Get my cookbooks

Garlic Butter Philly Cheesesteak Sandwiches you must try!

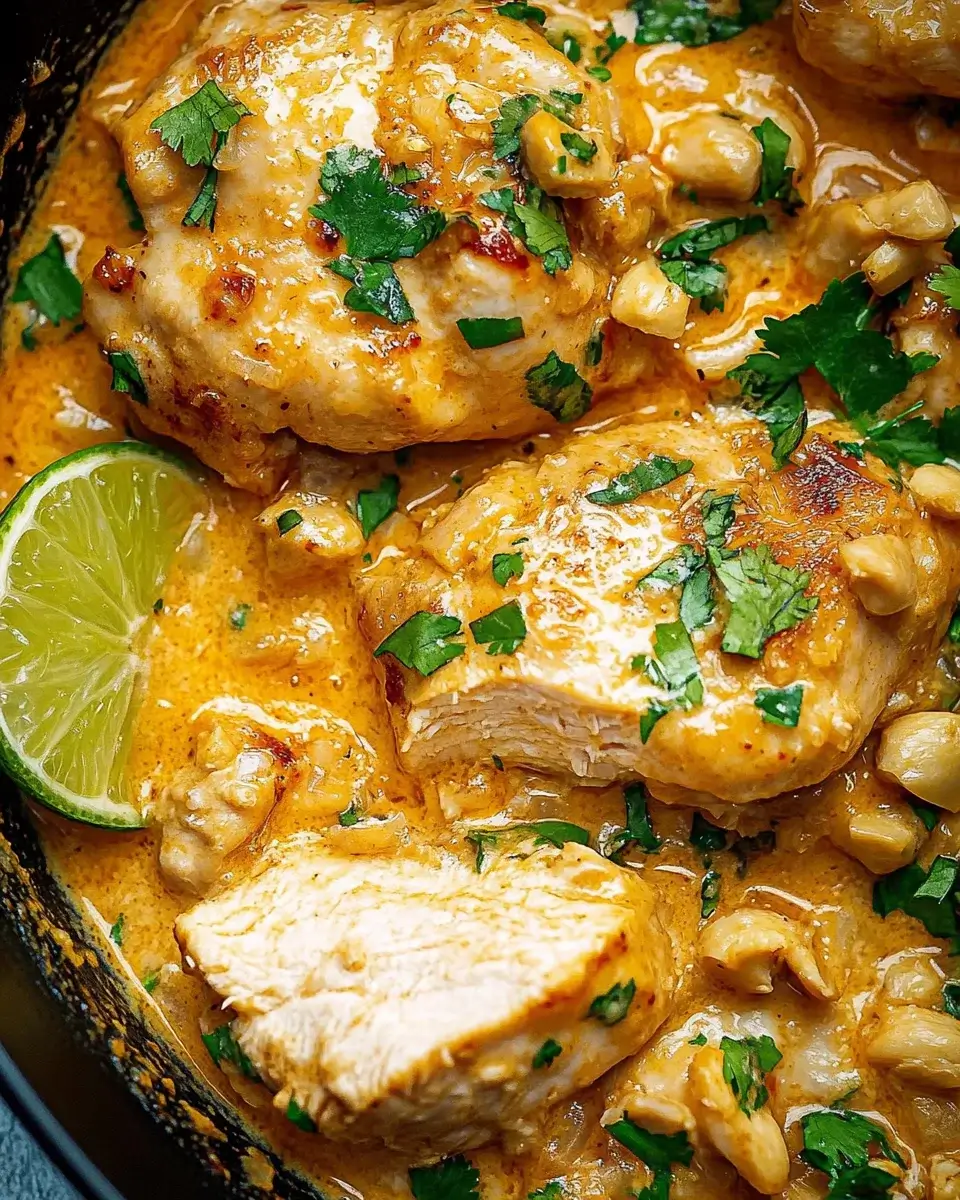
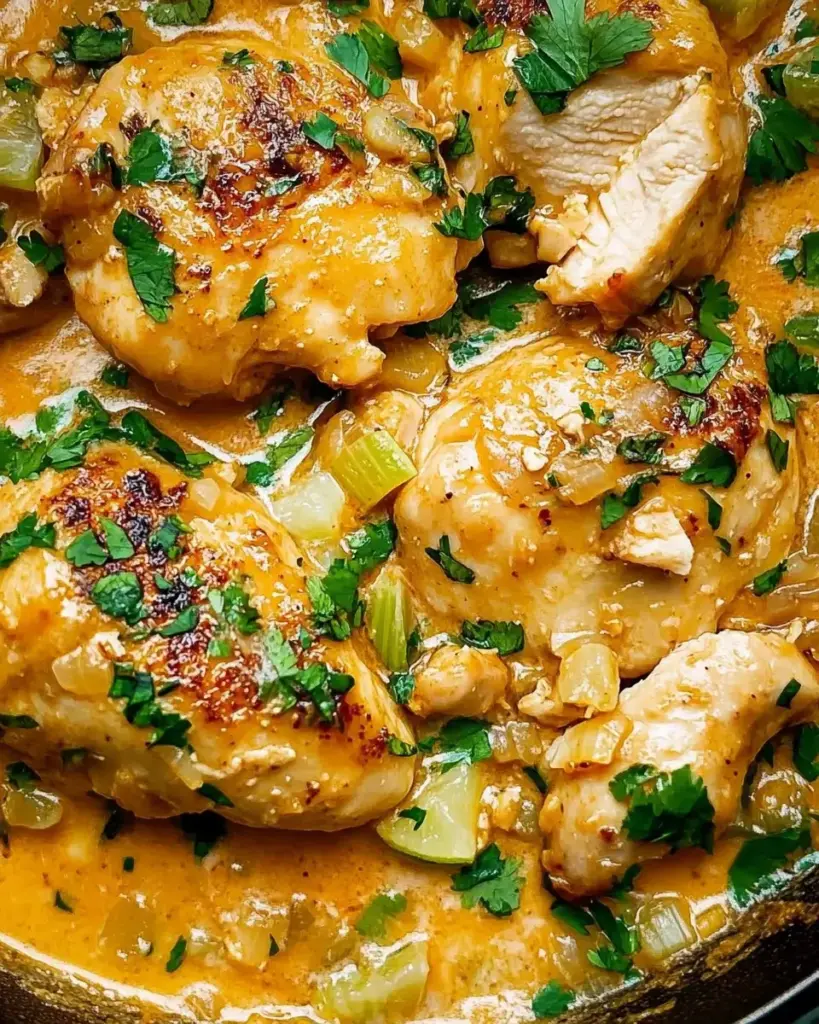
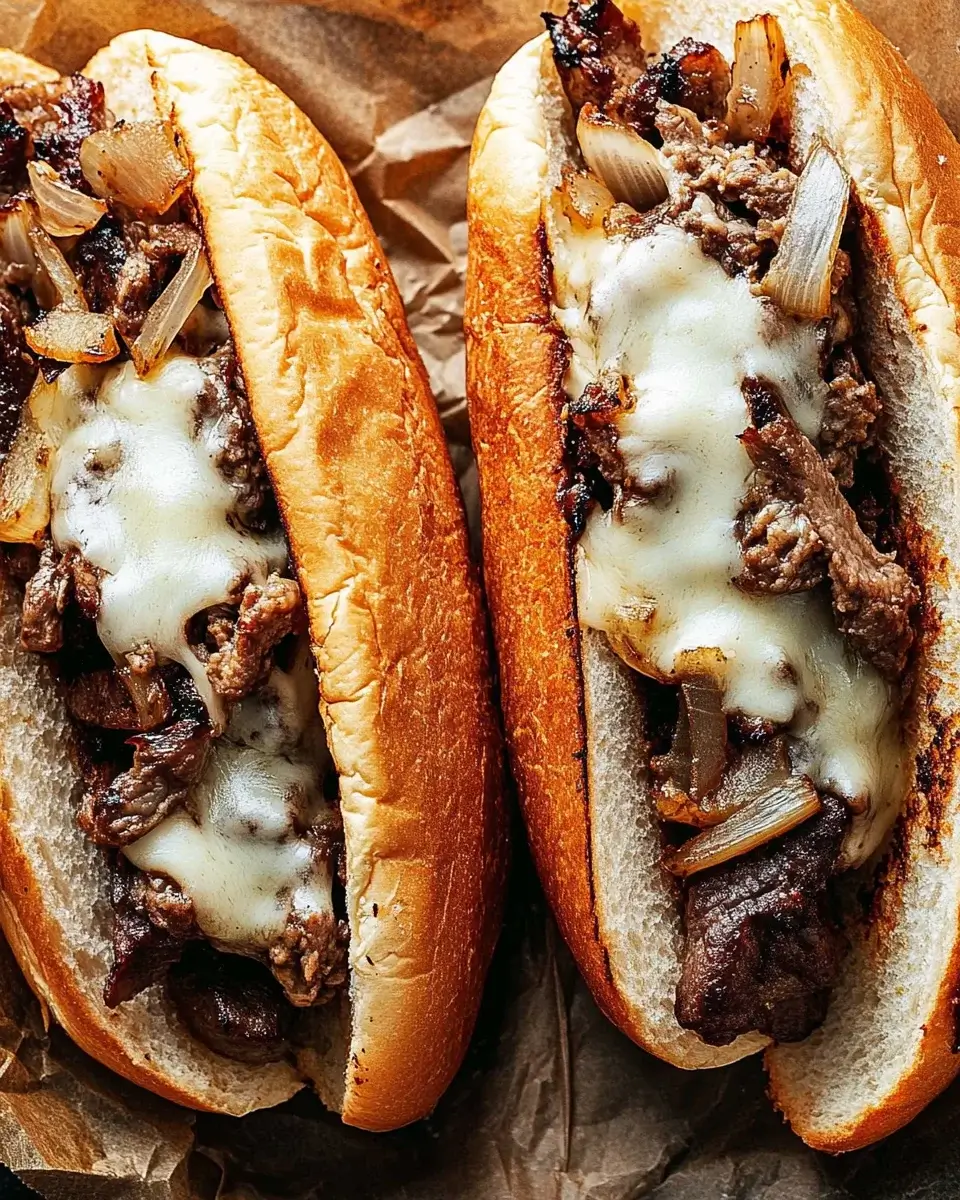
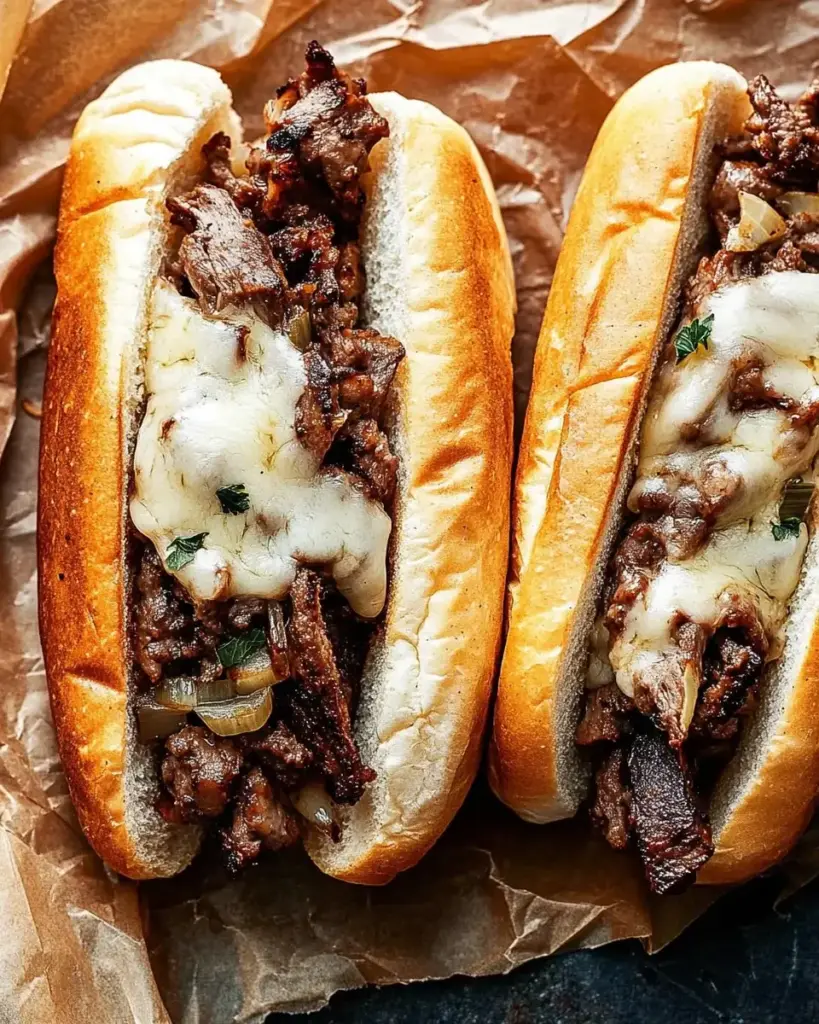
Introduction to Garlic Butter Philly Cheesesteak Sandwiches

There’s something magical about a warm sandwich that brings back memories of family gatherings and late-night cravings.

Garlic Butter Philly Cheesesteak Sandwiches are not just a meal; they’re an experience.

Picture sinking your teeth into a hoagie filled with tender ribeye, sautéed veggies, and gooey provolone, all kissed by rich garlic butter.

This recipe is perfect for those busy weeknights when you want to impress your loved ones without spending hours in the kitchen.

In just 25 minutes, you can whip up a delicious feast that will have everyone asking for seconds.

Why You’ll Love This Garlic Butter Philly Cheesesteak Sandwiches

These Garlic Butter Philly Cheesesteak Sandwiches are a game-changer for any home cook.

They come together in just 25 minutes, making them a quick solution for busy evenings.

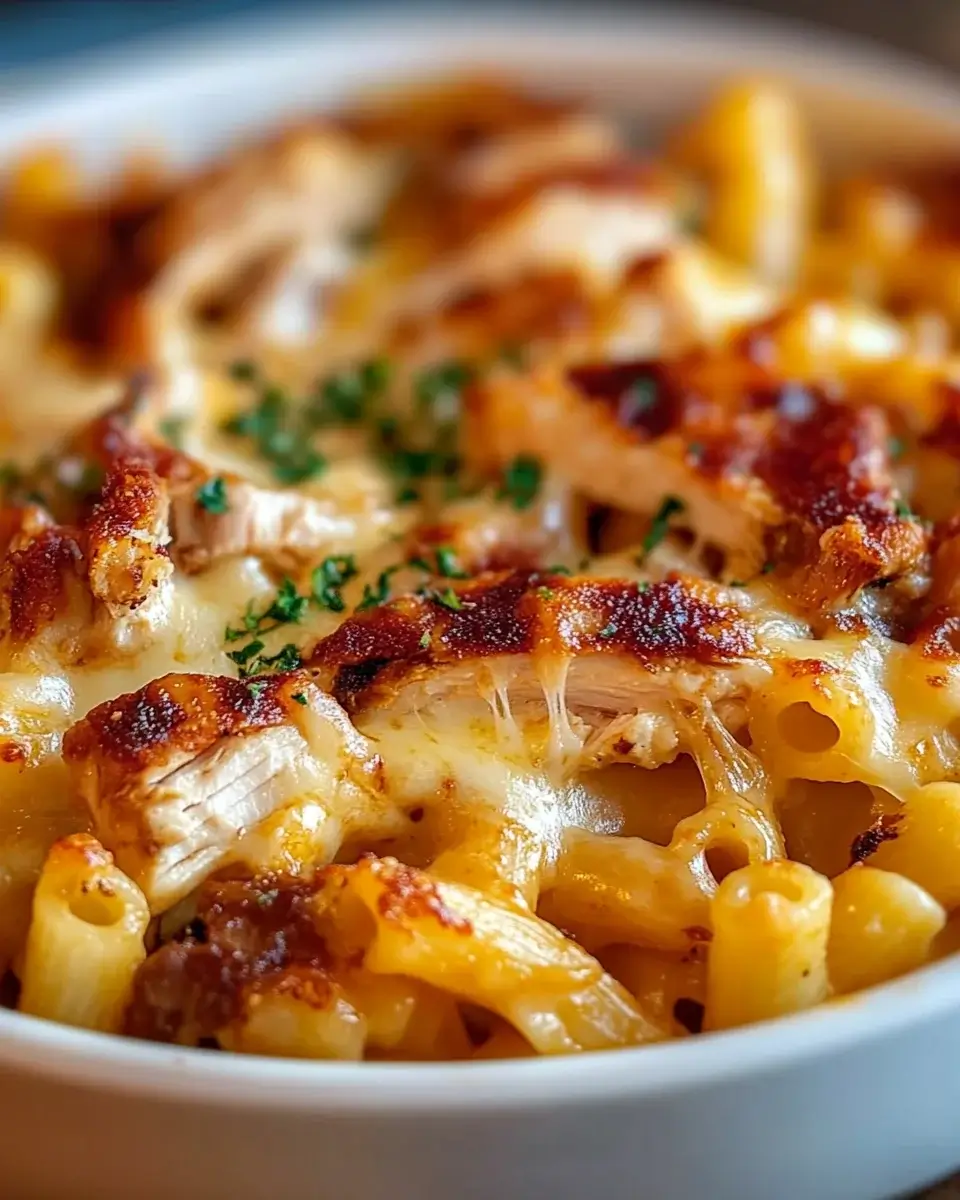
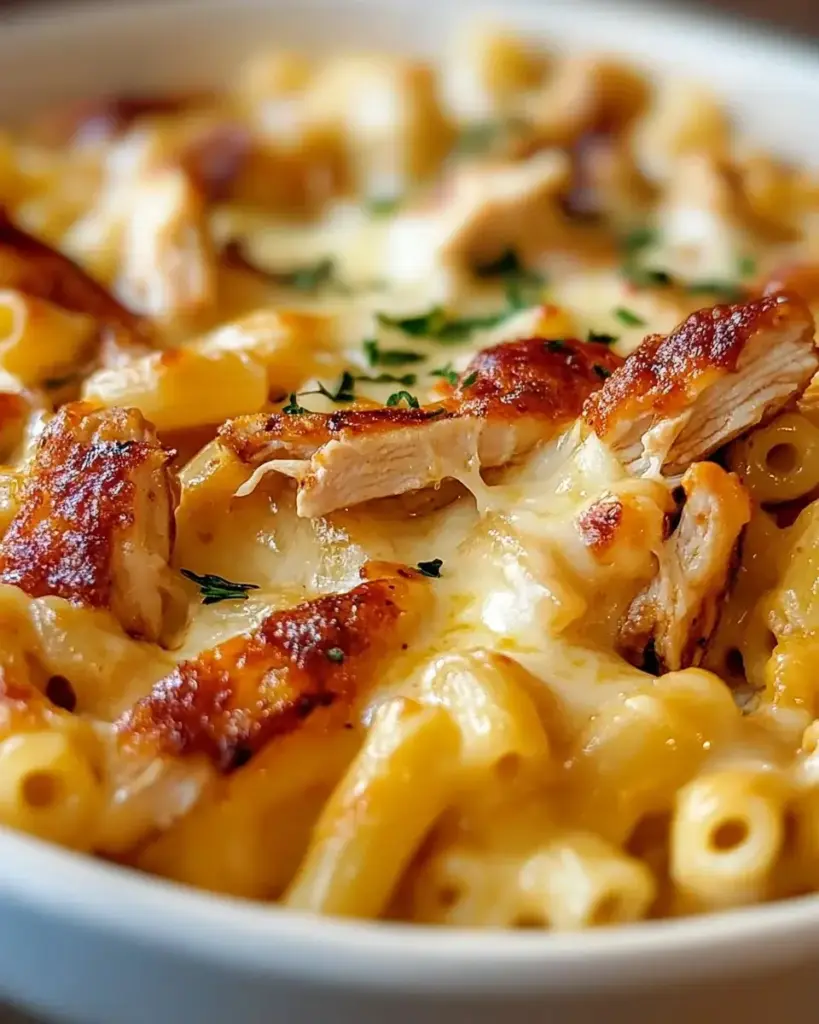
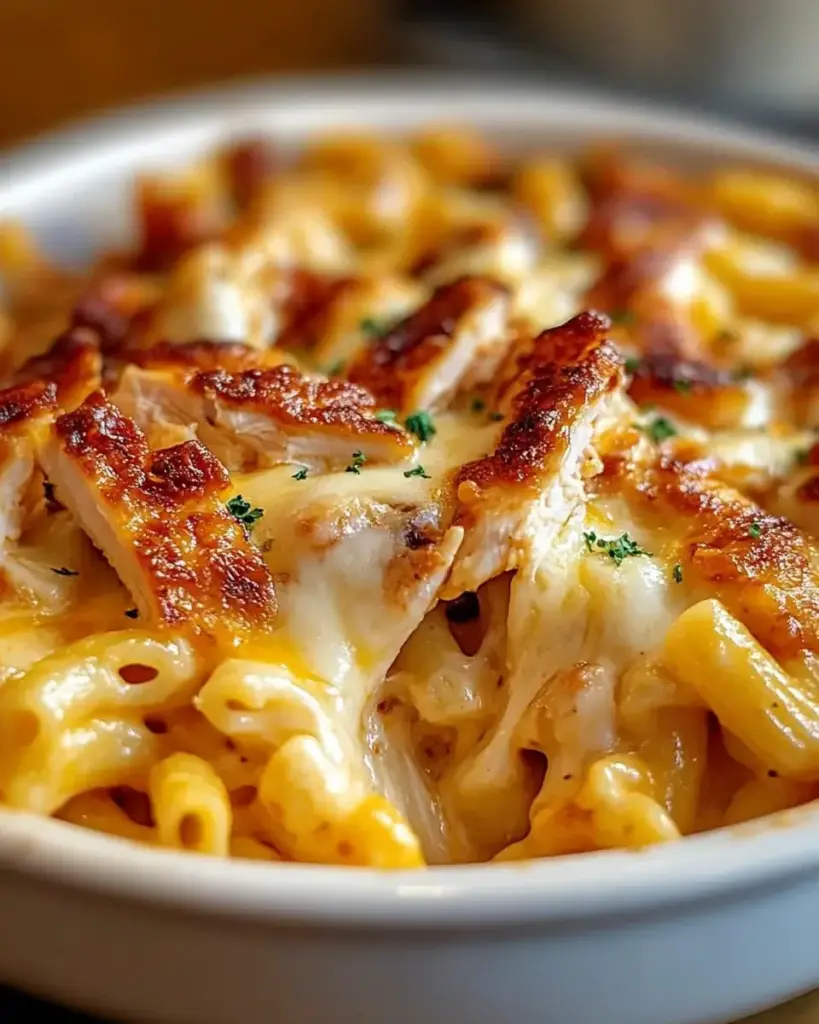
The combination of savory ribeye, fresh veggies, and melted provolone creates a flavor explosion that’s hard to resist.

Plus, the garlic butter adds a rich, aromatic touch that elevates this sandwich to a whole new level.

Trust me, your taste buds will thank you!

Ingredients for Garlic Butter Philly Cheesesteak Sandwiches

To create these mouthwatering Garlic Butter Philly Cheesesteak Sandwiches, you’ll need a handful of simple yet flavorful ingredients.

Here’s what you’ll gather:

  • Ribeye steak: The star of the show! Thinly sliced ribeye brings a rich, beefy flavor that’s tender and juicy.
  • Olive oil: A splash of olive oil helps sauté the veggies and adds a hint of healthy fat.
  • Onion: A medium onion, thinly sliced, adds sweetness and depth to the filling.
  • Green bell pepper: This veggie brings a fresh crunch and a pop of color to your sandwich.
  • Garlic: Four cloves of minced garlic infuse the dish with aromatic goodness that’s hard to resist.
  • Salt and black pepper: Essential seasonings that enhance the flavors of the steak and veggies.
  • Provolone cheese: Eight ounces of this melty cheese creates that gooey, indulgent layer we all crave.
  • Hoagie rolls: Four soft hoagie rolls are perfect for holding all that delicious filling.
  • Unsalted butter: A quarter cup of softened butter is mixed with garlic for spreading on the rolls.
  • Fresh parsley: A tablespoon of chopped parsley adds a touch of freshness and color to the garlic butter.

Feel free to get creative!

For a spicy kick, consider adding sliced jalapeños to the steak mixture.

If you’re looking for a healthier option, swap the hoagie rolls for whole grain or low-carb wraps.

Exact measurements for each ingredient can be found at the bottom of the article, ready for printing!

How to Make Garlic Butter Philly Cheesesteak Sandwiches

Making Garlic Butter Philly Cheesesteak Sandwiches is a breeze!

Follow these simple steps, and you’ll have a delicious meal ready in no time.

Let’s dive in!

Step 1: Sauté the Vegetables

Start by heating a tablespoon of olive oil in a large skillet over medium-high heat.

Once the oil is shimmering, toss in the thinly sliced onion and green bell pepper.

Sauté them for about 5 minutes until they soften and become fragrant.

The aroma will fill your kitchen, making your mouth water!

Add the minced garlic, salt, and black pepper, cooking for another minute.

This step is crucial; it builds the flavor base for your sandwich.

Step 2: Cook the Ribeye Steak

Now, it’s time to add the star of the show: the ribeye steak.

Add the thinly sliced ribeye to the skillet, stirring frequently.

Cook for about 3-5 minutes until the steak is browned and cooked through.

Don’t rush this step; you want that juicy goodness to shine.

Once done, remove the skillet from heat and set the steak mixture aside.

Step 3: Prepare the Garlic Butter

While the steak cools a bit, let’s whip up the garlic butter.

In a small bowl, mix the softened unsalted butter with the chopped parsley.

This garlic butter will add a rich, savory layer to your hoagie rolls.

Spread it generously on the inside of each roll.

Trust me, this step is where the magic happens!

Step 4: Assemble the Sandwiches

Preheat your oven to 350°F.

Place the hoagie rolls cut side up on a baking sheet.

Fill each roll with the steak and vegetable mixture, making sure to pack it in.

Top it off with slices of provolone cheese.

The cheese will melt beautifully, creating that gooey texture we all love.

Step 5: Bake to Perfection

Now, pop the baking sheet into your preheated oven.

Bake for about 10 minutes, or until the cheese is melted and the rolls are lightly toasted.

Keep an eye on them; you want that perfect golden-brown finish.

Once done, remove them from the oven and let them cool for a minute.

Then, serve warm and enjoy the deliciousness of your Garlic Butter Philly Cheesesteak Sandwiches!

Tips for Success

  • Use a sharp knife to slice the ribeye thinly; it makes a world of difference.
  • Don’t overcrowd the skillet when sautéing; give the veggies room to breathe.
  • For extra flavor, let the garlic butter sit for a few minutes before spreading.
  • Experiment with different cheeses like cheddar or Swiss for a unique twist.
  • Serve immediately for the best texture; these sandwiches are best enjoyed fresh!

Equipment Needed

  • Large skillet: A non-stick skillet works wonders for sautéing without sticking.
  • Baking sheet: Any flat baking tray will do; just make sure it fits in your oven.
  • Sharp knife: A good chef’s knife is essential for slicing the ribeye and veggies.
  • Cutting board: A sturdy board will keep your workspace organized and safe.

Variations

  • Spicy Kick: Add sliced jalapeños or a dash of hot sauce to the steak mixture for an extra layer of heat.
  • Mushroom Medley: Incorporate sautéed mushrooms for an earthy flavor that complements the ribeye beautifully.
  • Cheese Swap: Try different cheeses like sharp cheddar or pepper jack for a unique twist on the classic.
  • Veggie Delight: For a vegetarian option, replace the ribeye with grilled portobello mushrooms or a mix of your favorite veggies.
  • Low-Carb Option: Use lettuce wraps instead of hoagie rolls for a lighter, low-carb version of this delicious sandwich.

Serving Suggestions

  • Fries: Serve with crispy French fries or sweet potato fries for a classic combo.
  • Coleslaw: A refreshing coleslaw adds a crunchy contrast to the rich sandwich.
  • Beer: Pair with a cold lager or IPA to complement the savory flavors.
  • Presentation: Serve on a wooden board for a rustic touch that impresses.

FAQs about Garlic Butter Philly Cheesesteak Sandwiches

Can I use a different type of meat for these sandwiches?

Absolutely! While ribeye is the classic choice, you can use flank steak, sirloin, or even chicken for a lighter option. Just adjust the cooking time accordingly.

How can I make these sandwiches healthier?

To lighten things up, consider using whole grain or low-carb wraps instead of hoagie rolls. You can also load up on veggies or use less cheese.

What can I serve with Garlic Butter Philly Cheesesteak Sandwiches?

These sandwiches pair wonderfully with crispy fries, a fresh salad, or even a side of coleslaw. A cold beer or soda complements the flavors perfectly!

Can I prepare the filling ahead of time?

Yes! You can sauté the steak and veggies in advance. Just store them in the fridge and reheat before assembling your sandwiches.

What’s the best way to store leftovers?

Store any leftover sandwiches in an airtight container in the fridge for up to 2 days. Reheat in the oven for the best texture!

Final Thoughts

Creating Garlic Butter Philly Cheesesteak Sandwiches is more than just cooking; it’s about bringing people together.

The aroma of sizzling ribeye and garlic fills the air, inviting everyone to gather around the table.

Each bite is a delightful combination of flavors and textures, making it a meal that satisfies both hunger and heart.

Whether it’s a casual weeknight dinner or a gathering with friends, these sandwiches are sure to impress.

So roll up your sleeves, embrace the joy of cooking, and enjoy the deliciousness that awaits.

Trust me, your taste buds will be forever grateful!

jhessica

Garlic Butter Philly Cheesesteak Sandwiches you must try!

Delicious Garlic Butter Philly Cheesesteak Sandwiches loaded with ribeye steak, sautéed vegetables, and melted provolone cheese.
Prep Time 10 minutes
Cook Time 15 minutes
Total Time 25 minutes
Servings: 4 servings
Course: Sandwich
Cuisine: American
Calories: 550

Ingredients
  

  • 1 pound ribeye steak thinly sliced
  • 1 tablespoon olive oil
  • 1 medium onion thinly sliced
  • 1 medium green bell pepper thinly sliced
  • 4 cloves garlic minced
  • 1 teaspoon salt
  • 1/2 teaspoon black pepper
  • 8 ounces provolone cheese sliced
  • 4 hoagie rolls
  • 1/4 cup unsalted butter softened
  • 1 tablespoon fresh parsley chopped

Method
 

  1. Heat olive oil in a large skillet over medium-high heat.
  2. Add the sliced onion and bell pepper, sautéing until softened, about 5 minutes.
  3. Stir in the minced garlic, salt, and pepper, cooking for an additional minute until fragrant.
  4. Add the thinly sliced ribeye steak to the skillet. Cook for about 3-5 minutes, stirring frequently, until the steak is browned and cooked through. Remove from heat and set aside.
  5. Preheat your oven to 350°F.
  6. Mix the softened butter with chopped parsley in a small bowl. Spread the garlic butter mixture evenly on the inside of each hoagie roll.
  7. Place the hoagie rolls on a baking sheet, cut side up. Fill each roll with the steak and vegetable mixture, then top with slices of provolone cheese.
  8. Bake in the preheated oven for about 10 minutes, or until the cheese is melted and the rolls are lightly toasted.
  9. Remove from the oven, let cool for a minute, then serve warm.

Nutrition

Serving: 1sandwichCalories: 550kcalCarbohydrates: 30gProtein: 35gFat: 35gSaturated Fat: 15gPolyunsaturated Fat: 20gCholesterol: 90mgSodium: 1200mgFiber: 2gSugar: 2g

Notes

  • For a spicy kick, add sliced jalapeños to the steak mixture.
  • To make it a bit healthier, substitute the hoagie rolls with whole grain or low-carb wraps.

Tried this recipe?

Let us know how it was!

Tzatziki Chicken Salad: A Refreshing Twist on Your Lunch!

Introduction to Tzatziki Chicken Salad

There’s something special about a dish that feels like a hug on a plate. Tzatziki Chicken Salad is just that—a refreshing blend of flavors that brings comfort and satisfaction. Whether you’re racing against the clock on a busy weekday or looking to impress friends at a weekend gathering, this salad is your go-to solution. With tender chicken, creamy yogurt, and crisp veggies, it’s a healthy choice that doesn’t skimp on taste. Plus, it’s quick to whip up, making it perfect for those days when you need a delicious meal without the fuss.

Why You’ll Love This Tzatziki Chicken Salad

This Tzatziki Chicken Salad is a game-changer for your lunch routine. It’s not just easy to make; it’s also packed with flavor and nutrition. In just 15 minutes, you can create a dish that’s both satisfying and refreshing. The creamy yogurt dressing adds a delightful twist, while the fresh veggies keep it light. Perfect for meal prep or a quick bite, this salad is sure to become a favorite!

Ingredients for Tzatziki Chicken Salad

Gathering the right ingredients is the first step to creating a delicious Tzatziki Chicken Salad. Here’s what you’ll need:

  • Cooked chicken: Shredded or diced, this is the protein powerhouse of your salad. Use leftover rotisserie chicken for convenience.
  • Plain Greek yogurt: The creamy base that gives this salad its signature tzatziki flavor. It’s rich in protein and adds a tangy kick.
  • Cucumber: Grated and squeezed to remove excess moisture, it adds a refreshing crunch. Opt for English cucumbers for fewer seeds.
  • Garlic: Minced for a punch of flavor. Fresh garlic elevates the taste, but garlic powder can work in a pinch.
  • Dill: Fresh or dried, this herb brings a bright, aromatic quality. If you’re not a fan, mint is a great alternative.
  • Lemon juice: A splash of acidity that brightens the dish. Freshly squeezed is best, but bottled works too.
  • Olive oil: Just a touch adds richness and helps blend the flavors. Extra virgin olive oil is ideal for its robust taste.
  • Salt and pepper: Essential for seasoning. Adjust to your taste for the perfect balance.
  • Red onion: Finely chopped for a bit of sharpness. If it’s too strong for you, soak it in water for a milder flavor.
  • Cherry tomatoes: Halved for sweetness and color. Feel free to swap in diced bell peppers for a different twist.
  • Feta cheese: Optional, but crumbled feta adds a salty, creamy element that complements the salad beautifully.

For exact measurements, check the bottom of the article where you can find everything listed for easy printing!

How to Make Tzatziki Chicken Salad

Creating this Tzatziki Chicken Salad is as easy as pie—well, maybe easier! Follow these simple steps, and you’ll have a delicious meal ready in no time. Let’s dive in!

Step 1: Prepare the Tzatziki Base

Start by grabbing a large mixing bowl. Combine the plain Greek yogurt, grated cucumber, minced garlic, dill, lemon juice, olive oil, salt, and pepper. Mix everything together until it’s well blended. This creamy base is the heart of your salad, so make sure it’s smooth and flavorful!

Step 2: Add Chicken and Vegetables

Next, it’s time to add the star ingredients! Toss in the shredded chicken, finely chopped red onion, and halved cherry tomatoes. Gently fold everything together until each piece is coated in that luscious tzatziki mixture. This step is crucial for ensuring every bite is bursting with flavor.

Step 3: Incorporate Feta Cheese

If you’re feeling a bit fancy, sprinkle crumbled feta cheese on top. Gently mix it in, allowing the creamy cheese to mingle with the other ingredients. It adds a delightful salty kick that elevates the salad to a whole new level!

Step 4: Adjust Seasoning

Now comes the fun part—tasting! Take a moment to sample your creation. Adjust the seasoning with more salt, pepper, or a splash of lemon juice if needed. This is your chance to make it just right for your palate.

Step 5: Chill and Serve

Cover the bowl and pop it in the fridge for at least 30 minutes. This chilling time allows the flavors to meld beautifully. When you’re ready to serve, dish it out chilled. Enjoy your refreshing Tzatziki Chicken Salad!

Tips for Success

  • Use leftover chicken for a quick meal—rotisserie works wonders!
  • Don’t skip the chilling time; it enhances the flavors.
  • Adjust the garlic to your taste; fresh can be strong!
  • Experiment with herbs; mint can be a refreshing twist.
  • For a crunchier texture, add diced bell peppers or avocado.

Equipment Needed

  • Mixing bowl: A large bowl for combining ingredients. Any size will do, but a bigger one makes mixing easier.
  • Grater: For the cucumber. A box grater or a simple handheld one works perfectly.
  • Measuring cups: Handy for precise ingredient amounts, though you can eyeball it if you’re feeling adventurous!
  • Spatula: Great for folding ingredients together without mashing them.

Variations of Tzatziki Chicken Salad

  • Greek Twist: Add kalamata olives and artichoke hearts for a Mediterranean flair.
  • Spicy Kick: Mix in diced jalapeños or a dash of hot sauce for some heat.
  • Herb Explosion: Experiment with fresh herbs like parsley or cilantro for a different flavor profile.
  • Low-Carb Option: Replace chicken with shredded zucchini or cauliflower for a veggie-packed salad.
  • Protein Boost: Incorporate chickpeas or quinoa for added texture and nutrition.

Serving Suggestions for Tzatziki Chicken Salad

  • Pair with warm pita bread or crunchy pita chips for a delightful contrast.
  • Serve alongside a light Greek-style cucumber salad for a refreshing combo.
  • Enjoy with a chilled glass of lemonade or iced tea to complement the flavors.
  • Garnish with extra dill or a lemon wedge for a pop of color.

FAQs about Tzatziki Chicken Salad

Can I make Tzatziki Chicken Salad ahead of time?

Absolutely! This salad actually tastes better after chilling for a while. You can prepare it a day in advance and store it in the fridge. Just give it a good stir before serving to refresh the flavors.

What can I substitute for Greek yogurt?

If you’re not a fan of Greek yogurt, you can use regular plain yogurt or even sour cream. Just keep in mind that the flavor and texture will vary slightly, but it will still be delicious!

How long does Tzatziki Chicken Salad last in the fridge?

This salad can last up to three days in the fridge if stored in an airtight container. Just be sure to keep an eye on the freshness of the ingredients, especially the cucumbers and tomatoes.

Can I add more vegetables to the salad?

Definitely! Feel free to get creative. Diced bell peppers, shredded carrots, or even avocado can add extra flavor and nutrition. Just remember to adjust the dressing if you add more ingredients.

Is Tzatziki Chicken Salad suitable for meal prep?

Yes! This salad is perfect for meal prep. It’s easy to portion out for lunches throughout the week. Just keep the dressing separate if you prefer a fresher taste when you’re ready to eat.

Final Thoughts

Creating Tzatziki Chicken Salad is more than just whipping up a meal; it’s about embracing flavors that transport you to sun-soaked Mediterranean shores. Each bite is a celebration of freshness, with the creamy yogurt and crisp veggies dancing together in perfect harmony. Whether you’re enjoying it solo or sharing it with friends, this salad brings joy and satisfaction to the table. It’s a reminder that healthy eating doesn’t have to be boring. So, roll up your sleeves, dive into this recipe, and savor the delightful experience that is Tzatziki Chicken Salad!

jhessica

Tzatziki Chicken Salad: A Refreshing Twist on Your Lunch!

A refreshing and healthy Tzatziki Chicken Salad that combines tender chicken with a creamy yogurt dressing and fresh vegetables.
Prep Time 15 minutes
Total Time 45 minutes
Servings: 4 servings
Course: Salad
Cuisine: Mediterranean
Calories: 290

Ingredients
  

  • 2 cups cooked chicken shredded or diced
  • 1 cup plain Greek yogurt
  • 1 medium cucumber grated and excess moisture squeezed out
  • 2 cloves garlic minced
  • 1 tablespoon fresh dill chopped (or 1 teaspoon dried dill)
  • 1 tablespoon lemon juice
  • 1 teaspoon olive oil
  • Salt and pepper to taste
  • 1/4 cup red onion finely chopped
  • 1/4 cup cherry tomatoes halved
  • 1/4 cup feta cheese crumbled (optional)

Method
 

  1. In a large mixing bowl, combine the Greek yogurt, grated cucumber, minced garlic, dill, lemon juice, olive oil, salt, and pepper. Mix until well blended.
  2. Add the shredded chicken, red onion, and cherry tomatoes to the bowl. Gently fold the ingredients together until everything is evenly coated with the tzatziki mixture.
  3. If using, sprinkle the crumbled feta cheese on top and gently mix it in.
  4. Taste and adjust seasoning with more salt, pepper, or lemon juice if desired.
  5. Cover the bowl and refrigerate for at least 30 minutes to allow the flavors to meld. Serve chilled.

Nutrition

Serving: 1servingCalories: 290kcalCarbohydrates: 6gProtein: 30gFat: 15gSaturated Fat: 4gPolyunsaturated Fat: 10gCholesterol: 70mgSodium: 300mgFiber: 1gSugar: 3g

Notes

  • For a lighter version, substitute half of the Greek yogurt with low-fat yogurt.
  • Add diced bell peppers or avocado for extra flavor and nutrition.

Tried this recipe?

Let us know how it was!

BBQ Chicken Mac and Cheese: A Delicious Comfort Dish!

Introduction to BBQ Chicken Mac and Cheese

There’s something magical about the combination of BBQ Chicken Mac and Cheese that brings back memories of family gatherings and backyard barbecues. This dish is more than just a meal; it’s a warm hug on a plate. Whether you’re looking for a quick solution after a long day or a dish to impress your friends at the next game night, this recipe has you covered. The creamy, cheesy goodness paired with the smoky sweetness of BBQ sauce creates a flavor explosion that’s hard to resist. Trust me, your taste buds will thank you!

Why You’ll Love This BBQ Chicken Mac and Cheese

This BBQ Chicken Mac and Cheese is a game-changer for busy weeknights. It’s quick to whip up, taking just 45 minutes from start to finish. The creamy texture and smoky flavor make it a crowd-pleaser, perfect for family dinners or casual get-togethers. Plus, it’s versatile! You can easily customize it with your favorite ingredients, ensuring everyone leaves the table satisfied. Who wouldn’t love that?

Ingredients for BBQ Chicken Mac and Cheese

Gathering the right ingredients is the first step to creating this mouthwatering BBQ Chicken Mac and Cheese. Here’s what you’ll need:

  • Elbow macaroni: The classic pasta choice, it holds onto the cheese sauce beautifully.
  • Cooked chicken: Shredded chicken adds protein and heartiness. You can use rotisserie chicken for convenience.
  • BBQ sauce: This is where the magic happens! Choose your favorite brand or homemade version for that smoky sweetness.
  • Sharp cheddar cheese: This cheese brings a bold flavor that pairs perfectly with the BBQ sauce.
  • Mozzarella cheese: For that gooey, stretchy texture that everyone loves.
  • Milk: It helps create a creamy consistency in the cheese sauce.
  • Cream cheese: This adds richness and a velvety texture to the dish.
  • Garlic powder: A must for flavor; it enhances the overall taste without overpowering.
  • Onion powder: This adds a subtle sweetness and depth to the dish.
  • Smoked paprika: A pinch of this gives a lovely smoky flavor that complements the BBQ sauce.
  • Salt and pepper: Essential for seasoning; adjust to your taste.
  • Breadcrumbs (optional): For a crunchy topping that adds texture.
  • Olive oil (optional): If using breadcrumbs, mixing them with olive oil helps them crisp up nicely.

For exact measurements, check the bottom of the article where you can find everything listed for easy printing. Feel free to get creative! You can swap out the chicken for pulled pork or beef, or even toss in some cooked bacon or jalapeños for an extra kick. The possibilities are endless!

How to Make BBQ Chicken Mac and Cheese

Creating BBQ Chicken Mac and Cheese is a straightforward process that yields delicious results. Follow these simple steps, and you’ll have a comforting dish that’s sure to impress.

Step 1: Preheat the Oven

Start by preheating your oven to 350°F (175°C). Preheating is crucial because it ensures even cooking. You want that cheese to melt perfectly and the top to get that golden brown color. Trust me, it makes a difference!

Step 2: Cook the Elbow Macaroni

Next, cook the elbow macaroni according to the package instructions until it’s al dente. This means it should be firm to the bite. Overcooked pasta can turn mushy in the oven, ruining the texture of your BBQ Chicken Mac and Cheese. Drain it well and set it aside.

Step 3: Combine Ingredients

In a large mixing bowl, combine the cooked macaroni, shredded chicken, BBQ sauce, sharp cheddar cheese, mozzarella cheese, milk, cream cheese, garlic powder, onion powder, smoked paprika, salt, and pepper. Mix everything until it’s well combined. This step is where the magic happens! The flavors meld together, creating a creamy, cheesy delight.

Step 4: Transfer to Baking Dish

Now, grease a 9×13 inch baking dish with a little olive oil or cooking spray. This prevents sticking and makes cleanup easier. Pour the macaroni mixture into the dish, spreading it evenly. Make sure every corner is filled with that cheesy goodness!

Step 5: Add Topping

If you’re feeling adventurous, mix breadcrumbs with olive oil and sprinkle them over the top. This optional step adds a crunchy texture that contrasts beautifully with the creamy mac and cheese. It’s like a little surprise in every bite!

Step 6: Bake

Place the dish in the preheated oven and bake for 25-30 minutes. Keep an eye on it! You’ll know it’s done when the cheese is bubbly and the top is golden brown. That’s the moment you’ve been waiting for!

Step 7: Cool and Serve

Once it’s out of the oven, let it cool for about 5 minutes. This waiting period allows the dish to set, making it easier to serve. Plus, it’ll be hot! Trust me, you want to avoid burning your mouth on that cheesy goodness.

Tips for Success

  • Use freshly shredded cheese for better melting and flavor.
  • Don’t skip the preheating; it ensures even cooking.
  • Mix in some cooked bacon or jalapeños for an extra flavor boost.
  • Let the dish cool slightly before serving to enhance texture.
  • Experiment with different BBQ sauces to find your favorite flavor profile.

Equipment Needed

  • Large pot: For boiling the macaroni. A deep skillet works too.
  • Mixing bowl: To combine all the ingredients. A large saucepan can substitute.
  • Baking dish: A 9×13 inch dish is ideal, but any oven-safe dish will do.
  • Measuring cups and spoons: Essential for accuracy; you can use standard kitchen cups if needed.

Variations of BBQ Chicken Mac and Cheese

  • Spicy BBQ Chicken Mac and Cheese: Add diced jalapeños or a splash of hot sauce for a fiery kick.
  • Buffalo Chicken Mac and Cheese: Swap BBQ sauce for buffalo sauce and mix in some crumbled blue cheese for a tangy twist.
  • Vegetarian Option: Replace chicken with sautéed mushrooms and bell peppers, and use a plant-based BBQ sauce.
  • Gluten-Free Version: Use gluten-free elbow macaroni and ensure your BBQ sauce is gluten-free.
  • Cheesy Broccoli Mac and Cheese: Stir in steamed broccoli florets for added nutrition and color.

Serving Suggestions for BBQ Chicken Mac and Cheese

  • Side Salad: A crisp green salad with a tangy vinaigrette balances the richness of the mac and cheese.
  • Garlic Bread: Serve with warm, buttery garlic bread for a comforting meal.
  • Drink Pairing: A cold beer or iced tea complements the smoky flavors perfectly.
  • Presentation: Garnish with fresh parsley or chives for a pop of color.

FAQs about BBQ Chicken Mac and Cheese

Can I make BBQ Chicken Mac and Cheese ahead of time?

Absolutely! You can prepare the dish a day in advance. Just assemble everything in the baking dish, cover it tightly, and refrigerate. When you’re ready to bake, let it sit at room temperature for about 30 minutes before popping it in the oven.

What type of BBQ sauce works best?

It really depends on your taste! A sweet and tangy sauce pairs beautifully with the creamy cheese. If you prefer a smoky flavor, go for a hickory or mesquite BBQ sauce. Feel free to experiment until you find your favorite!

Can I freeze BBQ Chicken Mac and Cheese?

Yes, you can freeze it! Just make sure to let it cool completely before transferring it to an airtight container. It can be frozen for up to three months. When you’re ready to enjoy it, thaw it in the fridge overnight and bake as directed.

How can I make this dish healthier?

To lighten it up, consider using whole wheat elbow macaroni and low-fat cheese. You can also add more veggies, like spinach or zucchini, to boost the nutrition without sacrificing flavor.

What can I serve with BBQ Chicken Mac and Cheese?

This dish pairs well with a fresh side salad, garlic bread, or even some grilled vegetables. A cold drink, like iced tea or a light beer, complements the flavors perfectly!

Final Thoughts

BBQ Chicken Mac and Cheese is more than just a meal; it’s an experience that brings people together. The creamy, cheesy goodness combined with the smoky BBQ flavor creates a dish that warms the heart and satisfies the soul. Whether you’re enjoying it on a cozy weeknight or serving it at a gathering, this recipe is sure to impress. It’s a reminder that comfort food doesn’t have to be complicated. With just a few simple ingredients, you can create a dish that feels like home. So grab your fork and dig in—your taste buds are in for a treat!

jhessica

BBQ Chicken Mac and Cheese: A Delicious Comfort Dish!

BBQ Chicken Mac and Cheese is a delicious comfort dish that combines creamy macaroni and cheese with shredded chicken and BBQ sauce for a flavorful twist.
Prep Time 15 minutes
Cook Time 30 minutes
Total Time 45 minutes
Servings: 6 servings
Course: Main Course
Cuisine: American
Calories: 450

Ingredients
  

  • 2 cups elbow macaroni
  • 2 cups cooked chicken shredded
  • 1 cup BBQ sauce
  • 2 cups shredded sharp cheddar cheese
  • 1 cup shredded mozzarella cheese
  • 1/2 cup milk
  • 1/4 cup cream cheese softened
  • 1 teaspoon garlic powder
  • 1 teaspoon onion powder
  • 1/2 teaspoon smoked paprika
  • Salt and pepper to taste
  • 1/2 cup breadcrumbs optional
  • 2 tablespoons olive oil optional

Method
 

  1. Preheat your oven to 350°F (175°C).
  2. Cook the elbow macaroni according to package instructions until al dente. Drain and set aside.
  3. In a large mixing bowl, combine the cooked macaroni, shredded chicken, BBQ sauce, sharp cheddar cheese, mozzarella cheese, milk, cream cheese, garlic powder, onion powder, smoked paprika, salt, and pepper. Mix until well combined.
  4. Transfer the mixture to a greased 9×13 inch baking dish.
  5. If using breadcrumbs, mix them with olive oil and sprinkle evenly over the top of the mac and cheese for a crunchy topping.
  6. Bake in the preheated oven for 25-30 minutes, or until the cheese is bubbly and the top is golden brown.
  7. Remove from the oven and let it cool for 5 minutes before serving.

Nutrition

Serving: 1servingCalories: 450kcalCarbohydrates: 40gProtein: 30gFat: 20gSaturated Fat: 10gPolyunsaturated Fat: 8gCholesterol: 70mgSodium: 800mgFiber: 2gSugar: 5g

Notes

  • For added flavor, try mixing in some cooked bacon or diced jalapeños for a spicy kick.
  • You can also substitute the chicken with pulled pork or beef for a different twist on this dish.

Tried this recipe?

Let us know how it was!

Birria Tacos: Discover the Ultimate Recipe Today!

Introduction to Birria Tacos

There’s something magical about the aroma of simmering beef that takes me back to my childhood kitchen. Birria tacos are not just a meal; they’re an experience. Perfect for a busy weeknight or a weekend gathering, these tacos bring warmth and flavor to the table. Imagine tender beef, rich broth, and crispy tortillas all wrapped up in one delicious bite. Whether you’re impressing friends or simply treating yourself, this recipe is your go-to for a satisfying feast. Trust me, once you try these birria tacos, they’ll become a staple in your home cooking repertoire.

Why You’ll Love This Birria Tacos

Birria tacos are a game-changer for any home cook. They’re incredibly easy to make, especially with the Instant Pot speeding up the process. The rich, savory flavors will have your taste buds dancing, while the crispy tortillas add that perfect crunch. Plus, they’re versatile enough to please everyone at the table, from picky eaters to adventurous foodies. Trust me, once you serve these, they’ll be the talk of the dinner table!

Ingredients for Birria Tacos

Gathering the right ingredients is the first step to creating mouthwatering birria tacos. Here’s what you’ll need:

  • Beef Chuck Roast: This cut is perfect for slow cooking, becoming tender and flavorful.
  • Beef Short Ribs: They add richness and depth to the broth, making every bite unforgettable.
  • Onion: A quartered onion enhances the sauce’s flavor, bringing sweetness and aroma.
  • Garlic: Minced garlic adds a punch of flavor that complements the beef beautifully.
  • Dried Guajillo Peppers: These peppers provide a mild heat and a deep, rich color to the sauce.
  • Dried Ancho Peppers: With their sweet and smoky notes, they balance the flavors perfectly.
  • Cumin: This spice adds warmth and earthiness, enhancing the overall taste.
  • Oregano: A touch of oregano brings a hint of herbal freshness to the dish.
  • Smoked Paprika: This ingredient adds a subtle smokiness that elevates the flavor profile.
  • Salt and Black Pepper: Essential for seasoning, these staples enhance all the other flavors.
  • Beef Broth: A rich broth is the base of the sauce, infusing the meat with flavor.
  • Apple Cider Vinegar: This adds a tangy brightness that cuts through the richness of the beef.
  • Corn Tortillas: The perfect vessel for your filling, they add a delightful crunch when cooked.
  • Cilantro and Chopped Onions: These fresh garnishes add color and a burst of flavor.
  • Lime Wedges: A squeeze of lime brightens the tacos, adding a refreshing zing.

For those looking to spice things up, consider adding jalapeños to the sauce for an extra kick. If you want to switch things up, lamb or chicken can be used instead of beef for a different flavor profile. You can find the exact quantities for each ingredient at the bottom of the article, ready for printing!

How to Make Birria Tacos

Creating birria tacos is a rewarding journey that fills your kitchen with mouthwatering aromas. Follow these simple steps, and you’ll be on your way to taco perfection!

Step 1: Toast the Peppers

Start by heating a skillet over medium heat. Toss in the dried guajillo and ancho peppers. Toast them for about 2-3 minutes until they become fragrant. This step is crucial; it brings out their rich flavors. Once toasted, remove them from the heat and soak the peppers in hot water for 15 minutes. This softens them, making blending easier.

Step 2: Blend the Sauce

After soaking, drain the peppers and place them in a blender. Add the quartered onion, minced garlic, cumin, oregano, smoked paprika, salt, black pepper, beef broth, and apple cider vinegar. Blend everything until smooth. This sauce is the heart of your birria tacos, so make sure it’s well combined and flavorful.

Step 3: Prepare the Meat

In your Instant Pot, place the beef chuck roast and short ribs. Pour the blended sauce over the meat, ensuring it’s well coated. This is where the magic begins! The sauce will infuse the meat with incredible flavor as it cooks.

Step 4: Cook in the Instant Pot

Close the lid of the Instant Pot and set it to cook on high pressure for 45 minutes. This method locks in moisture and tenderness. After the cooking time is up, allow for a natural release for 15 minutes. Then, manually release any remaining pressure. Your kitchen will smell divine!

Step 5: Shred the Meat

Carefully remove the meat from the pot and shred it using two forks. It should fall apart easily. Next, strain the remaining liquid to separate the fat and solids. Reserve this broth for dipping; it’s packed with flavor and perfect for enhancing your tacos.

Step 6: Assemble the Tacos

Heat a skillet over medium heat. Dip a corn tortilla into the reserved broth, then place it in the skillet. Add a generous portion of the shredded meat, topped with chopped onions and cilantro. Fold the tortilla in half and cook until crispy, about 2-3 minutes per side. Repeat this process with the remaining tortillas and filling. Serve your birria tacos hot, alongside lime wedges and the reserved broth for dipping.

Tips for Success

  • Always toast your peppers; it enhances their flavor significantly.
  • Don’t rush the cooking time in the Instant Pot; it ensures tender meat.
  • Use fresh tortillas for the best texture and taste.
  • Experiment with garnishes like avocado or radishes for added flavor.
  • Make extra broth; it’s perfect for dipping and adds moisture to the tacos.

Equipment Needed

  • Instant Pot: A must-have for quick cooking. A slow cooker works too, but it takes longer.
  • Skillet: For toasting peppers and crisping tortillas. A non-stick pan is a great alternative.
  • Blender: Essential for making the sauce. A food processor can work in a pinch.
  • Forks: For shredding the meat. You can also use your hands if you prefer.

Variations

  • Spicy Birria Tacos: Add jalapeños or chipotle peppers to the sauce for an extra kick.
  • Vegetarian Option: Substitute beef with jackfruit or mushrooms for a plant-based twist.
  • Different Proteins: Try lamb or chicken instead of beef for a unique flavor profile.
  • Cheesy Birria Tacos: Add a slice of cheese inside the tortilla before folding for a gooey surprise.
  • Gluten-Free Tacos: Use corn tortillas, which are naturally gluten-free, to keep it safe for gluten-sensitive eaters.

Serving Suggestions

  • Side Dishes: Pair your birria tacos with Mexican rice or refried beans for a hearty meal.
  • Drinks: A cold cerveza or a refreshing agua fresca complements the flavors beautifully.
  • Presentation: Serve on a colorful platter with lime wedges and fresh garnishes for a vibrant look.

FAQs about Birria Tacos

What are Birria Tacos?

Birria tacos are a delicious Mexican dish made with tender, slow-cooked beef, served in crispy corn tortillas. The meat is typically marinated in a rich, flavorful broth, making each bite a savory delight. They’re often served with a side of the broth for dipping, enhancing the overall experience.

Can I make Birria Tacos ahead of time?

Absolutely! You can prepare the beef and broth in advance. Just store them in the fridge and reheat when you’re ready to assemble the tacos. This makes birria tacos a fantastic option for meal prep or entertaining guests.

What can I serve with Birria Tacos?

Birria tacos pair wonderfully with sides like Mexican rice, refried beans, or a fresh salad. For drinks, consider serving a cold beer or a refreshing agua fresca. These accompaniments elevate the meal and create a festive atmosphere.

Can I use other meats for Birria Tacos?

Yes! While beef is traditional, you can experiment with lamb or chicken for a different flavor profile. Just adjust the cooking time accordingly, especially if using chicken, which cooks faster than beef.

How do I store leftovers?

Store any leftover birria and broth in airtight containers in the fridge for up to three days. Reheat gently on the stove or in the microwave. The flavors will continue to develop, making your leftovers just as tasty!

Final Thoughts

Birria tacos are more than just a meal; they’re a celebration of flavor and tradition. Each bite transports you to a bustling Mexican market, where the air is filled with the scent of spices and sizzling meat. The joy of sharing these tacos with family and friends is unmatched. Whether you’re enjoying them on a casual weeknight or at a festive gathering, they bring people together. So roll up your sleeves, dive into this recipe, and savor the deliciousness that birria tacos offer. Trust me, once you make them, they’ll become a cherished favorite in your home!

jhessica

Birria Tacos: Discover the Ultimate Recipe Today!

Delicious and savory Birria Tacos made with tender beef and a flavorful broth.
Prep Time 15 minutes
Cook Time 1 hour
Total Time 1 hour 15 minutes
Servings: 6 servings
Course: Main Course
Cuisine: Mexican
Calories: 350

Ingredients
  

  • 2 lbs beef chuck roast cut into large chunks
  • 1 lb beef short ribs
  • 1 large onion quartered
  • 6 cloves garlic minced
  • 3 dried guajillo peppers stems and seeds removed
  • 2 dried ancho peppers stems and seeds removed
  • 1 teaspoon cumin
  • 1 teaspoon oregano
  • 1 teaspoon smoked paprika
  • 1 teaspoon salt
  • 1/2 teaspoon black pepper
  • 4 cups beef broth
  • 2 tablespoons apple cider vinegar
  • Corn tortillas
  • Chopped cilantro for garnish
  • Chopped onions for garnish
  • Lime wedges for serving

Method
 

  1. In a skillet over medium heat, toast the guajillo and ancho peppers for about 2-3 minutes until fragrant. Remove from heat and soak the peppers in hot water for 15 minutes until softened. Drain and set aside.
  2. In a blender, combine the soaked peppers, onion, garlic, cumin, oregano, smoked paprika, salt, black pepper, beef broth, and apple cider vinegar. Blend until smooth.
  3. Place the beef chuck roast and short ribs in the Instant Pot. Pour the blended sauce over the meat, ensuring it is well coated.
  4. Close the lid of the Instant Pot and set it to cook on high pressure for 45 minutes. Allow for a natural release for 15 minutes before manually releasing any remaining pressure.
  5. Remove the meat from the pot and shred it using two forks. Strain the remaining liquid to separate the fat and solids, reserving the broth for dipping.
  6. Heat a skillet over medium heat. Dip a corn tortilla into the reserved broth, then place it in the skillet. Add a portion of the shredded meat and top with chopped onions and cilantro. Fold the tortilla in half and cook until crispy, about 2-3 minutes per side.
  7. Repeat with remaining tortillas and filling. Serve the tacos hot with lime wedges and the reserved broth for dipping.

Nutrition

Serving: 1tacoCalories: 350kcalCarbohydrates: 10gProtein: 30gFat: 20gSaturated Fat: 8gPolyunsaturated Fat: 12gCholesterol: 80mgSodium: 800mgFiber: 2gSugar: 2g

Notes

  • For a spicier kick, add a few jalapeños to the blender with the sauce.
  • Substitute the beef with lamb or chicken for a different flavor profile.

Tried this recipe?

Let us know how it was!

Apple Pie Cheesecake Cookies: A Delightful Treat Awaits!

Introduction to Apple Pie Cheesecake Cookies

There’s something magical about the combination of apple pie and cheesecake, isn’t there?

When I first stumbled upon the idea of Apple Pie Cheesecake Cookies, I knew I had to try it.

These cookies are not just a treat; they’re a warm hug on a plate.

Perfect for a quick dessert after a long day or a delightful surprise for friends, they blend the comforting flavors of fall with the creamy richness of cheesecake.

Trust me, once you take a bite, you’ll be hooked.

Let’s dive into this delicious adventure together!

Why You’ll Love This Apple Pie Cheesecake Cookies

These Apple Pie Cheesecake Cookies are a game-changer for any dessert lover.

They’re incredibly easy to whip up, making them perfect for busy weeknights or last-minute gatherings.

The taste? A delightful fusion of sweet apples, creamy cheesecake, and warm spices that will transport you straight to your grandma’s kitchen.

Plus, they’re a hit with everyone, from kids to adults, ensuring smiles all around.

What’s not to love?

Ingredients for Apple Pie Cheesecake Cookies

To create these delightful Apple Pie Cheesecake Cookies, you’ll need a handful of simple ingredients that come together to make magic.

  • All-purpose flour: The backbone of your cookies, providing structure and chewiness.
  • Baking soda: This little leavening agent helps your cookies rise and become fluffy.
  • Salt: A pinch enhances the flavors, balancing the sweetness beautifully.
  • Ground cinnamon: Adds that warm, cozy spice reminiscent of apple pie.
  • Ground nutmeg: A hint of nutmeg brings depth and a touch of holiday cheer.
  • Unsalted butter: Softened butter creates a rich, tender cookie base.
  • Granulated sugar: Sweetens the dough and helps achieve that lovely golden color.
  • Brown sugar: Adds moisture and a hint of caramel flavor, making the cookies extra chewy.
  • Large eggs: They bind everything together and add richness.
  • Vanilla extract: A splash of vanilla elevates the flavor profile, making it irresistible.
  • Cream cheese: The star ingredient that gives these cookies their cheesecake-like creaminess.
  • Diced apples: Fresh apples bring a juicy, fruity burst, just like in a classic apple pie.
  • Chopped walnuts or pecans (optional): For a delightful crunch, add nuts if you like a bit of texture.
  • Caramel sauce: Drizzle this on top for an extra layer of sweetness and decadence.

For exact measurements, check the bottom of the article where you can find everything you need for printing. Happy baking!

How to Make Apple Pie Cheesecake Cookies

Creating these Apple Pie Cheesecake Cookies is a delightful journey that’s as enjoyable as the final product.

Let’s break it down step by step, ensuring you have all the tips you need for success.

Step 1: Preheat and Prepare

Start by preheating your oven to 350°F (175°C).

While that’s warming up, line a baking sheet with parchment paper.

This will prevent the cookies from sticking and make cleanup a breeze.

Step 2: Mix Dry Ingredients

In a medium bowl, whisk together the all-purpose flour, baking soda, salt, ground cinnamon, and nutmeg.

This blend of spices is what gives your cookies that cozy, apple pie flavor.

Set this mixture aside for now.

Step 3: Cream Butter and Sugars

In a large bowl, cream together the softened unsalted butter, granulated sugar, and brown sugar.

Mix until it’s light and fluffy—this step is crucial for a tender cookie.

You’ll want to use a hand mixer or stand mixer for the best results.

Step 4: Add Eggs and Cream Cheese

Next, beat in the eggs one at a time.

Then, add the vanilla extract and softened cream cheese.

Mix until everything is well combined and smooth.

This creamy mixture is what makes these cookies so special!

Step 5: Combine Wet and Dry Ingredients

Gradually add the dry ingredients to the wet mixture.

Stir gently until just combined; overmixing can lead to tough cookies.

You want a soft dough that holds together nicely.

Step 6: Fold in Apples and Nuts

Now it’s time to fold in the diced apples and chopped nuts, if you’re using them.

This adds a lovely texture and flavor to your cookies.

Be gentle here; you want to keep the dough fluffy.

Step 7: Shape and Bake

Drop tablespoon-sized portions of dough onto the prepared baking sheet.

Make sure to space them about 2 inches apart to allow for spreading.

Bake for 12-15 minutes or until the edges are lightly golden.

Your kitchen will smell heavenly!

Step 8: Cool and Drizzle

Once baked, allow the cookies to cool on the baking sheet for about 5 minutes.

Then, transfer them to a wire rack to cool completely.

Before serving, drizzle with caramel sauce for that extra touch of sweetness.

Enjoy your delicious Apple Pie Cheesecake Cookies!

Tips for Success

  • Use room temperature ingredients for better mixing and texture.
  • Don’t skip the parchment paper; it makes for easy removal and cleanup.
  • For a chewier cookie, chill the dough for 30 minutes before baking.
  • Experiment with different apple varieties for unique flavors.
  • Keep an eye on the cookies; they can go from perfect to overbaked quickly.

Equipment Needed

  • Baking sheet: A standard one works, but a silicone mat can help with even baking.
  • Parchment paper: Great for easy cleanup; aluminum foil is a good alternative.
  • Mixing bowls: Use any size, but a large bowl is best for the wet ingredients.
  • Hand mixer or stand mixer: A whisk can work, but it’ll take more effort.
  • Measuring cups and spoons: Essential for accuracy; a kitchen scale is a handy alternative.

Variations

  • For a gluten-free option, substitute all-purpose flour with a 1:1 gluten-free flour blend.
  • Add a splash of bourbon or rum to the dough for a grown-up twist.
  • Swap out the apples for diced pears or peaches for a different fruity flavor.
  • Incorporate dried cranberries or raisins for added sweetness and texture.
  • Try using flavored cream cheese, like cinnamon or pumpkin spice, for an extra kick.

Serving Suggestions

  • Pair these cookies with a scoop of vanilla ice cream for a delightful dessert experience.
  • Serve alongside a warm cup of spiced apple cider for a cozy fall treat.
  • For a festive touch, plate them on a rustic wooden board with fresh apple slices.
  • Drizzle extra caramel sauce on top for an eye-catching presentation.

FAQs about Apple Pie Cheesecake Cookies

Can I make these cookies ahead of time?

Absolutely! You can prepare the dough in advance and refrigerate it for up to 3 days. Just scoop and bake when you’re ready for fresh cookies.

What type of apples work best for these cookies?

I recommend using tart apples like Granny Smith or Honeycrisp. They hold their shape well and provide a nice contrast to the sweetness of the cookie.

Can I freeze Apple Pie Cheesecake Cookies?

Yes, these cookies freeze beautifully! Just place them in an airtight container, and they’ll stay fresh for up to 3 months. Thaw them at room temperature before enjoying.

How do I store leftover cookies?

Store your cookies in an airtight container at room temperature for up to a week. If you want to keep them longer, consider freezing them.

Can I substitute cream cheese with something else?

If you’re looking for a lighter option, you can use Greek yogurt. It won’t be as creamy, but it will still add moisture and a tangy flavor.

Final Thoughts

Baking these Apple Pie Cheesecake Cookies is more than just a culinary task; it’s an experience that fills your kitchen with warmth and nostalgia.

Each bite is a delightful blend of flavors that brings back memories of family gatherings and cozy autumn evenings.

Whether you’re sharing them with loved ones or enjoying them solo with a cup of coffee, these cookies are sure to bring a smile to your face.

So, roll up your sleeves and dive into this delicious adventure.

Trust me, once you taste them, you’ll be counting down the days until you can bake them again!

jhessica

Apple Pie Cheesecake Cookies: A Delightful Treat Awaits!

Delicious cookies combining the flavors of apple pie and cheesecake.
Prep Time 20 minutes
Cook Time 15 minutes
Total Time 35 minutes
Servings: 24 cookies
Course: Dessert
Cuisine: American
Calories: 150

Ingredients
  

  • 2 cups all-purpose flour
  • 1 teaspoon baking soda
  • 1/2 teaspoon salt
  • 1 teaspoon ground cinnamon
  • 1/2 teaspoon ground nutmeg
  • 1 cup unsalted butter softened
  • 1 cup granulated sugar
  • 1/2 cup brown sugar packed
  • 2 large eggs
  • 1 teaspoon vanilla extract
  • 1 cup cream cheese softened
  • 1 cup diced apples peeled and cored
  • 1/2 cup chopped walnuts or pecans optional
  • 1/4 cup caramel sauce for drizzling

Method
 

  1. Preheat your oven to 350°F (175°C) and line a baking sheet with parchment paper.
  2. In a medium bowl, whisk together the flour, baking soda, salt, cinnamon, and nutmeg. Set aside.
  3. In a large bowl, cream together the softened butter, granulated sugar, and brown sugar until light and fluffy.
  4. Beat in the eggs one at a time, then add the vanilla extract and cream cheese, mixing until well combined.
  5. Gradually add the dry ingredients to the wet mixture, stirring until just combined.
  6. Fold in the diced apples and nuts (if using).
  7. Drop tablespoon-sized portions of dough onto the prepared baking sheet, spacing them about 2 inches apart.
  8. Bake for 12-15 minutes or until the edges are lightly golden.
  9. Allow the cookies to cool on the baking sheet for 5 minutes before transferring them to a wire rack to cool completely.
  10. Drizzle with caramel sauce before serving.

Nutrition

Serving: 1cookieCalories: 150kcalCarbohydrates: 18gProtein: 2gFat: 7gSaturated Fat: 4gPolyunsaturated Fat: 2gCholesterol: 30mgSodium: 100mgFiber: 1gSugar: 10g

Notes

  • For a spicier flavor, add 1/4 teaspoon of ground ginger to the dry ingredients.
  • Substitute the diced apples with other fruits like pears or peaches for a different twist.

Tried this recipe?

Let us know how it was!

Easy Rotisserie Chicken Tacos: Quick and Delicious Recipe!

Introduction to Easy Rotisserie Chicken Tacos

When life gets hectic, finding time to cook can feel like a challenge. That’s where these Easy Rotisserie Chicken Tacos come in, offering a delicious solution for busy weeknights.

I remember those evenings when I’d rush home, exhausted from work, and the last thing I wanted was to spend hours in the kitchen. With this recipe, you can whip up a satisfying meal in just 15 minutes.

These tacos are not only quick to prepare but also packed with flavor, making them perfect for impressing family or friends. Trust me, they’ll be asking for seconds!

Why You’ll Love This Easy Rotisserie Chicken Tacos

These Easy Rotisserie Chicken Tacos are a game-changer for anyone who craves flavor without the fuss.

In just 15 minutes, you can serve up a meal that’s not only quick but also bursting with taste.

The beauty lies in the rotisserie chicken, which saves you time and effort.

Plus, the customizable toppings let you cater to everyone’s preferences, making it a hit for family dinners or casual gatherings.

Ingredients for Easy Rotisserie Chicken Tacos

Creating these Easy Rotisserie Chicken Tacos is a breeze, thanks to a handful of simple ingredients.

Here’s what you’ll need:

  • Shredded rotisserie chicken: The star of the show! It’s pre-cooked, juicy, and full of flavor, saving you precious time.
  • Olive oil: A splash of this adds richness and helps the spices stick to the chicken.
  • Chili powder: This brings a warm, smoky flavor that elevates the dish.
  • Cumin: Earthy and aromatic, cumin adds depth to the taco filling.
  • Garlic powder: A must-have for that savory kick without the chopping hassle.
  • Onion powder: It complements the garlic and enhances the overall flavor profile.
  • Salt and pepper: Essential for seasoning, adjust to your taste.
  • Tortillas: Choose between corn or flour, depending on your preference for texture.
  • Shredded lettuce: Adds a refreshing crunch to each bite.
  • Diced tomatoes: Juicy and vibrant, they bring a burst of freshness.
  • Shredded cheese: Cheddar or a Mexican blend melts beautifully, adding creaminess.
  • Sour cream: A dollop of this cools down the spices and adds richness.
  • Fresh cilantro: Optional, but it adds a bright, herbal note that’s hard to resist.
  • Lime wedges: A squeeze of lime at the end brightens the flavors and adds zing.

For exact quantities, check the bottom of the article where you can find everything listed for easy printing.

Feel free to mix and match ingredients based on what you have on hand or your personal taste!

How to Make Easy Rotisserie Chicken Tacos

Making these Easy Rotisserie Chicken Tacos is as simple as it gets.

Follow these straightforward steps, and you’ll have a delicious meal ready in no time!

Step 1: Heat the Chicken Mixture

Start by heating a tablespoon of olive oil in a skillet over medium heat.

Once the oil shimmers, add the shredded rotisserie chicken.

Sprinkle in the chili powder, cumin, garlic powder, onion powder, salt, and pepper.

Stir everything together, letting the spices coat the chicken.

Cook for about five minutes until everything is heated through and fragrant.

Your kitchen will smell amazing!

Step 2: Warm the Tortillas

While the chicken mixture is heating, it’s time to warm the tortillas.

You can do this in a separate skillet over low heat or pop them in the microwave for about 30 seconds.

Warming them makes them pliable and easier to fold.

Step 3: Assemble the Tacos

Now comes the fun part—assembling your tacos!

Take a warm tortilla and place a generous scoop of the chicken mixture in the center.

Top it off with shredded lettuce, diced tomatoes, and a sprinkle of cheese.

Don’t forget a dollop of sour cream for that creamy goodness.

Feel free to get creative with your toppings!

Step 4: Garnish and Serve

To finish, garnish your tacos with fresh cilantro if you like.

Serve them with lime wedges on the side for an extra zing.

A squeeze of lime just before taking a bite elevates the flavors to a whole new level!

Tips for Success

  • Use high-quality rotisserie chicken for the best flavor.
  • Don’t skip warming the tortillas; it makes a big difference in texture.
  • Experiment with spices—add cayenne for heat or smoked paprika for depth.
  • Prep your toppings ahead of time for a quicker assembly.
  • For a crunchier taco, briefly toast the tortillas in a dry skillet.

Equipment Needed

  • Skillet: A non-stick skillet works best, but any frying pan will do.
  • Spatula: Use this to stir the chicken mixture and serve the tacos.
  • Microwave or another skillet: For warming tortillas, either method is effective.
  • Serving platter: Perfect for presenting your delicious tacos.

Variations

  • Spicy Kick: Add sliced jalapeños or a drizzle of your favorite hot sauce for an extra layer of heat.
  • Vegetarian Option: Substitute the chicken with sautéed bell peppers, mushrooms, and black beans for a hearty meatless taco.
  • BBQ Twist: Mix in some barbecue sauce with the chicken for a smoky, sweet flavor profile.
  • Low-Carb Version: Use lettuce wraps instead of tortillas for a lighter, low-carb alternative.
  • Different Proteins: Swap the rotisserie chicken for shredded beef, pork, or even fish for a unique twist.

Serving Suggestions

  • Side Dishes: Pair your tacos with a side of Mexican rice or refried beans for a complete meal.
  • Fresh Salsa: Serve with a zesty pico de gallo or mango salsa for added flavor.
  • Drinks: Enjoy with a cold cerveza or a refreshing limeade.
  • Presentation: Arrange tacos on a colorful platter, garnished with lime wedges and cilantro for a vibrant look.

FAQs about Easy Rotisserie Chicken Tacos

Can I use leftover chicken instead of rotisserie chicken?

Absolutely! Leftover chicken works great in these Easy Rotisserie Chicken Tacos. Just shred it and follow the same steps to heat and season it.

How can I make these tacos spicier?

If you’re looking for a spicy kick, add sliced jalapeños or a drizzle of your favorite hot sauce. You can also increase the chili powder for more heat.

Can I prepare the chicken mixture ahead of time?

Yes! You can prepare the chicken mixture in advance and store it in the fridge. Just reheat it when you’re ready to assemble your tacos.

What toppings do you recommend for these tacos?

Some great toppings include shredded lettuce, diced tomatoes, cheese, sour cream, and fresh cilantro. Feel free to get creative with your favorites!

Are these tacos suitable for meal prep?

Definitely! These Easy Rotisserie Chicken Tacos are perfect for meal prep. Just store the chicken mixture and toppings separately, and assemble when you’re ready to eat.

Final Thoughts

Cooking should be a joyful experience, not a chore.

These Easy Rotisserie Chicken Tacos embody that spirit, transforming a busy weeknight into a flavorful feast in just 15 minutes.

The beauty of this recipe lies in its simplicity and versatility, allowing you to customize each taco to your liking.

Whether you’re feeding a hungry family or hosting friends, these tacos are sure to impress.

So, roll up your sleeves, gather your ingredients, and dive into this culinary adventure.

You’ll find that with each bite, you’re not just enjoying a meal, but creating memories that last.

jhessica

Easy Rotisserie Chicken Tacos: Quick and Delicious Recipe!

A quick and delicious recipe for tacos using shredded rotisserie chicken, perfect for a weeknight meal.
Prep Time 10 minutes
Cook Time 5 minutes
Total Time 15 minutes
Servings: 4 servings
Course: Main Course
Cuisine: Mexican
Calories: 350

Ingredients
  

  • 2 cups shredded rotisserie chicken
  • 1 tablespoon olive oil
  • 1 teaspoon chili powder
  • 1 teaspoon cumin
  • 1/2 teaspoon garlic powder
  • 1/2 teaspoon onion powder
  • Salt and pepper to taste
  • 8 small corn or flour tortillas
  • 1 cup shredded lettuce
  • 1 cup diced tomatoes
  • 1/2 cup shredded cheese cheddar or Mexican blend
  • 1/4 cup sour cream
  • 1/4 cup fresh cilantro chopped (optional)
  • Lime wedges for serving

Method
 

  1. In a skillet, heat the olive oil over medium heat. Add the shredded rotisserie chicken, chili powder, cumin, garlic powder, onion powder, salt, and pepper. Stir to combine and cook for about 5 minutes, until heated through.
  2. While the chicken mixture is heating, warm the tortillas in a separate skillet or microwave until pliable.
  3. To assemble the tacos, place a generous amount of the chicken mixture onto each tortilla. Top with shredded lettuce, diced tomatoes, cheese, and a dollop of sour cream.
  4. Garnish with fresh cilantro if desired and serve with lime wedges on the side.

Nutrition

Serving: 1tacoCalories: 350kcalCarbohydrates: 30gProtein: 25gFat: 15gSaturated Fat: 5gPolyunsaturated Fat: 10gCholesterol: 60mgSodium: 600mgFiber: 3gSugar: 2g

Notes

  • For a spicy kick, add sliced jalapeños or a drizzle of hot sauce to the tacos.
  • Substitute the rotisserie chicken with shredded beef or pork for a different flavor profile.

Tried this recipe?

Let us know how it was!

Coconut Lime Chicken: A Flavorful Recipe to Try Today!

Introduction to Coconut Lime Chicken

There’s something magical about the combination of coconut and lime that instantly transports me to a sun-soaked beach. This Coconut Lime Chicken recipe is not just a meal; it’s a mini-vacation on a plate. Perfect for those busy weeknights or when you want to impress your loved ones, this dish is both simple and bursting with flavor. With tender chicken thighs swimming in a creamy, zesty sauce, it’s a quick solution that doesn’t skimp on taste. Trust me, once you try this, it’ll become a staple in your kitchen!

Why You’ll Love This Coconut Lime Chicken

This Coconut Lime Chicken is a game-changer for your dinner routine. It’s incredibly easy to whip up, taking just 10 minutes of prep time. The creamy coconut milk and zesty lime create a flavor explosion that will have your taste buds dancing. Plus, it’s baked, so you can set it and forget it while you tackle other tasks. It’s a dish that brings joy without the fuss!

Ingredients for Coconut Lime Chicken

Gathering the right ingredients is the first step to creating this delightful Coconut Lime Chicken. Here’s what you’ll need:

  • Boneless, skinless chicken thighs: These are juicy and tender, perfect for soaking up the coconut lime sauce.
  • Coconut milk: This creamy base adds richness and a tropical flair to the dish.
  • Fresh lime juice: The zesty acidity brightens the flavors and balances the creaminess of the coconut.
  • Honey: A touch of sweetness that complements the tangy lime and enhances the overall flavor.
  • Garlic: Minced garlic brings a savory depth that pairs beautifully with the other ingredients.
  • Fresh ginger: Grated ginger adds a warm, spicy note that elevates the dish.
  • Salt and black pepper: Essential seasonings that enhance the flavors of the chicken and sauce.
  • Paprika: This adds a subtle smokiness and a pop of color to the dish.
  • Olive oil: A drizzle helps to keep the chicken moist while baking.
  • Fresh cilantro: Chopped cilantro is a vibrant garnish that adds freshness and a burst of flavor.
  • Lime wedges: Serve these on the side for an extra squeeze of lime just before eating.

For those who like a bit of heat, consider adding red pepper flakes to the coconut milk mixture. If you want to make it a complete meal, serve the chicken over rice or quinoa to soak up that delicious sauce. Exact quantities for each ingredient can be found at the bottom of the article, ready for printing!

How to Make Coconut Lime Chicken

Creating this Coconut Lime Chicken is a breeze. Follow these simple steps, and you’ll have a delicious meal ready in no time. Let’s dive in!

Step 1: Preheat the Oven

First things first, preheat your oven to 400°F (200°C). This ensures even cooking and helps the chicken develop a lovely golden color.

Step 2: Prepare the Coconut Lime Mixture

In a large bowl, whisk together the coconut milk, fresh lime juice, honey, minced garlic, grated ginger, salt, black pepper, and paprika. Mix until everything is well combined. The aroma will be heavenly!

Step 3: Coat the Chicken

Next, place the boneless, skinless chicken thighs in a large baking dish. Pour the coconut lime mixture over the chicken, making sure each piece is well coated. This is where the magic begins!

Step 4: Add Olive Oil

Drizzle a bit of olive oil over the chicken. Give it a gentle toss to mix everything together. This helps keep the chicken moist while it bakes.

Step 5: Bake the Chicken

Now, it’s time to bake! Place the dish in the preheated oven and let it cook for 30-35 minutes. You’ll know it’s done when the chicken reaches an internal temperature of 165°F (74°C). The smell will be irresistible!

Step 6: Rest and Garnish

Once baked, remove the chicken from the oven and let it rest for about 5 minutes. This allows the juices to redistribute. Garnish with fresh cilantro and serve with lime wedges for that extra zing!

Tips for Success

  • Always use fresh lime juice for the best flavor; bottled juice just doesn’t cut it.
  • Let the chicken marinate in the coconut lime mixture for an hour if you have time; it enhances the flavor.
  • Check the chicken’s internal temperature with a meat thermometer to ensure it’s perfectly cooked.
  • For a creamier sauce, stir in a bit of extra coconut milk before serving.
  • Don’t skip the resting time; it keeps the chicken juicy!

Equipment Needed

  • Baking dish: A 9×13 inch dish works great, but any oven-safe dish will do.
  • Mixing bowl: A large bowl for whisking the coconut lime mixture; a smaller bowl can work in a pinch.
  • Whisk: Essential for combining ingredients; a fork can substitute if needed.
  • Meat thermometer: To check chicken doneness; a knife can help, but it’s less accurate.

Variations

  • Spicy Coconut Lime Chicken: Add 1 teaspoon of red pepper flakes to the coconut lime mixture for a fiery kick.
  • Vegetarian Option: Substitute chicken with firm tofu or chickpeas for a plant-based version that still packs a punch.
  • Herb-Infused: Experiment with different herbs like basil or mint instead of cilantro for a unique twist.
  • Grilled Version: Marinate the chicken in the coconut lime mixture and grill it for a smoky flavor.
  • Low-Carb Adaptation: Serve the chicken over cauliflower rice instead of traditional rice for a low-carb meal.

Serving Suggestions

  • Rice or Quinoa: Serve the Coconut Lime Chicken over fluffy rice or quinoa to soak up the delicious sauce.
  • Fresh Salad: Pair with a light cucumber and avocado salad for a refreshing contrast.
  • Drink Pairing: Enjoy with a cold beer or a zesty mojito to complement the flavors.
  • Presentation: Garnish with extra lime wedges and cilantro for a vibrant, appealing look.

FAQs about Coconut Lime Chicken

Got questions about this Coconut Lime Chicken recipe? You’re not alone! Here are some common queries that might pop up as you whip up this delicious dish.

Can I use chicken breasts instead of thighs?

Absolutely! While chicken thighs are juicier, boneless, skinless chicken breasts can work too. Just be mindful of the cooking time, as they may cook faster.

How can I store leftovers?

Store any leftover Coconut Lime Chicken in an airtight container in the fridge for up to 3 days. Reheat gently in the oven or microwave to maintain its creamy texture.

Can I freeze Coconut Lime Chicken?

Yes, you can freeze it! Just make sure to let it cool completely before transferring it to a freezer-safe container. It can last up to 3 months in the freezer.

What can I serve with Coconut Lime Chicken?

This dish pairs wonderfully with rice, quinoa, or a fresh salad. You can also serve it with warm naan or tortillas for a fun twist!

Is this recipe gluten-free?

Yes! This Coconut Lime Chicken recipe is naturally gluten-free, making it a great option for those with dietary restrictions.

Final Thoughts

Cooking this Coconut Lime Chicken is more than just preparing a meal; it’s about creating a moment of joy in your kitchen. The vibrant flavors of coconut and lime dance together, bringing a taste of the tropics to your table. Each bite is a reminder that cooking can be simple yet incredibly rewarding. Whether you’re sharing it with family or enjoying a quiet dinner alone, this dish has a way of making any day feel special. So, roll up your sleeves, embrace the process, and let this Coconut Lime Chicken become a cherished part of your culinary adventures!

jhessica

Coconut Lime Chicken: A Flavorful Recipe to Try Today!

A flavorful and creamy Coconut Lime Chicken recipe that combines tender chicken thighs with a zesty coconut lime sauce.
Prep Time 10 minutes
Cook Time 35 minutes
Total Time 45 minutes
Servings: 4 servings
Course: Main Dish
Cuisine: Asian
Calories: 380

Ingredients
  

  • 2 pounds boneless skinless chicken thighs
  • 1 can 13.5 ounces coconut milk
  • 1/4 cup fresh lime juice about 2 limes
  • 2 tablespoons honey
  • 4 cloves garlic minced
  • 1 tablespoon fresh ginger grated
  • 1 teaspoon salt
  • 1/2 teaspoon black pepper
  • 1 teaspoon paprika
  • 1 tablespoon olive oil
  • 1/4 cup fresh cilantro chopped (for garnish)
  • Lime wedges for serving

Method
 

  1. Preheat your oven to 400°F (200°C).
  2. In a large bowl, whisk together the coconut milk, lime juice, honey, garlic, ginger, salt, pepper, and paprika until well combined.
  3. Place the chicken thighs in a large baking dish and pour the coconut lime mixture over the chicken, ensuring all pieces are well coated.
  4. Drizzle olive oil over the chicken and give it a gentle toss to mix.
  5. Bake in the preheated oven for 30-35 minutes, or until the chicken is cooked through and reaches an internal temperature of 165°F (74°C).
  6. Remove from the oven and let it rest for 5 minutes. Garnish with fresh cilantro and serve with lime wedges.

Nutrition

Serving: 1servingCalories: 380kcalCarbohydrates: 6gProtein: 28gFat: 28gSaturated Fat: 18gPolyunsaturated Fat: 10gCholesterol: 120mgSodium: 800mgSugar: 6g

Notes

  • For a spicier kick, add 1 teaspoon of red pepper flakes to the coconut milk mixture.
  • To make it a complete meal, serve the chicken over rice or quinoa to soak up the delicious sauce.

Tried this recipe?

Let us know how it was!

Savory Breakfast Egg Muffins: A Delicious Morning Boost

Introduction to Savory Breakfast Egg Muffins

Starting the day off right can be a challenge, especially when mornings feel like a race against the clock. That’s where these Savory Breakfast Egg Muffins come in. They’re not just a meal; they’re a game-changer for busy mornings. Packed with protein and veggies, these muffins are a delicious way to fuel your day. Whether you’re rushing out the door or looking to impress your family with a hearty breakfast, these muffins are your go-to solution. Trust me, once you try them, you’ll wonder how you ever lived without them!

Why You’ll Love This Savory Breakfast Egg Muffins

These Savory Breakfast Egg Muffins are a dream come true for anyone who craves a quick, nutritious breakfast. They’re easy to whip up, taking just 10 minutes of prep time. Plus, they’re versatile—perfect for using up leftover veggies or cheese. The best part? You can make a batch ahead of time and enjoy them all week. Delicious, convenient, and satisfying, these muffins are sure to become a breakfast staple!

Ingredients for Savory Breakfast Egg Muffins

Gathering the right ingredients is key to making these Savory Breakfast Egg Muffins a hit. Here’s what you’ll need:

  • Large eggs: The foundation of your muffins, providing protein and structure.
  • Milk: Adds creaminess and helps bind the ingredients together.
  • Spinach: A nutrient powerhouse that adds color and flavor. Fresh or frozen works!
  • Bell pepper: Sweet and crunchy, it brings a pop of color and taste.
  • Onion: Adds depth and savory notes. You can use yellow, red, or even green onions.
  • Shredded cheese: Choose your favorite! Cheddar is classic, but feta or mozzarella can be fun alternatives.
  • Salt: Enhances all the flavors, so don’t skip it!
  • Black pepper: A little kick to balance the richness of the eggs.
  • Garlic powder: For that aromatic touch without the fuss of fresh garlic.
  • Paprika: Adds a hint of smokiness and a beautiful color.
  • Cooking spray or oil: Essential for greasing the muffin tin to prevent sticking.

Feel free to get creative! You can add cooked sausage or bacon bits for a heartier muffin. Experiment with other veggies like zucchini or mushrooms to suit your taste. For exact quantities, check the bottom of the article where you can find everything available for printing.

How to Make Savory Breakfast Egg Muffins

Creating these Savory Breakfast Egg Muffins is a breeze! Follow these simple steps, and you’ll have a delicious breakfast ready in no time. Let’s dive in!

Step 1: Preheat and Prepare

First things first, preheat your oven to 350°F (175°C). This is crucial for even baking. While the oven warms up, grab your muffin tin and grease it with cooking spray or a little oil. This will keep your muffins from sticking and make cleanup a snap!

Step 2: Whisk the Eggs and Milk

In a large mixing bowl, crack open those eggs and pour in the milk. Whisk them together until they’re well combined. This mixture is the heart of your muffins, so make sure it’s nice and smooth. It’s like a blank canvas waiting for your colorful ingredients!

Step 3: Add Vegetables and Seasoning

Now, it’s time to bring in the flavor! Stir in the chopped spinach, diced bell pepper, diced onion, and shredded cheese. Don’t forget the spices—add salt, black pepper, garlic powder, and paprika. This step is where your muffins get their personality. Mix everything until it’s evenly distributed, and you can almost smell the goodness!

Step 4: Fill the Muffin Tin

Carefully pour the egg mixture into the prepared muffin tin, filling each cup about 3/4 full. This ensures they have room to rise without overflowing. It’s like giving them a cozy little home to bake in!

Step 5: Bake to Perfection

Pop the muffin tin into your preheated oven and bake for 20-25 minutes. You’ll know they’re ready when they’re set and lightly golden on top. This is where the magic happens! The aroma will fill your kitchen, making it hard to resist sneaking a taste.

Step 6: Cool and Serve

Once they’re done, remove the muffins from the oven and let them cool for a few minutes. This makes them easier to handle. Carefully take them out of the tin and enjoy them warm. If you have leftovers, store them in an airtight container in the fridge for a quick breakfast later!

Tips for Success

  • Use fresh ingredients for the best flavor and nutrition.
  • Don’t overfill the muffin cups; 3/4 full is perfect.
  • Let the muffins cool slightly before removing them from the tin.
  • Store leftovers in an airtight container to keep them fresh.
  • Reheat in the microwave for a quick breakfast on busy mornings.

Equipment Needed

  • Muffin tin: Essential for shaping your egg muffins. A silicone muffin pan works great for easy removal.
  • Mixing bowl: A large bowl for whisking the eggs and mixing ingredients. Any size will do!
  • Whisk: Perfect for blending eggs and milk. A fork can work in a pinch.
  • Measuring cups: Handy for accurate ingredient portions, but eyeballing can be fun too!

Variations

  • Meat Lovers: Add cooked sausage, bacon, or ham for a protein-packed version that will satisfy any meat lover.
  • Veggie Delight: Swap in your favorite vegetables like zucchini, mushrooms, or kale for a fresh twist.
  • Cheese Swap: Experiment with different cheeses such as feta, goat cheese, or pepper jack for unique flavors.
  • Spice It Up: Add a pinch of cayenne pepper or diced jalapeños for a spicy kick that wakes up your taste buds.
  • Herb Infusion: Incorporate fresh herbs like basil, cilantro, or chives for an aromatic touch that elevates the dish.

Serving Suggestions

  • Pair your Savory Breakfast Egg Muffins with a side of fresh fruit for a refreshing contrast.
  • A dollop of salsa or hot sauce adds a zesty kick that complements the muffins beautifully.
  • Serve with a steaming cup of coffee or herbal tea to round out your breakfast experience.
  • For a brunch gathering, arrange the muffins on a colorful platter for an inviting presentation.

FAQs about Savory Breakfast Egg Muffins

Can I make Savory Breakfast Egg Muffins ahead of time?

Absolutely! These muffins are perfect for meal prep. You can make a batch on the weekend and store them in the fridge. Just reheat them in the microwave for a quick breakfast during the week.

How long do these muffins last in the fridge?

When stored in an airtight container, your Savory Breakfast Egg Muffins will stay fresh for about 4-5 days. They’re great for grabbing on busy mornings!

Can I freeze Savory Breakfast Egg Muffins?

Yes, you can! Just let them cool completely, then place them in a freezer-safe container. They’ll keep well for up to 3 months. Thaw them overnight in the fridge before reheating.

What can I substitute for eggs in this recipe?

If you’re looking for an egg substitute, try using a flaxseed meal or a commercial egg replacer. Keep in mind that the texture and flavor will differ slightly from the original recipe.

Are these muffins suitable for a low-carb diet?

While Savory Breakfast Egg Muffins are relatively low in carbs, you can make them even lower by skipping the cheese or using fewer vegetables. They’re a flexible option for various dietary needs!

Final Thoughts

There’s something truly special about starting your day with a warm, homemade breakfast. These Savory Breakfast Egg Muffins not only deliver on taste but also bring a sense of accomplishment. Each bite is a reminder that you can enjoy a nutritious meal, even on the busiest mornings. Whether you’re sharing them with family or savoring them solo, these muffins are a delightful way to kick off your day. So, roll up your sleeves, get cooking, and let the aroma of fresh muffins fill your kitchen. You’ll be glad you did!

jhessica

Savory Breakfast Egg Muffins: A Delicious Morning Boost

Savory Breakfast Egg Muffins are a delicious and nutritious way to start your day, packed with vegetables and protein.
Prep Time 10 minutes
Cook Time 25 minutes
Total Time 35 minutes
Servings: 6 servings
Course: Breakfast
Cuisine: American
Calories: 150

Ingredients
  

  • 6 large eggs
  • 1/2 cup milk
  • 1 cup spinach chopped
  • 1/2 cup bell pepper diced
  • 1/2 cup onion diced
  • 1 cup shredded cheese cheddar or your choice
  • 1/2 teaspoon salt
  • 1/4 teaspoon black pepper
  • 1/4 teaspoon garlic powder
  • 1/4 teaspoon paprika
  • Cooking spray or oil for greasing the muffin tin

Method
 

  1. Preheat your oven to 350°F (175°C). Grease a muffin tin with cooking spray or oil.
  2. In a large mixing bowl, whisk together the eggs and milk until well combined.
  3. Add the chopped spinach, diced bell pepper, diced onion, shredded cheese, salt, black pepper, garlic powder, and paprika to the egg mixture. Stir until all ingredients are evenly distributed.
  4. Pour the egg mixture evenly into the prepared muffin tin, filling each cup about 3/4 full.
  5. Bake in the preheated oven for 20-25 minutes, or until the egg muffins are set and lightly golden on top.
  6. Remove from the oven and let cool for a few minutes before carefully removing the muffins from the tin. Serve warm or allow to cool completely and store in an airtight container in the refrigerator.

Nutrition

Serving: 1muffinCalories: 150kcalCarbohydrates: 2gProtein: 10gFat: 10gSaturated Fat: 4gPolyunsaturated Fat: 6gCholesterol: 200mgSodium: 300mgSugar: 1g

Notes

  • For a heartier muffin, add cooked sausage or bacon bits to the egg mixture.
  • Experiment with different vegetables like zucchini or mushrooms for added flavor and nutrition.

Tried this recipe?

Let us know how it was!

Carrot Muffins with Cream Cheese Swirl: A Delightful Recipe!

Introduction to Carrot Muffins with Cream Cheese Swirl

There’s something magical about the aroma of freshly baked goods wafting through the kitchen.

Carrot muffins with cream cheese swirl are not just a treat; they’re a warm hug on a busy morning.

Whether you’re rushing out the door or enjoying a leisurely weekend brunch, these muffins are the perfect solution.

They combine the wholesome goodness of carrots with a rich, creamy swirl that elevates each bite.

Trust me, your loved ones will be impressed, and you’ll feel like a kitchen rockstar.

Let’s dive into this delightful recipe that’s sure to become a family favorite!

Why You’ll Love This Carrot Muffins with Cream Cheese Swirl

These carrot muffins with cream cheese swirl are a game changer for busy mornings.

They’re quick to whip up, taking just 15 minutes of prep time.

The combination of sweet carrots and creamy cheese creates a flavor explosion that’s hard to resist.

Plus, they’re versatile enough to serve as a snack or a breakfast treat.

You’ll love how they make your kitchen smell heavenly while satisfying your cravings!

Ingredients for Carrot Muffins with Cream Cheese Swirl

Creating these carrot muffins with cream cheese swirl is a delightful journey, and it all starts with the right ingredients.

Here’s what you’ll need:

  • All-purpose flour: The backbone of your muffins, providing structure and a soft texture.
  • Baking powder and baking soda: These leavening agents help your muffins rise, giving them that fluffy quality we all love.
  • Ground cinnamon and nutmeg: These spices add warmth and depth, making each bite feel like a cozy hug.
  • Salt: A pinch enhances the flavors, balancing the sweetness of the sugars.
  • Granulated sugar and brown sugar: The duo sweetens the muffins, with brown sugar adding a hint of caramel flavor.
  • Vegetable oil: This keeps the muffins moist and tender, ensuring they don’t dry out.
  • Large eggs: They bind everything together and contribute to the muffins’ rich texture.
  • Grated carrots: The star of the show! They add natural sweetness and moisture, plus a pop of color.
  • Crushed pineapple: This adds a tropical twist and extra moisture, making the muffins even more delightful.
  • Chopped walnuts and raisins (optional): These add texture and a bit of chewiness, but feel free to skip them if you prefer a smoother muffin.
  • Cream cheese: The creamy swirl that takes these muffins to the next level, adding richness and tang.
  • Granulated sugar, egg, and vanilla extract (for the cream cheese swirl): These ingredients create a sweet, smooth mixture that complements the muffins perfectly.

For exact measurements, check the bottom of the article where you can find everything you need for printing.

Gather these ingredients, and let’s get ready to bake some magic!

How to Make Carrot Muffins with Cream Cheese Swirl

Making carrot muffins with cream cheese swirl is a straightforward process that yields delicious results.

Follow these steps, and you’ll be enjoying warm, fluffy muffins in no time!

Step 1: Preheat the Oven

Start by preheating your oven to 350°F (175°C).

This step is crucial because it ensures even baking.

While the oven heats up, line your muffin tin with paper liners or grease it with cooking spray.

This will prevent the muffins from sticking and make cleanup a breeze.

Step 2: Mix Dry Ingredients

In a large bowl, whisk together the all-purpose flour, baking powder, baking soda, ground cinnamon, nutmeg, and salt.

This step is essential for evenly distributing the leavening agents and spices.

A well-mixed dry mixture helps your muffins rise beautifully and ensures every bite is flavorful.

Step 3: Combine Wet Ingredients

In another bowl, mix the granulated sugar, brown sugar, and vegetable oil until well combined.

Add the eggs one at a time, mixing well after each addition.

Then, stir in the grated carrots and crushed pineapple.

This mixture brings moisture and sweetness, making your muffins irresistibly tender.

Step 4: Combine Wet and Dry Ingredients

Gradually add the dry ingredients to the wet mixture, stirring until just combined.

Be careful not to overmix; a few lumps are perfectly fine.

If you’re using walnuts or raisins, gently fold them in at this stage.

This keeps the muffins light and fluffy, ensuring a delightful texture.

Step 5: Prepare the Cream Cheese Swirl

In a separate bowl, beat together the softened cream cheese, granulated sugar, egg, and vanilla extract until smooth.

This creamy mixture is what makes your muffins special.

It adds a rich, tangy flavor that perfectly complements the sweetness of the carrot batter.

Step 6: Fill Muffin Tin

Spoon the carrot muffin batter into the prepared muffin tin, filling each cup about two-thirds full.

Then, drop a spoonful of the cream cheese mixture on top of each muffin.

Use a toothpick or knife to swirl it gently into the batter.

This creates that beautiful marbled effect that’s as pleasing to the eye as it is to the taste buds.

Step 7: Bake the Muffins

Place the muffin tin in the preheated oven and bake for 20-25 minutes.

To check for doneness, insert a toothpick into the center of a muffin.

If it comes out clean, they’re ready!

Let the muffins cool in the pan for about 5 minutes before transferring them to a wire rack to cool completely.

Enjoy the heavenly aroma filling your kitchen as you wait!

Tips for Success

  • Always preheat your oven for even baking.
  • Use fresh, finely grated carrots for the best flavor and moisture.
  • Don’t overmix the batter; a few lumps are okay!
  • For a fun twist, try adding shredded coconut or swapping walnuts for pecans.
  • Let the muffins cool completely before storing to maintain their texture.

Equipment Needed

  • Muffin tin: Essential for baking; a silicone muffin pan works great for easy removal.
  • Mixing bowls: Use at least two—one for dry ingredients and one for wet.
  • Whisk: Perfect for blending dry ingredients; a fork can work in a pinch.
  • Measuring cups and spoons: Accurate measurements ensure perfect results.
  • Spatula: Ideal for folding in ingredients and scraping the bowl clean.

Variations

  • Gluten-free option: Substitute all-purpose flour with a gluten-free flour blend for a delicious gluten-free treat.
  • Vegan twist: Replace eggs with flaxseed meal mixed with water and use a plant-based cream cheese alternative.
  • Spice it up: Add a pinch of cayenne pepper or ginger for a spicy kick that complements the sweetness.
  • Fruit fusion: Incorporate diced apples or pears for added moisture and flavor.
  • Nut-free version: Omit walnuts and raisins, or replace them with sunflower seeds for a crunchy texture.

Serving Suggestions

  • Pair with coffee: Enjoy these muffins with a hot cup of coffee or tea for a delightful breakfast.
  • Fresh fruit: Serve alongside sliced oranges or berries for a refreshing contrast.
  • Presentation: Dust with powdered sugar or drizzle with extra cream cheese frosting for a special touch.
  • Storage: Keep in an airtight container for up to three days for maximum freshness.

FAQs about Carrot Muffins with Cream Cheese Swirl

Can I make these carrot muffins with cream cheese swirl ahead of time?

Absolutely! You can prepare the batter a day in advance and store it in the fridge. Just remember to give it a good stir before baking. You can also bake the muffins ahead of time and store them in an airtight container for up to three days.

What can I substitute for the cream cheese?

If you’re looking for a lighter option, you can use Greek yogurt or a dairy-free cream cheese alternative. Both will still give you that creamy texture without compromising flavor.

How do I store leftover muffins?

To keep your muffins fresh, store them in an airtight container at room temperature for up to three days. For longer storage, freeze them in a zip-top bag for up to three months. Just thaw them at room temperature when you’re ready to enjoy!

Can I add other mix-ins to the batter?

<pDefinitely! Feel free to get creative. You can add chocolate chips, shredded coconut, or even dried cranberries for a fun twist. Just keep in mind that adding too many mix-ins might affect the texture.

Are these muffins suitable for kids?

<pYes! These carrot muffins with cream cheese swirl are a hit with kids. They’re sweet, moist, and packed with flavor, making them a great snack or breakfast option for little ones. Plus, they won’t even realize they’re eating veggies!

Final Thoughts

Baking carrot muffins with cream cheese swirl is more than just a recipe; it’s an experience that fills your kitchen with warmth and joy.

Each bite offers a delightful balance of sweet and tangy flavors, making them perfect for any occasion.

Whether you’re sharing them with family or savoring them solo, these muffins bring a sense of comfort and satisfaction.

They’re a reminder that simple ingredients can create something truly special.

So, roll up your sleeves, embrace the process, and enjoy the delicious rewards of your efforts. Happy baking!

jhessica

Carrot Muffins with Cream Cheese Swirl: A Delightful Recipe!

Delicious carrot muffins swirled with a creamy cream cheese mixture, perfect for breakfast or a snack.
Prep Time 15 minutes
Cook Time 25 minutes
Total Time 40 minutes
Servings: 12 muffins
Course: Baking
Cuisine: American
Calories: 210

Ingredients
  

  • 2 cups all-purpose flour
  • 1 teaspoon baking powder
  • 1 teaspoon baking soda
  • 1 teaspoon ground cinnamon
  • 1/2 teaspoon ground nutmeg
  • 1/2 teaspoon salt
  • 1 cup granulated sugar
  • 1/2 cup brown sugar packed
  • 1/2 cup vegetable oil
  • 4 large eggs
  • 2 cups grated carrots about 4 medium carrots
  • 1/2 cup crushed pineapple drained
  • 1/2 cup chopped walnuts optional
  • 1/2 cup raisins optional
  • 8 ounces cream cheese softened
  • 1/4 cup granulated sugar for cream cheese swirl
  • 1 large egg for cream cheese swirl
  • 1 teaspoon vanilla extract for cream cheese swirl

Method
 

  1. Preheat the oven to 350°F (175°C) and line a muffin tin with paper liners or grease with cooking spray.
  2. In a large bowl, whisk together the flour, baking powder, baking soda, cinnamon, nutmeg, and salt.
  3. In another bowl, mix the granulated sugar, brown sugar, and vegetable oil until well combined. Add the eggs one at a time, mixing well after each addition. Stir in the grated carrots and crushed pineapple.
  4. Gradually add the dry ingredients to the wet ingredients, mixing until just combined. If using, fold in the chopped walnuts and raisins.
  5. In a separate bowl, beat together the softened cream cheese, granulated sugar, egg, and vanilla extract until smooth.
  6. Spoon the carrot muffin batter into the prepared muffin tin, filling each cup about two-thirds full. Drop a spoonful of the cream cheese mixture on top of each muffin and use a toothpick or knife to swirl it gently into the batter.
  7. Bake for 20-25 minutes or until a toothpick inserted into the center comes out clean. Let the muffins cool in the pan for 5 minutes before transferring them to a wire rack to cool completely.

Nutrition

Serving: 1muffinCalories: 210kcalCarbohydrates: 28gProtein: 4gFat: 10gSaturated Fat: 2gPolyunsaturated Fat: 8gCholesterol: 50mgSodium: 200mgFiber: 1gSugar: 14g

Notes

  • This recipe makes 12 muffins.
  • For a lighter version, substitute half of the oil with unsweetened applesauce.
  • Add a teaspoon of vanilla extract to the muffin batter for extra flavor.
  • For a fun twist, try adding shredded coconut or swapping out the walnuts for pecans.

Tried this recipe?

Let us know how it was!

Bacon-Wrapped Shrimp: Deliciously Simple Recipe Today!

Introduction to Bacon-Wrapped Shrimp

There’s something undeniably satisfying about the combination of crispy bacon and tender shrimp. Bacon-Wrapped Shrimp is not just a dish; it’s a celebration of flavors that can elevate any gathering. Whether you’re hosting friends for game night or simply looking for a quick solution for a busy day, this recipe has you covered. It’s easy to whip up, and the aroma alone will have everyone flocking to the kitchen. Trust me, this dish is bound to impress your loved ones and leave them asking for seconds!

Why You’ll Love This Bacon-Wrapped Shrimp

This Bacon-Wrapped Shrimp recipe is a game-changer for any home cook. It’s incredibly easy to prepare, taking just 20 minutes from start to finish. The smoky, savory flavor of the bacon perfectly complements the succulent shrimp, creating a mouthwatering bite that’s hard to resist. Plus, it’s a low-carb option that fits into various diets, making it a versatile choice for gatherings or a cozy night in.

Ingredients for Bacon-Wrapped Shrimp

Gathering the right ingredients is the first step to culinary success. For this Bacon-Wrapped Shrimp, you’ll need a few simple yet flavorful components:

  • Large shrimp: Peeled and deveined, these are the stars of the dish. Look for fresh or frozen shrimp, but make sure they’re large enough to hold the bacon snugly.
  • Bacon: Cut in half, this adds a crispy, smoky layer to the shrimp. You can use regular or turkey bacon for a lighter option.
  • Garlic powder: A must-have for that savory depth. It enhances the overall flavor without overpowering the dish.
  • Smoked paprika: This spice brings a subtle smokiness that pairs beautifully with the bacon. It’s a game-changer for flavor!
  • Black pepper: A pinch of this adds a bit of heat and balances the richness of the bacon.
  • Salt: Essential for bringing out the flavors of the shrimp and bacon. Just a touch is all you need.
  • Olive oil: A drizzle helps the seasoning stick to the shrimp and adds a bit of richness.
  • Fresh lemon juice: This brightens up the dish and cuts through the richness of the bacon. A squeeze just before serving makes a world of difference.
  • Fresh parsley: Chopped for garnish, it adds a pop of color and freshness to your plate.

For those looking to spice things up, consider adding a pinch of cayenne pepper to the shrimp seasoning. It’s a great way to kick up the heat! You can find the exact quantities for each ingredient at the bottom of the article, ready for printing.

How to Make Bacon-Wrapped Shrimp

Now that you have your ingredients ready, let’s dive into the fun part: making Bacon-Wrapped Shrimp! This process is straightforward and rewarding. Follow these steps, and you’ll have a delicious appetizer in no time.

Step 1: Preheat the Air Fryer

Start by preheating your air fryer to 400°F. This step is crucial for achieving that crispy bacon texture. While it heats up, you can prepare the shrimp, making the most of your time.

Step 2: Prepare the Shrimp

In a mixing bowl, toss the peeled and deveined shrimp with olive oil, garlic powder, smoked paprika, black pepper, and salt. Make sure each shrimp is well-coated. This seasoning mix is what elevates the dish, so don’t skimp on it!

Step 3: Wrap the Shrimp

Now comes the fun part! Take a half slice of bacon and wrap it around each seasoned shrimp. Secure it with a toothpick to keep everything in place. The bacon should hug the shrimp snugly, ensuring that every bite is packed with flavor.

Step 4: Arrange in the Air Fryer

Carefully place the bacon-wrapped shrimp in a single layer in the air fryer basket. Avoid overcrowding; this allows the hot air to circulate and crisp up the bacon evenly. If you have extra shrimp, cook them in batches.

Step 5: Cook to Perfection

Cook the shrimp for 8-10 minutes, flipping them halfway through. You’ll know they’re done when the bacon is crispy and the shrimp are opaque. Keep an eye on them; air fryers can vary in cooking time!

Step 6: Serve and Enjoy

Once cooked, drizzle fresh lemon juice over the shrimp for a zesty finish. Garnish with chopped parsley for a pop of color. Serve these Bacon-Wrapped Shrimp hot, and watch them disappear in seconds!

Tips for Success

  • Use large shrimp for the best bite; they hold up well against the bacon.
  • Don’t skip the seasoning! It’s what makes the shrimp sing with flavor.
  • For extra crispiness, pat the bacon dry with a paper towel before wrapping.
  • Experiment with different spices to customize the flavor to your liking.
  • Let the shrimp rest for a minute after cooking for juicier bites.

Equipment Needed

  • Air Fryer: The star of the show! If you don’t have one, a conventional oven works too.
  • Mixing Bowl: For tossing the shrimp with seasonings. Any bowl will do!
  • Toothpicks: Essential for securing the bacon. Skewers can work as a substitute.
  • Tongs: Handy for flipping the shrimp and serving them up.

Variations

  • Spicy Bacon-Wrapped Shrimp: Add a pinch of cayenne pepper or red pepper flakes to the seasoning for a fiery kick.
  • Herb-Infused Shrimp: Mix in fresh herbs like thyme or rosemary with the seasoning for an aromatic twist.
  • Sweet and Spicy: Brush the bacon with a bit of maple syrup or honey before cooking for a sweet glaze that balances the savory flavors.
  • Vegetarian Option: Substitute shrimp with large mushrooms or zucchini slices for a plant-based version that still delivers on flavor.
  • Cheesy Delight: Add a small piece of cheese, like cheddar or pepper jack, inside the bacon wrap for a gooey surprise.

Serving Suggestions

  • Pair with a fresh salad: A crisp Caesar or mixed greens salad complements the richness of the shrimp.
  • Serve with dipping sauces: Try a zesty cocktail sauce or a creamy garlic aioli for added flavor.
  • Accompany with drinks: A cold beer or a citrusy cocktail enhances the overall experience.
  • Presentation: Arrange the shrimp on a platter with lemon wedges and parsley for a vibrant display.

FAQs about Bacon-Wrapped Shrimp

Got questions about making the perfect Bacon-Wrapped Shrimp? You’re not alone! Here are some common queries that might help you out:

Can I use frozen shrimp for this recipe?

Absolutely! Just make sure to thaw them completely before wrapping them in bacon. This ensures even cooking and prevents any excess moisture.

How do I know when the shrimp are done cooking?

The shrimp are ready when they turn opaque and the bacon is crispy. A quick check with a meat thermometer should read 145°F for perfectly cooked shrimp.

Can I make Bacon-Wrapped Shrimp ahead of time?

Yes! You can prepare the shrimp and wrap them in bacon a few hours in advance. Just keep them covered in the fridge until you’re ready to cook.

What dipping sauces pair well with Bacon-Wrapped Shrimp?

Try a tangy cocktail sauce, a spicy sriracha mayo, or a classic garlic aioli. Each adds a delightful twist to the savory shrimp!

Can I cook these in the oven instead of an air fryer?

Definitely! Preheat your oven to 400°F and bake the shrimp on a lined baking sheet for about 15-20 minutes, flipping halfway through. Just keep an eye on them to avoid burning!

Final Thoughts

Creating Bacon-Wrapped Shrimp is more than just cooking; it’s about bringing people together. The joy of watching friends and family savor each bite is truly rewarding. This dish is a testament to how simple ingredients can create something extraordinary. Whether it’s a casual weeknight dinner or a festive gathering, these shrimp are sure to steal the show. Plus, the ease of preparation means you can focus on what really matters—enjoying the moment with your loved ones. So, roll up your sleeves, fire up that air fryer, and let the deliciousness unfold!

jhessica

Bacon-Wrapped Shrimp: Deliciously Simple Recipe Today!

Bacon-Wrapped Shrimp is a delicious and simple recipe that combines the savory flavors of bacon with succulent shrimp, perfect for any occasion.
Prep Time 10 minutes
Cook Time 10 minutes
Total Time 20 minutes
Servings: 4 servings
Course: Appetizer
Cuisine: American
Calories: 250

Ingredients
  

  • 1 pound large shrimp peeled and deveined
  • 8 ounces bacon cut in half
  • 1 teaspoon garlic powder
  • 1 teaspoon smoked paprika
  • 1/2 teaspoon black pepper
  • 1/2 teaspoon salt
  • 1 tablespoon olive oil
  • 1 tablespoon fresh lemon juice
  • Fresh parsley chopped (for garnish)

Method
 

  1. Preheat the air fryer to 400°F.
  2. In a bowl, toss the shrimp with olive oil, garlic powder, smoked paprika, black pepper, and salt until well coated.
  3. Wrap each shrimp with a half slice of bacon and secure it with a toothpick.
  4. Arrange the bacon-wrapped shrimp in a single layer in the air fryer basket.
  5. Cook for 8-10 minutes, flipping halfway through, until the bacon is crispy and the shrimp are cooked through.
  6. Drizzle with lemon juice before serving and garnish with chopped parsley.

Nutrition

Serving: 1servingCalories: 250kcalCarbohydrates: 1gProtein: 22gFat: 18gSaturated Fat: 5gPolyunsaturated Fat: 13gCholesterol: 150mgSodium: 800mg

Notes

  • For a spicy kick, add a pinch of cayenne pepper to the shrimp seasoning.
  • Try using turkey bacon for a lighter version of this dish.

Tried this recipe?

Let us know how it was!

Stay Connected

Get recipes via email: