Get my cookbooks

Chicken Caesar Wrap: A Quick and Delicious Recipe!

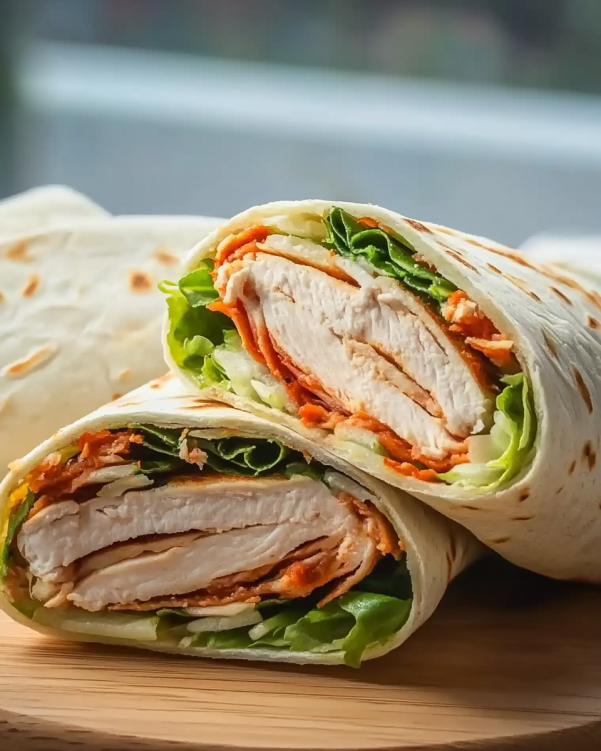
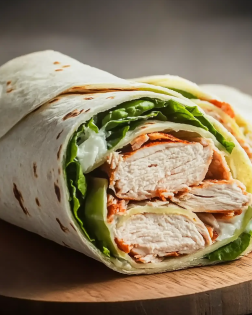
Introduction to Chicken Caesar Wrap

If you’re craving something quick, satisfying, and packed with flavor, this Chicken Caesar Wrap is the answer. Combining juicy chicken, crisp romaine, and tangy Caesar dressing all wrapped in a soft tortilla, it’s the perfect balance of convenience and taste. Whether you’re prepping a simple lunch, planning an easy dinner, or need a grab-and-go option, this recipe delivers every time. It’s everything you love about a Caesar salad—made even better in wrap form!

Why You’ll Love This Chicken Caesar Wrap

This Chicken Caesar Wrap is a lifesaver for busy days! It’s incredibly easy to make, taking just 10 minutes from start to finish. The combination of flavors is simply irresistible, with the creamy dressing and crunchy lettuce creating a delightful contrast. Plus, it’s versatile enough to please even the pickiest eaters in your family. Whether for lunch or a quick dinner, this wrap is sure to become a favorite!

Ingredients for Chicken Caesar Wrap

Gathering the right ingredients is key to making a delicious Chicken Caesar Wrap. Here’s what you’ll need:

  • Cooked chicken: Shredded or diced, this is the star of the wrap. You can use leftover rotisserie chicken for convenience.
  • Romaine lettuce: Chopped for that fresh crunch. It adds a nice texture and a pop of color.
  • Caesar dressing: Creamy and flavorful, it ties all the ingredients together. You can opt for a light version if you’re watching calories.
  • Parmesan cheese: Grated for a salty, nutty flavor that enhances the wrap. Freshly grated is always best!
  • Flour tortillas: Large ones work best for wrapping. Whole wheat tortillas are a healthier alternative.
  • Cherry tomatoes: Halved for a burst of sweetness. They add a lovely freshness to each bite.
  • Salt and pepper: Essential for seasoning. Adjust to your taste for the perfect flavor.
  • Optional croutons: For added crunch, toss in some croutons. They give a delightful texture contrast.

For exact measurements, check the bottom of the article where you can find everything listed for easy printing!

How to Make Chicken Caesar Wrap

Now that you have all your ingredients ready, let’s dive into making this delightful Chicken Caesar Wrap! Follow these simple steps, and you’ll have a delicious meal in no time.

Step 1: Prepare the Chicken Caesar Mixture

In a large bowl, combine the shredded chicken, chopped romaine lettuce, creamy Caesar dressing, and grated Parmesan cheese. Mix everything together until each ingredient is well-coated. Don’t forget to season with salt and pepper to taste. This mixture is the heart of your wrap, so make sure it’s flavorful!

Step 2: Lay Out the Tortillas

Next, lay out your flour tortillas on a clean surface. This is where the magic happens! Make sure they’re flat and ready for filling. If you’re using whole wheat tortillas, they’ll add a nice nutty flavor to your wrap.

Step 3: Fill the Tortillas

Now, divide the chicken Caesar mixture evenly among the tortillas. Place it right in the center of each one. Don’t be shy; you want a generous amount of filling to make each bite satisfying!

Step 4: Add Toppings

Top each wrap with a few halved cherry tomatoes for a burst of sweetness. If you’re feeling adventurous, sprinkle some croutons on top for that extra crunch. It’s these little touches that elevate your Chicken Caesar Wrap!

Step 5: Roll the Wraps

Here comes the fun part! Fold the sides of the tortilla inward, then roll it up tightly from the bottom to the top. Make sure the filling is secure inside. A well-rolled wrap is key to enjoying every bite without a mess!

Step 6: Serve or Store

Finally, slice each wrap in half diagonally and serve immediately. If you’re prepping for later, wrap them in foil and refrigerate for up to two hours. They’re perfect for a quick lunch or a grab-and-go dinner!

Tips for Success

  • Use leftover rotisserie chicken for a quick and easy option.
  • Don’t overfill the tortillas; it makes rolling them tricky.
  • For extra flavor, let the chicken mixture sit for a few minutes before wrapping.
  • Experiment with different dressings, like ranch or Greek yogurt, for a twist.
  • Keep your ingredients fresh for the best taste and texture.

Equipment Needed

  • Large bowl: For mixing the chicken Caesar mixture. A mixing bowl works just as well.
  • Cutting board: To slice your cherry tomatoes and wraps. A plate can also do the trick.
  • Knife: For cutting the wraps in half. A pizza cutter is a fun alternative!
  • Foil: If storing wraps for later. Plastic wrap is a good substitute.

Variations

  • Grilled Chicken Caesar Wrap: Swap out the shredded chicken for grilled chicken strips for a smoky flavor.
  • Vegetarian Option: Replace chicken with grilled vegetables or chickpeas for a hearty, meat-free wrap.
  • Spicy Twist: Add sliced jalapeños or a dash of hot sauce to the chicken mixture for a kick of heat.
  • Avocado Delight: Include sliced avocado for creaminess and added nutrition.
  • Low-Carb Version: Use lettuce leaves instead of tortillas for a lighter, low-carb alternative.

Serving Suggestions

  • Pair your Chicken Caesar Wrap with a side of crispy sweet potato fries for a delightful contrast.
  • A fresh fruit salad adds a refreshing touch and balances the meal.
  • Serve with a chilled glass of iced tea or lemonade for a perfect summer vibe.
  • For presentation, wrap in parchment paper and secure with a twine for a rustic look.

FAQs about Chicken Caesar Wrap

Can I make Chicken Caesar Wraps ahead of time?

Absolutely! You can prepare the Chicken Caesar mixture in advance and store it in the fridge. Just wrap the tortillas when you’re ready to eat. They can be refrigerated for up to two hours without losing their freshness.

What can I substitute for Caesar dressing?

If you’re looking for alternatives, ranch dressing or Greek yogurt can work beautifully. They add a different flavor profile while keeping the wrap creamy and delicious.

How can I make this wrap healthier?

To lighten things up, use whole wheat tortillas and a light Caesar dressing. You can also add more veggies, like spinach or bell peppers, for extra nutrition without compromising taste.

Can I freeze Chicken Caesar Wraps?

While it’s best to enjoy them fresh, you can freeze the wraps before slicing. Just make sure to wrap them tightly in foil or plastic wrap. Thaw in the fridge before serving.

What sides pair well with Chicken Caesar Wraps?

These wraps go great with a side of crispy sweet potato fries or a fresh garden salad. A light soup can also complement the meal nicely!

Final Thoughts

Creating a Chicken Caesar Wrap is more than just making a meal; it’s about bringing joy to your table. This recipe is a delightful blend of flavors and textures that can brighten even the busiest of days. Whether you’re enjoying it solo or sharing it with family, each bite is a reminder that good food doesn’t have to be complicated. Plus, the versatility of this wrap means you can customize it to suit your taste. So, roll up your sleeves, gather your ingredients, and let this Chicken Caesar Wrap become a cherished part of your culinary adventures!

“`

Olivia

Chicken Caesar Wrap: A Quick and Delicious Recipe!

A quick and delicious Chicken Caesar Wrap recipe that combines shredded chicken, romaine lettuce, and Caesar dressing wrapped in a tortilla.
Prep Time 10 minutes
Total Time 10 minutes
Servings: 4 servings
Course: Lunch
Cuisine: American
Calories: 450

Ingredients
  

  • 2 cups cooked chicken shredded or diced
  • 1 cup romaine lettuce chopped
  • ½ cup Caesar dressing
  • ½ cup grated Parmesan cheese
  • 4 large flour tortillas
  • 1 cup cherry tomatoes halved
  • Salt and pepper to taste
  • Optional: croutons for added crunch

Method
 

  1. In a large bowl, combine the shredded chicken, chopped romaine lettuce, Caesar dressing, and grated Parmesan cheese. Mix well until all ingredients are evenly coated. Season with salt and pepper to taste.
  2. Lay out the flour tortillas on a clean surface.
  3. Divide the chicken Caesar mixture evenly among the tortillas, placing it in the center of each one.
  4. Top each wrap with a few cherry tomato halves and, if desired, some croutons for extra texture.
  5. Fold the sides of the tortilla inward, then roll it up tightly from the bottom to the top, ensuring the filling is secure inside.
  6. Slice each wrap in half diagonally and serve immediately, or wrap in foil and refrigerate for up to 2 hours before serving.

Nutrition

Serving: 1wrapCalories: 450kcalCarbohydrates: 30gProtein: 30gFat: 25gSaturated Fat: 6gPolyunsaturated Fat: 15gCholesterol: 80mgSodium: 800mgFiber: 3gSugar: 2g

Notes

  • For a healthier option, use whole wheat tortillas and a light Caesar dressing.
  • Add sliced avocado or grilled vegetables for extra flavor and nutrition.

Tried this recipe?

Let us know how it was!

Crispy Bang Bang Salmon Bites: A Must-Try Recipe Today!

Introduction to Crispy Bang Bang Salmon Bites

Looking to spice up your seafood routine? These Crispy Bang Bang Salmon Bites are just the thing! Bursting with bold flavor, they feature tender chunks of salmon coated in a perfectly crisp crust and drizzled with a creamy, spicy-sweet bang bang sauce that’s utterly addictive. Whether served as an appetizer, party snack, or quick dinner, these bites are guaranteed to turn heads and win hearts. Fast to make and even faster to disappear—this is one recipe you’ll come back to again and again!

Why You’ll Love This Crispy Bang Bang Salmon Bites

These Crispy Bang Bang Salmon Bites are a game-changer for busy weeknights! They come together in just 30 minutes, making them a quick and satisfying option. The delightful crunch of the panko coating paired with the zesty bang bang sauce creates a flavor explosion that will have everyone asking for seconds. Plus, they’re a healthier alternative to traditional fried appetizers, so you can indulge without the guilt!

Ingredients for Crispy Bang Bang Salmon Bites

Gathering the right ingredients is the first step to creating these delightful Crispy Bang Bang Salmon Bites. Here’s what you’ll need:

  • Salmon fillet: Fresh, skinless salmon is the star of this dish, providing a tender and flaky texture.
  • Panko breadcrumbs: These Japanese-style breadcrumbs add an irresistible crunch to each bite.
  • All-purpose flour: This helps the coating stick to the salmon, creating a perfect base.
  • Eggs: Beaten eggs act as a binding agent, ensuring the breadcrumbs adhere well.
  • Garlic powder: A sprinkle of garlic powder enhances the flavor, giving it a savory kick.
  • Paprika: This adds a subtle smokiness and a beautiful color to the coating.
  • Salt and black pepper: Essential seasonings that elevate the overall taste of the bites.
  • Mayonnaise: The creamy base for the bang bang sauce, adding richness and depth.
  • Sweet chili sauce: This brings a sweet and tangy flavor that perfectly complements the salmon.
  • Sriracha: For those who enjoy a bit of heat, sriracha adds a spicy kick to the sauce.
  • Lime juice: A splash of lime juice brightens the sauce, balancing the flavors beautifully.
  • Chopped green onions: These are optional but make for a lovely garnish, adding freshness and color.

For exact measurements, check the bottom of the article where you can find everything listed for easy printing. Feel free to get creative with your ingredients! You can substitute the salmon with another fish or even chicken if you prefer. Enjoy the process of making these bites your own!

How to Make Crispy Bang Bang Salmon Bites

Now that you have all your ingredients ready, let’s dive into the fun part—making these Crispy Bang Bang Salmon Bites! Follow these simple steps, and you’ll have a delicious appetizer that’s sure to impress.

Step 1: Preheat the Oven

First things first, preheat your oven to 400°F (200°C). This ensures that your salmon bites cook evenly and get that perfect golden brown color. While the oven heats up, line a baking sheet with parchment paper. This will help prevent sticking and make cleanup a breeze!

Step 2: Prepare the Coating

In a shallow bowl, combine the all-purpose flour, garlic powder, paprika, salt, and black pepper. This flavorful mixture will create a delicious base for your salmon bites. Make sure to mix it well so that every bite is seasoned perfectly!

Step 3: Beat the Eggs

In another bowl, beat the eggs until they’re nice and frothy. This will act as the glue that holds the coating onto the salmon. It’s a simple step, but it makes a big difference in achieving that crispy texture!

Step 4: Set Up the Breading Station

Now, place the panko breadcrumbs in a third bowl. This is where the magic happens! The panko will give your salmon bites that irresistible crunch. Having everything set up in a row makes the coating process smooth and efficient.

Step 5: Coat the Salmon

It’s time to coat the salmon! Dip each piece into the flour mixture first, making sure it’s fully covered. Then, transfer it to the beaten eggs, allowing any excess to drip off. Finally, coat it with the panko breadcrumbs, pressing gently to ensure it sticks. Place the coated salmon bites on the prepared baking sheet, ready for baking!

Step 6: Bake the Salmon Bites

Pop the baking sheet into the preheated oven and bake for 12-15 minutes. Keep an eye on them! You want the salmon to be cooked through and the coating to be golden brown and crispy. The aroma will fill your kitchen, making it hard to wait!

Step 7: Make the Bang Bang Sauce

While the salmon is baking, let’s whip up the bang bang sauce. In a small bowl, mix together the mayonnaise, sweet chili sauce, sriracha, and lime juice. Adjust the sriracha to your taste if you like it spicier. This sauce is the perfect complement to your crispy bites!

Step 8: Serve and Enjoy

Once the salmon bites are done, remove them from the oven and let them cool for a couple of minutes. This helps them set and makes them easier to handle. Serve the salmon bites drizzled with the bang bang sauce and garnish with chopped green onions for a pop of color. Enjoy every crispy, flavorful bite!

Tips for Success

  • Make sure your salmon is fresh for the best flavor and texture.
  • Don’t rush the coating process; ensure each piece is well-covered.
  • For extra crunch, consider double-coating the salmon bites.
  • Let the salmon bites cool slightly before serving to enhance their crispiness.
  • Experiment with different spices in the coating for a unique twist!

Equipment Needed

  • Baking sheet: A standard baking sheet works well, but a wire rack can help achieve extra crispiness.
  • Parchment paper: This makes cleanup easy; aluminum foil is a good alternative.
  • Mixing bowls: Use any size you have on hand for mixing ingredients.
  • Whisk: A fork can also do the job for beating eggs.
  • Measuring cups and spoons: Essential for accurate ingredient amounts.

Variations

  • For a gluten-free option, use gluten-free breadcrumbs instead of panko.
  • Try adding a teaspoon of lemon zest to the bang bang sauce for a refreshing twist.
  • Substitute the salmon with shrimp or tofu for a different protein choice.
  • For a milder flavor, reduce the amount of sriracha in the sauce.
  • Add chopped herbs like cilantro or parsley to the coating for an extra burst of flavor.

Serving Suggestions

  • Pair these Crispy Bang Bang Salmon Bites with a fresh green salad for a light meal.
  • Serve with a side of steamed vegetables for a nutritious boost.
  • For drinks, consider a crisp white wine or a refreshing iced tea.
  • Present the bites on a colorful platter, garnished with lime wedges for a pop of color.

FAQs about Crispy Bang Bang Salmon Bites

Can I use frozen salmon for this recipe?

Absolutely! Just make sure to thaw the salmon completely before starting. Frozen salmon can still be delicious, but fresh salmon will give you the best flavor and texture.

How can I make the bang bang sauce spicier?

If you love heat, feel free to add more sriracha to the sauce. You can also mix in some red pepper flakes for an extra kick. Adjust it to your taste!

Can I prepare the salmon bites ahead of time?

Yes! You can coat the salmon bites and store them in the fridge for a few hours before baking. Just remember to bake them fresh for the best crunch!

What can I serve with Crispy Bang Bang Salmon Bites?

These bites pair wonderfully with a fresh salad, steamed veggies, or even a side of rice. They also make a great appetizer for parties!

Are Crispy Bang Bang Salmon Bites healthy?

They are a healthier alternative to traditional fried appetizers! With salmon as the main ingredient, they’re packed with protein and healthy fats. Plus, baking instead of frying keeps them lighter!

Final Thoughts

Making Crispy Bang Bang Salmon Bites is more than just cooking; it’s about creating joyful moments in the kitchen. The delightful crunch and zesty sauce bring smiles to my family’s faces, making every bite a celebration. Whether it’s a busy weeknight or a special gathering, these bites are a surefire way to impress. I love how simple ingredients can transform into something extraordinary. So, roll up your sleeves, gather your loved ones, and dive into this culinary adventure. Trust me, once you try these bites, they’ll become a cherished recipe in your home!

“`

Olivia

Crispy Bang Bang Salmon Bites: A Must-Try Recipe Today!

Crispy Bang Bang Salmon Bites are a delicious and easy-to-make appetizer that combines tender salmon with a crunchy coating and a spicy, tangy sauce.
Prep Time 15 minutes
Cook Time 15 minutes
Total Time 30 minutes
Servings: 4 servings
Course: Appetizer
Cuisine: American
Calories: 320

Ingredients
  

  • 1 pound salmon fillet skin removed and cut into bite-sized pieces
  • 1 cup panko breadcrumbs
  • 1/2 cup all-purpose flour
  • 2 large eggs
  • 1 teaspoon garlic powder
  • 1 teaspoon paprika
  • 1/2 teaspoon salt
  • 1/4 teaspoon black pepper
  • 1/2 cup mayonnaise
  • 2 tablespoons sweet chili sauce
  • 1 tablespoon sriracha adjust to taste
  • 1 tablespoon lime juice
  • Chopped green onions for garnish

Method
 

  1. Preheat your oven to 400°F (200°C) and line a baking sheet with parchment paper.
  2. In a shallow bowl, combine flour, garlic powder, paprika, salt, and black pepper.
  3. In another bowl, beat the eggs.
  4. Place the panko breadcrumbs in a third bowl.
  5. Dip each piece of salmon first into the flour mixture, then into the beaten eggs, and finally coat with panko breadcrumbs. Place the coated salmon bites on the prepared baking sheet.
  6. Bake for 12-15 minutes or until the salmon is cooked through and the coating is golden brown and crispy.
  7. While the salmon is baking, prepare the bang bang sauce by mixing mayonnaise, sweet chili sauce, sriracha, and lime juice in a small bowl.
  8. Once the salmon bites are done, remove them from the oven and let them cool for a couple of minutes.
  9. Serve the salmon bites drizzled with the bang bang sauce and garnish with chopped green onions.

Nutrition

Serving: 1servingCalories: 320kcalCarbohydrates: 15gProtein: 25gFat: 20gSaturated Fat: 3gPolyunsaturated Fat: 15gCholesterol: 100mgSodium: 500mgFiber: 1gSugar: 2g

Notes

  • For a healthier option, you can air fry the salmon bites at 375°F for about 10 minutes, shaking halfway through.
  • Add a teaspoon of lemon zest to the bang bang sauce for an extra citrusy flavor.

Tried this recipe?

Let us know how it was!

Grilled Shrimp Bowl with Asparagus and Creamy Garlic Sauce Recipe You’ll Love!

Introduction to Grilled Shrimp Bowl with Asparagus and Creamy Garlic Sauce

If you’re craving something light, flavorful, and satisfying, this Grilled Shrimp Bowl with Asparagus and Creamy Garlic Sauce is exactly what you need. It combines the smoky tenderness of grilled shrimp with crisp asparagus and a rich, velvety garlic sauce that ties everything together beautifully. Whether you’re planning a sunny outdoor meal or a cozy dinner indoors, this vibrant bowl delivers a perfect balance of freshness and indulgence—easy enough for a weeknight, yet impressive enough to serve to guests.

Why You’ll Love This Grilled Shrimp Bowl with Asparagus and Creamy Garlic Sauce

This Grilled Shrimp Bowl is a game-changer for busy nights. It’s quick to prepare, taking just 25 minutes from start to finish. The combination of succulent shrimp and vibrant asparagus makes it a feast for both the eyes and the palate. Plus, the creamy garlic sauce adds a rich, comforting touch that elevates the dish. You’ll find it’s a healthy option that doesn’t skimp on flavor, making it a family favorite!

Ingredients for Grilled Shrimp Bowl with Asparagus and Creamy Garlic Sauce

Gathering the right ingredients is the first step to creating a delicious Grilled Shrimp Bowl with Asparagus and Creamy Garlic Sauce. Here’s what you’ll need:

  • Shrimp: Large, peeled, and deveined shrimp are the stars of this dish. They cook quickly and soak up flavors beautifully.
  • Asparagus: Fresh asparagus adds a lovely crunch and vibrant color. Trimmed and cut into bite-sized pieces, they grill to perfection.
  • Olive Oil: A drizzle of olive oil helps to coat the shrimp and asparagus, ensuring they don’t stick to the grill.
  • Garlic Powder: This adds a subtle garlic flavor without the fuss of fresh garlic. It’s a time-saver!
  • Paprika: A sprinkle of paprika gives the shrimp a beautiful color and a hint of smokiness.
  • Salt and Pepper: Essential for seasoning, these staples enhance the natural flavors of the shrimp and asparagus.
  • Cooked Rice: Serve your grilled shrimp and asparagus over a bed of white or brown rice for a hearty base.
  • Sour Cream: This creamy ingredient forms the base of the sauce, adding richness and tang.
  • Mayonnaise: A touch of mayonnaise adds creaminess to the sauce, balancing the flavors perfectly.
  • Garlic: Freshly minced garlic brings a punch of flavor to the creamy sauce, making it irresistible.
  • Lemon Juice: A splash of lemon juice brightens the sauce and adds a refreshing zing.
  • Fresh Parsley: Chopped parsley is a lovely garnish that adds a pop of color and freshness to your bowl.

For those looking to mix things up, consider substituting asparagus with bell peppers or zucchini for a different flavor profile. You can find the exact quantities of these ingredients at the bottom of the article, ready for printing!

How to Make Grilled Shrimp Bowl with Asparagus and Creamy Garlic Sauce

Now that you have your ingredients ready, let’s dive into the steps to create this delightful Grilled Shrimp Bowl with Asparagus and Creamy Garlic Sauce. Each step is simple, ensuring you can whip this up even on the busiest of nights!

Step 1: Preheat the Grill

Preheating your grill is crucial for achieving that perfect char on your shrimp and asparagus. Set your grill or grill pan to medium-high heat. This ensures that everything cooks evenly and quickly. While it heats up, you can start prepping your shrimp and asparagus.

Step 2: Prepare the Shrimp and Asparagus

In a large bowl, combine the shrimp and asparagus with olive oil, garlic powder, paprika, salt, and pepper. Toss everything together until well coated. This marinating step is essential; it allows the flavors to meld beautifully, making each bite a burst of deliciousness!

Step 3: Skewer the Shrimp

For easier grilling, thread the shrimp onto skewers. If you’re using wooden skewers, don’t forget to soak them in water for about 30 minutes beforehand. This prevents them from burning on the grill. Plus, it makes flipping the shrimp a breeze!

Step 4: Grill the Shrimp and Asparagus

Once your grill is hot, place the skewers of shrimp and the asparagus directly on the grill. Grill for about 2-3 minutes per side. You’ll know they’re done when the shrimp turn opaque and the asparagus is tender-crisp. Keep an eye on them; you want that perfect balance of char and tenderness!

Step 5: Make the Creamy Garlic Sauce

While your shrimp and asparagus are grilling, it’s time to whip up the creamy garlic sauce. In a small bowl, mix together sour cream, mayonnaise, minced garlic, lemon juice, and a pinch of salt. This sauce is the star of the dish, adding a rich, creamy element that ties everything together.

Step 6: Assemble the Bowls

Now comes the fun part! Divide the cooked rice among four bowls. Top each bowl with the grilled shrimp and asparagus, then drizzle generously with the creamy garlic sauce. Finish with a sprinkle of fresh parsley for that pop of color. Your Grilled Shrimp Bowl is ready to impress!

Tips for Success

  • Always preheat your grill for even cooking.
  • Don’t overcrowd the grill; give shrimp and asparagus space to cook properly.
  • Use a meat thermometer to check shrimp doneness; they should reach 120°F.
  • Feel free to customize the sauce with herbs like dill or chives for extra flavor.
  • Leftovers can be stored in the fridge for up to two days—perfect for lunch!

Equipment Needed

  • Grill or Grill Pan: A standard outdoor grill works best, but a stovetop grill pan is a great alternative.
  • Skewers: Metal skewers are reusable, while wooden ones are fine if soaked beforehand.
  • Mixing Bowls: Use any large bowl for marinating ingredients.
  • Spatula or Tongs: Essential for flipping shrimp and asparagus on the grill.

Variations

  • Spicy Kick: Add a pinch of cayenne pepper to the shrimp marinade for a fiery twist.
  • Vegetable Medley: Swap asparagus for bell peppers, zucchini, or even cherry tomatoes for a colorful mix.
  • Quinoa Base: Replace rice with quinoa for a protein-packed, gluten-free option.
  • Herb-Infused Sauce: Mix in fresh herbs like dill or cilantro into the creamy garlic sauce for added freshness.
  • Low-Fat Version: Use Greek yogurt instead of sour cream for a lighter sauce without sacrificing flavor.

Serving Suggestions

  • Pair your Grilled Shrimp Bowl with a light, crisp salad for a refreshing contrast.
  • A chilled glass of white wine or sparkling water with lemon complements the dish beautifully.
  • For a pop of color, serve with sliced avocado or cherry tomatoes on the side.
  • Consider a sprinkle of feta cheese for an extra layer of flavor.

FAQs about Grilled Shrimp Bowl with Asparagus and Creamy Garlic Sauce

Can I use frozen shrimp for this recipe?

Absolutely! Just make sure to thaw the shrimp completely before marinating. Frozen shrimp can be just as delicious as fresh when cooked properly.

What can I substitute for asparagus?

If asparagus isn’t your favorite, feel free to swap it out for bell peppers, zucchini, or even broccoli. Each vegetable brings its own unique flavor and texture to the dish!

How can I make this dish spicier?

For a spicy kick, add a pinch of cayenne pepper to the shrimp marinade or drizzle some hot sauce over the finished bowl. It’s a simple way to elevate the flavor!

Can I prepare the creamy garlic sauce in advance?

Yes! You can make the creamy garlic sauce a day ahead and store it in the fridge. Just give it a good stir before serving to refresh the flavors.

Is this dish suitable for meal prep?

Definitely! The Grilled Shrimp Bowl with Asparagus and Creamy Garlic Sauce is perfect for meal prep. Just store the components separately in airtight containers, and you’ll have a quick, healthy meal ready to go!

Final Thoughts

Creating this Grilled Shrimp Bowl with Asparagus and Creamy Garlic Sauce is more than just cooking; it’s about bringing joy to your table. The vibrant colors and rich flavors make it a feast for the senses, perfect for family dinners or casual gatherings. I love how quickly it comes together, allowing me to spend more time with my loved ones. Plus, the creamy garlic sauce is a delightful touch that ties everything together. Whether you’re a seasoned cook or just starting, this recipe is sure to become a cherished favorite in your home!

“`

Olivia

Grilled Shrimp Bowl with Asparagus and Creamy Garlic Sauce Recipe You’ll Love!

A delicious Grilled Shrimp Bowl featuring tender shrimp and asparagus, topped with a creamy garlic sauce, perfect for a healthy meal.
Prep Time 15 minutes
Cook Time 10 minutes
Total Time 25 minutes
Servings: 4 servings
Course: Main Course
Cuisine: American
Calories: 450

Ingredients
  

  • 1 pound large shrimp peeled and deveined
  • 1 bunch asparagus trimmed and cut into 2-inch pieces
  • 2 tablespoons olive oil
  • 1 teaspoon garlic powder
  • 1 teaspoon paprika
  • Salt and pepper to taste
  • 2 cups cooked rice white or brown
  • 1/2 cup sour cream
  • 2 tablespoons mayonnaise
  • 2 cloves garlic minced
  • 1 tablespoon lemon juice
  • 1 tablespoon fresh parsley chopped (for garnish)

Method
 

  1. Preheat your grill or grill pan over medium-high heat. In a large bowl, combine shrimp, asparagus, olive oil, garlic powder, paprika, salt, and pepper. Toss until everything is well coated.
  2. Thread the shrimp onto skewers for easier grilling. If using wooden skewers, soak them in water for 30 minutes to prevent burning.
  3. Grill the shrimp and asparagus for about 2-3 minutes per side, or until the shrimp are opaque and the asparagus is tender-crisp. Remove from heat.
  4. In a small bowl, mix together sour cream, mayonnaise, minced garlic, lemon juice, and a pinch of salt to create the creamy garlic sauce.
  5. To assemble the bowls, divide the cooked rice among four bowls, top with grilled shrimp and asparagus, and drizzle with the creamy garlic sauce. Garnish with fresh parsley.

Nutrition

Serving: 1bowlCalories: 450kcalCarbohydrates: 40gProtein: 30gFat: 20gSaturated Fat: 4gPolyunsaturated Fat: 16gCholesterol: 200mgSodium: 500mgFiber: 2gSugar: 2g

Notes

  • For a spicier kick, add a pinch of cayenne pepper to the shrimp marinade or drizzle some hot sauce over the finished bowl.
  • Substitute the asparagus with other vegetables like bell peppers or zucchini for a different flavor and texture.

Tried this recipe?

Let us know how it was!

Steak and Shrimp Stir-Fry: A Quick, Delicious Recipe!

Introduction to Steak and Shrimp Stir-Fry

Looking for a meal that’s both quick and packed with flavor? This Steak and Shrimp Stir-Fry is the answer! Juicy steak and tender shrimp come together with vibrant vegetables and a savory sauce to create a mouthwatering dish that feels like a restaurant-quality dinner—right from your own kitchen. Perfect for busy weeknights or when you want something special without the fuss, this stir-fry is sure to become a favorite go-to recipe.

Why You’ll Love This Steak and Shrimp Stir-Fry

This Steak and Shrimp Stir-Fry is a lifesaver for busy evenings. It comes together in just 25 minutes, making it a fantastic option for those nights when time is tight. The combination of tender steak, juicy shrimp, and crisp vegetables creates a flavor explosion that will delight your taste buds. Plus, it’s a one-pan wonder, which means less cleanup for you—what’s not to love?

Ingredients for Steak and Shrimp Stir-Fry

Gathering the right ingredients is key to making this delightful Steak and Shrimp Stir-Fry. Here’s what you’ll need:

  • Sirloin steak: Tender and flavorful, it’s the star of the dish. Slice it thinly for quick cooking.
  • Shrimp: Large, peeled, and deveined shrimp add a succulent touch. They cook quickly and soak up the flavors beautifully.
  • Vegetable oil: This is essential for stir-frying. It has a high smoke point, perfect for achieving that lovely sear.
  • Red and green bell peppers: These colorful veggies not only add crunch but also a sweet flavor that balances the dish.
  • Snap peas: Their crispness and slight sweetness make them a delightful addition, providing a pop of color and texture.
  • Garlic: Minced garlic brings a fragrant aroma and depth of flavor. It’s a must-have in any stir-fry!
  • Fresh ginger: This adds a warm, spicy note that complements the other ingredients beautifully.
  • Soy sauce: A staple in Asian cuisine, it adds saltiness and umami. Opt for low-sodium if you’re watching your salt intake.
  • Oyster sauce: This rich sauce enhances the overall flavor, giving it a savory kick.
  • Cornstarch: Used to thicken the sauce, it helps create a glossy finish that clings to the ingredients.
  • Water: This helps to dissolve the cornstarch and create a smooth sauce.
  • Sesame oil: A drizzle of this fragrant oil at the end adds a nutty flavor that elevates the dish.
  • Cooked rice or noodles: Serve your stir-fry over rice or noodles for a complete meal. They soak up the delicious sauce!

For those who like a little heat, consider adding sliced jalapeños or a dash of red pepper flakes. If you’re looking for alternatives, chicken breast or tofu can be substituted for the steak. You can find the exact quantities for each ingredient at the bottom of the article, ready for printing!

How to Make Steak and Shrimp Stir-Fry

Now that you have all your ingredients ready, let’s dive into the steps for making this delicious Steak and Shrimp Stir-Fry. It’s easier than you might think, and I promise you’ll feel like a culinary rockstar in no time!

Step 1: Marinate the Steak and Shrimp

Start by combining the sliced sirloin steak and shrimp in a large bowl. In a separate small bowl, mix together the soy sauce, oyster sauce, cornstarch, water, and sesame oil. This marinade is the secret to infusing flavor into your proteins. Pour half of this mixture over the steak and shrimp, tossing everything to coat well. Let it marinate for about 15 minutes. This step is crucial; it allows the flavors to meld beautifully, making every bite a taste sensation!

Step 2: Cook the Steak

Heat 1 tablespoon of vegetable oil in a large skillet or wok over medium-high heat. Once the oil is shimmering, add the marinated steak. Cook for 2-3 minutes until it’s browned and just cooked through. Be careful not to overcrowd the pan; this helps achieve that perfect sear. Once done, remove the steak from the skillet and set it aside. This step ensures your steak remains juicy and tender.

Step 3: Stir-Fry the Vegetables

In the same skillet, add the remaining tablespoon of oil. Toss in the sliced red and green bell peppers along with the snap peas. Stir-fry these vibrant veggies for about 3-4 minutes until they’re tender-crisp. You want them to retain some crunch for that delightful texture contrast. Timing is key here; overcooking will make them mushy!

Step 4: Add Garlic and Ginger

Now, it’s time to amp up the flavor! Add the minced garlic and ginger to the skillet. Stir them in for about 30 seconds until they become fragrant. This is where the magic happens! The aroma will fill your kitchen, making it hard to resist diving in right away. Just remember, adding them at this stage ensures they don’t burn and lose their vibrant flavor.

Step 5: Combine Everything

Return the cooked steak to the skillet along with the shrimp. Pour the remaining marinade over the mixture and stir-fry everything together for another 2-3 minutes. This allows the shrimp to cook through and the sauce to thicken slightly, coating all the ingredients beautifully. Make sure everything is well combined; you want every bite to be packed with flavor!

Step 6: Serve

Finally, it’s time to serve your masterpiece! Spoon the Steak and Shrimp Stir-Fry over a bed of cooked rice or noodles. This not only makes for a complete meal but also helps soak up that delicious sauce. Garnish with sesame seeds or green onions if you like. Enjoy every bite, and watch your family rave about this dish!

Tips for Success

  • Prep all ingredients before you start cooking to streamline the process.
  • Use a sharp knife for slicing the steak thinly; it makes a big difference!
  • Don’t overcrowd the pan; cook in batches if necessary for better browning.
  • Adjust the sauce to your taste; feel free to add more soy sauce or spice.
  • For a fresh twist, add a squeeze of lime juice before serving.

Equipment Needed

  • Large skillet or wok: Essential for stir-frying. A non-stick skillet works well too.
  • Sharp knife: For slicing the steak and vegetables. A good chef’s knife is ideal.
  • Cutting board: A sturdy surface for prep work.
  • Measuring cups and spoons: For accurate ingredient measurements.
  • Spatula or tongs: Perfect for tossing and mixing ingredients in the skillet.

Variations

  • Protein Swap: Substitute the sirloin steak with chicken breast, tofu, or even scallops for a different flavor profile.
  • Vegetable Medley: Add other vegetables like broccoli, carrots, or zucchini for extra nutrition and color.
  • Spicy Kick: Incorporate sliced jalapeños or a splash of sriracha for those who enjoy a bit of heat.
  • Gluten-Free Option: Use tamari instead of soy sauce to keep it gluten-free while maintaining flavor.
  • Herb Infusion: Toss in fresh herbs like basil or cilantro at the end for a burst of freshness.

Serving Suggestions

  • Pair your Steak and Shrimp Stir-Fry with fluffy jasmine rice or hearty noodles for a satisfying meal.
  • Serve with a side of steamed broccoli or a fresh garden salad for added crunch and nutrition.
  • For drinks, consider a light white wine or sparkling water with lemon.
  • Garnish with sesame seeds or sliced green onions for a beautiful presentation.

FAQs about Steak and Shrimp Stir-Fry

Can I use frozen shrimp for this recipe?

Absolutely! Just make sure to thaw the shrimp completely before cooking. Frozen shrimp can be a great time-saver, and they’ll still taste delicious in your Steak and Shrimp Stir-Fry.

What can I substitute for sirloin steak?

If you’re looking for alternatives, chicken breast or tofu work wonderfully. Both options will absorb the flavors of the marinade beautifully, making your stir-fry just as tasty!

How do I store leftovers?

Store any leftovers in an airtight container in the fridge for up to three days. Reheat gently in a skillet or microwave, adding a splash of water to keep it moist.

Can I make this dish ahead of time?

While stir-fries are best enjoyed fresh, you can prep the ingredients ahead of time. Chop the veggies and marinate the steak and shrimp a few hours in advance for a quicker cooking time later.

Is this Steak and Shrimp Stir-Fry gluten-free?

Yes, it can be! Just use gluten-free soy sauce or tamari instead of regular soy sauce. This way, you can enjoy all the flavors without any gluten concerns.

Final Thoughts

Cooking this Steak and Shrimp Stir-Fry is more than just preparing a meal; it’s about creating a joyful experience in the kitchen. The vibrant colors, enticing aromas, and delightful flavors come together to make every bite a celebration. I love how this dish brings my family together, turning a busy weeknight into a special occasion. Plus, it’s a fantastic way to showcase my culinary skills without spending hours in the kitchen. So, roll up your sleeves, embrace the sizzle, and enjoy the satisfaction of serving a dish that’s sure to impress!

“`

Olivia

Steak and Shrimp Stir-Fry: A Quick, Delicious Recipe!

A quick and delicious recipe for Steak and Shrimp Stir-Fry that combines tender sirloin steak and succulent shrimp with colorful vegetables in a savory sauce.
Prep Time 15 minutes
Cook Time 10 minutes
Total Time 25 minutes
Servings: 4 servings
Course: Main Dish
Cuisine: Asian
Calories: 350

Ingredients
  

  • 1 pound sirloin steak thinly sliced
  • 1 pound large shrimp peeled and deveined
  • 2 tablespoons vegetable oil
  • 1 red bell pepper sliced
  • 1 green bell pepper sliced
  • 1 cup snap peas
  • 3 cloves garlic minced
  • 1 tablespoon fresh ginger minced
  • 1/4 cup soy sauce
  • 2 tablespoons oyster sauce
  • 1 tablespoon cornstarch
  • 1 tablespoon water
  • 1 teaspoon sesame oil
  • Cooked rice or noodles for serving

Method
 

  1. In a large bowl, combine the sliced steak and shrimp. In a small bowl, mix the soy sauce, oyster sauce, cornstarch, water, and sesame oil. Pour half of this mixture over the steak and shrimp, tossing to coat. Let marinate for 15 minutes.
  2. Heat 1 tablespoon of vegetable oil in a large skillet or wok over medium-high heat. Add the marinated steak and cook for 2-3 minutes until browned. Remove from the skillet and set aside.
  3. In the same skillet, add the remaining tablespoon of oil. Add the sliced bell peppers and snap peas, stir-frying for about 3-4 minutes until they are tender-crisp.
  4. Add the minced garlic and ginger to the vegetables, stirring for an additional 30 seconds until fragrant.
  5. Return the cooked steak to the skillet along with the shrimp. Pour the remaining sauce over the mixture and stir-fry for another 2-3 minutes until the shrimp are cooked through and everything is well combined.
  6. Serve hot over cooked rice or noodles.

Nutrition

Serving: 1servingCalories: 350kcalCarbohydrates: 15gProtein: 30gFat: 15gSaturated Fat: 3gPolyunsaturated Fat: 12gCholesterol: 200mgSodium: 800mgFiber: 2gSugar: 2g

Notes

  • For added heat, include sliced jalapeños or a dash of red pepper flakes when cooking the vegetables.
  • Substitute the sirloin steak with chicken breast or tofu for a different protein option.

Tried this recipe?

Let us know how it was!

Cajun Chicken Sloppy Joes: A Flavorful Twist You’ll Love!

Introduction to Cajun Chicken Sloppy Joes

Get ready to spice up your mealtime with Cajun Chicken Sloppy Joes—a bold and flavorful twist on a classic favorite. Packed with Cajun spices and tender chicken, this recipe brings a perfect balance of heat and heartiness that will satisfy your cravings. Easy to make and irresistibly delicious, it’s the perfect dish to impress family and friends with something new and exciting!

Why You’ll Love This Cajun Chicken Sloppy Joes

These Cajun Chicken Sloppy Joes are a lifesaver for busy nights! They come together in just 30 minutes, making them perfect for those evenings when time is tight. The combination of ground chicken and zesty Cajun seasoning creates a flavor explosion that will have your family asking for seconds. Plus, they’re easy to customize, so you can cater to everyone’s tastes. What’s not to love about a meal that’s quick, delicious, and satisfying?

Ingredients for Cajun Chicken Sloppy Joes

Gathering the right ingredients is key to making these Cajun Chicken Sloppy Joes a hit! Here’s what you’ll need:

  • Ground chicken: This lean protein is the star of the dish, providing a lighter alternative to traditional beef.
  • Olive oil: A splash of this healthy fat helps sauté the veggies and adds richness to the mix.
  • Onion: Diced onion brings sweetness and depth, enhancing the overall flavor profile.
  • Bell pepper: Choose your favorite color! This adds crunch and a hint of sweetness.
  • Garlic: Minced garlic is a flavor powerhouse, giving the dish that aromatic kick we all love.
  • Cajun seasoning: This spice blend is what makes the dish pop! It’s a mix of spices that adds warmth and zest.
  • Tomato sauce: A base for the sloppy joe mixture, it adds moisture and tanginess.
  • Worcestershire sauce: This adds a savory depth, balancing the sweetness of the tomato sauce.
  • Brown sugar: Just a touch of sweetness to round out the flavors and enhance the sauce.
  • Salt and pepper: Essential for seasoning, these staples help bring all the flavors together.
  • Hamburger buns: The perfect vessel for your sloppy joe filling! Choose whole grain for a healthier option.
  • Chopped green onions: A fresh garnish that adds a pop of color and a mild onion flavor.

For those who like it spicy, consider adding a few dashes of hot sauce to the chicken mixture. If you prefer a different protein, ground turkey or beef can be substituted easily. And for a lighter option, serve the mixture over a bed of lettuce instead of in buns. You can find the exact quantities for each ingredient at the bottom of the article, ready for printing!

How to Make Cajun Chicken Sloppy Joes

Now that you have all your ingredients ready, let’s dive into making these delicious Cajun Chicken Sloppy Joes! Follow these simple steps, and you’ll have a meal that’s bursting with flavor in no time.

Step 1: Heat the Olive Oil

Start by heating a tablespoon of olive oil in a large skillet over medium heat. This step is crucial! Properly heated oil helps to sauté the vegetables evenly, enhancing their flavors. You want that oil to shimmer, signaling it’s ready for the next ingredients.

Step 2: Sauté the Vegetables

Once the oil is hot, toss in the diced onion and bell pepper. Sauté them for about five minutes until they soften. This process releases their natural sweetness, which will elevate the overall taste of your Cajun Chicken Sloppy Joes. Stir occasionally to prevent sticking!

Step 3: Add Garlic

Next, it’s time to add the minced garlic. Cook it for just one minute until fragrant. Garlic adds a depth of flavor that’s hard to resist. Be careful not to let it burn, as burnt garlic can turn bitter and ruin your dish.

Step 4: Cook the Ground Chicken

Now, add the ground chicken to the skillet. Use a spoon to break it up as it cooks. You want to ensure it’s fully cooked through, which should take about 6-8 minutes. The chicken should turn a lovely golden brown, and that’s when you know it’s ready!

Step 5: Season with Cajun Spice

Sprinkle in the Cajun seasoning, stirring well to combine. This spice blend is what gives your sloppy joes that signature kick! Make sure every bit of chicken is coated in those vibrant spices for maximum flavor.

Step 6: Combine Sauces and Simmer

Pour in the tomato sauce, Worcestershire sauce, and brown sugar. Stir everything together and let it simmer for about 5-10 minutes. This step is essential for melding the flavors. Taste and adjust the seasoning with salt and pepper as needed. You want it to be just right!

Step 7: Toast the Buns

While the mixture simmers, consider toasting your hamburger buns. You can do this in a toaster or on a skillet for a few minutes. Toasting adds a delightful crunch and helps prevent the buns from getting soggy when you add the filling.

Step 8: Assemble the Sloppy Joes

Finally, it’s time to assemble your Cajun Chicken Sloppy Joes! Spoon the flavorful chicken mixture onto the bottom half of each bun. Top with chopped green onions for a fresh touch, then place the top half of the bun on each. Serve immediately and watch your family dig in!

Tips for Success

  • Prep your ingredients ahead of time to save precious minutes during cooking.
  • Don’t skip toasting the buns; it adds a delightful crunch!
  • Adjust the Cajun seasoning to your family’s spice tolerance for a perfect balance.
  • For a heartier meal, serve with a side salad or sweet potato fries.
  • Store leftovers in an airtight container for up to three days for easy reheating.

Equipment Needed

  • Large skillet: A non-stick skillet works great, but any large pan will do.
  • Wooden spoon: Perfect for breaking up the chicken and stirring the mixture.
  • Measuring spoons: Handy for measuring out your spices and sauces.
  • Toaster or skillet: For toasting the buns to perfection.

Variations

  • Spicy Cajun Chicken Sloppy Joes: Add diced jalapeños or a few dashes of hot sauce to the chicken mixture for an extra kick.
  • Vegetarian Option: Substitute ground chicken with lentils or black beans for a hearty, meatless version.
  • Cheesy Delight: Top the chicken mixture with shredded cheese before placing the bun on top, then broil for a few minutes until melted.
  • Low-Carb Version: Serve the Cajun chicken mixture in lettuce wraps instead of buns for a lighter, low-carb meal.
  • BBQ Twist: Mix in some barbecue sauce along with the tomato sauce for a smoky flavor profile.

Serving Suggestions

  • Pair your Cajun Chicken Sloppy Joes with crispy sweet potato fries for a delightful contrast.
  • A fresh side salad with a tangy vinaigrette complements the spicy flavors beautifully.
  • Serve with a cold glass of iced tea or lemonade to balance the heat.
  • For a fun presentation, wrap the buns in parchment paper for a casual, picnic-style meal.

FAQs about Cajun Chicken Sloppy Joes

Can I use a different type of meat for Cajun Chicken Sloppy Joes?

Absolutely! While ground chicken is the star of this recipe, you can easily substitute it with ground turkey or even beef if you prefer. Each option brings its own unique flavor, so feel free to experiment!

How can I make these Cajun Chicken Sloppy Joes spicier?

If you’re looking to turn up the heat, consider adding diced jalapeños or a few dashes of your favorite hot sauce to the chicken mixture. This will give your sloppy joes an extra kick that spice lovers will adore!

Can I prepare the Cajun Chicken mixture ahead of time?

Yes! You can make the Cajun Chicken mixture a day in advance. Just store it in an airtight container in the fridge. When you’re ready to serve, simply reheat it on the stove and toast your buns for a quick meal.

What can I serve with Cajun Chicken Sloppy Joes?

These flavorful sloppy joes pair wonderfully with crispy sweet potato fries or a fresh side salad. A cold glass of iced tea or lemonade also complements the spicy flavors beautifully!

Are Cajun Chicken Sloppy Joes healthy?

Yes! This recipe is a low-calorie option, especially when using ground chicken. It’s packed with protein and can be made even healthier by serving it in lettuce wraps instead of buns. Enjoy a delicious meal without the guilt!

Final Thoughts

Cooking should be a joyful experience, and my Cajun Chicken Sloppy Joes bring just that to the table! This recipe not only satisfies those busy weeknight cravings but also creates a moment of connection with family over a delicious meal. The vibrant flavors and easy preparation make it a go-to dish in my kitchen. Plus, it’s versatile enough to cater to everyone’s tastes. I hope you find as much joy in making and sharing these sloppy joes as I do. Here’s to flavorful meals that bring us together, one bite at a time!

“`

Olivia

Cajun Chicken Sloppy Joes: A Flavorful Twist You’ll Love!

Cajun Chicken Sloppy Joes are a flavorful twist on the classic sloppy joe, featuring ground chicken and a spicy Cajun seasoning.
Prep Time 10 minutes
Cook Time 20 minutes
Total Time 30 minutes
Servings: 4 servings
Course: Main Dish
Cuisine: American
Calories: 320

Ingredients
  

  • 1 pound ground chicken
  • 1 tablespoon olive oil
  • 1 small onion diced
  • 1 bell pepper diced
  • 2 cloves garlic minced
  • 1 tablespoon Cajun seasoning
  • 1 cup tomato sauce
  • 2 tablespoons Worcestershire sauce
  • 1 tablespoon brown sugar
  • Salt and pepper to taste
  • 4 hamburger buns
  • Chopped green onions for garnish

Method
 

  1. Heat the olive oil in a large skillet over medium heat.
  2. Add the diced onion and bell pepper, cooking until softened, about 5 minutes.
  3. Stir in the minced garlic and cook for an additional minute until fragrant.
  4. Add the ground chicken to the skillet, breaking it up with a spoon. Cook until browned and fully cooked through, about 6-8 minutes.
  5. Sprinkle in the Cajun seasoning, stirring well to combine.
  6. Pour in the tomato sauce, Worcestershire sauce, and brown sugar. Stir to mix everything together and let it simmer for about 5-10 minutes, allowing the flavors to meld. Season with salt and pepper to taste.
  7. While the mixture simmers, toast the hamburger buns if desired.
  8. Spoon the Cajun chicken mixture onto the bottom half of each bun. Top with chopped green onions and place the top half of the bun on each.
  9. Serve immediately.

Nutrition

Serving: 1sandwichCalories: 320kcalCarbohydrates: 28gProtein: 28gFat: 12gSaturated Fat: 2gPolyunsaturated Fat: 10gCholesterol: 70mgSodium: 600mgFiber: 2gSugar: 5g

Notes

  • For added heat, consider mixing in a few dashes of hot sauce to the chicken mixture.
  • You can also substitute ground turkey or beef for the chicken if preferred.
  • For a lighter option, serve the mixture over a bed of lettuce instead of in buns.

Tried this recipe?

Let us know how it was!

Fiesta Lime Chicken: Discover the Ultimate Recipe Now!

Introduction to Fiesta Lime Chicken

Bring vibrant flavors to your table with Fiesta Lime Chicken—a zesty and refreshing dish that’s perfect for any occasion. Bursting with tangy lime and a hint of spice, this recipe is easy to prepare and sure to become a new favorite. Whether you’re hosting a casual get-together or simply craving a flavorful weeknight meal, Fiesta Lime Chicken delivers bold taste and simple satisfaction every time!

Why You’ll Love This Fiesta Lime Chicken

This Fiesta Lime Chicken is a game-changer for busy weeknights. It’s quick to prepare, taking just 25 minutes from start to finish. The vibrant flavors of lime and spices will transport you to a sunny fiesta, making every bite a celebration. Plus, it’s versatile enough to please even the pickiest eaters in your family. You’ll love how easy it is to make a meal that feels special without the fuss!

Ingredients for Fiesta Lime Chicken

Gathering the right ingredients is key to making the perfect Fiesta Lime Chicken. Here’s what you’ll need:

  • Boneless, skinless chicken breasts: The star of the show! They’re lean and cook quickly, making them ideal for busy nights.
  • Garlic powder: This adds a savory depth to the chicken, enhancing its flavor without overpowering it.
  • Onion powder: A subtle sweetness that complements the garlic and spices beautifully.
  • Chili powder: For a hint of warmth and a touch of smokiness, this spice is essential in creating that fiesta vibe.
  • Cumin: This earthy spice brings a unique flavor that pairs perfectly with lime and chicken.
  • Salt: A must-have for seasoning, it helps to bring out all the other flavors in the dish.
  • Black pepper: Just a pinch adds a nice kick and balances the dish.
  • Lime juice: Freshly squeezed is best! It’s the zesty heart of this recipe, giving the chicken its signature tang.
  • Olive oil: This helps to keep the chicken moist while grilling and adds a lovely richness.
  • Monterey Jack cheese: Melting this on top of the chicken creates a creamy, delicious finish.
  • Fresh cilantro: A sprinkle of this herb adds a burst of freshness and color to your dish.
  • Avocado: Sliced avocado brings creaminess and a healthy fat that balances the flavors.
  • Pico de gallo: This fresh salsa adds a vibrant crunch and is a perfect topping for your chicken.
  • Lime wedges: For serving, these add an extra squeeze of freshness right before you dig in!

For those looking to spice things up, consider adding sliced jalapeños to your pico de gallo or drizzling some hot sauce over the chicken. If you want to make it a complete meal, serve it over a bed of rice or alongside black beans. You can find the exact quantities for each ingredient at the bottom of the article, ready for printing!

How to Make Fiesta Lime Chicken

Now that you have all your ingredients ready, let’s dive into the steps to create this mouthwatering Fiesta Lime Chicken. Each step is simple, and I promise you’ll feel like a culinary rockstar by the end!

Step 1: Preheat the Grill

First things first, preheat your grill or grill pan over medium-high heat. This step is crucial! Preheating ensures that your chicken cooks evenly and develops those beautiful grill marks. Plus, it helps lock in the juices, making your chicken tender and flavorful.

Step 2: Prepare the Spice Rub

In a small bowl, mix together the garlic powder, onion powder, chili powder, cumin, salt, and black pepper. This spice rub is the secret to elevating your chicken’s flavor. Rub it evenly over both sides of the chicken breasts. The spices will create a delicious crust that enhances the overall taste of your Fiesta Lime Chicken.

Step 3: Marinate the Chicken

Next, it’s time to marinate! In a separate bowl, whisk together the lime juice and olive oil. Place the seasoned chicken in a shallow dish and pour the lime marinade over it. Let it soak for at least 30 minutes, or up to 2 hours in the refrigerator for a flavor boost. Marinating allows the chicken to absorb all those zesty flavors, making every bite a fiesta in your mouth!

Step 4: Grill the Chicken

Once your chicken has marinated, remove it from the marinade and discard the leftover liquid. Grill the chicken for about 6-7 minutes on each side. To check for doneness, use a meat thermometer; the internal temperature should reach 165°F. This ensures your chicken is perfectly cooked and safe to eat. Don’t forget to keep an eye on it to avoid overcooking!

Step 5: Add Cheese and Rest

During the last minute of grilling, sprinkle the shredded Monterey Jack cheese on top of the chicken. Close the grill lid to melt the cheese beautifully. Once cooked, remove the chicken from the grill and let it rest for a few minutes. Resting is essential! It allows the juices to redistribute, keeping your chicken moist and flavorful.

Step 6: Serve and Enjoy

Now comes the fun part! Plate your Fiesta Lime Chicken and top it with chopped cilantro and sliced avocado. Serve it alongside pico de gallo and lime wedges for that extra zing. Each bite will be a burst of flavor, and I guarantee your family will be asking for seconds!

Tips for Success

  • Always preheat your grill for even cooking and those perfect grill marks.
  • Let the chicken marinate longer for a deeper flavor—up to 2 hours is ideal.
  • Use a meat thermometer to ensure your chicken is cooked to 165°F for safety.
  • Rest the chicken after grilling to keep it juicy and tender.
  • Feel free to customize toppings based on your family’s preferences!

Equipment Needed

  • Grill or Grill Pan: A traditional grill works best, but a grill pan on the stovetop is a great alternative.
  • Meat Thermometer: Essential for checking doneness; if you don’t have one, cut into the chicken to check for clear juices.
  • Mixing Bowls: Use these for your spice rub and marinade; any size will do!
  • Whisk: Perfect for mixing your marinade; a fork can work in a pinch.
  • Spatula or Tongs: Handy for flipping the chicken on the grill.

Variations

  • Spicy Fiesta Lime Chicken: Add sliced jalapeños to your marinade or pico de gallo for an extra kick.
  • Herb-Infused Chicken: Mix in fresh herbs like oregano or thyme with your spice rub for a fragrant twist.
  • Low-Carb Option: Serve the chicken over a bed of sautéed zucchini noodles instead of rice for a lighter meal.
  • Vegetarian Version: Substitute chicken with thick slices of portobello mushrooms, marinating and grilling them the same way.
  • Cheesy Fiesta Lime Chicken: Experiment with different cheeses like pepper jack or queso fresco for a unique flavor profile.

Serving Suggestions

  • Rice: Serve your Fiesta Lime Chicken over a bed of fluffy cilantro-lime rice for a complete meal.
  • Black Beans: A side of seasoned black beans adds protein and pairs perfectly with the chicken.
  • Fresh Salad: A light avocado and tomato salad complements the zesty flavors beautifully.
  • Drinks: Pair with a refreshing margarita or iced tea for a festive touch.
  • Presentation: Garnish with extra lime wedges and cilantro for a vibrant, inviting look!

FAQs about Fiesta Lime Chicken

Can I use chicken thighs instead of breasts for this recipe?

Absolutely! Chicken thighs are a great alternative. They’re juicier and can add even more flavor to your Fiesta Lime Chicken. Just adjust the cooking time slightly, as thighs may take a bit longer to reach the safe internal temperature of 165°F.

How can I make this dish spicier?

If you’re looking to turn up the heat, consider adding sliced jalapeños to your pico de gallo or mixing some hot sauce into the marinade. You can also use spicy chili powder for an extra kick!

Can I prepare the marinade in advance?

Yes! You can prepare the lime marinade a day ahead and store it in the refrigerator. Just remember to marinate the chicken for at least 30 minutes before grilling to ensure it absorbs all those delicious flavors.

What can I serve with Fiesta Lime Chicken?

This dish pairs wonderfully with a side of cilantro-lime rice, black beans, or a fresh salad. You can also serve it with tortilla chips and guacamole for a fun twist!

Is Fiesta Lime Chicken gluten-free?

Yes, this recipe is naturally gluten-free! Just be sure to check any store-bought ingredients, like pico de gallo, to ensure they don’t contain gluten. Enjoy your flavorful meal without worry!

Final Thoughts

Cooking Fiesta Lime Chicken is more than just preparing a meal; it’s about creating joyful moments around the dinner table. The vibrant flavors and colorful presentation make it a feast for the senses, turning an ordinary weeknight into a special occasion. I love how this dish brings my family together, sparking laughter and conversation with every bite. Whether you’re celebrating a small victory or simply enjoying a cozy night in, this recipe is sure to brighten your day. So grab your ingredients, fire up the grill, and let the fiesta begin!

“`

Olivia

Fiesta Lime Chicken: Discover the Ultimate Recipe Now!

A delicious and zesty grilled chicken recipe featuring a lime marinade and topped with cheese, avocado, and pico de gallo.
Prep Time 10 minutes
Cook Time 15 minutes
Total Time 25 minutes
Servings: 2 servings
Course: Main Dish
Cuisine: Mexican
Calories: 450

Ingredients
  

  • 2 boneless skinless chicken breasts (about 1 pound total)
  • 1 teaspoon garlic powder
  • 1 teaspoon onion powder
  • 1 teaspoon chili powder
  • 1 teaspoon cumin
  • 1 teaspoon salt
  • 1/2 teaspoon black pepper
  • 1/4 cup lime juice freshly squeezed is best
  • 1/4 cup olive oil
  • 1 cup Monterey Jack cheese shredded
  • 1/4 cup fresh cilantro chopped
  • 1 avocado sliced
  • 1 cup pico de gallo store-bought or homemade
  • Lime wedges for serving

Method
 

  1. Preheat your grill or a grill pan over medium-high heat.
  2. In a small bowl, mix together the garlic powder, onion powder, chili powder, cumin, salt, and black pepper. Rub this spice mixture evenly over both sides of the chicken breasts.
  3. In a separate bowl, whisk together the lime juice and olive oil. Place the seasoned chicken in a shallow dish and pour the lime marinade over it. Let it marinate for at least 30 minutes, or up to 2 hours in the refrigerator for more flavor.
  4. Remove the chicken from the marinade and discard the marinade. Grill the chicken for about 6-7 minutes on each side, or until the internal temperature reaches 165°F.
  5. During the last minute of grilling, sprinkle the shredded Monterey Jack cheese on top of the chicken and close the grill lid to melt the cheese.
  6. Once cooked, remove the chicken from the grill and let it rest for a few minutes. Top with chopped cilantro and sliced avocado. Serve with pico de gallo and lime wedges on the side.

Nutrition

Serving: 1chicken breast with toppingsCalories: 450kcalCarbohydrates: 6gProtein: 38gFat: 30gSaturated Fat: 8gPolyunsaturated Fat: 22gCholesterol: 120mgSodium: 800mgFiber: 2gSugar: 1g

Notes

  • For a spicier kick, add sliced jalapeños to the pico de gallo or top the chicken with a drizzle of hot sauce.
  • To make it a complete meal, serve the chicken over a bed of rice or with a side of black beans.

Tried this recipe?

Let us know how it was!

Crockpot Pulled Pork Bowls: Savor Every Bite Today!

Introduction to Crockpot Pulled Pork Bowls

Discover the comfort and ease of Crockpot Pulled Pork Bowls—a mouthwatering meal that comes together effortlessly. Tender, flavorful pulled pork pairs perfectly with your favorite toppings and sides, creating a bowl full of savory satisfaction. Ideal for busy days when you want a hearty dish without the hassle, this recipe promises to become a family favorite you’ll savor bite after bite!

Why You’ll Love This Crockpot Pulled Pork Bowls

Let’s be honest—life can get chaotic, and finding time to cook can feel like a juggling act. That’s where these Crockpot Pulled Pork Bowls shine! They’re incredibly easy to prepare, allowing you to set it and forget it. Plus, the flavor is out of this world! The tender pork, combined with zesty coleslaw and crunchy pickles, creates a delightful harmony that will have your family asking for seconds. Trust me, you’ll love every bite!

Ingredients for Crockpot Pulled Pork Bowls

Gathering the right ingredients is the first step to creating your Crockpot Pulled Pork Bowls. Here’s what you’ll need:

  • Pork Shoulder: This cut is perfect for slow cooking, becoming tender and flavorful as it cooks.
  • Smoked Paprika: Adds a rich, smoky flavor that elevates the dish.
  • Garlic Powder: A must-have for that aromatic kick.
  • Onion Powder: Enhances the savory depth of the pulled pork.
  • Salt: Essential for bringing out all the flavors.
  • Black Pepper: Adds a subtle heat and complexity.
  • Cayenne Pepper: Optional, but it gives a nice spicy touch if you like heat.
  • Barbecue Sauce: Choose your favorite brand for a personal touch; it’s the star of the show!
  • Onion: Sliced onions add sweetness and depth to the dish.
  • Chicken Broth: Keeps the pork moist and infuses it with flavor.
  • Cooked Rice or Cauliflower Rice: This serves as the base for your bowls, making it hearty and satisfying.
  • Coleslaw Mix: Adds crunch and freshness, balancing the richness of the pork.
  • Diced Pickles: Optional, but they bring a tangy crunch that complements the dish beautifully.
  • Fresh Cilantro: For garnish, it adds a pop of color and freshness.

For exact measurements, check the bottom of the article where you can find everything listed for easy printing. Feel free to get creative with your ingredients—substituting rice with quinoa or a salad base can lighten things up, while a few drops of liquid smoke in the barbecue sauce can enhance that smoky flavor!

How to Make Crockpot Pulled Pork Bowls

Now that you have your ingredients ready, let’s dive into the fun part—making those Crockpot Pulled Pork Bowls! Follow these simple steps, and you’ll have a delicious meal waiting for you at the end of the day.

Step 1: Prepare the Pork

Start by trimming any excess fat from the pork shoulder. This helps prevent the dish from becoming too greasy. Next, cut the pork into large chunks. This ensures even cooking, allowing the flavors to meld beautifully. Trust me, this little prep step makes a big difference!

Step 2: Season the Pork

In a small bowl, mix together the smoked paprika, garlic powder, onion powder, salt, black pepper, and cayenne pepper if you’re feeling adventurous. Rub this spice mixture all over the pork chunks. Make sure every piece is coated well. This seasoning is what gives your pulled pork that irresistible flavor!

Step 3: Assemble in the Crockpot

Now it’s time to layer everything in the crockpot. Start by placing the sliced onions at the bottom. This creates a sweet base for the pork. Then, add the seasoned pork on top. Pour your favorite barbecue sauce and chicken broth over the pork. This combination will keep the meat moist and flavorful as it cooks.

Step 4: Cook the Pork

Cover the crockpot and set it to cook on low for 8 hours or on high for 4 hours. The key here is patience! You’ll know it’s ready when the pork is tender and shreds easily with a fork. If you’re unsure, just give it a little poke. If it falls apart, you’ve hit the jackpot!

Step 5: Shred and Combine

Once the pork is cooked to perfection, carefully remove it from the crockpot. Use two forks to shred the meat. It should come apart effortlessly. Return the shredded pork to the crockpot and stir it into the sauce. This step ensures every bite is packed with flavor!

Step 6: Serve the Dish

To serve, scoop a generous portion of cooked rice or cauliflower rice into a bowl. Top it with the pulled pork, and don’t forget the coleslaw mix for that crunchy texture. If you like, add some diced pickles for a tangy kick. Garnish with fresh cilantro for a pop of color. Your Crockpot Pulled Pork Bowls are now ready to be enjoyed!

Tips for Success

  • Always trim excess fat from the pork for a leaner dish.
  • Let the pork rest for a few minutes before shredding for easier handling.
  • Experiment with different barbecue sauces to find your favorite flavor.
  • For a spicier kick, add more cayenne or a dash of hot sauce.
  • Make extra pulled pork for leftovers; it’s great on sandwiches!

Equipment Needed

  • Crockpot: A slow cooker is essential for this recipe. If you don’t have one, a Dutch oven can work too.
  • Cutting Board: For prepping your pork shoulder.
  • Sharp Knife: To trim and cut the pork into chunks.
  • Measuring Cups: For accurate ingredient portions.
  • Two Forks: Perfect for shredding the cooked pork.

Variations

  • Spicy Pulled Pork: Add more cayenne pepper or a splash of your favorite hot sauce to the spice rub for an extra kick.
  • BBQ Pulled Chicken: Swap the pork shoulder for boneless chicken thighs for a lighter option that’s just as delicious.
  • Vegetarian Version: Use jackfruit instead of pork for a plant-based alternative that mimics the texture of pulled pork.
  • Asian-Inspired Bowls: Replace barbecue sauce with teriyaki sauce and serve with steamed broccoli and sesame seeds.
  • Low-Carb Option: Serve the pulled pork over a bed of sautéed zucchini noodles instead of rice for a healthier twist.

Serving Suggestions

  • Pair your Crockpot Pulled Pork Bowls with a side of cornbread for a comforting touch.
  • A crisp green salad with a tangy vinaigrette complements the richness of the pork.
  • Serve with iced tea or lemonade for a refreshing drink.
  • For presentation, use colorful bowls to make the dish visually appealing.

FAQs about Crockpot Pulled Pork Bowls

As you embark on your culinary adventure with Crockpot Pulled Pork Bowls, you might have a few questions. Here are some common queries I’ve encountered, along with helpful answers to guide you along the way.

Can I use a different cut of meat for this recipe?

Absolutely! While pork shoulder is ideal for its tenderness, you can also use pork loin or even chicken thighs for a lighter option. Just keep in mind that cooking times may vary.

How do I store leftovers?

Leftover pulled pork can be stored in an airtight container in the fridge for up to 3 days. You can also freeze it for up to 3 months. Just make sure to separate it from the rice or coleslaw to keep everything fresh!

Can I make this recipe ahead of time?

Yes! You can prepare the pork and season it the night before. Just pop it in the crockpot in the morning, and you’ll come home to a delicious meal waiting for you!

What can I serve with my pulled pork bowls?

These bowls are versatile! You can pair them with cornbread, a fresh salad, or even some roasted vegetables. The options are endless, so feel free to get creative!

Is this recipe gluten-free?

Yes, Crockpot Pulled Pork Bowls can easily be made gluten-free. Just ensure that your barbecue sauce is gluten-free, and you’re good to go!

Final Thoughts

Cooking is more than just preparing a meal; it’s about creating memories and sharing joy with loved ones. My Crockpot Pulled Pork Bowls have become a family favorite, bringing smiles to our dinner table after a long day. The tender, flavorful pork paired with crunchy coleslaw and zesty pickles is a delightful combination that warms the heart. Plus, the ease of making it in a crockpot means I can spend more time with my family instead of slaving away in the kitchen. I hope this recipe brings as much joy to your home as it has to mine!

“`

Olivia

Crockpot Pulled Pork Bowls: Savor Every Bite Today!

Crockpot Pulled Pork Bowls are a delicious and easy meal made with tender pulled pork, served over rice or cauliflower rice, and topped with coleslaw and pickles.
Prep Time 15 minutes
Servings: 6 servings
Course: Main Course
Cuisine: American
Calories: 450

Ingredients
  

  • 2 pounds pork shoulder also known as pork butt
  • 1 tablespoon smoked paprika
  • 1 tablespoon garlic powder
  • 1 tablespoon onion powder
  • 1 teaspoon salt
  • 1 teaspoon black pepper
  • 1 teaspoon cayenne pepper optional, for heat
  • 1 cup barbecue sauce your favorite brand
  • 1 medium onion sliced
  • 1 cup chicken broth
  • 4 cups cooked rice or cauliflower rice
  • 1 cup coleslaw mix
  • 1/2 cup diced pickles optional
  • Fresh cilantro for garnish (optional)

Method
 

  1. Start by trimming any excess fat from the pork shoulder and cut it into large chunks for even cooking.
  2. In a small bowl, mix together the smoked paprika, garlic powder, onion powder, salt, black pepper, and cayenne pepper. Rub this spice mixture all over the pork chunks.
  3. Place the sliced onion at the bottom of the crockpot, then add the seasoned pork on top. Pour the barbecue sauce and chicken broth over the pork.
  4. Cover the crockpot and cook on low for 8 hours or on high for 4 hours, until the pork is tender and easily shreds with a fork.
  5. Once cooked, remove the pork from the crockpot and shred it using two forks. Return the shredded pork to the crockpot and stir to combine with the sauce.
  6. To serve, place a scoop of cooked rice or cauliflower rice in a bowl, top with pulled pork, and add coleslaw mix and diced pickles if desired. Garnish with fresh cilantro.

Nutrition

Serving: 1bowlCalories: 450kcalCarbohydrates: 30gProtein: 30gFat: 20gSaturated Fat: 7gPolyunsaturated Fat: 13gCholesterol: 90mgSodium: 800mgFiber: 2gSugar: 10g

Notes

  • For a smoky flavor, add a few drops of liquid smoke to the barbecue sauce before pouring it over the pork.
  • Substitute the rice with quinoa or a salad base for a lighter option.

Tried this recipe?

Let us know how it was!

Grilled Mango Pineapple Chicken: A Tropical Delight!

Introduction to Grilled Mango Pineapple Chicken

Experience a burst of tropical flavors with this Grilled Mango Pineapple Chicken! Juicy, tender chicken is perfectly paired with the sweet and smoky taste of grilled mango and pineapple, creating a dish that’s both refreshing and satisfying. Easy to prepare and full of vibrant colors, this recipe is sure to transport your taste buds straight to a sunny island getaway. Perfect for summer cookouts or anytime you crave a delicious escape!

Why You’ll Love This Grilled Mango Pineapple Chicken

This Grilled Mango Pineapple Chicken is not just a meal; it’s an experience! It’s incredibly easy to prepare, making it perfect for those hectic weeknights. The vibrant flavors of mango and pineapple dance on your palate, creating a taste of the tropics. Plus, it’s a healthy option that your family will love. With just a few simple ingredients, you can serve up a dish that feels gourmet without the fuss!

Ingredients for Grilled Mango Pineapple Chicken

Gathering the right ingredients is key to making this Grilled Mango Pineapple Chicken a success. Here’s what you’ll need:

  • Chicken Breasts: I prefer using large, boneless chicken breasts for their tenderness and ability to soak up flavors.
  • Fresh Pineapple: Diced pineapple adds a juicy sweetness that perfectly complements the chicken.
  • Ripe Mango: The mango brings a tropical flair and a hint of creaminess to the dish.
  • Soy Sauce: This adds a savory depth to the marinade, balancing the sweetness of the fruits.
  • Honey: A touch of honey enhances the sweetness and helps caramelize the chicken on the grill.
  • Olive Oil: This keeps the chicken moist and adds a rich flavor.
  • Garlic: Minced garlic gives a fragrant kick that elevates the overall taste.
  • Ground Ginger: A pinch of ginger adds warmth and a hint of spice.
  • Black Pepper: Freshly ground black pepper adds a subtle heat.
  • Red Pepper Flakes (optional): If you like a bit of heat, these are a great addition!
  • Lime Juice: Fresh lime juice brightens the flavors and adds a zesty finish.
  • Fresh Cilantro: For garnish, cilantro adds a pop of color and freshness.

For exact measurements, check the bottom of the article where you can find everything listed for easy printing. Feel free to get creative with your ingredients! You can substitute chicken with shrimp or tofu for a different protein option. Just adjust the grilling time accordingly. Happy cooking!

How to Make Grilled Mango Pineapple Chicken

Now that you have all your ingredients ready, let’s dive into the steps to create this mouthwatering Grilled Mango Pineapple Chicken. I promise, it’s easier than you think!

Step 1: Prepare the Marinade

Start by grabbing a medium bowl. Combine the diced pineapple, ripe mango, soy sauce, honey, olive oil, minced garlic, ground ginger, black pepper, and lime juice. Mix everything together until well blended. The aroma will make your mouth water!

Step 2: Marinate the Chicken

Next, take your chicken breasts and place them in a resealable plastic bag or a shallow dish. Pour the marinade over the chicken, ensuring it’s well coated. Seal the bag or cover the dish, then pop it in the fridge. Let it marinate for at least an hour, or up to four hours if you want that flavor to really soak in.

Step 3: Preheat the Grill

While the chicken is marinating, it’s time to preheat your grill. Set it to medium-high heat. This is crucial for getting those beautiful grill marks and ensuring the chicken cooks evenly. If you’re using a charcoal grill, let the coals burn down until they’re covered with white ash.

Step 4: Grill the Chicken

Once your grill is hot, remove the chicken from the marinade and discard the marinade. Place the chicken on the grill and cook for about 6-7 minutes on each side. You’ll know it’s done when the internal temperature reaches 165°F. The chicken should be juicy and slightly charred, giving it that perfect grilled flavor!

Step 5: Rest and Serve

After grilling, let the chicken rest for about 5 minutes. This helps the juices redistribute, making each bite tender and flavorful. Slice the chicken, garnish with fresh cilantro, and serve with extra diced pineapple and mango for that tropical touch. Enjoy your culinary creation!

Tips for Success

  • Always let the chicken marinate for at least an hour for maximum flavor.
  • Use a meat thermometer to ensure your chicken is perfectly cooked at 165°F.
  • Don’t skip the resting time; it makes a big difference in juiciness.
  • Experiment with different fruits like peaches or papaya for a unique twist.
  • For extra flavor, add a splash of coconut milk to the marinade!

Equipment Needed

  • Grill: A gas or charcoal grill works perfectly. If you don’t have one, a grill pan on the stovetop will do.
  • Medium Bowl: For mixing the marinade. Any mixing bowl will suffice.
  • Resealable Plastic Bag: Great for marinating; a shallow dish can be used instead.
  • Meat Thermometer: Essential for checking chicken doneness; a simple knife can also help check if juices run clear.

Variations

  • Spicy Kick: Add more red pepper flakes or a dash of hot sauce to the marinade for an extra kick.
  • Herb Infusion: Incorporate fresh herbs like basil or mint into the marinade for a refreshing twist.
  • Fruit Swap: Try using peaches, nectarines, or even strawberries instead of mango and pineapple for a different flavor profile.
  • Vegan Option: Substitute chicken with firm tofu or tempeh, and grill until golden brown.
  • Gluten-Free: Ensure your soy sauce is gluten-free or use tamari for a safe alternative.

Serving Suggestions

  • Side Dishes: Pair with coconut rice or a fresh green salad for a light meal.
  • Drinks: Serve with a refreshing mojito or iced tea to complement the tropical flavors.
  • Presentation: Arrange the chicken on a colorful platter with extra diced fruits for a vibrant display.

FAQs about Grilled Mango Pineapple Chicken

Can I use frozen fruit for the marinade?

While fresh fruit is ideal for the best flavor, you can use frozen mango and pineapple in a pinch. Just make sure to thaw and drain any excess liquid before adding them to the marinade.

How long can I marinate the chicken?

You can marinate the chicken for as little as one hour, but for deeper flavor, I recommend marinating it for up to four hours. Just don’t go overboard, as marinating too long can make the chicken mushy.

What can I serve with Grilled Mango Pineapple Chicken?

This dish pairs beautifully with coconut rice, a fresh green salad, or grilled vegetables. You can also serve it with a tropical salsa for an extra burst of flavor!

Can I make this recipe ahead of time?

Absolutely! You can marinate the chicken a day in advance and grill it when you’re ready to serve. Just remember to store it in the fridge until you’re ready to cook.

Is Grilled Mango Pineapple Chicken gluten-free?

Yes, this recipe can easily be made gluten-free by using tamari instead of regular soy sauce. Just check the labels to ensure all your ingredients are gluten-free!

Final Thoughts

Cooking should be a joyful experience, and my Grilled Mango Pineapple Chicken embodies that spirit! The vibrant flavors transport you to a tropical paradise, making every bite a mini-vacation. Whether you’re serving it at a family gathering or enjoying a quiet dinner at home, this dish brings smiles and satisfaction. Plus, it’s a breeze to prepare, allowing you to spend more time with your loved ones. I hope this recipe becomes a cherished part of your culinary adventures, just as it has in mine. Happy grilling, and may your kitchen always be filled with love and laughter!

“`

Olivia

Grilled Mango Pineapple Chicken: A Tropical Delight!

Grilled Mango Pineapple Chicken is a tropical delight that combines the sweetness of mango and pineapple with savory grilled chicken, perfect for a summer meal.
Prep Time 10 minutes
Cook Time 15 minutes
Total Time 1 hour 25 minutes
Servings: 4 servings
Course: Main Dish
Cuisine: Tropical
Calories: 290

Ingredients
  

  • 2 large chicken breasts about 1 pound
  • 1 cup fresh pineapple diced
  • 1 cup ripe mango diced
  • 1/4 cup soy sauce
  • 2 tablespoons honey
  • 2 tablespoons olive oil
  • 2 cloves garlic minced
  • 1 teaspoon ground ginger
  • 1/2 teaspoon black pepper
  • 1/4 teaspoon red pepper flakes optional
  • 1 tablespoon lime juice
  • Fresh cilantro for garnish

Method
 

  1. In a medium bowl, combine the diced pineapple, mango, soy sauce, honey, olive oil, minced garlic, ground ginger, black pepper, red pepper flakes (if using), and lime juice. Mix well to create a marinade.
  2. Place the chicken breasts in a resealable plastic bag or shallow dish and pour the marinade over the chicken. Seal the bag or cover the dish, and refrigerate for at least 1 hour, or up to 4 hours for more flavor.
  3. Preheat your grill to medium-high heat. Remove the chicken from the marinade and discard the marinade.
  4. Grill the chicken for about 6-7 minutes per side, or until the internal temperature reaches 165°F and the chicken is cooked through.
  5. Remove the chicken from the grill and let it rest for 5 minutes before slicing. Garnish with fresh cilantro and serve with extra diced pineapple and mango if desired.

Nutrition

Serving: 1servingCalories: 290kcalCarbohydrates: 10gProtein: 30gFat: 15gSaturated Fat: 2gPolyunsaturated Fat: 13gCholesterol: 70mgSodium: 800mgFiber: 1gSugar: 10g

Notes

  • For a smoky flavor, add a few slices of red onion or bell peppers to the grill alongside the chicken.
  • Substitute the chicken breasts with shrimp or tofu for a different protein option. Adjust grilling time accordingly.

Tried this recipe?

Let us know how it was!

Pineapple Chicken with Rice: A Delicious Quick Recipe

Introduction to Pineapple Chicken with Rice

Enjoy a perfect harmony of sweet and savory with this Pineapple Chicken with Rice! This quick and easy recipe combines tender chicken and juicy pineapple chunks served over fluffy rice, making it a satisfying meal that comes together in no time. Ideal for busy weeknights, it brings vibrant flavors and simple ingredients to your table, turning everyday dinners into something special.

Why You’ll Love This Pineapple Chicken with Rice

This Pineapple Chicken with Rice is a lifesaver for busy evenings. It comes together in just 25 minutes, making it a fantastic option for those hectic weeknights. The vibrant flavors of pineapple and chicken create a delightful harmony that will have your family asking for seconds. Plus, it’s a one-pan dish, which means less cleanup for you! Who doesn’t love a meal that’s quick, easy, and delicious?

Ingredients for Pineapple Chicken with Rice

Gathering the right ingredients is key to making this Pineapple Chicken with Rice a success. Here’s what you’ll need:

  • Cooked white rice: This serves as the fluffy base for your dish. You can use leftover rice or make it fresh.
  • Boneless, skinless chicken breasts: Cut into bite-sized pieces, they cook quickly and absorb all the delicious flavors.
  • Vegetable oil: A splash of this helps to sauté the chicken and veggies, giving them a nice golden color.
  • Bell pepper: Any color works! It adds a crunchy texture and a pop of color to your dish.
  • Fresh pineapple chunks: Sweet and juicy, they bring a tropical flair. Canned pineapple works too; just make sure to drain it well.
  • Soy sauce: This adds a savory depth to the dish. For a gluten-free option, look for tamari or coconut aminos.
  • Honey: A touch of sweetness balances the savory flavors. You can substitute it with maple syrup if you prefer.
  • Garlic powder: This brings a warm, aromatic flavor without the fuss of fresh garlic.
  • Ginger powder: It adds a hint of spice and warmth, enhancing the overall flavor profile.
  • Black pepper: Just a pinch for seasoning, it rounds out the flavors beautifully.
  • Green onions: Sliced for garnish, they add a fresh crunch and a burst of color to your plate.

For those who like a little heat, consider adding red pepper flakes or a dash of hot sauce to the sauce mixture. If you want to switch things up, feel free to substitute the chicken with shrimp or tofu, adjusting the cooking time as needed. You can find the exact quantities for each ingredient at the bottom of the article, ready for printing!

How to Make Pineapple Chicken with Rice

Now that you have all your ingredients ready, let’s dive into making this delightful Pineapple Chicken with Rice. Follow these simple steps, and you’ll have a delicious meal on the table in no time!

Step 1: Prepare the Chicken

Start by cutting your boneless, skinless chicken breasts into bite-sized pieces. This ensures even cooking, so every piece is juicy and tender. In a large skillet, heat the vegetable oil over medium-high heat. Once the oil is shimmering, add the chicken pieces. Cook them for about 5-7 minutes, stirring occasionally, until they turn golden brown and are cooked through. This step is crucial; you want that lovely sear to lock in the flavors!

Step 2: Sauté the Vegetables

Next, it’s time to add some color and crunch! Toss in the diced bell pepper and sauté for an additional 3-4 minutes. The bell pepper not only adds a vibrant hue but also a delightful texture that contrasts beautifully with the tender chicken. You want the pepper to be tender but still crisp, so keep an eye on it!

Step 3: Combine Ingredients

Now comes the fun part! Stir in the fresh pineapple chunks, soy sauce, honey, garlic powder, ginger powder, and black pepper. This combination creates a sweet and savory sauce that will coat your chicken and veggies perfectly. Let everything cook together for another 3-5 minutes. This allows the sauce to thicken slightly and the flavors to meld beautifully. Your kitchen will smell heavenly!

Step 4: Serve and Garnish

Finally, it’s time to serve! Spoon the pineapple chicken mixture over the fluffy cooked rice. Don’t forget to garnish with sliced green onions. They add a fresh crunch and a pop of color that makes the dish visually appealing. Plus, they bring a lovely oniony flavor that complements the sweetness of the pineapple. Enjoy your meal!

Tips for Success

  • Prep your ingredients ahead of time to save precious minutes during cooking.
  • Use leftover rice for a quicker meal; it’s a great way to reduce waste!
  • Don’t overcrowd the skillet; cook in batches if necessary for even browning.
  • Adjust the sweetness by adding more or less honey based on your taste.
  • Experiment with different vegetables like snap peas or carrots for added nutrition.

Equipment Needed

  • Large skillet: A non-stick skillet works best, but any large pan will do.
  • Cutting board: Essential for chopping your chicken and veggies safely.
  • Sharp knife: A good knife makes cutting chicken and vegetables a breeze.
  • Measuring spoons: Handy for measuring out sauces and spices accurately.
  • Serving spoon: Perfect for dishing out your delicious Pineapple Chicken with Rice.

Variations

  • Sweet and Spicy: Add a teaspoon of red pepper flakes or a splash of sriracha for a spicy kick that balances the sweetness of the pineapple.
  • Vegetarian Delight: Swap the chicken for tofu or tempeh. Just make sure to adjust the cooking time to ensure they’re heated through.
  • Quinoa Base: For a healthier twist, serve the pineapple chicken over quinoa instead of rice. It adds a nutty flavor and extra protein!
  • Mixed Veggies: Toss in additional vegetables like snap peas, broccoli, or carrots for a colorful and nutritious boost.
  • Teriyaki Twist: Substitute soy sauce with teriyaki sauce for a sweeter, more complex flavor profile.

Serving Suggestions

  • Pair your Pineapple Chicken with Rice with a side of steamed broccoli for a nutritious boost.
  • Serve with a refreshing cucumber salad to balance the sweetness of the dish.
  • For drinks, consider a light iced tea or a tropical fruit punch.
  • Garnish with sesame seeds for an extra touch of elegance.

FAQs about Pineapple Chicken with Rice

Can I use frozen chicken for this recipe?

Absolutely! Just make sure to thaw it completely before cutting and cooking. Frozen chicken can be a real time-saver, especially on busy nights.

What can I substitute for soy sauce?

If you’re looking for a gluten-free option, tamari or coconut aminos work wonderfully. They provide a similar savory flavor without the gluten.

How can I make this dish spicier?

For a spicy kick, add a teaspoon of red pepper flakes or a dash of hot sauce to the sauce mixture. It’ll elevate the flavor profile beautifully!

Can I make this dish ahead of time?

Yes! You can prepare the chicken and sauce in advance and store them in the fridge. Just reheat and serve over fresh rice when you’re ready to eat.

What sides pair well with Pineapple Chicken with Rice?

Steamed vegetables, a light salad, or even some crispy spring rolls make excellent companions to this dish. They add variety and balance to your meal!

Final Thoughts

Cooking this Pineapple Chicken with Rice is more than just preparing a meal; it’s about creating a joyful experience for you and your loved ones. The vibrant flavors and delightful aroma fill your kitchen, making it feel warm and inviting. I love how this dish brings a taste of the tropics to our dinner table, transforming an ordinary weeknight into something special. Plus, the ease of preparation means you can spend more time enjoying the meal and less time in the kitchen. I hope this recipe becomes a cherished favorite in your home, just as it has in mine!

“`

Olivia

Pineapple Chicken with Rice: A Delicious Quick Recipe

A quick and delicious recipe for Pineapple Chicken with Rice, perfect for a weeknight dinner.
Prep Time 10 minutes
Cook Time 15 minutes
Total Time 25 minutes
Course: Main Dish
Cuisine: Asian
Calories: 350

Ingredients
  

  • 2 cups cooked white rice
  • 1 pound boneless skinless chicken breasts, cut into bite-sized pieces
  • 1 tablespoon vegetable oil
  • 1 bell pepper diced (any color)
  • 1 cup fresh pineapple chunks or canned, drained
  • 1/4 cup soy sauce
  • 2 tablespoons honey
  • 1 teaspoon garlic powder
  • 1 teaspoon ginger powder
  • 1/4 teaspoon black pepper
  • 1/4 cup green onions sliced (for garnish)

Method
 

  1. In a large skillet, heat the vegetable oil over medium-high heat. Add the chicken pieces and cook for about 5-7 minutes, or until they are golden brown and cooked through.
  2. Add the diced bell pepper to the skillet and sauté for an additional 3-4 minutes until the pepper is tender.
  3. Stir in the pineapple chunks, soy sauce, honey, garlic powder, ginger powder, and black pepper. Cook for another 3-5 minutes, allowing the sauce to thicken slightly and the flavors to meld.
  4. Serve the pineapple chicken over the cooked rice and garnish with sliced green onions.

Nutrition

Serving: 1servingCalories: 350kcalCarbohydrates: 40gProtein: 30gFat: 10gSaturated Fat: 1.5gPolyunsaturated Fat: 8.5gCholesterol: 70mgSodium: 800mgFiber: 2gSugar: 10g

Notes

  • For a spicier kick, add a teaspoon of red pepper flakes or a dash of hot sauce to the sauce mixture.
  • Substitute the chicken with shrimp or tofu for a different protein option, adjusting the cooking time as needed.

Tried this recipe?

Let us know how it was!

Hawaiian Honey Pineapple Chicken: A Flavorful Delight!

Introduction to Hawaiian Honey Pineapple Chicken

Experience a burst of tropical flavor with this Hawaiian Honey Pineapple Chicken! Juicy chicken glazed in a sweet honey and tangy pineapple sauce creates a perfect balance that will transport your taste buds straight to the islands. Easy to prepare and full of vibrant tastes, this dish is a delightful way to add some sunshine to your dinner table any night of the week. Get ready to savor every bite of this irresistible recipe!

Why You’ll Love This Hawaiian Honey Pineapple Chicken

This Hawaiian Honey Pineapple Chicken is a delightful blend of sweet and savory flavors that will transport you straight to the islands. It’s incredibly easy to make, taking just 45 minutes from start to finish. The marinade infuses the chicken with a burst of flavor, while the caramelized pineapple adds a tropical twist. Perfect for busy weeknights or special occasions, this dish is sure to satisfy even the pickiest eaters in your family!

Ingredients for Hawaiian Honey Pineapple Chicken

Gathering the right ingredients is key to making this Hawaiian Honey Pineapple Chicken a hit. Here’s what you’ll need:

  • Boneless, skinless chicken thighs: These are juicy and flavorful, perfect for grilling. You can also use chicken breasts if you prefer a leaner option.
  • Fresh pineapple chunks: Fresh is best for that vibrant taste, but canned pineapple works too—just make sure to drain it well.
  • Honey: This natural sweetener adds a delightful glaze and balances the savory elements of the dish.
  • Soy sauce: A staple in many marinades, it brings depth and umami flavor to the chicken.
  • Apple cider vinegar: This adds a tangy kick that brightens the overall flavor profile.
  • Minced garlic: Fresh garlic infuses the marinade with aromatic goodness, enhancing the dish’s overall taste.
  • Grated fresh ginger: A little goes a long way! It adds warmth and a hint of spice.
  • Black pepper: Just a pinch elevates the flavors and adds a subtle heat.
  • Vegetable oil: This is used for cooking, ensuring the chicken doesn’t stick to the grill or skillet.
  • Chopped green onions: These are for garnish, adding a pop of color and freshness.
  • Sesame seeds: Optional, but they add a lovely crunch and nutty flavor when sprinkled on top.

For exact measurements, check the bottom of the article where you can find everything listed for easy printing. Happy cooking!

How to Make Hawaiian Honey Pineapple Chicken

Now that you have all your ingredients ready, let’s dive into the fun part—making this Hawaiian Honey Pineapple Chicken! Follow these simple steps, and you’ll have a delicious meal that will make your kitchen smell heavenly.

Step 1: Prepare the Marinade

Start by whisking together the honey, soy sauce, apple cider vinegar, minced garlic, grated ginger, and black pepper in a large bowl. You want everything to blend beautifully, creating a sweet and savory marinade that will infuse the chicken with flavor. It should smell amazing already!

Step 2: Marinate the Chicken

Next, add the boneless, skinless chicken thighs to the marinade. Make sure each piece is fully coated. This is where the magic happens! Cover the bowl and refrigerate for at least 30 minutes, or up to 2 hours if you have the time. The longer it marinates, the more flavorful it becomes.

Step 3: Preheat the Grill or Skillet

While the chicken is soaking up all that deliciousness, it’s time to preheat your grill or a large skillet over medium-high heat. Don’t forget to add a tablespoon of vegetable oil to the skillet or brush it on the grill. This will help prevent sticking and give your chicken a nice sear.

Step 4: Cook the Chicken

Once your grill or skillet is hot, remove the chicken from the marinade, letting any excess drip off. Grill or pan-sear the chicken for about 6-7 minutes on each side. You’re looking for that perfect golden-brown color and an internal temperature of 165°F. Trust me, the aroma will be irresistible!

Step 5: Thicken the Marinade

While the chicken is cooking, take the reserved marinade and pour it into a small saucepan. Bring it to a boil, then reduce the heat and let it simmer for about 5 minutes. This will thicken the marinade, making it a perfect drizzle over your finished dish.

Step 6: Caramelize the Pineapple

In the last few minutes of cooking, toss those fresh pineapple chunks onto the grill or into the skillet. Cook them until they’re caramelized and heated through. This adds a sweet, smoky flavor that pairs perfectly with the chicken.

Step 7: Serve and Garnish

Once the chicken is cooked, let it rest for a few minutes before slicing. Serve it up with the caramelized pineapple on top, and don’t forget to drizzle that thickened marinade over everything. Garnish with chopped green onions and sesame seeds for a beautiful presentation. Your Hawaiian Honey Pineapple Chicken is ready to impress!

Tips for Success

  • Always marinate the chicken for at least 30 minutes to enhance flavor.
  • Use a meat thermometer to ensure the chicken reaches 165°F for safety.
  • For extra caramelization, grill the pineapple until it has nice grill marks.
  • Feel free to customize the marinade with your favorite spices or herbs.
  • Serve with coconut rice for a delightful tropical experience!

Equipment Needed

  • Grill or Skillet: A grill gives that smoky flavor, but a skillet works just as well.
  • Mixing Bowl: For whisking the marinade; any large bowl will do.
  • Meat Thermometer: Essential for checking chicken doneness; a simple kitchen thermometer is perfect.
  • Small Saucepan: For thickening the marinade; a regular pot will suffice.

Variations

  • Spicy Hawaiian Honey Pineapple Chicken: Add a teaspoon of red pepper flakes to the marinade for a kick of heat.
  • Teriyaki Style: Substitute soy sauce with teriyaki sauce for a sweeter, thicker glaze.
  • Vegetarian Option: Replace chicken with firm tofu or tempeh, marinating and cooking them the same way.
  • Fruit Medley: Mix in other fruits like mango or peaches for a tropical twist.
  • Low-Carb Version: Serve the chicken over a bed of sautéed zucchini noodles instead of rice.

Serving Suggestions

  • Pair your Hawaiian Honey Pineapple Chicken with fluffy coconut rice for a tropical touch.
  • Serve alongside steamed vegetables like broccoli or snap peas for a colorful plate.
  • For drinks, consider a refreshing iced tea or a fruity mocktail to complement the flavors.
  • Garnish with extra green onions and sesame seeds for an appealing presentation.

FAQs about Hawaiian Honey Pineapple Chicken

As you embark on your culinary adventure with Hawaiian Honey Pineapple Chicken, you might have a few questions. Here are some common queries that can help you along the way:

Can I use chicken breasts instead of thighs?

Absolutely! While I love the juiciness of chicken thighs, chicken breasts can be a leaner option. Just keep an eye on the cooking time, as breasts may cook faster.

How can I make this dish gluten-free?

To make Hawaiian Honey Pineapple Chicken gluten-free, simply substitute regular soy sauce with tamari or a gluten-free soy sauce alternative. It’s an easy swap that keeps all the flavor intact!

Can I prepare the marinade in advance?

Yes! You can prepare the marinade a day ahead and store it in the fridge. This not only saves time but also allows the flavors to meld beautifully.

What can I serve with Hawaiian Honey Pineapple Chicken?

This dish pairs wonderfully with coconut rice, steamed veggies, or a fresh salad. You can also serve it with a fruity drink to enhance the tropical vibe!

Can I freeze leftovers?

Yes, you can freeze any leftovers! Just make sure to store them in an airtight container. When you’re ready to enjoy them again, thaw in the fridge and reheat gently.

Final Thoughts

Cooking Hawaiian Honey Pineapple Chicken is more than just preparing a meal; it’s about creating a joyful experience for you and your loved ones. The sweet aroma of grilled chicken and caramelized pineapple fills your kitchen, making it feel like a tropical getaway. Each bite is a delightful explosion of flavors that brings smiles to the dinner table. Whether it’s a busy weeknight or a special gathering, this dish is sure to impress. So, roll up your sleeves, embrace the culinary adventure, and let this recipe transport you to a sunny paradise, one delicious bite at a time!

“`

Olivia

Hawaiian Honey Pineapple Chicken: A Flavorful Delight!

Hawaiian Honey Pineapple Chicken is a flavorful dish featuring marinated chicken thighs grilled to perfection and served with caramelized pineapple.
Prep Time 30 minutes
Cook Time 15 minutes
Total Time 45 minutes
Servings: 4 servings
Course: Main Dish
Cuisine: Hawaiian
Calories: 380

Ingredients
  

  • 2 pounds boneless skinless chicken thighs
  • 1 cup fresh pineapple chunks or canned, drained
  • 1/2 cup honey
  • 1/4 cup soy sauce
  • 1 tablespoon apple cider vinegar
  • 1 tablespoon minced garlic
  • 1 teaspoon grated fresh ginger
  • 1/2 teaspoon black pepper
  • 1 tablespoon vegetable oil
  • 1/4 cup chopped green onions for garnish
  • Sesame seeds for garnish, optional

Method
 

  1. In a large bowl, whisk together honey, soy sauce, apple cider vinegar, minced garlic, grated ginger, and black pepper until well combined.
  2. Add the chicken thighs to the marinade, ensuring they are fully coated. Cover and refrigerate for at least 30 minutes, or up to 2 hours for more flavor.
  3. Preheat your grill or a large skillet over medium-high heat and add the vegetable oil.
  4. Remove the chicken from the marinade, reserving the marinade for later.
  5. Grill or pan-sear the chicken for about 6-7 minutes on each side, or until the internal temperature reaches 165°F.
  6. While the chicken is cooking, pour the reserved marinade into a small saucepan and bring to a boil. Reduce heat and simmer for about 5 minutes to thicken slightly.
  7. In the last few minutes of cooking, add the pineapple chunks to the grill or skillet, cooking until they are caramelized and heated through.
  8. Once the chicken is cooked, remove it from the heat and let it rest for a few minutes. Slice the chicken and serve with the grilled pineapple on top. Drizzle with the thickened marinade and garnish with chopped green onions and sesame seeds if desired.

Nutrition

Serving: 1servingCalories: 380kcalCarbohydrates: 28gProtein: 30gFat: 15gSugar: 28g

Notes

  • For a tropical twist, serve the chicken over coconut rice or with a side of steamed vegetables.
  • You can substitute the chicken thighs with chicken breasts for a leaner option.
  • If you prefer a spicier kick, add a teaspoon of red pepper flakes to the marinade.

Tried this recipe?

Let us know how it was!

Stay Connected

Get recipes via email: