Get my cookbooks

Crispy Cheesy Beef Taquitos: Your Ultimate Snack Revolution

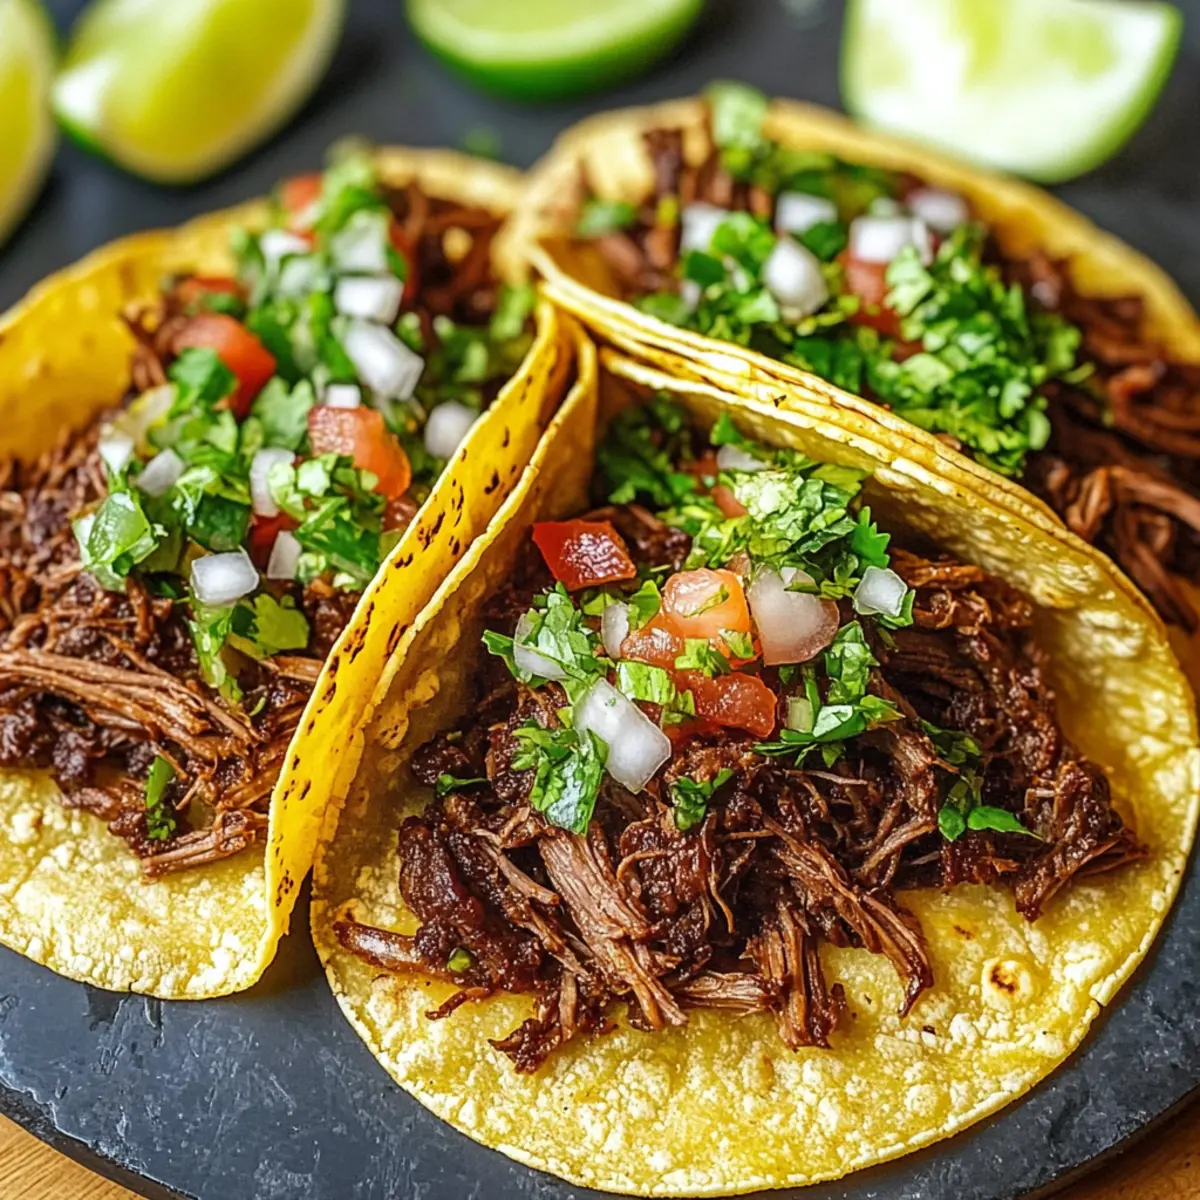
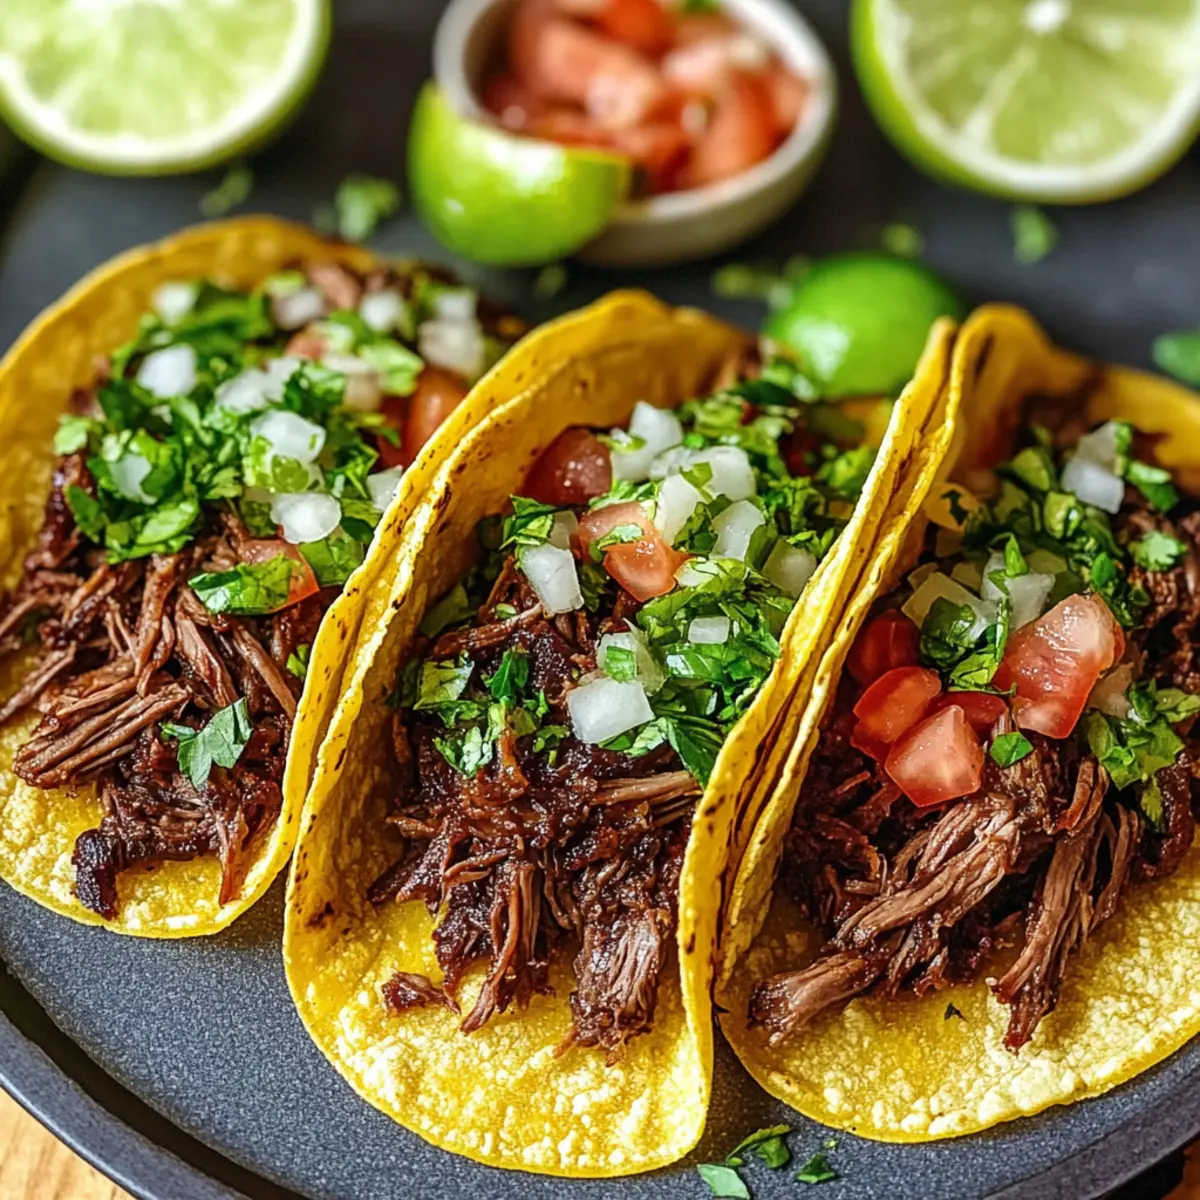
As I sat down with friends, the comforting aroma of baking tortillas filled the air, signaling that my Crispy Cheesy Beef Taquitos were on their way to becoming a crowd favorite. With each bite, you’ll experience the delightful crunch of perfectly baked tortillas hugging a savory, cheesy beef mixture that’s sure to impress even the toughest critics in your household. This easy recipe not only comes together in just 40 minutes, making it ideal for busy weeknights or game day snacking, but it also offers a versatile touch—you can customize the filling just as you like! Ready to roll your way to a delicious dinner? Join me in discovering how simple and satisfying these taquitos can be!

Why are these taquitos a must-try?

Unmatched Crunchiness: Each taquito delivers a crispy texture that’s impossible to resist. Baked to golden perfection, they make the ideal snack for crunchy food lovers!
Customizable Filling: Whether you’re a fan of ground beef, shredded chicken, or even a vegetarian option, the possibilities are endless. Adjust the ingredients to suit your taste!
Simple Prep: Don’t worry about complicated techniques—this recipe is easy enough for cooks of all levels. Enjoy the process and impress your friends with minimal effort.
Flavor Explosion: The combination of spices and cheese brings a savory twist to a classic dish, ensuring that every bite is bursting with deliciousness.
Perfect for Sharing: These taquitos are great for gatherings—serve them at parties or family dinners to keep everyone happy. They’ll disappear in no time!
For more easy recipe ideas, check out our quick snacks section to keep your mealtime exciting. Enjoy!

Crispy Cheesy Beef Taquitos Ingredients

For the Filling
Ground Beef – Adds a rich, savory flavor; substitute with shredded chicken or black beans for a delicious vegetarian option.
Onion – Provides sweetness and depth; finely chop for even cooking and enhanced flavor.
Minced Garlic – Elevates the taste profile; fresh garlic offers a stronger aroma and flavor.
Chili Powder – Delivers a warm kick; adjust to taste for a spicier taquito experience.
Cumin – Adds an earthy note; perfect for enhancing the overall flavor of the beef mixture.
Paprika – Brings subtle smokiness; opt for smoked paprika for extra depth.
Salt – Balances the flavors; use sea salt for a more refined taste.
Black Pepper – Enhances overall flavor; freshly ground adds the best aroma.
Tomato Sauce – Provides moisture and tanginess; swap for salsa to introduce a zesty flair.

For the Shell
Tortillas – The crunchy exterior; choose corn for a gluten-free option or flour for a soft texture.
Shredded Cheese – Adds creaminess and savory goodness; cheddar gives a classic taste, while Monterey Jack melts beautifully.

Feel free to get creative with your own fillings and adaptations—after all, these Crispy Cheesy Beef Taquitos are designed to be as versatile as they are delicious!

Step‑by‑Step Instructions for Crispy Cheesy Beef Taquitos

Step 1: Cook Filling
In a skillet over medium heat, add the ground beef and finely chopped onion, browning for about 5–7 minutes until the meat is no longer pink and the onion is softened. Stir in the minced garlic, chili powder, cumin, paprika, salt, and black pepper, continuing to cook for another minute to release the spices’ aromas. Finally, mix in the tomato sauce, letting the mixture simmer for 2 minutes until it thickens slightly.

Step 2: Prep Tortillas
Next, warm the tortillas to ensure they are pliable and easier to roll. This can be done by placing them in a skillet over low heat for about 10 seconds on each side or warming a few at a time in the microwave for about 5 seconds. Keeping the tortillas warm prevents them from cracking as you prepare to assemble your Crispy Cheesy Beef Taquitos.

Step 3: Assemble Taquitos
Now, take each warmed tortilla and spoon about 2 tablespoons of the savory beef filling onto the center. Sprinkle a generous amount of shredded cheese over the filling, then roll the tortilla tightly, tucking in the sides as you go. Place each rolled taquito seam-side down on a parchment-lined baking sheet, ensuring they are not overcrowded to allow for crispy baking.

Step 4: Bake
Preheat your oven to 425°F (220°C) to prepare for baking the taquitos. Once the oven is ready, lightly brush the tops of the taquitos with oil and sprinkle additional cheese if desired. Bake for 15–18 minutes or until they turn golden brown and crispy. For extra crunch, broil for 1–2 minutes at the end, keeping a close watch to prevent burning.

Step 5: Serve and Enjoy
Once out of the oven, let the Crispy Cheesy Beef Taquitos cool for a minute. Serve them warm with your favorite dipping sauces like sour cream, guacamole, or salsa. Gather everyone around, and watch these delightful bites disappear as you enjoy a satisfying and delicious snack!

What to Serve with Crispy Cheesy Beef Taquitos

Savor the delightful crunch of your taquitos with these perfect pairings that elevate your meal to another level.

  • Guacamole: This creamy avocado dip adds a rich flavor that beautifully contrasts the crunch of the taquitos.
  • Sour Cream: A dollop of tangy sour cream gives a cool, refreshing element, enhancing each bite.
  • Salsa: Fresh salsa introduces a vibrant burst of flavors and textures, perfect for dipping.
  • Mexican Street Corn: Sweet and smoky, this dish complements the savory beef with its buttery goodness.
  • Rice and Beans: A side of seasoned rice and hearty black beans makes for a complete meal, packing in flavors and proteins.
  • Elote (Grilled Corn on the Cob): Charred corn with lime and cheese creates a delightful textural contrast while echoing the Mexican flavors of your taquitos.
  • Mixed Green Salad: A light salad with a zesty vinaigrette adds freshness, balancing the richness of the taquitos.
  • Margaritas: For a refreshing drink, whip up a classic margarita to bring a festive flair and complement the flavors beautifully.
  • Churros: End your meal with crispy churros for a sweet treat that continues the theme of crunchy delights, drizzled with chocolate sauce for indulgence.

Make Ahead Options

Crispy Cheesy Beef Taquitos are the perfect meal prep solution for busy weeknights! You can prepare the filling (ground beef, onions, spices, and tomato sauce) up to 3 days in advance; simply refrigerate it in an airtight container to lock in freshness. Additionally, once you’ve assembled the taquitos, they can be stored unbaked in the fridge for up to 24 hours, making it easy to pop them in the oven right before serving. To maintain their crispy texture, avoid overcrowding on the baking sheet when you’re ready to bake. Just brush with oil and bake as instructed for fresh, golden taquitos that taste just as delicious as when made fresh!

Crispy Cheesy Beef Taquitos Variations

Feel free to explore these delicious twists and swaps to make this recipe truly your own!

  • Shredded Chicken: Swap ground beef for shredded chicken to lighten the dish while still packing in tons of flavor.
    Whether using leftovers or a store-bought rotisserie chicken, this variation offers a hearty alternative that’s equally delicious.

  • Vegetarian Delight: Replace beef with black beans or lentils for a protein-packed vegetarian option.
    Add chopped veggies like spinach or zucchini to boost nutrition without sacrificing taste!

  • Spicy Pepper Jack: Use pepper jack cheese instead of cheddar for an extra kick in every bite.
    The melted pepper jack will add just the right amount of heat to elevate your taquitas.

  • Salsa Swap: Instead of tomato sauce, try salsa for a zesty punch.
    This will not only change the flavor profile but also add some freshness to the filling—perfect for summer gatherings!

  • Crunchy Veggie Mix: Add diced bell peppers or corn to your beef mixture for a delightful crunch.
    These ingredients not only add texture but also a burst of color to your taquitos—making them as pleasing to the eye as they are to the palate.

  • Gluten-Free Option: Use gluten-free corn tortillas to create a wholesome snack for those with dietary restrictions.
    The result is just as delicious, ensuring everyone can join in on the fun!

  • Herbed and Spiced: Add fresh herbs like cilantro or a sprinkle of cumin to the filling for a fresh twist.
    These additions can brighten up the flavors and give your taquitos a vibrant taste that will impress.

For even more fun and easy recipe ideas, take a look at our quick snacks section to explore endless possibilities to share with your family and friends! Enjoy making your Crispy Cheesy Beef Taquitos uniquely yours!

Expert Tips for Crispy Cheesy Beef Taquitos

Tortilla Preparation: Warm tortillas thoroughly to prevent tearing during rolling; this ensures they stay intact when filled.

Spice Adjustments: If you’re hesitant about spice levels, start with half the recommended chili powder and taste as you go to avoid overpowering flavors.

Even Baking: Leave enough space between each taquito on the baking sheet; this allows for even cooking and ensures every taquito gets crispy without steaming.

Add Texture: For added crunch, toss in some corn or diced bell peppers into the beef mixture; this introduces additional flavor and nutrition to your taquitos.

Creative Dipping: Enhance your dining experience with unique sauces such as chipotle aioli or a zesty cilantro lime sauce for an exciting twist.

Feel confident that with these tips, your Crispy Cheesy Beef Taquitos will be both delicious and satisfying!

How to Store and Freeze Crispy Cheesy Beef Taquitos

Fridge: Store taquitos in an airtight container for up to 3 days. To maintain crispness, it’s best to reheat them in the oven rather than the microwave.

Freezer: Freeze unbaked taquitos in a single layer on a baking sheet. Once frozen, transfer to a freezer bag for up to 3 months. Bake from frozen, adding extra time for cooking.

Reheating: To reheat leftover baked taquitos, place them in a preheated oven at 350°F (175°C) for about 10-15 minutes until warmed through and crispy again.

Make-Ahead Tip: Assemble taquitos ahead of time and store them in the fridge for up to 24 hours before baking for an easy dinner option.

Crispy Cheesy Beef Taquitos Recipe FAQs

How do I select the best ground beef for my taquitos?
When choosing ground beef, look for 80/20 lean-to-fat ratio to ensure a juicy filling. Fresh meat should be bright red with a firm texture. Avoid packages with dark spots or excessive liquid. Additionally, consider buying grass-fed beef for a richer flavor.

Can I freeze my crispy taquitos for later enjoyment?
Absolutely! To freeze, arrange unbaked taquitos in a single layer on a baking sheet until firm, then transfer them to a freezer bag. They can be stored for up to 3 months. When ready to bake, cook directly from frozen, adding an extra 5-10 minutes to the initial 15-18 minutes baking time.

How should I store leftover taquitos?
Store any leftover baked taquitos in an airtight container in the fridge for up to 3 days. To keep them crispy, reheat in the oven at 350°F (175°C) for about 10-15 minutes rather than using a microwave, which can make them soggy.

What can I do if my taquitos are falling apart while rolling?
If your tortillas are cracking or tearing, they might be too cold or not warmed enough. Ensure you warm them properly—10 seconds in a skillet or a few seconds in a microwave can help make them pliable. If they’re still falling apart, try using fresher tortillas or a flour variety if you’ve been using corn.

Are crispy taquitos safe for my pet to eat?
While the filling itself isn’t toxic for pets, it’s always wise to avoid giving them human food. Ingredients like onion and garlic can be harmful to dogs and cats. If you wish to share, consider making a pet-friendly version without those ingredients for a special treat!

How can I customize the spices in my beef filling?
Feel free to adjust the spice levels according to your taste preferences! Start by halving the chili powder and gradually add more if desired. You can also experiment with other spices like smoked paprika for a deeper flavor or even a pinch of cayenne for extra heat.

undefined

Crispy Cheesy Beef Taquitos: Your Ultimate Snack Revolution

Enjoy the crunchy delight of Crispy Cheesy Beef Taquitos, a customizable snack perfect for any gathering.
Prep Time 10 minutes
Cook Time 30 minutes
Total Time 40 minutes
Servings: 4 taquitos
Course: Appetizers
Cuisine: Mexican
Calories: 250

Ingredients
  

Filling
  • 1 pound Ground Beef Can substitute with shredded chicken or black beans
  • 1 medium Onion Finely chopped
  • 2 cloves Minced Garlic Fresh for stronger flavor
  • 1 tablespoon Chili Powder Adjust to taste
  • 1 teaspoon Cumin
  • 1 teaspoon Paprika Smoked paprika for extra depth
  • 1 teaspoon Salt Sea salt recommended
  • 1/2 teaspoon Black Pepper Freshly ground
  • 1 cup Tomato Sauce Can substitute with salsa
Shell
  • 12 count Tortillas Choose corn for gluten-free
  • 2 cups Shredded Cheese Cheddar or Monterey Jack

Equipment

  • Skillet
  • Oven
  • Baking Sheet
  • Parchment Paper
  • Microwave

Method
 

Step-by-Step Instructions
  1. In a skillet over medium heat, add the ground beef and finely chopped onion. Brown for about 5-7 minutes until no longer pink.
  2. Stir in the minced garlic, chili powder, cumin, paprika, salt, and black pepper, continuing to cook for another minute.
  3. Mix in the tomato sauce, letting simmer for 2 minutes until slightly thickened.
  4. Warm tortillas in a skillet over low heat or microwave for 5 seconds to make them pliable.
  5. Spoon 2 tablespoons of the beef filling onto the center of each tortilla, sprinkle with cheese, and roll tightly.
  6. Place each rolled taquito seam-side down on a parchment-lined baking sheet, ensuring space between them.
  7. Preheat oven to 425°F (220°C). Brush tops with oil and sprinkle with cheese. Bake for 15-18 minutes until golden brown.
  8. Let cool for a minute, then serve warm with dipping sauces like sour cream or guacamole.

Nutrition

Serving: 1taquitoCalories: 250kcalCarbohydrates: 30gProtein: 15gFat: 10gSaturated Fat: 4gPolyunsaturated Fat: 1gMonounsaturated Fat: 5gCholesterol: 60mgSodium: 500mgPotassium: 300mgFiber: 3gSugar: 1gVitamin A: 200IUVitamin C: 5mgCalcium: 200mgIron: 2mg

Notes

These taquitos can be customized with different fillings and served with various dipping sauces to enhance flavor.

Tried this recipe?

Let us know how it was!

Delicious Shrimp Rice Bowls: Your Quick Weeknight Delight

As I scrolled through my fridge the other evening, a dilemma unfolded—how could I create something vibrant, satisfying, and quick enough for our busy weeknight? That’s when the idea for these Easy Shrimp Rice Bowls struck me! This dish combines succulent shrimp, fluffy jasmine rice, and a rainbow of vegetables, all drizzled with a savory sauce that envelops each bite in warmth. Not only is it perfect for seafood lovers, but it’s also incredibly customizable to suit everyone’s taste buds, whether you prefer a little heat or a cooler twist. Plus, they’re a breeze to prepare, making them an ideal option for busy nights or meal prep. Curious to see how such a simple recipe can elevate your dinner game? Let’s dive in!

Why are Shrimp Rice Bowls a must-try?

Quick and Easy: This recipe is designed for those hectic weeknights when you need a delightful meal without the fuss. Just a few ingredients and a handful of steps will get dinner on the table in 30 minutes or less!

Customizable Delight: Whether you prefer shrimp or want to switch it up with tofu, these bowls can adapt to any diet, making them perfect for everyone at the table.

Bursting with Flavor: The combination of fresh herbs, zesty spices, and savory sauce elevates each bite, ensuring your palate will be singing praises.

Colorful Presentation: Vibrant vegetables make this dish not just tasty but visually stunning, making it a hit for both family dinners and entertaining guests.

Meal Prep Friendly: You can easily prepare a batch ahead of time, so you’ll have delicious, homemade meals ready to go throughout the week. These Shrimp Rice Bowls are sensational and full of flavor, making every bite worth savoring!

Shrimp Rice Bowl Ingredients

• Dive into the delicious world of shrimp rice bowls with these essential ingredients!

For the Base

  • Shrimp – Use large, peeled and deveined shrimp for a succulent bite bursting with flavor.
  • Jasmine Rice – This fluffy rice provides the perfect canvas; brown rice can be swapped for extra nutrition.

For the Cooking Liquid

  • Water/Chicken Broth – Cooking rice in low-sodium chicken broth enhances flavor, making every bite richer.

For Sautéing

  • Olive Oil – Ideal for sautéing; replace it with sesame oil for a more aromatic twist.
  • Garlic – Adds depth and aroma; fresh minced garlic is a must for zest and fragrance.
  • Fresh Ginger – Grated ginger infuses an earthy warmth that’s simply delightful.

For the Vegetables

  • Red Bell Pepper – Bringing a sweet crunch; feel free to substitute with zucchini or another bell pepper.
  • Snap Peas – Adds a delightful crunch; you can also use broccoli or green beans in its place.
  • Corn Kernels – Sweetens the dish and adds texture; both fresh and frozen work wonderfully.

For Flavor and Seasoning

  • Soy Sauce – Essential for that umami taste; low-sodium options help keep it healthier.
  • Sesame Oil – A nutty addition; it’s optional if you have allergies.
  • Rice Vinegar – Provides a necessary tang; apple cider vinegar makes a good substitute.
  • Chili Paste – Spice lovers will enjoy this; adjust to your heat preference for the perfect kick.
  • Salt & Pepper – Essential for seasoning; feel free to adjust to taste.

For Garnish

  • Green Onions – Top your bowls with these for a fresh crunch; chives can be a nice alternative.
  • Fresh Cilantro – Adds freshness; omit if it’s not your favorite.
  • Sesame Seeds – Optional but recommended for a lovely texture and subtle nuttiness.

Enjoy crafting your own Shrimp Rice Bowl masterpiece with these flavorful ingredients!

Step‑by‑Step Instructions for Easy Shrimp Rice Bowls

Step 1: Prepare the Rice
Rinse 1 cup of jasmine rice under cold water until the water runs clear. In a medium saucepan, combine the rice with 1.5 cups of water or low-sodium chicken broth. Bring the mixture to a boil over medium-high heat, watching for bubbles to form and steam to escape, signaling it’s time to proceed.

Step 2: Simmer the Rice
Once boiling, reduce the heat to low, cover the saucepan with a tight-fitting lid, and let it simmer for 15-20 minutes. You’ll know it’s done when the water is absorbed, and the rice is tender. After removing from heat, let it sit covered for an additional 5 minutes to fluff up beautifully; this resting time lets the remaining steam do its magic.

Step 3: Sauté Aromatics
In a large skillet, heat 2 tablespoons of olive oil over medium heat. Once the oil is shimmering, add 3 cloves of minced garlic and 1 tablespoon of grated fresh ginger. Sauté for about 1 minute until fragrant, stirring constantly to avoid burning, and infuse your kitchen with a delightful aroma that invites everyone to the table.

Step 4: Add Vegetables
Next, toss in 1 chopped red bell pepper and 1 cup of snap peas into the skillet. Stir-fry the mixture for about 3-4 minutes until the vegetables are just tender yet still crisp, adding vibrant color to your Easy Shrimp Rice Bowls. The snap peas will brighten up, giving you a feast for the eyes as they cook.

Step 5: Cook the Shrimp
Adding 1 pound of large, peeled and deveined shrimp to the skillet, stir well to combine with the veggies. Cook for about 3-4 minutes, or until the shrimp turn a lovely pink color and are opaque. This step ensures your seafood is perfectly tender, setting the stage for the final layers of flavor in your dish.

Step 6: Incorporate Corn
Now, fold in 1 cup of corn kernels and heat through for another 2 minutes, allowing the sweetness of the corn to meld beautifully with the shrimp and vegetables. The mixture will begin to bubble slightly, indicating it’s time for the final seasoning that will elevate your Easy Shrimp Rice Bowls.

Step 7: Add the Sauce
In a small bowl, whisk together 3 tablespoons of soy sauce, 1 tablespoon of sesame oil, 2 tablespoons of rice vinegar, and optional chili paste to taste. Pour this delicious sauce over the cooked shrimp and vegetables. Stir everything together and cook for an additional 1-2 minutes until heated through, ensuring each ingredient is coated in the savory goodness.

Step 8: Assemble the Bowls
To assemble your Easy Shrimp Rice Bowls, start with a generous scoop of fluffy jasmine rice in each bowl. Top it with the vibrant shrimp and vegetable mixture, making it as colorful as it is appetizing. Finish with sliced green onions, a sprinkle of sesame seeds, and fresh cilantro for that final touch of brilliance and flavor that brings everything together.

Step 9: Serve Warm
Serve your Shrimp Rice Bowls warm, ensuring every bite is a delightful blend of textures and tastes. If desired, enjoy immediately or pack for meal prep, as these bowls are perfect for savoring throughout the week without losing their charm.

Shrimp Rice Bowls Variations & Substitutions

Feel free to get creative and make these Shrimp Rice Bowls your own with our delightful variations!

  • Vegetarian Option: Substitute shrimp with tofu or chickpeas for a hearty, protein-packed version that everyone can enjoy. It’s equally satisfying and will absorb the delicious flavors beautifully.

  • Additional Veggies: Mix in bok choy, carrots, or even spinach for a nourishing veggie boost. Experimenting with your favorite seasonal vegetables can elevate the dish and add extra color!

  • Spicy Twist: Kick up the heat by adding sriracha or a sprinkle of crushed red pepper flakes. A splash of lime juice also adds a refreshing zing that brightens the entire bowl.

  • Grain Swap: Try using quinoa or farro instead of jasmine rice for a different texture and added nutrition. Both grains provide a nutty twist and pair wonderfully with shrimp.

  • Nutty Flavor: Incorporate chopped peanuts or cashews for a delightful crunch. Their natural richness will complement the savory shrimp and sauce perfectly.

  • Sauce Variations: Switch up your sauce with teriyaki or sweet chili sauce for a different flavor profile. Each brings its own twist, allowing for endless personalization!

  • Fresh Herb Boost: Experiment with fresh herbs like basil or mint if cilantro isn’t your favorite. These herbs can provide a refreshing contrast to the savory elements of the dish.

With these variations, your Shrimp Rice Bowls can be as unique as you are! For more ideas on how to play with flavors, check out our recipes for Delicious Vegetarian Bowls or Exciting Grain Alternatives. Happy cooking!

Make Ahead Options

These Easy Shrimp Rice Bowls are perfect for meal prep, allowing you to enjoy vibrant, homemade meals throughout the week! You can cook the jasmine rice and sauté the shrimp and vegetables up to 3 days in advance. Just store the rice in an airtight container in the refrigerator to keep it fluffy and prevent drying out. For the shrimp and veggies, let them cool before refrigerating, and sauté them fresh to keep that delightful texture upon serving. When you’re ready to enjoy, simply reheat the shrimp and veggies in a skillet, assemble the bowls with the rice, and drizzle with sauce. This way, you’ll indulge in restaurant-quality results with minimal effort!

What to Serve with Easy Shrimp Rice Bowls

Elevate your dinner experience by exploring delightful sides that complement the vibrant flavors of this quick weeknight meal.

  • Creamy Mashed Potatoes: The rich creaminess balances the bowl’s textures, adding comfort to each bite.

  • Garlic Bread: Crispy and warm, this bread enhances the meal’s charm while soaking up delicious sauces from the rice bowls.

  • Steamed Broccoli: Bright green and perfectly tender, this veggie adds a nutritious crunch that echoes the freshness of your shrimp bowls.

  • Asian Cucumber Salad: Refreshing and tangy, this salad introduces a zesty contrast to the warm, savory shrimp, enhancing every bite with brightness.

  • Mango Salsa: Sweet and spicy, mango salsa brings a tropical flair, perfectly harmonizing with the shrimp and adding a pop of color.

  • Lychee Iced Tea: Light and fragrant, this sweet drink offers a refreshing palate cleanse between bites, enhancing your coastal dining experience.

  • Chocolate Mousse: End your meal with this creamy, decadent dessert that provides a luscious finish to your flavorful shrimp journey. The rich taste complements the vibrant flavors.

These pairings will round out your Easy Shrimp Rice Bowls meal beautifully, ensuring a delightful dining experience.

How to Store and Freeze Shrimp Rice Bowls

Fridge: Store leftovers in airtight containers in the fridge for up to 3 days. This will help maintain their freshness while allowing for convenient meal prep.

Freezer: For longer storage, place cooled shrimp rice bowls in freezer-safe containers, and freeze for 1-2 months. To enjoy later, thaw in the refrigerator overnight before reheating.

Reheating: Reheat in the microwave or on the stovetop, adding a splash of water or broth to maintain moisture. Heat until warmed through, usually about 2-3 minutes.

Serving Freshness: Shrimp Rice Bowls are best enjoyed fresh, but with proper storage, you can savor their deliciousness even days later!

Expert Tips for Shrimp Rice Bowls

Perfect Cooking Time: Ensure shrimp are not overcooked; they should turn pink and opaque within 3-4 minutes to avoid rubberiness.

Broth for Flavor: Cook your jasmine rice in low-sodium chicken broth instead of water to significantly enhance the flavor of your simple dish.

Customize Heat Levels: If you prefer spice, adjust the chili paste carefully; start with a smaller amount and gradually add more to suit your taste.

Non-Stick Skillet: Using a non-stick skillet can help prevent sticking and make cleanup a breeze, ensuring your shrimp rice bowls turn out beautifully.

Vegetable Variations: Feel free to substitute snap peas with other veggies like broccoli or zucchini; mixing colors will make your shrimp rice bowls more vibrant and appealing!

Shrimp Rice Bowls Recipe FAQs

What type of shrimp should I use for this recipe?
Absolutely! For the best flavor and texture, use large, peeled and deveined shrimp. Fresh shrimp is always recommended, but if you opt for frozen, just ensure it’s fully thawed before cooking to achieve that succulent bite.

How should I store leftover Shrimp Rice Bowls?
Store your leftover Shrimp Rice Bowls in airtight containers in the refrigerator for up to 3 days. This helps to maintain freshness and flavor, making for convenient meal prep throughout the week. Just remember to let them cool down before sealing!

Can I freeze Shrimp Rice Bowls?
Yes! To freeze, place cooled shrimp rice bowls in freezer-safe containers and store them for around 1-2 months. When you’re ready to enjoy, thaw them in the refrigerator overnight. For reheating, add a splash of water to keep them moist and heat until warmed through, about 2-3 minutes in the microwave or on the stovetop.

What if I don’t have some of the ingredients?
Very! Feel free to be creative with your ingredients! If you’re out of any vegetables, you can swap in others like broccoli, carrots, or zucchini. For protein, tofu or chickpeas make great vegetarian substitutions. The beauty of Shrimp Rice Bowls lies in their customizability, so don’t hesitate to mix and match based on what you have on hand.

Can I use other types of rice?
Sure thing! While jasmine rice is traditionally used, brown rice is a healthier alternative. It’ll take a bit longer to cook (about 45-50 minutes), so just be mindful of that if you’re making a switch. Quinoa is also a fantastic gluten-free option, adding a unique texture to your meal!

Is this recipe suitable for kids or those with allergies?
Absolutely! You can adjust the recipe by reducing or omitting the chili paste for a milder flavor that kids will love. Additionally, if anyone has seafood allergies, simply replace the shrimp with tofu or another protein. Each ingredient can be tailored to suit dietary needs, making Shrimp Rice Bowls a family-friendly meal!

undefined

Delicious Shrimp Rice Bowls: Your Quick Weeknight Delight

Discover the vibrant and customizable shrimp rice bowls, perfect for busy weeknights with a burst of flavor.
Prep Time 10 minutes
Cook Time 20 minutes
Resting Time 5 minutes
Total Time 35 minutes
Servings: 4 bowls
Course: Dinner
Cuisine: Asian
Calories: 400

Ingredients
  

For the Base
  • 1 pound large peeled and deveined shrimp
  • 1 cup jasmine rice can substitute with brown rice
For the Cooking Liquid
  • 1.5 cups water or low-sodium chicken broth
For Sautéing
  • 2 tablespoons olive oil or sesame oil
  • 3 cloves minced garlic
  • 1 tablespoon grated fresh ginger
For the Vegetables
  • 1 large chopped red bell pepper can substitute with zucchini or other bell pepper
  • 1 cup snap peas can use broccoli or green beans
  • 1 cup corn kernels fresh or frozen
For Flavor and Seasoning
  • 3 tablespoons soy sauce low-sodium preferred
  • 1 tablespoon sesame oil optional
  • 2 tablespoons rice vinegar can substitute with apple cider vinegar
  • to taste chili paste adjust for heat preference
  • to taste salt
  • to taste pepper
For Garnish
  • 2 tablespoons sliced green onions chives can be used instead
  • 2 tablespoons fresh cilantro optional
  • 1 tablespoon sesame seeds optional, for texture

Equipment

  • medium saucepan
  • Large skillet
  • Measuring cups
  • Measuring spoons
  • Cutting board
  • Knife

Method
 

Step-by-Step Instructions
  1. Rinse the jasmine rice under cold water until the water runs clear. In a medium saucepan, combine the rice with water or low-sodium chicken broth. Bring to a boil over medium-high heat.
  2. Once boiling, reduce heat to low, cover with a lid, and let it simmer for 15-20 minutes or until the water is absorbed. Let sit covered for an additional 5 minutes.
  3. In a large skillet, heat olive oil over medium heat. Add minced garlic and grated ginger. Sauté for about 1 minute until fragrant.
  4. Add chopped red bell pepper and snap peas to the skillet. Stir-fry for about 3-4 minutes until just tender but still crisp.
  5. Add the large shrimp to the skillet and cook for about 3-4 minutes until they turn pink and opaque.
  6. Fold in corn kernels and heat through for another 2 minutes.
  7. Whisk together soy sauce, sesame oil, rice vinegar, and chili paste in a small bowl. Pour over the shrimp and vegetable mixture, stirring to combine.
  8. Assemble the bowls with a scoop of jasmine rice topped with the shrimp and vegetable mixture. Garnish with green onions, sesame seeds, and cilantro.
  9. Serve warm, enjoy immediately or store leftovers for meal prep.

Nutrition

Serving: 1bowlCalories: 400kcalCarbohydrates: 45gProtein: 30gFat: 15gSaturated Fat: 2gCholesterol: 150mgSodium: 800mgPotassium: 600mgFiber: 4gSugar: 3gVitamin A: 500IUVitamin C: 30mgCalcium: 40mgIron: 2mg

Notes

These Shrimp Rice Bowls are customizable and excellent for meal prep, storing well in the fridge for up to 3 days.

Tried this recipe?

Let us know how it was!

Quick Korean Beef Bowls for a Tasty Weeknight Dinner

“Crispy edges, savory aromas, and a touch of sweetness—this is what you can expect with my Quick Korean Beef Bowls. In just 15 minutes, you can whisk your family away on a culinary adventure to Korea, minus the elaborate prep and fuss! This cheater version of bulgogi is not only delicious but also customizable, allowing you to swap proteins as you like. Whether it’s ground beef, chicken, or even tofu, these bowls make weeknight dinners a breeze and are a surefire hit with kids and adults alike. Plus, they’re perfect for meal prep: whip up a batch, tuck it in the fridge, and you have satisfying lunches or dinners ready to go. Hungry yet? Let’s dive into how to create magic with just a few ingredients!”

Why is Korean Beef Bowl a Must-Try?

Quick Preparation: With just 15 minutes, you can create a delightful dish that eliminates the wait for takeout.
Customizable Ingredients: Easily swap ground beef for chicken, turkey, or tofu to suit every palate in your family.
Savory Sweetness: A perfect blend of spices, like garlic and ginger, ensures each bite is packed with flavor.
Meal Prep Friendly: Make a big batch and enjoy it for lunch or dinner throughout the week. These bowls can be stored easily!
Family Favorite: Kids and adults alike will love these hearty bowls, making mealtime enjoyable for everyone! Discover more meal ideas like this with easy weeknight dinners.

Korean Beef Bowl Ingredients

For the Sauce
Brown SugarAdds sweetness to balance the savory flavors; substitute with honey or coconut sugar if needed.
Reduced Sodium Soy SauceDelivers umami without too much salt; regular soy sauce can replace it if preferred.
Sesame OilInfuses a nutty aroma into the dish; you can use olive oil as a substitute.
Crushed Red-Pepper FlakesIntroduce spice; adjust the amount to meet your preferred heat level.
Ground GingerEnhances flavor with warming notes; fresh ginger can be used for an extra kick.

For the Beef Bowl
Vegetable OilIdeal for cooking beef; canola or avocado oil are great alternatives.
GarlicProvides a delightful aromatic flavor; fresh minced garlic is best but garlic powder works in a pinch.
Ground BeefThe main protein source that gives a hearty texture; you can substitute it with ground turkey, chicken, or tofu for a lighter option.
Green OnionsAdds freshness and delightful crunch; feel free to use finely sliced scallions or chives.
Sesame SeedsPerfect for garnishing, adding a toasty flavor; optional but highly recommended for that beautiful presentation.

Step‑by‑Step Instructions for Quick Korean Beef Bowls

Step 1: Prepare the Sauce
In a small bowl, whisk together brown sugar, reduced sodium soy sauce, sesame oil, crushed red-pepper flakes, and ground ginger until smooth. This mixture will be the flavor base for your Quick Korean Beef Bowls. Set it aside, allowing the flavors to meld while you prepare the beef.

Step 2: Heat the Skillet
On medium-high heat, warm 1 tablespoon of vegetable oil in a large cast-iron skillet until shimmering, about 2 minutes. This step is crucial to achieving that lovely sear on your ground beef. Keep an eye on the oil so it doesn’t smoke, indicating it’s too hot.

Step 3: Sauté the Garlic
Add 2 cloves of minced garlic to the hot skillet and sauté for about 1 minute, stirring constantly. You’ll know it’s ready when the garlic becomes fragrant and lightly golden. This aromatic foundation enriches the flavors in your Quick Korean Beef Bowls.

Step 4: Cook the Ground Beef
Introduce 1 pound of ground beef into the skillet, using a spatula to break it apart as it cooks. Allow it to brown for 3 to 5 minutes, stirring occasionally. The beef should be fully cooked and no longer pink; draining any excess fat enhances the dish’s flavor.

Step 5: Combine the Sauce and Beef
Pour the prepared sauce over the cooked ground beef. Add the sliced green onions and stir well to incorporate, cooking for an additional 2 minutes. The sauce should bubble gently as it heats, infusing the beef with rich flavors for your Korean Beef Bowls.

Step 6: Serve and Garnish
Remove the skillet from the heat, and serve your Quick Korean Beef Bowls immediately. If desired, garnish with extra sliced green onions and sesame seeds for a pop of color and crunch. Pair with fluffy rice or your favorite side to complete this satisfying meal.

Make Ahead Options

These Quick Korean Beef Bowls are fantastic for meal prep enthusiasts! You can make the sauce up to 24 hours in advance and store it in an airtight container in the refrigerator to save time when you’re ready to cook. Additionally, ground beef can be browned and mixed with the sauce up to 3 days ahead; simply refrigerate it in the same container. When ready to serve, just reheat the mixture in a skillet over medium heat until heated through (about 5 minutes), and serve with rice or your favorite vegetables for a quick, balanced meal. This not only ensures flavors meld beautifully but also allows for hassle-free dinners, making your busy nights a breeze!

Expert Tips for Quick Korean Beef Bowls

  • Choose the Right Protein: Opt for lean ground beef or swap it for turkey, chicken, or tofu based on your dietary preferences for the best Korean Beef Bowls.

  • Don’t Rush the Sear: Allow the beef to brown properly for 3-5 minutes before adding the sauce. This caramelization enhances the dish’s flavor significantly.

  • Adjust the Spice Level: Dust the dish with crushed red-pepper flakes according to your family’s taste. Start with less and add more for those who enjoy heat.

  • Fresh is Best: Always use fresh minced garlic for a vibrant, aromatic flavor in your bowls. Garlic powder can work in a pinch but won’t provide the same punch.

  • Meal Prep Tip: Make extra sauce and store it separately to incorporate more flavor into any leftovers. This keeps your Quick Korean Beef Bowls satisfying all week long.

Variations & Substitutions

Feel free to embrace your creativity as you customize this recipe to suit your taste buds and dietary needs!

  • Dairy-Free: Use coconut aminos instead of soy sauce for a soy-free, dairy-free option that retains great flavor.
  • Gluten-Free: Swap reduced sodium soy sauce for tamari to easily make these bowls gluten-free without sacrificing taste.
  • Plant-Based: Replace ground beef with seasoned tofu or tempeh for a satisfying plant-based alternative that’s just as delicious.
  • Vegetable Boost: Add in your favorite stir-fry vegetables like bok choy or snap peas for an extra crunch and vibrant nutrition.
  • Heat It Up: Incorporate fresh chilies or sriracha into the sauce for a fiery kick that can appease spice lovers.
  • Flavor Twist: Elevate your flavor by adding a splash of rice vinegar or lime juice for a refreshing zesty zing.
  • Nutty Goodness: Top with crushed peanuts or cashews for an extra layer of texture and crunch that complements the dish beautifully.
  • Rice Alternatives: Serve over cauliflower rice or quinoa to give this recipe a nutritious twist without the carbs.

With these delightful variations, you can continue creating new versions of your Quick Korean Beef Bowls that will keep your family excited at mealtime! Looking for more inspiration? Check out these easy weeknight dinners or explore how to make a delicious vegetable stir-fry alongside your beef bowls for a well-rounded meal.

What to Serve with Quick Korean Beef Bowls

Crispy, savory flavors and mouthwatering aromas can inspire a whole meal experience—let’s elevate your dinner together!

  • Steamed Broccoli: A classic pairing, its bright green color and crunch balance the dish’s richness while adding nutrients.

  • Fluffy White Rice: The ultimate base, soaking up the savory sauce and providing a comforting texture that complements the beef perfectly.

  • Quick Kimchi: This tangy, spicy side adds an authentic touch and a zing that contrasts beautifully with the savory beef bowls.

  • Asian Slaw: A fresh mix of cabbage and carrots offers a crunchy texture and vibrant flavors that brighten your meal and add a refreshing crunch.

  • Cucumber Salad: Crisp cucumbers drizzled with soy and sesame add a delightful contrast in temperature and texture, enhancing the savory experience of each bite.

  • Fried Eggs: Topping your bowl with a runny fried egg introduces a creamy richness that beautifully melds with all the flavors and gives it an extra indulgent twist.

  • Sparkling Water: This effervescent drink can cleanse your palate between bites, refreshing your senses while enjoying your Korean Beef Bowls.

  • Mango Sticky Rice: For a sweet finish, this dessert balances the meal’s savory notes and leaves everyone with a satisfied smile.

How to Store and Freeze Korean Beef Bowls

Fridge: Store your leftover Korean Beef Bowls in an airtight container for up to 2-3 days. This keeps the flavors intact and ensures a tasty meal is just a reheat away!

Freezer: For longer storage, freeze the beef mixture in an airtight container for up to 3 months. Thaw in the refrigerator overnight before reheating to keep the consistency perfect.

Reheating: Reheat on the stovetop over medium heat, adding a splash of water for moisture. This prevents the beef from drying out and keeps it juicy upon serving again.

Make-Ahead: Prepare the sauce and cook the beef a day in advance. Store them separately in the fridge to save time during your busy weeknight dinners!

Quick Korean Beef Bowls Recipe FAQs

What type of beef should I use for Korean Beef Bowls?
Absolutely! Ground beef is typically used for its hearty texture, but feel free to swap it out for ground turkey, chicken, or even tofu if you’re looking for a lighter or vegetarian option. Each protein brings its own flavor and texture to the dish, allowing you to customize it to your liking.

How should I store leftover Korean Beef Bowls?
Leftovers can be stored in an airtight container in the refrigerator for up to 2-3 days. I recommend reheating on the stovetop over medium heat, adding a splash of water to keep the beef moist and flavorful. This way, your meal stays just as delicious as the first time you enjoyed it!

Can I freeze Korean Beef Bowls?
Certainly! For longer storage, freeze the beef mixture in an airtight container for up to 3 months. Be sure to thaw it in the refrigerator overnight before reheating. To ensure the beef doesn’t dry out when you reheat, warm it on the stovetop over medium heat and add a splash of water, mixing until heated through.

What are some common troubleshooting tips for Korean Beef Bowls?
If you find your dish is too salty, consider balancing it with a bit of sugar or honey. If it’s too sweet, adding a splash of vinegar can help neutralize the sweetness. And if the sauce isn’t thick enough, let it simmer uncovered for a few minutes to reduce and thicken to your preferred consistency.

Can I make Korean Beef Bowls gluten-free?
Very! To make this recipe gluten-free, simply substitute the reduced sodium soy sauce with tamari, which is a gluten-free option. This way, you can still enjoy the umami flavor without any of the gluten concerns. Plus, ensure any other ingredients you use, like sauces or marinades, are labeled gluten-free.

How do I know if my ingredients are fresh?
For the best taste, always use fresh ingredients! Look for ground beef with a bright red color and minimal marbling, and make sure your garlic is firm and not sprouting. If your green onions have wilted or brown tips, it’s time to toss them for the freshest flavor in your Quick Korean Beef Bowls!

undefined

Quick Korean Beef Bowls for a Tasty Weeknight Dinner

Quick Korean Beef Bowls offer crispy edges and savory sweetness in just 15 minutes, making them a perfect weeknight dinner option.
Prep Time 15 minutes
Cook Time 10 minutes
Total Time 25 minutes
Servings: 4 bowls
Course: Dinner
Cuisine: Korean
Calories: 450

Ingredients
  

For the Sauce
  • 2 tablespoons Brown Sugar Adds sweetness to balance the savory flavors; substitute with honey or coconut sugar if needed.
  • 1/4 cup Reduced Sodium Soy Sauce Delivers umami without too much salt; regular soy sauce can replace it if preferred.
  • 1 tablespoon Sesame Oil Infuses a nutty aroma into the dish; you can use olive oil as a substitute.
  • 1 teaspoon Crushed Red-Pepper Flakes Introduce spice; adjust the amount to meet your preferred heat level.
  • 1 teaspoon Ground Ginger Enhances flavor with warming notes; fresh ginger can be used for an extra kick.
For the Beef Bowl
  • 1 tablespoon Vegetable Oil Ideal for cooking beef; canola or avocado oil are great alternatives.
  • 2 cloves Garlic Provides a delightful aromatic flavor; fresh minced garlic is best but garlic powder works in a pinch.
  • 1 pound Ground Beef The main protein source that gives a hearty texture; you can substitute it with ground turkey, chicken, or tofu for a lighter option.
  • 2 stalks Green Onions Adds freshness and delightful crunch; feel free to use finely sliced scallions or chives.
  • 1 tablespoon Sesame Seeds Perfect for garnishing, adding a toasty flavor; optional but highly recommended for that beautiful presentation.

Equipment

  • large cast-iron skillet
  • small bowl

Method
 

Instructions
  1. In a small bowl, whisk together brown sugar, reduced sodium soy sauce, sesame oil, crushed red-pepper flakes, and ground ginger until smooth.
  2. On medium-high heat, warm 1 tablespoon of vegetable oil in a large cast-iron skillet until shimmering.
  3. Add 2 cloves of minced garlic to the hot skillet and sauté for about 1 minute, stirring constantly.
  4. Introduce 1 pound of ground beef into the skillet, using a spatula to break it apart as it cooks.
  5. Pour the prepared sauce over the cooked ground beef. Add the sliced green onions and stir well to incorporate, cooking for an additional 2 minutes.
  6. Remove the skillet from the heat, and serve your Quick Korean Beef Bowls immediately, garnishing with extra green onions and sesame seeds if desired.

Nutrition

Serving: 1bowlCalories: 450kcalCarbohydrates: 24gProtein: 32gFat: 25gSaturated Fat: 6gPolyunsaturated Fat: 7gMonounsaturated Fat: 10gCholesterol: 80mgSodium: 800mgPotassium: 500mgFiber: 2gSugar: 6gVitamin A: 500IUVitamin C: 3mgCalcium: 30mgIron: 3mg

Notes

These bowls can be stored easily, making them great for meal prep or quick weeknight dinners.

Tried this recipe?

Let us know how it was!

Tomato Spinach Shrimp Pasta: Light & Zesty Weeknight Wonder

As I tossed fresh spinach and plump, juicy tomatoes into a sizzling skillet, memories of sun-drenched Mediterranean coasts came flooding back. This Tomato Spinach Shrimp Pasta isn’t just another dinner; it’s a quick weeknight escape to sunnier shores, bringing warmth and comfort to your table. Packed with lean shrimp and vibrant veggies, this dish is not only a breeze to prepare but also a delightful way to nourish yourself and your loved ones. The flavors mingle beautifully, creating a light yet satisfying meal that feels indulgent without the heavy aftermath. Best of all, it’s flexible—swap in your favorite seasonal vegetables or proteins to make it your own! Are you ready to experience a taste of the Mediterranean at home?

What makes this pasta dish irresistible?

Simplicity and Speed: This Tomato Spinach Shrimp Pasta comes together in under 30 minutes, making it perfect for hectic weeknights.

Flavor-Packed Delight: Bursting with the fresh taste of the Mediterranean, each bite is a vibrant combination of shrimp, spinach, and juicy tomatoes.

Nutrient-Rich: Loaded with protein and vitamins from fresh ingredients, this dish is deliciously healthy and satisfying.

Versatile Options: Feel free to mix and match your favorite veggies or proteins, making it a unique dish every time. Check out how to include substitutes in your meals.

Crowd-Pleaser: Family and friends will rave about this dish, leaving them wanting seconds and thirds!

Tomato Spinach Shrimp Pasta Ingredients

• A delightful mix for your dish!

For the Pasta

  • Pasta – Choose any type you love, from spaghetti to gluten-free options; the choice is yours!

For the Main Ingredients

  • Shrimp – Succulent and protein-packed; always devein and remove tails for easy eating.
  • Fresh Spinach – Nutrient-rich and vibrant; substitute with kale or Swiss chard for a different flavor.
  • Tomatoes – Adds a touch of sweetness and acidity; cherry tomatoes can brighten the dish even more.
  • Garlic – A must for flavor; minced garlic will give you the best aroma and taste.

For Sautéing

  • Olive Oil – Extra virgin is preferred for richness; can be swapped with butter if you’re feeling indulgent.

Optional Extras

  • Parmesan Cheese – A sprinkle adds a nutty flavor; replace with nutritional yeast for a dairy-free touch.

Bring these ingredients together for a meal that not only satisfies but delights, offering a light, nutritious way to enjoy your dinner. Enjoy your Tomato Spinach Shrimp Pasta adventure!

Step‑by‑Step Instructions for Tomato Spinach Shrimp Pasta

Step 1: Cook Pasta
Start by bringing a large pot of salted water to a rolling boil over high heat. Add your preferred pasta to the boiling water and cook according to the package instructions, usually 8-10 minutes, until al dente. Once cooked, drain the pasta and set it aside, reserving a small cup of pasta water for later.

Step 2: Sauté Shrimp
In a large skillet, heat 2 tablespoons of extra virgin olive oil over medium heat. Add 3 minced garlic cloves and sauté for about 30 seconds until fragrant. Next, add the deveined shrimp to the pan and cook for 3-5 minutes, turning occasionally, until the shrimp turns pink and opaque. Remove the shrimp from the skillet and set aside.

Step 3: Add Vegetables
Using the same skillet, toss in the fresh spinach and diced tomatoes, stirring them gently for about 2-3 minutes. As the spinach wilts and the tomatoes start to soften, the vibrant colors and aromas will fill your kitchen. Make sure to scrape any bits left from the shrimp for added flavor.

Step 4: Combine Ingredients
Return the cooked shrimp to the skillet, along with the drained pasta. Gently toss everything together, allowing the wonderful flavors to meld for an additional 1-2 minutes. If the mixture seems dry, add a splash of the reserved pasta water to achieve your desired consistency.

Step 5: Season and Serve
Finally, season the Tomato Spinach Shrimp Pasta with salt and freshly cracked black pepper to taste. Spoon the vibrant dish onto plates, and finish with a generous sprinkle of freshly grated Parmesan cheese. Serve hot, possibly with garlic bread on the side for a delightful Mediterranean-inspired meal.

Make Ahead Options

These Tomato Spinach Shrimp Pasta are perfect for busy weeknights! You can prepare the pasta and sauté the shrimp in advance—up to 24 hours—to save precious time. Simply cook the pasta until al dente, drain, and toss with a bit of olive oil to prevent sticking; refrigerate in an airtight container. Sauté the shrimp separately with the garlic until just cooked, then store in the fridge as well. When you’re ready to serve, heat the shrimp, add the cooked pasta, and toss in the fresh spinach and tomatoes for a quick finish. This way, you’ll enjoy a delightful, fresh meal that feels just as satisfying, without the last-minute rush!

How to Store and Freeze Tomato Spinach Shrimp Pasta

Fridge: Store leftovers in an airtight container for up to 2 days. To keep the shrimp tender, reheat gently on the stove or microwave, adding a splash of water.

Freezer: For longer storage, freeze portions in airtight containers for up to 3 months. Thaw overnight in the fridge before reheating to maintain the dish’s texture.

Reheating: When reheating, avoid boiling as it can overcook the shrimp. Opt for low heat and stir frequently until warmed through.

Enjoying Leftovers: Revive the flavors by adding a squeeze of fresh lemon juice or a sprinkle of fresh herbs before serving your Tomato Spinach Shrimp Pasta.

Expert Tips for Tomato Spinach Shrimp Pasta

  • Perfect Shrimp: Avoid overcooking shrimp; they should be firm and opaque. Overcooking can lead to a rubbery texture—nobody wants that!

  • Ingredient Prep: Always devein and remove shrimp tails before cooking for a more enjoyable eating experience. Frozen shrimp should be thawed and patted dry for the best results.

  • Freshness Matters: Use fresh spinach and tomatoes for the most vibrant flavors. While you can substitute with frozen or canned, fresh ingredients truly elevate the dish.

  • Flavor Adjustments: Feel free to add a pinch of red pepper flakes for a little heat, balancing the dish’s lightness with a zesty kick.

  • Water Control: Don’t forget to reserve a bit of pasta water! It helps bring the dish together and creates a silky sauce that clings beautifully to the pasta.

What to Serve with Tomato Spinach Shrimp Pasta

Cozy up to a delightful spread that enhances the bright flavors of your Mediterranean meal.

  • Garlic Bread: The warm, buttery crunch perfectly complements the pasta, inviting you to savor every last bite.

  • Arugula Salad: With its peppery notes and citrusy dressing, this fresh salad adds a vibrant contrast, making every mouthful exciting.

  • Roasted Vegetables: A mix of seasonal veggies drizzled with olive oil brings a caramelized depth that rounds out the meal beautifully.

  • White Wine: A chilled glass of Sauvignon Blanc or Pinot Grigio pairs seamlessly, enhancing the dish’s freshness and flavor profile.

  • Lemon Sorbet: End your meal on a refreshing note; its light sweetness cleanses the palate and ties together the Mediterranean theme.

  • Chickpea Salad: Nutty chickpeas and fresh herbs provide a nutritious side that’s hearty yet light, echoing the main dish’s essence.

Tomato Spinach Shrimp Pasta Variations

Feel free to get creative and make this delicious dish your own with these fun modifications!

  • Chicken Swap: Replace shrimp with chicken breast for a heartier option. Grilled or sautéed, it adds an excellent flavor twist!

  • Chickpeas Option: For a plant-based protein, use chickpeas instead of shrimp. They’ll absorb the flavors beautifully and add a satisfying texture.

  • Veggie Boost: Toss in zucchini or bell peppers for extra color and nutrients. These veggies add not only healthy elements but also a delightful crunch!

  • Herbal Infusion: Fresh herbs like basil or oregano can boost the dish’s flavor. Adding them just before serving brings a burst of aromatics that feels like a garden-fresh gift.

  • Creamy Finish: Stir in a splash of cream or a dollop of ricotta for a richer sauce. This twist makes the dish decadently creamy without overpowering its light essence.

  • Spice it Up: Want a kick? Add a pinch of red pepper flakes or cayenne for heat. It’s a simple way to liven up your pasta experience.

  • Gluten-Free Noodles: Swap traditional pasta for gluten-free versions. This way, everyone can enjoy this vibrant dish, accommodating dietary needs.

  • Lemon Zest: A sprinkle of fresh lemon zest right before serving adds brightness. It elevates the dish with a refreshing finish that screams Mediterranean sunshine!

Feel inspired? Dive in and explore these variations, and don’t forget to check out ways to include substitutes in your meals for even more delicious options!

Tomato Spinach Shrimp Pasta Recipe FAQs

What type of tomatoes should I use for this dish?
Absolutely! Fresh tomatoes, particularly ripe and juicy varieties, like Roma or vine-ripened, work wonders. If those aren’t available, cherry tomatoes add a lovely pop of sweetness. For convenience, you can also use canned diced tomatoes; just drain them slightly to avoid excess moisture.

How should I store leftover Tomato Spinach Shrimp Pasta?
To keep your leftovers fresh, store them in an airtight container in the refrigerator for up to 2 days. Make sure you reheat gently, either on the stove or in the microwave, adding a splash of water to keep everything moist and prevent the shrimp from overcooking.

Can I freeze Tomato Spinach Shrimp Pasta?
Yes! For longer storage, you can freeze the pasta in airtight containers for up to 3 months. To freeze effectively, make sure the dish cools completely first. When you’re ready to enjoy it again, thaw overnight in the fridge and reheat on low heat to maintain that delightful texture.

What should I do if my shrimp turns out rubbery?
Very commonly, rubbery shrimp happens due to overcooking. Make sure to cook until the shrimp just turn pink and opaque—about 3-5 minutes. If you find yourself with frozen shrimp, always thaw and pat them dry before cooking to ensure the best texture.

Are there any dietary concerns I should consider?
Absolutely! If cooking for someone with allergies, ensure they don’t have seafood allergies before serving. For a healthier or dairy-free version, substitute the Parmesan with nutritional yeast or leave it out altogether; the dish will still be delicious!

What vegetables can I add to enhance the dish?
Feel free to get creative! Zucchini, bell peppers, or even broccoli can bring vibrant colors and additional nutrients to your Tomato Spinach Shrimp Pasta. Aim to sauté them alongside the spinach and tomatoes for a harmonious blend of flavors. The more the merrier!

undefined

Tomato Spinach Shrimp Pasta: Light & Zesty Weeknight Wonder

This Tomato Spinach Shrimp Pasta is a quick Mediterranean-inspired dish featuring shrimp, spinach, and tomatoes.
Prep Time 10 minutes
Cook Time 20 minutes
Total Time 30 minutes
Servings: 4 servings
Course: Pasta
Cuisine: Mediterranean
Calories: 400

Ingredients
  

For the Pasta
  • 8 ounces Pasta any type you love, from spaghetti to gluten-free options
For the Main Ingredients
  • 1 pound Shrimp deveined and tails removed
  • 4 cups Fresh Spinach can substitute with kale or Swiss chard
  • 2 cups Tomatoes diced, cherry tomatoes can be used
  • 3 cloves Garlic minced
For Sautéing
  • 2 tablespoons Olive Oil extra virgin preferred
Optional Extras
  • 1/4 cup Parmesan Cheese or nutritional yeast for a dairy-free option

Equipment

  • Large pot
  • Large skillet
  • Colander

Method
 

Cooking Instructions
  1. Bring a large pot of salted water to a rolling boil. Cook the pasta according to package instructions for 8-10 minutes until al dente. Drain and reserve some pasta water.
  2. Heat olive oil in a large skillet over medium heat. Sauté minced garlic for 30 seconds until fragrant. Add shrimp and cook for 3-5 minutes until pink and opaque. Remove from skillet.
  3. In the same skillet, add spinach and tomatoes, cooking for 2-3 minutes until spinach wilts and tomatoes soften.
  4. Return shrimp to the skillet and add pasta. Toss gently for 1-2 minutes, adding reserved pasta water if needed.
  5. Season with salt and pepper, and serve topped with Parmesan cheese.

Nutrition

Serving: 1servingCalories: 400kcalCarbohydrates: 45gProtein: 25gFat: 14gSaturated Fat: 3gPolyunsaturated Fat: 2gMonounsaturated Fat: 8gCholesterol: 170mgSodium: 900mgPotassium: 600mgFiber: 3gSugar: 5gVitamin A: 3000IUVitamin C: 45mgCalcium: 150mgIron: 3mg

Notes

This dish is versatile; feel free to add your favorite seasonal vegetables or proteins.

Tried this recipe?

Let us know how it was!

Miso Chili Noodles: A Flavor-Packed Weeknight Winner

A delightful aroma fills my kitchen as I mix the savory miso paste with a splash of spicy chili oil—this is the magic behind my Miso Chili Noodles. This dish is not only a quick and satisfying option for busy weeknights, but it also caters to anyone seeking a fresh alternative to boring takeout. The combination of chewy noodles, vibrant vegetables, and a flavorful sauce creates an unforgettable dining experience that’s both comforting and exciting. And the best part? These noodles can easily be made gluten-free and vegan, allowing everyone to indulge without compromise. Ready to spice up your dinner routine with a bold twist? Let’s dive into this delicious adventure together!

Why are Miso Chili Noodles a must-try?

Bold flavors: The luscious combination of rich miso and spicy chili oil creates a taste sensation that dances on your palate.

Quick preparation: This dish comes together in mere minutes, making it perfect for those busy weeknights when you crave something homemade.

Adaptable delight: Easily swap out ingredients to suit your dietary needs—whether you’re gluten-free, vegan, or just looking to use up veggies in your fridge!

Crowd pleaser: With a balance of flavor and texture, these noodles cater to every guest, making them an ideal choice for dinner parties or family meals.

Nutritional boost: Packed with vegetables and optional proteins, they not only satiate your hunger but also fuel your day. And, for creative ideas on variations, check out our tips on making this dish even more exciting with seasonal ingredients!

Miso Chili Noodles Ingredients

For the Sauce
Miso Paste – contributes a deep umami flavor; use white for sweetness or red for a bolder taste.
Chili Oil – adds a kick of heat; start with a small amount to tailor spice levels to your palate.

For the Noodles
Noodles (Udon or Knife-Cut) – serve as the hearty base; they hold the sauce beautifully; gluten-free options are readily available.

For the Vegetables
Bok Choy – enhances nutrition and adds crunch; feel free to substitute with your favorite greens.
Carrots – bring sweetness and color to the dish; cut them thinly for quick cooking.
Red Pepper – adds a vibrant flavor and a pop of color; choose fresh ones for the best taste.

For the Protein
Tofu – a fantastic plant-based protein boost that absorbs the sauce flavors; can be sautéed for a crispy texture.
Sautéed Mushrooms – earthy and umami-rich, perfect for texture and additional flavor depth.

Optional Garnishes
Sesame Seeds – sprinkle for a nutty crunch and extra visual appeal.
Cilantro – adds a fresh, herby note to brighten the dish.

Miso Chili Noodles are here to revolutionize your weeknight dinners, proving that homemade meals can be both delicious and effortless!

Step-by-Step Instructions for Miso Chili Noodles

Step 1: Prepare the Sauce
In a small mixing bowl, combine 2 tablespoons of miso paste with 1 tablespoon of chili oil. Use a whisk to blend until the mixture is smooth and creamy, ensuring no lumps remain. Set the sauce aside to allow the flavors to meld while you prepare the other components of your Miso Chili Noodles.

Step 2: Cook the Noodles
Bring a large pot of salted water to a rolling boil over medium-high heat. Add 8 ounces of udon or knife-cut noodles and cook according to the package instructions, usually around 6-8 minutes, until they are al dente. Once done, drain the noodles in a colander, rinsing briefly under cold water to stop the cooking process, then set them aside.

Step 3: Sauté the Vegetables
In a large non-stick pan or skillet, heat 1 tablespoon of oil over medium heat. Add sliced vegetables like bok choy, carrots, and red pepper, and sauté for 3-4 minutes until they become tender and vibrant in color. Stir occasionally for even cooking, allowing the natural flavors of the veggies to enhance your Miso Chili Noodles.

Step 4: Combine Ingredients
Once the vegetables are tender, add the drained noodles directly to the pan. Pour the prepared miso chili sauce over the noodles and vegetables. Toss everything together gently using tongs or a wooden spoon for about 2 minutes until the noodles are evenly coated with the sauce and heated through, forming a glossy and inviting dish.

Step 5: Serve and Garnish
Divide the Miso Chili Noodles among serving bowls. For an extra touch, sprinkle with sesame seeds and fresh cilantro leaves. You can also drizzle a bit more chili oil if you prefer additional heat. Serve your delicious creation immediately, and enjoy the vibrant flavors and textures!

What to Serve with Miso Chili Noodles

Enhance your dining experience by pairing these vivid miso chili noodles with delightful accompaniments that bring variety and balance.

  • Steamed Bok Choy: A vibrant side that adds freshness and crunch, balancing the dish’s heat beautifully.
  • Cucumber Salad: Crisp and refreshing, this salad offers a cool contrast to the warm noodles, perfect for cleansing the palate.
  • Roasted Brussels Sprouts: Their earthy flavor complements the umami notes in the noodles while adding a satisfying crunch.
  • Sesame Garlic Green Beans: Tender green beans drizzled with sesame oil and garlic enhance the dish’s depth without overwhelming the taste.
  • Savory Tofu Skewers: Grilled to perfection, these protein-rich skewers pair well with the noodles, reinforcing the meal’s hearty elements.
  • Mango Sticky Rice: For dessert, this sweet and creamy treat provides a delightful contrast to the spiciness, rounding off your meal with a tropical flair.

Expert Tips for Miso Chili Noodles

  • Taste as You Go: Always taste the miso chili sauce before adding in all the chili oil to avoid overpowering spice levels. Adjust to your liking!

  • Best Noodle Choice: Use knife-cut noodles for that desirable chewy texture; they hold the sauce better than regular noodles.

  • Veggie Variations: Don’t shy away from customizing the vegetables; use whatever is fresh in your fridge—bell peppers, snap peas, or even zucchini can elevate your miso chili noodles!

  • Make Ahead: If prepping for a future meal, store the sauce separately from the noodles to keep them from getting soggy. Simply combine when ready to serve.

  • Reheat with Care: When reheating leftovers, do so gently on the stovetop or in the microwave, adding a sprinkle of water if needed to maintain moisture while avoiding dryness.

How to Store and Freeze Miso Chili Noodles

Fridge: Store leftovers in an airtight container for up to 3 days. This helps retain the flavors and prevents the noodles from drying out.

Freezer: If you wish to freeze Miso Chili Noodles, place the noodles and sauce in separate freezer-safe bags for up to 2 months. This prevents sogginess upon thawing.

Reheating: Gently reheat noodles in a pan over low heat; add a splash of water to help restore moisture. You can also use a microwave, covering it to keep the steam in.

Sauce Storage: For best flavor retention, store the miso chili sauce separately, using it within a week for optimal taste.

Miso Chili Noodles Variations & Substitutions

Feel free to mix it up and create your own delicious twist on these Miso Chili Noodles that will tantalize your taste buds!

  • Gluten-Free Noodles: Use rice noodles or gluten-free pasta for a delightful alternative that still brings the flavor.

  • Vegan Protein: Swap in crispy chickpeas instead of tofu for a crunchy, plant-based protein option that will satisfy.

  • Add Crunch: Top with crushed peanuts or fried shallots to add an irresistible crunch and layers of flavor.

  • Extra Heat: Add a pinch of red pepper flakes or a squeeze of sriracha to infuse a little more spice into the mix.

  • Herb Infusion: Incorporate fresh Thai basil or mint for a refreshing herbal twist that brings brightness to your dish.

  • Vegetable Medley: Mix in seasonal vegetables like zucchini or snap peas for added nutrition and a pop of color.

  • Creamy Element: Stir in a tablespoon of coconut cream for a rich, creamy sauce that elevates the umami experience.

With so many options, you can truly make these noodles your own! And don’t forget to pair your dish with a side of fresh cucumber salad for a refreshing contrast to the spicy flavors. Enjoy experimenting!

Make Ahead Options

These Miso Chili Noodles are perfect for meal prep enthusiasts! You can prepare the miso chili sauce up to 24 hours in advance and store it in the refrigerator to meld those lovely flavors. Additionally, feel free to chop the vegetables and refrigerate them in an airtight container for up to 3 days. When you’re ready to serve, simply cook the noodles according to package instructions, sauté the vegetables until tender, then toss everything with the pre-made sauce for a piping-hot dish that’s just as delicious as when freshly made. This way, you save precious time on busy nights without sacrificing flavor!

Miso Chili Noodles Recipe FAQs

What type of miso paste should I use?
Absolutely! You can choose between white and red miso paste. White miso has a milder, sweeter flavor, perfect for those who prefer a subtle umami taste. Red miso, on the other hand, has a richer and bolder profile, making it suitable for those who want a more robust flavor in their Miso Chili Noodles. For a balanced approach, you can even mix them!

How should I store leftovers or prepared Miso Chili Noodles?
It’s very simple! Store any leftovers in an airtight container in the fridge for up to 3 days. This keeps them fresh and ready to enjoy again. If you want to maintain the quality, I recommend separating the sauce from the noodles, as this prevents the noodles from becoming soggy.

Can I freeze Miso Chili Noodles?
Certainly! To freeze, I suggest portioning the noodles and sauce into separate freezer-safe bags. This way, the flavors and textures stay intact. They can be frozen for up to 2 months. When you’re ready to enjoy them, thaw overnight in the refrigerator, then reheat gently on the stovetop or in the microwave. Just add a splash of water if they seem dry!

What are some common troubleshooting tips for this recipe?
If your Miso Chili Noodles turn out too salty, it could be the miso or the chili oil. To fix this, try adding a little more cooked noodle or vegetable to balance out the flavors. If they’re too spicy, a drizzle of sesame oil can help tone down the heat. Remember, tasting as you go is key to a satisfying dish!

Are there any dietary considerations I should be aware of?
Very much so! This recipe is adaptable for vegan and gluten-free diets. Simply choose gluten-free noodles and ensure the miso paste is gluten-free (some varieties contain barley). Always check the ingredients of your chili oil if you’re looking for specific dietary needs. Also, confirm the vegetables and toppings you use fit within any dietary restrictions you might have, like allergies to sesame seeds or cilantro.

How can I enhance the flavors of my Miso Chili Noodles?
For a flavor boost, consider adding fresh herbs like basil or mint or tossing in a splash of lime or rice vinegar just before serving. These bright notes can elevate the dish and add a delightful contrast to the savory sauce. You can also experiment with different types of vegetables or protein, ensuring every bowl is unique!

undefined

Miso Chili Noodles: A Flavor-Packed Weeknight Winner

Delicious miso chili noodles that are quick to prepare and cater to gluten-free and vegan diets.
Prep Time 10 minutes
Cook Time 15 minutes
Total Time 25 minutes
Servings: 2 bowls
Course: Dinner
Cuisine: Asian
Calories: 350

Ingredients
  

For the Sauce
  • 2 tablespoons miso paste use white for sweetness or red for bolder taste
  • 1 tablespoon chili oil start with a small amount to adjust spice levels
For the Noodles
  • 8 ounces udon or knife-cut noodles gluten-free options available
For the Vegetables
  • bok choy or substitute with favorite greens
  • carrots cut thinly for quick cooking
  • red pepper use fresh for best taste
For the Protein
  • tofu sautéed for a crispy texture
  • sautéed mushrooms for earthy flavor and texture
Optional Garnishes
  • sesame seeds for a nutty crunch
  • cilantro for freshness

Equipment

  • Mixing Bowl
  • Pot
  • Colander
  • Non-stick pan
  • whisk
  • Tongs

Method
 

Step-by-Step Instructions for Miso Chili Noodles
  1. In a small mixing bowl, combine miso paste with chili oil. Blend until smooth and creamy.
  2. Bring a large pot of salted water to a boil. Add noodles and cook until al dente, about 6-8 minutes. Drain and rinse under cold water.
  3. Heat oil in a non-stick pan over medium heat. Add sliced vegetables and sauté for 3-4 minutes until tender.
  4. Add drained noodles to the pan. Pour the miso chili sauce over and toss gently until heated through, about 2 minutes.
  5. Divide among serving bowls. Garnish with sesame seeds and cilantro. Serve immediately.

Nutrition

Serving: 1bowlCalories: 350kcalCarbohydrates: 60gProtein: 15gFat: 10gSaturated Fat: 1gPolyunsaturated Fat: 2gMonounsaturated Fat: 7gSodium: 600mgPotassium: 500mgFiber: 6gSugar: 3gVitamin A: 500IUVitamin C: 30mgCalcium: 100mgIron: 3mg

Notes

Homemade Miso Chili Noodles are quick and can be easily customized with seasonal vegetables.

Tried this recipe?

Let us know how it was!

Savory Slow-Cooked Chuck Roast Tacos: Family-Favorite Delight

“Can you believe that simple ingredients can transform into a taco night celebration?” These Easy Slow-Cooked Chuck Roast Tacos are a real game-changer, empowering you to swap out takeout for a delightful homemade feast. The slow cooking method yields super tender, juicy beef, while each taco offers the versatility to accommodate every family member’s topping preferences. You’ll love that these tacos are a quick prep option for busy evenings yet feel special enough to make any dinner feel festive. Plus, they’re a terrific opportunity to get creative with flavors—experiment with your favorite salsas, cheeses, or crunchy veggies! Ready to dive into a delicious twist on taco night?

Why Are These Tacos a Must-Try?

Simplicity reigns supreme in this recipe with minimal prep and cleanup, making it perfect for busy weeknights. Tender, Juicy Beef is the star, cooked low and slow, resulting in flavor that melts in your mouth. Versatile Toppings allow everyone at the table to customize their taco experience, from zesty salsa to creamy avocado. Quick Prep Time means more time enjoying dinner and less time slaving in the kitchen. Family Favorite status is guaranteed as these tacos bring everyone to the table for a delicious homemade meal. You’ll never look at takeout the same way again!

Slow-Cooked Chuck Roast Tacos Ingredients

For the Meat
Chuck Roast – The main protein, perfect for slow cooking due to its marbled fat that keeps the meat tender.

For the Seasoning
Olive Oil – Used for searing the roast to develop a rich flavor; can be swapped with vegetable or canola oil for a higher smoke point.
Chili Powder – A key spice that packs flavor; adjust based on preference or substitute with taco seasoning if needed.
Cumin – Adds warmth to the flavor profile; essential for authenticity but can be replaced with taco seasoning if desired.
Smoked Paprika – Provides a smoky depth; optional for those wanting a complex taste.
Oregano – Offers herbal notes; choose dried or fresh based on what you have.
Salt & Black Pepper – Basic seasonings that enhance overall flavor.

For the Aromatics
Onion – Adds aromatic flavor; switch yellow onion for red onion or shallots for a different touch.
Garlic – Deepens the dish’s flavor; fresh is best, but garlic powder will work in a hurry.

For Cooking Liquid
Beef Broth – Delivers moisture and richness to the dish; homemade is preferred, but store-bought works too. Chicken or vegetable broth can be lighter substitutes.

For Finishing Touch
Lime Juice – Brightens the final taco; a must-add for that zesty kick.

These slow-cooked Chuck Roast tacos blend convenience with exquisite flavor, making them a fantastic option for family meals. Enjoy customizing your feast with a variety of toppings!

Step‑by‑Step Instructions for Easy Slow-Cooked Chuck Roast Tacos

Step 1: Prep the Roast
Begin by heating 2 tablespoons of olive oil in a large skillet over medium-high heat. While the oil is heating, generously season the chuck roast with salt and black pepper on all sides. Once the oil is shimmering, you’re ready for the next step.

Step 2: Sear the Meat
Add the seasoned chuck roast to the hot skillet and sear it for 4-5 minutes on each side until it’s beautifully browned and develops a rich crust. This step enhances the flavor of your Easy Slow-Cooked Chuck Roast Tacos. Once seared, remove the roast from the skillet and set it aside.

Step 3: Combine in Cooker
Transfer the seared chuck roast to your slow cooker. Add one sliced onion, 4 minced garlic cloves, 1 cup of beef broth, 2 tablespoons of chili powder, 1 tablespoon of cumin, and any optional spices like smoked paprika and oregano. For an added twist, toss in a can of diced tomatoes if you like.

Step 4: Slow Cook
Cover the slow cooker and set it to cook on low for 7-8 hours or on high for 4-5 hours. You’ll know your Easy Slow-Cooked Chuck Roast Tacos are ready when the meat is fork-tender and shreds easily. This slow cooking allows all those delightful flavors to meld beautifully.

Step 5: Shred the Beef
Once cooked, carefully remove the roast from the slow cooker and place it on a large cutting board. Using two forks, shred the beef into bite-sized pieces, then return the shredded beef to the cooker, mixing it with the flavorful juices.

Step 6: Finish with Lime
To enhance the flavor of your shredded beef for the Easy Slow-Cooked Chuck Roast Tacos, stir in the juice from 1-2 limes. This adds a fresh, zesty kick that brightens up the dish and complements the savory beef perfectly.

Step 7: Prepare Tacos
Warm your tortillas according to the package instructions. Once heated, fill each tortilla with a generous portion of the shredded beef from the slow cooker. Finally, customize your tacos with your choice of toppings, from cheese and salsa to fresh veggies, making each bite delicious!

Easy Chuck Roast Tacos Variations

Feel free to explore your culinary creativity with these delightful twists on the classic taco recipe!

  • Brisket Swap: Replace chuck roast with brisket for a richer, buttery texture that melts in your mouth.

  • Spicy Kick: Add diced jalapeños or a splash of hot sauce to the beef mixture for an extra layer of excitement.

  • Herb Infusion: Incorporate fresh herbs like cilantro or parsley before serving for a pop of brightness and flavor.

  • Smoky Flavor: Include smoked chipotle powder in place of regular chili powder for a robust, smoky taste that delights the senses.

  • Taco Bar: Set up a toppings bar with options like sautéed bell peppers, pickled onions, or corn salsa, so everyone can build their perfect taco.

  • Vegetarian Delight: Swap beef for jackfruit or lentils, seasoned the same way, to create a fabulous vegetarian alternative.

  • Creamy Ranch Dressing: Drizzle ranch dressing over the assembled tacos for a creamy finish that adds an unexpected twist.

  • Wrap It Up: Instead of tortillas, use large lettuce leaves for a low-carb version that’s as crunchy as it is refreshing.

By rolling with these variations, you can transform your taco night into a culinary adventure that takes family meals to new heights. Don’t forget to explore creative toppings based on your family’s favorites!

How to Store and Freeze Easy Chuck Roast Tacos

Fridge: Store leftovers in an airtight container for up to 3-4 days. Reheat gently on the stovetop or in the microwave, adding a splash of broth to restore moisture.

Freezer: If you want to save them for later, freeze the shredded beef in a freezer-safe container or bag for up to 3 months. Thaw overnight in the fridge before reheating.

Reheating: When ready to enjoy your Easy Chuck Roast Tacos again, reheat in a skillet or microwave, ensuring it’s heated thoroughly before serving.

Wrapping: For best results, wrap any leftover tortillas separately to maintain their texture and prevent them from becoming soggy.

What to Serve with Easy Chuck Roast Tacos?

Elevate your taco night with delightful sides and beverages that complement the rich flavors of slow-cooked goodness.

  • Creamy Guacamole: The cool, creamy texture of fresh guacamole pairs perfectly with the savory beef, adding a refreshing contrast.

  • Zesty Cilantro Lime Rice: This aromatic rice dish brightens the meal, balancing the meatiness with a citrusy flavor profile.

  • Crispy Tortilla Chips: A crunchy textural element that can be enjoyed plain or with salsa for that perfect party dipper.

  • Fresh Corn Salad: The sweetness of corn combined with zesty lime and herbs offers a light, refreshing side that matches the bold tacos.

  • Pico de Gallo: A vibrant, tangy topping adds an extra layer of flavor to each bite, enhancing the overall taco experience.

  • Cheesy Mexican Street Corn: This rich and indulgent side adds a delightful sweetness and creaminess that complements the spiced beef.

  • Chilled Beer or Limeade: A cold drink option, whether a refreshing limeade or a chilled beer, can elevate your taco night to the next level.

  • Homemade Churros: End the meal with a sweet twist! These crispy, sugary snacks make a delightful dessert that leaves everyone satisfied.

Make Ahead Options

These Easy Chuck Roast Tacos are perfect for meal prep enthusiasts! You can prepare the chuck roast up to 24 hours in advance, seasoning and searing it as instructed, then refrigerate it tightly wrapped. While the slow cooker cooks the meat, feel free to chop your favorite toppings—veggies, cheese, or salsa—and store them in the fridge for easy access. When ready to serve, simply place the prepped ingredients in the slow cooker and follow the cooking instructions. This way, you’ll enjoy a delicious, home-cooked meal with minimal effort—even on the busiest weeknights. Just remember to use fresh toppings before serving so everything stays delightful and vibrant!

Expert Tips for Easy Chuck Roast Tacos

  • Slow Cooking Matters: Don’t rush the cooking time—allowing the chuck roast to cook low and slow enhances its tenderness and flavor, making your tacos unforgettable.

  • Searing is Key: Make sure to sear the meat properly; this step develops a rich flavor that elevates your tacos. Aim for a nice brown crust on all sides.

  • Customize Your Spices: Feel free to adjust the spices to suit your family’s taste. Adding extra chili powder or smoked paprika can give your Easy Chuck Roast Tacos a personal touch.

  • Lime is Essential: Don’t skip the lime juice. It brightens the overall dish and balances the richness of the meat, elevating the flavor profile.

  • Storage Made Simple: To store leftovers, place them in an airtight container for 3-4 days. Reheat gently with a splash of broth to restore moisture and flavor.

  • Creative Toppings: Experiment with various toppings like avocado, different cheeses, or fresh herbs. Your Easy Chuck Roast Tacos can be a new culinary adventure every time!

Easy Slow-Cooked Chuck Roast Tacos Recipe FAQs

How do I select the best chuck roast for my tacos?
Absolutely! Look for a chuck roast that has a good amount of marbling, which means there’s fat evenly distributed throughout the meat. This fat will melt during cooking, adding flavor and richness. Aim for a piece that has a deep red color, and avoid any with dark spots or excessive liquid packaging.

What’s the best way to store leftover tacos?
After dinner, store any leftover shredded beef in an airtight container and refrigerate. It’s best used within 3-4 days. To reheat, warm it gently on the stovetop, adding a splash of beef broth to restore moisture and flavor.

Can I freeze the cooked chuck roast for later use?
Very! To freeze your Easy Slow-Cooked Chuck Roast Tacos, let the shredded beef cool completely, then transfer it to a freezer-safe container or gallon-sized bag. It can be frozen for up to 3 months. When you’re ready to enjoy, simply thaw in the fridge overnight and reheat thoroughly before serving.

What if my beef isn’t shredding easily?
If your chuck roast isn’t shredding easily, it might need more cooking time. Make sure it’s cooked until fork-tender. If it seems a bit tough, put it back in the slow cooker on low for an additional 30 minutes to an hour to allow the meat fibers to break down further. Don’t rush the slow cooking; patience is key for maximum tenderness!

Are there any dietary considerations for this recipe?
Great question! If you have family members or guests with food allergies, be cautious with your seasoning and toppings. Ensure your beef broth is gluten-free if that’s a consideration, and opt for corn tortillas if gluten is a concern. Always check the labels of any store-bought spices or toppings to avoid allergens.

How can I adjust the spice level in my tacos?
Want it spicier? You can absolutely adjust the chili powder in the recipe! Start with a little less than specified and taste as it cooks. If you prefer more heat, consider adding diced jalapeños or a dash of hot sauce when serving. Remember, the more you taste as you go, the better control you’ll have over the flavors of your Easy Slow-Cooked Chuck Roast Tacos!

undefined

Savory Slow-Cooked Chuck Roast Tacos: Family-Favorite Delight

Easy Slow-Cooked Chuck Roast Tacos transform simple ingredients into a delightful taco night celebration.
Prep Time 15 minutes
Cook Time 8 hours
Total Time 8 hours 15 minutes
Servings: 6 tacos
Course: Dinner
Cuisine: Mexican
Calories: 300

Ingredients
  

For the Meat
  • 1 lb Chuck Roast Main protein
For the Seasoning
  • 2 tbsp Olive Oil Can substitute with vegetable or canola oil
  • 2 tbsp Chili Powder Adjust based on preference
  • 1 tbsp Cumin Essential for authenticity
  • 1 tsp Smoked Paprika Optional for added flavor
  • 1 tsp Oregano Choose dried or fresh
  • 1 tsp Salt
  • 1 tsp Black Pepper
For the Aromatics
  • 1 Onion Sliced, can substitute onion type
  • 4 cloves Garlic Minced, fresh preferred
For Cooking Liquid
  • 1 cup Beef Broth Homemade preferred
For Finishing Touch
  • 1-2 tbsp Lime Juice To taste

Equipment

  • Large skillet
  • Slow Cooker
  • Cutting board

Method
 

Step-by-Step Instructions
  1. Prep the Roast: Heat 2 tablespoons of olive oil in a large skillet over medium-high heat. Season the chuck roast with salt and black pepper on all sides.
  2. Sear the Meat: Add the seasoned chuck roast to the skillet and sear for 4-5 minutes on each side until browned.
  3. Combine in Cooker: Transfer the seared chuck roast to your slow cooker. Add sliced onion, minced garlic, beef broth, chili powder, cumin, and optional spices.
  4. Slow Cook: Cover and set the slow cooker to cook on low for 7-8 hours or high for 4-5 hours.
  5. Shred the Beef: Remove the roast from the slow cooker and shred the beef into bite-sized pieces, then return to the cooker.
  6. Finish with Lime: Stir in the juice from 1-2 limes to enhance the flavor.
  7. Prepare Tacos: Warm your tortillas and fill each with a portion of the shredded beef, then customize with toppings.

Nutrition

Serving: 1tacoCalories: 300kcalCarbohydrates: 20gProtein: 24gFat: 15gSaturated Fat: 4gPolyunsaturated Fat: 1gMonounsaturated Fat: 10gCholesterol: 80mgSodium: 600mgPotassium: 450mgFiber: 3gSugar: 1gVitamin A: 2IUVitamin C: 10mgCalcium: 4mgIron: 15mg

Notes

Don't rush the cooking time; allowing the chuck roast to cook low and slow enhances tenderness and flavor.

Tried this recipe?

Let us know how it was!

Crispy Coconut Shrimp Tacos That Will Brighten Your Evenings

A sudden craving hit me as I watched beachgoers devour vibrant, tropical tacos from a nearby food truck. That delicious moment inspired my creation: Crispy Coconut Shrimp Tacos with Spicy Lime Sauce. Each bite offers an inviting blend of sweet coconut and crispy shrimp topped with fresh veggies and a zesty sauce that’ll have your taste buds dancing. These tacos are not only quick to prep, making them a great option for busy weeknights, but they also shine as a crowd-pleaser for casual gatherings. Plus, if you’re looking to mix things up, I’ll share how to easily switch out the shrimp for chicken or even coconut tofu for a delightful vegetarian twist. Ready to embark on a culinary adventure that transports you straight to a tropical paradise? Let’s dive in!

Are You Ready for a Flavor Adventure?

Simplicity: This recipe is easy to whip up, perfect for busy weeknights or spontaneous gatherings.

Tropical Twist: The crispy coconut shrimp paired with spicy lime sauce brings vacation vibes to your dinner table.

Customizable: Swap the shrimp for chicken or coconut tofu to suit your dietary needs while still enjoying a vibrant flavor profile.

Crowd-Pleasing Delight: With fresh veggies and an irresistible sauce, these tacos are bound to impress friends and family, making them the star of any gathering.

Nutritional Balance: Packed with protein and healthy fats, it’s easier to indulge without any guilt! Looking for something lighter? Dive into our ideas for using lettuce wraps instead of tortillas.

Crispy Coconut Shrimp Taco Ingredients

• Get ready to gather the essentials for your delicious taco night!

For the Shrimp

  • Shrimp – Use large, peeled, and deveined shrimp for the best seafood flavor.
  • Panko Breadcrumbs – These add an extra crunch; you can substitute with regular breadcrumbs for a softer texture.
  • Shredded Coconut – Unsweetened coconut is preferred to balance the savory elements beautifully.
  • Flour – Any all-purpose flour works great as a base for the coating.
  • Egg – Acts as a binder; a flax egg is a perfect vegan substitute.

For the Spicy Lime Sauce

  • Mayonnaise or Greek Yogurt – This creates a creamy sauce base; opt for Greek yogurt for a lighter option.
  • Lime Juice – Freshly squeezed lime juice is key to adding tang and brightness to the sauce.
  • Hot Sauce – Adjust heat to your liking, or use chili paste for an extra kick.
  • Honey – Sweetens the sauce to balance out the heat; feel free to swap it with maple syrup for a vegan alternative.

For the Toppings

  • Cabbage – Shredded cabbage adds crunch and color to the tacos.
  • Carrots – Use shredded or julienned carrots for an additional snap and sweetness.
  • Avocado – Adds creaminess; substitute it for salsa if you prefer.
  • Fresh Cilantro & Lime Wedges – Use these for garnishing, elevating both flavor and presentation!

With these vibrant and flavorful Crispy Coconut Shrimp Taco ingredients, your culinary adventure is just around the corner! Enjoy every bite and savor the tropical bliss!

Step‑by‑Step Instructions for Crispy Coconut Shrimp Tacos with Spicy Lime Sauce

Step 1: Prepare the Spicy Lime Sauce
In a mixing bowl, combine ½ cup of mayonnaise or Greek yogurt with the juice of 2 limes, 1 tablespoon of honey, 1 teaspoon of minced garlic, and several dashes of your favorite hot sauce. Whisk until smooth and creamy, adjusting the hot sauce to taste based on your desired spice level. Set aside the spicy lime sauce while you prepare the shrimp, allowing the flavors to meld beautifully.

Step 2: Coat the Shrimp
Set up a breading station with three shallow bowls: one for ½ cup of all-purpose flour, another for 2 beaten eggs, and the last for a mixture of 1 cup panko breadcrumbs and 1 cup shredded unsweetened coconut. Pat the shrimp dry, then dredge each piece in flour, dip into the egg, and finally coat it in the coconut-panko mixture, ensuring an even coating for that perfect crunch.

Step 3: Fry the Shrimp
Heat about ½ inch of vegetable oil in a large skillet over medium heat until it reaches 350°F, ideal for frying. Carefully place the coated shrimp in the hot oil, making sure not to overcrowd the pan. Fry for 2-3 minutes on each side until they are golden brown and crispy. Once cooked, transfer the shrimp to a paper towel-lined plate to drain excess oil while you warm the tortillas.

Step 4: Assemble the Tacos
Warm the tortillas in a separate dry skillet over low heat until pliable, about 30 seconds per side. To assemble the tacos, layer each tortilla with a handful of shredded cabbage, a sprinkle of julienned carrots, and the crispy coconut shrimp. Drizzle generously with the spicy lime sauce, and finish with slices of avocado and fresh cilantro for a burst of color and flavor.

Step 5: Serve
Serve the tacos immediately, with extra lime wedges on the side for squeezing over your Crispy Coconut Shrimp Tacos. For a refreshing drink pairing, consider serving with mango margaritas or chilled coconut water to complement the vibrant tropical flavors of the meal. Enjoy the delightful fusion of tastes and textures!

What to Serve with Crispy Coconut Shrimp Tacos with Spicy Lime Sauce

If you’re dreaming of a tropical feast to accompany your delicious tacos, look no further!

  • Zesty Mango Salad: A light, refreshing salad with cubed mango and lime juice enhances the tropical experience.

  • Creamy Avocado Rice: Fluffy rice blended with creamy avocado offers a wonderful texture contrast to the crispy tacos.

  • Fresh Pineapple Salsa: Its sweet and tangy flavors mesh excellently with the shrimp’s savory notes, adding brightness to each bite.

  • Crispy Plantain Chips: The crispy texture brings a delightful crunch that pairs well with the soft tortillas and succulent shrimp.

  • Mango Margaritas: A tropical drink that complements the sweet notes of the shrimp and adds a festive vibe to your meal.

  • Coconut Water: Keep it refreshing and hydrating; this drink echoes coconut flavors in the shrimp while providing a delightful tropical touch.

  • Cilantro Lime Quinoa: This protein-packed side, topped with tangy cilantro and lime, matches the taco’s vibrant flavors beautifully.

These selections will not only bolster your dining experience but will truly transport you to a sandy beach, making every meal a mini-vacation!

How to Store and Freeze Crispy Coconut Shrimp Tacos

Fridge: Store the crispy shrimp and toppings separately in airtight containers for up to 2 days to maintain their fresh taste and texture.

Freezer: If you have leftover shrimp, freeze them in a single layer on a baking sheet before transferring to a freezer bag for up to 2 months.

Reheating: For the best results, reheat frozen shrimp in an oven at 400°F for about 10-12 minutes until crispy again.

Sauce Storage: Keep the spicy lime sauce in the fridge in an airtight container for up to 4 days; give it a good stir before using.

Helpful Tricks for Crispy Coconut Shrimp Tacos

Oil Temperature Matters: Maintain the oil around 350°F for perfect crispiness; too hot can burn the shrimp, while too cool leads to sogginess.

Double Coating Bonus: For an extra crunch, double-coat the shrimp—first with flour, then egg, and finally the coconut-panko mixture before frying.

Make-Ahead Convenience: Prep the spicy lime sauce and shrimp coating in advance to save time. Store them separately until ready to fry.

Freshness Storage: Keep leftover shrimp and toppings stored separately to maintain optimal freshness. Consume shrimp within 1-2 days for best quality, and sauce lasts 3-4 days.

Thawing Tip: Ensure frozen shrimp are thoroughly dried after thawing to avoid unwanted moisture that can easily ruin the crispiness.

Variations & Substitutions for Crispy Coconut Shrimp Tacos

Feel free to let your creativity shine and customize these tacos to suit your tastes and dietary preferences!

  • Chicken Option: Swap shrimp for chicken strips, seasoned and fried similarly for a hearty alternative.
    Elevate the flavors with a light marinade of lime juice and spices before coating.

  • Coconut Tofu: For a plant-based delight, replace shrimp with extra-firm coconut tofu.
    Simply press, cube, and coat the tofu similarly for a delicious vegetarian taco option.

  • Gluten-Free: Use gluten-free panko breadcrumbs for a crunchy coating that fits gluten-free needs.
    This keeps the crispy texture without sacrificing flavor; consider corn tortillas as well!

  • Extra Crunch: For double the crunch, try double-coating your shrimp!
    Just dredge in flour, dip in egg, and then coat again in the coconut-panko mix before frying.

  • Flavor Boosts: Add spices like smoked paprika or cayenne pepper to the flour for an extra flavor kick.
    This not only adds depth but can also elevate the heat level to suit your spice tolerance.

  • Topping Twist: Experiment with toppings! Try fresh mango salsa, pickled red onions, or even a zesty coleslaw.
    These vibrant additions can enhance your taco’s crunch and bring a refreshing contrast.

  • Heat Levels: Adjust the hot sauce quantity in the spicy lime sauce according to your heat preference.
    Replace with jalapeño slices for added heat without overpowering the zesty lime flavor.

  • Tropical Fruits: For a fruity twist, add slices of pineapple or mango to your tacos for a juicy contrast.
    This brings an added sweetness that pairs beautifully with the spicy lime sauce.

Feel free to explore these variations and make these tacos truly your own! And if you’re looking for more inspiring ideas, don’t miss out on this guide on exploring tropical ingredients or check out how to create the perfect margarita pairing for your taco night!

Make Ahead Options

These Crispy Coconut Shrimp Tacos are perfect for busy weeknights, allowing you to prep in advance for a stress-free meal. You can make the spicy lime sauce up to 3 days ahead—simply store it in an airtight container in the refrigerator. Additionally, you can coat the shrimp with the coconut-panko mixture up to 24 hours in advance; cover and refrigerate them until you’re ready to fry. To maintain the crispiness of the shrimp, fry them fresh just before serving. When you’re ready to assemble your tacos, just warm the tortillas and layer with your desired toppings for a glorious meal that tastes just as incredible as if it were made fresh!

Crispy Coconut Shrimp Tacos with Spicy Lime Sauce Recipe FAQs

How do I choose the right shrimp for this recipe?
Absolutely! For the best flavor and texture, opt for large, peeled, and deveined shrimp. Look for a “U” number like U10 or U12 on the packaging – that indicates the shrimp are sizable and plump. Fresh shrimp should smell like the ocean, not fishy, and have a firm texture.

What’s the best way to store leftovers?
For optimal freshness, store leftover crispy shrimp and toppings in separate airtight containers in the refrigerator. The shrimp should be consumed within 1-2 days to retain their crispy texture, while the other toppings can last up to 3 days.

Can I freeze the shrimp for later?
Yes, you can freeze leftover shrimp! After cooking, place the shrimp in a single layer on a baking sheet and freeze them until solid. Then, transfer to a resealable freezer bag. They can be stored for up to 2 months. To reheat, bake from frozen in an oven preheated to 400°F for about 10-12 minutes until crispy again.

What should I do if my shrimp isn’t crispy after frying?
The key to that perfect crunch is maintaining the oil temperature around 350°F. If the oil is too cold, the shrimp will soak up more oil and become soggy. If your shrimp ends up soggy, always ensure they are dried well after thawing if you’re using frozen shrimp, and avoid overcrowding the pan while frying.

Can I make this recipe gluten-free?
Absolutely! You can create a gluten-free version by using gluten-free panko breadcrumbs and substituting regular flour with a gluten-free flour blend or cornstarch for coating the shrimp. This way, you can still enjoy the delightful flavors of crispy coconut shrimp tacos without any gluten concerns.

Is this recipe safe for pets?
While the ingredients are generally safe for pets, it’s best to avoid sharing the spicy lime sauce or fried shrimp with your furry friends. The spices and potential high-fat content in the fried shrimp could upset their stomach. Always consult your veterinarian for advice on sharing any human food with pets.

undefined

Crispy Coconut Shrimp Tacos That Will Brighten Your Evenings

Delicious crispy coconut shrimp tacos with spicy lime sauce, perfect for a quick dinner and crowd-pleasing gatherings.
Prep Time 15 minutes
Cook Time 15 minutes
Total Time 30 minutes
Servings: 4 tacos
Course: Dinner
Cuisine: Mexican, Tropical
Calories: 320

Ingredients
  

For the Shrimp
  • 1 pound large shrimp, peeled and deveined
  • 1/2 cup all-purpose flour
  • 2 large eggs, beaten
  • 1 cup panko breadcrumbs
  • 1 cup shredded unsweetened coconut
For the Spicy Lime Sauce
  • 1/2 cup mayonnaise or Greek yogurt Greek yogurt for a lighter option
  • 2 tablespoons fresh lime juice
  • 1 tablespoon honey substitute with maple syrup for a vegan option
  • 1 teaspoon minced garlic
  • hot sauce to taste
For the Toppings
  • 2 cups shredded cabbage
  • 1 cup shredded or julienned carrots
  • 1 medium avocado, sliced or substitute for salsa
  • fresh cilantro for garnish
  • lime wedges for serving

Equipment

  • Mixing Bowl
  • Skillet
  • shallow bowls

Method
 

Preparation
  1. In a mixing bowl, combine the mayonnaise or Greek yogurt, lime juice, honey, minced garlic, and hot sauce. Whisk until smooth and creamy. Set aside.
  2. Set up a breading station with shallow bowls of flour, beaten eggs, and a mixture of panko breadcrumbs and shredded coconut. Dredge shrimp in flour, dip in egg, then coat with the panko-coconut mixture.
  3. Heat about 1/2 inch of vegetable oil in a skillet over medium heat to 350°F. Fry the coated shrimp for 2-3 minutes on each side until golden brown. Drain on paper towels.
  4. Warm tortillas in a separate dry skillet until pliable. Assemble the tacos with cabbage, carrots, crispy shrimp, spicy lime sauce, avocado, and cilantro.
  5. Serve immediately with extra lime wedges on the side.

Nutrition

Serving: 1tacoCalories: 320kcalCarbohydrates: 30gProtein: 14gFat: 18gSaturated Fat: 5gPolyunsaturated Fat: 2gMonounsaturated Fat: 10gCholesterol: 120mgSodium: 550mgPotassium: 300mgFiber: 5gSugar: 3gVitamin A: 500IUVitamin C: 10mgCalcium: 60mgIron: 1.5mg

Notes

For extra crispiness, double-coat shrimp. Store leftovers in airtight containers separately for best freshness. Consume shrimp within 1-2 days and sauce lasts 3-4 days in the fridge.

Tried this recipe?

Let us know how it was!

High-Protein Easy Potato Taco Bowls for a Flavorful Feast

As I stood in my kitchen, the aroma of roasted potatoes wafted through the air, and I couldn’t help but feel a little giddy knowing that a delicious meal was just moments away. These High-Protein Easy Potato Taco Bowls are my go-to when I crave something comforting yet healthy. They take the beloved flavors of tacos and elevate them by swapping traditional tortillas for hearty, roasted potatoes, making this a satisfying and nutritious option that’s perfect for any time of day. Packed with protein and loaded with fresh veggies, this recipe is not only quick to whip up but also feels like a warm hug in a bowl. Whether you’re feeding hungry bellies or meal prepping for a busy week ahead, these bowls deliver on flavor and convenience. Ready to dive into the perfect blend of textures and tastes? Let’s get cooking!

Why are these taco bowls a must-try?

Flavor Explosion: Each bite is a delightful blend of savory taco meat, crispy roasted potatoes, and fresh veggies that create an unforgettable taste experience.

Nutrient-Packed: Loaded with high-protein goodness, these bowls are ideal for those looking to nourish their bodies without sacrificing flavor.

Versatile Options: Feel free to experiment with different proteins or toppings to cater to your cravings or dietary preferences.

Quick & Easy: Perfect for busy weeknights, this meal comes together in under an hour, making it a go-to for delicious home cooking.

Crowd-Pleaser: Whether it’s family dinner or a gathering with friends, these potato taco bowls will impress and satisfy everyone at the table. Dive into this fusion of comfort food today and enjoy the wholesome benefits!

High-Protein Easy Potato Taco Bowl Ingredients

For the Base

  • Russet Potatoes – The heart of this dish, they provide structure and can be swapped with sweet potatoes for a different flavor profile.
  • Olive Oil – This rich addition helps the potatoes roast beautifully, but feel free to substitute with avocado oil if you prefer.

For the Taco Filling

  • Lean Ground Beef (93/7) – Packed with protein and depth, it’s perfect for a satisfying meal; you can use ground turkey or a meat substitute for a leaner option.
  • Taco Seasoning – This flavorful blend adds spice; consider using homemade seasoning to closely control the ingredients.
  • Tomato Paste – Enhances the sauce’s flavors and adds moisture—can be skipped if using fresh tomatoes.

For the Fresh Toppings

  • Roma Tomatoes – These add freshness and acidity that complements the dish; swap them with cherry tomatoes if desired.
  • Iceberg Lettuce – Offers a crunchy texture; consider using spinach or kale to boost nutrition levels.
  • Cotija Cheese – Brings creaminess and tang; feta cheese can be a tasty alternative if Cotija is unavailable.
  • Pickled Onions – Their bright acidity enhances the overall flavor; fresh onions can also work well if you’re out of pickled.

For the Creamy Sauce

  • Non-fat Greek Yogurt – Adds a creamy texture to the sauce; sour cream is an excellent alternative if you prefer.
  • Red Salsa – Serves as a flavorful base for the sauce; fresh pico de gallo could also be used for an extra burst of freshness.

Embrace the goodness of these High-Protein Easy Potato Taco Bowl Ingredients and get ready to create a meal that’s not just tasty, but also wonderfully nourishing!

Step‑by‑Step Instructions for High-Protein Easy Potato Taco Bowls

Step 1: Optional Pickled Onions
If you’d like to elevate your High-Protein Easy Potato Taco Bowls, prepare pickled onions ahead of time. Slice red onions thinly and soak them in vinegar, water, and a touch of sugar for at least 30 minutes to marinate. This can be done while the potatoes roast, infusing their tangy flavor for the dish.

Step 2: Preheat the Oven
Begin by preheating your oven to 425°F (220°C). This high temperature will ensure that the potatoes get crispy and golden brown. As the oven warms up, gather your baking sheet and parchment paper for easy clean-up, making your cooking process smoother.

Step 3: Prepare the Potatoes
Scrub the Russet potatoes under cold water until clean, then chop them into 1/4″ cubes for even roasting. In a large bowl, toss the potato cubes with olive oil and 1 tablespoon of taco seasoning until well-coated. This step will enhance their flavor and crispy texture, setting the stage for your delicious taco bowls.

Step 4: Roast the Potatoes
Spread the seasoned potatoes evenly on a parchment-lined baking sheet and sprinkle them with a pinch of salt. Roast in the preheated oven for 30 minutes, flipping halfway through to ensure all sides become nice and crispy. Keep an eye out for a golden brown color to indicate that they’re perfectly done.

Step 5: Cook the Taco Meat
While the potatoes bake, heat a skillet over medium-high heat. Add the lean ground beef and break it apart as it browns, cooking for about 5-7 minutes until fully cooked through. Once browned, stir in the tomato paste and remaining taco seasoning, combining everything thoroughly, then set aside to let the flavors meld.

Step 6: Make the Creamy Sauce
In a small bowl, mix together non-fat Greek yogurt, red salsa, and any leftover taco seasoning, creating a creamy sauce bursting with flavor. Aim for a smooth consistency and taste to adjust seasoning, which will complement the other ingredients in your High-Protein Easy Potato Taco Bowls perfectly.

Step 7: Assemble the Bowls
To assemble your delicious taco bowls, layer each bowl starting with a generous scoop of crispy roasted potatoes. Top with the savory taco meat, followed by chopped Roma tomatoes, crunchy iceberg lettuce, and a sprinkle of Cotija cheese. Don’t forget to add pickled onions and a drizzle of creamy sauce for that final flavor burst.

Step 8: Serve and Enjoy
Your High-Protein Easy Potato Taco Bowls are now ready to enjoy! Serve them warm, garnished with any additional toppings you desire, such as avocado slices or fresh cilantro. These bowls are not just a meal; they’re a satisfying treat for any taco lover looking for a healthy alternative.

How to Store and Freeze Easy Potato Taco Bowls

Fridge: Store leftovers in airtight containers for up to 3 days. Keep the components separate to maintain texture and freshness for your Easy Potato Taco Bowls.

Freezer: For longer storage, freeze the potato and taco meat components in freezer-safe bags for up to 2 months. Thaw in the fridge overnight before reheating.

Reheating: To preserve crispiness, reheat the potatoes in the oven at 375°F (190°C) for about 10-15 minutes. Warm the taco meat on the stovetop or microwave until heated through.

Assembly Tip: When ready to enjoy, combine the reheated elements with fresh toppings for a delightful meal experience.

Expert Tips for Perfect Potato Taco Bowls

  • Uniform Cuts: Ensure your potatoes are cut into even 1/4″ cubes for consistent roasting and a crispy texture. Uneven sizes can lead to some being undercooked while others become too soft.

  • Flavor Boost: Taste your taco meat mix before serving to adjust seasoning as needed. Everyone’s palate is different, and personalizing the flavor can elevate your High-Protein Easy Potato Taco Bowls significantly.

  • Storing Leftovers: Separate components into airtight containers and refrigerate for no more than three days. Reheat potatoes in the oven to retain crispiness, as microwaving can make them soggy.

  • Experimentation: Don’t hesitate to switch proteins or toppings based on your preferences. Try ground turkey or plant-based meat alternatives for a different twist that maintains the protein-rich element.

  • Make-Ahead Magic: Prepping the roasted potatoes and taco meat in advance can save you time during busy weeknights. Just assemble the bowls when you’re ready to eat for a quick meal!

Make Ahead Options

These High-Protein Easy Potato Taco Bowls are a fantastic choice for busy weeknights that require meal prep! You can prepare the roasted potatoes and taco meat up to 24 hours in advance. Simply roast the potatoes, let them cool, and store them in an airtight container in the refrigerator. Cook the taco meat and also refrigerate it separately to maintain the flavors. If you’ve made pickled onions, those can be prepped up to 3 days ahead for optimal tanginess. When you’re ready to serve, just reheat the potatoes in the oven for a few minutes until crispy, warm the taco meat on the stovetop, and assemble your bowls with the fresh toppings. This way, you’ll have a delicious and satisfying meal ready in no time!

What to Serve with High-Protein Easy Potato Taco Bowls

Let the flavors of your meal shine even brighter with the perfect pairings to complement your delicious potato taco bowls.

  • Crispy Tortilla Chips: The crunch of fresh tortilla chips pairs wonderfully, providing a delightful contrast to the creamy bowls. Enjoy them with a side of salsa or guacamole for extra dipping fun!

  • Zesty Corn Salad: This vibrant salad, mixed with lime juice and fresh herbs, adds a refreshing kick to balance the richness of the potato taco bowls, elevating your culinary experience!

  • Savory Black Beans: Offering an earthy flavor and additional protein, black beans are a hearty complement that rounds out the meal beautifully. Serve them on the side or mix them into the bowls for extra heartiness.

  • Creamy Avocado Lime Dressing: Drizzle this zesty dressing over your bowls for a creamy, tangy finish that enhances each bite. The coolness of the avocado contrasts splendidly with the warm potatoes.

  • Grilled Veggies: Charred bell peppers, zucchini, and onions contribute vibrant colors and sweet flavors, adding depth and texture to the overall dish.

  • Fresh Pico de Gallo: Bursting with freshness, this simple topping amplifies the flavor profile, with juicy tomatoes and crisp onions bringing a necessary brightness to the taco experience.

  • Cucumber Mint Salad: A cooling cucumber salad with a hint of mint creates a fresh palate cleanser between bites, enhancing the enjoyment of every mouthful.

  • Refreshing Sparkling Water: Keep it light with a sparkling water infused with lime or cucumber. It’s the perfect drink to cleanse your palate and allow those flavors to shine through.

  • Decadent Churros: For a sweet finish, these crispy treats dusted in cinnamon sugar make a delightful dessert that will leave your guests lingering over the last bite.

Variations & Substitutions

Feel the freedom to customize these tasty potato taco bowls to your liking and let your imagination run wild!

  • Dairy-Free: Use silken tofu blended until smooth in place of Greek yogurt for a creamy, vegan-friendly sauce.
  • Pulled Pork: Swap the beef for pulled pork, adding rich flavors that meld beautifully with the roasted potatoes.
  • Spicy Kick: Add diced jalapeños or a sprinkle of cayenne to the taco filling for an additional layer of heat.
  • Vegan Delight: Replace meat with a plant-based ground option and use avocado or coconut yogurt to keep it creamy.
  • Herb Infusion: Incorporate fresh cilantro, parsley, or chives into the creamy sauce for an aromatic burst of flavor.
  • Crunchy Additions: Top with crushed tortilla chips or fried onions for delightful crunch and an extra taste dimension.
  • Sweet Potato Twist: Switch the russet potatoes for sweet potatoes, providing a hint of sweetness that complements the savory taco flavors beautifully.
  • Pico de Gallo Swap: If you’re out of red salsa, use fresh pico de gallo for a zesty and robust flavor boost.

These delicious alternatives not only add variety but also cater to dietary preferences, making your High-Protein Easy Potato Taco Bowls a dish for everyone! For a refreshing side, consider serving these with a simple avocado salad or a bowl of fresh guacamole to round out your meal.

Easy Potato Taco Bowls Recipe FAQs

What type of potatoes should I use for the taco bowls?
Absolutely! Russet potatoes are ideal for this recipe due to their structure and heartiness. However, you can always swap them for sweet potatoes if you’re looking for a sweeter flavor profile.

How should I store leftovers from the potato taco bowls?
To keep your Easy Potato Taco Bowls fresh, store each component separately in airtight containers. They will last in the fridge for up to 3 days. This segregation helps maintain the crispiness of the potatoes and the freshness of the veggies.

Can I freeze the potato and taco meat components?
Yes, you can! For freezing, place the roasted potatoes and taco meat in freezer-safe bags or containers, and they will stay fresh for up to 2 months. Thaw them overnight in the fridge before reheating for the best texture.

What should I do if my potatoes aren’t crispy?
If your potatoes come out soggy, it might be due to overcrowding on your baking sheet. Be sure to spread the potato cubes in a single layer, and flip them halfway through roasting for even cooking. Additionally, check the oven temperature to ensure it’s hot enough—425°F (220°C) is best for a nice, crispy finish.

Can I modify this recipe to accommodate dietary restrictions?
Very! This recipe is versatile—feel free to swap the lean ground beef for shredded chicken or plant-based meat alternatives for a healthier tweak. Also, if you’re sensitive to lactose, the Cotija cheese can easily be replaced with a dairy-free cheese option. Just adjust the toppings to suit your dietary needs!

How can I add more protein to the bowls?
To boost the protein content further, you can add ingredients like black beans or chickpeas alongside or instead of the meat. You could also increase the quantity of meat used, or even add hard-boiled eggs as an additional topping for a nutritious boost.

undefined

High-Protein Easy Potato Taco Bowls for a Flavorful Feast

Delicious high-protein potato taco bowls, combining crispy potatoes and savory taco meat, perfect for a nourishing meal.
Prep Time 15 minutes
Cook Time 30 minutes
Total Time 45 minutes
Servings: 4 bowls
Course: Dinner
Cuisine: Mexican
Calories: 450

Ingredients
  

For the Base
  • 4 medium Russet Potatoes can be swapped with sweet potatoes
  • 2 tablespoons Olive Oil avocado oil can be substituted
For the Taco Filling
  • 1 pound Lean Ground Beef (93/7) can use ground turkey or meat substitute
  • 1 tablespoon Taco Seasoning homemade seasoning is recommended
  • 2 tablespoons Tomato Paste can be skipped if using fresh tomatoes
For the Fresh Toppings
  • 2 medium Roma Tomatoes can swap with cherry tomatoes
  • 1 cup Iceberg Lettuce can use spinach or kale
  • 1/2 cup Cotija Cheese feta cheese can be an alternative
  • 1/4 cup Pickled Onions can use fresh onions if out of pickled
For the Creamy Sauce
  • 1 cup Non-fat Greek Yogurt sour cream is a good alternative
  • 1/2 cup Red Salsa fresh pico de gallo can be used

Equipment

  • Oven
  • Baking Sheet
  • Skillet
  • Mixing Bowl

Method
 

Step-by-Step Instructions
  1. Prepare optional pickled onions by soaking sliced red onions in vinegar, water, and sugar for at least 30 minutes.
  2. Preheat your oven to 425°F (220°C).
  3. Scrub the Russet potatoes under cold water, chop them into 1/4" cubes, and toss with olive oil and taco seasoning.
  4. Spread seasoned potatoes on a baking sheet and roast for 30 minutes, flipping halfway.
  5. While potatoes are baking, cook the ground beef in a skillet for 5-7 minutes, then stir in tomato paste and remaining seasoning.
  6. Mix Greek yogurt and red salsa together to create a creamy sauce.
  7. Assemble bowls with crispy potatoes, taco meat, Roma tomatoes, iceberg lettuce, Cotija cheese, pickled onions, and the creamy sauce on top.
  8. Serve warm and enjoy your High-Protein Easy Potato Taco Bowls!

Nutrition

Serving: 1bowlCalories: 450kcalCarbohydrates: 40gProtein: 30gFat: 15gSaturated Fat: 5gPolyunsaturated Fat: 2gMonounsaturated Fat: 7gCholesterol: 70mgSodium: 600mgPotassium: 800mgFiber: 6gSugar: 5gVitamin A: 15IUVitamin C: 30mgCalcium: 15mgIron: 20mg

Notes

Ensure potatoes are uniform in size for even roasting. Taste and adjust seasoning as needed. Store leftovers separately for better texture.

Tried this recipe?

Let us know how it was!

Vibrant Mediterranean Stuffed Sweet Potatoes to Savor

As the warm sun sets over a bustling Mediterranean market, an explosion of colors and scents awakens the senses—ripe tomatoes, briny olives, and earthy spices all wanting to be a part of your dinner. Today, I’m excited to share my Mediterranean Stuffed Sweet Potatoes with Chickpeas and Feta, a dish that effortlessly brings the vibrant spirit of the Mediterranean right to your kitchen. This recipe is not only vegetarian and gluten-free, but it also allows for a delightful mix of fresh, customizable ingredients, making it perfect for any season or occasion. Whether you’re meal prepping for a busy week ahead or looking to impress guests at your next gathering, these stuffed sweet potatoes are sure to be a hit. Are you ready to embark on a flavor journey? Let’s dive in!

Why are Mediterranean flavors so delightful?

Vibrant Mediterranean flavors come alive in this unique dish, making every bite a blissful experience. Customizable and versatile, you can easily adapt the fillings to suit your seasonal cravings or dietary needs – think fresh herbs in the summer or hearty beans in winter! Nutrient-dense options like chickpeas and sweet potatoes mean you’re not just satisfying your taste buds but nourishing your body too. Time-saving and simple to prepare, you can have these stuffed sweet potatoes on the table in no time, perfect for a weeknight dinner or casual gathering. Serve them with a crisp green salad or your favorite warm pita for a complete meal that will leave everyone wanting more — a delicious way to break free from fast food!

Mediterranean Stuffed Sweet Potatoes Ingredients

Note: Gather these ingredients to create your delightful Mediterranean stuffed sweet potatoes bursting with flavor!

For the Sweet Potatoes

  • Sweet Potatoes – The base of the dish which offers natural sweetness and nutrition; great substituted with regular potatoes or butternut squash.

For the Filling

  • Chickpeas – Provides protein and fiber for a hearty texture; white beans or cooked quinoa can be delightful replacements.
  • Cherry Tomatoes – Adds a burst of freshness and juiciness; swap with grape tomatoes for a sweet alternative.
  • Cucumber – Brings crunch and hydration to the filling; zucchini serves well as a variation.
  • Red Onion – Contributes a sharp yet sweet flavor; consider using green onions or shallots as a substitution.
  • Kalamata Olives – Delivers a salty, briny bite; feel free to choose any other olives based on your taste.
  • Feta Cheese – Provides a creamy tang; for a vegan option, substitute with goat cheese or a dairy-free alternative.
  • Fresh Parsley – Injects color and freshness into the dish; basil or dill can add a lovely twist.
  • Fresh Mint – An optional touch that enhances the freshness; omit or swap with other herbs as preferred.

For the Dressing

  • Extra Virgin Olive Oil – Adds richness and flavor; other oils can work, but may vary in taste.
  • Lemon Juice – Brings acidity and brightness to the dish; lime juice is a great alternative for added zest.
  • Garlic – An aromatic must-have for enhancing flavor; it has no significant substitutions.
  • Dried Oregano – Fills the dish with a Mediterranean herbal note; Italian seasoning can be a good substitute.
  • Salt and Black Pepper – Essential for seasoning to enhance the flavors; adjust according to taste.

With these ingredients, you’re set to create a stunning dish that echoes the vibrant essence of the Mediterranean! Enjoy each bite of your Mediterranean stuffed sweet potatoes!

Step‑by‑Step Instructions for Mediterranean Stuffed Sweet Potatoes with Chickpeas and Feta

Step 1: Preheat and Prepare
Begin by preheating your oven to 400°F (200°C). While the oven is heating, line a baking sheet with parchment paper to make clean-up easier. Prepare your sweet potatoes by giving them a good scrub, then pricking each one several times with a fork. This will help steam escape while they roast, ensuring a tender interior.

Step 2: Roast the Sweet Potatoes
Place the pricked sweet potatoes on the lined baking sheet and roast them in the preheated oven for 40-50 minutes. Check for doneness by piercing them with a fork—when they’re fork-tender, they’re ready! As they roast, the natural sugars will caramelize, intensifying the sweetness and flavor of the sweet potatoes.

Step 3: Prepare the Filling
While the sweet potatoes are roasting, prepare the Mediterranean filling. In a large mixing bowl, combine drained chickpeas, halved cherry tomatoes, diced cucumber, finely chopped red onion, sliced Kalamata olives, and crumbled feta cheese. Add fresh parsley and optional mint for a burst of flavor. Mix gently until all ingredients are well incorporated and vibrant.

Step 4: Whisk the Dressing
In a separate small bowl, whisk together extra virgin olive oil, fresh lemon juice, minced garlic, and dried oregano. Season to taste with salt and black pepper. This dressing not only enhances the filling but also brings a bright Mediterranean flavor that perfectly complements the sweet potatoes.

Step 5: Dress the Filling Mixture
Pour the whisked dressing over the filling mixture and gently toss everything together until all the ingredients are evenly coated in the dressing. This step is key to ensuring each bite of your Mediterranean stuffed sweet potatoes is infused with zesty flavor, making for a delightful taste experience.

Step 6: Cool and Slice the Sweet Potatoes
Once the sweet potatoes are roasted to perfection, remove them from the oven and allow them to cool for about 5-10 minutes. When they’re manageable to handle, slice each sweet potato lengthwise down the center, being careful not to cut all the way through. Gently fluff the insides with a fork to create a cozy pocket for the filling.

Step 7: Stuff and Serve
Carefully spoon the prepared Mediterranean filling into each roasted sweet potato, allowing it to spill over slightly for a beautiful presentation. These Mediterranean stuffed sweet potatoes are meant to be enjoyed fresh, so serve them immediately to savor the warm, flavorful combination of hearty ingredients.

Make Ahead Options

These Mediterranean Stuffed Sweet Potatoes are an ideal choice for meal prep enthusiasts! You can roast the sweet potatoes up to 3 days in advance. Once cooled, store them in an airtight container in the refrigerator to maintain their tenderness. As for the filling, mix the chickpeas, tomatoes, cucumber, onion, olives, feta, and herbs, and keep it separate in the fridge for up to 3 days as well. When you’re ready to serve, simply reheat the sweet potatoes in the oven and fill them with the prepared mixture, drizzling the dressing over the top for that just-made freshness. Enjoy the same delicious flavors with minimized effort on busy weeknights!

Storage Tips for Mediterranean Stuffed Sweet Potatoes

Fridge: Keep your stuffed sweet potatoes in an airtight container for up to 3 days. This helps maintain freshness while protecting the flavors of the filling.

Freezer: If you need longer storage, you can freeze the unstuffed roasted sweet potatoes for up to 3 months. Ensure they are cooled, wrapped tightly, and use a freezer-safe container.

Reheating: To enjoy your Mediterranean stuffed sweet potatoes, reheat in the oven at 350°F (175°C) for about 15-20 minutes, or until heated through. If reheating in the microwave, cover with a damp paper towel to retain moisture.

Make-Ahead: You can make the filling in advance and store it separately in the fridge for up to 3 days, ensuring a delightful texture when serving with freshly roasted sweet potatoes.

What to Serve With Mediterranean Stuffed Sweet Potatoes

Elevate your dining experience by pairing these delicious stuffed sweet potatoes with complementary sides that bring balance to every bite.

  • Crisp Green Salad: A fresh, lightly dressed salad of mixed greens offers a refreshing contrast to the sweet potatoes’ sweetness.

  • Warm Pita Bread: Soft, warm pita provides a delightful vessel for scooping up the flavorful filling, enhancing the Mediterranean experience.

  • Tzatziki Sauce: This creamy yogurt-based sauce adds coolness and a tangy zest that beautifully complements the savory elements of the stuffed sweet potatoes.

  • Grilled Vegetables: Seasonal grilled veggies like zucchini and bell peppers add smoky flavors and color, making every plate visually appealing.

  • Quinoa Tabbouleh: This herby grain salad offers a chewy texture and bursts of flavor, creating a satisfying combination alongside the sweet potatoes.

  • Chilled Sauvignon Blanc: A refreshing glass of this white wine pairs perfectly, enhancing the bright lemony notes in your Mediterranean dish.

  • Roasted Chickpeas: For a snackable side, crispy roasted chickpeas provide an extra crunch and are perfectly seasoned to tie the meal together.

  • Baklava: For dessert, the sweet, flaky layers of baklava will end your meal on a deliciously indulgent note, resonating with the Mediterranean theme.

Mediterranean Stuffed Sweet Potatoes Variations

Feel free to get creative and adapt these stuffed sweet potatoes to fit your personal taste and dietary needs!

  • Vegan Twist: Swap feta cheese for a creamy cashew cheese or leave it out entirely for a rich, plant-based option.
    The beauty of vegan cooking lies in the textures—creamy cashew cheese offers a delightful contrast to the sweet potato.

  • Protein Boost: Add cooked lentils or tempeh to the filling for an extra layer of heartiness and protein.
    This variation not only enhances the texture but also brings additional flavor, making your meal even more satisfying.

  • Mediterranean Heat: Spice things up by incorporating red pepper flakes or diced jalapeños for a kick of heat.
    The warmth from the spices elevates the dish, adding a new dimension that will awaken your taste buds.

  • Seasonal Spin: In the fall, use roasted butternut squash and dried cranberries instead of sweet potatoes and chickpeas.
    The sweetness of butternut squash pairs beautifully with the tartness of cranberries, creating a cozy comfort dish.

  • Grain Base: Substitute sweet potatoes with quinoa-stuffed bell peppers for a fun and colorful twist.
    Quinoa ensures a hearty filling while bell peppers brightens up your plate with aesthetic appeal.

  • Herbal Infusion: Enhance the filling with a variety of herbs like fresh dill, tarragon, or parsley for an aromatic boost.
    A simple herb substitution can transform the entire dish, providing fresh notes that awaken the senses.

  • Sour Kick: For a tangy flair, stir in a spoonful of Greek yogurt or tahini sauce before stuffing the sweet potatoes.
    The creamy tang complements the sweetness of the potatoes perfectly, making each bite a flavor explosion.

  • Nutty Touch: Toast some pine nuts or walnuts and sprinkle them on top just before serving for added crunch.
    This not only provides a delightful texture but also adds a rich, nutty flavor that rounds out the dish beautifully.

Let your creativity shine and tailor these Mediterranean stuffed sweet potatoes to be your perfect meal! Try pairing them with a refreshing chickpea salad or a side of warm pita bread for a delicious feast. Each variation promises to bring joy to your dining table!

Expert Tips for Mediterranean Stuffed Sweet Potatoes

  • Perfect Roasting: Ensure sweet potatoes are evenly pricked to allow steam to escape while roasting, preventing them from bursting in the oven.

  • Fresh Ingredients: Use fresh herbs and crisp vegetables for the filling to enhance the Mediterranean flavors; wilted or old ingredients might dull the dish’s vibrancy.

  • Customize Wisely: If you choose substitutions for chickpeas, like quinoa, adjust cooking times accordingly; undercooked beans or grains can negatively affect texture.

  • Flavor Infusion: Allow the dressing to marinate for at least 10 minutes before mixing it with the filling; this enhances the overall flavor experience of your Mediterranean stuffed sweet potatoes.

  • Serving Tips: For a delightful presentation, serve the stuffed sweet potatoes on a colorful platter, allowing the vibrant fillings to shine through.

Mediterranean Stuffed Sweet Potatoes Recipe FAQs

How do I choose ripe sweet potatoes?
Absolutely! When selecting sweet potatoes, look for ones that are firm and free of dark spots or blemishes. The skin should appear smooth and evenly colored. A well-rounded shape often indicates good quality inside. I recommend avoiding any with soft spots or signs of sprouting.

What’s the best way to store leftovers?
Very! Store your Mediterranean stuffed sweet potatoes in an airtight container in the fridge for up to 3 days. This helps maintain their fresh flavors. For the best texture, I recommend storing the filling separately and then stuffing the sweet potatoes right before you’re ready to enjoy them again!

Can I freeze Mediterranean stuffed sweet potatoes?
Certainly! If you need to freeze them, I suggest wrapping the unstuffed roasted sweet potatoes in plastic wrap and placing them in a freezer-safe container. They can last up to 3 months in the freezer. When you’re ready to eat, thaw them overnight in the fridge, then reheat at 350°F (175°C) for about 15-20 minutes.

What should I do if my sweet potatoes are overcooked or dry?
Oh no! If your sweet potatoes end up overcooked, don’t fret. You can make them more enjoyable by adding a dollop of Greek yogurt or a drizzle of olive oil before stuffing them. This will add moisture and enhance the dish. A sprinkle of a few fresh herbs can boost the flavors beautifully, too!

Are there any common allergens in this recipe to be aware of?
Absolutely! Chickpeas and feta cheese could be allergens for some people, particularly those with dairy or legume sensitivities. For a vegan-friendly version, substitute the feta with a dairy-free alternative, and if you’re avoiding chickpeas, cooked quinoa or white beans are tasty replacements. Always check that the olives and other ingredients meet your dietary needs!

Can I prepare the filling ahead of time?
Very much so! You can make the filling a few days in advance. Store it in the refrigerator in an airtight container, and it will stay fresh for up to 3 days. Just remember to re-stir before stuffing your sweet potatoes to ensure even distribution of flavors!

undefined

Vibrant Mediterranean Stuffed Sweet Potatoes to Savor

Enjoy this delightful Mediterranean dish of stuffed sweet potatoes with chickpeas and feta, perfect for a healthy dinner.
Prep Time 15 minutes
Cook Time 50 minutes
Cooling Time 10 minutes
Total Time 1 hour 15 minutes
Servings: 4 potatoes
Course: Dinner
Cuisine: Mediterranean
Calories: 300

Ingredients
  

For the Sweet Potatoes
  • 4 medium Sweet Potatoes can substitute with regular potatoes or butternut squash
For the Filling
  • 1 can Chickpeas drained
  • 1 cup Cherry Tomatoes halved
  • 1 cup Cucumber diced
  • 1 medium Red Onion finely chopped
  • 1/2 cup Kalamata Olives sliced
  • 1 cup Feta Cheese crumbled
  • 1/4 cup Fresh Parsley chopped
  • 1/4 cup Fresh Mint optional
For the Dressing
  • 3 tablespoons Extra Virgin Olive Oil
  • 2 tablespoons Lemon Juice
  • 2 cloves Garlic minced
  • 1 teaspoon Dried Oregano
  • to taste Salt and Black Pepper

Equipment

  • Oven
  • Baking Sheet
  • Mixing Bowl
  • Fork
  • whisk

Method
 

Preparation
  1. Preheat your oven to 400°F (200°C) and line a baking sheet with parchment paper.
  2. Scrub the sweet potatoes and prick them several times with a fork.
Cooking
  1. Roast the sweet potatoes in the oven for 40-50 minutes until fork-tender.
  2. Prepare the filling by combining the chickpeas, cherry tomatoes, cucumber, red onion, Kalamata olives, feta cheese, parsley, and mint in a mixing bowl.
  3. Whisk together the dressing ingredients and season with salt and black pepper.
  4. Dress the filling mixture with the prepared dressing and toss to coat.
Serving
  1. Cool the sweet potatoes for 5-10 minutes, then slice each one lengthwise, fluffing the insides.
  2. Stuff the sweet potatoes with the filling and serve immediately.

Nutrition

Serving: 1potatoCalories: 300kcalCarbohydrates: 45gProtein: 10gFat: 12gSaturated Fat: 5gPolyunsaturated Fat: 1gMonounsaturated Fat: 8gCholesterol: 20mgSodium: 600mgPotassium: 850mgFiber: 8gSugar: 6gVitamin A: 18000IUVitamin C: 20mgCalcium: 150mgIron: 3mg

Notes

For best results, use fresh ingredients and allow the dressing to marinate before using.

Tried this recipe?

Let us know how it was!

Savory Yaki Udon with Shrimp for a Quick Comfort Meal

As I stood in my kitchen, the allure of sizzling shrimp and vibrant vegetables filled the air, transporting me to a bustling izakaya in Japan. Today, I’m excited to share my recipe for Quick and Delicious Yaki Udon with Shrimp—a fantastic comfort food that’s perfect for those busy weeknights when a takeaway just won’t cut it. In just 20 minutes, you can whip up this delightful stir-fried noodle dish that boasts flavorful udon noodles tossed with a medley of fresh veggies, all enveloped in a savory umami sauce. Not only is this meal a delicious way to indulge your cravings, but it’s also a wholesome choice that brings balance to your dinner table. Ready to dive into quick culinary bliss? Let’s get cooking!

Why is Yaki Udon a Must-Try?

Quick Prep Time: Imagine enjoying a delicious homemade meal in just 20 minutes! This Yaki Udon with shrimp is your perfect solution for busy evenings.

Flavor Explosion: Each bite is a burst of savory umami, thanks to the mix of fresh shrimp and vegetables, creating a delightful harmony of tastes.

Comfort Food Redefined: With its chewy udon noodles and rich sauce, this dish delivers that cozy, satisfying feeling we all crave after a long day.

Versatile Ingredients: Feel free to customize! You can easily swap shrimp for chicken or tofu and toss in any veggies you have on hand for a nutritious twist.

Crowd-Pleaser: Whether it’s a family dinner or a gathering with friends, this dish is bound to impress, leaving everyone reaching for seconds.

Dive into a world of flavor with this stir-fried noodle dish. It’s more than a meal; it’s a joyful experience!

Yaki Udon with Shrimp Ingredients

For the Noodles
Udon Noodles – The heartiness of these stir-fried noodles makes every bite fulfilling; opt for vacuum-packed for the best texture.

For the Stir-Fry
Neutral Oil – Essential for frying; can swap with canola or vegetable oil if needed.
Shrimp – Fresh or frozen, they add protein and flavor; chicken or tofu work as alternatives for variation.
Garlic – Minced to elevate the aroma and flavor profile of your dish.
Yellow Onion – Adds natural sweetness and texture, with shallots as a flavorful substitute.
White Mushrooms – Earthy depth to the dish; baby bella mushrooms serve as a great alternative.
Carrot – Sweetness and vibrant color; cut into matchsticks for even cooking.
Spring Onion – Adds freshness, with green parts reserved for garnish and white parts sautéed with the veggies.

For the Sauce
Soy Sauce – A core component bringing that salty umami flavor; tamari is perfect for gluten-free needs.
Salt and Pepper – Simple yet essential seasonings; adjust to taste for perfect balance.
Oyster Sauce – A hint of sweetness and depth; vegetarian versions are available for plant-based diets.
Dark Soy Sauce – Provides a rich, contrasting flavor that enhances the sauce; distinct from regular soy sauce.
Rice Vinegar – Introduces tanginess; apple cider vinegar can be used as a substitute.
Brown Sugar – Balances out savory notes; honey can be used if you’re looking for an alternative.
Freshly Crushed Black Pepper – Adds the desired kick; adjust based on your heat preference.
Toasted Sesame Oil – A little goes a long way for that nutty aroma, enhancing your dish’s richness.

Dive into the flavorful world of Yaki Udon with Shrimp—your new favorite quick meal!

Step‑by‑Step Instructions for Quick and Delicious Yaki Udon with Shrimp

Step 1: Boil the Udon Noodles
Begin by bringing a large pot of water to a boil. Add the udon noodles and cook according to the package instructions, usually around 4 to 5 minutes. Once they are al dente, drain them well and rinse under cold water to stop the cooking process. Toss with a drizzle of oil and set aside while you prepare the rest of the ingredients.

Step 2: Sauté the Garlic and Mushrooms
In a large skillet or wok, heat 1 tablespoon of neutral oil over medium heat. Add the minced garlic and sauté for about 1 minute until fragrant. Stir in the sliced white mushrooms and cook for an additional 2-3 minutes until they are tender and slightly golden. This aromatic base enhances the overall flavor of your Yaki Udon.

Step 3: Cook the Vegetables
Next, add the sliced yellow onion and matchstick-cut carrots to the skillet. Stir-fry for about 2-3 minutes, allowing the vegetables to soften and become vibrant in color. Season with a pinch of salt and pepper for added flavor. Once tender, remove the vegetables from the pan and set them aside in a bowl.

Step 4: Fry the Shrimp
Increase the heat to high, adding another 2 tablespoons of oil to the hot skillet. Toss in the shrimp seasoned with a splash of soy sauce. Fry for about 2-3 minutes, turning them occasionally until they are pink and cooked through. Be careful not to overcook them to maintain their juicy texture.

Step 5: Stir-Fry the Udon Noodles
Once the shrimp are cooked, add the prepared udon noodles back into the skillet. Use high heat to stir-fry the noodles for about 2-3 minutes, letting the edges become slightly crispy. It is essential to keep the noodles moving to prevent them from sticking and burning while achieving that perfect texture.

Step 6: Add the Sauce
Now, pour in the sauce mixture made with oyster sauce, dark soy sauce, rice vinegar, brown sugar, freshly crushed black pepper, and a drizzle of toasted sesame oil. Toss everything in the skillet for an additional 2 minutes, ensuring the noodles, shrimp, and vegetables are evenly coated with the savory sauce.

Step 7: Combine and Serve
Finally, return the cooked vegetables to the skillet, mixing gently to combine all the ingredients. Allow it to heat through for another minute. Serve your Quick and Delicious Yaki Udon hot, garnished with the green parts of the spring onion for an extra pop of color and flavor. Enjoy this delightful dish!

Make Ahead Options

Preparing your Yaki Udon with Shrimp ahead of time is a fantastic way to save precious minutes during busy weeknights! You can boil and store the udon noodles in the refrigerator for up to 3 days. When you’re ready to cook, simply reheat them briefly in boiling water until warmed through. Additionally, you can chop the vegetables (mushrooms, carrots, onions) and marinate the shrimp in soy sauce, storing them in an airtight container for up to 24 hours. This prepped step will enhance the flavor and make for a quick final stir-fry. Just toss everything in a hot pan, stir-fry for a few minutes, and you’ll have a delicious meal ready in no time, just as comforting as if prepared fresh!

What to Serve with Quick and Delicious Yaki Udon with Shrimp

Elevate your dining experience with delightful accompaniments that perfectly match this savory noodle dish.

  • Crispy Tempura: The light and crispy texture of tempura vegetables complements the chewy udon, adding a delightful crunch that everyone will love.

  • Miso Soup: A warm bowl of comforting miso soup enhances the meal, offering a light, yet umami-packed broth that balances the richness of your Yaki Udon.

  • Asian Slaw: A refreshing salad with shredded cabbage, carrots, and sesame dressing provides a crunchy contrast and bright flavors that cut through the dish’s richness.

  • Edamame: Lightly salted edamame not only adds a protein punch but also brings a vibrant pop of green to your table, sparking freshness.

  • Pickled Ginger: Serve some tangy pickled ginger as a palate cleanser, offering a burst of sharp flavor that complements the savory notes of your dish beautifully.

  • Sake or Green Tea: Pair your Yaki Udon with a chilled glass of sake or a warm cup of green tea for an authentic Japanese dining experience; both beverages enhance the meal’s flavors.

  • Mochi Ice Cream: End your meal with mochi ice cream for a sweet, chewy treat; its delicate texture leaves a lasting impression, making your dinner unforgettable!

Expert Tips for Yaki Udon with Shrimp

Perfect Shrimp: Avoid overcooking by frying shrimp until just pink; they’ll turn tough if cooked too long, ruining your dish.

Crispy Noodles: Continuously stir the udon during frying to achieve a crispy edge without burning. This texture enhances the comfort food experience.

Veggie Variations: Feel free to mix in colorful vegetables like bell peppers or broccoli for added nutrients and visual appeal in your Yaki Udon.

Sauce Balance: Monitor the sweetness and saltiness of your sauce—adjust with brown sugar or soy sauce for the perfect flavor balance.

Quick Serve: Serve Yaki Udon immediately for the best taste. The noodles are best enjoyed hot, right from the pan!

Yaki Udon with Shrimp Variations & Substitutions

Feel free to get creative with your Yaki Udon! This dish is all about personalizing your experience and waking up your taste buds.

  • Dairy-Free: Replace oyster sauce with a plant-based alternative, ensuring your meal stays light and completely dairy-free while still delicious.

  • Vegetarian: Switch out shrimp for firm tofu or tempeh, marinating them in soy sauce for a savory flavor boost that accommodates plant-based diets.

  • Extra Veggies: Toss in a medley of colorful vegetables like bell peppers, snap peas, or baby corn for an eye-catching and nutritious twist.

  • Spicy Kick: Drizzle in a bit of sriracha or chili oil while cooking for an inviting spicy finish that will warm your heart.

  • Gluten-Free: Opt for gluten-free udon noodles or substitute with rice noodles, offering a similar chewy texture while accommodating gluten sensitivities.

  • Crispy Additions: Consider adding a handful of crispy onions or tempura flakes on top for an irresistible crunch that complements the tender noodles.

  • Umami Boost: Enhance the flavor profile by including a dash of miso paste in your sauce blend, imparting deeper umami notes that make every bite memorable.

  • Stir-fry Sauce Swap: Experiment with different sauces like teriyaki or black bean sauce to create unique variations that keep mealtime exciting.

Feel free to explore these options, and don’t hesitate to combine ideas for your unique twist! For more inspiration, check out our delicious stir-fried noodle dish. Happy cooking!

Storage Tips for Yaki Udon with Shrimp

Fridge: Store leftover Yaki Udon in an airtight container and keep it in the fridge for up to 2 days. This ensures you can enjoy it again while maintaining its flavor.

Freezer: For longer storage, place the Yaki Udon in a freezer-safe container. It can be frozen for up to 1 month. Note that some vegetables may lose their texture upon thawing.

Reheating: To reheat, simply place the Yaki Udon in a skillet with a splash of water over medium heat. Stir until warmed through, making it as delicious as the first serving!

Airtight Guidance: Ensure your container is tightly sealed to keep the flavors intact and avoid drying out the noodles during storage.

Yaki Udon with Shrimp Recipe FAQs

What kind of udon noodles should I use for this recipe?
For the best texture and flavor, I recommend using vacuum-packed udon noodles. They are slightly chewier compared to dried noodles and cook quickly, perfect for this speedy dish.

How should I store leftover Yaki Udon?
Store any leftover Yaki Udon in an airtight container in the fridge for up to 2 days. Make sure it’s cooled down before sealing the container to avoid moisture build-up, which can make the noodles soggy.

Can I freeze Yaki Udon with Shrimp?
Absolutely! You can freeze Yaki Udon for up to 1 month. Just place it in a freezer-safe container, ensuring it’s well sealed to prevent freezer burn. When you’re ready to enjoy it again, thaw it in the fridge overnight then reheat in a skillet with a splash of water.

What should I do if my shrimp comes out tough?
To avoid tough shrimp, cook them only until they are just pink. Typically, that’s about 2-3 minutes over high heat. Remember, shrimp cook quickly, so stay attentive! If you find your shrimp is tough, it might have been left on the heat too long.

Can I use other vegetables instead of the ones listed?
Very! This dish is super versatile. Feel free to add any veggies you have on hand, such as bell peppers, broccoli, or snap peas. Just make sure to adjust cooking times based on the vegetables you choose to maintain that delightful texture.

Is this dish safe for my pet?
While Yaki Udon with shrimp is delicious for humans, it’s not suitable for most pets. Ingredients like soy sauce can be harmful to animals, so it’s best to keep this tasty dish just for you!

undefined

Savory Yaki Udon with Shrimp for a Quick Comfort Meal

Quick and Delicious Yaki Udon with Shrimp is a delightful comfort food perfect for busy weeknights.
Prep Time 10 minutes
Cook Time 10 minutes
Total Time 20 minutes
Servings: 4 servings
Course: Dinner
Cuisine: Japanese
Calories: 400

Ingredients
  

For the Noodles
  • 12 oz Udon Noodles Opt for vacuum-packed for best texture.
For the Stir-Fry
  • 1 tbsp Neutral Oil Can substitute with canola or vegetable oil.
  • 1 lb Shrimp Fresh or frozen; chicken or tofu can be used.
  • 2 cloves Garlic Minced.
  • 1 medium Yellow Onion Can use shallots as a substitute.
  • 8 oz White Mushrooms Baby bella mushrooms are a good alternative.
  • 1 medium Carrot Cut into matchsticks.
  • 2 scallions Spring Onion Reserve green parts for garnish.
For the Sauce
  • 3 tbsp Soy Sauce Tamari for gluten-free.
  • 1 tsp Salt
  • 1 tsp Black Pepper
  • 2 tbsp Oyster Sauce Vegetarian versions available.
  • 1 tbsp Dark Soy Sauce Distinct from regular soy sauce.
  • 1 tbsp Rice Vinegar Apple cider vinegar can be used.
  • 1 tbsp Brown Sugar Honey can be an alternative.
  • 1 tsp Freshly Crushed Black Pepper
  • 1 tbsp Toasted Sesame Oil

Equipment

  • Skillet
  • Pot

Method
 

Preparation
  1. Boil the udon noodles in a large pot of water for 4-5 minutes, then drain and rinse with cold water.
  2. In a skillet, heat 1 tablespoon of neutral oil and sauté minced garlic for 1 minute. Add sliced mushrooms and cook for 2-3 minutes.
  3. Add sliced onion and matchstick-cut carrots to the skillet. Stir-fry for 2-3 minutes, then season with salt and pepper.
  4. Increase heat to high, add 2 tablespoons of oil, and fry the shrimp seasoned with soy sauce for 2-3 minutes.
  5. Add the cooked udon noodles to the skillet and stir-fry for 2-3 minutes.
  6. Pour the sauce mixture into the skillet and toss for an additional 2 minutes.
  7. Return the cooked vegetables to the skillet and mix gently. Serve hot, garnished with spring onion greens.

Nutrition

Serving: 1servingCalories: 400kcalCarbohydrates: 50gProtein: 25gFat: 15gSaturated Fat: 2gPolyunsaturated Fat: 3gMonounsaturated Fat: 5gCholesterol: 150mgSodium: 900mgPotassium: 500mgFiber: 4gSugar: 5gVitamin A: 500IUVitamin C: 15mgCalcium: 60mgIron: 2mg

Notes

Yaki Udon is versatile; feel free to customize ingredients like adding bell peppers or broccoli.

Tried this recipe?

Let us know how it was!

Stay Connected

Get recipes via email: