Get my cookbooks

Savory Layered Mediterranean Vegetable Lasagna to Wow Your Taste Buds

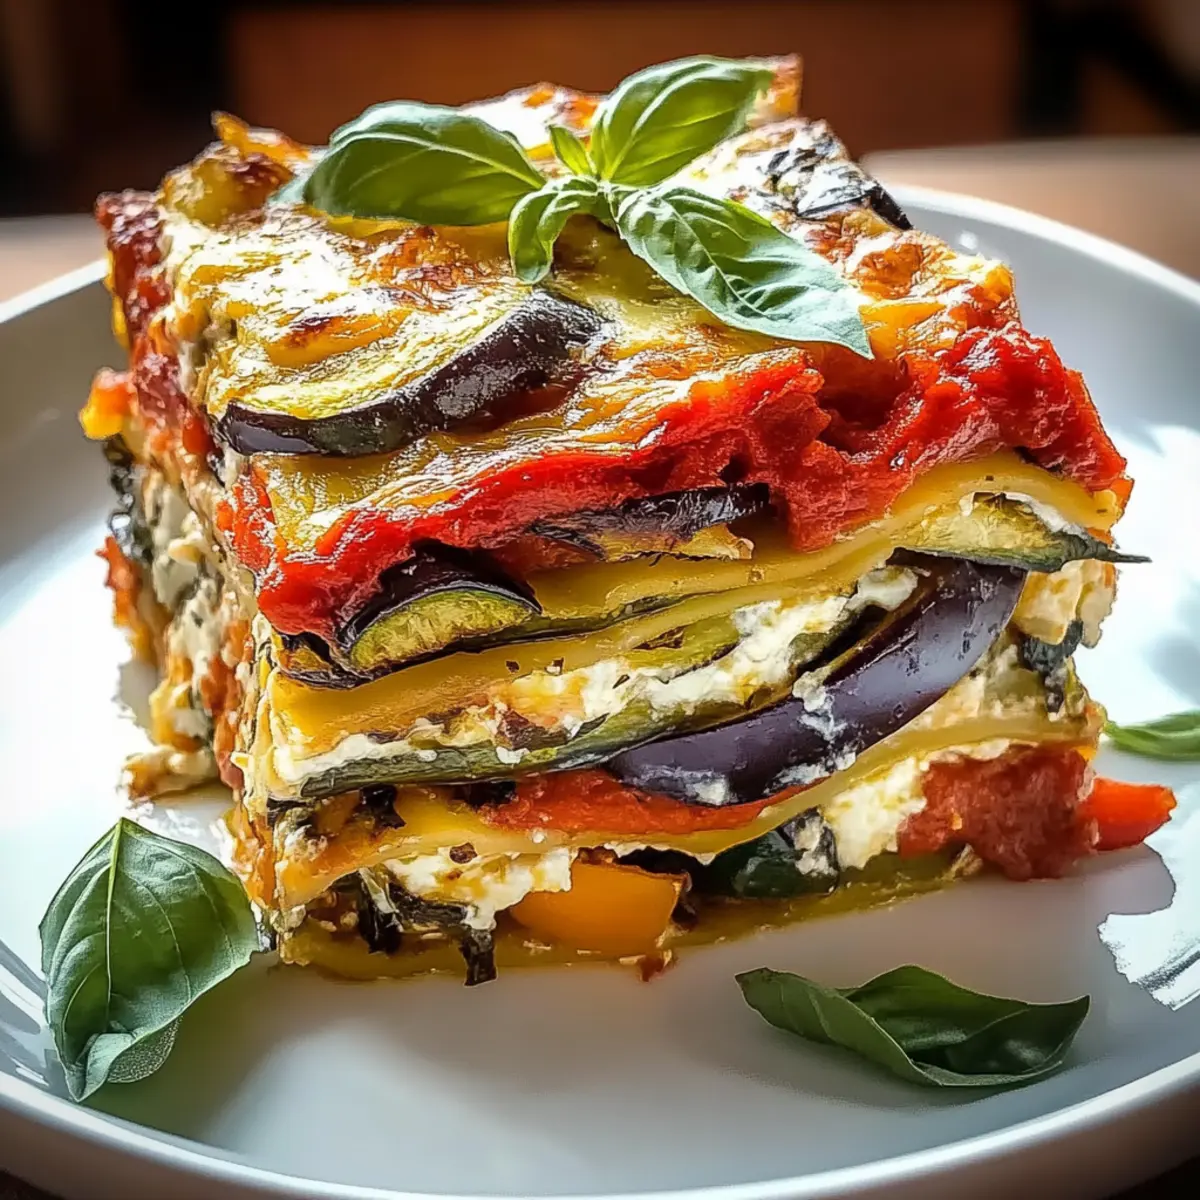
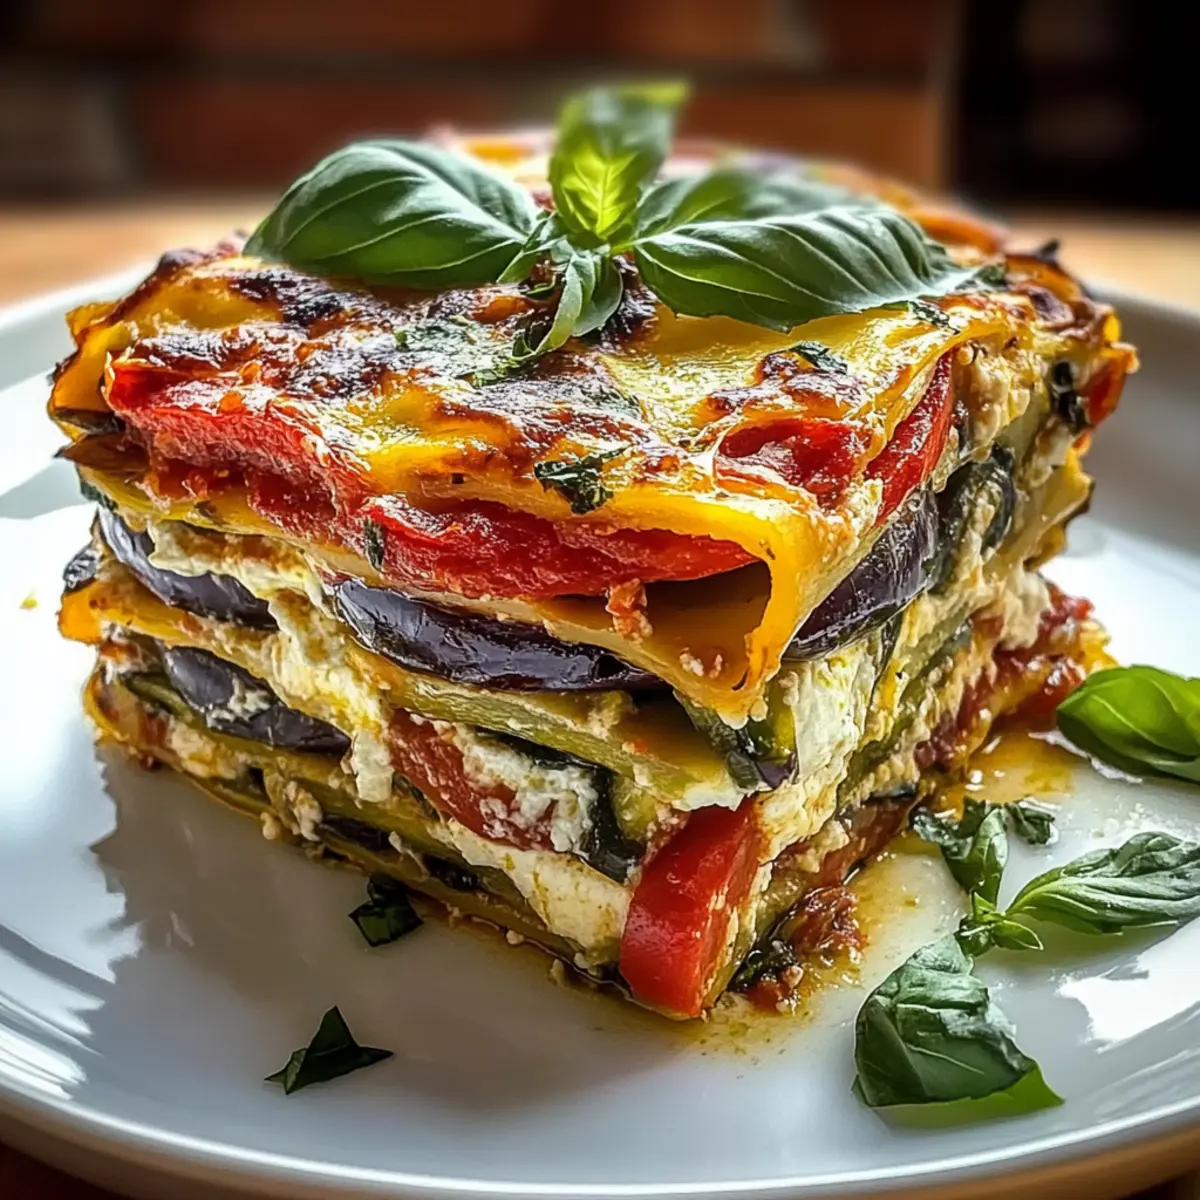
The aroma of roasted vegetables wafted through my kitchen, pulling me into a delicious daydream of Italy. Today’s recipe, Layered Mediterranean Vegetable Lasagna with Creamy Ricotta, is an embodiment of everything I love about cooking—it’s colorful, comforting, and utterly satisfying. This lovely dish features layers of vibrant, roasted eggplant, zucchini, and bell peppers, all enveloped in a luscious ricotta filling and rich marinara sauce.

It’s not just a feast for the eyes; this lasagna is quick to prepare and perfect for impressing family and friends. Plus, it’s a fantastic way to swap out fast food for fresh, homemade goodness. Best of all, it’s versatile—easily adaptable for gluten-free or vegan diets! Are you ready to dive into this Mediterranean-inspired culinary adventure?

Why Is This Lasagna So Special?

Layers of Flavor: This Layered Mediterranean Vegetable Lasagna bursts with vibrant tastes from roasted vegetables and creamy ricotta. Quick Preparation: Whip it up quickly, allowing you to spend more time enjoying meals with loved ones. Crowd-Pleasing Delight: Perfect for gatherings, it’s a dish everyone will rave about! Healthy Substitutions: Easily customize to fit gluten-free or vegan diets without sacrificing flavor. Whether paired with a crisp salad or a slice of garlic bread, this dish will make every meal feel like a special occasion. Need more ideas? Check out my Easter Chocolate Lasagna for an indulgent treat!

Layered Mediterranean Vegetable Lasagna Ingredients

• Create a masterpiece with these essential ingredients!

For the Roasted Vegetables

  • Eggplant – Provides a mild, slightly earthy flavor and meaty texture; substitute with zucchini for a lighter option.
  • Zucchini – Adds sweetness and moisture to the layers; helps maintain the lasagna’s overall lightness.
  • Red Bell Pepper – Introduces a sweet, fruity taste and vibrant color; can swap for orange or yellow peppers.
  • Yellow Bell Pepper – Offers a tangy sweetness similar to red; any sweet pepper variety works as a substitute.
  • Olive Oil – Essential for roasting vegetables and enhancing flavor; can substitute with avocado oil.
  • Salt and Pepper – Amplifies the natural flavors of the ingredients; using sea salt can improve texture.

For the Lasagna

  • Lasagna Noodles – The structural backbone of the dish; consider gluten-free or no-boil noodles as a substitute.
  • Ricotta Cheese – Adds creaminess to the dish; cottage cheese can be a lower-fat alternative.
  • Mozzarella Cheese – Melts beautifully, providing a stretchy texture; provolone can be a great substitute.
  • Parmesan Cheese – Contributes a nutty, salty finish; nutritional yeast can be a vegan alternative.

For Flavor

  • Garlic – Infuses flavor into the ricotta; use garlic powder if fresh isn’t available.
  • Dried Oregano – Contributes classic Mediterranean flavors; Italian seasoning can work as an alternative.
  • Dried Basil – Complements other herbs; fresh basil can elevate the flavor profile significantly.
  • Marinara Sauce – Binds all the layers together with robust flavor; opt for a quality store-bought or homemade version.

For Garnish

  • Fresh Basil Leaves – Brightens the dish’s finish; substitute with parsley if basil is unavailable.

This Layered Mediterranean Vegetable Lasagna will surely impress with its robust flavors and adaptable ingredients!

Step‑by‑Step Instructions for Layered Mediterranean Vegetable Lasagna

Step 1: Preheat and Prepare Baking Sheet
Begin by preheating your oven to 400°F (200°C). While the oven heats up, line a baking sheet with parchment paper to prevent sticking and ensure easy cleanup. This step sets the stage for roasting the vegetables that will make your Layered Mediterranean Vegetable Lasagna so flavorful.

Step 2: Arrange the Vegetables
Next, slice the eggplant, zucchini, and bell peppers into even pieces. Arrange them on the prepared baking sheet, ensuring they are spread out to avoid steaming. Drizzle with olive oil, and season generously with salt and pepper. This simple preparation enhances the natural flavors of the vegetables—essential for a delicious lasagna.

Step 3: Roast the Vegetables
Roast the vegetables in the preheated oven for 20 minutes, flipping them halfway through for even browning. You’ll know they’re done when they’re tender and slightly caramelized. This roasting process intensifies the flavors and adds a lovely texture, creating the perfect foundation for your Layered Mediterranean Vegetable Lasagna.

Step 4: Cook the Lasagna Noodles
While the vegetables are roasting, bring a large pot of salted water to a boil. Once boiling, add the lasagna noodles and cook until al dente according to package instructions, usually about 8-10 minutes. Drain the noodles and set them aside; this ensures that your lasagna layers will hold together beautifully.

Step 5: Prepare the Ricotta Mixture
In a medium bowl, combine the ricotta cheese, minced garlic, dried oregano, dried basil, salt, and pepper. Mix well until smooth and evenly blended. This creamy mixture will add richness to your Layered Mediterranean Vegetable Lasagna and complement the roasted vegetables perfectly.

Step 6: Assemble the Lasagna
Spread ½ cup of marinara sauce evenly across the bottom of a 9×13-inch baking dish. Layer three noodles on top, then add half of the roasted vegetables. Spoon half of the ricotta mixture over the veggies, followed by ⅓ of the mozzarella and Parmesan cheese. Repeat the layering process until all ingredients are used, finishing with noodles and a final spread of marinara sauce.

Step 7: Final Toppings and Baking
Top the final layer with the remaining marinara sauce and sprinkle the remaining mozzarella and Parmesan cheese evenly over the top. Cover the baking dish tightly with foil to avoid drying out, and place it in the oven. Bake for 25 minutes; the aroma of the Layered Mediterranean Vegetable Lasagna will fill your kitchen!

Step 8: Uncover and Brown the Lasagna
Remove the foil from the baking dish and bake for an additional 15 minutes. This step allows the cheese to become golden and bubbly, indicating that your lasagna is nearly ready. Keep an eye on it to ensure the cheese doesn’t over-brown, achieving that perfect melty top.

Step 9: Rest Before Serving
Once baked, remove the lasagna from the oven and let it rest for at least 10 minutes. This resting period allows the layers to settle, making it easier to slice and serve. As the scents waft through the air, you’ll know your Layered Mediterranean Vegetable Lasagna is a hit!

Step 10: Garnish and Enjoy
Before serving, garnish your beautiful lasagna with fresh basil leaves for a pop of color and flavor. This adds a lovely finishing touch to the dish. Now, your Layered Mediterranean Vegetable Lasagna is not only ready to impress your family and friends but also represents the heart of home-cooked goodness!

Expert Tips for Layered Mediterranean Vegetable Lasagna

  • Even Layers: Ensure that each layer is even to promote uniform cooking and make serving easier. Uneven layers can lead to a messy presentation.
  • Resting Time: Allow the lasagna to rest for at least 10 minutes before slicing. This helps achieve clean cuts and prevents the filling from spilling out.
  • Extra Veggies: Don’t hesitate to boost flavor by adding additional vegetables like mushrooms or spinach. Just be sure to chop them finely so that they fit seamlessly within the Layered Mediterranean Vegetable Lasagna.
  • Cheese Selection: Experiment with different types of cheese such as goat cheese or feta for a unique twist. Just be mindful of the saltiness—adjust accordingly!
  • Quality Marinara: Use a high-quality marinara sauce, whether store-bought or homemade. It ties all the ingredients together and enhances the overall flavor of the dish.

Layered Mediterranean Vegetable Lasagna Variations

Feel free to play with the flavors and textures of this delightful lasagna recipe and truly make it your own!

  • Gluten-Free: Use certified gluten-free lasagna noodles, ensuring everyone can enjoy this festive dish.
  • Vegan: Substitute ricotta and cheese with creamy plant-based alternatives like cashew or tofu-based ricotta for a vegan-friendly version.
  • Spicy Kick: Add red pepper flakes or diced jalapeños to the marinara sauce for those who enjoy heat in their dishes.
  • Herb-Infused: Mix fresh herbs like thyme or rosemary into the ricotta for an aromatic twist that elevates the lasagna.
  • Extra Veggies: Bulk it up by adding finely chopped spinach or sautéed mushrooms to the layers for added nutrition and flavor. This is a perfect way to use any leftover veggies!
  • Protein Boost: Incorporate layers of cooked lentils or chickpeas for a hearty, protein-packed vegetarian version that’s filling and delicious.
  • Cheese Variation: Swap out mozzarella for a smoked cheese or Fontina for a deeper flavor profile that tantalizes the taste buds.
  • Savoury Layers: Try replacing some of the marinara with a homemade pesto sauce between the layers for a twist of fresh basil flavor. If you love a robust flavor, check out my Mediterranean Herb Crusted Salmon recipe that pairs wonderfully with this lasagna!

What to Serve with Layered Mediterranean Vegetable Lasagna

Nothing completes a comforting lasagna like a few delightful side dishes to create a perfect meal experience.

  • Crisp Garden Salad: A fresh mix of greens, tomatoes, and cucumbers adds a light crunch and balances the richness of the lasagna. Toss with a zesty vinaigrette for extra flavor.

  • Garlic Bread: Warm, buttery garlic bread is the ultimate companion to soak up marinara sauce and enhance your meal’s rustic Italian charm. Its crispy exterior contrasts wonderfully with the soft layers of the lasagna.

  • Roasted Vegetables: Serving an additional side of seasonal roasted vegetables amplifies flavors and adds a delightful char, complementing the Mediterranean theme beautifully. Seasonal variations like asparagus or bell peppers can brighten your plate.

  • Herbed Quinoa: This nutty, fluffy grain is a fantastic side, offering a nutritious and filling option while harmonizing with the lasagna’s flavors. Toss in fresh herbs like parsley or basil for extra vibrancy.

  • Red Wine: A glass of smooth, medium-bodied red wine like Chianti or Merlot works wonders, enhancing the dish’s flavors while providing a delightful acidity that pairs perfectly with the richness of the cheese.

  • Lemon Sorbet: For a refreshing dessert, lemon sorbet cleanses the palate after your hearty lasagna, leaving a bright, tangy finish and a taste of sunny Italian summers.

Each of these delightful accompaniments elevates your Layered Mediterranean Vegetable Lasagna into a truly memorable dining experience!

How to Store and Freeze Layered Mediterranean Vegetable Lasagna

  • Fridge: Store leftovers in an airtight container for up to 3-5 days. This Lasagna tastes just as delicious the next day, making it perfect for quick meals.

  • Freezer: Freeze the assembled lasagna before baking if you’d like to prepare in advance. Wrap it tightly in plastic wrap and foil; it can be stored for up to 3 months.

  • Reheating: When ready to serve, thaw in the fridge overnight before baking. Reheat in a preheated oven at 350°F (175°C) for about 25-30 minutes until heated through.

  • Make-Ahead Tip: For convenience, consider preparing the Layered Mediterranean Vegetable Lasagna up to 2 days in advance and keep it wrapped in the fridge. Simply bake it when you’re ready to enjoy!

Make Ahead Options

These Layered Mediterranean Vegetable Lasagna are perfect for meal prep enthusiasts! You can roast the vegetables and prepare the ricotta mixture up to 24 hours in advance, storing them separately in airtight containers in the refrigerator to keep them fresh and flavorful. Assemble the lasagna with these components the day you plan to serve it for the best quality, ensuring the noodles are fully cooked and layered evenly. Alternatively, you can assemble the entire lasagna and refrigerate it for up to 3 days before baking. Just remember to cover it tightly to prevent drying out. When you’re ready to serve, bake it straight from the fridge, adding an extra 10-15 minutes to the cooking time for delicious, bubbly results!

Layered Mediterranean Vegetable Lasagna Recipe FAQs

How do I select ripe vegetables for my lasagna?
When choosing vegetables like eggplant and zucchini, look for firm specimens with smooth skin and vibrant colors. Avoid any that show signs of spoilage, such as dark spots or wrinkles. For bell peppers, opt for ones that feel heavy for their size, which often indicates juiciness and flavor. If you’re ever in doubt, ask your local produce vendor for their recommendations—they often know best!

What’s the best way to store leftover lasagna?
Absolutely! Store any leftover Layered Mediterranean Vegetable Lasagna in an airtight container in the refrigerator for up to 3-5 days. To keep it fresh, you can cover it with plastic wrap or aluminum foil before placing the lid on the container. This will help prevent it from drying out, ensuring every bite remains as delicious as the first!

Can I freeze my lasagna, and how do I do it?
Of course! To freeze your lasagna, prepare it as instructed and then wrap the unbaked dish tightly in plastic wrap, followed by aluminum foil. This double-wrapping protects it from freezer burn and keeps it fresh for up to 3 months. When you’re ready to enjoy it, simply thaw it in the fridge overnight before baking. Preheat your oven to 350°F (175°C) and bake for about 25-30 minutes until heated through.

What should I do if my lasagna is too watery after baking?
If your Layered Mediterranean Vegetable Lasagna turns out watery, it may be due to excess moisture from the vegetables or marinara sauce. To combat this, ensure you roast the vegetables thoroughly and consider draining any excess liquid before layering. Additionally, letting the lasagna rest for at least 10 minutes before slicing will help it set and absorb some moisture, leading to cleaner slices.

Can I adapt this recipe for dietary restrictions?
Very! This lasagna is easily adaptable for various dietary needs. For a gluten-free option, simply swap traditional noodles for gluten-free lasagna noodles. If you prefer a vegan version, replace the ricotta and mozzarella with your favorite plant-based cheeses, and use nutritional yeast for added creaminess and flavor. You can still enjoy all the vibrant flavors without compromising on your dietary choices!

Is this recipe safe for pets?
While some of the ingredients like zucchini and eggplant are generally safe for pets, it’s best to keep this Layered Mediterranean Vegetable Lasagna as a human-only dish. The cheeses and garlic can be harmful to pets in large amounts. If you want to share the love, consider giving them plain, cooked vegetables instead!

Layered Mediterranean Vegetable Lasagna

Savory Layered Mediterranean Vegetable Lasagna to Wow Your Taste Buds

This Layered Mediterranean Vegetable Lasagna combines vibrant roasted vegetables and creamy ricotta for a comforting, delicious dish.
Prep Time 30 minutes
Cook Time 45 minutes
Resting Time 10 minutes
Total Time 1 hour 25 minutes
Servings: 8 slices
Course: Pasta
Cuisine: Mediterranean
Calories: 350

Ingredients
  

For the Roasted Vegetables
  • 1 medium Eggplant Substitute with zucchini for a lighter option.
  • 2 medium Zucchini
  • 1 medium Red Bell Pepper Can swap for orange or yellow peppers.
  • 1 medium Yellow Bell Pepper Any sweet pepper variety works.
  • 2 tablespoons Olive Oil Can substitute with avocado oil.
  • to taste Salt Using sea salt can improve texture.
  • to taste Pepper
For the Lasagna
  • 9 sheets Lasagna Noodles Consider gluten-free or no-boil noodles as a substitute.
  • 15 ounces Ricotta Cheese Cottage cheese can be a lower-fat alternative.
  • 2 cups Mozzarella Cheese Provolone can be a great substitute.
  • 1 cup Parmesan Cheese Nutritional yeast can be a vegan alternative.
For Flavor
  • 2 cloves Garlic Use garlic powder if fresh isn't available.
  • 1 teaspoon Dried Oregano Italian seasoning can work as an alternative.
  • 1 teaspoon Dried Basil Fresh basil can elevate the flavor profile.
  • 2 cups Marinara Sauce Opt for quality store-bought or homemade.
For Garnish
  • 1 cup Fresh Basil Leaves Substitute with parsley if basil is unavailable.

Equipment

  • Oven
  • Baking Sheet
  • 9x13 inch baking dish
  • medium bowl
  • Large pot

Method
 

Step-by-Step Instructions
  1. Preheat your oven to 400°F (200°C) and line a baking sheet with parchment paper.
  2. Slice the eggplant, zucchini, and bell peppers into even pieces and arrange them on the prepared baking sheet. Drizzle with olive oil, and season generously with salt and pepper.
  3. Roast the vegetables in the oven for 20 minutes, flipping halfway through.
  4. While the vegetables are roasting, bring a large pot of salted water to a boil. Add the lasagna noodles and cook until al dente, about 8-10 minutes. Drain and set aside.
  5. Combine the ricotta cheese, minced garlic, dried oregano, dried basil, salt, and pepper in a medium bowl until smooth.
  6. Spread ½ cup of marinara sauce evenly across the bottom of a 9x13-inch baking dish. Layer three noodles on top, add half of the roasted vegetables, spoon half of the ricotta mixture over the veggies, and sprinkle with ⅓ of the mozzarella and Parmesan cheese. Repeat the process.
  7. Top with the remaining marinara sauce and sprinkle the remaining mozzarella and Parmesan cheese. Cover tightly with foil and bake for 25 minutes.
  8. Remove the foil and bake for an additional 15 minutes to achieve a golden and bubbly cheese topping.
  9. Let the lasagna rest for at least 10 minutes before slicing.
  10. Garnish with fresh basil leaves before serving.

Nutrition

Serving: 1sliceCalories: 350kcalCarbohydrates: 32gProtein: 18gFat: 15gSaturated Fat: 8gPolyunsaturated Fat: 1gMonounsaturated Fat: 6gCholesterol: 50mgSodium: 600mgPotassium: 500mgFiber: 3gSugar: 5gVitamin A: 1500IUVitamin C: 30mgCalcium: 250mgIron: 2mg

Notes

This lasagna is easily adaptable for gluten-free or vegan diets.

Tried this recipe?

Let us know how it was!

CrockPot Taco Spaghetti: Ultimate Comfort in One Pot

As the aroma of simmering spices fills the air, my heart does a little happy dance—there’s nothing quite like the comfort of a good home-cooked meal. Enter CrockPot Taco Spaghetti, a delightful blend that transforms classic spaghetti into a zesty, taco-inspired feast cooked right in your slow cooker. Not only is this recipe family-friendly and easy to whip up on busy weeknights, but it also requires minimal hands-on time, allowing you to savor the moments that matter most. Picture a creamy, cheesy pasta dish that promises to make everybody at the table smile, and you’ve got a winner on your hands! Curious about how to bring this one-pot wonder to life? Let’s dive into the excitement of cooking!

Why is this recipe a family favorite?

Ease of Preparation: Just toss your ingredients into the slow cooker and let it work its magic—no fuss, no mess!

Fabulous Flavor Fusion: The marrying of taco spices with creamy spaghetti creates a unique dish that’s bursting with flavor.

Crowd-Pleasing Dish: Perfect for family dinners or game night, this hearty meal pleases even the pickiest eaters!

Versatile Options: Customize your CrockPot Taco Spaghetti by swapping in different proteins or adding extra veggies to suit your taste. Don’t forget to check out my Mexican Taco Soup for another family favorite!

Comfort in Every Bite: The creamy, cheesy texture makes this dish feel like a warm hug, ensuring everyone leaves the table satisfied.

CrockPot Taco Spaghetti Ingredients

Unlock the wonderful flavors of CrockPot Taco Spaghetti with these simple ingredients!

For the Base

  • Lean Ground Beef – A hearty protein base; feel free to swap it for ground turkey or a plant-based alternative for a lighter option.
  • Salt and Pepper – Essential for enhancing the flavors; adjust to suit your taste preferences.
  • Medium Red or Green Bell Pepper – Adds a sweet and crunchy texture; you can use any color bell pepper you have on hand.
  • Crushed Tomatoes (15 oz) – Provides a rich tomato foundation for the sauce; diced tomatoes can work if you prefer a chunkier consistency.
  • Salsa (1 cup) – Infuses your dish with zesty flavors; choose your favorite salsas to adjust the heat level to your liking.
  • Canned Corn (15 oz, drained) – Adds a pop of sweetness; fresh or frozen corn can be substituted effortlessly.
  • Taco Seasoning (1 package, about 3 tablespoons) – Delivers that signature taco flavor; consider making your own for a healthier twist!
  • Chicken Broth (2 ½ cups) – Adds moisture and deepens the sauce; opt for vegetable broth if you’re going vegetarian.

For the Pasta and Toppings

  • Spaghetti Pasta (12 oz) – Serves as the base that soaks up all the delicious sauce; feel free to use any pasta shape you love, adjusting cooking times as necessary.
  • Shredded Cheddar Cheese (2 cups) – Adds creaminess and a delightful cheesy topping; mixing in a cheese blend can diversify the flavor profile.
  • Fresh Minced Cilantro – For garnish and a fresh touch; this is optional, but if you don’t have cilantro, parsley makes a great substitute.

Step‑by‑Step Instructions for CrockPot Taco Spaghetti

Step 1: Brown the Beef
In a large skillet over medium-high heat, cook the lean ground beef until it’s well-browned and crumbled, about 6-8 minutes. Season with salt and pepper to taste, ensuring it’s fully cooked through with no pink remaining. Once done, transfer the beef to your slow cooker, setting the stage for a hearty base in your CrockPot Taco Spaghetti.

Step 2: Combine the Ingredients
Add diced bell pepper, crushed tomatoes, salsa, drained corn, taco seasoning, and chicken broth to the slow cooker with the browned beef. Stir until all the ingredients are well combined, creating a vibrant and flavorful mixture. This savory blend will be the foundation for your creamy taco-inspired sauce, so ensure everything is mixed thoroughly.

Step 3: Cook the Mixture
Cover the slow cooker with its lid and cook the mixture on high for 3-4 hours. This slow-cooked process allows the flavors to meld beautifully, creating a rich and zesty sauce that permeates the beef and veggies. As the timer counts down, your kitchen will fill with enticing taco aromas that signal dinner is on the way!

Step 4: Add the Spaghetti
Once the cooking time is up, carefully add the spaghetti to the slow cooker. Stir it into the bubbling mixture, ensuring that the pasta is fully submerged in the sauce. Cover again and cook for an additional 10-20 minutes on high, monitoring closely until the pasta reaches your desired level of doneness—al dente is perfect!

Step 5: Melt the Cheese
When the spaghetti is cooked to perfection, sprinkle the shredded cheddar cheese over the top. Cover the slow cooker once more and let it sit for 5 minutes to allow the cheese to melt wonderfully over your flavorful feast. The melted cheese will give your CrockPot Taco Spaghetti that comforting, creamy finish that’s hard to resist.

Step 6: Serve with Fresh Garnish
After the cheese has melted, give the mixture a good stir to mix in the cheesy goodness. Serve the CrockPot Taco Spaghetti hot, garnished with freshly chopped cilantro for a burst of flavor and color. This delightful dish is now ready to share with family and friends, making every bite a comforting experience!

Expert Tips for CrockPot Taco Spaghetti

  • Browning the Meat: Ensuring the ground beef is well-browned adds depth and flavor to your CrockPot Taco Spaghetti, making it truly scrumptious.

  • Stir Before Serving: Give the mixture a good stir before serving to distribute the melted cheese evenly, enhancing every bite of this delightful dish.

  • Watch the Pasta: Avoid overcooking the spaghetti; check for doneness periodically after adding it to achieve the perfect texture in your comfort food.

  • Use Good Salsa: The type of salsa you choose greatly influences the flavor. Pick a quality salsa that suits your spice level for the best results.

  • Experiment with Toppings: Feel free to experiment with toppings! Add jalapeños for heat or a dollop of sour cream for creaminess that complements the taco flavors beautifully.

Make Ahead Options

CrockPot Taco Spaghetti is a fantastic candidate for meal prep, saving you precious time during busy weeknights! You can brown the lean ground beef and mix it with the diced bell pepper, crushed tomatoes, salsa, drained corn, taco seasoning, and chicken broth up to 24 hours in advance. Just store the mixture in an airtight container in the refrigerator to keep it fresh. When you’re ready to serve, simply transfer the mixture to the slow cooker, add the uncooked spaghetti, and follow the cooking instructions as outlined. Your family will enjoy a delicious meal that’s just as comforting and flavorful as if it were made fresh!

How to Store and Freeze CrockPot Taco Spaghetti

Fridge: Store leftovers in an airtight container for up to 3-4 days. Reheat portions in the microwave or on the stovetop until heated through, ensuring the creamy texture remains intact.

Freezer: Freeze CrockPot Taco Spaghetti in portions for up to 3 months. Use freezer-safe containers or bags, removing as much air as possible to prevent freezer burn.

Thawing: To enjoy your frozen spaghetti, thaw it overnight in the refrigerator. For a quicker option, place the sealed bag in a bowl of cold water until thawed.

Reheating: Reheat gently on the stovetop or in the microwave, adding a splash of chicken broth to restore creaminess if needed. Enjoy this comforting dish warm!

CrockPot Taco Spaghetti Variations

Feel free to let your creativity shine by personalizing this recipe to fit your family’s tastes and dietary needs!

  • Vegetarian Delight: Substitute the ground beef with black beans or lentils for a hearty, meat-free option. This choice maintains the dish’s robustness while being kinder to the planet.

  • Extra Veggies: Toss in some chopped zucchini or fresh spinach for an additional boost of nutrition and vibrant color. You can never go wrong with a little extra produce!

  • Spice It Up: Use spicy salsa or add sliced jalapeños to amplify the heat level. For those who love a kick, this variation makes each bite an adventure!

  • Cheesy Variants: Swap in pepper jack or Monterey Jack cheese instead of cheddar for a twist on flavor. Each cheese brings a unique taste profile that can change the whole vibe!

  • Pasta Variety: Explore different pasta shapes like penne or rotini. Each shape offers a new bite size, which can make the dish even more enjoyable!

  • Taco Seasoning Twist: Try using homemade taco seasoning for a fresher flavor. You can adjust the spices according to your preference, creating a personalized blend that everyone will love!

  • Creamy Upgrade: Stir in a splash of heavy cream or Greek yogurt before serving for an extra creamy texture. This addition brings richness without overshadowing the taco flavors.

For more delicious inspiration, try my fun Cheesy Taco Sticks or savor the flavors of Birria Tacos Culinary for a complete meal experience!

What to Serve with CrockPot Taco Spaghetti

As you whip up this satisfying dish, think about how to create a memorable meal that delights the senses.

  • Garlic Bread: Its toasty crunch complements the creamy spaghetti sauce, providing a fragrant, buttery side that everyone will love. Try adding a sprinkle of parsley for extra flavor!

  • Simple Green Salad: A fresh salad with mixed greens, cherry tomatoes, and a light vinaigrette adds a refreshing contrast to the rich spaghetti. It brings balance to your plate, making for a well-rounded meal.

  • Spanish Rice: The fluffy rice infused with spices and tomato pairs beautifully with the taco flavors, soaking up the savory sauce and enhancing the overall experience.

  • Avocado Slices: Creamy avocado provides a luscious texture and mild flavor, which perfectly balances the zesty spaghetti. Add a sprinkle of lime juice for a bright punch!

  • Cornbread Muffins: These slightly sweet muffins create a delightful contrast with the savory pasta. Their warm, fluffy texture is perfect for scooping up that cheesy goodness!

  • Peach Iced Tea: This refreshing beverage adds a fruity, sweet finish that complements the robust flavors of the CrockPot Taco Spaghetti, making each bite even more enjoyable.

  • Churros for Dessert: End your meal on a sweet note with these crispy, cinnamon-sugar coated treats. Their warmth and crunch are the perfect ending to a comforting taco-infused dinner!

CrockPot Taco Spaghetti Recipe FAQs

How do I choose ripe ingredients for this recipe?
Absolutely! For the best results, choose bell peppers that are firm and shiny, without any dark spots or wrinkles. Look for tomatoes that are vibrant and smell sweet; they should feel heavy for their size. Opt for salsa and taco seasoning that reflect your taste preferences—mild or spicy, based on your family’s palate.

What are the best storage methods for leftovers?
Store any leftover CrockPot Taco Spaghetti in an airtight container in the refrigerator for up to 3-4 days. Make sure to let it cool to room temperature before sealing to avoid condensation. When reheating, I suggest adding a splash of chicken broth to maintain its creamy texture.

Can I freeze CrockPot Taco Spaghetti?
Absolutely! You can freeze this comforting dish for up to 3 months. Portion it into freezer-safe containers, ensuring to remove as much air as possible. When you’re ready to enjoy it, thaw overnight in the fridge or use a bowl of cold water for a quicker thaw.

What should I do if my spaghetti is overcooked?
If you find your spaghetti is overcooked and mushy, that can happen. To salvage it, try adding a splash of chicken broth or water to the mix and stirring gently, then allow it to sit for a few extra minutes—this can help rejuvenate the texture slightly.

Are there any dietary considerations I should be aware of?
Yes! If you’re making this for a family that includes pets, be cautious with ingredients like onions and garlic, as they can be harmful to them. Additionally, for those with allergies, ensure any store-bought salsas or taco seasonings are free from allergens like gluten or dairy.

What can I do with leftover cheese?
The more the merrier! If you have leftover shredded cheese, it can easily be used in other dishes. Add it to quesadillas, sprinkle on salads, or even mix into scrambled eggs for a delicious cheesy breakfast. Alternatively, it can be frozen for later use—just place it in a freezer bag and remove as much air as possible.

CrockPot Taco Spaghetti

CrockPot Taco Spaghetti: Ultimate Comfort in One Pot

CrockPot Taco Spaghetti is a family-friendly, one-pot recipe that combines classic spaghetti with zesty taco flavors for a comforting meal.
Prep Time 20 minutes
Cook Time 4 hours
Total Time 4 hours 20 minutes
Servings: 8 servings
Course: Dinner
Cuisine: Mexican
Calories: 450

Ingredients
  

For the Base
  • 1 lb Lean Ground Beef Can substitute with ground turkey or plant-based alternative.
  • 1 tsp Salt
  • 1 tsp Pepper
  • 1 large Medium Red or Green Bell Pepper Any color works.
  • 15 oz Crushed Tomatoes Diced tomatoes can be used for a chunkier sauce.
  • 1 cup Salsa Adjust heat level with your favorite salsa.
  • 15 oz Canned Corn Drained; fresh or frozen corn can be substituted.
  • 1 package Taco Seasoning About 3 tablespoons; consider homemade for a healthier option.
  • 2.5 cups Chicken Broth Vegetable broth can be used for vegetarian option.
For the Pasta and Toppings
  • 12 oz Spaghetti Pasta Any pasta shape can be used.
  • 2 cups Shredded Cheddar Cheese Can mix in a cheese blend.
  • Fresh Minced Cilantro Optional, can substitute with parsley.

Equipment

  • Slow Cooker
  • Large skillet

Method
 

Step-by-Step Instructions
  1. In a large skillet over medium-high heat, cook the lean ground beef until browned and crumbled, about 6-8 minutes. Season with salt and pepper to taste, ensuring fully cooked. Transfer beef to slow cooker.
  2. Add diced bell pepper, crushed tomatoes, salsa, drained corn, taco seasoning, and chicken broth to the slow cooker with the browned beef. Stir until well combined.
  3. Cover the slow cooker and cook on high for 3-4 hours.
  4. Carefully add the spaghetti to the slow cooker, ensuring fully submerged in sauce. Cover and cook for an additional 10-20 minutes on high.
  5. Sprinkle shredded cheddar cheese over the top. Cover and let sit for 5 minutes to melt cheese.
  6. Mix in the melted cheese and serve hot, garnished with chopped cilantro.

Nutrition

Serving: 1bowlCalories: 450kcalCarbohydrates: 45gProtein: 30gFat: 20gSaturated Fat: 10gPolyunsaturated Fat: 2gMonounsaturated Fat: 3gCholesterol: 70mgSodium: 800mgPotassium: 500mgFiber: 5gSugar: 3gVitamin A: 300IUVitamin C: 25mgCalcium: 300mgIron: 3mg

Notes

Ensure to brown the meat well, stir before serving for even cheese distribution, and choose good quality salsa for best flavor.

Tried this recipe?

Let us know how it was!

Spicy Ground Beef Stir Fry Bowl: Quick Flavor Explosion

As the clock ticks down to dinner time, I often find myself in a mini crisis: craving something comforting yet quick to whip up. Enter the Spicy Ground Beef Stir Fry Bowl! In under 30 minutes, this recipe transforms humble ingredients into a vibrant feast of flavors. It’s not just a meal; it’s the perfect solution for busy weeknights, offering a delightful mix of savory ground beef, fresh veggies, and a dazzling sweet-spicy sauce. You can easily customize it based on what you have on hand, making it a reliable go-to for any kitchen. Whether you’re a meal prep perfectionist or just want a satisfying family dinner, this dish checks all the boxes. Ready to spice up your evening routine and impress your loved ones?

Why is this Stir Fry Bowl a Must-Try?

Quick and Easy: This recipe requires minimal preparation and cooking time, making it perfect for busy weeknights.

Flavor Packed: A harmonious blend of savory beef, vibrant vegetables, and a zesty sauce guarantees a taste sensation that will leave everyone asking for seconds.

Customizable Delight: Feel free to swap in your favorite veggies or proteins like chicken or tofu, ensuring it suits any dietary preference.

Healthier Alternative: Packed with nutrient-rich ingredients, it’s a wholesome way to enjoy a takeout-style meal at home without the guilt.

Crowd-Pleasing: With its bright colors and bold flavors, this dish is sure to impress family and friends, making it a fantastic choice for gatherings. So why not pair it with some Chicken Pepper Stir for an unforgettable meal?

Spicy Ground Beef Stir Fry Bowl Ingredients

For the Sauce

  • Sesame oil – Adds a nutty flavor; vegetable oil can substitute.
  • Low-sodium soy sauce – Enhances umami flavors while controlling saltiness; tamari is gluten-free.
  • Honey – Provides sweetness to balance heat; maple syrup works for a vegan option.
  • Sriracha – Adds spiciness; adjust to personal preference for heat.
  • Rice vinegar – Adds acidity to balance flavors; apple cider vinegar is a good alternative.
  • Cornflour – Used to thicken the sauce; can be replaced with arrowroot powder.

For the Stir Fry

  • Lean beef mince (500g) – This is the heart of the dish, providing rich flavor and texture; ground turkey or chicken can be used instead.
  • Onion (1 large) – Provides sweetness and depth; any onion type works, or substitute shallots.
  • Garlic (4 cloves) – Adds aromatic depth; garlic powder can be used in smaller amounts if needed.
  • Fresh ginger (1 tbsp) – Gives a warming spice and zest; ground ginger can substitute if fresh isn’t available.

For the Vegetables

  • Bell peppers (2, red and yellow) – Adds color, crunch, and sweetness; other peppers or similar veggies like zucchini work too.
  • Broccoli (1 head) – Contributes nutrition and vibrant color; cauliflower or snap peas make good substitutions.

For Serving

  • Cooked rice – Acts as a base; jasmine or basmati rice is recommended, or try quinoa or cauliflower rice for a twist.
  • Spring onions and toasted sesame seeds (for garnish) – Offers freshness and crunch; chopped peanuts or cilantro can serve as alternatives.

This Spicy Ground Beef Stir Fry Bowl is your ticket to a vibrant home-cooked meal that’s both quick and full of flavor!

Step‑by‑Step Instructions for Spicy Ground Beef Stir Fry Bowl

Step 1: Prepare the Sauce and Veggies
In a medium bowl, whisk together 80ml of low-sodium soy sauce, 2 tablespoons of honey, 1-2 tablespoons of sriracha, 1 tablespoon of rice vinegar, and 1 teaspoon of cornflour until smooth and well combined. Set the sauce aside. Meanwhile, chop your onion, garlic, ginger, bell peppers, and broccoli into bite-sized pieces for an effortless cooking process that showcases the vibrant colors of your Spicy Ground Beef Stir Fry Bowl.

Step 2: Brown the Beef Mince
Heat a wok or large skillet over medium-high heat and drizzle in 1 tablespoon of sesame oil. Once the oil shimmers, add the 500g of lean beef mince, breaking it apart as it cooks. Allow the beef to brown for about 5-7 minutes, stirring occasionally until it reaches a deep brown color, releasing a savory aroma that fills your kitchen.

Step 3: Sauté Aromatics
If there’s excess fat, carefully spoon it out to keep the dish from becoming greasy. Add the chopped garlic and fresh ginger to the hot wok, sautéing for 30-60 seconds until fragrant. The garlic should turn a light golden color, which adds a layer of aromatic depth to your Spicy Ground Beef Stir Fry Bowl, enhancing its overall flavor profile.

Step 4: Cook Hardy Veggies
Introduce the chopped onion and broccoli to the wok, stirring frequently for 4-5 minutes. Cook until the onion softens and the broccoli turns a bright green, signifying it’s tender yet still crunchy. This step adds both nutrition and vibrant texture to your dish, making it visually appealing and delightful to taste.

Step 5: Add Peppers
Now, add the chopped bell peppers to the stir-fry, continuing to stir-fry for an additional 2-3 minutes. You want the peppers to remain slightly crisp, which brightens the texture of your Spicy Ground Beef Stir Fry Bowl and ensures a delightful bite, contrasting beautifully with the tender beef and broccoli.

Step 6: Pour Over Sauce
Give the prepared sauce a quick stir before pouring it evenly over the beef and veggies in the wok. Mix everything well, allowing the sauce to coat all the ingredients. Let it bubble gently for 1-2 minutes, stirring frequently until the sauce thickens slightly, creating a glossy glaze that enhances the flavors and presentation of your meal.

Step 7: Serve and Garnish
Once everything is nicely mixed and heated through, serve the Spicy Ground Beef Stir Fry Bowl over a bed of warm cooked rice. For that finishing touch, garnish with chopped spring onions and toasted sesame seeds for added freshness and crunch. Embrace the vibrant colors and inviting aroma as you present this delicious meal to your family or guests!

Make Ahead Options

These Spicy Ground Beef Stir Fry Bowls are perfect for meal prep enthusiasts! You can prepare the sauce and chop all your vegetables up to 24 hours in advance, storing them in airtight containers in the refrigerator to maintain their freshness. Additionally, you can brown the beef mince and refrigerate it for up to 3 days, making dinner a breeze. When you’re ready to enjoy the dish, simply reheat the beef and vegetables in a wok, add the sauce, and stir-fry for just a couple of minutes until everything is hot and the sauce is shiny. This approach not only saves you time during busy weeknights but also ensures a delicious, home-cooked meal with minimal effort!

What to Serve with Spicy Ground Beef Stir Fry Bowl

Creating a memorable meal is an art, and pairing the right sides with your stir fry bowl elevates the dining experience.

  • Steamed Jasmine Rice: This fluffy base absorbs the savory sauce perfectly, enhancing each bite of your spicy ground beef dish. The subtle aroma of jasmine rice brings an exotic touch to the table.

  • Refreshing Cucumber Salad: Crisp cucumbers drizzled with a light vinaigrette provide a cooling contrast to the dish’s heat. This salad is a simple, fresh addition that brightens the palate and adds crunch.

  • Egg Rolls: Crispy on the outside and filled with veggies, egg rolls add a delightful texture that complements the tender beef and veggies of your stir fry. Their savory filling and crunch create a satisfying balance.

  • Garlic Butter Broccoli: Sautéed in garlic butter, tender broccoli offers a rich flavor and pairs beautifully with the spices in your stir fry. It’s a nutritious side that maintains the vibrant color theme.

  • Sweet and Sour Pineapple: Sweet pineapple chunks bring a burst of tropical flavor, balancing the dish’s heat with their juicy sweetness. This side adds a fun and fruity contrast that your family will love.

  • Iced Green Tea: A refreshing drink that complements the flavors of your meal while helping to cleanse the palate. Its subtle earthy tones enhance the taste of the spicy ground beef stir fry bowl.

  • Mango Sticky Rice: For a sweet finish, this dessert offers a delightful contrast with its creamy coconut flavor and chewy texture. It serves as a beautiful way to end a spicy meal on a sweet note.

Storage Tips for Spicy Ground Beef Stir Fry Bowl

  • Fridge: Store leftovers in an airtight container for up to 3 days. This helps maintain freshness while keeping the flavors intact.

  • Freezer: If you want to keep leftovers longer, freeze in a suitable container for up to 3 months. Ensure the container is airtight to prevent freezer burn.

  • Reheating: Reheat portions in the microwave or on the stovetop. Add a splash of water or broth to revive the moisture and prevent drying out.

  • Meal Prep: For quick meals throughout the week, divide the stir fry into portions over rice before refrigerating or freezing, making it easy to grab and reheat!

Expert Tips for Spicy Ground Beef Stir Fry Bowl

  • Mise en Place: Ensure all ingredients are prepped before cooking. The quick nature of this spicy ground beef stir fry bowl means timing is essential for the best results.

  • Heat Control: Avoid overcooking the beef by keeping the heat at medium-high. This ensures the meat remains juicy and tender, just as you want in your stir fry.

  • Customize Your Veggies: Don’t hesitate to swap in different vegetables based on your preference. Carrots, snap peas, or mushrooms add unique flavors and textures to your spicy ground beef stir fry bowl.

  • Taste as You Go: Adjust the levels of sriracha and honey according to your taste. It’s all about balancing heat and sweetness for the perfect flavor explosion.

  • Quick Serving: Serve immediately after cooking while the dish is hot and fresh. This enhances flavor and keeps the vibrant colors of the veggies intact, making your meal more appealing.

Spicy Ground Beef Stir Fry Bowl Variations

Feel free to play around with this recipe to match your taste buds and pantry staples!

  • Turkey Swap: Use ground turkey instead of beef for a leaner protein option that still packs a flavorful punch.

  • Veggie Variety: Toss in mushrooms, snap peas, or carrots for extra texture and nutrition. Experiment with your favorite veggies to keep things exciting!

  • Tofu Twist: For a vegetarian option, substitute the ground beef with crumbled firm tofu. It absorbs sauces beautifully and adds a delightful chew.

  • Heat Levels: Adjust the amount of sriracha to suit your heat preference. For those who like it fiery, try adding chili flakes or your favorite hot sauce!

  • Quinoa Base: Swap jasmine or basmati rice for quinoa. This nutty alternative boosts protein and brings a unique texture to your meal.

  • Honey Alternative: Use agave nectar or maple syrup instead of honey for a vegan-friendly sweetener that balances the sauce perfectly.

  • Crispy Finish: For a delightful crunch, sprinkle some crushed peanuts or fried shallots on top just before serving.

  • Asian-Inspired Fusion: Incorporate flavors from other cuisines; add a splash of lime juice and fresh cilantro for a zesty twist, much like what you would find in a Chicken Shawarma Bowl.

No matter how you choose to customize your Spicy Ground Beef Stir Fry Bowl, the key is to have fun, experiment, and enjoy the vibrant flavors you’re creating!

Spicy Ground Beef Stir Fry Bowl Recipe FAQs

What kind of beef is best for stir fry?
Absolutely! Lean beef mince is ideal for this Spicy Ground Beef Stir Fry Bowl as it offers great texture and flavor. If you prefer, ground turkey or chicken can also provide a delicious alternative, making the dish slightly lighter while maintaining its savory appeal.

How do I store leftovers of the stir fry?
You can store leftovers in an airtight container for up to 3 days in the refrigerator. This ensures that the ingredients stay fresh and retain their flavors. Make sure to reheat thoroughly before serving.

Can I freeze the Spicy Ground Beef Stir Fry Bowl?
Certainly! To freeze, let the stir fry cool completely, then portion it into airtight containers. It can be frozen for up to 3 months. When you’re ready to enjoy it again, thaw overnight in the fridge and reheat in a pan with a splash of water or broth to keep it moist.

What should I do if my stir fry is too salty?
Very! If you find your dish too salty, consider adding more vegetables or a little extra rice to help balance the flavors. You can also add a bit of sugar or honey to soften the salty notes. Just remember to taste as you go!

Can I add more vegetables to this recipe?
Definitely! This recipe is highly customizable. Feel free to add carrots, snap peas, or even mushrooms to enhance the texture and nutrition of your dish. Just make sure to chop them into similar-sized pieces for even cooking.

Are there any dietary considerations with this recipe?
Yes! When preparing the Spicy Ground Beef Stir Fry Bowl, be mindful if anyone has allergies to soy sauce or sesame oil. For gluten-free needs, you can use tamari instead of soy sauce. Additionally, for vegan options, substitute the beef with tofu and use maple syrup instead of honey.

Spicy Ground Beef Stir Fry Bowl

Spicy Ground Beef Stir Fry Bowl: Quick Flavor Explosion

Spicy Ground Beef Stir Fry Bowl is a quick and comforting meal packed with vibrant flavors, perfect for busy weeknights.
Prep Time 10 minutes
Cook Time 20 minutes
Total Time 30 minutes
Servings: 4 bowls
Course: Dinner
Cuisine: Asian
Calories: 450

Ingredients
  

For the Sauce
  • 1 tablespoon sesame oil
  • 80 ml low-sodium soy sauce
  • 2 tablespoons honey or maple syrup for vegan option
  • 1-2 tablespoons sriracha to taste
  • 1 tablespoon rice vinegar or apple cider vinegar
  • 1 teaspoon cornflour or arrowroot powder
For the Stir Fry
  • 500 g lean beef mince or ground turkey/chicken
  • 1 large onion any type
  • 4 cloves garlic
  • 1 tablespoon fresh ginger or ground ginger
For the Vegetables
  • 2 pieces bell peppers red and yellow
  • 1 head broccoli
For Serving
  • 4 servings cooked rice jasmine or basmati
  • spring onions and toasted sesame seeds for garnish

Equipment

  • wok
  • Large skillet
  • medium bowl

Method
 

Step-by-Step Instructions
  1. Whisk together the sauce ingredients in a medium bowl and set aside. Chop onion, garlic, ginger, bell peppers, and broccoli.
  2. Heat sesame oil in a wok, then brown the lean beef mince for 5-7 minutes.
  3. Add garlic and ginger to the wok, sautéing for 30-60 seconds until fragrant.
  4. Stir in chopped onion and broccoli, and cook for 4-5 minutes until tender yet crunchy.
  5. Add bell peppers and stir-fry for an additional 2-3 minutes.
  6. Pour the sauce over the meat and vegetables, mix well, and let bubble for 1-2 minutes to thicken.
  7. Serve over cooked rice and garnish with spring onions and sesame seeds.

Nutrition

Serving: 1bowlCalories: 450kcalCarbohydrates: 45gProtein: 30gFat: 15gSaturated Fat: 5gPolyunsaturated Fat: 3gMonounsaturated Fat: 7gCholesterol: 70mgSodium: 750mgPotassium: 600mgFiber: 5gSugar: 8gVitamin A: 1500IUVitamin C: 70mgCalcium: 40mgIron: 3mg

Notes

Ensure all ingredients are prepped before cooking for best results.

Tried this recipe?

Let us know how it was!

Crockpot Chicken with 6 Ingredients: Easy, Juicy Comfort Food

In the whirlwind of balancing work, family, and everything in between, it’s easy to forget the joys of cooking. But let me tell you, there’s nothing quite like returning home to the enticing aroma of a Crockpot Whole Chicken slowly cooking away. With just six ingredients, this deliciously simple recipe transforms an ordinary weeknight into a culinary delight. Not only does it come together with minimal prep time, but the tender, juicy result is perfect for meal prep or even to impress unexpected guests. Plus, it’s gluten-free and low-calorie, making it a go-to for both health-conscious folks and comfort food lovers alike. Are you curious about the effortless ways to jazz it up with different flavors? Let’s dive in!

Why is Crockpot Chicken So Special?

Simplicity: With just six ingredients, this recipe is perfect for novice cooks and busy individuals alike, making dinner almost effortless.

Flavor Explosion: The slow cooking method allows tantalizing flavors to meld beautifully, ensuring each bite is bursting with deliciousness.

Meal Prep-Friendly: This dish shines for meal prepping; prepare a batch on Sunday, and enjoy flavorful lunches throughout the week.

Customizable Options: Feeling adventurous? Try my Asian twist or spicy kick variations for an exciting new taste experience.

Crowd-Pleaser: Whether it’s a family gathering or a casual dinner with friends, this juicy chicken will be the star of the table! Enhance your meal with sides like garlic mashed potatoes or a refreshing salad for a complete feast.

Crockpot Chicken with 6 Ingredients

Quick Note: With just six essential ingredients, this delicious crockpot chicken recipe is perfect for anyone craving comfort food without the fuss!

For the Chicken

  • Whole Chicken – Choose a fully thawed chicken for even cooking and optimal tenderness.
  • Salt – Enhances the chicken’s flavor; consider using garlic salt for a unique twist.
  • Pepper – Freshly cracked pepper adds a basic seasoning that elevates the overall taste.
  • Garlic Powder – This lends a savory essence; fresh garlic can be substituted for a more robust flavor.
  • Paprika – Adds a rich color and mild taste; try using smoked paprika for a barbecued flair.
  • Olive Oil – Keeps the chicken moist while cooking; melted butter also works wonderfully as a substitute.

Step‑by‑Step Instructions for Crockpot Chicken with 6 Ingredients

Step 1: Prep Chicken
Start by patting the whole chicken dry with paper towels. Generously season the chicken inside and out with salt, freshly cracked pepper, garlic powder, and paprika to ensure it’s flavorful. Don’t rush this step; make sure each area is coated well, as this will enhance the dish’s overall taste.

Step 2: Transfer to Crockpot
Carefully place the seasoned chicken in the center of your crockpot. If desired, drizzle olive oil over the chicken to help retain moisture and achieve a succulent finish. Arrange the chicken breast-side up, allowing it to sit comfortably in the pot without crowding the sides for optimal cooking.

Step 3: Cook
Cover the crockpot with the lid and set it to low heat. Let the chicken cook slowly for about 6 hours. Avoid lifting the lid during this time, as the steam is essential for the chicken to cook evenly and become mouth-wateringly tender.

Step 4: Check Doneness
After the cooking time, use a meat thermometer to check the internal temperature of the chicken, ensuring it has reached at least 165°F. If the chicken hasn’t reached this safe temperature, cover and cook for an additional 30 minutes, checking periodically until it’s fully cooked.

Step 5: Rest
Once the chicken is perfectly cooked, carefully remove it from the crockpot using tongs. Let it rest on a cutting board for about 10 minutes. This resting period allows the juices to redistribute throughout the meat, which is crucial for achieving juicy slices when you carve it.

What to Serve with Crockpot Whole Chicken

Imagine gathering around the table, where flavor meets comfort in an unforgettable feast.

  • Garlic Mashed Potatoes: Creamy and buttery, these potatoes soak up the chicken’s juices, creating a delightful harmony of flavors.

  • Fresh Garden Salad: Crisp greens and colorful veggies add a refreshing crunch that balances the richness of the chicken beautifully.

  • Roasted Vegetables: Caramelized edges on seasonal veggies bring a sweet contrast that pairs perfectly with the savory chicken.

  • Herbed Rice: Fluffy rice infused with fresh herbs enhances the meal without overpowering the star of the show.

  • Steamed Asparagus: Bright and crisp, asparagus adds a pop of color and a tender texture that complements the juicy chicken.

  • Homemade Rolls: Warm, fluffy rolls are perfect for mopping up those delicious juices, making each bite feel like a comforting embrace.

  • Chardonnay: A glass of chilled Chardonnay can brighten the meal, its lightness enhancing the chicken and vegetable flavors.

  • Frozen Yogurt Sundae: A light dessert like frozen yogurt topped with fresh berries brings a satisfying and refreshing end to your delightful dinner.

Each of these pairings adds its own unique touch, creating a comforting and deliciously satisfying meal experience!

How to Store and Freeze Crockpot Chicken with 6 Ingredients

Refrigerate: Store leftovers in an airtight container in the fridge for up to 3 days to maintain freshness and flavor. Keep some of the cooking juices to help retain moisture.

Freezer: For longer storage, portion the chicken and freeze it in freezer-safe bags or containers for up to 2 months. Label with the date to keep track of freshness.

Reheating: Thaw the chicken in the fridge overnight before reheating. Warm it in the microwave or on the stovetop until heated through, ensuring it reaches 165°F for safe consumption.

Leftover Ideas: Shred any leftover chicken for salads, sandwiches, or wraps. This versatile Crockpot Chicken with 6 Ingredients can easily transform into new meals!

Make Ahead Options

These Crockpot Whole Chicken preparations are fantastic for busy home cooks looking to save time! You can season the whole chicken and let it marinate in the refrigerator for up to 24 hours (storing it in a covered container will maintain its flavor). This allows the spices to penetrate the meat more deeply, enhancing the taste. Additionally, you can prep any vegetables you wish to add during cooking, washing and chopping them to pop in the pot later. When you’re ready to enjoy your meal, simply place the seasoned chicken in the crockpot, cover it, and cook on low for 6 hours. This way, you can come home to a beautifully cooked, juicy chicken that’s just as delicious as if you had made it from scratch!

Expert Tips for Crockpot Chicken

  • Thaw Fully: Ensure your chicken is fully thawed for even cooking; an icy center makes for inconsistent results.

  • Check Temperature: Use a meat thermometer to confirm the chicken reaches 165°F. This prevents overcooking and dry meat, ensuring juicy results.

  • Season Generously: Don’t skimp on seasoning! Generous salt and spices enhance the flavor throughout the chicken and prevent blandness.

  • Avoid Opening Lid: Resist the urge to lift the lid while cooking, as this releases steam and can result in longer cooking times.

  • Optional Broil: For crispy skin, consider broiling the chicken for a few minutes after it’s done cooking in the crockpot.

  • Flavor Variations: Feel free to experiment with the recipe! Options like an Asian twist or spicy kick can elevate your Crockpot Chicken with 6 Ingredients experience.

Crockpot Chicken with 6 Ingredients Variations

Feel free to let your creativity soar and customize your chicken dish with these delightful twists!

  • Spicy Kick: Add cayenne pepper or red pepper flakes for a bold, fiery flavor. A little spice can uplift and transform the whole dish!
  • Herb-Infused: Toss in fresh herbs like rosemary or thyme before cooking. The fragrant aroma during cooking is simply irresistible and adds freshness.
  • Zesty Citrus: Squeeze in fresh lemon or orange juice before cooking for a bright, refreshing hint. This citrusy touch can lighten your meal with a vibrant zing.
  • Smoky Flavor: Substitute smoked paprika for regular paprika to achieve a barbecue-like taste. It adds depth and a delightful smokiness that’s hard to resist.
  • Sweet and Savory: Blend in a splash of maple syrup or honey for a subtle sweet glaze. That perfect balance makes every bite a delightful surprise!
  • Vegetable Medley: Include hearty veggies like carrots or potatoes in the pot during cooking. They soak up the chicken’s flavor, adding texture and nutrition to your meal.
  • Asian Twist: Infuse your chicken with soy sauce and grated ginger for a unique flavor profile. This combination brings a savory, umami-packed goodness that tantalizes the taste buds.

Each variation is a chance to create something new and exciting. For more comforting dishes, you might also enjoy my Tuscan Chicken Soup or a delicious Chilli Chicken Takeout that keeps your palate pleased!

Crockpot Chicken with 6 Ingredients Recipe FAQs

How do I select the best whole chicken?
Absolutely! Look for a chicken that is fully thawed with no dark spots all over, indicating freshness. Opt for organic or free-range chickens when possible for the best flavor and texture.

How should I store leftover Crockpot Chicken?
Very easy! Store any leftovers in an airtight container in the refrigerator for up to 3 days. To keep the chicken moist, pour some of its cooking juices over it before sealing the container.

Can I freeze Crockpot Chicken?
For sure! Once the chicken has cooled, portion it into freezer-safe bags or containers. Be sure to label them with the date. It can be frozen for up to 2 months. To reheat, thaw overnight in the fridge and warm it gently until it reaches 165°F.

What should I do if the chicken isn’t cooked through?
If your chicken hasn’t reached the safe internal temperature of 165°F, no worries! Just cover it again and continue cooking for an additional 30 minutes. Check again, and it should be ready to enjoy by then. Make sure you’re using a meat thermometer to ensure accuracy.

Can I feed leftover Crockpot chicken to my dog?
Absolutely! As long as the chicken is plain and unseasoned (no garlic or onion), it makes a great treat for your furry friend. Just be sure to remove any bones before serving, as they can splinter and pose a choking hazard.

What variations can I try for more flavor?
Oh, the more the merrier! For a kick, add cayenne pepper or throw in some fresh herbs like rosemary. For an Asian twist, consider adding soy sauce and ginger before cooking. You can even drizzle honey for a sweet glaze to surprise your taste buds!

Crockpot Chicken with 6 Ingredients

Crockpot Chicken with 6 Ingredients: Easy, Juicy Comfort Food

Discover the simple yet flavorful Crockpot Chicken with 6 Ingredients for an effortless dinner that is both comforting and healthy.
Prep Time 15 minutes
Cook Time 6 hours
Resting Time 10 minutes
Total Time 6 hours 25 minutes
Servings: 4 servings
Course: Dinner
Cuisine: American
Calories: 250

Ingredients
  

For the Chicken
  • 1 whole Whole Chicken Choose a fully thawed chicken for even cooking.
  • 1 teaspoon Salt Enhances the flavor; consider garlic salt for a twist.
  • 1 teaspoon Pepper Freshly cracked pepper adds basic seasoning.
  • 1 teaspoon Garlic Powder Fresh garlic can be substituted for a stronger flavor.
  • 1 teaspoon Paprika Try smoked paprika for a barbecued flavor.
  • 2 tablespoons Olive Oil Melted butter is also a great substitute.

Equipment

  • Crockpot

Method
 

Step-by-Step Instructions
  1. Start by patting the whole chicken dry with paper towels. Season it inside and out with salt, pepper, garlic powder, and paprika.
  2. Place the seasoned chicken in the center of your crockpot. Drizzle olive oil over the chicken, if desired.
  3. Cover the crockpot with the lid and set it to low heat. Cook for about 6 hours without lifting the lid.
  4. After cooking, check the internal temperature of the chicken to ensure it has reached at least 165°F.
  5. Remove the chicken from the crockpot and let it rest on a cutting board for about 10 minutes before carving.

Nutrition

Serving: 1servingCalories: 250kcalProtein: 40gFat: 10gSaturated Fat: 2gPolyunsaturated Fat: 1gMonounsaturated Fat: 7gCholesterol: 120mgSodium: 400mgPotassium: 500mgIron: 1mg

Notes

Enjoy with sides like garlic mashed potatoes or a refreshing salad for a complete meal.

Tried this recipe?

Let us know how it was!

Ultimate Cheesy Ground Beef & Potato Dinner Casserole Delight

As I gazed at the bubbling casserole emerging from the oven, a wave of nostalgia washed over me. There’s something undeniably comforting about a Cheesy Ground Beef & Potato Dinner Casserole that brings back memories of family gatherings and cozy nights in. This dish not only warms the soul but also offers unbeatable simplicity, making it perfect for those busy weeknights when fast food just won’t do. Packed with tender potatoes, savory ground beef, and mounds of melty cheese, it’s a budget-friendly crowd-pleaser that satisfies even the hungriest of appetites. Plus, it’s incredibly versatile, allowing you to sneak in those veggies you’ve been meaning to use. Ready to take your dinner game to the next level? Let’s get cooking!

Why is this casserole a must-try?

Comforting, Nostalgic: Each spoonful of this Cheesy Ground Beef & Potato Dinner Casserole transports you back to cherished family meals, creating a sense of warmth and comfort.

Effortless Preparation: Perfect for busy weeknights, this one-dish meal combines ease and deliciousness, making dinner a breeze.

Budget-Friendly: With economical ingredients like ground beef and potatoes, you can feed the whole family without breaking the bank.

Veggie Versatility: This recipe encourages creativity—toss in leftover veggies or substitute ground turkey for a leaner twist.

Crowd-Pleasing Appeal: It’s a sure-fire hit at potlucks, ensuring happy smiles from kids and adults alike!

Ready to explore more scrumptious options? Check out this Cheesy Hamburger Potato soup or try a delightful variation with our Korean Ground Beef.

Cheesy Ground Beef & Potato Dinner Casserole Ingredients

For the Casserole

  • Ground Beef – Provides savory flavor and protein; lean ground turkey is a great substitute for a lighter option.
  • Potatoes – Offers hearty texture; Yukon Gold or Russet potatoes work best for creamy results.
  • Cheddar Cheese – Adds rich creaminess; freshly shredded cheese will melt beautifully for that gooey finish.
  • Cream of Mushroom Soup – Ensures a delicious, creamy consistency; swap with gluten-free cream soup for a gluten-free option.
  • Onion – Elevates the flavor profile; shallots can be used for a milder onion taste.
  • Celery – Contributes crunch and flavor; bell peppers can replace it if you’re out.
  • Carrots – Adds a hint of sweetness and color; frozen mixed veggies work in a pinch.
  • Garlic Powder – Deepens aromatic notes; feel free to use fresh garlic for a stronger flavor.
  • Onion Powder – Enhances the onion flavor; can be omitted or replaced with leeks if needed.
  • Salt & Black Pepper – Essential for seasoning; adjust to suit your dietary needs.

Optional Topping

  • Additional Cheese – Sprinkle more cheese on top for an extra cheesy finish; consider mixing different cheese varieties for added depth.

With this delightful assembly of ingredients, your Cheesy Ground Beef & Potato Dinner Casserole is sure to become a cherished family favorite!

Step‑by‑Step Instructions for Cheesy Ground Beef & Potato Dinner Casserole

Step 1: Brown the Ground Beef
In a large skillet over medium heat, add the ground beef, breaking it apart with a spatula as it cooks. Sauté the beef for about 5–7 minutes, or until it’s no longer pink, and ensure to drain any excess fat. The browned meat should have a rich, savory aroma, making it the base for your Cheesy Ground Beef & Potato Dinner Casserole.

Step 2: Sauté the Vegetables
Add chopped onions, carrots, and celery to the skillet with the ground beef. Cook the mixture for another 5–7 minutes, stirring occasionally, until the vegetables soften and turn translucent. This adds layers of flavor that will meld beautifully in the casserole, enhancing the comfort food experience.

Step 3: Prepare the Potatoes
While the beef and veggies are cooking, peel and dice the potatoes into small, even chunks. To prevent browning, keep the diced potatoes in a bowl of cold water. Aim for uniform sizes to ensure they cook evenly, creating that signature heartiness in your Cheesy Ground Beef & Potato Dinner Casserole.

Step 4: Mix the Ingredients
In a large mixing bowl, combine the beef and vegetable mixture with the drained potatoes, cream of mushroom soup, garlic powder, onion powder, salt, and black pepper. Mix everything thoroughly until well-coated. This will create a deliciously creamy and flavorful filling for your casserole, bringing all elements together.

Step 5: Assemble the Casserole
Transfer the combined mixture into a greased 9×13” baking dish, spreading it evenly. Cover the dish tightly with aluminum foil to trap steam while baking. Place it in a preheated oven at 375°F and bake for 45 minutes. The casserole should become bubbly, and the potatoes will be fork-tender during this time.

Step 6: Add Cheese Topping
After 45 minutes, carefully remove the foil from the casserole, revealing a steamy and golden mixture. Sprinkle a generous layer of shredded cheddar cheese on top, ensuring it covers the entire surface. Return the uncovered casserole to the oven and bake for an additional 10–15 minutes, or until the cheese is melted and bubbly, creating a deliciously gooey top layer.

Step 7: Let it Rest
Once baked, carefully remove the casserole from the oven and allow it to rest for 5–10 minutes. This resting time helps the casserole set, making it easier to slice and serve. Your Cheesy Ground Beef & Potato Dinner Casserole is now ready to be dished up, warm and inviting!

What to Serve with Cheesy Ground Beef & Potato Dinner Casserole

Create the perfect meal experience around this comforting casserole that will awaken your taste buds!

  • Crisp Green Salad: A fresh, tangy salad with mixed greens and a light vinaigrette adds a refreshing contrast to the richness of the casserole.

  • Roasted Vegetables: Roasted broccoli or Brussels sprouts bring an earthy flavor and slight crunch, enriching the savory experience of your plate.

  • Garlic Bread: Warm, toasty garlic bread is perfect for soaking up every last bit of cheesy goodness, enhancing the overall heartiness of your meal.

  • Creamy Coleslaw: The crunchy texture and tangy dressing of coleslaw balances the casserole’s warmth and creamy richness, making for a delightful combination.

  • Corn on the Cob: Sweet, buttery corn adds a pop of sweetness that pairs well with the savory elements of the casserole, creating a satisfying bite.

  • Apple Crisp: For dessert, a warm apple crisp topped with vanilla ice cream offers a cozy end to your meal, with contrasting flavors and textures that feel like home.

Expert Tips for Cheesy Ground Beef & Potato Dinner Casserole

  • Even Potato Cuts: Ensure potatoes are diced into small, uniform pieces to guarantee even cooking throughout the Cheesy Ground Beef & Potato Dinner Casserole.

  • Fresh Cheese Choice: Opt for freshly shredded cheese instead of pre-packed for better melting and flavor in your casserole.

  • Resting Period: Allow the casserole to rest for 5–10 minutes after baking. This helps it set and makes serving easier without falling apart.

  • Prep Ahead: Consider preparing the casserole a day in advance. If doing so, increase baking time by about 10 minutes to ensure it’s fully heated.

  • Vegetable Add-Ins: Don’t hesitate to mix in leftover vegetables or new ones to boost nutrition and flavor; this versatility makes your Cheesy Ground Beef & Potato Dinner Casserole even more delightful!

How to Store and Freeze Cheesy Ground Beef & Potato Dinner Casserole

Fridge: Store leftover casserole in an airtight container for up to 4 days. Reheat it covered with foil in a 350°F oven to retain moisture.

Freezer: This Cheesy Ground Beef & Potato Dinner Casserole freezes beautifully. Cool it completely, wrap it tightly in plastic wrap, and place it in an airtight container for up to 2 months.

Reheating: Thaw the casserole overnight in the fridge before reheating. Bake at 350°F for 25–30 minutes until heated through, or microwave individual portions for a quick meal.

Make-Ahead Tip: You can prepare the casserole a day in advance and keep it refrigerated until you’re ready to bake. Just remember to increase the baking time by about 10 minutes for even cooking!

Make Ahead Options

These Cheesy Ground Beef & Potato Dinner Casserole preparations are perfect for meal prep enthusiasts looking to save time during busy weeknights! You can assemble the casserole up to 24 hours in advance; simply cover it tightly with plastic wrap and refrigerate until you’re ready to bake. To maintain quality, ensure the key ingredients like potatoes are evenly diced and stored cold to prevent browning. When you’re ready to serve, just bake directly from the refrigerator, adding about 10 extra minutes to the cooking time to ensure it’s heated through and bubbly, providing you with a comforting, hassle-free meal that feels just like home!

Cheesy Ground Beef & Potato Dinner Casserole Variations

Feel free to unleash your creativity and customize this delightful casserole to perfectly suit your taste preferences!

  • Lean Option: Substitute ground beef with ground turkey for a lighter, healthier version. The flavors still shine through.
  • Mixed Veggies: Toss in frozen mixed vegetables such as peas and carrots for extra nutrition and a pop of color; they blend beautifully and keep things vibrant.
  • Gluten-Free Twist: Replace cream of mushroom soup with a homemade gluten-free roux using gluten-free flour and broth for a creamy goodness everyone can enjoy.
  • Cheesy Delight: Mix different types of cheese like mozzarella or pepper jack with the cheddar for a tailormade cheesy experience, creating delightful flavor variations.
  • Spice It Up: Add a dash of cayenne or red pepper flakes for a little heat, catering to spice lovers while still keeping the creamy comfort intact.
  • Herbed Infusion: Enhance the flavor profile by incorporating fresh herbs like thyme or rosemary into the beef mixture; it adds a lovely aroma that elevates the dish.
  • Extra Potato Layers: Layer thinly sliced potatoes on top instead of dicing them for an elegant twist; this adds a beautiful presentation and different texture.
  • Creamy Variation: Add a dollop of sour cream or Greek yogurt into the mixture before baking for an extra creamy texture that’ll make your taste buds dance.

Looking for more comforting options? Check out this scrumptious Sticky Beef Noodles or whip together this cozy Potato Bacon Soup!

Cheesy Ground Beef & Potato Dinner Casserole Recipe FAQs

What type of potatoes are best for this casserole?
For your Cheesy Ground Beef & Potato Dinner Casserole, I recommend using Yukon Gold or Russet potatoes. These varieties provide a creamy texture and hold up well during baking, ensuring that each bite is hearty and satisfying.

How should I store leftovers?
Absolutely! Leftover casserole can be stored in an airtight container in the refrigerator for up to 4 days. To reheat, simply cover it with foil and warm it in a preheated 350°F oven until heated through, ensuring it remains moist and delicious.

Can I freeze this casserole?
Yes, it freezes wonderfully! Once the casserole has cooled completely, wrap it tightly in plastic wrap and place it in an airtight container. It can be frozen for up to 2 months. For reheating, transfer it to the refrigerator to thaw overnight and bake at 350°F for about 25–30 minutes or until hot throughout.

How do I avoid cooking problems with this casserole?
If you find your casserole is too watery, ensure that you’ve drained excess liquid from your beef and avoid overloading it with soup. Additionally, cutting the potatoes into small, even pieces help them cook thoroughly and evenly. If your casserole is too dry, consider adding a splash of broth when reheating to restore moisture.

Are there any dietary concerns with this recipe?
If you have allergies or dietary restrictions, you can make this Cheesy Ground Beef & Potato Dinner Casserole gluten-free by using gluten-free cream of mushroom soup or a simple homemade roux made with gluten-free flour. For those avoiding red meat, ground turkey is a fantastic substitute and retains the dish’s comforting essence.

Can I add additional vegetables to this dish?
Very! You can easily amp up the nutrition by mixing in sautéed vegetables like peas or bell peppers. Not only do they add color, but they also contribute additional vitamins and flavor, making your casserole even more delightful!

Cheesy Ground Beef & Potato Dinner Casserole

Ultimate Cheesy Ground Beef & Potato Dinner Casserole Delight

A comforting Cheesy Ground Beef & Potato Dinner Casserole perfect for family gatherings and busy weeknights.
Prep Time 15 minutes
Cook Time 55 minutes
Resting Time 10 minutes
Total Time 1 hour 20 minutes
Servings: 6 servings
Course: Casserole
Cuisine: American
Calories: 450

Ingredients
  

For the Casserole
  • 1 lb Ground Beef can substitute with lean ground turkey
  • 4 cups Potatoes Yukon Gold or Russet, peeled and diced
  • 2 cups Cheddar Cheese freshly shredded for best melting
  • 1 can Cream of Mushroom Soup use gluten-free version if needed
  • 1 medium Onion can substitute with shallots
  • 2 stalks Celery can replace with bell peppers
  • 1 cup Carrots frozen mixed veggies can be used
  • 1 tsp Garlic Powder or fresh garlic for stronger flavor
  • 1 tsp Onion Powder can be omitted or replaced with leeks
  • 1 tsp Salt
  • 1 tsp Black Pepper
Optional Topping
  • 1 cup Additional Cheese for extra cheesy finish

Equipment

  • Large skillet
  • Mixing Bowl
  • baking dish

Method
 

Step-by-Step Instructions
  1. Brown the ground beef in a skillet over medium heat for 5–7 minutes until no longer pink, then drain excess fat.
  2. Sauté chopped onions, carrots, and celery with the beef for another 5–7 minutes until softened.
  3. Peel and dice the potatoes into small chunks, keeping in cold water to prevent browning.
  4. In a mixing bowl, combine the beef mixture with potatoes, soup, garlic powder, onion powder, salt, and pepper. Mix thoroughly.
  5. Transfer mixture to a greased baking dish, cover with foil, and bake at 375°F for 45 minutes.
  6. Remove foil, sprinkle cheese on top, and bake uncovered for an additional 10–15 minutes until cheese is melted.
  7. Let the casserole rest for 5–10 minutes before serving.

Nutrition

Serving: 1servingCalories: 450kcalCarbohydrates: 35gProtein: 30gFat: 25gSaturated Fat: 12gPolyunsaturated Fat: 1gMonounsaturated Fat: 10gTrans Fat: 1gCholesterol: 80mgSodium: 800mgPotassium: 800mgFiber: 3gSugar: 2gVitamin A: 500IUVitamin C: 15mgCalcium: 250mgIron: 3mg

Notes

For best results, use freshly shredded cheese and allow the casserole to rest before serving.

Tried this recipe?

Let us know how it was!

Steakhouse Garlic Butter Mushrooms: A Flavorful Delight

As the sizzle of garlic fills the air, my kitchen transforms into a cozy steakhouse, all thanks to these Steakhouse Garlic Butter Mushrooms. This dish is more than just a side; it’s an experience that brings warmth and flavors to the table. Packed with health benefits and a low-calorie count, these savory mushrooms are sautéed to perfection in a rich garlic-butter sauce that will have everyone begging for seconds. Whether you’re serving them with a juicy grilled steak or enjoying them solo, this recipe promises a quick and satisfying solution for any mealtime dilemma. Curious about how to create this mouthwatering dish at home? Let’s dive in!

Why will you love these mushrooms?

Irresistible Flavor: Every bite of these Steakhouse Garlic Butter Mushrooms is a burst of savory goodness thanks to the rich garlic-butter sauce.

Healthy Indulgence: Savor the health benefits of mushrooms while enjoying a low-calorie side that doesn’t compromise on taste.

Quick & Easy: This recipe comes together in just a few steps, making it a reliable go-to for busy weeknights or last-minute gatherings.

Versatile Pairing: They make a perfect companion for grilled steak or roasted chicken, but are delightful on their own as a vegetarian treat.

Customizable: Feel free to experiment with herbs or substitute ingredients to suit gluten-free diets or vegan preferences, whether you explore Garlic Parmesan Chicken or try Garlic Butter Baked options.

Steakhouse Garlic Butter Mushrooms Ingredients

For the Mushrooms
Mushrooms – Use white button mushrooms for a mild flavor, or substitute with cremini for a deeper taste.
Butter – Provides a rich base; swap for olive oil if you prefer a lighter option.
Garlic – Fresh minced garlic enhances the dish; garlic powder is a good backup if needed.

For Seasoning
Soy Sauce – Adds umami depth; replace it with tamari or coconut aminos for a gluten-free version.
Salt and Pepper – Essential seasonings to enhance all flavors; adjust based on your taste preference.

For Flavor Variations
Herbs and Spices – Fresh thyme or parsley can elevate this dish, inviting you to get creative with your flavor profile.

These Steakhouse Garlic Butter Mushrooms capture the essence of a gourmet meal right in your home kitchen!

Step‑by‑Step Instructions for Steakhouse Garlic Butter Mushrooms

Step 1: Prep the Ingredients
Begin by cleaning your white button mushrooms under cool running water and patting them dry with a paper towel. Slice the mushrooms into even pieces for uniform cooking; approximately ¼-inch thick works well. While you’re at it, mince 3-4 cloves of fresh garlic, allowing their aromatic goodness to build anticipation for your Steakhouse Garlic Butter Mushrooms.

Step 2: Heat the Skillet
Place a large skillet over medium heat and add 4 tablespoons of butter, letting it melt completely until it foams. This will take about 1-2 minutes. Swirl the pan gently to ensure the butter distributes evenly. The goal is to coat the skillet for the flavorful sautéing ahead, creating a rich base for your mushrooms.

Step 3: Sauté the Garlic
Once the butter is bubbling, add the minced garlic to the skillet. Stir the garlic constantly for about 1 minute until it becomes fragrant and lightly golden. Keep a close eye on it to prevent burning, as you want that delicious garlicky aroma to fill your kitchen, setting the stage for the juicy Steakhouse Garlic Butter Mushrooms that are coming!

Step 4: Add the Mushrooms
Carefully add the sliced mushrooms to the skillet, ensuring they’re in a single layer for even browning. Sauté the mushrooms for about 8-10 minutes, stirring occasionally, until they’re tender and golden brown. Their color transformation is a sign of the deep flavor enhancement they’re undergoing, bringing your dish closer to perfection.

Step 5: Season and Finish
Once the mushrooms reach a beautiful golden shade, stir in 1-2 tablespoons of soy sauce, along with salt and pepper to taste. Cook for an additional 2 minutes, letting the soy sauce meld with the flavors. The mixture should be bubbling slightly, creating a delicious, savory sauce for your Steakhouse Garlic Butter Mushrooms.

Step 6: Serve Immediately
Remove the skillet from heat and transfer your luscious Steakhouse Garlic Butter Mushrooms to a serving dish. Serve them hot for the best flavor and texture, and enjoy this flavorful delight alongside your favorite dishes. Let their rich, buttery essence elevate your meal to a gourmet experience!

What to Serve with Steakhouse Garlic Butter Mushrooms?

Indulge in a cozy evening filled with rich flavors and delightful aromas that perfectly complement your meal.

  • Grilled Steak: The hearty, smoky flavors of grilled steak pair beautifully with the rich, buttery mushrooms, elevating your dining experience. A classic choice that never disappoints!

  • Roasted Chicken: Juicy roasted chicken meets its match with these garlic butter mushrooms, adding an exquisite layer of flavor to a comforting dish. Together, they create a satisfying meal for family gatherings.

  • Creamy Mashed Potatoes: Smooth, creamy mashed potatoes provide a buttery, velvety texture that meshes wonderfully with the savory mushrooms, perfect for soaking up that delicious garlic sauce. Comfort food at its finest!

  • Garlic Bread: Crunchy, buttery garlic bread serves as a delightful vessel for scooping up the mushrooms, offering an irresistible combination of textures and flavors.

  • Fresh Garden Salad: A crisp, refreshing garden salad balances the richness of the mushrooms and steak, providing a light, healthy contrast to your plate.

  • White Wine: A chilled glass of crisp white wine beautifully complements the savory notes of the mushrooms while enhancing your overall dining experience.

  • Chocolate Mousse: For a sweet finish, indulge in a light and airy chocolate mousse that contrasts nicely with the rich flavors of the meal, leaving everyone satisfied.

  • Steamed Asparagus: Tender, bright green asparagus adds a crisp texture and fresh taste that cuts through the richness of the mushrooms, making for a perfect side dish pairing.

Expert Tips for Steakhouse Garlic Butter Mushrooms

Dry Before Sautéing: Ensure your mushrooms are completely dry to prevent steaming, allowing for that delicious golden-brown finish.

Avoid Overcrowding: Cook mushrooms in batches if necessary. Overcrowding can lead to steaming instead of sautéing, sacrificing flavor and texture.

Stir Gently: Use a spatula to gently stir the mushrooms, ensuring even cooking without breaking them apart, preserving their lovely shape.

Monitor Garlic Closely: Garlic can burn quickly; keep an eye out while sautéing to maintain that fragrant, golden freshness in your Steakhouse Garlic Butter Mushrooms.

Taste and Adjust: Always taste before serving! Adjust salt and soy sauce levels according to your preference for a perfectly seasoned dish.

How to Store and Freeze Steakhouse Garlic Butter Mushrooms

Fridge: Store your cooked Steakhouse Garlic Butter Mushrooms in an airtight container for up to 3 days. This keeps them fresh and ready to enjoy again.

Freezer: If you’re looking to enjoy them later, freeze your mushrooms in a freezer-safe container or bag. They can last up to 2 months, but the texture may change slightly upon thawing.

Reheating: To reheat, gently warm the mushrooms on the stove over low heat. This helps maintain their tender texture and delicious garlic-butter flavor.

Airtight Care: Ensure containers are sealed properly to prevent freezer burn, preserving the mushrooms’ rich taste and aroma.

Make Ahead Options

Making these Steakhouse Garlic Butter Mushrooms ahead of time is a fantastic way to save precious minutes during busy weeknights! You can slice the mushrooms and mince the garlic up to 24 hours in advance; just be sure to keep them refrigerated in an airtight container to maintain freshness. When you’re ready to serve, simply heat butter in a skillet, sauté the garlic for a minute, and add the prepped mushrooms. Cooking from this stage only takes about 10-12 minutes, allowing you to enjoy a restaurant-quality side without the rush. Trust me, these mushrooms will taste just as delicious, making your meal prep a breeze!

Steakhouse Garlic Butter Mushrooms Variations

Feel free to get creative and customize these mushrooms to suit your taste buds and dietary needs!

  • Vegan Option: Replace butter with olive oil or vegan butter for a plant-based delight. Your dish will still be rich and satisfying!

  • Gluten-Free: Omit soy sauce entirely or swap it for tamari or coconut aminos, allowing everyone to enjoy without worry.

  • Herb-Infused: Add fresh thyme, rosemary, or oregano while cooking to introduce a fragrant layer of flavor to your mushrooms.

  • Spicy Kick: Incorporate red pepper flakes for a bit of heat that creates an exciting twist to the overall flavor profile.

  • Creamy Addition: Stir in a splash of heavy cream or vegan cream at the end for a luscious, creamy sauce that elevates the dish.

  • Texture Twist: Add toasted nuts like pine nuts or walnuts into the mix for an added crunch that contrasts beautifully with the tender mushrooms.

  • Umami Boost: Toss in some miso paste or sautéed onions for an extra depth of flavor that will leave everyone wanting more.

  • Fun Stuffing: Use the sautéed mushrooms as a stuffing for bell peppers or mix them into pasta for a hearty, comforting meal. You could even explore recipes like Honey Garlic Salmon or Cowboy Butter Chicken for additional ideas to enjoy your mushrooms!

Steakhouse Garlic Butter Mushrooms Recipe FAQs

What type of mushrooms should I use for this recipe?
I recommend using white button mushrooms for their mild flavor and firm texture, making them perfect for this recipe. However, feel free to substitute with cremini or portobello mushrooms if you prefer a more robust taste. Just keep in mind that larger mushrooms might require slightly longer cooking times.

How should I store any leftovers of the Steakhouse Garlic Butter Mushrooms?
Store your cooked mushrooms in an airtight container in the fridge for up to 3 days. This helps retain their flavor and texture. When you’re ready to enjoy them again, simply reheat gently on the stove over low heat.

Can I freeze Steakhouse Garlic Butter Mushrooms?
Absolutely! You can freeze your sautéed mushrooms for up to 2 months. To do this, allow them to cool completely before placing them in a freezer-safe container or bag. Be sure to remove excess air to prevent freezer burn. When you’re ready to eat, thaw in the fridge overnight and reheat on the stove to maintain that delectable flavor and texture!

What should I do if my mushrooms are too watery while cooking?
If you find your mushrooms releasing too much moisture, it’s usually because they were overcrowded in the pan. I recommend cooking them in smaller batches to ensure they sauté properly rather than steam. Also, make sure they’re dry before adding them to the skillet. This will encourage that lovely golden-brown color and concentrated taste!

Are these mushrooms suitable for a gluten-free diet?
Yes, they can easily be made gluten-free! Simply omit the soy sauce or substitute it with gluten-free tamari or coconut aminos. This allows you to enjoy the same rich taste without worrying about gluten.

Can I use olive oil instead of butter for a healthier option?
Very! For a lighter version, substitute the butter with extra virgin olive oil. This swap will still provide a wonderful flavor and richness to your Steakhouse Garlic Butter Mushrooms, while also being a great choice for those watching their saturated fat intake.

Steakhouse Garlic Butter Mushrooms

Steakhouse Garlic Butter Mushrooms: A Flavorful Delight

Delicious Steakhouse Garlic Butter Mushrooms sautéed in a rich garlic-butter sauce. A healthy, low-calorie side perfect for any meal.
Prep Time 10 minutes
Cook Time 15 minutes
Total Time 25 minutes
Servings: 4 servings
Course: Appetizers
Cuisine: American
Calories: 150

Ingredients
  

For the Mushrooms
  • 1 pound White button mushrooms or substitute with cremini for a deeper taste
  • 4 tablespoons Butter or swap for olive oil for a lighter option
  • 4 cloves Garlic fresh minced
For Seasoning
  • 1-2 tablespoons Soy sauce or tamari/coconut aminos for gluten-free
  • to taste Salt
  • to taste Pepper
For Flavor Variations
  • to taste Fresh thyme or parsley to elevate flavor

Equipment

  • Large skillet

Method
 

Step‑by‑Step Instructions
  1. Begin by cleaning your white button mushrooms under cool running water and patting them dry. Slice into ¼-inch thick pieces.
  2. Place a large skillet over medium heat and add 4 tablespoons of butter. Let it melt completely until foamy.
  3. Add minced garlic to the skillet once the butter is bubbling. Stir constantly for about 1 minute until fragrant.
  4. Carefully add the sliced mushrooms in a single layer. Sauté for 8-10 minutes until tender and golden brown.
  5. Once golden, stir in 1-2 tablespoons of soy sauce, along with salt and pepper. Cook for an additional 2 minutes.
  6. Remove from heat and transfer to a serving dish. Serve hot for the best flavor and texture.

Nutrition

Serving: 1cupCalories: 150kcalCarbohydrates: 7gProtein: 3gFat: 14gSaturated Fat: 8gPolyunsaturated Fat: 1gMonounsaturated Fat: 5gCholesterol: 30mgSodium: 400mgPotassium: 300mgFiber: 1gSugar: 2gVitamin A: 500IUVitamin C: 2mgCalcium: 5mgIron: 2mg

Notes

Ensure mushrooms are completely dry before sautéing to achieve a golden-brown finish. Adjust seasonings to taste before serving.

Tried this recipe?

Let us know how it was!

Mediterranean Chicken Gyros: Flavorful, Quick & Customizable

As the sun dips below the horizon, the enticing aroma of marinated chicken fills my kitchen, whisking me away to a bustling Greek street market. These Quick Mediterranean Chicken Gyros are not just a meal; they’re an experience bursting with vibrant flavors and fresh ingredients. Perfect for those busy weeknights or when I’m entertaining friends, these gyros provide a healthy yet satisfying option that anyone can customize with their favorite toppings. The creamy homemade tzatziki adds a delightful touch that takes them over the top! Are you ready to bring a taste of the Mediterranean into your home? Let’s dive into this delicious recipe together!

Why Are Mediterranean Chicken Gyros Irresistible?

Quick Preparation: Whip up these gyros in no time, making them perfect for your busy weeknights.
Healthy Ingredients: Packed with lean protein and fresh veggies, they’re a nutritious choice everyone can enjoy.
Customizable Toppings: Feel free to mix and match your favorite toppings—add feta, olives, or grilled veggies for unique twists!
Flavor Fusion: The combination of zesty tzatziki, aromatic herbs, and grilled chicken creates a flavor profile that transports you straight to Greece.
Crowd-Pleaser: Whether it’s a casual dinner or a gathering with friends, these gyros are sure to impress. For a complete Mediterranean experience, pair them with a refreshing Greek salad or some roasted vegetables!

Mediterranean Chicken Gyros Ingredients

For the Chicken Marinade
Chicken Breast – This is the primary protein source; opt for boneless, skinless pieces for convenience.
Olive Oil – Adds moisture and richness; you can swap it with avocado oil for a unique flavor.
Lemon Juice – Freshly squeezed is best to provide a zesty balance to the marinade.
Garlic – Enhances the overall flavor; use fresh minced garlic or garlic powder for quick preparation.
Oregano – Brings a distinct Mediterranean herbal note; consider substituting with Italian seasoning if needed.
Salt and Pepper – Essential for seasoning; customize to your personal taste preferences.

For the Gyros Assembly
Pita Bread – Serves as the delicious wrap; whole grain or gluten-free versions are great alternatives.
Tzatziki Sauce – Adds creaminess and freshness; swap Greek yogurt with dairy-free options for a vegan twist.
Cherry Tomatoes – Offer sweetness and color; feel free to use diced cucumbers for extra crunch.
Red Onion – Provides a sharp flavor; green onions can be a milder substitute.
Fresh Parsley (optional) – Adds a touch of freshness when garnishing; can be omitted or replaced with dill.

Step‑by‑Step Instructions for Mediterranean Chicken Gyros

Step 1: Marinate the Chicken
In a medium bowl, combine boneless, skinless chicken breast pieces with olive oil, freshly squeezed lemon juice, minced garlic, dried oregano, salt, and pepper. Make sure each piece is evenly coated in the marinade. Cover the bowl with plastic wrap and let the chicken marinate for at least 30 minutes at room temperature, or refrigerate for up to 4 hours to enhance the flavors for your Mediterranean Chicken Gyros.

Step 2: Cook the Chicken
Heat a grill pan or skillet over medium-high heat. Once hot, add the marinated chicken breasts, cooking for approximately 6–8 minutes on each side. The chicken should be golden brown and reach an internal temperature of 165°F (75°C) for safe consumption. Once cooked through, remove the chicken from the heat and let it rest for a few minutes before slicing it thinly for your gyros.

Step 3: Prepare the Tzatziki Sauce
While the chicken is resting, prepare the creamy tzatziki sauce. In a mixing bowl, combine Greek yogurt, grated cucumber (squeeze out excess moisture), minced garlic, freshly squeezed lemon juice, a pinch of salt, fresh dill, and a drizzle of olive oil. Mix well until smooth and creamy. Refrigerate the tzatziki for about 10 minutes to allow the flavors to meld together beautifully, enhancing your Mediterranean Chicken Gyros.

Step 4: Assemble the Gyros
Warm the pita bread in a dry skillet or microwave for about 30 seconds until it’s pliable. On each piece of pita, layer the sliced chicken evenly, followed by a generous scoop of tzatziki sauce. Add slices of cherry tomatoes, red onion, and any additional toppings you prefer, such as fresh parsley or olives. Ensure to balance the filling so it’s easy to wrap without spilling.

Step 5: Serve and Garnish
To serve your delicious Mediterranean Chicken Gyros, sprinkle with fresh parsley for a burst of color and flavor. Enjoy them warm, ideally with a side of Greek salad or roasted vegetables to enhance your meal. These gyros are perfect for gatherings or a quick family dinner, and you’ll love the vibrant, fresh tastes in every bite!

Expert Tips for Mediterranean Chicken Gyros

  • Marination Magic: Let the chicken marinate overnight if possible. This helps the flavors penetrate deeply, making your Mediterranean Chicken Gyros irresistibly tasty.
  • Pita Perfection: Always use fresh pita bread for the best texture. Stale pita can make wrapping difficult and affect the overall experience.
  • Topping Balance: Don’t overload your gyro with toppings. A balanced filling ensures easy handling and enhances every bite, making your gyros a delight.
  • Fresh is Best: Prepare your tzatziki sauce freshly to capture its vibrant flavor. Store-bought options often lack the zest you can achieve at home.
  • Cooking Time: Ensure chicken is cooked thoroughly, reaching an internal temperature of 165°F (75°C) for safety without sacrificing juiciness.

Make Ahead Options

These Mediterranean Chicken Gyros are perfect for busy home cooks looking to simplify meal prep! You can marinate the chicken up to 24 hours in advance for enhanced flavor; simply cover it tightly and refrigerate until you’re ready to cook. The tzatziki sauce can also be prepared a day ahead and stored in the fridge, allowing the flavors to meld beautifully. When it’s time to serve, just grill the marinated chicken, assemble your gyros with warmed pita, and enjoy a delicious meal that’s just as fresh and vibrant as if you made it in a rush. These make-ahead tips not only save you time but ensure that your Mediterranean Chicken Gyros remain delightful and flavorful!

Mediterranean Chicken Gyros: Customize Your Way

Feel free to sprinkle your creativity on these gyros—let your taste buds guide your choices!

  • Add Olives: Incorporate Kalamata or green olives for a briny kick that beautifully complements the gyros.
  • Feta Flavor: Crumble some feta cheese on top for a creamy, tangy contrast that elevates each bite.
  • Grilled Veggies: Toss in grilled zucchini or bell peppers for a smoky twist and added nutrition.
  • Herbed Tzatziki: Freshen up your tzatziki with mint or dill; this herbaceous layer will enhance the flavor vibrance.
  • Seafood Swap: Replace chicken with shrimp or grilled calamari for a coastal Mediterranean touch that seafood lovers will adore.
  • Heat It Up: Crank up the flavor by adding crushed red pepper flakes to the chicken marinade or tzatziki for an exciting kick.
  • Crunchy Alternatives: Swap cherry tomatoes for crispy radishes or add crunchy lettuce for extra texture in your gyros.
  • Spice It Up: Experiment with spices like smoked paprika or cumin in the marinade; it’s an easy way to introduce deeper flavor profiles.

If you’re looking for more delectable options, try these enticing recipes: Sizzling Chicken Pepper or dive into a comforting bowl of Tuscan Chicken Soup. Customize away!

How to Store and Freeze Mediterranean Chicken Gyros

Fridge: Store leftover gyros in an airtight container for up to 3 days. This will keep the chicken moist and maintain the flavors of your Mediterranean Chicken Gyros.

Freezer: For longer storage, wrap individual gyros tightly in plastic wrap and then foil, freezing them for up to 2 months. This way, they stay fresh and ready for a quick meal.

Reheating: When ready to enjoy, thaw the frozen gyros overnight in the fridge, then reheat in a skillet over medium heat or in the microwave until heated through.

What to Serve with Mediterranean Chicken Gyros

The aroma of marinated chicken and fresh veggies can transport any meal to blissful Mediterranean moments.

  • Greek Salad: A classic choice, bright and crunchy vegetables tossed in olive oil complement the gyros perfectly.

  • Roasted Vegetables: The sweetness of roasted bell peppers, zucchini, and eggplant adds depth and color to your plate. This pairing creates a hearty side full of flavors.

  • Tzatziki Dip: Serve alongside additional tzatziki for a creamy, cool accent that everyone will love, perfect for dipping additional pita.

  • Herb Quinoa: Light and fluffy, quinoa brings a subtle nutty flavor and adds a nutritious boost to balance the richness of the gyros. You’ll enjoy its texture against the tender chicken.

  • Olive Tapenade: A savory, umami-packed spread that adds a burst of flavor; spread it on bread or pita for added satisfaction.

  • Souvlaki Skewers: Enjoy a variety of flavors with succulent skewers that echo the grilled goodness of your gyros, providing an extra protein option.

  • Lemonade or Iced Tea: Refreshing beverages to cleanse your palate, enhancing the overall meal experience with a zesty pop.

  • Baklava: Conclude your meal with this sweet, flaky pastry. Its honey and nut flavors are a delightful way to finish a Mediterranean feast.

Mediterranean Chicken Gyros Recipe FAQs

What type of chicken is best for Mediterranean Chicken Gyros?
For the most tender and flavorful gyros, boneless, skinless chicken breasts are ideal. They cook quickly and absorb the marinade beautifully. If you prefer, you could also use chicken thighs, which can offer even more juiciness.

How do I know if my chicken has marinated long enough?
A minimum marination time of 30 minutes is great, but for optimal flavor, I recommend marinating the chicken for at least 1-4 hours. If possible, marinating overnight can deeply infuse your chicken with the aromatic spices, enhancing your Mediterranean Chicken Gyros.

What is the best way to store leftover gyros?
Store any leftover gyros in an airtight container in the refrigerator for up to 3 days. If you’d like to keep them longer, I often wrap each gyro individually in plastic wrap, then foil, to prevent freezer burn. They can be safely frozen for up to 2 months.

How should I reheat leftover gyros?
To reheat, first thaw any frozen gyros overnight in the fridge. For warming, place them in a skillet over medium heat for about 5 minutes, turning occasionally, until heated through. If using a microwave, cover with a damp paper towel and heat in bursts of 30 seconds until warm but not rubbery—a touch of care enhances the experience!

Can I freeze the marinated chicken?
Absolutely! To freeze, place the marinated chicken in a freezer-safe bag, removing as much air as possible. This method allows you to keep the chicken fresh for up to 3 months. When you’re ready to use, thaw it overnight in the fridge before cooking, and enjoy juicy, flavorful Mediterranean Chicken Gyros!

Is there a vegan option for this recipe?
Certainly! Substitute the chicken with grilled vegetables, chickpeas, or falafel for a delightful plant-based version. You can also replace Greek yogurt in the tzatziki sauce with a dairy-free yogurt alternative, creating a delicious vegan Mediterranean Chicken Gyros experience that’s just as satisfying!

Mediterranean Chicken Gyros

Mediterranean Chicken Gyros: Flavorful, Quick & Customizable

Quick Mediterranean Chicken Gyros are an irresistible meal experience bursting with vibrant flavors and fresh ingredients, perfect for busy weeknights.
Prep Time 30 minutes
Cook Time 15 minutes
Marination Time 30 minutes
Total Time 1 hour 15 minutes
Servings: 4 gyros
Course: Dinner
Cuisine: Mediterranean
Calories: 400

Ingredients
  

For the Chicken Marinade
  • 1 pound boneless, skinless chicken breast
  • 2 tablespoons olive oil or avocado oil
  • 2 tablespoons lemon juice freshly squeezed
  • 2 cloves garlic minced
  • 1 tablespoon oregano or Italian seasoning
  • to taste salt
  • to taste pepper
For the Gyros Assembly
  • 4 pieces pita bread whole grain or gluten-free
  • 1 cup tzatziki sauce or dairy-free option
  • 1 cup cherry tomatoes sliced
  • 1 small red onion sliced
  • 1/4 cup fresh parsley optional

Equipment

  • Grill Pan
  • Mixing Bowl

Method
 

Step‑by‑Step Instructions
  1. In a medium bowl, combine chicken breast pieces with olive oil, lemon juice, garlic, oregano, salt, and pepper. Cover and let marinate for at least 30 minutes.
  2. Heat a grill pan over medium-high heat and cook the marinated chicken for 6–8 minutes on each side until cooked through. Let it rest, then slice thinly.
  3. Prepare the tzatziki by mixing yogurt, grated cucumber, garlic, lemon juice, salt, dill, and olive oil in a bowl. Refrigerate for 10 minutes.
  4. Warm pita bread for about 30 seconds, then layer with sliced chicken, tzatziki, cherry tomatoes, red onion, and any additional toppings.
  5. Serve garnished with parsley and enjoy with Greek salad or roasted vegetables.

Nutrition

Serving: 1gyrosCalories: 400kcalCarbohydrates: 30gProtein: 30gFat: 20gSaturated Fat: 4gPolyunsaturated Fat: 1gMonounsaturated Fat: 12gCholesterol: 80mgSodium: 600mgPotassium: 600mgFiber: 3gSugar: 4gVitamin A: 1000IUVitamin C: 20mgCalcium: 150mgIron: 3mg

Notes

Let chicken marinate overnight for deeper flavor. Use fresh pita for best texture. Don't overload gyros with toppings for easy handling.

Tried this recipe?

Let us know how it was!

Succulent Carnitas Tacos for the Perfect Taco Night

As I strolled through the vibrant market, the enticing aroma of slow-cooked pork wafted through the air, instantly transporting me to a sun-drenched fiesta in Mexico. That day, I discovered the joy of making Easy Slow Cooker Carnitas Tacos, a recipe that promises to elevate your Taco Tuesday into an unforgettable experience. The best part? With minimal prep time and the magic of a slow cooker, you can create tender, juicy carnitas that are perfect for satisfying even the hungriest of guests. Ideal for a quick dinner or a cozy gathering, these tacos not only embrace rich flavors but also offer endless topping possibilities to delight everyone at the table. So, are you ready to fill your kitchen with mouthwatering scents and impress your loved ones? Let’s dive into this easy, flavor-packed adventure!

Why are Carnitas Tacos a must-try?

Simplicity at Its Best: This recipe requires just a few basic ingredients and minimal hands-on time; let your slow cooker do the magic!

Flavor Explosion: The combination of spices, citrus, and slow cooking meld perfectly, creating a rich and savory taste that will have everyone at the table asking for more.

Endless Customization: With topping variations like avocado, cheese, and fresh salsa, you can easily cater to every guest’s preference. Explore more delicious options with our Birria Tacos Culinary ideas!

Perfect for Gatherings: These carnitas tacos are a crowd-pleaser for any occasion—family dinners, game nights, or Taco Tuesday celebrations.

Time-Saving: With 8 to 10 hours of hands-off cooking, you can spend your day focusing on other tasks while still serving up a delightful meal!

Carnitas Tacos Ingredients

For the Carnitas
Pork Shoulder – The main protein; boneless is best for easy shredding. Alternatively, use pork butt for a similar result.
Garlic Cloves – Adds aromatic depth; if you’re short on fresh garlic, garlic powder works in a pinch.
Chili Powder – Contributes warmth and spice; feel free to adjust the amount to suit your heat preference.
Dried Oregano – Elevates flavor with herbal notes, enhancing the overall dish.
Ground Cumin – Essential for authentic carnitas, this spice imparts a warm, earthy flavor.
Yellow Onion – Provides sweetness and depth; red onion can substitute for a slightly different touch.
Orange Juice – Brings in acidity and sweetness, balancing the richness of the meat; lime juice is a zesty alternative.
Jalapeno Pepper – For a mild kick; deseeding it will reduce the heat if desired.
Salt & Black Pepper – Key seasonings for boosting flavor.

For Toppings
Red Onion – Adds a crunchy texture and sharp flavor as a fresh topping.
Fresh Cilantro – Lends freshness and color; omit if you’re not a fan of cilantro.
Tortillas – The ideal vessel for your carnitas, choose between corn or flour based on preference.
Lime – A squeeze of lime over the tacos enhances the flavor and freshness before serving.

Embrace this carnitas tacos recipe for an easy dinner that’s bursting with flavor and sure to be a hit!

Step‑by‑Step Instructions for Easy Slow Cooker Carnitas Tacos

Step 1: Prep the Pork
In a small bowl, combine dried oregano, ground cumin, black pepper, salt, and chili powder. Rub this fragrant spice mixture evenly over the pork shoulder, ensuring every inch is coated. This step not only enhances the flavor but also gets the meat ready for the slow cooker. Set aside for a moment while you prepare the other ingredients.

Step 2: Combining Ingredients
Place the seasoned pork shoulder in the slow cooker, allowing it to nestle comfortably at the bottom. Add the chopped yellow onion, minced garlic, and diced jalapeno pepper on top. Pour in the fresh orange juice, which will infuse the meat with citrusy sweetness as it cooks. Your slow cooker is now packed with flavor and ready to work its magic!

Step 3: Slow Cook
Cover the slow cooker with its lid and set it to cook on low for 8 to 10 hours or high for 5 to 6 hours. As it cooks, the pork will gradually become tender and easily shreddable. After the time is up, check if the meat is fork-tender—this means it’s ready to be transformed into delicious carnitas tacos.

Step 4: Shred the Pork
Once the cooking time is complete, carefully transfer the pork to a cutting board using tongs. Using two forks, shred the meat into bite-sized pieces, allowing the juices to escape for a moment. If desired, return the shredded pork to the slow cooker to keep it warm and coated in the remaining flavorful liquid as you prepare for the next step.

Step 5: Crisp the Pork (Optional)
For an extra layer of texture, preheat your broiler. Spread the shredded pork in a single layer on a baking sheet and pour a little of the reserved cooking liquid over the top. Broil for 5 to 10 minutes until the edges are nicely crispy and browned. This optional step elevates your carnitas tacos with a delightful crunch that adds to the overall experience.

Step 6: Assemble Tacos
Warm your tortillas in a skillet or directly over a flame until pliable. Start assembling your tacos by filling each tortilla with a generous portion of the shredded carnitas. Top with fresh red onion, diced cilantro, and a squeeze of lime over the top. These easy slow cooker carnitas tacos are now ready to serve, offering a mouthwatering combination of flavors and textures!

Storage Tips for Carnitas Tacos

Fridge: Store leftover cooked carnitas in an airtight container for up to 4 to 5 days. This keeps the flavors fresh and ready for quick meals.

Freezer: Freeze any extra carnitas in a freezer-safe bag for up to 3 months. Make sure to remove as much air as possible to prevent freezer burn.

Reheating: When ready to enjoy, thaw in the fridge overnight, then reheat in a skillet over medium heat, adding a splash of the reserved cooking liquid to keep the carnitas moist and flavorful.

Taco Assembly: Keep toppings stored separately in the fridge and assemble just before serving for the best texture and taste.

Expert Tips

  • Moisture Retention: Don’t discard the cooking liquid; use it to keep the shredded carnitas moist and flavor-packed.

  • Crisp It Up: For that delightful crunch, broil the shredded pork after cooking, pouring some reserved cooking liquid over it to enhance the flavor.

  • Flavor Boost: Marinating the pork overnight with spices and orange juice can intensify the flavor significantly, yielding an even richer carnitas taco experience.

  • Adjust the Heat: Be mindful of jalapeno quantity; deseeding them will significantly reduce the spice level for those with milder palates.

  • Versatile Tortillas: Experiment with different tortilla options—corn or flour—for varied textures and tastes that suit your family’s favorites.

Carnitas Tacos Variations & Substitutions

Feel free to play with the flavors and textures to make these carnitas tacos your own!

  • Dairy-Free: Skip cheese or use cashew cheese for a creamy twist. It still offers richness without the dairy!
  • Spice Level Boost: Add diced serrano peppers or chipotle in adobo for an extra kick. This enhances depth and smokiness, perfect for heat lovers.
  • Chicken Alternative: Swap pork for chicken thighs for a lighter, yet juicy option. The slow cooker will still yield tender, delicious results.
  • Low-Carb Option: Use large butter lettuce leaves instead of tortillas for a fresh, low-carb taco experience. A crisp and crunchy alternative awaits!
  • Fresh Toppings: Top with avocado, pineapple salsa, or pickled jalapenos for an exciting flavor boost. They add freshness and vibrant textures.
  • Slow-Cooked Beef: Try using a chuck roast instead of pork for a hearty beef version of carnitas. The cooking method remains the same and delivers delightful results.
  • Herb Infusion: Add fresh herbs like thyme or parsley to the slow cooker for an aromatic twist. Each bite will be a new experience!
  • Citrusy Twist: Try grapefruit juice in place of orange juice for a tangy surprise. It complements the savory pork beautifully and adds a unique touch.

Explore these variations and share your favorites, and enhance your next taco night with our easy recipe for Birria Tacos Culinary adventures!

What to Serve with Easy Slow Cooker Carnitas Tacos

Creating a delightful feast around your tacos can turn any ordinary meal into a festive occasion.

  • Spanish Rice: A fluffy side of Spanish rice complements the flavorful carnitas, absorbing the delicious juices with each bite. The vibrant colors of the rice can brighten up your table!

  • Black Beans: Creamy black beans add a hearty touch, providing plant-based protein and a rich texture that pairs beautifully with tacos. Try garnishing them with fresh cilantro for an added touch of freshness.

  • Fresh Guacamole: Creamy guacamole enhances the flavor experience while adding a cool contrast to the spicy carnitas. Spread it on your tortilla or serve as a side for dipping.

  • Corn Salsa: Sweet and zesty corn salsa brings a burst of flavor with each bite. The crunchy texture and fresh ingredients create a perfect balance with the tender meat in the tacos.

  • Grilled Street Corn: This savory treat enhances your taco night with its smoky flavor and delightful crunch. Top with chili powder, lime, and cheese for a mouthwatering experience.

  • Chips and Salsa: A classic accompaniment, crispy tortilla chips dipped in zesty salsa set the scene for a casual gathering. This is the perfect way to start your fiesta!

  • Margaritas: For a refreshing beverage, consider serving classic margaritas. The tangy notes complement the richness of the carnitas, making every sip a celebration of flavors.

Transform your taco night by combining these delicious side dishes and beverages with your Easy Slow Cooker Carnitas Tacos for a memorable dining experience!

Make Ahead Options

These Easy Slow Cooker Carnitas Tacos are perfect for meal prep, saving you time during busy weeknights! You can season the pork shoulder with spices and marinate it in orange juice up to 24 hours in advance in the refrigerator, allowing the flavors to meld beautifully. Additionally, you can chop the onion, garlic, and jalapeno ahead of time and store them in an airtight container for up to 3 days. When you’re ready to serve, simply place the pork and prepped ingredients in the slow cooker and let it cook until fork-tender. Crisping the pork under the broiler before assembling the tacos will ensure they are just as delicious as if made fresh, maintaining their flavorful quality while keeping your evening stress-free!

Carnitas Tacos Recipe FAQs

What type of pork is best for carnitas?
Absolutely! For the best flavor and texture, I recommend using a boneless pork shoulder. It becomes tender and shred easily after cooking. Alternatively, you can use pork butt, which offers a similar result with a bit more marbling for extra juiciness.

How should I store leftover carnitas?
For sure! Store leftover cooked carnitas in an airtight container in the refrigerator for up to 4 to 5 days. This way, you can easily enjoy the rich flavors throughout the week!

Can I freeze carnitas?
Yes, you can! To freeze your carnitas, portion them into freezer-safe bags or containers, removing as much air as possible to prevent freezer burn. They can be stored for up to 3 months. When you’re ready to enjoy, simply thaw in the fridge overnight and reheat in a skillet for the best taste and texture.

Why is my carnitas dry?
Very good question! If your carnitas turn out dry, it may be due to insufficient cooking time or not enough moisture in the slow cooker. To avoid this, ensure you use enough liquid—orange juice is ideal—and keep the lid on during the cooking process. Also, using the reserved cooking liquid when reheating can help to rehydrate the meat.

Are these carnitas tacos gluten-free?
Yes, they can be! Just be sure to select gluten-free tortillas. The carnitas themselves are naturally gluten-free, so with the right tortillas and toppings, you can easily enjoy this dish without any gluten concerns.

Can I make these carnitas a day ahead?
Definitely! Making the carnitas a day ahead actually enhances the flavors. Just refrigerate it once cooked and shredded, and reheat it gently when you’re ready to assemble your tacos. This also allows the spices to develop even more richness, making your tacos a hit at the table!

Carnitas Tacos

Succulent Carnitas Tacos for the Perfect Taco Night

Enjoy these delicious Carnitas Tacos, perfect for any gathering with their rich flavors and endless topping possibilities.
Prep Time 15 minutes
Cook Time 10 hours
Total Time 10 hours 15 minutes
Servings: 6 tacos
Course: Dinner
Cuisine: Mexican
Calories: 280

Ingredients
  

For the Carnitas
  • 3 pounds Pork Shoulder Boneless is best for easy shredding.
  • 4 cloves Garlic Minced; garlic powder can substitute.
  • 2 tablespoons Chili Powder Adjust amount to suit heat preference.
  • 1 tablespoon Dried Oregano
  • 1 teaspoon Ground Cumin
  • 1 large Yellow Onion Chopped; can substitute with red onion.
  • 1 cup Orange Juice Freshly squeezed.
  • 1 medium Jalapeno Pepper Diced; deseed for less heat.
  • 1 teaspoon Salt
  • 1 teaspoon Black Pepper
For Toppings
  • 1 small Red Onion Diced.
  • 1/4 cup Fresh Cilantro Chopped; optional.
  • 6 pieces Tortillas Corn or flour based on preference.
  • 1 lime Lime Cut into wedges for serving.

Equipment

  • Slow Cooker

Method
 

Step‑by‑Step Instructions
  1. In a small bowl, combine dried oregano, ground cumin, black pepper, salt, and chili powder. Rub this spice mixture evenly over the pork shoulder.
  2. Place the seasoned pork shoulder in the slow cooker. Add chopped onion, minced garlic, and diced jalapeno pepper. Pour in fresh orange juice.
  3. Cover the slow cooker and cook on low for 8 to 10 hours or high for 5 to 6 hours until pork is fork-tender.
  4. Once done, transfer the pork to a board and shred it using two forks. Optionally return to slow cooker to keep warm.
  5. For extra texture, preheat broiler, spread shredded pork on a baking sheet, and broil for 5 to 10 minutes.
  6. Warm tortillas and assemble tacos by filling with shredded carnitas, then top with red onion, cilantro, and a squeeze of lime.

Nutrition

Serving: 1tacoCalories: 280kcalCarbohydrates: 22gProtein: 20gFat: 14gSaturated Fat: 5gPolyunsaturated Fat: 1gMonounsaturated Fat: 8gCholesterol: 70mgSodium: 670mgPotassium: 450mgFiber: 3gSugar: 1gVitamin A: 100IUVitamin C: 10mgCalcium: 50mgIron: 2mg

Notes

Don't discard the cooking liquid; it keeps the carnitas moist and flavor-packed. Experiment with tortilla options for varied flavors.

Tried this recipe?

Let us know how it was!

Mouthwatering Barbacoa Tacos Made Easy in Your Slow Cooker

As I watched the sun dip below the horizon, the savory aroma of spices filled my kitchen, wrapping me in a warm embrace familiar only to the heart of Mexican cuisine. It’s taco night, and nothing steals the show quite like Slow Cooker Barbacoa Tacos. With just a few ingredients and minimal effort, you can create a family-style feast that beckons everyone to gather around the table. The tender beef roast, slow-cooked to juicy perfection, makes for an easily shreddable delight, while the vibrant toppings add a burst of freshness and flavor. Not only does this recipe allow you to serve a mouthwatering meal without hours of prep, but its crowd-pleasing nature guarantees smiles all around. Ready to discover how to elevate your taco night? Let’s dive into this absolute favorite!

Why are these Barbacoa Tacos a Must-Try?

Simplicity at Its Best: With just a handful of ingredients and a slow cooker, you can enjoy this easy and flavorful dish without any fuss.

Flavor Explosion: The perfect blend of smoky chipotle and vibrant spices creates a rich taste experience that will leave everyone craving more.

Tender and Juicy: Slow-cooking transform beef into a melt-in-your-mouth delight, making sure each taco bursts with juicy goodness.

Crowd-Pleasing: Ideal for family gatherings or casual get-togethers, everyone will love customizing their barbacoa with toppings like avocado and cilantro.

Versatility: Feeling adventurous? You can easily swap out proteins or try different toppings for varied flavors—like a tangy pickled onion from Birria Tacos Culinary.

Make-Ahead Magic: Prepare it the day before and let the flavors develop, so your taco night is all about relaxation and enjoyment!

Barbacoa Tacos Ingredients

• Let’s gather what you need for these mouthwatering barbacoa tacos!

For the Beef

  • Beef Chuck Roast – A main protein that tenderizes beautifully in slow cooking; substitute with brisket for enhanced flavor.
  • Beef Stock – Adds moisture and flavor; opt for low-sodium to control salt levels.

For the Aromatics

  • Onion – Provides natural sweetness; yellow or white onion works best for this dish.
  • Garlic Cloves – Elevates aroma and flavor; use fresh cloves for the best taste, yet garlic powder can substitute in a pinch.

For the Spice Blend

  • Chipotles in Adobo Sauce – Infuses a smoky heat; reduce quantity for a milder experience or omit for less spice.
  • Fresh Lime Juice – Brightens the whole dish with acidity; can swap with lemon juice in a bind.
  • Apple Cider Vinegar – Balances the richness of the beef; white vinegar is a sufficient replacement.
  • Ground Cumin – An essential spice for authenticity; ground coriander or chili powder works as alternatives.
  • Dried Oregano – Adds earthy undertones; consider using Mexican oregano for enhanced flavor.
  • Salt – Elevates all flavors; adjust to suit your taste preferences.
  • Black Pepper – Brings warmth and depth; white pepper can be used as a substitute if desired.
  • Ground Cloves – Adds a hint of warmth; use sparingly or omit if you prefer.

For Cooking

  • Bay Leaves – Imparts subtle herbal notes; remember to remove them before serving.

Now that you have the ingredients ready, it’s time to create a fiesta on your dinner table with these delightful barbacoa tacos!

Step‑by‑Step Instructions for Barbacoa Tacos

Step 1: Prepare the Ingredients
Begin by gathering all your ingredients for the barbacoa tacos. Chop the onion and mince the garlic cloves, then combine these with the beef chuck roast in the slow cooker. Next, add in the chipotles in adobo sauce, fresh lime juice, apple cider vinegar, ground cumin, dried oregano, salt, black pepper, and ground cloves. Ensure everything is evenly coated to enhance flavor.

Step 2: Add Beef Stock and Bay Leaves
Pour the beef stock over the seasoned meat mixture in the slow cooker. This will provide moisture and flavor as it cooks. Toss in the bay leaves, which will infuse a subtle herbal note. Cover the slow cooker with its lid securely, ensuring it creates a tight seal to lock in heat and moisture.

Step 3: Slow Cook the Barbacoa
Set your slow cooker to low heat and let the barbacoa cook for 8-9 hours, or on high for 4-5 hours. As it cooks, the beef should become incredibly tender and easily shreddable. When done, a fork should effortlessly shred the beef, and your kitchen will be filled with mouthwatering aromas that beckon everyone to the dinner table.

Step 4: Shred the Beef
Once the cooking time is up, carefully remove the beef from the slow cooker and place it on a cutting board. Using two forks, shred the beef into bite-sized pieces. The meat should fall apart without effort. After shredding, return the beef to the slow cooker, mixing it well with the remaining juices to soak up all the flavorful goodness.

Step 5: Serve the Barbacoa Tacos
Warm your tortillas over a skillet for a few seconds on each side or wrap them in foil and place them in a low oven. Once warm, fill each tortilla with a generous portion of the barbacoa beef. Top with diced onion, avocado, cilantro, and any additional toppings of your choice. Serve family-style and let everyone create their perfect barbacoa tacos.

Helpful Tricks for Barbacoa Tacos

Maximize Flavor: Marinate the beef overnight with spices and liquid to deepen the flavors of your barbacoa tacos.

Watch Cooking Time: Cooking too long can dry out the beef; check for tenderness around the recommended time to avoid this common mistake.

Use Quality Ingredients: Fresh ingredients like onions and garlic enhance the overall flavor profile of your tacos.

Adjust Spice Levels: If your family prefers milder tacos, reduce the amount of chipotles in adobo or omit them entirely for a less spicy option.

Serve with Variety: Offer a selection of toppings like pickled onions and spicy salsa, allowing everyone to customize their barbacoa tacos to their liking.

Barbacoa Tacos Variations & Substitutions

Unleash your creativity in the kitchen and customize these delicious tacos to suit your taste preferences!

  • Pork Shoulder: Swap beef chuck for pork shoulder for a different texture and flavor—it’s equally juicy and tender!

  • Chicken Delight: Use boneless, skinless chicken thighs for a lighter yet still flavorful option that shreds beautifully.

  • Vegetarian Twist: Replace meat with chicory or jackfruit, adding smoky spices for a delightful plant-based rendition.

  • Spicy Salsa: Amp up the heat with a spicy salsa verde or a fiery hot sauce drizzled on top for an extra kick!

  • Different Toppings: Try pickled red onions, crumbled queso fresco, or mango salsa for a sweet balance against the savory barbacoa.

  • Crispy Corn Tortillas: Opt for crispy corn tortillas for an exciting crunch with each bite—perfect for those who love texture!

  • Zesty Garnish: Add a sprinkle of cotija cheese or a squeeze of fresh lime juice to elevate the taco experience.

  • Serving with Flair: Serve alongside a refreshing Mexican street corn salad for a delicious and colorful meal combo, perfect for taco night!

Let your culinary adventure unfold as you try different ingredients, and don’t forget to explore the delicious world of taco recipes, like the mouthwatering flavors in the Birria Tacos Culinary experience!

How to Store and Freeze Barbacoa Tacos

Fridge: Store any leftover barbacoa in an airtight container for up to 3 days. Reheat gently on the stove or microwave to maintain tenderness.

Freezer: For longer storage, freeze shredded barbacoa in a freezer-safe container or bag for up to 3 months. Thaw in the fridge overnight before reheating.

Tortillas: If you have leftover tortillas, store them in a sealed plastic bag at room temperature for 1-2 days, or freeze for up to 3 months.

Reheating: Reheat tortillas in a skillet or wrapped in foil in the oven, and enjoy your barbacoa with fresh toppings to restore that homemade flavor!

Make Ahead Options

These Barbacoa Tacos are perfect for meal prep enthusiasts! You can prepare the beef by marinating it in the spices and liquid up to 24 hours in advance, allowing the flavors to deepen while you enjoy your busy day. Simply combine the beef chuck roast, onion, garlic, and seasoning in the slow cooker and refrigerate overnight. For best results, shred the beef once it’s cooked, then return it to the juices in the slow cooker to keep it tender and flavorful. When ready to serve, just warm your tortillas and assemble your tacos with your choice of toppings for a delicious meal that’s just as delightful as if you made it fresh!

What to Serve with Slow Cooker Barbacoa Tacos

As the enticing aroma of spices lingers in your kitchen, it’s time to consider delightful sides and accompaniments that complete your taco night experience.

  • Cilantro Lime Rice: Fluffy rice infused with zesty lime and fresh cilantro perfectly complements the bold flavors of barbacoa and adds a refreshing bite.

  • Fresh Guacamole: Creamy avocado blended with lime, garlic, and salt creates a velvety dip that balances the taco’s spices, providing a smooth contrast.

  • Black Bean Salad: Refreshing and nutritious, this mix of black beans, corn, tomatoes, and lime brings a colorful crunch that enhances each bite of barbacoa.

  • Chips and Salsa: Crisp tortilla chips served with a zesty salsa are an irresistibly fun snack that pairs wonderfully with the juicy beef. Each scoop is a burst of flavor!

  • Street Corn (Elote): Grilled corn slathered in creamy cheese and spices brings a delightful flavor adventure, enhancing the celebratory vibe of taco night.

  • Margaritas: A chilled glass of lime margarita adds an extra layer of refreshment, harmonizing beautifully with the savory barbacoa and lively atmosphere.

  • Churros: End the meal on a sweet note with warm, cinnamon-sugar dusted churros that perfectly contrast the spice of the tacos, making for a delightful dessert experience.

Each complement you choose not only enhances the barbacoa tacos but also brings a touch of joy and comfort to your gathering!

Barbacoa Tacos Recipe FAQs

How do I choose the right beef chuck roast?
Absolutely! Look for a beef chuck roast that has nice marbling and a bright red color. This marbling helps the meat stay tender and juicy during cooking. Avoid any that have dark spots or an unusual odor, which indicates it may not be fresh.

What’s the best way to store leftover barbacoa?
Very straightforward! Store any leftover barbacoa in an airtight container in the fridge for up to 3 days. If you’re planning to enjoy it later, I often recommend transferring it to the freezer, where it can last up to 3 months. Just make sure to thaw it in the fridge overnight before reheating for the best texture and flavor!

Can I freeze barbacoa tacos?
Absolutely! To freeze them, first, ensure the barbacoa is completely cooled. Place the shredded beef in a freezer-safe bag or container, making sure to remove excess air to prevent freezer burn. You can freeze the tortillas separately in a sealed bag for up to 3 months as well. When you’re ready to enjoy them, simply thaw everything in the fridge overnight, then reheat both the barbacoa and tortillas before serving.

What if my beef doesn’t shred easily?
If your beef isn’t shredding easily, it might need a little more time to cook. Check if it’s tender and easily falls apart with a fork; if not, cover and continue cooking for another 30 minutes. Sometimes all it needs is a bit more attention to become that perfect, melt-in-your-mouth texture!

Are there any dietary considerations for barbacoa tacos?
Definitely! If you or your guests have dietary restrictions, here are some tips: For a gluten-free option, use corn tortillas instead of wheat. If you have any allergies, make sure to check for spice contents, especially if you’re sensitive to chipotle or cumin. Alternatively, use turkey or chicken to create a lighter version. Just keep in mind that cooking times may vary depending on the protein you choose.

How should I serve barbacoa tacos for a large group?
For a successful taco night, I suggest serving the barbacoa beef family-style in a large bowl, alongside warm tortillas and a variety of toppings like diced onions, fresh cilantro, and avocado. This way, guests can build their tacos just the way they like! If you want to make it even more festive, throw in some sides like Mexican rice or refried beans for a complete meal!

Barbacoa Tacos

Mouthwatering Barbacoa Tacos Made Easy in Your Slow Cooker

Discover how to make delicious Barbacoa Tacos using a slow cooker with minimal effort.
Prep Time 15 minutes
Cook Time 8 hours
Total Time 8 hours 15 minutes
Servings: 6 tacos
Course: Dinner
Cuisine: Mexican
Calories: 300

Ingredients
  

For the Beef
  • 3 pounds Beef Chuck Roast Substitute with brisket for enhanced flavor.
  • 2 cups Beef Stock Low-sodium recommended.
For the Aromatics
  • 1 medium Onion Yellow or white onion preferred.
  • 4 cloves Garlic Cloves Fresh cloves recommended.
For the Spice Blend
  • 2 tablespoons Chipotles in Adobo Sauce Reduce for milder experience.
  • 1 lime Fresh Lime Juice Can swap with lemon juice.
  • 1 tablespoon Apple Cider Vinegar White vinegar is a suitable replacement.
  • 2 teaspoons Ground Cumin Authentic flavor.
  • 2 teaspoons Dried Oregano Mexican oregano preferred.
  • 1 teaspoon Salt Adjust to taste.
  • 1/2 teaspoon Black Pepper White pepper can be used.
  • 1/4 teaspoon Ground Cloves Use sparingly or omit.
For Cooking
  • 2 pieces Bay Leaves Remove before serving.

Equipment

  • Slow Cooker

Method
 

Preparation
  1. Begin by gathering all your ingredients. Chop the onion and mince the garlic cloves, then combine these with the beef chuck roast in the slow cooker.
  2. Add in the chipotles in adobo sauce, fresh lime juice, apple cider vinegar, ground cumin, dried oregano, salt, black pepper, and ground cloves. Ensure everything is evenly coated.
Cooking
  1. Pour the beef stock over the seasoned meat mixture in the slow cooker.
  2. Toss in the bay leaves, then cover the slow cooker with its lid securely.
  3. Set your slow cooker to low heat and let cook for 8-9 hours, or on high for 4-5 hours until the beef is tender.
Finishing Touches
  1. Once the cooking time is up, carefully remove the beef and shred using two forks. Return the beef to the slow cooker, mixing with the juices.
  2. Warm tortillas over a skillet or in foil, fill with barbacoa beef, and top with desired toppings.

Nutrition

Serving: 1tacoCalories: 300kcalCarbohydrates: 30gProtein: 25gFat: 15gSaturated Fat: 6gPolyunsaturated Fat: 1gMonounsaturated Fat: 8gCholesterol: 70mgSodium: 600mgPotassium: 500mgFiber: 2gSugar: 1gVitamin A: 500IUVitamin C: 5mgCalcium: 30mgIron: 2mg

Notes

For enhanced flavor, marinate the beef overnight with spices. Monitor cooking time to avoid dryness.

Tried this recipe?

Let us know how it was!

Savor Every Bite of Easy Shrimp Tacos with Cilantro Slaw

As the sizzling shrimp dances in the pan, I can’t help but smile at the vibrant, beachy flavors about to unfold in my kitchen. These Shrimp Tacos with Cilantro Lime Slaw are not just a meal; they’re an invitation to gather around the table and celebrate the freshness of homemade food. Perfect for a quick weeknight dinner or a lively gathering with friends, this recipe balances succulent, spicy shrimp with a refreshing slaw that’s both crunchy and creamy. And the best part? They’re gluten-free and packed with nutrients, making them a healthy choice without sacrificing flavor. Ready to transform your dinner routine and impress your guests? Let’s dive into this delightful taco adventure together!

Why are shrimp tacos a must-try?

Flavor Explosion: These shrimp tacos offer a burst of flavor with every bite, combining seasoned shrimp and zesty cilantro lime slaw for an unforgettable experience.
Quick & Easy: Perfect for busy weeknights, this recipe comes together in no time, allowing you to enjoy a homemade meal without the fuss.
Nutrient-Rich: Packed with protein and healthy fats, these gluten-free tacos are a great way to nourish your body without feeling deprived.
Crowd-Pleaser: Whether you’re hosting a dinner party or enjoying a family meal, these shrimp tacos appeal to everyone at the table.
Add some fun sides like cilantro lime rice or corn on the cob for a full fiesta experience!

Shrimp Taco Ingredients

For the Shrimp
Large Raw Shrimp – 1 pound, shells removed and deveined; use large or jumbo for the best texture.
Olive Oil – 2 tablespoons; enhances flavor while sautéing shrimp.
Chipotle Powder – ½ teaspoon; adds smokiness; adjust for spice level.
Cumin Powder – ½ teaspoon; brings earthy depth to the shrimp.

For the Cilantro Lime Slaw
Bacon – 8 ounces; crispy texture adds richness; substitute with turkey bacon for a lighter option.
Cabbage – ¼ medium green, core removed and sliced; provides crunch and volume.
Cilantro Leaves – 2 cups, roughly chopped; contributes brightness and freshness.
Lime Juice – 3 tablespoons; fresh juice balances flavors and adds zest.

For Assembling the Tacos
Corn Tortillas – 8 tortillas; for a gluten-free option and perfect to hold all the goodness.
Avocado – 1 large; offers a creamy richness that complements the shrimp.
Lime Crema – for drizzling; enhances the flavor; swap for dairy-free sour cream for a vegan choice.

Get ready to savor every bite of these delicious shrimp tacos!

Step‑by‑Step Instructions for Shrimp Tacos

Step 1: Prepare Bacon Slaw
Preheat your oven to 400°F (200°C). Spread the bacon strips on a baking sheet and bake for 18-20 minutes, or until crispy and golden brown. Once cooked, remove the bacon, let it cool, crumble it into bits, and set aside. In a mixing bowl, combine the thinly sliced cabbage, crumbled bacon, chopped cilantro, olive oil, lime juice, salt, and freshly ground pepper. Mix well and allow the flavors to meld.

Step 2: Season the Shrimp
In a separate bowl, add the 1 pound of large raw shrimp, then drizzle with 2 tablespoons of olive oil. Sprinkle in ½ teaspoon of chipotle powder, ½ teaspoon of cumin, and season with salt and pepper to your taste. Toss the shrimp until they’re evenly coated with the spices, ensuring each piece is well covered before cooking.

Step 3: Cook the Shrimp
Heat a large skillet over medium heat and add the seasoned shrimp. Sauté for 1-2 minutes on each side, or until they turn pink and begin to caramelize, indicating they are fully cooked. You want to avoid overcooking; they should be tender and juicy. Alternatively, you can grill the shrimp for a touch of smoky flavor that enhances your shrimp tacos tremendously.

Step 4: Assemble the Tacos
Take your warm corn tortillas and layer each with a generous portion of the sautéed shrimp. Top with the vibrant cilantro lime slaw you’ve prepared, then add creamy slices of avocado for richness. Finally, drizzle lime crema over each taco to tie all the flavors together beautifully. Serve immediately for the freshest taste and enjoy your flavorful shrimp tacos!

Helpful Tricks for Shrimp Tacos

Proper Shrimp Sizing: Ensure you use large or jumbo shrimp to maintain the best texture in your shrimp tacos; smaller shrimp can cook too quickly and become rubbery.

Avoid Overcrowding: When cooking shrimp, do not overcrowd the pan. This prevents steaming and ensures a beautifully seared shrimp, enhancing flavor and texture.

Fresh Is Best: Always opt for fresh lime juice and herbs for maximum flavor. Bottled substitutes can dull the taste of your cilantro lime slaw.

Adjust Spice Levels: Start with less chipotle powder and gradually increase to your preferred spice level, making sure it complements rather than overwhelms the shrimp tacos.

Rest the Slaw: Allow the cilantro lime slaw to rest for at least 15 minutes before serving; this helps the flavors meld beautifully, providing a flavorful crunch to the tacos.

Make Ahead: Prep the shrimp and slaw ahead of time. Store them separately in the fridge for an effortless assembly on busy nights!

Shrimp Tacos: Variations & Substitutions

Feel free to get creative with these shrimp tacos and make them your own with delightful swaps and additions!

  • Bacon-Free: Use turkey bacon or omit entirely for a lighter, plant-based slaw.
  • Alternate Proteins: Replace shrimp with grilled chicken or tofu for a tasty twist.
  • Veggie Power: Add extra veggies like bell peppers or avocado for more color and nutrition in your slaw.
  • Cheese It Up: Sprinkle crumbled feta or queso fresco on top for a creamy, tangy touch that complements the flavors beautifully.
  • Heat Boost: Add sliced jalapeños or a dash of hot sauce for an extra kick that spice lovers will adore.
  • Cabbage Variety: Experiment with different types of cabbage, such as red or Napa, to enhance both color and crunch in your slaw.
  • Seasoned Tortillas: Fry your tortillas briefly for a crispy texture, or use flavored tortillas like spinach or sun-dried tomato to add a new flavor dimension.
  • Lime Crema Twist: Instead of lime crema, try a mango salsa for a sweet and zesty topping that adds a refreshing burst of flavor.

No matter how you decide to customize these shrimp tacos, they’re sure to impress! Consider pairing with sides like cilantro lime rice or corn on the cob for a truly satisfying meal. Enjoy your culinary adventure!

Storage Tips for Shrimp Tacos

Fridge: Store cooked shrimp in an airtight container for up to 3 days; for optimal taste, keep the cilantro lime slaw separate to maintain its crunch.

Freezer: If needed, shrimp can be frozen for up to 2 months. Seal in a freezer bag and remove excess air to prevent freezer burn.

Reheating: When ready to enjoy again, reheat shrimp gently in the microwave for about 30 seconds or until warmed through. Avoid overcooking to prevent rubbery texture.

Assembling: For maximum freshness, assemble your shrimp tacos just before serving, ensuring the slaw remains crisp and the shrimp, flavorful and tender.

What to Serve with Shrimp Tacos with Cilantro Lime Slaw

Nothing complements your vibrant shrimp tacos like a selection of delightful sides and drinks to enhance your meal experience.

  • Cilantro Lime Rice: Fluffy rice infused with lime and fresh cilantro balances the flavors of your tacos, making each bite harmonious.
  • Grilled Corn on the Cob: Sweet, smoky corn drizzled with lime and chili powder adds a fun crunch and enhances the outdoor vibe of your meal.
  • Black Bean Salad: A zesty salad packed with protein and fiber, it’s the perfect fresh counterpoint to the spicy shrimp and creamy slaw.
  • Mango Salsa: Sweet and tangy mango salsa provides a tropical twist that pairs beautifully with the shrimp, brightening each bite.
  • Fresh Guacamole: Creamy avocados seasoned with lime and salt create a rich dip that complements the vibrant flavors of the tacos perfectly.
  • Pineapple Agua Fresca: Refreshing and slightly sweet, this fruity drink is a delightful way to wash down your shrimp tacos while complementing their flavors beautifully.
  • Churros with Chocolate Sauce: For a sweet ending, these crisp, cinnamon-sugar treats paired with warm chocolate sauce create a festive finish to your taco night.

Make Ahead Options

These Shrimp Tacos with Cilantro Lime Slaw are excellent for meal prep, saving you time on busy weeknights! You can prepare the slaw and cook the shrimp up to 3 days in advance. Simply store the slaw (cabbage, cilantro, and dressing combined) in an airtight container in the refrigerator to maintain its crunch and avoid wilting. The seasoned shrimp can be cooked and refrigerated; just ensure they are completely cooled before sealing them in a container. When you’re ready to serve, reheat the shrimp in the microwave for about 30 seconds and assemble the tacos in warm tortillas with avocado and lime crema for that fresh, vibrant taste we all love!

Shrimp Tacos with Cilantro Lime Slaw Recipe FAQs

How do I choose the best shrimp for my tacos?
Absolutely! Look for large or jumbo shrimp that are firm and have a slight sheen. Avoid any shrimp with a strong fishy smell or dark spots all over, as these can be signs of spoilage. Fresh shrimp should come clean with a slight briny scent of the ocean.

How should I store leftover shrimp tacos?
Leftover cooked shrimp can be stored in an airtight container in the fridge for up to 3 days. It’s best to keep the cilantro lime slaw separate to maintain its crunch. Place the slaw in a different container, and it should stay fresh for around 3-5 days.

Can I freeze the shrimp for later use?
Yes! To freeze shrimp, place them in a freezer-safe bag, making sure to remove as much air as possible to prevent freezer burn. They can be frozen for up to 2 months. When you’re ready to enjoy, thaw them overnight in the fridge and gently reheat before assembling your tacos.

What if my shrimp turn out rubbery during cooking?
If your shrimp become rubbery, it’s likely that they were overcooked. Shrimp cook very quickly, typically in just 1-2 minutes per side. To prevent this, ensure that your heat is set to medium and resist the temptation to crowd the pan. Cooking them in batches can help ensure they cook evenly and remain tender.

Are there any dietary considerations to be aware of when making shrimp tacos?
Definitely! For those with shellfish allergies, it’s important to substitute shrimp with proteins like grilled chicken or tofu. When making the cilantro lime slaw, opt for turkey bacon or omit bacon altogether for a vegetarian version. Additionally, ensure your tortillas are gluten-free if necessary, as some brands contain gluten.

Can I make the shrimp tacos ahead of time?
Absolutely! To save time on busy nights, you can prepare both the shrimp and slaw in advance. Simply season the shrimp and store them in the fridge, and you can also combine the slaw ingredients. Just remember to assemble the tacos right before serving to keep everything fresh and delicious!

Shrimp Tacos

Savor Every Bite of Easy Shrimp Tacos with Cilantro Slaw

Enjoy a flavor explosion with these gluten-free shrimp tacos featuring cilantro lime slaw. A nutritious and quick dinner option.
Prep Time 15 minutes
Cook Time 15 minutes
Resting Time 15 minutes
Total Time 45 minutes
Servings: 4 tacos
Course: Dinner
Cuisine: Mexican
Calories: 320

Ingredients
  

For the Shrimp
  • 1 pound Large Raw Shrimp shells removed and deveined
  • 2 tablespoons Olive Oil enhances flavor while sautéing shrimp
  • 0.5 teaspoon Chipotle Powder adjust for spice level
  • 0.5 teaspoon Cumin Powder brings earthy depth
For the Cilantro Lime Slaw
  • 8 ounces Bacon substitute with turkey bacon for a lighter option
  • 0.25 medium Cabbage core removed and sliced
  • 2 cups Cilantro Leaves roughly chopped
  • 3 tablespoons Lime Juice fresh juice balances flavors
For Assembling the Tacos
  • 8 tortillas Corn Tortillas for a gluten-free option
  • 1 large Avocado offers creamy richness
  • Lime Crema for drizzling, swap for dairy-free sour cream for a vegan choice

Equipment

  • Oven
  • Skillet
  • Mixing Bowl
  • Baking Sheet

Method
 

Step-by-Step Instructions for Shrimp Tacos
  1. Preheat your oven to 400°F (200°C). Spread the bacon strips on a baking sheet and bake for 18-20 minutes until crispy and golden brown. Remove, cool, crumble and set aside. Combine cabbage, crumbled bacon, chopped cilantro, olive oil, lime juice, salt and pepper in a bowl. Mix well.
  2. In a separate bowl, add shrimp, drizzle with olive oil, sprinkle with chipotle powder, cumin, and season with salt and pepper. Toss until evenly coated.
  3. Heat a large skillet over medium heat and add the seasoned shrimp. Sauté for 1-2 minutes on each side until pink and caramelized. Avoid overcooking.
  4. Layer warm tortillas with sautéed shrimp, cilantro lime slaw, creamy avocado, and drizzle lime crema. Serve immediately.

Nutrition

Serving: 1tacoCalories: 320kcalCarbohydrates: 30gProtein: 25gFat: 15gSaturated Fat: 4gPolyunsaturated Fat: 2gMonounsaturated Fat: 8gCholesterol: 160mgSodium: 600mgPotassium: 500mgFiber: 3gSugar: 1gVitamin A: 10IUVitamin C: 30mgCalcium: 4mgIron: 15mg

Notes

Make ahead by prepping shrimp and slaw, storing separately in the fridge for efficient assembly.

Tried this recipe?

Let us know how it was!

Stay Connected

Get recipes via email: