Get my cookbooks

Savory Ground Beef and Dumplings for Cozy Family Nights

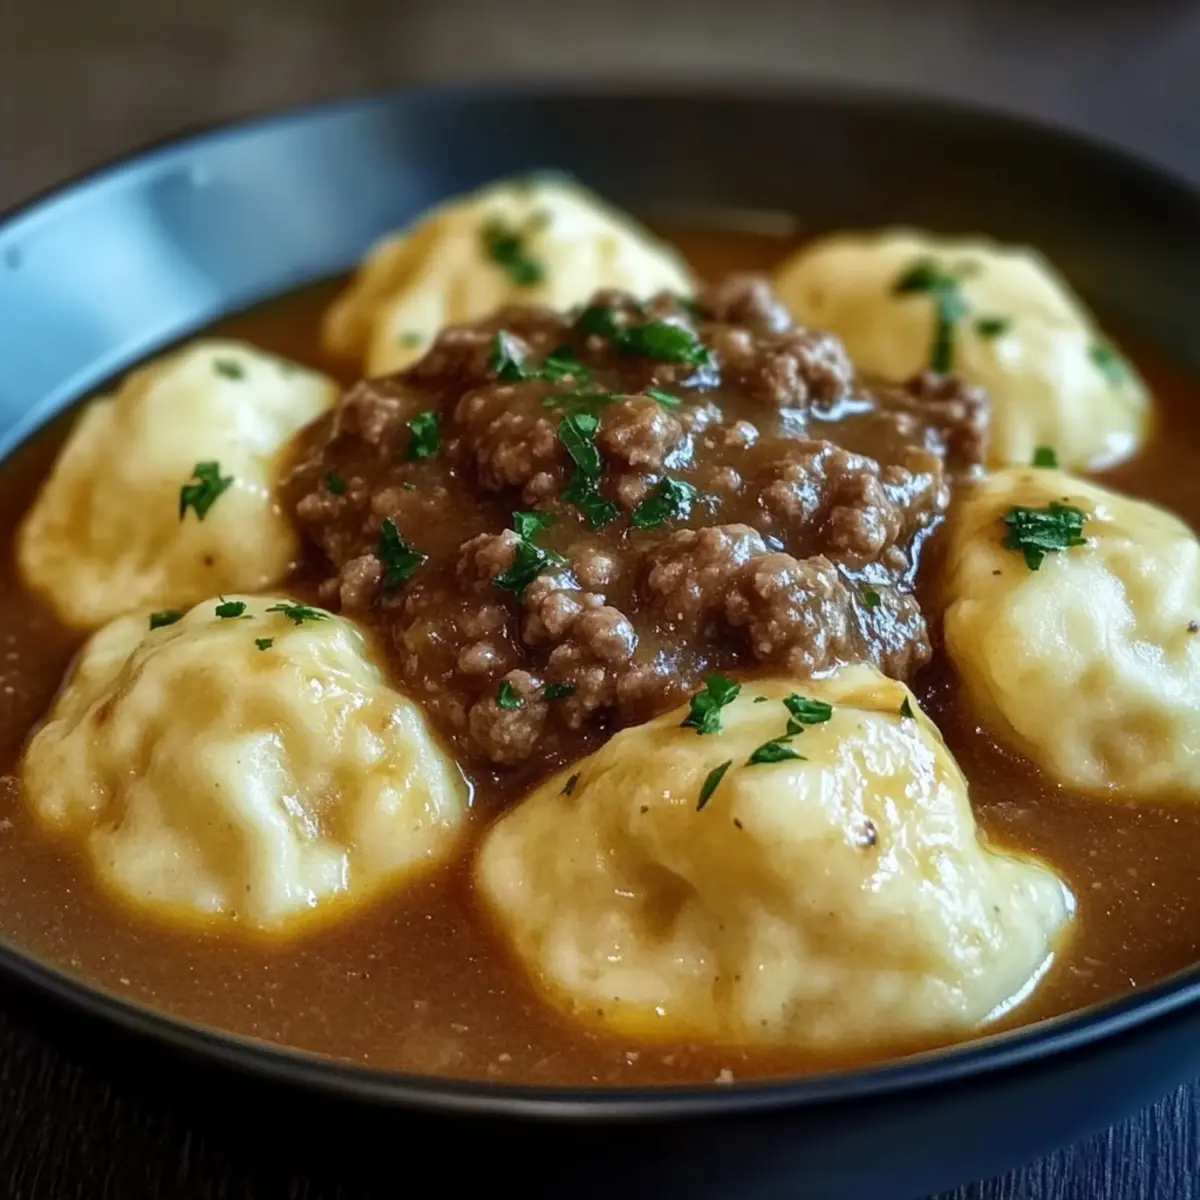
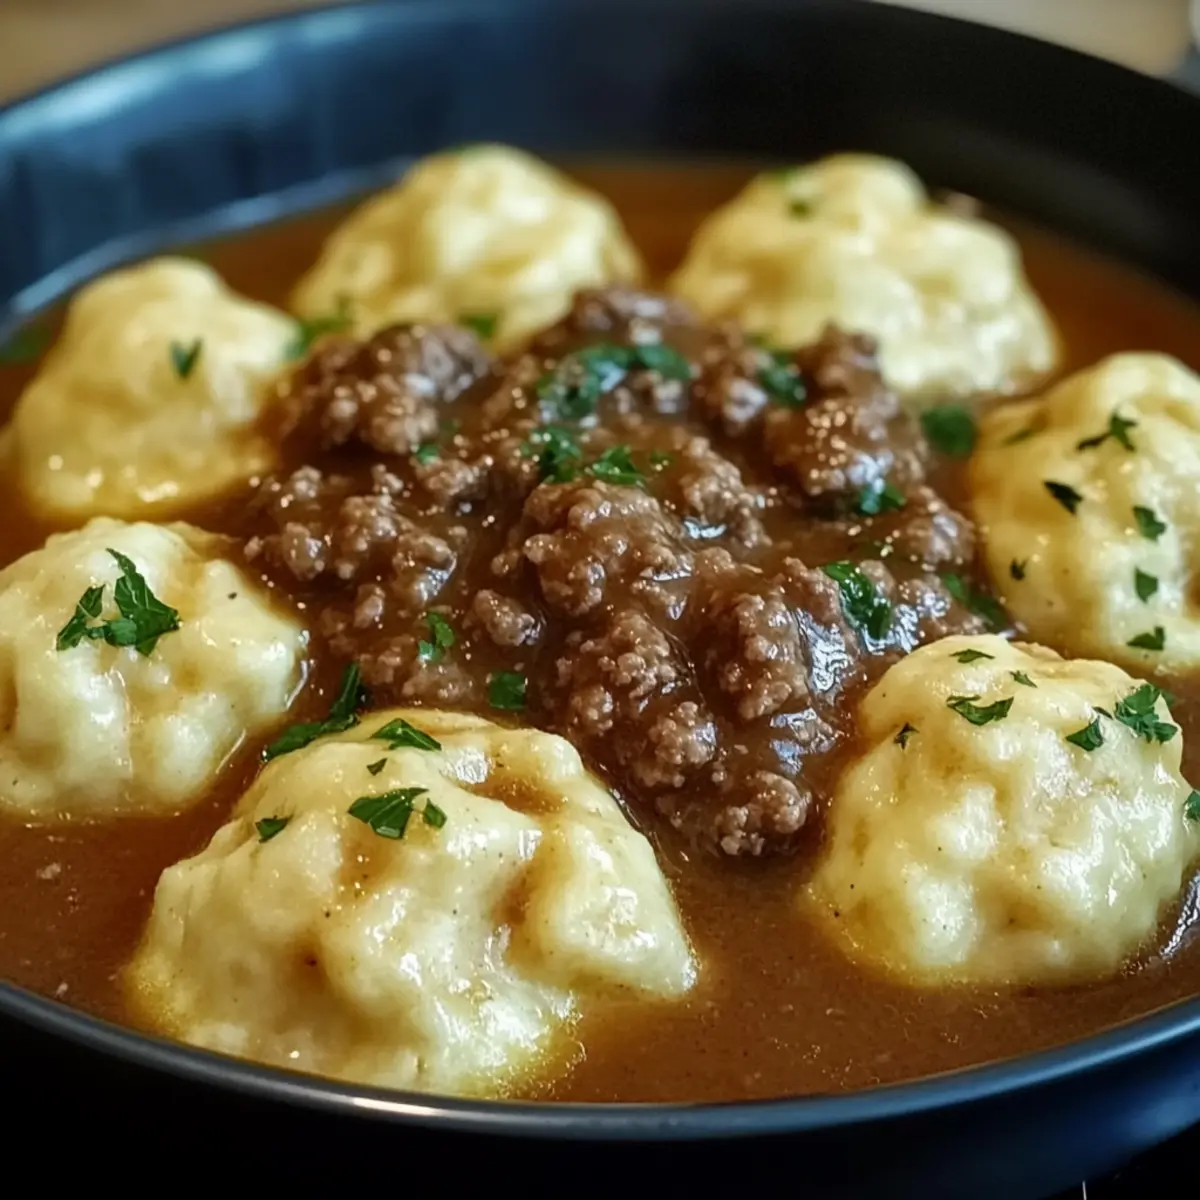
Nothing brings a family together quite like the aroma of Ground Beef and Dumplings wafting from the kitchen! This dish isn’t just a meal—it’s a heartfelt hug on a plate, ideal for those busy weeknights when time is short, but love for homemade food runs deep. The beauty of this comforting one-pot meal lies in its simplicity; you can whip it up effortlessly using staple pantry ingredients, making it a Weeknight Dinner MVP. Plus, the rich gravy combined with fluffy dumplings creates a satisfying experience for both taste buds and souls alike. Interested in adding your twist? Let’s dive into making this classic dish with options that cater to your cravings!

Why is this recipe a must-try?

Comforting warmth every bite brings; you’ll feel like you’re wrapped in a cozy blanket.
Quick preparation means you can have a delicious dinner ready in no time—perfect for those hectic weeknights!
Versatile modifications allow you to customize by swapping in ground turkey or adding veggies, ensuring everyone at the table is happy.
Hearty flavors from the savory beef and rich gravy elevate this dish beyond a typical meal; it’s a true comfort classic.
One-pot convenience not only makes cleanup a breeze but also intensifies the flavors as everything simmers together beautifully.
Serve it with a side salad or steamed green beans for a well-rounded meal that will impress your family!

Savory Ground Beef and Dumplings Ingredients

• Discover the essential ingredients for this comforting dish!

For the Beef Gravy

  • Ground Beef – A juicy 80/20 ratio yields the best flavor; leaner options can work with added moisture.
  • Onion – Choose yellow onion for a sweet depth that enhances the overall dish.
  • Garlic – Fresh garlic is key for that aromatic flavor profile.
  • Beef Broth – Essential for a rich gravy; homemade or store-bought works fine!
  • Flour (for Gravy) – All-purpose flour thickens the gravy beautifully; don’t skip this step.
  • Worcestershire Sauce – A dash adds a delightful umami kick to the beef flavor.
  • Thyme – Fresh or dried thyme contributes a warm earthiness that pairs splendidly with beef.
  • Salt & Pepper – Essential seasonings for balancing the flavors.

For the Dumplings

  • All-Purpose Flour (for Dumplings) – Ensures a fluffy texture; be gentle when mixing!
  • Baking Powder – This leavening agent makes your dumplings rise and stay light.
  • Milk – Adds moisture; whole milk offers the richest flavor but any type will do!
  • Butter – Cold, cubed butter provides that melt-in-your-mouth texture; don’t let it get too warm!
  • Fresh Parsley (optional) – A sprinkle brightens both the flavor and presentation of your dish.

Let these ingredients guide you in crafting a warm, inviting meal that your family will adore!

Step-By-Step Instructions for Comforting Ground Beef and Dumplings

Step 1: Brown the Beef
Heat a large skillet or Dutch oven over medium-high heat. Add the ground beef, breaking it up with a spatula. Cook for about 5–7 minutes, until the beef is browned, and any excess fat is drained off. The beef should have a nice sear, providing rich flavor for your comforting Ground Beef and Dumplings.

Step 2: Sauté the Aromatics
To the skillet, add the diced onion and minced garlic, sautéing for 4–5 minutes. Stir frequently until the onion is translucent and fragrant. This step builds a flavorful base, infusing your dish with sweetness and depth, essential for that heartwarming taste of comfort you seek in Ground Beef and Dumplings.

Step 3: Create the Gravy
Sprinkle the flour over the beef mixture and stir to combine, cooking for 1–2 minutes. This helps to develop flavor and thicken the gravy. Next, add Worcestershire sauce, thyme, salt, and black pepper, mixing well to ensure every ingredient is coated in this savory concoction, essential for a delicious meal.

Step 4: Add the Broth
Gradually pour in the beef broth while stirring continuously to avoid lumps. Bring the mixture to a gentle simmer, allowing it to thicken slightly for about 3–5 minutes. This rich gravy will envelop the beef, creating a comforting foundation for the fluffy dumplings that will soon join this delightful dish.

Step 5: Prepare the Dumpling Mixture
In a separate bowl, whisk together all-purpose flour, baking powder, and salt for the dumplings. Cut in the cold, cubed butter until the mixture resembles coarse crumbs. Finally, fold in the milk until just combined. Be careful not to overmix; you want tender dumplings for your Ground Beef and Dumplings.

Step 6: Form and Cook Dumplings
Drop spoonfuls of the dumpling dough over the beef mixture, ensuring even distribution. Cover the skillet with a lid and reduce the heat to low. Allow the dumplings to steam for about 15 minutes, until they are puffed and cooked through. Keep the lid on during this process to retain the steam for perfectly fluffy dumplings.

Step 7: Garnish and Serve
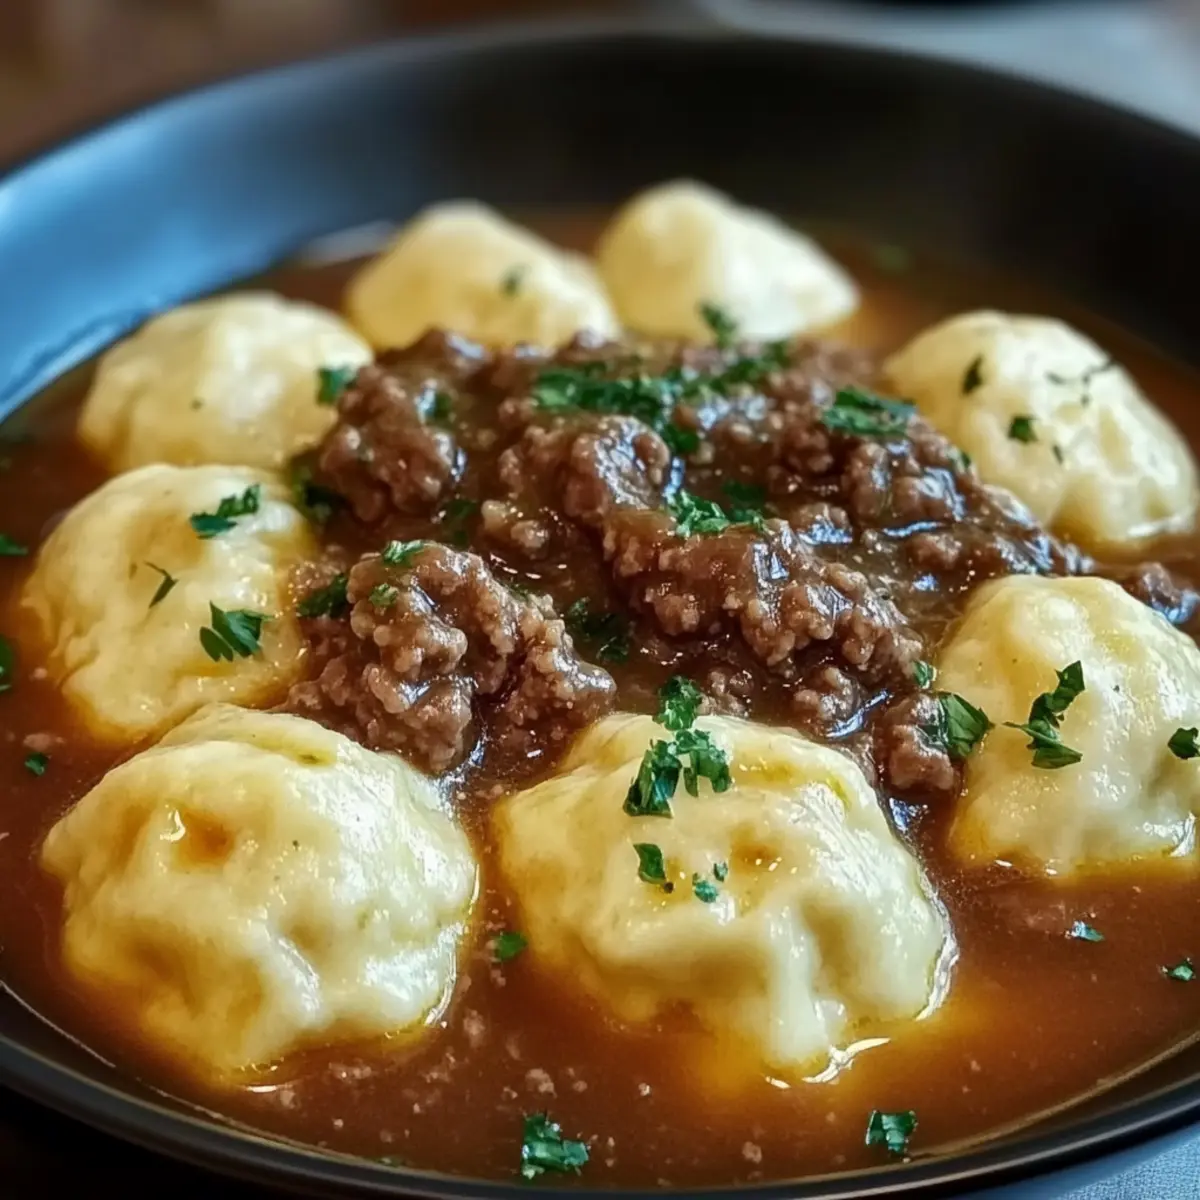
Once the dumplings are fully cooked, optionally sprinkle with fresh parsley for a pop of color and freshness. Serve the comforting Ground Beef and Dumplings warm, ensuring to scoop up both dumplings and rich gravy for a dish that’s not just a meal, but a hug on a plate.

Expert Tips for Ground Beef and Dumplings

  • Choose the Right Beef: Use 80/20 ground beef for the juiciest flavor. Leaner cuts can dry out—add a splash of broth if using 90/10.
  • Avoid Overmixing: When making dumplings, mix until just combined to maintain a light, fluffy texture. Overmixing can lead to dense dumplings.
  • Seal in the Steam: Keep the lid on while cooking the dumplings; this traps steam and helps them rise beautifully, giving you that comforting and soft consistency.
  • Boost Nutrition: For a healthier twist, incorporate finely chopped vegetables like peas or carrots during the sautéing step—it’s a simple way to add color and nutrients!
  • Make Ahead: This dish stores well! If you have leftovers, store them in an airtight container for up to 4 days, easily reheating for a cozy meal later on.

Ground Beef and Dumplings Variations

Feel free to get creative and make this comforting dish your own with these delightful twists!

  • Ground Turkey: Swap ground beef for turkey for a leaner version; just adjust the seasonings slightly for flavor.
  • Veggie Boost: Add peas, carrots, or even corn into the beef mixture for extra nutrients and a colorful touch. It’s a great way to sneak in some veggies without anyone noticing!
  • Herb Infusion: Replace thyme with fresh rosemary or parsley to give the gravy a different aromatic quality. This adds a fresh flavor twist that’s perfect for springtime meals!
  • Spice It Up: Add a pinch of cayenne pepper or red pepper flakes for a little heat if you’re a fan of spicy dishes. You can also serve with a side of hot sauce for those who like it extra zesty!
  • Cheesy Dumplings: Fold in shredded cheese into the dumpling mix for an added creamy and cheesy flair. The melted cheese paired with gravy creates a mouthwatering experience.
  • Creamy Gravy: Stir in a splash of heavy cream or sour cream to the gravy before adding the dumplings for a richer, creamier sauce. This will elevate the comfort food experience to new heights!
  • Alternative Flours: Try using whole wheat or gluten-free flour for the dumplings if you’re looking for a healthier or gluten-free option. Just keep an eye on the liquid ratios as they can vary.
  • Asian Twist: Substitute Worcestershire sauce with soy sauce and a hint of sesame oil for an Asian-inspired flavor profile. Pair it with steamed broccoli on the side for a complete meal.

By playing around with these variations, you’ll find a beloved version that speaks to your family’s tastes. Feel free to make adjustments, and don’t hesitate to incorporate your favorite ingredients! It’s all about bringing love into your kitchen.

What to Serve with Comforting Ground Beef and Dumplings

When the warm, savory aromas of your main dish fill the kitchen, it’s time to think about what delightful sides will complement this cozy meal.

  • Steamed Green Beans: A fresh crunch that balances the soft texture of the dumplings, offering a refreshing contrast.

  • Simple Side Salad: Crisp greens topped with a light vinaigrette adds brightness, cutting through the richness of the gravy.

  • Creamy Mashed Potatoes: While it may seem redundant with dumplings, the smooth, buttery potatoes can catch any leftover gravy and enhance the comfort factor!

  • Garlic Bread: Warm, crusty bread is perfect for sopping up any delicious dribbles of gravy and elevates the hearty experience.

  • Roasted Carrots: Sweet, caramelized carrots not only bring color to the plate but also add a delightful sweetness that pairs well with the savory beef.

  • Apple Crisp for Dessert: A warm apple crisp will provide a lovely sweet contrast to your savory meal, perfect for a comforting finish.

Let your meal be a feast for the senses, creating an inviting atmosphere that your family will love!

How to Store and Freeze Ground Beef and Dumplings

Fridge: Store leftover Ground Beef and Dumplings in an airtight container for up to 4 days. Reheat on the stove or microwave, adding a splash of beef broth to refresh the gravy.

Freezer: For longer storage, freeze portions in airtight containers for up to 3 months. Thaw overnight in the fridge before reheating to ensure quality.

Reheating: When reheating, warm on the stove over medium heat, adding a little beef broth if the gravy is too thick. This will maintain the dish’s comforting texture.

Avoiding Spoilage: Always let the dish cool completely before refrigerating or freezing to prevent condensation, ensuring your Ground Beef and Dumplings remain delicious for your next meal!

Make Ahead Options

These Ground Beef and Dumplings are perfect for meal prep enthusiasts seeking an easy weeknight dinner! You can prepare the beef gravy and refrigerate it for up to 3 days in advance. Simply brown the ground beef, sauté the onions and garlic, then stir in the flour and broth before cooling it down and storing in an airtight container. Additionally, you can mix the dumpling dough and keep it covered in the fridge for up to 24 hours. When you’re ready to serve, gently reheat the beef mixture in a skillet, then drop spoonfuls of dumpling dough on top, cover, and steam until fluffy. With this prep, you’ll enjoy a comforting dish just as delicious as if you made it fresh!

Ground Beef and Dumplings Recipe FAQs

What type of ground beef is best for this recipe?
Absolutely! For the best flavor and texture in your Ground Beef and Dumplings, I recommend using 80/20 ground beef, which has a nice balance of fat to keep the meat juicy. If you prefer a leaner option, 90/10 can work, but I suggest adding a splash of broth to avoid any dryness.

How should I store leftovers?
You can store your delicious Ground Beef and Dumplings in an airtight container in the fridge for up to 4 days. To reheat, warm them gently on the stove or in the microwave. I often add a little beef broth during reheating to keep the gravy nice and saucy!

Can I freeze Ground Beef and Dumplings?
Very! To freeze, let the dish cool completely, then portion it into airtight containers for up to 3 months. Thaw overnight in the refrigerator before reheating. When warming, take it slow on the stove and add a splash of broth if needed to keep everything moist and comforting.

What can I do if my dumplings don’t rise?
If your dumplings aren’t rising, don’t worry! Ensure that you accurately measure the baking powder, as it’s crucial for puffing up the dumplings. Also, remember not to overmix the dough; a gentle fold is all it needs to stay light. Keeping the lid on while cooking is vital, as it traps steam, promoting that fluffy texture.

Are there any dietary considerations for pets?
Absolutely! While Ground Beef and Dumplings is delicious for humans, it’s not a safe choice for pets. The meal’s seasoning, particularly garlic and onion, can be harmful to dogs. If you’re looking to share some love with your furry friend, consider plain cooked ground beef without any seasonings instead.

What vegetables can I add to this recipe?
You might enjoy adding some vegetables for a nutritious twist! I often sauté peas or carrots along with the onions; they add a pop of color and nutrients. Just chop them finely and toss them in at the same time as the onion and garlic for the best result.

undefined

Savory Ground Beef and Dumplings for Cozy Family Nights

This comforting dish combines savory ground beef and fluffy dumplings in a rich gravy, perfect for family dinners.
Prep Time 15 minutes
Cook Time 30 minutes
Total Time 45 minutes
Servings: 4 servings
Course: Dinner
Cuisine: American
Calories: 550

Ingredients
  

For the Beef Gravy
  • 1 lb Ground Beef 80/20 ratio recommended
  • 1 Onion yellow onion
  • 2 cloves Garlic minced
  • 2 cups Beef Broth
  • 1 tbsp Flour for thickening
  • 1 tbsp Worcestershire Sauce
  • 1 tsp Thyme fresh or dried
  • 1 tsp Salt
  • 1 tsp Pepper
For the Dumplings
  • 2 cups All-Purpose Flour for dumplings
  • 1 tbsp Baking Powder
  • 1 cup Milk whole milk recommended
  • 1/2 cup Butter cold, cubed
  • 1/4 cup Fresh Parsley optional, for garnish

Equipment

  • Large skillet
  • Dutch oven
  • Mixing Bowl

Method
 

Cooking Instructions
  1. Brown the beef in a skillet over medium-high heat for 5–7 minutes, draining excess fat.
  2. Sauté the diced onion and minced garlic for 4–5 minutes until translucent.
  3. Sprinkle flour over the beef mixture and stir for 1–2 minutes.
  4. Add Worcestershire sauce, thyme, salt, and pepper, mixing well.
  5. Gradually pour in beef broth while stirring and simmer for 3–5 minutes.
  6. In a bowl, whisk flour, baking powder, and salt for dumplings; cut in butter, then fold in milk.
  7. Drop dumpling dough over the beef mixture, cover, and steam for 15 minutes.
  8. Sprinkle with parsley and serve warm, ensuring to scoop up both dumplings and gravy.

Nutrition

Serving: 1servingCalories: 550kcalCarbohydrates: 45gProtein: 30gFat: 25gSaturated Fat: 10gCholesterol: 90mgSodium: 800mgPotassium: 800mgFiber: 2gSugar: 2gVitamin A: 500IUVitamin C: 5mgCalcium: 150mgIron: 4mg

Notes

This dish stores well; refrigerate leftovers for up to 4 days or freeze for up to 3 months.

Tried this recipe?

Let us know how it was!

Slow Cooker Orange Chicken: Tasty Takeout Made Easy at Home

Caught in a fast-food rut, I decided it was time for a culinary revolution right in my own kitchen. Enter the Easy Slow Cooker Orange Chicken—a delightful copycat version of my favorite takeout dish that you can easily whip up at home. With this recipe, I embraced the joy of slow cooking, allowing tender chicken to bask in a sweet-and-savory glaze, releasing an irresistible aroma that transforms any busy weeknight into a cozy feast. The beauty of this dish lies not just in its ease—minimal prep and hands-off cooking—but also in its versatility; it can be a comforting dinner or a crowd-pleasing delight for guests. Ready to bring a little restaurant magic into your home? Let’s dive into the world of homemade slow cooker meals!

Why Choose Slow Cooker Orange Chicken?

Convenience at Its Finest: With just a few minutes of prep, this dish transforms into a hassle-free meal while you go about your day.

Flavorful Brilliance: The combination of sweet orange marmalade and savory soy sauce creates a delightful balance that will impress your taste buds.

Crowd-Pleasing Appeal: Whether it’s a weeknight dinner with family or entertaining friends, this recipe is sure to be a hit.

Endless Versatility: Customize it by adding your favorite vegetables or substituting proteins, making it ideal for any dietary preference. Want more easy ideas? Check out my Chilli Chicken Takeout and Sizzling Chicken Pepper.

Guilt-Free Indulgence: Opt for gluten-free soy sauce or add more veggies to make this both satisfying and healthy.

Slow Cooker Orange Chicken Ingredients

For the Chicken
Boneless, Skinless Chicken Breasts or Tenders – 2 pounds, essential for the protein base of this tasty slow cooker orange chicken.

For the Coating
Cornstarch – ⅓ cup, helps create a crispy exterior when browning the chicken for extra texture.

For Sautéing
Olive Oil – 4 tablespoons, used for searing the chicken, adding richness and flavor to the dish.

For the Sauce
Orange Marmalade – 1 ½ cups, provides that signature sweetness and flavor; use about a 16 oz jar for convenience.
Low Sodium Soy Sauce – ½ cup, adds umami and balances the sweetness; opt for low sodium for a healthier option.
White Vinegar – 2 tablespoons, introduces acidity and brightens the flavors beautifully.
Sesame Oil – 1 teaspoon, enhances the flavor profile with its nutty undertone.
Ground Ginger – 1 teaspoon, offers warmth and spice that elevate the taste.
Minced Garlic – 3 cloves, contributes savory depth to the sauce.
Red Pepper Flakes – ½ teaspoon, adds a mild kick; feel free to adjust to your spice preference.
Sesame Seeds – 1 teaspoon, plus more for garnish, introduces crunch and visual appeal to the dish.

For Garnishing
Scallions – For garnish, adds freshness and a pop of color to the final dish.

Step‑by‑Step Instructions for Slow Cooker Orange Chicken

Step 1: Prepare the Chicken
Start by cutting the chicken breasts or tenders into approximately 1-inch pieces to ensure even cooking. This step is crucial for the perfect texture in your Slow Cooker Orange Chicken. After chopping, set the chicken aside while you prepare the next steps.

Step 2: Coat the Chicken
In a shallow dish, add the cornstarch and then coat each chicken piece thoroughly. This coating will help create a crispy exterior after browning, enhancing the overall flavor of your Slow Cooker Orange Chicken. Make sure every piece is evenly covered for the best results.

Step 3: Brown the Chicken
Heat 4 tablespoons of olive oil in a large skillet over medium-high heat. Once hot, add the coated chicken cubes, browning them lightly for about 3-4 minutes on each side, but do not fully cook. This step develops a deeper flavor that will elevate your dish, so watch for a golden crust before transferring.

Step 4: Transfer to the Slow Cooker
Carefully move the browned chicken into your 6-quart slow cooker, ensuring an even layer at the bottom. This allows the chicken to absorb the delicious flavors of the sauce as it cooks. The slow cooker will transform your dish into a tender, mouthwatering delight over the next few hours.

Step 5: Prepare the Sauce
In a medium-sized bowl, whisk together the orange marmalade, soy sauce, white vinegar, sesame oil, ground ginger, minced garlic, red pepper flakes, and sesame seeds. Mix until smooth and well combined. This sweet-and-savory sauce will be the star of your Slow Cooker Orange Chicken, infusing every piece with flavor.

Step 6: Combine Chicken and Sauce
Pour the prepared sauce evenly over the chicken in the slow cooker. Use a spatula or spoon to gently stir, ensuring that all the chicken pieces are well-coated. This step guarantees that the flavors meld together beautifully while your Slow Cooker Orange Chicken simmers.

Step 7: Cook the Chicken
Cover the slow cooker and set it to cook on LOW for 2-3 hours. Stir the mixture halfway through the cooking time to prevent burning and promote even cooking. You’ll know it’s ready when the chicken is tender and the sauce is beautifully thickened, filling your kitchen with an aromatic scent.

Step 8: Garnish and Serve
Once cooked, remove the lid and garnish your Slow Cooker Orange Chicken with chopped scallions and a sprinkle of sesame seeds. Serve the dish over fluffy rice for a comforting meal that feels like a treat from your favorite takeout spot. Enjoy the delightful flavors you’ve brought to your home!

Slow Cooker Orange Chicken Variations

Feel free to tailor this recipe to your taste and dietary needs for a personalized culinary delight!

  • Chicken Thighs: Swap chicken breasts for thighs for a richer, juicier flavor. This change brings a succulent texture that pairs beautifully with the sauce.
  • Gluten-Free: Use tamari or coconut aminos instead of soy sauce for a gluten-free version without sacrificing flavor. It’s a fantastic option for those with dietary restrictions!
  • Add Veggies: Include sliced bell peppers or broccoli during cooking for a colorful and nutritious twist. This not only enhances the dish but makes it more filling.
  • Citrus Zest: Enhance the orange flavor by adding a tablespoon of fresh orange zest to the sauce. This gives a lovely brightness and aromatic quality that’ll elevate your dish!
  • Heat Boost: Increase the red pepper flakes or add fresh sliced jalapeños for a spicier kick. Adjusting heat levels brings excitement to the classic recipe!
  • Sweetener Swap: Try honey or maple syrup instead of orange marmalade for a unique flavor profile. This can create a different sweetness that complements the savory notes.
  • Serve with Quinoa: Swap rice for cooked quinoa for a protein-packed option that adds a nutty flavor and fluffy texture to your meal. It’s a nourishing choice!
  • Different Sauces: Experiment with adding a tablespoon of hoisin sauce or teriyaki for a different depth of flavor. These twists can create an entirely different dining experience.

If you’re looking for more delicious chicken-inspired recipes, take a peek at my BBQ Chicken Grilled Cheese Sandwich or the comforting Tuscan Chicken Soup. Each offers its own unique flair that you can use to spice up your weekly meal planning!

What to Serve with Easy Slow Cooker Orange Chicken

Imagine the flavors of sweet, tangy orange chicken complemented by vibrant sides that bring your meal to life.

  • Fluffy Jasmine Rice: Acts as the perfect canvas for the flavorful orange chicken sauce, absorbing all its sweet and savory notes.
  • Steamed Broccoli: The bright green color and crunchy texture provide a fresh contrast to the sticky chicken, adding nutrition to your plate.
  • Crispy Egg Rolls: A fun and crunchy side, these make for an excellent appetizer that echoes takeout traditions and completes your Asian-inspired dinner.
  • Sweet and Sour Green Beans: The tanginess in these beans harmonizes with the orange chicken, creating a delightful dance of flavors on your palate.
  • Garden Salad with Sesame Dressing: Offers a refreshing crunch and a touch of acidity, complementing the richness of the chicken while enhancing the overall dining experience.
  • Chilled Sake or Sparkling Water: Light, refreshing drinks that cleanse your palate between bites of the rich, honeyed orange chicken.
  • Orange Sorbet: A light and citrusy dessert that echoes the flavor of the main dish, ending your meal on a bright and refreshing note.

Expert Tips for Slow Cooker Orange Chicken

Browning Matters: Searing the chicken first adds depth to the flavor, so don’t skip this crucial step to elevate your dish.

Monitor Cooking Time: Slow cookers vary, so check your settings to avoid overcooking. A little attention goes a long way in ensuring perfect orange chicken.

Spice Adjustment: If you’re a heat lover, feel free to increase the red pepper flakes. Just remember to taste and tweak as needed for your palate!

Thick Sauce Tip: To prevent the sauce from thickening too much, add a splash of water when reheating leftovers. This keeps your Slow Cooker Orange Chicken juicy and delicious.

Experiment with Veggies: Consider tossing in bell peppers or snap peas for extra nutrition and color; they can cook beautifully alongside the chicken.

Gluten-Free Option: Use tamari or coconut aminos instead of soy sauce to make this dish gluten-free without sacrificing flavor.

Make Ahead Options

These Easy Slow Cooker Orange Chicken are a lifesaver for meal prep enthusiasts! You can prepare the chicken and coat it in cornstarch up to 24 hours in advance, storing them in an airtight container in the refrigerator for maximum freshness. The sauce can also be prepped and kept in the fridge for up to 3 days. When you’re ready to cook, simply brown the chicken, transfer it to the slow cooker, and pour the sauce over it. Remember to give it a good stir to ensure every piece is evenly coated, and let it cook on LOW for 2-3 hours. With these make ahead options, you’ll enjoy delicious, homemade Slow Cooker Orange Chicken with minimal effort on busy weeknights!

Storage Tips for Slow Cooker Orange Chicken

Fridge: Store leftovers in an airtight container for up to 3 days. This preserves the flavor and keeps the dish fresh for your upcoming meals.

Freezer: For longer storage, freeze portions in airtight freezer bags for up to 3 months. Flatten the bags for efficient freezing and easy thawing later.

Reheating: When reheating, warm the Slow Cooker Orange Chicken on the stovetop or in the microwave. Add a splash of water if the sauce has thickened to maintain its delightful texture.

Leftover Transformation: Use leftover chicken in wraps or salads, reinvigorating meals with the same beloved flavors in creative new ways!

Slow Cooker Orange Chicken Recipe FAQs

How do I choose the best chicken for this recipe?
Absolutely! For this Slow Cooker Orange Chicken, I recommend using boneless, skinless chicken breasts or tenders. Look for pieces that are fresh, firm to the touch, and without any dark spots or discoloration. If you prefer a richer flavor, feel free to substitute chicken thighs instead.

What’s the best way to store leftovers?
Very good question! To keep your Slow Cooker Orange Chicken fresh, store any leftovers in an airtight container in the refrigerator for up to 3 days. Reheat it on the stovetop or in the microwave, and if the sauce has thickened too much, add a splash of water while warming to keep it juicy.

Can I freeze this orange chicken?
Yes, you certainly can! To freeze your Slow Cooker Orange Chicken, let it cool completely, then transfer portions into airtight freezer bags. Be sure to flatten the bags for quicker freezing and easier thawing. It will stay good for up to 3 months in the freezer. When you’re ready to enjoy it again, simply thaw it in the fridge overnight before reheating.

What if the chicken turns out dry?
No worries, that can happen! If you find your chicken turns out dry, you can revive it by adding a bit of chicken broth or water while reheating. For next time, make sure to monitor your slow cooker settings, as cooking times can vary, and keep an eye on it towards the end of cooking to ensure tenderness.

Is this recipe suitable for people with gluten allergies?
Absolutely! If you or someone you’re serving has gluten sensitivities, simply substitute the low sodium soy sauce with tamari or coconut aminos. This way, you can still enjoy the robust flavors of the sauce without any gluten issues.

How long can I keep the cooked orange chicken in the fridge?
You can safely keep your cooked Slow Cooker Orange Chicken in the fridge for up to 3 days. Just make sure it’s stored in an airtight container to lock in freshness and flavor—perfect for quick meals throughout the week!

Slow Cooker Orange Chicken

Slow Cooker Orange Chicken: Tasty Takeout Made Easy at Home

A delightful Slow Cooker Orange Chicken recipe that combines sweet and savory flavors for an easy homemade takeout experience.
Prep Time 15 minutes
Cook Time 2 hours
Total Time 2 hours 15 minutes
Servings: 4 servings
Course: Dinner
Cuisine: Asian
Calories: 400

Ingredients
  

For the Chicken
  • 2 pounds Boneless, Skinless Chicken Breasts or Tenders
For the Coating
  • cup Cornstarch
For Sautéing
  • 4 tablespoons Olive Oil
For the Sauce
  • 1 ½ cups Orange Marmalade about a 16 oz jar
  • ½ cup Low Sodium Soy Sauce
  • 2 tablespoons White Vinegar
  • 1 teaspoon Sesame Oil
  • 1 teaspoon Ground Ginger
  • 3 cloves Minced Garlic
  • ½ teaspoon Red Pepper Flakes
  • 1 teaspoon Sesame Seeds plus more for garnish
For Garnishing
  • Scallions for garnish

Equipment

  • Slow Cooker
  • Skillet
  • Mixing Bowl

Method
 

Step-by-Step Instructions
  1. Prepare the Chicken: Cut the chicken into approximately 1-inch pieces and set aside.
  2. Coat the Chicken: Coat each chicken piece with cornstarch in a shallow dish.
  3. Brown the Chicken: Heat olive oil in a skillet and brown the coated chicken pieces for 3-4 minutes on each side.
  4. Transfer to the Slow Cooker: Move the browned chicken into the slow cooker.
  5. Prepare the Sauce: Whisk together orange marmalade, soy sauce, white vinegar, sesame oil, ground ginger, minced garlic, red pepper flakes, and sesame seeds.
  6. Combine Chicken and Sauce: Pour the sauce over the chicken and stir gently to coat.
  7. Cook the Chicken: Cover and cook on LOW for 2-3 hours, stirring halfway through.
  8. Garnish and Serve: Garnish with chopped scallions and sesame seeds, and serve over rice.

Nutrition

Serving: 1servingCalories: 400kcalCarbohydrates: 35gProtein: 30gFat: 15gSaturated Fat: 2gPolyunsaturated Fat: 3gMonounsaturated Fat: 8gCholesterol: 70mgSodium: 600mgPotassium: 600mgFiber: 2gSugar: 15gVitamin A: 500IUVitamin C: 30mgCalcium: 40mgIron: 2mg

Notes

For gluten-free, use tamari or coconut aminos instead of soy sauce.

Tried this recipe?

Let us know how it was!

Irresistible Chicken Torta Sandwich: A Flavor Adventure Awaits

“Are you ready for a flavor explosion?” I overheard this excited question as I walked past a bustling kitchen, and it immediately caught my attention. This Chicken Torta Sandwich is the answer to that call, transforming simple ingredients into a vibrant and satisfying meal. With its delightful combination of tender chicken, crisp veggies, and zesty sauces, it’s not just a quick dinner option; it’s a crowd-pleaser that elevates any gathering. The best part? You can whip it up in under 30 minutes, making it perfect for busy weeknights or last-minute lunch plans. Plus, it’s fully customizable—whether you like your torta loaded with toppings or simply delicious in its classic form, this recipe has you covered. So, won’t you join me in making something that’s not just food, but an experience? Let’s dive into the irresistible world of the Chicken Torta Sandwich!

Why is this Chicken Torta Sandwich a must-try?

Flavor Explosion: This Chicken Torta Sandwich brings an irresistible burst of flavors, combining tender chicken, fresh veggies, and zesty sauces into every bite.

Quick & Easy: Perfect for busy nights, you can whip this up in under 30 minutes, making it a weeknight favorite.

Customizable Delight: Whether you like to load it with toppings or keep it classic, this recipe offers endless possibilities to suit your taste.

Crowd-Pleaser: Serve it at your next gathering, and watch it disappear—it’s sure to impress family and friends!

Perfect Pairing: Enjoy alongside a refreshing BLT Chicken Salad for a complete meal, or elevate your taco night with a Sizzling Chicken Pepper as an exciting side.

Chicken Torta Sandwich Ingredients

For the Chicken
Boneless chicken breasts – Use skinless for a leaner option that absorbs flavors beautifully.
Olive oil – Helps in searing the chicken to golden perfection while adding richness.
Garlic powder – Provides a savory depth; feel free to substitute with fresh garlic for a punchier taste.
Cumin – Gives a warm, earthy flavor; a must-have for that authentic torta taste.
Salt and pepper – Essential for enhancing all the incredible flavors in the sandwich.

For the Veggies
Tomato slices – Juicy and refreshing; they add essential moisture to your torta.
Avocado – Creamy and rich, it elevates the overall texture. Substitute with guacamole for extra flavor.
Lettuce or cabbage – Provides crunch and freshness; you can switch to spinach for a nutrient boost.
Pickled jalapeños – Adds a zesty kick; adjust the amount based on your spice tolerance.

For the Sauce
Mayonnaise – A creamy base for the sauce; mix with lime juice for extra zing.
Hot sauce – A few dashes will infuse a delightful spiciness; choose your favorite variety.
Lime juice – Brightens up the flavors, adding a tangy lift that complements the chicken.

For the Bread
Bolillo rolls or crusty bread – Perfect for holding all the delicious fillings together without falling apart.
Butter – A light spread before toasting gives an irresistible golden crust; feel free to omit for a lighter option.

With these ingredients, you’re all set to create a sensational Chicken Torta Sandwich that promises a delightful flavor adventure!

Step‑by‑Step Instructions for Chicken Torta Sandwich

Step 1: Preheat and Prepare
Begin by preheating your oven to 375°F (190°C). While it heats, prepare a baking sheet lined with parchment paper. This will be where you toast your bolillo rolls later. Set the stage for your Chicken Torta Sandwich by getting all your ingredients within reach—chicken breasts, veggies, and sauces.

Step 2: Season the Chicken
In a mixing bowl, combine olive oil, garlic powder, cumin, salt, and pepper. Add the boneless chicken breasts and coat them evenly with the seasoned oil mixture, allowing for about 5 minutes of marinating. This will ensure your chicken is full of flavor as it cooks.

Step 3: Cook the Chicken
Heat a skillet over medium heat, lightly greased with olive oil. Once hot, add the marinated chicken breasts and sear for about 6-7 minutes on each side, until they reach an internal temperature of 165°F (75°C) and are golden brown. Remove from the skillet and let them rest for a couple of minutes before slicing.

Step 4: Toast the Bread
While the chicken is resting, take your bolillo rolls and spread a thin layer of butter on the cut sides. Place them on the prepared baking sheet and toast in the oven for 5-7 minutes until they are golden and crispy. This step enhances the texture of your Chicken Torta Sandwich and prevents it from becoming soggy.

Step 5: Prepare the Sauce
In a small bowl, mix together the mayonnaise, a few dashes of your favorite hot sauce, and fresh lime juice. Stir until well combined, creating a creamy, zesty sauce that will elevate your Chicken Torta Sandwich. Adjust the hot sauce according to your spice preference!

Step 6: Assemble the Sandwich
Once the rolls are toasted and the chicken has rested, it’s time to build your sandwich. Spread the zesty sauce on the bottom half of each bolillo roll. Layer slices of the juicy chicken, followed by fresh tomato, creamy avocado, crispy lettuce or cabbage, and pickled jalapeños for that extra kick.

Step 7: Finish and Serve
Top your Chicken Torta Sandwich with the other half of the bolillo roll. You can cut them in half for easier handling if desired. Serve immediately and enjoy the explosion of flavors, knowing you’ve created a delightful dish that’s perfect for any occasion!

How to Store and Freeze Chicken Torta Sandwich

Room Temperature: Store any leftover Chicken Torta Sandwich at room temperature for up to 2 hours; beyond that, refrigerate to maintain freshness.

Fridge: Wrap sandwiches tightly in plastic wrap or place in an airtight container; they will stay fresh for up to 3 days in the fridge.

Freezer: Individually wrap each assembled sandwich in foil or plastic wrap and place them in a freezer bag; they can be frozen for up to 3 months.

Reheating: To reheat, thaw in the fridge overnight, then warm in the oven at 350°F (175°C) for about 10 minutes, or until heated through, ensuring that the Chicken Torta Sandwich stays delicious.

Chicken Torta Sandwich Variations & Substitutions

Feel free to get creative with your Chicken Torta Sandwich by exploring these exciting variations that tickle your taste buds.

  • Dairy-Free: Substitute mayonnaise with avocado or a dairy-free sour cream to keep it creamy without the dairy.

  • Spicy Twist: Add fresh sliced jalapeños for added heat or swap in a spicy chipotle sauce for a fiery kick.

  • Herb Infusion: Mix in fresh cilantro or parsley to the sauce for a fragrant herb boost that brightens the flavors.

  • Grilled Options: Instead of pan-searing, grill the chicken for those beautiful char marks and smoky flavor. Perfect for summer!

  • Crunch Factor: Toss in crispy bacon bits or fried onions for a delightful crunch that contrasts beautifully with the tender chicken.

  • Vegetarian Version: Replace chicken with sliced portobello mushrooms or grilled zucchini for a hearty vegetarian option that’s equally satisfying.

  • Fresh Ingredients: Use roasted veggies like bell peppers and zucchini instead of raw ones for a deeper flavor profile and softer texture.

  • Custom Bread Choices: Swap bolillo rolls for whole wheat or gluten-free bread, or even lettuce wraps for a lighter alternative.

Don’t hesitate to mix and match these ideas! Every chicken sandwich can turn into a tantalizing feast, just like those unforgettable flavors in my favorite Tuscan Chicken Soup. Or you might enjoy pairing your Chicken Torta with some delightful sides from my collection for a full meal experience that everyone will love!

Expert Tips for Chicken Torta Sandwich

Perfect Chicken Cook: Ensure your chicken is cooked to 165°F (75°C) for safety and juiciness. Use a meat thermometer to avoid undercooking!

Flavorful Marinate: Let the chicken sit in the seasoning for at least 5 minutes to build a richer flavor. This step is key for a flavorful Chicken Torta Sandwich.

Toast for Texture: Don’t skip toasting your bolillo rolls! It prevents sogginess and adds delightful crunch, enhancing the overall experience.

Adjust Spice Levels: Be mindful of the amount of pickled jalapeños; you can start with fewer if you prefer milder flavors. Balance is vital in every bite.

Fresh Veggies Matter: Use fresh, high-quality vegetables for a crisp texture and vibrant flavors. They make your Chicken Torta Sandwich truly refreshing!

What to Serve with Chicken Torta Sandwich

Are you ready to elevate your meal with sides that perfectly complement the burst of flavor in your Chicken Torta Sandwich?

  • Crispy Sweet Potato Fries: Their natural sweetness and crispy texture provide a delightful contrast to the savory sandwich, making them an irresistible side.

  • Zesty Coleslaw: A refreshing crunch from crunchy cabbage and carrots, combined with a tangy dressing, balances the richness of the torta beautifully.

  • Mexican Street Corn (Elote): This creamy, spicy treat topped with cheese brings a vibrant flavor that harmonizes with the zesty elements of the sandwich.

  • Guacamole and Tortilla Chips: The smooth, creamy guacamole paired with crunchy tortilla chips creates a fun appetizer that keeps the party lively.

  • Spicy Bean Salad: Bursting with flavors and protein, this refreshing salad pairs well with the sandwich, making for a satisfying meal.

  • Margaritas: A chilled margarita offers a refreshing and tangy beverage to wash down your scrumptious Chicken Torta Sandwich.

  • Fresh Fruit Salsa: A sweet and spicy fruit salsa made with mango or pineapple not only adds a vibrant color but also a juicy pop of flavor alongside the sandwich.

Make Ahead Options

These Chicken Torta Sandwiches are perfect for meal prep enthusiasts! You can marinate the boneless chicken breasts up to 24 hours in advance, allowing those rich flavors to develop beautifully. Additionally, you can prepare the sauce and slice the veggies a day ahead to save time. Just store the sauce in an airtight container in the refrigerator to keep it fresh. When you’re ready to serve, toast the bolillo rolls and cook the chicken for a delicious, quick meal. As a tip, assemble the sandwiches right before serving to preserve the crunch of the toppings and enjoy a delightful flavor adventure with minimal effort!

Chicken Torta Sandwich Recipe FAQs

What kind of chicken is best for a Chicken Torta Sandwich?
Using boneless, skinless chicken breasts is ideal, as they are lean and absorb flavor beautifully. You can also use leftover roasted chicken for a quicker option, just ensure it’s heated through before assembling your sandwich.

How long can I store leftover Chicken Torta Sandwiches?
Wrap any leftover Chicken Torta Sandwiches tightly in plastic wrap or place them in an airtight container. They will stay fresh in the refrigerator for up to 3 days. To maintain the fresh flavors, I recommend enjoying them within the first couple of days.

Can I freeze assembled Chicken Torta Sandwiches?
Absolutely! Individually wrap each assembled sandwich in foil or plastic wrap, then place them in a freezer bag. They can be frozen for up to 3 months. When you’re ready to enjoy them, thaw in the refrigerator overnight, then reheat in the oven at 350°F (175°C) for about 10 minutes.

What can I do if my Chicken Torta Sandwich seems soggy?
To prevent sogginess, ensure you toast your bolillo rolls before assembling your sandwich. If you find it’s already soggy, try wrapping it in a paper towel and reheating it in the microwave for a short time; this can help absorb excess moisture.

Are there any dietary modifications I can make to this Chicken Torta Sandwich?
Certainly! For a gluten-free version, substitute the bolillo rolls with gluten-free bread. If you’re looking for a lighter dish, you can skip the butter on the rolls or use a plant-based mayo for a dairy-free option. Always check your sauces and toppings for allergens if serving to guests with dietary restrictions.

Chicken Torta Sandwich

Irresistible Chicken Torta Sandwich: A Flavor Adventure Awaits

This Chicken Torta Sandwich is a flavor explosion, combining tender chicken, crisp veggies, and zesty sauces, perfect for any gathering.
Prep Time 10 minutes
Cook Time 15 minutes
Total Time 25 minutes
Servings: 4 sandwiches
Course: Lunch
Cuisine: Mexican
Calories: 450

Ingredients
  

For the Chicken
  • 2 pieces Boneless chicken breasts Use skinless for a leaner option.
  • 2 tablespoons Olive oil Helps in searing the chicken.
  • 1 teaspoon Garlic powder Can substitute with fresh garlic.
  • 1 teaspoon Cumin Essential for authentic torta taste.
  • to taste Salt
  • to taste Pepper
For the Veggies
  • 1 cup Tomato slices Juicy and refreshing.
  • 1 fruit Avocado Can substitute with guacamole.
  • 1 cup Lettuce or cabbage Can switch to spinach.
  • to taste Pickled jalapeños Adjust based on spice tolerance.
For the Sauce
  • 2 tablespoons Mayonnaise Creamy base for the sauce.
  • to taste Hot sauce Choose your favorite variety.
  • 1 tablespoon Lime juice Brightens up the flavors.
For the Bread
  • 4 pieces Bolillo rolls or crusty bread Perfect for holding fillings.
  • 2 tablespoons Butter Optional for toasting.

Equipment

  • Skillet
  • Oven
  • Mixing Bowl
  • Baking Sheet

Method
 

Preparation
  1. Begin by preheating your oven to 375°F (190°C). Prepare a baking sheet lined with parchment paper.
  2. In a mixing bowl, combine olive oil, garlic powder, cumin, salt, and pepper. Marinate the chicken for 5 minutes.
  3. Heat a skillet over medium heat, add chicken and sear for 6-7 minutes on each side until fully cooked.
  4. Toast the bolillo rolls in the prepared oven for 5-7 minutes.
  5. Mix mayonnaise, hot sauce, and lime juice in a small bowl to create the sauce.
  6. Spread the zesty sauce on the bottom half of each bolillo roll and layer with chicken, veggies.
  7. Top with the other half of the roll, slice if desired, and serve immediately.

Nutrition

Serving: 1sandwichCalories: 450kcalCarbohydrates: 30gProtein: 28gFat: 24gSaturated Fat: 5gPolyunsaturated Fat: 1gMonounsaturated Fat: 3gCholesterol: 65mgSodium: 600mgPotassium: 600mgFiber: 5gSugar: 2gVitamin A: 1500IUVitamin C: 20mgCalcium: 80mgIron: 2mg

Notes

Store leftover sandwiches at room temperature for up to 2 hours or in the fridge for up to 3 days. Freeze for up to 3 months, reheat in the oven at 350°F (175°C).

Tried this recipe?

Let us know how it was!

Crock Pot Birria Tacos: Flavor-Packed Comfort in Every Bite

As I sat sipping a rich, comforting consome, a burst of warmth wrapped around me like a cozy blanket. The moments spent cooking my favorite Crock Pot Beef Birria Tacos always carry joy, and the enticing aroma fills my kitchen with a hint of Mexico. This dish features tender beef, slow-braised to perfection, swimming in a flavorful sauce that promises to elevate any gathering. Not only does it shine as a crowd-pleaser, but it also offers the convenience of easy prep—just toss everything in your crock pot and let it work its magic. Get ready for a delightful experience that will turn your Taco Tuesday into a fiesta—will you be the chef who brings this deliciousness to your table?

Why Are These Tacos a Must-Try?

Flavor-Packed: The bold flavors of tender, slow-braised beef combined with aromatic spices create a taco experience that’s simply unforgettable.

Easy Prep: Just set and forget your Crock Pot, freeing you up to focus on hosting, while this flavorful dish cooks to perfection.

Versatile Variations: Whether you prefer the traditional Crock Pot method or the Instant Pot twist, these tacos can be tailored to fit any schedule.

Crowd-Pleaser: Perfect for gatherings, they offer a satisfying meal that everyone can enjoy—pair with sides like Mexican rice or beans for a complete feast!

Weekend Comfort: Experience a culinary escape right at home, transforming ordinary days into extraordinary moments with these delectable tacos. Want more tasty ideas? Check out our Cheesy Hamburger Potato for another comforting twist!

Crock Pot Birria Tacos Ingredients

For the Beef
2-3 lbs boneless chuck roast – The main protein that provides richness and tenderness. Substitution: Beef shoulder or pork shoulder can be used for differing flavors.

For the Cooking Liquid
1 tbsp avocado oil (plus more for frying) – Essential for searing beef and frying tortillas, adding flavor and aiding in browning. Substitution: Use any neutral oil like vegetable oil.
Coarse ground salt and fresh ground pepper – Basic seasonings enhance the beef’s flavor. Tip: Adjust according to your taste preference.
4 dried Guajillo chiles – Offers mild heat and a smoky flavor. Substitution: Dried ancho peppers can be used for milder taste.
5-6 Chipotle chilis in adobo – Introduces necessary heat and smokiness. Note: Reduce amount if sensitive to spice.
1 small red onion, thinly sliced – Adds a touch of sweetness and depth to the sauce.
8 whole cloves garlic, smashed – Essential for flavor and aromatic depth in the consome.
32 oz beef stock – Acts as the flavorful base for the sauce.
1 tbsp tomato paste – Enhances sauce thickness and adds umami.
1 can (14.5 oz) fire-roasted diced tomatoes – Adds acidity and texture to the consome.
¼ cup organic apple cider vinegar – Brightens the sauce with a tangy note. Substitution: Fresh lime juice works for similar acidity.
1 tbsp ground cumin – Contributes earthy flavor, an essential component in Mexican cuisine.
1 tbsp dried oregano – Offers herbaceous aromas to the dish.
1 cinnamon stick – Infuses warmth and sweetness, aiding in removing meat bitterness.
3 dry bay leaves – Adds aromatic depth while cooking.
1 tsp smoked paprika – Enhances the overall smoky flavor.
½ tbsp fresh grated ginger – Provides warmth and a layer of depth to the sauce.
1 tsp ground coriander – Balances flavors with a citrusy herbaceous note.

For the Tacos
Corn or flour tortillas – The base for your tacos. Tip: For an authentic touch, corn tortillas are recommended.
Lime wedges, fresh cilantro leaves, diced white onion, shredded Oaxacan cheese – Traditional garnishes that enhance freshness and flavor.

Experience delicious Crock Pot Birria Tacos that will have everyone coming back for seconds!

Step‑by‑Step Instructions for Crock Pot Birria Tacos

Step 1: Sear the Beef
In a cast iron skillet, heat 1 tablespoon of avocado oil over high heat for approximately 4-5 minutes. Generously season your 2-3 lbs boneless chuck roast with coarse ground salt and fresh ground pepper. Sear the beef for about 5-6 minutes on each side until a rich, golden-brown crust forms, enhancing the flavor of your Crock Pot Birria Tacos.

Step 2: Slow Cook
Transfer the beautifully seared beef to your crock pot. Add in the remaining ingredients: sliced red onion, smashed garlic cloves, beef stock, tomato paste, fire-roasted diced tomatoes, apple cider vinegar, dried spices, and chiles. Stir well to combine, ensuring the beef is submerged in the flavorful mixture. Cover and set your crock pot to low heat, allowing it to cook for 8 hours, filling the kitchen with delightful aromas.

Step 3: Prepare Consome
After 8 hours, the beef should be perfectly tender. Carefully remove the beef from the crock pot and set it aside to cool slightly. Discard the bay leaves and cinnamon stick. In a blender, blend the remaining liquid until smooth, creating a luscious consome that will flavor your tacos. If using a standard blender, let the liquid cool slightly to avoid splattering.

Step 4: Coat Shredded Beef
Once the beef is cool enough to handle, shred it with two forks into bite-sized pieces. In a mixing bowl, combine the shredded beef with 1½ to 2 cups of the blended consome, ensuring it’s evenly coated. This mixture will be the savory filling for your Crock Pot Birria Tacos, promising rich flavors and tenderness in every bite.

Step 5: Assemble Tacos
Heat a skillet over medium heat and lightly coat it with oil. Dip the tortillas into the consome, then place them in the hot skillet. On one half of each tortilla, add shredded beef, a sprinkle of shredded Oaxacan cheese, diced onions, and fresh cilantro. Fold the tortillas and fry until golden and crispy, about 2-3 minutes on each side, for that authentic taco experience.

Step 6: Serve
Serve your crispy tacos hot, alongside a small bowl of consome for dipping. Garnish with lime wedges and additional toppings like fresh cilantro and diced onions. With the delightful combination of flavors in these Crock Pot Birria Tacos, they’re sure to be the star of your meal, perfect for sharing with family and friends.

Make Ahead Options

These Crock Pot Beef Birria Tacos are perfect for meal prep enthusiasts! You can prepare the beef and consome up to 24 hours in advance. Simply sear the beef and combine it with other ingredients in the crock pot, then refrigerate. When you’re ready to cook, allow everything to rest at room temperature for about 30 minutes before setting the crock pot on low for 8 hours. To maintain the rich flavors, blend your consome and coat the shredded beef, ensuring even distribution. Assemble your tacos just before serving for that wonderfully crispy texture, so they’re just as delicious as when made fresh!

Variations & Substitutions for Crock Pot Birria Tacos

Feel free to get creative and make these tacos your own—experimenting in the kitchen can be such a delightful adventure!

  • Instant Pot: Use this method for a quicker meal! Cut the beef into chunks and cook under high pressure for 60 minutes.

  • Dairy-Free: Swap the Oaxacan cheese for a nut-based cheese or omit the cheese entirely for a lighter version that still delivers on flavor.

  • Vegetarian: Try using jackfruit or mushrooms as the base—both options soak up flavors beautifully, delivering a satisfying texture.

  • Heat Adjustment: Not a fan of spice? Reduce the number of chipotle chilis used or remove the seeds from the dried chilies for a milder experience.

  • Flavor Boost: Add a splash of your favorite hot sauce to the consome for an extra layer of flavor and a bit of heat.

  • Tortilla Twist: Switch to whole wheat or spinach tortillas for a healthier take, adding both nutrition and a fun pop of color.

  • Classic Toppings: Go traditional—add radish slices or crumbled queso fresco for added texture and flavor explosion.

  • Southwestern Fusion: For a unique twist, mix in some black beans and corn into the filling for a hearty addition to your tacos.

With so many options, your Crock Pot Birria Tacos can easily adapt to whatever craving strikes you. And if you’re as much of a fan of cozy, comforting dishes as I am, you may want to check out our Potato Bacon Soup for another warming recipe!

Helpful Tricks for Crock Pot Birria Tacos

  • Sear the Meat: Searing tenderizes and enriches flavors. Don’t skip this step; it’s vital for tasty Crock Pot Birria Tacos.

  • Proper Spice Adjustment: Spice preferences vary. To control heat, taste your sauce and gradually remove seeds from chiles to avoid overwhelming spice levels.

  • Tortilla Choices: For authentic flavor, opt for corn tortillas. They hold up better when dipped in consome, providing that classic taco texture.

  • Avoid Overcooking: Remove beef immediately after cooking to prevent it from becoming dry. Retain moisture for the best tasting tacos.

  • Consome Cooling Tip: If using a blender, allow the consome to cool slightly to avoid splatters. Safety first for the best results!

  • Double Up Tortillas: For crispy tacos that can handle fillings without tearing, consider doubling your corn tortillas; it’s a game changer!

Storage Tips for Crock Pot Birria Tacos

Fridge: Store leftover Crock Pot Birria Tacos in an airtight container for up to 4 days. This keeps them fresh and ready for quick meals.

Freezer: For longer storage, freeze the shredded beef mixture in airtight bags for up to 2 months. This way, you can enjoy tasty tacos whenever you crave them!

Reheating: Reheat in the microwave or on the stovetop until warmed through, making sure the beef is thoroughly heated to maintain flavor and moisture.

Consome Storage: Keep any leftover consome in a separate container in the fridge for up to 4 days. It also freezes well for up to 2 months and can add depth to soups and casseroles!

What to Serve with Crock Pot Beef Birria Tacos

Enhance your taco night by pairing these flavorful tacos with delightful sides that will take your meal to the next level.

  • Mexican Rice: This fluffy, cilantro-infused rice provides a perfect contrast to the tender beef, soaking up the savory consome beautifully.

  • Refried Beans: Creamy and satisfying, these beans add a hearty touch that complements each taco bite, making for a filling meal that everyone will love.

  • Fresh Guacamole: Cool and creamy, guacamole will elevate your tacos with its rich texture and vibrant flavors, balancing out the taco’s spicy richness wonderfully.

  • Crispy Tortilla Chips: Serve with a side of crispy chips for a fun crunch! Perfect for dipping into consome or pairing with guacamole.

  • Zesty Cabbage Slaw: A refreshing cabbage slaw adds a nice crunch and bright flavor, cutting through the richness of the beef. Tossed with lime juice, it’s a family favorite!

  • Margaritas: Sip on a classic Margarita to bring a festive vibe to your meal. The citrus notes and mild sweetness match beautifully with the flavors of the tacos.

  • Churros: End your taco feast on a sweet note with delectable churros. The crispy exterior and soft center, dusted with cinnamon sugar, are a delightful treat everyone will want to try!

Crock Pot Beef Birria Tacos Recipe FAQs

How do I choose the best beef for this recipe?
Absolutely! When selecting your beef, look for a 2-3 lbs boneless chuck roast. It should have good marbling which leads to tender and juicy results. If unavailable, beef or pork shoulder makes excellent substitutes, offering delicious flavor and texture.

What’s the best way to store leftover Crock Pot Birria Tacos?
For optimal freshness, store leftover tacos in an airtight container in the refrigerator for up to 4 days. This maintains their flavor and quality, perfect for quick meals later! Be sure to keep the filling and toppings separate to prevent sogginess.

Can I freeze the shredded beef for later use?
Yes, you can freeze the shredded beef mixture! Simply place it in an airtight freezer bag or container, and it will remain delicious for up to 2 months. When you’re ready to enjoy again, thaw in the refrigerator overnight and reheat on the stovetop for the best flavor.

I’m concerned about spice levels; how can I adjust them?
Very good question! To control warmth, taste your sauce before blending and carefully remove the seeds from the dried chiles. If you prefer milder flavors, you can also use less chipotle chilis or omit them altogether. Adjusting those key elements will make this dish just right for your palate!

Are total cooking and prep times the same for the Instant Pot variation?
Oh, great inquiry! For the Instant Pot method, the beef should be cut into chunks for faster cooking. Sear them first, then cook under high pressure for about 60 minutes. You’ll still follow the same steps for prepping the consome! This saves a lot of time while still deliciously satisfying your taco cravings.

Can my pets enjoy leftover beef?
Absolutely, but with a little caution! Plain, shredded beef is pet-friendly, but ensure no onions or spices are left in it. Always serve in moderation, and observe how your pet reacts, as some may have sensitivities.

Crock Pot Birria Tacos

Crock Pot Birria Tacos: Flavor-Packed Comfort in Every Bite

Enjoy flavorful Crock Pot Birria Tacos with tender beef in a delicious sauce, perfect for gatherings.
Prep Time 20 minutes
Cook Time 8 hours
Total Time 8 hours 20 minutes
Servings: 8 tacos
Course: Dinner
Cuisine: Mexican
Calories: 300

Ingredients
  

For the Beef
  • 2-3 lbs boneless chuck roast Substitution: Beef shoulder or pork shoulder can be used for differing flavors.
For the Cooking Liquid
  • 1 tbsp avocado oil Plus more for frying.
  • Coarse ground salt Adjust according to taste preference.
  • Fresh ground pepper Adjust according to taste preference.
  • 4 pieces dried Guajillo chiles Substitution: Dried ancho peppers can be used for milder taste.
  • 5-6 pieces Chipotle chilis in adobo Reduce amount if sensitive to spice.
  • 1 small red onion Thinly sliced.
  • 8 cloves garlic Smashed.
  • 32 oz beef stock
  • 1 tbsp tomato paste
  • 1 can (14.5 oz) fire-roasted diced tomatoes
  • ¼ cup organic apple cider vinegar Substitution: Fresh lime juice works for similar acidity.
  • 1 tbsp ground cumin
  • 1 tbsp dried oregano
  • 1 piece cinnamon stick
  • 3 pieces dry bay leaves
  • 1 tsp smoked paprika
  • ½ tbsp fresh grated ginger
  • 1 tsp ground coriander
For the Tacos
  • Corn or flour tortillas For authentic touch, corn tortillas are recommended.
  • Lime wedges
  • fresh cilantro leaves
  • diced white onion
  • shredded Oaxacan cheese

Equipment

  • Crock-Pot
  • cast-iron skillet

Method
 

Step-by-Step Instructions
  1. In a cast iron skillet, heat 1 tablespoon of avocado oil over high heat for approximately 4-5 minutes. Generously season your 2-3 lbs boneless chuck roast with coarse ground salt and fresh ground pepper. Sear the beef for about 5-6 minutes on each side until a rich, golden-brown crust forms.
  2. Transfer the beautifully seared beef to your crock pot. Add in the remaining ingredients: sliced red onion, smashed garlic cloves, beef stock, tomato paste, fire-roasted diced tomatoes, apple cider vinegar, dried spices, and chiles. Stir well to combine, ensuring the beef is submerged in the flavorful mixture. Cover and set your crock pot to low heat, allowing it to cook for 8 hours.
  3. After 8 hours, the beef should be perfectly tender. Carefully remove the beef from the crock pot and set it aside to cool slightly. Discard the bay leaves and cinnamon stick. In a blender, blend the remaining liquid until smooth, creating a luscious consome.
  4. Once the beef is cool enough to handle, shred it with two forks into bite-sized pieces. In a mixing bowl, combine the shredded beef with 1½ to 2 cups of the blended consome, ensuring it's evenly coated.
  5. Heat a skillet over medium heat and lightly coat it with oil. Dip the tortillas into the consome, then place them in the hot skillet. On one half of each tortilla, add shredded beef, a sprinkle of shredded Oaxacan cheese, diced onions, and fresh cilantro. Fold the tortillas and fry until golden and crispy, about 2-3 minutes on each side.
  6. Serve your crispy tacos hot, alongside a small bowl of consome for dipping. Garnish with lime wedges and additional toppings like fresh cilantro and diced onions.

Nutrition

Serving: 2tacosCalories: 300kcalCarbohydrates: 30gProtein: 25gFat: 15gSaturated Fat: 5gPolyunsaturated Fat: 2gMonounsaturated Fat: 8gCholesterol: 70mgSodium: 800mgPotassium: 600mgFiber: 3gSugar: 2gVitamin A: 150IUVitamin C: 5mgCalcium: 200mgIron: 3mg

Notes

Tips include searing the meat for added flavor, proper spice adjustment, and using corn tortillas for authenticity.

Tried this recipe?

Let us know how it was!

Crockpot Orange Chicken – Sweet, Tangy Perfection Made Easy

You won’t believe how such a simple dish can transform your weeknight dinners into something truly special! My Easy Slow Cooker Orange Chicken has become a staple in my kitchen, balancing sweet and tangy flavors with tender chicken that practically melts in your mouth. This recipe shines not just for its taste but also for its effortless preparation—five minutes in the morning and you can forget about dinner until it’s time to enjoy! With this crockpot creation, not only do you save time, but you also serve up comfort food that the whole family will love. Ready to learn how to whip up this uncomplicated yet delightful meal? Let’s dive into the magic of slow cooking!

Why is Crockpot Orange Chicken a Must-Try?

Effortless Prep: Just five minutes in the morning means less stress for busy families.
Mouthwatering Flavor: The sweet and tangy sauce is simply irresistible; it’ll become a dinner staple!
Tender Chicken: Slow cooking ensures every bite of chicken is soft and succulent, bursting with flavor.
Versatile Choices: Feel free to swap in other proteins or veggies for an exciting twist. You can even serve this with my delicious Sizzling Chicken Pepper or pair it with a nice Blt Chicken Salad for a complete spread!
Crowd-Pleaser: This dish is sure to impress everyone at the table, turning ordinary nights into exceptional dining experiences.

Crockpot Orange Chicken Ingredients

  • For the Chicken

  • Boneless Skinless Chicken Breasts or Tenders – The main protein choice that yields tender and juicy bites; breasts are more economical, while tenders give a softer texture.

  • For the Sauce

  • Cornstarch – Essential for creating a light crust on the chicken and ensuring it doesn’t become rubbery.

  • Olive Oil – Used for browning the chicken, adding flavor and texture before slow cooking.

  • Orange Marmalade – This sweet and tangy base is crucial for providing that signature flavor profile in this Crockpot Orange Chicken.

  • Reduced-Sodium Soy Sauce – Adds depth without overwhelming saltiness, enhancing the overall taste.

  • White Vinegar – Balances the sweetness with a touch of acidity, making the sauce well-rounded.

  • Sesame Oil – Infuses a nutty richness that complements the Asian-inspired flavors of the dish.

  • Ground Ginger – Introduces a warm spice element; adjust to taste depending on your preference for ginger flavor.

  • Garlic (3 cloves, minced) – A must-have for enhancing the savory notes of the sauce.

  • Crushed Red Pepper Flakes (1/2 tsp) – Provides a gentle heat; feel free to adjust or omit if you prefer a milder dish.

  • For Garnish

  • Sesame Seeds – Adds a delightful crunch and visual appeal when sprinkled on top before serving.

  • Chopped Scallions – Freshly chopped, they enhance flavor and bring a pop of color to the dish.

Step‑by‑Step Instructions for Crockpot Orange Chicken

Step 1: Prep Chicken
Begin by cutting your boneless skinless chicken breasts or tenders into 1-inch bite-sized pieces. Then, thoroughly coat each piece in cornstarch to ensure a light crust that keeps the chicken tender. Set aside while you prepare to brown the chicken, giving it a nice, flaky texture once cooked.

Step 2: Brown Chicken
In a skillet, heat a tablespoon of olive oil over medium-high heat. Once the oil is shimmering, add the coated chicken pieces in a single layer. Lightly brown them for about 3-5 minutes, turning occasionally. You want them golden on the outside but not cooked through, as they will finish cooking in the slow cooker.

Step 3: Prepare Sauce
While the chicken is browning, combine 1 cup of orange marmalade, 1/4 cup of reduced-sodium soy sauce, 2 tablespoons of white vinegar, and 1 tablespoon of sesame oil in a mixing bowl. Add 1 teaspoon of ground ginger, 3 cloves of minced garlic, and 1/2 teaspoon of crushed red pepper flakes. Whisk everything together until smooth and well combined.

Step 4: Combine in Slow Cooker
Once the chicken is browned, transfer it to your slow cooker, ensuring to scrape any fond from the skillet for added flavor. Pour the prepared sauce evenly over the chicken, then gently stir to coat every piece well. This step ensures the chicken is infused with that delicious sweet and tangy flavor as it cooks.

Step 5: Cook
Set your slow cooker to low and cover it, allowing the Crockpot Orange Chicken to cook for 2-3 hours, or on high for 1.5-2 hours. It’s essential to stir halfway through the cooking time to prevent the chicken from sticking and to enhance the overall flavor by redistributing the sauce.

Step 6: Serve
When the sauce has thickened and the chicken is cooked through, it’s time to serve! Garnish your Crockpot Orange Chicken with additional sesame seeds and chopped scallions for a pop of color and crunch. Pair it with fluffy rice or vibrant steamed vegetables for a complete meal that’s sure to please.

Expert Tips for Crockpot Orange Chicken

  • Perfect Coating: Always coat chicken pieces in cornstarch before browning. This prevents them from becoming rubbery during cooking and enhances texture.

  • Mind the Browning: Lightly brown your chicken without cooking it all the way through. This step locks in flavors and ensures tender bites in your crockpot orange chicken.

  • Slow Cooking Magic: Stick to low heat for a longer cook time. High heat can lead to stringy chicken, diminishing that desirable tenderness.

  • Thicken if Needed: If your sauce appears too thin at the end of cooking, mix cornstarch with a bit of water and stir it in. This will help you achieve that luscious, sticky consistency.

  • Adjustment Flexibility: Feel free to adjust spice levels. If you’re averse to heat, reduce or omit the crushed red pepper flakes for a milder flavor profile.

Storage Tips for Crockpot Orange Chicken

  • Fridge: Store leftovers in an airtight container for up to 4 days. The flavors develop even more as it sits, making each bite deliciously comforting!
  • Freezer: For longer storage, freeze in freezer-safe bags for up to 3 months. Make sure to remove as much air as possible to prevent freezer burn.
  • Reheating: When ready to enjoy, thaw in the fridge overnight if frozen. Reheat gently in a saucepan or microwave, adding a splash of water or broth for that perfect saucy texture.
  • Meal Prep: This crockpot orange chicken is ideal for meal prep, offering satisfying, quick meals throughout the week—just reheat and serve over rice or veggies!

What to Serve with Irresistible Crockpot Orange Chicken

Pair your mouthwatering creation with these delightful sides to create a comforting family meal that wraps everyone in warmth.

  • Fluffy Jasmine Rice: This aromatic rice soaks up the sweet and tangy sauce, making every bite deliciously satisfying. The soft texture complements the tender chicken perfectly.

  • Steamed Broccoli: Bright, fresh, and slightly crunchy, steamed broccoli adds a vibrant green contrast that balances the dish’s richness. Plus, it’s a simple way to sneak in some healthy greens!

  • Sesame Noodles: These tender noodles dressed in a light sesame oil and soy sauce blend provide a wonderful flavor pairing that melds beautifully with the orange chicken. Enjoying them side by side is a match made in culinary heaven.

  • Asian Slaw: A refreshing mix of cabbage, carrots, and herbs dressed in a tangy vinaigrette adds a crisp crunch, enhancing the dish’s overall texture and taste. It’s an energetic companion on the plate!

  • Garlic Green Beans: Sautéed green beans tossed with garlic and a splash of soy sauce bring a savory note that pairs beautifully while adding color and nutrients.

  • Coconut Milk Rice Pudding: For a sweet finish, consider this creamy dessert. Its subtle coconut flavor and sweet notes offer a lovely end to the meal, soothing any palate delightfully.

Each of these pairings enhances the flavors of your Crockpot Orange Chicken while introducing a variety of textures and tastes that refresh the dining experience!

Make Ahead Options

These Crockpot Orange Chicken are perfect for meal prep enthusiasts! You can chop the chicken and coat it in cornstarch up to 24 hours in advance, storing it in an airtight container in the refrigerator to keep it fresh. Additionally, you can prepare the sauce (without the chicken) and refrigerate it for up to 3 days, ensuring flavors meld beautifully. When you’re ready to cook, simply combine the browned chicken and sauce in the slow cooker as instructed, and let it work its magic. By prepping ahead, you save valuable time, allowing you to enjoy a delicious, home-cooked meal with minimal effort during your busy weeknights!

Crockpot Orange Chicken Variations

Feel free to make this delightful dish your own by trying out these exciting variations!

  • Pork Option: Swap chicken for boneless pork chops or tenderloin, resulting in a deliciously rich alternative.
  • Tofu Delight: For a plant-based version, replace chicken with firm tofu, marinating it in the sauce for an extra flavor boost.
  • Veggie Loaded: Toss in a mix of colorful vegetables like bell peppers, snap peas, or broccoli during the last hour of cooking for added nutrition.
  • Zingy Twist: Add a splash of fresh orange juice or zest along with the marmalade to brighten the flavors even more.
  • Heat Lover’s Dream: Increase the crushed red pepper flakes or incorporate fresh chopped chili for an extra spicy kick in every bite.
  • Sweet Adjustments: Use less orange marmalade or add a bit of honey for a sweeter sauce if desired—make it just right for your family!
  • Cyborg Chicken: Infuse with flavors of ginger and garlic by marinating the chicken overnight in a mixture of soy sauce, sesame oil, and minced garlic for deeper taste.
  • Feast with Friends: Serve your crockpot orange chicken alongside fluffy jasmine rice or my flavorful Garlic Chicken Gnocchi for a delicious and hearty spread that your guests will adore!

Crockpot Orange Chicken Recipe FAQs

How do I choose the best chicken for this recipe?
Absolutely! For the best results, you can use either boneless skinless chicken breasts or tenders. Breasts are more budget-friendly, while tenders yield an incredibly tender texture. Ensure they are fresh and firm, without any discoloration or dark spots for optimal flavor.

What is the best way to store leftovers of Crockpot Orange Chicken?
After you enjoy your delicious meal, store leftovers in an airtight container in the refrigerator for up to 4 days. The flavors actually improve as they meld! If you’d like to keep leftovers longer, you can freeze the chicken in freezer-safe bags for up to 3 months. Just make sure to remove as much air as possible to prevent freezer burn.

Can I freeze Crockpot Orange Chicken? If so, how?
Definitely! To freeze, let the chicken cool completely first. Then, transfer it to freezer-safe bags, squeezing out the air before sealing them tightly. Label with the date and store in the freezer for up to 3 months. When you’re ready to eat, thaw in the refrigerator overnight and reheat gently, adding a splash of water or broth if needed to maintain that enjoyable saucy texture.

What should I do if the sauce is too thin?
If the sauce ends up thinner than you’d like, don’t worry—it can easily be thickened! Mix 1-2 tablespoons of cornstarch with cold water to create a slurry, then add it to the crockpot about 15-30 minutes before serving. Stir well and let it cook covered, allowing the sauce to thicken up nicely.

Is this recipe suitable for allergies or dietary restrictions?
Very! If you’re concerned about allergies, be aware that this recipe contains soy (from the soy sauce) and sesame (from the sesame oil and seeds). To make it gluten-free, you can substitute soy sauce with tamari or coconut aminos. For a nut-free option, simply omit the sesame oil and seeds, or replace them with a splash of extra olive oil for flavor.

How can I adjust the sweetness of the sauce?
To tailor the sweetness to your taste, you can easily adjust the amount of orange marmalade. If you prefer a less sweet flavor, use about half a cup instead of a full cup and add an extra splash of vinegar to maintain the tanginess. Alternatively, if you enjoy it sweeter, feel free to add a bit more marmalade until it hits the sweet spot for you!

Crockpot Orange Chicken

Crockpot Orange Chicken – Sweet, Tangy Perfection Made Easy

Transform your weeknight dinners with this easy Crockpot Orange Chicken that combines sweet and tangy flavors with tender, melt-in-your-mouth chicken.
Prep Time 5 minutes
Cook Time 2 hours
Total Time 2 hours 5 minutes
Servings: 4 servings
Course: Dinner
Cuisine: Asian
Calories: 300

Ingredients
  

For the Chicken
  • 1 lb Boneless Skinless Chicken Breasts or Tenders Cut into 1-inch pieces
For the Sauce
  • 1 tbsp Cornstarch For coating chicken
  • 1 tbsp Olive Oil For browning chicken
  • 1 cup Orange Marmalade Sweet and tangy base
  • 1/4 cup Reduced-Sodium Soy Sauce Adds depth
  • 2 tbsp White Vinegar Balances sweetness
  • 1 tbsp Sesame Oil Infuses nutty richness
  • 1 tsp Ground Ginger Adjust to taste
  • 3 cloves Garlic, minced Enhances savory notes
  • 1/2 tsp Crushed Red Pepper Flakes Adjust for heat
For Garnish
  • 1 tbsp Sesame Seeds For crunch and visual appeal
  • 2 tbsp Chopped Scallions For flavor and color

Equipment

  • Slow Cooker
  • Skillet
  • Mixing Bowl

Method
 

Step‑by‑Step Instructions
  1. Prep Chicken: Cut chicken into 1-inch pieces and coat in cornstarch.
  2. Brown Chicken: Heat olive oil in skillet, add chicken, and lightly brown for 3-5 minutes.
  3. Prepare Sauce: Combine marmalade, soy sauce, vinegar, sesame oil, ginger, garlic, and red pepper flakes in a bowl.
  4. Combine in Slow Cooker: Transfer chicken to slow cooker, pour sauce over and stir to coat.
  5. Cook: Set slow cooker to low for 2-3 hours or high for 1.5-2 hours, stirring halfway through.
  6. Serve: Garnish with sesame seeds and scallions, serve with rice or veggies.

Nutrition

Serving: 1servingCalories: 300kcalCarbohydrates: 30gProtein: 25gFat: 10gSaturated Fat: 1.5gPolyunsaturated Fat: 0.5gMonounsaturated Fat: 8gCholesterol: 75mgSodium: 600mgPotassium: 450mgFiber: 1gSugar: 18gVitamin A: 250IUVitamin C: 15mgCalcium: 30mgIron: 1mg

Notes

Perfect coating with cornstarch and low heat for tender chicken. Adjust spice levels as desired.

Tried this recipe?

Let us know how it was!

Irresistible Crockpot Orange Chicken for Effortless Family Dinners

As I stood there with a struggling stomach and an empty fridge, I stumbled upon the magic of the Irresistible Crockpot Orange Chicken. With just five minutes of prep, this quick and easy recipe transforms humble ingredients into a sweet and tangy delight that the whole family will adore. The best part? While it simmers away in your slow cooker, your kitchen will fill with mouthwatering aromas, leaving you to unwind after a long day without the hassle of cleaning up a big mess. Say goodbye to the fast-food rut and embrace the comforting flavors of homemade goodness, perfect over fluffy rice or veggies. Curious to discover how simple it is to create this takeout classic in your own kitchen? Let’s dive into this delightful recipe!

Why is this orange chicken a must-try?

Effortless Preparation: With just five minutes of prep, toss everything into your crockpot and let it do the hard work!

Flavor Explosion: A delightful blend of sweet orange marmalade and savory soy sauce offers a taste that rivals your favorite takeout.

Crowd-Pleaser: This family-friendly meal is perfect for everyone, bringing smiles to both kids and adults alike.

Versatile Options: Want to switch it up? You can easily substitute chicken with tofu or try different marmalades for a new twist!

Perfect with Sides: Serve it over fluffy white rice or steamed veggies, transforming your dinner into a gourmet feast without breaking a sweat.

Weeknight Winner: Embrace a hassle-free dinner solution that lets you unwind while the flavors meld in the slow cooker! Why not also check out our Korean Fried Chicken for more delicious inspiration?

Irresistible Crockpot Orange Chicken Ingredients

• Perfect for a busy night!

For the Chicken

  • Boneless Skinless Chicken Breasts/Tenders – Cut into bite-sized pieces for even cooking and a tender texture.
  • Cornstarch – Ensures a light crust when browning the chicken, keeping it juicy; don’t skip this for the best results.

For the Sauce

  • Olive Oil – Ideal for browning the chicken and enhancing the overall flavor.
  • Orange Marmalade – The star of the sauce, providing a sweet and tangy flavor; feel free to substitute with homemade orange sauce if you wish!
  • Reduced-Sodium Soy Sauce – Adds depth and savoriness to the dish without overwhelming saltiness; regular soy sauce can be used for a richer taste.
  • White Vinegar – Adds a tangy kick that balances the sweetness of the marmalade perfectly.
  • Sesame Oil – Gives an authentic Asian flavor profile; can be swapped with canola oil if needed.
  • Ground Ginger – Infuses warmth and complements the orange flavor beautifully; fresh ginger can also work well here.
  • Garlic – Essential for adding aromatic depth to the dish.
  • Crushed Red Pepper Flakes – Adds a bit of heat; simply omit if you prefer a milder taste.

For Garnishing

  • Sesame Seeds – Sprinkle these on top for a delightful crunch and visual appeal.
  • Chopped Scallions – Freshness and a burst of color to elevate your dish!

Step‑by‑Step Instructions for Irresistible Crockpot Orange Chicken

Step 1: Cut and Coat the Chicken
Begin by cutting the boneless skinless chicken breasts or tenders into bite-sized pieces, approximately 1 inch each. Place the chicken pieces in a shallow dish and sprinkle them evenly with cornstarch, ensuring all sides are coated. This step is crucial for achieving that perfect texture when you brown the chicken.

Step 2: Brown the Chicken
In a skillet, heat a tablespoon of olive oil over medium-high heat until shimmering. Add the coated chicken pieces in a single layer and lightly brown them for about 2-3 minutes on each side, just until they develop a golden hue. Be careful not to cook them through, as they will finish cooking in the crockpot, enhancing the flavors of the Irresistible Crockpot Orange Chicken.

Step 3: Transfer Chicken to the Crockpot
Once browned, transfer the chicken pieces to the slow cooker, spreading them out evenly. This allows the chicken to cook uniformly and soak up the delicious flavors from the sauce. Make sure to scrape any browned bits from the skillet into the crockpot for added depth of flavor in your orange chicken.

Step 4: Whisk the Sauce Ingredients
In a mixing bowl, combine the orange marmalade, reduced-sodium soy sauce, white vinegar, sesame oil, ground ginger, minced garlic, and crushed red pepper flakes. Whisk these ingredients together until you achieve a smooth sauce. This luscious blend is what will make your Irresistible Crockpot Orange Chicken shine, marrying sweetness and a hint of heat.

Step 5: Pour the Sauce Over the Chicken
Carefully pour the prepared sauce over the chicken in the slow cooker, ensuring all pieces are generously coated. Give it a gentle stir to incorporate the sauce with the chicken, making sure everything is well mixed. This step is essential to ensure that each bite of your orange chicken bursts with flavor as it cooks.

Step 6: Slow Cook the Chicken
Cover the slow cooker and set it to cook on LOW for 2-3 hours or on HIGH for 1.5-2 hours. Stir the dish halfway through the cooking time to ensure that the chicken is evenly coated with sauce and cooks thoroughly. You’ll know it’s done when the chicken is tender and the sauce is thickened for that true orange chicken experience.

Step 7: Garnish and Serve
Once the cooking time is up and your chicken is fully cooked through, it’s time to serve! Spoon the chicken into bowls and garnish with a sprinkle of sesame seeds and chopped scallions for a fresh touch. The glossy sauce and tender chicken pieces are visually enticing, making your Irresistible Crockpot Orange Chicken an absolute winner for family dinner night.

Irresistible Crockpot Orange Chicken Variations

Customize this slow-cooked delight to suit your taste buds and dietary needs!

  • Vegetarian Option: Substitute chicken with firm tofu, cubed and sautéed until golden for a plant-based take that still warms your heart.

  • Marmalade Swap: Experiment with different fruit preserves, such as mango or apricot, to create a uniquely flavored sauce that surprises every time.

  • Spicy Kick: Add a tablespoon of Sriracha or a diced jalapeño to the sauce for a delightful heat that balances the sweetness with a bold punch.

  • Tangy Addition: Stir in some fresh orange juice or lime juice before cooking for a zesty brightness that elevates the entire dish.

  • Pineapple Twist: Toss in diced pineapple chunks for a delicious Hawaiian-inspired twist! The sweet juice melds beautifully with the orange flavor.

  • Low-Sodium Version: Use low-sodium soy sauce and eliminate the added salt in your sides for a healthier dish without sacrificing flavor—perfect for those watching their salt intake.

  • Nutty Flavor: Drizzle with toasted sesame oil before serving to enhance the nutty undertone, giving your dish an aromatic boost that pairs beautifully with the orange.

For more mouthwatering dishes, try our delicious Chilli Chicken Takeout or the flavorful Tuscan Chicken Soup for quick family meals that please everyone!

What to Serve with Irresistible Crockpot Orange Chicken

Create a delightful dining experience that entices all the senses and leaves everyone satisfied!

  • Steamed White Rice: The perfect vessel for soaking up the rich orange sauce, making every bite a heavenly experience. Fluffy and comforting, rice truly complements the tender chicken.

  • Stir-Fried Vegetables: Add a colorful mix of broccoli, bell peppers, and snap peas for crunch and freshness. They provide a vibrant contrast and brighten up your plate, adding nutrition and flavor.

  • Cauliflower Rice: For a lighter and low-carb option, fluffy cauliflower rice pairs beautifully with the sweet and tangy chicken. It’s a healthy twist that still delivers on taste!

  • Sesame Noodles: These savory noodles, tossed in sesame oil and soy sauce, bring a new layer of flavor to your meal. The nuttiness of the sesame enhances the Asian-inspired vibes of the orange chicken.

  • Asian Cucumber Salad: A crunchy salad with fresh cucumbers and a tangy dressing refreshes the palate. It’s a great side that balances the sweetness of the orange chicken while adding crunch.

  • Sweet and Sour Pineapple Chunks: Juicy pineapple pieces provide a tropical flair and a burst of sweetness that’s simply irresistible. They can serve as a light dessert or garnish for your meal.

  • Chilled Green Tea: Serving a refreshing glass of green tea alongside your dinner elevates the flavors with its subtle earthiness. It’s the perfect drink to cleanse the palate between bites.

  • Fortified Tea or Fruit-Infused Water: Sip on a warm ginger tea or lemon-infused water to complement the meal’s sweet and tangy notes. These beverages round out your dining experience and keep it refreshing.

Storage Tips for Irresistible Crockpot Orange Chicken

  • Fridge: Store leftovers in an airtight container for up to 4 days. This allows the flavors of the Irresistible Crockpot Orange Chicken to deepen as it sits.

  • Freezer: Freeze in freezer-safe containers for up to 3 months. Make sure to label and date the containers for easy identification later.

  • Reheating: Gently reheat on the stovetop or microwave, adding a splash of water or broth if the sauce thickens too much during storage. Enjoy the comforting taste without any hassle!

Expert Tips for Irresistible Crockpot Orange Chicken

  • Coat Properly: Ensure each piece of chicken is evenly coated with cornstarch before browning. This prevents a tough texture, ensuring your chicken is juicy and tender.

  • Don’t Rush Browning: Take your time when browning the chicken; high heat can lead to a rubbery finish. Aim for a light golden color without cooking it all the way through.

  • Monitor Cooking Time: Check the chicken frequently towards the end of the cooking process. Overcooking can dry out the meat, so it’s best to use a meat thermometer if unsure.

  • Thicken the Sauce: If your sauce appears thin at the end, mix a tablespoon of cornstarch with cold water and add it during the last half hour of cooking for that perfect thickness.

  • Serve Fresh Garnish: Always garnish your Irresistible Crockpot Orange Chicken with sesame seeds and chopped scallions just before serving. It adds freshness and elevates the presentation!

  • Experiment with Variations: Don’t hesitate to try different marmalades or substitute chicken with tofu for a vegetarian twist on this family-friendly dish!

Make Ahead Options

Preparing the Irresistible Crockpot Orange Chicken ahead of time is a fantastic way to streamline your busy weeknight dinners! You can cut the chicken into bite-sized pieces and coat them with cornstarch up to 24 hours in advance, storing them in the refrigerator in an airtight container. Additionally, you can whisk together the sauce ingredients (orange marmalade, soy sauce, vinegar, sesame oil, ginger, garlic, and red pepper flakes) and keep it refrigerated for up to 3 days. On cooking day, simply transfer the prepped chicken to the slow cooker, pour the sauce over it, and follow the regular cooking instructions. This method not only saves precious time but also ensures that your dish is just as delicious as if you made it from scratch in one go!

Irresistible Crockpot Orange Chicken Recipe FAQs

How do I select the right chicken for this recipe?
Absolutely! When choosing your chicken, look for boneless, skinless chicken breasts or tenders. Ensure they are fresh and free from any dark spots or odors. Tender pieces cut into bite-sized chunks will cook evenly and absorb all the delicious flavors of the sauce.

What are the best storage methods for leftovers?
Very! Store any leftover Irresistible Crockpot Orange Chicken in an airtight container in the fridge for up to 4 days. The flavors will intensify as it sits, making it even tastier! If you want to keep it longer, consider freezing it.

Can I freeze the orange chicken, and if so, how?
Of course! To freeze, let the orange chicken cool completely, then transfer it to freezer-safe containers or heavy-duty freezer bags. It can stay fresh for up to 3 months. Make sure to label and date the containers for easy access later. To reheat, you can thaw it overnight in the fridge and gently warm it on the stovetop or microwave.

What if my sauce is too thin at the end of cooking?
Don’t worry! If your sauce is thin, simply mix 1 tablespoon of cornstarch with 2 tablespoons of cold water in a small bowl until smooth. Add this mixture to the crockpot during the last 30 minutes of cooking, stirring gently. Cover and let it cook until the sauce thickens up beautifully.

Is this recipe suitable for my dietary needs?
Absolutely! If you have dietary restrictions, you can substitute chicken with tofu for a vegetarian version. For those with soy allergies, try using coconut aminos instead of soy sauce for a similar taste without the allergens. Always ensure your chosen ingredients match your dietary preferences!

How do I reheat the leftovers?
Very easy! To reheat, simply place the Irresistible Crockpot Orange Chicken in a skillet over low heat, add a splash of water or broth to loosen the sauce, and gently stir until warmed through. Alternatively, you can microwave it in 30-second intervals, stirring in between, until hot. Enjoy that comforting taste without any hassle!

Irresistible Crockpot Orange Chicken

Irresistible Crockpot Orange Chicken for Effortless Family Dinners

Discover the deliciousness of Irresistible Crockpot Orange Chicken, a quick and easy family dinner that transforms humble ingredients into a delightful sweet and tangy meal.
Prep Time 5 minutes
Cook Time 2 hours
Total Time 2 hours 5 minutes
Servings: 4 servings
Course: Dinner
Cuisine: Asian
Calories: 350

Ingredients
  

For the Chicken
  • 1 pound Boneless Skinless Chicken Breasts/Tenders Cut into bite-sized pieces
  • 2 tablespoons Cornstarch For coating the chicken
For the Sauce
  • 1 tablespoon Olive Oil For browning the chicken
  • 1 cup Orange Marmalade The star of the sauce
  • 1/2 cup Reduced-Sodium Soy Sauce For flavor depth
  • 1 tablespoon White Vinegar Adds a tangy kick
  • 1 teaspoon Sesame Oil For authentic flavor
  • 1 teaspoon Ground Ginger For warmth
  • 2 cloves Garlic Minced for aroma
  • 1/2 teaspoon Crushed Red Pepper Flakes Optional for heat
For Garnishing
  • 1 tablespoon Sesame Seeds For garnish
  • 2 tablespoons Chopped Scallions For garnish

Equipment

  • Crockpot
  • Skillet
  • Mixing Bowl

Method
 

Step-by-Step Instructions
  1. Begin by cutting the boneless skinless chicken breasts or tenders into bite-sized pieces, approximately 1 inch each. Place the chicken pieces in a shallow dish and sprinkle them evenly with cornstarch.
  2. In a skillet, heat a tablespoon of olive oil over medium-high heat until shimmering. Add the coated chicken pieces in a single layer and lightly brown them for about 2-3 minutes on each side.
  3. Once browned, transfer the chicken pieces to the slow cooker, spreading them out evenly. Scrape any browned bits from the skillet into the crockpot.
  4. In a mixing bowl, combine the orange marmalade, reduced-sodium soy sauce, white vinegar, sesame oil, ground ginger, minced garlic, and crushed red pepper flakes. Whisk together until smooth.
  5. Carefully pour the prepared sauce over the chicken in the slow cooker, ensuring all pieces are generously coated. Stir gently to incorporate.
  6. Cover the slow cooker and set it to cook on LOW for 2-3 hours or on HIGH for 1.5-2 hours. Stir halfway through cooking.
  7. Once the cooking time is up, spoon the chicken into bowls and garnish with a sprinkle of sesame seeds and chopped scallions.

Nutrition

Serving: 1servingCalories: 350kcalCarbohydrates: 22gProtein: 30gFat: 15gSaturated Fat: 2gPolyunsaturated Fat: 3gMonounsaturated Fat: 10gCholesterol: 70mgSodium: 600mgPotassium: 600mgFiber: 1gSugar: 14gVitamin A: 500IUVitamin C: 15mgCalcium: 20mgIron: 1.5mg

Notes

Ensure each piece of chicken is evenly coated with cornstarch before browning for the best texture. Monitor cooking time closely to avoid overcooking.

Tried this recipe?

Let us know how it was!

Mediterranean Bowl: A 5-Minute Vegan Meal You’ll Love

As I dive into the vibrant world of Mediterranean flavors, I’m always amazed at how simple ingredients can create such a satisfying dish. Today, I’m excited to share my 5-Minute Mediterranean Bowl, a wholesome and colorful meal that’s perfect for anyone seeking a quick and healthy option. This delightful bowl is not only vegan and gluten-free but also an incredible meal prep solution—allowing you to whip it up in no time, especially when your veggies and grains are prepped ahead. With fresh vegetables, creamy hummus, and protein-packed chickpeas, this recipe is brimming with anti-inflammatory goodness. Are you ready to elevate your lunch game and indulge in the freshness of the Mediterranean? Let’s get started!

Why is the Mediterranean Bowl a must-try?

Quick and Easy: This 5-Minute Mediterranean Bowl is perfect for busy individuals craving a satisfying meal without the wait.

Vegan and Gluten-Free: Delight in a nutrient-packed dish that accommodates various dietary preferences, making it a crowd-pleaser for family and friends.

Flavor Explosion: The combination of fresh veggies, creamy hummus, and savory chickpeas delivers a mouthwatering experience that’s both healthy and indulgent.

Meal Prep Friendly: Prepare components in advance for effortless assembly during the week, saving time without sacrificing taste. Pair it with options like Chicken Shawarma Bowl for variety!

Rich Health Benefits: Loaded with vitamins and antioxidants, this bowl supports your wellness while satisfying your cravings.

Mediterranean Bowl Ingredients

• Get ready to create a delicious foundation for your meal!

For the Salad

  • Cucumber – Adds crispness and hydration; optionally replace with thinly sliced bell pepper for a different crunch.
  • Tomatoes – Provide sweetness and lycopene for health benefits; cherry tomatoes can easily be substituted for convenience.
  • Spring Onions – Offer a mild onion flavor; green onions can serve as a suitable replacement.
  • Parsley – Brightens the bowl and packs in vitamins; swap with any fresh herb, like cilantro, if preferred.

For the Base

  • Chickpeas – A fantastic source of plant protein and fiber; can be swapped with black beans for a flavor twist.
  • Quinoa – An excellent gluten-free grain that boosts protein content; can be replaced with cooked brown rice or omitted entirely.

For the Creamy Elements

  • Hummus – Acts as a creamy base for the dish; either store-bought or homemade works well, and tahini can be a great alternative for a similar texture.
  • Tzatziki – Adds a flavorful creaminess; consider a vegan version or omit if you prefer a light bowl.

For the Finishing Touch

  • Olives – Provide an extra brininess and healthy fats; feel free to exclude if they don’t appeal to you.
  • Olive Oil – Enhances both flavor and texture; avocado oil can be used as a substitute for a different taste.

Step‑by‑Step Instructions for Mediterranean Bowl

Step 1: Prepare the Salad
Begin by washing and chopping 1 cucumber, 1 cup of cherry tomatoes, 2 spring onions, and a handful of fresh parsley. In a large mixing bowl, combine these vibrant ingredients, then drizzle with a couple of tablespoons of olive oil and a pinch of salt. Gently toss the mixture until everything is evenly coated, creating an aromatic salad base ready for your Mediterranean Bowl.

Step 2: Assemble the Base
In a serving bowl, start by layering the fresh salad mixture as the foundation. This colorful arrangement should take center stage, showcasing the mixture’s crunch and fragrance. This visual preparation only takes a moment, but it sets the tone for the nutritious Mediterranean Bowl to come, enhancing both its look and taste.

Step 3: Add the Protein and Grain
Now, scoop about 1 cup of cooked quinoa and half a cup of rinsed canned chickpeas, adding them on top of your salad layer. These ingredients provide essential texture and protein, making this Mediterranean Bowl both filling and satisfying. Make sure the chickpeas are evenly distributed, creating a hearty layer atop the colorful salad.

Step 4: Incorporate Creamy Elements
Next, add generous dollops of store-bought or homemade hummus and tzatziki on top of your bowl. This creamy layer is essential for creating that rich flavor and satisfying mouthfeel that complements the fresh salad. Aim for about ¼ cup of each, skillfully spooning them to ensure they blend beautifully into your Mediterranean Bowl.

Step 5: Season to Perfection
To finish off your Mediterranean Bowl, gently sprinkle a grind of black pepper over the entire dish. This simple step enhances the flavors without overpowering the freshness. Take a moment to admire your creation—its vibrant colors and enticing aromas signal that it’s time to dig in and enjoy a nutritious meal packed with goodness.

Mediterranean Bowl: Customization Ideas

Embrace your culinary creativity and make this Mediterranean Bowl your own with these exciting variations!

  • Dairy-Free: Swap tzatziki for a creamy avocado dressing to keep it vegan but still rich and satisfying.
  • Protein Punch: Add grilled chicken or tofu for a hearty protein boost that complements all the colorful veggies.
  • Heat It Up: Toss in chopped jalapeños or a drizzle of hot sauce for a spicy kick that ignites your taste buds.
  • Texture Twist: Replace quinoa with roasted sweet potatoes for a warm, comforting texture that contrasts beautifully with the fresh salad.
  • Flavor Boost: Sprinkle fresh lemon zest over the top for a zesty pop that elevates the vibrant flavors of the bowl.
  • Nutty Addition: Toss in some toasted pine nuts or slivered almonds for an extra crunch and nutty flavor that makes each bite delightful.
  • Herb Swap: Use fresh basil or mint instead of parsley for a fragrant twist that transports your taste buds straight to the Mediterranean.
  • Vegan Feta: Crumble some vegan feta cheese on top for that salty, creamy bite reminiscent of traditional Mediterranean dishes.

With endless possibilities, feel free to explore what you love best! If you’re looking for more delectable recipes, don’t miss out on my Mediterranean Herb Crusted Salmon Recipe or a cozy Shepherd’s Pie Soup perfect for those chilly nights!

What to Serve with 5-Minute Mediterranean Bowl

A delightful Mediterranean Bowl can be the star of a full meal, drawing on flavors and textures that leave guests wanting more.

  • Crispy Pita Chips: Perfect for dipping into the hummus, these provide a satisfying crunch that complements the bowl’s creaminess.

  • Roasted Vegetables: A mix of seasonal veggies like zucchini and bell peppers adds warmth and savoriness that contrasts beautifully with the freshness of the bowl.

  • Greek Salad: A side of tangy Greek salad offers added freshness and a burst of flavor, enhancing the overall Mediterranean experience.

  • Grilled Tofu Skewers: Marinated and grilled, these add a smoky taste and extra protein punch, making for a more filling meal option.

  • Quinoa Tabbouleh: Light and zesty, this herb-forward salad pairs perfectly, reflecting the flavors of the Mediterranean Bowl while introducing new textures.

  • Lemonade Spritzer: A refreshing drink that balances the bowl’s savory notes, providing a zesty lift with every sip.

  • Tiramisu Cups: For a sweet finish, this classic dessert offers a creamy contrast, rounding out your Mediterranean-inspired feast beautifully.

Make Ahead Options

These 5-Minute Mediterranean Bowls are perfect for meal prep enthusiasts! You can prepare the salad ingredients—cucumber, tomatoes, spring onions, and parsley—up to 24 hours in advance, mixing them with olive oil and salt to keep their freshness. The quinoa and hummus can also be made ahead and stored in separate airtight containers for up to 3-4 days. On the day of serving, simply layer the prepared salad with chickpeas, quinoa, and creamy hummus. This way, your Mediterranean Bowl will stay just as delicious and vibrant, allowing for quick assembly on busy weeknights while ensuring flavor and texture remain intact. Enjoy your effortless, nutritious meal!

How to Store and Freeze Mediterranean Bowl

Fridge: Store leftovers in an airtight container for up to 3 days. Keep the salad components separate from creamy elements to maintain freshness and texture.

Freezer: While it’s best enjoyed fresh, you can freeze the quinoa and chickpeas for up to 2 months. Thaw in the fridge before using in a fresh Mediterranean Bowl.

Reheating: If using frozen quinoa or chickpeas, reheat them in a microwave or on the stovetop until warm. Assemble with fresh ingredients for the best flavor.

Meal Prep: To save time, pre-chop your veggies and prepare hummus or tzatziki ahead of time, storing them in separate airtight containers in the fridge for effortless assembly all week long.

Expert Tips for the Mediterranean Bowl

  • Prep Ahead: Prepare hummus, tzatziki, and quinoa in advance. This keeps your Mediterranean Bowl quick and easy during busy days.

  • Fresh Ingredients: Always add salad ingredients fresh to maintain their crunch and flavor. Wilted veggies can ruin the experience!

  • Gentle Mixing: Avoid over-processing or aggressively tossing the salad. Gently mix to keep the textures vibrant and inviting.

  • Flavor Boost: A dash of lemon juice can elevate your Mediterranean Bowl, adding brightness without overpowering the dish.

  • Storage Savvy: Keep salad components separate from creamy elements to prevent sogginess when storing leftovers.

5-Minute Mediterranean Bowl Recipe FAQs

How do I choose ripe vegetables for my Mediterranean Bowl?
Absolutely! For the best flavor and texture, look for cucumbers that are firm and dark green, with no dark spots. Tomatoes should be slightly soft to the touch and fragrant; this ensures they are ripe and sweet. If you opt for bell peppers, choose those that are vibrant in color without blemishes. Freshness makes a significant difference in your bowl!

How should I store leftovers of the Mediterranean Bowl?
Very! Store leftovers in an airtight container in the fridge for up to 3 days. To maintain the crunch of your salad, it’s best to keep salad components separate from the creamy elements like hummus and tzatziki. Just layer everything together just before you plan to enjoy your meal again.

Can I freeze components of the Mediterranean Bowl?
Definitely! While the assembled bowl isn’t ideal for freezing, you can freeze cooked quinoa and rinsed chickpeas. Place them in an airtight container or freezer bag, and they will stay fresh for up to 2 months. When you’re ready to enjoy, simply thaw them in the fridge overnight and reheat before adding fresh ingredients.

What should I do if my salad ingredients wilt?
Oh no! If you notice that your salad ingredients are wilting or losing their crunch, it’s best to toss them out for a fresh batch. Always add salad ingredients fresh to maintain their crispness. You can prevent wilting by storing your chopped veggies in an airtight container with a damp paper towel to keep them hydrated.

Are there any dietary considerations for the Mediterranean Bowl?
Absolutely! This bowl is designed to be vegan and gluten-free, catering to a variety of dietary preferences. If you have allergies, it’s always a good idea to double-check the ingredients in your hummus and tzatziki, as some brands may contain allergens such as nuts. For those with specific dietary needs, feel free to customize the bowl with your favorite ingredients, ensuring a healthy meal for everyone!

Mediterranean Bowl

Mediterranean Bowl: A 5-Minute Vegan Meal You’ll Love

This quick and healthy Mediterranean Bowl is a vibrant vegan meal featuring fresh vegetables, creamy hummus, and protein-packed chickpeas.
Prep Time 5 minutes
Total Time 5 minutes
Servings: 2 bowls
Course: Lunch
Cuisine: Mediterranean
Calories: 450

Ingredients
  

For the Salad
  • 1 Cucumber Adds crispness and hydration
  • 1 cup Cherry tomatoes Provides sweetness and lycopene
  • 2 Spring onions Offers a mild onion flavor
  • handful Fresh parsley Brightens the bowl and packs in vitamins
For the Base
  • 1 cup Chickpeas A fantastic source of plant protein and fiber
  • 1 cup Quinoa An excellent gluten-free grain
For the Creamy Elements
  • 1/4 cup Hummus Acts as a creamy base for the dish
  • 1/4 cup Tzatziki Adds a flavorful creaminess
For the Finishing Touch
  • Olives Provide an extra brininess and healthy fats
  • 2 tablespoons Olive oil Enhances both flavor and texture

Equipment

  • Mixing Bowl
  • Serving bowl
  • Knife
  • Cutting board

Method
 

Step-by-Step Instructions
  1. Wash and chop the cucumber, cherry tomatoes, spring onions, and parsley. Combine in a large mixing bowl with olive oil and salt, then toss.
  2. Layer the salad mixture in a serving bowl as the foundation.
  3. Add cooked quinoa and chickpeas on top of the salad layer.
  4. Add dollops of hummus and tzatziki on top.
  5. Sprinkle with black pepper to finish.

Nutrition

Serving: 1bowlCalories: 450kcalCarbohydrates: 55gProtein: 15gFat: 20gSaturated Fat: 3gPolyunsaturated Fat: 5gMonounsaturated Fat: 10gSodium: 300mgPotassium: 600mgFiber: 12gSugar: 6gVitamin A: 2000IUVitamin C: 30mgCalcium: 100mgIron: 3mg

Notes

For meal prep, prepare components in advance and keep salad ingredients fresh for the best experience.

Tried this recipe?

Let us know how it was!

Easy Ground Beef Quesadillas Recipe for a Quick Family Feast

As I flipped the quesadilla, the sound of that delightful sizzle filled my kitchen—a welcoming reminder that quick family dinners can pack a punch of flavor. This Easy Ground Beef Quesadilla Recipe is a lifesaver on busy weeknights, assembling effortlessly in just 30 minutes. With savory ground beef, gooey cheese, and a crisp tortilla wrapping, it’s a meal that both kids and adults will crave. Plus, the minimal prep means you’ll have more time to unwind at the table sharing stories rather than fussing over complicated recipes. Imagine diving into that warm, cheesy goodness after a long day; it’s comfort food at its finest! So, are you ready to whip up a delicious, hassle-free dinner that everyone will love?

Why Are Easy Ground Beef Quesadillas a Must-Try?

Simplicity: This recipe is incredibly easy to follow, making it perfect for beginners and busy home cooks alike.

Speedy Prep: In just 30 minutes, you can serve up a hearty meal that feels like comfort food but doesn’t require hours in the kitchen.

Kid-Approved: Everyone loves gooey cheese and savory beef, so this dish will quickly become a family favorite—picky eaters love it!

Versatile: Feel free to get creative! Add bell peppers, spinach, or shift the cheese to suit your family’s tastes, or try unique variations like those found in Korean Ground Beef or Sticky Beef Noodles.

Crowd Pleaser: Perfect for parties or gatherings, these quesadillas disappear fast, making them ideal for entertaining or movie nights. Experience an easy dinner that brings everyone together!

Easy Ground Beef Quesadillas Ingredients

Note: Gather these simple ingredients for a delightful Easy Ground Beef Quesadillas Recipe that your family will love!

For the Filling

  • Olive Oil – Essential for sautéing the vegetables and meat; substitute with vegetable oil if desired.
  • Brown Onion – Adds a lovely sweetness and flavor; you can use yellow onion as a substitute.
  • Garlic – Provides a rich aromatic flavor; fresh is best, but ½ teaspoon garlic powder works in a pinch.
  • Lean Ground Beef – The star protein that brings heartiness to the filling; swap with ground turkey or chicken if you prefer.
  • Taco Seasoning – This adds bold flavor to your beef; you can use store-bought or whip up homemade for freshness.
  • Tomato Purée – Introduces moisture and richness to the mixture; tomato sauce is a fine alternative if you have it on hand.
  • Water/Beef Broth – Helps create a cozy, saucy consistency; broth adds extra flavor, making it more delicious.
  • Salt and Black Pepper – The dynamic duo for seasoning; adjust according to your taste preferences.

For the Tortillas

  • Flour Tortillas – The perfect outer layer adding texture; whole wheat or corn tortillas are great alternatives.

For the Cheese

  • Mature Cheddar Cheese – Delivers rich flavor and great melting characteristics; try Monterey Jack or Pepper Jack for a twist.
  • Monterey Jack Cheese – Adds creaminess and a delightful melt; mozzarella can replace it for a milder flavor.

Step‑by‑Step Instructions for Easy Ground Beef Quesadillas Recipe

Step 1: Sauté the Aromatics
Begin by heating a tablespoon of olive oil in a large frying pan over medium-high heat. Add the chopped brown onion and sauté for about 3-4 minutes until it becomes soft and translucent. Once the onion is softened, toss in the minced garlic and cook for an additional minute until fragrant, stirring occasionally to prevent burning.

Step 2: Brown the Ground Beef
Next, add the lean ground beef to the pan, breaking it apart with a spatula. Cook the beef for about 5-7 minutes, stirring frequently, until it is thoroughly browned and no longer pink. Once browned, drain any excess fat from the pan, ensuring you’re left with flavorful meat for your Easy Ground Beef Quesadillas.

Step 3: Create the Filling
Now, stir in your taco seasoning, salt, and pepper, mixing well to coat the meat. Pour in the tomato purée and water or beef broth, stirring to combine everything. Let the mixture simmer for 3-5 minutes, allowing the sauce to thicken and intensify in flavor. You should see bubbling around the edges when it’s done.

Step 4: Assemble the Quesadillas
Prepare the tortillas by laying one on a clean surface. Sprinkle a generous amount of mature cheddar cheese covering one half of the tortilla, followed by a spoonful of the beef mixture. Add more cheese on top of the beef before folding over the other half of the tortilla, ensuring the filling is secure.

Step 5: Cook the Quesadillas
Heat a clean, dry pan over medium heat and carefully place the assembled quesadilla in it. Cook for 2-3 minutes until the bottom is golden and crispy, then gently flip it using a wide spatula to avoid spilling the filling. Cook for an additional 2-3 minutes on the other side until the cheese is melted and the quesadilla is perfectly crunchy.

Step 6: Rest and Slice
Once cooked, transfer the quesadilla to a cutting board and let it rest for a minute, which helps the cheese set. Use a sharp knife or pizza cutter to slice the Easy Ground Beef Quesadilla into wedges. This resting step is key, ensuring every bite is cheesy and satisfying, ready to serve with your favorite dipping sauces.

How to Store and Freeze Easy Ground Beef Quesadillas

Refrigerator: Store cooked quesadillas in an airtight container for up to 3 days. Separate layers with parchment paper to prevent sticking.

Freezer: Wrap each quesadilla tightly in plastic wrap and then use aluminum foil for added protection. They can be frozen for up to 2 months.

Reheating: To reheat, place frozen quesadillas on a baking sheet and warm in a 350°F (175°C) oven for about 15-20 minutes or until heated through.

Make-Ahead: Prepare the filling in advance and assemble the quesadillas when ready to cook. They’ll be fresh and delicious, making your Easy Ground Beef Quesadillas a perfect last-minute meal!

Make Ahead Options

These Easy Ground Beef Quesadillas are a fantastic choice for busy home cooks looking to save time! You can prepare the beef filling up to 3 days in advance—just sauté the onions, garlic, and ground beef, then mix in the taco seasoning, tomato purée, and broth as instructed. Let the mixture cool before transferring it to an airtight container and refrigerating. To maintain quality, assemble the quesadillas just before cooking; this keeps them crispy and gooey. When you’re ready to serve, simply fill the tortillas with the beef mixture and cheese, then cook them in a skillet for 2-3 minutes per side for warm, melty perfection with minimal effort!

Easy Ground Beef Quesadillas Recipe Variations

Feel free to get creative with your quesadillas—there’s something so joyous about customizing this dish with flavors and textures you love!

  • Vegetable Boost: Add spinach or bell peppers to the beef filling for extra nutrition and a colorful twist. They not only enhance the flavor but make it a more wholesome meal.

  • Heat Level Up: Sprinkle in some jalapeños or crushed red pepper flakes for a spicy kick. Feel the warmth dance on your palate and savor the exciting heat!

  • Cheese Variety: Mix in feta or Pepper Jack cheese for a more adventurous filling. The feta brings a tangy surprise, while Pepper Jack adds an inviting spicy creaminess.

  • Protein Swap: Try ground turkey or chicken instead of beef for a lighter option that doesn’t skimp on flavor. Your quesadilla will remain juicy and satisfying with a different twist!

  • Black Beans: Replace some of the beef with canned black beans for added protein and texture. They give a lovely earthiness that pairs wonderfully with the cheese and spices.

  • Additional Toppings: Experiment with sour cream, avocados, or fresh cilantro once assembled. Each topping contributes a burst of freshness that elevates your quesadilla experience.

  • Sweet Touch: Add a spoonful of pineapple or mango salsa for a sweet and savory contrast. The natural sweetness complements the savory beef and cheese beautifully.

And if you’re in the mood for another cozy dish, be sure to check out the Homemade Corned Beef or try a comforting bowl of Korean Ground Beef. The culinary world is your oyster—enjoy experimenting with your Easy Ground Beef Quesadillas!

Expert Tips for Easy Ground Beef Quesadillas

  • Perfect Browning: Ensure the ground beef is fully browned for the best flavor and texture; undercooked beef can result in a less savory filling.

  • Spatula Sense: Use a wide spatula when flipping quesadillas to keep the filling intact, ensuring a full, delightful bite of your Easy Ground Beef Quesadilla.

  • Don’t Overcrowd: Avoid overcrowding the pan when cooking; making quesadillas in batches ensures each one gets crispy and golden without steaming.

  • Rest is Best: Let your cooked quesadillas rest for a minute before slicing. This helps the cheese set and prevents spills when cutting.

  • Customize Seasoning: Adjust the amount of taco seasoning, salt, and pepper to suit your family’s taste; feel free to experiment for a unique flavor profile!

What to Serve with Easy Ground Beef Quesadillas

Elevate your family meal by complementing warm, cheesy bites with delicious sides that indulge the senses and spark conversation.

  • Classic Guacamole: This creamy, rich concoction adds a refreshing contrast to the warm quesadillas, enhancing their flavors beautifully. It’s a crowd favorite, perfect for dipping!

  • Zesty Salsa: A vibrant salsa, whether it’s chunky or smooth, introduces a burst of freshness and acidity that brightens each bite of the cheesy quesadilla. Don’t forget the cilantro for that added zing!

  • Crisp Garden Salad: A refreshing salad of mixed greens adds crunch and color, balancing the richness of the quesadillas. Top it with a light vinaigrette for a pop of flavor.

  • Mexican Street Corn: Sweet, smoky, and full of flavor, this dish offers a delightful textural contrast as well as warmth, making it a perfect sidekick to your quesadillas.

  • Refried Beans: Creamy and nutritious, refried beans provide a hearty addition that complements the Mexican theme, enhancing your meal’s protein content.

  • Creamy Cilantro Lime Rice: A fragrant, zesty rice dish enhances your plate with a light and aromatic touch that pairs harmoniously with the savory quesadilla filling.

  • Chilled Margaritas: For an adult twist, serve refreshing margaritas by the glass. The tartness of the lime and sweetness of the orange will resonate perfectly with the flavors of your meal.

  • Sweet Flan: End your meal on a sweet note with a slice of flan. Its silky texture and caramel flavor offer a delightful contrast to the savory quesadillas. Each bite is simply divine!

  • Sparkling Water with Lime: This bubbly drink provides a light, refreshing contrast, cleansing the palate between bites, making each experience as enjoyable as the last.

Easy Ground Beef Quesadillas Recipe FAQs

How do I know if my ingredients are ripe and fresh?
Absolutely! When selecting ingredients like onions and garlic, look for bulbs that are firm and without dark spots. For cheese, ensure there are no signs of mold unless it’s a type where blue mold is expected. Fresh ingredients make all the difference in your Easy Ground Beef Quesadillas!

What’s the best way to store leftover quesadillas?
Very! To keep your quesadillas fresh, store them in an airtight container in the refrigerator for up to 3 days. If you want to keep them from sticking together, place parchment paper between each layer. They’ll stay delicious for your next craving!

Can I freeze quesadillas for later?
Absolutely! For freezing, wrap each quesadilla tightly in plastic wrap, then place them in a freezer-safe bag or container. This will protect them from freezer burn. They can be kept for up to 2 months. When you’re ready to enjoy, bake them at 350°F (175°C) for 15-20 minutes straight from the freezer—easy and delicious!

What if my quesadillas turn out soggy?
Ah, the age-old quesadilla struggle! If this happens, it might be from too much filling or cooking over too low a heat. Ensure you’re not overstuffing them; a good layer of filling combined with sufficient cheese usually does the trick. Additionally, cooking on medium-high heat helps achieve that perfect crispy exterior.

Are there any dietary considerations I should note?
Very! If you’re cooking for someone with dietary restrictions, keep in mind that this recipe is easily adaptable. For gluten-free options, swap in corn tortillas. If dairy is an issue, you can try using dairy-free cheese alternatives. It’s all about making it work for you and your family!

Can I prepare these quesadillas ahead of time?
Definitely! If you want to save time, consider preparing the beef filling in advance. Once it’s cooked, it can be stored in the fridge for up to 3 days. When you’re ready to cook, just assemble and fry—quick and hassle-free, making it perfect for busy weeknights.

Easy Ground Beef Quesadillas Recipe

Easy Ground Beef Quesadillas Recipe for a Quick Family Feast

This Easy Ground Beef Quesadilla Recipe is a quick family dinner that is packed with flavor.
Prep Time 10 minutes
Cook Time 20 minutes
Resting Time 1 minute
Total Time 30 minutes
Servings: 4 quesadillas
Course: Dinner
Cuisine: Mexican
Calories: 400

Ingredients
  

For the Filling
  • 1 tablespoon Olive Oil Or substitute with vegetable oil
  • 1 medium Brown Onion Can substitute with yellow onion
  • 2 cloves Garlic Minced; fresh is best, but garlic powder works in a pinch
  • 1 pound Lean Ground Beef Can substitute with ground turkey or chicken
  • 1 packet Taco Seasoning Store-bought or homemade
  • 1 cup Tomato Purée Tomato sauce is a fine alternative
  • 1/2 cup Water or Beef Broth Broth adds extra flavor
  • to taste Salt
  • to taste Black Pepper
For the Tortillas
  • 4 large Flour Tortillas Whole wheat or corn tortillas are great alternatives
For the Cheese
  • 1 cup Mature Cheddar Cheese Monterey Jack or Pepper Jack is an alternative
  • 1 cup Monterey Jack Cheese Mozzarella can replace it for a milder flavor

Equipment

  • Large frying pan
  • spatula
  • Cutting board
  • Knife

Method
 

Step-by-Step Instructions
  1. Sauté the Aromatics: Heat olive oil in a frying pan over medium-high heat. Add chopped onion and sauté for 3-4 minutes until soft. Add minced garlic and cook for another minute.
  2. Brown the Ground Beef: Add lean ground beef, breaking it apart with a spatula. Cook for 5-7 minutes, stirring frequently, until fully browned. Drain excess fat.
  3. Create the Filling: Stir in taco seasoning, salt, and pepper. Add tomato purée and water or beef broth and simmer for 3-5 minutes until the sauce thickens.
  4. Assemble the Quesadillas: Lay a tortilla on a surface, sprinkle cheddar cheese on half, add beef mixture, and more cheese before folding.
  5. Cook the Quesadillas: Heat a pan over medium heat, place the quesadilla in it, cook for 2-3 minutes until golden. Flip using a spatula and cook for another 2-3 minutes.
  6. Rest and Slice: Remove quesadilla to a cutting board, let it rest for a minute before slicing into wedges.

Nutrition

Serving: 1quesadillaCalories: 400kcalCarbohydrates: 30gProtein: 25gFat: 20gSaturated Fat: 10gPolyunsaturated Fat: 2gMonounsaturated Fat: 8gCholesterol: 70mgSodium: 600mgPotassium: 350mgFiber: 2gSugar: 2gVitamin A: 10IUVitamin C: 5mgCalcium: 15mgIron: 10mg

Notes

Perfect for busy weeknights, easy to customize with different fillings or spices to suit your family's taste.

Tried this recipe?

Let us know how it was!

Garlic Butter Beef Bites: Comfort Food Made Easy

On a brisk evening, as the leaves rustle outside and a slight chill seeps in, nothing satisfies quite like the warmth of a home-cooked meal. That’s where my High Protein Slow Cooker Garlic Butter Beef Bites come into play, turning ordinary moments into cozy culinary memories. This recipe is a perfect blend of comfort food and high protein, making it an ideal option for those looking to warm their hearts—and fill their bellies. With tender bites of beef simmered in a rich garlic butter sauce, this dish not only delivers on flavor but offers the ultimate convenience, too. Imagine coming home to a meal that practically cooks itself while you go about your day! Ready to elevate your dinner game and indulge in the sheer joy of slow-cooked goodness? Let’s dive into this delicious adventure!

Why Are Garlic Butter Beef Bites Amazing?

Comforting Delight: These Garlic Butter Beef Bites are the epitome of home-cooked warmth that wraps you in a cozy embrace on chilly nights.

Effortless Preparation: With minimal hands-on time, just set your slow cooker, and let it work its magic while you enjoy your day.

Savory Satisfaction: The rich garlic butter creates a mouthwatering sauce that enhances the tender beef and potatoes, making each bite irresistible.

Health-Conscious Choice: Packed with protein, this dish is not only filling but also a guilt-free indulgence compared to typical fast food.

Family-Favorite Appeal: Perfect for gatherings, this hearty dish will leave everyone asking for seconds, just like my Garlic Parmesan Chicken or the comforting Sticky Beef Noodles.

Embrace the joy of cooking with this fantastic recipe!

Garlic Butter Beef Bites Ingredients

For the Beef

  • Beef Stew Meat (1.5 pounds) – This is the main protein source that becomes incredibly tender during cooking. Chuck roast can be used if stew meat is unavailable.

For the Vegetables

  • Medium Potatoes (4, cubed) – These provide substance and absorb all the delicious flavors from the garlic butter. Sweet potatoes can offer a different, sweeter taste.

For the Sauce

  • Unsalted Butter (1/2 cup) – This ingredient adds richness and helps control the saltiness of the sauce.
  • Garlic (4 cloves, minced) – An essential for flavor; feel free to increase this for a stronger garlic taste!
  • Worcestershire Sauce (1 tablespoon) – Introduces a savory umami flavor that levels up the dish.
  • Salt and Pepper (to taste) – These seasonings enhance the overall flavor of the beef and potatoes.

For Garnish

  • Fresh Parsley (for garnish) – Add this for a pop of color and freshness to your beautiful dish.

Enjoy crafting your Garlic Butter Beef Bites with these fresh, quality ingredients!

Step‑by‑Step Instructions for Garlic Butter Beef Bites

Step 1: Combine Ingredients
In your slow cooker, start by placing 1.5 pounds of beef stew meat at the bottom. Next, add 4 cubed medium potatoes around the meat, ensuring they’re evenly distributed. This will provide a solid base for your Garlic Butter Beef Bites, allowing the flavors to meld beautifully during cooking.

Step 2: Cook Garlic
In a medium saucepan, melt ½ cup of unsalted butter over medium heat until fully liquid. Once melted, add 4 minced garlic cloves and sauté for about 1 minute, or until the garlic is fragrant and golden. This step adds a delightful richness to the garlic butter, enhancing the overall taste of the dish.

Step 3: Seasoning
Stir in 1 tablespoon of Worcestershire sauce along with salt and pepper to taste into the butter and garlic mixture. Mix well and allow it to heat for an additional 30 seconds so that the flavors blend together beautifully. This savory sauce will elevate your Garlic Butter Beef Bites.

Step 4: Combine Everything
Pour the garlic butter mixture over the beef and potatoes in the slow cooker, ensuring even coverage. Stir gently to coat the ingredients, as this step helps infuse every bite with that delicious garlic flavor. Take a moment to appreciate the inviting aroma wafting from your slow cooker.

Step 5: Cook
Cover the slow cooker with its lid and set the temperature to low, allowing it to cook for 6 to 8 hours. Alternatively, you can set it to high for 3 to 4 hours. When it’s done, the beef should be tender and easily shreddable with a fork, ensuring you have perfect Garlic Butter Beef Bites.

Step 6: Serve
Once cooked, carefully ladle your Garlic Butter Beef Bites into serving bowls and garnish with fresh parsley for a bright and inviting touch. This dish pairs wonderfully with crusty bread or a crisp salad, making it a heartwarming meal option perfect for cozy evenings.

How to Store and Freeze Garlic Butter Beef Bites

Fridge: Store leftover Garlic Butter Beef Bites in an airtight container for up to 3-4 days. Reheat gently on the stovetop or in the microwave until warmed through.

Freezer: For longer storage, freeze the beef bites in an airtight container or heavy-duty freezer bag for up to 3 months. Ensure they cool completely before sealing to maintain freshness.

Reheating: When ready to enjoy again, thaw overnight in the fridge, then reheat in a saucepan over low heat, adding a splash of broth to enhance moisture if needed.

Room Temperature: It’s best to avoid keeping the beef bites at room temperature for more than 2 hours to maintain their quality and safety.

Make Ahead Options

These Garlic Butter Beef Bites are a fantastic recipe for busy home cooks looking to save time during the week! You can prep the beef stew meat and potatoes up to 24 hours in advance. Simply combine the cubed potatoes and beef in your slow cooker, cover, and refrigerate overnight. Additionally, you can mix the melted garlic butter with Worcestershire sauce and seasonings, storing it in an airtight container in the refrigerator for up to 3 days. When you’re ready to serve, pour the garlic mixture over the meat and potatoes and cook as directed. This approach ensures that your meal is just as delicious while providing the convenience you need for seamless meal planning.

What to Serve with High Protein Slow Cooker Garlic Butter Beef Bites

Transform this tender dish into a complete meal that warms the heart and satisfies the soul!

  • Crusty Bread: Ideal for soaking up that rich garlic butter sauce, crusty bread adds a delightful crunch and satisfies your carb cravings.

  • Fresh Green Salad: A crisp salad offers a refreshing contrast to the savory beef. Try adding a zesty vinaigrette for a burst of flavor.

  • Garlic Mashed Potatoes: For a cozy, indulgent side, creamy mashed potatoes blend beautifully with flavors, creating a wonderfully comforting experience.

  • Roasted Vegetables: Enjoy a medley of roasted carrots, bell peppers, and zucchini for a touch of sweetness and texture that rounds out your meal.

  • Coleslaw: The crunchy, tangy taste of coleslaw provides a refreshing balance to the richness of the beef bites, making every bite a delight.

  • Savory Cornbread: Sweet cornbread pairs perfectly with this dish, adding a hint of sweetness while serving as a perfect vessel for that delectable sauce.

  • Red Wine: A glass of bold red wine can wonderfully complement the rich flavors of the beef, enhancing the overall dining experience.

  • Chocolate Cake: For dessert, a slice of rich chocolate cake provides a sweet finish to the meal, leaving everyone wishing for more.

Indulge in this fulfilling feast and watch your family gather around the table, delighted by every bite!

Garlic Butter Beef Bites Variations

Feel free to customize your Garlic Butter Beef Bites for an even more delightful experience—your taste buds will thank you!

  • Dairy-Free: Substitute unsalted butter with olive oil for a heart-healthy option while maintaining flavor.

  • Spicy Kick: Add 1-2 teaspoons of crushed red pepper flakes for a zesty flavor that will awaken your palate.

  • Flavor Boost: Incorporate freshly chopped herbs like rosemary or thyme into the garlic butter for an aromatic twist that enhances comfort levels.

  • Veggie-Packed: Toss in vibrant veggies like bell peppers or green beans to add sweetness and extra nutrition, making each bite colorful and hearty.

  • Sweet Potato Swap: Replace medium potatoes with sweet potatoes for a naturally sweet flavor that pairs beautifully with the garlic butter.

  • Low-Carb Option: Opt for cauliflower florets instead of potatoes for a low-carb alternative that doesn’t skimp on comfort; they’ll soak up that delicious garlic flavor beautifully.

  • Slow Cooker Mix: For a rich taste, incorporate a touch of balsamic vinegar into the garlic butter mixture, enhancing the depth of flavors like in my Garlic Butter Baked chicken recipe!

  • Meat Variation: Switch up the protein by using chicken thighs or pork belly for a different, savory taste. You might also enjoy the richness found in Cheesy Garlic Chicken wraps!

With these variations, you’ll discover a world of flavor possibilities while creating a heartwarming family favorite. Enjoy!

Tips for the Best Garlic Butter Beef Bites

  • Perfect Timing: Ensure you allow enough cooking time; tougher cuts may require extended periods for optimal tenderness.

  • Brown for Flavor: Browning the beef before adding it to the slow cooker intensifies the flavor, creating a rich, savory base for your Garlic Butter Beef Bites.

  • Season Wisely: Adjust the seasoning before cooking for a bolder taste later. Tasting during preparation will help avoid blandness.

  • Add Variety: Feel free to sneak in more vegetables, such as carrots or bell peppers, to enhance nutrition and texture without compromising flavor.

  • Storage Savvy: Leftovers can be stored in the fridge for 3-4 days; consider freezing for longer preservation. Remember to cool completely before sealing.

Garlic Butter Beef Bites Recipe FAQs

How do I choose the best beef for Garlic Butter Beef Bites?
Absolutely! For these Garlic Butter Beef Bites, it’s best to use beef stew meat, which is ideal due to its tenderness during slow cooking. If you can’t find stew meat, chuck roast is a fantastic substitute—just cut it into bite-sized chunks. Look for beef with a good amount of marbling, as this adds flavor and juiciness to the dish.

What’s the best way to store leftovers?
Very good question! Store leftover Garlic Butter Beef Bites in an airtight container in the fridge for up to 3-4 days. If you want to keep them longer, you can freeze them. Just ensure they cool completely before transferring to a freezer-safe container or heavy-duty freezer bag. They will stay fresh for up to 3 months!

Can I freeze Garlic Butter Beef Bites?
Absolutely! Freezing is a great option for these bites. To freeze, let them cool completely after cooking, then portion into airtight containers or heavy-duty freezer bags. Make sure to remove as much air as possible before sealing to prevent freezer burn. When you’re ready to enjoy, simply thaw overnight in the fridge before reheating.

What should I do if the beef isn’t tender enough after cooking?
Very good point! If your beef bites are tough after cooking, it may need more time in the slow cooker. For best results, cook on low for at least 7 hours, or on high for 4 hours. If it’s still not tender, try adding a bit of liquid (like broth) and cooking for an additional hour. This helps break down the connective tissue, yielding a wonderfully tender texture.

Are there any dietary considerations I should know about?
Great question! These Garlic Butter Beef Bites are not only delicious but can also accommodate various diets. For those avoiding gluten, be sure to check the Worcestershire sauce label for gluten-free options. If you’re concerned about allergies, you can omit the garlic or substitute it with garlic powder, though the flavor will differ. Additionally, please keep in mind that the dish contains beef, so it’s not suitable for vegetarians or vegans.

How do I ensure the best flavor in my dish?
Wonderful question! To elevate the flavor of your Garlic Butter Beef Bites, consider browning the beef in a skillet before adding it to the slow cooker. This step enhances the overall taste and creates a richer foundation. Additionally, don’t hesitate to adjust the seasoning! Taste as you go, and feel free to add a little more salt, pepper, or even a sprinkle of smoked paprika for an extra kick. Enjoy the cozy cooking experience!

Garlic Butter Beef Bites

Garlic Butter Beef Bites: Comfort Food Made Easy

Delicious Garlic Butter Beef Bites that offer comfort and high protein, perfect for cozy evenings.
Prep Time 15 minutes
Cook Time 8 hours
Total Time 8 hours 15 minutes
Servings: 6 bites
Course: Dinner
Cuisine: American
Calories: 350

Ingredients
  

For the Beef
  • 1.5 pounds Beef Stew Meat Chuck roast can be used if stew meat is unavailable.
For the Vegetables
  • 4 medium Potatoes cubed; Sweet potatoes can offer a different, sweeter taste.
For the Sauce
  • 0.5 cup Unsalted Butter Adds richness and helps control saltiness.
  • 4 cloves Garlic minced; feel free to increase for stronger garlic taste.
  • 1 tablespoon Worcestershire Sauce Introduces savory umami flavor.
  • Salt and Pepper to taste; enhances overall flavor.
For Garnish
  • Fresh Parsley for garnish.

Equipment

  • Slow Cooker
  • medium saucepan

Method
 

Step‑by‑Step Instructions
  1. In your slow cooker, place 1.5 pounds of beef stew meat at the bottom. Add 4 cubed medium potatoes around it, ensuring they're evenly distributed.
  2. In a medium saucepan, melt ½ cup of unsalted butter over medium heat. Once melted, add 4 minced garlic cloves and sauté for about 1 minute until fragrant.
  3. Stir in 1 tablespoon of Worcestershire sauce along with salt and pepper to taste into the butter and garlic mixture. Heat for an additional 30 seconds.
  4. Pour the garlic butter mixture over the beef and potatoes in the slow cooker, stirring gently to coat the ingredients.
  5. Cover the slow cooker and set it to low, allowing it to cook for 6 to 8 hours, or high for 3 to 4 hours.
  6. Once cooked, ladle your Garlic Butter Beef Bites into bowls and garnish with fresh parsley.

Nutrition

Serving: 1portionCalories: 350kcalCarbohydrates: 25gProtein: 30gFat: 15gSaturated Fat: 7gPolyunsaturated Fat: 1gMonounsaturated Fat: 6gCholesterol: 80mgSodium: 600mgPotassium: 800mgFiber: 3gSugar: 2gVitamin A: 5IUVitamin C: 15mgCalcium: 2mgIron: 15mg

Notes

Store leftovers in the fridge for up to 3-4 days or freeze for up to 3 months. Reheat gently when ready to enjoy again.

Tried this recipe?

Let us know how it was!

Garlic Butter Noodles Recipe That You’ll Crave Every Night

As I stood at my kitchen counter, the mouthwatering scent of garlic sizzling in melted butter enveloped me like a warm hug. This 4-Ingredient Garlic Butter Noodles recipe is the embodiment of cozy comfort food, delivering that rich, home-cooked feel that us busy home chefs crave. Not only is it a breeze to whip up in under 30 minutes, but its versatility means you can serve it as a satisfying main dish or a delightful side. Picture buttery, glossy noodles that will make your taste buds sing, all while using just four simple ingredients. So, are you ready to create your own quick pasta masterpiece that’s sure to become a family favorite?

Why Is This Garlic Butter Noodle Recipe Special?

Simplicity Reimagined: With just four ingredients, this recipe strips down the complexity, making it accessible for everyone—even those new to cooking!

Flavor Explosion: The aromatic garlic combined with rich butter provides a savory depth, making each bite so irresistible that it will have you craving more.

Versatile Delight: Effortlessly switch between long or short pasta shapes, and customize it with veggies or proteins, ensuring it fits any meal occasion.

Quick Preparation: Needing less than 30 minutes, this dish is perfect for hectic weeknights or last-minute dinner plans.

Crowd-Pleaser: Whether serving family or guests, this dish delivers comfort and satisfaction, reminiscent of a gourmet restaurant experience right at home.

For those who enjoy easy, delicious meals, pairing this with a fresh salad or trying Garlic Butter Baked will elevate your dining experience!

Garlic Butter Noodles Recipe Ingredients

For the Pasta

  • Dried Pasta Noodles – Use any shape, such as spaghetti or penne; note that you can substitute any pasta you have on hand.

For the Sauce

  • Butter – This rich ingredient creates a silky sauce; unsalted butter is preferred for better seasoning control.
  • Garlic Cloves – Minced for that aromatic flavor; you can also use garlic paste, starting with 1-2 teaspoons as it’s more potent.
  • Grated Parmesan Cheese – This adds savory depth; freshly grated is best, but pre-grated works in a pinch.
  • Salt and Ground Black Pepper – Essential for seasoning; adjust according to your taste preferences.

For Garnish

  • Chopped Parsley (optional) – Adds a fresh touch and vibrant color to your dish.

Now, gather these ingredients and get ready to enjoy a comforting bowl of Garlic Butter Noodles that will satisfy your cravings!

Step‑by‑Step Instructions for Garlic Butter Noodles Recipe

Step 1: Cook the Pasta
Bring a large pot of salted water to a rolling boil over high heat. Add your choice of dried pasta noodles, like spaghetti or penne. Cook according to the package instructions, usually around 8–10 minutes, until al dente. Once cooked, reserve ¾ cup of pasta water, then drain the noodles, allowing steam to escape so they don’t become soggy.

Step 2: Sauté the Garlic
In a large skillet, melt 3 tablespoons of unsalted butter over low heat. Once the butter is fully melted and bubbling gently, add the minced garlic. Sauté the garlic for about 1–2 minutes, stirring frequently until fragrant but not browned; this ensures the garlic remains aromatic without developing any bitterness for your garlic butter noodles.

Step 3: Combine Pasta and Sauce
Add the drained pasta noodles directly into the skillet with the sautéed garlic and butter. Toss to combine, then stir in freshly grated Parmesan cheese until melted and evenly coated. Gradually add the reserved pasta water a few tablespoons at a time, mixing until you achieve a glossy, well-coated pasta that clings beautifully to the noodles.

Step 4: Season and Serve
Taste your garlic butter noodles for seasoning, and sprinkle with salt and ground black pepper to enhance the flavors. Give everything a final toss to ensure even distribution. Serve immediately in warm bowls, with additional Parmesan on top and a sprinkle of chopped parsley if desired, adding a fresh touch that elevates your meal.

What to Serve with Garlic Butter Noodles

A comforting bowl of noodles deserves delightful companions to create a full, satisfying meal experience.

  • Crispy Garlic Bread: The crunchy exterior paired with soft, buttery insides brings a perfect balance to the creamy noodles, making every bite a heavenly mix of flavors.

  • Simple Green Salad: A fresh salad with crisp greens and a tangy vinaigrette cuts through the richness of the noodles, enhancing the overall dining experience. The lightness complements the buttery dish wonderfully.

  • Roasted Vegetables: Roasted seasonal veggies, with their caramelized edges and natural sweetness, add colorful vitality and wholesome nutrition to your spread.

  • Steamed Broccoli: Tender yet slightly crunchy, steamed broccoli offers a nutritious pop of color and a pleasant texture that pairs beautifully with the soft noodles.

  • Lemonade or Iced Tea: A refreshing glass of lemonade or iced tea—sweetened or unsweetened—provides a zesty contrast to the savory pasta, brightening the meal experience.

  • Chocolate Mousse: For dessert, rich and airy chocolate mousse is the perfect indulgence to finish off your meal, providing a sweet, decadent conclusion that keeps everyone smiling.

Make Ahead Options

These Garlic Butter Noodles are perfect for meal prep enthusiasts looking to save time on busy weeknights! You can cook the pasta and sauté the garlic in advance, storing them separately in the refrigerator for up to 3 days. To maintain the quality, ensure the pasta is well-drained and toss it with a drizzle of olive oil before refrigerating to prevent sticking. When you’re ready to enjoy, simply reheat the garlic in a skillet, add the pre-cooked pasta, and stir in the Parmesan cheese along with a splash of reserved pasta water to bring the dish back to its glossy goodness. This way, you’ll have a delightful meal on the table with minimal effort!

Expert Tips for Garlic Butter Noodles

  • Perfect Pasta Cooking: Make sure to cook pasta until al dente, as it will continue to cook slightly when mixed with the sauce. Avoid overcooking for the best texture.

  • Avoid Bitter Garlic: Sauté garlic over low heat to prevent it from browning. Browned garlic can introduce bitterness, ruining your garlic butter noodles.

  • Right Amount of Water: Gradually add reserved pasta water to achieve a creamy sauce consistency. Too much at once can make the dish overly watery.

  • Reheating Tips: When reheating leftovers, warm them gently in a skillet with a splash of water or additional butter to keep the sauce creamy and avoid drying out.

  • Garnish Ideas: Elevate your dish’s appearance and flavor by adding freshly chopped parsley. It adds a lovely color and freshness to your garlic butter noodles.

Garlic Butter Noodles Recipe Variations

Feel free to get creative with this delicious dish and customize it to suit your tastes!

  • Veggie Delight: Add sautéed spinach or broccoli for a nutritious boost. The vibrant colors and fresh flavors will make your dish pop!

  • Protein-Packed: Toss in grilled chicken or shrimp for a heartier meal. It’s an easy way to transform a simple side into a fulfilling main course.

  • Citrus Zing: Squeeze a bit of fresh lemon juice over your noodles just before serving. This adds a bright note that beautifully complements the garlic and butter.

  • Spicy Kick: Integrate crushed red pepper flakes for a hint of heat. It’s a simple adjustment that can elevate your dish to a whole new level!

  • Herb Infusion: Replace parsley with fresh basil or oregano for a different aromatic experience. Each herb brings a unique flavor journey to your plate.

  • Creamy Twist: Stir in a splash of heavy cream or a dollop of cream cheese for a luscious, creamy sauce. This makes the dish even more indulgent and rich.

  • Pasta Variety: Experiment with different shapes like farfalle or fettuccine—each will slightly alter the texture and presentation of your meal.

  • Cheese Lovers Unite: Swap out Parmesan for feta or goat cheese for a tangy flavor twist. These cheeses add a delightful creaminess that’s hard to resist.

Feel inspired? Check out our other comforting recipes like the Comfort Garlic Butter or tempt your taste buds with Honey Garlic Salmon for more ways to enjoy garlic bliss!

How to Store and Freeze Garlic Butter Noodles

Fridge: Store leftovers in an airtight container for up to 3 days. Make sure to let them cool before sealing to maintain freshness.

Freezer: You can freeze garlic butter noodles for up to 1 month. Pack them in a freezer-safe container, leaving some space for expansion.

Reheating: To reheat, gently warm in a skillet with a splash of water or additional butter. This helps to restore the creamy texture of the sauce, ensuring your garlic butter noodles taste delightful.

Thawing: When freezing, remember to thaw your garlic butter noodles overnight in the fridge before reheating for best results.

Garlic Butter Noodles Recipe FAQs

What type of pasta works best for garlic butter noodles?
You can use any shape of dried pasta, such as spaghetti, penne, or even fettuccine. I often recommend spaghetti for its texture, but feel free to substitute any pasta you have on hand without compromising the flavor!

How should I store leftover garlic butter noodles?
Store any leftovers in an airtight container in the fridge for up to 3 days. Make sure to let them cool down before sealing to keep them fresh. When you’re ready to enjoy them again, just gently reheat with a splash of water or extra butter to maintain the creamy texture of the sauce.

Can I freeze garlic butter noodles?
Absolutely! You can freeze garlic butter noodles for up to 1 month. Just pack them in a freezer-safe container, leaving a little space for expansion. To thaw, simply place them in the fridge overnight, and when you’re ready to reheat, warm them gently in a skillet, adding a splash of water or butter for the best results.

How do I avoid garlic becoming bitter when making this dish?
To prevent the garlic from browning and becoming bitter, sauté it over low heat and keep a close eye on it. Stir frequently to ensure it turns fragrant without darkening in color. This keeps your garlic butter sauce deliciously aromatic and pleasant!

Are garlic butter noodles safe for kids and those with dietary restrictions?
Yes, this recipe is vegetarian and usually safe for children. However, if you’re concerned about allergies, especially with garlic or dairy, consider using garlic powder as a milder alternative and vegan butter plus nutritional yeast instead of Parmesan for a dairy-free version.

How can I make this garlic butter noodles recipe more nutritious?
You can easily enhance this dish by adding sautéed vegetables like spinach, broccoli, or bell peppers to boost the nutrition. If you want more protein, consider topping it with grilled chicken or shrimp, which also makes it heartier!

Garlic Butter Noodles Recipe

Garlic Butter Noodles Recipe That You'll Crave Every Night

This Garlic Butter Noodles recipe combines only four ingredients for a quick and flavorful meal, making it perfect for busy nights.
Prep Time 10 minutes
Cook Time 20 minutes
Total Time 30 minutes
Servings: 4 servings
Course: Pasta
Cuisine: Italian
Calories: 400

Ingredients
  

For the Pasta
  • 8 oz Dried Pasta Noodles Any shape, like spaghetti or penne.
For the Sauce
  • 3 tbsp Butter Unsalted preferred.
  • 3 cloves Garlic Cloves Minced, or use garlic paste (1-2 tsp).
  • 1/2 cup Grated Parmesan Cheese Freshly grated is best.
  • to taste Salt Essential for seasoning.
  • to taste Ground Black Pepper Essential for seasoning.
For Garnish
  • 2 tbsp Chopped Parsley Optional, for garnish.

Equipment

  • Large pot
  • Large skillet

Method
 

Step-by-Step Instructions
  1. Bring a large pot of salted water to a rolling boil over high heat. Add your choice of dried pasta noodles and cook according to the package instructions, usually around 8–10 minutes, until al dente. Reserve ¾ cup of pasta water, then drain the noodles.
  2. In a large skillet, melt 3 tablespoons of unsalted butter over low heat. Add the minced garlic and sauté for 1–2 minutes, stirring frequently until fragrant.
  3. Add the drained pasta noodles directly into the skillet with the sautéed garlic and butter. Toss to combine, then stir in freshly grated Parmesan cheese until melted and evenly coated.
  4. Gradually add the reserved pasta water a few tablespoons at a time, mixing until you achieve a glossy, well-coated pasta.
  5. Season with salt and ground black pepper, toss to combine, and serve immediately in warm bowls, garnished with additional Parmesan and chopped parsley if desired.

Nutrition

Serving: 1servingCalories: 400kcalCarbohydrates: 45gProtein: 12gFat: 20gSaturated Fat: 12gPolyunsaturated Fat: 1gMonounsaturated Fat: 6gCholesterol: 40mgSodium: 500mgPotassium: 300mgFiber: 2gSugar: 1gVitamin A: 500IUVitamin C: 2mgCalcium: 200mgIron: 2mg

Notes

For best results, ensure to cook pasta al dente and avoid any bitterness by sautéing garlic gently.

Tried this recipe?

Let us know how it was!

Stay Connected

Get recipes via email: