Cheesy Hashbrown Breakfast Casserole for Stress-Free Mornings

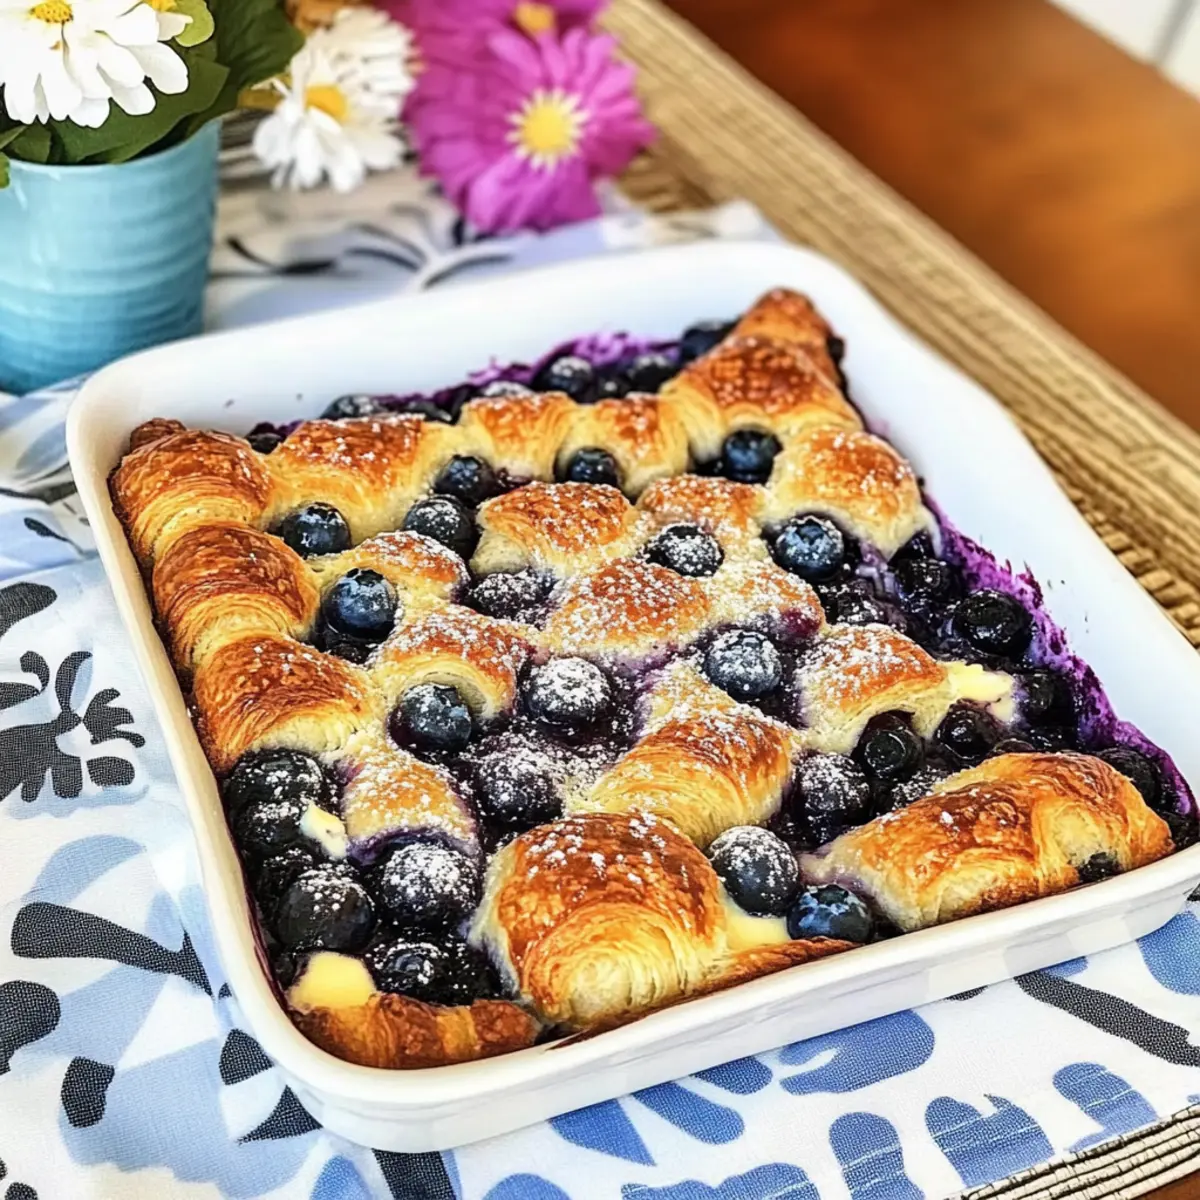
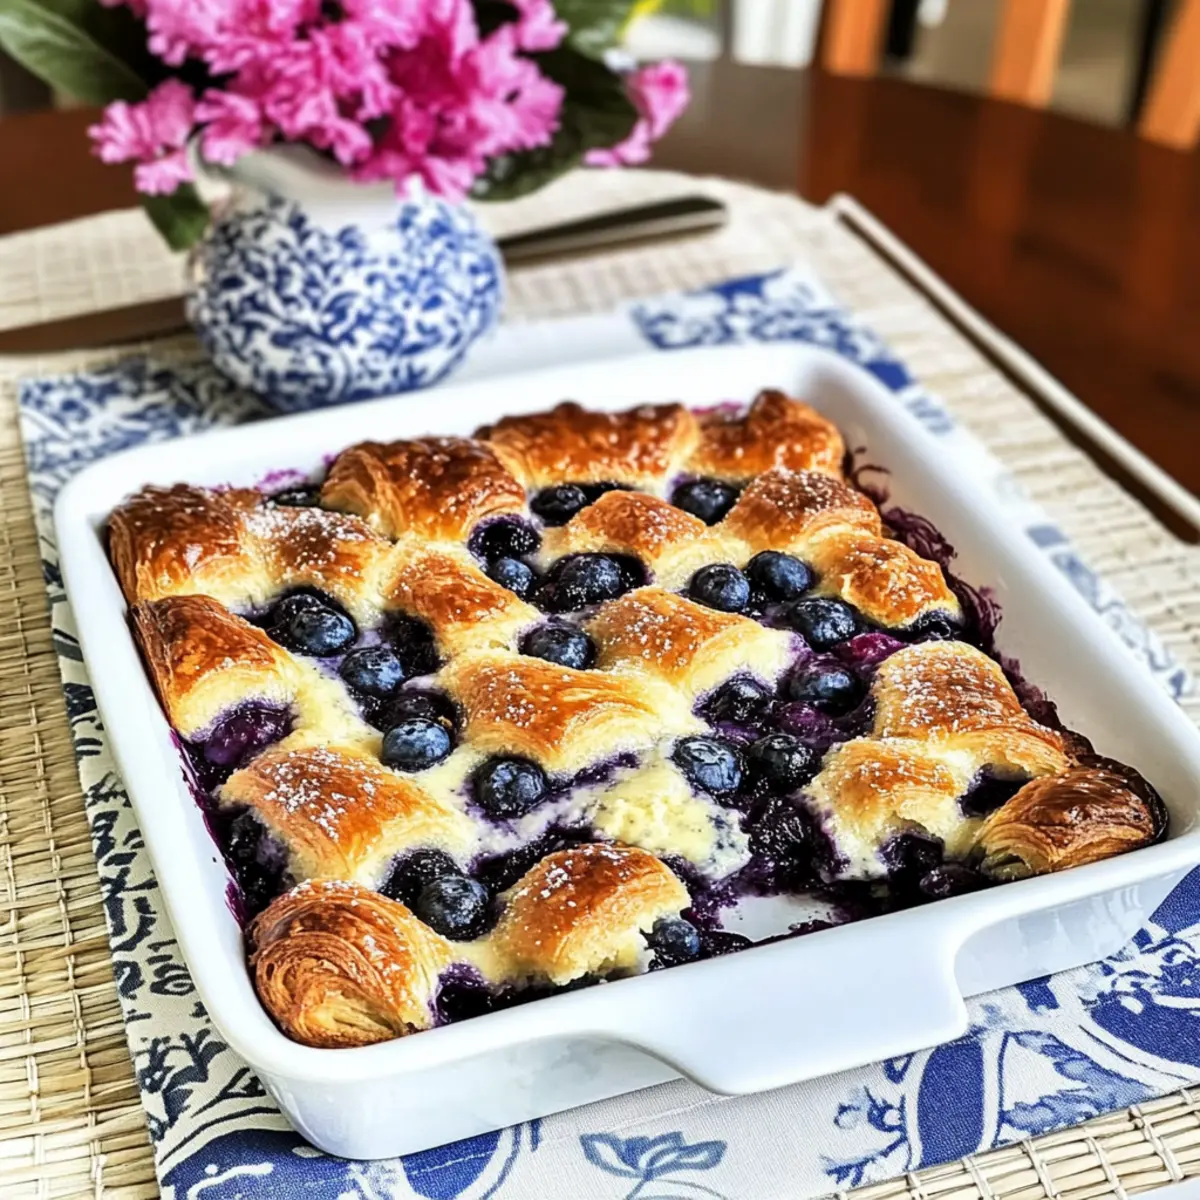
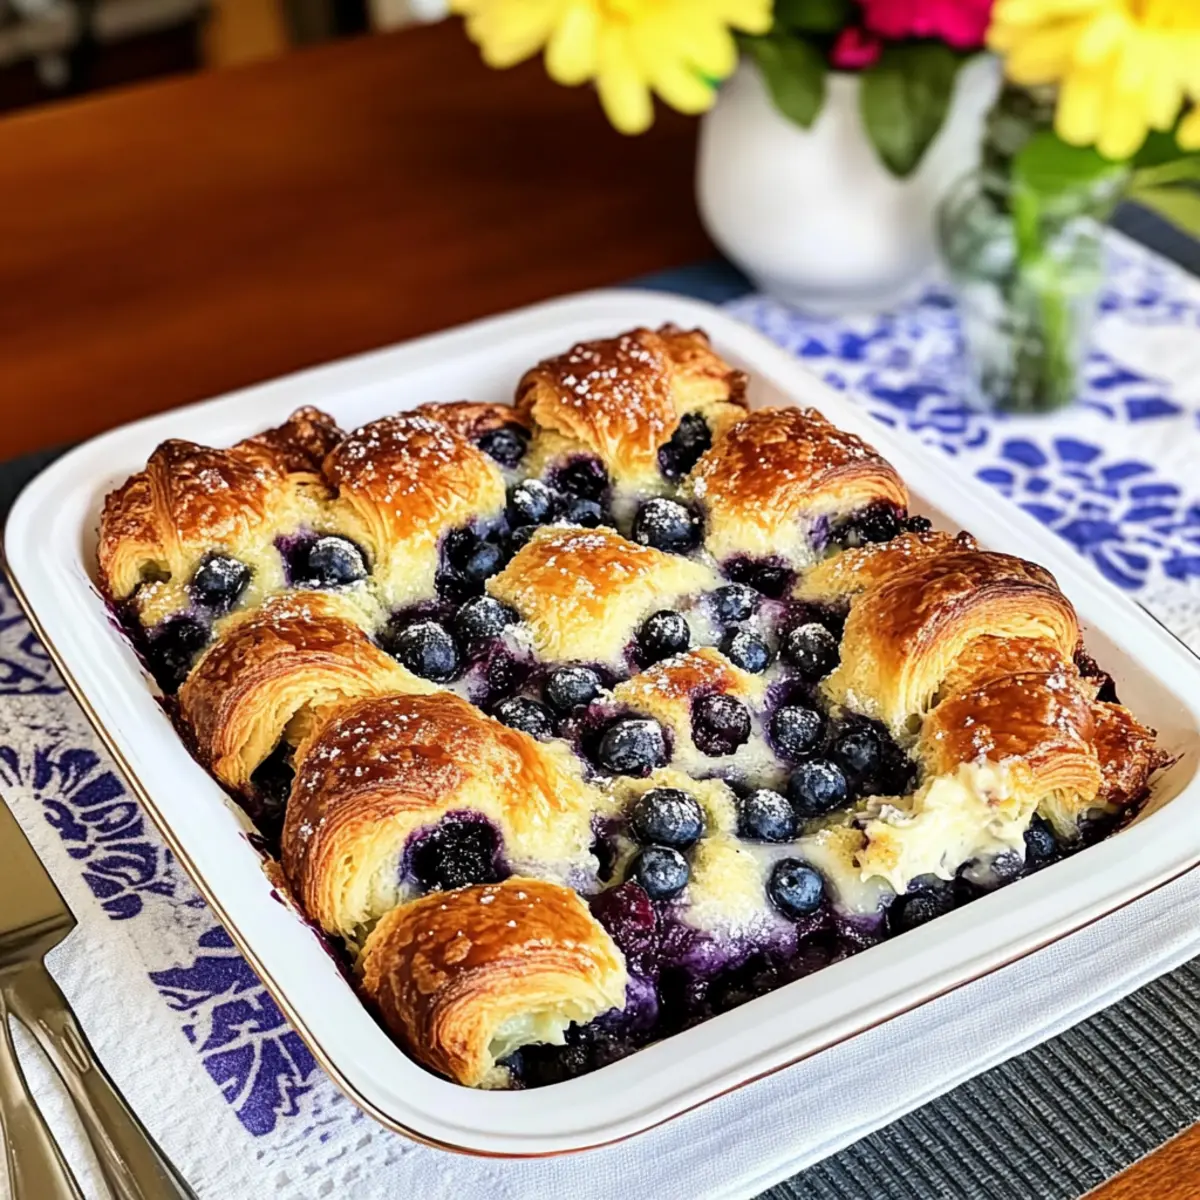
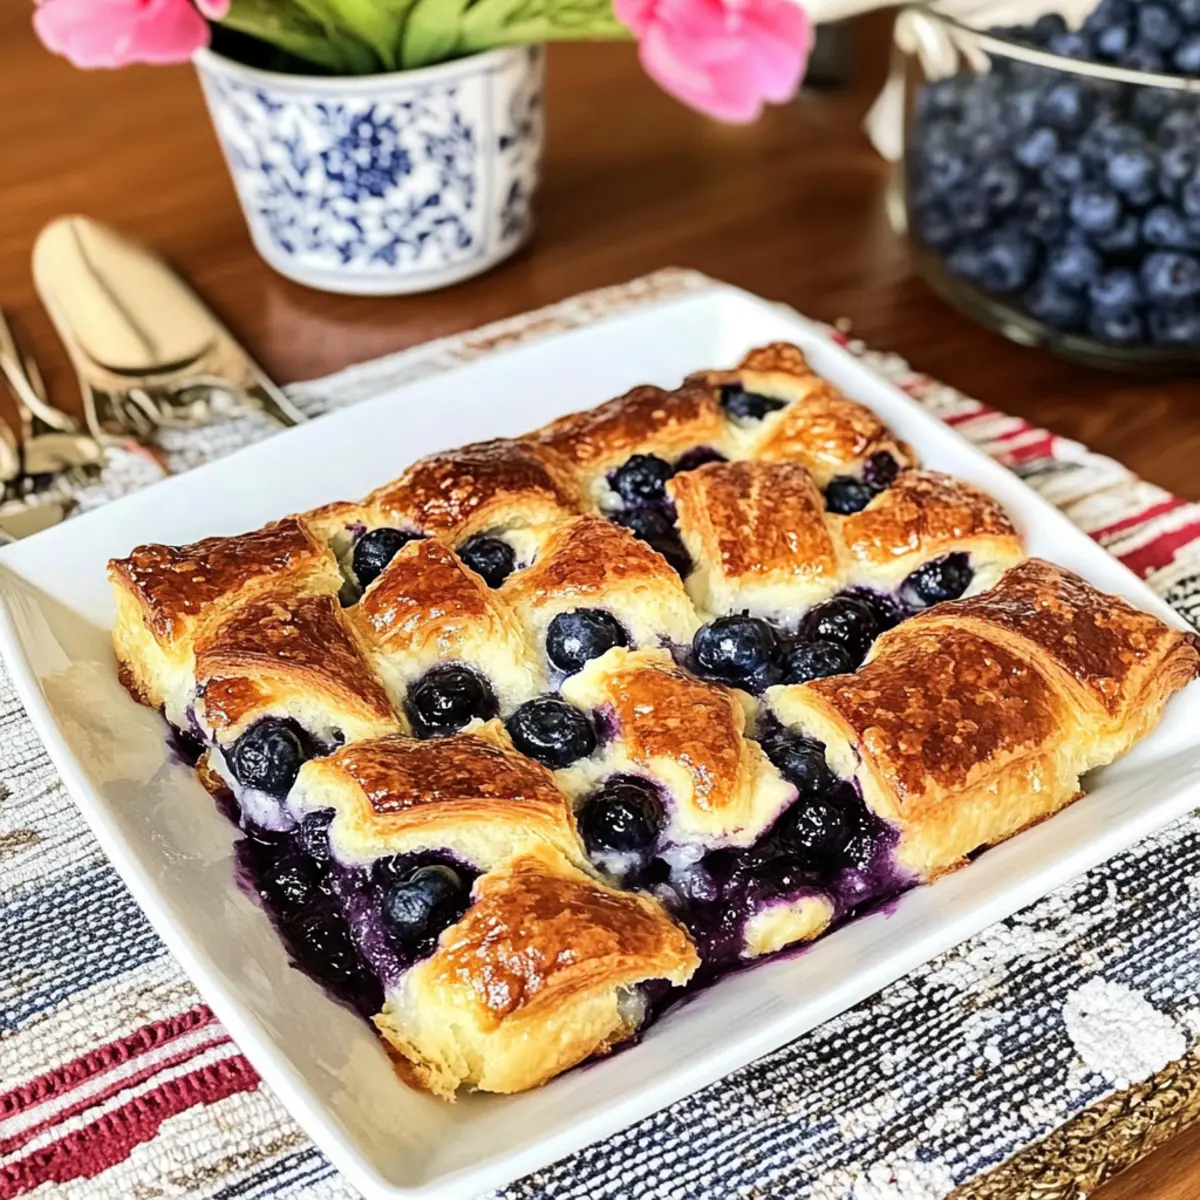
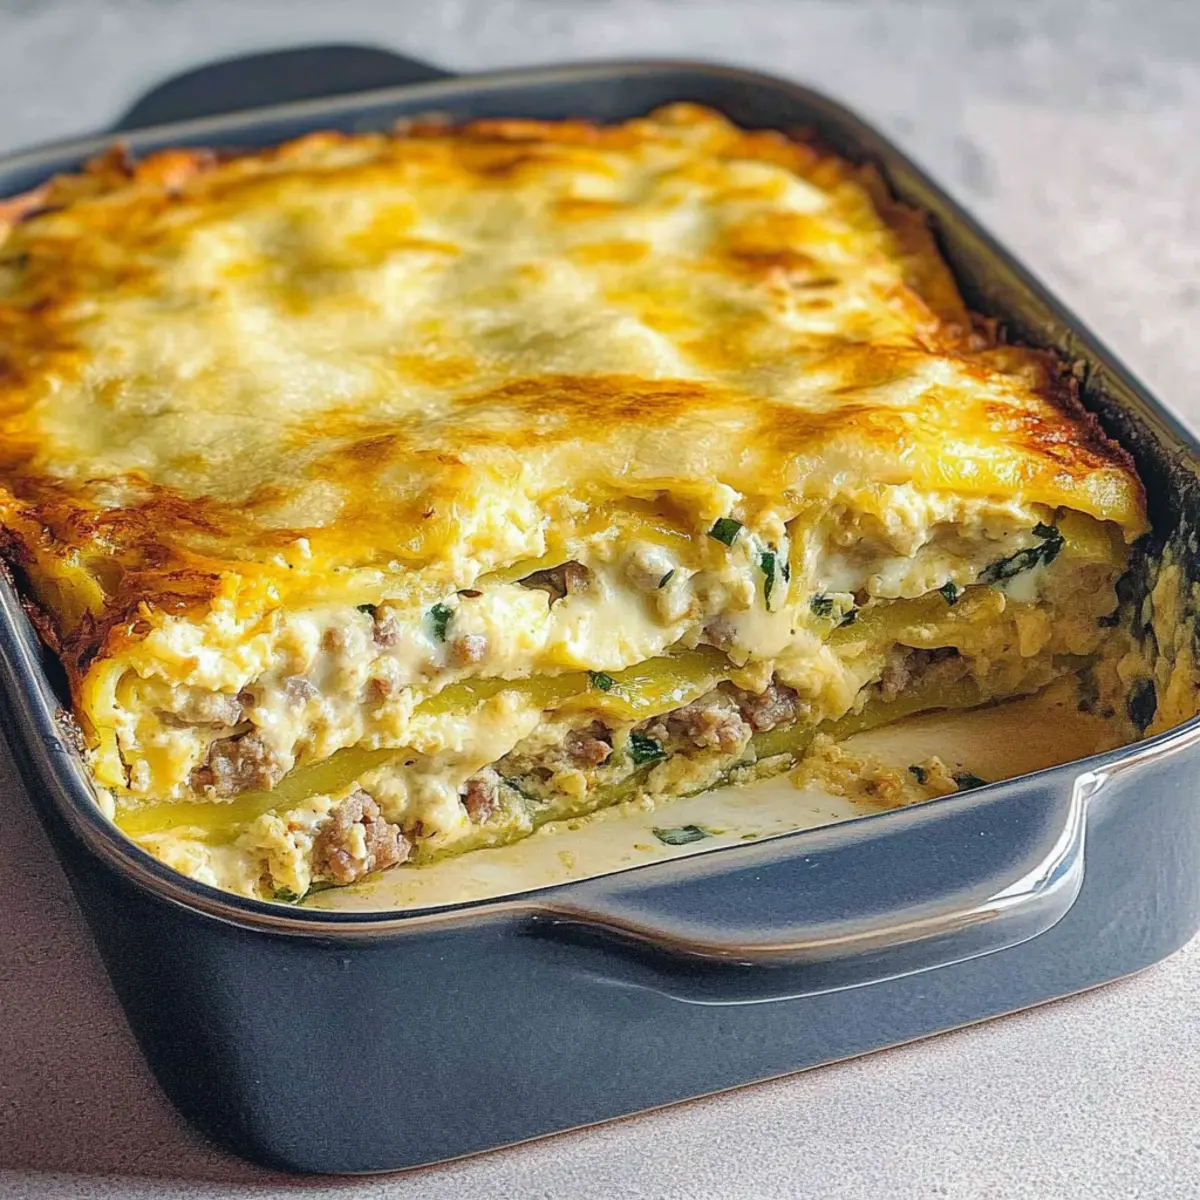
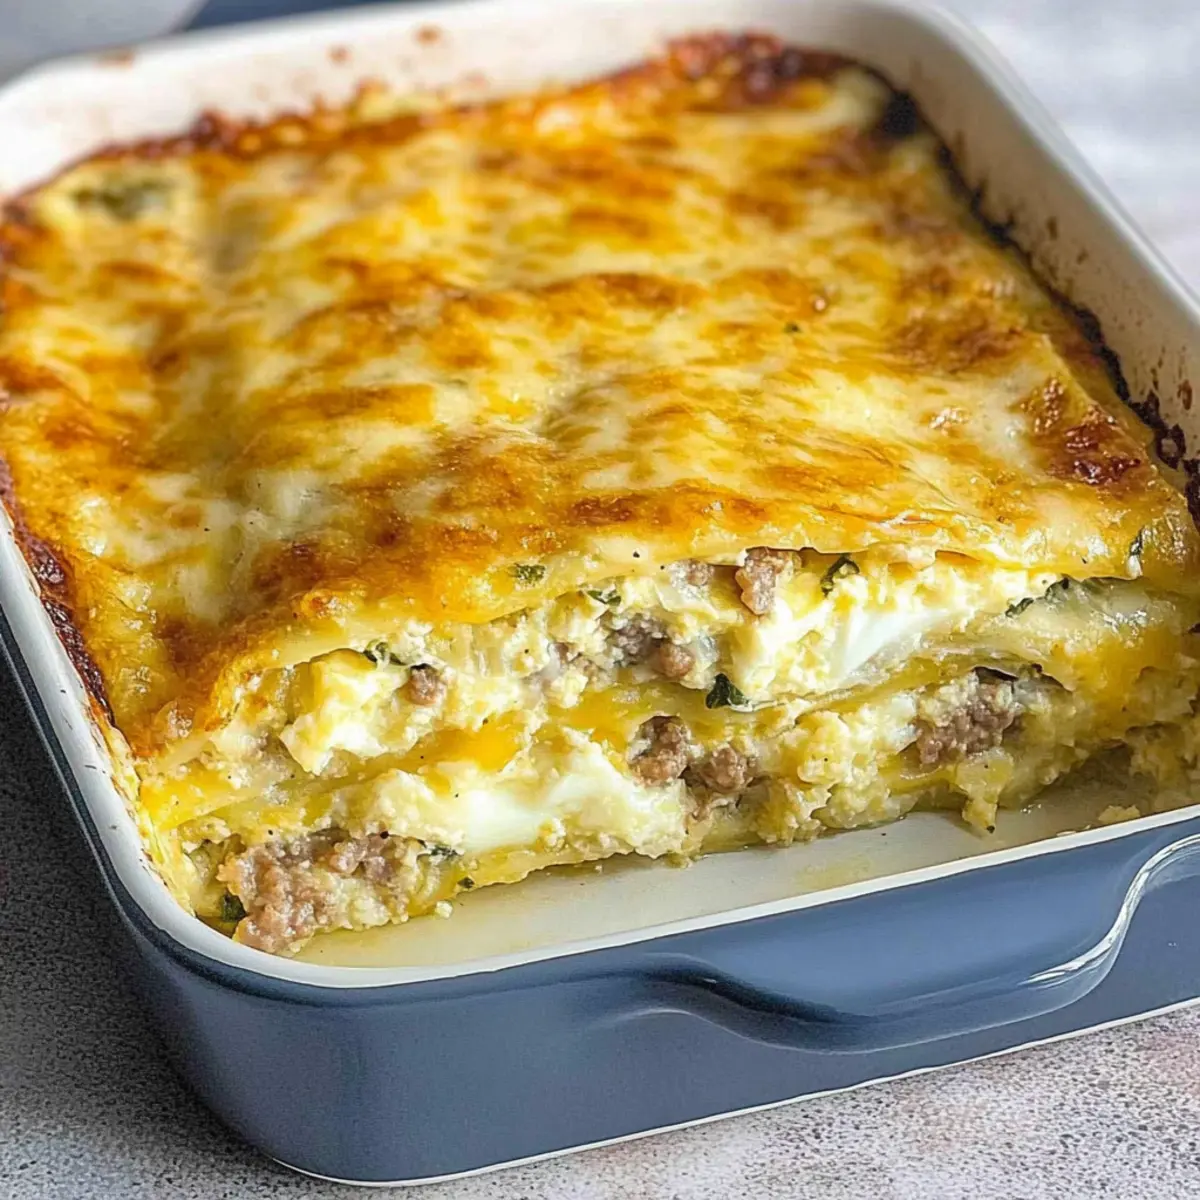
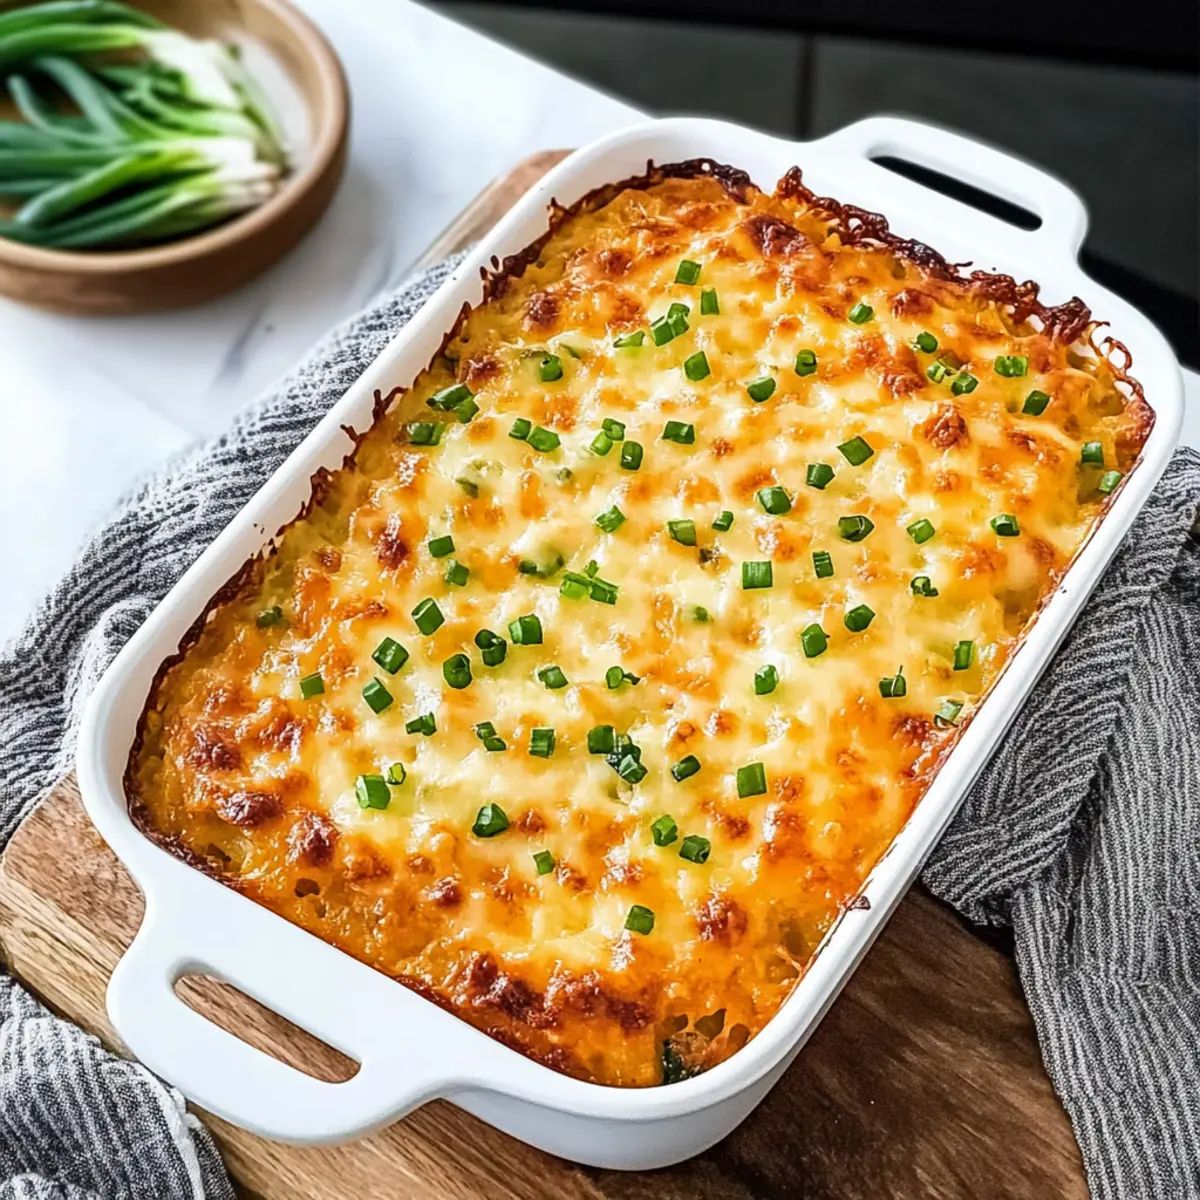
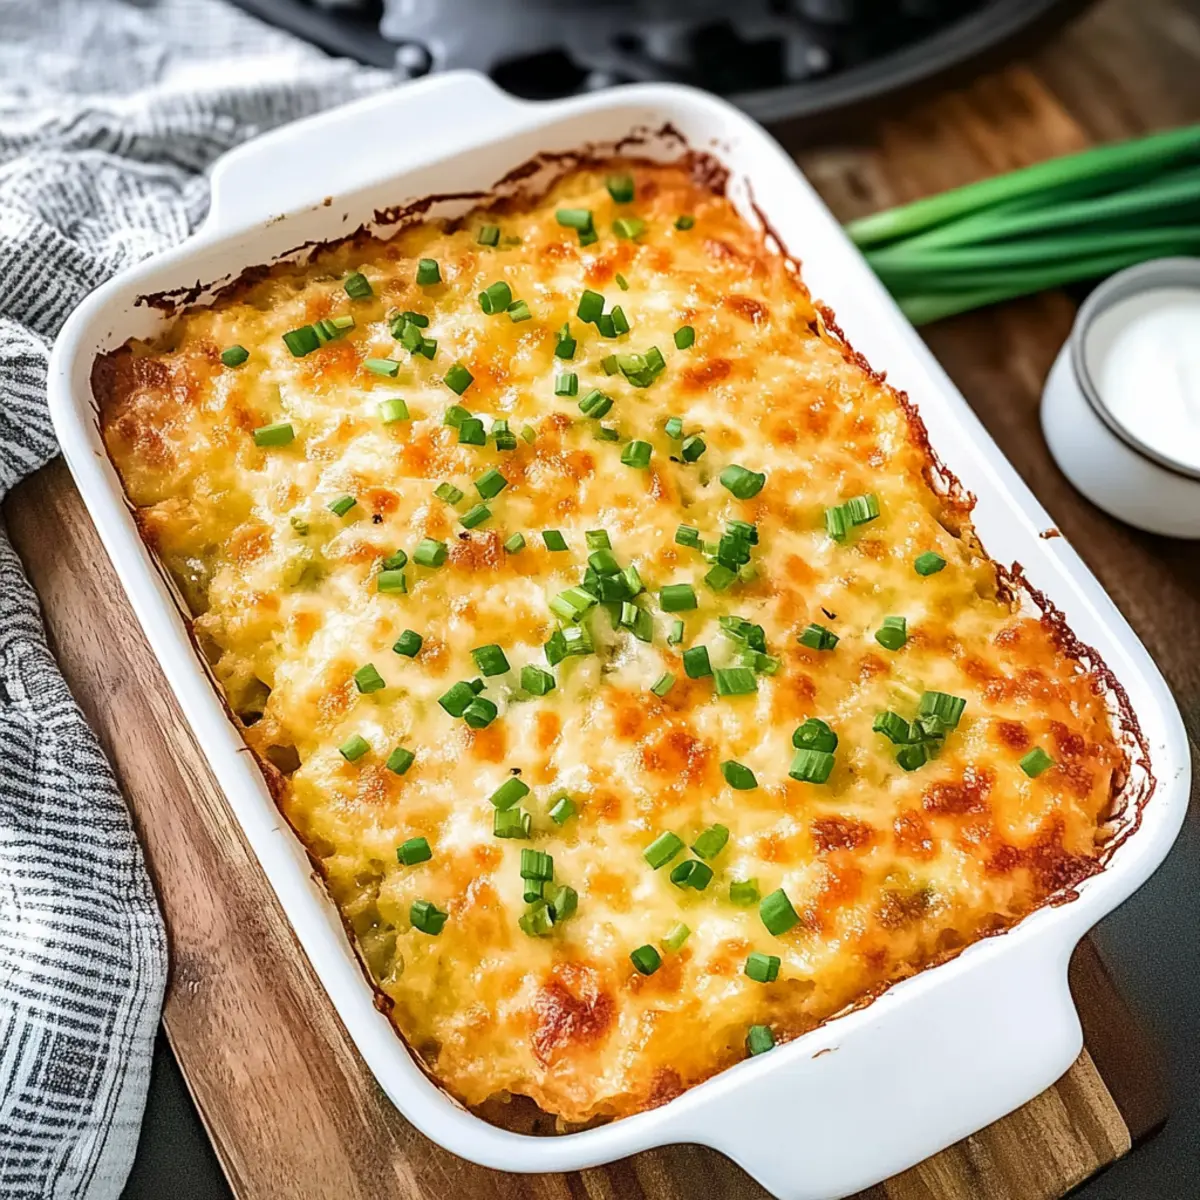
As I stood in my kitchen with a lingering aroma of sizzling bacon and melting cheese, I realized that an Easy Cheesy Hash Brown Breakfast Casserole is the kind of dish that can turn any morning into a celebration. This bright, hearty casserole combines crispy hash browns with creamy eggs and savory meat, making it perfect for brunches, especially when hosting friends and family. One of the greatest perks? Not only is it a stress-free, make-ahead option, but it can also feed a crowd with minimal effort, allowing you to enjoy more time at the table. Imagine serving up slices of this comforting casserole, its golden crust beckoning everyone to dig in. Curious about how to create a dish that guarantees smiles all around? Let’s dive into the recipe!

Why Choose This Cheesy Casserole?

Simplicity Made Delicious: Preparing this Easy Cheesy Hash Brown Breakfast Casserole is a breeze, requiring just a handful of ingredients and minimal kitchen skills.

Crowd-Pleaser: With its cheesy goodness and hearty flavors, it’s a surefire hit at any gathering—imagine the smiles as you serve it!

Versatile Ingredients: Customize it with your favorite vegetables or swap the meat for a veggie option, making this dish perfect for any dietary need.

Make-Ahead Wonder: Prepare it the night before to save time in the morning, allowing you to relax and enjoy the company of your guests.

Comfort Food Classic: This casserole captures the essence of home-cooked comfort, reminiscent of festive family gatherings. Pair it with a fresh fruit salad or some sweet cinnamon buns for a brunch that dazzles! Want a change of pace? Try out the Cheesy Low Casserole for another hearty option!

Cheesy Hash Brown Breakfast Casserole Ingredients

For the Casserole
Shredded Potatoes – Provides the base structure and heartiness; feel free to use frozen for convenience.
Melted Butter – Adds richness and helps to crisp the bottom layer, ensuring a delightful texture.
Large Eggs – Acts as the binding agent for the casserole, providing essential moisture and structure.
Whole Milk – Enhances creaminess and flavor; can be swapped for half-and-half if you prefer a richer dish.
Green Onions – Provides a fresh flavor and slight crunch; consider using more for a vibrant garnish.
Small Onion – Adds depth to the overall flavor profile; can be replaced with a shallot for a milder touch.
Green and Red Peppers – Introduces color and sweetness; don’t hesitate to substitute with any favored vegetables like spinach or mushrooms.
Salt and Pepper – Essential for seasoning; remember to adjust according to your taste.
Chopped Ham/Bacon/Sausage – Contributes protein and smokiness; ensure it’s thoroughly cooked before mixing in.
Shredded Cheese – Adds creaminess and savory goodness; opt for any melty cheese you love, such as cheddar or mozzarella.

Optional Garnish
Fresh Herbs – A sprinkle of parsley or cilantro adds a burst of freshness; perfect for a lively presentation.
Hot Sauce – Drizzle a little for those who enjoy a spicy kick with their cheesy hash brown breakfast casserole!

Step‑by‑Step Instructions for Cheesy Hashbrown Breakfast Casserole

Step 1: Preheat the Oven
Begin by preheating your oven to 375°F (190°C). This is a crucial step to ensure that your Cheesy Hashbrown Breakfast Casserole bakes evenly and achieves that delightful golden-brown crust. While the oven heats up, gather and prepare your ingredients to streamline the process.

Step 2: Cook the Meat
In a skillet over medium heat, cook the chopped bacon, sausage, or ham until browned and crispy, about 5-7 minutes. As the meat cooks, occasionally stir to avoid sticking. Once done, use a slotted spoon to transfer it to a paper towel-lined plate, allowing excess grease to drain. This savory component will enhance your casserole’s flavor.

Step 3: Prepare the Baking Dish
Take a 9 x 13-inch baking dish and grease it generously with melted butter, ensuring the bottom is well-coated for a non-stick surface. This step is vital for achieving a crispy bottom layer in your casserole. Spread it evenly, then set the dish aside while you layer the hash browns.

Step 4: Layer the Hash Browns
Evenly distribute the shredded potatoes at the bottom of your prepared baking dish, pressing down gently to form a solid base. This hearty layer serves as the foundation for your Cheesy Hashbrown Breakfast Casserole. Ensure that the potatoes cover the entire bottom to create a deliciously crispy texture as they bake.

Step 5: Mix the Egg Mixture
In a large mixing bowl, whisk together the large eggs and whole milk until smooth and well combined. Stir in the chopped green onions, diced peppers, cooked meat, salt, and pepper, blending all the ingredients thoroughly. This egg mixture will bind the casserole and create a creamy texture, enriching every bite.

Step 6: Pour the Egg Mixture
Carefully pour the egg mixture over the layered hash browns, ensuring even coverage throughout. Gently shake the baking dish to help the mixture settle, ensuring that every potato is enveloped in eggy goodness. This step fills the casserole with flavor and moisture, making it irresistibly delicious.

Step 7: Add the Cheese
Generously sprinkle shredded cheese on top of the casserole for that gooey, melty goodness we all love. You can mix different cheeses if you’d like for added flavor. As the Cheesy Hashbrown Breakfast Casserole bakes, this layer will melt into a delightful topping that perfectly complements the savory layers beneath.

Step 8: Bake the Casserole
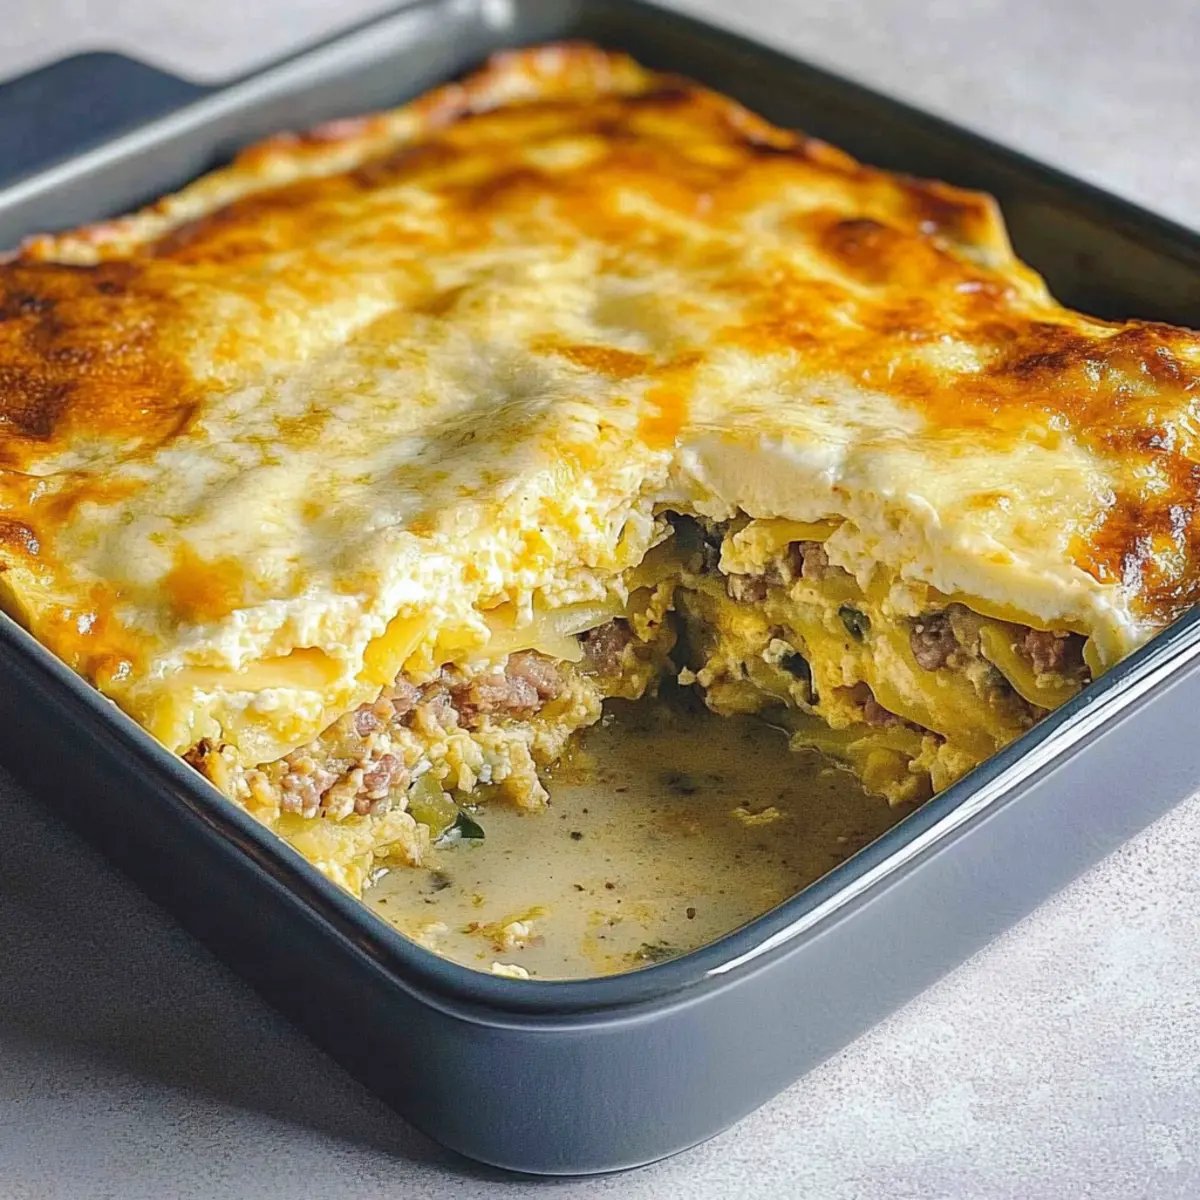
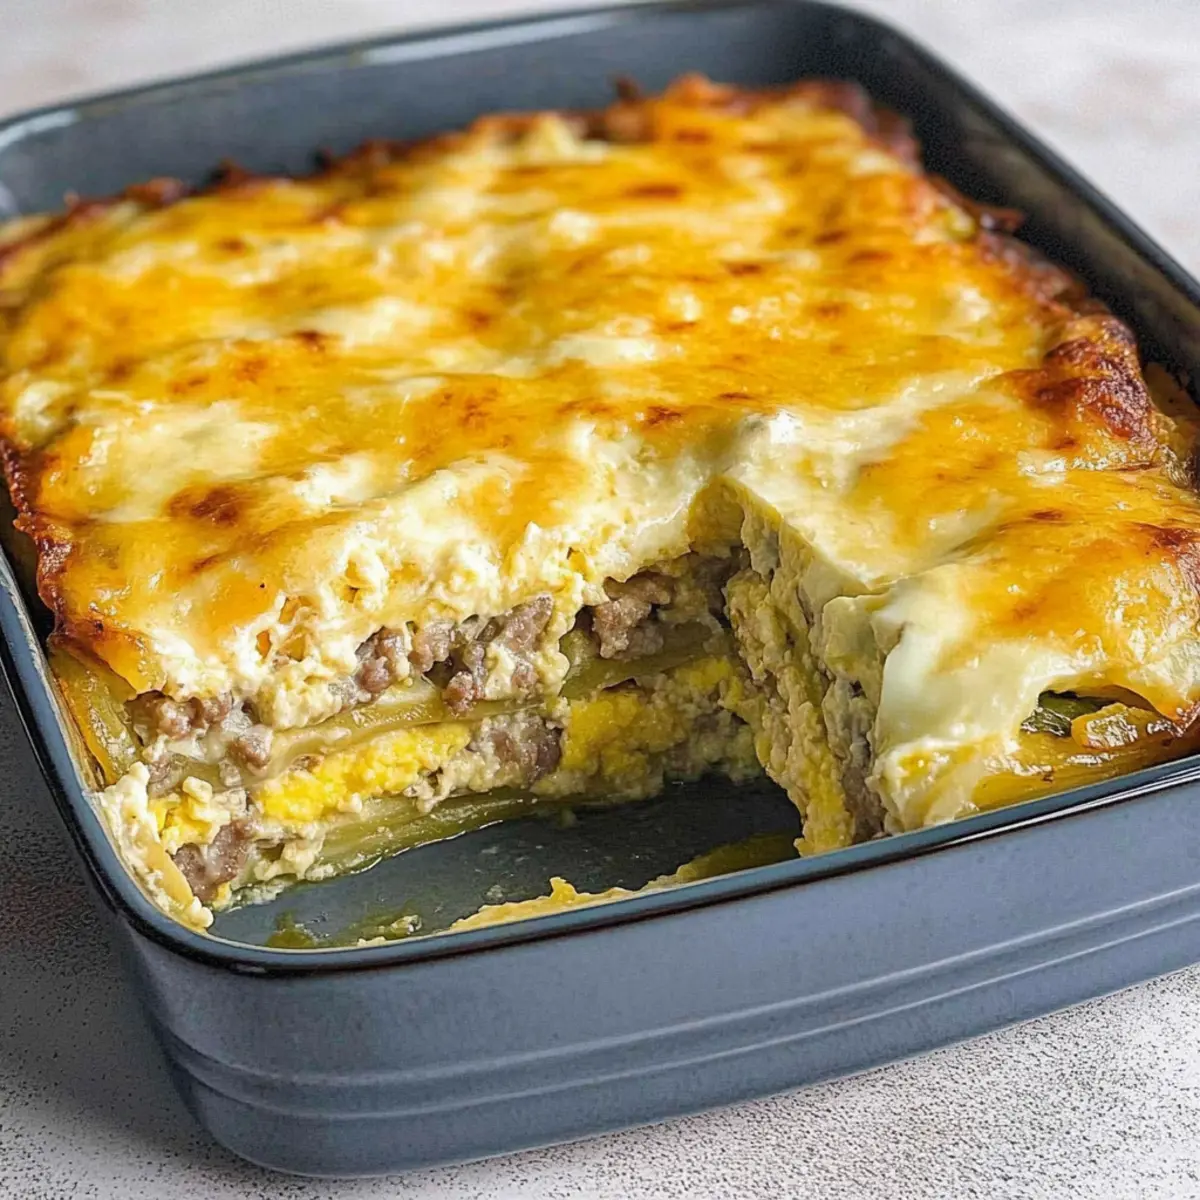
Place the baking dish in the preheated oven and bake for 45-60 minutes. Keep an eye on it; the casserole is ready when the center is fully set and no longer jiggles. Look for a golden, bubbly topping that promises an irresistible crunch and cheesy finish.

Step 9: Let It Rest
Once baked to perfection, remove the casserole from the oven and allow it to rest for about 10 minutes. This resting period is essential as it lets the casserole set up, making it easier to slice into squares. As it cools, the flavors meld together while you prepare for serving.

Step 10: Serve and Enjoy
After resting, slice your Cheesy Hashbrown Breakfast Casserole into squares, ready to be served. This dish pairs wonderfully with fresh fruit or sweet cinnamon buns, making it a fantastic option for any brunch. Enjoy the heartwarming smiles as you share this delightful homemade meal with family and friends!

Expert Tips for Cheesy Hashbrown Breakfast Casserole

Prep Ahead: Prepare the dish a night before without cheese. Just add the cheese before baking to save time in the morning.

Vegetable Boost: For a nutritious twist, incorporate 1/2 cup of diced mushrooms, broccoli, or spinach to increase your veggie intake in this cheesy hashbrown breakfast casserole.

Freezing Made Easy: This casserole freezes beautifully! Wrap tightly and freeze for up to 2 months. Thaw overnight in the fridge before baking.

Cook Your Meat: Always ensure that meat is thoroughly cooked before mixing it into the casserole to enhance flavor and ensure food safety.

Customize It: Feel free to swap ingredients based on your preferences or dietary needs, such as using sweet potatoes or crumbled tofu instead of hash browns.

Make Ahead Options

These Easy Cheesy Hash Brown Breakfast Casseroles are perfect for busy mornings! You can prepare the casserole (without the cheese) up to 24 hours in advance by following the layering instructions and covering it tightly with plastic wrap. As you store it in the refrigerator, this will keep the ingredients fresh and flavorful for when you’re ready to bake. On the day of serving, simply sprinkle the shredded cheese on top before putting it in the oven. By taking these steps, you’ll have a delicious breakfast ready to pop in the oven, allowing you to enjoy more time with loved ones while serving up smiles all around.

What to Serve with Easy Cheesy Hash Brown Breakfast Casserole

There’s something magical about creating a complete meal that not only satisfies the taste buds but also warms the heart.

  • Fresh Fruit Salad: A vibrant medley of seasonal fruits adds a refreshing touch, balancing the richness of the casserole beautifully.
  • Sweet Cinnamon Buns: These soft, gooey treats offer a delightful sweetness that perfectly complements the savory casserole, making every bite a treat!
  • Honey-Glazed Carrots: Their natural sweetness and tender bite provide a lovely contrast, adding a pop of color and nutrition to your brunch table.
  • Crispy Bacon Strips: For those who crave an extra salty crunch, crispy bacon pairs perfectly, enhancing the savory aspects of the casserole.
  • Spinach Salad: Tossed with a light vinaigrette, the peppery greens offer a fresh and tangy element, balancing the casserole’s richness.
  • Hot Coffee or Mimosas: Keep the energy up with a pot of rich coffee or serve mimosas for a bubbly touch that brightens the entire brunch experience.
  • Maple Syrup Drizzle: Offer a side of maple syrup for those who enjoy a sweet kick with their savory bites, adding layers of flavor to this filling dish.
  • Yogurt Parfaits: Layer creamy yogurt with granola and berries for a refreshing counterpoint, ensuring everyone finds something they love on the table.
  • Savory Scones: These flaky, herb-infused scones provide a delightful texture contrast and pair wonderfully with the casseroles’ cheesy goodness.
  • Chilled Iced Tea: A refreshing drink option, iced tea offers a cooling complement to the warm casserole, making every bite feel more vibrant.

How to Store and Freeze Cheesy Hashbrown Breakfast Casserole

Fridge: Store leftovers in an airtight container for up to 3-4 days. Reheat individual portions in the microwave until warmed through.

Freezer: This cheesy hashbrown breakfast casserole freezes well! Wrap tightly in plastic wrap or aluminum foil and freeze for up to 2 months.

Thawing: To prepare, thaw overnight in the fridge. Bake at 375°F (190°C) until heated through, ensuring it’s cooked thoroughly before serving.

Reheating: For best results, reheat in the oven instead of the microwave to maintain its delightful texture and cheesy crust.

Cheesy Hashbrown Breakfast Casserole Variations

Feel free to unleash your culinary creativity and make this casserole your own with these delightful variations!

  • Vegetarian Substitute: Replace meat with crumbled tofu or extra vegetables for a hearty vegetarian version. It’s a fantastic way to maintain a satisfying texture and flavor!

  • Different Cheese: Try a blend of different cheeses like feta for a tangy twist or even pepper jack for a little heat. The choice of cheese can transform the flavor profile entirely!

  • Sweet Potato Swap: Use sweet potatoes in place of traditional hash browns for added sweetness and a unique taste. This twist can also elevate the nutritional content of the dish.

  • Spicy Kick: Add diced jalapeños or a sprinkle of cayenne pepper to the egg mixture for a fiery update. This variation brings an invigorating zing to each square!

  • Hidden Veggies: Add up to 1 cup of finely chopped vegetables like spinach, mushrooms, or zucchini for extra nutrition and a delightful crunch. It’s an excellent way to sneak in those greens!

  • Herb Infusion: Mixing in fresh herbs like dill or parsley can brighten the flavor. These fresh additions offer a lovely aroma while elevating the overall taste experience.

  • Gluten-Free Option: Opt for gluten-free hash browns to create a dish that accommodates gluten sensitivities. It’s the same delicious comfort food without the gluten!

  • Cheesy Baked Goodness: Serve with a side of Cheesy Garlic Chicken for a double dose of cheesy satisfaction at your brunch gathering!

These variations make your casserole versatile and exciting, ensuring there’s something for everyone at the table!

Cheesy Hashbrown Breakfast Casserole Recipe FAQs

What kind of shredded potatoes should I use?
Absolutely! You can use either frozen or freshly shredded potatoes for this recipe. Frozen shredded potatoes are convenient and save prep time, while freshly shredded potatoes may offer a slightly better texture.

How do I store leftovers of the casserole?
Store any leftovers in an airtight container in the refrigerator for up to 3-4 days. Reheat individual portions in the microwave until warmed through, or for best results, place them in the oven at 350°F (175°C) until heated all the way through.

Can I freeze the Cheesy Hashbrown Breakfast Casserole?
Very much so! Wrap the assembled casserole tightly in plastic wrap or aluminum foil and freeze it for up to 2 months. When you’re ready to bake, thaw it overnight in the fridge. Bake at 375°F (190°C) until heated through and enjoy the cheesy goodness!

What if I want to add more vegetables?
I often recommend incorporating extra diced vegetables like mushrooms, broccoli, or spinach! You can easily mix in 1/2 cup of any of these for added flavor and nutrition. Just sauté them lightly before adding them to the egg mixture to help them release moisture and enhance cookware flavors.

Is this recipe pet-friendly?
It’s important to be cautious! This casserole is not suited for pets due to ingredients like onions and garlic, which can be harmful to dogs and cats. Always check with your veterinarian before sharing human food with your furry friends.

What if my casserole doesn’t set in the middle?
No problem! If you encounter a jiggle in the center, simply extend the baking time by 5-10 minutes. Make sure the temperature is accurate; you want the center solid and no longer wobbly. For future reference, an oven thermometer can be a helpful tool to ensure your oven is baking correctly!

Cheesy Hashbrown Breakfast Casserole

Cheesy Hashbrown Breakfast Casserole for Stress-Free Mornings

This Cheesy Hashbrown Breakfast Casserole combines crispy hash browns, creamy eggs, and savory meat for a delicious stress-free breakfast option.
Prep Time 15 minutes
Cook Time 1 hour
Resting Time 10 minutes
Total Time 1 hour 25 minutes
Servings: 8 slices
Course: Breakfast
Cuisine: American
Calories: 350

Ingredients
  

For the Casserole
  • 30 oz Shredded Potatoes Feel free to use frozen for convenience.
  • 1/2 cup Melted Butter Helps to crisp the bottom layer.
  • 8 Large Eggs Acts as the binding agent.
  • 1 cup Whole Milk Can be swapped for half-and-half for a richer dish.
  • 1/4 cup Green Onions Provides a fresh flavor and slight crunch.
  • 1 small Onion Can be replaced with shallot for a milder touch.
  • 1 cup Green and Red Peppers Can substitute with favored vegetables.
  • 1 tsp Salt Essential for seasoning.
  • 1 tsp Pepper Essential for seasoning.
  • 1 cup Chopped Ham/Bacon/Sausage Ensure it’s thoroughly cooked.
  • 2 cup Shredded Cheese Opt for any melty cheese you love.
Optional Garnish
  • 1/4 cup Fresh Herbs A sprinkle of parsley or cilantro.
  • to taste Hot Sauce For those who enjoy a spicy kick.

Equipment

  • Oven
  • Skillet
  • Mixing Bowl
  • 9 x 13-inch Baking Dish

Method
 

Step-by-Step Instructions
  1. Preheat your oven to 375°F (190°C).
  2. In a skillet, cook the chopped bacon, sausage, or ham until browned and crispy, about 5-7 minutes.
  3. Grease a 9 x 13-inch baking dish generously with melted butter.
  4. Evenly distribute the shredded potatoes at the bottom of your prepared baking dish.
  5. In a large mixing bowl, whisk together the eggs and whole milk. Stir in the green onions, peppers, cooked meat, salt, and pepper.
  6. Pour the egg mixture over the layered hash browns.
  7. Sprinkle shredded cheese on top of the casserole.
  8. Bake for 45-60 minutes until the center is fully set and the top is golden.
  9. Remove from the oven and let it rest for about 10 minutes.
  10. Slice into squares and serve.

Nutrition

Serving: 1sliceCalories: 350kcalCarbohydrates: 30gProtein: 20gFat: 20gSaturated Fat: 10gCholesterol: 180mgSodium: 800mgPotassium: 600mgFiber: 2gSugar: 2gVitamin A: 500IUVitamin C: 30mgCalcium: 250mgIron: 2mg

Notes

Prepare the dish a night before without cheese, just add cheese before baking. This casserole can be customized with vegetables and can be frozen for up to 2 months.

Tried this recipe?

Let us know how it was!

Delicious Blueberry Croissant Breakfast Casserole to Impress

The first bite of my Easy Blueberry Croissant Bake transports me straight to a cozy café on a sun-drenched morning. The harmony of buttery, flaky croissants enveloped in sweet, juicy blueberries creates an irresistible dish that’s as much about comfort as it is about flavor. This fantastic breakfast casserole not only brightens up your brunch table but also impresses without eating up your valuable time in the kitchen. With just a few simple ingredients, you’ll whip up a creamy, crowd-pleasing delight that’s perfect for both lazy Sundays and festive gatherings alike. Ready to elevate your morning routine with this deliciously easy recipe? Let’s dive into the bliss!

Why is this Casserole a Must-Try?

Irresistible Combination: The flaky croissant paired with juicy blueberries creates a heavenly flavor explosion that your taste buds will adore.
Easy to Prepare: No complicated steps here! This dish is simple enough for any home cook to master, making it perfect for lazy morning brunches or gatherings with friends.
Serve it Up Stylishly: Add a dusting of powdered sugar or a drizzle of maple syrup for that café-worthy presentation that will wow your guests.
Make It Your Own: Whether you want to swap blueberries for raspberries or add nuts for crunch, the versatility of this recipe means you can tailor it to your taste. Use it as a delightful brunch centerpiece or pair it with your favorite sides, like a fresh fruit platter or a cup of coffee.
Crowd-Pleaser: Everyone at the table will be reaching for seconds! It’s the ultimate comfort food that brings people together, perfect for family gatherings or brunch parties.
Make-Ahead Convenience: Prepare it the night before to simplify your morning routine, just like I recommend for my Blueberry French Toast. Enjoy the heavenly aroma and satisfaction of serving up this decadent dish to grateful friends and family!

Blueberry Croissant Breakfast Casserole Ingredients

• Delight in the simplicity of this delicious recipe!

For the Casserole

  • Croissants – Use stale croissants for better absorption of the cream mixture.
  • Blueberries – Fresh or frozen blueberries will add that juicy burst of flavor.
  • Cream Cheese – Soften it for an easier blend to create a smooth, rich filling.
  • Granulated Sugar – Adjust the sweetness to your liking; a little goes a long way.
  • Eggs – Vital for binding the ingredients and providing richness.
  • Vanilla Extract – Opt for pure vanilla for a more robust flavor experience.
  • Cinnamon – Adds warmth; don’t skip it for that extra depth of flavor!
  • Milk – Use whole or substitute with almond or oat milk for a creamy consistency.

For Serving

  • Powdered Sugar – A light dusting just before serving enhances presentation.
  • Maple Syrup – Drizzle it on top for a sweet finishing touch that your guests will love!

With these delightful ingredients, you’re ready to create a Blueberry Croissant Breakfast Casserole that’s sure to be a hit!

Step‑by‑Step Instructions for Blueberry Croissant Breakfast Casserole

Step 1: Preheat the Oven
Begin by preheating your oven to 350°F (175°C). While it’s warming up, take a moment to prepare a 9×13-inch baking dish by coating it thoroughly with cooking spray. This will ensure your Blueberry Croissant Breakfast Casserole comes out seamlessly without sticking. The inviting warmth of the oven will set the stage for a cozy bake.

Step 2: Prepare the Croissants
Next, cut your stale croissants into bite-sized pieces, ensuring a good mix of flaky texture and rich flavor. Spread the cut croissants evenly in the greased baking dish. Now, sprinkle a generous handful of blueberries over the croissant pieces, letting their vibrant color and sweetness peek through. This delightful base is just the start of your irresistible casserole.

Step 3: Mix the Cream Filling
In a medium mixing bowl, beat together the softened cream cheese and granulated sugar until smooth and creamy. Incorporate the eggs, vanilla extract, and cinnamon, blending thoroughly to create a rich filling. This mixture should be velvety and well-combined, making sure there are no lumps of cream cheese. The aroma of vanilla and cinnamon will elevate your anticipation for the tasty casserole ahead.

Step 4: Add Milk to the Mixture
Gradually mix in the milk, stirring until the entire cream mixture is well-blended and creamy. This will enhance the custard-like quality of the filling, ensuring it pours beautifully over the croissants. As you blend, check for desired creaminess; it should be smooth and ready to pour over the croissant and blueberry combination, bathing them in sweet goodness.

Step 5: Pour the Cream Mixture
Pour the creamy filling evenly over the croissants and blueberries, ensuring every piece is soaked in that delicious mixture. Gently press down with a spatula to help the croissants absorb the flavors. This step is crucial for flavor infusion, transforming the casserole into a rich, indulgent breakfast experience that your guests will love.

Step 6: Let it Soak
Allow your Blueberry Croissant Breakfast Casserole to sit for approximately 10-20 minutes. This resting time is essential for the croissants to soak up the creamy mixture, ensuring the final texture is soft and custard-like. Use this time to tidy up the kitchen or prepare any accompanying sides while the casserole absorbs all those wonderful flavors.

Step 7: Bake to Perfection
Place the baking dish in your preheated oven and bake for about 55 minutes. Keep an eye on it; the casserole should be set and have a golden brown top when done, creating a vivid contrast. For an even cook, you may cover with foil for the last 10 minutes if it gets too brown. This will prevent excessive browning while ensuring the inside is thoroughly baked.

Step 8: Cool and Serve
Once baked, take the casserole out and let it cool for about 5-10 minutes. This cooling period makes it easier to slice and serve, while the flavors continue to meld. When you’re ready to serve, dust the top with powdered sugar for that café-style finish and consider a drizzle of maple syrup for added sweetness. Enjoy this comforting Blueberry Croissant Breakfast Casserole warm!

What to Serve with Blueberry Croissant Bake

Elevate your brunch experience with delightful pairings that complement each creamy bite of this breakfast casserole.

  • Fresh Fruit Salad: A colorful medley of seasonal fruits adds a refreshing, vibrant contrast to the sweet richness of the casserole.
  • Greek Yogurt Parfait: The creamy tang of yogurt topped with granola provides a textural contrast, balancing the soft casserole perfectly.
  • Maple Bacon: The crispy, savory twist of maple bacon harmonizes beautifully, keeping the flavors rich and indulgent.
  • Cinnamon Roll Coffee Cake: For an extra layer of sweetness and warmth, this cake pairs beautifully with the casserole’s flavors, creating a delightful ensemble.
  • Coffee or Latte: The deep, rich taste of freshly brewed coffee or a creamy latte enhances the brunch experience, awakening your senses.
  • Fizzy Lemonade: For a refreshing zing, sip on a sparkling lemonade; its citrus notes brighten the meal full of creamy goodness.
  • Dark Chocolate Squares: Who can resist a little indulgence? Add a few dark chocolate squares for a sophisticated sweet finish.
  • Oven-Baked Sausages: Pair this with a side of sausages, their savory and juicy profile creating a satisfying contrast with the sweet bake.
  • Herbal Tea: A soothing cup of herbal tea rounds out the meal, providing a calming effect after a delightful feast, inviting relaxation.

Expert Tips for Blueberry Croissant Breakfast Casserole

  • Cream Cheese Prep: Make sure the cream cheese is fully softened to avoid lumps, ensuring a smooth mixture that melds perfectly with the croissants.
  • Soaking Time Matters: Let the casserole soak for at least 10 minutes before baking. This allows the croissants to absorb the flavors, making the final dish extra rich and custardy.
  • Adjust Sweetness: Taste the cream mixture before pouring it over the croissants. You can always add a bit more sugar if you like it sweeter or adjust based on your blueberry sweetness.
  • Avoid Over-Baking: Keep an eye on the casserole as it bakes. If the top browns too quickly, cover it with foil for the last 10 minutes to ensure an evenly baked Blueberry Croissant Breakfast Casserole.
  • Serving Ideas: Serve warm with powdered sugar or a drizzle of maple syrup. Add a side of fresh fruit for a complete brunch experience that will impress your guests.

Storage Tips for Blueberry Croissant Breakfast Casserole

Fridge: Store leftovers in an airtight container for up to 3 days to maintain freshness and flavor. Reheat individual portions in the oven or microwave, adding a splash of milk for moisture.

Freezer: For longer storage, freeze the casserole either before or after baking. Wrap it tightly in plastic wrap and foil, and use within 2-3 months for best quality.

Reheating: When ready to enjoy, thaw overnight in the fridge if frozen, then reheat at 350°F (175°C) until warmed through. This ensures the creamy texture remains delightful.

Preparation Tip: Consider pre-assembling the casserole the night before and storing it in the refrigerator. Bake it in the morning for a warm and comforting breakfast treat that’s ready to impress!

Make Ahead Options

These Blueberry Croissant Breakfast Casserole are perfect for busy mornings! You can prepare the casserole up to 24 hours in advance by assembling all the ingredients in your baking dish, then covering tightly with plastic wrap and refrigerating. This allows the croissants to soak up the creamy mixture overnight, enhancing the flavor and texture. When you’re ready to bake, simply remove the dish from the refrigerator and let it sit at room temperature for about 30 minutes before placing it in a preheated oven. This preparation ensures you can enjoy a delicious, homemade breakfast with minimal effort, while still delivering the same warm and comforting results your family will love!

Blueberry Croissant Breakfast Casserole Variations

Feel free to switch things up and personalize this recipe to your taste — it’s all about creating your own breakfast masterpiece!

  • Berry Swap: Substitute blueberries with fresh raspberries or blackberries for a delightful twist on flavor.
  • Nuts Included: Add a handful of chopped nuts, like pecans or almonds, to bring a pleasing crunch to each bite. The nutty flavor complements the sweet blueberries beautifully.
  • Chocolate Lovers: For a sweet indulgence, mix in chocolate chips or drizzle melted chocolate on top before serving. You might never look back!
  • Dairy-Free: Use almond or oat milk instead of regular milk for a dairy-free option. This change is perfect for those who are lactose intolerant while still enjoying a creamy texture.
  • Extra Spice: Try adding a pinch of nutmeg or a dash of pumpkin pie spice to the cream mixture for a warm, festive flavor that elevates your breakfast.
  • Citoreal Crunch: Layer in your favorite cereal (like granola) on top before baking for an added crunchy layer that provides texture contrast. It’s a fun twist that everyone will love!
  • Savory Twist: Use spinach and feta instead of sweet ingredients to create a savory croissant casserole. Pair it with a side of fresh fruit for balance.
  • Mix & Match: Combine different fruits like peaches, strawberries, or even apples — the possibilities are endless! Get creative and make it a mixed-fruit sensation.

Whichever variation you choose, your Blueberry Croissant Breakfast Casserole will remain a crowd favorite! If you’re interested in more dreamy breakfast options, check out these delightful recipes, such as Banana Blueberry Breakfast or a classic Croissant Breakfast Sandwich. Enjoy your culinary adventure!

Blueberry Croissant Breakfast Casserole Recipe FAQs

How do I choose the best croissants for this recipe?
Absolutely! For the best results, I recommend using stale croissants as they absorb the cream mixture better, creating a rich and custard-like texture. If your croissants are fresh, you can leave them out for a few hours to dry out slightly before using them in the recipe.

What is the best way to store leftovers?
Very! Store any leftovers in an airtight container in the refrigerator for up to 3 days. I often reheat them in the oven at 350°F (175°C) for about 10-15 minutes, adding a splash of milk to keep them moist and delicious.

Can I freeze the casserole for later?
You can absolutely freeze the Blueberry Croissant Breakfast Casserole! Wrap it tightly in plastic wrap and foil if you’d like to freeze it for 2-3 months. For freezing before baking, make sure to let it thaw in the fridge overnight before popping it in the oven.

What should I do if my casserole is too dry after baking?
If you find that your casserole is dry, it may be that it wasn’t soaked for long enough in the cream mixture before baking. Next time, I suggest letting it sit for at least 15-20 minutes. Additionally, a splash of milk during reheating can help revive that creamy texture!

Is this casserole suitable for my dairy-free friends?
Of course! To make a dairy-free version, you can substitute the cream cheese for a dairy-free cream cheese alternative and use almond or oat milk instead of regular milk. Just ensure your croissants are dairy-free, and you’ll have a delicious casserole that accommodates everyone’s dietary needs!

How can I adjust the sweetness of the casserole?
Great question! Adjusting the sweetness is quite simple. Before pouring the cream mixture over the croissants, taste it and add more granulated sugar to your liking. You could also consider using a sweeter variety of blueberries for a naturally sweeter flavor. Just remember, a little sweetness goes a long way!

Blueberry Croissant Breakfast Casserole

Delicious Blueberry Croissant Breakfast Casserole to Impress

Easy Blueberry Croissant Breakfast Casserole featuring flaky croissants and juicy blueberries for a perfect start to your day.
Prep Time 20 minutes
Cook Time 55 minutes
Soaking Time 15 minutes
Total Time 1 hour 30 minutes
Servings: 8 slices
Course: Breakfast
Cuisine: American
Calories: 320

Ingredients
  

  • 6 pieces croissants use stale for better absorption
  • 2 cups blueberries fresh or frozen
  • 8 ounces cream cheese softened
  • 1/2 cup granulated sugar adjust sweetness to taste
  • 4 large eggs
  • 1 tablespoon vanilla extract use pure for best flavor
  • 1 teaspoon cinnamon adds warmth
  • 2 cups milk whole or substitute with almond/oat milk
For Serving
  • 1 cup powdered sugar for dusting
  • 1/2 cup maple syrup for drizzling

Equipment

  • 9x13 inch baking dish
  • Mixing Bowl
  • spatula
  • Oven

Method
 

Step-by-Step Instructions
  1. Preheat your oven to 350°F (175°C) and grease a 9x13-inch baking dish.
  2. Cut stale croissants into bite-sized pieces and spread evenly in the baking dish. Sprinkle blueberries on top.
  3. In a bowl, beat softened cream cheese and granulated sugar until smooth. Incorporate eggs, vanilla extract, and cinnamon.
  4. Gradually mix in milk until creamy and well-blended.
  5. Pour the creamy mixture over the croissants and blueberries, pressing down to soak.
  6. Let the casserole soak for 10-20 minutes.
  7. Bake for about 55 minutes until golden brown and set.
  8. Cool for 5-10 minutes before serving. Dust with powdered sugar and drizzle with maple syrup.

Nutrition

Serving: 1sliceCalories: 320kcalCarbohydrates: 40gProtein: 8gFat: 15gSaturated Fat: 8gPolyunsaturated Fat: 1gMonounsaturated Fat: 4gCholesterol: 100mgSodium: 320mgPotassium: 200mgFiber: 2gSugar: 15gVitamin A: 500IUVitamin C: 2mgCalcium: 150mgIron: 1mg

Notes

For best results, allow the casserole to soak before baking and adjust sweetness to your preference. Serve warm for a comforting breakfast treat.

Tried this recipe?

Let us know how it was!

Flaky Cruffins with Cinnamon Filling: Your New Favorite Treat

The aroma of cinnamon wafted through my kitchen, pulling me back to my childhood—those mornings filled with warm pastries and laughter. Today, I’m thrilled to share my recipe for easy cinnamon sugar cruffins, the irresistible sweet treat that combines the best of croissants and muffins into a delightful experience. With just four ingredients and a quick prep time of 30 minutes, these flaky cruffins with cinnamon filling are perfect for breakfast, brunch, or even a cozy dessert. Not only are they simple to make, but they also promise to be a crowd-pleaser—whether you’re surprising your family or treating yourself. Ready to roll up your sleeves and dive into a buttery adventure? Let’s get started!

Why Are These Cruffins So Irresistible?

Flaky Texture: The combination of crescent roll dough and buttery layers creates an airy, flaky masterpiece that melts in your mouth.

Quick & Easy: With only four ingredients and just 30 minutes of prep, you can whip up these delightful treats in no time!

Perfect for Any Occasion: Whether served for breakfast, brunch, or dessert, these cruffins are sure to please everyone.

Customizable: Play with flavors! Add chocolate chips for a sweet surprise or experiment with fillings like cream cheese for something truly unique.

Crowd-Pleaser: Serve these warm out of the oven, and watch them disappear! For more flavor inspiration, try our Bananas Foster Cinnamon Rolls or Apple Crisp Cinnamon Roll Casserole.

Dive into this delicious recipe that keeps giving and delighting!

Flaky Cruffins with Cinnamon Filling

Get ready to enjoy these delightful treats!

For the Dough
Crescent Rolls – Provides the flaky, buttery texture; feel free to substitute with puff pastry for a different twist.
Softened Butter – Adds richness and ensures the cinnamon sugar adheres perfectly; vegetable oil can be a lighter option.

For the Cinnamon Sugar
Granulated Sugar – Brings sweetness and forms that delicious cinnamon sugar coating; try brown sugar for a deeper flavor enhancement.
Cinnamon – Infuses warmth and flavor into the cruffins; consider nutmeg for a unique spice alternative.

With these ingredients ready, you’re well on your way to creating flaky cruffins with cinnamon filling that will charm your taste buds and warm your heart!

Step‑by‑Step Instructions for Flaky Cruffins with Cinnamon Filling

Step 1: Preheat Your Oven
Begin by preheating your oven to 350°F (175°C). While the oven warms up, grease a 12-cup muffin tin thoroughly to ensure easy removal of your flaky cruffins once baked. This step sets the stage for perfectly golden-brown pastries that will fill your kitchen with a heavenly aroma.

Step 2: Prepare the Dough
Unroll the crescent rolls on a clean surface, ensuring to pinch the seams together to create a cohesive sheet of dough. Using a rolling pin, gently roll over the dough to smooth it out, creating a larger rectangle to work with. This uniformity is key for achieving evenly baked flakiness in your cruffins.

Step 3: Add Butter and Cinnamon Sugar
Spread approximately 2 tablespoons of softened butter evenly over the entire surface of the dough. Next, sprinkle 2 tablespoons of cinnamon sugar atop the butter, making sure to cover the whole area. The butter acts as an adhesive for the cinnamon sugar, infusing each flaky cruffin with sweet, warm flavor as they bake.

Step 4: Roll and Cut the Dough
Starting from the long side of the rectangle, roll the dough tightly into a log shape. Once rolled, slice the log in half, then cut each half into quarters. This will yield a total of 12 sections, each eager to become stuffed with flavor when baked. The tighter you roll, the more layers your cruffins will have.

Step 5: Shape the Cruffins
Take each section and gently roll it into a spiral shape. This twisting motion encourages a lovely layered effect, crucial for the flaky texture. Place each spiral in the greased muffin tin, leaving a little space between them to allow for expansion while baking.

Step 6: Bake Until Golden
Slide your muffin tin into the preheated oven and bake for 20-22 minutes or until the cruffins turn a delightful golden brown. Keep an eye on them toward the end; you want that perfect balance of crispy exterior and soft inside. The visual cue here is a beautifully golden crust that beckons to be enjoyed!

Step 7: Coat in Cinnamon Sugar
Once baked, remove the muffin tin from the oven and let the cruffins cool in the tin for about 5 minutes. While they are still warm, roll each cruffin in the remaining cinnamon sugar to coat the outside, enhancing their sweetness. This final touch ensures every bite is an irresistible experience filled with buttery, cinnamon goodness.

What to Serve with Flaky Cruffins with Cinnamon Filling

Indulging in flaky cruffins with cinnamon filling opens the door to a world of delightful pairings that will elevate your meal experience.

  • Creamy Yogurt: The tanginess of yogurt complements the sweetness of the cruffins perfectly, adding a refreshing contrast to each bite. Serve it plain or mix in some honey for extra flavor.

  • Rich Coffee: A steaming cup of coffee enhances the warm spices of the cruffins, creating a comforting morning ritual. Opt for a smooth blend that won’t overpower the sweet notes.

  • Fresh Berries: Ripe strawberries or blueberries provide a burst of juicy freshness, balancing the richness of the flaky cruffins. The vibrant colors also add a lovely visual appeal to your plate.

  • Vanilla Ice Cream: For an extra indulgent dessert, pair warm cruffins with a scoop of creamy vanilla ice cream. The melting ice cream contrasts beautifully with the crispy texture, making for an unforgettable treat.

  • Chai Tea: The aromatic spices in chai tea harmonize with the cinnamon filling in the cruffins, creating a cozy and inviting beverage choice. Sip it slowly while enjoying your cruffins for a delightful experience.

  • Maple Syrup Drizzle: A light drizzle of maple syrup brings a sweet, earthy flavor that complements the cinnamon cruffins beautifully. It’s a delightful way to enhance each bite!

  • Chocolate-Covered Strawberries: This elegant pairing adds decadence; the sweet fruit balances the warm, spiced flavors of the cruffins while introducing a fun texture contrast.

  • Nutty Granola: A handful of granola sprinkled alongside adds crunch and a nutty flavor, making your breakfast or brunch spread even more delightful. It’s a perfect contrast to the soft, flaky texture of the cruffins.

Flaky Cruffins with Cinnamon Filling

Embrace the joy of creating your own delightful treats! Feel free to experiment and make these cruffins uniquely yours.

  • Pumpkin Spice: Swap out the cinnamon for a sprinkle of pumpkin spice for a cozy, autumnal twist.
  • Nutty Delight: Add finely chopped nuts or chocolate chips into the dough for an extra burst of flavor and crunch.
  • Cheesy Cream: Stuff the cruffins with cream cheese mixed with a bit of sugar for a rich, creamy surprise in every bite.
  • Fruit-Filled: Try adding dollops of fruit preserves between layers of dough—berry or apple can bring a brilliant sweetness.
  • Maple Twist: Replace granulated sugar with maple sugar in the cinnamon mixture for a maple-infused cruffin experience.
  • Mini Muffin Adaptation: Cut the dough into smaller sections to create mini cruffins, perfect for snacking or sharing—perfect for parties!
  • Savory Option: For a savory twist, omit the sugar and cinnamon, then fill with a mixture of cheese and herbs for brunch.
  • Dough Variation: Substitute crescent rolls with puff pastry for an even flakier texture; just roll and bake as usual.

With these options, you’ll find that the sky’s the limit when it comes to customizing your flaky cruffins with cinnamon filling. If you’re searching for more exciting recipes, you might also enjoy our Chocolate Granola Cups with Peanut Butter Filling or the scrumptious Honeybun Carrot Filling alongside your cruffins. Happy baking!

Make Ahead Options

These flaky cruffins with cinnamon filling are perfect for busy home cooks looking to save time! You can prepare the dough rolls up to 24 hours in advance by following the first few steps of the recipe—unroll the crescent rolls, spread the butter, and sprinkle on the cinnamon sugar. After rolling and cutting them into sections, cover the muffin tin with plastic wrap and refrigerate. This method keeps them fresh and ensures they maintain their flaky texture. When you’re ready to bake, simply take them out and let them sit at room temperature for 15-20 minutes before popping them in the oven. You’ll have delicious, homemade cruffins ready with minimal effort!

Storage Tips for Flaky Cruffins with Cinnamon Filling

Room Temperature: Store cruffins in an airtight container at room temperature for up to 3 days to preserve their flaky texture and sweetness.

Freezer: For longer storage, freeze cruffins by wrapping them tightly in plastic wrap and placing them in a freezer-safe bag. They can last up to 3 months in the freezer.

Reheating: To enjoy warm cruffins again, preheat your oven to 350°F (175°C) and heat them for about 10 minutes. This will help restore their delightful flakiness.

Thawing: If frozen, thaw cruffins at room temperature for about an hour before reheating for the best texture and flavor experience.

Expert Tips for Flaky Cruffins with Cinnamon Filling

Pinch the Seams: Ensure the crescent roll seams are tightly pinched; this prevents the dough from unraveling during baking and maintains those flaky layers.

Watch the Bake Time: Keep an eye on the cruffins as they bake to avoid dryness. Look for a golden brown color for best results!

Mini Variation: Want a smaller bite? Cut the log into smaller sections to create mini cruffins. This yields 24 delightful, flaky cruffins with cinnamon filling!

Butter Application: Spread the softened butter evenly and generously; this will help the sugar adhere properly and create a beautiful, rich flavor.

Storage Tips: To maintain freshness, store cruffins in an airtight container at room temperature for up to 3 days. Enjoy them warm for the best experience!

Flaky Cruffins with Cinnamon Filling Recipe FAQs

How do I choose the best crescent rolls for my cruffins?
Absolutely! Look for crescent rolls that are fresh and ideally from the refrigerated section of your grocery store. Check the expiration date to ensure freshness, and avoid packages with dark spots or bulges, which can indicate spoilage. If you’re feeling adventurous, you can also try puff pastry for a different texture.

What’s the best way to store leftover cruffins?
For perfect preservation, store your flaky cruffins in an airtight container at room temperature for up to 3 days. This keeps them fresh and maintains their delightful texture. If you want to keep them for longer, wrap them in plastic wrap and place them in a freezer-safe bag to freeze for up to 3 months.

How should I reheat cruffins after freezing?
When you’re ready to enjoy your cruffins again, preheat your oven to 350°F (175°C). Place the frozen cruffins on a baking sheet and heat them for about 10 minutes. This gentle warmth restores their flaky texture and delightful flavor, reminiscent of freshly baked goodness!

Why did my cruffins not rise properly?
Very! If your cruffins didn’t rise, it could be due to rolling the dough too loosely or not pinching the seams tight enough, which might cause them to unravel during baking. Make sure to roll your dough tightly and ensure the seams are well sealed for that beautiful, layered look.

Can my pets enjoy these cruffins?
Definitely not! While these cruffins are delicious for humans, be cautious about sharing with pets. The high sugar and butter content can upset their stomachs. It’s always best to stick with treats that are specifically made for them!

What if I want to make mini cruffins instead?
Great question! To make mini cruffins, simply cut each log into smaller sections after rolling. For the best results, aim for 24 sections from the roll. This variation gives you bite-sized treats perfect for sharing—or keeping all to yourself!

Flaky Cruffins with Cinnamon Filling

Flaky Cruffins with Cinnamon Filling

Enjoy flaky cruffins with cinnamon filling for a delightful treat that's perfect for breakfast or brunch.
Prep Time 30 minutes
Cook Time 22 minutes
Total Time 52 minutes
Servings: 12 cruffins
Course: Breakfast
Cuisine: American
Calories: 200

Ingredients
  

For the Dough
  • 1 pack Crescent Rolls Substitute with puff pastry for a different twist.
  • 2 tablespoons Softened Butter Vegetable oil can be a lighter option.
For the Cinnamon Sugar
  • 1/2 cup Granulated Sugar Try brown sugar for a deeper flavor enhancement.
  • 2 tablespoons Cinnamon Consider nutmeg for a unique spice alternative.

Equipment

  • Muffin Tin
  • Rolling Pin

Method
 

Step-by-Step Instructions
  1. Preheat your oven to 350°F (175°C) and grease a 12-cup muffin tin thoroughly.
  2. Unroll the crescent rolls and pinch the seams together. Roll the dough to create a larger rectangle.
  3. Spread the softened butter over the dough; sprinkle cinnamon sugar evenly on top.
  4. Roll the dough tightly from the long side into a log, slice into 12 sections.
  5. Shape each section into a spiral and place in the greased muffin tin.
  6. Bake for 20-22 minutes or until golden brown.
  7. Cool in the tin for 5 minutes, then roll in remaining cinnamon sugar.

Nutrition

Serving: 1cruffinCalories: 200kcalCarbohydrates: 30gProtein: 2gFat: 10gSaturated Fat: 5gPolyunsaturated Fat: 1gMonounsaturated Fat: 3gCholesterol: 15mgSodium: 150mgPotassium: 50mgFiber: 1gSugar: 10gVitamin A: 200IUCalcium: 20mgIron: 0.5mg

Notes

Ensure the crescent roll seams are tightly pinched to prevent unraveling during baking. Store cruffins in an airtight container at room temperature for up to 3 days.

Tried this recipe?

Let us know how it was!

Cottage Cheese and Herb Biscuits for a Wholesome Breakfast

As I stood in my kitchen, a delightful aroma wafted through the air, beckoning with warmth and comfort. Fluffy Cottage Cheese and Herb Biscuits are a game-changer for anyone looking to elevate their breakfast or brunch. This easy, healthy recipe pairs creamy cottage cheese with fresh herbs, creating a deliciously versatile dish that’s perfect on its own or alongside soup and salad. Not only are these biscuits a quick fix for those busy mornings, but they also embrace a healthier twist on traditional recipes without sacrificing taste. Imagine biting into a golden-brown biscuit, its tender interior bursting with flavor—not to mention the wholesome goodness of cottage cheese packed in each fluffy bite. Are you ready to bring a little magic to your breakfast table? Let’s get baking!

Why Are These Biscuits a Must-Try?

Versatile Flavors: These Cottage Cheese and Herb Biscuits are fantastic on their own or as a delightful side for soups and salads, adding a unique twist to your meals.

Quick and Easy: With just a few simple ingredients, you can whip up these biscuits in no time, making them perfect for those bustling mornings.

Healthy Twist: The incorporation of cottage cheese brings added protein and moisture, allowing you to enjoy a delicious breakfast without the guilt.

Crowd-Pleasing Delight: Whether it’s a cozy brunch or an afternoon tea, these biscuits will impress your guests and have them coming back for more.

Perfect Pairing: Enjoy them warm with butter or your favorite spread, or try them alongside dishes like Chicken Grilled Cheese for a dinner that excites the taste buds.

Customizable Goodness: Feel free to experiment with different herbs or even a hint of garlic for a personalized touch that your family will love!

Cottage Cheese and Herb Biscuit Ingredients

For the Biscuit Dough
All-Purpose Flour – Provides structure; substitute with whole wheat flour for a heartier texture.
Baking Powder – Acts as a leavening agent for fluffiness; ensure it is fresh for optimal rising.
Salt – Enhances flavor; adjust based on dietary needs; low-sodium salt can be used as a substitute.
Cold Butter – Adds richness and helps create a flaky texture; can be substituted with margarine or a vegan butter alternative.
Cottage Cheese – Adds moisture and protein; low-fat versions can be used, though they may yield a slightly drier biscuit.
Fresh Herbs (e.g., chives, parsley, dill) – Provide flavor and aroma; use finely chopped fresh herbs for the best flavor; dried herbs can be used but may be overpowering and require adjustments.

Feel free to experiment with the ingredients to make your Cottage Cheese and Herb Biscuits uniquely yours!

Step‑by‑Step Instructions for Cottage Cheese and Herb Biscuits

Step 1: Preheat Your Oven
Preheat your oven to 400°F (200°C) to create the perfect baking environment for your Cottage Cheese and Herb Biscuits. While the oven heats, prepare a baking sheet by lining it with parchment paper, ensuring your biscuits won’t stick during baking. This step sets the stage for a crispy, golden crust.

Step 2: Combine Dry Ingredients
In a large mixing bowl, whisk together 2 cups of all-purpose flour, 1 tablespoon of baking powder, and 1 teaspoon of salt. This mixture will form the base of your biscuit dough. Make sure to blend these ingredients thoroughly to ensure even rising, as any clumps of baking powder can lead to uneven biscuits.

Step 3: Cut in the Butter
Take ½ cup of cold butter and cut it into small cubes, then add it to the flour mixture. Using a pastry cutter or your fingertips, blend the butter into the flour until the mixture resembles coarse crumbs. This step is crucial for creating that coveted flaky texture in your Cottage Cheese and Herb Biscuits.

Step 4: Mix in Cottage Cheese and Herbs
Gently fold in 1 cup of cottage cheese along with ¼ cup of finely chopped fresh herbs like chives or parsley into the mixture. Stir until just combined, being careful not to overmix; a few lumps are perfectly fine. The cottage cheese adds moisture and a delightful richness to your biscuits.

Step 5: Shape the Dough
Turn your dough out onto a lightly floured surface. Knead it gently for just a minute or so, then pat it down into a 1-inch thick round. Using a biscuit cutter or a glass, cut out rounds and place them on your prepared baking sheet. Each biscuit should be fluffy and slightly sticky to ensure the best texture.

Step 6: Bake to Perfection
Place the baking sheet in the preheated oven and bake for 15-20 minutes. Keep a close eye on them, checking for a lovely golden brown color. The biscuits are done when they are firm to the touch and have that irresistible golden crust—your Cottage Cheese and Herb Biscuits are almost ready!

Step 7: Cool and Serve
Once baked, remove your biscuits from the oven and let them cool on a wire rack for a few minutes. This brief cooling period helps them set properly while keeping the insides fluffy. Serve warm with butter or your favorite spread to elevate your breakfast or brunch!

What to Serve with Fluffy Cottage Cheese and Herb Biscuits

These delightful biscuits are perfect for creating a comforting breakfast or brunch experience that warms the heart and tantalizes the taste buds.

  • Creamy Garlic Soup: The velvety texture and rich flavors of garlic soup pair beautifully with warm biscuits, making for a cozy meal.
  • Simple Garden Salad: A fresh salad with ripe tomatoes, cucumbers, and a zesty dressing complements the rich biscuits, adding brightness.
  • Savory Omelette: A fluffy omelette filled with cheese and herbs offers a delightful contrast, complementing the flavors of the biscuits perfectly.
  • Honey Butter Spread: A dollop of honey-infused butter enhances the biscuits’ flavors, adding sweetness to your savory experience.
  • Fresh Fruit Compote: Sweetened berries or stone fruit compote provide a luscious finish, balancing out the savory notes of the biscuits.
  • Herbal Tea: A warm cup of herbal tea, like chamomile or mint, will evoke a sense of calm while pairing splendidly with the biscuits’ herbaceous notes.
  • Cheesy Tomato Soup: The combination of rich, cheesy tomato soup with the fluffy biscuits makes every bite incredible, perfect for those chilly days.
  • Sparkling Water: For a refreshing drink that cleanses the palate between bites, sparkling water enhances any meal with a light fizz.
  • Dark Chocolate Mousse: For a decadent dessert option, this rich and creamy treat rounds out your meal on a sweet note that delights the senses!

Cottage Cheese and Herb Biscuits Variations

Feel free to make these Cottage Cheese and Herb Biscuits your own with these delightful twists on the classic!

  • Whole Wheat: Substitute all-purpose flour with whole wheat flour for a nutty flavor and extra fiber. These biscuits will still be fluffy and delicious, offering a lovely texture change.

  • Cheesy Addition: Add 1 cup of shredded cheese, like cheddar or mozzarella, for a rich, savory twist. The gooey melted cheese pairs beautifully with the herbs and puts a smile on every face at the breakfast table.

  • Herb Swap: Experiment with different finely chopped herbs such as basil, thyme, or rosemary for various flavor profiles. Each herb brings its unique essence to the biscuits, making every batch a new experience.

  • Spicy Kick: Incorporate a pinch of red pepper flakes into the biscuit mix for a hint of heat. This subtle addition can elevate your biscuits, making them perfect for those who crave a little excitement with their morning meal.

  • Garlic Infusion: Mix in 1 teaspoon of garlic powder or a few minced fresh garlic cloves for aromatic depth. The garlic enhances the herbiness and creates a savory biscuit that pairs wonderfully with soups like Mediterranean Herb Crusted Salmon or salads.

  • Sweeten the Deal: For a twist, add a dollop of honey or maple syrup into the dough. This will give a subtle sweetness that makes them perfect for a brunch spread alongside a fresh fruit salad or dessert items like Strawberry Cheesecake Dump Cake.

  • Nutty Flavor: Incorporate a mix of nuts, such as chopped walnuts or pecans, for added crunch and richness. This gives your biscuits a delightful texture that adds contrast to the softness of the cottage cheese.

  • Vegan Friendly: Use plant-based butter and substitute the cottage cheese with a vegan alternative made from almond or soy. This creates a deliciously fluffy biscuit that everyone can enjoy, making them perfect for gatherings.

How to Store and Freeze Cottage Cheese and Herb Biscuits

Room Temperature: Store leftover biscuits in an airtight container at room temperature for up to 2 days to maintain their freshness and softness.

Fridge: If you plan to enjoy them later, refrigerate in an airtight container for up to 5 days, reheating in the oven for best results.

Freezer: For longer storage, wrap each biscuit tightly in plastic wrap or foil and freeze for up to 3 months. This preserves the texture and flavor for future enjoyment.

Reheating: When ready to savor your Cottage Cheese and Herb Biscuits, reheat directly from frozen or after thawing in the microwave or oven until warm throughout.

Expert Tips for Cottage Cheese and Herb Biscuits

  • Fresh Ingredients: Always use fresh baking powder and herbs to ensure maximum fluffiness and flavor. Stale leavening agents can lead to dense biscuits.

  • Avoid Overmixing: Gently mix the dough until just combined; overmixing can create tough biscuits. A few lumps are perfectly fine and will improve the texture.

  • Butter Temperature: Use cold butter cutting into the flour to create flaky layers. If the butter is too warm, your biscuits won’t rise adequately.

  • Monitor Baking Time: Ovens vary, so keep an eye on your biscuits as they bake. Look for a golden-brown color and a firm touch for perfect Cottage Cheese and Herb Biscuits.

  • Storage Tips: Store any leftovers in an airtight container for up to 2 days, or freeze them wrapped for up to three months to maintain freshness.

Make Ahead Options

These Cottage Cheese and Herb Biscuits are a fantastic option for meal prep, saving you time during busy mornings! You can prepare the dry ingredients up to 3 days in advance; simply combine the flour, baking powder, and salt, and store it in an airtight container. Additionally, you can mix the wet ingredients (cottage cheese and herbs) and store them, refrigerated, for up to 24 hours. When you’re ready to bake, just cut the cold butter into the dry mix, then fold in the cottage cheese and herbs, creating a dough that will yield the same delicious results! Baking them fresh not only provides the best texture but also keeps the flavors vibrant and delightful.

Cottage Cheese and Herb Biscuits Recipe FAQs

What type of cottage cheese is best for these biscuits?
I recommend using full-fat cottage cheese for the best moisture and flavor. However, you can opt for low-fat versions if you prefer a lighter biscuit, keeping in mind they may be slightly drier. Always choose cottage cheese that is fresh and has no dark spots or off smells.

How should I store leftover biscuits?
To keep your Cottage Cheese and Herb Biscuits fresh, store them in an airtight container at room temperature for up to 2 days. If you want to enjoy them later, refrigerate them in a sealed container for up to 5 days. For longer storage, consider freezing them!

Can I freeze these biscuits?
Absolutely! To freeze your biscuits, let them cool completely after baking, then wrap each one tightly in plastic wrap or aluminum foil. Place them in a freezer-safe bag and store for up to 3 months. When you’re ready to enjoy them, heat them directly from frozen in the oven until warmed through, about 10-15 minutes at 350°F (175°C).

What should I do if my biscuits come out dense?
If your Cottage Cheese and Herb Biscuits turn out dense, it might be due to overmixing the dough or using stale baking powder. When mixing, stop as soon as the ingredients are combined, leaving a few lumps for a lighter texture. Always check the expiration date on your baking powder before use to ensure maximum fluffiness.

Are there any dietary considerations I should be aware of?
Yes, if you’re accommodating dietary restrictions, look for low-sodium alternatives for salt or use dairy-free butter substitutes to cater to vegan preferences. Always check your cottage cheese for allergens if you’re cooking for someone with lactose intolerance or a dairy allergy. If you have pets, be cautious as human foods can sometimes upset their digestion.

Cottage Cheese and Herb Biscuits

Cottage Cheese and Herb Biscuits for a Wholesome Breakfast

Fluffy Cottage Cheese and Herb Biscuits are a game-changer for breakfast, combining cottage cheese with fresh herbs for a deliciously versatile dish.
Prep Time 15 minutes
Cook Time 20 minutes
Cooling Time 5 minutes
Total Time 40 minutes
Servings: 8 biscuits
Course: Breakfast
Cuisine: American
Calories: 150

Ingredients
  

For the Biscuit Dough
  • 2 cups all-purpose flour Substitute with whole wheat flour for a heartier texture.
  • 1 tablespoon baking powder Ensure it is fresh for optimal rising.
  • 1 teaspoon salt Adjust based on dietary needs; low-sodium salt can be used as a substitute.
  • 1/2 cup cold butter Can be substituted with margarine or a vegan butter alternative.
  • 1 cup cottage cheese Low-fat versions can be used, though they may yield a slightly drier biscuit.
  • 1/4 cup fresh herbs (e.g., chives, parsley, dill) Use finely chopped fresh herbs for best flavor.

Equipment

  • Oven
  • Mixing Bowl
  • Baking Sheet
  • pastry cutter
  • Biscuit Cutter

Method
 

Step-by-Step Instructions
  1. Preheat your oven to 400°F (200°C) and line a baking sheet with parchment paper.
  2. In a large mixing bowl, whisk together 2 cups of all-purpose flour, 1 tablespoon of baking powder, and 1 teaspoon of salt.
  3. Cut ½ cup of cold butter into small cubes and blend it into the flour mixture until it resembles coarse crumbs.
  4. Gently fold in 1 cup of cottage cheese and ¼ cup of finely chopped fresh herbs into the mixture.
  5. Turn the dough out onto a lightly floured surface, knead gently, and pat it into a 1-inch thick round.
  6. Cut out rounds with a biscuit cutter and place them on the prepared baking sheet.
  7. Bake for 15-20 minutes, checking for a golden brown color.
  8. Remove from the oven and cool on a wire rack for a few minutes before serving.

Nutrition

Serving: 1biscuitCalories: 150kcalCarbohydrates: 20gProtein: 5gFat: 6gSaturated Fat: 4gPolyunsaturated Fat: 0.5gMonounsaturated Fat: 1.5gCholesterol: 20mgSodium: 300mgPotassium: 150mgFiber: 1gSugar: 1gVitamin A: 200IUVitamin C: 1mgCalcium: 80mgIron: 0.8mg

Notes

Store leftovers in an airtight container for up to 2 days or freeze for up to three months. Reheat before serving.

Tried this recipe?

Let us know how it was!

Delicious Hash Brown Egg Cups for Busy Mornings

As I rifled through my fridge one frantic morning, I stumbled upon a treasure trove of ingredients just waiting to come together. That’s when my Hash Brown Egg Cups took shape! With their crisp hash brown crust, creamy egg filling, and a world of mix-ins at your fingertips, these delightful morsels are the answer to any breakfast rush. They’re not only quick to whip up in under 30 minutes but also offer a customizable twist that lets you use whatever leftovers or flavor combinations you have on hand. Perfect for busy weekday mornings or as a make-ahead option for lazy weekends, they’re a true game-changer for your morning routine. Curious to see how these little cups of joy come together? Let’s dive in!

Why Will You Adore Hash Brown Egg Cups?

Crispy Perfection: These cups start with a wonderfully crunchy hash brown base that makes every bite satisfying.
Endless Customization: Whether it’s bacon, bell peppers, or even spicy jalapeños, you can tailor these delightful morsels to your heart’s desire!
Quick and Easy: In just 30 minutes, you can have a delicious breakfast ready to fuel your day—perfect for busy mornings.
Make-Ahead Magic: Prepare them in advance and simply bake when you’re ready to eat; they’ll save you time without sacrificing flavor.
Healthy and Nutritious: Packed with protein and fiber, these egg cups are a balanced breakfast option that keeps you full and energized.
Feeling inspired? Pair them with Cheesy Protein Egg Bake for even more breakfast goodness!

Hash Brown Egg Cups Ingredients

For the Hash Brown Base
Shredded Hash Browns – Provides the crispy base; make sure they’re well-thawed and pressed to eliminate excess moisture.
Salt and Pepper – Essential seasonings to taste; don’t be shy—season well for a flavorful crust.

For the Egg Filling
Large Eggs – The star ingredient, bringing protein and structure to your cups.
Milk – Creates a fluffy texture; substitute with plant-based milk for a dairy-free option.
Shredded Cheddar Cheese – Adds richness; feel free to swap for mozzarella or Monterey Jack.

Optional Add-Ins
Cooked Bacon – Introduces a savory depth; can be replaced with crumbled sausage or diced ham for variety.
Diced Bell Peppers – Contributes color and crunch; any color bell pepper will work great here.
Diced Onion – Adds sweetness and depth of flavor; yellow or sweet onions are perfect.
Fresh Herbs – Use for garnish to enhance flavor and presentation; parsley or chives work beautifully.

Embark on your breakfast adventure with these delicious Hash Brown Egg Cups that can be customized to fit your palate!

Step‑by‑Step Instructions for Hash Brown Egg Cups

Step 1: Preheat and Prepare
Begin by preheating your oven to 400°F (200°C). While the oven heats up, generously grease a 12-cup muffin tin with cooking spray or butter to prevent sticking. This ensures that your Hash Brown Egg Cups slide out easily once baked, giving them that perfect golden hue and crispy texture.

Step 2: Create the Hash Brown Crust
In a mixing bowl, combine your thawed and drained shredded hash browns with salt and pepper to taste. Once seasoned, divide the mixture among the greased muffin cups and firmly press it into the bottom and up the sides to form nests. Aim for a good thickness to achieve that delightful crunch when baked.

Step 3: Bake the Hash Brown Nests
Place the muffin tin in the preheated oven and bake the hash brown nests for about 20 minutes. You’re looking for a golden-brown crust that’s crispy around the edges. Keep an eye on them during the last few minutes to ensure they don’t over-bake, as this is crucial for your Hash Brown Egg Cups.

Step 4: Prepare the Egg Mixture
Meanwhile, in a large bowl, whisk together the large eggs, milk, salt, and pepper, creating a fluffy and well-combined egg mixture. Stir in the remaining shredded cheddar cheese, and if you’re using any optional add-ins like cooked bacon or diced vegetables, fold them in now for added flavor and texture.

Step 5: Fill the Hash Brown Cups
Once the nests are beautifully baked and cooled slightly, reduce the oven temperature to 350°F (175°C). Carefully pour the egg mixture into each hash brown cup, filling them about three-quarters full to allow room for the eggs to puff up while baking.

Step 6: Bake the Egg Cups
Return the muffin tin to the oven and bake for an additional 15 to 18 minutes. The Hash Brown Egg Cups are done when the eggs are set and lightly browned on top; they should spring back when gently pressed. Keep an eye on them, as oven temperatures can vary.

Step 7: Cool and Garnish
Once baked, remove the muffin tin from the oven and allow the Hash Brown Egg Cups to cool in the tin for a few minutes. This helps them set further, making it easier to remove them. If desired, garnish with fresh herbs like parsley or chives for a pop of color and an extra layer of flavor before serving.

What to Serve with Hash Brown Egg Cups?

Enjoy a delightful breakfast spread that perfectly complements each satisfying bite of these crispy, creamy egg cups.

  • Fresh Fruit Salad: Bright, juicy fruits like berries and melon add a refreshing touch, balancing the richness of the egg cups.

  • Avocado Toast: Creamy avocado on toasted bread offers a delightful contrast in texture, making each meal feel gourmet.

  • Garden Salad: A light, crunchy salad with mixed greens and a zesty vinaigrette enhances the overall meal, making it vibrant and healthy.

  • Yogurt Parfait: Layered yogurt with granola and fruits provides a perfect sweet contrast, making your breakfast complete and visually appealing.

  • Coffee or Herbal Tea: A warm beverage can elevate your breakfast experience; try a smooth coffee blend or soothing herbal tea for a cozy touch.

  • Homemade Salsa: A fresh, spicy salsa brings a zesty kick, adding layers of flavor that enhance the overall enjoyment of your Hash Brown Egg Cups.

  • Savory Smoothie: Blend spinach, banana, and almond milk for a nutritious drink that complements the meal while adding a healthy boost.

  • Crispy Bacon or Sausage: For those wanting a protein punch, the savory richness of crispy bacon or sausage pairs beautifully with the cups’ flavors.

  • Mini Muffins: A side of sweet mini muffins offers a delightful touch of indulgence, balancing hearty and sweet beautifully.

Elevate your breakfast game with these thoughtful pairings that create a memorable morning routine!

Expert Tips for Hash Brown Egg Cups

  • Press Well: Ensure you press the hash browns firmly into the muffin tin; this creates a crispy crust and prevents falling apart.

  • Non-Stick Necessity: Generously coat your muffin tin with cooking spray or butter to avoid sticking; nobody wants a delicious cup that won’t come out easily!

  • Adjust Baking Times: If using frozen hash browns or adding more fillings, you may need to adjust baking times slightly, so keep an eye on them.

  • Cool Before Serving: Let the Hash Brown Egg Cups cool for a few minutes in the tin to set properly, making them easier to remove and enjoy.

  • Experiment with Add-Ins: Feel free to mix in different vegetables or proteins to suit your taste; just remember not to overload them to maintain structure.

Storage Tips for Hash Brown Egg Cups

Fridge: Store leftover Hash Brown Egg Cups in an airtight container for up to 3 days. Reheat in the microwave for 30–60 seconds or bake at 350°F for about 10–12 minutes.

Freezer: To freeze, place the cups in a single layer on a baking sheet until firm. Then transfer to a freezer-safe bag or container for up to 2 months.

Reheating: When ready to enjoy, reheat directly from frozen in the oven at 350°F, adding an extra few minutes to the baking time until heated through.

Room Temperature: It’s best to avoid leaving Hash Brown Egg Cups out at room temperature for more than 2 hours to ensure freshness and safety.

Hash Brown Egg Cups Variations

Feel free to get creative and make these delightful Hash Brown Egg Cups your own with these scrumptious ideas!

  • Vegetarian: Omit the bacon and add sautéed mushrooms or fresh spinach for a vibrant twist. This option adds not only color but also a boost of nutrients!

  • Spicy: For a kick, incorporate diced jalapeños or a sprinkle of cayenne pepper. These Hash Brown Egg Cups can bring the heat without overwhelming the palate.

  • Cheesy Delight: Experiment with different cheese blends like gouda or pepper jack to elevate the flavor profile. The beautiful melty texture will be irresistible!

  • Low-Carb Alternative: Substitute traditional hash browns with cauliflower rice. You’ll still enjoy a satisfying breakfast while keeping the carbs in check.

  • Sweet Addition: For a surprising twist, mix in finely diced apples or pears along with a sprinkle of cinnamon. It’ll create a unique sweet-and-savory experience sure to impress!

  • Fresh Herbs Galore: Don’t hold back on your herb garden! Toss in bright basil, dill, or chives to add fresh layers to your egg filling. Bursting with flavor, it’ll transform each bite into something special.

  • Get Saucy: Top with a dollop of your favorite salsa or hot sauce before serving. It adds not just flavor, but also a splash of color to your plate.

Feeling hungry for more? Pair these lovely Hash Brown Egg Cups with these Chocolate Granola Cups for a delightful breakfast spread or a sweet treat afterward!

Make Ahead Options

These Hash Brown Egg Cups are absolutely perfect for meal prep! You can prepare the hash brown crusts up to 24 hours in advance by assembling them in the muffin tin and refrigerating them. This keeps the crust crispy and ready to go. Additionally, you can whisk together the egg mixture, including any add-ins, and store it in the fridge for up to 3 days; just be sure to cover it tightly to maintain freshness. When you’re ready to serve, simply fill the baked nests with the egg mixture and pop them in the oven. You’ll have a delicious breakfast ready in no time, just as tasty as if you made it fresh!

Hash Brown Egg Cups Recipe FAQs

How do I choose the right hash browns?
Absolutely! For the best Hash Brown Egg Cups, opt for frozen shredded hash browns. Make sure they are well-thawed and pressed to eliminate excess moisture, which helps achieve that perfect crispiness. If you can, choose brands that don’t have added ingredients or preservatives for a cleaner taste.

How should I store leftover Hash Brown Egg Cups?
Store your leftover Hash Brown Egg Cups in an airtight container in the fridge for up to 3 days. To reheat, simply microwave for 30–60 seconds or bake at 350°F (175°C) for 10–12 minutes. It’s an easy way to enjoy a quick breakfast on those busy mornings!

Can I freeze Hash Brown Egg Cups?
Yes, you can! To freeze your Hash Brown Egg Cups, first bake them as directed. Once cooled, place the cups in a single layer on a baking sheet until firm. Then transfer them to a freezer-safe bag or container, where they can last for up to 2 months. When you’re ready to enjoy them, reheat straight from the freezer; just add a few extra minutes to the baking time until heated through.

What if my Hash Brown Egg Cups fall apart?
Very! If your Hash Brown Egg Cups fall apart, it’s often due to not pressing the hash browns firmly enough in the muffin tin or not baking them long enough initially. Make sure to press them firmly, creating a good base, and closely monitor the baking time to achieve that golden crispiness. If you’re adding lots of ingredients, consider reducing the amount slightly to maintain structure.

Are Hash Brown Egg Cups suitable for my gluten-free diet?
Absolutely! Just ensure you’re using gluten-free hash browns and check that your chosen cheese and any other add-ins, like bacon or spices, are also gluten-free. These tasty cups can easily fit into various dietary needs while still packing a delightful flavor punch!

Hash Brown Egg Cups

Delicious Hash Brown Egg Cups for Busy Mornings

Delight in these Hash Brown Egg Cups, perfect for a quick breakfast with customizable ingredients.
Prep Time 10 minutes
Cook Time 30 minutes
Total Time 40 minutes
Servings: 12 cups
Course: Breakfast
Cuisine: American
Calories: 180

Ingredients
  

For the Hash Brown Base
  • 30 oz Shredded Hash Browns Thawed and pressed to eliminate excess moisture
  • to taste Salt
  • to taste Pepper
For the Egg Filling
  • 6 large Eggs The star ingredient
  • 1/2 cup Milk Can substitute with plant-based milk
  • 1 cup Shredded Cheddar Cheese Can substitute with mozzarella or Monterey Jack
Optional Add-Ins
  • 4 oz Cooked Bacon Can replace with crumbled sausage or diced ham
  • 1 cup Diced Bell Peppers Any color will work
  • 1/2 cup Diced Onion Yellow or sweet onions work best
  • to taste Fresh Herbs For garnish, like parsley or chives

Equipment

  • Muffin Tin
  • Mixing Bowl
  • whisk

Method
 

Step‑by‑Step Instructions for Hash Brown Egg Cups
  1. Preheat your oven to 400°F (200°C) and grease a 12-cup muffin tin.
  2. Combine thawed shredded hash browns with salt and pepper; press into muffin cups.
  3. Bake hash brown nests for about 20 minutes until golden brown.
  4. In a bowl, whisk together eggs, milk, salt, and pepper. Mix in shredded cheddar and optional add-ins.
  5. Pour egg mixture into hash brown cups, filling them three-quarters full.
  6. Bake for an additional 15 to 18 minutes until eggs are set and lightly browned.
  7. Allow to cool for a few minutes, then garnish with fresh herbs before serving.

Nutrition

Serving: 1cupCalories: 180kcalCarbohydrates: 15gProtein: 10gFat: 10gSaturated Fat: 4gPolyunsaturated Fat: 0.5gMonounsaturated Fat: 4gCholesterol: 210mgSodium: 300mgPotassium: 250mgFiber: 1gSugar: 2gVitamin A: 500IUVitamin C: 15mgCalcium: 150mgIron: 1.5mg

Notes

Press hash browns firmly to create a crispy crust. Adjust baking times as needed for variations in cooking equipment.

Tried this recipe?

Let us know how it was!

Delicious Vegan Cinnamon Roll Pancakes for a Cozy Breakfast

As I poured the pancake batter onto the griddle, the aroma of cinnamon began swirling through my kitchen, instantly wrapping me in a warm hug of nostalgia. These Vegan Cinnamon Roll Pancakes are a delightful mashup of two beloved breakfast classics, designed to bring joy to your morning routine. Not only are they an easy and quick breakfast option, but they also serve as a festive treat perfect for holiday gatherings. With a fluffy texture and a sweet cinnamon swirl, these pancakes will easily steal the spotlight at your brunch table. Are you ready to elevate your breakfast game and impress your family and friends?

Why are Vegan Cinnamon Roll Pancakes a must-try?

Indulgent Flavor: The fusion of cinnamon roll sweetness with fluffy pancake goodness creates a breakfast treat that’s simply irresistible.

Quick and Easy: Perfect for busy mornings, these pancakes come together in no time, allowing you to enjoy a homemade meal without the hassle.

Vegan-Friendly: Enjoy all the classic flavors without any animal products, making them suitable for everyone.

Crowd-Pleasing: Impress family and friends at holiday brunches with a dish that’s both visually stunning and delicious! Pair them with a drizzle of maple syrup or a vegan cream cheese glaze for an extra treat, similar to Nutella Pancakes Blend or Chocolate Chip Pancakes.

Versatile Options: Feel free to customize them with your favorite plant-based milks or add-ins, like nuts or chocolate chips, for added flair!

Vegan Cinnamon Roll Pancakes Ingredients

For the Pancake Base

  • All-Purpose Flour – This provides the structure needed for fluffy Vegan Cinnamon Roll Pancakes; whole wheat flour can be substituted with careful liquid adjustments.
  • Ground Cinnamon – Adds the signature warmth of cinnamon rolls to each bite; feel free to experiment with other spices like nutmeg or cardamom.
  • Brown Sugar – Sweetens the pancakes and enhances flavor depth; you can opt for coconut sugar for a healthier alternative.
  • Vegan Butter – Gives a rich flavor and contributes to golden edges; avocado oil works well if you’re looking for a lighter option.
  • Soy Milk – Creates a vegan buttermilk for a fluffy texture; almond or pea milk can be excellent substitutes for added protein.
  • Apple Cider Vinegar – Activates the baking soda and baking powder to create that fluffy consistency; lemon juice serves as an effective equal substitute.
  • Vegan Yogurt – Boosts moisture and lightness; choosing a thicker variety will produce the best results.

For the Cinnamon Swirl

  • Ground Cinnamon – Reinforces that delightful cinnamon flavor you love; it’s essential for creating the swirl.
  • Brown Sugar – Used again here to create that sticky, sweet swirl; coconut sugar can substitute seamlessly.
  • Almond Butter – This adds creaminess and binds the swirl together; peanut butter can also be a tasty alternative.
  • Maple Syrup – Provides additional sweetness and helps to blend the swirl mix; agave syrup can be used if you prefer.

These ingredients blend perfectly to create a breakfast experience that goes beyond the ordinary, leaving your taste buds begging for more! So gather your ingredients, and let’s get cooking!

Step‑by‑Step Instructions for Vegan Cinnamon Roll Pancakes

Step 1: Prepare the Vegan Buttermilk
In a measuring cup, combine 1 cup of soy milk with 1 tablespoon of apple cider vinegar. Allow it to sit for about 5 minutes until it curdles and thickens slightly. This activates the leavening agents, ensuring your Vegan Cinnamon Roll Pancakes come out fluffy and light.

Step 2: Make the Cinnamon Swirl Mixture
In a medium mixing bowl, blend together 2 tablespoons of brown sugar, 1 teaspoon of ground cinnamon, 1 tablespoon of almond butter, and 1 tablespoon of maple syrup. Stir until smooth. Transfer this mixture to a sandwich bag, cutting a small hole in one corner, which will be used to create your appealing cinnamon swirl.

Step 3: Whisk the Dry Ingredients
In a large mixing bowl, whisk together 1 cup of all-purpose flour, 2 tablespoons of brown sugar, 2 teaspoons of baking powder, 1/2 teaspoon of baking soda, 1 teaspoon of ground cinnamon, and 1/4 teaspoon of salt. This step not only combines the ingredients but also aerates the flour, vital for the fluffiness of your Vegan Cinnamon Roll Pancakes.

Step 4: Combine the Wet Ingredients
Add 2 tablespoons of melted vegan butter, 1/2 cup of vegan yogurt, 1 teaspoon of vanilla extract, and your prepared soy milk mixture to the bowl of dry ingredients. Gently mix until just combined; it’s okay if there are a few lumps. Let the batter rest for about 5 minutes to enhance the texture and rise.

Step 5: Preheat the Griddle
While the batter rests, heat a non-stick griddle over medium heat and lightly grease it with vegan butter or cooking spray. Ensure the griddle is hot enough before adding the batter—this will give your pancakes beautiful golden edges and fluffy interiors.

Step 6: Cook the Pancakes
Pour 1/4 cup of pancake batter onto the hot griddle. Using the sandwich bag filled with the cinnamon swirl mixture, pipe a beautiful swirl on top of the pancake. Cook for about 2-3 minutes, or until you see the edges drying and bubbles forming on the surface, indicating it’s time to flip.

Step 7: Finish Cooking the Pancakes
Carefully flip the pancake and cook for another 2-3 minutes, until golden brown and cooked through. The aroma of cinnamon will fill the air, making it hard to resist these Vegan Cinnamon Roll Pancakes!

Step 8: Serve Warm
Once cooked, remove the pancakes from the griddle and serve them warm. Drizzle with maple syrup or a vegan cream cheese glaze for an extra decadent treat. Enjoy this delightful breakfast that combines the best of both pancakes and cinnamon rolls!

How to Store and Freeze Vegan Cinnamon Roll Pancakes

Fridge: Keep cooked pancakes in an airtight container, where they will last up to 3 days. Reheat in the microwave or on a skillet for a quick breakfast treat.

Freezer: Store pancakes in the freezer by layering parchment paper between each one and placing them in a sealed bag. They can last up to 2 months, ready to be reheated in the toaster.

Reheating: When reheating, consider popping them in the toaster for a crispy exterior or warming them in the microwave for about 30 seconds to 1 minute, based on your preference.

Serving Suggestion: Drizzle with maple syrup or a vegan cream cheese glaze to enhance those delicious Vegan Cinnamon Roll Pancakes!

Vegan Cinnamon Roll Pancakes Variations

Feel free to play around with these delightful pancake variations to make them uniquely yours!

  • Whole Wheat Flour: Swap all-purpose flour for whole wheat flour, adjusting liquid as necessary for added nutrition. This twist provides a heartier pancake that brings a wholesome touch.

  • Nut Milk Variety: Use your favorite plant-based milk like almond, oat, or coconut milk instead of soy. Each option offers its unique flavor profile, enhancing both creaminess and taste.

  • Cinnamon Roll Twist: Add a dash of nutmeg or cardamom to your cinnamon swirl for an extra flavorful kick. These spices elevate the aroma and make your pancakes even more irresistible!

  • Chocolate Chip Delight: Stir in some dairy-free chocolate chips into the batter before cooking for a luscious chocolatey flavor. These pancakes become a sweet treat fans will adore.

  • Fruity Flavors: Incorporate mashed bananas or diced apples into the batter or serve with fresh strawberries for a fruity twist. The natural sweetness adds layers of flavor, making breakfast feel extra special.

  • Nutty Crunch: Add chopped nuts like walnuts or pecans to the batter for a delightful crunch. This variation not only enhances texture but also boosts healthy fats.

  • Spicy Sweetness: Drizzle with spicy maple syrup or add a pinch of cayenne pepper to the cinnamon swirl for a surprising heat that contrasts beautifully with the sweetness.

Feeling inspired? The possibilities are endless—give these variations a go and watch your Vegan Cinnamon Roll Pancakes steal the show! After all, similar to our recipes like Sweet Escape Charm and Out Egg Roll, customization allows for creativity and joy in the kitchen!

What to Serve with Vegan Cinnamon Roll Pancakes

A cozy breakfast isn’t complete without the perfect companions to elevate the flavors and textures of your delightful pancakes.

  • Fresh Berries: A burst of juicy strawberries, raspberries, or blueberries not only adds a vibrant color but also balances the sweetness with a tart contrast. The refreshing taste enhances every bite of your cinnamon swirl pancakes.

  • Vegan Cream Cheese Glaze: Drizzling this creamy glaze over your pancakes takes them from delicious to decadent. The tanginess of the cream cheese complements the sweetness beautifully, creating a rich flavor profile that’s hard to resist.

  • Maple Syrup: Pouring warm maple syrup gives your pancakes that classic breakfast feel, enhancing the sweetness and adding a comforting, syrupy glaze that soaks into every bite.

  • Toasted Nuts: Sprinkle some toasted walnuts or pecans for a crunchy texture that contrasts delightfully with the fluffy pancakes. Their rich, nutty flavor adds depth, making each bite even more satisfying.

  • Coconut Whipped Cream: Light and airy, coconut whipped cream is a delightful alternative that contributes a subtle flavor and luxurious finish, creating a creamy experience with each mouthful.

  • Cold Brew Coffee: A refreshing glass of cold brew enhances the brunch experience, providing a rich coffee flavor that balances the sweetness of the pancakes perfectly. Enjoying it with a splash of oat milk creates a lovely harmony of flavors.

Make Ahead Options

These Vegan Cinnamon Roll Pancakes are perfect for meal prep enthusiasts! You can prepare the pancake batter and refrigerate it for up to 24 hours; just be sure to cover it tightly to keep it fresh. Additionally, you can make the cinnamon swirl mixture ahead of time and store it in the refrigerator in an airtight container for up to 3 days. When ready to serve, simply let the batter sit at room temperature for about 15 minutes while you preheat your griddle, then cook as directed. This strategy allows you to enjoy delicious, fluffy pancakes without the morning rush, ensuring they remain just as delightful!

Expert Tips for Vegan Cinnamon Roll Pancakes

  • Mix Wisely: Avoid overmixing the batter, as this can cause tough pancakes. Lumps are perfectly fine for fluffy Vegan Cinnamon Roll Pancakes!
  • Let It Rest: Allow the batter to rest for 5 minutes. This step helps the pancakes achieve an airy texture.
  • Griddle Temperature: Ensure your griddle is adequately preheated. A hot surface will create golden edges while keeping the insides fluffy.
  • Swirl Technique: When piping the cinnamon swirl, start from the center and work your way outwards to create a visually appealing design.
  • Watch for Bubbles: Look for bubbles forming on the pancake surface as an indicator that it’s time to flip. This avoids undercooking.

Vegan Cinnamon Roll Pancakes Recipe FAQs

How do I choose ripe ingredients for my pancakes?
Absolutely! For the best flavor, use fresh, ripe bananas if you’re adding them to your batter. If you’re using plant-based milks, opt for unsweetened versions to avoid overpowering sweetness. Check the dates on your vegan yogurt and make sure the cinnamon isn’t too old for optimal flavor.

How should I store leftovers?
Store your cooked Vegan Cinnamon Roll Pancakes in an airtight container in the fridge, where they’ll stay fresh for up to 3 days. If you plan to enjoy them later, simply reheat them on a skillet or in the microwave for a quick breakfast treat!

Can I freeze these pancakes?
Absolutely! To freeze your Vegan Cinnamon Roll Pancakes, layer them with parchment paper in between and place them in a sealed freezer bag. They can last in the freezer for up to 2 months. When you’re ready to enjoy, simply pop them in the toaster or microwave for a quick and easy breakfast.

What if my pancakes come out too dense?
If your pancakes turn out dense, it could be due to overmixing the batter. Remember, lumps are perfectly fine! Another tip is to ensure your baking powder is fresh, as expired leavening agents can result in flat pancakes. If they still seem heavy, try adding a little more liquid or letting the batter rest longer.

Are these pancakes suitable for people with allergies?
Yes! These Vegan Cinnamon Roll Pancakes are free of animal products, making them suitable for those following a vegan diet. However, if you have nut allergies, be cautious with almond butter and consider substituting it with sunflower seed butter or a similar alternative to suit your dietary needs.

Can I customize this recipe for different flavors?
Very! Feel free to play with flavors by adding spices like nutmeg or vanilla extract for extra depth. You can also incorporate add-ins like nuts, chocolate chips, or even fruit to create personalized variations. The more, the merrier!

Vegan Cinnamon Roll Pancakes

Delicious Vegan Cinnamon Roll Pancakes for a Cozy Breakfast

These Vegan Cinnamon Roll Pancakes are a delightful mashup of two beloved breakfast classics, designed to bring joy to your morning routine.
Prep Time 10 minutes
Cook Time 15 minutes
Resting Time 5 minutes
Total Time 30 minutes
Servings: 4 pancakes
Course: Breakfast
Cuisine: Vegan
Calories: 200

Ingredients
  

Pancake Base
  • 1 cup All-Purpose Flour Whole wheat flour can be substituted
  • 1 cup Soy Milk Can substitute with almond or pea milk
  • 1 tbsp Apple Cider Vinegar Can use lemon juice as an alternative
  • 1 tbsp Vegan Butter Avocado oil can be used for a lighter option
  • 2 tbsp Brown Sugar Coconut sugar is a healthier alternative
  • 2 tsp Baking Powder
  • 1/2 tsp Baking Soda
  • 1 tsp Ground Cinnamon Feel free to experiment with other spices
  • 1/4 tsp Salt
  • 1/2 cup Vegan Yogurt Choosing a thicker variety works best
  • 1 tsp Vanilla Extract
Cinnamon Swirl
  • 2 tbsp Brown Sugar Coconut sugar can substitute
  • 1 tsp Ground Cinnamon
  • 1 tbsp Almond Butter Peanut butter can also be a substitute
  • 1 tbsp Maple Syrup Agave syrup can be used as a substitute

Equipment

  • Mixing bowls
  • griddle
  • Measuring cups
  • whisk
  • Spoon
  • Sandwich Bag

Method
 

Preparation
  1. In a measuring cup, combine soy milk with apple cider vinegar and let it sit for 5 minutes.
  2. In a mixing bowl, blend brown sugar, ground cinnamon, almond butter, and maple syrup for the cinnamon swirl mixture.
  3. In a large bowl, whisk together all-purpose flour, brown sugar, baking powder, baking soda, ground cinnamon, and salt.
  4. Add melted vegan butter, vegan yogurt, vanilla extract, and the soy milk mixture to the dry ingredients and mix gently.
  5. Preheat the griddle over medium heat and lightly grease it with vegan butter.
  6. Pour pancake batter onto the griddle, pipe the cinnamon swirl on top, and cook until bubbles form, about 2-3 minutes.
  7. Flip the pancake and cook until golden brown for another 2-3 minutes.
  8. Serve warm, drizzled with maple syrup or a vegan cream cheese glaze.

Nutrition

Serving: 1pancakeCalories: 200kcalCarbohydrates: 30gProtein: 4gFat: 8gSaturated Fat: 1gPolyunsaturated Fat: 3gMonounsaturated Fat: 4gSodium: 200mgPotassium: 150mgFiber: 2gSugar: 6gCalcium: 10mgIron: 8mg

Notes

Enjoy these delightful pancakes that combine the best of pancakes and cinnamon rolls!

Tried this recipe?

Let us know how it was!

Cottage Cheese Blueberry Bread: A Light, Wholesome Treat

As I pulled the golden loaf from the oven, the delicate aroma of warm blueberries filled my kitchen, instantly making my mouth water. Today, I’m excited to share my take on a delightful twist—Fluffy Cottage Cheese Blueberry Cloud Bread. This recipe is a perfect marriage of airy texture and wholesome goodness, ideal for breakfast enthusiasts and snack lovers alike. Not only is it low-carb and gluten-free, but it packs a protein punch with the addition of creamy cottage cheese, ensuring that each slice is both satisfying and nutritious. Whether you’re looking to impress guests or simply enjoy a guilt-free bite, this healthy bread is incredibly easy to whip up, making it a fabulous choice for all skill levels. Ready to elevate your baking game? Let’s dive into creating this magical treat!

Why Choose Cottage Cheese Blueberry Bread?

Nutrition Meets Flavor: Packed with protein, this recipe offers a delicious way to enjoy healthy eating without sacrificing taste.

Guilt-Free Indulgence: Perfect for those on low-carb or gluten-free diets, each slice provides a satisfying treat that feels indulgent.

Easy to Make: With just a few simple ingredients, you can create a delightful loaf that’s ideal for both experienced bakers and novices.

Versatile Serving Options: Whether enjoyed for breakfast, as a snack, or paired with a fresh salad, it suits any meal time.

Creative Twist: Swap blueberries for other fruits like raspberries or strawberries to keep your taste buds entertained!

This Cottage Cheese Blueberry Bread is not just about taste; it’s an experience. Serve it fresh with a little almond butter for a boost of healthy fats or check out my recipe for Banana Blueberry Breakfast for another wholesome delight!

Cottage Cheese Blueberry Bread Ingredients

For the Base

  • Cottage Cheese – Provides moisture and protein; blend until smooth for even incorporation.
  • Egg Whites – Essential for fluffiness; must be whipped to stiff peaks for the desired airy texture.
  • Blueberries – Adds natural sweetness and antioxidants; use fresh or properly prepared frozen.
  • Cream of Tartar – Stabilizes egg whites during beating; optional but enhances volume.
  • Vanilla Extract – Optional for added flavor depth, making the Cottage Cheese Blueberry Bread more delightful.
  • Salt – Enhances the overall taste; a small amount is crucial to balance flavors.

For Serving (Optional)

  • Almond Butter – A wonderful spread to add healthy fats and creamy goodness on top of your bread.
  • Fresh Herbs or Salad Greens – Pair with greens for a light, refreshing side dish or topping option.

Step‑by‑Step Instructions for Cottage Cheese Blueberry Bread

Step 1: Preheat the Oven
Begin by preheating your oven to 300°F (150°C). This low temperature is key for creating the fluffy texture in your Cottage Cheese Blueberry Bread. While the oven heats, line a baking sheet with parchment paper; this will prevent sticking and make cleanup a breeze.

Step 2: Blend the Cottage Cheese
In a mixing bowl, place your cottage cheese and blend it until smooth. This step is crucial as it ensures even distribution throughout the bread, contributing to its airy consistency. A handheld blender or food processor will work wonders here, taking about 2-3 minutes for the perfect texture.

Step 3: Whip the Egg Whites
In a separate, clean bowl, add your egg whites along with a pinch of cream of tartar for stabilization. Using an electric mixer, beat the egg whites until they form stiff peaks—this will take approximately 3-5 minutes. They should look glossy and hold their shape firmly, setting the foundation for a light and fluffy loaf.

Step 4: Combine the Mixtures
Gently fold the smooth cottage cheese into the whipped egg whites using a spatula. Be careful to maintain the airiness you’ve created; the goal here is a homogenous mix without deflating the egg whites. This delicate integration is essential for achieving the cloud-like texture of your Cottage Cheese Blueberry Bread.

Step 5: Add Blueberries and Season
Next, gently fold in your fresh or prepared frozen blueberries, followed by a sprinkle of salt. Mixing slowly will retain the fluffy structure of the batter while ensuring the blueberries are evenly distributed. You want to see pockets of vibrant berries throughout the mixture for bursts of flavor in every bite.

Step 6: Spoon the Mixture onto the Baking Sheet
Using a large spoon or spatula, carefully transfer the cottage cheese mixture onto the prepared baking sheet, shaping it into a loaf. Aim for an even thickness to promote uniform baking. This step is vital for the Cottage Cheese Blueberry Bread to rise evenly and develop a beautiful golden crust.

Step 7: Bake the Bread
Place the baking sheet in the preheated oven and bake for 30 minutes. You’ll know it’s ready when the bread is golden brown and set in the middle, signaling that the internal texture is fluffy yet firm. Keep an eye on it in the last few minutes to avoid over-baking.

Step 8: Cool and Serve
Once baked, remove your Cottage Cheese Blueberry Bread from the oven and let it cool slightly on a wire rack. This cooling period allows the bread to set further, making it easier to slice. After about 10 minutes, it’s ready to be sliced and enjoyed, whether as a snack or a delightful breakfast treat.

What to Serve with Fluffy Cottage Cheese Blueberry Cloud Bread?

Elevate your meal experience by pairing this light and airy treat with delightful accompaniments that complete the culinary journey.

  • Almond Butter: This creamy spread adds healthy fats and a nutty flavor, perfect for slathering on a warm slice.

  • Fresh Fruit Salad: A medley of bright, seasonal fruits adds a refreshing, juicy contrast, enhancing the natural sweetness of the blueberries.

  • Greek Yogurt Parfait: Layer creamy yogurt with granola and fresh berries for a protein-packed, nutritious breakfast option that feels indulgent.

  • Herbed Green Salad: A simple salad with mixed greens and a light vinaigrette balances flavors and textures, creating a satisfying meal.

  • Scrambled Eggs: The fluffy texture of scrambled eggs pairs beautifully with the cloud bread, providing a hearty yet light breakfast idea.

  • Honey Drizzle: A touch of honey adds a warm sweetness that perfectly complements the tangy blueberries in the bread.

  • Sparkling Water with Citrus: A refreshing beverage option, infusing sparkling water with lemon or lime brightens the meal.

  • Dark Chocolate Squares: For a sweet treat, enjoy a few squares of dark chocolate alongside your bread—the rich flavors play well together.

Make Ahead Options

These Cottage Cheese Blueberry Bread loaves are perfect for meal prep enthusiasts! You can blend the cottage cheese and whip the egg whites up to 24 hours in advance, storing them separately in the refrigerator to maintain freshness. Additionally, you can mix the dry ingredients together (including the salt and cream of tartar) up to 3 days before baking for a quick assembly. When you’re ready to serve, simply fold everything together, add the blueberries, shape the loaf, and bake it fresh for a delightful treat that’s just as delicious as when made the same day. Enjoy the ease of having part of your baking prepped ahead, ensuring you have healthy, homemade options at your fingertips!

Expert Tips for Cottage Cheese Blueberry Bread

Grease-Free Bowls: Ensure that all bowls and utensils are completely clean and grease-free to achieve maximum volume in your egg whites.

Gentle Folding: When incorporating the cottage cheese into your whipped egg whites, fold gently to maintain airiness; overmixing can lead to a dense bread.

Fresh or Frozen Blueberries: Prefer fresh blueberries for the best flavor, but if you use frozen, be sure to rinse and dry them thoroughly to prevent excess moisture in the batter.

Monitor Baking Time: Keep an eye on your Cottage Cheese Blueberry Bread while it bakes; the perfect golden crust is your cue that it’s ready—avoid over-baking for the best texture.

Experiment with Flavors: Feel free to swap blueberries for other fruits like raspberries or strawberries, or consider adding lemon zest for a refreshing twist.

How to Store and Freeze Cottage Cheese Blueberry Bread

Room Temperature: Store the Cottage Cheese Blueberry Bread in an airtight container at room temperature for up to 3 days. This keeps it fresh without compromising its fluffy texture.

Fridge: If you prefer, refrigerate the bread in an airtight container for up to 5 days. Be sure to allow it to reach room temperature before serving for optimal taste.

Freezer: Freeze the bread by wrapping individual slices tightly in plastic wrap and then placing them in a freezer-safe bag. It can last up to 3 months; just thaw at room temperature when you’re ready to enjoy.

Reheating: For a warm treat, simply pop slices in the toaster or microwave, heating in short intervals until warm. Avoid overheating to maintain its delightful fluffiness.

Cottage Cheese Blueberry Bread Variations

Customize your Cottage Cheese Blueberry Bread to suit your taste and dietary needs with these fun variations!

  • Berry Swap: Replace blueberries with raspberries or strawberries for a refreshing twist. Both fruits offer unique flavors and delightful bursts of sweetness.

  • Sweetener Boost: Add a splash of honey or maple syrup to the mixture for extra sweetness. Just keep in mind this will slightly alter the carb count, making it a perfect treat for those who can indulge a little.

  • Zesty Delight: Incorporate lemon zest into the batter for a bright, citrusy flavor. The zest enhances the overall profile and pairs beautifully with the sweetness of the blueberries.

  • Creamy Alternative: Switch cottage cheese for Greek yogurt for a creamier texture. This change not only keeps the fluffiness intact but also adds a subtle tanginess.

  • Nutty Crunch: Fold in some chopped walnuts or pecans for added texture and healthy fats. The crunch of nuts complements the soft, airy bread beautifully.

  • Heat it Up: For those who enjoy a little spice, consider adding a pinch of cayenne pepper or crushed red pepper flakes to the batter. It creates an unexpected flavor contrast that’s sure to excite.

  • Flavored Extracts: Try swapping vanilla extract for almond extract for a delightful twist that adds depth and richness to your Cottage Cheese Blueberry Bread.

  • Savory Touch: Transform this bread into a savory option by adding herbs like rosemary or thyme. Pair it with a light salad for a refreshing lunch or snack option.

Let your creativity shine with this Cottage Cheese Blueberry Bread! Serve it fresh with almond butter or enjoy it alongside a light salad. If you’re looking for other delightful recipes, don’t miss out on my Lemon Blueberry Summery dish that is equally refreshing!

Cottage Cheese Blueberry Bread Recipe FAQs

What type of cottage cheese should I use?
For this recipe, I recommend using full-fat or 2% cottage cheese to achieve the best flavor and moisture. Make sure to blend it until smooth. This helps in achieving an even consistency throughout your Cottage Cheese Blueberry Bread, resulting in a cloud-like texture.

How should I store leftover Cottage Cheese Blueberry Bread?
Store your Cottage Cheese Blueberry Bread in an airtight container at room temperature for up to 3 days. For longer storage, you can refrigerate it for up to 5 days. Just be sure to let it come to room temperature before serving to enjoy the full flavor and texture.

Can I freeze Cottage Cheese Blueberry Bread, and how?
Absolutely! To freeze your Cottage Cheese Blueberry Bread, first wrap individual slices tightly in plastic wrap. Then, place them in a freezer-safe bag. This way, they can last up to 3 months in the freezer. Thaw at room temperature, and to warm them up, pop the slices in the toaster or microwave for a quick treat without losing the fluffiness.

What to do if my egg whites aren’t whipping up?
If your egg whites aren’t forming stiff peaks, ensure your mixing bowl and utensils are completely grease-free—any residual fat can inhibit the whipping process. It’s also helpful to start with room temperature egg whites, as they whip better. Be patient; sometimes, it can take a few extra minutes to reach that perfect stage!

Can I make this recipe dairy-free or suitable for allergies?
If you’re looking to make a dairy-free version, you can try using a dairy-free cottage cheese alternative or silken tofu as a base. However, be mindful that changing ingredients may alter the texture and flavor. Always check the labels to avoid allergens, and ensure that the rest of your ingredients are compliant with dietary needs.

Cottage Cheese Blueberry Bread

Cottage Cheese Blueberry Bread: A Light, Wholesome Treat

Cottage Cheese Blueberry Bread is a light and healthy treat that's low-carb and gluten-free.
Prep Time 15 minutes
Cook Time 30 minutes
Cooling Time 10 minutes
Total Time 55 minutes
Servings: 8 slices
Course: Breakfast
Cuisine: Wholesome
Calories: 120

Ingredients
  

For the Base
  • 1 cup Cottage Cheese Blend until smooth
  • 4 large Egg Whites Whipped to stiff peaks
  • 1 cup Blueberries Fresh or properly prepared frozen
  • 1/2 tsp Cream of Tartar Optional, for stabilization
  • 1 tsp Vanilla Extract Optional for added flavor
  • 1/4 tsp Salt Balances flavors
For Serving (Optional)
  • 1 tbsp Almond Butter For spreading
  • Fresh Herbs or Salad Greens Use as a light side

Equipment

  • Mixing Bowl
  • Electric mixer
  • spatula
  • Baking Sheet
  • Parchment Paper
  • Handheld blender or food processor

Method
 

Step-by-Step Instructions
  1. Preheat your oven to 300°F (150°C) and line a baking sheet with parchment paper.
  2. Blend the cottage cheese until smooth.
  3. Whip the egg whites with cream of tartar until they form stiff peaks.
  4. Gently fold the cottage cheese into the whipped egg whites.
  5. Fold in blueberries and sprinkle salt.
  6. Transfer the mixture onto the baking sheet and shape into a loaf.
  7. Bake for 30 minutes until golden brown.
  8. Cool on a wire rack for 10 minutes before slicing.

Nutrition

Serving: 1sliceCalories: 120kcalCarbohydrates: 9gProtein: 10gFat: 4gSaturated Fat: 1gPolyunsaturated Fat: 1gMonounsaturated Fat: 2gSodium: 100mgPotassium: 200mgFiber: 2gSugar: 3gVitamin A: 2IUVitamin C: 6mgCalcium: 10mgIron: 4mg

Notes

Store in an airtight container at room temperature for up to 3 days, or refrigerate for 5 days. Can be frozen for 3 months.

Tried this recipe?

Let us know how it was!

Cheddar & Bacon Dutch Baby: Your New Favorite Breakfast Treat

A whiff of crispy bacon and melted cheddar can whisk you straight to brunch heaven! Today, I’m thrilled to share my recipe for Savory Cheddar & Bacon Dutch Baby, a dish that perfectly marries the fluffiness of a pancake with the richness of quiche. In just 35 minutes, you can whip up this brunch showstopper that’s not only a delight to the palate but also a versatile canvas—feel free to customize it with gluten-free flour or swap out the bacon for sautéed veggies if you prefer a vegetarian twist. It’s the kind of meal that makes your kitchen feel like a cozy café, and I guarantee it will have your loved ones asking for seconds. Are you ready to elevate your breakfast game? Let’s dive into this delicious recipe!

Why is this Dutch Baby so special?

Fluffy Texture: The Savory Cheddar & Bacon Dutch Baby achieves a delightful puffiness, creating a light and airy sensation with every bite.

Versatile Base: Not only is it delicious as is, but you can easily customize by opting for gluten-free flour or swapping in your favorite vegetables instead of bacon.

Quick Cooking Time: With a total prep and cook time of just 35 minutes, this dish is perfect for busy mornings or impromptu brunch gatherings.

Crowd Pleaser: Its impressive presentation and savory flavor make it an instant favorite among friends and family—perfect for sharing or special occasions.

Comforting Flavor: The combination of crispy bacon and melted cheddar guarantees each mouthful is packed with rich, savory goodness. Try pairing it with a fresh fruit salad or crispy hash browns for the ultimate brunch experience!

Cheddar & Bacon Dutch Baby Ingredients

Get ready to savor each scrumptious bite!

For the Batter

  • Eggs – Essential for providing structure and lift.
  • All-Purpose Flour – Creates the base of the batter; provides structure.
  • Substitution Note: Use gluten-free flour for a gluten-free option.
  • Milk – Adds moisture and richness to the batter.
  • Substitution Note: Substitute with almond milk for a dairy-free version.
  • Melted Butter – Adds richness and flavor to the batter.
  • Substitution Note: Use olive oil or coconut oil for a dairy-free option.
  • Salt – Enhances flavors of the other ingredients.
  • Black Pepper – Adds a touch of spice; can be adjusted based on preference.
  • Substitution Note: Omit for a milder flavor.

For Toppings

  • Sharp Cheddar Cheese – Provides creaminess and flavor.
  • Substitution Note: Try gouda or feta for a distinct flavor experience.
  • Crispy Bacon – Adds savory richness to the dish.
  • Substitution Note: Use sautéed mushrooms or crispy tempeh for a meat-free option.
  • Fresh Parsley & Chives – Optional garnishes that enhance flavor and appearance.
  • Honey or Hot Honey – Adds a sweet-savory twist if drizzled over the finished dish.
  • Substitution Note: Optional for those who prefer sweetness.

Step‑by‑Step Instructions for Cheddar & Bacon Dutch Baby

Step 1: Preheat the Oven
Begin by preheating your oven to 425°F (220°C). Place a cast-iron skillet on the middle rack to heat up simultaneously. This crucial step ensures that the skillet is sizzling hot, which is key for creating those crispy edges in your Cheddar & Bacon Dutch Baby. Allow the oven to preheat for about 10-15 minutes.

Step 2: Blend the Batter
While the skillet heats, grab a blender and combine the eggs, all-purpose flour, milk, melted butter, salt, and black pepper. Blend the mixture until it’s smooth and frothy, which should take around 30 seconds. This step is essential for achieving a light texture in your Dutch Baby, so blend well and set the batter aside for a few minutes to let it rest.

Step 3: Prepare the Hot Skillet
After the oven has reached temperature, carefully remove the hot skillet using oven mitts. Be cautious of the heat! Add a generous pat of butter to the skillet, swirling it around until it’s melted and evenly coats the bottom. This will create a rich, flavorful base for your Cheddar & Bacon Dutch Baby and help prevent sticking.

Step 4: Pour in the Batter
Once the butter has melted, pour the rested batter directly into the hot skillet. Be careful to pour evenly, which will help the Dutch Baby puff up beautifully while baking. You should hear a slight sizzle as the batter meets the hot surface. This is a good sign that your Dutch Baby will develop a delightful texture.

Step 5: Add Toppings
Sprinkle the shredded sharp cheddar cheese and crumbled crispy bacon evenly over the batter in the skillet. The cheese will melt into the mixture, adding creamy goodness, while the bacon contributes a savory richness. Arrange your toppings to ensure every bite of your Cheddar & Bacon Dutch Baby is packed with flavor.

Step 6: Bake to Perfection
Place the skillet back into the preheated oven and bake for about 20-25 minutes. Look for the edges to puff up and turn a golden brown color while the center remains soft yet set. Avoid opening the oven door during baking to let it rise fully. The aroma will be irresistible!

Step 7: Garnish and Serve
Once baked, remove the skillet from the oven and let it cool slightly. Garnish your Cheddar & Bacon Dutch Baby with freshly chopped parsley and chives for a burst of color and flavor. If desired, drizzle with honey or hot honey for a sweet-savory accent. Serve warm straight from the skillet for a delightful brunch experience!

Expert Tips for Cheddar & Bacon Dutch Baby

  • Preheat Thoroughly: Ensure your skillet is very hot when you pour in the batter; this creates the crispy edges that make the Cheddar & Bacon Dutch Baby truly special.

  • Let it Rest: Allow the batter to rest for 5 minutes before pouring it into the skillet; this simple step improves the fluffiness of the final dish.

  • Avoid Opening the Oven: Do not open the oven door while baking! This prevents the Dutch Baby from deflating, ensuring it puffs elegantly.

  • Quality Ingredients Matter: Fresh, high-quality bacon and cheddar significantly enhance the flavor of your Dutch Baby; consider using artisanal cheese or local bacon for the best results.

  • Customize Wisely: Feel free to swap bacon for veggies, but be cautious with moisture levels when using ingredients like spinach to avoid a soggy Dutch Baby.

Cheddar & Bacon Dutch Baby Variations

Feel free to explore these exciting twists to make your Cheddar & Bacon Dutch Baby truly your own!

  • Gluten-Free: Use a gluten-free flour blend to keep it light and airy for those avoiding gluten. This way, everyone can enjoy this fabulous dish without compromise.

  • Vegetarian: Swap the bacon with sautéed mushrooms, spinach, or even roasted cherry tomatoes for a hearty, veggie-rich version. Your Dutch Baby will still be packed with flavor, just without the meat!

  • Dairy-Free: Substitute the milk with almond milk and use dairy-free cheese to make this breakfast dish suitable for those avoiding dairy. You won’t sacrifice taste; it still comes alive with flavor!

  • Spicy Kick: Add a pinch of cayenne pepper or diced jalapeños to the batter for a touch of heat! This vibrant variation will bring a delightful zing to your Dutch Baby.

  • Cheese Adventure: Try replacing sharp cheddar with gouda, feta, or even pepper jack for different flavor profiles. Each cheese will give your Dutch Baby a unique twist and added depth.

  • Savory Herbs: Mix fresh herbs like thyme or rosemary into the batter for an aromatic lift. These hints of freshness will make your breakfast even more inviting.

  • Sweet and Savory: Drizzle hot honey over the top before serving for a wonderful contrast against the rich flavors. This delightful addition turns a breakfast classic into a sweet adventure!

  • Loaded Style: Top with diced tomatoes, avocado slices, and a dollop of sour cream or Greek yogurt for an extravagant brunch experience. These toppings add creaminess and freshness to each bite!

Feel free to explore these variations and make this Cheddar & Bacon Dutch Baby a dish that reflects your taste! And don’t forget, if you’re in the mood for more comforting flavors, check out my bubbly Potato Bacon Soup or my creamy Cozy Broccoli Cheddar Soup. You’ll find plenty of comfort food delights to share!

What to Serve with Cheddar & Bacon Dutch Baby

Elevate your breakfast experience with delightful accompaniments that complement the rich flavors of this savory dish.

  • Fresh Fruit Salad: Bright, juicy fruits like berries and melons add a refreshing contrast to the savory richness, balancing flavors beautifully.

  • Crispy Hash Browns: The crunchy texture of golden-brown hash browns pairs perfectly, providing a comforting and satisfying bite alongside the fluffy Dutch Baby.

  • Arugula Salad: A light salad with peppery arugula, cherry tomatoes, and a lemon vinaigrette adds brightness and a hint of pepperiness, enhancing each bite.

  • Mimosas: This classic brunch cocktail, a mix of sparkling wine and fresh orange juice, offers a celebratory touch, perfectly complementing the savory notes of the dish.

  • Yogurt Parfait: Layered with granola and fresh fruit, a yogurt parfait provides a creamy, sweet, and crunchy contrast to the Cheddar & Bacon Dutch Baby, making each mouthful a delightful experience.

  • Creamy Avocado Toast: The creamy richness of avocado on toasted bread adds a luxurious texture and flavor that complements the Dutch Baby’s savory elements.

Each of these pairings will enhance your dining experience, making your meal not just satisfying but truly memorable!

Make Ahead Options

Preparing your Savory Cheddar & Bacon Dutch Baby in advance is a fantastic way to streamline your busy mornings! You can mix the batter, combining the eggs, flour, milk, melted butter, salt, and pepper, up to 24 hours before baking—just refrigerate it in an airtight container. Additionally, you can pre-cook the bacon and have it ready to sprinkle on top. When you’re ready to bake, simply bring the batter to room temperature, pour it into your hot skillet, add the cheese and bacon, and bake as directed. This way, you’ll enjoy a delicious, homemade breakfast in no time, making it perfect for meal prep!

Storage Tips for Cheddar & Bacon Dutch Baby

  • Room Temperature: If you have any leftovers, you can leave the Cheddar & Bacon Dutch Baby out for up to 2 hours after cooking, but be sure to refrigerate it afterward to keep it fresh.

  • Fridge: Store any cooled leftovers in an airtight container in the fridge for up to 3 days. This helps maintain its texture while preserving its delightful flavors.

  • Freezer: For longer storage, wrap individual portions tightly in plastic wrap and then place them in a freezer-safe bag. The Dutch Baby can be frozen for up to 2 months.

  • Reheating: When ready to enjoy again, reheat in the oven at 350°F (175°C) for about 10-15 minutes until warmed through. This will help retain the crispy edges and fluffy texture.

Cheddar & Bacon Dutch Baby Recipe FAQs

How do I choose the right bacon for my Cheddar & Bacon Dutch Baby?
When selecting bacon, look for high-quality, thick-cut varieties for the best flavor and texture. Fresh bacon with a good balance of meat and fat will render nicely, contributing savory richness to the dish. Check for a nice pink color with minimal dark spots on the packaging; this indicates freshness.

How should I store leftovers of the Cheddar & Bacon Dutch Baby?
Store any cooled leftovers in an airtight container in the fridge for up to 3 days. This will help maintain its delightful fluffiness and flavors. If you want to keep it for longer, wrap individual portions tightly in plastic wrap and place them in a freezer-safe bag. They can be frozen for up to 2 months.

Can I freeze my Cheddar & Bacon Dutch Baby? How?
Absolutely! To freeze, just let the Dutch Baby cool completely, then slice it into individual portions. Wrap each slice tightly in plastic wrap, followed by aluminum foil, to prevent freezer burn. Place the wrapped portions in a labeled freezer-safe bag. When ready to eat, simply reheat in the oven at 350°F (175°C) for about 10-15 minutes until warmed through. This helps retain that wonderful fluffy texture!

What should I do if my Dutch Baby doesn’t rise properly?
If your Dutch Baby doesn’t rise as expected, it could be due to a few factors. Make sure your oven is preheated properly, as a hot skillet is crucial for that perfect puff. Also, blend your batter until smooth—air incorporated during blending adds lift. Lastly, avoid opening the oven door while it bakes, as even a small change in temperature can cause it to deflate.

Are there any dietary concerns I should consider with this recipe?
If you’re cooking for someone with dietary restrictions, this recipe is quite adaptable! To make it gluten-free, use a dedicated gluten-free flour blend. For dairy-free options, substitute the milk with almond milk and use dairy-free cheese. If there are allergy concerns regarding bacon, consider swapping it with sautéed mushrooms or crispy tempeh for a delightful vegetarian alternative.

Cheddar & Bacon Dutch Baby

Cheddar & Bacon Dutch Baby: Your New Favorite Breakfast Treat

Experience brunch heaven with this Cheddar & Bacon Dutch Baby, a delicious fusion of pancake fluffiness and quiche richness.
Prep Time 15 minutes
Cook Time 20 minutes
Resting Time 5 minutes
Total Time 35 minutes
Servings: 4 slices
Course: Breakfast
Cuisine: American
Calories: 300

Ingredients
  

For the Batter
  • 4 large Eggs
  • 1 cup All-Purpose Flour Use gluten-free flour for a gluten-free option.
  • 1 cup Milk Substitute with almond milk for a dairy-free version.
  • 3 tablespoons Melted Butter Use olive oil or coconut oil for a dairy-free option.
  • 1/2 teaspoon Salt
  • 1/4 teaspoon Black Pepper Omit for a milder flavor.
For Toppings
  • 1 cup Sharp Cheddar Cheese Try gouda or feta for a distinct flavor experience.
  • 6 slices Crispy Bacon Use sautéed mushrooms or crispy tempeh for a meat-free option.
  • 1/4 cup Fresh Parsley & Chives Optional garnishes.
  • to taste Honey or Hot Honey Optional for those who prefer sweetness.

Equipment

  • cast-iron skillet
  • blender

Method
 

Step-by-Step Instructions
  1. Preheat your oven to 425°F (220°C) and place a cast-iron skillet inside to heat up for about 10-15 minutes.
  2. Blend the eggs, all-purpose flour, milk, melted butter, salt, and black pepper until smooth and frothy. Allow it to rest for a few minutes.
  3. Carefully remove the hot skillet, add a pat of butter, and swirl until melted to prevent sticking.
  4. Pour the rested batter into the hot skillet evenly, ensuring a sizzling sound.
  5. Sprinkle sharp cheddar cheese and crumbled bacon over the batter.
  6. Bake for 20-25 minutes until puffed and golden brown; do not open the oven door.
  7. Let it cool slightly, then garnish with parsley and chives, drizzle with honey if desired, and serve warm.

Nutrition

Serving: 1sliceCalories: 300kcalCarbohydrates: 30gProtein: 12gFat: 15gSaturated Fat: 7gPolyunsaturated Fat: 1gMonounsaturated Fat: 6gCholesterol: 150mgSodium: 600mgPotassium: 250mgFiber: 1gSugar: 1gVitamin A: 500IUVitamin C: 1mgCalcium: 200mgIron: 2mg

Notes

This Dutch Baby is delicious as is but can be customized with gluten-free flour or vegetables instead of bacon. Avoid opening the oven while baking for best results.

Tried this recipe?

Let us know how it was!

Savory Breakfast Lasagna: A Hearty Morning Delight

As I stood in my kitchen on a lazy Sunday morning, the tantalizing aroma of breakfast wafted through the air, instantly cheering me up. That’s the magic of this Hearty Spicy Breakfast Lasagna—layer upon layer of creamy, cheesy delight waiting to be devoured! Ideal for those who crave a hearty meal, this recipe combines fluffy scrambled eggs, savory breakfast sausage, and crispy hash browns into a beautiful bake that not only satisfies but also saves precious time. It’s perfect for a stress-free brunch with friends or a cozy family gathering. Plus, it doubles as a fantastic make-ahead dish, ensuring you’ll have a delicious morning treat ready when you need it most. Are you ready to elevate your breakfast game? Let’s dive into this exciting and hearty dish!

Why is Breakfast Lasagna a Must-Make?

Hearty layers of flavor: This Spicy Breakfast Lasagna brings together fluffy eggs, savory sausage, and crispy hash browns for a satisfying start to your day.

Make-Ahead Magic: Prepare it the night before for effortless morning dining—just bake and serve!

Crowd-Pleasing Delight: Perfect for brunch gatherings, this dish pleases both family and friends, leaving everyone wanting seconds.

Nutrient-Rich Benefits: With high protein content, this meal fuels your day while being indulgent.

Versatile Options: Feeling adventurous? Customize it with your favorite veggies or a dash of hot sauce for that extra kick!

As you explore this recipe, don’t forget to check out my Banana Blueberry Breakfast for a lovely side or my Croissant Breakfast Sandwich to complete your brunch spread!

Breakfast Lasagna Ingredients

This dish is packed with all the hearty flavors and textures you crave!

For the Cheese Mixture
Cottage Cheese (3 cups) – Provides creaminess and protein; Ricotta can be used for a similar texture.
Chives (1/2 cup) – Adds a mild onion flavor; Green onions or scallions can replace chives if desired.

For the Egg Mixture
Large Eggs (18) – Forms the base for your breakfast lasagna, providing structure and protein.
2% Milk (1/3 cup) – Adds moisture to the eggs; Whole milk or a plant-based milk also works well.
Salt (1/2 tsp) and Pepper (1/4 tsp) – Enhances the overall flavor profile.

For the Layers
Lasagna Noodles (8, cooked and drained) – Creates the layered structure; Avoid no-boil noodles for the best results.
Frozen Shredded Hash Browns (4 cups, thawed) – Provides a crispy layer; Homemade or leftover potatoes can do the trick.
Bulk Pork Sausage (1 lb, cooked and crumbled) – Delivers richness and a spiced kick; Use plant-based sausage for a vegetarian alternative.

For the Toppings
Pepper Jack Cheese (8 oz, sliced) – Adds creaminess and a spicy kick; Monterey Jack offers a milder flavor if preferred.
Muenster Cheese (8 oz, sliced) – Melts beautifully and enhances the overall creaminess.

This rich and hearty breakfast lasagna is sure to be a hit at your next gathering. Happy cooking!

Step‑by‑Step Instructions for Hearty Spicy Breakfast Lasagna

Step 1: Prepare the Cheese Mixture
In a large mixing bowl, combine the cottage cheese, chives, and green onions. Stir until well blended, ensuring the ingredients are evenly distributed. This creamy mixture sets the foundation for your Hearty Spicy Breakfast Lasagna. Set the bowl aside while you prepare the eggs.

Step 2: Whisk the Egg Mixture
In another bowl, whisk together the eggs, milk, salt, and pepper until fully combined and frothy. This mixture will form the core protein layer of your breakfast lasagna. Aim for a smooth consistency to ensure an even texture when cooked.

Step 3: Scramble the Eggs
Heat a tablespoon of butter in a skillet over medium heat. Pour in the egg mixture and gently scramble, stirring continuously until the eggs are just thickened but still slightly runny—about 3-4 minutes. Remove from heat; the eggs will continue cooking in the oven, adding the perfect fluffiness to your lasagna.

Step 4: Assemble the Baking Dish
Grease a 13×9-inch baking dish with butter. Start layering by placing 4 lasagna noodles at the bottom, ensuring they slightly overlap for even coverage. This base holds the entire Hearty Spicy Breakfast Lasagna together.

Step 5: Layer the Ingredients
Spread half the hash browns over the noodles, followed by the scrambled eggs, crumbled sausage, and half of the cottage cheese mixture. This step builds the hearty layers of flavor. Repeat the process for even distribution, ensuring each layer remains balanced and flavorful.

Step 6: Add Cheese and Final Layers
Top the lasagna with slices of pepper jack cheese. Then add the remaining lasagna noodles, followed by the rest of the hash browns and cottage cheese mixture. This final assembly seals in the flavors and ensures every bite is deliciously cheesy.

Step 7: Finish with Muenster Cheese
Layer the Muenster cheese slices evenly over the top of the assembled lasagna. This will melt beautifully during baking, creating a golden crust that’s as enticing as it is delicious, making your Hearty Spicy Breakfast Lasagna irresistible.

Step 8: Refrigerate Before Baking
Cover the dish tightly with plastic wrap and refrigerate for at least 8 hours or overnight if possible. This not only enhances the flavors but also allows the lasagna to set, making it easier to bake evenly.

Step 9: Preheat and Let Sit
On the day of baking, preheat your oven to 350°F (175°C). Remove the lasagna from the refrigerator and let it sit at room temperature for about 30 minutes before baking. This helps the dish bake more evenly, ensuring a perfect texture.

Step 10: Bake to Perfection
Bake the Hearty Spicy Breakfast Lasagna uncovered for 35-40 minutes, or until the top is golden and set. The cheese should be bubbling, and a toothpick inserted into the center should come out clean.

Step 11: Rest and Slice
Once baked, remove the dish from the oven and let it rest for 5 minutes. This resting time allows the lasagna to set further, making it easier to slice. Serve warm and watch everyone delight in the savory flavor of your creation.

Expert Tips for Breakfast Lasagna

  • Egg Care: Avoid overcooking the scrambled eggs; they will firm up while baking, which may toughen your breakfast lasagna.
  • Layer Wisely: Ensure even layering of ingredients for a balanced taste in every slice, making the dish enjoyable from start to finish.
  • Cooling Time: Let the lasagna sit for 5 minutes after baking before slicing; this helps with cleaner cuts and a more appealing presentation.
  • Moisture Management: Adjust moisture when using vegetarian sausage or extra veggies; too much may make your breakfast lasagna soggy.
  • Prep Ahead: Feel free to prepare the lasagna the night before; chilling allows the flavors to meld beautifully for a delicious morning dish!

How to Store and Freeze Breakfast Lasagna

Fridge: Store leftovers in an airtight container for up to 4 days. Place parchment paper between layers to prevent sticking and maintain freshness.

Freezer: You can freeze the breakfast lasagna before or after baking. Wrap it tightly in plastic wrap and then aluminum foil; it lasts up to 2 months.

Reheating: Thaw overnight in the fridge before reheating. Bake at 350°F (175°C) for about 25-30 minutes until heated through. Enjoy every flavorful bite!

What to Serve with Hearty Spicy Breakfast Lasagna

Elevate your brunch experience by pairing this delightful breakfast bake with complementary sides that entice the senses.

  • Fresh Mixed Fruit Salad: A bright medley of seasonal fruits adds a refreshing contrast to the savory lasagna, cleansing the palate between bites.

  • Crispy Toasted Garlic Bread: The crunchy texture and warm garlic flavor enhance the lasagna’s heartiness, making each meal feel indulgent and satisfying.

  • Zesty Lemony Arugula Salad: The peppery arugula, tossed with a light lemon vinaigrette, balances the richness of the lasagna beautifully and adds a refreshing element.

  • Savory Sausage Links: For a true breakfast feast, serve with extra sausages that echo the flavors in your lasagna, ensuring everyone leaves the table satisfied.

  • Warm Maple Syrup: Drizzling a bit of maple syrup over your slice adds a delightful sweet touch, enhancing the come-together flavors in this hearty dish.

  • Classic Mimosas: A refreshing citrusy drink, mimosas cut through the richness of the lasagna and add a festive flair to any brunch occasion.

Make Ahead Options

These Hearty Spicy Breakfast Lasagna are perfect for busy home cooks! You can assemble the entire lasagna up to 24 hours in advance, ensuring you’re one step closer to a stress-free breakfast. Simply prepare all layers, and once assembled, cover the dish tightly with plastic wrap and refrigerate. To maintain quality, let it sit at room temperature for about 30 minutes before baking, which allows for even cooking. When you’re ready to serve, preheat your oven to 350°F, bake uncovered for 35-40 minutes, and enjoy a flavor-packed, hearty meal with minimal morning effort!

Breakfast Lasagna: Exciting Variations Await

Feel free to unleash your culinary creativity and customize this delicious breakfast lasagna to your liking!

  • Vegetarian Delight: Swap out the sausage for sautéed mushrooms, diced bell peppers, or fresh spinach. This way, you keep all the hearty flavor while catering to vegetarian eaters.
  • Spicy Kick: Stir in some hot sauce or diced jalapeños into the cottage cheese mixture for those mornings when you crave an extra burst of heat. A little spice goes a long way!
  • Extra Veggies: Add more nutrition and color by layering in zucchini, sun-dried tomatoes, or even bell peppers. These vibrant veggies will infuse flavor and elevate your dish visually too.
  • Cheesy Bliss: Experiment with different cheeses! You can mix in sharp cheddar or gouda instead of the pepper jack for a distinct twist. Each cheese brings its own unique flavor profile.
  • Herb Infusion: Add chopped fresh herbs like parsley, cilantro, or basil to the cheese mixture or sprinkle on top before serving. Fresh herbs add brightness and elevate the flavor!
  • Hash Brown Substitution: Use leftover roasted potatoes or homemade hash browns instead of store-bought, making use of what you have on hand for a personal touch.
  • Breakfast-Style: Toss in crispy bacon or diced ham for a classic breakfast addition. This twist will bring a savory, smoky flavor to your lasagna while keeping it hearty.

Don’t forget to enhance your brunch experience with my delightful Easter Chocolate Lasagna for dessert after this savory dish!

Spicy Breakfast Lasagna Recipe FAQs

What kind of cheese should I use for the Breakfast Lasagna?
For a creamy and flavorful combination, I recommend using cottage cheese, pepper jack, and Muenster cheese. If you prefer a milder taste, feel free to substitute the pepper jack with Monterey Jack. The cottage cheese can also be replaced with ricotta for a rich texture.

How do I know if the ingredients are ripe or fresh?
When selecting eggs, choose large eggs that are clean and free from cracks. For cottage cheese, look for a smooth texture without dark spots. If you’re using frozen shredded hash browns, ensure they’re thawed properly; they should be moist but not soggy, which helps in achieving that crispy layer.

What’s the best way to store leftovers from the Breakfast Lasagna?
Absolutely! Store leftovers in an airtight container in the refrigerator for up to 4 days. To keep the layers from sticking together, I recommend placing parchment paper between the layers. This little tip ensures you can enjoy every slice fresh and delicious!

Can I freeze the Breakfast Lasagna, and how should I do it?
Yes, you can freeze it! Wrap your assembled or baked lasagna tightly in plastic wrap and then cover it with aluminum foil. This preserves its freshness and prevents freezer burn, allowing it to last for up to 2 months. When you’re ready to enjoy it, thaw overnight in the refrigerator before reheating at 350°F for about 25-30 minutes.

What if I want to adjust the recipe for dietary restrictions?
Certainly! To make this Breakfast Lasagna vegetarian, you can substitute the sausage with sautéed mushrooms or diced bell peppers, adjusting the moisture level as you go. If you’re concerned about allergies, always check labels for any potential allergens in the ingredients like cheese or pre-packaged items.

Why did my eggs turn out runny in the Breakfast Lasagna?
This can happen if the eggs are undercooked during scrambling. Be sure to cook the scrambled eggs until they’re thickened but still slightly runny (about 3-4 minutes on medium heat). They will continue to cook in the oven, giving you that perfect fluffy texture in the lasagna. Adjusting the cooking time ensures everything bakes together beautifully!

Breakfast Lasagna

Savory Breakfast Lasagna: A Hearty Morning Delight

This Breakfast Lasagna combines fluffy scrambled eggs, savory sausage, and crispy hash browns into a delicious bake.
Prep Time 30 minutes
Cook Time 40 minutes
Cooling Time 5 minutes
Total Time 1 hour 15 minutes
Servings: 8 slices
Course: Breakfast
Cuisine: American
Calories: 400

Ingredients
  

For the Cheese Mixture
  • 3 cups Cottage Cheese Ricotta can be used for a similar texture.
  • 1/2 cup Chives Green onions or scallions can replace chives if desired.
For the Egg Mixture
  • 18 large Eggs
  • 1/3 cup 2% Milk Whole milk or a plant-based milk also works well.
  • 1/2 tsp Salt
  • 1/4 tsp Pepper
For the Layers
  • 8 pieces Lasagna Noodles Cooked and drained; Avoid no-boil noodles for the best results.
  • 4 cups Frozen Shredded Hash Browns Thawed; Homemade or leftover potatoes can do the trick.
  • 1 lb Bulk Pork Sausage Cooked and crumbled; Use plant-based sausage for a vegetarian alternative.
For the Toppings
  • 8 oz Pepper Jack Cheese Sliced; Monterey Jack offers a milder flavor if preferred.
  • 8 oz Muenster Cheese Sliced.

Equipment

  • Mixing Bowl
  • Skillet
  • baking dish

Method
 

Step-by-Step Instructions
  1. Prepare the Cheese Mixture by combining the cottage cheese, chives, and green onions in a large mixing bowl until well blended.
  2. Whisk the Egg Mixture together with eggs, milk, salt, and pepper until fully combined and frothy.
  3. Scramble the eggs in a skillet over medium heat, stirring continuously until thickened but slightly runny.
  4. Assemble the Baking Dish by greasing a 13x9-inch baking dish with butter and layering 4 lasagna noodles at the bottom.
  5. Layer the Ingredients by spreading half the hash browns, followed by scrambled eggs, crumbled sausage, and half of the cottage cheese mixture; repeat for even distribution.
  6. Add Cheese and Final Layers by topping with slices of pepper jack cheese, then adding the remaining lasagna noodles, hash browns, and cottage cheese mixture.
  7. Finish with Muenster Cheese by layering the slices evenly over the top of the assembled lasagna.
  8. Refrigerate Before Baking by covering tightly with plastic wrap and chilling for at least 8 hours or overnight.
  9. Preheat and Let Sit by preheating the oven to 350°F (175°C) and letting the lasagna sit at room temperature for about 30 minutes before baking.
  10. Bake to Perfection by baking uncovered for 35-40 minutes until the top is golden and set.
  11. Rest and Slice by removing from oven and letting it rest for 5 minutes before slicing.

Nutrition

Serving: 1sliceCalories: 400kcalCarbohydrates: 28gProtein: 25gFat: 23gSaturated Fat: 10gPolyunsaturated Fat: 2gMonounsaturated Fat: 6gCholesterol: 300mgSodium: 800mgPotassium: 650mgFiber: 3gSugar: 2gVitamin A: 600IUVitamin C: 2mgCalcium: 300mgIron: 2mg

Notes

Let the lasagna sit for 5 minutes after baking for cleaner cuts. Adjust moisture if using vegetarian sausage or extra veggies to prevent sogginess.

Tried this recipe?

Let us know how it was!

Homemade Crumpets That Are Fluffy, Soft, and Irresistible

As I reached for a steaming cup of tea, a warm whiff of nostalgia washed over me, transporting me back to cozy mornings filled with the chatter of friends and family. There’s something uniquely comforting about homemade crumpets—those delightful, soft, spongey circles with their trademark holes, just waiting to soak up a generous pat of butter or your favorite jam. This recipe for homemade crumpets is truly a game-changer. Not only is it simple to whip up, but it also transforms ordinary ingredients into a brunch staple that will impress anyone at your table. Plus, they freeze beautifully, making future breakfasts a breeze! So, who’s ready to dive into this peculiar yet rewarding world of crumpet-making?

Why are Homemade Crumpets the Best?

Irresistible Texture: Imagine sinking your teeth into crumpets that are soft and spongy, with those perfect holes to capture melting butter!
Quick Preparation: With just a little mixing and waiting, you can have a delicious breakfast on the table in no time.
Versatile Delights: Top them with anything from classic butter and jam to savory cheese or even Vegemite—your options are endless!
Crowd-Pleasing: Whether it’s brunch with friends or a cozy family breakfast, these homemade crumpets are sure to impress every palate.
Freezer-Friendly: Whip up a batch and freeze for hassle-free mornings—just toast and enjoy! Don’t miss out on serving these alongside a lovely cup of tea or even with Homemade Corned Beef for a unique twist!

Homemade Crumpets Ingredients

For the Batter
Plain Flour – Gives your crumpets the perfect structure; all-purpose flour works too!
Sugar – Adds a hint of sweetness while helping the yeast activate; adjust to taste.
Table Salt – Enhances flavor and regulates yeast activity; sea salt is a great substitute.
Instant Yeast – Promotes fermentation for that fluffy texture; ensure freshness to get the best rise.
Baking Soda – Essential for fluffiness and nice browning; don’t skip this ingredient!
Warm Tap Water – Activates the yeast and creates a perfect batter consistency; warm but not hot is key.
Oil – Used for greasing your pan to prevent sticking; butter can add a rich, decadent flavor.

For Cooking
Crumpet Rings – These are crucial for shaping the crumpets perfectly; make sure to grease them well!

Enjoy creating your homemade crumpets with these simple ingredients!

Step‑by‑Step Instructions for Homemade Crumpets

Step 1: Mix Dry Ingredients
In a large mixing bowl, combine the plain flour, sugar, salt, instant yeast, and baking soda, ensuring that the yeast does not come into direct contact with the salt. This mixture sets the foundation for your homemade crumpets. Stir them together thoroughly until well blended, which will take about 1 minute.

Step 2: Combine Ingredients
Gradually pour in warm tap water while mixing with an electric beater on low speed for approximately 1 minute. The goal is to achieve a smooth, thick batter that clings to the beater without completely losing its form. You might notice a few lumps; that’s okay! The batter should be a bit thicker than pancake batter.

Step 3: Rest Batter
Cover the bowl with a clean kitchen towel and allow it to rest in a warm location for 30-45 minutes. This resting period is crucial as it allows the homemade crumpets to develop bubbles, giving them that airy texture. Look for the surface to become frothy and bubbly, but don’t expect the batter to rise dramatically.

Step 4: Prepare Crumpet Rings
While the batter rests, grease and dust the insides of your crumpet rings with a little oil and flour to prevent sticking during cooking. Make sure they’re well-greased, as this will help you easily remove the crumpets later. Set them aside on your counter, ready for use.

Step 5: Heat Pan
Preheat a large non-stick skillet over medium-high heat until it’s hot but not smoking, which takes about 3-4 minutes. Ensure that the heat is even across the skillet to promote consistent cooking of your homemade crumpets. If the skillet is too hot, the crumpets might burn before they cook through.

Step 6: Cook Crumpets (Stage 1)
Place the greased crumpet rings into the skillet and pour about 1/4 cup of batter into each ring. Cook for 5-6 minutes, keeping an eye on the edges; they should gradually dry out, and bubbles will rise to the surface. This is a good sign they’re cooking perfectly.

Step 7: Cook Crumpets (Stage 2)
Reduce the heat to low-medium and allow the crumpets to cook for another 5-6 minutes. During this time, they should appear completely dry on the top, and all the bubbles should pop, creating the signature holes that crumpets are known for. Patience is key to achieving a delightful texture.

Step 8: Flip to Seal
Once they’re cooked, carefully remove the crumpet rings and flip each crumpet for just 2-3 seconds to seal the tops slightly. This quick step helps to enhance their structure. Place them on a wire rack to cool, which helps to maintain their soft texture.

Step 9: Toast & Serve
Toast the cooled crumpets until golden brown on the outside, which usually takes about 2-3 minutes in a toaster or under a broiler. This final step adds a delicious crispiness while keeping the inside soft and airy. They’re now ready to enjoy with your preferred toppings, making your homemade crumpets irresistible!

Make Ahead Options

These homemade crumpets are perfect for busy mornings when you want to save time without sacrificing flavor! You can prepare the batter up to 24 hours in advance—simply mix the ingredients and cover the bowl before refrigerating. This resting period not only saves you time but also allows the flavors to develop. When you’re ready to cook, just pull the batter out, let it sit at room temperature for a few minutes, and follow the cooking instructions as usual. To maintain quality, be sure to store any cooked crumpets in an airtight container in the fridge for up to 3 days or freeze them for longer storage. Just toast to reheat when serving, and you’ll enjoy those delightful homemade crumpets with minimal effort!

Homemade Crumpets Variations Galore!

Feel free to sprinkle some creativity into your homemade crumpets—the possibilities are endless, and I can’t wait to see which twist you choose!

  • Gluten-Free: Use a gluten-free flour blend for a delightful version that’s friendly to those with dietary restrictions.
  • Herb-Infused: Mix in dried herbs like rosemary or thyme for a savory crumpet that pairs beautifully with cheese.
  • Cheese Crumpets: Add shredded cheese to the batter for a gooey, flavorful twist. These crumpets are a must-try for a brunch feast!
  • Fruit-Packed: Fold in small pieces of your favorite dried fruit, such as cranberries or apricots, for a sweet touch and added texture.
  • Cinnamon Sugar: Incorporate ground cinnamon and a touch of sugar to the batter for a sweet breakfast treat. Top with a sprinkle of cinnamon sugar after toasting!
  • Savory Spicy: Add a pinch of cayenne pepper or chili flakes for a spicy kick. Serve them warm with avocado and poached eggs for a breakfast sensation.
  • Fruity Toppings: Swap out the traditional butter for a spread of fruit preserves or a fresh fruit compote. This adds a refreshing burst to your crumpets!
  • Chocolate Delight: Stir in mini chocolate chips to create a decadent dessert crumpet. Pair with whipped cream for an indulgent treat!

No matter how you choose to experiment, these variations ensure that each batch of your homemade crumpets can become a completely new adventure. Enjoy these delightful creations alongside a soothing cup of tea or even with a slice of Homemade Corned Beef for a surprising brunch combination!

Storage Tips for Homemade Crumpets

Room Temperature: Store cooked crumpets in an airtight container at room temperature for up to 3 days; this keeps them soft and ready for toasting.

Freezer: For longer storage, place crumpets in a freezer-safe bag or container, with baking paper between them to prevent sticking. They can be frozen for up to 3 months.

Reheating: To reheat frozen homemade crumpets, simply toast them directly from the freezer until golden brown, ensuring they retain their fluffy interior.

Thawing: If you prefer to thaw, let them sit at room temperature for about 15-20 minutes before toasting, making breakfast a seamless experience!

Expert Tips for Homemade Crumpets

Perfect Temperature: Ensure your warm tap water is around 100°F (37°C). Too hot can kill the yeast, while too cold won’t activate it properly.

Batter Consistency: Aim for a thick batter that clings to the beater. Adjust with a bit more water if needed, but avoid making it too runny for the best homemade crumpets.

Preheating Matters: Give your skillet ample time to heat up evenly. An uneven surface can lead to undercooked or burnt crumpets.

Timing Is Key: Don’t rush the resting time for the batter. This step is essential for creating those characteristic bubbles, ensuring the final texture is fluffy.

Greasing Crumpet Rings: Don’t skimp on greasing your crumpet rings well. This prevents sticking and allows for easy removal once cooked.

Storing Crumpets: For the best storage, consider freezing the crumpets with baking paper in between each to prevent sticking. Enjoy fresh homemade crumpets any time!

What to Serve with Perfect Homemade Crumpets?

These delectable, fluffy crumpets can be the highlight of any breakfast or brunch, and pairing them right can elevate your meal to new heights!

  • Melted Butter: The classic choice; hot, melted butter seeps into the crumpets, making them even more irresistible.

  • Fruit Jam: Try strawberry or raspberry—sweet and tangy spreads offer a perfect contrast to the crumpets’ soft texture, bringing a burst of flavor in every bite.

  • Honey or Maple Syrup: Drizzling honey or syrup adds a delightful sweetness. The gooey texture pairs wonderfully with the fluffy crumpets.

  • Cream Cheese with Peaches: A refreshing twist, the creaminess complements the crumpet’s airy bite while the fruit adds a summery brightness.

  • Savory Toppings: Imagine crumpets topped with fresh avocado and a sprinkle of salt. This savory option creates a satisfying balance, perfect for brunch.

  • Eggs Benedict Style: Elevate your crumpets by topping them with poached eggs and hollandaise sauce for an over-the-top breakfast experience that oozes luxury.

  • Chai or Earl Grey Tea: A warm, spiced tea lifts the crumpets’ warmth while keeping the mood cozy. Sip as you savor each crumpet!

  • Mixed Berry Compote: A warm berry compote balances sweetness and tartness, infusing each bite with a luscious topping that feels indulgent.

  • Crispy Bacon: For a savory kick, pairing crumpets with crispy bacon brings a crunchy texture that harmonizes beautifully, creating a delightful range of flavors.

Embrace these pairing ideas, and create a breakfast that not only fills your tummy but also warms your heart!

Homemade Crumpets Recipe FAQs

How do I select the right flour for homemade crumpets?
Absolutely! Using plain flour is optimal for achieving the right structure in your homemade crumpets. All-purpose flour can also work well if that’s what you have on hand. Just avoid using whole wheat flour, as it may alter the texture.

How should I store leftover crumpets?
For homemade crumpets, store them in an airtight container at room temperature for up to 3 days. This keeps them soft and ready for toasting. If you find you have extra, freeze them for up to 3 months to enjoy later!

What’s the best way to freeze homemade crumpets?
To freeze, place cooked crumpets in a single layer with baking paper in between each one. This helps prevent them from sticking together. Store them in a freezer-safe bag or container for up to 3 months, ensuring a quick breakfast option later.

Why didn’t my crumpets rise properly?
Very! A common issue is if the yeast was either inactive or too old. Ensure your yeast is fresh by checking the expiration date, and remember that warm water (around 100°F/37°C) is essential for activating it. If the batter seems too thick, add a touch more warm water to achieve the right consistency.

Can I make these crumpets gluten-free?
Indeed! For gluten-free homemade crumpets, use a gluten-free all-purpose flour blend that contains xanthan gum for best results. Adjust the liquid slightly as needed to reach the right batter consistency, keeping it thicker than pancake batter.

Can pets have crumpets?
I recommend avoiding giving homemade crumpets to pets. Ingredients like sugar and yeast may not sit well with their digestive systems, and toppings could pose further risks. Always opt for pet-safe treats instead!

Homemade Crumpets

Homemade Crumpets That Are Fluffy, Soft, and Irresistible

This homemade crumpets recipe transforms simple ingredients into fluffy, irresistible treats that are perfect for breakfast.
Prep Time 45 minutes
Cook Time 15 minutes
Resting Time 30 minutes
Total Time 1 hour
Servings: 4 crumpets
Course: Breakfast
Cuisine: British
Calories: 150

Ingredients
  

For the Batter
  • 2 cups plain flour all-purpose flour works too
  • 1 tablespoon sugar adjust to taste
  • 1 teaspoon table salt sea salt is a great substitute
  • 1 packet instant yeast ensure freshness
  • 1 teaspoon baking soda
  • 1.5 cups warm tap water about 100°F (37°C)
  • 1 tablespoon oil for greasing the pan
For Cooking
  • 4 pieces crumpet rings grease them well

Equipment

  • large mixing bowl
  • Electric beater
  • Non-stick skillet
  • Crumpet rings

Method
 

Step-by-Step Instructions
  1. In a large mixing bowl, combine the plain flour, sugar, salt, instant yeast, and baking soda, ensuring that the yeast does not come into direct contact with the salt. Stir together until well blended, about 1 minute.
  2. Gradually pour in warm tap water while mixing with an electric beater on low speed for approximately 1 minute until you achieve a smooth, thick batter.
  3. Cover the bowl with a clean kitchen towel and allow it to rest in a warm location for 30-45 minutes until the surface is frothy and bubbly.
  4. Grease and dust the insides of your crumpet rings with a little oil and flour. Set them aside.
  5. Preheat a non-stick skillet over medium-high heat for about 3-4 minutes.
  6. Place the greased crumpet rings into the skillet and pour about 1/4 cup of batter into each ring. Cook for 5-6 minutes until edges dry out and bubbles rise.
  7. Reduce heat to low-medium and cook for another 5-6 minutes until the tops are dry and bubbles pop.
  8. Carefully remove the crumpet rings and flip each crumpet for 2-3 seconds to seal the tops slightly, then place on a wire rack to cool.
  9. Toast the cooled crumpets in a toaster or under a broiler until golden brown, usually about 2-3 minutes.

Nutrition

Serving: 1crumpetCalories: 150kcalCarbohydrates: 30gProtein: 4gFat: 2gSaturated Fat: 0.5gMonounsaturated Fat: 1gSodium: 200mgPotassium: 120mgFiber: 1gSugar: 2gCalcium: 1mgIron: 5mg

Notes

Enjoy your homemade crumpets with various toppings such as butter, jam, or cheese. They are perfect for any breakfast occasion.

Tried this recipe?

Let us know how it was!