Get my cookbooks

Irresistible Cookies and Cream Cupcakes for Every Celebration

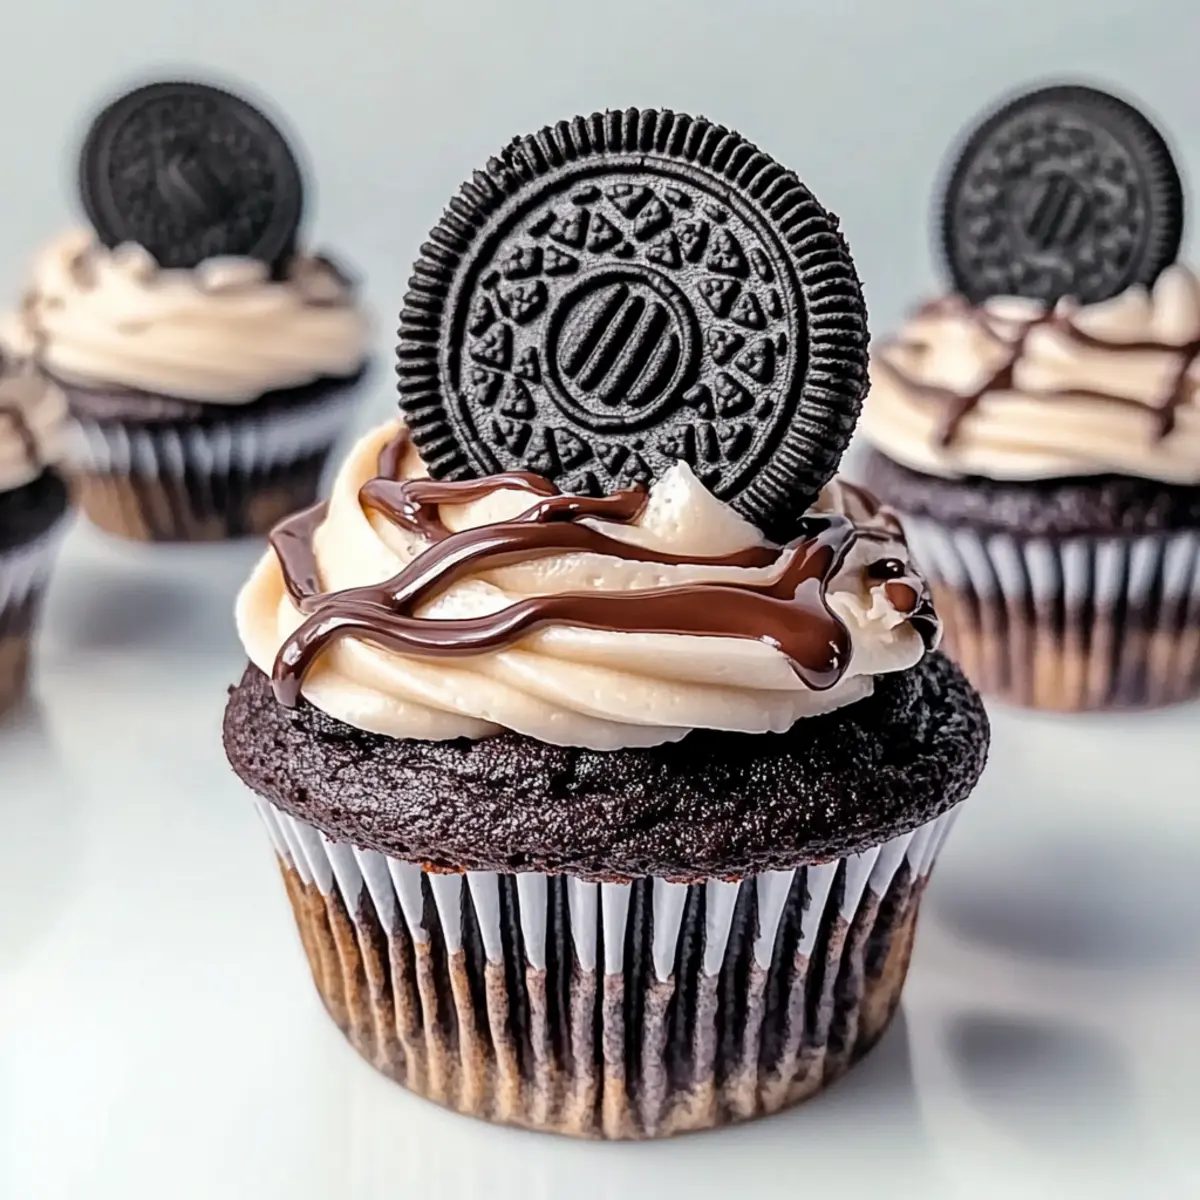
As I stood amidst the warm, inviting smells wafting from the oven, I couldn’t help but feel a rush of nostalgia when making these decadent Cookies and Cream Cupcakes. With their moist chocolate base and fluffy frosting, they serve as the ultimate treat for any Oreo lover. These delightful cupcakes not only come together quickly, making them perfect for last-minute gatherings, but they also effortlessly impress friends and family with their mouthwatering twist on a classic dessert. Plus, with easy adaptations for gluten-free and vegan diets, everyone can join in on the celebration! Curious about how to elevate your baking game with these irresistible cupcakes? Let’s dive right in!

Why Are These Cupcakes a Must-Try?

Decadent flavor: Indulge in the rich chocolate taste paired with the nostalgic crunch of Oreos, making every bite a trip down memory lane.
Quick preparation: Whip them up in no time! These cupcakes require simple ingredients and minimal effort, perfect for busy days or spontaneous celebrations.
Versatile options: Dare to customize! From gluten-free to vegan alternatives, everyone can enjoy these treats without sacrificing flavor or satisfaction.
Crowd-pleaser: Impress your friends and family; these cupcakes are a hit at any gathering, ensuring no one can resist a second helping.
Unique toppings: Enhance the experience by adding chocolate ganache or whipped cream—it’s all about making them your own!

Cookies and Cream Cupcake Ingredients

For the Cupcakes

  • Semisweet Chocolate Chips – Adds richness and depth to the chocolate flavor; for a milder taste, use milk chocolate instead.
  • Dark Cocoa Powder – Provides a rich, dark chocolate taste; unsweetened cocoa powder is a great alternative.
  • Boiling Water – Activates the cocoa and dissolves chocolate chips for a moist cupcake; consider using hot coffee to enhance the flavors further.
  • All-Purpose Flour – Gives structure to the cupcakes; opt for gluten-free flour to make a gluten-free version.
  • Granulated Sugar – Contributes sweetness; sugar substitutes can help reduce the sugar content.
  • Baking Soda – Helps the cupcakes rise; ensure it’s fresh for best results.
  • Salt – Enhances flavor; kosher salt is a suitable alternative.
  • Vegetable Oil – Keeps the cupcakes moist; melted coconut oil provides a delightful flavor twist.
  • Large Eggs – Provides moisture and structure; flax eggs can be used as a vegan alternative.
  • Vanilla Extract – Adds warmth and flavor; always choose pure extract over imitation for the best taste.

For the Frosting

  • Unsalted Butter – Forms the creamy base for buttercream; margarine works well for dairy-free options.
  • Powdered Sugar – Sweetens the buttercream; reduce calories by using sugar substitutes.
  • Heavy Cream – Ensures a smooth consistency for the frosting; milk can serve as a lighter alternative.
  • Oreo Cookie Crumbs – Infuses the buttercream with Oreo flavor and texture; any chocolate sandwich cookie can be used if you’re in a pinch.
  • Oreo Cookies (halved) – Adds a decorative touch and extra cookie flavor; feel free to swap in any similar cookie you love.

With these carefully chosen ingredients, you’re well on your way to baking irresistible Cookies and Cream Cupcakes that will shine at any celebration!

Step-by-Step Instructions for Decadent Cookies and Cream Cupcakes with Chocolate Ganache

Step 1: Preheat the Oven
Begin by preheating your oven to 350℉ (177℃). While the oven warms up, line a cupcake pan with colorful cupcake liners to make your decadent Cookies and Cream Cupcakes visually appealing. This step is essential for achieving a perfect bake, ensuring your cupcakes rise beautifully and have a lovely golden color.

Step 2: Prepare the Chocolate Mixture
In a medium bowl, combine semisweet chocolate chips, dark cocoa powder, and boiling water. Stir this mixture until it’s smooth and glossy, allowing the chocolate to melt and the cocoa to activate. Set the bowl aside to cool slightly while you move on to the next step, letting the rich aroma fill your kitchen.

Step 3: Mix the Dry Ingredients
In a large mixing bowl, whisk together the all-purpose flour, granulated sugar, baking soda, and salt. This creates a dry mixture that will provide the structure for your cupcakes. Make sure there are no lumps, and enjoy the sweet, inviting scent as your dry ingredients blend together.

Step 4: Combine Wet Ingredients
Pour the cooled chocolate mixture into a separate bowl and add the vegetable oil, large eggs, and vanilla extract. Beat these ingredients together until smooth and well combined. This rich mixture is what will give your cupcakes a moist texture and deep chocolate flavor that will delight any Oreo lover.

Step 5: Fold Ingredients Together
Gently fold the wet ingredients into the dry mixture using a spatula. Mix until just combined; be careful not to overmix, as this will ensure your Cookies and Cream Cupcakes remain tender and fluffy. You’ll see small flecks of dry ingredients remaining, which is perfectly fine—just the way we like it!

Step 6: Fill and Bake
Spoon the batter into the lined cupcake pan, filling each liner about two-thirds full. Place the pan in the preheated oven and bake for 20 minutes, or until a toothpick inserted in the center comes out clean. Your cupcakes will rise perfectly, puffing up into beautiful, dome-shaped delights.

Step 7: Cool the Cupcakes
Once baked, allow the cupcakes to cool in the pan for 5 minutes before carefully transferring them to a wire rack. Let them cool completely at room temperature—this step is crucial for achieving the best texture before adding any frosting.

Step 8: Make the Frosting
In a medium bowl, beat unsalted butter until creamy and smooth, using a hand mixer or stand mixer on medium speed. Gradually add powdered sugar, and whip until fluffy and well combined, ensuring the sweetness is just right for your Cookies and Cream Cupcakes. The butter will become light in color as you beat it.

Step 9: Add Flavor and Crumbs
Mix in the vanilla extract and heavy cream, then continue to beat until the frosting reaches a light and airy consistency. Finally, fold in the Oreo cookie crumbs, giving your frosting that delightful cookies and cream flavor. This frosting is creamy and rich, perfect for piping onto your cupcakes.

Step 10: Prepare the Ganache
To make the chocolate ganache, heat a small saucepan over low heat and combine more chocolate chips with heavy cream. Stir constantly until it’s smooth and well blended. This luscious ganache will add an extra layer of decadence, perfectly complementing your Cookies and Cream Cupcakes.

Step 11: Assemble the Cupcakes
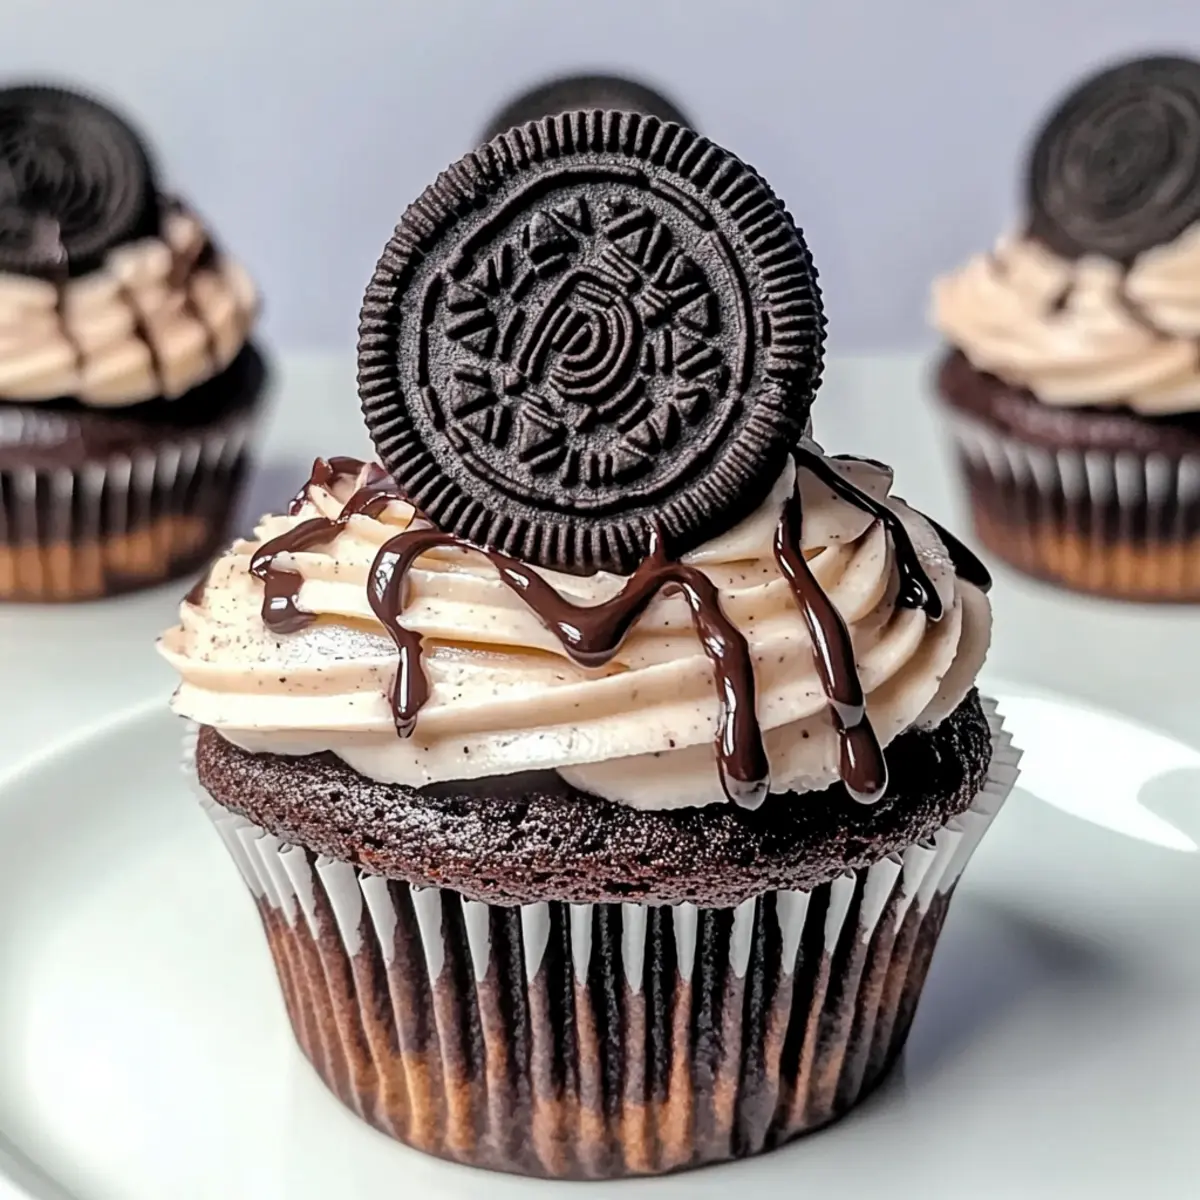
Once cupcakes have completely cooled, pipe the Oreo frosting generously on top of each cupcake, creating swirls that look just as tasty as they are. Drizzle the warm chocolate ganache over the frosted cupcakes for a beautiful finish, allowing it to cascade down the sides, making them irresistible.

Step 12: Garnish and Serve
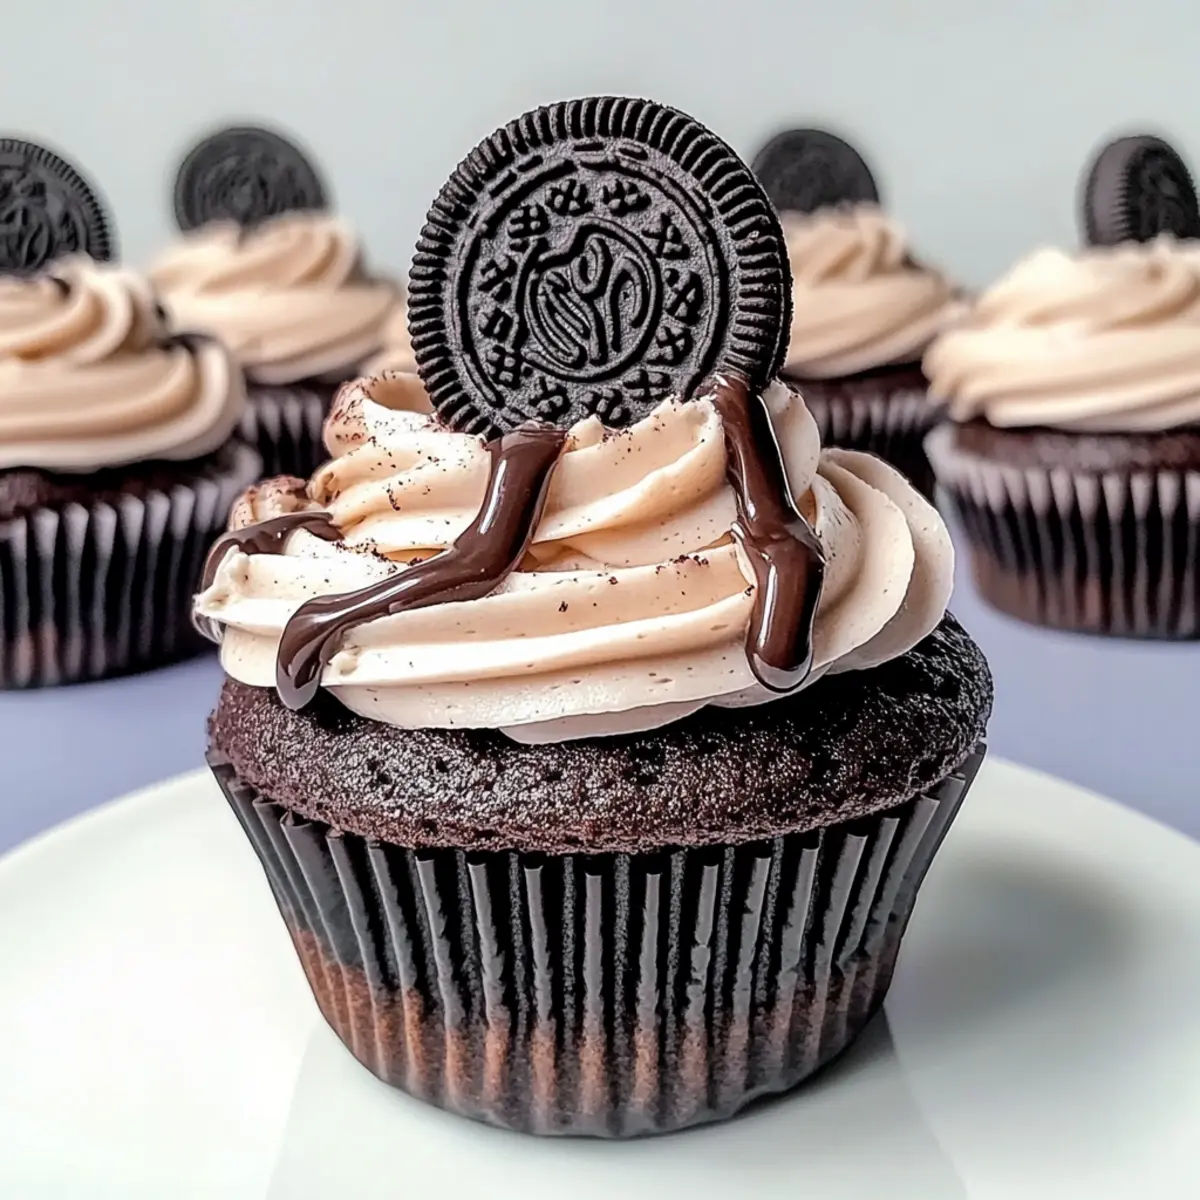
Top each cupcake with a halved Oreo cookie for that classic cookies and cream look, adding a decorative touch. These treats are now ready to be served! Enjoy them at room temperature to savor the full flavor and delightful textures of your Decadent Cookies and Cream Cupcakes at any celebration.

What to Serve with Decadent Cookies and Cream Cupcakes?

The perfect meal experience can be as sweet as these dreamy cupcakes topped with creamy frosting and chocolate ganache.

  • Cold Milk: A classic pairing that elevates every bite, cutting through the sweetness while enhancing the chocolatey goodness.
  • Vanilla Ice Cream: Serve a scoop alongside your cupcakes for a decadent dessert experience, creating a delightful contrast of textures.
  • Fresh Berries: The tartness of strawberries or raspberries cuts through the rich frosting, adding a refreshing burst of flavor to each mouthful.
  • Chocolate Chip Cookies: For the ultimate dessert table, serve these alongside your cupcakes for those who believe in ultimate indulgence. The more, the merrier!
  • Fruit Salad: A light and refreshing side dish that balances out the sweetness of the cupcakes while providing a healthy option.
  • Coffee or Espresso: A cup of freshly brewed coffee complements the rich flavors beautifully, creating a delightful after-dinner treat.
  • Chocolate Milkshake: For kids and the young at heart, a chocolate milkshake brings playful nostalgia and pairs perfectly with cupcakes during casual gatherings.
  • Sparkling Water: A bubbly refreshment that cleanses the palate between bites, keeping your cupcake enjoyment delightful and light.

How to Store and Freeze Cookies and Cream Cupcakes

  • Room Temperature: Enjoy cookies and cream cupcakes at room temperature for up to 1 day. Keep them in an airtight container to prevent drying out.

  • Fridge: If you’d like to keep your cupcakes for longer, refrigerate them for up to 3 days. Make sure they’re in an airtight container to maintain their freshness.

  • Freezer: For longer storage, cookies and cream cupcakes can be frozen for up to 2 months. Wrap them individually in plastic wrap and place in a freezer-safe bag. Frost after thawing for optimal texture and flavor.

  • Reheating: If you want to enjoy your cupcakes warm, simply thaw at room temperature or gently warm them in the microwave for a few seconds—just enough to take the chill off!

Helpful Tricks for Cookies and Cream Cupcakes

  • Room Temperature Butter: Ensure your butter is at room temperature to achieve a smooth, creamy frosting without lumps, enhancing your Cookies and Cream Cupcakes.
  • Accurate Measurements: Measure the flour correctly; too much can lead to dense cupcakes. Use the scoop-and-level method for precision and fluffiness.
  • Avoid Overmixing: When folding wet and dry ingredients, mix just until combined. Overmixing can result in toughness, so be gentle!
  • Complete Cooling: Allow cupcakes to cool completely before frosting. Frosting a warm cupcake can lead to a melty mess instead of a beautiful swirl.
  • Finely Ground Crumbs: For smooth frosting, use finely ground Oreo crumbs to avoid clumping. This will ensure effortless piping and a polished presentation.

Make Ahead Options

These Decadent Cookies and Cream Cupcakes are perfect for meal prep enthusiasts! You can prepare the cupcake batter up to 24 hours in advance by mixing all ingredients and refrigerating it in an airtight container. Additionally, once baked, the cupcakes can be stored in the refrigerator for up to 3 days; just remember to frost them just before serving to maintain their light and fluffy texture. If you want to freeze them, wrap the cooled cupcakes tightly in plastic wrap and store for up to 2 months—just frost after thawing to keep them just as delicious. With these make ahead tips, you’ll save precious time on busy weeknights and be ready for any celebration!

Cookies and Cream Cupcakes Variations & Substitutions

Feel free to get creative and customize these delicious cupcakes with your personal touch for a fun twist on a classic treat!

  • Gluten-Free: Use a 1:1 gluten-free flour blend to make these cupcakes suitable for gluten-sensitive friends and family.

  • Vegan: Replace eggs with flax eggs (1 tablespoon flaxseed meal + 2.5 tablespoons water per egg) and use coconut oil instead of butter for a plant-based delight.

  • Flavor Extraction: Add a splash of almond or mint extract to the batter for a unique flavor twist that surprises your taste buds.

  • Miniature Marvels: Create mini cupcakes using mini liners and shortening the baking time to about 12-15 minutes, perfect for parties or snack time.

  • Extra Chocolatey: Fold in a handful of chocolate chips for an extra burst of chocolate flavor in every bite.

  • Spicy Kick: Mix in a pinch of cayenne pepper or cinnamon into the frosting for a bold and surprising warmth.

  • Cream Cheese Frosting: Swap the buttercream for a tangy cream cheese frosting to balance the sweetness and add depth.

  • Festive Toppings: Put a fun spin on presentation by topping with colorful sprinkles or seasonal candies for celebrations.

With these variations, your Cookies and Cream Cupcakes will be a sure hit—no matter the occasion! And if you’re in the mood for more delightful treats, consider checking out my guide on How to Make Fluffy Cupcakes or explore some tasty Frosting Recipes to elevate your cupcake game!

Cookies and Cream Cupcakes Recipe FAQs

What type of chocolate should I use for the cupcakes?
I recommend using semisweet chocolate chips for their rich, deep flavor that perfectly complements the dark cocoa powder. However, if you prefer a sweeter taste, milk chocolate can also be a delightful alternative!

How long do I need to let the cupcakes cool before frosting?
Allow your cupcakes to cool completely on a wire rack for at least 30 minutes after baking. This is crucial because frosting a warm cupcake can result in a melty and less appealing appearance!

Can I store the cupcakes in the fridge?
Absolutely! You can refrigerate your cookies and cream cupcakes for up to 3 days. Just make sure to keep them in an airtight container to maintain their moistness and freshness.

What’s the best way to freeze the cupcakes?
For freezing, first allow the cupcakes to cool completely. Then wrap each one individually in plastic wrap and place them in a freezer-safe bag. They can be frozen for up to 2 months. For best results, frost them after thawing for optimum taste and texture!

Can I make these cupcakes gluten-free?
Yes! Simply substitute all-purpose flour with a gluten-free flour blend. Many of my friends have successfully used this method, and the texture and flavor remain wonderfully delicious!

What’s the best way to reheat a frozen cupcake?
To enjoy a frozen cupcake, just take it out and let it thaw at room temperature for a couple of hours. If you’d like it warm, you can also microwave it for just a few seconds to take the chill off—this will keep it moist and tasty!

undefined

Irresistible Cookies and Cream Cupcakes for Every Celebration

Delightful cookies and cream cupcakes perfect for celebrations, featuring a moist chocolate base and fluffy frosting.
Prep Time 20 minutes
Cook Time 20 minutes
Cooling Time 5 minutes
Total Time 45 minutes
Servings: 12 cupcakes
Course: Dessert
Cuisine: American
Calories: 250

Ingredients
  

For the Cupcakes
  • 1 cup semisweet chocolate chips For a milder taste, use milk chocolate instead.
  • 3/4 cup dark cocoa powder Unsweetened cocoa powder is an alternative.
  • 1 cup boiling water Consider using hot coffee to enhance flavors.
  • 1 1/2 cups all-purpose flour Opt for gluten-free flour for a gluten-free version.
  • 1 cup granulated sugar Sugar substitutes can help reduce content.
  • 1 teaspoon baking soda Ensure it's fresh for best results.
  • 1/2 teaspoon salt Kosher salt is a suitable alternative.
  • 1/3 cup vegetable oil Melted coconut oil provides a flavor twist.
  • 2 large eggs Flax eggs can be used as vegan alternative.
  • 1 teaspoon vanilla extract Always choose pure extract for the best taste.
For the Frosting
  • 1/2 cup unsalted butter Margarine works for dairy-free options.
  • 3 cups powdered sugar Reduce calories by using sugar substitutes.
  • 1/4 cup heavy cream Milk can serve as a lighter alternative.
  • 1 cup Oreo cookie crumbs Any chocolate sandwich cookie can be used.
  • 12 halved Oreo cookies Feel free to swap in any similar cookie.

Equipment

  • Cupcake pan
  • Mixing bowls
  • Hand mixer

Method
 

Cupcake Instructions
  1. Preheat your oven to 350℉ (177℃) and line a cupcake pan with cupcake liners.
  2. Combine semisweet chocolate chips, dark cocoa powder, and boiling water in a bowl and stir until smooth.
  3. Whisk together the all-purpose flour, granulated sugar, baking soda, and salt in a large mixing bowl.
  4. Pour the cooled chocolate mixture into a bowl and add vegetable oil, eggs, and vanilla extract. Beat until smooth.
  5. Fold the wet ingredients into the dry mixture until just combined.
  6. Spoon batter into cupcake liners, filling each about two-thirds full, and bake for 20 minutes.
  7. Allow cupcakes to cool in the pan for 5 minutes before transferring them to a wire rack to cool completely.
  8. Beat unsalted butter until creamy, gradually add powdered sugar, and whip until fluffy.
  9. Mix in vanilla extract and heavy cream, then fold in Oreo cookie crumbs.
  10. Heat chocolate chips with heavy cream to make ganache, stirring until smooth.
  11. Once cupcakes are completely cool, pipe frosting on top and drizzle with chocolate ganache.
  12. Top with a halved Oreo cookie before serving.

Nutrition

Serving: 1cupcakeCalories: 250kcalCarbohydrates: 35gProtein: 3gFat: 12gSaturated Fat: 5gPolyunsaturated Fat: 1gMonounsaturated Fat: 3gCholesterol: 50mgSodium: 200mgPotassium: 150mgFiber: 1gSugar: 18gVitamin A: 200IUCalcium: 30mgIron: 1mg

Notes

Ensure butter is at room temperature for smooth frosting. Measure flour accurately to avoid dense cupcakes. Allow cupcakes to cool completely before frosting.

Tried this recipe?

Let us know how it was!

Refreshing Green Tea Soda Recipe for a Guilt-Free Sip

A splash of fizz and a hint of fresh mint are just what you need to elevate your beverage game! This Refreshing Green Tea Soda is not only a delightful twist on conventional drinks but also a low-calorie, low-sugar alternative that’s brimming with health benefits. Bursting with the refreshing flavors of green tea, zesty lemon, and seasonal fruits, it’s perfect for warm summer days or when you crave something light and invigorating. Whether you’re hosting a brunch or simply looking for a healthy pick-me-up, this drink will surely impress your guests and keep your cravings at bay. Curious about how to make this bubbly sensation? Let’s dive into the recipe!

Why is this drink so refreshing?

Elevating your refreshment game! This Green Tea Soda is a guilt-free sip perfect for any occasion.
Health Benefits abound, thanks to the antioxidant-rich green tea, promoting wellness while you indulge.
Customizable Flavors let you get creative! Add seasonal fruits for a unique twist that suits your taste buds.
Low-Calorie Assurance means you can savor each bubbly sip without the guilt of traditional sodas.
Effortless Preparation makes it a breeze to whip up, leaving more time to enjoy with friends! It’s perfect for brunches or poolside gatherings, making it a delightful choice for entertaining.

Green Tea Soda Ingredients

For the Base
Green Tea – Use high-quality green tea bags for optimal flavor and health benefits.
Honey – Sweetener that can be adjusted; substitute with agave syrup or stevia for a low-sugar option.

For Flavor
Fresh Mint – Adds a burst of freshness and aroma; garnish with whole leaves for a lovely presentation.
Fresh Fruit (lemon, berries, etc.) – Enhance flavor and personalize the drink; choose seasonal fruits for a diverse taste experience.

For Fizz
Sparkling Water – Creates delightful bubbles; can be swapped with tonic water for extra flavor in your Green Tea Soda.

Now you’re well-equipped for this refreshing, low-calorie beverage that will surely elevate your drink choices! Enjoy crafting the perfect mix for your next gathering!

Step‑by‑Step Instructions for Refreshing Green Tea Soda

Step 1: Brew the Green Tea
Begin by boiling 4 cups of water in a medium saucepan over high heat. Once the water reaches a rolling boil, remove it from the heat and add 4 high-quality green tea bags. Allow the tea to steep for 2-3 minutes until it shifts to a vibrant green color, then carefully remove the tea bags, discarding them.

Step 2: Sweeten the Tea
While the brewed green tea is still warm, stir in ¼ cup of honey until completely dissolved. This step is essential for achieving a perfectly balanced sweetness in your Refreshing Green Tea Soda. If you prefer a sugar-free option, consider using agave syrup or stevia instead, ensuring it’s well blended.

Step 3: Chill the Mixture
Transfer the sweetened green tea to a pitcher and let it cool to room temperature. Once cooled, place the pitcher in the refrigerator and chill for at least 1 hour. This cooling process enhances the refreshing experience and allows the flavors to meld beautifully, preparing for a delightful soda.

Step 4: Prepare the Fruit
While the green tea chills, rinse and slice your chosen fresh fruits, such as lemons and seasonal berries. Aim for bite-sized pieces, showcasing vibrant colors and flavors that will elevate your Green Tea Soda. Set the sliced fruit aside, ready to enhance the drink’s appeal and taste.

Step 5: Assemble the Drinks
Once the tea is chilled, fill glasses halfway with the green tea mixture. Add a generous handful of the sliced fruits to each glass, allowing their natural juices to infuse into the tea. This step is crucial for achieving a beautifully layered and visually appealing drink.

Step 6: Add the Sparkle
Top off each glass with sparkling water to create the fizzy sensation of your Refreshing Green Tea Soda. Pour slowly to prevent overflow, and adjust the amount based on your fizz preference. The sparkling water brings a delightful effervescence, enhancing your beverage experience.

Step 7: Garnish and Serve
Finally, garnish each glass with fresh mint leaves, giving a pop of green and a refreshing aroma. Serve immediately to enjoy the bubbly freshness while it lasts. This last touch not only adds visual appeal but also elevates the overall flavor profile of your refreshing drink.

Green Tea Soda Variations

Feel free to get creative with your Green Tea Soda and make it your own delicious masterpiece!

  • Sweetness Switch: Replace honey with maple syrup for a unique twist that adds a depth of flavor.

  • Herb Infusion: Add basil or rosemary for an unexpected herbaceous kick that elevates your drink’s aroma and taste.

  • Flavor Variety: Try using jasmine or chamomile tea instead of green tea for a different flavor profile. This subtle change creates a completely new drinking experience!

  • Fruity Additions: Incorporate peaches in summer or cranberries in fall for a seasonal burst of flavor that adapts with the seasons. Each fruit brings its own refreshing essence.

  • Spicy Touch: Add a pinch of ginger or a few slices of jalapeño to your green tea for a refreshing zing with a kick. This twist introduces a fascinating contrast to the sweetness!

  • Bubbly Boost: Swap out sparkling water for flavored soda water like lemon-lime or berry for extra sparkle and flavor infusion. It’ll make your drink even more exciting!

  • Citrus Blend: Mix in orange or lime juice along with lemon for a citrusy explosion that adds brightness and zest to your beverage.

  • Creamy Indulgence: Stir in a splash of coconut milk for richness, turning your soda into a smooth, creamy refresher perfect for summer gatherings.

Explore these variations to find your perfect Green Tea Soda blend! You’ll never get bored with so many vibrant options beckoning from your kitchen. Plus, for a delicious addition, consider the potential of seasonal produce to enhance your drink even more. Happy sipping!

How to Store and Freeze Green Tea Soda

  • Fridge: Store leftover Green Tea Soda in an airtight container in the refrigerator for up to 3 days. This keeps the flavors fresh and ready for a quick sip.

  • Freezer: For longer storage, freeze the green tea mixture (without sparkling water) in ice cube trays. It keeps well for up to 2 months, perfect for refreshing future beverages.

  • Reassembling: When you’re ready to enjoy, thaw the green tea cubes and mix with fresh sparkling water. Customize with fresh fruit and mint right before serving for an invigorating taste!

  • Avoid Over-Carbonation: If stored in the fridge, combine the sparkling water and the tea mixture just before serving to prevent loss of fizz and ensure every sip is delightfully bubbly.

What to Serve with Refreshing Green Tea Soda

Setting the stage for a delightful meal, this vibrant beverage pairs beautifully with various delicious options.

  • Light Appetizers: Serve with cucumber sandwiches for a refreshing bite that complements the drink’s flavors. The crispness of cucumber contrasts perfectly with the fizz.

  • Savory Finger Foods: Pair with mini caprese skewers. The fresh basil and mozzarella enhance the mintiness of the soda while offering a satisfying savory balance.

  • Fruit Salad: A colorful fruit salad serves as a refreshing side that’s easy to make. Incorporating seasonal fruits can mirror the flavors in your Green Tea Soda.

  • Chilled Pasta Salad: A light, lemon-infused pasta salad adds zest to your meal. Its chilled nature aligns with the refreshing vibe of the drink.

  • Grilled Chicken Wraps: These juicy wraps offer a hearty option that balances the lightness of the beverage. The grill’s smokiness pairs wonderfully with the tea’s flavors.

  • Mini Desserts: Consider serving light desserts like sorbet or fruit tarts. Their sweetness complements the soda, creating a satisfying end to your meal without overwhelming your palate.

Expert Tips for the Best Green Tea Soda

  • Tea Quality Matters: Use high-quality green tea bags for the best flavor; cheap tea can result in a bitter taste.

  • Sweetness Control: Start with less honey, taste-testing as you add. You can always add more, but it’s tough to fix an overly sweet Green Tea Soda.

  • Chill Thoroughly: Let your brewed tea chill completely in the fridge. This enhances the drink’s refreshment and helps the flavors meld nicely.

  • Freshness is Key: Use fresh fruits and herbs for the most invigorating flavor. Dried or old ingredients will dull the crispness of your Green Tea Soda.

  • Serve Immediately: Enjoy your Green Tea Soda right after mixing. It’s a fizzy delight that loses carbonation quickly if left out too long.

  • Customizable Fun: Experiment by swapping in different teas or seasonal fruits to keep your Green Tea Soda fresh and exciting every time!

Make Ahead Options

These Refreshing Green Tea Soda beverages are a fantastic choice for busy home cooks looking to save time without sacrificing taste! You can brew the green tea and sweeten it with honey up to 3 days in advance; simply chill the mixture in the refrigerator. To keep the fizz intact, wait until just before serving to add sparkling water. Additionally, slice your fresh fruits and store them in an airtight container in the fridge for up to 24 hours to maintain their freshness and vibrant colors. When it’s time to serve, simply assemble the drinks by adding the chilled green tea mixture, fresh fruit, and sparkling water for a delightful, bubbly experience that’s just as refreshing as when freshly made!

Green Tea Soda Recipe FAQs

What kind of green tea should I use?
It’s best to use high-quality green tea bags to achieve the best flavor. Look for brands that offer organic options with fresh leaves, as cheaper varieties can sometimes result in a bitter taste that won’t mesh well with the sweetness of honey.

How should I store leftover Green Tea Soda?
Store any leftover Green Tea Soda in an airtight container in the refrigerator for up to 3 days. This will maintain the freshness of the flavors, allowing you to enjoy your drink later without sacrificing taste. If you prefer, you can also store the green tea mixture separately from sparkling water to keep the fizziness intact until you’re ready to serve.

Can I freeze Green Tea Soda?
Absolutely! For longer storage, freeze the green tea mixture (without the sparkling water) in ice cube trays. They’ll keep well for up to 2 months. When you’re ready to enjoy your drink, simply thaw the cubes and mix them with fresh sparkling water, adding fruits and mint for a refreshing experience.

How do I know if my fruit is ripe enough for the drink?
Look for fruits that are colorful and free from dark spots or blemishes. Fresh berries should be plump and firm, while lemons should have a bright yellow color and be slightly soft to the touch, indicating juiciness. Ripe, in-season fruits will enhance your Green Tea Soda’s flavor, so always choose what’s freshest!

Is this recipe suitable for people with allergies?
This Green Tea Soda is inherently gluten-free and dairy-free, making it a safe choice for various dietary restrictions. However, if you or someone you’re serving has a honey allergy, you can easily substitute it with agave syrup or stevia for a sugar-free option. Always check the labels on your ingredients to be sure they meet any specific dietary needs.

Why does my Green Tea Soda lose carbonation?
To keep your Green Tea Soda fizzy, combine the sparkling water with the tea mixture just before serving. If you’ve made the beverage ahead of time and stored it, the carbonation will dissipate over time. For best results, serve immediately after mixing to enjoy the delightful effervescence.

undefined

Refreshing Green Tea Soda Recipe for a Guilt-Free Sip

A refreshing twist on drinks, this Green Tea Soda is a low-calorie, low-sugar alternative packed with health benefits.
Prep Time 10 minutes
Cook Time 5 minutes
Chilling Time 1 hour
Total Time 1 hour 15 minutes
Servings: 4 glasses
Course: Drinks
Cuisine: Healthy
Calories: 50

Ingredients
  

For the Base
  • 4 cups water for boiling
  • 4 bags high-quality green tea
  • 1/4 cup honey or substitute with agave syrup or stevia
For Flavor
  • 1 bunch fresh mint for garnish
  • 2 pieces fresh fruit (lemon, berries, etc.) for flavor enhancement
For Fizz
  • 4 cups sparkling water or tonic water for extra flavor

Equipment

  • medium saucepan
  • pitcher
  • Glasses

Method
 

Step-by-Step Instructions
  1. Boil 4 cups of water in a medium saucepan. Add 4 green tea bags and steep for 2-3 minutes. Remove and discard the tea bags.
  2. Stir in 1/4 cup of honey into the warm tea until dissolved. Substitute with agave syrup or stevia if desired.
  3. Chill the sweetened tea in the refrigerator for at least 1 hour.
  4. Rinse and slice your chosen fresh fruits into bite-sized pieces.
  5. Fill glasses halfway with the chilled green tea and add the sliced fruits.
  6. Top off each glass with sparkling water. Pour slowly to prevent overflow.
  7. Garnish with fresh mint leaves and serve immediately.

Nutrition

Serving: 1glassCalories: 50kcalCarbohydrates: 13gPotassium: 100mgSugar: 12gVitamin C: 5mgCalcium: 1mg

Notes

Use high-quality ingredients for best results and enjoy the drink immediately for maximum fizz.

Tried this recipe?

Let us know how it was!

Cheesy Chicken Cauliflower Rice Casserole Your Family Will Love

As I tucked my daughter in bed, she whispered about her hunger for something warm and cheesy. That’s when the inspiration struck for this Cheesy Chicken and Cauliflower Rice Casserole—a wholesome blend of familiar comfort food that makes both taste buds and parents smile. This dish is a family-friendly, veggie-loaded delight packed with tender chicken, creamy sauce, and a sneaky 3.5 cups of riced cauliflower, ensuring all the hidden nutrition without any complaints at the dinner table! Plus, its gluten-free and nut-free qualities mean it’s inclusive for all. With quick prep and satisfying flavor, it’s the perfect recipe to rescue mealtime from boring leftovers and greasy fast food runs. Are you ready to turn your kitchen into the ultimate comfort zone? Let’s dive in!

Why Is This Casserole a Must-Try?

Comfort and Warmth: This Cheesy Chicken, Rice & Cauliflower Rice Casserole brings cozy satisfaction to any dinner table, perfect for chilly evenings.

Hidden Veggies: With over 3.5 cups of riced cauliflower and spinach, sneaking in veggies has never been easier, ensuring your family gets essential nutrients without fuss.

Quick and Easy: This dish is a time-saver, combining simple ingredients and straightforward steps—ideal for busy weeknights when you crave home-cooked goodness.

Endless Customization: Feel free to switch up proteins or add extra vegetables based on what you have on hand, making it versatile and personalized for every family’s taste.

Melty Cheesy Goodness: Topped with rich cheddar cheese that becomes gooey and crispy, this casserole not only looks appealing but also delivers on flavor and comfort.

Get ready to impress your family with this healthy yet indulgent dish that bridges the gap between convenience and nourishment!

Cheesy Chicken Casserole Ingredients

• Discover everything you need for this delightful dish!

For the Casserole

  • Avocado Oil – Provides fat for cooking and greasing; olive oil works as a great substitute.
  • Onion – Adds sweetness and depth of flavor; feel free to use any onion variety.
  • Frozen Riced Cauliflower – Acts as the veggie base and easily incorporates into the dish; fresh riced cauliflower can be used instead.
  • Kosher Salt & Black Pepper – Essential for seasoning; adjust to taste for optimal flavor.
  • Garlic – Offers aromatic flavor; fresh garlic or pre-minced will do the trick.
  • Milk – Enhances creaminess of the sauce; non-dairy milk can be used if preferred.
  • Garlic Powder – Intensifies garlic flavor; it’s optional if fresh garlic is used generously.
  • Italian Seasoning – Adds a lovely multi-herb flavor; swap with oregano or thyme if desired.
  • Dijon Mustard – Provides a tangy kick; honey mustard is a delicious alternative.
  • Cream Cheese – Creates that creamy texture; can be substituted with ricotta or a vegan cream option.
  • Plain Greek Yogurt – Adds protein and tangy goodness; sour cream can work in a pinch.
  • Baby Spinach – Nutrient-packed; swap it with kale or Swiss chard for a different flavor.
  • Cooked Shredded Chicken – Main protein source; rotisserie chicken is a great shortcut.
  • Cooked White Jasmine Rice – Offers heartiness; can be replaced with brown rice or quinoa, or left out for a lower-carb option.
  • Shredded Cheddar Cheese – A melty topping that delivers unbeatable flavor; use dairy-free cheese for a lactose-free option.

This cheesy chicken casserole is not just a meal; it’s a ticket to a comforting family dinner!

Step‑by‑Step Instructions for Cheesy Chicken and Cauliflower Rice Casserole

Step 1: Preheat the Oven
Begin by preheating your oven to 350°F (175°C). While that heats up, grab a 9×13-inch casserole dish and give it a generous coat of avocado oil to prevent sticking. This step ensures that your Cheesy Chicken and Cauliflower Rice Casserole bakes evenly and comes out perfectly golden.

Step 2: Sauté the Onions
In a Dutch oven, heat 2 tablespoons of avocado oil over medium-high heat. Once the oil shimmers, add one diced onion and sauté for about 5-7 minutes until it softens and turns translucent. Keep an eye on it to avoid burning, as this fragrant base enhances the flavor of your casserole.

Step 3: Cook the Cauliflower
Next, stir in 4 cups of frozen riced cauliflower into the onions, seasoning with kosher salt and black pepper. Cook this mixture for about 8-10 minutes, stirring occasionally, until the cauliflower becomes tender and begins to brown slightly. This step adds delicious texture and a veggie boost to your Cheesy Chicken and Cauliflower Rice Casserole.

Step 4: Add Garlic
Lower the heat and mix in 3-4 cloves of minced garlic. Sauté for an additional 1-2 minutes until the garlic is fragrant but not browned. The aroma will fill your kitchen, setting the stage for a comforting casserole that your family will anticipate.

Step 5: Create the Sauce
Now, lower the heat and pour in 1 cup of milk along with 1 teaspoon of garlic powder, 1 tablespoon of Italian seasoning, and 1 tablespoon of Dijon mustard. Add 8 ounces of cream cheese and ½ cup of plain Greek yogurt into the pot. Stir until the mixture is smooth and creamy, ensuring all ingredients are well combined and the flavors meld beautifully.

Step 6: Mix in Greens and Proteins
Add 3 cups of fresh baby spinach, 2 cups of cooked shredded chicken, and 2 cups of cooked white jasmine rice to the mixture. Gently fold everything together, allowing the spinach to wilt and incorporate while ensuring the chicken and rice are evenly dispersed throughout. This hearty blend will be the heart of your Cheesy Chicken and Cauliflower Rice Casserole.

Step 7: Assemble the Casserole
Pour the entire mixture into the greased casserole dish, spreading it evenly. Top it off with 1-2 cups of shredded cheddar cheese, allowing for a gooey, melty finish. This is where your casserole starts to take shape, ready for the oven!

Step 8: Bake the Casserole
Cover the dish with aluminum foil and place it in the preheated oven for 25 minutes. This step ensures that the casserole heats through and flavors meld together perfectly. After 25 minutes, remove the foil and switch the oven to broil.

Step 9: Broil for a Crispy Finish
Broil the dish for an additional 2-3 minutes until the cheese is bubbly and golden brown. Keep a close eye to prevent burning, as broilers can vary in strength. Look for a beautifully bubbly, crispy top that will invite everyone to the table for this delightful Cheesy Chicken and Cauliflower Rice Casserole!

Make Ahead Options

These Cheesy Chicken, Rice & Cauliflower Rice Casserole preparations are perfect for busy weeknights! You can assemble the entire casserole up to 24 hours in advance; simply prepare the mixture, transfer it to the greased dish, and cover tightly with foil before refrigerating. To maintain the casserole’s quality, ensure the ingredients are well mixed to prevent separation, and consider slightly underbaking it by about 5 minutes before refrigerating. When you’re ready to serve, just pop it in the oven (no need to thaw), follow with the 25 minutes of baking, then uncover and broil for that irresistible crispy cheese top. Enjoy restaurant-quality ease and comfort at home!

Cheesy Chicken Cauliflower Rice Casserole Variations

Feel free to get creative with this comforting dish and make it your own!

  • Dairy-Free: Swap cream cheese and Greek yogurt with a vegan alternative to keep the creamy texture without dairy.
  • Extra Veggies: Add chopped bell peppers or zucchini to boost nutrition and color; they’ll provide a pleasant crunch!
  • Spicy Kick: Include diced jalapeños or a sprinkle of red pepper flakes for a flavorful heat that layers beautifully with the cheese.
  • Quinoa Base: Replace white jasmine rice with quinoa for a protein-packed twist that’s gluten-free and adds a nutty flavor.
  • Herb Swap: Use fresh herbs such as basil or parsley instead of dried Italian seasoning to bring a bright, garden-fresh taste to the casserole.
  • Protein Twist: Substitute cooked shredded chicken with ground turkey or chickpeas for a hearty plant-forward approach.
  • Cauliflower Variations: Experiment with riced broccoli or a mix of other veggies like carrots or peas for a colorful alternative to the riced cauliflower base.
  • Cheesy Mix: Try varying cheese types; pepper jack or gouda can add an exciting spin along with their rich melting properties.

These variations not only keep the dish interesting but also cater to dietary preferences and encourage kitchen creativity. For even more ideas, check out different flavor combinations to explore how to elevate your home-cooked meals!

Expert Tips for Cheesy Chicken Casserole

  • Creamy Consistency: Ensure the cream cheese is fully melted before adding the chicken to achieve a rich and smooth sauce.
  • Brown Better: Avoid overcrowding the pan while cooking the cauliflower; this helps it brown nicely and enhances flavor.
  • Watch Baking Time: Baking times can vary; look for bubbling edges as a sign the casserole is nearly ready.
  • Substitution Savvy: Feel free to substitute the chicken with ground turkey or a plant-based protein for variations that fit dietary needs.
  • Veggie Boost: Add extra vegetables like bell peppers or broccoli to increase nutrition and provide different textures in your cheesy chicken casserole.

What to Serve with Cheesy Chicken and Cauliflower Rice Casserole

A wholesome meal deserves delightful accompaniments to create a truly satisfying dining experience.

  • Garlic Bread: The buttery, garlicky goodness of warm garlic bread complements the creamy casserole perfectly, making each bite more indulgent.
  • Steamed Broccoli: Bright, vibrant green broccoli adds freshness and nutrition, creating a lovely contrast in both color and texture against the cheesy comfort of the dish.
  • Side Salad: A refreshing mix of crisp lettuce, cucumbers, and cherry tomatoes brings lightness to the meal, balancing the richness of the casserole.
  • Mashed Sweet Potatoes: The natural sweetness and creamy texture of mashed sweet potatoes pairs beautifully with the savory flavors in the casserole, offering a delightful twist.
  • Roasted Brussels Sprouts: Caramelized Brussels sprouts bring a nutty depth that complements the cheesy chicken dish while adding a crunchy texture to the meal.
  • Fruit Salad: A light and fruity side with a medley of seasonal fruits adds a refreshing zing, rounding out the meal with a hint of sweetness.
  • Chardonnay: A chilled glass of crisp Chardonnay enhances the creamy notes of the casserole while providing a refreshing palate cleanser between bites.
  • Apple Crisp: For a light, comforting dessert, apple crisp serves a warm, sweet finish that echoes the cozy flavors of the casserole, making for a delightful end to your meal.

How to Store and Freeze Cheesy Chicken Casserole

Fridge: Store leftovers in an airtight container in the refrigerator for up to 4 days. This cheesy chicken casserole maintains its delicious flavor and texture when properly sealed.

Freezer: For longer storage, freeze the casserole in a freezer-safe container for up to 3 months. To prevent freezer burn, wrap it tightly with plastic wrap before sealing.

Reheating: When ready to enjoy, thaw the casserole in the fridge overnight. Reheat in a 350°F oven for about 25-30 minutes until heated through, or microwave individual portions for quick satisfaction.

Serving Suggestion: This comforting dish is best served warm; you can add a sprinkle of fresh herbs or a side salad to bring freshness to your meal!

Cheesy Chicken and Cauliflower Rice Casserole Recipe FAQs

How do I choose the best riced cauliflower for my casserole?
Absolutely! When selecting riced cauliflower, look for packages that are free from dark spots or excess moisture as this can indicate spoilage. If you’re using fresh riced cauliflower, ensure it’s firm and not wilted. Trust me, fresh ones roast beautifully, adding a lovely texture to your dish!

What’s the best way to store leftovers of the casserole?
Very! Once the casserole has cooled to room temperature, transfer it to an airtight container and store it in the fridge. It will keep well for up to 4 days. Just remember to let it cool completely before sealing to prevent condensation inside the container.

Can I freeze Cheesy Chicken and Cauliflower Rice Casserole? How?
Of course! To freeze, let the casserole cool fully, then wrap it tightly in plastic wrap followed by aluminum foil. This layering prevents freezer burn. Place it in a freezer-safe container for up to 3 months. When you’re ready to enjoy, thaw it overnight in the fridge before reheating, so it warms evenly.

What should I do if my casserole turns out too dry?
No worries! If you find your casserole is a bit dry, next time ensure you’re mixing enough sauce ingredients, specifically the cream cheese and milk, to create a creamy consistency. You can also add a splash of chicken broth when reheating if it seems a little parched—this can revive the flavors beautifully.

Are there any allergens I should be aware of in this dish?
Good question! This casserole is nut-free and gluten-free, making it suitable for many diets. However, if you or someone in your family has a dairy allergy, consider substituting the cream cheese and shredded cheddar cheese with dairy-free alternatives that are available in stores. Always read labels to avoid hidden allergens.

How long does the casserole take to come out of the oven perfectly?
Very! Bake it covered in foil for 25 minutes, then you can broil for an additional 2-3 minutes to achieve that golden, crispy cheese topping you crave. Keeping an eye on it while broiling ensures you don’t miss out on that perfect bubbling surface!

undefined

Cheesy Chicken Cauliflower Rice Casserole Your Family Will Love

A comforting cheesy chicken cauliflower rice casserole packed with hidden veggies and wholesome ingredients, perfect for family dinners.
Prep Time 15 minutes
Cook Time 50 minutes
Total Time 1 hour 5 minutes
Servings: 6 servings
Course: Casserole
Cuisine: American
Calories: 400

Ingredients
  

Casserole Base
  • 2 tablespoons Avocado Oil Can substitute with olive oil.
  • 1 Onion Diced, any variety.
  • 4 cups Frozen Riced Cauliflower Fresh can be used.
  • to taste Kosher Salt
  • to taste Black Pepper
  • 3-4 cloves Garlic Minced.
  • 1 cup Milk Non-dairy milk can be used.
  • 1 teaspoon Garlic Powder Optional if using fresh garlic.
  • 1 tablespoon Italian Seasoning Can swap with oregano or thyme.
  • 1 tablespoon Dijon Mustard Honey mustard is an alternative.
  • 8 ounces Cream Cheese Can be substituted with ricotta.
  • ½ cup Plain Greek Yogurt Sour cream can be used.
  • 3 cups Baby Spinach Can substitute with kale.
  • 2 cups Cooked Shredded Chicken Rotisserie chicken works well.
  • 2 cups Cooked White Jasmine Rice Substitute with brown rice or quinoa.
  • 1-2 cups Shredded Cheddar Cheese Use dairy-free for lactose-free option.

Equipment

  • Dutch oven
  • 9x13 inch casserole dish

Method
 

Preparation Steps
  1. Preheat your oven to 350°F (175°C) and grease a 9x13-inch casserole dish with avocado oil.
  2. Heat 2 tablespoons of avocado oil in a Dutch oven over medium-high heat. Sauté 1 diced onion for 5-7 minutes until softened.
  3. Stir in 4 cups of frozen riced cauliflower, seasoning with kosher salt and black pepper. Cook for 8-10 minutes until tender.
  4. Add 3-4 cloves of minced garlic, sauté for an additional 1-2 minutes until fragrant.
  5. Pour in 1 cup of milk, 1 teaspoon of garlic powder, 1 tablespoon of Italian seasoning, and 1 tablespoon of Dijon mustard. Stir in 8 ounces of cream cheese and ½ cup of plain Greek yogurt until smooth.
  6. Fold in 3 cups of fresh baby spinach, 2 cups of cooked shredded chicken, and 2 cups of cooked white jasmine rice thoroughly.
  7. Transfer the mixture to the greased casserole dish and top with 1-2 cups of shredded cheddar cheese.
  8. Cover with foil and bake for 25 minutes, then remove the foil and broil for an additional 2-3 minutes until the cheese is bubbly and golden.

Nutrition

Serving: 1servingCalories: 400kcalCarbohydrates: 30gProtein: 30gFat: 20gSaturated Fat: 10gPolyunsaturated Fat: 2gMonounsaturated Fat: 8gCholesterol: 80mgSodium: 600mgPotassium: 700mgFiber: 4gSugar: 5gVitamin A: 1500IUVitamin C: 30mgCalcium: 300mgIron: 3mg

Notes

Store leftovers in an airtight container in the refrigerator for up to 4 days; can freeze for up to 3 months.

Tried this recipe?

Let us know how it was!

Cheesy Ground Beef and Rice Casserole for Cozy Family Nights

As I was rummaging through my pantry one busy weeknight, I stumbled upon the ultimate comfort food stars: ground beef, rice, and a mix of all things cheesy. This Cheesy Ground Beef and Rice Casserole came to life, melding nostalgia with simplicity. What I love most about this dish is how effortlessly it transforms humble pantry staples into a family-friendly meal that pleases even the pickiest eaters. It’s not just quick to prep, but it also requires minimal cleanup, letting you spend more time enjoying dinner and less time at the sink. Plus, you can easily customize this casserole with your favorite ingredients, ensuring everyone gets a taste they adore. Are you ready to dive into a bowl of cozy goodness?

What makes this casserole a family favorite?

Ease of Preparation: This dish is perfect for busy weeknights, requiring only basic cooking skills to whip up.

Comforting Flavors: The marriage of savory ground beef, fluffy rice, and melted cheese creates a taste that feels like a warm hug.

Endless Customization: Add your favorite veggies or swap proteins to suit everyone’s taste, making it a versatile meal for any occasion.

Minimal Cleanup: One-dish wonder means less mess, allowing you to enjoy more time with family.

Crowd-Pleasing Appeal: Kids and adults alike can’t resist this cheesy delight, making it a surefire hit for your next family gathering.

Cheesy Ground Beef and Rice Casserole Ingredients

For the Casserole
Lean Ground Beef – Rich in protein and flavor; consider using ground turkey for a lighter twist.
Cooked White Rice – Provides bulk and texture; leftover rice works best to keep everything from getting mushy.
Cream of Mushroom Soup – Serves as a creamy base; feel free to substitute with cream of chicken soup for a different flavor.
Milk or Beef Broth – Adds creaminess to the casserole; use milk for richness or broth for extra depth.
Cheddar Cheese – Supplies the familiar cheesy goodness; mix it up with Monterey Jack for a delightful change.
Onion – Adds sweetness and fragrance; yellow or white onions work best, but shallots are a great substitute.
Garlic – Elevates the overall flavor; if needed, use garlic powder as a quick substitution (½ tsp for every 2 cloves).
Paprika – Delivers a mild smokiness and color; opt for smoked paprika to further enhance the flavor profile.
Salt and Pepper – Essential seasonings to taste; adjust based on the saltiness of your soup or broth used.

Optional Additions
Vegetables (e.g., peas, bell peppers) – Incorporate for added nutrition and vibrant color; they blend perfectly into the dish.
Fresh Parsley – Garnish for a pop of color and freshness; sprinkle on top before serving.

Step‑by‑Step Instructions for Cheesy Ground Beef and Rice Casserole

Step 1: Preheat the Oven
Begin by preheating your oven to 350°F (175°C). While that warms up, take a moment to grease a 9×13-inch baking dish thoroughly with cooking spray or a touch of butter. This will ensure your cheesy ground beef and rice casserole slides out easily once it’s baked.

Step 2: Cook the Beef and Onions
In a large skillet, set over medium heat, brown 1 pound of lean ground beef along with 1 diced onion. Stir occasionally, breaking up the meat, until both are browned and cooked through, about 6-8 minutes. Once cooked, drain any accumulated fat to keep your dish light and healthy.

Step 3: Add Garlic
Now, stir in 2 minced garlic cloves into the skillet with the beef and onions. Cook for an additional 30 seconds until fragrant, ensuring that the garlic doesn’t burn. This quick step enhances the flavors of your casserole, setting a delightful aroma in the kitchen.

Step 4: Mix the Soup and Liquid
In a separate bowl, whisk together 1 can of cream of mushroom soup with 1/2 cup of milk or beef broth, along with 1 teaspoon of paprika and a pinch of salt and pepper. This creamy mixture will serve as the flavorful base for your cheesy ground beef and rice casserole, so ensure it’s well combined.

Step 5: Combine Ingredients in Dish
In your greased baking dish, combine the cooked rice, the beef and onion mixture, and about half of the shredded cheddar cheese. Mix everything together gently until well incorporated. This will create a hearty base that will soak in the wonderful creamy sauce.

Step 6: Add the Creamy Mixture
Pour the creamy soup mixture over the beef and rice combination in the baking dish. Use a spatula to fold everything together gently but thoroughly, ensuring the sauce evenly coats every ingredient. This step is key to achieving that comforting texture everyone loves.

Step 7: Top with Cheese
Next, sprinkle the remaining shredded cheddar cheese generously over the top of your casserole mixture. Cover your baking dish tightly with aluminum foil to trap in moisture, which will help the cheese melt perfectly during baking.

Step 8: Bake the Casserole
Place the covered casserole in the preheated oven and bake for 20 minutes. This allows the flavors to blend and the cheese to start melting, creating that desired gooey texture that makes your cheesy ground beef and rice casserole truly irresistible.

Step 9: Uncover and Brown the Cheese
After 20 minutes, carefully remove the foil and continue baking for another 10 minutes until the cheese is bubbly and golden brown on top. Keep an eye on it, as you want that beautiful, toasty finish that will draw everyone to the table.

Step 10: Broil for Extra Crispness
For an added touch, you can broil the casserole on high for an additional 2 minutes if you desire a crispier cheese topping. Watch closely to prevent burning, ensuring your cheesy ground beef and rice casserole comes out just right.

Step 11: Serve and Garnish
Remove the casserole from the oven and let it sit for a few minutes to cool slightly. Serve hot, optionally garnishing with chopped fresh parsley for a pop of color and freshness. This comforting dish is perfect for cozy family nights or any occasion that calls for a satisfying meal.

Expert Tips for Cheesy Ground Beef and Rice Casserole

  • Pre-cook Rice: Always use pre-cooked rice to ensure the right texture; uncooked rice can lead to uneven cooking and mushiness.

  • Lean Meat Choices: Consider swapping ground beef for ground turkey or chicken for a lighter, yet still delicious, cheesy ground beef and rice casserole.

  • Creamy Consistency: Whisk your soup and milk or broth thoroughly before adding to prevent clumps and ensure a velvety sauce throughout the casserole.

  • Layer Wisely: Top your dish with extra cheese for a bubbly, golden crust; remember to cover it during the first half of baking to avoid burning.

  • Chill & Bake Later: You can prepare the casserole up to 24 hours ahead; just refrigerate it before baking, making weeknight meals a breeze.

  • Freezing Leftovers: Portion and freeze leftovers in airtight containers for up to 2 months, allowing you to enjoy this comforting meal anytime!

What to Serve with Cheesy Ground Beef and Rice Casserole

Indulge in the comforting flavors of this casserole, and elevate your dining experience with delightful side dishes.

  • Garlic Bread: This warm, buttery treat perfectly complements the creamy casserole, adding a satisfying crunch and a garlicky kick.

  • Steamed Broccoli: The fresh crunch of steamed broccoli not only adds vibrant color to your plate but also provides a nutritious counterbalance to the rich flavors of the casserole.

  • Caesar Salad: A crisp Caesar salad with its tangy dressing and crunchy croutons adds a refreshing contrast to the warmly baked casserole, making each bite feel light yet satisfying.

  • Roasted Carrots: Sweet and tender roasted carrots drizzled with a touch of honey or balsamic glaze can elevate your meal with their caramelized richness.

  • Coleslaw: A zesty coleslaw brings a crunchy texture and a tangy flavor that cuts through the richness of the casserole, providing an enjoyable balance.

  • Iced Tea or Lemonade: Refresh your palate with a glass of iced tea or homemade lemonade; their chilled sweetness contrasts the warmth of the casserole while enhancing the meal’s overall enjoyment.

How to Store and Freeze Cheesy Ground Beef and Rice Casserole

Fridge: Store leftovers in an airtight container for up to 4 days; simply reheat in the oven or microwave until warmed through for easy meals.

Freezer: Freeze individual portions in airtight containers for up to 2 months; let them cool completely before placing them in the freezer to maintain the best texture.

Thawing: When ready to eat, thaw in the fridge overnight or microwave for a quick defrost. Reheat covered in the oven to restore creaminess and flavor.

Reheating: To reheat, place in a preheated oven at 350°F (175°C) for approximately 20 minutes, or until heated through—your cheesy ground beef and rice casserole will be deliciously gooey again!

Make Ahead Options

These Cheesy Ground Beef and Rice Casserole are perfect for meal prep, allowing you to enjoy a homemade meal with minimal effort on busy nights! You can assemble the entire casserole up to 24 hours in advance; simply cover it tightly with plastic wrap or foil and refrigerate. For optimal flavor and texture, allow the casserole to sit at room temperature for about 30 minutes before baking. If you’re looking to prep further ahead, you can freeze the assembled casserole for up to 2 months. Just thaw it overnight in the refrigerator before baking as directed, and you’ll have a comforting dish ready to impress, just as delicious as when freshly made!

Variations & Substitutions for Cheesy Ground Beef and Rice Casserole

Feel free to tailor this casserole to suit your taste buds and pantry, creating a unique spin on this comforting classic!

  • Ground Turkey: Swap lean ground beef for ground turkey, making it a lighter dish without sacrificing flavor. It’s a tasty alternative that even picky eaters will love.

  • Vegetable Medley: Add a colorful mix of vegetables like peas, bell peppers, or corn for a nutrient boost. Not only do they enhance the flavor, but they also bring a vibrant look to your casserole.

  • Different Cheeses: Instead of cheddar, use a blend of Monterey Jack and Colby for a creamy twist. Each cheese offers a distinct flavor, resulting in a cheesy explosion that tantalizes the palate.

  • Gluten-Free Option: For a gluten-free casserole, swap cream of mushroom soup with a gluten-free alternative or make your own using a simple roux. This way, everyone can enjoy a slice of comfort.

  • Spicy Kick: If you enjoy a little heat, add diced jalapeños or a sprinkle of crushed red pepper flakes. This simple addition kicks up the flavor and makes your casserole pop!

  • Cauliflower Rice: For a low-carb version, substitute cooked rice with cauliflower rice. This swap keeps the dish creamy while significantly reducing the carbs.

  • Homemade Sauce: Ditch the canned soup and whip up a homemade cheese sauce using butter, flour, milk, and your choice of cheese. It adds a richness that elevates the overall taste.

  • Herbs & Seasonings: Try fresh herbs like thyme or oregano to infuse the dish with bright, aromatic flavors. They add freshness and further depth to the comforting taste you crave.

For additional inspiration, consider adding ingredients from our Italian Ground Beef Casserole or even some delightful variations mentioned in our Comforting One-Pot Meals article. Enjoy experimenting!

Cheesy Ground Beef and Rice Casserole Recipe FAQs

What type of rice works best for this casserole?
I recommend using cooked white rice for the best texture and flavor. Leftover rice is ideal, as it avoids mushiness. However, you can also opt for long grain, jasmine, or even brown rice depending on your preference.

How should I store leftovers from the casserole?
Store leftovers in an airtight container in the refrigerator for up to 4 days. Simply reheat in the oven or microwave until warmed through. This way, you can enjoy the comforting flavors all over again without much fuss!

Can I freeze cheesy ground beef and rice casserole?
Absolutely! You can portion out leftovers into airtight containers and freeze them for up to 2 months. Just be sure to let the casserole cool completely before freezing. This makes for a convenient meal option later on!

What if my casserole looks too dry after baking?
If your casserole appears dry, a little added liquid—like broth or milk—can help. Stir it in gently and pop it back in the oven covered for a short time. Keeping an eye on it will help ensure it regains that creamy goodness!

Is this casserole suitable for different dietary needs?
You can easily modify this recipe to accommodate various dietary needs. Swap ground beef for ground turkey or chicken for a lighter dish. Additionally, using gluten-free cream of mushroom soup makes it suitable for those avoiding gluten.

How can I ensure my cheese topping is extra bubbly?
For a bubbly and golden cheese topping, bake covered for the first half of the cooking time, then uncover to brown the cheese. If you want an even crispier finish, broil it for just 2 minutes at the end—watch it carefully to prevent burning!

undefined

Cheesy Ground Beef and Rice Casserole for Cozy Family Nights

This Cheesy Ground Beef and Rice Casserole combines lean beef, rice, and cheese into a comforting family meal.
Prep Time 15 minutes
Cook Time 30 minutes
Total Time 45 minutes
Servings: 6 servings
Course: Casserole
Cuisine: American
Calories: 450

Ingredients
  

For the Casserole
  • 1 pound Lean Ground Beef Consider using ground turkey for a lighter twist.
  • 3 cups Cooked White Rice Leftover rice works best to keep everything from getting mushy.
  • 1 can Cream of Mushroom Soup Feel free to substitute with cream of chicken soup.
  • 1/2 cup Milk or Beef Broth Use milk for richness or broth for extra depth.
  • 2 cups Cheddar Cheese Mix it up with Monterey Jack for a delightful change.
  • 1 medium Onion Yellow or white onions work best.
  • 2 cloves Garlic If needed, use garlic powder as a quick substitution.
  • 1 teaspoon Paprika Opt for smoked paprika to enhance flavor.
  • to taste Salt and Pepper Adjust based on the saltiness of your soup or broth used.
Optional Additions
  • Vegetables (e.g., peas, bell peppers) Incorporate for added nutrition and color.
  • Fresh Parsley Garnish for a pop of color and freshness.

Equipment

  • Oven
  • Skillet
  • baking dish

Method
 

Step-by-Step Instructions
  1. Preheat your oven to 350°F (175°C) and grease a 9x13-inch baking dish.
  2. In a large skillet, brown the ground beef and diced onion over medium heat for 6-8 minutes.
  3. Stir in the minced garlic and cook for an additional 30 seconds until fragrant.
  4. In a bowl, whisk together cream of mushroom soup, milk or broth, paprika, salt, and pepper.
  5. In the baking dish, combine cooked rice, beef mixture, and half of the cheddar cheese.
  6. Pour the creamy soup mixture over the rice and beef, folding gently.
  7. Top with the remaining cheddar cheese and cover with aluminum foil.
  8. Bake covered for 20 minutes, then uncover and bake for an additional 10 minutes.
  9. Optionally broil for 2 minutes for a crispy cheese topping, watching closely.
  10. Let sit for a few minutes, then serve hot, garnished with fresh parsley if desired.

Nutrition

Serving: 1servingCalories: 450kcalCarbohydrates: 40gProtein: 30gFat: 20gSaturated Fat: 10gCholesterol: 70mgSodium: 800mgPotassium: 600mgFiber: 2gSugar: 2gVitamin A: 15IUVitamin C: 10mgCalcium: 20mgIron: 15mg

Notes

Use pre-cooked rice and consider swapping ground beef for turkey or chicken for a lighter dish.

Tried this recipe?

Let us know how it was!

15-Minute Garlic Butter Steak Bites with Zucchini Bliss

Every time the sizzling sound of steak hits a hot skillet, I feel an irresistible pull to gather friends for a cozy dinner. That’s where my 15-Minute Garlic Butter Steak Bites with Zucchini come in. This dish transforms busy weeknights into a culinary delight, serving up tender, juicy steak bites mingling with buttery, garlicky zucchini—all on the table in just 15 minutes. Not only is it a quick weeknight dinner option, but it’s also a fantastic low-carb solution that satisfies both cravings for comfort and mindful eating. With the ease of preparation and the flavors that envelop every bite, you’ll find yourself reaching for this recipe time and again. Are you ready to experience a flavor-packed dinner without the fuss? Let’s dive into the details!

Why is this recipe a weeknight winner?

Simplicity: This recipe requires minimal prep and cooking time, making it ideal for busy weeknights. Just 15 minutes, and you’re done!

Bold Flavors: The combination of garlic butter and juicy steak infuses every bite with a delicious and savory punch that’s hard to resist.

Versatile Ingredients: You can easily swap out steak cuts or use different vegetables like broccoli or bell peppers, allowing you to customize the dish to your preference.

Low-Carb Delight: It’s a fantastic low-carb meal that fits perfectly into a keto lifestyle, helping you stick to your health goals without sacrificing taste!

Crowd-Pleaser: Whether it’s a cozy family dinner or an inviting meal for friends, this dish brings everyone together with its appealing flavors and comforting vibe.

This one is bound to become a go-to in your kitchen, especially if you’re looking for quick, delicious meals that don’t compromise on flavor! Fancy some crispy salad on the side? Check out my simple side salad recipe.

Garlic Butter Steak Bites Ingredients

• Get ready to create unforgettable flavors!

For the Steak Bites

  • Steak – Use sirloin, ribeye, or any tender cut for the richest flavor; flank steak or tenderloin can be excellent substitutes, just adjust cooking time.
  • Salt & Pepper – Season just before cooking to retain moisture and enhance the steak’s natural flavors.

For the Garlic Butter

  • Butter – Essential for creating a rich sauce; substitute with ghee or dairy-free butter for a lactose-free option.
  • Garlic – Mince finely to ensure robust aroma and even flavor distribution.

For the Vegetables

  • Zucchini – Adds fresh texture and soaks up the garlic butter beautifully; feel free to swap with broccoli florets or bell peppers as needed for variety.
  • Olive Oil – Choose high-quality oil for searing the steak to prevent sticking and enhance flavor.

These ingredients come together to whip up a delightful and quick meal that fits into your busy schedule while still being a tasty low-carb option, perfect for weeknight dinners!

Step‑by‑Step Instructions for 15-Minute Garlic Butter Steak Bites with Zucchini

Step 1: Prep the Steak
Begin by patting the steak dry with paper towels to remove excess moisture. This step is crucial for achieving a beautiful sear. Then, season both sides of the steak generously with salt and pepper to enhance the natural flavors. Allow the seasoned steak to rest while you prepare the skillet, ensuring it’s ready to sizzle.

Step 2: Sear the Steak
In a large skillet, heat 2 tablespoons of olive oil over medium-high heat until shimmering, which should take about 1-2 minutes. Once hot, add the seasoned steak in a single layer; avoid overcrowding. Sear the steak for 1-2 minutes on each side until it’s golden brown and develops a nice crust. Remove the steak from the skillet and set aside.

Step 3: Cook the Garlic
Reduce the heat to medium and add 2 tablespoons of butter to the same skillet, allowing it to melt and bubble. Within about 30 seconds, add 3-4 cloves of minced garlic, stirring constantly to prevent burning. Cook until fragrant, about 30 seconds, creating a luscious garlic butter sauce that will coat the steak and zucchini.

Step 4: Add the Zucchini
Toss in 2 medium zucchinis, cut into half-moons, into the skillet with the garlic butter. Stir well to coat the zucchini and cook for 3-5 minutes, stirring frequently, until they become tender-crisp and gain a beautiful sheen from the garlic butter. This softens the veggies while infusing them with flavor.

Step 5: Combine and Heat Through
Return the seared steak to the skillet, adding it to the garlic butter zucchini mix. Gently toss everything together and let it cook for an additional 1-2 minutes until the steak is warmed through and coated evenly in the garlic butter sauce. This final heating melds all the flavors beautifully.

Step 6: Serve
Once everything is combined and heated, transfer the garlic butter steak bites and zucchini to a serving platter. Garnish with freshly chopped parsley for a burst of color and flavor. Serve immediately, and allow the rich aromas of this quick, delicious 15-Minute Garlic Butter Steak Bites with Zucchini to entice your guests!

What to Serve with 15-Minute Garlic Butter Steak Bites with Zucchini

Elevate your dining experience by complementing your savory steak bites with a variety of delightful sides and beverages!

  • Creamy Mashed Cauliflower: A low-carb alternative to traditional mashed potatoes that adds a silky texture to your meal. Perfect for soaking up any extra garlic butter sauce!
  • Garlic Butter Green Beans: Crisp-tender green beans sautéed in garlic butter harmonize beautifully with the richness of steak, bringing a fresh crunch to your plate.
  • Simple Side Salad: A refreshing mix of greens with a light vinaigrette provides a delightful contrast to the hearty steak bites, balancing flavors and textures.
  • Roasted Brussels Sprouts: Caramelized Brussels sprouts add a slightly nutty flavor and crispy edge, enhancing the overall experience with their delightful crunch.
  • Zucchini Noodles: Light and veggie-forward, these noodles absorb the delicious garlic butter sauce, making for a cohesive low-carb option alongside your savory bites.
  • Cauliflower Rice: Fluffy and filling, cauliflower rice complements your steak beautifully and offers an excellent base for the garlic butter sauce.
  • Red Wine: A glass of full-bodied red wine will elevate the meal, its rich and robust flavor pairing perfectly with the savory notes of the steak.
  • Chocolate Mousse: For dessert, indulge in a silky chocolate mousse to round off the meal with a sweet touch that contrasts the savory dishes.

Make Ahead Options

These 15-Minute Garlic Butter Steak Bites with Zucchini are perfect for meal prep enthusiasts looking to save time on busy weeknights! You can season and cube the steak up to 24 hours in advance, placing it in an airtight container in the refrigerator to keep it fresh. Additionally, wash and slice the zucchini ahead of time, storing it in a separate container to maintain its crunch. When you’re ready to cook, simply heat the olive oil in your skillet and follow the final steps—sear the steak and then add the zucchini to the garlic butter sauce. This way, you can enjoy a delicious, restaurant-quality meal with minimal effort!

How to Store and Freeze Garlic Butter Steak Bites

Fridge: Store leftovers in an airtight container for up to 3 days. This helps maintain freshness and flavor while keeping the garlic butter steak bites ready for a quick meal.

Freezer: If you want to save them for later, freeze in a single layer in a freezer-safe container for up to 3 months. When ready to enjoy, thaw in the fridge overnight before reheating.

Reheating: To maintain tenderness, reheat gently over medium-low heat in a skillet or microwave. Add a splash of water or broth to the skillet to prevent drying out and keep those flavors rich!

Reminder: Remember that the zucchini may become softer upon reheating, but the garlic butter sauce adds a delightful touch to every bite, making it a satisfying dish again!

Garlic Butter Steak Bites Variations

Feel free to get creative with the flavors and ingredients in this dish, making it truly yours!

  • Different Steak: Explore using flank steak or top round for varied textures and flavor profiles. Each cut brings its own unique taste.
  • Veggie Swap: Instead of zucchini, try broccoli, bell peppers, or asparagus to add color and crunch. Each vegetable can change the flavor dynamic beautifully.
  • Spice it Up: Add a pinch of red pepper flakes for an exciting kick of heat. It enhances the dish without overpowering the garlic and butter.
  • Herb Infusion: Toss in fresh herbs like rosemary or thyme for an earthy aroma and flavor boost. They’ll elevate the dish to new culinary heights.
  • Dairy-Free Option: Substitute regular butter with ghee or a plant-based alternative for a delicious dairy-free experience without sacrificing richness.
  • Sauce Variation: Drizzle with soy sauce or Worcestershire sauce for a savory umami twist that’ll tantalize your taste buds and add depth.
  • Vegan Delight: Use tofu or tempeh in place of steak and load up on seasonal veggies for a comforting vegan-friendly dish. You won’t miss the meat at all.
  • Creamy Addition: Stir in a dollop of creme fraiche or a splash of heavy cream for a decadent twist on the garlic butter sauce, elevating it to restaurant quality.

Don’t forget, the beauty of cooking lies in personal touches! For a touch of freshness on the side, try pairing with a simple side salad recipe that complements your main dish perfectly.

Expert Tips for Garlic Butter Steak Bites

Prep Your Steak: Ensure the steak is thoroughly dried before seasoning. This prevents steaming and guarantees a perfect sear!

Avoid Overcooking: Sear quickly for 1-2 minutes per side to lock in juiciness. Gently warm the steak through at the end to keep it tender.

Mind the Garlic: Stir minced garlic frequently while cooking. This prevents burning, which can introduce bitter notes to your garlic butter sauce.

Easy Swaps: Feel free to substitute steak cuts and vegetables based on availability. Experimenting with variations keeps the garlic butter steak bites exciting!

Season Wisely: Add salt and pepper just before cooking to enhance flavors without drawing out moisture prematurely. Enjoy a meal that’s truly delicious and low-carb!

Garlic Butter Steak Bites with Zucchini Recipe FAQs

How do I choose the right steak for this recipe?
Absolutely! For this dish, I recommend tender cuts like sirloin or ribeye, known for their rich flavor. If you’re feeling adventurous, flank steak or tenderloin also works beautifully—just be mindful of adjusting the cooking time as needed for tenderness.

What’s the best way to store leftovers?
Very! Store your garlic butter steak bites in an airtight container in the refrigerator for up to 3 days. To retain their deliciousness, simply reheat them gently over medium-low heat in a skillet or microwave, adding a splash of water or broth to keep them moist.

Can I freeze garlic butter steak bites?
Absolutely! To freeze, place the steak bites on a baking sheet in a single layer and freeze until solid. Once frozen, transfer them to a freezer-safe container. They can be stored for up to 3 months. Just remember to thaw them in the fridge overnight before reheating for best results.

What should I do if the garlic burns while cooking?
Oh no! If your garlic starts to burn, it can create a bitter flavor. Make sure to reduce the heat when adding it to the butter, stirring constantly. If it does burn, sadly, you may need to start over—so keep that heat in check and your garlic will stay fragrant and delicious!

Are garlic butter steak bites suitable for a low-carb diet?
Absolutely! This recipe is a fantastic low-carb dish, focusing on protein-rich steak and non-starchy zucchini. If you’re following a keto lifestyle or just looking for healthier options, this meal fits perfectly without sacrificing any of the wonderful flavors. Enjoy this guilt-free treat!

undefined

15-Minute Garlic Butter Steak Bites with Zucchini Bliss

This quick low-carb dish features tender steak bites and garlicky zucchini, perfect for busy weeknights.
Prep Time 5 minutes
Cook Time 10 minutes
Total Time 15 minutes
Servings: 4 servings
Course: Dinner
Cuisine: American
Calories: 350

Ingredients
  

For the Steak Bites
  • 1 pound steak sirloin, ribeye, flank steak, or tenderloin
  • to taste salt
  • to taste pepper
For the Garlic Butter
  • 2 tablespoons butter or substitute with ghee for lactose-free option
  • 3-4 cloves garlic minced
For the Vegetables
  • 2 medium zucchini cut into half-moons
  • 2 tablespoons olive oil high-quality for searing

Equipment

  • Large skillet

Method
 

Step-by-Step Instructions
  1. Pat the steak dry with paper towels and season with salt and pepper. Allow to rest.
  2. Heat olive oil in a skillet over medium-high heat. Sear steak for 1-2 minutes on each side.
  3. Add butter to the skillet, melt it, then add minced garlic and cook until fragrant.
  4. Add zucchini to the skillet, stir to coat and cook until tender-crisp, about 3-5 minutes.
  5. Return steak to the skillet, toss and warm through for 1-2 minutes.
  6. Transfer to a serving platter, garnish with parsley, and serve immediately.

Nutrition

Serving: 1servingCalories: 350kcalCarbohydrates: 6gProtein: 31gFat: 24gSaturated Fat: 10gPolyunsaturated Fat: 2gMonounsaturated Fat: 10gCholesterol: 90mgSodium: 350mgPotassium: 650mgFiber: 2gSugar: 2gVitamin A: 500IUVitamin C: 15mgCalcium: 40mgIron: 3mg

Notes

For best results, ensure steak is dried thoroughly before cooking, and avoid overcooking.

Tried this recipe?

Let us know how it was!

Delicious One-Pot Mexican Chicken Adobo for Cozy Dinners

As the sun sets and the aroma of spices fills the kitchen, there’s something incredibly comforting about preparing a warm, homemade meal. This is where my One-Pot Mexican Chicken Adobo comes in, a quick dinner option that brings the rich, traditional flavors of Mexico right to your table. Imagine tender chicken pieces simmering in a smoky adobo sauce, the vibrant notes of dried chiles dancing around the room. Not only is this dish a feast for the senses, but it’s also a time-saver, allowing you to whip up a hearty, satisfying meal in just one pot! Whether you’re cooking for family or entertaining friends, this delightful recipe is sure to transform your evening into a celebratory gathering. Ready to dive into the joys of home cooking with me? Let’s get started!

Why is One-Pot Mexican Chicken Adobo Special?

Simplicity at Its Finest: With just one pot, this recipe saves you from a sink full of dishes.

Authentic Flavors: Rich, smoky adobo sauce made from dried chiles brings a genuine taste of Mexico to your kitchen.

Quick Dinner Solution: Perfect for busy weeknights, dinner is ready in about an hour!

Crowd-Pleasing Comfort: Ideal for family gatherings or dinner parties, it pleases palates and sparks conversation.

Versatile Pairings: Serve over rice or with warm tortillas for a complete meal that suits everyone’s taste!

Explore ways to elevate your dinner table with this quick dinner that combines ease and exuberance!

Mexican Chicken Adobo Ingredients

Get ready to savor the wonderful flavors of this comforting dish with an easy-to-follow ingredient list.

For the Chicken

  • Bone-in Chicken Legs – Moisture and flavor; thighs may add extra richness.
  • Bone-in Chicken Thighs – Tender when cooked; choose skin-on or skinless based on your preference.

For the Sauce

  • Olive Oil – Perfect for browning chicken and sautéing; any neutral oil works well.
  • Onion (sliced) – Adds a natural sweetness; substitute shallots for a milder taste.
  • Roma Tomatoes (quartered) – Provides acidity and sweetness; substitute with other tomato varieties as needed.
  • Garlic Cloves (chopped) – Essential for robust flavor; garlic powder can replace fresh in smaller amounts.

For the Adobo Flavor

  • Dried Guajillo Chiles – The key ingredient for authentic adobo flavor; New Mexico chiles offer a milder option.
  • Dried Ancho or Chipotle Chile – Adds depth; chipotle enhances the spiciness.
  • Dried Pasilla or New Mexico Chiles – Enhance the overall flavor; replace with more guajillo if unavailable.
  • Chicken Broth – Creates a flavorful sauce base; low-sodium varieties are the best choice.
  • Apple Cider Vinegar – Adds necessary acidity; white vinegar is a suitable substitute.
  • Sea/Kosher Salt – Elevates flavor; adjust according to your taste.
  • Ground Cumin – Introduces an earthy note; coriander works as an alternative.
  • Dried Oregano – Adds delightful herbal notes; Mexican oregano is more traditional.
  • Ground Coriander – Complements the spices in the sauce.
  • Ground Cloves (optional) – Provides warmth; can be omitted if not preferred.
  • Bay Leaves – Enhance aromatic flavor; remove before serving.

For Garnish

  • Chopped Cilantro – Adds freshness; omit or switch to parsley if desired.

Prepare your ingredients, and get ready to enjoy the rich, delightful flavors of Mexican Chicken Adobo!

Step‑by‑Step Instructions for One-Pot Mexican Chicken Adobo

Step 1: Prep the Chicken
Begin by patting the bone-in chicken legs and thighs dry with paper towels. This helps achieve a golden-brown sear. Season generously with sea or kosher salt and freshly ground pepper on both sides. Prepping the chicken in this way ensures it will be flavorful and juicy, setting the stage for your delicious One-Pot Mexican Chicken Adobo.

Step 2: Make the Adobo Sauce
In a large pot, heat 2 tablespoons of olive oil over medium heat. Add the sliced onion and quartered Roma tomatoes, sautéing until the onions are soft and translucent, about 5 minutes. Next, stir in the chopped garlic and quickly add the dried guajillo, ancho, and pasilla chiles, frying for another couple of minutes until fragrant. Slowly pour in 2 cups of chicken broth and bring the mixture to a boil.

Step 3: Blend the Sauce
Remove the pot from heat and let the sauce cool slightly to avoid splattering. Transfer the mixture into a blender, adding 1/4 cup apple cider vinegar, a teaspoon of cumin, dried oregano, ground coriander, and optional ground cloves. Blend until the sauce is smooth and velvety. This flavorful adobo sauce is now ready to envelop the chicken in your One-Pot Mexican Chicken Adobo!

Step 4: Brown the Chicken
Return the pot to medium-high heat and pour in 1 tablespoon of olive oil. Once hot, carefully add the seasoned chicken, browning it for about 2-3 minutes on each side until golden. This step enhances flavor and texture, providing a beautiful sear that gets locked in during the cooking process. Once browned, remove the chicken from the pot and set it aside.

Step 5: Cook in Adobo Sauce
With the chicken set aside, pour the blended adobo sauce back into the pot. Add the chicken legs and thighs back in, along with 2 bay leaves. Bring the mixture to a gentle simmer, reducing the heat to low. Cover and let it cook for approximately 45 minutes, until the chicken reaches an internal temperature of 165°F and becomes tender and flavorful.

Step 6: Serve
Once cooked, carefully remove the bay leaves from your One-Pot Mexican Chicken Adobo. Taste and adjust seasoning as necessary, adding more salt or pepper to your liking. Serve hot, garnished with freshly chopped cilantro. This dish pairs perfectly with fluffy white rice or warm tortillas, offering a comforting meal everyone will love!

Expert Tips for Mexican Chicken Adobo

  • Prep Ahead: Prepare the adobo sauce in advance for richer flavors when cooking. A little planning goes a long way.
  • Avoid Crowding: Brown chicken in batches if necessary to ensure even searing; overcrowding can lead to steaming instead.
  • Spice Control: Adjust the spiciness by varying the types and amounts of dried chiles based on your family’s preferences for this comforting dish.
  • Use Fresh Ingredients: Fresh garlic and onions provide the best flavor base. Substituting can often result in a dulled taste.
  • Storage Savvy: Store leftovers in airtight containers for 3-4 days; if freezing, keep for up to 2 months. This way, you can enjoy your Mexican Chicken Adobo again!

Make Ahead Options

These One-Pot Mexican Chicken Adobo delights are perfect for busy meal preppers! You can prepare the adobo sauce up to 24 hours in advance by following the blending instructions, then store it in an airtight container in the refrigerator to maintain its rich flavors. You can also season your chicken and refrigerate it overnight, which helps infuse the meat with seasoning and ensures a juicy result. When you’re ready to cook, simply brown the pre-seasoned chicken and add your prepared sauce to the pot. This method provides a quick, satisfying dinner with minimal effort, allowing you to enjoy flavorful food at the end of a hectic day!

What to Serve with One-Pot Mexican Chicken Adobo

Pairing your meal with the perfect sides elevates your dining experience, making it a delightful gathering of flavors and textures.

  • Fluffy White Rice: The perfect vehicle for soaking up the rich adobo sauce, adding comforting, fluffy texture to every bite.
  • Warm Tortillas: Soft flour or corn tortillas complement the dish, allowing you to enjoy it as a delightful handheld meal. Pair with a squeeze of lime for a zesty kick!
  • Creamy Avocado Slices: Fresh avocado adds a buttery richness that balances out the smoky spices of the adobo, a delightful contrast in textures.
  • Spicy Refried Beans: These provide heartiness and a deliciously creamy element to the plate, enhancing the overall Mexican flavors of your meal.
  • Corn Salad: A refreshing contrast with sweetness from corn and the crunch of bell peppers, this adds a colorful and crisp element that brightens your feast.
  • Cilantro Lime Rice: Tossing cooked rice with lime juice and fresh cilantro infuses it with a bright flavor that pairs beautifully with the savory chicken.
  • Margaritas: For a festive celebration, serve refreshing margaritas with a hint of salt on the rim—an ideal drink to complement your flavorful meal.
  • Churros: End your meal on a sweet note with cinnamon sugar-dusted churros for a comforting finish that echoes the Mexican flair of the main dish.
  • Mexican Hot Chocolate: A rich, spiced drink can warm your heart, perfectly enhancing the conviviality of your gathering.
  • Garden Salad: Light and fresh, a simple garden salad with a zesty vinaigrette provides a crunch that complements the tender chicken beautifully.

Mexican Chicken Adobo Variations

Feel free to make this recipe your own—each twist brings forth new flavors and possibilities!

  • Dairy-Free: Use coconut milk instead of traditional dairy-based sides for creaminess without the lactose. A coconut-infused rice can be delightful too!

  • Heat Adjustments: Level-up or dial down the spice by choosing different chiles. For an extra kick, add more chipotle chiles for that smoky flavor. If you’re looking for something milder, consider using just guajillo.

  • Herb Swap: Replace cilantro with fresh parsley or even chives for a different herby note. This swap can introduce a brighter, grassier taste that balances the rich adobo sauce beautifully.

  • Tomato Alternatives: Experiment with roasted red peppers or sun-dried tomatoes in place of Roma tomatoes. They provide an intense sweetness and a slight tang, adding a fun twist to the sauce.

  • Veggie Boost: Stir in some bell peppers or zucchini for added color and nutrition. These veggies not only enhance the dish’s presentation but also introduce lovely textures.

  • Citrus Zing: A splash of lime or lemon juice at the end can brighten the flavors without overpowering the traditional taste. It’s a refreshing addition that wakes up the palate!

  • Rice Variations: Instead of white rice, try serving with quinoa or cauliflower rice for a lighter spin. Both options are nutritious and offer unique flavors that pair wonderfully with adobo.

  • Garnish Curiosity: Top with sliced radishes or avocado for added crunch and creaminess. The coolness of avocado perfectly balances the heat of the dish.

Remember, this One-Pot Mexican Chicken Adobo will always be a comforting classic, but your creativity can customize it into something uniquely yours! Why not try differing combinations and see what deliciousness emerges?

Storage Tips for Mexican Chicken Adobo

Fridge: Store leftovers in an airtight container for up to 3-4 days. This keeps the flavors intact and ensures convenient reheating.

Freezer: Mexican Chicken Adobo can be frozen for up to 2 months. Portion it out in freezer-safe containers for easy dinners later.

Thawing: When ready to enjoy, thaw in the fridge overnight for best results. This method helps maintain the dish’s texture and flavors.

Reheating: To reheat, warm gently in a pot over low heat, stirring occasionally until heated through. If needed, add a splash of chicken broth to refresh the sauce.

One-Pot Mexican Chicken Adobo Recipe FAQs

What type of chicken is best for Mexican Chicken Adobo?
Absolutely! Using bone-in chicken legs and thighs is ideal for this recipe. The bones impart moisture and flavor while cooking, ensuring that the chicken remains juicy and tender. If you prefer, you can use skinless chicken, but keep in mind that the skin adds an extra layer of richness to the dish.

How should I store leftover Mexican Chicken Adobo?
Very easy! Store your leftover Mexican Chicken Adobo in an airtight container in the refrigerator for up to 3-4 days. Make sure it has cooled completely before sealing it. This ensures that the flavors remain fresh and allows for easy reheating throughout the week.

Can I freeze Mexican Chicken Adobo?
Definitely! You can freeze Mexican Chicken Adobo for up to 2 months. To do this, let the dish cool completely, then portion it into freezer-safe containers. When you’re ready to enjoy it again, thaw overnight in the fridge, and reheating gently on the stove will help maintain the sauce’s rich texture.

What should I do if my adobo sauce is too spicy?
No worries at all! If you find your adobo sauce is a bit spicier than you like, you can balance it out by adding a bit of sugar or honey. Start with a teaspoon, and adjust to taste. Adding a splash of cream or sour cream when serving can also help to mellow the heat while adding creaminess.

Are there any dietary considerations I should keep in mind?
It’s a great question! This Mexican Chicken Adobo recipe contains chicken, and while it’s not gluten-free or vegan, it’s safe for those who don’t have allergies to chicken or any of the ingredients used. However, if you want to make it more inclusive, consider serving it with a side of fresh veggies or a salad to provide a lighter option for any dietary restrictions.

How do I know when the chicken is fully cooked?
An excellent point! The chicken is fully cooked when it reaches an internal temperature of 165°F (75°C). You can use a meat thermometer to check this easily. When the chicken is cooked, it should also be tender and easily pull away from the bone, ensuring a deliciously flavorful bite!

undefined

Delicious One-Pot Mexican Chicken Adobo for Cozy Dinners

One-Pot Mexican Chicken Adobo is a comforting and flavorful dish that simplifies dinner with authentic Mexican flavors.
Prep Time 15 minutes
Cook Time 45 minutes
Total Time 1 hour
Servings: 4 servings
Course: Dinner
Cuisine: Mexican
Calories: 380

Ingredients
  

For the Chicken
  • 4 legs Bone-in Chicken Legs Moisture and flavor
  • 4 thighs Bone-in Chicken Thighs Tender when cooked
For the Sauce
  • 2 tablespoons Olive Oil Perfect for browning chicken
  • 1 medium Onion (sliced) Adds a natural sweetness
  • 2 medium Roma Tomatoes (quartered) Provides acidity and sweetness
  • 4 cloves Garlic Cloves (chopped) Essential for robust flavor
For the Adobo Flavor
  • 3 pieces Dried Guajillo Chiles Key ingredient for authentic adobo flavor
  • 2 pieces Dried Ancho or Chipotle Chile Adds depth
  • 2 pieces Dried Pasilla or New Mexico Chiles Enhance the overall flavor
  • 2 cups Chicken Broth Creates a flavorful sauce base
  • 1/4 cup Apple Cider Vinegar Adds necessary acidity
  • 1 teaspoon Sea/Kosher Salt Elevates flavor
  • 1 teaspoon Ground Cumin Introduces an earthy note
  • 1 teaspoon Dried Oregano Adds delightful herbal notes
  • 1 teaspoon Ground Coriander Complements the spices
  • 1/4 teaspoon Ground Cloves (optional) Provides warmth
  • 2 pieces Bay Leaves Enhance aromatic flavor
For Garnish
  • 1/4 cup Chopped Cilantro Adds freshness

Equipment

  • Large pot

Method
 

Step-by-Step Instructions
  1. Begin by patting the bone-in chicken legs and thighs dry with paper towels. Season generously with salt and pepper.
  2. In a large pot, heat olive oil over medium heat. Add the sliced onion and tomatoes, sautéing until soft.
  3. Stir in chopped garlic and add the dried guajillo, ancho, and pasilla chiles. Pour in chicken broth and bring to a boil.
  4. Remove the pot from heat and allow to cool slightly. Transfer mixture to a blender with apple cider vinegar and spices. Blend until smooth.
  5. Return the pot to medium-high heat and add olive oil. Brown the chicken for 2-3 minutes on each side.
  6. Pour the adobo sauce back into the pot, add chicken and bay leaves. Simmer on low for 45 minutes.
  7. Remove bay leaves, taste and adjust seasoning. Serve hot, garnished with chopped cilantro.

Nutrition

Serving: 1servingCalories: 380kcalCarbohydrates: 12gProtein: 30gFat: 24gSaturated Fat: 6gPolyunsaturated Fat: 4gMonounsaturated Fat: 10gCholesterol: 120mgSodium: 800mgPotassium: 600mgFiber: 2gSugar: 4gVitamin A: 15IUVitamin C: 20mgCalcium: 2mgIron: 10mg

Notes

Prepare the adobo sauce in advance for richer flavors. Store leftovers in airtight containers for convenient reheating.

Tried this recipe?

Let us know how it was!

Creamy Seafood Casserole That Will Wow Your Family

As I ripped open a chilled wine and prepared for another cozy night in, a sudden thought struck me: there’s nothing quite like a warm, creamy seafood casserole to wrap yourself in after a long day. This Creamy Seafood Casserole with Shrimp and Imitation Crab is a heartwarming dish that expertly combines tender shrimp and savory crab in a blanket of rich sauce, making it a must-try for any seafood lover. One of the best perks? It’s quick to whip up, allowing you to delight your family or friends without the fuss of complicated recipes. Plus, it’s completely customizable—swap in your favorite seafood or veggies for a personal touch. Curious about how to make this comforting masterpiece? Let’s dive in!

Why is seafood casserole so appealing?

Comforting and Hearty: This dish combines tender shrimp and delicate crab, wrapped in a rich, creamy sauce that warms your soul.

Customizable to You: Swap in your favorite seafood or vegetables, making it easy to tailor to your family’s preferences—the possibilities are endless!

Quick to Prepare: With just a few simple steps, you’ll have a delicious family dinner ready in no time.

Crowd-Pleasing Flavor: Its savory richness is sure to impress guests, making this casserole an excellent choice for gatherings.

Perfect Texture: The contrast between the creamy filling and crispy breadcrumb topping creates a delightful dining experience.

Whether you’re looking to impress at dinner parties or just treating yourself to a cozy night in, this creamy seafood casserole is sure to become a staple in your home.

Seafood Casserole Ingredients

  • For the Base
    Long Grain and Wild Rice – Provides the foundational texture with a hint of nuttiness.
    Frozen Crabmeat – Sweet and delicate, this is the star of your seafood casserole.
    Cooked Shrimp – Adds richness; fresh raw shrimp can be used with careful cooking adjustments.

  • For the Vegetables
    Celery – Brings crunch and freshness; substitute with diced zucchini if desired.
    Onion – A key ingredient that adds sweetness; make sure to chop finely for even cooking.
    Green Pepper – Introduces color and a hint of bitterness; swap for red or yellow for extra sweetness.
    Canned Mushroom Stems and Pieces – Boosts umami flavor; fresh mushrooms are a delightful alternative.
    Diced Pimientos – Brightens the dish with mild sweetness; can be replaced with roasted red peppers if you prefer.

  • For the Sauce
    Mayonnaise – Ensures creaminess and binds the ingredients; or use a creamy soup to achieve a similar effect.
    2% Milk – Thin out the sauce without compromising creaminess; consider using half and half for richness.
    Pepper – A simple seasoning to elevate flavor; feel free to adjust based on your taste.
    Worcestershire Sauce – Adds depth; soy sauce can be a tasty substitute for a different flavor profile.

  • For the Crunchy Topping
    Dry Bread Crumbs – Creates a pleasing crunch on top; crushed crackers can also work beautifully.

Dive into this delicious seafood casserole easy enough for weeknight dinners and special enough for gatherings!

Step‑by‑Step Instructions for Creamy Seafood Casserole with Shrimp and Imitation Crab

Step 1: Prepare the Rice
Start by cooking the long grain and wild rice according to the package instructions, which typically takes around 25-30 minutes. While the rice is cooking, preheat your oven to 375°F (190°C). This will ensure the casserole bakes evenly once you’re ready to combine all the delicious ingredients.

Step 2: Mix Ingredients
In a large mixing bowl, combine the frozen crabmeat, cooked shrimp, chopped celery, finely diced onion, green pepper, canned mushroom stems, and diced pimientos. Stir well to incorporate all the flavors, ensuring the seafood and vegetables are evenly distributed. The mixture should have a colorful appearance, showcasing the variety of textures and ingredients in your seafood casserole.

Step 3: Create the Sauce
In a separate bowl, whisk together mayonnaise, 2% milk, pepper, and Worcestershire sauce until smooth. This creamy sauce will enhance the flavors of your seafood and bind the ingredients together beautifully. Aim for a velvety consistency, as this will lend richness to your seafood casserole.

Step 4: Combine Ingredients
Gently fold the creamy sauce into the seafood mixture, ensuring everything is well coated. Then, add the cooked rice, folding it in carefully to maintain the integrity of the seafood. This step will blend all the flavors together, making your creamy seafood casserole even more delightful.

Step 5: Transfer and Top
Pour the combined mixture into a greased 13×9-inch baking dish, spreading it evenly to create a level surface. Next, sprinkle dry breadcrumbs generously on top, ensuring every corner is covered. This crunchy topping will add texture and contrast beautifully to the rich filling beneath it.

Step 6: Bake
Place the baking dish in the preheated oven and bake uncovered for 40-50 minutes. Keep an eye on it; the casserole should be bubbling around the edges and have a lovely golden-brown crust on top when it’s done. The aromas will fill your kitchen, creating an inviting atmosphere for your family and guests.

How to Store and Freeze Seafood Casserole

  • Room Temperature: Leftover seafood casserole should not be left at room temperature for more than 2 hours to ensure freshness and prevent spoilage.

  • Fridge: Store any leftovers in an airtight container for up to 2 days. When ready to eat, simply reheat in the microwave or oven until heated through.

  • Freezer: For longer preservation, freeze the seafood casserole in a tightly sealed container for up to 3 months. Consider portioning into smaller amounts for easy reheating.

  • Reheating: When ready to enjoy your frozen seafood casserole, thaw in the refrigerator overnight and reheat in the oven at 350°F (175°C) until hot and bubbly.

Make Ahead Options

These Creamy Seafood Casseroles are perfect for busy weeknights! You can prepare the entire casserole up to 24 hours in advance. Begin by cooking the rice and mixing the seafood with the vegetables and sauce. Once combined, transfer everything to your greased baking dish, but hold off on adding the breadcrumbs until just before baking to maintain their crunch. Cover the dish tightly with foil or plastic wrap and refrigerate. When you’re ready to enjoy your meal, simply sprinkle the breadcrumbs on top and bake it directly from the fridge for about 50-60 minutes, ensuring it’s heated through and bubbly. This way, your casserole will be just as delicious and comforting, saving you valuable time in the kitchen!

Seafood Casserole Variations & Substitutions

Feel free to personalize your creamy seafood casserole and make it uniquely yours with these fun variations!

  • Dairy-Free: Substitute mayonnaise and milk with coconut milk and dairy-free mayonnaise for a lighter, creamier option.

  • Meat-Free: Use tofu or tempeh as a protein replacement for the crab and shrimp; they’ll soak up the flavors beautifully.

  • Flavorful Boost: Add a tablespoon of Old Bay seasoning to the seafood mix for that classic seafood flavor everyone loves.

  • Vegetable Medley: Toss in chopped spinach, peas, or artichoke hearts to enhance the dish’s nutrient profile and add more color.

  • Spicy Kick: Spice things up a notch by incorporating diced jalapeños or a pinch of red pepper flakes to the vegetable mix.

  • Zesty Twist: Squeeze fresh lemon juice over the top before serving to brighten the flavors; a refreshing touch that ties everything together.

  • Crunchy Topping: Swap bread crumbs for fried onions or crushed tortilla chips for an exciting crunch and a twist on texture.

  • Seafood Symphony: Mix in some cooked lobster or crab legs for a luxurious seafood experience that your friends and family will adore.

Each of these variations can help you create a dish everyone will enjoy while using what you have on hand. Dive into your pantry and have fun with the ingredients! For more ways to elevate your cooking, consider checking out our guide on creative seafood recipes or learn about simple ingredients swaps to customize your dishes.

What to Serve with Creamy Seafood Casserole with Shrimp and Imitation Crab

Indulging in this rich and creamy creation makes it essential to pair it with delightful accompaniments that enhance your dining experience.

  • Garlic Bread: Perfect for sopping up every delicious bite, its crunch adds warmth to the meal. A spread of herbed butter can elevate it further.

  • Fresh Green Salad: A crisp salad with mixed greens and a light vinaigrette balances the casserole’s richness, boasting bright flavors that refresh the palate. Add some cherry tomatoes for a pop of color!

  • Roasted Asparagus: Lightly seasoned and drizzled with olive oil, the tender crunch of asparagus complements the soft, creamy texture of the casserole.

  • Steamed Broccoli: Providing a gorgeous green contrast, the slight bitterness of broccoli enhances the sweetness of the seafood while adding vital nutrients.

  • Coleslaw: A zesty slaw with a tangy dressing pairs beautifully to contrast the creamy dish, adding a refreshing crunch that enhances every bite.

  • Chardonnay: A chilled glass of this white wine matches the dish’s flavors perfectly, bringing out the nuances of the seafood while offering a touch of acidity.

Each of these accompaniments will make your seafood casserole not just a meal, but a memorable culinary experience. Enjoy!

Expert Tips for Creamy Seafood Casserole

  • Perfect Shrimp Texture: Avoid overcooking shrimp; they should be just heated through to maintain tenderness in your seafood casserole.

  • Prevent Runny Casserole: Consider substituting some or all mayonnaise with condensed soup to achieve a thicker consistency while enhancing flavor.

  • Seafood Variety: Feel free to experiment! Quick-cooking seafood like scallops or clams can be delicious additions, adding richness to your dish.

  • Cooling Time: Allow the casserole to sit for a few minutes after baking; this allows it to set and makes serving easier while enhancing the flavors.

  • Customize Ingredients: Use whatever seafood and vegetables you have on hand to create a version of this creamy seafood casserole that suits your family’s tastes.

Creamy Seafood Casserole with Shrimp and Imitation Crab Recipe FAQs

What type of seafood should I use for the casserole?
Absolutely! You can get creative with seafood selections. While shrimp and imitation crab are excellent choices, feel free to substitute with scallops, clams, or even fish like cod or haddock. Just remember that quick-cooking varieties work best to keep the casserole from becoming overcooked.

How long can I store leftover seafood casserole?
Leftovers can be stored in an airtight container in the fridge for up to 2 days. I often recommend reheating gently to preserve the texture, either in the microwave or oven until heated through.

Can I freeze the creamy seafood casserole?
Very much so! To freeze, transfer the casserole into a tightly sealed container or freezer-safe dish. It will maintain its best quality for about 3 months. For easy reheating, consider portioning it into smaller containers.

How do I know if my seafood is fresh enough to use?
When selecting seafood, look for freshness—shrimp should have a translucent appearance and a mild ocean scent, while crabmeat should be sweet and crab-like without any off odors. Avoid any seafood with dark spots or a strong fishy smell.

Can I make this recipe allergy-friendly?
Of course! For those with shellfish allergies, you can easily replace the seafood with cooked chicken or a mix of vegetables. If you’re avoiding dairy, swap mayonnaise for a dairy-free alternative or a mixture of tahini and water for creaminess.

What should I do if my casserole looks too runny?
If your casserole ends up being too runny, a good fix is to incorporate a thickening agent. Try stirring in a spoonful of cornstarch mixed with a bit of water or substitute some of the mayonnaise with condensed soup. Baking uncovered can also help firm it up!

undefined

Creamy Seafood Casserole That Will Wow Your Family

A heartwarming creamy seafood casserole with shrimp and crab, perfect for family dinners and gatherings.
Prep Time 15 minutes
Cook Time 50 minutes
Cooling Time 5 minutes
Total Time 1 hour 10 minutes
Servings: 6 servings
Course: Casserole
Cuisine: Seafood
Calories: 350

Ingredients
  

For the Base
  • 1 cup Long Grain and Wild Rice
  • 8 oz Frozen Crabmeat
  • 1 lb Cooked Shrimp
For the Vegetables
  • 1 cup Celery chopped
  • 1 medium Onion finely diced
  • 1 cup Green Pepper chopped
  • 7 oz Canned Mushroom Stems and Pieces
  • 4 oz Diced Pimientos
For the Sauce
  • 1 cup Mayonnaise
  • 0.5 cup 2% Milk
  • 1 tsp Pepper
  • 1 tbsp Worcestershire Sauce
For the Crunchy Topping
  • 1 cup Dry Bread Crumbs

Equipment

  • Oven
  • Mixing Bowl
  • baking dish

Method
 

Step-by-Step Instructions
  1. Prepare the Rice: Cook the long grain and wild rice according to the package instructions. Preheat your oven to 375°F (190°C).
  2. Mix Ingredients: In a large bowl, combine the crabmeat, shrimp, celery, onion, green pepper, mushrooms, and pimientos.
  3. Create the Sauce: Whisk together mayonnaise, milk, pepper, and Worcestershire sauce until smooth.
  4. Combine Ingredients: Fold the sauce into the seafood mixture, then add the cooked rice and mix gently.
  5. Transfer and Top: Pour the mixture into a greased 13x9-inch baking dish and top with breadcrumbs.
  6. Bake: Place in the oven and bake for 40-50 minutes until bubbly and golden brown.

Nutrition

Serving: 1servingCalories: 350kcalCarbohydrates: 30gProtein: 25gFat: 15gSaturated Fat: 2gPolyunsaturated Fat: 1gMonounsaturated Fat: 7gCholesterol: 70mgSodium: 800mgPotassium: 350mgFiber: 2gSugar: 2gVitamin A: 10IUVitamin C: 15mgCalcium: 8mgIron: 10mg

Notes

Customize with your favorite seafood or vegetables for a personal touch!

Tried this recipe?

Let us know how it was!

Savory Slow-Cooker Korean Beef: Comfort in Every Bite

The savory aroma of tender beef wafting through your home can instantly transform a humdrum evening into a cozy culinary adventure. In this recipe for Slow-Cooker Korean Beef with Gochujang Sauce, I’ll share how easy it is to whip up a delightful one-pot meal that takes just minutes to prepare. Imagine succulent beef, perfectly marinated in a luscious blend of garlic, ginger, and that irresistible kick of gochujang—every bite is a testament to comfort food at its finest. Not only is this dish a true crowd-pleaser, but it’s also a game-changer for busy weeknights, allowing you to spend more time enjoying your meal and less time in the kitchen. Are you ready to dive into the world of rich flavors and uncomplicated prep? Let’s get cooking!

Why Is This Recipe a Must-Try?

Ease of Preparation: Simply toss the ingredients in your slow cooker and let it do all the work—perfect for those busy evenings!

Rich, Flavorful Sauce: The combination of gochujang, ginger, and garlic creates a unique, mouthwatering sauce that elevates the dish.

Versatile Servings: Serve this delightful Korean beef over rice, in tacos, or as a sandwich filler for endless meal options!

Crowd-Pleasing Comfort Food: With its tender beef and bold flavors, it’s guaranteed to impress family and friends at your next gathering.

Make-Ahead Convenience: Enjoy the freedom of preparing this dish ahead of time; leftovers can be reheated easily for an instant meal!

With effortless preparation and delightful versatility, you’ll likely find yourself returning to this recipe time and again. For more budget-friendly meals, check out my post on affordable one-pot recipes.

Slow-Cooker Korean Beef Ingredients

• The perfect blend of flavors awaits you!

For the Sauce

  • Ginger – Fresh ginger provides a warm, zesty flavor and should be minced for the best taste.
  • Garlic – Use freshly chopped garlic to add depth and aromatic quality to your sauce.
  • Low-Sodium Beef Broth – Serves as the base for the sauce, adding necessary moisture—feel free to substitute with vegetable broth for a lighter option.
  • Light Brown Sugar – Introduces a touch of sweetness; consider reducing to ¼ cup if you prefer a less sweet sauce.
  • Reduced-Sodium Soy Sauce – This ingredient brings umami flavor; tamari can be used for a gluten-free alternative.
  • Gochujang – An essential Korean chili paste that offers heat and richness; while optional Sriracha may be substituted, it can compromise authenticity.
  • Toasted Sesame Oil – Provides a distinct nuttiness; this ingredient is crucial and should not be omitted.
  • Unseasoned Rice Vinegar – Balances the flavors within the sauce; apple cider vinegar can work as an effective substitute.
  • Cornstarch – Optional thickener for your sauce if you desire a thicker consistency.

For the Beef

  • Beef Shoulder – The main protein, which should be diced for even cooking; make sure to trim excess fat for optimal results.

For Serving

  • Cooked White Rice – The ideal base for your savory Korean beef; you can replace this with cauliflower rice or quinoa for a low-carb option.
  • Chopped Scallions – These add a touch of freshness and visual appeal to your dish.
  • Fresh Cilantro – Offers a burst of color and a refreshing flavor boost.
  • Toasted Sesame Seeds – Sprinkle these on top for that perfect finishing touch and added texture.

With these delightful ingredients for your Slow-Cooker Korean Beef, you’ll be well on your way to a comforting meal that’s sure to impress!

Step‑by‑Step Instructions for Slow-Cooker Korean Beef with Gochujang Sauce

Step 1: Prep the Beef
Start by trimming any excess fat from the beef shoulder and cutting it into 1.5-inch pieces to ensure even cooking. This initial preparation will help the beef absorb the rich flavors of the sauce later on. Set the beef aside as you move on to mixing the delicious sauce.

Step 2: Mix the Sauce
In a large mixing bowl, combine minced ginger, freshly chopped garlic, low-sodium beef broth, light brown sugar, reduced-sodium soy sauce, gochujang, toasted sesame oil, unseasoned rice vinegar, and cornstarch. Stir the ingredients until they are well blended, creating a savory sauce that promises to envelop the beef in mouthwatering flavor during the slow cooking.

Step 3: Combine Beef and Sauce
Place the prepared beef pieces in the slow cooker, making sure they are in an even layer. Pour the sauce mixture over the beef, ensuring each piece is thoroughly coated. This step is crucial for achieving that deep flavor profile in your Slow-Cooker Korean Beef as it cooks slowly, allowing the sauce to seep into the meat.

Step 4: Cook to Perfection
Cover the slow cooker and cook the beef on low for 5-6 hours or on high for 3-4 hours. The beef is done when it’s tender and can be easily shredded with a fork. During this time, enjoy the enticing aroma filling your kitchen, a true testament to the flavors developing within the pot.

Step 5: Shred the Beef
Once the cooking time is complete, remove the lid and carefully shred the beef directly in the slow cooker using two forks. Mix well, allowing the beef to soak up any remaining sauce. Taste and adjust the seasoning if necessary, ensuring the flavors are just right for your palate.

Step 6: Serve and Garnish
Spoon the tender, shredded Slow-Cooker Korean Beef over a bed of fluffy cooked white rice. For an added touch of freshness, garnish each serving with chopped scallions, fresh cilantro, and a sprinkle of toasted sesame seeds. This final presentation not only enhances the dish visually but also adds delightful flavor notes.

Storage Tips for Slow-Cooker Korean Beef

  • Fridge: Store leftovers in an airtight container for up to 3 days. Allow the beef to cool before sealing to maintain quality.

  • Freezer: For longer storage, freeze the Slow-Cooker Korean Beef in a well-sealed freezer bag for up to 3 months. Make sure to remove excess air to prevent freezer burn.

  • Reheating: When ready to enjoy, thaw in the refrigerator overnight, then reheat gently on the stove or in the microwave until heated through.

  • Serving Suggestions: Pair the reheated beef over fresh rice or tuck into tortillas for quick and satisfying meals!

Make Ahead Options

These Slow-Cooker Korean Beef bites are perfect for meal prep enthusiasts looking to save time during busy weeknights! You can chop the beef and mix the sauce up to 24 hours in advance, storing them separately in the refrigerator to maintain taste and freshness. When you’re ready to cook, simply combine the marinated beef with the sauce in your slow cooker and follow the recipe instructions as usual. For best results, store any leftovers in an airtight container; they can be kept in the refrigerator for up to 3 days or frozen for up to 3 months. Reheat gently before serving for just as delicious results, allowing you to enjoy this comforting dish without the last-minute stress!

What to Serve with Slow-Cooker Korean Beef?

Imagine transforming a simple meal into a vibrant feast that tantalizes the taste buds and delights the senses.

  • Steamed Broccoli: The crunchy texture and slight bitterness of broccoli perfectly balance the rich, savory flavors of the Korean beef.

  • Kimchi: This classic Korean side offers a spicy and tangy contrast, adding depth and authenticity to your meal.

  • Garlic Rice: Infused with fragrant garlic, this flavorful rice serves as a wonderful base, soaking up the luscious sauce from the beef.

  • Asian Cabbage Slaw: Crisp, fresh slaw adds a refreshing crunch, making it a delightful palate cleanser alongside the hearty beef.

  • Sesame Green Beans: Lightly sautéed and sprinkled with sesame seeds, these green beans provide a nutty flavor that complements the dish beautifully.

  • Cucumber Pickles: Quick-pickled cucumbers add a bright, tangy bite that cuts through the richness, enhancing every bite of your Slow-Cooker Korean Beef.

  • Slightly Sweet Red Wine: A light to medium-bodied red wine will elevate your dining experience, pairing wonderfully with the bold flavors of the dish.

  • Mango Sticky Rice: For dessert, this sweet and creamy treat wraps up the meal perfectly, contrasting with the savory richness of the beef.

Slow-Cooker Korean Beef Variations

Feel free to explore these delightful variations that will elevate your Slow-Cooker Korean Beef to new culinary heights!

  • Vegetarian Twist: Use jackfruit or tofu instead of beef; adjust cooking times to ensure tenderness.

  • Low-Carb Option: Swap cooked white rice for cauliflower rice or quinoa, perfect for a lighter meal.

  • Extra Veggies: Add bell peppers or broccoli during the last hour of cooking for added nutrition and color.

  • Spicy Kick: Increase the amount of gochujang or add chopped fresh chilies for an extra heat level.

  • Savory Additions: Incorporate sliced mushrooms or shredded carrots in the sauce for additional texture and flavor.

  • Sweet Balance: Experiment with replacing brown sugar with honey or maple syrup for a different sweetness profile.

  • Umami Boost: Stir in a spoonful of miso paste into the sauce for an added depth of flavor.

  • Herb-Infusion: Add fresh herbs like basil or mint right before serving for a refreshing twist and bright aroma.

Versatile meals like this can be tailored to everyone’s taste. For those who appreciate simplicity, consider trying more delicious one-pot options like my favorite chicken curry recipe or explore the wonders of quick dinner ideas to make every meal a family gathering!

Expert Tips for Slow-Cooker Korean Beef

  • Marinate for Flavor: Let the beef marinate in the sauce for at least an hour before cooking to intensify the taste and tenderness.

  • Watch the Cook Time: Overcooking can dry out the meat; ensure the beef is tender and shreds easily to achieve the best Slow-Cooker Korean Beef.

  • Sweetness Control: Feel free to adjust the amount of brown sugar based on your flavor preference; less sugar can yield a more balanced taste.

  • Fresh Herb Boost: Add a layer of fresh herbs just before serving for a pop of color and flavorful aroma that elevates your dish.

  • Substitutions Allowed: For a different twist, try using a chuck roast instead of beef shoulder or tofu for a vegetarian version while maintaining the same cooking method.

Slow-Cooker Korean Beef Recipe FAQs

What kind of beef should I use for this recipe?
Absolutely! For this Slow-Cooker Korean Beef, I recommend using beef shoulder for its tenderness and flavor. You can also opt for chuck roast if that’s what you have on hand — both cuts work wonderfully in a slow cooker.

How do I ensure the beef is tender and easy to shred?
The key to tender beef is allowing it to cook long enough in the slow cooker. Cook on low for 5-6 hours or on high for 3-4 hours. You’ll know it’s done when it can be easily shredded with a fork. Also, monitoring the cook time closely will help prevent overcooking!

Can I freeze the leftovers?
Very much! After it cools, you can freeze any leftover Slow-Cooker Korean Beef in a well-sealed freezer bag for up to 3 months. Just remember to remove as much excess air as possible to prevent freezer burn. When you’re ready to enjoy, thaw it in the refrigerator overnight and reheat gently.

How should I store the leftovers?
Store your leftover Korean Beef in an airtight container in the refrigerator for up to 3 days. Make sure to let the beef cool before sealing the container to maintain its quality. When reheating, add a splash of broth to keep the sauce moist!

What if I have dietary restrictions regarding gluten?
No problem at all! You can easily make this recipe gluten-free by substituting reduced-sodium soy sauce with tamari, which is a fantastic alternative. For vegetarians, feel free to replace the beef with jackfruit or tofu, adjusting the cooking time as needed.

How can I tell if my ingredients (like ginger or garlic) are ripe or fresh?
Generally, fresh ginger should be firm, smooth, and free of dark spots, while garlic should be plump and have a papery skin with no sprouting. When selecting these ingredients, look for vibrancy and a strong aroma, ensuring the best flavors for your Slow-Cooker Korean Beef!

undefined

Savory Slow-Cooker Korean Beef: Comfort in Every Bite

This Savory Slow-Cooker Korean Beef brings rich flavors and comfort to your meal, perfect for busy weeknights.
Prep Time 15 minutes
Cook Time 6 hours
Total Time 6 hours 15 minutes
Servings: 6 servings
Course: Dinner
Cuisine: Korean
Calories: 350

Ingredients
  

For the Sauce
  • 1 tablespoon minced Ginger Fresh ginger provides a warm, zesty flavor.
  • 4 cloves Garlic Use freshly chopped garlic.
  • 1 cup Low-Sodium Beef Broth Can substitute with vegetable broth.
  • 1/2 cup Light Brown Sugar Reduce to 1/4 cup for less sweetness.
  • 1/3 cup Reduced-Sodium Soy Sauce Tamari can be used for gluten-free.
  • 2 tablespoons Gochujang Essential Korean chili paste.
  • 1 tablespoon Toasted Sesame Oil Crucial for distinct nuttiness.
  • 2 tablespoons Unseasoned Rice Vinegar Apple cider vinegar can substitute.
  • 1 tablespoon Cornstarch Optional thickener for sauce.
For the Beef
  • 2 pounds Beef Shoulder Diced and trimmed of excess fat.
For Serving
  • 3 cups Cooked White Rice Can replace with cauliflower rice or quinoa.
  • 1/4 cup Chopped Scallions Adds freshness.
  • 1/4 cup Fresh Cilantro Offers a refreshing flavor boost.
  • 2 tablespoons Toasted Sesame Seeds For garnish and added texture.

Equipment

  • Slow Cooker

Method
 

Step-by-Step Instructions
  1. Trim excess fat from the beef shoulder and cut into 1.5-inch pieces.
  2. In a large bowl, combine minced ginger, freshly chopped garlic, beef broth, brown sugar, soy sauce, gochujang, sesame oil, rice vinegar, and cornstarch.
  3. Place prepared beef pieces in the slow cooker, pour the sauce over and coat thoroughly.
  4. Cover and cook on low for 5-6 hours or high for 3-4 hours until tender.
  5. Shred beef in the slow cooker and mix well with remaining sauce.
  6. Serve over rice and garnish with scallions, cilantro, and sesame seeds.

Nutrition

Serving: 1cupCalories: 350kcalCarbohydrates: 40gProtein: 30gFat: 10gSaturated Fat: 2gPolyunsaturated Fat: 1gMonounsaturated Fat: 6gCholesterol: 90mgSodium: 600mgPotassium: 800mgFiber: 2gSugar: 10gVitamin A: 200IUVitamin C: 5mgCalcium: 10mgIron: 2.5mg

Notes

For best flavors, let the beef marinate in sauce for at least an hour before cooking. Adjust sweetness based on preference and use fresh herbs for added flavor.

Tried this recipe?

Let us know how it was!

Deliciously Chewy Homemade Oatmeal Creme Pies You’ll Love

As I sift through my kitchen, the familiar aroma of warm spices and sweet vanilla wafts through the air, transporting me back to a simpler time. Today, I’m sharing my beloved recipe for Nostalgic Homemade Oatmeal Creme Pies, a delightful twist on those classic Little Debbie treats we all know and love. These sandwich cookies are not only a fantastic way to reconnect with childhood memories but also an easy and wholesome alternative to their store-bought counterparts. With minimal prep and simple ingredients, these oatmeal creme pies are perfect for satisfying a sweet tooth without the guilt. Whether you’re looking to impress guests or treat the kids after school, these tender, chewy cookies filled with rich vanilla cream are sure to bring smiles all around. Are you ready to dive into this nostalgic baking adventure?

Why Are These Oatmeal Creme Pies Irresistible?

Nostalgic Flavor: Each bite evokes childhood memories, reminiscent of the beloved Little Debbie treat.
Simple Ingredients: Crafted with everyday staples, making it accessible for anyone to whip up.
Quick Preparation: Ready in under an hour, perfect for busy days or spontaneous cravings.
Versatile Options: Customize them with chocolate chips or different extracts for a delightful twist.
Crowd-Pleasing Treat: Ideal for lunchboxes, parties, or after-school snacks, they’re loved by both kids and adults!
Homemade Goodness: Made without preservatives, you can savor the wholesome flavors while knowing exactly what’s in your dessert. Enjoy these delightful oatmeal creme pies; they’ll surely become a favorite!

Homemade Oatmeal Creme Pies Ingredients

For the Cookies

  • Unsalted Butter – Provides rich flavor and moisture; can use salted butter but reduce added salt.
  • Light Brown Sugar – Adds sweetness and helps keep cookies soft; dark brown sugar can enhance flavor.
  • Molasses – Contributes moisture and unique flavor; substitute with honey or maple syrup for a milder taste.
  • Large Egg – Binds ingredients and adds structure; can use a flax egg for a vegan option.
  • Vanilla Extract – Enhances sweetness and adds aromatic flavor; use almond extract for a different profile.
  • All-Purpose Flour – Essential for the cookie structure; a gluten-free flour blend can be used for a gluten-free option.
  • Old Fashioned Oats – Adds texture and chewiness; quick oats can be used but may alter final texture.
  • Baking Soda – Creates lift and chewiness; ensure it’s fresh for best results.
  • Salt – Balances sweetness and enhances flavor.

For the Vanilla Cream Filling

  • Unsalted Butter – Similar role as above; substitution as mentioned earlier for cookies.
  • Powdered Sugar – Provides sweetness and smooth texture; granulated sugar can be blended to make powdered sugar.
  • Heavy Cream – Adds richness and creaminess; can use half-and-half or milk for a lighter option.
  • Vanilla Extract – Adds flavor; substitutions mentioned above apply.
  • Pinch of Salt – Enhances overall sweetness.

Indulge in the joy of making these Homemade Oatmeal Creme Pies with these simple ingredients, perfect for reviving warm memories while keeping Guilt at bay!

Step‑by‑Step Instructions for Nostalgic Homemade Oatmeal Creme Pies

Step 1: Preheat the Oven
Start by preheating your oven to 325°F (163°C). While waiting, line your baking sheets with parchment paper to prevent sticking and ensure easy cleanup later. This initial preparation sets the stage for baking your delightful Homemade Oatmeal Creme Pies.

Step 2: Mix Wet Ingredients
In a stand mixer, combine 1 cup of unsalted butter, 1 cup of light brown sugar, and 1/4 cup of molasses. Beat the mixture on medium speed for about 2 minutes until it becomes smooth and creamy. Next, add in 1 large egg and 1 teaspoon of vanilla extract, mixing until everything is well blended and fully incorporated.

Step 3: Combine Dry Ingredients
In a separate bowl, whisk together 1 1/2 cups of all-purpose flour, 1 cup of old-fashioned oats, 1 teaspoon of baking soda, and 1/2 teaspoon of salt. Gradually add this dry mixture to your wet ingredients, mixing on low speed just until everything is combined. This will ensure a soft and chewy texture in your Oatmeal Creme Pies.

Step 4: Scoop the Dough
Using a cookie scoop or a tablespoon, portion out the dough, placing each mound about 2 inches apart on the prepared baking sheets. Aim for a uniform size to ensure even baking, which creates consistently delicious Homemade Oatmeal Creme Pies. You should have enough dough for about 24 cookies.

Step 5: Bake the Cookies
Place the baking sheets in the oven, allowing the cookies to bake for 9 to 11 minutes. You’ll know they’re ready when they appear puffy and lightly set around the edges. After baking, let them cool on the sheets for about 5 minutes to firm up before transferring them to a wire rack to cool completely for 30 minutes.

Step 6: Prepare the Filling
While the cookies cool, make the cream filling. In a mixing bowl, combine 1/2 cup of unsalted butter, 2 cups of powdered sugar, 2 tablespoons of heavy cream, and 1 teaspoon of vanilla extract. Beat on medium speed until the mixture is smooth and creamy, about 3-5 minutes. Adjust the consistency with more cream as needed to achieve a fluffy filling.

Step 7: Assemble the Cookies
Once the cookies are completely cooled, flip half of them upside down. Pipe or spread a generous amount of the creamy filling onto the bottom of each flipped cookie. Top them with the remaining cookies, pressing down gently to create your delicious sandwich. Repeat until all your Homemade Oatmeal Creme Pies are assembled and ready to enjoy!

How to Store and Freeze Homemade Oatmeal Creme Pies

Airtight Container: Store these delightful oatmeal creme pies in an airtight container at room temperature for up to 7 days to maintain their softness and flavor.

Refrigeration: For longer freshness, you can refrigerate them for up to 10 days. Just ensure they’re covered well to avoid absorbing odors.

Freezing Cookies: If you want to save some for later, freeze the assembled pies in a single layer, then transfer to a freezer-safe bag. They’ll last up to 3 months.

Thawing: To enjoy, simply thaw them in the fridge overnight or leave them at room temperature for about 30 minutes before serving.

Oatmeal Creme Pies Variations & Substitutions

Feel free to get creative with your oatmeal creme pies, enhancing flavors or accommodating dietary preferences for a truly personal touch!

  • Chocolate Chip Delight: Add 1 cup of chocolate chips to the dough for a rich, chocolatey experience. The sweetness of the chocolate beautifully complements the spiced cookies.
  • Vegan-Friendly: Swap butter for coconut oil and use a flax egg to maintain moisture and binding. You’ll enjoy all the delightful flavors in a plant-based version!
  • Gluten-Free: Substitute all-purpose flour with a 1:1 gluten-free flour blend for a gluten-free treat. The texture may slightly differ, but the taste will still shine.
  • Flavor Boost: Experiment with almond or coconut extract instead of vanilla for a new aromatic twist. Each extract brings a unique flavor that can transform the classic recipe.
  • Nutty Crunch: Incorporate 1/2 cup of chopped nuts, like walnuts or pecans, into the dough for delightful texture and added flavor. A nutty surprise will elevate the cookie experience!
  • Raisin Variation: Mix in 1 cup of raisins for a chewy pop of sweetness. The natural sweetness of raisins complements the cookie’s spices perfectly.
  • Spiced Twist: Enhance the cookie mix with a teaspoon of cinnamon or nutmeg for added warmth. These spices deepen flavor, making each bite feel cozy and comforting.
  • Heat it Up: Add a pinch of cayenne pepper to the dough for a surprising heat that contrasts beautifully with the sweetness. It’s a bold choice that will please adventurous palates!

These variations allow you to tailor your oatmeal creme pies, making each batch uniquely yours! Whether you’re enjoying them with a warm cup of coffee or serving them for dessert at a party, explore these ideas and let your culinary creativity shine!

Expert Tips for Perfect Oatmeal Creme Pies

  • Room Temperature Butter: Ensure your butter is soft and at room temperature for easier blending, which results in a smoother cookie dough.
  • Gentle Mixing: When combining dry ingredients with wet, mix gently to avoid overworking the dough. This keeps your oatmeal creme pies chewy and tender.
  • Cool Completely: Allow cookies to cool fully before adding the filling. This prevents melting and ensures an intact, delicious sandwich cookie.
  • Consistency Control: Beat the cream filling longer for extra fluffiness. Adjust with more cream if necessary to achieve your desired texture.

Make Ahead Options

These delightful Homemade Oatmeal Creme Pies are perfect for meal prep enthusiasts! You can prepare the cookie dough up to 24 hours in advance by mixing it and storing it in an airtight container in the refrigerator. Alternatively, you can scoop the portioned dough balls and freeze them for up to 3 months; just bake them straight from the freezer, adding a minute or two to the baking time. For the cream filling, you can whip that up and store it in the fridge for up to 3 days—just give it a quick stir before using. When ready to assemble, simply bake the cookies, allow them to cool, and spread the filling to enjoy delicious, homemade treats with minimal effort!

What to Serve with Nostalgic Homemade Oatmeal Creme Pies

These delightful cookies are perfect for creating a comforting meal that satisfies both your sweet tooth and hunger.

  • Ice Cream Sundaes: Scoop your favorite ice cream on top, drizzled with chocolate sauce; it adds creamy decadence to the chewy cookies.
  • Fruit Salad: Fresh fruit brings a refreshing contrast to the sweetness, adding brightness and color to your dessert table.
  • Coffee or Tea: A warm cup of coffee or herbal tea perfectly balances the sweetness and enhances the nostalgic flavors of the pies.
  • Milk: Classic pairing! A glass of cold milk complements the rich cream filling wonderfully, making each bite even more enjoyable.
  • Chocolate Chip Cookies: For the cookie lovers, serve alongside some warm chocolate chip cookies for a delightful dessert duo that will please all.
  • Cheese Platter: Add a touch of sophistication! A selection of mild cheeses balances the sweet flavors and provides a savory contrast.
  • Almond Biscotti: Their crunchy texture pairs beautifully, offering a delightful twist to your cookie experience with every dunk.
  • Trail Mix: For a healthier option, serve a homemade trail mix of nuts and dried fruits, perfectly balancing sweetness and crunch.
  • Dark Chocolate Squares: A piece of rich dark chocolate alongside enhances the dessert experience without overwhelming the palate.

Homemade Oatmeal Creme Pies Recipe FAQs

How can I ensure my oats are the right kind for this recipe?
Absolutely! For the best texture, use old-fashioned oats, as they provide the chewy bite you’re looking for. If you only have quick oats, you can use them, but keep in mind that the texture may become softer and less chewy.

What is the best way to store oatmeal creme pies to keep them fresh?
Store your homemade oatmeal creme pies in an airtight container at room temperature for up to 7 days. Their delightful softness will be preserved, making them perfect for enjoying throughout the week. If you choose to refrigerate them, they’ll remain fresh for about 10 days but be sure they are well covered to keep out any unwanted odors.

Can I freeze the oatmeal creme pies? How should I do it?
Yes, you can freeze your oatmeal creme pies! To do this, follow these steps:

  1. Assemble the pies completely and allow them to cool completely.
  2. Once cooled, place them in a single layer on a baking sheet and freeze for about 1 hour until firm.
  3. After they are frozen, transfer the pies to a freezer-safe bag or container. They will last up to 3 months.
    To enjoy, simply take out the desired number of pies and allow them to thaw in the fridge overnight or at room temperature for about 30 minutes.

Can I make substitutions for the filling ingredients due to dietary restrictions?
Very much so! If you’re looking for a lighter option, you can replace heavy cream with half-and-half or milk. Additionally, ensure that your butter is dairy-free if you’re vegan, and you can create a fluffy filling by using a plant-based cream alternative. You can also adjust the sugar level; however, these changes may slightly alter the texture of the filling.

What should I do if my cookies spread too much during baking?
If you find your cookies spread too much, consider chilling the dough for about 30 minutes before scooping and baking. This helps solidify the fats, leading to a puffier cookie shape. Also, be sure you’re measuring your flour correctly, as too little can result in excessive spreading. Enjoy the process!

How can I tell if my oatmeal creme pies are perfectly baked?
You’ll want to look for a puffy appearance with lightly set edges, usually around 9 to 11 minutes of baking time at 325°F (163°C). Allow them to cool on the baking sheets for about 5 minutes before transferring them to a cooling rack. You’ll know they’re ready when they maintain their shape but are soft to the touch!

These cozy and nostalgic Homemade Oatmeal Creme Pies are sure to be a hit, fulfilling your sweet cravings with homemade goodness!

undefined

Deliciously Chewy Homemade Oatmeal Creme Pies You'll Love

Indulge in these nostalgic homemade oatmeal creme pies, a delightful twist on classic treats with wholesome ingredients.
Prep Time 15 minutes
Cook Time 11 minutes
Cooling Time 30 minutes
Total Time 56 minutes
Servings: 24 cookies
Course: Dessert
Cuisine: American
Calories: 150

Ingredients
  

For the Cookies
  • 1 cup Unsalted Butter Can use salted butter but reduce added salt.
  • 1 cup Light Brown Sugar Dark brown sugar can enhance flavor.
  • 1/4 cup Molasses Can substitute with honey or maple syrup.
  • 1 large Egg Can use a flax egg for a vegan option.
  • 1 teaspoon Vanilla Extract Almond extract can be used for a different flavor.
  • 1 1/2 cups All-Purpose Flour Can use a gluten-free flour blend.
  • 1 cup Old Fashioned Oats May use quick oats but alters texture.
  • 1 teaspoon Baking Soda Ensure it's fresh for best results.
  • 1/2 teaspoon Salt Balances sweetness.
For the Vanilla Cream Filling
  • 1/2 cup Unsalted Butter Similar role as above.
  • 2 cups Powdered Sugar Granulated sugar can be blended to make powdered sugar.
  • 2 tablespoons Heavy Cream Can use half-and-half or milk for a lighter option.
  • 1 teaspoon Vanilla Extract Substitutions mentioned for cookies apply.
  • Pinch Salt Enhances sweetness.

Equipment

  • Stand mixer
  • Baking Sheets
  • Parchment Paper
  • Cookie Scoop

Method
 

Step-by-Step Instructions
  1. Preheat your oven to 325°F (163°C) and line your baking sheets with parchment paper.
  2. Combine 1 cup of unsalted butter, 1 cup of light brown sugar, and 1/4 cup of molasses in a stand mixer. Beat for about 2 minutes until smooth. Add in 1 large egg and 1 teaspoon of vanilla extract, mixing until well blended.
  3. In a separate bowl, whisk together 1 1/2 cups of all-purpose flour, 1 cup of oats, 1 teaspoon of baking soda, and 1/2 teaspoon of salt. Gradually mix into the wet ingredients until combined.
  4. Scoop the dough onto prepared baking sheets, spacing about 2 inches apart. Aim for uniform size.
  5. Bake for 9 to 11 minutes until puffy and lightly set around the edges. Cool on the sheets for about 5 minutes then transfer to a wire rack.
  6. Prepare the filling by combining 1/2 cup of unsalted butter, 2 cups of powdered sugar, 2 tablespoons of heavy cream, and 1 teaspoon of vanilla extract. Beat until smooth.
  7. Once cookies are cooled, flip half upside down, pipe or spread filling on the bottom, and top with remaining cookies to assemble.

Nutrition

Serving: 1cookieCalories: 150kcalCarbohydrates: 21gProtein: 1gFat: 7gSaturated Fat: 4gPolyunsaturated Fat: 1gMonounsaturated Fat: 2gCholesterol: 20mgSodium: 100mgPotassium: 50mgFiber: 1gSugar: 10gVitamin A: 200IUCalcium: 10mgIron: 1mg

Notes

Store in an airtight container for up to 7 days. Refrigerate for up to 10 days or freeze for 3 months.

Tried this recipe?

Let us know how it was!

Creamy Chicken Taco Soup for Quick and Cozy Nights

As I watched a thick winter frost covering everything in sight, the craving for something warm and comforting washed over me. That’s when I reached for my favorite recipe for Creamy Chicken Taco Soup. This dish combines familiar Tex-Mex flavors with a rich broth made of Rotel tomatoes and cream cheese, ensuring that each spoonful feels like a cozy hug on a chilly evening. Perfect for busy weeknights, this quick, easy meal packs a punch of flavor in just 35 minutes. Not only is it delightful to whip up, but it also doubles as an inviting crowd-pleaser—ideal for gathering friends or family around the table. Curious about how to bring this comforting dish to life in your kitchen? Let’s dive into the recipe!

Why is Creamy Chicken Taco Soup a Must-Try?

Comforting and hearty, this soup wraps you in a warm, creamy embrace on chilly nights. Quick prep allows you to serve up a delicious dinner in just 35 minutes. Versatile options mean you can adapt it easily—try ground turkey or extra veggies. Pantry-friendly ingredients make it a go-to for busy weeknights, and crowd-pleasing flavors ensure everyone at the table will be asking for seconds. Pair it with some crispy tortilla chips, and you’ve got a meal that’s not just filling, but downright delightful!

Creamy Chicken Taco Soup Ingredients

  • For the Soup Base
    Olive Oil – Adds richness and aids in sautéing; substitute with vegetable oil if needed.
    Onion – Provides a flavorful base; use yellow or white onions for a milder taste.
    Chicken Broth – Acts as the liquid base for the soup; opt for low-sodium broth for a healthier option.
    Rotel Diced Tomatoes & Green Chilies – Offers a spicy kick; if unavailable, use diced tomatoes and add a can of diced green chilies.
    Black Beans – Introduces protein and fiber; canned beans should be drained and rinsed for better flavor.
    Corn – Adds sweetness and texture; substitute with fresh or frozen corn if preferred.
    Red Bell Pepper – Provides sweetness and crunch; you can use any color bell pepper.
    Chili Powder – Delivers heat and depth; adjust to your preferred spice level.
    Garlic Powder – Enhances the flavor profile; fresh garlic is an excellent alternative.
    Ground Cumin – Adds earthy flavor notes.
    Smoked Paprika – Brings a subtle smokiness; regular paprika can be a substitute.

  • For the Creaminess
    Cream Cheese – Creates a rich texture; ensure it’s softened for easy mixing.
    Cooked/Roasted Chicken – Serves as the main protein; rotisserie chicken works wonderfully.

  • Seasoning
    Salt & Pepper – To taste, enhances overall flavor; adjust based on the sodium level of your broth.

  • Optional Toppings
    Shredded Mexican Cheese Blend – Adds creaminess and flavor.
    Avocado – Offers a fresh, creamy texture.
    Cilantro – Imparts a fresh, herbaceous touch.
    Tortilla Strips – Adds crunch and extra texture.

Each ingredient comes together seamlessly in this hearty creamy chicken taco soup, making it the ultimate quick and satisfying weeknight meal!

Step-by-Step Instructions for Creamy Chicken Taco Soup

Step 1: Sauté Aromatics
In a large pot, heat 2 tablespoons of olive oil over medium-high heat. Once the oil glistens, add 1 chopped onion and sauté it for about 5 minutes, or until it turns translucent and softens. This initial step creates a savory base that infuses the Creamy Chicken Taco Soup with tantalizing flavor.

Step 2: Add Ingredients
Next, pour in 4 cups of chicken broth along with 1 can of Rotel diced tomatoes, 1 can of rinsed black beans, 1 cup of corn, and 1 chopped red bell pepper. Sprinkle in 2 tablespoons of chili powder, 1 teaspoon of garlic powder, 1 teaspoon of ground cumin, and 1 teaspoon of smoked paprika. Stir everything well to combine your ingredients, ensuring even distribution of flavors.

Step 3: Boil and Simmer
Raise the heat to high, allowing the soup to reach a rolling boil. Once boiling, reduce the heat to low and let it gently simmer uncovered for 5 minutes. This simmering step helps meld all the flavors together beautifully while keeping the ingredients tender and vibrant in your Creamy Chicken Taco Soup.

Step 4: Incorporate Cheese
Cut 8 ounces of softened cream cheese into cubes and stir them into the simmering soup. Keep stirring until the cream cheese is fully melted and incorporated, creating a luscious and creamy texture. This step is essential for achieving the richness that defines the Creamy Chicken Taco Soup.

Step 5: Add Chicken
Now, stir in 2 cups of shredded cooked chicken, ensuring it’s evenly dispersed throughout the soup. Continue cooking for an additional 5-7 minutes, or until the chicken is heated through and the soup is bubbling gently. This infusion of chicken adds heartiness and protein to the Creamy Chicken Taco Soup, making every bowl satisfying.

Step 6: Season and Serve
Finally, taste the soup and season it with salt and pepper according to your preference. Once seasoned, ladle the Creamy Chicken Taco Soup into bowls and garnish with your choice of toppings, such as shredded cheese, diced avocado, cilantro, or crispy tortilla strips. Enjoy the comforting warmth of this flavorful dish!

What to Serve with Creamy Chicken Taco Soup

A delicious meal deserves delightful companions that elevate every bite, bringing joy and satisfaction to the table.

  • Crispy Tortilla Chips: These add a satisfying crunch that perfectly contrasts the creamy soup, making every bite a delightful experience. Scoop up your soup with a chip for a fun twist!

  • Mexican Street Corn Salad: Bursting with sweet corn, lime, and cotija cheese, this salad adds a fresh, tangy flavor that complements the rich taco soup beautifully. It’s a refreshing side that keeps everything light.

  • Guacamole: Creamy and rich, guacamole brings a luscious texture to your meal. Pairing it with fresh lime and cilantro brightens the flavors, making every bowl feel like a celebration.

  • Lime Wedges: A simple squeeze of lime brings a punch of acidity to balance the richness of the soup. This brightens each bite and enhances the Tex-Mex flavors.

  • Spicy Salsa: Whether fresh or store-bought, salsa adds a zesty kick that enhances the soup’s flavors. Try a fruity salsa for a sweet contrast that dances on the palate.

  • Cheesy Quesadillas: Melty, gooey, and easy to share, quesadillas filled with cheese and veggies make a wonderful accompaniment. Dip them in your creamy soup for a comforting combination!

  • Chilled Mexican Beer: For a refreshing drink option, a chilled Mexican lager pairs beautifully with your Chicken Taco Soup. Its crispness cuts through the creaminess, making it a perfect pairing.

  • Dessert: Serve with flan or churros for a sweet finale that balances the savory soup. These desserts are light yet indulgent, ensuring your meal ends on a high note.

Expert Tips for Creamy Chicken Taco Soup

  • Soften Cream Cheese: Make sure your cream cheese is very soft to blend easily. If it’s too firm, microwave it for a few seconds to ensure smooth incorporation.

  • Season Generously: Don’t forget to taste and adjust your seasonings at the end. Adding salt and pepper to your Creamy Chicken Taco Soup can make all the difference in flavor.

  • Customize Heat Levels: If you prefer a milder soup, opt for “mild” Rotel or reduce the chili powder. You can always add heat later, but you can’t take it out!

  • Ingredient Prep: Rinse canned beans and corn to remove excess salt and improve the flavor. Also, chop your veggies uniformly to ensure even cooking.

  • Use Rotisserie Chicken: For an even quicker prep, use store-bought rotisserie chicken. It saves time and adds a wonderful depth of flavor to your soup.

Creamy Chicken Taco Soup Variations

Feel free to get creative with this recipe, bringing out unique flavors and textures to suit your taste!

  • Ground Turkey: Swap chicken for ground turkey for a leaner twist, keeping the richness of the soup intact. Just brown the turkey before adding to the broth for a delightful change.
  • Vegetarian Delight: Use vegetable broth and replace chicken with hearty mushrooms and chickpeas for a satisfying vegetarian option. This twist remains protein-packed, ensuring everyone enjoys the comforting flavors.
  • Extra Veggies: Add diced zucchini or kale for a nutrient boost and lovely color. The extra veggies will create a heartier soup, making it feel even more comforting.
  • Spicy Kick: Increase the heat by adding jalapeños or a splash of hot sauce. For spice lovers, this variation will elevate your taco soup experience!
  • Creamy Variations: Swap cream cheese for Greek yogurt or sour cream for a tangy flavor with added probiotics. Just stir in at the end to maintain its creaminess while keeping it lighter.
  • New Broth Options: Experiment with homemade chicken broth or a spicy broth for a richer flavor profile. Each option can add a different dimension to the entire dish.
  • Flavorful Additions: Toss in a can of diced green chiles for more heat and complexity. This easy addition will elevate the flavor to new heights.

Remember, each variation is not just a substitution but a delightful opportunity to explore new flavor combinations that make this soup your own! If you’re eager for more Tex-Mex inspiration, check out our Tex-Mex chicken tacos or consider using some leftover chicken for a quick chicken enchilada bake—you’ll be amazed at how versatile these ingredients can be!

How to Store and Freeze Creamy Chicken Taco Soup

Fridge: Store your Creamy Chicken Taco Soup in an airtight container for up to 3 days. Allow it to cool completely before sealing to maintain freshness.

Freezer: For longer storage, freeze the soup for up to 3 months. Portion it into freezer-safe containers or bags, leaving some space for expansion.

Reheating: Thaw overnight in the refrigerator if frozen, then reheat on the stovetop over medium heat, stirring occasionally until heated through. Add a splash of chicken broth if the soup is too thick after freezing.

Leftovers: If you have leftover toppings such as cheese or avocado, store them separately to maintain their texture and flavor when serving later.

Make Ahead Options

These Creamy Chicken Taco Soup preparations are perfect for busy weeknights! You can chop the vegetables (onion and bell pepper) and store them in the refrigerator for up to 3 days in advance. Additionally, you can also combine the spices (chili powder, cumin, smoked paprika, and garlic powder) and keep them ready to go, which saves time during cooking. For best quality, wait to add the cream cheese and chicken until just before serving; they should be freshly incorporated to maintain their texture and flavor. Simply follow the last steps of the recipe when you’re ready to enjoy, and you’ll have a warm, comforting meal with minimal effort!

Creamy Chicken Taco Soup Recipe FAQs

How do I select the best ingredients for the soup?
Absolutely! When picking ingredients, look for fresh produce: choose firm bell peppers without dark spots and onions that are free of soft patches. For tomatoes, pick a can of Rotel with a recognizable label to ensure flavor, and check if your cream cheese is fresh—it’s essential for that creamy texture!

How should I store leftover soup?
Very easily! Store your Creamy Chicken Taco Soup in an airtight container in the refrigerator for up to 3 days. Make sure it cools completely before sealing it to keep freshness at its best. Simply reheat on the stove or in the microwave when you’re ready for a delicious bowl again!

Can I freeze Creamy Chicken Taco Soup?
Absolutely! To freeze, let the soup cool down and then portion it into freezer-safe containers or bags, leaving some space for expansion. You can freeze it for up to 3 months. When ready to enjoy, thaw it overnight in the refrigerator and reheat, adding a splash of broth if needed for consistency.

What should I do if my soup is too thick after reheating?
Great question! If your Creamy Chicken Taco Soup is too thick after thawing or reheating, simply add a splash of chicken broth or water and stir until it reaches your desired consistency. Heat it gently over medium-low to avoid burning, and it should be back to its creamy glory in no time!

Are there any dietary considerations for pets or allergies?
Very much so! This soup is not suitable for pets due to ingredients like onions and garlic, which can be harmful to dogs and cats. If you have allergies, be cautious with the beans and dairy in the recipe. There are many substitutions available to ensure it’s friendly for your dietary needs—don’t hesitate to ask for alternatives!

undefined

Creamy Chicken Taco Soup for Quick and Cozy Nights

Creamy Chicken Taco Soup is a comforting Tex-Mex-inspired dish, perfect for quick weeknight dinners.
Prep Time 10 minutes
Cook Time 25 minutes
Total Time 35 minutes
Servings: 6 servings
Course: Dinner
Cuisine: Tex-Mex
Calories: 300

Ingredients
  

Soup Base
  • 2 tablespoons Olive Oil Substitute with vegetable oil if needed.
  • 1 chopped Onion Use yellow or white onions for a milder taste.
  • 4 cups Chicken Broth Opt for low-sodium broth for a healthier option.
  • 1 can Rotel Diced Tomatoes & Green Chilies Offers a spicy kick.
  • 1 can Black Beans Canned beans should be drained and rinsed.
  • 1 cup Corn Substitute with fresh or frozen corn if preferred.
  • 1 chopped Red Bell Pepper You can use any color bell pepper.
  • 2 tablespoons Chili Powder Adjust to your preferred spice level.
  • 1 teaspoon Garlic Powder Fresh garlic is an excellent alternative.
  • 1 teaspoon Ground Cumin
  • 1 teaspoon Smoked Paprika Regular paprika can be a substitute.
Creaminess
  • 8 ounces Cream Cheese Ensure it's softened for easy mixing.
  • 2 cups Cooked/Roasted Chicken Rotisserie chicken works wonderfully.
Seasoning
  • Salt To taste.
  • Pepper To taste.
Optional Toppings
  • Shredded Mexican Cheese Blend
  • Avocado Offers a fresh, creamy texture.
  • Cilantro Imparts a fresh, herbaceous touch.
  • Tortilla Strips Adds crunch and extra texture.

Equipment

  • Large pot

Method
 

Step-by-Step Instructions
  1. In a large pot, heat 2 tablespoons of olive oil over medium-high heat. Add 1 chopped onion and sauté for about 5 minutes, or until translucent.
  2. Pour in 4 cups of chicken broth, 1 can of Rotel diced tomatoes, 1 can of rinsed black beans, 1 cup of corn, and 1 chopped red bell pepper. Add 2 tablespoons of chili powder, 1 teaspoon of garlic powder, 1 teaspoon of ground cumin, and 1 teaspoon of smoked paprika. Stir well.
  3. Raise the heat to high to reach a rolling boil. Once boiling, reduce the heat to low and let it simmer uncovered for 5 minutes.
  4. Cut 8 ounces of softened cream cheese into cubes and stir into the soup. Keep stirring until fully melted.
  5. Stir in 2 cups of shredded cooked chicken and cook for an additional 5-7 minutes, or until heated through.
  6. Season with salt and pepper to taste. Ladle into bowls and garnish with toppings like cheese, avocado, cilantro, or tortilla strips.

Nutrition

Serving: 1bowlCalories: 300kcalCarbohydrates: 30gProtein: 25gFat: 15gSaturated Fat: 8gPolyunsaturated Fat: 2gMonounsaturated Fat: 3gCholesterol: 75mgSodium: 800mgPotassium: 600mgFiber: 8gSugar: 4gVitamin A: 30IUVitamin C: 20mgCalcium: 15mgIron: 10mg

Notes

Ensure cream cheese is soft for smooth blending and adjust seasonings to taste.

Tried this recipe?

Let us know how it was!

Stay Connected

Get recipes via email: