Get my cookbooks

Comforting Ginger Bok Choy Soup with Noodles for Cozy Days

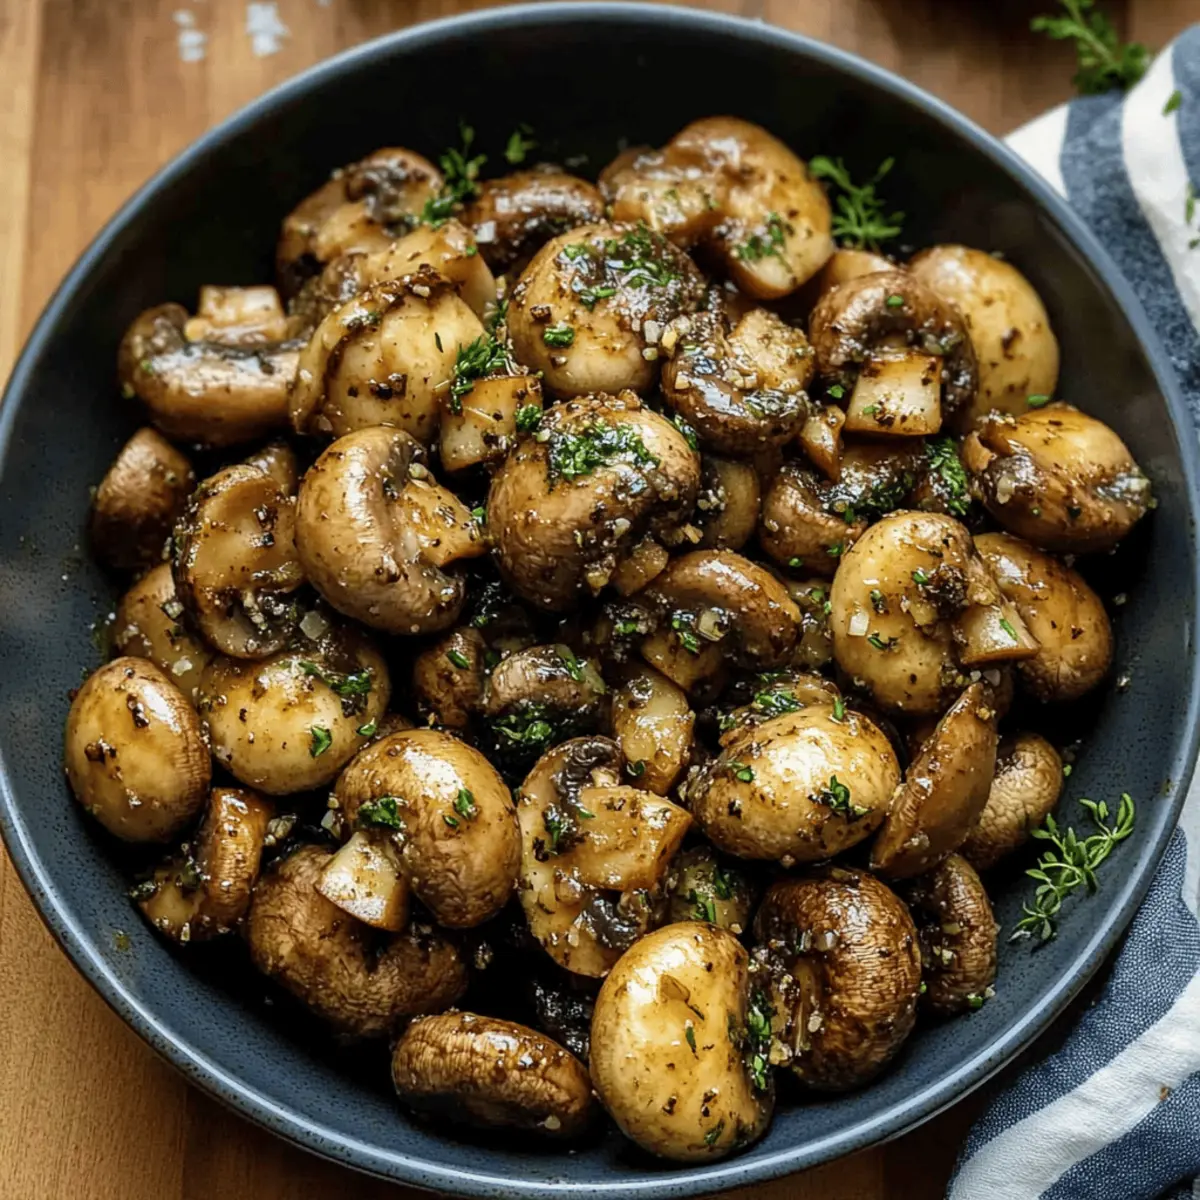
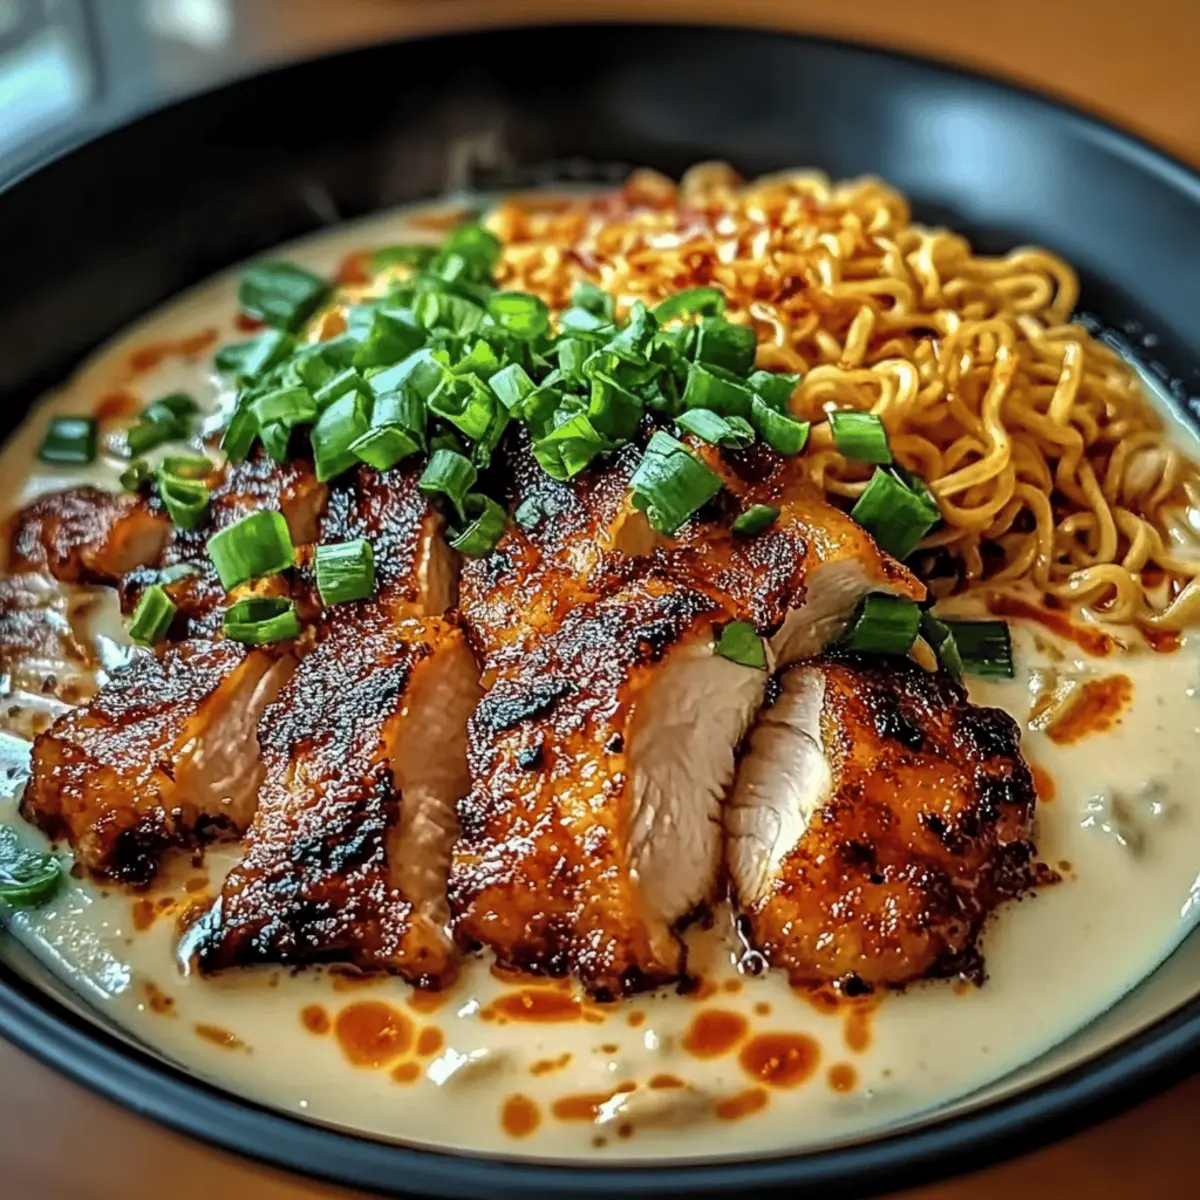
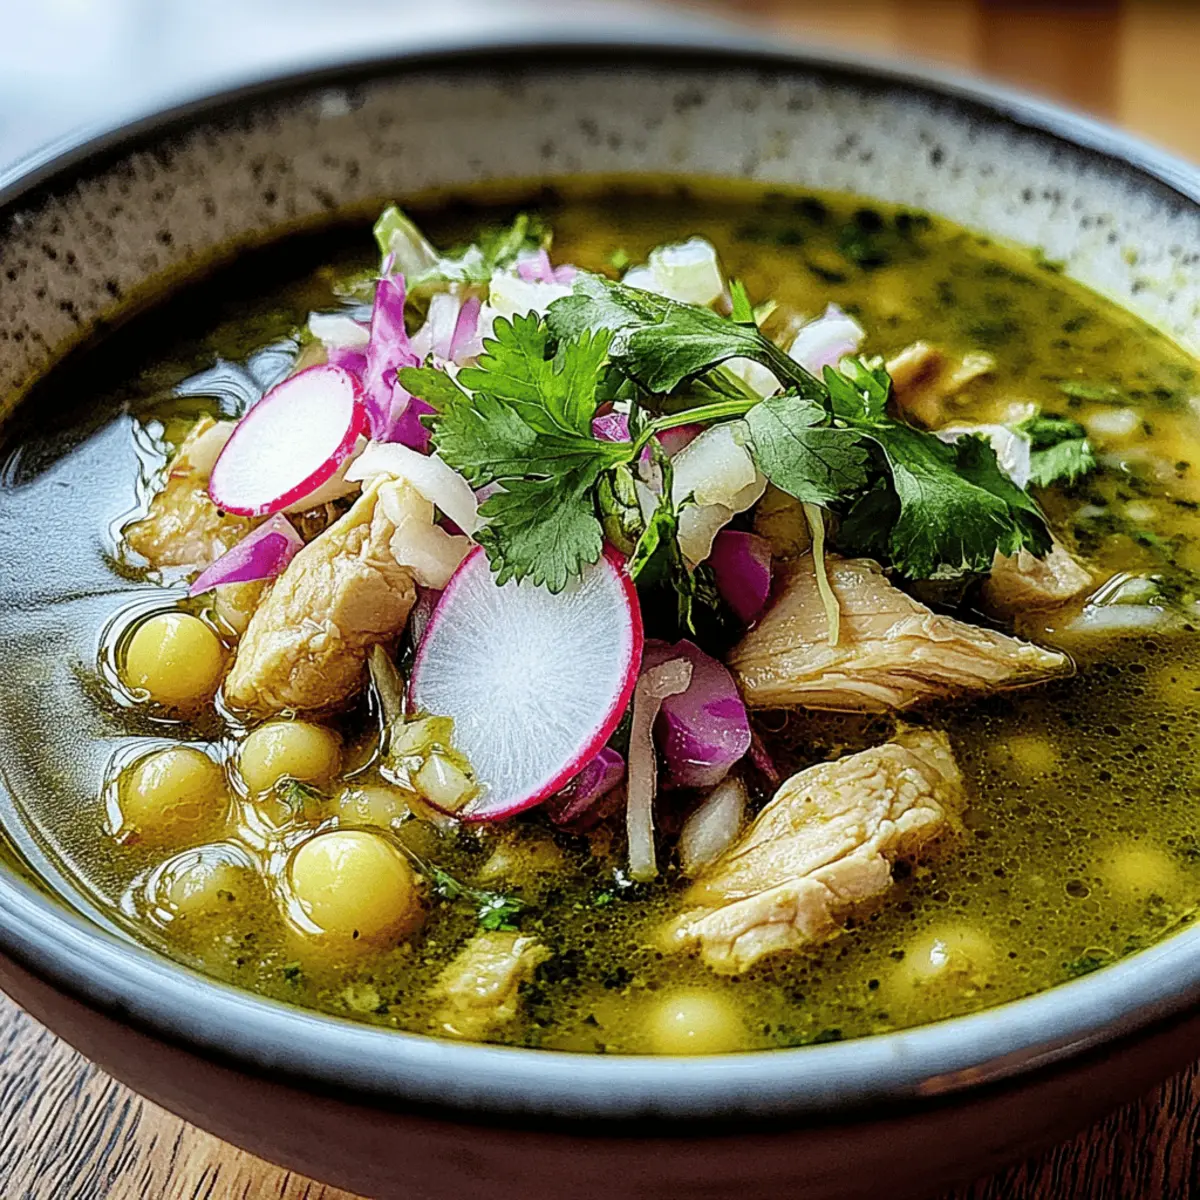
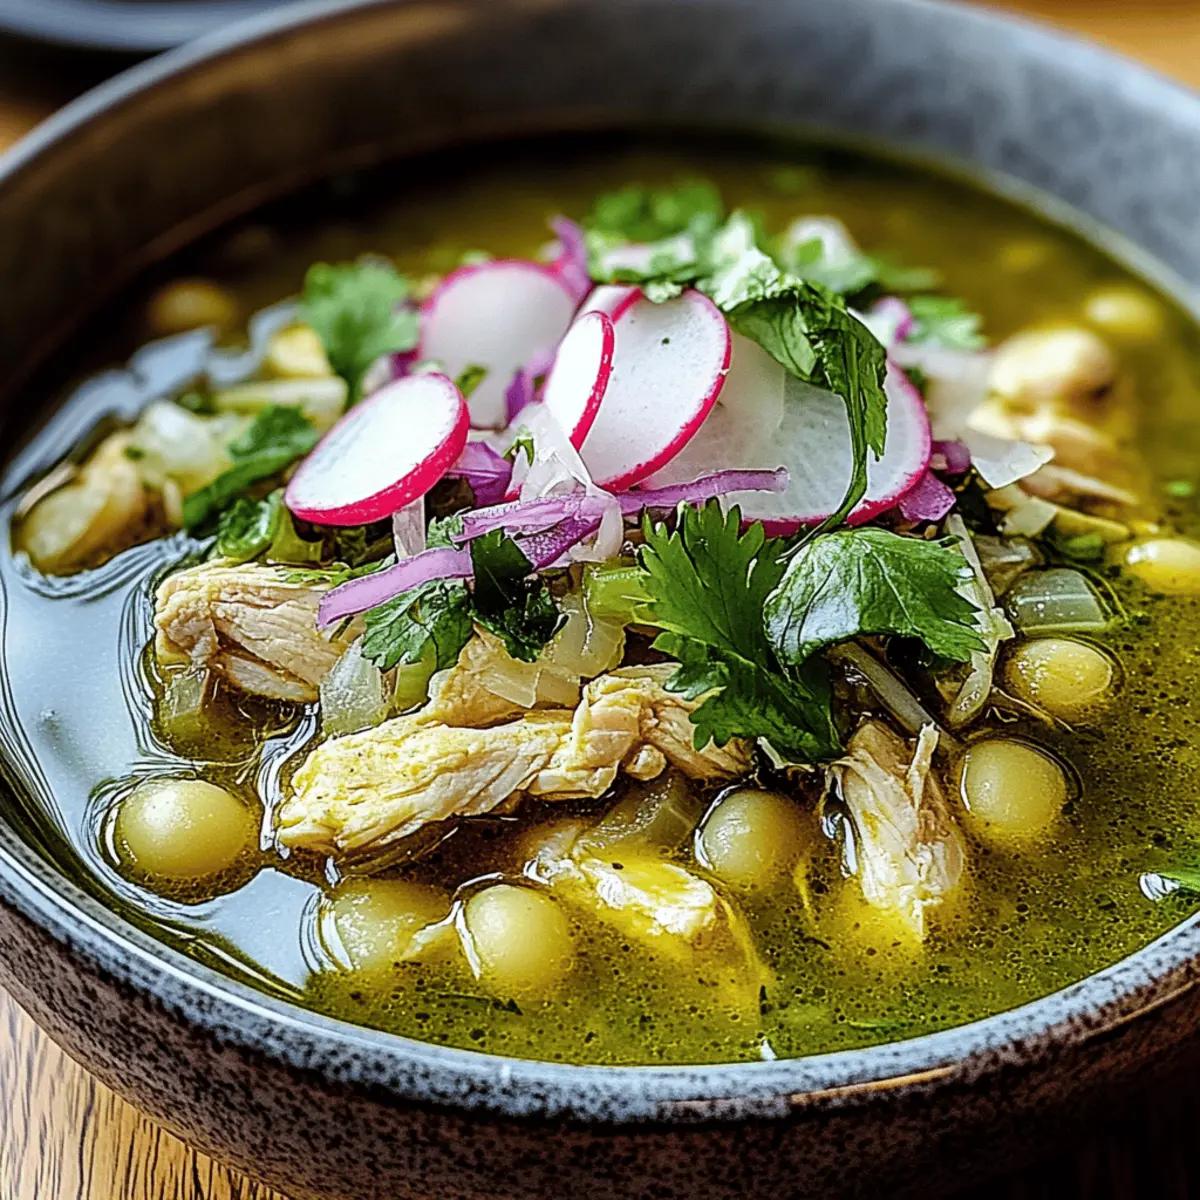
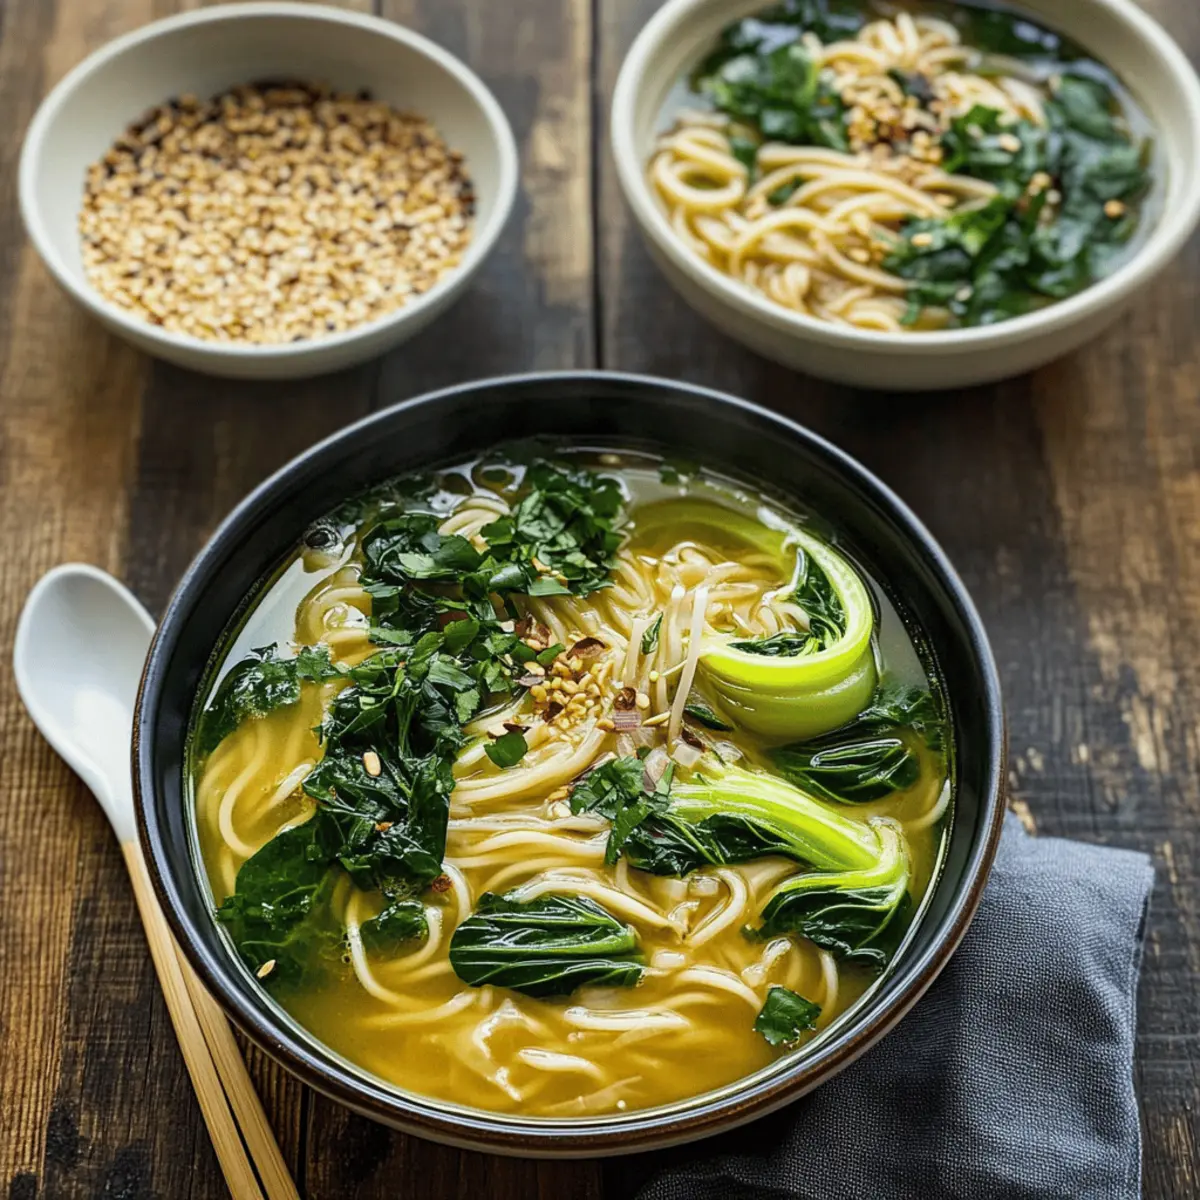
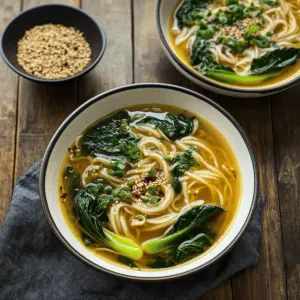
As I wandered through my local market, the vibrant colors of fresh bok choy caught my eye, reminding me of the comforting Ginger Bok Choy Soup with Noodles I’ve come to love. This nourishing dish not only warms you from the inside out, but it’s also a breeze to whip up, making it an ideal choice for busy weeknights or cozy weekends alike. Packed with a fragrant ginger broth and tender greens, it’s a versatile recipe that allows for easy ingredient substitutions to cater to your tastes and dietary needs—be it gluten-free or vegetarian. Whether you’re feeling under the weather or just in need of a cozy meal, this delightful soup delivers warmth and satisfaction in every spoonful. Ready to create a warm hug in a bowl? Let’s dive into the recipe!

Why is this soup so comforting?

Comforting and Nourishing: This Ginger Bok Choy Soup with Noodles will wrap you in warmth like a cozy blanket on a chilly night.

Quick Prep: Ready in under 30 minutes, making it perfect for busy evenings. No need to spend hours in the kitchen!

Customizable Delight: Feel free to swap in your favorite noodles or veggies; it’s versatile to fit any diet. If you love hearty soups, don’t miss out on our Tuscan Chicken Soup or Asian Ginger Soy for more flavorful options.

Wholesome Ingredients: Packed with vitamins A and C, it’s a guilt-free treat that’ll leave you feeling great.

Crowd-Pleasing: Perfect for cozy dinners with family, this soup is sure to be a hit at any gathering!

Ginger Bok Choy Soup Ingredients

For the Broth

  • Vegetable Broth – Serves as the delicious base; feel free to opt for homemade for extra depth of flavor.
  • Ginger – Adds warmth and spice; using fresh ginger ensures a zingy taste that’s perfect for a comforting broth.

For the Soup

  • Bok Choy – A beautiful, nutritious green that offers a mild flavor; you can substitute it with kale or chard if desired.
  • Noodles – Traditional ramen noodles are great, but rice noodles are a fantastic gluten-free alternative; adjust the cooking time accordingly.

Optional Ingredients

  • Tofu – Provides a protein boost and heartiness; substitute with a poached egg for a different twist or leave out for a lighter soup.
  • Soy Sauce – Enhances umami flavors in the soup; coconut aminos work well for a soy-free option.
  • Lime Juice – Adds a refreshing acidity to balance the flavors; lemon juice can be used as an alternative.

Get ready to enjoy your DIY Ginger Bok Choy Soup with Noodles in no time!

Step‑by‑Step Instructions for Ginger Bok Choy Soup with Noodles

Step 1: Prepare the Ginger Broth
In a large pot, combine 4 cups of vegetable broth with 2 tablespoons of freshly grated ginger. Heat the mixture over medium heat, bringing it to a gentle simmer. Allow the broth to cook for about 5 minutes until it becomes aromatic and the ginger infuses its warmth into the liquid, creating a robust base for your Ginger Bok Choy Soup.

Step 2: Chop the Bok Choy and Prepare Noodles
While the broth simmers, rinse and chop 2 cups of bok choy into bite-sized pieces, discarding any tough stems. In a separate pot, cook 8 ounces of your choice of noodles according to the package instructions, usually around 3-5 minutes for ramen or rice noodles. Drain and set the noodles aside, ensuring they’re ready to mingle with the soup in the next steps.

Step 3: Add Bok Choy to the Broth
Once the broth has reached a simmering point and is fragrant, stir in the chopped bok choy. Continue to simmer the broth for an additional 2-3 minutes, just until the bok choy is tender yet still vibrant green. This step enhances the flavors of your Ginger Bok Choy Soup with Noodles, ensuring a nourishing and delightful experience.

Step 4: Combine Noodles and Tofu
Next, add the drained noodles to the pot with the ginger broth and bok choy. If you’re including tofu, stir in 1 cup of cubed tofu now. Allow everything to heat together for another 2-3 minutes, until the noodles have absorbed some broth and the tofu is warmed through, creating a comforting and hearty blend.

Step 5: Season and Serve
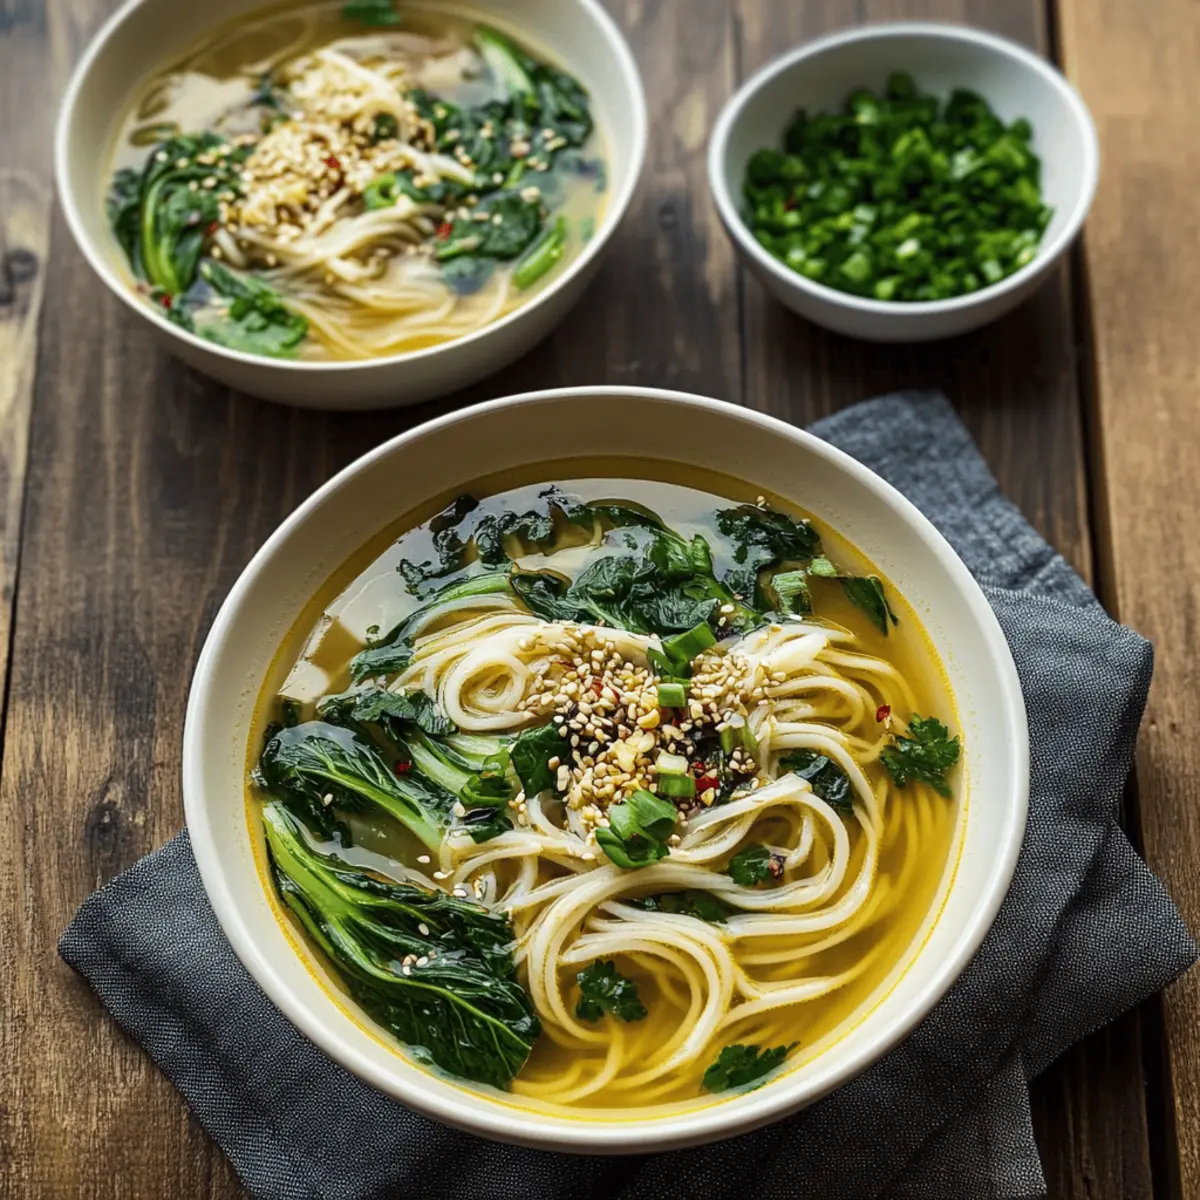
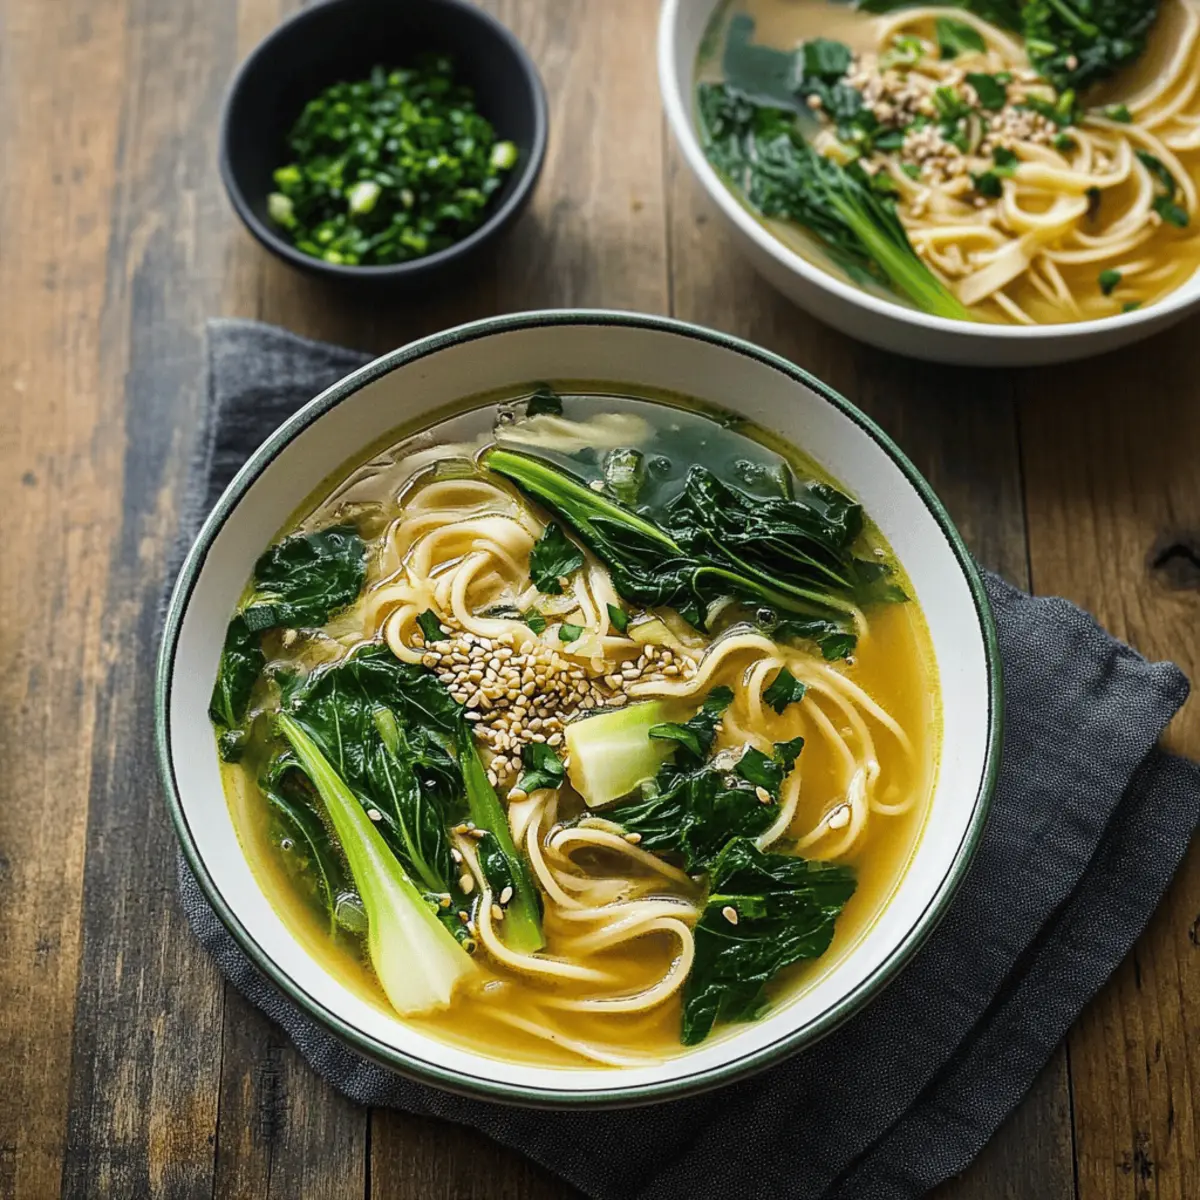
Finally, season your Ginger Bok Choy Soup with a splash of soy sauce and a squeeze of lime juice to taste, enhancing the flavors beautifully. Stir well and let it simmer for an additional minute before serving. Ladle the soup into warm bowls, garnishing with fresh herbs or scallions if desired, and enjoy the comforting warmth of your creation!

Expert Tips for Ginger Bok Choy Soup

Fresh Ginger: Use fresh ginger for the best flavor. Ground ginger can lack the bright, zesty punch needed to elevate this comforting ginger bok choy soup.

Protein Options: Not a fan of tofu? Try adding shredded chicken or chickpeas instead for a satisfying boost!

Broth Matters: Ensure you’re using enough broth, as noodles absorb liquid quickly. Keep extra broth on standby to maintain a soupy consistency.

Don’t Overcook: Watch the cooking times for your noodles and bok choy. Overcooking will lead to mushy noodles and wilted greens; you want crisp, tender results.

Taste As You Go: Adjust seasoning with soy sauce or lime juice as you cook. Tasting throughout ensures the perfect balance in your ginger bok choy soup!

How to Store and Freeze Ginger Bok Choy Soup

Fridge: Store leftover Ginger Bok Choy Soup in an airtight container in the refrigerator for up to 3 days. To maintain its vibrant flavors, reheat gently on the stove or in the microwave, adding a splash of broth if needed.

Freezer: If you want to keep it longer, freeze the soup (without the noodles) in freezer-safe containers for up to 3 months. Thaw in the fridge overnight before reheating.

Noodles: If possible, keep noodles separate from the broth when storing, as they can absorb too much liquid and become mushy. Prepare fresh noodles when ready to serve.

Reheating: For reheating, warm the soup in a pot over medium heat, stirring occasionally until heated through. Always check if the consistency is right; add additional broth if it thickened too much during storage.

What to Serve with Ginger Bok Choy Soup with Noodles

As you savor each spoonful of this fragrant and nourishing soup, consider complementing it with a few delightful accompaniments to build a full meal experience.

  • Crispy Spring Rolls: These golden bites add a crunchy texture that perfectly contrasts the warm soup, offering delightful flavors wrapped in delicate rice paper.

  • Garlic Breadsticks: Soft and buttery, these breadsticks will soak up every last drop of broth, bringing robust garlic flavor to your table.

  • Sautéed Greens: A side of sautéed spinach or kale provides a nutritious, vibrant color contrast while enhancing the overall health benefits of your meal.

  • Sesame Edamame: These lightly salted pods bring a satisfying bite; their natural sweetness balances the ginger’s warmth, making them a delightful snack.

  • Chili Oil Drizzle: A few drops of spicy chili oil elevate the soup’s flavor, adding a hint of heat that excites your taste buds and warms your soul.

  • Coconut Rice: Creamy coconut rice pairs beautifully with the soup, introducing a subtle sweetness that invites a tropical twist to your comforting bowl.

  • Crispy Tofu Bites: For extra protein and texture, serve crispy tofu bites on the side, which you can easily dip into the flavorful broth.

  • Chilled Cucumber Salad: Light and refreshing, this cool salad offers a perfect contrast to the warm soup while providing a refreshing crunch with each bite.

  • Fruit Sorbet for Dessert: To wrap up your meal, a scoop of fruit sorbet cleanses the palate, leaving a sweet finish after the savory soup.

Make Ahead Options

These Ginger Bok Choy Soup with Noodles are perfect for meal prep enthusiasts! You can prepare the ginger broth and chopped bok choy up to 24 hours in advance; just store them separately in airtight containers in the refrigerator to maintain freshness and prevent the bok choy from wilting. Cooked noodles can be kept in the fridge for up to 3 days, but be sure to toss them with a bit of oil to prevent sticking. When you’re ready to serve, simply reheat the broth, add in the bok choy and noodles, and let everything warm through for a few minutes. With this make-ahead approach, you’ll have a comforting meal ready with minimal effort, just as delicious as if you made it fresh!

Variations & Substitutions for Ginger Bok Choy Soup with Noodles

Feel free to get creative with this comforting soup—your taste buds will love the possibilities!

  • Gluten-Free: Swap traditional ramen noodles for rice noodles or soba noodles to keep it gluten-free and still delicious. This way, everyone can enjoy a warm bowl of comfort!

  • Vegetable Boost: Add sliced shiitake mushrooms for an earthy flavor that enriches your soup. Their umami kick pairs perfectly with the ginger broth, giving you an extra layer of taste.

  • Extra Crunch: Stir in shredded carrots or bean sprouts when you add the bok choy for added texture and nutrition. This addition makes every spoonful exciting!

  • Heat It Up: For a fiery twist, add a splash of Sriracha or crushed red pepper flakes. A little heat can elevate the savory profile, especially on chilly evenings.

  • Herb Infusion: Toss in chopped cilantro or basil before serving to brighten the dish. Fresh herbs bring a burst of flavor that enhances the overall experience.

  • Protein Variations: Not a tofu fan? Try adding shredded chicken, chickpeas, or even a poached egg for a different protein option. Each choice brings its own comforting essence to the bowl.

  • Citrus Swap: If lime isn’t your thing, lemon juice offers a refreshing acidity that works wonders too. Just like with the Mexican Soup Flavorful, citrus brightens the flavors beautifully.

  • Homemade Broth: For a richer flavor, opt for homemade vegetable or chicken broth instead of store-bought. It’s an incredible way to infuse your soup with love!

Let your taste preferences guide you and enjoy crafting your unique version of this delightful dish!

Ginger Bok Choy Soup with Noodles Recipe FAQs

What type of broth should I use for the Ginger Bok Choy Soup?
Absolutely, the base of your soup is crucial! I recommend using vegetable broth for a delightful vegetarian option. However, if you’re looking for a more savory flavor, homemade chicken broth can work beautifully. Making your own broth allows you to control the seasoning and achieve a depth of flavor that store-bought just can’t match.

How long can I store leftover Ginger Bok Choy Soup?
You can store your leftover Ginger Bok Choy Soup in an airtight container in the refrigerator for up to 3 days. When you’re ready to enjoy it again, just reheat it gently on the stove or microwave. Don’t forget to add a splash of broth if you find it’s thickened too much during storage!

Can I freeze Ginger Bok Choy Soup?
Yes, you can freeze this soup for future cozy meals! Just be sure to freeze it without the noodles. Use freezer-safe containers and it should last up to 3 months. When you’re ready for a warm bowl, thaw it in the fridge overnight and reheat it over medium heat, adding fresh noodles for the best texture.

What happens if I overcook the bok choy?
Be careful not to overcook the bok choy! When overcooked, it can become wilted and lose its vibrant green color and nutritional qualities. To keep it tender yet crisp, simmer it in the broth just until it’s bright green and tender, about 2-3 minutes after adding it to the simmering broth.

Can I substitute bok choy with other greens?
Very! Bok choy is delicious, but if you can’t find it or want to switch things up, kale or Swiss chard make fantastic substitutes. They’ll give your soup a slightly different flavor while still adding that nice, leafy goodness. Just make sure to chop them into bite-sized pieces and adjust the cooking time in the same way!

Is this soup suitable for my gluten-free diet?
Yes, indeed! For a gluten-free version of your Ginger Bok Choy Soup with Noodles, simply choose rice noodles or gluten-free ramen. Just keep an eye on the cooking time, as different noodles can vary significantly, ensuring you get that perfect al dente bite without the mush.

Ginger Bok Choy Soup with Noodles

Comforting Ginger Bok Choy Soup with Noodles for Cozy Days

This Ginger Bok Choy Soup with Noodles is a nourishing, cozy dish that warms you from the inside out.
Prep Time 10 minutes
Cook Time 20 minutes
Total Time 30 minutes
Servings: 4 bowls
Course: Dinner
Cuisine: Asian
Calories: 250

Ingredients
  

For the Broth
  • 4 cups Vegetable Broth Use homemade for extra flavor.
  • 2 tablespoons Freshly Grated Ginger Ensure it adds warmth and spice.
For the Soup
  • 2 cups Bok Choy Can substitute with kale or chard.
  • 8 ounces Noodles Ramen or rice noodles are great.
Optional Ingredients
  • 1 cup Cubed Tofu Substitute with poached egg if desired.
  • to taste Soy Sauce Coconut aminos for soy-free option.
  • to taste Lime Juice Lemon juice can be used as alternative.

Equipment

  • Large pot
  • separate pot for noodles

Method
 

Step-by-Step Instructions
  1. Combine 4 cups of vegetable broth with 2 tablespoons of freshly grated ginger in a large pot. Heat over medium and simmer for about 5 minutes.
    Ginger Bok Choy Soup with Noodles
  2. While the broth simmers, chop 2 cups of bok choy into bite-sized pieces. Cook 8 ounces of noodles in a separate pot according to package instructions.
    Ginger Bok Choy Soup with Noodles
  3. Stir in the chopped bok choy into the simmering broth. Cook for an additional 2-3 minutes until tender.
    Ginger Bok Choy Soup with Noodles
  4. Add drained noodles and 1 cup of cubed tofu to the broth, simmer for another 2-3 minutes until warmed through.
    Ginger Bok Choy Soup with Noodles
  5. Season with soy sauce and lime juice to taste. Simmer for an additional minute before serving.
    Ginger Bok Choy Soup with Noodles

Nutrition

Serving: 1bowlCalories: 250kcalCarbohydrates: 30gProtein: 10gFat: 8gSaturated Fat: 1gSodium: 600mgPotassium: 450mgFiber: 3gSugar: 2gVitamin A: 900IUVitamin C: 30mgCalcium: 50mgIron: 2mg

Notes

Fresh ginger is recommended for the best flavor. Adjust seasoning as needed while cooking.

Tried this recipe?

Let us know how it was!

Savor Cowboy Mushrooms in Rich, Flavorful Butter Delight

The sizzle of butter hitting a hot skillet always gives me a little thrill, reminding me of home-cooked warmth and comfort. That’s exactly the vibe we’re going for with these Cowboy Mushrooms, where tender white button mushrooms are transformed into a delicious side or appetizer in under 25 minutes. Coated in zesty compound butter infused with a medley of herbs and spices, these mushrooms perfectly complement grilled meats, making them a must-have at any barbecue or cozy family dinner. Plus, with the option to prepare the Cowboy Butter in advance, this dish is not just tasty but also a breeze to whip up on a busy weeknight. Are you ready to elevate your mushroom game?

Why Are Cowboy Mushrooms a Must-Try?

Deliciously Rich: The Cowboy Mushrooms are enveloped in a decadent, zesty compound butter that takes this simple side dish to a whole new level of flavor.

Quick Preparation: In just 25 minutes, you can create a stunning appetizer or side that is both impressive and homemade.

Versatile Pairing: They pair beautifully with grilled meats, making them the perfect companion for your next barbecue or cozy dinner at home.

Make-Ahead Convenience: Prepare the Cowboy Butter ahead of time and store it for days when you need a quick yet delicious side. Check out my Cowboy Butter Chicken for another delicious way to use this compound butter!

Crowd-Pleaser: Whether served as an appetizer or a side, these mushrooms will please both family and guests, making them an instant hit at any gathering.

Cowboy Mushrooms Ingredients

• The perfect components for your flavorful dish!

For the Mushrooms

  • White Button Mushrooms – Tender and mild, these are the star of your Cowboy Mushrooms; can substitute with cremini, portobello, or shiitake for variation.

For the Cowboy Butter

  • Unsalted Butter – This rich base delivers the necessary creaminess; unsalted allows you to control the saltiness.
  • Garlic Powder – Adds warmth and depth; fresh minced garlic can also be used for a punchier flavor.
  • Fresh Parsley – Brightens up the dish with its fresh herbal notes; feel free to replace with thyme or rosemary for a twist.
  • Paprika – Contributes a smoky, sweet flavor; smoked paprika can add an extra depth to the Cowboy Mushrooms.
  • Lemon Juice – Introduces a zesty brightness; can be substituted with lime for a different citrus flair.
  • Salt – Essential for enhancement; adjust to your taste for the best flavor balance.

Embrace the wonderful world of Cowboy Mushrooms by gathering these simple yet delightful ingredients!

Step‑by‑Step Instructions for Cowboy Mushrooms

Step 1: Melt the Butter
Begin by heating a large skillet over medium heat. Add the Cowboy Butter and allow it to melt fully, stirring occasionally for about 2-3 minutes. The butter should become bubbly and fragrant, releasing its rich aroma. This step is crucial for developing the flavor base for your Cowboy Mushrooms.

Step 2: Prepare the Mushrooms
While the butter is melting, clean and trim the white button mushrooms, ensuring they are free from dirt and debris. Once the butter is melted, carefully add the cleaned mushrooms to the skillet. Use a spatula to stir and coat the mushrooms evenly with the melted butter, ensuring each piece is well covered.

Step 3: Sauté the Mushrooms
Cook the mushrooms over medium heat for 20-22 minutes. Stir occasionally to ensure even cooking. As they sauté, the mushrooms will begin to soften and turn a beautiful golden brown. Keep an eye on their progress, and when they’re tender and well-cooked, you’ll know they are ready to shine as your Cowboy Mushrooms.

Step 4: Serve and Enjoy
Once the Cowboy Mushrooms are finished cooking and have reached a delectable golden color, remove the skillet from heat. Transfer the sautéed mushrooms to a serving dish while they are warm. These mushrooms can be served alone or as a delicious topping for grilled meats, making them a versatile addition to any meal.

Expert Tips for Cowboy Mushrooms

  • Prep Ahead: Make your Cowboy Butter in advance to save time during busy weeknights and always have deliciousness at your fingertips.

  • Mushroom Cleanliness: Always clean your mushrooms before cooking; a damp cloth works wonders. This ensures no grit affects your delightful Cowboy Mushrooms.

  • Sautéing Technique: Keep the heat medium—it helps prevent burning while allowing the mushrooms to caramelize beautifully, enhancing their flavor.

  • Watch the Time: Avoid overcooking your mushrooms. Aim for that perfect tender texture, around 20-22 minutes, to enjoy the best of your Cowboy Mushrooms.

  • Storing Leftovers: If you have leftovers, cool them completely and store in an airtight container for up to 5 days. Reheat for a quick and tasty side!

Cowboy Mushrooms Variations & Substitutions

Embrace your culinary creativity and customize these Cowboy Mushrooms to suit your taste buds or dietary needs.

  • Dairy-Free: Use vegan butter or olive oil instead of unsalted butter for a plant-based option. This swap maintains the delightful texture and flavor while catering to dairy-free diets.

  • Herb Variations: Add fresh thyme or rosemary along with parsley for an aromatic twist. Their fragrant profiles elevate the dish and infuse it with even more flavor.

  • Spice It Up: Introduce a pinch of red pepper flakes to give your mushrooms a delightful kick of heat. You can easily adjust the level of spice to suit your preference.

  • Smoky Flavor: Replace regular paprika with smoked paprika for an added depth and smokiness that will transport your taste buds to a campfire scene.

  • Add Cheese: For a luscious touch, sprinkle grated Parmesan or feta cheese over the mushrooms just before serving. As the cheese melts slightly, it adds rich creaminess that amplifies the flavors.

  • Mushroom Delight: Combine different mushroom varieties like cremini, shiitake, or portobello with the white button mushrooms. This blend offers layered textures and earthy flavors that make for a more complex dish.

  • Citrus Zing: Swap lemon juice for lime for a fresh and zesty flavor twist. Lime adds brightness that uniquely complements the buttery richness of the mushrooms.

  • Nutty Crunch: Top the finished dish with toasted walnuts or pecans for an added crunch. The nuts provide delightful texture and a touch of nuttiness that pairs perfectly with the tender mushrooms.

Feel free to explore these variations and personalize your Cowboy Mushrooms, just as you might with the Cowboy Butter Chicken or other beloved dishes!

What to Serve with Cowboy Mushrooms?

Enhance your next meal with delightful pairings that elevate the rich, buttery flavor of Cowboy Mushrooms.

  • Grilled Steak: Juicy and smoky, a perfectly grilled steak is a match made in culinary heaven with these herb-infused mushrooms.
  • Crispy Roasted Potatoes: The crunchy golden exterior and fluffy inside of roasted potatoes provide a satisfying contrast to the tender Cowboy Mushrooms.
  • Garlic Bread: The combination of warm, crusty bread slathered in garlic butter makes for the perfect vessel to soak up any leftover compound butter.
  • Roasted Vegetables: A medley of seasonal roasted veggies adds vibrant colors and sweet earthiness, perfectly balancing the savory richness of the mushrooms.
  • Caesar Salad: Crisp romaine lettuce, creamy dressing, and crunchy croutons offer a refreshing bite to counter the luscious Cowboy Mushrooms.
  • Chardonnay: An oaked Chardonnay, with its buttery notes, complements the mushroom dish wonderfully, amplifying its flavor and adding a touch of elegance.
  • Dessert Option – Chocolate Mousse: Follow your savory delight with a light and airy chocolate mousse to end on a sweet note that lingers beautifully.
  • Herb-Crusted Chicken: This tender chicken dish, seasoned beautifully, makes a fantastic entrée to accompany the cowboy mushrooms, enhancing each flavorful bite.
  • Grilled Corn on the Cob: Sweet and smoky grilled corn provides a seasonal touch and a fun texture that pairs nicely with robust flavors.
  • Spicy Quinoa Salad: This protein-packed side dish offers a nutty taste and can stand up to the strong flavors of Cowboy Mushrooms, creating an exciting plate experience.

Storage Tips for Cowboy Mushrooms

  • Fridge: Allow Cowboy Mushrooms to cool completely before transferring them to an airtight container. They can be stored in the fridge for up to 5 days without losing their delightful flavor.

  • Freezer: For longer storage, place the cooled mushrooms in a freezer-safe bag or container. They can be frozen for up to 3 months. Just remember, their texture may change slightly after thawing.

  • Reheating: To reheat, warm the Cowboy Mushrooms in a skillet over low heat, stirring gently, or use the microwave in short 30-second intervals until heated through.

  • Room Temperature: Serve the mushrooms immediately after cooking, but if left out at room temperature, consume within 2 hours to ensure they remain safe and tasty.

Make Ahead Options

These Cowboy Mushrooms are perfect for busy home cooks looking to save time during the week! You can prepare the Cowboy Butter up to 5 days in advance, storing it in an airtight container in the refrigerator. Simply scoop out the desired amount and let it soften at room temperature while you clean and trim your mushrooms (this step ensures they stay fresh and free from browning). When you’re ready to serve, melt the prepared Cowboy Butter in a skillet over medium heat, add the mushrooms, and sauté for 20-22 minutes until they’re golden brown and tender. By prepping ahead, you’ll enjoy a delicious, homemade side with minimal effort—perfect for family dinners or unexpected guests!

Cowboy Mushrooms Recipe FAQs

What type of mushrooms should I use for Cowboy Mushrooms?
Absolutely! White button mushrooms are the star of this recipe, providing a tender texture and mild flavor. However, if you’re feeling adventurous, you can easily substitute them with cremini, portobello, or shiitake mushrooms for a richer taste and distinct variation.

How long can I store leftover Cowboy Mushrooms?
Very! Once your Cowboy Mushrooms have cooled completely, transfer them to an airtight container and store them in the fridge. They can last for up to 5 days. Reheat them in a skillet over low heat to bring back that delightful buttery flavor!

Can I freeze Cowboy Mushrooms, and if so, how?
Definitely! For long-term storage, allow your Cowboy Mushrooms to cool completely. Then, pack them in a freezer-safe bag or container, removing as much air as possible. They can be frozen for up to 3 months. To reheat, simply thaw in the fridge overnight and warm them gently on the stovetop or in the microwave.

What can I do if my mushrooms are soggy after cooking?
Don’t worry; it’s a common issue! If your mushrooms are releasing too much moisture, ensure you’re using medium heat to allow for proper sautéing and caramelization. If they’re already soggy, increase the heat slightly and continue to cook them while stirring frequently until they release their moisture and begin to brown. This should help improve their texture!

Are Cowboy Mushrooms suitable for those with dietary restrictions?
Absolutely! They’re vegetarian and can easily be adapted for vegan diets by substituting the unsalted butter with plant-based alternatives. However, always check ingredient labels for any allergens, especially if using pre-packaged or flavored butters. Just remember to serve them fresh out of the pan for the best flavor experience!

Can I prepare the Cowboy Butter ahead of time?
Yes, indeed! Making your Cowboy Butter in advance is a fantastic idea. Simply mix all the butter ingredients together, shape it into a log, and wrap it tightly in wax paper or plastic wrap. Store it in the fridge for up to 5 days or freeze it for up to 3 months. This way, you can whip up those Cowboy Mushrooms in no time when you need a quick yet delicious side!

These Cowboy Mushrooms Recipe FAQs are designed to help you navigate your cooking experience with ease. Enjoy your flavorful creation!

Cowboy Mushrooms

Savor Cowboy Mushrooms in Rich, Flavorful Butter Delight

Cowboy Mushrooms are a zesty side dish coated in compound butter that pairs beautifully with grilled meats.
Prep Time 10 minutes
Cook Time 22 minutes
Total Time 32 minutes
Servings: 4 servings
Course: Appetizers
Cuisine: American
Calories: 100

Ingredients
  

For the Mushrooms
  • 16 oz White Button Mushrooms Can substitute with cremini, portobello, or shiitake
For the Cowboy Butter
  • 1 cup Unsalted Butter Rich base for the dish
  • 1 tsp Garlic Powder Can substitute with fresh minced garlic
  • 1/4 cup Fresh Parsley Can replace with thyme or rosemary
  • 1 tsp Paprika Smoked paprika can add extra depth
  • 1 tbsp Lemon Juice Can substitute with lime
  • 1 tsp Salt Adjust to taste

Equipment

  • Skillet

Method
 

Cooking Instructions
  1. Begin by heating a large skillet over medium heat. Add the Cowboy Butter and allow it to melt fully, stirring occasionally for about 2-3 minutes.
  2. While the butter is melting, clean and trim the white button mushrooms. Once the butter is melted, carefully add the cleaned mushrooms to the skillet.
  3. Cook the mushrooms over medium heat for 20-22 minutes, stirring occasionally until they turn golden brown.
  4. Once the Cowboy Mushrooms are cooked, remove from heat and transfer to a serving dish.

Nutrition

Serving: 1servingCalories: 100kcalCarbohydrates: 5gProtein: 2gFat: 9gSaturated Fat: 5gPolyunsaturated Fat: 0.5gMonounsaturated Fat: 3gCholesterol: 30mgSodium: 200mgPotassium: 300mgFiber: 1gSugar: 1gVitamin A: 500IUVitamin C: 2mgCalcium: 20mgIron: 0.5mg

Notes

Make your Cowboy Butter in advance for convenience. Clean mushrooms with a damp cloth before cooking. Cook for optimal tenderness, about 20-22 minutes.

Tried this recipe?

Let us know how it was!

Crockpot Creamy Broccoli Cheddar Chicken for Cozy Nights

As I lifted the slow cooker lid, a wave of heartwarming scents filled my kitchen, instantly transporting me to cozy family dinners from my childhood. My Crockpot Creamy Broccoli Cheddar Chicken has become an essential staple in our home, especially for those bustling weekdays when the thought of cooking feels overwhelming. This dish combines tender chicken and vibrant broccoli in a rich, creamy sauce that is not only easy to prepare but also customizable to suit any palate. Whether you’re looking to impress your family or simply crave some comfort food, this slow cooker gem is your new best friend. Perfect for satiating hungry bellies while also being a breeze to clean up, isn’t it time to dive into a bowl of nostalgia?

Why Is This Recipe a Must-Try?

Convenience at Its Finest: This Crockpot Creamy Broccoli Cheddar Chicken makes weeknight dinners effortless! Just set it and forget it, allowing your slow cooker to transform simple ingredients into a flavorful feast.

Customizable for Everyone: Feel free to mix and match with your favorite veggies or opt for dairy-free alternatives, ensuring there’s something for everyone.

Rich, Comforting Flavor: Each bite is a hearty embrace of cheesy goodness, perfectly complemented by tender chicken and fresh broccoli that brings comfort to your table.

Perfect for Leftovers: Make a big batch and enjoy easy lunches for days or save some for a quick weeknight dinner. It only gets better as the flavors meld!

For other delightful comfort dishes, check out our Cozy Broccoli Cheddar or Crack Chicken Noodle soup recipes!

Crockpot Creamy Broccoli Cheddar Chicken Ingredients

For the Chicken
Chicken Breasts – This serves as the main protein source and becomes wonderfully tender through slow cooking; frozen can also be used, just ensure it reaches 165°F.

For the Vegetables
Broccoli – Adds a pop of color and nutritional benefits; both fresh and frozen varieties work beautifully in this slow cooker recipe.

For the Sauce
Cream of Chicken Soup – Acts as the creamy base for the dish; for healthier options, you can substitute with a dairy-free version.
Cheddar Cheese – Infuses the dish with that beloved cheesy flavor; feel free to mix in some lower-fat cheese for a lighter touch.

For the Seasonings
Garlic Powder – Enhances the overall flavor; adjust according to your taste for a delightful aroma.
Onion Powder – Complements the garlic well and rounds out the dish; a necessary ingredient for depth of flavor.
Black Pepper – Adds just the right hint of spice; can be omitted for a milder flavor profile.

Dive into this delicious Crockpot Creamy Broccoli Cheddar Chicken, and let its warmth nourish both body and soul!

Step‑by‑Step Instructions for Crockpot Creamy Broccoli Cheddar Chicken

Step 1: Prepare the Ingredients
Begin by gathering your ingredients for the Crockpot Creamy Broccoli Cheddar Chicken recipe. If using frozen chicken breasts, ensure they are fully thawed to facilitate even cooking. Rinse and chop the broccoli into bite-sized florets, setting them aside to add later. This prep will streamline your cooking process, making it even easier to assemble the dish in the slow cooker.

Step 2: Layer the Chicken
Place the thawed chicken breasts at the bottom of the slow cooker, ensuring they are evenly spaced. This positioning allows the chicken to cook thoroughly and absorb the rich flavors. If you’re feeling adventurous, sprinkle a bit of black pepper over the chicken for added flavor. This initial layering sets the stage for a comforting meal.

Step 3: Add Broccoli and Soup
Next, gently add the chopped broccoli on top of the chicken breasts. Then, pour the cream of chicken soup over the broccoli and chicken, ensuring everything is evenly covered. The creamy soup will meld with the chicken and broccoli as it cooks, creating a delicious sauce. If desired, sprinkle garlic powder and onion powder on top for an aromatic boost.

Step 4: Set the Crockpot
Secure the lid on your slow cooker and set it to cook on low for approximately 6 hours. Alternatively, you can opt for the high setting and cook for about 3 hours. During this time, the chicken will tenderize, and the broccoli will become beautifully cooked. Check for doneness with a fork; the chicken should shred easily when fully cooked.

Step 5: Shred the Chicken
Once the cooking time is up, carefully remove the lid and take a moment to enjoy the mouthwatering aroma. Use two forks to shred the chicken right in the crockpot, mixing it with the broccoli and sauce. This step allows the flavors to combine wonderfully.

Step 6: Stir in Cheddar Cheese
After shredding the chicken, incorporate the cheddar cheese into the mixture. Stir gently until the cheese is fully melted and creamy, creating a deliciously rich sauce. The transformation of your Crockpot Creamy Broccoli Cheddar Chicken is nearly complete, providing that heartwarming comfort you crave.

Step 7: Serve and Enjoy
Serve your delectable dish over rice, quinoa, or alongside crusty bread for a fulfilling meal. If you’d like, garnish with additional cheddar cheese or fresh herbs for a pop of color. This final presentation brings together the comforting flavors, ensuring that every bite is a warm hug from the kitchen.

Make Ahead Options

These Crockpot Creamy Broccoli Cheddar Chicken preparations are perfect for busy weeknights! You can assemble the chicken, broccoli, and cream of chicken soup up to 24 hours in advance. Simply layer the ingredients in the slow cooker, cover, and refrigerate. When you’re ready to cook, just set the crockpot to low for 6 hours or high for about 3 hours – that’s it! For the best results, shred the chicken and stir in the cheddar cheese right before serving, ensuring it melts beautifully into the sauce. This method saves you valuable time while keeping the dish just as delicious and comforting, making your weeknight meals effortless!

What to Serve with Crockpot Creamy Broccoli Cheddar Chicken

Elevate your comforting meal experience with the perfect accompaniments that complement each delicious bite.

  • Creamy Mashed Potatoes: These fluffy delights soak up the savory sauce, creating a comforting contrast to the creamy chicken.
  • Crispy Garlic Bread: The crunch of toasted bread paired with garlicky flavors makes every bite of the creamy dish even more enjoyable.
  • Quinoa Salad: A refreshing salad with quinoa, herbs, and lemon balances the rich flavors and adds a delightful texture to your meal.
  • Steamed Green Beans: Their tenderness and slight crispness bring freshness and color, enhancing the overall plate without overpowering the dish.
  • Roasted Carrots: Sweet and caramelized, these vibrant veggies provide a lovely, earthy depth that complements the richness of the chicken.
  • Light Creamy Coleslaw: Adding a cool and crunchy slaw offers a refreshing contrast to the warm, creamy chicken.
  • Sparkling Lemonade: A zesty drink choice to cleanse the palate, making it easier to enjoy the rich flavors of the meal.
  • Apple Crisp: For dessert, warm apple crisp with a scoop of vanilla ice cream is the perfect sweet conclusion to this comforting feast.

Expert Tips for Crockpot Creamy Broccoli Cheddar Chicken

Even Cooking: Ensure your chicken breasts are of similar thickness for even cooking throughout the Crockpot Creamy Broccoli Cheddar Chicken. If they vary widely, consider pounding them to a uniform size.

Flavor Boost: Letting the mixture sit for a few minutes after shredding the chicken enhances the flavors, allowing the creamy sauce to envelop the ingredients evenly.

Cheese Selection: For a balanced flavor, try mixing regular cheddar with a lower-fat cheese. This helps maintain creaminess without sacrificing taste.

Veggie Variations: Don’t hesitate to add extra veggies! Bell peppers, carrots, or even spinach can enhance the nutritional profile and taste of your dish.

Storage Tips: To keep leftovers creamy, store them in an airtight container and reheat gently. Adding a splash of chicken broth during reheating helps retain that luscious texture.

Serving Suggestions: Consider serving with a fresh green salad or warm bread to complement the rich flavors of your Crockpot Creamy Broccoli Cheddar Chicken.

Crockpot Creamy Broccoli Cheddar Chicken Variations

Embrace the joy of cooking by making this recipe truly your own with delightful twists!

  • Vegetable Medley: Add bell peppers or carrots to enhance flavor and nutrition. Mixing in vibrant, crunchy veggies elevates the dish while keeping it colorful.
  • Whole Grain Base: Swap white rice for brown rice or quinoa for added fiber. This heartier choice brings a nutty taste and a satisfying texture to your meal.
  • Dairy-Free Delight: Use non-dairy cream of chicken soup and cashew or almond cheese for a creamy, lactose-free alternative. You won’t miss the dairy with this fantastic swap!
  • Spicy Kick: Toss in red pepper flakes or diced jalapeños for a spicy twist. Just a pinch can elevate the dish, making it perfect for those who love a touch of heat!
  • Herb Infusion: Add fresh herbs like thyme or parsley for an aromatic burst of flavor. A sprinkle on top before serving can take this comfort dish to the next level.
  • Creamy Spinach: Mix in some fresh or frozen spinach for a nutrient-rich addition. The spinach not only enhances the dish’s creaminess but also adds a lovely green color.
  • Chicken Variations: Experiment with other proteins such as turkey or even a meatless chicken substitute for diverse flavors and textures. Each option brings its unique charm!

If you’re in the mood for more comforting recipes, you might enjoy my Crack Chicken Noodle for a cozy meal or the delicious Crack Chicken Penne for a savory twist!

How to Store and Freeze Crockpot Creamy Broccoli Cheddar Chicken

Fridge: Store leftovers in an airtight container for up to 3 days. This will keep your Crockpot Creamy Broccoli Cheddar Chicken fresh and flavorful.

Freezer: If you want to keep it longer, freeze it in airtight containers. Make sure to cool completely before freezing, and it can last up to 2 months.

Reheating: When reheating, add a splash of chicken broth or cream to maintain its creamy texture. Warm it gently on the stovetop or in the microwave until heated through.

Thawing: To thaw, transfer the frozen dish to the fridge overnight before reheating it. This slow method preserves the flavors and texture beautifully.

Crockpot Creamy Broccoli Cheddar Chicken Recipe FAQs

What type of broccoli should I use?
Absolutely! You can use either fresh or frozen broccoli for this recipe. Fresh broccoli will have a slightly firmer texture, while frozen broccoli can be more convenient and just as nutritious. If you opt for fresh, ensure it’s vibrant green without dark spots, and if using frozen, no need to thaw; just add it directly to the slow cooker.

How long can I store leftovers?
You can store your Crockpot Creamy Broccoli Cheddar Chicken in an airtight container for up to 3 days in the fridge. For optimal freshness, try to let the dish cool completely before sealing it in the container. When you’re ready to eat, just reheat gently to maintain that creamy goodness!

Can I freeze this dish?
Yes, freezing is a great option for prolonging the life of your Crockpot Creamy Broccoli Cheddar Chicken! Cool the dish completely before transferring it to airtight containers or heavy-duty freezer bags. It can last up to 2 months in the freezer. For best results, be sure to label it with the date so you can keep track!

How do I reheat leftovers without losing creaminess?
To keep the creamy texture intact while reheating, simply add a splash of chicken broth or cream to the dish before warming it up. You can heat it gently on the stovetop or in the microwave. Stir occasionally to ensure even heating and prevent the sauce from separating.

Are there any dietary considerations I should be aware of?
The recipe is quite flexible! For those with dietary restrictions, you can easily swap the cream of chicken soup for a dairy-free version and use non-dairy cheese alternatives. Additionally, it’s best to check for any allergies related to chicken or dairy. If cooking for pets, keep the dish away from them, as ingredients like garlic can be harmful to dogs.

What if my chicken isn’t cooking evenly?
If you notice that your chicken isn’t cooking evenly, ensure the breasts are of similar thickness. If they vary widely, pound them to a more uniform size before placing them in the crockpot. You may also want to ensure you don’t overcrowd the crockpot; this allows for better heat distribution. If necessary, you can also check the internal temperature with a thermometer to ensure it’s reaching 165°F for safe consumption.

Crockpot Creamy Broccoli Cheddar Chicken

Crockpot Creamy Broccoli Cheddar Chicken for Cozy Nights

Savor the nostalgic flavors of Crockpot Creamy Broccoli Cheddar Chicken, a heartwarming dish perfect for weeknight dinners.
Prep Time 15 minutes
Cook Time 6 hours
Total Time 6 hours 15 minutes
Servings: 4 servings
Course: Dinner
Cuisine: American
Calories: 450

Ingredients
  

For the Chicken
  • 1 pound Chicken Breasts frozen can also be used
For the Vegetables
  • 2 cups Broccoli chopped into florets
For the Sauce
  • 1 can Cream of Chicken Soup or dairy-free version
  • 1 cup Cheddar Cheese can use lower-fat cheese
For the Seasonings
  • 1 teaspoon Garlic Powder adjust to taste
  • 1 teaspoon Onion Powder
  • 1/2 teaspoon Black Pepper optional

Equipment

  • Slow Cooker

Method
 

Step-by-step Instructions
  1. Gather all ingredients and ensure frozen chicken breasts are thawed. Rinse and chop broccoli.
  2. Layer thawed chicken breasts in the slow cooker and optionally sprinkle with black pepper.
  3. Add chopped broccoli on top of chicken, then pour cream of chicken soup over all ingredients.
  4. Secure the lid and cook on low for about 6 hours or high for 3 hours.
  5. Once cooked, shred the chicken in the slow cooker and mix with broccoli and sauce.
  6. Stir in cheddar cheese until melted, creating a creamy sauce.
  7. Serve over rice or quinoa, optionally garnishing with extra cheese or fresh herbs.

Nutrition

Serving: 1servingCalories: 450kcalCarbohydrates: 30gProtein: 35gFat: 20gSaturated Fat: 10gPolyunsaturated Fat: 2gMonounsaturated Fat: 6gCholesterol: 90mgSodium: 800mgPotassium: 800mgFiber: 3gSugar: 3gVitamin A: 500IUVitamin C: 60mgCalcium: 250mgIron: 2mg

Notes

Store leftovers in an airtight container for up to 3 days. For longer storage, freeze in airtight containers for up to 2 months.

Tried this recipe?

Let us know how it was!

High Protein Frozen Peanut Butter Greek Yogurt Bites Bliss

As I stood in my kitchen, the sun streaming through the window, I couldn’t help but crave something both delicious and nutritious. Enter my High Protein Frozen Peanut Butter Greek Yogurt Bites! The moment I combined the creamy Greek yogurt with smooth peanut butter, I knew I wasn’t just making a snack; I was creating a guilt-free indulgence that my entire family would love. These delightful bites are not only an easy, quick-prep treat, but also pack a protein punch—perfect for keeping everyone energized throughout the day. Whether enjoyed after a workout or as a sweet afternoon pick-me-up, these frozen delights are bound to satisfy your cravings while keeping you on your healthy track. Curious to find out how to whip up these little wonders? Let’s dive into the recipe!

Why are these yogurt bites so special?

Guilt-Free Indulgence: With a rich and creamy texture, these bites provide a satisfying treat without compromising your health goals.
High Protein Punch: Each bite is loaded with protein, making them ideal for pre- or post-workout snacks.
Family-Friendly Fun: Perfectly sized for little hands, these yogurt bites are a nutritious option that kids will actually love!
Endless Variations: Feel free to mix it up! Substitute almond butter or experiment with flavor extracts for a personalized treat. For more flavorful options, check out my Cheesy Protein Egg Bake for a protein-packed meal!
Effortless Prep: Whip them up in no time and store them in your freezer for quick snacks on busy days.

High Protein Frozen Peanut Butter Greek Yogurt Bites

  • For the Base
    Full-fat Greek Yogurt – Provides creaminess and a rich texture that makes each bite delicious; avoid low-fat versions to prevent iciness.
    Powdered Peanut Butter – Adds concentrated peanut flavor with less thickness; if you prefer, swap in more creamy peanut butter but adjust the amount.
    Creamy Peanut Butter – Vital for rich flavor and mouthfeel; choose a brand with good fat content for the best taste.
    Maple Syrup – A natural sweetener that balances flavors; honey can be substituted if desired.

  • For the Coating
    Coconut Oil – Thins melted chocolate to ensure a smooth coating; skip if necessary, but this might affect the sheen and texture.
    Chocolate Chips – Choose dark, milk, or semi-sweet options based on your preference; use dairy-free chocolate for a vegan variation.
    Flaky Sea Salt – A sprinkle on top enhances sweetness and adds a lovely contrast; this is optional but highly recommended for flavor.

These High Protein Frozen Peanut Butter Greek Yogurt Bites offer a delicious treat ready to be enjoyed by the whole family!

Step‑by‑Step Instructions for High Protein Frozen Peanut Butter Greek Yogurt Bites

Step 1: Combine the Base Ingredients
In a mixing bowl, blend together 1 cup of full-fat Greek yogurt, ¼ cup of powdered peanut butter, ¼ cup of creamy peanut butter, and 2 tablespoons of maple syrup. Stir vigorously until the mixture is smooth and creamy with no lumps, about 2-3 minutes. This rich base forms the heart of your High Protein Frozen Peanut Butter Greek Yogurt Bites.

Step 2: Prepare the Freezing Surface
Line a plate or a baking tray with parchment paper to prevent the yogurt bites from sticking. This step is essential for maintaining the shape and ensuring easy removal after freezing. Make sure the surface is flat and stable since it will hold the yogurt portions while they set in the freezer.

Step 3: Scoop and Shape the Bites
Using a small ice cream scoop or two tablespoons, portion out the yogurt mixture onto the parchment-lined surface. Aim for approximately 6 evenly sized dollops. Space them out to allow room for freezing and easy access. The bite-sized portions will transform into delightful frozen snacks in no time!

Step 4: Freeze the Bites
Place the tray in the freezer and let the yogurt bites freeze for about 15-20 minutes, or until they’re solid to the touch. This initial freeze helps them hold their shape when you dip them in chocolate. Check their firmness by gently pressing on one; it should feel firm yet slightly pliable.

Step 5: Melt the Chocolate Coating
In a microwave-safe bowl, combine ½ cup of chocolate chips and 1 tablespoon of coconut oil. Microwave in 30-second intervals, stirring in between, until fully melted and smooth, about 1-2 minutes total. The coconut oil helps give the chocolate a glossy finish, perfect for coating your High Protein Frozen Peanut Butter Greek Yogurt Bites.

Step 6: Dip Each Bite in Chocolate
Once the yogurt bites are solidly frozen, remove them from the freezer and use a fork to dip each bite into the melted chocolate mixture. Ensure each bite is evenly coated in chocolate, then lift and let the excess drip off. This chocolaty shell adds a decadent layer to your healthy snack!

Step 7: Add Flaky Sea Salt
While the chocolate is still wet, sprinkle a pinch of flaky sea salt on top of each coated bite. This step is optional but highly recommended, as it enhances the sweetness of the chocolate and adds a delightful contrast in flavor. It elevates these High Protein Frozen Peanut Butter Greek Yogurt Bites to a gourmet treat!

Step 8: Final Freeze to Set
Return the coated yogurt bites to the parchment-lined tray and place them back in the freezer for an additional 30-60 minutes, or until the chocolate is fully set and hard. This final freeze ensures that every bite is perfectly frozen and ready to be enjoyed whenever the craving strikes.

Make Ahead Options

These High Protein Frozen Peanut Butter Greek Yogurt Bites are perfect for meal prep enthusiasts! You can make the yogurt mixture up to 24 hours in advance and store it in the refrigerator (just cover the bowl tightly to maintain its creamy texture). When you’re ready to enjoy them, scoop the mixture onto a parchment-lined tray and freeze, allowing them to set for about 15-20 minutes. Once frozen, dip them in chocolate and return them to the freezer for another 30-60 minutes to fully harden. This way, you can whip up these delicious bites quickly, ensuring you always have a satisfying snack on hand, just as delicious when made ahead!

High Protein Frozen Peanut Butter Greek Yogurt Bites Variations

Feel free to get creative and customize these bites to suit your taste buds and dietary preferences!

  • Nut-Free: Swap the peanut butter with sunflower seed butter for a nut-free alternative that still packs a punch.
    For a delightful change, make sure the flavor profile shines through! This is a fantastic option for school lunches or gatherings.

  • Chocolate-Free: Skip the chocolate and drizzle with a homemade berry sauce or pureed fruit for a fresh twist.
    The fruity finish not only enhances the nutritional value but also makes for a colorful treat your kids will love!

  • Sugar-Free: Use a sugar-free sweetener in place of maple syrup for a low-calorie version without sacrificing taste.
    This can be perfect for those watching their sugar intake—every bite remains blissfully satisfying!

  • High Fiber: Add ground flaxseeds or chia seeds to the yogurt mix for a fiber boost that enhances health benefits.
    These additions blend seamlessly into the mixture, infusing each bite with a nutritious twist that helps keep you fuller for longer!

  • Spicy Peanut Butter: Mix in a hint of cayenne pepper or cinnamon into the peanut butter for a surprising flavor kick.
    This simple change elevates your snack game and leaves a tantalizing warmth that keeps things interesting!

  • Dairy-Free: Use coconut yogurt in place of Greek yogurt to keep these bites dairy-free while enjoying the same creamy texture.
    Delicious and satisfying, this twist caters to those with lactose sensitivities yet remains indulgent!

  • Fruit-Infused: Stir in mini chocolate chips or chopped dried fruits like cranberries or apricots for a fun twist on flavor and texture.
    These fruity bites will surprise you with each morsel while providing an added burst of flavor!

  • Chocolate Variations: Experiment with white chocolate chips or flavored chocolate (like dark mint) to coat your yogurt bites.
    This playful variation allows you to indulge in diverse chocolate flavors while keeping health in consideration.

For even more delightful recipes, consider trying my Chocolate Granola Cups with Peanut Butter Filling or Cowboy Butter Chicken for tasty family meals!

What to Serve with High Protein Frozen Peanut Butter Greek Yogurt Bites?

Indulge in a collection of delightful pairings that will elevate your snack experience to a new level of enjoyment.

  • Fresh Fruit Salad: A vibrant mix of strawberries, blueberries, and kiwi adds a refreshing touch and sweetness to your yogurt bites. The fruit’s natural sugars enhance the nutty flavors, creating a symphony of taste with every bite.

  • Crunchy Granola: Serve alongside a sprinkle of your favorite granola for a satisfying crunch. Each bite brings together creamy, crunchy, and chewy textures that keep your taste buds intrigued.

  • Dark Chocolate Dipped Bananas: For added indulgence, slice up some bananas and dip them in dark chocolate. The richness of chocolate perfectly complements the flavors of the yogurt bites while offering a fruity twist.

  • Nutty Trail Mix: A handful of nutty trail mix provides an extra protein boost as well as a delightful contrast to the creamy consistency of the yogurt bites. Try one with your favorite nuts and dried fruits for a pleasantly chewy snack.

  • Honey Drizzle: A touch of honey drizzled over the yogurt bites adds an extra layer of sweetness. This simple addition elevates the dish, making it taste even more gourmet and enticing.

  • Iced Coffee or Matcha Latte: Pair your bites with a refreshing iced coffee or a matcha latte for an energizing combo. The caffeine complements the creamy, rich yogurt without overpowering its delightful flavors.

  • Coconut Yogurt: Swap a plate of yogurt bites for coconut yogurt for a tropical twist. The creamy, velvety texture is a perfect partner, creating an exotic experience that transports your palate to a sunny paradise.

  • Greek Yogurt Parfait: Layer your yogurt bites with fresh berries and granola for a beautifully presented parfait. Not only does this combination look stunning, but it also amplifies the protein content—ideal for a nutritious breakfast or snack.

  • Chilled Herbal Tea: Finish off your treat with a glass of chilled herbal tea for a hydrating touch. Flavored teas like hibiscus or mint complement the creaminess without overwhelming the palate.

How to Store and Freeze High Protein Frozen Peanut Butter Greek Yogurt Bites

Fridge: Store in an airtight container for up to 3 days if they’re not eaten all at once, but freezing is best for longevity.

Freezer: Keep these High Protein Frozen Peanut Butter Greek Yogurt Bites in a freezer bag or container for up to 3 months. Layer them between sheets of parchment paper to prevent sticking.

Reheating: There’s no need to reheat! Enjoy straight from the freezer for a refreshing treat that’s ready whenever you need a snack.

Thawing: If you prefer a softer bite, let them sit at room temperature for about 5-10 minutes before indulging.

Expert Tips for High Protein Frozen Peanut Butter Greek Yogurt Bites

  • Use Full-Fat Yogurt: Make sure to use full-fat Greek yogurt for the best creamy texture; low-fat or non-fat versions can lead to icy bites.
  • Perfect Chocolate Coating: Melt chocolate slowly to avoid burning; stirring at intervals ensures a smooth, glossy finish for your yogurt bites.
  • Freeze Before Coating: Always freeze the yogurt bites solid before dipping in chocolate; this helps maintain their shape and makes coating easier.
  • Adjust Sweetness: Feel free to taste the mixture before freezing and adjust the maple syrup or honey to your preference, ensuring your High Protein Frozen Peanut Butter Greek Yogurt Bites are just right.
  • Storage Tips: Keep these bites in an airtight container in the freezer for up to 3 months to maintain freshness; separating layers with parchment will prevent sticking.

High Protein Frozen Peanut Butter Greek Yogurt Bites Recipe FAQs

What type of Greek yogurt should I use for the bites?
Absolutely! It’s best to opt for full-fat Greek yogurt to ensure a creamy texture without iciness. Low-fat or non-fat versions tend to form ice crystals and can create a less enjoyable bite.

How should I store the yogurt bites?
You can store these High Protein Frozen Peanut Butter Greek Yogurt Bites in an airtight container in the fridge for up to 3 days. However, for the very best freshness and longevity, keep them in the freezer where they will last for about 3 months. Make sure to layer them with parchment paper to prevent sticking!

Can I freeze these bites, and if so, how?
Yes! To freeze your yogurt bites, once you have dipped them in chocolate and topped with flaky sea salt, return them to the parchment-lined tray and place them in the freezer for 30-60 minutes until the chocolate is fully set. For long-term storage, transfer them to a freezer-safe container or bag, layering parchment paper between bites to avoid them sticking together.

What can I do if my yogurt mixtures are too thin?
If you find your yogurt mixture is too runny, you can thicken it up by adding a little more powdered peanut butter. Start with 1 tablespoon at a time, mixing well until you achieve the desired consistency. Ideally, the mixture should hold its shape when scooped but still be smooth enough to douse in chocolate.

Are there any allergy concerns with this recipe?
Yes! This recipe contains both peanuts and chocolate. If you’re preparing these treats for friends or family with allergies, be mindful to double-check the ingredients. You can use almond butter instead of peanut butter for nut allergies but ensure all chocolate options are also allergy-friendly if needed.

Can I substitute the maple syrup in this recipe?
Of course! If you prefer a different sweetener, honey or agave syrup can be great alternatives to maple syrup. Just remember that the flavor and sweetness levels may vary slightly, so feel free to adjust to your personal liking!

High Protein Frozen Peanut Butter Greek Yogurt Bites

High Protein Frozen Peanut Butter Greek Yogurt Bites Bliss

Discover the guilt-free indulgence of High Protein Frozen Peanut Butter Greek Yogurt Bites, a delicious and nutritious treat for the whole family.
Prep Time 10 minutes
Freezing Time 1 hour
Total Time 1 hour 10 minutes
Servings: 6 bites
Course: Dessert
Calories: 120

Ingredients
  

For the Base
  • 1 cup full-fat Greek yogurt Avoid low-fat versions to prevent iciness.
  • 1/4 cup powdered peanut butter Adds concentrated peanut flavor.
  • 1/4 cup creamy peanut butter Vital for rich flavor.
  • 2 tablespoons maple syrup Natural sweetener; honey can be substituted.
For the Coating
  • 1 tablespoon coconut oil Thins melted chocolate for a smooth coating.
  • 1/2 cup chocolate chips Choose dark, milk, or semi-sweet.
  • flaky sea salt Optional but enhances sweetness.

Equipment

  • Mixing Bowl
  • microwave-safe bowl
  • small ice cream scoop

Method
 

Step-by-Step Instructions
  1. In a mixing bowl, blend together 1 cup of full-fat Greek yogurt, ¼ cup of powdered peanut butter, ¼ cup of creamy peanut butter, and 2 tablespoons of maple syrup until smooth.
  2. Line a plate or baking tray with parchment paper to prevent sticking.
  3. Using a small ice cream scoop or two tablespoons, portion out the yogurt mixture onto the parchment-lined surface.
  4. Freeze the bites for about 15-20 minutes, or until they’re solid to the touch.
  5. In a microwave-safe bowl, combine ½ cup of chocolate chips and 1 tablespoon of coconut oil. Microwave until melted and smooth.
  6. Dip each frozen yogurt bite in the melted chocolate mixture and let the excess drip off.
  7. Sprinkle a pinch of flaky sea salt on top of each coated bite while the chocolate is still wet.
  8. Return the coated yogurt bites to the freezer for an additional 30-60 minutes, or until the chocolate is fully set.

Nutrition

Serving: 1biteCalories: 120kcalCarbohydrates: 12gProtein: 6gFat: 7gSaturated Fat: 3gPolyunsaturated Fat: 1gMonounsaturated Fat: 3gSodium: 50mgPotassium: 100mgFiber: 1gSugar: 4gCalcium: 50mgIron: 1mg

Notes

Store in an airtight container in the freezer for up to 3 months. Allow to sit at room temperature for 5-10 minutes for a softer bite if desired.

Tried this recipe?

Let us know how it was!

Fiery Chicken Ramen with Creamy Garlic Sauce: Cozy Comfort Bowl

As I was swirling a fragrant bowl of noodles, it struck me—when was the last time comfort and adventure danced on the same plate? Enter my Fiery Chicken Ramen with Creamy Garlic Sauce, a recipe that does just that. This stunning dish melds smoky, spice-rubbed chicken with a rich, velvety broth that’s just waiting to envelop those chewy ramen noodles. Not only is it a quick weeknight meal that doesn’t compromise on flavor, but it also offers a protein-packed boost to power through your evening. I can’t wait to guide you through this journey of taste, where warmth meets zest. Are you ready to take on your next culinary masterpiece?

Why is this ramen a must-try?

Bold flavors: Your taste buds will rejoice with the exciting kick of spice from the chili powder, perfectly balanced by the creamy garlic sauce.

Ease of preparation: This Fiery Chicken Ramen is quick and straightforward, making it a perfect weeknight meal that feels like a special treat.

Customizable: Want to tweak it? This recipe easily adapts to vegetarian lifestyles with simple substitutions like firm tofu or mushrooms, so everyone can join in.

Comfort in every bite: The combination of tender chicken and rich broth creates a warm, soothing bowl that’s perfect for those cozy nights in.

Protein-packed goodness: Not only is it delish, but it’s also loaded with protein to keep you energized into the evening, making it a smart choice after a busy day.

If you love comforting bowls like this, you might want to check out my Garlic Butter Baked Chicken or Tuscan Chicken Soup for more satisfying meals!

Fiery Chicken Ramen Ingredients

For the Chicken
Boneless, Skinless Chicken Thighs/Breasts – A great source of protein to keep the dish hearty. Substitution Note: Use tofu for a vegetarian option.
Chili Powder – Delivers a punch of heat; adjust quantity for your desired spice level.
Paprika – Adds vibrant color and a subtle flavor; smoked paprika can intensify the smoky taste.
Salt & Black Pepper – Essential for seasoning; a little goes a long way!
Vegetable Oil – Ideal for searing chicken, enhancing flavor.

For the Broth
Chicken Broth – The heart of your spicy broth, bringing depth and umami; vegetable broth works for vegetarian versions.
Soy Sauce – Adds saltiness and complexity to the broth.
Sesame Oil – Infuses a warm, nutty flavor; absolutely delightful.
Garlic (minced) – Essential for that aromatic kick in both broth and sauce.
Heavy Cream – Creates a luscious creaminess in your broth; reduce or omit for a lighter option.

For the Noodles and Garnish
Ramen Noodles – The star of your dish, offering delightful texture; substitute with udon, soba, or rice noodles as desired.
Green Onion (chopped) – Brightens up the dish with a fresh bite.
Chili Oil (optional) – For those who seek that extra layer of heat and flavor—add to taste!

Dive into this delicious Fiery Chicken Ramen with Creamy Garlic Sauce that promises to warm your soul and satisfy your cravings!

Step‑by‑Step Instructions for Fiery Chicken Ramen with Creamy Garlic Sauce

Step 1: Marinate Chicken
In a mixing bowl, combine chili powder, paprika, salt, and black pepper to create a flavorful rub. Coat your boneless, skinless chicken thighs or breasts evenly with the spice mixture, ensuring each piece is thoroughly covered. Let the chicken marinate for 15 minutes at room temperature so the flavors can penetrate for a robust taste.

Step 2: Cook Chicken
Heat a tablespoon of vegetable oil in a pan over medium-high heat until shimmering. Carefully add the marinated chicken and sear for 5-7 minutes on each side until a satisfying char forms and the internal temperature reaches 165°F. Once cooked, remove the chicken from the pan and let it rest for a few minutes before slicing it into bite-sized pieces.

Step 3: Make Creamy Garlic Sauce
In a medium saucepan over medium heat, melt a tablespoon of butter until bubbly. Add minced garlic and sauté for about 1-2 minutes until fragrant and slightly golden. Gradually whisk in heavy cream, and let the sauce simmer gently for 3-5 minutes, stirring occasionally until it thickens slightly. Set aside this creamy garlic sauce to pour over your ramen later.

Step 4: Cook Ramen Noodles
Bring a medium pot of water to a rolling boil, then add your ramen noodles. Cook according to the package instructions, usually around 3-5 minutes, until tender yet firm. Once cooked, drain the noodles and rinse with cold water to stop the cooking process. Set aside for assembly later in your Fiery Chicken Ramen.

Step 5: Prepare Spicy Broth
In the same pan you used for the chicken, heat a teaspoon of sesame oil over medium heat. Add minced garlic and sauté for about 1 minute until aromatic. Pour in the chicken broth and soy sauce, bringing the mixture to a gentle simmer. Stir in the heavy cream and simmer the broth for about 5 minutes, allowing all the flavors to meld together beautifully.

Step 6: Assemble Ramen Bowls
Divide the cooked ramen noodles between serving bowls, creating a delightful nest for the rich ingredients. Carefully ladle the hot spicy broth over each bowl of noodles, ensuring they’re well coated. Top each bowl with the sliced chicken pieces and drizzle generously with the creamy garlic sauce, creating an inviting and sumptuous visual.

Step 7: Garnish & Serve
Finish your Fiery Chicken Ramen by sprinkling freshly chopped green onions over the top for a pop of color and freshness. If desired, drizzle with a little chili oil for an extra kick. Serve immediately while piping hot, making sure to savor each comforting bite of this flavorful dish!

Fiery Chicken Ramen with Creamy Garlic Sauce Variations

Feel free to make this delightful recipe your own with these easy and exciting swaps!

  • Vegetarian: Substitute chicken with firm tofu or sautéed mushrooms for a hearty meat-free option. You’ll still enjoy that lovably rich taste!
  • Noodle Swap: Switch ramen noodles for udon, soba, or rice noodles, creating a whole new texture and experience with every bite. The possibilities are endless!
  • Heat Level: Adjust the spice by varying the amount of chili powder used or swap it out for a milder paprika for a gentler flavor that’s still satisfying.
  • Creamy Alternative: For a dairy-free version, replace heavy cream with coconut milk, yielding a velvety broth with a hint of sweetness that pairs beautifully with the spice!
  • Umami Boost: Add a splash of miso paste to the broth for an intensified savory flavor that will warm your heart and soul.
  • Garnish Ideas: Get creative with toppings! Consider adding sliced jalapeños for more heat, or sprinkle with toasted sesame seeds and seaweed for a delightful crunch.
  • Lighter Option: Reduce the heavy cream or substitute it with cashew cream for a lighter version that’s still indulgent and creamy.
  • Broth Variations: Experiment with a spicy kimchi broth by adding chopped kimchi to the mix for a tangy twist on your traditional ramen base.

If you’re a fan of delicious chicken recipes, you might enjoy trying my warm and comforting Garlic Parmesan Chicken or the delightful Garlic Chicken Gnocchi. Enjoy your culinary adventure!

What to Serve with Fiery Chicken Ramen with Creamy Garlic Sauce

Pair your delicious ramen with these delightful side dishes to elevate your meal experience.

  • Steamed Veggies: A medley of colorful vegetables balances the richness of the broth and adds a healthy touch. Carrots and broccoli pair beautifully!

  • Garlic Breadsticks: Crispy, buttery breadsticks offer a delightful crunch to every slurp of ramen. Dip them into the broth for a tasty treat!

  • Crisp Salad: A light salad with a citrus vinaigrette cuts through the creaminess of the sauce while adding refreshing flavor and texture.

  • Spicy Pickles: Tangy, spicy pickles add a zesty contrast, enhancing every bite of the ramen. Their crunch is a perfect texture complement!

  • Tapioca Dessert: Finish your meal with a light tapioca dessert for a sweet contrast. The creamy pearls are a delightful way to stay on theme!

  • Iced Green Tea: A chilled glass of iced green tea refreshes your palate, making it an ideal beverage choice alongside your flavorful ramen.

These pairings invite you to enjoy the cozy comfort of Fiery Chicken Ramen with Creamy Garlic Sauce while engaging your senses in every delicious bite.

Make Ahead Options

These Fiery Chicken Ramen with Creamy Garlic Sauce are perfect for meal prep enthusiasts who want to savor deliciousness without the rush! You can marinate the chicken up to 24 hours in advance, allowing those flavors to really penetrate. Additionally, the creamy garlic sauce can be made ahead and refrigerated for up to 3 days; just reheat gently before serving. To keep the ramen noodles from getting soggy, cook them fresh on the day you plan to serve. When you’re ready to enjoy, simply assemble your delicious bowls by adding warmed broth over the noodles, topping with sliced chicken and drizzling the sauce on top—effortless and oh-so-satisfying!

Expert Tips for Fiery Chicken Ramen

  • Marination Magic: Make sure to marinate the chicken for at least 15 minutes. This enhances flavor and juiciness, ensuring your Fiery Chicken Ramen is unforgettable.

  • Perfectly Sear: Avoid flipping the chicken too often while searing. Let it cook undisturbed to develop a beautiful char that adds depth to the dish.

  • Noodle Timing: Cook ramen noodles just until al dente; they will continue to soften in the broth. This will maintain a pleasant chewiness in your Fiery Chicken Ramen.

  • Broth Consistency: If you prefer a thicker broth, feel free to adjust the cream amount or add a cornstarch slurry. This touches up the richness and body of your ramen.

  • Chili Control: Adjust chili powder to your heat preference! Start with less if you’re sensitive to spice, and add more to elevate the kick as desired.

How to Store and Freeze Fiery Chicken Ramen

Fridge: Store leftover components separately in airtight containers in the fridge for up to 3 days. Keep chicken, broth, and noodles apart to preserve texture.

Freezer: For longer storage, freeze the broth and chicken together in a freezer-safe container for up to 2 months. Noodles should be cooked fresh before serving.

Reheating: Thaw frozen broth overnight in the fridge. Reheat on the stovetop until hot, then add freshly cooked noodles before serving. Enjoy your Fiery Chicken Ramen again with that delicious taste!

Garnish separately: Add fresh toppings like green onions and chili oil just before serving to maintain their crunch and flavor.

Fiery Chicken Ramen with Creamy Garlic Sauce Recipe FAQs

How do I choose the right chicken for this recipe?
Absolutely! For the best results, I recommend using boneless, skinless chicken thighs for their tenderness and juiciness; however, chicken breasts work too if you prefer a leaner option. Look for chicken that is pink and plump without any dark spots. If opting for a vegetarian alternative, firm tofu or meaty mushrooms like shiitake are great substitutes that soak up the flavors beautifully.

What’s the best way to store leftovers?
Very! It’s best to store each component separately in airtight containers in the fridge for up to 3 days. This means keeping your chicken, broth, and noodles in different containers to preserve their individual textures. When you’re ready to enjoy your Fiery Chicken Ramen again, simply reassemble the bowls with fresh toppings for the best experience.

Can I freeze this ramen for later?
Definitely! You can freeze the broth and chicken together in a freezer-safe container for up to 2 months. Just remember, it’s a good idea to cook the noodles fresh each time you prepare the dish to maintain their perfect texture. When ready to use, thaw the broth overnight in the fridge, bring it to a gentle simmer on the stovetop, and then add freshly cooked noodles for a delightful meal.

What if the broth is too thick or too spicy?
No worries! If your broth turns out thicker than desired, simply whisk in a little more chicken or vegetable broth until it reaches your preferred consistency. If you find it’s too spicy, add a splash of cream or a bit of sugar to balance the heat by mellowing it out. Remember, every kitchen adventure leads to tasty discoveries!

Are there any dietary considerations for this recipe?
Absolutely! This dish can easily cater to dietary needs. For gluten-free diets, substitute regular ramen noodles with rice noodles or ensure your noodles are specifically labeled gluten-free. Additionally, if cooking for pets, remember that garlic and onions can be toxic to dogs, so avoid sharing those components and serve them plain cooked chicken if you’d like them to enjoy a taste!

Fiery Chicken Ramen with Creamy Garlic Sauce

Fiery Chicken Ramen with Creamy Garlic Sauce: Cozy Comfort Bowl

Experience the vibrant flavors of Fiery Chicken Ramen with Creamy Garlic Sauce, a quick, comforting meal that satisfies cravings and fuels your evening.
Prep Time 15 minutes
Cook Time 30 minutes
Total Time 45 minutes
Servings: 4 bowls
Course: Dinner
Cuisine: Asian
Calories: 500

Ingredients
  

For the Chicken
  • 1 pound Boneless, Skinless Chicken Thighs/Breasts Substitution Note: Use tofu for a vegetarian option.
  • 2 tablespoons Chili Powder Adjust for desired spice level.
  • 1 teaspoon Paprika Smoked paprika intensifies taste.
  • 1 teaspoon Salt
  • 1/2 teaspoon Black Pepper
  • 1 tablespoon Vegetable Oil For searing chicken.
For the Broth
  • 4 cups Chicken Broth Use vegetable broth for vegetarian versions.
  • 2 tablespoons Soy Sauce
  • 1 teaspoon Sesame Oil For nutty flavor.
  • 4 cloves Garlic (minced)
  • 1/2 cup Heavy Cream Reduce or omit for lighter option.
For the Noodles and Garnish
  • 2 packs Ramen Noodles Can substitute with udon or soba noodles.
  • 2 stalks Green Onion (chopped)
  • 1 tablespoon Chili Oil (optional) Add for an extra kick.

Equipment

  • Mixing Bowl
  • pan
  • medium saucepan
  • Pot

Method
 

Step-by-Step Instructions
  1. In a mixing bowl, combine chili powder, paprika, salt, and black pepper to create a flavorful rub. Coat chicken evenly and marinate for 15 minutes.
  2. Heat vegetable oil in a pan over medium-high heat and sear the chicken for 5-7 minutes on each side until charred and cooked through. Remove and let rest before slicing.
  3. In a medium saucepan, melt butter and sauté minced garlic until fragrant. Gradually whisk in heavy cream and let simmer for 3-5 minutes until thickened.
  4. Boil a pot of water and cook ramen noodles according to package instructions, about 3-5 minutes. Drain and rinse with cold water.
  5. In the same pan used for the chicken, heat sesame oil and sauté minced garlic. Add chicken broth and soy sauce, then stir in heavy cream and simmer for 5 minutes.
  6. Divide cooked ramen noodles into bowls and ladle hot spicy broth over them. Top with sliced chicken and drizzle with creamy garlic sauce.
  7. Garnish with chopped green onions and optional chili oil. Serve immediately while hot.

Nutrition

Serving: 1bowlCalories: 500kcalCarbohydrates: 45gProtein: 30gFat: 22gSaturated Fat: 10gPolyunsaturated Fat: 2gMonounsaturated Fat: 8gCholesterol: 80mgSodium: 900mgPotassium: 600mgFiber: 2gSugar: 3gVitamin A: 800IUVitamin C: 5mgCalcium: 50mgIron: 2mg

Notes

Store leftovers separately in airtight containers. Refrigerate for up to 3 days or freeze broth and chicken for up to 2 months. Reheat on stovetop before serving.

Tried this recipe?

Let us know how it was!

Savory Chicken Pozole Verde for Cozy Family Gatherings

“Why grab a takeout that leaves you unsatisfied when you can whip up something truly comforting at home?” That’s the question I asked myself the first time I made Chicken Pozole Verde, and it took mere minutes for my taste buds to remind me why homemade food is unbeatable. This vibrant Mexican comfort soup isn’t just a feast for the eyes with its lush green hue, but it’s also nourishing and full of life, with tender chicken, zesty green chiles, and hearty hominy that will warm your heart. Perfect for cozy weeknight dinners or gatherings with friends, this dish offers an effortless way to elevate your culinary game. So, if you’re ready to savor the flavors of Mexico while bringing your loved ones together, grab your ingredients and let’s dive into this delightful recipe. What toppings will you choose to personalize your bowl?

Why is Chicken Pozole Verde a Must-Try?

Comforting Warmth: This Chicken Pozole Verde is the ultimate cozy dish, perfect for chilly evenings and gatherings. Nourishing Ingredients come together in harmony, creating a wholesome experience that feeds both body and soul. Vibrant Flavors of tomatillos and green chiles dance on your palate, making each spoonful exciting. Quick & Easy to prepare, this soup is ready in under an hour—ideal for busy weeknights! For some delightful meal ideas, check out my recipes for Chilli Chicken Takeout or Sizzling Chicken Pepper. Customizable Toppings allow you to personalize your serving, ensuring everyone has a bowl they love. What’s not to adore about this vibrant Mexican classic?

Chicken Pozole Verde Ingredients

• Let’s gather everything you need for this hearty Mexican soup!

For the Soup

  • Chicken – Use boneless, skinless thighs for tenderness that holds up during cooking.
  • Hominy – This canned corn product adds a delightful chew; if unavailable, regular canned corn can be a substitute.
  • Tomatillos – These green gems offer a signature tang; if you can’t find them, green tomatoes work well in a pinch.
  • Green chiles – Adds that perfect kick of spice; you can use jalapeños or pablanos based on your heat tolerance.
  • Chicken broth – Enhances the soup’s richness; feel free to swap for vegetable broth for a vegetarian option.
  • Cilantro – Imparts a fresh, herbal flavor; omit if cilantro isn’t your favorite herb.
  • Lime – A splash of this citrus brightens every bowl; lemon can substitute though it slightly alters the flavor.

For Toppings

  • Shredded cabbage – Provides a crunchy texture to balance the soup’s richness.
  • Radishes – Their crispness adds a refreshing bite that complements the warmth of the soup.
  • Avocado – Creamy and soothing, avocado rounds out the flavors beautifully; sprinkle to taste for a luxurious touch!

Enjoy preparing your Chicken Pozole Verde that will surely gather friends and family around the table!

Step‑by‑Step Instructions for Chicken Pozole Verde

Step 1: Brown the Chicken
In a large pot, heat a drizzle of oil over medium-high heat until shimmering. Add the boneless, skinless chicken thighs and cook for about 5–7 minutes, flipping until they are lightly golden on all sides. Once browned, remove the chicken from the pot and set it aside on a plate, allowing the residual heat to begin developing the base flavor.

Step 2: Sauté the Vegetables
In the same pot, lower the heat to medium and add chopped tomatillos, diced green chiles, and onions. Sauté these ingredients for 5–7 minutes, stirring occasionally until the onions become translucent and fragrant. This step builds a rich, flavorful foundation for your Chicken Pozole Verde that will enhance the broth.

Step 3: Combine Ingredients
Return the browned chicken to the pot, layering it atop the sautéed veggies. Then, pour in the hominy and chicken broth, stirring gently to combine. Bring the mixture to a gentle simmer over medium heat, watching for bubbles to break the surface. This interaction of flavors is essential for a comforting and hearty soup.

Step 4: Simmer and Meld Flavors
Reduce the heat to low, cover the pot, and let the Chicken Pozole Verde simmer for at least 30 minutes. As it cooks, the chicken will become tender and juicy, and the flavors will meld beautifully, resulting in a warm, inviting aroma that fills your kitchen. Don’t rush this step; allow those vibrant flavors to come together fully.

Step 5: Add Fresh Herbs
After simmering, carefully remove the chicken to shred it using two forks. Add the shredded chicken back into the pot along with the chopped cilantro, stirring gently to incorporate. Taste and adjust the seasoning with salt or pepper if needed. This final addition brings a fresh herbaceous note to your Chicken Pozole Verde.

Step 6: Serve with Toppings
Ladle the hot Chicken Pozole Verde into bowls and serve immediately with lime wedges and your choice of toppings, such as shredded cabbage, radishes, and avocado. The colorful additions will not only create a beautiful presentation but enhance the soup’s flavor profile, resulting in a truly comforting meal that’s perfect for gathering around the table.

How to Store and Freeze Chicken Pozole Verde

Fridge: Store leftovers in an airtight container in the refrigerator for up to 3 days. This allows the flavors to deepen while keeping the soup fresh.

Freezer: Chicken Pozole Verde can be frozen for up to 2 months. For best results, transfer the cooled soup to freezer-safe bags, removing excess air to prevent freezer burn.

Reheating: To reheat, thaw overnight in the fridge if frozen, and then warm gently on the stove over medium heat until heated through. Stir occasionally to maintain the soup’s texture.

Serving Suggestion: Consider adding fresh garnishes like chopped cilantro or lime right before serving for an extra burst of flavor after reheating!

Expert Tips for Chicken Pozole Verde

  • Choose Quality Chicken: Use fresh, boneless, skinless thighs for the best flavor and texture. Avoid overcooking to keep the chicken tender in your Chicken Pozole Verde.

  • Adjust the Spice: Remember, the type and amount of green chiles can significantly impact the heat level. Start with less if unsure, and add more to taste.

  • Simmer Longer: For deeper flavor, let your pozole simmer longer than 30 minutes. This patience allows the ingredients to meld beautifully.

  • Fresh Garnishes Matter: Don’t skip on the toppings! They add flavor, crunch, and freshness that elevate your Chicken Pozole Verde from good to extraordinary.

  • Reheat Gently: If you have leftovers, reheat gently over low heat to preserve the texture and moisture; avoid boiling them to prevent overcooking the chicken.

  • Customize with Variations: Feel free to experiment with additional veggies, proteins, or different toppings to make the dish your own—each variation offers a unique experience!

Chicken Pozole Verde Variations

Feel free to make this vibrant soup your own with these tempting twists!

  • Pork Swap: Replace chicken with diced pork for a different protein option that pairs beautifully with the broth. You’ll revel in the rich flavor it brings!

  • Vegetarian Delight: Use diced tofu instead of chicken for a wholesome, plant-based version that’s just as satisfying and heartwarming. The tofu absorbs all those fantastic flavors!

  • Extra Veggies: Toss in diced zucchini and carrots for extra nutrition and a medley of colors in your soup. These vegetables complement the dish while adding a touch of sweetness!

  • Spice It Up: Add a splash of hot sauce or throw in a diced jalapeño for some extra heat that will make your taste buds dance with joy! Adjust as desired for the perfect kick.

  • Flavored Broth: Use homemade bone or vegetable broth for a more robust base that enhances the overall depth of flavors in your pozole. It’s worth the little extra effort!

  • Dairy Boost: Top with a dollop of sour cream or crumbled queso fresco for creamy bites that balance the zesty broth perfectly. This adds a lovely richness!

  • Crunchy Toppings: Experiment with crispy tortilla strips for added texture and fun! The crunch will contrast nicely with the warmth of the soup, making each bowl delightful.

As you explore these variations, don’t forget to serve your Chicken Pozole Verde alongside crispy tortilla chips or warm tortillas for a complete, comforting experience!

Make Ahead Options

Chicken Pozole Verde is a fantastic recipe for those busy weeknights when meal prep is essential! You can prepare the soup up to 24 hours in advance, allowing the flavors to deepen overnight. To do this, simply follow all the steps until you reach the simmering point, then let it cool before refrigerating. Make sure to store it in an airtight container to maintain its quality. When you’re ready to serve, gently reheat the soup on the stove and adjust the seasoning if necessary. For an added freshness, stir in chopped cilantro just before serving, ensuring your Chicken Pozole Verde remains vibrant and delicious while saving you precious time!

What to Serve with Chicken Pozole Verde

Imagine the delightful aroma wafting through your kitchen while you bring together the perfect meal accompaniments for a comforting experience.

  • Crispy Tortilla Chips: The texture contrast adds a satisfying crunch to each spoonful of pozole, perfect for dipping.

  • Warm Corn Tortillas: Soft and pliable, these are ideal for scooping up the soup, enhancing the authentic Mexican experience.

  • Zesty Slaw: A bright cabbage slaw with lime and cilantro brings freshness, balancing the rich flavors of the pozole.

  • Guacamole: Creamy and rich, this avocado dip complements the spicy tones in the soup, providing a luxurious finish to your meal.

  • Chilled Horchata: This sweet rice drink refreshes your palate with its smooth, cinnamon flavor, creating an exciting contrast to the heat of the pozole.

  • Fresh Mango Salsa: Bursting with sweetness and acidity, it adds a tropical note that brings out the vibrant green flavors of the pozole.

  • Mexican Street Corn: Grilled corn topped with cheese and chili powder provides a deliciously smoky and flavorful side that pairs charmingly with this warm soup.

  • Lime Wedges: Serve on the side for an extra burst of bright citrus that enhances the flavor profile of the soup when drizzled over each bowl.

Chicken Pozole Verde Recipe FAQs

How do I choose the right chicken for Chicken Pozole Verde?
Absolutely! For the best results, opt for boneless, skinless chicken thighs. They are tender and hold up beautifully in the soup. If you prefer white meat, you can use chicken breasts, but keep in mind they may dry out if overcooked. Always check for freshness, and look for chicken that’s free from dark spots or an off smell.

How long can I store leftover Chicken Pozole Verde?
Very! Leftovers can be refrigerated in an airtight container for up to 3 days. If you’re like me, you’ll find that the flavors get even better the next day as they meld together! Just remember to reheat gently on the stove to preserve the soup’s lovely texture.

Can I freeze Chicken Pozole Verde? If so, how?
Of course! Chicken Pozole Verde can be a fantastic freezer-friendly meal. To freeze, let the soup cool completely. Then, transfer it into freezer-safe bags or containers, removing excess air to prevent freezer burn. It can be frozen for up to 2 months. When you’re ready to enjoy it again, thaw it overnight in the fridge and reheat gently on the stove.

What toppings work best for Chicken Pozole Verde?
The more, the merrier! I recommend fresh toppings like shredded cabbage for crunch, sliced radishes for a refreshing bite, and avocado for creaminess. You can also add a squeeze of lime to brighten each spoonful. Feel free to be creative; toppings are a wonderful way to customize this dish according to your family’s preferences.

Are there any dietary considerations I should be aware of?
Absolutely! This Chicken Pozole Verde is generally a wholesome dish, but it’s always good to check for personal allergies. If you or someone you know is allergic to chicken or corn, you can easily substitute chicken with tofu or diced pork, and swap hominy for another grain like quinoa. Ensure your broth is also free from common allergens if needed.

What if my pozole is too thick?
No worries! If your Chicken Pozole Verde turns out thicker than you’d like, simply add a bit more chicken broth or water to reach your desired consistency. Stir it in gradually over low heat and let it simmer for a few minutes. It’s an easy fix that won’t compromise flavor.

Chicken Pozole Verde

Savory Chicken Pozole Verde for Cozy Family Gatherings

Enjoy this comforting Chicken Pozole Verde, a vibrant Mexican soup perfect for cozy family gatherings.
Prep Time 20 minutes
Cook Time 30 minutes
Total Time 50 minutes
Servings: 6 bowls
Course: Dinner
Cuisine: Mexican
Calories: 350

Ingredients
  

For the Soup
  • 1 lb boneless, skinless chicken thighs
  • 2 cups hominy canned
  • 4 medium tomatillos chopped
  • 2 moderate green chiles diced, adjust to taste
  • 4 cups chicken broth or vegetable broth for vegetarian option
  • 1/2 cup cilantro chopped, omit if not preferred
  • 1 medium lime cut into wedges
For Toppings
  • 1 cup shredded cabbage
  • 1 cup radishes sliced
  • 1 medium avocado sliced

Equipment

  • Large pot

Method
 

Cooking Steps
  1. In a large pot, heat a drizzle of oil over medium-high heat until shimmering. Add the boneless, skinless chicken thighs and cook for about 5–7 minutes, flipping until they are lightly golden on all sides. Once browned, remove the chicken from the pot and set it aside.
  2. In the same pot, lower the heat to medium and add chopped tomatillos, diced green chiles, and onions. Sauté these ingredients for 5–7 minutes, stirring occasionally until the onions become translucent.
  3. Return the browned chicken to the pot, layering it atop the sautéed veggies. Then, pour in the hominy and chicken broth, stirring gently to combine. Bring to a gentle simmer over medium heat.
  4. Reduce heat to low, cover the pot, and let it simmer for at least 30 minutes. Allow those vibrant flavors to come together fully.
  5. Remove the chicken to shred it using two forks. Add the shredded chicken back into the pot along with the chopped cilantro. Stir gently to incorporate.
  6. Ladle the hot Chicken Pozole Verde into bowls and serve immediately with lime wedges and your choice of toppings.

Nutrition

Serving: 1bowlCalories: 350kcalCarbohydrates: 40gProtein: 30gFat: 12gSaturated Fat: 3gPolyunsaturated Fat: 1.5gMonounsaturated Fat: 4gCholesterol: 90mgSodium: 800mgPotassium: 600mgFiber: 5gSugar: 2gVitamin A: 1000IUVitamin C: 25mgCalcium: 25mgIron: 2mg

Notes

For best flavor, use fresh ingredients and adjust seasoning as needed. Consider adding your favorite toppings for a personalized experience.

Tried this recipe?

Let us know how it was!

Mediterranean Quesadillas with Spinach, Feta, and More Delight

Imagine stepping into a sun-soaked kitchen, the aroma of sizzling olive oil and fresh veggies filling the air. That’s the magic behind my Quick and Easy Mediterranean Quesadillas with Spinach, Feta, Mozzarella, and Red Onion. In just 15 minutes, you can indulge in a medley of creamy cheeses and vibrant vegetables wrapped in crispy tortillas, making it an ideal solution for those busy weeknights. Not only are these quesadillas a breeze to whip up, but they’re also versatile enough to cater to various dietary preferences—gluten-free or vegan options? No problem! Whether you’re treating yourself or feeding a crowd, these delightful creations promise to elevate your mealtime experience. Ready to bring a taste of the Mediterranean to your table? Let’s dive into this deliciousness!

Why Choose Mediterranean Quesadillas?

Deliciously Versatile: These quesadillas can easily accommodate any dietary requirement, whether you’re vegan, gluten-free, or simply in the mood for a cheesy delight!

Quick Preparation: Whipped up in just 15 minutes, they are perfect for those bustling weeknights when you crave something fresh without the fuss.

Flavor Explosion: With a fantastic fusion of creamy mozzarella, tangy feta, and vibrant veggies, every bite delivers a burst of Mediterranean goodness.

Customizable Options: Feel free to sprinkle in additional ingredients, like olives or jalapeños, to make your quesadillas uniquely yours.

Crowd-Pleasing: Whether you’re hosting a dinner party or enjoying a quiet night in, these quesadillas are sure to impress everyone at the table!

For an extra twist, consider pairing these with my delightful Mediterranean Herb Crusted Salmon for a themed feast.

Mediterranean Quesadilla Ingredients

For the Tortillas
Flour Tortillas – These are the base of the quesadillas providing structure; substitute with corn tortillas for a gluten-free option.

For the Filling
Fresh Spinach (1 cup, chopped) – Adds a fresh green color; feel free to replace with kale for a heartier flavor.
Shredded Mozzarella Cheese (½ cup) – This provides a creamy melt; vegan cheese works great for a plant-based version.
Crumbled Feta Cheese (½ cup) – Offers a delightful tang; goat cheese can be used if you fancy a different taste.
Tomato (1 small, diced) – Adds freshness and juiciness; Roma tomatoes are preferred, but any ripe variety will do.
Red Onion (¼ cup, thinly sliced) – Contributes a lovely zesty crunch; you can substitute with shallots for a milder touch.
Black Pepper (¼ teaspoon) – Enhances flavor; adjust to your personal taste.

For Cooking
Olive Oil (1 tablespoon) – Adds richness for frying; feel free to use any high-heat oil if olive oil isn’t available.

These Mediterranean Quesadillas with Spinach, Feta, Mozzarella, and Red Onion promise an irresistible flavor profile packed with goodness!

Step‑by‑Step Instructions for Mediterranean Quesadillas with Spinach, Feta, Mozzarella, and Red Onion

Step 1: Prepare the Filling
In a mixing bowl, combine the chopped spinach, shredded mozzarella, crumbled feta, diced tomato, thinly sliced red onion, and black pepper. Mix these delightful ingredients thoroughly until they’re well blended. The combination of cheeses and vegetables will create a flavorful filling that captures the essence of Mediterranean quesadillas.

Step 2: Assemble the Quesadilla
Take a flour tortilla and lay it flat on a clean surface. Spoon one-fourth of the filling mixture onto one half of the tortilla, spreading it evenly. This ensures each bite will be packed with that delicious Mediterranean flavor. Fold the tortilla over to cover the filling, creating a half-moon shape.

Step 3: Heat the Skillet
Place a skillet over medium heat and add one tablespoon of olive oil. Allow the oil to heat up until it shimmers, which should take about a minute. The hot oil will help achieve that crispy, golden-brown exterior on your Mediterranean quesadillas.

Step 4: Cook the Quesadilla
Carefully place the folded quesadilla into the hot skillet. Cook for 3-4 minutes, pressing down gently with a spatula to promote even melting of the cheese. Look for the tortilla to turn golden-brown and the cheese to start bubbling, which indicates it’s time to flip.

Step 5: Flip and Finish Cooking
Once the first side is golden, carefully flip the quesadilla using a spatula. Cook the other side for an additional 3-4 minutes, pressing lightly to ensure even browning. The quesadilla should now be crispy on both sides with the cheese fully melted.

Step 6: Slice and Serve
Remove the cooked quesadilla from the skillet and let it cool for a minute on a cutting board. Using a sharp knife or pizza cutter, slice it into wedges for easy serving. These beautiful Mediterranean Quesadillas with Spinach, Feta, Mozzarella, and Red Onion are now ready to be enjoyed warm, perhaps with a side of tzatziki or salsa!

Mediterranean Quesadillas Variations

Feel free to mix and match ingredients in these Mediterranean quesadillas, making each bite uniquely yours!

  • Gluten-Free: Swap out flour tortillas for corn tortillas to create a delicious gluten-free version. This simple adjustment will keep your quesadillas just as tasty!

  • Vegan Delight: For a fun plant-based twist, replace mozzarella and feta with vegan cheese alternatives. You’ll enjoy the same great flavors without any dairy.

  • Spicy Kick: Spice things up by adding jalapeños or a dash of red pepper flakes to the filling. The heat will nicely contrast the creamy cheeses!

  • Hearty Protein: Boost the nutritious factor by including shredded chicken or turkey. This adds heartiness to your meal while keeping it deliciously Mediterranean.

  • Extra Veggies: Incorporate more colorful veggies like bell peppers, mushrooms, or olives for added flavor and nutrition. The more, the merrier in this tasty mix!

  • Herb Infusion: Elevate flavors by adding fresh herbs like basil or oregano to the filling. They bring a fragrant aroma and delightful taste to each bite.

  • Creamy Avocado: Consider slathering mashed avocado on the tortilla before adding the filling. This creamy layer adds richness and balances the tanginess of the cheese.

Don’t forget to serve your Mediterranean quesadillas with a refreshing dip, like tzatziki or salsa. For a full Mediterranean experience, pair them with Mediterranean Herb Crusted Salmon or a side of my Chocolate Granola Cups with Peanut Butter Filling for dessert. Enjoy your culinary adventure!

Make Ahead Options

These Mediterranean Quesadillas with Spinach, Feta, Mozzarella, and Red Onion are perfect for busy meal prep! You can prepare the filling (spinach, cheeses, tomatoes, and onions) up to 3 days in advance by mixing it together and storing it in an airtight container in the refrigerator. This keeps the ingredients fresh and flavorful. When you’re ready to serve, simply assemble the quesadillas by filling tortillas and cooking them as directed. To maintain quality, be sure to refrigerate the filling promptly after preparation and allow it to come to room temperature before using. The result? A quick and satisfying meal that’s just as delicious as if you made it on the spot!

What to Serve with Mediterranean Quesadillas with Spinach, Feta, Mozzarella, and Red Onion

Elevate your meal experience by pairing these delightful quesadillas with complementary sides and drinks that enhance their vibrant Mediterranean flavors.

  • Tzatziki Sauce: A cool and creamy yogurt dip that adds refreshing flavor to complement the savory quesadillas. Perfect for dipping!
  • Greek Salad: The crunch of cucumbers, juicy tomatoes, and feta creates a refreshing contrast, enhancing the Mediterranean theme.
  • Roasted Vegetables: Toss seasonal veggies with olive oil and herbs, creating a colorful side that balances the quesadilla’s creaminess with earthy flavors.
  • Chickpea Salad: A hearty mix of chickpeas, bell peppers, and a zesty dressing brings in protein and a refreshing crunch that pairs wonderfully.
  • Lemon Herb Quinoa: Fluffy quinoa with a hint of lemon adds lightness and nutty flavors, making it an ideal, nutritious accompaniment.
  • Mint Lemonade: A refreshing drink that brightens up the meal with its citrusy zing and herbal notes, creating a beautiful flavor harmony.
  • Hummus: Creamy and smooth, it’s not only a classic dip but also pairs beautifully with quesadillas, enhancing the overall Mediterranean delight.
  • Pita Chips: Crunchy and lightly salted, they offer a satisfying contrast in texture when served alongside the warm quesadillas.
  • Baklava: For dessert, this sweet and flaky pastry filled with nuts and honey provides a perfect ending, complementing the Mediterranean theme beautifully.

These pairing suggestions will not only elevate your meal but also create an unforgettable dining experience filled with Mediterranean charm!

How to Store and Freeze Mediterranean Quesadillas

Fridge: Store leftover Mediterranean Quesadillas in an airtight container for up to 5 days. This keeps them fresh and prevents them from drying out.

Freezer: To freeze, wrap quesadillas tightly in plastic wrap or aluminum foil and place them in a freezer-safe bag. They can be stored for up to 2 months.

Reheating: When ready to eat, reheat from frozen in the toaster oven or microwave until warm. If using a skillet, cook over medium heat for about 5-7 minutes per side to get them crispy again.

Storage Tips: Always allow quesadillas to cool before storing to avoid excess moisture, which can make them soggy.

Expert Tips for Mediterranean Quesadillas

  • Press While Cooking: Ensure even melting and browning by gently pressing the quesadilla down with a spatula as it cooks.

  • Thickness Matters: If you’re using thicker tortillas, be mindful of adjusting the cooking time; thicker quesadillas may require a bit longer to heat through.

  • Veggie Variations: For an extra nutritional boost, consider adding more vegetables like bell peppers or mushrooms to your filling mix in your Mediterranean quesadillas.

  • Baking Option: If you prefer to bake, preheat your oven to 375°F and place the assembled quesadillas on a baking sheet. Bake for 10-15 minutes, flipping halfway through for crispy results.

  • Freshness Factor: Using fresh ingredients will significantly enhance the flavor profile. Opt for seasonal vegetables when available to personalize your Mediterranean quesadillas.

Mediterranean Quesadillas with Spinach, Feta, Mozzarella, and Red Onion Recipe FAQs

What tortillas should I use for Mediterranean Quesadillas?
Absolutely! You can use flour tortillas for a classic quesadilla structure. If you’re looking for a gluten-free option, corn tortillas make a fantastic substitute—they’re just as tasty and crisp up beautifully.

How do I store leftover Mediterranean Quesadillas?
Very simply! Store any leftover quesadillas in an airtight container in the fridge, where they will stay fresh for up to 5 days. Be sure to allow them to cool completely before sealing to maintain that perfect texture!

Can I freeze Mediterranean Quesadillas?
Yes, indeed! For freezing, wrap your quesadillas tightly in plastic wrap or aluminum foil. Place them in a freezer-safe bag, and they’ll be good for up to 2 months. When you’re ready to enjoy them, reheat straight from the freezer in a toaster oven or skillet until crispy—approximately 5-7 minutes per side.

What if my quesadillas don’t seem to melt well?
If you encounter this, it might be due to cooking at too low a temperature. Ensure your skillet is adequately heated before adding the quesadilla. If the cheese isn’t melting well, try pressing down gently during cooking to evenly distribute the heat and facilitate melting. Also, give it a minute longer if using thicker tortillas.

Are there any dietary considerations for Mediterranean Quesadillas?
Of course! For those with dairy allergies, using vegan cheese is a perfect alternative—many options melt beautifully! Additionally, those adhering to gluten-free diets can simply opt for corn tortillas. Just remember to check your ingredient labels if you’re concerned about cross-contamination.

Mediterranean Quesadillas with Spinach, Feta, Mozzarella, and Red Onion

Mediterranean Quesadillas with Spinach, Feta, and More Delight

Enjoy these Quick and Easy Mediterranean Quesadillas with Spinach, Feta, Mozzarella, and Red Onion, perfect for busy weeknights.
Prep Time 10 minutes
Cook Time 5 minutes
Total Time 15 minutes
Servings: 4 quesadillas
Course: Lunch
Cuisine: Mediterranean
Calories: 300

Ingredients
  

For the Tortillas
  • 4 large Flour Tortillas substitute with corn tortillas for a gluten-free option
For the Filling
  • 1 cup Fresh Spinach, chopped or use kale for a heartier flavor
  • ½ cup Shredded Mozzarella Cheese vegan cheese works for a plant-based version
  • ½ cup Crumbled Feta Cheese goat cheese can be used for a different taste
  • 1 small Tomato, diced Roma tomatoes are preferred
  • ¼ cup Red Onion, thinly sliced can be substituted with shallots
  • ¼ teaspoon Black Pepper adjust to taste
For Cooking
  • 1 tablespoon Olive Oil use any high-heat oil if preferred

Equipment

  • Skillet

Method
 

Step-by-Step Instructions
  1. In a mixing bowl, combine the chopped spinach, shredded mozzarella, crumbled feta, diced tomato, thinly sliced red onion, and black pepper. Mix thoroughly until well blended.
  2. Take a flour tortilla and lay it flat. Spoon one-fourth of the filling mixture onto one half and fold the tortilla over to cover the filling.
  3. Place a skillet over medium heat and add one tablespoon of olive oil. Allow the oil to heat until it shimmers.
  4. Carefully place the folded quesadilla into the hot skillet. Cook for 3-4 minutes, pressing down gently with a spatula.
  5. Once the first side is golden, carefully flip the quesadilla and cook the other side for an additional 3-4 minutes.
  6. Remove the cooked quesadilla from the skillet, let it cool for a minute, and slice it into wedges.

Nutrition

Serving: 1quesadillaCalories: 300kcalCarbohydrates: 35gProtein: 12gFat: 14gSaturated Fat: 6gPolyunsaturated Fat: 1gMonounsaturated Fat: 7gCholesterol: 30mgSodium: 500mgPotassium: 300mgFiber: 3gSugar: 2gVitamin A: 1500IUVitamin C: 10mgCalcium: 250mgIron: 2mg

Notes

Serve with tzatziki or salsa for extra flavor. These quesadillas are versatile and can accommodate various dietary needs.

Tried this recipe?

Let us know how it was!

Irresistible Baked Broccoli Cheese Balls Recipe for Cheesy Bliss

As I rummaged through my fridge, I stumbled upon a bunch of vibrant broccoli florets that begged for attention. Little did I know, these fresh greens would soon transform into my new obsession: the Irresistible Baked Broccoli Cheese Balls Recipe. These delightful bites are the perfect blend of crispy exterior and gooey cheese center, making them a hit at any gathering. With their easy-to-make nature, not only are they a healthier snack option for when cravings strike, but they also sneak in veggies in a way even the pickiest eaters won’t resist. And the best part? You can customize them with various cheeses and spices, making every batch uniquely yours. Ready to elevate your snacking game? Let’s dive into the cheesy goodness together!

Why Are These Cheese Balls a Must-Try?

Crispy Texture: Each bite delivers a satisfying crunch, perfectly complemented by the gooey cheese center.
Healthier Snack Option: Packed with fresh broccoli, they’re a tasty way to get your greens in without sacrificing flavor.
Kid-Friendly: These bites are a hit with children, making them an easy choice for family meals or get-togethers.
Customizable: Experiment with different cheeses or spices to suit your taste, just like you might with Cozy Broccoli Cheddar or Cheeseburger Soup Comforting.
Make-Ahead Friendly: Prepare ahead of time and refrigerate for stress-free entertaining!
Quick and Easy: With just a few simple steps, you can whip up these delightful bites in no time, leaving you more time to enjoy gatherings with friends and family.

Irresistible Baked Broccoli Cheese Balls Ingredients

For the Veggie Base

  • Fresh Broccoli Florets – Adds nutrition and flavor; substitute with cauliflower for an alternative veggie.

For the Cheesy Goodness

  • Sharp Cheddar Cheese – Provides creaminess and rich taste; may use mozzarella for a milder flavor.

For the Crunchy Coating

  • Panko Breadcrumbs – Contributes to the crispy texture; can swap with traditional breadcrumbs or gluten-free options.

To Bind It All Together

  • Large Eggs – Binds the mixture together; use flaxseed meal mixed with water for a vegan option.

For Flavor Enhancement

  • Garlic Powder – Adds savory depth; fresh minced garlic can be used instead for a more intense flavor.
  • Salt and Pepper – Enhances overall taste; adjust according to preference or dietary needs.

Get ready to enjoy these Irresistible Baked Broccoli Cheese Balls that are sure to impress!

Step‑by‑Step Instructions for Irresistible Baked Broccoli Cheese Balls Recipe

Step 1: Preheat the Oven
Begin by preheating your oven to 400°F (200°C). This temperature ensures your Baked Broccoli Cheese Balls turn out perfectly crispy. While the oven heats, line a baking sheet with parchment paper to prevent sticking and help with cleanup later.

Step 2: Blanch the Broccoli
Chop your fresh broccoli florets into small pieces and bring a pot of water to a boil. Once boiling, add the broccoli and blanch for about 2 minutes until it turns a vibrant green. Immediately transfer the broccoli to a bowl of ice water to stop the cooking process, ensuring it retains its crispness.

Step 3: Prepare the Mixture
In a large mixing bowl, combine the blanched broccoli, shredded sharp cheddar cheese, panko breadcrumbs, large eggs, garlic powder, salt, and pepper. Gently mix the ingredients together until everything is well combined, making sure not to over-mix, as this could affect the texture of your Irresistible Baked Broccoli Cheese Balls.

Step 4: Shape the Balls
Once your mixture is ready, use your hands to form it into 1-inch balls. Place each ball onto the prepared baking sheet, ensuring there’s space between them for even cooking. You should have a lovely mixture ready to bake, perfect for anyone seeking a healthier snack.

Step 5: Bake to Perfection
Slide the baking sheet into your preheated oven and bake the broccoli cheese balls for 20-25 minutes. They are ready when they are golden brown and crispy on the outside. Set a timer and enjoy the delicious aroma filling your kitchen during this time.

Step 6: Serve and Savor
Once baked, remove the Baked Broccoli Cheese Balls from the oven and let them cool slightly before serving. Their delightful crispy texture pairs wonderfully with dipping sauces such as ranch or marinara. Gather your loved ones and enjoy these mouth-watering bites together!

Make Ahead Options

These Irresistible Baked Broccoli Cheese Balls are perfect for meal prep, allowing you to save time on busy weekdays. You can prepare the mixture and shape the balls up to 24 hours in advance. Simply store them in an airtight container in the refrigerator to maintain their freshness. When you’re ready to enjoy them, just pop them into the oven straight from the fridge—there’s no need to thaw! Baking time will remain the same, ensuring they come out just as deliciously crispy and cheesy. This way, you can savor the delightful flavors with minimal effort on your part while providing a nutritious snack option for your family!

Storage Tips for Irresistible Baked Broccoli Cheese Balls

Fridge: Keep leftovers in an airtight container refrigerated for up to 3 days; they’ll retain their flavor and texture when properly stored.
Freezer: For longer storage, freeze the cooled cheese balls in a single layer, then transfer to a freezer bag for up to 2 months—perfect for a quick snack later!
Reheating: To restore their delightful crispness, reheat in the oven at 350°F (175°C) for about 10 minutes; avoid using the microwave, which can make them soggy.
Make-Ahead Tip: Prepare the mixture and roll it into balls, then refrigerate for up to 24 hours before baking for an easy, last-minute snack!

What to Serve with Irresistible Baked Broccoli Cheese Balls

Looking to create a vibrant and delicious meal around your cheesy bites? Here are some fantastic pairings that will elevate your dining experience.

  • Creamy Mashed Potatoes: The velvety texture and buttery flavor create a perfect contrast to the crispy cheese balls, making each bite a delight.

  • Fresh Garden Salad: A mixed greens salad with a tangy vinaigrette provides a refreshing crunch that balances the richness of the cheese balls. Add cherry tomatoes and cucumbers for extra color.

  • Spicy Marinara Sauce: Serve your cheese balls with a zesty marinara for dipping, enhancing their flavor with a touch of heat and a hint of herbiness that complements the broccoli.

  • Herbed Quinoa: Light and nutty, quinoa adds a wonderful chewiness alongside the cheese balls. Infuse it with fresh herbs to make it a delightful side dish.

  • Roasted Veggies: Caramelized vegetables such as bell peppers and zucchini introduce a warm, roasted flavor that pairs beautifully with cheesy bites.

  • Garlic Aioli: This creamy dip adds a touch of sophistication. The garlic flavor provides a delightful accent to the cheesy goodness, making each bite even more irresistible.

  • Sparkling Lemonade: Refreshing and slightly tart, this sparkling drink will cut through the richness of the cheese balls, making a fantastic pairing for any gathering.

  • Lemon Sorbet: For a light dessert, this fruity sorbet will cleanse your palate with its refreshing taste, making it an ideal end to your cheesy meal.

With these suggestions, you’ll create a feast that not only pleases the eye but also tantalizes the taste buds!

Helpful Tricks for Irresistible Baked Broccoli Cheese Balls

  • Chop Finely: Ensure the broccoli is finely chopped for even cooking and the best texture. Larger pieces may not hold together well.
  • Avoid Over-Mixing: Mix just until combined. Over-mixing can create dense balls that lose their delightful texture, making your Irresistible Baked Broccoli Cheese Balls less enjoyable.
  • Cooling Time: Let the balls cool slightly before serving. This step helps them hold their shape better when transferring to your serving dish.
  • Watch the Oven: Keep an eye on them while baking. Ovens can vary; you want a golden brown exterior without burning.
  • Customize Wisely: Feel free to explore cheese swaps or spice variations, but remember that significant changes might alter the texture and taste. Stick to the essentials for best results!

Irresistible Baked Broccoli Cheese Balls Variations

Feel free to get creative and customize the recipe to make it truly yours!

  • Cheese Swap: Replace sharp cheddar with mozzarella or pepper jack for a different flavor profile. Each cheese brings its own magic to the dish, adding unique dimensions to the creamy center.
  • Herb-Infused: Toss in fresh herbs like thyme or parsley for an aromatic lift. The earthy notes can elevate the flavor and create a delightful aroma while baking.
  • Quinoa Boost: Incorporate cooked quinoa for added texture and nutrition. It turns these bites into a heartier snack, perfect for a filling appetizer or a light meal.
  • Spicy Kick: Add a pinch of cayenne pepper or red pepper flakes for some heat. Perfect for those who crave that extra zing in their bite!
  • Nutty Crunch: Mix in finely chopped nuts like almonds or walnuts for a delicious crunchy texture. This twist will surprise your taste buds while providing an enjoyable contrast to the gooey cheese.
  • Veggie Medley: Include other veggies like spinach or bell peppers to the mixture. Beyond just broccoli, this variation can intertwine exciting tastes, making every ball a delightful surprise.
  • Smoky Flavor: Use smoked paprika in place of regular paprika for a deeper flavor. This adds an inviting smokiness that makes these cheese balls even more enticing.
  • Mediterranean Vibe: Incorporate feta cheese and sun-dried tomatoes. It transforms these cheese balls into an exciting Mediterranean-inspired snack that will wow your guests!

With options galore, you can keep the family guessing what delicious twist is coming next. Feeling adventurous? Try pairing these with dips like ranch or garlic aioli! If you love comforting flavors, you might also enjoy the Comforting Charm Baked or the creamy Garlic Butter Baked chicken. Happy cooking!

Irresistible Baked Broccoli Cheese Balls Recipe FAQs

How do I select fresh broccoli for this recipe?
Absolutely! When choosing broccoli, look for vibrant green florets with tightly packed buds. Avoid any yellowing or dark spots, as these indicate overripeness. The stalks should be firm and crisp—fresh broccoli is key for the best flavor and texture in your Baked Broccoli Cheese Balls.

What’s the best way to store leftover cheese balls?
You can store any leftover Baked Broccoli Cheese Balls in an airtight container in the refrigerator for up to 3 days. To maintain their crispy texture, I recommend reheating them in the oven at 350°F (175°C) for about 10 minutes—this will refresh them beautifully, making them almost as delightful as when they were first baked!

Can I freeze the Baked Broccoli Cheese Balls?
Certainly! To freeze, first let the cheese balls cool completely. Arrange them in a single layer on a baking sheet and place them in the freezer for about 1 hour until they’re solid. After that, transfer them to a freezer bag or airtight container. They can be stored in the freezer for up to 2 months. When ready to enjoy, simply bake straight from the freezer at 400°F (200°C) for 25-30 minutes or until they are heated through and crispy.

What should I do if my cheese balls fall apart while baking?
Very! If your Baked Broccoli Cheese Balls fall apart, it could be due to a few reasons. First, ensure that the broccoli is finely chopped; larger pieces can prevent them from holding together. Secondly, don’t skip the binding agents like eggs—alternatively, use flaxseed meal mixed with water for a vegan option. Lastly, make sure you’ve mixed the ingredients just until combined; overmixing can lead to a denser texture. If they still fall apart, consider adding an extra tablespoon of breadcrumbs or adjusting the baking time slightly.

Can these cheese balls be considered a healthy snack for kids?
Absolutely! These Irresistible Baked Broccoli Cheese Balls are a fantastic way to sneak in some nutritious veggies while appealing to kids’ taste buds. They’re packed with fresh broccoli and rich, melty cheese, making them an enticing snack that can help keep those vegetable portions up without fuss. Plus, with customizable cheese and spice options, you can adapt them to fit your children’s preferences, ensuring they’re happy and nourished!

Are there any dietary considerations I should be aware of?
The beauty of these Baked Broccoli Cheese Balls is their versatility! While the recipe contains dairy, you can easily make it vegan by substituting with flaxseed meal for eggs and using non-dairy cheese options. For gluten-free folks, simply swap out the panko breadcrumbs with gluten-free alternatives. Always check labels for allergens, especially if preparing for guests or family members with food sensitivities.

Irresistible Baked Broccoli Cheese Balls Recipe

Irresistible Baked Broccoli Cheese Balls Recipe for Cheesy Bliss

Transform fresh broccoli into Irresistible Baked Broccoli Cheese Balls for a cheesy, crunchy snack that everyone will love.
Prep Time 15 minutes
Cook Time 25 minutes
Cooling Time 5 minutes
Total Time 45 minutes
Servings: 4 balls
Course: Appetizers
Cuisine: American
Calories: 180

Ingredients
  

For the Veggie Base
  • 2 cups Fresh Broccoli Florets Substitute with cauliflower for an alternative veggie.
For the Cheesy Goodness
  • 1 cup Sharp Cheddar Cheese May use mozzarella for a milder flavor.
For the Crunchy Coating
  • 1 cup Panko Breadcrumbs Can swap with traditional breadcrumbs or gluten-free options.
To Bind It All Together
  • 2 Large Eggs Use flaxseed meal mixed with water for a vegan option.
For Flavor Enhancement
  • 1 teaspoon Garlic Powder Fresh minced garlic can be used instead for a more intense flavor.
  • 1 teaspoon Salt Adjust according to preference or dietary needs.
  • 1 teaspoon Pepper Adjust according to preference or dietary needs.

Equipment

  • Oven
  • Mixing Bowl
  • Baking Sheet
  • Parchment Paper
  • Pot
  • Ice Water Bowl

Method
 

Step-by-Step Instructions
  1. Preheat the oven to 400°F (200°C) and line a baking sheet with parchment paper.
  2. Chop broccoli into small pieces and blanch in boiling water for about 2 minutes. Transfer to ice water to stop cooking.
  3. In a mixing bowl, combine blanched broccoli, cheddar cheese, panko breadcrumbs, eggs, garlic powder, salt, and pepper. Mix gently.
  4. Form the mixture into 1-inch balls and place them on the prepared baking sheet.
  5. Bake for 20-25 minutes until golden brown and crispy.
  6. Let the balls cool slightly before serving with dipping sauces.

Nutrition

Serving: 3ballsCalories: 180kcalCarbohydrates: 14gProtein: 8gFat: 10gSaturated Fat: 5gPolyunsaturated Fat: 0.5gMonounsaturated Fat: 3gCholesterol: 110mgSodium: 300mgPotassium: 200mgFiber: 3gSugar: 1gVitamin A: 500IUVitamin C: 50mgCalcium: 200mgIron: 1mg

Notes

Chop broccoli finely for even cooking. Avoid over-mixing to maintain texture. Let cool before transferring to serving dish. Keep an eye while baking for perfect color.

Tried this recipe?

Let us know how it was!

Slow Cooker Chicken Shawarma: Easy, Flavorful Dinner Delight

The scent of roasting cumin and garlic can transport you straight to a bustling Mediterranean market. That’s the magic behind my Slow Cooker Chicken Shawarma—a comforting dish that effortlessly brings vibrant flavors to your dinner table. Not only is this recipe packed with spices that’ll make your taste buds sing, but it also requires minimal prep time, letting you savor the cozy moments at home. Picture juicy chicken thighs, tenderized by a zesty marinade, and then shredded to perfection, ready to be wrapped in warm pita with fresh veggies and a drizzle of creamy sauce. It’s a delightful meal that’s not just easy to make but also versatile enough to suit any dietary preference, including a dairy-free option. So, are you ready to fill your kitchen with tantalizing aromas and create a meal that even the pickiest eaters will adore?

Why is Slow Cooker Chicken Shawarma a Must-Try?

Irresistible Aromas: The moment you start cooking, your kitchen transforms into a fragrant haven, with spices like cumin and garlic infusing the air.
Effortless Preparation: With just a few simple steps, dinner is on autopilot while you enjoy your evening, whether you’re unwinding or entertaining.
Flavor Explosion: Each bite delivers a burst of taste, making this dish a crowd-pleaser that’s sure to impress family and friends.
Diet-Friendly Options: Easily adapt this recipe to suit your dietary needs—go dairy-free by omitting yogurt and boosting your flavors with extra olive oil.
Versatile Serving: Wrap it up in warm pita, top with fresh veggies, or serve it alongside a refreshing salad; the choices are endless! For a complete meal experience, you’ll also love pairing it with a light and tangy BLT Chicken Salad or savoring it with a comforting bowl of Tuscan Chicken Soup.

Slow Cooker Chicken Shawarma Ingredients

• Dive into the world of flavor with these essential ingredients!

For the Chicken

  • Chicken Thighs – Juicy and tender, they keep your shawarma moist; for a leaner option, substitute with chicken breasts, but watch for dryness.

For the Marinade

  • Olive Oil – Adds richness and enhances flavor; feel free to swap with canola or vegetable oil, or for a unique twist, try coconut oil.
  • Minced Garlic – Essential for aromatic depth—fresh garlic brings the best flavor!
  • Cumin – A key player in shawarma that delivers warmth; use ground cumin for convenience.
  • Paprika – Infuses a mild sweetness and vibrant color; smoked paprika can add an exciting twist.
  • Turmeric – Adds a lovely golden hue and health benefits; just a pinch goes a long way.
  • Coriander – Enhances the flavor profile with its citrusy notes; ground coriander is quick and easy to use.
  • Cinnamon – A secret ingredient that amplifies aromatic qualities; a dash is all you need!
  • Cayenne Pepper – For those who like a kick; adjust according to your spice tolerance.
  • Salt & Black Pepper – Essential seasonings to elevate all the other flavors.

For the Creamy Element

  • Plain Yogurt – Adds creaminess and tenderizes the chicken; Greek yogurt is a great substitute, or skip it for a dairy-free shawarma by using extra olive oil.

For Brightness

  • Lemon Juice – Brightens the dish with acidity; fresh juice is best, but vinegar or lime juice works too.

Explore the vibrant flavors of Slow Cooker Chicken Shawarma and transform your dinner into a celebration of taste!

Step‑by‑Step Instructions for Slow Cooker Chicken Shawarma

Step 1: Prepare the Spice Mixture
In a large mixing bowl, combine minutely chopped garlic, cumin, paprika, turmeric, coriander, cinnamon, cayenne pepper, salt, and black pepper. Stir well to create a vibrant spice blend that echoes the magic of Slow Cooker Chicken Shawarma. The mixture should be uniform in color and fragrant, with the spices fully integrated.

Step 2: Create the Marinade
Add olive oil, plain yogurt, apple cider vinegar, and fresh lemon juice into the bowl with the spices. Mix thoroughly until a luscious marinade forms, ensuring that the yogurt breaks down the garlic while infusing the chicken with flavor. This step is crucial for enriching the chicken’s texture and taste.

Step 3: Coat the Chicken
Place the boneless chicken thighs in the slow cooker, ensuring they are evenly spaced. Pour the freshly made marinade over the chicken, ensuring every piece is generously coated. Use tongs to turn the chicken, ensuring it is entirely enveloped in the beautiful spices and marinade.

Step 4: Slow Cook the Chicken
Cover your slow cooker and set it to cook on low for 6–8 hours or on high for 3–4 hours. The chicken is done when it is fork-tender and shreds easily, emitting tantalizing aromas that fill your kitchen. Ensure the slow cooker remains undisturbed to maintain even cooking.

Step 5: Shred the Chicken
Once the cooking time is complete, use two forks to shred the chicken directly in the slow cooker. Mix the shredded chicken with the accumulated juices to enhance moisture and flavor. This method ensures the chicken remains juicy and packed with the delicious essence of the shawarma.

Step 6: Serve the Chicken Shawarma
Prepare warm pita bread and fill it with the succulent shredded chicken. Top with fresh veggies, feta cheese, and a drizzle of yogurt sauce for a delightful touch. The combination of textures and flavors makes your Slow Cooker Chicken Shawarma a hearty and satisfying meal that everyone will love.

Slow Cooker Chicken Shawarma Variations

Feel free to get creative and make this delicious recipe uniquely yours!

  • Dairy-Free: Omit the yogurt and add extra olive oil for richness while keeping it creamy and flavorful.
    This simple swap means you don’t have to sacrifice taste while enjoying a dairy-free meal.

  • Spicy Shawarma: Increase cayenne pepper or add chili flakes for a bolder kick, igniting your taste buds.
    If you love the heat, try adding sliced jalapeños or a dash of hot sauce to the final dish!

  • Protein Options: Swap chicken for pork, lamb, or even firm tofu for a different protein twist.
    Each protein brings its unique richness, offering a fresh take on this beloved dish.

  • Veggie-Packed: Toss in bell peppers, carrots, or even zucchini in the slow cooker for extra flavor and nutrition.
    The added veggies cook beautifully and infuse their essence into the chicken, creating a colorful dish.

  • Flavor Burst: Add a splash of pomegranate molasses or honey to the marinade for a hint of sweetness.
    This sweet-tart addition pairs perfectly with the savory spices, enhancing the overall flavor profile.

  • Fresh Toppings: Experiment with toppings like sliced avocado, arugula, or pickled red onions for extra brightness and crunch.
    Each layer of texture and taste elevates your shawarma experience to new heights!

  • Wrap It Up: Try wrapping the chicken in lettuce leaves instead of pita for a low-carb option.
    This fun twist offers a refreshing crunch and can be topped with your favorite sauce for added flavor.

Explore these tasty variations alongside your Slow Cooker Chicken Shawarma and make your dinner anything but ordinary! You might also enjoy serving it with a side of Chilli Chicken Takeout for an exciting culinary adventure.

Make Ahead Options

Slow Cooker Chicken Shawarma is perfect for busy home cooks looking to save time during the week! You can prepare the marinade and coat the chicken up to 24 hours in advance. Simply mix your spices with olive oil, yogurt, and lemon juice, then marinate the chicken thighs before placing them in the slow cooker. This allows the flavors to meld beautifully while preventing the chicken from drying out. When it’s time to serve, just pop everything in the slow cooker and cook on low for 6–8 hours or high for 3–4 hours. Trust me, your efforts in prepping ahead will lead to a mouthwatering dish that’s just as delicious as if you made it from scratch the same day!

How to Store and Freeze Slow Cooker Chicken Shawarma

  • Fridge: Store leftovers in an airtight container for up to 3 days. This helps maintain the juicy texture and flavor of your Slow Cooker Chicken Shawarma.

  • Freezer: For longer storage, freeze in airtight containers or freezer bags for up to 2 months. This keeps the flavors and tenderness intact for future meals.

  • Reheating: Gently reheat in the microwave or on the stovetop, adding a splash of water to keep it moist. This ensures every bite remains delightful and flavorful!

  • Serving Refresh: After reheating, consider a fresh drizzle of lemon juice or yogurt sauce to brighten the flavors again before serving.

Expert Tips for Slow Cooker Chicken Shawarma

  • Marination Time Matters: Allow the chicken to marinate for at least 30 minutes or longer if possible; this enhances the flavor and tenderness of the chicken in your Slow Cooker Chicken Shawarma.

  • Avoid Dried-out Chicken: If using chicken breasts, be diligent with cooking times. Monitor closely to prevent them from becoming dry during the slow cooking process.

  • Experiment with Veggies: Toss in bell peppers, onions, or carrots to the slow cooker for added flavor and nutrition. These vegetables infuse their essence into the dish, enhancing your Slow Cooker Chicken Shawarma even further.

  • Spice to Your Preference: If you enjoy heat, feel free to increase the cayenne or add chili flakes. This allows you to tailor your dish to suit your family’s taste buds.

  • Storage Tips: Leftovers can keep for up to 3 days in an airtight container. To maintain moisture when reheating, add a splash of water; alternatively, you can freeze portions for up to 2 months.

What to Serve with Slow Cooker Chicken Shawarma?

Transform your cozy chicken shawarma into a complete feast with delightful pairings that bring out its vibrant flavors and textures.

  • Warm Pita Bread: Soft and pillowy, pita serves as the perfect vessel for holding your savory chicken and fresh toppings, adding a comforting chewiness to each bite.

  • Crisp Salad Greens: A refreshing salad with cucumbers, tomatoes, and parsley provides a light contrast to the rich shawarma, balancing the meal beautifully.

  • Creamy Hummus: Smooth and nutty, hummus enhances the meal’s Mediterranean vibe while serving as a perfect dip for pita or a spread for extra flavor.

  • Tzatziki Sauce: With its cool yogurt and cucumber base, tzatziki adds a refreshing element that complements the spices in the chicken, keeping every bite bright and lively.

  • Sauteed Vegetables: Toss together bell peppers and zucchini for a colorful side that not only enhances nutrition but also mirrors the vibrant flavors of the shawarma.

  • Spiced Rice: Fluffy rice seasoned with cumin and coriander provides a hearty base, soaking up all the delicious juices from your chicken, making for a satisfying accompaniment.

  • Pickled Onions: Their sharp tanginess cuts through the richness of the chicken, adding a delightful crunch and zing that elevates the overall dining experience.

  • Fizzy Drink: Pair your meal with a refreshing sparkly lemonade or mint-infused iced tea; the acidity and bubbles contrast beautifully with the flavorful shawarma.

Slow Cooker Chicken Shawarma Recipe FAQs

Can I use different cuts of chicken for this recipe?
Absolutely! While chicken thighs are the best choice for juiciness and flavor, chicken breasts can be used as a leaner option. However, you’ll need to keep a close eye on the cooking time. Cook them on low for about 4-5 hours to avoid drying out.

How should I store leftovers?
Store any leftover Slow Cooker Chicken Shawarma in an airtight container in the refrigerator for up to 3 days. This helps to maintain the juicy texture. When you reheat, I recommend adding a splash of water to keep it moist and flavorful!

Can I freeze Slow Cooker Chicken Shawarma?
Yes, you can freeze it! Place the shredded chicken in an airtight container or freezer bag and freeze for up to 2 months. When you’re ready to enjoy, thaw it in the fridge overnight and reheat gently on the stove or in the microwave.

What if my chicken is tough after cooking?
This can happen if the chicken is overcooked or cooked on a high setting for too long. To avoid this, always cook on low for 6-8 hours, and ensure you’re using enough marinade. If the chicken seems tough, try adding a bit of chicken broth to the slow cooker and let it cook for another 30 minutes on low.

Can I make this dish dairy-free?
Very! You can simply omit the yogurt and replace its richness with an extra splash of olive oil in the marinade. This will not only keep it delicious but also satisfy those with dairy sensitivities.

What’s the best way to enjoy my Slow Cooker Chicken Shawarma?
Serve it wrapped in warm pita with fresh veggies like cucumbers, tomatoes, and a sprinkle of feta. Drizzle with a creamy yogurt sauce—or skip the yogurt for a saffron-infused tahini dressing for an extra twist! Your family will adore this comforting and versatile meal.

Slow Cooker Chicken Shawarma

Slow Cooker Chicken Shawarma: Easy, Flavorful Dinner Delight

Experience the magic of Slow Cooker Chicken Shawarma with vibrant flavors and effortless preparation for a delightful dinner.
Prep Time 30 minutes
Cook Time 8 hours
Total Time 8 hours 30 minutes
Servings: 4 servings
Course: Dinner
Cuisine: Mediterranean
Calories: 350

Ingredients
  

For the Chicken
  • 1 kg Boneless Chicken Thighs Juicy and tender
For the Marinade
  • 1/4 cup Olive Oil Can substitute with other oils
  • 4 cloves Minced Garlic Fresh garlic preferred
  • 2 tbsp Cumin Ground cumin
  • 2 tbsp Paprika Smoked paprika for added flavor
  • 1 tsp Turmeric Just a pinch adds color
  • 1 tsp Coriander Ground for convenience
  • 1/2 tsp Cinnamon Secret ingredient for depth
  • 1/4 tsp Cayenne Pepper Adjust for spice preference
  • 1 tsp Salt
  • 1/2 tsp Black Pepper
For the Creamy Element
  • 1/2 cup Plain Yogurt Greek yogurt can be substituted
For Brightness
  • 2 tbsp Lemon Juice Fresh juice is best

Equipment

  • Slow Cooker

Method
 

Preparation Steps
  1. In a large mixing bowl, combine minutely chopped garlic, cumin, paprika, turmeric, coriander, cinnamon, cayenne pepper, salt, and black pepper.
  2. Add olive oil, plain yogurt, apple cider vinegar, and fresh lemon juice into the bowl with the spices.
  3. Place the boneless chicken thighs in the slow cooker and pour the marinade over the chicken, ensuring every piece is generously coated.
  4. Cover the slow cooker and set it to cook on low for 6–8 hours or on high for 3–4 hours.
  5. Once cooked, use two forks to shred the chicken directly in the slow cooker, mixing it with the accumulated juices.
  6. Prepare warm pita bread and fill it with the shredded chicken, adding fresh veggies and a drizzle of yogurt sauce.

Nutrition

Serving: 1servingCalories: 350kcalCarbohydrates: 12gProtein: 30gFat: 20gSaturated Fat: 4gPolyunsaturated Fat: 2gMonounsaturated Fat: 10gCholesterol: 90mgSodium: 800mgPotassium: 600mgFiber: 3gSugar: 1gVitamin A: 200IUVitamin C: 5mgCalcium: 50mgIron: 3mg

Notes

Allow the chicken to marinate for at least 30 minutes for best flavor. Store leftovers in an airtight container for up to 3 days.

Tried this recipe?

Let us know how it was!

Creamy Coconut Milk Chicken: A Quick Thai Delight

As the creamiest, heartwarming bowls of comfort swirl through my kitchen, I can’t help but fall for the magic of Coconut Milk Chicken. This dish invites you to discover poached chicken enveloped in a luscious broth, infused with fragrant ginger, garlic, and vibrant Thai curry paste. Not only can we whip up this delightful meal in under 30 minutes, making it a perfect fit for our busy weeknights, but it’s also a gluten-free treat that promises to satisfy hungry hearts. Each tender bite, soaked in that velvety sauce and nestled over a bed of fluffy rice or noodles, feels like a warm hug. Are you ready to take a flavorful leap into this comforting creation?

Why is Coconut Milk Chicken a Must-Try?

Quick and Easy: This recipe whips up in just 30 minutes, perfect for hectic weeknights when you crave something flavorful without the fuss.

Comforting Aura: Rich, creamy coconut milk envelops tender chicken, creating a soothing bowl that warms the soul.

Flavor Explosion: Infused with aromatic ginger and red Thai curry paste, each bite brims with deliciousness, making you feel like a master chef.

Versatile Delight: Serve it over rice, noodles, or even zoodles for a low-carb twist. It’s truly adaptable to your cravings.

Crowd-Pleaser: With its delightful balance of flavors, this dish is sure to impress family and friends. Pair it with a refreshing BLT Chicken Salad to round out your meal!

Coconut Milk Chicken Ingredients

For the Chicken
Chicken breast (or thighs) – Choose skinless chicken for a leaner option; thighs add extra moisture and flavor.
Salt & Pepper – Essential for seasoning; adjust to your taste preference.

For the Broth
Coconut Oil – Provides a rich base for sautéing; can be swapped with canola oil if preferred.
Onion – Adds sweetness and depth; yellow or sweet onions work best.
Fresh Ginger – Infuses warmth and aroma; finely dice for maximum flavor release.
Garlic – Enhances the flavor profile; always use fresh for the best results.
Red Chili – Brings a mild heat; adjust quantity based on your spice tolerance.
Coconut Milk – Acts as the creamy sauce base; full-fat offers richer flavor; light coconut milk is a low-calorie option.
Soy Sauce – Adds umami and balances sweetness; use tamari for a gluten-free option.
Red Thai Curry Paste – Delivers signature Thai flavors; customize for your desired spice level.
Brown Sugar – Balances flavors with subtle sweetness; omit for a low-sugar version.

For Garnishing
Cilantro – Adds a vibrant, fresh finish just before serving.
Chili Oil or Chili Crunch – Enhances heat and flavor as an optional topping.
Scallions – Provides crunch and freshness as a garnish.

For Serving
Steamed Rice or Noodles – Acts as a delightful base; coconut rice or noodles soak up that creamy coconut milk sauce beautifully.

Embrace the joy of homemade Coconut Milk Chicken tonight as it enchants your dinner routine!

Step‑by‑Step Instructions for Coconut Milk Chicken

Step 1: Sauté Aromatics
In a large skillet over medium heat, melt 2 tablespoons of coconut oil. Once the oil is shimmering, add 1 diced onion and cook for 4-5 minutes until it’s softened and translucent. Stir in 2 tablespoons of finely diced fresh ginger, 3 minced garlic cloves, and 1 diced red chili, cooking for an additional 2 minutes until fragrant and softened, creating a flavorful base for your Coconut Milk Chicken.

Step 2: Add Coconut Milk
Pour in 1 can of coconut milk, 2 tablespoons of soy sauce (or tamari for gluten-free), 1 tablespoon of brown sugar, and a pinch of salt and pepper to taste into the skillet. Stir in 2 tablespoons of red Thai curry paste, mixing thoroughly to combine the ingredients. Bring the mixture to a gentle simmer over medium heat, allowing the flavors to meld beautifully while the broth thickens slightly.

Step 3: Poach Chicken
Add 1 pound of sliced chicken breast (or thighs) into the simmering coconut milk mixture. Reduce the heat to medium-low, ensuring it doesn’t boil, and cover the skillet. Let the chicken poach gently for about 15-20 minutes, stirring occasionally, until fully cooked through and no longer pink, soaking in the rich flavors of the coconut curry sauce.

Step 4: Finishing Touches
Once the chicken is cooked, remove the skillet from heat. If desired, squeeze in fresh lime juice and stir in a handful of chopped cilantro for an extra burst of flavor. Serve your Coconut Milk Chicken hot over a bed of steamed rice or noodles, garnishing with drizzle of chili oil, sliced scallions, and additional cilantro for a vibrant finish.

Coconut Milk Chicken Variations

Feel free to get creative and customize your Coconut Milk Chicken to suit your taste buds!

  • Thighs instead of Breasts: Switch to chicken thighs for a richer flavor and extra tenderness. They’ll hug that creamy sauce blissfully!

  • Zucchini Noodles: For a low-carb twist, swap out noodles for zoodles—perfect for a light, nutritious meal without sacrificing satisfaction.

  • Add Lemongrass: Incorporate fresh lemongrass into the broth for a delightful citrusy aroma that brings the Thai flavors to life even more!

  • Spicy Kick: Increase the heat by adding a sliced jalapeño or a dash of sriracha, making your dish a fiery sensation.

  • Vegetable Boost: Toss in assorted veggies like bell peppers or snap peas during the poaching stage to add color and extra crunch.

  • Herb Variations: Try using basil or mint in place of cilantro for a fresh and fragrant garnishing alternative, adding a unique touch to your dish.

  • Coconut Rice: Serve over coconut rice instead of plain; this adds layers of flavor and creaminess, elevating your meal’s richness.

  • Curry Paste Swaps: Experiment with different curry pastes—yellow or green curries can shift the flavor profile while keeping that comforting essence intact.

These variations can help enhance your Coconut Milk Chicken experience while keeping it delightful and unique, just like a visit to a cozy Thai restaurant! If you’re looking for another comforting dish, don’t forget to check out my Sizzling Chicken Pepper or the vibrant Tuscan Chicken Soup. Enjoy experimenting!

Expert Tips for Coconut Milk Chicken

  • Don’t Overcook: Keep an eye on the chicken while poaching; remove it from heat as soon as it’s cooked through to ensure tenderness.

  • Fresh Ingredients Matter: Use fresh ginger and garlic instead of powdered for a vibrant flavor. They are truly the stars of your Coconut Milk Chicken!

  • Adjust Spice Levels: If you prefer less heat, reduce the amount of red chili or choose a milder curry paste. You’ll still enjoy the Thai flavors!

  • Customize the Broth: Feel free to experiment with adding lemongrass or additional vegetables like bell peppers or snap peas for a unique twist.

  • Sultry Sauce: If the sauce is too thick, add a splash of chicken broth or water to achieve your desired consistency. Keep it creamy, but just right!

Make Ahead Options

These creamy Coconut Milk Chicken bowls are perfect for meal prep enthusiasts! You can chop the aromatics—onion, ginger, garlic, and chili—up to 24 hours in advance and store them in an airtight container in the refrigerator. Additionally, you can poach the chicken and prepare the coconut milk sauce ahead of time, allowing it to chill for up to 3 days in the fridge, which deepens the flavors. When you’re ready to serve, simply reheat the mixture in a skillet over medium heat until warmed through, then ladle it over fresh rice or noodles for a comforting, weeknight meal just as delicious as when freshly made!

How to Store and Freeze Coconut Milk Chicken

  • Fridge: Store leftovers in an airtight container for up to 3 days. Reheat gently on the stove or in the microwave, adding a splash of water or broth to restore moisture.
  • Freezer: You can freeze Coconut Milk Chicken for up to 2 months. Portion it into freezer-safe containers, leaving space for expansion. Thaw in the fridge overnight before reheating.
  • Reheating: When reheating, do so slowly over low heat to avoid curdling the coconut milk. Stir frequently and add a bit of coconut milk or water for a creamy texture.
  • Serving Suggestions: Reheat and serve over fresh rice or noodles; add a sprinkle of cilantro or a dash of chili oil to brighten the dish once again.

What to Serve with Creamy Poached Coconut Milk Chicken?

Experience a vibrant dinner atmosphere that invites everyone to the table, where flavors and comfort unite.

  • Fluffy Jasmine Rice: A classic pairing, this aromatic rice absorbs the creamy coconut sauce, creating a delightful balance of textures.

  • Zesty Cucumber Salad: Crisp cucumbers with a tangy dressing provide a refreshing contrast to the richness of the chicken, making every bite lively.

  • Steamed Broccoli: Tender, bright green florets add a nutritious crunch and a touch of earthiness that pleasantly complements the coconut milk’s creaminess.

  • Chili Lime Corn on the Cob: Sweet corn infused with zesty lime and spice enhances the dish’s tropical vibes, creating a festive, flavor-packed side.

  • Thai Mango Salad: This refreshing salad, with its sweet mango and crunchy peanuts, adds a burst of sweetness that harmonizes beautifully with spicy chicken.

  • Light Coconut Rice: Swap out plain rice for coconut rice to intensify flavors, offering an extra layer of creaminess that seamlessly melds with the chicken.

  • Cold Thai Iced Tea: A sweet and creamy beverage, this tea helps cool the palate when the chicken’s spiciness kicks in, making for a balanced meal experience.

  • Coconut Macaroons: For dessert, indulge in these chewy treats to echo the coconut theme and end the meal on a sweet, nostalgic note.

Coconut Milk Chicken Recipe FAQs

How do I choose the best coconut milk for my recipe?
Absolutely! Opt for full-fat coconut milk for a richer taste; it creates a creamy, luxurious sauce that embraces the chicken beautifully. Look for brands that use minimal additives. If you’re watching calories, light coconut milk works too, but keep in mind it will be less creamy.

What’s the best way to store leftovers of Coconut Milk Chicken?
Very good question! Store leftovers in an airtight container in the refrigerator for up to 3 days. When reheating, add a splash of water or chicken broth to maintain creaminess, gently warming it on the stove or in the microwave.

Can I freeze Coconut Milk Chicken?
Absolutely! You can freeze it for up to 2 months. Portion the chicken and sauce into freezer-safe containers, leaving a little space for expansion. Thaw overnight in the fridge before reheating. When reheating, do so slowly over low heat, adding a bit of coconut milk or broth to keep it creamy.

What if my chicken turns out tough?
Oh no! If your chicken is tough, it might have been overcooked. Poaching at a low temperature is crucial. Keep an eye on it and cook just until it’s no longer pink, usually 15-20 minutes. For extra tenderness, consider using chicken thighs, as they have more fat and flavor.

Are there any dietary considerations for Coconut Milk Chicken?
Yes! This dish can easily be made gluten-free by using tamari instead of soy sauce. Additionally, if anyone at your table has allergies, take care with the red curry paste—some brands may contain allergens. For pets, avoid giving them any cooked chicken seasoned with these ingredients, as spices can be harmful.

What if my coconut milk sauce is too thick?
If your sauce seems too thick, simply add a splash of chicken broth or water to reach your desired consistency. You can do this while reheating, stirring slowly to incorporate. Remember, you want that creamy texture to coat the chicken perfectly!

Coconut Milk Chicken

Creamy Coconut Milk Chicken: A Quick Thai Delight

Enjoy a quick and delicious Coconut Milk Chicken dish, infused with aromatic spices and creamy coconut milk, in under 30 minutes.
Prep Time 10 minutes
Cook Time 20 minutes
Total Time 30 minutes
Servings: 4 servings
Course: Dinner
Cuisine: Thai
Calories: 450

Ingredients
  

For the Chicken
  • 1 pound Chicken breast (or thighs) Choose skinless for a leaner option.
  • to taste Salt Essential for seasoning.
  • to taste Pepper Essential for seasoning.
For the Broth
  • 2 tablespoons Coconut Oil Can be swapped with canola oil if preferred.
  • 1 medium Onion Yellow or sweet onions work best.
  • 2 tablespoons Fresh Ginger Finely diced for maximum flavor.
  • 3 cloves Garlic Always use fresh for the best results.
  • 1 medium Red Chili Adjust quantity based on spice tolerance.
  • 1 can Coconut Milk Full-fat offers richer flavor.
  • 2 tablespoons Soy Sauce Use tamari for a gluten-free option.
  • 2 tablespoons Red Thai Curry Paste Customize for desired spice level.
  • 1 tablespoon Brown Sugar Omit for a low-sugar version.
For Garnishing
  • to taste Cilantro Adds a vibrant, fresh finish.
  • to taste Chili Oil or Chili Crunch Optional topping.
  • to taste Scallions Provides crunch and freshness.
For Serving
  • 4 cups Steamed Rice or Noodles Soak up the creamy sauce beautifully.

Equipment

  • Skillet

Method
 

Step‑by‑Step Instructions
  1. Melt 2 tablespoons of coconut oil in a large skillet over medium heat. Add 1 diced onion and cook for 4-5 minutes until softened.
  2. Stir in 2 tablespoons of finely diced fresh ginger, 3 minced garlic cloves, and 1 diced red chili. Cook for an additional 2 minutes.
  3. Pour in 1 can of coconut milk, 2 tablespoons of soy sauce, 1 tablespoon of brown sugar, and season with salt and pepper to taste.
  4. Stir in 2 tablespoons of red Thai curry paste, and bring to a gentle simmer.
  5. Add 1 pound of sliced chicken into the mixture, cover, and let poach for about 15-20 minutes until fully cooked.
  6. Remove from heat and stir in lime juice and a handful of chopped cilantro, if desired. Serve hot over rice or noodles.

Nutrition

Serving: 1servingCalories: 450kcalCarbohydrates: 45gProtein: 30gFat: 20gSaturated Fat: 12gPolyunsaturated Fat: 2gMonounsaturated Fat: 5gCholesterol: 70mgSodium: 800mgPotassium: 800mgFiber: 3gSugar: 4gVitamin A: 500IUVitamin C: 6mgCalcium: 45mgIron: 2mg

Notes

Store leftovers in an airtight container for up to 3 days. Freezing is also an option for up to 2 months.

Tried this recipe?

Let us know how it was!

Stay Connected

Get recipes via email: