Get my cookbooks

Crispy Buffalo Chicken Tenders Your New Favorite Snack

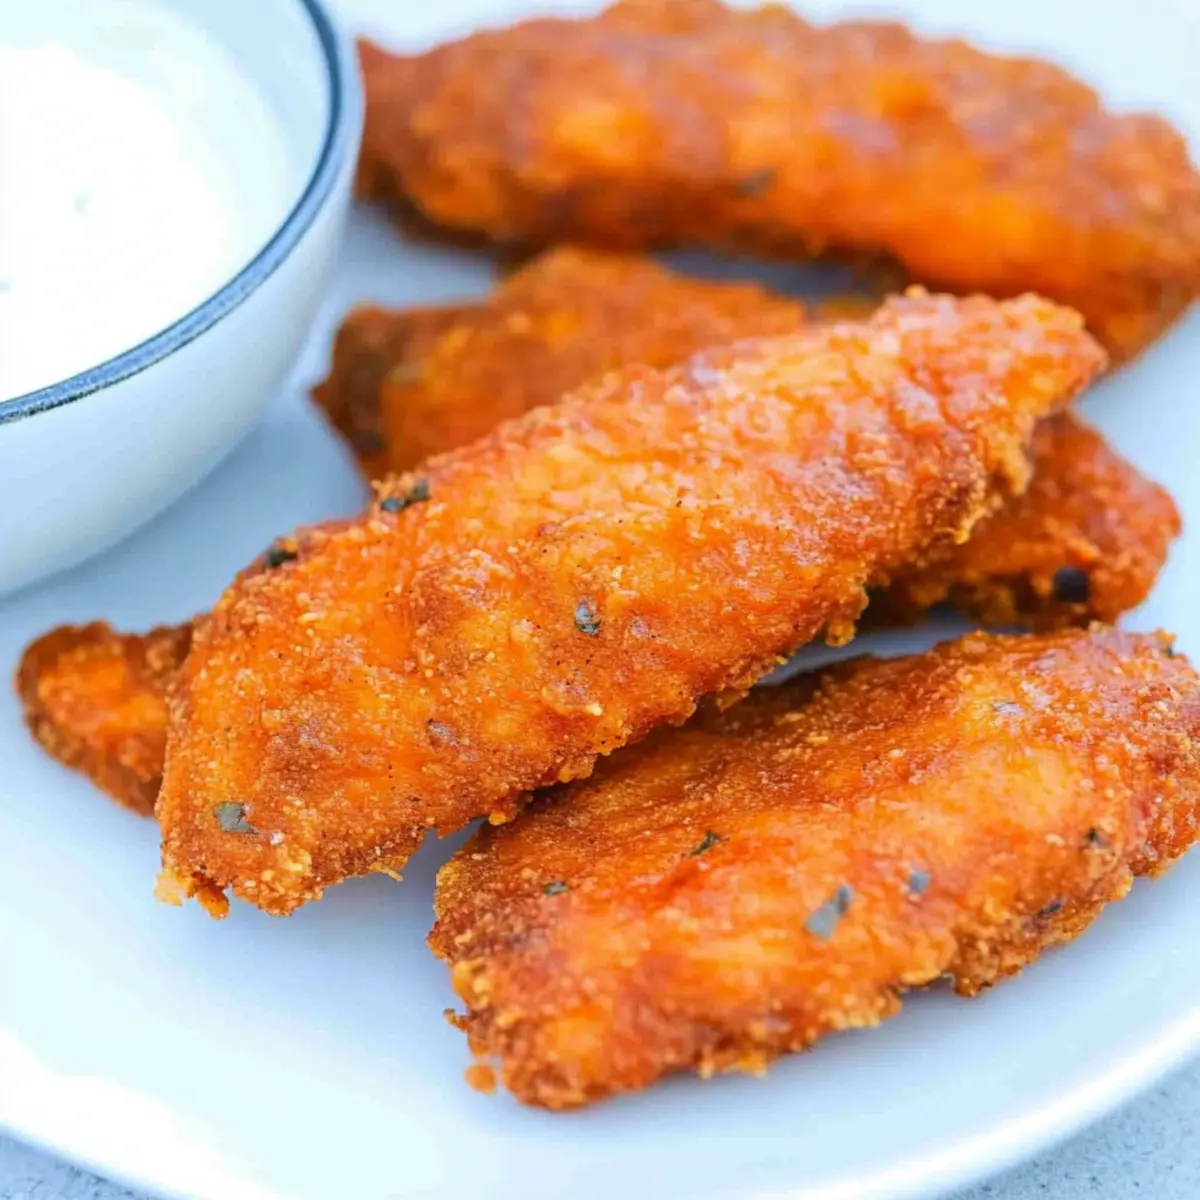
The aroma of spicy Buffalo Chicken Tenders wafts through my kitchen, instantly transforming the space into a cozy gathering spot. These tenders are not just easy to make, but they’re also a healthier baked alternative to the classic fried variety that we all love. Coated in a tantalizing buffalo sauce, they’re crispy on the outside and tender on the inside—ideal for game days or a quick dinner when you’re craving something comforting yet flavorful. Plus, they come together in no time, making them a go-to weeknight meal that even the busiest of schedules can accommodate. Pair them with creamy ranch dressing or a sprinkle of celery for that classic touch. Ready to satisfy your spice craving? Let’s get cooking!

Why Are These Chicken Tenders So Irresistible?

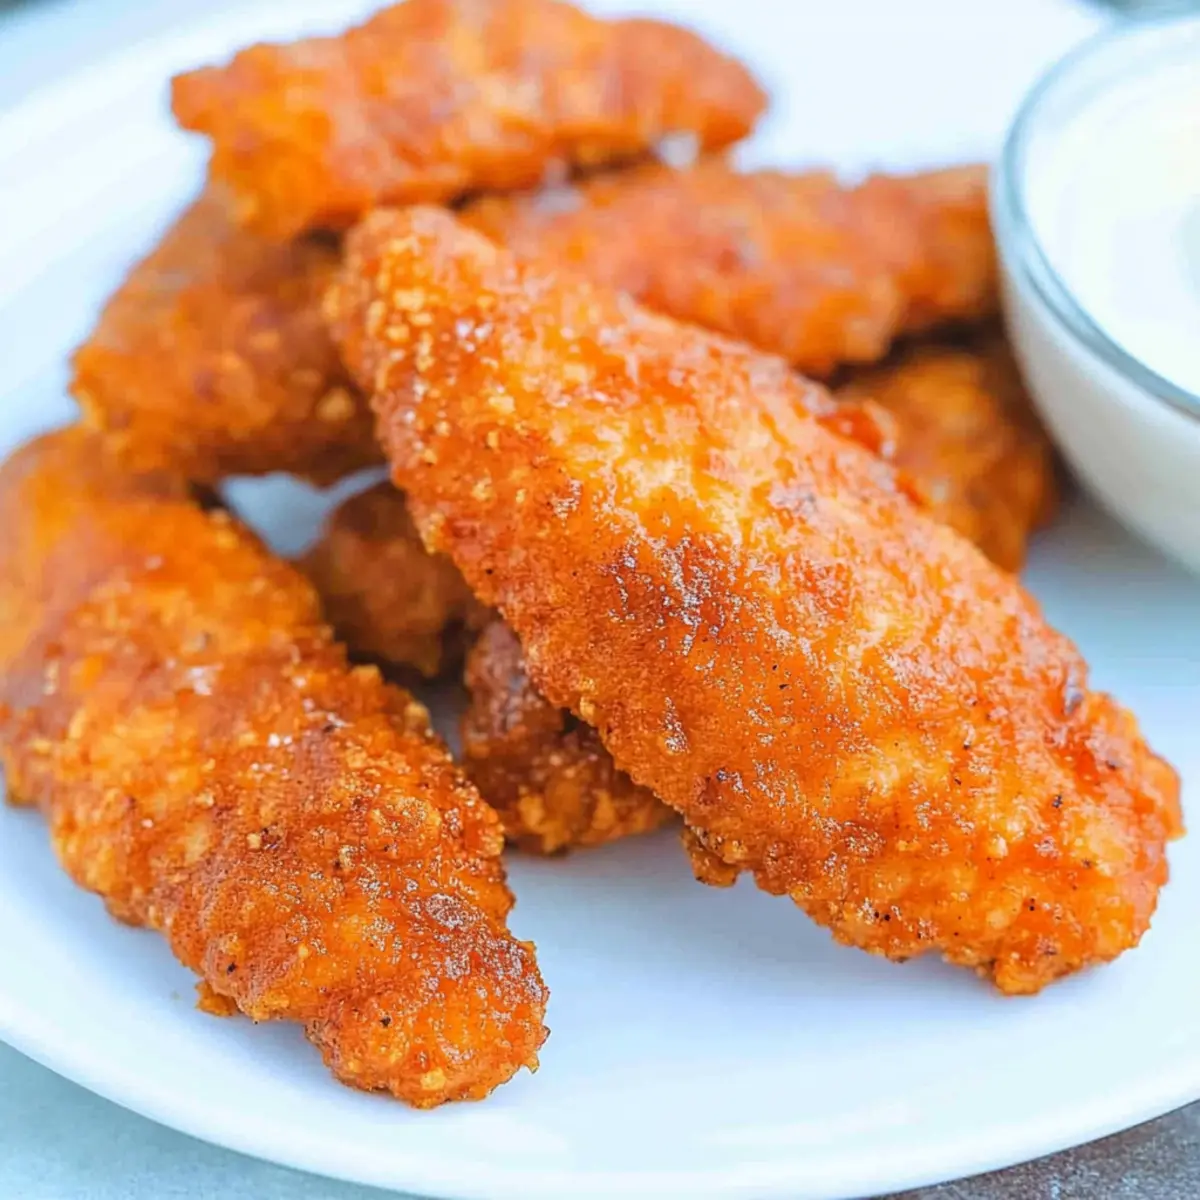
Crispy Perfection: Each tender is baked to a golden brown, delivering a satisfying crunch.
Flavor Explosion: Coated in zesty buffalo sauce, they strike the perfect balance between heat and flavor—every bite will have you coming back for more.
Healthier Option: Unlike traditional fried wings, these baked tenders are lower in calories but packed with protein, making them guilt-free comfort food.
Quick & Easy: Ready in under 30 minutes, this recipe is perfect for busy weeknights or spontaneous get-togethers.
Versatile Serving: Elevate your meal by pairing them with creamy ranch alongside fresh vegetables for a well-rounded dish.
Crowd Favorite: Whether for game day or a casual dinner, these tenders are a guaranteed hit with family and friends, making them a staple in your home cooking repertoire.

Buffalo Chicken Tenders Ingredients

For the Chicken
Chicken Tenders – The star of the dish; opt for boneless, skinless for easy preparation.

For the Coating
All-Purpose Flour – Helps the egg wash stick; gluten-free flour works perfectly for a gluten-free diet.
Bread Crumbs – Adds a delightful crunch; choose panko for extra texture or seasoned for more flavor.
Garlic Powder – Infuses the tenders with a rich aroma; fresh garlic is a great replacement but use sparingly.
Paprika – Provides a lovely warmth and deep color; smoked paprika can enhance flavor if desired.
Salt – Essential for seasoning; adjust to your taste preferences.

For the Binding
Egg – Binds the coating; swap for a flax egg to make it vegan-friendly.
Milk – Improves the egg wash consistency; feel free to use any milk alternative.

For the Sauce
Buffalo Wing Sauce – Delivers that signature spicy kick; select your favorite brand or try homemade for a personal touch.

These Buffalo Chicken Tenders are not only delicious but also an easy-to-make addition that’s perfect for any meal!

Step-by-Step Instructions for Spicy Baked Buffalo Chicken Tenders

Step 1: Preheat Oven
Begin by preheating your oven to 400°F (200°C). While the oven heats, prepare a baking sheet by spraying it with nonstick spray or lining it with parchment paper. This ensures your spicy baked buffalo chicken tenders will cook evenly without sticking.

Step 2: Coat Chicken
In a large mixing bowl, take your boneless skinless chicken tenders and add enough all-purpose flour to coat them thoroughly. Toss the chicken until it’s evenly coated, ensuring there are no dry spots. This initial layer will help the egg wash stick nicely to your chicken.

Step 3: Prepare Breading Setup
Set up your breading station by placing two bowls side by side. In the first bowl, whisk together one egg and a splash of milk until smooth, creating your egg wash. In the second bowl, mix together breadcrumbs, garlic powder, paprika, salt, and pepper to form a zesty coating for your tenders.

Step 4: Bread Chicken
Take each coated chicken tender and dip it into the egg wash, allowing any excess to drip off. Next, roll it in the breadcrumb mixture, pressing gently to ensure the coating adheres well. Place the breaded chicken tenders onto the prepared baking sheet, spacing them evenly.

Step 5: Bake
Slide the baking sheet into the preheated oven and bake the chicken tenders for 20-25 minutes. About halfway through cooking, flip each tender to achieve an even golden color. You’ll know they’re ready when they reach a beautiful golden-brown color and an internal temperature of at least 165°F (75°C).

Step 6: Sauce Up
Once the spicy baked buffalo chicken tenders are out of the oven, brush them generously with buffalo wing sauce while they’re still warm. Ensure each tender is nicely coated, adding a tantalizing layer of flavor that enhances their already delicious taste.

Make Ahead Options

These Buffalo Chicken Tenders are perfect for meal prep aficionados! You can coat the chicken and set them on the baking sheet up to 24 hours in advance, covering them with plastic wrap and refrigerating to maintain freshness. The breading mixture can also be prepared ahead of time and stored in an airtight container, making the final cooking process a breeze. When you’re ready to enjoy, simply bake them straight from the fridge, ensuring an internal temperature of 165°F (75°C) for safe consumption. This way, you’ll have delicious, crispy tenders ready for busy weeknights with minimal effort, just as flavorful as if you made them on the spot!

How to Store and Freeze Buffalo Chicken Tenders

Fridge: Store leftovers in an airtight container for up to 3 days. This will help maintain their texture and flavor so you can enjoy them again.

Freezer: For longer storage, freeze the cooked tenders in a single layer on a baking sheet until solid, then transfer to a freezer-safe bag for up to 2 months.

Reheating: Reheat in the oven at 375°F (190°C) for about 10-15 minutes to restore crispiness. Avoid using the microwave to keep them from becoming soggy.

Make-Ahead: You can also prepare the chicken tenders ahead of time by breading them and keeping them in the refrigerator until ready to bake for a quick and easy meal.

Expert Tips for Buffalo Chicken Tenders

  • Pat Dry: Ensure chicken tenders are patted dry before coating. This helps the flour adhere better for a crispier bite.
  • Temperature Check: Use a meat thermometer to verify the chicken’s internal temperature reaches 165°F (75°C) for safe eating.
  • Even Cooking: Flip the tenders halfway through baking to promote even browning and an irresistible crunchy texture.
  • Adjust Spice: If you’re sensitive to heat, use less buffalo sauce or switch to a milder BBQ sauce for delicious results.
  • Serve Fresh: These chicken tenders are best enjoyed hot out of the oven, paired with ranch dipping sauce for the ultimate experience.
  • Make-Ahead Tips: You can coat the chicken in advance and refrigerate them. Just bake when you’re ready for that fresh, crispy goodness!

What to Serve with Buffalo Chicken Tenders

Nothing pairs better with these spicy delights than delicious sides that complement their flavor and crunch!

  • Creamy Ranch Dip: This classic choice provides a cooling contrast to the spiciness, enhancing the overall taste experience.
  • Fresh Celery Sticks: Their crisp texture and mild flavor balance the heat of the tenders. Plus, they add a refreshing crunch!
  • Sweet Potato Fries: The sweetness of these fries creates a delightful contrast that perfectly matches the spicy tenders, making for a fun mix.
  • Coleslaw: Creamy coleslaw brings a tangy freshness that beautifully cuts through the richness of the chicken, enhancing every bite.
  • Garlic Bread: A warm, buttery side with its irresistible aroma can be the perfect complement to your tenders’ zesty flavor.
  • Crisp Green Salad: A simple side salad with a light vinaigrette can help brighten your meal, offering a refreshing crunch to your plate.
  • Beer or Cider: An ice-cold beer or fruity cider creates a wonderful balance to the spicy tenders, perfect for game day gatherings.
  • Chocolate Mousse: For dessert, the rich creaminess will delight your guests, leaving them satisfied and happy after this indulgent meal.

Buffalo Chicken Tenders: Your Customization Dream

Feel free to let your creativity flow and make these chicken tenders your own!

  • Gluten-Free: Swap all-purpose flour for a gluten-free flour blend, ensuring everyone can enjoy these tasty bites.
  • Air Fryer: Cooking in an air fryer? Use 375°F (190°C) for about 15-20 minutes for an even crispier finish.
  • Vegan-Friendly: Replace chicken with tofu or cauliflower florets, and use a flax egg and non-dairy milk for a delicious vegan twist!
  • Extra Crunch: Mix crushed cornflakes with your breadcrumbs for an unbeatable crunch and a delightful texture difference.
  • Cheesy Coating: Add shredded cheese to your breadcrumb mixture for a cheesy layer that melds beautifully with the buffalo sauce!
  • Spicy Fusion: Incorporate spices like cayenne pepper or chili powder for an extra kick, while keeping a nice balance of flavor.
  • Sauce Varieties: Instead of standard buffalo sauce, experiment with chipotle or sriracha for a smoky or flavorful alternative.
  • Sweet Twist: Mix honey or maple syrup with the buffalo sauce for a hint of sweetness that beautifully complements the spice.

With these variations, you can transform the Buffalo Chicken Tenders into an entirely new experience! If you’re feeling extra adventurous, consider serving them alongside a refreshing blue cheese dressing for that classic Buffalo pairing. Enjoy your culinary adventure!

Buffalo Chicken Tenders Recipe FAQs

What type of chicken should I use for this recipe?
Absolutely! For optimal results, I recommend using boneless, skinless chicken tenders. They are easy to cook and provide the right texture you desire for these Buffalo Chicken Tenders. Alternatively, you can use chicken breast cut into strips, which works just as well!

How should I store leftover Buffalo Chicken Tenders?
Store any leftover tenders in an airtight container in the fridge for up to 3 days. This helps maintain their flavor and texture, allowing you to enjoy a delicious snack even after the initial meal!

Can I freeze the Buffalo Chicken Tenders?
Very! To freeze them, let the cooked tenders cool completely. Place them in a single layer on a baking sheet and freeze until firm, about 1-2 hours. After that, transfer them to a freezer-safe bag, making sure to remove as much air as possible. They’ll be good for up to 2 months!

What’s the best way to reheat Buffalo Chicken Tenders?
To reheat, I recommend placing the tenders on a baking sheet and warming them in a preheated oven at 375°F (190°C) for about 10-15 minutes. This method helps to restore their crispiness, making them taste freshly baked again.

Can I adjust the spice level of the buffalo sauce?
Definitely! If you prefer a milder flavor, you can use less buffalo sauce than called for, or substitute it with a BBQ sauce instead. For an extra kick, adding a sprinkle of cayenne pepper to the breadcrumb mixture will give you that added heat!

Are these Buffalo Chicken Tenders gluten-free?
Yes! To make them gluten-free, simply substitute the all-purpose flour with a gluten-free flour blend and use gluten-free breadcrumbs. This way, you can enjoy all the crispy goodness while adhering to gluten-free dietary requirements.

undefined

Crispy Buffalo Chicken Tenders Your New Favorite Snack

Delicious and easy-to-make baked Buffalo Chicken Tenders, perfect for game days or a quick dinner.
Prep Time 10 minutes
Cook Time 25 minutes
Total Time 35 minutes
Servings: 4 tenders
Course: Dinner
Cuisine: American
Calories: 250

Ingredients
  

For the Chicken
  • 1 lb Boneless Skinless Chicken Tenders
For the Coating
  • 1/2 cup All-Purpose Flour Can substitute with gluten-free flour
  • 1 cup Bread Crumbs Panko is preferred for texture
  • 1 tsp Garlic Powder Fresh garlic can be used
  • 1 tsp Paprika Smoked paprika can enhance flavor
  • 1/2 tsp Salt Adjust to taste
For the Binding
  • 1 large Egg Flax egg can be used for vegan option
  • 2 tbsp Milk Any milk alternative works
For the Sauce
  • 1/2 cup Buffalo Wing Sauce Select your favorite brand

Equipment

  • Oven
  • Baking Sheet
  • Mixing Bowl

Method
 

Step-by-Step Instructions for Spicy Baked Buffalo Chicken Tenders
  1. Preheat your oven to 400°F (200°C) and prepare a baking sheet.
  2. Coat the chicken tenders with all-purpose flour thoroughly.
  3. Set up a breading station with egg wash and breadcrumb mixture.
  4. Dip each chicken tender in the egg wash, then roll in the breadcrumb mixture.
  5. Bake in the oven for 20-25 minutes, flipping halfway through.
  6. Brush with buffalo wing sauce while warm before serving.

Nutrition

Serving: 1tenderCalories: 250kcalCarbohydrates: 18gProtein: 24gFat: 10gSaturated Fat: 2gPolyunsaturated Fat: 3gMonounsaturated Fat: 5gCholesterol: 70mgSodium: 800mgPotassium: 300mgFiber: 1gSugar: 1gVitamin A: 200IUVitamin C: 2mgCalcium: 50mgIron: 1mg

Notes

Best served fresh out of the oven with ranch dressing.

Tried this recipe?

Let us know how it was!

Refreshing Strawberry Cucumber Salad: Quick Summer Delight

As my friends and I gathered around the patio table, the scent of summer filled the air, each bite of our meals beckoning joy. It was then that I unveiled my secret weapon: the 20-Minute Strawberry Cucumber Salad with Feta and Honey Lemon Dressing. This vibrant dish is a cheerful celebration, marrying sweet, juicy strawberries with crispy cucumbers—made all the better with the touch of creamy feta and fresh herbs. In just 20 minutes, you’ll create a quick and easy side that shines on any summer dinner table while keeping things deliciously nutritious. This salad is bound to become your go-to recipe, perfect for warm evenings or a refreshing potluck dish. Ready to dive into a delightful twist on summertime? Let’s get started!

Why is this salad a summer must-have?

Quick and Easy: In just 20 minutes, you can whip up this stunning salad that fits perfectly into your busy summer schedule.
Vibrant Colors: The bright hues of strawberries and cucumbers make it a feast for the eyes—an impressive side at any gathering!
Flavorful Layers: The combination of creamy feta and fresh herbs elevates the dish, offering every bite an explosion of taste.
Versatile Option: Whether you’re serving it alongside grilled chicken or as a light main dish, this salad pairs effortlessly with various proteins.
Healthy and Refreshing: With its nutritional benefits, this salad is a guilt-free indulgence that keeps you feeling light and energetic. Enjoy this perfect summer delight that your friends and family will adore!

Strawberry Cucumber Salad Ingredients

• Discover the delicious elements that make this salad shine!

For the Salad

  • Chopped Strawberries – Adds sweetness and moisture; use ripe strawberries for best flavor.
  • Chopped Cucumbers – Provides crunch and hydration; Persian or mini cucumbers are recommended for extra crunch.
  • Crumbled Feta Cheese – Adds creamy, tangy richness; high-quality sheep’s feta is preferred for optimal taste.
  • Fresh Basil – Brings herbal freshness; adjust the quantity based on leaf size.
  • Fresh Mint – Adds a refreshing flavor; also adjustable based on leaf size.
  • Salt and Pepper – Enhances flavor; adjust to taste.

For the Dressing

  • Olive Oil – Serves as the base for salad dressing, adding richness.
  • Lemon Juice – Provides acidity and brightness; freshly squeezed is ideal.
  • Honey – Adds a touch of sweetness; can substitute with maple syrup for a vegan option.
  • White Wine Vinegar (or Apple Cider Vinegar) – Adds tanginess to the dressing.
  • Garlic Powder – Gives a subtle depth of flavor; adjust based on preference.

Enjoy creating this vibrant Strawberry Cucumber Salad bursting with flavors!

Step‑by‑Step Instructions for 20-Minute Strawberry Cucumber Salad with Feta and Honey Lemon Dressing

Step 1: Prepare the Dressing
In a small bowl or jar, combine 1/4 cup olive oil, 2 tablespoons lemon juice, 1 tablespoon honey, and 1 tablespoon white wine vinegar. Add 1/2 teaspoon garlic powder, salt, and pepper to taste. Whisk vigorously for about 30 seconds until the mixture is well combined and emulsified. Set aside the dressing while you prep the salad ingredients, letting the flavors meld together.

Step 2: Chop the Salad Ingredients
Grab a large cutting board and finely chop 2 cups of fresh strawberries and 2 cups of Persian cucumbers. Aim for bite-sized pieces to create a beautiful, colorful mix. Once chopped, transfer them to a large serving bowl. This vibrant combination will make your Strawberry Cucumber Salad truly eye-catching and appetizing!

Step 3: Add Herbs and Feta
Next, sprinkle in 1/2 cup crumbled feta cheese, 1/4 cup fresh basil leaves, and 1/4 cup fresh mint leaves into the bowl with the strawberries and cucumbers. Gently toss the ingredients together with a wooden spoon; the creamy feta will blend nicely with the crispness of the cucumbers and the sweetness of the strawberries, creating an aroma that’s simply irresistible!

Step 4: Dress the Salad
Now it’s time to take the dressing you prepared in Step 1 and pour it evenly over the salad mixture. Use a large spoon to gently toss everything together until the salad is well-coated with the honey lemon dressing. You’ll want to see all those beautiful colors shining through, promising a burst of flavor in each bite of your Strawberry Cucumber Salad.

Step 5: Taste and Adjust Seasonings
Before serving, take a moment to taste the salad. Depending on your preference, you may want to add a bit more salt, pepper, or honey. Feel free to let your taste buds guide you for that perfect balance of flavors! Remember, this fresh Strawberry Cucumber Salad is all about customization and enjoyment.

Step 6: Serve Immediately
To get the best texture and flavors, serve the salad immediately after dressing. Plating this refreshing Strawberry Cucumber Salad while it’s fresh will keep it crisp and vibrant. It’s a perfect side to summer gatherings, barbecues, or simply as a light main dish on those warm evenings. Enjoy the delightful medley of flavors!

What to Serve with Strawberry Cucumber Salad

There’s nothing quite like a summer gathering that calls for vibrant sides to elevate the meal.

  • Grilled Chicken: Juicy, charred chicken provides a savory contrast to the fresh, sweetness of the salad. Perfect for a wholesome outdoor feast!
  • Seared Salmon: The rich, buttery flavor of salmon harmonizes beautifully with the lightness of the salad, creating a well-rounded meal experience.
  • Quinoa Pilaf: Nutty and fluffy quinoa adds heartiness while complementing the dish’s freshness; it’s also a satisfying vegetarian option.
  • Garlic Bread: Crunchy, toasted bread with a hint of garlic provides a delightful texture that enhances the flavors of the salad.
  • Watermelon Feta Salad: A different twist on fruit salads, this refreshing mix mirrors the lightness of the Strawberry Cucumber Salad—perfect for summer!
  • Iced Tea or Lemonade: Chilled drinks like sweet iced tea or zesty lemonade add a thirst-quenching touch that pairs wonderfully with the salad’s bright flavors.
  • Berry Tart: End the meal on a sweet note with a light berry tart; the fruits echo the salad’s sweet notes for a harmonious finish.
  • Roasted Nuts: A small bowl of lightly salted roasted almonds or walnuts offers a delightful crunch that contrasts well with the salad’s soft textures.
  • Pesto Pasta: A cold or warm pesto pasta dish adds a savory herbaceous layer that complements the fresh ingredients of the salad effortlessly.
  • Fruit Sorbet: As a refreshing dessert, fruit sorbet cleanses the palate while keeping the flavors fruity and light, perfect for warm evenings.

Strawberry Cucumber Salad Variations

Feel free to embrace creativity and customize this delightful salad with these fun ideas!

  • Vegan Feta: Replace crumbled feta with a plant-based feta alternative for a delicious dairy-free option. The creamy consistency will still create that wonderful texture!

  • Herb Swaps: Try using fresh dill or cilantro instead of basil and mint for a unique flavor twist. These herbs bring their own delightful freshness to the salad.

  • Nutty Crunch: Add a handful of toasted walnuts or almonds for extra crunch and healthy fats. The nuttiness beautifully complements the sweetness of the strawberries.

  • Spicy Kick: For those who enjoy a little heat, toss in finely chopped jalapeño or sprinkle some red chili flakes. They will spark a fun contrast against the sweetness!

  • Berry Medley: Mix in some blueberries or raspberries along with the strawberries. The medley of berries will enhance the visual appeal and provide even more flavor complexity.

  • Creamy Avocado: Diced avocado will add a rich, creamy element to the salad, elevating its heartiness. Plus, it’s a fantastic way to enjoy healthy fats.

  • Citrus Burst: Replace lemon juice with fresh lime or orange juice for a refreshing twist. The citrusy zing introduces an exciting new dimension to the dressing!

  • Sautéed Onions: For a savory contrast, add some caramelized onions. They will add sweetness and depth that elevates the overall taste with an aromatic quality.

Don’t hesitate to dive into these variations and let this refreshing Strawberry Cucumber Salad shine on your summer table! For more tasty ideas, check out how to make a delicious garlic-infused olive oil here or explore our range of quick salad recipes here.

How to Store and Freeze Strawberry Cucumber Salad

Fridge: For best quality, enjoy your Strawberry Cucumber Salad fresh, but if you have leftovers, store them in an airtight container in the fridge for up to 1 day. The salad may lose its crispness over time.

Separation: Store the dressing separately to avoid sogginess in the salad. Keep chopped strawberries and cucumbers stored in another container; combine just before serving for optimal flavor and texture.

Freezer: Freezing is not recommended for this salad due to the watery nature of cucumbers and strawberries, which can change texture after thawing.

Reheating: This dish is best served cold and fresh. There’s no need to reheat; simply enjoy as is or chill in the fridge before serving.

Make Ahead Options

These Strawberry Cucumber Salad components are ideal for meal prep, allowing you to save time on those busy weeknights! You can chop the strawberries and cucumbers up to 24 hours in advance, storing them in airtight containers in the refrigerator to maintain freshness. Additionally, crumble the feta cheese and prepare the honey lemon dressing a day ahead, keeping them separate until serving to prevent sogginess. When it’s time to enjoy your salad, simply combine everything in a large bowl and toss it with the dressing. This way, you’ll have a vibrant and delicious Strawberry Cucumber Salad ready to impress your family and friends with minimal effort!

Expert Tips for the Best Strawberry Cucumber Salad

  • Quality Ingredients: Always choose ripe strawberries and high-quality feta cheese, as they significantly enhance the flavor of your Strawberry Cucumber Salad.

  • Fresh Herbs: Add basil and mint just before serving to keep their flavor bright and fresh, avoiding wilting.

  • Dressing Separation: If making ahead, store the dressing separately to prevent sogginess in your salad. Toss right before serving for optimal texture.

  • Adjust to Taste: Always taste your salad before serving; adding more salt, pepper, or honey can elevate the overall flavor profile.

  • Vegan Substitutions: For a great vegan option, remember to replace the feta cheese with a plant-based alternative and use maple syrup instead of honey.

  • Mix and Match: Feel free to experiment with different herbs or nuts for added flavor and crunch in your Strawberry Cucumber Salad!

20-Minute Strawberry Cucumber Salad Recipe FAQs

What type of strawberries should I use for the salad?
Absolutely! Using ripe, sweet strawberries is key for the best flavor in your Strawberry Cucumber Salad. Look for berries that are vibrant red, firm, and free from dark spots or blemishes—these will ensure the sweetest taste!

How should I store leftovers?
Very! If you have any leftover salad, place it in an airtight container and store it in the fridge. It’s best to consume it within 1 day for peak freshness. If you find it becoming soggy, it’s likely due to the dressing—next time, keep the dressing separate until you’re ready to enjoy!

Can I freeze Strawberry Cucumber Salad?
Not recommended! Freezing this salad is a no-go because cucumbers and strawberries contain a lot of water. Once thawed, they can lose their texture and become mushy. It’s best enjoyed fresh and cold straight from the fridge!

How can I prevent the salad from becoming soggy?
Certainly! To keep your Strawberry Cucumber Salad crisp and fresh, store the dressing separately from the salad ingredients. Only combine them just before serving. This way, the moisture from the dressing won’t wilt the cucumbers or make the strawberries mushy before you’re ready to dig in!

Is this salad safe for those with dairy allergies?
Absolutely! If you need a dairy-free option, simply swap the crumbled feta cheese for a plant-based feta alternative and replace the honey with maple syrup for a vegan twist. Enjoying this delightful Strawberry Cucumber Salad can be inclusive for everyone at your table!

What are some good variations for this salad?
Absolutely! You can mix things up by trying different herbs like dill or cilantro for a unique flavor. Adding nuts like walnuts or almonds not only introduces lovely crunch but also boosts the nutritious value of your Strawberry Cucumber Salad. It’s all about enjoying and personalizing each bite!

undefined

Refreshing Strawberry Cucumber Salad: Quick Summer Delight

A vibrant Strawberry Cucumber Salad bursting with flavors, perfect for summer gatherings.
Prep Time 20 minutes
Total Time 20 minutes
Servings: 4 servings
Course: Salad
Cuisine: American
Calories: 150

Ingredients
  

For the Salad
  • 2 cups fresh strawberries chopped, ripe
  • 2 cups Persian cucumbers chopped
  • 1/2 cup crumble feta cheese high-quality, sheep's feta preferred
  • 1/4 cup fresh basil adjust based on leaf size
  • 1/4 cup fresh mint adjust based on leaf size
  • salt to taste
  • pepper to taste
For the Dressing
  • 1/4 cup olive oil base for salad dressing
  • 2 tablespoons lemon juice freshly squeezed is ideal
  • 1 tablespoon honey can substitute with maple syrup
  • 1 tablespoon white wine vinegar or apple cider vinegar
  • 1/2 teaspoon garlic powder adjust based on preference

Equipment

  • Cutting board
  • Mixing Bowl
  • small bowl or jar
  • whisk
  • large spoon

Method
 

Preparation Steps
  1. In a small bowl or jar, combine olive oil, lemon juice, honey, and white wine vinegar. Add garlic powder, salt, and pepper to taste. Whisk vigorously for about 30 seconds until well combined and emulsified. Set aside.
  2. Finely chop fresh strawberries and Persian cucumbers. Aim for bite-sized pieces and transfer them to a large serving bowl.
  3. Sprinkle crumbled feta cheese, fresh basil leaves, and fresh mint leaves into the bowl, then gently toss together.
  4. Pour the dressing over the salad mixture and gently toss until the salad is well-coated with the dressing.
  5. Taste the salad and adjust seasonings with more salt, pepper, or honey if needed.
  6. Serve immediately for the best texture and flavor.

Nutrition

Serving: 1servingCalories: 150kcalCarbohydrates: 12gProtein: 4gFat: 10gSaturated Fat: 3gPolyunsaturated Fat: 1gMonounsaturated Fat: 5gCholesterol: 15mgSodium: 200mgPotassium: 300mgFiber: 2gSugar: 6gVitamin A: 400IUVitamin C: 50mgCalcium: 150mgIron: 1mg

Notes

For a vegan option, replace feta cheese with a plant-based alternative and use maple syrup instead of honey. Store dressing separately to prevent sogginess in the salad.

Tried this recipe?

Let us know how it was!

Mexican Street Corn Pasta Salad: A Flavorful Twist You’ll Love

As I was biting into a homemade meal the other day, the vibrant flavors of summer burst forth in every mouthful. It took me straight to the streets of Mexico, where the iconic elote reigns supreme. That’s when the idea hit me: why not capture that deliciousness in a pasta salad? Enter my Mexican Street Corn Pasta Salad, a delightful twist that’s both creamy and zesty. This dish is a breeze to prepare, making it the ideal choice for potlucks or summer barbecues. Not only is it customizable to fit various dietary preferences—think gluten-free or vegan—but it’s also perfect for making ahead, so you can savor flavor without the hassle. Ready to bring a taste of Mexico to your table? Let’s dive in!

Why is this pasta salad a must-try?

Vibrant Flavors: The zesty combination of lime, chili powder, and smoked paprika creates a mouthwatering experience that transports you straight to the streets of Mexico.
Customizable Delight: Whether you’re gluten-free or vegan, this salad easily adapts to fit your dietary needs without compromising on taste.
Easy Preparation: With simple steps, this dish can be whipped up in no time, making it the perfect choice for busy schedules.
Crowd-Pleasing Appeal: Serve it at your next barbecue or picnic, and watch it disappear as friends and family rave about its deliciousness!
Make-Ahead Friendly: Prepare it a day in advance, allowing the flavors to meld beautifully for a refreshing taste that’s always ready to impress.

Don’t forget to check out my tips for making gluten-free pasta to elevate this dish!

Mexican Street Corn Pasta Salad Ingredients

For the Pasta
Elbow Macaroni or Rotini Pasta – Base of the salad providing structure and heartiness; use gluten-free pasta for a gluten-free version.

For the Corn
Corn (Grilled, Frozen, or Canned) – Adds sweetness and texture; grilled corn enhances flavor significantly.

For the Dressing
Mayonnaise – Adds creaminess to the dressing; can substitute with Greek yogurt for a lighter option.
Sour Cream – Provides a rich, tangy flavor; swap with plant-based sour cream for a vegan version.
Lime Juice – Adds acidity and brightness; fresh lime is preferred over bottled for a fresher taste.
Chili Powder – Gives the salad a subtle heat; adjust quantity for desired spice level.
Smoked Paprika – Introduces a smokey depth; regular paprika can be used as a substitute.
Garlic Powder – Enhances overall flavor; fresh minced garlic could also be used.
Salt and Pepper – For seasoning to taste.

For the Garnish
Chopped Fresh Cilantro – Adds a fresh herbal note; omit for those who dislike cilantro.
Crumbled Cotija Cheese – Provides a creamy and salty finish; for vegan adaptation, use a plant-based cheese alternative.

This Mexican Street Corn Pasta Salad is the perfect dish that captures all those vibrant flavors while being flexible for different dietary preferences!

Step‑by‑Step Instructions for Mexican Street Corn Pasta Salad

Step 1: Cook the Pasta
Begin by bringing a large pot of salted water to a boil. Add the elbow macaroni or rotini pasta and cook for 7-9 minutes until al dente, stirring occasionally. Once cooked, drain the pasta and rinse it under cold water to stop the cooking process and cool it down. Set the pasta aside to let it drain completely.

Step 2: Prepare the Corn
While the pasta is cooking, prepare the corn. If you have grilled corn, carefully slice the kernels off the cob; if using frozen or canned corn, thaw the frozen corn or drain the canned corn thoroughly. Set the prepared corn aside so it can be mixed into the Mexican Street Corn Pasta Salad later.

Step 3: Whisk the Dressing
In a medium-sized mixing bowl, combine ½ cup of mayonnaise, ¼ cup of sour cream, and the juice of one lime. Add 1 teaspoon of chili powder, ½ teaspoon of smoked paprika, ½ teaspoon of garlic powder, and season with salt and pepper to taste. Whisk the dressing until it’s smooth and well combined, creating a zesty base for your pasta salad.

Step 4: Assemble the Salad
In a large mixing bowl, combine the cooled pasta, prepared corn, halved cherry tomatoes, finely chopped red onion, chopped fresh cilantro, and crumbled cotija cheese. Gently fold the ingredients together to evenly distribute everything, ensuring the colorful ingredients will shine through in the Mexican Street Corn Pasta Salad.

Step 5: Combine and Toss
Pour the creamy dressing over the pasta and vegetable mixture. Using a spatula or large spoon, carefully toss until all ingredients are well coated with the dressing. Make sure to incorporate all the flavors into the pasta salad, creating a delightful mix that highlights the essence of elote.

Step 6: Chill and Serve
Cover the assembled Mexican Street Corn Pasta Salad with plastic wrap or a lid and place it in the refrigerator for at least 30 minutes. Allowing it to chill will help the flavors meld beautifully. When ready to serve, gently stir again to re-distribute the dressing before transferring to your serving dish.

Make Ahead Options

These Mexican Street Corn Pasta Salad preparations are perfect for busy weeknights or gatherings! You can cook the pasta up to 3 days in advance and store it in an airtight container in the refrigerator. Additionally, prepare the corn and dressing ahead of time, as they can be combined up to 24 hours before serving. Just remember to keep the dressing separate until you’re ready to toss everything together to prevent sogginess. When ready to serve, simply mix the chilled pasta, corn, and the dressing, then gently fold in the fresh ingredients like tomatoes and cilantro. This way, your salad will be just as delicious and bursting with flavor, saving you valuable time!

How to Store and Freeze Mexican Street Corn Pasta Salad

Fridge: Store the salad in an airtight container in the refrigerator for up to 3 days. Stir gently before serving to re-distribute the dressing and flavors.

Freezer: It’s best not to freeze the salad due to the creamy dressing and fresh ingredients. If needed, assemble without the dressing and freeze for up to 1 month; add dressing when ready to serve.

Make-Ahead: Prepare the salad up to 24 hours in advance. Chill in the refrigerator, allowing time for flavors to meld beautifully for that perfect Mexican Street Corn Pasta Salad taste.

Reheating: If you have leftovers to reheat, remove only the amount you want, but it’s recommended to enjoy it cold for the best flavor experience.

Variations & Substitutions for Mexican Street Corn Pasta Salad

Feel free to explore your culinary creativity with this delectable salad; every twist is a new adventure in flavor!

  • Gluten-Free: Use your favorite gluten-free pasta, ensuring everyone can enjoy this dish without worry.
  • Dairy-Free: Opt for a plant-based mayonnaise and sour cream to create a delicious vegan version that everyone can savor.
  • Protein Boost: Add grilled chicken, shrimp, or black beans for a heartier meal option. Each addition brings its own delightful taste.
  • Extra Veggies: Toss in diced bell peppers, zucchini, or avocado for added nutrition and creaminess. These veggies offer a wonderful crunch to every bite.
  • Spicy Kick: Incorporate diced jalapeños or a dash of hot sauce into the dressing to amp up the heat to your preference.
  • Smoky Flavor: Swap smoked paprika with chipotle powder for a bolder, smokier profile that offers a delightful depth.
  • Fresh Herbs: Experiment with fresh basil or parsley instead of cilantro for a delightful twist tailored to your taste buds. Every herb brings a unique flavor burst.
  • Nutty Addition: Incorporate toasted corn nuts or slivered almonds for an unexpected crunch that elevates the overall texture of this salad.

For more delicious variations, don’t miss my tips on making gluten-free pasta and unleashing your creativity with veggies in salads!

Expert Tips for Mexican Street Corn Pasta Salad

  • Cook Pasta Al Dente: Ensure pasta maintains a firm texture; overcooking can lead to mushy salad.
  • Chill Time Is Key: Allow your pasta salad to chill for at least 30 minutes to meld the vibrant flavors together beautifully.
  • Fresh Ingredients Matter: Use fresh lime juice and grilled corn when possible for maximum taste; frozen or canned corn lacks the same depth.
  • Customizable Spice: Adjust the amount of chili powder based on your spice preference to personalize your Mexican Street Corn Pasta Salad experience.
  • Add Protein: Boost your salad by incorporating grilled chicken, shrimp, or black beans, making it a heartier meal option.

What to Serve with Mexican Street Corn Pasta Salad

Looking to create a delightful meal that complements the vibrant flavors of this creamy dish?

  • Grilled Chicken: Juicy, grilled chicken adds protein and a savory element, making for a satisfying pairing alongside the bright pasta salad.

  • Avocado Salad: Creamy avocado salad brings freshness to the table, balancing the flavors with its smooth texture and rich flavor.

  • Fresh Fruit Salad: A colorful, fruity medley provides a sweet contrast to the zesty pasta, elevating the entire meal with refreshing bursts of flavor.

  • Corn on the Cob: Keeping with the theme, serving charred corn on the cob brings a delightful crunch, reminiscent of traditional elote.

  • Chips and Salsa: Crispy tortilla chips with zesty salsa offer a satisfying crunch and a touch of spice that pairs beautifully with the creamy salad.

  • Sparkling Water with Lime: Light and refreshing, sparkling water garnished with lime is perfect for cleansing your palate between bites and enhancing the meal experience.

For a dessert idea, don’t forget about Key Lime Pie. Its creamy and slightly tart flavor echoes the lime in the salad, providing a perfect sweet finish to your gathering.

Mexican Street Corn Pasta Salad Recipe FAQs

How do I select ripe corn for this salad?
Absolutely! When choosing corn, look for ears with bright green husks and plump kernels. The kernels should be firm and juicy, without any dark spots or dullness. Fresh corn from a local farmers market often yields the best flavor. If you’re using frozen or canned corn, opt for brands that have minimal additives for optimal taste.

How do I store leftover Mexican Street Corn Pasta Salad?
Very simply! Store your Mexican Street Corn Pasta Salad in an airtight container in the refrigerator for up to 3 days. It’s best to stir it gently before serving to re-distribute the dressing and ingredients once again. If you notice any separation, just give it a quick toss, and you’re ready to enjoy.

Can I freeze this pasta salad?
It’s best not to freeze the entire salad due to its creamy dressing. However, if you want to prepare it in advance, you can assemble the salad without the dressing and freeze it for up to 1 month. When ready to serve, simply thaw in the refrigerator overnight and mix in your dressing fresh before serving.

What should I do if my pasta salad gets too mushy?
If your pasta turns out mushy, it’s often due to overcooking. For future batches, make sure to cook your pasta al dente and remember to rinse it under cold water after draining to halt the cooking process. If you find it’s already mushy, consider adding more fresh ingredients like crunchy vegetables (cucumber or bell peppers) to balance the texture a bit.

Is this recipe suitable for my gluten-intolerant friend?
The more the merrier! You can easily make this Mexican Street Corn Pasta Salad gluten-free by substituting regular elbow macaroni or rotini with gluten-free pasta options available in stores. Just follow cooking instructions on the package for the best results, and your salad will be perfect for everyone to enjoy!

Can I replace the mayo and sour cream for a healthier version?
Certainly! For a lighter twist on this Mexican Street Corn Pasta Salad, you can substitute mayonnaise with Greek yogurt, which adds a creamy texture while cutting down on calories. Similarly, using plant-based sour cream is a fantastic option for a vegan adaptation. Just keep an eye on the flavors to ensure they still align with your taste preferences!

undefined

Mexican Street Corn Pasta Salad: A Flavorful Twist You’ll Love

Experience the vibrant flavors of Elote in this Mexican Street Corn Pasta Salad, a creamy and zesty dish perfect for potlucks and summer barbecues.
Prep Time 10 minutes
Cook Time 9 minutes
Chill Time 30 minutes
Total Time 49 minutes
Servings: 6 servings
Course: Pasta
Cuisine: Mexican
Calories: 350

Ingredients
  

For the Pasta
  • 8 oz Elbow Macaroni or Rotini Pasta Use gluten-free pasta for a gluten-free version.
For the Corn
  • 2 cups Corn (Grilled, Frozen, or Canned) Grilled corn enhances flavor significantly.
For the Dressing
  • ½ cup Mayonnaise Can substitute with Greek yogurt for a lighter option.
  • ¼ cup Sour Cream Swap with plant-based sour cream for a vegan version.
  • 1 Juice of Lime Fresh lime is preferred.
  • 1 tsp Chili Powder Adjust quantity for desired spice level.
  • ½ tsp Smoked Paprika Regular paprika can be used as a substitute.
  • ½ tsp Garlic Powder Fresh minced garlic could also be used.
  • To taste Salt
  • To taste Pepper
For the Garnish
  • ¼ cup Chopped Fresh Cilantro Omit for those who dislike cilantro.
  • ½ cup Crumbled Cotija Cheese For vegan adaptation, use a plant-based cheese alternative.

Equipment

  • Large pot
  • Medium-sized mixing bowl
  • large mixing bowl

Method
 

Step-by-Step Instructions
  1. Cook the Pasta: Bring a large pot of salted water to a boil, add the elbow macaroni or rotini pasta, and cook for 7-9 minutes until al dente. Drain and rinse under cold water.
  2. Prepare the Corn: Slice kernels off the cob for grilled corn, or thaw and drain frozen or canned corn. Set aside.
  3. Whisk the Dressing: In a medium bowl, combine mayonnaise, sour cream, lime juice, chili powder, smoked paprika, garlic powder, salt, and pepper. Whisk until smooth.
  4. Assemble the Salad: In a large bowl, combine cooled pasta, prepared corn, halved cherry tomatoes, finely chopped red onion, cilantro, and cotija cheese. Gently fold ingredients together.
  5. Combine and Toss: Pour dressing over the salad mix and toss gently to coat all ingredients.
  6. Chill and Serve: Cover the salad and chill for at least 30 minutes to meld flavors. Stir before serving.

Nutrition

Serving: 1cupCalories: 350kcalCarbohydrates: 45gProtein: 10gFat: 15gSaturated Fat: 3gPolyunsaturated Fat: 2gMonounsaturated Fat: 8gCholesterol: 20mgSodium: 600mgPotassium: 300mgFiber: 4gSugar: 2gVitamin A: 200IUVitamin C: 10mgCalcium: 100mgIron: 1mg

Notes

This salad is versatile and can be made ahead of time, giving the flavors a chance to meld beautifully. Customizable for various dietary preferences.

Tried this recipe?

Let us know how it was!

Mozzarella Pepperoni Croissant Rolls: Cheesy Snack Bliss

I was in the kitchen, trying to whip up a last-minute snack when a brilliant idea struck: Mozzarella Pepperoni Croissant Rolls! The combination of flaky croissant dough and gooey cheese brought back memories of cozy gatherings where everyone couldn’t resist just one more. This easy recipe is perfect for both seasoned chefs and kitchen novices looking to impress their friends—and it’s beginner-friendly, making it a fun adventure for all skill levels. Not only do these rolls come together in no time, but they also adapt beautifully to your taste. Swap in fresh veggies for a vegetarian twist or other cheese options to suit your palate. Ready to sink your teeth into this deliciousness? Let’s dive into the recipe!

Why Are These Rolls a Must-Try?

Flaky Delight: The croissant dough creates a crispy, buttery shell that perfectly complements the gooey filling.

Savory Goodness: Each bite bursts with the rich flavor of mozzarella and savory pepperoni, offering a delightful combination that’s hard to resist.

Customizable Options: Enjoy the flexibility to transform these rolls into your favorite version, whether that’s swapping pepperoni for colorful veggies or using your preferred cheese blend.

Quick and Easy: This recipe is a time-saver, taking just minutes to prepare and bake, which makes it ideal for unexpected guests or a cozy night in.

Crowd Pleaser: Whether it’s a casual gathering or a family snack, these rolls always steal the show, guaranteeing empty plates and happy faces.

Additional Tip: Consider pairing your rolls with a side of homemade marinara sauce for dipping – it takes them to the next level!

Mozzarella Pepperoni Croissant Rolls Ingredients

For the Dough
Croissant Dough – Store-bought dough is quick and convenient for these rolls.

For the Filling
Mozzarella Cheese (6 oz., shredded) – Provides a melty, gooey center; can be swapped with cheddar, provolone, or a cheese blend.
Pepperoni (3 oz. slices) – Adds a savory, slightly spicy flavor; substitute with vegetables for a vegetarian option.

For the Topping
Butter (2 tbsp, melted) – Enhances flavor and aids in browning; olive oil is a lighter alternative.
Garlic Powder (1/4 tsp) – Adds depth of flavor that elevates the rolls.
Dried Oregano (1/4 tsp) – Provides an aromatic, savory note that complements the cheese.
Dried Basil (1/4 tsp) – Complements the flavors with a fresh, herbal quality, enhancing the overall taste.

Enjoy these Mozzarella Pepperoni Croissant Rolls as a delightful snack or appetizer!

Step‑by‑Step Instructions for Mozzarella Pepperoni Croissant Rolls

Step 1: Preheat and Prepare
Begin by preheating your oven to 375°F (190°C). While the oven heats, line a baking sheet with parchment paper to catch any drips during baking. The anticipation of warm, cheesy Mozzarella Pepperoni Croissant Rolls will fill your kitchen as you prepare the dough!

Step 2: Unroll Dough
Carefully unroll the store-bought croissant dough, separating it into individual triangles. Lay them out on a clean surface, ensuring they’re ready for filling. Look for the perforated edges for easy separation; this step sets the foundation for your delightful rolls.

Step 3: Prepare Cheese
In a bowl, place the shredded mozzarella cheese and set aside. This gooey filling will melt beautifully inside the croissant rolls, adding a creamy layer that contrasts with the flaky exterior. Make sure to use fresh mozzarella for the best melt and flavor.

Step 4: Slice Pepperoni
Take your pepperoni slices and cut each one in half. This will ensure that the slices fit perfectly within the triangle of croissant dough. The savory, slightly spicy bursts of pepperoni will complement the mozzarella nicely, creating a delicious balance of flavors.

Step 5: Mix Butter and Seasoning
Melt the butter in a small bowl, then add the garlic powder, dried oregano, and dried basil. Stir until well mixed. This flavorful butter will not only help with browning but also enhance the overall taste of your Mozzarella Pepperoni Croissant Rolls, adding a beautiful aroma as they bake.

Step 6: Brush Dough with Butter Mixture
Using a pastry brush, generously brush the triangles of dough with the seasoned butter mixture. Ensure the butter coats each piece well, especially around the edges, which will help achieve that golden-brown finish. The warm scent of garlic and herbs will begin to fill the air.

Step 7: Add Filling
At the wide end of each triangle, place a half slice of pepperoni followed by a sprinkle of mozzarella cheese. Don’t overstuff, as this may cause the filling to leak out. The right amount of cheese will melt beautifully and create the perfect gooey center for your rolls.

Step 8: Roll Up the Dough
Starting from the wide end, carefully roll up each triangle of dough toward the point, tucking in the filling as you go. Ensure that the fillings are sealed inside, creating a nice package. This step is crucial for maintaining the integrity of your tasty rolls while baking.

Step 9: Arrange and Brush
Place the rolled croissant dough on your prepared baking sheet. Once arranged, brush the tops of the rolls with any remaining butter mixture. This will aid in achieving a lovely golden hue and an irresistible sheen once they come out of the oven.

Step 10: Bake to Perfection
Transfer the baking sheet to the preheated oven and bake the rolls for 12-15 minutes. Keep an eye on them and look for a golden brown color and bubbling cheese as cues they are ready. This is when your kitchen will start to smell heavenly!

Step 11: Cool and Serve
Once baked, remove the Mozzarella Pepperoni Croissant Rolls from the oven and allow them to cool slightly. This will make them easier to handle, while still retaining that gooey, cheesy interior. They’re perfect for dipping in marinara sauce or enjoying on their own!

How to Store and Freeze Mozzarella Pepperoni Croissant Rolls

Room Temperature: Store leftover croissant rolls in a cool, dry place in an airtight container for up to 2-3 days to maintain their flaky texture.

Fridge: If you prefer, refrigerate the rolls, where they can stay fresh for up to 5 days. Be sure to reheat them in the oven for crispness.

Freezer: For longer storage, wrap cooled rolls tightly in plastic wrap or aluminum foil, then place them in an airtight container or freezer bag for up to 2 months.

Reheating: When ready to enjoy, reheat from frozen or chilled in the oven at 350°F (175°C) for 10-15 minutes for that delicious, warm, cheesiness to return!

Mozzarella Pepperoni Croissant Rolls Variations

Feel free to let your creativity shine with these delightful variations of mozzarella pepperoni croissant rolls—each twist brings a unique flavor experience!

  • Cheese Swaps: Replace mozzarella with cheddar, provolone, or a fancy cheese blend for a completely new flavor profile. Imagine biting into a roll bursting with the zesty flavor of cheddar, perfectly melted and gooey!

  • Vegetarian Option: Omit pepperoni and opt for vibrant bell peppers or earthy mushrooms instead. This variation is not only colorful but also adds a delicious crunch, making it a great choice for a satisfying vegetarian snack.

  • Spicy Kick: Add red pepper flakes or diced jalapeños to the filling for a spicy twist. Just a pinch can take your croissant rolls from mild to wild, igniting a flavorful explosion in each bite!

  • Herb Infusion: Try mixing in fresh herbs like parsley or chives into the butter mixture for an aromatic boost. Fresh herbs will elevate the flavor, leaving a fresh, delightful taste in your mouth.

  • Pesto Delight: Spread a thin layer of pesto on the dough before adding cheese and pepperoni. The nutty, herbal flavor of pesto adds a gourmet touch, making each roll a little piece of Italy!

  • Sweet and Savory: Experiment with adding some caramelized onions or a hint of honey to the filling for a sweet note. This unexpected combination will surprise and delight anyone who takes a bite!

  • Crunchy Topping: Before baking, sprinkle some breadcrumbs or crushed cracker topping on the rolls for extra crunch. A crispy topping enhances the texture, making each roll even more irresistible.

  • Dipping Sauce Inspiration: Pair your rolls with a tangy marinara sauce or a creamy ranch for dipping. Those dips complement the flavors and provide a fun interactive element to your snack!

With these variations, there’s always a new way to enjoy your mozzarella pepperoni croissant rolls!

Make Ahead Options

These Mozzarella Pepperoni Croissant Rolls are perfect for busy home cooks looking to save time during the week! You can prepare the filling and roll the croissants up to 24 hours in advance. Simply assemble the rolls, ensuring that they are well-sealed to hold in all that deliciousness. After rolling, place them in an airtight container and refrigerate to maintain their freshness. When it’s time to enjoy them, simply brush with the seasoned butter mixture, pop them in a preheated oven, and bake until golden brown and bubbly. With this make-ahead option, you’ll have tasty, cheesy goodness ready to go with minimal effort!

What to Serve with Mozzarella Pepperoni Croissant Rolls

A cozy gathering calls for flavorful additions that enhance the delight of these flaky rolls.

  • Marinara Sauce: Perfect for dipping, this classic sauce adds a tangy contrast to the rich, cheesy rolls.
  • Mixed Green Salad: A light, refreshing salad with a citrus vinaigrette balances the richness of the croissant rolls and adds a pop of color.
  • Garlic Bread: Add another layer of Italian comfort with warm, aromatic garlic bread, complementing the savory flavors beautifully.
  • Roasted Vegetables: Sweet and caramelized, roasted seasonal veggies like bell peppers and zucchini perfectly contrast the cheesy goodness of the rolls.
  • Caprese Salad: Fresh mozzarella, tomatoes, and basil create a vibrant, fresh flavor that melds well with the savory pepperoni.
  • Sparkling Lemonade: A refreshing, bubbly drink that cuts through the richness, making each bite feel even more delightful.
  • Cheese Platter: Offer a variety of cheeses alongside olives and crackers for a sophisticated touch that pairs well with the croissant rolls.
  • Fruit Skewers: Sweet, juicy fruits like strawberries and melon provide a refreshing counterpoint to the savory rolls, creating a complete meal experience.

Expert Tips for Mozzarella Pepperoni Croissant Rolls

Crispy Texture: Brush with more butter: For an extra crispy exterior, brush with additional melted butter before baking.

Avoid Sogginess: Cool before storing: Always let your croissant rolls cool completely before storing to maintain that delightful crunch.

Make Ahead: Refrigerate optional: If you’re preparing ahead, roll the croissants and refrigerate for up to 24 hours before baking—perfect for busy days!

Freezing Guide: Store properly: To freeze, wrap cooled rolls tightly and keep in an airtight container for up to 2 months to preserve flavor.

Cheese Substitution: Get creative: Feel free to swap mozzarella for other cheese options like cheddar or provolone to change up the taste of your rolls.

Vegetarian Twist: Add veggies: Replace pepperoni with bell peppers or mushrooms for a delicious vegetarian adaptation of these mozzarella pepperoni croissant rolls!

Mozzarella Pepperoni Croissant Rolls Recipe FAQs

What type of croissant dough should I use?
Absolutely! Store-bought croissant dough works wonderfully for these rolls. It’s convenient and easy to handle, allowing you to focus on the fun part—creating that cheesy filling! If you’re feeling adventurous, you could even make homemade dough, but for starters, the store-bought version is perfect.

How should I store leftover croissant rolls?
To keep those delectable Mozzarella Pepperoni Croissant Rolls fresh, store them in an airtight container at room temperature for up to 2-3 days. If you’re hoping to extend their life, refrigerate them, and they can last for up to 5 days. I often recommend reheating them in the oven to regain their crispy texture!

Can I freeze these croissant rolls?
Definitely! To freeze, allow the croissant rolls to cool completely. Wrap each one tightly in plastic wrap or aluminum foil, then place them in an airtight container or freezer bag. They can be frozen for up to 2 months. When you’re ready to enjoy, simply reheat from frozen in the oven at 350°F (175°C) for about 10-15 minutes until they’re warm and melty inside!

What if my cheese doesn’t melt properly?
If you find your mozzarella isn’t melting as beautifully as you hoped, it might be due to the type of cheese used. Opt for a high-moisture mozzarella rather than pre-shredded cheese, which can contain anti-caking agents that prevent melting. Another tip is to ensure your rolls are tightly sealed when baking, which helps keep that gooey texture inside.

Can I make these mozzarella pepperoni croissant rolls vegetarian?
Very much so! Simply omit the pepperoni and replace it with colorful diced vegetables like bell peppers, mushrooms, or even spinach. For the cheese, feel free to use a blend of your favorite options like cheddar or provolone to maintain that delectable cheesy flavor! This adaptable recipe welcomes creativity, so have fun with your ingredient choices.

How can I tell when the rolls are ready to come out of the oven?
Keep a close eye on them! Your Mozzarella Pepperoni Croissant Rolls should be golden brown and bubbly. Typically, they take around 12-15 minutes in the oven. A great visual cue is to look for a beautifully golden top and slight puffiness. Don’t forget to let them cool slightly before serving to avoid burning your fingers!

undefined

Mozzarella Pepperoni Croissant Rolls: Cheesy Snack Bliss

Easy and delicious Mozzarella Pepperoni Croissant Rolls make for a delightful appetizer or snack, combining flaky dough with gooey cheese and pepperoni.
Prep Time 15 minutes
Cook Time 15 minutes
Total Time 30 minutes
Servings: 4 rolls
Course: Appetizers
Cuisine: American
Calories: 320

Ingredients
  

For the Dough
  • 1 Croissant Dough Store-bought dough is quick and convenient
For the Filling
  • 6 oz Mozzarella Cheese, shredded Provides a melty, gooey center; can be swapped with cheddar, provolone, or a cheese blend.
  • 3 oz Pepperoni, sliced Adds savory flavor; substitute with vegetables for a vegetarian option.
For the Topping
  • 2 tbsp Butter, melted Enhances flavor and aids in browning; olive oil is a lighter alternative.
  • 1/4 tsp Garlic Powder Adds depth of flavor.
  • 1/4 tsp Dried Oregano Provides an aromatic, savory note.
  • 1/4 tsp Dried Basil Complements the flavors with a fresh, herbal quality.

Equipment

  • Oven
  • Baking Sheet
  • Parchment Paper
  • Mixing Bowl
  • Pastry Brush

Method
 

Step-by-Step Instructions
  1. Preheat your oven to 375°F (190°C) and line a baking sheet with parchment paper.
  2. Unroll the croissant dough into individual triangles.
  3. In a bowl, place the shredded mozzarella cheese and set aside.
  4. Cut each pepperoni slice in half.
  5. Melt the butter and mix in garlic powder, oregano, and basil.
  6. Brush the triangles of dough with the butter mixture.
  7. At the wide end of each triangle, place a half slice of pepperoni followed by mozzarella cheese.
  8. Roll up each triangle starting from the wide end, tucking in the filling as you go.
  9. Arrange the rolled croissant dough on the baking sheet and brush the tops with remaining butter mixture.
  10. Bake for 12-15 minutes until golden brown.
  11. Allow to cool slightly before serving.

Nutrition

Serving: 1rollCalories: 320kcalCarbohydrates: 30gProtein: 13gFat: 20gSaturated Fat: 10gPolyunsaturated Fat: 2gMonounsaturated Fat: 6gCholesterol: 45mgSodium: 600mgPotassium: 150mgFiber: 1gSugar: 1gVitamin A: 500IUCalcium: 200mgIron: 1.5mg

Notes

Consider pairing your rolls with a side of homemade marinara sauce for dipping.

Tried this recipe?

Let us know how it was!

Deviled Strawberries: The Sweet Twist on Cheesecake Delights

One sunny afternoon, I found myself dreaming of a sweet indulgence that could brighten any gathering. Enter these delightful Deviled Strawberries with Cheesecake Filling, a playful twist on a classic dessert that embodies the spirit of summer! With their luscious cream cheese filling nestled in fresh strawberries, these finger-friendly treats capture the essence of strawberry cheesecake in every vibrant bite. Not only are they a show-stopping addition to any party platter, but they also require no baking, making them an effortless way to impress your friends and family. The combination of creamy, tangy filling and the hint of crunch from graham cracker crumbs creates a harmony that will leave everyone reaching for seconds. Curious about how to whip up this easy and charming finger food? Let’s dive into the recipe together!

Why Are These Strawberries So Irresistible?

Visually Stunning: Bright red strawberries showcase a creamy, thick filling, instantly capturing attention at any gathering.

Effortless Preparation: The no-bake nature means you can whip these up in no time, making them perfect for unexpected guests or potlucks.

Creamy Balance: The luscious cream cheese mixture, enhanced with a touch of lemon, mimics classic cheesecake flavors in every bite.

Party Showstopper: These delightful treats not only look amazing but also offer a fun, finger-friendly option that everyone loves! Elevate your dessert game with these simple yet captivating bites, perfect for your next event. Would you like more recipe ideas? Check out our favorites like Mini Cheesecake Bites to keep the inspiration flowing!

Deviled Strawberries Ingredients

• Perfect for summer gatherings!

For the Filling

  • Cream Cheese (softened) – This creamy base mimics the texture of cheesecake, ensuring a rich bite.
  • Heavy Whipping Cream – Adds a light, fluffy texture to the filling; no direct substitutions, but coconut cream works for non-dairy diets.
  • Sour Cream – Contributes a tangy flavor, balancing the sweetness; Greek yogurt can be a great substitute.
  • Granulated Sugar – Sweetens the filling to achieve the desired cheesecake flavor; consider using a low-carb sweetener for sugar-free options.
  • Vanilla Extract – Enhances the flavors; fresh vanilla bean is a lovely alternative.
  • Fresh Lemon Juice (optional) – Brightens the filling with a hint of acidity; feel free to omit if you prefer a sweeter taste.

For the Strawberries

  • Large Strawberries – The star of the dish; use fresh, ripe strawberries for the tastiest outcome.

For Garnish

  • Graham Cracker Crumbs – Adds a delightful crunch reminiscent of cheesecake crust; crushed nuts are a gluten-free alternative.

These deviled strawberries serve as a tasty centerpiece that will be the talk of your event!

Step‑by‑Step Instructions for Deviled Strawberries with Cheesecake Filling

Step 1: Prepare the Strawberries
Begin by rinsing your large strawberries under cool water, then gently patting them dry. Carefully cut off the stems and slice each strawberry in half lengthwise. Use a small melon baller or spoon to hollow out the center slightly, creating room for the delicious cheesecake filling. To ensure they stand upright, trim a tiny piece from the backside of each half.

Step 2: Whip the Cream
In a medium-sized bowl, pour in the heavy whipping cream. Using an electric mixer, beat the cream on medium speed for about 5 minutes or until stiff peaks form. This step is crucial for achieving a light and airy texture in your filling that mimics the fluffiness of cheesecake. Set the whipped cream aside for later use.

Step 3: Mix the Filling
In a separate mixing bowl, combine the softened cream cheese, sour cream, sugar, vanilla extract, and optional fresh lemon juice. Using a hand mixer, blend these ingredients on medium speed until the mixture is completely smooth and creamy, which should take about 2-3 minutes. This rich mixture forms the creamy cheesecake center of your deviled strawberries.

Step 4: Combine Mixtures
Gently fold the whipped cream into the cream cheese mixture. Use a spatula to carefully incorporate the two mixtures, being careful not to deflate the whipped cream. Continue folding until the filling is well combined and creamy. This step is key to achieving a light texture that will perfectly mimic the delightful experience of eating cheesecake.

Step 5: Pipe the Filling
Transfer the cheesecake filling into a piping bag fitted with a large star tip. If you don’t have a piping bag, you can also use a plastic zip-top bag with a corner snipped off. Generously pipe the creamy filling into each hollowed strawberry half, creating beautiful swirls on top that are reminiscent of a classic cheesecake.

Step 6: Garnish and Serve
Sprinkle the tops of the filled strawberries with graham cracker crumbs for that classic cheesecake crunch. This adds not just flavor but also a delightful texture contrast. Serve the deviled strawberries immediately for the best presentation, or refrigerate them for up to an hour to chill slightly before serving. Enjoy this fun and festive dessert with friends and family!

Expert Tips for Deviled Strawberries

Chill the Tools: Ensure the bowl and beaters are chilled before whipping the cream to achieve the best volume.

Select Strawberries Wisely: Choose fresh, large strawberries that are firm and ripe to create the best base for your deviled strawberries.

Don’t Overmix: When combining the whipped cream with the cheesecake filling, fold gently to retain the airy texture. Overmixing can lead to a dense filling.

Prep Ahead: You can make the cheesecake filling the night before and store it in the refrigerator. Just fill the strawberries shortly before serving to maintain their freshness.

Garnish Smartly: Add the graham cracker crumbs just before serving to keep them crunchy and enhance the presentation of your deviled strawberries.

Make Ahead Options

These Deviled Strawberries with Cheesecake Filling are perfect for busy cooks looking to save time without sacrificing flavor! You can prepare the cheesecake filling up to 24 hours in advance; simply mix and store it in an airtight container in the refrigerator. Additionally, you can hollow out the strawberries a few hours ahead of time—just keep them stored in a damp paper towel-lined container to maintain freshness and prevent browning. When you’re ready to serve, all you need to do is pipe the filling into the strawberries and sprinkle with graham cracker crumbs right before serving, ensuring they remain just as delicious and visually appealing!

What to Serve with Deviled Strawberries with Cheesecake Filling

Delight your guests with complementary dishes that highlight the sweetness and creaminess of these charming treats!

  • Creamy Mashed Potatoes: Their rich, buttery texture balances the lightness of the strawberries and offers a comforting contrast at your gathering.

  • Fresh Green Salad: A crisp salad with a tangy vinaigrette not only cleanses the palate but also adds bright flavors and fresh textures to the meal.

  • Mini Quiches: Savory and customizable, these bite-sized delights bring a wonderful flavor contrast to the sweet strawberries, making for an unforgettable finger food experience.

  • Prosecco: This bubbly wine’s bright acidity pairs perfectly with the sweet cream cheese filling, enhancing the overall taste and adding a festive flair.

  • Chocolate-Covered Almonds: The crunch and slight bitterness of chocolate-covered almonds provide a delightful textural contrast, elevating the sweetness of the strawberries.

  • Lemon Sorbet: Refreshing and slightly tart, a scoop of lemon sorbet serves as a palate cleanser while echoing the lemon notes in the filling.

  • Fruit Skewers: Colorful, fresh fruit skewers add an appealing visual aspect to your meal and complement the flavor profile of the strawberries beautifully.

  • Vanilla Ice Cream: The creamy, smooth texture of vanilla ice cream is the ideal sweet counterpart to the tangy filling, making for a delicious dessert combo.

How to Store and Freeze Deviled Strawberries

Fridge: Store any filled deviled strawberries in an airtight container for up to 3 hours. After this time, the strawberries may begin to lose their firmness and freshness.

Make-Ahead Filling: You can prepare the cheesecake filling a day in advance. Keep it stored in an airtight container in the fridge until you’re ready to fill your deviled strawberries.

Freezer: While it’s not recommended to freeze filled strawberries, you can freeze the cheesecake filling for up to a month. Thaw it in the fridge overnight before using.

Sogginess Prevention: If storing whole strawberries, place them in an airtight container with a paper towel to absorb excess moisture and maintain freshness.

Deviled Strawberries: Sweet Twist Surprises

Feel free to play around with this delightful recipe and create your personalized version of these charming bites!

  • Dairy-Free: Substitute heavy whipping cream with coconut cream and cream cheese with a plant-based alternative for a creamy, vegan twist.
  • Flavor Boost: Add flavored cream cheese, such as strawberry or chocolate, to amplify the taste profile.
  • Nutty Crunch: Top with crushed almonds or walnuts instead of graham cracker crumbs to give a different nutty flavor and texture.
  • Fruit Swap: Use mini peaches or ripe kiwi slices instead of strawberries to offer a fresh and unique fruity variation.
  • Bit of Heat: Drizzle a touch of honey infused with chili oil for a sweet and spicy contrast that will surprise your taste buds!
  • Citrus Zing: Try incorporating lime juice in place of lemon juice for a tantalizing citrus twist that brightens the filling.
  • Granola Crunch: Replace graham cracker crumbs with granola for an exciting twist, adding wholesome crunch and adding rustic charm.
  • Mini Cheesecake Version: Serve the filling in mini phyllo cups to create bite-sized cheesecake treats perfectly suited for gatherings.

These variations not only elevate the original recipe but also ensure there’s something for everyone at your next event! If you’re looking for more delightful desserts, don’t miss our scrumptious Mini Cheesecake Bites or indulge in a classic Fruit Salad with Yogurt Dressing to refresh your spread.

Deviled Strawberries with Cheesecake Filling Recipe FAQs

How do I choose ripe strawberries for making deviled strawberries?
Absolutely! When selecting strawberries, look for large, firm berries with a vibrant red color. Avoid those with dark spots or bruises, as they may be overripe. A simple squeeze should reveal a slight give without being mushy, ensuring your strawberries are fresh and flavorful for the best deviled strawberries experience.

What is the best way to store filled deviled strawberries?
Very! For filled deviled strawberries, it’s best to consume them within 3 hours for peak freshness. Store them in an airtight container in the fridge if needed. To keep the strawberries from getting soggy, place a paper towel at the bottom of the container to absorb excess moisture—this little trick works wonders!

Can I freeze the cheesecake filling for deviled strawberries?
Yes, you can! Although I don’t recommend freezing filled strawberries, the cheesecake filling can be frozen for up to a month. To do this, portion it into an airtight container. When you’re ready to use it, simply thaw in the refrigerator overnight and then fill your strawberries as usual. It’s a great time-saver for parties!

What dietary considerations should I keep in mind for this recipe?
Very! If you’re looking for low-carb options, substitute granulated sugar with a low-carb sweetener, and use gluten-free graham cracker crumbs or crushed nuts. For a dairy-free alternative, coconut cream can replace heavy whipping cream, and ensure to use dairy-free cream cheese. Always check for allergies before serving to your guests for the best experience.

Why is my whipped cream not forming stiff peaks?
Oh dear! Make sure your bowl and beaters are completely chilled before whipping the cream. Warm equipment can prevent the cream from reaching the desired fluffy texture. Whip on medium speed and be patient—it usually takes about 5 minutes. If it’s still not thickening, you can add a tablespoon of powdered sugar to help stabilize it.

Can I prepare the filling in advance?
Absolutely! You can make the cheesecake filling the night before and store it in the fridge. Just keep it in an airtight container to maintain freshness. This will save you time on the day of your gathering, allowing for a quick and easy assembly of your deviled strawberries right before serving.

undefined

Deviled Strawberries: The Sweet Twist on Cheesecake Delights

Delight your guests with these deviled strawberries filled with creamy cheesecake. Perfect for summer gatherings!
Prep Time 30 minutes
Total Time 30 minutes
Servings: 8 pieces
Course: Appetizers
Cuisine: American
Calories: 120

Ingredients
  

For the Filling
  • 8 oz Cream Cheese (softened) This creamy base mimics the texture of cheesecake.
  • 1 cup Heavy Whipping Cream Adds a light, fluffy texture.
  • 1/2 cup Sour Cream Contributes a tangy flavor.
  • 1/2 cup Granulated Sugar Sweetens the filling.
  • 1 tsp Vanilla Extract Enhances the flavors.
  • 1 tbsp Fresh Lemon Juice (optional) Brightens the filling.
For the Strawberries
  • 12 large Large Strawberries Use fresh, ripe strawberries.
For Garnish
  • 1/2 cup Graham Cracker Crumbs Adds a delightful crunch.

Equipment

  • Electric mixer
  • Piping Bag
  • melon baller

Method
 

Step-by-Step Instructions
  1. Begin by rinsing your large strawberries under cool water, then gently patting them dry. Carefully cut off the stems and slice each strawberry in half lengthwise. Hollow out the center slightly to create room for the filling.
  2. In a medium-sized bowl, pour in the heavy whipping cream and beat on medium speed for about 5 minutes until stiff peaks form. Set aside.
  3. In a separate bowl, combine the softened cream cheese, sour cream, sugar, vanilla extract, and optional lemon juice. Mix until smooth.
  4. Gently fold the whipped cream into the cream cheese mixture until well combined.
  5. Transfer the filling into a piping bag and generously pipe it into each hollowed strawberry half.
  6. Sprinkle graham cracker crumbs on top of the filled strawberries before serving.

Nutrition

Serving: 1pieceCalories: 120kcalCarbohydrates: 10gProtein: 2gFat: 9gSaturated Fat: 5gPolyunsaturated Fat: 0.5gMonounsaturated Fat: 3.5gCholesterol: 30mgSodium: 50mgPotassium: 100mgFiber: 1gSugar: 8gVitamin A: 200IUVitamin C: 10mgCalcium: 50mgIron: 0.5mg

Notes

Chill the tools for the best volume when whipping cream. Use fresh, large strawberries for the best results. Prepare the filling ahead of time for convenience.

Tried this recipe?

Let us know how it was!

Street Corn Creamy Cucumber Salad That’s Perfect for Summer

As I strolled through a bustling summer market, the sweet aroma of grilled corn caught my attention, mingling with laughter and the sounds of sizzling barbecues. That moment sparked the inspiration for my Refreshing Street Corn Creamy Cucumber Salad. This delightful dish captures the essence of summer gatherings, combining crunchy cucumbers and juicy corn for a delightful twist on a classic elote. It’s incredibly quick to prepare and customizable to suit various dietary needs, making it an essential recipe for your warm-weather menu. Whether you’re hosting a backyard barbecue or looking for a refreshing side dish to pair with grilled favorites, this gluten-free salad is sure to shine. Curious about the best way to whip it all together? Let’s dive into this vibrant summer favorite!

Why You’ll Love This Salad

Freshness abounds in every bite with crisp cucumbers and sweet corn providing a refreshing contrast. Versatile enough to cater to various dietary preferences, this salad easily adapts to be gluten-free or vegan. Quick to prepare, you’ll have a colorful dish ready in no time. Perfect for gatherings, its vibrant flavors and creamy dressing make it a showstopper at any barbecue. Serve it alongside grilled chicken or your favorite summer dishes to elevate your meals!

Street Corn Creamy Cucumber Salad Ingredients

• Get ready to make a scrumptious salad!

For the Salad

  • Fresh Corn Kernels – Adds a delightful sweetness and crunch; canned corn can be used if fresh isn’t available.
  • Cucumber (preferably English) – Offers a refreshing crunch; English cucumbers keep the salad crisp and light.
  • Cherry Tomatoes – Provides juicy bursts of flavor and vibrant color; grape tomatoes are a great alternative.
  • Red Onion – Contributes a mild pungency and sweetness; swap for green onions for a gentler flavor.

For the Dressing

  • Mayonnaise – Serves as the creamy base; Greek yogurt can lighten it up if desired.
  • Sour Cream – Adds tanginess to the dressing; substitute with more Greek yogurt if needed.
  • Lime Juice – Brightens flavors with acidity; lemon juice works as a fine substitute.
  • Chili Powder – Introduces a hint of spice; adjust according to your preferred heat level.
  • Salt and Pepper – Essential for seasoning to taste; don’t skip this step for balanced flavor.

For the Garnish

  • Feta Cheese – Imparts a creamy, tangy finish to the salad; can be omitted or replaced with goat cheese for variations.
  • Cilantro – Offers aromatic freshness; this can be skipped if cilantro isn’t your favorite!

With these delicious ingredients, your Street Corn Creamy Cucumber Salad will become a go-to summer favorite! Ready to dive into the assembly?

Step‑by‑Step Instructions for Refreshing Street Corn Creamy Cucumber Salad

Step 1: Cook the Corn
Bring a large pot of water to a boil over high heat. Add fresh corn kernels and cook for 5–7 minutes until tender yet crisp. Once cooked, drain the corn and transfer it to a bowl to cool. This sweet corn will be the star of your Refreshing Street Corn Creamy Cucumber Salad!

Step 2: Combine Vegetables
In a large mixing bowl, combine the cooled corn, diced English cucumber, halved cherry tomatoes, and finely chopped red onion. Gently toss the ingredients together, ensuring they’re well mixed. This colorful blend will create a delightful base for your summer salad.

Step 3: Prepare Dressing
In a separate bowl, whisk together mayonnaise, sour cream, fresh lime juice, chili powder, and a pinch of salt and pepper. Aim for a smooth, creamy consistency as you blend the ingredients, ensuring the dressing is well combined. This rich dressing will enhance the flavors of your Refreshing Street Corn Creamy Cucumber Salad.

Step 4: Mix Dressing and Salad
Add the prepared dressing to the vegetable mixture in the large bowl. Using a large spoon, gently toss everything together until all the vegetables are evenly coated with the creamy dressing. This step is crucial to achieving that delicious flavor throughout the salad.

Step 5: Garnish
Before serving, sprinkle crumbled feta cheese and chopped cilantro on top of the salad for an extra burst of flavor and color. Feel free to adjust these garnishes according to your taste preferences. Your Refreshing Street Corn Creamy Cucumber Salad is now ready to shine at your summer gatherings!

What to Serve with Street Corn Creamy Cucumber Salad

As the sun shines and the grill warms up, it’s time to create a delightful summer meal that pairs perfectly with this vibrant salad.

  • Grilled Chicken: Juicy, char-grilled chicken offers a savory contrast to the creamy salad, enhancing your summer dining experience. The smokiness adds depth to the meal.
  • Tortilla Chips: Crunchy tortilla chips provide a satisfying textural contrast, perfect for scooping up this refreshing salad. Pair them with a zesty salsa for an extra kick!
  • Chilled White Wine: A crisp, chilled Sauvignon Blanc brightens the flavors of the salad and balances the richness of the dressing. Ideal for a warm evening on the patio.
  • Avocado Toast: Creamy avocado on toasted bread offers a deliciously satisfying bite. The richness complements the fresh salad beautifully.
  • Fruit Skewers: A fresh fruit medley skewered together provides a burst of color and sweetness, creating a delightful contrast to the savory components.
  • Grilled Shrimp Tacos: Light, flavorful shrimp tacos bring a tasty coastal flair that pairs wonderfully with the salad. Add a squeeze of lime for enhanced brightness.
  • Cornbread: Soft and slightly sweet, cornbread adds a comforting element to your meal, harmonizing perfectly with the sweet corn in the salad.
  • Chocolate Mousse: End your meal on a sweet note with a rich chocolate mousse; its creamy texture is a delightful finish after the refreshing salad.

Make Ahead Options

These Refreshing Street Corn Creamy Cucumber Salads are a fantastic option for meal prep, saving you time on busy weeknights! You can prep the vegetables—fresh corn, diced cucumbers, cherry tomatoes, and red onion—up to 24 hours in advance by storing them in an airtight container in the refrigerator. To preserve freshness and quality, mix the creamy dressing separately and refrigerate it. When you’re ready to serve, combine the prepped components and drizzle the dressing over, tossing gently to ensure everything is coated evenly. This strategy not only maintains crispness but also ensures your salad is just as delicious as if made fresh that day!

Storage Tips for Street Corn Creamy Cucumber Salad

Fridge: Store the salad in an airtight container for up to 3 days. This keeps the flavors fresh and prevents moisture loss.

Avoid Freezing: Freezing the salad is not recommended, as it can lead to a mushy texture upon thawing and compromise the fresh taste.

Mix Before Serving: If you prepare the salad in advance, mix the dressing in just before serving to maintain the creaminess and prevent the cucumbers from becoming watery.

Refrigerate Leftovers: Any leftovers should be refrigerated promptly. If there’s excess dressing, consider serving it on the side to keep the salad’s crispness intact.

Expert Tips for Street Corn Creamy Cucumber Salad

Choose Fresh Ingredients: Using fresh corn and cucumbers makes a noticeable difference in flavor and texture. Always opt for the freshest produce available!

Prevent Watery Salad: To avoid excess moisture, salt the cucumbers and let them drain for about 15 minutes before mixing them in. This helps maintain the salad’s crispness.

Mix Just Before Serving: Combine your dressing and salad right before serving. This keeps the creamy consistency fresh and prevents cucumbers from releasing too much water.

Customize to Taste: Feel free to adjust the heat by adding more or less chili powder, or spice it up with diced jalapeños. The Street Corn Creamy Cucumber Salad is all about your preferences!

Dairy-Free Options: If you’re looking for a vegan alternative, use plant-based mayonnaise and sour cream. You can still enjoy rich creaminess without dairy!

Street Corn Creamy Cucumber Salad Variations

Feel free to explore the delightful twists and turns of this recipe to make it truly your own!

  • Spicy Kick: Add diced jalapeños for extra heat. This fiery addition will turn up the flavor while keeping your taste buds dancing!
  • Flavor Swaps: Swap cilantro for fresh basil for a fragrant twist. This change will introduce a new herbaceous note while maintaining the freshness of the salad.
  • Dairy-Free Delight: Replace mayonnaise and sour cream with plant-based alternatives. This way, everyone at the table can enjoy a creamy experience without dairy!
  • Cheese Options: Try goat cheese instead of feta for a different tangy profile. This swap will add creaminess and a subtle earthiness to the salad.
  • Hearty Addition: Stir in diced avocado for added richness. Creamy avocados harmonize beautifully with the crunchy textures of this salad, making each bite luscious.
  • Tangy Zing: Use apple cider vinegar in place of lime juice. This adds an interesting tang that complements the salad’s other flavors wonderfully.
  • Nutty Crunch: Toss in some toasted pumpkin seeds or sunflower seeds for an extra crunchy texture. These will elevate the salad with delightful nutty flavors!
  • Herbed Goodness: Incorporate chopped parsley or dill alongside or instead of cilantro. This will give a fresh herbal punch that enhances the overall flavor profile.

Feel inspired? Don’t hesitate to mix and match these variations for a customized experience that suits your cravings! And if you’re looking for more ideas to liven up your summer meals, consider trying the wonderful flavors of salsa or perhaps a refreshing fruit salad. Enjoy your culinary journey!

Street Corn Creamy Cucumber Salad Recipe FAQs

What type of corn should I use for the salad?
Absolutely, fresh corn kernels are ideal for adding sweetness and crunch to your salad. If fresh corn isn’t available, you can use canned corn – just be sure to drain and rinse it well to remove excess sodium and ensure great flavor.

How long can I store the salad in the refrigerator?
Store your Street Corn Creamy Cucumber Salad in an airtight container in the refrigerator for up to 3 days. It’s best enjoyed fresh, but it will hold its flavor and texture for a short while. Remember to mix well before serving!

Can I freeze the salad for later use?
Freezing is not recommended for this salad. The creamy dressing and fresh vegetables, particularly cucumbers, do not freeze well and can turn mushy upon thawing. For the best experience, enjoy it fresh or store leftovers in the fridge.

I’m concerned about dietary restrictions. Can I make this salad dairy-free?
Very! To make your salad dairy-free, simply substitute the mayonnaise and sour cream with plant-based alternatives. You can also omit the feta cheese or replace it with a dairy-free cheese option. This way, everyone can enjoy this refreshing dish!

How can I prevent the cucumbers from making the salad watery?
To keep your salad crisp, a little trick is to salt the cucumbers before adding them to the mix. Let them sit for about 15 minutes, then drain any excess liquid carefully. This small step makes a big difference in maintaining the fresh texture of your salad.

What can I do if I don’t have certain ingredients?
The beauty of this salad is its customization! If you don’t have cherry tomatoes, grape tomatoes can work just as well. For the dressing, Greek yogurt can easily substitute mayonnaise or sour cream. Feel free to explore alternatives based on what you have on hand.

undefined

Street Corn Creamy Cucumber Salad That's Perfect for Summer

A refreshing salad combining crunchy cucumbers and sweet corn, perfect for summer gatherings.
Prep Time 15 minutes
Cook Time 7 minutes
Cooling Time 10 minutes
Total Time 32 minutes
Servings: 4 servings
Course: Salad
Cuisine: American
Calories: 220

Ingredients
  

For the Salad
  • 2 cups Fresh Corn Kernels Canned corn can be used if fresh isn't available.
  • 1 large Cucumber (preferably English) Keeps salad crisp and light.
  • 1 cup Cherry Tomatoes Grape tomatoes are a great alternative.
  • 1 small Red Onion Swap for green onions for a gentler flavor.
For the Dressing
  • 1/2 cup Mayonnaise Greek yogurt can lighten it up if desired.
  • 1/2 cup Sour Cream Substitute with more Greek yogurt if needed.
  • 2 tablespoons Lime Juice Lemon juice works as a fine substitute.
  • 1 teaspoon Chili Powder Adjust according to your preferred heat level.
  • to taste Salt and Pepper Essential for seasoning to taste.
For the Garnish
  • 1/2 cup Feta Cheese Can be omitted or replaced with goat cheese.
  • 1/4 cup Cilantro Can be skipped if cilantro isn’t your favorite.

Equipment

  • Large pot
  • Mixing Bowl
  • whisk
  • large spoon

Method
 

Step-by-Step Instructions
  1. Bring a large pot of water to a boil over high heat. Add fresh corn kernels and cook for 5–7 minutes until tender yet crisp. Once cooked, drain the corn and transfer it to a bowl to cool.
  2. In a large mixing bowl, combine the cooled corn, diced English cucumber, halved cherry tomatoes, and finely chopped red onion. Gently toss the ingredients together.
  3. In a separate bowl, whisk together mayonnaise, sour cream, fresh lime juice, chili powder, and a pinch of salt and pepper until smooth and creamy.
  4. Add the prepared dressing to the vegetable mixture in the large bowl. Using a large spoon, gently toss everything together.
  5. Before serving, sprinkle crumbled feta cheese and chopped cilantro on top of the salad.

Nutrition

Serving: 1servingCalories: 220kcalCarbohydrates: 15gProtein: 4gFat: 18gSaturated Fat: 3gPolyunsaturated Fat: 0.5gMonounsaturated Fat: 2gCholesterol: 15mgSodium: 300mgPotassium: 260mgFiber: 2gSugar: 3gVitamin A: 500IUVitamin C: 14mgCalcium: 80mgIron: 0.5mg

Notes

Using fresh corn and cucumbers makes a noticeable difference in flavor and texture. Mix dressing just before serving to maintain salad's crispness.

Tried this recipe?

Let us know how it was!

Tropical Hawaiian Cheesecake Salad: A No-Bake Tropical Treat

The sun-drenched beaches of Hawaii beckon with their vibrant colors and tropical delights, and today, I’m bringing that paradise right to your kitchen with my Tropical Hawaiian Cheesecake Salad. This no-bake dessert is not only a visual feast but also incredibly easy to whip up, making it a perfect choice for sunny summer gatherings and potlucks. Imagine juicy pineapples, succulent strawberries, and zesty kiwis all enveloped in a silky cheesecake-flavored whipped cream—it’s like a refreshing vacation in every bite! Plus, it’s vegetarian and can be customized with your favorite fruits. Are you ready to dive into this creamy, dreamy concoction that promises to impress your guests and satisfy your sweet tooth? Let’s get started!

Why is this dessert a must-try?

Creamy Delight: The touch of cream cheese blended with cloud-like whipped topping creates an ultra-creamy texture that’s simply irresistible.

Tropical Freshness: Juicy fruits like pineapples, strawberries, and kiwis provide bursts of flavor, transporting you to a sun-soaked paradise with every bite.

No-Bake Convenience: Perfect for busy days, this no-bake recipe saves you precious time without sacrificing taste—ideal for summer BBQs!

Customizable Options: Feel free to mix it up with other fruits like bananas or mangoes for added variety. Want a fruity twist? Try different combinations to keep it exciting!

Instant Crowd-Pleaser: With its vibrant presentation and delicious flavor, this salad is bound to impress guests at any gathering. Don’t forget to check out my tips for storing and serving!

Hawaiian Cheesecake Salad Ingredients

Get ready to create a tropical delight with these vibrant ingredients!

For the Cheesecake Base

  • Cream Cheese – Use softened to easily blend into a creamy base.
  • Whipped Topping – Store-bought is best for stability in this no-bake dessert.
  • Powdered Sugar – Adjust the sweetness to match the ripeness of your fruits.
  • Vanilla Extract – Enhance flavor with pure vanilla for the best taste.

For the Fruit Medley

  • Fresh Strawberries – Hull and halve for sweetness and beautiful color.
  • Pineapple Chunks – Use fresh for a tropical kick; drain canned pineapple well to reduce moisture.
  • Kiwis – Peel and slice to add tangy brightness and vibrant color.
  • Raspberries – Use fresh for a juicy pop of flavor that’s quick to prepare.
  • Optional Fruits (Banana, Blueberries, Mango) – Use these to add even more deliciousness and color to your Hawaiian Cheesecake Salad!

For the Topping

  • Toasted Coconut Flakes – Sprinkle on top for added crunch and tropical flair!

Step‑by‑Step Instructions for Tropical Hawaiian Cheesecake Salad

Step 1: Beat the Cheesecake Base
In a large mixing bowl, use an electric mixer to beat 8 ounces of softened cream cheese on medium speed until it’s smooth and creamy, about 2-3 minutes. Look for a fluffy texture that’s easy to scoop. This creamy base sets the foundation for your Tropical Hawaiian Cheesecake Salad.

Step 2: Sweeten and Flavor
Gradually add 1 cup of powdered sugar and 1 teaspoon of vanilla extract to the cream cheese mixture, mixing on low speed until everything is thoroughly combined. The mixture should be sweet and aromatic, a perfect canvas for the fruity additions.

Step 3: Incorporate Whipped Topping
Gently fold in 8 ounces of thawed whipped topping using a spatula until light and airy, ensuring not to deflate the mixture. This will help create a lush, creamy texture for your Tropical Hawaiian Cheesecake Salad that complements the vibrant fruits beautifully.

Step 4: Prepare the Fruits
Rinse, dry, and prepare all your fruits: hull and halve strawberries, peel and slice kiwis, and chop pineapples into bite-sized pieces. Take a moment to admire the colorful display of tropical fruits, as this will add visual appeal to your salad.

Step 5: Mix in the Fruits
Carefully fold the prepared fruits into the cheesecake mixture until they are evenly coated, making sure to maintain the shape of the fruits to enhance the presentation. You should see bursts of color from the strawberries, pineapples, and kiwis in your Tropical Hawaiian Cheesecake Salad.

Step 6: Chill the Salad
Cover the bowl with plastic wrap and refrigerate the prepared salad for at least 1 hour. This chilling time allows the flavors to meld together beautifully and ensures the salad is refreshingly cool when served.

Step 7: Add the Finishing Touches
Just before serving, sprinkle toasted coconut flakes on top for a delightful crunch and added texture. The toasted coconut will complement the fresh fruits, making your Tropical Hawaiian Cheesecake Salad visually stunning and delicious!

What to Serve with Tropical Hawaiian Cheesecake Salad

Imagine a sunny picnic or a cozy gathering—this salad pairs beautifully with delightful sides and drinks that elevate your tropical experience.

  • Grilled Chicken Skewers: Marinated in a sweet and spicy sauce, these skewers bring a smoky flavor that complements the fruity freshness perfectly, making for a balanced meal.

  • Crispy Spring Rolls: Light and crunchy, filled with fresh veggies and served with a tangy dipping sauce, these provide a delightful contrast to the creamy dessert.

  • Lemonade or Iced Tea: Refreshing drinks like homemade lemonade or iced tea offer a perfect thirst-quencher, enhancing the flavor of the tropical fruits in the salad.

  • Coconut Rice: This subtly sweet and fragrant rice dish not only echoes the salad’s tropical theme but also provides a beautiful textural contrast.

  • Mini Fruit Tarts: Bring out the dessert-loving side in everyone with these bite-sized treats, echoing similar fruity flavors while adding a sugary crunch.

  • Pineapple Coconut Smoothie: Blending these ingredients creates a creamy, refreshing drink that ties together the flavors of the meal, making for a wholesome tropical dining experience.

Storage Tips for Hawaiian Cheesecake Salad

Refrigerator: Store any leftover Hawaiian Cheesecake Salad in an airtight container in the fridge for up to 24 hours. For best flavor and texture, consume it by this time.

Separation: If making ahead, keep the fruits and cheesecake mixture separate until just before serving to maintain freshness and prevent sogginess.

Freezer: While not recommended for the salad itself, you can freeze individual fruits (like pineapple or strawberries) to use in your next batch of Hawaiian Cheesecake Salad!

Serving: To enjoy it again, simply take it out of the fridge, give it a gentle stir, and no need to reheat—serve chilled for a refreshing treat!

Expert Tips for Hawaiian Cheesecake Salad

Chill Ingredients: Keeping all ingredients chilled before preparation enhances texture and flavor, ensuring your Hawaiian Cheesecake Salad is refreshing.

Dry Fruits Well: After rinsing, ensure fruits are thoroughly dried to prevent excess moisture, which can make your salad watery and less appealing.

Add Bananas Last: To maintain vibrant color and freshness, add banana slices just before serving, avoiding browning that can occur if they sit too long.

Use Ripe Fruits: Select fruits that are perfectly ripe but not overripe. This will keep your salad flavorful and prevent mushiness in the mixture.

Toast Coconut Flakes: Toasting coconut flakes enhances their flavor and adds a crunchy texture, making your tropical delight even more irresistible.

Hawaiian Cheesecake Salad Variations

Feel free to let your creativity shine and customize your Hawaiian Cheesecake Salad with these delightful twists!

  • Berry Blast: Swap out raspberries for blueberries or mixed berries for a vibrant burst of flavors. These berries complement the creamy base beautifully and offer a new depth to each spoonful.

  • Dairy-Free: For a lactose-free option, use dairy-free cream cheese and coconut whipped topping. This adaptation allows everyone to indulge guilt-free while still enjoying that creamy texture.

  • Citrus Kick: Add mandarin orange segments for a zesty contrast against the richness of the cream cheese. The bright citrus notes will perk up your salad, providing a refreshing twist.

  • Tropical Medley: Mix in or substitute with tropical fruits like mango or passion fruit for an exotic flair. Each bite will be a delightful taste of the tropics, making your dessert feel like a getaway.

  • Fruity Nut Crunch: Top with finely chopped macadamia nuts or almonds for a crunchy texture. Nuts will add a delightful layer of flavor that contrasts beautifully with the creaminess of the salad.

  • Spicy Touch: If you’re feeling adventurous, sprinkle a pinch of chili powder or cayenne pepper into the mix for a surprising kick. This unexpected heat will elevate the flavor profile and excite your taste buds.

  • Banana Bliss: Incorporate sliced bananas for added creaminess and sweetness. Just remember to fold them in just before serving to keep them looking fresh and bright.

  • Herb Infusion: Add a hint of fresh mint or basil for an aromatic lift. These herbs will offer a nice counterpoint to the sweetness of the fruits and create a unique, refreshing experience for your palate.

Now, gather your favorite fruits, and let’s make this Tropical Hawaiian Cheesecake Salad a masterpiece that suits every taste! Don’t forget to check out my expert tips for more delightful ways to serve this dessert!

Make Ahead Options

These Tropical Hawaiian Cheesecake Salad components are perfect for meal prep, making your summer gatherings a breeze! You can prep the cheesecake base and fruits up to 24 hours ahead by mixing the cream cheese, whipped topping, powdered sugar, and vanilla. Simply store the mixture in an airtight container in the refrigerator. Keep the fruits—strawberries, pineapples, kiwis, and raspberries—separate until you’re ready to serve to maintain their freshness and prevent excess moisture. When it’s time to serve, gently fold the fruits into the cheesecake mixture, add the toasted coconut flakes, and enjoy this luscious dessert that will impress your guests without the last-minute rush!

Tropical Hawaiian Cheesecake Salad Recipe FAQs

How do I select ripe fruits for this salad?
Absolutely! When picking fruits for your Hawaiian Cheesecake Salad, look for strawberries that are bright red and firm, pineapples with a sweet aroma and a slight give when pressed, kiwis that are slightly soft but not mushy, and raspberries that are plump and vibrant. Avoid fruits with blemishes or dark spots all over.

How should I store leftovers of the salad?
Very good question! Store any leftover Hawaiian Cheesecake Salad in an airtight container in the refrigerator for up to 24 hours for optimal freshness. To prevent a soggy salad, keep the fruits and cream mixture separate until just before serving, especially if you plan on prepping ahead of time.

Can I freeze the Hawaiian Cheesecake Salad?
While I don’t recommend freezing the entire salad mixture due to the texture change, you can freeze individual fruits like pineapple or strawberries for later use. To do this, rinse, dry, and chop the fruit, then spread them out on a baking sheet to freeze. Once frozen, transfer them to a freezer-safe bag where they can stay for up to 3 months!

What if my whipped topping won’t hold its shape?
Don’t fret! If your whipped topping is too soft, try refrigerating it for 15-30 minutes to firm it up before gently folding it into the cream cheese mixture. If you’re making your own, ensure it’s whipped to soft peaks, not overwhipped, as that can cause deflation and make it watery.

Is this dessert suitable for kids or those with allergies?
Absolutely! It’s a hit with kids! However, if someone has dairy allergies, simply use dairy-free cream cheese and coconut whipped topping. Also, take note of any specific fruit allergies (like pineapple) so that you can substitute those with safe alternatives such as bananas or blueberries.

undefined

Tropical Hawaiian Cheesecake Salad: A No-Bake Tropical Treat

Enjoy the refreshing flavors of this Tropical Hawaiian Cheesecake Salad, an easy no-bake dessert featuring vibrant fruits and a creamy cheesecake base.
Prep Time 30 minutes
Chilling Time 1 hour
Total Time 1 hour 30 minutes
Servings: 8 servings
Course: Dessert
Cuisine: Hawaiian
Calories: 250

Ingredients
  

For the Cheesecake Base
  • 8 ounces Cream Cheese Use softened to easily blend into a creamy base.
  • 8 ounces Whipped Topping Store-bought is best for stability in this no-bake dessert.
  • 1 cup Powdered Sugar Adjust the sweetness to match the ripeness of your fruits.
  • 1 teaspoon Vanilla Extract Enhance flavor with pure vanilla for the best taste.
For the Fruit Medley
  • 1 cup Fresh Strawberries Hull and halve for sweetness and beautiful color.
  • 1 cup Pineapple Chunks Use fresh for a tropical kick; drain canned pineapple well to reduce moisture.
  • 1 cup Raspberries Use fresh for a juicy pop of flavor.
  • Optional Fruits (Banana, Blueberries, Mango) Use these to add even more deliciousness and color.
For the Topping
  • 1 cup Toasted Coconut Flakes Sprinkle on top for added crunch and tropical flair!

Equipment

  • Mixing Bowl
  • Electric mixer
  • spatula
  • Plastic Wrap

Method
 

Step-by-Step Instructions
  1. In a large mixing bowl, use an electric mixer to beat 8 ounces of softened cream cheese on medium speed until it's smooth and creamy, about 2-3 minutes.
  2. Gradually add 1 cup of powdered sugar and 1 teaspoon of vanilla extract to the cream cheese mixture, mixing on low speed until everything is thoroughly combined.
  3. Gently fold in 8 ounces of thawed whipped topping using a spatula until light and airy.
  4. Rinse, dry, and prepare all your fruits: hull and halve strawberries, peel and slice kiwis, and chop pineapples into bite-sized pieces.
  5. Carefully fold the prepared fruits into the cheesecake mixture until they are evenly coated.
  6. Cover the bowl with plastic wrap and refrigerate the prepared salad for at least 1 hour.
  7. Just before serving, sprinkle toasted coconut flakes on top for a delightful crunch.

Nutrition

Serving: 1servingCalories: 250kcalCarbohydrates: 30gProtein: 3gFat: 12gSaturated Fat: 7gPolyunsaturated Fat: 1gMonounsaturated Fat: 3gCholesterol: 30mgSodium: 180mgPotassium: 150mgFiber: 1gSugar: 20gVitamin A: 500IUVitamin C: 15mgCalcium: 70mgIron: 0.5mg

Notes

Chill ingredients beforehand and dry fruits well to prevent excess moisture in the salad. Add bananas just before serving to maintain freshness.

Tried this recipe?

Let us know how it was!

Mini Melting Moments Sliders with Garlic Aioli Bliss

As I stood in my kitchen, a delightful aroma of sizzling patties danced in the air, instantly transforming my space into a cozy gathering spot. With these Mini Melting Moments Sliders with Garlic Aioli, I’ve discovered the ultimate crowd-pleaser that’s not only quick and easy to whip up but also incredibly customizable. Picture juicy, mouthwatering mini burgers nestled between buttery brioche buns, topped off with a luscious garlic aioli that brings it all together. This recipe is a game-changer for any get-together, whether you’re hosting friends for game night or looking for a satisfying family dinner. Plus, with options for turkey, lamb, and plant-based alternatives, everyone can indulge in their favorite version. Ready to dive into the world of sliders? Let’s create something unforgettable together!

Why will you love these sliders?

Customization Galore: Tailor these sliders to your taste with options for ground turkey, lamb, or plant-based meat.

Quick & Easy: Whip up these delectable bites in under 30 minutes, perfect for last-minute gatherings.

Irresistibly Flavorful: The rich, buttery brioche buns combined with a zesty garlic aioli create a taste sensation.

Crowd-Pleasing Delight: Whether for a casual dinner or a festive game night, these sliders are sure to impress everyone at the table.

Healthy Alternatives: Embrace gluten-free options or turn keto by swapping buns for lettuce wraps; everyone can enjoy a delicious slider!

Built for Sharing: Pair them with sweet potato fries or a vibrant quinoa salad for a complete meal that invites seconds.

Mini Melting Moments Sliders Ingredients

• For those looking to make these delicious Mini Melting Moments Sliders at home, here’s what you’ll need!

For the Patties

  • Ground Beef (80% lean) – This provides richness and structure; substitute with ground turkey, lamb, or plant-based crumbles for a variation.
  • Sea Salt – Enhances the meat’s natural flavors; choose coarse sea salt for better texture.
  • Black Pepper – Freshly ground adds a warm kick; you can use white pepper for a milder flavor.

For the Buns

  • Mini Brioche Buns – Buttery softness that complements the patties; use gluten-free mini buns or lettuce wraps for a low-carb option.

For the Toppings

  • Sharp Cheddar Cheese – Provides creamy flavor that melts beautifully; swap for pepper jack for heat or dairy-free cheese for vegan options.
  • Mixed Lettuce Leaves – Adds a fresh crunch; try arugula for a peppery twist.
  • Quick-Pickled Cucumbers – Offers crunch and acidity; substitute with thinly sliced red onion or jalapeños for an extra bite.

For the Garlic Aioli

  • Mayonnaise – Acts as a creamy base; swap with vegan mayo for a dairy-free option.
  • Garlic (minced) – Brings intense flavor to the aioli; adjust to your liking for more or less garlic flavor.
  • Dijon Mustard – Adds tanginess; mustard powder can work in a pinch.
  • Lemon Juice – Brightens and balances flavors; lime juice can be used as an alternative for a different profile.

These Mini Melting Moments Sliders ingredients set the stage for an unforgettable culinary experience that’s as enjoyable to make as it is to eat. Grab your apron, and let’s turn your kitchen into a slider paradise!

Step‑by‑Step Instructions for Mini Melting Moments Sliders with Garlic Aioli

Step 1: Prepare Patties
In a mixing bowl, gently combine the ground beef, sea salt, and black pepper until just combined to maintain tenderness. Form the mixture into ½-inch thick patties, making a small dimple in the center of each to prevent puffing while cooking. Set the formed patties aside on a plate or cutting board.

Step 2: Make Aioli
In a separate bowl, whisk together the mayonnaise, minced garlic, Dijon mustard, and lemon juice until smooth and creamy. Season the mixture with salt and pepper to taste, adjusting the flavors as desired. Cover the bowl and place the garlic aioli in the refrigerator to chill while you cook the patties.

Step 3: Cook Patties
Heat a skillet over medium-high heat and add a splash of oil. When the pan is hot, place your formed patties in the skillet, being careful not to overcrowd. Cook for about 3-4 minutes on one side until browned, then flip and top each with a slice of sharp cheddar cheese. Continue to cook for another 3-4 minutes, or until the cheese is melty and the patties reach an internal temperature of 160°F.

Step 4: Toast Buns
While the patties finish cooking, take the mini brioche buns and slice them in half. Lightly toast the cut sides in the same skillet for about 30 seconds, just until they are golden and slightly crispy. This adds an irresistible texture that complements the sliders perfectly.

Step 5: Assemble Sliders
To assemble your Mini Melting Moments Sliders, spread a generous layer of the garlic aioli on the bottom half of each toasted bun. Layer on a few mixed lettuce leaves, followed by a cheesy beef patty. Top with quick-pickled cucumber slices for added crunch and zest, and then crown with the top half of the bun.

Step 6: Serve
Serve the sliders immediately while the patties are warm and melty. Arrange them on a serving platter alongside your favorite side dishes like sweet potato fries or a vibrant quinoa salad. Enjoy the delightful combination of flavors in every satisfying bite!

Expert Tips for Mini Melting Moments Sliders

  • Keep It Cool: Refrigerate the patties before cooking to ensure they stay juicy and are easier to handle during cooking.

  • Gentle Mixing: Avoid over-mixing the meat when forming patties to maintain a tender texture; lightly combine the ingredients instead.

  • Don’t Press Down: Resist the urge to press down on patties while they cook; this helps retain the delicious juices and keeps them flavorful.

  • Use a Thermometer: Ensure safety by cooking patties to an internal temperature of 160°F for ground beef, guaranteeing they are fully cooked.

  • Prep Ahead: Prepare the garlic aioli, veggies, and buns before you cook the meat to streamline the assembly process and enhance efficiency!

What to Serve with Mini Melting Moments Sliders

Elevate your slider experience by complementing them with delightful side dishes that enhance every bite.

  • Sweet Potato Fries: The natural sweetness and crunch of these fries provide a perfect contrast to the savory sliders.

  • Tangy Coleslaw: A creamy coleslaw adds a refreshing crunch that balances the rich flavors of the sliders superbly.

  • Quinoa Salad: A bright, colorful quinoa salad filled with veggies brings a nutritious and flavorful touch to your meal.

  • Garlic Butter Corn on the Cob: Hot, buttery corn drizzled with garlic enhances the comfort food vibe while offering a delicious pairing.

  • Zesty Pickle Chips: The sharp acidity of pickle chips complements the sliders well, adding an irresistible crunch.

  • Margaritas or Lemonade: A chilled glass of margaritas or lemonade brings a refreshing zest, perfect for summer gatherings.

  • Chocolate Chip Cookies: Finish your meal on a sweet note with warm cookies that invite everyone back for dessert.

Each of these suggestions pairs wonderfully, creating a complete meal around your Mini Melting Moments Sliders.

Mini Melting Moments Sliders Variations

Feel free to make these sliders your own, adding your favorite flavors and dietary choices!

  • Turkey Option: Substitute ground beef with ground turkey for a lighter take. Just keep an eye on cooking time, as it may vary slightly!

  • Lamb Delight: Swap in ground lamb for a rich, savory flavor that elevates your sliders to a gourmet level.

  • Plant-Based Alternative: Use plant-based crumbles or patties for a vegetarian or vegan-friendly version. They’re equally delicious and satisfying!

  • Cheese Swap: Experiment with different cheeses like pepper jack for a spicy kick or creamy goat cheese for a tangy twist.

  • Paprika Aioli: Fold in smoked paprika into the garlic aioli to add a warm, smoky flavor that enhances every bite of your slider.

  • Low-Carb Option: Ditch the buns entirely and serve the patties on crisp lettuce wraps. Add creamy avocado for an extra velvety texture.

  • Crunchy Toppings: Replace quick-pickled cucumbers with crunchy jalapeños or thinly sliced red onions for an added zing that brings the sliders to life.

  • Zesty Sauce: Spice things up with a drizzle of Sriracha or homemade barbecue sauce to give your mini sliders an exciting flavor boost.

Whether you’re looking for healthier alternatives or new flavor bursts, these variations ensure that your sliders are always a hit. For a tasty side, consider pairing them with sweet potato fries, or for a fresh contrast, whip up a quinoa salad that complements the sliders perfectly!

Make Ahead Options

These Mini Melting Moments Sliders are perfect for meal prep, saving you valuable time during busy weeknights! You can prepare the patties and garlic aioli up to 24 hours in advance. Simply form the patties, cover them, and refrigerate to maintain freshness, while storing the aioli in a sealed container. The quick-pickled cucumbers can also be made ahead and stored in the fridge for up to 3 days. When you’re ready to serve, just cook the patties and toast the buns—isn’t that simple? You’ll end up with the same juicy, flavorful sliders that everyone loves, but with much less stress to create them!

Storage Tips for Mini Melting Moments Sliders

Room Temperature: Store sliders at room temperature for up to 2 hours if serving immediately; beyond that, refrigerate to maintain freshness.

Fridge: Keep cooked sliders in an airtight container in the fridge for up to 3 days. To preserve their taste, store patties and buns separately.

Freezer: For long-term storage, freeze patties and buns separately for up to 2 months. Wrap them well in plastic wrap followed by foil for best results.

Reheating: Reheat patties in a preheated oven at 350°F for 8-10 minutes. Warm buns for the last 2 minutes, uncovered, to maintain their freshness. Enjoy your stored Mini Melting Moments Sliders!

Mini Melting Moments Sliders with Garlic Aioli Recipe FAQs

What should I look for when selecting ground beef?
When choosing ground beef, opt for 80% lean for the perfect balance of flavor and juiciness. Look for bright red color without any dark spots or excessive liquid in the packaging. If you prefer a lighter option, ground turkey or lamb can be great substitutes!

How can I store leftover sliders?
To keep your Mini Melting Moments Sliders fresh, allow them to cool completely before storing. Place the patties and buns in separate airtight containers, and they can be stored in the fridge for up to 3 days. For longer storage, wrap them tightly in plastic wrap, followed by foil, and freeze for up to 2 months.

Can I freeze the sliders? If so, how?
Absolutely! To freeze, follow these steps:

  1. Allow the cooked patties to cool completely.
  2. Wrap each patty tightly in plastic wrap.
  3. Place the wrapped patties in a freezer bag and remove as much air as possible.
  4. For buns, wrap them individually or store them in a separate freezer bag.
    They’ll last in the freezer for up to 2 months. Just thaw and reheat before serving for that freshly-made taste!

Why did my patties shrink while cooking?
Patties can shrink if they’re pressed down while cooking or if they weren’t shaped correctly. Always form patties gently and make a small dimple in the center to prevent puffing up during cooking. This way, you’ll retain their juicy goodness and keep them perfectly tender!

Are there any dietary considerations for these sliders?
These sliders are versatile and can cater to various dietary preferences! For gluten-free eaters, swap mini brioche buns for gluten-free buns or lettuce wraps. If you’re looking for vegetarian options, use plant-based crumbles instead of meat. Always read labels to check for potential allergens, especially with store-bought ingredients like aioli or cheese.

How can I spice up the garlic aioli?
To enhance the flavor of your garlic aioli, consider adding a pinch of smoked paprika for warmth or a dash of hot sauce for heat. For a fresh twist, incorporate chopped herbs like parsley or basil. Feel free to experiment to find your perfect mix of flavors!

undefined

Mini Melting Moments Sliders with Garlic Aioli Bliss

Delightful Mini Melting Moments Sliders featuring customizable patties and a creamy garlic aioli, perfect for gatherings.
Prep Time 10 minutes
Cook Time 20 minutes
Chill Time 10 minutes
Total Time 40 minutes
Servings: 4 sliders
Course: Dinner
Cuisine: American
Calories: 300

Ingredients
  

For the Patties
  • 1 lb Ground Beef (80% lean) or substitute with ground turkey, lamb, or plant-based crumbles
  • 1 tsp Sea Salt coarse preferred
  • 1 tsp Black Pepper freshly ground
For the Buns
  • 12 count Mini Brioche Buns or gluten-free mini buns, or lettuce wraps
For the Toppings
  • 4 slices Sharp Cheddar Cheese or substitute with pepper jack or dairy-free cheese
  • 1 cup Mixed Lettuce Leaves or arugula for a peppery twist
  • 1 cup Quick-Pickled Cucumbers or thinly sliced red onion or jalapeños
For the Garlic Aioli
  • 1/2 cup Mayonnaise or vegan mayo for dairy-free option
  • 2 cloves Garlic (minced) adjust to taste
  • 1 tbsp Dijon Mustard mustard powder can be used as alternative
  • 1 tbsp Lemon Juice or lime juice as an alternative

Equipment

  • Mixing Bowl
  • Skillet
  • whisk
  • serving platter

Method
 

Preparation Steps
  1. In a mixing bowl, gently combine the ground beef, sea salt, and black pepper until just combined to maintain tenderness. Form into ½-inch thick patties.
  2. In a separate bowl, whisk together the mayonnaise, minced garlic, Dijon mustard, and lemon juice until smooth. Season the mixture and refrigerate.
  3. Heat a skillet over medium-high heat and cook the patties for about 3-4 minutes on each side, topping with cheddar cheese until melted.
  4. Slice and lightly toast the mini brioche buns in the skillet for about 30 seconds until golden.
  5. Assemble sliders by spreading garlic aioli, adding lettuce, a patty, pickled cucumbers, and topping with the bun.
  6. Serve immediately with sides like sweet potato fries or quinoa salad.

Nutrition

Serving: 1sliderCalories: 300kcalCarbohydrates: 25gProtein: 20gFat: 15gSaturated Fat: 5gPolyunsaturated Fat: 1gMonounsaturated Fat: 4gCholesterol: 60mgSodium: 600mgPotassium: 300mgFiber: 1gSugar: 3gVitamin A: 10IUVitamin C: 8mgCalcium: 15mgIron: 10mg

Notes

Refrigerate patties before cooking for best results. Use a thermometer to check for doneness at 160°F.

Tried this recipe?

Let us know how it was!

Delicious Hawaiian Roll French Toast for a Cozy Breakfast

As I stood in the kitchen this morning, the enticing aroma of cinnamon and vanilla whisked me back to my childhood breakfast table. Those were the days when a simple meal felt like an event, and the magic happened with just a few ingredients. Enter my Heavenly Hawaiian Roll French Toast Bites—a delightful twist on the classic dish that has quickly become a family favorite. These bites are quick to whip up, making them perfect for lazy weekend mornings or festive brunch gatherings. Plus, their pillowy texture and burst of sweetness transform breakfast into a delightful experience that everyone will love. If you’re looking to wow your guests or simply indulge in some comforting goodness, these bites are just the ticket. Ready to dive in and create a breakfast masterpiece? Let’s get started!

Why You’ll Crave These Bites?

Simplicity Made Delicious: With minimal ingredients like King’s Hawaiian Rolls, eggs, and milk, you can easily whip up this recipe without any fuss.
Flavor Explosion: Infused with warm cinnamon and vanilla, each bite offers a sweet, indulgent flavor that delights your senses.
Perfect for Sharing: These bite-sized treats are ideal for brunch gatherings or family breakfasts. Imagine serving them with fresh fruit and maple syrup!
Versatile Delight: Whether you want a hearty breakfast or a sweet dessert, these bites adapt effortlessly, inviting creative toppings like whipped cream or chocolate drizzle.
Quick and Easy: Ready in minutes, this recipe saves time without sacrificing flavor, perfect for those busy mornings.

Hawaiian Roll French Toast Ingredients

For the Batter
King’s Hawaiian Rolls – These sweet rolls provide the perfect fluffy base. Substitute with any soft sweet bread if needed.
Large Eggs – Essential for the custard base, providing binding; no substitutions necessary.
Half and Half or Whole Milk – Adds a creamy richness; almond milk or oat milk can be used for a lighter option.
Vanilla Extract – Enhances flavor; consider almond extract for a unique twist.
Ground Cinnamon – Infuses a warm spice; nutmeg can be used for a different flavor profile.
Brown Sugar – Adds depth and sweetness; white sugar works in a pinch.
Salt – Balances sweetness and lifts all flavors; an essential component.

For Cooking
Butter – For a rich, golden finish; olive or coconut oil can substitute for dairy-free.

For Serving
Powdered Sugar – A lovely dusting finishing touch; feel free to omit based on preference.
Fresh Fruit and Maple Syrup – Serve with berries like strawberries or blueberries for a refreshing element; maple syrup perfectly complements the sweetness of Hawaiian Roll French Toast.

Step-by-Step Instructions for Heavenly Hawaiian Roll French Toast Bites

Step 1: Prepare the Custard Mixture
In a large bowl, whisk together 4 large eggs and 1 cup of half and half until fully combined. Add 1 teaspoon of vanilla extract, 1 teaspoon of ground cinnamon, 2 tablespoons of brown sugar, and a pinch of salt. Mix until the sugar dissolves and the mixture is smooth, creating a sweet and fragrant custard that will infuse your Hawaiian Roll French Toast bites with delicious flavor.

Step 2: Soak the Rolls
Using a toothpick, poke several holes in the bottoms of each King’s Hawaiian Roll to allow the custard to soak in effectively. Slightly dip each roll into the custard mixture for about 30 seconds, ensuring all sides are coated. Avoid oversaturation to prevent sogginess; the goal is a deliciously custardy interior while maintaining the structure of the rolls.

Step 3: Heat the Skillet
Place a nonstick skillet over medium-low heat and add 2 tablespoons of butter. Allow the butter to melt completely, coating the skillet evenly, and wait for it to foam but not burn. This step ensures your Hawaiian Roll French Toast bites will turn golden brown on all sides, creating a delightful crispy exterior that contrasts beautifully with the fluffy inside.

Step 4: Cook the French Toast Bites
Carefully place the soaked Hawaiian Roll bites in the skillet. Cook each side for about 30 to 60 seconds, or until they become golden brown and crispy. Use a spatula to gently flip them, ensuring even cooking. Pay attention to the sizzling sound, which indicates they are cooking perfectly and developing a delicious crust.

Step 5: Serve and Enjoy
Once cooked, transfer the Hawaiian Roll French Toast bites to a serving plate. Dust them lightly with powdered sugar for an elegant finish, and consider adding a handful of fresh berries and a drizzle of maple syrup atop the bites. Serve warm, and relish the moment as you share this delightful breakfast treat with family and friends.

Make Ahead Options

These Heavenly Hawaiian Roll French Toast Bites are fantastic for meal prep lovers! You can prepare the custard mixture and soak the Hawaiian rolls up to 24 hours in advance. After poking holes in the rolls, dip them in the custard for about 30 seconds, then store them in an airtight container in the refrigerator to prevent any browning. When it’s time to serve, simply heat 2 tablespoons of butter in a skillet and cook the soaked bites for 30 to 60 seconds per side until golden brown. This way, you get to enjoy a delicious breakfast with minimal effort and time on busy mornings!

Expert Tips for Hawaiian Roll French Toast

  • Monitor Soaking Time: Limit soaking the rolls to 30 seconds to avoid sogginess; too long may lead to a mushy texture instead of fluffy bites.
  • Cook at Medium-Low Heat: This temperature ensures that the custard sets perfectly without burning, producing that golden brown crust we crave for Hawaiian Roll French Toast.
  • Use Nonstick Cookware: A nonstick skillet or griddle is essential to prevent sticking; this allows for easier flipping and perfect browning of the bites.
  • Customize Your Toppings: Feel free to get creative! Consider adding toppings like whipped cream or chocolate drizzle for a festive twist on your Hawaiian Roll French Toast.
  • Prep Ahead: For a quicker breakfast, prepare the custard mixture the night before and soak the rolls just before cooking to maintain the ideal texture.

Hawaiian Roll French Toast Variations

Customize your Hawaiian Roll French Toast bites with these delightful twists that will tantalize your taste buds!

  • Nutty Delight: Add a handful of chopped nuts like pecans or walnuts to the custard mixture for a crunchy texture.

  • Cinnamon Rolls: Swap the Hawaiian rolls for cinnamon rolls for an extra layer of sweet, spiced flavor. It’s like a cozy hug for your taste buds!

  • Extra Sweetness: Stir in mini chocolate chips to the custard for a decadent touch that the whole family will adore. Just imagine that gooey chocolate melting in every bite!

  • Fruit Fusion: Mix in fresh or frozen berries such as blueberries or strawberries to the custard for a fruity burst that enhances sweetness and freshness. Pairing flavors is a delightful way to keep things interesting!

  • Vegan Option: Use a flax or chia seed mixture and plant-based milk to create a vegan version without sacrificing the deliciousness of the original.

  • Spiced Up: Add a pinch of cayenne pepper or a drizzle of maple syrup with chili for a surprising kick that will spice up your morning.

  • Whipped Indulgence: Top with freshly whipped cream and drizzled caramel sauce for an extravagant dessert twist when served after dinner.

  • Savory Surprise: For a savory kick, add some cooked bacon or ham inside the French toast bites for an unexpected flavor combination that’s all about balance.

These variations not only offer exciting flavor profiles but also cater to different dietary preferences, helping you create a breakfast that’s uniquely yours. Happy cooking!

How to Store and Freeze Hawaiian Roll French Toast

Fridge: Store leftover Hawaiian Roll French Toast bites in an airtight container for up to 3 days. Reheat in a skillet over low heat, adding a little butter for extra flavor.

Freezer: If you want to keep your French toast bites longer, freeze them in a single layer on a baking sheet, then transfer to a resealable bag or container. They can last for up to 2 months.

Reheating: To enjoy frozen bites, thaw them overnight in the fridge, then reheat in a skillet or toaster oven until warmed through and crispy.

Tip: For best results, avoid soaking the rolls too long during preparation to preserve their texture, even after storage.

What to Serve with Heavenly Hawaiian Roll French Toast Bites

Elevate your breakfast experience with satisfying sides and delightful accompaniments that create a memorable meal.

  • Crispy Bacon: The salty crunch of bacon contrasts beautifully with the sweetness of the French toast, adding heartiness to your plate.
  • Fresh Berries: Top with strawberries, blueberries, or raspberries for a burst of freshness and a pop of color that complements the dish.
  • Maple Syrup: A drizzle of real maple syrup enhances the flavors with its rich sweetness, making every bite indulgent and flavorful.
  • Sausage Links: The savory flavor of sausage pairs perfectly with the sweet bites, creating a delightful balance that everyone will enjoy.
  • Whipped Cream: A dollop of homemade whipped cream adds a luxurious touch, transforming breakfast into a delightful dessert experience.
  • Chocolate Drizzle: Drizzling melted chocolate over the bites can turn your French toast into an irresistible treat that everyone craves.
  • Coffee or Latte: Pair with a warm cup of coffee or a frothy latte to enhance the breakfast experience with comfort and warmth.
  • Coconut Flakes: Sprinkling toasted coconut on top adds an unexpected tropical flair, enhancing the Hawaiian essence of your meal.
  • Cream Cheese Icing: For a dessert-like feel, serve with a side of cream cheese icing for dipping; it’s an indulgent twist that’s fun to enjoy.

Hawaiian Roll French Toast Recipe FAQs

What type of King’s Hawaiian Rolls should I use for this recipe?
Absolutely! Use any soft, sweet rolls for this recipe. King’s Hawaiian Rolls are perfect due to their sweetness and texture, but feel free to experiment with other soft sweet breads like brioche if you can’t find them.

How should I store leftover Hawaiian Roll French Toast bites?
To keep them fresh, store leftover bites in an airtight container in the fridge for up to 3 days. When you’re ready to indulge again, simply reheat them in a skillet over low heat with a touch of butter for added flavor!

Can I freeze Hawaiian Roll French Toast?
Yes, you can! Place the bites in a single layer on a baking sheet to freeze initially. Once they are solid, transfer them to a resealable bag or airtight container. They can stay fresh in the freezer for up to 2 months. To enjoy, thaw overnight in the fridge, then reheat in a skillet or toaster oven until warm and crispy.

What should I do if my French toast bites are too soggy?
To prevent sogginess, be mindful of the soaking time—30 seconds is ideal. If you find your bites soggy after cooking, it might be due to oversoaking or using too much custard. For next time, ensure you’re gently dipping and not fully submerging the rolls.

Are there any dietary considerations for this recipe?
Great question! For those with dairy restrictions, substitute half and half with almond or oat milk, and use coconut oil instead of butter for cooking. Always be mindful of potential allergies related to eggs, milk, and gluten in the rolls if you’re serving guests with dietary restrictions.

Can I make the custard mixture ahead of time?
Very! You can prepare the custard the night before. Just whisk together the ingredients and store them in the fridge. Soak the rolls just before cooking to maintain that delightful fluffy texture. Happy cooking!

undefined

Delicious Hawaiian Roll French Toast for a Cozy Breakfast

Heavenly Hawaiian Roll French Toast Bites, a delightful twist on the classic dish perfect for breakfast.
Prep Time 15 minutes
Cook Time 10 minutes
Total Time 25 minutes
Servings: 4 bites
Course: Breakfast
Cuisine: Hawaiian
Calories: 180

Ingredients
  

For the Batter
  • 4 large eggs Essential for the custard base
  • 1 cup half and half Can use whole milk
  • 1 teaspoon vanilla extract Enhances flavor
  • 1 teaspoon ground cinnamon Infuses a warm spice
  • 2 tablespoons brown sugar Adds depth and sweetness
  • a pinch salt Essential component
  • 1 package King's Hawaiian Rolls Provides the perfect fluffy base
For Cooking
  • 2 tablespoons butter For a rich, golden finish
For Serving
  • to taste powdered sugar A lovely dusting finishing touch
  • to taste fresh fruit and maple syrup Berries complement the sweetness

Equipment

  • Nonstick skillet

Method
 

Step-by-Step Instructions
  1. In a large bowl, whisk together eggs and half and half until fully combined. Add vanilla extract, ground cinnamon, brown sugar, and salt. Mix until smooth.
  2. Poke several holes in the bottoms of each King's Hawaiian Roll. Dip each roll into the custard mixture for about 30 seconds.
  3. Heat a nonstick skillet over medium-low heat and melt butter, coating the skillet evenly.
  4. Place soaked Hawaiian Roll bites in the skillet. Cook each side for about 30 to 60 seconds until golden brown and crispy.
  5. Transfer cooked Hawaiian Roll bites to a serving plate, dust with powdered sugar, and serve warm with fresh berries and maple syrup.

Nutrition

Serving: 1biteCalories: 180kcalCarbohydrates: 22gProtein: 4gFat: 8gSaturated Fat: 5gPolyunsaturated Fat: 0.5gMonounsaturated Fat: 2gCholesterol: 100mgSodium: 250mgPotassium: 130mgFiber: 1gSugar: 5gVitamin A: 300IUCalcium: 100mgIron: 0.5mg

Notes

Limit soaking time to avoid sogginess and cook at medium-low heat for the best results.

Tried this recipe?

Let us know how it was!

Caprese Stuffed Balsamic Chicken That Will Wow Your Tastebuds

As I stood in my kitchen, the tantalizing aroma of balsamic vinegar simmering on the stove pulled me right back to a little Italian trattoria I stumbled upon during my travels. This Caprese Stuffed Balsamic Chicken combines juicy chicken breasts filled with creamy mozzarella, fresh tomatoes, and fragrant basil—all smothered in a rich balsamic glaze that beautifully balances savory and sweet. Not only is this dish a crowd-pleaser that transforms dinner into an occasion, but it’s also an effortless gluten-free option, perfect for those weeknights when you crave something homemade yet easy to prepare. Curious how a few simple ingredients can bring a taste of Italy to your table? Let’s dive in!

Why is This Chicken Recipe a Must-Try?

Irresistible Flavor: The combination of gooey mozzarella, fresh tomatoes, and aromatic basil creates a burst of delightful taste in every bite.

Ease of Preparation: With straightforward steps, you can whip up this dish in no time—perfect for busy weeknights or impressing guests without fuss.

Gluten-Free Delight: This recipe accommodates gluten-free diets, making it a versatile choice for all your dinner guests.

Crowd-Pleasing Appeal: Whether you’re hosting a family dinner or a casual gathering, this Caprese Stuffed Chicken is sure to satisfy and leave everyone asking for seconds.

Feel free to pair it with a refreshing side salad or some warm garlic bread for a complete meal that feels gourmet!

Caprese Stuffed Balsamic Chicken Ingredients

Ready to bring a taste of Italy to your kitchen? Here’s what you need to make this flavorful dish!

For the Chicken
Large Chicken Breasts – Make sure they’re thick enough to hold all that delicious filling.
Salt and Pepper – Essential seasonings that enhance the natural flavors of the chicken. Adjust to your taste.
Dried Oregano & Basil – Adds aromatic notes of herbaceous goodness; fresh herbs can elevate the flavor even more.

For the Stuffing
Roma Tomatoes – These juicy beauties keep the chicken moist and add a fresh pop; cherry tomatoes are a great substitute if you prefer.
Sun-Dried Tomato Strips in Oil – Intensifies flavor with a sweet and tangy kick; homemade sun-dried tomatoes work too!
Thick Sliced Mozzarella Cheese – Melts beautifully and adds that creamy texture we all crave; go for dairy-free cheese if you need an allergen-friendly option.
Basil Leaves – Fresh basil not only adds color but invigorates the dish’s profile; use additional for garnishing.

For the Balsamic Glaze
Garlic Cloves – Imparts an aromatic depth to the glaze; feel free to adjust how garlicky you like it!
Balsamic Vinegar – The star of the sauce that offers a tangy punch; red wine vinegar is an emergency substitute.
Brown Sugar – Balances the acidity of the vinegar with its sweetness; honey can also serve as a natural alternative.

Topping
Additional Chopped Basil Leaves – Sprinkling these at the end enhances both presentation and flavor!

Dive into creating this mouthwatering Caprese Stuffed Balsamic Chicken – it’s a dish destined to impress!

Step‑by‑Step Instructions for Caprese Stuffed Balsamic Chicken with Mozzarella and Fresh Basil

Step 1: Preheat the Oven
Begin by preheating your oven to 350°F (175°C). This temperature is essential for ensuring that the Caprese Stuffed Balsamic Chicken cooks evenly, resulting in juicy, tender chicken. As the oven warms up, you can prep the chicken, making efficient use of your time.

Step 2: Prepare the Chicken Breasts
Take the large chicken breasts and butterfly them by cutting them partially, creating pockets for stuffing without completely halving them. This technique allows you to fill them with the delicious stuffing while keeping them intact. Set the chicken aside on a clean cutting board as you season it.

Step 3: Season the Chicken
Generously season both sides of the chicken breasts with salt, pepper, dried oregano, and basil. Make sure to rub the seasonings in well to enhance the flavor of your Caprese Stuffed Balsamic Chicken. This step adds depth and richness that will permeate the meat as it cooks.

Step 4: Add Sun-Dried Tomato Oil
Spoon some of the reserved oil from the sun-dried tomatoes onto the chicken, ensuring that the oil is evenly rubbed into the pockets you created. This flavorful oil will infuse the chicken with a delightful taste while adding moisture during cooking. Keep the chicken ready for the next step of stuffing.

Step 5: Stuff the Chicken
Now it’s time to fill those chicken pockets! Divide fresh tomatoes, sun-dried tomato strips, thick mozzarella slices, and fresh basil leaves among the pockets. Pack them generously, ensuring each bite of the Caprese Stuffed Balsamic Chicken will be bursting with flavor.

Step 6: Secure the Filling
To ensure the stuffing stays in place, secure each chicken breast with toothpicks. This step helps maintain the shape of the chicken during cooking and prevents the delicious filling from spilling out, allowing you to achieve a stunning presentation.

Step 7: Sear the Chicken
In an oven-safe skillet, heat a drizzle of oil over medium-high heat. Once hot, carefully place the stuffed chicken breasts in the skillet and sear for about 2 minutes on each side, until they turn golden brown. This browning adds flavor and creates a beautiful crust.

Step 8: Prepare the Balsamic Sauce
While the chicken is searing, prepare the balsamic glaze by mixing balsamic vinegar, brown sugar, and minced garlic in a bowl. Once the chicken is browned, pour this sauce around the chicken in the skillet. This step adds a tangy sweetness that complements the savory stuffing perfectly.

Step 9: Simmer the Sauce
Allow the sauce to simmer for 2-3 minutes until it slightly thickens, releasing a wonderful aroma throughout your kitchen. This will create a luscious glaze that clings to the chicken and infuses it with flavor.

Step 10: Bake the Chicken
Transfer the skillet to your preheated oven and bake the Caprese Stuffed Balsamic Chicken for 15-17 minutes or until the chicken is thoroughly cooked and its internal temperature reaches 165°F (75°C). The cheese should melt beautifully, and the chicken will remain juicy.

Step 11: Cool and Garnish
Once baked, carefully remove the skillet from the oven and let the chicken cool for about 5 minutes. After cooling, remove the toothpicks and gently drizzle the pan juices over the chicken. Sprinkle additional chopped basil on top for a fresh finishing touch.

Step 12: Serve
Finally, your Caprese Stuffed Balsamic Chicken is ready to be served! This dish pairs wonderfully with a side salad or warm bread, creating a delightful meal that feels special yet is easy to prepare.

How to Store and Freeze Caprese Stuffed Balsamic Chicken

  • Fridge: Store any leftover Caprese Stuffed Balsamic Chicken in an airtight container for up to 3 days. This helps maintain its flavor and moisture.

  • Freezer: For longer storage, wrap the stuffed chicken tightly in plastic wrap or aluminum foil, then place in an airtight container. It can be frozen for up to 3 months.

  • Reheating: When ready to enjoy, thaw in the fridge overnight. Reheat in the oven at 350°F (175°C) for about 20 minutes or until heated through.

  • Serving Tip: To enhance taste, drizzle with extra balsamic glaze or fresh basil before serving after reheating.

Make Ahead Options

These Caprese Stuffed Balsamic Chicken breasts are ideal for meal prep enthusiasts! You can prepare the filling (mozzarella, tomatoes, and basil) up to 24 hours in advance and store it in the refrigerator. Simply stuff the chicken breasts with the filling and secure them with toothpicks the day you plan to cook. If you’re looking to prepare the chicken entirely, you can assemble and refrigerate the stuffed chicken up to 3 days ahead. When you’re ready to serve, sear the chicken and bake it as instructed, ensuring it remains just as delicious and succulent. This approach not only saves time but also infuses the flavors beautifully, perfect for busy weeknights!

Expert Tips for Caprese Stuffed Balsamic Chicken

  • Use Thick Chicken Breasts: Ensure your chicken is thick enough to hold all the flavorful stuffing. Thin breasts can dry out easily, affecting texture.

  • Searing Secret: Sear the chicken until golden brown for maximum flavor. Not browning enough may lead to a bland flavor profile.

  • Don’t Skip the Toothpicks: Secureting the stuffed chicken with toothpicks prevents the delicious filling from spilling out during cooking—keep your chicken looking beautiful!

  • Monitor Internal Temperature: Always check that the chicken reaches 165°F (75°C). This ensures it’s fully cooked and safe for your family.

  • Let It Rest: Allow the chicken to cool for 5 minutes before serving. This resting time helps retain juices, making each bite succulent and flavorful.

Dive into this recipe and enjoy a delicious, gluten-free Caprese Stuffed Balsamic Chicken that will wow everyone at your dinner table!

Caprese Stuffed Balsamic Chicken Variations

Customize this delightful dish to satisfy your palate or dietary needs with these exciting twists!

  • Pesto-Stuffed: Replace the mozzarella with a generous scoop of basil pesto for a herby and vibrant flavor explosion.

  • Bacon-Wrapped: Elevate the savoriness by wrapping each chicken breast in crispy bacon, adding a smoky crunch that everyone will love.

  • Greek-Style: Stir in some crumbled feta and chopped olives with the stuffing for a Mediterranean flair that pairs beautifully with fresh herbs.

  • Spicy Twist: Add a dash of red pepper flakes to the balsamic glaze for a delightful kick that enhances the overall flavor profile.

  • Vegetarian Version: Swap the chicken for large portobello mushrooms, stuffed with the same ingredients for a hearty, plant-based meal that captures the flavors beautifully.

  • Herb-Infused Oil: Use infused oils instead of plain olive oil to enhance each bite—try garlic or chili-infused oils for added depth.

  • Citrus Zing: Incorporate a splash of lemon juice or zest into the balsamic glaze; this brightens the sauce and brings a refreshing twist that tantalizes the taste buds.

  • Smoky BBQ: Brush the chicken with your favorite BBQ sauce before baking for a smoky-sweet variant that is irresistibly good on those summer nights.

Whether you choose a gluten-free option or a flavor-packed twist, each variation brings something uniquely delicious to your dinner table. And don’t forget, serving your chicken alongside a fresh side salad or some warm garlic bread elevates the experience even more!

What to Serve with Caprese Stuffed Balsamic Chicken

As you relish the incredible taste of this vibrant chicken dish, consider these delightful pairings to create a full and satisfying meal.

  • Garlic Bread: Warm, buttery garlic bread offers a crispy texture, perfect for mopping up the rich balsamic glaze. Every bite feels like a hug for your taste buds.

  • Mixed Green Salad: A light salad with fresh greens, cucumbers, and a tangy vinaigrette adds a refreshing contrast, balancing the savory flavors of the chicken beautifully.

  • Roasted Vegetables: Roasted seasonal vegetables like zucchini, bell peppers, and asparagus provide a crunchy texture and colorful presentation that complements the dish perfectly.

  • Creamy Risotto: The creamy, dreamy texture of risotto enhances the dish’s luxurious feel and soaks up those lovely juices that come from the stuffed chicken.

  • Quinoa Salad: A hearty quinoa salad loaded with herbs and lemon zest offers a nutty flavor and is packed with protein, making it a satisfying yet light side.

  • White Wine: A chilled glass of Sauvignon Blanc or Pinot Grigio harmonizes with the balsamic chicken, bringing out the subtle flavors of the dish while adding a refreshing zing.

Elevate your dining experience by choosing one or more of these delicious options to enhance your Caprese Stuffed Balsamic Chicken!

Caprese Stuffed Balsamic Chicken Recipe FAQs

How do I select ripe tomatoes for this recipe?
Absolutely! When choosing tomatoes, look for ripe Roma tomatoes that are firm yet slightly soft to the touch. Avoid any with dark spots or blemishes, as those can indicate overripeness. A vibrant color and fragrant smell are also good signs of freshness. If you can’t find Roma tomatoes, cherry tomatoes can be a delightful substitute!

How can I store leftovers of Caprese Stuffed Balsamic Chicken?
Store any leftover Caprese Stuffed Balsamic Chicken in an airtight container in the refrigerator for up to 3 days. This method helps maintain the dish’s moistness and flavor. When you’re ready to enjoy it again, simply reheat in the oven at 350°F (175°C) for about 20 minutes for optimal taste.

Can I freeze Caprese Stuffed Balsamic Chicken?
Very! To freeze, wrap each stuffed chicken tightly in plastic wrap or aluminum foil to prevent freezer burn, then place them in an airtight container. The dish can be frozen for up to 3 months. When you’re ready to cook, thaw the chicken in the fridge overnight and follow the original baking instructions straight from there—just add an extra 5 minutes to ensure it’s heated through.

What should I do if the chicken isn’t cooking evenly?
If your Caprese Stuffed Balsamic Chicken ends up not cooking evenly, first check the thickness of the chicken breasts. Using thicker breasts can help maintain moisture and ensure even cooking. Additionally, make sure your oven is adequately preheated. If you find that one side is cooking faster than the other, rotating the skillet midway can encourage even cooking.

Is there a gluten-free alternative for the balsamic glaze?
Absolutely! Balsamic vinegar itself is naturally gluten-free, so you can use it without worry. However, if you prefer an alternative, red wine vinegar works in a pinch. Just be sure to check any other ingredients, like sweeteners, for gluten if you need to stay strict about gluten-free options.

Can I make this dish ahead of time?
Absolutely! You can prepare the Caprese Stuffed Balsamic Chicken and store it in the fridge—uncooked—for up to 24 hours. Just season, stuff, and secure the chicken as usual, then cover it tightly until you’re ready to bake it. The flavors will meld beautifully, enhancing your dish once it’s cooked!

undefined

Caprese Stuffed Balsamic Chicken That Will Wow Your Tastebuds

This gluten-free Caprese Stuffed Balsamic Chicken combines juicy chicken breasts filled with mozzarella, tomatoes, and basil, all smothered in a rich balsamic glaze.
Prep Time 20 minutes
Cook Time 30 minutes
Cooling Time 5 minutes
Total Time 55 minutes
Servings: 4 pieces
Course: Dinner
Cuisine: Italian
Calories: 350

Ingredients
  

For the Chicken
  • 4 large Chicken Breasts Make sure they’re thick enough to hold all that delicious filling.
  • to taste Salt Essential seasoning.
  • to taste Pepper Essential seasoning.
  • 1 tsp Dried Oregano
  • 1 tsp Dried Basil
For the Stuffing
  • 2 cups Roma Tomatoes Juicy tomatoes keep the chicken moist.
  • 1 cup Sun-Dried Tomato Strips in Oil Intensifies flavor.
  • 8 oz Thick Sliced Mozzarella Cheese Melts beautifully.
  • 1/2 cup Basil Leaves Fresh basil for stuffing.
For the Balsamic Glaze
  • 3 cloves Garlic Minced.
  • 1/2 cup Balsamic Vinegar The star of the sauce.
  • 1 tbsp Brown Sugar Balances acidity.
Topping
  • 1/4 cup Chopped Basil Leaves For garnishing.

Equipment

  • Oven-safe skillet

Method
 

Step-by-Step Instructions
  1. Preheat your oven to 350°F (175°C).
  2. Butterfly the chicken breasts, creating pockets for stuffing.
  3. Season both sides of the chicken with salt, pepper, oregano, and basil.
  4. Rub sun-dried tomato oil into the chicken pockets.
  5. Stuff the chicken with tomatoes, sun-dried tomato strips, mozzarella, and basil.
  6. Secure each breast with toothpicks.
  7. Sear the chicken in a hot skillet for about 2 minutes on each side.
  8. Mix balsamic vinegar, brown sugar, and garlic to make the glaze.
  9. Pour the balsamic sauce around the chicken in the skillet.
  10. Simmer the sauce for 2-3 minutes until slightly thickened.
  11. Bake the chicken for 15-17 minutes until cooked through.
  12. Let the chicken cool for 5 minutes before serving.
  13. Garnish with additional chopped basil before serving.

Nutrition

Serving: 1pieceCalories: 350kcalCarbohydrates: 12gProtein: 34gFat: 18gSaturated Fat: 8gPolyunsaturated Fat: 2gMonounsaturated Fat: 8gCholesterol: 120mgSodium: 600mgPotassium: 800mgFiber: 2gSugar: 6gVitamin A: 15IUVitamin C: 25mgCalcium: 20mgIron: 6mg

Notes

This gluten-free dish is perfect for busy weeknights or impressing guests without fuss.

Tried this recipe?

Let us know how it was!

Stay Connected

Get recipes via email: