Get my cookbooks

Mini Muffin Pancake Bites: Fluffy Morning Bliss Awaits

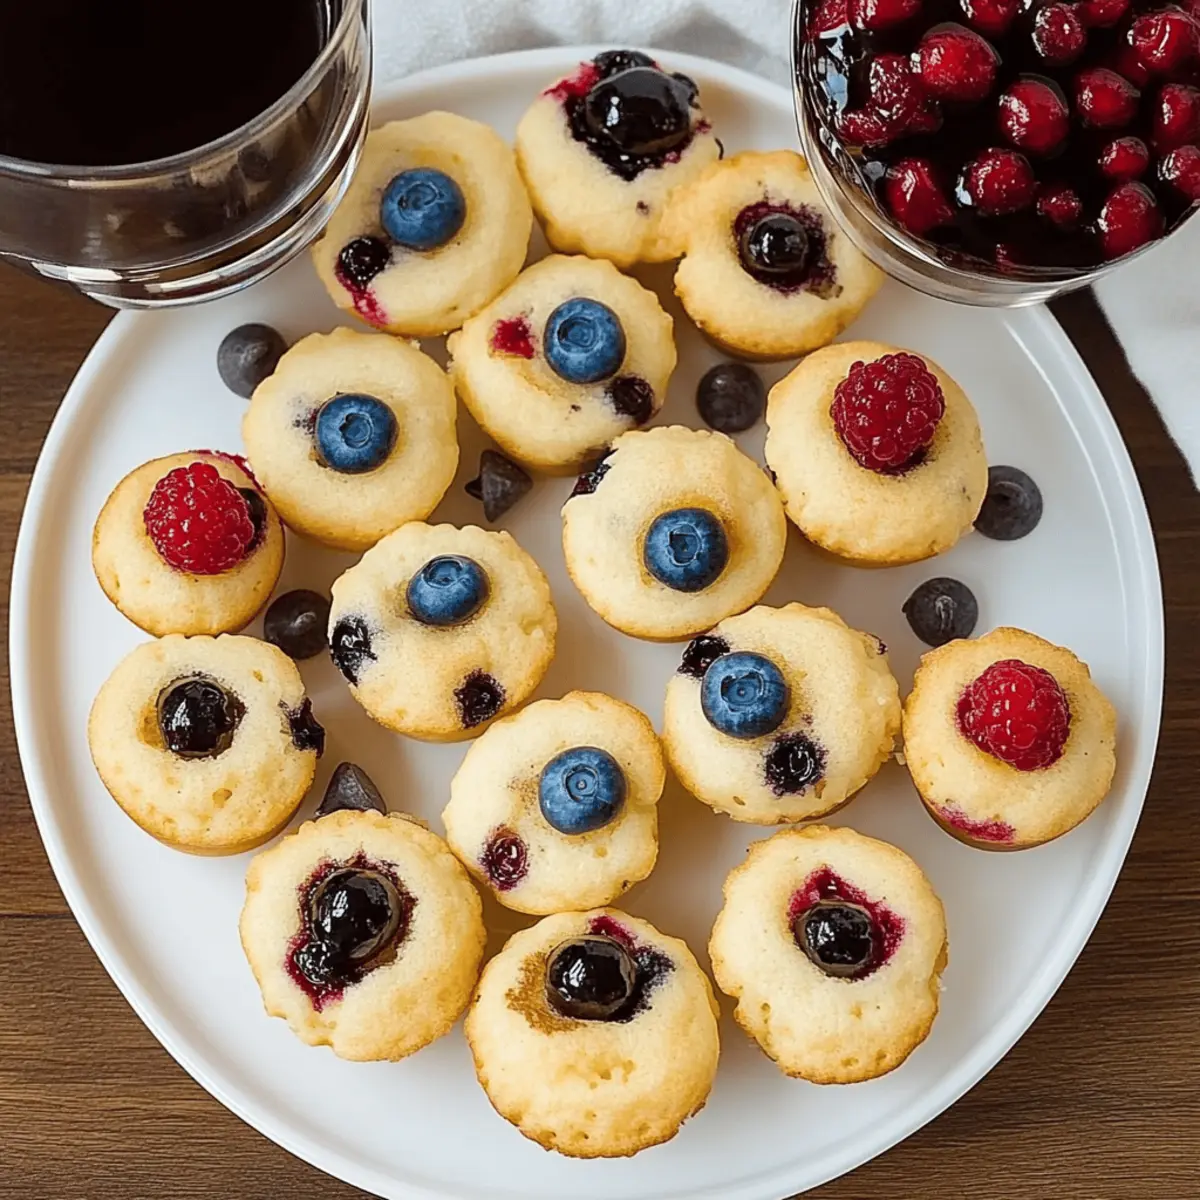
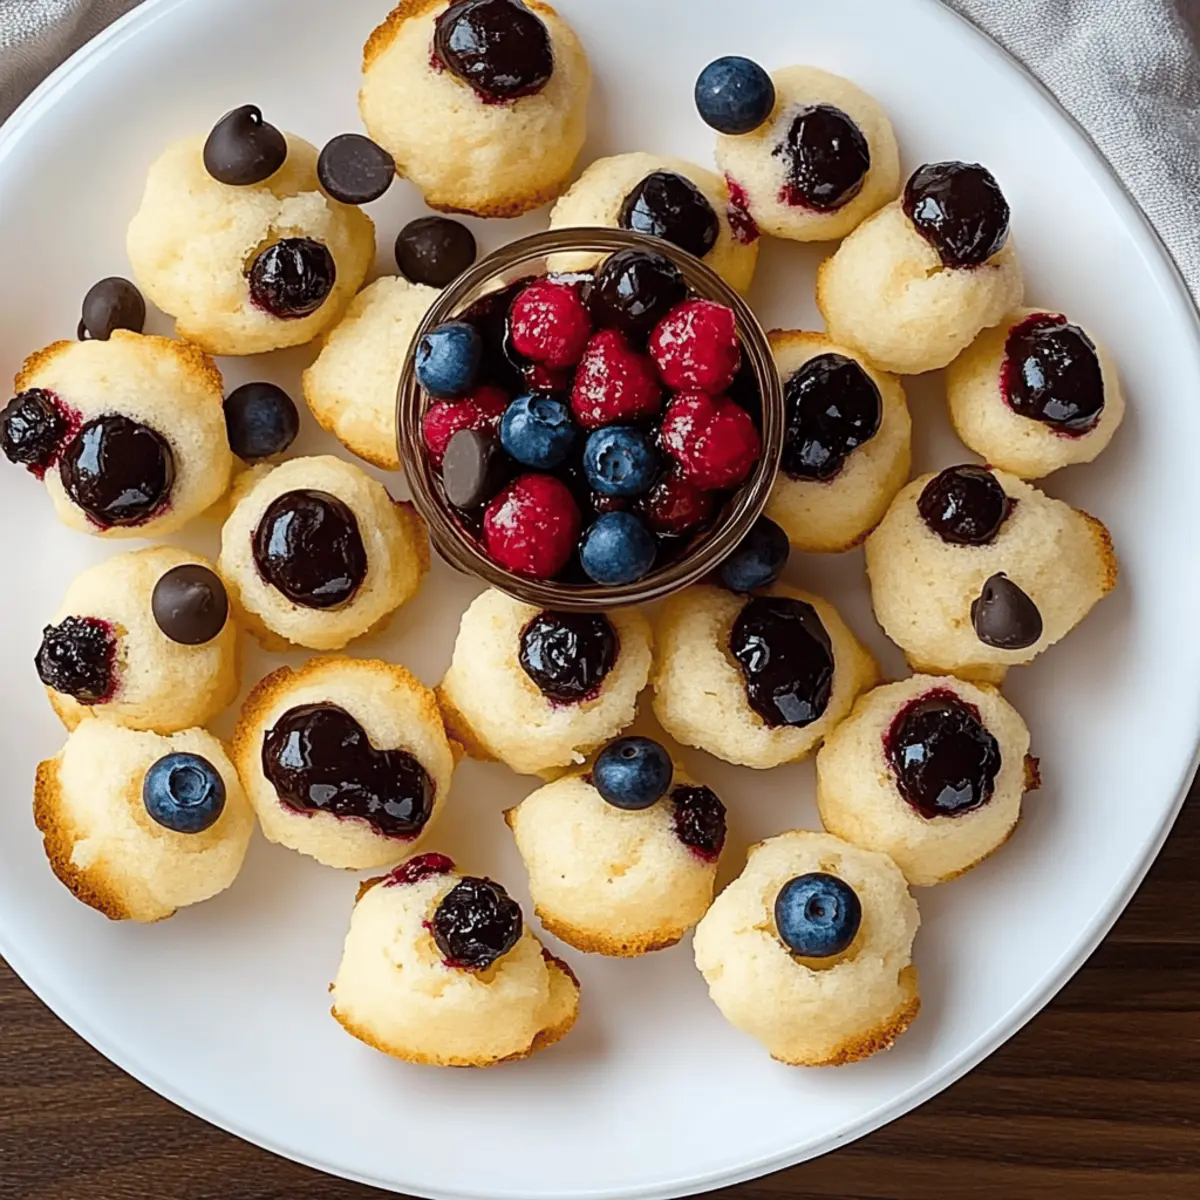
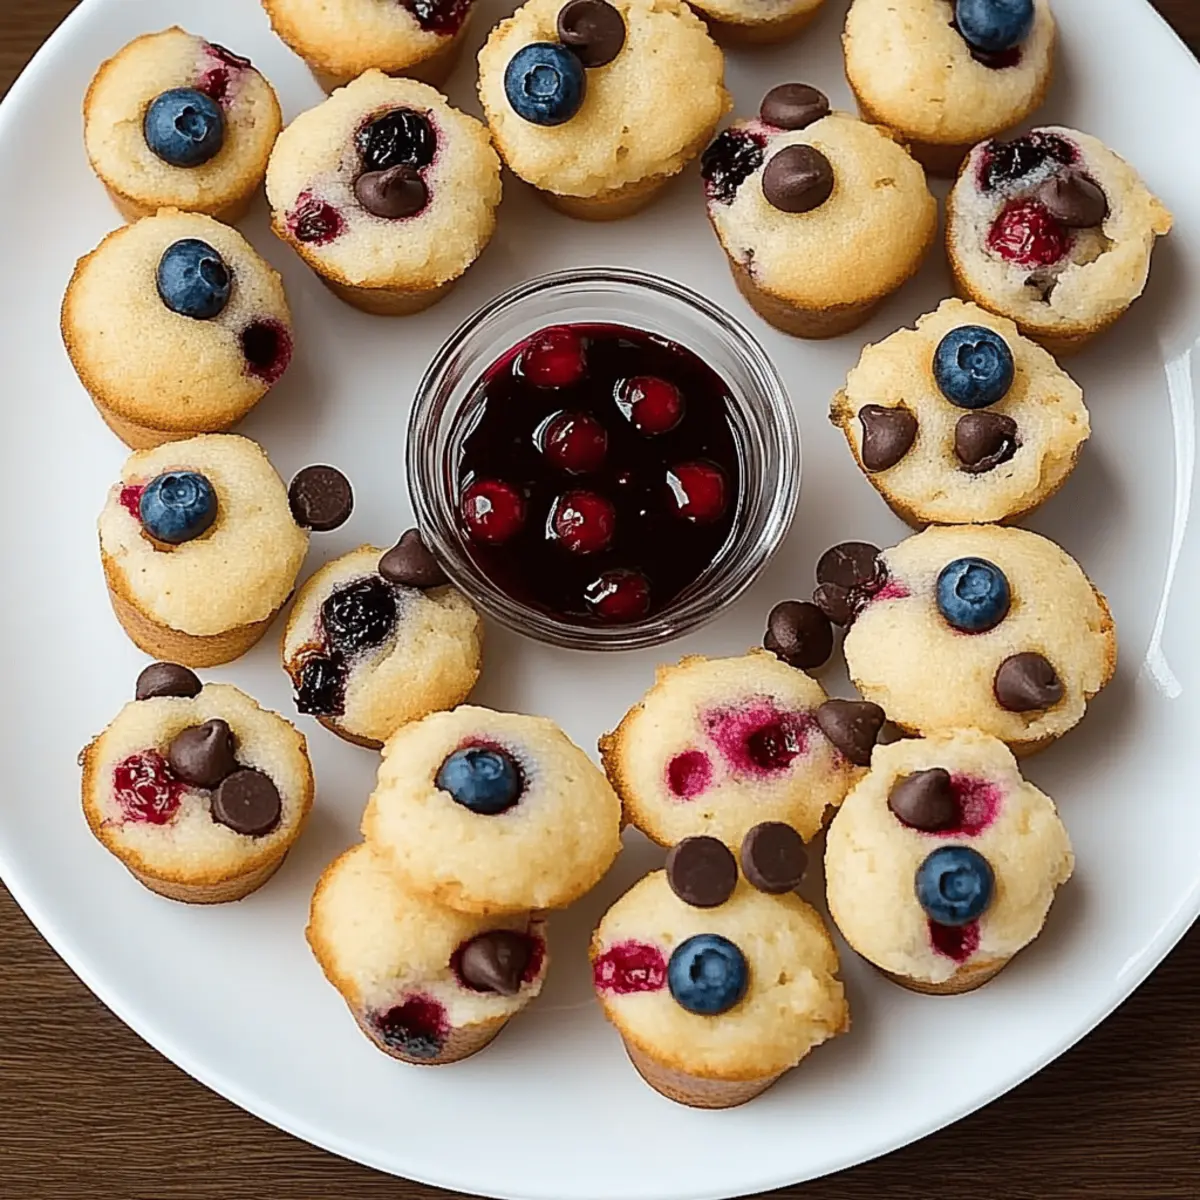
There’s something magical about breakfast that’s quick, cute, and irresistibly delicious. Enter the world of Mini Pancake Muffin Bites, where fluffy pancake goodness meets the convenience of muffins! This easy recipe comes together in just 30 minutes, making it a stellar choice for busy mornings or spontaneous brunch gatherings. Whether you’re a harried parent trying to get the kids fed or just a pancake enthusiast looking for a fun twist, these mini muffin delights are sure to be a hit. Plus, you can customize them with your favorite toppings, from fresh fruits to chocolate chips, ensuring that each batch feels fresh and exciting. Ready to whip up a batch of joy? These bite-sized wonders are waiting for you!

Why Choose Mini Muffin Pancake Bites?

Quick preparation makes these treats a go-to for busy mornings—you can have them ready in just 30 minutes! Irresistible flavor combines the nostalgia of pancakes with the fun of muffins, ensuring everyone loves them. Customizable toppings allow you to get creative; mix in fruits like blueberries or go wild with mini chocolate chips! Perfect for sharing, they’re ideal for brunch gatherings or a fun family breakfast. Finally, easy storage means you can make a batch ahead of time, enjoying fluffy bites all week long—just warm them up before serving!

Mini Muffin Pancake Bites Ingredients

For the Muffins

  • All-Purpose Flour – Provides structure to the muffins; gluten-free flour can be used as a substitute.
  • Granulated Sugar – Adds sweetness; can be reduced or replaced with honey or maple syrup.
  • Baking Powder – Key leavening agent for texture; do not substitute for best results.
  • Baking Soda – Works with baking powder for extra lift; ensure it’s fresh.
  • Salt – Enhances flavor; omitting will reduce overall taste.
  • Buttermilk – Adds moisture and tang; regular milk mixed with vinegar is a good substitute.
  • Large Eggs – Binds the ingredients and adds moisture; use flax eggs for a vegan option.
  • Unsalted Butter – Adds richness; oil can be used for a dairy-free version.

For the Toppings

  • Blueberries, Raspberries, Mini Chocolate Chips – Fun flavor additions; feel free to mix or swap according to preference.

For Serving

  • Maple Syrup – The perfect sweetener for drizzling; try agave syrup for a twist.

Step‑by‑Step Instructions for Mini Muffin Pancake Bites

Step 1: Preheat the Oven
Begin by preheating your oven to 400°F (200°C). This is an essential step to ensure that the Mini Muffin Pancake Bites bake evenly and rise perfectly. While the oven heats up, gather your ingredients so everything is within reach, making the process streamlined and enjoyable.

Step 2: Mix Dry Ingredients
In a large mixing bowl, whisk together the all-purpose flour, granulated sugar, baking powder, baking soda, and salt. This step incorporates air into the dry mix, which is vital for achieving fluffy muffins. Ensure everything is well combined before moving on to the wet ingredients, and enjoy the aromas of your dry ingredients as they blend together!

Step 3: Combine Wet Ingredients
In a separate bowl, whisk together the buttermilk, large eggs, and melted unsalted butter until smooth. This mixture adds moisture and binds the ingredients for your Mini Muffin Pancake Bites. The lovely creamy texture should be consistent, and if you like, taste a small spoonful to experience the delightful flavor profile!

Step 4: Mix Wet and Dry Ingredients
Pour the wet ingredients into the bowl with the dry mix, gently stirring until just combined. Be cautious not to over-mix; it’s okay if the batter is slightly lumpy, as this helps maintain the muffins’ light texture. Let the batter sit for 2 minutes to thicken slightly, allowing the flavors to meld beautifully.

Step 5: Prepare the Muffin Pans
While the batter rests, prepare two 24-cup mini muffin pans by spraying them generously with non-stick cooking spray. This ensures that your Mini Muffin Pancake Bites will come out easily once baked. As you spray, it’s important to make sure every muffin cup gets a good coating to avoid sticking later.

Step 6: Fill the Muffin Cups
Using a tablespoon, fill each muffin cup about 2/3 full, which is roughly a heaping tablespoon of batter. This provides enough volume for the muffins to rise without overflowing. Distributing the batter evenly will give you beautifully uniform Mini Pancake Muffin Bites, so take your time while scooping!

Step 7: Add Toppings
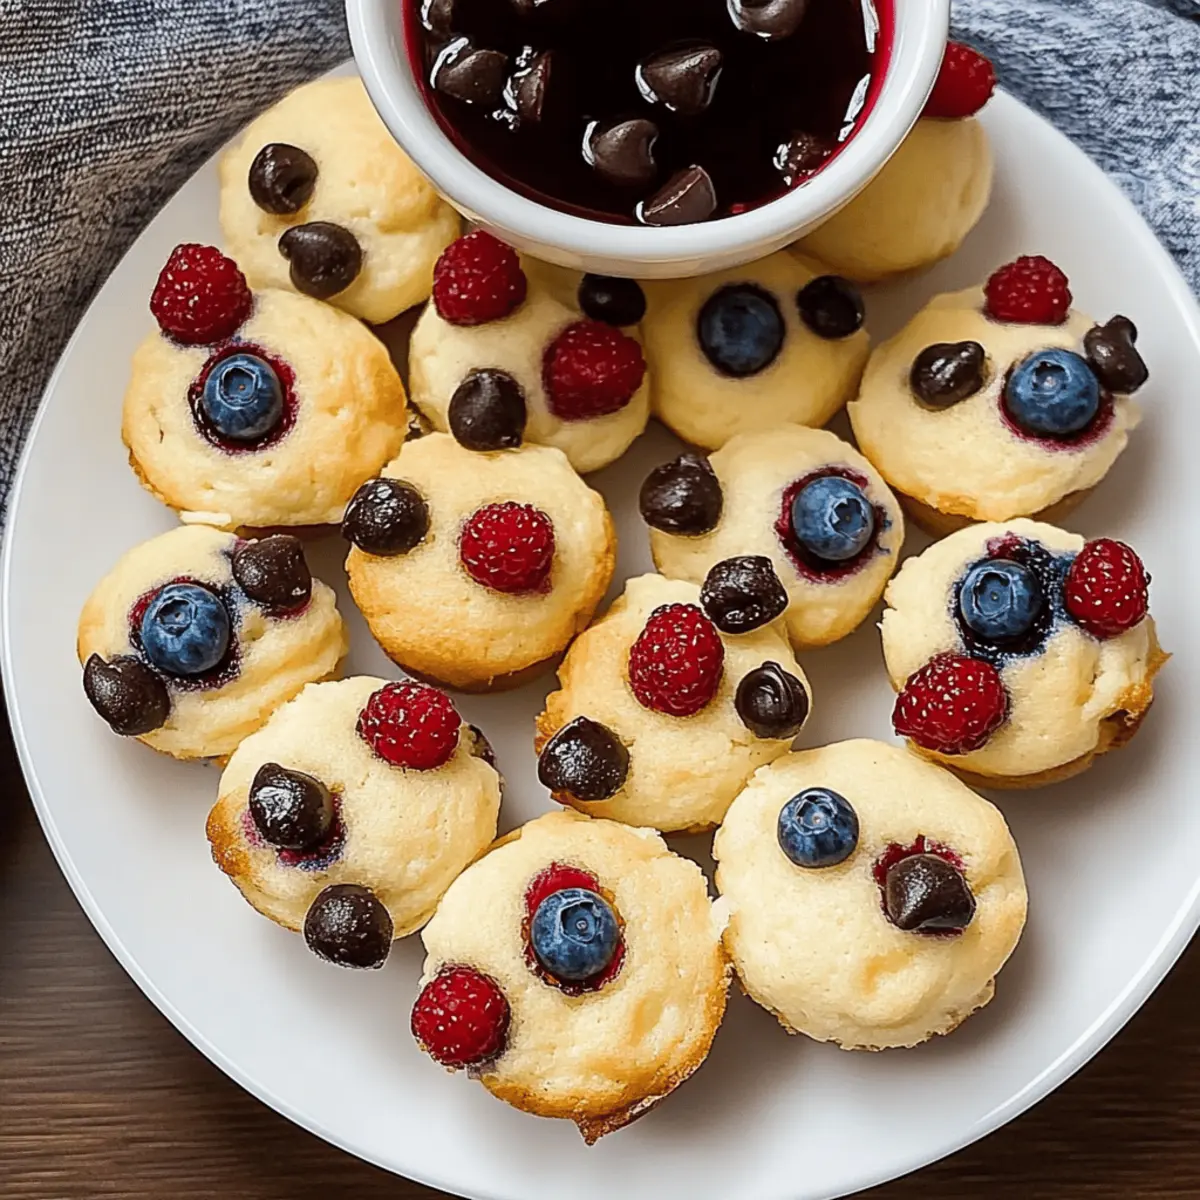
Once the muffin cups are filled, add your desired toppings to each cup. You can place 4 blueberries, 1 raspberry, or a few mini chocolate chips in each batter-filled cup. This step not only enhances flavor but also adds a pop of color, making your Mini Muffin Pancake Bites visually appealing!

Step 8: Bake the Muffins
Carefully place the muffin pans in the preheated oven and bake for 10-12 minutes. The muffins will be slightly puffy when done, but they won’t develop much color on top. Keep an eye on them and do a toothpick test; it should come out clean when inserted into the center of a muffin.

Step 9: Cool and Serve
After baking, let the muffins cool in the pan for about 1 minute. Then, gently invert them onto a wire rack to cool completely. These Mini Muffin Pancake Bites are best served warm alongside a drizzle of maple syrup, ensuring a delightful breakfast experience!

Expert Tips for Mini Muffin Pancake Bites

  • Don’t Overmix: Ensure your batter is slightly lumpy to maintain fluffiness. Overmixing can lead to dense muffins instead of light pancake bites.

  • Measure Ingredients Carefully: Accurate measurements, especially for baking powder and flour, are crucial for the perfect rise and texture in your mini muffins.

  • Experiment with Toppings: Get creative with toppings like spices, fruits, or even savory options to make your Mini Muffin Pancake Bites unique every time!

  • Check Freshness: Always use fresh baking soda and powder for the best leavening. Old ingredients can diminish the rise and fluffiness.

  • Custom Serve Options: For a delightful twist, brush tops with melted butter and sprinkle with cinnamon sugar right after baking for a churro-inspired flavor!

Make Ahead Options

These Mini Pancake Muffin Bites are fantastic for meal prep, allowing you to savor the flavors of breakfast with minimal effort! You can mix the dry ingredients and store them in an airtight container for up to 3 days. The wet ingredients can be whisked together and kept in the fridge for up to 24 hours before baking. When you’re ready to enjoy these delightful bites, simply combine the dry and wet mixtures, fill your muffin pans, and bake as directed. This method not only saves time during busy mornings but also ensures delicious, fresh-tasting muffins that are sure to please your family! Enjoy the convenience of breakfast made ahead!

Mini Muffin Pancake Bites Variations

Feel free to embrace your creativity and personalize these delightful muffin bites for a unique spin on breakfast!

  • Dairy-Free: Substitute buttermilk with almond milk mixed with a tablespoon of vinegar for a dairy-free version. The muffins will still be fluffy and delicious!

  • Whole Wheat: For a heartier option, replace half of the all-purpose flour with whole wheat flour, adding a nutty flavor and extra nutrients. Balance the texture by adjusting the liquid slightly.

  • Sugar Alternatives: Swap granulated sugar for coconut sugar or maple syrup for a natural sweetener that adds a subtle caramel flavor. Your kids won’t even notice it’s healthier!

  • Savory Delight: Combine shredded cheese (like cheddar) and chopped herbs (like chives or parsley) for a savory twist. These muffins can serve as a delicious appetizer or snack.

  • Flavor Boost: Add a teaspoon of vanilla extract or a sprinkle of cinnamon to the batter to enhance sweetness and spice. The aroma as they bake will be irresistible!

  • Nutty Crunch: Fold in chopped nuts such as walnuts or pecans for a delightful crunch. They add texture and nutty flavor that pairs perfectly with sweet toppings.

  • Fruit Variations: Experiment with different fruits like diced strawberries, bananas, or even applesauce to add moisture and flavor. The fruity bites are sure to brighten your morning!

  • Choco-Matcha Madness: Try incorporating a teaspoon of matcha powder along with mini chocolate chips for an exciting flavor combination. It’s a fun way to boost your breakfast with some green goodness!

Don’t forget, these variations allow you to create a new experience with every batch, just like the delicious Nutella Pancakes Blend or the rich flavors of Comfort Garlic Butter recipes!

Storage Tips for Mini Muffin Pancake Bites

Room Temperature: Store leftover mini muffin pancake bites in an airtight container at room temperature for up to 3 days to maintain their softness.

Fridge: For longer freshness, keep them in the fridge for up to a week. Place them in an airtight container to prevent drying out.

Freezer: Freeze any uneaten mini muffin pancake bites by placing them in a single layer in a freezer-safe bag for up to 3 months.

Reheating: To enjoy them warm, reheat in the microwave for about 15-20 seconds or in an oven at 350°F (175°C) for 5-7 minutes, ensuring a soft, fluffy bite every time!

What to Serve with Mini Pancake Muffin Bites?

Indulge in a delightful breakfast experience by pairing these fluffy bites with perfect accompaniments that elevate every morsel.

  • Fresh Fruit Salad: A vibrant mix of seasonal fruits enhances the sweetness of the muffin bites and adds a refreshing crunch.

  • Creamy Yogurt Parfait: Layered with granola and fresh berries, yogurt parfaits provide a creamy contrast and a protein boost to your breakfast.

  • Savory Bacon Strips: These crispy, salty strips bring a delightful contrast to the sweetness of the muffin bites and add satisfying protein.

  • Maple Syrup Drizzle: A classic pairing that never disappoints—drizzling warm maple syrup gives a sweet, sticky finish that complements the pancake flavor.

  • Whipped Cream: Top the muffin bites with a dollop of fluffy whipped cream for a decadent treat that feels like a mini dessert.

  • Choco-Coconut Bliss Balls: For a sweet treat on the side, these bite-sized snacks balance the flavors beautifully, adding a hint of tropical flair.

  • Nut Butter Spread: A dollop of almond or peanut butter adds a nutty richness that pairs wonderfully with the fluffiness of the muffins.

  • Iced Coffee: A refreshing beverage to wash down the sweetness, iced coffee provides a caffeine kick to energize your morning.

Let your creativity shine as you explore flavors and textures to create the ultimate breakfast spread!

Mini Muffin Pancake Bites Recipe FAQs

What types of flour can I use for Mini Muffin Pancake Bites?
You can use all-purpose flour for a classic taste and texture. If you prefer a gluten-free option, substitute with a gluten-free flour blend. Just ensure that the blend contains xanthan gum or similar ingredients to help bind the muffins.

How should I store leftover Mini Muffin Pancake Bites?
Store your mini muffin pancake bites in an airtight container at room temperature for up to 3 days. For longer storage, keep them in the fridge where they will last up to a week. Just make sure to seal them properly to maintain their softness and fresh flavor!

Can I freeze Mini Muffin Pancake Bites?
Absolutely! To freeze, lay them out in a single layer on a baking sheet until frozen solid. Then, transfer the muffin bites to a freezer-safe bag, where they can be stored for up to 3 months. When you’re ready to enjoy, just reheat them in the microwave for about 15-20 seconds until warm.

Why did my muffins not rise properly?
If your muffins didn’t rise as expected, check that your baking powder and baking soda are fresh—old leavening agents can greatly affect the rise. Also, be sure you didn’t over-mix your batter! A slightly lumpy batter is key to keeping them fluffy.

Can I make Mini Muffin Pancake Bites vegan-friendly?
Yes! Simply replace the eggs with flax eggs (1 tablespoon ground flaxseed mixed with 2.5 tablespoons water per egg, let sit for a few minutes to thicken) and use a dairy-free milk like almond milk instead of buttermilk. You can also substitute non-dairy butter or oil for the unsalted butter in the recipe.

What are the best toppings for my Mini Muffin Pancake Bites?
The sky’s the limit! You can use berries like blueberries or raspberries, nuts, mini chocolate chips, or even a sprinkle of cinnamon for extra flavor. The more the merrier—feel free to mix and match to suit your taste!

Mini Muffin Pancake Bites

Mini Muffin Pancake Bites: Fluffy Morning Bliss Awaits

Mini Muffin Pancake Bites offer a quick, cute, and delicious breakfast treat that's customizable and easy to make.
Prep Time 10 minutes
Cook Time 12 minutes
Resting Time 2 minutes
Total Time 30 minutes
Servings: 12 muffins
Course: Breakfast
Cuisine: American
Calories: 100

Ingredients
  

For the Muffins
  • 2 cups All-Purpose Flour Gluten-free flour can be used as a substitute.
  • 1/4 cup Granulated Sugar Can be reduced or replaced with honey or maple syrup.
  • 2 tablespoons Baking Powder Do not substitute for best results.
  • 1/2 teaspoon Baking Soda Ensure it's fresh.
  • 1/2 teaspoon Salt Omitting will reduce overall taste.
  • 1 cup Buttermilk Regular milk mixed with vinegar is a good substitute.
  • 2 Large Eggs Use flax eggs for a vegan option.
  • 1/4 cup Unsalted Butter Oil can be used for a dairy-free version.
For the Toppings
  • Blueberries Fun flavor additions; feel free to mix or swap according to preference.
  • Raspberries Fun flavor additions; feel free to mix or swap according to preference.
  • Mini Chocolate Chips Fun flavor additions; feel free to mix or swap according to preference.
For Serving
  • 1/4 cup Maple Syrup Try agave syrup for a twist.

Equipment

  • Oven
  • Mixing bowls
  • whisk
  • Muffin Pans
  • Spoon

Method
 

Step-by-Step Instructions
  1. Preheat your oven to 400°F (200°C).
  2. In a large mixing bowl, whisk together the all-purpose flour, granulated sugar, baking powder, baking soda, and salt.
  3. In a separate bowl, whisk together the buttermilk, large eggs, and melted unsalted butter until smooth.
  4. Pour the wet ingredients into the bowl with the dry mix, gently stirring until just combined.
  5. Prepare two 24-cup mini muffin pans by spraying them generously with non-stick cooking spray.
  6. Using a tablespoon, fill each muffin cup about 2/3 full with batter.
  7. Add your desired toppings to each cup, using blueberries, raspberries, or mini chocolate chips.
  8. Carefully place the muffin pans in the preheated oven and bake for 10-12 minutes.
  9. After baking, let the muffins cool in the pan for about 1 minute before inverting them onto a wire rack.

Nutrition

Serving: 1muffinCalories: 100kcalCarbohydrates: 15gProtein: 2gFat: 4gSaturated Fat: 2gMonounsaturated Fat: 2gCholesterol: 20mgSodium: 100mgPotassium: 50mgFiber: 1gSugar: 3gVitamin C: 2mgCalcium: 2mgIron: 4mg

Notes

These bites can be customized with various toppings and served warm with syrup for a delightful experience.

Tried this recipe?

Let us know how it was!

Slow Cooker Chicken Pot Pie: Comfort Food Made Easy

As I stirred together the ingredients for my Easy Slow Cooker Chicken Pot Pie, the rich aroma wafted through my kitchen, instantly wrapping me in a warm embrace of nostalgia. This comforting dish combines the ease of a slow cooker with the heartiness of a classic favorite, making it perfect for busy weeknights when you crave something truly satisfying. With creamy filling mingled with tender chicken and fluffy biscuits, it promises a hassle-free dinner that’s just as customizable for vegetarians or those who like a little extra creaminess. Plus, it’s a great way to sneak in some frozen veggies without anyone noticing! Ready to bring some warmth to your dinner table? Let’s dive into this delightful recipe together!

Why is this pot pie a must-try?

Comforting Home-Cooked Goodness: This Slow Cooker Chicken Pot Pie delivers the nostalgic flavors of home cooking without the long hours in the kitchen.

Effortless Preparation: With simply layering ingredients in a slow cooker, dinner becomes a breeze, giving you more time to relax or spend with family.

Creamy, Delicious Flavor: The creamy filling, enriched with tender chicken and savory herbs, will leave everyone asking for seconds.

Customizable Delight: Whether you want to switch to vegetarian options or enhance creaminess, this recipe welcomes your creativity, similar to my Chilli Chicken Takeout or BBQ Chicken Grilled Cheese Sandwich.

Family-Friendly Appeal: Perfect for busy weeknights, it’s a meal that even the pickiest eaters will love, making it a family favorite in no time!

Slow Cooker Chicken Pot Pie Ingredients

For the Filling

  • Boneless, skinless chicken breasts – Approximately 2 ½ pounds ensure optimal tenderness.
  • Dried oregano – A pinch adds herbaceous flavor; substitute with Italian seasoning if needed.
  • Garlic powder – Enhances overall taste; consider fresh garlic for a stronger kick.
  • Salt – Essential for seasoning; adjust according to your taste preference.
  • Cracked black pepper – Adds mild spice; opt for white pepper for a subtler note.
  • Smoked paprika – Imparts depth and warmth; regular paprika can be used for a milder profile.
  • Large yellow onion – Provides sweetness and depth; shallots work well for a milder onion flavor.
  • Frozen mixed vegetables – Contributes nutrition and texture; feel free to use fresh veggies like carrots or peas.
  • Condensed cream of chicken soup – Serves as a creamy base; cream of mushroom or celery can substitute.
  • Condensed cream of celery soup – Enhances flavor and creaminess; an extra can of cream of chicken is a great substitute.
  • Chicken broth – Infuses moisture and flavor; homemade broth can elevate the dish further.
  • Heavy cream – Adds luxurious creaminess; sour cream can replace it for a tangy twist.

For the Topping

  • Grands or jumbo biscuits – The ideal topping for the pot pie; homemade biscuits can elevate the meal further.

Get ready to create a comforting bowl of joy with this Slow Cooker Chicken Pot Pie!

Step‑by‑Step Instructions for Slow Cooker Chicken Pot Pie

Step 1: Prepare the Slow Cooker
Begin by placing approximately 2 ½ pounds of boneless, skinless chicken breasts at the bottom of your 5-quart slow cooker. Make sure the chicken is arranged evenly in a single layer. This will allow the chicken to cook thoroughly and absorb all the delicious flavors from the ingredients added later.

Step 2: Season the Chicken
Next, sprinkle a generous amount of dried oregano, garlic powder, salt, cracked black pepper, and smoked paprika over the chicken breasts. Use about a teaspoon of each spice, ensuring an even coating. These seasonings will enhance the flavor of the Slow Cooker Chicken Pot Pie filling, making the chicken wonderfully aromatic as it cooks.

Step 3: Add the Vegetables
Layer one large diced yellow onion and about 3 cups of frozen mixed vegetables directly on top of the seasoned chicken. The vegetables add both nutrition and texture to the dish. When you first see the vibrant colors of the veggies popping against the white chicken, you’ll know you’re creating something special for dinner.

Step 4: Combine the Creamy Base
In a separate bowl, mix together one can each of condensed cream of chicken soup and cream of celery soup with one cup of chicken broth until well combined. This will form a creamy mixture that will envelop the chicken and vegetables. Pour this creamy concoction over the ingredients already in the slow cooker, ensuring everything is well-coated.

Step 5: Set the Cooking Time
Cover the slow cooker with its lid and set it to cook on high for 3-4 hours or low for 5-7 hours. The chicken should reach an internal temperature of 165°F when done. During cooking, enjoy the rich aroma filling your kitchen, as your Slow Cooker Chicken Pot Pie starts to come together perfectly.

Step 6: Shred the Chicken
Once the cooking time is complete, carefully remove the lid from the slow cooker. Using two forks, shred the cooked chicken breasts directly in the pot until they are nice and chunky, then stir everything well. This step ensures that every bite of the filling is infused with flavor from the chicken and creamy base.

Step 7: Add the Creaminess
For an extra touch of creaminess, stir in half a cup of heavy cream after shredding the chicken. This will elevate your Slow Cooker Chicken Pot Pie to a delightful level of richness. After mixing, let it sit for a few moments to warm through while you prepare the biscuits.

Step 8: Bake the Biscuits
As the final step, bake the Grands or jumbo biscuits according to the package instructions. While the biscuits are baking, give your delicious filling one last gentle stir. Once the biscuits are golden brown and fluffy, serve them warm alongside your creamy Chicken Pot Pie, bringing comfort and joy to your dinner table.

Make Ahead Options

These Easy Slow Cooker Chicken Pot Pie ingredients are perfect for meal prep! You can chop and combine the vegetables (like the large yellow onion and frozen mixed veggies) and store them in an airtight container in the fridge for up to 3 days. The seasoning mix can also be prepared and stored in a small jar for convenience. To maintain quality, refrigerate the mixture and ensure everything is well-covered to prevent browning or drying out. On the day you plan to serve, simply layer the chicken and prepped veggies in the slow cooker, pour the creamy soups over, and cook as directed. You’ll be left with a delightful pot pie that tastes just as delicious, saving you time on busy weeknights!

Slow Cooker Chicken Pot Pie Variations

Feel free to put your own spin on this cozy dish for an even more delightful experience!

  • Vegetarian Option: Swap out chicken for plant-based proteins like tofu or chickpeas. This variation preserves the comforting flavors while keeping it meat-free.

  • Cream Soup Variety: Experiment with different cream soups, such as cream of mushroom or broccoli, for a unique spin on the creamy base. Each option offers a different taste and texture twist that keeps things exciting.

  • Fresh Herb Boost: Add a handful of fresh herbs like thyme or rosemary for a fragrant kick. These herbs can elevate the dish, bringing bright notes that contrast beautifully with the creaminess.

  • Spice It Up: If you crave heat, sprinkle in some cayenne pepper or red pepper flakes to the mix. A touch of spice transforms a familiar dish into a bold and invigorating meal experience.

  • Hearty Noodles: Incorporate cooked egg noodles into the pot pie for a heartier meal. The noodles soak up all the tasty flavors, creating a satisfying texture that even the kids will love.

  • Nutty Flavor: Add a handful of toasted nuts, like pecans or almonds, before serving. This will provide a fantastic crunch and an unexpected twist.

  • Cauliflower Substitute: Use cauliflower florets instead of mixed vegetables for a low-carb version. Roasted on the side or gently steamed, they can add an earthy flavor to your pot pie.

  • Creamy Spin: For an ultra-creamy filling, replace the heavy cream with a blend of mascarpone or cream cheese. It gives the filling a luxurious texture, elevating your slow cooker chicken pot pie to new heights.

No matter how you choose to customize it, your pot pie will always be a comforting, soul-warming meal, much like my family’s favorite Tuscan Chicken Soup or the delicious BLT Chicken Salad you’ve come to love!

Storage Tips for Slow Cooker Chicken Pot Pie

Fridge: Store any leftovers in an airtight container for up to 3 days to maintain the creamy filling’s freshness and flavor.

Freezer: For longer storage, freeze the chicken pot pie filling in an airtight container for up to three months. Cool it completely before freezing to prevent freezer burn.

Reheating: Thaw in the refrigerator overnight before reheating. For best results, gently warm in a saucepan on the stove or the microwave, adding a splash of chicken broth or cream for creaminess.

Biscuits: If you’ve made homemade biscuits, they’re best enjoyed fresh; however, store them separately in an airtight container for up to 2 days.

What to Serve with Easy Slow Cooker Chicken Pot Pie

Pairing your Easy Slow Cooker Chicken Pot Pie with the right sides can create a comforting meal that warms the heart and fills the belly.

  • Garden Salad: A light, crisp salad balances the rich creaminess of the pot pie, adding fresh and vibrant flavors to your plate.

  • Creamy Mashed Potatoes: These fluffy potatoes provide an extra layer of comfort and pair beautifully with the savory filling. They’re perfect for soaking up any extra gravy.

  • Buttery Cornbread: This sweet, tender bread complements the pot pie’s savory elements, offering a delightful contrast in flavors and textures.

  • Roasted Brussels Sprouts: The slightly bitter, crispy edges of Brussels sprouts, roasted to perfection, elevate the meal significantly, enhancing its heartiness.

  • Steamed Green Beans: Bright and tender, green beans add a pop of color and freshness, brightening the overall dish while contributing essential veggies to your meal.

  • Cranberry Sauce: A touch of tartness from cranberry sauce provides an unexpected but delightful contrast to the creamy, savory flavors of the pot pie.

  • Chardonnay or Sparkling Cider: Elevate your dining experience with a glass of chilled Chardonnay, which enhances the creamy texture, or opt for sparkling cider for a non-alcoholic refreshment.

Each of these pairs will surely enhance your Slow Cooker Chicken Pot Pie experience, making it a mealtime favorite for any occasion.

Expert Tips for Slow Cooker Chicken Pot Pie

  • Thicker Filling: For a thicker filling, reduce the chicken broth to ½ cup or add a cornstarch slurry at the end of cooking.
  • Enhance Creaminess: Stir in heavy cream or sour cream after shredding the chicken for a rich, indulgent texture.
  • Using Bone-In Chicken: If opting for bone-in chicken, be aware that it may require longer cooking times to ensure tender meat.
  • Avoid Overcooking: Keep an eye on the slow cooker; start checking for doneness around 4 hours on low to avoid dry chicken.
  • Vegetable Options: Feel free to swap frozen veggies for fresh ones or use your favorites, like broccoli or green beans, in the slow cooker chicken pot pie for added flavor.

Slow Cooker Chicken Pot Pie Recipe FAQs

How do I know if my chicken is ripe for cooking?
Absolutely! When selecting boneless, skinless chicken breasts, look for a fresh pink color with no dark spots or an off smell. Make sure to use chicken that’s within the sell-by date for the best quality and taste!

How long can I store leftovers in the fridge?
Very! You can refrigerate the leftover Slow Cooker Chicken Pot Pie filling in an airtight container for up to 3 days. It’s a cozy meal that holds well, but be sure to let it cool completely before sealing it up to retain its flavor and texture.

Can I freeze my Slow Cooker Chicken Pot Pie?
Definitely! To freeze, cool the filling completely before transferring it to an airtight container. It can be stored in the freezer for up to three months. When you’re ready to enjoy it again, simply thaw it in the refrigerator overnight and reheat gently on the stove or in the microwave, adding a splash of broth or cream to maintain creaminess.

What should I do if my filling is too thin?
No worries! If your pot pie filling turns out less thick than desired, you can easily fix it. As it cooks, mix a cornstarch slurry by combining 2 tablespoons of cornstarch with 2 tablespoons of water. Stir this mixture into the filling about 30 minutes before serving. This will help thicken it up beautifully, ensuring a more satisfying texture! Just keep stirring until you see the consistency you love.

Can I make this recipe vegetarian-friendly?
Absolutely! To customize for a vegetarian option, substitute the chicken with plant-based proteins like tofu or chickpeas. You could also replace the cream soups with mushroom or vegetable broths and add in more flavorful veggies such as zucchini or butternut squash to create a delicious veggie version of this comforting dish.

Can my pets enjoy Slow Cooker Chicken Pot Pie leftovers?
I recommend caution. While the cooked chicken itself is safe for dogs and cats, it’s essential to avoid giving them any filling that contains seasoning, onion, or garlic, as these can be harmful to pets. Instead, share some plain shredded chicken with them as a special treat!

Slow Cooker Chicken Pot Pie

Slow Cooker Chicken Pot Pie: Comfort Food Made Easy

This Slow Cooker Chicken Pot Pie is an easy, comforting dinner that combines tender chicken, creamy filling, and fluffy biscuits, perfect for busy weeknights.
Prep Time 15 minutes
Cook Time 4 hours
Total Time 4 hours 15 minutes
Servings: 6 servings
Course: Dinner
Cuisine: American
Calories: 450

Ingredients
  

For the Filling
  • 2.5 pounds boneless, skinless chicken breasts Ensure optimal tenderness.
  • 1 teaspoon dried oregano Can substitute with Italian seasoning.
  • 1 teaspoon garlic powder Consider fresh garlic for a stronger kick.
  • 1 teaspoon salt Adjust according to your taste preference.
  • 1 teaspoon cracked black pepper Opt for white pepper for a subtler note.
  • 1 teaspoon smoked paprika Regular paprika can be used for a milder profile.
  • 1 large yellow onion Shallots work well for a milder onion flavor.
  • 3 cups frozen mixed vegetables Feel free to use fresh veggies like carrots or peas.
  • 1 can condensed cream of chicken soup Serves as a creamy base.
  • 1 can condensed cream of celery soup Enhances flavor and creaminess.
  • 1 cup chicken broth Homemade broth can elevate the dish further.
  • 0.5 cup heavy cream Sour cream can replace it for a tangy twist.
For the Topping
  • 1 package Grands or jumbo biscuits The ideal topping for the pot pie.

Equipment

  • 5-quart slow cooker

Method
 

Step-by-Step Instructions
  1. Prepare the Slow Cooker: Place 2 ½ pounds of boneless, skinless chicken breasts at the bottom of your 5-quart slow cooker in a single layer.
  2. Season the Chicken: Sprinkle dried oregano, garlic powder, salt, cracked black pepper, and smoked paprika over the chicken breasts, about a teaspoon of each.
  3. Add the Vegetables: Layer one large diced yellow onion and about 3 cups of frozen mixed vegetables on top of the seasoned chicken.
  4. Combine the Creamy Base: Mix together one can each of condensed cream of chicken soup and cream of celery soup with one cup of chicken broth until well combined and pour over the ingredients in the slow cooker.
  5. Set the Cooking Time: Cover and cook on high for 3-4 hours or low for 5-7 hours until the chicken reaches 165°F internally.
  6. Shred the Chicken: Remove the lid and shred the cooked chicken in the pot using two forks, then stir everything well.
  7. Add the Creaminess: Stir in half a cup of heavy cream after shredding the chicken.
  8. Bake the Biscuits: Bake the Grands or jumbo biscuits according to the package instructions and serve warm with your creamy chicken pot pie.

Nutrition

Serving: 1servingCalories: 450kcalCarbohydrates: 30gProtein: 25gFat: 25gSaturated Fat: 10gPolyunsaturated Fat: 5gMonounsaturated Fat: 5gCholesterol: 90mgSodium: 800mgPotassium: 600mgFiber: 3gSugar: 2gVitamin A: 10IUVitamin C: 4mgCalcium: 6mgIron: 15mg

Notes

Store leftovers in an airtight container for up to 3 days. Freeze filling for up to three months. Reheat gently with added chicken broth or cream.

Tried this recipe?

Let us know how it was!

Simple Zucchini Dill Casserole for a Cozy Family Feast

As I stood in my kitchen, the aroma of fresh dill wafted through the air, instantly transporting me to sunny summer days when zucchini seemed to be in abundance. This Simple Zucchini Dill Casserole is not just a recipe; it’s a comforting embrace after a long day, perfect for those busy weeknights. With its quick and easy prep, it’s a family-friendly dish that brings a nutritious twist to your table while keeping the kids excited to eat their veggies. The creamy goodness is balanced beautifully with tender zucchini and a burst of fresh herbs, making every bite feel indulgent. What could be better than a meal that’s not only delicious but can be made ahead and enjoyed later? Are you ready to dive into your new favorite casserole?

Why is this Zucchini Casserole a Must-Try?

Versatile Dish: This Simple Zucchini Dill Casserole can easily adapt to your family’s taste by swapping in other veggies or proteins! Easy Preparation: With minimal chopping and mixing required, it’s perfect for those hectic weeknights. Nutritious Delight: Packed with fresh vegetables and wholesome ingredients, it’s a guilt-free way to indulge. Make-Ahead Friendly: Prepare it in advance and enjoy a comforting meal any night of the week. If you love casseroles, you’ll definitely want to check out our Tater Tot Casserole or French Toast Casserole for more family-friendly options!

Simple Zucchini Dill Casserole Ingredients

For the Casserole Base
Biscuit Mix – Provides structure and a base for the casserole; you can use a homemade biscuit blend or a gluten-free mix as a substitution.
Eggs – Binds the mixture together and adds structure; for a vegan option, consider using flax eggs (1 tbsp flaxseed meal + 2.5 tbsp water per egg).
Oil – Provides moisture to the batter; melted butter or coconut oil can be used for added richness.

For Flavor and Texture
Parmesan Cheese – Adds a rich, cheesy flavor that elevates the dish; Romano cheese works well for a sharper taste if desired.
Salt – Enhances overall flavors; adjust to taste, especially in low-sodium diets.
Pepper – Adds warmth and depth; freshly ground is preferred for the best flavor.
Fresh Dill – Infuses a bright, herbal flavor; dried dill can be used but will have less aroma.

For the Main Ingredients
Medium Zucchini – The star ingredient, providing texture and nutrition; avoid large, watery zucchinis for the best results.
Onion – Adds depth and flavor; shallots can be used for a milder taste or green onions for a fresh twist.

This Simple Zucchini Dill Casserole not only showcases the bounty of summer but also transforms mealtime into a delightful experience for the whole family!

Step‑by‑Step Instructions for Simple Zucchini Dill Casserole

Step 1: Prepare Zucchini
Begin by washing and dicing the medium zucchini into small, even pieces without peeling them; this keeps the nutrients intact and adds a lovely green hue. Set the diced zucchini aside so it’s ready for incorporation. Preheating your oven to 375°F (190°C) during this step ensures it’s hot and ready for baking when the casserole mixture is prepared.

Step 2: Mix Dry Ingredients
In a large mixing bowl, combine the biscuit mix, grated Parmesan cheese, fresh dill, salt, and pepper. Stir these dry ingredients together with a whisk until well blended, creating a uniform mixture that will form the base of the Simple Zucchini Dill Casserole. This step will highlight the aromatic flavors of dill and cheese, setting a delicious foundation.

Step 3: Create Wet Mixture
Make a well in the center of the dry mixture, then add the eggs and oil into this well. Using a spatula or wooden spoon, mix everything together until smooth and thick, ensuring no dry spots remain. This wet mixture will bind the casserole together, adding richness to the final dish.

Step 4: Incorporate Vegetables
Gently fold in the diced zucchini and chopped onion into the wet mixture. Use a spatula to ensure the vegetables are evenly distributed throughout the batter. This step is crucial for ensuring every bite of your Simple Zucchini Dill Casserole is flavorful, with a delightful mix of textures from the zucchini and onion.

Step 5: Prepare Baking Dish
Take a 1.5-quart baking dish and lightly grease it with oil or butter to prevent sticking. Make sure to coat the bottom and sides evenly. This preparation is essential for easy serving and cleanup after baking the Simple Zucchini Dill Casserole.

Step 6: Transfer Mixture
Carefully pour the casserole batter into the prepared baking dish. Use a spatula to spread the mixture evenly, ensuring an even surface. This will help the casserole cook uniformly in the oven, resulting in a deliciously golden top with tender zucchini throughout.

Step 7: Bake
Slide the baking dish into your preheated oven and let it bake for 25-30 minutes. Keep an eye on the casserole as it cooks; it should turn golden brown, and a toothpick inserted into the center should come out clean. This step ensures that your Simple Zucchini Dill Casserole is perfectly cooked and ready to serve.

Step 8: Cool and Serve
Once baked, remove the casserole from the oven and allow it to cool for a few minutes. This cooling period will help the casserole set, making it easier to slice and serve. Cut into squares and enjoy this comforting, family-friendly dish while it’s still warm, allowing the aroma of fresh dill to entice your family to the table.

Expert Tips for Zucchini Dill Casserole

  • Quality Zucchini: Choose medium-sized zucchinis, as large ones may be watery and diminish flavor. Fresh produce is key to a delicious Simple Zucchini Dill Casserole.
  • Salting Tip: Lightly salt the zucchini before mixing to draw out excess moisture, enhancing both taste and reducing cooking time.
  • Dill Substitute: If fresh dill isn’t available, use dried dill sparingly. Remember, dried herbs are more potent, so reduce the amount!
  • Chilling Benefits: Refrigerating the casserole overnight allows flavors to meld beautifully, resulting in a tastier dish when warmed up.
  • Reheating Advice: For the best texture when reheating, use an oven instead of a microwave, which can make the casserole soggy.
  • Serve it Right: Pair with a simple green salad or crusty bread for a satisfying, well-rounded meal. Enjoy your delicious Simple Zucchini Dill Casserole!

What to Serve with Simple Zucchini Dill Casserole

Enhance your dining experience with delightful pairings that complement the comforting flavors of this casserole.

  • Creamy Mashed Potatoes: Their velvety texture and buttery flavor provide a satisfying contrast, making every bite a revelation. The mashed potatoes will hold onto any leftover sauce for a delicious scoop!
  • Simple Green Salad: A fresh mix of leafy greens with a light vinaigrette cuts through the richness of the casserole, adding a refreshing crunch that brightens your meal. Toss in some cherry tomatoes for a pop of color and sweetness!
  • Herbed Quinoa: This nutty grain brings a wholesome element to the table. Seasoned with a hint of lemon and fresh herbs, it amplifies the dish’s flavor while offering a hearty side. Plus, it’s a perfect way to soak up leftover juices!
  • Garlic Bread: Crispy on the outside and soft on the inside, garlic bread is the ultimate comfort food companion. The aromatic garlic and buttery essence blend wonderfully with the casserole. Dip it in for an exquisite experience!
  • Roasted Vegetables: A medley of seasonal veggies like carrots and bell peppers enhances your plate with vibrant colors and natural sweetness. Their charred notes provide a lovely contrast to the creamy casserole.
  • Chilled White Wine: Sip a refreshing glass of Sauvignon Blanc or Pinot Grigio alongside your meal. The bright acidity of the wine elevates the herbaceous notes of the casserole, making it a delightful pairing.
  • Apple Crisp for Dessert: End on a sweet note! The warm, spiced apples and crunchy topping provide a cozy finish to your meal while complementing the zucchini’s natural sweetness.
  • Lemonade: A chilled glass of lemonade adds a zesty kick, balancing the savory richness of the casserole with a sweet, citrusy twist. Perfect for summer evenings!

Storage Tips for Simple Zucchini Dill Casserole

Fridge: Store leftover casserole in an airtight container for up to 4 days. This keeps the flavors fresh and the texture intact, ready for a quick meal.

Freezer: You can freeze the Simple Zucchini Dill Casserole for up to 3 months. Make sure to wrap it tightly in plastic wrap or foil for best results.

Reheating: When ready to enjoy, thaw overnight in the fridge and reheat in the oven at 350°F (175°C) until heated through, about 20-25 minutes. This method preserves the casserole’s delightful texture!

Make Ahead Options

This Simple Zucchini Dill Casserole is perfect for meal prep enthusiasts looking to save time during hectic weeknights! You can prepare the entire casserole mixture up to 24 hours in advance; simply cover it tightly with plastic wrap and refrigerate. To maintain quality, avoid adding salt to the zucchini beforehand if you’re prepping more than a few hours ahead, as it can release moisture. When you’re ready to bake, simply transfer the mixture to a greased baking dish and let it sit at room temperature for about 30 minutes before placing it in the preheated oven (375°F or 190°C) for 25-30 minutes until golden. This way, you’ll enjoy a delicious homemade meal with minimal effort!

Simple Zucchini Dill Casserole Variations

Feel free to embark on a culinary adventure by personalizing your Simple Zucchini Dill Casserole with these delightful twists!

  • Gluten-Free: Swap the biscuit mix for a gluten-free blend to make this dish suitable for gluten-sensitive eaters. Choose a mix that rises well for the best texture.

  • Cheese Lovers: Add a blend of mozzarella and cheddar for a richer, gooier texture. The melty combination will make your casserole irresistible!

  • Vegetable Medley: Toss in chopped spinach or roasted red bell peppers for added color and nutrition. This variation not only packs more flavor but also brightens up your dish.

  • Protein-Packed: Stir in some shredded rotisserie chicken or cooked sausage for an extra hearty meal. The added protein makes this casserole a filling option for dinner.

  • Spicy Kick: For those who love a little heat, include diced jalapeños or red pepper flakes into the mix. Just a hint can elevate the dish and excite your taste buds!

  • Herb Infusion: Switch fresh dill for basil or oregano to create a different flavor profile that pairs wonderfully with summer veggies. Experiment with herbs to find your family’s favorite combination.

  • Creamy Version: Blend in some ricotta cheese for an ultra-creamy texture. This will provide a lovely contrast to the zucchini’s tenderness, making each bite more delectable.

  • Nutritional Boost: Mix in a cup of cooked quinoa or brown rice for added fiber and protein. Not only does it enhance the nutritional value, but it also creates a delightful chewiness!

Feel free to explore these variations, and if you’re looking for more colorful casserole ideas, check out our tasty Apple Crisp Casserole or try out our Cheesy Low Carb Chicken Casserole for a comforting meal any night of the week!

Simple Zucchini Dill Casserole Recipe FAQs

What type of zucchini is best for this casserole?
Absolutely! Choose medium-sized zucchinis for the best texture and flavor. Large zucchinis can be watery, which may negatively impact your casserole’s consistency. Look for firm zucchinis with vibrant skin and no dark spots for optimal results.

How do I store leftovers from the casserole?
For sure! Store leftover Simple Zucchini Dill Casserole in an airtight container in the fridge for up to 4 days. This preserves its flavors and texture, making it easy to enjoy later in the week as a quick meal option.

Can I freeze Simple Zucchini Dill Casserole?
Yes, you can! To freeze, allow the casserole to cool completely, then wrap it tightly in plastic wrap or foil, ensuring it’s airtight. It can be frozen for up to 3 months. When you’re ready to enjoy it, thaw it overnight in the fridge and reheat in an oven at 350°F (175°C) for about 20-25 minutes until heated through.

What if my casserole doesn’t rise as expected?
No worries! If you find your casserole didn’t rise well, it may be due to old or improperly stored baking ingredients. Ensure your biscuit mix and baking powder are fresh, as these play a crucial role in helping it rise. Also, fold the mixture gently; over-mixing can create a denser texture.

Are there any dietary considerations for this casserole?
Very much so! This Simple Zucchini Dill Casserole is vegetarian and can be made vegan using flax eggs and a dairy-free cheese alternative. If you’re cooking for someone with allergies, always check ingredient labels for gluten or dairy. It’s a versatile dish; you can add cooked proteins or swap in gluten-free ingredients easily!

Simple Zucchini Dill Casserole

Simple Zucchini Dill Casserole for a Cozy Family Feast

Enjoy this Simple Zucchini Dill Casserole, a comforting and nutritious dish that's perfect for weeknights and can be made ahead.
Prep Time 15 minutes
Cook Time 30 minutes
Cooling Time 5 minutes
Total Time 50 minutes
Servings: 6 slices
Course: Casserole
Cuisine: American
Calories: 250

Ingredients
  

For the Casserole Base
  • 2 cups Biscuit Mix Can use a gluten-free mix
  • 3 large Eggs Or flax eggs for vegan option
  • 1/4 cup Oil Melted butter or coconut oil recommended
For Flavor and Texture
  • 1/2 cup Parmesan Cheese Romano cheese can be used for sharper taste
  • 1 teaspoon Salt Adjust to taste
  • 1/2 teaspoon Pepper Freshly ground preferred
  • 1/4 cup Fresh Dill Dried dill can be used, but amount should be reduced
For the Main Ingredients
  • 2 medium Zucchini Avoid large, watery zucchinis
  • 1 medium Onion Shallots or green onions can be used

Equipment

  • Mixing Bowl
  • baking dish
  • whisk
  • spatula

Method
 

Preparation Steps
  1. Wash and dice the zucchini into small pieces.
  2. Preheat the oven to 375°F (190°C).
  3. In a large mixing bowl, combine the biscuit mix, Parmesan cheese, dill, salt, and pepper.
  4. Make a well in the dry mixture and add the eggs and oil. Mix until smooth.
  5. Fold in the diced zucchini and chopped onion.
  6. Grease a 1.5-quart baking dish and pour the mixture in, spreading evenly.
  7. Bake for 25-30 minutes until golden brown and a toothpick comes out clean.
  8. Allow to cool for a few minutes before slicing and serving.

Nutrition

Serving: 1sliceCalories: 250kcalCarbohydrates: 30gProtein: 8gFat: 12gSaturated Fat: 5gPolyunsaturated Fat: 0.5gMonounsaturated Fat: 1.5gCholesterol: 70mgSodium: 500mgPotassium: 300mgFiber: 2gSugar: 2gVitamin A: 1000IUVitamin C: 10mgCalcium: 200mgIron: 1mg

Notes

Refrigerating overnight enhances flavor; best reheated in the oven for texture.

Tried this recipe?

Let us know how it was!

Easy Tomato Zucchini Pasta With Fresh Veggies in 20 Minutes

As I stood in my kitchen, the unmistakable aroma of sautéed zucchini mingling with ripe cherry tomatoes wafted through the air, instantly transporting me to lazy summer afternoons. This Quick and Easy Tomato Zucchini Pasta is my go-to solution for those hectic weeknights when the last thing I want is to reach for takeout. Ready in just 20 minutes, this dish is not only a delightful way to use up fresh veggies but also strikes the perfect balance between light and satisfying. Best of all, it’s adaptable—swap in your favorite vegetables or add protein for a custom twist! Are you curious to discover how to make this wholesome dish that even picky eaters will love? Let’s get cooking!

Why Will You Love This Tomato Zucchini Pasta?

Simplicity at Its Best: This recipe is quick and easy, allowing anyone—chefs and home cooks alike—to whip it up in just 20 minutes.

Fresh, Flavorful Ingredients: The vibrant combination of fresh zucchini and sweet cherry tomatoes makes for a dish bursting with flavor, perfect for those who crave something light yet satisfying.

Endless Versatility: Feel free to swap in other vegetables like bell peppers or spinach, or add protein such as grilled chicken or Italian sausage for a heartier meal.

Crowd-Pleasing Appeal: This dish caters to everyone at the table, making it an excellent choice for family dinners or entertaining guests.

Healthy and Wholesome: Packed with vegetables and customizable with dietary preferences in mind, you’ll feel good serving this colorful pasta dish to your loved ones.

Check out more recipes like Cajun Sausage Pasta or Marry Shrimp Pasta for additional culinary inspiration!

Tomato Zucchini Pasta Ingredients

For the Pasta
Fusilli Pasta – A great base that gives the dish its structure; you can swap it for penne or whole wheat for added fiber.

For the Vegetables
Zucchini – Offers a fresh, crunchy texture; be cautious not to overcook to keep that delightful bite.
Cherry Tomatoes – Their sweetness adds depth to the sauce; add towards the end to maintain their shape while bursting with flavor.

For the Sauce
Olive Oil – Essential for sautéing, providing a rich flavor; opt for extra virgin for a bolder taste.
Vegetable Broth – Creates a luscious sauce; chicken broth works well if you’re not aiming for vegetarian.

For the Seasonings
Black Pepper – Enhances all the flavors; adjust to taste for a hint of spice.
Fennel Seed – Adds a delightful anise note; experiment with quantity based on your preference.
Garlic Powder – Gives a warm base flavor; fresh garlic could also be used for an extra punch.
Cayenne Pepper – Introduces a subtle heat; add sparingly for a gentle kick.

For the Finishing Touches
Parmesan Cheese – Imparts creaminess and umami; feel free to add more for a cheesy delight.
Fresh Basil or Parsley – A sprinkle of these herbs offers a refreshing pop of flavor; use generously for that garden-fresh taste.

This Tomato Zucchini Pasta is not only a feast for the eyes but an invitation to enjoy the wonderful flavors of fresh, wholesome ingredients!

Step‑by‑Step Instructions for Tomato Zucchini Pasta

Step 1: Boil the Pasta
Begin by bringing a large pot of salted water to a rolling boil over high heat. Once boiling, add the fusilli pasta, stirring occasionally. Cook for 8-10 minutes until it reaches al dente, or firm to the bite. Drain the pasta in a colander, reserving a cup of the starchy pasta water to adjust the sauce later if needed.

Step 2: Sauté the Zucchini
While the pasta cooks, heat a tablespoon of olive oil in a large skillet over medium heat. Dice the zucchini into bite-sized pieces and add them to the skillet. Sauté for about 5-7 minutes, stirring frequently, until the zucchini is golden brown and tender yet still has a slight crunch. Remove the zucchini from the skillet and set aside.

Step 3: Cook the Tomatoes
In the same skillet, add another splash of olive oil if needed, followed by the halved cherry tomatoes. Season with black pepper, fennel seeds, garlic powder, and a pinch of cayenne pepper for a subtle heat. Cover the skillet and cook for 5-7 minutes, allowing the tomatoes to blister and burst, creating a juicy, flavorful sauce.

Step 4: Combine the Ingredients
Once the tomatoes have blistered beautifully, return the sautéed zucchini to the skillet. Pour in the vegetable broth, stirring to combine all ingredients. Then, add the drained fusilli pasta and toss everything together. If the mixture seems too dry, add some reserved pasta water to achieve your desired saucy consistency.

Step 5: Finish with Cheese and Herbs
After combining, sprinkle the grated Parmesan cheese over the pasta and stir gently to allow it to melt and coat the dish. Cook for an additional 2-3 minutes over low heat, just until everything is warmed through. Remove from heat, and garnish generously with fresh basil or parsley for that vibrant flavor boost before serving the Tomato Zucchini Pasta hot.

Expert Tips for Tomato Zucchini Pasta

  • Perfect Pasta Water: Salt the pasta water well before adding the fusilli; it should taste like the sea to enhance flavor throughout.

  • Zucchini Crunch: Don’t overcook the zucchini! Aim for a tender yet firm bite to avoid mushiness in your Tomato Zucchini Pasta.

  • Broth Adjustments: Reserve some pasta water! It’s great for adjusting the sauce’s thickness if it becomes too dry during cooking.

  • Cheese Boost: For a creamier texture, mix in additional Parmesan cheese while tossing the pasta; it’ll add a delightful umami punch!

  • Fresh Herb Finish: Always garnish with fresh basil or parsley just before serving for a burst of freshness that will elevate your dish.

Tomato Zucchini Pasta Variations

Let your creativity shine as you customize this delightful dish to suit your taste buds!

  • Vegetable Swap: Replace zucchini with bell peppers or fresh spinach for a vibrant twist. The colors and flavors can change the character of the dish completely!

  • Added Protein: Toss in grilled chicken, Italian sausage, or plant-based white beans for a hearty meal. Protein not only enriches the dish but also makes it more filling, perfect for a family dinner.

  • Cheesy Delight: Mix in extra Parmesan or try a different cheese like goat or feta for a unique flavor boost. This will take your Tomato Zucchini Pasta to creamy new heights.

  • Herb Explosion: Experiment with fresh herbs like thyme, oregano, or even arugula for an interesting flavor profile. Fresh herbs elevate any dish, leaving your kitchen smelling divine.

  • Spice It Up: Don’t shy away from extra heat! A pinch of red pepper flakes or fresh jalapeños can provide that much-loved kick to enliven your pasta.

  • Citrusy Fresh: Add a splash of lemon juice or zest for a bright pop of flavor. This simple twist transforms your Tomato Zucchini Pasta into something refreshingly bright.

  • Gluten-Free: Swap fusilli for gluten-free pasta options like chickpea or lentil pasta. You won’t lose flavor but gain dietary flexibility!

  • Savory Twist: Try incorporating olives or sun-dried tomatoes for a Mediterranean flair. The briny goodness will add depth and a new exciting taste.

Feeling inspired? Dive into more pasta nights with options like Shrimp Scampi Pasta for something savory or get cozy with Marry Shrimp Pasta for a romance of flavors!

Make Ahead Options

Preparing this Quick and Easy Tomato Zucchini Pasta ahead of time can streamline your weeknight dinners! You can cook the fusilli pasta and sauté the zucchini up to three days in advance. After cooling, store them separately in airtight containers in the refrigerator to maintain their texture. The cherry tomatoes can be prepped by simple halving—consider doing this the night before to keep mealtime stress-free. When you’re ready to serve, just combine the prepped ingredients in a skillet with broth and seasonings, heating them on low until warmed through. This way, you’ll enjoy the same delicious flavors of a fresh meal without the fuss!

How to Store and Freeze Tomato Zucchini Pasta

Fridge: Store any leftovers in an airtight container, and enjoy your Tomato Zucchini Pasta for up to 3 days.

Freezer: Freeze portions in freezer-safe bags or containers for up to 2 months. Make sure to remove excess air to prevent freezer burn.

Reheating: Thaw overnight in the fridge, then reheat in the microwave or on the stovetop. Add a splash of water or broth for moisture as needed.

Best Enjoyed Fresh: For optimal taste and texture, it’s best to consume this dish promptly; freezing may alter the crunchiness of the zucchini.

What to Serve With Tomato Zucchini Pasta

A beautiful bowl of pasta is just the beginning; let’s complete your meal with some delightful sides!

  • Garlic Bread: The perfect crispy companion; its warm, buttery aroma and crunchy texture pair wonderfully with the fresh sauce.

  • Simple Green Salad: Crisp greens tossed in a zesty lemon vinaigrette add a refreshing brightness and balance to the rich flavors of the pasta.

  • Roasted Vegetables: Enhance the veggie experience with hearty roasted broccoli or bell peppers, bringing out their natural sweetness and adding depth to your meal.

  • Chilled White Wine: A glass of chilled Sauvignon Blanc or Pinot Grigio complements the dish elegantly, enhancing the fresh flavors of the tomatoes and zucchini.

  • Parmesan Crisps: For a delightful crunch, serve these savory bites alongside; they create a tantalizing contrast against the tender pasta.

  • Balsamic Glazed Bruschetta: Topped with fresh herbs and diced tomatoes, this appetizer is a vibrant way to kick off your Italian-inspired dinner.

Imagine the warm conversations, the rich flavors, and the memories being created around your table as these dishes come together!

Tomato Zucchini Pasta Recipe FAQs

How do I select ripe zucchini and cherry tomatoes?
Absolutely! Choose zucchini that is firm and smooth with vibrant green skin. Avoid those with dark spots or blemishes. For cherry tomatoes, look for plump, shiny ones that yield slightly to pressure. If they’re too soft or shriveled, they may be past their prime.

How should I store leftovers?
Very simple! Store any leftover Tomato Zucchini Pasta in an airtight container in the fridge for up to 3 days. Make sure to let it cool completely before sealing to avoid condensation. Reheat gently on the stovetop or in the microwave, adding a splash of water if it’s too thick.

Can I freeze Tomato Zucchini Pasta?
Yes, you can! To freeze, portion your pasta into freezer-safe bags or containers, leaving a little room for expansion, and remove excess air to prevent freezer burn. It will keep well for up to 2 months. When ready to enjoy, thaw overnight in the fridge, then reheat gently on the stove or in the microwave with a bit of broth or water for moisture.

What if my zucchini turns mushy?
Avoid that tricky situation by sautéing until just tender—about 5-7 minutes should do! If the zucchini is overcooked, it will lose its delightful crunch. Remember to keep an eye on it while cooking; a slight bite is what we’re aiming for!

Any dietary considerations I should be aware of?
Good question! This Tomato Zucchini Pasta can easily be made gluten-free by swapping the fusilli for gluten-free pasta. For those with dairy allergies, you can omit the Parmesan cheese or use a plant-based alternative. And as always, make sure to adjust any seasoning to accommodate personal preferences!

What can I use as a substitute for vegetables?
Absolutely! If zucchini isn’t available, feel free to swap it out for bell peppers, spinach, or even broccoli—get creative! For added protein, consider tossing in grilled chicken, Italian sausage, or plant-based white beans for a heartier meal option.

Tomato Zucchini Pasta

Easy Tomato Zucchini Pasta With Fresh Veggies in 20 Minutes

This Quick and Easy Tomato Zucchini Pasta is a delightful way to use fresh veggies, adaptable to any palate.
Prep Time 10 minutes
Cook Time 10 minutes
Total Time 20 minutes
Servings: 4 servings
Course: Pasta
Cuisine: Italian
Calories: 320

Ingredients
  

For the Pasta
  • 8 ounces Fusilli Pasta can be swapped for penne or whole wheat
For the Vegetables
  • 2 cups Zucchini diced
  • 1 cup Cherry Tomatoes halved
For the Sauce
  • 2 tablespoons Olive Oil extra virgin preferred
  • 1 cup Vegetable Broth or chicken broth
For the Seasonings
  • 1/2 teaspoon Black Pepper adjust to taste
  • 1/2 teaspoon Fennel Seed adjust based on preference
  • 1 teaspoon Garlic Powder or fresh garlic
  • 1/4 teaspoon Cayenne Pepper add sparingly
For the Finishing Touches
  • 1/2 cup Parmesan Cheese grated
  • 1/4 cup Fresh Basil or Parsley for garnish

Equipment

  • Large pot
  • Skillet
  • Colander

Method
 

Step‑by‑Step Instructions
  1. Boil a large pot of salted water and cook the fusilli pasta for 8-10 minutes until al dente. Drain, reserving a cup of pasta water.
  2. Heat olive oil in a skillet, add diced zucchini, and sauté for 5-7 minutes until golden brown and tender. Remove from skillet.
  3. In the same skillet, add halved cherry tomatoes, season and cover to cook for 5-7 minutes until blistered.
  4. Return zucchini to the skillet, add vegetable broth, drained pasta, and mix. Adjust sauce consistency with reserved water.
  5. Sprinkle Parmesan over the pasta, stir gently, and warm through for 2-3 minutes. Garnish with fresh basil or parsley before serving.

Nutrition

Serving: 1servingCalories: 320kcalCarbohydrates: 45gProtein: 10gFat: 12gSaturated Fat: 3gPolyunsaturated Fat: 1gMonounsaturated Fat: 8gCholesterol: 10mgSodium: 350mgPotassium: 600mgFiber: 4gSugar: 3gVitamin A: 300IUVitamin C: 25mgCalcium: 150mgIron: 2mg

Notes

Don't overcook the zucchini to maintain its crunch. Reserve pasta water for adjusting sauce thickness if needed.

Tried this recipe?

Let us know how it was!

Peach Butter Swim Biscuits for a Sweet Southern Morning

As I stood in my kitchen, the warm scent of melting butter infused with ripe peaches began to envelop me, transporting me straight to a sun-drenched Southern morning. That’s exactly how I feel each time I whip up a batch of Peach Butter Swim Biscuits. These delightful biscuits are not just any baked good; they’re an effortless union of sweet, juicy peaches and a buttery, tender crust that can elevate your breakfast, brunch, or dessert game in a snap. With easy preparation that banishes the need for rolling and cutting, these biscuits invite you to a comforting indulgence without the fuss. Plus, they’re adjustable for dietary preferences, making them a welcoming treat for everyone. Ready to discover why these biscuits have become a staple in my home? Let’s dive into this recipe!

Why are Peach Butter Swim Biscuits a must-try?

Irresistible flavor: The juicy peaches meld beautifully with a rich buttery base, creating a delightful explosion of taste.
Quick and easy: With no rolling or cutting required, these biscuits can be whipped up in a flash.
Versatile options: Feel free to customize with other fruits or spices, making each batch unique!
Perfect for any occasion: Whether enjoyed for breakfast, brunch, or dessert, they appeal to all cravings.
Crowd-pleaser: These biscuits are sure to impress guests and loved ones alike, making them a great feature for gatherings like tea or coffee moments.
If you’re looking for more delicious recipes, consider trying Garlic Butter Baked Chicken for a savory twist or Granola Cups Peanut for a healthy snack option!

Peach Butter Swim Biscuits Ingredients

• Get ready to indulge in this sweet treat!

For the Biscuits

  • All-purpose flour – Provides structure; you can swap with a 1:1 gluten-free flour blend for a gluten-free version.
  • Baking powder – Acts as a leavening agent for fluffiness; no substitutions recommended.
  • Granulated sugar – Adds sweetness; reduce the amount if you prefer a less sweet biscuit.
  • Salt – Essential for taste balance and enhances flavor.
  • Buttermilk – Adds moisture and tenderness; use homemade buttermilk by mixing 1 tbsp lemon juice or vinegar with 1.5 cups milk.
  • Unsalted butter, melted – Gives richness and flavor; this is a must-have for the biscuit base.
  • Canned or fresh diced peaches – Infuses fruity sweetness; ensure canned peaches are drained well before use.
  • Peach juice or syrup – Enhances peach flavor in the dough; this is optional if using fresh peaches.

For the Glaze

  • Powdered sugar – Used to create the glaze; no substitutes for desired sweetness are recommended.
  • Milk – Adds consistency to the glaze; substitute with maple syrup for a unique flavor twist.
  • Vanilla extract – Essential for enhancing the sweetness and adding aromatic flavor to the glaze.

Now that you have all the ingredients lined up, it’s time to bring those Peach Butter Swim Biscuits to life! Happy baking!

Step‑by‑Step Instructions for Peach Butter Swim Biscuits

Step 1: Preheat Your Oven
Begin by preheating your oven to 450°F (232°C). This high temperature is essential for creating the crispy, golden exterior of your Peach Butter Swim Biscuits. While your oven heats, gather your ingredients and equipment, including an 8×8-inch baking dish and mixing bowls, to streamline your cooking process.

Step 2: Prepare the Baking Dish
Pour melted unsalted butter into the prepared 8×8-inch baking dish, ensuring it covers the bottom evenly. The melted butter not only adds flavor but also creates the delightful “swim” element of these biscuits. Set the dish aside while you prepare the biscuit batter.

Step 3: Mix Dry Ingredients
In a large mixing bowl, whisk together the all-purpose flour, baking powder, granulated sugar, and salt. This combination will provide the structure and lightness that your Peach Butter Swim Biscuits need. Make sure to incorporate these dry ingredients thoroughly to eliminate any lumps and ensure even flavor distribution.

Step 4: Combine Wet Ingredients
Stir in the buttermilk and optional peach juice or syrup into the dry mixture until just combined. Be careful not to overmix; it’s okay if there are a few small lumps. Gently fold in the diced peaches, allowing their sweetness to infuse the batter while retaining the light, fluffy texture that makes these biscuits special.

Step 5: Pour the Batter
Carefully pour the batter into the baking dish over the melted butter, spreading it evenly with a spatula. The batter will float atop the butter, creating a delightful contrast during baking. This step is crucial for ensuring that your biscuits achieve that perfect swim effect once baked.

Step 6: Score the Dough
Using a sharp knife, lightly score the dough into nine squares, taking care not to cut all the way through. Scoring helps the biscuits bake evenly and makes it easier to serve later. This technique is a simple way to prepare your Peach Butter Swim Biscuits for their time in the oven.

Step 7: Bake to Perfection
Place the baking dish in the preheated oven and bake for 25–30 minutes. You’ll know they’re done when the biscuits are golden brown and bubbly around the edges. The aroma of sweet peaches and buttery goodness will fill your kitchen, inviting everyone to gather around for a warm treat.

Step 8: Cool and Glaze
Once baked, allow your Peach Butter Swim Biscuits to cool in the pan for about 10 minutes. This will help them set and make them easier to serve. During this time, you can prepare the glaze by whisking together powdered sugar, milk, and vanilla until smooth, creating a delicious topping.

Step 9: Drizzle the Glaze
After cooling, drizzle the prepared glaze over the warm biscuits. This sweet finishing touch enhances the flavors and adds a lovely aesthetic, making your Peach Butter Swim Biscuits irresistible. The combination of warm biscuits with a rich glaze is sure to delight anyone at your table.

Step 10: Serve and Enjoy
Finally, serve your warm Peach Butter Swim Biscuits immediately. They are perfect on their own or alongside coffee or tea for a delightful breakfast or brunch option. Each bite combines buttery richness with the juicy sweetness of peaches, making for a truly comforting experience!

What to Serve with Peach Butter Swim Biscuits

Indulging in these heavenly biscuits opens the door to a delightful array of serving options that will elevate your meal to new heights.

  • Creamy Buttermilk Gravy: This rich gravy perfectly complements the tender biscuits, adding a savory contrast that balances the sweetness of peaches.

  • Fresh Fruit Salad: A medley of seasonal fruits brightens the dish, introducing vibrant flavors and textures while enhancing the overall fresh ambiance of your meal.

  • Maple Syrup Drizzle: A touch of sweet maple syrup can transform your biscuits into the perfect brunch treat, blending harmoniously with the peachy goodness.

  • Crispy Bacon or Sausage: The salty crispness of breakfast meats beautifully offsets the sweet biscuits, making for a satisfying combination that appeals to all cravings.

  • Iced Coffee or Tea: A refreshing cup of iced coffee or iced tea pairs wonderfully, adding a cooling element that complements the warmth of the biscuits.

  • Vanilla Ice Cream: For a sweet dessert twist, serve warm biscuits with a scoop of vanilla ice cream, allowing the melt-in-your-mouth texture to meld delectably with creamy richness.

  • Whipped Cream Topping: Light and airy whipped cream adds a dreamy quality, inviting indulgence and a touch of elegance to your biscuits.

  • Peach Lemonade: Use this fruity beverage as a refreshing companion that echoes the vibrant peach flavors in your biscuits, creating a delightful pairing for a sunny brunch.

Expert Tips for Peach Butter Swim Biscuits

  • Drain Peaches Well: Make sure to thoroughly drain canned peaches to prevent excess moisture, which can make your biscuits soggy.
  • Gentle Mixing: Be careful when folding in the peaches; overmixing can lead to dense biscuits instead of light and fluffy Peach Butter Swim Biscuits.
  • Scoring Technique: Lightly score the dough to help with even baking and easy serving. It’s not mandatory but will help ensure delightful portions!
  • Flavor Boost: Experiment with adding spices like cinnamon or nutmeg to deepen the flavor of your biscuits, making them a delightful treat.
  • Proper Baking: Keep an eye on your biscuits while baking; the golden brown look and bubbling edges indicate they’re done and ready to enjoy!

Peach Butter Swim Biscuits Variations

Feel free to elevate your baking adventure by customizing this delicious recipe to suit your taste buds!

  • Berry Bliss: Substitute half the peaches with fresh blueberries or raspberries for a berry twist. A delightful combination that celebrates summer fruits!

  • Spiced Delight: Add ½ teaspoon of cinnamon or nutmeg to the dough for a warm, spiced flavor. These aromas will fill your kitchen with cozy vibes!

  • Nutty Crunch: Top your batter with chopped pecans or almonds before baking for an irresistible nutty crunch. The contrast in textures will keep you coming back for more.

  • Maple Glaze: Replace milk in the glaze with maple syrup for a uniquely sweet finish. This delightful option brings a touch of fall into your kitchen!

  • Coconut Flour: For an exotic twist, substitute ¼ of the all-purpose flour with coconut flour. It adds a subtle sweetness and unique texture that pairs beautifully with peaches.

  • Zesty Citrus: Grate some lemon or orange zest into the batter for a citrusy sparkle that brightens the flavor. Imagine that zing with each soft bite!

  • Savory Touch: Mix in crumbled goat cheese or sharp cheddar before baking for a savory twist. The creamy cheese elevates the flavor profile to new heights that surprise and delight!

  • Gluten-Free Goodness: Swap all-purpose flour for a 1:1 gluten-free flour blend to create a gluten-free version of these scrumptious biscuits. Everyone can indulge in this comforting treat!

These Peach Butter Swim Biscuits are not just versatile but also a wonderful canvas for your creative culinary flair! If you’re seeking more delightful twists, don’t forget to explore the flavors of Cajun Honey Butter or taste the savory Comfort Garlic Butter for meal inspiration!

Make Ahead Options

These Peach Butter Swim Biscuits are perfect for busy home cooks looking to save time without sacrificing flavor! You can prepare the batter and store it in the refrigerator for up to 24 hours before baking. To do this, simply mix all the dry ingredients with the wet, gently fold in the peaches, and cover the bowl tightly. When you’re ready to bake, pour the batter over the melted butter as directed and bake straight from the fridge; just add an extra 2-5 minutes to the baking time. This method ensures your biscuits come out just as delicious and fluffy, making breakfast or brunch a breeze!

How to Store and Freeze Peach Butter Swim Biscuits

Room Temperature: Keep biscuits in an airtight container at room temperature for up to 2 days to maintain their delightful texture.

Fridge: For extended freshness, refrigerate the biscuits in an airtight container for up to 4 days. Reheat in the microwave for a few seconds to restore warmth.

Freezer: Freeze individual biscuits wrapped tightly in plastic wrap for up to 1 month. Thaw at room temperature or microwave briefly for a quick treat.

Reheating: To enjoy the biscuits warm, reheat in the oven at 350°F (175°C) for 5–10 minutes, or until heated through, ensuring they’re just as fluffy as the day they were made!

Peach Butter Swim Biscuits Recipe FAQs

How do I select the best peaches for this recipe?
Absolutely! For the best flavor and texture in your Peach Butter Swim Biscuits, look for ripe peaches that give slightly when pressed. They should have a fresh, fragrant aroma and their skin should be free from dark spots or wrinkles. If using canned peaches, opt for those packed in juice or water rather than syrup, and ensure to drain them well to avoid excess moisture in the biscuits.

How should I store leftover biscuits?
Very! Store your Peach Butter Swim Biscuits in an airtight container at room temperature for up to 2 days. If you want to keep them fresh for a longer time, refrigerate them for up to 4 days. Just remember to microwave them for a few seconds before serving to bring back their delightful warmth and texture!

Can I freeze Peach Butter Swim Biscuits?
Absolutely! If you’d like to freeze your Peach Butter Swim Biscuits, wrap each biscuit tightly in plastic wrap and place them in a freezer-safe bag. They can be stored like this for up to 1 month. When you’re ready to enjoy them, simply thaw at room temperature or pop them in the microwave for about 30 seconds until warmed through.

What should I do if my mixture seems too dry or wet?
Don’t worry; this can happen! If your batter seems too dry, add an extra splash of buttermilk or peach juice, one tablespoon at a time, until you reach a thicker, pourable consistency. On the other hand, if it’s too wet and runny, sprinkle in a bit more flour, a tablespoon at a time, until you get that perfect biscuit batter texture. Remember, gentle mixing is key to fluffy biscuits!

Are there any dietary considerations I need to keep in mind?
Absolutely! If you or someone you’re serving has dietary restrictions, you can easily adjust this recipe. To make it gluten-free, simply substitute the all-purpose flour with a 1:1 gluten-free flour blend. Always check that your baking powder is certified gluten-free if necessary. Also, if you’re concerned about allergies, this recipe is egg-free, making it a safe option for many.

How do I enhance the flavor of my biscuits?
Very! To give your Peach Butter Swim Biscuits a flavor boost, consider adding spices like ½ teaspoon of cinnamon or nutmeg to the dry ingredients. You can also substitute half of the peaches with other fruits, like blueberries or raspberries, for an extra twist on the classic flavor. Adding chopped nuts like pecans or almonds will give you that delightful crunch!

Peach Butter Swim Biscuits

Peach Butter Swim Biscuits for a Sweet Southern Morning

Peach Butter Swim Biscuits are a delightful blend of sweet peaches and buttery goodness, perfect for any breakfast or brunch.
Prep Time 10 minutes
Cook Time 30 minutes
Cooling Time 10 minutes
Total Time 50 minutes
Servings: 9 biscuits
Course: Breakfast
Cuisine: Southern
Calories: 250

Ingredients
  

For the Biscuits
  • 2 cups all-purpose flour can swap with a 1:1 gluten-free flour blend
  • 1 tbsp baking powder acts as a leavening agent
  • 1/4 cup granulated sugar can reduce amount for less sweetness
  • 1/2 tsp salt essential for taste
  • 1 cup buttermilk or mix 1 tbsp lemon juice/vinegar with 1.5 cups milk
  • 1/2 cup unsalted butter, melted adds richness and flavor
  • 1 cup canned or fresh diced peaches ensure canned peaches are drained well
  • 1/4 cup peach juice or syrup optional if using fresh peaches
For the Glaze
  • 1 cup powdered sugar no substitutes recommended
  • 2 tbsp milk can substitute with maple syrup
  • 1 tsp vanilla extract enhances sweetness and flavor

Equipment

  • Mixing bowls
  • 8×8-inch baking dish

Method
 

Step‑by‑Step Instructions
  1. Preheat your oven to 450°F (232°C). Gather your ingredients and equipment.
  2. Pour melted unsalted butter into the prepared 8×8-inch baking dish, covering the bottom evenly.
  3. In a large mixing bowl, whisk together all-purpose flour, baking powder, granulated sugar, and salt.
  4. Stir in buttermilk and optional peach juice or syrup into the dry mixture until just combined.
  5. Carefully pour the batter into the baking dish over the melted butter, spreading it evenly.
  6. Lightly score the dough into nine squares with a sharp knife, without cutting all the way through.
  7. Place the baking dish in the oven and bake for 25–30 minutes until golden brown.
  8. Allow your biscuits to cool in the pan for about 10 minutes.
  9. Prepare the glaze by whisking together powdered sugar, milk, and vanilla until smooth.
  10. Drizzle the prepared glaze over the warm biscuits and serve immediately.

Nutrition

Serving: 1biscuitCalories: 250kcalCarbohydrates: 35gProtein: 3gFat: 12gSaturated Fat: 7gPolyunsaturated Fat: 0.5gMonounsaturated Fat: 4gCholesterol: 30mgSodium: 200mgPotassium: 100mgFiber: 1gSugar: 10gVitamin A: 500IUVitamin C: 2mgCalcium: 50mgIron: 1mg

Notes

Drain canned peaches well to prevent excess moisture. Be gentle when folding in peaches to retain fluffiness. Scoring the dough helps with even baking.

Tried this recipe?

Let us know how it was!

Cucumber Carrot Salad with Spicy Dressing for a Crunchy Boost

As I sat at my kitchen counter, a burst of vibrant colors caught my eye—crisp cucumbers and bright orange carrots beckoning me to create something fresh and exciting. That’s how my Refreshing Cucumber Carrot Salad with Spicy Gochugaru Dressing came to life! This recipe not only elevates your meals with its delightful crunch, but it’s also a quick, healthy option that anyone can whip up in no time. Packed with nutrients and bursting with flavor, it’s the perfect vegan, gluten-free side that pairs wonderfully with a variety of dishes. Plus, the spicy gochugaru dressing adds a delightful kick that keeps everyone coming back for more. Ready to transform your salad game? Let’s dive into this refreshing and satisfying recipe!

Why is this salad so refreshing?

Freshness is key in this delightful Cucumber Carrot Salad, where every bite sings with vibrant flavors. Nutritious ingredients like crunchy cucumbers and sweet carrots make it a guilt-free choice, perfect for health-conscious eaters. Quick prep means you can whip this up in no time, making it ideal for busy weeknights. Versatility pairs beautifully with a variety of main courses, or you can enjoy it solo as a light snack. If you’re looking for more inspiration, try this Honeybun Carrot Cake for a sweet treat or whip up the Blt Chicken Salad for a protein boost!

Cucumber Carrot Salad Ingredients

• Discover the fresh essentials!

For the Salad

  • Cucumber – Provides hydration and a refreshing crunch; choose English cucumbers for fewer seeds.
  • Carrots – These sweet gems are rich in beta-carotene for eye health; opt for organic for better flavor.
  • Sesame Seeds – Adds delightful crunchiness and healthy fats; toasting them enhances their nutty flavor.
  • Garlic – Boosts flavor and offers immune support; use fresh garlic for the best taste.
  • Fresh Parsley – This herb adds a pop of freshness; you can also substitute with cilantro or mint for a twist.

For the Dressing

  • Olive Oil – Acts as the base, adding richness; extra virgin olive oil enhances the flavor.
  • Lemon Juice – Provides acidity that balances the dish; fresh lemon juice is best for brightness.
  • Gochugaru (Korean Red Chili Flakes) – Adds heat and flavor complexity; adjust the amount to suit your spice level.
  • Soy Sauce – Provides the umami flavor that rounds out the dressing; opt for low-sodium if desired.
  • Sugar – Balances the tanginess; substitute with maple syrup or agave for a healthier option.

Step‑by‑Step Instructions for Cucumber Carrot Salad

Step 1: Prepare the Vegetables
Start by washing and drying the cucumber and carrots thoroughly. Using a knife or a julienne peeler, cut the cucumber and carrots into thin strips for a delightful crunch. Aim for uniformity in size to ensure even marination. This prep takes about 5–10 minutes; you want those vibrant colors to shine!

Step 2: Mix the Dressing
In a small mixing bowl, whisk together ¼ cup of olive oil, the juice of 1 lemon, 1 tablespoon of gochugaru, 2 tablespoons of soy sauce, and 1 teaspoon of sugar. Keep whisking until the dressing is fully incorporated and slightly emulsified, which should take about 2–3 minutes. The dressing will be fragrant and smooth—this is the heart of your Cucumber Carrot Salad!

Step 3: Combine Ingredients
In a large mixing bowl, combine the julienned cucumber and carrots. Add the freshly minced garlic (about one clove) and chopped fresh parsley to the bowl. Pour the prepared dressing over the vegetables, ensuring they are evenly coated. Toss everything gently but thoroughly for about 1–2 minutes; the colors should brighten and that fresh aroma will fill your kitchen!

Step 4: Final Touches
Sprinkle toasted sesame seeds over the top of your Cucumber Carrot Salad for that extra crunch. Give everything one final toss to mix in the seeds thoroughly. For the best flavor experience, serve immediately, allowing the fresh and spicy elements to shine through. If you prefer a more blended taste, let it sit for 10-15 minutes at room temperature before serving.

How to Store and Freeze Cucumber Carrot Salad

  • Fridge: Keep your Cucumber Carrot Salad in an airtight container for up to 24 hours to maintain its crispness. Store the dressing separately to prevent the veggies from becoming soggy.

  • Freezer: While it’s not ideal to freeze this salad due to the texture of cucumbers and carrots, if necessary, it can be frozen for up to 1 month. Thaw in the fridge and serve immediately for best quality.

  • Reheating: This salad is best enjoyed cold and doesn’t require reheating. Simply toss after thawing if frozen and serve fresh!

Expert Tips for Cucumber Carrot Salad

  • Serve Fresh: Enjoy the Cucumber Carrot Salad immediately after preparation to maintain the crispness of the vegetables and the vibrancy of flavors.
  • Adjust Spice Level: Feel free to play with the amount of gochugaru in the dressing; start small if you’re unsure, and gradually add more for extra heat.
  • Texture Matters: To avoid sogginess, store the dressing separately if you’re making the salad ahead of time, adding it just before serving.
  • Experiment with Variations: Try incorporating different herbs like dill or basil, or add nuts for an extra crunch, to mix things up in this Cucumber Carrot Salad.
  • Marination Tip: If you love bold flavors, allowing the salad to sit for 10-15 minutes allows the dressing to meld perfectly with the vegetables, enhancing each bite.

Cucumber Carrot Salad Variations

Feel free to get creative with this delightful Cucumber Carrot Salad, exploring flavors and textures that excite your palate!

  • Dairy-Free: Substitute traditional dressings with a creamy tahini or avocado dressing for a rich, smooth twist.
  • Herb Twist: Replace parsley with fresh cilantro or mint for a unique flavor boost; each herb transforms the salad’s profile beautifully.
  • Protein-Packed: Add chickpeas or cubed tofu for extra protein; this transforms it into a heartier meal that’s just as vibrant and delicious.
  • Nutty Crunch: Mix in toasted almonds or cashews for added texture; their crunchiness complements the salad’s fresh ingredients perfectly.
  • Heat it Up: Increase the gochugaru amount for a fiery kick or substitute it with sriracha for a different flavor while keeping the spice.
  • Fruit Addition: Toss in diced apples or mango for a sweet contrast to the savory dressing; this fruity note lightens the overall flavor.
  • Asian Flair: Drizzle with a hint of sesame oil for a nutty depth; this complements the sesame seeds and adds an even richer taste.
  • Nut-Free: Opt for sunflower seeds instead of sesame seeds to maintain crunch when avoiding nuts; they offer a tasty and safe alternative.

Explore these variations to make the salad your own. And if you’re in the mood for comfort food, you might enjoy the indulgent Honeybun Carrot Cake or whip up a protein-rich Blt Chicken Salad to balance your meal plan!

What to Serve with Cucumber Carrot Salad

Transform your meal into a harmonious feast and delight your palate with these perfect pairings!

  • Steamed Jasmine Rice: A fragrant, fluffy side that absorbs the spicy dressing, enhancing the overall meal experience.
  • Grilled Tofu Skewers: Their savory, smoky flavor complements the fresh crispness of your Cucumber Carrot Salad, making it a well-rounded dish.
  • Tempura Vegetables: Light and crispy, these fried delights add a delightful crunch and contrast to your refreshing salad. The pairing is both visually striking and utterly satisfying.
  • Sesame Noodles: Their nutty, zesty flavor profile enhances the Asian theme of your meal, offering a wonderful texture and taste contrast.
  • Soy Sauce Glazed Edamame: A protein-packed snack or side that brings umami depth, balancing the salad’s fresh and zesty notes perfectly.
  • Chilled Sake: This rice wine, served cold, offers a smooth sweetness that can beautifully mellow the salad’s spice while enhancing your dining experience.
  • Fruit Sorbet: A refreshing, light dessert that cleanses the palate and complements the salad’s vibrant flavors. Try lemon or mango for an extra zesty finish.
  • Miso Soup: The warm, umami-rich broth provides a comforting contrast to the cool salad, making it a classic Japanese combination that never disappoints.
  • Nori Rolls: Fresh sushi rolls filled with vegetables echo the salad’s freshness while adding a delicious layer of flavor and texture to your meal.

Make Ahead Options

These Cucumber Carrot Salads are perfect for meal prep enthusiasts! You can julienne the cucumbers and carrots up to 24 hours in advance, storing them in an airtight container in the refrigerator to maintain their crunch. To keep the flavors vibrant, prepare the dressing and store it separately; this prevents the vegetables from wilting. When ready to serve, simply toss the prepped veggies with the prepared dressing, minced garlic, and fresh parsley. Add a sprinkle of sesame seeds on top right before serving for that delightful crunch. This way, you can create a fresh, flavorful salad with minimal effort during busy weeknights!

Cucumber Carrot Salad Recipe FAQs

How do I choose ripe cucumbers and carrots?
Absolutely! Look for firm, blemish-free cucumbers that feel heavy for their size; those have the best crunch. For carrots, choose ones that are vibrant in color and firm. Avoid any that are soft, shriveled, or have dark spots, which can indicate they are past their prime.

How should I store leftover Cucumber Carrot Salad?
Very! To keep your Cucumber Carrot Salad fresh, store it in an airtight container for up to 24 hours in the fridge. It’s best to keep the dressing in a separate container until you’re ready to serve, as this prevents the vegetables from getting soggy.

Can I freeze the Cucumber Carrot Salad?
Not ideal, but you can! If you must, freeze the salad for up to 1 month in an airtight container. To thaw, place it in the refrigerator overnight. Keep in mind, the texture of the cucumber may change after freezing; it’s best enjoyed fresh.

What if my salad is too spicy?
No worries at all! If your Cucumber Carrot Salad ends up too spicy due to the gochugaru, try balancing the heat by adding a touch more olive oil or a bit of sugar. You can also add more cucumbers or carrots to dilute the spice.

Can I make this salad in advance?
Yes, you can! For optimal flavor and texture, prepare the salad and dressing separately up to a day ahead. Store the cut vegetables in an airtight container in the fridge, and mix in the dressing just before serving for the best crunch.

Are there any dietary considerations for this salad?
Absolutely! This Cucumber Carrot Salad is vegan and gluten-free, making it suitable for many dietary preferences. If you’re serving it to pets or people with allergies, ensure to avoid ingredients like soy sauce if gluten is a concern, and always check for specific allergies related to sesame seeds, garlic, and gochugaru.

Cucumber Carrot Salad

Cucumber Carrot Salad with Spicy Dressing for a Crunchy Boost

This Cucumber Carrot Salad is a vibrant, healthy dish with a spicy gochugaru dressing, perfect as a quick side.
Prep Time 10 minutes
Marination Time 15 minutes
Total Time 25 minutes
Servings: 4 servings
Course: Salad
Cuisine: Gluten-Free, Vegan
Calories: 150

Ingredients
  

For the Salad
  • 2 cups Cucumber English cucumbers are recommended.
  • 2 cups Carrots Opt for organic for better flavor.
  • 2 tablespoons Sesame Seeds Toasted for enhanced flavor.
  • 1 clove Garlic Use fresh for best taste.
  • 1 tablespoon Fresh Parsley Substitute with cilantro or mint if desired.
For the Dressing
  • ¼ cup Olive Oil Extra virgin for enhanced flavor.
  • 1 tablespoon Lemon Juice Fresh lemon juice is best.
  • 1 tablespoon Gochugaru (Korean Red Chili Flakes) Adjust to taste.
  • 2 tablespoons Soy Sauce Low-sodium if preferred.
  • 1 teaspoon Sugar Substitute with maple syrup or agave if desired.

Equipment

  • Mixing Bowl
  • Knife
  • julienne peeler
  • whisk

Method
 

Step-by-Step Instructions
  1. Prepare the vegetables by washing and drying them, then cut cucumbers and carrots into thin strips.
  2. In a bowl, whisk together olive oil, lemon juice, gochugaru, soy sauce, and sugar until emulsified.
  3. Combine julienned cucumber and carrots, then add minced garlic and parsley. Pour the dressing over and toss well.
  4. Sprinkle toasted sesame seeds on top, toss gently and serve immediately or let sit for up to 15 minutes for melded flavors.

Nutrition

Serving: 1cupCalories: 150kcalCarbohydrates: 12gProtein: 2gFat: 11gSaturated Fat: 1.5gPolyunsaturated Fat: 3gMonounsaturated Fat: 6gSodium: 350mgPotassium: 500mgFiber: 3gSugar: 2gVitamin A: 6000IUVitamin C: 15mgCalcium: 70mgIron: 1mg

Notes

Best enjoyed fresh. Adjust spice level and store dressing separately if made ahead.

Tried this recipe?

Let us know how it was!

Savor Comfort with Hamburger Green Bean Casserole Delight

The smell of Hamburger Green Bean Casserole bubbling away in the oven is like a warm hug, wrapping you in comfort and nostalgia. This delightful dish brings together seasoned ground beef and crisp green beans, all enveloped in a creamy mushroom sauce that promises to soothe both the stomach and soul. Whether you’re navigating a hectic weeknight or planning a cozy family gathering, this casserole is both easy to make and a hit with everyone around the table. It’s not just a meal; it’s a hearty solution to busy lives, offering the kind of comfort food that feels like home. Ready to dive into a recipe that’s sure to win hearts and appetites? Let’s whip up this family classic together!

Why is this casserole a family favorite?

Easy Preparation: This recipe is a breeze to make, perfect for those busy weeknights when time is short. Versatile Ingredients: Feel free to personalize it by swapping ground beef for ground turkey or experimenting with various cheese options. Crowd-Pleasing Comfort: The creamy mushroom sauce and crunchy onions create a dish that friends and family will rave about. Make-Ahead Magic: You can prep it in advance and simply pop it in the oven when you’re ready to eat! For more comforting recipes, check out my Cheesy Hamburger Potato or Tater Tot Casserole.

Hamburger Green Bean Casserole Ingredients

• Dive into this cozy dish with all the essential components!

For the Casserole

  • Ground Beef – Provides protein and rich flavor; swapping for ground turkey makes it lighter.
  • Onion (chopped) – Adds sweetness and depth; no substitutions necessary.
  • Garlic (minced) – Enhances flavor with its aromatic quality; use garlic powder for convenience.
  • Green Beans (canned, drained) – Offers texture and freshness; fresh or frozen beans work beautifully if briefly cooked.
  • Cream of Mushroom Soup – Acts as a creamy binder; consider cream of chicken for variety.
  • Milk – Thins the soup for a smooth consistency; almond milk or vegetable broth can be dairy-free alternatives.
  • Cheddar Cheese (shredded) – Adds richness and creates a golden crust; try mozzarella or a dairy-free option for fun.
  • Salt & Black Pepper – Seasons the dish perfectly; adjust to please your taste buds.
  • French Fried Onions – Provides a crunchy topping; crushed crackers or breadcrumbs can add a delightful twist.

Optional Add-Ins

  • Mushrooms – For an earthy flavor boost; sauté with the beef for added yum.
  • Bell Peppers – Toss in colorful varieties for taste and a nutrition boost; they bring a sweet crunch.

Enjoy crafting this Hamburger Green Bean Casserole with all these flavorful ingredients!

Step‑by‑Step Instructions for Hamburger Green Bean Casserole

Step 1: Preheat the Oven
Begin by preheating your oven to 350°F (175°C). This crucial first step ensures your Hamburger Green Bean Casserole will bake evenly and achieve that perfect bubbling, golden-brown top. While the oven warms up, gather your ingredients and prepare your baking dish for easy access later.

Step 2: Brown the Ground Beef
In a large skillet set over medium heat, add the ground beef. Using a spatula, break it apart as it cooks, allowing it to brown completely until fork-tender and no longer pink, about 6-8 minutes. Once cooked, carefully drain any excess fat, ensuring the beef remains moist and flavorful as the foundation for your casserole.

Step 3: Sauté the Aromatics
Next, add the chopped onion and minced garlic to the skillet with the browned ground beef. Sauté for about 5 minutes or until the onions become translucent, releasing their sweet aroma. This step enhances the overall flavor profile of the Hamburger Green Bean Casserole, bringing warmth and depth to your dish.

Step 4: Mix the Sauce
In a medium mixing bowl, combine the cream of mushroom soup with milk. Stir until the mixture is smooth and well-combined, creating a creamy binder for your casserole. This sauce brings a rich, comforting texture to your Hamburger Green Bean Casserole, ensuring every bite is deliciously satisfying.

Step 5: Combine Ingredients
Add the cooked beef mixture, drained green beans, and half of the shredded cheddar cheese to the mixing bowl with the soup. Blend everything together gently until well mixed. Don’t forget to season with salt and pepper! This step is vital to achieving the comforting flavor that makes the Hamburger Green Bean Casserole a family favorite.

Step 6: Transfer to Baking Dish
Carefully transfer the mixture into a greased 9×13 inch baking dish, spreading it evenly with a spatula. This ensures all the ingredients are well positioned for cooking. As you layer the casserole, watch for any gaps that may need mixing together so every serving is as tasty as the next.

Step 7: Add Toppings
Sprinkle the remaining shredded cheddar cheese over the top of the casserole, followed by a generous layer of French fried onions. These toppings will create a delightful crunch and golden crust, elevating the comfort factor of your Hamburger Green Bean Casserole to new heights.

Step 8: Bake to Perfection
Place the casserole in your preheated oven and bake for 25-30 minutes. Keep an eye on it as it cooks; you’ll know it’s done when it’s bubbly and the top is golden brown. Once baked, remove it from the oven and allow it to cool slightly before serving, letting the flavors meld together beautifully.

Make Ahead Options

These Hamburger Green Bean Casserole is a lifesaver for busy weeknights! You can prep the entire casserole up to 24 hours in advance by assembling the dish in your baking pan and covering it with plastic wrap before refrigerating. To maintain the casserole’s delightful creaminess, make sure to refrigerate it promptly to prevent any spoilage. Just before baking, add the remaining shredded cheese and French fried onions on top, then pop it in the oven. If you want to prepare it even further ahead, you can freeze it for up to three months—just thaw overnight in the refrigerator before baking. With these make-ahead options, you’ll have a hearty, homemade meal ready to enjoy with minimal effort!

Hamburger Green Bean Casserole Variations

Get ready to elevate your Hamburger Green Bean Casserole with these fun twists that can cater to your taste buds!

  • Lean Meat: Swap ground beef for ground turkey or chicken for a lighter yet hearty dish. It doesn’t compromise on flavor, keeping that comforting essence intact.

  • Vegan Delight: Use plant-based meat substitutes along with vegan cream of mushroom soup for a deliciously creamy texture. This way, everyone at the table can enjoy the casserole!

  • Cheesy Twist: Experiment with different types of cheese such as mozzarella or pepper jack for an unexpected flavor profile. The choices available can always make it a new experience!

  • Vegetable Boost: Toss in some colorful bell peppers or fresh mushrooms along with the ground meat for added texture and nutrition. They not only elevate the dish visually but also add a delicious crunch.

  • Dairy-Free Option: Substitute regular milk with almond milk or coconut milk for a creamy consistency that everyone can enjoy, without any dairy.

  • Crunchy Toppings: Instead of French fried onions, top your casserole with crushed crackers, panko breadcrumbs, or even crispy bacon bits for a delightful twist on the texture.

  • Spice It Up: If you’re a heat lover, add a pinch of cayenne pepper or red pepper flakes to the meat mixture for a little kick that will surprise your palate.

  • Herb Infusion: Fresh herbs such as thyme or parsley mixed in will not only enhance flavor but also brighten the casserole. You can feel good about adding a little garden-fresh goodness!

Remember, cooking is about creativity! Dive into these variations and make this Hamburger Green Bean Casserole uniquely yours. If you’re looking for more comforting options, don’t miss out on my Apple Crisp Casserole or Cheesy Low Carb Chicken Casserole. Enjoy the journey of flavor exploration!

What to Serve with Hamburger Green Bean Casserole?

The delightful harmony of flavors in this comforting casserole can be beautifully complemented by a variety of sides and treats.

  • Crisp Green Salad: Light and refreshing, a crisp salad offers a crunchy contrast to the rich casserole, balancing your meal.

  • Garlic Bread: Warm, buttery garlic bread is perfect for soaking up every creamy drop, combining comfort with convenience in every bite.

  • Sautéed Garlic Spinach: Nutrient-rich and vibrant, this simple side adds a healthy twist to your dinner table, infusing it with warmth and flavor.

  • Roasted Vegetables: The earthy flavors of roasted carrots and zucchini enhance the meal, creating a satisfying, colorful display of seasonal produce.

  • Mashed Potatoes: Creamy and indulgent, mashed potatoes provide a cozy texture that pairs beautifully with the casserole’s savory elements.

  • Crusty Dinner Rolls: These fluffy, warm rolls are perfect for sharing; they invite everyone to the table and enhance meal moments together.

  • Antioxidant-Boosting Cranberry Sauce: A hint of sweetness brings a refreshing contrast to the hearty casserole, making each bite a delightful mix of flavors.

  • Homemade Apple Crisp: End on a sweet note with a warm, spiced apple crisp that evokes the comforts of home, rounding off your meal with love.

Storage Tips for Hamburger Green Bean Casserole

Fridge: Store any leftover Hamburger Green Bean Casserole in an airtight container for up to 3 days. Reheat portions in the microwave or oven for a quick meal.

Freezer: This casserole freezes beautifully, so save it for later! Wrap tightly in plastic wrap or use a freezer-safe container for up to 3 months.

Reheating: When ready to enjoy again, thaw it overnight in the fridge before reheating. Bake at 350°F (175°C) until heated through, around 20-25 minutes.

Make-Ahead: You can also prepare the casserole ahead of time, assemble it, and store it in the fridge for up to 24 hours before baking. Just pop it in the oven when you’re ready to serve!

Expert Tips for Hamburger Green Bean Casserole

  • Ingredient Quality: Always opt for fresh ingredients when possible, as they enhance the flavors and texture of the Hamburger Green Bean Casserole, making every bite satisfying.
  • Avoid Overbaking: Keep an eye on the casserole while it bakes to prevent dryness. You want it bubbly and golden, not burnt!
  • Cool Before Serving: Let the casserole sit for a few minutes after baking. This allows it to set properly, making it easier to cut and serve.
  • Season Thoughtfully: Don’t skip the seasoning! Adjust salt and pepper according to your family’s taste preferences to achieve the perfect flavor.
  • Experiment Boldly: Feel free to add your favorite veggies or spices for a personal twist. Whether it’s mushrooms or bell peppers, customize it to suit your family’s palate.

Hamburger Green Bean Casserole Recipe FAQs

How do I choose the best green beans for this casserole?
Absolutely! For the best flavor and texture in your Hamburger Green Bean Casserole, opt for green beans that are bright in color and firm to the touch. If you’re using fresh green beans, look for those without dark spots or wrinkles, as these may indicate ripeness and spoilage. If using canned beans, make sure to drain them thoroughly to avoid excess moisture in your dish.

What are the best storage methods for leftovers?
Very! After enjoying your Hamburger Green Bean Casserole, store leftovers in an airtight container in the refrigerator for up to 3 days. To reheat, simply pop a serving in the microwave or place it back in the oven at 350°F (175°C) until heated through. Let the casserole cool to room temperature before storing to help maintain its creamy texture.

Can I freeze Hamburger Green Bean Casserole?
Of course! To freeze your Hamburger Green Bean Casserole, cool it completely first. Then, wrap it tightly in plastic wrap or aluminum foil and place it in a freezer-safe container for up to 3 months. When you’re ready to enjoy it, let it thaw in the fridge overnight and bake at 350°F (175°C) until heated through, about 20-25 minutes. This way, you’re assured of a hearty meal ready to comfort you!

What should I do if my casserole turns out too dry?
If your casserole happens to be dry, don’t worry! A sprinkle of broth or a dollop of extra cream of mushroom soup can revive moisture. For future bakes, be sure to keep an eye on the baking time! If you notice it bubbling vigorously and the cheese turning golden brown, that’s a good sign it’s time to take it out. Moisture is key to achieving that cozy, creamy texture everyone loves.

Are there any allergenic ingredients I should consider?
Definitely! When preparing the Hamburger Green Bean Casserole, be mindful of any allergies. The primary allergens here include dairy (from cheese and milk) and possible gluten (from French fried onions or breadcrumbs, depending on your brand). For dairy-free alternatives, almond milk and dairy-free cheese work well. Always double-check labels if you’re serving guests with dietary restrictions.

Hamburger Green Bean Casserole

Savor Comfort with Hamburger Green Bean Casserole Delight

Experience the heartwarming Hamburger Green Bean Casserole, a comforting blend of seasoned ground beef and green beans in a creamy sauce.
Prep Time 15 minutes
Cook Time 30 minutes
Cooling Time 5 minutes
Total Time 50 minutes
Servings: 6 servings
Course: Casserole
Cuisine: American
Calories: 450

Ingredients
  

For the Casserole
  • 1 lb Ground Beef or ground turkey
  • 1 cup Onion (chopped)
  • 2 cloves Garlic (minced) or garlic powder
  • 2 cans Green Beans (canned, drained) or fresh/frozen briefly cooked
  • 1 can Cream of Mushroom Soup or cream of chicken
  • 1/2 cup Milk or almond milk/vegetable broth
  • 1 cup Cheddar Cheese (shredded) or mozzarella/dairy-free option
  • to taste Salt & Black Pepper
  • 1 cup French Fried Onions or crushed crackers/breadcrumbs
Optional Add-Ins
  • 1 cup Mushrooms sauté with the beef
  • 1 cup Bell Peppers various colors for flavor

Equipment

  • Large skillet
  • Mixing Bowl
  • baking dish
  • spatula

Method
 

Step-by-Step Instructions
  1. Preheat the oven to 350°F (175°C).
  2. In a large skillet, brown the ground beef over medium heat for about 6-8 minutes. Drain excess fat.
  3. Add chopped onion and minced garlic to the skillet. Sauté for about 5 minutes until onions are translucent.
  4. In a medium bowl, combine cream of mushroom soup with milk, stirring until smooth.
  5. Add cooked beef mixture, drained green beans, and half of the cheddar cheese to the sauce and mix well. Season with salt and pepper.
  6. Transfer the mixture to a greased 9x13 inch baking dish.
  7. Sprinkle remaining cheddar cheese and French fried onions on top.
  8. Bake for 25-30 minutes until bubbly and golden brown.

Nutrition

Serving: 1servingCalories: 450kcalCarbohydrates: 30gProtein: 25gFat: 25gSaturated Fat: 10gPolyunsaturated Fat: 2gMonounsaturated Fat: 5gCholesterol: 70mgSodium: 800mgPotassium: 600mgFiber: 4gSugar: 3gVitamin A: 10IUVitamin C: 15mgCalcium: 20mgIron: 15mg

Notes

For best results, use fresh ingredients and avoid overbaking. Allow casserole to cool slightly before serving for easier slicing.

Tried this recipe?

Let us know how it was!

Ground Beef and Chopped Cabbage for a Cozy One-Pan Feast

As the aroma of sautéed onions and garlic fills the kitchen, I find myself transported to cozy family dinners where the heartwarming taste of Ground Beef and Chopped Cabbage takes center stage. This hearty one-pan meal is not only a delightful comfort food but also incredibly quick to prepare, with just 10 minutes of prep and 20 minutes of cooking time. It’s the perfect solution for busy weeknights, delivering satisfaction without the hassle of multiple pots and pans. Plus, with its gluten-free nature and room for creative protein swaps, this dish caters to a variety of dietary needs. Are you ready to rekindle your love for homemade meals with a recipe that’s simple and wholesome? Let’s dive in!

Why is Ground Beef and Chopped Cabbage a Winner?

Simplicity: This one-pan meal is incredibly easy to whip up, making it a go-to for those busy nights when time is short.

Flavor Explosion: Rich flavors from the garlic, spices, and caramelized cabbage mingle effortlessly, creating a dish that’s comfort in every bite.

Versatility: Whether you’re sticking to traditional ground beef or experimenting with ground turkey, the possibilities are endless! You could easily add extra veggies like bell peppers or carrots to boost nutrition and flavor.

Healthy Twist: Packed with protein and fiber, this dish fits into various dietary needs without sacrificing taste.

Crowd-Pleaser: This comforting meal is sure to delight family and friends alike. It pairs perfectly with sides like crusty bread or rice, giving everyone something to enjoy. You’ll never miss fast food again once you try this satisfying homemade gem!

Ground Beef and Chopped Cabbage Ingredients

For the Beef Base

  • Ground Beef – A savory backbone that absorbs spices beautifully; swap for ground turkey or chicken for a lighter take.
  • Onion – Adds natural sweetness and depth; yellow or white work best, while shallots offer a milder flavor.
  • Minced Garlic – Infuses fragrant notes into the dish; fresh garlic is ideal, but garlic powder can save the day in a pinch.

For the Cabbage

  • Chopped Cabbage – The star of the dish that provides texture and absorbs flavors; feel free to replace with shredded Brussels sprouts or spinach!

For the Sauce

  • Tomato Paste – Elevates umami and moisture for richness; if you’re looking for a lighter alternative, opt for tomato sauce or a vegetable broth reduction.
  • Beef Broth – Enhances flavors and keeps the dish moist; substitute with vegetable broth for a vegetarian twist.

For Seasoning

  • Spices (Salt, Pepper, Paprika, Cumin/Chili Flakes) – The magic makers that elevate the dish’s profile; adjust according to spice preference, using smoked paprika for extra flavor or chili flakes for heat.

This recipe for Ground Beef and Chopped Cabbage is designed to satisfy your cravings while keeping cooking simple and straightforward!

Step‑by‑Step Instructions for Ground Beef and Chopped Cabbage

Step 1: Heat the Skillet
Start by placing a large skillet over medium-high heat and adding a drizzle of oil. Allow the oil to shimmer for about 1-2 minutes, ensuring it’s hot enough to brown the meat properly, which will enhance the flavor of your Ground Beef and Chopped Cabbage dish.

Step 2: Brown the Ground Beef
Add the ground beef to the skillet, using a spatula to break it apart into smaller pieces. Cook for approximately 5-7 minutes, stirring occasionally, until the beef is evenly browned and no longer pink. If there’s excess fat, drain it from the pan to keep the dish from becoming greasy.

Step 3: Sauté the Onions
Once the beef is ready, stir in the chopped onion and cook for about 3-4 minutes. You’ll want to watch for the onions to become translucent and tender, which will add a touch of sweetness to your Ground Beef and Chopped Cabbage, deepening the flavor profile.

Step 4: Add the Garlic
Mix in the minced garlic and sauté for an additional minute until fragrant. This step will infuse your dish with aromatic notes that will have your kitchen smelling delightful before you even finish cooking.

Step 5: Incorporate Tomato Paste
Stir in the tomato paste, letting it cook for 1-2 minutes. You should see the paste darken slightly as it caramelizes, which intensifies the flavor and prepares the base for the rich sauce of your Ground Beef and Chopped Cabbage.

Step 6: Season the Mixture
Season your beef mixture with salt, pepper, and a sprinkle of cumin or chili flakes to taste. Allow these spices to meld for a minute, creating a beautifully seasoned base that will perfectly complement the upcoming addition of cabbage.

Step 7: Add the Chopped Cabbage
Toss in the chopped cabbage, stirring thoroughly to coat it with the beef mixture. Cook this combination for about 2-3 minutes, allowing the cabbage to wilt slightly while mingling with the rich flavors from the beef and spices.

Step 8: Pour in Beef Broth
Add the beef broth to the skillet and stir well. Bring the mixture to a gentle simmer, and reduce the heat if necessary. Let it cook uncovered for 10-12 minutes, or until the cabbage is tender and has absorbed the delicious flavors of the Ground Beef and Chopped Cabbage.

Step 9: Final Stir and Serve
Give the dish a final stir to ensure everything is well combined and heated through. Serve it warm, optionally garnishing with fresh herbs like parsley or cilantro for a pop of color. Enjoy your hearty, one-pan meal that brings comfort in every bite!

What to Serve with Ground Beef and Chopped Cabbage?

Creating a satisfying meal goes beyond just the main dish; the right sides can elevate your dining experience.

  • Creamy Mashed Potatoes: These fluffy potatoes provide a buttery contrast, absorbing the flavorful juices from the beef and cabbage for a comforting bite.
  • Crusty Bread: Serve this alongside to soak up the delicious sauce. The crunchy exterior and soft interior complement the hearty dish perfectly.
  • Garlic Green Beans: Their crisp texture and fresh flavor cut through the richness of the ground beef. A light garlic sauté enhances both color and taste!
  • Caesar Salad: The crisp romaine and tangy dressing offer a refreshing balance to the savory flavors, making it a perfect palate cleanser.
  • Rice Pilaf: This fluffy side adds a slightly nutty flavor and helps to capture the traditional essence of your savory dish, enhancing each bite.
  • Steamed Broccoli: With its vibrant color and nutritious profile, this simple side provides a healthy crunch and visually brightens your plate.
  • Pickled Vegetables: The tangy notes from pickles contrast beautifully with the savory ingredients, making your meal feel special and multi-dimensional.
  • Sparkling Water with Lemon: A refreshing drink option that complements your meal, cleansing the palate with each sip while being a delightful non-alcoholic choice.
  • Chocolate Pudding: End your meal on a sweet note! The creamy dessert balances out the savory main, creating a satisfying conclusion to your dining experience.

Expert Tips for Ground Beef and Chopped Cabbage

  • Perfect Pan Heat: Ensure your skillet is hot enough before adding the beef. A properly heated pan prevents the meat from steaming and promotes browning, enhancing the flavor of your Ground Beef and Chopped Cabbage.

  • Avoid Overcrowding: When browning ground beef, don’t overcrowd the pan. If necessary, cook in batches to achieve that deep, delicious caramelization without steaming the meat.

  • Use Fresh Ingredients: Fresh garlic and onions will elevate the dish’s flavor. If you must substitute, consider that dried garlic or powder may not pack the same punch.

  • Maintain Cabbage Crunch: When adding cabbage, stir it in and watch the cooking time to keep it tender yet crunchy. Overcooking can lead to mushiness, compromising the texture of your Ground Beef and Chopped Cabbage.

  • Customize Your Spices: Feel free to adjust the spices according to your taste. Adding smoked paprika can bring a wonderful depth, while chili flakes let you control the heat level.

  • Storage Solutions: For an easy meal later, store leftovers in an airtight container and refrigerate. Reheat gently with a splash of beef broth to maintain moisture in your Ground Beef and Chopped Cabbage.

Ground Beef and Chopped Cabbage Variations

Feel free to get creative and make this delightful one-pan meal truly your own!

  • Ground Turkey: Swap out ground beef for ground turkey for a lighter, yet equally delicious option.

  • Veggie Boost: Toss in diced carrots or bell peppers for an extra splash of color and nutrition. These veggies not only elevate the visual appeal but also pack a nutritious punch.

  • Leafy Greens: Substitute chopped cabbage with spinach or kale for a fresh twist, adding more vitamins and a hint of earthiness to the dish.

  • Asian Flair: Add a splash of soy sauce and some ginger to the mix for a flavorful Asian-inspired variation. This twist gives your Ground Beef and Chopped Cabbage a delightful tangy zing.

  • Spice it up: If you love heat, consider adding diced jalapeños or more chili flakes. This fiery addition will definitely satisfy spice lovers and turn up the flavor dial!

  • Smoky Flavor: Incorporate smoked paprika or chipotle powder for a wonderful smoky undertone that makes your meal even more savory and irresistible.

  • Chili Style: Transform this dish into a comforting chili by adding kidney or black beans. Just simmer a bit longer to let those flavors meld in perfectly.

  • Comforting Herb Blend: Mix in fresh herbs like thyme or rosemary before serving to bring a fragrant, fresh element, making your Ground Beef and Chopped Cabbage an even more comforting meal idea.

Take your culinary adventure up a notch with these variations, or explore recipes like Sticky Beef Noodles for a delightful change of pace! Let your kitchen be a canvas for creativity!

How to Store and Freeze Ground Beef and Chopped Cabbage

Fridge: Store leftovers in an airtight container in the fridge for up to 3 days to preserve freshness and flavor.

Freezer: This hearty dish can be frozen for up to 3 months. Make sure to cool it completely before transferring to a freezer-safe container.

Reheating: When you’re ready to enjoy it again, reheat gently in a skillet over low heat, adding a splash of broth or water to maintain moisture in your Ground Beef and Chopped Cabbage.

Batching: If you plan to make a larger batch, portion out the servings before freezing for easy meal prep.

Make Ahead Options

These Ground Beef and Chopped Cabbage are perfect for meal prep enthusiasts! You can chop the cabbage and onions up to 24 hours in advance, storing them in airtight containers in the fridge to keep them fresh. Additionally, you can fully cook the beef mixture and refrigerate it for up to 3 days, allowing the flavors to meld beautifully. When you’re ready to serve, simply reheat the dish on the stove over medium heat, adding a splash of beef broth to maintain moisture. This way, you can enjoy a comforting homemade meal with just a few minutes of effort on busy weeknights!

Ground Beef and Chopped Cabbage Recipe FAQs

How do I choose the right cabbage?
Absolutely! When selecting cabbage, look for heads that feel heavy for their size and have tightly packed leaves. Avoid any with dark spots or wilting leaves, as these can indicate spoilage. Fresh, firm green or savoy cabbage will add the best texture and flavor to your Ground Beef and Chopped Cabbage dish.

What is the best method to store leftovers?
Very! To keep your Ground Beef and Chopped Cabbage fresh, store leftovers in an airtight container in the fridge. They’ll last up to 3 days. When ready to enjoy again, I recommend reheating gently on the stove and adding a splash of broth to maintain moisture.

Can I freeze this dish?
Absolutely! To freeze your Ground Beef and Chopped Cabbage, first allow it to cool completely. Then transfer it to a freezer-safe container, where it can be stored for up to 3 months. To reheat, simply thaw overnight in the fridge, then warm on the stovetop with a little broth or water to keep it from drying out.

What can I do if my cabbage becomes mushy?
Oh no, don’t worry! If your cabbage ended up mushy, it may have been overcooked or had too much liquid. Next time, try reducing the cooking time after adding the cabbage. You want it to be tender but still have some crunch. Keep a close eye, and check for that bright green color and slight crispness!

Are there any allergen considerations for this recipe?
Yes! This Ground Beef and Chopped Cabbage recipe is gluten-free, making it perfect for those with gluten sensitivities. However, if you or your guests have any other allergies, be mindful of the spices used—some pre-mixed spices may contain allergens. Always opt for fresh, whole ingredients to control potential allergens better.

What protein alternatives can I use in this recipe?
Very! If you’re looking to switch things up or cater to different dietary needs, you can easily substitute the ground beef with ground turkey, chicken, or even crumbled tempeh or tofu for a vegetarian option. Each alternative will bring its unique flavor, making it versatile and family-friendly!

Ground Beef and Chopped Cabbage

Ground Beef and Chopped Cabbage for a Cozy One-Pan Feast

This quick, hearty dish combines ground beef and chopped cabbage for a satisfying meal that's perfect for busy weeknights.
Prep Time 10 minutes
Cook Time 20 minutes
Total Time 30 minutes
Servings: 4 servings
Course: Dinner
Cuisine: American
Calories: 350

Ingredients
  

For the Beef Base
  • 1 pound Ground Beef or ground turkey/chicken for a lighter option
  • 1 medium Onion yellow or white
  • 2 cloves Minced Garlic fresh preferred
For the Cabbage
  • 4 cups Chopped Cabbage can substitute with Brussels sprouts or spinach
For the Sauce
  • 2 tablespoons Tomato Paste or substitute with tomato sauce
  • 1 cup Beef Broth or vegetable broth for vegetarian option
For Seasoning
  • to taste Salt
  • to taste Pepper
  • 1 teaspoon Paprika smoked for extra flavor
  • 1/2 teaspoon Cumin or chili flakes for heat

Equipment

  • Large skillet

Method
 

Step-by-Step Instructions
  1. Start by placing a large skillet over medium-high heat and adding a drizzle of oil. Allow the oil to shimmer for about 1-2 minutes.
  2. Add the ground beef to the skillet, using a spatula to break it apart into smaller pieces. Cook for approximately 5-7 minutes, stirring occasionally, until browned.
  3. Stir in the chopped onion and cook for about 3-4 minutes until translucent and tender.
  4. Mix in the minced garlic and sauté for an additional minute until fragrant.
  5. Stir in the tomato paste, letting it cook for 1-2 minutes until it darkens slightly.
  6. Season your mixture with salt, pepper, and a sprinkle of cumin or chili flakes to taste, allowing the spices to meld.
  7. Toss in the chopped cabbage and stir thoroughly to coat with the beef mixture. Cook for about 2-3 minutes until slightly wilted.
  8. Add the beef broth to the skillet and stir well. Bring to a gentle simmer, reduce the heat if necessary, and cook uncovered for 10-12 minutes until the cabbage is tender.
  9. Give the dish a final stir to ensure everything is well combined and heated through. Serve warm, optionally garnished with fresh herbs.

Nutrition

Serving: 1bowlCalories: 350kcalCarbohydrates: 15gProtein: 28gFat: 20gSaturated Fat: 8gPolyunsaturated Fat: 1gMonounsaturated Fat: 10gCholesterol: 70mgSodium: 600mgPotassium: 800mgFiber: 5gSugar: 3gVitamin A: 10IUVitamin C: 40mgCalcium: 4mgIron: 15mg

Notes

Store leftovers in an airtight container in the fridge for up to 3 days. Can be frozen for up to 3 months.

Tried this recipe?

Let us know how it was!

Hearty Poblano Chicken Tortilla Soup for Cozy Nights

The tantalizing aroma of roasted poblano peppers fills your kitchen, instantly transporting you to a vibrant Mexican market bustling with spices and warmth. This Poblano Chicken Tortilla Soup is not just another meal; it’s a heartwarming embrace in a bowl, perfect for cozy evenings or gatherings with loved ones. As a comforting yet easy recipe, it harmonizes tender chicken, zesty tomatoes, and black beans into a delightful symphony of flavors. With just a few simple steps, you can create a hearty dish that balances richness and wholesome ingredients, making it a true crowd-pleaser. Whether it’s a busy weeknight or a special occasion, this soup is an effortless way to indulge in homemade comfort food that nourishes both body and soul. Are you ready to explore a fresh twist on your dinner routine? Let’s dive in!

Why is this soup a must-try?

Comforting warmth: This Poblano Chicken Tortilla Soup envelops you in cozy flavors, perfect for those chilly nights.
Hearty ingredients: With tender chicken, smoky peppers, and vibrant black beans, each spoonful is a burst of satisfying goodness.
Quick preparation: Ready in under 30 minutes, it’s an ideal choice for busy weeknights, allowing you to enjoy home-cooked meals without the hassle.
Crowd-pleasing appeal: Whether you’re hosting friends or enjoying a family dinner, this soup is sure to impress and bring everyone together.
Endless variations: Feel free to experiment with toppings or veggies, making it a versatile dish that never gets boring—just like it’s delicious cousin, Chicken Noodle Soup!

Poblano Chicken Tortilla Soup Ingredients

• Get ready to create your new favorite comfort food!

  • Poblano Peppers – Adds a smoky flavor to the soup; can substitute with green bell peppers for less heat.
  • Olive Oil – Provides fat for sautéing the aromatics; can use vegetable oil for neutrality.
  • Onion – Imparts sweetness and depth; yellow or white onion works best for flavor.
  • Garlic – Enhances the dish’s aroma and flavor; fresh garlic is preferred, but garlic powder can also be used.
  • Boneless, Skinless Chicken Breasts – Main protein source; can substitute with shredded rotisserie chicken for a quick option.
  • Chicken Broth – The base for the soup adds richness; vegetable broth serves as a good substitute for a vegetarian option.
  • Ground Cumin – Adds warming spice notes; coriander can be used as an alternative if you’re out of cumin.
  • Chili Powder – Contributes heat and flavor complexity; adjust quantity based on your preferred spice level.
  • Smoked Paprika – Gives a distinct smoky taste; regular paprika can substitute but will lack the smoky flavor.
  • Salt and Pepper – Essential for seasoning; adjust to taste, making sure every flavor shines through.
  • Diced Tomatoes (canned) – Add acidity and moisture; fresh tomatoes can be used in a pinch, though canned provides convenience.
  • Corn Kernels – Adds sweetness and texture; both fresh and frozen work well, while canned corn is another option.
  • Black Beans – Provide protein and fiber; can be replaced with pinto beans for a change in texture.
  • Heavy Cream – Creates a creamy texture in the soup; use half-and-half or coconut cream for a lighter option.
  • Tortilla Strips – Adds garnish and crunch; you can use store-bought or make your own from corn tortillas.
  • Fresh Cilantro – Brightens the flavor of the soup; omit if you’re not a fan of cilantro.
  • Avocado – A creamy addition for serving; optional, but it enhances the texture beautifully.
  • Lime Wedges – Provides a fresh, zesty squeeze right before eating to lift all the flavors.

Enjoy gathering these ingredients as you prepare to make a comforting bowl of Poblano Chicken Tortilla Soup!

Step‑by‑Step Instructions for Poblano Chicken Tortilla Soup

Step 1: Roast Peppers
Preheat your oven to 425°F (220°C). Place the poblano peppers on a baking sheet lined with parchment paper. Roast them for about 15-20 minutes, turning halfway through, until the skins are charred and blistered. Once done, transfer the peppers to a bowl, cover with plastic wrap, and let them cool. This will make peeling easier, giving your Poblano Chicken Tortilla Soup a rich, smoky flavor.

Step 2: Sauté Aromatics
In a large pot, heat 2 tablespoons of olive oil over medium heat. Add one diced onion and sauté for about 5 minutes, or until it turns translucent. Then, stir in 3 minced garlic cloves and sauté for an additional minute until fragrant, being careful not to let it brown. This aromatic base is essential for layering flavors in your delightful Poblano Chicken Tortilla Soup.

Step 3: Cook Chicken
Season 1 pound of boneless, skinless chicken breasts with salt, pepper, ground cumin, chili powder, and smoked paprika. Add the chicken to the pot and sear each side for 3-4 minutes until golden brown. This step helps lock in juices and flavor, ensuring your soup is hearty and satisfying as you progress with the Poblano Chicken Tortilla Soup.

Step 4: Add Broth & Veggies
Pour in 6 cups of chicken broth, along with one can of diced tomatoes (with juices), chopped roasted poblanos, 1 cup of corn kernels, and one can of black beans (rinsed and drained). Stir everything together and bring the mixture to a gentle boil. This vibrant combination adds depth and nutrition, making your Poblano Chicken Tortilla Soup irresistible.

Step 5: Simmer
Once boiling, reduce the heat to low and let the soup simmer for about 20 minutes. During this time, the chicken will cook through, becoming tender while releasing its flavors into the broth. Stir occasionally to prevent sticking, and enjoy the delicious aroma wafting through your kitchen as your Poblano Chicken Tortilla Soup develops its character.

Step 6: Shred Chicken
After 20 minutes, carefully remove the chicken from the pot and place it on a cutting board. Use two forks to shred the chicken into bite-sized pieces. Return the shredded chicken to the pot and stir to combine, ensuring that every spoonful of your Poblano Chicken Tortilla Soup is packed with flavor and hearty goodness.

Step 7: Stir in Cream
Add 1 cup of heavy cream to the pot and stir well. Heat the soup over low heat for an additional 2-3 minutes, or until warmed through. The cream will add a lovely richness and smooth texture, elevating your Poblano Chicken Tortilla Soup to new heights of comfort and indulgence.

Step 8: Taste & Adjust
Take a moment to taste your soup. Adjust the seasoning with additional salt, pepper, or spices as desired. This is your chance to make the flavor profile perfect for your palate, ensuring that your Poblano Chicken Tortilla Soup has just the right balance for your family’s enjoyment.

Step 9: Prepare Tortilla Strips
While the soup simmers, prepare the tortilla strips. Cut corn tortillas into thin strips and pan-fry them in a bit of hot oil until they are crispy. Alternatively, bake them in the oven at 400°F (200°C) for 10-12 minutes until golden. These crunchy toppings will add a delightful texture to your warm Poblano Chicken Tortilla Soup.

How to Store and Freeze Poblano Chicken Tortilla Soup

Fridge: Store the soup in an airtight container for up to 3-4 days. Allow the soup to cool completely before refrigerating to maintain quality.

Freezer: For longer storage, freeze portions in airtight containers or freezer bags for up to 3 months. Just remember to leave out the cream; stir it in fresh when you reheat.

Reheating: Thaw frozen soup overnight in the fridge. Reheat on the stove or in the microwave until heated through, adding a splash of chicken broth if needed for consistency.

Make-Ahead: This Poblano Chicken Tortilla Soup is perfect for meal prep! Prepare the ingredients in advance and store separately—combine them on the day you’re ready to cook.

What to Serve with Poblano Chicken Tortilla Soup

When you’re ready to enjoy a comforting bowl of Poblano Chicken Tortilla Soup, consider these delightful pairings that enhance your meal experience.

  • Crispy Tortilla Chips: The crunch of tortilla chips adds a delightful texture that contrasts beautifully with the creamy soup, perfect for dipping.

  • Fresh Green Salad: A light, tangy salad with lime vinaigrette refreshes your palate and balances the richness of the soup, making every bite more enjoyable.

  • Mexican Street Corn: Grilled corn with queso fresco and chili powder complements the smoky flavors of the soup, creating a harmonious blend of tastes.

  • Avocado Toast: Creamy avocado spread on crispy bread offers a satisfying, healthy side that blends well with the soup’s heartiness.

  • Margaritas: A chilled margarita with a hint of lime accentuates the vibrant notes of the soup, making for an exciting pairing that livens up your dinner table.

  • Churros with Chocolate Sauce: End your meal on a sweet note with warm churros. The chocolate dip provides a decadent contrast to the savory soup, making it a memorable feast.

Let your creativity shine as you mix and match these ideas to build a full meal that makes every spoonful of Poblano Chicken Tortilla Soup feel extra special!

Make Ahead Options

This Poblano Chicken Tortilla Soup is perfect for busy home cooks who want to save time while enjoying homemade comfort food! You can prep various components in advance: roast the poblano peppers and sauté the aromatics (about up to 24 hours ahead), then store them in the refrigerator. Additionally, you can cook the chicken and assemble the broth with veggies (but hold off on adding the cream) to keep it fresh for up to 3 days. When you’re ready to serve, just reheat the soup on the stove, stir in the cream, and prepare the crispy tortilla strips for a delightful finishing touch. This way, you’ll have a delicious, hearty meal with minimal effort on busy weeknights!

Expert Tips for Poblano Chicken Tortilla Soup

  • Peeling Peppers: Make sure to peel the skins off the roasted poblanos thoroughly. Skins left on can impart a bitter taste to your Poblano Chicken Tortilla Soup.
  • Use Fresh Ingredients: Fresh garlic and spices will elevate the flavors significantly. Dried spices may not provide the same depth of flavor; avoid using stale ingredients.
  • Cook Chicken with Care: Cook the chicken directly in the soup for maximum flavor, ensuring it stays juicy and tender in your Poblano Chicken Tortilla Soup.
  • Adjust Spice Levels: Taste as you go and tweak spice levels with chili powder or cumin according to your preference; everyone’s heat tolerance is different!
  • Enhance Creaminess: For a richer soup, feel free to increase the heavy cream or use coconut cream for a dairy-free twist while keeping that silky texture.
  • Garnish Meaningfully: Don’t skimp on the toppings! Fresh cilantro, avocado, and crispy tortilla strips add texture and contrast to the smooth soup.

Poblano Chicken Tortilla Soup Variations

Feel free to play around with this recipe to make it your own, elevating flavors and textures for a comforting meal!

  • Dairy-Free: Substitute heavy cream with coconut milk for a creamy texture without dairy. It adds a slight sweetness that pairs beautifully with the soup’s spices.

  • Hearty Veggie Boost: Add chopped zucchini or bell peppers to the mix for extra nutrition and vibrant color. They’ll soften nicely and absorb the smoky flavors of the poblanos.

  • Turkey Twist: For a leaner protein option, use turkey instead of chicken. It still delivers the same cozy feel and can prove to be a delicious change of pace.

  • Chickpeas Instead: Swap black beans for chickpeas for a unique flavor and a different texture. They’re also a great source of additional fiber and protein!

  • Pasta Addition: Stir in some cooked pasta for a satisfying and hearty twist. This not only adds substance but can also make the soup feel more like a complete meal.

  • Spicy Kick: Crank up the heat with diced jalapeños or a splash of hot sauce. It’s perfect for those who crave a little extra warmth in their bowl.

  • Additional Toppings: Experiment with toppings like pickled red onions or jalapeños for a zesty contrast. These additions can elevate the flavors and presentation of your Poblano Chicken Tortilla Soup.

  • Homemade Tortilla Strips: For an extra crunch, make your own tortilla strips by frying or baking corn tortillas coated lightly in oil. They’ll add a touch of love to your dish.

Whether you’re in the mood for a hearty weeknight meal or fancy a twist on a classic, this recipe is adaptable and endless in its possibilities! If you’re curious to try more comforting dishes, don’t miss out on Tuscan Chicken Soup or Chilli Chicken Takeout.

Poblano Chicken Tortilla Soup Recipe FAQs

How do I choose ripe poblano peppers?
Absolutely! When selecting poblano peppers, look for those with a dark green color, smooth skin, and a firm texture. Avoid peppers with dark spots or wrinkles, as these can indicate overripeness. The peppers should feel heavy for their size, suggesting they are juicy and fresh.

How long can I store Poblano Chicken Tortilla Soup in the fridge?
You can store your Poblano Chicken Tortilla Soup in an airtight container for up to 3-4 days. Allow it to cool completely before sealing it to maintain optimal freshness. When you’re ready to enjoy it again, just reheat on the stove or in the microwave, adding a splash of broth if it thickens up too much.

Can I freeze Poblano Chicken Tortilla Soup?
Very! This creamy soup freezes beautifully, but I recommend omitting the heavy cream before freezing. It can be stored in airtight containers or freezer bags for up to 3 months. To reheat, thaw overnight in the fridge, then warm it up on the stove, adding cream fresh for that luscious texture right before serving.

What should I do if the soup is too spicy?
If your Poblano Chicken Tortilla Soup is too spicy—don’t worry! You can dilute the heat by stirring in extra chicken broth or adding a splash of coconut milk or heavy cream, which will not only tone down the spice but also add a luscious creaminess. If needed, increase the sweetness with a small amount of sugar to balance the flavors.

Is this soup safe for my pet dog to eat?
While the Poblano Chicken Tortilla Soup is delicious for us, certain ingredients like onions and garlic can be toxic to dogs. It’s best to keep this recipe strictly for human consumption. If you’d like to treat your pet, consider cooking plain chicken and vegetables without any spices for a pet-friendly meal.

Can I make this soup vegetarian?
Absolutely! Just substitute the chicken with hearty vegetables or beans like chickpeas or lentils. Use vegetable broth instead of chicken broth, and you’ll still get that comforting texture and flavor profile. Add in extra vegetables like zucchini or bell peppers for an added twist!

Poblano Chicken Tortilla Soup

Hearty Poblano Chicken Tortilla Soup for Cozy Nights

This Poblano Chicken Tortilla Soup is a comforting and easy recipe perfect for cozy evenings, featuring tender chicken and zesty flavors.
Prep Time 10 minutes
Cook Time 30 minutes
Total Time 40 minutes
Servings: 6 cups
Course: Dinner
Cuisine: Mexican
Calories: 400

Ingredients
  

Vegetables
  • 3 each Poblano Peppers Can substitute with green bell peppers for less heat.
  • 1 each Onion Yellow or white onion works best for flavor.
  • 3 cloves Garlic Fresh garlic is preferred.
  • 1 cup Corn Kernels Fresh, frozen, or canned work.
Proteins
  • 1 lb Boneless, Skinless Chicken Breasts Can substitute with shredded rotisserie chicken.
  • 1 can Black Beans Rinsed and drained.
Liquids
  • 6 cups Chicken Broth Vegetable broth serves as a good substitute.
  • 1 can Diced Tomatoes Canned for convenience.
  • 1 cup Heavy Cream Use half-and-half or coconut cream for a lighter option.
Spices
  • 1 tbsp Ground Cumin Coriander can be used as an alternative.
  • 1 tbsp Chili Powder Adjust quantity based on desired spice level.
  • 1 tbsp Smoked Paprika Regular paprika can substitute, but lacks the smoky flavor.
  • to taste Salt Essential for seasoning.
  • to taste Pepper Essential for seasoning.
Garnishes
  • 1 cup Tortilla Strips Store-bought or homemade.
  • 1 cup Fresh Cilantro Omit if not a fan.
  • 1 each Avocado Optional, enhances texture.
  • 2 each Lime Wedges For serving.

Equipment

  • Oven
  • Large pot
  • Baking Sheet

Method
 

Preparation
  1. Preheat your oven to 425°F (220°C). Place the poblano peppers on a baking sheet. Roast for about 15-20 minutes until charred. Transfer to a bowl, cover, and let cool.
  2. In a large pot, heat olive oil over medium heat. Add diced onion and sauté until translucent. Stir in minced garlic and sauté until fragrant.
  3. Season chicken breasts with salt, pepper, cumin, chili powder, and smoked paprika. Add to the pot and sear each side until golden brown.
  4. Pour in chicken broth, add diced tomatoes, chopped roasted poblanos, corn, and black beans. Stir and bring to a gentle boil.
  5. Reduce heat to low and let the soup simmer for about 20 minutes. Stir occasionally.
  6. After 20 minutes, remove chicken from the pot and shred into bite-sized pieces. Return to the pot and stir.
  7. Add heavy cream to the pot and stir well. Heat over low for an additional 2-3 minutes.
  8. Taste and adjust seasoning as needed.
  9. Prepare tortilla strips by cutting corn tortillas into thin strips and pan-frying or baking until crispy.

Nutrition

Serving: 1cupCalories: 400kcalCarbohydrates: 35gProtein: 25gFat: 20gSaturated Fat: 10gPolyunsaturated Fat: 1gMonounsaturated Fat: 7gCholesterol: 80mgSodium: 800mgPotassium: 700mgFiber: 7gSugar: 5gVitamin A: 500IUVitamin C: 40mgCalcium: 50mgIron: 3mg

Notes

Make sure to peel the skins off the roasted poblanos thoroughly. Fresh ingredients elevate flavors significantly.

Tried this recipe?

Let us know how it was!

Irresistible Turkey Club Sandwich with Tangy Aioli Bliss

“What’s for lunch?” I overheard my friend pondering as we stood in line, contemplating another uninspired fast-food option. That’s when it hit me: nothing compares to a homemade Turkey Club Sandwich! This easy lunch brings together layers of succulent oven-roasted turkey breast, crispy bacon, and creamy avocado, all slathered with a zesty sun-dried tomato aioli. The best part? It’s not just quick to whip up; it’s a customizable delight that can easily cater to any palate, whether you prefer turkey, chicken, or even a vegetarian twist. If you’re looking to invigorate your meal routine and ditch the drive-thru, this recipe is your ticket to satisfying lunches that won’t leave you feeling sluggish. Ready to elevate your sandwich game? Grab your ingredients, and let’s dive in!

Why is the Turkey Club Sandwich a Must-Try?

Layers of Flavor: This Turkey Club Sandwich bursts with succulent layers of turkey, crispy bacon, and creamy avocado, delivering a taste that’s anything but ordinary.

Quick & Easy: With a preparation time of just minutes, you’ll whip up this delicious meal in no time, making it an excellent choice for your busy lifestyle.

Customizable Delight: Whether you prefer swapping turkey for grilled chicken or opting for a vegetarian version, this recipe is all about personal preference.

Perfect for Any Occasion: From picnics to quick lunches at home, this recipe shines everywhere, making it a beloved staple.

Freshness that Counts: Pair it with a side salad or chips for a complete meal that leaves you satisfied, not sluggish—goodbye fast food rut! Try it alongside my Honey Banana Sandwich for an irresistible lunch duo!

Turkey Club Sandwich Ingredients

Transform your lunch with these delightful ingredients!

For the Aioli

  • Mayonnaise – Adds creaminess and serves as the base for the aioli; substitute with Greek yogurt for a lighter option.
  • Sun-Dried Tomatoes – Deliver a rich, tangy flavor for the mayonnaise; finely chop if preferred instead of blending.
  • Garlic – Enhances the flavor of the aioli; adjust the quantity to suit your taste preferences.

For the Sandwich

  • Sourdough Bread – Provides a soft yet sturdy base; can be swapped with ciabatta or a tortilla for variation.
  • Turkey Deli Meat – Main protein source; easily interchangeable with chicken or ham for different flavor profiles.
  • Bacon – Introduces a crispy texture; consider turkey bacon for a healthier twist.
  • Avocado – Brings creaminess and healthy fats; can also be omitted or replaced with another spread if desired.
  • Romaine Lettuce – Adds a refreshing crunch; feel free to replace it with other leafy greens for diversity.

Enjoy crafting your Turkey Club Sandwich with these fresh ingredients that are sure to impress!

Step‑by‑Step Instructions for Turkey Club Sandwich

Step 1: Prepare Sun-Dried Tomato Aioli
In a mason jar or small bowl, combine 1 cup of mayonnaise, 1/4 cup of finely chopped sun-dried tomatoes, and 1 minced garlic clove. Blend or mix until smooth and creamy. The aioli should have a vibrant, chunky appearance with an even consistency. Set aside so the flavors can meld while you assemble the sandwich.

Step 2: Toast the Bread
Preheat your toaster or oven to 350°F (175°C). Place 4 slices of sourdough bread on a baking sheet and toast them for about 5-7 minutes or until golden brown. Keep an eye on them to achieve a crunchy texture without burning, as this will hold the sandwich together beautifully.

Step 3: Assemble the Layers
Lay out the toasted sourdough slices on a clean cutting board. Generously spread the sun-dried tomato aioli on one side of each slice, ensuring even coverage. This will elevate the Turkey Club Sandwich by adding a rich flavor profile to every bite.

Step 4: Add the Turkey and Bacon
On two slices of bread, layer 3 slices of turkey deli meat, ensuring the turkey covers the base uniformly. Follow this with 3 crispy bacon strips, arranged evenly. The combination of turkey and bacon will provide a hearty protein punch that’s both satisfying and delicious.

Step 5: Stack with Vegetables
On top of the bacon, add a handful of fresh romaine lettuce and slices of creamy avocado to taste. You may also add extra sun-dried tomatoes for added flavor if desired. Layering these ingredients will give the sandwich a fresh crunch and vibrant color.

Step 6: Complete the Sandwich
Carefully place the second slice of aioli-covered bread on top, pressing down gently to secure the layers. To make it easier to eat, cut the sandwich diagonally in half. This creates a beautiful presentation of the Turkey Club Sandwich that highlights all the delightful ingredients within.

Step 7: Serve and Enjoy
Plate your Turkey Club Sandwich alongside chips or a small side salad for a complete meal. The contrasting textures and flavors will make each bite a satisfying experience. Feel free to share this delicious homemade option with family or friends, giving a delightful twist to your lunch routine!

Turkey Club Sandwich Variations & Substitutions

Feel free to customize your Turkey Club Sandwich in delightful ways that will excite your taste buds!

  • Dairy-Free: Swap mayonnaise with avocado or hummus for a creamy, dairy-free aioli alternative.
    This twist not only provides a rich texture but also infuses the sandwich with vibrant flavors.

  • Spicy Kick: Add sliced jalapeños or a drizzle of sriracha to amp up the heat level.
    A touch of heat can transform your sandwich into a fiery delight that leaves you craving more!

  • Vegetarian Style: Replace turkey and bacon with roasted veggies like eggplant, zucchini, and bell peppers.
    This hearty variation packs in nutrients while offering a delicious, savory flavor profile.

  • Herbed Boost: Incorporate fresh herbs like basil or dill into the aioli for an aromatic twist.
    A sprinkle of freshness brightens the flavor and enhances the overall experience of your sandwich.

  • Toast Alternatives: Switch the sourdough for pita bread or a whole-grain wrap if you prefer.
    Each option offers its distinct texture and character, keeping your lunches exciting and fresh.

  • Sweet Addition: Layer in thin apple slices or a drizzle of honey for a sweet contrast to the savory elements.
    This unexpected sweetness can create a delightful balance and enhance the overall taste!

  • Crunch Factor: Add crispy onion rings or potato chips inside the sandwich for extra texture.
    Nothing beats that satisfying crunch that elevates every bite of your Turkey Club Sandwich!

Do try it with my Avocado Melt Sandwich for a delightful lunch experience, or explore the layers of flavor in my Bbq Chicken Sandwich to mix things up!

What to Serve with Easy Turkey Club Sandwich

Elevate your lunch experience with delightful sides that complement every bite of your scrumptious sandwich.

  • Crispy Sweet Potato Fries: The natural sweetness and crunch of these fries provide a wonderful contrast to the savory flavors of the Turkey Club Sandwich.

  • Fresh Garden Salad: A mix of vibrant greens and crisp veggies adds a refreshing crunch that balances the richness of the sandwich, making every bite feel light.

  • Homemade Potato Chips: Seasoned to perfection, these chips offer a satisfying crunch that enhances the textural experience of your meal while adding a salty touch.

  • Tangy Coleslaw: Creamy and tangy coleslaw serves as a perfect counterpoint, cutting through the richness and bringing freshness to your plate.

  • Zesty Pickles: Their sharp, tangy flavor awakens your taste buds and complements the creaminess of the avocado and aioli beautifully.

  • Iced Tea or Lemonade: Pair your Turkey Club Sandwich with a refreshing drink to cleanse your palate, adding just the right zing to your meal.

These delicious accompaniments promise to transform your lunch into a satisfying feast!

Storage Tips for Turkey Club Sandwich

Fridge: Keep leftovers in an airtight container for up to 3 days. This preserves the sandwich’s freshness and prevents sogginess.

Freezer: For longer storage, separate ingredients and freeze turkey and bacon for up to 2 months. Assemble the sandwich fresh when ready to enjoy!

Wrap: If storing whole sandwiches, wrap them tightly in plastic wrap. This helps retain moisture and flavor while preventing freezer burn.

Reheating: To reheat leftovers, unwrap and place the sandwich in a toaster or air fryer. This will revive the crispy texture—perfect for a satisfying meal!

Make Ahead Options

These Turkey Club Sandwiches are perfect for meal prep enthusiasts! You can prepare the sun-dried tomato aioli and store it in the refrigerator for up to 3 days. For the best flavor retention, keep it in an airtight container. Additionally, you can layer the turkey and bacon on the bread with the aioli, and wrap it tightly to prevent drying out; this can be done up to 24 hours ahead of time. When ready to serve, simply grab your sandwich from the fridge, add fresh avocado and lettuce, and give it a little press to secure the layers. You’ll enjoy a delicious and satisfying meal without the last-minute fuss!

Expert Tips for the Best Turkey Club Sandwich

  • Smooth Aioli: Ensure the sun-dried tomato mayo is well blended for a creamy consistency. This enhances the sandwich’s flavor in every bite.

  • Toast Your Bread: Lightly toast the sourdough to avoid a soggy sandwich. Crispy bread provides the perfect structural support for this Turkey Club Sandwich.

  • Layer Smartly: Start with the turkey and bacon on the bottom layer to keep the crunch of the lettuce and avocado intact. A well-balanced stack keeps it from falling apart!

  • Add Freshness: For a vibrant twist, add fresh tomato slices or a sprinkle of herbs like basil. This not only improves flavor but also elevates presentation.

  • Wrap it Well: If taking it on-the-go, secure the sandwich with toothpicks or wrap it tightly. This keeps everything in place while you enjoy your homemade creation.

Turkey Club Sandwich Recipe FAQs

What type of turkey should I use for the Turkey Club Sandwich?
Absolutely! I recommend using oven-roasted turkey breast for its tenderness and flavor. If you prefer something different, deli turkey or even grilled chicken can be great alternatives!

How do I store leftover Turkey Club Sandwich?
To keep your sandwich fresh, place any leftovers in an airtight container and refrigerate them for up to 3 days. Make sure to store any wet ingredients separately to avoid sogginess, especially if you used avocado or mayonnaise.

Can I freeze Turkey Club Sandwich?
Yes, you can freeze the components but not the assembled sandwich. For best results, wrap the turkey and bacon tightly in plastic wrap and store them in a freezer-safe bag for up to 2 months. When you’re ready to enjoy, simply thaw the ingredients and assemble fresh!

Why is my Turkey Club Sandwich soggy?
Very! A common cause of sogginess is the moisture from ingredients like tomatoes and avocado. To prevent this, layer dryer ingredients like turkey and bacon at the bottom and avoid spreading too much mayonnaise directly on the bread before adding juicy veggies. Toasting the bread will also help hold the shape!

Can I make this Turkey Club vegan-friendly?
Absolutely! For a delicious vegetarian twist, substitute the turkey with grilled vegetables or favorite plant-based proteins. You can also use hummus or avocado as a spread instead of aioli for that creamy goodness!

Is there a way to make the Turkey Club Sandwich healthier?
Certainly! You can lighten it up by using whole grain bread, swapping traditional mayonnaise for Greek yogurt, and opting for turkey bacon or omitting bacon altogether. This way, you’ll enjoy all the flavors with fewer calories!

Turkey Club Sandwich

Irresistible Turkey Club Sandwich with Tangy Aioli Bliss

Satisfy your cravings with this delicious Turkey Club Sandwich featuring layers of turkey, bacon, and zesty sun-dried tomato aioli.
Prep Time 10 minutes
Cook Time 7 minutes
Total Time 17 minutes
Servings: 2 sandwiches
Course: Lunch
Cuisine: American
Calories: 650

Ingredients
  

For the Aioli
  • 1 cup Mayonnaise Substitute with Greek yogurt for a lighter option.
  • 1/4 cup Sun-Dried Tomatoes Finely chopped if preferred.
  • 1 clove Garlic Minced.
For the Sandwich
  • 4 slices Sourdough Bread Can be swapped with ciabatta or a tortilla.
  • 6 slices Turkey Deli Meat Easily interchangeable with chicken or ham.
  • 3 slices Bacon Consider turkey bacon for a healthier twist.
  • 1 fruit Avocado Sliced.
  • 1 cup Romaine Lettuce Feel free to replace with other leafy greens.

Equipment

  • Toaster
  • Mason jar
  • Baking Sheet
  • Cutting board

Method
 

Prepare Sun-Dried Tomato Aioli
  1. Combine 1 cup of mayonnaise, 1/4 cup of finely chopped sun-dried tomatoes, and 1 minced garlic clove in a mason jar. Blend until smooth.
Toast the Bread
  1. Preheat toaster or oven to 350°F (175°C). Toast 4 slices of sourdough bread for about 5-7 minutes until golden brown.
Assemble the Layers
  1. Spread sun-dried tomato aioli on one side of each toasted sourdough slice.
Add the Turkey and Bacon
  1. On two slices, layer 3 slices of turkey and 3 bacon strips.
Stack with Vegetables
  1. Add romaine lettuce and avocado slices on top of the bacon.
Complete the Sandwich
  1. Place the second slice of aioli-covered bread on top and cut diagonally in half.
Serve and Enjoy
  1. Plate the sandwich alongside chips or a small side salad.

Nutrition

Serving: 1sandwichCalories: 650kcalCarbohydrates: 45gProtein: 35gFat: 38gSaturated Fat: 8gPolyunsaturated Fat: 5gMonounsaturated Fat: 22gCholesterol: 70mgSodium: 1350mgPotassium: 800mgFiber: 5gSugar: 3gVitamin A: 1000IUVitamin C: 15mgCalcium: 100mgIron: 2mg

Notes

For the freshest flavor, serve immediately and pair with a side salad or chips.

Tried this recipe?

Let us know how it was!

Stay Connected

Get recipes via email: