Get my cookbooks

Decadent Strawberry Cheesecake Quesadilla Recipe You’ll Love

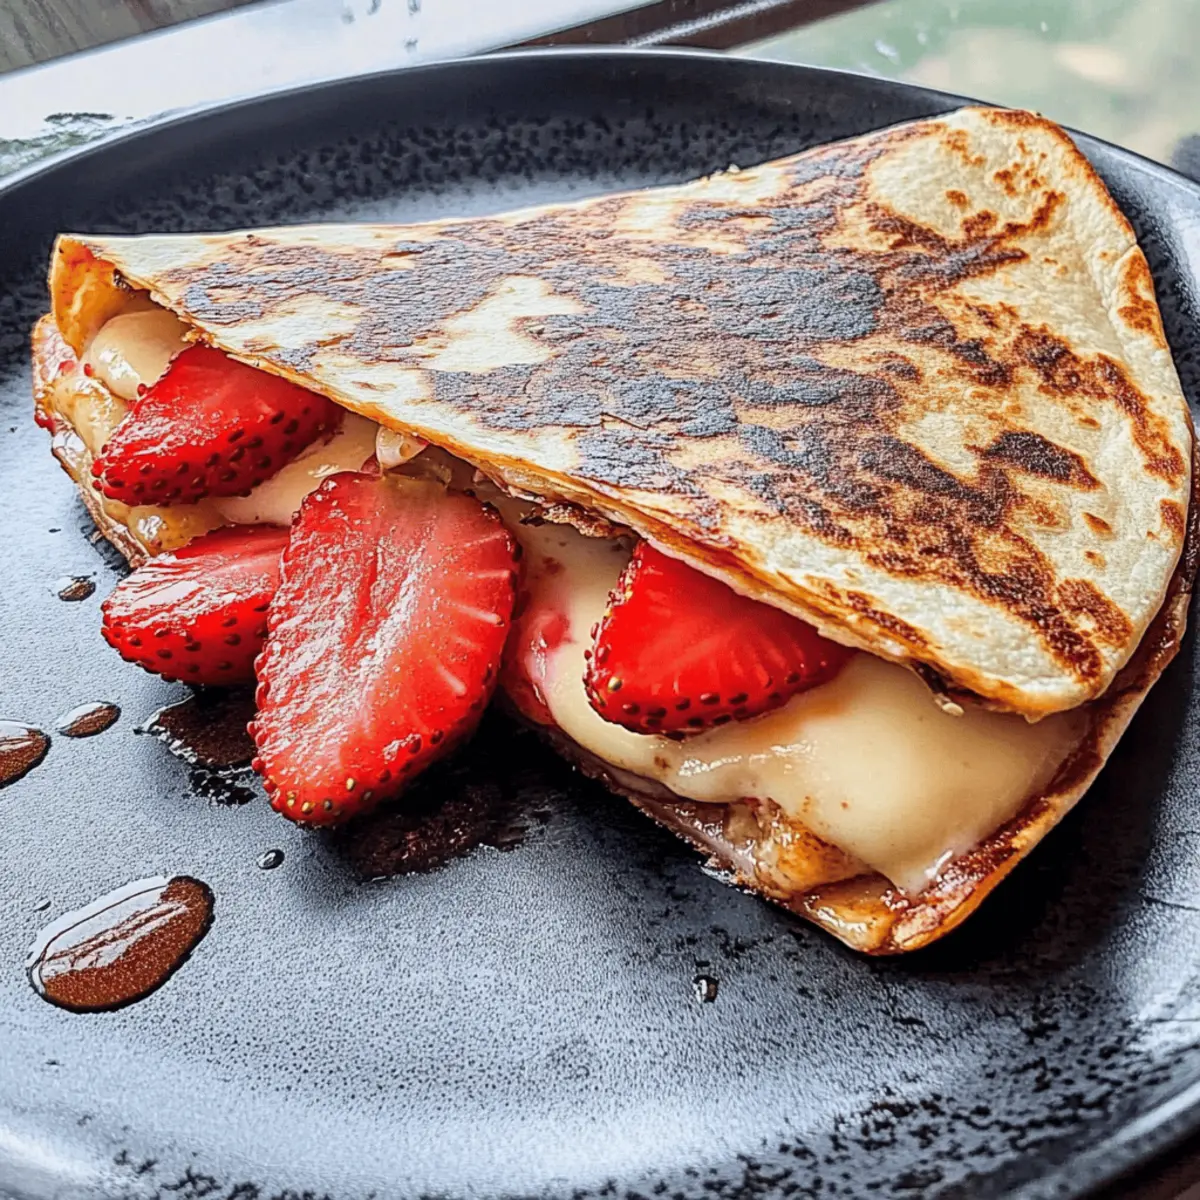
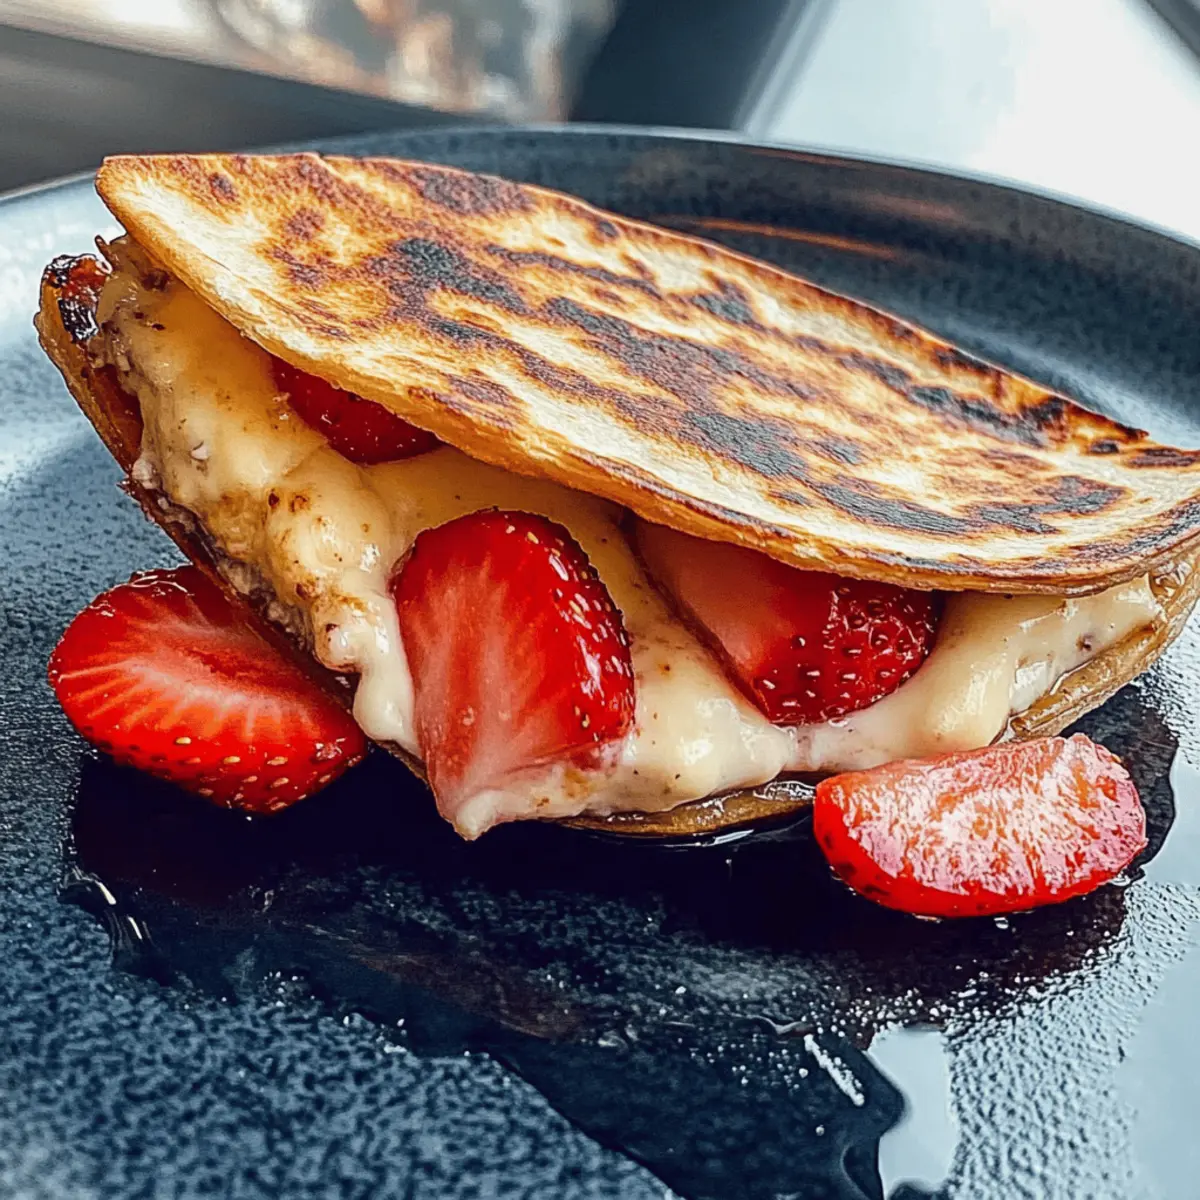
The aroma of warm tortillas sizzling in a pan always sparks a smile, but what happens when you elevate that classic comfort with a ridiculously delicious twist? Let me introduce you to the Strawberry Cheesecake Quesadilla Recipe, where creamy cheesecake meets sweet, juicy strawberries, all wrapped in a crispy tortilla. This simple dessert not only brings joy to your cooking routine with its quick prep time but also creates a fun, portable treat that’s perfect for sharing (or not!). Imagine the delightful crunch as you bite into this fusion of flavors—it’s sure to impress both your family and friends at any gathering. So, are you ready to take your dessert game to the next level? Let’s dive in!

Why is this quesadilla so irresistible?

Unique Combination: The fusion of creamy cheesecake with fresh strawberries wrapped in a crispy tortilla creates an irresistible flavor profile.
Quick to Make: You’ll whip this dessert up in no time—perfect for when sweet cravings hit unexpectedly.
Customizable Options: Whether you prefer blueberries or chocolate chips, feel free to mix and match your favorite fillings!
Crowd-Pleasing Appeal: This Strawberry Cheesecake Quesadilla is bound to impress at any gathering, leaving everyone asking for seconds.
Fun Presentation: Serve it up with a drizzle of honey or a scoop of ice cream for an eye-catching and delightful treat!
This recipe makes dessert not just tasty but also an adventure in creativity. If you’re in the mood for more delicious combinations, consider checking out our Carrot Cake Cheesecake for another fun spin on a classic!

Strawberry Cheesecake Quesadilla Recipe Ingredients

For the Filling

  • Cream Cheese – Provides that luscious creamy filling; opt for low-fat cream cheese for a healthier twist.
  • Sugar – Adds sweetness; feel free to swap with a favorite sweetener for a guilt-free version.
  • Cinnamon – Brings warmth and flavor depth; can be omitted for a more straightforward taste.
  • Vanilla Extract – Enhances the filling; almond extract works well as an alternative for a different flavor note.

For the Tortilla

  • Flour Tortilla – The base of this dessert; a fajita-sized tortilla is perfect for wrapping. You can choose low-carb or gluten-free tortillas for a different diet.

For the Berries

  • Strawberries – Fresh and sweet; substitute with blueberries or raspberries if you’re feeling adventurous!

For Cooking

  • Butter – Ensures a golden and crispy exterior; replace with cooking spray for a lighter option.

For Drizzling

  • Honey – A delightful finishing touch; agave syrup is a great substitute if desired.

This Strawberry Cheesecake Quesadilla recipe promises deliciousness and a fun culinary experience, making it an exciting addition to any dessert table!

Step‑by‑Step Instructions for Strawberry Cheesecake Quesadilla Recipe

Step 1: Prepare the Cream Cheese Mixture
In a medium bowl, blend softened cream cheese, 1 teaspoon sugar, ground cinnamon, and vanilla extract until smooth and creamy. This should take about 2-3 minutes with a hand mixer or whisk, ensuring there are no lumps. You want a luscious filling that embodies the rich flavors of a classic cheesecake.

Step 2: Slice the Strawberries
Clean and slice fresh strawberries into thin pieces, about ¼ inch thick, and set them aside on a plate. This ensures that the strawberries will blend beautifully with the creamy filling. The vibrant colors will add an enticing look to your Strawberry Cheesecake Quesadilla.

Step 3: Assemble the Tortilla
Take a flour tortilla and spread a generous layer of the cream cheese mixture on one side. Use a spatula to create an even layer, reaching the edges to maximize the delicious filling. This will set the stage for your delightful fusion of flavors in the quesadilla.

Step 4: Heat the Skillet
Place a non-stick skillet over medium heat and add 1 teaspoon of butter, allowing it to melt and coat the bottom of the pan. Keep an eye on the butter to prevent burning; it should be bubbling but not browned. This step is crucial for achieving the crispy exterior you’re aiming for.

Step 5: Sugar and Cinnamon Sprinkle
Sprinkle the remaining sugar and a dash of cinnamon evenly across the skillet. The sugar will caramelize, adding a delightful crunch to your quesadilla. Once the skillet is fragrant, quickly lay your tortilla (cream side up) into the pan, ensuring it sits atop the buttery bed.

Step 6: Add Strawberries and Fold
Layer the sliced strawberries over the cream cheese filling in the tortilla. Allow this to cook for about 2-3 minutes until the underside turns a light golden brown. Once the bottom is crisp, carefully fold the tortilla in half using a spatula, creating a savory purse for all those delicious flavors.

Step 7: Crisp the Quesadilla
Continue to cook the folded quesadilla for another 2-3 minutes, pressing down slightly to ensure even crisping. Once it achieves a beautiful golden-brown exterior, carefully remove it from the skillet, letting it cool for a moment on a cutting board before slicing.

Step 8: Finish and Serve
Drizzle honey over the top of your Strawberry Cheesecake Quesadilla for a hint of sweetness and an elegant touch. Cut it into wedges, serve while warm, and enjoy the magnificent combination of creamy cheesecake and tangy strawberries enveloped in a crisp tortilla!

Expert Tips for Strawberry Cheesecake Quesadilla

  • Cook with Care: Monitor the quesadilla closely while it cooks; the sugar can burn quickly, leading to an unpleasant taste. Remove it from the skillet once it achieves a light golden brown.
  • Prep First: Have all your ingredients ready before you start cooking. This will streamline the process and prevent any last-minute scrambles that might disrupt your flow.
  • Use Non-Stick Cookware: A non-stick skillet is essential to ensure your quesadilla doesn’t stick while caramelizing, allowing for an easy flip and perfect texture.
  • Experiment Freely: Don’t hesitate to customize this Strawberry Cheesecake Quesadilla Recipe with different fruits or flavored cream cheeses. Get creative and make it your own!
  • Serving Note: Serving these quesadillas warm is key to enjoying their lovely textures. Consider pairing with a scoop of ice cream or fresh fruit for a fabulous presentation.

Strawberry Cheesecake Quesadilla Recipe Variations

Feel free to get creative with your quesadilla and explore exciting new flavor profiles!

  • Berry Bonanza: Substitute strawberries with a mix of blueberries and raspberries for a colorful explosion of flavors. Each bite will surprise your palate with freshness.
  • Chocolate Delight: Add mini chocolate chips to the cream cheese mixture for a decadent twist. The combination of chocolate and cheesecake will leave sweet lovers in bliss!
  • Nutty Crunch: Incorporate chopped nuts, like pecans or almonds, into the filling for an added texture. It will give your quesadilla a delightful crunch that complements the creamy filling.
  • Dairy-Free: Use a dairy-free cream cheese alternative and coconut oil in place of butter. This way, everyone can indulge, feeling good about their dessert choice!
  • Cinnamon Sugar Dust: Mix cinnamon and sugar together and sprinkle it generously on the quesadilla before serving. It adds an extra burst of sweet and spiced flavor.
  • Almond Twist: Swap out vanilla extract for almond extract to create a distinctly different flavor. It will elevate the taste profile and intrigue your guests with its uniqueness.
  • Spicy Kick: Add a tiny pinch of cayenne pepper to the cream cheese mixture for a surprise heat that counterbalances the sweetness perfectly. This twist will thrill adventurous eaters!
  • Fruit Compote: Serve with a quick homemade strawberry compote on the side for dipping. This added layer of fruitiness makes every bite even more delightful.

The possibilities are endless! If you’re looking for more dessert inspiration, don’t miss checking out our delicious Strawberry Cheesecake Dump recipe or indulge in a warm slice of Carrot Cake Cheesecake.

What to Serve with Strawberry Cheesecake Quesadilla?

When you elevate a quesadilla to dessert status, pairing it becomes a delightful adventure that sets the stage for a memorable meal.

  • Fresh Fruit Salad: A colorful medley of seasonal fruits adds a refreshing contrast to the creamy quesadilla, balancing sweetness and textures.
  • Vanilla Ice Cream: The cold, creamy scoop perfectly complements the warm quesadilla, creating a fantastic contrast that will have everyone swooning.
  • Chocolate Drizzle: A rich drizzle of melted chocolate not only enhances the dessert’s appeal but adds a luxurious flavor layer for chocolate lovers. Pour it over right before serving and watch the smiles unfold!
  • Whipped Cream: Light and airy, whipped cream provides a delightful counterpart to the dense filling, making every bite feel indulgent and refreshing.
  • Churros: These cinnamon-sugar coated treats echo the crunchiness of the quesadilla, creating a fun theme—perfect for dessert lovers!
  • Sparkling Lemonade: A zesty beverage with a hint of sweetness to cleanse the palate, ensuring each bite of the quesadilla feels refreshing. Equip your gathering with a large pitcher for added festivity!
  • Coffee or Tea: A warm beverage that pairs wonderfully with dessert, the rich flavors enhance the sweetness of the quesadilla while providing comfort and warmth.
  • Chocolate-Covered Strawberries: An elegant touch that ties back to the strawberries in your quesadilla, adding a delightful pop of flavor and sophistication to your dessert table.

Let these pairings inspire a lovely feast that turns your Strawberry Cheesecake Quesadilla into the star of a delightful evening!

How to Store and Freeze Strawberry Cheesecake Quesadilla

Fridge: Store any leftover quesadillas in an airtight container for up to 3 days. This helps maintain their crispness while keeping the filling fresh.

Freezer: For longer storage, you can freeze the quesadillas wrapped tightly in plastic wrap and then placed in a freezer-safe bag for up to 2 months.

Reheating: To enjoy, thaw in the fridge overnight, then reheat in a skillet over medium heat for about 3-5 minutes or until warmed through and crispy again.

Make-Ahead: Feel free to prepare the filling and assemble the quesadilla ahead of time. Store it in the fridge for up to a day before cooking for a quick dessert option!

Make Ahead Options

These Strawberry Cheesecake Quesadilla recipes are perfect for those busy weeknights! You can prepare the cream cheese mixture and slice the strawberries up to 24 hours in advance, storing them separately in airtight containers in the refrigerator. This keeps the fresh flavors intact and prevents the strawberries from becoming soggy. When you’re ready to enjoy your dessert, simply assemble the quesadillas by spreading the cream cheese on the tortillas and layering the strawberries as instructed. Cook them immediately for that warm, crispy finish—the result will be just as delicious and satisfying as if they were made fresh!

Strawberry Cheesecake Quesadilla Recipe FAQs

What kind of strawberries should I use?
Absolutely! When making this recipe, look for fresh, ripe strawberries that are bright red and firm. Avoid berries with dark spots or those that feel mushy, as these may affect the overall sweetness and texture of your quesadilla.

How should I store leftover quesadillas?
To keep your leftover Strawberry Cheesecake Quesadilla fresh, place them in an airtight container in the fridge. They can last for up to 3 days. I recommend reheating them in a skillet for a few minutes to restore their crispy texture before serving!

Can I freeze these quesadillas?
Yes, you can freeze the quesadillas! Wrap them tightly in plastic wrap and then place them in a freezer-safe bag. They can be stored for up to 2 months. To reheat, simply thaw in the fridge overnight and then warm them in a skillet over medium heat for about 3-5 minutes or until crisp and heated through.

What if my quesadilla is sticking to the pan?
If your quesadilla is sticking, it may be due to insufficient grease or using a pan that isn’t non-stick. Make sure to heat up your non-stick skillet with enough butter to coat the bottom before adding the quesadilla. If needed, use a silicone spatula to gently loosen the edges.

Are there any dietary considerations to keep in mind?
Great question! If you have dietary restrictions, feel free to substitute the cream cheese for a dairy-free alternative, use gluten-free tortillas, or switch the sugar for a low-calorie sweetener. This recipe is quite versatile and can be adapted to suit various dietary needs!

Can I prepare the filling in advance?
Certainly! You can make the cream cheese filling ahead of time and store it in an airtight container in the fridge for up to 2 days. This way, when you’re ready to cook, you can simply assemble the quesadilla and enjoy a quick and delightful dessert!

Strawberry Cheesecake Quesadilla Recipe

Decadent Strawberry Cheesecake Quesadilla Recipe You’ll Love

Experience the best of dessert with this Strawberry Cheesecake Quesadilla, where creamy cheesecake meets sweet strawberries in a crispy tortilla.
Prep Time 10 minutes
Cook Time 15 minutes
Total Time 25 minutes
Servings: 4 quesadillas
Course: Dessert
Cuisine: American
Calories: 300

Ingredients
  

Filling
  • 8 oz Cream Cheese Softened
  • 2 tbsp Sugar Divided
  • 1 tsp Cinnamon Optional
  • 1 tsp Vanilla Extract Or almond extract
Tortilla
  • 2 large Flour Tortillas Fajita-sized
Berries
  • 1 cup Strawberries Fresh
Cooking
  • 2 tbsp Butter Or cooking spray
Drizzling
  • 2 tbsp Honey Or agave syrup

Equipment

  • medium bowl
  • Non-stick skillet
  • spatula

Method
 

Preparation
  1. In a medium bowl, blend softened cream cheese, 1 tablespoon sugar, ground cinnamon, and vanilla extract until smooth.
  2. Clean and slice fresh strawberries into thin pieces, about ¼ inch thick, and set them aside.
  3. Take a flour tortilla and spread a generous layer of the cream cheese mixture on one side evenly.
  4. Place a non-stick skillet over medium heat and add 1 tablespoon of butter, allowing it to melt.
  5. Sprinkle the remaining sugar and a dash of cinnamon evenly across the skillet.
  6. Layer the sliced strawberries over the cream cheese filling in the tortilla and fold it in half.
  7. Continue to cook the folded quesadilla for another 2-3 minutes, pressing down slightly.
  8. Drizzle honey over the top of your Strawberry Cheesecake Quesadilla, cut into wedges and serve warm.

Nutrition

Serving: 1quesadillaCalories: 300kcalCarbohydrates: 35gProtein: 6gFat: 15gSaturated Fat: 9gCholesterol: 50mgSodium: 200mgPotassium: 150mgFiber: 2gSugar: 10gVitamin A: 500IUVitamin C: 30mgCalcium: 100mgIron: 1mg

Notes

Store leftover quesadillas in an airtight container for up to 3 days. They can be frozen for up to 2 months and reheated on a skillet.

Tried this recipe?

Let us know how it was!

Decadent Root Vegetable Gratin That Will Wow Your Family

As I stood in my kitchen, the earthy aroma of golden beets and Japanese sweet potatoes began to whisk me away to a cozy autumn scene. There’s something truly special about a Creamy Root Vegetable Gratin—not only is it a delightful comfort food that pleases the whole family, but it’s also a feast for the eyes with its vibrant colors. This recipe brings together unique root vegetables enveloped in a rich, garlic-infused creamy sauce, creating a dish that perfectly balances nutrition and indulgence. Plus, it’s quick to prepare, making it a win for busy weeknights or casual gatherings with friends. Ready to impress everyone at the dinner table? Let’s dive into this deliciously easy gratin that’s bound to become a new favorite!

Why is this gratin a must-try?

Comforting, creamy goodness: This root vegetable gratin wraps earthy golden beets and sweet potatoes in a luscious sauce, turning a humble dish into something extraordinary.

Easy preparation: With straightforward steps and just a few ingredients, you can whip up this stunning dish in no time, making it perfect for busy weeknights or causal get-togethers.

Visual feast: Its vibrant colors make it not just delicious but also an eye-catching centerpiece, guaranteed to wow your family and friends.

Nutritional boost: Packed with vitamins and minerals from the root vegetables, this is a meal you can feel good about serving. Plus, for other delicious options, check out our classic potato gratin and seasonal vegetable medley recipes!

Versatile ingredients: Feel free to use whatever root veggies you have on hand, or even add some cheese for an extra layer of flavor—this gratin is bound to please every palate!

Root Vegetable Gratin Ingredients

For the Veggies
Golden Beets – Adds sweetness and vibrant color; can be replaced with regular beets if unavailable.
Japanese Sweet Potatoes – Offers a creamy texture; substitute with regular sweet potatoes for similar results.

For the Cream Sauce
Heavy Whipping Cream – Provides richness and creaminess; dairy-free alternatives include coconut cream.
Fresh Thyme – Adds an aromatic herbal note; substitute with dried thyme (use 1/3 the amount).
Salt and Pepper – Essential for seasoning; adjust according to personal taste preferences.

This Root Vegetable Gratin is not only delicious but also a colorful way to enjoy your favorite root vegetables!

Step‑by‑Step Instructions for Root Vegetable Gratin

Step 1: Preheat and Prepare
Preheat your oven to 375°F (190°C). Grease a 9×13-inch baking dish with butter or olive oil to prevent sticking, ensuring an easy release for your creamy root vegetable gratin. This step sets the stage for the perfect baking environment, allowing the gratin to cook evenly.

Step 2: Veggie Prep
Wash the golden beets and Japanese sweet potatoes thoroughly, then slice them into thin, even rounds—about 1/8 inch thick. This consistency ensures uniform cooking throughout the gratin. Arrange the sliced vegetables on a clean surface, and take a moment to admire their vibrant colors before you begin layering.

Step 3: Mix the Creamy Sauce
In a medium bowl, combine the heavy whipping cream with fresh thyme, salt, and pepper. Whisk the mixture until it’s well blended, about 1-2 minutes—this luxurious sauce will soak into the root vegetables as they bake, enhancing the flavors of your root vegetable gratin.

Step 4: Layer the Vegetables
Start by layering half of the sliced golden beets in the prepared baking dish. Pour half of the cream mixture evenly over this first layer, allowing the sauce to seep in. Next, add half of the sliced Japanese sweet potatoes, followed by the remaining cream mixture, ensuring each layer is nicely coated with that creamy goodness.

Step 5: Final Layering
Finish by adding the rest of the golden beets and sweet potatoes to the baking dish. Pour any remaining cream mixture over the top, covering the vegetables completely. This will create a lush, flavorful base that melds beautifully during baking and gives your root vegetable gratin its signature creaminess.

Step 6: Bake
Cover the baking dish tightly with aluminum foil and transfer it to the preheated oven. Bake for 45 minutes, or until the vegetables are tender. The enclosed heat will steam them to perfection. After 45 minutes, carefully remove the foil, exposing the top to bubble and brown beautifully.

Step 7: Brown the Top
Return the uncovered gratin to the oven and bake for an additional 15-20 minutes until the top is golden and slightly crisp. Keep an eye on it during this time; you want that perfect bubbling action that indicates your creamy root vegetable gratin is just about ready to wow!

Step 8: Cool and Serve
Once baked, remove the gratin from the oven and allow it to cool for about 10 minutes before slicing. This cooling period helps the layers set and makes serving easier. Slice into squares and serve warm, inviting your family to enjoy this colorful, creamy root vegetable gratin together.

Expert Tips for Root Vegetable Gratin

Even Slices: Ensure root vegetables are sliced uniformly for even cooking. Thicker pieces might remain crunchy while others get too soft.

Herb Infusion: For a deeper flavor, sauté fresh thyme in olive oil before mixing it with cream. This step enhances the aromatics in your root vegetable gratin.

Watch the Baking: To avoid burning, keep a close eye on the gratin during the last 10 minutes of baking. You want a perfect golden top, not charred edges!

Layering Technique: Alternate layers of golden beets and sweet potatoes for a beautiful presentation. Each layer assures a mix of flavors in your creamy root vegetable gratin.

Make-Ahead Magic: Prepare this gratin a day in advance. Just store it covered in the fridge and reheat before serving—perfect for stress-free entertaining!

Storage Tips for Root Vegetable Gratin

Fridge: Store any leftover root vegetable gratin in an airtight container for up to 3 days. Make sure it cools completely before sealing to maintain its creamy texture.

Freezer: You can freeze the gratin for up to 2 months. Wrap it tightly in plastic wrap and then foil to prevent freezer burn for a future comforting meal.

Reheating: To reheat, thaw overnight in the fridge if frozen, then cover and warm in the oven at 350°F (175°C) until heated through, about 20-25 minutes. This helps retain the indelible creaminess of your root vegetable gratin.

Make-Ahead: Prepare this gratin a day in advance to save time. Simply store it covered in the fridge and reheat before serving for a hassle-free dish at your next gathering.

Root Vegetable Gratin Variations

Feel free to unleash your culinary creativity and make this gratin truly your own!

  • Dairy-Free: Swap heavy whipping cream for coconut cream for a rich, creamy base without dairy.

  • Cheesy Delight: Add layers of Gruyère or sharp cheddar between the vegetables for a luscious, melty texture.

  • Herb Infusion: Experiment with different herbs like rosemary or oregano to give your gratin a unique flavor twist.

  • Spicy Kick: Add a dash of cayenne pepper or red pepper flakes to the cream mixture for a delightful heat that complements the sweetness of the veggies. The contrast can be electrifying!

  • Seasonal Veggies: Use parsnips, carrots, or even turnips depending on what’s fresh and in season. This adds a fun seasonal twist while keeping it nutritious.

  • Nutty Crunch: Top the gratin with toasted breadcrumbs mixed with chopped nuts for a satisfying crunch that contrasts beautifully with the creamy filling.

  • Sweet and Savory: Layer in thin slices of apple or pear to introduce a hint of sweetness, creating a lovely balance with the earthiness of the root vegetables.

  • Vegan Option: Make a fully plant-based version by substituting the cream with blended cashews mixed with vegetable broth and nutritional yeast for that cheesy flavor.

Feel inspired? This gratin is a canvas for your creativity! And if you’re feeling adventurous, try pairing it with a comforting dish like classic potato gratin or a hearty seasonal vegetable medley for a lovely meal spread.

Make Ahead Options

These Creamy Root Vegetable Gratin is perfect for busy home cooks looking to save time during the week! You can prepare the entire gratin up to 24 hours in advance, layering the sliced golden beets and Japanese sweet potatoes with the cream mixture, then cover and refrigerate. To maintain quality, make sure the dish is tightly wrapped to prevent drying out. When you’re ready to serve, simply pop it in the oven, covered with foil, and bake for about 45 minutes. After that, remove the foil for the last 15-20 minutes until the top is golden and bubbly. This way, you’ll enjoy a delicious, four-season comfort dish with minimal last-minute effort!

What to Serve with Creamy Root Vegetable Gratin

Imagine the comforting aroma of your home filled with delightful flavors, bringing warmth and togetherness around the dinner table.

  • Roasted Chicken: Juicy, herb-marinated chicken complements the gratin’s richness; their flavors meld beautifully for a comforting meal.

  • Seared Pork Chops: The savory, caramelized exterior of pork chops adds a hint of smokiness, balancing the creamy textures of the gratin.

  • Green Salad with Vinaigrette: A light, tangy salad adds a refreshing contrast to the indulgent gratin, enhancing the overall dining experience.

  • Garlic Bread: Crunchy, buttery bread is perfect for soaking up the luscious sauce in the gratin, adding a satisfying texture to each bite.

  • Grilled Asparagus: Smoky, charred asparagus brings a bright, green element, balancing the earthy sweetness of the root vegetables beautifully.

  • Red Wine: A glass of smooth, rich red wine elevates the meal, while its tannins complement the creamy richness of the gratin.

  • Apple Crisp: End the meal on a sweet note with warm apple crisp, offering a delightful contrast of warmth and flavor to this comforting feast.

Root Vegetable Gratin Recipe FAQs

How do I select ripe golden beets and sweet potatoes?
When choosing golden beets, look for firm, unblemished skin without dark spots. For sweet potatoes, opt for smooth, unwrinkled ones, and ensure they feel heavy for their size. Both vegetables should feel hard and fresh.

What is the best way to store leftover root vegetable gratin?
Store your leftover root vegetable gratin in an airtight container in the fridge for up to 3 days. Make sure to let it cool completely before sealing it to maintain its creamy texture and prevent sogginess.

Can I freeze root vegetable gratin, and what are the steps?
Absolutely! To freeze, let the gratin cool completely, then wrap it tightly in plastic wrap followed by aluminum foil to prevent freezer burn. It can be stored for up to 2 months. When ready to enjoy, thaw in the fridge overnight and reheat in the oven at 350°F (175°C) for about 20-25 minutes.

What should I do if my gratin is too watery after baking?
If your gratin turns out watery, it’s likely due to excess moisture in the vegetables. For the next time, make sure to slice them evenly and consider pre-cooking them slightly to release some moisture. Additionally, you can mix in a tablespoon of cornstarch with the cream mixture beforehand to help thicken it.

Are there any dietary restrictions I should consider with this recipe?
This creamy root vegetable gratin contains heavy cream, which is not suitable for dairy-free diets but can be replaced with coconut cream for a dairy-free option. Additionally, if you have allergies, be sure to verify that none of the herbs or substitutions contain allergens.

Root Vegetable Gratin

Decadent Root Vegetable Gratin That Will Wow Your Family

This Creamy Root Vegetable Gratin combines vibrant root vegetables in a rich garlic-infused sauce, providing a delicious comfort food.
Prep Time 20 minutes
Cook Time 1 hour
Cooling Time 10 minutes
Total Time 1 hour 30 minutes
Servings: 6 slices
Course: Casserole
Cuisine: American
Calories: 320

Ingredients
  

For the Veggies
  • 2 medium Golden Beets Adds sweetness and vibrant color
  • 2 medium Japanese Sweet Potatoes Offers a creamy texture
For the Cream Sauce
  • 2 cups Heavy Whipping Cream Provides richness and creaminess
  • 2 teaspoons Fresh Thyme Adds an aromatic herbal note
  • 1 teaspoon Salt Essential for seasoning
  • 1 teaspoon Pepper Essential for seasoning

Equipment

  • Oven
  • baking dish
  • Mixing Bowl
  • whisk
  • Knife
  • Cutting board

Method
 

Step-by-Step Instructions for Root Vegetable Gratin
  1. Preheat your oven to 375°F (190°C). Grease a 9x13-inch baking dish with butter or olive oil.
  2. Wash the golden beets and Japanese sweet potatoes thoroughly, then slice them into thin, even rounds—about 1/8 inch thick.
  3. In a medium bowl, combine the heavy whipping cream with fresh thyme, salt, and pepper. Whisk until blended.
  4. Layer half of the sliced golden beets in the baking dish. Pour half of the cream mixture over this first layer.
  5. Add half of the sliced Japanese sweet potatoes and top with remaining cream mixture.
  6. Finish by layering the rest of the golden beets and sweet potatoes. Pour any remaining cream mixture over the top.
  7. Cover with aluminum foil and bake for 45 minutes.
  8. Remove foil and bake for an additional 15-20 minutes until the top is golden and slightly crisp.
  9. Allow to cool for about 10 minutes before slicing and serving warm.

Nutrition

Serving: 1sliceCalories: 320kcalCarbohydrates: 30gProtein: 5gFat: 20gSaturated Fat: 12gMonounsaturated Fat: 8gCholesterol: 50mgSodium: 300mgPotassium: 600mgFiber: 4gSugar: 6gVitamin A: 1500IUVitamin C: 15mgCalcium: 100mgIron: 1mg

Notes

Ensure root vegetables are sliced uniformly for even cooking. Prepare a day in advance for stress-free entertaining.

Tried this recipe?

Let us know how it was!

Crispy Easy Zucchini Fritters That Everyone Will Love

Stepping into summer’s embrace, I found myself enchanted by my garden’s bountiful zucchinis, each one waiting to transform into something delightful. That’s when the idea for these Easy Zucchini Fritters struck me—crispy on the outside and tender within, they’re a fresh twist on your usual fare. What makes them truly special is not just how quickly they come together, but also that they’re a versatile crowd-pleaser everyone can enjoy, including those little taste testers at home. With options for gluten-free flour and substitutions like yellow squash, you can customize these fritters to fit any dietary needs. So, are you ready to bring the taste of summer onto your plate? Let’s get cooking!

Why Are These Zucchini Fritters Amazing?

Crispiness Guaranteed: Achieving that perfect golden-brown layer is a breeze with the right technique and a little olive oil.
Versatile Customization: Swap in yellow squash or spice it up with jalapeños to cater to different tastes and dietary needs, making these fritters suitable for everyone.
Quick & Easy: In just under 30 minutes, you can whip up a delicious dish that’ll impress even the most discerning foodies.
Kid-Approved: These tasty bites are not only healthy but also fun for kids to eat, perfect for breakfast or as a snack that feels indulgent.
Outstanding Flavor: The fresh, vibrant taste of zucchini shines through, enhanced by your choice of herbs or cheese. For a well-rounded meal, serve with a side salad and a dollop of sour cream, making every bite count. If you’re looking for something equally delectable, check out Turtle Bars or our Better Than Takeout fried rice for more family favorites!

Easy Zucchini Fritter Ingredients

For the Fritters

  • Zucchini – 2 large or 5 medium zucchinis work best for that moisture-rich base.
  • Fine Sea Salt – Enhances flavor and draws out moisture; divide into 1 tsp for mixing and ½ tsp for salting the zucchini.
  • Large Eggs – Lightly beaten to help bind the fritters together into a cohesive mixture.
  • Chopped Green Onions – Adds a fresh and subtle flavor; can be swapped out for regular onions if needed.
  • All-Purpose Flour – Creates structure; substitute with gluten-free flour to stick to the dietary needs of your guests.
  • Baking Powder – This helps the fritters stay light and fluffy for that perfect texture.
  • Ground Black Pepper – For a hint of spice; adjust according to personal preference.
  • Olive Oil – Essential for sautéing, providing that crisp, golden exterior you desire.

For Serving

  • Sour Cream – A delightful topping that complements the fritters wonderfully; feel free to substitute with Greek yogurt for a healthier option.

Enjoy making these Easy Zucchini Fritters and watch your family ask for seconds!

Step‑by‑Step Instructions for Easy Zucchini Fritters

Step 1: Prep Zucchini
Begin by washing and trimming the zucchinis. Grate them using a box grater or food processor, collecting the shreds in a bowl. Sprinkle 1 teaspoon of fine sea salt over the grated zucchini, mixing it well. Allow the zucchini to sit for about 10 minutes—this step helps draw out moisture, ensuring your Easy Zucchini Fritters have that perfectly crispy texture.

Step 2: Remove Moisture
After the zucchini has rested, it’s time to squeeze out the moisture. Using your hands or a cheesecloth, firmly press the grated zucchini to expel the excess liquid. You want the zucchini to feel dry to the touch; this is crucial for achieving that satisfying crispiness in your fritters. Set the drained zucchini aside in a mixing bowl.

Step 3: Mix Ingredients
In another bowl, whisk together the chopped green onions, lightly beaten eggs, and the dried zucchini until fully combined. In a separate mixing bowl, whisk together the all-purpose flour, baking powder, the remaining ½ teaspoon of fine sea salt, and ground black pepper. Gradually fold the dry mixture into the wet ingredients, mixing until just incorporated and a cohesive batter forms for your Easy Zucchini Fritters.

Step 4: Cook Fritters
Heat a generous tablespoon of olive oil in a skillet over medium heat. Once the oil shimmers, scoop about 2 tablespoons of the zucchini mixture into the skillet, gently flattening each scoop with the back of a spatula. Cook the fritters for 3-5 minutes on one side until they’re golden-brown, then carefully flip them and cook for another 3-5 minutes on the other side, achieving that deliciously crispy exterior.

Step 5: Serve
Once cooked, transfer the fritters to a paper towel-lined plate to absorb any excess oil. Repeat the cooking process with the remaining mixture, adding more oil to the skillet as needed. Serve the warm Easy Zucchini Fritters alongside a dollop of sour cream or Greek yogurt for dipping, making them a delightful addition to any meal!

Easy Zucchini Fritter Variations

Feel free to get creative with your zucchini fritters, adding delightful twists that delight your taste buds.

  • Yellow Squash: Substitute yellow squash for an alternative flavor that still maintains a delightful texture.
  • Herb-Infused: Mix in fresh dill or parsley to elevate the flavor profile and introduce a burst of fresh aroma.
  • Cheesy Delight: Incorporate feta or sharp cheddar cheese to the batter for a rich, creamy taste that complements the zucchini.
  • Spicy Kick: Add diced jalapeños or red pepper flakes to the batter for those who love a bit of heat in their bites.
  • Mediterranean Flair: Include sun-dried tomatoes and olives, creating a fritter that transports your taste buds straight to the Mediterranean.
  • Vegetable Mix: Toss in grated carrots or shredded bell peppers for added color and nutrition; they also enhance the sweetness of each bite.
  • Nutty Crunch: Sprinkle crushed nuts, like walnuts or almonds, into the mixture for an exciting crunchy texture and wholesome flavor boost.
  • Sweet Twist: For a unique dessert option, introduce a hint of cinnamon and sweetened coconut—perfect for breakfast or a light snack.

For more family favorites to complement your meal, don’t miss our recipe for Oven Chicken Rice or the flavorful Better Than Takeout fried rice. Enjoy your culinary journey!

How to Store and Freeze Easy Zucchini Fritters

Fridge: Keep cooked fritters in an airtight container for up to 3 days. Reheat in a skillet over medium heat for best results, restoring that beloved crispiness.

Freezer: For longer storage, freeze cooked fritters in a single layer on a baking sheet. Once frozen, transfer to a freezer bag and store for up to 2 months.

Reheating: To enjoy frozen Easy Zucchini Fritters, reheat in the oven at 350°F (175°C) for about 15-20 minutes until heated through and crispy.

Make-Ahead Tip: Prepare and cook fritters in advance, then chill before storing in the fridge or freezer for a quick meal option later on.

Make Ahead Options

These Easy Zucchini Fritters are perfect for meal prep, allowing you to enjoy delicious homemade food even on your busiest days! You can grate and salt the zucchini, and let it drain for up to 24 hours in advance, which helps achieve that wonderfully crispy texture. Additionally, the prepared batter can be refrigerated for up to 3 days in an airtight container. When you’re ready to cook, simply heat olive oil in your skillet and scoop the mixture in, flattening slightly before frying for 3-5 minutes on each side. This way, you’ll have restaurant-quality fritters with minimal effort, perfect for breakfast or a quick snack anytime!

Expert Tips for Easy Zucchini Fritters

  • Moisture Removal: Squeeze the zucchini thoroughly after salting; excess moisture leads to soggy fritters and ruins the desired crispiness.
  • Batch Cooking: Consider using two skillets to speed up the process if you’re serving a crowd—no one likes waiting too long for more fritters!
  • Scooping Method: For evenly sized fritters, use a trigger-release ice cream scoop; it ensures uniform cooking and a professional look.
  • Serving Warm: Fritters are best served fresh and warm. If not serving immediately, keep them in a warm oven to maintain crispness.
  • Flavor Variations: Don’t hesitate to experiment! Add spices or herbs for unique twists; this makes your Easy Zucchini Fritters even more enjoyable.

What to Serve with Perfectly Crispy Homemade Zucchini Fritters

Imagine a vibrant table filled with fresh colors, flavors, and textures, enhancing your zucchini fritters experience to new heights.

  • Garden Salad: A crisp garden salad, tossed with lemon vinaigrette, balances the savory fritters and adds a refreshing crunch.
  • Creamy Mashed Potatoes: Fluffy, garlic-infused mashed potatoes provide a comforting side that complements the fritters’ crispy texture and mild flavors beautifully.
  • Tzatziki Sauce: Cool and tangy tzatziki is a delightful dip that adds an herbaceous note, making each bite of fritter even more tantalizing.
  • Grilled Corn on the Cob: Sweet, charred corn brings a touch of summer to your plate, offering a juicy and slightly smoky flavor to contrast the fritters.
  • Roasted Cherry Tomatoes: Juicy cherry tomatoes lightly roasted enrich the meal with their sweet acidity, enhancing the overall depth of flavors.
  • Chilled White Wine: A crisp white wine, such as Sauvignon Blanc, pairs perfectly, cutting through the richness and elevating the entire dining experience.
  • Fruit Salad: A vibrant fruit salad with berries, watermelon, or citrus adds a bright, sweet note that balances the savory fritters.
  • Dill Yogurt Sauce: A creamy dill yogurt sauce gives a refreshing, herbal twist that beautifully harmonizes with the fritters’ taste.
  • Sautéed Spinach: Lightly sautéed spinach with garlic provides a nutritious and vibrant green side, adding a delightful earthiness to your meal.

Easy Zucchini Fritters Recipe FAQs

How do I choose the best zucchini for these fritters?
Absolutely! When selecting zucchini, look for firm, smooth-skinned specimens without dark spots or any signs of squishiness. Ideally, pick medium-sized zucchinis, as they contain the right moisture content and flavor. If you’re using larger zucchinis, be sure to scoop out the seeds, as they can be tough and watery.

What is the best way to store leftover fritters?
Very! To store cooked Easy Zucchini Fritters, place them in an airtight container in the fridge, where they’ll stay fresh for up to 3 days. When you’re ready to enjoy them again, simply reheat in a skillet over medium heat for a few minutes until warm and crispy. It’s a delightful way to relive those yummy bites!

Can I freeze these fritters, and what’s the best way to do it?
Of course! Freezing Easy Zucchini Fritters is a fantastic way to keep them for future meals. Start by freezing them in a single layer on a baking sheet until solid, about 1-2 hours. Then, transfer the fritters to a freezer-safe bag or container, layering parchment paper between them if you want to prevent sticking. They can be stored for up to 2 months. When you’re ready to enjoy them, reheat in the oven at 350°F (175°C) for about 15-20 minutes until heated through and crisp.

What common issues can arise while making zucchini fritters, and how can I avoid them?
Great question! The most common issue is sogginess, which happens if there’s too much moisture in the zucchini. To avoid this, make sure to squeeze the grated zucchini thoroughly after salting it. If your fritters are falling apart, try adding another tablespoon of flour or an extra egg to help bind them better. Cooking at the right temperature is also key: a medium heat ensures they crisp up nicely without burning.

Are these fritters suitable for anyone with dietary restrictions?
Certainly! Easy Zucchini Fritters can be easily adapted for various dietary needs. If you’re making them gluten-free, simply swap the all-purpose flour for a gluten-free blend. They are naturally vegetarian, and for those avoiding eggs, you can substitute with a flaxseed meal (1 tablespoon of flaxseed mixed with 2.5 tablespoons of water) to help bind the mixture. Always check for personal allergens in your ingredients, especially when adding spices or cheeses.

Easy Zucchini Fritters

Crispy Easy Zucchini Fritters That Everyone Will Love

Delight in these Easy Zucchini Fritters, crispy on the outside and tender on the inside, perfect for summer meals.
Prep Time 10 minutes
Cook Time 15 minutes
Resting Time 10 minutes
Total Time 35 minutes
Servings: 4 fritters
Course: Appetizers
Cuisine: American
Calories: 150

Ingredients
  

For the Fritters
  • 2 large Zucchini or 5 medium zucchinis
  • 1 teaspoon Fine Sea Salt divided
  • 2 Large Eggs lightly beaten
  • 1 cup Chopped Green Onions can substitute with regular onions
  • 1 cup All-Purpose Flour can use gluten-free flour
  • 1 teaspoon Baking Powder
  • 1/2 teaspoon Ground Black Pepper adjust to taste
  • 2 tablespoons Olive Oil for sautéing
For Serving
  • 1 cup Sour Cream or Greek yogurt as a substitute

Equipment

  • Skillet
  • Box grater
  • Mixing Bowl
  • spatula
  • Cheesecloth

Method
 

Step‑by‑Step Instructions
  1. Wash and trim the zucchinis. Grate them and mix with 1 teaspoon of fine sea salt. Let sit for 10 minutes.
  2. Squeeze out moisture from the zucchini using hands or cheesecloth until dry.
  3. In a bowl, combine chopped green onions, eggs, and zucchini. In another bowl, mix flour, baking powder, remaining salt, and pepper. Combine both mixtures.
  4. Heat olive oil in a skillet. Scoop 2 tablespoons of the mixture into the skillet, flattening each scoop. Cook for 3-5 minutes per side until golden-brown.
  5. Transfer cooked fritters to a paper towel-lined plate. Serve warm with sour cream or Greek yogurt.

Nutrition

Serving: 1fritterCalories: 150kcalCarbohydrates: 12gProtein: 4gFat: 10gSaturated Fat: 1gPolyunsaturated Fat: 2gMonounsaturated Fat: 6gCholesterol: 50mgSodium: 250mgPotassium: 150mgFiber: 2gSugar: 1gVitamin A: 300IUVitamin C: 15mgCalcium: 40mgIron: 1mg

Notes

Fritters are best enjoyed fresh and warm. Keep them in a warm oven if not serving immediately.

Tried this recipe?

Let us know how it was!

Homemade Panda Express Chow Mein in Just 15 Minutes

As I stood in my kitchen, the fragrance of garlic and sautéed vegetables filled the air, and I couldn’t help but smile at the simplicity of what I was creating—a delicious homemade Panda Express Chow Mein. This quick and easy recipe unravels the comforting goodness of chewy noodles stir-fried in a mouthwatering, savory sauce, loaded with crunchy cabbage, celery, and onions. Perfect for those busy weeknights, this delightful dish can be on your table in just 15 minutes, providing a cost-effective alternative to takeout without sacrificing flavor. Plus, it’s completely customizable to suit your taste—add your favorite protein like tofu, chicken, or shrimp for a satisfying meal! Are you ready to transform your evenings with this easy, wholesome twist on a takeout classic?

Why is This Chow Mein a Must-Try?

Quick Preparation: In just 15 minutes, you can whip up this chow mein, making it an ideal option for busy weeknights.

Savory Satisfaction: This recipe blends chewy noodles with fresh vegetables, creating a stir-fry that’s bursting with flavor and crunch.

Customizable Delight: Whether you prefer chicken, shrimp, or tofu, this dish is super versatile and caters to every taste preference.

Budget-Friendly: Save money without sacrificing taste compared to takeout while also knowing exactly what’s in your meal.

Wholesome Ingredients: Load it up with fresh veggies like cabbage and celery, ensuring every bite is not just delicious but nutritious too.

Get ready to enjoy your very own homemade Panda Express Chow Mein that you can easily make any night of the week!

Panda Express Chow Mein Ingredients

• Whip up this delicious dish with fresh ingredients!

For the Noodles
Chow Mein Noodles – Provide the base for the dish; bouncy and chewy. Use fresh noodles from an Asian market for best results.

For the Vegetables
Cabbage – Adds crunch and volume to the dish. Regular green cabbage works well.
Celery – Contributes a crisp texture and fresh flavor. Substitutions include bell peppers for added color.
Onion – Enhances sweetness and depth of flavor. Can replace with green onions for a milder taste.

For the Cooking
Vegetable Oil – Used for frying vegetables and noodles. Any neutral oil may be substituted, such as canola or grapeseed oil.
Garlic – Enhances the overall aroma and flavor. Fresh is ideal; avoid powdered for authenticity.

For the Sauce
Regular Soy Sauce – Brings umami flavor to the dish. Low-sodium soy sauce can be used for a healthier option.
Dark Soy Sauce – Adds sweetness and richness. If unavailable, substitute with double the amount of regular soy sauce.
Oyster Sauce – Provides additional savory flavor. For a vegetarian option, use vegetarian stir fry sauce.
Sesame Oil – Adds a fragrant finish. Use toasted sesame oil for deeper flavor.
Chicken Stock – Adds moisture and depth of flavor. Use vegetable stock or cold water for a vegetarian option.
Cornstarch – Aids in thickening the sauce. Potato starch can be a substitute.

Get ready to experience the flavors of homemade Panda Express Chow Mein!

Step‑by‑Step Instructions for Panda Express Chow Mein

Step 1: Prepare the Sauce
In a bowl, combine regular soy sauce, dark soy sauce, oyster sauce, sesame oil, chicken stock, and cornstarch to create your flavorful sauce. Stir until the cornstarch is fully dissolved, ensuring a smooth texture. Set this sauce aside to allow the flavors to meld while you work on the other components of your homemade Panda Express Chow Mein.

Step 2: Blanch the Noodles
Bring a large pot of water to a rolling boil over high heat. Carefully add the chow mein noodles and blanch for 20-30 seconds until they are just loosened but still firm. Drain the noodles in a colander but do not rinse them, as this helps maintain their chewy texture and allows the sauce to cling better during stir-frying.

Step 3: Sauté the Vegetables
In the same large pan, heat 2 tablespoons of vegetable oil over medium-high heat until shimmering. Add sliced onions, cabbage, and celery, cooking them for about 1 minute. Stir frequently until the vegetables begin to soften but retain some crunch. The vibrant colors should pop, signaling that they’re ready for the next step.

Step 4: Combine Everything in the Pan
Push the sautéed vegetables to one side of the pan and add an additional tablespoon of vegetable oil to the empty space. Add the previously blanched noodles and the prepared sauce directly into the pan. Toss everything together vigorously for 2-3 minutes, ensuring the noodles are evenly coated in the rich sauce and heated through.

Step 5: Final Toss and Serve
Once the chow mein noodles are well-mixed and heated, take the pan off the heat. Garnish with additional sesame oil for a fragrant finish, if desired. The noodles should be glossy and slightly sticky, surrounded by the colorful vegetables. Serve your homemade Panda Express Chow Mein immediately for the best flavor and texture!

Storage Tips for Panda Express Chow Mein

Fridge: Store leftover Panda Express Chow Mein in an airtight container in the refrigerator for up to 4 days to maintain freshness and flavor.

Freezer: If you want to keep it longer, freeze chow mein in a freezer-safe container for up to 3 months. Thaw in the fridge before reheating.

Reheating: To reheat, warm it in the microwave or on the stovetop over medium heat. Add a splash of water or extra soy sauce to retain moisture while heating.

Airtight Storage: Make sure to seal tightly to prevent freezer burn or fridge odor absorption when storing leftovers.

Make Ahead Options

Preparing your Panda Express Chow Mein in advance is a fantastic way to save time on busy weeknights! You can easily chop the vegetables and make the sauce up to 3 days ahead of time, storing them in airtight containers in the refrigerator. To keep the vegetables crisp, ensure they are properly sealed to avoid moisture. When you’re ready to serve, blanch the chow mein noodles and toss everything in a pan as per the original recipe instructions. Simply stir-fry the vegetables and noodles for a few minutes until heated through, and you’ll enjoy a fresh, delicious meal that tastes just as good as if you made it on the same day!

Expert Tips for Panda Express Chow Mein

  • Noodle Care: Avoid rinsing noodles after blanching; this helps maintain their bouncy texture and ensures the sauce adheres well.

  • High Heat Stir-Frying: Always cook on high heat and keep the ingredients moving in the pan to achieve that perfect stir-fried char without burning.

  • Protein Addition: For a heartier meal, easily customize with cooked chicken, shrimp, or tofu—just add them in with the noodles and sauce for the last toss.

  • Vegetable Variety: Don’t hesitate to experiment with different vegetables like bell peppers or snow peas for extra crunch and nutrition in your Panda Express Chow Mein.

  • Sauce Consistency: Make sure to dissolve the cornstarch completely in the sauce to avoid any clumps while cooking; this will give you a silky finish.

Panda Express Chow Mein Variations

Feel free to explore these delightful twists that will make your chow mein experience even more exciting!

  • Protein Boost: Add shredded chicken, shrimp, or sliced beef for an added protein punch. Just toss them in with the noodles to heat through.

  • Tofu Twist: For a vegetarian option, use extra-firm tofu, cubed and pan-fried until golden. It adds a lovely texture while soaking up all the delicious flavors.

  • Veggie Explosion: Mix in colorful bell peppers, snap peas, or shredded carrots for a vibrant veggie medley. This not only enhances the nutritional value but also makes the dish visually stunning.

  • Spicy Kick: If you enjoy heat, toss in some red pepper flakes or chopped fresh chili peppers just before serving. This quick addition will give your chow mein an exciting spicy twist!

  • Noodle Variety: Switch out chow mein noodles for udon or rice noodles for a different texture and flavor profile. Each type of noodle brings its own unique charm to the dish.

  • Flavor Infusion: Add a splash of hoisin sauce or sriracha for a deeper flavor and a hint of sweetness. This little boost can completely transform your chow mein!

  • Greens Galore: Incorporate leafy greens like spinach or bok choy towards the end of the cooking process. They will wilt perfectly into the dish, offering added nutrients and a beautiful touch of color.

  • Nuts & Seeds: For a crunchy finish, sprinkle with toasted sesame seeds or chopped peanuts right before serving. This adds a delightful textural contrast that elevates your homemade chow mein.

By customizing your chow mein with these variations, you’ll create an unforgettable meal that the whole family will love. You can even serve it alongside your favorite Chinese entrées like Orange Chicken or Sweet and Sour Pork for a complete feast!

What to Serve with Panda Express Chow Mein?

Savor the delightful experience of pairing this flavorful chow mein with complementary dishes that elevate your meal to new heights.

  • Sweet and Sour Chicken: The tangy sweetness of this popular dish beautifully balances the savory flavors of the chow mein, creating a harmonious dining experience.

  • Egg Rolls: The crispy texture of these savory bites adds a satisfying crunch, while the warm filling provides a delightful contrast to the noodles.

  • Fried Rice: A must-have side! The chewy, seasoned rice harmonizes perfectly with the chow mein, making for a truly indulgent and fulfilling meal.

  • Sesame Broccoli: This dish brings freshness and vibrant color, with a nutty flavor that complements the richness of the noodles.

  • Spring Rolls: Light and crispy, these rolls can offer a refreshing bite before your main course, enhancing the overall flavor palette of your meal.

  • Hot and Sour Soup: The spicy and tangy notes of this soup set an exciting tone for your dinner, warming up your palate for the chow mein.

  • Chili Garlic Tofu: This dish adds a bold kick, with crispy tofu pieces that catch the savory sauce from the chow mein, inviting a delicious play of flavors.

  • Green Tea: A soothing drink that cleanses your palate, making it an ideal choice to accompany the rich flavors of your chow mein.

  • Chocolate Fortune Cookies: End your meal on a sweet note with these delightful treats that offer a little crunch and an element of surprise!

Panda Express Chow Mein Recipe FAQs

What type of chow mein noodles should I use?
For the best texture and flavor, I recommend using fresh chow mein noodles from an Asian market. These noodles are bouncy and chewy, making your homemade Panda Express Chow Mein truly authentic. If you can’t find fresh noodles, you can use dried chow mein noodles—just follow the package instructions for cooking.

How should I store leftovers of chow mein?
Absolutely! You can store leftover Panda Express Chow Mein in an airtight container in the refrigerator for up to 4 days. This helps maintain its freshness and flavor. When you’re ready to enjoy it again, simply reheat in the microwave or on the stovetop over medium heat, adding a splash of water or soy sauce to keep it moist.

Can I freeze chow mein?
Certainly! To freeze your Panda Express Chow Mein, place it in a freezer-safe container and store it for up to 3 months. When you’re ready to eat it, let it thaw in the refrigerator overnight. To reheat, warm it up on the stovetop over medium heat, adding a bit of water or soy sauce to ensure it doesn’t dry out.

What if my noodles stick together after blanching?
If your noodles stick together, it might be that they weren’t blanched long enough, or they were rinsed after cooking. Make sure to blanch them for 20-30 seconds and avoid rinsing. If they are stuck together, try using a fork to gently separate them before adding to the stir fry.

Is this recipe suitable for vegetarians?
Yes! This Panda Express Chow Mein can easily be made vegetarian-friendly. Simply replace the oyster sauce with a vegetarian stir fry sauce and use vegetable stock or cold water instead of chicken stock. You can also load it up with extra veggies or tofu for a protein punch.

Can I customize the vegetables in the chow mein?
Very much! This recipe is super versatile, so feel free to experiment with other vegetables like bell peppers, snow peas, or bean sprouts. The more, the merrier! Just remember to chop them into similar sizes so they can cook evenly and add a delightful crunch to your dish.

Panda Express Chow Mein

Homemade Panda Express Chow Mein in Just 15 Minutes

This homemade Panda Express Chow Mein is a quick, delicious, and customizable dinner option ready in just 15 minutes.
Prep Time 15 minutes
Total Time 15 minutes
Servings: 4 servings
Course: Dinner
Cuisine: Asian
Calories: 350

Ingredients
  

For the Noodles
  • 8 oz Chow Mein Noodles Use fresh noodles from an Asian market for best results.
For the Vegetables
  • 2 cups Cabbage Regular green cabbage works well.
  • 1 cup Celery Substitutions include bell peppers for added color.
  • 1 medium Onion Can replace with green onions for a milder taste.
For the Cooking
  • 3 tbsp Vegetable Oil Any neutral oil may be substituted, such as canola or grapeseed oil.
  • 3 cloves Garlic Fresh is ideal; avoid powdered for authenticity.
For the Sauce
  • ¼ cup Regular Soy Sauce Low-sodium soy sauce can be used for a healthier option.
  • 1 tbsp Dark Soy Sauce If unavailable, substitute with double the amount of regular soy sauce.
  • 2 tbsp Oyster Sauce For a vegetarian option, use vegetarian stir fry sauce.
  • 1 tbsp Sesame Oil Use toasted sesame oil for deeper flavor.
  • ½ cup Chicken Stock Use vegetable stock or cold water for a vegetarian option.
  • 1 tbsp Cornstarch Potato starch can be a substitute.

Equipment

  • Large pot
  • large pan
  • Colander
  • Mixing Bowl
  • Measuring cups
  • Measuring spoons

Method
 

Step‑by‑Step Instructions
  1. In a bowl, combine regular soy sauce, dark soy sauce, oyster sauce, sesame oil, chicken stock, and cornstarch. Stir until the cornstarch is fully dissolved and set aside.
  2. Bring a large pot of water to a rolling boil. Add the chow mein noodles and blanch for 20-30 seconds. Drain and do not rinse.
  3. In the same large pan, heat 2 tablespoons of vegetable oil until shimmering. Add sliced onions, cabbage, and celery, cooking for about 1 minute until the vegetables begin to soften.
  4. Push the sautéed vegetables to one side and add an additional tablespoon of vegetable oil. Add the noodles and prepared sauce, tossing together for 2-3 minutes.
  5. Once well-mixed and heated, take the pan off the heat and garnish with additional sesame oil if desired. Serve immediately.

Nutrition

Serving: 1servingCalories: 350kcalCarbohydrates: 55gProtein: 10gFat: 12gSaturated Fat: 1.5gSodium: 800mgPotassium: 250mgFiber: 3gSugar: 2gVitamin A: 10IUVitamin C: 20mgCalcium: 5mgIron: 10mg

Notes

Avoid rinsing noodles after blanching; cook on high heat to achieve a perfect stir-fried char. You can add proteins like chicken or tofu if desired.

Tried this recipe?

Let us know how it was!

Nutritious Zucchini Bagels That Kids Will Love

As I stood in my kitchen, the scent of warm, freshly baked Zucchini Bagels enveloped me like a cozy hug. These delightful creations are not just your average bagel; they pack a nutritious punch while delivering that satisfying, chewy goodness we all crave. Prepared with wholesome zucchini, this recipe is a fantastic way to sneak in some extra veggies at breakfast – perfect for even the pickiest eaters. Plus, they’re incredibly easy to whip up, making them a perfect option for busy mornings or delightful brunch gatherings. Keep reading to discover how to make these unique bagels that are sure to impress your family and friends. Are you ready to elevate your bagel game?

Why Choose Zucchini Bagels?

Nutritious Twist: These bagels boost your breakfast with the added benefits of zucchini, making them a smart choice for health-conscious eaters.
Kid-Approved: Packed with flavor and a touch of fun, they are sure to be a hit with even the pickiest kids!
Gluten-Friendly: Easily adapt this recipe with gluten-free flour, ensuring everyone can enjoy a tasty bagel.
Quick Adaptation: Feel free to mix in herbs or cheese for a delicious twist each time you bake.
Crowd Favorite: These Zucchini Bagels are perfect for brunch gatherings, appealing to both adults and children alike. Enjoy them plain, or pair them with your favorite spread for a delicious, guilt-free snack!

Zucchini Bagel Ingredients

• Elevate your bagel experience with this healthy and delicious twist!

For the Dough

  • Zucchini – Provides moisture and texture; remember to grate and squeeze out excess liquid before use.
  • All-Purpose Flour – Acts as the base; you can substitute with gluten-free flour for a gluten-sensitive option.
  • Active Dry Yeast – Helps the bagels rise, ensuring that classic fluffy interior.
  • Salt – Enhances flavor, making every bite delightful.
  • Olive Oil – Adds richness while keeping the dough moist and supple.
  • Sugar – Activates the yeast and contributes a hint of sweetness; honey is an excellent alternative.
  • Eggs – Key for binding the dough together, providing both structure and moisture.

For the Topping

  • Sesame Seeds/Everything Bagel Topping – Creates a crunchy texture and adds classic bagel flair; feel free to use poppy seeds for variation.

Step‑by‑Step Instructions for Zucchini Bagels

Step 1: Preheat the Oven
Begin by preheating your oven to 375°F (190°C). As the oven heats, line a baking sheet with parchment paper to ensure your Zucchini Bagels won’t stick during baking. This will help achieve the ideal golden crust that you’re aiming for.

Step 2: Prepare the Zucchini
Grate the zucchini using a box grater, aiming for thin, even shreds. Once grated, place the zucchini in a clean kitchen towel and squeeze out as much excess moisture as possible. This step is crucial for preventing soggy bagels that won’t hold their shape.

Step 3: Combine the Dry Ingredients
In a large mixing bowl, whisk together the all-purpose flour, active dry yeast, salt, and sugar until fully combined. This mixture will form the base of your Zucchini Bagels, providing the perfect texture and flavor. Ensure there are no lumps for even consistency.

Step 4: Add Wet Ingredients
Create a well in the center of the dry ingredients and add the drained zucchini, olive oil, and eggs. Stir the mixture gently with a wooden spoon until everything is just combined. The dough may appear slightly sticky, which is perfectly normal and will yield delicious bagels when shaped.

Step 5: Shape the Bagels
Divide the dough into equal portions, shaping each piece into a ball. Using your finger, poke a hole through the center of each ball to form the classic bagel shape. Make sure the hole is large enough to prevent it from closing as they bake, giving you the perfect Zucchini Bagels.

Step 6: Prepare for Baking
Carefully transfer the shaped bagels onto the prepared baking sheet, spacing them a few inches apart. Consider sprinkling sesame seeds or any additional bagel toppings of your choice on top of each bagel. This adds a delightful crunch and enhances their appearance before baking.

Step 7: Bake to Perfection
Place the baking sheet with the shaped Zucchini Bagels into the preheated oven. Bake for 25-30 minutes, or until they are golden brown and firm to the touch. The delightful aroma filling your kitchen will signal that they are almost ready to be enjoyed!

Step 8: Cool and Serve
Once baked, remove the Zucchini Bagels from the oven and let them cool on a wire rack for a few minutes. As they cool, you can admire their lovely golden color and unique texture. Serve them warm with your favorite spreads, and enjoy a wholesome homemade treat!

Make Ahead Options

These Zucchini Bagels are a fantastic option for busy home cooks looking to streamline their meal prep! You can prepare the dough and shape the bagels up to 24 hours in advance. Simply store the formed bagels tightly covered in the fridge to maintain their freshness. When you’re ready to bake, just preheat the oven and pop them in directly from the fridge; there’s no need to wait for them to come to room temperature. Additionally, for longer storage, freeze the shaped bagels individually wrapped for up to 3 months. When cravings hit, just bake straight from the freezer, adding an extra few minutes to the baking time. Embrace the joy of having these nutritious Zucchini Bagels ready when you need them most!

Storage Tips for Zucchini Bagels

Room Temperature: Store the bagels in a cool, dry place in a paper bag for up to 2 days to maintain freshness. Avoid using plastic bags as they can make the bagels soggy.

Fridge: Keep your Zucchini Bagels in an airtight container in the fridge for up to 5 days. This helps retain their soft texture while extending their shelf life.

Freezer: For longer storage, freeze the bagels individually wrapped in plastic wrap, then placed in a zip-top bag for up to 3 months. They’ll taste just as delightful when reheated!

Reheating: To reheat, simply toast in a toaster oven or regular oven at 350°F (175°C) for 5-10 minutes until warmed through and slightly crisped. Enjoy them fresh and tasty again!

What to Serve with Zucchini Bagels

Elevate your Zucchini Bagels into a memorable meal with these delightful pairings that will tantalize your taste buds and satisfy your cravings.

  • Creamy Cream Cheese: Smooth and rich, it spreads effortlessly on warm bagels, adding a luxurious touch to your breakfast.

  • Sliced Avocado: Its buttery texture and subtle flavor create a heavenly contrast with the chewy bagels, making for a heart-healthy spread.

  • Savory Smoked Salmon: This classic pairing not only adds protein but also infuses a smoky depth that complements the bagels beautifully.

  • Fresh Herb Salad: Crisp greens tossed with herbs like dill or parsley offer a refreshing burst of flavor, enhancing the whole experience.

  • Roasted Cherry Tomatoes: Their sweet, caramelized flavor pairs perfectly with the earthy zucchini, adding a juicy element that brightens each bite.

  • Honey or Maple Syrup: A drizzle of sweetness brings balance to the savory notes, creating a delightful harmony that’s simply irresistible.

  • Zesty Lemonade: Quench your thirst with this tangy drink; it’s the perfect refreshment alongside warm, wholesome bagels for brunch.

  • Fruit Salad: A mix of fresh, vibrant fruits not only adds color to your plate but also contributes a natural sweetness that enhances the meal.

Transform each bite of your Zucchini Bagels into a flavorful journey by trying out these delightful serving suggestions!

Zucchini Bagels Variations & Substitutions

Feel free to get creative and make these zucchini bagels your own with these fun swaps and twists!

  • Whole Wheat: Substitute all-purpose flour with whole wheat flour for a heartier texture and additional nutrients.

  • Gluten-Free: Use a 1:1 gluten-free flour blend to keep these bagels gluten-sensitive while maintaining the delicious taste.

  • Cheesy Delight: Fold in shredded cheese like cheddar or mozzarella into the dough for a rich and savory flavor boost.

  • Herb-Infused: Mix in fresh herbs such as dill or chives for a fragrant aroma and a burst of flavor with each bite. This adds a beautiful green color alongside the zucchini, enhancing both taste and appearance.

  • Spicy Kick: Add a pinch of red pepper flakes to the dough for a delightful hint of heat that spice lovers won’t be able to resist.

  • Seeds Galore: Experiment with different seeds on top, like flaxseeds or sunflower seeds, to add extra crunch and nutrition to your bagels.

  • Nutty Flavor: Replace the olive oil with melted coconut oil for a subtle coconut flavor that pairs beautifully with zucchini.

  • Sweet and Savory: Drizzle a touch of honey or maple syrup into the dough for a lightly sweetened bagel that’s perfect for pairing with cream cheese or nut butter.

Remember, the beauty of cooking lies in customization, so enjoy these variations while making this recipe your own! If you’re interested in embracing even more veggie-packed options, why not explore a delicious zucchini bread recipe? Or if you’re looking to elevate your snacks, consider making homemade cream cheese spreads to accompany your creations!

Expert Tips for Zucchini Bagels

  • Drain Carefully: Ensure you squeeze out as much moisture from the zucchini as possible to prevent soggy Zucchini Bagels. Excess moisture can lead to less-than-ideal texture.
  • Use Parchment Paper: Lining your baking sheet with parchment paper helps achieve a perfect crust while preventing your bagels from sticking.
  • Mix It Up: Consider adding herbs or shredded cheese into the dough for a flavor boost that complements the zucchini beautifully.
  • Monitor Baking Time: Keep an eye on your bagels in the oven; baking them for too long can result in dryness. Aim for a golden brown finish.
  • Experiment with Toppings: Get creative! Mix in different toppings like poppy seeds, garlic salt, or a blend of seeds to make each batch unique and delicious.

Zucchini Bagels Recipe FAQs

What’s the best way to select and prepare zucchini for bagels?
Absolutely! Look for firm, shiny zucchini without any dark spots or blemishes. Choose medium-sized zucchinis for the best texture. Once you’ve got your zucchini, grate it using a box grater, and don’t forget to squeeze out the excess moisture in a clean kitchen towel. This step is crucial to prevent soggy bagels!

How should I store leftover Zucchini Bagels?
To keep your delicious Zucchini Bagels fresh, place them in an airtight container in the fridge where they’ll stay good for up to 5 days. For best results, try to eat them within a couple of days. If you like your bagels warm, simply reheat them in a toaster oven to regain their chewy texture.

Can I freeze Zucchini Bagels? If so, how?
Absolutely! Freezing is a great option for these bagels. Once they have completely cooled, wrap each Zucchini Bagel tightly in plastic wrap, then place them in a zip-top freezer bag to prevent freezer burn. They can be stored in the freezer for up to 3 months. To enjoy later, just pop them in a toaster oven for around 5-10 minutes at 350°F (175°C) until warmed through and slightly crispy.

What if my bagels turn out too soggy?
If your Zucchini Bagels come out soggy, it likely means there was too much moisture in the dough. To troubleshoot this, ensure you squeeze out as much liquid as possible from the grated zucchini before mixing it into the dough. You might also consider adding a little extra flour to achieve a firmer consistency while mixing.

Are Zucchini Bagels suitable for gluten-sensitive diets?
Definitely! You can easily make these Zucchini Bagels gluten-free by substituting all-purpose flour with your favorite gluten-free flour blend. Just make sure it’s designed for baking to ensure proper texture and rise. Mixing in a little xanthan gum can also help mimic the structure provided by gluten!

Zucchini Bagels

Nutritious Zucchini Bagels That Kids Will Love

These Zucchini Bagels are a nutritious breakfast option that kids will love, combining wholesome ingredients for a delicious twist.
Prep Time 15 minutes
Cook Time 30 minutes
Cooling Time 10 minutes
Total Time 55 minutes
Servings: 12 bagels
Course: Breakfast
Cuisine: American
Calories: 150

Ingredients
  

For the Dough
  • 1 cup Zucchini Grated and excess liquid squeezed out
  • 2 cups All-Purpose Flour Can substitute with gluten-free flour
  • 2 teaspoons Active Dry Yeast
  • 1 teaspoon Salt
  • 2 tablespoons Olive Oil
  • 1 tablespoon Sugar Honey is an alternative
  • 2 Eggs
For the Topping
  • 2 tablespoons Sesame Seeds Use as a topping

Equipment

  • Mixing Bowl
  • Box grater
  • Baking Sheet
  • Parchment Paper
  • Wooden spoon

Method
 

Step-by-Step Instructions for Zucchini Bagels
  1. Preheat your oven to 375°F (190°C) and line a baking sheet with parchment paper.
  2. Grate the zucchini and squeeze out excess moisture using a kitchen towel.
  3. In a large mixing bowl, whisk together flour, yeast, salt, and sugar until combined.
  4. Add zucchini, olive oil, and eggs to the dry ingredients and stir until just combined.
  5. Divide the dough into portions, shape into balls, and poke a hole through the center to form bagels.
  6. Transfer shaped bagels to the baking sheet and sprinkle with toppings.
  7. Bake for 25-30 minutes or until golden brown.
  8. Remove from the oven, let cool on a wire rack, and serve with your favorite spreads.

Nutrition

Serving: 1bagelCalories: 150kcalCarbohydrates: 30gProtein: 5gFat: 2gSaturated Fat: 0.5gPolyunsaturated Fat: 0.5gMonounsaturated Fat: 1gCholesterol: 50mgSodium: 180mgPotassium: 150mgFiber: 1gSugar: 1gVitamin A: 200IUVitamin C: 5mgCalcium: 40mgIron: 1mg

Notes

Ensure to squeeze out as much moisture from the zucchini to prevent soggy bagels. Experiment with different toppings for variety.

Tried this recipe?

Let us know how it was!

Creamy Roasted Tomato Basil Soup for Cozy Nights

On chilly afternoons when comfort food calls, there’s nothing quite like a steaming bowl of Roasted Tomato Basil Soup. The magic begins when you roast fresh Roma tomatoes, coaxing out their natural sweetness and deep flavors—an essential step that makes this soup a crowd-pleaser. In just 40 minutes, you’ll have a creamy and aromatic soup that adapts beautifully to different diets, effortlessly transitioning from a dairy-laden delight to a comforting vegan option. Imagine spooning up a velvety concoction that warms your soul, perfect for pairing with crusty bread or your favorite grilled cheese sandwich. What twist will you put on this classic favorite to make it your own?

Why is this soup a must-try?

Comforting warmth: This Roasted Tomato Basil Soup wraps you in a cozy embrace on cold days. Versatile adaptations: Easily switch it up for a creamy dairy or a hearty vegan delight! Quick and easy: Ready in under 40 minutes, making it a weeknight favorite. Flavor explosion: The roasted tomatoes elevate the sweetness, perfectly balanced by fresh herbs. Crowd-pleaser: Serve it with grilled cheese or crusty bread for a winning meal! For another delightful comfort food, check out my Potato Bacon Soup.

Roasted Tomato Basil Soup Ingredients

• Warm up your kitchen with these.

For the Soup

  • Roma Tomatoes – The star of the dish, offering sweet, robust flavor; can substitute any tomato type, but Roma is best for roasting.
  • Extra Virgin Olive Oil – Richens the soup and helps the tomatoes roast beautifully; any oil will work if you’re out of olive oil.
  • Unsalted Butter – Adds a luxurious, velvety texture; swap for additional olive oil if you’re going dairy-free.
  • Yellow Onion – Provides depth and sweetness upon sautéing; shallots can be used for a milder flavor alternative.
  • Garlic Cloves – Boosts the soup’s aroma and depth; mince them for maximum flavor infusion.
  • Fresh Thyme – Elevates the savory profile; substitute with 1.5 teaspoons of dried thyme if fresh isn’t available.
  • Kosher Salt – Essential for enhancing all flavors; adjust to taste to prevent over seasoning.
  • Ground Black Pepper – Adds warmth and a slight kick; freshly ground offers the best flavor experience.
  • San Marzano Tomatoes (28 oz. can) – Introduces body and enhances sweetness; whole canned tomatoes work as an acceptable substitute.
  • Fresh Basil – Imparts freshness and aromatic notes; use ¼ cup dried basil in a pinch, but fresh is best for this Roasted Tomato Basil Soup.
  • Sugar – Helps balance the acidity of the tomatoes; feel free to omit if using naturally sweet tomatoes.
  • Chicken Stock – Deepens the flavor profile; opt for vegetable stock for a vegetarian version.
  • Heavy Cream – Indicates richness and creaminess; omit or substitute with coconut milk for a dairy-free option.

Optional Garnishes

  • Fresh Basil Leaves – A beautiful, aromatic topping; adds a pop of color and fresh flavor.
  • Croutons – Perfect for adding a delightful crunch; use homemade or store-bought for convenience.

This treasure trove of ingredients lays the foundation for an unforgettable bowl of Roasted Tomato Basil Soup—one that will surely keep you cozy on those chilly nights!

Step‑by‑Step Instructions for Roasted Tomato Basil Soup

Step 1: Preheat the Oven
Begin by preheating your oven to 375°F (190°C). This will prepare a warm environment for roasting the tomatoes, ensuring they develop that sweet, caramelized flavor essential for the Roasted Tomato Basil Soup. Preheating helps in cooking them evenly, allowing their juices to concentrate beautifully.

Step 2: Prepare the Tomatoes
While the oven warms, take your Roma tomatoes and slice them in half lengthwise. Lay the halved tomatoes, cut side up, on a baking sheet. Drizzle with extra virgin olive oil, and sprinkle with kosher salt and freshly ground black pepper to enhance their natural flavors. This preparation will make the tomatoes irresistible once roasted.

Step 3: Roast the Tomatoes
Place the prepared baking sheet in the preheated oven and roast the tomatoes for about 1 hour, or until they are tender and slightly charred. Keep an eye on them; they should turn into colorful, flavorful gems that will form the base of your Roasted Tomato Basil Soup, concentrating their sweetness as they cook.

Step 4: Sauté the Aromatics
In a large pot or Dutch oven, heat a tablespoon of olive oil or unsalted butter over medium heat. Once shimmering, add chopped yellow onion, and sauté for about 5 minutes until it’s soft and translucent. Next, add minced garlic and fresh thyme, cooking for an additional minute until fragrant. This aromatic base is the heart of your soup.

Step 5: Combine Ingredients
With the aromatics ready, stir in the crushed San Marzano tomatoes and fresh basil. Add sugar if you wish to balance the acidity, then allow the mixture to simmer gently for 10 minutes, allowing the flavors to meld. This step prepares your soup for the crowning glory—the roasted tomatoes.

Step 6: Add Roasted Tomatoes and Stock
Now it’s time to stir in the roasted tomatoes along with their juices, followed by the chicken stock or vegetable stock for a vegetarian version. Let the soup simmer for another 30 minutes, allowing it to thicken and all the flavors to blend for your comforting Roasted Tomato Basil Soup.

Step 7: Blend the Soup
Using an immersion blender, carefully blend the soup until you reach your desired texture, whether smooth or chunky. If you don’t have an immersion blender, you can transfer the soup to a traditional blender in batches. This creamy blending creates the comforting base of your Roasted Tomato Basil Soup that you crave.

Step 8: Finish and Serve
Finally, stir in the heavy cream for an extra touch of richness, adjusting seasoning with salt and pepper as needed. Serve your Roasted Tomato Basil Soup hot, garnished with fresh basil leaves and croutons for a delightful crunch, making it the perfect cozy meal for any chilly night.

Roasted Tomato Basil Soup Variations

Feel free to explore your culinary creativity with these delightful variations that take this Roasted Tomato Basil Soup to new heights!

  • Roasted Garlic:
    Roast a head of garlic alongside the tomatoes for added depth and sweetness. The mellow, buttery flavor of roasted garlic will elevate your soup experience.

  • Spicy Twist:
    Add crushed red pepper flakes while sautéing the garlic to introduce a lovely kick. This fiery twist brilliantly complements the sweetness of the tomatoes.

  • Creamy Vegan Option:
    Swap heavy cream for coconut milk for a dairy-free version that doesn’t lose its creamy texture. The subtle coconut flavor will bring a different, tropical vibe to your soup.

  • Herby Boost:
    Mix in a tablespoon of fresh oregano along with thyme for an aromatic upgrade. This additional herb will deepen the flavor complexity and give an Italian flair.

  • Cheesy Addition:
    Stir in grated Parmesan or a dollop of cream cheese for a rich, cheesy base. This variation creates a comforting, umami-packed hug in a bowl.

  • Heartier Meal:
    Toss in leftover rotisserie chicken or chickpeas as a protein boost, turning your soup into a filling meal. This makes for a quick and satisfying dinner, without extra fuss!

  • Flavorful Garnish:
    Top your soup with a swirl of pesto for a burst of flavor and color. Homemade or store-bought, the pesto brings freshness that brightens the overall dish beautifully.

  • Substituting Broth:
    Use mushroom stock instead of chicken or vegetable stock for an earthy depth. This alternative adds complexity without sacrificing the beloved comfort feeling you crave in your soup.

This Roasted Tomato Basil Soup is versatile enough to accommodate different dietary needs and flavor preferences. Each adjustment can make it uniquely yours! For more comforting options, don’t forget to check out my Sausage Tortellini Soup and Shepherd’s Pie Soup.

Expert Tips for Roasted Tomato Basil Soup

  • Perfect Roasting Time: Make sure to roast the tomatoes for a full hour to enhance their sweetness fully. Rushing this step leads to a less flavorful Roasted Tomato Basil Soup.

  • Fresh Herbs Matter: Fresh basil elevates the soup’s flavor. If using dried basil, add it during simmering to maximize aroma and taste.

  • Blending Techniques: Use an immersion blender for a smooth texture directly in the pot. If using a traditional blender, blend in small batches to avoid burns.

  • Adjusting Consistency: If the soup seems too thick, add stock or water gradually until you achieve the desired creaminess.

  • Make-ahead Advantage: Roasted tomatoes can be prepared a day in advance. Store in the fridge, and combine them with the other ingredients for a speedy soup on busy nights!

Make Ahead Options

Preparing your Roasted Tomato Basil Soup in advance is a fantastic way to save time and ensure a delicious meal during busy weeknights! You can roast the tomatoes up to 24 hours ahead of time; simply complete the roasting step and cool them completely before refrigerating. Additionally, you can chop the onions and garlic a day in advance and store them in an airtight container in the fridge to maintain their freshness. When you’re ready to enjoy your soup, just sauté the aromatics, add the prepped ingredients, and simmer as directed. This not only saves precious time but ensures your soup is just as vibrant and comforting when it’s time to serve!

What to Serve with Ultimate Roasted Tomato Basil Soup

Elevate your cozy meal with delicious pairings that enhance the comforting flavors of this delightful soup.

  • Grilled Cheese Sandwich: The melty, savory layers of cheese between crispy bread create a nostalgic dipper for the creamy soup.

  • Crusty Bread: A hearty baguette or sourdough bread provides a satisfying crunch and perfect vessel for scooping every last bite.

  • Caesar Salad: The crispy romaine and tangy dressing offer a refreshing contrast to the rich, velvety texture of the soup.

  • Garlic Bread: Crispy, buttery, and fragrant, this classic side amplifies the Italian flavors, making each bowl of soup even more inviting.

  • Roasted Veggies: Seasonal roasted vegetables add a medley of textures and nutrients that complement the sweetness of the tomatoes.

  • Caprese Salad: Fresh mozzarella, ripe tomatoes, and basil highlight the soup’s flavors; a drizzle of balsamic glaze brings a tangy finish.

  • Pesto Pasta: Tossed with a spoonful of vibrant pesto, pasta turns into a delightful side that pairs beautifully with the thick soup.

  • Chardonnay: A glass of chilled Chardonnay enhances the meal with its crisp acidity, perfectly balancing the soup’s creamy richness.

  • Chocolate Cake: For a sweet finish, a slice of rich chocolate cake offers a delightful contrast, bringing a smile to any table after cozy soup.

How to Store and Freeze Roasted Tomato Basil Soup

Fridge: Store leftover Roasted Tomato Basil Soup in an airtight container for up to 1 week. Reheat gently on the stove, adding a splash of stock if the soup thickens.

Freezer: For longer storage, freeze the soup in portioned airtight containers for up to 2 months. Thaw overnight in the fridge before reheating.

Reheating: Reheat frozen soup on the stove over low heat, stirring occasionally. Add extra stock or water to reach your desired consistency while warming.

Make-Ahead Tip: If you make a big batch, consider storing roasted tomatoes separately, allowing you to blend and finish the soup just before serving!

Roasted Tomato Basil Soup Recipe FAQs

How do I choose ripe tomatoes for roasting?
Absolutely! When selecting tomatoes, look for firm, vibrant Roma tomatoes that are slightly soft to the touch. Avoid those with dark spots all over or blemishes. If you’re ever in doubt, opt for other varieties like vine-ripened or heirloom, but Romans will give you the best sweetness and results when roasted.

How should I store leftover Roasted Tomato Basil Soup?
To keep your delicious soup fresh, store it in an airtight container in the refrigerator for up to 1 week. When reheating, make sure to do so gently on the stove, adding a splash of stock if you find it’s thickened up too much. It’s a real treat to enjoy for lunch or a cozy dinner!

Can I freeze Roasted Tomato Basil Soup?
Yes, indeed! You can freeze this comforting soup in airtight containers or freezer bags for up to 2 months. For best results, freeze in individual portions. When you’re ready to enjoy, thaw the soup in the fridge overnight and reheat on the stove, stirring in a little extra stock or water if needed to get that perfect creamy consistency.

What should I do if my soup is too thick?
If you find your Roasted Tomato Basil Soup is thicker than you’d like, no worries! Simply add more stock or some water gradually while stirring until you reach your ideal consistency. A little extra chicken stock doubles the flavor and helps soften the texture without losing that creamy goodness.

Is this soup safe for my pet?
While this soup is packed with delicious flavors for humans, be cautious about sharing it with pets, especially those sensitive to garlic or onion. If your furry friend snags a spoonful, watch for any unusual reactions, as it’s always best to stick to pet-friendly meals for their health and safety.

Can I make this soup dairy-free?
Very easily! To adapt your Roasted Tomato Basil Soup to a dairy-free version, simply omit the heavy cream entirely or substitute it with coconut milk or any other non-dairy milk of your choice. The soup will still be rich and comforting while fitting into a dairy-free diet perfectly!

Roasted Tomato Basil Soup

Creamy Roasted Tomato Basil Soup for Cozy Nights

This Roasted Tomato Basil Soup is creamy, aromatic, and perfect for cozy nights.
Prep Time 10 minutes
Cook Time 30 minutes
Roasting Time 1 hour
Total Time 40 minutes
Servings: 4 bowls
Course: Dinner
Cuisine: Italian
Calories: 300

Ingredients
  

Soup Ingredients
  • 10 whole Roma Tomatoes can substitute with any tomato type, but Roma is best for roasting
  • 2 tablespoons Extra Virgin Olive Oil any oil works if you're out of olive oil
  • 2 tablespoons Unsalted Butter substitute with additional olive oil for dairy-free
  • 1 medium Yellow Onion shallots can be used for a milder flavor
  • 4 cloves Garlic mince for maximum flavor infusion
  • 1 teaspoon Fresh Thyme substitute with 1.5 teaspoons of dried thyme if fresh isn’t available
  • 1 teaspoon Kosher Salt adjust to taste
  • 0.5 teaspoon Ground Black Pepper freshly ground for best flavor
  • 28 oz San Marzano Tomatoes whole canned tomatoes work as a substitute
  • 0.5 cup Fresh Basil use ¼ cup dried basil in a pinch
  • 1 teaspoon Sugar omit if using naturally sweet tomatoes
  • 4 cups Chicken Stock opt for vegetable stock for vegetarian version
  • 0.5 cup Heavy Cream omit or substitute with coconut milk for dairy-free
Optional Garnishes
  • 0.5 cup Fresh Basil Leaves for topping
  • 1 cup Croutons use homemade or store-bought

Equipment

  • Oven
  • Baking Sheet
  • Large Pot or Dutch Oven
  • Immersion blender

Method
 

Instructions
  1. Step 1: Preheat the Oven - Begin by preheating your oven to 375°F (190°C).
  2. Step 2: Prepare the Tomatoes - Slice the Roma tomatoes in half lengthwise, lay cut side up on a baking sheet, drizzle with olive oil, and sprinkle with salt and pepper.
  3. Step 3: Roast the Tomatoes - Roast the tomatoes for about 1 hour, or until tender and slightly charred.
  4. Step 4: Sauté the Aromatics - In a pot, heat olive oil or butter, then add chopped onion and sauté for 5 minutes. Add garlic and thyme, cook for 1 minute until fragrant.
  5. Step 5: Combine Ingredients - Stir in crushed San Marzano tomatoes and fresh basil, add sugar if desired, and simmer for 10 minutes.
  6. Step 6: Add Roasted Tomatoes and Stock - Stir in the roasted tomatoes with juices and stock, simmer for another 30 minutes.
  7. Step 7: Blend the Soup - Blend the soup until you reach your desired texture, using an immersion blender or traditional blender in batches.
  8. Step 8: Finish and Serve - Stir in heavy cream, adjust seasoning, and serve hot garnished with fresh basil leaves and croutons.

Nutrition

Serving: 1bowlCalories: 300kcalCarbohydrates: 20gProtein: 4gFat: 22gSaturated Fat: 10gPolyunsaturated Fat: 1gMonounsaturated Fat: 7gCholesterol: 30mgSodium: 800mgPotassium: 800mgFiber: 3gSugar: 5gVitamin A: 1500IUVitamin C: 35mgCalcium: 100mgIron: 1.5mg

Notes

Optional: Make-ahead by prepping roasted tomatoes a day in advance and store separately until ready to blend the soup.

Tried this recipe?

Let us know how it was!

Pumpkin S’mores Cookies that Will Warm Your Fall Evenings

As I stood in my kitchen, the aroma of pumpkin wafted through the air, instantly transporting me to cozy autumn evenings. Today, I’m excited to share my Pumpkin S’mores Cookies, a delightful blend of soft and gooey textures that will make your taste buds dance with joy. With just a touch of warm spices and the nostalgic flavors of classic s’mores—think melted chocolate, fluffy marshmallows, and crunchy graham crackers—these cookies are perfect for any occasion, whether you’re welcoming guests or treating yourself. Not only are they incredibly simple to whip up, but they’re also a fantastic way to celebrate the fall season while steering clear of fast food temptations. Curious about how to bring this delicious twist on a classic into your home? Let’s dive in!

Why are Pumpkin S’mores Cookies irresistible?

Deliciously Unique: These cookies merge the warm, comforting flavors of pumpkin with classic s’mores ingredients, creating a unique treat that delights all season long.

Quick & Easy: With straightforward steps, you can have these cookies baked and cooling in no time—perfect for busy fall evenings!

Crowd-Pleasing Flavor: Chocolate, marshmallows, and graham crackers pair beautifully with pumpkin spice, making these cookies a hit at gatherings or cozy nights in.

Endless Variations: Customize your cookies with different sweets or nuts to cater to everyone’s taste—no two batches need to be the same! If you love experimenting, try them alongside my Blueberry Breakfast Cookies for a fun assortment!

Perfectly Chewy: Enjoy a soft and gooey center with a slight crunch, reminiscent of classic s’mores—comfort food at its finest!

Festive Aesthetic: A pop of orange food coloring adds a lovely autumn touch, making them not just tasty but also visually appealing—ideal for holiday cookie trays!

Pumpkin S’mores Cookies Ingredients

For the Batter
Unsalted Butter – Provides moisture and richness; ensure it’s at room temperature for easy creaming.
Brown Sugar – Adds sweetness and depth of flavor; substitute with coconut sugar for a unique taste.
Granulated Sugar – Sweetens the cookies and helps with texture; reduce if using sweeter chocolate.
Pumpkin Puree – Adds moisture and pumpkin flavor; use 100% pure pumpkin puree, not pie filling.
Egg – Binds ingredients together; a flax egg works as a great vegan alternative.
Vanilla Extract – Enhances overall flavor; can be swapped with almond extract for a twist.
All-Purpose Flour – Provides structure; substitute with a 1:1 gluten-free blend for those avoiding gluten.
Baking Soda – Acts as a leavening agent for a light cookie; you could use baking powder instead, but adjust the amount.
Pumpkin Pie Spice – Adds warm spices that perfectly complement the pumpkin; can replace with cinnamon and nutmeg.
Salt – Enhances flavor and balances sweetness; don’t skip this essential ingredient!

For the Mix-Ins
Chocolate Chips – Provide sweetness and richness; choose dark, milk, or white chocolate depending on preference.
Mini Marshmallows – Offer a chewy texture and classic s’mores flavor; consider non-melting marshmallows if desired.
Graham Crackers – Add a delightful crunch and are crucial to the s’mores experience; opt for gluten-free versions if needed.

For the Finish
Orange Food Coloring – Optional for an autumn touch; add a drop at a time until the desired hue is reached.

Step‑by‑Step Instructions for Pumpkin S’mores Cookies

Step 1: Preheat the Oven
Begin by preheating your oven to 350°F (175°C). While the oven warms up, line a baking sheet with parchment paper to prevent sticking and ensure easy cleanup later. This setup creates a perfect foundation for your Pumpkin S’mores Cookies, so take a moment to prepare your baking area.

Step 2: Cream the Butters and Sugars
In a large mixing bowl, combine unsalted butter, brown sugar, and granulated sugar. Use an electric mixer to cream the mixture together on medium speed for about 2-3 minutes, until it becomes light and fluffy. This step is crucial for achieving the soft texture of your cookies, so make sure the mixture is well combined before moving to the next step.

Step 3: Add the Wet Ingredients
Now, gently fold in the pumpkin puree, egg, and vanilla extract into the creamed mixture. Mix on low speed until everything is just combined, which should take about 1-2 minutes. If you’re using orange food coloring for a festive touch, add it now and blend until the desired color is achieved, enhancing the visual appeal of your Pumpkin S’mores Cookies.

Step 4: Combine Dry Ingredients
In a separate bowl, whisk together the all-purpose flour, baking soda, pumpkin pie spice, and salt. This mixture creates the structure needed for your cookies. Once thoroughly combined, gradually add these dry ingredients to the wet mixture in intervals, mixing gently until everything is just combined. This step helps maintain the lightness of the cookies.

Step 5: Fold in Mix-Ins
Carefully fold in the chocolate chips, mini marshmallows, and crushed graham crackers into the dough. Use a spatula to incorporate them without overmixing, which can make the cookies tough. This delicious mix-in stage brings the beloved s’mores element to your Pumpkin S’mores Cookies, ensuring every bite is packed with flavor.

Step 6: Scoop the Cookie Dough
Using a cookie scoop or tablespoon, drop rounded scoops of the dough onto the prepared baking sheet. Space each scoop about 2 inches apart, allowing room for the cookies to spread during baking. Make sure the dough is heaped to form nice, thick cookies that will be delightful and chewy when finished.

Step 7: Add Extra Toppings
For an extra indulgence, sprinkle additional chocolate chips, mini marshmallows, and graham cracker pieces on top of each cookie dough scoop. This step enhances the visual appeal and ensures each cookie is richly flavored, capturing the essence of classic s’mores in your Pumpkin S’mores Cookies.

Step 8: Bake the Cookies
Place the baking sheet in the preheated oven and bake for about 12-14 minutes. Keep an eye on the cookies; they’re ready when the edges turn golden brown while the centers remain soft. This balance is essential for achieving that perfect, chewy texture characteristic of Pumpkin S’mores Cookies.

Step 9: Cool the Cookies
Once baked, remove the cookies from the oven and let them cool on the baking sheet for 5 minutes. This brief cooling period allows the cookies to set up slightly, making them easier to transfer without breaking. Then gently move them to a wire rack to cool completely.

What to Serve with Pumpkin S’mores Cookies?

Cozy up your fall gatherings or simple family nights with these delightful cookies as your centerpiece, paired with the perfect accompaniments.

  • Warm Vanilla Ice Cream: The creamy richness of vanilla ice cream adds a luscious contrast to the chewy cookies while enriching the pumpkin flavors.

  • Spiced Apple Cider: Enjoy a warm cup of spiced apple cider alongside your cookies; its fruity warmth perfectly enhances the seasonal spices in your treats.

  • Chocolate Milk: A glass of indulgent chocolate milk echoes the chocolate chips in the cookies, creating a nostalgic and fun experience for both kids and adults!

  • Pumpkin Spice Latte: Embrace the fall vibe with a steaming pumpkin spice latte; the combination of pumpkin flavors and coffee warms both the heart and soul.

  • Graham Cracker Crumble: Top each cookie with a sprinkle of crushed graham crackers for extra crunch and to echo the classic s’mores experience.

  • Whipped Cream: A dollop of fresh whipped cream on the side can elevate your pumpkin-themed treat to an even cozier dessert that feels indulgent and festive.

  • Cinnamon Sugar Dust: A light dusting of cinnamon sugar over your cookies adds a sweet and spicy finish, making every bite delightful.

  • Chocolate Dipping Sauce: Serve with a warm chocolate dipping sauce for a decadent twist—the gooey chocolate perfectly complements the texture of the cookies.

Expert Tips for Pumpkin S’mores Cookies

Perfect Butter Texture: Make sure your unsalted butter is at room temperature and well-creamed. This ensures a light, fluffy cookie that’s perfect for Pumpkin S’mores Cookies.

Don’t Overmix: Once you add the dry ingredients, mix gently until just combined. Overmixing can lead to tough cookies, so treat your dough tenderly!

Cooling Consideration: Allow cookies to cool on the baking sheet for a few minutes before transferring. They can be delicate when hot and may break if moved too soon.

Check Baking Time: Keep an eye on the edges; they should be golden while the centers remain soft. This timing is crucial for a delightful chewy texture in your Pumpkin S’mores Cookies.

Try Different Mix-Ins: Feel free to experiment with chocolate chip varieties or add nuts. Customizing your cookies keeps them exciting for every batch!

How to Store and Freeze Pumpkin S’mores Cookies

Room Temperature: Store your cookies in an airtight container at room temperature for up to 3 days. This keeps them soft and delicious for snacking!

Fridge: If you want to extend their freshness, refrigerate them for up to a week. Just make sure they’re in a sealed container to prevent them from drying out.

Freezer: Freeze unbaked dough in portions for up to a year. When you’re ready to enjoy, bake directly from the freezer, adding a couple of minutes to the baking time for perfect Pumpkin S’mores Cookies.

Reheating: For a warm treat, microwave cookies for 10-15 seconds. This brings back their gooey center and delightful texture.

Make Ahead Options

These Pumpkin S’mores Cookies are perfect for meal prep enthusiasts! You can prepare the cookie dough and refrigerate it for up to 24 hours before baking, ensuring maximum freshness without sacrificing flavor. Simply mix your ingredients as directed, then cover tightly and refrigerate until you’re ready to bake. For even longer storage, scoop the dough into balls and freeze them for up to 3 months; bake them directly from the freezer, adding a minute or two to the baking time. This way, you’ll enjoy warm, gooey cookies any time you need a quick treat, saving you time while still delivering just as delicious results!

Pumpkin S’mores Cookies Variations

Feel free to get creative and personalize your Pumpkin S’mores Cookies for a delightful twist!

  • Chocolate Swap: Replace chocolate chips with butterscotch or peanut butter chips for a fun flavor change. The subtle sweetness of butterscotch pairs beautifully with pumpkin.
  • Nutty Crumble: Swap mini marshmallows for chopped pecans or walnuts to add a crunchy texture and reduce the sweetness for those who prefer it.
  • Dairy-Free Delight: Use coconut oil instead of butter and dairy-free chocolate chips for a tasty dairy-free version. These cookies will still be rich and satisfying!
  • Spice It Up: Add a pinch of cayenne or chipotle powder to the dough for a playful kick of heat that contrasts wonderfully with the sweetness.
  • Fruity Boost: Fold in a handful of dried cranberries or cherries into the dough for a pop of tartness that complements the pumpkin flavors.
  • Gluten-Free Option: Substitute all-purpose flour with a 1:1 gluten-free blend for anyone avoiding gluten without sacrificing taste or texture.
  • Pumpkin Spice Boost: Increase the pumpkin pie spice by an extra teaspoon for more aromatic goodness. It will fill your kitchen with that warm autumn scent!
  • S’mores Stack: For the ultimate s’mores experience, sandwich melted marshmallows and chocolate between two cookies for a decadent treat that’s absolutely irresistible!

These variations can help keep your baking routine exciting, and if you’re looking for more comforting treats, don’t miss my delicious Joumou Haitian Pumpkin soup or make a batch of my delightful Blueberry Breakfast Cookies alongside! Enjoy your baking journey!

Pumpkin S’mores Cookies Recipe FAQs

How do I choose the perfect pumpkin puree?
Absolutely! When selecting pumpkin puree, look for 100% pure pumpkin on the label, avoiding any that contain added spices or sugar, like pumpkin pie filling. The puree should be smooth and free of dark spots, indicating spoilage. I often opt for brands that use organic pumpkins for the best flavor.

What is the best way to store leftover cookies?
Very! For soft and chewy Pumpkin S’mores Cookies, store them in an airtight container at room temperature for up to 3 days. If you want to keep them longer, pop them in the refrigerator where they can stay fresh for up to a week. Just ensure they’re sealed tightly to maintain their deliciousness!

Can I freeze the cookie dough?
Absolutely! To freeze unbaked Pumpkin S’mores Cookies dough, scoop the dough onto a baking sheet and freeze for about an hour until firm. Then transfer the frozen dough balls to a zip-top bag, storing them in the freezer for up to a year. When you’re ready to bake, just pop them directly in the oven, adding an extra couple of minutes to the baking time.

What should I do if my cookies spread too much while baking?
No worries! If your Pumpkin S’mores Cookies spread too much, it’s often due to overly soft butter or not enough flour. Make sure your butter is just softened, not melted, and try chilling your dough for 30 minutes before baking. This will help prevent them from spreading too thin, resulting in the perfect shape!

Are there any dietary considerations I should keep in mind?
Very! If you’re baking for someone with allergies, be mindful of common allergens like gluten and dairy. You can substitute all-purpose flour with a gluten-free blend and use specialized dairy-free chocolate chips and coconut oil in place of butter. This way, everyone can indulge in your delightful Pumpkin S’mores Cookies!

How long do these cookies stay fresh if frozen?
Great question! When properly frozen, your Pumpkin S’mores Cookies will remain delicious for up to 3 months. Make sure to store them in a freezer-safe container or bag and label them with the date. When the cookie craving strikes, simply defrost them at room temperature for a few hours before enjoying!

Pumpkin S’mores Cookies

Pumpkin S'mores Cookies that Will Warm Your Fall Evenings

Delight in these Pumpkin S’mores Cookies, a unique blend of fall flavors with classic s'mores ingredients.
Prep Time 15 minutes
Cook Time 14 minutes
Cooling Time 5 minutes
Total Time 34 minutes
Servings: 12 cookies
Course: Dessert
Cuisine: American
Calories: 150

Ingredients
  

For the Batter
  • 1 cup Unsalted Butter at room temperature
  • 1 cup Brown Sugar can substitute with coconut sugar
  • 1/2 cup Granulated Sugar reduce if using sweeter chocolate
  • 1 cup Pumpkin Puree 100% pure, not pie filling
  • 1 large Egg or a flax egg for vegan
  • 1 teaspoon Vanilla Extract can substitute with almond extract
  • 2 cups All-Purpose Flour can substitute with gluten-free blend
  • 1 teaspoon Baking Soda or baking powder, adjust amount
  • 2 teaspoons Pumpkin Pie Spice can replace with cinnamon and nutmeg
  • 1/2 teaspoon Salt essential for flavor
For the Mix-Ins
  • 1 cup Chocolate Chips dark, milk, or white as preferred
  • 1 cup Mini Marshmallows can use non-melting marshmallows
  • 1 cup Graham Crackers optional gluten-free versions
For the Finish
  • 1 drop Orange Food Coloring add to achieve desired hue

Equipment

  • Oven
  • Mixing Bowl
  • Electric mixer
  • Baking Sheet
  • Parchment Paper
  • Cookie Scoop

Method
 

Preparation Steps
  1. Preheat your oven to 350°F (175°C) and line a baking sheet with parchment paper.
  2. In a large mixing bowl, combine unsalted butter, brown sugar, and granulated sugar. Cream together on medium speed for 2-3 minutes.
  3. Gently fold in the pumpkin puree, egg, and vanilla extract. Mix on low speed for 1-2 minutes. Add orange food coloring if desired.
  4. In a separate bowl, whisk together the all-purpose flour, baking soda, pumpkin pie spice, and salt. Gradually add this mixture to the wet ingredients.
  5. Fold in the chocolate chips, mini marshmallows, and crushed graham crackers carefully.
  6. Drop rounded scoops of dough onto the prepared baking sheet, spacing them about 2 inches apart.
  7. Sprinkle additional chocolate chips, mini marshmallows, and graham cracker pieces on top of each scoop.
  8. Bake in the preheated oven for 12-14 minutes until the edges are golden brown and centers are soft.
  9. Let the cookies cool on the baking sheet for 5 minutes before transferring to a wire rack to cool completely.

Nutrition

Serving: 1cookieCalories: 150kcalCarbohydrates: 22gProtein: 2gFat: 7gSaturated Fat: 4gPolyunsaturated Fat: 1gMonounsaturated Fat: 2gCholesterol: 30mgSodium: 100mgPotassium: 100mgFiber: 1gSugar: 10gVitamin A: 500IUCalcium: 20mgIron: 0.5mg

Notes

For a rich flavor, ensure that all ingredients are at their proper temperature, and avoid overmixing to maintain the soft texture of the cookies.

Tried this recipe?

Let us know how it was!

Soft Pumpkin Cookies with Cinnamon Frosting for Cozy Fall Vibes

As the crisp air begins to wrap its cool fingers around September, my thoughts drift to cozy afternoons and the warm scent of baking that fills my kitchen. What’s more inviting than Soft Vegan Pumpkin Cookies with Cinnamon Frosting? These little delights are not just your average cookie; they are soft, cake-like morsels that melt in your mouth, bringing the essence of fall straight to your taste buds. Not only are they easy to whip up, but they’re also perfect for sharing at gatherings or enjoying on a quiet evening with a hot cup of tea. Plus, being vegan means they can be enjoyed by everyone! Are you ready to dive into this delightful autumn treat that’s bound to become your new favorite?

Why Choose These Pumpkin Cookies?

Irresistible Flavor: The warm spices mixed with pumpkin create an inviting taste that embodies fall.

Quick & Easy: With simple ingredients and a straightforward process, these cookies come together in no time, making them perfect for a last-minute treat.

Vegan-Friendly: Everyone can enjoy these delightful cookies, catering to plant-based diets without sacrificing flavor!

Versatile Variations: Feel free to explore by adding chocolate chips or nuts, or even switching pumpkin puree with mashed bananas.

Cozy Pairing: Serve with hot cider or a warm cup of tea for an irresistible autumn snack that friends and family will adore! These cookies are sure to be a hit, much like our Bananas Foster Cinnamon or Honeybun Carrot recipes!

Pumpkin Cookies with Cinnamon Frosting Ingredients

For the Cookies

  • Pumpkin Puree – Provides moisture and natural sweetness; can substitute with applesauce for a different flavor.
  • All-Purpose Flour – Creates the structure of the cookies; substitute with a gluten-free flour blend if needed.
  • Brown Sugar – Adds sweetness and a hint of caramel flavor; light brown sugar can be used for a milder taste.
  • Cinnamon – Enhances flavor and brings warmth; you can add pumpkin pie spice for more complexity.
  • Baking Powder – Helps the cookies rise; make sure it is fresh for optimal results.
  • Oil (vegetable or coconut) – Provides fat for moisture; can substitute with applesauce to reduce fat content.
  • Non-Dairy Milk – Binds the ingredients together and adds moisture; any plant-based milk works well.

For the Frosting

  • Cinnamon – For flavoring the frosting; use fine ground for a smooth texture.
  • Powdered Sugar – Adds sweetness to the frosting; cornstarch-free options can be used for a cleaner taste.
  • Vanilla Extract – Enhances overall flavor; optional but recommended for a richer taste.

Step‑by‑Step Instructions for Pumpkin Cookies with Cinnamon Frosting

Step 1: Preheat the Oven
Begin by preheating your oven to 350°F (175°C). While the oven warms up, line a baking sheet with parchment paper to prevent sticking and make cleanup a breeze. This preparation ensures a smooth baking process for your Pumpkin Cookies with Cinnamon Frosting, so everything is ready when you mix your ingredients.

Step 2: Combine Wet Ingredients
In a large mixing bowl, combine the pumpkin puree, vegetable oil, brown sugar, and non-dairy milk. Using a whisk or a spatula, mix these ingredients until smooth and well-blended. This step is crucial for creating the moist base of your pumpkin cookies, so make sure there are no clumps before moving on.

Step 3: Mix Dry Ingredients
In a separate bowl, whisk together the all-purpose flour, baking powder, and cinnamon. Ensure everything is evenly distributed, as this will enhance the texture and flavor of your Pumpkin Cookies with Cinnamon Frosting. Once mixed, gradually fold the dry ingredients into the wet ingredients, creating a thick, cohesive dough.

Step 4: Shape the Cookies
Using a spoon or cookie scoop, drop spoonfuls of the cookie dough onto the prepared baking sheet, spacing them about two inches apart. This will allow the cookies to spread without touching. You should see their soft, thick shape, which guarantees a delightful chewy texture once they bake.

Step 5: Bake the Cookies
Place the baking sheet in your preheated oven and bake for approximately 10 minutes. Keep an eye on them; you’ll know they’re ready when the edges start to turn golden brown. The tops may still look slightly soft, which is perfect for achieving that melt-in-your-mouth quality.

Step 6: Cool the Cookies
After baking, allow the cookies to cool on the baking sheet for about 5 minutes. This resting time helps them firm up slightly. Then, carefully transfer the cookies to a wire rack to cool completely. Ensuring they are fully cool is essential before frosting them, as even a little warmth can cause the frosting to melt.

Step 7: Prepare the Cinnamon Frosting
While the cookies cool, in a mixing bowl, beat together the powdered sugar, cinnamon, and just enough non-dairy milk to reach a smooth, spreadable consistency. The frosting should be thick yet easy to swirl on the cookies. This sweet topping will elevate your Pumpkin Cookies with Cinnamon Frosting to an irresistible treat.

Step 8: Frost the Cookies
Once your cookies are completely cool, generously swirl the prepared cinnamon frosting onto each cookie using a spatula or a butter knife. Take your time to create delightful swirls; these aesthetics make your Pumpkin Cookies even more inviting. Now, they’re ready to be served or enjoyed with your favorite beverage!

Make Ahead Options

These Soft Pumpkin Cookies with Cinnamon Frosting are a fantastic option for those busy weeknights! You can prepare the cookie dough up to 24 hours in advance and refrigerate it, sealing it tightly to maintain freshness. The unfrosted cookies can also be baked and stored in an airtight container for up to 3 days at room temperature. When you’re ready to serve, simply whip up the frosting while the cookies cool, then swirl it on each cookie for that delightful finishing touch. This way, you can have these comforting fall treats ready to enjoy without the last-minute rush!

Pumpkin Cookies with Cinnamon Frosting Variations

Feel free to get creative with these Soft Pumpkin Cookies, as there’s always room for delightful twists and personal touches!

  • Chocolate Chip: Add a handful of vegan chocolate chips to the dough for an indulgent sweet surprise in every bite.

  • Gluten-Free: Substitute the all-purpose flour with a 1:1 gluten-free baking blend for a celiac-friendly treat. Make sure the flour blend contains xanthan gum for better texture.

  • Nutty Crunch: Toss in some chopped walnuts or pecans into the dough to create a lovely crunch that complements the soft texture beautifully.

  • Spice It Up: Mix in a teaspoon of nutmeg or ginger for an extra warm flavor that enhances the cozy fall vibes.

  • Fruity Twist: Swap out pumpkin puree for mashed bananas or cooked sweet potato for a unique flavor profile that still captures the essence of fall.

  • Maple Icing: Use maple syrup instead of powdered sugar in the frosting for a maple-flavored twist that beautifully complements the pumpkin.

  • Cinnamon Sugar Topping: Before baking, sprinkle a mixture of sugar and cinnamon on top of the unbaked cookies for an added sugary crunch.

  • Pumpkin Pie Spice: Replace cinnamon with pumpkin pie spice in both the cookie dough and frosting for a deeper, nuanced flavor that shouts autumn!

These variations not only elevate the classic pumpkin cookie experience but can also be perfectly paired with your favorite warm beverage. For more cozy recipes, make sure to check out our delightful Apple Crisp Cinnamon or the wonderfully sweet Blueberry Breakfast Cookies!

What to Serve with Soft Vegan Pumpkin Cookies with Cinnamon Frosting

Indulge in the season’s flavors with delightful pairings that elevate your cozy cookie experience.

  • Spiced Chai Latte: The warm spices in chai beautifully complement the cinnamon frosting, creating a comforting drink pairing.
  • Hot Apple Cider: The sweet and tangy notes of apple cider enhance the pumpkin flavor, making every bite feel like a warm hug.
  • Vegan Marshmallow Treats: These chewy delights offer a contrasting texture to the cookies, perfect for a fun dessert table.
  • Chocolate Drizzle: A light drizzle of dairy-free chocolate over the frosting adds an exciting richness that pairs wonderfully with warm spices.
  • Nutty Granola: Sprinkle some crunchy granola on top for added texture and a delightful contrast to the soft cookies.
  • Crunchy Fall Salad: Mix fresh greens with apples and nuts for a refreshing side that complements the richness of the cookies.
  • Warm Tea: A simple cup of herbal or black tea balances the sweetness and rounds out your delightful fall snack.
  • Cinnamon Ice Cream: For the ultimate treat, serve the cookies alongside a scoop of cinnamon or vanilla vegan ice cream, bringing everything together!

Expert Tips for Pumpkin Cookies

  • Mix Gently: Avoid overmixing the dough as it can result in tough cookies. Aim for a soft, fluffy texture that shines in your Pumpkin Cookies with Cinnamon Frosting.

  • Check Freshness: Make sure your baking powder is fresh to ensure good rising. Old baking powder can lead to flat cookies that lose their appeal.

  • Cooling Time: Allow cookies to cool completely before frosting to prevent melting. This ensures your beautiful frosting maintains its shape and adds a perfect touch to each bite.

  • Spacing is Key: Space your cookie dough at least two inches apart on the baking sheet. This helps them maintain their shape and prevents sticking while they bake.

  • Customize: Feel free to mix in chocolate chips or nuts for additional texture and flavor! These simple tweaks can elevate your Pumpkin Cookies with Cinnamon Frosting to a whole new level.

How to Store and Freeze Pumpkin Cookies with Cinnamon Frosting

Room Temperature: Keep your cookies in an airtight container at room temperature for up to 3-4 days to ensure they remain soft and delicious.

Fridge: For longer freshness, store the cookies in the fridge where they can last up to a week; just remember to allow them to come to room temperature before serving.

Freezer: Freeze your Pumpkin Cookies with Cinnamon Frosting by placing them in a single layer in an airtight container or freezer bag for up to 2 months.

Reheating: If desired, you can warm the cookies in the microwave for a few seconds before enjoying them; just be cautious not to overheat!

Pumpkin Cookies with Cinnamon Frosting Recipe FAQs

What type of pumpkin puree should I use?
Absolutely! Use canned pumpkin puree for convenience, or you can make your own by roasting fresh pumpkin and pureeing it until smooth. Just ensure you use plain pumpkin puree, not pumpkin pie filling, which contains added sugars and spices.

How should I store my pumpkin cookies?
To keep your pumpkin cookies with cinnamon frosting fresh, store them in an airtight container at room temperature for 3-4 days. If you’d like them to last longer, refrigerate them for up to a week or freeze for up to 2 months. Just remember, for best texture, let them come to room temperature before serving!

Can I freeze these cookies?
Yes! To freeze, place the cookies in a single layer in an airtight container or a freezer bag, ensuring they have enough room to avoid sticking together. They can be frozen for up to 2 months. When ready to enjoy, simply let them thaw at room temperature or warm them in the microwave for a few seconds!

What if my cookies turn out too dry?
If your cookies are dry, it might be due to overmixing or too much flour. For a softer texture, make sure to gently fold the dry ingredients into the wet ingredients until just combined. If you notice your dough is too dry, adding an extra tablespoon of non-dairy milk can help achieve the right consistency.

Are these cookies suitable for pets?
No, it’s best to avoid sharing these cookies with your pets. Ingredients like cinnamon, nutmeg, and sugars can be harmful to dogs and cats in larger quantities. Always keep your delicious pumpkin cookies with cinnamon frosting for human enjoyment only!

Can I substitute any ingredients for allergies?
Certainly! If you’re avoiding gluten, use a gluten-free flour blend instead of all-purpose flour. For nut allergies, opt for a nut-free oil such as sunflower oil, and feel free to skip the frosting or replace powdered sugar with a suitable alternative like coconut sugar for a different flavor profile!

Pumpkin Cookies with Cinnamon Frosting

Soft Pumpkin Cookies with Cinnamon Frosting for Cozy Fall Vibes

Enjoy these Soft Pumpkin Cookies with Cinnamon Frosting, perfect for fall! Easy, vegan, and packed with flavor.
Prep Time 15 minutes
Cook Time 10 minutes
Cooling Time 5 minutes
Total Time 30 minutes
Servings: 12 cookies
Course: Dessert
Cuisine: Vegan
Calories: 150

Ingredients
  

For the Cookies
  • 1 cup Pumpkin Puree Can substitute with applesauce
  • 1 1/2 cups All-Purpose Flour Gluten-free blend can be used
  • 1 cup Brown Sugar Light brown sugar for a milder taste
  • 1 teaspoon Cinnamon Add pumpkin pie spice for complexity
  • 1 teaspoon Baking Powder Ensure it's fresh
  • 1/2 cup Oil (vegetable or coconut) Can substitute with applesauce to reduce fat
  • 1/4 cup Non-Dairy Milk Any plant-based milk works
For the Frosting
  • 1 teaspoon Cinnamon Fine ground for smooth texture
  • 2 cups Powdered Sugar Cornstarch-free options can be used
  • 1 teaspoon Vanilla Extract Optional but recommended

Equipment

  • Mixing Bowl
  • whisk
  • Baking Sheet
  • Parchment Paper
  • spatula
  • Cookie Scoop

Method
 

Step-by-Step Instructions
  1. Preheat your oven to 350°F (175°C) and line a baking sheet with parchment paper.
  2. Combine pumpkin puree, vegetable oil, brown sugar, and non-dairy milk in a large mixing bowl until smooth.
  3. In another bowl, whisk together flour, baking powder, and cinnamon, then fold into the wet ingredients.
  4. Drop spoonfuls of dough onto the baking sheet, spacing them about two inches apart.
  5. Bake for approximately 10 minutes, until edges are golden brown.
  6. Cool on the baking sheet for 5 minutes, then transfer to a wire rack.
  7. In a bowl, beat together powdered sugar, cinnamon, and enough non-dairy milk for a smooth frosting.
  8. Once cookies are cool, frost each with cinnamon frosting.

Nutrition

Serving: 1cookieCalories: 150kcalCarbohydrates: 22gProtein: 2gFat: 6gSaturated Fat: 1gSodium: 120mgPotassium: 100mgFiber: 1gSugar: 8gVitamin A: 230IUVitamin C: 2mgCalcium: 2mgIron: 4mg

Notes

These cookies can be customized by adding chocolate chips or nuts. Make sure to allow for cooling time before frosting to keep the frosting intact.

Tried this recipe?

Let us know how it was!

Crispy Zucchini Garlic Bites for Guilt-Free Snacking

As I rummaged through my kitchen one afternoon, I stumbled upon a couple of fresh zucchinis that were just begging to be transformed into something scrumptious. That’s when I had the lightbulb moment that led to these Crispy Zucchini Garlic Bites! Not only are they a delightful and healthy snack packed with vibrant flavors, but they also bring a satisfying crunch that many fried snacks just can’t match. Plus, they’re vegetarian and freezer-friendly—perfect for weekday munchies or unexpected guests! I promise, once you serve these golden treats warm with your favorite dipping sauce, your loved ones will be asking for seconds. Curious to whip up a batch of these irresistible bites? Let’s dive into the recipe!

Why are Crispy Zucchini Garlic Bites Amazing?

Healthy Snack Option: These baked bites offer a guilt-free alternative to fried snacks, making them perfect for health-conscious eaters.
Flavor Explosion: Fresh garlic, herbs, and Parmesan create a flavor profile that’s both savory and satisfying.
Make-Ahead Magic: Prep these bites in advance and freeze them for a quick, delicious treat anytime.
Versatile Serving: Pair them with marinara, ranch, or tzatziki sauce for an added taste sensation; they’re perfect for any occasion!
Easy to Customize: Whether you choose to spice them up with red pepper flakes or switch up the cheese, these bites are easily tailored to your cravings.

Crispy Zucchini Garlic Bites Ingredients

For the Bites
Grated Zucchini – Provides moisture and serves as the base for these veggie bites; make sure to squeeze out excess moisture for the best texture.
Breadcrumbs – Acts as a binding agent and adds crispness; for an extra crunch, substitute with panko breadcrumbs.
Parmesan Cheese – Adds flavor and helps achieve a crispy texture; use nutritional yeast for a delightful dairy-free option.
Eggs – Binds the ingredients together; whisk them well for a consistent mixture.
Garlic – Enhances the savory flavor profile; fresh, minced garlic is a must for optimal taste.
Onion – Adds sweetness and depth of flavor; finely chopped ensures even distribution.
Fresh Parsley (or dried) – Provides a burst of freshness; feel free to substitute with your favorite herbs based on preference.
Salt and Black Pepper – Essential for seasoning and enhancing the flavors.
Italian Seasoning (optional) – A wonderful addition for more flavor; can be omitted if desired.
Cooking Spray or Olive Oil – Used for greasing the baking sheet, preventing the bites from sticking.

Dipping Sauce Suggestions
Marinara Sauce – Perfectly pairs with the bites for a classic Italian twist.
Ranch Dressing – Adds a creamy complement that kids love!
Tzatziki Sauce – Provides a refreshing zing and is especially delightful in summer.

These Crispy Zucchini Garlic Bites are not only delicious but a fun way to incorporate veggies into your snacking routine!

Step‑by‑Step Instructions for Crispy Zucchini Garlic Bites

Step 1: Preheat and Prepare
Start by preheating your oven to 400°F (200°C). Line a baking sheet with parchment paper, then lightly grease it with cooking spray or a drizzle of olive oil to ensure that your Crispy Zucchini Garlic Bites won’t stick when baking. This sets up a perfect base for those golden, crispy bites!

Step 2: Mix the Ingredients
In a large mixing bowl, combine the grated zucchini, breadcrumbs, Parmesan cheese, eggs, minced garlic, finely chopped onion, parsley, salt, pepper, and optional Italian seasoning. Mix until all ingredients are fully incorporated, creating a cohesive mixture that holds together well. This should take just a couple of minutes, resulting in a thick consistency ready for shaping.

Step 3: Shape the Bites
Using your hands, form the mixture into small balls about 1 to 1½ inches in size. Place them evenly spaced on the prepared baking sheet to allow for even cooking. The shaping process is crucial for achieving that delightful crispiness, so make sure not to compact them too tightly.

Step 4: Bake to Perfection
Transfer the baking sheet to your preheated oven and bake for 20–25 minutes. Halfway through, carefully turn the bites to ensure even browning. Keep an eye on them; they should turn golden brown and become wonderfully crispy by the end of the baking time.

Step 5: Cool and Serve
Once baked, remove your Crispy Zucchini Garlic Bites from the oven and allow them to cool slightly on the baking sheet. This brief cooling period helps them firm up a bit more, making them ideal for dipping. Serve them warm with your choice of dipping sauces, such as marinara or ranch, for a truly scrumptious experience!

Expert Tips for Crispy Zucchini Garlic Bites

  • Squeeze Zucchini Dry: Make sure to thoroughly squeeze out excess moisture from the grated zucchini. This is crucial to avoid soggy bites.

  • Breadcrumb Choices: For an extra crunch in your Crispy Zucchini Garlic Bites, opt for panko breadcrumbs instead of regular ones. They provide a delightful crispy texture.

  • Customize Away: Feel free to get creative by adding different herbs or spices. Fresh basil, thyme, or even a pinch of smoked paprika can elevate the flavor.

  • Batch Baking: If you’re preparing in advance, shape the bites and store them in the refrigerator. Bake them fresh just before serving to retain optimal texture.

  • Watch the Oven: Keep a close eye on your bites during the last few minutes of baking. They should be golden brown and crisp on the outside while being tender inside.

What to Serve with Crispy Zucchini Garlic Bites

Pairing your delicious bites with the right sides can elevate your snack experience to a whole new level.

  • Creamy Avocado Dip: This silky, rich dip adds a delightful creaminess that balances the crispiness of the bites perfectly. Its cooling effect makes it an ideal pairing.

  • Garlic Aioli: A zesty and flavorful dip that enhances the garlic notes in the zucchini bites, adding a gourmet touch to your snack. Your taste buds will dance with delight!

  • Classic Marinara Sauce: Nothing beats the classic! Its tangy tomato flavor complements the savory bites, making each bite a tasty journey through Italian flavors.

  • Fresh Salad: A light, refreshing garden salad with a citrus vinaigrette offers a delightful textural contrast, adding freshness while cutting through the richness of the bites.

  • Zucchini Noodles: Keep the theme going by serving these bites alongside zoodles. Tossed with olive oil and garlic, they create a harmonious plate that celebrates zucchini.

  • Sparkling Lemonade: This refreshing drink elevates any gathering, providing a sweet-yet-tart complement that can cleanse the palate between bites.

  • Roasted Red Pepper Hummus: A silky, smoky addition that pairs well with the crispy texture of the bites, offering a savory richness that’ll make you crave more.

  • Cheesy Garlic Bread: The indulgent flavors of cheesy, garlicky bread create a delightful side that feels comforting when served alongside the vibrant zucchini bites.

  • Warm Potato Wedges: Crispy potato wedges introduce a hearty element to your snacking experience, adding a satisfying crunch that pairs nicely with the bites’ texture.

With these serving suggestions, your Crispy Zucchini Garlic Bites will shine even brighter at your next gathering or family snack time!

Make Ahead Options

These Crispy Zucchini Garlic Bites are perfect for busy home cooks looking to save time during hectic weekdays! You can prepare the mixture and shape the bites up to 24 hours in advance. Simply cover the baking sheet with plastic wrap and refrigerate the shaped bites to maintain their quality. When you’re ready to serve, just pop them in the oven and bake for the same 20-25 minutes, ensuring they turn golden brown and crispy. For longer storage, consider freezing them before baking and simply add a few extra minutes to the cooking time when baking from frozen. This way, you’ll have a delicious, healthy snack ready with minimal effort!

Crispy Zucchini Garlic Bites Variations

Feel free to unleash your creativity and make these bites uniquely yours with some tantalizing twists!

  • Yellow Squash: Swap out zucchini for yellow squash for a subtly different flavor and vibrant color.
  • Vegan Option: Omit Parmesan cheese and use nutritional yeast or a dairy-free cheese alternative to keep these bites plant-based.
  • Spicy Kick: Add a teaspoon of red pepper flakes to the mixture for a zesty, spicy version that’ll awaken your taste buds.
  • Cheesy Goodness: Incorporate a blend of mozzarella and cheddar for a glorious cheesy explosion in every bite.
  • Herb-Infused: Try swapping parsley for other fresh herbs like basil or cilantro to explore new flavor profiles.
  • Undoubtedly Crunchy: For those who seek crunchier bites, consider mixing in crushed cornflakes or crispy rice cereal into the mixture.
  • Sautéed Veggies: Enhance the flavors by adding finely chopped sautéed onions and bell peppers for an extra layer of taste.
  • Sweet Twist: For a unique variation, add a pinch of cinnamon to the mix, pairing perfectly with a honey yogurt dip.

As you take your first crunchy bite, imagine pairing them with delicious dipping sauces like Comfort Garlic Butter or even Garlic Parmesan Chicken. Enjoy customizing until you find your perfect match!

How to Store and Freeze Crispy Zucchini Garlic Bites

Fridge: Store leftover crispy zucchini garlic bites in an airtight container for up to 3 days. Reheat in the oven for a refreshing crispiness.

Freezer: For longer storage, freeze the uncooked shaped bites on a baking sheet until firm, then transfer to a zip-top bag. They can last for up to 3 months.

Reheating: Bake frozen bites straight from the freezer at 400°F (200°C) for about 25–30 minutes, adding a few extra minutes if needed, until they’re heated through and crispy again.

Make-Ahead: Prepare the bites in advance, store in the fridge, and bake just before serving—perfect for quick snacks or entertaining without stress!

Crispy Zucchini Garlic Bites Recipe FAQs

How do I choose the right zucchini for this recipe?
Absolutely! When selecting zucchini, look for firm, unblemished specimens with a vibrant, dark green color. Avoid zucchinis displaying dark spots or soft areas, as these can indicate overripeness.

How should I store leftovers of the Crispy Zucchini Garlic Bites?
Very! Store any leftover bites in an airtight container in the refrigerator for up to 3 days. To enjoy their crispiness again, simply reheat them in the oven at 350°F (175°C) for about 10 minutes, allowing the edges to regain their delightful crunch.

Can I freeze the Crispy Zucchini Garlic Bites?
Absolutely! After shaping the bites but before baking, place them on a baking sheet and freeze until firm (about 1 hour). Then transfer them to a zip-top bag or airtight container and store in the freezer for up to 3 months. When you’re ready to bake, cook them straight from the freezer at 400°F (200°C) for about 25–30 minutes until they are golden and crispy!

What if my mixture feels too wet to shape?
No worries! If your mixture seems too wet, it’s crucial to squeeze out even more excess moisture from the grated zucchini. You can do this by placing the grated zucchini in a clean kitchen towel and twisting it to wring out the liquid. The right texture should hold together when shaped into balls without falling apart.

Are these bites suitable for vegans?
Absolutely! For a vegan version, simply replace the Parmesan cheese with nutritional yeast for that cheesy flavor and omit the eggs. Instead, you can use a chia or flaxseed egg (1 tablespoon chia/flaxseed mixed with 2.5 tablespoons water, rested for 5 minutes) as a binding agent.

Can I customize the flavor of the Crispy Zucchini Garlic Bites?
Yes, the more the merrier! Feel free to experiment by adding herbs like fresh basil or dill, or spices like red pepper flakes for a bit of heat. You can even use different cheeses or mix in finely chopped roasted red peppers or olives for a unique twist that complements your taste!

Crispy Zucchini Garlic Bites

Crispy Zucchini Garlic Bites for Guilt-Free Snacking

Crispy Zucchini Garlic Bites are a delightful and healthy snack packed with vibrant flavors and a satisfying crunch.
Prep Time 15 minutes
Cook Time 25 minutes
Total Time 40 minutes
Servings: 4 bites
Course: Appetizers
Cuisine: Vegetarian
Calories: 150

Ingredients
  

For the Bites
  • 2 cups grated zucchini Squeeze out excess moisture
  • 1 cup breadcrumbs Panko for extra crunch
  • 1/2 cup Parmesan cheese Can substitute with nutritional yeast
  • 2 large eggs Whisked
  • 3 cloves garlic Minced
  • 1/2 cup onion Finely chopped
  • 1/4 cup fresh parsley Can substitute with favorite herbs
  • 1 teaspoon salt
  • 1/2 teaspoon black pepper
  • 1 teaspoon Italian seasoning Optional
  • 1 tablespoon cooking spray Or olive oil for greasing
Dipping Sauce Suggestions
  • 1 cup marinara sauce
  • 1 cup ranch dressing
  • 1 cup tzatziki sauce

Equipment

  • Oven
  • Mixing Bowl
  • Baking Sheet
  • Parchment Paper

Method
 

Step‑by‑Step Instructions
  1. Preheat your oven to 400°F (200°C) and line a baking sheet with parchment paper, lightly greased.
  2. In a large mixing bowl, combine the grated zucchini, breadcrumbs, Parmesan cheese, eggs, minced garlic, finely chopped onion, parsley, salt, pepper, and optional Italian seasoning, mixing until cohesive.
  3. Form the mixture into small balls about 1 to 1½ inches in size and place evenly on the prepared baking sheet.
  4. Bake for 20–25 minutes, turning halfway through for even browning until golden and crispy.
  5. Allow to cool slightly before serving warm with your choice of dipping sauces.

Nutrition

Serving: 3bitesCalories: 150kcalCarbohydrates: 14gProtein: 6gFat: 7gSaturated Fat: 3gPolyunsaturated Fat: 1gMonounsaturated Fat: 2gCholesterol: 100mgSodium: 300mgPotassium: 300mgFiber: 2gSugar: 1gVitamin A: 750IUVitamin C: 10mgCalcium: 150mgIron: 1.5mg

Notes

Squeeze zucchini dry and consider using panko breadcrumbs for added crispiness. Customize with additional herbs or spices as desired.

Tried this recipe?

Let us know how it was!

Blueberry Peach Crumble: The Ultimate Summer Dessert Delight

As the sun begins to set and the warm evening breeze carries the sweet scent of summer, there’s something magical about bringing the essence of the season into my kitchen. That’s exactly why I’m excited to share my Blueberry Peach Crumble recipe, a dessert that perfectly captures the flavors of ripe, juicy peaches and plump blueberries tucked beneath a golden, buttery oat topping. This easy-to-make delight not only warms the heart but also brings everyone together, making it a crowd-pleaser for summer gatherings. Plus, it’s vegetarian-friendly, ensuring everyone can indulge in its comforting charm. Are you ready to dive into this delicious adventure and create a dessert that will make your taste buds dance?

Why is Blueberry Peach Crumble a Must-Try?

Simplicity in preparation ensures any cook can master this delightful dessert quickly. Bursting with seasonal flavors, the combination of sweet peaches and tangy blueberries creates a refreshing taste of summer. Versatile ingredient swaps allow for creativity; try using raspberries or cherries for a unique twist! Crowd-pleaser status is guaranteed when served warm with a scoop of vanilla ice cream. Plus, it’s easy to make ahead for those busy summer evenings! Dive deeper into more fruit delights like our Banana Blueberry Breakfast and Lemon Blueberry Summery recipes!

Blueberry Peach Crumble Ingredients

For the Filling
Blueberries – Fresh or frozen, both work wonders for natural sweetness.
Peaches – Use 5-6 ripe, peeled, and sliced peaches to add juiciness and delightful flavor.
Fresh Lemon Juice – A splash of freshly squeezed juice brightens the overall flavor profile.
Lemon Zest – Enhances the lemon’s zing; orange zest can substitute for a twist.
Vanilla Extract – Imparts deep flavor to elevate your Blueberry Peach Crumble.
Granulated Sugar (1/2 cup) – Sweeten the fruit mixture, adjusting based on the fruit’s natural sweetness.
All-Purpose Flour (1/4 cup) – Helps thicken the fruit, creating a luscious filling.

For the Crumble Topping
All-Purpose Flour (1/2 cup) – The base for your crumble to ensure a lovely texture.
Old-Fashioned Oats (1/2 cup) – Add crunch; instant oats won’t give the same delicious result.
Brown Sugar (1/3 cup) – Introduces rich moisture and flavor to the crumble topping.
Salt (1/2 teaspoon) – Balances sweetness for that perfect bite.
Ground Cinnamon (1 teaspoon) – Infuses warmth and spice into the crumble; mix in alternatives for fun variations.
Cold Butter (6 tablespoons) – Keep it cold for a flaky topping that melts in your mouth!

Step‑by‑Step Instructions for Blueberry Peach Crumble

Step 1: Preheat the Oven
Start by preheating your oven to 350°F (175°C). This step is vital for ensuring the Blueberry Peach Crumble bakes evenly and achieves that golden-brown crust. While the oven is heating, gather your ingredients and prepare your baking dish—either a 9-inch round or square pan works beautifully.

Step 2: Prepare the Fruit Filling
In a large mixing bowl, combine the fresh blueberries and sliced peaches along with freshly squeezed lemon juice, lemon zest, a splash of vanilla extract, granulated sugar, and a quarter cup of all-purpose flour. Gently toss the mixture until the fruit is evenly coated. Let it rest for 5-10 minutes to allow the flavors to meld and the juices to release.

Step 3: Make the Crumble Topping
In a separate bowl, mix together the remaining half cup of flour, old-fashioned oats, brown sugar, salt, and ground cinnamon. Use your fingers to rub in the cold, diced butter until the mixture resembles coarse crumbs with some pea-sized butter chunks remaining. This step is crucial for achieving that perfect crumbly texture on top of your Blueberry Peach Crumble.

Step 4: Assemble the Crumble
Spread the prepared fruit filling evenly into your greased baking dish. Make sure to incorporate all the delicious juices that have pooled at the bottom of the bowl. Once the fruit mixture is set, evenly sprinkle the crumble topping over it, ensuring it is well distributed for that delightful crunch in every bite.

Step 5: Bake to Perfection
Place the assembled Blueberry Peach Crumble in the preheated oven and bake for 40-45 minutes. Watch closely as it cooks; it’s finished when the topping turns a lovely golden brown and the juices are bubbling around the edges. If baking in ramekins, know that they will require approximately 25-30 minutes.

Step 6: Serve and Savor
After removing the crumble from the oven, let it cool for about 10 minutes. Then, serve warm, ideally topped with a generous scoop of vanilla ice cream or a dollop of whipped cream. The combination of warm fruit, crunchy topping, and cool cream is simply irresistible!

Make Ahead Options

These Blueberry Peach Crumbles are perfect for meal prep enthusiasts! You can prepare the fruit filling up to 24 hours in advance—simply combine the blueberries and peaches with lemon juice, lemon zest, vanilla, sugar, and flour, then refrigerate it in an airtight container. The crumble topping can also be made ahead and stored separately in the refrigerator for up to 2 days to maintain its crispness. When you’re ready to enjoy, layer the filling in your baking dish, sprinkle the chilled crumble topping on top, and bake as directed until golden brown. This way, you can savor a delightful dessert with minimal effort on busy weeknights!

Blueberry Peach Crumble Variations

Feel free to add your own twist to this delightful dessert and make it even more special for your family!

  • Berry Swap: Substitute blueberries with raspberries or cherries for a different flavor explosion. Each berry brings unique sweetness and tartness, creating a refreshing twist.

  • Mixed Berries: Use a combination of blueberries, blackberries, and strawberries for a colorful berry medley. The blend creates a dynamic flavor profile that’s fun and vibrant.

  • Gluten-Free: Swap all-purpose flour for a gluten-free blend to accommodate dietary preferences. Your crumble will still be deliciously crunchy and satisfying!

  • Oat-Free Topping: Omit oats entirely for a buttery flour-only crumble topping. This creates a richer, more decadent bite that pairs perfectly with the juicy fruit beneath.

  • Coconut Sugar: Replace brown sugar with coconut sugar to add a subtle caramel flavor and cut down on refined sugars. It’s a simple switch that infuses a new layer of flavor!

  • Spicy Kick: Add a dash of nutmeg or ginger to the cinnamon for an unexpected, warm spice intrigue. These spices will enhance the overall comforting taste of the crumble.

  • Citrus Variation: Try orange zest instead of lemon zest for a sweeter, citrusy contrast. This change brightens the flavor and adds a sophisticated flair!

Don’t forget, if you’re craving even more fruit-based recipes, check out our delicious Blueberry French Toast or the refreshing Lemon Blueberry Summery dessert.

What to Serve with Blueberry Peach Crumble

Elevate your dessert experience with delightful pairings that complement the sweet and tart flavors of this summer treat.

  • Vanilla Ice Cream: This classic duo creates a heavenly contrast of warm crumble and cool, creamy texture that melts beautifully.
  • Whipped Cream: Light and airy, a dollop of whipped cream adds a touch of elegance to your serving and highlights the crumble’s richness.
  • Greek Yogurt: A tangy alternative that balances sweetness while providing a healthy touch, perfect for those looking for a lighter option.
  • Lemonade: The brightness of freshly squeezed lemonade cuts through the richness, enhancing the summery vibes of your dessert.
  • Sparkling Wine: A chilled glass of bubbly adds sophistication and pairs exquisitely with the fruity notes, perfect for celebrations.
  • Berry Compote: Extra doses of mixed berries in syrup over the crumble can amplify flavors and tartness, refreshing every bite.
  • Coconut Whipped Cream: This dairy-free option introduces a tropical note, striking a lovely balance with the fruit’s sweetness.
  • Coffee: A warm cup of coffee brings depth and warmth, beautifully complementing the crumble’s comforting essence.
  • Chocolate Drizzle: A decadent drizzle of chocolate sauce transforms your dessert into an indulgent experience, pleasing the chocolate lovers in the crowd.
  • Mint Sprigs: Fresh mint leaves as a garnish provide a fragrant note and visual appeal, brightening up your dessert presentation.

How to Store and Freeze Blueberry Peach Crumble

Room Temperature: Keep the crumble at room temperature for up to 2 hours after baking; cover loosely with foil to maintain freshness.

Fridge: Store leftover Blueberry Peach Crumble in an airtight container for up to 3 days. Reheat in the oven or microwave, adding a scoop of ice cream for extra indulgence!

Freezer: Freeze unbaked crumble for up to 3 months. Wrap tightly in plastic wrap and aluminum foil. Bake directly from the freezer, adding a few extra minutes to the baking time.

Reheating: To reheat baked crumble, place it in a preheated oven at 350°F (175°C) for about 15-20 minutes or until heated through, maintaining its delicious crumbly topping.

Helpful Tricks for Blueberry Peach Crumble

  • Juice Release: Let the fruit mixture rest after combining to enhance the filling’s flavor and juiciness, ensuring your Blueberry Peach Crumble is luscious.
  • Browning Butter: For a deeper flavor profile, consider browning the butter before mixing it into the crumble topping—this adds an incredible richness.
  • Ramekin Magic: Use individual ramekins for personal servings that cook faster—approximately 25-30 minutes—perfect for quick treats!
  • Frozen Fruit: If using frozen blueberries or peaches, there’s no need to thaw. Just note that they may require slightly longer baking time to cook through.
  • Alternative Flavors: Don’t shy away from mixing and matching fruits—try cherries or raspberries instead of blueberries for a delightful variation that keeps things exciting!

Blueberry Peach Crumble Recipe FAQs

How do I know if my peaches and blueberries are ripe?
Absolutely! For peaches, look for fruits that are slightly soft when gently squeezed and have a sweet aroma. They should have vibrant color—avoid any that have dark spots. As for blueberries, make sure they are plump and firm, with a deep blue color and a dusty finish, which indicates they are fresh. If you notice any mushy berries, it’s best to discard those.

What is the best way to store leftover Blueberry Peach Crumble?
The more the merrier! To store, simply place your leftover crumble in an airtight container and refrigerate it for up to 3 days. If you’d like to reheat it, just pop it in a preheated oven at 350°F (175°C) for about 15-20 minutes, until warm and the topping remains crispy.

Can I freeze Blueberry Peach Crumble?
Yes, indeed! To freeze, prepare the crumble but do not bake it. Wrap it tightly in plastic wrap and then aluminum foil. You can freeze it for up to 3 months. When you’re ready to enjoy, bake it directly from the freezer for an extra 5-10 minutes to ensure it cooks through properly. Just think of it as a lovely surprise waiting for you!

Why is my crumble topping not crunchy?
Very often, it’s all about the butter! Ensure the butter is cold when mixing it into the topping; this helps to create that flaky texture. If the mixture becomes too wet, you might have added too much liquid or sugar. If this happens, you can always mix in a bit more flour to reach the desired consistency.

Can I use different fruits in the Blueberry Peach Crumble?
Absolutely! The Blueberry Peach Crumble is incredibly versatile; you can replace blueberries with raspberries, cherries, or even a mix of different berries for a delightful twist. Just keep in mind that the sweetness levels may vary, so adjust the sugar as needed based on your fruit choice.

Is this Blueberry Peach Crumble safe for pets or those with allergies?
For pet safety, it’s best to keep this dessert away from dogs and cats, as ingredients like sugar and chocolate can be harmful to them. For allergy considerations, note that this recipe contains gluten due to all-purpose flour, but you can easily substitute it with a gluten-free flour blend to make it suitable for gluten-sensitive individuals. Always check for specific allergies with your guests to ensure everyone can enjoy this wonderful treat!

Blueberry Peach Crumble

Blueberry Peach Crumble: The Ultimate Summer Dessert Delight

The Blueberry Peach Crumble is a delightful summer dessert bursting with flavors and easy to make, perfect for gatherings.
Prep Time 15 minutes
Cook Time 45 minutes
Cooling Time 10 minutes
Total Time 1 hour 10 minutes
Servings: 8 slices
Course: Dessert
Cuisine: American
Calories: 250

Ingredients
  

For the Filling
  • 1 cup Blueberries Fresh or frozen
  • 5-6 pieces Peaches Ripe, peeled, and sliced
  • 2 tablespoons Fresh Lemon Juice
  • 1 teaspoon Lemon Zest
  • 1 teaspoon Vanilla Extract
  • 1/2 cup Granulated Sugar Adjust based on fruit sweetness
  • 1/4 cup All-Purpose Flour For thickening the filling
For the Crumble Topping
  • 1/2 cup All-Purpose Flour Base for crumble
  • 1/2 cup Old-Fashioned Oats Do not use instant oats
  • 1/3 cup Brown Sugar For moisture and flavor
  • 1/2 teaspoon Salt Balances sweetness
  • 1 teaspoon Ground Cinnamon For flavor
  • 6 tablespoons Cold Butter Keep it cold for flakiness

Equipment

  • Oven
  • Mixing Bowl
  • baking dish
  • Measuring cups
  • Measuring spoons

Method
 

Preparation Steps
  1. Preheat your oven to 350°F (175°C). Prepare your baking dish.
  2. In a large mixing bowl, combine blueberries, sliced peaches, lemon juice, lemon zest, vanilla extract, granulated sugar, and flour. Toss until coated and let it rest for 5-10 minutes.
  3. In another bowl, mix flour, oats, brown sugar, salt, and cinnamon. Rub in cold butter until it resembles coarse crumbs.
  4. Spread the fruit filling in the greased baking dish and sprinkle the crumble topping evenly over the fruit.
  5. Bake for 40-45 minutes until the topping is golden brown and juices are bubbling.
  6. Let it cool for about 10 minutes before serving warm, ideally with vanilla ice cream or whipped cream.

Nutrition

Serving: 1sliceCalories: 250kcalCarbohydrates: 38gProtein: 3gFat: 10gSaturated Fat: 6gCholesterol: 20mgSodium: 100mgPotassium: 150mgFiber: 2gSugar: 15gVitamin A: 500IUVitamin C: 10mgCalcium: 20mgIron: 1mg

Notes

Alternative fruits like raspberries or cherries can be used for a twist. Let the fruit mixture rest to enhance flavor and juiciness.

Tried this recipe?

Let us know how it was!

Stay Connected

Get recipes via email: