Get my cookbooks

Delicious Gluten Free Oatmeal Chocolate Chip Cookies Easy Recipe

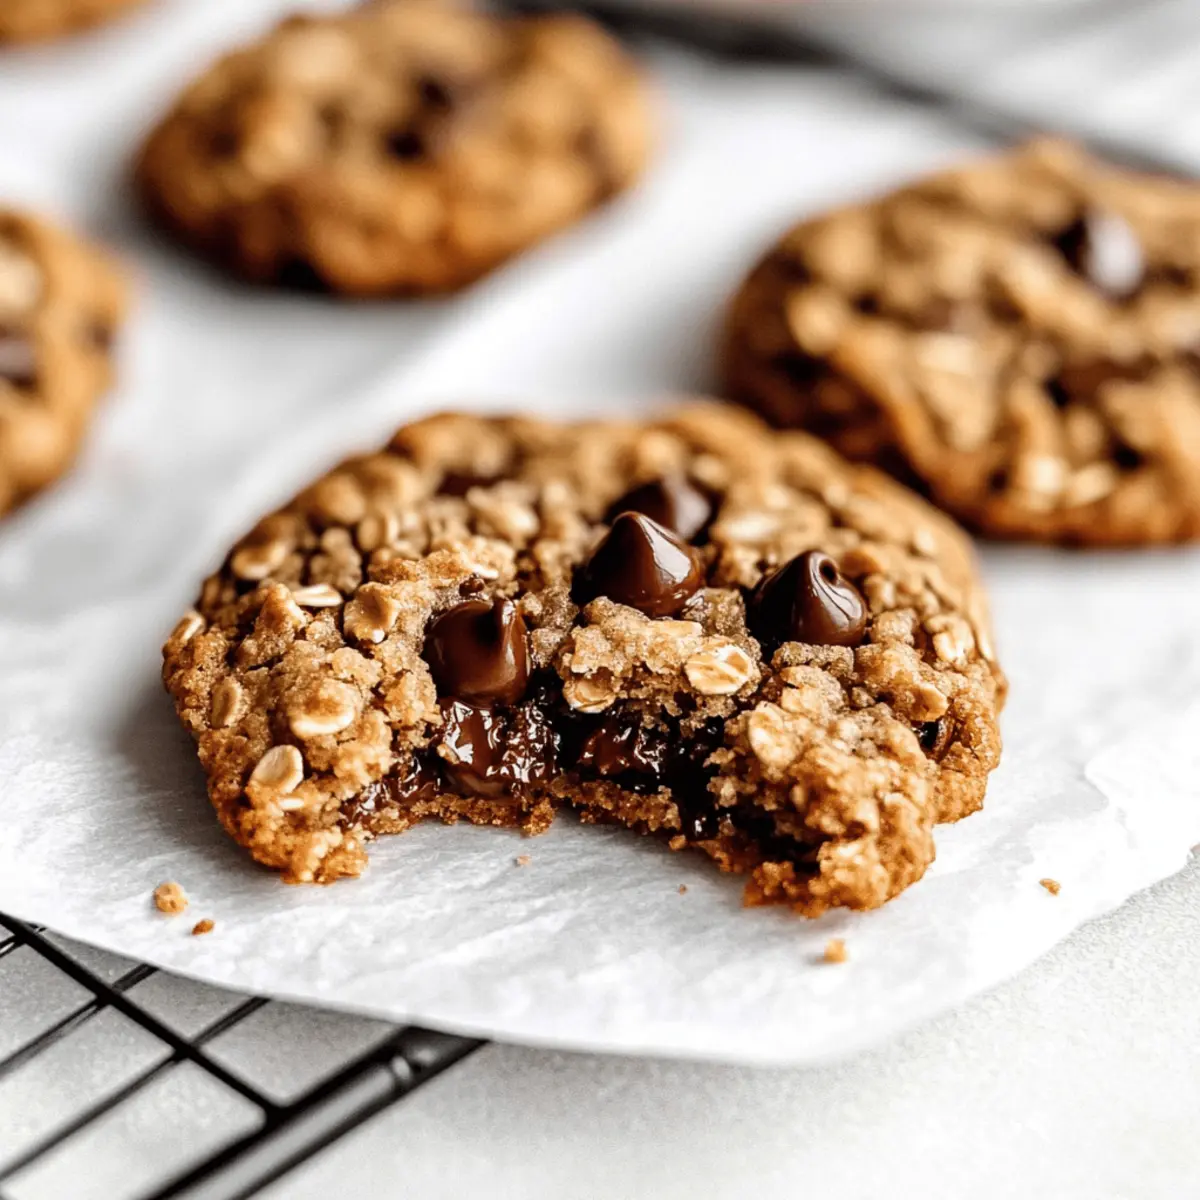
As the aroma of freshly baked cookies wafts through my kitchen, I can’t help but feel a wave of nostalgia for those sweet afternoons spent with loved ones. Today, I’m excited to share my recipe for Chewy Gluten Free Oatmeal Chocolate Chip Cookies. This delightful treat strikes the perfect balance between chewy and crispy, with melty chocolate chips that add just the right touch of sweetness. With a one-bowl approach, these cookies are not only quick to whip up, but they also cater to gluten-free, nut-free, and dairy-free diets, making them an inclusive option for everyone. Whether you’re treating yourself after a long day or want to impress friends at a gathering, these cookies are sure to become a favorite. Ready to dive into cookie bliss? Let’s get baking!

Why Choose Gluten Free Oatmeal Cookies?

Simplicity: This recipe is a breeze, utilizing just one bowl, making cleanup a cinch!
Wholesome Ingredients: Packed with oats and dark chocolate, they’re not only delicious but also nutritious.
Versatile Treat: Customize them with nuts or dried fruits, or enjoy them as a breakfast option—try adding blueberries for a fun twist!
Crowd-Pleaser: Perfect for gatherings, these cookies will satisfy both your gluten-free friends and the traditional cookie lovers alike.
Store & Share: Keep leftovers for up to three days or freeze them for a tasty treat anytime! These Blueberry Breakfast Cookies won’t last long, guaranteed!

Gluten Free Oatmeal Chocolate Chip Cookies Ingredients

For the Cookie Dough

  • Room Temperature Butter – Provides richness and moisture; can be substituted with dairy-free butter (e.g., Earth Balance).
  • White Sugar – Adds sweetness and helps achieve a nice texture; avoid substitutions for best results.
  • Dark Brown Sugar – Contributes deep flavor and moisture; coconut sugar can replace it, but don’t substitute for white sugar.
  • Large Egg – Binds ingredients together; substitute with 3 tablespoons of applesauce or 1 flax egg for a vegan option.
  • Gluten Free All Purpose Flour – Essential for cookie structure; must contain xanthan gum for gluten-free baking—do not use regular flour.
  • Quick Oats – Adds hearty texture; rolling oats can be used but may slightly alter the cookie’s texture.
  • Baking Soda – Helps cookies rise and achieve a lovely texture.
  • Baking Powder – Works with baking soda for leavening the cookies.
  • Salt – Enhances overall flavor, balancing the sweetness.
  • Ground Cinnamon – Adds warmth and depth to the flavor profile.
  • Chocolate Chips – Adds sweetness and richness; can be replaced with raisins or other mix-ins like blueberries for a breakfast twist.

Enjoy these Gluten Free Oatmeal Chocolate Chip Cookies, perfect for any occasion!

Step‑by‑Step Instructions for Gluten Free Oatmeal Chocolate Chip Cookies

Step 1: Cream the Butter and Sugars
In a large mixing bowl, use a hand mixer to cream together room temperature butter, white sugar, and dark brown sugar. Beat them on medium speed for about 1 minute until the mixture is slightly fluffy and creamy, giving it a pale appearance. This vital step helps create a rich base for your Gluten Free Oatmeal Chocolate Chip Cookies.

Step 2: Combine Wet Ingredients
Next, beat in the egg and vanilla extract until everything is well combined and smooth. This should take about 30 seconds. You want to ensure that the egg is fully incorporated into the mixture, providing structure for your cookies as they bake. The delightful aroma of vanilla will start to fill your kitchen!

Step 3: Mix in Dry Ingredients
Carefully fold in the gluten-free all-purpose flour, quick oats, baking soda, baking powder, salt, and ground cinnamon using a spatula. Make sure all ingredients are combined, but avoid overmixing to maintain the chewy texture of your cookies. Once mixed, gently stir in the chocolate chips, ensuring they’re evenly distributed throughout the dough.

Step 4: Chill the Dough
Cover the bowl with plastic wrap and chill the dough in the refrigerator for 30 minutes. Chilling helps the cookies maintain their shape while baking, resulting in perfectly chewy Gluten Free Oatmeal Chocolate Chip Cookies. As the dough sets, preheat your oven to 350°F (180°C) to prepare for baking.

Step 5: Prepare for Baking
As your oven reaches temperature, line a baking sheet with parchment paper. Once the dough has chilled, use a cookie scoop to form balls of dough, placing them about 2 inches apart on the baking sheet. This spacing allows the cookies to spread without merging into one another, ensuring each cookie bakes evenly.

Step 6: Bake the Cookies
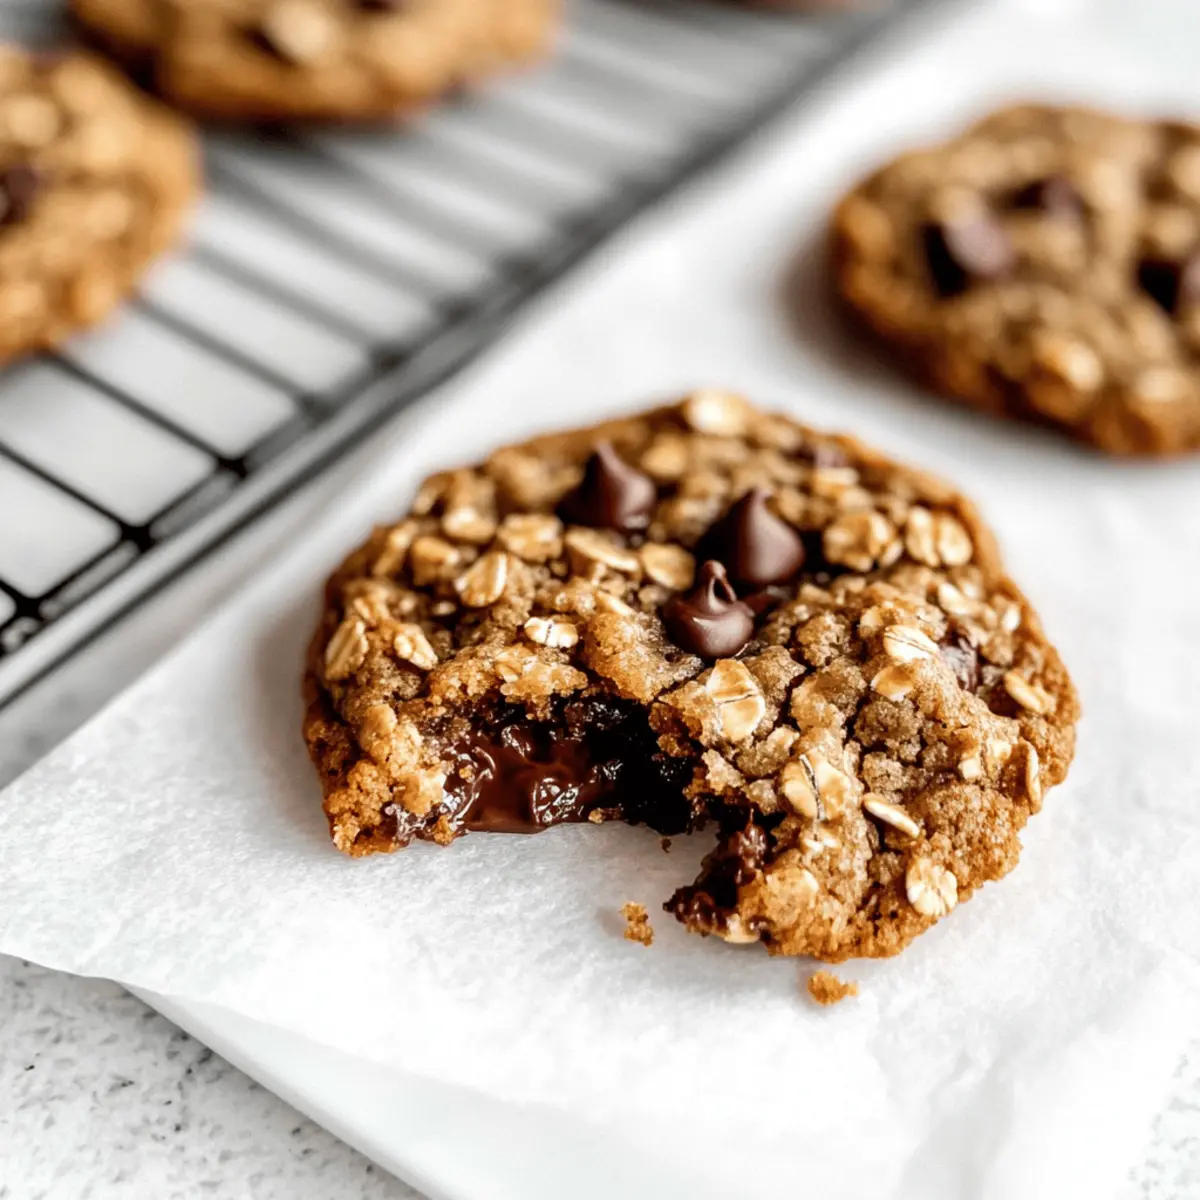
Bake in the preheated oven for 10-14 minutes, until the edges are golden brown while the centers remain soft. Keep an eye on them, as cookies will continue to firm up as they cool. The enticing aroma will fill your kitchen, letting you know that delicious Gluten Free Oatmeal Chocolate Chip Cookies are on the way!

Step 7: Cool and Shape (Optional)
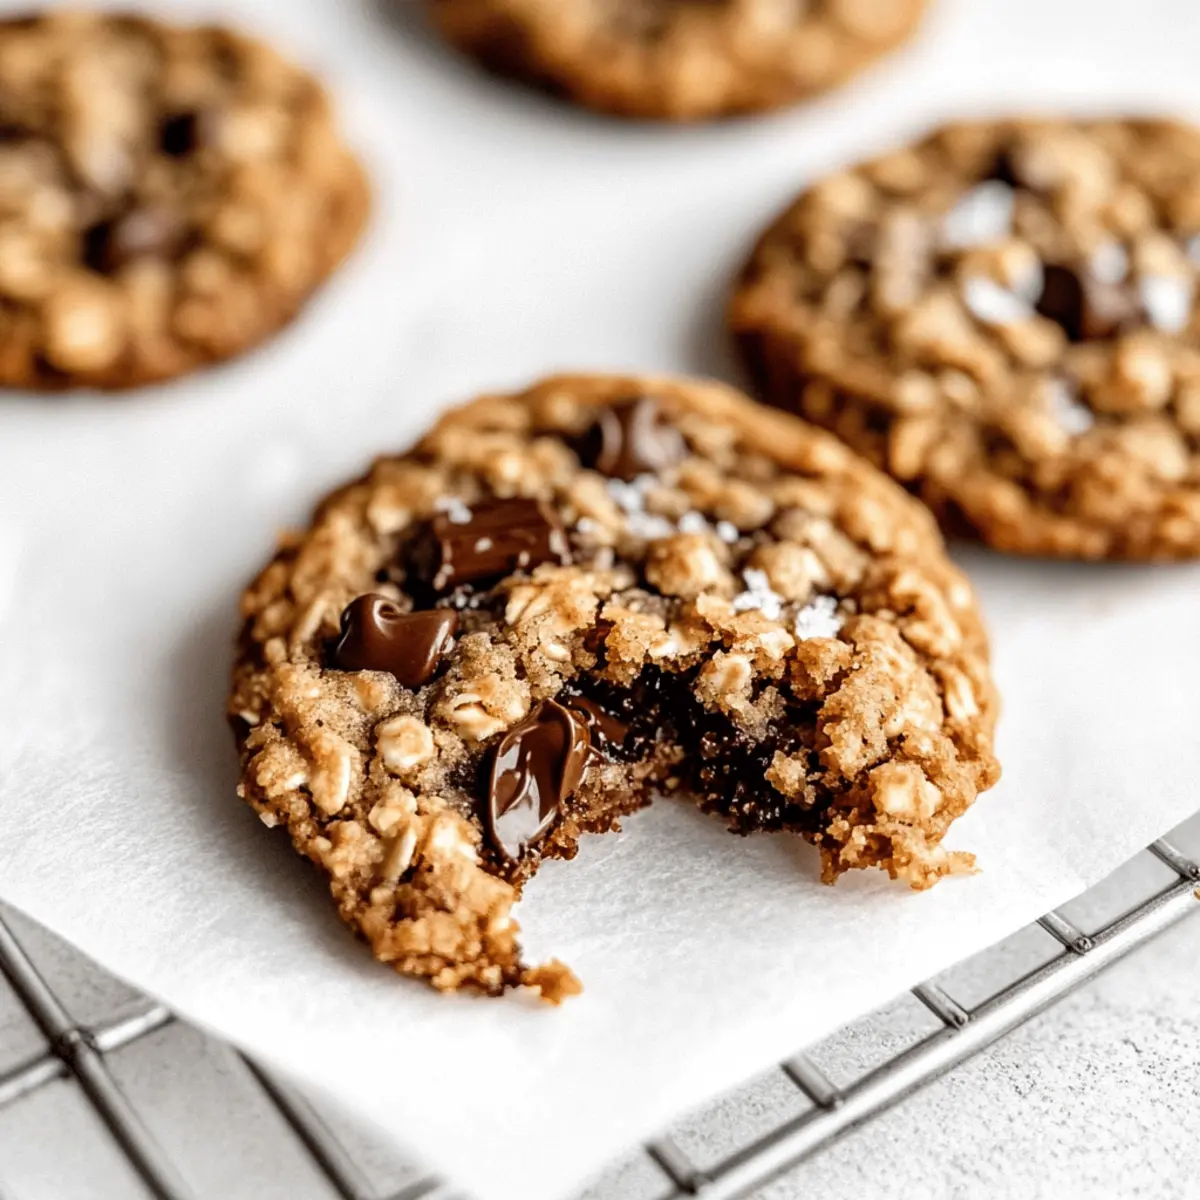
Once baked, remove the cookies from the oven and let them cool on the baking sheet for about 5 minutes. For a perfectly rounded shape, you can use a round cookie cutter to gently reshape the still-warm cookies. Let them cool completely on a wire rack to reach the ideal chewy texture before serving. If desired, sprinkle lightly with salt flakes for an extra touch!

Make Ahead Options

These Gluten Free Oatmeal Chocolate Chip Cookies are perfect for meal prep! You can prepare the cookie dough up to 24 hours in advance by following the first three steps of the recipe, then cover and refrigerate. This chilling not only saves time but also enhances the flavors. If you want to go even further, you can scoop the individual cookie balls onto a parchment-lined baking sheet, freeze them for a couple of hours, and then transfer them to a freezer-safe bag for up to 3 months. When you’re ready to bake, just pop the frozen dough directly into the oven, adjusting the baking time by a few minutes for delicious, freshly baked cookies that are just as good as when made day-of!

How to Store and Freeze Gluten Free Oatmeal Chocolate Chip Cookies

Room Temperature: Store cookies in an airtight container at room temperature for up to 3 days to maintain their delightful chewiness.

Refrigerator: If preferred, you can keep them in the fridge for an extended freshness but note they might harden slightly, so allow them to come to room temperature before enjoying.

Freezer: Place cooled cookies in a freezer-safe bag or container, separating layers with parchment paper, and freeze for up to 1 month for a delicious treat anytime!

Reheating: To enjoy cookies from the freezer, reheat in the oven at 300°F (150°C) for about 5-10 minutes until warmed through, bringing back their delightful chewy texture!

What to Serve with Chewy Gluten Free Oatmeal Chocolate Chip Cookies?

There’s nothing like a warm cookie to elevate your afternoon or dessert experience, so let’s explore some delightful pairings!

  • Creamy Vanilla Ice Cream: The rich creaminess of vanilla ice cream perfectly complements the chewy texture of these cookies, creating a satisfying contrast. Imagine taking a bite of the warm cookie, followed by a scoop of melted ice cream—it’s pure bliss!

  • Fresh Berries: A vibrant assortment of fresh strawberries, blueberries, or raspberries adds a refreshing touch that cuts through the sweetness of cookies. Their juicy burst balances the rich chocolate and enhances the overall flavor profile.

  • Nutty Granola: Pairing the cookies with a scoop of nutty granola introduces a delightful crunch, enhancing the texture while also providing a healthful element to your dessert. This duo makes for a great breakfast option too!

  • Chilled Almond Milk: This nut-free drink is a creamy addition that washes down the sweetness and offers a satisfying contrast to the cookies. It’s perfect for dunking, bringing out the oatiness in every bite!

  • Coconut Whipped Cream: A light and airy coconut whipped cream adds a tropical twist that pairs beautifully with the chocolate and oatmeal flavors. Just imagine the lusciousness—it’s a taste of paradise!

  • Espresso or Coffee: The bold flavors of coffee or espresso create a harmonious pairing with the cookies, enhancing the chocolatey richness while providing a cozy, aromatic experience. Perfect for an afternoon pick-me-up!

  • Caramel Sauce: Drizzling some warm caramel sauce over the cookies can elevate your dessert beyond the ordinary, introducing a delightful sweetness and luxurious texture with every bite.

  • Homemade Chia Pudding: A rich, creamy chia pudding can balance the cookies’ sweetness. It’s a nutritious side that adds a visual appeal and pairs beautifully with the oats and chocolate.

  • Chocolate Milkshake: For a fun and indulgent treat, serve with a thick chocolate milkshake that mirrors the cookie flavors while offering a cool and creamy contrast.

Each pairing enhances the chewy gluten free oatmeal chocolate chip cookies in delightful ways, making your homemade dessert experience even more special!

Expert Tips for Gluten Free Oatmeal Chocolate Chip Cookies

  • Use Certified Oats: Ensure your oats are certified gluten-free to prevent cross-contamination, especially important for those with Celiac disease.

  • Chill for Chewy Texture: Refrigerating the dough for at least 30 minutes is crucial for maintaining the chewy texture of your gluten-free oatmeal chocolate chip cookies.

  • Avoid Overbaking: Keep an eye on the cookies while baking; they should be golden brown at the edges but soft in the center, as they will firm up while cooling.

  • Measure Accurately: Use a kitchen scale for precise measurements of gluten-free flour for the best results, as too much or too little can affect the cookie’s texture.

  • Customize Wisely: Feel free to mix in different chocolate varieties or dried fruits, but be cautious not to disrupt the balance of wet and dry ingredients in the dough.

Gluten Free Oatmeal Chocolate Chip Cookies Variations

Feel free to put your personal spin on these delicious cookies and make them your own!

  • Dairy-Free: Substitute room temperature butter with dairy-free butter, like Earth Balance, to keep it cozy for plant-based eaters. The cookies will remain rich and satisfying!

  • Vegan Delight: Replace the egg with 3 tablespoons of applesauce or 1 flax egg to create a vegan-friendly version. Just watch as they turn out every bit as chewy!

  • Cranberry Crunch: Add a handful of dried cranberries or cherries for a sweet and tart flavor replacement. These fruity bursts will give a lovely chew to the cookies—perfect for a breakfast treat!

  • Nutty Boost: Toss in some chopped walnuts or pecans for a crunchy texture that contrasts beautifully with the chewy oats. You’ll be surprised how delightful the nutty flavor is in every bite.

  • Peanut Butter Lovers: Mix in peanut butter chips along with chocolate chips for a richer, more indulgent flavor. It’s a sweet twist that packs a punch!

  • Cinnamon Spice: Amp up the warmth by adding a sprinkle of pumpkin spice or nutmeg alongside the ground cinnamon. Your kitchen will smell heavenly, and the flavors take these cookies to a festive level.

  • Zesty Orange: For a citrus kick, add some orange zest to the dough. This unexpected twist adds freshness, making them perfect for a bright afternoon snack.

  • Double Chocolate: Swap half of the chocolate chips for cocoa nibs or dark chocolate chunks for an extra chocolatey experience. If you love chocolate, this variation will surely win your heart!

Enjoy making these variations as you explore new flavors, and while you’re at it, why not pair your treat with some delightful Chocolate Fudge Cupcakes or serve them alongside a bowl of warm, comforting Chocolate Granola Cups? Happy baking!

Gluten Free Oatmeal Chocolate Chip Cookies Recipe FAQs

What type of oats should I use for this recipe?
Absolutely! It’s essential to use certified gluten-free quick oats to ensure there’s no cross-contamination, especially for those with Celiac disease. Quick oats offer a better texture for these cookies than rolled oats, contributing to that delightful chewy center!

How should I store my cookies for freshness?
To maintain their fresh flavor and chewy texture, store the cookies in an airtight container at room temperature for up to 3 days. You can also keep them in the fridge, although they may harden a bit, so let them come to room temperature before enjoying!

Can I freeze these cookies?
Definitely! Place cooled cookies in a freezer-safe bag, separating layers with parchment paper, and freeze them for up to 1 month. When you’re ready to enjoy, reheat them in the oven at 300°F (150°C) for about 5-10 minutes until warmed through—this will help revive their delightful chewiness.

What if my cookies turn out too hard?
Oh no, that can happen sometimes! If your cookies feel hard, it may be due to overbaking. To prevent this, always bake until the edges are golden brown and the centers are still soft—remember that cookies firm up as they cool. Keep a close eye on the baking time, as ovens can vary!

Can I make these cookies vegan?
Yes, you can easily make these cookies vegan! Substitute the large egg with 3 tablespoons of applesauce or 1 flax egg (made by mixing 1 tablespoon of ground flaxseed with 3 tablespoons of water, then letting it sit for a few minutes until it thickens). Just remember to use dairy-free butter for the same rich flavor!

Are these cookies safe for people with nut allergies?
Very! These cookies are nut-free as long as you use the suggested ingredients and chocolate chips that do not contain nuts. Always double-check the labels to ensure there are no potential allergens, especially if you’re serving them to guests with dietary restrictions.

Gluten Free Oatmeal Chocolate Chip Cookies

Delicious Gluten Free Oatmeal Chocolate Chip Cookies Easy Recipe

Enjoy these chewy and crispy Gluten Free Oatmeal Chocolate Chip Cookies, packed with melty chocolate chips and perfect for all occasions.
Prep Time 30 minutes
Cook Time 14 minutes
Chilling Time 30 minutes
Total Time 1 hour 14 minutes
Servings: 12 cookies
Course: Dessert
Cuisine: American
Calories: 180

Ingredients
  

For the Cookie Dough
  • 1 cup Room Temperature Butter Can be substituted with dairy-free butter.
  • 1 cup White Sugar Avoid substitutions for best results.
  • 1/2 cup Dark Brown Sugar Coconut sugar can replace it.
  • 1 large Egg Can use 3 tablespoons of applesauce or 1 flax egg for vegan option.
  • 1 cup Gluten Free All Purpose Flour Must contain xanthan gum.
  • 2 cups Quick Oats Rolling oats can be used.
  • 1 teaspoon Baking Soda
  • 1 teaspoon Baking Powder
  • 1/2 teaspoon Salt
  • 1 teaspoon Ground Cinnamon
  • 1 cup Chocolate Chips Can be replaced with raisins or other mix-ins.

Equipment

  • large mixing bowl
  • Hand mixer
  • spatula
  • Cookie Scoop
  • Baking Sheet
  • Parchment Paper

Method
 

Step-by-Step Instructions
  1. Cream the butter and sugars together until slightly fluffy and creamy.
  2. Beat in the egg and vanilla extract until well combined.
  3. Fold in the gluten-free flour, oats, baking soda, baking powder, salt, and cinnamon.
  4. Cover the bowl and chill the dough in the refrigerator for 30 minutes.
  5. Preheat the oven to 350°F (180°C) and line a baking sheet with parchment paper.
  6. Scoop balls of dough onto the baking sheet, spaced 2 inches apart.
  7. Bake for 10-14 minutes until golden brown at the edges.
  8. Cool on the baking sheet for 5 minutes, then let cool completely on a wire rack.

Nutrition

Serving: 1cookieCalories: 180kcalCarbohydrates: 24gProtein: 2gFat: 8gSaturated Fat: 4gPolyunsaturated Fat: 1gMonounsaturated Fat: 2gCholesterol: 30mgSodium: 120mgPotassium: 40mgFiber: 1gSugar: 12gVitamin A: 250IUCalcium: 10mgIron: 1mg

Notes

Store cookies in an airtight container at room temperature for up to 3 days or freeze for up to 1 month.

Tried this recipe?

Let us know how it was!

No Bake White Chocolate Raspberry Cheesecake Recipe Bliss

As I sifted through my fridge one warm afternoon, a dazzling vision popped into my mind: No-Bake White Chocolate Raspberry Cheesecake. An effortless yet elegant dessert, it boasts a creamy texture perfectly balanced with the zesty kick of fresh raspberries. This cheesecake is not only a delight to make but also a show-stopping centerpiece for gatherings or a quick indulgence after a long day. Whether you’re entertaining guests or simply treating yourself, this easy cheesecake keeps the hassle of baking at bay, allowing you to savor every luscious bite. Are you ready to dive into this refreshing treat and impress even the pickiest of dessert lovers? Let’s whip up some joy together!

Why Will You Adore This Cheesecake?

Effortless Preparation: This easy no-bake cheesecake requires minimal effort and no baking skills, making it perfect for busy days.

Creamy Indulgence: The combination of rich white chocolate and fresh raspberries creates a luxurious dessert that will impress your taste buds.

Versatile Flavor Options: Feel free to swap raspberries for strawberries or blueberries, tailoring the recipe to your preferences or seasonal fruits.

Perfect for Entertaining: With its stunning presentation and crowd-pleasing flavors, this cheesecake is the ideal sweet ending for special gatherings or celebrations.

Quick Chilling Time: Just pop it in the fridge for a few hours, and you’ll have a show-stopping dessert ready in no time. Combine it with a delightful Chocolate Fudge Cupcakes for a sweet spread that will wow your guests!

No Bake White Chocolate Raspberry Cheesecake Ingredients

For the Crust

  • Plain Sweet Biscuits (200g) – Provides structure and crunch for the base; feel free to substitute with any similar sweet cookie.
  • Butter (120g, melted) – Binds the crust together; margarine can be used for a dairy-free version.

For the Filling

  • Cream (1 cup, lightly whipped) – Adds lightness and creaminess to the filling; ensure it’s lightly whipped to avoid over-beating.
  • White Chocolate (200g) – Contributes richness and sweetness; you can use dark chocolate for a different flavor profile.
  • Raspberries (¾ cup, fresh or frozen, pureed) – Adds vibrant flavor; fresh gives the best taste, but frozen are suitable out of season.
  • Gelatine (2 ½ teaspoons, dissolved in ¼ cup water) – Provides structure to the no-bake cheesecake; agar-agar can serve as a vegetarian alternative.
  • Cream Cheese (500g, softened) – Forms the creamy base for the filling; Neufchâtel cheese can be swapped for a lighter version.
  • Vanilla Bean Paste (1 teaspoon, optional) – Enhances flavor with a rich aroma; vanilla extract works if you’re out of this.
  • Sugar (150g, or ¾ cup) – Balances the tartness of raspberries; adjust to your taste for sweetness.

For Garnishing

  • Fresh Raspberries (for decoration) – Used for an attractive garnish and added freshness; mint leaves can provide a different touch.
  • Grated White Chocolate (50g, for decoration) – Adds delightful flavor and texture to your cheesecake.

Dive into this No Bake White Chocolate Raspberry Cheesecake Recipe and prepare to be amazed by its effortless deliciousness!

Step‑by‑Step Instructions for No Bake White Chocolate Raspberry Cheesecake Recipe

Step 1: Prepare the Pan
Start by greasing and lining a 23cm springform pan with baking paper. This step prevents sticking and ensures easy release later. Make sure to smooth out any air bubbles beneath the paper to create a flat surface for your no-bake white chocolate raspberry cheesecake.

Step 2: Make the Crust
In a food processor, crush the plain sweet biscuits into fine crumbs. Combine these crumbs with 120g of melted butter, stirring until evenly mixed. Press the mixture firmly into the base of the prepared pan, spreading it with the back of a spoon. Refrigerate the crust for about 30 minutes until firm and set.

Step 3: Prepare the Gelatine
Dissolve 2 ½ teaspoons of gelatine in ¼ cup of boiling water, stirring until fully dissolved. Allow it to cool slightly; this is key for achieving the right texture in your no-bake cheesecake without cooking the other ingredients. Set it aside while you prepare the filling.

Step 4: Mix Cheese and Sugar
In a mixing bowl, beat together 500g of softened cream cheese and 150g of sugar using an electric mixer at medium speed until the mixture is smooth and creamy. This should take about 3–5 minutes. If using, add in 1 teaspoon of vanilla bean paste to elevate the flavor profile of your cheesecake.

Step 5: Incorporate Gelatine
Once the gelatine has cooled down, slowly pour it into the cream cheese mixture while continuing to beat. Ensure that it is thoroughly combined without any lumps, which will help the filling set properly. This mixture forms the base of your luscious no-bake white chocolate raspberry cheesecake.

Step 6: Add Chocolate and Cream
Carefully fold in 200g of melted white chocolate and 1 cup of lightly whipped cream into the cream cheese mixture. Use gentle motions to combine; be careful not to overmix, as you want to maintain a light and airy texture in the filling. This creates the creamy richness of the cheesecake.

Step 7: Separate the Mixture
Divide the cheesecake mixture evenly into two bowls. In one bowl, gently stir in ¾ cup of pureed raspberries until well combined and vibrant. This gives you a lovely raspberry-flavored layer that adds a refreshing contrast to the creamy white chocolate filling.

Step 8: Layer the Mixture
Spoon the plain white chocolate mixture evenly into the bottom of the prepared crust, smoothing it out with a spatula. Refrigerate this layer for about 15 minutes, allowing it to firm up slightly before adding the raspberry layer on top. This will create distinct layers in your cheesecake.

Step 9: Add Raspberry Layer
After the initial chill, carefully spread the raspberry cheesecake mixture over the white chocolate layer. Use a spatula to evenly distribute the raspberry layer while keeping it smooth and even. This vibrant red layer provides a beautiful visual contrast in your no-bake cheesecake.

Step 10: Chill the Cheesecake
Cover the pan with plastic wrap and place it in the refrigerator, allowing it to set for a minimum of 4 hours or, for the best results, overnight. This prolonged chill is crucial for the cheesecake to firm up properly, ensuring easy slicing and serving.

Step 11: Decorate & Serve
Before serving, remove the cheesecake from the springform pan. Decorate the top with fresh raspberries and sprinkle 50g of grated white chocolate for a beautiful finishing touch. Slice it up and revel in the delightful layers of this no-bake white chocolate raspberry cheesecake recipe!

Storage Tips for No-Bake White Chocolate Raspberry Cheesecake

Fridge: Store your cheesecake in an airtight container for up to 5 days. This keeps the flavors fresh and delicious, ready for your next indulgent slice.

Freezer: The uncut cheesecake can be wrapped tightly and frozen for up to a month. Thaw in the fridge overnight before serving for the best texture.

Serving: After chilling, always allow the cheesecake to sit at room temperature for about 15 minutes before slicing. This helps it soften for easier serving and enhances the creamy texture of your no-bake white chocolate raspberry cheesecake.

What to Serve with Easy No-Bake White Chocolate Raspberry Cheesecake

Imagine serving up a delectable feast, where each dish enhances the charm of your creamy cheesecake masterpiece.

  • Fresh Berries: Bright, ripe berries like strawberries, blueberries, or more raspberries heighten the tartness and add a delightful pop of color to your dessert table. Their freshness perfectly complements the rich texture of the cheesecake.

  • Mint-Infused Iced Tea: A refreshing glass of iced tea infused with mint offers a cool contrast to the sweet richness of the cheesecake, creating a soothing balance of flavors on the palate.

  • Chocolate Drizzle: A simple drizzle of dark chocolate ganache adds a luxurious touch, intensifying the flavors while providing a beautiful visual accent that will impress your guests.

  • Creamy Vanilla Ice Cream: Serve a scoop of velvety vanilla ice cream alongside each slice. The creamy contrast elevates the dessert experience, making each bite a heavenly indulgence.

  • Crispy Shortbread Cookies: Pairing with buttery shortbread cookies provides a crunchy texture, creating an exciting contrast to the creamy cheesecake.

  • Sparkling Water with Citrus Garnish: A refreshing sparkle of citrus-infused sparkling water cleanses the palate between bites, enhancing the dessert’s flavors while keeping everything light.

  • Caramel Sauce: A drizzle of warm caramel sauce over the cheesecake or served on the side adds a decadent element, making the indulgence even sweeter and more luxurious.

  • Coffee or Espresso: Serve with a rich cup of coffee or espresso to bring out the complexity of flavors. The slight bitterness of coffee wonderfully balances the sweetness of the cheesecake, promoting a harmonious finish.

  • Chocolate Chip Cookies: Classic chocolate chip cookies add a homey touch and a comforting crunch, creating an inviting dessert spread that feels familiar and warm.

Embark on a delightful journey of flavors and textures with these pairing suggestions, making your no-bake white chocolate raspberry cheesecake the star of the show!

No Bake White Chocolate Raspberry Cheesecake Variations

Feel free to explore these tempting variations to personalize your cheesecake experience and make it even more delightful!

  • Berry Bliss: Substitute raspberries with strawberries or blueberries for a sweet twist that tantalizes your taste buds. The vibrant colors will make your cheesecake even more visually stunning!

  • Chocolate Indulgence: Use chocolate biscuits instead of sweet ones in the crust for an extra chocolatey kick. Adding cocoa powder to the filling takes the richness to decadent levels that chocolate lovers will adore.

  • Healthier Option: For a lighter treat, swap cream cheese for Neufchâtel cheese. You’ll maintain the creaminess while cutting down on calories, making this dessert more guilt-free!

  • Dairy-Free Delight: Replace butter with margarine and use a dairy-free cream cheese. This gives everyone at the table a chance to enjoy the cheesecake without compromising on flavor.

  • Gluten-Free Goodness: Make it gluten-free by opting for gluten-free biscuits for the crust. Always double-check your other ingredients to ensure they’re certified gluten-free too.

  • Tropical Twist: Add pineapple or mango purée along with your raspberries for a refreshing tropical flavor. The fruity notes will transport you to a sunny paradise!

  • Spiced Chic: Incorporate a pinch of cinnamon or nutmeg into the cheesecake filling for a warm spiced vibe that adds depth and warmth, perfect for cozy gatherings.

  • Tangy Citrus: Mix in some lemon or lime zest for a zesty zing that brightens every bite. It’s the perfect contrast against the richness of white chocolate!

Looking for more dessert ideas? Pair this cheesecake with some delightful Chocolate Fudge Cupcakes or a fluffy Protein Egg Bake to create a wonderful spread for any occasion!

Expert Tips for No-Bake Cheesecake

  • Room Temperature Ingredients: Ensure all ingredients, especially cream cheese and cream, are at room temperature for the smoothest texture in your cheesecake.
  • Gentle Folding: Use gentle folding techniques when mixing in the whipped cream and melted white chocolate to maintain the airy, luscious texture of your no-bake cheesecake.
  • Avoid Whole Berries: For a neater appearance, avoid adding whole raspberries in the layers. Pureeing raspberries will prevent any bleeding and maintain a clean design.
  • Proper Chilling: Allow enough time for your cheesecake to chill—aim for a minimum of 4 hours but overnight is best for set perfection.
  • Save Leftovers Wisely: Store any leftovers in the fridge for up to 5 days or freeze uncut portions for up to a month, ensuring your cheesecake remains delicious for future enjoyment.

Make Ahead Options

These No-Bake White Chocolate Raspberry Cheesecake delights are perfect for busy cooks looking to save time! You can prepare the crust and filling up to 24 hours in advance. Simply follow the initial steps, including chilling the crust after pressing it into the pan, and mix the cheesecake filling (minus the whipped cream) before refrigerating it separately. When ready to serve, gently fold in the whipped cream and layer the mixtures as indicated in the recipe before chilling for at least 4 hours or overnight. This ensures each slice remains just as luscious and fresh as if made on the same day! Enjoy the convenience of this make-ahead dessert that will impress your family and friends.

No-Bake White Chocolate Raspberry Cheesecake Recipe FAQs

How do I choose the right ingredients for this cheesecake?
Absolutely! When selecting your raspberries, look for ones that are bright and plump with no dark spots or mushiness. For the cream cheese, ensure it’s softened at room temperature for easier mixing. If you’re using white chocolate, opt for high-quality chocolate for the best flavor. Fresh fruit will always provide a fresher taste, but frozen raspberries are perfect when fresh ones are out of season.

How do I store any leftovers from my no-bake cheesecake?
Very good question! Store your no-bake white chocolate raspberry cheesecake in an airtight container in the fridge for up to 5 days. Be sure to cover it well to maintain its freshness. If you have uncut cheesecake left, you can wrap it tightly and freeze it for up to a month. Just remember to thaw it in the fridge overnight before serving to retain its creamy texture.

Can I freeze the cheesecake, and if so, how?
Yes, you can! To freeze your cheesecake, start by wrapping the uncut cheesecake tightly in plastic wrap or aluminum foil, making sure it’s completely sealed to prevent freezer burn. Place it in a freezer-safe container for extra protection. It can be frozen for up to a month. When you’re ready to enjoy it, transfer it to the fridge and allow it to thaw overnight before serving.

What should I do if my cheesecake doesn’t set properly?
Oh no! If your cheesecake doesn’t set as expected, it’s often due to not allowing enough time in the fridge. Make sure to chill it for at least 4 hours, or preferably overnight, to give the gelatine time to work its magic. If it still looks too soft, consider adding a bit more dissolved gelatine next time or chilling it a tad longer before serving.

Is this cheesecake suitable for special diets or allergies?
Definitely! To make it gluten-free, swap the biscuits for gluten-free cookies. For a lighter option, use Neufchâtel cheese instead of cream cheese. If you have a dairy allergy, try using dairy-free cream cheese and margarine in the crust. Just make sure to check your gelatin’s source, as some may not be suitable for vegetarian diets—consider using agar-agar instead for an entirely vegetarian-friendly dessert!

No Bake White Chocolate Raspberry Cheesecake Recipe

No Bake White Chocolate Raspberry Cheesecake Recipe Bliss

Enjoy a delightful No Bake White Chocolate Raspberry Cheesecake, an effortless dessert balancing creamy texture with fresh raspberries.
Prep Time 15 minutes
Chilling Time 4 hours
Total Time 4 hours 15 minutes
Servings: 8 slices
Course: Dessert
Cuisine: American
Calories: 350

Ingredients
  

For the Crust
  • 200 g Plain Sweet Biscuits Provides structure and crunch; substitute with any similar sweet cookie.
  • 120 g Butter Melted; margarine can be used for a dairy-free version.
For the Filling
  • 1 cup Cream Lightly whipped; avoid over-beating.
  • 200 g White Chocolate Can use dark chocolate for a different flavor.
  • ¾ cup Raspberries Fresh or frozen, pureed; fresh gives the best taste.
  • 2 ½ teaspoons Gelatine Dissolved in ¼ cup water; agar-agar can be a vegetarian alternative.
  • 500 g Cream Cheese Softened; Neufchâtel cheese can be swapped for a lighter version.
  • 1 teaspoon Vanilla Bean Paste Optional; vanilla extract works as a substitute.
  • 150 g Sugar Adjust to taste for sweetness.
For Garnishing
  • Fresh Raspberries For decoration; mint leaves can provide a different touch.
  • 50 g Grated White Chocolate For decoration.

Equipment

  • 23cm springform pan
  • Food Processor
  • Mixing Bowl
  • Electric mixer

Method
 

Preparation Steps
  1. Prepare the Pan: Grease and line a 23cm springform pan with baking paper.
  2. Make the Crust: Crush the biscuits into fine crumbs, combine with melted butter, press into the pan, and refrigerate for 30 minutes.
  3. Prepare the Gelatine: Dissolve gelatine in boiling water, allow to cool slightly, then set aside.
  4. Mix Cheese and Sugar: Beat cream cheese and sugar in a mixing bowl until smooth and creamy, adding vanilla if using.
  5. Incorporate Gelatine: Slowly pour cooled gelatine into the cream cheese mixture while beating until well combined.
  6. Add Chocolate and Cream: Fold melted white chocolate and whipped cream into the mixture gently.
  7. Separate the Mixture: Divide the cheesecake mixture into two bowls, adding pureed raspberries to one.
  8. Layer the Mixture: Spoon the plain mixture into the crust, refrigerate for 15 minutes.
  9. Add Raspberry Layer: Spread the raspberry mixture over the white chocolate layer evenly.
  10. Chill the Cheesecake: Cover and refrigerate for a minimum of 4 hours or overnight.
  11. Decorate & Serve: Remove from pan, decorate with fresh raspberries and grated chocolate, then serve.

Nutrition

Serving: 1sliceCalories: 350kcalCarbohydrates: 30gProtein: 5gFat: 22gSaturated Fat: 13gPolyunsaturated Fat: 1gMonounsaturated Fat: 6gCholesterol: 60mgSodium: 180mgPotassium: 150mgFiber: 1gSugar: 20gVitamin A: 500IUVitamin C: 5mgCalcium: 70mgIron: 1mg

Notes

Allow cheesecake to sit at room temperature for about 15 minutes before slicing for best texture.

Tried this recipe?

Let us know how it was!

Japanese Egg Sandwich Bliss – Creamy, Fluffy, Irresistible!

With a light crunch of bread and an explosion of creamy goodness, the Japanese Egg Sandwich, or Tamago Sando, is a delightful treat that takes me straight to the heart of Japan. This quick meal showcases high-quality eggs transformed into a rich, velvety egg salad, lovingly cradled between slices of fluffy Japanese milk bread. What makes this recipe irresistible is its charming simplicity and the ability to cater to both kids and adults, making it perfect for lunchboxes or a cozy snack at home. Not only will you be whipping up a dish that’s bursting with authentic flavors, but you’ll also discover just how rewarding it is to create something so comforting yet sophisticated in your own kitchen. Curious how to bring this Japanese classic to life? Let’s dive into the details!

Why is Tamago Sando So Irresistible?

Authentic Flavors: The unique combination of high-quality eggs and Japanese mayonnaise creates a taste that transports you straight to Tokyo with every bite.
Quick Prep Time: Ready in under 30 minutes, making it perfect for busy weekdays or last-minute meals.
Versatile Enjoyment: Whether you choose soft-boiled or hard-boiled eggs, this recipe allows you to customize your egg salad with ease, catering to every preference.
Crowd Pleaser: Ideal for both kids and adults, it’s a recipe that everyone will adore—perfect for lunchboxes or an afternoon snack! For more delightful sandwich ideas, check out our Honey Banana Sandwich or the Avocado Melt Sandwich.
Delightful Textures: The fluffy Japanese milk bread combined with a creamy filling is a match made in heaven, making each bite a pleasurable experience.

Japanese Egg Sandwich Ingredients

• To recreate the creamy and fluffy delight of the Japanese Egg Sandwich, here’s everything you need to gather!

For the Egg Salad

  • 6 large Pete and Gerry’s Organic Eggs – This high-quality egg ensures a rich flavor; use soft-boiled for a creamier texture.
  • 1/4 teaspoon sugar – Balances the flavors beautifully without needing a substitute.
  • 1/4 teaspoon salt – Enhances the taste; add this only after tasting the mayo for perfect flavor.
  • 1/4 teaspoon ground black pepper – A touch of mild spiciness; adjust it to your liking.
  • 1 to 2 teaspoons milk or plant milk (optional) – Adds moisture, prefer it in hard-boiled versions; omit if using soft-boiled eggs.
  • 4 tablespoons Japanese mayonnaise – This creamier alternative elevates the flavor; if unavailable, American mayo works in a pinch.

For the Sandwich

  • 4 slices Japanese milk bread – This soft, slightly sweet bread is essential; high-quality white bread can work as an alternative.
  • 2 tablespoons unsalted butter, softened – Adds richness and binds the sandwich together; no substitutions recommended.

For Garnish (optional)

  • Chives, sliced – Freshness and visual appeal included; green onions can replace chives if desired.

With these ingredients on hand, you’ll be well on your way to savoring the delightful experience of making an authentic Japanese Egg Sandwich!

Step‑by‑Step Instructions for Japanese Egg Sandwich

Step 1: Prepare Ice Bath
Begin by filling a large bowl with ice water and setting it aside; this will quickly cool the eggs after boiling. Preparing the ice bath ensures that your Japanese Egg Sandwich features perfectly soft-boiled or hard-boiled eggs.

Step 2: Cook Eggs
In a medium pot, bring water to a gentle boil over medium heat. Carefully lower the six organic eggs into the boiling water using a slotted spoon. For soft-boiled eggs, let them cook for 7 minutes, or for hard-boiled, aim for 10 minutes. Once the time is up, turn off the heat and allow the eggs to sit in the hot water for an additional minute.

Step 3: Chill Eggs
Using a slotted spoon, transfer the cooked eggs into the prepared ice bath immediately. Let them chill for about 2 minutes to stop the cooking process. This step is crucial for achieving the ideal texture for your Japanese Egg Sandwich. Once they are cool enough to handle, gently tap the eggs to crack the shells and peel them.

Step 4: Make Egg Salad
In a mixing bowl, mash the peeled eggs with a fork until you have a chunky, yet cohesive texture. Add in the sugar, salt, ground black pepper, and Japanese mayonnaise. If desired, mix in 1 to 2 teaspoons of milk for extra creaminess. Stir everything together until well combined; taste and adjust the seasoning according to your preferences.

Step 5: Assemble Sandwiches
Take the slices of Japanese milk bread and generously spread softened butter on one side of each slice. Place a heaping portion of the egg salad between two slices, buttered side inwards. For a neat presentation, trim off the crusts. If you wish, sprinkle sliced chives on top of the egg salad before adding the second slice of bread.

Step 6: Serve
Finally, slice each assembled Japanese Egg Sandwich in half diagonally for easy handling and visual appeal. Serve immediately to enjoy the delightful combination of creamy filling and fluffy bread. This comforting treat will surely be a hit among family and friends!

Japanese Egg Sandwich Variations

Feel free to play around with this Japanese Egg Sandwich recipe and let your creativity shine!

  • Dairy-Free: Substitute milk with plant-based milk for a dairy-free option while maintaining moisture.
  • Spicy Kick: Add a pinch of chili flakes or diced jalapeños to the egg salad for a flavorful heat boost.
  • Herb Infusion: Experiment with fresh herbs like dill or parsley instead of chives for a garden-fresh flavor.
  • Crunchy Texture: Incorporate finely diced cucumber or radishes for an extra crunch that contrasts beautifully with the creamy egg salad.
  • Sriracha Swirl: Mix in a tablespoon of sriracha or your favorite hot sauce for a tangy and spicy twist that will excite your palate.
  • Avocado Enhancement: Layer thin slices of avocado inside the sandwich for added creaminess and healthy fats. You might also enjoy our delightful Avocado Melt Sandwich.
  • Savory Depth: Introduce finely chopped olives or capers to enhance the flavors with a salty, briny twist.
  • Gourmet Variation: Swap the Japanese mayonnaise for flavored aioli to elevate this simple sandwich into a gourmet delight.

With these variations, you can make this beloved dish your own while indulging in the comforting flavors of a classic tamago sando!

Expert Tips for Japanese Egg Sandwich

  • Perfectly Boiled Eggs: For soft-boiled eggs, remember to chill quickly in an ice bath after boiling to stop the cooking process, ensuring a creamy texture.

  • Choose Quality Mayo: Authentic Japanese mayonnaise enhances the flavor significantly. If you use American mayo instead, don’t expect the same richness.

  • Adjust Seasoning Wisely: Add salt after mixing the egg salad and tasting it, preventing over-salting from the onset and allowing you to perfect the flavor.

  • Sandwich Storage: Keep assembled Japanese Egg Sandwiches wrapped in plastic wrap in an airtight container for up to 2 days, especially if using milk bread.

  • Butter Generously: Apply softened butter on the bread for a richer taste and to help bind the sandwich together, enhancing the overall experience.

Make Ahead Options

These Japanese Egg Sandwiches are perfect for busy home cooks looking to save time! You can prepare the egg salad filling up to 24 hours in advance. Simply boil and cool the eggs, then mash them with the other ingredients (sugar, salt, pepper, mayonnaise) and store the mixture in an airtight container in the refrigerator. To maintain quality, keep the egg salad separate from the bread until you’re ready to serve. Assemble the sandwiches just before mealtime, spreading butter on the bread and adding the egg salad for that fresh, fluffy taste. This way, you’ll have a delightful lunch or snack ready to go with minimal effort!

What to Serve with Japanese Egg Sandwich (Tamago Sando)?

Elevate your delightful Japanese egg sandwich experience by pairing it with complementary sides that enhance the overall meal.

  • Crispy Potato Chips: The crunch of chips balances the sandwich’s creamy filling, providing a satisfying contrast with every bite. Their salty flavor makes for a delightful indulgence.

  • Fresh Cucumber Salad: A refreshing side packed with hydrating elements and a touch of tanginess, this salad brightens up the meal and adds crunch.

  • Miso Soup: This warm, soothing soup complements the sandwich perfectly, providing umami flavors that resonate beautifully with the egg filling.

  • Fruity Side Dish: Serve with a medley of seasonal fruit like sliced melons or berries for a sweet touch. The natural sweetness of the fruit pairs well with the savory egg salad.

  • Pickled Vegetables: A side of tangy pickles offers a delightful contrast to the rich flavors of the sandwich, cleansing the palate and adding zest.

  • Iced Green Tea: Refreshing and light, this beverage enhances your meal with subtle flavors while keeping you cool and invigorated.

  • Matcha Latte: If you’re looking for warmth, the creamy texture of a matcha latte brings a unique flavor profile, harmonizing with the sandwich’s creaminess.

  • Mochi Dessert: For a sweet finish, a piece of mochi provides a chewy texture and a burst of sweetness, rounding out this refined meal experience.

Storage Tips for Japanese Egg Sandwich

Fridge: Keep assembled Japanese Egg Sandwiches wrapped in plastic wrap or in an airtight container for up to 2 days. This helps maintain freshness and prevents the bread from becoming soggy.

Freezer: While not recommended, you can freeze the egg salad separately in an airtight container for up to 1 month. Thaw in the fridge before assembling your sandwiches.

Reheating: If you prefer to warm the egg salad, do so gently in the microwave, stirring occasionally, but be careful not to overheat as this can change the texture.

Enjoy Freshly Made: For the best taste and texture, always aim to enjoy your tamago sando fresh, ideally within 1 day of assembly.

Japanese Egg Sandwich (Tamago Sando) Recipe FAQs

How do I select the right eggs for this recipe?
Absolutely! For the best flavor and texture in your Japanese Egg Sandwich, I recommend using high-quality organic eggs, like Pete and Gerry’s. Soft-boiled eggs yield a creamier salad, while hard-boiled eggs are firmer. Ensure there are no dark spots or cracks on the eggs before you purchase them.

What is the best way to store leftovers?
Very good question! To keep your assembled Japanese Egg Sandwiches fresh, wrap them tightly in plastic wrap or place them in an airtight container. They will stay delicious for up to 2 days in the fridge. Just remember that sandwiches made with milk bread tend to have a shorter shelf life, so enjoy them as soon as possible!

Can I freeze the egg salad for later use?
Yes, you can! While it’s best to assemble the Japanese Egg Sandwich fresh, you can freeze the egg salad separately. Place it in an airtight container and store it in the freezer for up to 1 month. When you’re ready to enjoy it, simply thaw it in the fridge overnight before putting your sandwich together.

What if my egg salad is too dry?
If you find that your egg salad is on the dry side, don’t worry! You can easily adjust the consistency. Just mix in an extra teaspoon of Japanese mayonnaise or a splash of milk to moisten it up. If you’re using hard-boiled eggs, gently mashing them with a fork will also help create a creamier texture.

Are there any dietary considerations I should be aware of?
Absolutely! If you’re making this Japanese Egg Sandwich for a group, be mindful of allergies. The recipe includes eggs and mayonnaise, both of which are common allergens. For those with egg allergies, consider using egg substitutes like silken tofu blended into a smooth consistency, although it will change the flavor profile significantly.

How can I enhance the flavor of my egg salad?
The more the merrier! To amp up the flavors in your egg salad, consider mixing in some finely chopped cucumber for a refreshing crunch or a pinch of chili flakes for some heat. Adding fresh herbs like dill or parsley can also elevate your Japanese Egg Sandwich to the next level, making it a delightful treat for everyone.

Japanese Egg Sandwich

Japanese Egg Sandwich Bliss – Creamy, Fluffy, Irresistible!

Experience the delightful Japanese Egg Sandwich (Tamago Sando) featuring creamy egg salad between fluffy bread.
Prep Time 15 minutes
Cook Time 10 minutes
Chill Time 2 minutes
Total Time 27 minutes
Servings: 2 sandwiches
Course: Breakfast
Cuisine: Japanese
Calories: 320

Ingredients
  

For the Egg Salad
  • 6 large Pete and Gerry’s Organic Eggs Use soft-boiled for a creamier texture.
  • 1/4 teaspoon sugar Balances the flavors.
  • 1/4 teaspoon salt Add after tasting the mayo.
  • 1/4 teaspoon ground black pepper Adjust to your liking.
  • 1 to 2 teaspoons milk or plant milk Optional, prefer in hard-boiled versions.
  • 4 tablespoons Japanese mayonnaise American mayo works in a pinch.
For the Sandwich
  • 4 slices Japanese milk bread High-quality white bread can work as an alternative.
  • 2 tablespoons unsalted butter Softened, adds richness.
For Garnish (optional)
  • chives, sliced Green onions can replace chives if desired.

Equipment

  • medium pot
  • Mixing Bowl
  • slotted spoon

Method
 

Step-by-Step Instructions
  1. Prepare Ice Bath: Fill a large bowl with ice water and set it aside.
  2. Cook Eggs: Boil water in a pot. Lower in the eggs, cooking for 7 minutes for soft-boiled or 10 minutes for hard-boiled.
  3. Chill Eggs: Transfer cooked eggs to the ice bath for 2 minutes. Crack and peel the eggs once cool.
  4. Make Egg Salad: Mash peeled eggs, mix in sugar, salt, pepper, and mayo. Adjust seasoning as needed.
  5. Assemble Sandwiches: Spread softened butter on bread, add egg salad, and cover with another slice. Trim crusts if desired.
  6. Serve: Slice sandwiches diagonally and serve immediately.

Nutrition

Serving: 1sandwichCalories: 320kcalCarbohydrates: 30gProtein: 12gFat: 20gSaturated Fat: 8gPolyunsaturated Fat: 2gMonounsaturated Fat: 8gCholesterol: 180mgSodium: 350mgPotassium: 250mgFiber: 1gSugar: 1gVitamin A: 500IUCalcium: 50mgIron: 1mg

Notes

For the best taste and texture, serve freshly made sandwiches within 1 day of assembly. Store leftovers wrapped in plastic for up to 2 days.

Tried this recipe?

Let us know how it was!

Easy Saucy Ramen Noodles for a Fast Vegan Delight

Under the glow of my kitchen lights, I felt that familiar tickle of excitement in my stomach. These Easy Saucy Ramen Noodles have quickly become my go-to meal for those whirlwind evenings when the clock is merciless. In just about 20 minutes, I whip up this vegan delight, where vibrant veggies and extra firm tofu dance delightfully in a thick, rich sauce that tantalizes the taste buds. What I love most is how easily customizable this dish is; you can throw in whatever vegetables you have on hand or swap out the protein for a different twist. It’s not just quick to prepare, but it’s also bursting with versatility, making it the perfect meal to keep your culinary creativity alive—no takeout required! Are you ready to elevate your weeknight dinners with this saucy sensation?

Why You’ll Crave This Recipe

Simplicity at Its Best: This dish is a breeze to make in 20 minutes, perfect for even the busiest weeknights.

Rich, Flavorful Sauce: The thick sauce clings to each noodle, delivering an explosion of taste with every bite, guaranteeing a satisfying meal.

Endless Customization: Use whatever veggies or proteins you have on hand, making it a weekly staple that never gets old.

Healthy and Filling: Packed with tofu and nutrient-rich vegetables, this recipe balances flavor with a nourishing punch—ideal for health-conscious foodies.

Crowd-Pleasing Appeal: Whether it’s a quick dinner for one or a meal shared with friends, these Easy Saucy Ramen Noodles are sure to impress everyone at the table.

Pair it Perfectly: Try serving them alongside a light cucumber salad or refreshing seaweed salad for a delightful contrast that elevates the entire meal. For more delightful noodle dishes, check out my recipes for Sticky Beef Noodles or Dragon Noodles Colorful.

Easy Saucy Ramen Noodles Ingredients

For the Noodles

  • Dry Instant Ramen Noodles – These form the delightful base of the dish; switch to brown rice ramen for a gluten-free treat.

For the Sauce

  • Water or Vegetable Broth – Liquid for the sauce base; choose broth for an extra burst of flavor.
  • Soy Sauce – This key flavor enhancer adds the perfect level of saltiness; feel free to adjust for lower sodium options.
  • Dark Soy Sauce (optional) – Adds rich color to the sauce; omit if not available.
  • Corn Starch – Essential for thickening the sauce; arrowroot or tapioca starch can be excellent alternatives.
  • Sweetener (e.g., maple syrup) – Balances the salty flavors, making the sauce irresistible; adjust to your taste.
  • Rice Vinegar (or lemon juice) – Introduces a touch of acidity; other vinegars can work just as well.
  • Ground Pepper – Provides a hint of heat; swap between white or black pepper based on your preference.
  • Chili Garlic Sauce (optional) – Adds a spicy kick; substitute with your favorite hot sauce if desired.
  • Sesame Oil – Contributes a distinct nutty flavor; though other oils can work, sesame is preferred for its aroma.
  • Garlic (minced) – Elevates the overall flavor of the sauce; garlic powder is a handy substitute if needed.

For the Protein

  • Extra Firm Tofu – Offers a hearty texture while being packed with protein; tempeh or seitan are great swaps for variety.

For the Veggies

  • Vegetables (e.g., mushrooms) – Delightfully add nutrition and taste; feel free to use whatever veggies you have on hand!

Step‑by‑Step Instructions for Easy Saucy Ramen Noodles

Step 1: Prepare the Sauce
In a medium bowl, combine soy sauce, dark soy sauce (if using), corn starch, sweetener, rice vinegar, ground pepper, and chili garlic sauce. Whisk these ingredients together until the corn starch is fully dissolved and the mixture is smooth. Set aside to let the flavors meld while you prepare the rest of the dish.

Step 2: Cook the Noodles
Bring a pot of water to a rolling boil over high heat. Once boiling, add the dry instant ramen noodles and cook for 2-3 minutes, until chewy but not fully cooked—remember, they’ll finish cooking later. Drain the noodles in a colander and set them aside, ensuring they don’t stick together.

Step 3: Sauté Tofu and Vegetables
In a large non-stick pan, heat a tablespoon of sesame oil over medium-high heat. Once shimmering, add cubed extra firm tofu and any chopped vegetables like mushrooms. Sauté them for about 4-5 minutes, stirring frequently, until the tofu is golden and the vegetables are tender and vibrant, showcasing their colors.

Step 4: Add the Sauce
Pour the prepared sauce into the pan with the sautéed tofu and vegetables. Stir well to coat everything evenly. Reduce the heat to medium and let the mixture simmer for 2-3 minutes. The sauce should start to thicken and cling beautifully to the tofu and veggies, creating a luscious coating.

Step 5: Combine with Noodles
Add the slightly undercooked ramen noodles to the pan with the sauce mixture. Gently toss everything together, ensuring the noodles are well coated in the sauce. Continue to cook for an additional 3 minutes, allowing the noodles to absorb the flavors and finish cooking to a perfect texture.

Step 6: Taste and Serve
After cooking, taste the Easy Saucy Ramen Noodles and adjust the seasoning if needed. If you desire more spice or sweetness, tweak the flavors to your liking. Serve hot, garnished with chopped scallions and sesame seeds for a delightful crunch and presentation.

Make Ahead Options

These Easy Saucy Ramen Noodles are perfect for meal prep enthusiasts! You can prepare the sauce up to 3 days in advance by mixing all the sauce ingredients and refrigerating it in an airtight container. This not only saves time but also allows the flavors to deepen for even tastier noodles. The tofu and vegetables can be prepped a day ahead; simply chop them and store in the fridge. When ready to serve, sauté the prepped tofu and veggies, add the sauce, and then pour in the cooked noodles for a quick meal that’s just as delicious as when freshly made! Enjoy a stress-free dinner in no time!

How to Store and Freeze Easy Saucy Ramen Noodles

Fridge: Store leftovers in an airtight container in the fridge for up to 3 days. Keep the sauce separate from noodles to maintain texture.

Freezer: If you want to freeze your Easy Saucy Ramen Noodles, place cooled, sauced noodles in a freezer-safe bag. They will last for up to 2 months.

Reheating: To reheat, thaw frozen noodles overnight in the fridge, then warm them on the stovetop with a splash of water or broth to restore the sauce’s creamy consistency.

Extra Tips: For best results, do not freeze raw tofu or vegetables, as they can alter the texture upon thawing. Enjoy your delicious noodles anytime!

Easy Saucy Ramen Noodles Variations

Feel free to let your creativity shine with these delicious twists on the classic recipe!

  • Protein Swap: Replace tofu with chickpeas or lentils for a different texture. Both options bring a robust flavor while maintaining that satisfying protein punch.

  • Veggie Boost: Add colorful spinach, crisp bell peppers, or crunchy bok choy to enhance the dish’s nutrition and vibrancy. The more, the merrier, don’t you think?

  • Noodle Alternatives: Experiment with buckwheat soba or even zoodles (zucchini noodles) for a low-carb version. Each option brings a unique flavor profile to the table.

  • Hearty Add-ins: Toss in mushrooms or edamame for that extra heartiness. These not only amp up the nutrition but also add delightful textures to each bite.

  • Spice Level: Crank up the heat with a dollop of your favorite hot sauce instead of chili garlic sauce. Adjust the spiciness to your taste for that perfect kick.

  • Flavor Enhancements: Mix in a splash of coconut milk for a creamy finish, adding an exotic touch. The richness complements the sauce beautifully.

  • Swap Sweetener: Use agave syrup instead of maple syrup for a different sweetness dimension. You might find it gives the sauce a whole new vibe.

  • Citrus Addition: Squeeze in some lime or lemon juice for an uplifting tang that brightens the dish. This delightful twist will surprise your taste buds!

Now that you are equipped with these options, you can easily make the Easy Saucy Ramen Noodles your own every time! For more noodle inspiration, check out my Easy Turtle Bars for a sweet treat or savor the comforting flavors in my Oven Chicken Rice.

What to Serve with Easy Saucy Ramen Noodles

Pair your delightful creation with these complementary dishes to build a satisfying, full-meal experience.

  • Cucumber Salad: A refreshing side that adds a cool crunch, perfectly balancing the rich flavors of the ramen. Its subtle sweetness enhances the overall dining experience.

  • Seaweed Salad: Light and umami-packed, this salad introduces a chewy texture and a hint of brininess, making it an ideal counterpart to the saucy noodles.

  • Stir-Fried Vegetables: Mix in colorful veggies like bell peppers and bok choy, which not only provide extra nutrients but also complement the dish’s vibrant flavors with their freshness.

  • Garlic Edamame: These protein-packed pods are simple yet full of flavor, offering a satisfying bite alongside the ramen and enhancing the meal.

  • Miso Soup: A warm, savory soup that brings a comforting touch, miso soup is an exquisite pairing that harmonizes beautifully with the noodle dish’s bold sauce.

  • Green Tea: A warm cup of green tea cleanses the palate and complements the flavors of the Easy Saucy Ramen Noodles, making it a soothing drink choice.

  • Mango Sorbet: For dessert, this light and refreshing treat provides a sweet contrast, capping off the meal with a fruity finish that leaves you craving more.

Expert Tips for Easy Saucy Ramen Noodles

  • Customize the Sauce: Adjust the sauce ingredients to match your personal taste. If you love sweet, add more maple syrup; if you prefer spicy, increase the chili garlic sauce.

  • Perfect Noodle Texture: Cook the ramen noodles slightly under the package instructions. This way, they won’t turn mushy when mixed with the sauce—aim for chewy perfection!

  • Enhance the Veggies: Embrace variety by adding colorful vegetables like bell peppers or bok choy. They boost nutrition and make your Easy Saucy Ramen Noodles vibrant and appealing.

  • Save the Sauce: If you have leftovers, store any unused sauce separately from the noodles to keep them from getting soggy. Reheat on the stovetop before combining!

  • Protein Alternatives: For a twist, swap out tofu for chickpeas or lentils. They offer a different flair while ensuring you still get that satisfying bite!

  • Garnish for Flavor: Never skip on garnishing with scallions and sesame seeds—they add not only flavor but also a beautiful touch to your dish, enhancing the overall enjoyment.

Easy Saucy Ramen Noodles Recipe FAQs

How do I choose the best vegetables for my ramen?
Absolutely! When selecting vegetables for your Easy Saucy Ramen Noodles, look for ones that are fresh and vibrant. Vegetables like mushrooms, bell peppers, and bok choy work wonderfully, but you can also use whatever you have on hand, such as spinach or carrots. Just make sure they’re firm and free of dark spots for the best flavor and texture. Remember, the more colorful your veggie mix, the more visually appealing and nutritious your dish will be!

What’s the best way to store my leftover ramen noodles?
Very good question! To keep your Easy Saucy Ramen Noodles fresh, store any leftovers in an airtight container in the fridge for up to 3 days. It’s crucial to keep the sauce separate from the noodles to prevent sogginess. Simply reheat the sauce on the stovetop and toss it with freshly cooked noodles when you’re ready to enjoy your meal again!

Can I freeze my saucy ramen noodles?
Absolutely! If you’d like to freeze your Easy Saucy Ramen Noodles, allow them to cool completely first. Then, place the sauced noodles in a freezer-safe bag, and store them flat to save space. These noodles will keep well for up to 2 months. When you’re ready to eat, thaw the noodles overnight in the fridge, and reheat them on the stovetop. Add a splash of water or broth to bring back the creamy sauce consistency and enjoy!

What if my sauce turns out too thick or too thin?
No worries at all! If you find your sauce is too thick, simply add a little water or vegetable broth gradually while stirring until you reach your desired consistency. On the other hand, if it’s too thin, mix a teaspoon of cornstarch with a tablespoon of cold water and stir it into the sauce while simmering. This will help thicken it nicely! Adjusting sauce thickness is all about listening to your taste preferences, so feel free to get creative!

Are there any dietary considerations for this recipe?
Absolutely, and I’m glad you asked! This Easy Saucy Ramen Noodles recipe is vegan, making it perfect for plant-based diets. If you’re gluten-sensitive, consider substituting dry instant ramen noodles with brown rice ramen or other gluten-free noodles. Always ensure to check labels on sauces and ingredients for any potential allergens. Tofu provides a great protein source, but if you’re allergic to soy, feel free to replace it with chickpeas or lentils instead. Enjoy experimenting with this versatile dish!

Easy Saucy Ramen Noodles

Easy Saucy Ramen Noodles for a Fast Vegan Delight

A quick and customizable recipe for Easy Saucy Ramen Noodles that bursts with flavor and vegan goodness.
Prep Time 10 minutes
Cook Time 10 minutes
Total Time 20 minutes
Servings: 2 bowls
Course: Dinner
Cuisine: Asian, Vegan
Calories: 400

Ingredients
  

For the Noodles
  • 2 packs Dry Instant Ramen Noodles Switch to brown rice ramen for gluten-free.
For the Sauce
  • 1 cup Water or Vegetable Broth Use broth for extra flavor.
  • 3 tablespoons Soy Sauce Adjust for lower sodium.
  • 1 tablespoon Dark Soy Sauce (optional) Omit if not available.
  • 2 tablespoons Corn Starch Arrowroot or tapioca starch can be used.
  • 1 tablespoon Sweetener (e.g., maple syrup) Adjust to taste.
  • 1 tablespoon Rice Vinegar (or lemon juice) Other vinegars can work.
  • 1 teaspoon Ground Pepper Use white or black pepper as preferred.
  • 1 tablespoon Chili Garlic Sauce (optional) Substitute with your favorite hot sauce.
  • 1 tablespoon Sesame Oil Preferred for aroma.
  • 2 cloves Garlic (minced) Garlic powder can substitute.
For the Protein
  • 1 block Extra Firm Tofu Tempeh or seitan can be used.
For the Veggies
  • 2 cups Vegetables (e.g., mushrooms) Use whatever veggies you have on hand.

Equipment

  • medium bowl
  • Pot
  • Colander
  • large non-stick pan
  • whisk

Method
 

Step-by-Step Instructions for Easy Saucy Ramen Noodles
  1. In a medium bowl, combine soy sauce, dark soy sauce (if using), corn starch, sweetener, rice vinegar, ground pepper, and chili garlic sauce. Whisk until smooth and set aside.
  2. Bring a pot of water to a rolling boil over high heat. Add the dry instant ramen noodles and cook for 2-3 minutes until chewy. Drain and set aside.
  3. In a large non-stick pan, heat a tablespoon of sesame oil over medium-high heat. Add cubed extra firm tofu and chopped vegetables. Sauté for 4-5 minutes until golden and tender.
  4. Pour the prepared sauce into the pan and stir well. Reduce heat to medium and let simmer for 2-3 minutes until the sauce thickens.
  5. Add the slightly undercooked ramen noodles to the pan. Toss everything together and cook for an additional 3 minutes.
  6. Taste the noodles and adjust seasoning if needed. Serve hot, garnished with chopped scallions and sesame seeds.

Nutrition

Serving: 1bowlCalories: 400kcalCarbohydrates: 56gProtein: 20gFat: 10gSaturated Fat: 1gPolyunsaturated Fat: 2gMonounsaturated Fat: 4gSodium: 800mgPotassium: 500mgFiber: 6gSugar: 5gVitamin A: 10IUVitamin C: 15mgCalcium: 200mgIron: 3mg

Notes

Customize the sauce according to taste preferences. Store leftovers in the fridge for up to 3 days, keeping the sauce separate from the noodles to maintain texture.

Tried this recipe?

Let us know how it was!

Savory Salmon Patties with Veggies for a Family Feast

The scent of sizzling salmon fills the air as I prepare my Crispy Salmon Patties with Fresh Vegetables, evoking memories of cozy family dinners. These flavorful patties are not only a fantastic way to elevate your weeknight meals, but they’re also packed with nutritious veggies to please both the kids and adults alike. With minimal prep time and an adaptable ingredient list, you can whip these up in no time—perfect for those nights when fast food isn’t an option! Plus, they store beautifully, making leftovers a breeze. Are you ready to discover the secret to making salmon the star of your dinner table?

Why Are Salmon Patties a Family Favorite?

Versatile Ingredients: You can easily tailor these patties to your family’s taste, swapping ingredients or adjusting spice levels. Nutritious and Tasty: They’re filled with healthy vegetables, making each bite not just delicious but also wholesome. Quick Preparation: With simple steps and minimal prep, you’ll have dinner on the table in no time. Crowd-Pleasing Delight: Perfect for both kids and adults, these patties are an ideal choice for a family feast. Make-Ahead Magic: Cook a batch ahead of time and store them in the fridge or freezer, giving you a steal-ready meal on busy nights. These Honey Garlic Salmon bites work great too if you’re looking for something different!

Salmon Patties Ingredients

For the Patties
Salmon – Fresh protein source; substitute with canned salmon if preferred.
Olive Oil – Adds moisture and flavor; any neutral oil can be substituted.
Kosher Salt – Enhances overall flavor; use sea salt as an alternative.
Unsalted Butter – For sautéing vegetables and adding richness; margarine can be used instead.
Red Onion – Provides sharpness and flavor; yellow or white onion can be substituted.
Celery – Adds crunch and freshness; can be replaced with green bell pepper.
Jalapeno or Red Bell Pepper – Offers heat (jalapeno) or sweetness (red bell); choose according to preferred spice level.
Yellow Bell Pepper – Contributes sweetness and color; substitutable with any bell pepper.
Fresh Parsley – For freshness and herby notes; use cilantro for a different flavor.
Capers – Adds a briny flavor; can omit for a less salty result.
Hot Sauce – Introduces heat; adjust quantity to taste or skip entirely.
Worcestershire Sauce – Deepens flavor complexity; tamari can be used for a gluten-free option.
Old Bay Seasoning – Provides a signature seasoning blend; substitute with Cajun seasoning if unavailable.
Bread Crumbs – Binds the patties together; use Panko for a crispier texture.
Mayonnaise – Adds moisture and richness; substitute with Greek yogurt for a lighter option.
Dijon Mustard – Gives a tangy flavor; yellow mustard can be an alternative.
Eggs – Acts as a binding agent; flax eggs can be used for a vegan option.

Step‑by‑Step Instructions for Crispy Salmon Patties with Fresh Vegetables

Step 1: Prepare Salmon
Start by preheating your oven to 350°F. Place the salmon skin-side down on a sheet pan, generously brush it with olive oil, and sprinkle with kosher salt. Roast the salmon for 15-20 minutes until it’s opaque and flakes easily with a fork. Once cooked, allow it to cool, then refrigerate until cold.

Step 2: Chop Vegetables
While the salmon cools, finely chop your red onion, celery, and both jalapeno and yellow bell pepper, ensuring uniform size for even flavor distribution in your salmon patties. Aim for a small chop to maximize texture and taste. Set the chopped vegetables aside as you prepare to sauté them.

Step 3: Sauté Vegetables
In a skillet over medium heat, melt a combination of unsalted butter and olive oil. Add the chopped onion, celery, jalapeno, and yellow bell pepper along with a pinch of kosher salt. Sauté for about 15-20 minutes, stirring occasionally, until the vegetables are softened and fragrant. Let them cool completely before mixing into your salmon patties.

Step 4: Combine Mixture
In a large mixing bowl, flake the cooled salmon into bite-sized pieces, ensuring any skin is removed. Add the sautéed vegetables, breadcrumbs, mayonnaise, Dijon mustard, eggs, and your seasonings like Worcestershire sauce and Old Bay. Mix everything thoroughly until the ingredients are evenly combined and well coated.

Step 5: Chill & Shape Patties
Cover the mixture with plastic wrap and refrigerate for about 30 minutes. Chilling helps the ingredients meld together and makes shaping easier. Once chilled, use a 1/3 cup measuring cup to portion out the mixture, then form it into neat patties, pressing them gently to maintain shape while you prepare to cook them.

Step 6: Cook Patties
In a large skillet, heat the remaining butter and olive oil over medium-high heat until shimmering. Carefully add the salmon patties, cooking for 3-4 minutes on each side until they achieve a beautiful golden brown crust. Once cooked, transfer the patties to paper towels to drain excess oil, keeping them warm until ready to serve.

What to Serve with Crispy Salmon Patties with Fresh Vegetables

These tasty salmon patties can be the highlight of your dinner table, surrounded by delightful companions that elevate your meal.

  • Creamy Tartar Sauce: A tangy accompaniment that adds richness and enhances the flavors of the salmon patties, making each bite more delightful.
  • Honey Cornbread Muffins: Soft, sweet cornbread offers a comforting contrast, perfect for soaking up any sauce and balancing savory flavors.
  • Garden Salad: Fresh greens with colorful veggies provide a crisp, refreshing counterpoint, adding lightness and nutrition to your meal.
  • Roasted Vegetables: Seasoned carrots, broccoli, or bell peppers bring a beautiful caramelization and extra flavor that pairs wonderfully with the patties.
  • Garlic Mashed Potatoes: The creamy, buttery texture and rich garlic flavor create a comforting side dish that complements the fish beautifully.
  • Cucumber Yogurt Dip: Light and refreshing, this dip cools down spicy elements while adding a delightful crunch with every bite.
  • Mango Salsa: A sweet and zesty salsa fires up the senses, providing a fruity contrast that brightens the flavor profile of the salmon patties.
  • Lemonade or Iced Tea: Crisp, refreshing beverages to wash down your meal, with citrus brightness to enhance the dish’s flavor and balance.
  • Chocolate Chip Cookies: A warm, sweet treat to end your meal on a joyful note, offering a satisfying crunch and a touch of nostalgia.

Salmon Patties Variations & Substitutions

Feel free to get creative with these salmon patties, customizing them to fit your taste buds and pantry favorites!

  • Canned Salmon: Use canned salmon for a quicker option—just drain well and flake before mixing. It’s an easy swap that saves time!

  • Jalapeño Substitute: Replace jalapeño with diced green bell pepper for a milder flavor. This makes it great for little ones who might be averse to heat.

  • Herb Twist: Try swapping parsley for fresh dill, giving your patties a fragrant twist that adds a new flavor dimension.

  • Breading Alternative: Use crushed cornflakes instead of bread crumbs for a crunchy texture that’s sure to impress. This variation will make your patties even more enjoyable!

  • Dairy-Free Option: Substitute unsalted butter with vegan butter or olive oil when sautéing. It keeps everything plant-based while maintaining flavor.

  • Egg Replacement: For a vegan version, replace eggs with flax eggs—mix 1 tablespoon of ground flaxseed with 2.5 tablespoons of water, let it sit for 10 minutes before adding.

  • Flavor Boost: Enhance the flavor profile by adding a teaspoon of smoked paprika or lemon zest to the mixture. It’ll give your patties an extra zest that shines through.

  • Spicy Kick: For heat lovers, include a couple of dashes of cayenne pepper or a splash of your favorite hot sauce into the mixture. This will make every bite a delightful adventure.

Remember, these salmon patties serve as a fantastic canvas for your culinary creativity, whether you’re looking to replicate a restaurant favorite like Baked Salmon Honey or experiment with flavors, you can’t go wrong!

Expert Tips for Salmon Patties

Measure Properly: Use a measuring cup to ensure all patties are uniform in size, promoting even cooking for perfectly crispy salmon patties.

Chill for Success: Refrigerating the mixture before shaping enhances the patties’ ability to hold together while cooking, preventing crumbling.

Adjust the Heat: Monitor the frying temperature and adjust as necessary to avoid burning; a medium heat allows for a golden crust without overcooking.

Customize Ingredients: Don’t hesitate to swap ingredients based on personal preference—like using yellow pepper instead of jalapeno for a milder flavor.

Work in Batches: If you’re cooking multiple patties, consider frying them in smaller batches to ensure they have enough space to brown nicely.

Make Ahead Options

These Crispy Salmon Patties with Fresh Vegetables are a fantastic choice for meal prep, saving you time on busy weeknights! You can prepare the salmon mixture and shape the patties up to 24 hours in advance. Simply make the mixture, cover it tightly, and refrigerate. For best results, ensure the patties are packed closely together to maintain their shape and flavor. When you’re ready to cook, just heat the skillet and fry the chilled patties for 3-4 minutes on each side until they’re golden brown. This way, you’ll enjoy delicious, homemade salmon patties on demand, perfect for getting a wholesome meal on the table without the rush!

How to Store and Freeze Salmon Patties

Fridge: Keep cooked salmon patties in an airtight container for up to 3 days. This way, they’ll stay fresh and tasty, ready for quick reheating.

Freezer: For longer storage, freeze the patties in a single layer on a baking sheet, then transfer to a freezer bag for up to 3 months. Thaw in the fridge overnight before cooking.

Reheating: To reheat, place thawed patties in a preheated oven at 375°F for about 10-15 minutes, until heated through and crispy again. This preserves the delicious texture of the salmon patties.

Make-Ahead Option: You can also refrigerate the uncooked mixture and form patties later, keeping them fresh for up to 24 hours before cooking.

Salmon Patties Recipe FAQs

How do I choose the best salmon for my patties?
Absolutely! When selecting salmon, look for fresh fillets that are bright in color and smell like the ocean rather than fishy. If using canned salmon, ensure it’s packed in water or oil and has a light, pleasant aroma. For the best texture, aim for wild-caught salmon when possible, though farmed is a good alternative.

How should I store leftover salmon patties?
Store any cooked salmon patties in an airtight container in the refrigerator for up to 3 days. Make sure they cool completely before sealing to prevent sogginess. This way, you’ll have a delicious meal ready to reheat at a moment’s notice!

Can I freeze salmon patties?
Very! To freeze your salmon patties, lay them flat on a baking sheet lined with parchment paper and freeze until solid. Then, transfer them to a freezer bag or airtight container. This method helps avoid sticking and allows you to take out only what you need. They can last up to 3 months in the freezer. When you’re ready to enjoy, just thaw overnight in the refrigerator before reheating.

What can I do if my patties fall apart while cooking?
If your salmon patties are crumbling, don’t worry! Here are steps to help remedy this: 1. Ensure you’re using enough binding ingredients, like eggs and breadcrumbs. 2. Chill the mixture for about 30 minutes before shaping—this helps the patties hold their shape better. 3. When frying, handle them gently, turning only when they’re nicely browned on one side. The more delicate the touch, the less likely they’ll fall apart!

Are there any dietary considerations for these salmon patties?
Definitely! If anyone in your family has allergies, be mindful of substitutions you might need to make. You can replace eggs with flax eggs for a vegan option, and check that your Worcestershire sauce is gluten-free if needed. Consult with your doctor or nutritionist if serving to pets—allium vegetables like onion are harmful to dogs and cats.

Salmon Patties

Savory Salmon Patties with Veggies for a Family Feast

Delicious Salmon Patties packed with nutritious veggies, perfect for a family dinner.
Prep Time 30 minutes
Cook Time 20 minutes
Chill Time 30 minutes
Total Time 1 hour 20 minutes
Servings: 4 patties
Course: Dinner
Cuisine: American
Calories: 250

Ingredients
  

For the Patties
  • 1 lb Salmon Fresh protein source; substitute with canned salmon if preferred.
  • 2 tbsp Olive Oil Adds moisture and flavor; any neutral oil can be substituted.
  • 1 tsp Kosher Salt Enhances overall flavor; use sea salt as an alternative.
  • 2 tbsp Unsalted Butter For sautéing vegetables and adding richness; margarine can be used instead.
  • 1 medium Red Onion Provides sharpness and flavor; yellow or white onion can be substituted.
  • 1 cup Celery Adds crunch and freshness; can be replaced with green bell pepper.
  • 1 medium Jalapeno or Red Bell Pepper Offers heat (jalapeno) or sweetness (red bell); choose according to preferred spice level.
  • 1 medium Yellow Bell Pepper Contributes sweetness and color; substitutable with any bell pepper.
  • 1/4 cup Fresh Parsley For freshness and herby notes; use cilantro for a different flavor.
  • 2 tbsp Capers Adds a briny flavor; can omit for a less salty result.
  • 1 tbsp Hot Sauce Introduces heat; adjust quantity to taste or skip entirely.
  • 1 tbsp Worcestershire Sauce Deepens flavor complexity; tamari can be used for a gluten-free option.
  • 1 tbsp Old Bay Seasoning Provides a signature seasoning blend; substitute with Cajun seasoning if unavailable.
  • 1 cup Bread Crumbs Binds the patties together; use Panko for a crispier texture.
  • 1/4 cup Mayonnaise Adds moisture and richness; substitute with Greek yogurt for a lighter option.
  • 1 tbsp Dijon Mustard Gives a tangy flavor; yellow mustard can be an alternative.
  • 2 large Eggs Acts as a binding agent; flax eggs can be used for a vegan option.

Equipment

  • Skillet
  • Mixing Bowl
  • Sheet Pan
  • Measuring cup
  • Knife

Method
 

Step-by-Step Instructions
  1. Preheat your oven to 350°F. Place the salmon skin-side down on a sheet pan, generously brush it with olive oil, and sprinkle with kosher salt. Roast the salmon for 15-20 minutes until it's opaque and flakes easily with a fork. Once cooked, allow it to cool, then refrigerate until cold.
  2. While the salmon cools, finely chop your red onion, celery, and both jalapeno and yellow bell pepper, ensuring uniform size for even flavor distribution in your salmon patties.
  3. In a skillet over medium heat, melt a combination of unsalted butter and olive oil. Add the chopped onion, celery, jalapeno, and yellow bell pepper along with a pinch of kosher salt. Sauté for about 15-20 minutes, stirring occasionally, until the vegetables are softened and fragrant.
  4. In a large mixing bowl, flake the cooled salmon into bite-sized pieces. Add the sautéed vegetables, breadcrumbs, mayonnaise, Dijon mustard, eggs, and your seasonings like Worcestershire sauce and Old Bay. Mix everything thoroughly until the ingredients are evenly combined.
  5. Cover the mixture with plastic wrap and refrigerate for about 30 minutes. Once chilled, use a 1/3 cup measuring cup to portion out the mixture, then form it into neat patties.
  6. In a large skillet, heat the remaining butter and olive oil over medium-high heat until shimmering. Carefully add the salmon patties, cooking for 3-4 minutes on each side until they achieve a golden brown crust.

Nutrition

Serving: 1pattieCalories: 250kcalCarbohydrates: 15gProtein: 20gFat: 15gSaturated Fat: 4gPolyunsaturated Fat: 3gMonounsaturated Fat: 7gCholesterol: 100mgSodium: 400mgPotassium: 500mgFiber: 3gSugar: 2gVitamin A: 500IUVitamin C: 20mgCalcium: 30mgIron: 1.5mg

Notes

Refrigerating the uncooked mixture helps it stay fresh for up to 24 hours before cooking. Cooked patties can be stored in an airtight container for up to 3 days or frozen for up to 3 months.

Tried this recipe?

Let us know how it was!

Delicious Chicken Waldorf Salad With Healthy Yogurt Twist

As I stood in my kitchen, the crisp autumn air wafting through the open window, I remembered the delightful mix of flavors that made Chicken Waldorf Salad a classic. This vibrant dish effortlessly combines sweet grapes, crunchy apples, and tender chicken, all drizzled with a creamy yogurt dressing that’s both nutritious and delicious. Not only is this healthy Chicken Waldorf Salad a breeze to prepare, but it’s also ideal for meal prep or impressing guests at a cozy gathering. With its high-protein, low-calorie benefits, it’s the perfect alternative to heavy fast food while still satisfying those cravings for something wholesome. Are you ready to dive into this refreshing twist on a timeless favorite?

Why is this Chicken Waldorf Salad special?

Flavorful Fusion: This Chicken Waldorf Salad incorporates the sweetness of grapes and apples with savory chicken, all enveloped in a light yogurt dressing that enhances, rather than overwhelms, the fresh ingredients.

Quick Prep Time: Whipping up this salad takes mere minutes, making it perfect for busy weeknights or last-minute gatherings.

Health Conscious: Packed with protein and low in calories, this recipe gives you a guilt-free alternative to heavier fast food options.

Versatile Serving Options: Enjoy it on a bed of greens, in a wrap, or even as a filling for a refreshing sandwich.

Meal Prep Friendly: Store leftovers in an airtight container for up to three days, ensuring you’ll have a delicious meal at your fingertips.

This Chicken Waldorf Salad is not just a dish; it’s a culinary experience that you’ll delight in sharing with friends and family! You might also enjoy trying my Tuscan Chicken Soup or Garlic Chicken Gnocchi for more hearty, healthy options.

Chicken Waldorf Salad Ingredients

• Dive into the fresh flavors of this delightful Chicken Waldorf Salad!

For the Salad

  • Cooked Chicken – Provides a healthy source of protein; use rotisserie chicken for instant convenience.
  • Medium Apple – Adds a crisp sweetness; a red apple is perfect for color and flavor.
  • Grapes – Offers natural sweetness; opt for red grapes for a beautiful pop of color.
  • Celery – Brings a refreshing crunch; dice finely for even distribution throughout the salad.
  • Chopped Walnuts/Pecans – Adds a lovely nutty flavor and texture; feel free to substitute with your favorite nuts.
  • Dried Cranberries – Introduces a tangy element; raisins can be used for a different twist.

For the Yogurt Dressing

  • Greek Yogurt – Forms the creamy base of the dressing, making this Chicken Waldorf Salad healthier; switch to dairy-free yogurt if needed.
  • Fresh Lemon Juice – Balances flavors with a hint of acidity; adjust to taste based on personal preference.
  • Honey – Provides a touch of natural sweetness to the dressing; modify the amount to suit your taste.
  • Salt and Black Pepper – Season to taste; these staples elevate the overall flavor of the salad.
  • Black Poppy Seeds – Adds a splash of color and unique crunch; optional, but highly recommended for visual appeal.

Step‑by‑Step Instructions for Chicken Waldorf Salad

Step 1: Prepare the Ingredients
Begin by gathering all your ingredients: cooked chicken, chopped apple, grapes, celery, nuts, and dried cranberries. Dice or shred the chicken into bite-sized pieces and chop the apple into small cubes, leaving the skin on for added crunch. Rinse the grapes and slice the celery thin, so each bite offers a delightful variety of texture.

Step 2: Mix the Salad Components
In a large mixing bowl, combine the cooked chicken, chopped apple, halved grapes, sliced celery, and your choice of chopped walnuts or pecans. Add in the dried cranberries for a touch of sweetness. Toss them together lightly, ensuring all the ingredients are evenly distributed, creating a colorful visual that represents the vibrant Chicken Waldorf Salad.

Step 3: Whisk the Yogurt Dressing
In a separate small bowl, whisk together the Greek yogurt, fresh lemon juice, honey, salt, and black pepper until smooth and well combined. The dressing should be creamy and slightly tangy, perfectly balancing the sweetness of the fruits. For an added texture surprise, sprinkle in black poppy seeds as you whisk, giving it a unique flair that enhances the overall presentation.

Step 4: Combine Salad and Dressing
Drizzle the prepared yogurt dressing over the chicken salad mix. Gently toss everything together until all ingredients are coated evenly with the creamy dressing. Take a moment to admire the lively colors and textures of your Chicken Waldorf Salad as you blend them into one harmonious dish.

Step 5: Serve or Chill
You can serve your Chicken Waldorf Salad immediately for a refreshing dish. Alternatively, cover the bowl and refrigerate for at least 15 minutes to allow the flavors to meld beautifully. This will enhance the taste, making it even more delightful when enjoyed cold.

Step 6: Enjoy the Salad
Spoon the Chicken Waldorf Salad over a bed of fresh greens, or serve in lettuce cups for a fun twist. It can also be used as a filling for pita pockets or tortillas for a wholesome meal on the go. Taste the freshness and variety that makes this salad a family favorite!

Chicken Waldorf Salad Variations

Feel free to tailor your Chicken Waldorf Salad to your taste—explore these exciting twists that will elevate your meal!

  • Dairy-Free: Use a plant-based yogurt instead of Greek yogurt to keep it creamy and health-conscious.

  • Fruit Swap: Replace the apple with pear or peach for a different fruity note; each brings unique sweetness to the dish.

  • Nut Variety: Experiment with pecans or almonds for an exciting crunch; these alternatives add lovely flavors and textures.

  • Tropical Twist: Incorporate diced pineapple or mandarin oranges for a refreshing, sunny flair that brightens your salad.

Consider using leftover grilled chicken for a smoky flavor infusion. The robust taste really enhances the overall experience!

  • Extra Crunch: Add crispy bacon bits for a savory, crunchy twist; this small change adds depth and satisfaction.

  • Spicy Kick: Toss in some finely chopped jalapeños or a sprinkle of red pepper flakes to introduce a delightful heat level.

For a hearty meal, serve your salad in a wrap or sandwich; this adds a filling twist to your enjoying experience. You might even enjoy it as a topping on my delicious Bbq Chicken Grilled cheese sandwich!

What to Serve with Healthy Chicken Waldorf Salad

Elevate your dining experience by complementing this delightful dish with the perfect side options that tantalize the palate.

  • Crispy Garlic Bread: The crunchy, buttery goodness of garlic bread adds a satisfying texture, perfectly balancing the salad’s refreshing elements.

  • Quinoa Pilaf: A nutty quinoa pilaf brings a hearty grain component that pairs beautifully, enhancing the salad’s protein-rich benefits. It’s a wholesome choice!

  • Roasted Sweet Potatoes: These caramelized gems add a sweet and savory contrast, melding wonderfully with the crisp flavors of the Chicken Waldorf Salad.

  • Green Bean Almondine: Lightly sautéed green beans with almonds offer a bright, crunchy side, creating a delightful textural experience alongside the creamy salad.

  • Fruit-Infused Sparkling Water: Refreshing and bubbly, a hint of citrus or berry-infused sparkling water beautifully complements the sweetness of the grapes and apples while remaining guilt-free.

  • Apple Crisp: For a sweet finish, serve a warm apple crisp that echoes the flavors in your salad, satisfying any sweet tooth while echoing the fruity elements.

  • Mixed Green Salad: Keep it simple with a light mixed green salad drizzled with a tangy vinaigrette—this balances with the richness of the Chicken Waldorf Salad while adding freshness.

  • Herbed Couscous: Fluffy couscous infused with fresh herbs provides an earthy contrast, making it an ideal side that complements the salad’s vibrant flavors.

  • Lemon Sorbet: For dessert, a light lemon sorbet cleanses the palate with a refreshing zing, keeping the meal light and delightful.

Expert Tips for Chicken Waldorf Salad

  • Cool the Chicken: Ensure the cooked chicken is completely cooled before mixing it with fresh ingredients to maintain the appealing texture of the salad.

  • Storage Guidelines: For meal prepping, store leftovers in an airtight container and consume within 3 days to keep the Chicken Waldorf Salad fresh and tasty.

  • Yogurt Substitution: If you prefer a dairy-free option, feel free to swap Greek yogurt with a dairy-free yogurt alternative to achieve a similar creamy dressing.

  • Avoid Freezing: Don’t freeze the salad as it can compromise the texture of the yogurt dressing and make the fruits soggy when thawed.

  • Nutritional Balancing: Adjust the amount of honey in your yogurt dressing based on your sweetness preference, keeping nutrition in mind for a healthy and delightful meal!

Make Ahead Options

These Chicken Waldorf Salad preparations make busy days a breeze! You can chop the apples, grapes, celery, and nuts, and cook the chicken up to 24 hours in advance. Just be sure to store these prepped ingredients separately in airtight containers to maintain their freshness and crunch. The yogurt dressing can also be prepared ahead and refrigerated for up to 3 days; simply give it a quick whisk before using. When you’re ready to enjoy, combine everything in a bowl, toss with the dressing, and serve over greens or as a sandwich filling for a quick, nutritious meal. This way, you’ll have a delicious Chicken Waldorf Salad ready in no time!

How to Store and Freeze Chicken Waldorf Salad

Fridge: Keep your Chicken Waldorf Salad in an airtight container for up to 3 days to maintain freshness. Make sure the yogurt used in the dressing is within its expiry date.

Avoid Freezing: It’s best not to freeze this salad, as the yogurt dressing and fresh ingredients can lose their appealing texture and flavor when thawed.

Refrigeration Tip: For optimal taste, allow the salad to chill in the refrigerator for at least 15 minutes before serving. This helps the flavors meld beautifully together!

Serving Suggestions: If you’re meal prepping, consider portioning individual servings for easy grab-and-go meals throughout the week.

Chicken Waldorf Salad Recipe FAQs

What type of chicken should I use in this salad?
Absolutely! For the best results, use cooked chicken breast—rotisserie chicken is a fantastic time-saver. You can also cook your own by poaching or grilling chicken; just make sure it’s cooled and shredded or diced into bite-sized pieces.

How should I store leftover Chicken Waldorf Salad?
Very important! Store any leftover Chicken Waldorf Salad in an airtight container in the refrigerator for up to 3 days. Make sure the yogurt you used in the dressing is within its expiry date to ensure safety and freshness.

Can I freeze Chicken Waldorf Salad?
It’s best to avoid freezing this salad. Freezing can dramatically change the texture of the yogurt dressing and make the fruits soggy when thawed. Instead, enjoy it fresh within that 3-day fridge timeframe for the best taste!

How can I make this salad safe for people with nut allergies?
Great question! If you’re prepping this Chicken Waldorf Salad for someone with nut allergies, simply omit the chopped nuts or replace them with seeds like sunflower seeds or pumpkin seeds for a similar crunch without the allergens.

What can I do if my yogurt dressing is too thick?
If you find your yogurt dressing to be thicker than you’d like, just add a little bit of water or extra lemon juice, one tablespoon at a time, while whisking until you reach your desired consistency. This will help you achieve a creamier, more pourable dressing without losing flavor!

Can I substitute Greek yogurt with something else?
Certainly! If you’re looking for a dairy-free option, substitute Greek yogurt with a dairy-free yogurt alternative like almond or coconut yogurt. Just ensure it’s plain unsweetened for a similar flavor profile, and adjust the sweetness of your dressing as needed!

Chicken Waldorf Salad

Delicious Chicken Waldorf Salad With Healthy Yogurt Twist

This Chicken Waldorf Salad combines sweet grapes and crunchy apples with tender chicken, all drizzled with a creamy yogurt dressing.
Prep Time 15 minutes
Total Time 15 minutes
Servings: 4 servings
Course: Salad
Cuisine: Healthy
Calories: 350

Ingredients
  

For the Salad
  • 2 cups Cooked Chicken Chopped or shredded
  • 1 medium Apple Diced, red apple preferred
  • 1 cup Red Grapes Halved
  • 1 cup Celery Finely diced
  • 0.5 cup Chopped Walnuts or Pecans Your choice of nuts
  • 0.5 cup Dried Cranberries
For the Yogurt Dressing
  • 1 cup Greek Yogurt Can use dairy-free yogurt
  • 2 tablespoons Fresh Lemon Juice Adjust to taste
  • 1 tablespoon Honey Adjust to taste
  • 1 pinch Salt To taste
  • 1 pinch Black Pepper To taste
  • 1 tablespoon Black Poppy Seeds Optional

Equipment

  • Mixing Bowl
  • whisk
  • Cutting board
  • Knife

Method
 

Steps
  1. Gather all your ingredients: cooked chicken, chopped apple, grapes, celery, nuts, and dried cranberries.
  2. In a large mixing bowl, combine the cooked chicken, chopped apple, halved grapes, sliced celery, and nuts. Add dried cranberries.
  3. In a separate bowl, whisk together Greek yogurt, fresh lemon juice, honey, salt, and black pepper until smooth.
  4. Drizzle the yogurt dressing over the salad mix and toss until evenly coated.
  5. Serve immediately or chill for at least 15 minutes before serving.
  6. Spoon over fresh greens or serve in lettuce cups.

Nutrition

Serving: 1servingCalories: 350kcalCarbohydrates: 30gProtein: 25gFat: 15gSaturated Fat: 3gPolyunsaturated Fat: 1gMonounsaturated Fat: 2gCholesterol: 70mgSodium: 300mgPotassium: 500mgFiber: 4gSugar: 12gVitamin A: 500IUVitamin C: 10mgCalcium: 50mgIron: 1mg

Notes

Store leftovers in an airtight container for up to 3 days. For optimal flavor, chill before serving.

Tried this recipe?

Let us know how it was!

One Pan Creamy Garlic Shrimp Bursting with Flavor

In a bustling kitchen where flavor meets ease, I recently crafted a dish that transformed my weeknight dinners: One Pan Creamy Garlic Shrimp. Imagine rich, velvety sauce draping over succulent shrimp, all whipped up in under 30 minutes! This delightful recipe is a game-changer, not just for those busy evenings but for anyone craving a satisfying yet healthy meal. Bursting with creamy garlic goodness, it’s gluten-free, paleo, and Whole30 compliant—perfect for diverse diets. Plus, it pairs beautifully with cauliflower rice or your favorite pasta, ensuring your family will love this comforting dish. Curiosity piqued? Let’s dive into the details of this quick and healthy dinner!

Why is this shrimp dish a must-try?

Simplicity at Its Best: This recipe makes gourmet cooking feel effortless, ready in just 30 minutes.

Bursting with Flavor: The creamy garlic sauce, enriched with sun-dried tomatoes, creates a rich flavor profile that will leave your taste buds dancing.

Healthy yet Satisfying: This dish is not only gluten-free and paleo but also rich in protein and healthy fats, ensuring a filling meal that’s good for you!

Endless Versatility: Pair it with cauliflower rice for a low-carb option or your favorite pasta for a heartier meal—whichever way you choose, you can’t go wrong.

Crowd-Pleasing Comfort: Perfect for family dinners, this dish appeals to everyone—from foodies to picky eaters—just like my Garlic Parmesan Chicken that’s always a hit!

One Pan Creamy Garlic Shrimp Ingredients

For the Sauce

  • Grass-fed butter or ghee – Adds a rich, buttery flavor; substitute with coconut oil for a dairy-free option.
  • Garlic cloves – Provides a deliciously aromatic kick; mince finely for an even blend.
  • Bone broth (chicken) – Enriches the sauce with warmth; swap for vegetable broth to keep it vegetarian.
  • Canned coconut milk – Creates the creamy base; opt for full-fat for added richness or half and half for a lighter choice.
  • Nutritional yeast – Introduces a cheesy flavor without dairy; omit for a non-vegan option or replace with grated Parmesan.

For the Shrimp and Veggies

  • Large shrimp – The star of the dish; use deveined, tails-off shrimp for easy eating.
  • Yellow onion – Adds a touch of sweetness; shallots can be used for a milder flavor.
  • Sun-dried tomatoes (in olive oil) – Intensifies the dish’s flavor; reserve some oil for sautéing.
  • Spinach – Provides nutrition and bursts of color; could substitute with kale or any leafy greens.

Seasoning

  • Italian seasoning – Blends aromatics for an extra flavor dimension; fresh herbs are a lovely alternative when available.
  • Kosher salt and black pepper – Essential for balancing overall taste; adjust according to your preference.

This One Pan Creamy Garlic Shrimp will become a cherished recipe in your home, offering both comfort and sophistication!

Step‑by‑Step Instructions for One Pan Creamy Garlic Shrimp

Step 1: Sauté the Garlic
In a large skillet, melt 2 tablespoons of grass-fed butter or ghee over medium heat. Add 4 finely minced garlic cloves, stirring continuously for about 1 minute until fragrant, taking care not to let them burn. You want the garlic to turn a light golden color, which will enhance the savory base for your One Pan Creamy Garlic Shrimp.

Step 2: Cook the Shrimp
Next, add 1 pound of deveined, tails-off large shrimp to the skillet. Cook them for approximately 2 minutes on each side until they become opaque and pink. Once cooked, transfer the shrimp to a bowl and set aside, keeping the skillet on the heat to build flavors.

Step 3: Sauté the Onions
Increase the heat to medium-high and add one diced yellow onion to the skillet. Sauté for about 2-3 minutes until the onions soften and turn translucent, stirring occasionally. This will develop a sweet aroma, which perfectly complements the shrimp in your One Pan Creamy Garlic Shrimp dish.

Step 4: Deglaze the Pan
Pour in 1 cup of chicken bone broth, using a wooden spoon to scrape any brown bits off the skillet bottom. These add depth of flavor to your sauce. Allow the broth to simmer and reduce by about 50%, which should take around 3-4 minutes, letting the liquid thicken slightly.

Step 5: Add Sun-Dried Tomatoes
Stir in 1 tablespoon of the reserved oil from the jar of sun-dried tomatoes along with ½ cup of the sun-dried tomatoes themselves. Sauté for another 2-3 minutes, letting their flavor infuse into the broth as it thickens, creating a savory medley for your One Pan Creamy Garlic Shrimp.

Step 6: Incorporate Coconut Milk
Pour in one can of full-fat coconut milk, stirring well to combine with the other ingredients. Bring the mixture to a gentle boil, then reduce the heat to medium-low. This creamy base adds richness and warmth, ensuring your shrimp will be enveloped in a luscious sauce.

Step 7: Add the Spinach
Toss in 2 cups of fresh spinach and stir until just wilted, which takes about 2 minutes. The vibrant greens not only add nutrition but also a beautiful pop of color to your One Pan Creamy Garlic Shrimp, enhancing its visual appeal.

Step 8: Combine the Shrimp and Season
Return the cooked shrimp to the skillet, seasoning with 1 teaspoon of Italian seasoning, kosher salt, and black pepper to taste. Mix everything well, allowing the shrimp to heat through for about 5-7 minutes, so they absorb the flavors of the creamy sauce.

Step 9: Finish and Serve
Once everything is well combined and the shrimp are hot, adjust seasoning if necessary. Serve your One Pan Creamy Garlic Shrimp immediately, garnished with fresh parsley and lemon wedges for an added zest. This delightful dish is sure to impress!

One Pan Creamy Garlic Shrimp Variations

Feel free to get creative with this recipe, as there are so many delightful ways to customize it!

  • Chicken Swap: Replace shrimp with bite-sized pieces of chicken, ensuring it’s fully cooked through for an equally delicious meal. Tender chicken absorbs the same creamy flavors, creating a heartier alternative.

  • Spicy Kick: Add a pinch of red pepper flakes to the sauce for a spicy twist that elevates the dish’s warmth. This fiery touch complements the creaminess beautifully!

  • Vegetarian Option: Substitute shrimp with chickpeas or tofu for a plant-based protein source, ensuring a satisfying texture while keeping it vegetarian-friendly.

  • Creamy Spin: Enhance the richness by adding a dollop of cream cheese or a splash of heavy cream to the sauce. This will elevate the creaminess and provide a lush mouthfeel.

  • Herb Infusion: Experiment with different herbs like fresh basil or cilantro added towards the end of cooking. This adds a fresh, vibrant flavor that brightens the dish.

  • Zoodle it Up: Swap cauliflower rice for zucchini noodles (zoodles) for a refreshing low-carb option that brings an exciting texture to your meal.

  • Citrus Burst: Squeeze fresh lemon or lime juice over the finished dish to impart a zesty note. The citrus brightens the flavors—perfect for sunny days!

  • Additional Veggies: Toss in other vegetables like bell peppers or asparagus to add colors and nutrients. They not only enhance the dish visually but also bring additional textures.

Make this One Pan Creamy Garlic Shrimp your own, just like the comforting flavors of my Garlic Parmesan Chicken or indulge in a delightful twist with the Garlic Parmesan Roasted Shrimp. Each variation can lead to a whole new culinary adventure!

Make Ahead Options

These One Pan Creamy Garlic Shrimp are perfect for busy home cooks looking to save time! You can prepare the sauce, including the garlic, onions, and sun-dried tomatoes, up to 24 hours in advance; simply store it in an airtight container in the refrigerator. Additionally, you can devein and prep the shrimp, keeping them refrigerated until you’re ready to cook. When you’re ready to serve, heat the sauce in a skillet, add the shrimp and cook until they’re opaque and heated through, about 5-7 minutes. This method ensures you enjoy a delicious meal with minimal effort, maintaining all the rich flavors just as if you had made it fresh!

What to Serve with One Pan Creamy Garlic Shrimp

Transform your One Pan Creamy Garlic Shrimp into a complete meal that will tantalize your taste buds and impress your family!

  • Creamy Cauliflower Rice: This low-carb alternative mimics traditional rice perfectly, soaking up the rich sauce for a delightful bite. It’s an excellent base that adds to the dish’s creamy consistency.

  • Zoodles (Zucchini Noodles): Light and refreshing, zoodles provide a fresh crunch that balances the creamy shrimp, creating a colorful and nutritious plate.

  • Garlic Bread: Satisfying and indulgent, garlic bread makes an irresistible companion for this dish, perfect for mopping up every bit of that luscious sauce.

  • Roasted Asparagus: The earthy, slightly charred flavors of asparagus complement the shrimp beautifully, bringing a delightful contrast in both taste and texture.

  • Fresh Garden Salad: A crisp, vibrant salad adds a refreshing element to your meal, providing a healthy and colorful boost with every forkful.

  • White Wine: A chilled glass of Sauvignon Blanc or Pinot Grigio enhances the creamy garlic flavors, making for a lovely dining experience.

  • Lemon Sorbet: For dessert, a refreshing lemon sorbet cleanses the palate beautifully after this hearty meal, leaving everyone feeling satisfied and light.

With these pairings, your One Pan Creamy Garlic Shrimp will shine on any table, captivating hearts and appetites alike!

Expert Tips for One Pan Creamy Garlic Shrimp

Dry Shrimp First: Avoid a watery sauce by ensuring shrimp are thoroughly dried before cooking. This step enhances the sauce’s richness.

Adjust Thickness: For a thicker sauce, mix arrowroot flour with water to create a slurry, adding it as needed when the sauce simmers.

Timing is Key: Serve the One Pan Creamy Garlic Shrimp immediately for the best texture; leftovers can become mushy if frozen.

Fresh Ingredients: Use fresh herbs instead of dried for a more vibrant flavor. They elevate the dish beautifully!

Customizable Options: Feel free to use chicken instead of shrimp or add red pepper flakes for a spicy kick; both options maintain the dish’s deliciousness!

How to Store and Freeze One Pan Creamy Garlic Shrimp

Fridge: Store leftovers in an airtight container for up to 4–5 days. This keeps the flavors fresh and delicious for your next meal!

Freezer: While it’s not recommended to freeze, if necessary, freeze in a sealed container for up to 1 month. Be aware it may affect the shrimp’s texture upon thawing.

Reheating: Reheat gently on the stovetop over low heat, adding a splash of broth or coconut milk to restore creaminess. Enjoy your One Pan Creamy Garlic Shrimp warm!

One Pan Creamy Garlic Shrimp Recipe FAQs

How can I choose the best shrimp for this recipe?
Absolutely! Look for large shrimp that are deveined and with the tails off for easier eating. If you’re buying frozen shrimp, make sure to thaw them completely in the refrigerator overnight or under cold running water for quick thawing. Fresh shrimp should have a mild scent of the ocean, and they shouldn’t be slimy—those are signs of freshness!

What’s the best way to store leftovers of One Pan Creamy Garlic Shrimp?
Leftovers can be stored in an airtight container in the refrigerator for up to 4-5 days. I often make sure to consume them quickly since they taste best fresh. If you feel they will last longer than that, it’s better to freeze them (although texture might change).

Can I freeze One Pan Creamy Garlic Shrimp?
You can freeze it, but keep in mind that it may affect the shrimp’s texture upon thawing. To freeze, transfer the cooled dish into a sealed, airtight container, and label it with the date. It should last up to 1 month in the freezer. When ready to eat, thaw overnight in the refrigerator and reheat gently on the stovetop over low heat.

What should I do if the sauce is too watery?
If you find your sauce is too watery, don’t worry! To thicken it, mix equal parts arrowroot flour and water to create a slurry. Stir this slurry into the sauce while it simmers on low heat. Continue cooking until the sauce has thickened to your desired consistency. This simple fix will give your sauce a delightful, creamy texture!

Is this dish suitable for those with dietary restrictions?
Absolutely! The One Pan Creamy Garlic Shrimp is gluten-free, Paleo, and Whole30 compliant, making it a great option for various dietary needs. However, if you have shellfish allergies, you can easily substitute the shrimp with bite-sized pieces of cooked chicken or firm tofu for a tasty alternative.

How can I make this dish spicier?
If you’re craving a bit of heat, consider adding a pinch of red pepper flakes during the cooking process. Start with a small amount (about 1/4 teaspoon) and adjust to taste! Another option would be to toss in a diced jalapeño along with the onions for an extra kick. Enjoy customizing your One Pan Creamy Garlic Shrimp with flavors you love!

One Pan Creamy Garlic Shrimp

One Pan Creamy Garlic Shrimp Bursting with Flavor

One Pan Creamy Garlic Shrimp is a quick, flavorful meal perfect for busy weeknights, packed with creamy garlic goodness.
Prep Time 10 minutes
Cook Time 20 minutes
Total Time 30 minutes
Servings: 4 servings
Course: Dinner
Cuisine: American
Calories: 350

Ingredients
  

For the Sauce
  • 2 tablespoons grass-fed butter or ghee Add a rich, buttery flavor; substitute with coconut oil for a dairy-free option.
  • 4 cloves garlic Provides a deliciously aromatic kick; mince finely for an even blend.
  • 1 cup bone broth (chicken) Enriches the sauce with warmth; swap for vegetable broth to keep it vegetarian.
  • 1 can canned coconut milk Creates the creamy base; opt for full-fat for added richness or half and half for a lighter choice.
  • 1 tablespoon nutritional yeast Introduces a cheesy flavor without dairy; omit for a non-vegan option or replace with grated Parmesan.
For the Shrimp and Veggies
  • 1 pound large shrimp The star of the dish; use deveined, tails-off shrimp for easy eating.
  • 1 medium yellow onion Adds a touch of sweetness; shallots can be used for a milder flavor.
  • ½ cup sun-dried tomatoes (in olive oil) Intensifies the dish’s flavor; reserve some oil for sautéing.
  • 2 cups spinach Provides nutrition and bursts of color; could substitute with kale or any leafy greens.
Seasoning
  • 1 teaspoon Italian seasoning Blends aromatics for an extra flavor dimension; fresh herbs are a lovely alternative when available.
  • kosher salt Essential for balancing overall taste; adjust according to your preference.
  • black pepper Essential for balancing overall taste; adjust according to your preference.

Equipment

  • Large skillet

Method
 

Step‑by‑Step Instructions
  1. In a large skillet, melt 2 tablespoons of grass-fed butter or ghee over medium heat. Add 4 finely minced garlic cloves, stirring continuously for about 1 minute until fragrant.
  2. Add 1 pound of deveined, tails-off large shrimp to the skillet. Cook for approximately 2 minutes on each side until they become opaque and pink. Transfer the shrimp to a bowl and set aside.
  3. Increase the heat to medium-high and add one diced yellow onion to the skillet. Sauté for about 2-3 minutes until the onions soften and turn translucent.
  4. Pour in 1 cup of chicken bone broth, using a wooden spoon to scrape any brown bits off the skillet bottom. Allow the broth to simmer and reduce by about 50%, which should take around 3-4 minutes.
  5. Stir in 1 tablespoon of the reserved oil from the jar of sun-dried tomatoes along with ½ cup of the sun-dried tomatoes themselves. Sauté for another 2-3 minutes.
  6. Pour in one can of full-fat coconut milk, stirring well to combine with the other ingredients. Bring to a gentle boil, then reduce the heat to medium-low.
  7. Toss in 2 cups of fresh spinach and stir until just wilted, which takes about 2 minutes.
  8. Return the cooked shrimp to the skillet, seasoning with 1 teaspoon of Italian seasoning, kosher salt, and black pepper to taste. Mix everything well.
  9. Once everything is well combined and the shrimp are hot, adjust seasoning if necessary. Serve immediately, garnished with fresh parsley and lemon wedges.

Nutrition

Serving: 1servingCalories: 350kcalCarbohydrates: 12gProtein: 28gFat: 24gSaturated Fat: 15gPolyunsaturated Fat: 2gMonounsaturated Fat: 9gCholesterol: 300mgSodium: 800mgPotassium: 600mgFiber: 4gSugar: 4gVitamin A: 1500IUVitamin C: 10mgCalcium: 50mgIron: 2mg

Notes

Serve the One Pan Creamy Garlic Shrimp immediately for the best texture. For a thicker sauce, mix arrowroot flour with water and add it when the sauce simmers. Use fresh herbs for a more vibrant flavor, and consider adding red pepper flakes for a spicy kick.

Tried this recipe?

Let us know how it was!

Easy Chinese Beef and Broccoli: A Healthier Takeout at Home

As the enticing aroma of sizzling beef fills the kitchen, I find myself transported to my favorite Chinese take-out spot. This Healthier Chinese Beef and Broccoli Stir-Fry is not just a meal; it’s a comforting dish that brings the joy of a restaurant experience right to my dining table. With juicy, tender beef and crisp broccoli enveloped in a flavorful sauce, it’s quicker to whip up than it is to wait in line for take-out. Plus, this delightful stir-fry is a healthier alternative, allowing you to relish the classic flavors without the guilt. And the best part? It’s incredibly versatile—feel free to swap in your favorite veggies or cuts of beef! Curious how you can elevate a weeknight dinner into something special? Let’s dive into this culinary adventure together!

Why is Homemade Chinese Beef and Broccoli Special?

Homemade Chinese Beef and Broccoli isn’t just a meal; it’s an experience! Quick to prepare, this dish offers all the savory goodness of take-out without the guilt. Versatile at its core, you can easily swap in your favorite vegetables or different cuts of beef. Flavor-packed sauce enhances each bite, while the tender beef and crunchy broccoli create a satisfying texture. Want something equally delicious? Try out my Cozy Broccoli Cheddar or Sticky Beef Noodles for a comforting twist on dinner!

Chinese Beef and Broccoli Ingredients

• To create your very own homemade Chinese Beef and Broccoli stir-fry, gather these essential ingredients that blend together for a satisfying meal.

For the Beef

  • Flank steak – This cut offers rich flavor and tenderness; skirt steak is a great substitute if needed.
  • Cornstarch – Essential for marinating the beef to keep it juicy and help thicken the sauce.
  • Baking soda (optional) – A handy trick for tenderizing tougher cuts of beef; just use 1/2 teaspoon in your marinade.

For the Sauce

  • Soy sauce – The backbone of the dish, delivering that savory umami flavor; you can swap in tamari for a gluten-free alternative.
  • Dark soy sauce – Adds depth and rich color to your sauce; regular soy sauce will do just fine if that’s what you have.
  • Peanut oil – Ideal for stir-frying with its distinct flavor; vegetable oil works as a substitute.
  • Shaoxing wine (or dry sherry) – Enhances complexity and flavor; leave it out for an alcohol-free dish.
  • Brown sugar – Sweetens the sauce and balances flavors; feel free to use white sugar instead.
  • Chicken or beef stock – Adds depth to your sauce; water can be used in a pinch if you’re out.

For the Vegetables

  • Broccoli – This main vegetable provides crunch and essential nutrients; you can mix in other veggies like carrots or snap peas for variety.
  • Garlic and ginger – Aromatics that elevate the dish with warmth and flavor, making them indispensable to your stir-fry!

Now that you have all the ingredients, you’re ready to embark on your culinary creation of Chinese Beef and Broccoli! It’s time to bring those vibrant flavors to your kitchen.

Step‑by‑Step Instructions for Chinese Beef and Broccoli

Step 1: Prepare the Beef
Begin by slicing the flank steak against the grain into thin strips, which will ensure tenderness. In a mixing bowl, marinate the beef with soy sauce, peanut oil, and cornstarch for about 10 minutes. This step is crucial as it helps to both flavor and tenderize the beef, making your Chinese Beef and Broccoli irresistibly juicy.

Step 2: Make the Sauce
While the beef marinates, prepare the sauce. In a separate bowl, mix together dark soy sauce, chicken or beef stock, Shaoxing wine (or omit for a non-alcoholic option), and brown sugar. Stir these ingredients until well combined, creating a rich, savory base for the stir-fry that will perfectly complement the beef and broccoli.

Step 3: Steam the Broccoli
In your deep skillet, add just a splash of water and bring it to a simmer over medium heat. Add the broccoli florets and steam them for about 1 minute, or until they turn bright green and are tender yet crisp. Once done, remove the broccoli from the skillet and set it aside while you cook the beef, preserving its color and crunch.

Step 4: Cook the Beef
Heat the skillet over high heat and add a bit more peanut oil. Once the oil is shimmering, carefully add the marinated beef in a single layer. Let it cook undisturbed for about 2-3 minutes, or until the beef is charred on the outside but still slightly pink in the center. This step creates that delicious stir-fry flavor we love in Chinese Beef and Broccoli.

Step 5: Add Aromatics
Once the beef is beautifully browned, add in the minced garlic and ginger, stirring continuously for about 30 seconds. The delightful aroma will fill your kitchen, enhancing the flavor of your dish. Be cautious not to let the garlic burn, as it will turn bitter and impact the overall taste.

Step 6: Combine Ingredients
Return the steamed broccoli to the skillet with the beef. Pour the prepared sauce over the mixture, stirring well to ensure everything is coated evenly. Allow the sauce to cook for about 1 minute, or until it thickens, enveloping the beef and broccoli in a glossy, flavorful layer.

Step 7: Serve Your Dish
Once the sauce has thickened, remove the skillet from the heat. Serve your vibrant Chinese Beef and Broccoli immediately over a bed of steaming hot rice or noodles. The combination of juicy beef, crunchy broccoli, and aromatic sauce will surely impress your family, making this delicious meal feel like a restaurant-quality experience right at home.

Make Ahead Options

These Healthier Chinese Beef and Broccoli stir-fry ingredients are perfect for meal prep enthusiasts! You can marinate the beef up to 24 hours in advance, using soy sauce, peanut oil, and cornstarch. Simply store the marinated beef in the refrigerator in an airtight container to keep it tender and flavorful. You can also pre-steam the broccoli and refrigerate it for up to 3 days, ensuring it remains bright and crunchy. When you’re ready to serve, simply heat the skillet, cook the marinated beef, add the garlic and ginger, then toss in the broccoli and sauce. This way, you’ll achieve restaurant-quality results with minimal effort, making weeknight dinners a breeze!

Expert Tips for Chinese Beef and Broccoli

  • Prep Ingredients First: Have all your ingredients ready and organized before cooking. This ensures a smooth stir-frying process and helps avoid overcooking the beef.

  • Choose the Right Pan: Using a nonstick deep skillet can provide a larger cooking surface than a wok, enhancing the sear on your beef and ensuring even cooking.

  • Marinade Balance: Don’t skip the marination step! Marinating the beef in soy sauce, cornstarch, and peanut oil enhances flavor and tenderness—key to achieving that delicious Chinese Beef and Broccoli taste.

  • Control the Heat: Cook on high heat but keep an eye on your beef. Overcooking can lead to tough meat; you want a nice sear but still juicy on the inside.

  • Vege Variations: Feel free to mix in other veggies like carrots or snap peas for added nutrition—this not only boosts flavor but also adds beautiful color to your dish!

  • Spice it Up: To add a kick, incorporate chili oil or sriracha to your sauce. Adjust according to your preference to create the perfect balance for your Chinese Beef and Broccoli.

What to Serve with Healthier Chinese Beef and Broccoli Stir-Fry

Looking to elevate your family dinner with delightful accompaniments that sing in harmony with the savory flavors?

  • Steamed Jasmine Rice: This fluffy, fragrant rice provides the perfect base to soak up the delicious sauce, creating a comforting experience with every bite.

  • Sesame Noodles: Tossed in peanut or sesame sauce, these noodles add a delightful, nutty flavor that complements the dish beautifully while providing a satisfying contrast of textures.

  • Garlic Green Beans: Stir-fried until tender, these vibrant green beans offer a crunchy freshness to balance the richness of the beef and broccoli.

  • Crispy Egg Rolls: Crunchy and filled with vegetables, these egg rolls make for a fantastic starter, wrapping all the delightful ingredients into a crispy shell. Pair with sweet and sour sauce for added flavor!

  • Chilled Cucumber Salad: This light and refreshing salad, tossed with sesame oil and rice vinegar, balances the meal’s heartiness with its cool, crisp components, making it an excellent palate cleanser.

  • Tropical Fruit Salad: Pineapple, mango, and kiwi will surprise your taste buds with a burst of sweetness after the savory meal, leaving you feeling satisfied and refreshed.

  • Hot Green Tea: The warm, earthy flavor of this tea complements the strong tastes of the beef and broccoli, aiding digestion while enhancing your overall dining experience for a touch of tradition.

  • Chocolate Mousse: For dessert, serving a rich chocolate mousse can wrap up your meal on a delightful sweet note; its silky texture is a wonderful contrast to the stir-fry.

How to Store and Freeze Chinese Beef and Broccoli

Fridge: Store leftovers in an airtight container for up to 3 days. This helps retain the flavor and texture of your delicious Chinese Beef and Broccoli.

Freezer: For longer storage, freeze the dish in a freezer-safe container for up to 3 months. Ensure it’s completely cooled before sealing to prevent freezer burn.

Reheating: When ready to enjoy, thaw overnight in the fridge and reheat gently on the stove over low heat, adding a splash of water or broth to revive the sauce and prevent drying out.

Make-Ahead: If you’re prepping ahead, you can marinate the beef a day in advance and store it separately, making your cooking time even quicker when you’re ready to whip up this wholesome stir-fry.

Chinese Beef and Broccoli Variations

Feel free to get creative and make this dish your own with these delightful twists and swaps!

  • Vegetable Swap: Add in sliced carrots or bell peppers for a pop of color and flavor; they pair beautifully with the beef and broccoli.
    The sweetness of the carrots beautifully contrasts the savory sauce, creating a vibrant dish that’s visually appealing and delectable.

  • Protein Alternative: Go for tofu or tempeh instead of beef for a vegetarian option; firm tofu absorbs flavors well and adds a lovely texture.
    Cooking tofu until golden will give you a satisfying crunch complemented by the tender broccoli.

  • Gluten-Free: Substitute tamari for soy sauce to ensure your dish remains gluten-free without compromising on taste.
    This easy swap allows everyone at the table to enjoy a hearty meal tailored to their dietary needs.

  • Flavor Enhancement: Infuse the dish with a splash of sesame oil at the end for a nutty aroma that will elevate your stir-fry.
    Just a drizzle can transform your meal, bringing an authentic taste that transports you directly to your favorite take-out spot.

  • Sweetness Adjustment: Experiment with the sauce’s sweetness by using maple syrup or agave nectar instead of brown sugar; this adds a unique twist.
    The alternative sweeteners lend a different flavor profile to the stir-fry, making it an exciting option for your palate.

  • Crispy Finish: For extra texture, top your dish with crushed peanuts or sesame seeds; they add crunch and a burst of flavor.
    This element not only enhances the presentation but also elevates the dining experience with layers of texture.

  • Spice it Up: Add chili flakes or sriracha for a spicy kick; adjust according to your heat tolerance.
    The heat complements the savory notes of the dish beautifully, transforming it into a firecracker of flavor.

  • Noodle Base: Serve your beef and broccoli over stir-fried noodles instead of rice for a heartier meal.
    The noodles soak up all the delicious sauce, making every bite a comforting and satisfying experience.

With so many ways to customize, your Chinese Beef and Broccoli can be a new adventure every time. Enjoy exploring the flavors while creating a dish that feels uniquely yours!

Chinese Beef and Broccoli Recipe FAQs

What cut of beef is best for Chinese Beef and Broccoli?
I recommend using flank steak for its rich flavor and tenderness. If you have tougher cuts, you can use the baking soda method to tenderize; just use 1/2 teaspoon mixed with your marinade. Skirt steak is also a good alternative if you can’t find flank.

How do I store leftovers of Chinese Beef and Broccoli?
Absolutely! Store any leftovers in an airtight container in the fridge for up to 3 days. This will help maintain the flavor and texture of your stir-fry. When you reheat, just warm it on the stove over low heat to avoid overcooking the beef.

Can I freeze Chinese Beef and Broccoli?
Yes! For freezing, place your cooled dish in a freezer-safe container, ensuring it is sealed tightly to avoid freezer burn. It can be frozen for up to 3 months. When you’re ready to enjoy it, thaw it overnight in the fridge and gently reheat on the stove.

What should I do if the beef turns out tough?
If your beef becomes tough, it may not have been sliced thinly enough or cooked too long. For next time, make sure to slice against the grain and cook it over high heat for a short period. Also, marinate your beef with cornstarch and soy sauce, as this not only adds flavor but also helps to tenderize the meat.

Can I make this recipe gluten-free?
Very! To make your Chinese Beef and Broccoli gluten-free, you can substitute regular soy sauce with tamari. This gives you the same umami flavor without the gluten. Additionally, ensure that any stock used is gluten-free as well.

What vegetables can I add for variety in my Beef and Broccoli?
Feel free to get creative! You can add vegetables like sliced carrots, red bell peppers, or snap peas. This not only adds nutrition but also gives your dish a vibrant look. Have fun experimenting with different combinations to find your favorite!

Chinese Beef and Broccoli

Easy Chinese Beef and Broccoli: A Healthier Takeout at Home

This Healthier Chinese Beef and Broccoli stir-fry is a quick and flavorful alternative to take-out, packed with juicy beef and crisp broccoli.
Prep Time 10 minutes
Cook Time 15 minutes
Total Time 25 minutes
Servings: 4 servings
Course: Dinner
Cuisine: Chinese
Calories: 350

Ingredients
  

For the Beef
  • 1 pound flank steak skirt steak can be substituted
  • 1 tablespoon cornstarch for marinating
  • 1/2 teaspoon baking soda optional for tenderizing
For the Sauce
  • 1/4 cup soy sauce tamari for gluten-free
  • 1 tablespoon dark soy sauce regular soy sauce can be used
  • 2 tablespoons peanut oil or vegetable oil as a substitute
  • 2 tablespoons Shaoxing wine or dry sherry, omit for alcohol-free
  • 1 tablespoon brown sugar white sugar can be used
  • 1/2 cup chicken or beef stock water can be substituted in a pinch
For the Vegetables
  • 2 cups broccoli can add carrots or snap peas
  • 3 cloves garlic minced
  • 1 tablespoon ginger minced

Equipment

  • deep skillet

Method
 

Preparation Steps
  1. Slice the flank steak against the grain into thin strips.
  2. Marinate the beef with soy sauce, peanut oil, and cornstarch for about 10 minutes.
  3. In a separate bowl, mix dark soy sauce, stock, Shaoxing wine, and brown sugar to create the sauce.
  4. Add water to a deep skillet and bring to a simmer, then steam the broccoli for about 1 minute.
  5. Heat the skillet with peanut oil, then cook the marinated beef until charred yet slightly pink.
  6. Add minced garlic and ginger to the beef, stirring for about 30 seconds.
  7. Return the steamed broccoli to the skillet and pour the sauce over the mixture. Cook until sauce thickens.
  8. Serve immediately over rice or noodles.

Nutrition

Serving: 1servingCalories: 350kcalCarbohydrates: 24gProtein: 30gFat: 15gSaturated Fat: 3gPolyunsaturated Fat: 2gMonounsaturated Fat: 8gCholesterol: 60mgSodium: 700mgPotassium: 600mgFiber: 4gSugar: 8gVitamin A: 500IUVitamin C: 75mgCalcium: 60mgIron: 3mg

Notes

Feel free to mix in other vegetables like carrots or snap peas for added nutrition and color. Adjust spice levels with chili oil or sriracha as desired.

Tried this recipe?

Let us know how it was!

Easy 3 Ingredient Orange Chicken for a Flavorful Family Meal

As I rummaged through my freezer one hectic afternoon, the innocent chicken nuggets caught my eye, whispering possibilities. That’s when inspiration struck! Why not transform these simple bites into a homemade delight? Enter the 3-Ingredient Orange Chicken, the ultimate solution for busy weeknights. With a quick prep time under 25 minutes, this adaptable dish marries crunchy chicken nuggets with a tangy orange sauce that takes it to new heights. It’s an alluring, budget-friendly way to indulge in homemade flavors reminiscent of your favorite takeout—minus the long wait and hefty bill. If you’re looking for a dinner that pleases the whole family without breaking a sweat, you’re in for a treat. Curious about how to whip up this tasty meal? Let’s dive in!

Why Is This Recipe a Game Changer?

Simplicity at its finest: With just three ingredients and minimal prep, this dish is perfect for even the busiest weeknights.

Budget-friendly meals mean more money for your family adventures, and this 3-Ingredient Orange Chicken fits the bill beautifully.

Adaptable flavors allow you to customize it to your family’s taste. Want to spice it up? Toss in some red pepper flakes!

Crispy texture combined with a sweet and tangy orange sauce creates an irresistible taste that keeps everyone coming back for seconds.

If you’re a fan of quick, delightful meals, you might also love this Chilli Chicken Takeout or the savory Sizzling Chicken Pepper.

3 Ingredient Orange Chicken Ingredients

• Save time and money with these essential elements.

For the Chicken

  • Frozen Chicken Nuggets – They provide a perfectly crispy base for your meal; feel free to substitute with homemade, breaded chicken for a fresher touch.

For the Sauce

  • Sweet Orange Marmalade – This adds a delightful sweetness and tang; consider peach or apricot preserves for a different flavor twist.
  • Barbecue Sauce – Enhances the dish with a smoky dimension; opt for a sugar-free variety to lower the calorie count.
  • Low-Sodium Soy Sauce – Infuses umami goodness and saltiness into the mix; use tamari for a gluten-free version.

Optional Additions

  • Cooked Rice – This serves as a wholesome base that soaks up the delightful sauce and balances the meal perfectly.
  • Steamed Vegetables – They add color and nutrition to your plates; broccoli or bell peppers make great options!

Now that you have your ingredients ready, you’re one step closer to enjoying the delightful flavors of this 3 Ingredient Orange Chicken!

Step‑by‑Step Instructions for 3 Ingredient Orange Chicken

Step 1: Prepare Chicken
Begin by preheating your oven to 400°F (200°C) or prepare your air fryer to 380°F (193°C). Spread the frozen chicken nuggets evenly on a baking sheet lined with parchment paper. Bake for 15-20 minutes, flipping halfway through, until they are golden brown and crispy. This crispy foundation is essential for your flavorful 3 Ingredient Orange Chicken.

Step 2: Make Sauce
While the chicken is baking, grab a small microwave-safe bowl and combine sweet orange marmalade, barbecue sauce, and low-sodium soy sauce. Stir the mixture until smooth and uniform. Microwave for about 1 minute, then give it another stir. This simple sauce will provide a delightful, tangy flavor that complements your nuggets perfectly.

Step 3: Mix Chicken with Sauce
Once the chicken nuggets are baked to a crispy perfection, transfer them to a large mixing bowl. Pour the sweet and tangy sauce over the hot chicken nuggets. Using a spatula or tongs, gently toss everything together until each nugget is coated in the luscious sauce. This step is vital for creating the signature flavor of your 3 Ingredient Orange Chicken.

Step 4: Serve
Now it’s time to plate your delicious creation! Serve the saucy orange chicken over a bed of fluffy cooked rice, allowing the grains to soak up any extra sauce. For added nutrition and color, consider garnishing with steamed vegetables like broccoli or bell peppers. Dig into this quick and delightful dish, and savor the flavors reminiscent of your favorite takeout!

Expert Tips for 3 Ingredient Orange Chicken

  • Crispy Nuggets: Ensure your chicken nuggets are baked until golden and crispy for the best texture in your 3 Ingredient Orange Chicken. Proper crispness enhances the overall dish.

  • Sauce Thickness: If your sauce is too thin, add a cornstarch mixture (1 tbsp cornstarch with 3 tbsp cold water) to thicken it up. This will give your dish a lovely, glossy finish.

  • Flavor Enhancements: Add a splash of fresh orange juice or a few red pepper flakes to elevate the flavor profile of your sauce. This will make it even more delightful!

  • Mix It Up: Don’t hesitate to customize! Incorporate veggies like bell peppers or snap peas during the mixing step for added nutrition and color.

  • Storage Solutions: Store leftovers in an airtight container for up to 3 days. Reheat in the microwave or on the skillet to maintain crispiness in your 3 Ingredient Orange Chicken.

3 Ingredient Orange Chicken Variations

Feel free to make this recipe your own with some fun twists and adjustments! Each variation opens up new flavors and possibilities to keep your family excited about homemade meals.

  • Vegetarian Option: Swap chicken nuggets for breaded tofu or cauliflower bites. This gives you a hearty, meat-free option that maintains the delightful crunch.

  • Add Veggies: Toss in some bell peppers or broccoli during the mixing step. They’ll not only add color but also boost the nutritional value of your dish.

  • Zesty Twist: Mix in a splash of fresh orange juice for a brighter flavor, enhancing the citrus notes. Just be sure to thicken the sauce if it gets too runny!

  • Heat It Up: For a spicier punch, sprinkle in some red pepper flakes according to your heat preference. This will amp up the flavor, making each bite exciting!

  • Orange Sauce Variation: Consider substituting the sweet orange marmalade with peach or apricot preserves. This will lend a unique sweetness that pairs beautifully with the nuggets.

  • Gluten-Free: Use tamari instead of soy sauce for a gluten-free option. Your guests likely won’t even notice the difference in taste!

  • Flavor Infusion: Stir in a splash of sesame oil for a nutty undertone. It lends a depth of flavor that transports your dish to the next level.

You might enjoy pairing your Orange Chicken with a wholesome dish like Tuscan Chicken Soup or a deliciously crispy Bbq Chicken Grilled Cheese for an unforgettable family meal.

Storage Tips for 3 Ingredient Orange Chicken

  • Room Temperature: It’s best to avoid leaving your orange chicken at room temperature for more than 2 hours to ensure safety and maintain freshness.

  • Fridge: Store leftovers in an airtight container in the refrigerator for up to 3 days. This helps retain the flavors while keeping the chicken safe to eat.

  • Freezer: For longer storage, you can freeze the orange chicken for up to 2 months. Make sure to seal it in a freezer-safe bag, removing as much air as possible.

  • Reheating: To reheat, simply place your 3 Ingredient Orange Chicken in a skillet over medium heat until warmed through. This method preserves the crispy texture, making it just as delightful as when freshly made!

Make Ahead Options

These 3-Ingredient Orange Chicken bites are perfect for meal prep! You can prepare the sweet orange marmalade sauce up to 3 days in advance, storing it in an airtight container in the refrigerator to maintain its vibrant flavor. Additionally, bake the chicken nuggets and keep them crispy by letting them cool completely before refrigerating them in a separate container for up to 24 hours. When you’re ready to enjoy your meal, simply reheat the chicken nuggets in the oven or air fryer until they’re crispy again, then toss them in the pre-made sauce before serving over warm rice. This way, you can experience just as delicious flavors on busy weeknights without the hassle!

What to Serve with 3-Ingredient Orange Chicken

As you prepare to indulge in this bright and flavorful dish, consider these delightful accompaniments that will elevate your meal experience.

  • Fluffy Jasmine Rice: Light and fragrant, it soaks up the tangy sauce, balancing out flavors beautifully.
  • Steamed Broccoli: Crisp-tender and vibrant, it adds color and nutrition while contrasting the dish’s sweetness.

For a heartier option, toss in sautéed bell peppers or snap peas. They not only enhance the meal but also provide a pleasant crunch.

  • Crispy Tofu Bites: Add an extra source of protein with textural contrast; they seamlessly absorb flavors from the orange sauce.

For a refreshing drink, consider serving Iced Green Tea. Its lightness complements the rich flavors of the chicken, providing a nice palate cleanse.

  • Mango Salad: Sweet and tangy, this salad made with fresh mango and cilantro provides a refreshing counterpoint to the savory orange chicken.
  • Chocolate Pudding: To finish off your meal on a sweet note, a cup of creamy chocolate pudding offers a comforting dessert that’ll leave everyone smiling.

3-Ingredient Orange Chicken Recipe FAQs

What type of chicken nuggets should I use?
Absolutely! For the best results, I recommend using frozen chicken nuggets, as they provide a crispy base that pairs perfectly with the sauce. However, if you prefer a fresher option, feel free to make homemade breaded chicken for a more personalized touch.

How should I store leftovers?
To keep your 3-Ingredient Orange Chicken fresh, store leftovers in an airtight container in the refrigerator for up to 3 days. Be sure to let it cool before sealing to avoid condensation which can make it soggy. When ready to eat, simply reheat in the microwave or on a skillet to retain that delightful crispiness.

Can I freeze the orange chicken?
Yes! You can freeze your 3-Ingredient Orange Chicken for up to 2 months. To do this, place it in a freezer-safe bag, ensuring you remove as much air as possible. When you’re ready to enjoy it, thaw in the refrigerator overnight and reheat in a skillet over medium heat to help the nuggets regain their crunch.

What if the sauce is too thin or too thick?
If you find your sauce is too thin, dissolve 1 tablespoon of cornstarch in 3 tablespoons of cold water and whisk it into the sauce over low heat until thickened. This will give your sauce that glossy finish you’re looking for. Conversely, if your sauce turns out too thick, adding a splash of water or extra orange juice can help loosen it up.

Can this dish be made gluten-free?
Very! Simply use gluten-free chicken nuggets, and substitute the low-sodium soy sauce with tamari, which is a fantastic gluten-free alternative. This way, everyone can enjoy the deliciousness of your 3-Ingredient Orange Chicken!

Are there any dietary considerations I should be aware of?
Absolutely! Always check the labels for your chicken nuggets and sauces to avoid allergens. The sweet orange marmalade and barbecue sauce can sometimes contain soy or gluten, so opt for brands that cater to your dietary needs. If you’re serving this dish to pets, keep in mind that ingredients like soy sauce can be harmful to them, so it’s best to keep this dinner safely for human enjoyment only.

3 Ingredient Orange Chicken

Easy 3 Ingredient Orange Chicken for a Flavorful Family Meal

Enjoy this 3 Ingredient Orange Chicken, a quick and delicious dinner that transforms simple chicken nuggets into a delightful dish.
Prep Time 10 minutes
Cook Time 15 minutes
Total Time 25 minutes
Servings: 4 servings
Course: Dinner
Cuisine: Asian
Calories: 350

Ingredients
  

For the Chicken
  • 1 bag Frozen Chicken Nuggets Feel free to substitute with homemade, breaded chicken for a fresher touch.
For the Sauce
  • 1/2 cup Sweet Orange Marmalade Consider peach or apricot preserves for a different flavor twist.
  • 1/4 cup Barbecue Sauce Opt for a sugar-free variety to lower the calorie count.
  • 2 tablespoons Low-Sodium Soy Sauce Use tamari for a gluten-free version.
Optional Additions
  • 2 cups Cooked Rice Serves as a wholesome base.
  • 1 cup Steamed Vegetables Broccoli or bell peppers make great options!

Equipment

  • Oven
  • Microwave
  • Baking Sheet
  • Mixing Bowl

Method
 

Step-by-Step Instructions
  1. Preheat your oven to 400°F (200°C) or prepare your air fryer to 380°F (193°C). Spread the frozen chicken nuggets evenly on a baking sheet lined with parchment paper. Bake for 15-20 minutes, flipping halfway through, until they are golden brown and crispy.
  2. While the chicken is baking, combine sweet orange marmalade, barbecue sauce, and low-sodium soy sauce in a small microwave-safe bowl. Stir until smooth. Microwave for about 1 minute, then stir again.
  3. Once the chicken nuggets are baked, transfer them to a large mixing bowl. Pour the sauce over the hot chicken nuggets and gently toss until coated.
  4. Serve the orange chicken over a bed of cooked rice, and garnish with steamed vegetables if desired.

Nutrition

Serving: 1servingCalories: 350kcalCarbohydrates: 35gProtein: 15gFat: 15gSaturated Fat: 5gPolyunsaturated Fat: 2gMonounsaturated Fat: 5gCholesterol: 40mgSodium: 800mgPotassium: 400mgFiber: 2gSugar: 12gVitamin A: 200IUVitamin C: 10mgCalcium: 20mgIron: 3mg

Notes

Ensure your chicken nuggets are baked until golden and crispy for the best texture. Store leftovers in an airtight container for up to 3 days.

Tried this recipe?

Let us know how it was!

Savory Ground Turkey Korean-Style: Quick & Healthy Delight

As I rummaged through my fridge one busy evening, the last thing I wanted was another bland, takeout dinner. Enter this Korean-Style Ground Turkey recipe—a colorful twist on convenience that turns weeknight cooking into a flavorful adventure! This dish whips up in just 45 minutes, making it a fantastic option for anyone craving a satisfying meal without the fuss. Not only is ground turkey a healthier alternative to red meats, but it also soaks up all the delicious spicy, sweet, and tangy notes, creating a dish that delights every palate. Whether you’re cooking solo or feeding the family, you’ll find it’s the perfect balance of taste, nutrition, and budget-friendliness. What flavor surprises await you in this quick culinary treasure?

Why Is This Recipe a Must-Try?

Simplicity, This Korean-Style Ground Turkey recipe is incredibly straightforward, requiring just 45 minutes to prepare and serve.

Versatility, Easily customize the dish by swapping ground turkey for ground chicken or pork, making it a fantastic option for various preferences.

Flavor Explosion, The harmonious blend of spicy, sweet, and savory flavors, enhanced with sesame seeds and fresh chives, elevates it beyond typical weeknight dinners.

Health-Conscious, At approximately 230 calories per serving, this dish packs a punch of nutrition without compromising taste, perfect for those seeking balanced meals.

Crowd Pleaser, Ideal for family dinners or hosting friends, it’s a dish that everyone will rave about, ensuring you won’t have leftovers!

For more delicious ideas, check out my Korean Ground Beef for another quick and delightful meal or try the Mongolian Ground Beef for a hearty dinner option!

Ground Turkey Ingredients

For the Sauce
Soy Sauce – Adds saltiness and depth of flavor; consider low-sodium soy sauce for a healthier option.
Cornstarch – Acts as a thickening agent for the sauce; can be omitted for a thinner texture.
Brown Sugar – Provides sweetness to balance the soy sauce; substitute with coconut sugar for a less refined choice.
Red Chili Flakes – Introduces heat; adjust to your spice preference or use fresh chopped chili for a different flavor profile.

For the Aromatics
Sesame Oil – Adds a nutty flavor; olive oil can be a lighter substitute but will alter the final taste.
Garlic (minced) – Enhances flavor; fresh is best, but garlic powder can work in a pinch.
Fresh Ginger (grated) – Adds warmth and complexity; ground ginger can be used, though fresh is recommended for authenticity.

For the Main Dish
Ground Turkey – The lean protein focus; swap for ground chicken or pork if preferred.
Chives (chopped) – Adds freshness; green onions can be used as a substitute.
Sesame Seeds – Provides a crunchy texture and nutty flavor; toasted sesame seeds can enhance the taste even further.

This delightful blend of ingredients coming together will certainly make your meal unforgettable!

Step‑by‑Step Instructions for Korean-Style Ground Turkey

Step 1: Prepare the Sauce
In a small bowl, whisk together soy sauce, cornstarch, brown sugar, and red chili flakes until the cornstarch is completely dissolved. This mixture will create a flavorful sauce that binds the dish together. Set the bowl aside and take a moment to savor the savory aroma as the ingredients blend—this will be a key component of your Korean-style ground turkey.

Step 2: Sauté Aromatics
Heat 1 tablespoon of sesame oil in a large skillet over medium heat. Add the minced garlic and grated ginger, and cook for about 1-2 minutes, stirring constantly until the mixture becomes aromatic and fragrant. This step not only infuses the oil with flavor but also forms a delectable base for the ground turkey, enhancing the overall taste profile of the dish.

Step 3: Cook the Ground Turkey
Add the ground turkey to the skillet, breaking it into smaller pieces with a wooden spoon. Cook the turkey for approximately 5-7 minutes, stirring occasionally until it’s cooked through and no longer pink. As the turkey browns, it absorbs the flavors from the garlic and ginger, so pay attention to achieve a nice golden color—this signals that it’s ready for the next step.

Step 4: Combine with Sauce
Pour the prepared soy sauce mixture over the cooked turkey in the skillet. Increase the heat to high and stir everything together, allowing it to cook for an additional 2-3 minutes. Watch carefully as the sauce thickens and clings to the turkey, creating a glossy finish. If the sauce becomes too thick, feel free to add a splash of water to adjust the consistency as desired.

Step 5: Add Fresh Ingredients
Remove the skillet from the heat and stir in the chopped chives, reserving a few for garnish later. The chives will add a burst of freshness and a touch of color to your Korean-style ground turkey. Mix well to ensure the chives are evenly distributed throughout the dish, enhancing both flavor and visual appeal.

Step 6: Garnish and Serve
To plate your delicious Korean-style ground turkey, serve it over a bed of rice or noodles, and garnish with the reserved chives and a sprinkle of sesame seeds. This final touch not only adds texture but also creates an inviting presentation. Enjoy your quick and healthy weeknight dinner alongside steamed vegetables for a complete meal!

Storage Tips for Ground Turkey

Fridge: Store your Korean-style ground turkey in an airtight container for up to 4 days. Allow it to cool completely before sealing to retain its moisture.

Freezer: This delicious dish freezes well! Transfer to a freezer-safe container and store for up to 3 months. Thaw in the refrigerator overnight before reheating.

Reheating: To reheat, warm in a skillet over medium heat until heated through, adding a splash of water to maintain moisture if needed.

Make-Ahead: Consider preparing a larger batch for meal prep, as this ground turkey recipe is perfect for quick lunches or dinners throughout the week.

What to Serve with Korean-Style Ground Turkey

Elevate your weeknight dinner experience with exciting side dishes that perfectly complement this flavorful delight.

  • Steamed Jasmine Rice: This fluffy rice soaks up the tasty sauce, providing a satisfying base that balances the dish’s bold flavors.

  • Roasted Broccoli: The slight crunch and char from roasted broccoli add a savory element that enhances the meal’s nutrition and taste profile.

  • Kimchi: This traditional side adds a tangy, fermented punch that contrasts wonderfully with the savory ground turkey, enriching your culinary experience.

  • Cucumber Salad: A refreshing mix of crisp cucumber, rice vinegar, and sesame seeds offers a cool contrast, cutting through the richness of the dish.

  • Sesame Noodles: Toss warm noodles in a light sesame dressing for a delightful side that complements the dish’s Asian-inspired flavors perfectly.

  • Miso Soup: A warm, savory broth filled with tofu and seaweed creates a comforting addition to the meal, enhancing the overall dining experience.

  • Pickled Carrots: These tangy, crunchy bites provide a bright and zesty counterpoint to the savory turkey, keeping your palate lively.

  • Sweet Potato Fries: Crispy sweet potato fries bring a hint of sweetness, balancing the dish’s flavors with their caramelized outside and soft texture inside.

Expert Tips for Ground Turkey

Avoid Overcooking: Ground turkey dries out quickly; cook just until no longer pink to keep it juicy and tender.

Thicker Sauce: If you prefer a thicker sauce, let it simmer a bit longer, but stir frequently to prevent burning.

Personalize Heat: Adjust the red chili flakes based on your spice tolerance or swap for fresh chili for a different heat profile.

Fresh Ingredients Matter: Using fresh garlic and ginger greatly enhances flavor; dried options are okay, but fresh is always best.

Storage Tips: This Korean-style ground turkey can be refrigerated for up to 4 days, making it perfect for meal prep!

Ground Turkey Variations & Substitutions

Feel free to unleash your creativity and customize this recipe—deliciousness awaits in every delightful twist!

  • Ground Chicken: Substitute ground turkey with ground chicken for a similar texture and flavor that’s equally tender and satisfying.

  • Lean Pork: For a richer taste, swap out the turkey for lean ground pork; it complements the sauce beautifully and adds depth.

  • Vegetable Medley: Enhance nutrition by tossing in diced veggies like bell peppers, carrots, or broccoli, making your dish more colorful and nutrient-packed.

  • Plant-Based Option: Try using plant-based meat alternatives for a vegetarian twist—this version allows everyone to enjoy a guilt-free meal bursting with flavor.

  • Sriracha or Gochujang: Craving heat? Add a splash of Sriracha or gochujang to the sauce for a fiery kick that elevates the flavor profile.

  • Low-Sodium Soy Sauce: Opt for low-sodium soy sauce instead of the regular variety to create a lighter dish without sacrificing flavor—perfect for those watching their sodium intake!

  • Coconut Sugar: Swap brown sugar for coconut sugar for a less refined option that maintains sweetness while infusing a note of caramel complexity into the dish.

  • Fresh Herbs: Experiment with fresh herbs like cilantro or basil instead of chives to bring a refreshing fragrance and flavor, giving you a new culinary experience!

For more adventurous recipes, discover how deliciously quick meals can be with my Korean Ground Beef or explore the flavorful realms of Mongolian Ground Beef.

Make Ahead Options

These Korean-Style Ground Turkey preparations are perfect for busy home cooks looking to save time during the week! You can prepare the sauce (soy sauce, cornstarch, brown sugar, and red chili flakes) up to 24 hours in advance; just keep it refrigerated in an airtight container to maintain the flavor. Additionally, you can cook the ground turkey and store it in the fridge for up to 3 days before adding the sauce. When ready to serve, simply reheat the turkey in a skillet, pour over the prepared sauce, and cook until heated through. This way, you’ll enjoy a hassle-free, delicious dinner that’s just as satisfying as when freshly made!

Korean-Style Ground Turkey Recipe FAQs

How do I know if my ground turkey is fresh?
Absolutely! When selecting ground turkey, look for meat that is pink and has a firm texture. Avoid packages with grayish or dark spots, which may indicate spoilage. The packaging should be intact without any tears or leaks. If you’re in doubt, check the sell-by date to ensure it’s still fresh.

What’s the best way to store leftover Korean-style ground turkey?
Very! To store your delicious Korean-style ground turkey, transfer it to an airtight container and keep it in the refrigerator for up to 4 days. Make sure to let it cool completely before sealing it to prevent condensation, which can lead to sogginess. Always reheat it thoroughly before serving again!

Can I freeze Korean-style ground turkey?
Absolutely! Freezing this recipe is easy and a great way to meal prep. Simply transfer the cooled dish to a freezer-safe container or zip-top bag, making sure to remove as much air as possible. It can be frozen for up to 3 months. When you’re ready to enjoy it again, thaw overnight in the refrigerator and reheat it gently on the stove, adding a splash of water if needed to maintain moisture.

What if I don’t have some of the ingredients?
No worries! If you don’t have fresh garlic or ginger, you can use garlic powder and ground ginger as substitutes. For a bit of extra heat, don’t hesitate to adjust the quantity of red chili flakes or swap them out for fresh chilies if available. And if chives are not on hand, green onions will work beautifully as a stand-in.

Is ground turkey safe for my pet?
Very! Ground turkey is generally safe for dogs when cooked without any added seasonings or oils. Just make sure to consult your veterinarian before introducing any new foods into your pet’s diet, as each animal’s needs can differ. Always cook it thoroughly to avoid any health risks.

What should I do if my sauce is too thick?
Don’t fret! If the sauce becomes too thick while cooking, simply add a splash of water or low-sodium chicken broth, stirring well to combine. This will help loosen the sauce’s consistency while keeping all those delightful flavors intact. Enjoy your cooking adventure!

Ground Turkey

Savory Ground Turkey Korean-Style: Quick & Healthy Delight

A quick and healthy Korean-style ground turkey recipe, perfect for satisfying weeknight dinners.
Prep Time 15 minutes
Cook Time 30 minutes
Total Time 45 minutes
Servings: 4 servings
Course: Dinner
Cuisine: Korean
Calories: 230

Ingredients
  

For the Sauce
  • 1/4 cup Soy Sauce Consider low-sodium for a healthier option.
  • 1 tablespoon Cornstarch Can be omitted for a thinner texture.
  • 2 tablespoons Brown Sugar Substitute with coconut sugar for a less refined choice.
  • 1 teaspoon Red Chili Flakes Adjust to your spice preference.
For the Aromatics
  • 1 tablespoon Sesame Oil A lighter substitute can alter the final taste.
  • 2 cloves Garlic (minced) Fresh is best.
  • 1 tablespoon Fresh Ginger (grated) Fresh is recommended for authenticity.
For the Main Dish
  • 1 pound Ground Turkey Lean protein focus.
  • 1/4 cup Chives (chopped) Green onions can be substituted.
  • 2 tablespoons Sesame Seeds Toasted sesame seeds can enhance the taste.

Equipment

  • Large skillet
  • small bowl
  • whisk

Method
 

Step-by-Step Instructions for Korean-Style Ground Turkey
  1. In a small bowl, whisk together soy sauce, cornstarch, brown sugar, and red chili flakes until the cornstarch is dissolved.
  2. Heat sesame oil in a large skillet over medium heat. Add minced garlic and grated ginger, and cook for 1-2 minutes until aromatic.
  3. Add ground turkey to the skillet, breaking it into smaller pieces. Cook for 5-7 minutes until no longer pink.
  4. Pour the prepared sauce mixture over the cooked turkey and stir. Cook for an additional 2-3 minutes until thickened.
  5. Remove from heat and stir in chopped chives, reserving some for garnish.
  6. Serve over rice or noodles, garnished with reserved chives and sesame seeds.

Nutrition

Serving: 1servingCalories: 230kcalCarbohydrates: 18gProtein: 29gFat: 8gSaturated Fat: 2gPolyunsaturated Fat: 0.5gMonounsaturated Fat: 5gCholesterol: 75mgSodium: 900mgPotassium: 500mgFiber: 1gSugar: 5gVitamin A: 500IUVitamin C: 3mgCalcium: 30mgIron: 2mg

Notes

This Korean-style ground turkey can be refrigerated for up to 4 days and is perfect for meal prep!

Tried this recipe?

Let us know how it was!

Stay Connected

Get recipes via email: