Get my cookbooks

Creamy Cowboy Butter Chicken Linguine for Ultimate Comfort

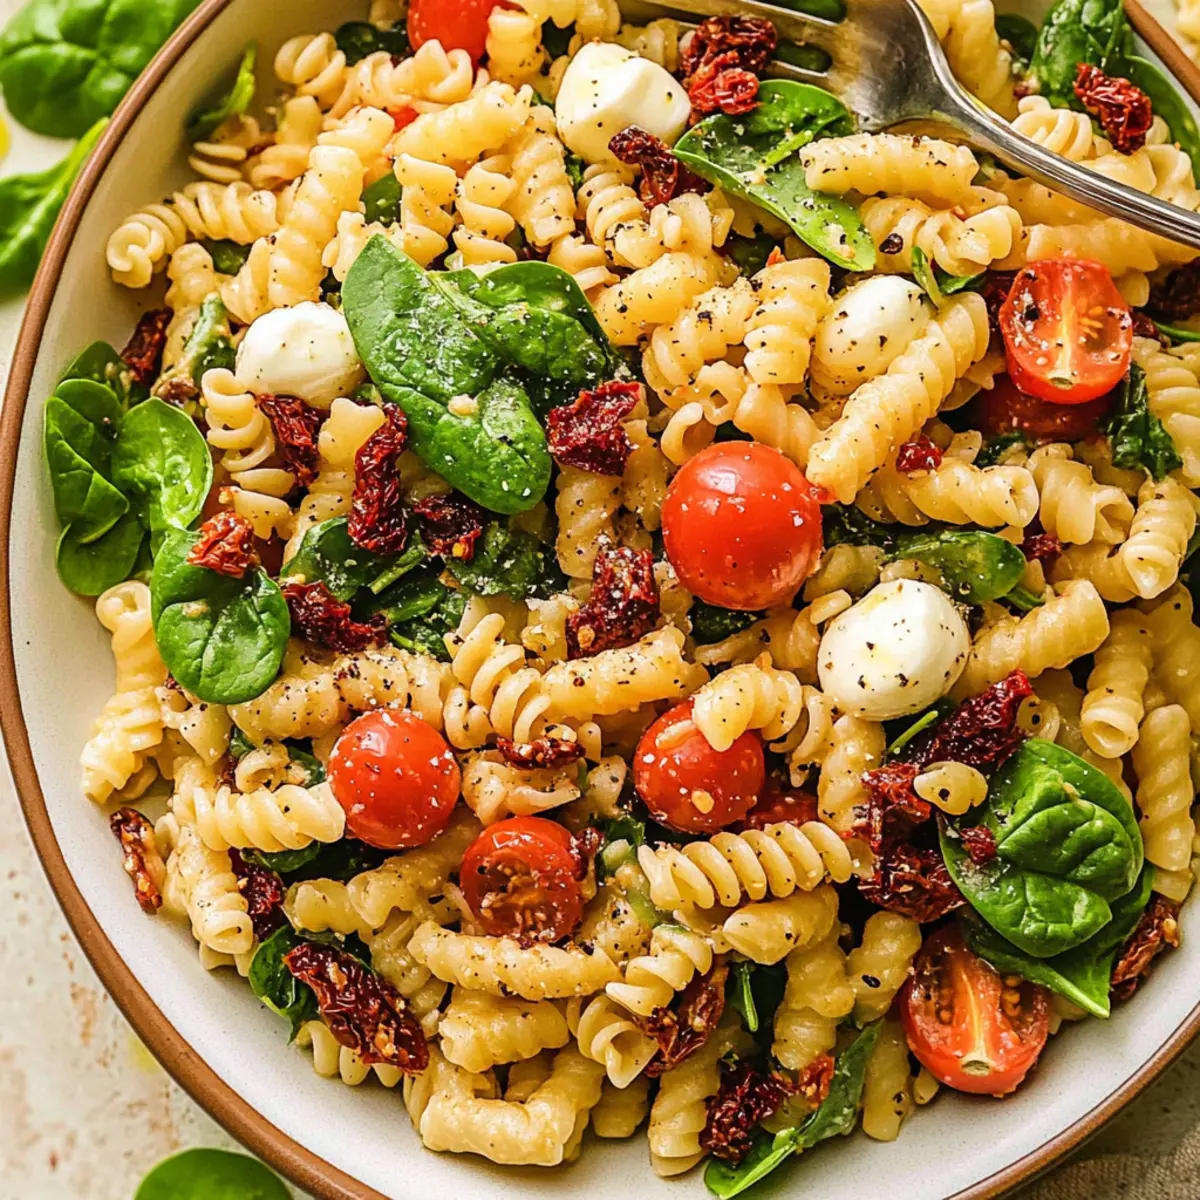
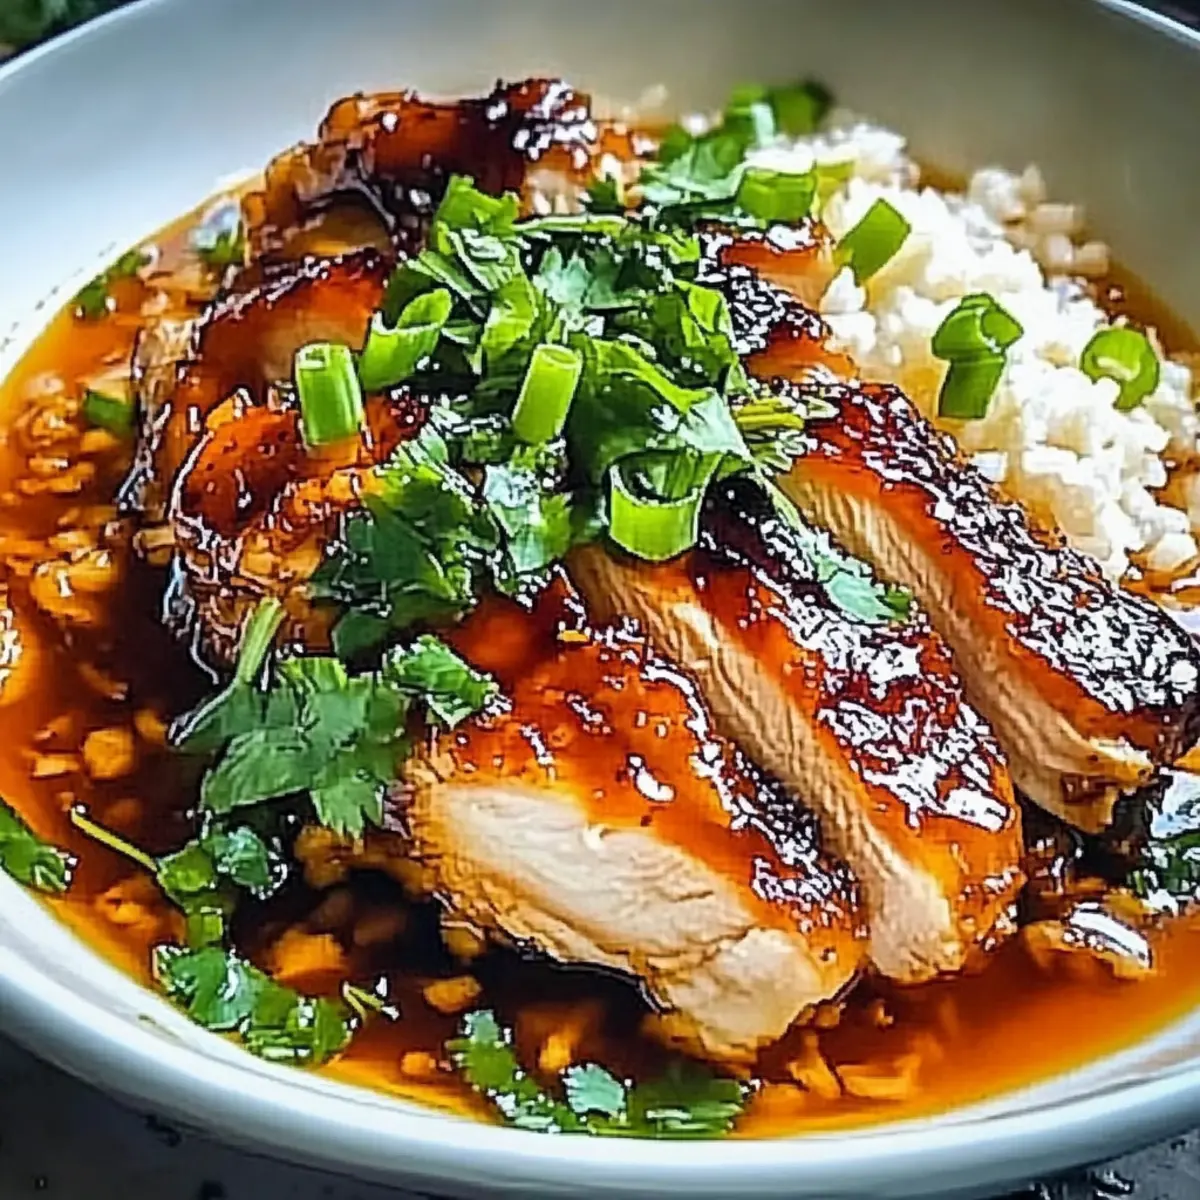
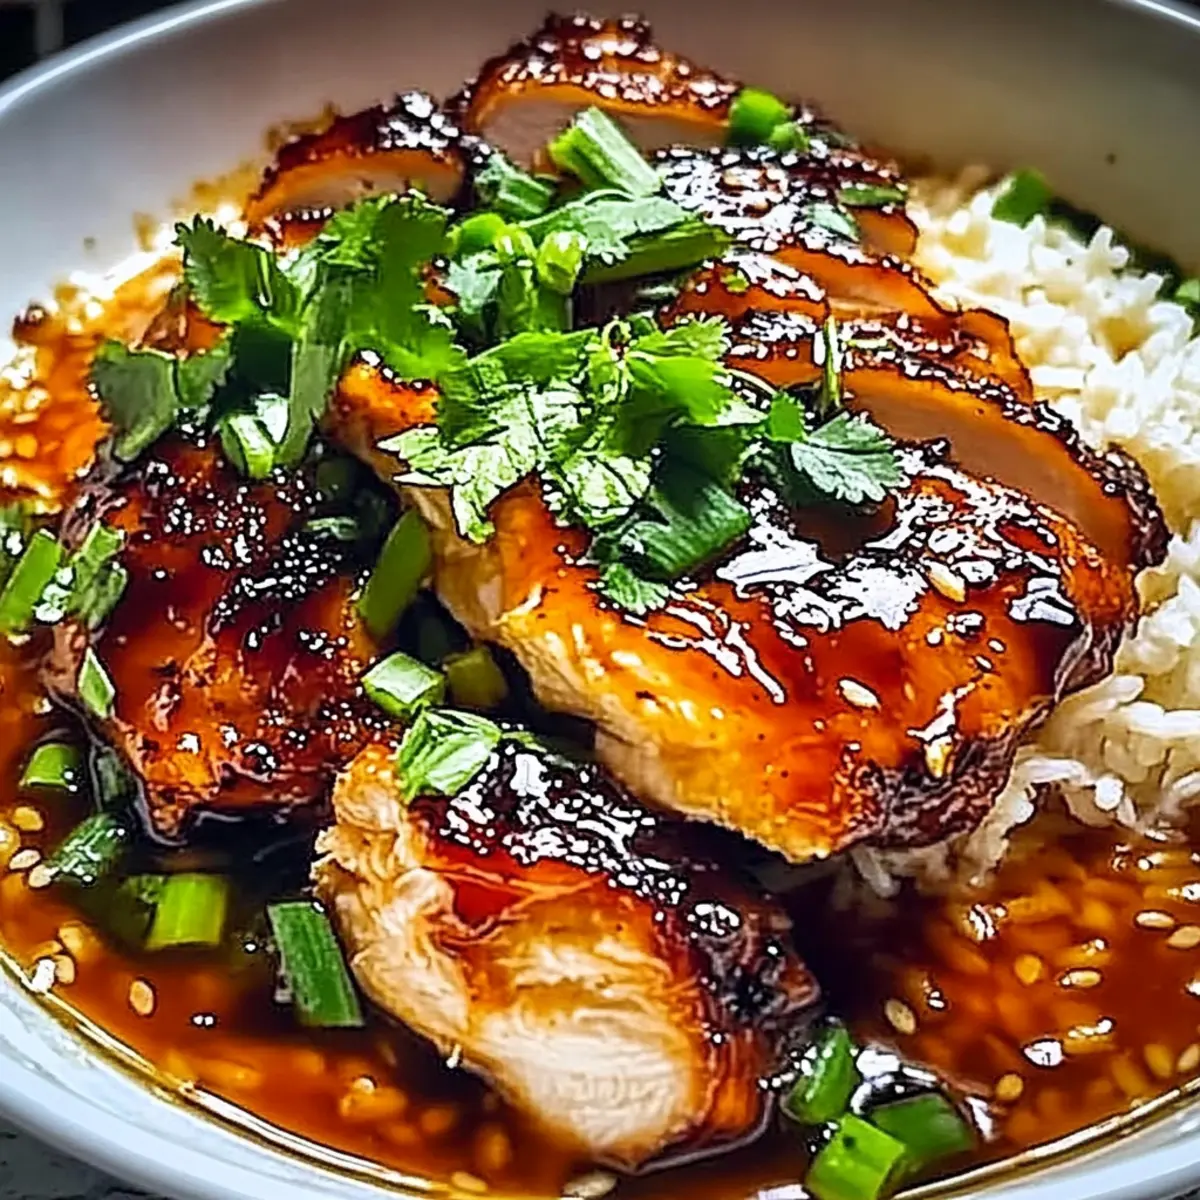
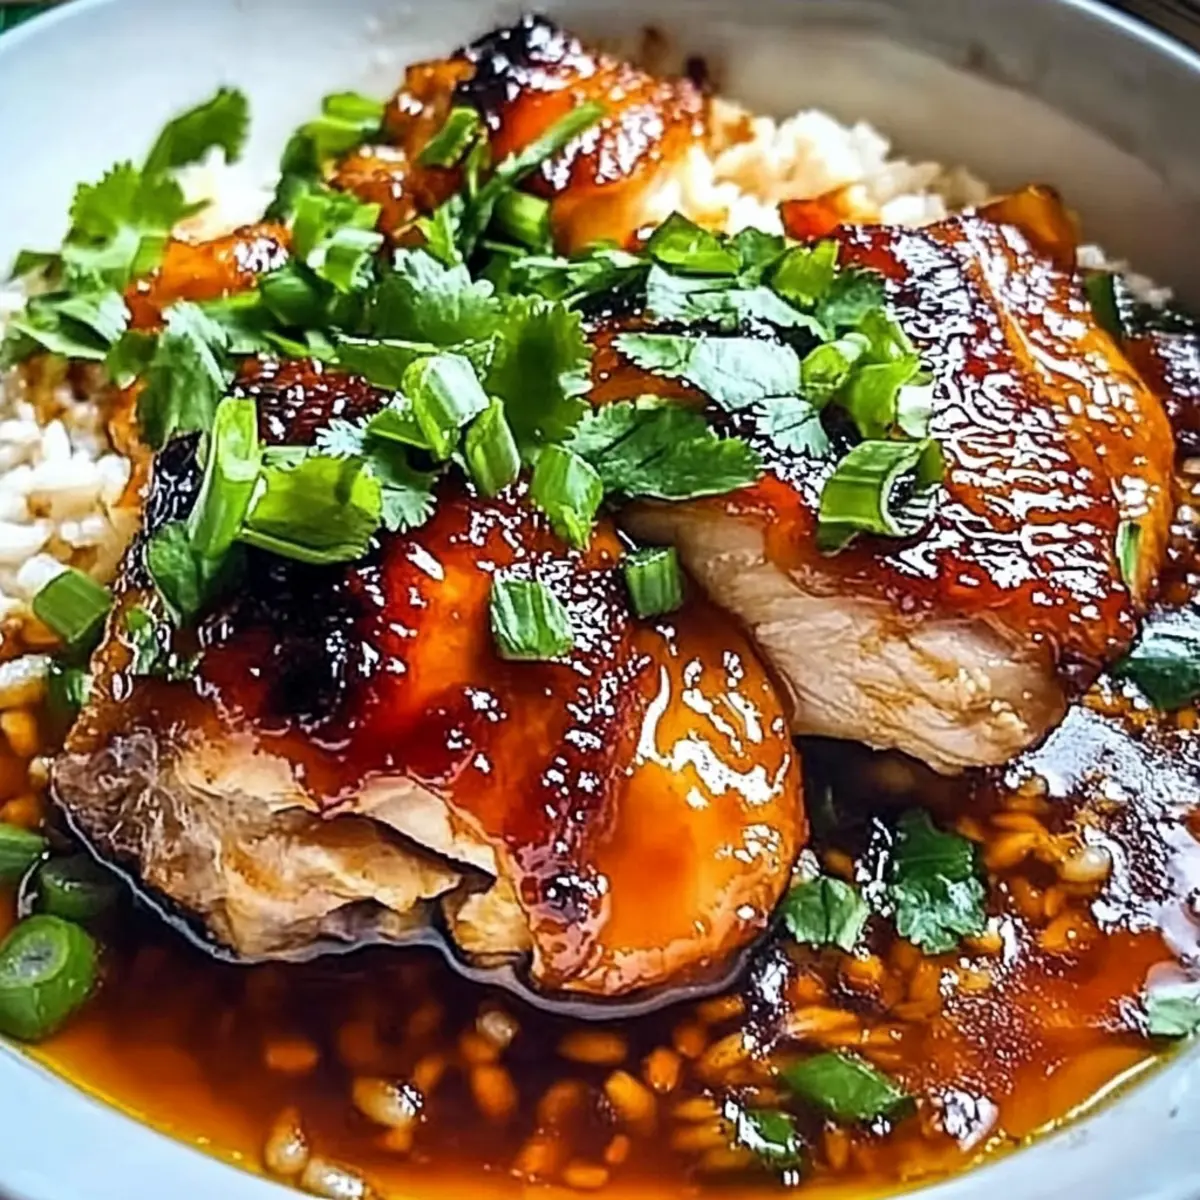
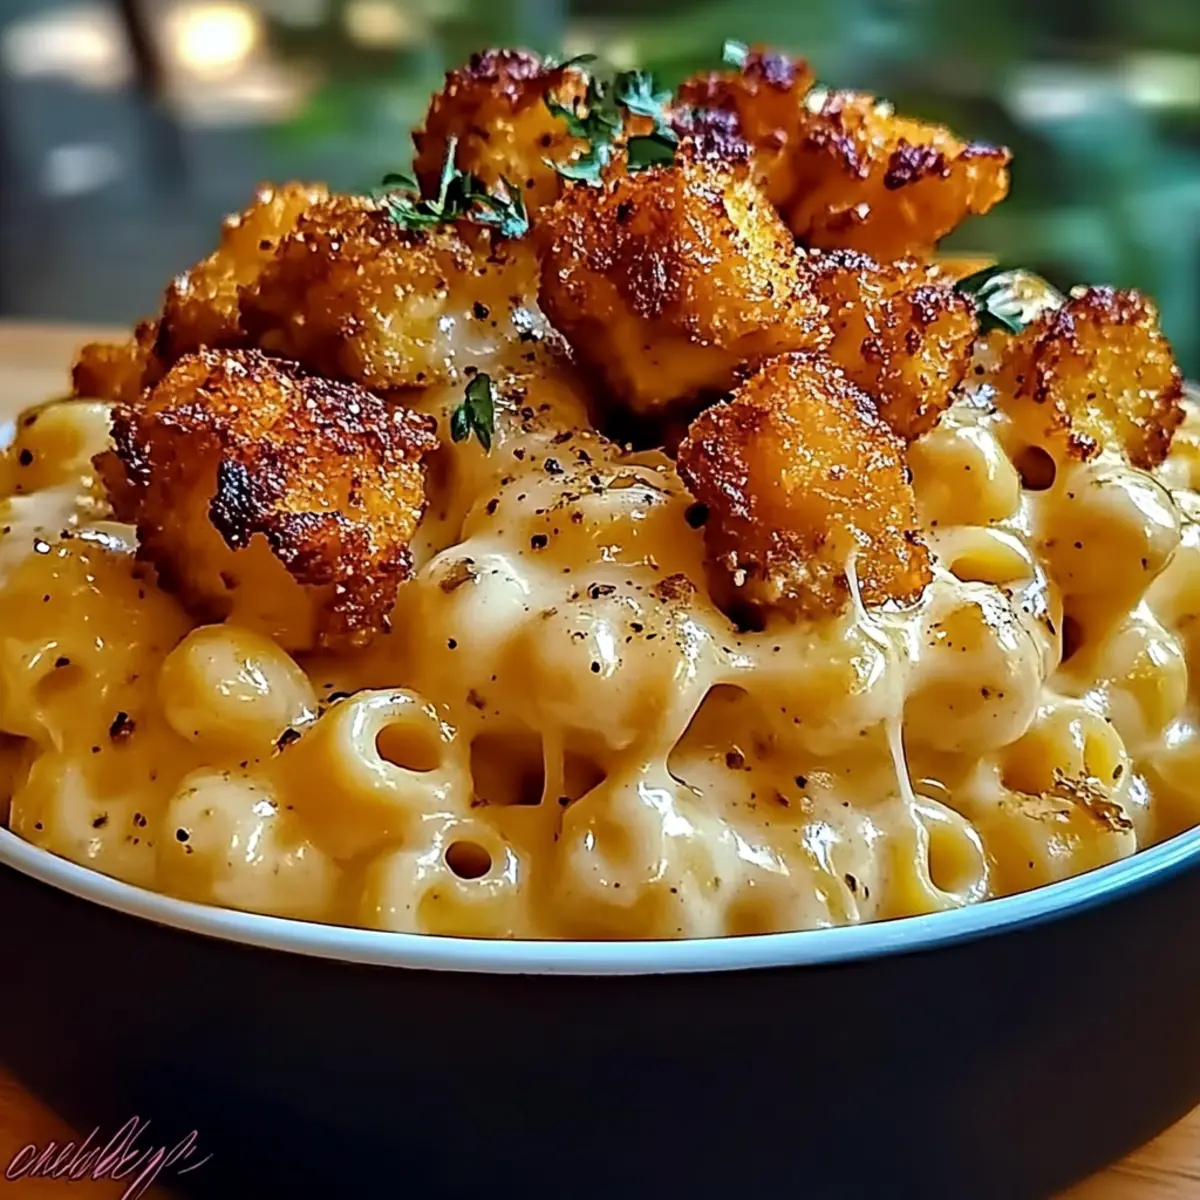
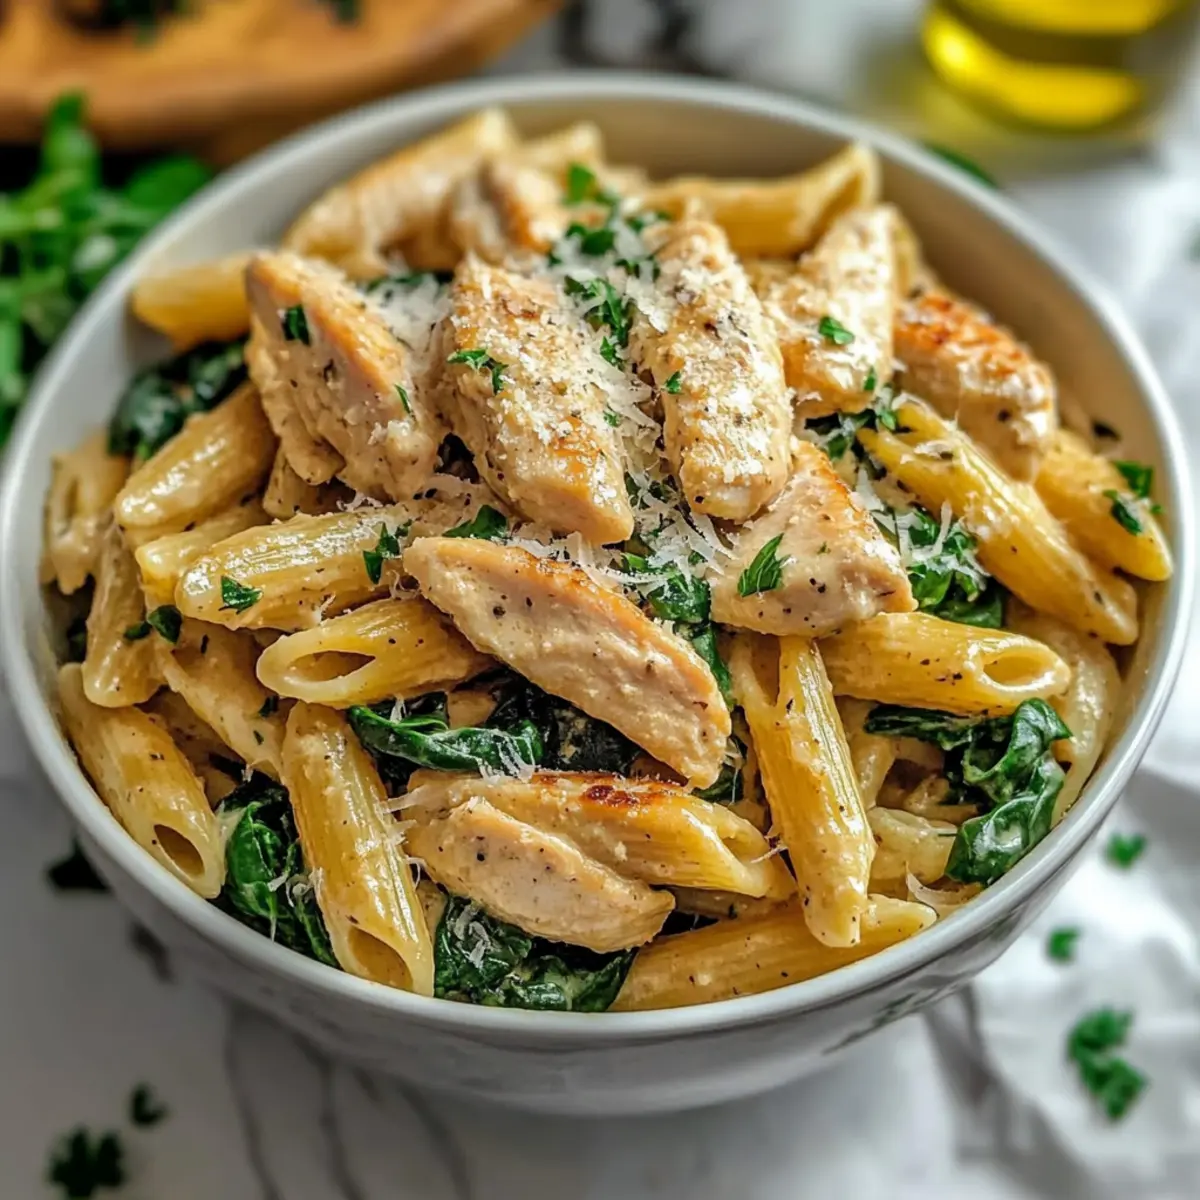
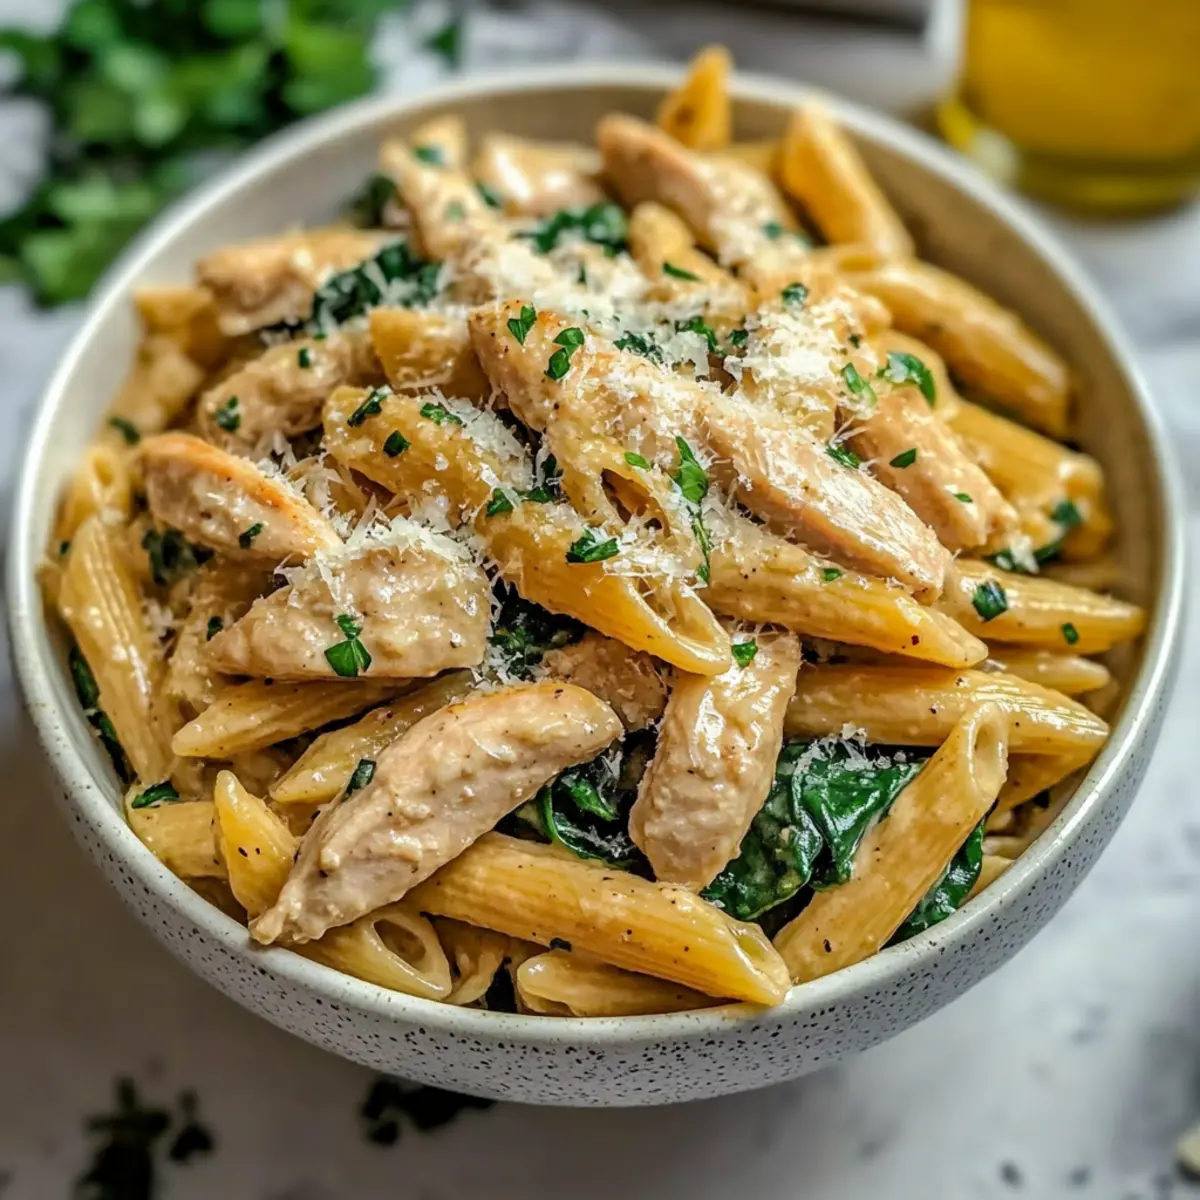
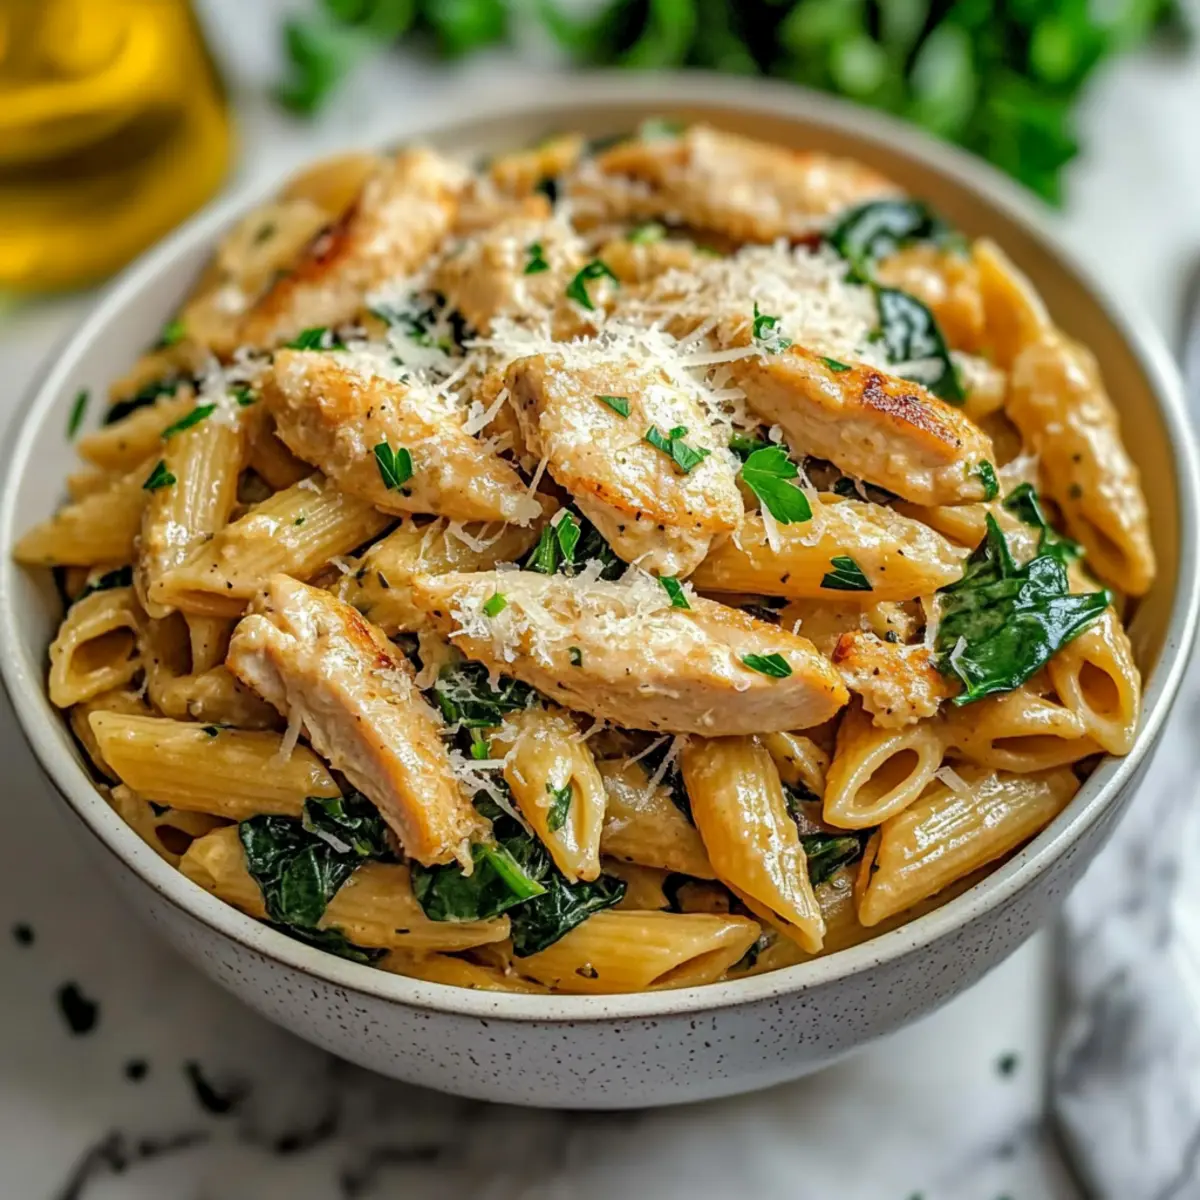
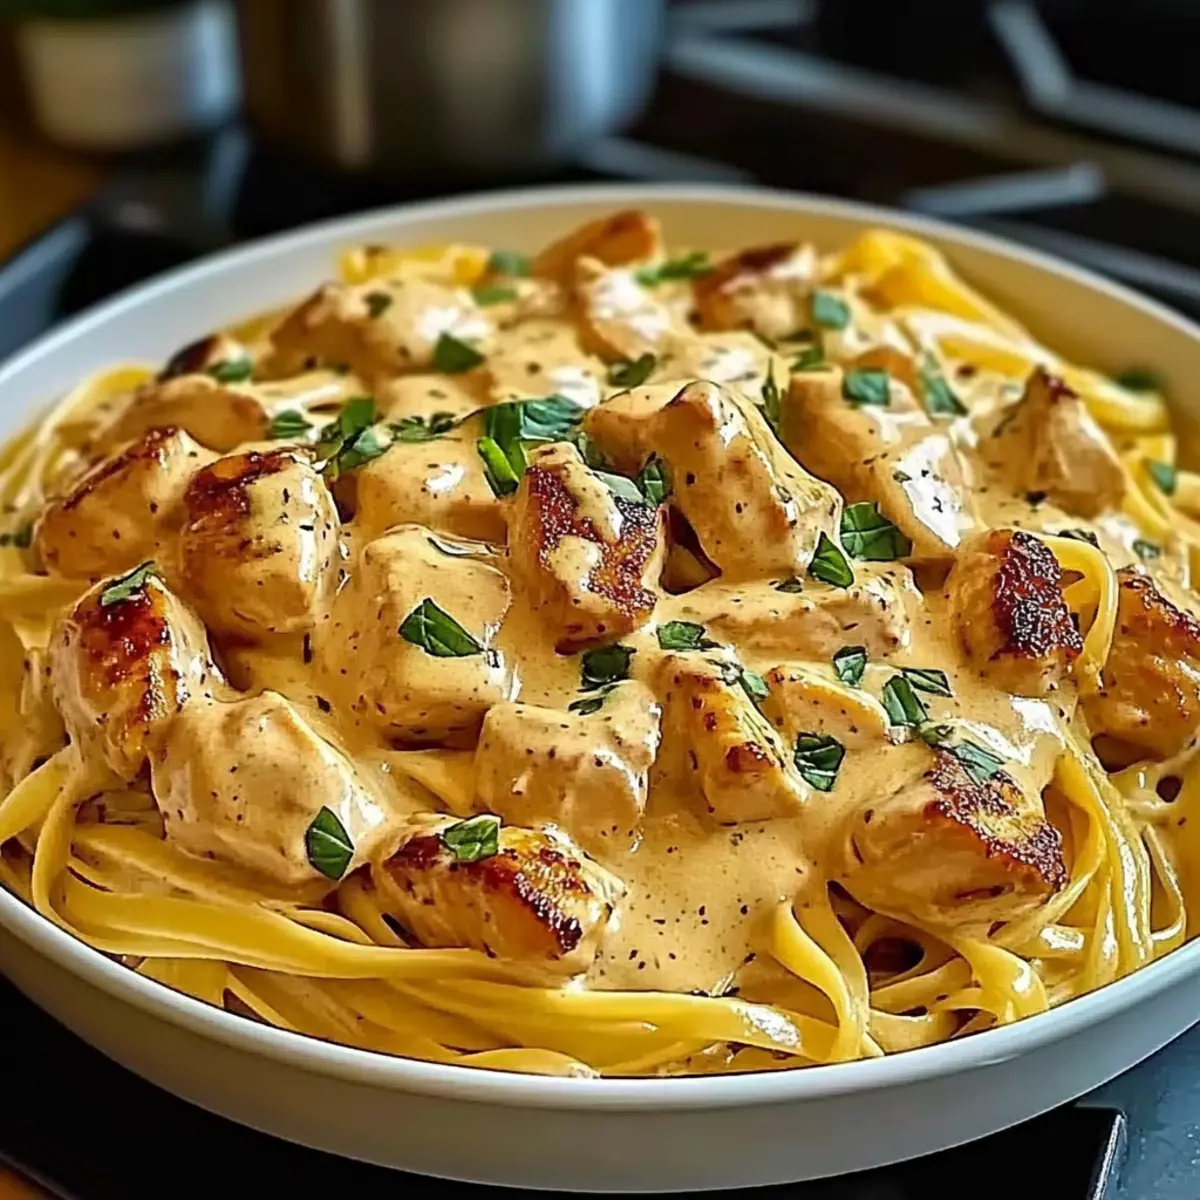
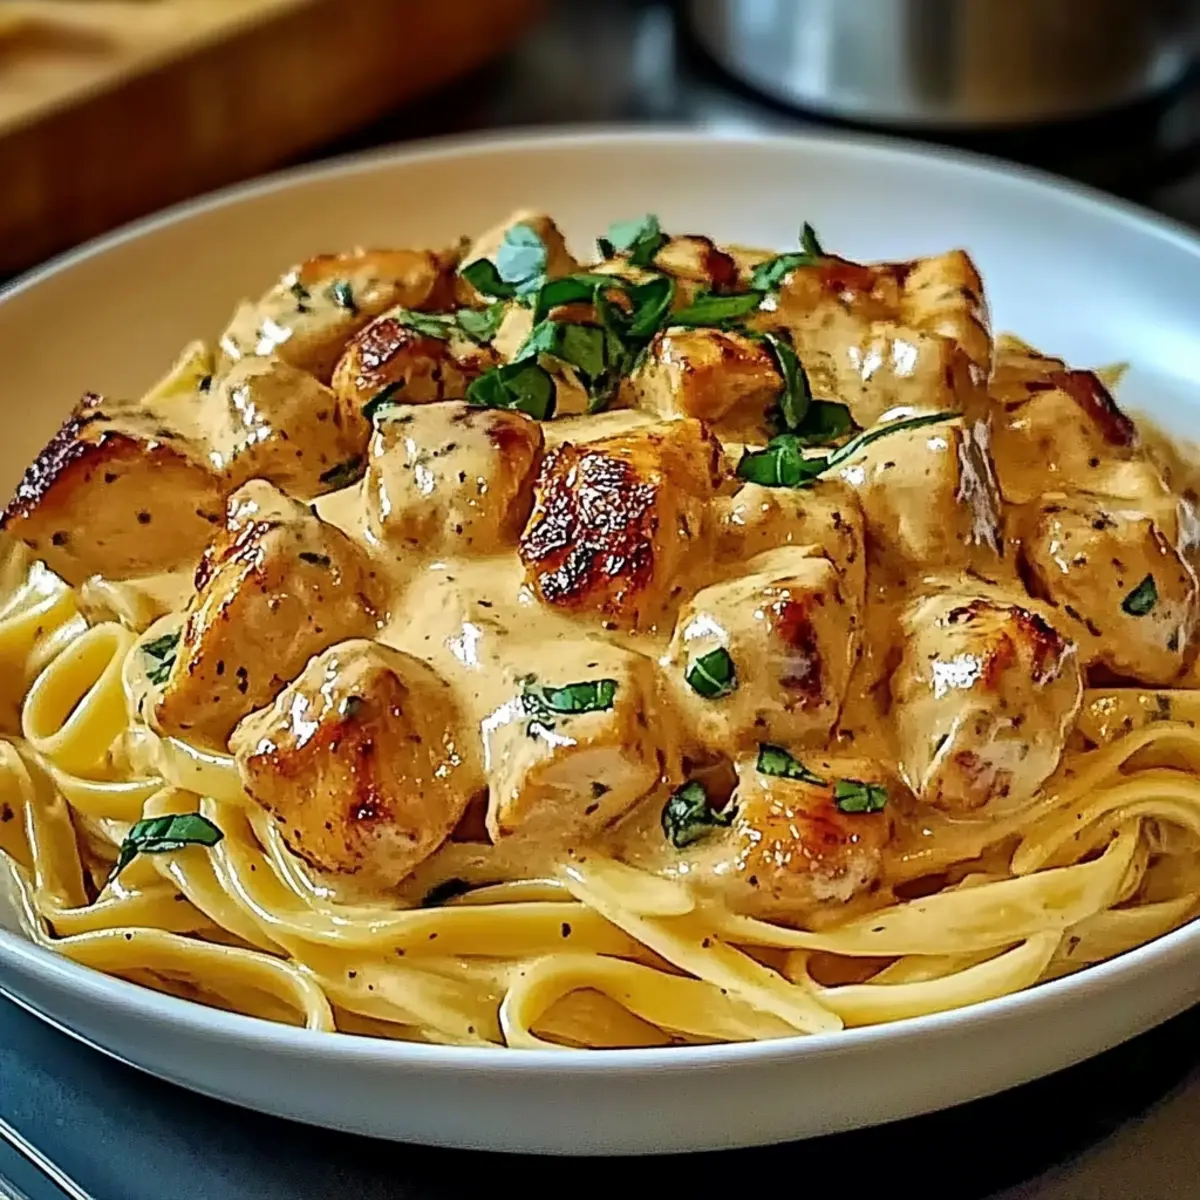
The first bite of Cowboy Butter Chicken Linguine is like a warm embrace on a chilly evening, swirling together the rich, buttery goodness of the cowboy butter sauce and perfectly tender chicken. This dish isn’t just a meal; it’s a speedy escape into creamy comfort food territory, making it ideal for hectic weeknights when you want something hearty yet hassle-free. With just a handful of ingredients, you can transform your kitchen into a cozy haven that satisfies your cravings and warms your heart. Plus, this recipe is incredibly versatile—feel free to swap the linguine for your favorite pasta or add a fiery Cajun twist if you’re in the mood for some spice. Are you ready to dive into a bowl of pure satisfaction?

Why is Cowboy Butter Chicken Linguine a Must-Try?

Flavorful Comfort: This Cowboy Butter Chicken Linguine melds rich, buttery flavors with tender chicken, making every bite a satisfying experience.
Quick & Easy: Perfect for busy weeknights, this dish comes together in under 30 minutes without compromising on taste.
Versatile Options: Whether you prefer penne or a spicy Cajun kick, feel free to customize this recipe to suit your palate.
Creamy Indulgence: The silky cowboy butter sauce envelops the pasta beautifully, ensuring a luscious texture that feels indulgent yet comforting.
Crowd-Pleasing Delight: Ideal for family gatherings or dinner parties, this dish has a way of impressing everyone at the table, leaving them wanting seconds or even thirds! If you love creamy, savory dishes, be sure to also check out my Butter Baked Chicken or the mouthwatering Sizzling Chicken Pepper for more delicious inspiration.

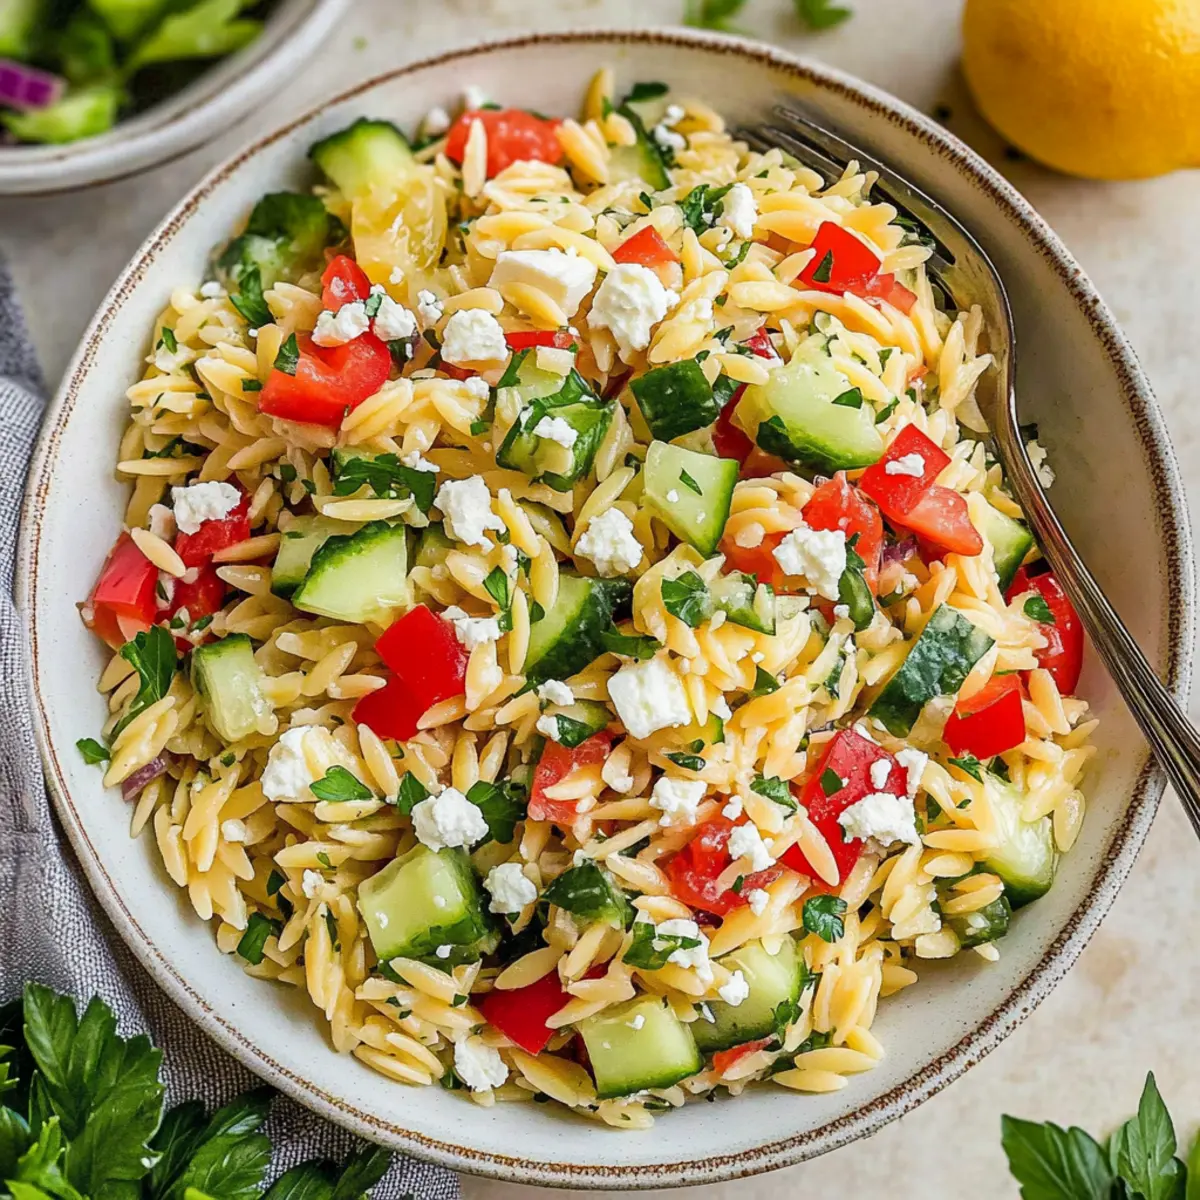
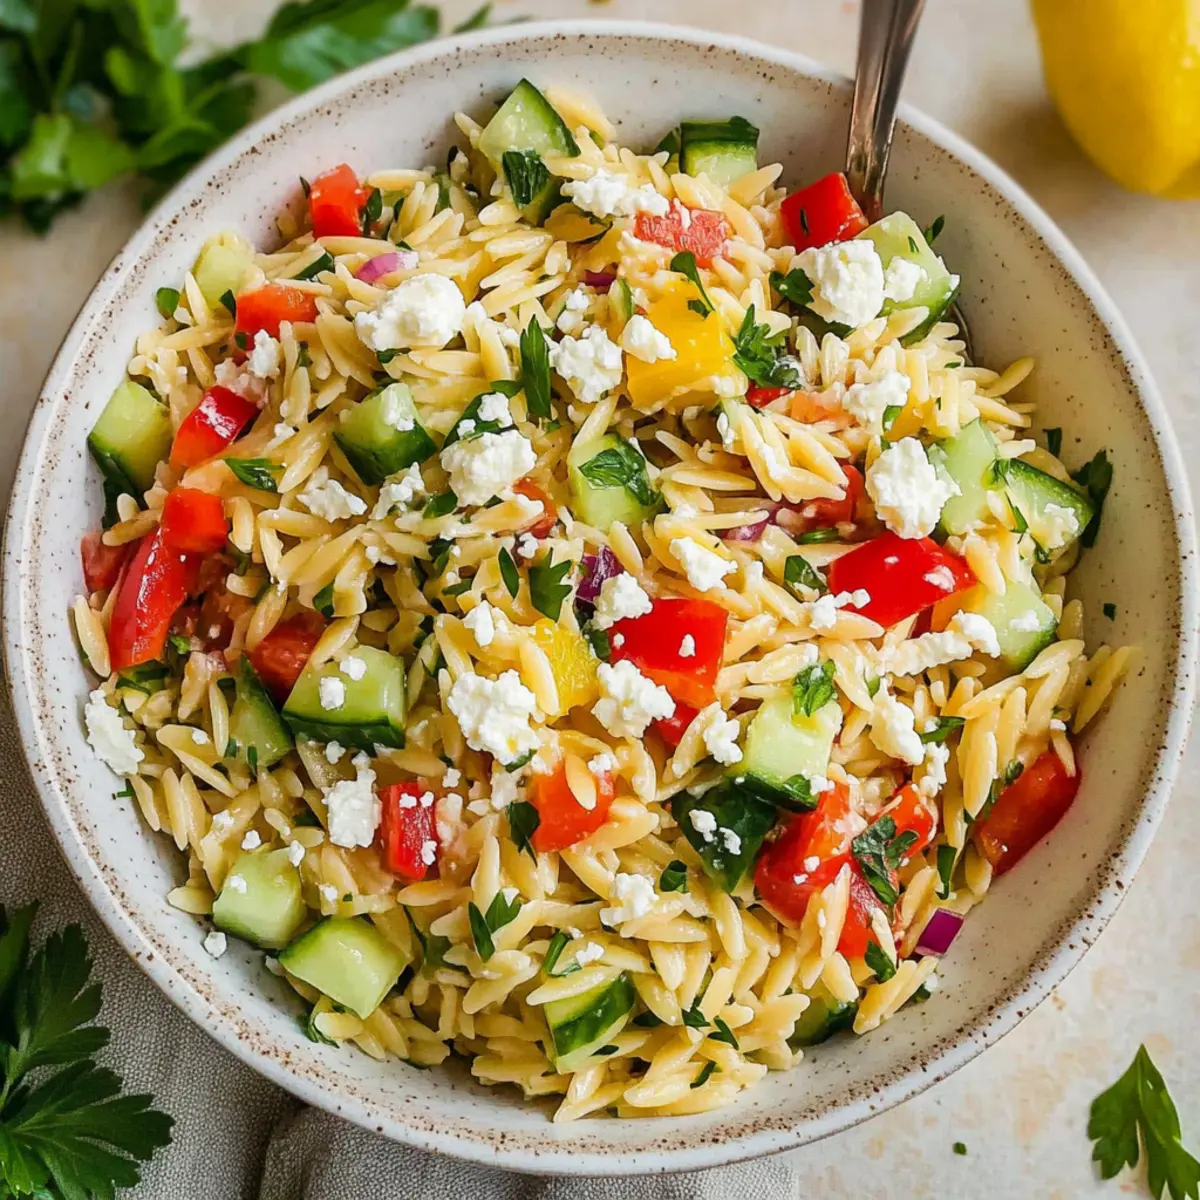
Cowboy Butter Chicken Linguine Ingredients

For the Pasta

  • 8 oz (225g) linguine pasta – The main carbohydrate base; substitute with penne or fettuccine for different textures.

For the Chicken

  • 1 pound (450g) boneless, skinless chicken breast, sliced – A protein-packed choice; pre-cooked chicken or turkey can be a quick alternative.

For Cooking

  • 2 tablespoons olive oil – Essential for cooking the chicken; canola or avocado oil works well too.
  • 1 teaspoon salt – Enhances all flavors; adjust accordance to your taste preferences.
  • ½ teaspoon black pepper – Adds a touch of mild heat; white pepper is a great substitute for a lighter flavor.

For the Seasoning

  • ½ teaspoon garlic powder – Infuses a warm, savory depth; fresh garlic is a wonderful swap for a stronger punch.
  • ½ teaspoon onion powder – Complements the garlic beautifully; consider using fresh onions for a fresh twist.

For the Sauce

  • ½ cup (120ml) heavy cream – Creates that beloved creamy texture; opt for half-and-half or whole milk for a lighter sauce.
  • ½ cup (50g) grated Parmesan cheese – Adds rich flavor and depth; Pecorino Romano can elevate the dish with a sharper taste.
  • ½ teaspoon crushed red pepper flakes (optional) – Perfect for those who like a kick; adjust based on your spice tolerance.

For Garnish

  • ¼ cup chopped fresh basil or parsley – Brings freshness and brightens the dish; cilantro provides a unique flavor twist for those adventurous with herbs.

This Cowboy Butter Chicken Linguine is a delightful blend of flavors that will make any weeknight dinner feel special!

Step‑by‑Step Instructions for Cowboy Butter Chicken Linguine

Step 1: Boil Pasta
Start by bringing a large pot of salted water to a rolling boil over high heat. Once boiling, add the 8 oz (225g) of linguine pasta and cook for about 9-11 minutes, or until al dente, stirring occasionally. Carefully reserve ½ cup of the pasta water for later, then drain the linguine and set it aside in a large bowl.

Step 2: Prepare Cowboy Butter Sauce
In a medium bowl, whisk together ½ cup melted butter, 2 teaspoons minced garlic, 1 tablespoon Dijon mustard, 1 tablespoon Worcestershire sauce, 1 teaspoon smoked paprika, ¼ teaspoon crushed red pepper flakes, the juice of ½ lemon, 2 tablespoons chopped parsley, 1 teaspoon salt, and ½ teaspoon black pepper until smooth. Set this vibrant cowboy butter sauce aside as you move onto the chicken.

Step 3: Cook Chicken
Heat 2 tablespoons of olive oil in a large skillet over medium heat. Season the sliced chicken breast (1 pound or 450g) with 1 teaspoon salt, ½ teaspoon black pepper, ½ teaspoon garlic powder, and ½ teaspoon onion powder. Once the oil is hot, add the chicken to the skillet and cook for 5-6 minutes, until golden brown and cooked through. Remove the chicken from the skillet and set it aside on a plate.

Step 4: Make Creamy Sauce
In the same skillet, add the prepared cowboy butter sauce over medium heat and let it simmer for about 1 minute. Slowly pour in ½ cup of heavy cream, stirring continuously, to blend it into the sauce. Once combined, add in ½ cup of grated Parmesan cheese and mix until everything is smooth and creamy, creating a luscious coating for your Cowboy Butter Chicken Linguine.

Step 5: Combine
Add the reserved chicken back into the skillet with the creamy sauce and stir to coat it evenly. Then, gently fold in the cooked linguine, tossing everything together until the pasta is fully coated in the rich sauce. If the sauce appears too thick, add a little bit of your reserved pasta water to reach the desired consistency.

Step 6: Serve
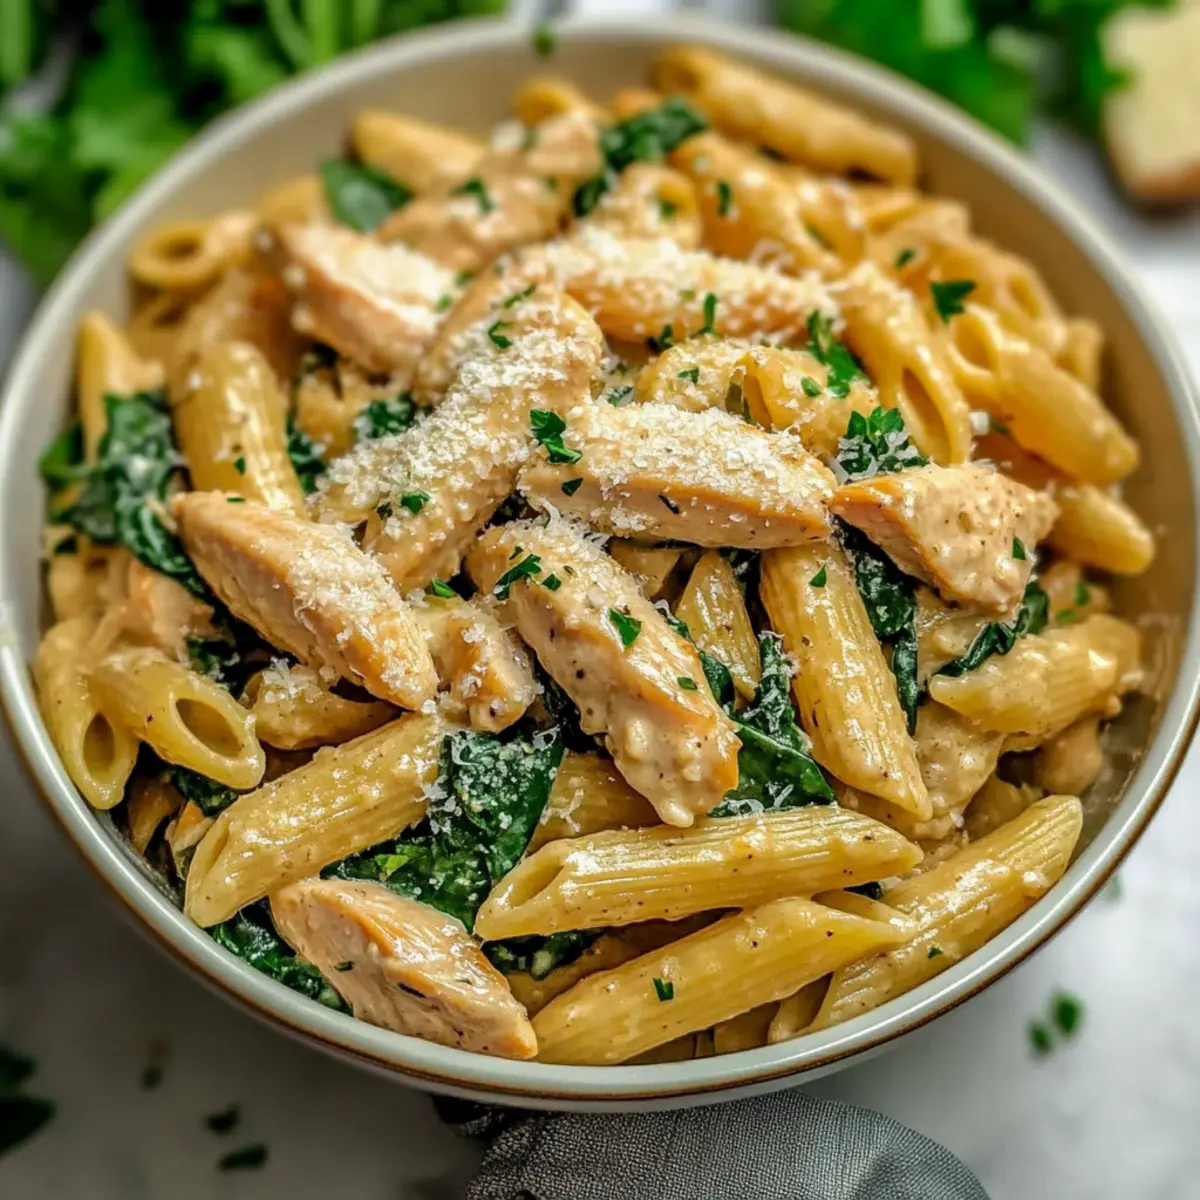
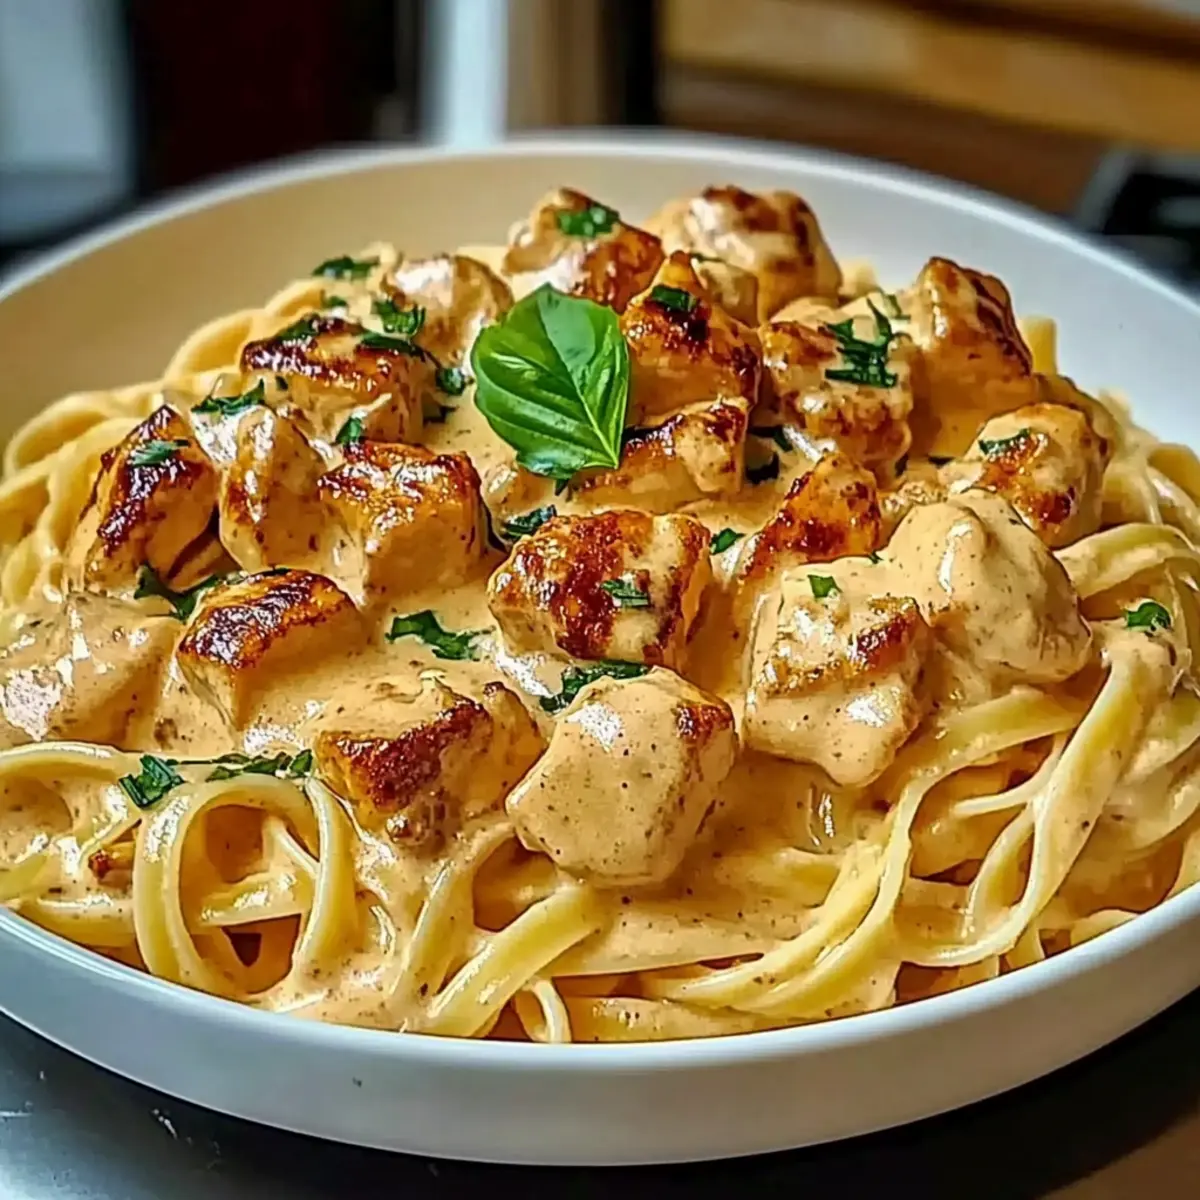
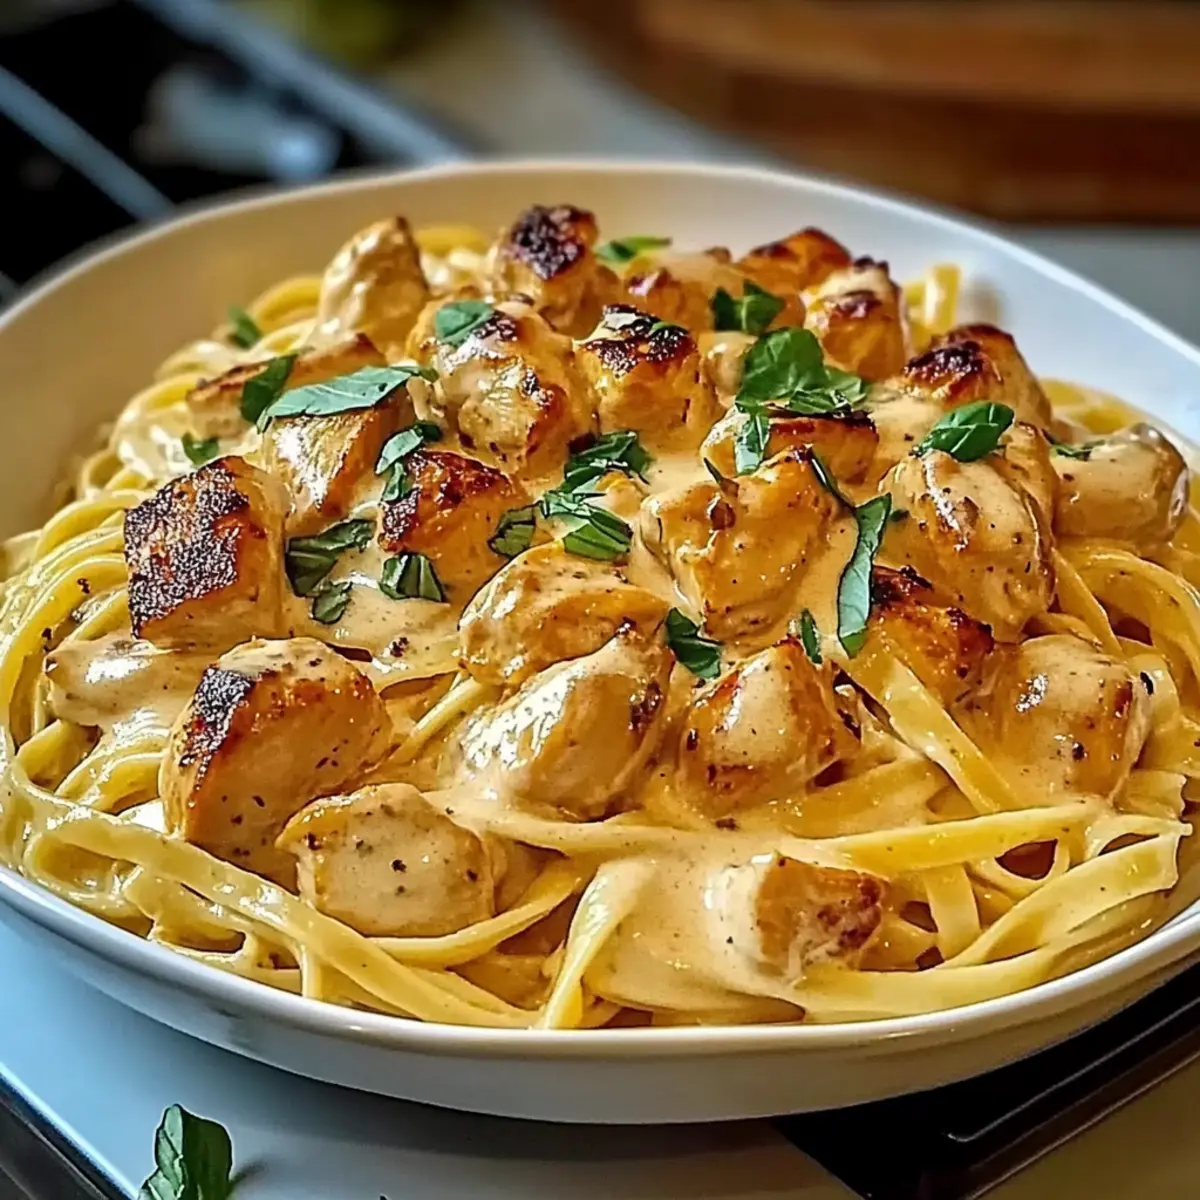
Finally, serve your Cowboy Butter Chicken Linguine immediately, garnishing each plate with a sprinkle of chopped fresh basil or parsley for an added burst of flavor and color. Enjoy the creamy goodness warm—it’s sure to become a family favorite!

How to Store and Freeze Cowboy Butter Chicken Linguine

  • Fridge: Store leftovers in an airtight container for up to 3 days. Make sure to cool it down before sealing to maintain freshness.

  • Freezer: For longer storage, freeze the Cowboy Butter Chicken Linguine in individual portions. It can last up to 2 months without losing flavor.

  • Reheating: Thaw overnight in the fridge before reheating. Warm it on the stovetop over low heat, adding a splash of cream or reserved pasta water for creaminess.

  • Tip: Avoid freezing with fresh herbs as they can lose their texture. Add them just before serving for a fresh touch!

Expert Tips for Cowboy Butter Chicken Linguine

  • Chicken Perfection: Ensure your chicken is cooked until golden without drying it out. Overcooking can lead to tough, chewy bites in your Cowboy Butter Chicken Linguine.

  • Creamy Consistency: If your sauce thickens too much, don’t hesitate to stir in your reserved pasta water gradually. This trick keeps your dish creamy and perfectly sauced.

  • Use Fresh Ingredients: Opt for fresh garlic and herbs whenever possible, as they dramatically enhance the flavors of your Cowboy Butter Chicken Linguine. Dried herbs can lack depth.

  • Adjust the Spice Level: For those who enjoy a kick, you can amp up the heat by doubling the crushed red pepper flakes or incorporating Cajun seasoning for a zesty variation.

  • Flavorful Pasta: While linguine is delicious, don’t shy away from experimenting with other pasta types, like penne or fettuccine, to find your family’s favorite texture.

Cowboy Butter Chicken Linguine Variations

Feel free to get creative with this recipe and add a personal touch that tantalizes your taste buds!

  • Pasta Type: Swap linguine for penne or fettuccine for a different bite and texture. Embrace the comfort of pasta as you explore new shapes, allowing your favorite sauce to cling beautifully.

  • Spice Level: Incorporate Cajun seasoning for a Southern kick that’ll send your taste buds dancing. Adding a bit of spice not only elevates the flavors but also transports you to a sunny, vibrant kitchen.

  • Healthier Option: Use half-and-half instead of heavy cream for a lighter, guilt-free version of this creamy dish. Your palate will still enjoy richness while you maintain a lighter twist that’s just as soothing.

  • Vegetarian Version: Substitute chicken with mushrooms or seasonal roasted vegetables to make a hearty vegetarian option. Rich, earthy flavors enhance this dish, proving that comfort food isn’t exclusive to meat!

  • Cheesy Transformation: Experiment with mozzarella cheese on top before baking for a gooey, cheesy twist. Melty goodness will provide a lovely contrast to the creamy sauce, creating a fun, indulgent experience.

  • Herb Infusion: Add fresh thyme or oregano in place of basil or parsley to bring a different herbal note to the dish. Your dish will take on delightful, aromatic undertones that are sure to impress.

  • Citrus Zest: Squeeze some lemon or lime juice into the sauce for a bright, refreshing kick. This lightens the dish and adds a lovely tang that perfectly balances the creaminess.

If you’re looking for more flavor-packed dishes, don’t miss my recipe for Cowboy Butter Chicken or try whipping up the delightful Chilli Chicken Takeout for a satisfying evening meal!

Make Ahead Options

These Cowboy Butter Chicken Linguine are perfect for busy home cooks looking to save time during the week! You can prep the cowboy butter sauce and cook the chicken up to 24 hours in advance. Simply cool them down, then store them separately in airtight containers in the refrigerator. This way, the sauce stays creamy, and the chicken remains juicy without drying out. When you’re ready to serve, just reheat the chicken in a skillet over medium heat, stir in the pre-made sauce, and toss with freshly cooked linguine. Add a splash of reserved pasta water as needed to bring everything back to that silky, luscious texture you love!

What to Serve with Cowboy Butter Chicken Linguine?

To create a full dining experience, consider these delightful accompaniments that elevate your meal and tickle your taste buds.

  • Garlic Bread: A warm, crusty loaf brushed with butter and garlic is the perfect tool for soaking up that creamy sauce. The combination is simply divine!
  • Caesar Salad: Crisp romaine lettuce with a tangy dressing adds a refreshing crunch that contrasts beautifully with the rich linguine. Plus, it’s a classic pairing!
  • Roasted Vegetables: Seasoned seasonal veggies like zucchini and bell peppers bring vibrant colors and healthy fiber, balancing the dish’s creaminess.
  • Pesto Caprese Salad: Fresh tomatoes, mozzarella, and basil drizzled with pesto create a light, flavorful side that’s simply irresistible.
  • White Wine: A chilled glass of Sauvignon Blanc or Chardonnay complements the creamy sauce perfectly, enhancing the overall dining experience with light acidity.
  • Chocolate Mousse: End your meal on a sweet note with a fluffy chocolate mousse that contrasts the savory flavors while providing a luxurious finish.
  • Lemon Sorbet: A refreshing, citrusy sorbet serves as a palate cleanser, brightening your meal with its zesty notes while offering a lighter dessert option.
  • Sparkling Water with Lime: For a bubbly refreshment, sparkling water with a splash of lime is a non-alcoholic option that adds a hint of zest without overpowering the meal.

Cowboy Butter Chicken Linguine Recipe FAQs

How should I select the best chicken for this recipe?
Absolutely! For the best results in your Cowboy Butter Chicken Linguine, I recommend using boneless, skinless chicken breasts, as they are tender and cook evenly. Look for chicken that is pink in color, with no dark spots or a foul odor. Fresh chicken should not feel slimy. If possible, opt for organic or free-range options for enhanced flavor and quality.

What’s the best way to store leftovers?
Very good question! Store your Cowboy Butter Chicken Linguine in an airtight container in the fridge for up to 3 days. Be sure to let it cool to room temperature before sealing the container to avoid condensation, which can make your pasta mushy. I often enjoy reheating it on the stovetop with a splash of cream or reserved pasta water to restore its creamy texture.

Can I freeze Cowboy Butter Chicken Linguine?
Of course! You can freeze your Cowboy Butter Chicken Linguine for up to 2 months. To do this, let the dish cool, then divide it into individual portions in freezer-safe containers. Make sure to label them with the date. When you’re ready to enjoy it again, thaw it overnight in the fridge and reheat gently on the stovetop, adding a bit of cream or reserved pasta water to revitalize the sauce.

What if my sauce turns out too thick?
No worries at all! If you find your creamy sauce for the Cowboy Butter Chicken Linguine gets too thick, simply stir in some of the reserved pasta water, a little at a time, while gently heating it. This will loosen the sauce without losing its creamy consistency. Just remember to add only a small amount until you reach your desired thickness!

Are there any dietary considerations I should be aware of?
Absolutely thoughtful! This recipe can be modified to accommodate various dietary needs. For those with dairy allergies, you can substitute heavy cream with a non-dairy alternative like cashew cream or coconut cream. If you’re looking for a gluten-free option, use gluten-free pasta instead. For vegetarians, feel free to substitute the chicken with sautéed mushrooms or roasted seasonal vegetables to enjoy this comforting dish without compromising on flavor.

How spicy can I make the Cowboy Butter Chicken Linguine?
Very! If you enjoy a hearty kick in your dishes, you can amp up the spice by adding extra crushed red pepper flakes or even incorporate Cajun seasoning for a delicious Southern twist. Start with a small amount, taste it, and add more according to your spice tolerance. The more the merrier when it comes to flavor!

Cowboy Butter Chicken Linguine

Creamy Cowboy Butter Chicken Linguine for Ultimate Comfort

Indulge in the rich flavors of Cowboy Butter Chicken Linguine—a creamy, comforting dish perfect for weeknights.
Prep Time 10 minutes
Cook Time 20 minutes
Total Time 30 minutes
Servings: 4 servings
Course: Pasta
Cuisine: American
Calories: 560

Ingredients
  

For the Pasta
  • 8 oz linguine pasta Substitute with penne or fettuccine for different textures.
For the Chicken
  • 1 pound boneless, skinless chicken breast, sliced Pre-cooked chicken or turkey can be a quick alternative.
For Cooking
  • 2 tablespoons olive oil Canola or avocado oil works well too.
  • 1 teaspoon salt Enhances all flavors; adjust to taste.
  • ½ teaspoon black pepper White pepper is a great substitute.
For the Seasoning
  • ½ teaspoon garlic powder Fresh garlic is a wonderful swap.
  • ½ teaspoon onion powder Consider using fresh onions.
For the Sauce
  • ½ cup heavy cream Opt for half-and-half or whole milk for a lighter sauce.
  • ½ cup grated Parmesan cheese Pecorino Romano can give a sharper taste.
  • ½ teaspoon crushed red pepper flakes Optional for those who like a kick.
For Garnish
  • ¼ cup chopped fresh basil or parsley Cilantro provides a unique flavor twist.

Equipment

  • Large pot
  • medium bowl
  • Large skillet
  • whisk
  • Measuring cups
  • Measuring spoons

Method
 

Making Cowboy Butter Chicken Linguine
  1. Start by bringing a large pot of salted water to a rolling boil over high heat. Once boiling, add the linguine pasta and cook for about 9-11 minutes, or until al dente. Carefully reserve ½ cup of the pasta water for later, then drain the linguine and set it aside in a large bowl.
  2. In a medium bowl, whisk together melted butter, minced garlic, Dijon mustard, Worcestershire sauce, smoked paprika, crushed red pepper flakes, lemon juice, chopped parsley, salt, and black pepper until smooth. Set this vibrant cowboy butter sauce aside.
  3. Heat olive oil in a large skillet over medium heat. Season the sliced chicken breast with salt, black pepper, garlic powder, and onion powder. Once the oil is hot, add the chicken to the skillet and cook for 5-6 minutes, or until golden brown and cooked through. Remove the chicken from the skillet and set it aside.
  4. In the same skillet, add the prepared cowboy butter sauce over medium heat and let it simmer for about 1 minute. Slowly pour in heavy cream, stirring continuously, to blend it into the sauce. Add in grated Parmesan cheese and mix until smooth and creamy.
  5. Add the reserved chicken back into the skillet with the creamy sauce and stir to coat evenly. Fold in the cooked linguine, tossing until the pasta is fully coated. If the sauce is too thick, add reserved pasta water to reach the desired consistency.
  6. Serve immediately, garnishing with chopped fresh basil or parsley. Enjoy the creamy goodness warm!

Nutrition

Serving: 1servingCalories: 560kcalCarbohydrates: 45gProtein: 35gFat: 30gSaturated Fat: 15gPolyunsaturated Fat: 5gMonounsaturated Fat: 10gCholesterol: 110mgSodium: 750mgPotassium: 800mgFiber: 3gSugar: 2gVitamin A: 500IUVitamin C: 15mgCalcium: 300mgIron: 2mg

Notes

For the best results, use fresh ingredients and adjust spice levels to personal preference. Store leftovers in an airtight container for up to 3 days in the fridge.

Tried this recipe?

Let us know how it was!

Elevate Dinner with Sun-Dried Tomato Pasta Salad Bliss

As I tossed those vibrant sun-dried tomatoes into my mixing bowl, the kitchen filled with a tantalizing aroma that promised delightful flavors. This Quick & Flavorful Sun-Dried Tomato Pasta Salad is a testament to how easy and rewarding it can be to whip up a satisfying dish in under 30 minutes. Not only does it burst with the Mediterranean essence of sun-dried tomatoes and fresh spinach, but it also serves as a beautiful meal prep solution that will have everyone asking for seconds. With minimal chopping and versatile ingredient options, this pasta salad adapts to your mood, making it the perfect side for summer barbecues or a quick, light lunch. Are you ready to bring a touch of sunshine to your table?

Why is this pasta salad a must-try?

Quick Preparation: This Sun-Dried Tomato Pasta Salad comes together in under 30 minutes, making it ideal for busy weeknights or unexpected guests.

Flavor Explosion: The medley of sun-dried tomatoes, fresh basil, and tangy balsamic dressing delivers a burst of Mediterranean flavor that will transport your taste buds.

Versatile Options: You can easily customize the recipe by adding grilled chicken or veggies, ensuring it satisfies everyone’s preferences.

Crowd-Pleasing Appeal: Perfect as a light lunch or a side at barbecues, everyone will love this colorful dish.

Minimal Chopping: The prep is simple, leaving you with more time to relax while your salad does the talking—just like with this Cajun Sausage Pasta or Marry Me Shrimp Pasta.

Sun-Dried Tomato Pasta Salad Ingredients

Get ready to create a flavor-filled bowl of joy with this easy Sun-Dried Tomato Pasta Salad!

For the Pasta

  • 16 oz. short pasta – This serves as the hearty base; feel free to use rigatoni, rotini, or bowtie pasta for variety.

For the Freshness

  • 3 oz. baby spinach – Adds a vibrant green color; substitute with arugula for a peppery twist.
  • 10 oz. cherry tomatoes – These provide sweetness and juiciness; grape tomatoes work well as an alternative.
  • 1/2 red onion, diced – Introduces a crunchy bite; switch to green onions for a milder taste.
  • 1/3 cup chopped basil – Offers aromatic notes; parsley can be used if basil is unavailable.

For the Zesty Flavor

  • 1 jar sun-dried tomatoes in oil (8.5 oz) – Infuses the salad with a robust flavor; utilize the oil in your dressing for more depth.
  • 1/2 cup shredded parmesan – Enhances savory richness; opt for grated pecorino or nutritional yeast to keep it dairy-free.
  • 8 oz. mozzarella pearls – Introduces a creamy texture; omit if watching dairy intake.

For the Dressing

  • 1/3 cup extra virgin olive oil – Adds richness; you could substitute with the oil from sun-dried tomatoes for added flavor.
  • 1/3 cup oil drained from sun-dried tomatoes – Provides further depth of flavor.
  • 2 tbsp balsamic vinegar – Brings a zesty acidity; use white balsamic for a milder taste.
  • 2 garlic cloves, minced – Delivers a delightful pungency; garlic powder can substitute if needed.
  • 1 tsp Italian seasoning – Enriches the dish with herby goodness; replace dried herbs with fresh for an extra touch.
  • 1/2 tsp pepper – Season to your preference for optimal flavor.
  • 1/2 tsp salt – Essential for bringing out all the flavors; reduce for low-sodium diets.

Step‑by‑Step Instructions for Sun-Dried Tomato Pasta Salad

Step 1: Cook the Pasta
Bring a large pot of salted water to a boil and add the short pasta, cooking it according to package instructions for about 10 minutes, or until al dente. Once cooked, drain the pasta and toss it gently with the baby spinach in the pot; the residual heat will slightly wilt the spinach. Rinse under cool water to stop the cooking process and prevent it from becoming mushy.

Step 2: Combine Ingredients
In a spacious mixing bowl, combine the cooled pasta and wilted spinach with the chopped basil, diced red onion, julienned sun-dried tomatoes, halved cherry tomatoes, shredded parmesan, and mozzarella pearls if included. Mix everything gently until well blended, ensuring that the ingredients are evenly distributed for a vibrant Sun-Dried Tomato Pasta Salad that looks as good as it tastes.

Step 3: Mix Dressing
In a separate bowl, whisk together the extra virgin olive oil, drained oil from the sun-dried tomatoes, balsamic vinegar, minced garlic, Italian seasoning, salt, and pepper. This delicious dressing will elevate the flavors of your pasta salad. Aim for a well-emulsified mixture, and taste it for seasoning, adjusting with more salt or pepper if needed to suit your preference.

Step 4: Toss and Chill
Pour about three-quarters of the dressing over the pasta mixture and toss gently to coat everything evenly. Reserve the remaining dressing for later. Cover the bowl with plastic wrap or a lid, and refrigerate the salad for at least 30 minutes, allowing the flavors to meld beautifully while the salad chills to a refreshing temperature, perfect for serving.

Step 5: Serve
Before serving the chilled Sun-Dried Tomato Pasta Salad, give it a gentle toss and drizzle the reserved dressing over the top. This final touch enhances the salad’s flavors just before it hits the table, ensuring each bite is sumptuous and flavorful. Serve it at your next gathering, and watch it disappear as your guests savor every morsel!

How to Store and Freeze Sun-Dried Tomato Pasta Salad

Fridge: Store in an airtight container for up to 3-4 days. This keeps the Sun-Dried Tomato Pasta Salad fresh while allowing the flavors to meld beautifully.

Room Temperature: If serving at a gathering, let the salad sit at room temperature for about 15 minutes to restore the olive oil’s consistency before serving.

Refrigerate: Before serving, give the salad a gentle toss and drizzle any reserved dressing over it for added flavor and moisture.

Freezing: It’s best not to freeze this pasta salad, as the texture can change and become mushy when thawed. Enjoy fresh!

What to Serve with Sun-Dried Tomato Pasta Salad

Elevate your meal experience by pairing this delightful pasta salad with complementary dishes that enhance its vibrant flavors and textures.

  • Garlic Bread: The warm, buttery goodness of garlic bread offers a satisfying crunch that contrasts beautifully with the tenderness of the salad. Perfect for soaking up those extra flavors.

  • Grilled Vegetable Platter: A colorful medley of grilled veggies adds freshness and a smoky flavor, creating a harmony of taste that complements the sun-dried tomatoes. These veggies are not only visually appealing but add nutritional value too.

  • Caprese Skewers: Cherry tomatoes, mozzarella, and fresh basil come together for a bright and refreshing bite-sized snack. Their familiar flavors tie in nicely with the pasta salad, making them a popular choice for gatherings.

  • Lemon Herb Grilled Chicken: The zesty brightness of grilled chicken infused with herbs provides a protein-packed complement to the pasta salad’s rich flavors. This heartier pairing makes it a well-rounded meal.

  • Crispy Caesar Salad: A crisp Caesar salad with romaine lettuce and crunchy croutons creates a delightful contrast in texture. The creamy dressing accentuates the Mediterranean flavors—truly a match made in heaven.

  • Sparkling Lemonade: A glass of refreshing sparkling lemonade serves as a delightful palate cleanser, balancing the savory elements of your dish with its zesty and effervescent notes.

  • Fruit Salad: A light, refreshing fruit salad brings a sweet, juicy element that offers a welcome contrast to the richness of the pasta salad. Seasonal fruits like berries and melon make this a colorful accompaniment.

Expert Tips for Sun-Dried Tomato Pasta Salad

  • Cook Pasta Al Dente: Ensure your pasta is slightly firm when cooked; overcooked pasta can lead to a mushy salad texture.
  • Cool Before Mixing: Allow the pasta to cool before adding delicate ingredients like mozzarella to avoid melting.
  • Adjust Seasoning: Taste your dressing before tossing it with the salad; adjust salt, pepper, or vinegar to enhance the flavor of the Sun-Dried Tomato Pasta Salad.
  • Extra Dressing: If the salad appears dry after chilling, add the reserved dressing or a splash of olive oil for extra moisture and flavor.
  • Storage Tip: Enjoy your salad fresh within 3-4 days for the best taste; store in an airtight container to preserve flavor and freshness.

Sun-Dried Tomato Pasta Salad Variations

Embrace the joy of creativity in your kitchen, and let your palate guide you to delicious possibilities!

  • Dairy-Free: Swap out parmesan and mozzarella for nutritional yeast and a dairy-free cheese alternative for a creamy yet guilt-free treat.

  • Protein Boost: For a heartier salad, toss in grilled chicken or chickpeas. This not only adds protein but turns the salad into a complete meal.

  • Veggie Lovers: Add grilled vegetables or artichoke hearts for extra flavor and nutrition, creating a lovely medley of textures that will make every bite a delight.

  • Herb Infusion: Try mixing in fresh dill or cilantro instead of basil for a unique twist that brightens the salad’s flavor profile.

  • Zesty Kick: Include crushed red pepper flakes or sliced olives for a touch of heat and brininess. This adds an interesting layer of flavor that is sure to impress.

  • Pasta Variety: Choose a different short pasta like orzo or farfalle for a fun texture change. Each shape carries the flavors uniquely, making your salad feel fresh and new.

  • Nutty Flavor: Add a sprinkle of toasted pine nuts or walnuts for an extra crunch and a nutty richness that complements the tangy tomatoes beautifully.

  • Cold Salad Twist: Transform it into a refreshing cold pasta salad by adding diced cucumber and bell peppers, making it perfect for summer picnics and barbecues.

As you explore these variations, you can serve this pasta salad alongside other favorites like Blt Chicken Salad for a balanced meal that everyone will enjoy!

Make Ahead Options

This Sun-Dried Tomato Pasta Salad is a fantastic recipe for meal prep enthusiasts looking to simplify busy weeknights! You can cook the pasta and toss it with the spinach up to 24 hours in advance, then store it in the refrigerator. Additionally, chop your vegetables and prepare the dressing ahead of time—both can be refrigerated for up to 3 days. To maintain quality, keep the remaining dressing separate until just before serving to prevent the salad from becoming soggy. When you’re ready to enjoy your salad, simply combine everything, toss it with the reserved dressing, and you’ll have a fresh, delicious dish that’s just as delightful as if made the same day!

Sun-Dried Tomato Pasta Salad Recipe FAQs

How do I choose the right ripe ingredients for this pasta salad?
Absolutely! When selecting cherry or grape tomatoes, look for ones that are plump and firm with no dark spots or wrinkles. They should be vibrant in color, indicating freshness. For sun-dried tomatoes, avoid jars with visible mold or strange odors, and choose those that are packed in oil for added flavor. Fresh basil leaves should be bright green and fragrant.

What’s the best way to store leftovers of my Sun-Dried Tomato Pasta Salad?
Store your pasta salad in an airtight container, and it will happily stay fresh in the fridge for up to 3-4 days. If you need to keep it longer, store the dressing separately to prevent the pasta from becoming soggy. Just remember, it’s best served cold, so allow it to sit out for about 15 minutes at room temperature before digging in.

Can I freeze my Sun-Dried Tomato Pasta Salad?
I do not recommend freezing this pasta salad, as the texture of the ingredients can change after thawing. The pasta may become mushy, and the fresh ingredients won’t hold up well in the freezer. Instead, enjoy the vibrant flavors fresh, or prepare just enough to eat within a few days!

What should I do if my salad ends up dry after chilling?
Don’t worry! If you find the salad has dried out after being in the fridge, you can easily salvage it. Just drizzle some extra dressing or plain olive oil over the salad and toss it gently to moisten everything up before serving. This quick fix can revitalize the salad and enhance its flavor!

Are there any dietary considerations for this recipe?
Yes! This Sun-Dried Tomato Pasta Salad is vegetarian, making it a great option for meat-free meals, but it’s always wise to check for any allergies the guests may have. For instance, if you’re catering to a dairy-free crowd, swap the parmesan and mozzarella for nutritional yeast or vegan cheese alternatives. If you’re serving it to pets (like dogs), be cautious with ingredients like onions and garlic as they can be harmful to them.

Can I customize the salad further for added nutrition?
Very! Add grilled vegetables such as zucchini or bell peppers for more nutrients and vibrant colors. For protein, feel free to toss in grilled chicken or chickpeas. If you crave some heat, consider adding red pepper flakes or sliced olives to take the flavor profile up a notch. The more the merrier when it comes to your culinary creativity!

Sun-Dried Tomato Pasta Salad

Elevate Dinner with Sun-Dried Tomato Pasta Salad Bliss

This Sun-Dried Tomato Pasta Salad is a quick and flavorful dish that embodies Mediterranean essence and is perfect for any occasion.
Prep Time 15 minutes
Cook Time 10 minutes
Chill Time 30 minutes
Total Time 55 minutes
Servings: 4 servings
Course: Pasta
Cuisine: Mediterranean
Calories: 350

Ingredients
  

For the Pasta
  • 16 oz short pasta Choose rigatoni, rotini, or bowtie pasta.
For the Freshness
  • 3 oz baby spinach Substitute with arugula if desired.
  • 10 oz cherry tomatoes Grape tomatoes can be used instead.
  • 1/2 red onion Diced; green onions can be used for a milder flavor.
  • 1/3 cup chopped basil Substitute with parsley if unavailable.
For the Zesty Flavor
  • 1 jar sun-dried tomatoes in oil 8.5 oz for robust flavor.
  • 1/2 cup shredded parmesan Grated pecorino or nutritional yeast as dairy-free alternative.
  • 8 oz mozzarella pearls Omit if avoiding dairy.
For the Dressing
  • 1/3 cup extra virgin olive oil Use oil from sun-dried tomatoes for added flavor.
  • 1/3 cup oil drained from sun-dried tomatoes Provides depth of flavor.
  • 2 tbsp balsamic vinegar Use white balsamic for a milder taste.
  • 2 cloves garlic Minced; garlic powder can be used as substitute.
  • 1 tsp Italian seasoning Replace with fresh herbs for an extra touch.
  • 1/2 tsp pepper Season to taste.
  • 1/2 tsp salt Adjust for low-sodium diets.

Equipment

  • Large pot
  • Mixing Bowl
  • whisk

Method
 

Step-by-Step Instructions
  1. Cook the Pasta: Bring a large pot of salted water to a boil. Add the short pasta and cook according to package instructions for about 10 minutes until al dente. Drain, toss gently with baby spinach in the pot, and rinse under cool water.
  2. Combine Ingredients: In a mixing bowl, combine cooled pasta and wilted spinach with chopped basil, diced red onion, julienned sun-dried tomatoes, halved cherry tomatoes, shredded parmesan, and mozzarella pearls. Mix gently until well blended.
  3. Mix Dressing: In a separate bowl, whisk together extra virgin olive oil, drained oil from sun-dried tomatoes, balsamic vinegar, minced garlic, Italian seasoning, salt, and pepper. Taste and adjust seasoning as needed.
  4. Toss and Chill: Pour about three-quarters of the dressing over the pasta mixture and toss gently. Cover and refrigerate for at least 30 minutes.
  5. Serve: Give the salad a gentle toss and drizzle remaining dressing over the top before serving.

Nutrition

Serving: 1servingCalories: 350kcalCarbohydrates: 40gProtein: 12gFat: 18gSaturated Fat: 4gPolyunsaturated Fat: 2gMonounsaturated Fat: 10gCholesterol: 15mgSodium: 500mgPotassium: 300mgFiber: 3gSugar: 2gVitamin A: 1000IUVitamin C: 15mgCalcium: 200mgIron: 1.5mg

Notes

For best results, enjoy the salad fresh within 3-4 days, stored in an airtight container.

Tried this recipe?

Let us know how it was!

Caramelised Soy Chicken: Your New Favorite Comfort Dish

As I lifted the lid off my pot, the rich aroma of caramelized soy chicken mingled with the sharpness of garlic and the warmth of ginger, instantly transporting me to a cozy kitchen bustling with life. This Caramelised Soy Chicken in Garlic Ginger Broth with Jasmine Rice is more than just a dish; it’s a comforting one-pot meal that’s both satisfying and easy to whip up on any busy evening. With tender chicken thighs simmered to perfection, the savory broth envelops each bite, making it a delicious alternative to takeout that you can feel good about serving. Not only is this recipe a true crowd-pleaser, but it’s also perfect for meal prep, ensuring hearty leftovers for days. Ready to dive into a bowl of cozy goodness? Let’s get cooking!

Why is this recipe a must-try?

Comforting Flavors: The savory soy sauce and sweet brown sugar make each bite irresistibly rich, while the garlic and ginger add a delightful warmth that wraps you in comfort.

One-Pot Wonder: Say goodbye to the hassle of multiple dishes! This easy recipe allows you to create a hearty meal without the chaos of cleanup.

Hearty & Satisfying: With tender chicken thighs and fluffy jasmine rice, this dish is perfect for cozy evenings or gatherings with loved ones.

Versatile Option: Feel free to swap in your favorite veggies or proteins to suit your taste. You can even try it alongside a fresh salad or with a side of Sizzling Chicken Pepper for extra variety!

Meal Prep Friendly: This recipe stores well, making it a great choice for meal prep. Enjoy comforting leftovers, just like with the delightful Tuscan Chicken Soup.

Get ready to enjoy a comforting and flavorful experience that’s perfect for any occasion!

Caramelised Soy Chicken Ingredients

For the Chicken
Chicken Thighs – Provide rich flavor and tenderness; opt for bone-in and skin-on for maximal juiciness.
Vegetable Oil – Used for searing chicken to achieve crispy skin; substitute with olive oil if preferred.
Salt and Pepper – To season the chicken; adjust according to taste preferences.

For the Broth
Soy Sauce – Adds umami and saltiness; consider low-sodium soy sauce for a healthier option.
Brown Sugar – Balances the saltiness of the soy sauce with caramelized sweetness; can be replaced with honey or maple syrup.
Ginger (minced) – Introduces warmth and spice; fresh ginger is preferred for optimal flavor.
Garlic (minced) – Contributes aromatic depth; use fresh garlic for best results.
Chicken Broth – Forms the base of the broth, enhancing the chicken’s flavor; use vegetable broth for a vegetarian option.
Sesame Oil – Adds a nutty aroma; can be replaced with more vegetable oil if unavailable.
Cornstarch (optional) – For thickening the broth; can omit if a thinner broth is preferred.

For Serving
Jasmine Rice – Fluffy texture pairs excellently with the broth; substitute basmati rice if necessary.
Green Onions – Fresh garnish that adds a mild onion flavor; can replace with chives if needed.
Fresh Cilantro – Complements flavors with freshness; omit for those who dislike the flavor.

Get ready to savor a comforting dish that’s not just about the flavors but also the warmth of home-cooked meals!

Step‑by‑Step Instructions for Caramelised Soy Chicken

Step 1: Prep the Chicken
Begin by patting the chicken thighs dry with paper towels to ensure they crisp nicely while cooking. Season both sides generously with salt and pepper. This simple step brings out the flavors in the chicken and prepares it for the delicious Caramelised Soy Chicken experience ahead.

Step 2: Heat Oil
In a large, heavy-bottomed pot, heat 2 tablespoons of vegetable oil over medium-high heat. Give the oil a moment to warm up until it shimmers, indicating it’s ready for searing. This crucial step will help achieve that crispy, golden skin on the chicken thighs, creating a beautiful base for your broth.

Step 3: Sear Chicken
Carefully place the seasoned chicken thighs skin-side down into the hot oil within the pot. Allow them to sear undisturbed for 5-7 minutes, or until the skin turns a deep golden brown and crisps up delightfully. Resist the urge to move the chicken for all that time to ensure a perfect crust.

Step 4: Make Sauce
Once the chicken is beautifully seared, flip each thigh over to the other side. Add in the rich soy sauce, brown sugar, minced garlic, and ginger. Stir the mixture gently to combine everything, allowing the sugar to start dissolving and flavors to meld together, enriching your Caramelised Soy Chicken dish.

Step 5: Add Broth
Pour in 2 cups of chicken broth, making sure all chicken pieces are well submerged. Raise the heat to bring the broth to a gentle boil. Cover the pot with a lid as it heats, which helps to lock in flavors while preparing for the next essential simmering step.

Step 6: Simmer
Reduce the heat to low and cover the pot. Let everything simmer for approximately 20 minutes, or until the chicken is cooked through and tender. You’ll know it’s ready when the chicken juices run clear and it reaches an internal temperature of 165°F (75°C).

Step 7: Cook Rice
While the chicken is simmering, rinse 1 cup of jasmine rice under cold water to remove excess starch. This will ensure your rice is fluffy when cooked. Set it aside for a moment while you prepare the next steps in your delicious journey to some comforting Caramelised Soy Chicken.

Step 8: Prepare Rice
In a separate pot, bring 2 cups of water to a boil. Add the rinsed jasmine rice, cover with a tight-fitting lid, and reduce the heat to low. Let it simmer for about 15-20 minutes until the rice has absorbed all the water and is tender. Fluff with a fork once done.

Step 9: Thicken Broth (Optional)
If you prefer a thicker broth, mix 1 tablespoon of cornstarch with 2 tablespoons of cold water in a small bowl to create a slurry. Stir this mixture into your pot and let it cook for an additional 2-3 minutes, enabling the broth to thicken to a luscious consistency.

Step 10: Garnish and Serve
Remove the chicken from the pot and slice it into bite-sized pieces. Serve the tender chicken over a generous scoop of fluffy jasmine rice, pouring the rich broth over the top. Finish with a sprinkle of chopped green onions and fresh cilantro, transforming your Caramelised Soy Chicken into a beautiful, comforting dish.

Expert Tips for Caramelised Soy Chicken

  • Dry Chicken: Make sure to pat the chicken thighs dry before seasoning. This helps achieve maximum crispiness when searing, preventing a soggy texture.

  • Don’t Rush the Sear: Allow the chicken to sear undisturbed for 5-7 minutes. Moving it too soon can result in a less crispy skin, diminishing the flavor.

  • Seasoning Check: Adjust salt and pepper during preparation based on your taste preferences. This step significantly influences the final flavor of your Caramelised Soy Chicken.

  • Broth Consistency: Keep an eye on the broth’s thickness when adding cornstarch. Start with less and add more if you desire a thicker consistency to avoid over-thickening.

  • Rice Rinsing: Don’t skip rinsing the jasmine rice. This step removes excess starch and ensures the rice cooks up fluffy and perfect, complementing the broth beautifully.

Make Ahead Options

These Caramelised Soy Chicken in Garlic Ginger Broth are perfect for busy home cooks looking to save time on hectic evenings! You can season and sear the chicken thighs up to 24 hours in advance, storing them in an airtight container in the refrigerator to maintain their crispiness. Additionally, the flavorful broth can be prepared up to 3 days ahead; simply refrigerate it after cooking. When you’re ready to serve, reheat the broth, add the prepped chicken, and let it simmer until heated through. This ensures that you have a comforting and delicious meal with minimal effort, perfect for those who want home-cooked flavor fast!

What to Serve With Caramelised Soy Chicken in Garlic Ginger Broth

Elevate your cozy meal experience by pairing delightful sides and drinks that complement this comforting dish beautifully.

  • Steamed Bok Choy: This vibrant green vegetable adds a delightful crunch and a touch of freshness, balancing the richness of the broth.
  • Simple Cucumber Salad: Crisp cucumber salad with a bit of vinegar provides a refreshing contrast, cleansing the palate between bites.
  • Garlic Naan: Warm, fluffy naan offers a wonderful vehicle for soaking up the savory broth, making every bite satisfying.
  • Sesame Green Beans: Tender green beans tossed in sesame oil and sesame seeds contribute nutty flavors and vibrant color.

Integrating these sides creates a well-rounded meal. Consider serving a glass of coconut water or ginger tea for a delightful beverage choice. Each pairing enhances the flavor journey, allowing the Caramelised Soy Chicken to shine even brighter!

How to Store and Freeze Caramelised Soy Chicken

Fridge: Store leftovers in an airtight container for up to 3 days. To maintain the flavor, reheat thoroughly before serving, adding a splash of broth if needed.

Freezer: For longer storage, freeze the Caramelised Soy Chicken in an airtight container for up to 3 months. Thaw in the fridge overnight before reheating.

Reheating: When ready to enjoy, reheat the chicken and broth on the stove over low heat until piping hot. Stir gently to prevent sticking and ensure even heating.

Proper Container: Use a glass or BPA-free plastic container to store your chicken; this helps preserve flavors and textures while preventing freezer burn.

Caramelised Soy Chicken Variations

Feel free to explore different twists and swaps to make this recipe your own!

  • Vegetarian Option: Substitute chicken thighs with firm tofu. Simply press and cube the tofu, then sauté until golden for a delightful plant-based alternative.

  • Low-Carb Delight: Replace jasmine rice with cauliflower rice. It cooks quickly and adds a healthy, grain-free twist that pairs wonderfully with the savory broth.

  • Add Extra Veggies: Toss in bok choy or bell peppers to the broth while it simmers. This not only boosts nutrition but also adds vibrant color and texture to your meal.

  • Spicy Kick: Infuse some heat by adding sliced red chili or a dash of sriracha to the broth. This spicy upgrade complements the sweet and savory flavors beautifully!

  • Coconut Twist: Swap half of the chicken broth with coconut milk for a creamy, tropical flavor. Just imagine the rich richness enveloping that tender chicken!

  • Garlic-Lovers Version: Up the garlic ante by doubling the minced garlic in the broth. It amplifies the aromatic goodness, creating an irresistible dish perfect for garlic fans.

When you’re ready to join in on this comforting culinary adventure, consider pairing your meal with a side of BLT Chicken Salad or enjoy a warm bowl of Tuscan Chicken Soup as delightful companions. Each variation offers unique flavors and textures while staying true to the comforting essence of the original dish. Enjoy customizing your cooking experience!

Caramelised Soy Chicken Recipe FAQs

What type of chicken is best for this recipe?
I highly recommend using bone-in and skin-on chicken thighs for the best flavor and tenderness. The bones and skin help keep the chicken juicy, creating a rich flavor profile that elevates your Caramelised Soy Chicken dish. If you prefer a healthier option, boneless, skinless chicken thighs can be used, but you may need to adjust cooking time to ensure they don’t dry out.

How should I store leftovers?
To store leftovers, place the Caramelised Soy Chicken and remaining broth in an airtight container. They can be kept in the refrigerator for up to 3 days. Make sure to reheat thoroughly on the stove before enjoying, and feel free to add a splash of chicken broth to revive the creaminess of the sauce during reheating.

Can I freeze Caramelised Soy Chicken?
Absolutely! You can freeze your Caramelised Soy Chicken in an airtight container for up to 3 months. To ensure the best texture, allow it to cool completely before sealing. When you’re ready to enjoy, simply thaw it in the fridge overnight. Then, reheat on the stove over low heat until heated through, stirring gently to avoid sticking.

What if my broth is too thin?
If you find your broth is thinner than you like, the cornstarch slurry is your best friend! Mix 1 tablespoon of cornstarch with 2 tablespoons of cold water until smooth, then stir this into the simmering broth. Let it cook for another 2-3 minutes, and you’ll notice the broth thickening beautifully. Just remember to taste and adjust seasoning if necessary!

Can I use substitutes for any ingredients?
Certainly! If you don’t have jasmine rice on hand, feel free to substitute it with basmati or long-grain white rice, which will work just as well. For ginger, fresh is ideal, but if you’re in a pinch, ground ginger can replace minced ginger—just use about 1/4 teaspoon instead. Likewise, if soy sauce isn’t available, coconut aminos can provide a similar flavor profile for a soy-free alternative.

Is this dish suitable for dietary restrictions?
If there are dietary concerns, this recipe can be customized. For a gluten-free option, swap regular soy sauce for a gluten-free version. You can also replace chicken broth with vegetable broth for a vegetarian alternative. Just be sure to check the ingredients on any packaged items to avoid any allergens.

Caramelised Soy Chicken

Caramelised Soy Chicken: Your New Favorite Comfort Dish

Savor the rich flavors of Caramelised Soy Chicken in a cozy garlic ginger broth, making it your new favorite comfort dish.
Prep Time 15 minutes
Cook Time 40 minutes
Total Time 55 minutes
Servings: 4 servings
Course: Dinner
Cuisine: Asian
Calories: 450

Ingredients
  

For the Chicken
  • 4 pieces Chicken Thighs bone-in and skin-on for maximum juiciness
  • 2 tablespoons Vegetable Oil or olive oil
  • Salt to taste
  • Pepper to taste
For the Broth
  • 1/2 cup Soy Sauce consider low-sodium for a healthier option
  • 2 tablespoons Brown Sugar or honey/maple syrup
  • 1 tablespoon Ginger (minced) fresh preferred
  • 2 cloves Garlic (minced) use fresh for best results
  • 2 cups Chicken Broth or vegetable broth for a vegetarian option
  • 1 tablespoon Sesame Oil or more vegetable oil if unavailable
  • 1 tablespoon Cornstarch optional for thickening
For Serving
  • 1 cup Jasmine Rice or basmati rice
  • 2 tablespoons Green Onions chopped, can replace with chives
  • 2 tablespoons Fresh Cilantro omit if disliked

Equipment

  • Large Heavy-Bottomed Pot
  • Separate Pot for Rice

Method
 

Step-by-Step Instructions for Caramelised Soy Chicken
  1. Begin by patting the chicken thighs dry with paper towels and season with salt and pepper.
  2. In a large pot, heat the vegetable oil over medium-high heat until shimmering.
  3. Sear the chicken thighs skin-side down for 5-7 minutes until golden brown, undisturbed.
  4. Flip the chicken, then add soy sauce, brown sugar, garlic, and ginger, stirring to combine.
  5. Pour in chicken broth, ensuring chicken is submerged, and raise the heat to boil.
  6. Cover and simmer on low heat for approximately 20 minutes until chicken is cooked through.
  7. Rinse jasmine rice under cold water to remove excess starch.
  8. In a separate pot, bring water to boil, add rinsed rice, cover, and reduce heat to simmer for 15-20 minutes.
  9. For thickening, mix cornstarch with cold water, stir into the pot, and cook for 2-3 minutes.
  10. Slice the chicken and serve over rice, pouring broth on top and garnishing with green onions and cilantro.

Nutrition

Serving: 1servingCalories: 450kcalCarbohydrates: 50gProtein: 30gFat: 15gSaturated Fat: 4gPolyunsaturated Fat: 3gMonounsaturated Fat: 8gCholesterol: 100mgSodium: 850mgPotassium: 600mgFiber: 2gSugar: 8gVitamin C: 2mgCalcium: 2mgIron: 10mg

Notes

Ensure to pat chicken dry for maximum crispiness during cooking. Adjust seasonings to taste and rinse rice for fluffiness.

Tried this recipe?

Let us know how it was!

Creamy Honey Pepper Chicken Mac and Cheese Delight You’ll Love

A sweet and spicy aroma fills the kitchen as I drizzle honey over sizzling chicken, and the anticipation for my Creamy Honey Pepper Chicken Mac and Cheese Delight reaches a fever pitch. This dish isn’t just another weeknight meal; it’s a celebration of comfort, combining creamy macaroni and gooey cheese with crispy, honey-glazed chicken that will make your taste buds dance. With its quick prep and ability to impress family and friends alike, this recipe is perfect for those wishing to elevate their dining experiences without spending hours in the kitchen. As the mac and cheese melds with the zesty chicken, you’ll discover a delightful twist on traditional comfort food. Curious to see how you can transform your dinner table with this indulgent creation? Let’s dive into the details!

Why is this dish a must-try?

Creamy Comfort: Each forkful of this dish envelops you in a velvety embrace of cheesy goodness that screams indulgence.

Flavor Explosion: Sweet honey and spicy black pepper meld beautifully with savory chicken, creating a taste experience that excites your palate.

Easy to Make: Whip it up in no time, making it perfect for busy weeknights or unexpected guests—your family won’t believe how quickly it comes together.

Incredible Crowd-Pleaser: This recipe is guaranteed to impress at your next gathering, standing out among ordinary mac and cheese recipes.

For more delicious ideas, why not pair it with a side salad or check out the Crack Chicken Penne for an equally delightful meal?

Creamy Honey Pepper Chicken Mac and Cheese Ingredients

• Elevate your dish with these key ingredients!

For the Mac and Cheese

  • Macaroni – The sturdy base that absorbs all the creamy goodness; elbow pasta works best!
  • Cheese (e.g., Cheddar, Mozzarella) – Adds that luxurious creaminess; feel free to substitute with Gouda for a unique twist.
  • Butter – Gives richness to your sauce; olive oil can be used for a lighter alternative.
  • Milk or Heavy Cream – This is key for a rich sauce; consider low-fat milk if you’re watching calories.
  • Garlic Powder – Enhances the flavor profile; swapping for fresh minced garlic adds a lovely zing.
  • Onion Powder – Provides depth to the cheese sauce; diced onions can be a flavorful substitute.

For the Chicken

  • Chicken Breasts – The star protein that holds it all together; for a juicier option, chicken thighs are splendid.
  • Honey – Adds a sweet touch to the glaze; maple syrup is a great substitute if you want to switch it up.
  • Black Pepper – Delivers the heat and excitement; adjust based on your spice preference.

Now you’re equipped with all the essential ingredients for the Creamy Honey Pepper Chicken Mac and Cheese Delight! Get ready to create a meal that’s sure to become a family favorite.

Step‑by‑Step Instructions for Creamy Honey Pepper Chicken Mac and Cheese Delight

Step 1: Prepare the Chicken
Start by seasoning two chicken breasts with salt and freshly cracked black pepper. Heat a skillet over medium heat and add a tablespoon of oil. Sear the chicken for about 6-7 minutes on each side, or until golden brown and cooked through, reaching an internal temperature of 165°F. Once cooked, remove the chicken from the skillet and set it aside to rest while you prepare the glaze.

Step 2: Make the Honey Pepper Glaze
In a small saucepan, combine ¼ cup of honey and 1 tablespoon of black pepper. Heat the mixture over low-medium heat for about 3-4 minutes, stirring occasionally, until it thickens slightly. When ready, take the skillet off the heat and coat the rested chicken breasts in the honey pepper glaze, ensuring they are thoroughly covered for a sweet and spicy kick.

Step 3: Cook the Macaroni
Bring a large pot of salted water to a boil, adding 8 ounces of macaroni. Cook the pasta until al dente, usually about 7-9 minutes depending on the package instructions. Once cooked, drain the macaroni and set it aside. This is the perfect base for your Creamy Honey Pepper Chicken Mac and Cheese Delight!

Step 4: Prepare the Cheese Sauce
In a separate saucepan, melt 3 tablespoons of butter over medium heat. Once melted, whisk in 2 cups of milk, stirring until well combined. Gradually add in 2 cups of shredded cheese (such as Cheddar and Mozzarella), continuing to stir until the cheese melts smoothly, taking about 4-5 minutes. Mix well with garlic powder and onion powder to enhance the cheesiness.

Step 5: Combine Macaroni and Cheese Sauce
Once the cheese sauce is creamy and homogenous, stir in the cooked macaroni, ensuring each piece is enrobed in cheese. Continue cooking on low for an additional 2-3 minutes, allowing the flavors to meld beautifully together. This rich and creamy mixture is the star of your Creamy Honey Pepper Chicken Mac and Cheese Delight.

Step 6: Assemble the Dish
Preheat your oven to 350°F. In a greased baking dish, layer the creamy macaroni evenly across the bottom. Next, chop the glazed chicken into bite-sized pieces and scatter it generously over the macaroni. This layering creates a harmonious blend of flavors that will delight everyone at the dinner table.

Step 7: Bake to Perfection
Place the assembled dish in the preheated oven and bake for 15-20 minutes. Keep an eye on it—you’re looking for the cheese to bubble and the top to turn a lovely golden color. Once i it achieves that delightful visual cue, remove it from the oven and let it sit for a few minutes before serving, allowing the flavors to settle in.

Expert Tips for Creamy Honey Pepper Chicken Mac and Cheese

  • Chicken Perfection: For juicy chicken, use chicken thighs instead of breasts; they stay moister when cooked.

  • Cheese Choices: Experimenting is key! Try different cheeses like Gouda or Pepper Jack for unique flavors in your creamy dish.

  • Glaze Balance: Be careful not to overheat the honey glaze; it should be thick but not burnt, keeping the flavor just right for your chicken.

  • Macaroni Cooking: Avoid mushy macaroni by cooking it al dente; it will continue to soften in the oven when baked with the cheese sauce.

  • Chef’s Touch: Top your dish with breadcrumbs before baking for a delightful crunchy texture that contrasts with the creamy honey pepper chicken mac and cheese.

What to Serve with Creamy Honey Pepper Chicken Mac and Cheese Delight

Elevate your dining experience with delightful sides that harmonize beautifully with this creamy, sweet, and spicy dish.

  • Garlic Bread: The buttery, garlicky flavors create a perfect balance with the rich mac and cheese, making each bite a slice of heaven.

  • Caesar Salad: Crisp romaine and tangy dressing contrast with the creaminess, adding a refreshing crunch that brightens your plate.

  • Roasted Vegetables: Colorful veggies like carrots and bell peppers roast to sweet perfection, complementing the honey in the chicken and adding a wholesome touch.

  • Steamed Broccoli: The slight bitterness of broccoli helps cut through the richness of the mac and cheese, providing both texture and nutrition.

  • Sweet Corn on the Cob: Juicy, buttery corn brings a touch of sweetness, harmonizing with the honey glaze while enhancing the overall comfort food experience.

  • Sparkling Lemonade: A refreshing drink that offers a zesty kick, cleansing your palate between bites and beautifully matching the dish’s bold flavors.

Storage Tips for Creamy Honey Pepper Chicken Mac and Cheese Delight

Fridge: Store leftovers in an airtight container for up to 3 days to maintain freshness. Ensure it’s completely cooled before sealing to prevent condensation.

Freezer: You can freeze the dish for up to 2 months. Portion into freezer-safe containers and allow to cool completely before wrapping tightly.

Reheating: Reheat in the oven at 350°F for about 20-25 minutes until heated through. Consider adding a splash of milk to restore creaminess and avoid dryness.

Freshness Check: Before consuming, always verify that the creamy honey pepper chicken mac and cheese delight has a pleasant smell and appearance to ensure it’s safe to eat.

Make Ahead Options

These Creamy Honey Pepper Chicken Mac and Cheese Delight are perfect for meal prep enthusiasts! You can prepare the mac and cheese mix up to 24 hours in advance; simply cook the macaroni, make the cheese sauce, and combine them. Store this mixture in an airtight container in the refrigerator to maintain its creamy consistency. The chicken can also be cooked, glazed, and stored separately for 3 days; remember to reheat it in the oven for optimal texture. When it’s time to serve, layer the chicken on top of the macaroni and bake at 350°F for 15-20 minutes. This ensures you have a delicious, comforting meal with minimal effort!

Variations & Substitutions for Creamy Honey Pepper Chicken Mac and Cheese

Feel free to adapt this delightful recipe to suit your tastes and dietary needs!

  • Shrimp Substitute: Replace chicken with shrimp for a seafood twist. Cook shrimp until pink and toss in the same honey pepper glaze for a quick sea-inspired meal.

  • Vegetarian Option: Swap chicken for tofu or tempeh, marinating them in the glaze for flavor. This adds protein to your dish while keeping it plant-based and heartwarming.

  • Cheese Variety: Experiment with different cheeses like Gouda or Pepper Jack for a flavor boost. Each variety brings unique creaminess and depth to your comforting mac and cheese.

  • Extra Veggies: Add in vibrant vegetables like spinach or broccoli for nutrition. Just blanch them before mixing in to keep them bright and fresh!

  • Gluten-Free Pasta: Use gluten-free macaroni for a celiac-friendly version. Rice or corn-based pasta works well and creates a satisfying texture without the gluten.

  • Spicy Kick: Amp up the heat by mixing in some diced jalapeños or a pinch of cayenne pepper. This fiery twist complements the sweetness of the honey beautifully.

  • Herb Infusion: Fresh herbs like thyme or basil can elevate your dish further! Sprinkle some chopped herbs into the cheese sauce for a fragrant touch that brightens every bite.

For a well-rounded meal, consider serving this indulgent creamy mac with a fresh side salad, or check out the delicious Sizzling Chicken Pepper for more ideas!

Creamy Honey Pepper Chicken Mac and Cheese Recipe FAQs

What type of macaroni should I use?
Absolutely! Elbow pasta is the classic choice, but feel free to experiment with other shapes like shells or cavatappi to add some fun to your dish. Just make sure whatever pasta you choose can hold onto that creamy cheese sauce.

How should I store leftovers?
To keep your Creamy Honey Pepper Chicken Mac and Cheese Delight fresh, refrigerate leftovers in an airtight container for up to 3 days. I recommend letting it cool completely before sealing it up to avoid any sogginess from condensation.

Can I freeze this dish?
Very! To freeze, let the dish cool completely, then portion it into freezer-safe containers. It can last in the freezer for up to 2 months. When you’re ready to enjoy, let it thaw in the refrigerator overnight, then reheat in the oven at 350°F for about 20-25 minutes until heated through.

What if my cheese sauce is grainy?
If your sauce ends up grainy, it’s usually due to the cheese being added too quickly or at too high of a temperature. The best way to fix this is to lower the heat and add your cheese gradually while stirring constantly to help it melt smoothly. Patience is key! Also, ensure you’re using freshly shredded cheese for optimal melting.

Can I modify this recipe for dietary needs?
Definitely! If you have dietary restrictions, you can easily adjust this recipe. Swap out chicken for tofu or shrimp for a different protein. For dairy-free options, use plant-based cheese and milk alternatives. Just remember to check the ingredients to ensure they suit your specific allergies or preferences.

How can I enhance the flavor of my dish?
I often make this dish even more exciting with added elements! Consider sprinkling some smoked paprika or fresh herbs like basil or parsley for a pop of color and flavor. You can also add sautéed vegetables, such as spinach or bell peppers, to elevate the nutrition and taste.

Creamy Honey Pepper Chicken Mac and Cheese Delight

Creamy Honey Pepper Chicken Mac and Cheese Delight You’ll Love

Savor the Creamy Honey Pepper Chicken Mac and Cheese Delight, a comforting dish combining creamy macaroni with honey-glazed chicken.
Prep Time 20 minutes
Cook Time 30 minutes
Resting Time 5 minutes
Total Time 55 minutes
Servings: 4 servings
Course: Casserole
Cuisine: American
Calories: 600

Ingredients
  

For the Mac and Cheese
  • 8 ounces Macaroni Elbow pasta works best.
  • 2 cups Cheese (e.g., Cheddar, Mozzarella) Feel free to substitute with Gouda.
  • 3 tablespoons Butter Olive oil can be used for a lighter alternative.
  • 2 cups Milk or Heavy Cream Consider low-fat milk if you're watching calories.
  • 1 teaspoon Garlic Powder Swapping for fresh minced garlic adds a lovely zing.
  • 1 teaspoon Onion Powder Diced onions can be a flavorful substitute.
For the Chicken
  • 2 pieces Chicken Breasts Chicken thighs are a juicier option.
  • 1/4 cup Honey Maple syrup is a great substitute.
  • 1 tablespoon Black Pepper Adjust based on your spice preference.

Equipment

  • Skillet
  • Saucepan
  • Large pot
  • baking dish

Method
 

Step-by-Step Instructions
  1. Season chicken breasts with salt and black pepper. Sear in a skillet with oil for 6-7 minutes per side until cooked through.
  2. Combine honey and black pepper in a saucepan over low-medium heat for 3-4 minutes until slightly thickened. Coat the cooked chicken in the glaze.
  3. Cook macaroni in salted boiling water for 7-9 minutes until al dente. Drain and set aside.
  4. Melt butter in a saucepan over medium heat. Whisk in milk and gradually add cheese, stirring until melted. Mix with garlic and onion powder.
  5. Stir cooked macaroni into the cheese sauce, cooking for an additional 2-3 minutes.
  6. Preheat oven to 350°F. Layer macaroni in a greased baking dish, top with chopped glazed chicken.
  7. Bake for 15-20 minutes until the cheese bubbles and turns golden. Let it sit for a few minutes before serving.

Nutrition

Serving: 1servingCalories: 600kcalCarbohydrates: 50gProtein: 30gFat: 25gSaturated Fat: 15gPolyunsaturated Fat: 3gMonounsaturated Fat: 10gCholesterol: 100mgSodium: 800mgPotassium: 700mgFiber: 2gSugar: 10gVitamin A: 500IUVitamin C: 2mgCalcium: 300mgIron: 2mg

Notes

Store leftovers in an airtight container for up to 3 days. For longer storage, freeze for up to 2 months.

Tried this recipe?

Let us know how it was!

Healthy Garlic Parmesan Chicken Pasta Recipe for Guilt-Free Indulgence

As I twisted the strands of pasta around my fork, I couldn’t help but savor the creamy dream that is my Healthy Garlic Parmesan Chicken Pasta recipe. Whether you’re looking to satisfy your comfort food cravings or need a quick post-workout meal, this dish ticks all the boxes. With a secret swap of heavy cream for Greek yogurt and low-fat milk, it manages to be both indulgent and guilt-free. Plus, you’ll whip it up in just about 30 minutes, making it perfect for those busy weeknights when time is of the essence. So, what’s stopping you from diving into this high-protein delight that’s sure to leave you feeling energized and satisfied? Let’s get cooking!

Why Choose Healthy Garlic Parmesan Chicken Pasta?

Flavorful Delight: This dish combines rich garlic and Parmesan in a creamy sauce that delivers on taste without the guilt.
Quick & Easy: With a prep time of just 30 minutes, it’s your go-to recipe for busy weeknights or post-workout meals.
High Protein Boost: Packed with chicken breast and Greek yogurt, it provides the protein your body craves after a workout.
Clean Eating: Made with whole wheat pasta and low-fat ingredients, it aligns perfectly with your clean eating goals.
Versatile Dish: Feel free to customize with veggies like spinach or switch up the protein with shrimp for a fresh twist! For more delicious options, check out Garlic Parmesan Chicken or Garlic Butter Baked.

Healthy Garlic Parmesan Chicken Pasta Ingredients

• Discover the secrets behind this delicious dish!

For the Pasta

  • Whole Wheat Pasta – A source of complex carbohydrates and fiber that keeps you full longer.

For the Chicken

  • Chicken Breast – Lean protein that supports muscle recovery after workouts.
  • Salt – Elevates flavor; adjust based on taste preferences.
  • Pepper – Adds a hint of spice to enhance the chicken’s taste.
  • Paprika – Offers a mild warmth and vibrant color to the dish.
  • Italian Seasoning – A blend that enriches the overall flavor profile.

For the Sauce

  • Olive Oil – Healthy fats that give the sauce a silky, rich texture.
  • Garlic – Infuses a fragrant aroma and robust flavor into the dish.
  • Whole Wheat Flour – Used to thicken the sauce without heavy calories.
  • Chicken Broth – Provides depth and richness; opt for low-sodium for a healthier choice.
  • Low-Fat Milk – Ensures creaminess while keeping calories in check.
  • Greek Yogurt – Adds a creamy touch and extra protein; substitute it with plain yogurt if needed.
  • Parmesan Cheese – Offers a classic rich flavor; nutritional yeast can be a lighter alternative.

Optional Ingredients

  • Spinach – Packed with nutrients; feel free to swap with kale for added health benefits.
  • Parsley – Adds a pop of color and freshness as a garnish.

Enjoy crafting your Healthy Garlic Parmesan Chicken Pasta recipe with these delightful ingredients!

Step‑by‑Step Instructions for Healthy Garlic Parmesan Chicken Pasta Recipe

Step 1: Cook the Pasta
Bring a large pot of salted water to a rolling boil over high heat. Once boiling, add the whole wheat pasta and cook according to the package instructions until al dente, usually about 8–10 minutes. Before draining, reserve 1/4 cup of the pasta water to adjust the sauce’s thickness later. Drain the pasta and set it aside, keeping it warm.

Step 2: Sear the Chicken
In a large skillet, heat 2 tablespoons of olive oil over medium-high heat. Add the cubed chicken breast seasoned with salt, pepper, paprika, and Italian seasoning. Cook for about 5–6 minutes, stirring occasionally, until the chicken is golden brown and fully cooked. Remove the chicken from the skillet and set it aside, leaving any drippings.

Step 3: Sauté the Garlic
In the same skillet, reduce heat to medium and add a little more olive oil if needed. Add 4 minced garlic cloves and sauté for 30–60 seconds until fragrant, making sure not to brown the garlic as this can lead to a bitter taste. You should see a lovely golden color, signaling that it’s time for the next step.

Step 4: Make the Sauce Base
Stir in 2 tablespoons of whole wheat flour to create a light roux with the garlic, cooking for about 1 minute to eliminate the raw flour taste. Gradually whisk in 1 cup of chicken broth, ensuring no lumps form. Keep stirring until the mixture is smooth and starts to thicken slightly.

Step 5: Incorporate the Creaminess
Slowly whisk in 1 cup of low-fat milk into the sauce base. Continue to cook on low heat for 2–3 minutes until the sauce thickens to your desired consistency. Once ready, remove the skillet from the heat and mix in 1/2 cup of Greek yogurt until fully incorporated, creating that creamy texture for your Healthy Garlic Parmesan Chicken Pasta.

Step 6: Add the Cheese
Return the skillet to low heat and add 1/2 cup of grated Parmesan cheese. Stir until the cheese melts completely and the sauce is creamy and smooth. If the sauce is too thick for your liking, gradually whisk in some reserved pasta water until you reach the desired consistency.

Step 7: Combine All Ingredients
Add the cooked chicken back into the skillet, tossing to coat in the sauce. Next, gently fold in the cooked pasta until everything is well combined. If you’re using spinach, add it now and stir until it wilts, adding a nice burst of color and nutrients to your Healthy Garlic Parmesan Chicken Pasta.

Step 8: Serve with Garnish
Once everything is mixed thoroughly, remove the skillet from heat. Plate the pasta and garnish with chopped parsley and extra Parmesan cheese for a lovely finish. Enjoy the rich, garlic-infused flavors of your Healthy Garlic Parmesan Chicken Pasta!

How to Store and Freeze Healthy Garlic Parmesan Chicken Pasta

Fridge: Store your Healthy Garlic Parmesan Chicken Pasta in an airtight container in the refrigerator for up to 3 days. This ensures it stays fresh and ready for a quick meal.

Freezer: If you want to store for longer, freeze the pasta in individual portion sizes. It can last for about 2-3 months. Make sure to use freezer-safe containers to prevent freezer burn.

Reheating: To reheat, simply microwave individual servings with a splash of low-fat milk to loosen the sauce, or warm it gently on the stovetop over low heat until heated through.

Meal Prep: This dish is great for meal prepping! Prepare a batch at the start of the week and enjoy it on busy days without the need for unhealthy fast food.

What to Serve with Healthy Garlic Parmesan Chicken Pasta?

Creating a delicious meal is all about balance and complements. These pairings will elevate your dining experience!

  • Fresh Side Salad: A crisp, leafy greens salad provides a refreshing contrast to the creamy pasta, enhancing each bite. You can mix in colorful veggies, nuts, or cheese for an extra crunch and depth of flavor.

  • Garlic Bread: Tantalizingly warm and crispy, garlic bread is a comforting classic that pairs perfectly with the savory garlic sauce. It’s great for soaking up any leftover sauce left on your plate!

  • Roasted Vegetables: Roasted broccoli, zucchini, or bell peppers add a delightful charred flavor that complements the pasta’s creaminess while boosting your nutrient intake.

  • Steamed Asparagus: The light, bright flavor of steamed asparagus brings a fresh touch that balances the richness of the dish. Plus, it adds a beautiful pop of color!

  • Italian White Wine: A chilled glass of Pinot Grigio or Sauvignon Blanc enhances the flavors of the meal, making each sip a delightful accompaniment. Its acidity elegantly cuts through the creaminess, refreshing your palate.

  • Chocolate Mousse: For dessert, a light chocolate mousse is a delightful way to end the meal on a sweet note. Its airy texture contrasts beautifully with the hearty pasta!

With these accompaniments, your Healthy Garlic Parmesan Chicken Pasta dinner will be a memorable feast everyone will love!

Expert Tips for Healthy Garlic Parmesan Chicken Pasta

  • Avoid Garlic Bitterness: Make sure not to brown the garlic when sautéing; it can become bitter. Keep a close eye on it!
  • Smooth Sauce: Whisk constantly while adding liquids to the sauce, ensuring a smooth, lump-free consistency for your Healthy Garlic Parmesan Chicken Pasta.
  • Season to Taste: Always taste as you go! Adjust seasoning to your personal preference for the perfect flavor balance in your dish.
  • Perfect Pasta Texture: Cook the whole wheat pasta until just al dente; it will continue to cook slightly when combined with the sauce.
  • Creamy Consistency: If the sauce thickens too much, gradually add back the reserved pasta water until it reaches your desired creaminess.

Make Ahead Options

These Healthy Garlic Parmesan Chicken Pasta meal prep options are perfect for busy home cooks! You can cook the whole wheat pasta and refrigerate it in an airtight container for up to 3 days. Similarly, the chicken can be seasoned and cooked ahead of time, then stored for the same duration. When you’re ready to enjoy this delicious dish, simply reheat the pasta and chicken in a skillet over medium heat, adding a splash of low-fat milk to ensure the sauce remains creamy and avoid clumping. For the best results, mix in the freshly made sauce just before serving for that delightful, restaurant-quality finish. Enjoy the ease of having this nutritious meal ready to go!

Healthy Garlic Parmesan Chicken Pasta Variations

Embrace your inner chef and let your creativity shine by customizing this dish with some delightful tweaks!

  • Dairy-Free: Substitute Greek yogurt and Parmesan with nutritional yeast and cashew cream for a creamy, cheeseless delight.
  • Vegetarian Swap: Replace chicken with sautéed mushrooms or tofu for a plant-based twist; both options bring their own unique textures.
  • Gluten-Free Option: Use gluten-free pasta instead of whole wheat to make the recipe accessible for gluten-sensitive individuals.
  • Extra Veggies: Boost nutrients by adding broccoli or zucchini; simply toss them in during the last minute of pasta cooking.
  • Spicy Kick: Add red pepper flakes to the sauce for a flavorful heat that will awaken your taste buds.
  • Herb Infusion: Incorporate fresh basil or thyme – just a handful will elevate the herbaceous notes in your dish beautifully.
  • Nutty Addition: Sprinkle in toasted pine nuts or walnuts for that extra crunch and nutty flavor that beautifully complements the creamy sauce.

Feeling inspired? As you explore these variations, don’t forget to check out Cheesy Garlic Chicken or Garlic Chicken Gnocchi for more mouthwatering ideas!

Healthy Garlic Parmesan Chicken Pasta Recipe FAQs

How do I select the best whole wheat pasta?
Choose whole wheat pasta that has a rich, nutty aroma and a firm texture. Look for brands that have a high protein content and minimal additives. I recommend checking the ingredient list to ensure that it lists whole wheat flour as the first ingredient for the best nutritional value.

What’s the best way to store leftover Healthy Garlic Parmesan Chicken Pasta?
Store your pasta in an airtight container in the refrigerator for up to 3 days. This will keep it fresh and ready for quick meals. Be sure to allow it to cool down to room temperature before sealing it in the container to prevent moisture buildup.

Can I freeze Healthy Garlic Parmesan Chicken Pasta?
Absolutely! To freeze, portion the pasta into individual servings, and place them in freezer-safe containers. It can last for up to 3 months. When you’re ready to enjoy it, defrost in the fridge overnight and reheat gently on the stovetop, adding a splash of low-fat milk to help loosen the sauce.

What should I do if my sauce is too thick?
If your sauce turns out too thick, don’t worry! Gradually add in some of the reserved pasta water while stirring until you reach your desired consistency. The starch from the pasta water will help create a creamy texture.

Are there any dietary considerations for this recipe?
For allergies, this recipe contains dairy, so if you have lactose intolerance, consider using plant-based milk and a dairy-free yogurt alternative. Additionally, if you’re preparing this dish for pets, avoid giving them any garlic, as it can be toxic to dogs and cats.

How can I add extra nutrition to my Healthy Garlic Parmesan Chicken Pasta?
You can easily increase the nutrients by adding more vegetables! Consider tossing in bell peppers, zucchini, or broccoli along with the spinach. This not only enhances the dish visually but also boosts fiber and vitamins. Feel free to get creative with your veggie choices!

Healthy Garlic Parmesan Chicken Pasta Recipe

Healthy Garlic Parmesan Chicken Pasta Recipe for Guilt-Free Indulgence

A creamy, high-protein dish that's quick to prepare, satisfying comfort food cravings without guilt.
Prep Time 30 minutes
Cook Time 15 minutes
Total Time 45 minutes
Servings: 4 servings
Course: Pasta
Cuisine: Italian
Calories: 400

Ingredients
  

For the Pasta
  • 8 ounces Whole Wheat Pasta
For the Chicken
  • 1 pound Chicken Breast Cubed
  • 1 teaspoon Salt
  • 1 teaspoon Pepper
  • 1 teaspoon Paprika
  • 1 teaspoon Italian Seasoning
For the Sauce
  • 2 tablespoons Olive Oil
  • 4 cloves Garlic Minced
  • 2 tablespoons Whole Wheat Flour
  • 1 cup Chicken Broth Preferably low-sodium
  • 1 cup Low-Fat Milk
  • 1/2 cup Greek Yogurt Or plain yogurt as substitute
  • 1/2 cup Parmesan Cheese Grated
Optional Ingredients
  • 1 cup Spinach Or substitute with kale
  • 2 tablespoons Parsley Chopped, for garnish

Equipment

  • Large pot
  • Large skillet
  • Measuring cups
  • Measuring spoons
  • whisk

Method
 

Step-by-Step Instructions
  1. Bring a large pot of salted water to a rolling boil over high heat. Add the whole wheat pasta and cook until al dente, about 8–10 minutes. Reserve 1/4 cup of pasta water before draining and setting the pasta aside.
  2. In a large skillet, heat 2 tablespoons of olive oil over medium-high heat. Add the cubed chicken breast seasoned with salt, pepper, paprika, and Italian seasoning. Cook for 5–6 minutes until golden brown and fully cooked. Remove from skillet.
  3. In the same skillet, reduce heat to medium and add more olive oil if needed. Add 4 minced garlic cloves and sauté for 30–60 seconds until fragrant.
  4. Stir in 2 tablespoons of whole wheat flour to create a light roux with the garlic, cooking for about 1 minute. Gradually whisk in 1 cup of chicken broth until smooth.
  5. Slowly whisk in 1 cup of low-fat milk, cooking on low heat for 2–3 minutes until thickened. Remove from heat and mix in 1/2 cup of Greek yogurt.
  6. Return to low heat, add 1/2 cup of grated Parmesan cheese and stir until melted and smooth. Adjust sauce thickness with reserved pasta water if needed.
  7. Add the cooked chicken back into the skillet, tossing to coat with the sauce. Gently fold in the cooked pasta and spinach if using.
  8. Plate the pasta and garnish with chopped parsley and extra Parmesan cheese. Serve warm.

Nutrition

Serving: 1servingCalories: 400kcalCarbohydrates: 45gProtein: 30gFat: 10gSaturated Fat: 3gPolyunsaturated Fat: 1gMonounsaturated Fat: 7gCholesterol: 70mgSodium: 600mgPotassium: 700mgFiber: 6gSugar: 5gVitamin A: 500IUVitamin C: 8mgCalcium: 250mgIron: 3mg

Notes

Ensure to not brown the garlic to avoid bitterness and whisk constantly for a smooth sauce.

Tried this recipe?

Let us know how it was!

Queso Smothered Chicken and Rice for Cozy Family Dinners

As I whisked the cheese into a bubbling pot, the aroma of melting queso filled my kitchen, creating an inviting atmosphere that felt like a warm hug. This Queso Smothered Chicken and Rice, also known as Pollo con Queso, is my go-to recipe for cozy family dinners and effortless meal prep. Juicy chicken sautéed to golden perfection, paired with fluffy homemade Spanish rice, is smothered in a rich, creamy queso sauce that transforms any weeknight into a fiesta. Not only is it a delicious comfort food option, but it’s also freezer-friendly, making it perfect for busy days when you crave something hearty. Ready to dive into cheesy, savory bliss? Let’s explore how to whip up this delightful dish together!

Why Is This Recipe a Must-Try?

Flavor Explosion: The zesty melding of spices with creamy cheese makes each bite a carnival of taste that will have everyone asking for seconds.

Easy to Make: With straightforward steps, you can whip up this comforting dish in no time, making it perfect for weeknights or family gatherings.

Meal Prep Friendly: Perfect for busy schedules, store leftovers in an airtight container and enjoy them throughout the week. This dish pairs wonderfully with Oven Chicken Rice.

Versatile Ingredients: Customize it easily by swapping chicken for shrimp or tofu, and feel free to add veggies like corn for an extra nutritional boost.

Family Favorite: Its rich, cheesy goodness is sure to please both kids and adults, creating memorable mealtime moments. Don’t forget to serve it with a side of guacamole or warm tortillas for an added touch!

Queso Smothered Chicken and Rice Ingredients

For the Chicken
Chicken Breast or Thighs – A lean protein providing the base for this flavorful dish; swap with tofu for a vegetarian option.
Oil (2 tablespoons) – Essential for sautéing the chicken to achieve that golden sear; olive oil or avocado oil works beautifully.
Taco or Fajita Seasoning (1 packet) – Adds a burst of flavor to the chicken; use homemade spices like cumin and paprika if you prefer a personal touch.

For the Queso Sauce
Boar’s Head White American Cheese (2/3 lb) – This is the key to a smooth, creamy queso; Velveeta Queso Blanco can be a great alternative.
Pepper Jack or Monterey Jack Cheese (1/2 lb) – Provides a delightful hint of spice and richness; swap for mozzarella if you want a milder flavor.
Rotel Tomatoes with Green Chilies (1 can, drained) – Brings moisture and flavor to the queso; fresh tomatoes and diced green chilies can serve as a substitute.
Salt (1/4 teaspoon) – Enhances the overall flavor; adjust to your taste.
Jalapeño (1, diced) – Adds a little heat to the queso; omit for a milder dish or replace with bell pepper for sweetness.
Evaporated Milk (1 can, 12 oz) – Creates a beautifully creamy texture for the queso; half-and-half or whole milk can also work.
Green Chilies (1 can, 4 oz) – Adds another layer of flavor to the queso; fresh chilies can be subbed in.
Cilantro (for garnish) – Delivers freshness and a pop of color; feel free to omit if you’re not a fan.

For the Spanish Rice
Homemade Spanish Rice – Complement this dish with fluffy Spanish rice; check the linked recipe below to create it from scratch.

Every rich bite of Queso Smothered Chicken and Rice is guaranteed to bring smiles to the table!

Step‑by‑Step Instructions for Queso Smothered Chicken and Rice

Step 1: Prepare Spanish Rice
Begin by preparing your homemade Spanish rice according to the linked recipe. This essential base will enhance the Queso Smothered Chicken and Rice. Follow the instructions carefully, allowing the rice to cook fully until fluffy and fragrant. Once done, fluff the rice with a fork and set it aside, keeping it warm for assembly later.

Step 2: Sauté Chicken
Slice your chicken breasts or thighs into even strips, ensuring they cook uniformly. Heat 2 tablespoons of oil in a large skillet over medium-high heat. Once shimmering, add the seasoned chicken strips, searing them for about 3-4 minutes per side until golden brown and cooked through. Remove the chicken from the skillet and allow it to rest, keeping the juices locked in.

Step 3: Make the Queso
In the same skillet, reduce the heat to medium-low, and add the drained Rotel tomatoes and diced jalapeño, stirring to incorporate the flavors. Next, pour in the can of evaporated milk. Gradually add the Boar’s Head White American cheese and Pepper Jack cheese, stirring continuously until fully melted and creamy. Add the green chilies, cooking for an additional 5 minutes while stirring to achieve a silky texture.

Step 4: Assemble Dish
Now it’s time to assemble your Queso Smothered Chicken and Rice! On each plate, spoon a generous portion of the fluffy Spanish rice as the base. Top it with the sautéed chicken strips, and then drizzle the luscious queso sauce generously over the chicken. To finish, garnish each dish with fresh cilantro, adding a delightful pop of color and flavor.

How to Store and Freeze Queso Smothered Chicken and Rice

Fridge: Store leftovers in an airtight container for up to 3 days, ensuring the queso sauce remains creamy and the chicken stays juicy.

Freezer: You can freeze the Queso Smothered Chicken and Rice for up to 3 months. Store it in freezer-safe containers, separating the rice, chicken, and queso if desired.

Reheating: When ready to enjoy, thaw overnight in the fridge. Reheat on the stove over low heat, adding a splash of milk to restore creaminess to the queso sauce.

Make-Ahead: Prepare the queso sauce ahead of time and store it in the fridge for up to 2 days. Layer it over warm chicken and rice right before serving for easy mealtime magic.

Make Ahead Options

These Queso Smothered Chicken and Rice are perfect for meal prep enthusiasts! You can prepare the Spanish rice up to 3 days in advance, storing it in an airtight container in the refrigerator. Additionally, cook the chicken and make the queso sauce ahead of time, allowing them to cool before refrigerating for up to 24 hours. To maintain the creamy texture of the queso, reheat it gently on the stove, adding a splash of evaporated milk if needed. When ready to serve, simply reheat the chicken, rice, and queso together until warmed through, and enjoy a restaurant-quality meal with minimal effort during your busy weeknights!

Expert Tips for Queso Smothered Chicken and Rice

  • Rice Rinsing: Rinse the rice before cooking to remove excess starch; this helps achieve a fluffy texture and prevents it from becoming gummy during cooking.

  • Avoid Overcrowding: When sautéing the chicken, ensure the pieces aren’t crowded in the skillet. Overcrowding can lead to steaming rather than achieving that beautiful golden sear.

  • Fresh Grating: Use block cheese and grate it yourself for the smoothest queso sauce. Pre-shredded cheese often contains anti-caking agents that can make your queso grainy.

  • Slow Reheating: If you have leftovers, reheat the queso slowly on the stove or in the microwave. Adding a splash of milk helps restore its creamy texture.

  • Season As You Go: Always taste as you go! Adjust the seasoning of your queso smothered chicken and rice to create the perfect blend of flavors that suits your palate.

What to Serve with Queso Smothered Chicken and Rice

Treat your taste buds to a delightful array of sides that elevate this cheesy, savory meal.

  • Warm Tortillas: Soft, fresh tortillas make the perfect vehicle for scooping up delicious bites. Roll them up with extra queso and chicken for a handheld delight.

  • Guacamole: The creamy avocado dip adds a refreshing contrast to the rich queso sauce, balancing flavors that delight with every bite.

  • Corn Salsa: Bright and zesty, corn salsa bursts with sweet and tangy flavors that complement the dish’s heartiness, lending a lively crunch.

  • Refried Beans: Creamy refried beans provide a luscious, protein-packed side that pairs wonderfully with the cheesy chicken, adding hearty satisfaction to your meal.

  • Mexican Street Corn (Elote): Grilled corn smeared with creamy sauce and sprinkled with cheese and spices brings a smoky, sweet element that enhances the flavor profile of your dinner.

  • Lime Wedges: A squeeze of lime adds a zesty brightness that lifts the entire dish and balances the richness of the queso, making every bite more vibrant.

  • Churros: For dessert, these crispy, cinnamon-dusted pastries offer a sweet finish that rounds out your meal in delightful sugary bliss.

Queso Smothered Chicken and Rice Variations

Feel free to jazz up your Queso Smothered Chicken and Rice by trying out these delightful variations that cater to your taste!

  • Seafood Swap: Replace chicken with shrimp for a seafood twist. Sauté the shrimp until pink, then drizzle with queso.

  • Vegetarian Delight: Opt for firm tofu or sautéed Tempeh instead of chicken. It soaks up flavors beautifully, providing a satisfying meatless option.

  • Spicy Kick: Add in more jalapeños or a splash of hot sauce to the queso for an extra layer of heat. Spice lovers won’t be able to resist!

  • Creamy Cheddar: Swap the White American cheese for sharp cheddar for a richer flavor. Its boldness complements the dish nicely.

  • Veggie Boost: Toss in veggies like corn, diced bell peppers, or zucchini into the queso for brighter flavors and added nutrients. These colorful additions make every bite a treat!

  • Herb Infusion: Mix in some fresh herbs like oregano or thyme into your queso or as a topping for a burst of freshness that brightens everything.

  • Corn Tortilla Crust: Layer the bottom of your baking dish with corn tortillas, add the chicken and queso, then bake for a cheesy casserole-style dinner—comfort food at its best!

  • Freezer Friendly: Prepare extra portions to freeze for those busy evenings. A creamy delight awaits you in no time with a few gentle reheating steps!

Remember, great dishes like Forgotten Chicken Rice and Corn Chicken Rice can also bring excitement to your meal rotation, so don’t hesitate to explore!

Queso Smothered Chicken and Rice Recipe FAQs

How do I know if my chicken is fresh?
Absolutely! When selecting chicken, look for a vibrant pink color without any dark spots or gray patches. The flesh should feel firm, and there should be no unpleasant odors. Fresh chicken should never feel slimy or tacky.

What’s the best way to store leftovers?
Very! After serving, let your Queso Smothered Chicken and Rice cool to room temperature. Transfer it into an airtight container and store it in the refrigerator for up to 3 days. This way, the chicken stays juicy and the queso sauce remains creamy.

Can I freeze Queso Smothered Chicken and Rice?
Absolutely! To freeze, divide the Queso Smothered Chicken and Rice into individual portions. Place them in freezer-safe containers or zip-top bags, removing as much air as possible. You can freeze it for up to 3 months. When ready, thaw overnight in the fridge and reheat gently on the stove, adding a splash of milk to restore the queso’s creamy goodness.

What if my queso sauce is too thick?
Don’t worry; it happens to the best of us! If your queso sauce ends up too thick, simply add a splash of evaporated milk or regular milk while reheating. Stir continuously over low heat until it reaches your desired consistency. The goal is a smooth, silky sauce that coats your delicious chicken and rice perfectly.

Are there any dietary concerns with this recipe?
Yes! Be mindful of dietary restrictions—it’s a precautionary step. If you’re serving this dish to kids or those who cannot handle spicy food, omit the jalapeños and choose a mild cheese option instead. Also, confirm that all cheese and seasoning ingredients comply with your dietary preferences to create a meal that’s enjoyable for everyone!

Can I use other types of cheese for the queso?
Absolutely! Feel free to get creative with your cheese choices. If you’re after a sharper flavor, cheddar cheese can be a wonderful substitute. You can also blend in other creamy cheeses, such as Gouda or Havarti, for unique taste variations that everyone will love!

Queso Smothered Chicken and Rice

Queso Smothered Chicken and Rice for Cozy Family Dinners

This Queso Smothered Chicken and Rice is a rich, comforting dish perfect for family dinners, featuring melted queso and juicy chicken.
Prep Time 15 minutes
Cook Time 30 minutes
Total Time 45 minutes
Servings: 4 servings
Course: Dinner
Cuisine: Mexican
Calories: 600

Ingredients
  

For the Chicken
  • 2 tablespoons Oil olive oil or avocado oil works beautifully
  • 1 packet Taco or Fajita Seasoning adds a burst of flavor
  • 2 pounds Chicken Breast or Thighs lean protein base; swap with tofu for vegetarian option
For the Queso Sauce
  • 2/3 lb Boar’s Head White American Cheese key for a smooth, creamy queso
  • 1/2 lb Pepper Jack or Monterey Jack Cheese adds spice and richness; can swap for mozzarella
  • 1 can Rotel Tomatoes with Green Chilies drained; fresh tomatoes and chilies as substitute
  • 1/4 teaspoon Salt enhances flavor; adjust to taste
  • 1 Jalapeño diced; omit for milder dish
  • 1 can Evaporated Milk 12 oz; creates creamy texture
  • 1 can Green Chilies adds flavor; fresh chilies can be substituted
  • Cilantro for garnish; optional
For the Spanish Rice
  • Homemade Spanish Rice complement this dish; check linked recipe

Equipment

  • Large skillet
  • Fork

Method
 

Step-by-Step Instructions
  1. Begin by preparing your homemade Spanish rice according to the linked recipe. Once done, fluff the rice with a fork and set it aside.
  2. Slice your chicken into even strips. Heat oil in a skillet over medium-high heat, add chicken, sear for 3-4 minutes per side until cooked. Remove chicken and let rest.
  3. In the same skillet, reduce heat to medium-low, add drained Rotel tomatoes and diced jalapeño. Pour in evaporated milk and gradually add cheeses, stir until melted. Add green chilies and cook for 5 minutes while stirring.
  4. Assemble the dish! On each plate, spoon fluffy Spanish rice as a base, top with chicken strips, and drizzle generously with queso sauce. Garnish with fresh cilantro.

Nutrition

Serving: 1servingCalories: 600kcalCarbohydrates: 50gProtein: 35gFat: 30gSaturated Fat: 15gPolyunsaturated Fat: 2gMonounsaturated Fat: 10gCholesterol: 100mgSodium: 800mgPotassium: 800mgFiber: 4gSugar: 5gVitamin A: 600IUVitamin C: 15mgCalcium: 500mgIron: 2mg

Notes

This dish is freezer-friendly and makes for excellent meal prep. Store leftovers in an airtight container and reheat as desired.

Tried this recipe?

Let us know how it was!

Zesty Easy Lemon Orzo Salad with Feta for Summer Fun

Summer isn’t just a season; it’s an explosion of colors and flavors that beckons us into the kitchen. One of my go-to dishes that perfectly captures this vibrancy is the Easy Lemon Orzo Salad with Feta. This delightful recipe isn’t just quick to whip up; it’s also a sensational side dish that effortlessly pairs with just about anything. Imagine zesty lemon mingling with creamy feta and an array of crunchy vegetables, all nestled in perfectly cooked orzo. Best of all, it’s vegetarian and wholesome, making it an ideal choice for those looking to lighten up their meals without sacrificing taste. Whether you’re preparing for a summer barbecue or a simple family dinner, I promise this salad will leave everyone asking for seconds. Curious about how to bring this refreshing dish to life? Let’s dive in!

Why is this salad a must-try?

Vibrant Flavors: The zesty lemon and creamy feta blend perfectly, creating a burst of fresh taste in every bite.
Quick Preparation: With simple steps and minimal ingredients, you can have this salad ready in no time, perfect for last-minute gatherings.
Versatile Base: You can easily customize it with seasonal vegetables or proteins to suit your preferences, whether adding grilled chicken or keeping it completely vegetarian.
Crowd-Pleaser: It’s a delightful dish that appeals to everyone—family, friends, and even guests at your next barbecue.
Refreshing Texture: The combination of chewy orzo, crunchy veggies, and smooth feta makes for a satisfying meal, especially on hot summer days. If you’re in the mood for more refreshing options, check out my Lemon Blueberry Summery or Blt Chicken Salad recipes!

Easy Lemon Orzo Salad Ingredients

• Here’s everything you need to make your Easy Lemon Orzo Salad with Feta shine!

For the Salad

  • Orzo – Use uncooked orzo for a hearty texture that pairs beautifully with the fresh ingredients.
  • Red Bell Pepper – Adds a sweet crunch and vibrant color; feel free to substitute with yellow or orange peppers for variety.
  • English Cucumber – Provides a refreshing crunch; a regular cucumber works well if that’s what you have on hand.
  • Red Onion – Gives a mild sharpness to the mix; swap it out for green onions for a milder alternative.
  • Feta Cheese – Delivers a creamy tang; goat cheese can be used for a different flavor, or omit for a dairy-free option.
  • Garlic – Enhances overall flavor; adjust the amount to suit your personal taste.
  • Fresh Parsley – Infuses freshness; cilantro makes a great substitute if you prefer.
  • Fresh Basil – Adds a lovely aromatic touch; feel free to omit or use another herb if basil isn’t available.
  • Lemon Juice and Zest – Brings that bright, zesty acidity; opt for fresh lemons for the best taste.
  • Extra Virgin Olive Oil – Adds richness and depth; a high-quality oil will elevate the flavor of your salad.
  • Honey – Balances the tartness of the lemon; consider maple syrup for a vegan alternative.
  • Sea Salt & Cracked Pepper – Essential for seasoning; adjust according to your personal preferences.

Optional Additions

  • Sliced Olives – Introduce a briny flavor for an extra kick.
  • Grilled Chicken or Chickpeas – Make this salad a heartier main dish with added protein.
  • Different Herbs – Experiment with flavors by using unique herbs like mint or dill for a fun twist.

Now you’re all set to create your scrumptious Easy Lemon Orzo Salad with Feta!

Step‑by‑Step Instructions for Easy Lemon Orzo Salad With Feta

Step 1: Cook the Orzo
Bring a large pot of salted water to a boil, then add 1 cup of uncooked orzo. Cook according to the package instructions (usually around 8–10 minutes) until al dente. Once cooked, drain the orzo in a colander and rinse under cold water for a few seconds to stop the cooking process, ensuring it cools down quickly for your Easy Lemon Orzo Salad with Feta.

Step 2: Prepare the Vegetables
While the orzo cools, wash and chop one red bell pepper, one English cucumber, and half a red onion into small, bite-sized pieces. Aim for uniformity in size, as this not only helps the salad look vibrant but also ensures every spoonful is balanced. Set the chopped vegetables aside to add to your salad mix.

Step 3: Combine Ingredients
In a large mixing bowl, transfer the cooled orzo, chopped bell pepper, cucumber, and onion. Then, mince 1–2 cloves of garlic and add them to the bowl, along with a handful of finely chopped fresh parsley and basil. Finally, zest and juice one fresh lemon, drizzling both the zest and juice into the bowl to infuse your Easy Lemon Orzo Salad with Feta with bright flavors.

Step 4: Mix in Oils and Sweetness
Next, drizzle about 3 tablespoons of extra virgin olive oil and a tablespoon of honey over the orzo and vegetable mixture. Toss everything gently but thoroughly to combine; the oil and honey will enhance the dish’s flavor and promote a lovely sheen over the salad. Ensure each ingredient is well coated for maximum flavor integration.

Step 5: Season the Salad
Sprinkle the salad with sea salt and cracked pepper to taste, adjusting the seasoning according to your preference. Toss the mixture one more time to evenly distribute the seasoning. This step is crucial to elevate the vibrancy of your Easy Lemon Orzo Salad with Feta and ensure every bite is perfectly seasoned.

Step 6: Add Feta Cheese
Gently fold in about ¾ cup of crumbled feta cheese, being careful not to break it apart too much. This creamy cheese will add a fantastic tang and richness that complements the crisp vegetables and zesty lemon. Ensure the feta is evenly distributed throughout the salad for that delightful taste in every bite.

Step 7: Chill and Serve
Once everything is combined, cover the salad with plastic wrap or a lid, and chill it in the refrigerator for at least 30 minutes. This allows the flavors of your Easy Lemon Orzo Salad with Feta to meld beautifully. Just before serving, consider drizzling an additional splash of olive oil to maintain freshness and enhance the visual appeal.

How to Store and Freeze Easy Lemon Orzo Salad

Fridge: Store any leftover Easy Lemon Orzo Salad with Feta in an airtight container for up to 3 days. This keeps the flavors fresh while maintaining the salad’s delightful textures.

Room Temperature: Avoid leaving the salad out at room temperature for more than 2 hours, as the ingredients are best enjoyed chilled and can spoil over time.

Freezer: It’s not recommended to freeze the salad, as the vegetables and feta may become mushy once thawed, compromising the texture and overall taste.

Reheating: If you have leftovers that have solidified in the fridge, enjoy them chilled. For best flavor, let the salad come to room temperature before serving or add a touch of olive oil to revive its freshness.

Easy Lemon Orzo Salad With Feta Variations

Feel free to get creative with this delicious salad and customize it to your taste preferences or dietary needs!

  • Dairy-Free: Substitute feta cheese with crumbled tofu or avocado for a creamy texture without the dairy. Perfect for those avoiding cheese.
  • Add Protein: For a heartier dish, toss in grilled chicken or roasted chickpeas. Both options provide a satisfying boost of protein that’s great for lunch or dinner.
  • Spicy Kick: Add a pinch of red pepper flakes or diced jalapeños for a subtle heat that contrasts beautifully with the refreshing lemon.
  • Nutty Crunch: Toss in toasted pine nuts or walnuts for an added crunch and depth of flavor. They create a satisfying contrast to the creamy feta.
  • Citrus Twist: Mix in segments of orange or grapefruit for a tropical flair. This twist adds a sweet-tart element that brightens every bite.
  • Herb Swap: Try using dill or mint instead of basil and parsley for a different flavor profile. Each herb brings its unique character to the mix.
  • Vegan Sweetener: Replace honey with agave syrup or maple syrup for a vegan alternative that still provides that necessary sweetness without compromising flavor.
  • Seasonal Veggies: Incorporate fresh summer veggies like zucchini or asparagus for seasonal freshness. Their mild taste complements the salad perfectly.

With so many options, you can keep this Easy Lemon Orzo Salad with Feta fresh and exciting every time you make it! If you’re looking for more inspired dishes, don’t forget to explore my recipes for Feta Fried Eggs or a delightful Honeybun Carrot Cake.

Expert Tips for Easy Lemon Orzo Salad

  • Chill Time Matters: Ensure your salad sits in the fridge for at least 30 minutes before serving. This allows the flavors in your Easy Lemon Orzo Salad with Feta to meld beautifully.
  • Fresh Ingredients: Opt for high-quality, fresh produce whenever possible. Fresh herbs and vegetables elevate the salad’s vibrant taste.
  • Adjust the Garlic: Don’t overdo the garlic; start with 1 clove and taste before adding more. Too much can overpower the other flavors.
  • Balance the Acidity: If the salad tastes too sour, add a bit more honey or olive oil to balance the acidity from the lemon juice.
  • Customize Wisely: Experiment with veggies or proteins mindfully; stick to light, fresh options to keep the salad’s essence intact.

What to Serve with Easy Lemon Orzo Salad with Feta

Dive into a world of flavors with this vibrant salad, perfect for sunny days and delightful gatherings.

  • Grilled Chicken Skewers: The smoky flavors of grilled chicken contrast beautifully with the zesty salad, providing a satisfying protein boost.
  • Crispy Pita Chips: These crunchy bites are perfect for scooping up the salad or enjoying alongside, adding a fun textural element.
  • Roasted Vegetables: A tray of roasted seasonal veggies adds depth and warmth to your meal, making it both hearty and wholesome.
  • Quinoa Tabbouleh: This fresh, herbaceous salad echoes the bright lemon notes and adds a delightful chewiness, doubling the salad delight!
  • Watermelon Feta Salad: For an unexpected twist, this sweet and savory pairing enhances the feta and creates a refreshing contrast.
  • Iced Mint Tea: Keep things cool and refreshing with a glass of iced mint tea, complementing the salad’s bright flavors beautifully.
  • Lemon Sorbet: End your meal on a light note with a scoop of lemon sorbet, mirroring the salad’s zesty theme and cleansing the palate.
  • Grilled Shrimp: Juicy, fire-kissed shrimp elevate your meal, their bold flavors dancing harmoniously with the orzo salad’s refreshing zest.

Each pairing can elevate your dining experience, ensuring that your summer meals are as bright and vibrant as the Easy Lemon Orzo Salad with Feta itself!

Make Ahead Options

These Easy Lemon Orzo Salad with Feta is perfect for busy home cooks looking to save time during the week! You can prepare the orzo and chop the vegetables up to 24 hours in advance; just store them separately in airtight containers in the refrigerator to maintain their freshness. However, it’s best to add the feta cheese, herbs, and the dressing right before serving to keep the flavors vibrant and prevent sogginess. Consider giving a quick toss with an extra drizzle of olive oil if it seems dry. With these make-ahead tips, you’ll have a refreshing salad ready to enjoy with minimal effort!

Easy Lemon Orzo Salad with Feta Recipe FAQs

What type of orzo should I use?
Absolutely! You should use uncooked orzo for your Easy Lemon Orzo Salad with Feta. It provides a hearty and chewy texture that complements the fresh ingredients beautifully.

How should I store leftover salad?
Store any leftover Easy Lemon Orzo Salad with Feta in an airtight container in the refrigerator for up to 3 days. This will keep the flavors intact and ensure the salad maintains its delightful textures.

Can I freeze the Easy Lemon Orzo Salad?
No, it’s not recommended to freeze this salad. Freezing can make the vegetables and feta cheese mushy upon thawing, compromising both the texture and taste of your dish. It’s best enjoyed fresh!

What if my salad is too sour?
If you find your Easy Lemon Orzo Salad with Feta a bit too tart, a simple fix is to add an extra drizzle of honey or olive oil to balance out the acidity from the lemon juice. Start small—about a teaspoon at a time—until you reach your desired flavor.

How can I use up extra ingredients?
Very! You can easily customize the salad with seasonal vegetables or proteins. Consider adding grilled chicken or chickpeas for extra protein. Sliced olives or different herbs like mint or dill can also bring a delightful twist to your dish while using up ingredients you love.

Is this salad pet-friendly?
It’s best to keep your Easy Lemon Orzo Salad with Feta away from pets. Ingredients like garlic and onion can be harmful to animals, so it’s safer to enjoy this delicious salad on your own!

Easy Lemon Orzo Salad With Feta

Zesty Easy Lemon Orzo Salad with Feta for Summer Fun

Easy Lemon Orzo Salad with Feta is a vibrant and quick dish that captures summer flavors superbly.
Prep Time 10 minutes
Cook Time 10 minutes
Chill Time 30 minutes
Total Time 50 minutes
Servings: 4 servings
Course: Salad
Cuisine: Mediterranean
Calories: 250

Ingredients
  

For the Salad
  • 1 cup Orzo Uncooked
  • 1 Red Bell Pepper Chopped
  • 1 English Cucumber Chopped
  • 0.5 Red Onion Chopped
  • 0.75 cup Feta Cheese Crumble
  • 1-2 cloves Garlic Minced
  • 1 handful Fresh Parsley Chopped
  • 1 handful Fresh Basil Chopped
  • 1 Lemon Juice and Zest From fresh lemons
  • 3 tablespoons Extra Virgin Olive Oil High quality
  • 1 tablespoon Honey Or maple syrup for vegan option
  • Sea Salt & Cracked Pepper To taste
Optional Additions
  • Sliced Olives For added flavor
  • Grilled Chicken or Chickpeas For added protein
  • Different Herbs Use options like mint or dill

Equipment

  • Large pot
  • Colander
  • Mixing Bowl
  • Cutting board
  • Knife

Method
 

Directions
  1. Bring a large pot of salted water to a boil, then add 1 cup of uncooked orzo. Cook according to the package instructions (around 8–10 minutes) until al dente. Drain and rinse under cold water.
  2. While the orzo cools, wash and chop one red bell pepper, one English cucumber, and half a red onion into small, bite-sized pieces.
  3. In a large mixing bowl, combine the cooled orzo, chopped bell pepper, cucumber, and onion. Mince 1–2 cloves of garlic and add along with chopped parsley and basil. Zest and juice one lemon, adding both to the bowl.
  4. Drizzle 3 tablespoons of extra virgin olive oil and 1 tablespoon of honey over the mixture, tossing gently to combine.
  5. Sprinkle with sea salt and pepper to taste, tossing again to distribute evenly.
  6. Gently fold in ¾ cup of crumbled feta cheese, ensuring even distribution.
  7. Cover and chill in the refrigerator for at least 30 minutes before serving.

Nutrition

Serving: 1servingCalories: 250kcalCarbohydrates: 35gProtein: 8gFat: 10gSaturated Fat: 2gPolyunsaturated Fat: 1gMonounsaturated Fat: 7gCholesterol: 15mgSodium: 300mgPotassium: 200mgFiber: 3gSugar: 3gVitamin A: 500IUVitamin C: 30mgCalcium: 150mgIron: 2mg

Notes

This salad is best enjoyed fresh, but can be stored in an airtight container in the fridge for up to 3 days. Avoid leaving at room temperature for more than 2 hours.

Tried this recipe?

Let us know how it was!

Succulent Salmon with Garlic Lemon Butter Sauce in 20 Minutes

Have you ever found yourself staring at a busy weeknight ahead, longing for a delicious dinner that won’t keep you in the kitchen all evening? That’s where my Pan Seared Salmon with Garlic Lemon Butter Sauce comes in! This recipe is a true lifesaver, transforming tender salmon into a gourmet meal in just 20 minutes. Not only is it incredibly easy to prepare, but it’s also a delightful way to incorporate seafood into your routine without the fuss of complicated prep work. The rich, buttery sauce, brightened with fresh lemon and garlic, adds an irresistible touch that makes this dish a standout for both busy weekdays and special occasions. Ready to elevate your dinner game and impress everyone at the table? Let’s dive into this quick culinary adventure together!

Why is this salmon recipe a must-try?

Easy Preparation: Even novice cooks can master this dish with just a few simple steps and minimal equipment.

Mouthwatering Flavor: The garlic lemon butter sauce delivers a burst of fresh, zesty flavor that transforms the salmon into a restaurant-worthy dish.

Time-Saving Delight: Ideal for busy weeknights, you can prepare this gourmet meal in approximately 20 minutes, leaving you more time to unwind.

Healthy Indulgence: Packed with protein and healthy fats, this recipe is a fantastic way to incorporate nutritious seafood into your diet without sacrificing flavor.

Crowd-Pleasing Appeal: Serve this delectable salmon at your next gathering, and watch it disappear—it’s certain to impress family and friends alike!

For a delightful twist, try pairing your salmon with some steamed asparagus or quinoa salad to create a complete meal that feels like a treat.

Salmon with Garlic Lemon Butter Sauce Ingredients

For the Salmon

  • Salmon Fillets – Skinless fillets about 6 oz ensure even cooking and tenderness.
  • Salt and Black Pepper – Adjust seasoning to taste for enhanced flavor.

For the Sauce

  • Olive Oil – A perfect cooking fat for searing; substitute with butter for a richer flavor.
  • Garlic Cloves – Fresh cloves give the sauce an aromatic depth; always use fresh for the best taste.
  • Low-Sodium Chicken Broth – This ingredient adds moisture and richness; vegetable broth is a great pescatarian substitute.
  • Fresh Lemon Juice – Brightens the dish with acidity; freshly squeezed is highly recommended.
  • Unsalted Butter – Provides a creamy texture for the sauce; consider adding more for richness while keeping it healthier.
  • Honey – Adds a hint of sweetness to balance the flavors; omit if you prefer a less sweet sauce.

For Garnishing

  • Fresh Parsley – Optional, but it adds freshness and visual appeal to the dish.
  • Lemon Slices – These enhance presentation and can also add a lovely burst of flavor.

This Salmon with Garlic Lemon Butter Sauce is not just a meal; it’s an experience waiting to be savored! Enjoy creating this quick and delicious dish that everyone will fall in love with.

Step‑by‑Step Instructions for Salmon with Garlic Lemon Butter Sauce

Step 1: Prepare the Salmon
Start by seasoning your salmon fillets generously with salt and black pepper, making sure to cover both sides for maximum flavor. Heat a large skillet over medium-high heat and add a splash of olive oil. Once the oil is shimmering, you are ready to sear the salmon.

Step 2: Sear the Salmon
Place the salmon fillets in the skillet with the skin-side down (if they have skin) and let them cook undisturbed for about 4 minutes until a golden crust forms. Carefully flip the fillets and cook for an additional 2-3 minutes until the salmon is opaque and flakes easily with a fork. This ensures perfectly tender salmon for your Garlic Lemon Butter Sauce.

Step 3: Make the Garlic Lemon Butter Sauce
While the salmon is searing, use a separate saucepan over medium heat and add 1 teaspoon of unsalted butter. Once melted, add minced garlic cloves and sauté until fragrant, about 1 minute. Pour in low-sodium chicken broth and freshly squeezed lemon juice, letting the mixture simmer until slightly reduced, intensifying the flavors for your garlic lemon butter sauce.

Step 4: Finish the Sauce
As the broth simmers, stir in the remaining butter and a drizzle of honey, if using, until fully incorporated. Allow the sauce to thicken slightly, enhancing the rich and buttery texture. This step creates a luscious topping that beautifully complements the pan-seared salmon.

Step 5: Serve
Once the salmon is cooked through, transfer the fillets to serving plates. Generously drizzle the warm garlic lemon butter sauce over each fillet, allowing the flavors to meld. For a touch of freshness and presentation, garnish with chopped parsley and lemon slices. Your delightful Salmon with Garlic Lemon Butter Sauce is ready to enjoy!

What to Serve with Pan Seared Salmon with Garlic Lemon Butter Sauce

Transform your dinner into a flavorful feast by pairing delicious sides that enhance your succulent salmon experience.

  • Creamy Mashed Potatoes:
    Smooth and buttery, the richness of mashed potatoes complements the lightness of the salmon perfectly.

  • Steamed Asparagus:
    Crisp and vibrant, this vegetable adds a fresh crunch, balancing the buttery sauce and enriching the meal.

  • Garlic Rice Pilaf:
    Aromatic and fluffy, this side absorbs the garlic lemon butter sauce, making every bite utterly delightful.

  • Quinoa Salad:
    Packed with nutrients, a light quinoa salad studded with veggies and herbs offers a refreshing contrast to the rich flavors.

  • Roasted Brussels Sprouts:
    Caramelized and slightly crispy, their earthy sweetness enhances the salmon’s flavor profile, creating a delightful harmony.

  • Chardonnay:
    A glass of chilled Chardonnay brings out the citrus notes in the dish, enriching the overall dining experience.

  • Lemon Sorbet:
    Light and refreshing, this dessert cleanses the palate and provides a perfect ending to your gourmet meal.

These pairings not only enhance the flavors of your pan-seared salmon with garlic lemon butter sauce but also create a well-rounded dining experience that is sure to impress!

Make Ahead Options

These Pan Seared Salmon with Garlic Lemon Butter Sauce are a game-changer for busy weeknights! You can season the salmon fillets up to 24 hours in advance, keeping them covered in the refrigerator to ensure freshness. Additionally, you can prepare the garlic lemon butter sauce ahead of time; simply refrigerate it for up to 3 days. To maintain the sauce’s quality, store it in an airtight container and gently reheat it on the stove before serving. When you’re ready to enjoy this quick meal, simply sear the salmon for a few minutes and drizzle the warmed sauce over the top. Get ready to savor a delicious dinner with minimal effort!

Expert Tips for Salmon with Garlic Lemon Butter Sauce

  • Perfectly Hot Skillet: Ensure your skillet is adequately heated before adding the salmon. A hot surface helps achieve that beautiful sear.

  • Avoid Overcrowding: Cook the salmon in batches if necessary. Overcrowding can steam the fish instead of searing, preventing that lovely golden crust.

  • Monitor Cooking Time: Keep an eye on the salmon while it cooks. Overcooking can lead to dry, tough fish; it should flake easily but remain moist.

  • Fresh Ingredients Matter: Use fresh garlic and lemon for the best flavor in your garlic lemon butter sauce. Dried alternatives just won’t capture the same zest.

  • Adjust the Sauce: Feel free to personalize the garlic lemon butter sauce. Adding capers or fresh herbs can elevate the dish even more!

  • Serving Suggestions: Pair your salmon with refreshing sides, like quinoa or asparagus, to balance the rich flavors of the salmon with garlic lemon butter sauce.

Salmon with Garlic Lemon Butter Sauce Variations

Feel free to get creative and personalize this delicious salmon dish to suit your tastes or dietary needs!

  • Herb-Infused: Add fresh dill or tarragon to the garlic lemon butter sauce for an aromatic boost. These herbs pair beautifully with salmon, adding depth and freshness.

  • Spicy Kick: Incorporate red pepper flakes to the garlic lemon butter sauce for a zesty heat. It’s a simple twist that transforms the flavor profile into something exciting.

  • Capers Crunch: Toss in some capers for a briny pop that enhances the richness of the sauce. The contrast pairs wonderfully with the buttery salmon.

  • Citrus Twist: Experiment with other citrus juices, like orange or lime, for a unique flavor. This can brighten your dish even more while adding a different fruity note.

  • Nutty Addition: Stir in some toasted almonds or walnuts for a delightful crunch. This not only elevates the texture but also adds a nutty flavor that complements the salmon perfectly.

  • Vegetarian Option: Swap the salmon for pan-seared tofu or chickpea patties, adjusting the cooking time as needed. This creates an equally delightful and healthy meal for non-meat eaters.

  • Creamy Spin: For a luxurious take, stir in a splash of heavy cream or crème fraîche into the garlic lemon butter sauce. This creates a rich and creamy texture that is simply divine.

  • Asian Fusion: Drizzle soy sauce or teriyaki sauce over the salmon before serving for an unexpected twist. This swap gives the dish a delightful Asian flair that your taste buds will love!

Whichever variation you choose, this dish is sure to make dinner feel special. For more delicious sauce ideas, check out our recipes for Garlic Butter Baked Chicken and Honey Garlic Salmon. Happy cooking!

How to Store and Freeze Salmon with Garlic Lemon Butter Sauce

Fridge: Place leftovers in an airtight container and refrigerate for up to 2 days. Gently reheat in a skillet over low heat to preserve moisture.

Freezer: Wrap individual salmon portions tightly in plastic wrap, then place them in a freezer-safe bag. They can be frozen for up to 2 months.

Reheating: When ready to enjoy, thaw in the fridge overnight and reheat gently on the stove, adding a splash of broth to keep the salmon moist.

Storage Tip: Keep the garlic lemon butter sauce separately in a small container in the fridge for up to 2 days. This sauce is best fresh!

Salmon with Garlic Lemon Butter Sauce Recipe FAQs

What type of salmon should I use for the best results?
Absolutely! For this recipe, I recommend using skinless salmon fillets weighing about 6 oz each. They’ll ensure even cooking and tenderness. Fresh salmon is ideal, but you can also use frozen fillets; just make sure to thaw them completely before cooking.

How should I store leftovers from the salmon with garlic lemon butter sauce?
To store leftovers, place them in an airtight container and refrigerate for up to 2 days. When reheating, do so gently over low heat on the stove to avoid drying out the salmon. Adding a splash of broth can help maintain moisture.

Can I freeze the salmon with garlic lemon butter sauce?
Yes, you can freeze the salmon! Wrap each portion tightly in plastic wrap and place them in a freezer-safe bag. They can be stored in the freezer for up to 2 months. When you’re ready to enjoy it, thaw it in the refrigerator overnight and reheat gently on the stove to bring back its tenderness.

What should I do if my garlic lemon butter sauce is too thin?
If your sauce turns out too thin, simply let it simmer for a bit longer over medium heat until it reduces and thickens to your desired consistency. Stir frequently to prevent burning. You can also add a bit more butter or a teaspoon of cornstarch mixed with water to thicken it quickly.

Are there any dietary considerations to keep in mind while making this recipe?
Certainly! This dish is naturally gluten-free, but be mindful if you’re using store-bought chicken broth as some brands may contain gluten. For a pescatarian option, substitute with vegetable broth. If anyone at your table has seafood allergies, you can also swap the salmon for other safe protein options according to their needs.

How long does the garlic lemon butter sauce last in the refrigerator?
The garlic lemon butter sauce can be kept in the refrigerator in a sealed container for up to 2 days. I personally recommend enjoying it fresh for the best flavor, but you can gently reheat it if necessary.

Salmon with Garlic Lemon Butter Sauce

Succulent Salmon with Garlic Lemon Butter Sauce in 20 Minutes

Try this Salmon with Garlic Lemon Butter Sauce for a quick, flavorful dinner that’s ready in just 20 minutes.
Prep Time 10 minutes
Cook Time 10 minutes
Total Time 20 minutes
Servings: 4 fillets
Course: Dinner
Cuisine: American
Calories: 350

Ingredients
  

For the Salmon
  • 4 fillets Salmon about 6 oz each
  • to taste Salt
  • to taste Black Pepper
For the Sauce
  • 1 tablespoon Olive Oil or substitute with butter
  • 3 cloves Garlic minced
  • 1 cup Low-Sodium Chicken Broth or vegetable broth
  • 2 tablespoons Fresh Lemon Juice freshly squeezed
  • 2 tablespoons Unsalted Butter add more for richness
  • 1 teaspoon Honey optional
For Garnishing
  • to taste Fresh Parsley chopped, optional
  • 1 slices Lemon for garnish

Equipment

  • Skillet
  • Saucepan

Method
 

Step-by-Step Instructions
  1. Season salmon fillets generously with salt and black pepper. Heat a skillet over medium-high heat and add olive oil.
  2. Place the salmon skin-side down in the skillet and cook for about 4 minutes until golden. Flip and cook for an additional 2-3 minutes.
  3. In a separate saucepan, melt 1 teaspoon of butter and sauté minced garlic until fragrant.
  4. Add chicken broth and lemon juice to the saucepan, letting it simmer until slightly reduced.
  5. Stir in the remaining butter and honey until incorporated, then let the sauce thicken.
  6. Transfer cooked salmon to plates, drizzle with garlic lemon butter sauce, and garnish with parsley and lemon slices.

Nutrition

Serving: 1filletCalories: 350kcalCarbohydrates: 6gProtein: 35gFat: 20gSaturated Fat: 6gPolyunsaturated Fat: 4gMonounsaturated Fat: 10gCholesterol: 80mgSodium: 400mgPotassium: 650mgFiber: 1gSugar: 1gVitamin A: 5IUVitamin C: 15mgCalcium: 2mgIron: 5mg

Notes

For a complete meal, serve with steamed asparagus or quinoa salad.

Tried this recipe?

Let us know how it was!

Smoked Salmon Cottage Cheese Toast: Breakfast Bliss Awaits

There’s something truly satisfying about the combination of smoky and savory—a duo that works wonders, especially when it arrives on a slice of toasted sourdough. My Smoked Salmon Cottage Cheese Toast brings together creamy cottage cheese and tender smoked salmon to create a delightful breakfast that’s high in protein and full of flavor. With just a drizzle of hot honey and a sprinkle of everything bagel seasoning, this dish captures the magic of breakfast vibes in an effortlessly simple meal. It’s not only a quick fix for those busy mornings but also a fantastic snack or light dinner option that’s easily customizable. Have you ever wondered how a simple toast can transform into a gourmet experience right in your kitchen? Let’s dive into this flavorful journey together!

Why Is This Toast So Amazing?

Simplicity at its finest: Minimal prep means you can whip up this Smoked Salmon Cottage Cheese Toast in just minutes!

Flavor-packed goodness: The mix of creamy cottage cheese, smoky salmon, and hot honey creates a harmonious balance of savory and sweet.

Customizable to your taste: Feel free to experiment with toppings or choose alternatives like Greek yogurt for a twist!

Nutritious delight: High in protein and packed with nutrients, this dish elevates your breakfast game while keeping you full.

Crowd-pleaser potential: Whether it’s a family breakfast or a weekend brunch with friends, everyone will love this sophisticated yet easy dish!

Smoked Salmon Cottage Cheese Toast Ingredients

For the Toast
Sourdough Bread – The crunchy base adds great texture; whole grain or gluten-free options make it versatile.
Cottage Cheese – This high-protein star brings creaminess; Greek yogurt is a tangy alternative if desired.

For the Seasoning
Hot Honey – Essential for a sweet and spicy kick; substitute regular honey for milder sweetness.
Everything Bagel Seasoning – Adds a flavorful depth; using sea salt and sesame seeds is a simpler option.

For the Toppings
Arugula Greens – Provides freshness and a peppery bite; spinach or mixed greens are great substitutes.
Smoked Salmon – A protein powerhouse that offers umami flavor; consider cooked shrimp or tofu for a seafood alternative.
Quick Pickled Onions – Adds acidity and crunch; sliced cucumbers or radishes can also provide a nice bite.

Each ingredient combines to make this Smoked Salmon Cottage Cheese Toast a delightful experience!

Step‑by‑Step Instructions for Smoked Salmon Cottage Cheese Toast.

Step 1: Toast Sourdough
Begin by preheating your toaster or toaster oven to high. Take two slices of sourdough bread and toast them until they achieve a golden brown color, with a slightly crispy exterior—about 4 to 5 minutes. Keep an eye on them to ensure they don’t burn, as you want them crunchy but not overly dark.

Step 2: Add Cottage Cheese
Once your toast is ready, spread about ⅓ cup of creamy cottage cheese evenly over each slice. Use a butter knife or a spatula for an even application, aiming for a thick layer that beautifully contrasts the crunch of the sourdough. This rich layer of cottage cheese is what makes your Smoked Salmon Cottage Cheese Toast decadent and satisfying.

Step 3: Season
Drizzle a generous amount of hot honey over the cottage cheese on each toast, letting it cascade down into the crevices for added sweetness and a hint of spice. Following that, sprinkle everything bagel seasoning generously on top; this will enhance every bite with a mix of sesame, poppy, and onion flavor, perfectly complementing the creaminess and smokiness.

Step 4: Top with Greens
Now it’s time to add some freshness. Grab a handful of arugula and place it atop the seasoned cottage cheese. This layer not only adds vibrant color but also introduces a slight peppery bite that balances the richness of the toast. Make sure to arrange the greens evenly for a beautiful presentation.

Step 5: Layer Salmon
Next, take 2 to 3 ounces of velvety smoked salmon and lay it delicately over the arugula on each slice. Ensure the salmon overlaps slightly to provide a sumptuous layer and don’t hesitate to place any extra seasoning on top of the salmon for a flavor boost. This step transforms your Smoked Salmon Cottage Cheese Toast into a protein-loaded delight.

Step 6: Finish with Onions
To elevate your creation, add a generous amount of quick pickled onions over the smoked salmon. These add a zesty crunch and a burst of acidity that beautifully rounds off the flavors. Serve your toasts immediately while the bread is still warm, ensuring you experience the delightful contrast of textures and tastes in each bite.

Smoked Salmon Cottage Cheese Toast Variations

Explore the endless possibilities to make this Smoked Salmon Cottage Cheese Toast truly your own and delight your taste buds!

  • Dairy-Free: Use silken tofu blended with a splash of lemon for a creamy, plant-based alternative.

  • Protein Boost: Add a poached egg on top for extra protein; the runny yolk creates a delicious sauce!

  • Fruity Twist: Top with thinly sliced figs or peaches alongside the salmon for a sweet contrast that elevates every bite.

  • Spicy Kick: Incorporate sliced jalapeños or a dash of sriracha to heat things up, changing your toast’s flavor profile.

  • Herb Infusion: Swap out everything bagel seasoning for fresh chopped dill or chives for a refreshing herbal note.

  • Nutty Crunch: Sprinkle toasted sesame seeds or chopped nuts on top for a delightful crunch and added nutrition.

  • Smoky Flavor: Try smoked paprika sprinkled on the cottage cheese for extra depth without having to rely solely on salmon.

Feel free to dive deeper into other delightful combinations like Baked Salmon Honey or Honey Garlic Salmon, and turn this toast into your family favorite!

How to Store and Freeze Smoked Salmon Cottage Cheese Toast

Fridge: Keep any leftover assembled toast in an airtight container for up to 1 day. However, note that the texture may change, becoming less crunchy.

Freezer: It’s best to freeze only the bread; toast slices can be wrapped tightly in plastic wrap and frozen for up to 3 months. This preserves the crispiness for your next serving!

Reheating: When you’re ready to enjoy, re-toast the slices from frozen until crisp and golden. Then, add fresh cottage cheese and toppings for the best taste.

Ingredients Storage: Store unused ingredients, like smoked salmon and cottage cheese, in the fridge. Consume salmon within 1-2 days, and enjoy cottage cheese before the expiration date for optimal freshness.

Make Ahead Options

These Smoked Salmon Cottage Cheese Toasts are perfect for busy home cooks looking to save time during the week! You can easily prepare the components up to 24 hours in advance: toast the sourdough bread and store it in an airtight container to maintain its crunch. Prepare the cottage cheese mixture, combine it with the hot honey and everything bagel seasoning, and refrigerate it separately. The arugula and quick pickled onions can also be prepped ahead and stored in the fridge for added freshness. When you’re ready to serve, simply assemble the toasts by spreading the cottage cheese mixture on the toasted bread, layering with arugula, smoked salmon, and finishing with pickled onions. This way, you’ll have a delicious breakfast ready in minutes, without sacrificing quality!

What to Serve with Smoked Salmon Cottage Cheese Toast

For a well-rounded meal that elevates your Smoked Salmon Cottage Cheese Toast, consider these delightful pairings.

  • Soft Boiled Eggs: Creamy, runny yolks bring richness and a protein boost, complementing the flavors of the toast perfectly. The textural contrast is also a winner!

  • Fresh Fruit Salad: A medley of sweet, juicy fruits heightens the meal’s freshness, relieving richness and adding vibrant color to the plate. Think berries, melons, and citrus!

  • Crispy Roasted Potatoes: Seasoned and golden, these add heartiness and a satisfying crunch, turning your breakfast into a comforting brunch feast.

  • Mimosa or Bellini: These refreshing brunch cocktails infused with citrus elevate the dining experience, offering a delightful sweetness that harmonizes with the toast’s flavors.

  • Greek Yogurt Parfait: Layer with granola and honey for a balanced dish that offers creamy, crunchy, and sweet elements alongside your savory toast.

  • Simply dressed Arugula Salad: Adding a light salad with a tangy vinaigrette matches the pepperiness of arugula on your toast, creating a cohesive meal that feels fresh and exciting.

Each of these components can take your breakfast from delightful to extraordinary while maintaining the focus on that scrumptious smoked salmon cottage cheese toast!

Expert Tips for Smoked Salmon Cottage Cheese Toast

Perfect Toasting: Ensure your sourdough is golden brown and crispy to create a satisfying crunch that holds up against the toppings.

Creamy Balance: Don’t skimp on the cottage cheese; it’s essential for the creamy base that complements the smoky salmon.

Honey Magic: Use hot honey for optimal balance; its sweetness cuts through the richness, elevating your Smoked Salmon Cottage Cheese Toast experience.

Top It Right: Layer your toppings thoughtfully, stacking greens and salmon to prevent sogginess and maintain delicious textures.

Be Bold with Seasoning: Experiment with different bagel seasoning blends or even add fresh herbs to make it uniquely yours!

Smoked Salmon Cottage Cheese Toast Recipe FAQs

What kind of bread is best for this toast?
Absolutely! Sourdough bread is my top recommendation for its excellent crunch and flavor. However, don’t hesitate to try whole grain or gluten-free bread if you prefer. Just make sure it toasts well to achieve that satisfying crispness!

How should I store leftover smoked salmon or cottage cheese?
For optimal freshness, store your smoked salmon and cottage cheese in airtight containers in the fridge. The smoked salmon is best consumed within 1 to 2 days, while cottage cheese should be enjoyed before its expiration date. This way, you’ll keep that creamy goodness intact!

Can I prepare the components of the toast in advance?
Very! You can pre-toast the sourdough bread and prepare the toppings ahead of time. Just keep everything in separate containers in the fridge until you’re ready to serve. This makes for a quick assembly, and you’ll get to enjoy your delicious Smoked Salmon Cottage Cheese Toast in just minutes!

How do I freeze leftover toast?
For freezing, it’s best to freeze only the bread. Wrap your toasted slices tightly in plastic wrap or place them in a freezer bag, squeezing out as much air as possible, and they’ll keep for up to 3 months. When you’re ready to enjoy it, simply re-toast from frozen until crisp and golden, then add fresh toppings for the best taste!

What can I substitute for smoked salmon if I have dietary restrictions?
Great question! If you’re avoiding fish, try using cooked shrimp or even tofu for a protein boost. These alternatives still offer excellent flavor and texture. You can also add ingredients like sliced turkey or even fruits like figs for a sweeter version; the possibilities are endless!

How do I know if my smoked salmon is still good to use?
To ensure safety, check for any off odors and a slimy texture. If the smoked salmon has any discoloration or dark spots all over, it’s best to discard it. Fresh smoked salmon should have a bright color and a pleasant aroma!

Smoked Salmon Cottage Cheese Toast.

Smoked Salmon Cottage Cheese Toast: Breakfast Bliss Awaits

Enjoy this Smoked Salmon Cottage Cheese Toast, a high-protein, flavorful breakfast that combines creamy cottage cheese and smoky salmon on toasted sourdough.
Prep Time 10 minutes
Cook Time 5 minutes
Total Time 15 minutes
Servings: 2 toasts
Course: Breakfast
Cuisine: American
Calories: 450

Ingredients
  

For the Toast
  • 2 slices Sourdough Bread Whole grain or gluten-free options available.
  • 2/3 cup Cottage Cheese Greek yogurt can be used as an alternative.
For the Seasoning
  • 2 tablespoons Hot Honey Regular honey can be substituted.
  • 1 tablespoon Everything Bagel Seasoning Sea salt and sesame seeds are alternatives.
For the Toppings
  • 1 cup Arugula Greens Spinach or mixed greens are good substitutes.
  • 4 ounces Smoked Salmon Cooked shrimp or tofu can be alternatives.
  • 1/4 cup Quick Pickled Onions Sliced cucumbers or radishes can also be used.

Equipment

  • Toaster
  • Knife
  • spatula

Method
 

Step-by-Step Instructions
  1. Preheat your toaster or toaster oven to high and toast the sourdough slices until golden brown, about 4 to 5 minutes.
  2. Spread about ⅓ cup of cottage cheese evenly over each slice of toast.
  3. Drizzle hot honey over the cottage cheese, then sprinkle everything bagel seasoning on top.
  4. Add a handful of arugula greens on top of the seasoned cottage cheese.
  5. Layer 2 to 3 ounces of smoked salmon over the arugula.
  6. Top with quick pickled onions and serve immediately while warm.

Nutrition

Serving: 1toastCalories: 450kcalCarbohydrates: 40gProtein: 30gFat: 20gSaturated Fat: 6gPolyunsaturated Fat: 3gMonounsaturated Fat: 7gCholesterol: 60mgSodium: 800mgPotassium: 500mgFiber: 5gSugar: 10gVitamin A: 500IUVitamin C: 10mgCalcium: 200mgIron: 2mg

Notes

Store any leftovers in an airtight container for up to 1 day in the fridge. Freeze only the bread if necessary, and re-toast before adding fresh toppings.

Tried this recipe?

Let us know how it was!

Irresistible Eggs Benedict Casserole for Lazy Weekend Brunches

As I poured the rich, creamy egg mixture over layers of buttery English muffins and savory Canadian bacon, a wave of nostalgia washed over me. This Overnight Eggs Benedict Casserole embraces the classic flavors of a beloved brunch staple but without the stress of traditional preparation. Not only does this dish save precious time with its make-ahead convenience—it also transforms the quintessential Eggs Benedict into a crowd-pleasing centerpiece that’s sure to impress family and friends. Imagine serving up a warm, custardy delight at your next gathering, all baked to golden perfection. Ready to take your brunch game to a new level? Let’s dive in!

Why is this Eggs Benedict Casserole special?

Convenience: This make-ahead casserole allows you to prep the night before, freeing up your morning for enjoying time with loved ones.

Flavor Explosion: A luscious combination of creamy eggs, salty bacon, and flavorful spices creates a rich taste experience in every bite.

Versatile Options: Mix things up by substituting meats or cheeses to suit your family’s preferences—spinach for a pop of color or cheddar for extra cheesiness!

Crowd-Pleaser: Perfect for family gatherings or brunch with friends, everyone will be asking for seconds of this hearty dish!

Elevated Comfort: The texture is reminiscent of a decadent French toast, ensuring each serving feels like a treat. Pair it with fresh fruit or a light salad for a balanced meal.

Eggs Benedict Casserole Ingredients

For the Casserole
English Muffins – The base of the casserole providing texture and structure; you can substitute with sourdough or your favorite bread.
Canadian Bacon – Adds savory flavor; use regular ham if you have that on hand.
Large Eggs – Essential for the custard body; they help bind the casserole nicely.
Cream – Provides richness and moisture; heavy or whipping cream will yield the best taste.
Whole Milk – Balances the creaminess; feel free to use almond or oat milk for a dairy-free option.
Kosher Salt – Enhances flavor well; regular salt is a good substitute if kosher is not available.
Seasoned Salt – Adds depth to the dish, though it’s optional.
Black Pepper – Freshly cracked is best for flavor; it gives a nice kick!
Onion Powder – Imparts flavor easily; can be omitted or replaced with sautéed fresh onions.
Paprika – This adds a slight smoky flavor; smoked paprika can be used for more intensity.
Dried Mustard Powder – Offers tanginess; prepared mustard is a suitable substitute.
Monterey Jack Cheese (optional) – For added creaminess and flavor on top of the casserole.

For the Hollandaise
Egg Yolks – Form the base of the sauce, making it rich and creamy.
Lemon Juice – Brightens the sauce; fresh is best!
Mustard – Enhances the sauce’s depth; any mustard variety works well.
Cayenne Pepper – Adds a subtle heat; adjust according to taste preference.
Salt – Season to taste; enhances flavors beautifully.
Butter – Melted and added slowly helps the sauce to emulsify, creating that silky texture.

With these ingredients gathered, you’re one step closer to creating a delicious Eggs Benedict Casserole that will surely elevate your brunch experience! ready to impress your guests with this creamy delight?

Step‑by‑Step Instructions for Eggs Benedict Casserole

Step 1: Prepare the Dish
Begin by greasing a 9×13 inch casserole dish with butter or cooking spray to prevent sticking. This step is essential to ensure your Eggs Benedict Casserole comes out smoothly after baking. Ensure the dish is evenly coated for best results.

Step 2: Layer the Bacon
Chop the Canadian bacon into bite-sized pieces and layer half of it evenly across the bottom of the prepared dish. This savory layer will provide a solid foundation for the casserole, adding immense flavor. Feel free to let the bacon sit for a moment while you prepare the next step.

Step 3: Toast and Add the Muffins
Split the English muffins in half and toast them until golden brown. Once toasted, chop them into pieces and layer half over the bacon. The toasted muffins add a delightful texture to the Eggs Benedict Casserole, soaking up the egg mixture beautifully without becoming soggy.

Step 4: Repeat the Layers
Now, repeat the layering process by adding the remaining Canadian bacon followed by the rest of the English muffins. Ensure an even distribution across the casserole so that every bite is filled with deliciousness. This step captures all the flavors, creating a beautiful base for your dish.

Step 5: Mix the Egg Mixture
In a large mixing bowl, whisk together the large eggs, cream, whole milk, kosher salt, seasoned salt, black pepper, onion powder, paprika, and dried mustard powder until well combined. This creamy mixture is crucial for binding the casserole, ensuring each bite is delightful and flavorful.

Step 6: Combine Ingredients
Pour the egg mixture evenly over the layered ingredients, pressing down gently to help the muffins absorb the liquid. Ensure that every part of the Eggs Benedict Casserole is soaked to achieve that luscious, custardy texture. You should see the mixture gently bubbling around the edges.

Step 7: Refrigerate Overnight
Cover the casserole tightly with aluminum foil and refrigerate overnight or for at least 4 hours. This resting period allows the flavors to meld and the muffins to soak up the egg mixture, creating an unforgettable dish for your brunch.

Step 8: Preheat the Oven
When you’re ready to bake, preheat your oven to 375°F (190°C). While the oven heats, remove the casserole from the refrigerator to take the chill off. This step aids in even cooking and prevents any drastic temperature changes.

Step 9: Bake the Casserole
Bake the covered casserole in the preheated oven for 35 minutes. After this time, remove the foil and continue baking for an additional 10–15 minutes, or until the top is set and golden brown. You’ll know it’s done when it puffs slightly and a toothpick inserted comes out clean.

Step 10: Prepare the Hollandaise Sauce
While the casserole is baking, prepare the hollandaise sauce. In a blender, combine the egg yolks, cream, lemon juice, mustard, cayenne, and salt; blend until smooth. Slowly drizzle in melted butter while blending to emulsify the sauce until it reaches a rich, creamy consistency.

Step 11: Serve and Enjoy
Once the Eggs Benedict Casserole has baked to perfection, serve warm with the homemade hollandaise drizzled over individual portions. This cozy casserole is sure to be the star of your brunch table, offering everyone a delightful experience with every forkful!

Eggs Benedict Casserole Variations

Feel free to let your culinary creativity shine by customizing this delightful casserole to suit your tastes!

  • Dairy-Free: Substitute heavy cream and milk with almond or oat milk for a lighter option. The casserole will still be creamy without sacrificing flavor.

  • Cheese Swap: Use cheddar or Gruyère cheese in place of Monterey Jack for a different flavor profile. Each cheese brings its special nuance to your meal!

  • Vegetarian Delight: Replace Canadian bacon with sautéed spinach and mushrooms. This twist not only adds color but also provides a satisfying, earthy depth.

  • Heat it Up: Add diced jalapeños or a sprinkle of red pepper flakes for a spicy kick. You’ll enjoy an unexpected warmth with each bite!

  • Savory Herb Boost: Mix in fresh herbs like chives or parsley to the egg mixture for an aromatic lift. The freshness will brighten every forkful, making your casserole even more inviting.

  • Bread Variety: Trade English muffins for croissants or brioche for a richer base. The buttery qualities of these breads will elevate the casserole to new heights!

  • Meat Variations: Swap the Canadian bacon for diced leftover ham from a holiday meal, or even crispy bacon for a smoky touch. Each protein offers a delightful new layer of taste!

  • Add a Sweet Twist: Layer in some caramelized onions or roasted tomatoes for subtle sweetness. These add-ins can enhance the overall complexity of flavors and elevate your brunch experience.

With these variations, you can easily make the Eggs Benedict Casserole your own and keep your brunches exciting! For a golden twist, why not pair it with a side of crispy homemade Feta Fried Eggs? Or perhaps enjoy a sweet finish with an Apple Crisp Casserole? The ideas are endless!

How to Store and Freeze Eggs Benedict Casserole

Fridge: Store leftover Eggs Benedict Casserole in an airtight container for up to 4-5 days. Reheat portions in the oven or microwave, ensuring it’s warm throughout.

Freezer: If you want to make ahead, this casserole can be frozen before baking for up to 2 months. Thaw overnight in the fridge before baking to ensure even cooking.

Reheating: To retain moisture, reheat individual servings in the oven at 350°F (175°C) covered with foil for about 20 minutes, or until heated through.

Hollandaise Sauce: Store any leftover hollandaise separately in the refrigerator and gently reheat in hot water to maintain its creamy texture.

Expert Tips for Eggs Benedict Casserole

  • Even Distribution: Ensure the egg mixture is evenly poured over the layers; this guarantees a moist and custardy texture throughout the casserole.

  • Layer Wisely: Avoid sogginess by not overloading on moisture-rich ingredients. Pre-cooking vegetables or meats can help prevent excess moisture.

  • Chill for Flavor: Letting the casserole sit overnight allows flavors to meld, making it even more delicious when baked the next day.

  • Preheat Properly: Always allow your oven to fully preheat to 375°F before baking; this helps achieve that perfect golden crust.

  • Separate Hollandaise: Store hollandaise sauce separately and reheat it gently in hot water to maintain its silky texture; never microwave it!

Make Ahead Options

These Overnight Eggs Benedict Casserole is a fantastic solution for busy home cooks looking to save time without sacrificing flavor! You can prepare the entire dish up to 24 hours in advance by layering the ingredients and pouring the egg mixture over the top. Simply cover it tightly with foil and refrigerate to allow the flavors to meld beautifully. For optimal quality, ensure the casserole is stored in an airtight container if making ahead, which will help prevent drying out. When you’re ready to bake, just preheat your oven to 375°F, remove the casserole from the fridge while preheating, and bake covered for 35 minutes, then uncover for an additional 10-15 minutes until it’s golden and set. Enjoy a stress-free brunch with this delightful make-ahead option!

What to Serve with Overnight Eggs Benedict Casserole

Pair your delightful casserole with these scrumptious side dishes and drinks for a memorable brunch experience.

  • Fresh Fruit Salad: A light and refreshing blend of sweet seasonal fruits adds a burst of flavor that perfectly balances the richness of the casserole. The vibrant colors and natural sweetness will complement the savory elements of your dish.

  • Light Green Salad: Tossed greens with a tangy vinaigrette enhance the overall meal, providing a crisp contrast to the creamy casserole. The crunch of the salad will keep each bite interesting.

  • Roasted Asparagus: Tender, roasted asparagus spears sprinkled with lemon juice offer a bright, earthy flavor that plays well against the creamy textures. This side is as elegant as it is delicious.

  • Crispy Hash Browns: Golden-brown, crispy hash browns bring a satisfying crunch that contrasts beautifully with the softness of the Eggs Benedict Casserole. Dip them in the hollandaise for a decadent treat!

  • Mimosas: The bubbly freshness of mimosas made with sparkling wine and orange juice adds a festive touch to your brunch. Sip on this refreshing drink while you savor the flavors of your casserole.

  • Coffee or Tea: Warm, comforting beverages like a rich cup of coffee or a soothing herbal tea pair wonderfully with this dish. The warmth will invite conversation over your brunch table, making for an enjoyable gathering.

  • Cinnamon Roll: Indulge in a sweet cinnamon roll on the side for a delightful contrast to the savory casserole. The gooey sweetness will round out your brunch with a touch of comfort.

Elevate your brunch experience with these delightful pairings and watch as they become instant favorites for you and your guests!

Eggs Benedict Casserole Recipe FAQs

What type of bread is best for this casserole?
Absolutely! While English muffins provide a classic texture, you can easily substitute them with sourdough or any bread you prefer. Just ensure whatever bread you use can hold up to soaking in the egg mixture without becoming mushy.

How should I store leftover Eggs Benedict Casserole?
Leftover casserole can be stored in an airtight container in the fridge for up to 4-5 days. To reheat, warm individual portions in the oven at 350°F (175°C) wrapped in foil for about 20 minutes, or until heated through. This helps keep the casserole moist and delicious!

Can I freeze the Eggs Benedict Casserole?
Yes, you can! If you want to make this dish in advance, freeze it before baking for up to 2 months. To do so, prepare the casserole as directed, cover it tightly with foil, and place it in the freezer. When ready to bake, thaw it overnight in the fridge before cooking as per the recipe instructions.

What do I do if my casserole is too soggy?
If your casserole turns out soggy, it might be due to excess moisture from vegetables or meats used in the recipe. To avoid this in the future, I recommend pre-cooking any watery ingredients or reducing their amount. You can also try adjusting the egg mixture ratio to help balance moisture levels.

Are there any dietary considerations for this recipe?
Certainly! For those with dietary restrictions, consider using dairy alternatives like almond or oat milk for a dairy-free version. If you’re catering to lactose intolerance, ensure you use lactose-free cream and cheese. Additionally, be mindful of substitutions for meat if allergies are present, opting for alternative proteins as necessary.

How long should I let the casserole sit before serving?
It’s best to let the casserole rest for about 5-10 minutes after baking. This resting time allows it to set properly, making it easier to serve and enhancing the custardy texture. This small wait is well worth the creamy goodness that follows!

Eggs Benedict Casserole

Irresistible Eggs Benedict Casserole for Lazy Weekend Brunches

This Eggs Benedict Casserole combines creamy eggs, savory bacon, and spices for a delicious brunch dish that’s easy to prepare.
Prep Time 15 minutes
Cook Time 45 minutes
Refrigeration Time 8 hours
Total Time 9 hours
Servings: 8 slices
Course: Breakfast
Cuisine: American
Calories: 350

Ingredients
  

For the Casserole
  • 4 whole English Muffins or substitute with sourdough or your favorite bread
  • 8 oz Canadian Bacon or regular ham
  • 8 large Large Eggs
  • 2 cups Cream heavy or whipping cream
  • 2 cups Whole Milk or almond/oat milk for dairy-free option
  • 1 tsp Kosher Salt or regular salt
  • 1 tsp Seasoned Salt optional
  • 1 tsp Black Pepper freshly cracked
  • 1 tsp Onion Powder or fresh onions
  • 1 tsp Paprika smoked paprika for more intensity
  • 1 tbsp Dried Mustard Powder or prepared mustard
  • 1 cup Monterey Jack Cheese optional
For the Hollandaise
  • 4 large Egg Yolks
  • 1 tbsp Lemon Juice fresh preferred
  • 1 tsp Mustard any variety
  • 1/4 tsp Cayenne Pepper to taste
  • 1/2 tsp Salt to taste
  • 1/2 cup Butter melted

Equipment

  • 9x13 inch casserole dish
  • blender

Method
 

Preparation Steps
  1. Grease a 9x13 inch casserole dish with butter or cooking spray.
  2. Chop the Canadian bacon and layer half of it across the bottom.
  3. Split the English muffins, toast until golden brown, and chop into pieces.
  4. Layer half of the toasted muffins over the bacon.
  5. Repeat layering with remaining Canadian bacon and English muffins.
  6. In a large bowl, whisk together eggs, cream, whole milk, salts, pepper, onion powder, paprika, and mustard powder.
  7. Pour the egg mixture over the layered ingredients, pressing down gently.
  8. Cover with foil and refrigerate overnight or for at least 4 hours.
  9. Preheat oven to 375°F (190°C). Remove casserole from fridge.
  10. Bake covered casserole for 35 minutes, then uncover and bake for an additional 10–15 minutes.
  11. For hollandaise, blend egg yolks, cream, lemon juice, mustard, cayenne, and salt.
  12. Slowly drizzle in melted butter while blending until emulsified.
  13. Serve warm with hollandaise drizzled over individual portions.

Nutrition

Serving: 1sliceCalories: 350kcalCarbohydrates: 30gProtein: 20gFat: 20gSaturated Fat: 10gPolyunsaturated Fat: 2gMonounsaturated Fat: 5gCholesterol: 200mgSodium: 800mgPotassium: 300mgFiber: 1gSugar: 3gVitamin A: 500IUVitamin C: 2mgCalcium: 200mgIron: 1mg

Notes

Perfect for family gatherings, this casserole offers ultimate convenience and deliciousness.

Tried this recipe?

Let us know how it was!

Stay Connected

Get recipes via email: