Get my cookbooks

Garlic Parmesan Chicken Wings: A Flavorful Recipe Delight

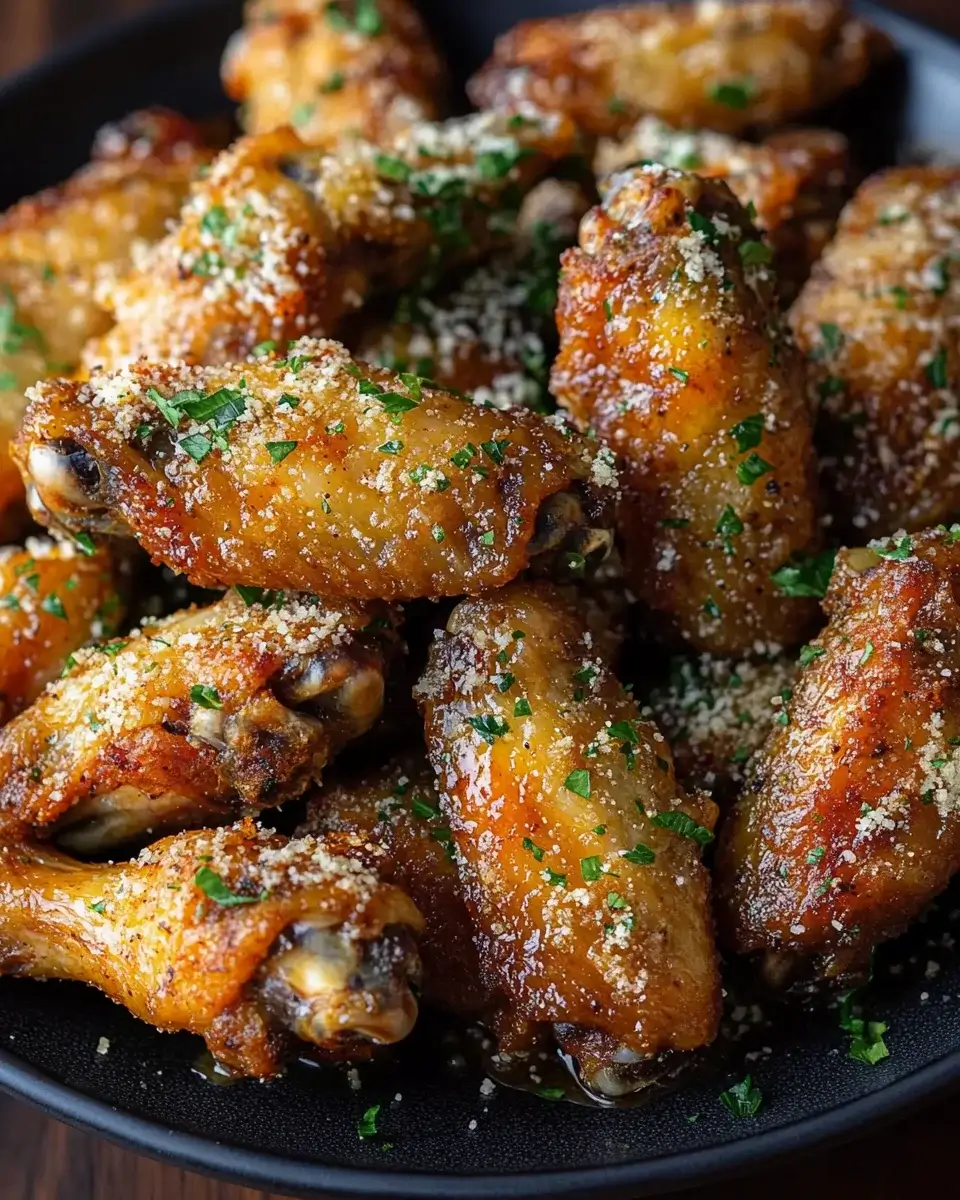
Introduction to Garlic Parmesan Chicken Wings

There’s something magical about the aroma of Garlic Parmesan Chicken Wings wafting through the house.

Growing up, my family had a tradition of gathering around the TV for game nights, and these wings were always the star of the show.

Whether you’re hosting friends for the big game or just looking for a quick solution for a busy weeknight dinner, this recipe is a winner.

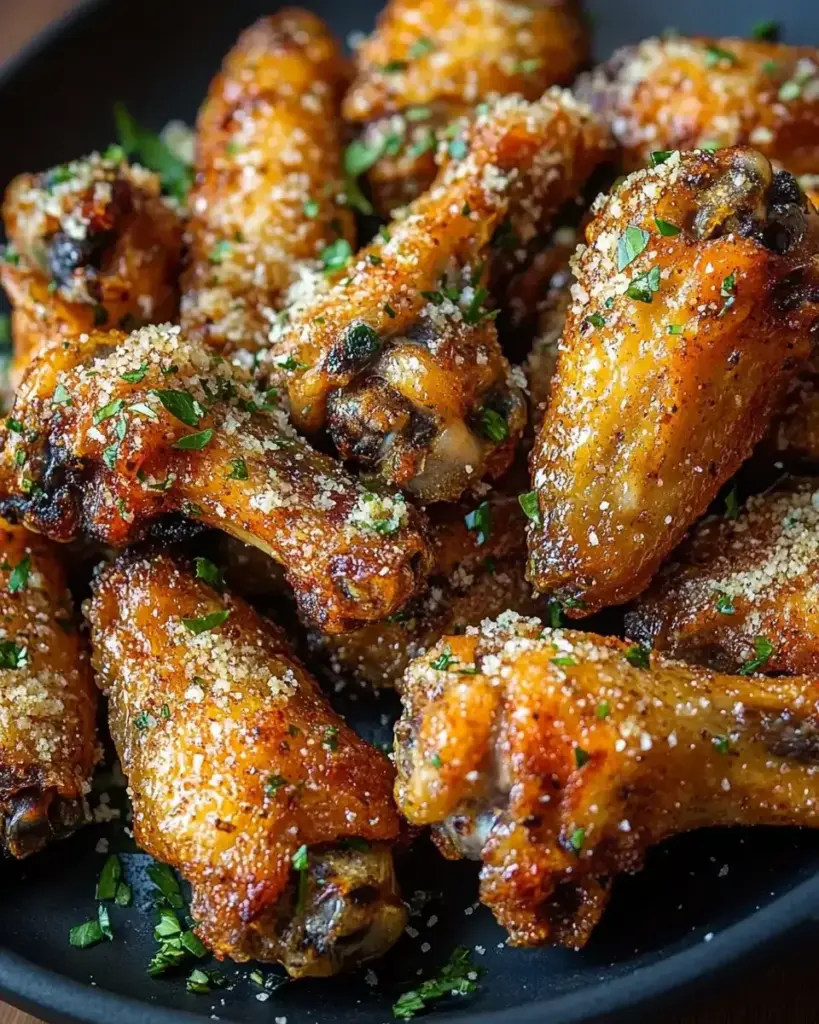
With crispy skin and a rich, buttery garlic sauce, these wings are sure to impress.

Let’s dive into this flavorful delight that’s perfect for any occasion!

Why You’ll Love This Garlic Parmesan Chicken Wings

These Garlic Parmesan Chicken Wings are a game-changer for any home cook.

They’re incredibly easy to whip up, making them perfect for busy weeknights or last-minute gatherings.

The combination of crispy skin and savory garlic flavor is simply irresistible.

Plus, they bake in the oven, freeing you up to tackle other tasks.

With just a handful of ingredients, you’ll have a crowd-pleasing dish that’s sure to satisfy!

Ingredients for Garlic Parmesan Chicken Wings

To create these mouthwatering Garlic Parmesan Chicken Wings, you’ll need a few key ingredients that pack a punch of flavor.

– **Chicken Wings**: The star of the dish! Choose fresh or frozen wings, but if using frozen, make sure to thaw them first.

– **Salt and Black Pepper**: Essential for seasoning, these two will enhance the natural flavors of the chicken.

– **Garlic Powder and Onion Powder**: These spices add depth and a savory kick, making every bite delicious.

– **Paprika**: This spice brings a subtle smokiness and vibrant color to the wings.

– **Grated Parmesan Cheese**: The creamy, nutty flavor of Parmesan is what makes these wings truly special.

– **Unsalted Butter**: This adds richness to the sauce, helping it cling to the wings perfectly.

– **Garlic**: Freshly minced garlic elevates the flavor profile, giving it that aromatic punch.

– **Fresh Parsley (optional)**: A sprinkle of parsley not only adds a pop of color but also a fresh taste.

– **Lemon Juice**: A splash of lemon juice brightens the sauce, balancing the richness of the butter and cheese.

For exact measurements, check the bottom of the article where you can find everything listed for easy printing.

With these ingredients on hand, you’re well on your way to creating a dish that will have everyone coming back for more!

How to Make Garlic Parmesan Chicken Wings

Step 1: Preheat the Oven

Preheating your oven is crucial for achieving that perfect crispy texture.

Set it to 400°F and line a baking sheet with aluminum foil.

Place a wire rack on top to allow air circulation, ensuring even cooking.

This simple step makes a world of difference!

Step 2: Season the Wings

In a large bowl, combine the chicken wings with salt, black pepper, garlic powder, onion powder, and paprika.

Toss everything together until the wings are evenly coated.

This seasoning blend is what gives your Garlic Parmesan Chicken Wings that irresistible flavor.

Don’t be shy—make sure every wing is well-seasoned for maximum taste!

Step 3: Bake the Wings

Arrange the seasoned wings in a single layer on the wire rack.

Bake them in the preheated oven for 40-45 minutes.

Halfway through, flip the wings to ensure they cook evenly and get that golden brown color.

The aroma will have your mouth watering as they crisp up beautifully!

Step 4: Prepare the Garlic Parmesan Sauce

While the wings are baking, it’s time to whip up the garlic Parmesan sauce.

In a small bowl, mix together the melted butter, minced garlic, grated Parmesan cheese, and lemon juice.

This sauce is the secret to elevating your wings to a whole new level of deliciousness!

Step 5: Toss the Wings in Sauce

Once the wings are done baking, remove them from the oven.

Immediately toss them in the garlic Parmesan sauce until they are well coated.

This step ensures that every bite is bursting with flavor.

Trust me, you won’t want to skip this part!

Step 6: Optional Garnish

For a touch of color and freshness, sprinkle some chopped parsley over the wings before serving.

It adds a nice visual appeal and a hint of herbaceous flavor!

Equipment Needed

  • Baking Sheet: A standard sheet works, but a rimmed one helps catch drippings.
  • Wire Rack: This allows air circulation; if you don’t have one, just place the wings directly on the sheet.
  • Mixing Bowl: Any large bowl will do for seasoning the wings.
  • Measuring Cups: Handy for measuring butter and cheese.
  • Spatula or Tongs: Use these to toss the wings in the sauce easily.

Variations

  • Spicy Garlic Parmesan Wings: Add a pinch of red pepper flakes to the sauce for a fiery kick that complements the garlic beautifully.
  • Buffalo Garlic Parmesan Wings: Toss the wings in your favorite buffalo sauce before adding the garlic Parmesan sauce for a tangy twist.
  • Herb-Infused Wings: Mix in dried herbs like oregano or thyme with the seasonings for an aromatic flavor boost.
  • Cheesy Garlic Wings: Swap out Parmesan for a blend of mozzarella and cheddar for a gooey, cheesy experience.
  • Low-Carb Option: Use almond flour instead of traditional breading for a keto-friendly version that still delivers on flavor.

Serving Suggestions

  • Pair your Garlic Parmesan Chicken Wings with a side of crispy celery and carrot sticks for a refreshing crunch.
  • Serve with a creamy ranch or blue cheese dressing for dipping.
  • Complement the wings with a cold beer or a zesty lemonade.
  • For presentation, arrange the wings on a platter and garnish with lemon wedges and parsley.

FAQs about Garlic Parmesan Chicken Wings

Can I use frozen chicken wings for this recipe?

Absolutely! Just make sure to thaw them completely before seasoning. This ensures even cooking and crispy skin.

How can I make these wings spicier?

If you like a kick, add red pepper flakes to the garlic Parmesan sauce. You can also toss the wings in hot sauce before coating them in the garlic sauce.

Can I prepare the wings ahead of time?

Yes! You can season the wings and store them in the fridge for a few hours or overnight. Just bake them when you’re ready to serve.

What can I serve with Garlic Parmesan Chicken Wings?

These wings pair perfectly with celery sticks, carrot sticks, and your favorite dipping sauces like ranch or blue cheese. A cold drink is a must!

How do I store leftovers?

Store any leftover wings in an airtight container in the fridge for up to three days. Reheat them in the oven for the best texture!

Final Thoughts

Cooking these Garlic Parmesan Chicken Wings is more than just a recipe; it’s an experience that brings people together.

The joy of sharing a plate of crispy, flavorful wings with friends or family is unmatched.

Each bite is a delightful explosion of garlic and cheese, making it hard to stop at just one.

Whether it’s game day or a casual weeknight, these wings are sure to elevate any gathering.

So roll up your sleeves, embrace the mess, and enjoy the deliciousness that comes from your kitchen.

Trust me, your taste buds will thank you!

jhessica

Garlic Parmesan Chicken Wings: A Flavorful Recipe Delight

A flavorful recipe for crispy Garlic Parmesan Chicken Wings, perfect for any gathering.
Prep Time 10 minutes
Cook Time 45 minutes
Total Time 55 minutes
Servings: 4 -6 servings
Course: Appetizer
Cuisine: American
Calories: 400

Ingredients
  

  • 3 pounds chicken wings
  • 1 teaspoon salt
  • 1 teaspoon black pepper
  • 1 teaspoon garlic powder
  • 1 teaspoon onion powder
  • 1 teaspoon paprika
  • 1/2 cup grated Parmesan cheese
  • 1/4 cup unsalted butter melted
  • 4 cloves garlic minced
  • 2 tablespoons fresh parsley chopped (optional)
  • 1 tablespoon lemon juice

Method
 

  1. Preheat your oven to 400°F. Line a baking sheet with aluminum foil and place a wire rack on top.
  2. In a large bowl, combine the chicken wings, salt, black pepper, garlic powder, onion powder, and paprika. Toss until the wings are evenly coated with the seasonings.
  3. Arrange the seasoned wings in a single layer on the wire rack. Bake in the preheated oven for 40-45 minutes, or until the wings are crispy and golden brown, flipping them halfway through for even cooking.
  4. While the wings are baking, prepare the garlic Parmesan sauce by mixing together the melted butter, minced garlic, grated Parmesan cheese, and lemon juice in a small bowl.
  5. Once the wings are done, remove them from the oven and immediately toss them in the garlic Parmesan sauce until well coated.
  6. If desired, sprinkle with fresh parsley before serving.

Nutrition

Serving: 1servingCalories: 400kcalCarbohydrates: 2gProtein: 30gFat: 30gSaturated Fat: 15gPolyunsaturated Fat: 10gCholesterol: 100mgSodium: 600mg

Notes

  • For extra crispiness, broil the wings for an additional 2-3 minutes after baking.
  • You can add a pinch of red pepper flakes to the sauce for a spicy kick.
  • For a different flavor, try using a mix of different cheeses like mozzarella or cheddar in place of Parmesan.

Tried this recipe?

Let us know how it was!

Italian Sushi Rolls: A Unique Twist on Tradition!

Introduction to Italian Sushi Rolls

There’s something magical about blending cultures in the kitchen. When I first stumbled upon the idea of Italian sushi rolls, I was intrigued. Imagine the delightful combination of sushi rice and fresh Italian ingredients like salami and mozzarella. This dish is not just a meal; it’s a conversation starter, perfect for impressing friends or enjoying a cozy night in. Whether you’re a seasoned chef or a kitchen novice, these Italian sushi rolls are a quick solution for a busy day or a fun way to spice up your dinner routine. Let’s dive into this culinary adventure!

Why You’ll Love This Italian Sushi Rolls

These Italian sushi rolls are a game changer! They combine the best of both worlds—Italian flavors and sushi fun. Not only are they easy to make, but they also come together quickly, making them perfect for busy weeknights or last-minute gatherings. The taste? Absolutely irresistible! Each bite bursts with fresh ingredients, and the unique twist will have everyone asking for seconds. Trust me, you’ll want to keep this recipe close!

Ingredients for Italian Sushi Rolls

Gathering the right ingredients is key to making these Italian sushi rolls a hit. Here’s what you’ll need:

  • Sushi rice: This sticky rice is the foundation of your rolls, providing that classic sushi texture.
  • Water: Essential for cooking the rice to perfection.
  • Rice vinegar: Adds a tangy flavor that balances the richness of the other ingredients.
  • Sugar: Just a touch to enhance the flavor of the rice.
  • Salt: A pinch to season the rice and bring out the flavors.
  • Nori (seaweed): The wrap that holds everything together, giving your rolls that authentic sushi feel.
  • Cucumber: Fresh and crunchy, it adds a refreshing bite.
  • Bell pepper: Choose any color for a sweet crunch and vibrant color.
  • Avocado: Creamy and rich, it complements the other ingredients beautifully.
  • Salami: This Italian classic brings a savory depth to your rolls.
  • Mozzarella cheese: Shredded for a melty, gooey texture that ties the flavors together.
  • Soy sauce: For dipping, it adds a salty umami kick that enhances each bite.

For those looking to switch things up, consider substituting the salami with roasted red peppers or marinated artichokes for a vegetarian option. And if you want to elevate the flavor, a drizzle of balsamic glaze over the rolls before serving is a delightful touch. Exact measurements for these ingredients can be found at the bottom of the article, ready for printing!

How to Make Italian Sushi Rolls

Creating Italian sushi rolls is a fun and rewarding experience. Follow these simple steps, and you’ll be rolling like a pro in no time. Let’s get started!

Step 1: Prepare the Sushi Rice

First things first, rinse the sushi rice under cold water. This removes excess starch and helps achieve that perfect sticky texture. Once the water runs clear, combine the rinsed rice and water in a medium saucepan. Bring it to a boil, then reduce the heat to low. Cover and let it simmer for about 18-20 minutes. When the rice is tender and the water is absorbed, remove it from heat. Let it sit, covered, for 10 minutes. This resting time is crucial for fluffy rice!

Step 2: Season the Rice

While the rice cools, mix the rice vinegar, sugar, and salt in a small bowl. Stir until everything is dissolved. Once the rice has cooled to room temperature, gently fold this mixture into the rice. Be careful not to mash the grains; you want to keep that lovely texture. This seasoning adds a delightful tang that complements the Italian ingredients beautifully.

Step 3: Assemble the Rolls

Now, grab your bamboo sushi mat and lay it on a clean surface. Place a sheet of nori on the mat, shiny side down. With wet hands (this prevents sticking), spread about 1/2 cup of the cooled sushi rice evenly over the nori. Leave about a 1-inch border at the top. This space is essential for sealing the roll later. It’s like giving your sushi a cozy blanket!

Step 4: Roll the Sushi

Time to add the good stuff! Arrange a line of cucumber, bell pepper, avocado, salami, and mozzarella cheese across the center of the rice-covered nori. Starting at the bottom, use the bamboo mat to roll the sushi tightly away from you. Press gently to keep the filling in place. When you reach the border of the nori, moisten the edge with a little water to seal the roll. It’s like wrapping a present, but way tastier!

Step 5: Slice and Serve

Once all your rolls are made, it’s time to slice them up. Use a sharp knife to cut each roll into 6-8 pieces. Wipe the knife with a damp cloth between cuts to keep the edges clean. Serve your Italian sushi rolls with soy sauce for dipping. Trust me, the combination of flavors will have everyone coming back for more!

Tips for Success

  • Always rinse your sushi rice thoroughly to achieve the right texture.
  • Use a sharp knife for clean cuts; it makes a big difference in presentation.
  • Keep a bowl of water nearby to wet your hands and the knife.
  • Experiment with fillings—don’t be afraid to get creative!
  • Let the rice cool completely before assembling to avoid soggy rolls.

Equipment Needed

  • Bamboo sushi mat: Essential for rolling; a clean kitchen towel can work in a pinch.
  • Medium saucepan: For cooking the rice; any pot with a lid will do.
  • Sharp knife: For slicing; a serrated knife can also be effective.
  • Small bowl: For mixing the vinegar seasoning; any bowl will suffice.

Variations

  • Vegetarian Delight: Swap out salami for roasted red peppers or marinated artichokes for a fresh, meat-free option.
  • Spicy Kick: Add sliced jalapeños or a drizzle of sriracha for those who enjoy a bit of heat.
  • Herb Infusion: Incorporate fresh basil or arugula for an aromatic twist that enhances the Italian flavors.
  • Cheesy Goodness: Experiment with different cheeses like provolone or goat cheese for a unique flavor profile.
  • Fruit Fusion: Try adding thin slices of strawberries or peaches for a sweet contrast to the savory ingredients.

Serving Suggestions

  • Pair with a crisp salad: A light arugula or mixed greens salad complements the rolls beautifully.
  • Drink options: Serve with a chilled white wine or sparkling water for a refreshing touch.
  • Presentation: Arrange the rolls on a wooden board, garnished with fresh herbs for an inviting look.

FAQs about Italian Sushi Rolls

Curious about Italian sushi rolls? You’re not alone! Here are some common questions I’ve encountered, along with answers to help you navigate this delicious fusion dish.

Can I make Italian sushi rolls ahead of time?

Absolutely! You can prepare the sushi rolls a few hours in advance. Just keep them covered with a damp cloth to prevent them from drying out. However, I recommend slicing them just before serving for the best presentation and freshness.

What can I use instead of sushi rice?

If you can’t find sushi rice, short-grain rice is a good alternative. It won’t have the same stickiness, but it will still hold together well. Just be sure to adjust the cooking time as needed.

Are Italian sushi rolls suitable for kids?

Definitely! Kids often love the fun of rolling their own sushi. You can customize the fillings to suit their tastes, making it a great way to get them involved in the kitchen.

Can I freeze Italian sushi rolls?

While it’s not ideal to freeze sushi rolls, you can freeze the ingredients separately. Just assemble and roll them fresh when you’re ready to enjoy. This way, you’ll have the best texture and flavor!

What dipping sauces pair well with Italian sushi rolls?

Besides traditional soy sauce, consider trying a balsamic reduction or a zesty Italian dressing. These options enhance the Italian flavors and add a unique twist to your dipping experience!

Final Thoughts

Creating Italian sushi rolls is more than just cooking; it’s an experience that brings joy and creativity to your kitchen. Each roll is a delightful fusion of flavors, combining the best of Italian cuisine with the fun of sushi-making. Whether you’re impressing guests or enjoying a casual family dinner, these rolls are sure to spark conversation and smiles. Plus, the versatility of ingredients means you can tailor them to your taste. So roll up your sleeves, gather your loved ones, and dive into this culinary adventure. Trust me, you’ll be savoring every bite and craving more!

jhessica

Italian Sushi Rolls: A Unique Twist on Tradition!

A unique twist on traditional sushi, featuring Italian ingredients like salami and mozzarella cheese.
Prep Time 30 minutes
Cook Time 20 minutes
Total Time 50 minutes
Servings: 4 servings
Course: Appetizer
Cuisine: Italian
Calories: 350

Ingredients
  

  • 2 cups sushi rice
  • 2 1/2 cups water
  • 1/4 cup rice vinegar
  • 2 tablespoons sugar
  • 1 teaspoon salt
  • 4 sheets nori seaweed
  • 1/2 cup sliced cucumber
  • 1/2 cup sliced bell pepper any color
  • 1/2 cup sliced avocado
  • 1/2 cup sliced salami
  • 1/2 cup shredded mozzarella cheese
  • Soy sauce for serving

Method
 

  1. Rinse the sushi rice under cold water until the water runs clear. Combine the rinsed rice and water in a medium saucepan and bring to a boil. Once boiling, reduce the heat to low, cover, and simmer for 18-20 minutes, or until the rice is tender and the water is absorbed. Remove from heat and let it sit, covered, for 10 minutes.
  2. In a small bowl, mix the rice vinegar, sugar, and salt until dissolved. Gently fold this mixture into the cooked rice, being careful not to mash the grains. Allow the rice to cool to room temperature.
  3. Place a bamboo sushi mat on a clean surface. Lay a sheet of nori on the mat, shiny side down. With wet hands, spread about 1/2 cup of the cooled sushi rice evenly over the nori, leaving a 1-inch border at the top.
  4. Arrange a line of cucumber, bell pepper, avocado, salami, and mozzarella cheese across the center of the rice-covered nori.
  5. Starting at the bottom, use the bamboo mat to roll the sushi tightly away from you, pressing gently to keep the filling in place. Roll until you reach the border of the nori. Moisten the edge of the nori with a little water to seal the roll.
  6. Repeat the process with the remaining nori sheets and fillings. Once all rolls are made, use a sharp knife to slice each roll into 6-8 pieces.
  7. Serve the Italian sushi rolls with soy sauce for dipping.

Nutrition

Serving: 1rollCalories: 350kcalCarbohydrates: 45gProtein: 10gFat: 12gSaturated Fat: 4gPolyunsaturated Fat: 8gCholesterol: 20mgSodium: 500mgFiber: 2gSugar: 2g

Notes

  • For a vegetarian option, substitute the salami with roasted red peppers or marinated artichokes.
  • Add a drizzle of balsamic glaze over the rolls before serving for an extra burst of flavor.

Tried this recipe?

Let us know how it was!

Creamy Coconut Shrimp with Rice: A Delightful Recipe!

Introduction to Creamy Coconut Shrimp with Rice

There’s something magical about a dish that transports you to a tropical paradise, even if you’re just in your kitchen. Creamy coconut shrimp with rice is that dish for me. It’s quick, flavorful, and perfect for those busy weeknights when you want to impress your loved ones without spending hours in the kitchen. The rich coconut milk and zesty lime create a symphony of flavors that dance on your palate. Plus, it’s a one-skillet wonder, making cleanup a breeze. Trust me, this recipe will become a go-to in your culinary repertoire!

Why You’ll Love This Creamy Coconut Shrimp with Rice

This creamy coconut shrimp with rice is a lifesaver for anyone juggling a busy schedule. It comes together in just 25 minutes, making it perfect for those nights when you want something delicious without the fuss. The combination of creamy coconut and tender shrimp is not only satisfying but also a crowd-pleaser. Whether you’re cooking for family or friends, this dish is sure to impress and leave everyone asking for seconds!

Ingredients for Creamy Coconut Shrimp with Rice

Gathering the right ingredients is the first step to creating this delightful dish. Here’s what you’ll need:

  • Shrimp: Large, peeled, and deveined shrimp are the stars of this recipe. They cook quickly and soak up all the delicious flavors.
  • Olive Oil: A tablespoon of olive oil helps sauté the onions and garlic, adding a rich base to the dish.
  • Onion: A small, finely chopped onion brings sweetness and depth to the flavor profile.
  • Garlic: Three cloves of minced garlic add a fragrant kick that elevates the dish.
  • Coconut Milk: A can of creamy coconut milk is essential for that luscious texture and tropical taste.
  • Red Curry Paste: This adds a hint of spice and complexity. Adjust the amount based on your heat preference.
  • Fish Sauce: A tablespoon of fish sauce enhances the umami flavor, making the dish more savory.
  • Brown Sugar: A touch of brown sugar balances the flavors, adding a hint of sweetness.
  • Lime Juice: Fresh lime juice brightens the dish and adds a zesty finish.
  • Salt and Pepper: Simple seasonings to taste, ensuring all flavors shine through.
  • Jasmine Rice: Serve the creamy coconut shrimp over fluffy jasmine rice for a perfect pairing.
  • Cilantro: Fresh cilantro for garnish adds a pop of color and freshness.
  • Lime Wedges: Serve with lime wedges on the side for an extra burst of citrus.

For those looking to spice things up, consider adding sliced red chili peppers or a dash of sriracha. If shrimp isn’t your thing, feel free to substitute with chicken or tofu. The exact quantities for each ingredient are available at the bottom of the article for easy printing!

How to Make Creamy Coconut Shrimp with Rice

Now that you have all your ingredients ready, let’s dive into the cooking process. This creamy coconut shrimp with rice comes together in just a few simple steps. Follow along, and you’ll have a delicious meal on the table in no time!

Step 1: Sauté the Onions

Start by heating a tablespoon of olive oil in a large skillet over medium heat. Once the oil is shimmering, toss in the finely chopped onion. Sauté it for about 3-4 minutes until it becomes translucent. This step builds a flavorful base for your dish, so don’t rush it!

Step 2: Add Garlic

Next, it’s time to add the minced garlic. Stir it in and let it cook for about 1 minute. The aroma will fill your kitchen, and trust me, it’s heavenly! Garlic adds a depth of flavor that’s hard to resist, so make sure not to skip this step.

Step 3: Cook the Shrimp

Now, add the shrimp to the skillet. Cook them for about 2-3 minutes, or until they turn a lovely pink color. This is where the magic happens! The shrimp will soak up all those delicious flavors from the onions and garlic.

Step 4: Create the Sauce

Pour in the can of coconut milk, followed by the red curry paste, fish sauce, and brown sugar. Stir everything together until well combined. The sauce should start to bubble gently, creating a creamy, aromatic mixture that’s simply irresistible.

Step 5: Simmer and Season

Let the sauce simmer for about 5 minutes. This allows it to thicken slightly and the flavors to meld beautifully. Taste it and adjust the seasoning with salt and pepper as needed. If you like a bit of heat, now’s the time to add some sliced red chili peppers or a dash of sriracha!

Step 6: Serve

Finally, serve your creamy coconut shrimp over a bed of fluffy jasmine rice. Garnish with fresh cilantro and lime wedges on the side for that extra zing. Your dish is now ready to impress!

Tips for Success

  • Prep all ingredients before starting to cook. It makes the process smoother.
  • Don’t overcook the shrimp; they should be just pink and tender.
  • Adjust the spice level by varying the amount of red curry paste.
  • For a creamier sauce, let it simmer a bit longer.
  • Garnish generously with cilantro for a fresh touch.

Equipment Needed

  • Large Skillet: A non-stick skillet works best, but any large pan will do.
  • Wooden Spoon: Perfect for stirring without scratching your skillet.
  • Measuring Cups and Spoons: Essential for accurate ingredient measurements.
  • Cutting Board: A sturdy surface for chopping onions and garlic.
  • Knife: A sharp knife makes prep work quick and easy.

Variations

  • Spicy Coconut Shrimp: Add sliced red chili peppers or a dash of sriracha for an extra kick.
  • Vegetarian Option: Substitute shrimp with firm tofu or chickpeas for a plant-based twist.
  • Seafood Medley: Mix in scallops or crab for a delightful seafood combination.
  • Herb Infusion: Experiment with fresh basil or mint alongside cilantro for a unique flavor profile.
  • Low-Carb Version: Serve over cauliflower rice instead of jasmine rice for a lighter meal.

Serving Suggestions

  • Side Salad: Pair with a crisp cucumber and tomato salad for a refreshing contrast.
  • Drink: Enjoy with a chilled Thai iced tea or a light beer to complement the flavors.
  • Presentation: Serve in shallow bowls, garnished with extra cilantro and lime wedges for a vibrant look.

FAQs about Creamy Coconut Shrimp with Rice

Can I use frozen shrimp for this recipe?

Absolutely! Just make sure to thaw them completely before cooking. Frozen shrimp can be a convenient option, and they’ll still taste delicious in your creamy coconut shrimp with rice.

What can I substitute for coconut milk?

If you’re looking for a dairy-free alternative, try using almond milk or cashew cream. However, keep in mind that the flavor will differ slightly from the original creamy coconut shrimp with rice.

How can I make this dish spicier?

To kick up the heat, add more red curry paste or toss in some sliced jalapeños or red chili peppers while cooking. This will give your creamy coconut shrimp a fiery twist!

Can I make this dish ahead of time?

While it’s best enjoyed fresh, you can prepare the sauce in advance and store it in the fridge. Just reheat it and add the shrimp when you’re ready to serve over rice.

What sides pair well with creamy coconut shrimp?

A light cucumber salad or steamed vegetables complement the dish beautifully. You could also serve it with a refreshing Thai iced tea for a complete meal experience!

Final Thoughts

Cooking creamy coconut shrimp with rice is more than just preparing a meal; it’s about creating a moment of joy. The vibrant flavors and creamy texture transport you to a tropical getaway, even if it’s just for dinner. Each bite is a reminder of the simple pleasures in life, like sharing a meal with loved ones. This dish is not only quick and easy but also a delightful way to impress your guests. So, roll up your sleeves, embrace the process, and let the aromas fill your kitchen. You’ll find that this recipe becomes a cherished favorite in no time!

jhessica

Creamy Coconut Shrimp with Rice: A Delightful Recipe!

A delightful recipe for creamy coconut shrimp served over jasmine rice, perfect for a quick and flavorful meal.
Prep Time 10 minutes
Cook Time 15 minutes
Total Time 25 minutes
Servings: 4 servings
Course: Main Course
Cuisine: Thai
Calories: 350

Ingredients
  

  • 1 pound large shrimp peeled and deveined
  • 1 tablespoon olive oil
  • 1 small onion finely chopped
  • 3 cloves garlic minced
  • 1 can 13.5 ounces coconut milk
  • 1 tablespoon red curry paste
  • 1 tablespoon fish sauce
  • 1 tablespoon brown sugar
  • 1 teaspoon lime juice
  • Salt and pepper to taste
  • 2 cups cooked jasmine rice
  • Fresh cilantro for garnish
  • Lime wedges for serving

Method
 

  1. In a large skillet, heat the olive oil over medium heat. Add the chopped onion and sauté until translucent, about 3-4 minutes.
  2. Stir in the minced garlic and cook for an additional 1 minute until fragrant.
  3. Add the shrimp to the skillet and cook until they turn pink, about 2-3 minutes.
  4. Pour in the coconut milk, red curry paste, fish sauce, and brown sugar. Stir well to combine and bring to a gentle simmer.
  5. Cook for another 5 minutes, allowing the sauce to thicken slightly. Stir in the lime juice and season with salt and pepper to taste.
  6. Serve the creamy coconut shrimp over cooked jasmine rice, garnished with fresh cilantro and lime wedges on the side.

Nutrition

Serving: 1servingCalories: 350kcalCarbohydrates: 30gProtein: 25gFat: 15gSaturated Fat: 10gPolyunsaturated Fat: 5gCholesterol: 200mgSodium: 800mgFiber: 1gSugar: 5g

Notes

  • For a spicier dish, add sliced red chili peppers or a dash of sriracha when cooking the shrimp.
  • Substitute the shrimp with chicken or tofu for a different protein option.

Tried this recipe?

Let us know how it was!

Coffee Mousse Delight: Indulge in a Creamy Treat!

Introduction to Coffee Mousse Delight

There’s something magical about a dessert that combines the rich, bold flavor of coffee with a light, airy texture. That’s where my Coffee Mousse Delight comes in. This creamy treat is perfect for those moments when you want to impress your friends or simply indulge after a long day. It’s a quick solution for busy evenings, yet elegant enough to serve at a dinner party. With just a few simple ingredients, you can whip up a dessert that feels luxurious without the fuss. Trust me, your taste buds will thank you!

Why You’ll Love This Coffee Mousse Delight

This Coffee Mousse Delight is a game-changer for dessert lovers. It’s incredibly easy to make, requiring no baking and minimal prep time. In just 20 minutes, you can create a dessert that tastes like it came from a fancy restaurant. The rich coffee flavor combined with the creamy texture makes every spoonful a delight. Plus, it’s a fantastic way to impress guests without spending hours in the kitchen!

Ingredients for Coffee Mousse Delight

Gathering the right ingredients is the first step to creating your Coffee Mousse Delight. Here’s what you’ll need:

  • Heavy cream: This is the star of the show, providing that rich, velvety texture.
  • Strong brewed coffee: Use your favorite brew; espresso works wonders for a bolder flavor.
  • Granulated sugar: Just a touch to sweeten the mix without overpowering the coffee.
  • Vanilla extract: A splash adds warmth and depth to the overall flavor.
  • Egg whites: These help create that light, airy mousse texture.
  • Cream of tartar: This stabilizes the egg whites, ensuring they whip up perfectly.
  • Chocolate shavings (optional): A delightful garnish that adds a touch of elegance and extra flavor.

For those looking to switch things up, consider using espresso instead of brewed coffee for a richer taste. If you want to add a little adult flair, a splash of coffee liqueur can elevate this dessert to new heights. Exact measurements for each ingredient can be found at the bottom of the article, ready for printing!

How to Make Coffee Mousse Delight

Creating your Coffee Mousse Delight is a breeze! Follow these simple steps, and you’ll have a dessert that’s sure to impress. Let’s dive in!

Step 1: Whip the Cream

Start by pouring the heavy cream into a medium bowl. Using a hand mixer or stand mixer, whip the cream until soft peaks form. This means the cream should hold its shape but still be a bit wobbly. Gradually add the granulated sugar and vanilla extract while continuing to whip. Keep going until you achieve stiff peaks. This is the moment when the cream becomes thick and fluffy, perfect for our mousse!

Step 2: Prepare the Coffee Mixture

In another bowl, combine your cooled strong brewed coffee with the egg whites and cream of tartar. The cream of tartar is essential here; it helps stabilize the egg whites. Beat this mixture with an electric mixer until soft peaks form. You want it to be airy but not too stiff. This step is crucial for that light texture we love in a mousse!

Step 3: Combine the Mixtures

Now comes the fun part! Gently fold the whipped cream into the coffee mixture. Use a spatula and be careful not to deflate the whipped cream. You want to maintain that airy texture. Fold until everything is just combined; a few streaks of cream are okay. This is where the magic happens, blending the rich coffee flavor with the lightness of the cream.

Step 4: Serve and Chill

Spoon the mousse into individual serving dishes or glasses. I love using clear glasses to show off the beautiful layers! Once filled, cover them with plastic wrap and refrigerate for at least 2 hours. This chilling time allows the mousse to set properly. When you’re ready to serve, feel free to top with chocolate shavings for that extra touch of elegance!

Tips for Success

  • Use cold heavy cream for better whipping results.
  • Make sure your coffee is cooled to avoid melting the cream.
  • Gently fold the mixtures to keep the mousse light and airy.
  • Chill the mousse longer for a firmer texture if desired.
  • Experiment with different coffee flavors for a unique twist.

Equipment Needed

  • Mixing bowls: Use any size, but a medium bowl works best for whipping cream.
  • Electric mixer: A hand mixer is perfect, but a whisk can work if you’re feeling adventurous.
  • Spatula: Essential for folding the mixtures without deflating them.
  • Serving dishes: Clear glasses or ramekins showcase the mousse beautifully.

Variations

  • Decaf Delight: For those avoiding caffeine, use decaffeinated coffee to enjoy the same rich flavor without the buzz.
  • Vegan Version: Substitute heavy cream with coconut cream and use aquafaba (chickpea water) in place of egg whites for a plant-based treat.
  • Flavor Infusions: Add a splash of hazelnut or almond extract for a nutty twist that complements the coffee beautifully.
  • Chocolate Lovers: Mix in cocoa powder or melted dark chocolate into the coffee mixture for a mocha-inspired mousse.
  • Spiced Mousse: Incorporate a pinch of cinnamon or nutmeg for a warm, spiced flavor that adds depth to your dessert.

Serving Suggestions

  • Pair your Coffee Mousse Delight with a dollop of whipped cream for added richness.
  • Serve alongside biscotti or chocolate-covered espresso beans for a delightful crunch.
  • Complement with a shot of espresso or a creamy cappuccino to enhance the coffee experience.
  • Garnish with fresh mint leaves for a pop of color and freshness.

FAQs about Coffee Mousse Delight

Can I make Coffee Mousse Delight ahead of time?

Absolutely! This dessert is perfect for making in advance. You can prepare it a day ahead and let it chill overnight. Just remember to cover it well to keep it fresh.

What can I substitute for heavy cream?

If you’re looking for a lighter option, you can use whipped coconut cream. It won’t be as rich, but it will still give you that creamy texture. Just make sure to chill the coconut cream beforehand!

How long will the mousse last in the fridge?

Your Coffee Mousse Delight will stay fresh for about 3 days in the fridge. Just keep it covered to prevent it from absorbing any odors.

Can I use instant coffee instead of brewed coffee?

Yes, you can! Just dissolve instant coffee in hot water to create a strong coffee flavor. It’s a quick and convenient option if you’re short on time.

Is this dessert suitable for kids?

While the mousse is delicious, it does contain coffee, which might not be ideal for kids. However, you can make a kid-friendly version by using decaf coffee or even chocolate milk for a fun twist!

Final Thoughts

Creating this Coffee Mousse Delight is more than just whipping up a dessert; it’s about crafting a moment of joy. Each spoonful is a celebration of rich coffee flavor and creamy texture that transports you to a cozy café. Whether you’re treating yourself after a long day or impressing guests at a dinner party, this mousse brings a touch of elegance to any occasion. Plus, the simplicity of the recipe means you can focus on what truly matters—enjoying the experience and sharing it with loved ones. So go ahead, indulge in this delightful treat!

jhessica

Coffee Mousse Delight: Indulge in a Creamy Treat!

Indulge in a creamy and rich Coffee Mousse Delight, perfect for coffee lovers.
Prep Time 20 minutes
Total Time 2 hours 20 minutes
Servings: 4 servings
Course: Dessert
Cuisine: International
Calories: 250

Ingredients
  

  • 1 cup heavy cream
  • 1/2 cup strong brewed coffee cooled
  • 1/4 cup granulated sugar
  • 1 teaspoon vanilla extract
  • 2 large egg whites
  • 1/4 teaspoon cream of tartar
  • 1/4 cup chocolate shavings optional, for garnish

Method
 

  1. In a medium bowl, whip the heavy cream until soft peaks form. Gradually add the sugar and vanilla extract, continuing to whip until stiff peaks form. Set aside.
  2. In another bowl, combine the cooled coffee with the egg whites and cream of tartar. Using an electric mixer, beat until soft peaks form.
  3. Gently fold the whipped cream into the coffee mixture until fully combined, being careful not to deflate the mixture.
  4. Spoon the mousse into individual serving dishes or glasses.
  5. Refrigerate for at least 2 hours to allow the mousse to set.
  6. Before serving, top with chocolate shavings if desired.

Nutrition

Serving: 1servingCalories: 250kcalCarbohydrates: 8gProtein: 4gFat: 22gSaturated Fat: 13gPolyunsaturated Fat: 9gCholesterol: 70mgSodium: 30mgSugar: 8g

Notes

  • For a richer flavor, use espresso instead of brewed coffee.
  • Add a splash of coffee liqueur for an adult twist.

Tried this recipe?

Let us know how it was!

Texas Trash Pie: Discover Its Irresistible Recipe Now!

Introduction to Texas Trash Pie

Growing up, dessert was always the highlight of family gatherings. I remember my aunt bringing out a pie that looked like a treasure chest of sweets. That pie was Texas Trash Pie, a delightful mix of flavors that never failed to impress. This recipe is perfect for those busy days when you want to whip up something quick yet indulgent. With its rich combination of chocolate, coconut, and pecans, it’s a guaranteed crowd-pleaser. Whether you’re hosting friends or just treating yourself, this pie is sure to bring smiles and satisfied taste buds.

Why You’ll Love This Texas Trash Pie

This Texas Trash Pie is a game-changer for dessert lovers. It’s incredibly easy to make, requiring just a handful of ingredients and minimal prep time. In less than an hour, you can have a decadent treat that tastes like it took all day to prepare. The combination of chocolate, coconut, and nuts creates a flavor explosion that will leave everyone asking for seconds. Trust me, this pie is a sweet victory!

Ingredients for Texas Trash Pie

Gathering the right ingredients is the first step to creating this delightful Texas Trash Pie. Here’s what you’ll need:

  • Graham cracker crumbs: These form the base of your pie crust, providing a sweet and crunchy texture.
  • Unsalted butter: Melted butter binds the crumbs together, adding richness to the crust.
  • Sweetened condensed milk: This creamy ingredient sweetens the filling and gives it a luscious consistency.
  • Semi-sweet chocolate chips: They add a rich chocolate flavor that balances perfectly with the other ingredients.
  • Shredded coconut: This brings a tropical twist and chewy texture to the pie.
  • Chopped pecans: These nuts add a delightful crunch and nutty flavor, enhancing the overall taste.
  • Mini marshmallows: They melt beautifully, creating pockets of gooey sweetness throughout the pie.
  • Vanilla extract: A splash of vanilla elevates the flavors, making everything taste even better.

For those looking to mix things up, consider adding peanut butter chips for an extra layer of flavor. If you’re not a fan of pecans, walnuts or almonds can be great substitutes. You can find all the exact measurements for these ingredients at the bottom of the article, ready for printing!

How to Make Texas Trash Pie

Creating this Texas Trash Pie is a straightforward process that anyone can master. Follow these simple steps, and you’ll have a dessert that’s sure to impress.

Step 1: Preheat the Oven

First things first, preheat your oven to 350°F. This ensures that your pie bakes evenly and comes out perfectly golden brown.

Step 2: Prepare the Crust

In a medium bowl, combine the graham cracker crumbs and melted butter until well mixed. The mixture should resemble wet sand. Press it firmly into the bottom of a 9-inch pie pan to form a crust. Make sure it’s even; this will hold all that delicious filling!

Step 3: Bake the Crust

Now, bake the crust for 10 minutes. This step is crucial as it helps set the crust. Once done, remove it from the oven and let it cool slightly. You want it warm, not hot, when you add the filling.

Step 4: Make the Filling

In another bowl, mix together the sweetened condensed milk, chocolate chips, shredded coconut, chopped pecans, mini marshmallows, and vanilla extract. Stir until everything is well combined. The mixture should look like a sweet, gooey dream!

Step 5: Combine and Pour

Pour this luscious filling over the cooled crust, spreading it evenly. Make sure every corner is covered; you want every bite to be as delicious as the last.

Step 6: Bake the Pie

Return the pie to the oven and bake for an additional 25-30 minutes. Keep an eye on it! You’re looking for a golden brown top that’s bubbly and inviting. The aroma will fill your kitchen, making it hard to wait!

Step 7: Cool and Serve

Let the pie cool at room temperature for at least 30 minutes before slicing. This helps it set up nicely. Serve it warm or at room temperature, and don’t forget the whipped cream or a scoop of vanilla ice cream on top for that extra indulgence!

Tips for Success

  • Use fresh ingredients for the best flavor, especially the chocolate chips and nuts.
  • Don’t skip cooling the pie; it helps the filling set properly.
  • For a cleaner slice, use a sharp knife dipped in hot water.
  • Experiment with different nuts or add a pinch of sea salt for a flavor boost.
  • Store leftovers in an airtight container to keep them fresh longer.

Equipment Needed

  • 9-inch pie pan: A standard pie dish works best, but a square baking dish can also do the trick.
  • Mixing bowls: Use medium and large bowls for mixing crust and filling; any size will work.
  • Measuring cups: Essential for accurate ingredient portions; a kitchen scale is a great alternative.
  • Spatula: A rubber spatula helps in mixing and spreading the filling evenly.
  • Oven mitts: Protect your hands when handling hot pans; a thick kitchen towel can substitute.

Variations

  • Nut-Free Option: Omit the pecans and replace them with sunflower seeds for a nut-free alternative.
  • Gluten-Free Version: Use gluten-free graham cracker crumbs to make the crust suitable for gluten-sensitive friends.
  • Chocolate Lovers: Add a layer of peanut butter chips along with the chocolate chips for a rich, nutty flavor.
  • Fruit Twist: Incorporate chopped dried fruits like cherries or apricots for a fruity surprise in every bite.
  • Vegan Adaptation: Substitute sweetened condensed milk with coconut cream and use dairy-free chocolate chips for a vegan-friendly treat.

Serving Suggestions

  • Pair with a scoop of vanilla ice cream for a classic combination that enhances the pie’s richness.
  • Serve alongside fresh berries for a refreshing contrast to the sweet pie.
  • Drizzle with chocolate or caramel sauce for an extra indulgent touch.
  • Enjoy with a cup of coffee or a glass of cold milk to balance the sweetness.
  • Garnish with whipped cream and a sprinkle of toasted coconut for a beautiful presentation.

FAQs about Texas Trash Pie

What is Texas Trash Pie?

Texas Trash Pie is a delightful dessert that combines a variety of sweet ingredients, including chocolate, coconut, and nuts, all baked into a rich, gooey filling. It’s a crowd-pleaser that’s perfect for any occasion!

Can I make Texas Trash Pie ahead of time?

Absolutely! You can prepare the pie a day in advance. Just store it in an airtight container in the fridge. When you’re ready to serve, let it come to room temperature or warm it slightly in the oven.

How do I store leftovers?

To keep your Texas Trash Pie fresh, store any leftovers in an airtight container at room temperature for up to three days. If you want to keep it longer, refrigerate it for up to a week.

Can I customize the ingredients?

Definitely! Feel free to swap out the nuts or add different types of chocolate chips. You can even throw in some dried fruits for a unique twist. The beauty of Texas Trash Pie is its versatility!

Is Texas Trash Pie suitable for vegetarians?

Yes, this pie is vegetarian-friendly! It contains no meat or animal-derived ingredients, making it a great dessert option for vegetarians.

Final Thoughts

Making Texas Trash Pie is more than just baking; it’s about creating memories and sharing joy. Each slice is a delightful blend of flavors that brings people together, whether it’s a family gathering or a casual get-together with friends. The ease of preparation means you can whip it up without stress, leaving you more time to enjoy the company of loved ones. Plus, the smiles and compliments you’ll receive are the cherry on top! So, roll up your sleeves, embrace the sweet chaos, and let this pie be the star of your next dessert table.

jhessica

Texas Trash Pie: Discover Its Irresistible Recipe Now!

Texas Trash Pie is a delicious dessert that combines a variety of sweet ingredients for a rich and indulgent treat.
Prep Time 15 minutes
Cook Time 40 minutes
Total Time 55 minutes
Servings: 8 servings
Course: Dessert
Cuisine: American
Calories: 320

Ingredients
  

  • 1 ½ cups graham cracker crumbs
  • ½ cup unsalted butter melted
  • 1 cup sweetened condensed milk
  • 1 cup semi-sweet chocolate chips
  • 1 cup shredded coconut
  • 1 cup chopped pecans
  • 1 cup mini marshmallows
  • 1 teaspoon vanilla extract

Method
 

  1. Preheat your oven to 350°F.
  2. In a medium bowl, combine the graham cracker crumbs and melted butter until well mixed.
  3. Press the mixture firmly into the bottom of a 9-inch pie pan to form a crust.
  4. Bake the crust for 10 minutes, then remove it from the oven and let it cool slightly.
  5. In another bowl, mix together the sweetened condensed milk, chocolate chips, shredded coconut, chopped pecans, mini marshmallows, and vanilla extract.
  6. Pour this filling over the cooled crust, spreading it evenly.
  7. Return the pie to the oven and bake for an additional 25-30 minutes, or until the top is golden brown and bubbly.
  8. Let the pie cool at room temperature for at least 30 minutes before slicing.
  9. Serve warm or at room temperature, optionally with whipped cream or a scoop of vanilla ice cream on top.

Nutrition

Serving: 1sliceCalories: 320kcalCarbohydrates: 30gProtein: 4gFat: 18gSaturated Fat: 10gPolyunsaturated Fat: 8gCholesterol: 30mgSodium: 150mgFiber: 2gSugar: 20g

Notes

  • For a fun variation, try adding a layer of peanut butter chips along with the chocolate chips.
  • You can substitute the pecans with walnuts or almonds for a different nutty taste.

Tried this recipe?

Let us know how it was!

Spicy Sesame Ramen: Discover a Flavorful Recipe Today!

Introduction to Spicy Sesame Ramen

There’s something magical about a steaming bowl of ramen, especially when it’s infused with the bold flavors of Spicy Sesame Ramen. I remember the first time I slurped up a bowl at a tiny noodle shop tucked away in a bustling city. The warmth wrapped around me like a cozy blanket, and the spice danced on my tongue. This recipe is perfect for those busy weeknights when you crave something quick yet satisfying. With just a handful of ingredients, you can whip up a dish that impresses your loved ones and warms your soul. Let’s dive into this flavorful adventure!

Why You’ll Love This Spicy Sesame Ramen

This Spicy Sesame Ramen is a game-changer for your weeknight dinners. It’s quick to prepare, taking just 30 minutes from start to finish. The combination of savory ground pork, fresh veggies, and that delightful kick of spice creates a flavor explosion in every bite. Plus, it’s versatile! You can easily customize it to suit your taste or dietary needs. Trust me, once you try it, you’ll be hooked!

Ingredients for Spicy Sesame Ramen

Gathering the right ingredients is the first step to creating your Spicy Sesame Ramen masterpiece. Here’s what you’ll need:

  • Ramen noodles: The star of the dish! Choose your favorite brand, whether fresh or dried.
  • Vegetable oil: This is for sautéing the pork. It has a neutral flavor that lets the other ingredients shine.
  • Ground pork: Adds richness and protein. You can swap it for crumbled tofu or tempeh for a vegetarian option.
  • Garlic: Minced garlic brings a punch of flavor. Fresh is best, but jarred works in a pinch.
  • Ginger: Fresh ginger adds warmth and a hint of spice. It’s a must for that authentic Asian flavor.
  • Soy sauce: This salty, umami-rich sauce enhances the overall taste. Low-sodium options are available if you’re watching your salt intake.
  • Tahini: A creamy sesame paste that adds depth and richness. It’s a unique twist that sets this ramen apart.
  • Chili paste: Adjust the heat to your liking! This is where the spicy magic happens.
  • Chicken broth: The base of your broth. You can use homemade or store-bought for convenience.
  • Sesame oil: A drizzle at the end adds a nutty aroma and flavor that elevates the dish.
  • Green onions: Chopped for garnish and a fresh crunch. They add a pop of color too!
  • Baby spinach: A nutritious addition that wilts beautifully into the broth.
  • Soft-boiled egg: Optional, but it adds creaminess and richness. Perfect for those who love a runny yolk!
  • Sesame seeds: For garnish, these little seeds add a delightful crunch and visual appeal.

For exact measurements, check the bottom of the article where you can find everything listed for easy printing. Now, let’s get cooking!

How to Make Spicy Sesame Ramen

Now that you have all your ingredients ready, it’s time to bring this Spicy Sesame Ramen to life! Follow these simple steps, and you’ll have a delicious meal in no time.

Step 1: Cook the Ramen Noodles

Start by boiling water in a pot. Once it’s bubbling, add the ramen noodles. Cook them according to the package instructions, usually just a few minutes. When they’re tender, drain and set them aside. This will be the cozy base for your spicy broth!

Step 2: Brown the Ground Pork

In a large pot, heat the vegetable oil over medium heat. Once hot, add the ground pork. Cook it for about 5-7 minutes, breaking it up with a spoon as it browns. You want it to be nice and crispy, which adds great texture to your ramen.

Step 3: Add Garlic and Ginger

Next, stir in the minced garlic and ginger. These two ingredients are the flavor powerhouses of this dish! Cook them for about 1-2 minutes until they become fragrant. You’ll know it’s time to move on when your kitchen smells amazing!

Step 4: Mix in Sauces

Now, it’s time to add the soy sauce, tahini, and chili paste. Pour them into the pot and mix well. This is where the magic happens! The combination of these sauces creates a rich, savory flavor that will make your taste buds dance.

Step 5: Simmer the Broth

Pour in the chicken broth and bring the mixture to a simmer. Let it cook for about 5 minutes. This allows all those wonderful flavors to meld together, creating a broth that’s both spicy and comforting.

Step 6: Add Spinach and Green Onions

Stir in the chopped green onions and baby spinach. Cook for another 2-3 minutes until the spinach wilts down. This adds a pop of color and nutrition to your ramen, making it even more delightful!

Step 7: Serve the Ramen

Finally, it’s time to serve! Divide the cooked ramen noodles into bowls and ladle the spicy broth and pork mixture over the top. If you’re feeling fancy, add a soft-boiled egg and sprinkle with sesame seeds for that extra touch. Enjoy your delicious creation!

Tips for Success

  • Prep all your ingredients before starting to cook. It makes the process smoother!
  • Adjust the chili paste to your spice preference. Start small and add more if needed.
  • For extra flavor, consider marinating the ground pork in soy sauce for 15 minutes before cooking.
  • Don’t skip the soft-boiled egg; it adds creaminess that complements the broth.
  • Experiment with different vegetables like bok choy or mushrooms for added nutrition.

Equipment Needed

  • Large pot: Essential for cooking the broth and browning the pork. A Dutch oven works great too!
  • Colander: For draining the ramen noodles. A slotted spoon can work in a pinch.
  • Cutting board and knife: For chopping garlic, ginger, and veggies.
  • Measuring spoons: Handy for precise ingredient amounts.

Variations of Spicy Sesame Ramen

  • Vegetarian Delight: Swap the ground pork for crumbled tofu or tempeh. This keeps the dish hearty while catering to plant-based diets.
  • Seafood Twist: Use shrimp or scallops instead of pork for a seafood version. Just add them in during the last few minutes of cooking.
  • Extra Veggies: Toss in additional vegetables like bok choy, mushrooms, or bell peppers for a colorful and nutritious boost.
  • Spicy Peanut Ramen: Replace tahini with peanut butter for a nutty flavor that pairs beautifully with the spice.
  • Gluten-Free Option: Use gluten-free ramen noodles to make this dish suitable for those with gluten sensitivities.

Serving Suggestions for Spicy Sesame Ramen

  • Side Salad: Pair your ramen with a light cucumber salad dressed in rice vinegar for a refreshing contrast.
  • Drink Pairing: Enjoy with a cold Japanese beer or a crisp iced green tea to balance the spice.
  • Presentation: Serve in deep bowls, garnished with extra green onions and a sprinkle of sesame seeds for a beautiful finish.

FAQs about Spicy Sesame Ramen

Can I make Spicy Sesame Ramen vegetarian?

Absolutely! Simply swap the ground pork for crumbled tofu or tempeh. This keeps the dish hearty while catering to plant-based diets. You can also add more vegetables for extra flavor and nutrition.

How can I adjust the spice level?

Adjusting the spice level is easy! Start with a small amount of chili paste and taste as you go. You can always add more if you like it hotter. Remember, it’s easier to add than to take away!

What can I use instead of tahini?

If you don’t have tahini on hand, peanut butter is a great alternative. It adds a nutty flavor that pairs beautifully with the other ingredients. Just keep in mind that it will change the flavor profile slightly.

Can I prepare this ramen in advance?

Yes, you can prep the ingredients ahead of time! Cook the ramen noodles and store them separately from the broth. When you’re ready to eat, simply reheat the broth and combine everything for a quick meal.

What are some good toppings for Spicy Sesame Ramen?

There are plenty of delicious toppings you can add! Consider soft-boiled eggs, sliced jalapeños, or even a sprinkle of nori for an extra touch. Fresh herbs like cilantro or basil can also elevate the dish.

Final Thoughts

Cooking Spicy Sesame Ramen is more than just preparing a meal; it’s about creating a moment of joy. The aroma that fills your kitchen, the vibrant colors in your bowl, and that first slurp of spicy goodness all come together to make this dish special. Whether you’re enjoying it solo after a long day or sharing it with friends, this ramen brings warmth and comfort. It’s a reminder that good food can elevate our spirits and create lasting memories. So grab your ingredients and dive into this flavorful adventure—you won’t regret it!

jhessica

Spicy Sesame Ramen: Discover a Flavorful Recipe Today!

A flavorful and spicy ramen dish featuring ground pork, sesame oil, and fresh vegetables.
Prep Time 10 minutes
Cook Time 20 minutes
Total Time 30 minutes
Servings: 4 servings
Course: Main Course
Cuisine: Asian
Calories: 450

Ingredients
  

  • 8 ounces ramen noodles
  • 1 tablespoon vegetable oil
  • 1 pound ground pork
  • 2 cloves garlic minced
  • 1 tablespoon ginger minced
  • 2 tablespoons soy sauce
  • 1 tablespoon tahini
  • 1 tablespoon chili paste adjust to taste
  • 4 cups chicken broth
  • 2 teaspoons sesame oil
  • 2 green onions chopped
  • 1 cup baby spinach
  • 1 soft-boiled egg optional
  • Sesame seeds for garnish

Method
 

  1. Cook the ramen noodles according to package instructions. Drain and set aside.
  2. In a large pot, heat the vegetable oil over medium heat. Add the ground pork and cook until browned, breaking it up with a spoon, about 5-7 minutes.
  3. Stir in the minced garlic and ginger, cooking for an additional 1-2 minutes until fragrant.
  4. Add the soy sauce, tahini, and chili paste to the pot, mixing well to combine.
  5. Pour in the chicken broth and bring the mixture to a simmer. Let it cook for about 5 minutes to allow the flavors to meld.
  6. Stir in the sesame oil, chopped green onions, and baby spinach. Cook for another 2-3 minutes until the spinach is wilted.
  7. Divide the cooked ramen noodles into bowls and ladle the spicy broth and pork mixture over the top.
  8. If desired, top each bowl with a soft-boiled egg and sprinkle with sesame seeds before serving.

Nutrition

Serving: 1bowlCalories: 450kcalCarbohydrates: 40gProtein: 25gFat: 20gSaturated Fat: 5gPolyunsaturated Fat: 15gCholesterol: 70mgSodium: 800mgFiber: 3gSugar: 2g

Notes

  • For a vegetarian option, substitute the ground pork with crumbled tofu or tempeh.
  • You can also add other vegetables like bok choy or mushrooms for extra nutrition and flavor.
  • Adjust the level of chili paste to suit your spice preference.

Tried this recipe?

Let us know how it was!

Grilled Miso-Glazed Salmon: Discover the Perfect Recipe!

Introduction to Grilled Miso-Glazed Salmon

There’s something magical about the aroma of grilled fish wafting through the air, isn’t there? Grilled Miso-Glazed Salmon is not just a dish; it’s an experience that brings warmth to any gathering. Whether you’re looking to impress your loved ones or simply want a quick solution for a busy weeknight dinner, this recipe has you covered. The savory miso marinade infuses the salmon with rich flavors, making it a delightful centerpiece on your table. Plus, it’s easy to whip up, so you can spend less time cooking and more time enjoying the moment.

Why You’ll Love This Grilled Miso-Glazed Salmon

This Grilled Miso-Glazed Salmon is a game-changer for your dinner routine. It’s incredibly easy to prepare, taking just 20 minutes from start to finish. The combination of miso, mirin, and sake creates a flavor explosion that will have your taste buds dancing. Plus, it’s a healthy option packed with protein, making it perfect for those busy nights when you still want something delicious and nutritious on your plate.

Ingredients for Grilled Miso-Glazed Salmon

Gathering the right ingredients is the first step to culinary success. For this Grilled Miso-Glazed Salmon, you’ll need a few key players that work together to create a symphony of flavors.

  • Salmon fillets: Fresh, high-quality salmon is essential. Look for vibrant color and firm texture. You can also use skin-on or skinless, depending on your preference.
  • White miso paste: This fermented soybean paste adds depth and umami. It’s the star of the marinade, so don’t skimp on quality. You can find it in most grocery stores or Asian markets.
  • Mirin: A sweet rice wine that balances the savory miso. If you can’t find mirin, a splash of white wine mixed with a bit of sugar can work as a substitute.
  • Sake (or dry white wine): This adds a subtle complexity. If you’re not a fan of sake, a dry white wine like Sauvignon Blanc will do the trick.
  • Sugar: Just a touch to enhance the flavors and help with caramelization on the grill. Brown sugar can be a nice alternative for a deeper flavor.
  • Soy sauce: A splash of soy sauce brings saltiness and richness. For a gluten-free option, use tamari instead.
  • Sesame oil: This adds a nutty aroma and flavor. A little goes a long way, so just a teaspoon is all you need.
  • Green onion: Finely sliced for garnish, it adds a fresh crunch and a pop of color to your dish.
  • Lemon wedges: A squeeze of lemon brightens the flavors and adds a refreshing zing when serving.

For those who like to experiment, consider adding a teaspoon of grated ginger to the marinade for an extra kick. You can find the exact quantities of these ingredients at the bottom of the article, ready for printing!

How to Make Grilled Miso-Glazed Salmon

Now that you have your ingredients ready, let’s dive into the steps for making this delicious Grilled Miso-Glazed Salmon. Each step is straightforward, ensuring you can whip this up with confidence. Let’s get cooking!

Step 1: Prepare the Miso Marinade

Start by grabbing a small bowl. In it, whisk together the white miso paste, mirin, sake, sugar, soy sauce, and sesame oil. You want to mix until it’s smooth and well combined. This marinade is where the magic happens, so make sure everything is blended nicely. The aroma will already start to hint at the deliciousness to come!

Step 2: Marinate the Salmon

Next, take your salmon fillets and place them in a shallow dish. Pour the miso marinade over the fillets, ensuring they are well coated. This is crucial for flavor! Cover the dish and pop it in the refrigerator for at least 30 minutes. If you have time, letting it marinate for up to 2 hours will deepen the flavors even more. Trust me, it’s worth the wait!

Step 3: Preheat the Grill

While the salmon is soaking up all that flavor, it’s time to preheat your grill or grill pan. Set it to medium-high heat. If you’re using a grill, make sure the grates are clean and lightly oiled to prevent sticking. A hot grill is key to achieving those beautiful grill marks and a perfectly cooked salmon.

Step 4: Grill the Salmon

Once your grill is hot, carefully remove the salmon from the marinade, letting any excess drip off. Discard the leftover marinade. Place the salmon fillets skin-side down on the grill. Grill for about 4-5 minutes, then gently flip them over. Cook for another 3-4 minutes, or until the salmon flakes easily with a fork. Keep an eye on it; overcooking can dry it out!

Step 5: Rest and Garnish

After grilling, remove the salmon from the heat and let it rest for a couple of minutes. This allows the juices to redistribute, keeping it moist. To serve, garnish with finely sliced green onions and a few lemon wedges on the side. A squeeze of lemon adds a refreshing touch that brightens the dish beautifully!

Tips for Success

  • Always use fresh salmon for the best flavor and texture.
  • Don’t skip the marinating time; it’s essential for flavor infusion.
  • Keep an eye on the grill temperature to avoid overcooking.
  • Use a fish spatula for easy flipping without breaking the fillets.
  • Experiment with additional spices or herbs in the marinade for a unique twist.

Equipment Needed

  • Grill or Grill Pan: A standard outdoor grill works best, but a stovetop grill pan is a great alternative.
  • Whisk: Essential for mixing the marinade; a fork can work in a pinch.
  • Shallow Dish: For marinating the salmon; any glass or ceramic dish will do.
  • Fish Spatula: Ideal for flipping the salmon without breaking it; a regular spatula can suffice.

Variations

  • Spicy Miso-Glazed Salmon: Add a teaspoon of sriracha or chili paste to the marinade for a kick of heat.
  • Herb-Infused Marinade: Mix in fresh herbs like cilantro or basil for a fragrant twist on the traditional flavor.
  • Maple Miso Glaze: Substitute half of the sugar with maple syrup for a sweet and smoky flavor profile.
  • Vegetarian Option: Use the miso marinade on grilled tofu or eggplant for a delicious plant-based alternative.
  • Asian-Inspired Bowl: Serve the grilled salmon over a bed of rice with steamed vegetables and a drizzle of sesame oil for a complete meal.

Serving Suggestions

  • Pair with steamed jasmine rice for a classic combination that soaks up the flavors.
  • Serve alongside sautéed bok choy or asparagus for a vibrant, healthy side.
  • A chilled glass of Sauvignon Blanc complements the dish beautifully.
  • For presentation, arrange the salmon on a platter with lemon wedges and green onions for a pop of color.

FAQs about Grilled Miso-Glazed Salmon

Can I use frozen salmon for this recipe?
Absolutely! Just make sure to thaw it completely before marinating. Frozen salmon can still be delicious when cooked properly.

How long can I marinate the salmon?
You can marinate the salmon for as little as 30 minutes or up to 2 hours. The longer it marinates, the more flavorful it becomes, but don’t exceed 2 hours to avoid an overly salty taste.

What can I serve with Grilled Miso-Glazed Salmon?
This dish pairs wonderfully with steamed rice, sautéed vegetables, or a fresh salad. You can also serve it with a side of miso soup for a complete Japanese-inspired meal.

Can I make the miso marinade ahead of time?
Yes! You can prepare the miso marinade a day in advance and store it in the refrigerator. Just give it a good stir before using it to ensure everything is well combined.

Is Grilled Miso-Glazed Salmon gluten-free?
Yes, as long as you use gluten-free soy sauce or tamari in the marinade, this dish is a great gluten-free option!

Final Thoughts

Grilled Miso-Glazed Salmon is more than just a meal; it’s a celebration of flavors and a testament to the joy of cooking. Each bite transports you to a cozy Japanese eatery, where the warmth of the grill meets the savory notes of miso. This dish is perfect for any occasion, whether it’s a casual weeknight dinner or a special gathering with friends. The ease of preparation means you can focus on what truly matters—sharing delicious food and creating memories. So fire up that grill, and let this delightful salmon dish bring a little joy to your table!

jhessica

Grilled Miso-Glazed Salmon: Discover the Perfect Recipe!

A delicious and easy recipe for grilled salmon glazed with a savory miso marinade.
Prep Time 10 minutes
Cook Time 10 minutes
Total Time 20 minutes
Servings: 2 servings
Course: Main Course
Cuisine: Japanese
Calories: 350

Ingredients
  

  • 2 6-ounce salmon fillets
  • 1/4 cup white miso paste
  • 2 tablespoons mirin
  • 2 tablespoons sake or dry white wine
  • 1 tablespoon sugar
  • 1 teaspoon soy sauce
  • 1 teaspoon sesame oil
  • 1 green onion finely sliced (for garnish)
  • Lemon wedges for serving

Method
 

  1. In a small bowl, whisk together the miso paste, mirin, sake, sugar, soy sauce, and sesame oil until smooth and well combined.
  2. Place the salmon fillets in a shallow dish and pour the miso marinade over them, ensuring they are well coated. Cover and refrigerate for at least 30 minutes, or up to 2 hours for a stronger flavor.
  3. Preheat your grill or grill pan over medium-high heat.
  4. Remove the salmon from the marinade, allowing any excess to drip off. Discard the remaining marinade.
  5. Place the salmon fillets skin-side down on the grill. Cook for about 4-5 minutes, then carefully flip and grill for an additional 3-4 minutes, or until the salmon is cooked through and flakes easily with a fork.
  6. Remove the salmon from the grill and let it rest for a couple of minutes.
  7. Garnish with sliced green onions and serve with lemon wedges on the side.

Nutrition

Serving: 1filletCalories: 350kcalCarbohydrates: 5gProtein: 34gFat: 20gSugar: 1g

Notes

  • For a different flavor profile, add a teaspoon of grated ginger to the marinade.
  • Serve with steamed rice and sautéed vegetables for a complete meal.

Tried this recipe?

Let us know how it was!

Rhubarb Ricotta Cake: Discover This Delightful Recipe

Introduction to Rhubarb Ricotta Cake

There’s something magical about the combination of tart and sweet, and that’s exactly what you get with a Rhubarb Ricotta Cake.

Growing up, my grandmother had a rhubarb patch that seemed to thrive on neglect.

Every spring, we’d gather the stalks and whip up something delicious.

This cake is a nod to those sunny afternoons, blending the tangy rhubarb with creamy ricotta for a dessert that’s both comforting and impressive.

Whether you’re looking for a quick solution for a busy day or a showstopper for a gathering, this cake fits the bill perfectly.

Why You’ll Love This Rhubarb Ricotta Cake

This Rhubarb Ricotta Cake is a game-changer in the dessert world.

It’s incredibly easy to whip up, making it perfect for those busy weeknights or last-minute gatherings.

The balance of tart rhubarb and creamy ricotta creates a flavor explosion that will have your taste buds dancing.

Plus, it’s a versatile recipe; you can easily adapt it with different fruits or flavors.

Trust me, this cake will quickly become a favorite!

Ingredients for Rhubarb Ricotta Cake

To create this delightful Rhubarb Ricotta Cake, you’ll need a handful of simple ingredients that come together beautifully.

Here’s what you’ll gather:

  • Rhubarb: Fresh, vibrant stalks are key. They bring that signature tartness that pairs perfectly with the sweetness of the cake.
  • Granulated Sugar: This sweetener balances the tartness of the rhubarb. You’ll use it in two parts—one for macerating the rhubarb and the other for the cake batter.
  • Ricotta Cheese: This creamy cheese adds moisture and richness, making the cake tender and flavorful.
  • Unsalted Butter: Softened butter is essential for creating a light and fluffy texture in the cake.
  • Eggs: They act as a binding agent, helping to hold everything together while adding richness.
  • Vanilla Extract: A splash of vanilla enhances the overall flavor, making each bite more aromatic and inviting.
  • All-Purpose Flour: This is the backbone of the cake, providing structure and stability.
  • Baking Powder: A leavening agent that helps the cake rise, giving it that perfect fluffy texture.
  • Salt: Just a pinch enhances the flavors and balances the sweetness.
  • Ground Cinnamon: This optional spice adds warmth and depth to the cake, complementing the rhubarb beautifully.
  • Powdered Sugar: For dusting on top, this is purely optional but adds a lovely finishing touch.

For exact measurements, check the bottom of the article where you can find everything listed for easy printing.

With these ingredients, you’re well on your way to baking a cake that’s not just delicious but also a delightful nod to springtime flavors!

How to Make Rhubarb Ricotta Cake

Baking a Rhubarb Ricotta Cake is a delightful journey that combines simple steps with a touch of love.

Let’s dive into the process, ensuring you create a cake that’s as beautiful as it is delicious.

Step 1: Preheat and Prepare

Start by preheating your oven to 350°F (175°C).

This step is crucial for even baking, ensuring your cake rises perfectly.

While the oven warms up, grease a 9-inch round cake pan and line the bottom with parchment paper.

This will help the cake release easily once it’s baked.

Step 2: Macerate the Rhubarb

In a medium bowl, toss the chopped rhubarb with 1/4 cup of granulated sugar.

Let it sit for about 15 minutes.

This process, known as maceration, draws out the juices and enhances the rhubarb’s flavor, making it even more delicious in the cake.

Step 3: Cream Butter and Sugar

In a large mixing bowl, cream together the softened butter and the remaining 3/4 cup of granulated sugar.

Use an electric mixer for about 3-5 minutes until the mixture is light and fluffy.

This step is key for creating a tender cake, as it incorporates air into the batter.

Step 4: Combine Wet Ingredients

Next, add the ricotta cheese, eggs, and vanilla extract to the butter mixture.

Beat everything together until well combined.

Mixing well ensures that the ricotta is evenly distributed, contributing to the cake’s moist texture.

Step 5: Mix Dry Ingredients

In another bowl, whisk together the all-purpose flour, baking powder, salt, and ground cinnamon.

This step is essential for cake structure, as it evenly distributes the leavening agent.

Gradually add the dry ingredients to the wet mixture, mixing until just combined.

Avoid overmixing to keep the cake light.

Step 6: Fold in Rhubarb

Now, gently fold in the macerated rhubarb along with any juices that have accumulated.

Folding is a technique that helps maintain the cake’s texture, ensuring it stays fluffy.

Be careful not to overwork the batter; you want those lovely chunks of rhubarb to remain intact.

Step 7: Bake the Cake

Pour the batter into the prepared cake pan and smooth the top with a spatula.

Bake for 40-45 minutes, or until a toothpick inserted into the center comes out clean.

Keep an eye on it towards the end; every oven is a little different!

Step 8: Cool and Serve

Once baked, allow the cake to cool in the pan for about 10 minutes.

Then, transfer it to a wire rack to cool completely.

For a lovely finishing touch, dust the top with powdered sugar before serving.

This adds a sweet contrast to the tart rhubarb, making each slice even more inviting.

Tips for Success

  • Use fresh rhubarb for the best flavor; frozen can work, but the texture may differ.
  • Don’t skip the maceration step; it enhances the rhubarb’s sweetness and flavor.
  • Make sure your butter is softened for easy creaming; it should be at room temperature.
  • Check for doneness a few minutes early; ovens can vary in temperature.
  • Let the cake cool completely before slicing for cleaner pieces.

Equipment Needed

  • 9-inch round cake pan: A standard choice, but you can use a square pan if that’s what you have.
  • Mixing bowls: A set of various sizes is handy; even a large pot can work in a pinch.
  • Electric mixer: Great for creaming, but a whisk and some elbow grease will do just fine.
  • Spatula: Essential for folding and smoothing the batter; a wooden spoon can also work.
  • Wire rack: For cooling; if you don’t have one, a plate will suffice.

Variations of Rhubarb Ricotta Cake

  • Berry Bliss: Substitute rhubarb with fresh strawberries or blueberries for a sweeter twist.
  • Nutty Delight: Add chopped walnuts or almonds to the batter for a delightful crunch and added flavor.
  • Gluten-Free Option: Use a gluten-free all-purpose flour blend to make this cake suitable for gluten-sensitive friends.
  • Vegan Version: Replace eggs with flaxseed meal and use a plant-based butter and ricotta alternative.
  • Spiced Up: Incorporate a teaspoon of ginger or nutmeg for a warm, spiced flavor profile.

Serving Suggestions for Rhubarb Ricotta Cake

  • Pair with Whipped Cream: A dollop of freshly whipped cream adds a light, airy touch.
  • Serve with Ice Cream: Vanilla or strawberry ice cream complements the tartness beautifully.
  • Accompany with Tea: A cup of herbal tea enhances the cake’s flavors during afternoon gatherings.
  • Garnish with Fresh Mint: A sprig of mint adds a pop of color and freshness.
  • Presentation: Serve on a rustic wooden board for a charming, homemade feel.

FAQs about Rhubarb Ricotta Cake

Can I use frozen rhubarb for this cake?

Yes, you can use frozen rhubarb! Just make sure to thaw and drain any excess moisture before adding it to the batter. This helps maintain the cake’s texture.

How do I store leftover Rhubarb Ricotta Cake?

Store any leftovers in an airtight container at room temperature for up to three days. If you want to keep it longer, refrigerate it for up to a week.

Can I make this cake ahead of time?

Absolutely! You can bake the cake a day in advance. Just let it cool completely, then wrap it tightly in plastic wrap to keep it fresh.

What can I substitute for ricotta cheese?

If you don’t have ricotta, cottage cheese can work in a pinch. Just blend it until smooth for a similar texture. Cream cheese is another option, but it will change the flavor slightly.

Is this cake suitable for special diets?

This Rhubarb Ricotta Cake can be adapted for various diets. Use gluten-free flour for a gluten-free version, or try a vegan substitute for a plant-based option. The possibilities are endless!

Final Thoughts

Baking a Rhubarb Ricotta Cake is more than just following a recipe; it’s about creating memories and sharing joy.

The delightful blend of tart rhubarb and creamy ricotta brings a taste of spring to your table, making every bite a celebration.

Whether you’re enjoying it with family or impressing friends at a gathering, this cake is sure to spark smiles and compliments.

So, roll up your sleeves, embrace the process, and let the aroma fill your kitchen.

Trust me, this cake will not only satisfy your sweet tooth but also warm your heart.

jhessica

Rhubarb Ricotta Cake: Discover This Delightful Recipe

A delightful Rhubarb Ricotta Cake that combines the tartness of rhubarb with the creaminess of ricotta cheese, perfect for any occasion.
Prep Time 15 minutes
Cook Time 45 minutes
Total Time 1 hour
Servings: 8 servings
Course: Dessert
Cuisine: American
Calories: 220

Ingredients
  

  • 2 cups rhubarb chopped into 1-inch pieces
  • 1 cup granulated sugar divided
  • 1 cup ricotta cheese
  • 1/2 cup unsalted butter softened
  • 3 large eggs
  • 1 teaspoon vanilla extract
  • 1 1/2 cups all-purpose flour
  • 1 teaspoon baking powder
  • 1/2 teaspoon salt
  • 1/4 teaspoon ground cinnamon
  • Powdered sugar for dusting (optional)

Method
 

  1. Preheat the oven to 350°F (175°C). Grease a 9-inch round cake pan and line the bottom with parchment paper.
  2. In a medium bowl, toss the chopped rhubarb with 1/4 cup of granulated sugar. Set aside to macerate for about 15 minutes.
  3. In a large mixing bowl, cream together the softened butter and remaining 3/4 cup of granulated sugar until light and fluffy.
  4. Add the ricotta cheese, eggs, and vanilla extract to the butter mixture. Beat until well combined.
  5. In another bowl, whisk together the flour, baking powder, salt, and cinnamon. Gradually add the dry ingredients to the wet mixture, mixing until just combined.
  6. Fold in the macerated rhubarb, along with any juices that have accumulated.
  7. Pour the batter into the prepared cake pan and smooth the top.
  8. Bake for 40-45 minutes, or until a toothpick inserted into the center comes out clean.
  9. Allow the cake to cool in the pan for 10 minutes before transferring it to a wire rack to cool completely. Dust with powdered sugar before serving, if desired.

Nutrition

Serving: 1sliceCalories: 220kcalCarbohydrates: 28gProtein: 4gFat: 10gSaturated Fat: 6gPolyunsaturated Fat: 4gCholesterol: 70mgSodium: 150mgFiber: 1gSugar: 14g

Notes

  • For a richer flavor, try adding a teaspoon of almond extract along with the vanilla.
  • You can also substitute the rhubarb with fresh strawberries or blueberries for a different fruit variation.

Tried this recipe?

Let us know how it was!

Broccoli Cheddar Pasta Salad: A Cool and Creamy Delight!

Introduction to Broccoli Cheddar Pasta Salad

When I think of summer gatherings, the first dish that comes to mind is Broccoli Cheddar Pasta Salad. This cool and creamy delight is not just a salad; it’s a celebration of flavors and textures that everyone loves.

Whether you’re hosting a backyard barbecue or just looking for a quick solution for a busy day, this pasta salad fits the bill perfectly.

It’s easy to whip up, and the combination of fresh broccoli, sharp cheddar, and elbow macaroni makes it a crowd-pleaser. Trust me, your loved ones will be asking for seconds!

Why You’ll Love This Broccoli Cheddar Pasta Salad

This Broccoli Cheddar Pasta Salad is a game-changer for busy weeknights or casual get-togethers.

It comes together in just over an hour, making it a quick and satisfying option.

The creamy dressing perfectly complements the crunch of fresh broccoli and the sharpness of cheddar.

Plus, it’s versatile enough to adapt to your taste, ensuring everyone at the table leaves happy.

What’s not to love?

Ingredients for Broccoli Cheddar Pasta Salad

Creating a delicious Broccoli Cheddar Pasta Salad starts with gathering the right ingredients. Here’s what you’ll need:

  • Elbow macaroni: The classic choice for pasta salads, its shape holds the dressing beautifully.
  • Fresh broccoli florets: These add a vibrant crunch and a pop of color, making the salad visually appealing.
  • Shredded sharp cheddar cheese: This is the star of the show, bringing a rich, tangy flavor that pairs perfectly with the creamy dressing.
  • Mayonnaise: A key ingredient for creaminess, it binds everything together and adds a smooth texture.
  • Sour cream: This adds a tangy kick and enhances the creaminess of the dressing.
  • Apple cider vinegar: A splash of acidity that brightens the flavors and balances the richness.
  • Dijon mustard: Just a hint of this adds depth and a subtle zing to the dressing.
  • Garlic powder: For a touch of savory flavor without the hassle of fresh garlic.
  • Onion powder: This complements the garlic and adds a mild sweetness.
  • Salt and pepper: Essential for seasoning, these enhance all the flavors in the salad.
  • Cherry tomatoes: Halved for sweetness and a burst of juiciness in every bite.
  • Red onion: Finely chopped for a bit of sharpness and crunch.

Feel free to get creative! You can mix in diced cooked chicken or chickpeas for added protein. If you’re feeling adventurous, swap the cheddar for feta or mozzarella to give it a unique twist.

For exact measurements, check the bottom of the article where you can find everything available for printing.

How to Make Broccoli Cheddar Pasta Salad

Making Broccoli Cheddar Pasta Salad is a breeze! Follow these simple steps, and you’ll have a delicious dish ready in no time.

Step 1: Cook the Pasta

Start by boiling a pot of salted water.

Add the elbow macaroni and cook according to the package instructions until al dente.

This usually takes about 7-9 minutes.

Once done, drain the pasta and rinse it under cold water.

This stops the cooking process and helps cool it down for the salad.

Step 2: Blanch the Broccoli

In a separate pot, bring water to a boil again.

Add the fresh broccoli florets and blanch them for 2-3 minutes.

You want them bright green and tender-crisp.

After that, quickly transfer the broccoli to a bowl of ice water.

This technique locks in the color and crunch.

Once cooled, drain the broccoli and set it aside.

Step 3: Prepare the Dressing

In a large mixing bowl, combine the mayonnaise, sour cream, apple cider vinegar, and Dijon mustard.

Whisk them together until smooth.

Then, sprinkle in the garlic powder, onion powder, salt, and pepper.

Give it another good whisk to blend all those flavors.

This creamy dressing is what makes the salad so irresistible!

Step 4: Combine Ingredients

Now it’s time to bring everything together.

Add the cooled macaroni, blanched broccoli, shredded cheddar cheese, halved cherry tomatoes, and chopped red onion to the bowl with the dressing.

Gently toss everything until well coated.

Be careful not to mash the broccoli; you want those lovely florets intact!

Step 5: Chill and Serve

Cover the bowl with plastic wrap or a lid and refrigerate for at least 1 hour.

This allows the flavors to meld beautifully.

Before serving, taste the salad and adjust the seasoning if needed.

You can serve it chilled or at room temperature.

Either way, it’s a delightful dish that’s sure to impress!

Tips for Success

  • Always rinse the pasta with cold water after cooking to prevent it from becoming mushy.
  • For extra flavor, let the salad chill overnight; it enhances the taste.
  • Adjust the dressing ingredients to suit your taste; add more vinegar for tang or more mayo for creaminess.
  • Don’t skip the ice bath for broccoli; it keeps the vibrant green color.
  • Experiment with different cheeses for a unique twist!

Equipment Needed

  • Large pot: For boiling pasta and blanching broccoli. A deep skillet can work too.
  • Colander: To drain the pasta and broccoli. A slotted spoon can be a handy alternative.
  • Mixing bowl: For combining ingredients. Any large bowl will do.
  • Whisk: To mix the dressing. A fork can also get the job done.

Variations of Broccoli Cheddar Pasta Salad

  • Protein Boost: Add diced cooked chicken or chickpeas for a heartier salad that packs a protein punch.
  • Cheese Swap: Try feta or mozzarella instead of cheddar for a different flavor profile.
  • Veggie Medley: Toss in other vegetables like bell peppers, carrots, or peas for added color and crunch.
  • Herb Infusion: Fresh herbs like dill or parsley can elevate the flavor and add freshness.
  • Spicy Kick: Mix in a dash of hot sauce or red pepper flakes for those who enjoy a little heat.

Serving Suggestions for Broccoli Cheddar Pasta Salad

  • Grilled Chicken: Pair with juicy grilled chicken for a satisfying meal.
  • Crusty Bread: Serve with a side of crusty bread or garlic knots for a complete experience.
  • Refreshing Drinks: Enjoy with iced tea or lemonade to complement the flavors.
  • Colorful Platter: Present in a vibrant bowl, garnished with fresh herbs for a pop of color.

FAQs about Broccoli Cheddar Pasta Salad

Can I make Broccoli Cheddar Pasta Salad ahead of time?

Absolutely! This salad tastes even better after sitting in the fridge for a few hours or overnight. Just be sure to give it a good stir before serving.

How long does Broccoli Cheddar Pasta Salad last in the fridge?

Stored in an airtight container, it can last up to 3-5 days. Just keep an eye on the freshness of the ingredients, especially the broccoli.

Can I use different types of pasta?

Yes! While elbow macaroni is traditional, feel free to experiment with rotini, penne, or even whole wheat pasta for a healthier twist.

Is this Broccoli Cheddar Pasta Salad suitable for vegetarians?

Yes, this recipe is vegetarian-friendly! You can also make it vegan by substituting the mayonnaise and sour cream with plant-based alternatives.

What can I serve with Broccoli Cheddar Pasta Salad?

This salad pairs wonderfully with grilled meats, sandwiches, or even as a light lunch on its own. It’s versatile enough to complement any meal!

Final Thoughts

Creating this Broccoli Cheddar Pasta Salad is more than just a cooking task; it’s an opportunity to bring people together.

The vibrant colors and creamy textures make it a feast for the eyes and the palate.

Every bite is a delightful mix of crunch and creaminess, reminding me of sunny days spent with family and friends.

Whether it’s a picnic or a simple weeknight dinner, this dish is sure to spark joy.

So, roll up your sleeves, gather your ingredients, and let this pasta salad become a staple in your kitchen.

You won’t regret it!

jhessica

Broccoli Cheddar Pasta Salad: A Cool and Creamy Delight!

A cool and creamy Broccoli Cheddar Pasta Salad that combines elbow macaroni, fresh broccoli, and sharp cheddar cheese in a delicious dressing.
Prep Time 15 minutes
Cook Time 10 minutes
Total Time 1 hour 25 minutes
Servings: 6 servings
Course: Salad
Cuisine: American
Calories: 290

Ingredients
  

  • 8 ounces elbow macaroni
  • 2 cups broccoli florets
  • 1 cup shredded sharp cheddar cheese
  • 1/2 cup mayonnaise
  • 1/4 cup sour cream
  • 2 tablespoons apple cider vinegar
  • 1 tablespoon Dijon mustard
  • 1/2 teaspoon garlic powder
  • 1/2 teaspoon onion powder
  • Salt and pepper to taste
  • 1/2 cup cherry tomatoes halved
  • 1/4 cup red onion finely chopped

Method
 

  1. Cook the elbow macaroni according to package instructions until al dente. Drain and rinse under cold water to cool.
  2. In a large pot of boiling water, blanch the broccoli florets for 2-3 minutes until bright green and tender-crisp. Drain and immediately transfer to a bowl of ice water to stop cooking. Drain again and set aside.
  3. In a large mixing bowl, combine the mayonnaise, sour cream, apple cider vinegar, Dijon mustard, garlic powder, onion powder, salt, and pepper. Whisk until smooth.
  4. Add the cooled macaroni, broccoli, cheddar cheese, cherry tomatoes, and red onion to the bowl. Gently toss until everything is well coated with the dressing.
  5. Cover and refrigerate for at least 1 hour to allow the flavors to meld.
  6. Before serving, taste and adjust seasoning if necessary. Serve chilled or at room temperature.

Nutrition

Serving: 1servingCalories: 290kcalCarbohydrates: 28gProtein: 9gFat: 16gSaturated Fat: 6gPolyunsaturated Fat: 10gCholesterol: 30mgSodium: 400mgFiber: 2gSugar: 3g

Notes

  • For added protein, consider mixing in diced cooked chicken or chickpeas.
  • Substitute the cheddar cheese with a different cheese like feta or mozzarella for a unique flavor twist.

Tried this recipe?

Let us know how it was!

Cottage Cheese Wraps: A Healthy Snack You’ll Love!

Introduction to Cottage Cheese Wraps

Life can get hectic, and sometimes we need a quick solution that doesn’t compromise on taste or nutrition. Enter Cottage Cheese Wraps! These delightful snacks are not only easy to whip up but also packed with flavor and goodness. I remember the first time I made them; it was a busy afternoon, and I needed something healthy yet satisfying. With just a few ingredients, I created a wrap that became an instant favorite. Perfect for a light lunch or a post-workout snack, these wraps are a delicious way to fuel your day without the fuss.

Why You’ll Love This Cottage Cheese Wraps

Cottage Cheese Wraps are a game-changer for anyone juggling a busy lifestyle. They come together in just 10 minutes, making them perfect for those rushed days. The creamy cottage cheese pairs beautifully with fresh veggies, creating a satisfying snack that’s both nutritious and delicious. Plus, you can customize them to your taste, ensuring every bite is a delightful surprise. Who knew healthy eating could be this easy and enjoyable?

Ingredients for Cottage Cheese Wraps

Gathering the right ingredients is key to making these Cottage Cheese Wraps a hit. Here’s what you’ll need:

  • Cottage Cheese: The star of the show! It adds creaminess and a protein boost.
  • Tortilla: Choose between whole wheat or regular. This is your wrap’s foundation.
  • Spinach Leaves: Fresh and vibrant, they bring a pop of color and nutrients.
  • Shredded Carrots: These add a sweet crunch and are rich in vitamins.
  • Diced Bell Pepper: Any color works! They add a sweet, crisp texture.
  • Garlic Powder: A pinch of this elevates the flavor without overpowering.
  • Black Pepper: Just a dash for a little kick.
  • Olive Oil (optional): A drizzle can enhance the richness of the wrap.
  • Lemon Juice (optional): A splash brightens the flavors and adds zest.

Feel free to get creative! You can swap in other veggies like cucumbers or tomatoes, or even add sliced turkey for extra protein. For exact measurements, check the bottom of the article where you can find everything available for printing.

How to Make Cottage Cheese Wraps

Creating Cottage Cheese Wraps is a breeze! Follow these simple steps, and you’ll have a delicious snack ready in no time. Let’s dive in!

Step 1: Prepare the Cottage Cheese Mixture

Start by grabbing a medium bowl. Combine the cottage cheese, garlic powder, and black pepper. Mix everything together until it’s smooth and creamy. This mixture is the heart of your wrap, so make sure it’s well blended!

Step 2: Lay Out the Tortilla

Next, take your tortilla and lay it flat on a clean surface or plate. This is where the magic happens, so make sure it’s nice and even. A good foundation is key to a great wrap!

Step 3: Spread the Cottage Cheese Mixture

Now, take that creamy cottage cheese mixture and spread it evenly over the tortilla. Leave a small border around the edges to prevent any filling from spilling out. This step ensures every bite is packed with flavor!

Step 4: Add Fresh Vegetables

Time to layer on the goodness! Place the fresh spinach leaves, shredded carrots, and diced bell pepper on top of the cottage cheese. Feel free to get creative here—add as many veggies as you like for a colorful and nutritious wrap!

Step 5: Drizzle Optional Ingredients

If you want to elevate the flavor, drizzle a bit of olive oil and a splash of lemon juice over the vegetables. This adds a delightful richness and brightness that takes your wrap to the next level.

Step 6: Roll the Tortilla

Starting from one edge, carefully roll the tortilla tightly to form a wrap. Keep it snug but not too tight, or the filling might burst out. A good roll is essential for a perfect Cottage Cheese Wrap!

Step 7: Slice and Serve

Finally, slice the wrap in half diagonally. Serve it immediately for the best taste, or wrap it in plastic wrap and refrigerate for up to 2 hours. This makes for a great grab-and-go snack!

Tips for Success

  • Use fresh ingredients for the best flavor and texture.
  • Experiment with different tortillas, like spinach or tomato basil, for a fun twist.
  • Don’t overfill your wrap; a little goes a long way!
  • For a crunchier texture, add some sliced cucumbers or radishes.
  • Make a batch ahead of time for quick snacks throughout the week.

Equipment Needed

  • Medium Bowl: For mixing the cottage cheese. A large mug works too!
  • Spatula or Spoon: To spread the mixture. A butter knife can do the trick.
  • Cutting Board: For slicing the wrap. A plate can also serve this purpose.
  • Knife: To cut the wrap in half. Any sharp knife will suffice.

Variations

  • Protein-Packed: Add sliced turkey, chicken breast, or even tofu for an extra protein boost.
  • Spicy Kick: Incorporate jalapeños or a sprinkle of red pepper flakes for some heat.
  • Herb Infusion: Mix in fresh herbs like basil or cilantro for a burst of flavor.
  • Sweet Twist: Swap in sliced strawberries or apples for a sweet and savory combo.
  • Gluten-Free Option: Use a gluten-free tortilla to make this snack suitable for everyone.

Serving Suggestions

  • Pair your Cottage Cheese Wraps with a side of crunchy veggie sticks for extra texture.
  • A light salad drizzled with vinaigrette complements the wraps beautifully.
  • Serve with a refreshing glass of iced tea or sparkling water for a delightful meal.
  • For presentation, slice the wraps into pinwheels for a fun, shareable snack.

FAQs about Cottage Cheese Wraps

Curious about Cottage Cheese Wraps? You’re not alone! Here are some common questions I often hear, along with helpful answers to guide you on your culinary journey.

Can I make Cottage Cheese Wraps ahead of time?

Absolutely! You can prepare these wraps in advance. Just wrap them in plastic wrap and refrigerate for up to 2 hours. This makes them a perfect grab-and-go snack for busy days.

What can I substitute for cottage cheese?

If cottage cheese isn’t your thing, try Greek yogurt or ricotta cheese. Both options provide a creamy texture and a good protein boost, making them great alternatives in your wraps.

Are Cottage Cheese Wraps suitable for kids?

Definitely! These wraps are a fun and nutritious option for kids. You can customize the fillings to suit their tastes, making healthy eating enjoyable for the little ones.

How can I add more flavor to my wraps?

For an extra flavor kick, consider adding spices like cumin or smoked paprika. You can also experiment with different sauces, such as hummus or a light ranch dressing, to enhance the taste.

Can I freeze Cottage Cheese Wraps?

While it’s best to enjoy them fresh, you can freeze the wraps. Just make sure to wrap them tightly in plastic wrap and foil. Thaw them in the fridge before serving for the best texture.

Final Thoughts

Cottage Cheese Wraps are more than just a quick snack; they’re a canvas for creativity and flavor. Each bite is a delightful blend of creamy, crunchy, and fresh, making them a joy to eat. I love how they fit seamlessly into my busy life, providing nourishment without the hassle. Whether you’re enjoying them as a light lunch or a post-workout treat, these wraps are sure to impress. Plus, the ability to customize them means you can keep things exciting in the kitchen. So, roll up your sleeves and give these wraps a try—you won’t be disappointed!

jhessica

Cottage Cheese Wraps: A Healthy Snack You’ll Love!

Cottage Cheese Wraps are a healthy and delicious snack option that combines creamy cottage cheese with fresh vegetables wrapped in a tortilla.
Prep Time 10 minutes
Total Time 10 minutes
Servings: 1 serving
Course: Snack
Cuisine: American
Calories: 280

Ingredients
  

  • 1 cup cottage cheese
  • 1 large tortilla whole wheat or regular
  • 1/2 cup spinach leaves fresh
  • 1/4 cup shredded carrots
  • 1/4 cup diced bell pepper any color
  • 1/4 teaspoon garlic powder
  • 1/4 teaspoon black pepper
  • 1 tablespoon olive oil optional
  • 1 tablespoon lemon juice optional

Method
 

  1. In a medium bowl, combine the cottage cheese, garlic powder, and black pepper. Mix well until smooth.
  2. Lay the tortilla flat on a clean surface or plate.
  3. Spread the cottage cheese mixture evenly over the tortilla, leaving a small border around the edges.
  4. Layer the spinach leaves, shredded carrots, and diced bell pepper on top of the cottage cheese.
  5. If desired, drizzle olive oil and lemon juice over the vegetables for added flavor.
  6. Starting from one edge, carefully roll the tortilla tightly to form a wrap.
  7. Slice the wrap in half diagonally and serve immediately, or wrap in plastic wrap and refrigerate for up to 2 hours before serving.

Nutrition

Serving: 1wrapCalories: 280kcalCarbohydrates: 30gProtein: 18gFat: 10gSaturated Fat: 2gPolyunsaturated Fat: 8gCholesterol: 20mgSodium: 400mgFiber: 5gSugar: 3g

Notes

  • For added protein, consider adding sliced turkey or chicken breast to the wrap.
  • Experiment with different vegetables such as cucumbers, tomatoes, or avocado for varied flavors and textures.

Tried this recipe?

Let us know how it was!

Stay Connected

Get recipes via email: