Get my cookbooks

Miso Soup with Tofu and Seaweed: A Quick Recipe Reveal

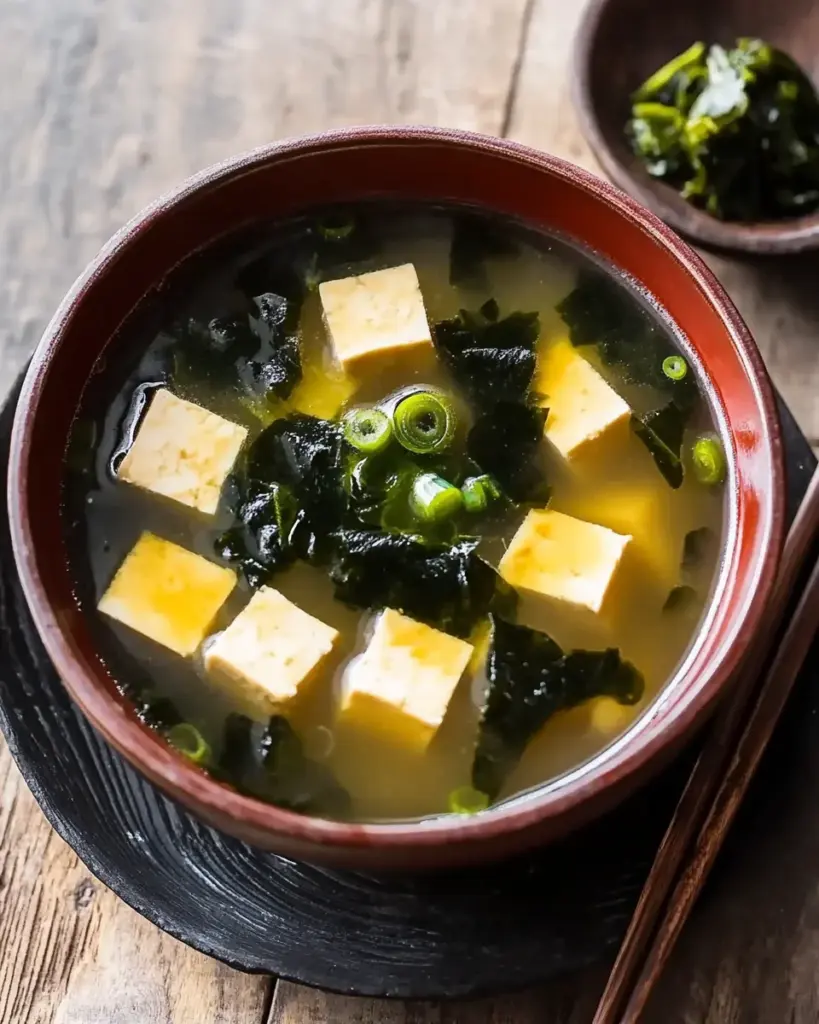
Introduction to Miso Soup with Tofu and Seaweed

There’s something incredibly comforting about a warm bowl of Miso Soup with Tofu and Seaweed. It takes me back to cozy evenings spent in my grandmother’s kitchen, where the aroma of simmering broth filled the air. This recipe is not just a quick solution for a busy day; it’s a delightful way to impress your loved ones with minimal effort. With just a handful of ingredients, you can whip up a nourishing dish that’s both satisfying and light. Let’s dive into this simple yet flavorful journey that will warm your heart and soul.

Why You’ll Love This Miso Soup with Tofu and Seaweed

This Miso Soup with Tofu and Seaweed is a game-changer for anyone looking for a quick, delicious meal. It’s ready in just 25 minutes, making it perfect for those hectic weeknights. The umami-rich miso pairs beautifully with the soft tofu and tender seaweed, creating a comforting bowl that warms you from the inside out. Plus, it’s vegan-friendly, so everyone can enjoy it without a second thought!

Ingredients for Miso Soup with Tofu and Seaweed

Gathering the right ingredients is key to making a delicious Miso Soup with Tofu and Seaweed. Here’s what you’ll need:

  • Water: The base of your soup, bringing everything together. Use filtered water for the best flavor.
  • Miso Paste: This fermented soybean paste is the star of the show. White or yellow miso works well, offering a mild, sweet flavor.
  • Firm Tofu: Adds protein and a satisfying texture. Firm tofu holds its shape well in the soup.
  • Dried Wakame Seaweed: This nutrient-rich seaweed expands when soaked, adding a unique flavor and texture to your soup.
  • Green Onions: Freshly sliced, they provide a pop of color and a mild onion flavor that brightens the dish.
  • Soy Sauce (optional): A splash can enhance the umami flavor, but it’s not necessary if you prefer a lighter taste.
  • Sesame Oil (optional): Just a drizzle adds a nutty aroma and richness to the soup.

For those looking to mix things up, consider adding sliced mushrooms or bok choy for extra heartiness. If you’re not a tofu fan, cooked chicken or shrimp can be great substitutes. You can find all the exact measurements at the bottom of the article, ready for printing!

How to Make Miso Soup with Tofu and Seaweed

Making Miso Soup with Tofu and Seaweed is a breeze. Follow these simple steps, and you’ll have a delicious bowl ready in no time. Let’s get started!

Step 1: Prepare the Broth

Begin by pouring 3 cups of water into a medium saucepan. Place it over medium heat and bring it to a gentle simmer. This is the foundation of your soup, so keep an eye on it. You want it hot but not boiling just yet.

Step 2: Soak the Seaweed

While the water heats, grab a small bowl and add 1/4 cup of dried wakame seaweed. Pour warm water over it and let it soak for about 10 minutes. This will allow the seaweed to expand and soften. Once it’s ready, drain the water and set the seaweed aside. It’s like a little transformation in your kitchen!

Step 3: Mix the Miso

In a separate small bowl, take 1/4 cup of miso paste. Add a few tablespoons of the hot water from your saucepan to the miso. Stir until it’s smooth and well combined. This step is crucial because adding miso directly to boiling water can kill its beneficial properties. We want all that umami goodness!

Step 4: Combine Ingredients

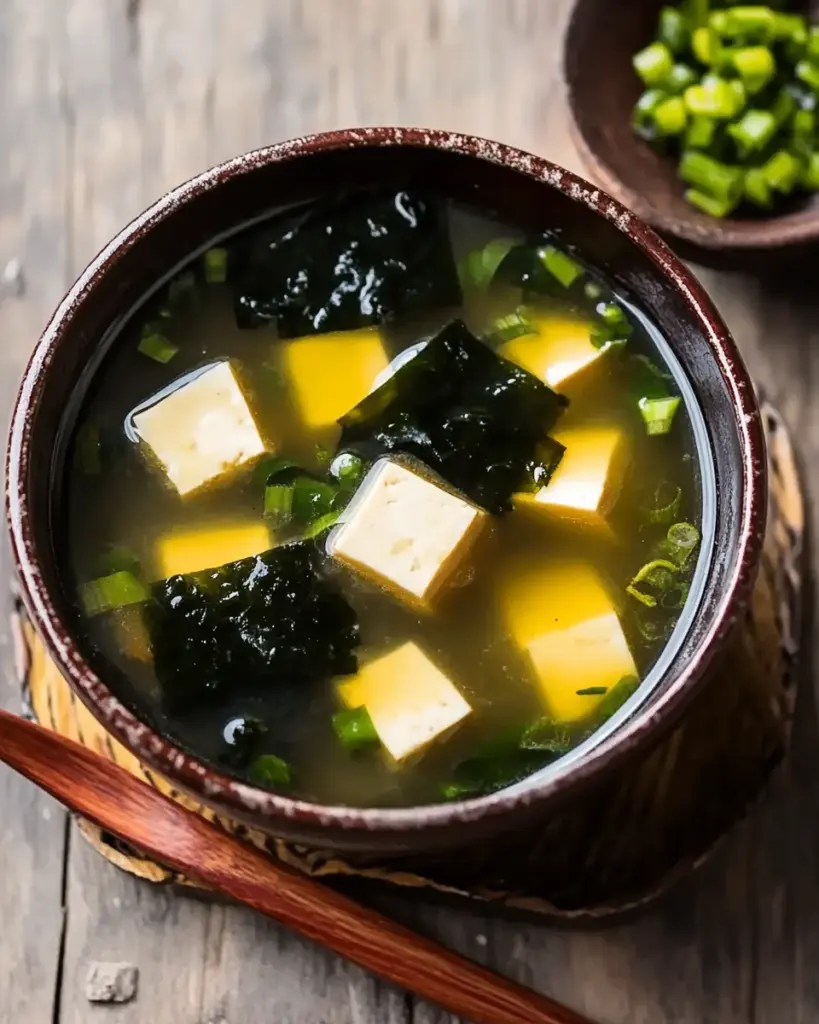
Once your broth is simmering, reduce the heat to low. Stir the miso mixture back into the saucepan. Next, gently add the cubed firm tofu and the soaked wakame seaweed. Allow everything to heat through for about 5 minutes. Remember, don’t let it boil! We want a gentle warmth to keep the flavors intact.

Step 5: Heat and Serve

If you like, stir in a tablespoon of soy sauce and a teaspoon of sesame oil for an extra flavor boost. Remove the pot from heat and garnish with sliced green onions. Serve your Miso Soup with Tofu and Seaweed hot, and enjoy the comforting aroma that fills your kitchen!

Tips for Success

  • Always mix miso with hot water before adding it to the soup to preserve its flavor.
  • Don’t let the soup boil after adding miso; it can lose its beneficial properties.
  • Experiment with different types of miso for varied flavors.
  • For a heartier soup, add vegetables like mushrooms or bok choy.
  • Store leftovers in the fridge, but consume within a couple of days for the best taste.

Equipment Needed

  • Medium Saucepan: Essential for simmering your soup. A large pot works too.
  • Small Bowl: Perfect for mixing the miso paste. Any bowl will do.
  • Measuring Cups: Handy for accurate ingredient portions. Use any cup you have.
  • Stirring Spoon: A wooden or silicone spoon is ideal for mixing.

Variations

  • Spicy Miso Soup: Add a teaspoon of chili paste or a sprinkle of red pepper flakes for a kick.
  • Vegetable-Loaded: Toss in sliced carrots, bok choy, or mushrooms for added nutrition and flavor.
  • Protein Boost: Substitute tofu with cooked chicken, shrimp, or even edamame for a different protein source.
  • Gluten-Free Option: Ensure your miso paste and soy sauce are labeled gluten-free to accommodate dietary needs.
  • Coconut Miso Soup: For a twist, add a splash of coconut milk for creaminess and a hint of sweetness.

Serving Suggestions

  • Rice: Serve with a side of steamed jasmine or brown rice for a complete meal.
  • Salad: Pair with a light cucumber salad dressed in rice vinegar for a refreshing contrast.
  • Presentation: Use a beautiful bowl and garnish with extra green onions for a pop of color.
  • Drink: Enjoy with green tea or a light beer to complement the flavors.

FAQs about Miso Soup with Tofu and Seaweed

Can I use different types of miso paste?

Absolutely! While white and yellow miso are milder and sweeter, red miso offers a stronger flavor. Feel free to experiment with different types to find your favorite!

Is Miso Soup with Tofu and Seaweed healthy?

Yes! This soup is low in calories and packed with nutrients. Tofu provides protein, while seaweed is rich in vitamins and minerals. It’s a great option for a light meal or appetizer.

How long can I store leftover miso soup?

You can store leftover Miso Soup with Tofu and Seaweed in the fridge for up to 2 days. Just remember to reheat gently to preserve the flavors!

Can I make this soup ahead of time?

While you can prepare the broth and soak the seaweed in advance, it’s best to add the miso and tofu just before serving. This keeps everything fresh and flavorful.

What can I serve with Miso Soup?

This soup pairs wonderfully with steamed rice, a light salad, or even sushi. It’s versatile enough to complement various dishes!

Final Thoughts

Creating a bowl of Miso Soup with Tofu and Seaweed is more than just cooking; it’s an experience that warms the heart. Each sip transports me back to those cherished family moments, where laughter and love filled the air. This soup is a reminder that simple ingredients can create something truly special. Whether you’re enjoying it on a busy weeknight or serving it to impress friends, this recipe brings comfort and joy. So, grab your ingredients, and let the soothing flavors of miso and seaweed wrap around you like a warm hug. Happy cooking!

jhessica

Miso Soup with Tofu and Seaweed: A Quick Recipe Reveal

A quick and easy recipe for Miso Soup with Tofu and Seaweed, perfect for a light meal or appetizer.
Prep Time 15 minutes
Cook Time 10 minutes
Total Time 25 minutes
Servings: 4 servings
Course: Soup
Cuisine: Japanese
Calories: 80

Ingredients
  

  • 3 cups water
  • 1/4 cup miso paste white or yellow
  • 1 cup firm tofu cubed
  • 1/4 cup dried wakame seaweed
  • 2 green onions sliced
  • 1 tablespoon soy sauce optional
  • 1 teaspoon sesame oil optional

Method
 

  1. In a medium saucepan, bring the water to a gentle simmer over medium heat.
  2. While the water is heating, soak the dried wakame seaweed in a small bowl of warm water for about 10 minutes until it expands. Drain and set aside.
  3. Once the water is simmering, reduce the heat to low. In a small bowl, mix the miso paste with a few tablespoons of the hot water until smooth.
  4. Stir the miso mixture back into the saucepan with the simmering water.
  5. Add the cubed tofu and soaked wakame to the pot. Allow everything to heat through for about 5 minutes, but do not let it boil.
  6. If desired, stir in the soy sauce and sesame oil for added flavor.
  7. Remove from heat and garnish with sliced green onions before serving.

Nutrition

Serving: 1cupCalories: 80kcalCarbohydrates: 5gProtein: 7gFat: 4gSaturated Fat: 1gPolyunsaturated Fat: 3gSodium: 600mgFiber: 1gSugar: 1g

Notes

  • For a heartier soup, add sliced mushrooms or bok choy during step 5.
  • You can also substitute the tofu with cooked chicken or shrimp for a different protein option.

Tried this recipe?

Let us know how it was!

Brown Butter Banana Bread: Discover a Delicious Twist!

Introduction to Brown Butter Banana Bread

There’s something magical about the aroma of freshly baked bread wafting through the house. It takes me back to my childhood, where the kitchen was the heart of our home. Today, I’m excited to share my twist on a classic favorite: Brown Butter Banana Bread. This recipe is not just a quick solution for a busy day; it’s a delightful way to impress your loved ones. The rich, nutty flavor of brown butter elevates the traditional banana bread to new heights. Trust me, once you try this, you’ll never look at banana bread the same way again!

Why You’ll Love This Brown Butter Banana Bread

This Brown Butter Banana Bread is a game-changer in the baking world. It’s incredibly easy to whip up, making it perfect for those busy weekends or last-minute gatherings. The rich, nutty flavor of brown butter adds depth that will have everyone asking for seconds. Plus, it’s a fantastic way to use up those overripe bananas sitting on your counter. You’ll love how simple and satisfying this recipe is!

Ingredients for Brown Butter Banana Bread

Gathering the right ingredients is the first step to creating your Brown Butter Banana Bread masterpiece. Here’s what you’ll need:

  • Ripe Bananas: The star of the show! Look for bananas with plenty of brown spots for maximum sweetness.
  • Unsalted Butter: This is where the magic happens. Browning the butter gives it a rich, nutty flavor that transforms the bread.
  • Granulated Sugar: Adds sweetness and helps create a lovely crust.
  • Brown Sugar: This brings moisture and a hint of caramel flavor, enhancing the overall taste.
  • Large Eggs: They bind everything together and add richness to the batter.
  • Vanilla Extract: A splash of vanilla elevates the flavor profile, making it even more delicious.
  • Baking Soda: This is your leavening agent, helping the bread rise and become fluffy.
  • Salt: Just a pinch enhances all the flavors and balances the sweetness.
  • All-Purpose Flour: The base of your batter, providing structure to the bread.
  • Chopped Walnuts or Pecans (optional): For a delightful crunch, add these nuts. They also complement the banana flavor beautifully.

For exact measurements, check the bottom of the article where you can find everything listed for easy printing. Happy baking!

How to Make Brown Butter Banana Bread

Now that you have your ingredients ready, let’s dive into the steps to create this delicious Brown Butter Banana Bread. Follow along, and I promise you’ll be rewarded with a loaf that’s bursting with flavor!

Step 1: Preheat the Oven

First things first, preheat your oven to 350°F (175°C). This ensures that your bread bakes evenly. While the oven warms up, grease a 9×5-inch loaf pan or line it with parchment paper for easy removal later.

Step 2: Brown the Butter

In a medium saucepan, melt the unsalted butter over medium heat. Keep stirring as it melts, watching closely as it transforms. You want it to turn golden brown and develop a nutty aroma. This step is crucial; it’s where the magic happens! Once it reaches that perfect color, remove it from the heat and let it cool slightly.

Step 3: Mix the Wet Ingredients

In a large mixing bowl, combine the mashed bananas, your beautifully browned butter, granulated sugar, and brown sugar. Mix everything together until it’s smooth and well combined. The bananas should be fully incorporated, creating a luscious base for your batter.

Step 4: Add Eggs and Vanilla

Next, crack in the large eggs and pour in the vanilla extract. Stir until everything is fully incorporated. This adds richness and a lovely depth of flavor to your Brown Butter Banana Bread.

Step 5: Combine Dry Ingredients

In a separate bowl, whisk together the baking soda, salt, and all-purpose flour. This step helps to evenly distribute the leavening agent, ensuring your bread rises perfectly. It’s a simple yet important part of the process!

Step 6: Mix Wet and Dry Ingredients

Now, gradually add the dry ingredients to the wet mixture. Stir gently until just combined. Be careful not to overmix; a few lumps are perfectly fine. This will keep your bread tender and fluffy.

Step 7: Fold in Nuts

If you’re feeling adventurous, fold in the chopped walnuts or pecans at this stage. They add a delightful crunch and complement the banana flavor beautifully. If nuts aren’t your thing, feel free to skip this step!

Step 8: Bake the Bread

Pour the batter into your prepared loaf pan, smoothing the top with a spatula. Pop it into the oven and bake for 60-65 minutes. You’ll know it’s done when a toothpick inserted into the center comes out clean. The aroma will be irresistible!

Step 9: Cool and Serve

Once baked, allow the bread to cool in the pan for about 10 minutes. Then, carefully transfer it to a wire rack to cool completely. This step is essential; it helps the bread set and makes slicing easier. Enjoy your warm, delicious Brown Butter Banana Bread!

Tips for Success

  • Use very ripe bananas for the best flavor and sweetness.
  • Don’t skip browning the butter; it’s key to that nutty taste.
  • Mix gently to avoid dense bread; a few lumps are okay!
  • Let the bread cool completely before slicing for cleaner cuts.
  • Store leftovers in an airtight container to keep it fresh longer.

Equipment Needed

  • 9×5-inch loaf pan: A standard size for baking bread. If you don’t have one, a round cake pan works too!
  • Medium saucepan: For browning the butter. A skillet can also do the job.
  • Mixing bowls: Use any size you have on hand.
  • Whisk: A fork can work in a pinch for mixing dry ingredients.
  • Spatula: Perfect for smoothing the batter and scraping the bowl.

Variations

  • Chocolate Chip Brown Butter Banana Bread: Add 1/2 cup of chocolate chips for a sweet twist that chocolate lovers will adore.
  • Spiced Banana Bread: Incorporate 1 teaspoon of cinnamon and 1/4 teaspoon of nutmeg into the dry ingredients for a warm, cozy flavor.
  • Gluten-Free Option: Substitute all-purpose flour with a gluten-free flour blend to make this recipe suitable for gluten-sensitive friends.
  • Vegan Version: Replace eggs with flax eggs (1 tablespoon of ground flaxseed mixed with 2.5 tablespoons of water) and use coconut oil instead of butter.
  • Fruit-Infused Banana Bread: Mix in 1/2 cup of chopped apples or pears for added moisture and flavor.

Serving Suggestions

  • Serve warm with a pat of butter for a comforting treat.
  • Pair with a scoop of vanilla ice cream for a delightful dessert.
  • Enjoy alongside a hot cup of coffee or tea for a cozy afternoon snack.
  • Slice and serve on a rustic wooden board for a charming presentation.

FAQs about Brown Butter Banana Bread

As you embark on your Brown Butter Banana Bread journey, you might have a few questions. Here are some common queries that can help you along the way:

Can I use frozen bananas for this recipe?

Absolutely! Just make sure to thaw them completely and drain any excess liquid before mashing. Frozen bananas can actually enhance the flavor!

How do I know when my banana bread is done baking?

Insert a toothpick into the center of the loaf. If it comes out clean or with a few moist crumbs, your Brown Butter Banana Bread is ready to come out of the oven.

Can I make this banana bread ahead of time?

Yes! You can bake it a day in advance. Just store it in an airtight container at room temperature. It tastes even better the next day!

What can I do if my batter is too thick?

If your batter seems too thick, you can add a tablespoon of milk or water to loosen it up. Just mix gently until combined.

How should I store leftover banana bread?

Keep it in an airtight container at room temperature for up to three days. For longer storage, wrap it tightly and freeze for up to three months.

Final Thoughts

There’s a certain joy that comes from baking, especially when it involves a recipe as delightful as Brown Butter Banana Bread. The rich, nutty aroma fills your kitchen, creating a warm atmosphere that invites everyone to gather around. Each slice is a perfect blend of sweetness and texture, making it a treat for any occasion. Whether you’re enjoying it with your morning coffee or sharing it with friends, this banana bread brings smiles and satisfaction. So, roll up your sleeves, embrace the process, and let this recipe become a cherished part of your baking repertoire!

jhessica

Brown Butter Banana Bread: Discover a Delicious Twist!

A delicious twist on traditional banana bread, featuring the rich flavor of brown butter.
Prep Time 15 minutes
Cook Time 1 hour 5 minutes
Total Time 1 hour 20 minutes
Servings: 8 servings
Course: Dessert
Cuisine: American
Calories: 210

Ingredients
  

  • 3 ripe bananas mashed
  • 1/2 cup unsalted butter 1 stick, browned
  • 1/2 cup granulated sugar
  • 1/2 cup packed brown sugar
  • 2 large eggs
  • 1 teaspoon vanilla extract
  • 1 teaspoon baking soda
  • 1/4 teaspoon salt
  • 1 1/2 cups all-purpose flour
  • 1/2 cup chopped walnuts or pecans optional

Method
 

  1. Preheat your oven to 350°F (175°C). Grease a 9×5-inch loaf pan or line it with parchment paper.
  2. In a medium saucepan, melt the butter over medium heat. Continue cooking, stirring frequently, until the butter turns golden brown and has a nutty aroma. Remove from heat and let it cool slightly.
  3. In a large mixing bowl, combine the mashed bananas, browned butter, granulated sugar, and brown sugar. Mix well until smooth.
  4. Add the eggs and vanilla extract to the banana mixture, stirring until fully incorporated.
  5. In a separate bowl, whisk together the baking soda, salt, and flour. Gradually add the dry ingredients to the wet ingredients, mixing until just combined. Do not overmix.
  6. If using, fold in the chopped nuts.
  7. Pour the batter into the prepared loaf pan and smooth the top with a spatula.
  8. Bake for 60-65 minutes, or until a toothpick inserted into the center comes out clean.
  9. Allow the bread to cool in the pan for about 10 minutes, then transfer it to a wire rack to cool completely.

Nutrition

Serving: 1sliceCalories: 210kcalCarbohydrates: 30gProtein: 3gFat: 9gSaturated Fat: 5gPolyunsaturated Fat: 4gCholesterol: 40mgSodium: 150mgFiber: 1gSugar: 15g

Notes

  • For a sweeter banana bread, add 1/2 cup of chocolate chips to the batter before baking.
  • For a spiced version, add 1 teaspoon of cinnamon and 1/4 teaspoon of nutmeg to the dry ingredients.

Tried this recipe?

Let us know how it was!

Soft Mini Chocolate Chip Cookie Bites are a must-try!

Introduction to Soft Mini Chocolate Chip Cookie Bites

There’s something magical about the aroma of freshly baked cookies wafting through the house.

Soft Mini Chocolate Chip Cookie Bites are not just a treat; they’re a warm hug on a plate.

Whether you’re looking to whip up a quick dessert for a busy weeknight or impress your friends at a gathering, these little delights are your go-to solution.

With their soft texture and rich chocolate flavor, they’re bound to bring smiles to faces of all ages.

Let’s dive into this simple recipe that’s sure to become a favorite in your kitchen!

Why You’ll Love This Soft Mini Chocolate Chip Cookie Bites

These Soft Mini Chocolate Chip Cookie Bites are a dream come true for any cookie lover.

They come together in just 25 minutes, making them perfect for those last-minute cravings.

The soft, chewy texture paired with rich chocolate chips creates a delightful experience in every bite.

Plus, they’re small enough to enjoy guilt-free, so you can indulge without the worry.

What’s not to love?

Ingredients for Soft Mini Chocolate Chip Cookie Bites

Creating these Soft Mini Chocolate Chip Cookie Bites is a breeze, thanks to a handful of simple ingredients.

Here’s what you’ll need:

  • All-purpose flour: The backbone of any cookie, it gives structure and texture.
  • Baking soda: This little leavening agent helps the cookies rise, making them soft and fluffy.
  • Salt: A pinch enhances the sweetness and balances flavors.
  • Unsalted butter: Softened butter adds richness and moisture, creating that melt-in-your-mouth experience.
  • Granulated sugar: This sweetener contributes to the cookie’s crisp edges and overall sweetness.
  • Brown sugar: Packed with molasses, it adds depth and a hint of caramel flavor.
  • Large egg yolk: Just the yolk keeps the cookies rich and tender.
  • Vanilla extract: A splash of this classic flavor elevates the cookie experience.
  • Mini chocolate chips: These tiny morsels are the star of the show, providing bursts of chocolatey goodness.

Feel free to get creative!

You can substitute half of the mini chocolate chips with chopped nuts or dried fruit for added texture and flavor.

For those who prefer a chewier cookie, consider chilling the dough for about 30 minutes before baking.

Exact measurements for these ingredients are available at the bottom of the article for easy printing.

How to Make Soft Mini Chocolate Chip Cookie Bites

Baking these Soft Mini Chocolate Chip Cookie Bites is a delightful journey.

With just a few simple steps, you’ll have a batch of warm, gooey cookies ready to enjoy.

Let’s break it down step by step.

Step 1: Preheat the Oven

Start by preheating your oven to 350°F (175°C).

This step is crucial because it ensures even baking.

While the oven warms up, line a baking sheet with parchment paper.

This prevents sticking and makes cleanup a breeze.

Step 2: Mix Dry Ingredients

In a small bowl, whisk together the all-purpose flour, baking soda, and salt.

This process helps to evenly distribute the baking soda and salt throughout the flour.

It’s a simple step, but it sets the foundation for your cookie’s texture.

Step 3: Cream the Butter and Sugars

In a large mixing bowl, cream together the softened unsalted butter, granulated sugar, and brown sugar.

Use a hand mixer or a sturdy spoon to beat them until the mixture is light and fluffy.

This step is key for achieving that melt-in-your-mouth texture.

Don’t rush it; take your time to get it just right.

Step 4: Combine Wet Ingredients

Next, add the large egg yolk and vanilla extract to the butter-sugar mixture.

Mix until everything is well combined.

The egg yolk adds richness, while the vanilla brings a warm, inviting flavor to the cookies.

Step 5: Incorporate Dry Ingredients

Gradually add the dry ingredients to the wet mixture.

Stir gently until just combined.

Be careful not to overmix; this keeps your cookies soft and tender.

Step 6: Fold in Chocolate Chips

Now it’s time for the star of the show: the mini chocolate chips.

Gently fold them into the dough using a spatula.

This technique ensures the chocolate is evenly distributed without breaking the chips.

Step 7: Shape and Bake

Using a teaspoon, scoop small amounts of dough and roll them into balls.

Place them on the prepared baking sheet, spacing them about 2 inches apart.

Bake for 8-10 minutes, or until the edges are lightly golden.

Let them cool on the baking sheet for 5 minutes before transferring to a wire rack.

This cooling time helps them set perfectly.

Enjoy the sweet aroma filling your kitchen as you wait!

Tips for Success

  • Use room temperature butter for easier creaming with sugars.
  • Don’t skip the parchment paper; it prevents sticking and makes cleanup a breeze.
  • For a chewier texture, chill the dough for 30 minutes before baking.
  • Keep an eye on the cookies; they can go from perfect to overbaked quickly.
  • Store leftovers in an airtight container to maintain freshness.

Equipment Needed

  • Baking sheet: A standard sheet works, but a silicone mat can be a great alternative.
  • Parchment paper: Essential for easy cleanup; aluminum foil can work in a pinch.
  • Mixing bowls: Use any size, but a large bowl is best for creaming.
  • Whisk: A fork can substitute if you don’t have one handy.
  • Spatula: Perfect for folding in chocolate chips; a wooden spoon will do too.

Variations

  • Nutty Delight: Substitute half of the mini chocolate chips with chopped walnuts or pecans for a crunchy twist.
  • Fruit Fusion: Add dried cranberries or raisins for a fruity burst in every bite.
  • Gluten-Free Option: Use a gluten-free all-purpose flour blend to make these cookie bites suitable for gluten-sensitive friends.
  • Vegan Version: Replace the egg yolk with a flax egg (1 tablespoon ground flaxseed mixed with 2.5 tablespoons water) and use coconut oil instead of butter.
  • Minty Fresh: Incorporate a few drops of peppermint extract for a refreshing mint chocolate chip flavor.

Serving Suggestions

  • Milk: Pair these cookie bites with a cold glass of milk for the ultimate classic experience.
  • Coffee: Enjoy them alongside a warm cup of coffee or espresso for a delightful afternoon treat.
  • Presentation: Serve on a colorful plate or in a mason jar for a charming touch.
  • Ice Cream: Crumble over vanilla ice cream for a delicious sundae twist.

FAQs about Soft Mini Chocolate Chip Cookie Bites

Can I use regular chocolate chips instead of mini chocolate chips?

Absolutely! Regular chocolate chips will work just fine, but keep in mind that they may create larger pockets of chocolate. Mini chocolate chips melt more evenly, giving you that delightful chocolatey goodness in every bite.

How do I store leftover Soft Mini Chocolate Chip Cookie Bites?

To keep your cookies fresh, store them in an airtight container at room temperature. They should stay soft for about a week. If you want to keep them longer, consider freezing them!

Can I make the dough ahead of time?

Yes! You can prepare the dough and refrigerate it for up to 3 days. Just remember to let it sit at room temperature for a few minutes before baking, as it will be a bit firm.

What can I substitute for the egg yolk?

If you’re looking for an egg substitute, try using a flax egg. Mix 1 tablespoon of ground flaxseed with 2.5 tablespoons of water and let it sit for a few minutes until it thickens. This works great for keeping your cookies soft!

Can I add spices to the cookie dough?

Definitely! A pinch of cinnamon or nutmeg can add a warm, cozy flavor to your Soft Mini Chocolate Chip Cookie Bites. Just be careful not to overdo it; a little goes a long way!

Final Thoughts

Baking Soft Mini Chocolate Chip Cookie Bites is more than just a recipe; it’s an experience that fills your home with warmth and joy.

Each bite is a reminder of simpler times, evoking memories of childhood and family gatherings.

These little treats are perfect for sharing, whether with friends or just enjoying a quiet moment to yourself.

The combination of soft texture and rich chocolate creates a delightful indulgence that’s hard to resist.

So, roll up your sleeves, gather your ingredients, and let the magic of baking bring happiness to your kitchen!

jhessica

Soft Mini Chocolate Chip Cookie Bites are a must-try!

Soft Mini Chocolate Chip Cookie Bites are a must-try for cookie lovers, offering a delightful combination of soft texture and rich chocolate flavor.
Prep Time 15 minutes
Cook Time 10 minutes
Total Time 25 minutes
Servings: 12 servings
Course: Dessert
Cuisine: American
Calories: 90

Ingredients
  

  • 1 cup all-purpose flour
  • 1/2 teaspoon baking soda
  • 1/4 teaspoon salt
  • 1/4 cup unsalted butter softened
  • 1/4 cup granulated sugar
  • 1/4 cup packed brown sugar
  • 1 large egg yolk
  • 1 teaspoon vanilla extract
  • 1/2 cup mini chocolate chips

Method
 

  1. Preheat your oven to 350°F (175°C) and line a baking sheet with parchment paper.
  2. In a small bowl, whisk together the flour, baking soda, and salt. Set aside.
  3. In a large mixing bowl, cream together the softened butter, granulated sugar, and brown sugar until light and fluffy.
  4. Add the egg yolk and vanilla extract to the butter mixture, mixing until well combined.
  5. Gradually add the dry ingredients to the wet ingredients, stirring until just combined.
  6. Fold in the mini chocolate chips.
  7. Using a teaspoon, scoop small amounts of dough and roll them into balls. Place them on the prepared baking sheet, spacing them about 2 inches apart.
  8. Bake for 8-10 minutes, or until the edges are lightly golden. Remove from the oven and let them cool on the baking sheet for 5 minutes before transferring to a wire rack to cool completely.

Nutrition

Serving: 1cookieCalories: 90kcalCarbohydrates: 10gProtein: 1gFat: 5gSaturated Fat: 3gPolyunsaturated Fat: 2gCholesterol: 20mgSodium: 50mgSugar: 6g

Notes

  • For a chewier cookie, try chilling the dough for 30 minutes before baking.
  • You can substitute half of the mini chocolate chips with chopped nuts or dried fruit for added texture and flavor.

Tried this recipe?

Let us know how it was!

Grilled Miso-Glazed Salmon: Elevate Your Dinner Tonight!

Introduction to Grilled Miso-Glazed Salmon

There’s something magical about the aroma of grilled fish wafting through the air, isn’t there?

Grilled Miso-Glazed Salmon is not just a meal; it’s an experience that brings warmth to your kitchen and joy to your dinner table.

Whether you’re looking to impress your loved ones or simply want a quick solution for a busy weeknight, this dish fits the bill perfectly.

With its savory miso marinade and tender, flaky salmon, you’ll find yourself savoring every bite.

Let’s dive into this delightful recipe that’s as easy to make as it is delicious!

Why You’ll Love This Grilled Miso-Glazed Salmon

This Grilled Miso-Glazed Salmon is a game changer for your dinner routine.

It’s incredibly easy to whip up, making it perfect for those hectic evenings when time is short.

The rich umami flavor of the miso glaze elevates the salmon, turning a simple meal into something extraordinary.

Plus, it’s a healthy option packed with protein, ensuring you feel good about what you’re serving.

Trust me, your taste buds will thank you!

Ingredients for Grilled Miso-Glazed Salmon

To create this mouthwatering Grilled Miso-Glazed Salmon, you’ll need a handful of simple yet flavorful ingredients.

Here’s what you’ll gather:

  • Salmon fillets: Fresh, high-quality salmon is key. Look for vibrant color and firm texture.
  • White miso paste: This fermented soybean paste adds a rich umami flavor. It’s the star of the marinade!
  • Mirin: A sweet rice wine that balances the saltiness of the miso. It’s essential for that authentic taste.
  • Sake: Another Japanese rice wine, it enhances the marinade’s depth. If you don’t have sake, dry white wine can work in a pinch.
  • Sugar: Just a touch to round out the flavors. Brown sugar can be a nice alternative for a deeper sweetness.
  • Soy sauce: Adds saltiness and complexity. Opt for low-sodium if you’re watching your salt intake.
  • Sesame oil: A drizzle of this nutty oil brings warmth and richness to the dish.
  • Green onion: Finely sliced for garnish, it adds a fresh crunch and a pop of color.
  • Lemon wedges: A squeeze of lemon brightens the dish and balances the flavors beautifully.

For exact measurements, check the bottom of the article where you can find everything listed for easy printing.

Gather these ingredients, and you’re on your way to a delightful culinary adventure!

How to Make Grilled Miso-Glazed Salmon

Creating this Grilled Miso-Glazed Salmon is a straightforward process that will have you feeling like a culinary pro in no time.

Follow these simple steps, and you’ll be on your way to a delicious dinner that impresses everyone at the table.

Step 1: Prepare the Miso Marinade

Start by whisking together the white miso paste, mirin, sake, sugar, soy sauce, and sesame oil in a medium bowl.

You want a smooth, creamy mixture that smells heavenly.

This marinade is the heart of your dish, so take a moment to enjoy the aroma as you mix!

Step 2: Marinate the Salmon

Next, grab your salmon fillets and place them in a shallow dish or a resealable plastic bag.

Pour the miso mixture over the salmon, ensuring each fillet is well coated.

Cover the dish or seal the bag, then refrigerate for at least 2 hours.

If you have the time, letting it marinate overnight will deepen the flavors even more.

Step 3: Preheat the Grill

While the salmon is soaking up all that flavor, it’s time to preheat your grill.

Set it to medium-high heat, or if you’re using a grill pan, heat it over medium heat on the stovetop.

A hot grill is essential for achieving those beautiful grill marks and a perfectly cooked salmon.

Step 4: Grill the Salmon

Once your grill is ready, remove the salmon from the marinade.

Let any excess marinade drip off, and discard the remaining marinade.

Place the salmon fillets skin-side down on the grill.

Cook for about 4-5 minutes, then carefully flip and grill for another 3-4 minutes.

You’ll know it’s done when the salmon flakes easily with a fork.

Step 5: Serve and Enjoy

After grilling, let the salmon rest for a minute.

This helps keep it juicy and tender.

Garnish with sliced green onions for a fresh touch, and serve with lemon wedges on the side.

A squeeze of lemon brightens the dish and enhances the flavors beautifully.

Now, dig in and enjoy your delicious Grilled Miso-Glazed Salmon!

Tips for Success

  • Use fresh salmon for the best flavor and texture.
  • Don’t skip the marinating time; it’s crucial for flavor.
  • Keep an eye on the grill temperature to avoid overcooking.
  • Let the salmon rest after grilling for juiciness.
  • Experiment with adding herbs like cilantro or basil for a twist.

Equipment Needed

  • Grill: A standard outdoor grill works best, but a grill pan on the stovetop is a great alternative.
  • Medium bowl: For mixing the marinade; any mixing bowl will do.
  • Whisk: Essential for blending the marinade smoothly; a fork can work in a pinch.
  • Shallow dish or resealable bag: For marinating the salmon; both options are effective.

Variations

  • Spicy Miso Glaze: Add a teaspoon of chili paste or sriracha to the marinade for a kick of heat.
  • Herb-Infused Marinade: Mix in fresh herbs like dill or cilantro for a refreshing twist.
  • Maple Miso Glaze: Substitute sugar with maple syrup for a sweet, caramelized finish.
  • Vegetarian Option: Use the miso marinade on grilled tofu or eggplant for a delicious plant-based alternative.
  • Low-Carb Version: Skip the sugar entirely or use a sugar substitute to keep it keto-friendly.

Serving Suggestions

  • Steamed Rice: Serve the salmon over a bed of fluffy steamed rice to soak up the delicious glaze.
  • Grilled Vegetables: Pair with seasonal grilled veggies like zucchini, bell peppers, or asparagus for a colorful plate.
  • Refreshing Salad: A light cucumber or seaweed salad complements the rich flavors beautifully.
  • Drink Pairing: Enjoy with a chilled sake or a crisp white wine for a delightful dining experience.

FAQs about Grilled Miso-Glazed Salmon

Can I use other types of fish for this recipe?

Absolutely! While salmon is the star here, you can use other firm fish like tuna or swordfish. Just adjust the cooking time as needed.

How long should I marinate the salmon?

For the best flavor, marinate the salmon for at least 2 hours. If you can, letting it sit overnight will deepen the taste even more.

Is Grilled Miso-Glazed Salmon gluten-free?

Yes, this recipe can be gluten-free! Just ensure you use gluten-free soy sauce or tamari in the marinade.

What can I serve with Grilled Miso-Glazed Salmon?

Pair it with steamed rice, grilled vegetables, or a refreshing salad. A squeeze of lemon adds a nice touch!

Can I make the marinade ahead of time?

Definitely! You can prepare the miso marinade a day in advance. Just store it in the fridge until you’re ready to use it.

Final Thoughts

Cooking Grilled Miso-Glazed Salmon is more than just preparing a meal; it’s about creating a moment.

The rich flavors of the miso glaze combined with the tender salmon will transport you to a cozy Japanese izakaya, right in your kitchen.

Each bite is a celebration of umami, and the vibrant colors on your plate will impress anyone lucky enough to join you.

Whether it’s a weeknight dinner or a special occasion, this dish brings joy and satisfaction.

So fire up that grill, gather your loved ones, and enjoy the delicious experience that awaits!

jhessica

Grilled Miso-Glazed Salmon: Elevate Your Dinner Tonight!

A delicious and easy recipe for grilled salmon glazed with a savory miso marinade.
Prep Time 2 hours
Cook Time 10 minutes
Total Time 2 hours 10 minutes
Course: Dinner
Cuisine: Japanese
Calories: 350

Ingredients
  

  • 4 salmon fillets 6 ounces each
  • 1/2 cup white miso paste
  • 1/4 cup mirin sweet rice wine
  • 2 tablespoons sake Japanese rice wine
  • 2 tablespoons sugar
  • 1 tablespoon soy sauce
  • 1 teaspoon sesame oil
  • 1 green onion finely sliced (for garnish)
  • Lemon wedges for serving

Method
 

  1. In a medium bowl, whisk together the miso paste, mirin, sake, sugar, soy sauce, and sesame oil until smooth.
  2. Place the salmon fillets in a shallow dish or a resealable plastic bag. Pour the miso mixture over the salmon, ensuring each fillet is well coated. Cover the dish or seal the bag and refrigerate for at least 2 hours, or up to overnight for a deeper flavor.
  3. Preheat your grill to medium-high heat. If using a grill pan, heat it over medium heat on the stovetop.
  4. Remove the salmon from the marinade and let any excess marinade drip off. Discard the remaining marinade.
  5. Place the salmon fillets skin-side down on the grill. Cook for about 4-5 minutes, then carefully flip and grill for another 3-4 minutes, or until the salmon is cooked through and flakes easily with a fork.
  6. Remove the salmon from the grill and let it rest for a minute. Garnish with sliced green onions and serve with lemon wedges.

Nutrition

Serving: 1filletCalories: 350kcalCarbohydrates: 5gProtein: 30gFat: 20gSugar: 5g

Notes

  • For a smoky flavor, try adding a few wood chips to your grill while cooking.
  • Serve the salmon over a bed of steamed rice or alongside grilled vegetables for a complete meal.

Tried this recipe?

Let us know how it was!

Crispy Baked Honey BBQ Popcorn Chicken is irresistible!

Introduction to Crispy Baked Honey BBQ Popcorn Chicken

There’s something magical about the aroma of chicken baking in the oven, especially when it’s coated in a sweet and tangy sauce. Crispy Baked Honey BBQ Popcorn Chicken is not just a meal; it’s an experience that brings comfort and joy.

Whether you’re looking for a quick solution for a busy weeknight or a dish to impress your friends during game day, this recipe has you covered.

With tender chicken pieces enveloped in a crunchy coating, every bite is a delightful explosion of flavor. Trust me, your taste buds will thank you!

Why You’ll Love This Crispy Baked Honey BBQ Popcorn Chicken

This dish is a game-changer for busy nights.

It’s quick to prepare, taking just an hour from start to finish.

The combination of crispy texture and sweet BBQ flavor makes it a crowd-pleaser.

Plus, it’s baked, not fried, so you can enjoy it guilt-free.

Whether for a family dinner or a casual gathering, this popcorn chicken will have everyone coming back for seconds!

Ingredients for Crispy Baked Honey BBQ Popcorn Chicken

To create this mouthwatering dish, you’ll need a handful of simple ingredients that pack a punch.

– **Boneless, skinless chicken breasts**: The star of the show! Cut into bite-sized pieces for easy eating.

– **Buttermilk**: This tenderizes the chicken and adds a rich flavor. If you don’t have buttermilk, you can make a quick substitute by mixing milk with a splash of vinegar.

– **Garlic powder**: A must-have for that savory kick. It enhances the overall flavor without overpowering the dish.

– **Onion powder**: Adds depth and sweetness, complementing the garlic perfectly.

– **Smoked paprika**: This gives a subtle smokiness that elevates the dish. If you prefer a bit of heat, try using hot paprika instead.

– **Salt and black pepper**: Essential for seasoning. Adjust to your taste, but don’t skimp on these!

– **All-purpose flour**: This is the base for your coating. For a gluten-free option, almond flour works well.

– **Panko breadcrumbs**: These create that irresistible crunch. Regular breadcrumbs can be used, but panko gives a lighter texture.

– **Honey**: Adds sweetness and helps the BBQ sauce stick to the chicken.

– **BBQ sauce**: Choose your favorite brand or homemade version for a personal touch.

– **Olive oil**: A drizzle helps the chicken crisp up beautifully in the oven.

For exact measurements, check the bottom of the article where you can find everything listed for easy printing.

With these ingredients, you’re well on your way to creating a dish that will impress everyone at the table!

How to Make Crispy Baked Honey BBQ Popcorn Chicken

Step 1: Preheat and Prepare

Preheat your oven to 400°F (200°C).

While it warms up, line a baking sheet with parchment paper.

This will prevent sticking and make cleanup a breeze.

Trust me, you’ll appreciate this little step later!

Step 2: Marinate the Chicken

In a large bowl, combine the buttermilk, garlic powder, onion powder, smoked paprika, salt, and black pepper.

Whisk it all together until smooth.

Now, add the chicken pieces, ensuring they’re well coated.

Let them soak for at least 30 minutes.

If you have time, marinating for up to 2 hours in the fridge will deepen the flavor.

This step is crucial for tender, juicy chicken!

Step 3: Prepare the Coating

Set up your coating stations.

In one bowl, place the all-purpose flour.

In another, add the panko breadcrumbs.

This organized setup will make the coating process smooth and efficient.

You’ll be glad you did this when it’s time to get your hands dirty!

Step 4: Coat the Chicken

Remove the marinated chicken from the bowl, letting the excess buttermilk drip off.

First, dredge each piece in flour, shaking off the extra.

Then, dip it back into the buttermilk.

Finally, coat it with panko breadcrumbs, pressing gently to ensure they stick.

Place the coated chicken pieces on the prepared baking sheet.

This three-step process creates that perfect crispy layer!

Step 5: Bake the Chicken

Drizzle olive oil over the chicken pieces.

This helps them crisp up beautifully in the oven.

Bake for 20-25 minutes, or until the chicken is golden brown and cooked through.

Keep an eye on them; you want that perfect crunch!

Step 6: Sauce the Chicken

While the chicken is baking, mix the honey and BBQ sauce in a small bowl.

Once the chicken is done, remove it from the oven.

Toss the hot chicken in the honey BBQ sauce until well coated.

This step adds that irresistible sweet and tangy flavor!

Step 7: Final Bake

Return the sauced chicken to the baking sheet.

Bake for an additional 5-7 minutes to caramelize the sauce.

This final touch will give your chicken a beautiful glaze.

Trust me, the aroma will have everyone gathering around the kitchen!

Tips for Success

  • Let the chicken marinate longer for deeper flavor—up to 2 hours is ideal.
  • Use a meat thermometer to ensure chicken reaches 165°F for perfect doneness.
  • For extra crunch, spray the chicken lightly with cooking spray before baking.
  • Experiment with different BBQ sauces for unique flavor profiles.
  • Serve immediately for the best texture; leftovers can lose their crispiness.

Equipment Needed

  • Baking sheet: A standard one works, but a wire rack can help with even crisping.
  • Parchment paper: This makes cleanup easy; aluminum foil is a good alternative.
  • Mixing bowls: Use any size, but a large one is best for marinating.
  • Whisk: A fork can work in a pinch for mixing ingredients.
  • Meat thermometer: Essential for checking chicken doneness; a simple knife can also help cut into the thickest part.

Variations

  • For a spicy twist, add cayenne pepper to the flour mixture for a kick.
  • Try using different flavored BBQ sauces, like honey mustard or teriyaki, for a unique taste.
  • Substitute chicken with turkey or tofu for a different protein option.
  • For a healthier version, use whole wheat flour and bake with less oil.
  • Make it a meal by adding veggies like bell peppers or zucchini to the baking sheet.

Serving Suggestions

  • Pair with crispy coleslaw for a refreshing crunch that complements the chicken.
  • Serve with sweet potato fries for a deliciously hearty side.
  • Offer a cold beer or iced tea to balance the sweetness of the BBQ sauce.
  • Garnish with fresh parsley for a pop of color and flavor.

FAQs about Crispy Baked Honey BBQ Popcorn Chicken

Can I make Crispy Baked Honey BBQ Popcorn Chicken ahead of time?

Absolutely! You can marinate the chicken a day in advance. Just keep it covered in the fridge. When you’re ready to bake, follow the coating and baking steps as usual.

What can I serve with this popcorn chicken?

This dish pairs wonderfully with coleslaw, sweet potato fries, or a fresh garden salad. You can also serve it with dipping sauces for extra flavor!

Can I use frozen chicken for this recipe?

While fresh chicken is best, you can use frozen chicken. Just make sure to thaw it completely before marinating. This ensures even cooking and flavor absorption.

How do I store leftovers?

Store any leftovers in an airtight container in the fridge for up to three days. To reheat, pop them back in the oven for a few minutes to regain that crispy texture.

Is this recipe suitable for kids?

Definitely! Kids love the sweet and tangy flavor of the honey BBQ sauce. Plus, the crispy texture makes it fun to eat. Just adjust the spice level to suit their taste!

Final Thoughts

Crispy Baked Honey BBQ Popcorn Chicken is more than just a meal; it’s a celebration of flavors and textures that brings everyone together.

The joy of watching friends and family dive into a platter of this deliciousness is unmatched.

Each bite is a reminder of the simple pleasures in life—good food, laughter, and shared moments.

Whether it’s a casual weeknight dinner or a festive gathering, this dish never fails to impress.

So, roll up your sleeves, embrace the cooking adventure, and let this popcorn chicken become a staple in your kitchen.

Your taste buds will thank you!

jhessica

Crispy Baked Honey BBQ Popcorn Chicken is irresistible!

Crispy Baked Honey BBQ Popcorn Chicken is an irresistible dish that combines tender chicken pieces with a crunchy coating and a sweet and tangy BBQ sauce.
Prep Time 30 minutes
Cook Time 30 minutes
Total Time 1 hour
Servings: 4 servings
Course: Main Dish
Cuisine: American
Calories: 450

Ingredients
  

  • 2 pounds boneless skinless chicken breasts, cut into bite-sized pieces
  • 1 cup buttermilk
  • 1 teaspoon garlic powder
  • 1 teaspoon onion powder
  • 1 teaspoon smoked paprika
  • 1 teaspoon salt
  • 1/2 teaspoon black pepper
  • 1 cup all-purpose flour
  • 2 cups panko breadcrumbs
  • 1/2 cup honey
  • 1/2 cup BBQ sauce
  • 1 tablespoon olive oil

Method
 

  1. Preheat your oven to 400°F (200°C) and line a baking sheet with parchment paper.
  2. In a large bowl, combine the buttermilk, garlic powder, onion powder, smoked paprika, salt, and black pepper. Add the chicken pieces to the marinade and let them soak for at least 30 minutes (or up to 2 hours in the refrigerator for more flavor).
  3. In a separate bowl, place the flour. In another bowl, add the panko breadcrumbs.
  4. Remove the chicken from the marinade, allowing excess to drip off. Dredge each piece in flour, shaking off the excess, then dip it back into the buttermilk, and finally coat it with panko breadcrumbs. Place the coated chicken pieces on the prepared baking sheet.
  5. Drizzle the olive oil over the chicken pieces to help them crisp up in the oven. Bake for 20-25 minutes, or until the chicken is golden brown and cooked through.
  6. While the chicken is baking, mix the honey and BBQ sauce in a small bowl. Once the chicken is done, remove it from the oven and toss it in the honey BBQ sauce until well coated.
  7. Return the sauced chicken to the baking sheet and bake for an additional 5-7 minutes to caramelize the sauce.

Nutrition

Serving: 1servingCalories: 450kcalCarbohydrates: 30gProtein: 35gFat: 20gSaturated Fat: 3gPolyunsaturated Fat: 17gCholesterol: 90mgSodium: 800mgFiber: 2gSugar: 15g

Notes

  • For a spicier kick, add a teaspoon of cayenne pepper to the flour mixture.
  • To make it gluten-free, substitute all-purpose flour with almond flour and use gluten-free panko breadcrumbs.

Tried this recipe?

Let us know how it was!

Citrus Bliss Fruit Salad: Refresh Your Summer Meals!

Introduction to Citrus Bliss Fruit Salad

Summer days call for something refreshing, and that’s where my Citrus Bliss Fruit Salad comes in. It’s vibrant, colorful, and bursting with flavor, making it the perfect dish to impress your loved ones or simply enjoy on a hot afternoon. I remember my first taste of a fruit salad like this at a family picnic, where the sweet and tangy flavors danced on my tongue. This recipe is not just quick and easy; it’s a delightful way to bring a little sunshine to your table. Trust me, once you try it, you’ll be hooked!

Why You’ll Love This Citrus Bliss Fruit Salad

This Citrus Bliss Fruit Salad is a game-changer for your summer meals. It’s incredibly easy to whip up, taking just 15 minutes of prep time. The vibrant mix of flavors not only tantalizes your taste buds but also adds a splash of color to your table. Plus, it’s a guilt-free treat that’s both refreshing and satisfying. Whether you’re hosting a barbecue or just need a quick snack, this salad has you covered!

Ingredients for Citrus Bliss Fruit Salad

Gathering the right ingredients is key to making this Citrus Bliss Fruit Salad a hit. Here’s what you’ll need:

  • Fresh strawberries: Sweet and juicy, they add a lovely red hue and a burst of flavor.
  • Blueberries: These little gems are packed with antioxidants and provide a delightful pop of sweetness.
  • Mandarin oranges: Their bright, tangy flavor brings a refreshing citrus note to the mix.
  • Pineapple chunks: Whether fresh or canned, they add a tropical twist that complements the other fruits.
  • Kiwi: With its unique tartness and vibrant green color, kiwi adds a fun texture and taste.
  • Fresh mint leaves: Chopped mint gives a refreshing aroma and a hint of coolness to the salad.
  • Honey: A natural sweetener that enhances the fruit’s flavors without overpowering them.
  • Lime juice: This adds a zesty kick that brightens the entire dish.
  • Orange juice: It complements the lime and enhances the citrusy goodness.

For those looking to mix things up, consider adding chopped nuts like walnuts or almonds for a crunchy texture. You can also substitute any of the fruits with seasonal options like peaches or apples for a different flavor profile. The exact quantities for each ingredient are listed at the bottom of the article, ready for you to print and take to the store!

How to Make Citrus Bliss Fruit Salad

Step 1: Prepare the Fruit

Start by washing all your fruits under cool running water. Hull the strawberries and slice them into bite-sized pieces. For the blueberries, just give them a good rinse and set them aside. If you’re using canned mandarin oranges, drain them well. For fresh pineapple, cut off the skin, remove the core, and chop it into chunks. Finally, peel the kiwi and slice it into rounds. Each fruit brings its own unique flavor, making this salad a true Citrus Bliss experience!

Step 2: Mix the Ingredients

In a large mixing bowl, combine all the prepared fruits. Gently toss them together to ensure an even distribution. The colors should be vibrant and inviting, creating a feast for the eyes. This step is crucial because it sets the stage for the delicious flavors to meld together. Remember, the more colorful the mix, the more appealing your Citrus Bliss Fruit Salad will be!

Step 3: Create the Dressing

In a small bowl, whisk together the honey, lime juice, and orange juice until well combined. This dressing is the secret weapon that ties all the flavors together. The sweetness of the honey balances the tartness of the lime and orange, creating a delightful harmony. Make sure to whisk it well so that the honey dissolves completely, ensuring every bite is perfectly coated.

Step 4: Combine Dressing and Fruit

Now, it’s time to drizzle the dressing over your fruit mixture. Pour it slowly, allowing it to coat the fruits evenly. Gently toss everything together again, being careful not to mash the delicate berries. This step is where the magic happens, as the dressing enhances the natural sweetness of the fruits. You’ll want to savor this moment as the aroma fills your kitchen!

Step 5: Add Fresh Mint

Next, sprinkle the chopped mint leaves over the salad. Toss lightly to incorporate the mint without bruising the leaves. The mint adds a refreshing touch that elevates the entire dish. It’s like a cool breeze on a hot summer day, making your Citrus Bliss Fruit Salad even more delightful!

Step 6: Chill and Serve

Cover the salad and refrigerate it for at least 30 minutes before serving. This chilling time allows the flavors to meld beautifully. When you’re ready to serve, you’ll have a refreshing, vibrant dish that’s perfect for any summer gathering. Enjoy the burst of flavors in every bite!

Tips for Success

  • Use ripe fruits for the best flavor and sweetness.
  • Chill the salad longer for enhanced flavor melding.
  • Mix fruits just before serving to maintain freshness.
  • Experiment with different fruits based on seasonal availability.
  • Adjust the honey to your taste; you can always add more!

Equipment Needed

  • Large mixing bowl: A big bowl is essential for combining all the fruits. A salad bowl works well too.
  • Small bowl: Use this for whisking the dressing. A measuring cup can double as a bowl.
  • Whisk: Perfect for mixing the dressing. A fork can do the job in a pinch.
  • Cutting board and knife: Essential for prepping your fruits. A sturdy plate can substitute if needed.

Variations

  • Tropical Twist: Add diced mango or papaya for an exotic flair that complements the citrus.
  • Berry Medley: Swap out blueberries for raspberries or blackberries for a different berry experience.
  • Nutty Crunch: Mix in chopped pecans or pistachios for added texture and flavor.
  • Vegan Delight: Keep it plant-based by using agave syrup instead of honey for sweetness.
  • Spicy Kick: Add a pinch of cayenne pepper to the dressing for a surprising heat that balances the sweetness.

Serving Suggestions

  • Pair the Citrus Bliss Fruit Salad with grilled chicken or fish for a refreshing contrast.
  • Serve it alongside a light quinoa salad for a wholesome meal.
  • For drinks, consider iced tea or a citrus-infused sparkling water.
  • Present in a clear glass bowl to showcase the vibrant colors.

FAQs about Citrus Bliss Fruit Salad

Can I make Citrus Bliss Fruit Salad ahead of time?

Absolutely! You can prepare the salad a few hours in advance. Just remember to keep it refrigerated until you’re ready to serve. This allows the flavors to meld beautifully, enhancing the overall taste.

What fruits can I substitute in this salad?

If you want to switch things up, feel free to substitute any of the fruits. Seasonal options like peaches or apples work wonderfully. Just keep the balance of sweet and tart in mind for the best flavor.

Is this salad suitable for a vegan diet?

Yes! The Citrus Bliss Fruit Salad is naturally vegan. Just use agave syrup instead of honey if you want to keep it plant-based. It will still taste delicious!

How long will the salad last in the fridge?

This salad is best enjoyed fresh, but it can last up to 2 days in the fridge. Just be aware that the fruits may start to release juices, which can make it a bit watery.

Can I add other ingredients to the salad?

Definitely! Feel free to get creative. Adding nuts for crunch or even a sprinkle of chia seeds can enhance the texture and nutritional value. Just make sure to mix them in gently!

Final Thoughts

Creating this Citrus Bliss Fruit Salad is more than just a recipe; it’s an experience that brings joy to your table. Each bite is a celebration of summer, with vibrant flavors that dance together in perfect harmony. Whether you’re enjoying it solo or sharing it with friends and family, this salad is sure to spark smiles and compliments. It’s a simple yet delightful way to embrace the season’s bounty. So, grab your favorite fruits, whip up this refreshing dish, and let the Citrus Bliss brighten your day. Trust me, you’ll be reaching for seconds!

jhessica

Citrus Bliss Fruit Salad: Refresh Your Summer Meals!

A refreshing and vibrant fruit salad featuring a mix of citrus and berries, perfect for summer meals.
Prep Time 15 minutes
Total Time 45 minutes
Servings: 6 servings
Course: Salad
Cuisine: American
Calories: 120

Ingredients
  

  • 3 cups fresh strawberries hulled and sliced
  • 2 cups blueberries
  • 2 cups mandarin oranges drained
  • 2 cups pineapple chunks fresh or canned
  • 1 cup kiwi peeled and sliced
  • 1/4 cup fresh mint leaves chopped
  • 1 tablespoon honey
  • 1 tablespoon lime juice
  • 1 tablespoon orange juice

Method
 

  1. In a large mixing bowl, combine the strawberries, blueberries, mandarin oranges, pineapple chunks, and kiwi. Gently toss the fruit together to mix.
  2. In a small bowl, whisk together the honey, lime juice, and orange juice until well combined.
  3. Drizzle the honey mixture over the fruit salad and gently toss again to coat the fruit evenly.
  4. Add the chopped mint leaves and toss lightly to incorporate.
  5. Cover the salad and refrigerate for at least 30 minutes before serving to allow the flavors to meld.

Nutrition

Serving: 1servingCalories: 120kcalCarbohydrates: 22gProtein: 2gSodium: 5mgFiber: 2gSugar: 15g

Notes

  • For added crunch, consider mixing in 1/2 cup of chopped nuts such as walnuts or almonds.
  • Substitute any of the fruits with seasonal options like peaches or apples for a different flavor profile.

Tried this recipe?

Let us know how it was!

Beef Taquitos: Discover the Perfect Recipe Today!

Introduction to Beef Taquitos

There’s something magical about the aroma of sizzling beef wafting through the kitchen. It takes me back to family gatherings, where laughter and good food filled the air. Beef taquitos are not just a dish; they’re a celebration of flavor and comfort. Perfect for a quick snack or a meal that impresses, these crispy delights are sure to win over even the pickiest eaters. Whether you’re hosting friends for game night or just need a satisfying bite after a long day, this beef taquitos recipe is your go-to solution. Let’s dive into this culinary adventure!

Why You’ll Love This Beef Taquitos

Beef taquitos are the ultimate crowd-pleaser. They’re quick to whip up, making them perfect for busy weeknights or spontaneous gatherings. The crispy exterior gives way to a savory filling that’s bursting with flavor. Plus, they’re versatile! You can customize them with your favorite toppings or sides. Whether you’re enjoying them solo or sharing with friends, these taquitos are sure to satisfy your cravings and bring smiles all around.

Ingredients for Beef Taquitos

Gathering the right ingredients is the first step to creating mouthwatering beef taquitos. Here’s what you’ll need:

  • Ground Beef: The star of the show! Choose lean ground beef for a flavorful filling without too much grease.
  • Garlic Powder: Adds a savory depth to the beef. Fresh garlic works too, but the powder is quick and easy.
  • Onion Powder: A must-have for that classic flavor. It blends seamlessly into the meat mixture.
  • Chili Powder: This spice brings a mild heat and a rich color to your taquitos.
  • Cumin: Earthy and warm, cumin enhances the overall flavor profile, giving it a hint of smokiness.
  • Salt: Essential for bringing out all the flavors. Adjust to your taste preference.
  • Black Pepper: A dash of pepper adds a subtle kick that complements the spices.
  • Corn Tortillas: The perfect vessel for your filling. They’re soft and pliable, making them easy to roll.
  • Shredded Cheddar Cheese: Melts beautifully inside the taquitos, adding creaminess and richness.
  • Vegetable Oil: Used for frying, it gives the taquitos that irresistible crispy texture.
  • Sour Cream and Salsa: These are optional but highly recommended for dipping. They add a refreshing contrast to the warm taquitos.

For those looking to mix things up, consider adding diced jalapeños or bell peppers to the beef mixture for an extra crunch. If you prefer a healthier option, you can bake the taquitos instead of frying them. Exact measurements for each ingredient can be found at the bottom of the article, ready for printing!

How to Make Beef Taquitos

Now that you have your ingredients ready, let’s get cooking! Making beef taquitos is a straightforward process that will have your kitchen smelling amazing in no time. Follow these simple steps, and you’ll be enjoying crispy, flavorful taquitos before you know it.

Step 1: Cook the Ground Beef

Start by heating a large skillet over medium heat. Add the ground beef, breaking it apart with a spatula as it cooks. You want it to brown evenly, so keep stirring. Once it’s fully cooked and no longer pink, drain any excess fat. This step is crucial for keeping your taquitos from being greasy.

Step 2: Season the Beef

With the beef cooked, it’s time to add flavor. Sprinkle in the garlic powder, onion powder, chili powder, cumin, salt, and black pepper. Stir everything together and let it cook for another 2-3 minutes. This allows the spices to bloom, filling your kitchen with a mouthwatering aroma.

Step 3: Prepare the Tortillas

Next, warm the corn tortillas. You can do this in a dry skillet over low heat or pop them in the microwave for a few seconds. Warming them makes them pliable, so they won’t crack when you roll them. Trust me, this little step makes a big difference!

Step 4: Fill and Roll the Taquitos

Now comes the fun part! Take a warm tortilla and place about 2 tablespoons of the beef mixture in the center. Add a sprinkle of shredded cheddar cheese on top. Roll the tortilla tightly, tucking in the sides as you go. If needed, secure them with a toothpick to keep everything in place.

Step 5: Fry the Taquitos

In a large skillet, heat the vegetable oil over medium-high heat. Once hot, carefully add the taquitos seam side down. Fry them for about 2-3 minutes on each side until they’re golden brown and crispy. Keep an eye on them; you want that perfect crunch!

Step 6: Serve and Enjoy

Once fried, remove the taquitos from the oil and let them drain on paper towels. Serve them hot with a side of sour cream and salsa for dipping. The creamy and tangy flavors perfectly complement the crispy beef taquitos. Enjoy every bite!

Tips for Success

  • Don’t overcrowd the skillet when frying; this ensures even cooking and crispiness.
  • Use a thermometer to check oil temperature; it should be around 350°F for perfect frying.
  • Let the taquitos cool slightly before serving; this helps the filling set.
  • Experiment with different cheeses for unique flavors, like pepper jack or Monterey Jack.
  • For extra crunch, consider baking them at 400°F for a healthier option.

Equipment Needed

  • Large Skillet: Essential for frying. A non-stick skillet works well too.
  • Spatula: For breaking apart the beef and flipping the taquitos.
  • Paper Towels: To drain excess oil after frying.
  • Toothpicks: Optional, for securing rolled taquitos.
  • Microwave or Dry Skillet: For warming tortillas.

Variations

  • Spicy Beef Taquitos: Add diced jalapeños or a splash of hot sauce to the beef mixture for an extra kick.
  • Vegetarian Option: Substitute ground beef with black beans or lentils, seasoned similarly for a hearty filling.
  • Cheesy Taquitos: Mix in cream cheese or pepper jack cheese with the cheddar for a creamier texture.
  • Herbed Taquitos: Incorporate fresh cilantro or parsley into the beef mixture for a burst of freshness.
  • Breakfast Taquitos: Replace beef with scrambled eggs and add diced bell peppers and onions for a morning twist.

Serving Suggestions

  • Fresh Guacamole: A creamy dip that pairs perfectly with the crispy taquitos.
  • Mexican Rice: Serve alongside for a hearty meal.
  • Cold Beverages: Pair with a refreshing cerveza or iced tea.
  • Garnish: Top with fresh cilantro or lime wedges for a pop of color.

FAQs about Beef Taquitos

Can I make beef taquitos ahead of time?

Absolutely! You can prepare the filling and roll the taquitos in advance. Just store them in the fridge for up to 24 hours. When you’re ready to enjoy, fry them straight from the fridge for a quick snack or meal.

What can I use instead of corn tortillas?

If you’re not a fan of corn tortillas, flour tortillas work just as well. They’re a bit softer and easier to roll, but keep in mind they won’t have that classic taquito crunch.

How do I store leftover taquitos?

Store any leftover beef taquitos in an airtight container in the fridge for up to three days. To reheat, pop them in the oven at 350°F until heated through for that crispy texture.

Can I bake beef taquitos instead of frying?

Yes! For a healthier option, bake your taquitos at 400°F for 15-20 minutes. Just brush them lightly with oil before baking to achieve that golden, crispy finish.

What toppings go well with beef taquitos?

There are so many delicious options! Sour cream, salsa, guacamole, or even shredded lettuce and diced tomatoes make great toppings. Get creative and add your favorites!

Final Thoughts

Beef taquitos are more than just a recipe; they’re a gateway to joyful moments shared with family and friends. The crispy exterior and savory filling create a delightful contrast that’s hard to resist. Whether you’re enjoying them during a game night or as a quick weeknight dinner, these taquitos bring warmth and satisfaction to the table. Plus, the versatility of this dish means you can customize it to suit your taste. So, roll up your sleeves, gather your loved ones, and dive into this delicious adventure. Trust me, every bite will be worth it!

jhessica

Beef Taquitos: Discover the Perfect Recipe Today!

Delicious and crispy beef taquitos filled with seasoned ground beef and cheese, perfect for a snack or meal.
Prep Time 15 minutes
Cook Time 20 minutes
Total Time 35 minutes
Servings: 4 servings
Course: Appetizer
Cuisine: Mexican
Calories: 350

Ingredients
  

  • 1 pound ground beef
  • 1 teaspoon garlic powder
  • 1 teaspoon onion powder
  • 1 teaspoon chili powder
  • 1 teaspoon cumin
  • 1 teaspoon salt
  • 1/2 teaspoon black pepper
  • 8 small corn tortillas
  • 1 cup shredded cheddar cheese
  • 1/2 cup vegetable oil for frying
  • Sour cream and salsa for serving

Method
 

  1. In a large skillet over medium heat, cook the ground beef until browned, breaking it apart with a spatula. Drain any excess fat.
  2. Stir in the garlic powder, onion powder, chili powder, cumin, salt, and black pepper. Cook for an additional 2-3 minutes until the spices are fragrant. Remove from heat and let cool slightly.
  3. Warm the corn tortillas in a dry skillet or microwave until pliable.
  4. Place about 2 tablespoons of the beef mixture and a sprinkle of cheddar cheese in the center of each tortilla. Roll them tightly and secure with a toothpick if necessary.
  5. In a large skillet, heat the vegetable oil over medium-high heat. Carefully add the taquitos, seam side down, and fry until golden brown and crispy, about 2-3 minutes per side.
  6. Remove the taquitos from the oil and drain on paper towels. Serve hot with sour cream and salsa.

Nutrition

Serving: 1taquitoCalories: 350kcalCarbohydrates: 15gProtein: 20gFat: 25gSaturated Fat: 10gPolyunsaturated Fat: 15gCholesterol: 70mgSodium: 600mgFiber: 2gSugar: 1g

Notes

  • For a healthier version, bake the taquitos at 400°F for 15-20 minutes until crispy instead of frying.
  • Add diced jalapeños or bell peppers to the beef mixture for extra flavor and crunch.

Tried this recipe?

Let us know how it was!

Creamy Spring Vegetable Soup: A Delightful Recipe to Try!

Introduction to Creamy Spring Vegetable Soup

There’s something magical about spring, isn’t there? The air is fresh, flowers bloom, and the produce aisle bursts with vibrant colors. This is the perfect time to whip up a bowl of Creamy Spring Vegetable Soup.

Whether you’re looking for a quick solution after a long day or a dish to impress your loved ones, this soup is your answer. It’s light yet satisfying, packed with seasonal veggies, and oh-so-creamy.

Trust me, once you try this recipe, it will become a staple in your kitchen. Let’s dive into the deliciousness that awaits!

Why You’ll Love This Creamy Spring Vegetable Soup

This Creamy Spring Vegetable Soup is a game-changer for busy weeknights.

It comes together in just 40 minutes, making it a quick and satisfying meal.

The flavors are fresh and vibrant, thanks to seasonal vegetables.

Plus, it’s versatile! You can easily customize it to suit your taste or dietary needs.

With every spoonful, you’ll feel the warmth and comfort that only a homemade soup can provide.

Ingredients for Creamy Spring Vegetable Soup

Creating a delicious Creamy Spring Vegetable Soup starts with fresh, vibrant ingredients. Here’s what you’ll need:

  • Olive oil: A staple in many kitchens, it adds richness and depth to the soup.
  • Onion: Chopped onion brings a sweet, aromatic base that enhances the overall flavor.
  • Garlic: Minced garlic adds a punch of flavor, making the soup irresistible.
  • Carrots: Diced carrots contribute sweetness and a lovely color to the mix.
  • Celery: This crunchy vegetable adds a refreshing note and balances the flavors.
  • Zucchini: Diced zucchini provides a tender texture and absorbs the soup’s flavors beautifully.
  • Asparagus: Fresh asparagus adds a touch of spring and a delightful crunch.
  • Peas: Whether fresh or frozen, peas bring a burst of sweetness and vibrant green color.
  • Vegetable broth: The base of the soup, it infuses everything with savory goodness.
  • Heavy cream: This is what makes the soup creamy and luxurious. For a lighter option, consider coconut milk or a plant-based cream.
  • Salt and pepper: Essential for seasoning, they enhance all the flavors in the soup.
  • Dried thyme: This herb adds an earthy aroma that complements the vegetables perfectly.
  • Fresh lemon juice: A splash of lemon juice brightens the soup and adds a refreshing zing.
  • Fresh parsley: Chopped parsley is a lovely garnish that adds color and freshness.

Feel free to get creative! You can add cooked chicken or white beans for extra protein.

For exact measurements, check the bottom of the article where you can find everything available for printing.

How to Make Creamy Spring Vegetable Soup

Making this Creamy Spring Vegetable Soup is a breeze.

With just a few simple steps, you’ll have a delicious bowl of goodness ready to enjoy.

Let’s get started!

Step 1: Sauté the Aromatics

Begin by heating the olive oil in a large pot over medium heat.

Once it’s shimmering, toss in the chopped onion.

Sauté for about 5 minutes until the onion turns translucent.

Then, add the minced garlic and stir for another minute.

The aroma will fill your kitchen, making it hard to resist!

Step 2: Add the Vegetables

Next, stir in the diced carrots and celery.

Cook these for another 5 minutes until they start to soften.

Now, it’s time to add the zucchini, asparagus, and peas.

Mix everything well, letting those vibrant colors shine.

Step 3: Pour in the Broth

Pour in the vegetable broth, bringing the mixture to a boil.

Once boiling, reduce the heat and let it simmer for 15 minutes.

This allows the vegetables to become tender and the flavors to meld beautifully.

Step 4: Blend the Soup

After simmering, grab your immersion blender.

Carefully blend the soup until it’s smooth.

If you prefer a chunkier texture, blend only half and leave the rest as is.

This step is where the magic happens!

Step 5: Stir in the Cream and Seasonings

Now, stir in the heavy cream, dried thyme, salt, and pepper.

Heat through for another 5 minutes, but avoid boiling.

This is where the soup gets its creamy richness, making it utterly delightful.

Step 6: Finish with Lemon Juice

Finally, remove the pot from heat and add the fresh lemon juice.

Give it a taste and adjust the seasoning if needed.

This last touch brightens the soup, making every spoonful refreshing and vibrant.

Serve hot, garnished with chopped parsley for that extra pop of color!

Tips for Success

  • Use fresh, seasonal vegetables for the best flavor and nutrition.
  • Don’t rush the sautéing process; it builds a flavorful base.
  • Adjust the thickness by blending more or less of the soup.
  • For added depth, try roasting the vegetables before adding them to the pot.
  • Garnish with lemon zest for an extra zing!

Equipment Needed

  • Large pot: A sturdy pot is essential for cooking the soup. A Dutch oven works great too.
  • Immersion blender: This handy tool makes blending easy. A regular blender can be used, but be cautious with hot liquids.
  • Cutting board and knife: Essential for chopping your veggies efficiently.

Variations of Creamy Spring Vegetable Soup

  • Herb-Infused: Add fresh herbs like basil or dill for a fragrant twist.
  • Spicy Kick: Toss in a pinch of red pepper flakes or a dash of hot sauce for some heat.
  • Protein Boost: Incorporate cooked chicken, shrimp, or white beans for added protein and heartiness.
  • Vegan Option: Substitute heavy cream with coconut milk or a plant-based cream for a creamy, dairy-free version.
  • Root Veggie Delight: Swap in sweet potatoes or parsnips for a different flavor profile and added sweetness.

Serving Suggestions for Creamy Spring Vegetable Soup

  • Pair with crusty bread or a warm baguette for dipping.
  • Serve alongside a fresh garden salad for a light meal.
  • Drizzle with a bit of olive oil or a sprinkle of Parmesan for added flavor.
  • Enjoy with a chilled glass of white wine or sparkling water.

FAQs about Creamy Spring Vegetable Soup

Can I make this soup ahead of time?

Absolutely! This Creamy Spring Vegetable Soup stores well in the fridge for up to three days. Just reheat gently on the stove before serving.

Can I freeze Creamy Spring Vegetable Soup?

Yes, you can freeze it! Allow the soup to cool completely, then transfer it to an airtight container. It will keep for about three months. Just remember to leave some space for expansion.

What can I substitute for heavy cream?

If you’re looking for a lighter option, coconut milk or a plant-based cream works beautifully. They’ll still give you that creamy texture without the heaviness.

How can I make this soup spicier?

For a spicy kick, add red pepper flakes or a dash of hot sauce while cooking. You can also toss in some diced jalapeños for an extra layer of heat!

What are some good toppings for this soup?

Garnish with fresh herbs like parsley or chives, a sprinkle of croutons, or even a drizzle of olive oil for added flavor and texture. Enjoy experimenting!

Final Thoughts

Cooking this Creamy Spring Vegetable Soup is more than just preparing a meal; it’s an experience that brings joy and warmth to your kitchen.

Each spoonful is a celebration of spring, bursting with fresh flavors and vibrant colors.

Whether you’re enjoying it solo or sharing it with family, this soup has a way of making any day feel special.

It’s comforting yet light, perfect for those sunny afternoons or cozy evenings.

So, roll up your sleeves, gather those ingredients, and let the magic of this soup fill your home with delightful aromas. You won’t regret it!

jhessica

Creamy Spring Vegetable Soup: A Delightful Recipe to Try!

A creamy and delicious spring vegetable soup that is perfect for a light meal or appetizer.
Prep Time 10 minutes
Cook Time 30 minutes
Total Time 40 minutes
Servings: 6 servings
Course: Soup
Cuisine: American
Calories: 220

Ingredients
  

  • 2 tablespoons olive oil
  • 1 medium onion chopped
  • 2 cloves garlic minced
  • 2 medium carrots diced
  • 2 stalks celery diced
  • 1 medium zucchini diced
  • 1 cup asparagus trimmed and cut into 1-inch pieces
  • 1 cup fresh or frozen peas
  • 4 cups vegetable broth
  • 1 cup heavy cream
  • Salt and pepper to taste
  • 1 teaspoon dried thyme
  • 1 tablespoon fresh lemon juice
  • Fresh parsley chopped (for garnish)

Method
 

  1. In a large pot, heat the olive oil over medium heat. Add the chopped onion and sauté until translucent, about 5 minutes.
  2. Stir in the minced garlic, diced carrots, and celery. Cook for another 5 minutes until the vegetables start to soften.
  3. Add the zucchini, asparagus, and peas to the pot. Stir well to combine.
  4. Pour in the vegetable broth and bring the mixture to a boil. Reduce heat and let it simmer for 15 minutes, or until all the vegetables are tender.
  5. Using an immersion blender, carefully blend the soup until smooth. If you prefer a chunkier texture, blend only half of the soup and leave the rest as is.
  6. Stir in the heavy cream, dried thyme, salt, and pepper. Heat through for another 5 minutes, but do not let it boil.
  7. Remove from heat and add the fresh lemon juice. Taste and adjust seasoning if necessary.
  8. Serve hot, garnished with chopped parsley.

Nutrition

Serving: 1cupCalories: 220kcalCarbohydrates: 12gProtein: 4gFat: 18gSaturated Fat: 10gPolyunsaturated Fat: 8gCholesterol: 60mgSodium: 500mgFiber: 3gSugar: 3g

Notes

  • For a lighter version, substitute the heavy cream with coconut milk or a plant-based cream alternative.
  • Add cooked chicken or white beans for extra protein and heartiness.

Tried this recipe?

Let us know how it was!

Pumpkin Chocolate Chip Cookies: A Must-Try Recipe Today!

Introduction to Pumpkin Chocolate Chip Cookies

As the leaves turn and the air gets crisp, there’s nothing quite like the aroma of freshly baked Pumpkin Chocolate Chip Cookies wafting through the house. These cookies are more than just a treat; they’re a warm hug on a chilly day. Perfect for a quick solution after a long day at work or a delightful surprise for your loved ones, this recipe is a must-try. With their soft texture and rich flavors, these cookies will have everyone asking for seconds. Trust me, once you take a bite, you’ll understand why they’re a fall favorite!

Why You’ll Love This Pumpkin Chocolate Chip Cookies

These Pumpkin Chocolate Chip Cookies are a game-changer in the kitchen. They come together in just 30 minutes, making them perfect for busy weeknights or last-minute gatherings. The combination of pumpkin and chocolate creates a flavor explosion that’s both comforting and indulgent. Plus, they’re soft and chewy, ensuring every bite is a delightful experience. You’ll love how easy they are to make and how quickly they disappear!

Ingredients for Pumpkin Chocolate Chip Cookies

Gathering the right ingredients is the first step to baking success. For these Pumpkin Chocolate Chip Cookies, you’ll need a mix of pantry staples and a few seasonal favorites. Here’s what you’ll need:

  • All-purpose flour: The backbone of your cookies, providing structure and texture.
  • Baking soda and baking powder: These leavening agents help your cookies rise and become fluffy.
  • Ground cinnamon: Adds warmth and a hint of spice, perfect for fall.
  • Ground nutmeg: This aromatic spice complements the pumpkin beautifully.
  • Salt: Enhances the flavors and balances the sweetness.
  • Unsalted butter: For that rich, creamy texture; make sure it’s softened for easy mixing.
  • Brown sugar: Adds moisture and a deep caramel flavor.
  • Granulated sugar: Sweetens the cookies and helps them spread.
  • Egg: Binds the ingredients together and adds richness.
  • Vanilla extract: A splash of this elevates the overall flavor.
  • Canned pumpkin puree: The star of the show, providing moisture and that signature pumpkin flavor.
  • Semi-sweet chocolate chips: These little morsels bring sweetness and a delightful contrast to the pumpkin.

For those looking to mix things up, consider adding chopped nuts or dried cranberries for extra texture. If you want a spicier kick, a dash of ground ginger or cloves can do wonders. You can find all the exact measurements at the bottom of the article, ready for printing!

How to Make Pumpkin Chocolate Chip Cookies

Now that you have all your ingredients ready, it’s time to dive into the fun part: baking! Follow these simple steps to create your delicious Pumpkin Chocolate Chip Cookies. Trust me, the process is as enjoyable as the end result!

Step 1: Preheat the Oven

First things first, preheat your oven to 350°F (175°C). This ensures your cookies bake evenly. While the oven warms up, line a baking sheet with parchment paper. This little trick prevents sticking and makes cleanup a breeze!

Step 2: Mix Dry Ingredients

In a medium bowl, whisk together the all-purpose flour, baking soda, baking powder, ground cinnamon, ground nutmeg, and salt. This step is crucial as it evenly distributes the leavening agents and spices. Set this mixture aside for now; it’ll come into play shortly.

Step 3: Cream Butter and Sugars

In a large bowl, cream together the softened unsalted butter, brown sugar, and granulated sugar. Use a hand mixer or a sturdy spatula to beat until the mixture is light and fluffy. This step adds air to your dough, making your cookies soft and chewy.

Step 4: Add Egg and Vanilla

Next, beat in the large egg and vanilla extract until everything is well combined. The egg adds richness, while the vanilla enhances the overall flavor. You’ll notice the mixture becoming even creamier!

Step 5: Incorporate Pumpkin

Now, stir in the canned pumpkin puree until it’s fully incorporated. This is where the magic happens! The pumpkin not only adds flavor but also keeps your cookies moist and tender.

Step 6: Combine Wet and Dry Ingredients

Gradually add the dry ingredients to the wet mixture. Stir gently until just combined. Be careful not to overmix; a few lumps are perfectly fine. This will keep your cookies soft and prevent them from becoming tough.

Step 7: Fold in Chocolate Chips

Now it’s time for the best part—fold in the semi-sweet chocolate chips! Use a spatula to gently mix them into the dough. This ensures every cookie is packed with chocolatey goodness.

Step 8: Bake the Cookies

Drop rounded tablespoons of dough onto the prepared baking sheet, spacing them about 2 inches apart. This gives them room to spread. Bake for 12-15 minutes, or until the edges are lightly golden. Your kitchen will smell heavenly during this time!

Step 9: Cool the Cookies

Once baked, allow the cookies to cool on the baking sheet for 5 minutes. This helps them set. After that, transfer them to a wire rack to cool completely. Patience is key here; the wait will be worth it!

Tips for Success

  • Use room temperature ingredients for better mixing.
  • Don’t skip the parchment paper; it prevents sticking.
  • For softer cookies, underbake slightly; they’ll continue to cook on the sheet.
  • Chill the dough for 30 minutes if it’s too sticky.
  • Experiment with spices to find your perfect flavor balance.

Equipment Needed

  • Baking sheet: A standard sheet works, but a silicone mat can help with even baking.
  • Parchment paper: Essential for easy cleanup; aluminum foil is a good alternative.
  • Mixing bowls: Use a large bowl for wet ingredients and a medium one for dry.
  • Whisk: A hand whisk is perfect for mixing dry ingredients; a fork can work too.
  • Spatula: A rubber spatula is great for folding in chocolate chips and scraping bowls.

Variations

  • Nutty Delight: Add 1/2 cup of chopped walnuts or pecans for a crunchy texture.
  • Cranberry Twist: Substitute half of the chocolate chips with dried cranberries for a tart contrast.
  • Spicy Kick: Mix in 1/4 teaspoon of ground ginger or cloves for an extra layer of warmth.
  • Gluten-Free Option: Use a gluten-free all-purpose flour blend to make these cookies suitable for gluten-sensitive friends.
  • Vegan Version: Replace the egg with a flax egg (1 tablespoon ground flaxseed mixed with 2.5 tablespoons water) and use vegan butter.

Serving Suggestions

  • Pair these cookies with a warm cup of spiced chai or pumpkin spice latte for a cozy treat.
  • Serve alongside a scoop of vanilla ice cream for an indulgent dessert.
  • For a festive touch, dust with powdered sugar before serving.
  • Present on a rustic wooden platter for a charming display.

FAQs about Pumpkin Chocolate Chip Cookies

Got questions about these delightful Pumpkin Chocolate Chip Cookies? You’re not alone! Here are some common queries that might pop up as you embark on your baking adventure.

Can I use fresh pumpkin instead of canned puree?

Absolutely! If you have fresh pumpkin, just roast it, scoop out the flesh, and blend it until smooth. It’ll add a lovely homemade touch to your cookies.

How do I store leftover cookies?

To keep your cookies fresh, store them in an airtight container at room temperature. They’ll stay soft for about a week. You can also freeze them for up to three months!

Can I make these cookies ahead of time?

Yes! You can prepare the dough in advance and refrigerate it for up to 3 days. Just scoop and bake when you’re ready for a fresh batch!

What can I substitute for chocolate chips?

If chocolate isn’t your thing, try using white chocolate chips, butterscotch chips, or even dried fruit like cranberries for a different flavor profile.

Are these cookies suitable for a gluten-free diet?

Definitely! Just swap the all-purpose flour with a gluten-free flour blend, and you’ll have a delicious treat that everyone can enjoy.

Final Thoughts

Baking these Pumpkin Chocolate Chip Cookies is more than just a culinary task; it’s an experience that fills your home with warmth and joy. Each bite transports you to cozy autumn days, where laughter and sweet treats abound. The combination of pumpkin and chocolate creates a delightful harmony that’s hard to resist. Whether you’re sharing them with family or enjoying them solo with a cup of coffee, these cookies bring a sense of comfort and nostalgia. So, roll up your sleeves, embrace the process, and let these cookies become a cherished part of your fall traditions!

jhessica

Pumpkin Chocolate Chip Cookies: A Must-Try Recipe Today!

Delicious and soft pumpkin chocolate chip cookies that are perfect for fall.
Prep Time 15 minutes
Cook Time 15 minutes
Total Time 30 minutes
Servings: 24 cookies
Course: Dessert
Cuisine: American
Calories: 150

Ingredients
  

  • 2 cups all-purpose flour
  • 1 teaspoon baking soda
  • 1 teaspoon baking powder
  • 1 teaspoon ground cinnamon
  • 1/2 teaspoon ground nutmeg
  • 1/2 teaspoon salt
  • 1 cup unsalted butter softened
  • 1 cup brown sugar packed
  • 1/2 cup granulated sugar
  • 1 large egg
  • 1 teaspoon vanilla extract
  • 1 cup canned pumpkin puree
  • 1 1/2 cups semi-sweet chocolate chips

Method
 

  1. Preheat your oven to 350°F (175°C) and line a baking sheet with parchment paper.
  2. In a medium bowl, whisk together the flour, baking soda, baking powder, cinnamon, nutmeg, and salt. Set aside.
  3. In a large bowl, cream together the softened butter, brown sugar, and granulated sugar until light and fluffy.
  4. Beat in the egg and vanilla extract until well combined.
  5. Stir in the pumpkin puree until fully incorporated.
  6. Gradually add the dry ingredients to the wet mixture, stirring until just combined.
  7. Fold in the chocolate chips.
  8. Drop rounded tablespoons of dough onto the prepared baking sheet, spacing them about 2 inches apart.
  9. Bake for 12-15 minutes, or until the edges are lightly golden.
  10. Allow the cookies to cool on the baking sheet for 5 minutes before transferring them to a wire rack to cool completely.

Nutrition

Serving: 1cookieCalories: 150kcalCarbohydrates: 20gProtein: 2gFat: 7gSaturated Fat: 4gPolyunsaturated Fat: 3gCholesterol: 20mgSodium: 100mgFiber: 1gSugar: 10g

Notes

  • For a spicier flavor, add 1/4 teaspoon of ground ginger or cloves to the dry ingredients.
  • Substitute half of the chocolate chips with chopped nuts or dried cranberries for a different texture and taste.

Tried this recipe?

Let us know how it was!

Cookie Croissant Bites: An Irresistible Treat Recipe!

Introduction to Cookie Croissant Bites

There’s something magical about the combination of flaky croissants and rich chocolate that takes me back to my childhood. Those lazy Sunday mornings, when the smell of fresh pastries wafted through the house, always felt special. Now, I can recreate that joy with Cookie Croissant Bites, a delightful treat that’s perfect for any occasion. Whether you’re looking for a quick solution for a busy day or a dish to impress your loved ones, these bites are sure to bring smiles. They’re easy to whip up and even easier to devour!

Why You’ll Love This Cookie Croissant Bites

Cookie Croissant Bites are the ultimate treat for anyone who craves something sweet without spending hours in the kitchen. They come together in just 22 minutes, making them perfect for unexpected guests or a cozy night in. The flaky croissant exterior gives way to a gooey, chocolatey center that’s simply irresistible. Plus, you can customize the filling to suit your taste, ensuring every bite is a delightful surprise!

Ingredients for Cookie Croissant Bites

Gathering the right ingredients is the first step to creating these delicious Cookie Croissant Bites. Here’s what you’ll need:

  • Croissants: The star of the show! Flaky and buttery, they provide the perfect base for our sweet filling.
  • Chocolate Chips: Rich and melty, these are essential for that gooey center. Dark, milk, or even white chocolate can work wonders.
  • Chopped Nuts: Walnuts or pecans add a delightful crunch and nutty flavor. Feel free to skip them if you prefer a nut-free version.
  • Granulated Sugar: A touch of sweetness to balance the rich chocolate. You can adjust this based on your taste.
  • Ground Cinnamon: This spice adds warmth and depth to the filling. It’s a small addition that makes a big difference!
  • Melted Butter: This helps bind the filling together and adds richness. You can use unsalted butter for better control over the saltiness.
  • Vanilla Extract: A splash of vanilla enhances the overall flavor, making each bite even more delightful.
  • Powdered Sugar: Optional for dusting, it adds a lovely finishing touch and a bit of elegance to your bites.

For exact measurements, check the bottom of the article where you can find everything listed for easy printing. Happy baking!

How to Make Cookie Croissant Bites

Creating these Cookie Croissant Bites is a breeze! Follow these simple steps, and you’ll have a delicious treat ready in no time. Let’s dive in!

Step 1: Preheat the Oven

First things first, preheat your oven to 350°F. This ensures that your Cookie Croissant Bites bake evenly. While the oven warms up, line a baking sheet with parchment paper. This will prevent sticking and make cleanup a snap!

Step 2: Prepare the Croissants

Next, grab those flaky croissants and slice each one in half lengthwise. Place the bottom halves on the prepared baking sheet. This is where the magic happens, so make sure they’re ready to hold all that delicious filling!

Step 3: Mix the Filling

In a mixing bowl, combine the chocolate chips, chopped nuts, granulated sugar, and ground cinnamon. Stir everything together until well mixed. The aroma of cinnamon and chocolate will already start to fill your kitchen, and trust me, it’s just a taste of what’s to come!

Step 4: Add Butter and Vanilla

Now, drizzle the melted butter and vanilla extract over the chocolate mixture. Give it a good stir until everything is combined. This step adds richness and depth to your filling, making each bite even more indulgent.

Step 5: Assemble the Croissants

Time to assemble! Spoon the chocolate mixture evenly over the bottom halves of the croissants. Don’t be shy—load them up! Then, place the top halves back on. It’s like a sweet little sandwich waiting to be baked.

Step 6: Bake

Pop the baking sheet into the preheated oven and bake for 10-12 minutes. Keep an eye on them! You want the croissants to turn golden brown and the chocolate to melt into a gooey delight. The smell will be irresistible!

Step 7: Cool and Serve

Once they’re out of the oven, let the Cookie Croissant Bites cool for a few minutes. This helps the chocolate set just a bit. If you’re feeling fancy, dust them with powdered sugar before serving. It adds a lovely touch and makes them look even more tempting!

Tips for Success

  • Use day-old croissants for a sturdier base; they hold up better during baking.
  • Experiment with different chocolate types—dark, milk, or even white chocolate for variety.
  • Don’t skip the cinnamon; it elevates the flavor profile significantly.
  • For a gourmet touch, add a pinch of sea salt to the filling.
  • Let them cool slightly before serving to avoid chocolate burns!

Equipment Needed

  • Baking Sheet: A standard baking sheet works perfectly. If you don’t have one, a large oven-safe dish will do.
  • Parchment Paper: This prevents sticking. If you’re out, a silicone baking mat is a great alternative.
  • Mixing Bowl: Any bowl will suffice, but a medium-sized one is ideal for mixing.
  • Spatula: Use a spatula for easy filling transfer. A spoon can work in a pinch!

Variations

  • Nut-Free Option: Omit the nuts or substitute with seeds like sunflower or pumpkin for a crunchy texture.
  • Fruit-Infused: Add fresh berries or sliced bananas to the chocolate mixture for a fruity twist.
  • Caramel Delight: Swap chocolate chips for caramel bits for a gooey, sweet alternative.
  • Spiced Up: Experiment with spices like nutmeg or cardamom for a unique flavor profile.
  • Gluten-Free: Use gluten-free croissants to make this treat suitable for those with dietary restrictions.

Serving Suggestions

  • Pair with a hot cup of coffee or a rich hot chocolate for a cozy treat.
  • Serve alongside fresh fruit like strawberries or raspberries for a refreshing contrast.
  • For a brunch spread, add a side of whipped cream or vanilla ice cream.
  • Present on a decorative platter, dusted with powdered sugar for an elegant touch.

FAQs about Cookie Croissant Bites

Got questions about these delightful Cookie Croissant Bites? You’re not alone! Here are some common queries that might help you out:

Can I make Cookie Croissant Bites ahead of time?

Absolutely! You can prepare the filling and assemble the croissants a few hours in advance. Just cover them and pop them in the fridge until you’re ready to bake. This makes for a quick dessert when guests arrive!

What can I substitute for chocolate chips?

If chocolate isn’t your thing, try caramel bits or peanut butter chips. They’ll give your Cookie Croissant Bites a unique twist that’s just as delicious!

How do I store leftovers?

Store any leftover bites in an airtight container at room temperature for up to two days. If you want to keep them longer, refrigerate them for up to a week. Just reheat in the oven for a few minutes to bring back that fresh-baked taste!

Can I freeze Cookie Croissant Bites?

Yes, you can freeze them! Just wrap each bite tightly in plastic wrap and place them in a freezer-safe bag. They’ll last for about a month. When you’re ready to enjoy, thaw and reheat in the oven.

Are Cookie Croissant Bites suitable for vegetarians?

Yes! This recipe is vegetarian-friendly, making it a great option for those who don’t eat meat. Enjoy these sweet treats without any worries!

Final Thoughts

Creating Cookie Croissant Bites is more than just baking; it’s about sharing joy and deliciousness with those you love. The flaky croissant, combined with a rich chocolate filling, brings a sense of comfort that’s hard to beat. Whether you’re enjoying them on a quiet morning or serving them at a gathering, these bites are sure to impress. They’re quick, easy, and oh-so-satisfying. So, roll up your sleeves, gather your ingredients, and let the sweet aroma fill your kitchen. Trust me, every bite will be a delightful reminder of life’s simple pleasures!

jhessica

Cookie Croissant Bites: An Irresistible Treat Recipe!

Cookie Croissant Bites are a delightful treat combining flaky croissants with a rich chocolate and nut filling, perfect for any occasion.
Prep Time 10 minutes
Cook Time 12 minutes
Total Time 22 minutes
Servings: 4 servings
Course: Dessert
Cuisine: French
Calories: 300

Ingredients
  

  • 2 large croissants
  • 1 cup chocolate chips
  • 1/2 cup chopped nuts walnuts or pecans
  • 1/4 cup granulated sugar
  • 1/2 teaspoon ground cinnamon
  • 1/4 cup butter melted
  • 1/2 teaspoon vanilla extract
  • Powdered sugar for dusting optional

Method
 

  1. Preheat your oven to 350°F. Line a baking sheet with parchment paper.
  2. Slice each croissant in half lengthwise. Place the bottom halves on the prepared baking sheet.
  3. In a mixing bowl, combine the chocolate chips, chopped nuts, granulated sugar, and ground cinnamon. Mix well.
  4. Drizzle the melted butter and vanilla extract over the chocolate mixture and stir until combined.
  5. Spoon the chocolate mixture evenly over the bottom halves of the croissants. Place the top halves back on the croissants.
  6. Bake in the preheated oven for 10-12 minutes, or until the croissants are golden brown and the chocolate is melted.
  7. Remove from the oven and let cool for a few minutes. Dust with powdered sugar before serving, if desired.

Nutrition

Serving: 1servingCalories: 300kcalCarbohydrates: 30gProtein: 5gFat: 18gSaturated Fat: 10gPolyunsaturated Fat: 8gCholesterol: 30mgSodium: 150mgFiber: 2gSugar: 15g

Notes

  • For a richer flavor, try adding a pinch of sea salt to the chocolate mixture.
  • You can substitute the chocolate chips with caramel bits or peanut butter chips for a different taste.

Tried this recipe?

Let us know how it was!

Stay Connected

Get recipes via email: