Get my cookbooks

Unstuffed Bell Peppers: A Quick, Tasty Meal Idea!

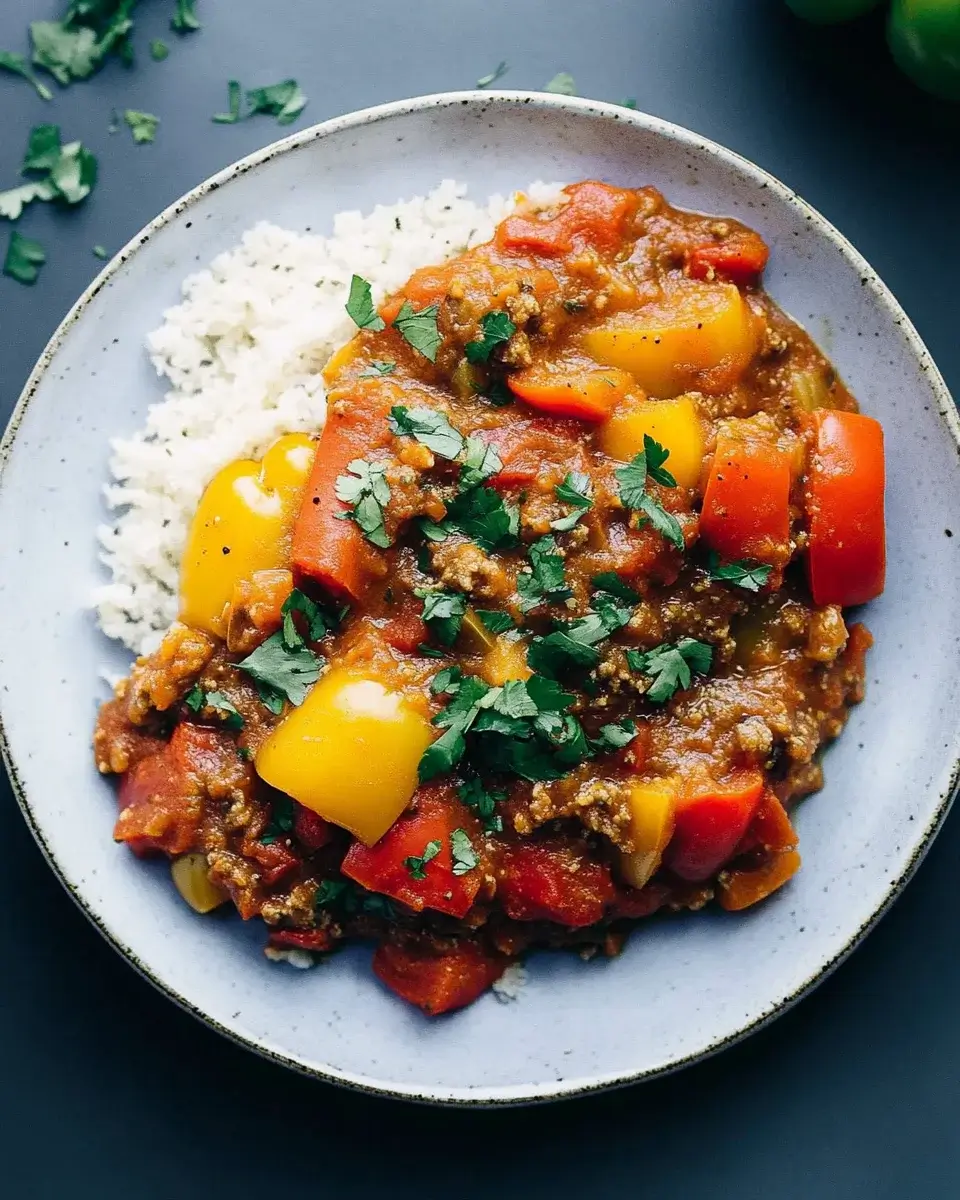
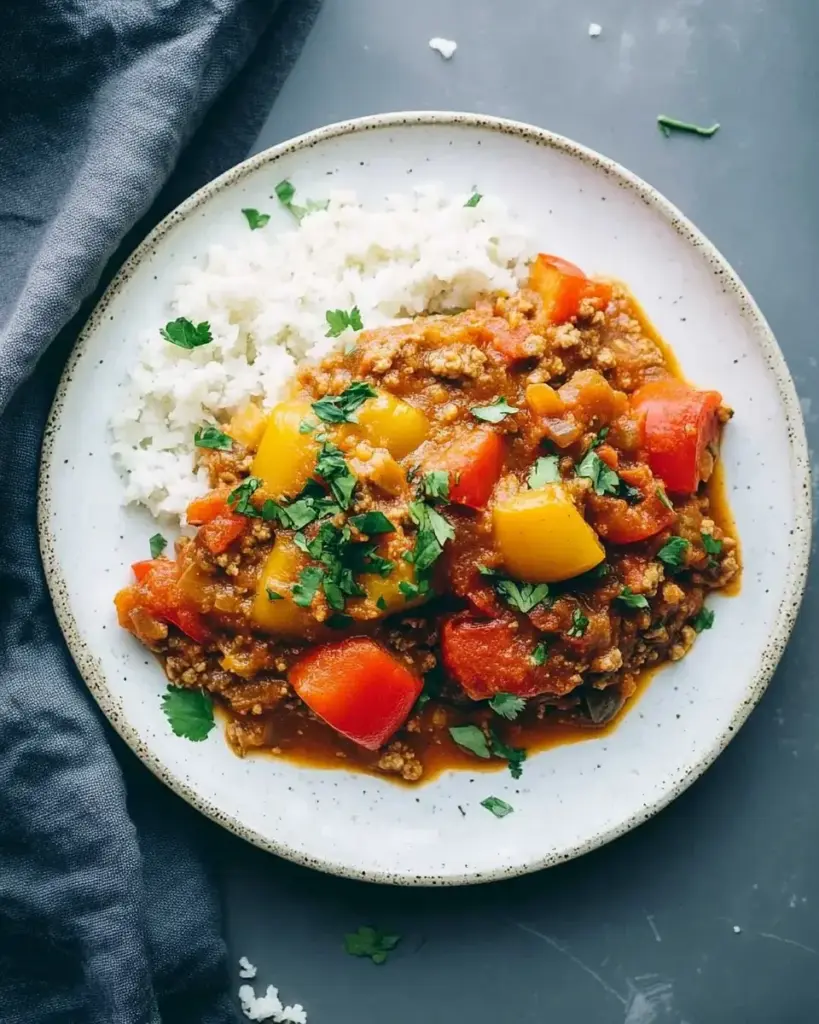
Introduction to Unstuffed Bell Peppers

After a long day, the last thing I want is to spend hours in the kitchen. That’s where unstuffed bell peppers come to the rescue! This dish is a delightful twist on the classic stuffed peppers, offering all the flavors without the fuss. It’s a one-pan wonder that brings together ground beef or turkey, rice, and vibrant bell peppers in a hearty meal. Perfect for busy weeknights or impressing friends at a casual dinner, this recipe is not just quick; it’s also packed with flavor and comfort. Let’s dive into this culinary adventure!

Why You’ll Love This Unstuffed Bell Peppers

Unstuffed bell peppers are a game-changer for anyone who craves a delicious meal without the hassle. They come together in just one pan, making cleanup a breeze. The combination of savory ground meat, tender rice, and fresh bell peppers creates a comforting dish that satisfies. Plus, it’s versatile! You can easily customize it to fit your taste or dietary needs. Quick, tasty, and stress-free—what’s not to love?

Ingredients for Unstuffed Bell Peppers

Gathering the right ingredients is key to making these unstuffed bell peppers a hit. Here’s what you’ll need:

  • Ground beef or turkey: This is the protein base. Choose lean options for a healthier dish.
  • Onion: Diced onion adds sweetness and depth to the flavor profile.
  • Garlic: Minced garlic brings a fragrant kick that elevates the dish.
  • Diced tomatoes: A can of these adds moisture and a tangy taste, making everything come together.
  • Uncooked rice: This is the heart of the meal, soaking up all the delicious flavors as it cooks.
  • Broth: Beef or vegetable broth enhances the overall taste and keeps the rice tender.
  • Bell peppers: Chopped bell peppers add color and crunch. Feel free to mix colors for a vibrant dish!
  • Italian seasoning: A blend of herbs that brings a classic Italian flair to the mix.
  • Salt and pepper: Essential for seasoning, adjusting to your taste preferences.
  • Shredded cheese: Cheddar or mozzarella melts beautifully on top, adding a creamy finish.

For those looking to switch things up, consider these options:

  • Vegetarian option: Substitute the meat with black beans or lentils and use vegetable broth.
  • Extra veggies: Toss in corn, zucchini, or spinach for added nutrition and flavor.

Exact quantities for each ingredient can be found at the bottom of the article, ready for printing!

How to Make Unstuffed Bell Peppers

Creating these unstuffed bell peppers is as easy as pie, or should I say, as easy as a one-pan meal! Follow these simple steps, and you’ll have a delicious dinner on the table in no time.

Step 1: Brown the Meat

Start by heating a large skillet over medium heat. Add your choice of ground beef or turkey. Cook it until it’s browned and fully cooked through, about 5-7 minutes. Don’t forget to drain any excess fat. This step is crucial for keeping your dish light and flavorful!

Step 2: Sauté the Vegetables

Next, toss in the diced onion and minced garlic. Sauté them for about 3-4 minutes until the onion turns translucent. The aroma will fill your kitchen, making it hard to resist sneaking a taste. This is where the magic begins!

Step 3: Combine Ingredients

Now, it’s time to bring everything together. Stir in the can of diced tomatoes, uncooked rice, broth, and chopped bell peppers. Sprinkle in the Italian seasoning, salt, and pepper. Bring this colorful mixture to a boil. The vibrant colors will make your heart sing!

Step 4: Simmer the Mixture

Once boiling, reduce the heat to low and cover the skillet. Let it simmer for 20-25 minutes. This allows the rice to absorb the flavors and become tender. Keep an eye on it, and give it a stir occasionally. You want everything to meld together beautifully.

Step 5: Add Cheese and Serve

Finally, remove the skillet from heat and sprinkle the shredded cheese on top. Cover it for a few minutes to let the cheese melt into gooey perfection. Serve hot, and if you’re feeling fancy, garnish with fresh herbs. Enjoy your hearty, comforting meal!

Tips for Success

  • Use a non-stick skillet to prevent sticking and make cleanup easier.
  • For extra flavor, brown the meat with a dash of Worcestershire sauce.
  • Let the dish sit for a few minutes after cooking; it helps the flavors meld.
  • Experiment with different cheeses for a unique twist.
  • Prep your ingredients ahead of time to save on cooking time.

Equipment Needed

  • Large skillet: A non-stick skillet works best, but any large pan will do.
  • Wooden spoon: Perfect for stirring and combining ingredients.
  • Measuring cups: Essential for accurate ingredient portions.
  • Knife and cutting board: For chopping vegetables with ease.

Variations

  • Spicy Kick: Add diced jalapeños or a sprinkle of red pepper flakes for a fiery twist.
  • Quinoa Swap: Replace rice with quinoa for a protein-packed, gluten-free option.
  • Mexican Flair: Incorporate black beans, corn, and taco seasoning for a zesty, south-of-the-border flavor.
  • Herb Infusion: Experiment with fresh herbs like basil or cilantro for a burst of freshness.
  • Cheesy Delight: Mix in cream cheese or ricotta for an extra creamy texture.

Serving Suggestions

  • Side Salad: A crisp green salad with a tangy vinaigrette complements the richness of the dish.
  • Garlic Bread: Serve with warm garlic bread for a comforting, hearty meal.
  • Wine Pairing: A light red wine, like Pinot Noir, enhances the flavors beautifully.
  • Presentation: Garnish with fresh parsley or basil for a pop of color.

FAQs about Unstuffed Bell Peppers

Curious about unstuffed bell peppers? Here are some common questions I often hear, along with helpful answers to guide you through this delicious dish.

Can I make unstuffed bell peppers ahead of time?

Absolutely! You can prepare the mixture in advance and store it in the fridge for up to 24 hours. Just reheat it in the skillet before adding the cheese and serving.

What can I substitute for rice in this recipe?

If you’re looking for alternatives, quinoa or cauliflower rice work great! They both absorb flavors well and add a unique twist to your unstuffed bell peppers.

How do I store leftovers?

Leftovers can be stored in an airtight container in the fridge for up to three days. Just reheat in the microwave or on the stovetop when you’re ready to enjoy them again!

Can I freeze unstuffed bell peppers?

Yes, you can freeze the cooked dish! Just let it cool completely, then transfer it to a freezer-safe container. It will keep well for up to three months. Thaw in the fridge before reheating.

What are some good side dishes to serve with unstuffed bell peppers?

Pair your unstuffed bell peppers with a fresh side salad, garlic bread, or even some roasted vegetables for a complete meal that’s sure to impress!

Final Thoughts

Cooking should be a joyful experience, and unstuffed bell peppers embody that spirit perfectly. This dish not only brings together comforting flavors but also simplifies your time in the kitchen. It’s a meal that can easily adapt to your tastes, making it a family favorite. Whether you’re whipping it up on a busy weeknight or serving it to friends, the smiles around the table will be worth every minute spent. So grab your skillet, embrace the deliciousness, and let this one-pan wonder become a staple in your home. Happy cooking!

jhessica

Unstuffed Bell Peppers: A Quick, Tasty Meal Idea!

A quick and tasty meal idea featuring ground beef or turkey, rice, and bell peppers, all cooked together for a delicious one-pan dish.
Prep Time 10 minutes
Cook Time 30 minutes
Total Time 40 minutes
Servings: 4 servings
Course: Main Dish
Cuisine: American
Calories: 450

Ingredients
  

  • 1 pound ground beef or turkey
  • 1 medium onion diced
  • 2 cloves garlic minced
  • 1 can 14.5 ounces diced tomatoes, undrained
  • 1 cup uncooked rice white or brown
  • 2 cups beef or vegetable broth
  • 2 medium bell peppers chopped (any color)
  • 1 teaspoon Italian seasoning
  • Salt and pepper to taste
  • 1 cup shredded cheese cheddar or mozzarella

Method
 

  1. In a large skillet over medium heat, brown the ground beef or turkey until fully cooked. Drain any excess fat.
  2. Add the diced onion and minced garlic to the skillet, cooking until the onion is translucent, about 3-4 minutes.
  3. Stir in the diced tomatoes, uncooked rice, broth, chopped bell peppers, Italian seasoning, salt, and pepper. Bring the mixture to a boil.
  4. Reduce the heat to low, cover, and simmer for 20-25 minutes, or until the rice is tender and has absorbed most of the liquid.
  5. Remove the skillet from heat and sprinkle the shredded cheese on top. Cover for a few minutes until the cheese melts.
  6. Serve hot, garnished with fresh herbs if desired.

Nutrition

Serving: 1servingCalories: 450kcalCarbohydrates: 35gProtein: 30gFat: 20gSaturated Fat: 8gPolyunsaturated Fat: 10gCholesterol: 80mgSodium: 600mgFiber: 3gSugar: 5g

Notes

  • For a vegetarian option, substitute the meat with black beans or lentils and use vegetable broth.
  • Add extra vegetables like corn, zucchini, or spinach for added nutrition and flavor.

Tried this recipe?

Let us know how it was!

White Bean Chicken Chili: A Flavorful and Easy Recipe

Introduction to White Bean Chicken Chili

There’s something magical about a warm bowl of chili on a chilly evening. White Bean Chicken Chili is my go-to recipe when I want to whip up something comforting yet simple. It’s like a hug in a bowl, perfect for those busy days when you need a quick solution. This dish not only warms your soul but also impresses your loved ones with its rich flavors. With just a handful of ingredients and minimal prep time, you’ll find yourself reaching for this recipe again and again. Let’s dive into the deliciousness that awaits!

Why You’ll Love This White Bean Chicken Chili

This White Bean Chicken Chili is a game-changer for your weeknight dinners. It’s incredibly easy to make, taking just about 40 minutes from start to finish. The flavors meld beautifully, creating a hearty dish that’s both satisfying and nutritious. Plus, it’s versatile! You can customize it to suit your taste or dietary needs. Whether you’re feeding a crowd or just yourself, this chili is sure to please.

Ingredients for White Bean Chicken Chili

Gathering the right ingredients is the first step to creating a delicious White Bean Chicken Chili. Here’s what you’ll need:

  • Olive oil: This is your base for sautéing, adding a rich flavor to the dish.
  • Onion: Diced onion brings sweetness and depth, making it a must-have aromatic.
  • Garlic: Minced garlic adds a punch of flavor that elevates the entire chili.
  • Boneless, skinless chicken breasts: Diced chicken provides protein and heartiness, making this chili filling.
  • Ground cumin: This spice adds warmth and earthiness, a key player in chili recipes.
  • Chili powder: A blend of spices that gives your chili that classic kick.
  • Smoked paprika: This adds a subtle smokiness, enhancing the overall flavor profile.
  • Cayenne pepper (optional): For those who like it spicy, a dash of cayenne can elevate the heat.
  • White beans: These creamy beans are the star of the show, providing texture and nutrition.
  • Diced tomatoes with green chilies: This adds acidity and a bit of zest, balancing the flavors.
  • Chicken broth: A flavorful base that ties all the ingredients together.
  • Corn: Fresh, frozen, or canned corn adds sweetness and a pop of color.
  • Salt and pepper: Essential for seasoning, enhancing all the flavors in your chili.
  • Fresh cilantro: Chopped cilantro is perfect for garnishing, adding freshness to each bowl.
  • Lime wedges: A squeeze of lime brightens the dish, making it even more refreshing.

For those looking to mix things up, consider adding diced jalapeños for extra heat or a splash of hot sauce during cooking. If you prefer a creamier texture, stir in some sour cream or Greek yogurt just before serving. You can find the exact quantities for each ingredient at the bottom of the article, ready for printing!

How to Make White Bean Chicken Chili

Now that you have all your ingredients ready, let’s get cooking! Making White Bean Chicken Chili is straightforward and fun. Follow these simple steps, and you’ll have a delicious meal in no time.

Step 1: Sauté the Aromatics

Start by heating the olive oil in a large pot over medium heat. Once it’s shimmering, toss in the diced onion. Sauté for about 5 minutes until it turns translucent. The aroma will fill your kitchen, making your mouth water. Add the minced garlic and cook for another minute. This step lays the flavorful foundation for your chili.

Step 2: Brown the Chicken

Next, add the diced chicken to the pot. Cook it for about 5-7 minutes, stirring occasionally, until it’s browned on all sides. This step is crucial; browning the chicken adds depth to the flavor. You want that golden color to develop, so don’t rush it!

Step 3: Toast the Spices

Once the chicken is browned, it’s time to spice things up! Stir in the ground cumin, chili powder, smoked paprika, and cayenne pepper if you’re feeling adventurous. Cook for another minute to toast the spices. This will release their essential oils, enhancing the overall flavor of your White Bean Chicken Chili.

Step 4: Combine Ingredients

Now, it’s time to bring everything together. Add the white beans, diced tomatoes with green chilies, chicken broth, and corn to the pot. Stir well to combine all the ingredients. The colors will be vibrant, and the mixture will start to look like a hearty chili.

Step 5: Simmer the Chili

Bring the mixture to a boil, then reduce the heat to low. Let it simmer for 20-25 minutes. This is where the magic happens! The flavors meld together beautifully, creating a comforting and satisfying dish. Stir occasionally to prevent sticking.

Step 6: Season and Serve

Finally, taste your chili and season with salt and pepper to your liking. Serve it hot, garnished with fresh cilantro and lime wedges on the side. The lime adds a refreshing zing that brightens the dish. Enjoy your homemade White Bean Chicken Chili!

Tips for Success

  • Prep your ingredients ahead of time to streamline the cooking process.
  • Don’t skip browning the chicken; it adds essential flavor.
  • Adjust the spice levels to suit your taste; add more cayenne for heat.
  • For a thicker chili, let it simmer a bit longer.
  • Garnish generously with cilantro and lime for a fresh finish.

Equipment Needed

  • Large pot: A heavy-bottomed pot works best for even cooking. A Dutch oven is a great alternative.
  • Wooden spoon: Perfect for stirring without scratching your pot. A silicone spatula can also do the trick.
  • Measuring cups and spoons: Essential for accuracy, but you can eyeball it if you’re feeling adventurous!

Variations of White Bean Chicken Chili

  • Vegetarian Option: Swap the chicken for diced bell peppers, zucchini, or mushrooms for a hearty vegetarian chili.
  • Spicy Kick: Add diced jalapeños or a splash of your favorite hot sauce for an extra layer of heat.
  • Creamy Texture: Stir in 1/2 cup of sour cream or Greek yogurt just before serving for a rich, creamy finish.
  • Southwestern Twist: Incorporate black beans and corn for a more southwestern flavor profile.
  • Herb Infusion: Experiment with fresh herbs like oregano or thyme to elevate the flavor even further.

Serving Suggestions for White Bean Chicken Chili

  • Crusty Bread: Serve with a side of warm, crusty bread for dipping.
  • Rice or Quinoa: Pair with rice or quinoa for a heartier meal.
  • Beer: Enjoy with a cold beer or a refreshing iced tea.
  • Presentation: Garnish with extra cilantro and lime wedges for a vibrant look.

FAQs about White Bean Chicken Chili

As you embark on your culinary adventure with White Bean Chicken Chili, you might have a few questions. Here are some common queries that can help you along the way:

Can I make White Bean Chicken Chili in a slow cooker?

Absolutely! Just sauté the aromatics and chicken first, then transfer everything to your slow cooker. Cook on low for 6-8 hours or high for 3-4 hours. This method allows the flavors to deepen beautifully.

What can I substitute for white beans?

If you’re out of white beans, you can use kidney beans or black beans instead. Each will bring its unique flavor and texture, but they’ll still work well in this chili recipe.

How can I make this chili spicier?

For a spicier kick, add more cayenne pepper or toss in some diced jalapeños. A splash of your favorite hot sauce can also elevate the heat level to your liking.

Can I freeze White Bean Chicken Chili?

Yes! This chili freezes wonderfully. Just let it cool completely, then store it in an airtight container. It can last up to three months in the freezer. Reheat on the stovetop or in the microwave when you’re ready to enjoy it again.

What toppings go well with White Bean Chicken Chili?

Top your chili with shredded cheese, sour cream, or avocado for added creaminess. Fresh cilantro and lime wedges are also fantastic for a burst of flavor!

Final Thoughts

Cooking White Bean Chicken Chili is more than just preparing a meal; it’s about creating a moment of warmth and comfort. Each spoonful is a reminder of cozy nights spent with family or friends, sharing stories and laughter. The blend of spices and creamy beans brings a delightful harmony that’s hard to resist. Whether you’re enjoying it on a busy weeknight or serving it at a gathering, this chili is sure to become a cherished recipe in your kitchen. So grab your ingredients, and let the deliciousness unfold—your taste buds will thank you!

jhessica

White Bean Chicken Chili: A Flavorful and Easy Recipe

A flavorful and easy recipe for White Bean Chicken Chili, perfect for a comforting meal.
Prep Time 10 minutes
Cook Time 30 minutes
Total Time 40 minutes
Servings: 6 servings
Course: Main Dish
Cuisine: American
Calories: 320

Ingredients
  

  • 2 tablespoons olive oil
  • 1 medium onion diced
  • 2 cloves garlic minced
  • 1 pound boneless skinless chicken breasts, diced
  • 1 teaspoon ground cumin
  • 1 teaspoon chili powder
  • 1/2 teaspoon smoked paprika
  • 1/4 teaspoon cayenne pepper optional
  • 2 cans 15 ounces each white beans, drained and rinsed
  • 1 can 14.5 ounces diced tomatoes with green chilies
  • 4 cups chicken broth
  • 1 cup corn fresh, frozen, or canned
  • Salt and pepper to taste
  • 1/4 cup fresh cilantro chopped (for garnish)
  • Lime wedges for serving

Method
 

  1. In a large pot, heat the olive oil over medium heat. Add the diced onion and sauté for about 5 minutes until it becomes translucent. Add the minced garlic and cook for an additional minute until fragrant.
  2. Add the diced chicken to the pot and cook until browned on all sides, about 5-7 minutes.
  3. Stir in the cumin, chili powder, smoked paprika, and cayenne pepper (if using). Cook for another minute to toast the spices.
  4. Add the white beans, diced tomatoes, chicken broth, and corn to the pot. Stir well to combine.
  5. Bring the mixture to a boil, then reduce the heat to low and let it simmer for 20-25 minutes, allowing the flavors to meld.
  6. Season with salt and pepper to taste.
  7. Serve hot, garnished with fresh cilantro and lime wedges on the side.

Nutrition

Serving: 1bowlCalories: 320kcalCarbohydrates: 30gProtein: 28gFat: 10gSaturated Fat: 2gPolyunsaturated Fat: 8gCholesterol: 70mgSodium: 800mgFiber: 8gSugar: 2g

Notes

  • For a creamier chili, stir in 1/2 cup of sour cream or Greek yogurt just before serving.
  • For added heat, include diced jalapeños or a splash of hot sauce during cooking.

Tried this recipe?

Let us know how it was!

Hearty Vegetable Beef Soup: Discover the Ultimate Comfort!

Introduction to Hearty Vegetable Beef Soup

There’s something magical about a steaming bowl of Hearty Vegetable Beef Soup that instantly warms the soul.

Growing up, my mom would whip up a big pot on chilly evenings, filling the house with rich aromas that made everyone feel at home.

This recipe is perfect for those busy days when you crave comfort without the fuss.

Packed with nutritious ingredients and robust flavors, it’s a dish that not only satisfies hunger but also brings loved ones together.

So grab your apron, and let’s dive into this delightful culinary adventure!

Why You’ll Love This Hearty Vegetable Beef Soup

This Hearty Vegetable Beef Soup is a game-changer for your weeknight dinners.

It’s incredibly easy to make, requiring just one pot and minimal prep time.

The rich, savory flavors meld beautifully as it simmers, creating a dish that feels like a warm hug.

Plus, it’s packed with nutrients, making it a wholesome choice for you and your family.

Trust me, this soup will quickly become a favorite in your home!

Ingredients for Hearty Vegetable Beef Soup

Creating a delicious Hearty Vegetable Beef Soup starts with gathering the right ingredients.

Here’s what you’ll need:

  • Olive oil: This is your base for sautéing, adding a rich flavor to the soup.
  • Beef stew meat: Tender chunks of beef are essential for that hearty texture.
  • Onion: Chopped onions bring sweetness and depth to the dish.
  • Garlic: Minced garlic adds a punch of flavor that elevates the soup.
  • Carrots: Sliced carrots contribute natural sweetness and vibrant color.
  • Celery: This adds a nice crunch and aromatic quality to the mix.
  • Potato: Diced potatoes help thicken the soup and make it more filling.
  • Diced tomatoes: Canned tomatoes provide acidity and a rich base for the broth.
  • Beef broth: The heart of the soup, giving it that deep, savory flavor.
  • Dried thyme and oregano: These herbs add warmth and earthiness to the dish.
  • Bay leaf: A single leaf infuses the soup with a subtle, aromatic flavor.
  • Salt and pepper: Essential for seasoning, enhancing all the flavors.
  • Frozen peas: These add a pop of color and sweetness at the end.
  • Green beans: Trimmed and cut, they provide a fresh crunch to the soup.
  • Fresh parsley: Chopped parsley is perfect for garnishing, adding a fresh finish.

Feel free to get creative!

For a spicier kick, toss in some red pepper flakes or a diced jalapeño when sautéing the onions and garlic.

If you prefer a lighter version, substitute the beef with ground turkey or chicken, adjusting the cooking times as needed.

You can find the exact quantities for each ingredient at the bottom of the article, ready for printing!

How to Make Hearty Vegetable Beef Soup

Making a Hearty Vegetable Beef Soup is a straightforward process that rewards you with a bowl of comfort.

Let’s break it down step by step, ensuring you have all the tips you need for success.

Step 1: Brown the Beef

Start by heating the olive oil in a large pot over medium-high heat.

Once the oil shimmers, add the beef stew meat.

Brown the meat on all sides, which should take about 5-7 minutes.

This step is crucial; it locks in flavor and gives your soup a rich base.

After browning, remove the beef and set it aside.

Don’t worry if some bits stick to the pot; they’ll add depth to your soup later.

Step 2: Sauté the Aromatics

In the same pot, toss in the chopped onion and minced garlic.

Sauté them for 2-3 minutes until the onion turns translucent.

The aroma will be heavenly!

This step builds the flavor foundation for your Hearty Vegetable Beef Soup.

Make sure to scrape up any browned bits from the bottom of the pot; they’re packed with flavor.

Step 3: Add the Vegetables

Next, add the sliced carrots, celery, and diced potato to the pot.

Cook these veggies for about 5 minutes, stirring occasionally.

This softens them slightly and enhances their natural sweetness.

You want them to be tender but not mushy, as they’ll continue cooking later.

Step 4: Combine Ingredients

Now it’s time to bring everything together.

Return the browned beef to the pot, along with the undrained diced tomatoes and beef broth.

Sprinkle in the dried thyme, oregano, bay leaf, salt, and pepper.

Stir well to combine all the ingredients.

Bring the mixture to a boil, then reduce the heat to low.

Step 5: Simmer to Perfection

Cover the pot and let it simmer for 1.5 to 2 hours.

This slow cooking allows the flavors to meld beautifully.

Check occasionally, giving it a stir to ensure nothing sticks to the bottom.

The beef should become tender and the soup thick and hearty.

Step 6: Add Final Touches

About 10 minutes before serving, stir in the frozen peas and green beans.

These add a burst of color and freshness to your Hearty Vegetable Beef Soup.

Cook until the vegetables are heated through.

Before serving, remember to remove the bay leaf.

Garnish with fresh parsley for a lovely finishing touch.

Now, you’re ready to enjoy a bowl of warmth and comfort!

Tips for Success

  • Prep your ingredients ahead of time to streamline the cooking process.
  • Don’t rush the browning of the beef; it adds depth to the flavor.
  • Feel free to adjust the seasoning to your taste; every palate is different.
  • For a thicker soup, mash a few potato pieces against the pot.
  • Store leftovers in an airtight container for up to three days.

Equipment Needed

  • Large pot: A Dutch oven works great, but any heavy-bottomed pot will do.
  • Wooden spoon: Perfect for stirring and scraping up those flavorful bits.
  • Cutting board: Essential for chopping your veggies and meat.
  • Sharp knife: A good knife makes prep work a breeze.

Variations

  • Spicy Kick: Add diced jalapeños or a pinch of cayenne pepper for a heat boost.
  • Herb Infusion: Experiment with fresh herbs like rosemary or basil for a unique flavor twist.
  • Vegetarian Option: Swap the beef for hearty mushrooms or lentils, and use vegetable broth instead.
  • Whole Grain Boost: Stir in some cooked barley or quinoa for added texture and nutrition.
  • Seasonal Veggies: Incorporate whatever vegetables are in season, like zucchini or bell peppers, for freshness.

Serving Suggestions

  • Crusty Bread: Serve with a warm, crusty baguette or sourdough for dipping.
  • Salad: Pair with a fresh green salad for a balanced meal.
  • Wine: A glass of red wine complements the rich flavors beautifully.
  • Garnish: Top with extra parsley or a sprinkle of grated cheese for added flair.

FAQs about Hearty Vegetable Beef Soup

Can I make Hearty Vegetable Beef Soup in a slow cooker?

Absolutely! Just brown the beef and sauté the aromatics as directed, then transfer everything to your slow cooker. Cook on low for 6-8 hours for a deliciously tender result.

What can I substitute for beef broth?

If you’re looking for a lighter option, vegetable broth works well. You can also use chicken broth for a different flavor profile while keeping it hearty.

How do I store leftovers of Hearty Vegetable Beef Soup?

Store any leftovers in an airtight container in the fridge for up to three days. Reheat on the stovetop or in the microwave, adding a splash of broth if it thickens too much.

Can I freeze Hearty Vegetable Beef Soup?

Yes! This soup freezes beautifully. Just let it cool completely before transferring it to freezer-safe containers. It can last up to three months in the freezer.

What are some good side dishes to serve with this soup?

Pair your Hearty Vegetable Beef Soup with a simple green salad or some crusty bread. A side of roasted vegetables also complements the flavors perfectly!

Final Thoughts

Cooking up a pot of Hearty Vegetable Beef Soup is more than just a meal; it’s an experience that brings warmth and comfort to your home.

The rich flavors and vibrant colors create a feast for the senses, while the aroma fills the air, inviting everyone to gather around the table.

Whether you’re sharing it with family on a chilly evening or enjoying a quiet moment alone, this soup has a way of making everything feel right.

So, grab your spoon and savor each bite, knowing you’ve created something truly special.

Happy cooking!

jhessica

Hearty Vegetable Beef Soup: Discover the Ultimate Comfort!

A comforting and hearty vegetable beef soup packed with nutritious ingredients and rich flavors.
Prep Time 15 minutes
Cook Time 2 hours
Total Time 2 hours 15 minutes
Servings: 6 servings
Course: Soup
Cuisine: American
Calories: 280

Ingredients
  

  • 2 tablespoons olive oil
  • 1 pound beef stew meat cut into 1-inch cubes
  • 1 medium onion chopped
  • 2 cloves garlic minced
  • 3 medium carrots sliced
  • 2 stalks celery sliced
  • 1 medium potato diced
  • 1 can 14.5 ounces diced tomatoes, undrained
  • 4 cups beef broth
  • 1 teaspoon dried thyme
  • 1 teaspoon dried oregano
  • 1 bay leaf
  • Salt and pepper to taste
  • 1 cup frozen peas
  • 1 cup green beans trimmed and cut into 1-inch pieces
  • Fresh parsley chopped (for garnish)

Method
 

  1. In a large pot, heat the olive oil over medium-high heat. Add the beef stew meat and brown on all sides, about 5-7 minutes. Remove the beef and set aside.
  2. In the same pot, add the chopped onion and garlic. Sauté for 2-3 minutes until the onion is translucent.
  3. Add the carrots, celery, and potato to the pot. Cook for another 5 minutes, stirring occasionally.
  4. Return the browned beef to the pot. Add the diced tomatoes, beef broth, thyme, oregano, bay leaf, salt, and pepper. Bring to a boil.
  5. Reduce heat to low, cover, and simmer for 1.5 to 2 hours, or until the beef is tender.
  6. About 10 minutes before serving, stir in the frozen peas and green beans. Cook until the vegetables are heated through.
  7. Remove the bay leaf before serving. Garnish with fresh parsley if desired.

Nutrition

Serving: 1bowlCalories: 280kcalCarbohydrates: 15gProtein: 25gFat: 12gSaturated Fat: 3gPolyunsaturated Fat: 9gCholesterol: 70mgSodium: 600mgFiber: 4gSugar: 5g

Notes

  • For a spicier kick, add a pinch of red pepper flakes or a diced jalapeño when sautéing the onions and garlic.
  • Substitute the beef with ground turkey or chicken for a lighter version, and adjust cooking times accordingly.

Tried this recipe?

Let us know how it was!

Pea Salad Delight: A Simple Recipe to Savor Today!

Introduction to Pea Salad Delight

There’s something special about a dish that brings back memories of summer barbecues and family gatherings. Pea Salad Delight is one of those recipes that feels like a warm hug on a plate. It’s a quick solution for a busy day, yet impressive enough to serve at a gathering. With its vibrant colors and delightful crunch, this salad is not just easy to whip up, but it also packs a punch of flavor. Whether you’re looking to impress your loved ones or simply want a refreshing side, this Pea Salad Delight is sure to become a favorite.

Why You’ll Love This Pea Salad Delight

This Pea Salad Delight is a game-changer for anyone who craves flavor without the fuss. It comes together in just 10 minutes, making it perfect for those hectic weeknights. The combination of creamy dressing, crunchy bacon, and fresh peas creates a taste explosion that’s hard to resist. Plus, it’s versatile enough to pair with any main dish, ensuring it’ll be a hit at your next meal or gathering.

Ingredients for Pea Salad Delight

Gathering the right ingredients is the first step to creating this delightful dish. Here’s what you’ll need:

  • Frozen peas: These little green gems are the star of the show. Thaw them for a burst of sweetness and vibrant color.
  • Diced cheddar cheese: Sharp and creamy, cheddar adds a rich flavor that complements the peas beautifully.
  • Diced red onion: A touch of crunch and a hint of sharpness, red onion brings balance to the salad.
  • Cooked bacon: Crumbled bacon adds a savory, smoky element that elevates the entire dish.
  • Mayonnaise: This creamy base binds everything together, creating a luscious dressing.
  • Apple cider vinegar: A splash of acidity brightens the flavors and cuts through the richness.
  • Sugar: Just a pinch helps to balance the tanginess of the vinegar.
  • Salt and pepper: Essential seasonings that enhance all the flavors in the salad.
  • Chopped fresh parsley (optional): For a pop of color and freshness, parsley is a lovely addition.

For those looking to mix things up, consider adding diced bell peppers or cherry tomatoes for extra color and crunch. If you want a lighter version, swap out half of the mayonnaise for Greek yogurt. You can find the exact quantities for each ingredient at the bottom of the article, ready for printing!

How to Make Pea Salad Delight

Creating this Pea Salad Delight is as easy as pie, or should I say, as easy as salad! Follow these simple steps, and you’ll have a refreshing dish ready in no time.

Step 1: Combine the Base Ingredients

Start by grabbing a large mixing bowl. Toss in the thawed peas, diced cheddar cheese, red onion, and crumbled bacon. The colors will pop, and the aroma will make your mouth water. Gently mix everything together, ensuring each ingredient gets to know its neighbors. This is where the magic begins!

Step 2: Prepare the Dressing

In a separate small bowl, whisk together the mayonnaise, apple cider vinegar, sugar, salt, and pepper. The goal here is to create a smooth, creamy dressing that will coat your salad perfectly. Don’t rush this step; a well-mixed dressing is key to a flavorful Pea Salad Delight!

Step 3: Mix the Dressing with the Salad

Now, pour that luscious dressing over your pea mixture. Use a spatula or a large spoon to gently stir everything together. You want to ensure that every pea and piece of bacon is coated in that creamy goodness. It’s like giving your salad a warm embrace!

Step 4: Add Freshness

If you’re using parsley, now’s the time to fold it in. This adds a burst of freshness and a lovely green touch. Just be gentle; you don’t want to break up the peas. This little step elevates the dish, making it even more delightful.

Step 5: Chill and Serve

Cover the salad and pop it in the fridge for at least 30 minutes. This chilling time allows the flavors to meld beautifully. When you’re ready to serve, take it out, give it a quick stir, and enjoy your Pea Salad Delight chilled. It’s the perfect side dish or light meal!

Tips for Success

  • Make sure to thaw the peas completely for the best texture.
  • Use freshly cooked bacon for maximum flavor; it adds a nice crunch.
  • Let the salad chill longer than 30 minutes if you can; it enhances the flavors.
  • Adjust the dressing ingredients to suit your taste; a little more vinegar can add zing!
  • Experiment with different cheeses for a unique twist on the classic recipe.

Equipment Needed

  • Large mixing bowl: Essential for combining ingredients. A sturdy pot can work in a pinch.
  • Small bowl: For whisking the dressing. A mason jar is a great alternative.
  • Whisk or fork: To mix the dressing smoothly. A spoon can also do the job.
  • Spatula or large spoon: For gently mixing the salad. A wooden spoon is perfect.

Variations

  • Greek Yogurt Swap: Replace half of the mayonnaise with Greek yogurt for a tangy, lighter version.
  • Veggie Boost: Add diced bell peppers or cherry tomatoes for extra color and crunch.
  • Herb Infusion: Experiment with fresh herbs like dill or chives for a unique flavor twist.
  • Nutty Crunch: Toss in some toasted walnuts or pecans for added texture and nuttiness.
  • Spicy Kick: Mix in a dash of hot sauce or diced jalapeños for a spicy version of Pea Salad Delight.

Serving Suggestions

  • Pair your Pea Salad Delight with grilled chicken or steak for a hearty meal.
  • Serve alongside crusty bread or dinner rolls to soak up the flavors.
  • For drinks, a chilled lemonade or iced tea complements the salad perfectly.
  • Present in a colorful bowl to enhance its vibrant look.

FAQs about Pea Salad Delight

Can I use fresh peas instead of frozen?

Absolutely! Fresh peas can add a delightful crunch and sweetness to your Pea Salad Delight. Just make sure to blanch them briefly to soften slightly before mixing.

How long can I store Pea Salad Delight in the fridge?

This salad can be stored in the fridge for up to three days. Just keep it covered to maintain freshness. The flavors will continue to meld, making it even tastier!

Can I make this salad ahead of time?

Yes! In fact, making it a day in advance allows the flavors to develop beautifully. Just remember to give it a good stir before serving.

Is Pea Salad Delight gluten-free?

Yes, this recipe is naturally gluten-free! Just ensure that any additional ingredients you add, like bacon or cheese, are also gluten-free.

What can I serve with Pea Salad Delight?

This salad pairs wonderfully with grilled meats, sandwiches, or even as a light lunch on its own. It’s versatile enough to complement any meal!

Final Thoughts

Pea Salad Delight is more than just a recipe; it’s a celebration of flavors and memories. Each bite transports me back to sunny days spent with family, laughter echoing around the table. The creamy dressing, crunchy bacon, and sweet peas create a symphony of taste that’s hard to resist. Whether you’re serving it at a backyard barbecue or enjoying it as a quick lunch, this salad brings joy and satisfaction. It’s a reminder that simple ingredients can create something truly delightful. So, grab your bowl and make this Pea Salad Delight a staple in your kitchen!

jhessica

Pea Salad Delight: A Simple Recipe to Savor Today!

A refreshing and simple Pea Salad Delight recipe that combines peas, cheddar cheese, bacon, and a creamy dressing.
Prep Time 10 minutes
Total Time 40 minutes
Servings: 4 servings
Course: Salad
Cuisine: American
Calories: 220

Ingredients
  

  • 1 cup frozen peas thawed
  • 1 cup diced cheddar cheese
  • 1/2 cup diced red onion
  • 1/2 cup cooked bacon crumbled
  • 1/4 cup mayonnaise
  • 1 tablespoon apple cider vinegar
  • 1 teaspoon sugar
  • Salt and pepper to taste
  • 1/4 cup chopped fresh parsley optional

Method
 

  1. In a large mixing bowl, combine the thawed peas, diced cheddar cheese, diced red onion, and crumbled bacon.
  2. In a separate small bowl, whisk together the mayonnaise, apple cider vinegar, sugar, salt, and pepper until smooth.
  3. Pour the dressing over the pea mixture and gently stir until everything is well coated.
  4. If using, fold in the chopped parsley for added freshness.
  5. Cover the salad and refrigerate for at least 30 minutes to allow the flavors to meld.
  6. Serve chilled as a side dish or a light meal.

Nutrition

Serving: 1servingCalories: 220kcalCarbohydrates: 8gProtein: 10gFat: 16gSaturated Fat: 6gPolyunsaturated Fat: 10gCholesterol: 30mgSodium: 400mgFiber: 2gSugar: 1g

Notes

  • For a lighter version, substitute Greek yogurt for half of the mayonnaise.
  • Add diced bell peppers or cherry tomatoes for extra color and crunch.

Tried this recipe?

Let us know how it was!

Big Mac Salad: Enjoy a Healthy Twist on a Classic!

Introduction to Big Mac Salad

There’s something nostalgic about the Big Mac, isn’t there? The layers of flavors and textures always hit the spot. But what if I told you that you could enjoy all that deliciousness in a healthier way? Enter the Big Mac Salad! This dish is a quick solution for those busy weeknights when you crave comfort food but want to keep it light. Packed with fresh veggies and seasoned beef, it’s a meal that impresses without the fuss. Trust me, your taste buds will thank you, and your waistline will too!

Why You’ll Love This Big Mac Salad

This Big Mac Salad is a game-changer for busy guys like us. It’s quick to whip up, taking just 17 minutes from start to finish. The flavors are spot-on, giving you that classic Big Mac taste without the guilt. Plus, it’s customizable! You can toss in your favorite veggies or adjust the dressing. It’s a satisfying meal that keeps you full and happy, making it perfect for any day of the week.

Ingredients for Big Mac Salad

Gathering the right ingredients is key to making this Big Mac Salad a hit. Here’s what you’ll need:

  • Ground Beef: The star of the show! Choose lean ground beef for a healthier option.
  • Salt and Black Pepper: Essential seasonings that enhance the beef’s flavor.
  • Garlic Powder: Adds a savory depth that makes every bite irresistible.
  • Onion Powder: A subtle sweetness that complements the beef perfectly.
  • Shredded Iceberg Lettuce: Provides a crisp base, reminiscent of the classic Big Mac.
  • Cherry Tomatoes: These juicy gems add a burst of freshness and color.
  • Dill Pickles: For that tangy crunch that brings the Big Mac vibe to life.
  • Shredded Cheddar Cheese: A creamy addition that ties all the flavors together.
  • Red Onion: Adds a bit of bite and a pop of color to the salad.
  • Thousand Island Dressing: The finishing touch that gives this salad its signature taste.

Feel free to get creative! You can swap out the ground beef for turkey or even a plant-based alternative if you prefer. And if you’re looking to lighten things up, consider using a low-calorie dressing. For exact quantities, check the bottom of the article where you can find everything available for printing.

How to Make Big Mac Salad

Now that you have all your ingredients ready, let’s dive into making this delicious Big Mac Salad. It’s straightforward and fun, so roll up your sleeves and let’s get cooking!

Step 1: Cook the Ground Beef

Start by heating a large skillet over medium heat. Add the ground beef and cook it until it’s browned, which should take about 5-7 minutes. Make sure to break it up with a spatula as it cooks. Once it’s nice and brown, drain any excess fat. This keeps your salad from getting greasy and helps maintain that fresh taste.

Step 2: Season the Beef

With the beef cooked, it’s time to amp up the flavor. Sprinkle in the salt, black pepper, garlic powder, and onion powder. Stir everything together until the beef is well-coated with those seasonings. Once it’s all mixed, remove the skillet from the heat. The aroma will have you ready to dig in!

Step 3: Prepare the Salad Base

In a large bowl, combine the shredded iceberg lettuce, halved cherry tomatoes, chopped dill pickles, shredded cheddar cheese, and diced red onion. This colorful mix not only looks great but also adds a variety of textures and flavors. Toss it gently to ensure everything is evenly distributed.

Step 4: Combine Ingredients

Now, it’s time to bring it all together! Add the seasoned beef to your salad mixture. Gently toss everything together, making sure the beef is well incorporated with the veggies. This is where the magic happens, and you can already start to taste that Big Mac goodness!

Step 5: Dress the Salad

Drizzle the Thousand Island dressing over the salad. This is the final touch that gives your Big Mac Salad its signature flavor. Toss everything again to coat the salad evenly with the dressing. You want every bite to be bursting with flavor!

Step 6: Serve or Chill

Finally, you can serve your Big Mac Salad right away for a warm, hearty meal. If you prefer a cooler dish, pop it in the refrigerator for 15-30 minutes. This allows the flavors to meld beautifully. Either way, you’re in for a treat!

Tips for Success

  • Use lean ground beef to keep the salad healthier without sacrificing flavor.
  • Don’t skip draining the fat; it keeps the salad fresh and light.
  • Chill the salad for a bit before serving to enhance the flavors.
  • Feel free to customize with your favorite veggies or toppings.
  • For extra crunch, add crushed tortilla chips or croutons just before serving.

Equipment Needed

  • Large Skillet: A non-stick skillet works great, but any large pan will do.
  • Spatula: Use a wooden or silicone spatula for easy stirring and breaking up the beef.
  • Large Bowl: A mixing bowl to combine all your fresh ingredients.
  • Measuring Spoons: Handy for seasoning your beef just right.

Variations

  • Turkey or Chicken: Swap the ground beef for ground turkey or chicken for a leaner option.
  • Vegetarian Delight: Use black beans or lentils instead of meat for a hearty vegetarian version.
  • Low-Carb Twist: Omit the cheese and use a low-carb dressing to keep it keto-friendly.
  • Spicy Kick: Add jalapeños or a dash of hot sauce for a spicy flavor boost.
  • Extra Veggies: Toss in bell peppers, cucumbers, or avocado for added nutrition and flavor.

Serving Suggestions

  • Pair your Big Mac Salad with a side of crispy sweet potato fries for a satisfying crunch.
  • Serve it with a refreshing iced tea or a cold beer to complement the flavors.
  • For presentation, use a large bowl and garnish with extra pickles or cheese on top.

FAQs about Big Mac Salad

Can I make Big Mac Salad ahead of time?

Absolutely! You can prepare the salad base and cook the beef in advance. Just keep the dressing separate until you’re ready to serve. This way, the salad stays fresh and crisp.

Is Big Mac Salad suitable for meal prep?

Yes, it’s perfect for meal prep! Divide the salad into individual containers and store them in the fridge. Just add the dressing when you’re ready to eat. It’s a quick, healthy lunch option!

Can I use a different dressing for my Big Mac Salad?

Definitely! While Thousand Island dressing is traditional, you can try ranch, blue cheese, or even a vinaigrette for a different flavor profile. Get creative!

How can I make this salad low-carb?

To make a low-carb Big Mac Salad, simply omit the cheese and use a low-carb dressing. You can also add more leafy greens to bulk it up without the carbs.

What can I serve with Big Mac Salad?

This salad pairs well with crispy sweet potato fries or a side of garlic bread. For drinks, a cold beer or iced tea complements the flavors beautifully!

Final Thoughts

Creating this Big Mac Salad is more than just a cooking experience; it’s a delightful journey back to those carefree days of enjoying fast food without a care in the world. With every bite, you get that familiar taste, but in a healthier package. It’s a dish that brings friends and family together, sparking conversations and laughter around the table. Whether you’re whipping it up for a quick weeknight dinner or impressing guests at a gathering, this salad is sure to be a hit. So grab your ingredients and dive into this delicious twist on a classic!

jhessica

Big Mac Salad: Enjoy a Healthy Twist on a Classic!

A healthy twist on the classic Big Mac, this salad combines ground beef with fresh vegetables and a tangy dressing.
Prep Time 10 minutes
Cook Time 7 minutes
Total Time 17 minutes
Servings: 4 servings
Course: Salad
Cuisine: American
Calories: 450

Ingredients
  

  • 1 pound ground beef
  • 1 teaspoon salt
  • 1 teaspoon black pepper
  • 1 teaspoon garlic powder
  • 1 teaspoon onion powder
  • 1 cup shredded iceberg lettuce
  • 1 cup cherry tomatoes halved
  • 1/2 cup dill pickles chopped
  • 1/2 cup shredded cheddar cheese
  • 1/4 cup red onion diced
  • 1/4 cup Thousand Island dressing

Method
 

  1. In a large skillet over medium heat, cook the ground beef until browned, about 5-7 minutes. Drain excess fat.
  2. Season the cooked beef with salt, black pepper, garlic powder, and onion powder. Stir to combine and remove from heat.
  3. In a large bowl, combine the shredded lettuce, cherry tomatoes, dill pickles, shredded cheddar cheese, and red onion.
  4. Add the seasoned beef to the salad mixture and toss gently to combine.
  5. Drizzle the Thousand Island dressing over the salad and toss again to coat evenly.
  6. Serve immediately or chill in the refrigerator for 15-30 minutes for a cooler dish.

Nutrition

Serving: 1servingCalories: 450kcalCarbohydrates: 6gProtein: 30gFat: 35gSaturated Fat: 15gPolyunsaturated Fat: 20gCholesterol: 90mgSodium: 800mgFiber: 1gSugar: 3g

Notes

  • For added crunch, consider topping the salad with crushed tortilla chips or croutons.
  • To make it a low-carb option, substitute the dressing with a low-carb alternative and omit the cheese.

Tried this recipe?

Let us know how it was!

Thai Beef Salad: A Refreshing Recipe to Try Today!

Introduction to Thai Beef Salad

There’s something magical about a dish that combines vibrant flavors and fresh ingredients, and that’s exactly what you get with Thai Beef Salad. This recipe is not just a meal; it’s a celebration of taste and texture. Whether you’re looking for a quick solution for a busy day or a dish to impress your loved ones, this salad fits the bill perfectly. The grilled flank steak, paired with a colorful medley of vegetables and herbs, creates a refreshing experience that’s both satisfying and healthy. Trust me, once you try it, you’ll be hooked!

Why You’ll Love This Thai Beef Salad

This Thai Beef Salad is a game-changer for anyone who craves flavor without the fuss. It’s quick to whip up, taking just 25 minutes from start to finish. The combination of grilled steak and fresh veggies makes it a feast for the senses. Plus, it’s a healthy option that doesn’t skimp on taste. Perfect for busy weeknights or impressing guests, this salad is sure to become a favorite!

Ingredients for Thai Beef Salad

Gathering the right ingredients is key to making a delicious Thai Beef Salad. Here’s what you’ll need:

  • Flank steak: This cut is perfect for grilling, offering a rich flavor and tenderness when cooked right.
  • Vegetable oil: A light oil helps to enhance the grill’s heat and keeps the steak from sticking.
  • Salt and black pepper: Simple seasonings that elevate the natural flavors of the beef.
  • Cherry tomatoes: Their sweetness adds a burst of flavor and color to the salad.
  • Cucumber: Crisp and refreshing, it balances the richness of the steak.
  • Red bell pepper: Adds a sweet crunch and vibrant color to the mix.
  • Red onion: A touch of sharpness that complements the other ingredients beautifully.
  • Cilantro and mint: Fresh herbs that bring a fragrant, aromatic quality to the dish.
  • Lime juice: This zesty ingredient brightens the salad and adds a tangy kick.
  • Fish sauce: A staple in Thai cuisine, it adds depth and umami flavor.
  • Sugar: Just a hint to balance the acidity of the lime and fish sauce.
  • Chili flakes: For those who like a bit of heat, adjust to your taste!

For those looking to switch things up, consider substituting the beef with grilled tofu or tempeh for a vegetarian option. You can also add sliced avocado for extra creaminess and healthy fats. The exact quantities for each ingredient are available at the bottom of the article for easy printing!

How to Make Thai Beef Salad

Creating a Thai Beef Salad is a straightforward process that brings together fresh ingredients and bold flavors. Follow these simple steps, and you’ll have a delicious meal ready in no time!

Step 1: Prepare the Grill

Start by preheating your grill or grill pan over medium-high heat. This ensures a nice sear on the flank steak. While the grill heats up, rub the steak with vegetable oil, salt, and black pepper. This simple seasoning enhances the beef’s natural flavor and helps it cook evenly.

Step 2: Grill the Flank Steak

Once the grill is hot, place the flank steak on it. Grill for about 4-5 minutes on each side for medium-rare. If you prefer it more done, leave it on a bit longer. To check for doneness, use a meat thermometer; it should read 130°F for medium-rare. After grilling, let the steak rest for 5 minutes. This resting period allows the juices to redistribute, making the meat tender and juicy.

Step 3: Mix the Salad Ingredients

While the steak is resting, grab a large bowl and combine the cherry tomatoes, cucumber, red bell pepper, red onion, cilantro, and mint. This colorful mix not only looks great but also adds a variety of textures and flavors to your salad. Toss them gently to ensure everything is evenly distributed.

Step 4: Whisk the Dressing

In a small bowl, whisk together the lime juice, fish sauce, sugar, and chili flakes. Make sure the sugar dissolves completely; this balances the acidity of the lime and the saltiness of the fish sauce. The dressing is what ties all the flavors together, so don’t skip this step!

Step 5: Combine and Serve

Now it’s time to bring everything together! Slice the rested flank steak thinly against the grain and add it to the salad mixture. Pour the dressing over the top and toss gently to combine. This ensures every bite is packed with flavor. Serve immediately, garnished with extra herbs if you like. Enjoy your refreshing Thai Beef Salad!

Tips for Success

  • Let the steak rest after grilling to keep it juicy.
  • Use a sharp knife to slice the beef against the grain for tenderness.
  • Adjust the chili flakes to your heat preference; start small!
  • For extra flavor, marinate the steak for a few hours before grilling.
  • Chill the salad ingredients for a refreshing crunch.

Equipment Needed

  • Grill or Grill Pan: A standard grill works best, but a grill pan on the stovetop is a great alternative.
  • Meat Thermometer: Essential for checking doneness; a simple knife can also help.
  • Large Bowl: For mixing salad ingredients; any mixing bowl will do.
  • Small Bowl: For whisking the dressing; a jar with a lid works too!
  • Sharp Knife: For slicing the steak; a serrated knife can also work in a pinch.

Variations

  • Vegetarian Option: Swap the flank steak for grilled tofu or tempeh for a plant-based delight.
  • Spicy Kick: Add sliced jalapeños or a dash of sriracha to the dressing for an extra heat boost.
  • Crunchy Additions: Toss in some chopped peanuts or cashews for a satisfying crunch and nutty flavor.
  • Fruit Twist: Incorporate mango or pineapple chunks for a sweet and tropical twist.
  • Low-Carb Version: Replace the sugar with a sugar substitute to keep it low-carb while maintaining flavor.

Serving Suggestions

  • Pair your Thai Beef Salad with jasmine rice or quinoa for a hearty meal.
  • Serve with a chilled Thai iced tea or a light beer to complement the flavors.
  • For presentation, use a large platter and garnish with extra herbs and lime wedges.

FAQs about Thai Beef Salad

Can I make Thai Beef Salad ahead of time?

Absolutely! You can prepare the salad ingredients and dressing in advance. Just keep them separate until you’re ready to serve. This way, the veggies stay crisp, and the flavors remain fresh.

What can I substitute for fish sauce?

If you’re looking for a substitute, soy sauce or tamari works well for a similar umami flavor. For a vegan option, try using coconut aminos, which adds a touch of sweetness.

How do I store leftovers?

Store any leftovers in an airtight container in the fridge. The salad is best enjoyed within a day or two, but the flavors will still be good for up to three days.

Can I use a different cut of beef?

Yes! While flank steak is ideal, you can also use sirloin or ribeye. Just remember to adjust the cooking time based on the thickness of the cut.

Is Thai Beef Salad suitable for meal prep?

Definitely! This salad is perfect for meal prep. Just keep the dressing separate until you’re ready to eat to maintain the salad’s freshness and crunch.

Final Thoughts

Making Thai Beef Salad is more than just cooking; it’s an experience that brings joy to your kitchen. The vibrant colors and fresh aromas create a feast for the senses, while the combination of flavors dances on your palate. Whether you’re enjoying it solo or sharing it with friends, this salad is sure to impress. It’s quick, healthy, and bursting with taste, making it a go-to recipe for any occasion. So, roll up your sleeves, fire up that grill, and let this delightful dish bring a little Thai magic to your table!

jhessica

Thai Beef Salad: A Refreshing Recipe to Try Today!

A refreshing Thai Beef Salad featuring grilled flank steak and a vibrant mix of vegetables and herbs.
Prep Time 15 minutes
Cook Time 10 minutes
Total Time 25 minutes
Servings: 4 servings
Course: Salad
Cuisine: Thai
Calories: 320

Ingredients
  

  • 1 pound flank steak
  • 1 tablespoon vegetable oil
  • 1 teaspoon salt
  • 1/2 teaspoon black pepper
  • 1 cup cherry tomatoes halved
  • 1 cucumber thinly sliced
  • 1 red bell pepper thinly sliced
  • 1/4 red onion thinly sliced
  • 1/4 cup fresh cilantro chopped
  • 1/4 cup fresh mint leaves chopped
  • 1/4 cup lime juice
  • 2 tablespoons fish sauce
  • 1 tablespoon sugar
  • 1 teaspoon chili flakes adjust to taste

Method
 

  1. Preheat a grill or grill pan over medium-high heat. Rub the flank steak with vegetable oil, salt, and black pepper.
  2. Grill the steak for about 4-5 minutes on each side for medium-rare, or until desired doneness. Remove from the grill and let it rest for 5 minutes before slicing thinly against the grain.
  3. In a large bowl, combine the cherry tomatoes, cucumber, red bell pepper, red onion, cilantro, and mint.
  4. In a small bowl, whisk together lime juice, fish sauce, sugar, and chili flakes until the sugar is dissolved.
  5. Add the sliced beef to the salad mixture and pour the dressing over the top. Toss gently to combine.
  6. Serve immediately, garnished with additional herbs if desired.

Nutrition

Serving: 1servingCalories: 320kcalCarbohydrates: 8gProtein: 28gFat: 18gSaturated Fat: 5gPolyunsaturated Fat: 13gCholesterol: 70mgSodium: 600mgFiber: 2gSugar: 3g

Notes

  • For a vegetarian option, substitute the beef with grilled tofu or tempeh.
  • Add sliced avocado for extra creaminess and healthy fats.

Tried this recipe?

Let us know how it was!

Southern Squash Casserole: A Must-Try Comfort Food!

Introduction to Southern Squash Casserole

There’s something undeniably comforting about a warm, cheesy Southern Squash Casserole.

Growing up, my family gathered around the table, and this dish was always a star.

It’s the kind of recipe that brings everyone together, whether it’s a busy weeknight or a festive family gathering.

With its creamy texture and buttery cracker topping, it’s a quick solution for a busy day or a dish to impress your loved ones.

Trust me, once you try it, you’ll understand why this casserole has earned its place in Southern kitchens everywhere.

Why You’ll Love This Southern Squash Casserole

This Southern Squash Casserole is a game-changer for any home cook.

It’s incredibly easy to whip up, making it perfect for those hectic weeknights.

The combination of tender squash, rich cheese, and a crunchy topping creates a flavor explosion that will have everyone asking for seconds.

Plus, it’s a fantastic way to sneak in some veggies without anyone noticing.

Trust me, this dish will quickly become a family favorite!

Ingredients for Southern Squash Casserole

Creating a delicious Southern Squash Casserole starts with gathering the right ingredients.

Here’s what you’ll need:

  • Yellow Squash: The star of the dish, it brings a mild flavor and tender texture.
  • Onion: Adds a savory depth, balancing the sweetness of the squash.
  • Shredded Cheddar Cheese: This melty goodness is essential for that creamy, cheesy experience.
  • Crushed Buttery Crackers: Think Ritz! They create a delightful crunch on top.
  • Milk: Helps bind the ingredients together, adding creaminess.
  • Eggs: These act as a binding agent, giving the casserole its structure.
  • Mayonnaise: A secret ingredient that enhances the richness and flavor.
  • Salt and Black Pepper: Essential seasonings to elevate the taste.
  • Garlic Powder and Onion Powder: These add a subtle kick and depth of flavor.
  • Olive Oil: Used for sautéing the veggies, it adds a touch of healthy fat.
  • Grated Parmesan Cheese: This is for topping, giving a golden, crispy finish.

For those looking to mix things up, consider adding a pinch of cayenne pepper for heat or swapping half the squash for zucchini for a different twist.

You can find the exact quantities for each ingredient at the bottom of the article, ready for printing!

How to Make Southern Squash Casserole

Making a Southern Squash Casserole is a delightful journey that fills your kitchen with mouthwatering aromas.

Let’s dive into the steps that will lead you to this comforting dish.

Step 1: Preheat the Oven

First things first, preheat your oven to 350°F (175°C).

This ensures even cooking and a perfectly golden top.

Step 2: Sauté the Vegetables

In a large skillet, heat a splash of olive oil over medium heat.

Add the chopped onion and sauté until it turns translucent, about 5 minutes.

Next, toss in the sliced squash and cook for an additional 5-7 minutes until tender.

Once done, remove from heat and let it cool slightly.

This step brings out the natural sweetness of the squash, making it even more delicious.

Step 3: Prepare the Mixture

Grab a large mixing bowl and combine the milk, eggs, mayonnaise, salt, black pepper, garlic powder, and onion powder.

Whisk everything together until it’s well blended.

This creamy mixture is the heart of your casserole, binding all the flavors together.

Step 4: Combine Ingredients

Now, stir in the sautéed squash and onion mixture.

Follow that with the shredded cheddar cheese and crushed crackers.

Mix until everything is evenly coated.

This is where the magic happens, as the flavors meld into a comforting blend.

Step 5: Bake the Casserole

Pour the mixture into a greased 9×13-inch baking dish.

Sprinkle the grated Parmesan cheese evenly over the top.

Bake in the preheated oven for 30-35 minutes or until the top is golden brown and the casserole is set.

The anticipation will be worth it as the aroma fills your home.

Step 6: Serve and Enjoy

Once it’s out of the oven, let it cool for about 5 minutes before serving.

This brief wait allows the casserole to set, making it easier to serve.

Now, gather your loved ones and enjoy this Southern delight together!

Tips for Success

  • Use fresh yellow squash for the best flavor and texture.
  • Don’t skip the sautéing step; it enhances the sweetness of the squash.
  • Let the casserole cool slightly before serving to help it set.
  • Feel free to experiment with different cheeses for a unique twist.
  • Make it ahead of time and reheat for an easy weeknight meal.

Equipment Needed

  • Large Skillet: A non-stick skillet works best for sautéing.
  • Mixing Bowl: Any large bowl will do; a glass one is great for visibility.
  • Whisk: A fork can substitute if you don’t have one.
  • Baking Dish: A 9×13-inch dish is ideal, but any similar size will work.

Variations of Southern Squash Casserole

  • Spicy Twist: Add diced jalapeños or a pinch of cayenne pepper for a kick that’ll wake up your taste buds.
  • Cheesy Delight: Swap out cheddar for pepper jack or gouda for a different flavor profile.
  • Herb Infusion: Mix in fresh herbs like thyme or basil for an aromatic touch that elevates the dish.
  • Gluten-Free Option: Use gluten-free crackers instead of buttery ones to accommodate dietary needs.
  • Vegetable Medley: Incorporate zucchini, bell peppers, or even spinach for added nutrition and color.

Serving Suggestions for Southern Squash Casserole

  • Pair with Fried Chicken: This classic Southern dish complements the casserole beautifully.
  • Serve with a Side Salad: A fresh garden salad adds a crisp contrast.
  • Enjoy with Sweet Tea: Nothing beats a glass of sweet tea alongside this comfort food.
  • Presentation Tip: Garnish with fresh herbs for a pop of color and flavor.

FAQs about Southern Squash Casserole

Can I make Southern Squash Casserole ahead of time?

Absolutely! You can prepare the casserole a day in advance. Just cover it tightly and refrigerate. When you’re ready to bake, let it sit at room temperature for about 30 minutes before popping it in the oven.

What can I substitute for yellow squash?

If yellow squash isn’t available, zucchini works wonderfully as a substitute. You can even mix both for a colorful twist!

How do I store leftovers?

Store any leftovers in an airtight container in the fridge for up to 3 days. Reheat in the oven or microwave until warmed through.

Can I freeze Southern Squash Casserole?

Yes, you can freeze it! Just make sure to let it cool completely before wrapping it tightly. It can be frozen for up to 2 months. Thaw in the fridge overnight before reheating.

Is Southern Squash Casserole vegetarian?

Yes, this dish is vegetarian-friendly! It’s packed with veggies and cheese, making it a great option for meatless meals.

Final Thoughts

Cooking this Southern Squash Casserole is more than just preparing a meal; it’s about creating memories.

The aroma wafting through your kitchen will draw everyone in, sparking conversations and laughter.

Each bite is a warm hug, reminding us of family gatherings and cherished moments.

Whether you’re serving it at a potluck or enjoying it on a quiet weeknight, this dish brings comfort and joy.

So, roll up your sleeves and dive into this delightful recipe.

I promise, it will become a beloved staple in your home, just like it has in mine.

jhessica

Southern Squash Casserole: A Must-Try Comfort Food!

A comforting Southern dish made with yellow squash, cheese, and buttery crackers, perfect for family gatherings.
Prep Time 15 minutes
Cook Time 35 minutes
Total Time 50 minutes
Servings: 6 servings
Course: Casserole
Cuisine: Southern
Calories: 220

Ingredients
  

  • 3 cups yellow squash sliced (about 4 medium squash)
  • 1 cup onion chopped (about 1 medium onion)
  • 1 cup shredded cheddar cheese
  • 1 cup crushed buttery crackers like Ritz
  • 1/2 cup milk
  • 2 large eggs
  • 1/4 cup mayonnaise
  • 1 teaspoon salt
  • 1/2 teaspoon black pepper
  • 1/2 teaspoon garlic powder
  • 1/2 teaspoon onion powder
  • 1 tablespoon olive oil
  • 1/2 cup grated Parmesan cheese for topping

Method
 

  1. Preheat your oven to 350°F (175°C).
  2. In a large skillet, heat the olive oil over medium heat. Add the chopped onion and sauté until translucent, about 5 minutes. Add the sliced squash and cook for an additional 5-7 minutes until tender. Remove from heat and let cool slightly.
  3. In a large mixing bowl, combine the milk, eggs, mayonnaise, salt, black pepper, garlic powder, and onion powder. Whisk until well blended.
  4. Stir in the sautéed squash and onion mixture, followed by the shredded cheddar cheese and crushed crackers. Mix until everything is evenly coated.
  5. Pour the mixture into a greased 9×13-inch baking dish. Sprinkle the grated Parmesan cheese evenly over the top.
  6. Bake in the preheated oven for 30-35 minutes or until the top is golden brown and the casserole is set.
  7. Let it cool for about 5 minutes before serving.

Nutrition

Serving: 1servingCalories: 220kcalCarbohydrates: 12gProtein: 8gFat: 15gSaturated Fat: 6gPolyunsaturated Fat: 9gCholesterol: 100mgSodium: 600mgFiber: 1gSugar: 3g

Notes

  • For a spicier kick, add 1/4 teaspoon of cayenne pepper or diced jalapeños to the mixture.
  • Substitute half of the yellow squash with zucchini for a different flavor and texture.

Tried this recipe?

Let us know how it was!

Pistachio Cream Chocolate Chip Cookies that Delight!

Introduction to Pistachio Cream Chocolate Chip Cookies

There’s something magical about the aroma of freshly baked cookies wafting through the house.

Pistachio Cream Chocolate Chip Cookies are not just any cookies; they’re a delightful blend of nutty goodness and sweet chocolate that can brighten even the busiest of days.

Whether you’re looking to impress friends at a gathering or simply want a quick treat for yourself, these cookies are the answer.

Soft, chewy, and bursting with flavor, they’re perfect for satisfying that sweet tooth while adding a unique twist to a classic favorite.

Let’s dive into this delicious adventure together!

Why You’ll Love This Pistachio Cream Chocolate Chip Cookies

These Pistachio Cream Chocolate Chip Cookies are a game-changer in the baking world.

They come together in just 32 minutes, making them perfect for those last-minute cravings or unexpected guests.

The combination of creamy pistachio and rich chocolate creates a flavor explosion that’s hard to resist.

Plus, they’re soft and chewy, ensuring every bite is a delightful experience.

Trust me, once you try them, you’ll be hooked!

Ingredients for Pistachio Cream Chocolate Chip Cookies

To whip up these delightful Pistachio Cream Chocolate Chip Cookies, you’ll need a handful of simple ingredients that pack a punch of flavor.

Here’s what you’ll gather:

  • Unsalted butter: This is the base of your cookies, providing richness and a soft texture.
  • Granulated sugar: Adds sweetness and helps create that lovely chewy texture.
  • Brown sugar: Brings moisture and a hint of caramel flavor, enhancing the overall taste.
  • Large eggs: They bind everything together and contribute to the cookies’ structure.
  • Vanilla extract: A must-have for that warm, comforting flavor that complements the pistachios.
  • All-purpose flour: The backbone of your cookie dough, giving it body and structure.
  • Baking soda: This leavening agent helps the cookies rise and become fluffy.
  • Salt: Just a pinch enhances all the flavors and balances the sweetness.
  • Chocolate chips: The star of the show, adding melty sweetness in every bite.
  • Pistachio cream (or pistachio paste): This is where the magic happens, infusing the cookies with a nutty richness.
  • Chopped pistachios: For that extra crunch and a pop of color, making each cookie visually appealing.

Feel free to get creative! You can swap chocolate chips for white chocolate or butterscotch chips if you’re feeling adventurous.

For exact measurements, check the bottom of the article where you can find everything you need for printing.

How to Make Pistachio Cream Chocolate Chip Cookies

Baking these Pistachio Cream Chocolate Chip Cookies is a delightful journey.

With each step, you’ll see how simple it is to create something truly special.

Let’s get started!

Step 1: Preheat the Oven

Preheat your oven to 350°F.

This ensures even baking, giving your cookies that perfect golden edge.

Step 2: Cream the Butter and Sugars

In a large mixing bowl, cream together the softened butter, granulated sugar, and brown sugar.

Mix until the mixture is light and fluffy.

This step is crucial; it incorporates air, making your cookies soft and chewy.

Step 3: Add Eggs and Vanilla

Add the eggs one at a time, mixing well after each addition.

Then, stir in the vanilla extract.

This adds a warm, comforting flavor that pairs beautifully with the pistachios.

Step 4: Combine Dry Ingredients

In a separate bowl, whisk together the flour, baking soda, and salt.

This helps to evenly distribute the leavening agent, ensuring your cookies rise perfectly.

Step 5: Mix Wet and Dry Ingredients

Gradually add the dry ingredients to the wet mixture.

Stir until just combined; overmixing can lead to tough cookies.

You want that soft, chewy texture!

Step 6: Fold in Chocolate and Pistachios

Now, fold in the chocolate chips, pistachio cream, and chopped pistachios.

This is where the magic happens!

The creamy pistachio and rich chocolate create a flavor explosion.

Step 7: Shape the Cookies

Drop rounded tablespoons of dough onto ungreased baking sheets.

Leave space between each cookie; they will spread while baking.

Step 8: Bake the Cookies

Bake for 10-12 minutes or until the edges are golden brown.

Keep an eye on them; you want that perfect balance of chewy and crispy.

Step 9: Cool and Enjoy

Allow the cookies to cool on the baking sheets for a few minutes.

Then, transfer them to wire racks to cool completely.

This step is essential for achieving that perfect texture.

Now, grab a glass of milk and enjoy your delicious creation!

Tips for Success

  • Chill the dough for 30 minutes for softer cookies.
  • Use a cookie scoop for uniform sizes and even baking.
  • Don’t overmix the dough; it can make cookies tough.
  • Experiment with different chocolate types for unique flavors.
  • Store cookies in an airtight container to maintain freshness.

Equipment Needed

  • Mixing bowls: A large bowl for mixing and a smaller one for dry ingredients.
  • Electric mixer: A hand mixer works well, but a whisk can do the job too.
  • Baking sheets: Use parchment paper for easy cleanup.
  • Cookie scoop: For uniform cookie sizes, but a tablespoon works too.

Variations

  • Nut-Free Option: Omit the pistachios and use almond extract instead of vanilla for a different flavor profile.
  • Gluten-Free: Substitute all-purpose flour with a gluten-free flour blend to accommodate dietary needs.
  • Vegan Version: Replace eggs with flaxseed meal mixed with water and use vegan butter for a plant-based treat.
  • Flavor Twists: Add a teaspoon of espresso powder for a mocha flavor or a pinch of cinnamon for warmth.
  • Chocolate Lovers: Use dark chocolate chips or chunks for a richer chocolate experience.

Serving Suggestions

  • Pair these cookies with a cold glass of milk for a classic treat.
  • Serve alongside a scoop of vanilla ice cream for an indulgent dessert.
  • For a festive touch, dust with powdered sugar before serving.
  • Present on a colorful platter to impress guests at gatherings.

FAQs about Pistachio Cream Chocolate Chip Cookies

Can I use salted butter instead of unsalted?

Yes, you can use salted butter, but reduce the added salt in the recipe to balance the flavors. This will still yield delicious Pistachio Cream Chocolate Chip Cookies!

How do I store leftover cookies?

Store your cookies in an airtight container at room temperature. They’ll stay fresh for about a week, but I doubt they’ll last that long!

Can I freeze the cookie dough?

Absolutely! You can freeze the dough for up to three months. Just scoop the dough onto a baking sheet, freeze until solid, then transfer to a freezer bag. Bake straight from the freezer, adding a couple of extra minutes to the baking time.

What can I substitute for pistachio cream?

If you can’t find pistachio cream, almond butter or hazelnut spread can work as tasty alternatives. Just remember, the flavor will change slightly, but it’ll still be delicious!

Are these cookies suitable for a gluten-free diet?

Yes, simply swap the all-purpose flour for a gluten-free flour blend. This way, everyone can enjoy these delightful Pistachio Cream Chocolate Chip Cookies!

Final Thoughts

Baking Pistachio Cream Chocolate Chip Cookies is more than just a recipe; it’s an experience that brings joy to your kitchen.

The delightful aroma fills the air, creating a warm atmosphere that invites everyone to gather around.

Each bite offers a perfect balance of chewy texture and nutty flavor, making them a hit with family and friends.

Whether you’re enjoying them fresh out of the oven or sharing them at a gathering, these cookies are sure to create sweet memories.

So, roll up your sleeves and let the magic of baking unfold!

jhessica

Pistachio Cream Chocolate Chip Cookies that Delight!

Delicious Pistachio Cream Chocolate Chip Cookies that are soft and chewy with a delightful nutty flavor.
Prep Time 20 minutes
Cook Time 12 minutes
Total Time 32 minutes
Servings: 24 cookies
Course: Dessert
Cuisine: American
Calories: 180

Ingredients
  

  • 1 cup unsalted butter softened
  • 1 cup granulated sugar
  • 1 cup packed brown sugar
  • 2 large eggs
  • 2 teaspoons vanilla extract
  • 2 cups all-purpose flour
  • 1 teaspoon baking soda
  • 1/2 teaspoon salt
  • 1 cup chocolate chips
  • 1/2 cup pistachio cream or pistachio paste
  • 1/2 cup chopped pistachios

Method
 

  1. Preheat your oven to 350°F.
  2. In a large mixing bowl, cream together the softened butter, granulated sugar, and brown sugar until light and fluffy.
  3. Add the eggs one at a time, mixing well after each addition, then stir in the vanilla extract.
  4. In a separate bowl, whisk together the flour, baking soda, and salt.
  5. Gradually add the dry ingredients to the wet mixture, stirring until just combined.
  6. Fold in the chocolate chips, pistachio cream, and chopped pistachios.
  7. Drop rounded tablespoons of dough onto ungreased baking sheets, leaving space between each cookie.
  8. Bake for 10-12 minutes or until the edges are golden brown.
  9. Allow the cookies to cool on the baking sheets for a few minutes before transferring them to wire racks to cool completely.

Nutrition

Serving: 1cookieCalories: 180kcalCarbohydrates: 20gProtein: 2gFat: 9gSaturated Fat: 5gPolyunsaturated Fat: 4gCholesterol: 30mgSodium: 100mgFiber: 1gSugar: 10g

Notes

  • For a softer cookie, chill the dough for 30 minutes before baking.
  • You can substitute the chocolate chips with white chocolate or butterscotch chips for a different flavor profile.

Tried this recipe?

Let us know how it was!

Crispy Cheese Baked Broccoli: A Tasty Side that Delights!

Introduction to Crispy Cheese Baked Broccoli

There’s something magical about transforming a simple vegetable into a crispy, cheesy delight. Crispy Cheese Baked Broccoli is not just a side dish; it’s a game-changer for your dinner table. Whether you’re juggling a busy weeknight or looking to impress friends at a gathering, this recipe fits the bill perfectly. It’s quick, easy, and packed with flavor, making it a go-to for anyone who wants to elevate their meals without spending hours in the kitchen. Trust me, once you try this, you’ll wonder how you ever lived without it!

Why You’ll Love This Crispy Cheese Baked Broccoli

This Crispy Cheese Baked Broccoli is a true crowd-pleaser. It’s incredibly easy to whip up, taking just 35 minutes from start to finish. The combination of melted cheddar and Parmesan creates a rich, savory flavor that even the pickiest eaters can’t resist. Plus, it’s a fantastic way to sneak in some veggies without anyone noticing. You’ll find yourself making this dish again and again!

Ingredients for Crispy Cheese Baked Broccoli

Gathering the right ingredients is the first step to creating this delicious dish. Here’s what you’ll need:

  • Fresh broccoli florets: The star of the show! Look for vibrant green florets that are firm and fresh.
  • Shredded cheddar cheese: This adds a creamy, tangy flavor that melts beautifully. Feel free to use sharp cheddar for a bolder taste.
  • Grated Parmesan cheese: A sprinkle of this brings a nutty richness that complements the cheddar perfectly.
  • Olive oil: This helps the broccoli crisp up in the oven while adding a touch of healthy fat.
  • Garlic powder: A must for that savory kick. It infuses the broccoli with a warm, aromatic flavor.
  • Onion powder: This adds depth and sweetness, enhancing the overall taste of the dish.
  • Salt: Essential for bringing out the flavors of the ingredients. Adjust to your taste.
  • Black pepper: A dash of this adds a subtle heat that balances the richness of the cheese.
  • Red pepper flakes (optional): For those who like a little heat, these flakes can elevate the dish to a new level.

For those looking to mix things up, consider substituting the cheddar with mozzarella for a milder flavor or using a dairy-free cheese alternative to cater to dietary preferences. You can find the exact quantities for each ingredient at the bottom of the article, ready for printing!

How to Make Crispy Cheese Baked Broccoli

Now that you have your ingredients ready, let’s dive into the fun part: making this Crispy Cheese Baked Broccoli! Follow these simple steps, and you’ll have a delicious side dish that’s sure to impress.

Step 1: Preheat the Oven

Start by preheating your oven to 425°F (220°C). This high temperature is key to achieving that crispy texture we all love. While the oven heats up, you can prepare the broccoli.

Step 2: Prepare the Broccoli Mixture

In a large mixing bowl, toss the fresh broccoli florets with olive oil, garlic powder, onion powder, salt, black pepper, and red pepper flakes if you’re feeling adventurous. Make sure every floret is coated evenly. This step is crucial for flavor and crispiness!

Step 3: Spread on Baking Sheet

Next, spread the broccoli mixture in a single layer on a baking sheet lined with parchment paper. This helps prevent sticking and makes cleanup a breeze. Give the florets a little space; they need room to roast and get crispy.

Step 4: Bake the Broccoli

Pop the baking sheet into your preheated oven and bake for 15 minutes. The broccoli should start to turn a lovely shade of bright green and get a bit tender. Keep an eye on it; you want it to be just right!

Step 5: Add Cheese and Bake Again

After 15 minutes, take the baking sheet out and sprinkle the shredded cheddar and grated Parmesan cheese evenly over the broccoli. Return it to the oven for another 10-12 minutes. You’ll know it’s done when the cheese is melted, bubbly, and slightly golden. That’s the magic moment!

Step 6: Cool and Serve

Once the cheese is perfectly melted, remove the baking sheet from the oven. Let the Crispy Cheese Baked Broccoli cool for a few minutes before serving. This dish is best enjoyed warm, with that gooey cheese and crispy edges. Trust me, it’s worth the wait!

Tips for Success

  • Use fresh broccoli for the best flavor and texture.
  • Don’t overcrowd the baking sheet; give the florets space to crisp up.
  • Experiment with different cheeses for unique flavors.
  • For extra crunch, broil the dish for the last minute of baking.
  • Let the broccoli cool slightly before serving to enhance the crispy texture.

Equipment Needed

  • Baking sheet: A standard sheet works great, but a cast-iron skillet can add extra crispiness.
  • Parchment paper: This makes for easy cleanup; aluminum foil is a good alternative.
  • Mixing bowl: Any large bowl will do; a salad bowl is perfect.
  • Measuring cups: Essential for accuracy, but you can eyeball it if you’re confident!

Variations

  • Spicy Kick: Add a teaspoon of cayenne pepper or a splash of hot sauce for an extra kick.
  • Herb Infusion: Toss in some fresh herbs like thyme or rosemary for a fragrant twist.
  • Cheesy Medley: Mix different cheeses like gouda or feta for a unique flavor profile.
  • Nutty Crunch: Sprinkle some toasted almonds or walnuts on top before serving for added texture.
  • Vegan Option: Use a dairy-free cheese alternative and olive oil to keep it plant-based.

Serving Suggestions

  • Pair with grilled chicken or steak for a hearty meal.
  • Serve alongside quinoa or brown rice for a wholesome vegetarian option.
  • Drizzle with balsamic glaze for a touch of sweetness.
  • Garnish with fresh parsley or chives for a pop of color.
  • Enjoy with a crisp white wine or sparkling water for a refreshing drink.

FAQs about Crispy Cheese Baked Broccoli

Can I use frozen broccoli for this recipe?

While fresh broccoli is ideal for achieving that crispy texture, you can use frozen broccoli in a pinch. Just make sure to thaw and drain it well before mixing with the other ingredients. This will help prevent excess moisture.

How can I make this dish spicier?

If you’re looking to add some heat, consider increasing the amount of red pepper flakes or adding a dash of cayenne pepper. You can also drizzle some hot sauce over the finished dish for an extra kick!

Can I prepare this dish ahead of time?

Absolutely! You can prep the broccoli and season it a few hours in advance. Just store it in the fridge until you’re ready to bake. This makes it a great option for meal prep or entertaining.

What can I serve with Crispy Cheese Baked Broccoli?

This dish pairs wonderfully with grilled meats, roasted potatoes, or even as a topping for baked potatoes. It’s versatile enough to complement a variety of main courses!

Is this recipe suitable for a vegetarian diet?

Yes! Crispy Cheese Baked Broccoli is a vegetarian-friendly dish. Just ensure that the cheese you use aligns with your dietary preferences, especially if you opt for a dairy-free alternative.

Final Thoughts

Cooking is more than just a task; it’s an experience that brings joy and connection. Crispy Cheese Baked Broccoli is a perfect example of how a simple dish can elevate your meals and create lasting memories. The delightful crunch, the gooey cheese, and the vibrant green of the broccoli make it a feast for the senses. Whether you’re sharing it with family or enjoying it solo, this dish is sure to bring a smile to your face. So, roll up your sleeves, embrace the kitchen, and let this recipe become a staple in your culinary adventures!

jhessica

Crispy Cheese Baked Broccoli: A Tasty Side that Delights!

A delicious and crispy side dish featuring broccoli baked with a blend of cheeses.
Prep Time 10 minutes
Cook Time 25 minutes
Total Time 35 minutes
Servings: 4 servings
Course: Side Dish
Cuisine: American
Calories: 180

Ingredients
  

  • 2 cups fresh broccoli florets
  • 1 cup shredded cheddar cheese
  • 1/2 cup grated Parmesan cheese
  • 1/4 cup olive oil
  • 1 teaspoon garlic powder
  • 1 teaspoon onion powder
  • 1/2 teaspoon salt
  • 1/4 teaspoon black pepper
  • 1/4 teaspoon red pepper flakes optional

Method
 

  1. Preheat your oven to 425°F (220°C).
  2. In a large mixing bowl, combine the broccoli florets, olive oil, garlic powder, onion powder, salt, black pepper, and red pepper flakes. Toss until the broccoli is evenly coated.
  3. Spread the broccoli mixture in a single layer on a baking sheet lined with parchment paper.
  4. Bake in the preheated oven for 15 minutes.
  5. Remove the baking sheet from the oven and sprinkle the cheddar and Parmesan cheeses evenly over the broccoli.
  6. Return the baking sheet to the oven and bake for an additional 10-12 minutes, or until the cheese is melted and bubbly, and the broccoli is crispy.
  7. Allow to cool for a few minutes before serving.

Nutrition

Serving: 1servingCalories: 180kcalCarbohydrates: 5gProtein: 8gFat: 15gSaturated Fat: 6gPolyunsaturated Fat: 9gCholesterol: 30mgSodium: 400mgFiber: 2gSugar: 2g

Notes

  • For a different flavor, try adding a teaspoon of smoked paprika or a squeeze of lemon juice before serving.
  • Substitute the cheddar cheese with mozzarella or a dairy-free cheese alternative for a different taste or dietary preference.

Tried this recipe?

Let us know how it was!

Creamy Garlic Parmesan Chicken Pasta: Discover Easy Steps!

Introduction to Creamy Garlic Parmesan Chicken Pasta

There’s something magical about a plate of pasta that brings everyone together.

Creamy Garlic Parmesan Chicken Pasta is one of those dishes that feels like a warm hug after a long day.

It’s quick, satisfying, and packed with flavor, making it the perfect solution for busy weeknights or a cozy dinner with friends.

Imagine tender chicken, rich cream, and a sprinkle of Parmesan all mingling with perfectly cooked penne.

This recipe is not just about feeding the family; it’s about creating moments that linger long after the last bite.

Let’s dive into this culinary adventure!

Why You’ll Love This Creamy Garlic Parmesan Chicken Pasta

This dish is a game-changer for anyone who craves comfort food without spending hours in the kitchen.

In just 30 minutes, you can whip up a creamy, savory masterpiece that will impress your family and friends.

The combination of garlic and Parmesan creates a flavor explosion that dances on your taste buds.

Plus, it’s versatile enough to adapt to your pantry staples, making it a go-to recipe for any occasion!

Ingredients for Creamy Garlic Parmesan Chicken Pasta

Gathering the right ingredients is the first step to culinary success.

For this Creamy Garlic Parmesan Chicken Pasta, you’ll need a few key players that come together to create a symphony of flavors.

  • Penne pasta: This tubular pasta holds onto the creamy sauce beautifully, making every bite a delight.
  • Olive oil: A staple in Italian cooking, it adds richness and helps sauté the chicken to perfection.
  • Boneless, skinless chicken breasts: Tender and juicy, they provide a hearty protein that complements the creamy sauce.
  • Garlic: Freshly minced garlic brings a fragrant punch that elevates the dish to new heights.
  • Heavy cream: The star of the show, it creates that luscious, velvety sauce we all crave.
  • Parmesan cheese: Grated for easy melting, it adds a nutty, salty flavor that ties everything together.
  • Italian seasoning: A blend of herbs that enhances the dish with a touch of Mediterranean flair.
  • Salt and pepper: Essential for seasoning, they help balance the flavors and bring everything to life.
  • Fresh parsley: A vibrant garnish that adds a pop of color and freshness to your plate.

For those looking to mix things up, consider adding sautéed spinach or sun-dried tomatoes for extra flavor.

If you’re feeling adventurous, swap the chicken for shrimp or grilled vegetables to cater to different tastes.

Exact quantities for each ingredient can be found at the bottom of the article, ready for printing!

How to Make Creamy Garlic Parmesan Chicken Pasta

Cooking this Creamy Garlic Parmesan Chicken Pasta is a breeze.

With just a few simple steps, you’ll have a delicious meal on the table in no time.

Let’s break it down!

Step 1: Cook the Pasta

Start by boiling a large pot of salted water.

Add the penne pasta and cook according to the package instructions until al dente.

This usually takes about 8-10 minutes.

Once done, drain the pasta and set it aside.

Don’t forget to save a splash of that pasta water; it can help adjust the sauce later!

Step 2: Sauté the Chicken

In a large skillet, heat the olive oil over medium heat.

Add the bite-sized chicken pieces, seasoning them with salt and pepper.

Cook for about 5-7 minutes, stirring occasionally, until the chicken is browned and cooked through.

Once done, remove the chicken from the skillet and set it aside.

This step is crucial for building flavor!

Step 3: Sauté the Garlic

In the same skillet, toss in the minced garlic.

Sauté it for about a minute until it becomes fragrant.

Be careful not to burn it; burnt garlic can turn bitter.

This is where the magic begins, as the aroma fills your kitchen!

Step 4: Create the Creamy Sauce

Pour in the heavy cream, bringing it to a gentle simmer.

Stir in the grated Parmesan cheese and Italian seasoning.

Mix until the cheese melts and the sauce becomes creamy.

If it’s too thick, add a splash of that reserved pasta water to reach your desired consistency.

This sauce is the heart of the dish!

Step 5: Combine Chicken and Pasta

Return the cooked chicken to the skillet.

Add the drained pasta and toss everything together until well coated in the creamy sauce.

Cook for an additional 2-3 minutes to heat through.

This is where all the flavors meld together beautifully!

Step 6: Serve and Garnish

Once everything is heated through, it’s time to serve.

Plate the pasta and garnish with freshly chopped parsley for a pop of color.

This dish is best enjoyed immediately, while it’s warm and creamy.

Trust me, your taste buds will thank you!

Tips for Success

  • Always salt your pasta water; it enhances the flavor of the pasta.
  • Don’t rush the garlic; sauté it just until fragrant for the best taste.
  • Reserve some pasta water to adjust the sauce’s consistency if needed.
  • For a richer flavor, let the sauce simmer a bit longer.
  • Garnish with extra Parmesan for a delightful finishing touch!

Equipment Needed

  • Large pot: For boiling pasta; a deep skillet can work too.
  • Skillet: A non-stick skillet is ideal for sautéing chicken and making the sauce.
  • Colander: To drain the pasta; a slotted spoon can be a handy alternative.
  • Measuring cups: For accurate ingredient portions; eyeballing can work in a pinch!

Variations

  • Vegetarian Option: Swap the chicken for sautéed mushrooms or grilled zucchini for a hearty, meatless dish.
  • Seafood Twist: Use shrimp or scallops instead of chicken for a delightful seafood version.
  • Spicy Kick: Add red pepper flakes or diced jalapeños to the sauce for a spicy flavor boost.
  • Herb Infusion: Experiment with fresh basil or thyme for an aromatic twist that brightens the dish.
  • Gluten-Free Pasta: Substitute regular penne with gluten-free pasta to cater to dietary needs.

Serving Suggestions

  • Side Salad: Pair with a crisp Caesar or mixed greens salad for a refreshing contrast.
  • Garlic Bread: Serve with warm, buttery garlic bread to soak up that creamy sauce.
  • Wine Pairing: A chilled Chardonnay complements the richness of the dish beautifully.
  • Presentation: Serve in shallow bowls, garnished with extra Parmesan and a sprinkle of parsley for a restaurant-style touch.

FAQs about Creamy Garlic Parmesan Chicken Pasta

Can I make Creamy Garlic Parmesan Chicken Pasta ahead of time?

Absolutely! You can prepare the chicken and sauce in advance. Just cook the pasta fresh when you’re ready to serve. This way, you’ll enjoy that perfect al dente texture!

What can I substitute for heavy cream?

If you’re looking for a lighter option, you can use half-and-half or even a combination of milk and Greek yogurt. Just keep in mind that the sauce may not be as rich and creamy.

How do I store leftovers?

Store any leftovers in an airtight container in the fridge for up to three days. Reheat gently on the stovetop, adding a splash of water or milk to loosen the sauce.

Can I use a different type of pasta?

Definitely! While penne works beautifully, feel free to swap it for fettuccine, rigatoni, or even gluten-free pasta. Just adjust the cooking time as needed.

Is this dish suitable for meal prep?

Yes! Creamy Garlic Parmesan Chicken Pasta is perfect for meal prep. Just portion it out into containers for easy lunches or dinners throughout the week.

Final Thoughts

Cooking Creamy Garlic Parmesan Chicken Pasta is more than just a meal; it’s an experience that brings joy to the table.

The rich, creamy sauce envelops the tender chicken and pasta, creating a dish that feels indulgent yet simple.

Every bite is a reminder of the comfort food we crave, perfect for sharing with loved ones or enjoying solo after a long day.

This recipe is a testament to how easy it can be to create something special in your kitchen.

So grab your ingredients, and let’s make some delicious memories together!

jhessica

Creamy Garlic Parmesan Chicken Pasta: Discover Easy Steps!

A delicious and creamy pasta dish featuring tender chicken, garlic, and Parmesan cheese.
Prep Time 10 minutes
Cook Time 20 minutes
Total Time 30 minutes
Servings: 4 servings
Course: Main Course
Cuisine: Italian
Calories: 550

Ingredients
  

  • 8 ounces penne pasta
  • 2 tablespoons olive oil
  • 1 pound boneless skinless chicken breasts, cut into bite-sized pieces
  • 4 cloves garlic minced
  • 1 cup heavy cream
  • 1 cup grated Parmesan cheese
  • 1 teaspoon Italian seasoning
  • Salt and pepper to taste
  • Fresh parsley chopped (for garnish)

Method
 

  1. Cook the penne pasta according to package instructions until al dente. Drain and set aside.
  2. In a large skillet, heat the olive oil over medium heat. Add the chicken pieces and season with salt and pepper. Cook until the chicken is browned and cooked through, about 5-7 minutes. Remove the chicken from the skillet and set aside.
  3. In the same skillet, add the minced garlic and sauté for about 1 minute until fragrant.
  4. Pour in the heavy cream and bring to a simmer. Stir in the Parmesan cheese and Italian seasoning, mixing until the cheese is melted and the sauce is creamy.
  5. Return the cooked chicken to the skillet and add the drained pasta. Toss everything together until the pasta is well coated with the sauce.
  6. Cook for an additional 2-3 minutes to heat through. Adjust seasoning with salt and pepper as needed.
  7. Serve immediately, garnished with chopped parsley.

Nutrition

Serving: 1servingCalories: 550kcalCarbohydrates: 40gProtein: 35gFat: 30gSaturated Fat: 15gPolyunsaturated Fat: 10gCholesterol: 120mgSodium: 600mgFiber: 2gSugar: 2g

Notes

  • For added flavor, consider adding sautéed spinach or sun-dried tomatoes to the pasta before serving.
  • Substitute the chicken with shrimp or grilled vegetables for a different protein option or a vegetarian dish.

Tried this recipe?

Let us know how it was!

Stay Connected

Get recipes via email: