Get my cookbooks

Buffalo Chicken Wraps: A Spicy and Delicious Recipe!

Introduction to Buffalo Chicken Wraps

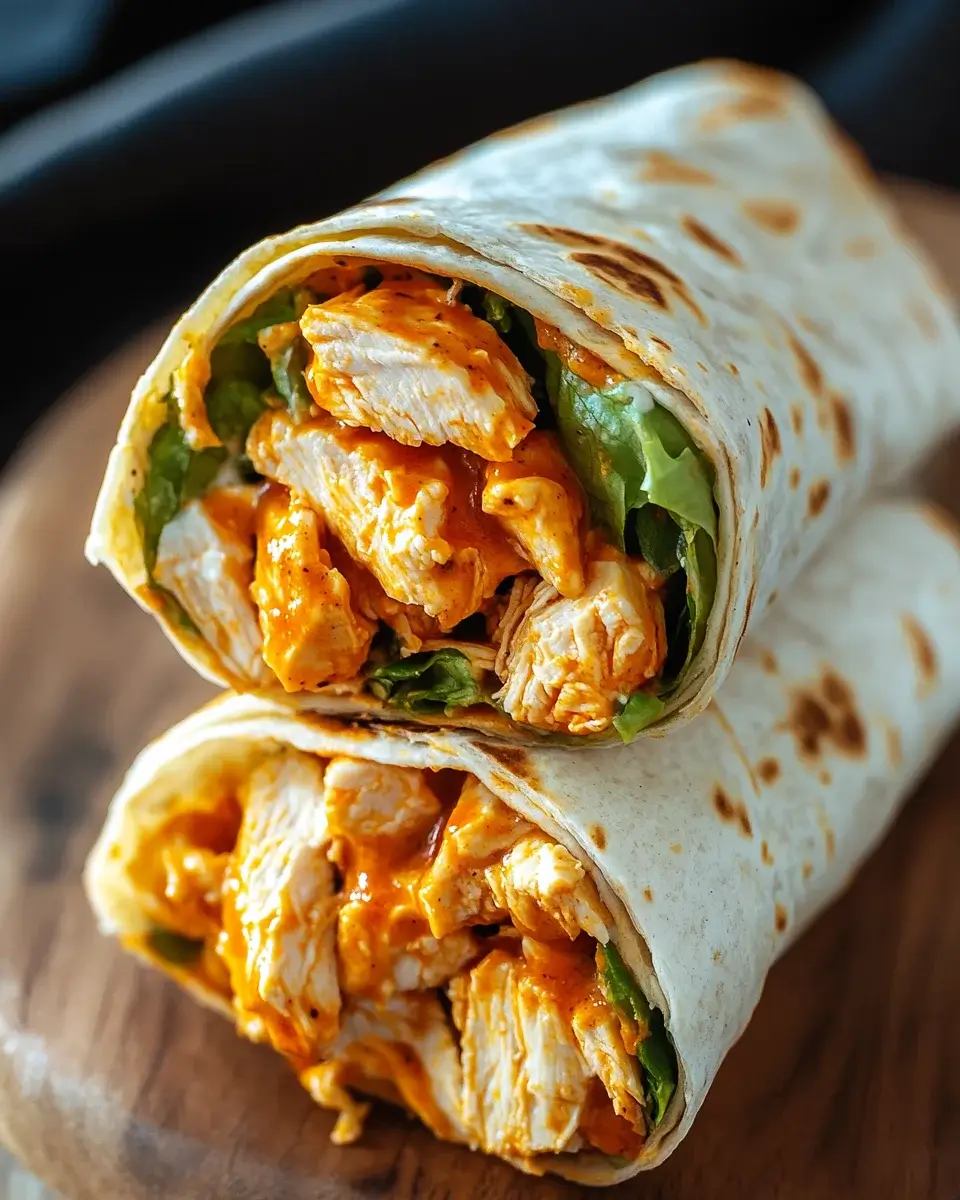
There’s something about Buffalo Chicken Wraps that just feels like home. Maybe it’s the spicy kick that dances on your taste buds or the comforting embrace of a warm tortilla. As a busy guy, I know how precious time can be, especially when hunger strikes. These wraps are a quick solution for a hectic day, yet they pack a punch of flavor that will impress anyone at your table. Whether you’re whipping up lunch for yourself or dinner for the family, this recipe is sure to become a go-to favorite. Let’s dive into this delicious adventure!

Why You’ll Love This Buffalo Chicken Wraps

Buffalo Chicken Wraps are the ultimate meal for anyone craving something quick and delicious. They come together in just 15 minutes, making them perfect for those busy weeknights. The combination of spicy chicken, fresh veggies, and creamy ranch dressing creates a flavor explosion that’s hard to resist. Plus, they’re versatile enough to please even the pickiest eaters. Trust me, once you try these wraps, they’ll become a staple in your kitchen!

Ingredients for Buffalo Chicken Wraps

Gathering the right ingredients is key to making these Buffalo Chicken Wraps a hit. Here’s what you’ll need:

  • Cooked chicken, shredded: This is the star of the show. Use rotisserie chicken for convenience or cook your own for a fresher taste.
  • Buffalo sauce: The spicy kick that gives these wraps their name. Choose your favorite brand or make your own for a personal touch.
  • Flour tortillas: These provide the perfect wrap for all the delicious fillings. You can opt for whole wheat or spinach tortillas for a healthier twist.
  • Romaine lettuce: Adds a refreshing crunch. Feel free to swap it out for other greens like spinach or kale if you prefer.
  • Cherry tomatoes: Their sweetness balances the heat of the buffalo sauce. You can use regular tomatoes, but cherry tomatoes are bite-sized and fun!
  • Shredded cheddar cheese: This creamy addition enhances the flavor. Try pepper jack for an extra kick or a dairy-free option if needed.
  • Ranch dressing: A classic pairing with buffalo flavors. You can use store-bought or whip up a homemade version for a fresher taste.
  • Salt and pepper: Essential for seasoning. Adjust to your taste, but don’t skip this step—it makes a difference!

For those looking to elevate their wraps, consider adding sliced avocado or cucumber for extra crunch and flavor. The exact quantities of these ingredients are listed at the bottom of the article, ready for you to print out and take to the store!

How to Make Buffalo Chicken Wraps

Creating Buffalo Chicken Wraps is a breeze! Follow these simple steps, and you’ll have a delicious meal ready in no time. Let’s get started!

Step 1: Prepare the Chicken Mixture

In a medium bowl, combine the shredded chicken with the buffalo sauce. Stir well until every piece of chicken is coated in that fiery goodness. This is where the magic begins, so make sure it’s evenly mixed!

Step 2: Lay Out the Tortillas

Next, grab your flour tortillas and lay them out on a clean surface. This is your canvas, so make sure they’re ready for all the tasty fillings you’re about to add. A clean workspace makes everything easier!

Step 3: Fill the Tortillas

Now, it’s time to fill those tortillas! Divide the buffalo chicken mixture evenly among them, placing it right in the center. Don’t be shy—load them up! You want each bite to be bursting with flavor.

Step 4: Add Fresh Ingredients

Top the chicken with a generous handful of chopped romaine lettuce, halved cherry tomatoes, and a sprinkle of shredded cheddar cheese. These fresh ingredients add crunch and balance out the spice. Feel free to get creative with your toppings!

Step 5: Drizzle with Dressing

Now, drizzle ranch dressing over the toppings. This creamy addition is a game-changer! Season with salt and pepper to taste. A little seasoning goes a long way in enhancing the flavors.

Step 6: Roll the Wraps

It’s time to roll! Fold in the sides of each tortilla, then roll from the bottom up to enclose all that delicious filling. Make sure it’s snug but not too tight—nobody wants a burst wrap!

Step 7: Grill for Extra Flavor

If you’re feeling adventurous, grill the wraps in a skillet over medium heat for 2-3 minutes on each side. This gives them a crispy finish and adds a delightful texture. Plus, who doesn’t love a little char?

Tips for Success

  • Use rotisserie chicken for a quick and easy option.
  • Don’t skimp on the buffalo sauce; it’s what makes these wraps sing!
  • Warm the tortillas slightly before filling to make them more pliable.
  • Experiment with different toppings like jalapeños or blue cheese for added flavor.
  • Wrap tightly to prevent any filling from escaping during grilling.

Equipment Needed

  • Medium bowl: For mixing the chicken and buffalo sauce. A large mixing bowl works too!
  • Cutting board: Essential for chopping veggies. A plate can work in a pinch.
  • Skillet: For grilling the wraps. An electric griddle is a great alternative.
  • Sharp knife: For slicing the wraps. A pizza cutter can also do the trick!

Variations

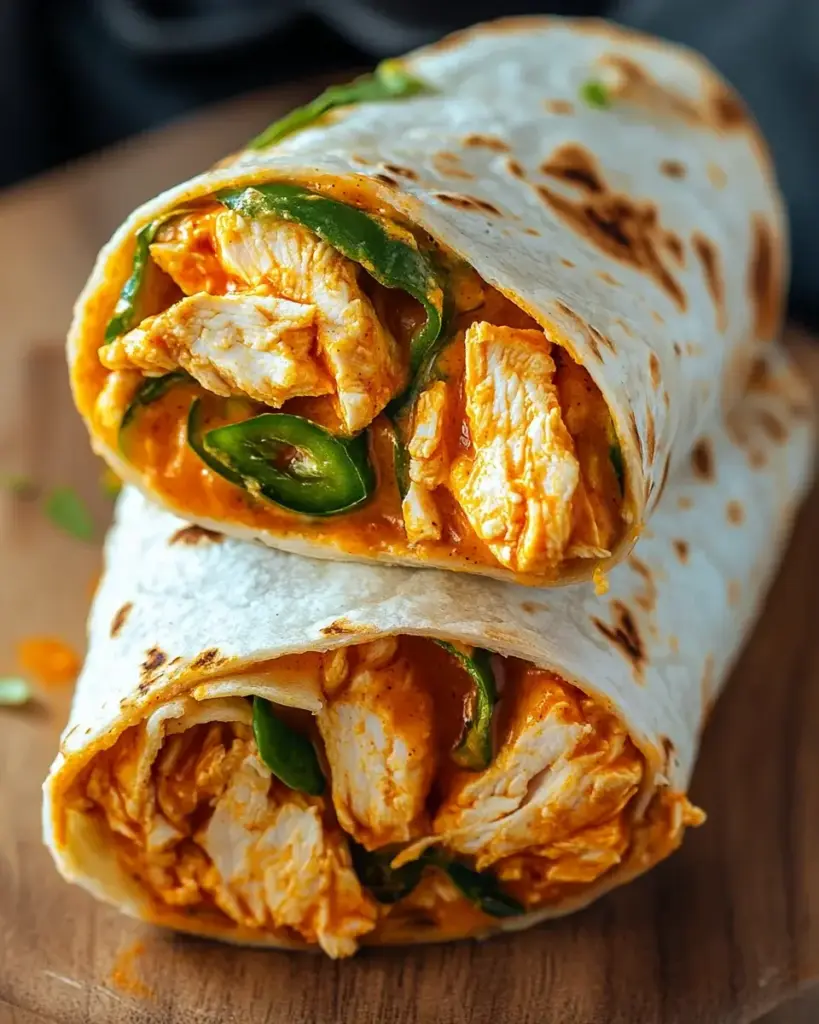
  • Spicy Buffalo Chicken Wrap: Add sliced jalapeños or a sprinkle of cayenne pepper for an extra kick.
  • Vegetarian Option: Substitute shredded chicken with roasted cauliflower or chickpeas tossed in buffalo sauce.
  • Low-Carb Wrap: Use lettuce leaves instead of tortillas for a lighter, gluten-free option.
  • BBQ Chicken Wrap: Swap buffalo sauce for your favorite barbecue sauce for a sweet and smoky flavor.
  • Greek-Inspired Wrap: Add feta cheese, olives, and tzatziki sauce for a Mediterranean twist.

Serving Suggestions

  • Pair your Buffalo Chicken Wraps with crispy sweet potato fries for a satisfying crunch.
  • A side of celery sticks and carrot sticks adds a refreshing crunch and balances the spice.
  • Serve with a cold beer or a refreshing iced tea to complement the flavors.
  • For presentation, wrap them in parchment paper and secure with a toothpick for a fun touch.

FAQs about Buffalo Chicken Wraps

Got questions about Buffalo Chicken Wraps? You’re not alone! Here are some common queries that might help you out:

Can I make Buffalo Chicken Wraps ahead of time?

Absolutely! You can prepare the chicken mixture and chop the veggies in advance. Just assemble the wraps when you’re ready to eat. This makes for a quick meal on busy days!

What can I substitute for buffalo sauce?

If you’re not a fan of buffalo sauce, try using BBQ sauce or a spicy sriracha sauce. Both options will give your wraps a unique twist while still keeping them flavorful.

Are Buffalo Chicken Wraps healthy?

They can be! By using whole wheat tortillas and adding plenty of veggies, you can create a nutritious meal. Just keep an eye on the amount of buffalo sauce and ranch dressing you use.

Can I freeze Buffalo Chicken Wraps?

Yes, you can! Wrap them tightly in plastic wrap and store them in an airtight container. When you’re ready to enjoy, just thaw and heat them up in a skillet or microwave.

What sides go well with Buffalo Chicken Wraps?

These wraps pair perfectly with a side of crispy fries, a fresh salad, or even some crunchy veggie sticks. They’re versatile enough to complement a variety of sides!

Final Thoughts

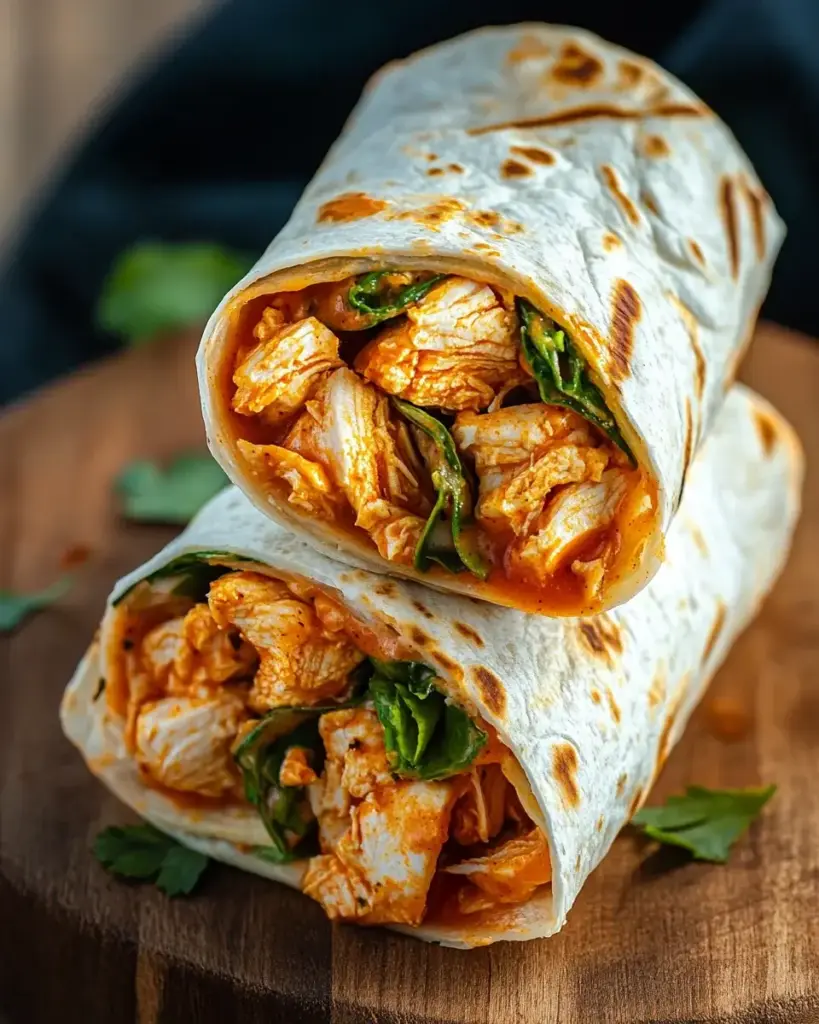
Buffalo Chicken Wraps are more than just a meal; they’re an experience that brings a burst of flavor and joy to your table. The combination of spicy chicken, fresh veggies, and creamy ranch dressing creates a delightful harmony that’s hard to resist. Whether you’re enjoying them solo or sharing with friends and family, these wraps are sure to spark smiles and satisfied appetites. Plus, their quick preparation makes them a lifesaver on busy days. So, roll up your sleeves, gather your ingredients, and dive into this delicious adventure. You won’t regret it!

jhessica

Buffalo Chicken Wraps: A Spicy and Delicious Recipe!

Buffalo Chicken Wraps are a spicy and delicious meal option, perfect for lunch or dinner.
Prep Time 10 minutes
Cook Time 5 minutes
Total Time 15 minutes
Servings: 4 servings
Course: Main Course
Cuisine: American
Calories: 350

Ingredients
  

  • 2 cups cooked chicken shredded
  • ½ cup buffalo sauce
  • 4 large flour tortillas
  • 1 cup romaine lettuce chopped
  • ½ cup cherry tomatoes halved
  • ½ cup shredded cheddar cheese
  • ¼ cup ranch dressing
  • Salt and pepper to taste

Method
 

  1. In a medium bowl, combine the shredded chicken and buffalo sauce. Mix well until the chicken is evenly coated.
  2. Lay out the flour tortillas on a clean surface.
  3. Divide the buffalo chicken mixture evenly among the tortillas, placing it in the center of each.
  4. Top the chicken with chopped romaine lettuce, cherry tomatoes, and shredded cheddar cheese.
  5. Drizzle ranch dressing over the toppings and season with salt and pepper to taste.
  6. Fold in the sides of each tortilla, then roll from the bottom up to enclose the filling.
  7. If desired, grill the wraps in a skillet over medium heat for 2-3 minutes on each side until golden brown and heated through.
  8. Slice each wrap in half and serve immediately.

Nutrition

Serving: 1wrapCalories: 350kcalCarbohydrates: 30gProtein: 25gFat: 15gSaturated Fat: 5gPolyunsaturated Fat: 10gCholesterol: 70mgSodium: 800mgFiber: 2gSugar: 2g

Notes

  • For a healthier option, substitute the flour tortillas with whole wheat or spinach tortillas.
  • Add sliced avocado or cucumber for extra crunch and flavor.

Tried this recipe?

Let us know how it was!

Buffalo Chicken Dip: The Ultimate Crowd-Pleasing Recipe

Introduction to Buffalo Chicken Dip

Buffalo Chicken Dip is more than just a recipe; it’s a celebration in a dish. I remember the first time I made it for a game night with friends. The moment that creamy, spicy goodness hit the table, it was like magic. Everyone dove in, and suddenly, the room was filled with laughter and cheers. This dip is perfect for any gathering, whether it’s a casual get-together or a big party. It’s quick to whip up and always impresses. Trust me, once you serve this, you’ll be the hero of the evening!

Why You’ll Love This Buffalo Chicken Dip

This Buffalo Chicken Dip is a game-changer for any occasion. It’s incredibly easy to make, taking just 10 minutes of prep time. The creamy texture combined with that spicy kick makes it a flavor explosion in every bite. Plus, it’s a crowd-pleaser, so you can relax while your guests rave about it. Whether it’s a party or a cozy night in, this dip is sure to elevate your experience!

Ingredients for Buffalo Chicken Dip

Gathering the right ingredients is the first step to creating this mouthwatering Buffalo Chicken Dip. Here’s what you’ll need:

  • Cream Cheese: This is the base of your dip, providing that rich, creamy texture that makes it irresistible.
  • Ranch Dressing: Adds a tangy flavor that balances the heat from the buffalo sauce.
  • Blue Cheese Dressing: For those who love bold flavors, this dressing enhances the dip with its distinct taste.
  • Cooked Shredded Chicken: You can use rotisserie chicken for convenience or cook your own. It’s the heart of the dip!
  • Buffalo Sauce: This is where the magic happens! It brings the heat and signature flavor that Buffalo Chicken Dip is known for.
  • Shredded Cheddar Cheese: Melts beautifully and adds a cheesy goodness that everyone loves.
  • Chopped Green Onions (optional): These add a fresh crunch and a pop of color, making your dip look even more appealing.

For those looking to mix things up, consider adding diced jalapeños for an extra kick or swapping out the blue cheese dressing for a milder option. You can find all the exact measurements at the bottom of the article, ready for printing!

How to Make Buffalo Chicken Dip

Creating Buffalo Chicken Dip is a straightforward process that anyone can master. Follow these simple steps, and you’ll have a delicious dip ready to impress your friends and family!

Step 1: Preheat the Oven

Start by preheating your oven to 350°F (175°C). Preheating is crucial because it ensures even cooking. You want that dip to bubble and melt perfectly, so don’t skip this step!

Step 2: Mix the Base

In a mixing bowl, combine the softened cream cheese, ranch dressing, and blue cheese dressing. Use a hand mixer or a sturdy spatula to blend everything until it’s smooth and creamy. This base is the heart of your Buffalo Chicken Dip, so make sure it’s well mixed!

Step 3: Add Chicken and Sauce

Next, stir in the cooked shredded chicken and buffalo sauce. Make sure every piece of chicken is coated in that spicy goodness. This is where the flavor really starts to come together, so don’t be shy with the buffalo sauce!

Step 4: Fold in Cheese and Onions

Now, it’s time to fold in 3/4 cup of shredded cheddar cheese and half of the chopped green onions, if you’re using them. Gently mix until everything is combined. The cheese will melt beautifully in the oven, adding that gooey texture we all love.

Step 5: Transfer and Spread

Transfer the mixture to a baking dish, spreading it evenly. A 9×9 inch dish works perfectly. Make sure it’s spread out evenly so it cooks uniformly. You want every bite to be just as delicious as the last!

Step 6: Bake to Perfection

Place the dish in your preheated oven and bake for 20-25 minutes. Keep an eye on it! You’ll know it’s done when the dip is bubbly and the cheese is melted. That golden, gooey top is what you’re aiming for!

Step 7: Cool and Garnish

Once it’s out of the oven, let the dip cool for a few minutes. This helps prevent burns and allows the flavors to settle. Before serving, garnish with the remaining green onions for a fresh touch. Now, it’s ready to be devoured!

Tips for Success

  • Use room temperature cream cheese for easier mixing.
  • Don’t skimp on the buffalo sauce; it’s the star of the show!
  • For a creamier dip, add a splash of milk or extra ranch dressing.
  • Let the dip cool slightly before serving to enhance flavors.
  • Experiment with different cheeses like pepper jack for a spicy twist.

Equipment Needed

  • Mixing Bowl: A large bowl for combining ingredients. A sturdy pot can work in a pinch.
  • Hand Mixer or Spatula: For blending the dip smoothly. A whisk can also do the job.
  • Baking Dish: A 9×9 inch dish is ideal. Any oven-safe dish will suffice.
  • Measuring Cups: For accurate ingredient portions. You can use any standard measuring tools.

Variations

  • Spicy Buffalo Chicken Dip: Add diced jalapeños or a splash of hot sauce for an extra kick.
  • Buffalo Chicken Dip with Creamy Spinach: Mix in some fresh or frozen spinach for added nutrition and flavor.
  • Healthier Version: Substitute Greek yogurt for cream cheese and use light dressings to cut calories.
  • Vegetarian Option: Replace chicken with shredded jackfruit or chickpeas for a plant-based twist.
  • Cheesy Buffalo Chicken Dip: Experiment with different cheeses like pepper jack or gouda for unique flavors.

Serving Suggestions

  • Serve with crispy tortilla chips for the perfect crunch.
  • Pair with fresh celery and carrot sticks for a refreshing contrast.
  • Offer a selection of drinks like cold beer or sparkling water to complement the spice.
  • For a fun presentation, use a hollowed-out bread bowl to serve the dip.

FAQs about Buffalo Chicken Dip

Can I make Buffalo Chicken Dip ahead of time?

Absolutely! You can prepare the dip a day in advance. Just mix everything and store it in the fridge. When you’re ready to serve, pop it in the oven to heat up. This makes it a perfect party appetizer!

What can I serve with Buffalo Chicken Dip?

This dip pairs wonderfully with tortilla chips, celery sticks, and carrot sticks. You can also try it with pita chips or even spread it on a toasted baguette for a delicious twist!

How do I store leftovers?

Leftover Buffalo Chicken Dip can be stored in an airtight container in the fridge for up to three days. Just reheat it in the oven or microwave before serving again. It’s just as tasty the next day!

Can I freeze Buffalo Chicken Dip?

Yes, you can freeze it! Just make sure to store it in a freezer-safe container. When you’re ready to enjoy it, thaw it in the fridge overnight and then reheat it in the oven.

What’s the best way to spice up my Buffalo Chicken Dip?

If you’re looking for more heat, add extra buffalo sauce or mix in some diced jalapeños. You can also experiment with different hot sauces to find your perfect flavor balance!

Final Thoughts

Buffalo Chicken Dip is more than just a dish; it’s a way to bring people together. The joy of watching friends and family gather around a bubbling dish, sharing stories and laughter, is truly special. Each bite is a reminder of good times and great flavors. Whether it’s game day or a casual get-together, this dip never fails to impress. So, roll up your sleeves, gather your ingredients, and create your own delicious memories. Trust me, once you serve this dip, you’ll find yourself making it again and again, each time with a smile on your face!

jhessica

Buffalo Chicken Dip: The Ultimate Crowd-Pleasing Recipe

Buffalo Chicken Dip is a creamy, spicy, and cheesy dip that is perfect for parties and gatherings.
Prep Time 10 minutes
Cook Time 25 minutes
Total Time 35 minutes
Servings: 8 servings
Course: Appetizer
Cuisine: American
Calories: 230

Ingredients
  

  • 8 ounces cream cheese softened
  • 1/2 cup ranch dressing
  • 1/2 cup blue cheese dressing
  • 1 cup cooked shredded chicken
  • 1/2 cup buffalo sauce
  • 1 cup shredded cheddar cheese
  • 1/4 cup chopped green onions optional

Method
 

  1. Preheat your oven to 350°F (175°C).
  2. In a mixing bowl, combine the softened cream cheese, ranch dressing, and blue cheese dressing. Mix until smooth and well combined.
  3. Stir in the shredded chicken and buffalo sauce until everything is evenly coated.
  4. Fold in 3/4 cup of the shredded cheddar cheese and half of the chopped green onions, if using.
  5. Transfer the mixture to a baking dish and spread it evenly.
  6. Top with the remaining 1/4 cup of shredded cheddar cheese.
  7. Bake in the preheated oven for 20-25 minutes, or until the dip is bubbly and the cheese is melted.
  8. Remove from the oven and let it cool slightly before serving. Garnish with the remaining green onions, if desired.

Nutrition

Serving: 1/8 of the dipCalories: 230kcalCarbohydrates: 4gProtein: 12gFat: 18gSaturated Fat: 10gPolyunsaturated Fat: 6gCholesterol: 60mgSodium: 500mgSugar: 1g

Notes

  • For a spicier kick, add more buffalo sauce or mix in some diced jalapeños.
  • Serve with tortilla chips, celery sticks, or carrot sticks for dipping.

Tried this recipe?

Let us know how it was!

Creamy Butter Chicken: Discover the Best Recipe Today!

Introduction to Creamy Butter Chicken

There’s something magical about a dish that wraps you in warmth and comfort, and that’s exactly what Creamy Butter Chicken does. I remember the first time I tasted this rich, velvety delight at a friend’s family gathering. The aroma filled the room, and I knew I had to recreate it. This recipe is perfect for those busy weeknights when you want to impress your loved ones without spending hours in the kitchen. With just a few simple ingredients, you can whip up a meal that feels like a hug on a plate. Let’s dive into this culinary adventure!

Why You’ll Love This Creamy Butter Chicken

This Creamy Butter Chicken recipe is a game-changer for any home cook. It’s incredibly easy to prepare, making it perfect for those hectic evenings when time is short. The rich, buttery sauce envelops tender chicken, creating a flavor explosion that will have everyone asking for seconds. Plus, it’s a crowd-pleaser, so whether you’re hosting friends or enjoying a cozy family dinner, this dish is sure to impress!

Ingredients for Creamy Butter Chicken

Gathering the right ingredients is the first step to creating a delicious Creamy Butter Chicken. Here’s what you’ll need:

  • Boneless, skinless chicken thighs: These are juicy and tender, perfect for soaking up the flavors.
  • Plain yogurt: This helps tenderize the chicken while adding a tangy flavor.
  • Lemon juice: A splash of acidity brightens the dish and balances the richness.
  • Ground cumin: This spice adds a warm, earthy flavor that’s essential in Indian cuisine.
  • Ground coriander: It brings a citrusy note that complements the other spices beautifully.
  • Ground turmeric: Known for its vibrant color and health benefits, it adds a subtle bitterness.
  • Garam masala: A blend of spices that adds depth and warmth to the dish.
  • Chili powder: For those who like a bit of heat, this spice kicks up the flavor.
  • Salt: Essential for enhancing all the flavors in the dish.
  • Unsalted butter: The star of the show, it creates that creamy, rich sauce.
  • Onion: Finely chopped, it adds sweetness and depth when sautéed.
  • Garlic: Minced garlic infuses the dish with a fragrant aroma.
  • Fresh ginger: Adds a zesty kick that brightens the overall flavor.
  • Tomato puree: This forms the base of the sauce, providing richness and color.
  • Heavy cream: The secret to that luxurious, creamy texture.
  • Fresh cilantro: For garnish, it adds a pop of color and freshness.
  • Cooked basmati rice: A perfect side to soak up all that delicious sauce.

For those looking to spice things up, consider adding more chili powder or even a diced jalapeño to the onion mixture. If you prefer a dairy-free option, coconut milk can be a fantastic substitute for heavy cream. You can find the exact measurements for these ingredients at the bottom of the article, ready for printing!

How to Make Creamy Butter Chicken

Creating the perfect Creamy Butter Chicken is a delightful journey. Each step builds layers of flavor, making the dish truly unforgettable. Let’s break it down into simple steps that will have you cooking like a pro in no time!

Step 1: Marinate the Chicken

Start by marinating the chicken. In a large bowl, mix together yogurt, lemon juice, and spices like cumin, coriander, and garam masala. This blend not only tenderizes the chicken but also infuses it with incredible flavor. Toss in the chicken pieces, ensuring they’re well-coated. Cover the bowl and let it marinate in the fridge for at least an hour, or overnight if you can. This step is crucial; it allows the spices to penetrate the meat, creating a rich taste that’s hard to resist.

Step 2: Sauté the Onions

Next, it’s time to sauté the onions. In a large skillet, melt the unsalted butter over medium heat. Add the finely chopped onion and cook until it turns golden brown, about 5-7 minutes. This caramelization process brings out the natural sweetness of the onions, adding depth to your sauce. Stir occasionally to prevent burning. The aroma wafting through your kitchen will have everyone eagerly anticipating dinner!

Step 3: Add Garlic and Ginger

Once the onions are perfectly sautéed, it’s time to add minced garlic and ginger. Stir them into the skillet and cook for an additional 1-2 minutes. The garlic and ginger are essential; they elevate the dish with their fragrant aroma and zesty flavor. You’ll know they’re ready when the kitchen smells heavenly. This step is where the magic begins, setting the stage for the rich sauce to come.

Step 4: Cook the Chicken

Now, add the marinated chicken along with all the marinade to the skillet. Cook the chicken for about 5-7 minutes, stirring occasionally until it’s browned on all sides. This browning process locks in the flavors and gives the chicken a beautiful color. Make sure not to overcrowd the pan; you want each piece to get that lovely sear. The sizzling sound is music to your ears, signaling that dinner is on its way!

Step 5: Simmer with Tomato Puree

Pour in the tomato puree and bring the mixture to a gentle simmer. This is where the magic happens! Reduce the heat to low, cover the skillet, and let it cook for 15-20 minutes. This simmering allows the flavors to meld beautifully, creating a rich and savory sauce. Stir occasionally to prevent sticking. The vibrant color of the sauce will make your mouth water, and the anticipation will build as you wait for the final touches.

Step 6: Stir in the Cream

Finally, it’s time to stir in the heavy cream. This is the secret to achieving that luxurious, creamy texture that makes Creamy Butter Chicken so irresistible. Let it simmer for another 5 minutes, allowing the cream to blend seamlessly with the sauce. Taste and adjust the seasoning if needed. The result is a velvety sauce that clings to the chicken, ready to be served over fluffy basmati rice. Your taste buds are in for a treat!

Tips for Success

  • Marinate the chicken overnight for maximum flavor.
  • Use fresh spices for a more vibrant taste.
  • Don’t rush the sautéing process; golden onions are key.
  • Adjust the chili powder to suit your heat preference.
  • Serve with warm naan or basmati rice to soak up the sauce.

Equipment Needed

  • Large bowl: For marinating the chicken; a mixing bowl works too.
  • Skillet or pot: A deep skillet is ideal for cooking; a Dutch oven can also be used.
  • Wooden spoon: Perfect for stirring; a spatula can work as well.
  • Measuring cups and spoons: Essential for accuracy; you can eyeball it if you’re confident!

Variations

  • Spicy Butter Chicken: Increase the chili powder or add diced jalapeños for an extra kick.
  • Coconut Butter Chicken: Substitute heavy cream with coconut milk for a dairy-free option that adds a tropical twist.
  • Vegetarian Version: Replace chicken with paneer or chickpeas for a hearty, meat-free meal.
  • Low-Carb Option: Serve over cauliflower rice instead of basmati rice for a healthier alternative.
  • Herb-Infused Butter Chicken: Add fresh herbs like mint or basil for a refreshing flavor boost.

Serving Suggestions

  • Serve Creamy Butter Chicken over fluffy basmati rice to soak up the rich sauce.
  • Pair with warm naan or roti for a delightful bread option.
  • A crisp cucumber salad adds a refreshing crunch.
  • Enjoy with a chilled mango lassi for a sweet contrast.
  • Garnish with fresh cilantro for a pop of color and flavor.

FAQs about Creamy Butter Chicken

Can I make Creamy Butter Chicken ahead of time?

Absolutely! You can prepare the dish a day in advance. Just store it in the fridge after cooking. Reheat gently on the stovetop, adding a splash of cream if needed to restore its creamy texture.

What can I serve with Creamy Butter Chicken?

This dish pairs beautifully with basmati rice or warm naan. A side of cucumber salad or roasted vegetables can add a refreshing touch. Don’t forget a mango lassi for a sweet drink!

Can I use chicken breasts instead of thighs?

Yes, you can! Chicken breasts will work, but they may be less juicy than thighs. Just be careful not to overcook them to keep them tender.

Is Creamy Butter Chicken spicy?

The spice level can be adjusted to your taste. If you prefer a milder dish, reduce the chili powder or omit it altogether. For more heat, feel free to add extra spices or fresh chilies.

Can I make this dish dairy-free?

Definitely! Substitute the heavy cream with coconut milk for a delicious dairy-free version. It adds a unique flavor while keeping the dish creamy.

Final Thoughts

Cooking Creamy Butter Chicken is more than just preparing a meal; it’s about creating a moment of joy and connection. The rich, buttery sauce and tender chicken come together to form a dish that warms the heart and satisfies the soul. Whether you’re sharing it with family or enjoying a quiet night in, this recipe brings a taste of India right to your kitchen. The delightful aromas and vibrant flavors will have everyone asking for more. So roll up your sleeves, embrace the process, and let this dish become a cherished part of your culinary repertoire!

jhessica

Creamy Butter Chicken: Discover the Best Recipe Today!

A rich and creamy butter chicken recipe that is perfect for a comforting meal.
Prep Time 1 hour
Cook Time 30 minutes
Total Time 1 hour 30 minutes
Servings: 6 servings
Course: Main Course
Cuisine: Indian
Calories: 450

Ingredients
  

  • 2 pounds boneless skinless chicken thighs, cut into bite-sized pieces
  • 1 cup plain yogurt
  • 2 tablespoons lemon juice
  • 2 teaspoons ground cumin
  • 2 teaspoons ground coriander
  • 1 teaspoon ground turmeric
  • 1 teaspoon garam masala
  • 1 teaspoon chili powder
  • 1 teaspoon salt
  • 4 tablespoons unsalted butter
  • 1 medium onion finely chopped
  • 4 cloves garlic minced
  • 1 tablespoon fresh ginger minced
  • 1 can 15 ounces tomato puree
  • 1 cup heavy cream
  • Fresh cilantro for garnish
  • Cooked basmati rice for serving

Method
 

  1. In a large bowl, combine the yogurt, lemon juice, cumin, coriander, turmeric, garam masala, chili powder, and salt. Add the chicken pieces and mix well to coat. Cover and marinate in the refrigerator for at least 1 hour, or overnight for best flavor.
  2. In a large skillet or pot, melt the butter over medium heat. Add the chopped onion and sauté until golden brown, about 5-7 minutes.
  3. Stir in the minced garlic and ginger, cooking for an additional 1-2 minutes until fragrant.
  4. Add the marinated chicken (along with the marinade) to the skillet. Cook for about 5-7 minutes until the chicken is browned on all sides.
  5. Pour in the tomato puree and bring to a simmer. Reduce the heat to low and cover, cooking for 15-20 minutes until the chicken is cooked through.
  6. Stir in the heavy cream and simmer for another 5 minutes. Adjust seasoning if necessary.
  7. Serve hot over cooked basmati rice, garnished with fresh cilantro.

Nutrition

Serving: 1servingCalories: 450kcalCarbohydrates: 8gProtein: 30gFat: 30gSaturated Fat: 18gPolyunsaturated Fat: 8gCholesterol: 120mgSodium: 800mgFiber: 1gSugar: 4g

Notes

  • For a spicier version, add more chili powder or a diced jalapeño to the onion mixture.
  • You can also substitute the heavy cream with coconut milk for a dairy-free option.

Tried this recipe?

Let us know how it was!

Chicken Parmesan Stuffed Zucchini Boats are easy and tasty!

Introduction to Chicken Parmesan Stuffed Zucchini Boats

There’s something magical about a dish that combines comfort and health, and Chicken Parmesan Stuffed Zucchini Boats do just that. I remember the first time I made these; my kitchen filled with the aroma of melting cheese and savory chicken. It felt like a warm hug on a busy weeknight. This recipe is perfect for those evenings when you want to impress your loved ones without spending hours in the kitchen. With just a few simple ingredients, you can create a meal that’s not only delicious but also nutritious. Let’s dive into this culinary adventure!

Why You’ll Love This Chicken Parmesan Stuffed Zucchini Boats

These Chicken Parmesan Stuffed Zucchini Boats are a game-changer for busy nights. They come together in no time, making dinner feel effortless. The combination of tender zucchini, savory chicken, and gooey cheese creates a flavor explosion that will have everyone asking for seconds. Plus, they’re a healthier twist on a classic dish, so you can indulge without the guilt. What’s not to love?

Ingredients for Chicken Parmesan Stuffed Zucchini Boats

Gathering the right ingredients is the first step to culinary success. For these Chicken Parmesan Stuffed Zucchini Boats, you’ll need:

  • Zucchinis: These are the star of the show, providing a healthy base that’s low in calories and high in flavor.
  • Ground Chicken: A lean protein that keeps the dish light while still being filling. You can also use ground turkey if you prefer.
  • Marinara Sauce: This adds a rich, tangy flavor. Choose your favorite brand or make your own for a personal touch.
  • Italian Seasoning: A blend of herbs that brings a taste of Italy to your kitchen. It’s a must-have for any Italian-inspired dish.
  • Garlic Powder: For that aromatic kick, garlic powder is a convenient way to add depth without the fuss of fresh garlic.
  • Onion Powder: This enhances the overall flavor profile, giving a subtle sweetness that balances the dish.
  • Shredded Mozzarella Cheese: The gooey goodness that melts beautifully on top, making every bite irresistible.
  • Grated Parmesan Cheese: Adds a nutty flavor and a bit of crunch, elevating the dish to gourmet status.
  • Salt and Pepper: Essential seasonings that enhance all the flavors in your dish.
  • Fresh Basil (optional): A fragrant garnish that adds a pop of color and freshness to your finished dish.

For those looking to mix things up, consider adding chopped spinach or bell peppers to the chicken mixture for extra veggies. If you like a bit of heat, red pepper flakes or a spicy marinara sauce can give your boats a kick. Exact quantities for each ingredient are available at the bottom of the article for easy printing!

How to Make Chicken Parmesan Stuffed Zucchini Boats

Now that you have all your ingredients ready, let’s get cooking! Making Chicken Parmesan Stuffed Zucchini Boats is a straightforward process that will have your kitchen smelling divine. Follow these simple steps, and you’ll be enjoying a delicious meal in no time.

Step 1: Preheat the Oven

First things first, preheat your oven to 375°F (190°C). This ensures it’s hot and ready to bake those zucchini boats to perfection.

Step 2: Prepare the Zucchini

Next, grab your zucchinis. Cut them in half lengthwise and scoop out the center using a spoon. This creates the perfect little boats for your filling. Place the zucchini halves in a baking dish, ready to be stuffed.

Step 3: Cook the Chicken

In a skillet over medium heat, cook the ground chicken until it’s browned and cooked through, about 5-7 minutes. Season it with salt, pepper, Italian seasoning, garlic powder, and onion powder. This step is crucial for building flavor, so don’t rush it!

Step 4: Add Marinara Sauce

Once the chicken is cooked, stir in the marinara sauce. Let it cook for an additional 2-3 minutes until everything is heated through. The sauce adds moisture and richness to the filling, making it irresistible.

Step 5: Stuff the Zucchini

Now it’s time to spoon the chicken mixture evenly into the zucchini boats. Don’t be shy—fill them generously! Each boat should be brimming with that savory goodness.

Step 6: Add Cheese

Top each stuffed zucchini with shredded mozzarella and grated Parmesan cheese. This cheesy layer is what makes these boats truly special. It’ll melt beautifully and create a golden crust.

Step 7: Bake

Place the baking dish in the preheated oven and bake for 25-30 minutes. You’ll know they’re done when the zucchinis are tender and the cheese is bubbly and golden. The aroma wafting through your kitchen will be hard to resist!

Step 8: Garnish and Serve

Once baked, remove the zucchini boats from the oven and let them cool for a few minutes. If you like, garnish with fresh basil for a pop of color and flavor. Now, dig in and enjoy your delicious Chicken Parmesan Stuffed Zucchini Boats!

Tips for Success

  • Use a melon baller or spoon to scoop out the zucchini for even boats.
  • Don’t overcook the chicken; it will continue to cook in the oven.
  • Feel free to mix in your favorite veggies for added nutrition.
  • Let the stuffed zucchinis cool slightly before serving to avoid burns.
  • Experiment with different cheeses for a unique flavor twist!

Equipment Needed

  • Baking Dish: A 9×13 inch dish works well, but any oven-safe dish will do.
  • Skillet: A non-stick skillet is ideal for cooking the chicken.
  • Spoon: Use a regular spoon or a melon baller for scooping out the zucchini.
  • Knife: A sharp knife is essential for cutting the zucchinis.

Variations

  • Vegetarian Option: Substitute ground chicken with a mix of quinoa and black beans for a hearty, meatless version.
  • Cheesy Spinach Delight: Add chopped spinach to the chicken mixture for an extra layer of flavor and nutrition.
  • Spicy Kick: Incorporate diced jalapeños or red pepper flakes into the filling for a fiery twist.
  • Herb Infusion: Experiment with fresh herbs like thyme or oregano to elevate the flavor profile.
  • Gluten-Free: Ensure your marinara sauce is gluten-free and enjoy this dish without worry.

Serving Suggestions

  • Side Salad: Pair your zucchini boats with a fresh garden salad for a light, refreshing contrast.
  • Garlic Bread: Serve with warm garlic bread to soak up any extra marinara sauce.
  • Wine Pairing: A crisp white wine, like Pinot Grigio, complements the flavors beautifully.
  • Presentation: Arrange the boats on a colorful platter and sprinkle with extra basil for a vibrant touch.

FAQs about Chicken Parmesan Stuffed Zucchini Boats

Can I use other types of meat for the filling?
Absolutely! Ground turkey or even lean beef can work well in this recipe. Just adjust the cooking time as needed to ensure it’s fully cooked.

How do I store leftovers?
Store any leftover Chicken Parmesan Stuffed Zucchini Boats in an airtight container in the fridge for up to three days. Reheat in the oven or microwave before serving.

Can I make these zucchini boats ahead of time?
Yes! You can prepare the stuffed zucchini boats a day in advance. Just cover them and store them in the fridge until you’re ready to bake.

What can I serve with Chicken Parmesan Stuffed Zucchini Boats?
These boats pair wonderfully with a side salad, garlic bread, or even some roasted vegetables for a complete meal.

Are Chicken Parmesan Stuffed Zucchini Boats healthy?
Definitely! They’re low in calories and packed with protein, making them a nutritious option for a satisfying dinner. Plus, they’re a great way to sneak in some veggies!

Final Thoughts

Cooking Chicken Parmesan Stuffed Zucchini Boats is more than just preparing a meal; it’s about creating a moment of joy in your kitchen. The blend of flavors, the vibrant colors, and the delightful aroma all come together to make dinner feel special. Whether you’re impressing guests or enjoying a cozy night in, these zucchini boats are sure to bring smiles to the table. Plus, they’re a fantastic way to embrace healthy eating without sacrificing taste. So, roll up your sleeves, gather your ingredients, and let the magic happen. You won’t regret it!

jhessica

Chicken Parmesan Stuffed Zucchini Boats are easy and tasty!

Chicken Parmesan Stuffed Zucchini Boats are easy and tasty!
Prep Time 15 minutes
Cook Time 30 minutes
Total Time 45 minutes
Servings: 4 servings
Course: Main Dish
Cuisine: Italian
Calories: 290

Ingredients
  

  • 2 medium zucchinis
  • 1 pound ground chicken
  • 1 cup marinara sauce
  • 1 teaspoon Italian seasoning
  • 1/2 teaspoon garlic powder
  • 1/2 teaspoon onion powder
  • 1 cup shredded mozzarella cheese
  • 1/4 cup grated Parmesan cheese
  • Salt and pepper to taste
  • Fresh basil for garnish optional

Method
 

  1. Preheat the oven to 375°F (190°C).
  2. Cut the zucchinis in half lengthwise and scoop out the center using a spoon to create boats. Place the zucchini halves in a baking dish.
  3. In a skillet over medium heat, cook the ground chicken until browned and cooked through, about 5-7 minutes. Season with salt, pepper, Italian seasoning, garlic powder, and onion powder.
  4. Stir in the marinara sauce and cook for an additional 2-3 minutes until heated through.
  5. Spoon the chicken mixture evenly into the zucchini boats.
  6. Top each stuffed zucchini with shredded mozzarella and grated Parmesan cheese.
  7. Bake in the preheated oven for 25-30 minutes, or until the zucchinis are tender and the cheese is bubbly and golden.
  8. Remove from the oven and let cool for a few minutes. Garnish with fresh basil if desired before serving.

Nutrition

Serving: 1stuffed zucchini boatCalories: 290kcalCarbohydrates: 6gProtein: 30gFat: 15gSaturated Fat: 7gPolyunsaturated Fat: 8gCholesterol: 85mgSodium: 600mgFiber: 2gSugar: 4g

Notes

  • For added flavor, mix in some chopped spinach or bell peppers into the chicken mixture before stuffing the zucchinis.
  • If you prefer a spicier kick, add red pepper flakes to the chicken mixture or use a spicy marinara sauce.

Tried this recipe?

Let us know how it was!

Buffalo Chicken Flatbread: A Delicious Quick Recipe!

Introduction to Buffalo Chicken Flatbread

There’s something magical about a dish that combines comfort and flavor, and that’s exactly what Buffalo Chicken Flatbread delivers. Whether you’re racing against the clock after a long day or looking to impress friends at game night, this recipe is your go-to solution. It’s quick, satisfying, and packed with that irresistible buffalo kick. I remember the first time I made it; the aroma filled my kitchen, and my family couldn’t wait to dig in. Trust me, once you try this, it’ll become a staple in your home, perfect for any occasion!

Why You’ll Love This Buffalo Chicken Flatbread

This Buffalo Chicken Flatbread is a game-changer for busy weeknights. It’s incredibly easy to whip up, taking just 25 minutes from start to finish. The combination of tender chicken, zesty buffalo sauce, and gooey cheese creates a flavor explosion that’s hard to resist. Plus, it’s versatile enough to please everyone at the table, making it a perfect choice for family dinners or casual gatherings with friends.

Ingredients for Buffalo Chicken Flatbread

Gathering the right ingredients is key to making a delicious Buffalo Chicken Flatbread. Here’s what you’ll need:

  • Cooked shredded chicken: This is the star of the show. You can use rotisserie chicken for convenience or cook your own. Either way, it adds protein and heartiness.
  • Buffalo sauce: The zesty kick that defines this dish. Choose your favorite brand, or make your own for a personal touch.
  • Shredded mozzarella cheese: This melty goodness binds everything together. It adds creaminess and a mild flavor that balances the heat.
  • Blue cheese crumbles: For those who love bold flavors, blue cheese adds a tangy punch. If you’re not a fan, feel free to skip it or substitute with feta.
  • Ranch dressing: A drizzle on top brings a cooling contrast to the spicy buffalo chicken. You can use store-bought or whip up a homemade version.
  • Flatbread or naan: These serve as the base for your toppings. They’re quick to prepare and provide a delightful chewiness. You can also use pita bread if that’s what you have on hand.
  • Chopped green onions: These add a fresh crunch and a pop of color. They’re optional but highly recommended for that extra flair.
  • Olive oil: A light brush on the flatbread enhances flavor and helps achieve a crispy texture.
  • Salt and pepper: Simple seasonings that elevate the dish. Adjust to your taste.

For exact measurements, check the bottom of the article where you can find everything listed for easy printing. Feel free to get creative with your ingredients; this recipe is all about making it your own!

How to Make Buffalo Chicken Flatbread

Creating Buffalo Chicken Flatbread is a breeze! Follow these simple steps, and you’ll have a delicious meal ready in no time. Let’s dive in!

Step 1: Preheat the Oven

Start by preheating your oven to 400°F (200°C). This step is crucial because it ensures even cooking. A hot oven helps the cheese melt beautifully and the flatbread crisp up perfectly. Trust me, you want that golden-brown finish!

Step 2: Prepare the Chicken Mixture

In a medium bowl, combine your cooked shredded chicken with the buffalo sauce. Mix it well until every piece of chicken is coated in that spicy goodness. This is where the flavor really starts to shine. If you like it extra spicy, feel free to add more sauce!

Step 3: Prepare the Flatbread

Next, grab your flatbread or naan and place it on a baking sheet. Brush each piece lightly with olive oil. This not only adds flavor but also helps achieve that crispy texture. Don’t forget to sprinkle a little salt and pepper for an extra kick!

Step 4: Assemble the Flatbreads

Now it’s time to assemble! Evenly distribute the buffalo chicken mixture over each flatbread. Make sure to spread it out so every bite is packed with flavor. Then, sprinkle the shredded mozzarella cheese and blue cheese crumbles on top. The cheese will melt and create a deliciously gooey layer.

Step 5: Bake the Flatbreads

Pop the baking sheet into your preheated oven and bake for 12-15 minutes. Keep an eye on them! You’ll know they’re done when the cheese is melted and bubbly, and the edges of the flatbread are golden brown. That’s the moment you’ve been waiting for!

Step 6: Add Finishing Touches

Once out of the oven, drizzle ranch dressing over the top for that creamy contrast. Garnish with chopped green onions for a fresh crunch. Slice into pieces and serve hot. Your Buffalo Chicken Flatbread is ready to impress!

Tips for Success

  • Use rotisserie chicken for a quick and easy option.
  • Experiment with different buffalo sauces to find your perfect heat level.
  • Don’t skip the olive oil; it’s key for that crispy flatbread texture.
  • For extra flavor, add sliced bell peppers or jalapeños before baking.
  • Let the flatbreads cool for a minute before slicing to keep the toppings intact.

Equipment Needed

  • Baking sheet: A standard sheet works great, but a pizza stone can enhance crispiness.
  • Medium bowl: For mixing the chicken and buffalo sauce. Any mixing bowl will do.
  • Brush: Use a pastry brush for olive oil, or even a paper towel in a pinch.
  • Knife: For slicing the finished flatbreads into perfect pieces.

Variations

  • Spicy Buffalo Chicken: Add diced jalapeños or a sprinkle of cayenne pepper to the chicken mixture for an extra kick.
  • Vegetarian Option: Substitute the chicken with roasted cauliflower or chickpeas tossed in buffalo sauce for a hearty, meat-free alternative.
  • Cheesy Delight: Mix in some cheddar cheese along with the mozzarella for a richer flavor profile.
  • Gluten-Free: Use gluten-free flatbread or cauliflower crust to make this dish suitable for gluten-sensitive diets.
  • Herb-Infused: Add fresh herbs like cilantro or parsley to the ranch dressing for a burst of freshness.

Serving Suggestions

  • Pair with celery sticks: The crunch complements the flatbread’s flavors and adds a refreshing touch.
  • Serve with a cold beer: A crisp lager or pale ale enhances the spicy kick of the buffalo chicken.
  • Presentation: Arrange the flatbreads on a wooden board for a rustic look, garnished with extra green onions.
  • Side salad: A simple mixed greens salad with a light vinaigrette balances the richness of the flatbread.

FAQs about Buffalo Chicken Flatbread

Can I make Buffalo Chicken Flatbread ahead of time?

Absolutely! You can prepare the chicken mixture and assemble the flatbreads in advance. Just cover them and store them in the fridge. When you’re ready to eat, pop them in the oven for a quick bake. This makes it a fantastic option for meal prep!

What can I substitute for buffalo sauce?

If buffalo sauce isn’t your thing, you can use barbecue sauce for a sweeter flavor or a spicy sriracha sauce for a different kick. Just remember, the key is to find a sauce that you enjoy!

How can I make this recipe healthier?

To lighten things up, use whole wheat flatbread and reduce the amount of cheese. You can also add more veggies like spinach or bell peppers to boost the nutrition without sacrificing flavor.

Is Buffalo Chicken Flatbread gluten-free?

Yes, it can be! Just make sure to use gluten-free flatbread or naan. This way, you can enjoy this delicious dish without any worries.

Can I freeze Buffalo Chicken Flatbread?

Yes, you can freeze the assembled flatbreads before baking. Just wrap them tightly in plastic wrap and foil. When you’re ready to enjoy, bake them straight from the freezer, adding a few extra minutes to the cooking time.

Final Thoughts

Making Buffalo Chicken Flatbread is more than just cooking; it’s about creating moments. The joy of pulling a bubbling, cheesy flatbread from the oven fills the kitchen with warmth and excitement. Each bite is a delightful blend of flavors that brings friends and family together. Whether it’s a casual weeknight dinner or a game day feast, this dish never fails to impress. I love how easy it is to customize, making it a canvas for creativity. So, roll up your sleeves, gather your ingredients, and let the deliciousness unfold. You won’t regret it!

jhessica

Buffalo Chicken Flatbread: A Delicious Quick Recipe!

A quick and delicious recipe for Buffalo Chicken Flatbread, perfect for a satisfying meal or snack.
Prep Time 10 minutes
Cook Time 15 minutes
Total Time 25 minutes
Servings: 4 servings
Course: Main Dish
Cuisine: American
Calories: 450

Ingredients
  

  • 2 cups cooked shredded chicken
  • 1/2 cup buffalo sauce
  • 1 cup shredded mozzarella cheese
  • 1/2 cup blue cheese crumbles
  • 1/4 cup ranch dressing
  • 4 pieces of flatbread or naan
  • 1/4 cup chopped green onions
  • 1 tablespoon olive oil
  • Salt and pepper to taste

Method
 

  1. Preheat the oven to 400°F (200°C).
  2. In a medium bowl, combine the shredded chicken and buffalo sauce. Mix until the chicken is well coated.
  3. Place the flatbread on a baking sheet. Brush each piece lightly with olive oil and season with salt and pepper.
  4. Evenly distribute the buffalo chicken mixture over the flatbreads.
  5. Sprinkle the shredded mozzarella cheese and blue cheese crumbles on top of the chicken.
  6. Bake in the preheated oven for 12-15 minutes, or until the cheese is melted and bubbly.
  7. Remove from the oven and drizzle ranch dressing over the top. Garnish with chopped green onions.
  8. Slice into pieces and serve hot.

Nutrition

Serving: 1flatbreadCalories: 450kcalCarbohydrates: 30gProtein: 30gFat: 25gSaturated Fat: 10gPolyunsaturated Fat: 15gCholesterol: 80mgSodium: 800mgFiber: 2gSugar: 2g

Notes

  • For a milder flavor, use a mild buffalo sauce or mix the buffalo sauce with a bit of ranch dressing before adding it to the chicken.
  • Add your favorite vegetables, such as sliced bell peppers or red onions, to the flatbread before baking for extra flavor and nutrition.

Tried this recipe?

Let us know how it was!

Cheesy Ground Beef Pasta Skillet: A Quick Dinner Delight!

Introduction to Cheesy Ground Beef Pasta Skillet

There’s something magical about a one-pan meal that brings everyone together.

The Cheesy Ground Beef Pasta Skillet is just that—a delightful dish that combines comfort and convenience.

After a long day, the last thing you want is to spend hours in the kitchen.

This recipe is a quick solution for busy weeknights, allowing you to whip up a hearty dinner in just 30 minutes.

With its creamy, cheesy goodness and savory beef, it’s sure to impress your loved ones.

Let’s dive into this easy, satisfying meal that will have everyone asking for seconds!

Why You’ll Love This Cheesy Ground Beef Pasta Skillet

This Cheesy Ground Beef Pasta Skillet is a game-changer for your dinner routine.

It’s not just quick; it’s packed with flavor that’ll make your taste buds dance.

In just 30 minutes, you can serve a meal that feels like a warm hug after a long day.

Plus, it’s a one-pan wonder, which means less cleanup and more time to enjoy with family.

What’s not to love?

Ingredients for Cheesy Ground Beef Pasta Skillet

Creating the perfect Cheesy Ground Beef Pasta Skillet starts with gathering the right ingredients.

Here’s what you’ll need:

  • Ground beef: The star of the dish, providing rich flavor and protein. You can also use ground turkey or chicken for a leaner option.
  • Onion: Diced for sweetness and depth, it adds a savory base to the skillet.
  • Garlic: Minced for that aromatic kick, it elevates the overall taste.
  • Italian seasoning: A blend of herbs that brings a taste of Italy to your kitchen.
  • Salt and black pepper: Essential for enhancing flavors; adjust to your taste.
  • Diced tomatoes: Canned and undrained, they add moisture and a tangy flavor.
  • Beef broth: This adds richness and helps cook the pasta to perfection.
  • Elbow macaroni: The perfect pasta shape for this dish, holding onto the cheesy goodness.
  • Cheddar cheese: Shredded for creaminess and a sharp flavor that melts beautifully.
  • Parmesan cheese: Grated for a nutty finish, it complements the cheddar perfectly.
  • Olive oil: Used for sautéing, it adds healthy fats and flavor.
  • Fresh parsley: Chopped for garnish, it adds a pop of color and freshness.

Feel free to get creative!

For a spicier kick, toss in some red pepper flakes or diced jalapeños while cooking the beef.

And if you’re looking for a healthier twist, whole wheat pasta is a great substitute.

Exact quantities for each ingredient are available at the bottom of the article for easy printing.

How to Make Cheesy Ground Beef Pasta Skillet

Making the Cheesy Ground Beef Pasta Skillet is as easy as pie.

Follow these simple steps, and you’ll have a delicious meal ready in no time.

Step 1: Sauté the Aromatics

Start by heating olive oil in a large skillet over medium heat.

Add the diced onion and cook until it turns translucent, about 3-4 minutes.

Then, stir in the minced garlic and let it cook for an additional minute.

The aroma will fill your kitchen, making it hard to resist!

Step 2: Brown the Ground Beef

Next, add the ground beef to the skillet.

Break it up with a spoon as it cooks, ensuring it browns evenly.

This should take about 5-7 minutes.

If there’s excess fat, drain it off to keep the dish from becoming greasy.

Step 3: Add Seasonings and Tomatoes

Now, sprinkle in the Italian seasoning, salt, and black pepper.

Stir well to combine, then add the can of diced tomatoes with their juice.

Pour in the beef broth and bring everything to a gentle simmer.

This step is crucial for infusing flavor into the pasta.

Step 4: Cook the Pasta

Once simmering, toss in the elbow macaroni.

Stir everything together and cover the skillet.

Let it cook for about 10-12 minutes, stirring occasionally.

You want the pasta to be al dente and most of the liquid absorbed.

Step 5: Stir in the Cheeses

Remove the skillet from heat and add the shredded cheddar and grated Parmesan cheese.

Stir until the cheeses melt and create a creamy, dreamy sauce.

This is where the magic happens, transforming your dish into cheesy perfection!

Step 6: Garnish and Serve

Finally, sprinkle chopped parsley on top for a fresh touch.

Serve the Cheesy Ground Beef Pasta Skillet hot, and watch everyone dig in.

It’s a meal that’s sure to bring smiles and satisfied bellies!

Tips for Success

  • Always taste as you go! Adjust seasonings to suit your palate.
  • For extra creaminess, add a splash of milk or cream when stirring in the cheeses.
  • Don’t skip the parsley; it brightens the dish and adds freshness.
  • Use a non-stick skillet to prevent sticking and make cleanup easier.
  • Leftovers? Store in an airtight container for up to three days.

Equipment Needed

  • Large skillet: A non-stick skillet works best for easy cooking and cleanup.
  • Wooden spoon: Perfect for stirring and breaking up the ground beef.
  • Measuring cups: Handy for measuring pasta and liquids accurately.
  • Cutting board: Essential for chopping onions and garlic.
  • Knife: A sharp knife makes prep work quick and easy.

Variations

  • Spicy Kick: Add red pepper flakes or diced jalapeños for a fiery twist.
  • Vegetarian Option: Swap ground beef for lentils or mushrooms for a hearty, meatless meal.
  • Cheese Lovers: Experiment with different cheeses like mozzarella or pepper jack for unique flavors.
  • Whole Wheat Pasta: Use whole wheat elbow macaroni for added fiber and a healthier option.
  • One-Pot Wonder: Toss in some spinach or kale during the last few minutes of cooking for extra nutrients.

Serving Suggestions

  • Garlic Bread: Serve with warm, buttery garlic bread for a classic pairing.
  • Side Salad: A fresh green salad with a light vinaigrette complements the richness of the dish.
  • Wine Pairing: Enjoy with a glass of red wine, like a Merlot or Chianti.
  • Presentation: Serve in bowls, garnished with extra parsley for a pop of color.

FAQs about Cheesy Ground Beef Pasta Skillet

Can I make this Cheesy Ground Beef Pasta Skillet ahead of time?

Absolutely! You can prepare the dish in advance and store it in the fridge. Just reheat it on the stove or in the microwave when you’re ready to serve. It’s a great meal prep option!

What can I substitute for ground beef?

If you’re looking for a leaner option, ground turkey or chicken works well. For a vegetarian twist, try using lentils or mushrooms instead. Both alternatives will still deliver a hearty meal.

How do I store leftovers?

Store any leftovers in an airtight container in the fridge for up to three days. Reheat on the stove or microwave, adding a splash of broth or water to keep it moist.

Can I freeze this dish?

Yes! This Cheesy Ground Beef Pasta Skillet freezes beautifully. Just let it cool completely, then transfer it to a freezer-safe container. It can be frozen for up to three months. Thaw in the fridge before reheating.

What can I serve with this dish?

Pair it with garlic bread or a fresh side salad for a complete meal. A glass of red wine also complements the flavors perfectly!

Final Thoughts

Cooking the Cheesy Ground Beef Pasta Skillet is more than just preparing a meal; it’s about creating moments.

The joy of watching your family gather around the table, their faces lighting up with each cheesy bite, is priceless.

This dish is a reminder that comfort food doesn’t have to be complicated.

In just 30 minutes, you can serve a hearty, satisfying dinner that warms the heart.

So, roll up your sleeves, embrace the simplicity, and enjoy the deliciousness that this skillet brings to your kitchen.

Happy cooking!

jhessica

Cheesy Ground Beef Pasta Skillet: A Quick Dinner Delight!

A quick and delicious cheesy ground beef pasta skillet that is perfect for a weeknight dinner.
Prep Time 10 minutes
Cook Time 20 minutes
Total Time 30 minutes
Servings: 4 servings
Course: Dinner
Cuisine: American
Calories: 480

Ingredients
  

  • 1 pound ground beef
  • 1 medium onion diced
  • 2 cloves garlic minced
  • 1 teaspoon Italian seasoning
  • 1/2 teaspoon salt
  • 1/4 teaspoon black pepper
  • 1 14.5-ounce can diced tomatoes, undrained
  • 2 cups beef broth
  • 2 cups elbow macaroni
  • 1 cup shredded cheddar cheese
  • 1/2 cup grated Parmesan cheese
  • 2 tablespoons olive oil
  • Fresh parsley chopped (for garnish)

Method
 

  1. In a large skillet, heat olive oil over medium heat. Add diced onion and cook until translucent, about 3-4 minutes. Stir in minced garlic and cook for an additional 1 minute until fragrant.
  2. Add ground beef to the skillet, breaking it up with a spoon. Cook until browned and no longer pink, about 5-7 minutes. Drain excess fat if necessary.
  3. Stir in Italian seasoning, salt, and black pepper. Add the can of diced tomatoes (with juice) and beef broth. Bring to a simmer.
  4. Once simmering, add elbow macaroni. Stir well and cover the skillet. Cook for about 10-12 minutes, stirring occasionally, until the pasta is al dente and most of the liquid is absorbed.
  5. Remove the skillet from heat and stir in shredded cheddar cheese and grated Parmesan cheese until melted and creamy.
  6. Garnish with chopped parsley before serving.

Nutrition

Serving: 1servingCalories: 480kcalCarbohydrates: 40gProtein: 30gFat: 25gSaturated Fat: 10gPolyunsaturated Fat: 15gCholesterol: 80mgSodium: 800mgFiber: 2gSugar: 4g

Notes

  • For a spicier version, add red pepper flakes or diced jalapeños while cooking the beef.
  • Substitute ground turkey or chicken for a leaner option, and use whole wheat pasta for added fiber.

Tried this recipe?

Let us know how it was!

Cinnamon Sugar Twist Donuts: A Delightful Recipe Guide

Introduction to Cinnamon Sugar Twist Donuts

There’s something magical about the aroma of freshly fried donuts wafting through the kitchen.

Cinnamon Sugar Twist Donuts are not just a treat; they’re a warm hug on a plate.

Whether you’re looking to impress your family on a lazy Sunday morning or need a quick solution for a busy weekday breakfast, these donuts fit the bill perfectly.

They’re easy to whip up, and the delightful combination of cinnamon and sugar will have everyone coming back for seconds.

Trust me, once you try making these at home, store-bought donuts will never taste the same again!

Why You’ll Love This Cinnamon Sugar Twist Donuts

These Cinnamon Sugar Twist Donuts are a game changer for your breakfast routine.

They come together in just about 50 minutes, making them perfect for busy mornings or spontaneous brunches.

The taste? Absolutely irresistible!

With a crispy exterior and a soft, fluffy inside, each bite is a delightful explosion of cinnamon sweetness.

Plus, they’re a fun project to tackle with the kids or impress your friends.

Who wouldn’t love a homemade donut?

Ingredients for Cinnamon Sugar Twist Donuts

Creating these delightful Cinnamon Sugar Twist Donuts starts with gathering a few simple ingredients.

Here’s what you’ll need:

  • All-purpose flour: The backbone of your donuts, providing structure and a fluffy texture.
  • Baking powder: This leavening agent helps the donuts rise, giving them that light and airy feel.
  • Salt: Just a pinch enhances the flavors and balances the sweetness.
  • Ground cinnamon: The star of the show! It adds warmth and that signature cinnamon flavor.
  • Granulated sugar: Sweetens the dough and is also used for coating, creating that irresistible crunch.
  • Whole milk: Adds moisture and richness to the batter, making the donuts tender.
  • Unsalted butter: Melted butter brings a rich flavor and helps keep the donuts moist.
  • Large eggs: They bind the ingredients together and contribute to the overall texture.
  • Vanilla extract: A splash of vanilla adds depth and enhances the sweetness.
  • Oil for frying: Choose a neutral oil with a high smoke point, like vegetable or canola oil, for frying.
  • Cinnamon sugar coating: A mix of granulated sugar and ground cinnamon for that final sweet touch.

Feel free to get creative!

For a chocolate twist, consider adding cocoa powder to the dry ingredients.

You can also experiment with spices like nutmeg or cardamom in the cinnamon sugar for an extra flavor kick.

Exact measurements are available at the bottom of the article for your convenience.

How to Make Cinnamon Sugar Twist Donuts

Making Cinnamon Sugar Twist Donuts is a delightful journey that fills your kitchen with warmth and sweetness.

Let’s dive into the steps to create these delicious treats!

Step 1: Prepare the Dry Ingredients

Start by grabbing a large mixing bowl.

Whisk together the all-purpose flour, baking powder, salt, ground cinnamon, and granulated sugar until everything is well combined.

This step is crucial; it ensures that the leavening agent is evenly distributed, giving your donuts that perfect rise.

The aroma of cinnamon will already start to dance in the air!

Step 2: Mix the Wet Ingredients

In a separate bowl, mix the whole milk, melted unsalted butter, large eggs, and vanilla extract.

Stir until the mixture is smooth and creamy.

This is where the magic begins!

The wet ingredients will add moisture and richness to your donuts, making them irresistibly tender.

Step 3: Combine Wet and Dry Ingredients

Now, pour the wet mixture into the bowl with the dry ingredients.

Gently stir until just combined.

Don’t worry if there are a few lumps; overmixing can lead to tough donuts.

You want a soft, slightly sticky dough that’s ready to be shaped.

Step 4: Shape the Donuts

Turn the dough out onto a floured surface.

Knead it gently a few times until it comes together.

Roll the dough out to about 1/2-inch thick.

Using a donut cutter or two round cookie cutters, cut out your donuts and the holes in the center.

This is where you can get creative!

Save those donut holes for a tasty treat later.

Step 5: Fry the Donuts

Heat oil in a deep fryer or a large pot to 350°F.

Carefully add the donuts to the hot oil, frying a few at a time.

Fry them for about 2-3 minutes on each side, or until they turn a beautiful golden brown.

Keep an eye on them; they can go from perfect to overdone in a flash!

Step 6: Coat in Cinnamon Sugar

Once the donuts are fried, remove them from the oil and let them drain on paper towels.

While they’re still warm, toss them in the cinnamon sugar mixture until they’re well coated.

This final touch is what makes these Cinnamon Sugar Twist Donuts truly irresistible.

Serve them warm, and watch as everyone gathers around for a taste!

Tips for Success

  • Ensure your oil is at the right temperature (350°F) for even frying.
  • Don’t overcrowd the pot; fry a few donuts at a time for best results.
  • Use a thermometer to check the oil temperature for consistent frying.
  • Let the donuts cool slightly before coating them in cinnamon sugar.
  • Experiment with different spices in the sugar for unique flavors.

Equipment Needed

  • Mixing bowls: A set of various sizes will help you mix ingredients easily.
  • Whisk: Essential for combining dry and wet ingredients smoothly.
  • Donut cutter: If you don’t have one, two round cookie cutters will work just fine.
  • Deep fryer or large pot: A heavy pot can be a great alternative for frying.
  • Thermometer: Useful for checking oil temperature, ensuring perfect frying.

Variations

  • Chocolate Cinnamon Sugar Donuts: Add 1/4 cup of cocoa powder to the dry ingredients for a rich chocolate flavor.
  • Maple Glazed Donuts: Replace the cinnamon sugar coating with a maple glaze for a sweet twist.
  • Gluten-Free Option: Substitute all-purpose flour with a gluten-free flour blend for a delicious gluten-free treat.
  • Apple Cinnamon Donuts: Fold in small chunks of apple into the dough for a fruity addition.
  • Spiced Pumpkin Donuts: Add 1/2 cup of pumpkin puree and a teaspoon of pumpkin pie spice for a seasonal flavor.

Serving Suggestions

  • Fresh Brewed Coffee: Pair your donuts with a hot cup of coffee for the perfect breakfast combo.
  • Milk or Hot Chocolate: A glass of cold milk or a warm mug of hot chocolate makes for a delightful treat.
  • Fruit Salad: Serve with a side of fresh fruit for a refreshing contrast to the sweetness.
  • Presentation: Arrange the donuts on a colorful platter, dusted with extra cinnamon sugar for a beautiful display.

FAQs about Cinnamon Sugar Twist Donuts

Can I bake these Cinnamon Sugar Twist Donuts instead of frying them?

Absolutely! While frying gives them that classic texture, you can bake them at 375°F for about 12-15 minutes. Just keep an eye on them to ensure they don’t overbake.

How do I store leftover donuts?

Store any leftover donuts in an airtight container at room temperature for up to two days. For longer storage, consider freezing them. Just reheat in the oven for a few minutes to bring back their freshness.

Can I use almond milk instead of whole milk?

Yes, almond milk works well as a substitute! It may slightly alter the flavor, but it will still yield delicious results. Just make sure to use unsweetened almond milk for the best balance.

What can I do with the donut holes?

Donut holes are a delightful treat on their own! You can coat them in cinnamon sugar just like the donuts or dip them in chocolate for an extra indulgence.

Can I make the dough ahead of time?

Yes! You can prepare the dough and refrigerate it for up to 24 hours. Just let it come to room temperature before shaping and frying. This can save you time on busy mornings!

Final Thoughts

Creating Cinnamon Sugar Twist Donuts is more than just a cooking project; it’s an experience that fills your home with warmth and joy.

The simple act of frying these donuts transforms an ordinary day into something special.

Each bite is a reminder of the little pleasures in life, whether enjoyed with family or shared with friends.

As you savor the sweet, cinnamon-coated goodness, you’ll find that these homemade treats bring smiles and laughter to the table.

So roll up your sleeves, embrace the mess, and enjoy the delightful journey of making these irresistible donuts!

jhessica

Cinnamon Sugar Twist Donuts: A Delightful Recipe Guide

Delicious homemade cinnamon sugar twist donuts that are perfect for breakfast or a sweet treat.
Prep Time 20 minutes
Cook Time 30 minutes
Total Time 50 minutes
Servings: 12 donuts
Course: Dessert
Cuisine: American
Calories: 180

Ingredients
  

  • 2 cups all-purpose flour
  • 1 tablespoon baking powder
  • 1/2 teaspoon salt
  • 1 teaspoon ground cinnamon
  • 1/2 cup granulated sugar
  • 1/2 cup whole milk
  • 1/4 cup unsalted butter melted
  • 2 large eggs
  • 1 teaspoon vanilla extract
  • 1/4 cup granulated sugar for coating
  • 1 tablespoon ground cinnamon for coating
  • Oil for frying

Method
 

  1. In a large mixing bowl, whisk together the flour, baking powder, salt, 1 teaspoon of cinnamon, and 1/2 cup of sugar until well combined.
  2. In another bowl, mix the milk, melted butter, eggs, and vanilla extract until smooth.
  3. Pour the wet ingredients into the dry ingredients and stir until just combined. Do not overmix; a few lumps are okay.
  4. Turn the dough out onto a floured surface and gently knead it a few times until it comes together. Roll the dough out to about 1/2-inch thick.
  5. Using a donut cutter or two round cookie cutters (one larger and one smaller), cut out donuts and holes from the dough.
  6. Heat oil in a deep fryer or large pot to 350°F. Carefully add the donuts to the hot oil, frying a few at a time for about 2-3 minutes on each side or until golden brown.
  7. Remove the donuts from the oil and drain on paper towels.
  8. In a small bowl, mix together the 1/4 cup of sugar and 1 tablespoon of cinnamon. While the donuts are still warm, toss them in the cinnamon sugar mixture until well coated.
  9. Serve warm and enjoy!

Nutrition

Serving: 1donutCalories: 180kcalCarbohydrates: 22gProtein: 2gFat: 8gSaturated Fat: 4gPolyunsaturated Fat: 3gCholesterol: 40mgSodium: 150mgFiber: 1gSugar: 10g

Notes

  • For a chocolate twist, add 1/4 cup of cocoa powder to the dry ingredients and use chocolate glaze instead of cinnamon sugar.
  • Try adding a pinch of nutmeg or cardamom to the cinnamon sugar for an extra flavor kick.

Tried this recipe?

Let us know how it was!

Crispy Bang Bang Salmon Bites are a must-try recipe!

Introduction to Crispy Bang Bang Salmon Bites

Cooking can sometimes feel like a chore, especially on those busy weeknights when you just want something quick and delicious. That’s where these Crispy Bang Bang Salmon Bites come in! They’re not just a meal; they’re a delightful experience that combines tender salmon with a crunchy panko coating and a spicy kick. Perfect for impressing your loved ones or simply treating yourself, this recipe is a game-changer. In just 30 minutes, you can whip up a dish that’s both satisfying and packed with flavor. Let’s dive into this culinary adventure!

Why You’ll Love This Crispy Bang Bang Salmon Bites

These Crispy Bang Bang Salmon Bites are a dream come true for anyone who craves flavor without the fuss. They come together in just 30 minutes, making them perfect for a quick weeknight dinner or a fun appetizer for gatherings. The combination of crunchy panko and zesty bang bang sauce creates a taste explosion that will have everyone coming back for more. Trust me, you’ll be hooked!

Ingredients for Crispy Bang Bang Salmon Bites

Gathering the right ingredients is the first step to creating these mouthwatering Crispy Bang Bang Salmon Bites. Here’s what you’ll need:

  • Salmon fillet: Fresh, skinless salmon is the star of this dish, providing a tender and flaky texture.
  • Panko breadcrumbs: These Japanese-style breadcrumbs add an irresistible crunch that elevates the bites.
  • All-purpose flour: This helps the coating stick to the salmon, creating a perfect base for the crispy layer.
  • Eggs: Beaten eggs act as a binding agent, ensuring the panko adheres beautifully to the salmon.
  • Garlic powder: A sprinkle of garlic powder infuses a savory depth of flavor into the bites.
  • Paprika: This adds a subtle smokiness and a pop of color to the coating.
  • Salt and black pepper: Essential seasonings that enhance the overall taste of the dish.
  • Mayonnaise: A creamy base for the bang bang sauce, adding richness and flavor.
  • Sweet chili sauce: This brings a delightful sweetness that balances the heat of the sriracha.
  • Sriracha: Adjust this spicy sauce to your liking for that extra kick!
  • Green onions: Chopped for garnish, they add a fresh, vibrant touch to the finished dish.
  • Lemon wedges: A squeeze of lemon brightens the flavors and adds a refreshing zing.

For those looking to mix things up, you can substitute salmon with chicken or tofu for a different protein option. All ingredient quantities are listed at the bottom of the article for easy printing. Happy cooking!

How to Make Crispy Bang Bang Salmon Bites

Now that you have all your ingredients ready, let’s get cooking! Making these Crispy Bang Bang Salmon Bites is a straightforward process that will have your kitchen smelling amazing in no time. Follow these simple steps, and you’ll be enjoying a delicious meal before you know it.

Step 1: Preheat the Oven

First things first, preheat your oven to 425°F. This ensures that your salmon bites will cook evenly and get that perfect golden brown color. While the oven heats up, line a baking sheet with parchment paper. This makes cleanup a breeze and prevents sticking.

Step 2: Prepare the Coating

In a shallow bowl, mix together the all-purpose flour, garlic powder, paprika, salt, and black pepper. This flavorful coating is what gives your salmon bites that extra oomph. Make sure it’s well combined so every piece of salmon gets a taste of this delicious blend.

Step 3: Beat the Eggs

In another bowl, beat the eggs until they’re well mixed. This will create a binding layer that helps the panko breadcrumbs stick to the salmon. It’s a crucial step for achieving that crispy texture we all love!

Step 4: Set Up the Panko

Now, place the panko breadcrumbs in a third bowl. This is where the magic happens! The panko will give your salmon bites that irresistible crunch. Make sure it’s ready to go for the final coating.

Step 5: Coat the Salmon

Time to get your hands a little messy! Take each piece of salmon and dip it into the flour mixture first. Then, coat it in the beaten eggs, and finally, roll it in the panko breadcrumbs. Make sure each piece is fully covered for that perfect crunch.

Step 6: Bake the Salmon Bites

Arrange the coated salmon bites on your prepared baking sheet. Bake them in the preheated oven for 12-15 minutes. You’ll know they’re done when they’re golden brown and cooked through. Keep an eye on them; you want that crispy exterior without overcooking the salmon!

Step 7: Make the Bang Bang Sauce

While the salmon is baking, it’s time to whip up the bang bang sauce. In a small bowl, mix together the mayonnaise, sweet chili sauce, and sriracha. Adjust the sriracha to your preferred spice level. This sauce is the perfect complement to your crispy bites!

Step 8: Serve and Enjoy

Once your salmon bites are out of the oven, drizzle them generously with the bang bang sauce. Garnish with chopped green onions for a fresh touch, and serve with lemon wedges on the side. A squeeze of lemon adds a bright flavor that ties everything together. Enjoy your culinary creation!

Tips for Success

  • Use fresh salmon for the best flavor and texture.
  • Don’t rush the coating process; ensure each piece is well-covered.
  • For extra crunch, consider frying the salmon bites instead of baking.
  • Adjust the spice level of the bang bang sauce to suit your taste.
  • Let the salmon bites cool slightly before serving for the perfect crunch.

Equipment Needed

  • Baking sheet: A standard baking sheet works well; a cast iron skillet can be used for frying.
  • Parchment paper: This makes cleanup easy; aluminum foil is a good alternative.
  • Mixing bowls: Use any size; a shallow dish is great for coating.
  • Whisk: A fork can also do the job for beating eggs.

Variations of Crispy Bang Bang Salmon Bites

  • Chicken Bites: Swap out salmon for chicken breast, following the same coating and baking process for a different protein option.
  • Tofu Bites: For a vegetarian twist, use firm tofu. Press it to remove excess moisture, then cut into bite-sized pieces and coat as usual.
  • Spicy Bang Bang: Increase the sriracha in the bang bang sauce for an extra kick, or add a dash of cayenne pepper to the coating mix.
  • Herb-Infused: Mix fresh herbs like dill or parsley into the panko for added flavor and a pop of color.
  • Gluten-Free Option: Substitute all-purpose flour and panko with gluten-free alternatives to cater to dietary needs.

Serving Suggestions for Crispy Bang Bang Salmon Bites

  • Fresh Salad: Pair with a crisp green salad for a refreshing contrast.
  • Rice or Quinoa: Serve over a bed of rice or quinoa to soak up the bang bang sauce.
  • Cold Beverages: Enjoy with a chilled beer or a zesty lemonade.
  • Presentation: Arrange on a platter with lemon wedges and green onions for a vibrant display.

FAQs about Crispy Bang Bang Salmon Bites

Can I use frozen salmon for this recipe?

Absolutely! Just make sure to thaw the salmon completely before starting. Frozen salmon can still yield delicious Crispy Bang Bang Salmon Bites if prepared correctly.

How can I make these salmon bites spicier?

If you’re looking for a kick, increase the amount of sriracha in the bang bang sauce. You can also sprinkle some cayenne pepper into the coating mix for an extra layer of heat.

What can I serve with Crispy Bang Bang Salmon Bites?

These bites pair wonderfully with a fresh salad, rice, or quinoa. You can also serve them with a side of dipping sauce for added flavor!

Can I make the bang bang sauce ahead of time?

Yes! The bang bang sauce can be made a day in advance and stored in the fridge. Just give it a good stir before serving to bring it back to life.

Are these salmon bites suitable for meal prep?

Definitely! You can prepare and bake them ahead of time. Just reheat in the oven for a few minutes to restore their crispiness before serving.

Final Thoughts

Creating Crispy Bang Bang Salmon Bites is more than just cooking; it’s about bringing joy to your table. The delightful crunch paired with the spicy bang bang sauce transforms a simple meal into a memorable experience. Whether you’re sharing them with friends during game night or enjoying a quiet dinner at home, these bites are sure to impress. Plus, they’re quick and easy, making them a perfect solution for busy days. So, roll up your sleeves, embrace the flavors, and let these salmon bites become a staple in your culinary repertoire. Happy cooking!

jhessica

Crispy Bang Bang Salmon Bites are a must-try recipe!

Crispy Bang Bang Salmon Bites are a must-try recipe that combines tender salmon with a crunchy panko coating and a spicy bang bang sauce.
Prep Time 15 minutes
Cook Time 15 minutes
Total Time 30 minutes
Servings: 4 servings
Course: Appetizer
Cuisine: American
Calories: 320

Ingredients
  

  • 1 pound salmon fillet skin removed and cut into bite-sized pieces
  • 1 cup panko breadcrumbs
  • 1/2 cup all-purpose flour
  • 2 large eggs
  • 1 teaspoon garlic powder
  • 1 teaspoon paprika
  • 1/2 teaspoon salt
  • 1/4 teaspoon black pepper
  • 1/4 cup mayonnaise
  • 2 tablespoons sweet chili sauce
  • 1 tablespoon sriracha adjust to taste
  • 2 tablespoons green onions chopped (for garnish)
  • Lemon wedges for serving

Method
 

  1. Preheat the oven to 425°F. Line a baking sheet with parchment paper.
  2. In a shallow bowl, combine flour, garlic powder, paprika, salt, and black pepper.
  3. In another bowl, beat the eggs.
  4. In a third bowl, place the panko breadcrumbs.
  5. Coat each piece of salmon in the flour mixture, then dip it into the beaten eggs, and finally coat it with panko breadcrumbs.
  6. Place the coated salmon bites on the prepared baking sheet.
  7. Bake in the preheated oven for 12-15 minutes, or until the salmon is cooked through and the panko is golden brown and crispy.
  8. While the salmon is baking, prepare the bang bang sauce by mixing mayonnaise, sweet chili sauce, and sriracha in a small bowl. Adjust the sriracha to your preferred spice level.
  9. Once the salmon bites are done, remove them from the oven and drizzle with the bang bang sauce.
  10. Garnish with chopped green onions and serve with lemon wedges on the side.

Nutrition

Serving: 1servingCalories: 320kcalCarbohydrates: 15gProtein: 25gFat: 18gSaturated Fat: 3gPolyunsaturated Fat: 15gCholesterol: 70mgSodium: 500mgFiber: 1gSugar: 2g

Notes

  • For extra crunch, consider frying the salmon bites in a skillet with oil instead of baking.
  • You can also substitute the salmon with chicken or tofu for a different protein option.

Tried this recipe?

Let us know how it was!

Peanut Butter Chocolate Chip Cookies that Delight Your Tastebuds!

Introduction to Peanut Butter Chocolate Chip Cookies

There’s something magical about the aroma of freshly baked cookies wafting through the house. It takes me back to my childhood, where my mom would whip up a batch of peanut butter chocolate chip cookies on a lazy Sunday afternoon. These cookies are not just a treat; they’re a warm hug in dessert form. Perfect for a quick solution on a busy day or a delightful surprise for loved ones, this recipe is simple yet satisfying. With just a handful of ingredients, you can create chewy, delicious cookies that will have everyone asking for seconds!

Why You’ll Love This Peanut Butter Chocolate Chip Cookies

These peanut butter chocolate chip cookies are a game changer. They come together in a flash, making them perfect for those last-minute cravings or unexpected guests. The rich, nutty flavor of peanut butter pairs beautifully with the sweet chocolate chips, creating a delightful balance. Plus, they’re chewy and satisfying, ensuring that every bite is a little piece of heaven. Trust me, once you try them, you’ll be hooked!

Ingredients for Peanut Butter Chocolate Chip Cookies

Gathering the right ingredients is the first step to cookie perfection. Here’s what you’ll need:

  • Creamy Peanut Butter: The star of the show! It adds richness and that signature nutty flavor.
  • Brown Sugar: This sweetener gives the cookies a deep, caramel-like taste and helps keep them chewy.
  • Large Egg: Acts as a binder, giving the cookies structure and moisture.
  • Vanilla Extract: A splash of this adds warmth and enhances the overall flavor profile.
  • Baking Soda: This leavening agent helps the cookies rise and become light and fluffy.
  • Salt: Just a pinch balances the sweetness and enhances the flavors.
  • Semi-Sweet Chocolate Chips: These little morsels of joy provide bursts of chocolatey goodness in every bite.

For those looking to mix things up, consider these optional ingredients:

  • Chopped Nuts: Swap out half the chocolate chips for nuts to add crunch and texture.
  • Cinnamon: A pinch can add a warm, spicy note that complements the peanut butter.
  • Cocoa Powder: For a chocolatey twist, add a tablespoon to the dough.

Exact measurements for these ingredients can be found at the bottom of the article, ready for you to print and take to the kitchen!

How to Make Peanut Butter Chocolate Chip Cookies

Now that you have your ingredients ready, let’s dive into the fun part—making these delicious peanut butter chocolate chip cookies! Follow these simple steps, and you’ll be enjoying warm cookies in no time.

Step 1: Preheat the Oven

First things first, preheat your oven to 350°F (175°C). This ensures that your cookies bake evenly and come out perfectly golden. While the oven heats up, you can get everything else ready.

Step 2: Mix Peanut Butter and Sugar

In a large mixing bowl, combine the creamy peanut butter and brown sugar. Use a sturdy spoon or a hand mixer to blend them until smooth. This mixture should be thick and creamy, almost like a delicious peanut butter frosting!

Step 3: Add Egg and Vanilla

Next, crack in the large egg and pour in the vanilla extract. Mix until everything is fully incorporated. The egg adds moisture, while the vanilla brings a lovely warmth to the flavor. You’ll start to see the mixture come together beautifully.

Step 4: Combine Dry Ingredients

In a separate bowl, whisk together the baking soda and salt. Gradually add this dry mixture to your peanut butter blend. Stir until just combined. This step is crucial; it helps the cookies rise and gives them that perfect chewy texture.

Step 5: Fold in Chocolate Chips

Now for the best part—fold in those semi-sweet chocolate chips! Use a spatula to gently mix them into the dough. Make sure they’re evenly distributed, so every bite is packed with chocolatey goodness.

Step 6: Shape the Cookies

Using a tablespoon, scoop out the dough and roll it into balls. Place them on a baking sheet lined with parchment paper, leaving about 2 inches of space between each ball. This allows them to spread out while baking. For a fun touch, flatten each ball slightly with the back of a fork.

Step 7: Bake the Cookies

Pop the baking sheet into your preheated oven and bake for 10-12 minutes. Keep an eye on them; you want the edges to be golden brown while the centers remain soft. The aroma will be irresistible!

Step 8: Cool and Enjoy

Once baked, let the cookies cool on the baking sheet for about 5 minutes. This helps them set up nicely. Then, transfer them to a wire rack to cool completely. Now, grab a glass of milk and enjoy your homemade peanut butter chocolate chip cookies!

Tips for Success

  • Chill the dough for 30 minutes for chewier cookies.
  • Use a cookie scoop for uniform sizes and even baking.
  • Don’t overmix the dough; it should be just combined.
  • Experiment with different chocolate chip varieties for unique flavors.
  • Store cookies in an airtight container to maintain freshness.

Equipment Needed

  • Mixing Bowl: A large bowl for combining ingredients. A sturdy pot can work in a pinch.
  • Measuring Cups: Essential for accuracy. Use a kitchen scale if you prefer weight measurements.
  • Baking Sheet: A flat tray for baking. A cast iron skillet can also do the job.
  • Parchment Paper: For easy cleanup. Aluminum foil is a good alternative.
  • Spatula: For folding in chocolate chips. A wooden spoon works just as well.

Variations

  • Nutty Delight: Add chopped walnuts or pecans for an extra crunch and nutty flavor.
  • Gluten-Free Option: Substitute regular flour with almond flour or a gluten-free baking blend.
  • Dark Chocolate Twist: Use dark chocolate chips instead of semi-sweet for a richer taste.
  • Peanut Butter Swirl: Mix in a swirl of crunchy peanut butter for added texture and flavor.
  • Vegan Version: Replace the egg with a flax egg (1 tablespoon ground flaxseed mixed with 2.5 tablespoons water) and use maple syrup instead of brown sugar.

Serving Suggestions

  • Milk: A classic pairing! Serve your cookies with a cold glass of milk for the ultimate treat.
  • Ice Cream: Top a warm cookie with a scoop of vanilla ice cream for a decadent dessert.
  • Presentation: Arrange cookies on a colorful plate and dust with powdered sugar for a festive touch.
  • Coffee: Enjoy with a cup of coffee for a delightful afternoon pick-me-up.

FAQs about Peanut Butter Chocolate Chip Cookies

Can I use crunchy peanut butter instead of creamy?

Absolutely! Crunchy peanut butter will add a delightful texture to your cookies. Just keep in mind that it may slightly alter the overall consistency.

How do I store leftover cookies?

To keep your peanut butter chocolate chip cookies fresh, store them in an airtight container at room temperature. They should stay delicious for about a week!

Can I freeze the cookie dough?

Yes, you can freeze the dough! Just scoop the dough into balls, place them on a baking sheet to freeze, then transfer to a freezer bag. They’ll be ready to bake whenever you have a craving!

What can I substitute for brown sugar?

If you don’t have brown sugar, you can use white sugar mixed with a bit of molasses. For every cup of white sugar, add 1 tablespoon of molasses to mimic that rich flavor.

Are these cookies suitable for a gluten-free diet?

Yes, you can make these cookies gluten-free by using a gluten-free flour blend. Just ensure that all your ingredients are certified gluten-free to avoid cross-contamination.

Final Thoughts

There’s a special kind of joy that comes from baking peanut butter chocolate chip cookies. The process is simple, yet it brings back memories of laughter and warmth shared with family and friends. Each bite is a delightful combination of chewy peanut butter and rich chocolate, making it hard to resist just one. Whether you’re baking for a gathering or treating yourself after a long day, these cookies are sure to bring smiles. So, roll up your sleeves, embrace the mess, and enjoy the sweet rewards of your efforts. Happy baking!

jhessica

Peanut Butter Chocolate Chip Cookies that Delight Your Tastebuds!

Delicious and chewy peanut butter chocolate chip cookies that are easy to make and perfect for any occasion.
Prep Time 15 minutes
Cook Time 12 minutes
Total Time 27 minutes
Servings: 24 cookies
Course: Dessert
Cuisine: American
Calories: 120

Ingredients
  

  • 1 cup creamy peanut butter
  • 1 cup brown sugar packed
  • 1 large egg
  • 1 teaspoon vanilla extract
  • 1 teaspoon baking soda
  • 1/2 teaspoon salt
  • 1 cup semi-sweet chocolate chips

Method
 

  1. Preheat your oven to 350°F (175°C).
  2. In a large mixing bowl, combine the peanut butter and brown sugar, mixing until smooth.
  3. Add the egg and vanilla extract, and mix until fully incorporated.
  4. Stir in the baking soda and salt until combined.
  5. Gently fold in the chocolate chips.
  6. Using a tablespoon, scoop out dough and roll it into balls.
  7. Place them on a baking sheet lined with parchment paper, spacing them about 2 inches apart.
  8. Flatten each ball slightly with the back of a fork.
  9. Bake for 10-12 minutes, or until the edges are golden brown.
  10. Allow the cookies to cool on the baking sheet for 5 minutes before transferring them to a wire rack to cool completely.

Nutrition

Serving: 1cookieCalories: 120kcalCarbohydrates: 10gProtein: 3gFat: 7gSaturated Fat: 1.5gPolyunsaturated Fat: 5.5gCholesterol: 20mgSodium: 100mgFiber: 1gSugar: 10g

Notes

  • For a chewier cookie, chill the dough for 30 minutes before baking.
  • You can substitute half of the chocolate chips with chopped nuts for added texture.
  • For a fun twist, try adding a pinch of cinnamon or a tablespoon of cocoa powder to the dough for a chocolatey flavor.

Tried this recipe?

Let us know how it was!

Creamy Alfredo Tortellini Bake is a must-try recipe!

Introduction to Creamy Alfredo Tortellini Bake

There’s something magical about a dish that wraps you in warmth and comfort, and the Creamy Alfredo Tortellini Bake does just that. After a long day, when time is short and hunger is high, this recipe shines as a quick solution. It’s not just about filling your belly; it’s about sharing a moment with loved ones over a cheesy, delicious meal. Picture the smiles as you pull this golden-brown bake from the oven, the aroma wafting through your home. Trust me, this dish will become a staple in your kitchen!

Why You’ll Love This Creamy Alfredo Tortellini Bake

This Creamy Alfredo Tortellini Bake is a game-changer for busy weeknights. It’s incredibly easy to whip up, taking just 45 minutes from start to finish. The rich, cheesy flavor will have your taste buds dancing, while the comforting texture makes it a family favorite. Plus, it’s versatile! You can customize it with your favorite veggies or proteins, ensuring everyone at the table leaves satisfied.

Ingredients for Creamy Alfredo Tortellini Bake

Gathering the right ingredients is the first step to creating your Creamy Alfredo Tortellini Bake. Here’s what you’ll need:

  • Cheese tortellini: Fresh or frozen, this pasta is the star of the dish, bringing a delightful cheesy flavor.
  • Olive oil: A splash of this liquid gold helps sauté the aromatics, adding depth to the dish.
  • Onion: Diced, it provides a sweet and savory base that enhances the overall flavor.
  • Garlic: Minced, it adds a fragrant kick that elevates the dish to new heights.
  • Heavy cream: This is the heart of the Alfredo sauce, creating that rich, creamy texture we all love.
  • Parmesan cheese: Grated, it adds a nutty flavor and helps thicken the sauce.
  • Italian seasoning: A blend of herbs that brings a taste of Italy right to your kitchen.
  • Salt and pepper: Essential for seasoning, these staples enhance all the flavors in the dish.
  • Shredded mozzarella cheese: This melty topping creates a gooey, golden crust that’s hard to resist.
  • Spinach: Fresh or frozen, it adds a pop of color and nutrition, making the dish a bit healthier.
  • Breadcrumbs: Combined with butter, they create a crunchy topping that contrasts beautifully with the creamy filling.
  • Butter: Melted, it helps the breadcrumbs achieve that perfect golden finish.
  • Fresh parsley: Chopped, it’s a lovely garnish that adds a touch of freshness and color.

For those looking to mix things up, consider adding cooked chicken or sausage for extra protein. You can also swap out the spinach for other veggies like broccoli or bell peppers, depending on your taste. Exact quantities for each ingredient can be found at the bottom of the article, ready for printing!

How to Make Creamy Alfredo Tortellini Bake

Step 1: Preheat and Prepare

Start by preheating your oven to 375°F (190°C). While it warms up, grab a 9×13-inch baking dish and grease it with cooking spray or butter. This step ensures your Creamy Alfredo Tortellini Bake won’t stick, making cleanup a breeze later on.

Step 2: Cook the Tortellini

Next, cook the cheese tortellini according to the package instructions until they’re al dente. This usually takes just a few minutes. Once done, drain the tortellini and set them aside. They’ll soak up all that delicious sauce later!

Step 3: Sauté the Aromatics

In a large skillet, heat a tablespoon of olive oil over medium heat. Add the diced onion and sauté for about 3-4 minutes until it softens. Then, toss in the minced garlic and cook for an additional minute. The aroma will be irresistible!

Step 4: Make the Alfredo Sauce

Now, stir in the heavy cream, grated Parmesan cheese, Italian seasoning, salt, and pepper. Cook this mixture for 2-3 minutes until it’s heated through and slightly thickened. This creamy sauce is the heart of your Creamy Alfredo Tortellini Bake.

Step 5: Combine Ingredients

Gently add the cooked tortellini and spinach to the skillet, mixing everything together. Be careful not to break the tortellini! You want them to stay whole and soak up that rich Alfredo sauce.

Step 6: Assemble the Bake

Pour the tortellini mixture into your prepared baking dish. Spread it out evenly, then sprinkle the shredded mozzarella cheese generously over the top. This will create that gooey, melty layer we all crave!

Step 7: Add Breadcrumbs

In a small bowl, combine the breadcrumbs with the melted butter. Mix well, then sprinkle this crunchy topping over the cheese layer. This adds a delightful texture contrast to your creamy bake.

Step 8: Bake

Finally, place the baking dish in the preheated oven and bake for 25-30 minutes. You’re looking for a golden, bubbly top that promises deliciousness. Once it’s done, let it cool for a few minutes before serving!

Tips for Success

  • Don’t overcook the tortellini; they’ll continue to cook in the oven.
  • For a creamier sauce, add a splash of pasta water before baking.
  • Feel free to mix in your favorite veggies for added flavor and nutrition.
  • Let the bake cool for a few minutes before serving to set the layers.
  • Store leftovers in an airtight container for up to three days.

Equipment Needed

  • Baking dish: A 9×13-inch dish is ideal, but any oven-safe dish will work.
  • Large skillet: Essential for sautéing and mixing the sauce; a non-stick pan is a great alternative.
  • Measuring cups and spoons: For accurate ingredient measurements, though you can eyeball it if you’re confident!
  • Wooden spoon or spatula: Perfect for stirring and combining ingredients without scratching your cookware.

Variations

  • Protein Boost: Add cooked chicken, sausage, or shrimp for a heartier meal that packs a protein punch.
  • Veggie Delight: Swap spinach for other vegetables like broccoli, bell peppers, or zucchini for a colorful twist.
  • Gluten-Free Option: Use gluten-free tortellini to make this dish suitable for those with dietary restrictions.
  • Herb Infusion: Experiment with fresh herbs like basil or thyme for an aromatic lift in flavor.
  • Spicy Kick: Add red pepper flakes or diced jalapeños for a spicy version that tantalizes the taste buds.

Serving Suggestions

  • Garlic Bread: Serve warm, buttery garlic bread on the side for a classic pairing.
  • Salad: A fresh Caesar or mixed greens salad adds a crisp contrast to the creamy bake.
  • Wine: Pair with a chilled white wine, like Pinot Grigio, to enhance the flavors.
  • Presentation: Garnish with fresh parsley for a pop of color and freshness.

FAQs about Creamy Alfredo Tortellini Bake

Can I use frozen tortellini for this recipe?

Absolutely! Frozen tortellini works perfectly in this Creamy Alfredo Tortellini Bake. Just cook them according to the package instructions, and you’re good to go!

How can I make this dish healthier?

To lighten up your Creamy Alfredo Tortellini Bake, consider using low-fat cream or substituting half of the heavy cream with vegetable broth. You can also add more veggies to boost the nutrition.

Can I prepare this dish ahead of time?

Yes! You can assemble the bake a day in advance. Just cover it tightly and store it in the fridge. When you’re ready to eat, pop it in the oven straight from the fridge, adding a few extra minutes to the baking time.

What can I serve with this bake?

This Creamy Alfredo Tortellini Bake pairs wonderfully with garlic bread or a fresh salad. The contrast of flavors and textures makes for a delightful meal!

How do I store leftovers?

Store any leftovers in an airtight container in the fridge for up to three days. Reheat in the oven or microwave until warmed through. Enjoy your delicious creation again!

Final Thoughts

Creating a Creamy Alfredo Tortellini Bake is more than just cooking; it’s about crafting a moment of joy. The rich flavors and comforting textures come together to create a dish that warms the heart and satisfies the soul. Whether you’re sharing it with family or enjoying a quiet night in, this bake is sure to impress. Plus, the ease of preparation means you can focus on what truly matters—making memories around the dinner table. So, roll up your sleeves, embrace the deliciousness, and let this recipe become a cherished part of your culinary repertoire!

jhessica

Creamy Alfredo Tortellini Bake is a must-try recipe!

Creamy Alfredo Tortellini Bake is a delicious and comforting dish that combines cheese tortellini with a rich Alfredo sauce, topped with mozzarella and breadcrumbs for a golden finish.
Prep Time 15 minutes
Cook Time 30 minutes
Total Time 45 minutes
Servings: 6 servings
Course: Main Course
Cuisine: Italian
Calories: 400

Ingredients
  

  • 8 ounces cheese tortellini fresh or frozen
  • 1 tablespoon olive oil
  • 1 small onion diced
  • 2 cloves garlic minced
  • 1 cup heavy cream
  • 1 cup grated Parmesan cheese
  • 1 teaspoon Italian seasoning
  • Salt and pepper to taste
  • 1 cup shredded mozzarella cheese
  • 1 cup spinach fresh or frozen, thawed and drained
  • 1/2 cup breadcrumbs
  • 2 tablespoons butter melted
  • Fresh parsley chopped (for garnish)

Method
 

  1. Preheat your oven to 375°F (190°C). Grease a 9×13-inch baking dish with cooking spray or butter.
  2. Cook the tortellini according to package instructions until al dente. Drain and set aside.
  3. In a large skillet, heat the olive oil over medium heat. Add the diced onion and sauté for about 3-4 minutes until softened. Add the minced garlic and cook for an additional 1 minute until fragrant.
  4. Stir in the heavy cream, Parmesan cheese, Italian seasoning, salt, and pepper. Cook for 2-3 minutes until the sauce is heated through and slightly thickened.
  5. Add the cooked tortellini and spinach to the skillet, stirring gently to combine everything evenly.
  6. Pour the tortellini mixture into the prepared baking dish. Sprinkle the shredded mozzarella cheese evenly over the top.
  7. In a small bowl, combine the breadcrumbs and melted butter. Sprinkle this mixture over the cheese layer.
  8. Bake in the preheated oven for 25-30 minutes, or until the top is golden and bubbly.
  9. Remove from the oven and let it cool for a few minutes before serving. Garnish with fresh parsley.

Nutrition

Serving: 1servingCalories: 400kcalCarbohydrates: 30gProtein: 18gFat: 25gSaturated Fat: 15gPolyunsaturated Fat: 5gCholesterol: 80mgSodium: 600mgFiber: 2gSugar: 2g

Notes

  • For added protein, consider mixing in cooked chicken or sausage before baking.
  • Substitute the spinach with other vegetables like broccoli or bell peppers for a different flavor profile.

Tried this recipe?

Let us know how it was!

Stay Connected

Get recipes via email: