Get my cookbooks

Watermelon Cucumber Feta Salad: A Refreshing Delight!

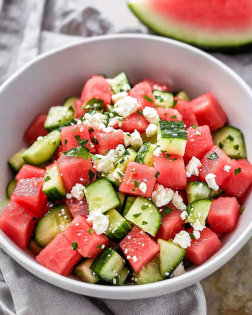
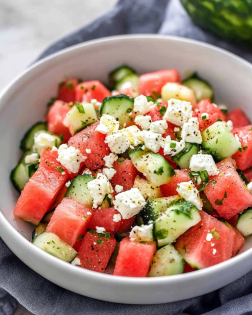
Introduction to Watermelon Cucumber Feta Salad

As the summer sun shines brightly, I find myself craving something light and refreshing. That’s where my Watermelon Cucumber Feta Salad comes in! This delightful dish is not just a feast for the eyes; it’s a quick solution for busy days when you want to impress your loved ones without spending hours in the kitchen. The sweet juiciness of watermelon, the crispness of cucumber, and the creamy feta create a symphony of flavors that dance on your palate. Trust me, this salad will become your go-to recipe for summer gatherings and family dinners!

Why You’ll Love This Watermelon Cucumber Feta Salad

This Watermelon Cucumber Feta Salad is a true gem for anyone juggling a busy lifestyle. It comes together in just 15 minutes, making it perfect for those last-minute gatherings or a refreshing side dish on a hot day. The combination of sweet, crunchy, and creamy flavors is simply irresistible. Plus, it’s a healthy option that will leave you feeling satisfied without weighing you down. What’s not to love?

Ingredients for Watermelon Cucumber Feta Salad

Gathering the right ingredients is key to making this Watermelon Cucumber Feta Salad a hit. Here’s what you’ll need:

  • Watermelon: The star of the show! Its natural sweetness and juiciness provide a refreshing base.
  • Cucumber: Adds a satisfying crunch and a cool contrast to the sweetness of the watermelon.
  • Feta Cheese: This creamy cheese brings a salty richness that perfectly balances the flavors.
  • Red Onion: Thinly sliced, it adds a bit of sharpness and color to the salad.
  • Fresh Mint Leaves: These aromatic leaves give a burst of freshness and elevate the dish.
  • Olive Oil: A drizzle of this healthy fat enhances the flavors and adds a silky texture.
  • Balsamic Vinegar: This tangy addition brightens the salad and complements the sweetness of the watermelon.
  • Salt and Pepper: Essential for seasoning, these staples help bring all the flavors together.

For those looking to spice things up, consider adding a pinch of red pepper flakes to the dressing. If you prefer a different flavor profile, goat cheese can be a delightful substitute for feta. You can find all the exact quantities for these ingredients at the bottom of the article, ready for printing!

How to Make Watermelon Cucumber Feta Salad

Making this Watermelon Cucumber Feta Salad is as easy as pie! Follow these simple steps, and you’ll have a refreshing dish ready in no time. Let’s dive in!

Step 1: Combine the Base Ingredients

Start by grabbing a large bowl. In it, combine the cubed watermelon, diced cucumber, crumbled feta cheese, and sliced red onion. The colors will pop, and the aroma will make your mouth water. This is where the magic begins!

Step 2: Prepare the Dressing

In a small bowl, whisk together the olive oil, balsamic vinegar, salt, and pepper. This dressing is the secret sauce that ties everything together. The tangy balsamic will dance with the sweetness of the watermelon, creating a flavor explosion!

Step 3: Dress the Salad

Now, drizzle the dressing over the salad mixture. Gently toss everything together until the ingredients are well-coated. Be careful not to mash the watermelon; we want those juicy cubes to stay intact!

Step 4: Add Fresh Herbs

Next, add the chopped mint leaves to the salad. Toss again lightly to distribute the mint throughout. This herb adds a refreshing twist that elevates the entire dish. Trust me, your taste buds will thank you!

Step 5: Chill and Serve

Finally, chill the salad in the refrigerator for at least 30 minutes before serving. This step is crucial as it allows the flavors to meld beautifully. When you’re ready to serve, you’ll have a vibrant, refreshing salad that’s perfect for any occasion!

Tips for Success

  • Choose a ripe watermelon for maximum sweetness; it should feel heavy and have a uniform shape.
  • Use a sharp knife to easily cut through the watermelon and cucumber.
  • For extra flavor, let the salad sit longer in the fridge—up to two hours is ideal!
  • Experiment with different herbs like basil or cilantro for a unique twist.
  • Always taste before serving; adjust seasoning as needed!

Equipment Needed

  • Large Bowl: A mixing bowl to combine all the ingredients. A salad bowl works too!
  • Small Bowl: For whisking the dressing. A mason jar can double as a shaker!
  • Knife: A sharp knife for cutting the watermelon and cucumber.
  • Cutting Board: Essential for safe chopping.
  • Whisk: To mix the dressing. A fork can do the job in a pinch!

Variations

  • Spicy Watermelon Cucumber Feta Salad: Add a pinch of jalapeño or diced chili for a spicy kick that contrasts beautifully with the sweetness.
  • Quinoa Addition: Mix in cooked quinoa for added protein and a heartier texture, making it a complete meal.
  • Vegan Option: Substitute feta with avocado or a vegan cheese alternative for a creamy texture without dairy.
  • Fruit Medley: Incorporate other fruits like strawberries or blueberries for a colorful twist and added sweetness.
  • Herb Variations: Try using dill or parsley instead of mint for a different flavor profile that still complements the salad.

Serving Suggestions

  • Pair this Watermelon Cucumber Feta Salad with grilled chicken or fish for a complete meal.
  • Serve it alongside crusty bread or pita chips for a delightful crunch.
  • For drinks, a chilled white wine or sparkling water with lime complements the flavors beautifully.
  • Present the salad in a large, colorful bowl to showcase its vibrant ingredients.

FAQs about Watermelon Cucumber Feta Salad

Can I make this Watermelon Cucumber Feta Salad ahead of time?

Absolutely! You can prepare the salad a few hours in advance. Just remember to add the mint leaves right before serving to keep them fresh and vibrant.

What can I substitute for feta cheese?

If feta isn’t your thing, goat cheese is a fantastic alternative. It offers a creamy texture and a slightly tangy flavor that pairs well with the other ingredients.

Is this salad suitable for meal prep?

Yes! This salad is perfect for meal prep. Just store it in an airtight container in the fridge. It stays fresh for up to three days, making it a great option for busy weeks.

Can I add protein to this salad?

Definitely! Grilled chicken, shrimp, or even chickpeas can be added for a protein boost. This makes the salad more filling and transforms it into a complete meal.

How can I make this salad more flavorful?

For an extra flavor kick, consider adding a splash of lime juice or a sprinkle of chili flakes to the dressing. These additions will enhance the overall taste and make it even more delightful!

Final Thoughts

Creating this Watermelon Cucumber Feta Salad is more than just preparing a dish; it’s about bringing joy to your table. The vibrant colors and refreshing flavors make it a celebration of summer in every bite. Whether you’re hosting a backyard barbecue or enjoying a quiet dinner at home, this salad is sure to impress. Plus, it’s a breeze to make, allowing you to spend more time with loved ones and less time in the kitchen. So, grab your ingredients and let this delightful salad become a cherished part of your culinary adventures!

“`

Olivia

Watermelon Cucumber Feta Salad: A Refreshing Delight!

A refreshing salad combining the sweetness of watermelon, the crunch of cucumber, and the creaminess of feta cheese.
Prep Time 15 minutes
Total Time 45 minutes
Servings: 4 servings
Course: Salad
Cuisine: Mediterranean
Calories: 120

Ingredients
  

  • 3 cups watermelon cubed
  • 1 cup cucumber diced
  • 1/2 cup feta cheese crumbled
  • 1/4 cup red onion thinly sliced
  • 1/4 cup fresh mint leaves chopped
  • 2 tablespoons olive oil
  • 1 tablespoon balsamic vinegar
  • Salt and pepper to taste

Method
 

  1. In a large bowl, combine the cubed watermelon, diced cucumber, crumbled feta cheese, and sliced red onion.
  2. In a small bowl, whisk together the olive oil, balsamic vinegar, salt, and pepper.
  3. Drizzle the dressing over the salad and gently toss to combine.
  4. Add the chopped mint leaves and toss again lightly.
  5. Chill the salad in the refrigerator for at least 30 minutes before serving to enhance the flavors.

Nutrition

Serving: 1servingCalories: 120kcalCarbohydrates: 8gProtein: 4gFat: 8gSaturated Fat: 4gPolyunsaturated Fat: 4gCholesterol: 20mgSodium: 300mgFiber: 1gSugar: 6g

Notes

  • For a spicy kick, add a pinch of red pepper flakes to the dressing.
  • Substitute the feta with goat cheese for a creamier texture and different flavor profile.

Tried this recipe?

Let us know how it was!

Italian Chopped Salad: Discover a Fresh Delight Today!

Introduction to Italian Chopped Salad

Ready to refresh your salad routine? The Italian Chopped Salad offers a vibrant mix of crisp vegetables, tangy cheeses, and savory cured meats, all tossed together with a zesty dressing that awakens your taste buds. Perfect as a light lunch or a colorful side, this salad brings the essence of Italy straight to your table. Dive into this fresh, flavorful dish and experience a delightful twist on a classic favorite!

Why You’ll Love This Italian Chopped Salad

This Italian Chopped Salad is a game-changer for busy days. It’s incredibly easy to make, taking just 15 minutes from start to finish. The combination of fresh vegetables and chickpeas creates a delightful crunch, while the zesty dressing adds a burst of flavor. Plus, it’s versatile! You can enjoy it as a light meal or a side dish. Trust me, this salad will quickly become your go-to for any occasion!

Ingredients for Italian Chopped Salad

Gathering the right ingredients is key to making a delicious Italian Chopped Salad. Here’s what you’ll need:

  • Romaine lettuce: This crunchy base adds a refreshing crunch and is packed with nutrients.
  • Cherry tomatoes: Their sweetness and vibrant color brighten up the salad.
  • Cucumber: Crisp and hydrating, cucumbers bring a cool element to the mix.
  • Bell pepper: Choose red or yellow for a pop of color and a sweet, crunchy bite.
  • Red onion: Finely chopped, it adds a sharp flavor that balances the sweetness of the other veggies.
  • Chickpeas: These protein-packed gems make the salad hearty and satisfying.
  • Black olives: Their briny flavor adds depth and a touch of Mediterranean flair.
  • mozzarella balls: Creamy and mild, they provide a delightful contrast to the crunchy veggies.
  • Fresh parsley: This herb adds a burst of freshness and a lovely green hue.
  • Grated Parmesan cheese: A sprinkle of this savory cheese elevates the flavor profile.
  • Olive oil: A must for the dressing, it brings richness and helps meld the flavors.
  • Red wine vinegar: This tangy ingredient brightens the salad and balances the richness of the oil.
  • Dried oregano: A classic Italian herb that adds an aromatic touch.
  • Garlic powder: For a hint of garlicky goodness without the fuss of fresh garlic.
  • Salt and pepper: Essential for seasoning, they enhance all the flavors in the salad.

For those looking to customize, consider adding grilled chicken or shrimp for extra protein. If you prefer a tangy twist, swap the mozzarella for feta cheese. You can find the exact quantities for each ingredient at the bottom of the article, ready for printing!

How to Make Italian Chopped Salad

Making an Italian Chopped Salad is a breeze! Follow these simple steps, and you’ll have a colorful, fresh salad ready in no time. Let’s dive in!

Step 1: Prepare the Vegetables

Start by washing all your vegetables thoroughly. I love to use a salad spinner to get rid of excess water. Chop the romaine lettuce into bite-sized pieces, and don’t be shy about making them colorful! Halve the cherry tomatoes, dice the cucumber, and chop the bell pepper into small cubes. Finely chop the red onion, too. The more vibrant the colors, the more inviting your salad will be!

Step 2: Combine the Ingredients

In a large mixing bowl, combine all your chopped vegetables. Add the chickpeas, black olives, and mozzarella balls. I like to layer the ingredients for a beautiful presentation. Gently toss everything together with a wooden spoon. This way, you ensure that every bite is packed with flavor and texture!

Step 3: Make the Dressing

In a separate small bowl, whisk together the olive oil, red wine vinegar, dried oregano, garlic powder, salt, and pepper. I find that using a small whisk or a fork works best. The goal is to create a smooth, zesty dressing that will bring all the flavors together. Taste it! Adjust the seasoning if needed; it should be tangy and delicious!

Step 4: Toss the Salad

Now, pour the dressing over your salad mixture. Gently toss everything together until the vegetables are well coated. Be careful not to crush the mozzarella balls! This step is where the magic happens, as the dressing enhances the freshness of the veggies and the heartiness of the chickpeas.

Step 5: Serve or Chill

Your Italian Chopped Salad is ready to enjoy! You can serve it immediately for a crisp, refreshing bite. However, if you have a little time, refrigerate it for about 30 minutes. This allows the flavors to meld beautifully, making each bite even more delightful!

Tips for Success

  • Use fresh, high-quality ingredients for the best flavor.
  • Chill your salad bowl before mixing to keep everything crisp.
  • Adjust the dressing to your taste; add more vinegar for tang or more oil for richness.
  • For meal prep, keep the dressing separate until serving to maintain freshness.
  • Experiment with different veggies or proteins to keep it exciting!

Equipment Needed

  • Large mixing bowl: A big bowl is essential for combining all the ingredients. A salad bowl works great too!
  • Small bowl: For whisking the dressing, any small bowl will do.
  • Whisk or fork: Use either to mix the dressing smoothly.
  • Cutting board and knife: Essential for chopping your veggies.

Variations

  • Grilled Chicken or Shrimp: Add grilled chicken or shrimp for a protein boost and a heartier meal.
  • Feta Cheese: Swap mozzarella for feta cheese to introduce a tangy flavor that complements the salad beautifully.
  • Quinoa or Farro: For a grainy twist, mix in cooked quinoa or farro for added texture and nutrition.
  • Avocado: Toss in diced avocado for creaminess and healthy fats that elevate the dish.
  • Vegan Option: Omit cheese and use a plant-based dressing to make this salad vegan-friendly.
  • Spicy Kick: Add sliced jalapeños or a dash of red pepper flakes for a spicy twist that wakes up your taste buds.

Serving Suggestions

  • Pair your Italian Chopped Salad with crusty garlic bread for a satisfying meal.
  • Serve alongside grilled chicken or fish for a complete dinner.
  • For drinks, a chilled glass of white wine or sparkling water complements the flavors beautifully.
  • Garnish with extra parsley or a sprinkle of pine nuts for an elegant touch.

FAQs about Italian Chopped Salad

Can I make Italian Chopped Salad ahead of time?

Absolutely! You can prepare the salad a few hours in advance. Just keep the dressing separate until you’re ready to serve. This way, the veggies stay crisp and fresh!

What can I substitute for chickpeas?

If chickpeas aren’t your thing, you can use black beans or even diced grilled chicken for added protein. Both options will still keep your salad hearty and satisfying!

Is this salad gluten-free?

Yes, this Italian Chopped Salad is naturally gluten-free! Just ensure that any additional ingredients you add, like dressings or toppings, are also gluten-free.

How long will leftovers last in the fridge?

Leftover salad can be stored in an airtight container in the fridge for up to 2 days. However, the veggies may lose some crunch, so it’s best enjoyed fresh!

Can I add fruits to this salad?

Definitely! Adding fruits like diced apples or pears can introduce a sweet contrast to the savory flavors. It’s a delightful twist that adds freshness!

Final Thoughts

Creating this Italian Chopped Salad is more than just a cooking task; it’s a joyful experience that brings a burst of color and flavor to your table. Each bite is a celebration of fresh ingredients, and the zesty dressing ties everything together beautifully. Whether you’re serving it for a family dinner or enjoying it solo, this salad is sure to brighten your day. Plus, it’s a fantastic way to sneak in those veggies without anyone noticing! I hope this recipe becomes a cherished part of your culinary adventures, just as it has in mine.

“`

Olivia

Italian Chopped Salad: Discover a Fresh Delight Today!

A refreshing and colorful Italian Chopped Salad packed with vegetables, chickpeas, and a zesty dressing.
Prep Time 15 minutes
Total Time 15 minutes
Servings: 6 servings
Course: Salad
Cuisine: Italian
Calories: 210

Ingredients
  

  • 1 head romaine lettuce chopped
  • 1 cup cherry tomatoes halved
  • 1 cucumber diced
  • 1 bell pepper red or yellow, diced
  • 1/2 red onion finely chopped
  • 1 cup chickpeas drained and rinsed
  • 1/2 cup black olives sliced
  • 1/2 cup mozzarella balls halved
  • 1/4 cup fresh parsley chopped
  • 1/4 cup grated Parmesan cheese
  • 1/4 cup olive oil for dressing
  • 2 tablespoons red wine vinegar for dressing
  • 1 teaspoon dried oregano for dressing
  • 1 teaspoon garlic powder for dressing
  • Salt and pepper to taste for dressing

Method
 

  1. In a large bowl, combine the chopped romaine, cherry tomatoes, cucumber, bell pepper, red onion, chickpeas, black olives, mozzarella balls, parsley, and Parmesan cheese.
  2. In a separate small bowl, whisk together the olive oil, red wine vinegar, oregano, garlic powder, salt, and pepper until well combined.
  3. Pour the dressing over the salad and toss gently to combine. Adjust seasoning if necessary.
  4. Serve immediately or refrigerate for 30 minutes to allow the flavors to meld.

Nutrition

Serving: 1servingCalories: 210kcalCarbohydrates: 10gProtein: 8gFat: 15gSaturated Fat: 4gPolyunsaturated Fat: 11gCholesterol: 10mgSodium: 300mgFiber: 3gSugar: 3g

Notes

  • For added protein, consider adding grilled chicken or shrimp.
  • Substitute the mozzarella with feta cheese for a tangy twist.

Tried this recipe?

Let us know how it was!

Italian Pressed Sandwich: Discover the Ultimate Recipe!

Introduction to Italian Pressed Sandwich

Craving a sandwich that bursts with bold flavors and satisfying textures? The Italian Pressed Sandwich is your new go-to meal, combining savory cured meats, melty cheese, and crisp veggies all pressed to perfection. Whether you’re packing lunch or hosting a casual get-together, this recipe delivers a perfect balance of taste and convenience that’s sure to impress. Get ready to elevate your sandwich game with this irresistible classic reinvented for any occasion!

Why You’ll Love This Italian Pressed Sandwich

This Italian Pressed Sandwich is a game-changer for busy days. It’s incredibly easy to make, taking just 25 minutes from start to finish. The combination of flavors is simply irresistible, with each bite bursting with savory goodness. Plus, it’s versatile! You can customize it to suit your family’s tastes, making it a perfect meal for everyone. Whether for lunch or dinner, this sandwich is sure to satisfy and delight!

Ingredients for Italian Pressed Sandwich

Gathering the right ingredients is key to crafting the perfect Italian Pressed Sandwich. Here’s what you’ll need:

  • Ciabatta loaf: This rustic bread is the star of the show, providing a chewy texture and a crispy crust that holds everything together.
  • Salami: A classic Italian cured meat that adds a rich, savory flavor. You can also use pepperoni for a spicier kick!
  • Ham: Thinly sliced ham complements the salami beautifully, bringing a touch of sweetness to the mix.
  • Provolone cheese: This semi-hard cheese melts wonderfully, creating a creamy layer that binds the ingredients.
  • Roasted red peppers: These jarred beauties add a sweet, smoky flavor and a pop of color to your sandwich.
  • Fresh spinach leaves: A handful of spinach not only adds a nutritious crunch but also a fresh taste that balances the richness of the meats and cheese.
  • Pesto sauce: This vibrant sauce is a flavor powerhouse, infusing the sandwich with herby goodness. You can make your own or buy a jar from the store.
  • Olive oil: Brushing the outside of the sandwich with olive oil helps achieve that golden, crispy crust we all love.
  • Italian seasoning: A sprinkle of this blend enhances the flavors, bringing a taste of Italy right to your kitchen.
  • Salt and pepper: Essential for seasoning, these staples elevate the overall flavor of your sandwich.

For those looking to switch things up, consider adding sliced olives or artichokes for an extra layer of flavor. If you prefer a vegetarian option, grilled vegetables and extra cheese work beautifully as substitutes. You can find the exact quantities for each ingredient at the bottom of the article, ready for printing!

How to Make Italian Pressed Sandwich

Now that you have all your ingredients ready, let’s dive into making this delicious Italian Pressed Sandwich! Follow these simple steps, and you’ll have a mouthwatering meal in no time.

Step 1: Prepare the Ciabatta

Start by slicing the ciabatta loaf in half horizontally. Make sure to use a serrated knife for a clean cut. This will create a perfect pocket for all those tasty fillings. The goal is to keep the loaf intact while creating two beautiful halves.

Step 2: Spread the Pesto

Next, grab your pesto sauce. Spread it evenly on both cut sides of the bread. Don’t be shy! The pesto adds a burst of flavor that will elevate your sandwich. Make sure every inch is covered for maximum taste.

Step 3: Layer the Ingredients

Now it’s time to build your masterpiece! Start layering the salami, ham, provolone cheese, roasted red peppers, and fresh spinach on the bottom half of the ciabatta. Feel free to arrange them in any order you like. Just remember, the more colorful, the better!

Step 4: Season the Layers

Once your layers are in place, sprinkle Italian seasoning, salt, and pepper over them. This step is crucial! It enhances the flavors and brings everything together. A little seasoning goes a long way in making your sandwich sing!

Step 5: Assemble the Sandwich

Carefully place the top half of the ciabatta on the sandwich. Press down gently to help the layers stick together. This is where the magic begins, as all those delicious flavors start to meld.

Step 6: Prepare for Pressing

Brush the outside of the sandwich with olive oil. This will help achieve that golden, crispy crust we all love. Then, wrap the sandwich tightly in aluminum foil. Make sure it’s snug, so everything stays in place while cooking.

Step 7: Press and Heat

Place a heavy skillet or a baking sheet on top of the wrapped sandwich. Heat it on a skillet over medium heat. Cook for about 10-15 minutes, flipping halfway through. You want the bread to be crispy and the cheese to melt beautifully.

Step 8: Serve

Once it’s done, remove the sandwich from heat and unwrap it. Slice it into individual servings, and get ready to enjoy! Each bite will be a delightful explosion of flavors, making your Italian Pressed Sandwich a hit at the table.

Tips for Success

  • Use a serrated knife for slicing the ciabatta to avoid squishing the bread.
  • Let the sandwich rest for a few minutes after pressing for easier slicing.
  • Experiment with different cheeses like mozzarella or fontina for a unique twist.
  • For extra crunch, add some sliced pickles or cucumbers inside.
  • Don’t skip the olive oil; it’s key for that crispy exterior!

Equipment Needed

  • Serrated knife: Essential for slicing the ciabatta without squishing it. A regular knife works in a pinch.
  • Heavy skillet: Perfect for pressing the sandwich. A baking sheet can also do the job.
  • Aluminum foil: Keeps the sandwich snug while cooking. Parchment paper is a good alternative.
  • Cutting board: A must-have for safe and easy slicing.

Variations

  • Vegetarian Delight: Swap out the meats for grilled vegetables like zucchini, bell peppers, and eggplant. Add extra cheese for a satisfying bite.
  • Spicy Kick: Use spicy capicola or add sliced jalapeños for a fiery twist that will wake up your taste buds.
  • Herbed Chicken: Replace the salami and ham with sliced herb-marinated chicken for a lighter, protein-packed option.
  • Cheese Lovers: Mix different cheeses like mozzarella, gouda, or feta for a melty, cheesy experience.
  • Gluten-Free: Use gluten-free bread to make this sandwich accessible for those with dietary restrictions.

Serving Suggestions

  • Side Salad: Pair your Italian Pressed Sandwich with a fresh arugula or mixed greens salad drizzled with balsamic vinaigrette.
  • Chips: Serve with crunchy potato chips or homemade sweet potato fries for a satisfying crunch.
  • Drinks: A chilled glass of lemonade or iced tea complements the flavors perfectly.
  • Presentation: Cut the sandwich diagonally and serve on a wooden board for a rustic touch.

FAQs about Italian Pressed Sandwich

Can I make the Italian Pressed Sandwich ahead of time?

Absolutely! You can prepare the sandwich a few hours in advance. Just wrap it tightly in foil and store it in the fridge. When you’re ready to enjoy, simply heat it up in a skillet as directed.

What can I substitute for ciabatta bread?

If ciabatta isn’t available, you can use focaccia or even a baguette. Just ensure the bread is sturdy enough to hold all those delicious fillings without falling apart.

Can I freeze the Italian Pressed Sandwich?

Yes, you can freeze the sandwich before pressing it. Wrap it tightly in plastic wrap and then foil. When you’re ready to eat, thaw it in the fridge overnight and then press and heat as usual.

What are some good side dishes to serve with this sandwich?

Pair your Italian Pressed Sandwich with a light salad, some crispy chips, or even a bowl of soup for a complete meal. The options are endless!

How can I make this sandwich vegetarian?

For a vegetarian version, simply replace the meats with grilled vegetables like zucchini and bell peppers. You can also add extra cheese for a satisfying bite!

Final Thoughts

Creating an Italian Pressed Sandwich is more than just making a meal; it’s about bringing joy to the table. Each layer tells a story, from the savory meats to the vibrant veggies, all nestled in that perfect ciabatta. This recipe is a delightful way to connect with family and friends, making busy days feel a little brighter. Whether you’re enjoying it for lunch or dinner, every bite is a celebration of flavors. So, roll up your sleeves, gather your ingredients, and let this Italian Pressed Sandwich become a cherished part of your culinary adventures!

“`

Olivia

Italian Pressed Sandwich: Discover the Ultimate Recipe!

A delicious Italian Pressed Sandwich filled with layers of meats, cheese, and fresh vegetables, perfect for a hearty meal.
Prep Time 10 minutes
Cook Time 15 minutes
Total Time 25 minutes
Course: Sandwich
Cuisine: Italian
Calories: 450

Ingredients
  

  • 1 large ciabatta loaf
  • 4 ounces sliced salami
  • 4 ounces sliced ham
  • 4 ounces sliced provolone cheese
  • 4 ounces sliced roasted red peppers jarred
  • 1 cup fresh spinach leaves
  • 1/4 cup pesto sauce
  • 2 tablespoons olive oil
  • 1 teaspoon Italian seasoning
  • Salt and pepper to taste

Method
 

  1. Slice the ciabatta loaf in half horizontally.
  2. Spread the pesto sauce evenly on both cut sides of the bread.
  3. Layer the salami, ham, provolone cheese, roasted red peppers, and spinach on the bottom half of the ciabatta.
  4. Sprinkle Italian seasoning, salt, and pepper over the layers.
  5. Place the top half of the ciabatta on the sandwich.
  6. Brush the outside of the sandwich with olive oil.
  7. Wrap the sandwich tightly in aluminum foil.
  8. Place a heavy skillet or a baking sheet on top of the wrapped sandwich to press it down.
  9. Heat on a skillet over medium heat for about 10-15 minutes, flipping halfway through, until the bread is crispy and the cheese is melted.
  10. Remove from heat, unwrap, and slice into individual servings.

Nutrition

Serving: 1sandwichCalories: 450kcalCarbohydrates: 30gProtein: 20gFat: 25gSaturated Fat: 10gPolyunsaturated Fat: 15gCholesterol: 60mgSodium: 1200mgFiber: 2gSugar: 3g

Notes

  • For a vegetarian option, substitute the meats with grilled vegetables and extra cheese.
  • Add sliced olives or artichokes for an extra layer of flavor.

Tried this recipe?

Let us know how it was!

Club Sandwich Delight: Discover the Ultimate Recipe!

Introduction to Club Sandwich Delight

Welcome to my kitchen, where today I’m excited to share my favorite recipe: the Club Sandwich Delight! This hearty sandwich is not just a meal; it’s a comforting hug between two slices of bread. Perfect for busy days when you need something quick yet satisfying, this recipe combines layers of turkey, crispy bacon, and fresh veggies. It’s a delightful way to impress your loved ones or simply treat yourself. Trust me, once you take a bite, you’ll understand why this Club Sandwich Delight is a staple in my home!

Why You’ll Love This Club Sandwich Delight

This Club Sandwich Delight is a lifesaver for busy moms and professionals alike. It’s quick to prepare, taking just 20 minutes from start to finish. The layers of turkey and bacon create a flavor explosion that will satisfy even the pickiest eaters. Plus, it’s versatile! You can customize it with your favorite ingredients. Whether it’s a lunch for yourself or a family dinner, this sandwich is sure to please everyone!

Ingredients for Club Sandwich Delight

Gathering the right ingredients is key to making the perfect Club Sandwich Delight. Here’s what you’ll need:

  • Whole wheat bread: This adds a nutty flavor and is a healthier option compared to white bread.
  • Cooked turkey breast: Lean and packed with protein, turkey is the star of this sandwich.
  • Crispy bacon: For that irresistible crunch and smoky flavor, bacon is a must!
  • Cheddar cheese: Adds a creamy texture and sharp taste that complements the other ingredients.
  • Tomato: Fresh slices bring juiciness and a pop of color to your sandwich.
  • Romaine lettuce: Crisp and refreshing, it adds a nice crunch and balances the richness of the bacon.
  • Mayonnaise: This creamy spread enhances flavor and keeps everything moist.
  • Dijon mustard: A little tanginess goes a long way in elevating the taste.
  • Salt and pepper: Essential for seasoning and bringing out the flavors of the ingredients.
  • Toothpicks: These handy little tools help keep your sandwich together for easy eating.

For those looking to lighten things up, consider using low-fat mayonnaise or turkey bacon. You can also add avocado slices for an extra layer of creaminess and flavor. If you’re feeling adventurous, try swapping out the turkey for grilled chicken or even a veggie patty for a meatless option!

Exact measurements for these ingredients can be found at the bottom of the article, ready for you to print and take to the grocery store.

How to Make Club Sandwich Delight

Now that you have all your ingredients ready, let’s dive into making this delicious Club Sandwich Delight! Follow these simple steps, and you’ll have a mouthwatering sandwich in no time.

Step 1: Toast the Bread

Start by toasting the slices of whole wheat bread until they’re golden brown. This adds a lovely crunch and enhances the flavor. If you’re in a hurry, a toaster works wonders!

Step 2: Spread the Mayonnaise

Once your bread is toasted, spread 1 tablespoon of mayonnaise on one side of each slice. This creamy layer not only adds flavor but also keeps the sandwich moist. Feel free to use low-fat mayonnaise if you prefer!

Step 3: Layer the First Ingredients

On the first slice of bread, layer half of the turkey breast. Then, add 2 slices of crispy bacon, followed by 1 slice of cheddar cheese. Top it off with a few slices of fresh tomato. Don’t forget to sprinkle a little salt and pepper to enhance the flavors!

Step 4: Add the Second Slice of Bread

Place the second slice of bread on top, mayonnaise side up. This is where the magic happens! Spread 1 teaspoon of Dijon mustard on this slice for a zesty kick that complements the other ingredients beautifully.

Step 5: Build the Second Layer

Now, it’s time to layer again! Add the romaine lettuce, the remaining turkey, the second slice of cheddar cheese, and the rest of the crispy bacon. This second layer is where you can really pile on the goodness!

Step 6: Top with the Final Slice

Finish off your masterpiece with the third slice of bread, mayonnaise side down. This creates a sturdy base for your Club Sandwich Delight. It’s starting to look delicious, isn’t it?

Step 7: Secure and Slice

To keep everything together, secure the sandwich with toothpicks at each corner. Then, slice the sandwich into quarters for easier handling. Now, it’s ready to be served! Enjoy it with your favorite chips or a refreshing side salad.

Tips for Success

  • Use fresh ingredients for the best flavor and texture.
  • Don’t skip toasting the bread; it adds a delightful crunch.
  • Feel free to customize with your favorite veggies or spreads.
  • For a gourmet touch, try adding sliced avocado or a sprinkle of herbs.
  • Assemble the sandwich just before serving to keep it fresh.

Equipment Needed

  • Toaster: For perfectly toasted bread; a skillet works too!
  • Knife: A sharp knife for slicing the sandwich and veggies.
  • Cutting board: Essential for safe and easy prep.
  • Toothpicks: To hold your sandwich together; cocktail picks can work as well.

Variations

  • Avocado Club: Add sliced avocado for a creamy texture and healthy fats.
  • Spicy Kick: Incorporate jalapeños or a spicy aioli for those who love heat.
  • Veggie Delight: Swap turkey for grilled vegetables like zucchini and bell peppers for a meatless option.
  • Herbed Mayo: Mix fresh herbs like dill or basil into your mayonnaise for an aromatic twist.
  • Cheese Swap: Experiment with different cheeses like Swiss or pepper jack for varied flavors.

Serving Suggestions

  • Chips: Serve with a side of crispy potato chips for a classic pairing.
  • Salad: A light side salad with vinaigrette complements the sandwich perfectly.
  • Drinks: Pair with iced tea or a refreshing lemonade for a delightful meal.
  • Presentation: Arrange on a colorful plate and garnish with fresh herbs for a pop of color.

FAQs about Club Sandwich Delight

As you embark on your culinary adventure with the Club Sandwich Delight, you might have a few questions. Here are some common queries I’ve encountered, along with helpful answers to guide you!

Can I make the Club Sandwich Delight ahead of time?

Absolutely! You can prepare the ingredients in advance and assemble the sandwich just before serving. This keeps everything fresh and delicious. Just remember to store the components separately to maintain their crispness.

What can I substitute for turkey in the Club Sandwich Delight?

If turkey isn’t your thing, feel free to swap it out for grilled chicken, ham, or even a veggie patty for a meatless option. The beauty of this sandwich is its versatility!

How can I make this sandwich healthier?

To lighten up your Club Sandwich Delight, use whole grain bread, low-fat mayonnaise, and turkey bacon. You can also load it up with more veggies like cucumbers or bell peppers for added nutrition.

What sides pair well with the Club Sandwich Delight?

This sandwich goes wonderfully with a side of crispy chips, a fresh salad, or even some sweet potato fries. It’s all about balancing flavors and textures!

Can I customize the ingredients in the Club Sandwich Delight?

Definitely! This recipe is all about personal preference. Add your favorite veggies, switch up the cheese, or even try different spreads. Make it your own!

Final Thoughts

Creating the Club Sandwich Delight is more than just making a meal; it’s about bringing joy to your table. Each layer tells a story, from the crispy bacon to the fresh veggies, making every bite a delightful experience. This sandwich is perfect for busy days or special gatherings, effortlessly impressing family and friends alike. Plus, it’s a canvas for your culinary creativity! So, whether you’re enjoying it solo or sharing it with loved ones, this Club Sandwich Delight is sure to become a cherished recipe in your home. Happy cooking!

“`

Olivia

Club Sandwich Delight: Discover the Ultimate Recipe!

A delicious and hearty Club Sandwich Delight recipe that combines layers of turkey, bacon, cheese, and fresh vegetables.
Prep Time 10 minutes
Cook Time 10 minutes
Total Time 20 minutes
Servings: 2 servings
Course: Sandwich
Cuisine: American
Calories: 550

Ingredients
  

  • 3 slices of whole wheat bread
  • 4 ounces of cooked turkey breast sliced
  • 4 ounces of cooked bacon crispy
  • 2 slices of cheddar cheese
  • 1 medium tomato sliced
  • 1 cup of romaine lettuce
  • 2 tablespoons of mayonnaise
  • 1 teaspoon of Dijon mustard
  • Salt and pepper to taste
  • Toothpicks for assembly

Method
 

  1. Toast the slices of whole wheat bread until golden brown.
  2. Spread 1 tablespoon of mayonnaise on one side of each slice of toasted bread.
  3. On the first slice of bread, layer half of the turkey breast, followed by 2 slices of bacon, 1 slice of cheddar cheese, and a few slices of tomato. Season with salt and pepper.
  4. Place the second slice of bread on top, mayonnaise side up. Spread 1 teaspoon of Dijon mustard on this slice.
  5. Layer the romaine lettuce, the remaining turkey, the second slice of cheddar cheese, and the rest of the bacon.
  6. Top with the third slice of bread, mayonnaise side down.
  7. Secure the sandwich with toothpicks at each corner and slice the sandwich into quarters for easier handling.
  8. Serve immediately with your favorite chips or a side salad.

Nutrition

Serving: 1sandwichCalories: 550kcalCarbohydrates: 30gProtein: 35gFat: 30gSaturated Fat: 10gPolyunsaturated Fat: 15gCholesterol: 80mgSodium: 1200mgFiber: 5gSugar: 3g

Notes

  • For a lighter version, use low-fat mayonnaise and turkey bacon.
  • You can also add avocado slices for extra creaminess and flavor.

Tried this recipe?

Let us know how it was!

Rhubarb Bread Delight: Discover the Perfect Recipe!

Introduction to Rhubarb Bread Delight

Welcome to the world of Rhubarb Bread Delight! If you’re like me, juggling a busy schedule while trying to whip up something delicious can feel overwhelming. This delightful bread is not just a treat; it’s a quick solution for those hectic mornings or a sweet snack to impress your loved ones. Imagine the aroma of freshly baked bread wafting through your home, inviting everyone to gather around the kitchen. With its moist texture and tangy rhubarb, this recipe is sure to become a family favorite. Let’s dive into this culinary adventure together!

Why You’ll Love This Rhubarb Bread Delight

This Rhubarb Bread Delight is a game-changer for busy moms and professionals alike. It’s incredibly easy to make, requiring just a handful of ingredients and minimal prep time. The sweet and tangy flavors dance on your palate, making it a delightful treat for breakfast or an afternoon snack. Plus, it’s versatile enough to adapt to your family’s tastes, ensuring everyone will love it. What’s not to adore?

Ingredients for Rhubarb Bread Delight

Gathering the right ingredients is the first step to creating this scrumptious Rhubarb Bread Delight. Here’s what you’ll need:

  • All-purpose flour: The backbone of your bread, providing structure and a soft texture.
  • Baking soda: This leavening agent helps the bread rise, giving it that perfect fluffy quality.
  • Salt: A pinch enhances the flavors, balancing the sweetness of the sugars.
  • Ground cinnamon: Adds warmth and a hint of spice, making each bite comforting.
  • Ground nutmeg: Just a touch brings a lovely depth of flavor to the mix.
  • Granulated sugar: Sweetens the bread, creating a delightful contrast with the tart rhubarb.
  • Brown sugar: Packed for moisture and a rich, caramel-like flavor that complements the other ingredients.
  • Vegetable oil: Keeps the bread moist and tender, ensuring it stays fresh longer.
  • Large eggs: They bind everything together and add richness to the batter.
  • Vanilla extract: A splash of this aromatic essence elevates the overall flavor profile.
  • Chopped rhubarb: The star of the show! Fresh or frozen, it brings a delightful tartness to the bread.
  • Chopped walnuts or pecans (optional): For a crunchy texture and nutty flavor, these can be added if desired.

For those who want to experiment, consider substituting half of the all-purpose flour with whole wheat flour for a nuttier taste and added nutrition. You can also add chocolate chips for a sweeter twist! Exact measurements for these ingredients can be found at the bottom of the article, ready for printing.

How to Make Rhubarb Bread Delight

Now that we have our ingredients ready, let’s dive into the fun part—making this delightful Rhubarb Bread! Follow these simple steps, and you’ll have a warm loaf ready to share in no time.

Step 1: Preheat and Prepare

First things first, preheat your oven to 350°F (175°C). This ensures your bread bakes evenly. While the oven warms up, grease a 9×5-inch loaf pan. I like to use a bit of vegetable oil or cooking spray to make sure the bread slides out easily later.

Step 2: Mix Dry Ingredients

In a medium bowl, whisk together the all-purpose flour, baking soda, salt, ground cinnamon, and ground nutmeg. This step is crucial! Mixing these dry ingredients well helps distribute the leavening agent evenly, ensuring your bread rises beautifully.

Step 3: Combine Wet Ingredients

In a large bowl, mix the granulated sugar, brown sugar, and vegetable oil until they’re well combined. Then, add the eggs one at a time, mixing thoroughly after each addition. Stir in the vanilla extract. The mixture should be smooth and creamy, like a warm hug!

Step 4: Combine Mixtures

Gradually add the dry ingredients to the wet mixture. Stir gently until just combined. Be careful not to overmix; a few lumps are perfectly fine. This keeps your Rhubarb Bread Delight tender and moist.

Step 5: Fold in Rhubarb and Nuts

Now comes the fun part! Gently fold in the chopped rhubarb and any optional nuts you’re using. Make sure they’re evenly distributed throughout the batter. The vibrant pink of the rhubarb will make your bread look so inviting!

Step 6: Bake the Bread

Pour the batter into your prepared loaf pan and smooth the top with a spatula. Bake in the preheated oven for 50-60 minutes. To check for doneness, insert a toothpick into the center. If it comes out clean, your bread is ready to shine!

Step 7: Cool and Serve

Once baked, allow the bread to cool in the pan for about 10 minutes. Then, carefully transfer it to a wire rack to cool completely. This step is essential; it helps the bread set and makes slicing easier. Enjoy a slice warm or at room temperature!

Tips for Success

  • Use fresh rhubarb for the best flavor, but frozen works just as well!
  • Don’t overmix the batter; it should be slightly lumpy for a tender loaf.
  • Let the bread cool completely before slicing to avoid a crumbly mess.
  • Store leftovers in an airtight container to keep it moist.
  • Feel free to experiment with spices like ginger or cardamom for a unique twist!

Equipment Needed

  • 9×5-inch loaf pan: Essential for baking your bread. A round cake pan can work in a pinch!
  • Mixing bowls: Use one large and one medium for easy mixing.
  • Whisk: Perfect for blending dry ingredients. A fork can also do the trick!
  • Spatula: Great for folding in ingredients and smoothing the batter.
  • Toothpick: Handy for testing doneness; a knife works too!

Variations

  • Whole Wheat Flour: Substitute half of the all-purpose flour with whole wheat flour for a nuttier flavor and added nutrition.
  • Chocolate Chip Delight: Add 1/2 cup of chocolate chips to the batter for a sweet twist that kids will love!
  • Spiced Up: Experiment with spices like ginger or cardamom to give your bread a unique flavor profile.
  • Fruit Fusion: Mix in other fruits like blueberries or strawberries along with the rhubarb for a delightful medley.
  • Nut-Free Option: Omit the nuts for a nut-free version, perfect for those with allergies.

Serving Suggestions

  • Pair your Rhubarb Bread Delight with a dollop of whipped cream for a decadent treat.
  • Enjoy it alongside a steaming cup of coffee or tea for a cozy afternoon break.
  • Serve slices with fresh fruit or a light yogurt for a balanced breakfast.
  • For a festive touch, dust with powdered sugar before serving.

FAQs about Rhubarb Bread Delight

Can I use frozen rhubarb for this recipe?

Absolutely! Frozen rhubarb works just as well as fresh. Just make sure to chop it while still frozen to prevent it from becoming mushy.

How do I store leftover Rhubarb Bread Delight?

Store any leftovers in an airtight container at room temperature for up to three days. For longer storage, you can freeze slices wrapped in plastic wrap and then in foil.

Can I make this bread gluten-free?

Yes! Substitute the all-purpose flour with a gluten-free flour blend. Just ensure it contains a binding agent like xanthan gum for the best texture.

What can I serve with Rhubarb Bread Delight?

This bread pairs wonderfully with a dollop of whipped cream, a side of yogurt, or even a cup of tea. It’s perfect for breakfast or as a delightful snack!

How can I make this recipe healthier?

To make it healthier, consider using whole wheat flour instead of all-purpose flour and reducing the sugar by a quarter. You can also add in some flaxseed for extra fiber!

Final Thoughts

Creating this Rhubarb Bread Delight is more than just baking; it’s about sharing joy and warmth with those you love. The process is simple, yet the results are nothing short of magical. Each slice offers a delightful balance of sweet and tangy flavors, making it perfect for any occasion. Whether you’re enjoying it with your morning coffee or serving it at a family gathering, this bread brings smiles and comfort. So, roll up your sleeves, embrace the mess, and let the aroma of freshly baked bread fill your home. You won’t regret it!

“`

Olivia

Rhubarb Bread Delight: Discover the Perfect Recipe!

A delightful and moist bread made with fresh or frozen rhubarb, perfect for breakfast or as a snack.
Prep Time 15 minutes
Cook Time 1 hour
Total Time 1 hour 15 minutes
Servings: 8 servings
Course: Baking
Cuisine: American
Calories: 210

Ingredients
  

  • 2 cups all-purpose flour
  • 1 teaspoon baking soda
  • 1/2 teaspoon salt
  • 1 teaspoon ground cinnamon
  • 1/2 teaspoon ground nutmeg
  • 1 cup granulated sugar
  • 1/2 cup brown sugar packed
  • 1/2 cup vegetable oil
  • 2 large eggs
  • 1 teaspoon vanilla extract
  • 2 cups rhubarb chopped (fresh or frozen)
  • 1/2 cup walnuts or pecans chopped (optional)

Method
 

  1. Preheat the oven to 350°F (175°C). Grease a 9×5-inch loaf pan.
  2. In a medium bowl, whisk together the flour, baking soda, salt, cinnamon, and nutmeg.
  3. In a large bowl, mix the granulated sugar, brown sugar, and vegetable oil until well combined.
  4. Add the eggs one at a time, mixing well after each addition. Stir in the vanilla extract.
  5. Gradually add the dry ingredients to the wet mixture, stirring until just combined.
  6. Fold in the chopped rhubarb and nuts (if using) until evenly distributed.
  7. Pour the batter into the prepared loaf pan and smooth the top.
  8. Bake for 50-60 minutes, or until a toothpick inserted into the center comes out clean.
  9. Allow the bread to cool in the pan for 10 minutes, then transfer to a wire rack to cool completely.

Nutrition

Serving: 1sliceCalories: 210kcalCarbohydrates: 30gProtein: 3gFat: 9gSaturated Fat: 1gPolyunsaturated Fat: 8gCholesterol: 30mgSodium: 150mgFiber: 1gSugar: 15g

Notes

  • For a sweeter twist, add 1/2 cup of chocolate chips to the batter.
  • Try substituting half of the all-purpose flour with whole wheat flour for a nuttier flavor and added nutrition.

Tried this recipe?

Let us know how it was!

Street Corn Chicken Rice Bowl: A Flavorful Delight!

Introduction to Street Corn Chicken Rice Bowl

Experience the vibrant taste of the streets with this Street Corn Chicken Rice Bowl! Combining juicy grilled chicken, sweet and smoky corn, and a medley of fresh toppings over a bed of fluffy rice, this bowl delivers bold flavors in every bite. It’s the perfect dish to bring a burst of excitement to your everyday meals!

Why You’ll Love This Street Corn Chicken Rice Bowl

This Street Corn Chicken Rice Bowl is a game-changer for busy nights. It’s quick to prepare, taking just 35 minutes from start to finish. The combination of tender chicken, sweet corn, and creamy sauce creates a flavor explosion that will leave everyone asking for seconds. Plus, it’s versatile! You can easily customize it to suit your family’s tastes, making it a perfect weeknight meal that everyone will enjoy.

Ingredients for Street Corn Chicken Rice Bowl

Gathering the right ingredients is key to creating a mouthwatering Street Corn Chicken Rice Bowl. Here’s what you’ll need:

  • Cooked white rice: This serves as the hearty base of your bowl, providing a comforting foundation.
  • Boneless, skinless chicken breasts: Tender and juicy, they soak up all the delicious flavors from the spices.
  • Olive oil: A healthy fat that helps to season and cook the chicken perfectly.
  • Chili powder: Adds a warm kick, giving your dish that authentic street corn flavor.
  • Garlic powder: A must-have for that aromatic depth that elevates the entire dish.
  • Cumin: This spice brings a warm, earthy note that complements the other flavors beautifully.
  • Salt and pepper: Essential for enhancing the overall taste of your ingredients.
  • Corn: Fresh, frozen, or canned, it adds sweetness and texture to the bowl.
  • Mayonnaise: This creamy base helps create a luscious sauce that ties everything together.
  • Sour cream: Adds tanginess and creaminess, balancing the flavors perfectly.
  • Lime juice: A splash of brightness that cuts through the richness of the sauce.
  • Cotija cheese: This crumbly cheese adds a salty, creamy finish; feel free to substitute with feta or omit for a dairy-free option.
  • Fresh cilantro: A burst of freshness that brightens up the dish.
  • Avocado: Sliced for creaminess and healthy fats, it’s a delightful addition.
  • Lime wedges: Perfect for squeezing over the top, enhancing the flavors even more.

For exact measurements, check the bottom of the article where you can find everything listed for easy printing!

How to Make Street Corn Chicken Rice Bowl

Step 1: Prepare the Creamy Sauce

Start by mixing the mayonnaise, sour cream, lime juice, and half of the cotija cheese in a medium bowl. Stir until everything is well combined and creamy. This sauce is the heart of your Street Corn Chicken Rice Bowl, adding a rich and tangy flavor that perfectly complements the other ingredients. Set it aside while you prepare the chicken and corn. Trust me, this sauce will elevate your dish!

Step 2: Season the Chicken

Next, take your boneless, skinless chicken breasts and drizzle them with olive oil. Sprinkle chili powder, garlic powder, cumin, salt, and pepper over the chicken. Rub the spices into the meat, ensuring every inch is coated. This seasoning not only enhances the chicken’s flavor but also gives it a beautiful color when cooked. Let it sit for a few minutes to absorb those delicious spices.

Step 3: Cook the Chicken

Heat a skillet over medium-high heat and add the seasoned chicken breasts. Cook them for about 6-7 minutes on each side, or until the internal temperature reaches 165°F. This ensures your chicken is juicy and safe to eat. Once cooked, remove the chicken from the skillet and let it rest for 5 minutes before slicing. This resting period allows the juices to redistribute, making every bite tender and flavorful.

Step 4: Sauté the Corn

In the same skillet, add the corn and sauté for about 3-4 minutes. You want it heated through and slightly charred for that delicious street corn flavor. The leftover spices from the chicken will add an extra layer of taste to the corn. Stir occasionally to ensure even cooking. This step is quick but adds a wonderful texture to your bowl!

Step 5: Assemble the Bowls

Now it’s time to bring everything together! Start by placing 1 cup of cooked rice in each bowl. Top it with sliced chicken, sautéed corn, and a generous drizzle of the creamy sauce you prepared earlier. Sprinkle the remaining cotija cheese and chopped cilantro over the top for added flavor. Finally, add avocado slices and serve with lime wedges on the side. Your Street Corn Chicken Rice Bowl is ready to enjoy!

Tips for Success

  • Marinate the chicken for at least 30 minutes to enhance flavor.
  • Use fresh corn when in season for the best taste and texture.
  • Don’t skip the resting time for the chicken; it makes a big difference!
  • Feel free to customize the sauce with your favorite spices or herbs.
  • For a spicier kick, add diced jalapeños to the sautéed corn.

Equipment Needed

  • Skillet: A non-stick skillet works best, but any frying pan will do.
  • Medium bowl: For mixing the creamy sauce; a large mixing bowl can also work.
  • Meat thermometer: To ensure your chicken is cooked perfectly; a simple knife can check doneness too.
  • Cutting board: Essential for slicing the chicken and avocado.
  • Knife: A sharp chef’s knife makes prep easier.

Variations

  • Spicy Street Corn Chicken Rice Bowl: Add diced jalapeños or a splash of hot sauce to the creamy sauce for an extra kick.
  • Vegetarian Option: Substitute the chicken with grilled zucchini or portobello mushrooms for a hearty, meat-free meal.
  • Quinoa Base: Swap out the white rice for quinoa to boost the protein and fiber content.
  • Southwestern Twist: Incorporate black beans and diced bell peppers for added flavor and nutrition.
  • Low-Carb Version: Use cauliflower rice instead of white rice for a lighter, low-carb alternative.

Serving Suggestions

  • Pair your Street Corn Chicken Rice Bowl with a refreshing side salad for a light meal.
  • Serve with tortilla chips and salsa for a fun, crunchy contrast.
  • A chilled glass of iced tea or a fruity mocktail complements the flavors beautifully.
  • Garnish with extra cilantro and lime wedges for a vibrant presentation.

FAQs about Street Corn Chicken Rice Bowl

Can I make the Street Corn Chicken Rice Bowl ahead of time?

Absolutely! You can prepare the chicken and sauce in advance. Just store them separately in the fridge. When you’re ready to eat, simply reheat the chicken and assemble the bowls. This makes it a fantastic option for meal prep!

What can I substitute for cotija cheese?

If you can’t find cotija cheese, feta is a great alternative. It offers a similar crumbly texture and salty flavor. For a dairy-free option, you can simply omit the cheese or use a dairy-free cheese substitute.

How can I make this dish spicier?

For a spicy kick, add diced jalapeños to the sautéed corn or mix in a dash of hot sauce into the creamy sauce. You can also sprinkle some cayenne pepper over the chicken before cooking for an extra layer of heat!

Is this Street Corn Chicken Rice Bowl gluten-free?

Yes! This recipe is naturally gluten-free, making it a perfect choice for those with gluten sensitivities. Just ensure that any additional ingredients you use, like sauces or toppings, are also gluten-free.

Can I use brown rice instead of white rice?

Definitely! Brown rice is a nutritious alternative that adds more fiber to your meal. Just keep in mind that it may require a longer cooking time, so plan accordingly. Your Street Corn Chicken Rice Bowl will still be delicious!

Final Thoughts

Creating this Street Corn Chicken Rice Bowl is more than just cooking; it’s about bringing joy to your family’s table. The vibrant colors and bold flavors make it a feast for the eyes and the palate. I love how this dish transforms a simple weeknight into a special occasion, all while being quick and easy to prepare. Whether you’re enjoying it with your family or impressing friends, this bowl is sure to spark smiles and satisfied bellies. So, roll up your sleeves and dive into this culinary adventure—you won’t regret it!

“`

Olivia

Street Corn Chicken Rice Bowl: A Flavorful Delight!

A flavorful and satisfying Street Corn Chicken Rice Bowl featuring seasoned chicken, sautéed corn, and a creamy sauce.
Prep Time 15 minutes
Cook Time 20 minutes
Total Time 35 minutes
Servings: 4 servings
Course: Main Course
Cuisine: Mexican
Calories: 550

Ingredients
  

  • 2 cups cooked white rice
  • 1 lb boneless skinless chicken breasts
  • 1 tablespoon olive oil
  • 1 teaspoon chili powder
  • 1 teaspoon garlic powder
  • 1 teaspoon cumin
  • Salt and pepper to taste
  • 1 cup corn fresh, frozen, or canned
  • 1/2 cup mayonnaise
  • 1/4 cup sour cream
  • 1 tablespoon lime juice
  • 1/2 cup crumbled cotija cheese
  • 1/4 cup chopped fresh cilantro
  • 1 avocado sliced
  • Lime wedges for serving

Method
 

  1. In a medium bowl, combine the mayonnaise, sour cream, lime juice, and half of the cotija cheese. Mix well and set aside.
  2. Season the chicken breasts with olive oil, chili powder, garlic powder, cumin, salt, and pepper.
  3. Heat a skillet over medium-high heat. Add the seasoned chicken and cook for about 6-7 minutes per side, or until the internal temperature reaches 165°F. Remove from heat and let rest for 5 minutes before slicing.
  4. In the same skillet, add the corn and sauté for about 3-4 minutes until heated through and slightly charred.
  5. To assemble the bowls, place 1 cup of cooked rice in each bowl. Top with sliced chicken, sautéed corn, and a generous drizzle of the creamy sauce.
  6. Sprinkle the remaining cotija cheese and chopped cilantro over the top. Add avocado slices and serve with lime wedges on the side.

Nutrition

Serving: 1bowlCalories: 550kcalCarbohydrates: 45gProtein: 30gFat: 25gSaturated Fat: 4gPolyunsaturated Fat: 21gCholesterol: 80mgSodium: 600mgFiber: 4gSugar: 3g

Notes

  • For added flavor, consider marinating the chicken in lime juice and spices for at least 30 minutes before cooking.
  • You can substitute the cotija cheese with feta or omit it for a dairy-free option.
  • For a spicy kick, add diced jalapeños or a dash of hot sauce to the creamy sauce.

Tried this recipe?

Let us know how it was!

Chili Lime Chicken and Sweet Potato Skillet Recipe Awaits!

Introduction to Chili Lime Chicken and Sweet Potato Skillet

Get ready to savor bold and zesty flavors with this Chili Lime Chicken and Sweet Potato Skillet! Packed with tender, juicy chicken and perfectly roasted sweet potatoes, all tossed in a vibrant chili-lime sauce, this dish is a one-pan wonder that’s both satisfying and easy to make. Perfect for busy weeknights when you want a flavorful meal without the hassle!

Why You’ll Love This Chili Lime Chicken and Sweet Potato Skillet

This Chili Lime Chicken and Sweet Potato Skillet is a game-changer for busy nights. It’s not only quick to prepare, but it also packs a punch of flavor that will have your family asking for seconds. The combination of tender chicken and sweet potatoes creates a satisfying meal that’s both healthy and delicious. Plus, it’s all made in one pan, making cleanup a breeze!

Ingredients for Chili Lime Chicken and Sweet Potato Skillet

Gathering the right ingredients is the first step to creating a delicious Chili Lime Chicken and Sweet Potato Skillet. Here’s what you’ll need:

  • Olive oil: This healthy fat is perfect for sautéing and adds a rich flavor.
  • Boneless, skinless chicken breasts: Tender and lean, they cook quickly and soak up all the spices.
  • Chili powder: This spice brings a warm, smoky flavor that’s essential for that chili kick.
  • Cumin: Earthy and aromatic, cumin enhances the overall flavor profile of the dish.
  • Garlic powder: A convenient way to add that beloved garlic flavor without the fuss of fresh cloves.
  • Onion powder: This adds a subtle sweetness and depth to the dish.
  • Salt and pepper: Essential seasonings that elevate all the flavors in your skillet.
  • Sweet potatoes: Naturally sweet and packed with nutrients, they provide a hearty base for the meal.
  • Red bell pepper: This vibrant veggie adds color and a slight crunch, making the dish visually appealing.
  • Corn: Whether fresh, frozen, or canned, corn adds a pop of sweetness and texture.
  • Lime juice: The zesty acidity brightens the dish and balances the flavors beautifully.
  • Fresh cilantro (optional): A sprinkle of this herb adds freshness and a burst of flavor at the end.

For those looking to mix things up, consider substituting sweet potatoes with butternut squash or regular potatoes for a different twist. You can find the exact quantities for each ingredient at the bottom of the article, ready for printing!

How to Make Chili Lime Chicken and Sweet Potato Skillet

Step 1: Sauté the Chicken

Start by heating the olive oil in a large skillet over medium-high heat. Once the oil shimmers, add the bite-sized chicken pieces. Sprinkle them with chili powder, cumin, garlic powder, onion powder, salt, and pepper. This spice blend is what gives the chicken its delicious flavor. Cook the chicken for about 5-7 minutes, stirring occasionally, until it’s browned and cooked through. The aroma will be irresistible! Once done, remove the chicken from the skillet and set it aside. This step is crucial for building layers of flavor in your Chili Lime Chicken and Sweet Potato Skillet.

Step 2: Cook the Sweet Potatoes

In the same skillet, toss in the diced sweet potatoes. They’ll soak up all those tasty bits left behind by the chicken. Cook them for about 10 minutes, stirring occasionally. You want them to start softening but not mushy. If they seem to stick, add a splash more olive oil. The sweet potatoes are the heart of this dish, providing a sweet contrast to the spices. Keep an eye on them; you want them tender but still holding their shape for that perfect texture!

Step 3: Add Vegetables

Now it’s time to add some color! Toss in the diced red bell pepper and corn. These veggies not only add vibrant hues but also a delightful crunch. Cook everything together for an additional 5 minutes, stirring gently. You want the bell pepper to soften just a bit while keeping its crispness. The sweet corn will bring a lovely sweetness that balances the spices beautifully. This step is where your Chili Lime Chicken and Sweet Potato Skillet starts to come alive with flavor and texture!

Step 4: Combine and Finish

Return the cooked chicken to the skillet, mixing it with the sweet potatoes and veggies. Now, pour the fresh lime juice over the entire mixture. This zesty addition brightens up the dish and ties all the flavors together. Stir everything to combine and let it cook for another 2-3 minutes, just to heat through. The vibrant colors and aromas will have your family gathering around the table in no time. Once done, remove from heat and garnish with fresh cilantro if desired. Your Chili Lime Chicken and Sweet Potato Skillet is ready to be served!

Tips for Success

  • Prep your ingredients ahead of time to save precious minutes during cooking.
  • Don’t overcrowd the skillet; cook in batches if necessary for even browning.
  • Adjust the spice levels to your family’s taste; add more chili powder for heat!
  • Use a non-stick skillet for easier cleanup and to prevent sticking.
  • Let leftovers cool before storing them in an airtight container for up to 3 days.

Equipment Needed

  • Large skillet: A non-stick skillet works best, but any large pan will do.
  • Cutting board: Essential for chopping your veggies and chicken safely.
  • Sharp knife: A good knife makes prep work quick and easy.
  • Spatula or wooden spoon: Perfect for stirring and flipping ingredients.

Variations

  • Spicy Kick: Add diced jalapeños or a pinch of cayenne pepper for an extra heat boost.
  • Vegetarian Option: Substitute chicken with chickpeas or black beans for a hearty plant-based meal.
  • Different Veggies: Experiment with zucchini, spinach, or broccoli for added nutrition and flavor.
  • Herb Swap: Try fresh parsley or basil instead of cilantro for a different herbal note.
  • Sweet Potato Alternatives: Use butternut squash or regular potatoes for a unique twist on texture and taste.

Serving Suggestions

  • Pair your Chili Lime Chicken and Sweet Potato Skillet with a side of fluffy quinoa or brown rice for a complete meal.
  • Serve with a refreshing green salad drizzled with a light vinaigrette to balance the flavors.
  • A chilled glass of iced tea or a light white wine complements the dish beautifully.
  • For presentation, garnish with extra lime wedges and cilantro for a pop of color.

FAQs about Chili Lime Chicken and Sweet Potato Skillet

Can I make this Chili Lime Chicken and Sweet Potato Skillet ahead of time?

Absolutely! You can prepare the ingredients in advance and store them in the fridge. Just cook everything when you’re ready to eat. This makes it a perfect meal for busy nights!

What can I substitute for sweet potatoes?

If sweet potatoes aren’t your thing, you can easily swap them for butternut squash or regular potatoes. Each option brings its own unique flavor and texture to the dish.

Is this recipe gluten-free?

Yes! The Chili Lime Chicken and Sweet Potato Skillet is naturally gluten-free, making it a great choice for those with dietary restrictions.

How can I store leftovers?

Store any leftovers in an airtight container in the fridge for up to three days. Reheat in the skillet or microwave for a quick meal!

Can I add more vegetables to this dish?

Definitely! Feel free to add your favorite veggies like zucchini, spinach, or even broccoli. They’ll enhance the nutrition and flavor of your Chili Lime Chicken and Sweet Potato Skillet.

Final Thoughts

Cooking the Chili Lime Chicken and Sweet Potato Skillet is more than just preparing a meal; it’s about creating a moment of joy for you and your family. The vibrant colors and tantalizing aromas fill your kitchen, making it a warm and inviting space. Each bite is a delightful blend of flavors that brings smiles and satisfaction. Whether it’s a busy weeknight or a special gathering, this dish is sure to impress. I hope you find as much joy in making it as I do. Happy cooking, and may your skillet always be filled with love and flavor!

“`

Olivia

Chili Lime Chicken and Sweet Potato Skillet Recipe Awaits!

A delicious and healthy Chili Lime Chicken and Sweet Potato Skillet recipe that combines tender chicken, sweet potatoes, and vibrant vegetables, all seasoned with zesty lime and spices.
Prep Time 15 minutes
Cook Time 25 minutes
Total Time 40 minutes
Servings: 4 servings
Course: Main Dish
Cuisine: Mexican
Calories: 350

Ingredients
  

  • 2 tablespoons olive oil
  • 1 pound boneless skinless chicken breasts, cut into bite-sized pieces
  • 1 teaspoon chili powder
  • 1 teaspoon cumin
  • 1/2 teaspoon garlic powder
  • 1/2 teaspoon onion powder
  • Salt and pepper to taste
  • 2 medium sweet potatoes peeled and diced (about 3 cups)
  • 1 red bell pepper diced
  • 1 cup corn fresh, frozen, or canned
  • Juice of 2 limes
  • 1/4 cup fresh cilantro chopped (optional)

Method
 

  1. In a large skillet, heat the olive oil over medium-high heat. Add the chicken pieces and season with chili powder, cumin, garlic powder, onion powder, salt, and pepper. Cook for about 5-7 minutes, stirring occasionally, until the chicken is browned and cooked through. Remove the chicken from the skillet and set aside.
  2. In the same skillet, add the diced sweet potatoes. Cook for about 10 minutes, stirring occasionally, until they start to soften.
  3. Add the diced red bell pepper and corn to the skillet with the sweet potatoes. Cook for an additional 5 minutes, or until the vegetables are tender.
  4. Return the cooked chicken to the skillet and pour the lime juice over the mixture. Stir to combine and cook for another 2-3 minutes to heat everything through.
  5. Remove from heat and garnish with fresh cilantro, if desired. Serve warm.

Nutrition

Serving: 1servingCalories: 350kcalCarbohydrates: 30gProtein: 30gFat: 12gSaturated Fat: 2gPolyunsaturated Fat: 10gCholesterol: 70mgSodium: 300mgFiber: 5gSugar: 5g

Notes

  • For added heat, include diced jalapeños or a pinch of cayenne pepper when cooking the chicken.
  • Substitute the sweet potatoes with butternut squash or regular potatoes for a different flavor and texture.

Tried this recipe?

Let us know how it was!

White Peach Sangria: Refreshing Recipe to Try Today!

Introduction to White Peach Sangria

As summer rolls in, I find myself dreaming of refreshing drinks that can whisk me away to sun-soaked afternoons. That’s where my beloved White Peach Sangria comes in! This delightful concoction is not just a drink; it’s a celebration in a glass. Perfect for busy moms like us, it requires minimal prep time and delivers maximum flavor. Whether you’re hosting a backyard barbecue or simply unwinding after a long day, this sangria is a quick solution that will impress your loved ones. Trust me, once you take a sip, you’ll be transported to a sunny paradise!

Why You’ll Love This White Peach Sangria

This White Peach Sangria is a game-changer for your summer gatherings. It’s incredibly easy to whip up, taking just 10 minutes of your time. The vibrant flavors of fresh peaches and strawberries dance together, creating a refreshing drink that everyone will adore. Plus, it’s a versatile recipe that you can customize to suit your taste. With this sangria, you’ll be the star of any get-together, and your friends will be begging for the recipe!

Ingredients for White Peach Sangria

Gathering the right ingredients is the first step to crafting your perfect White Peach Sangria. Here’s what you’ll need:

  • White Wine: A crisp Sauvignon Blanc or Pinot Grigio works wonders. These wines provide a refreshing base that complements the fruity flavors.
  • Peach Schnapps: This sweet liqueur adds a delightful peachy punch. If you’re feeling adventurous, try using apricot schnapps for a twist!
  • Soda Water or Lemon-Lime Soda: For that fizzy finish, soda water keeps it light, while lemon-lime soda adds a touch of sweetness.
  • Fresh Peaches: The star of the show! Use ripe, juicy peaches for the best flavor. If peaches aren’t in season, nectarines can be a great substitute.
  • Strawberries: These berries bring a pop of color and sweetness. Make sure to hull and slice them for easy mixing.
  • Orange and Lemon: Thinly sliced citrus adds brightness and a zesty kick. Feel free to experiment with other citrus fruits like limes!
  • Fresh Mint Leaves (optional): A sprinkle of mint elevates the drink with a refreshing aroma. It’s like a garden party in your glass!
  • Ice Cubes: Essential for serving, ice keeps your sangria chilled and refreshing on hot days.

For exact measurements, check the bottom of the article where you can find everything listed for easy printing. Happy mixing!

How to Make White Peach Sangria

Now that you have all your ingredients ready, let’s dive into the fun part—making your White Peach Sangria! This process is as easy as pie, and I promise you’ll feel like a mixologist in no time. Let’s get started!

Step 1: Combine the Base

In a large pitcher, pour in your chosen white wine and peach schnapps. This combination creates a sweet and fruity base that sets the stage for your sangria. Give it a gentle stir to blend the two together. It’s like a warm hug for your taste buds!

Step 2: Add Fresh Fruits

Next, it’s time to add the fresh fruits. Toss in the sliced peaches, strawberries, orange, and lemon. Each fruit brings its own unique flavor, making your sangria a colorful masterpiece. Stir gently to ensure the fruits are evenly distributed. Just imagine the vibrant colors swirling together!

Step 3: Mix and Chill

Once your fruits are in, cover the pitcher and place it in the refrigerator. Let it chill for at least two hours. This step is crucial as it allows the flavors to meld beautifully. Trust me, the wait will be worth it! You’ll be rewarded with a refreshing drink that tastes like summer.

Step 4: Add Fizz

When you’re ready to serve, it’s time to add the fizz! Pour in the soda water or lemon-lime soda just before serving. This adds a delightful sparkle to your sangria. Give it a gentle stir to combine, but be careful not to lose that bubbly goodness!

Step 5: Serve and Garnish

Finally, grab some ice cubes and fill your glasses. Pour the sangria over the ice, making sure to include plenty of fruit in each glass. For an extra touch, garnish with fresh mint leaves. It’s like a little green crown for your drink! Now, sit back, relax, and enjoy your refreshing White Peach Sangria!

Tips for Success

  • Use ripe, juicy peaches for the best flavor—check for a sweet aroma!
  • Chill your sangria for at least two hours to enhance the flavors.
  • Experiment with different fruits like mango or pineapple for a unique twist.
  • Adjust sweetness by adding sugar or simple syrup to taste.
  • For a fun presentation, serve in mason jars or colorful glasses!

Equipment Needed

  • Large Pitcher: A glass or plastic pitcher works well. If you don’t have one, any large bowl can do the trick!
  • Measuring Cups: Essential for accuracy. If you’re in a pinch, use a standard coffee mug for rough estimates.
  • Stirring Spoon: A long spoon is perfect for mixing. A wooden spoon or even a chopstick can work just as well!
  • Ice Cube Tray: For ice cubes. If you prefer, you can use frozen fruit instead for a fun twist!

Variations

  • Tropical Twist: Swap out the peaches for mango or pineapple for a sunny, tropical vibe.
  • Berry Blast: Add blueberries or raspberries for an extra burst of flavor and color.
  • Herbal Infusion: Experiment with basil or rosemary instead of mint for a unique herbal note.
  • Sparkling Version: Use sparkling wine instead of white wine for a bubbly, festive touch.
  • Non-Alcoholic Option: Replace the wine and schnapps with sparkling grape juice and peach nectar for a family-friendly version.

Serving Suggestions

  • Pair your White Peach Sangria with light appetizers like bruschetta or cheese platters for a delightful spread.
  • Serve alongside grilled chicken or seafood for a refreshing meal.
  • For a fun presentation, use mason jars or colorful glasses to showcase the vibrant fruits.
  • Consider adding a sprig of mint or a slice of peach on the rim for an elegant touch.

FAQs about White Peach Sangria

As you embark on your White Peach Sangria journey, you might have a few questions. Here are some common queries that I often hear, along with my answers to help you out!

Can I make White Peach Sangria ahead of time?

Absolutely! You can prepare the sangria a day in advance. Just remember to add the soda right before serving to keep that refreshing fizz intact.

What type of white wine is best for sangria?

I recommend using a crisp white wine like Sauvignon Blanc or Pinot Grigio. These wines complement the fruity flavors beautifully without overpowering them.

Can I use frozen fruit in my sangria?

Yes, frozen fruit is a fantastic option! It keeps your sangria chilled and adds a burst of flavor. Just be aware that it may slightly alter the texture.

How long can I store leftover sangria?

If you have any leftovers, store them in the fridge for up to three days. However, the flavors may change, and the fizz will diminish over time.

Is White Peach Sangria gluten-free?

Yes, this delightful drink is gluten-free! Just ensure that the wine and schnapps you choose are labeled gluten-free to be safe.

Final Thoughts

Creating this White Peach Sangria is more than just mixing ingredients; it’s about crafting moments of joy and connection. Each sip transports you to a sunlit afternoon, surrounded by laughter and good company. Whether you’re celebrating a special occasion or simply enjoying a quiet evening, this refreshing drink adds a touch of magic to any gathering. I hope you find as much joy in making and sharing this sangria as I do. So, gather your loved ones, raise your glasses, and toast to the sweet moments life has to offer. Cheers to summer and all its delicious possibilities!

jhessica

White Peach Sangria: Refreshing Recipe to Try Today!

A refreshing White Peach Sangria recipe perfect for summer gatherings.
Prep Time 10 minutes
Total Time 2 hours 10 minutes
Servings: 6 servings
Course: Beverage
Cuisine: American
Calories: 150

Ingredients
  

  • 2 cups white wine such as Sauvignon Blanc or Pinot Grigio
  • 1 cup peach schnapps
  • 1 cup soda water or lemon-lime soda
  • 1 cup fresh peaches sliced
  • 1 cup strawberries hulled and sliced
  • 1 orange thinly sliced
  • 1 lemon thinly sliced
  • 1 tablespoon fresh mint leaves optional
  • Ice cubes

Method
 

  1. In a large pitcher, combine the white wine and peach schnapps.
  2. Add the sliced peaches, strawberries, orange, and lemon to the pitcher.
  3. Stir gently to combine all the ingredients.
  4. Refrigerate the mixture for at least 2 hours to allow the flavors to meld.
  5. Just before serving, add the soda water or lemon-lime soda and stir gently.
  6. Serve over ice cubes and garnish with fresh mint leaves if desired.

Nutrition

Serving: 1servingCalories: 150kcalCarbohydrates: 12gSugar: 12g

Notes

  • For a sweeter sangria, add a tablespoon of sugar or simple syrup to the mixture before chilling.
  • Try substituting the peaches with other fruits like mango or pineapple for a tropical twist.

Tried this recipe?

Let us know how it was!

Grilled Buffalo Chicken Salad: A Flavorful Delight!

Introduction to Grilled Buffalo Chicken Salad

Experience the perfect blend of bold and fresh with this Grilled Buffalo Chicken Salad! Tender, spicy buffalo chicken meets crisp greens and cool veggies, creating a dish that’s both satisfying and packed with flavor. Ideal for a quick lunch or a light dinner, this salad brings a delicious kick to your table without the fuss.

Why You’ll Love This Grilled Buffalo Chicken Salad

This Grilled Buffalo Chicken Salad is a game-changer for busy days. It’s quick to prepare, taking just 30 minutes from start to finish. The combination of spicy buffalo chicken and fresh greens creates a flavor explosion that’s hard to resist. Plus, it’s a healthy option that doesn’t skimp on taste. Whether you’re feeding a family or enjoying a solo meal, this salad is sure to satisfy your cravings!

Ingredients for Grilled Buffalo Chicken Salad

Gathering the right ingredients is key to making a delicious Grilled Buffalo Chicken Salad. Here’s what you’ll need:

  • Boneless, skinless chicken breasts: The star of the show! They grill beautifully and soak up the buffalo sauce perfectly.
  • Buffalo sauce: This spicy sauce adds that signature kick. You can choose mild or extra hot, depending on your taste.
  • Mixed salad greens: A blend of romaine, spinach, and arugula gives a fresh crunch and vibrant color.
  • Cherry tomatoes: These sweet little gems add juiciness and a pop of color to your salad.
  • Cucumber: Crisp and refreshing, cucumbers balance the heat of the buffalo sauce.
  • Red onion: Thinly sliced for a bit of sharpness, they add depth to the flavor profile.
  • Blue cheese crumbles: A classic pairing with buffalo chicken, they bring a creamy richness that’s irresistible.
  • Ranch dressing: Drizzled over the salad, it cools down the spice and ties everything together.
  • Salt and pepper: Essential for seasoning the chicken and enhancing all the flavors.
  • Olive oil: A light brush on the chicken helps it grill beautifully and prevents sticking.

For those looking to mix things up, consider adding sliced jalapeños for extra heat or substituting grilled shrimp or tofu for a different protein option. You can find the exact quantities for each ingredient at the bottom of the article, ready for printing!

How to Make Grilled Buffalo Chicken Salad

Now that you have all your ingredients ready, let’s dive into making this delicious Grilled Buffalo Chicken Salad! Follow these simple steps, and you’ll have a flavorful meal in no time.

Step 1: Preheat the Grill

Preheating your grill is crucial for achieving that perfect sear on the chicken. It ensures even cooking and helps lock in those juicy flavors. Aim for medium-high heat, around 375°F to 400°F. A hot grill will give your chicken those beautiful grill marks and a delicious smoky flavor.

Step 2: Prepare the Chicken

Season your boneless, skinless chicken breasts with salt and pepper. This simple step enhances the chicken’s natural flavor. Next, brush a light coat of olive oil on both sides. This not only prevents sticking but also helps the buffalo sauce cling better once grilled. Trust me, this little detail makes a big difference!

Step 3: Grill the Chicken

Place the chicken on the preheated grill. Grill for about 6-7 minutes on each side. To check for doneness, use a meat thermometer; the internal temperature should reach 165°F. If you don’t have one, cut into the thickest part of the chicken. It should be opaque and juices should run clear. No one wants dry chicken, right?

Step 4: Rest and Slice the Chicken

Once grilled, remove the chicken from the grill and let it rest for 5 minutes. This step is essential! Resting allows the juices to redistribute, keeping your chicken moist and tender. After resting, slice the chicken into strips. The aroma will have your family gathering around the kitchen!

Step 5: Toss the Salad Ingredients

In a large bowl, combine your mixed salad greens, halved cherry tomatoes, diced cucumber, and thinly sliced red onion. Toss them gently to mix. This colorful combination not only looks appealing but also adds a variety of textures and flavors to your salad. Feel free to get creative with your mix!

Step 6: Assemble the Salad

Now it’s time to bring it all together! Place the tossed salad on a serving platter or individual bowls. Lay the sliced grilled chicken on top, then drizzle with buffalo sauce. Finally, sprinkle blue cheese crumbles over everything. For an extra touch, add a drizzle of ranch dressing. Your Grilled Buffalo Chicken Salad is ready to be devoured!


Tips for Success

  • Always preheat your grill for the best results.
  • Let the chicken rest after grilling to keep it juicy.
  • Feel free to customize the salad with your favorite veggies.
  • For a milder flavor, use less buffalo sauce or opt for a mild version.
  • Make extra chicken for leftovers; it’s great in wraps or sandwiches!

Equipment Needed

  • Grill: A gas or charcoal grill works perfectly. If you don’t have one, a grill pan on the stovetop is a great alternative.
  • Meat thermometer: Essential for checking chicken doneness. If you’re in a pinch, just cut into the chicken to check.
  • Mixing bowl: For tossing your salad ingredients together.
  • Cutting board and knife: To slice your grilled chicken and veggies.

Variations

  • Spicy Kick: Add sliced jalapeños or a sprinkle of crushed red pepper flakes for an extra heat boost.
  • Protein Swap: Substitute grilled shrimp or tofu for the chicken to cater to different dietary preferences.
  • Greens Galore: Experiment with different greens like kale or mixed baby greens for a unique twist.
  • Vegan Option: Use chickpeas or black beans instead of chicken, and opt for a vegan ranch dressing.
  • Fruit Fusion: Toss in some diced avocado or sliced strawberries for a refreshing sweetness that complements the spice.

Serving Suggestions

  • Pair your Grilled Buffalo Chicken Salad with a side of crispy sweet potato fries for a satisfying crunch.
  • A chilled glass of lemonade or iced tea complements the spicy flavors beautifully.
  • For presentation, serve in vibrant bowls to highlight the colorful ingredients.

FAQs about Grilled Buffalo Chicken Salad

Can I make this salad ahead of time?

Absolutely! You can grill the chicken and prepare the salad ingredients in advance. Just keep the buffalo sauce and ranch dressing separate until you’re ready to serve. This way, your salad stays fresh and crisp!

What can I substitute for blue cheese?

If blue cheese isn’t your thing, try feta or goat cheese for a different flavor profile. Both add a creamy texture that complements the spicy chicken beautifully.

Is this salad gluten-free?

Yes! This Grilled Buffalo Chicken Salad is naturally gluten-free. Just ensure that your buffalo sauce and ranch dressing are gluten-free as well, as some brands may contain gluten.

How can I make this salad more filling?

To make your salad heartier, consider adding quinoa or brown rice. These grains provide extra fiber and protein, making it a complete meal!

Can I use a different protein besides chicken?

Definitely! Grilled shrimp, tofu, or even chickpeas work wonderfully in this salad. Each option brings its own unique flavor and texture, so feel free to experiment!

Final Thoughts

Creating this Grilled Buffalo Chicken Salad is more than just a cooking experience; it’s a joyful journey that brings family and friends together. The vibrant colors and bold flavors make every bite a celebration. I love how this dish transforms a simple meal into something special, all while being quick and easy to prepare. Whether it’s a busy weeknight or a weekend gathering, this salad is sure to impress. So, roll up your sleeves, fire up that grill, and enjoy the deliciousness that awaits. Trust me, your taste buds will thank you!

Olivia

Grilled Buffalo Chicken Salad: A Flavorful Delight!

A delicious and spicy grilled buffalo chicken salad that combines tender chicken with fresh greens and a tangy dressing.
Prep Time 15 minutes
Cook Time 15 minutes
Total Time 30 minutes
Course: Salad
Cuisine: American
Calories: 350

Ingredients
  

  • 1 pound boneless skinless chicken breasts
  • 1/2 cup buffalo sauce
  • 6 cups mixed salad greens such as romaine, spinach, and arugula
  • 1 cup cherry tomatoes halved
  • 1/2 cup cucumber diced
  • 1/4 cup red onion thinly sliced
  • 1/2 cup blue cheese crumbles
  • 1/4 cup ranch dressing or to taste
  • Salt and pepper to taste
  • Olive oil for grilling

Method
 

  1. Preheat your grill to medium-high heat.
  2. Season the chicken breasts with salt and pepper, then brush lightly with olive oil.
  3. Grill the chicken for about 6-7 minutes on each side, or until fully cooked (internal temperature should reach 165°F).
  4. Remove the chicken from the grill and let it rest for 5 minutes before slicing.
  5. In a bowl, toss the salad greens, cherry tomatoes, cucumber, and red onion together.
  6. Drizzle the ranch dressing over the salad and toss to combine.
  7. Slice the grilled chicken and place it on top of the salad.
  8. Drizzle the buffalo sauce over the chicken and sprinkle with blue cheese crumbles.
  9. Serve immediately.

Nutrition

Serving: 1servingCalories: 350kcalCarbohydrates: 10gProtein: 30gFat: 20gSaturated Fat: 6gPolyunsaturated Fat: 14gCholesterol: 90mgSodium: 800mgFiber: 2gSugar: 3g

Notes

  • For a spicier kick, use extra hot buffalo sauce or add sliced jalapeños to the salad.
  • Substitute grilled shrimp or tofu for the chicken for a different protein option.

Tried this recipe?

Let us know how it was!

Malibu Bay Breeze Cocktail: Refresh Your Summer Sip!

Introduction to Malibu Bay Breeze Cocktail

As summer rolls in, I find myself dreaming of sun-soaked beaches and refreshing sips. The Malibu Bay Breeze Cocktail is my go-to drink for those lazy afternoons when I want to unwind. It’s a delightful blend of tropical flavors that transports me straight to paradise, even if I’m just in my backyard. This cocktail is not only quick to whip up, but it also impresses friends and family alike. Whether you’re hosting a gathering or simply treating yourself after a long day, this drink is the perfect solution to cool down and savor the moment.

Why You’ll Love This Malibu Bay Breeze Cocktail

This Malibu Bay Breeze Cocktail is a breeze to make, taking just five minutes from start to finish. It’s perfect for busy moms like me who crave a refreshing drink without the fuss. The sweet and tangy combination of cranberry and pineapple juices, paired with smooth Malibu rum, creates a taste that’s simply irresistible. Plus, it’s a crowd-pleaser, making it ideal for summer gatherings or a quiet evening on the porch.

Ingredients for Malibu Bay Breeze Cocktail

Gathering the right ingredients is key to crafting the perfect Malibu Bay Breeze Cocktail. Here’s what you’ll need:

  • Malibu rum: This coconut-flavored rum is the star of the show, bringing a tropical vibe to your drink.
  • Cranberry juice: Its tartness balances the sweetness of the rum, adding a refreshing zing.
  • Pineapple juice: This juice adds a sweet, fruity flavor that complements the other ingredients beautifully.
  • Ice cubes: Essential for chilling your cocktail and keeping it refreshing on a hot day.
  • Lime wedge: A zesty garnish that enhances the drink’s flavor and adds a pop of color.
  • Pineapple slice: Another lovely garnish that not only looks great but also ties in with the tropical theme.

If you’re feeling adventurous, you can blend all the ingredients with ice for a frozen version. For a lighter twist, try substituting coconut water for the juices. The exact quantities for each ingredient are listed at the bottom of the article, ready for you to print and take to the kitchen!

How to Make Malibu Bay Breeze Cocktail

Making a Malibu Bay Breeze Cocktail is as easy as pie! Follow these simple steps, and you’ll have a refreshing drink in no time. Let’s dive into the fun of cocktail-making!

Step 1: Prepare Your Shaker

Start by grabbing your cocktail shaker. Fill it with ice cubes, about halfway. This will chill your drink perfectly. The sound of ice clinking is music to my ears, signaling that a delicious cocktail is on the way!

Step 2: Add the Ingredients

Next, pour in the Malibu rum, cranberry juice, and pineapple juice. The order doesn’t matter, but I like to add the rum first. It feels like the star of the show! Each ingredient brings its own flavor, creating a tropical symphony in your shaker.

Step 3: Shake It Up

Now, it’s time to shake things up! Secure the lid on your shaker and give it a good shake for about 15-20 seconds. You want to feel that chill in your hands. This step is crucial for blending the flavors and making your cocktail refreshing.

Step 4: Strain and Serve

Once you’ve shaken it well, it’s time to strain the mixture into a glass filled with ice. Use a fine mesh strainer if you have one, to catch any pulp. Watching the vibrant colors swirl together is like a mini art show in your kitchen!

Step 5: Garnish

Finally, it’s time to make your cocktail look as good as it tastes. Garnish with a lime wedge and a slice of pineapple. Not only do they add a pop of color, but they also enhance the tropical vibe. Cheers to your beautiful creation!

Tips for Success

  • Use chilled ingredients for an extra refreshing cocktail.
  • Experiment with the juice ratios to find your perfect balance of sweetness and tartness.
  • For a fun twist, try adding a splash of soda water for some fizz.
  • Don’t skip the garnishes; they elevate the drink’s presentation and flavor.
  • Make a batch for a party by multiplying the ingredients and serving in a pitcher.

Equipment Needed

  • Cocktail shaker: Essential for mixing your ingredients. A mason jar works in a pinch!
  • Strainer: Helps to catch any pulp. A fine mesh strainer or even a slotted spoon will do.
  • Glass: Use a tall glass for serving. A mason jar adds a fun, rustic touch!

Variations

  • Frozen Malibu Bay Breeze: Blend all ingredients with ice until smooth for a slushy treat that’s perfect for hot days.
  • Berry Twist: Add a handful of fresh berries, like strawberries or blueberries, to the shaker for a fruity explosion.
  • Mocktail Version: Omit the rum and replace it with coconut water or sparkling water for a refreshing non-alcoholic drink.
  • Spicy Kick: Add a dash of jalapeño or a few slices of fresh ginger for a spicy twist that complements the sweetness.
  • Herbal Infusion: Muddle fresh mint or basil leaves in the shaker before adding the liquids for an aromatic touch.

Serving Suggestions

  • Pair your Malibu Bay Breeze Cocktail with light appetizers like shrimp cocktail or tropical fruit skewers.
  • Serve alongside a fresh salad topped with citrus vinaigrette for a refreshing meal.
  • For a fun presentation, use colorful straws and cocktail umbrellas to enhance the tropical vibe.
  • Consider serving it in mason jars for a casual, beachy feel.

FAQs about Malibu Bay Breeze Cocktail

What is a Malibu Bay Breeze Cocktail?

The Malibu Bay Breeze Cocktail is a refreshing tropical drink made with Malibu rum, cranberry juice, and pineapple juice. It’s perfect for summer gatherings or a relaxing evening at home.

Can I make a non-alcoholic version?

Absolutely! To create a mocktail version, simply omit the rum and replace it with coconut water or sparkling water. You’ll still enjoy a deliciously refreshing drink!

How can I adjust the sweetness of the cocktail?

If you prefer a less sweet drink, you can reduce the amount of cranberry juice or use unsweetened juice. Experimenting with the juice ratios can help you find your perfect balance.

Can I prepare this cocktail in advance?

While it’s best enjoyed fresh, you can mix the juices ahead of time and store them in the fridge. Just add the rum and ice right before serving for the best flavor.

What snacks pair well with the Malibu Bay Breeze Cocktail?

This cocktail pairs wonderfully with light appetizers like shrimp cocktail, tropical fruit skewers, or a fresh salad. The bright flavors complement each other beautifully!

Final Thoughts

Creating a Malibu Bay Breeze Cocktail is more than just mixing drinks; it’s about crafting moments of joy. Each sip transports me to a sunlit beach, where worries fade away. This cocktail is a celebration of summer, perfect for unwinding after a busy day or sharing with friends at a gathering. The vibrant colors and tropical flavors bring a smile to my face, reminding me to savor life’s little pleasures. So, whether you’re lounging by the pool or enjoying a quiet evening, let this delightful drink be your companion in creating unforgettable memories.

“`

Olivia

Malibu Bay Breeze Cocktail: Refresh Your Summer Sip!

A refreshing tropical cocktail perfect for summer, combining the flavors of Malibu rum, cranberry juice, and pineapple juice.
Prep Time 5 minutes
Total Time 5 minutes
Servings: 1 serving
Course: Cocktail
Cuisine: Tropical
Calories: 200

Ingredients
  

  • 2 ounces Malibu rum
  • 3 ounces cranberry juice
  • 3 ounces pineapple juice
  • Ice cubes
  • Lime wedge for garnish
  • Pineapple slice for garnish

Method
 

  1. Fill a cocktail shaker with ice cubes.
  2. Pour in the Malibu rum, cranberry juice, and pineapple juice.
  3. Shake well until the mixture is chilled, about 15-20 seconds.
  4. Strain the mixture into a glass filled with ice.
  5. Garnish with a lime wedge and a slice of pineapple.

Nutrition

Serving: 1cocktailCalories: 200kcalCarbohydrates: 25gSugar: 25g

Notes

  • For a frozen version, blend all ingredients with ice until smooth.
  • Substitute coconut water for a lighter, refreshing twist.

Tried this recipe?

Let us know how it was!

Stay Connected

Get recipes via email: