Moist One Bowl Banana Bread That’s Quick and Irresistible

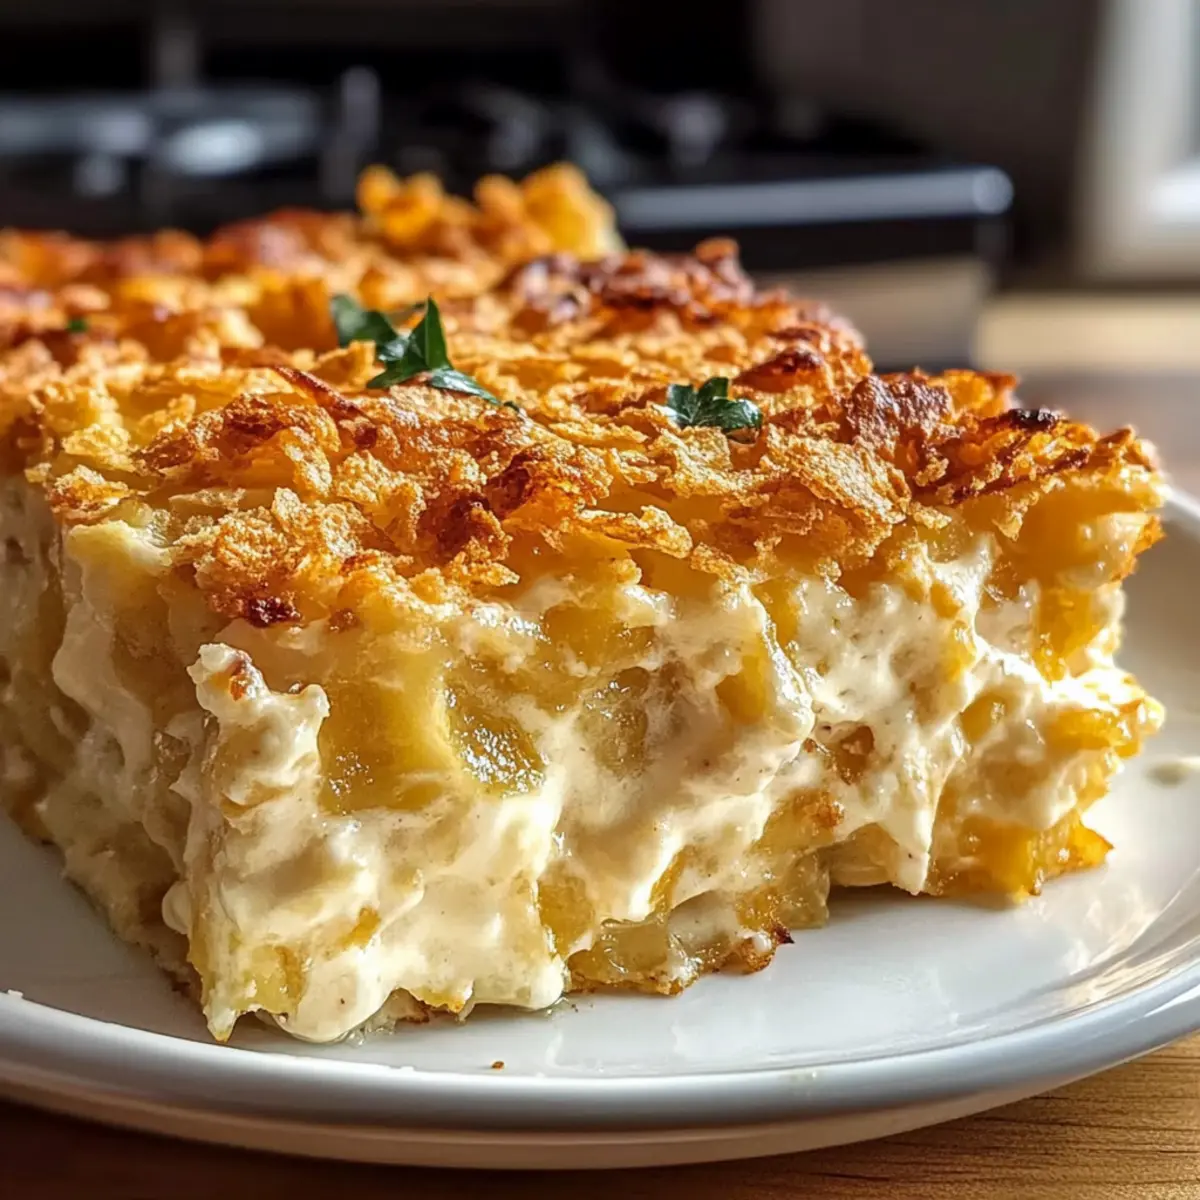
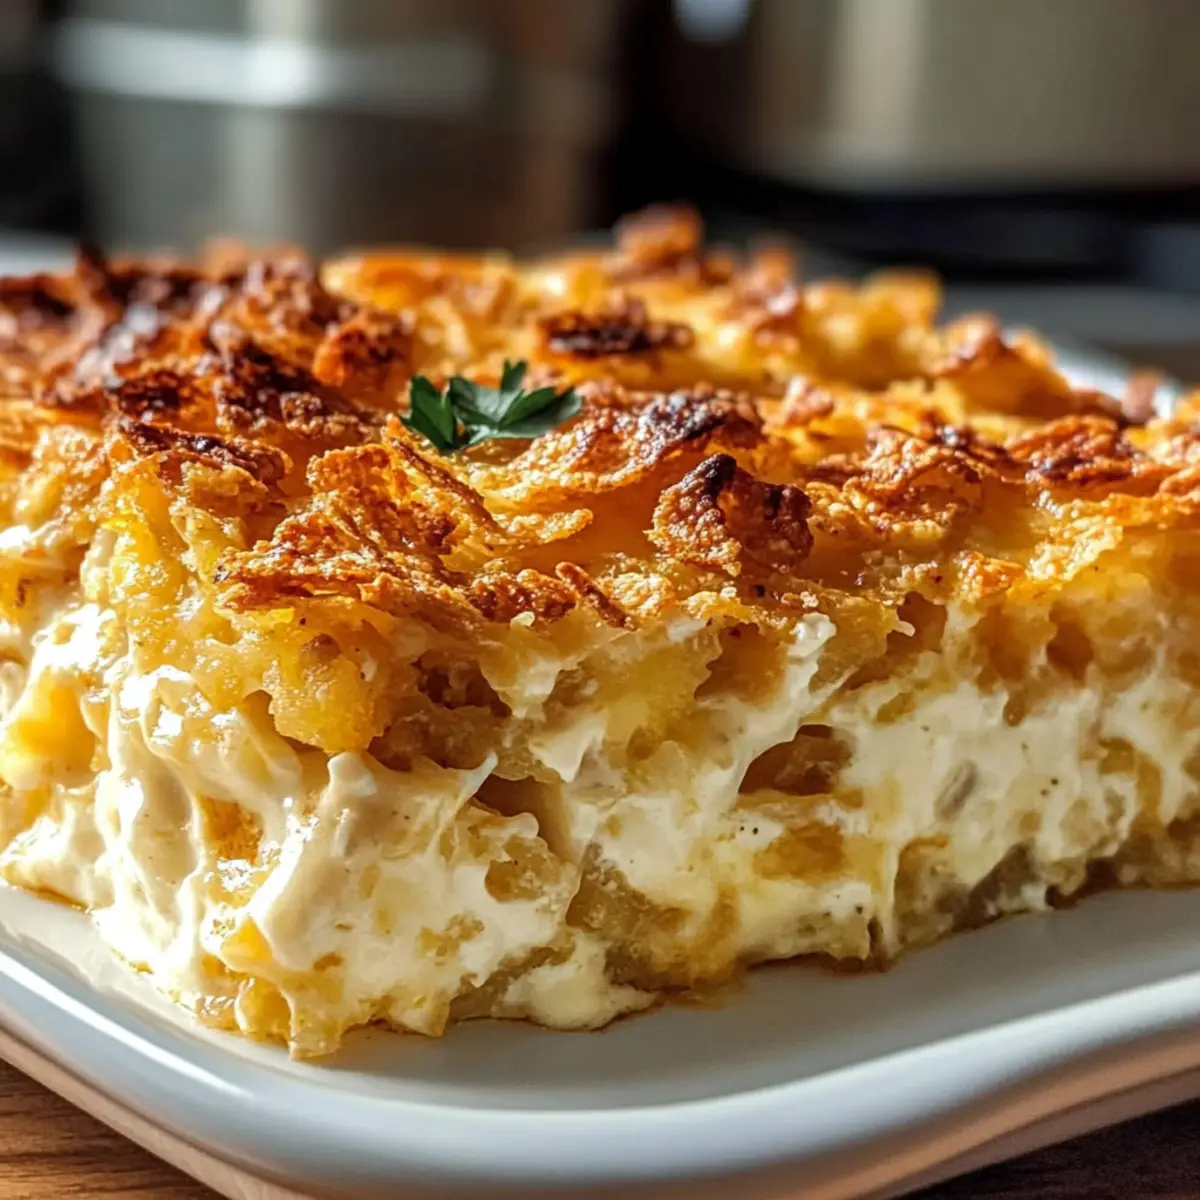
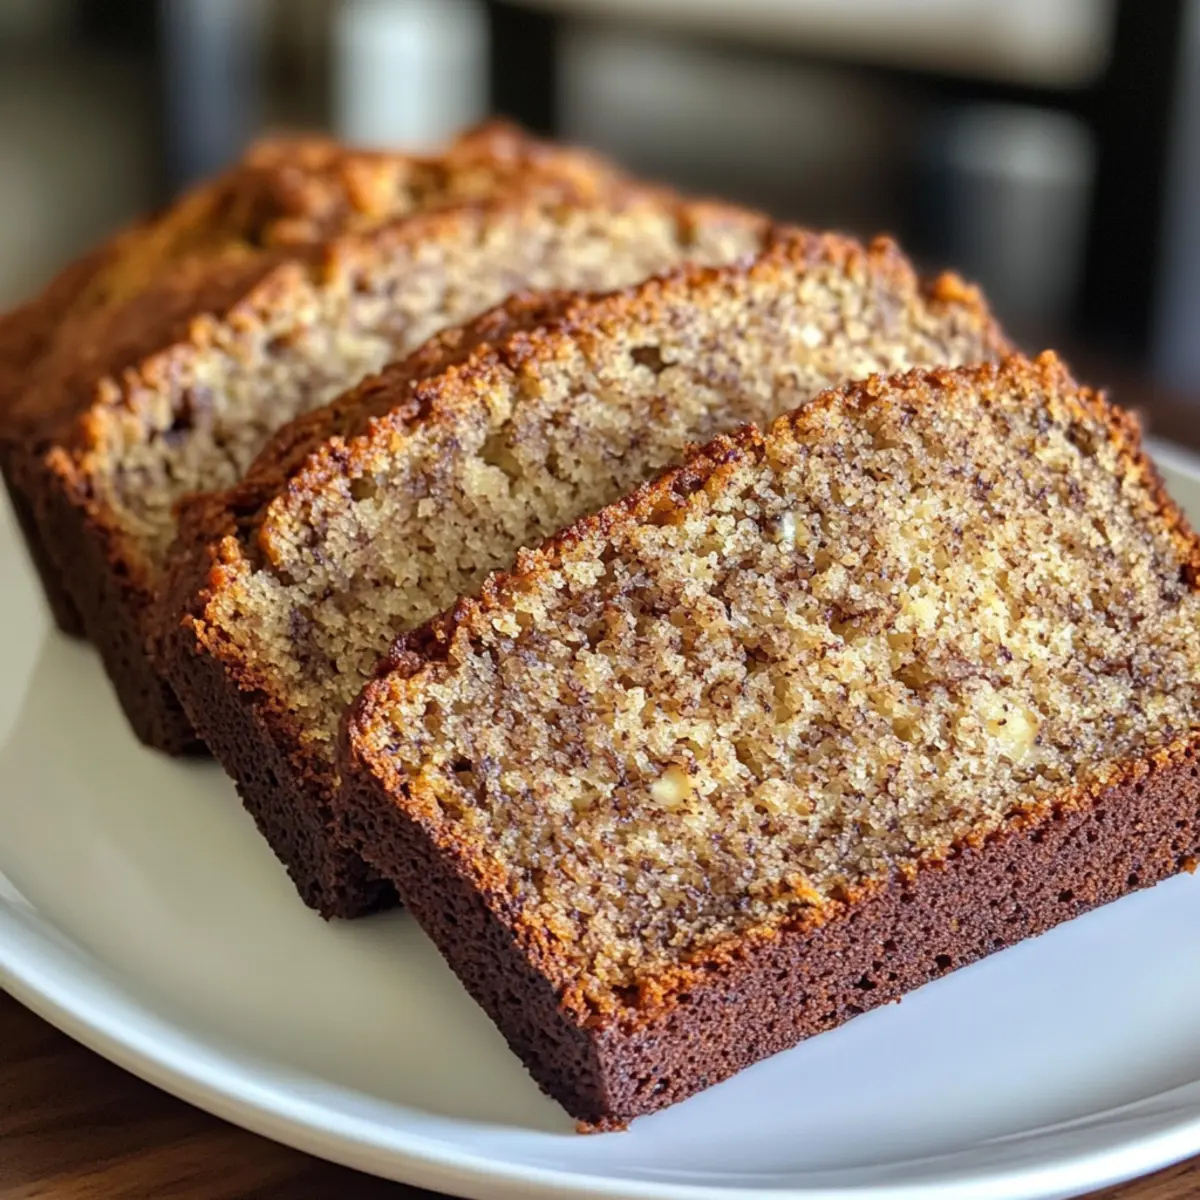
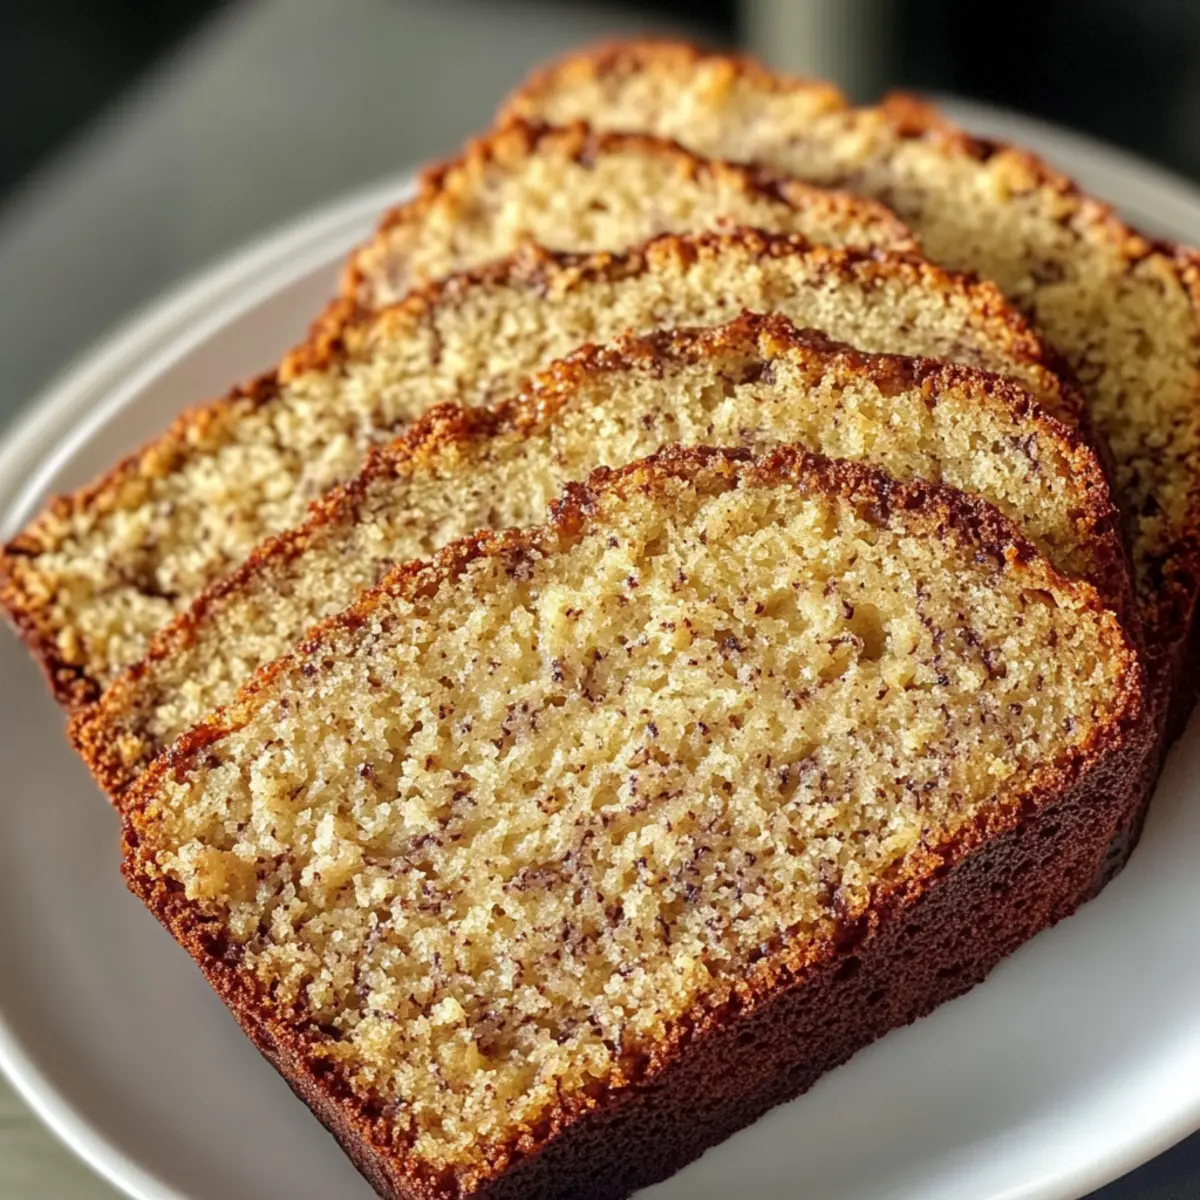
As the inviting aroma of just-baked goods wafts through my kitchen, I can’t help but feel a wave of nostalgia that brings back cherished memories of warm, homemade treats. Today, I’m thrilled to share my Moist One Bowl Banana Bread recipe, a simple yet satisfying way to turn overripe bananas into an irresistible snack. Not only does this easy, one-bowl recipe save you time on cleanup, but it also promises a deliciously moist texture that’s perfect alongside your morning coffee or as a delightful afternoon pick-me-up. Plus, with just a few customization options like adding nuts or chocolate chips, this versatile bread will easily become a beloved staple in your home. What flavors will you tempt your taste buds with?

Why Is This Banana Bread So Special?

Simplicity: This one-bowl recipe takes the stress out of baking, making it a breeze for both novices and seasoned bakers.

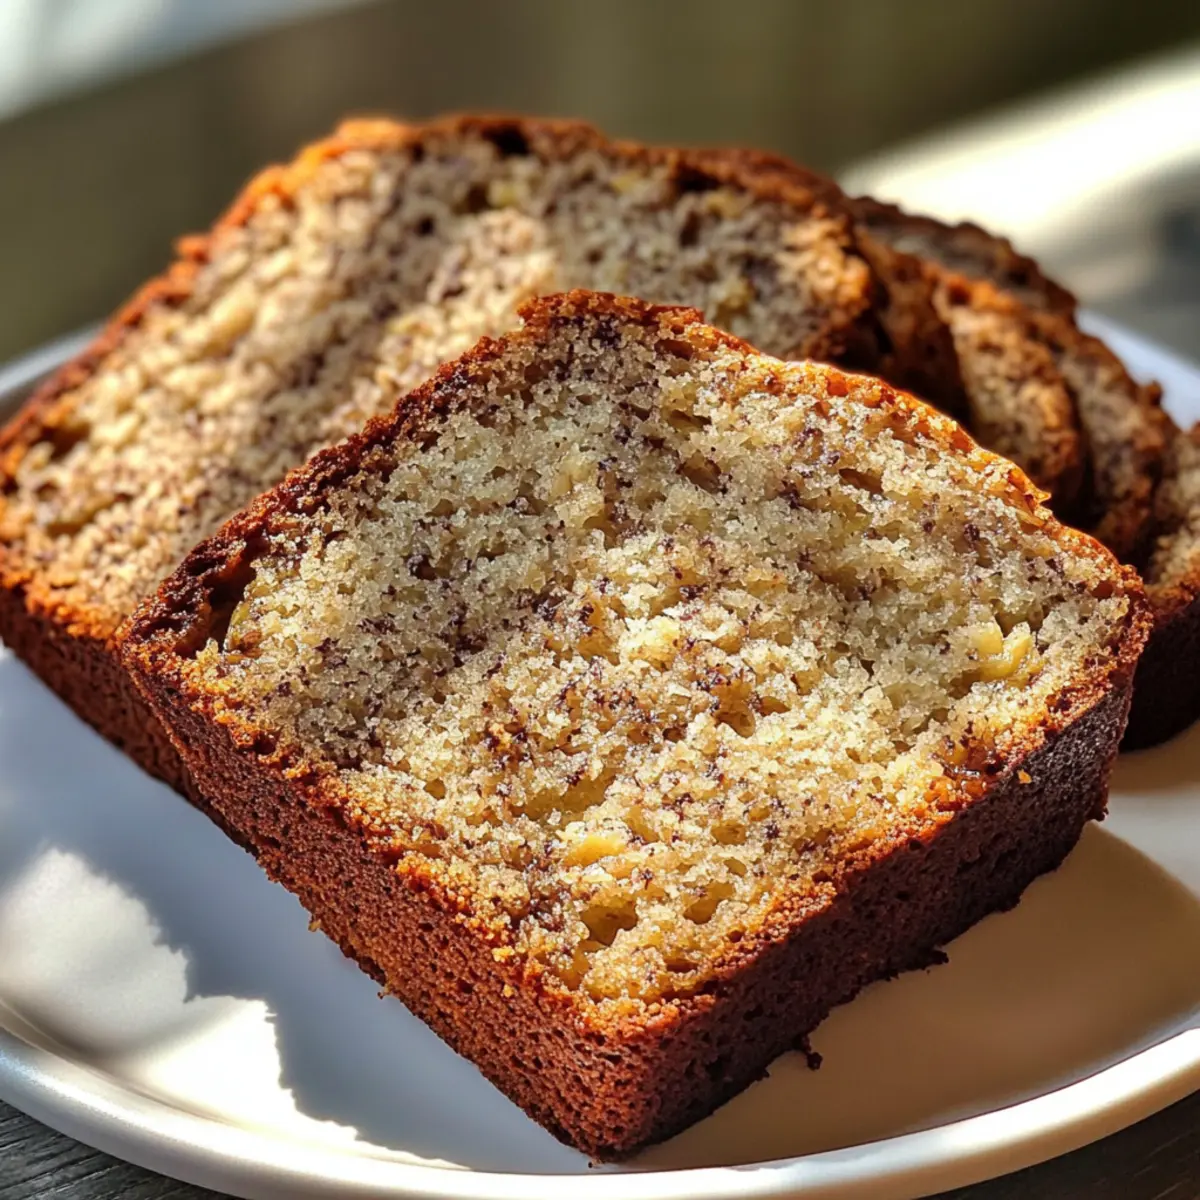
Moist and Flavorful: The use of overripe bananas ensures a naturally sweet and moist loaf that’s hard to resist.

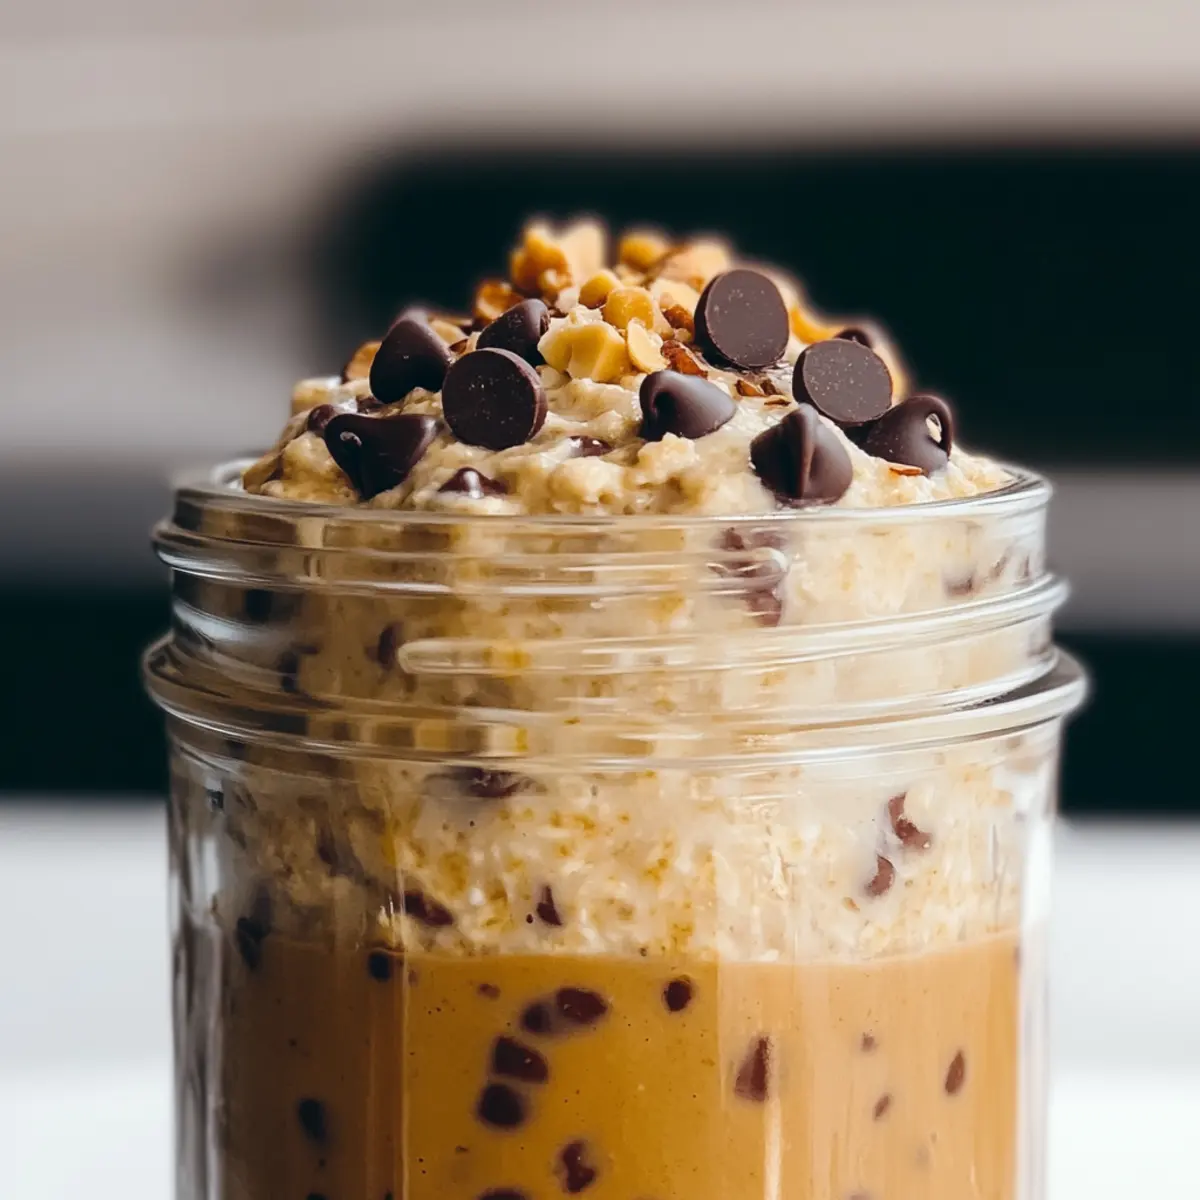
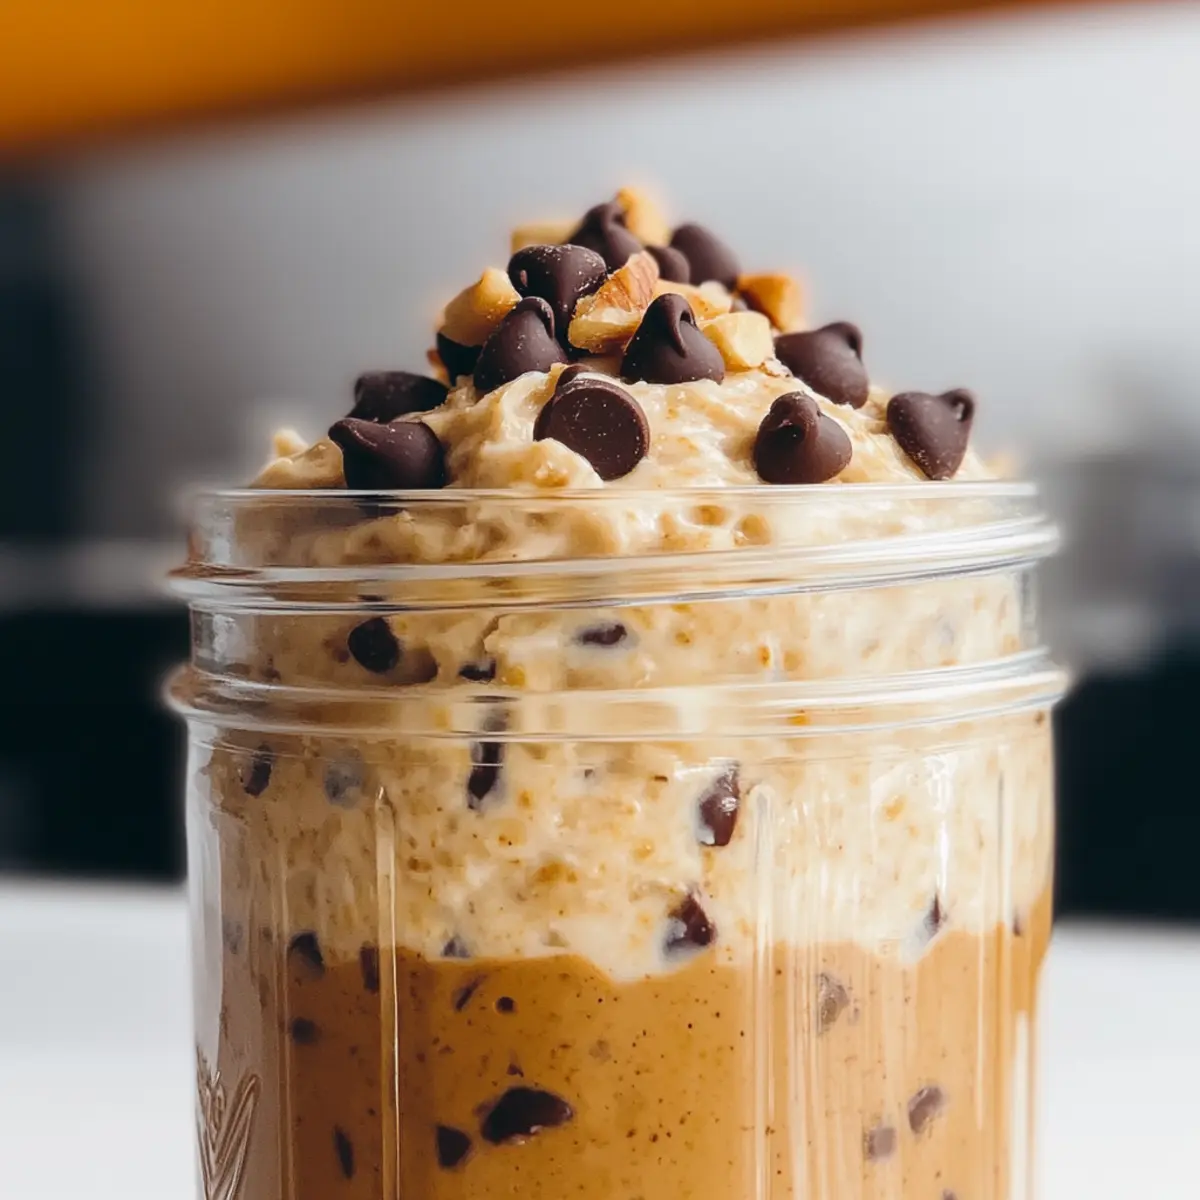
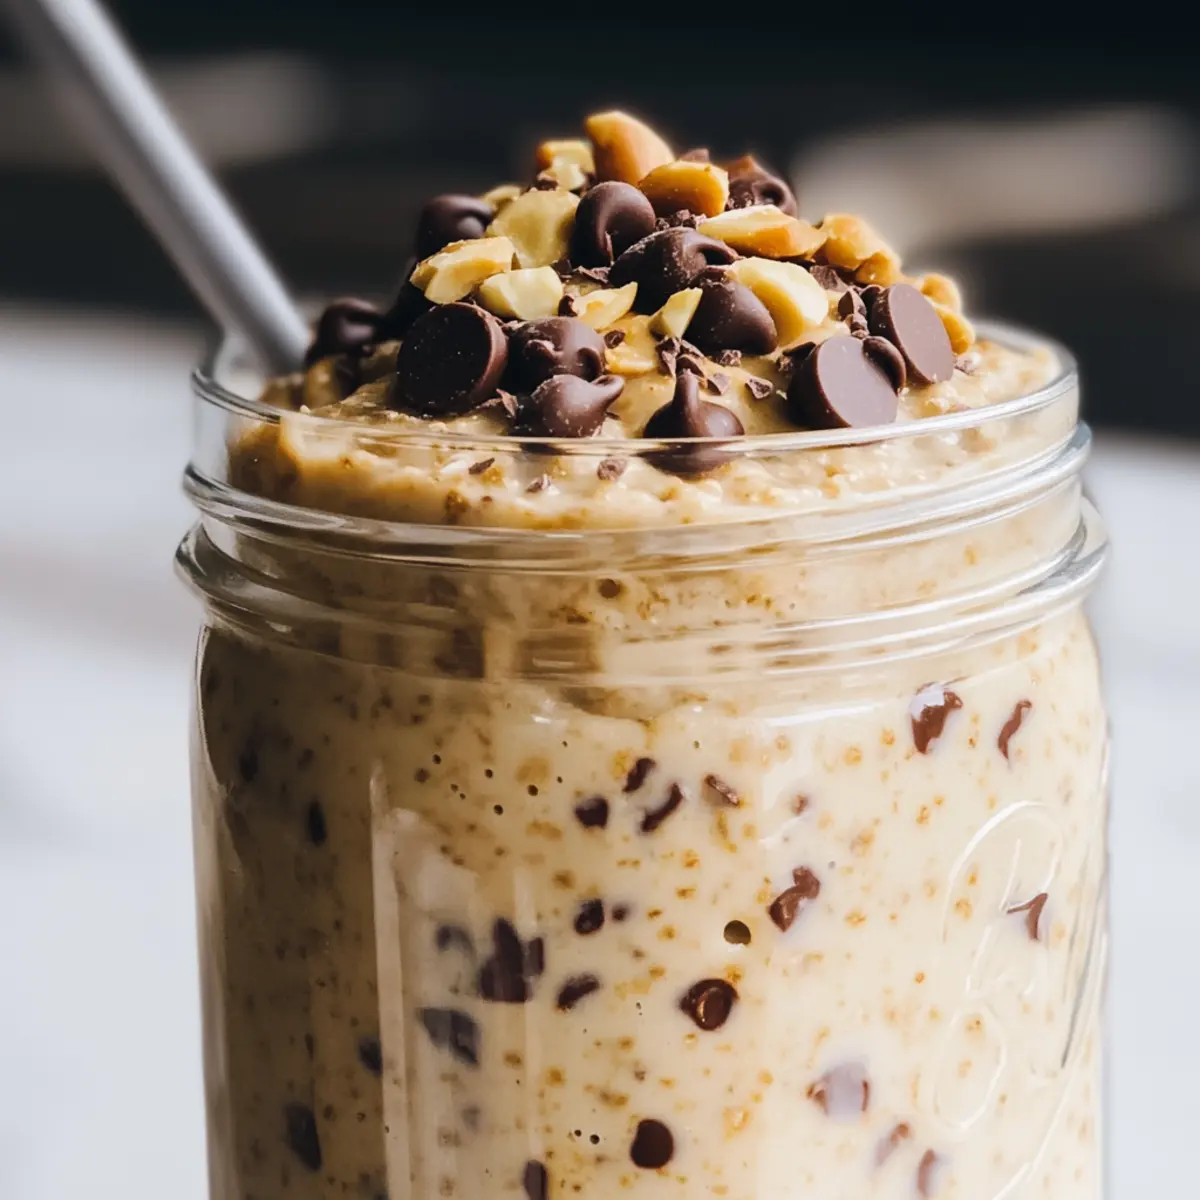
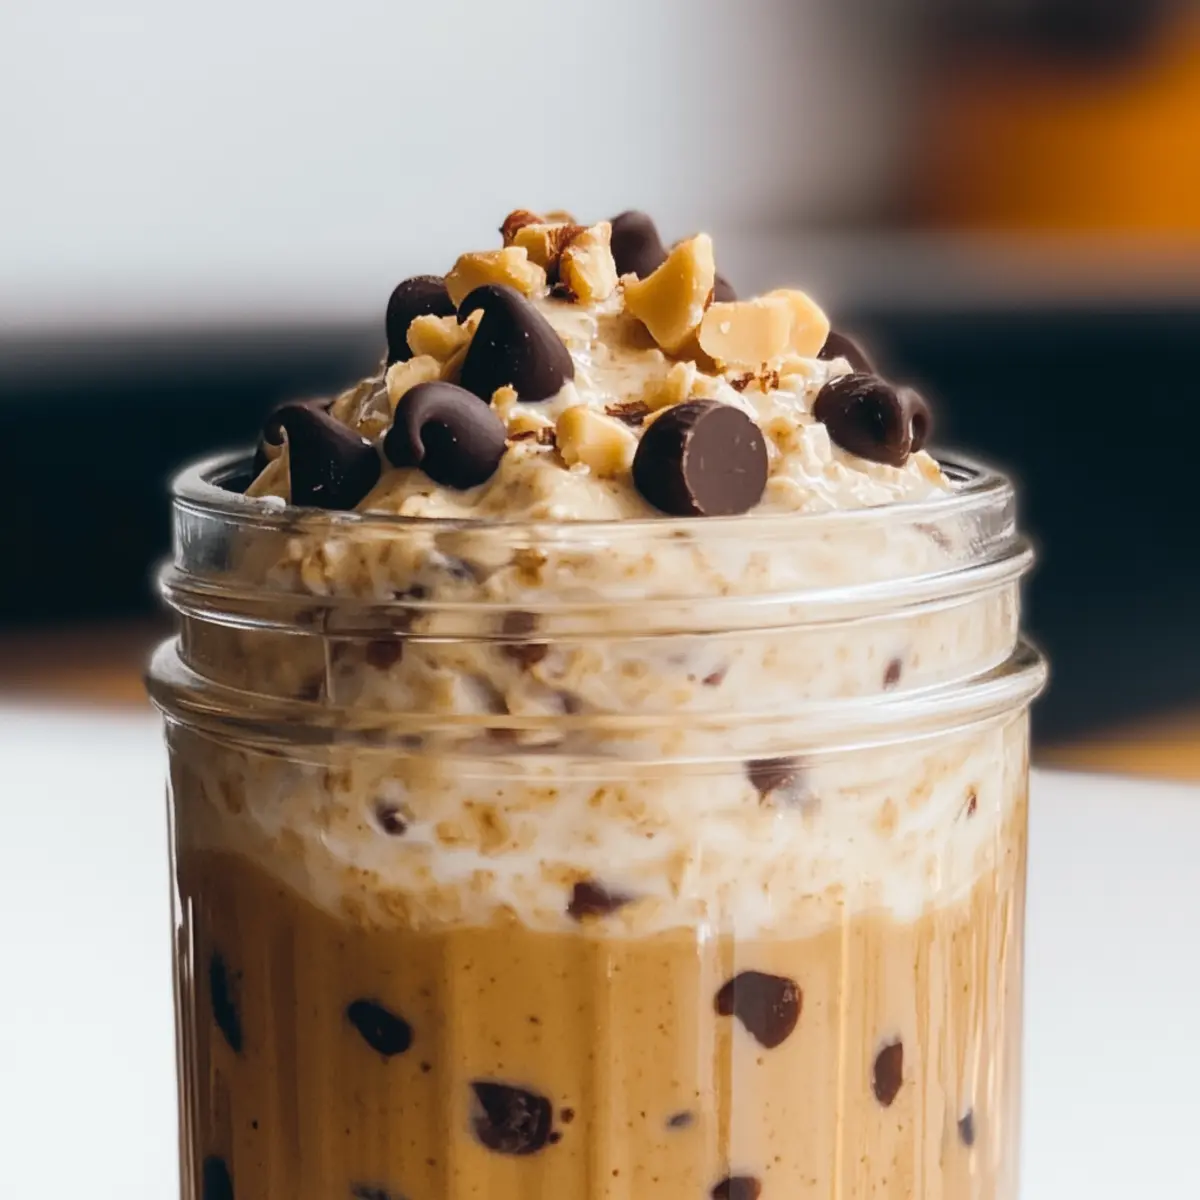
Customizable: With options to mix in chocolate chips or nuts, you can tailor this banana bread to suit any taste.

Perfect for Any Occasion: Whether for breakfast, a snack, or dessert, this banana bread is ideal anytime.

Crowd-Pleasing: It’s a hit with family and friends—serve it warm, and watch it disappear! Try pairing it with a dollop of whipped cream or a drizzle of honey for that extra touch.

One Bowl Banana Bread Ingredients

Here’s everything you need to create this delightful banana bread!

For the Bread

  • 3 large bananas (or 4 small bananas) – Use overripe bananas with brown spots for the best flavor and moisture.
  • ½ cup unsalted butter, melted – Adds richness; can substitute with oil for a lighter texture if desired.
  • ⅔ cup granulated sugar – Sweetens the bread; raw or coconut sugar can be great alternatives.
  • 2 large eggs, room temperature – Binds the ingredients; make sure they’re at room temperature for better mixing.
  • 1 teaspoon vanilla extract – Enhances flavor; opt for pure vanilla for an authentic taste.
  • 2 cups all-purpose flour – Provides structure; can substitute with a gluten-free blend for a different look.
  • 1 teaspoon baking soda – Acts as a leavening agent for that perfect rise.
  • ½ teaspoon baking powder – Complements baking soda to ensure light and fluffy bread.
  • 1 teaspoon cinnamon – Adds warmth and flavor; adjust to suit your taste!
  • ¼ teaspoon salt – Balances sweetness and enhances the overall flavor.

Optional Mix-Ins

  • Nuts (walnuts or pecans) – Adds a wonderful crunch; consider 2/3 to 1 cup for a delightful addition.
  • Chocolate chips – For a sweet twist; mix in to elevate your banana bread experience.
  • Dried fruits – Try raisins or cranberries for extra sweetness and flavor.

This One Bowl Banana Bread recipe is easy to make and customize, making it a must-try for any banana lover!

Step‑by‑Step Instructions for Moist One Bowl Banana Bread

Step 1: Preheat the Oven
Begin by preheating your oven to 350°F (175°C). While it warms up, grease a 9×5-inch loaf pan with butter or non-stick spray to ensure that your Moist One Bowl Banana Bread comes out easily once baked. This critical step helps prevent any sticking, creating a beautifully shaped loaf.

Step 2: Mash the Bananas
In a large mixing bowl, take your overripe bananas—about 3 large or 4 small—and mash them thoroughly using a fork or a potato masher. Aim for a smooth texture with a few small lumps for added character. This process should take about 2-3 minutes. The sweeter and softer the bananas, the moister your bread will be!

Step 3: Mix in the Butter
Once the bananas are mashed to your satisfaction, pour in the melted unsalted butter. Stir vigorously until the mixture is fully combined and smooth. This step allows the warm butter to blend seamlessly into the banana puree, enriching the flavor and moisture of your one-bowl banana bread.

Step 4: Add Sugar, Eggs, and Vanilla
Next, add ⅔ cup of granulated sugar, 2 room-temperature eggs, and 1 teaspoon of vanilla extract to the banana-butter mixture. Whisk everything together until it’s smooth and creamy—about another 2-3 minutes. This mixture will become the sweet base of your banana bread, infusing it with flavor and moisture.

Step 5: Incorporate Dry Ingredients
Now, it’s time to fold in the dry ingredients. Sift in 2 cups of all-purpose flour, 1 teaspoon of baking soda, ½ teaspoon of baking powder, 1 teaspoon of cinnamon, and ¼ teaspoon of salt. Using a spatula, mix gently until just combined, making sure to avoid overmixing. You want the batter to be lumpy yet cohesive for a tender result.

Step 6: Pour and Smooth the Batter
Carefully pour the banana bread batter into the greased loaf pan. Use a spatula to smooth the top evenly, making sure there are no big air pockets. This ensures your Moist One Bowl Banana Bread will rise beautifully in the oven, yielding an invitingly soft texture throughout once baked.

Step 7: Bake the Banana Bread
Place the loaf pan in the preheated oven and bake for about 60 minutes. Keep an eye on it! You’ll know it’s ready when a toothpick inserted into the center comes out clean with just a few moist crumbs attached. The top should be golden-brown and inviting, filling your kitchen with rich aromas.

Step 8: Cool and Serve
After baking, remove the bread from the oven and let it cool in the pan for 5-10 minutes. Once slightly cooled, transfer it to a wire rack to cool completely. This step is crucial for allowing your Moist One Bowl Banana Bread to set perfectly, making it easy to slice and enjoy warm with your favorite spreads!

One Bowl Banana Bread Variations

Feel free to mix things up and make this delightful banana bread truly your own!

  • Gluten-Free: Substitute all-purpose flour with a gluten-free blend for a wheat-free version that everyone can enjoy.

  • Nutty Delight: Add 1 cup of walnuts or pecans to the batter for a crunchy surprise in every slice. The contrast of texture makes each bite even more enjoyable!

  • Chocolate Lovers: Swirl in 1 cup of chocolate chips for a deliciously sweet twist. The gooey chocolaty goodness will make your heart skip a beat!

  • Fruit Fusion: Fold in 1 cup of blueberries or 1 cup of shredded zucchini for a fruity twist that complements the bananas beautifully. This adds moisture and a pop of color to your bread.

  • Spice It Up: If you adore warm flavors, increase the cinnamon to 1½ teaspoons or add a pinch of nutmeg for an aromatic enhancement.

  • Healthy Swap: Reduce sugar by substituting half with honey or maple syrup for a more health-conscious choice. The moisture level will remain intact, ensuring your loaf stays soft.

  • Decadent Swirl: Create a cream cheese filling by mixing softened cream cheese with a bit of sugar and vanilla. Swirl it through the batter before baking for a sweet surprise.

  • Savory Kick: Try adding a touch of finely chopped fresh herbs like rosemary or thyme for something unexpectedly delightful. This unique flavor will elevate your banana bread to gourmet levels!

Feeling inspired? Customizing your banana bread not only reflects your taste but also makes baking even more fun! For more flavor adventures, you might enjoy pairing your bread with some delicious fresh fruit or drizzle it with honey for that extra sweetness.

Expert Tips for Moist One Bowl Banana Bread

  • Choose Perfect Bananas: Use overripe bananas with plenty of brown spots to maximize sweetness and moisture in your one-bowl banana bread.

  • Mind the Mixing: Avoid overmixing the batter to prevent a dense loaf; just stir until the dry ingredients are incorporated for a light texture.

  • Add Flavor Boosters: Consider adding nuts, chocolate chips, or dried fruit; these mix-ins can enhance the flavor and texture of your banana bread.

  • Cooling is Key: Allow the bread to cool in the pan for 5-10 minutes before transferring it to a wire rack; this helps maintain its structure and prevents sogginess.

  • Storage Secrets: Keep your banana bread in an airtight container or zip-lock bag to ensure it stays moist and fresh for up to a week.

Make Ahead Options

These Moist One Bowl Banana Bread options are perfect for busy home cooks! You can mash the bananas and mix the wet ingredients up to 24 hours in advance. Simply refrigerate the banana mixture in an airtight container to keep it fresh. Additionally, you can measure and combine the dry ingredients, storing them in a separate bowl for up to 3 days. When you’re ready to bake, just mix the wet and dry components together, pour the batter into the loaf pan, and bake as directed. By prepping ahead, you’ll save valuable time and enjoy home-baked goodness with just a little effort!

How to Store and Freeze One Bowl Banana Bread

Room Temperature: Store your banana bread in an airtight container for up to 3 days. This keeps it moist and flavorful without needing refrigeration.

Fridge: If you prefer, you can refrigerate the banana bread to prolong freshness for up to a week. Just ensure it’s tightly wrapped to prevent it from drying out.

Freezer: For longer storage, slice the banana bread and wrap each piece in foil or place them in a zip-lock bag. It will keep well in the freezer for up to 2-3 months.

Reheating: To enjoy a slice warm, simply pop it in the microwave for 10-15 seconds or warm it in a toaster oven. The result? A delightful treat reminiscent of fresh-baked goodness!

What to Serve with One Bowl Banana Bread?

There’s nothing quite like a warm slice of banana bread to brighten your day, but what should you enjoy alongside it?

  • Creamy Greek Yogurt: Its tangy flavor and creamy texture provide a refreshing contrast, making each bite feel indulgently smooth. Drizzle honey on top to add a natural sweetness.
  • Fresh Berries: Juicy blueberries or strawberries brighten your plate while adding vibrant colors and a hint of natural sweetness that pairs perfectly with the banana bread.
  • Nutty Granola: A sprinkle of granola offers satisfying crunch and complements the soft bread, making it an excellent addition for a balance of textures. Great over yogurt!
  • Warm Coffee: The bold flavors of coffee enhance the richness of the bread, making each sip and bite a comforting experience perfect for chilly mornings.
  • Honey Butter: A dollop of whipped honey butter takes your banana bread to the next level, enhancing its moistness with a sweet, fluffy topping you won’t want to miss.
  • Vanilla Ice Cream: Pairing a slice of warm banana bread with a scoop of vanilla ice cream creates a delightful contrast that’s simply irresistible—think of it as a cozy dessert!
  • Coconut Chai Tea: The aromatic spices in chai tea beautifully complement the cinnamon notes in the banana bread, creating a soothing experience you can enjoy anytime of day.
  • Dried Fruits: Figs or apricots bring a chewy texture and a hint of sweetness that harmonizes wonderfully with the natural flavors of banana bread. Ideal for snacking!
  • Almond Milk: A glass of chilled almond milk adds a nutty flavor while being a lighter alternative to traditional milk, refreshing in every sip alongside your bread.
  • Chocolate Spread: For a decadent twist, spread a bit of chocolate hazelnut spread on your banana bread—it’s a chocolate lover’s dream come true!

One Bowl Banana Bread Recipe FAQs

What type of bananas should I use for this recipe?
Absolutely! Use overripe bananas—those with plenty of brown spots. They will provide the natural sweetness and moisture that are crucial for a deliciously moist One Bowl Banana Bread. If you grab those bananas that no one wants, you’re on the right track!

How should I store leftover banana bread?
You can store your banana bread in an airtight container at room temperature for up to 3 days to keep it moist and flavorful. If you’d like it to last longer, refrigerate it in the same container for about a week. Just remember to wrap it tightly to avoid drying out!

Can I freeze banana bread, and if so, how?
Yes, you can definitely freeze your One Bowl Banana Bread! Here’s how: slice the bread first, then wrap each slice in foil or place them in a zip-lock freezer bag, removing as much air as possible. This will keep the bread fresh for up to 2-3 months. Whenever you’re ready to enjoy, just pop a slice in the microwave for 10-15 seconds for a warm, delightful treat.

I mixed the batter too much; will my banana bread still turn out okay?
Very! While overmixing can lead to a denser loaf, don’t worry too much. If your batter is mixed well and you’ve still seen some lumps, it should come out fine. Just give it a shot! To prevent this in the future, mix until ingredients are just combined—this will keep your bread light and fluffy.

Can I make substitutions for dietary restrictions?
Absolutely! This recipe is quite forgiving. For gluten-free options, you can use a gluten-free flour blend. If you have an egg allergy, you can substitute each egg with 1/4 cup of unsweetened applesauce or 1/2 banana. And if you want to lower sugar intake, consider reducing the sugar by a third or using stevia or another sugar substitute. Always make sure adjustments are suited to your dietary needs!

Can pets eat banana bread?
While bananas themselves are safe for pets, it’s best to keep banana bread away from them. Many recipes include ingredients like sugar, butter, and flour that aren’t good for animals. If you want to share a treat with your furry friend, a plain banana is a much safer option!

undefined

Moist One Bowl Banana Bread That's Quick and Irresistible

This Moist One Bowl Banana Bread is a quick, simple recipe that is perfect for transforming overripe bananas into a deliciously moist loaf.
Prep Time 15 minutes
Cook Time 1 hour
Cooling Time 10 minutes
Total Time 1 hour 25 minutes
Servings: 10 slices
Course: Dessert
Cuisine: American
Calories: 200

Ingredients
  

For the Bread
  • 3 large bananas Use overripe bananas with brown spots for the best flavor and moisture.
  • ½ cup unsalted butter melted
  • cup granulated sugar raw or coconut sugar can be great alternatives.
  • 2 large eggs room temperature
  • 1 teaspoon vanilla extract opt for pure vanilla for an authentic taste.
  • 2 cups all-purpose flour can substitute with a gluten-free blend.
  • 1 teaspoon baking soda acts as a leavening agent.
  • ½ teaspoon baking powder complements baking soda.
  • 1 teaspoon cinnamon adjust to suit your taste.
  • ¼ teaspoon salt balances sweetness.
Optional Mix-Ins
  • Nuts (walnuts or pecans) consider 2/3 to 1 cup.
  • Chocolate chips mix in to elevate your banana bread experience.
  • Dried fruits try raisins or cranberries.

Equipment

  • 9x5 inch loaf pan
  • Mixing Bowl
  • spatula
  • fork or potato masher

Method
 

Step‑by‑Step Instructions
  1. Preheat your oven to 350°F (175°C) and grease a 9x5-inch loaf pan.
  2. In a large mixing bowl, mash the overripe bananas until smooth with a few small lumps.
  3. Pour in the melted unsalted butter and stir until fully combined.
  4. Add the sugar, eggs, and vanilla extract; whisk until smooth and creamy.
  5. Fold in the sifted dry ingredients until just combined.
  6. Pour the batter into the greased loaf pan and smooth the top.
  7. Bake for about 60 minutes, or until a toothpick comes out clean with a few moist crumbs.
  8. Cool in the pan for 5-10 minutes, then transfer to a wire rack to cool completely.

Nutrition

Serving: 1sliceCalories: 200kcalCarbohydrates: 30gProtein: 2gFat: 8gSaturated Fat: 5gPolyunsaturated Fat: 1gMonounsaturated Fat: 2gCholesterol: 40mgSodium: 150mgPotassium: 200mgFiber: 1gSugar: 12gVitamin A: 300IUVitamin C: 2mgCalcium: 20mgIron: 1mg

Notes

This banana bread is customisable with various mix-ins, storage options, and perfect for any occasion.

Tried this recipe?

Let us know how it was!

Cookie Dough Overnight Oats for a Tasty, Guilt-Free Breakfast

There’s something magical about breakfast that feels like a delightful dessert, and that’s exactly what these Cookie Dough Overnight Oats deliver. Picture waking up to a creamy, indulgent bowl infused with the rich flavors of almond butter and sweet vanilla, all while knowing it’s not just a treat, but a wholesome, healthier breakfast choice. As someone who thrives on quick and satisfying meals, I love how this no-cook recipe seamlessly fits into my busy mornings while keeping my energy high and sugar low—perfect for everyone, from the health-conscious to the dessert-lover! Whether you’re meal prepping for the week or just enjoying a moment for yourself, these oats are easily customizable, comforting, and utterly irresistible. Ready to turn your breakfast routine into a delightful treat? Let’s dive in!

Why will you crave this breakfast?

Simplicity at its finest: With no cooking involved, you can whip up these Cookie Dough Overnight Oats in minutes, making them perfect for busy mornings.

Indulgent flavor: Each bite bursts with the deliciousness of cookie dough thanks to almond butter, sweet vanilla, and chocolate chips.

Nutrient-packed: This healthy breakfast is high in protein and low in sugar, keeping you full and energized throughout your morning.

Customizable goodness: Easily swap ingredients to fit your taste or dietary needs—think oat milk for dairy-free or fresh fruit for extra flavor.

Whether you’re meal prepping for the week or just treating yourself, these delightful oats will surely become a go-to recipe.

Cookie Dough Overnight Oats Ingredients

For the Base

  • Rolled Oats – The foundation of the dish, providing a chewy texture; choose rolled oats for the best results.
  • Milk – Adds creaminess; use any milk, but for a dairy-free option, almond, oat, or coconut milk works beautifully.

For the Flavor

  • Almond Butter or Peanut Butter – Delivers rich flavor and healthy fats; swap for sunflower seed butter for a nut-free alternative.
  • Maple Syrup or Honey – Brings natural sweetness; brown sugar can serve as a great alternative for a cookie dough taste.
  • Vanilla Extract – Infuses that unmistakable cookie dough taste; don’t skip this ingredient!
  • Cinnamon – Adds warm undertones that enhance the entire flavor profile.

For Texture and Fun

  • Chia Seeds or Flaxseeds (optional) – Thickens the mixture while boosting nutrition; omit if you prefer a smoother texture.
  • Mini Chocolate Chips – Essential for that cookie dough vibe; they’re optional but highly recommended for indulgence!
  • Crushed Nuts (optional) – Boosts crunch; walnuts or pecans add delightful flavor and texture.

These Cookie Dough Overnight Oats are not just a yummy breakfast but a simple and nourishing way to start your day. Enjoy crafting your morning treat!

Step-by-Step Instructions for Cookie Dough Overnight Oats

Step 1: Mix Ingredients
In a medium bowl or jar, combine 1 cup of rolled oats, 1 cup of milk of your choice, 2 tablespoons of almond butter, 2 tablespoons of maple syrup, 1 teaspoon of vanilla extract, and ½ teaspoon of cinnamon. Stir well until all the ingredients are fully blended, ensuring the nut butter is evenly distributed. The mixture should be creamy and cohesive, ready to absorb flavors overnight.

Step 2: Add Seeds and Chocolate
Next, fold in 1 tablespoon of chia seeds or flaxseeds if you’re using them, along with ¼ cup of mini chocolate chips. Gently mix until everything is combined and the chocolate chips are scattered throughout the oats. You should see a delightful blend of textures, with the seeds adding a nutritious boost while contributing to the cookie dough experience.

Step 3: Store Overnight
Cover the bowl or jar with a lid or plastic wrap and place it in the refrigerator. Let the mixture sit overnight, ideally for at least 6 hours, allowing the oats to soak up the milk and flavors. By morning, you’ll notice that the oats have swollen and thickened, transforming into a rich, creamy consistency reminiscent of cookie dough.

Step 4: Serve
In the morning, give the Cookie Dough Overnight Oats a good stir to redistribute the ingredients. If desired, top with additional chocolate chips, crushed nuts, or your favorite fresh fruits for extra flavor and texture. Enjoy your delicious, chilled oats straight from the fridge, perfect for a quick, wholesome breakfast that satisfies your sweet cravings!

Storage Tips for Cookie Dough Overnight Oats

Fridge: Keep your Cookie Dough Overnight Oats in an airtight container and store them in the fridge for up to 4 days for a quick and healthy breakfast option.

Freezer: If you’d like to prepare a larger batch, you can freeze individual servings in freezer-safe jars or containers for up to 1 month; just remember to thaw overnight in the fridge before eating.

Reheating: These oats are best enjoyed cold, but if you prefer them warm, gently heat in the microwave for about 30-45 seconds, watching carefully not to overheat.

Customization Tip: When storing, you can leave off delicate toppings like fresh fruit or extra chocolate chips until just before serving to keep them fresh and tasty.

Cookie Dough Overnight Oats Variations

Feel free to let your creativity shine by customizing these oats to fit your personal taste and dietary needs!

  • Nut-Free: Substitute almond butter with sunflower seed butter for a deliciously nut-free option.
  • Supercharged Protein: Boost your protein by mixing in a scoop of protein powder or Greek yogurt before soaking.
  • Sugar-Free Delight: Swap maple syrup for mashed bananas or unsweetened applesauce to keep it naturally sweet without the added sugar.
  • Seasonal Twist: Top with fresh seasonal fruits like strawberries or peaches for a pop of freshness and added nutrients.
  • Spiced Up: Add a pinch of nutmeg or ginger to the cinnamon for an exciting flavor twist that awakes your taste buds.
  • Vegan Version: Use agave syrup instead of honey to make this recipe completely vegan-friendly.
  • Creamy Coconut: Replace regular milk with coconut milk for a rich, tropical flavor that pairs wonderfully with chocolate.
  • Extra Crunch: Add some granola on top before serving for an interesting crunch that contrasts with the creamy oats.

Want more ways to elevate your breakfast? Try pairing it with a scoop of this Healthy Homemade Granola for an extra nutrient boost or enjoy it alongside a refreshing smoothie like my Berry Banana Spinach Smoothie for a vibrant morning plate!

What to Serve with Cookie Dough Overnight Oats

Discover the perfect accompaniments to elevate your indulgent breakfast into a wholesome, delightful meal.

  • Fresh Berries: Bursting with flavor, fresh berries provide a juicy contrast to the creamy oats and add a pop of color.

  • Nutty Granola: A crunchy, homemade granola offers a delightful texture and enhances the nutty flavors within the oats.

  • Yogurt Parfait: Layer your oats with dairy-free yogurt for extra creaminess, creating a satisfying breakfast that feels like dessert.

  • Smoothie: Pair your oats with a refreshing fruit smoothie for a quick, nutrient-packed breakfast that will keep you energized.

  • Peanut Butter Banana Toast: A twist on classic toast, this combination brings a comforting, sweet-savory element to your breakfast table.

  • Herbal Tea or Coffee: Sip on a calming herbal tea or a robust cup of coffee to complement the sweet, rich flavors of your oats.

  • Nut Milk Shake: A silky nut milk shake, flavored with cocoa or vanilla, enhances the dessert feel while keeping your breakfast creamy and satisfying.

  • Chia Seed Pudding: Add layers of chia pudding for a nutritious twist that ties in the flavors perfectly, making it a heartwarming meal.

Expert Tips for Cookie Dough Overnight Oats

  • Rolled Oats Only: Stick with rolled oats to avoid a mushy breakfast; quick oats can spoil the chewy texture you want.

  • Choose Your Milk: Use any milk you prefer, but for a creamy, dairy-free option, almond or oat milk elevates the flavor beautifully.

  • Swapping Sweeteners: If you’re looking to cut down on sugar, substitute maple syrup with ripe mashed banana for natural sweetness—delicious and healthy!

  • Protein Boost: For a high-protein version, add a scoop of protein powder or Greek yogurt to your oats before soaking to keep you feeling full longer.

  • Customize Your Mix-Ins: Feel free to adjust the chocolate chips, nuts, or even add seasonal fruits; this flexibility makes the Cookie Dough Overnight Oats a fun treat!

Make Ahead Options

These Cookie Dough Overnight Oats are perfect for busy home cooks looking to save time during hectic mornings! You can prepare them up to 3 days ahead for a grab-and-go breakfast. To make ahead, simply combine the rolled oats, milk, almond butter, maple syrup, vanilla extract, and cinnamon as directed, and mix in the chia seeds and mini chocolate chips. Cover tightly and refrigerate for up to 24 hours before serving. To maintain quality, ensure the oats are stored in an airtight container to retain moisture and flavor. When ready to enjoy, just give them a stir, add your favorite toppings, and you’ll have a delicious, nutritious breakfast ready in minutes!

Cookie Dough Overnight Oats Recipe FAQs

What type of oats should I use for Cookie Dough Overnight Oats?
Absolutely stick with rolled oats! They provide that perfect chewy texture, which is crucial for this recipe. Quick oats can become too mushy and may ruin the delightful consistency we’re aiming for.

How long can I store Cookie Dough Overnight Oats?
You can enjoy your Cookie Dough Overnight Oats for up to 4 days when stored in an airtight container in the refrigerator. This makes them a fantastic option for meal prep and busy mornings!

Can I freeze Cookie Dough Overnight Oats?
Yes, you can! For longer storage, pour single servings into freezer-safe containers or jars. They can be frozen for up to 1 month. When you’re ready to enjoy, simply transfer them to the fridge the night before to thaw, or you can microwave them for 30-45 seconds if you’d prefer them warm.

What if my mixture is too thick after soaking overnight?
No worries! If you find your Cookie Dough Overnight Oats are too thick upon serving, simply stir in a splash of additional milk to loosen them up. This will also help you achieve the creamy texture reminiscent of cookie dough. Remember, everyone’s oat absorption is a bit different based on how much liquid they’re absorbing.

Are these Cookie Dough Overnight Oats safe for those with nut allergies?
If you or someone you’re serving has a nut allergy, you can absolutely substitute the almond butter with sunflower seed butter. This adjustment still allows for delicious flavor without compromising safety!

Can I customize the toppings for Cookie Dough Overnight Oats?
Very much so! Feel free to add your favorite toppings, whether it’s seasonal fruits, extra chocolate chips, or a sprinkle of granola for crunch. Each personalization adds a unique touch to your breakfast, making it even more delightful!

undefined

Cookie Dough Overnight Oats for a Tasty, Guilt-Free Breakfast

Delightful Cookie Dough Overnight Oats for a nutritious breakfast option packed with flavor and low in sugar.
Prep Time 10 minutes
Resting Time 6 hours
Total Time 6 hours 10 minutes
Servings: 2 servings
Course: Breakfast
Cuisine: American
Calories: 300

Ingredients
  

For the Base
  • 1 cup Rolled Oats The foundation of the dish, providing a chewy texture.
  • 1 cup Milk Any milk, dairy-free options like almond, oat, or coconut work beautifully.
For the Flavor
  • 2 tablespoons Almond Butter Delivers rich flavor and healthy fats; swap for sunflower seed butter for nut-free.
  • 2 tablespoons Maple Syrup Brings natural sweetness; brown sugar can serve as a swap.
  • 1 teaspoon Vanilla Extract Infuses that unmistakable cookie dough taste.
  • ½ teaspoon Cinnamon Adds warm undertones.
For Texture and Fun
  • 1 tablespoon Chia Seeds Optional, thickens the mixture while boosting nutrition.
  • ¼ cup Mini Chocolate Chips Essential for cookie dough vibe.
  • Crushed Nuts Optional, walnuts or pecans add flavor and texture.

Equipment

  • bowl or jar

Method
 

Step-by-Step Instructions
  1. In a medium bowl or jar, combine rolled oats, milk, almond butter, maple syrup, vanilla extract, and cinnamon. Stir well until blended.
  2. Fold in chia seeds and mini chocolate chips, mixing gently until combined.
  3. Cover and refrigerate overnight for at least 6 hours.
  4. Stir before serving, and top with additional chocolate chips, nuts, or fruits if desired.

Nutrition

Serving: 1servingCalories: 300kcalCarbohydrates: 45gProtein: 10gFat: 10gSaturated Fat: 2gPolyunsaturated Fat: 1gMonounsaturated Fat: 7gSodium: 150mgPotassium: 300mgFiber: 8gSugar: 8gVitamin A: 2IUCalcium: 20mgIron: 10mg

Notes

These oats can be stored in an airtight container for up to 4 days in the fridge. For longer storage, freeze individual servings for up to 1 month.

Tried this recipe?

Let us know how it was!

Mediterranean Shrimp Skillet: Quick Flavorful One-Pan Dish

The kitchen was filled with the mouthwatering aroma of garlic and lemon, instantly transporting me to sun-soaked Mediterranean shores. My Mediterranean Shrimp Skillet with Lemon Garlic Sauce captures that vibrant essence, offering a quick meal loaded with flavor that can effortlessly turn a busy weeknight into a culinary escape. This one-pan wonder showcases succulent shrimp nestled among fresh cherry tomatoes and nutrient-rich baby spinach, making it not only healthy but also a breeze to prepare. Plus, it’s endlessly customizable—swap in your favorite proteins or seasonal veggies to fit your tastes. So, whether you’re cooking for yourself or aiming to impress guests, this dish is bound to delight. Ready to dive into a taste of the Mediterranean?

Why is This Recipe a Must-Try?

Simplicity at its finest: With minimal prep and only one skillet, you can whip up this meal in under 30 minutes—perfect for those hectic weeknights!
Fresh and Flavorful: The vibrant combination of garlic, lemon, and colorful veggies makes each bite a burst of Mediterranean sunshine.
Customizable: Easily swap shrimp for chicken or chickpeas, tailoring the dish to your taste or dietary needs with versatile variation ideas.
Healthy and Wholesome: Packed with protein and nutrients, this dish offers a guilt-free indulgence that’s both satisfying and nourishing.
Crowd-Pleaser: Impress family and friends with this stunning dish that looks as good as it tastes, making it ideal for gatherings or special occasions!

Mediterranean Shrimp Skillet Ingredients

For the Skillet
Shrimp – Use large, peeled, and deveined shrimp for the best texture and flavor.
Olive Oil – Healthy fats help sauté the garlic and create a flavorful base.
Garlic – Minced for perfect garlic distribution, infusing fragrance into every bite.
Red Pepper Flakes – Adjust to your desired spice level for a touch of heat.
Cherry Tomatoes – Halved to release their juicy goodness and add a touch of sweetness.
Baby Spinach – Fresh spinach adds color and nutrients, wilting beautifully in the dish.
Lemon – Use both juice and zest for a bright, citrusy kick to the sauce.
Salt and Pepper – Essential seasonings to elevate the overall taste; adapt to your preference.
Fresh Parsley – A sprinkle on top boosts flavor and adds a fresh visual appeal.
Cooked Rice or Quinoa – These hearty bases make the meal satisfying and complete.

Optional Add-Ins
Protein Switch – Feel free to swap shrimp for scallops or chicken to customize your meal.
Veggie Options – Incorporate bell peppers, zucchini, or olives for added Mediterranean flair.
Plant-Based Alternative – For a vegetarian version, chickpeas or tofu can take the spotlight beautifully.

With this Mediterranean Shrimp Skillet packed with vibrant flavors, you’ll have a quick meal that’s not only hearty but also endlessly customizable to fit your tastes!

Step-by-Step Instructions for Mediterranean Shrimp Skillet with Lemon Garlic Sauce

Step 1: Prepare Ingredients
Start by prepping your ingredients for the Mediterranean Shrimp Skillet. Peel and devein the shrimp, then set them aside. Mince the garlic, halve the cherry tomatoes, zest and juice the lemon, and chop the fresh parsley. Having everything ready will make the cooking process smooth and enjoyable.

Step 2: Sauté Garlic
In a large skillet, heat 2 tablespoons of olive oil over medium heat. Once the oil is shimmering, add the minced garlic and red pepper flakes. Sauté for about 1 minute until the garlic is fragrant and lightly golden, but be careful not to burn it, as burnt garlic can turn bitter.

Step 3: Cook Shrimp
Next, add the prepared shrimp to the skillet, seasoning them with salt and pepper. Cook for 2-3 minutes on one side until they turn pink and opaque. Gently flip the shrimp and cook for an additional 2-3 minutes on the other side until fully cooked and tender.

Step 4: Add Cherry Tomatoes
Once the shrimp is beautifully cooked, stir in the halved cherry tomatoes. Cook for about 2 minutes, allowing the tomatoes to soften and release their juices. This adds a burst of sweetness that complements the Mediterranean Shrimp Skillet perfectly.

Step 5: Incorporate Spinach and Lemon
Add the fresh baby spinach to the skillet, along with the lemon juice and lemon zest. Stir everything together, cooking for an additional 1-2 minutes until the spinach is wilted and vibrant. The flavors will meld beautifully, creating a luscious sauce.

Step 6: Garnish and Serve
Remove the skillet from heat and sprinkle the dish with fresh parsley for a touch of color and flavor. Serve your Mediterranean Shrimp Skillet over a bed of cooked rice or quinoa, allowing the sauce to soak in and enhance each bite. Enjoy this quick and flavorful one-pan meal!

Make Ahead Options

These Mediterranean Shrimp Skillets are perfect for meal prep enthusiasts! You can chop the vegetables (like cherry tomatoes and spinach) and marinate the shrimp up to 24 hours in advance, storing them in the refrigerator until you’re ready to cook. Just remember to keep the garlic, lemon, and parsley separate until you are ready to sauté, as they maintain their fresh flavor best when added at the last minute. When you’re ready to enjoy this quick and flavorful one-pan meal, simply heat the olive oil in your skillet, sauté the garlic and red pepper flakes, add in marinated shrimp, followed by the remaining ingredients, and serve! By prepping ahead, you not only save time but also ensure a delicious dinner that can be ready in minutes.

Mediterranean Shrimp Skillet Variations

Feel free to let your culinary creativity shine as you personalize this dish to suit your taste buds!

  • Seafood Swap: Swap shrimp for scallops for a sweet, tender twist that elevates the dish into a gourmet experience.
  • Chicken Delight: Use sliced chicken breast instead of shrimp, cooking it until golden brown, for a heartier variation perfect for meat lovers.
  • Vegetarian Option: Enjoy a plant-based meal by replacing shrimp with chickpeas or tofu for a nutritious vegetarian delight. Sauté until nicely browned for texture and flavor.
  • Zesty Veggies: Add bell peppers or zucchini for an extra burst of color and nutrients, enhancing the Mediterranean flair in every bite.
  • Olive Touch: Incorporate kalamata olives for a briny pop that complements the garlic and lemon beautifully, making your dish even more Mediterranean-inspired.
  • Heat It Up: For those who love spice, add chili flakes or diced jalapeños to bring a fiery kick to the dish. Adjust according to your heat tolerance!
  • Citrus Boost: Experiment with different citrus fruits—try lime or orange zest along with the lemon for a fresh and vibrant flavor profile.
  • Nutty Crunch: Top your skillet with toasted pine nuts or sliced almonds for a delightful crunch and a nutty flavor that pairs beautifully with the shrimp and veggies.

Feeling adventurous? Explore these delightful variations to make this Mediterranean Shrimp Skillet your own masterpiece!

Expert Tips for Mediterranean Shrimp Skillet

  • Fresh Shrimp Matters: Use fresh or properly thawed shrimp for the best taste and texture. Frozen shrimp may turn rubbery if not thawed correctly.

  • Manage the Skillet: Avoid overcrowding the skillet; this ensures each shrimp cooks evenly. If needed, work in batches for a perfect golden sear.

  • Season Gradually: Taste and adjust seasoning as you cook. Adding salt at the end can help elevate the flavor of the Mediterranean shrimp dish without overpowering it.

  • Vegetable Variations: Feel free to mix in seasonal vegetables such as zucchini or asparagus. These add both color and nutrients while keeping the dish customizable to your preference.

  • Proper Storage: Allow leftovers to cool before storing them in an airtight container. This Mediterranean shrimp skillet can be refrigerated for up to two days, ensuring it remains flavorful when reheated.

  • Garnish for Presentation: Fresh parsley not only adds flavor but also enhances visual appeal. A sprinkle of lemon zest can bring out the dish’s vibrant flavors even more!

What to Serve with Mediterranean Shrimp Skillet?

The joy of the Mediterranean Shrimp Skillet doesn’t stop at its tantalizing flavors—complementing sides can turn this dish into a feast!

  • Crispy Garlic Bread: Perfect for soaking up the lemon garlic sauce, this crunchy delight adds an irresistible texture to the meal.

  • Mixed Greens Salad: A light salad with vinaigrette brightens your plate, providing freshness that balances the richness of the shrimp.

  • Herbed Quinoa: Fluffy quinoa dressed with herbs offers an earthy base that pairs beautifully with the vibrant skillet flavors.

  • Roasted Asparagus: Crisp-tender asparagus brings a delightful crunch and a hint of nuttiness—a perfect foil for the succulent shrimp.

  • Tzatziki Sauce: This cool, creamy dip made with yogurt and cucumber adds a refreshing contrast, elevating the dish to Mediterranean heights.

  • Grilled Vegetable Platter: A medley of seasonal veggies adds color and sweetness, enhancing the overall meal experience and packing in extra nutrients.

  • Chardonnay or Sauvignon Blanc: A chilled glass of white wine accentuates the dish’s citrus notes, rounding out a delightful culinary adventure.

Each pairing works harmoniously with the Mediterranean Shrimp Skillet, making your dinner experience unforgettable!

How to Store and Freeze Mediterranean Shrimp Skillet

Fridge: Store leftovers in an airtight container for up to 2 days. Make sure the dish has cooled down before sealing to preserve flavor and texture.

Freezer: You can freeze this Mediterranean Shrimp Skillet for up to 2 months. However, it’s best to do so without the quinoa or rice; just defrost and reheat when you’re ready to serve.

Reheating: When ready to eat, reheat gently on the stovetop over medium heat. Add a splash of water or broth to maintain moisture and ensure the shrimp don’t become rubbery.

Freshness Tip: For the best quality, always use fresh shrimp, as frozen options can affect the overall taste of your Mediterranean shrimp skillet.

Mediterranean Shrimp Skillet with Lemon Garlic Sauce Recipe FAQs

What kind of shrimp should I use for this recipe?
Absolutely use large, peeled, and deveined shrimp for the best flavor and texture. If using frozen shrimp, make sure to properly thaw them before cooking—leave them in the fridge overnight or run them under cold water for quick thawing.

How long can I store leftovers?
Store leftovers in an airtight container in the refrigerator for up to 2 days. It’s important to let the dish cool completely before sealing it to maintain its wonderful flavor and texture.

Can I freeze Mediterranean Shrimp Skillet?
Yes, you can freeze this delicious dish for up to 2 months! I recommend freezing the shrimp and sauce separately from the cooked rice or quinoa; this way, you can reheat them together without compromising their texture. To freeze, let the meal cool, then transfer to a freezer-safe container.

How do I reheat the Mediterranean Shrimp Skillet?
When you’re ready to enjoy your frozen Mediterranean Shrimp Skillet, thaw it overnight in the fridge. Then, reheat gently on the stovetop over medium heat. Add a splash of water or broth to keep everything moist, ensuring that the shrimp don’t turn rubbery—this should take about 5-7 minutes.

Are there any dietary considerations for this dish?
If you’re serving guests with dietary restrictions, you can easily customize this dish! Swap shrimp for chicken or chickpeas for a protein alternative. Always check for allergies, especially with shrimp and any seasonings used. For a vegetarian option, tofu or mixed vegetables can be delicious substitutes.

undefined

Mediterranean Shrimp Skillet: Quick Flavorful One-Pan Dish

A quick and delicious Mediterranean shrimp skillet with lemon garlic sauce, perfect for busy weeknights.
Prep Time 10 minutes
Cook Time 20 minutes
Total Time 30 minutes
Servings: 4 servings
Course: Dinner
Cuisine: Mediterranean
Calories: 350

Ingredients
  

For the Skillet
  • 1 pound large shrimp, peeled and deveined
  • 2 tablespoons olive oil
  • 4 cloves garlic, minced
  • 1 teaspoon red pepper flakes adjust to taste
  • 1 pint cherry tomatoes, halved
  • 4 cups baby spinach
  • 1 each lemon, juiced and zested
  • to taste salt
  • to taste pepper
  • 1/4 cup fresh parsley, chopped
  • 2 cups cooked rice or quinoa
Optional Add-Ins
  • substitute scallops or chicken as protein switch
  • to taste bell peppers, zucchini, or olives for added veggie options
  • substitute chickpeas or tofu for a vegetarian option

Equipment

  • Large skillet

Method
 

Step-by-Step Instructions
  1. Prepare your ingredients: peel and devein shrimp, mince garlic, halve tomatoes, zest and juice lemon, and chop parsley.
  2. Heat olive oil in a large skillet over medium heat, then add garlic and red pepper flakes. Sauté for about 1 minute.
  3. Add shrimp, seasoning with salt and pepper. Cook for 2-3 minutes per side until pink and opaque.
  4. Stir in cherry tomatoes and cook for 2 minutes until they soften and release juices.
  5. Incorporate spinach, lemon juice, and zest. Cook for an additional 1-2 minutes until spinach wilts.
  6. Remove from heat, garnish with parsley, and serve over rice or quinoa.

Nutrition

Serving: 1plateCalories: 350kcalCarbohydrates: 40gProtein: 30gFat: 10gSaturated Fat: 1.5gPolyunsaturated Fat: 2gMonounsaturated Fat: 6gCholesterol: 200mgSodium: 600mgPotassium: 800mgFiber: 4gSugar: 5gVitamin A: 1500IUVitamin C: 50mgCalcium: 80mgIron: 3mg

Notes

Use fresh shrimp for the best flavor. Adjust seasoning to taste as you cook.

Tried this recipe?

Let us know how it was!

Fluffy Sourdough Cinnamon Rolls That Melt in Your Mouth

The first whiff of cinnamon swirling through my kitchen has a magical way of transforming even the sleepiest mornings into something special. As I dive into the world of baking, there’s nothing quite like crafting a batch of Soft and Fluffy Sourdough Cinnamon Rolls. These rolls boast a delightful combination of tangy sourdough and a sweet cinnamon-sugar filling, making them the perfect centerpiece for a cozy brunch or a comforting breakfast treat. The beauty of this recipe lies not just in its incredible flavor, but also in its ability to be prepped the night before, allowing you to savor the joy of freshly baked rolls with minimal morning fuss. Ready to elevate your weekend breakfast game? Let’s roll up our sleeves and get started!

Why Are Sourdough Cinnamon Rolls So Irresistible?

Fluffy Texture: These rolls emerge from the oven soft and light, creating a melt-in-your-mouth experience that is simply delightful.

Easy Prep: With a few simple steps, you can whip up these treats without needing expert baking skills. Perfect for even the busiest home chefs!

Make-Ahead Magic: Prepare the dough the night before and refrigerate; these rolls are ready to rise and bake whenever you are. Enjoy the convenience without sacrificing flavor!

Dreamy Frosting: The cream cheese icing adds a luxurious finish that enhances the sweetness and tang of the sourdough, making each bite heavenly.

Crowd Pleaser: Whether at brunch or a special occasion, these rolls are sure to impress friends and family, leaving everyone asking for seconds! For more breakfast inspiration, check out my favorite make-ahead recipes.

Sourdough Cinnamon Roll Ingredients

• Perfect for making fluffy rolls!

For the Dough

  • Active Sourdough Starter – This is essential for natural leavening and creating a soft texture.
  • Bread Flour – Provides a high, fluffy rise; all-purpose flour can be used but may yield denser results.
  • Whole Milk – Adds necessary moisture; feel free to substitute with a non-dairy option if you prefer.
  • Unsalted Butter – Softens the dough for a chewy texture; use at room temperature for easy spreading.
  • Large Egg – Contributes moisture and improves overall texture.
  • Salt – Enhances the flavor; opt for unrefined versions for an extra boost.

For the Filling

  • Dark Brown Sugar – Offers a rich, caramel-like flavor; light brown sugar is a fine substitute, but dark brings more depth.
  • Ground Cinnamon – This spice is essential for creating that classic cinnamon roll flavor that we all crave.

For the Frosting

  • Powdered Sugar – Sweetens the frosting; it dissolves smoothly, giving a creamy consistency.
  • Cream Cheese – Adds richness and a tangy flavor that contrasts beautifully with the sweetness.
  • Heavy Cream – Ensures a smooth texture in the frosting; adjust the quantity for your desired consistency.

Now that we have everything ready, your journey to warm, fluffy, and irresistibly delicious sourdough cinnamon rolls is just a step away! Let’s get baking!

Step‑by‑Step Instructions for Soft and Fluffy Sourdough Cinnamon Rolls

Step 1: Prepare Dough
In a stand mixer, combine the active sourdough starter, dark brown sugar, and warm whole milk until smooth. Add in the melted unsalted butter, large egg, and salt, mixing until thoroughly incorporated. The mixture should be well-combined and slightly frothy.

Step 2: Incorporate Flour
Gradually add the bread flour to the mixture while mixing at low speed. Continue to add flour until the dough pulls away from the sides of the bowl and feels tacky to the touch. Knead the dough on a floured surface for about 5 minutes until it becomes smooth and elastic.

Step 3: First Rise
Transfer the kneaded dough into a lightly greased bowl, covering it with a clean kitchen towel or plastic wrap. Let the dough rise in a warm area for 3-7 hours, or until it has doubled in size. You’ll know it’s ready when it feels puffy and light to the touch.

Step 4: Shape Rolls
Once risen, turn the dough out onto a lightly floured surface and roll it into a rectangle about ¼-inch thick. Spread the softened butter evenly across the surface, then sprinkle with a generous filling of the cinnamon-sugar mixture. Carefully roll the dough tightly from one long side to the other and cut it into 9 equal pieces.

Step 5: Second Rise
Place the sliced rolls into a greased baking dish, ensuring they fit snugly together. Cover the dish with a kitchen towel or plastic wrap and allow them to rise for an additional 2-4 hours until they become puffy and nearly doubled in size.

Step 6: Bake
Preheat your oven to 350°F (175°C). Pour warmed heavy cream gently over the top of the rolls just before placing them in the oven. Bake the sourdough cinnamon rolls for 30-35 minutes, or until they turn a beautiful golden brown and are bubbling around the edges.

Step 7: Frost
Remove the rolls from the oven and let them cool slightly, about 10 minutes. While they cool, prepare the cream cheese frosting by mixing together powdered sugar, cream cheese, and a splash of heavy cream until smooth. Spread the luscious frosting over the warm rolls for a delightful finish.

How to Store and Freeze Sourdough Cinnamon Rolls

Room Temperature: Allow the rolls to cool completely, then store them in an airtight container at room temperature for up to 2 days. This keeps them soft and fresh.

Fridge: For longer storage, place the rolls in an airtight container in the fridge for up to 3 days. Reheat in the microwave or oven when ready to enjoy.

Freezer: To freeze, wrap each roll tightly in plastic wrap and then place them in a freezer bag. They can be stored for up to 3 months. Thaw overnight in the fridge before reheating.

Reheating: Warm frozen sourdough cinnamon rolls in a 350°F oven for about 10-15 minutes, or in the microwave for about 30 seconds, to restore their fluffy texture.

What to Serve with Soft and Fluffy Sourdough Cinnamon Rolls

Pairing these cinnamon rolls with the right accompaniments transforms your breakfast into a delightful spread that pleases everyone!

  • Fresh Fruit Salad: A colorful mix of seasonal fruits adds a refreshing burst of flavor that perfectly balances the sweetness of the rolls.

  • Scrambled Eggs: Fluffy, buttery scrambled eggs provide a nice protein contrast, making your meal hearty and satisfying.

  • Crispy Bacon: The savory crunch of crispy bacon beautifully complements the sweet, gooey cinnamon rolls, creating a delightful flavor harmony.

  • Strong Coffee: A rich cup of coffee enhances the warmth of the rolls, offering a contrasting bitterness that cuts through their sweetness.

  • Homemade Jam: Spread a layer of tart berry jam on your warm rolls for added sweetness and a fruity twist that enhances the experience.

  • Creamy Yogurt: A dollop of thick yogurt adds a creaminess that pairs well with the cinnamon and adds a probiotic boost to your breakfast.

  • Herbal Tea: Opt for a soothing herbal tea for a lighter beverage option that allows the cinnamon flavor to shine while keeping the mood calming.

  • Warm Milk: Cozy up with a glass of warm milk; it’s a nostalgic touch that pairs beautifully with freshly baked rolls.

The key to a joyful breakfast lies in balancing flavors and textures, offering your loved ones a memorable feast. Enjoy!

Sourdough Cinnamon Rolls Variations & Substitutions

Feel free to explore these creative twists and substitutions to make the recipe your own and tailor it to your taste buds!

  • Dairy-Free: Swap whole milk with almond or oat milk, and use vegan butter for a delicious dairy-free version.

  • Nutty Delight: Add chopped walnuts or pecans to the filling for an extra crunch that complements the sweetness beautifully.

  • Spicy Kick: Mix in a pinch of nutmeg or ginger with the cinnamon for a spicier flavor profile that’s sure to warm your mornings.

  • Mini Rolls: Roll the dough into smaller sections to create bite-sized mini cinnamon rolls. Adjust baking time to 15-20 minutes for these delightful treats.

  • Vanilla Glaze: Instead of cream cheese frosting, whisk together powdered sugar, milk, and vanilla extract for a lighter vanilla glaze.

  • Citrus Zing: Add zest from an orange or lemon to the frosting for a bright, refreshing twist that cuts through the sweetness.

  • Chocolate Chip: Toss in a handful of chocolate chips into the filling for an indulgent, dessert-like twist on the classic recipe.

  • Heat It Up: Sprinkle in some cayenne pepper or red pepper flakes to the cinnamon-sugar mixture for a surprising hint of heat that balances with the sweetness.

Don’t forget, the beauty of baking lies in experimentation! For even more breakfast delights, check out my favorite make-ahead recipes that can save you time in the kitchen without sacrificing flavor.

Make Ahead Options

These Soft and Fluffy Sourdough Cinnamon Rolls are perfect for busy mornings when you want a delightful treat without the hassle! You can prepare the dough and shape the rolls up to 24 hours in advance. Simply cover the unbaked rolls with plastic wrap and refrigerate them overnight; this will enhance the flavor while keeping them fresh. When you’re ready to bake, allow them to rise in a warm spot for about 1-2 hours before preheating your oven. For even greater convenience, you can shape the rolls, freeze them for up to 3 months, and just let them thaw and rise before baking. With these make ahead options, you’ll enjoy homemade goodness with minimal morning fuss!

Expert Tips for the Best Sourdough Cinnamon Rolls

Use a Kitchen Scale: Measurement accuracy is crucial for achieving the perfect fluffy texture. A scale ensures you use just the right amounts of each ingredient.

Mind the Proofing: Avoid over-proofing your rolls; bubbles will collapse if they rise too long. Keep an eye on your dough during both rises for airy rolls.

Temperature Matters: In cooler kitchens, rise times can be longer. If your kitchen is chilly, consider placing the dough in a warm oven (the light on can help) to speed up the process.

Chill, Don’t Freeze: If preparing in advance, you can refrigerate unbaked rolls overnight. However, refrain from chilling them for more than 24 hours to maintain taste and texture.

Use Fresh Ingredients: For the best flavor, ensure your sourdough starter is active and bubbly. Old ingredients can lead to dense and dull rolls.

Experiment with Fillings: Don’t hesitate to vary the cinnamon filling with nuts or different spices like nutmeg. This way, you can customize your sourdough cinnamon rolls to suit all tastes!

Sourdough Cinnamon Rolls Recipe FAQs

Why is my sourdough starter important for these rolls?
Absolutely! An active sourdough starter is essential for creating that soft, fluffy texture. It provides natural leavening, which helps the rolls rise beautifully. Look for a starter that’s bubbly and has a pleasant tangy smell—it’s a sign it’s ready to work its magic in your dough!

How should I store leftover sourdough cinnamon rolls?
For sure! Allow the rolls to cool completely, then store them in an airtight container at room temperature for up to 2 days. This keeps them fresh and soft. If you prefer them to last longer, you can keep them in the refrigerator for up to 3 days.

Can I freeze sourdough cinnamon rolls?
Yes, indeed! To freeze your rolls, wrap each one tightly in plastic wrap and then place them in a freezer bag. They can stay frozen for up to 3 months. When you’re ready to enjoy them, simply thaw them overnight in the refrigerator, then reheat in a 350°F oven for about 10-15 minutes.

What should I do if my rolls don’t rise properly?
Very good question! If your rolls aren’t rising as expected, ensure your sourdough starter is active and bubbly. If it’s weak, it won’t leaven the dough adequately. Additionally, temperature plays a key role; if your kitchen is too cool, the dough may require extra time to rise. Consider placing it in a warm place, like a slightly warm oven, to encourage rising.

Can I make these cinnamon rolls ahead of time?
Absolutely, making them ahead is a breeze! You can prepare the dough and shape it the night before. Simply place the unbaked rolls in the fridge after the first rise, then allow them to rise on your counter for about 30 minutes before baking in the morning. This make-ahead magic lets you savor the thrill of warm rolls with minimal morning fuss!

Are there any dietary considerations for these rolls?
Yes! If anyone has dairy allergies, you can easily substitute whole milk with a non-dairy alternative, and use vegan butter in place of the unsalted butter. Ensure that your cream cheese for frosting is also dairy-free if needed. Always check your ingredients to cater to any dietary restrictions.

undefined

Fluffy Sourdough Cinnamon Rolls That Melt in Your Mouth

Experience the magic of soft and fluffy sourdough cinnamon rolls, perfect for breakfast or brunch.
Prep Time 45 minutes
Cook Time 35 minutes
Rising Time 8 hours
Total Time 9 hours 20 minutes
Servings: 9 rolls
Course: Breakfast
Cuisine: American
Calories: 320

Ingredients
  

For the Dough
  • 1 cup Active Sourdough Starter This is essential for natural leavening.
  • 1 cup Whole Milk Feel free to substitute with a non-dairy option.
  • 1/2 cup Unsalted Butter Softened at room temperature.
  • 1 Large Egg Contributes moisture.
  • 1 tsp Salt Opt for unrefined for an extra boost.
  • 4 cups Bread Flour Provides a high fluffy rise.
For the Filling
  • 1 cup Dark Brown Sugar Offers a rich, caramel-like flavor.
  • 2 tbsp Ground Cinnamon Essential for classic flavor.
For the Frosting
  • 2 cups Powdered Sugar Dissolves smoothly for creamy consistency.
  • 8 oz Cream Cheese Adds a tangy flavor.
  • 1/4 cup Heavy Cream Adjust quantity for desired consistency.

Equipment

  • Stand mixer
  • baking dish
  • Kitchen Scale

Method
 

Preparation
  1. In a stand mixer, combine the active sourdough starter, dark brown sugar, and warm whole milk until smooth.
  2. Add in the melted unsalted butter, large egg, and salt, mixing until thoroughly incorporated.
  3. Gradually add the bread flour until the dough pulls away from the sides of the bowl and feels tacky.
  4. Knead the dough on a floured surface for about 5 minutes until smooth and elastic.
  5. Transfer the kneaded dough into a greased bowl, cover, and let rise for 3-7 hours until doubled in size.
  6. Roll the dough into a rectangle, spread softened butter, and sprinkle with cinnamon-sugar mixture. Roll tightly and cut into 9 pieces.
  7. Place into a greased baking dish and let rise for an additional 2-4 hours until puffy.
  8. Preheat oven to 350°F (175°C). Pour heavy cream over the rolls and bake for 30-35 minutes until golden brown.
  9. Cool slightly and prepare the frosting by mixing powdered sugar, cream cheese, and heavy cream until smooth. Spread over rolls.

Nutrition

Serving: 1rollCalories: 320kcalCarbohydrates: 44gProtein: 4gFat: 15gSaturated Fat: 9gPolyunsaturated Fat: 0.5gMonounsaturated Fat: 4gCholesterol: 40mgSodium: 240mgPotassium: 100mgFiber: 1gSugar: 18gVitamin A: 500IUCalcium: 100mgIron: 1mg

Notes

Use a kitchen scale for accurate measurements, and avoid over-proofing the rolls to maintain texture. Experiment with different fillings to customize your rolls.

Tried this recipe?

Let us know how it was!

Easy Cinnamon Roll Casserole: A Warm Morning Hug

As I stood in my kitchen, a sweet aroma began wafting through the air, instantly transporting me to cozy mornings spent over hot rolls and warm syrup. This Easy Cinnamon Roll Casserole captures that heartwarming nostalgia, making it the perfect breakfast option for gatherings, celebrations, or simply indulging yourself on a lazy Sunday. With just 10 minutes of prep time, this delightful dish combines the irresistible flavors of cinnamon, creamy milk, and a touch of maple—all baked to golden perfection. Imagine serving up a fluffy, satisfying breakfast that not only looks impressive but also effortlessly feeds a crowd. Believe me, it’s the kind of recipe that will have everyone asking for seconds… or thirds! Ready to dive into the details and create a comforting masterpiece in your own kitchen?

Why is this casserole a must-try?

Simplicity makes this recipe a breeze, taking only 10 minutes of prep time. Crowd-pleasing flavors of cinnamon and maple syrup create a warm hug for your taste buds, perfect for family gatherings or sleepy weekend brunches. Versatile enough to add nuts or fruit, it’s also a great excuse to indulge! Make-ahead convenience means you can prepare it the night before, allowing you to enjoy your mornings without the fuss. Perfect texture delivers fluffy bites that melt in your mouth, leaving you wanting more! Serve it warm and watch your loved ones beam with joy; they’ll never go back to plain breakfast again!

Easy Cinnamon Roll Casserole Ingredients

• The essential ingredients you need!

For the Casserole

  • Cinnamon Rolls – Use refrigerated cinnamon rolls for a quick assembly and soft base.
  • Milk – Whole milk adds the creamy texture essential for the custard-like filling.
  • Pure Maple Syrup – Enhances the overall cinnamon flavor; feel free to substitute with agave syrup if needed.
  • Eggs – Large eggs are crucial for binding and ensuring a fluffy texture in the casserole.
  • Vanilla Extract – Adds a wonderful depth; almond extract can be a delightful alternative!
  • Ground Cinnamon – Increases the cinnamon taste; adjust for a more intense flavor if you dare!

Topping (Optional)

  • Reserved Frosting – Drizzle this over the casserole for a sugary finish that ties all the flavors together.
  • Fresh Fruit – Top with berries or bananas to add a refreshing contrast to the sweetness.
  • Whipped Cream – A dollop can elevate the dish into a decadent treat, perfect for special occasions!

This Easy Cinnamon Roll Casserole will soon become a breakfast favorite, bringing comfort and warmth to your mornings!

Step‑by‑Step Instructions for Easy Cinnamon Roll Casserole

Step 1: Preheat Your Oven
Start by preheating your oven to 350°F (175°C). While the oven warms up, lightly spray a 9×13 inch baking dish with nonstick spray to ensure your Easy Cinnamon Roll Casserole won’t stick. This will help create a beautifully golden crust on your casserole.

Step 2: Prepare the Cinnamon Rolls
Take your refrigerated cinnamon rolls and cut each roll into 3/4 inch pieces—this will help them soak up the creamy mixture better. Evenly place the cinnamon roll pieces in the greased baking dish, ensuring they’re spread out for optimal baking and flavor absorption.

Step 3: Whisk Together the Egg Mixture
In a mixing bowl, combine 1 cup of whole milk, 1/2 cup of pure maple syrup, 4 large eggs, 1 teaspoon of vanilla extract, and 2 teaspoons of ground cinnamon. Whisk everything together until well combined and smooth. This mixture will create a custard-like filling that elevates your Easy Cinnamon Roll Casserole.

Step 4: Pour the Mixture into the Dish
Once your egg mixture is ready, pour it over the cinnamon roll pieces in the baking dish. Ensure that every piece is thoroughly coated with the liquid mixture—this step is crucial for achieving that delicious, custard-like texture while baking.

Step 5: Bake the Casserole
Place your prepared casserole into the preheated oven. Bake for 35-45 minutes, or until the top is puffed and golden brown. You’ll know it’s done when a toothpick inserted in the center comes out clean. Keep an eye on it towards the end to prevent overbaking!

Step 6: Cool and Drizzle
Once baked, remove the casserole from the oven and let it cool for about 10-15 minutes. This cooling time helps the casserole set up a bit more. When ready, drizzle your reserved frosting over the top before slicing into warm servings, inviting everyone to enjoy a taste of this scrumptious Easy Cinnamon Roll Casserole.

Make Ahead Options

This Easy Cinnamon Roll Casserole is a fantastic choice for meal prep! You can prepare the entire casserole up to 24 hours in advance by assembling it the night before and refrigerating it overnight. Just follow the usual steps of cutting the cinnamon rolls and mixing the egg mixture, then pour it over the rolls and cover it tightly with plastic wrap. To preserve the quality, make sure the casserole is well-sealed to prevent it from drying out in the fridge. When you’re ready to bake, simply remove it from the fridge, let it sit at room temperature for about 30 minutes, and then bake as instructed. Your busy mornings just got a whole lot easier with this delightful breakfast option!

What to Serve with Easy Cinnamon Roll Casserole

There’s nothing quite like the perfect breakfast spread to elevate your Easy Cinnamon Roll Casserole experience, filling your home with warmth and delightful scents.

  • Fresh Fruit Salad: A vibrant mix of seasonal fruits adds a refreshing contrast that balances the sweetness of the casserole. Think juicy berries and crisp apples!

  • Crispy Bacon or Sausage: The savory crunch of bacon or sausage pairs wonderfully with the sweet flavors of cinnamon, creating a harmonious breakfast bite.

  • Greek Yogurt Parfait: Layering creamy Greek yogurt with granola and a drizzle of honey creates a light, tangy option that complements the richness of the casserole.

  • Over-Easy Eggs: The sumptuous yolk of over-easy eggs adds an extra layer of indulgence, bringing a delightful creaminess that marries beautifully with the casserole.

  • Maple-Infused Coffee: A steaming cup of coffee with a hint of maple perfectly enhances the cozy vibes of cinnamon rolls, creating a sensory harmony.

  • Whipped Cream Topping: Serving a dollop of whipped cream on top of the casserole is a simple way to elevate its presentation, adding elegance and decadence at once.

  • Chocolate Chip Pancakes: For those who crave a bit of extra sweetness, fluffy pancakes dotted with chocolate chips can make for a deliciously indulgent breakfast spread.

Easy Cinnamon Roll Casserole Variations

Invite your taste buds to explore delicious twists on this classic breakfast treat with a few simple changes.

  • Nutty Delight: Add 1 cup of chopped pecans or walnuts to the cinnamon roll pieces for an added crunch that complements the softness beautifully.
  • Fruit Fusion: Mix in 1 cup of diced apples or berries with the cinnamon rolls for a burst of fruity flavor. It transforms your casserole into a delightful seasonal treat!
  • Dairy-Free Option: Substitute almond milk and coconut cream for whole milk to create a rich, dairy-free version that everyone can enjoy.
  • Chocolate Indulgence: Add chocolate chips to the mix—about 1 cup—to melt into a gooey chocolatey surprise, perfect for sweet-toothed family members. Who can resist more chocolate?
  • Spicy Twist: Incorporate a pinch of nutmeg or ginger along with the cinnamon to elevate the flavor profile with a warm, spicy kick. It’s like a hug of warmth on a chilly morning!
  • Extra Creamy: Swap half of the milk for cream to achieve an exceptionally rich and custardy texture. Just imagine how delightful that creamy thickness will be!
  • Maple Pecan Topping: Instead of frosting, sprinkle a mixture of pecans and maple syrup on top before baking for a crunchy, caramelized finish that adds another level of flavor.
  • Vegan Version: Use flax eggs in place of regular eggs and opt for a plant-based milk to create a completely vegan dish that’s still incredibly delicious and satisfying.

Feel free to get creative with these options! Each variation can turn your Easy Cinnamon Roll Casserole into a personal signature dish. If you’re curious about more exciting toppings, consider whipping up some homemade whipped cream or serving it alongside fresh fruit, as suggested in the serving suggestions. And don’t forget about those leftovers—check out my tips on how to store and freeze this delectable casserole for quick breakfasts throughout the week!

Expert Tips for Easy Cinnamon Roll Casserole

  • Incorporate Eggs Well: Ensure the eggs are fully incorporated into the milk mixture for a smooth, creamy casserole. Lumps can lead to an uneven texture.

  • Check for Doneness: Use a toothpick to check the casserole; it should come out clean when done. This helps prevent overbaking and drying out the Easy Cinnamon Roll Casserole.

  • Avoid Overbaking: Keep a close eye on the casserole as it bakes. Overbaking can result in a dry texture that detracts from the delightful fluffiness.

  • Cool Before Serving: Allow the casserole to cool for 10-15 minutes after baking. This setting time helps the layers firm up, making it easier to slice and serve.

  • Customize Flavor: Feel free to adjust the amount of ground cinnamon to your taste, or consider adding nutmeg for an additional flavor depth—just remember, it’s your Easy Cinnamon Roll Casserole!

How to Store and Freeze Easy Cinnamon Roll Casserole

  • Refrigerator Storage: Store leftovers in an airtight container for up to 3 days. This way, you’ll always have a sweet breakfast ready to enjoy!
  • Freezer: You can freeze the Easy Cinnamon Roll Casserole for up to 2 months in freezer-safe containers. Just make sure to cool it completely before wrapping it tightly for the best results.
  • Reheating: To enjoy leftovers, reheat individual portions in the microwave for about 30-60 seconds or heat the whole casserole in the oven at 350°F (175°C) until warmed through.
  • Make-Ahead: Consider preparing the casserole the night before—just assemble it in the baking dish, cover, and refrigerate. Bake fresh the next morning for a delightful breakfast!

Easy Cinnamon Roll Casserole Recipe FAQs

What type of cinnamon rolls should I use?
Absolutely! For this Easy Cinnamon Roll Casserole, I recommend using refrigerated cinnamon rolls as they provide the perfect texture and sweetness with minimal effort. They’re convenient and ensure your casserole has that classic cinnamon roll taste.

How should I store leftovers?
Storing your Easy Cinnamon Roll Casserole is super simple! Just place any leftovers in an airtight container and keep them in the refrigerator for up to 3 days. This way, you can enjoy the delightful flavors again without any fuss!

Can I freeze the casserole?
Yes! You can freeze your Easy Cinnamon Roll Casserole for up to 2 months. Here’s how: First, let it cool completely after baking. Next, cut it into individual portions (if you prefer) and wrap each piece tightly in plastic wrap or aluminum foil, then place in a freezer-safe container. When you’re ready to enjoy it, simply thaw in the refrigerator overnight and reheat in the oven or microwave.

What if my casserole turns out dry?
Very common! If your Easy Cinnamon Roll Casserole ends up a little dry, it may have been overbaked. To prevent this, always check for doneness a few minutes before the recommended baking time by inserting a toothpick; it should come out clean but not dry. Also, ensure you’re pouring enough of the egg mixture over the cinnamon rolls for proper moisture!

Are there any dietary considerations for this dish?
Absolutely! This Easy Cinnamon Roll Casserole contains eggs and dairy, so those with allergies to eggs or lactose should be cautious. You can substitute almond milk for whole milk and use egg replacers for a vegan version. Be sure to check ingredients on your cinnamon rolls for any allergens as well!

Can I prepare this casserole the night before?
Yes, yes, yes! I often make this casserole the night before for a hassle-free morning. Just assemble the entire dish, cover it well, and refrigerate. In the morning, pop it in the oven—your family will be thrilled with the warm, fragrant treat waiting for them!

undefined

Easy Cinnamon Roll Casserole: A Warm Morning Hug

This Easy Cinnamon Roll Casserole combines comforting flavors of cinnamon and maple syrup, perfect for breakfast gatherings.
Prep Time 10 minutes
Cook Time 40 minutes
Cooling Time 15 minutes
Total Time 1 hour 5 minutes
Servings: 8 slices
Course: Breakfast
Cuisine: American
Calories: 300

Ingredients
  

Casserole Ingredients
  • 1 package Refrigerated Cinnamon Rolls For quick assembly and soft base
  • 1 cup Whole Milk Adds creamy texture essential for custard
  • 1/2 cup Pure Maple Syrup Enhances overall cinnamon flavor
  • 4 large Eggs Crucial for binding and fluffy texture
  • 1 teaspoon Vanilla Extract Adds wonderful depth
  • 2 teaspoons Ground Cinnamon Increases cinnamon taste
Topping (Optional)
  • 1 container Reserved Frosting For a sugary finish
  • 1 cup Fresh Fruit Berries or bananas for contrast
  • 1 cup Whipped Cream For a decadent treat

Equipment

  • Oven
  • 9x13 inch baking dish
  • Mixing Bowl
  • whisk

Method
 

Preparation Steps
  1. Preheat your oven to 350°F (175°C) and lightly spray a 9x13 inch baking dish with nonstick spray.
  2. Cut refrigerated cinnamon rolls into 3/4 inch pieces and place them evenly in the greased baking dish.
  3. In a mixing bowl, combine milk, maple syrup, eggs, vanilla extract, and ground cinnamon, then whisk until smooth.
  4. Pour the egg mixture over the cinnamon roll pieces in the baking dish, ensuring each piece is coated.
  5. Bake for 35-45 minutes until the top is puffed and golden brown.
  6. Remove from the oven and let cool for 10-15 minutes before drizzling with reserved frosting.

Nutrition

Serving: 1sliceCalories: 300kcalCarbohydrates: 45gProtein: 6gFat: 12gSaturated Fat: 4gPolyunsaturated Fat: 1gMonounsaturated Fat: 5gCholesterol: 80mgSodium: 350mgPotassium: 210mgFiber: 1gSugar: 15gVitamin A: 250IUVitamin C: 1mgCalcium: 150mgIron: 1mg

Notes

This casserole is customizable; feel free to add nuts or fruit and adjust ground cinnamon to taste.

Tried this recipe?

Let us know how it was!

Crispy Air Fried Babybel Cheese Bites for Guilt-Free Snacking

The aroma of melting cheese fills the air, beckoning you to indulge in an irresistible treat. Enter my Crispy Air Fried Babybel Cheese Bites — a delightful fusion of crunch and creaminess that transforms those beloved Babybel rounds into something extraordinary. With this quick and easy recipe, you can whip up these vegetarian-friendly snacks in under 15 minutes, making them perfect for game nights or an impromptu appetizer that impresses friends and family alike. Plus, they’re a guilt-free alternative to traditional frying, all thanks to the air fryer! The best part? You can play with flavors by using various cheese options to cater to every palate. So, are you ready to take your cheese game to new heights? Let’s dive into this delicious adventure!

Why Are These Cheese Bites Irresistible?

Golden, crispy exterior: These Air Fried Babybel Cheese Bites boast a delightful crunch that lures you in.
Gooey, melty center: Each bite reveals a warm, creamy texture that’s simply enchanting.
Quick prep time: Ready in under 15 minutes, these snacks fit perfectly into your busy schedule.
Versatile flavors: Feel free to explore different Babybel varieties, from classic cheddar to adventurous gouda.
Crowd-pleasing snack: Perfect for parties or quiet nights at home; they appeal to cheese lovers of all ages.
Guilt-free indulgence: Enjoy all the flavor without the greasiness of deep frying, thanks to the air fryer!

For more quick and delicious recipes, check out our guide on easy appetizers.

Crispy Air Fried Babybel Cheese Ingredients

Ready to create your delicious bites? Here’s what you’ll need!

For the Coating

  • Babybel Cheese Rounds – Choose your favorite flavors, like cheddar or gouda, for an exciting twist.
  • All-Purpose Flour – This creates a sturdy base for your coating; gluten-free flour works as a fantastic substitute.
  • Eggs – Beat them well to ensure your coating sticks perfectly to the cheese.
  • Milk – Adds a touch of creaminess to the egg wash, optional for added richness.
  • Panko Breadcrumbs – These provide the crunchiest texture; feel free to switch to gluten-free breadcrumbs if needed.
  • Garlic Powder – Introduces a warm and inviting flavor to the mixture.
  • Onion Powder – This boosts the overall savoriness, making every bite tantalizing.
  • Smoked Paprika – It adds a subtle smokiness for an unexpected depth of flavor.
  • Salt and Pepper – Essential staples that elevate the flavor profile of the coating.
  • Olive Oil Spray – Helps achieve a crispy finish without the extra grease.

For Garnishing

  • Chopped Parsley (optional) – A sprinkle adds a burst of freshness to your golden bites.

Let’s get ready to enjoy these delectable air fried Babybel cheese bites! They’re sure to become a family favorite and a go-to for guilt-free snacking.

Step‑by‑Step Instructions for Crispy Air Fried Babybel Cheese Bites

Step 1: Prepare the Coating Station
Set up three shallow bowls for your coating process. In the first bowl, mix all-purpose flour with a pinch of salt and pepper. In the second, beat the eggs until well-blended, adding a splash of milk for creaminess if desired. Finally, combine the panko breadcrumbs with garlic powder, onion powder, and smoked paprika in the third bowl, making sure the mixture is evenly seasoned.

Step 2: Unwrap and Dry the Cheese
Unwrap the Babybel cheese rounds and gently pat them dry with a paper towel. This crucial step ensures that the coating sticks well to the cheese, allowing for that perfect crispy exterior. Keeping the cheese dry will help achieve the desired texture and prevent any excess moisture from causing sogginess.

Step 3: Coat the Cheese Rounds
Take each Babybel round and dip it first into the seasoned flour, ensuring it’s fully coated. Next, immerse it in the egg wash, allowing any excess to drip off. Finally, roll the cheese in the seasoned panko breadcrumbs, pressing gently to adhere. For an extra crunchy bite, repeat the egg wash and panko steps for a double coating.

Step 4: Chill the Coated Cheese
Arrange the coated Babybel rounds on a parchment-lined tray, ensuring they aren’t touching. Place the tray in the freezer for 10-15 minutes, which allows the coating to firm up. This step is vital for preventing the cheese from leaking during cooking, ensuring each cheese bite remains intact and delicious.

Step 5: Preheat the Air Fryer
While the cheese is chilling, preheat your air fryer to 380°F (193°C). Once preheated, lightly grease the basket with olive oil spray to prevent sticking and enhance the crunchiness of your Crispy Air Fried Babybel Cheese Bites. A well-prepped air fryer ensures even cooking and perfect texture.

Step 6: Air Fry the Cheese Bites
Carefully place the chilled, coated cheese rounds in a single layer in the air fryer basket, making sure to leave room between each one for optimal air circulation. Lightly spray the tops with olive oil and cook for 5-7 minutes. Flip the cheese halfway through cooking until they turn golden brown and develop a crispy exterior.

Step 7: Cool and Serve
Once the cheese bites are perfectly golden, remove them from the air fryer and let them cool for 1-2 minutes. This brief cooling time allows the inside to set, making them easier to handle. For a vibrant presentation, garnish with chopped parsley and serve alongside your favorite dipping sauces for that extra zing.

Expert Tips for Air Fried Babybel Cheese

  • Chill Before Frying: Make sure to freeze the coated cheese rounds for 10-15 minutes to prevent leakage during cooking. This ensures the best texture and taste.

  • Double Coating Delight: For an extra crunchy bite, double-coat your Babybel cheese by repeating the egg wash and panko steps. This not only improves the crunch but also helps contain the gooey cheese.

  • Don’t Overcrowd: Ensure there’s ample space between your cheese bites in the air fryer basket. Overcrowding can lead to uneven cooking, making it crucial to cook in batches if needed.

  • Flavor Variations: Feel free to experiment with different Babybel flavors like gouda or light cheddar. Each variety brings a unique taste, elevating your air fryer experience.

  • Perfecting Texture: Keep an eye on cooking time. Air frying for 5-7 minutes generally yields the best results, but every air fryer is different; adjust as necessary. Enjoy your delightful air fried Babybel cheese bites!

Variations & Substitutions for Air Fried Babybel Cheese

Get ready to customize your snacks with these delightful twists! The right tweaks can elevate your Crispy Air Fried Babybel Cheese Bites to even greater heights of flavor and fun.

  • Gluten-Free: Substitute all-purpose flour and panko with your favorite gluten-free alternatives for a similar texture and flavor.
  • Herbed Breadcrumbs: Infuse flavor by mixing dried herbs like oregano or basil into the breadcrumb mixture for a Mediterranean flair. This small addition can transform the bites into a fragrant delight!
  • Spicy Kick: Add cayenne pepper or crushed red pepper flakes to the flour or panko for a zesty twist. Feel the warmth awaken your taste buds as you savor these fiery bites!
  • Cheese Variety: Experiment with different Babybel flavors such as light mozzarella or gouda for unique taste experiences. Each variety brings its own charm—find your favorite!
  • Cheesy Double Delight: Use a small slice of mozzarella or cheddar alongside the Babybel cheese for a “cheese within a cheese” experience. It’s double the fun and double the melty goodness!
  • Nutty Crunch: Blend some crushed nuts like almonds or pecans into your panko breadcrumbs for an extra crunchy texture. The nutty flavor blends beautifully with the cheese, creating a delightful contrast.
  • Air Fried Veggies: Pair these bites with air-fried veggies like zucchini or bell peppers, seasoned to perfection, for a wholesome appetizer platter. A colorful addition that complements your bites wonderfully!

For more exciting ideas on flavor boosts, don’t miss our guide on easy appetizers or discover how to adjust your bites for different dietary needs with our gluten-free recipes. Happy snacking!

Make Ahead Options

These Crispy Air Fried Babybel Cheese Bites are perfect for meal prep enthusiasts looking to save time during busy weeknights! You can coat and freeze the cheese rounds up to 24 hours in advance. After following the coating steps and placing them on a parchment-lined tray, simply freeze until firm, then transfer them to an airtight container. When you’re ready to enjoy, there’s no need to thaw; cook them directly from frozen in the air fryer at 380°F (193°C) for 7-9 minutes, flipping halfway through until golden brown. This method keeps your cheese bites just as delicious and ensures you have a quick, savory snack ready in no time!

What to Serve with Crispy Air Fried Babybel Cheese Bites

Looking for the perfect accompaniments to elevate your cheese bites into a full-fledged feast?

  • Fresh Garden Salad: Crisp greens, cherry tomatoes, and a zesty vinaigrette brighten the rich cheese, adding a refreshing balance.

  • Cheesy Garlic Bread: The warm, buttery garlic flavor pairs delightfully, making it an irresistible duo with your crispy bites.

  • Creamy Spinach Dip: This luscious dip adds a rich earthy flavor and a veggie boost, perfect for sharing alongside your cheesy snacks.

  • Spicy Marinara Sauce: A tangy and slightly spicy tomato sauce enhances the cheesy goodness, inviting you to dip with abandon.

  • Sliced Avocado: Creamy avocado adds a velvety texture that complements the crunch, bringing freshness to each bite.

  • Savory Herb Quinoa: Light and fluffy, this nutritious side offers a nutty flavor that pairs beautifully with the deep-fried cheeses.

  • Sparkling Water or Lemonade: A refreshing drink choice to cleanse your palate between bites, enhancing the overall tasting experience.

  • Chocolate Fondue: Indulge your sweet tooth by dipping fresh fruits into warm chocolate after savoring the savory bites for a delightful contrast.

How to Store and Freeze Air Fried Babybel Cheese

Fridge: Store leftover Air Fried Babybel Cheese bites in an airtight container for up to 2 days to maintain freshness. Reheat in the air fryer at 350°F for 3-4 minutes to restore their crunchy texture.

Freezer: To freeze, place the uncooked coated cheese rounds on a baking tray in a single layer until firm, then transfer to a freezer bag. They can be frozen for up to 3 months. Cook from frozen, adding a couple more minutes to the cooking time.

Reheating: Avoid reheating cooked bites in the microwave, as this can make them soggy. Use the air fryer to achieve a crispy finish again. Simply preheat and reheat for a few minutes until warm.

Chill Before Cooking: If you plan to freeze the coated cheese rounds before cooking, remember to chill them for 10-15 minutes to ensure the cheese remains intact while cooking.

Air Fried Babybel Cheese Recipe FAQs

What type of Babybel cheese should I use?
Absolutely! You can use any flavor of Babybel cheese rounds like classic cheddar or gouda. Feel free to mix and match different flavors to create an exciting variety that caters to everyone’s taste buds!

How should I store leftover Air Fried Babybel Cheese?
Leftover bites can be stored in an airtight container in the fridge for up to 2 days. When you’re ready to enjoy them again, simply reheat them in the air fryer at 350°F (175°C) for about 3-4 minutes to restore their crispy texture.

Can I freeze Air Fried Babybel Cheese bites?
Yes, you can! To freeze, place the uncooked, coated cheese rounds on a baking tray in a single layer until they are firm, about 10-15 minutes. Then transfer them to a freezer bag, where they can be kept for up to 3 months. When cooking from frozen, increase the cooking time by a couple of minutes, ensuring they’re heated through and crispy.

What if my cheese leaks during cooking?
If your cheese leaks while air frying, it could be because the coating wasn’t chilled adequately before cooking. Always chill the coated rounds for 10-15 minutes to prevent this mishap. Additionally, ensure the coating is well-adhered by double-coating if you prefer extra crunchiness.

Are Air Fried Babybel Cheese bites suitable for dietary restrictions?
Definitely! This recipe can be made gluten-free by using gluten-free flour and breadcrumbs. They’re also a fantastic vegetarian option. However, always check the cheese packaging for allergen information if you’re cooking for someone with allergies.

How do I achieve the perfect crispy texture?
To ensure your Air Fried Babybel Cheese bites are perfectly crispy, follow these steps: Chill coated cheese rounds in the freezer for 10-15 minutes before cooking, avoid overcrowding your air fryer basket, and make sure to double-coat the cheese with egg wash and breadcrumbs for an extra crunch. Enjoy your delicious creation!

undefined

Crispy Air Fried Babybel Cheese Bites for Guilt-Free Snacking

Enjoy Crispy Air Fried Babybel Cheese Bites, a guilt-free snack bursting with flavor and crunch.
Prep Time 10 minutes
Cook Time 7 minutes
Chilling Time 15 minutes
Total Time 32 minutes
Servings: 4 bites
Course: Appetizers
Cuisine: Vegetarian
Calories: 100

Ingredients
  

For the Coating
  • 6 pieces Babybel Cheese Rounds Choose your favorite flavors.
  • 1 cup All-Purpose Flour Gluten-free flour works as a substitute.
  • 2 large Eggs Beaten well.
  • 2 tablespoons Milk Optional for added richness.
  • 1 cup Panko Breadcrumbs Or gluten-free breadcrumbs.
  • 1 teaspoon Garlic Powder
  • 1 teaspoon Onion Powder
  • 1 teaspoon Smoked Paprika
  • 1 teaspoon Salt
  • 1 teaspoon Black Pepper
  • Spray Olive Oil For greasing.
For Garnishing
  • 2 tablespoons Chopped Parsley Optional.

Equipment

  • Air Fryer
  • Bowls

Method
 

Step-by-Step Instructions
  1. Prepare the Coating Station: Set up three shallow bowls for your coating process. In the first bowl, mix all-purpose flour with a pinch of salt and pepper. In the second, beat the eggs until well-blended, adding a splash of milk for creaminess if desired. Finally, combine the panko breadcrumbs with garlic powder, onion powder, and smoked paprika in the third bowl.
  2. Unwrap and Dry the Cheese: Unwrap the Babybel cheese rounds and gently pat them dry with a paper towel.
  3. Coat the Cheese Rounds: Dip each Babybel round into the seasoned flour, then into the egg wash, and roll it in the seasoned panko breadcrumbs.
  4. Chill the Coated Cheese: Arrange the coated Babybel rounds on a parchment-lined tray and place in the freezer for 10-15 minutes.
  5. Preheat the Air Fryer: Preheat your air fryer to 380°F (193°C) and lightly grease the basket with olive oil spray.
  6. Air Fry the Cheese Bites: Place the chilled, coated cheese rounds in a single layer in the air fryer basket and cook for 5-7 minutes.
  7. Cool and Serve: Remove the cheese bites from the air fryer and let them cool for 1-2 minutes. Garnish with chopped parsley and serve.

Nutrition

Serving: 1biteCalories: 100kcalCarbohydrates: 8gProtein: 4gFat: 6gSaturated Fat: 2gMonounsaturated Fat: 3gCholesterol: 45mgSodium: 200mgPotassium: 50mgSugar: 1gVitamin A: 300IUCalcium: 200mgIron: 0.5mg

Notes

Store leftover bites in an airtight container for up to 2 days. It’s best to reheat in the air fryer for a crispy finish.

Tried this recipe?

Let us know how it was!

Grandma’s Hash Brown Casserole: Comfort Food to Savor!

As I took my first bite of this creamy dish, it transported me straight back to Grandma’s bustling kitchen, where laughter and comfort food mingled in the air. This Grandma’s Hash Brown Casserole isn’t just a recipe; it’s a warm embrace on chilly mornings or a beloved side at family gatherings. The beauty of this dish lies in its versatility—whether you choose cream of chicken soup or a vegetarian twist with cream of mushroom, it guarantees to become a crowd-pleaser. Plus, it’s make-ahead friendly, making your life easier during busy weekdays or festive celebrations. Are you ready to create a batch of nostalgia that’ll have everyone asking for seconds?

Why is this casserole a crowd-pleaser?

Nostalgic Comfort: Digging into this casserole brings back cherished memories of Grandma’s kitchen, creating an emotional connection that resonates with everyone at the table.

Versatile Ingredients: Easily customize your dish with different soups and optional add-ins like bacon or veggies, ensuring there’s a flavor for every palate.

Make-Ahead Magic: Perfect for busy schedules, prep it a day in advance, saving you time without sacrificing taste when serving it fresh from the oven.

Golden Crunch: The irresistible buttery topping provides a delightful contrast to the creamy interior, making each bite a satisfying experience.

Feeding a Crowd: Ideal for gatherings, this casserole not only stretches your dollar but also fills hungry bellies, leaving everyone raving about your cooking.

Embrace the joy of homemade food together with this easy-to-make dish—link to serving suggestions for ideas to complement your meal!

Grandma’s Hash Brown Casserole Ingredients

For the Casserole
Frozen Shredded Hash Browns – the heart of the dish, providing texture; can substitute with freshly grated potatoes, but remember to dry them to avoid excess moisture.
Cream of Chicken Soup – adds that creamy, comforting flavor; for a vegetarian option, swap it for cream of mushroom or cream of celery soup.
Sour Cream – contributes a wonderful tanginess; feel free to use Greek yogurt for a lighter, protein-packed alternative.
Shredded Cheddar Cheese – gives a classic cheesy flavor; freshly shredded is ideal, but you can vary it with Monterey Jack or Pepper Jack cheese for an extra kick.
Melted Butter – key for flavor and binding; salted butter enhances taste, whereas unsalted provides better seasoning control.
Finely Chopped Onion – adds depth; sauté for a milder flavor or use raw for a sharper bite.
Garlic Powder, Salt, and Black Pepper – essential seasonings; adjust salt based on cheese and soup saltiness.
Crushed Cornflakes or Buttery Crackers – optional topping for that satisfying crunch; Panko breadcrumbs can also be used for a different texture.
Melted Butter (for topping) – ensures the topping is crispy and bursting with flavor.

Each layer of this Grandma’s Hash Brown Casserole is a delightful expression of comfort food, perfect for bringing everyone together around the table!

Step‑by‑Step Instructions for Grandma’s Hash Brown Casserole

Step 1: Preheat the Oven
Begin by preheating your oven to 350°F (175°C). While it heats up, take a moment to grease a 9×13-inch baking dish with a little melted butter or cooking spray to ensure your creamy hash brown casserole releases easily after baking.

Step 2: Mix the Base Ingredients
In a large mixing bowl, combine the cream of chicken soup, sour cream, and melted butter. Stir in the shredded cheddar cheese, finely chopped onion, garlic powder, salt, and black pepper until the mixture is smooth and well blended, creating a flavorful foundation for your casserole.

Step 3: Incorporate the Hash Browns
Gently fold in the thawed frozen shredded hash browns with a spatula, ensuring each strand is coated with the creamy mixture. This step is crucial, as it combines the comforting flavors of the casserole while maintaining the hash browns’ texture for that delightful bite.

Step 4: Transfer to Baking Dish
Pour the hash brown mixture into the prepared baking dish, spreading it out evenly with the spatula. Smooth the top to ensure even cooking, allowing the creamy goodness to bake uniformly and create that beautiful golden crust you’ll love.

Step 5: Prepare the Crunchy Topping
In a small bowl, mix the crushed cornflakes or buttery crackers with the remaining melted butter until well combined. Generously sprinkle this crunchy topping evenly over the casserole, adding texture and additional flavor to your Grandma’s Hash Brown Casserole.

Step 6: Bake to Perfection
Place the baking dish in the preheated oven and bake for 45-55 minutes. The casserole is done when the top is golden brown and bubbly, filling your kitchen with a mouthwatering aroma that signals the comfort food is ready.

Step 7: Rest Before Serving
Once baked, remove the casserole from the oven and let it sit for about 10 minutes. This resting time allows the layers to set, making it easier to slice and serve while ensuring each piece holds its delicious shape.

What to Serve with Grandma’s Hash Brown Casserole

Enhance your meal with delightful side options that perfectly complement the creamy, comforting flavors of this dish.

  • Crispy Bacon Strips: Offers a smoky, salty contrast to the rich casserole, making every bite unforgettable.
    Serve these alongside for breakfast or brunch, adding heartiness and excitement to the meal.

  • Steamed Broccoli: Fresh and vibrant, this veggie brings a pop of color and a satisfying crunch.
    The subtle bitterness of the broccoli balances the casserole’s creaminess while maintaining a wholesome touch.

  • Apple Sauce: A sweet side that brightens the palate and adds a refreshing note.
    Its natural sweetness pairs beautifully with the savory flavors, making it a delightful combination.

  • Garden Salad: Crisp greens tossed with vinaigrette introduce a vibrant freshness.
    The crunchy vegetables and zesty dressing provide a delightful foil to the casserole’s richness.

  • Garlic Bread: Buttery and warm with a hint of garlic, this classic pairing complements the casserole perfectly.
    The crispy exterior contrasting with the soft interior enhances the overall dining experience.

  • Sparkling Apple Cider: A bubbly, refreshing drink that adds a festive touch to your meal.
    Its sweetness and effervescence pair wonderfully with the savory, cheesy casserole, creating balance.

Explore these delightful pairings to round out your meal and create lasting memories around the table!

Make Ahead Options

These Grandma’s Hash Brown Casserole preparations are perfect for meal prep enthusiasts! You can mix all the ingredients together up to 24 hours in advance and refrigerate the mixture until you’re ready to bake. Just cover the baking dish tightly with plastic wrap to maintain freshness and prevent browning. When you’re ready to serve, simply remove the dish from the fridge, sprinkle on the crunchy topping, and bake as directed—just add an extra 5-10 minutes to the cooking time to ensure it warms through thoroughly. This way, you’ll have a comforting, crowd-pleasing dish ready with minimal effort, perfect for busy weeknights or family gatherings!

Grandma’s Hash Brown Casserole Variations

Feel free to let your creativity shine with these delightful twists on Grandma’s timeless recipe!

  • Loaded Version: Stir in crispy bacon bits and scallions for a savory punch that everyone will love. Picture that satisfying crunch and rich flavor enhancing your casserole!

  • Spicy Kick: Add diced jalapeños or use Pepper Jack cheese to introduce a zesty surprise and elevate the heat level—perfect for those who crave a bit of excitement!

  • Breakfast Delight: Incorporate cooked breakfast sausage and beat a few eggs to pour on top before baking, transforming this dish into a hearty morning feast.

  • Vegetarian Delight: Replace meat with sautéed bell peppers, spinach, or mushrooms for a nutritious twist that adds vibrant color and flavor.

  • Holiday Special: Substitute cream of mushroom soup and sprinkle fresh herbs like rosemary or thyme on top for a festive touch that warms the heart during special gatherings.

  • Creamy Delight: Upgrade the creaminess by swapping in cream cheese for sour cream, creating a rich, velvety texture that makes the casserole even more indulgent.

  • Herby Twist: Mix in fresh herbs, like dill or chives, with the casserole for an aromatic surprise that brightens every bite and celebrates fresh flavors.

  • Nutty Crunch: Swap crushed cornflakes for crushed nuts like pecans or almonds to add an unexpected nutty depth and delightful crunch to your dish!

These variations not only diversify your casserole but also make it a versatile dish for any occasion. For more ideas on complementing your meal, check out some wonderful serving suggestions that pair beautifully with this comforting classic!

Expert Tips for Grandma’s Hash Brown Casserole

  • Prep the Hash Browns: Ensure your shredded hash browns are thawed and as dry as possible to avoid a soggy casserole. Consider patting them with paper towels before mixing.

  • Choose the Right Soup: Experiment with different types of cream soups. Cream of chicken offers a classic flavor, but for a vegetarian twist, try cream of mushroom or celery instead.

  • Layering Cheese: For richer flavor, consider mixing different cheeses into the casserole. A blend of sharp cheddar and Monterey Jack can elevate your Grandma’s Hash Brown Casserole experience.

  • Topping Variations: Don’t hesitate to customize the crunchy topping! Panko breadcrumbs mixed with parmesan cheese can add a delightful twist and extra crunch.

  • Resting Time Matters: Allow the casserole to rest for 10 minutes post-baking. This step ensures the layers hold together when sliced, making for a beautiful presentation.

  • Make Ahead: Prep the casserole a day in advance and refrigerate it, but remember to add a few extra minutes to the baking time if starting from cold.

How to Store and Freeze Grandma’s Hash Brown Casserole

Fridge: Store leftover casserole in an airtight container for up to 4 days. Keep it sealed to retain its creamy texture and prevent it from drying out.

Freezer: To freeze, wrap the unbaked casserole tightly in plastic wrap or foil. It can be stored for up to 3 months. Thaw overnight in the fridge before baking for best results.

Reheating: For reheating, place individual servings in a microwave-safe dish, cover, and heat for 2-3 minutes or until warm. For a crispy topping, reheat in the oven at 350°F (175°C) for 15-20 minutes.

Make-Ahead Tips: You can prepare Grandma’s Hash Brown Casserole up to 24 hours in advance. Just keep the mixture covered in the fridge and add 5-10 extra minutes to baking time.

Grandma’s Hash Brown Casserole Recipe FAQs

How do I select the right hash browns for this casserole?
Absolutely! When choosing hash browns, opt for the frozen shredded variety, as they provide the best texture and heartiness. If you use fresh potatoes, make sure to grate and dry them thoroughly to prevent excess moisture, which could make the casserole mushy.

How should I store leftovers from Grandma’s Hash Brown Casserole?
Very simply! Store any leftovers in an airtight container in the fridge for up to 4 days. Make sure the container is sealed tight to preserve the casserole’s creamy texture and keep it from drying out.

Can I freeze Grandma’s Hash Brown Casserole?
Absolutely! To freeze, wrap the unbaked casserole tightly in plastic wrap or aluminum foil. It can be stored in the freezer for up to 3 months. When you’re ready to bake, just thaw it overnight in the fridge, and add 5-10 minutes to the baking time if it’s still cold.

What can I do to prevent the casserole from being soggy?
To avoid a soggy casserole, ensure that your hash browns are completely thawed and dried. Pat them with paper towels if needed. Also, using shredded cheese instead of pre-shredded can help—freshly grated has less moisture.

Are there any dietary considerations for Grandma’s Hash Brown Casserole?
Certainly! If you have dietary restrictions, you can easily make adjustments. For a vegetarian option, use cream of mushroom or celery soup in place of cream of chicken. Additionally, switch sour cream for Greek yogurt for a lighter version, or avoid certain allergens by selecting gluten-free cornflakes or breadcrumbs for the topping.

How long should I let the casserole sit before serving?
I often recommend resting the casserole for about 10 minutes after baking. This resting period allows the layers to set, making it easier to slice and serve, while also enhancing the overall flavor.

undefined

Grandma's Hash Brown Casserole: Comfort Food to Savor!

A nostalgic and versatile hash brown casserole that evokes memories of Grandma's kitchen, perfect for gatherings and make-ahead meals.
Prep Time 15 minutes
Cook Time 50 minutes
Resting Time 10 minutes
Total Time 1 hour 15 minutes
Servings: 8 slices
Course: Casserole
Cuisine: American
Calories: 300

Ingredients
  

For the Casserole
  • 30 oz Frozen Shredded Hash Browns can substitute with freshly grated potatoes
  • 10.5 oz Cream of Chicken Soup or cream of mushroom for vegetarian
  • 1 cup Sour Cream or Greek yogurt for lighter option
  • 2 cups Shredded Cheddar Cheese can use Monterey Jack or Pepper Jack
  • 0.5 cup Melted Butter salted or unsalted depending on preference
  • 1 medium Finely Chopped Onion sautéed for milder flavor or raw for sharper bite
  • 1 tsp Garlic Powder
  • 1 tsp Salt adjust based on the saltiness of soup and cheese
  • 0.5 tsp Black Pepper
  • 1 cup Crushed Cornflakes or Buttery Crackers optional topping
  • 0.25 cup Melted Butter (for topping)

Equipment

  • 9x13 inch baking dish
  • Mixing Bowl
  • spatula
  • Oven

Method
 

Step-by-Step Instructions
  1. Preheat your oven to 350°F (175°C) and grease a 9x13-inch baking dish with melted butter or cooking spray.
  2. In a large mixing bowl, combine cream of chicken soup, sour cream, and melted butter. Stir in the shredded cheddar cheese, finely chopped onion, garlic powder, salt, and black pepper until smooth.
  3. Gently fold in the thawed frozen shredded hash browns with a spatula until coated.
  4. Pour the mixture into the prepared baking dish and spread evenly. Smooth the top.
  5. In a small bowl, mix the crushed cornflakes or buttery crackers with the remaining melted butter and sprinkle on top of the casserole.
  6. Bake in the preheated oven for 45-55 minutes until the top is golden brown and bubbly.
  7. Remove from the oven and let it sit for about 10 minutes before serving.

Nutrition

Serving: 1sliceCalories: 300kcalCarbohydrates: 36gProtein: 8gFat: 15gSaturated Fat: 8gPolyunsaturated Fat: 1gMonounsaturated Fat: 6gCholesterol: 35mgSodium: 590mgPotassium: 300mgFiber: 2gSugar: 2gVitamin A: 15IUVitamin C: 4mgCalcium: 20mgIron: 4mg

Notes

This casserole can be prepared a day in advance and refrigerated. Bake straight from the fridge but add extra time to cooking.

Tried this recipe?

Let us know how it was!

Lemon Tiramisu: A Refreshing No-Bake Delight for Summer

As I whisked the heavy cream into frothy peaks, I was suddenly transported to a sun-soaked Italian villa, where the air was filled with laughter and the scent of citrus blossoms. My latest creation, a Refreshing Lemon Tiramisu, perfectly captures that essence, transforming the classic Italian dessert into a zesty masterpiece. This no-bake treat is not only a breeze to whip up, but it’s also a lovely addition to any warm-weather gathering, making it a go-to for everything from summer picnics to festive brunches. If you’re ready to impress your guests with a dessert that balances creamy richness with a burst of lemony freshness, stick around—your taste buds are in for a delightful surprise!

Why is Lemon Tiramisu a Must-Try?

Unique Twist: This refreshing take on classic tiramisu combines rich mascarpone with bright lemon flavors, elevating any gathering.

No-Bake Convenience: Perfect for warm weather, this no-bake dessert saves time, letting you enjoy quality moments with loved ones without the oven hustle.

Versatile Layering: Customize easily by adding berries or adjusting citrus flavors for a dessert that fits any occasion.

Crowd-Pleasing: With its vibrant presentation and creamy texture, this lemon tiramisu is sure to wow guests at your next celebration or picnic!

Make-Ahead Delight: Prepare it a day in advance, so you can impress with effortless elegance. Check out our tips for perfect make-ahead desserts that will save you time on party day!

Lemon Tiramisu Ingredients

For the Lemon Syrup

  • Freshly Squeezed Lemon Juice – Provides the tangy flavor essential to the dessert; approximately 3 lemons yield 1/2 cup.
  • Water – Used to dissolve the sugar in the lemon syrup for optimal sweetness.
  • Granulated Sugar – Sweetens the lemon syrup, perfectly balancing the tartness of the lemon.

For the Mascarpone Cream

  • Heavy Whipping Cream – Adds richness and a light texture to the mascarpone cream; ensure it is cold for optimal whipping.
  • Mascarpone Cheese – The primary ingredient for creaminess; bring to room temperature for easy mixing.
  • Powdered Sugar – Sweetens the mascarpone mixture while maintaining a smooth consistency.
  • Pure Vanilla Extract – Enhances the overall flavor profile, making it extra delicious.
  • Lemon Zest – Provides additional lemon flavor and aroma, enriching the overall sensory experience.

For Assembly

  • Ladyfinger Cookies (Savoiardi) – These form the base layers and absorb the lemon syrup for flavor and texture; dip briefly to avoid sogginess.
  • Extra Lemon Zest or Candied Lemon Slices – For garnish, adding visual appeal and an extra burst of citrus flavor to your lemon tiramisu.

This refreshing Lemon Tiramisu embodies the light and zesty spirit of the season, making it a delightful addition to any gathering!

Step‑by‑Step Instructions for Refreshing Lemon Tiramisu

Step 1: Make Lemon Syrup
In a small saucepan over medium heat, combine ½ cup freshly squeezed lemon juice, ¼ cup water, and ⅓ cup granulated sugar. Stir continuously until the sugar is fully dissolved, about 3–5 minutes. Once dissolved, remove from heat and let the syrup cool completely. This tangy lemon syrup will layer delicious zesty flavor into the refreshing lemon tiramisu.

Step 2: Prepare Mascarpone Cream
In a chilled mixing bowl, whip 1 cup of cold heavy whipping cream with 3 tablespoons of powdered sugar and 1 teaspoon of pure vanilla extract until soft peaks form, which should take about 3–4 minutes. In another bowl, beat 1 cup of room-temperature mascarpone cheese with 1 tablespoon of lemon zest until smooth. Gently fold the whipped cream into the mascarpone mixture to keep it light and airy.

Step 3: Assemble Tiramisu
Take a shallow dish and briefly dip half of the ladyfinger cookies into the cooled lemon syrup, making sure they absorb but don’t become soggy. Layer these dipped ladyfingers at the bottom of the dish, then spread half of the mascarpone cream mixture on top. Repeat the layering with the remaining ladyfingers and mascarpone cream, smoothing the top for an even finish.

Step 4: Chill
Cover the assembled lemon tiramisu with plastic wrap and refrigerate for 4–6 hours, or ideally overnight. This chilling time allows the flavors to meld beautifully, resulting in a harmonious, creamy texture. You’ll know it’s ready when the layers are set and slightly firm to the touch.

Step 5: Serve
Before serving, garnish the top of the lemon tiramisu with extra lemon zest or candied lemon slices for a beautiful presentation. Cut into squares and serve chilled to reveal the luscious layers of this refreshing lemon tiramisu. This dessert will be the highlight of any gathering, offering a delightful blend of creamy and zesty flavors.

Make Ahead Options

These delightful Lemon Tiramisu treats are perfect for meal prep enthusiasts! You can prepare the lemon syrup and mascarpone cream mixture up to 24 hours in advance. Simply follow the initial steps to make the lemon syrup and mascarpone cream, then cover them separately and refrigerate. To maintain the quality, store the ladyfingers at room temperature in an airtight container to prevent them from becoming soggy. When you’re ready to serve, layer the ladyfingers with the mascarpone cream and refrigerate the assembled dessert for 4–6 hours (ideally overnight) before enjoying this refreshing lemon tiramisu. This way, you’ll impress your guests with a gorgeous dessert that tastes just as delicious without any last-minute fuss!

How to Store and Freeze Lemon Tiramisu

Fridge: Store leftover lemon tiramisu in an airtight container in the refrigerator for up to 3 days, ensuring each portion stays fresh and creamy.

Freezer: If you wish to make it ahead, lemon tiramisu can be frozen for up to 1 month. Wrap it tightly in plastic wrap and then in aluminum foil to prevent freezer burn.

Thawing: When ready to enjoy, transfer the frozen lemon tiramisu to the fridge to thaw overnight for a soft, delightful dessert.

Serving Tip: Prior to serving, garnish with fresh lemon zest or candied lemon slices for an extra touch, bringing back the vibrant flavors of this refreshing treat!

Expert Tips for Lemon Tiramisu

  • Fresh Ingredients Matter: Use freshly squeezed lemon juice for the best flavor. Bottled juice may taste flat and overly sweet, impacting the freshness of your lemon tiramisu.

  • Timing is Key: Prepare your lemon tiramisu the day before serving. This allows the flavors to meld beautifully and ensures a silky texture.

  • Watch the Soaking: Dip ladyfingers quickly in the lemon syrup. Prolonged soaking can lead to sogginess, disrupting the layered texture of your dessert.

  • Chill Thoroughly: Allow the tiramisu to chill for a minimum of 4 hours, but overnight is preferred. This helps the mascarpone cream set and enhances the overall flavor.

  • Garnish Creatively: Elevate your presentation with extra lemon zest or candied lemon slices on top. A simple garnish can wow your guests and add a pop of color!

What to Serve with Refreshing Lemon Tiramisu

Elevate your lemon tiramisu experience with delightful pairings that enhance its zesty notes and creamy texture.

  • Fresh Berries: The natural sweetness and juiciness of strawberries or blueberries provide a bright contrast, complementing the tartness of the lemon tiramisu beautifully.

  • Mint-Infused Iced Tea: A cool, refreshing beverage with hints of mint perfectly balances the rich flavors of the tiramisu, creating a harmonious palate.

  • Chocolate-Dipped Biscotti: The crunchy texture and chocolatey richness of biscotti makes for an elegant touch, enhancing the dessert experience with every bite.

  • Lemon Sorbet: For those who can’t get enough citrus, a scoop of refreshing lemon sorbet offers a clean, icy complement to the creamy layers of your tiramisu.

  • Prosecco Spritz: Its effervescent qualities and fruity notes will elevate any gathering, bringing out the brightness of the lemon and the decadence of mascarpone.

  • Whipped Cream with Zest: A dollop of lightly sweetened whipped cream infused with lemon zest can add an extra layer of creaminess and enhance the overall citrus flavor.

Enjoy these pairings with your refreshing lemon tiramisu, and watch as your gatherings transform into delightful culinary celebrations!

Lemon Tiramisu Variations & Substitutions

Get ready to elevate your lemon tiramisu with these delightful twists that cater to various tastes and preferences!

  • Dairy-Free: Use coconut cream instead of heavy whipping cream and dairy-free cream cheese for a luscious, creamy alternative that still shines with vibrant lemon flavors.

  • Limoncello Infusion: Add a splash of limoncello to the lemon syrup for an adult twist. It introduces a delightful hint of lemon liqueur that perfectly complements the refreshing profile.

  • Berry Bliss: Layer in fresh berries, like raspberries or blueberries, between the mascarpone cream for a pop of color and fruity sweetness. The berries provide a juicy contrast to the creamy layers that your guests will love.

  • Lime Variation: Swap freshly squeezed lemon juice and zest for lime for a tropical twist. This switch gives the dessert a tangy zing that’s just as refreshing!

  • Ginger Snap Kick: Use ginger snap cookies in place of ladyfingers for added spice and a unique textural element. The spicy crunch brings a surprising depth to the classic dessert.

  • Nutty Finish: Sprinkle sliced almonds or crushed pistachios on top just before serving. They add an unexpected crunch and a layer of nutty flavor that enriches the overall experience.

  • Chili Heat: For a daring twist, mix in a pinch of chili powder with the lemon syrup. It adds a subtle heat that dances on your palate, creating an exciting contrast with the cool creaminess.

  • Make it Mini: Create individual servings by layering in small jars or glasses. This not only elevates presentation but also makes it easier for guests to enjoy without sharing!

As you experiment with these variations, remember that there’s no wrong way to create your lemon tiramisu! If you’re looking for inspiration on making a classic dessert another way, check out our guide for perfect make-ahead desserts. Enjoy the journey of flavor!

Lemon Tiramisu Recipe FAQs

What type of lemons should I use for the lemon tiramisu?
Absolutely! For the best flavor, use fresh, ripe lemons that are firm and free of dark spots. Look for lemons that feel heavy for their size, as they tend to have more juice. Organic lemons are also a great choice, as they usually have a more intense flavor.

How should I store leftover lemon tiramisu?
You can store leftover lemon tiramisu in an airtight container in the refrigerator for up to 3 days. Make sure it’s well sealed to maintain its creamy texture and vibrant flavors. Enjoy every last bite!

Can I freeze lemon tiramisu?
Yes, you can! To freeze lemon tiramisu, wrap it tightly in plastic wrap and then in aluminum foil to prevent freezer burn. It can be frozen for up to 1 month. When you’re ready to eat, simply transfer it to the refrigerator to thaw overnight. Enjoy it chilled for the best taste!

What should I do if my tiramisu layers are too soggy?
If you find that your lemon tiramisu layers are soggy, it’s likely that the ladyfingers were dipped in the lemon syrup for too long. For next time, dip them quickly, just enough to absorb flavor without becoming too wet. Aim for a soaking time of just 1-2 seconds on each side.

Are there any dietary considerations for pets or allergies with this recipe?
Very! If you’re serving this lemon tiramisu at a gathering, be sure to inform your guests about the use of dairy ingredients, such as mascarpone cheese and heavy cream—common allergens for many. Additionally, keep the dessert away from pets; ingredients like chocolate or even high amounts of sugar are not good for them.

Can I substitute any ingredients in the lemon tiramisu?
Definitely! If mascarpone cheese is unavailable, mix cream cheese with heavy cream as a substitute, though it might yield a slightly different texture. You can also switch out lemon for lime for a zesty variation. If you’re looking for a twist, add a splash of limoncello to the syrup for an adult-friendly version!

undefined

Lemon Tiramisu: A Refreshing No-Bake Delight for Summer

This refreshing Lemon Tiramisu combines rich mascarpone with bright lemon flavors, making it a must-try summer dessert.
Prep Time 20 minutes
Cook Time 5 minutes
Chilling Time 6 hours
Total Time 6 hours 25 minutes
Servings: 8 slices
Course: Dessert
Cuisine: Italian
Calories: 290

Ingredients
  

For the Lemon Syrup
  • 0.5 cups Freshly Squeezed Lemon Juice Approximately 3 lemons yield 1/2 cup.
  • 0.25 cups Water
  • 0.33 cups Granulated Sugar
For the Mascarpone Cream
  • 1 cups Heavy Whipping Cream Ensure it is cold for optimal whipping.
  • 1 cups Mascarpone Cheese Bring to room temperature for easy mixing.
  • 3 tablespoons Powdered Sugar
  • 1 teaspoons Pure Vanilla Extract
  • 1 tablespoons Lemon Zest
For Assembly
  • 24 pieces Ladyfinger Cookies (Savoiardi) Dip briefly to avoid sogginess.
  • 1 tablespoons Extra Lemon Zest or Candied Lemon Slices For garnish.

Equipment

  • Mixing Bowl
  • Saucepan
  • whisk
  • shallow dish

Method
 

Step-by-Step Instructions
  1. In a small saucepan over medium heat, combine ½ cup freshly squeezed lemon juice, ¼ cup water, and ⅓ cup granulated sugar. Stir continuously until the sugar is fully dissolved, about 3–5 minutes. Once dissolved, remove from heat and let the syrup cool completely.
  2. In a chilled mixing bowl, whip 1 cup of cold heavy whipping cream with 3 tablespoons of powdered sugar and 1 teaspoon of pure vanilla extract until soft peaks form, which should take about 3–4 minutes. In another bowl, beat 1 cup of room-temperature mascarpone cheese with 1 tablespoon of lemon zest until smooth. Gently fold the whipped cream into the mascarpone mixture.
  3. Take a shallow dish and briefly dip half of the ladyfinger cookies into the cooled lemon syrup, then layer these dipped ladyfingers at the bottom of the dish, followed by half of the mascarpone cream.
  4. Repeat the layering with the remaining ladyfingers and mascarpone cream, smoothing the top for an even finish.
  5. Cover the assembled lemon tiramisu with plastic wrap and refrigerate for 4–6 hours, or ideally overnight.
  6. Before serving, garnish the top of the lemon tiramisu with extra lemon zest or candied lemon slices.

Nutrition

Serving: 1sliceCalories: 290kcalCarbohydrates: 31gProtein: 4gFat: 16gSaturated Fat: 10gMonounsaturated Fat: 6gCholesterol: 60mgSodium: 85mgPotassium: 110mgSugar: 12gVitamin A: 500IUVitamin C: 5mgCalcium: 100mgIron: 0.5mg

Notes

Use freshly squeezed lemon juice for the best flavor. Prepare the day before for optimal taste.

Tried this recipe?

Let us know how it was!

Irresistible French Toast Casserole for Cozy Mornings

As I stood at my kitchen counter, the aroma of cinnamon and vanilla danced around me like an old friend. That’s when it hit me—nothing quite matches the warmth and comfort of a classic French Toast Casserole, perfect for cozy mornings with loved ones. This dish is not only a crowd-pleaser but also a make-ahead marvel that will turn any hectic morning into a relaxing family gathering. Whether you opt for the traditional version or get a little adventurous with the Cinnamon Roll variation, you’ll find an easy and delicious way to savor breakfast without the stress. Who’s ready to transform their weekends with a slice of pure comfort? Let’s dive into this delightful recipe and see what makes it so irresistible!

Why is French Toast Casserole a Must-Try?

Deliciously Versatile: This French Toast Casserole can easily adapt to your family’s tastes, whether you prefer the Classic or a fun twist like the Cinnamon Roll version.

Make-Ahead Magic: Prepare it the night before to save time in the morning, making it an effortless option for busy days.

Comforting Aroma: The heavenly mix of cinnamon and vanilla fills your kitchen with warmth, making it a delightful start to any day.

Crowd-Pleaser: Perfect for gatherings! Everyone loves a hearty, comforting breakfast that can be shared.

Easy Cleanup: With just one dish needed, enjoy your meal without the stress of a pile of dishes afterward.

You’ll love how simple it is to whip up this breakfast that feels like a hug in a dish! For more fun options, you might also enjoy making a breakfast strata or experimenting with overnight oats for a delicious start to your day!

French Toast Casserole Ingredients

For the Base

  • Brioche/Challah/French Bread – Provides structure and absorbs custard well; choose sturdy options to avoid a soggy texture.
  • Large Eggs – Creates a rich custard base for delicious flavor and structure.
  • Whole Milk – Adds creaminess to the custard; can substitute with almond or oat milk for a lighter version.
  • Granulated Sugar – Sweetens the dish; can reduce to 1/4 cup for less sweetness or use maple syrup as a natural alternative.
  • Vanilla Extract – Enhances the overall flavor profile.
  • Ground Cinnamon – Adds warmth and spice, elevating the French toast experience.
  • Salt – Balances sweetness and enhances the casserole’s flavor.
  • Unsalted Butter – Adds richness and helps achieve a crisp top; feel free to use oil for a lighter alternative.

For the Variations

  • Heavy Cream (for Cinnamon Roll version) – Improves richness and gooey texture; substitute with milk for a lighter option.
  • Brown Sugar (for Overnight version) – Adds sweetness and depth; can replace with coconut sugar for a healthier approach.
  • Cinnamon Rolls (for Cinnamon Roll version) – Provides sweetness and fun textures; both homemade or store-bought work beautifully!

With this delightful lineup of ingredients, you’re set to create the irresistible French Toast Casserole that will warm your heart and nourish your loved ones. Now, let’s get cooking!

Step‑by‑Step Instructions for Easy French Toast Casserole

Step 1: Prepare the Baking Dish
Preheat your oven to 350°F and gather a 9×13-inch baking dish. Grease the dish generously with unsalted butter or cooking spray to prevent sticking. This will ensure your Easy French Toast Casserole releases smoothly once baked, giving you beautifully golden slices to serve.

Step 2: Combine Bread
Take your brioche, challah, or French bread and cut it into 1-inch cubes. Evenly spread these cubes in the prepared baking dish, ensuring a nice, even layer. This solid foundation is crucial for your casserole, allowing it to soak up the custard perfectly.

Step 3: Mix Custard
In a large mixing bowl, whisk together the large eggs, whole milk, granulated sugar, vanilla extract, ground cinnamon, and a pinch of salt. This mixture will create a luscious custard base. Whisk until fully combined, and take a moment to appreciate the sweet and aromatic blend—it’s the heart of your French toast casserole.

Step 4: Pour Custard
Pour the custard mixture evenly over the bread cubes in the baking dish. Use a spatula to gently press down on the bread, ensuring each cube is coated and soaking up the rich liquid. This soaking process is essential for creating that soft, custardy inside that we adore in a French toast casserole.

Step 5: Add Toppings/Butter
If you’re going for extra flavor, drizzle melted unsalted butter over the top, and sprinkle some brown sugar if you are making the Overnight version. For the Cinnamon Roll variation, you could drizzle icing at this stage. This adds a delightful richness and can create a crispy topping that’s simply irresistible.

Step 6: Let Sit
Allow your casserole to sit for about 10 to 20 minutes if using the Classic method. If preparing the Overnight version, cover and refrigerate it overnight. This resting period is crucial, as it lets the bread absorb all those delicious custard flavors and softens the bread.

Step 7: Bake
Place your baking dish in the preheated oven and bake uncovered. For the Classic French Toast Casserole, bake for 30-45 minutes, until the top is golden brown and the center has set. If making the Cinnamon Roll variation, check for doneness at 30-35 minutes. Keep an eye out for the golden crust; it’s a sure sign it’s ready.

Step 8: Serve
Once baked, allow the casserole to cool slightly so it’s easier to slice. Serve warm, topped with maple syrup, a dusting of powdered sugar, or fresh fruit. The Easy French Toast Casserole is best enjoyed fresh from the oven, capturing that crispy top and soft middle in every delightful bite.

Storage Tips for French Toast Casserole

Fridge: Store leftovers in an airtight container or wrapped tightly with foil for up to four days. This will help maintain the casserole’s delightful texture and flavor.

Freezer: For longer storage, freeze individual slices wrapped in plastic wrap and then placed in a freezer-safe bag for up to three months. This ensures easy reheating when you crave comfort food!

Reheating: When ready to enjoy, reheat slices in the oven at 350°F covered with foil for 15 minutes, or use a microwave for a quick fix. Either way, you’ll have a cozy breakfast waiting for you!

Make Ahead Options

These Easy French Toast Casserole recipes are perfect for meal prep enthusiasts! You can prepare the casserole up to 24 hours in advance, allowing the bread to soak in the custard overnight for maximum flavor. Simply assemble the dish, cover it tightly with plastic wrap or aluminum foil, and refrigerate. For the Classic version, you can bake it right after prep or leave it to soak overnight. When you’re ready to serve, just pop it in the preheated oven and bake until golden brown. This time-saving approach ensures you’ll have a delightful and comforting breakfast ready to go, making your mornings a breeze!

French Toast Casserole Variations

Customize this French Toast Casserole to your heart’s desire with these delightful twists that elevate flavor and texture!

  • Fruit-Enhanced: Add fresh blueberries or banana slices for a fruity pop that brightens each bite. The sweetness of ripe fruit complements the warm spices beautifully.

  • Nutmeg Twist: Sprinkle in a dash of nutmeg along with your cinnamon to create a warm spice medley that’ll warm you from the inside out. This subtle change can bring a whole new depth to your comforting dish.

  • Sourdough Switch: Swap brioche for a tangy sourdough for a unique flavor profile. The added chewiness pairs wonderfully with the custard, turning the dish into a sophisticated breakfast option.

  • Whole Grain Goodness: Use whole grain bread for a healthier twist that boosts fiber without sacrificing taste. You’ll enjoy a nourishing meal while still indulging in the classic comfort.

  • Creamy Topping: Add a dollop of Greek yogurt or cream cheese on top for a delightful creamy contrast. It adds richness and pairs perfectly with the warm casserole for a luscious experience.

  • Heat It Up: Spice things up by adding a pinch of cayenne pepper or a drizzle of hot sauce to the custard mix. You’ll be surprised at how the heat enhances the overall flavor!

  • Caramel Delight: Top with a generous drizzle of homemade caramel sauce for a rich, indulgent finish. It transforms your casserole into a dessert-like breakfast that feels extra special.

  • Nutty Crunch: Fold in chopped nuts, like pecans or walnuts, before baking for added crunch and nuttiness. They bring a satisfying textural contrast to the soft casserole.

With these simple variations, you can keep the excitement alive in your kitchen! For some more delicious inspiration, why not try your hand at a breakfast strata for those lazy weekend mornings or cozy up with a bowl of overnight oats for effortless breakfast perfection?

What to Serve with Easy French Toast Casserole?

Start your meal off right with delightful pairings that elevate your French toast experience beyond the plate.

  • Crispy Bacon: The salty crunch of bacon complements the sweet richness of the casserole, balancing flavors beautifully.

  • Fresh Berries: A vibrant mix of strawberries, blueberries, and raspberries adds a burst of color and fresh tartness that brightens each bite.

  • Whipped Cream: Light and airy, a dollop of whipped cream adds a creamy contrast to the fluffy casserole, making each serving feel luxurious.

  • Maple Syrup: Drizzling warm maple syrup brings a classic sweetness that harmonizes perfectly with the cinnamon flavors in the casserole.

  • Yogurt Parfait: A side of creamy Greek yogurt layered with granola and fruit offers a refreshing crunch and nutrition that complements the sweet dish.

  • Cinnamon Apples: Sautéed apples with cinnamon provide a warm, spiced accompaniment, deepening the comforting flavors of the casserole.

  • Smoothies: A fruity or green smoothie on the side can refresh your palate while adding a healthy twist to the comforting meal.

  • Coffee or Tea: A hot cup of rich coffee or soothing herbal tea enhances the whole experience, warming you from the inside out on cozy mornings.

Tips for the Best French Toast Casserole

  • Choose the Right Bread: Thick, sturdy bread like brioche or challah absorbs the custard beautifully. Avoid soft bread to prevent sogginess.
  • Let Bread Sit: Dry out fresh bread cubes by letting them sit for a few hours before use. This step enhances the absorption of the custard for the perfect texture.
  • Soaking Time Matters: For the Classic version, allow the casserole to sit for 10 minutes after pouring the custard. For the Overnight version, let it soak covered in the fridge for a stress-free morning.
  • Check Doneness: Avoid overbaking by checking the casserole near the lower end of the baking time. A golden top and set center indicate it’s done!
  • Store Leftovers Properly: Cool completely, cover tightly, and refrigerate leftovers for up to four days or freeze for three months for a delightful breakfast anytime!

With these expert tips, your French Toast Casserole will be a glorious crowd-pleaser that warms both hearts and bellies!

French Toast Casserole Recipe FAQs

How do I choose the right bread for my French Toast Casserole?
Absolutely! Opt for thick, sturdy bread like brioche or challah, as these absorb the custard beautifully and provide a delightful texture. If you’re using fresh bread, allowing it to dry out for a few hours can also enhance its absorption capabilities. Avoid using soft bread like white sandwich bread, which may become mushy.

How should I store leftovers of the French Toast Casserole?
Very simply! You can store leftovers in an airtight container or wrapped tightly with foil in the refrigerator for up to four days. This will help keep the casserole’s delightful texture and flavor intact, making it easy to enjoy during the week.

Can I freeze the French Toast Casserole?
Absolutely! To freeze, allow the casserole to cool completely. Then, cut it into individual slices, wrap each slice tightly in plastic wrap, and place them in a freezer-safe bag. You can enjoy it for up to three months! This method makes it easy to reheat just the right portion when you’re craving comfort.

What’s the best way to reheat French Toast Casserole?
When you’re ready to enjoy your frozen slices, remove them from the freezer and let them thaw in the refrigerator overnight. To reheat, place the slices in an oven preheated to 350°F, covering them with foil to maintain moisture. Warm for about 15 minutes or until heated through, and you’ve got a cozy breakfast ready in no time!

Are there any special dietary considerations for French Toast Casserole?
Yes! If you’re accommodating dietary restrictions, keep in mind that this recipe can easily be tailored. For a dairy-free option, substitute whole milk with almond or oat milk, and use plant-based butter. Adjust the sugar levels as needed for those watching their intake. Always check ingredients like bread for potential allergens, particularly gluten.

What should I do if my French Toast Casserole turns out soggy?
Don’t worry; this can often be remedied! If you find your casserole too soggy, it might be due to using too much fresh bread or not allowing it to sit long enough to soak. Next time, ensure you are using stale or dried-out bread and allow adequate soaking time. You can lightly toast the bread cubes before assembling to help reduce moisture absorption.

undefined

Irresistible French Toast Casserole for Cozy Mornings

This French Toast Casserole is a must-try breakfast that's easy to prepare and perfect for sharing on cozy mornings.
Prep Time 15 minutes
Cook Time 45 minutes
Resting Time 20 minutes
Total Time 1 hour 20 minutes
Servings: 8 slices
Course: Breakfast
Cuisine: French
Calories: 350

Ingredients
  

For the Base
  • 8 slices Brioche/Challah/French Bread Cut into 1-inch cubes
  • 6 large Eggs
  • 2 cups Whole Milk Can substitute with almond or oat milk
  • 0.5 cups Granulated Sugar Can reduce to 1/4 cup or use maple syrup
  • 2 teaspoons Vanilla Extract
  • 2 teaspoons Ground Cinnamon
  • 0.5 teaspoon Salt
  • 0.25 cups Unsalted Butter Melted, for greasing and topping
For the Variations
  • 1 cup Heavy Cream For Cinnamon Roll version
  • 0.5 cups Brown Sugar For Overnight version
  • 1 pack Cinnamon Rolls For Cinnamon Roll variation

Equipment

  • 9x13 inch baking dish

Method
 

Step-by-Step Instructions
  1. Preheat your oven to 350°F and grease the baking dish with unsalted butter or cooking spray.
  2. Cut the brioche, challah, or French bread into 1-inch cubes and spread them evenly in the prepared baking dish.
  3. In a large bowl, whisk together the eggs, whole milk, sugar, vanilla extract, ground cinnamon, and salt until combined.
  4. Pour the custard mixture over the bread cubes and gently press down to ensure soaking.
  5. Drizzle melted unsalted butter over the top and sprinkle brown sugar if making the Overnight version, or icing for the Cinnamon Roll version.
  6. Allow the casserole to sit for 10-20 minutes, or refrigerate overnight if preparing the Overnight version.
  7. Bake uncovered in the preheated oven for 30-45 minutes, until golden brown and set.
  8. Let cool slightly before slicing and serve warm with maple syrup, powdered sugar, or fresh fruit.

Nutrition

Serving: 1sliceCalories: 350kcalCarbohydrates: 45gProtein: 10gFat: 15gSaturated Fat: 8gPolyunsaturated Fat: 1gMonounsaturated Fat: 4gCholesterol: 150mgSodium: 300mgPotassium: 250mgFiber: 2gSugar: 12gVitamin A: 500IUCalcium: 200mgIron: 2mg

Notes

Choose thick, sturdy bread for best results, and allow fresh bread cubes to dry out to enhance absorption. Store leftovers properly for delightful reheating.

Tried this recipe?

Let us know how it was!

Korean Carrot Salad: A Crunchy, Healthy Delight for Everyone

As I chopped the bright orange carrots, their crisp sound was like an invitation to whip up something fresh and exciting. This Korean Carrot Salad has a knack for transforming simple ingredients into a sensational side dish that complements any meal. With a healthy and crunchy profile, it’s not only a burst of color on your plate but also a delightful explosion of sweet and tangy flavors. Best of all, it takes mere minutes to prepare, making it a go-to recipe for those busy weeknights or last-minute gatherings. Trust me, this salad will become your new favorite way to enjoy vegetables! Curious about how to create this tasty dish? Let’s dive in!

Why is Korean Carrot Salad a Must-Try?

Vibrant Colors: This salad’s bright orange hue adds an eye-catching appeal to any meal.

Quick Preparation: With just 15 minutes needed, it’s a lifesaver for busy cooks seeking vibrant flavors.

Crunchy and Fresh: The shredded carrots deliver a satisfying crunch alongside a zesty dressing, making every bite exciting.

Flavor Balance: A perfect sweet and tangy harmony makes it an irresistibly refreshing side dish.

Versatile Pairing: Pair it with grilled meats or serve it solo for a nutritious option that’ll impress guests. For more easy salad ideas, check out our Simple Salad Recipes.

Korean Carrot Salad Ingredients

• Here’s what you need to create this healthy, crunchy delight!

For the Salad

  • Carrots – The stars of the show; choose fresh, vibrant ones for maximum sweetness and crunch.
  • Garlic – Freshly minced adds depth; if you’re in a pinch, garlic powder works too.
  • Vinegar (Rice Vinegar preferred) – This adds necessary acidity to enhance flavor; apple cider vinegar is a solid substitute.
  • Sugar (or honey) – Balances the tartness; adjust to your taste and feel free to use agave syrup for a vegan option.
  • Sesame Oil – Provides a nutty aroma that elevates your salad; opt for toasted sesame oil for even more flavor.
  • Salt – Simple yet essential for enhancing all the flavors; tweak to your liking.

For the Garnish (Optional)

  • Sesame seeds – Sprinkle over the top for extra texture and a nutty touch.
  • Green onions – Chopped for a burst of color and flavor; a delightful finishing touch!

Now that you have the ingredients ready, get excited to mix and enjoy this crunchy Korean Carrot Salad!

Step‑by‑Step Instructions for Korean Carrot Salad

Step 1: Prep the Carrots
Begin by washing and peeling fresh carrots, ensuring they are vibrant and crunchy. Grate or julienne them finely using a box grater or a food processor. Once shredded, transfer the carrots to a large mixing bowl, creating a colorful base for your Korean Carrot Salad.

Step 2: Prepare Dressing
In a separate bowl, combine the minced garlic and vinegar. Whisk in the sugar and sesame oil, stirring vigorously until well blended. The mixture should have a smooth consistency and a balanced sweet and tangy aroma. Taste the dressing and adjust the sweetness with more sugar or honey if desired.

Step 3: Combine
Pour the prepared dressing over the bowl of shredded carrots. Using tongs or a large spoon, toss the mixture thoroughly, ensuring each carrot strand is coated in that delicious dressing. The vibrant colors will shine through as the flavors begin to meld, creating an exciting blend for your Korean Carrot Salad.

Step 4: Chill
To enhance the flavors, cover the salad with plastic wrap and place it in the refrigerator. Allow it to chill for at least 20 to 30 minutes. This marinating time helps the sugars to balance out the acidity and lets the freshness of the carrots shine, making each bite even more delightful.

Step 5: Serve
Once chilled, remove the salad from the refrigerator. Garnish with a sprinkle of sesame seeds and finely chopped green onions for an added pop of flavor and texture. Serve the Korean Carrot Salad as a refreshing side dish alongside your favorite Asian meals, or enjoy it as a healthy snack on its own.

Make Ahead Options

These Korean Carrot Salad preparations are perfect for meal prep enthusiasts! You can grate the carrots and prepare the dressing up to 24 hours in advance; simply store the shredded carrots in an airtight container and refrigerate to maintain their crispness. Keep the dressing separate in another container to preserve its flavor. When it’s time to serve, combine the carrots with the dressing, toss well, and refrigerate for at least 20-30 minutes to allow the flavors to meld. This method ensures your salad remains just as delicious, making it an ideal side dish that saves you time on busy weeknights!

What to Serve with Korean Carrot Salad?

Elevate your meal experience with vibrant accompaniments that enhance every crunchy bite of this refreshing salad.

  • Grilled Chicken: Juicy and slightly smoky, grilled chicken adds a beautiful contrast to the tangy crunch of the salad.

  • Fried Rice: A hearty option, fried rice complements the salad’s freshness while delivering a comforting, savory element to the table.

  • Kimchi: The fermented spicy kick of kimchi brings a delightful depth that harmonizes with the salad’s sweetness, offering a full-flavored experience.

  • Seafood Pancakes: These crispy delights add a unique texture; their savory notes pair beautifully with the salad’s sweet and tangy profile.

  • Crispy Tofu: Lightly seasoned and fried, crispy tofu offers a protein-packed option that mirrors the salad’s crunchiness while enhancing overall flavor.

  • Chilled Green Tea: A refreshing drink option, it cleanses the palate and accentuates the salad’s vibrant, zesty flavors without overwhelming your taste buds.

  • Mango Sticky Rice: For dessert, this sweet treat provides a delightful contrast; its creaminess complements the salad’s crispness beautifully, rounding off the meal perfectly.

Expert Tips for Korean Carrot Salad

  • Select Fresh Carrots: Use vibrant, firm carrots to ensure maximum crunch and sweetness. Older carrots can be limp and lacking in flavor.

  • Chill Time Matters: Allowing the salad to rest in the refrigerator for 20-30 minutes is essential; this helps develop the flavors and enhance the overall taste of your Korean Carrot Salad.

  • Adjust Sweetness: Taste the dressing before combining it with the carrots. You can easily modify the sugar or honey for your perfect balance of sweetness.

  • Mix Just Before Serving: To preserve the crunchiness of the carrots, mix the salad right before serving to avoid any sogginess.

  • Add Variety: Feel free to experiment! Thinly sliced bell peppers or chopped apples can add extra color and flavor nuances to your Korean Carrot Salad.

  • Save for Later: If you have leftovers, store them in an airtight container in the refrigerator for up to 3 days. The flavors will intensify, but be sure to adjust seasoning when serving again.

How to Store and Freeze Korean Carrot Salad

Fridge: Store any leftover Korean Carrot Salad in an airtight container in the refrigerator for up to 3 days. This keeps it fresh and crunchy.

Freezer: For longer storage, the salad can be frozen for up to 2 months, although the texture may change. Ensure it’s in a freezer-safe, airtight container.

Thawing: When ready to enjoy, thaw in the refrigerator overnight and toss again before serving to revive flavors.

Reheating: This salad is best served cold; however, if you prefer it warm, gently sauté the chilled salad in a pan for a few minutes.

Korean Carrot Salad Variations to Try

Feel free to let your creativity shine as you put your own spin on this delightful salad!

  • Dairy-Free: Swap sugar for maple syrup or agave to keep it vegan-friendly while adding a unique flavor twist.

  • Spicy Kick: Add sliced jalapeños or a dash of chili flakes for a spicy version that wakes up your taste buds.

  • Crunchy Add-Ins: Toss in sunflower seeds or pumpkin seeds for an extra layer of texture and nutty flavor that balances beautifully with the carrots.

  • Fruit Fusion: Mix in diced mango or pineapple to introduce a sweet, tropical twist that harmonizes with the tangy dressing.

  • Herbaceous Flair: Incorporate fresh cilantro or mint for a refreshing herbal note that adds an exciting new dimension to the dish.

  • Protein-Packed: Enhance the salad with chickpeas or edamame for a satisfying protein boost, making it a more filling meal on its own.

  • Whole Grain Boost: Serve over a bed of quinoa or brown rice for a wholesome twist; it gives the salad a hearty base and adds more nutrients.

  • Asian Flavors Enhanced: Drizzle with a bit of soy sauce or add a pinch of five-spice powder to deepen the flavor and bring more authentic Asian notes to your dish.

Don’t hesitate to explore these variations, and remember, if you enjoyed this salad, you might also love our Quick and Easy Salad Recipes for more scrumptious ideas!

Korean Carrot Salad Recipe FAQs

How do I select the best carrots for Korean Carrot Salad?
Absolutely! For the best flavor and crunch, look for firm, bright orange carrots without any dark spots or blemishes. Fresh, vibrant carrots will deliver the sweetness and texture that this dish is known for. If possible, choose organic ones, which tend to have a more intense flavor.

How should I store leftover Korean Carrot Salad?
To keep your delicious salad fresh, transfer any leftovers to an airtight container and refrigerate. It will stay good for up to 3 days. Just keep in mind that the flavors may intensify over time, so adjust seasoning when you enjoy it again.

Can I freeze Korean Carrot Salad?
Yes, you can! While it’s best enjoyed fresh, you can freeze Korean Carrot Salad for up to 2 months in a freezer-safe, airtight container. To thaw, simply place it in the refrigerator overnight and give it a good toss before serving. Note that the texture may change slightly, but the flavors will still be tasty!

What can I do if my dressing is too acidic?
No worries! If you find the dressing too tart, just whisk in a little more sugar or honey, tasting as you go until it reaches the balance you enjoy. A pinch of salt can also help in mellowing out acidity, so feel free to adjust that too!

Are there any dietary considerations for this salad?
Very! This Korean Carrot Salad is generally vegetarian and can be made vegan by using agave syrup instead of honey. However, if you have allergies, be cautious with sesame oil and seeds, as they can trigger reactions in some people. Always check ingredient labels if you’re uncertain!

Can I add other vegetables or proteins to the salad?
The more the merrier! Feel free to incorporate thinly sliced bell peppers, cucumbers for extra crunch, or even chopped apples for sweetness. For a protein boost, add chopped cooked chicken or tofu to make it a heartier meal. Enjoy exploring the endless possibilities!

undefined

Korean Carrot Salad: A Crunchy, Healthy Delight for Everyone

Korean Carrot Salad is a vibrant, healthy side dish that bursts with flavor, perfect for any meal.
Prep Time 15 minutes
Chill Time 30 minutes
Total Time 45 minutes
Servings: 4 servings
Course: Salad
Cuisine: Korean
Calories: 150

Ingredients
  

For the Salad
  • 4 medium Carrots fresh, vibrant
  • 2 cloves Garlic minced
  • 3 tablespoons Vinegar Rice Vinegar preferred
  • 1 tablespoon Sugar or honey
  • 2 tablespoons Sesame Oil toasted sesame oil preferred
  • 1 teaspoon Salt
For the Garnish (Optional)
  • 1 tablespoon Sesame seeds
  • 2 stalks Green onions chopped

Equipment

  • Box grater
  • Mixing Bowl
  • Food Processor

Method
 

Step-by-Step Instructions for Korean Carrot Salad
  1. Wash and peel fresh carrots, then grate or julienne them finely. Transfer to a large mixing bowl.
  2. In a separate bowl, combine minced garlic and vinegar. Whisk in sugar and sesame oil until smooth.
  3. Pour the dressing over the shredded carrots and toss thoroughly to coat.
  4. Cover the salad and refrigerate for 20-30 minutes to meld flavors.
  5. Garnish with sesame seeds and chopped green onions before serving.

Nutrition

Serving: 1cupCalories: 150kcalCarbohydrates: 20gProtein: 2gFat: 7gSaturated Fat: 1gPolyunsaturated Fat: 0.5gMonounsaturated Fat: 5gSodium: 200mgPotassium: 300mgFiber: 4gSugar: 6gVitamin A: 8000IUVitamin C: 10mgCalcium: 40mgIron: 0.5mg

Notes

For extra flavor, consider adding thinly sliced bell peppers or chopped apples. Store leftovers in an airtight container for up to 3 days.

Tried this recipe?

Let us know how it was!