Savory Birria Tacos with Crispy Tortillas and Cheese Bliss

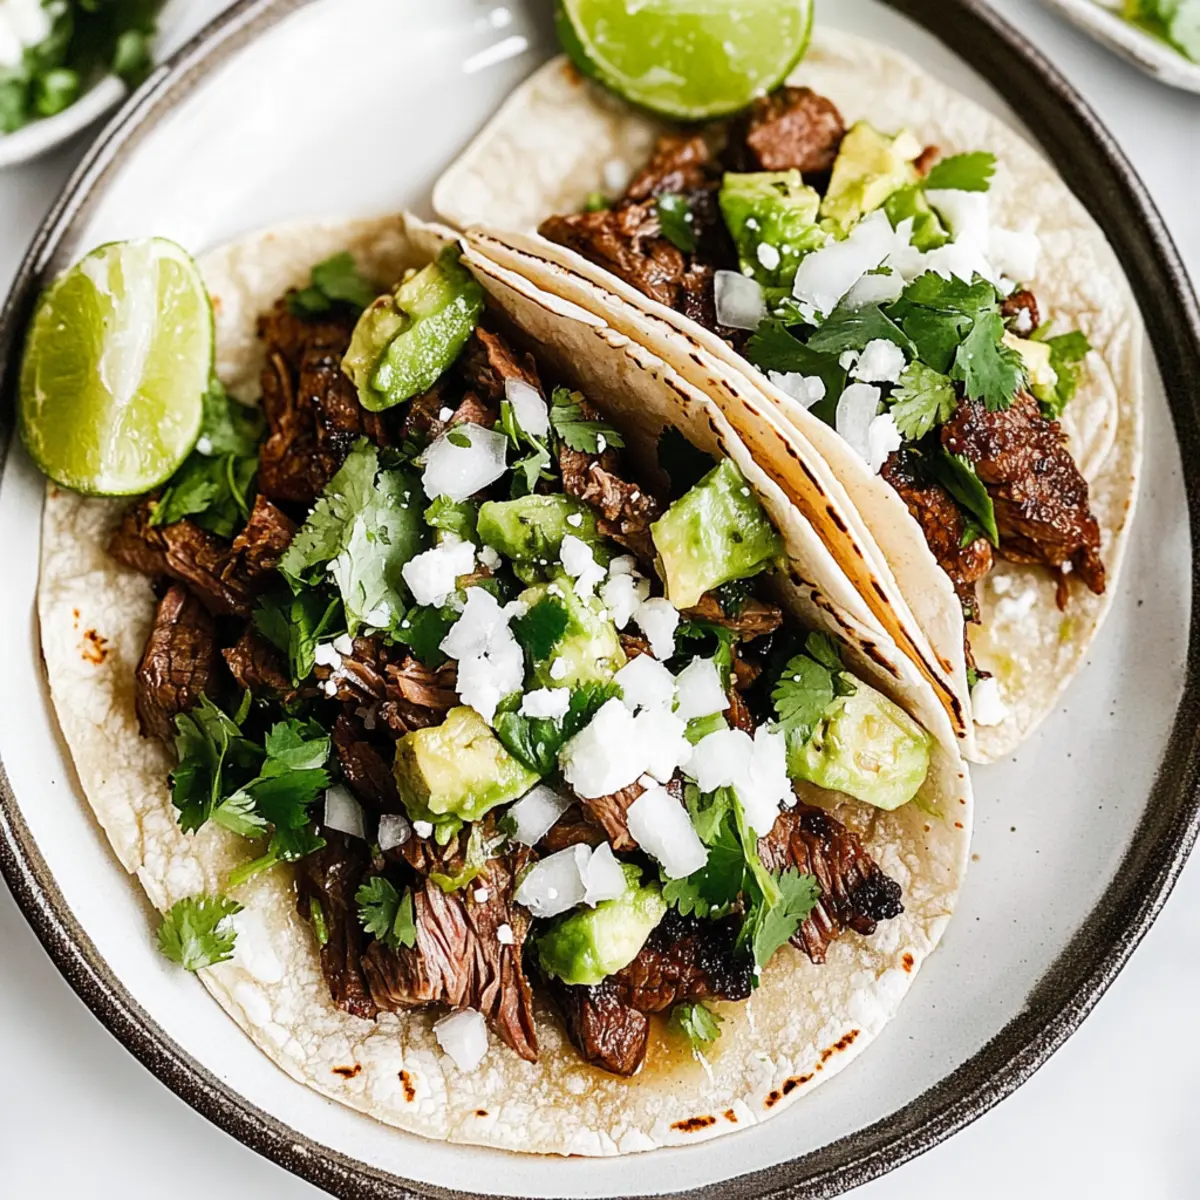
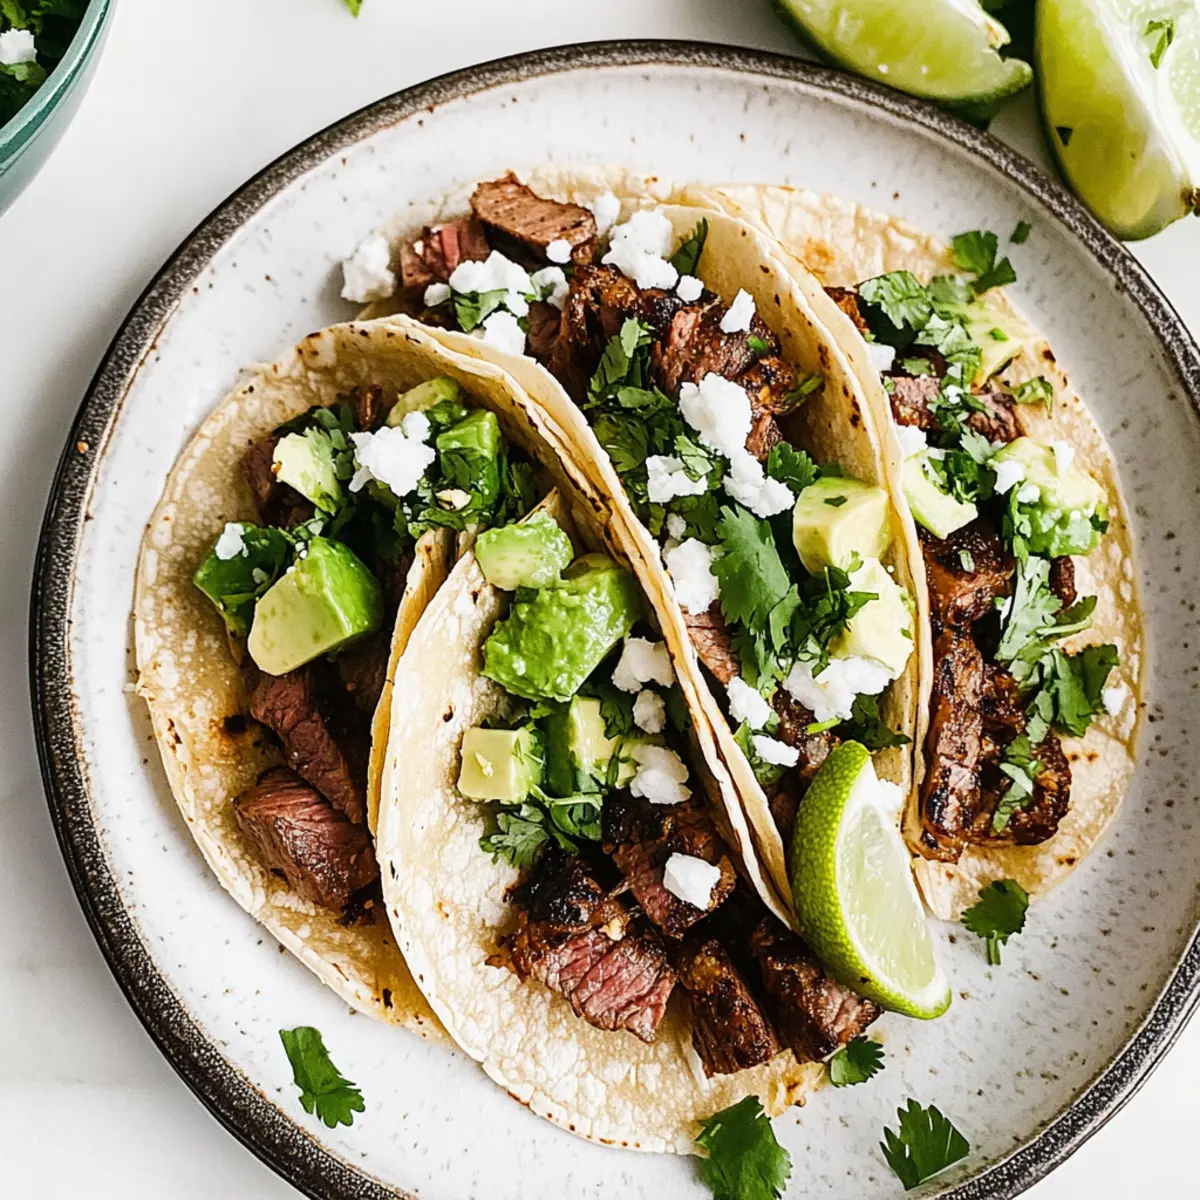
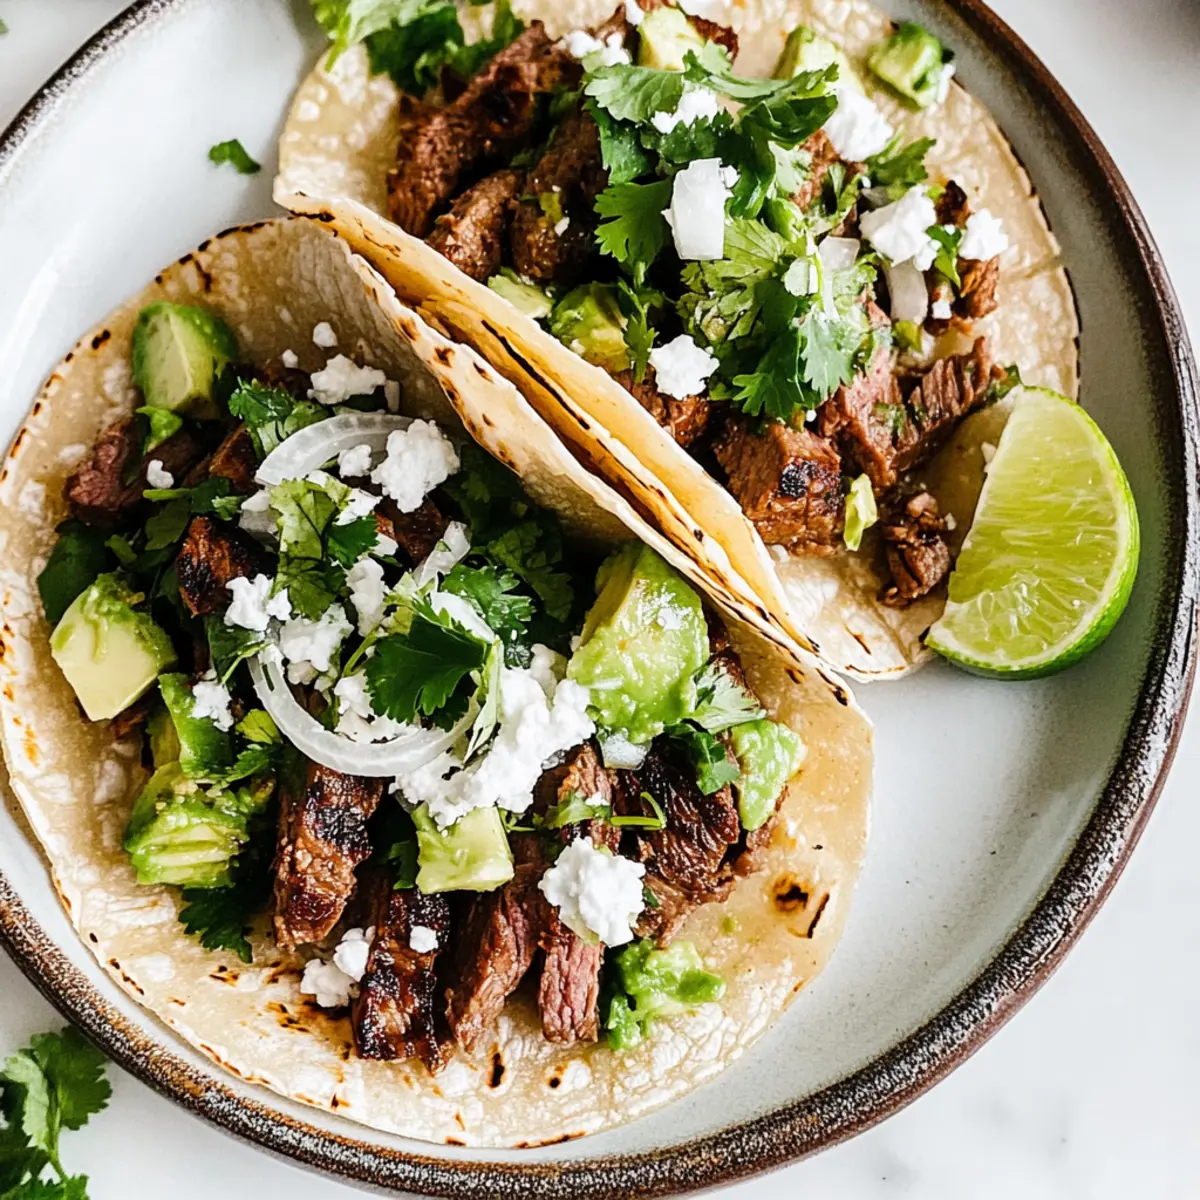
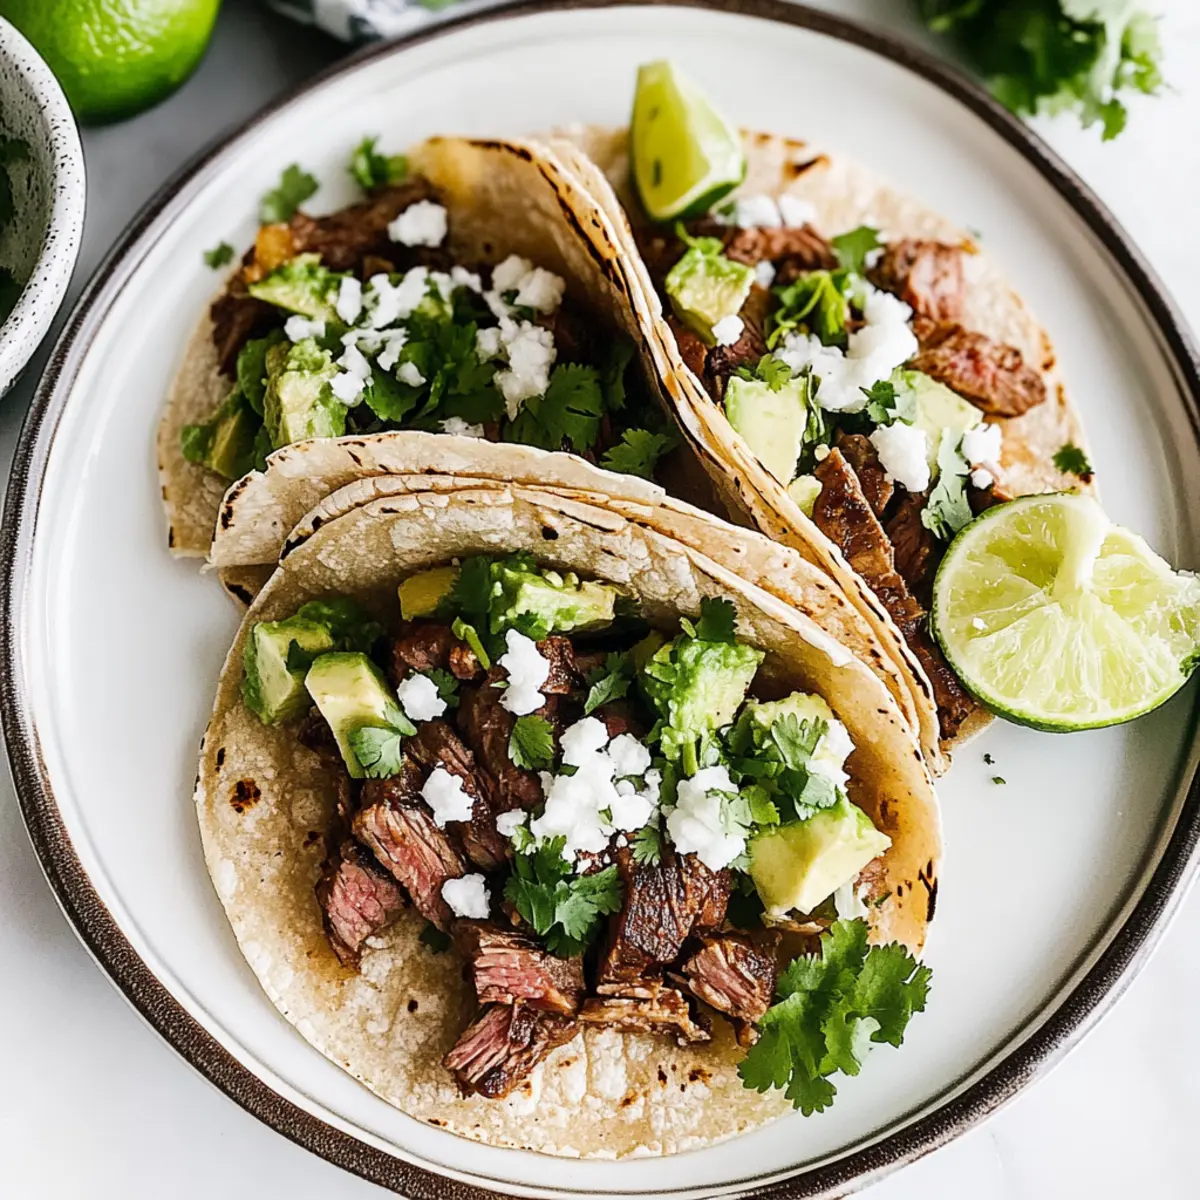
The sizzling sound of corn tortillas hitting the hot skillet is music to my ears—a prelude to taco night that never fails to excite! Today, I’m thrilled to share with you my recipe for Beef Birria Tacos, or quesabirria, complete with crispy tortillas and melty Oaxacan cheese. This traditional Tijuana-style dish transforms any weeknight into a festive culinary adventure, making it perfect for gatherings or a cozy family meal. With rich, slow-cooked flavors and an optional gluten-free twist using cassava flour tortillas, these tacos are a true crowd-pleaser that keeps everyone coming back for seconds. Are you ready to dive into this flavorful delight and elevate your taco game?

Why Are Birria Tacos So Special?

Crispy Tortillas: The satisfying crunch of fried tortillas adds a delightful texture to each bite.
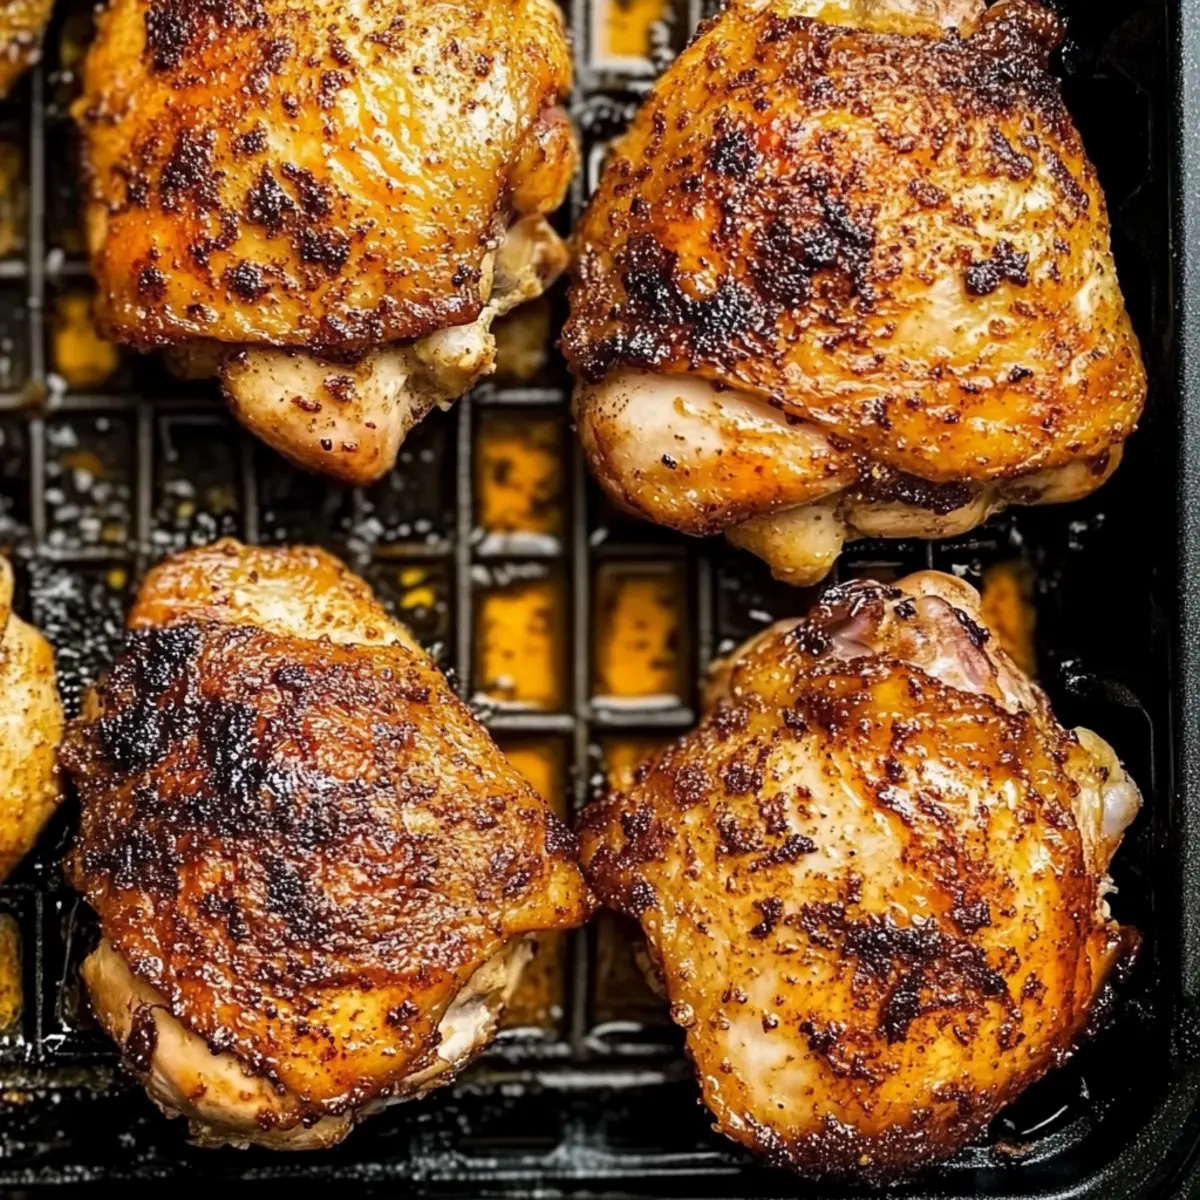
Slow-Cooked Goodness: The beef is cooked for hours, infusing every morsel with rich, savory flavors.
Cheese Bliss: Melty Oaxacan cheese makes every taco a cheesy delight you won’t forget.
Endless Versatility: Swap beef for chicken, pork, or even jackfruit for a vegetarian option, allowing you to customize to taste!
Gluten-Free Option: Use cassava flour tortillas for a delicious gluten-free twist that everyone can enjoy.
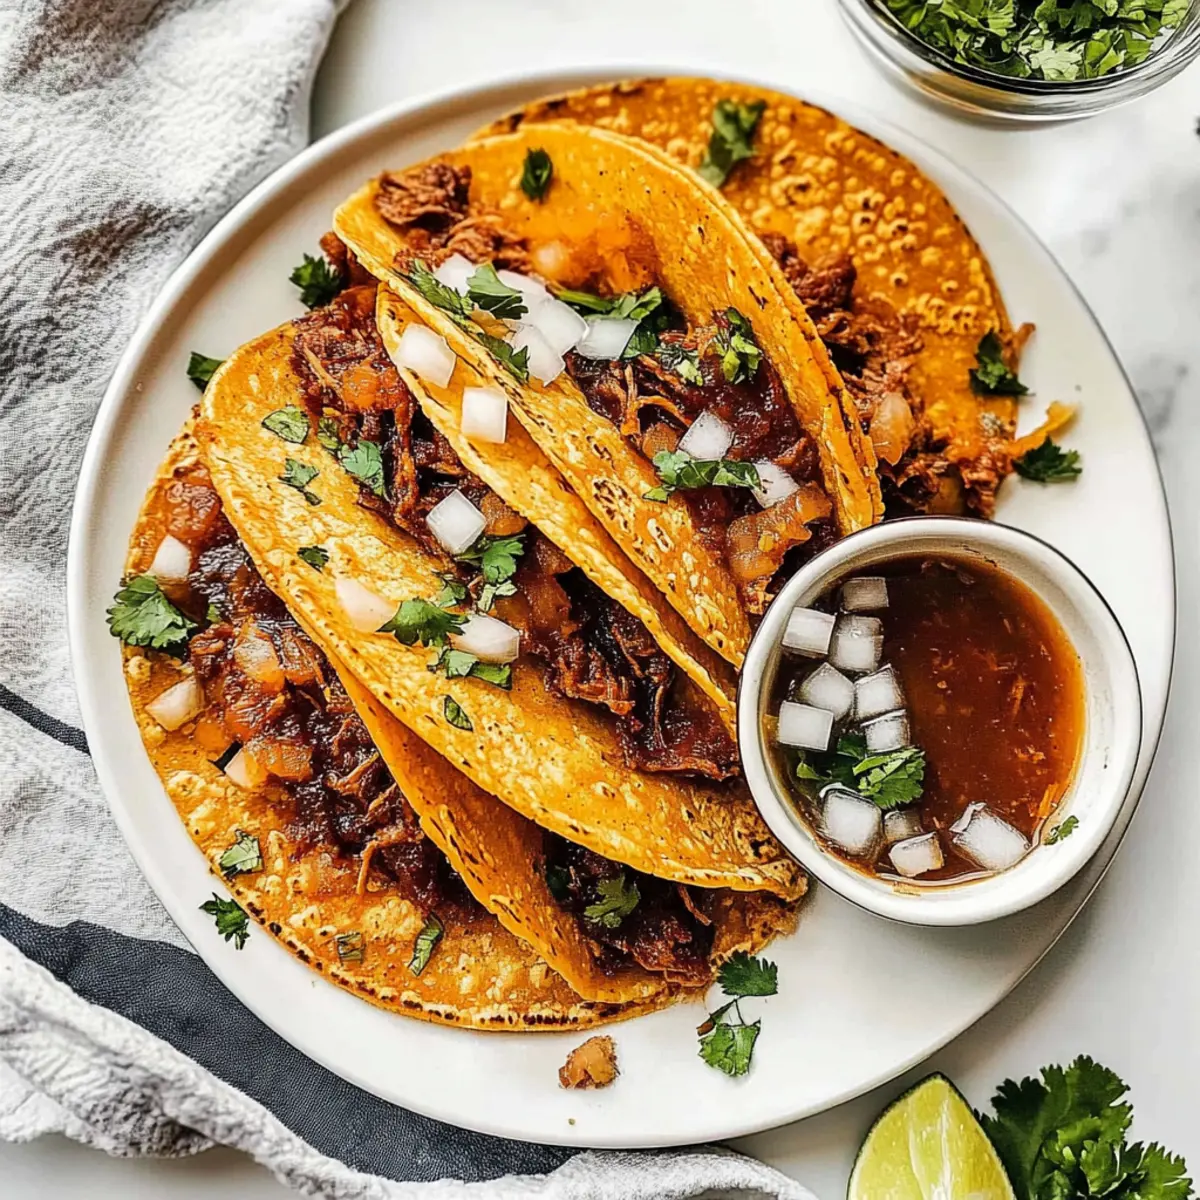
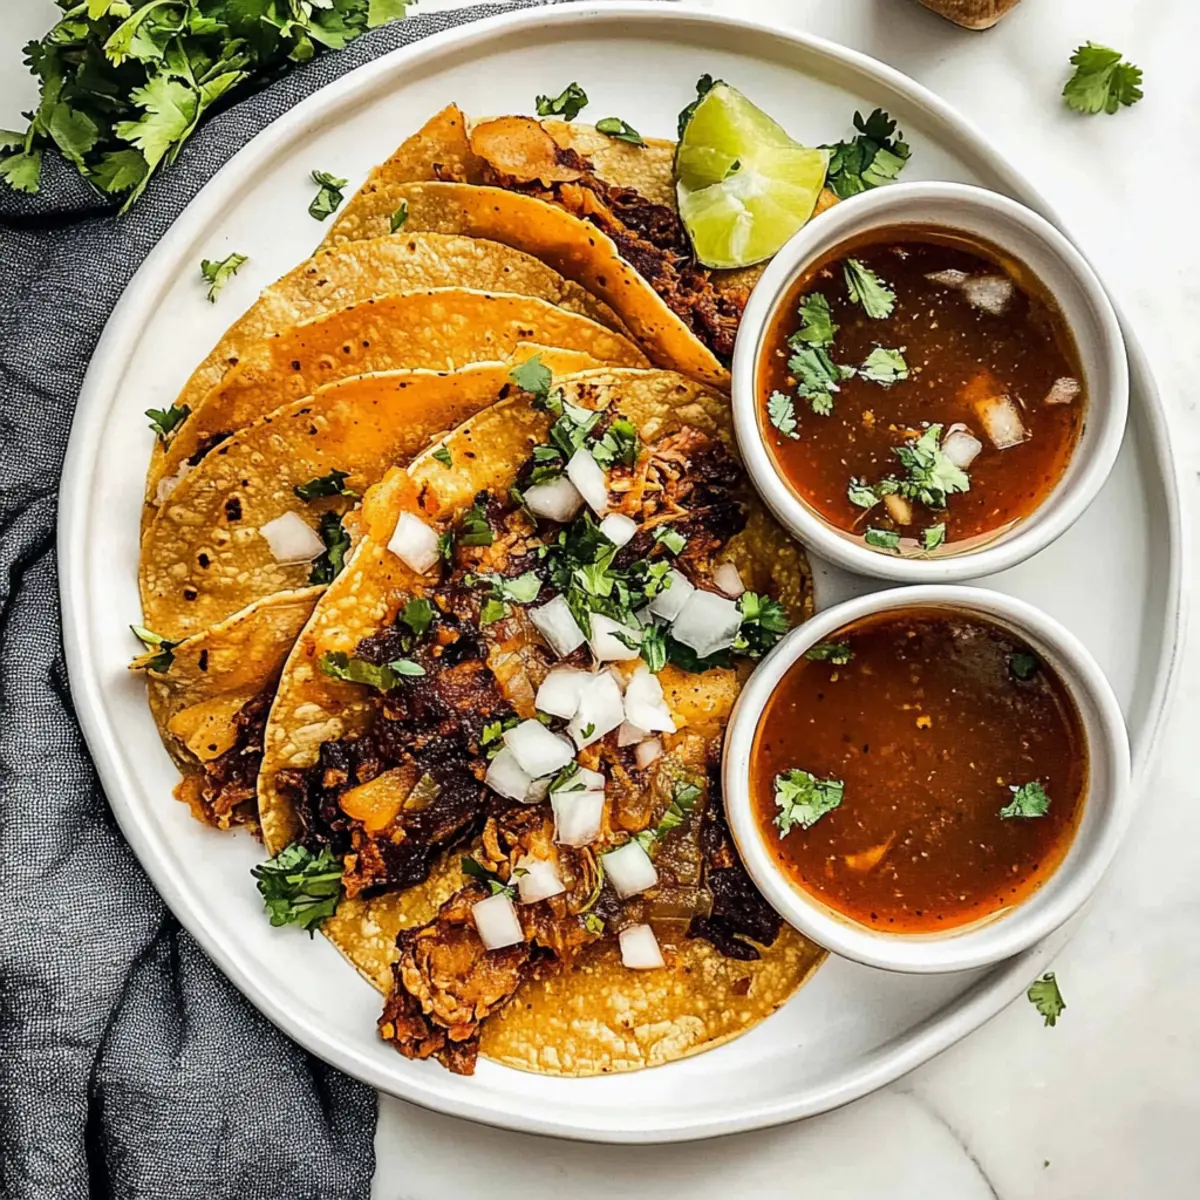
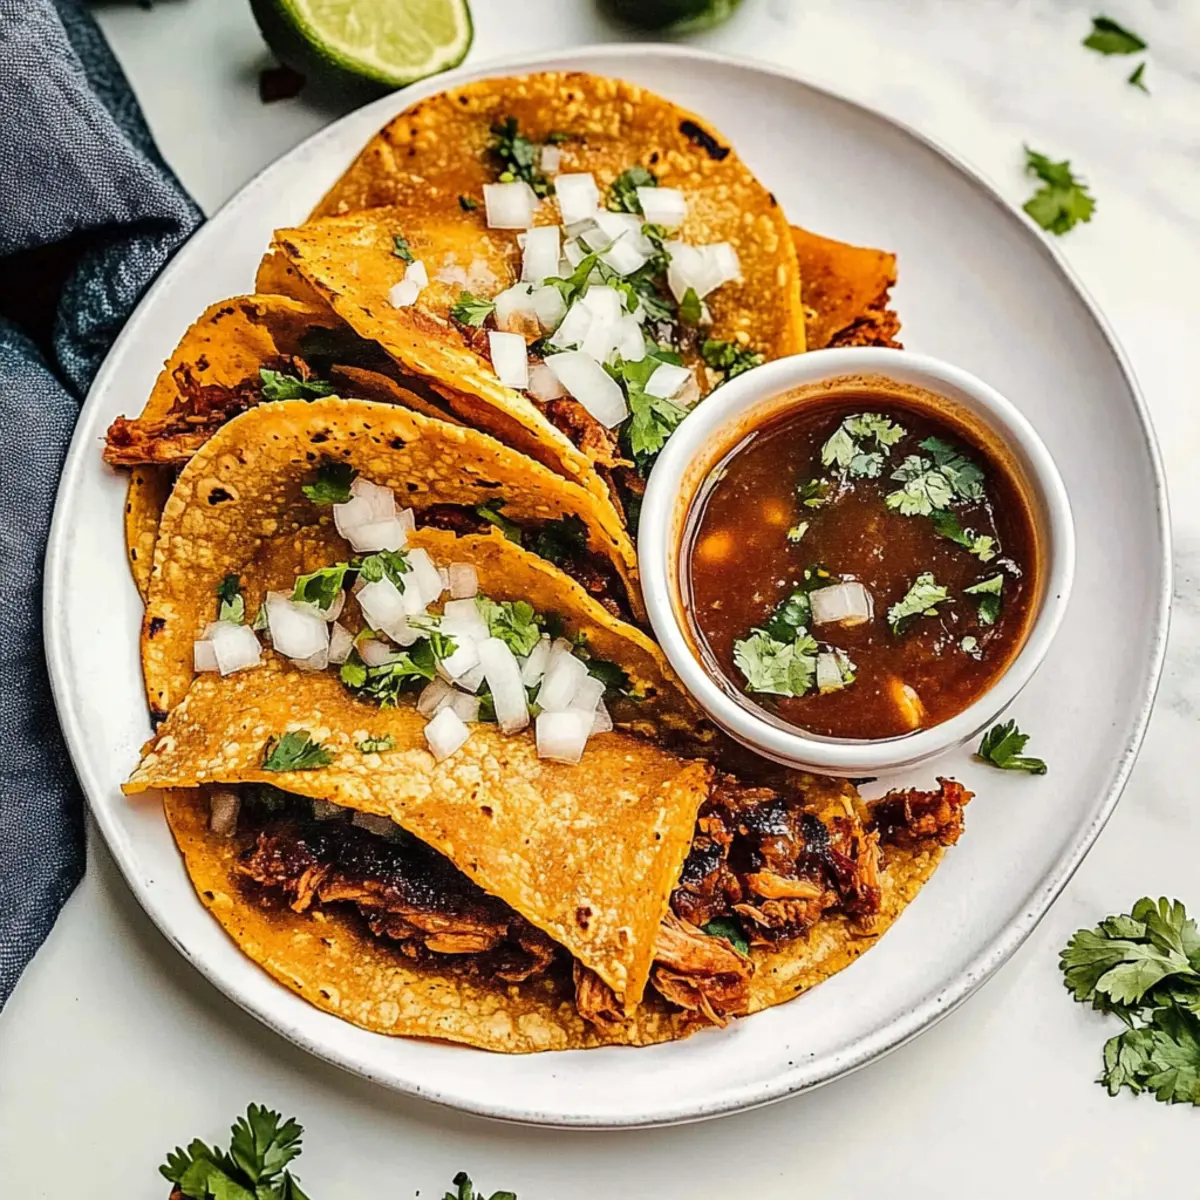
Indulge in these flavorsome tacos and pair them with a side of consommé for dipping to truly elevate your meal!

Birria Tacos Ingredients

For the Beef and Sauce
Beef Chuck Roast – Provides a tender and juicy base, but you can use sirloin tip roast for a leaner option.
Guajillo Chiles – Adds sweet, mild heat; deseed to ensure a smoother sauce.
Ancho Chilies – Offers depth and sweetness; can substitute with other dried mild peppers if needed.
Arbol Chiles – Adds a moderate kick; reduce quantity if you’re sensitive to spice.
Roma Tomatoes – Enhances flavor and color; canned tomatoes work well if fresh aren’t available.
White Onion – Sweetens the sauce; quarter for easier roasting.
Garlic Cloves – Roasting these unpeeled adds aromatic depth to the sauce.
Low-Sodium Beef Broth – Serves as the sauce’s flavorful base; substitute with vegetable broth for a lighter version.
Apple Cider Vinegar – Brightens the flavors for a balanced taste.
Kosher Salt – Essential for seasoning; adjust amount to your preference.
Ground Black Pepper – For basic seasoning and warmth.
Ground Cumin – Adds earthiness; a little goes a long way!
Dried Mexican Oregano – Imparts herbal notes; regular oregano can be an emergency substitute.
Ground Cloves, Cinnamon, Ground Ginger – Each adds a unique flavor note; adjust according to your taste.
Bay Leaves – Infuses a subtle flavor during cooking.

For the Tacos
Corn Tortillas or Cassava Flour Tortillas – The base for your tacos; cassava is perfect for a gluten-free option.
Diced White Onion & Chopped Cilantro – Fresh toppings that elevate the flavor and presentation.
Oaxacan Cheese – Melts beautifully to create cheesy bliss; use a Mexican cheese blend if necessary.

Indulge in the magic of these Birria Tacos and savor the delicious flavors they create!

Step‑by‑Step Instructions for Authentic Quesabirria Tacos

Step 1: Prepare the Chiles
Begin by deseeding the guajillo, ancho, and arbol chiles to ensure your sauce maintains a smooth texture. Rinse them off, then place in a pot with enough water to cover the chiles. Simmer over medium heat for 15 minutes until they soften and become pliable, brightening in color and enhancing their natural sweetness.

Step 2: Roast Vegetables
While the chiles simmer, preheat your oven’s broiler. Arrange the roma tomatoes, quartered white onion, and unpeeled garlic cloves on a baking sheet. Broil them for 4-6 minutes, turning occasionally until they achieve a light char. Look for a smoky aroma and a slight blackening—a key step in enriching the flavor of your birria tacos.

Step 3: Make the Sauce
Once the chiles are softened and the vegetables are roasted, transfer everything into a blender. Add the simmering water from the chiles, low-sodium beef broth, apple cider vinegar, and all the spices. Blend until you reach a smooth and luscious consistency. This sauce will become the flavorful base of your authentic birria tacos.

Step 4: Cook the Birria
In your slow cooker, place the beef chuck roast and season with salt and pepper. Pour the vibrant sauce over the meat, and add 2-3 bay leaves for extra aroma. Cover and cook on low for 8-9 hours or on high for 4-5 hours. The meat should be fork-tender and deeply infused with that rich, savory flavor characteristic of traditional birria.

Step 5: Shred the Beef
When your beef is cooked to perfection, remove it from the slow cooker. Let it cool slightly before shredding it with two forks, pulling apart the tender meat into bite-sized pieces. Mix the shredded beef back into the velvety sauce, ensuring every bit is coated, enhancing the flavor profile of your build-your-own birria tacos.

Step 6: Assemble Tacos
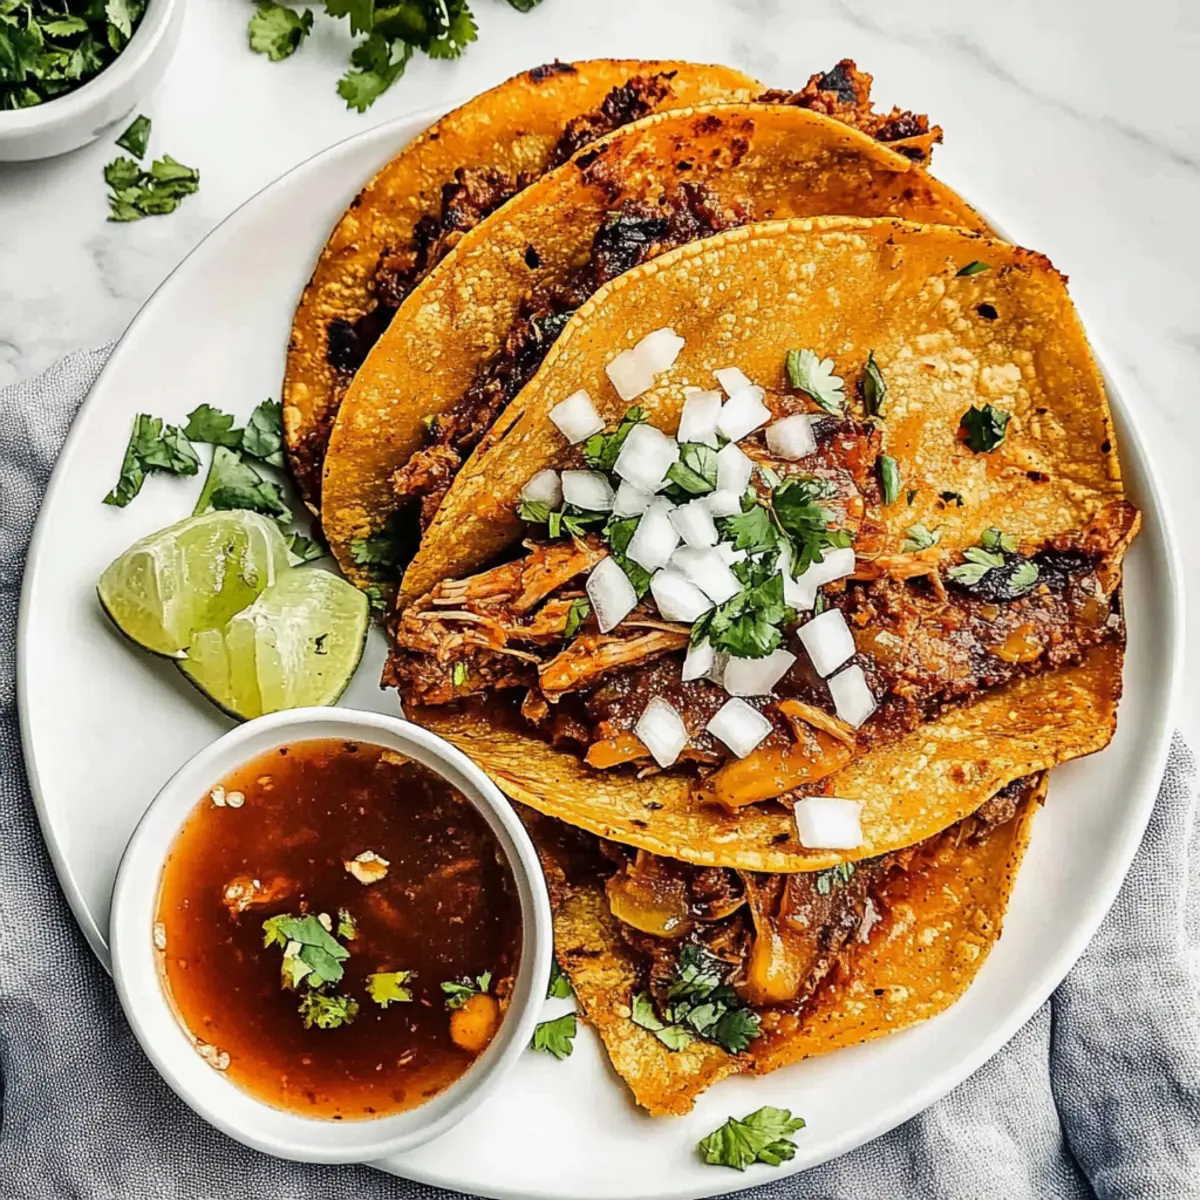
Set up a skillet over medium-high heat and prepare to dip each corn tortilla into the warm consommé—the key to crispy perfection. Fry them in the skillet until golden and crisp on both sides. Add a generous amount of the beef and a sprinkle of Oaxacan cheese to each tortilla. Fold the tacos and let them cook for a minute, until the cheese melts delightfully.

Step 7: Serve
Your delicious and authentic birria tacos are now ready to serve! Pair them with a small bowl of the rich consommé for dipping, along with fresh diced white onion and chopped cilantro as toppings. Enjoy the blend of flavors and textures that only homemade birria tacos can bring to your dining experience.

What to Serve with Authentic Quesabirria Tacos

Elevate your taco experience by pairing these savory delights with vibrant, complementary sides that add color and flavor to your meal.

  • Cilantro Lime Rice: This fluffy rice dish, infused with zesty lime and fresh cilantro, offers a cool contrast to the rich birria flavors.
  • Sautéed Fajita Veggies: A medley of bell peppers and onions sautéed until tender and slightly caramelized; their sweetness enhances the savory profile of the tacos.
  • Mexican Street Corn (Elote): Grilled corn on the cob slathered with cotija cheese and a sprinkle of chili powder adds a joyous crunch that perfectly complements the soft fillings.
  • Guacamole: Creamy avocado mixed with lime, cilantro, and garlic creates a luscious dip that pairs well with the bold flavors of the birria, elevating each bite.
  • Pico de Gallo: Fresh diced tomatoes, onions, cilantro, and lime juice provide a burst of freshness and acidity, balancing the richness of the tacos beautifully.
  • Chips and Salsa: Crunchy tortilla chips paired with a bowl of vibrant salsa brings a fun and informal element to your dining experience.
  • Watermelon Agua Fresca: A refreshing drink made with juicy watermelon, lime, and a touch of sweetness; it cleanses the palate between bites of the savory quesabirria.
  • Flan: This silky caramel custard offers a sweet finish to your feast, balancing the savory and spicy notes of your tacos with its rich creaminess.
  • Mexican Hot Chocolate: End the meal with this rich, spiced beverage that warms the soul and pairs wonderfully with your taco adventure.

Storage Tips for Birria Tacos

Fridge: Store leftover birria in an airtight container in the refrigerator for up to 4-5 days to maintain its delicious flavor and tenderness.

Freezer: For longer storage, freeze the birria in a sealed, freezer-safe container for up to 3 months. Thaw in the fridge before reheating for best results.

Tortilla Storage: Keep leftover tortillas wrapped tightly in plastic wrap or stored in a resealable bag at room temperature for 1-2 days. To regain crispiness, reheat on a skillet before serving.

Reheating: Gently reheat the birria in a saucepan over low heat until warmed through, adding a splash of beef broth if necessary to keep it moist. Enjoy your flavorful Birria Tacos again!

Expert Tips for Birria Tacos

  • Crispy Tacos: Ensure you dip the tortillas well in the consommé before frying to achieve that perfect crispy texture.
  • Balanced Heat: Adjust the amount of arbol chiles based on your spice tolerance; this allows you to control the heat level in your birria tacos.
  • Make-Ahead Sauce: Prepare the sauce a day in advance and refrigerate it for enhanced flavors; this step truly elevates your dish!
  • Meat Substitution: Don’t hesitate to swap the beef for chicken or pork; each protein brings a unique twist to your birria tacos.
  • Gluten-Free Choice: For a gluten-free option, opt for cassava flour tortillas—delicious and suitable for anyone avoiding gluten.
  • Leftover Storage: Store any leftover birria in an airtight container; it lasts up to 4-5 days in the fridge or freezes well for up to 3 months.

Make Ahead Options

These Beef Birria Tacos are perfect for busy home cooks looking to save time without sacrificing flavor! You can prepare the birria sauce and cook the beef up to 24 hours in advance. Simply follow the sauce and cooking steps, then allow the beef to cool before shredding and mixing it back into the sauce. Store everything in an airtight container in the refrigerator. When you’re ready to serve, quickly reheat the mixture in a skillet while frying your tortillas until crispy. This way, you’ll have delicious, homemade birria tacos ready in no time, ensuring they remain just as flavorful as when freshly made!

Birria Tacos Variations & Substitutions

Explore delightful ways to customize your birria tacos, enhancing their flavors and textures to suit everyone’s taste!

  • Chicken or Pork: Swap the beef for shredded chicken or pulled pork for a unique twist, maintaining that savory essence.

  • Vegetarian Delight: Use jackfruit or hearty mushrooms as the main filling for a satisfying vegetarian option that still feels indulgent.

  • Spicy Kick: Add diced jalapeños or a splash of hot sauce to the beef mixture for those who love an extra kick in their tacos.

  • Cheese Variations: Experiment with different cheeses like Monterey Jack or a smoky cheese for a unique melted topping that diversifies each bite.

  • Herbaceous Twist: Incorporate fresh herbs like parsley or mint into the toppings to elevate the freshness of your tacos beautifully.

  • Gluten-Free Friendly: Opt for cassava flour tortillas instead of corn for a gluten-free twist without compromising taste—perfect for those with dietary restrictions!

  • Flavor Infusion: Marinate the beef overnight with spices and broth for a deeper flavor before cooking, enriching your taco experience.

Don’t forget to check out my Birria Tacos Culinary Adventure for more tips and tricks on unlocking the full potential of these delicious tacos!

Beef Birria Tacos Recipe FAQs

What type of beef should I use for birria tacos?
Absolutely! Beef chuck roast is ideal as it becomes tender and juicy after slow cooking. However, if you’re looking for a leaner option, you can substitute it with sirloin tip roast, which still delivers great flavor but with less fat.

How do I store leftover birria and how long will it last?
Very good question! Leftover birria can be stored in an airtight container in the fridge for up to 4-5 days. To enjoy it later, just reheat gently on a stove for the best flavor. If you want to keep it longer, it’s safe to freeze the birria for up to 3 months—just make sure it’s stored in a freezer-safe container.

Can I freeze the birria and how do I do it properly?
Yes, you can definitely freeze your birria! Start by letting it cool completely after cooking. Once cooled, transfer the birria into a freezer-safe container or resealable bag, squeezing out as much air as possible to avoid freezer burn. Label it with the date, and it should be good for up to 3 months. To reheat, thaw it in the fridge overnight and warm it up on the stovetop, adding a splash of beef broth if necessary to keep it moist.

What can I use if I can’t find guajillo chiles?
If you can’t find guajillo chiles, don’t worry! You can use other dried mild peppers, such as pasilla or even a little more ancho chiles. Just ensure that whichever chiles you use, you deseed and soak them as instructed to keep that rich, smooth sauce consistency.

Are these tacos suitable for people with gluten intolerance?
Yes! I often recommend using cassava flour tortillas as a delicious gluten-free alternative. They’re sturdy and packed with flavor, making them a fantastic choice for those avoiding gluten without sacrificing the authenticity of your birria tacos.

What should I do if my sauce is too spicy?
If your sauce turns out too spicy for your taste, there are a few ways to mellow it. You could add a bit of sugar or honey to balance the heat, or incorporate more broth, tomatoes, or even avocado to minimize spiciness. This way, you can adjust flavors to suit your preference while still enjoying the delightful essence of your birria tacos!

Birria Tacos

Savory Birria Tacos with Crispy Tortillas and Cheese Bliss

Enjoy the rich flavors of Birria Tacos, featuring slow-cooked beef, crispy tortillas, and melty cheese that make for a festive meal.
Prep Time 30 minutes
Cook Time 9 hours
Total Time 9 hours 30 minutes
Servings: 4 tacos
Course: Dinner
Cuisine: Mexican
Calories: 420

Ingredients
  

For the Beef and Sauce
  • 2 pounds Beef Chuck Roast or sirloin tip roast for a leaner option
  • 3 pieces Guajillo Chiles deseeded
  • 2 pieces Ancho Chilies can substitute with other dried mild peppers
  • 5 pieces Arbol Chiles reduce quantity for less spice
  • 3 pieces Roma Tomatoes or canned tomatoes if fresh are unavailable
  • 1 piece White Onion quartered for easier roasting
  • 4 cloves Garlic Cloves unpeeled and roasted
  • 4 cups Low-Sodium Beef Broth can substitute with vegetable broth
  • 2 tablespoons Apple Cider Vinegar
  • 2 teaspoons Kosher Salt to taste
  • 1 teaspoon Ground Black Pepper
  • 1 teaspoon Ground Cumin adjust according to taste
  • 1 teaspoon Dried Mexican Oregano or regular oregano as substitute
  • 1/4 teaspoon Ground Cloves
  • 1/4 teaspoon Ground Cinnamon
  • 1/4 teaspoon Ground Ginger
  • 2-3 pieces Bay Leaves
For the Tacos
  • 8 pieces Corn Tortillas or Cassava Flour Tortillas cassava is gluten-free
  • 1/2 cup Diced White Onion for topping
  • 1/2 cup Chopped Cilantro for topping
  • 2 cups Oaxacan Cheese or Mexican cheese blend

Equipment

  • Slow Cooker
  • Oven
  • Skillet
  • blender
  • Baking Sheet

Method
 

Step‑by‑Step Instructions for Authentic Quesabirria Tacos
  1. Prepare the Chiles: Deseed the guajillo, ancho, and arbol chiles. Rinse them, then simmer over medium heat for 15 minutes until softened.
  2. Roast Vegetables: Preheat the oven's broiler. Broil the tomatoes, onion, and garlic for 4-6 minutes until charred.
  3. Make the Sauce: In a blender, combine softened chiles, roasted vegetables, simmering water, beef broth, vinegar, and spices. Blend to a smooth consistency.
  4. Cook the Birria: Place beef in the slow cooker, season, pour sauce over, add bay leaves, cover, and cook on low for 8-9 hours or high for 4-5 hours.
  5. Shred the Beef: Remove beef from the cooker, cool slightly, shred, and mix back into the sauce.
  6. Assemble Tacos: Fry dipped tortillas in a skillet until crispy, fill with beef and cheese, fold, and cook until cheese melts.
  7. Serve: Pair tacos with consommé for dipping and fresh toppings of onion and cilantro.

Nutrition

Serving: 1tacoCalories: 420kcalCarbohydrates: 30gProtein: 25gFat: 22gSaturated Fat: 10gPolyunsaturated Fat: 2gMonounsaturated Fat: 8gCholesterol: 80mgSodium: 750mgPotassium: 500mgFiber: 4gSugar: 2gVitamin A: 500IUVitamin C: 15mgCalcium: 200mgIron: 3mg

Notes

For best results, refrigerate the sauce overnight and reheat before use. Adjust the spice level to your preference and enjoy customizing with different proteins.

Tried this recipe?

Let us know how it was!

Ground Turkey and Zucchini Skillet – Quick, Healthy Delight

As the sizzling sound of ground turkey hitting the skillet fills the air, I can’t help but smile at the comforting embrace this dish promises. My Ground Turkey and Zucchini Skillet is not just a quick meal; it’s a delightful one-pan wonder that transforms simple ingredients into a flavorful feast in under 30 minutes. Perfect for those busy weeknight dinners, this healthy recipe is low-carb and beginner-friendly, ensuring that even the most novice cooks can whip it up with ease. With the satisfying combination of tender ground turkey and sweet zucchini, each bite brings a nourishing comfort that leaves fast food in the dust. Curious about how such simplicity can pack so much taste? Let’s dive in and discover the secrets behind this delicious skillet!

Why is this skillet a must-try?

Simplicity: With just a few staple ingredients, this recipe makes meal prep a breeze—perfect for busy weeknights.

Flavor Burst: The union of savory ground turkey and sweet zucchini, seasoned to perfection, offers a delightful flavor explosion in every bite.

Nutrient-Packed: This dish is low-carb and healthy, allowing you to enjoy a satisfying meal without the guilt!

One-Pan Wonder: Enjoy minimal cleanup thanks to being cooked all in one skillet—more time to relax after dinner!

Versatile: Don’t hesitate to customize by adding veggies or swapping proteins; it’s adaptable to your pantry’s offerings.

You can easily serve it alongside a fresh side salad or even wrap it in a tortilla for a quick lunch option. With its effortless preparation and rich flavor, the Ground Turkey and Zucchini Skillet makes every meal feel special while keeping things simple.

Ground Turkey and Zucchini Skillet Ingredients

For the Skillet
Ground Turkey – A lean protein that absorbs spices well; can replace with chicken, beef, or pork.
Zucchini – The star vegetable that sweetens as it cooks; can be replaced with yellow squash.
Olive Oil – Used for sautéing to add richness; substitute with avocado oil or canola oil.
Onion – Adds savory sweetness and depth; use finely chopped for even cooking.
Garlic – Provides aromatic flavor; mince for maximum impact.
Dried Oregano – Adds earthy notes; complements the dish beautifully.
Salt – Enhances flavors; adjust to taste.
Black Pepper – Adds subtle heat; coarse grind is recommended for texture.
Crushed Red Pepper Flakes – Introduces a hint of spice; adjust according to heat preference.
Chicken Broth – Keeps the dish moist and enhances flavor; vegetable broth can also be used.
Grated Parmesan Cheese – Adds nutty richness and creaminess; substitute with nutritional yeast for a dairy-free option.

Enjoy creating this delicious Ground Turkey and Zucchini Skillet that not only saves time but also delights your taste buds!

Step‑by‑Step Instructions for Ground Turkey and Zucchini Skillet

Step 1: Heat the Oil
In a large skillet, heat 1 tablespoon of olive oil over medium heat. Allow the oil to shimmer, which indicates it’s hot enough for cooking. This step sets the stage for a flavorful Ground Turkey and Zucchini Skillet as we begin to build our savory base.

Step 2: Sauté the Onion
Add the finely chopped onion to the skillet and sauté for 3 to 4 minutes. Stir frequently, watching for the onions to turn soft and translucent. This process releases their natural sweetness, which will enhance the overall flavor of the dish beautifully.

Step 3: Add Garlic
Next, incorporate the minced garlic into the skillet and cook for an additional 30 seconds. Stir constantly until the garlic becomes fragrant, which is your signal that it’s perfectly cooked and ready to elevate the dish with its aromatic goodness.

Step 4: Cook the Ground Turkey
Crumble in 1 pound of ground turkey, stirring it into the sautéed onion and garlic mixture. Cook for 6 to 8 minutes, breaking the turkey into smaller pieces as it browns. Ensure there are no pink bits remaining to confirm it’s fully cooked, creating a tasty foundation for your skillet.

Step 5: Prepare the Zucchini
While the turkey cooks, prepare the zucchinis by washing and trimming off the ends. Slice them into half-moon shapes, which will allow for even cooking. This step brings in the vibrant green color and natural sweetness that complements the savory turkey.

Step 6: Cook the Zucchini
Add the sliced zucchini to the skillet and sauté for 4 to 5 minutes. Stir occasionally until the zucchini starts to soften but still maintains a slight crunch. This step enhances the texture of your Ground Turkey and Zucchini Skillet, creating a delightful balance.

Step 7: Season the Mixture
Sprinkle in 1 teaspoon of dried oregano, salt, black pepper, and crushed red pepper flakes to taste. Stir well to evenly coat the turkey and zucchini with the seasonings, infusing the dish with rich flavors as it continues to cook together.

Step 8: Add Chicken Broth
Pour in ½ cup of chicken broth, stirring to combine. Lower the heat and let the mixture simmer for 3 to 4 minutes. This allows the flavors to meld and keeps the skillet moist, transforming it into a comforting meal ideal for any night of the week.

Step 9: Incorporate Parmesan Cheese
Finally, sprinkle ¼ cup of grated Parmesan cheese over the skillet and stir until it melts and integrates into the mixture. The cheese adds creaminess and a touch of nutty richness to your Ground Turkey and Zucchini Skillet, making every bite savory and satisfying.

Step 10: Adjust and Serve
Taste the skillet and adjust the seasonings if necessary, adding more salt or pepper as desired. Once you’re happy with the flavors, serve immediately while hot, and enjoy the warm, comforting flavors of this versatile one-pan dish.

Ground Turkey and Zucchini Skillet Variations

Feel free to sprinkle your personal touch on this comforting dish with these exciting variations that embrace creativity and flavor.

  • Protein Swap: Replace ground turkey with chicken, beef, or pork for a different taste.

  • Veggie Boost: Add bell peppers, mushrooms, or spinach to enhance nutrition and color. Mixed vegetables bring a delightful textural contrast.

  • Herbal Twist: Experiment with fresh herbs like basil or cilantro instead of dried oregano for a vibrant freshness.

  • Cheesy Option: Stir in mozzarella or feta cheese instead of Parmesan for a creamy, melty texture with a different flavor profile.

  • Spicy Kick: Add jalapeños or a dash of hot sauce to the skillet for an extra layer of heat—you have control over the spice level!

  • Zesty Flavor: Squeeze a bit of lemon juice before serving for brightness that cuts through the richness of the dish; it adds a refreshing zing.

  • Grain Base: Serve over quinoa, brown rice, or cauliflower rice for added substance and to make this meal even heartier.

  • Wrap It Up: Transform your skillet into a delicious wrap by stuffing it into tortillas; this is a fun and portable way to enjoy your meal.

If you’re intrigued by more comforting flavors, check out my delightful Korean Ground Beef or savor the warmth of a Heartwarming Comfort Skillet. Each suggestion adds a flavorful twist, inviting you to discover new favorites!

How to Store and Freeze Ground Turkey and Zucchini Skillet

Fridge: Store leftovers in an airtight container for up to 3 days. Keep it chilled to maintain freshness and flavor.

Freezer: Freeze your Ground Turkey and Zucchini Skillet in a freezer-safe container for up to 3 months. Label with the date for easy tracking.

Reheating: When ready to enjoy, reheat in a skillet over medium heat, adding a splash of chicken broth to prevent drying out. Stir occasionally until heated through.

Expert Tips for Ground Turkey and Zucchini Skillet

  • Cook Thoroughly: Ensure turkey reaches 165°F for safety and flavor. Using a meat thermometer will help eliminate guesswork.

  • Zucchini Texture: For best results, add zucchini after turkey is browned; avoid cooking too long to maintain a slight crunch, enhancing your Ground Turkey and Zucchini Skillet.

  • Prep in Advance: Chop onion and zucchini beforehand to streamline your cooking process, making it quicker and more enjoyable after a long day.

  • Seasoning Balance: Adjust spice levels according to preference—taste as you go to craft the perfect flavor profile for your skillet, ensuring every bite is delightful.

  • Leftover Savvy: Store leftovers in an airtight container for up to 3 days; when reheating, add a splash of broth to keep it moist and tasty.

  • Customize Freely: Feel free to swap out turkey for chicken or beef and incorporate other vegetables like spinach for added nutrition and variety.

What to Serve with Ground Turkey and Zucchini Skillet

Elevate your meal experience with delicious sides that complement the comforting flavors of this satisfying dish!

  • Fresh Side Salad: A crisp salad with mixed greens, cucumbers, and cherry tomatoes adds a refreshing contrast, balancing the heartiness of the skillet.

  • Garlic Bread: Warm, buttery garlic bread is perfect for soaking up the skillet’s juices, offering a comforting side that pairs beautifully with the savory turkey.

  • Quinoa: Light and fluffy quinoa serves as a nutritious base that absorbs all the delicious flavors of the Ground Turkey and Zucchini Skillet, enhancing every bite.

  • Sautéed Spinach: Quick-cooked spinach with a squeeze of lemon offers vibrant color and freshness, making your plate visually appealing and nutritious. It’s a delightful contrast to the rich turkey.

  • Roasted Sweet Potatoes: The natural sweetness of roasted sweet potatoes adds an exciting flavor dimension, creating a beautiful balance with the savory skillet.

  • Cauliflower Rice: Low-carb and light, cauliflower rice complements the skillet wonderfully while adding an extra veggie boost and can easily soak up the dish’s moisture.

  • Chardonnay: A glass of chilled Chardonnay refreshes the palate and enhances the meal, thanks to its crisp acidity that brings out the flavors in both the turkey and zucchini.

  • Chocolate Mousse: For dessert, a light, airy chocolate mousse delivers a sweet finale that will leave everyone feeling satisfied without being too heavy after the hearty skillet.

Make Ahead Options

This Ground Turkey and Zucchini Skillet is a fantastic candidate for meal prep, allowing you to enjoy a healthy dinner with minimal effort on busy nights! You can chop the vegetables (like zucchini and onion) up to 24 hours in advance and store them in an airtight container in the refrigerator to maintain their freshness. The ground turkey can also be browned ahead of time and refrigerated for up to 3 days. When you’re ready to serve, simply reheat the turkey, add the prepped vegetables, and follow the seasoning and broth steps to finish cooking. This way, you’ll have a flavorful and hearty meal ready to delight your taste buds without the rush!

Ground Turkey and Zucchini Skillet Recipe FAQs

What type of zucchini should I use for the skillet?
Absolutely! Choose firm, medium-sized zucchinis that are free from dark spots or blemishes. The best zucchinis have a rich green color and are relatively smooth. If you can’t find zucchinis, yellow squash is a fantastic alternative that works just as wonderfully.

How long can I store leftovers of this Ground Turkey and Zucchini Skillet?
You can store leftovers in an airtight container in the fridge for up to 3 days. Be sure to let the dish cool completely before sealing it for storage, as this will help maintain its freshness and flavor.

Can I freeze Ground Turkey and Zucchini Skillet?
Absolutely! You can freeze your Ground Turkey and Zucchini Skillet in a freezer-safe container for up to 3 months. To freeze, let the skillet cool, then transfer to the container, label it with the date, and ensure a sealed fit to avoid freezer burn.

What’s the best way to reheat frozen skillet leftovers?
When you’re ready to enjoy your frozen Ground Turkey and Zucchini Skillet, thaw it in the refrigerator overnight for the best results. Reheat it in a skillet over medium heat, adding a splash of chicken broth to keep it moist. Stir occasionally for even heating until it’s warmed through.

Is this recipe suitable for people with dietary restrictions?
Yes! This dish is quite versatile. If you have any allergies, you can swap out certain ingredients—like using vegetable broth instead of chicken broth for a vegetarian option or nutritional yeast in place of Parmesan for a dairy-free alternative. Always check your specific dietary needs to ensure it’s suitable for everyone at your table!

Ground Turkey and Zucchini Skillet

Ground Turkey and Zucchini Skillet - Quick, Healthy Delight

Delightful Ground Turkey and Zucchini Skillet is a quick, low-carb meal perfect for busy weeknights.
Prep Time 10 minutes
Cook Time 20 minutes
Total Time 30 minutes
Servings: 4 servings
Course: Dinner
Cuisine: Healthy
Calories: 280

Ingredients
  

For the Skillet
  • 1 pound Ground Turkey A lean protein that absorbs spices well; can replace with chicken, beef, or pork.
  • 2 medium Zucchini The star vegetable that sweetens as it cooks; can be replaced with yellow squash.
  • 1 tablespoon Olive Oil Used for sautéing to add richness; substitute with avocado oil or canola oil.
  • 1 medium Onion Adds savory sweetness and depth; use finely chopped for even cooking.
  • 2 cloves Garlic Provides aromatic flavor; mince for maximum impact.
  • 1 teaspoon Dried Oregano Adds earthy notes; complements the dish beautifully.
  • to taste Salt Enhances flavors; adjust to taste.
  • to taste Black Pepper Adds subtle heat; coarse grind is recommended for texture.
  • to taste Crushed Red Pepper Flakes Introduces a hint of spice; adjust according to heat preference.
  • 1/2 cup Chicken Broth Keeps the dish moist and enhances flavor; vegetable broth can also be used.
  • 1/4 cup Grated Parmesan Cheese Adds nutty richness and creaminess; substitute with nutritional yeast for a dairy-free option.

Equipment

  • Skillet

Method
 

Step‑by‑Step Instructions for Ground Turkey and Zucchini Skillet
  1. In a large skillet, heat 1 tablespoon of olive oil over medium heat until shimmering.
  2. Add the finely chopped onion and sauté for 3 to 4 minutes until soft and translucent.
  3. Incorporate the minced garlic and cook for 30 seconds until fragrant.
  4. Add 1 pound of crumbled ground turkey, cooking for 6 to 8 minutes until browned.
  5. Prepare zucchinis by washing, trimming, and slicing into half-moons.
  6. Add the sliced zucchini and sauté for 4 to 5 minutes until softened but still crunchy.
  7. Season with 1 teaspoon of dried oregano, salt, black pepper, and crushed red pepper flakes to taste.
  8. Pour in 1/2 cup of chicken broth, reduce heat, and simmer for 3 to 4 minutes.
  9. Sprinkle 1/4 cup of grated Parmesan cheese over the skillet and stir until melted.
  10. Taste and adjust seasonings, then serve immediately while hot.

Nutrition

Serving: 1servingCalories: 280kcalCarbohydrates: 6gProtein: 28gFat: 15gSaturated Fat: 4gPolyunsaturated Fat: 1gMonounsaturated Fat: 9gCholesterol: 85mgSodium: 450mgPotassium: 600mgFiber: 2gSugar: 2gVitamin A: 800IUVitamin C: 20mgCalcium: 150mgIron: 2mg

Notes

This dish is versatile; customize by adding veggies or swapping proteins. Great for busy weeknight dinners.

Tried this recipe?

Let us know how it was!

Savory Asian Ground Beef Noodles in Just 20 Minutes

As I tossed together ingredients in my kitchen, the aroma of sizzling ginger and soy sauce took me back to bustling street markets in Asia, where flavors dance in the air. Today, I’m excited to share my Easy Asian Ground Beef Noodles, a quick one-pot meal that brings those vibrant tastes right to your dinner table. In just 20 minutes, you can whip up a delicious dish packed with tender beef and comforting noodles, making it a perfect option for those busy weeknights. It’s not only low-fat and low-lactose, but also remarkably versatile—substitutions abound for a variety of dietary needs! Who knew weeknight meals could be this delightful? Ready to explore some simple tips and delicious variations? Let’s dive in!

Why Are These Noodles So Special?

Quick and Easy: With just 20 minutes of prep and cooking, you’ll have a delicious dish on the table in no time, perfect for those busy weeknights.

Flavorful Fusion: The blend of soy sauce, ginger, and optional chili oil brings vibrant Asian flavors right to your home.

Low-Fat and Flexible: Enjoy a satisfying meal that fits your dietary needs. Substitute ground beef with turkey or try lentils for a vegetarian option.

One-Pot Wonder: Save time on cleanup! All ingredients meld together in one pot, making you more relaxed and focused on savoring every bite.

Customizable Comfort: This recipe welcomes your creativity! Add your choice of veggies or try with different types of noodles for a unique experience each time. Want more tasty options? Check out my Korean Ground Beef and Sticky Beef Noodles for additional flavor inspirations!

Asian Ground Beef Noodles Ingredients

For the Beef Mixture
Oil – Use vegetable oil or sesame oil to enhance flavor and prevent sticking during frying.
Ground Beef – The heart of this dish; substitute with ground turkey or chicken for a leaner option.
Soy Sauce – Adds savory depth; opt for low-sodium soy sauce to keep it healthier.
Grated Ginger – Infuses warmth; fresh ginger is best, but ground ginger works in a pinch.
White Pepper Powder – Provides a subtle kick; black pepper can serve as a suitable alternative.

For the Sauce
Corn Flour (Corn Starch) – Thickens your sauce for a velvety texture; sweet potato starch is an excellent gluten-free swap.
Chinese Dark Vinegar – Enhances flavor; balsamic vinegar can work in a hurry, but the taste may differ.
Chinese Chili Oil – For an optional spicy element; skip it based on your heat preference or make your own at home.

For the Noodles
Vermicelli – The base for this dish; explore rice noodles or angel hair pasta if you prefer.

For Garnish
Spring Onion – Adds a fresh crunch on top; chives or scallions make a perfect substitution.

These Asian Ground Beef Noodles ingredients unite to create a quick and satisfying meal perfect for your family dinner table!

Step‑by‑Step Instructions for Asian Ground Beef Noodles

Step 1: Cook Beef
Heat 2 tablespoons of oil in a large saucepan over medium heat. Once the oil is shimmering, add 1 pound of ground beef, breaking it apart with a spatula. Brown the beef for about 5 minutes until it’s no longer pink, stirring occasionally to ensure even cooking. The beef should be lightly browned and sizzling, filling your kitchen with a delicious aroma.

Step 2: Add Flavors
Stir in 2 tablespoons of soy sauce and 1 tablespoon of grated ginger to the browned beef mixture. Sauté for another 10-15 seconds, allowing the ginger to release its aromatic scent and combine with the meat. The mixture will transform into a fragrant medley that lays the foundation of flavors for your Asian ground beef noodles.

Step 3: Simmer
Pour in 1 cup of water and sprinkle ½ teaspoon of white pepper powder over the beef. Stir well, cover the pan, and reduce the heat to low. Let the mixture simmer for about 10 minutes, stirring occasionally and adding more water if needed. The beef should be tender and the sauce slightly thickened, creating a mouthwatering base for the noodles.

Step 4: Cook Noodles
While the beef simmers, bring a pot of salted water to a boil. Add 5 ounces of vermicelli and cook for 3-4 minutes until it’s al dente. Drain the noodles well and set them aside in a colander. Be careful not to overcook them, as they will continue to soften when tossed with the sauce later in your Asian ground beef noodles.

Step 5: Thicken Sauce
In a small bowl, mix 1 tablespoon of corn flour with ½ cup of water to create a slurry. Gradually stir this mixture into the beef sauce, cooking for an additional 2-3 minutes. Keep stirring until the sauce thickens to your desired consistency, coating the beef and becoming velvety. The aroma should be irresistible at this point!

Step 6: Combine
Add the cooked vermicelli to the thickened beef mixture, tossing gently to combine everything evenly. Ensure the noodles are thoroughly coated with the sauce. Remove from heat and transfer to a serving platter, then garnish with finely chopped spring onions. Your Asian ground beef noodles are ready to be enjoyed, bringing a delightful taste of home-cooked comfort to your table!

Make Ahead Options

These Easy Asian Ground Beef Noodles are perfect for meal prep enthusiasts! You can cook the ground beef mixture up to 3 days in advance and store it in an airtight container in the refrigerator. To keep the flavors vibrant, allow the mixture to cool before refrigerating. You can also prepare the vermicelli noodles up to 24 hours ahead and toss them with a little oil to prevent sticking. When you’re ready to serve, simply reheat the beef mixture in a pan over medium heat, adding a splash of water if necessary to loosen the sauce, then combine with the noodles for a quick, delicious meal that’s just as satisfying as when freshly made!

Tips for the Best Asian Ground Beef Noodles

  • Ingredient Freshness: Use fresh ginger and spring onions for vibrant flavors. Dried or old ingredients can dull the dish’s taste and richness.
  • Noodle Care: Avoid overcooking the vermicelli to prevent mushy noodles. They should be al dente since they’ll continue to cook in the sauce.
  • Flavor Enhancements: Feel free to increase the soy sauce or ginger for more depth, but watch the sodium levels if using regular soy sauce with ground beef.
  • Customization Boost: Experiment with vegetables like bell peppers or snap peas for added crunch and nutrients, enhancing your Asian ground beef noodles experience.
  • Storage Savvy: Leftovers can be stored in the fridge for up to 3 days. Reheating on the stovetop retains the noodles’ texture better than microwaving.

Asian Ground Beef Noodles Variations

Feel free to get creative with this recipe and tailor it to your taste buds by exploring these tempting variations!

  • Meat Swap: Substitute ground beef with ground pork for a richer flavor, or opt for lentils for a delightful vegetarian twist. You’ll discover new textures and tastes that make every bite delightful.

  • Veggie Boost: Add chopped bell peppers, broccoli, or carrots for an extra crunch and nutrients. A splash of color never hurts and can transform your dish into a rainbow of deliciousness!

  • Noodle Alternatives: Use rice noodles or gluten-free pasta instead of vermicelli if you have dietary needs. Each noodle type brings its own charm, creating a different yet enjoyable experience with every bite.

  • Low-Sodium Option: For a healthier twist, swap regular soy sauce with low-sodium soy sauce without sacrificing flavor. You’ll still get that rich umami taste with less guilt!

  • Aromatic Additions: Enhance the flavor by adding a splash of sesame oil or a sprinkle of garlic powder during the cooking process. These extra aromas will elevate your dish to a whole new level of deliciousness.

  • Heat It Up: If you love spice, increase the amount of Chinese chili oil or try adding fresh diced chili peppers. The kick will awaken your taste buds and make every bite an adventure!

  • Herb Substitutions: Replace spring onions with fresh cilantro or Thai basil as garnish for a fresh herbaceous finish. The fragrance will transport you to a Thai street vendor, bustling with aromas and flavors.

Ready to take your Asian ground beef noodles to the next level? Try these variations and don’t forget to pair them with scrumptious sides, like my Mongolian Ground Beef or Chilli Beef Experience. Enjoy the culinary journey!

What to Serve with Asian Ground Beef Noodles

As you savor each delightful bite of this dish, consider pairing it with vibrant sides to create a wholesome meal.

  • Steamed Broccoli: Offers a crisp, fresh contrast that enriches your noodles while adding nutritional value. The slight bitterness of broccoli balances the savory richness of the beef beautifully.

  • Cucumber Salad: A refreshing, tangy salad brings a burst of flavor. The cool crunch of cucumbers complements the hearty warmth of the Asian ground beef noodles perfectly.

  • Garlic Roasted Green Beans: These tender green beans provide a delicious, garlicky kick, enhancing the overall flavor profile of your meal. Their slight char adds depth to every mouthful!

  • Miso Soup: This warm, comforting soup creates a wonderful contrast with the noodles’ richness. It’s light yet packed with umami, making it a soothing side choice.

  • Spring Rolls: Crunchy and fresh, spring rolls bring texture and lightness to your meal. Stuffed with crisp veggies, they provide a satisfying bite that complements the main dish wonderfully.

  • Lemonade or Iced Green Tea: Refreshing beverages like lemonade or iced green tea cleanse the palate and balance the savory notes of the meal. Enjoying them alongside enhances your dining experience.

  • Chocolate Mousse: For a sweet finish, indulge in a creamy chocolate mousse. The dessert’s rich flavors will create a delightful ending after the satisfying hearty noodles.

With these pairings, your table will be a feast of flavors and textures, perfectly complementing your Asian ground beef noodles!

How to Store and Freeze Asian Ground Beef Noodles

Fridge: Store leftovers in an airtight container for up to 3 days. This keeps your Asian ground beef noodles fresh and ready for your next meal.

Freezer: Freeze portions in airtight containers or freezer bags for up to 3 months. Be sure to label them for easy identification later!

Reheating: When ready to enjoy, reheat on the stovetop over medium heat, adding a splash of water if necessary. This helps restore the noodles’ texture and flavor.

Avoid Overpacking: When freezing, leave some space in containers for expansion as they freeze, ensuring your delicious noodles maintain their quality!

Asian Ground Beef Noodles Recipe FAQs

How do I select the right ingredients for my Asian Ground Beef Noodles?
Absolutely! For the best flavor, choose fresh ingredients. When selecting ground beef, look for a lean cut for a healthier option—a good rule of thumb is 80% lean. For ginger, fresh is always best due to its vibrant punch; if you only have ground ginger, use about one-quarter the amount of fresh. Look for spring onions with bright green tops and firm white bulbs for ideal freshness.

What is the best way to store leftovers?
Very! Keep your Asian ground beef noodles in an airtight container and store them in the fridge for up to 3 days. Make sure they cool down before sealing to prevent condensation, which can make your noodles soggy. When you’re ready to dig back in, I recommend reheating them on the stovetop rather than the microwave for better texture.

Can I freeze these noodles?
Absolutely! You can freeze your Asian ground beef noodles in airtight containers or freezer bags for up to 3 months. Just make sure to label them with the date, and when it’s time to enjoy them again, thaw them in the fridge overnight before reheating. When you reheat them on the stovetop, add a splash of water to help restore their original texture.

What if my noodles become too sticky or mushy?
Very! If your noodles end up sticky, they might have been overcooked. To avoid this, always cook them al dente, as they continue to cook when combined with the sauce. If they end up mushy, that can happen when there’s too much sauce or they’ve been kept in the fridge for too long. Next time, try tossing them with a little oil after cooking to keep them separated.

Are there any dietary considerations I should keep in mind?
Indeed! This dish is versatile, and you can easily adjust ingredients to accommodate dietary needs. For those who are lactose intolerant, this recipe naturally fits! If you have nut allergies, ensure that your soy sauce and other condiments are nut-free. Just remember, when substituting ground beef for alternatives like turkey or lentils, check cooking times; lentils cook faster and require less liquid.

What’s the best way to enhance flavor without adding calories?
Great question! To amp up flavor while keeping things light, consider adding in herbs and spices such as garlic or fresh cilantro. A splash of rice vinegar or a squeeze of lime juice at the end can lift the overall taste without extra calories. Additionally, roasting your vegetables before adding them to the dish can concentrate their flavor beautifully.

Asian Ground Beef Noodles

Savory Asian Ground Beef Noodles in Just 20 Minutes

Quick and easy Asian Ground Beef Noodles perfect for busy weeknights with vibrant flavors.
Prep Time 10 minutes
Cook Time 10 minutes
Total Time 20 minutes
Servings: 4 servings
Course: Dinner
Cuisine: Asian
Calories: 400

Ingredients
  

For the Beef Mixture
  • 2 tablespoons vegetable oil or sesame oil
  • 1 pound ground beef can substitute with turkey or chicken
  • 2 tablespoons soy sauce low-sodium recommended
  • 1 tablespoon grated ginger fresh is best
  • 0.5 teaspoon white pepper powder black pepper can substitute
For the Sauce
  • 1 tablespoon corn flour or corn starch
  • 0.5 cup water for slurry
  • 1 tablespoon Chinese dark vinegar balsamic can work in a hurry
  • 1 tablespoon Chinese chili oil optional
For the Noodles
  • 5 ounces vermicelli rice noodles or angel hair pasta can be used
For Garnish
  • 2 tablespoons spring onion can substitute chives or scallions

Equipment

  • large saucepan
  • Colander

Method
 

Cooking Steps
  1. Heat 2 tablespoons of oil in a large saucepan over medium heat. Add 1 pound of ground beef and brown for about 5 minutes.
  2. Stir in 2 tablespoons of soy sauce and 1 tablespoon of grated ginger to the beef. Sauté for 10-15 seconds.
  3. Pour in 1 cup of water and sprinkle 0.5 teaspoon of white pepper powder. Stir and cover, then simmer for about 10 minutes.
  4. Cook 5 ounces of vermicelli in salted boiling water for 3-4 minutes. Drain and set aside.
  5. Mix 1 tablespoon of corn flour with 0.5 cup of water to make a slurry. Stir into the beef sauce and simmer for 2-3 minutes.
  6. Add the cooked vermicelli to the beef mixture, toss gently to combine, and garnish with spring onion. Serve hot.

Nutrition

Serving: 1servingCalories: 400kcalCarbohydrates: 45gProtein: 25gFat: 15gSaturated Fat: 5gPolyunsaturated Fat: 2gMonounsaturated Fat: 8gCholesterol: 70mgSodium: 800mgPotassium: 600mgFiber: 3gSugar: 2gVitamin A: 500IUVitamin C: 2mgCalcium: 30mgIron: 3mg

Notes

For the best results, use fresh ingredients and avoid overcooking the noodles to maintain their texture.

Tried this recipe?

Let us know how it was!

Creamy Miso Chili Crisp Noodles with Crispy Tofu Sensation

As I stirred the noodles in the pan, the aroma of miso and peanut butter enveloped my kitchen, instantly transporting me to a cozy corner of my favorite Asian eatery. These Creamy Miso Peanut Butter Noodles with Spicy Chili Crisp are not just a dish; they are a celebration of flavor and simplicity, ready in under 30 minutes. Packed with wholesome ingredients like crispy tofu and fresh vegetables, this plant-based meal checks all the boxes—delicious, quick, and utterly satisfying. Whether you’re a seasoned home chef or just looking to elevate your weeknight dinners, these noodles promise a delightful twist on traditional flavors. Ready to unleash your inner culinary artist? Let’s dive into this scrumptious recipe together!

Why Will You Love These Noodles?

Deliciously Unique: The combination of sweet miso and creamy peanut butter creates a flavor explosion that excites the palate.

Quick & Easy: Ready in under 30 minutes, this recipe is perfect for busy weeknights or when you’re craving something tasty without the fast food guilt.

Versatile Ingredients: Feel free to swap out tofu for grilled chicken or add in your favorite vegetables, making it adaptable to your taste.

Health-Conscious Comfort: Packed with plant-based protein from tofu and healthy fats from peanut butter, this dish offers a hearty yet nutritious meal you can feel good about.

Great for Sharing: Serve this dish at your next gathering, alongside options like Sweet Chili Chicken or Dragon Noodles, and watch your friends rave about it!

Miso Chili Crisp Noodles Ingredients

For the Tofu
Olive Oil – Provides fat for sautéing and enhances flavor; consider using sesame oil for an extra nutty taste.
Super Firm Tofu – Offers the best texture for frying; pat dry and tear for larger chunks, or use extra-firm tofu if needed.

For the Vegetables
Yellow Onion – Adds a base flavor for the dish; sauté until translucent for maximum sweetness.
Garlic – Enhances the aroma and flavor profile; minced garlic releases more oils for a stronger flavor.
Fresh Ginger – Contributes warmth and a fragrant note; don’t skip on mincing for better integration into the dish.
Shiitake Mushrooms – Offers a meaty texture; substitute with any mushroom variety if you prefer.
Snap Peas – Brings a nice crunch and color; you can also use green beans or bell peppers for variety.

For the Noodles and Sauce
Rice Noodles – Light and airy, they absorb flavors beautifully; be sure to cook according to package instructions.
Chili Crisp – Adds heat and texture to the satiny sauce; the recommended Fly By Jing Sichuan Chili Crisp balances the dish perfectly.
Creamy Natural Peanut Butter – Essential for that creamy sauce; opt for unsweetened for the best flavor profile.
Soy Sauce – Complements the sauce with a savory depth; low-sodium options are excellent for health-conscious cooks.
Mirin – Adds a touch of sweetness; honey works well as a substitute if mirin isn’t available.
White Miso Paste – Delivers sweet and nutty notes, adding depth to the sauce; an essential ingredient for your Miso Chili Crisp Noodles.

For Garnish
Scallions and Cilantro – Bright, fresh toppings that contribute a burst of flavor; sprinkle generously before serving.

Get ready to whip up a delicious bowl of these Miso Chili Crisp Noodles that will surely become a weeknight favorite!

Step‑by‑Step Instructions for Creamy Miso Chili Crisp Noodles

Step 1: Prepare Tofu
Heat a large skillet over medium-high heat and add a splash of olive oil. Once shimmering, carefully add torn pieces of super firm tofu, ensuring they don’t overcrowd the pan. Sauté for about 5-7 minutes until they’re golden brown and crispy on all sides. Once done, transfer the crispy tofu to a plate and set aside.

Step 2: Sauté Vegetables
In the same skillet, reduce the heat to medium and add finely diced yellow onion, minced garlic, and grated fresh ginger. Sauté for around 2-3 minutes, stirring frequently until fragrant and the onions are translucent. Next, add shiitake mushrooms and snap peas, cooking them for an additional 3-5 minutes until tender yet still vibrant.

Step 3: Cook Noodles
While the vegetables are sautéing, bring a pot of water to a rolling boil. Cook the rice noodles according to the package instructions, usually around 3-5 minutes, until al dente. Once cooked, drain them in a colander and rinse briefly under cold water to stop the cooking process and prevent sticking.

Step 4: Make Sauce
In a mixing bowl, combine creamy natural peanut butter, chili crisp, low-sodium soy sauce, mirin, white miso paste, and a splash of water. Whisk together until smooth and well-blended, achieving a creamy consistency. This rich sauce will beautifully coat the noodles and vegetables in your Miso Chili Crisp Noodles.

Step 5: Combine
Return the sautéed vegetables to the skillet over medium heat and add the drained rice noodles. Pour the prepared sauce over everything, gently tossing to ensure all the noodles and vegetables are well coated. Heat through for about 2 minutes, making sure everything is warmed and combined.

Step 6: Serve
Finally, take the skillet off the heat and gently fold in the crispy tofu, chopped scallions, and fresh cilantro. Dish out the Creamy Miso Chili Crisp Noodles into serving bowls, garnishing with extra scallions and a drizzle of chili crisp if desired, for an extra kick.

Make Ahead Options

These Creamy Miso Peanut Butter Noodles are perfect for meal prep, allowing you to enjoy a quick and delicious meal any day of the week! You can prepare the sauce (peanut butter, chili crisp, soy sauce, mirin, and miso) up to 24 hours in advance and store it in an airtight container in the refrigerator. Additionally, cook the rice noodles and sauté the vegetables, refrigerating them together for up to 3 days. To maintain quality, keep the crispy tofu separate until you’re ready to serve. When it’s time to enjoy, simply reheat the noodles and veggies, toss with the sauce, and fold in the crispy tofu before garnishing with scallions and cilantro for a delightful, satisfying meal!

Storage Tips for Miso Chili Crisp Noodles

Fridge: Store cooked Miso Chili Crisp Noodles in an airtight container in the refrigerator for up to 3 days. Reheat gently on the stovetop or microwave to enjoy later.

Freezer: For longer storage, freeze the noodles in an airtight container for up to 2 months. Thaw in the fridge overnight before reheating for best texture.

Reheating: When reheating, add a splash of water or vegetable broth to the pan to help keep the noodles moist and prevent clumping.

Crispy Components: For the best experience, store crispy tofu separately from the noodles and add just before serving to maintain its texture.

Miso Chili Crisp Noodles Variations

Feel free to play around with this recipe to make it your own—your taste buds will thank you!

  • Nut Variety: Swap peanut butter for almond or cashew butter for a unique nutty twist in the sauce.

  • Zucchini Noodles: Replace rice noodles with spiralized zucchini for a light, low-carb option that still packs in flavor.

  • Veggie Boost: Add other vegetables like bok choy or bell peppers based on what’s fresh or available in your kitchen.

  • Protein Packed: Toss in some cooked chicken or tempeh for an extra protein boost while keeping the flavors vibrant.

  • Spice it Up: Increase the chili crisp or add a sprinkle of crushed red pepper if you crave more heat.

  • Sweet and Savory: Replace mirin with a splash of maple syrup for a sweeter note that complements the savory miso.

  • Herb Swap: Substitute cilantro with fresh basil or mint to lend a unique herbaceous flavor to your dish.

  • Texture Contrast: Try adding crushed peanuts or sesame seeds on top for tantalizing crunch, enhancing each bite.

Serving your variations alongside a dish like One Pan Chili or Sticky Beef Noodles will surely impress your guests!

What to Serve with Creamy Miso Peanut Butter Noodles?

These noodles are the perfect centerpiece for a delightful meal full of vibrant flavors and comforting textures.

  • Crispy Spring Rolls: Bursting with fresh veggies, these crunchy bites offer a delightful contrast to the creamy noodles.
  • Thai Mango Salad: The sweetness of the mango and zesty dressing will brighten your palate, complementing the rich peanut sauce.
  • Coconut Rice: Creamy and fragrant, the coconut undertones of this rice dish harmonize beautifully with the savory flavors of the noodles.
  • Grilled Vegetable Skewers: Smoky and colorful, these tender veggies add a rustic charm, enhancing the meal’s visual appeal and nutrition.
  • Spicy Edamame: Lightly salted and seasoned with chili, these little bites provide a fun, snacking element that echoes the spiciness of the chili crisp.
  • Chilled Cucumber Salad: Refreshing and crisp, this salad balances the warmth of the noodles with a cool touch, perfect for summer meals.
  • Mint Lemonade: A bright and refreshing beverage, its citrusy spritz will cleanse your palate, making each bite of noodles even more enjoyable.
  • Vegan Chocolate Mousse: For dessert, this rich and airy treat provides a sweet yet light finish that contrasts nicely with the savory main dish.
  • Sesame Green Beans: Lightly sautéed and sprinkled with sesame seeds, these add a crunchy texture that echoes the crispy tofu without overshadowing the noodles.

Expert Tips for Miso Chili Crisp Noodles

  • Perfectly Crispy Tofu: Ensure your tofu is well-pressed and dry before frying. This prevents it from becoming soggy and helps achieve that delicious crispiness.

  • Adjusting the Spice: If you’re hesitant about the heat from the chili crisp, start with a small amount. You can always add more later, but it’s harder to tone down spice once it’s mixed in.

  • Noodles Preparation: Rinse your cooked rice noodles in cold water immediately after draining. This halts the cooking process and keeps them from clumping together in your Miso Chili Crisp Noodles.

  • Flavor Layering: Don’t skip the sautéing step! Cooking your onions, garlic, and ginger until aromatic builds a deeper flavor base for the dish, ensuring every bite is scrumptious.

  • Final Adjustments: Always taste the sauce before mixing it with noodles. You can tweak sweetness or saltiness to match your preference, ensuring a balanced flavor profile.

  • Creative Swaps: Feel free to substitute tofu with another protein or change vegetables seasonally. This recipe is versatile and can easily be tailored to your taste!

Creamy Miso Peanut Butter Noodles with Crispy Tofu Recipe FAQs

How do I choose the right tofu for this recipe?
Absolutely! For the best texture, opt for super firm tofu. It’s perfect for frying; just pat it dry and tear it into larger chunks for that delightful crispiness. If you can’t find super firm, extra-firm will do—just make sure to press it to remove as much moisture as possible before cooking.

What’s the best way to store leftovers?
Very! You can refrigerate the cooked Miso Chili Crisp Noodles in an airtight container for up to 3 days. When you’re ready to enjoy them again, gently reheat in a skillet over medium heat, adding a splash of water or vegetable broth to maintain moisture. This will help keep the noodles from clumping together.

Can I freeze Miso Chili Crisp Noodles?
Yes, you can! For freezing, place the cooled noodles in an airtight container and store them for up to 2 months. When you’re ready to eat, let them thaw overnight in the refrigerator. When reheating, add a little water or broth to keep things nice and moist, but remember to store crispy tofu separately to maintain its crunch!

What should I do if my sauce is too thick?
Absolutely! If you find that your sauce is too thick, simply whisk in a bit of water or vegetable broth gradually until you reach your desired consistency. Taste as you go to adjust the flavor if needed. This step ensures your noodles are beautifully coated without being clumpy.

Are there any common allergies I should be aware of when making this dish?
Certainly! This recipe uses peanut butter, which poses an allergy risk for some individuals. For those with peanut allergies, I recommend swapping the peanut butter with sunflower seed butter or almond butter. Be sure also to check that your soy sauce or coconut aminos are gluten-free if that’s a dietary consideration for you.

How can I spice up my Miso Chili Crisp Noodles?
The more the merrier! You can adjust the heat level by using a different amount of chili crisp or even adding some red pepper flakes or fresh chili slices when sautéing the vegetables. Just remember to start with a small amount of chili crisp and add more as desired, tasting along the way to ensure it suits your spice tolerance.

Miso Chili Crisp Noodles

Creamy Miso Chili Crisp Noodles with Crispy Tofu Sensation

Delicious Miso Chili Crisp Noodles offering a unique blend of flavors, featuring crispy tofu and fresh vegetables in a quick, satisfying meal.
Prep Time 10 minutes
Cook Time 20 minutes
Total Time 30 minutes
Servings: 4 servings
Course: Dinner
Cuisine: Asian, Plant-Based, Quick
Calories: 400

Ingredients
  

For the Tofu
  • 2 tablespoons Olive Oil Consider using sesame oil for extra flavor.
  • 14 ounces Super Firm Tofu Pat dry and tear for larger chunks.
For the Vegetables
  • 1 medium Yellow Onion Sauté until translucent.
  • 3 cloves Garlic Minced for stronger flavor.
  • 1 inch Fresh Ginger Grated for better integration.
  • 8 ounces Shiitake Mushrooms Any mushroom variety can be substituted.
  • 1 cup Snap Peas Can substitute with green beans or bell peppers.
For the Noodles and Sauce
  • 8 ounces Rice Noodles Cook according to package instructions.
  • 3 tablespoons Chili Crisp Recommended: Fly By Jing Sichuan Chili Crisp.
  • 1/2 cup Creamy Natural Peanut Butter Opt for unsweetened.
  • 1 tablespoon Soy Sauce Low-sodium options are ideal.
  • 2 tablespoons Mirin Honey works as a substitute.
  • 1/4 cup White Miso Paste Essential for this dish.
For Garnish
  • 1/4 cup Scallions Chopped.
  • 1/4 cup Cilantro Chopped.

Equipment

  • Large skillet
  • Pot
  • Mixing Bowl

Method
 

Step-by-Step Instructions
  1. Step 1: Heat a skillet over medium-high heat with olive oil. Add torn tofu and sauté for 5-7 minutes until golden brown and crispy. Set aside.
  2. Step 2: In the same skillet, reduce heat to medium. Add onion, garlic, and ginger, and sauté for 2-3 minutes until fragrant. Add mushrooms and snap peas, cooking for another 3-5 minutes.
  3. Step 3: Boil water and cook rice noodles according to package instructions for 3-5 minutes. Drain and rinse under cold water.
  4. Step 4: In a bowl, mix peanut butter, chili crisp, soy sauce, mirin, and miso paste until smooth.
  5. Step 5: Return veggies to skillet, add noodles and sauce, tossing to coat. Heat for 2 minutes.
  6. Step 6: Remove from heat and fold in tofu, scallions, and cilantro. Serve with extra scallions and chili crisp.

Nutrition

Serving: 1bowlCalories: 400kcalCarbohydrates: 40gProtein: 15gFat: 20gSaturated Fat: 3gPolyunsaturated Fat: 4gMonounsaturated Fat: 10gSodium: 800mgPotassium: 500mgFiber: 5gSugar: 5gVitamin A: 50IUVitamin C: 15mgCalcium: 80mgIron: 3mg

Notes

Tofu should be well-pressed and dried for crispiness. Adjust spice levels to taste and rinse noodles to prevent clumping.

Tried this recipe?

Let us know how it was!

Crispy Parmesan Crusted Chicken for a Delightful Dinner

In just twenty minutes, I can transform a simple weeknight dinner into something truly extraordinary. The standout dish? My Easy Parmesan Crusted Chicken, where juicy, tender chicken breasts are lovingly coated in crispy breadcrumbs and a generous sprinkle of Parmesan, delivering every bite with an incredible crunch. What I love most about this recipe is how it effortlessly combines comfort and convenience—perfect for busy chefs seeking a delicious homemade meal without the fuss. Plus, this dish is not only a surefire crowd-pleaser but also a treat for the senses, making it ideal for both family dinners and lazy weekends. Ready to elevate your dinner game and impress your loved ones with this delightful twist on a classic American favorite? Let’s dive in!

Why is Parmesan Crusted Chicken a Must-Try?

Quick Preparation: This recipe is a time-saver, ready in just 20 minutes! Perfect for those hectic weeknights.

Irresistible Crunch: The golden, crispy crust creates a delightful contrast to tender chicken, making it a dish everyone will love.

Versatile Flavor: Easily customize by adding your favorite herbs or serving with sides like Garlic Parmesan Chicken or a fresh salad.

Family Favorite: Its comforting taste appeals to both kids and adults, ensuring you have happy diners around the table.

Easy Adaptations: Whether you want to go vegetarian with eggplant or serve it with pasta, the options are endless!

Parmesan Crusted Chicken Ingredients

For the Chicken
Boneless Skinless Chicken Breasts – Use thin cutlets for quicker cooking and tender bites.

For the Breading
Flour – A base coating that adds texture; don’t forget to season it for extra flavor.
Eggs – Beaten eggs help bind the breadcrumbs to the chicken, enhancing every crunchy bite.
Breadcrumbs – Opt for Panko for extra crunch or Italian breadcrumbs for a flavorful twist.
Parmesan Cheese – Finely grated cheese provides deep flavor and perfect adherence to the chicken.

For the Seasoning
Dried Herb Mix – Adds aromatic Italian flavors; feel free to use your favorite blend.
Garlic Powder – Infuses savory depth; fresh garlic is a great substitute if you want more zing.
Paprika – For a touch of color and mild spice; smoked paprika gives a deliciously rich flavor.
Salt – Enhances overall taste; adjust to suit your preference.

With these ingredients in hand, you’re just moments away from crafting an unforgettable Parmesan crusted chicken that will wow your family and friends!

Step‑by‑Step Instructions for Parmesan Crusted Chicken

Step 1: Prepare the Chicken
Start by slicing each boneless skinless chicken breast horizontally to create thin cutlets, which will help them cook quickly and evenly. This gives your Parmesan crusted chicken a juicy, tender texture. Aim for around ½ inch thick for the best results. Set the chicken aside on a clean plate while you prepare the breading stations.

Step 2: Set Up Breading Stations
Gather three shallow bowls to create a breading station: one with seasoned flour (add salt and pepper), a second with beaten eggs, and a third filled with a mixture of breadcrumbs, finely grated Parmesan, and your chosen spices like garlic powder and paprika. This organized setup makes it easy to coat your chicken and ensures an even breading for that delicious crunch.

Step 3: Coat Chicken
Begin coating your chicken cutlets by first dredging them in the seasoned flour, shaking off any excess. Next, dip each cutlet into the beaten eggs, allowing the excess to drip off. Finally, press the chicken into the breadcrumb mixture, ensuring an even coating on both sides. This is what will give your Parmesan crusted chicken its irresistible crunch and flavor.

Step 4: Heat Oil
In a large skillet, pour in enough oil to cover the bottom with about ½ to ¾ inch depth, then heat over medium heat. You’ll know the oil is ready when it reaches 350°F (175°C) or when a breadcrumb dropped in sizzles immediately. This step is crucial for creating that golden-brown crust while keeping the chicken juicy.

Step 5: Cook Chicken
Carefully place 2-3 coated chicken cutlets in the hot oil, avoiding overcrowding the pan. Fry for 2-3 minutes on each side or until the cutlets are golden brown and cooked through. Use tongs to flip them gently, ensuring even cooking. The sizzling sound and rich aroma will let you know your Parmesan crusted chicken is on its way to perfection.

Step 6: Drain and Serve
Once cooked, transfer the chicken to a plate lined with paper towels to absorb any excess oil. Allow them to rest for a minute while you prepare to serve. This quick cooling step keeps the crust crispy. Serve your freshly made Parmesan crusted chicken with optional lemon wedges for brightness and extra Parmesan on top as a finishing touch.

How to Store and Freeze Parmesan Crusted Chicken

Fridge: Store leftovers in an airtight container for up to 3 days. This keeps your Parmesan crusted chicken fresh while retaining its flavor.

Freezer: For longer storage, freeze the cooked chicken in a single layer on a baking sheet, then transfer to an airtight container for up to 2 months.

Reheating: Reheat in the oven at 350°F (175°C) for about 10-15 minutes or in the air fryer for a few minutes until heated through, ensuring the crust stays crisp.

Avoid sogginess: If reheating from frozen, it’s best to thaw in the fridge overnight first for the best texture.

Expert Tips for Parmesan Crusted Chicken

Perfect Breading: Ensure your chicken is dry before coating to help the flour stick, which prevents the breading from falling off during cooking.

Thicker Crust Option: For a crunchier Parmesan crust, consider double-dipping! After the first coating, dip the chicken back into the egg and then into the breadcrumbs again.

Cooking in Batches: Avoid overcrowding the skillet. Fry in small batches to ensure even cooking and maintain that delightful crispiness on your Parmesan crusted chicken.

Oil Temperature Check: Use a thermometer to check oil temperature. If it’s too hot, the chicken will burn; too cold, and the breading will absorb excess oil.

Adapt for Oven or Air Fryer: If you’re looking for a healthier option, bake or air fry the coated chicken instead. Adjust cooking times for the best results!

Make Ahead Options

These Easy Parmesan Crusted Chicken cutlets are ideal for meal prep enthusiasts! You can coat the chicken cutlets with the seasoned flour, beaten eggs, and breadcrumb mixture up to 24 hours in advance. Simply refrigerate the breaded cutlets in an airtight container to maintain their freshness and prevent sogginess. When you’re ready to serve, heat the oil and fry the chicken for 2-3 minutes on each side until golden brown and crispy. This way, you’ll enjoy a restaurant-quality meal that’s just as delicious and saves you precious time on busy weeknights! Just remember to not overcrowd the pan while cooking to ensure even browning and crispiness.

What to Serve with Easy Parmesan Crusted Chicken

Delight your taste buds by creating an unforgettable meal that perfectly complements the crispy, cheesy goodness of your chicken.

  • Creamy Mashed Potatoes: The smooth, buttery texture of mashed potatoes creates a comforting side, absorbing any delicious juices from the chicken.

  • Garlic Green Beans: A refreshing dash of green, sautéed with garlic, adds brightness and a slight crunch to your plate, balancing the richness of the chicken.

  • Caesar Salad: Crisp romaine and tangy dressing create a refreshing contrast to the savory chicken, enhancing your meal with a classic flavor combination.

  • Roasted Vegetables: Seasonal veggies, roasted until caramelized, bring out their natural sweetness, making each bite harmonious with the perfectly seasoned chicken.

  • Lemon Risotto: Creamy, lemon-infused risotto adds a touch of elegance, while its creamy consistency beautifully counterbalances the crispy textures of the Parmesan crusted chicken.

  • Herbed Couscous: Fluffy and light, couscous pairs well with any protein and provides a gentle herbaceous note, supporting the dish without overwhelming it.

  • Chardonnay: A chilled glass of this white wine complements the rich flavors of the chicken while its acidity cuts through the creaminess of the sides.

  • Chocolate Mousse: Finish off your meal with a light yet decadent dessert like chocolate mousse, adding a sweet touch that will leave everyone smiling.

Parmesan Crusted Chicken Variations

Feel free to personalize your dish and make it your own, adding delightful touches that excite your taste buds!

  • Vegetarian Option: Replace chicken with eggplant slices, breaded and fried for a deliciously crunchy alternative. You’ll be amazed at how satisfying this twist can be!

  • Gluten-Free: Swap traditional breadcrumbs for gluten-free alternatives like crushed rice crackers or gluten-free Panko. This means everyone can enjoy a home-cooked classic.

  • Extra Flavor: Mix in Italian spices like oregano or fresh herbs such as basil into your breadcrumb mix. This adds a burst of flavor and freshness that’s simply irresistible.

  • Cheesy Delight: Experiment with blending different cheeses, like mozzarella or cheddar, with Parmesan in the breadcrumb mixture. The melty goodness will elevate every bite!

  • Heat It Up: For a spicy kick, incorporate red pepper flakes into the breading or serve with a side of spicy marinara. A hint of heat can give your dish an exciting twist.

  • Pasta Paradise: Serve your Parmesan crusted chicken over a bed of pasta with marinara sauce for a delicious Chicken Parmesan twist. It’s a comforting favorite that your family will adore.

  • Crispy Additions: Add some crushed nuts or seeds like pistachios or sunflower seeds to the breadcrumb mixture for an added crunch and nutty flavor. Crunch brings joy with every bite!

  • Asian-Inspired: Coat the chicken with a mix of breadcrumbs and sesame seeds for an Asian-inspired version. Pair with a sweet and spicy sauce or over fried rice for a delightful fusion.

For more inspiration, consider trying options like Garlic Parmesan Chicken or a refreshing Blt Chicken Salad for a light side dish.

Parmesan Crusted Chicken Recipe FAQs

What type of chicken should I use for Parmesan crusted chicken?
Absolutely! For this recipe, boneless skinless chicken breasts are the best choice as they cook quickly and remain juicy. If you can, opt for thin cutlets, about ½ inch thick, to ensure even cooking and a tender result that’s perfect for the crispy coating.

How should I store leftover Parmesan crusted chicken?
Very simple! Store any leftovers in an airtight container in the refrigerator for up to 3 days. Make sure to let the chicken cool down before sealing to maintain its crispiness. When you’re ready to enjoy it again, reheat in the air fryer or oven to keep that delightful crunch intact.

Can I freeze Parmesan crusted chicken?
Absolutely! To freeze, first let the cooked chicken cool completely. Then arrange the pieces in a single layer on a baking sheet and freeze until solid, usually for about 1-2 hours. Once frozen, transfer them to an airtight container or a heavy-duty freezer bag. They can be stored for up to 2 months. When you’re ready to eat, thaw them in the fridge overnight and reheat as instructed for best results.

What if the breading falls off while frying?
Common troubleshooting! If the breading isn’t sticking well, make sure the chicken is dry before you coat it. Also, pressing firmly into the breadcrumb mixture will help it adhere better. If you prefer a thicker crust, consider double-dipping by repeating the egg and breadcrumb steps. This extra layer gives you a more robust crunch and helps lock in flavor!

Are there any dietary considerations for this dish?
Absolutely! If you’re making it for guests with allergies, be mindful of gluten in the flour and breadcrumbs. You can substitute with gluten-free alternatives like chickpea flour and gluten-free breadcrumbs. For a vegetarian option, try using slices of eggplant or zucchini instead of chicken, following the same coating and cooking method!

What sides go well with Parmesan crusted chicken?
The more the merrier! This delightful dish pairs wonderfully with a variety of sides such as a fresh mixed salad, buttery mashed potatoes, or roasted green beans for a colorful and well-rounded meal. You could also toss it onto a bed of pasta with a light marinara sauce for a comforting twist!

Parmesan Crusted Chicken

Crispy Parmesan Crusted Chicken for a Delightful Dinner

This Parmesan Crusted Chicken offers a quick and delightful dinner option, perfectly crispy and flavorful.
Prep Time 20 minutes
Cook Time 10 minutes
Total Time 30 minutes
Servings: 4 pieces
Course: Dinner
Cuisine: American
Calories: 350

Ingredients
  

For the Chicken
  • 4 pieces Boneless Skinless Chicken Breasts Use thin cutlets for quicker cooking
For the Breading
  • 1 cup Flour Seasoned with salt and pepper
  • 2 large Eggs Beaten
  • 1 cup Breadcrumbs Panko or Italian
  • 1/2 cup Parmesan Cheese Finely grated
For the Seasoning
  • 1 tablespoon Dried Herb Mix Your favorite blend
  • 1 teaspoon Garlic Powder Or fresh garlic for more flavor
  • 1 teaspoon Paprika Smoked paprika for flavor
  • 1 teaspoon Salt Adjust to taste

Equipment

  • Large skillet
  • shallow bowls
  • Tongs

Method
 

Step-by-Step Instructions
  1. Slice each chicken breast horizontally to create thin cutlets and set aside.
  2. Set up three shallow bowls: one with seasoned flour, one with beaten eggs, and one with breadcrumbs, Parmesan, and spices.
  3. Coat chicken in flour, dip in eggs, and then press into the breadcrumb mixture, ensuring even coverage.
  4. Heat oil in a skillet to about 350°F and ensure it covers the bottom with ½ to ¾ inch depth.
  5. Fry 2-3 coated chicken cutlets for 2-3 minutes on each side until golden and cooked through.
  6. Transfer finished chicken to a plate lined with paper towels and let cool for a minute before serving.

Nutrition

Serving: 1pieceCalories: 350kcalCarbohydrates: 30gProtein: 30gFat: 15gSaturated Fat: 5gPolyunsaturated Fat: 2gMonounsaturated Fat: 7gCholesterol: 120mgSodium: 800mgPotassium: 600mgFiber: 1gSugar: 1gVitamin A: 500IUVitamin C: 1mgCalcium: 200mgIron: 3mg

Notes

Serve with lemon wedges and extra Parmesan on top for additional flavor.

Tried this recipe?

Let us know how it was!

Lusciously Creamy Butter Chicken Just Like at Your Favorite Eatery

As I stirred the simmering pot, an enchanting aroma washed over me, instantly transporting me to the vibrant streets of Delhi, filled with spices and warmth. This Creamy Indian Butter Chicken, or Murgh Makhani, is not just a meal; it’s a culinary experience that wraps you in a blanket of rich, buttery goodness. With juicy marinated chicken thighs enveloped in a dreamy curry sauce, this dish captures the essence of comfort food. What sets this recipe apart is its quick prep time and the ability to satisfy a crowd—perfect for weeknight dinners or festive gatherings. Imagine serving this delight over fluffy basmati rice, where each bite brings a taste of home. Are you ready to embark on this flavor journey with me?

Why is Butter Chicken a Must-Try?

Indulgent Flavor: Each bite of this creamy Butter Chicken is a delightful explosion of spices, perfectly balancing richness and warmth.

Easy to Prepare: With minimal prep and straightforward steps, you can whip up this luxurious dish in no time.

Crowd-Pleaser: Whether it’s a cozy family dinner or a festive gathering, this dish pleases everyone—from spice lovers to those new to Indian cuisine.

Versatile Pairing: Serve it over fluffy basmati rice or alongside naan, and feel free to mix in your favorite vegetables for an added twist!

Meal Prep Friendly: Make extra for leftovers or freeze portions for later—this dish retains its heavenly flavor, making it an excellent go-to throughout the week.

Butter Chicken Ingredients

For the Marinade

  • Boneless Skinless Chicken Thighs – This main protein is juicier and more flavorful than chicken breast, ideal for a rich dish.
  • Full-Fat Greek Yogurt – Acts as a marinade base, tenderizing the chicken and adding acidity.
  • Fresh Lemon Juice – Brightens the flavors; can be substituted with vinegar if needed.
  • Minced Ginger – Adds warmth and earthiness; can use ginger paste for convenience.
  • Minced Garlic – Provides depth of flavor and aroma; fresh is preferred, but jarred can substitute.
  • Kashmiri Red Chili Powder – This authentic spice lends vivid color and mild heat; substitute with a paprika-cayenne mix if needed.
  • Garam Masala – An essential spice blend that adds warmth; consider alternatives if omitted.
  • Ground Turmeric – Contributes both color and warmth.
  • Salt – Enhances overall flavor profile.

For the Sauce

  • Extra Virgin Olive Oil or Avocado Oil – Choose either as the cooking fat for sautéing, adding richness to the dish.
  • Medium Yellow Onion – Forms the flavor base of the sauce, imparting sweetness and depth.
  • Ground Coriander – Adds floral notes, enhancing the overall flavor complexity.
  • Ground Cumin – Provides an earthy flavor that complements the spices.
  • Raw Cashews – These thicken the sauce and add a creamy texture; can be replaced with almonds or omitted entirely.
  • Coconut Sugar – Helps balance the acidity in the sauce; feel free to swap with other sweeteners.
  • Crushed Tomatoes – The main liquid component of the sauce, providing body and depth.
  • Water – Used to adjust the sauce to your desired consistency.

For Finishing the Dish

  • Unsalted Butter or Ghee – Adds a lush flavor to the finished product.
  • Heavy Cream or Coconut Cream – Creates that sought-after creamy sauce texture.
  • Basmati Rice – Serves as a perfect side, absorbing all the delectable sauce flavors.
  • Freshly Chopped Cilantro – Adds a vibrant burst of flavor and color as a garnish.

Step‑by‑Step Instructions for Butter Chicken

Step 1: Prepare Chicken
Begin by dicing the boneless skinless chicken thighs into 1-inch pieces for even cooking. In a mixing bowl, combine the chicken with full-fat Greek yogurt, fresh lemon juice, ginger, garlic, Kashmiri red chili powder, garam masala, ground turmeric, and salt, ensuring the chicken is thoroughly coated. Refrigerate for at least 1 hour, preferably overnight, to allow the flavors to meld.

Step 2: Cook Chicken
Heat 2 tablespoons of extra virgin olive oil or avocado oil in a large sauté pan over medium-high heat. Once the oil glistens, add the marinated chicken pieces, ensuring they aren’t overcrowded. Cook for about 5-6 minutes, stirring occasionally until the chicken is opaque and cooked through. Remove the chicken and set it aside on a plate, letting it rest while you prepare the sauce.

Step 3: Make Sauce
In the same pan, add the diced medium yellow onion and sauté for 3-4 minutes until it turns translucent and fragrant. Stir in the remaining minced ginger and garlic, along with Kashmiri red chili powder, garam masala, ground coriander, and ground cumin. Cook for an additional minute, allowing the spices to bloom and infuse the onion mixture with rich flavors.

Step 4: Combine Ingredients
Add ¼ cup of raw cashews, 15 ounces of crushed tomatoes, 1 tablespoon of coconut sugar, and 1 cup of water to the pan. Stir well to combine and bring the mixture to a gentle simmer. Let it simmer for about 5 minutes, allowing the flavors to deepen and the sauce to thicken slightly before proceeding to the next step.

Step 5: Blend Sauce
Carefully transfer the sauce mixture to a blender. Blend until smooth and creamy, ensuring there are no lumps left, as this creates the luscious texture characteristic of indulgent Butter Chicken. If you prefer, you can use an immersion blender directly in the pan for ease, but blending in a stand blender will yield the smoothest results.

Step 6: Finalize Dish
Wipe the sauté pan clean and return the blended sauce to the heat. Stir in 2 tablespoons of unsalted butter or ghee and ½ cup of heavy cream or coconut cream, mixing until melted and combined. Gently fold in the cooked chicken, simmering everything together for an additional 3-5 minutes until heated through and the chicken absorbs the creamy flavors of the sauce.

Step 7: Serve
Serve this enticing Butter Chicken warm over fluffy basmati rice, creating a bed for the rich sauce. Garnish with freshly chopped cilantro for a vibrant and flavorful touch. Enjoy the divine combination of spices and creaminess that will leave everyone asking for seconds!

Expert Tips for Butter Chicken

  • Use Kashmiri Powder: Ensure to use Kashmiri red chili powder for its authentic color and mild heat; regular chili powder can be too spicy if used in excess.

  • Marinate Overnight: For the best flavor and tenderness, consider marinating the chicken overnight, allowing it to fully absorb the spices and yogurt.

  • Texture Matters: Blend the sauce until completely smooth—this step is crucial for achieving that restaurant-quality, creamy Butter Chicken.

  • Don’t Overcrowd: When cooking the chicken, ensure it’s in a single layer in the pan to achieve even cooking and a nice sear; overcrowding can lead to steaming instead of browning.

  • Storage Tips: Leftovers can be stored in the fridge for 3-4 days or frozen for up to 3 months, making this a great meal prep option to enjoy later.

  • Taste and Adjust: Be sure to taste the sauce before serving; you can adjust seasoning or sweetness with a bit more salt or coconut sugar if needed.

How to Store and Freeze Butter Chicken

Fridge: Refrigerate leftovers in an airtight container for up to 3-4 days, ensuring the flavors remain intact and fresh for your next meal.

Freezer: Store Butter Chicken in a freezer-safe container for up to 3 months. To avoid freezer burn, make sure it’s tightly sealed.

Reheating: For best texture, thaw overnight in the fridge before reheating gently on the stove or in the microwave. Add a splash of water or cream to restore creaminess.

Serving Tip: Enjoy it over fresh basmati rice for a comforting meal any time!

Make Ahead Options

These Creamy Indian Butter Chicken preparations are perfect for busy home cooks looking to save time during the week! You can marinate the chicken thighs in yogurt, lemon juice, and spices up to 24 hours in advance—this not only enhances flavor but ensures tenderness as well. Additionally, the sauce can be made ahead and stored in the refrigerator for up to 3 days; simply cool it down completely before refrigerating. When you’re ready to serve, reheat the sauce gently over low heat, add the cooked chicken, and stir in the butter and cream just until everything is warmed through. This way, you can enjoy a restaurant-quality Butter Chicken with minimal effort on your busy nights!

What to Serve with Creamy Indian Butter Chicken?

Imagine the delightful aroma wafting through your kitchen, inviting a feast that perfectly complements the velvety richness of this beloved dish.

  • Fluffy Basmati Rice: It soaks up the creamy sauce beautifully, enhancing every bite of chicken with its subtle nuttiness.
  • Garlic Naan: Soft and chewy, it’s the ultimate vessel for sopping up luscious curry, bringing a garlicky twist to every mouthful.
  • Cucumber Raita: A cooling yogurt dip that balances the spices in the Butter Chicken, offering refreshing crunch and a creamy texture.
  • Sauteed Spinach: Lightly sautéed with garlic, it provides a nutritious green element, bringing a contrast to the richness of the dish.
  • Mango Chutney: The sweet and tangy flavors of this chutney elevate the dish, adding a fruity contrast that delights the palate.
  • Samosas: These crispy pastries filled with spiced potatoes or lentils make for a wonderful appetizer, setting the stage for your Butter Chicken.
  • Mint Tea: A soothing herbal complement, this tea will cleanse your palate and leave you feeling refreshed after your meal.
  • Coconut Ladoo: For dessert, these sweet, chewy treats are a delightful finish, echoing the coconut cream in the dish with their rich flavors.

Butter Chicken Variations & Substitutions

Feel the freedom to make this Butter Chicken your own with delightful twists that suit your taste buds!

  • Chicken Breasts: Swap chicken thighs for leaner breasts; just be cautious not to overcook!

  • Dairy-Free Delight: Use coconut cream instead of heavy cream for a luscious, dairy-free option that still packs flavor.

  • Vegetarian Twist: Replace chicken with paneer or chickpeas for a delightful vegetarian version; both options absorb the sauce beautifully.

  • Spice It Up: For an extra kick, add a pinch of cayenne pepper or chopped green chilies while cooking. This adds more depth and heat!

  • Nut-Free Version: If you’re avoiding nuts, omit cashews and blend in silken tofu for creaminess without compromising texture.

  • Herb Infusion: Stir in fresh herbs like mint or basil at the end for a refreshing flavor twist; this elevates your Butter Chicken experience!

  • Flavor Boost: Enhance the sauce with a splash of apple cider vinegar or lemon juice before serving; this brightens up the flavors beautifully.

  • Slow Cooker Option: Try using a slow cooker to make this dish; simply combine all ingredients and cook for 4 hours on low for effortless deliciousness.

If you’re looking for more mouthwatering chicken recipes, I highly recommend trying my Cowboy Butter Chicken or the irresistible Butter Baked Chicken for more variety!

Creamy Indian Butter Chicken with Basmati Rice Recipe FAQs

What type of chicken is best for Butter Chicken?
I highly recommend using boneless skinless chicken thighs for Butter Chicken as they are juicier and more flavorful than chicken breasts. If you prefer a leaner option, chicken breasts can be used, but be cautious not to overcook them to maintain tenderness.

How do I store leftovers of Butter Chicken?
Leftovers can be refrigerated in an airtight container for up to 3-4 days. To maintain the dish’s flavor and texture, ensure it’s completely cooled before sealing. When you’re ready to enjoy it again, reheat gently on the stove or in the microwave for the best results.

Can I freeze Butter Chicken?
Absolutely! You can freeze Butter Chicken in a freezer-safe container for up to 3 months. Just make sure the container is well-sealed to prevent freezer burn. When you’re ready to eat, thaw it overnight in the refrigerator and reheat gently, adding a splash of water or cream to help restore creaminess.

What should I do if my Butter Chicken sauce isn’t thickening?
If your sauce isn’t thickening as desired, don’t fret! You can blend in a bit more raw cashews or even a spoonful of cornstarch mixed with water to help thicken it. Alternatively, let it simmer uncovered for a bit longer, allowing some of the liquid to evaporate.

Is Butter Chicken suitable for people with dietary restrictions?
Yes! This recipe is naturally gluten-free, making it suitable for those with gluten sensitivities. If you have dairy allergies, you can substitute heavy cream with coconut cream for a delicious dairy-free version. Just ensure to check all spice blends for gluten if sensitivity is a concern.

What should I look for when selecting ripe ingredients?
For the best flavor, select ripe tomatoes that are firm and bright in color, avoiding any with dark spots or blemishes. When picking onions, choose those that feel heavy for their size, with dry, intact skin. Fresh herbs like cilantro should be vibrant and green, with no wilting.

Butter Chicken

Lusciously Creamy Butter Chicken Just Like at Your Favorite Eatery

This Butter Chicken is a creamy, indulgent dish that brings the flavors of Delhi to your table, making it a must-try for any home cook.
Prep Time 10 minutes
Cook Time 30 minutes
Marinating Time 1 hour
Total Time 1 hour 40 minutes
Servings: 4 servings
Course: Dinner
Cuisine: Indian
Calories: 450

Ingredients
  

For the Marinade
  • 1 pound Boneless Skinless Chicken Thighs Juicier and more flavorful than chicken breast.
  • 1 cup Full-Fat Greek Yogurt Acts as a marinade base.
  • 2 tablespoons Fresh Lemon Juice Can be substituted with vinegar.
  • 1 tablespoon Minced Ginger Or ginger paste.
  • 1 tablespoon Minced Garlic Fresh preferred.
  • 1 tablespoon Kashmiri Red Chili Powder Substitute with a paprika-cayenne mix if needed.
  • 1 tablespoon Garam Masala An essential spice blend.
  • 1 teaspoon Ground Turmeric
  • 1 teaspoon Salt
For the Sauce
  • 2 tablespoons Extra Virgin Olive Oil or Avocado Oil
  • 1 medium Yellow Onion
  • 1 teaspoon Ground Coriander
  • 1 teaspoon Ground Cumin
  • ¼ cup Raw Cashews Can be replaced with almonds or omitted.
  • 1 tablespoon Coconut Sugar Feel free to swap with other sweeteners.
  • 15 ounces Crushed Tomatoes Main liquid component.
  • 1 cup Water To adjust consistency.
For Finishing the Dish
  • 2 tablespoons Unsalted Butter or Ghee
  • ½ cup Heavy Cream or Coconut Cream For the creamy sauce.
  • 2 cups Basmati Rice Perfect side.
  • ¼ cup Freshly Chopped Cilantro For garnish.

Equipment

  • Large sauté pan
  • Mixing Bowl
  • blender

Method
 

Step-by-Step Instructions
  1. Dice the boneless skinless chicken thighs into 1-inch pieces, then combine with Greek yogurt, lemon juice, ginger, garlic, chili powder, garam masala, turmeric, and salt in a bowl. Coat well and refrigerate for at least 1 hour, preferably overnight.
  2. Heat oil in a large sauté pan over medium-high heat. Add marinated chicken pieces without overcrowding and cook for 5-6 minutes until opaque. Remove and set aside.
  3. In the same pan, sauté diced onion for 3-4 minutes until translucent. Add ginger, garlic, chili powder, garam masala, coriander, and cumin. Cook for another minute.
  4. Stir in cashews, crushed tomatoes, coconut sugar, and water. Mix well and simmer for about 5 minutes.
  5. Transfer sauce to a blender and blend until smooth. Alternatively, use an immersion blender in the pan.
  6. Return blended sauce to heat, stir in butter and cream until melted, then fold in cooked chicken. Simmer for 3-5 minutes.
  7. Serve warm over basmati rice and garnish with cilantro.

Nutrition

Serving: 1servingCalories: 450kcalCarbohydrates: 30gProtein: 25gFat: 25gSaturated Fat: 12gPolyunsaturated Fat: 3gMonounsaturated Fat: 10gCholesterol: 100mgSodium: 800mgPotassium: 700mgFiber: 3gSugar: 6gVitamin A: 500IUVitamin C: 10mgCalcium: 80mgIron: 3mg

Notes

Overnight marination enhances flavor; ensure to blend sauce smooth for creamy texture.

Tried this recipe?

Let us know how it was!

20 Minute Green Goddess Pasta Salad That’s a Creamy Delight

As I tossed the bright green ingredients in my bowl, an unexpected wave of nostalgia washed over me, bringing back memories of carefree summer picnics. This 20 Minute Green Goddess Pasta Salad is the perfect homage to those lazy afternoons, offering a vibrant and refreshing blend of creamy avocado, fresh greens, and aromatic herbs. Not only is it a quick and easy recipe, but it also embraces the spirit of creativity—feel free to customize it with your favorite veggies or pasta shapes. Whipping up this vegan dish in just 20 minutes makes it a fabulous option for busy weeknights or sunny gatherings with friends. Are you ready to elevate your pasta game with a splash of green goodness?

Why Is This Salad a Must-Try?

Quick Preparation: With just 20 minutes to spare, you can whip up this delightful dish that suits even the busiest of schedules.

Endless Customization: Tailor this salad to your taste by swapping in your favorite veggies or pasta shapes!

Healthy Indulgence: Packed with creamy avocado and fresh greens, it’s a nutritious twist on traditional pasta salads.

Perfect for Gatherings: Impress your friends at summer barbecues with this vibrant, eye-catching dish that everyone will love.

Elevate your meals further with this flavorful option alongside a Cajun Sausage Pasta or a refreshing Blt Chicken Salad. Enjoy every bite!

20 Minute Green Goddess Pasta Salad Ingredients

• A quick rundown of all you need for this delightful dish!

For the Salad

  • Pasta – The base of the salad; choose gluten-free or protein-rich pasta for added nutrition!
  • Avocado – Provides creaminess and healthy fats; select a ripe avocado that yields slightly when pinched.
  • Spinach – A fresh and nutritious green; fresh is best, but thawed frozen spinach works in a pinch.
  • Fresh Herbs (Basil, Dill) – Add vibrant flavor; feel free to swap in your favorite herbs for a custom taste.
  • Green Onions – Adds crunch and a mild onion flavor; replace with shallots if needed.
  • Chickpeas – Boosts protein content; can be omitted for a lighter salad.

For the Dressing

  • Garlic – A depth of flavor is essential; feel free to adjust the amount based on your taste preference.
  • White Wine Vinegar – Provides a mild acidity; apple cider vinegar or rice vinegar works well as a substitute.
  • Nutritional Yeast – Delivers umami flavor; can be omitted or replaced with vegan parmesan for a cheesier kick.

Dive into the deliciousness of this 20 Minute Green Goddess Pasta Salad and bring vibrant colors and flavors to your table!

Step‑by‑Step Instructions for 20 Minute Green Goddess Pasta Salad

Step 1: Boil the Pasta
Begin by bringing a large pot of salted water to a rolling boil over high heat. Once boiling, add your pasta and cook according to the package instructions until it reaches al dente texture, about 8-10 minutes. As the pasta cooks, stir occasionally to prevent sticking, and keep an eye on it until it’s perfectly tender yet firm to bite.

Step 2: Cool the Pasta
After draining the cooked pasta, return it to the pot and drizzle with a splash of olive oil to prevent sticking. Next, add a few ice cubes to the pasta and gently toss until it cools down, which should take about 2-3 minutes. This step is crucial for refreshing the pasta and setting the stage for your 20 Minute Green Goddess Pasta Salad.

Step 3: Prepare the Dressing
While the pasta cools, grab a blender and add the ripe avocado, fresh spinach, herbs, garlic, white wine vinegar, and nutritional yeast. Blend these ingredients together for about 30-45 seconds, or until the mixture becomes creamy and smooth. The result should be a luscious green dressing bursting with flavors that will beautifully coat your salad.

Step 4: Combine Ingredients
Once the dressing is ready, transfer the cooled pasta back into the large mixing pot. Add your chickpeas and any crunchy vegetables you’ve chosen, such as bell peppers or cucumbers. Drizzle the fresh green dressing over the top and gently toss everything together until well combined, ensuring each pasta piece is coated with that vibrant green goodness.

Step 5: Garnish and Serve
To finish your 20 Minute Green Goddess Pasta Salad, slice green onions and sprinkle them generously on top for a touch of flavor and crunch. Serve the salad immediately or chill it in the fridge for about 10-15 minutes before serving. This dish is best enjoyed fresh, showcasing its colorful and appetizing vibe.

20 Minute Green Goddess Pasta Salad Variations

Feel free to remix this vibrant salad and make it truly yours with these fun substitutions and twists!

  • Gluten-Free: Use gluten-free pasta alternatives such as quinoa or brown rice pasta for a wholesome option that everyone can enjoy.
  • Creamy Spinach Substitute: Instead of avocado, blend in tahini for a nutty creaminess that pairs beautifully with the greens.
  • Herb Variation: Swap the basil and dill for fresh cilantro and mint for a refreshing, zesty flavor profile that brightens each bite.
  • Vegetarian Protein Boost: Add in cubed feta cheese or mozzarella balls for added richness and texture—it’s a lovely contrast to the creamy dressing.
  • Chickpeas Alternative: Replace chickpeas with roasted edamame for a loveable crunch and extra protein that won’t weigh you down.
  • Nutty Crunch: Toss in some toasted pine nuts or walnuts for a delightful crunch that enhances both flavor and texture.
  • Heat Lovers: Crank up the heat by adding crushed red pepper flakes or a dash of sriracha, bringing life to the creamy mix.
  • Roasted Goodness: Fold in roasted vegetables like zucchini or bell peppers for a warm twist, creating a comforting, hearty pasta salad.

For more delicious ideas, consider whipping up a Marry Me Shrimp Pasta as a delightful side pairing. Enjoy the blend of flavors!

What to Serve with 20 Minute Green Goddess Pasta Salad

Elevate your mealtime experience by complementing this vibrant salad with delicious sides and accompaniments.

  • Grilled Vegetables: Their smoky flavor enhances the freshness of the salad, adding an irresistible charred element that brings depth.

  • Quinoa Patties: These provide a hearty texture and protein boost, making your meal even more satisfying and nutritious.

  • Crispy Garlic Bread: The crunchiness of garlic bread contrasts beautifully with the creamy salad, creating a delightful textural balance.

  • Fruit Skewers: Their natural sweetness offers a refreshing palate cleanser after the herbaceous notes of the pasta salad.

  • Lemonade Spritzer: This bright, fizzy drink complements the salad’s freshness and adds a fun, festive vibe to any gathering.

Enjoy crafting a well-rounded meal that makes every bite a celebration of flavors and textures!

How to Store and Freeze 20 Minute Green Goddess Pasta Salad

Fridge: Store the salad in an airtight container for up to 3 days to keep it fresh. Press plastic wrap directly onto the surface to minimize oxidation.

Freezer: While not recommended for freezing due to potential texture changes, if needed, freeze for up to 1 month. Thaw in the fridge before serving, but expect some changes in creaminess.

Reheating: Enjoy chilled for the best flavor, but if you prefer it warm, gently reheat in a microwave using the defrost setting until just warm, not hot.

Serving Suggestions: This vibrant vegan salad is best consumed within 4-5 days to enjoy its creamy goodness and refreshing taste!

Expert Tips for 20 Minute Green Goddess Pasta Salad

  • Perfect Avocado: Always choose a ripe avocado that yields slightly to your touch; this ensures a creamy texture without browning.

  • Chill Properly: After dressing, refrigerate your salad for at least 10-15 minutes to let the flavors meld and enhance the overall taste.

  • Prevent Oxidation: For the best storage, press plastic wrap directly onto the surface of the salad before sealing it in an airtight container to maintain freshness.

  • Nutritional Boost: Opt for chickpeas or protein-rich pasta to elevate the nutritional profile of your 20 Minute Green Goddess Pasta Salad.

  • Customize Wisely: Don’t hesitate to explore different herbs or textures; however, ensure that your additional ingredients complement the creamy dressing and overall flavor.

Make Ahead Options

These 20 Minute Green Goddess Pasta Salad components are perfect for meal prep, making your busy weeknights a breeze! You can cook the pasta and refrigerate it in an airtight container for up to 3 days to save time. Additionally, prepare the green goddess dressing in advance and store it separately in the fridge for up to 24 hours; this will keep the vibrant flavors intact. When you’re ready to serve, simply combine the cold pasta, dressing, and your choice of crunchy vegetables and chickpeas. This way, you’ll enjoy a delicious, fresh salad that feels just as delightful as if you made it all in one go!

20 Minute Green Goddess Pasta Salad Recipe FAQs

What kind of pasta should I use for this salad?
Absolutely! You can use any pasta shape you prefer, such as penne, fusilli, or spaghetti. For a healthier twist, consider whole grain or gluten-free pasta. If you’re looking for added protein, bean-based pasta is a fantastic option as well!

How do I choose a ripe avocado?
Choose a ripe avocado that yields slightly when gently squeezed; this indicates it’s ready to use. Avoid avocados with dark spots all over, as these may signify overripeness. If you have unripe avocados, leave them at room temperature for a few days until they soften.

How should I store leftovers of the 20 Minute Green Goddess Pasta Salad?
To keep your salad fresh, store it in an airtight container in the fridge for up to 3 days. To minimize oxidation and maintain its lovely green color, press a piece of plastic wrap directly onto the surface of the salad before sealing it.

Can I freeze this salad?
While it’s not recommended to freeze the salad due to texture changes of the avocado, if you must, it can be frozen for up to 1 month. Place it in a freezer-safe container, ensuring it’s airtight. When ready to eat, thaw it in the fridge; expect some creaminess to be altered but it will still be enjoyable!

Are there any dietary considerations I should be aware of?
Great question! This salad is naturally vegan and gluten-free if you choose the right pasta. However, always check for allergens in your specific ingredients, such as chickpeas. If sharing with pets, avoid feeding them avocado, as it can be harmful to them.

What can I do if the dressing is too thick?
If the dressing turns out too thick for your liking, don’t worry! Simply add a tablespoon of water or a splash of olive oil to the blender and blend again until the desired consistency is achieved. Feel free to adjust the seasoning afterward for a well-rounded flavor!

20 Minute Green Goddess Pasta Salad

20 Minute Green Goddess Pasta Salad That's a Creamy Delight

This 20 Minute Green Goddess Pasta Salad is a vibrant, creamy dish perfect for summer gatherings and busy weeknights.
Prep Time 20 minutes
Cook Time 10 minutes
Cooling Time 3 minutes
Total Time 33 minutes
Servings: 4 servings
Course: Pasta
Cuisine: Vegan
Calories: 300

Ingredients
  

For the Salad
  • 8 oz pasta choose gluten-free or protein-rich
  • 1 ripe avocado provides creaminess and healthy fats
  • 4 cups fresh spinach fresh is best
  • 0.5 cups fresh herbs basil and dill
  • 2 stalks green onions adds crunch
  • 1 cup chickpeas can be omitted
For the Dressing
  • 2 cloves garlic adjust according to taste
  • 2 tbsp white wine vinegar or substitute
  • 2 tbsp nutritional yeast can replace with vegan parmesan

Equipment

  • blender
  • Large pot
  • Mixing Bowl

Method
 

Step-by-Step Instructions
  1. Begin by bringing a large pot of salted water to a rolling boil over high heat.
  2. Once boiling, add your pasta and cook according to the package instructions until al dente, about 8-10 minutes.
  3. After draining, drizzle the pasta with olive oil and add a few ice cubes to cool it down.
  4. In a blender, add avocado, spinach, herbs, garlic, vinegar, and nutritional yeast. Blend until smooth.
  5. Combine cooled pasta with chickpeas and any chosen veggies, drizzle dressing over, and toss gently.
  6. Slice green onions and sprinkle on top, serve immediately or chill for 10-15 minutes.

Nutrition

Serving: 1servingCalories: 300kcalCarbohydrates: 40gProtein: 10gFat: 12gSaturated Fat: 1gPolyunsaturated Fat: 2gMonounsaturated Fat: 8gSodium: 300mgPotassium: 700mgFiber: 10gSugar: 3gVitamin A: 2200IUVitamin C: 30mgCalcium: 50mgIron: 2mg

Notes

Best enjoyed fresh, this salad can be customized with your favorite veggies.

Tried this recipe?

Let us know how it was!

Irresistible Texas Roadhouse Salmon You Can Make in 30 Minutes

As I stood in my kitchen, the sweet aroma of melting butter and caramelizing sugar began to dance around me, transporting me straight to the heart of Texas. This Amazing Texas Roadhouse Salmon recipe brings together the best of both worlds—mouthwatering taste and effortless preparation. With a sticky-sweet glaze crafted from brown sugar, soy sauce, and honey, it’s a dish that not only tantalizes your taste buds but also fits seamlessly into a busy schedule. In just 30 minutes, you can serve up a gluten-free meal that’s both delicious and impressive, perfect for weeknight dinners or when entertaining guests. Why settle for takeout when you can whip up this restaurant-quality salmon at home? Are you ready to add a hefty dose of flavor to your dinner table?

Why Will You Love This Salmon?

Quick and Easy: In just 30 minutes, you can enjoy a delicious, homemade meal that rivals any restaurant offering. Perfect for those busy nights when you crave something special without the hassle!

Gluten-Free Goodness: This recipe allows everyone to indulge, whether they are gluten-sensitive or just seeking healthier options. You can relish each bite without guilt!

Irresistible Glaze: The sticky-sweet glaze made from brown sugar, soy sauce, and honey elevates the salmon, creating a delightful flavor profile that is simply addictive.

Crowd-Pleasing Delight: Impress your family or guests with this stunning dish. Pair it with steamed veggies or fluffy white rice, and you have a meal sure to satisfy everyone’s palate!

For more incredible salmon recipes, don’t miss the delicious Baked Salmon Honey or Honey Garlic Salmon options that can equally spice up your dinner!

Texas Roadhouse Salmon Ingredients

For the Salmon

  • Salmon fillets – Choose fillets of the same thickness for consistent cooking.
  • Black pepper – Freshly ground adds warmth and character to the dish.

For the Glaze

  • Brown sugar – This is key for sweetness and delicious caramelization; light or dark works well.
  • Soy sauce – Provides a deep umami flavor; low-sodium is a perfect choice for those watching their sodium intake.
  • Butter – Melting it creates a rich glaze; can be swapped with olive oil for a lighter option.
  • Honey – Adds that sticky sweetness that balances the soy sauce; maple syrup is a good alternative if needed.
  • Garlic powder – Offers a savory kick without moisture, enhancing the glaze flavor.
  • Paprika – Gives the glaze a vibrant color; feel free to omit if not on hand.

For Garnish

  • Fresh parsley – Adds a burst of color and freshness; dried parsley can also be used in a pinch.

Step‑by‑Step Instructions for Texas Roadhouse Salmon

Step 1: Preheat and Prepare
Begin by preheating your oven to 400°F (200°C). While the oven heats, line a baking sheet with parchment paper to prevent sticking. This setup will ensure that your Texas Roadhouse Salmon cooks evenly and releases easily from the pan once baked.

Step 2: Dry and Season the Salmon
Pat the salmon fillets dry using paper towels, which is crucial for achieving a nice sear and preventing moisture from affecting your glaze. Season the fillets lightly with black pepper for a touch of warmth, setting the stage for the flavorful glaze that will follow.

Step 3: Mix the Glaze
In a medium bowl, whisk together the brown sugar, soy sauce, melted butter, and honey until well combined. Incorporate garlic powder and paprika for added depth and visual appeal. The glaze should be a smooth, glossy mixture that beautifully coats the salmon once applied.

Step 4: Apply the Glaze
Brush half of the glaze evenly onto the top of each salmon fillet. Make sure to cover the surfaces well so that the flavors penetrate as it bakes. This initial layer creates a delightful sweetness while the salmon starts to cook.

Step 5: Bake the Salmon
Carefully place the glazed salmon fillets on the prepared baking sheet and put them in the preheated oven. Bake for 8 minutes, during which the salmon will start to caramelize and the glaze will begin to form a shiny finish.

Step 6: Glaze Again and Finish Baking
After 8 minutes, remove the salmon from the oven and apply the remaining glaze over each fillet. Return the baking sheet to the oven and bake for an additional 8–10 minutes. Look for the fillets to flake easily with a fork and reach an internal temperature of 145°F (63°C) for perfect doneness.

Step 7: Rest and Garnish
Once fully cooked, take the salmon out of the oven and let it rest for a couple of minutes. This resting period enhances the flavors and moisture retention. Before serving, garnish your Texas Roadhouse Salmon with freshly chopped parsley for a burst of color and freshness that elevates the dish.

Expert Tips for Texas Roadhouse Salmon

  • Even Thickness: Ensure your salmon fillets are of similar thickness for uniform cooking. This prevents some pieces from overcooking while others remain undercooked.

  • Monitor Baking Time: Keep an eye on the salmon during the last few minutes of baking. If it starts to caramelize quickly, reduce the time to prevent burning the glaze.

  • Resting Period: Allow the salmon to rest for a few minutes after baking. This step ensures the juices redistribute, resulting in a tender, flaky texture for your Texas Roadhouse Salmon.

  • Glaze Consistency: If your glaze seems too runny, let it bake a bit longer after the first application. It thickens up nicely on the salmon, enhancing the sticky-sweet experience.

  • Customize Your Glaze: Feel free to experiment with spices in the glaze. Adding ginger or a bit of chili can create a personal twist on this Texas Roadhouse Salmon recipe.

Storage Tips for Texas Roadhouse Salmon

Fridge: Store leftover Texas Roadhouse Salmon in an airtight container for up to 2-3 days. This helps maintain its freshness and flavor without drying out.

Freezer: For long-term storage, freeze the salmon for up to 2 months. Wrap tightly in plastic wrap and then in aluminum foil or place in a freezer-safe bag to prevent freezer burn.

Reheating: To reheat, thaw the salmon overnight in the fridge, then gently warm it in a skillet over low heat with a splash of water to keep it moist. Alternatively, use the oven at 300°F (150°C) until warmed through.

Avoid Room Temperature: Do not leave salmon at room temperature for more than 2 hours to prevent any food safety issues.

Make Ahead Options

These Texas Roadhouse Salmon fillets are perfect for meal prep enthusiasts! You can prepare the glaze up to 3 days in advance; simply mix together the brown sugar, soy sauce, melted butter, honey, garlic powder, and paprika, then refrigerate in an airtight container. Additionally, you can pat the salmon fillets dry and season them with black pepper up to 24 hours before cooking. When you’re ready to serve, just brush the refrigerated glaze onto the salmon, bake it in a preheated oven, and follow the recipe’s instructions for cooking time. With these make-ahead options, you’ll enjoy a tasty, restaurant-quality dish on busy weeknights with minimal effort!

Texas Roadhouse Salmon Variations

Feel free to tailor this recipe to your family’s tastes and dietary needs—there’s something for everyone!

  • Low-Sodium Option: Use low-sodium soy sauce to control salt levels while retaining that same delicious umami flavor.

  • Dairy-Free Delight: Swap the butter for olive oil, making this dish suitable for dairy-free diets without sacrificing richness.

  • Sweet Heat: Add a dash of sriracha or red pepper flakes to the glaze for a spicy kick that would perfectly complement the sweetness.

  • Citrusy Twist: Incorporate fresh lemon or lime juice into the glaze for a zesty finish that brightens each bite.

  • Herb-Infused: Mix in fresh herbs like dill or cilantro within the glaze to enhance the overall flavor profile. Fresh herbs can truly elevate simple dishes!

  • Veggie Side: Serve with a side of roasted asparagus or broccoli drizzled with lemon; it pairs beautifully with the salmon’s flavor.

  • Other Proteins: Substitute salmon with cod or halibut for variety, or try chicken thighs, adjusting the cooking times as needed. This opens up a whole new world of flavor!

  • Simple Slaw: Pair this dish with a crunchy coleslaw for added texture and freshness—an easy way to incorporate more veggies!

For more delicious salmon ideas, don’t forget to explore the mouthwatering Honey Garlic Salmon and the flavorful Herb Crusted Salmon options that can inspire your dinner routine!

What to Serve with Amazing Texas Roadhouse Salmon?

The perfect meal is just a few side dishes away from creating a symphony of flavors and textures that complement the glazed salmon beautifully.

  • Fluffy White Rice: A fragrant base that soaks up the sauce, ensuring every bite is full and satisfying. It’s the perfect canvas for this delightful salmon.

  • Steamed Broccoli: Bright, tender, and vibrant, it adds a refreshing crunch that balances the sticky glaze of the salmon. A splash of lemon juice can enhance its deep green color and flavor.

  • Garlic Mashed Potatoes: Creamy and buttery, these mashed potatoes provide a cozy and comforting element to your meal. The smooth texture pairs perfectly with the flaky salmon.

  • Roasted Asparagus: The slightly charred flavor from roasting pairs wonderfully with the sweet notes of the glaze, creating a delightful contrast. Just drizzle with olive oil and season before roasting.

  • Coleslaw: A crunchy, tangy coleslaw gives a refreshing aspect to the meal that cuts through the richness of the salmon. The crispness adds texture and the dressing ties all elements together beautifully.

  • Chardonnay: A chilled glass of this white wine beautifully complements the sweetness of the glaze, enhancing each bite while offering a crisp, refreshing finish.

  • Fresh Berries: For dessert, a simple bowl of mixed fresh berries makes a light, refreshing end to the meal. Their natural sweetness echoes the salmon’s glaze, making it a harmonious finale.

Texas Roadhouse Salmon Recipe FAQs

What type of salmon should I use?
For the best results, opt for fresh salmon fillets that are of similar thickness. This ensures even cooking and that each piece achieves that flaky perfection. If fresh salmon isn’t available, don’t hesitate to use frozen fillets, but make sure to thaw them completely in the refrigerator before cooking.

How long can I store leftover Texas Roadhouse Salmon?
Leftover salmon can be stored in an airtight container in the fridge for up to 2-3 days. To enjoy it at its best, reheat gently in a skillet with a splash of water to keep it moist or in the oven at a low temperature (300°F/150°C).

Can I freeze Texas Roadhouse Salmon?
Absolutely! You can freeze salmon for up to 2 months. Wrap each piece tightly in plastic wrap, then in aluminum foil, or store in a freezer-safe bag. This prevents freezer burn and helps retain the flavor and texture for your next meal.

What should I do if my glaze is too runny?
If you find that your glaze is thinner than expected, return the salmon to the oven for an extra minute or two. The heat will help the glaze thicken and give that lovely sticky finish you desire. Just keep an eye on it to prevent burning!

Is this recipe suitable for gluten-sensitive individuals?
Yes! This Texas Roadhouse Salmon recipe is gluten-free when using a gluten-free soy sauce. Just make sure to check labels when purchasing soy sauce to ensure it meets your dietary needs, and you can enjoy this delicious dish without worry!

How can I ensure my salmon is cooked perfectly?
To achieve perfectly cooked salmon, bake until it flakes easily with a fork and reaches an internal temperature of 145°F (63°C). Using a meat thermometer is a great way to take the guesswork out of cooking fish!

Texas Roadhouse Salmon

Irresistible Texas Roadhouse Salmon You Can Make in 30 Minutes

This Texas Roadhouse Salmon recipe offers a sticky-sweet glaze and quick preparation for a delicious dinner.
Prep Time 10 minutes
Cook Time 20 minutes
Resting Time 2 minutes
Total Time 30 minutes
Servings: 4 fillets
Course: Dinner
Cuisine: American
Calories: 350

Ingredients
  

For the Salmon
  • 4 fillets Salmon Choose fillets of the same thickness for consistent cooking.
  • to taste Black pepper Freshly ground adds warmth and character.
For the Glaze
  • 1/2 cup Brown sugar Light or dark works well.
  • 1/4 cup Soy sauce Low-sodium is a perfect choice.
  • 1/4 cup Butter Can be swapped with olive oil.
  • 1/4 cup Honey Maple syrup is a good alternative.
  • 1 teaspoon Garlic powder Enhances the glaze flavor.
  • 1 teaspoon Paprika Feel free to omit if not on hand.
For Garnish
  • 2 tablespoons Fresh parsley Adds a burst of color and freshness.

Equipment

  • Oven
  • Baking Sheet
  • Parchment Paper
  • medium bowl
  • whisk
  • Brush

Method
 

Step-by-Step Instructions
  1. Preheat your oven to 400°F (200°C) and line a baking sheet with parchment paper.
  2. Pat the salmon fillets dry with paper towels and season lightly with black pepper.
  3. In a medium bowl, whisk together brown sugar, soy sauce, melted butter, and honey. Incorporate garlic powder and paprika.
  4. Brush half of the glaze over each salmon fillet.
  5. Place the glazed salmon on the baking sheet and bake for 8 minutes.
  6. After 8 minutes, remove from the oven and apply the remaining glaze, then bake for another 8-10 minutes.
  7. Let the salmon rest for a couple of minutes and garnish with freshly chopped parsley.

Nutrition

Serving: 1filletCalories: 350kcalCarbohydrates: 24gProtein: 30gFat: 15gSaturated Fat: 7gPolyunsaturated Fat: 2gMonounsaturated Fat: 6gCholesterol: 70mgSodium: 400mgPotassium: 800mgSugar: 15gVitamin A: 500IUVitamin C: 2mgCalcium: 20mgIron: 1mg

Notes

Ensure salmon fillets are of similar thickness for uniform cooking. Keep an eye on the baking time to avoid burning the glaze.

Tried this recipe?

Let us know how it was!

Savor Every Bite: Juicy Carne Asada Tacos Recipe

As I sizzle juicy flank steak on the grill, the air fills with the enticing aroma of spices melded with smoky char. These Carne Asada Tacos, a symphony of flavor, will transport you straight to a sun-soaked fiesta. Not only are they a breeze to prepare, making them perfect for both bustling weeknights and lively gatherings, but they’re also customizable with fresh toppings that let your creativity shine. Imagine warming soft tortillas cradling tender steak, creamy avocado, and a sprinkle of fresh herbs, each bite bursting with authentic Mexican goodness. This recipe is your ticket to elevating Taco Tuesday into a culinary celebration. Curious to learn how to whip up these delightful tacos? Let’s dive in!

Why Are These Carne Asada Tacos a Must-Try?

Bold Flavors: Juicy, marinated flank steak shines through in this recipe, offering a hearty flavor that’s hard to resist.
Fresh Ingredients: Every bite bursts with freshness from creamy avocado, zesty lime, and vibrant cilantro, giving you a taste of authentic Mexican cuisine.
Customizable Delight: There’s endless potential for creativity—add pico de gallo, radishes, or a drizzle of lime crema for unique twists!
Quick and Easy: This recipe is designed for busy home cooks, with minimal prep and quick cooking, making Taco Tuesday or gatherings a breeze.
Crowd-Pleasing: Impress friends and family with these mouthwatering tacos. They’re perfect for casual dinners or lively celebrations, just like the Birria Tacos Culinary experience!

Carne Asada Tacos Ingredients

• Ready to create these mouthwatering carne asada tacos? Here’s what you’ll need!

For the Tacos

  • Carne Asada – This tender, marinated flank steak is the star of the dish. Substitute with skirt steak or filet mignon for different textures.
  • Tortillas – The base for your tacos; opt for warm corn or soft flour tortillas based on your preference.

For the Toppings

  • Avocados – Adds a creamy texture and rich flavor; ready-made guacamole is a great shortcut if you’re short on time.
  • Cotija Cheese – Sprinkle this crumbly cheese for a salty finish; feel free to swap for queso fresco or omit for a dairy-free option.
  • Onion – Finely diced for a crisp and zesty crunch; any color works, so choose your favorite—red, white, or yellow!
  • Fresh Cilantro – Brightens the dish with its fresh flavor; if you’re not a fan, parsley is a perfect substitute.
  • Limes – Squeeze fresh lime juice over your tacos to enhance their flavor; it’s the perfect finishing touch!

Now that you have all the ingredients ready, let’s get cooking these delicious carne asada tacos!

Step‑by‑Step Instructions for Carne Asada Tacos

Step 1: Grill the Carne Asada
Preheat your grill to medium-high heat, around 450°F (232°C). Season the flank steak with spices of your choice and place it on the grill. Cook for about 5-7 minutes per side, aiming for a medium-rare doneness (internal temperature of 130-135°F). Look for a nice char and grill marks before removing it from the heat to rest for 5 minutes.

Step 2: Slice the Steak
Once the carne asada has rested, place it on a cutting board. Carefully slice the steak against the grain into thin strips to ensure tenderness. After slicing, chop the strips into bite-sized pieces. Allow these savory pieces to soak in their juices as you prepare the tortillas and toppings for your carne asada tacos.

Step 3: Warm the Tortillas
While the steak is resting, heat a skillet or griddle over medium heat. Place the corn or flour tortillas in the skillet for about 30 seconds on each side, just until they’re warm and slightly pliable. A quick toast will enhance their flavor and make your carne asada tacos even more enjoyable.

Step 4: Prepare the Toppings
In a separate bowl, mash your avocados with a fork until smooth, adding a pinch of salt and lime juice for extra flavor. Finely dice the onion and chop the fresh cilantro. Set the cotija cheese within reach so you can easily sprinkle these delicious toppings onto your carne asada tacos.

Step 5: Assemble Tacos
Take a warm tortilla and spread a generous layer of mashed avocado on one side. Next, add a hearty portion of the chopped carne asada on top of the avocado. Sprinkle with crumbled cotija cheese, diced onion, and chopped cilantro, making sure each taco is vibrant and flavorful.

Step 6: Garnish and Serve
Before serving, generously squeeze fresh lime juice over the assembled carne asada tacos. This bright adds a zesty kick, enhancing the flavor profile of your tacos. Serve immediately while still warm, and enjoy the delightful combination of flavors in every bite!

How to Store and Freeze Carne Asada Tacos

Fridge: Store leftover carne asada tacos in an airtight container in the fridge for up to 3 days. Keep components separated to maintain freshness.

Freezer: If you want to freeze, wrap each assembled taco tightly in plastic wrap, then place in a freezer-safe bag. They can be kept in the freezer for up to 2 months.

Reheating: To reheat, thaw in the refrigerator overnight. Warm in a skillet over medium heat for about 2-3 minutes, or until heated through. Enjoy flavorful carne asada tacos any time!

Room Temperature: Avoid leaving tacos at room temperature for more than 2 hours to ensure safety and maintain the best taste.

Make Ahead Options

These Carne Asada Tacos are a fantastic meal prep option that saves you time during busy weeknights! You can marinate the flank steak up to 24 hours in advance, allowing the flavors to deepen. Additionally, slice the cooked carne asada and store it in an airtight container in the refrigerator for up to 3 days. Prepare the toppings—like mashed avocado and diced onions—just before serving to maintain the freshness (avocado can be stored with a bit of lime juice to prevent browning). When it’s time to enjoy, simply warm your tortillas, assemble the tacos, and add your favorite toppings for a delicious meal that’s just as mouthwatering as if it were prepared fresh!

What to Serve with Flavorful Carne Asada Tacos

Looking to elevate your carne asada taco experience into a full culinary celebration?

  • Crispy Tortilla Chips: Perfect for scooping up salsa or guacamole, adding a satisfying crunch to your meal.
  • Zesty Mango Salsa: Sweet and tangy, this refreshing salsa beautifully balances the savory flavors of the tacos.
  • Mexican Street Corn (Elote): Grilled corn slathered in mayo, cotija cheese, and chili powder brings vibrant flavors to your table.
  • Fresh Guacamole: Creamy and rich, guacamole is a classic dip that makes every bite of taco even more delicious.
  • Spicy Black Beans: Hearty and flavorful, these beans offer a savory contrast and are sure to satisfy your appetite.
  • Cucumber Salad: Refreshing and light, this crunchy salad adds a cool element to offset the spice in your tacos.

Pairing a pitcher of classic margaritas creates a perfect match for the lively flavors, enhancing the entire dining experience.

Carne Asada Tacos – Endless Variations

Feel free to jazz up your carne asada tacos and tailor them to your taste preferences for an exciting twist!

  • Dairy-Free: Omit the cotija cheese and mash in fresh guacamole for a creamy texture without dairy.
  • Spicy Kick: Add sliced jalapeños or a drizzle of your favorite hot sauce to elevate the heat levels and tantalize your taste buds.
  • Grilled Veggies: Toss some grilled peppers and onions into your taco mix for added sweetness and crunch; they complement the carne asada beautifully.
  • Zesty Garnish: Top your tacos with zesty lime crema or tangy yogurt sauce for a cooling contrast against the robust flavors.
  • Savory Salsa: Swap fresh cilantro for a homemade salsa verde or mango salsa, adding vibrant flavors that burst in every bite.
  • Flavor Blend: Use a mix of cheeses like pepper jack and cotija to create a delightful, cheesy taco experience; the melty goodness adds warmth.
  • Crunch Factor: Throw in crispy tortilla strips or thinly sliced radishes for a fun crunch that complements the soft tortillas.
  • Fusion Touch: For an adventurous twist, try using kimchi as a topping, combining Korean and Mexican flavors for a delightful fusion!

Ready for more delicious options? Check out our Birria Tacos Culinary adventure to explore yet another wonderful taco recipe. Enjoy crafting your perfect carne asada tacos!

Expert Tips for Carne Asada Tacos

  • Slice Against the Grain: Always slice the steak against the grain to ensure tender, melt-in-your-mouth pieces in your carne asada tacos.

  • Let It Rest: Don’t skip resting the steak for 5 minutes post-grilling; it helps to retain those flavorful juices, making your tacos deliciously juicy.

  • Marinate for Flavor: For an extra flavor boost, consider marinating your carne asada with citrus juices and spices for at least 2 hours prior to grilling.

  • Warm Tortillas: Ensure your tortillas are warm and pliable by briefly toasting them on a skillet—this enhances their flavor and prevents tearing.

  • Customize Toppings: Feel free to experiment with toppings! Add pico de gallo, radishes, or a drizzle of lime crema for a refreshing twist on your carne asada tacos.

  • Don’t Overcook: Aim for medium-rare doneness; overcooking can lead to tough meat. Use a meat thermometer for perfect results!

Carne Asada Tacos Recipe FAQs

How do I select the best carne asada?
Absolutely! When you’re choosing your flank steak for carne asada, look for well-marbled cuts with a bright red color and minimal dark spots. This helps ensure tenderness and flavor. Ask your butcher for advice if you’re unsure; they can often recommend the freshest cuts available.

How should I store leftover carne asada tacos?
To keep your leftover carne asada tacos fresh, store them in an airtight container in the fridge for up to 3 days. I recommend keeping the components—tortillas, meat, and toppings—separate until you’re ready to eat, as this helps maintain their texture and flavor. Reheat the meat in a skillet for the best results!

Can I freeze carne asada tacos?
Yes, you can freeze carne asada tacos! Wrap each assembled taco tightly in plastic wrap and then place them in a freezer-safe bag. They can be stored in the freezer for up to 2 months. When you’re ready to enjoy them, thaw the tacos overnight in the refrigerator, then warm them in a skillet over medium heat for about 2-3 minutes until heated through.

What if my steak is tough after grilling?
Very! If your carne asada turns out tough, it might be due to slicing against the grain. Always remember to slice the steak parallel to the grain for tenderness. Additionally, consider marinating the steak beforehand to tenderize it; citrus juices in marinades help break down proteins and add delicious flavor.

Are carne asada tacos safe for my pets?
While it’s tempting to share, it’s best to limit your pets’ intake of carne asada tacos. The seasonings used (like onions and certain spices) can be harmful to pets. However, if you want to treat them, a small, plain piece of grilled flank steak is safe—just be sure to leave out any spices and toppings!

What kind of tortillas should I use for carne asada tacos?
You have options! For a traditional flavor, opt for corn tortillas; they’re naturally gluten-free and hold up well to the juicy fillings. If you prefer a softer texture, go for flour tortillas. Warm them up on a skillet for the best taste experience—just 30 seconds on each side should do the trick!

Carne Asada Tacos

Savor Every Bite: Juicy Carne Asada Tacos Recipe

Indulge in these flavorful Carne Asada Tacos made with tender marinated steak, perfect for any occasion.
Prep Time 15 minutes
Cook Time 15 minutes
Resting Time 5 minutes
Total Time 35 minutes
Servings: 4 tacos
Course: Lunch
Cuisine: Mexican
Calories: 300

Ingredients
  

For the Tacos
  • 1 lb Carne Asada Or substitute with skirt steak or filet mignon
  • 8 pieces Tortillas Warm corn or soft flour tortillas
For the Toppings
  • 2 medium Avocados Or use ready-made guacamole
  • 1 cup Cotija Cheese Substitute with queso fresco or omit for dairy-free
  • 1 medium Onion Any color works—red, white, or yellow
  • 1 cup Fresh Cilantro Parsley can be used as a substitute
  • 2 whole Limes For squeezing fresh juice

Equipment

  • Grill
  • Skillet
  • Cutting board

Method
 

Step-by-Step Instructions for Carne Asada Tacos
  1. Preheat your grill to medium-high heat, around 450°F (232°C). Season the flank steak with spices of your choice and place it on the grill. Cook for about 5-7 minutes per side, aiming for medium-rare doneness. Remove from heat and let it rest for 5 minutes.
  2. Once the carne asada has rested, slice the steak against the grain into thin strips, then chop into bite-sized pieces.
  3. While the steak is resting, heat a skillet or griddle. Place the tortillas in for about 30 seconds on each side until warm and pliable.
  4. Mash your avocados in a bowl with salt and lime juice. Finely dice the onion and chop the fresh cilantro.
  5. Take a warm tortilla, spread a layer of mashed avocado, add chopped carne asada, and sprinkle with cotija cheese, onion, and cilantro.
  6. Squeeze fresh lime juice over the tacos before serving and enjoy!

Nutrition

Serving: 1tacoCalories: 300kcalCarbohydrates: 30gProtein: 15gFat: 15gSaturated Fat: 5gPolyunsaturated Fat: 2gMonounsaturated Fat: 5gCholesterol: 40mgSodium: 450mgPotassium: 300mgFiber: 5gSugar: 1gVitamin A: 200IUVitamin C: 10mgCalcium: 150mgIron: 2mg

Notes

Slice against the grain for tender pieces and don't skip resting the steak to retain juices.

Tried this recipe?

Let us know how it was!

Crispy Air Fried Chicken Thighs That Everyone Will Love

The first bite of crispy chicken, with its juicy interior and tantalizing spices, instantly transports me back to sun-drenched backyard barbecues. Today, I’m sharing my go-to recipe for Air Fried Chicken Thighs, a dish that has become a staple in my home for busy weeknights. This recipe shines with its convenience, as it requires minimal prep time while delivering unbeatable flavor—perfect for family dinners or meal prepping! Plus, it’s a healthier twist on fried chicken with all the crunch and none of the guilt. Who wouldn’t want a dish that satisfies cravings while keeping the kitchen light and airy? Are you ready to make some delicious magic happen with those chicken thighs?

Why Are Air Fried Chicken Thighs So Irresistible?

Juicy Perfection: The combination of crispy skin and tender meat makes each bite a delight. Healthy Alternative: This air fryer method reduces oil usage, giving you all the flavors of fried chicken without the guilt. Versatile Variations: You can switch up the spices or use boneless thighs for faster cooking, perfect for hectic weeknights! Meal Prep Friendly: Make a big batch and enjoy them throughout the week, paired with sides like garlicky rice or a vibrant summer corn salad. Crowd-Pleaser: Whether it’s a cozy family dinner or a gathering with friends, this dish will win hearts and satisfy appetites effortlessly.

Air Fried Chicken Thighs Ingredients

For the Chicken
Chicken Thighs – Use bone-in, skin-on for juicy flavor; boneless thighs cook quicker and are great for weeknights.

For the Seasoning Oil
Olive Oil – Adds moisture and helps spices stick; avocado oil is a suitable replacement for a different flavor profile.
Lemon Juice – Brightens the flavors with acidity; white vinegar can be a great substitute if needed.
Smoked Paprika – Adds depth and a smoky essence; feel free to use regular paprika for a milder taste.
Garlic Powder – Provides a savory kick; substitute with fresh minced garlic for an extra layer of flavor if you prefer.
Dried Oregano – Offers earthy herbal notes; thyme or Italian seasoning can work well if you’re out.
Red Pepper Flakes – Introduces a slight heat; reduce for milder taste or substitute with cayenne for a bolder kick.
Celery Salt – Enhances the overall flavor; regular salt mixed with a dash of celery seeds can be an effective alternative.
Salt & Pepper – Essential for seasoning; adjust according to your taste to make the dish truly yours.

Step‑by‑Step Instructions for Easy Air Fried Chicken Thighs

Step 1: Prepare the Seasoning Oil
In a small bowl, mix together olive oil, lemon juice, smoked paprika, garlic powder, dried oregano, red pepper flakes, celery salt, salt, and pepper until well combined. This flavorful seasoning oil will ensure every bite of your air fried chicken thighs is packed with savory goodness. The vibrant colors and aroma signal that you’re on the right track!

Step 2: Coat the Chicken Thighs
Pat the chicken thighs dry with paper towels to ensure a crispy finish. Then, generously coat them with the seasoning oil, making sure to cover every inch for maximum flavor infusion. The combination of spices on the chicken should create a beautiful, glistening sheen, enticing your senses as you prepare to cook them.

Step 3: Arrange in the Air Fryer
Place the seasoned chicken thighs skin-side up in the air fryer basket, ensuring they’re not overcrowded for even cooking. This spacing allows the hot air to circulate around each thigh, which is crucial for achieving that crispy exterior. The skin should look inviting and ready to crisp up as you close the fryer.

Step 4: Air Fry the Chicken
Set the air fryer to cook at 380°F (190°C) for 20-25 minutes. You’ll know your air fried chicken thighs are ready when they’re golden brown and reach an internal temperature of 165°F (75°C). Keep an eye on the thighs as they cook; the sizzling sounds and beautiful color will guide you to perfection.

Step 5: Rest Before Serving
Once cooked, remove the chicken thighs from the air fryer and let them rest for a few minutes on a plate. This resting period will lock in the juices, ensuring each bite remains juicy and flavorful. As you wait, the enticing aroma fills your kitchen, promising a delightful meal ahead.

Step 6: Enjoy Your Meal
Now that your easy air fried chicken thighs are resting, it’s time to serve! Pair these delicious thighs with a bright summer corn salad or garlicky rice for an unforgettable dinner experience. Each crispy bite will remind you of summer barbecues, bringing warmth and satisfaction to your table.

Make Ahead Options

These Air Fried Chicken Thighs are perfect for meal prep enthusiasts! You can season the chicken thighs and marinate them in the flavorful seasoning oil up to 24 hours in advance, allowing the spices to penetrate the meat and enhance the taste. Simply place the coated chicken in an airtight container and refrigerate until you’re ready to cook. Additionally, if you have leftovers, they can be stored in the fridge for up to 3 days. To reheat, pop them back in the air fryer for a few minutes to regain their crispiness before serving. This way, you’ll enjoy just as delicious results with minimal effort on busy weeknights!

Storage Tips for Air Fried Chicken Thighs

Fridge: Store leftover air fried chicken thighs in an airtight container for up to 3 days. This keeps them fresh and prevents any moisture loss.

Freezer: If you want to keep them longer, wrap chicken thighs tightly in plastic wrap or aluminum foil, then place in a freezer-safe container. They can be frozen for up to 2 months.

Reheating: To reheat, use the air fryer or microwave. In the air fryer, reheat at 350°F (175°C) for about 5-7 minutes until warmed through, ensuring the skin stays crispy.

Make-Ahead: Prepare the chicken thighs in advance and marinate in the seasoning oil for up to 24 hours in the fridge before cooking for maximum flavor infusion.

Expert Tips for Air Fried Chicken Thighs

Marinate for Flavor: Allow the chicken to marinate in the seasoning oil for up to 24 hours. This enhances flavor and ensures juicy, tasty air fried chicken thighs.

Check Doneness: Use a meat thermometer to ensure the internal temperature reaches 165°F (75°C). This ensures perfectly cooked meat without any risk.

Avoid Overcrowding: Make sure there’s space between chicken thighs in the air fryer. Overcrowding can lead to uneven cooking and less crispy skin.

Use a Quick Dry: Pat the chicken thighs dry before seasoning to achieve that golden, crispy exterior. Moisture can cause steaming rather than frying.

Experiment with Spices: Feel free to switch up the herbs and spices used in the seasoning oil. This keeps your meal interesting and personalizes the flavor of your air fried chicken thighs.

Air Fried Chicken Thighs Variations & Substitutions

Feel free to get creative and make this recipe your own, adding twists that cater to your taste buds!

  • Boneless Swap: Use boneless chicken thighs for quicker cooking; adjust the time to 15-20 minutes for perfectly cooked meat.

  • Spice It Up: Try Cajun seasoning for a fiery twist. The bold flavors will transport you to the heart of Louisiana with every bite!

  • Herb Alternative: Replace dried oregano with fresh herbs like rosemary or thyme for a fragrant flavor explosion that screams freshness.

  • Zesty Kick: Add a splash of hot sauce in your seasoning oil for an added layer of flavor. It brings the heat without overpowering the original taste!

  • Oil Options: Switch olive oil for coconut oil for a subtly sweet essence. It pairs wonderfully with the savory spices for a delightful twist.

  • Crispier Skin: For an extra crispy finish, spray the thighs lightly with cooking oil after seasoning. This will enhance the texture and golden-brown color.

  • Flavorful Marinade: Let the chicken thighs sit in the seasoning oil for a few hours or overnight. The result? An explosion of flavor that tantalizes the taste buds!

  • Explore Sauces: Serve with homemade sauces like barbecue or teriyaki for an added touch. Try pairing with Tuscan Chicken Soup for a comforting combo perfect for cool evenings.

What to Serve with Easy Air Fried Chicken Thighs

Pairing the perfect sides with your main dish elevates your meal to a whole new level of deliciousness.

  • Creamy Mashed Potatoes: These fluffy potatoes provide a rich, buttery contrast to the crispy chicken, creating a delightful textural harmony on your plate.

  • Garlicky Rice: Light and fragrant, this rice complements the bold flavors of the chicken, making each bite a soothing experience.

  • Summer Corn Salad: Fresh, sweet corn mixed with vibrant veggies offers a refreshing crunch that brightens up every bite of your air-fried chicken.

  • Sautéed Seasonal Vegetables: A medley of colorful veggies adds a nutritious and vibrant touch, enhancing both flavor and texture for a well-rounded plate.

  • Crispy Potato Wedges: Golden and crunchy potato wedges mirror the chicken’s crispy exterior, making for a satisfyingly hearty meal.

  • Tangy Coleslaw: The crisp, zesty slaw adds a tangy element that breaks through the richness of the chicken thighs, making each bite pop with flavor!

  • Herb-Infused Quinoa: A light and nutty side, quinoa brings a healthy aspect to the meal, perfectly balancing the chicken’s richness and adding delightful textural interest.

  • Chilled White Wine: A glass of chilled Sauvignon Blanc or Chardonnay can elevate your meal, offering refreshing notes that cut through the savory flavors beautifully.

Air Fried Chicken Thighs Recipe FAQs

What type of chicken thighs should I use for air frying?
You can use bone-in, skin-on chicken thighs for the juiciest flavor and texture. However, boneless thighs are also an excellent option if you’re looking for a quicker cook time. Just be sure to adjust your cooking time because boneless thighs will cook faster!

How can I store leftover air fried chicken thighs?
Store leftover air fried chicken thighs in an airtight container in the refrigerator for up to 3 days. Make sure the container is sealed well to keep the chicken moist. If you’re looking to store them longer, you can freeze them!

Can I freeze air fried chicken thighs?
Absolutely! To freeze, wrap each chicken thigh tightly in plastic wrap or aluminum foil, then place them in a freezer-safe container. They can last in the freezer for up to 2 months. When you’re ready to enjoy them, just thaw in the fridge overnight before reheating.

What should I do if my chicken thighs don’t turn out crispy?
If your chicken thighs come out less crispy, there are a couple of things to check. First, ensure you pat the thighs dry before applying the seasoning oil; moisture is your enemy here. Additionally, avoid overcrowding the air fryer basket—this can trap steam and lead to soggy chicken. If necessary, try cooking them in batches!

Are there any dietary considerations with this recipe?
This recipe is naturally gluten-free, making it suitable for various diets. However, if you have allergies, particularly to any spices like red pepper flakes, you could easily omit them or substitute them with milder options. Always check ingredient labels to avoid hidden allergens!

Can I prepare the chicken thighs in advance?
Yes, you can prep the chicken thighs ahead of time! Marinate them in the seasoning oil for up to 24 hours in the fridge for maximum flavor. This will not only enhance the taste but also save you time on busy weeknights. Just be sure to cook them straight from the refrigerator for the best results!

Air Fried Chicken Thighs

Crispy Air Fried Chicken Thighs That Everyone Will Love

Enjoy these air fried chicken thighs with crispy skin and juicy interior, perfect for family dinners or meal prepping.
Prep Time 10 minutes
Cook Time 25 minutes
Resting Time 5 minutes
Total Time 40 minutes
Servings: 4 thighs
Course: Dinner
Cuisine: American
Calories: 300

Ingredients
  

For the Chicken
  • 4 pieces Chicken Thighs bone-in, skin-on for juicy flavor
For the Seasoning Oil
  • 2 tablespoons Olive Oil or avocado oil for different flavor
  • 1 tablespoon Lemon Juice or white vinegar as a substitute
  • 1 teaspoon Smoked Paprika or regular paprika for milder taste
  • 1 teaspoon Garlic Powder or fresh minced garlic for extra flavor
  • 1 teaspoon Dried Oregano or thyme/Italian seasoning as substitutes
  • 1 teaspoon Red Pepper Flakes reduce for milder taste or substitute with cayenne
  • 1 teaspoon Celery Salt or regular salt with celery seeds
  • to taste Salt essential for seasoning
  • to taste Pepper essential for seasoning

Equipment

  • Air Fryer

Method
 

Step-by-Step Instructions for Easy Air Fried Chicken Thighs
  1. Prepare the Seasoning Oil: In a small bowl, mix together olive oil, lemon juice, smoked paprika, garlic powder, dried oregano, red pepper flakes, celery salt, salt, and pepper until well combined.
  2. Coat the Chicken Thighs: Pat the chicken thighs dry with paper towels and generously coat them with the seasoning oil.
  3. Arrange in the Air Fryer: Place the seasoned chicken thighs skin-side up in the air fryer basket without overcrowding.
  4. Air Fry the Chicken: Set the air fryer to cook at 380°F (190°C) for 20-25 minutes until golden brown with an internal temperature of 165°F (75°C).
  5. Rest Before Serving: Once cooked, remove the chicken thighs from the air fryer and let them rest for a few minutes.
  6. Enjoy Your Meal: Serve the air fried chicken thighs with sides like summer corn salad or garlicky rice.

Nutrition

Serving: 1thighCalories: 300kcalCarbohydrates: 2gProtein: 25gFat: 22gSaturated Fat: 6gPolyunsaturated Fat: 2gMonounsaturated Fat: 12gCholesterol: 100mgSodium: 600mgPotassium: 350mgVitamin A: 300IUVitamin C: 2mgCalcium: 20mgIron: 1mg

Notes

Marinate chicken in seasoning oil for up to 24 hours for enhanced flavor. Ensure chicken reaches an internal temperature of 165°F (75°C).

Tried this recipe?

Let us know how it was!