Moist Contessa Cranberry Orange Bread for Holiday Bliss

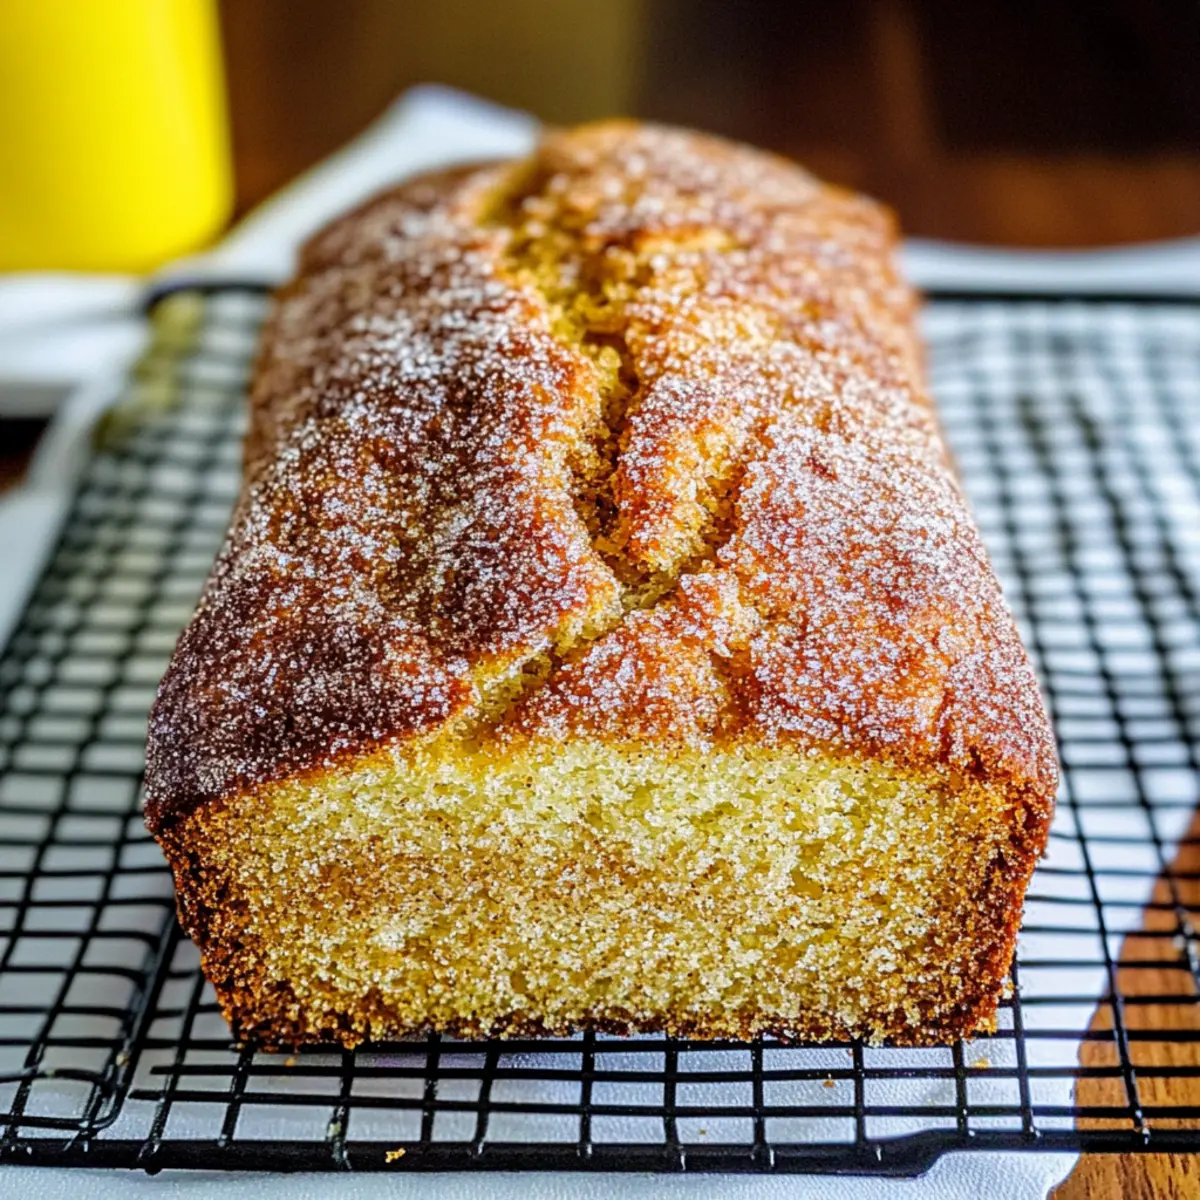
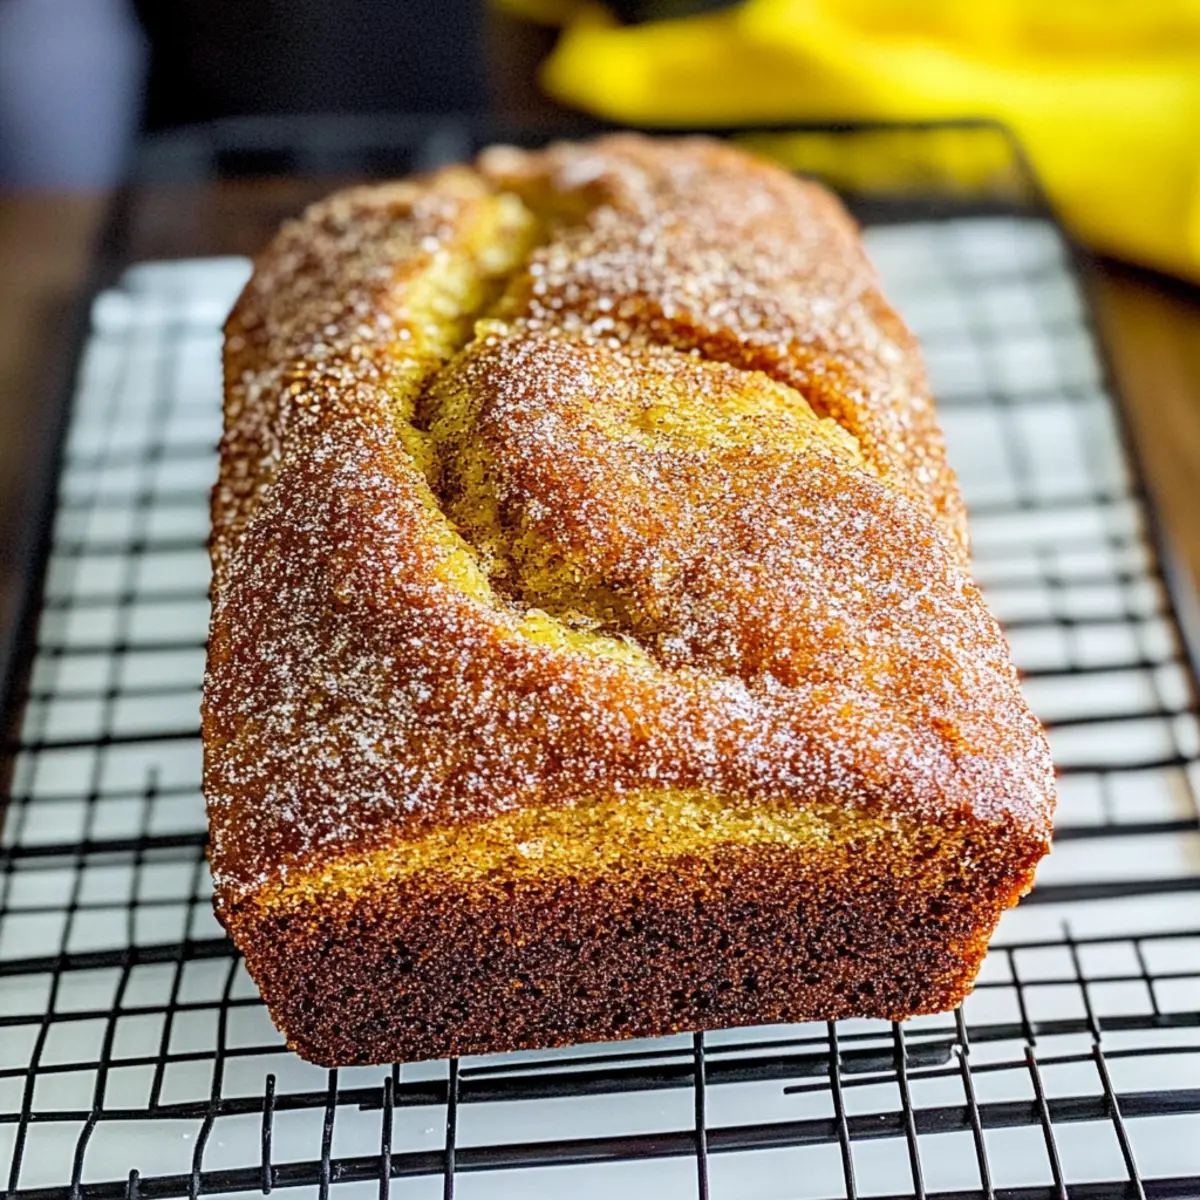
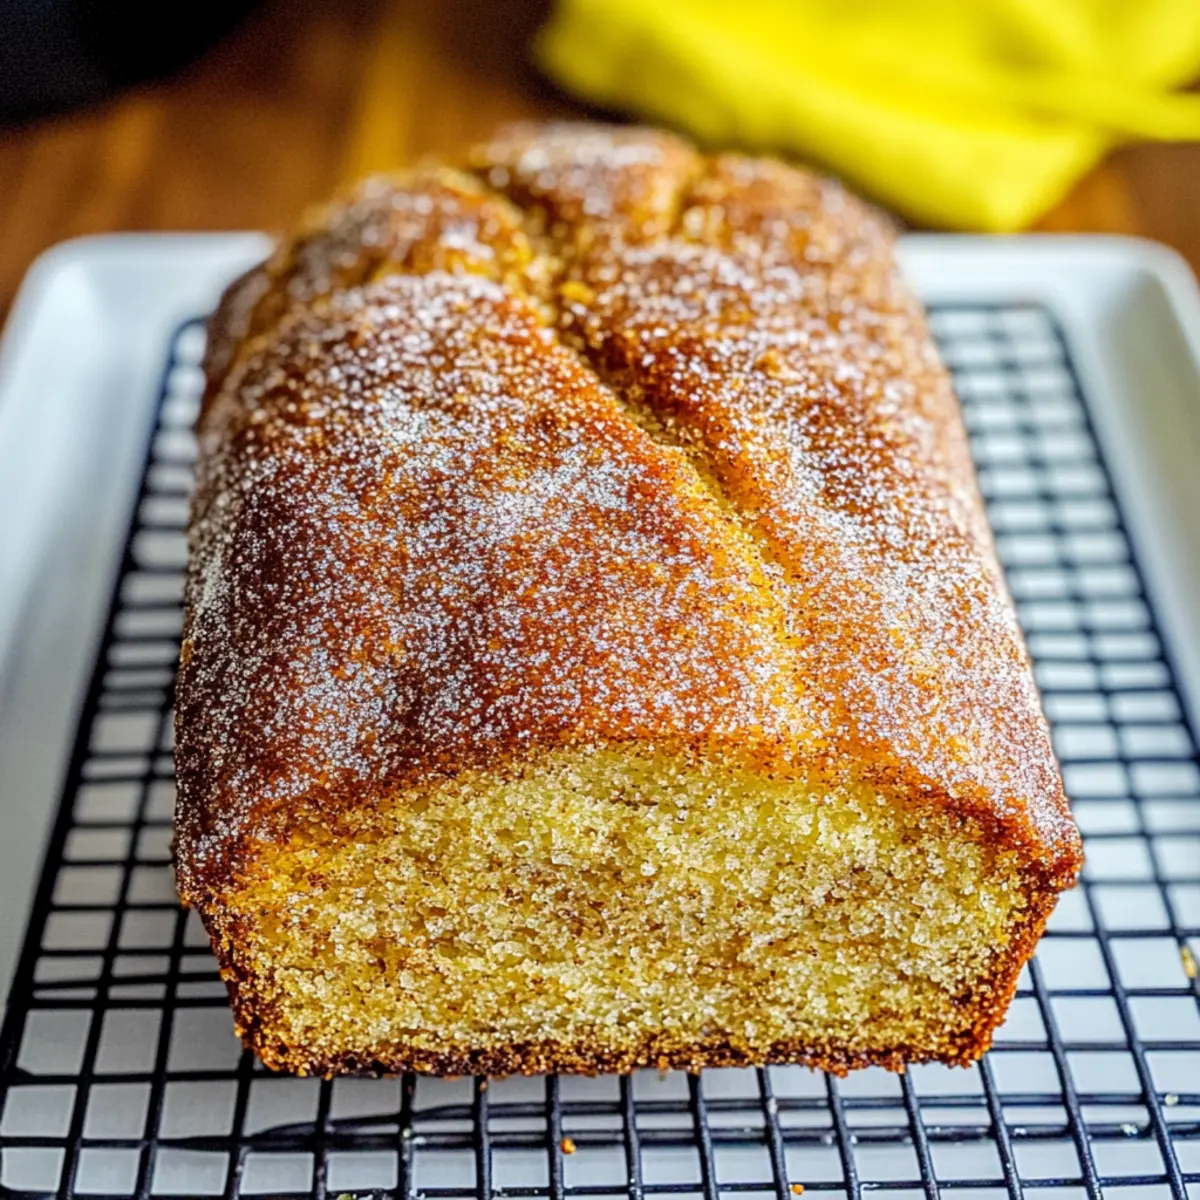
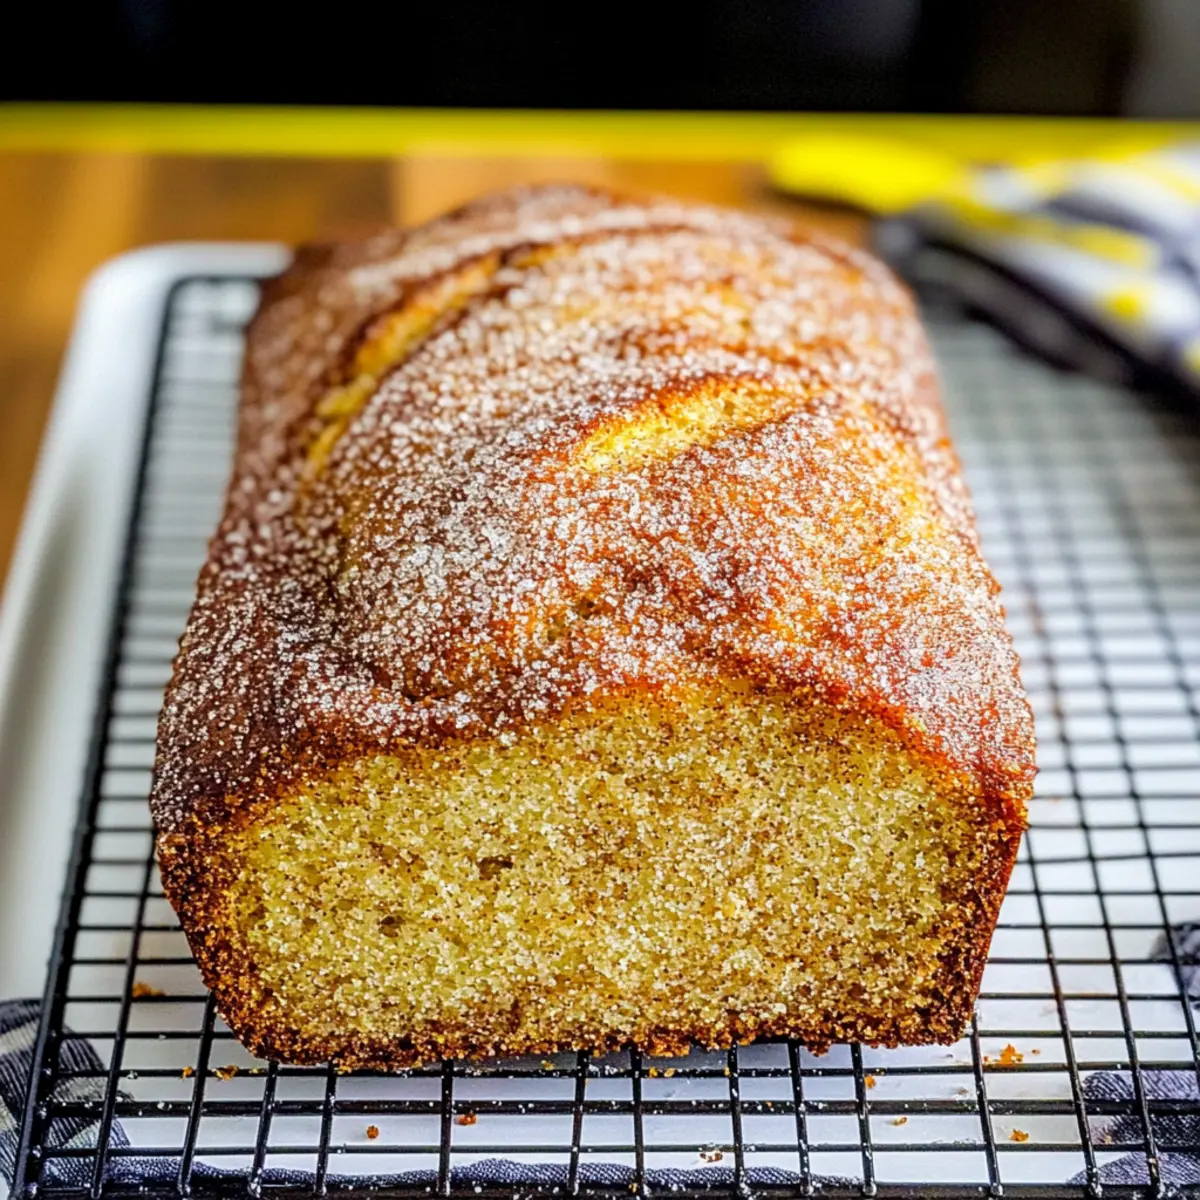
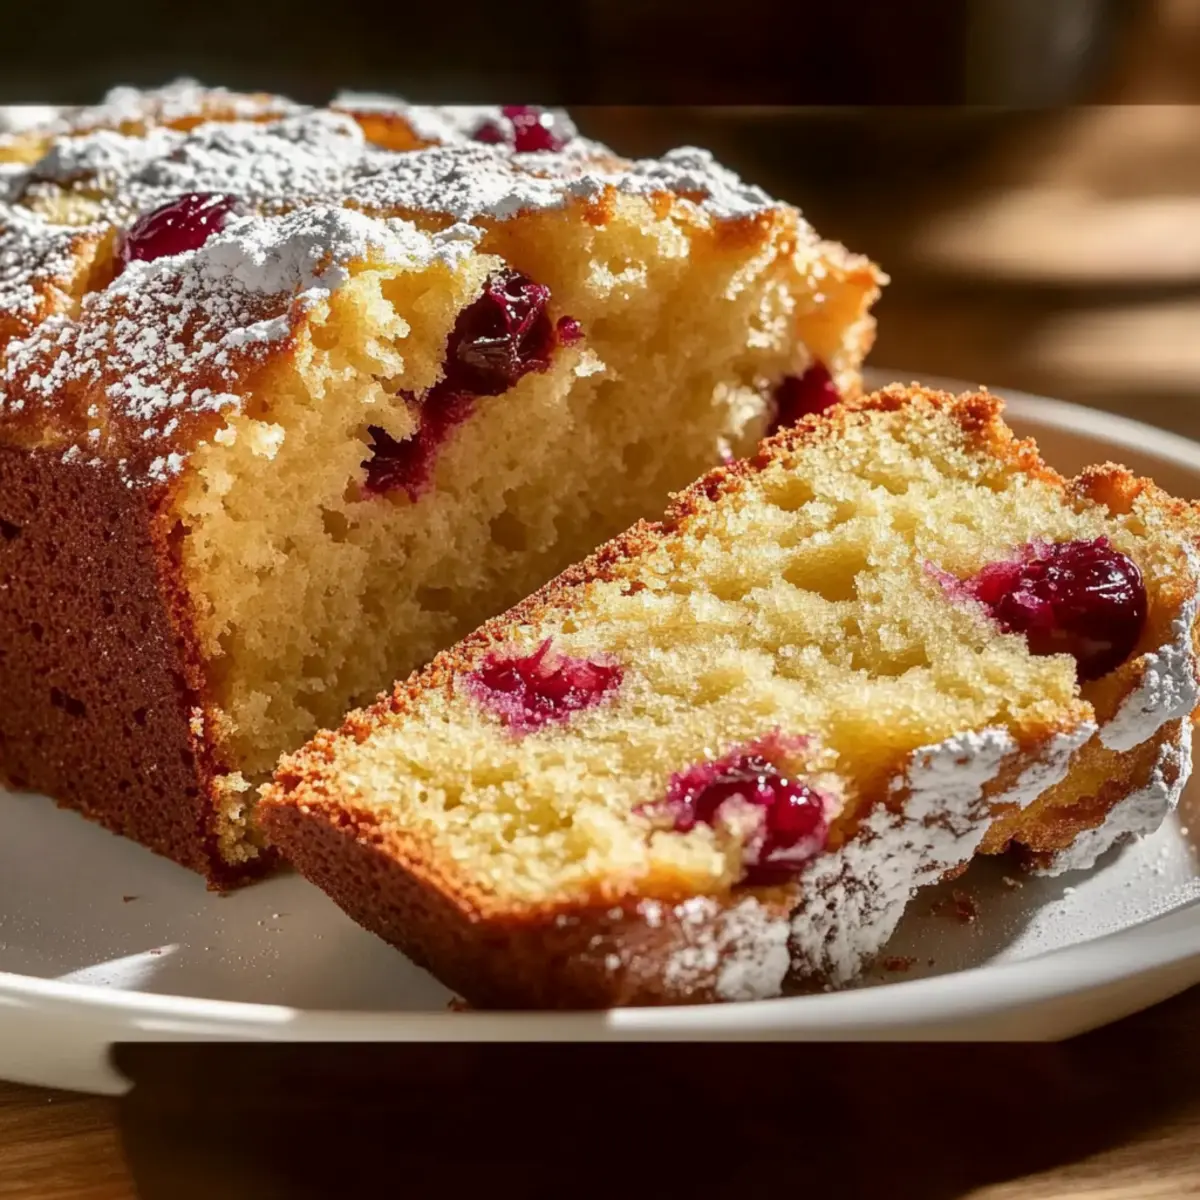
There’s something undeniably comforting about the aroma of freshly baked goods wafting through the house, and this Moist Cranberry Orange Bread perfectly captures that essence. As I sliced into this delightful quick bread, the vibrant red cranberries mingled with the bright citrus flavor of orange truly popped. Not only does it come together in about an hour, but it’s also a wholesome choice for breakfast or brunch, making your mornings a little brighter. And let’s not forget—it makes a stunning homemade gift during the holiday season! Trust me, this Barefoot Contessa Cranberry Orange Bread will be the star of your holiday baking lineup. Are you ready to bring a taste of joy to your kitchen?

Why is This Bread a Must-Try?

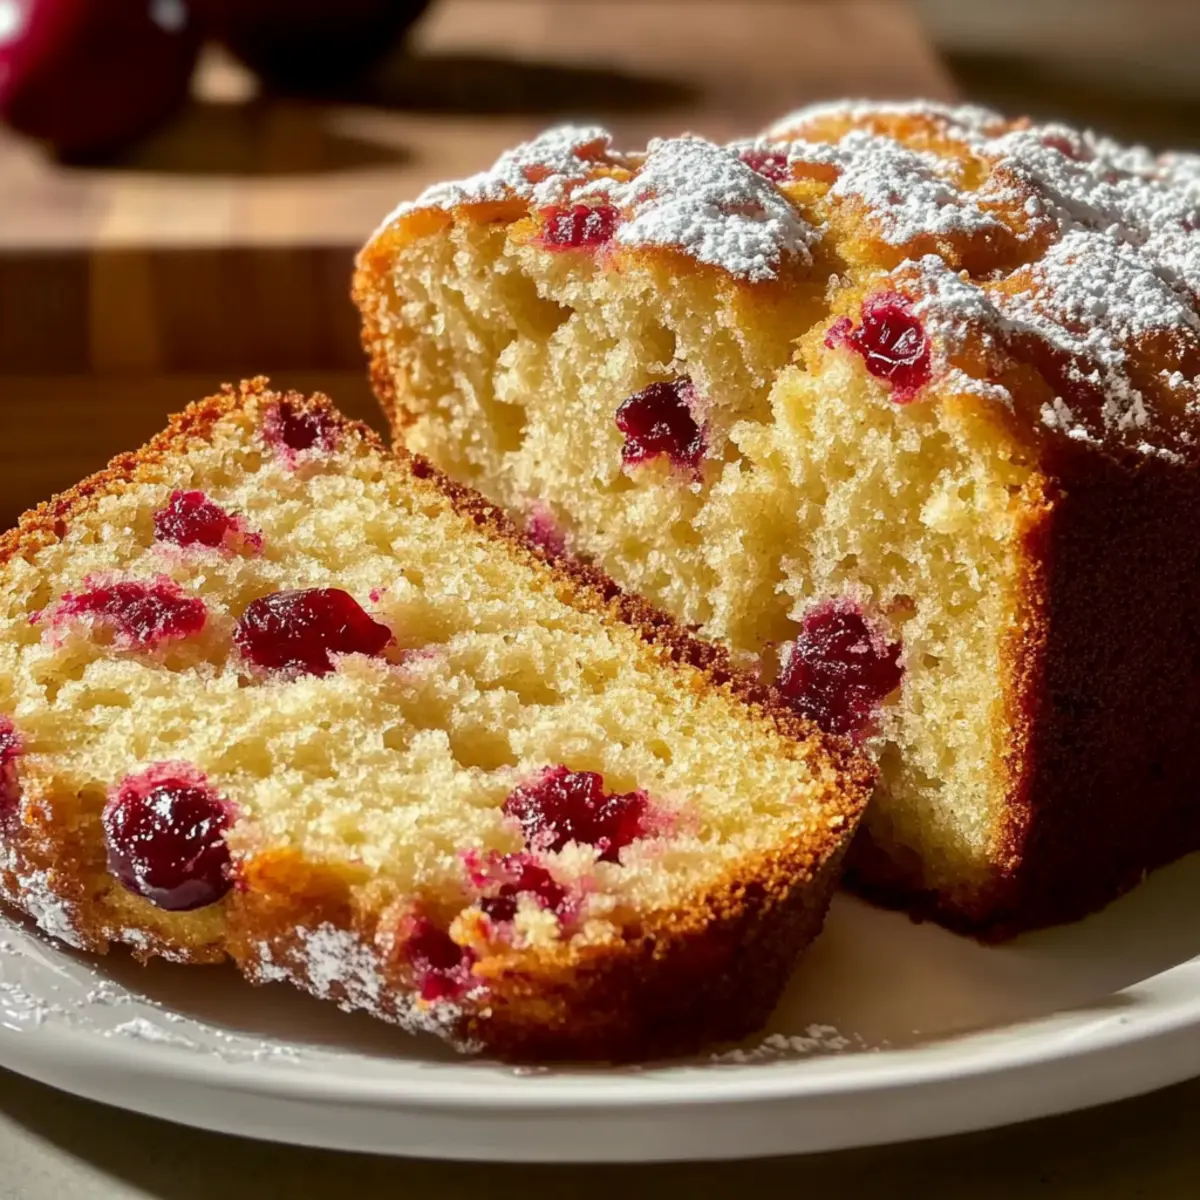
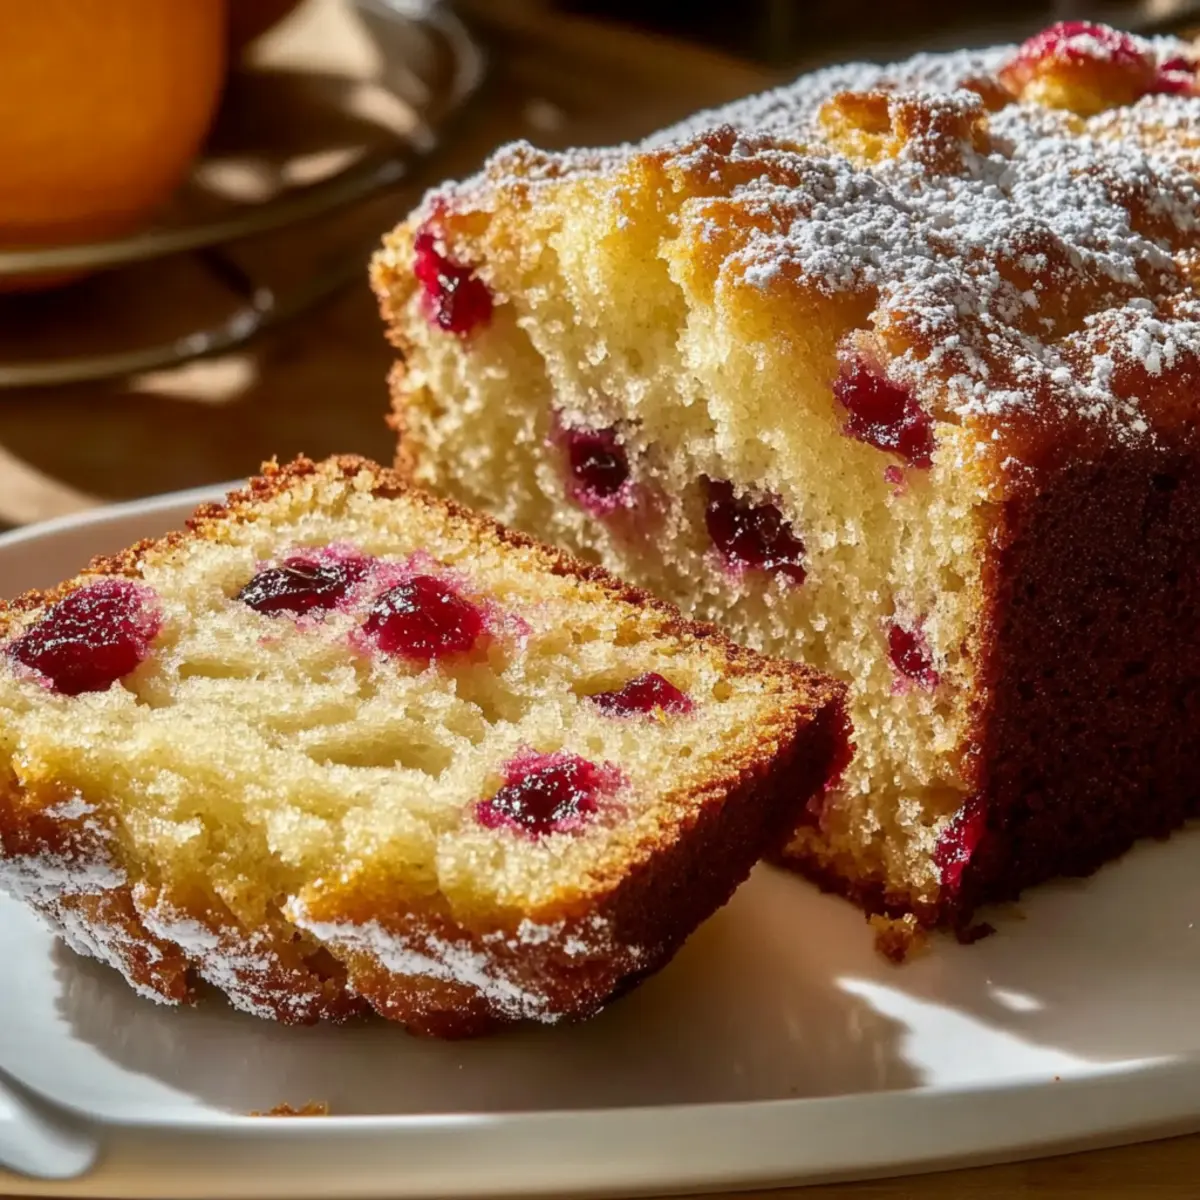
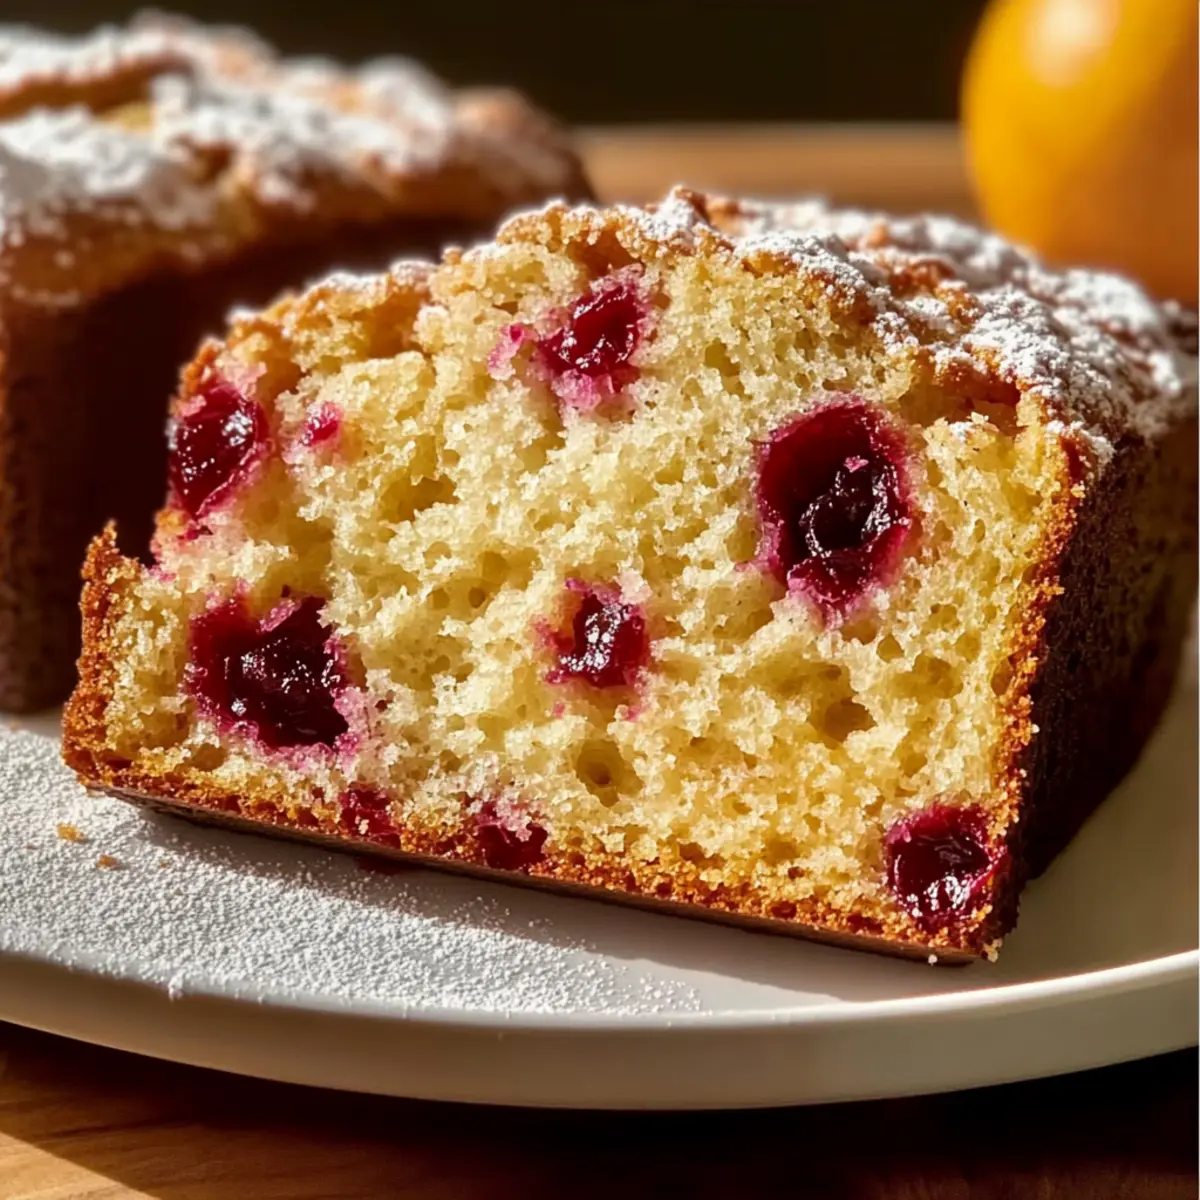
Moist, Each slice of this Contessa Cranberry Orange Bread is perfectly moist, making it a delightful addition to any breakfast or brunch table.
Bright Flavors, The combination of tart cranberries and zesty oranges creates a vibrant flavor profile that’s sure to impress.
Quick and Easy, With just about an hour of prep time, this quick bread is simple enough for even beginner bakers to master.
Perfect for Gifting, Its beautiful golden crust and inviting aroma make it an exceptional gift during the holidays, sure to bring smiles to family and friends.
Versatile Enjoyment, Whether enjoyed warm or at room temperature with coffee or tea, this bread offers a wonderful treat at any occasion!

Contessa Cranberry Orange Bread Ingredients

For the Bread

  • All-purpose flour – Provides the structure of the bread; substitute with a 1:1 gluten-free flour blend for a gluten-free option.
  • Baking powder – Acts as a leavening agent to ensure the bread rises beautifully.
  • Salt – Enhances flavors while balancing the sweetness of the cranberries.
  • Granulated sugar – Adds sweetness and moisture; feel free to reduce if using dried cranberries.
  • Orange zest – Imparts a fresh, citrus aroma and flavor, using the zest from one large orange.
  • Fresh orange juice – Contributes rich moisture and tanginess; don’t skip this for the full flavor!
  • Unsalted butter (melted) – Adds richness; let it cool slightly before mixing into the batter.
  • Large eggs – Binds the bread together and helps with leavening.
  • Vanilla extract – Elevates the overall flavor profile with warm notes.
  • Fresh or dried cranberries (roughly chopped) – Provides a burst of tartness and texture; toss dried cranberries in a little flour to help prevent sinking.

For Dusting

  • Powdered sugar (optional) – Adds a beautiful touch before serving and enhances the presentation.

This Contessa Cranberry Orange Bread is destined to become a cherished recipe in your collection, bringing warmth and joy to every occasion!

Step‑by‑Step Instructions for Contessa Cranberry Orange Bread

Step 1: Preheat the Oven
Begin by preheating your oven to 350°F (175°C). While it warms, prepare a 9×5-inch loaf pan by greasing it with butter or spraying it with non-stick cooking spray. You may also line the pan with parchment paper for easy removal. This setup ensures your Contessa Cranberry Orange Bread bakes evenly and releases without sticking.

Step 2: Combine Dry Ingredients
In a large mixing bowl, whisk together the all-purpose flour, baking powder, salt, and granulated sugar until evenly combined. Next, add the fragrant orange zest, mixing well to distribute it throughout the dry ingredients. This step is crucial, as it sets the foundation for the tender texture of your quick bread.

Step 3: Mix Wet Ingredients
In a separate bowl, whisk together the fresh orange juice, melted unsalted butter, large eggs, and vanilla extract until the mixture is smooth and well incorporated. Ensure the melted butter is slightly cooled before adding it to prevent cooking the eggs. This bright and rich mixture will enhance the flavor of your Contessa Cranberry Orange Bread.

Step 4: Combine Wet and Dry Mixtures
Gently pour the wet ingredients into the bowl with the dry ingredients. Using a rubber spatula, carefully fold the mixtures together until just combined, being cautious not to overmix. This helps retain the moist texture of the bread. You want a few flour streaks to remain for the best results.

Step 5: Fold in the Cranberries
Now, add the roughly chopped fresh or dried cranberries to the batter, folding them in with care. Ensure they are evenly distributed throughout the mixture. If using dried cranberries, tossing them in a bit of flour first can help prevent them from sinking. The tartness of the cranberries is a delightful complement to the orange zest!

Step 6: Bake the Bread
Pour the thick batter into the prepared loaf pan, smoothing the top with a spatula. Place the pan in your preheated oven and bake for 50 to 60 minutes. Keep an eye on it; the bread is done when a toothpick inserted into the center comes out clean, and the top is golden brown, signaling a perfectly baked Contessa Cranberry Orange Bread.

Step 7: Cool the Bread
Once baked, remove the loaf pan from the oven and let it cool for about 10 minutes on a wire rack. After this, carefully turn the bread out onto the rack to cool completely. This cooling period allows flavors to meld and the crust to set, making your bread even more enjoyable when it’s time to slice and serve.

Contessa Cranberry Orange Bread Variations

Feel free to let your creativity shine and customize this delightful bread to suit your taste and dietary preferences!

  • Gluten-Free: Substitute all-purpose flour with a 1:1 gluten-free flour blend to keep every bite just as moist. You’ll be amazed at how delicious gluten-free can be!

  • Nutty Twist: Add ½ cup of chopped walnuts or pecans for an extra crunch that beautifully complements the soft texture of the bread. The crunch will elevate each slice and provide a lovely contrast!

  • Citrus Burst: Enhance the citrus flavor by folding in extra orange zest or a tablespoon of lemon zest for a delightful zing. Just imagine that refreshing aroma filling your kitchen!

  • Dried Fruits: Swap cranberries with dried cherries or apricots for a unique flavor twist. Their sweetness offers a wonderful balance to the tartness, creating a fruity masterpiece!

  • Zesty Glaze: Drizzle a simple glaze made from powdered sugar and orange juice over the cooled bread for a delightful sweet touch. This not only adds flavor but also looks beautiful on the loaf!

  • Spicy Kick: Add a pinch of cayenne pepper or chili flakes to the batter for a surprising hint of heat. This little twist will wake up your taste buds and create an unforgettable blend.

  • Muffin Conversion: Transform the batter into muffins for a portable treat! Bake in a muffin tin for about 20-22 minutes, and enjoy individually-sized delights perfect for breakfast on the go.

  • Choco-Orange Delight: For a decadent touch, fold in ½ cup of mini chocolate chips for a delightful clash of tart and sweet. The combination of chocolate and orange is simply irresistible!

By exploring these variations, you can create a truly personalized version of the Contessa Cranberry Orange Bread that suits your palate and the occasion. Happy baking!

Expert Tips for Contessa Cranberry Orange Bread

  • Flavor Boost: Add a teaspoon of orange extract for an extra zesty kick that elevates the overall taste.
  • Prevent Sinking: To keep cranberries from sinking to the bottom, lightly toss them in a bit of flour before folding into the batter.
  • Avoid Overmixing: Be careful not to overmix your batter; gentle mixing ensures a moist Contessa Cranberry Orange Bread rather than a dense loaf.
  • Perfect Muffins: If you’re in the mood for muffins, simply bake the batter in a muffin tin for 20-22 minutes at the same temperature.
  • Storage Tip: Wrap any leftover bread tightly in plastic wrap and store at room temperature for up to 3 days to maintain moisture.

Make Ahead Options

This Moist Contessa Cranberry Orange Bread is perfect for meal prep, allowing you to enjoy homemade flavors with minimal effort! You can prepare the dry ingredients (flour, baking powder, salt, sugar, and orange zest) and store them in an airtight container up to 3 days in advance. Alternatively, the batter can be made and refrigerated for up to 24 hours; just ensure to cover it tightly to maintain freshness. When you’re ready to bake, simply fold in the cranberries, pour the batter into the loaf pan, and bake as directed. With these make-ahead strategies, you’ll have a delightful treat ready for breakfast or gifting, just as delicious as if it had been freshly made!

What to Serve with Moist Contessa Cranberry Orange Bread

Indulging in the sweetness of cranberry and orange is a treat on its own, but pairing it with the right sides elevates the experience to new heights.

  • Creamy Mashed Potatoes: The rich, buttery flavors of mashed potatoes balance the tartness of the bread, creating a delightful comfort meal.
  • Fresh Fruit Salad: A vibrant medley of seasonal fruits brightens up your plate and complements the citrus notes beautifully. Enjoy a mix of berries and melons to refresh your palate.
  • Herbal Tea: The soothing quality of a warm cup of herbal tea, like chamomile or green tea, enhances the experience and offers a calming moment.
  • Cream Cheese Spread: A spread of cream cheese or a cream cheese frosting subtly adds a tangy layer, enriching each slice of bread for a luxurious texture.
  • Spinach Salad with Citrus Vinaigrette: The peppery taste of fresh spinach pairs well with the bread’s sweetness and the vinaigrette mirrors the orange flavor. It adds a lovely crunch and freshness to your meal.
  • Almond Biscotti: For those with a sweet tooth, pairing a slice or two of crunchy almond biscotti offers a satisfying texture contrast and elevates your simple afternoon snack into a gourmet treat.

Each of these pairings enhances the wholesome joy of your Moist Contessa Cranberry Orange Bread, creating a meal that comforts the soul and delights the senses!

How to Store and Freeze Contessa Cranberry Orange Bread

Room Temperature: Keep this delicious bread wrapped tightly in plastic wrap and at room temperature for up to 3 days to maintain its moist texture.

Fridge: For extended freshness, store the wrapped bread in the refrigerator; it will stay fresh for about a week but may become slightly drier.

Freezer: You can freeze Contessa Cranberry Orange Bread for up to 2 months. Wrap it tightly in plastic wrap and then in aluminum foil for best results.

Reheating: Thaw frozen bread overnight in the fridge before serving. Warm slices in the toaster or microwave for a quick, delightful treat!

Contessa Cranberry Orange Bread Recipe FAQs

What type of cranberries should I use?
Absolutely! Fresh cranberries are preferred for their tartness, which beautifully complements the sweet orange flavor. However, if fresh ones aren’t available, dried cranberries can work too; just reduce the amount of granulated sugar slightly to account for their natural sweetness.

How should I store leftovers?
To keep your Contessa Cranberry Orange Bread fresh, wrap it tightly in plastic wrap and store it at room temperature for up to 3 days. You can also refrigerate it for about a week, but it may become slightly drier. For longer storage, freezing is an excellent option.

Can I freeze this bread?
Yes, you can freeze your Contessa Cranberry Orange Bread! Wrap it tightly in plastic wrap, followed by aluminum foil for extra protection, and it will last for up to 2 months. To enjoy, simply thaw it overnight in the refrigerator and warm individual slices in the toaster or microwave for a delightful treat.

Why is my bread dense?
Very! A common reason for dense bread is overmixing the batter. When folding the wet and dry ingredients, mix gently until just combined, leaving some flour streaks. Also, ensure that your baking powder is fresh and hasn’t expired, as this can affect the rise.

Can this recipe be made gluten-free?
Absolutely! To adapt the Contessa Cranberry Orange Bread for gluten-free diets, substitute the all-purpose flour with a 1:1 gluten-free flour blend. This will maintain the texture while allowing everyone to enjoy this delightful loaf!

Is this recipe suitable for gifts?
Absolutely, gifting this Cranberry Orange Bread is a wonderful idea! Its beautiful presentation and delightful aroma make it a heartfelt homemade gift during the holidays. Just wrap it nicely, and it’s sure to bring joy to anyone who receives it!

Contessa Cranberry Orange Bread

Moist Contessa Cranberry Orange Bread for Holiday Bliss

This Moist Contessa Cranberry Orange Bread captures comforting aromas and bright flavors, making it perfect for breakfast or gifting during the holidays.
Prep Time 15 minutes
Cook Time 1 hour
Cooling Time 10 minutes
Total Time 1 hour 25 minutes
Servings: 12 slices
Course: Breakfast
Cuisine: American
Calories: 200

Ingredients
  

For the Bread
  • 2 cups all-purpose flour substitute with a 1:1 gluten-free flour blend for a gluten-free option
  • 1 tablespoon baking powder acts as a leavening agent
  • 1 teaspoon salt enhances flavors
  • 1 cup granulated sugar reduce if using dried cranberries
  • 1 tablespoon orange zest using zest from one large orange
  • 1 cup fresh orange juice don’t skip this for full flavor
  • 1/2 cup unsalted butter (melted) let it cool slightly before mixing
  • 2 large eggs binds the bread together
  • 1 teaspoon vanilla extract elevates overall flavor
  • 1 cup fresh or dried cranberries (roughly chopped) toss dried cranberries in a little flour to help prevent sinking
For Dusting
  • 1 cup powdered sugar optional for garnish

Equipment

  • 9x5 inch loaf pan
  • Mixing bowls
  • whisk
  • Rubber spatula

Method
 

Step-by-Step Instructions
  1. Preheat your oven to 350°F (175°C) and prepare a 9x5-inch loaf pan by greasing it.
  2. In a large mixing bowl, whisk together flour, baking powder, salt, and sugar. Add orange zest and mix.
  3. In another bowl, whisk together orange juice, melted butter, eggs, and vanilla extract until smooth.
  4. Pour wet ingredients into dry ingredients and fold together until just combined. Do not overmix.
  5. Fold in the cranberries gently, ensuring even distribution.
  6. Pour the batter into the prepared loaf pan and bake for 50-60 minutes until a toothpick comes out clean.
  7. Allow the bread to cool in the pan for 10 minutes before transferring to a wire rack to cool completely.

Nutrition

Serving: 1sliceCalories: 200kcalCarbohydrates: 30gProtein: 3gFat: 9gSaturated Fat: 5gPolyunsaturated Fat: 1gMonounsaturated Fat: 3gCholesterol: 50mgSodium: 200mgPotassium: 150mgFiber: 1gSugar: 10gVitamin A: 150IUVitamin C: 5mgCalcium: 20mgIron: 1mg

Notes

This Contessa Cranberry Orange Bread is a cherished recipe that brings warmth and joy.

Tried this recipe?

Let us know how it was!

Crescent Cinnamon Rolls in 30 Minutes: Easy & Irresistible

The aroma of fresh, warm cinnamon rolls wafting through the house is enough to make anyone’s day brighter. That’s exactly the feeling I aim for with my Quick Crescent Roll Cinnamon Rolls. These delightful treats are not only incredibly quick to prepare using refrigerated crescent dough, but they also bring the joy of homemade baking to the breakfast table in less than 30 minutes. Whether you’re enjoying them as a sweet start to your day, a cozy brunch treat, or a dessert that feels extra special, this recipe has got you covered. Plus, with just a few simple ingredients, you’ll love how easy it is to whip up a batch for family and friends. Are you ready to learn how to create this heavenly indulgence with ease? Let’s dive in!

Why are Crescent Cinnamon Rolls so beloved?

Quick Preparation: These crescent cinnamon rolls come together in under 30 minutes, making them the perfect choice for busy mornings or unexpected guests.

Homemade Taste: The use of refrigerated crescent dough means you’ll experience that cherished homemade flavor without the fuss of traditional dough preparation.

Delightfully Sweet: Each roll is filled with a sticky cinnamon sugar mix that complements the buttery dough, offering a warm hug in every bite!

Versatile Treat: Enjoy them for breakfast, brunch, or dessert; they fit any occasion and pair beautifully with coffee or tea. If you’re feeling adventurous, check out my Apple Crisp Cinnamon variation or indulge in my Foster Cinnamon Rolls for a creative twist!

Crowd-Pleaser: Bake a batch for gatherings, and watch them disappear; their irresistible charm is sure to leave guests asking for the recipe!

Crescent Cinnamon Roll Ingredients

Get ready to create your delightful Crescent Cinnamon Rolls with these simple ingredients!

For the Rolls

  • Crescent Rolls – Use refrigerated crescent dough like Pillsbury for easy rolling and delicious results.
  • Unsalted Butter – Make sure it’s softened to room temperature for easy mixing with other ingredients.
  • Granulated Sugar – Sweetens the filling; feel free to adjust based on your taste preference.
  • Cinnamon – This adds that cozy warmth and spice; customize the amount to suit your flavor cravings.

For the Icing

  • Powdered Sugar – Essential for a creamy drizzle; combines perfectly with milk and vanilla.
  • Milk – Helps achieve the icing’s desired consistency; you can use any plant-based milk as a substitute.
  • Pure Vanilla Extract – Enhances the flavor of your icing; imitation vanilla works well too if that’s what you have on hand.

With these ingredients, you’ll be all set to whip up a batch of these scrumptious Crescent Cinnamon Rolls in no time!

Step‑by‑Step Instructions for Crescent Cinnamon Rolls

Step 1: Prepare Cinnamon Butter
In a medium bowl, combine ½ cup of softened unsalted butter, ¼ cup of granulated sugar, and 1 tablespoon of cinnamon. Mix the ingredients together using a hand mixer or spatula until the mixture is creamy and well blended. You want a smooth consistency that spreads easily. Set this cinnamon butter aside as it will be the delicious filling for your Crescent Cinnamon Rolls.

Step 2: Preheat Oven
Before starting with the dough, preheat your oven to 375°F (190°C) to ensure it’s nice and hot when your rolls are ready to bake. While the oven heats up, prepare your baking area by lining a rimmed baking sheet with parchment paper. This will prevent the rolls from sticking and aid in cleanup later.

Step 3: Prepare Dough
Unwrap a tube of refrigerated crescent dough and gently separate the dough into 8 wedges along the perforations. Lay the wedges flat on your counter, ensuring they are evenly spaced apart. They should be visually distinct and ready to be filled. This crescent dough forms the base of your delightful cinnamon rolls.

Step 4: Spread Filling
Take your prepared cinnamon butter and evenly spread a generous amount over each wedge of crescent dough. Be sure to cover them from the wide end to the point, leaving a small border at the edges to prevent overflow. The filling is what gives the Crescent Cinnamon Rolls their sweet and sticky flavor, so don’t skimp on it!

Step 5: Roll Up
Starting from the wide end of each wedge, carefully roll the dough tightly toward the point, forming a crescent shape. Make sure to keep the rolls snug but not overly tight, as they need space to expand. Place each rolled crescent seam-side down on the prepared baking sheet, ensuring they are spaced apart for even baking.

Step 6: Chill (Optional)
For best results, chill the assembled Crescent Cinnamon Rolls in the refrigerator for at least 15 minutes. This helps the butter firm up, preventing it from leaking out during baking. While waiting, you can enjoy the delicious aroma wafting from your kitchen, imagining the warm rolls soon to be devoured!

Step 7: Bake
Once chilled, place the baking sheet in your preheated oven and bake the rolls for 10-12 minutes, or until they appear golden brown and puffed up. Keep an eye on them in the last few minutes, as you want to catch them just as they turn perfectly golden. The aroma will fill your kitchen, making it hard to wait!

Step 8: Make Icing
While your Crescent Cinnamon Rolls cool slightly, prepare the creamy icing by whisking together 1 cup of powdered sugar, 2 tablespoons of milk, and ½ teaspoon of pure vanilla extract in a small bowl. Stir until the mixture is smooth and drizzle-worthy. Adjust the milk as needed to achieve your desired consistency for a delightful topping.

Step 9: Drizzle Icing
Once the rolls have cooled for about 10 minutes on the baking sheet, generously drizzle your creamy icing over the warm rolls using a spoon or a whisk. The icing will melt slightly into the rolls, adding a delicious finish to your homemade Crescent Cinnamon Rolls. Serve warm to enjoy the heavenly combination of flavors!

How to Store and Freeze Crescent Cinnamon Rolls

Room Temperature: Keep the rolls in an airtight container at room temperature for up to 2 days. This will help maintain their delicious texture and flavor.

Fridge: If you need them to last longer, store them in the fridge for up to 5 days. Wrap them tightly to prevent drying out and enjoy them when you’re ready!

Freezer: For long-term storage, freeze the baked rolls individually in freezer-safe bags for up to 2 months. Thaw them in the fridge overnight when you’re ready to enjoy.

Reheating: Reheat individually in the microwave for about 20 seconds or in a preheated oven at 350°F (175°C) for about 5–10 minutes until warmed through, savoring that fresh-baked taste of your Crescent Cinnamon Rolls!

Crescent Cinnamon Rolls Variations & Substitutions

Feel free to customize your Crescent Cinnamon Rolls for a delightful twist that suits your taste!

  • Chocolate Twist: Substitute the cinnamon filling with chocolate hazelnut spread for a rich and indulgent treat that’s hard to resist.
  • Fruit-Packed: Replace the cinnamon mixture with fruit preserves like raspberry or apricot for a fresh, fruity update. The tangy flavor will brighten every bite!
  • Nutty Addition: Add chopped nuts, like pecans or walnuts, into the filling for extra crunch and flavor. They add a beautiful texture that complements the softness of the rolls.
  • Dairy-Free Delight: Use plant-based butter and milk for a delicious dairy-free version without compromising on taste. You can still enjoy every gooey bite!
  • Spicy Kick: Mix in some pumpkin spice or nutmeg with the cinnamon for a warm and aromatic cake-like flavor. It’s perfect for cozy gatherings!
  • Lemon Icing: Swap the vanilla in the icing for lemon juice and zest for a zesty, refreshing flavor that contrasts beautifully with the sweetness of the rolls.
  • Crescent Roll Sheets: Use large crescent roll sheets instead of pre-cut rolls for a single, luscious roll that can be cut into thick pieces. Ideal for sharing!
  • Cinnamon Sugar Topping: Before baking, sprinkle some cinnamon sugar over the rolled-up crescents for a crunchy sweetness on top that adds an irresistible layer!

For more fun recipe ideas that mix traditional flavors with a modern twist, don’t miss my delightful Foster Cinnamon Rolls or a cozy Apple Crisp Cinnamon! Enjoy experimenting in your kitchen!

Make Ahead Options

These Crescent Roll Cinnamon Rolls are perfect for meal prep, saving you precious time on busy mornings! You can prepare the filling and spread it over the crescent dough ahead of time, refrigerating the assembled rolls for up to 24 hours. Simply cover the baking sheet with plastic wrap to maintain freshness and prevent drying out. When you’re ready to bake, just pop them in the oven and bake for 10-12 minutes until golden brown. For optimal results, ensure they chill for at least 15 minutes before baking to help maintain their shape. With these make-ahead tips, you’ll enjoy the same delightful freshness and ease of preparation!

Expert Tips for Crescent Cinnamon Rolls

Chill for Shape: Refrigerate the assembled rolls for at least 15 minutes to help them retain their shape and prevent butter from leaking.

Rolling Technique: Start rolling from the wide end and keep the rolls snug but not too tight to allow for expansion during baking.

Seal the Edges: Tuck the tip of each roll underneath to prevent it from unwinding while baking and ensure they maintain their crescent shape.

Icing Consistency: Adjust the milk in the icing to achieve your desired smoothness; a thicker icing will stay on top while a thinner one will drizzle nicely over the rolls.

Watch Baking Time: Keep an eye on the rolls in the last few minutes of baking; they should be golden brown but not overly browned or hard.

Enjoy these tips while you create your delightful Crescent Cinnamon Rolls with ease!

What to Serve with Quick Crescent Roll Cinnamon Rolls

Indulge in a delightful spread that enhances the warmth and sweetness of your cinnamon rolls, creating the perfect meal moment.

  • Fresh Fruit Salad: A zesty blend of seasonal fruits adds brightness and freshness, balancing the richness of the rolls perfectly.
  • Savory Bacon: The crispy, salty goodness of bacon contrasts beautifully with the sweet, fluffy rolls for a well-rounded breakfast.
  • Scrambled Eggs: Fluffy scrambled eggs provide a protein boost, making the meal more substantial while complementing the sweetness of the rolls.
  • Rich Coffee: A steaming cup of coffee enhances the warm spices of the cinnamon rolls, creating a comforting and satisfying breakfast experience.
  • Warm Maple Syrup: Drizzle over your rolls for an extra layer of sweetness that brings out the cinnamon flavor beautifully.
  • Creamy Yogurt Parfait: Layer yogurt with granola and berries for a light, refreshing option that pairs nicely with the cinnamon rolls’ texture.
  • Chocolate Milk: Treat yourself to a nostalgic combination; the rich chocolate flavor makes for a sweet pairing with your cinnamon rolls.
  • Refreshing Herbal Tea: A soothing herbal tea harmonizes with the cinnamon and balances the sweetness for a calming touch.
  • Vanilla Ice Cream: Turn your rolls into dessert by adding a scoop of vanilla ice cream, creating a delightful hot-cold contrast.

Crescent Roll Cinnamon Rolls Recipe FAQs

How do I choose the best crescent rolls?
Absolutely! When selecting crescent rolls, look for brands like Pillsbury that offer fresh, refrigerated dough. Check the expiration date to ensure maximum freshness and avoid any packages with dents or damage that might compromise the dough.

How do I store leftover Crescent Roll Cinnamon Rolls?
Very simply! Store the rolls in an airtight container at room temperature for up to 2 days. If you’d like them to last longer, keep them in the fridge for up to 5 days. Just be sure to wrap them tightly to keep them from drying out.

Can I freeze Crescent Roll Cinnamon Rolls?
Certainly! To freeze the rolls, allow them to cool completely after baking. Then, wrap each roll in freezer-safe wrap and place them in freezer bags. They can be stored for up to 2 months. When you’re ready to enjoy, thaw them in the fridge overnight and reheat in the microwave for 20 seconds or in a preheated oven at 350°F (175°C) for about 5–10 minutes.

Why did my Crescent Roll Cinnamon Rolls come out flat?
This can happen sometimes, but don’t worry! If the dough was not chilled before baking, it may cause the butter to melt too quickly, leading to flat rolls. Make sure to chill the assembled rolls for at least 15 minutes before baking, and ensure they are snugly rolled to maintain their shape.

Are Crescent Roll Cinnamon Rolls safe for dogs?
While the rolls are safe in small amounts, the high sugar content and butter are not ideal for your furry friends. It’s best to avoid giving them cinnamon rolls due to possible digestive upset and higher calorie content. Always stick to dog-friendly treats!

Can I adjust the sweetness in the icing?
Absolutely! You can easily modify the icing by adjusting the amount of powdered sugar or milk you use. If you prefer a less sweet glaze, add less powdered sugar or incorporate a pinch of salt to balance the flavors. Adjust the consistency by adding small amounts of milk to reach your desired creaminess!

Crescent Cinnamon Rolls

Crescent Cinnamon Rolls in 30 Minutes: Easy & Irresistible

Quick and delicious Crescent Cinnamon Rolls made with refrigerated dough, perfect for breakfast or dessert.
Prep Time 15 minutes
Cook Time 12 minutes
Chilling Time 15 minutes
Total Time 30 minutes
Servings: 8 rolls
Course: Breakfast
Cuisine: American
Calories: 210

Ingredients
  

For the Rolls
  • 1 tube refrigerated crescent dough like Pillsbury for easy rolling
  • ½ cup unsalted butter softened to room temperature
  • ¼ cup granulated sugar sweetens the filling
  • 1 tablespoon cinnamon adds spice and warmth
For the Icing
  • 1 cup powdered sugar for a creamy drizzle
  • 2 tablespoons milk adjust for icing consistency
  • ½ teaspoon pure vanilla extract enhances icing flavor

Equipment

  • Mixing Bowl
  • Baking Sheet
  • Parchment Paper
  • whisk

Method
 

Step-by-Step Instructions for Crescent Cinnamon Rolls
  1. In a medium bowl, combine ½ cup of softened unsalted butter, ¼ cup of granulated sugar, and 1 tablespoon of cinnamon. Mix until creamy and smooth. Set aside.
  2. Preheat your oven to 375°F (190°C) and prepare a baking sheet lined with parchment paper.
  3. Unwrap the refrigerated crescent dough and separate it into 8 wedges.
  4. Spread the cinnamon butter mixture evenly over each wedge from the wide end to the point.
  5. Starting from the wide end, roll each wedge tightly towards the point and place seam-side down on the baking sheet.
  6. (Optional) Chill the assembled rolls in the refrigerator for at least 15 minutes.
  7. Bake the rolls for 10-12 minutes until golden brown and puffed up.
  8. While the rolls cool, whisk together 1 cup of powdered sugar, 2 tablespoons of milk, and ½ teaspoon of vanilla extract until smooth.
  9. Drizzle the icing over warm rolls before serving.

Nutrition

Serving: 1rollCalories: 210kcalCarbohydrates: 30gProtein: 2gFat: 9gSaturated Fat: 5gCholesterol: 20mgSodium: 150mgSugar: 12gVitamin A: 300IUCalcium: 10mgIron: 0.5mg

Notes

Refrigerate assembled rolls for best shape and icing consistency can be adjusted with milk.

Tried this recipe?

Let us know how it was!

Cinnamon Sugar Donut Bread That’ll Melt in Your Mouth

As I pulled the warm loaf from the oven, my kitchen filled with an enticing blend of cinnamon and sugar, instantly whisking me away to my favorite bakery. This Easy Cinnamon Donut Bread is my secret weapon for satisfying those donut cravings without the fuss of frying and dough rising. In just a few simple steps, you can whip up this delightful quick bread that captures the nostalgic flavors of the beloved cake donut. Not only is it yeast-free for quick preparation, but it also offers a tender texture that makes it perfect for breakfast or an afternoon snack. Plus, it’s an absolute crowd-pleaser that pairs wonderfully with a cup of coffee. How could you resist indulging in a slice or two? Let’s dive into this delicious journey together!

Why is this Cinnamon Sugar Donut Bread Special?

Irresistible Aroma: As it bakes, your kitchen will fill with the warm, inviting scents of cinnamon and sugar that will have everyone eagerly anticipating a slice.

Quick and Easy: With no yeast involved, this recipe saves you time and effort, making it ideal for busy mornings or spontaneous snack cravings.

Soft, Tender Texture: Each bite offers a melt-in-your-mouth experience that perfectly mimics your favorite cake donuts, making it a delightful treat anytime.

Versatile Enjoyment: Whether served warm for breakfast, paired with coffee for an afternoon pick-me-up, or as a sweet dessert, this bread holds its own in any setting.

Crowd-Pleaser: Impress your friends and family at gatherings with a homemade delight that captures the beloved flavors of cinnamon donuts without the mess of frying. For more delicious ideas, try Savory Brown Sugar dishes or explore the cozy warmth of Bananas Foster Cinnamon treats!

Cinnamon Sugar Donut Bread Ingredients

For the Bread

  • ¼ cup Oil – Adds moisture; vegetable oil works as a substitute.
  • ¼ cup Unsalted Butter, softened – Ensures richness and flavor; make sure it’s soft for easy mixing.
  • 1 cup Sugar – Sweetens the bread; you can reduce this for a less sweet version or use a sugar substitute at the cost of texture.
  • 1 tsp Vanilla Extract – Elevates the overall flavor profile brilliantly.
  • 2 Large Eggs, room temperature – Binds the ingredients and contributes to the structure of your cinnamon sugar donut bread.
  • 1 ½ cups All-Purpose Flour – Forms the base of the quick bread.
  • 1 tsp Baking Powder – Acts as the leavening agent so that the bread rises beautifully.
  • ½ tsp Salt – Balances the sweetness, enhancing flavors all around.
  • ½ cup Buttermilk – Adds moisture and a subtle tang; you can easily make it by mixing ½ tsp vinegar with ½ cup milk.
  • ½ tsp Molasses – Provides color and deeper flavor.
  • ½ tsp Cinnamon – Infuses the bread with the beloved warmth of cinnamon.

For the Topping

  • ½ cup Unsalted Butter, melted – For dipping and adds an extra richness after baking.
  • ¼ cup Light Brown Sugar, packed – Contributes moist sweetness to the topping.
  • ¼ cup Granulated Sugar – Adds sweetness and a delightful crunch.
  • ½ tsp Cinnamon – Intensifies topping flavor with an extra kick of warmth.

This combination of ingredients is what makes this Cinnamon Sugar Donut Bread a heartwarming delight you’ll want to share with others!

Step‑by‑Step Instructions for Cinnamon Sugar Donut Bread

Step 1: Preheat the Oven
Start by preheating your oven to 350°F (175°C). While the oven warms up, generously grease a loaf pan with non-stick spray to ensure that your Cinnamon Sugar Donut Bread releases easily once baked. This step is crucial to achieving a perfectly shaped loaf that everyone will love.

Step 2: Mix Wet Ingredients
In a large mixing bowl, combine ¼ cup softened unsalted butter, ¼ cup oil, and 1 cup sugar. Using a handheld mixer or a whisk, beat the mixture until it’s smooth and well combined, about 2-3 minutes. The texture should be creamy and slightly fluffy, giving the base of your donut bread the delicious richness it needs.

Step 3: Incorporate Eggs and Vanilla
Next, beat in 2 large room-temperature eggs and 1 teaspoon of vanilla extract to the butter and sugar mixture. Continue mixing until everything is smooth and fully incorporated, which should take about 1-2 minutes. This step is essential for combining flavors, giving your Cinnamon Sugar Donut Bread its delightful taste.

Step 4: Combine Dry Ingredients
In another bowl, whisk together 1½ cups all-purpose flour, 1 teaspoon baking powder, ½ teaspoon salt, and ½ teaspoon cinnamon. Gradually add these dry ingredients to the wet mixture, alternating with ½ cup buttermilk. Mix until just combined, ensuring no lumps remain. The batter should be thick yet smooth, perfect for creating the tender texture of the bread.

Step 5: Create the Molasses Mixture
In a separate small bowl, take a portion of the batter and mix in ½ teaspoon of molasses and a pinch of cinnamon. This mixture will introduce a rich flavor to your Cinnamon Sugar Donut Bread. Stir until it’s fully combined, and set it aside for the next layering step.

Step 6: Layer the Batter
Pour half of the plain batter into the prepared loaf pan. Now, spread the molasses mixture evenly over this layer, being careful not to disturb it. Finally, spoon the remaining plain batter over the top, creating a layered effect. This method ensures that every slice of your Cinnamon Sugar Donut Bread has beautiful swirls and flavors.

Step 7: Swirl for Effect
Using a knife, gently swirl the top layer of the batter in a figure-eight motion to create a marbled effect. Be careful not to mix it too much; you want distinct layers to show in your finished bread. This visual element makes your Cinnamon Sugar Donut Bread even more enticing.

Step 8: Bake the Bread
Place the loaf pan in your preheated oven and bake for 40-45 minutes. Check for doneness by inserting a toothpick into the center; it should come out clean or with a few moist crumbs. The golden-brown top will also signal that your Cinnamon Sugar Donut Bread is ready to be taken out.

Step 9: Cool the Bread
Once baked, remove the loaf from the oven and let it cool in the pan for about 10 minutes. This cooling time allows the bread to set up properly. After that, carefully transfer the loaf to a wire cooling rack to cool completely. This step prevents moisture buildup and ensures the best texture.

Step 10: Add the Finishing Touch
While the bread is still warm, dip the top of the loaf into ½ cup of melted unsalted butter. Then, generously sprinkle it with a mix of ¼ cup light brown sugar, ¼ cup granulated sugar, and ½ teaspoon of cinnamon. This final touch will create a deliciously sweet, crunchy topping, making your Cinnamon Sugar Donut Bread irresistible!

Storage Tips for Cinnamon Sugar Donut Bread

  • Room Temperature: Store the bread in an airtight container for up to 4 days. This keeps it fresh and moist while retaining that delightful flavor reminiscent of cake donuts.

  • Fridge: If you’d like to extend its life, you can refrigerate the bread for up to 6 days. Make sure to wrap it well to prevent it from drying out or picking up other odors.

  • Freezer: For longer storage, freeze the bread for up to 3 months. Slice it first for easier thawing. Wrap it tightly in plastic wrap and then in aluminum foil to protect against freezer burn.

  • Reheating: To enjoy warm slices, simply microwave for 10-20 seconds or toast them lightly. This brings back that comforting aroma and melt-in-your-mouth texture of your Cinnamon Sugar Donut Bread!

Make Ahead Options

These Cinnamon Sugar Donut Bread options are perfect for busy home cooks looking to save time without compromising on flavor! You can prepare the batter up to 24 hours in advance by mixing all the wet and dry ingredients and storing it in an airtight container in the refrigerator. Additionally, you can bake the bread ahead of time and store it, tightly wrapped, in the refrigerator for up to 3 days. When you’re ready to serve, you can simply reheat individual slices in the microwave for 10-15 seconds or enjoy it at room temperature. To maintain its delightful softness, ensure you wrap the cooled bread well to prevent it from drying out. This makes enjoying the tasty flavors of your Cinnamon Sugar Donut Bread a breeze during your busy week!

Expert Tips for Cinnamon Sugar Donut Bread

  • Softened Butter: Make sure your butter is at room temperature to prevent lumps in the batter. Cold butter can hinder smooth mixing.

  • Alternating Dry and Wet: When combining the dry ingredients with the wet ingredients, alternate between them to create a perfectly smooth batter without overmixing.

  • Molasses Magic: Don’t skip the molasses in the batter; it adds a beautiful depth of flavor that enhances the overall taste of your cinnamon sugar donut bread.

  • Toothpick Test: Always check doneness with a toothpick; it should come out clean or with a few crumbs. Overbaking can dry out the bread.

  • Cooling Time: Allow the bread to cool before slicing. Cutting too soon can lead to a crumbly texture, and you want those perfect slices!

What to Serve with Cinnamon Sugar Donut Bread?

Serving this delightful treat is all about enhancing the sweet, spiced flavors while adding complementary textures and tastes that will elevate your meal.

  • Creamy Mashed Potatoes: Their rich, buttery texture provides a savory balance to the sweet donut bread, making for a delightful contrast.

  • Fresh Fruit Salad: A vibrant mix of berries and melon adds a refreshing zing, cutting through the sweetness of the bread.

  • Strong Coffee: Pair with a bold cup of coffee to enhance the warm spices and provide a perfect morning companion.

  • Vanilla Ice Cream: Serve warm slices topped with a scoop of vanilla ice cream for a decadent dessert experience that’s hard to resist.

  • Honey Drizzle: A light drizzle of honey adds a natural sweetness that pairs beautifully with the cinnamon flavors.

  • Chai Tea: The aromatic spices in chai tea complement the cinnamon sugar notes perfectly, making it an ideal pairing for a cozy afternoon.

Imagine curling up with a slice of Cinnamon Sugar Donut Bread while sipping your chosen beverage and indulging in a moment of sweet bliss. It’s a simple delight that transforms any occasion into something truly special!

Cinnamon Sugar Donut Bread Variations

Feel free to explore these delightful twists to make this recipe uniquely yours!

  • Nutty Crunch: Add ½ cup of chopped walnuts or pecans for a delightful crunch and added richness.

  • Chocolate Delight: Fold in ½ cup of chocolate chips to elevate the sweetness and add a decadent touch. Everyone loves a gooey surprise!

  • Whole Wheat Health: Substitute half of the all-purpose flour with whole wheat flour to create a heartier texture packed with nutrients.

  • Seasonal Spice: Replace cinnamon with pumpkin spice for a festive twist that’s perfect for autumn gatherings.

  • Fruit Fusion: Mix in ½ cup of diced apples or pears for a fruity burst that complements the sweetness beautifully. This will also add moisture and flavor.

  • Zesty Lemon: Incorporate the zest of one lemon in the batter for a refreshing citrus lift that balances the sweetness.

  • Vanilla Bean Bliss: Swap the vanilla extract for a tablespoon of vanilla bean paste to deepen the flavor profile with those delightful little flecks.

For a harmonious pairing with this scrumptious bread, consider trying out an exquisite treat like Apple Crisp Cinnamon or indulge in a scrumptious Bananas Foster Cinnamon delight! The possibilities are endless, so embrace your creativity!

Cinnamon Sugar Donut Bread Recipe FAQs

How do I choose the best ingredients for this bread?
Absolutely! For the best flavor, start with fresh, high-quality ingredients. When selecting your Cinnamon Sugar Donut Bread ingredients, opt for ripe, room-temperature eggs and ensure your butter is softened adequately. Fresh spices, especially cinnamon, will make a noticeable difference in the flavor profile. Check for slightly aged buttermilk or make your own by mixing vinegar with milk for a fresher option.

What’s the best way to store leftover Cinnamon Sugar Donut Bread?
You can store this delightful bread in an airtight container for up to 4 days at room temperature. This keeps it moist and delicious. If you prefer, refrigerate it for up to 6 days by wrapping it well to prevent it from drying out. Remember to let it cool completely before storing for the best texture!

Can I freeze Cinnamon Sugar Donut Bread?
Yes, you can freeze your Cinnamon Sugar Donut Bread for up to 3 months! To do this, slice the bread first for easier thawing later. Carefully wrap each slice in plastic wrap, then place them in a freezer-safe container or bag. When you’re ready to enjoy a slice, just remove it from the freezer and let it thaw in the fridge or microwave for a cozy treat.

What should I do if my bread turns out too dense?
If your bread is too dense, it may be due to overmixing the batter or heavy-handed measuring of flour. Always measure flour accurately by spooning it into the measuring cup and leveling it off with a knife. If the batter seems thick, try incorporating your buttermilk initially and then adding dry ingredients gradually. Remember, gentle mixing is key to maintaining that tender texture!

Is this recipe suitable for those with dietary restrictions?
Yes, it can be! For a dairy-free version, you can substitute dairy ingredients like butter and buttermilk with plant-based alternatives, such as coconut oil and almond milk with a splash of vinegar for a vegan-friendly twist. Just ensure any alternative flour or sweetener you use suits your dietary needs!

Cinnamon Sugar Donut Bread

Cinnamon Sugar Donut Bread That'll Melt in Your Mouth

This Cinnamon Sugar Donut Bread captures the nostalgic flavors of cake donuts, offering a melt-in-your-mouth experience without the fuss of frying.
Prep Time 15 minutes
Cook Time 45 minutes
Cooling Time 10 minutes
Total Time 1 hour 10 minutes
Servings: 10 slices
Course: Dessert
Cuisine: American
Calories: 250

Ingredients
  

For the Bread
  • 0.25 cup Oil Vegetable oil works as a substitute.
  • 0.25 cup Unsalted Butter, softened Ensure it's soft for easy mixing.
  • 1 cup Sugar You can reduce this for a less sweet version.
  • 1 tsp Vanilla Extract Elevates the overall flavor profile.
  • 2 Large Eggs, room temperature Contributes to the structure.
  • 1.5 cups All-Purpose Flour Forms the base of the quick bread.
  • 1 tsp Baking Powder Acts as the leavening agent.
  • 0.5 tsp Salt Balances sweetness.
  • 0.5 cup Buttermilk Can be made by mixing ½ tsp vinegar with ½ cup milk.
  • 0.5 tsp Molasses Provides color and deeper flavor.
  • 0.5 tsp Cinnamon Infuses the bread with warmth.
For the Topping
  • 0.5 cup Unsalted Butter, melted For dipping.
  • 0.25 cup Light Brown Sugar, packed Contributes moist sweetness.
  • 0.25 cup Granulated Sugar Adds sweetness and crunch.
  • 0.5 tsp Cinnamon Intensifies topping flavor.

Equipment

  • Loaf Pan
  • Mixing bowls
  • Handheld Mixer
  • whisk
  • Knife
  • cooling rack

Method
 

Step-by-Step Instructions
  1. Preheat your oven to 350°F (175°C) and grease a loaf pan.
  2. Combine ¼ cup softened unsalted butter, ¼ cup oil, and 1 cup sugar in a mixing bowl and beat until smooth.
  3. Add 2 large eggs and 1 tsp vanilla extract to the mixture, then mix until smooth.
  4. In another bowl, whisk together 1½ cups flour, 1 tsp baking powder, ½ tsp salt, and ½ tsp cinnamon. Gradually add to the wet ingredients alternating with ½ cup buttermilk.
  5. In a small bowl, mix a portion of the batter with ½ tsp molasses and a pinch of cinnamon.
  6. Layer half of the plain batter in the loaf pan, add the molasses mixture, then cover with the remaining plain batter.
  7. Swirl the top layer gently with a knife to create a marbled effect.
  8. Bake for 40-45 minutes until a toothpick comes out clean.
  9. Let cool in the pan for 10 minutes before transferring to a wire rack.
  10. Dip the top of the loaf in ½ cup melted butter and sprinkle with the topping mixture.

Nutrition

Serving: 1sliceCalories: 250kcalCarbohydrates: 36gProtein: 3gFat: 12gSaturated Fat: 7gPolyunsaturated Fat: 1gMonounsaturated Fat: 4gCholesterol: 35mgSodium: 190mgPotassium: 120mgSugar: 18gVitamin A: 500IUCalcium: 40mgIron: 0.5mg

Notes

Allow the bread to cool before slicing for the best texture.

Tried this recipe?

Let us know how it was!

Savory Mozzarella Pepperoni Croissant Rolls in 30 Min

As the aroma of flaky croissants wafts through the kitchen, I can’t help but feel a wave of excitement for what’s coming. Meet my quick and cheesy Mozzarella Pepperoni Croissant Rolls—a delightful twist on comfort food that brings the essence of your favorite pizzeria right to your table. Perfect for those rushed weeknights or impromptu gatherings, these rolls are a breeze to whip up and can be customized with different cheeses or even a vegetarian spin! In under 30 minutes, you can enjoy a warm, gooey delight that’s bound to impress, whether as a snack, appetizer, or even a satisfying lunch. Are you ready to unravel the secrets of this comforting yet oh-so-easy recipe? Let’s dive in!

Why are These Croissant Rolls So Irresistible?

Ease: You can make Mozzarella Pepperoni Croissant Rolls in under 30 minutes, making them ideal for busy days.
Versatility: Customize the recipe with your favorite cheeses or even go vegetarian for a satisfying twist.
Crowd-Pleaser: Perfect for parties or family gatherings, these rolls will impress your guests with minimal effort.
Flavor Explosion: The combination of gooey mozzarella and zesty pepperoni creates a savory treat that’s hard to resist. Looking for more yummy ideas? Check out my Foster Cinnamon Rolls or the delightful Croissant Breakfast Sandwich for breakfast options!
Freezer-Friendly: These rolls can be prepped ahead and frozen for quick snacks or meals anytime.

Mozzarella Pepperoni Croissant Rolls Ingredients

For the Dough
Refrigerated Crescent Roll Dough – Provides that flaky, tender texture; feel free to swap in puff pastry for a crunchier bite!

For the Filling
Shredded Mozzarella Cheese – Adds creamy, stretchy goodness; go for whole milk mozzarella to maximize meltiness.
Pepperoni Slices – Delivers a spicy kick; try turkey pepperoni or ham for a lighter alternative.
Italian Seasoning – Boosts flavor; completely optional, but adds a delightful herbal note.

For the Topping
Grated Parmesan Cheese – Introduces a nutty, salty touch; sprinkle on top for extra flavor!

For Serving
Marinara Sauce – Perfect for dipping; won’t be the same without it!

Step‑by‑Step Instructions for Mozzarella Pepperoni Croissant Rolls

Step 1: Preheat the Oven
Begin by preheating your oven to 375°F (190°C). While the oven warms, line a baking sheet with parchment paper, allowing for easy cleanup later. This step is essential to achieve a perfectly baked Mozzarella Pepperoni Croissant Rolls that are wonderfully golden and flaky.

Step 2: Prepare the Dough
Unroll the refrigerated crescent roll dough onto a clean, flat surface. Carefully separate the dough into 8 triangles, ensuring each piece remains intact. The triangles will serve as the perfect wrapping for the cheesy and pepperoni goodness you’ll create, offering that delightful flaky texture.

Step 3: Add the Filling
At the wide end of each triangle, place 3–4 pepperoni slices followed by a generous handful of shredded mozzarella cheese. Ensure that the filling is evenly distributed, providing a savory punch in each bite. This layer of cheesy goodness is what makes these Mozzarella Pepperoni Croissant Rolls irresistible.

Step 4: Roll the Dough
Starting from the wide end, roll each triangle tightly toward the tip, ensuring the filling is completely enclosed within the dough. Tightly rolling helps prevent the cheese from leaking during baking and creates a scrumptious texture. Place each rolled croissant seam side down on the prepared baking sheet.

Step 5: Season and Top
If desired, sprinkle Italian seasoning and grated Parmesan cheese on top of each rolled croissant. This additional seasoning enhances the overall flavor profile, making your Mozzarella Pepperoni Croissant Rolls even more delectable. The saltiness of Parmesan combined with the herbs will elevate your dish.

Step 6: Bake to Perfection
Carefully place the baking sheet in the preheated oven and bake for 12–15 minutes. Keep an eye on the rolls; they should turn a beautiful golden brown while the cheese inside melts deliciously. You’ll know they’re done when the dough appears crisp on the outside, inviting you to grab one right away.

Step 7: Serve Warm
Once baked, remove the Mozzarella Pepperoni Croissant Rolls from the oven and let them cool for a few minutes. Serve them warm with marinara sauce for dipping, enhancing the flavors and creating a delightful munching experience. These rolls are perfect as an appetizer or a quick snack, ready to impress!

Expert Tips for Mozzarella Pepperoni Croissant Rolls

  • Roll Tightly: Ensure the dough is rolled tightly around the filling to avoid leaking cheese during baking. This will ensure a perfectly enclosed, cheesy bite.
  • Cheese Choice: Use whole milk mozzarella for the best melt; it creates that gooey, stretchy texture that makes these Mozzarella Pepperoni Croissant Rolls irresistible.
  • Flavor Boost: Toss in some red pepper flakes with the filling if you crave extra heat. This little addition can transform the flavor profile!
  • Make Ahead: You can prepare unbaked rolls and refrigerate them for up to 24 hours, making weeknight dinners a breeze. Just pop them in the oven when you’re ready!
  • Freezing Tips: Baked rolls freeze well for up to 2 months. Reheat at 350°F for about 5–7 minutes, and they’ll taste freshly made!

How to Store and Freeze Mozzarella Pepperoni Croissant Rolls

Fridge: Store baked croissant rolls in an airtight container for up to 3 days. This keeps them fresh and ready for a quick snack or meal.

Freezer: Baked rolls can be frozen for up to 2 months. Place them in a single layer on a baking sheet, then transfer to an airtight container after freezing to maintain texture.

Reheating: To reheat, preheat your oven to 350°F (175°C) and bake the frozen Mozzarella Pepperoni Croissant Rolls for 5–7 minutes until warmed through and crispy again.

Make-Ahead: Unbaked rolls may be prepared ahead and stored in the fridge for up to 24 hours. Just bake them fresh when you’re ready to enjoy!

What to Serve with Mozzarella Pepperoni Croissant Rolls

When it comes to creating a full meal, pairing is essential to amplify the delightful flavors of these cheesy bites.

  • Crispy Garlic Bread: The crunch combined with garlic will enhance your savory experience, making each bite even more delightful.
  • Mixed Green Salad: A light and refreshing salad with vine tomatoes and a tangy dressing will balance the richness of the croissant rolls. The crispness of fresh greens perfectly complements the gooey textures.
  • Stuffed Mushrooms: These bite-sized delights packed with cheese and herbs offer a classic appetizer touch, delivering flavors that dance beautifully together.
  • Caprese Skewers: Fresh mozzarella, tomatoes, and basil drizzled with balsamic glaze create colorful pops of flavor that resonate with the cheesy croissant rolls.
  • Vegetable Medley: Roasted seasonal vegetables add a healthy and colorful side, providing both crunch and flavor to your meal’s composition.
  • Chocolate Lava Cake: End your meal on a sweet note with this rich dessert, bringing warmth and indulgence that contrasts wonderfully with the savory bites.
  • Sparkling Water with Citrus: Keep it refreshing with a zesty beverage that cleanses the palate between each heavenly bite, ensuring you appreciate every flavor nuance.

Make Ahead Options

These Mozzarella Pepperoni Croissant Rolls are a fantastic choice for meal prep! You can prepare the unbaked rolls up to 24 hours in advance by assembling them and then refrigerating them tightly wrapped in plastic wrap. This ensures that the dough remains fresh and the filling stays perfectly gooey. Just remember to bake them right before serving; simply pop them in a preheated oven at 375°F (190°C) for 12–15 minutes. This will revive their flaky texture and melty cheese, giving you that homemade warmth without the last-minute rush. By prepping these rolls ahead of time, you’ll save valuable moments on busy days, allowing you to effortlessly enjoy a delightful snack or appetizer!

Mozzarella Pepperoni Croissant Rolls Variations

Feel free to make these delightful rolls your own with just a few simple tweaks!

  • Cheese Swap: Replace mozzarella with cheddar or provolone for a different flavor kick.
  • Pepperoni Alternatives: Use turkey pepperoni or deli ham for a lighter twist; the taste remains deliciously satisfying.

For those who prefer a lighter option, sautéed veggies like spinach and mushrooms also make a great filling! Paired with cheese, these savory ingredients create a melody of flavors that will please any palate.

  • Make It Vegetarian: Omit the pepperoni or choose vegetarian pepperoni slices for a satisfying meat-free version.
  • Spicy Version: Add red pepper flakes to the cheese filling for an extra kick.

Imagine that delightful heat complemented by the creamy cheese—absolutely bursting with flavor and fun.

  • Puff Pastry Twist: Substitute crescent roll dough with puff pastry for a more flaky, gourmet experience.
  • Herb Boost: Mix fresh herbs like basil or oregano into the cheese for a garden-fresh touch.

Feeling adventurous? Why not craft a savory blend of herbs right into the filling, elevating each bite to a fragrant delight.

  • Dip Diversion: Serve with a variety of dips like ranch or garlic sauce for a fun appetizer platter.

And if you loved these croissant rolls, don’t forget to explore my delightful Comforting Charm Croissants for even more flaky goodness!

Mozzarella Pepperoni Croissant Rolls Recipe FAQs

What type of cheese is best to use for Mozzarella Pepperoni Croissant Rolls?
I recommend using whole milk mozzarella for the ultimate gooey and stretchy texture. It melts beautifully, creating that delicious cheese pull you’re craving! If you’re looking for variety, feel free to swap in cheddar or provolone for different flavors.

How should I store leftover croissant rolls?
Store the baked Mozzarella Pepperoni Croissant Rolls in an airtight container in the fridge for up to 3 days. This keeps them fresh and ready for a quick snack or meal anytime you desire a savory treat!

Can I freeze these croissant rolls? If so, how?
Absolutely! Baked rolls can be frozen for up to 2 months. Place them in a single layer on a baking sheet and freeze until solid. Once frozen, transfer them to an airtight container or freezer bag to maintain their texture, separating layers with parchment paper.

What should I do if the cheese leaks during baking?
To prevent leaking, ensure you’re rolling the crescent dough tightly around the filling. If it still leaks, it might be due to using pre-shredded cheese, which can have anti-caking agents. I always suggest using block cheese and shredding it yourself for the best results!

Can these croissant rolls be made vegetarian?
Certainly! To make the Mozzarella Pepperoni Croissant Rolls vegetarian, simply omit the pepperoni or substitute it with a vegetarian pepperoni alternative. You could also add some sautéed vegetables or spinach for a delicious twist!

How long does it take to prepare these croissant rolls?
From start to finish, you can have these delectable Mozzarella Pepperoni Croissant Rolls ready in under 30 minutes! Perfect for those busy weeknights or last-minute gatherings, you’ll have a delicious snack in no time.

Mozzarella Pepperoni Croissant Rolls

Savory Mozzarella Pepperoni Croissant Rolls in 30 Min

Quick and cheesy Mozzarella Pepperoni Croissant Rolls that make for a delightful snack or appetizer.
Prep Time 10 minutes
Cook Time 15 minutes
Total Time 25 minutes
Servings: 8 rolls
Course: Appetizers
Cuisine: Italian
Calories: 180

Ingredients
  

For the Dough
  • 1 package Refrigerated Crescent Roll Dough Feel free to swap in puff pastry for a crunchier bite!
For the Filling
  • 1 cup Shredded Mozzarella Cheese Go for whole milk mozzarella to maximize meltiness.
  • 24 slices Pepperoni Slices Try turkey pepperoni or ham for a lighter alternative.
  • 1 teaspoon Italian Seasoning Completely optional but adds delightful herbal note.
For the Topping
  • 1/4 cup Grated Parmesan Cheese Sprinkle on top for extra flavor.
For Serving
  • 1 cup Marinara Sauce Perfect for dipping.

Equipment

  • Oven
  • Baking Sheet
  • Parchment Paper

Method
 

Step-by-Step Instructions
  1. Preheat your oven to 375°F (190°C) and line a baking sheet with parchment paper.
  2. Unroll the refrigerated crescent roll dough and separate it into 8 triangles.
  3. At the wide end of each triangle, place 3–4 pepperoni slices followed by mozzarella cheese.
  4. Roll each triangle tightly toward the tip, making sure the filling is enclosed.
  5. Sprinkle Italian seasoning and grated Parmesan cheese on top if desired.
  6. Place the baking sheet in the oven and bake for 12–15 minutes until golden brown.
  7. Let the rolls cool for a few minutes and serve warm with marinara sauce for dipping.

Nutrition

Serving: 1rollCalories: 180kcalCarbohydrates: 16gProtein: 7gFat: 10gSaturated Fat: 4gPolyunsaturated Fat: 1gMonounsaturated Fat: 4gCholesterol: 20mgSodium: 320mgPotassium: 150mgFiber: 1gSugar: 1gVitamin A: 300IUCalcium: 150mgIron: 1mg

Notes

These rolls can be prepped ahead and frozen for quick snacks or meals anytime.

Tried this recipe?

Let us know how it was!

Delicious Brazilian Cheese Bread You Can’t Resist!

As I pulled the fragrant Pão de Queijo from the oven, memories flooded back of bustling Brazilian streets and the warm sun on my face. These delightful little cheese puffs have a festive spirit, making them a perfect addition to any gathering or a cozy family meal. What makes this Easy Low-Carb Brazilian Cheese Bread even more irresistible is that it’s gluten-free and keto-friendly, allowing you to indulge guilt-free at any time of the day. Whether you’re serving them at brunch or snacking in the afternoon, they are sure to impress with their golden, crispy outside and fluffy, cheesy inside. Aren’t you curious about how to create your own batch of these delectable treats?

Why Is This Recipe So Irresistible?

Easy to Make: With just a blender and a few simple steps, you’ll whip up these cheesy delights in no time.

Low-Carb Goodness: Perfect for those following a keto lifestyle, these snacks let you indulge without the guilt.

Gluten-Free Delight: Made with tapioca flour, everyone can enjoy them, making them perfect for parties or casual get-togethers.

Versatile Flavor Options: Feel free to experiment with different cheeses or add herbs – your taste buds are the limit!

Crowd-Pleaser: Whether it’s a family gathering or a brunch with friends, these little puffs never fail to impress and disappear quickly! Enjoy them warm, perhaps with a dip, or even with a sweet jam, similar to how I savor my Banana Grilled Cheese on those special mornings!

Brazilian Cheese Bread Ingredients

For the Batter

  • Tapioca Flour – Provides that iconic chewy texture that’s synonymous with Brazilian cheese bread; no direct substitutes recommended.
  • Whole Milk – Acts as a source of moisture and richness; you can substitute with any non-dairy milk for a dairy-free option.
  • Eggs – Essential for binding the ingredients and contributing to the puffiness; make sure they’re at room temperature for the best results.
  • Vegetable Oil (or Avocado/Olive Oil) – Adds fat for moisture and a light texture; opt for any neutral oil if you prefer.
  • Shredded Sharp Cheddar Cheese – Delivers a bold flavor and delightful stretch; feel free to switch with other hard cheeses like Gruyère for variation.
  • Shredded Mozzarella Cheese – Enhances the gooeyness that makes each puff irresistible; a mix of mozzarella and provolone is a fantastic alternative.
  • Salt – Enhances overall flavor; adjust according to your taste preferences.
  • Garlic Powder – Optional, adds a savory depth; skip it if you like your cheese puffs simple.

Embrace the joy of making Brazilian cheese bread and enjoy a delicious, gluten-free, and low-carb treat that’s perfect for any occasion!

Step‑by‑Step Instructions for Easy Low-Carb Brazilian Cheese Bread (Pão de Queijo)

Step 1: Preheat the Oven
Begin by preheating your oven to 400°F (204°C). While the oven warms up, prepare your mini muffin pans by lightly greasing them with nonstick spray or a drizzle of vegetable oil. This will ensure your Brazilian cheese bread slides out easily once baked, enhancing the overall presentation and enjoyment of each fluffy puff.

Step 2: Blend the Batter
In a blender, combine all the ingredients: tapioca flour, whole milk, eggs, vegetable oil, shredded sharp cheddar, shredded mozzarella, salt, and garlic powder if desired. Blend on high until the mixture is smooth and frothy, taking about 30–45 seconds. This blending process is crucial for achieving the light and airy texture that makes Pão de Queijo so delightful.

Step 3: Fill the Muffin Pans
Carefully pour the rich batter into your prepared mini muffin pans, filling each well about three-quarters full. This allows room for the dough to rise beautifully as it bakes. Take a moment to admire the smooth consistency of the batter; it should have a creamy appearance that promises a delicious outcome.

Step 4: Bake the Cheese Bread
Place the muffin pans in your preheated oven and bake for 19-20 minutes. Keep an eye on your Brazilian cheese bread; they should puff up and turn a lovely golden brown. The enticing aroma of melting cheese will fill your kitchen, giving you a hint that they are almost ready!

Step 5: Cool and Serve
Once baked, remove the mini muffin pans from the oven and let them cool for a few minutes. This rest time allows the structures to set, making it easier to pop them out. Enjoy these warm Brazilian cheese breads as a delightful snack or as part of your brunch spread, relishing in their crispy exterior and cheesy, airy center.

Storage Tips for Brazilian Cheese Bread

  • Room Temperature: Store cooled Pão de Queijo in an airtight container for up to 4 days. Keep them in a cool, dry place to maintain their texture and flavor.

  • Fridge: While not necessary, you can refrigerate them for longer freshness. Use an airtight container and enjoy within 5 days. Reheat straight from the fridge for best results.

  • Freezer: Freeze Brazilian cheese bread for up to 3 months. Place them in a single layer on a baking sheet to freeze individually before transferring to a freezer-safe bag.

  • Reheating: Thaw frozen cheese puffs in the fridge overnight. Reheat in the oven at 350°F (175°C) for about 10–12 minutes or in an air fryer until warm and crispy. Enjoy the delightful bursts of flavor!

Brazilian Cheese Bread Variations

Feel free to make this delightful Pão de Queijo your own with these inspiring variations!

  • Dairy-Free: Substitute whole milk with your favorite non-dairy milk like almond or oat milk for a creamy taste without the dairy.

  • Herbed Delight: Add fresh herbs like rosemary or chives to the batter for an aromatic twist, bringing an exciting flavor dimension to each puff.

  • Spicy Kick: For those who love heat, mix in finely diced jalapeños or a dash of cayenne pepper. It creates a delightful contrast with the cheese’s richness.

  • Cheese Medley: Experiment with different cheese combinations, such as Gruyère, feta, or even a strong blue cheese, for a unique and delightful taste experience.

  • Savory Garlic: Enhance the overall flavor by adding minced garlic instead of garlic powder, giving a fresher taste that connects well with the cheese.

  • Sweet Surprise: Try adding a bit of sugar along with your cheese for a sweet-and-savory combo that pairs wonderfully with fruity jams; akin to how I enjoy my Strawberry Cheesecake Dump.

  • Whole-Grain Twist: Replace some of the tapioca flour with a gluten-free whole grain flour to add extra nutrition and a slight nuttiness to your cheese puffs.

No matter how you choose to personalize these scrumptious bites, each variant promises to deliver on taste, making them perfect for any occasion!

Make Ahead Options

These Easy Low-Carb Brazilian Cheese Bread are perfect for meal prep enthusiasts! You can prepare the batter up to 24 hours in advance, storing it in an airtight container in the refrigerator. To maintain their delightful texture and flavor, keep them sealed properly to prevent drying out. When you’re ready to bake, simply pour the chilled batter into the mini muffin pans and pop them in the oven as directed. You can also bake them ahead and freeze individual puffs for up to 3 months. Thaw overnight in the refrigerator, then reheat in the oven or air fryer before serving for just as delicious results. Enjoy the convenience and warmth of freshly baked Pão de Queijo without the hassle!

What to Serve with Easy Low-Carb Brazilian Cheese Bread?

Warm, cheesy bites are just the beginning of your delicious meal; let’s elevate the experience with these perfect pairings.

  • Savory Dips: A rich garlic aioli or a zesty chimichurri complements the cheese bread and adds a flavorful pop. These dipping sauces enhance the soft, cheesy interior, making each bite unforgettable.

  • Fresh Salad: A light arugula or mixed greens salad dressed with lemon vinaigrette offers a refreshing contrast to the warm, cheesy puffs, balancing creamy and crispy textures beautifully.

  • Sliced Avocado: Creamy, ripe avocado sprinkled with salt brings a welcoming, buttery element that enhances the savory goodness of the Pão de Queijo, creating a delightful palate experience.

  • Fruit Chutney: Sweet and tangy fruit chutneys, like mango or pineapple, add a burst of sweetness that pairs wonderfully with the savory cheese bread. Try serving them alongside to surprise your taste buds!

  • Brunch Pairing: Fluffy scrambled eggs with herbs make a hearty, comforting duo with the cheese puffs, creating a filling breakfast or brunch spread.

  • Coffee or Tea: A cup of rich Brazilian coffee or herbal tea complements the flavors and helps clear the palate between bites, turning a simple snack into a delightful experience.

  • Sparkling Water: Refreshing sparkling water infused with citrus brings a lively touch to your meal, balancing the rich cheese flavors and quenching your thirst perfectly.

Expert Tips for Pão de Queijo

  • Smooth Batter: Use a blender: Blending the ingredients well ensures a smooth batter, crucial for achieving the perfect texture in your Brazilian cheese bread.

  • Watch Your Bake: Monitor closely: Keep an eye on the baking time to prevent over-browning; the ideal puffs will be golden outside and airy inside.

  • Temperature Matters: Room Temperature Eggs: Using room temperature eggs helps with puffiness, ensuring your cheese bread rises beautifully.

  • Fill Smartly: Don’t Overfill: Fill your muffin pans about ¾ full to allow for proper rising and prevent spillage.

  • Cheese Choices: Mix It Up: Feel free to swap cheeses like Gruyère or provolone for unique flavor profiles in your delicious Pão de Queijo!

Brazilian Cheese Bread Recipe FAQs

How do I select the right tapioca flour?
Absolutely! Look for finely milled tapioca flour specifically labeled for baking. It should be white with a slightly grainy texture and stored in a cool, dry place. Avoid coarse tapioca or any that shows signs of moisture, like clumps or dark spots.

What is the best way to store Pão de Queijo?
I recommend storing cooled Pão de Queijo in an airtight container at room temperature for up to 4 days. If you prefer, you can refrigerate them for up to 5 days, but make sure they’re in an airtight container. Just reheat them directly from the fridge for the best taste!

Can I freeze Brazilian cheese bread?
Yes! To freeze, place your cooled Pão de Queijo in a single layer on a baking sheet and freeze individually for about 2 hours. Once firm, transfer them to a freezer-safe bag, and they’ll keep well for up to 3 months. For reheating, thaw in the fridge overnight, then pop them in the oven at 350°F (175°C) for 10–12 minutes for that fresh-out-of-the-oven taste.

What if my cheese puffs don’t rise properly?
Very often, the culprit is under-mixed batter or not using room temperature eggs, which are crucial for puffiness. Blend the batter until it’s smooth and frothy, about 30–45 seconds. If you see flat puffs, next time check the oven temperature, or remember to fill the muffin wells only about ¾ full to allow for proper rising.

Are Pão de Queijo suitable for people with dairy allergies?
Yes, absolutely! You can make them dairy-free by swapping whole milk with any non-dairy milk, such as almond or oat milk. Additionally, choose dairy-free cheese alternatives that melt well for the best results! Just check the labels to ensure they meet your dietary needs.

Brazilian Cheese Bread

Delicious Brazilian Cheese Bread You Can’t Resist!

Delight in these Brazilian Cheese Bread puffs, a gluten-free and keto-friendly treat that is perfect for any occasion.
Prep Time 10 minutes
Cook Time 20 minutes
Cooling Time 5 minutes
Total Time 35 minutes
Servings: 24 pieces
Course: Appetizers
Cuisine: Brazilian
Calories: 100

Ingredients
  

For the Batter
  • 1 cup tapioca flour Provides chewy texture
  • 1 cup whole milk Can substitute with non-dairy milk
  • 2 large eggs At room temperature
  • 1/4 cup vegetable oil Can substitute with avocado or olive oil
  • 1 cup shredded sharp cheddar cheese Provides bold flavor
  • 1 cup shredded mozzarella cheese Enhances gooeyness
  • 1 teaspoon salt Adjust to taste
  • 1 teaspoon garlic powder Optional

Equipment

  • blender
  • Mini muffin pans

Method
 

Step-by-Step Instructions
  1. Preheat your oven to 400°F (204°C) and prepare mini muffin pans by greasing them.
  2. In a blender, combine all ingredients and blend on high until smooth and frothy for about 30–45 seconds.
  3. Pour the batter into prepared muffin pans, filling each well about three-quarters full.
  4. Bake in the preheated oven for 19-20 minutes until puffed and golden brown.
  5. Remove from oven, cool for a few minutes, then enjoy warm.

Nutrition

Serving: 1pieceCalories: 100kcalCarbohydrates: 8gProtein: 3gFat: 7gSaturated Fat: 3gPolyunsaturated Fat: 1gMonounsaturated Fat: 3gCholesterol: 30mgSodium: 150mgPotassium: 50mgFiber: 1gSugar: 1gVitamin A: 5IUCalcium: 150mgIron: 1mg

Notes

Feel free to experiment with different cheeses or add herbs for unique flavors. Store in an airtight container at room temperature for up to 4 days.

Tried this recipe?

Let us know how it was!

Buttermilk Beignets: Light & Fluffy Brunch Delight

The aroma of freshly fried dough, subtly spiced with nutmeg, instantly transports me to the bustling streets of New Orleans. As I watch golden-brown Buttermilk Beignets puffing up in the hot oil, it’s hard not to smile. These delightful treats are the quintessential brunch indulgence—light, fluffy, and simply irresistible when dusted with powdered sugar. What I love most about this beignet recipe is how easy it is to whip up with staple ingredients, making it perfect for cozy family gatherings or a festive brunch with friends. Plus, you can unleash your creativity by experimenting with various fillings or toppings, like a drizzle of rich chocolate or a dollop of fruity jam. Ready to create these heavenly bites of joy in your kitchen? Let’s dive into the delightful world of homemade beignets together!

Why are Buttermilk Beignets a Must-Try?

Heavenly Aroma: The moment you fry these beignets, your kitchen will fill with a warm, inviting scent that evokes the charm of New Orleans.

Effortlessly Simple: With just a few basic ingredients, this recipe allows anyone to create a truly gourmet treat right at home.

Endless Variations: Personalize your beignets with delightful toppings—imagine fluffy clouds topped with rich chocolate sauce or sweet fruit preserves!

Crowd-Pleasing Delight: Whether for brunch or dessert, these beignets are sure to impress family and friends alike.

Perfect Texture: Enjoy the contrast of a crispy outer layer with a tender, fluffy interior that will have everyone coming back for more.

Dive into this delightful recipe and discover just how easy it is to bring a taste of New Orleans into your home!

Buttermilk Beignets Ingredients

For the Dough

  • All-Purpose Flour – The main structure of the beignet; measure accurately for best results.
  • Granulated Sugar – Balances the tanginess of buttermilk and adds sweetness.
  • Baking Powder – Essential for achieving that airy texture we crave in beignets.
  • Baking Soda – Works with the buttermilk for perfect leavening.
  • Salt – Enhances the overall flavors, making each bite delightful.
  • Ground Nutmeg – Adds a warm, spiced note to the flavor profile.
  • Buttermilk – Provides moisture and essential tang; if unavailable, substitute with milk mixed with vinegar or lemon juice.
  • Eggs – Contributes richness and structure, ensuring a fluffy texture.
  • Vanilla Extract – Enhances sweetness and provides a depth of flavor.
  • Unsalted Butter – Adds moisture; enjoy it just warm and melted.

For Frying & Finishing

  • Vegetable Oil – Used for frying; choose an oil with a high smoke point for optimal results.
  • Powdered Sugar – For dusting; it creates a sweet, finishing touch that makes beignets irresistible.

Get ready to indulge in the heavenly experience of homemade Buttermilk Beignets!

Step‑by‑Step Instructions for Buttermilk Beignets

Step 1: Prepare Ingredients
Begin by gathering all your ingredients for the Buttermilk Beignets. Measure out the all-purpose flour, sugars, baking powder, baking soda, salt, nutmeg, buttermilk, eggs, vanilla extract, and melted butter. Organizing your workspace will make the cooking process smoother and more enjoyable, setting the stage for delicious results.

Step 2: Mix Dry Ingredients
In a large mixing bowl, combine the all-purpose flour, granulated sugar, baking powder, baking soda, salt, and ground nutmeg. Whisk these dry ingredients together until well blended, ensuring no lumps remain. The mixture should have a light and airy appearance, which is crucial for achieving that fluffy texture in your beignets.

Step 3: Combine Wet Ingredients
In another bowl, whisk together the buttermilk, eggs, vanilla extract, and warm melted unsalted butter until fully combined. This mixture should appear smooth and creamy, with no visible egg whites. Incorporating the buttermilk provides moisture and tang, essential elements for the indulgent taste of Buttermilk Beignets.

Step 4: Mix Together
Gently fold the wet ingredients into the dry mixture using a spatula or wooden spoon until just combined. Be careful not to overmix; it’s okay if a few lumps remain. This step is vital, as overworking the batter can lead to tougher beignets instead of the light, fluffy texture we desire.

Step 5: Rest Batter
Set your batter aside for about 10 to 15 minutes. Letting the batter rest allows the leavening agents to activate, leading to fluffier beignets when fried. During this time, prepare your frying station and ensure your oil will be hot and ready for cooking.

Step 6: Heat Oil
In a deep, heavy pot, heat vegetable oil to 350°F (175°C). A kitchen thermometer is helpful for maintaining this temperature, which is ideal for frying your beignets. Proper oil temperature ensures the beignets cook evenly and achieve that golden-brown color without being greasy.

Step 7: Fry Beignets
Using a spoon or small scoop, drop spoonfuls of the batter into the hot oil, being careful not to overcrowd the pot. Fry the beignets for approximately 2 to 3 minutes on each side or until they are puffed and golden brown. The bubbling of the oil around them is a wonderful sign of magic happening!

Step 8: Drain Oil
Once cooked, use a slotted spoon to remove the beignets from the oil. Place them on a plate lined with paper towels to absorb any excess oil. This step helps keep your Buttermilk Beignets from becoming soggy and ensures they maintain their delightful texture.

Step 9: Dust with Sugar
While still warm, generously sprinkle powdered sugar over the beignets. This not only adds sweetness but also creates an appealing presentation. The warmth helps the powdered sugar adhere, enhancing their deliciously indulgent look.

Step 10: Serve
Serve your freshly made Buttermilk Beignets immediately for the best taste and texture. They are delightful on their own or paired with your favorite fruit, ice cream, or warm beverage. Enjoying them warm allows you to experience the full burst of flavors and bliss that these treats offer!

Storage Tips for Buttermilk Beignets

Room Temperature: Store leftover beignets in an airtight container at room temperature for up to two days to maintain their fluffy texture.

Refrigerator: If you need to keep them longer, refrigerate for up to four days, placing a paper towel in the container to absorb excess moisture.

Freezer: For longer storage, freeze the beignets in a single layer on a baking sheet, then transfer to a resealable bag. They can last for up to two months.

Reheating: To enjoy them warm again, reheat in an oven at 350°F for about 10 minutes, ensuring they regain their delightful crispness and fluffy texture.

Expert Tips for Buttermilk Beignets

Oil Temperature: Keep the frying oil at a steady 350°F to avoid greasy beignets and ensure they cook evenly.

Don’t Overmix: Gently fold the wet and dry ingredients together until just combined; overmixing can lead to dense beignets that lose their fluffy charm.

Let Dough Rest: Allow the batter to sit for 10-15 minutes before frying; this step helps improve the texture of your buttermilk beignets.

Check Oil Readiness: Test the oil by dropping a small amount of batter; it should bubble vigorously—this means your oil is hot enough!

Serve Warm: For the best flavor experience, enjoy your beignets immediately after frying while they’re still warm and fluffy.

Buttermilk Beignets: Variations & Substitutions

Feel free to get creative with these delightful treats and make them your own!

  • Vegan Option: Substitute eggs with a flaxseed meal mixture (1 tablespoon flaxseed meal + 2.5 tablespoons water per egg) for a plant-based twist.
    This switch retains the fluffiness and richness without the eggs, allowing everyone to enjoy the goodness.

  • Different Sweeteners: Use brown sugar instead of granulated sugar for a deeper flavor profile that adds a hint of caramel.
    The natural moisture in brown sugar will enhance the beignet’s sweetness and make them even more luscious!

  • Cinnamon Sugar Topping: Mix ground cinnamon with powdered sugar for a lovely warm spice kick.
    Dust this blend over the beignets once they’re warm for an extra layer of delight that will warm your heart.

  • Fruity Fillings: Consider filling your beignets with fruity jelly or cream before frying for an unexpected surprise.
    Strawberry, raspberry, or even lemon curd fillings create a mouthwatering medley of flavors in each delicious bite!

  • Nutty Crunch: Add chopped nuts to the batter for a little extra texture and flavor.
    Walnuts or pecans offer a delightful contrast that complements the softness of the beignets beautifully.

  • Chili Chocolate Drizzle: Spice things up with a drizzle of chili-infused chocolate sauce on top for a sweet and spicy combo.
    This contrast will elevate your beignet game, appealing to those who crave a bit of heat!

  • Gluten-Free Alternative: Substitute all-purpose flour with a gluten-free blend to cater to gluten-sensitive friends.
    Just be sure to choose a blend that includes xanthan gum for the best results in maintaining that airy texture.

Adding your personal flair to these Buttermilk Beignets will surely make them even more special, especially when shared with loved ones.

What to Serve with Buttermilk Beignets

Indulging in fluffy buttermilk beignets opens up a world of delicious pairings that elevate your brunch experience to new heights.

  • Fresh Fruit Salad: A vibrant medley of seasonal fruits adds a refreshing contrast to the sweetness of the beignets, enhancing the overall meal’s brightness.

  • Rich Chocolate Sauce: Drizzling warm chocolate over the beignets transforms them into a decadent treat, perfect for chocolate lovers craving a sweet escape.

  • Vanilla Ice Cream: The creamy coolness of vanilla ice cream complements the warm, fluffy beignets, creating a delightful combination of temperatures that will satisfy any dessert lover.

  • Creamy Yogurt with Honey: A dollop of tangy yogurt drizzled with honey provides a light balance to the beignets, adding a nutritious twist to your indulgence.

  • Espresso or Coffee: The rich, bold flavors of coffee perfectly complement the sweetness of beignets, making it the ideal beverage choice for brunch gatherings.

  • Mimosa: Light and refreshing, a mimosa made with bubbly champagne and fresh orange juice adds a touch of festivity to your brunch table.

Each pairing brings its own unique flavor and texture, ensuring that your delicious beignets are part of a delightful and memorable meal!

Make Ahead Options

These Buttermilk Beignets are perfect for meal prep enthusiasts! You can mix the dry ingredients up to 3 days in advance and store them in an airtight container, ensuring your beignets are just as delightful when you fry them. Additionally, you can prepare the wet mixture (buttermilk, eggs, vanilla, melted butter) and refrigerate it for up to 24 hours; just give it a gentle whisk and bring it to room temperature before combining. When you’re ready to indulge, simply combine the wet and dry mixes, let the batter rest for 10-15 minutes, and proceed to fry for fresh, fluffy beignets that taste just like they came from a cozy New Orleans café!

Buttermilk Beignets Recipe FAQs

What is the best way to choose ripe ingredients for Buttermilk Beignets?
Absolutely! For the best results, ensure that your buttermilk is fresh and free from any signs of spoilage. When baking, always check your eggs for freshness by placing them in water; if they sink, they’re good to use. Selecting all-purpose flour that feels light and free-flowing ensures proper aeration when mixed into your batter.

How should I store leftover Buttermilk Beignets, and how long will they last?
Store leftover beignets in an airtight container at room temperature for up to two days. For longer storage, refrigerate them wrapped in a paper towel to absorb any moisture, and they’ll last for up to four days. Make sure to keep them sealed well to prevent drying out and maintain that delightful texture.

Can I freeze Buttermilk Beignets, and if so, how?
Very! To freeze your beignets, first allow them to cool completely. Then, place them in a single layer on a baking sheet and flash freeze them for about 1-2 hours. Once they are solid, transfer them to a resealable freezer bag. They can be frozen for up to two months. When ready to enjoy, reheat them in an oven at 350°F for about 10 minutes to bring back their fluffy goodness.

What should I do if my Buttermilk Beignets are too dense or not puffing up?
If your beignets are too dense, it may have been due to overmixing the batter or not letting the mixture rest long enough. Be sure to gently fold the ingredients together until just combined—and don’t skip the resting step! If your beignets aren’t puffing up when frying, check your oil temperature; it should be at 350°F. If it’s cooler, the beignets won’t rise properly.

Are Buttermilk Beignets suitable for those with dietary restrictions?
While these beignets traditionally contain eggs and dairy, they can be modified! For a vegan version, substitute the eggs with a flaxseed meal mixture (1 tablespoon of flaxseed mixed with 2.5 tablespoons of water) and use a plant-based milk in place of buttermilk. Always ensure to check for any allergies related to individual ingredients like gluten from the flour or nutmeg if sensitivities arise.

Can pets eat Buttermilk Beignets?
Not at all! It’s best to avoid sharing beignets with pets as they contain sugar and flour, both of which aren’t suitable for their diets. Instead, consider making them a special pet-friendly treat!

Buttermilk Beignets

Buttermilk Beignets: Light & Fluffy Brunch Delight

Enjoy the light and fluffy Buttermilk Beignets, a delightful treat perfect for brunch.
Prep Time 15 minutes
Cook Time 20 minutes
Resting Time 15 minutes
Total Time 50 minutes
Servings: 4 beignets
Course: Dessert
Cuisine: American
Calories: 200

Ingredients
  

Dough Ingredients
  • 3 cups All-Purpose Flour The main structure of the beignet; measure accurately for best results.
  • 1 tablespoon Granulated Sugar Balances the tanginess of buttermilk and adds sweetness.
  • 1 tablespoon Baking Powder Essential for achieving that airy texture we crave in beignets.
  • 1 teaspoon Baking Soda Works with the buttermilk for perfect leavening.
  • 1 teaspoon Salt Enhances the overall flavors, making each bite delightful.
  • 1/2 teaspoon Ground Nutmeg Adds a warm, spiced note to the flavor profile.
  • 1 cup Buttermilk Provides moisture and essential tang; if unavailable, substitute with milk mixed with vinegar or lemon juice.
  • 2 large Eggs Contributes richness and structure, ensuring a fluffy texture.
  • 1 teaspoon Vanilla Extract Enhances sweetness and provides a depth of flavor.
  • 4 tablespoons Unsalted Butter Adds moisture; enjoy it just warm and melted.
Frying & Finishing Ingredients
  • 4 cups Vegetable Oil Used for frying; choose an oil with a high smoke point for optimal results.
  • 1 cup Powdered Sugar For dusting; it creates a sweet, finishing touch that makes beignets irresistible.

Equipment

  • Mixing bowls
  • whisk
  • spatula
  • Deep pot
  • slotted spoon
  • kitchen thermometer

Method
 

Beignet Instructions
  1. Prepare Ingredients: Begin by gathering all your ingredients for the Buttermilk Beignets. Measure out the all-purpose flour, sugars, baking powder, baking soda, salt, nutmeg, buttermilk, eggs, vanilla extract, and melted butter.
  2. Mix Dry Ingredients: In a large mixing bowl, combine the all-purpose flour, granulated sugar, baking powder, baking soda, salt, and ground nutmeg. Whisk these dry ingredients together until well blended.
  3. Combine Wet Ingredients: In another bowl, whisk together the buttermilk, eggs, vanilla extract, and warm melted unsalted butter until fully combined.
  4. Mix Together: Gently fold the wet ingredients into the dry mixture until just combined. Be careful not to overmix.
  5. Rest Batter: Set your batter aside for about 10 to 15 minutes to allow the leavening agents to activate.
  6. Heat Oil: In a deep, heavy pot, heat vegetable oil to 350°F (175°C).
  7. Fry Beignets: Drop spoonfuls of the batter into the hot oil, frying for approximately 2 to 3 minutes on each side.
  8. Drain Oil: Use a slotted spoon to remove the beignets from the oil and place them on a plate lined with paper towels.
  9. Dust with Sugar: While still warm, generously sprinkle powdered sugar over the beignets.
  10. Serve: Serve your freshly made Buttermilk Beignets immediately for the best taste and texture.

Nutrition

Serving: 1beignetCalories: 200kcalCarbohydrates: 30gProtein: 3gFat: 8gSaturated Fat: 5gPolyunsaturated Fat: 1gMonounsaturated Fat: 2gCholesterol: 30mgSodium: 150mgPotassium: 80mgSugar: 5gVitamin A: 300IUCalcium: 50mgIron: 1mg

Notes

Enjoy your beignets warm and experiment with different toppings and fillings!

Tried this recipe?

Let us know how it was!

Moist Oatmeal Muffins w/ Maple & Sugar for Cozy Mornings

As the aroma of baking muffins wafts through the kitchen, I can’t help but feel a warm sense of comfort wash over me. There’s something truly magical about these Hearty Maple and Brown Sugar Oatmeal Muffins that turns an ordinary morning into a delightful experience. With just the right blend of wholesome oats and the sweet touch of pure maple syrup, they strike an irresistible balance between heartiness and sweetness, guaranteed to brighten any day. The best part? They’re not only incredibly moist but also super easy to whip up, making them a perfect swift breakfast option or a tasty snack anytime. So, are you ready to transform your mornings with a muffin that feels like a warm hug? Let’s dive in!

Why are these muffins a must-try?

Moisture Meets Flavor: These muffins boast a rich, moist texture thanks to the hearty oats and just the right amount of maple syrup, creating a delightful breakfast treat.
Versatility: Perfect for customizing! Add nuts or dried fruits to make them uniquely yours; try Savory Brown Sugar for a flavor twist!
Quick Prep Time: Whipping up a batch is a breeze—ideal for busy mornings or last-minute snack cravings.
Feel-Good Ingredients: With wholesome oats at the forefront, these muffins are packed with dietary fiber, making them a healthier alternative to typical sugary pastries.
Crowd Favorite: Their inviting aroma and delectable taste will have family and friends coming back for seconds, turning any ordinary morning into a cozy gathering.

Oatmeal Muffins w/ Maple & Sugar Ingredients

For the Muffins

  • Old-Fashioned Rolled Oats – Provides a hearty texture; quick oats can be used but will yield a softer muffin.
  • Milk – Helps soften oats and adds moisture to the muffins.
  • Pure Maple Syrup – Adds rich sweetness to the mix; feel free to substitute with honey, although the flavor will differ.
  • Oil (Vegetable or Coconut) – Ensures moisture and enhances the muffin’s texture.
  • Brown Sugar – Sweetens the muffins and contributes a rich flavor; consider using a low-calorie sweetener for a different profile.
  • All-Purpose Flour – Provides structure; sifting is optional but can help avoid lumps.
  • Baking Powder – Acts as a leavening agent for a fluffy rise.
  • Ground Cinnamon – Infuses warmth and a subtle spice to each bite.
  • Baking Soda – Promotes rising and contributes to a light texture.
  • Kosher Salt – Enhances the overall flavor balance.
  • Eggs – Adds moisture and structure when lightly beaten.

Optional Add-Ins

  • Chopped Nuts (like Walnuts or Pecans) – Adds crunch and depth to the flavor.
  • Dried Fruits (like Raisins or Cranberries) – Increases sweetness and adds a chewy texture; feel free to mix and match!

Whip up these delightful Oatmeal Muffins w/ Maple & Sugar and savor the comfort they bring to your mornings!

Step‑by‑Step Instructions for Oatmeal Muffins w/ Maple & Sugar

Step 1: Preheat and Prepare
Begin by preheating your oven to 400°F (200°C). While the oven heats up, prepare your muffin tin by either lining it with muffin liners or greasing each cup generously with oil or cooking spray. This ensures your Oatmeal Muffins w/ Maple & Sugar will release easily after baking, providing a beautiful, golden finish.

Step 2: Soak the Oats
In a large mixing bowl, combine 2 cups of old-fashioned rolled oats with 1 cup of milk. Allow this mixture to sit for about 5 to 10 minutes, which will soften the oats and create a heartier texture in your muffins. You’ll know it’s ready when the oats have absorbed most of the milk, appearing plump and tender.

Step 3: Mix the Wet Ingredients
Add 1/2 cup of pure maple syrup, 1/3 cup of your choice of oil, 2/3 cup of brown sugar, and 2 lightly beaten eggs to the soaked oats. Stir gently until all the ingredients are well incorporated; however, be cautious not to overmix. The goal is to blend these ingredients into a smooth mixture for your Oatmeal Muffins w/ Maple & Sugar.

Step 4: Combine the Dry Ingredients
In a separate bowl, whisk together 1 ½ cups of all-purpose flour, 1 teaspoon of baking powder, 1/2 teaspoon of ground cinnamon, 1/2 teaspoon of baking soda, and 1/2 teaspoon of kosher salt. This mix provides the structure and flavor that enhances your muffins, ensuring they rise beautifully in the oven.

Step 5: Blend Wet and Dry Mixtures
Gradually add the dry mixture to the wet oat mixture, stirring gently until just combined. It’s perfectly fine for the batter to be slightly lumpy; this will help keep your Oatmeal Muffins w/ Maple & Sugar light and fluffy. Avoid overmixing to ensure a wonderful texture in your finished product.

Step 6: Fill the Muffin Cups
Carefully fill each muffin cup with the batter, filling them about three-quarters full to allow space for rising. For an added touch, consider sprinkling a little extra sugar on top of each muffin before baking to create a delightful crunch. This gives them that bakery-style finish!

Step 7: Bake to Perfection
Place the muffin tin in the preheated oven and bake for 18 to 25 minutes. Keep an eye on them; the muffins are ready when they are golden brown on top and a toothpick inserted into the center comes out clean. This is a visual cue that your Oatmeal Muffins w/ Maple & Sugar are perfectly baked.

Step 8: Cool and Enjoy
Once baked, remove the muffin tin from the oven and let the muffins cool in the tin for about 5 minutes. Afterward, transfer them to a wire rack to cool completely. This step will ensure they set perfectly, making them ready for you to enjoy or store for later!

Expert Tips for Oatmeal Muffins w/ Maple & Sugar

  • Soak Oats Well: Ensure oats are fully absorbed in milk for optimal moisture; this prevents dry muffins.
  • Avoid Overmixing: To keep muffins light and fluffy, mix just until combined. Slight lumps are okay!
  • Adjust Baking Time: Every oven is different; start checking muffins at 18 minutes to avoid overbaking.
  • Customize Flavors: Feel free to experiment with add-ins like nuts or dried fruits, but keep portion sizes in check.
  • Cool Properly: Let muffins cool in the tin for about 5 minutes before transferring to a wire rack for a better texture.

Make Ahead Options

These Hearty Maple and Brown Sugar Oatmeal Muffins are perfect for meal prep enthusiasts looking to save time in the mornings! You can prepare the dry ingredients (1 ½ cups flour, 1 tsp baking powder, etc.) and store them in an airtight container up to 3 days in advance. Additionally, you can soak the oats in milk (2 cups oats with 1 cup milk) and refrigerate this mixture overnight, which will enhance the muffin’s texture when baked. When you’re ready to bake, simply combine the prepped dry mix with the soaked oats, add the wet ingredients, and follow the baking instructions for fresh muffins that are just as delicious as if made the same day!

Oatmeal Muffins w/ Maple & Sugar Variations

Feel free to get creative with these delightful muffins to suit your taste and dietary needs!

  • Honey Swap: Use honey instead of maple syrup for a floral sweetness that changes the flavor profile beautifully.

  • Nutty Crunch: Add 1/2 cup of chopped walnuts or pecans for a satisfying crunch. They bring texture and richness, making every bite even more enjoyable!

  • Fruit-Infused: Include 1/2 cup of dried fruits like raisins or cranberries for natural sweetness and a chewy texture that perfectly complements the hearty oats.

  • Gluten-Free Option: Substitute all-purpose flour with gluten-free flour blend to make these muffins suitable for gluten-sensitive folks. The muffins will still be deliciously moist!

  • Cinnamon & Spice: Boost the flavor by adding 1 teaspoon of pumpkin pie spice or another warm spice blend for a more aromatic experience.

  • Vegan-Friendly: Replace eggs with 1/2 cup of unsweetened applesauce or flaxseed meal mixed with water for a delightful vegan option. Enjoy the same lovely texture without compromising on taste!

  • Banana Bliss: Mash 1 ripe banana and stir it into the wet ingredients for extra sweetness and a delightful banana flavor. It’s a fun twist on the classic muffin.

  • Lower Sugar: Reduce brown sugar to 1/3 cup and adjust maple syrup for a less sweet muffin without sacrificing moisture—perfect for those watching their sugar intake.

These variations keep the spirit of your Oatmeal Muffins w/ Maple & Sugar intact while adding a personal touch! Happy baking!

What to Serve with Oatmeal Muffins w/ Maple & Sugar

These delightful muffins are perfect for creating a warm breakfast spread that will please the entire family.

  • Fresh Fruit Salad: A colorful mix of seasonal fruits adds brightness and a refreshing contrast to the hearty muffins. The natural sweetness of fruits pairs beautifully with the maple and brown sugar flavors.

  • Greek Yogurt: Creamy and tangy, Greek yogurt provides a protein-packed boost to your meal. Top it with a drizzle of honey for added sweetness, making it an enticing accompaniment.

  • Scrambled Eggs: Fluffy scrambled eggs bring warmth and richness to your table, adding a savory element that complements the sweet muffins. This combination creates a balanced and satisfying breakfast.

  • Nut Butter Toast: Toasted bread spread with almond or peanut butter creates a delightful crunch and nutty flavor that pairs well with the muffins’ soft, moist texture.

  • Herbal Tea: A warm cup of peppermint or chamomile tea can elevate your breakfast experience, providing soothing notes that complement the muffins’ wholesome goodness.

  • Maple Cinnamon Butter: Spread a delightful blend of butter, maple syrup, and cinnamon on your warm muffins to elevate them to new heights. This sweet and spicy concoction is like a hug in every bite!

  • Milk or Nut Milk: A glass of cold milk—dairy or plant-based—serves as the perfect drink alongside your muffins. It enhances the flavors and offers a nostalgic breakfast experience.

  • Chocolate Chips: Treat yourself and sprinkle some mini chocolate chips on your muffins before baking. This sweet twist makes for a delectable dessert-like snack that pairs well with coffee or tea later in the day.

  • Cheese Platter: Pair your muffins with a small cheese board featuring light cheeses such as Brie or goat cheese; their creaminess nicely balances the muffin’s sweet flavors.

Storage Tips for Oatmeal Muffins w/ Maple & Sugar

Room Temperature: Store in an airtight container at room temperature for up to 3 days to maintain freshness and moisture.

Fridge: Keep in the refrigerator for up to 1 week; ensure they’re sealed tightly to prevent drying out.

Freezer: For longer storage, freeze muffins in a freezer-safe bag or container for up to 3 months. Thaw at room temperature before enjoying.

Reheating: To revive your muffins, warm them in the microwave for 15-20 seconds or toast them lightly for a crispy finish.

Oatmeal Muffins w/ Maple & Sugar Recipe FAQs

How do I select ripe and fresh ingredients for these muffins?
Absolutely! Choose old-fashioned rolled oats that are fresh and whole, avoiding any that appear stale or have an off smell. When selecting milk, opt for a variety that suits your preference, whether it’s whole, almond, or oat milk. For maple syrup, go for pure maple syrup as it has a richer flavor than artificially flavored syrups.

What is the best way to store Oatmeal Muffins w/ Maple & Sugar?
To keep these muffins fresh, store them in an airtight container at room temperature for up to 3 days. For longer storage, placing them in the refrigerator can extend their life to about one week. Just be sure to wrap them well to prevent them from drying out.

Can I freeze Oatmeal Muffins w/ Maple & Sugar?
Absolutely! To freeze, first, let the muffins cool completely. Then, wrap them individually in plastic wrap or aluminum foil and place them in a freezer-safe bag or container. They can be frozen for up to 3 months. When you’re ready to enjoy, simply thaw them at room temperature overnight or pop them in the microwave for about 15-20 seconds for a quick warm-up!

What should I do if my muffins turn out dense?
If your muffins are dense, there are a few potential culprits. First, ensure that you haven’t overmixed the batter, as this can lead to a tough texture. Additionally, check that your leavening agents, like baking powder and baking soda, are fresh and active; old agents won’t provide the lift your muffins need. Lastly, make sure to let the oats soak long enough to absorb the milk, which helps create the desired moisture content.

Are these muffins safe for people with nut allergies?
The base recipe for the Oatmeal Muffins w/ Maple & Sugar is nut-free, making it suitable for those with nut allergies. However, if you decide to add nuts, be cautious and use alternative add-ins like dried fruit or seeds for a delicious, allergy-friendly twist. Always double-check your ingredients for any nut derivatives to ensure safety.

How can I enhance the flavor of my muffins?
For an extra boost of flavor, consider adding a pinch of nutmeg along with the cinnamon for a warm spice kick. You can also enhance the muffins with vanilla extract, adding 1 teaspoon to the wet ingredients. If you love a little crunch, lightly toasted nuts or chocolate chips make delightful add-ins, but keep portion sizes in check to maintain the muffins’ hearty structure.

Oatmeal Muffins w/ Maple & Sugar

Moist Oatmeal Muffins w/ Maple & Sugar for Cozy Mornings

Delightful Oatmeal Muffins w/ Maple & Sugar, perfect for cozy mornings.
Prep Time 10 minutes
Cook Time 25 minutes
Total Time 35 minutes
Servings: 12 muffins
Course: Breakfast
Calories: 180

Ingredients
  

For the Muffins
  • 2 cups Old-Fashioned Rolled Oats Quick oats can be used but will yield a softer muffin.
  • 1 cup Milk Helps soften oats and adds moisture.
  • 1/2 cup Pure Maple Syrup Adds rich sweetness; can substitute with honey.
  • 1/3 cup Oil (Vegetable or Coconut) Ensures moisture and enhances texture.
  • 2/3 cup Brown Sugar Sweetens and contributes rich flavor.
  • 1 1/2 cups All-Purpose Flour Sifting is optional.
  • 1 teaspoon Baking Powder Acts as a leavening agent.
  • 1/2 teaspoon Ground Cinnamon Infuses warmth and subtle spice.
  • 1/2 teaspoon Baking Soda Promotes rising.
  • 1/2 teaspoon Kosher Salt Enhances flavor balance.
  • 2 large Eggs Lightly beaten.
Optional Add-Ins
  • 1 cup Chopped Nuts (like Walnuts or Pecans) Adds crunch and depth.
  • 1 cup Dried Fruits (like Raisins or Cranberries) Increases sweetness and adds chewiness.

Equipment

  • Oven
  • Muffin Tin
  • Mixing bowls
  • whisk
  • Measuring cups
  • Measuring spoons

Method
 

Step-by-Step Instructions
  1. Preheat your oven to 400°F (200°C). Prepare muffin tin with liners or grease with oil.
  2. Combine 2 cups of old-fashioned rolled oats with 1 cup of milk. Let sit for 5-10 minutes.
  3. Add 1/2 cup pure maple syrup, 1/3 cup oil, 2/3 cup brown sugar, and 2 beaten eggs to soaked oats. Stir gently.
  4. In another bowl, whisk together 1 ½ cups flour, 1 tsp baking powder, 1/2 tsp cinnamon, 1/2 tsp baking soda, and 1/2 tsp salt.
  5. Gradually add dry mixture to wet oat mixture, stirring gently until just combined.
  6. Fill each muffin cup 3/4 full with batter and optionally sprinkle extra sugar on top.
  7. Bake in preheated oven for 18-25 minutes or until golden and a toothpick comes out clean.
  8. Let muffins cool in tin for 5 minutes, then transfer to a wire rack.

Nutrition

Serving: 1muffinCalories: 180kcalCarbohydrates: 24gProtein: 3gFat: 8gSaturated Fat: 1gCholesterol: 35mgSodium: 180mgPotassium: 150mgFiber: 2gSugar: 6gCalcium: 5mgIron: 8mg

Notes

Soak oats well to prevent dry muffins. Avoid overmixing for light and fluffy texture.

Tried this recipe?

Let us know how it was!

Homemade Starbucks Spinach Feta Wrap You’ll Love

One bite of this delicious copycat Starbucks Spinach Feta Wrap, and you’ll understand why it’s an instant breakfast favorite in my kitchen. Brimming with cheesy goodness and an array of vibrant Mediterranean flavors, this wrap is not only a quick and satisfying option for busy mornings, but it also packs in nearly double the protein of the store-bought version. Plus, it’s meal prep-friendly—perfect for those of us who want to savor wholesome, homemade meals without spending hours in the kitchen. Are you ready to elevate your morning routine with this delectable twist? Let’s unwrap the secrets to making this satisfying breakfast wrap.

Why is this wrap a game changer?

Packed with Protein: Each bite delivers a protein punch, helping you feel full and energized throughout your day.

Customizable Goodness: Whether you’re craving a gluten-free meal or a dairy-free option, this wrap adapts flawlessly to your dietary needs, ensuring no one misses out on the Mediterranean flavors.

Quick and Easy Prep: With simple steps and a short baking time, you can have this wrap ready to go in just minutes—perfect for busy mornings when you need a delicious breakfast on the fly.

Meal Prep Friendly: Make a batch ahead of time and store them for a quick reheat option, making week-ahead planning a breeze! For similar meal ideas, check out these delicious Garlic Chicken Wraps or try something different like Feta Fried Eggs.

Crowd-Pleasing Flavor: Elevate your breakfast game and impress your family with this Mediterranean twist that’s sure to satisfy everyone’s taste buds.

Starbucks Spinach Feta Wrap Ingredients

• Get ready for a delicious homemade masterpiece!

For the Wrap

  • Lavash Wrap – The perfect base; you can swap with a large burrito-style wrap for heartiness.

For the Filling

  • Oil from Sun-Dried Tomatoes – Adds moisture and richness; olive oil is a great substitute if needed.
  • Fresh Spinach – Packed with nutrients and color; feel free to use kale for a flavorful twist.
  • Sun-Dried Tomatoes – Introduces a sweet and tangy flavor profile; fresh tomatoes can be used if you’re in a pinch.
  • Garlic Powder – Delivers depth of flavor; use fresh minced garlic for a more robust taste.
  • Italian Seasoning – Complements the Mediterranean theme wonderfully; create your own blend for a unique touch.
  • Salt & Pepper – Essential for flavor enhancement; adjust them to suit your taste preferences.

For the Protein

  • Egg Whites – The main source of protein in this wrap; switch to whole eggs if you prefer a richer flavor.
  • Shredded Mozzarella – Provides creaminess and that delightful stretch; swap with dairy-free mozzarella for a vegan option.
  • Crumbled Feta – Offers a salty, tangy taste that shines; vegan feta is a perfect alternative for dairy-free needs.

With all these ingredients ready, you’re one step closer to enjoying your homemade Starbucks Spinach Feta Wrap!

Step‑by‑Step Instructions for Starbucks Spinach Feta Wrap

Step 1: Preheat and Prepare
Begin by preheating your oven to 400°F (200°C). While the oven is warming up, line a baking sheet with parchment paper to prevent sticking. This preparation sets the stage for your homemade Starbucks Spinach Feta Wrap, ensuring a crispy exterior and easy cleanup later.

Step 2: Sauté the Spinach
In a skillet, heat a tablespoon of oil from sun-dried tomatoes over medium heat. Add fresh spinach and sauté it for about 2-3 minutes until it’s wilted and vibrant green. Stir occasionally to ensure even cooking. This step enhances the flavor of the spinach, making it a delightful addition to your wrap.

Step 3: Add Flavors
Once the spinach is wilted, mix in sun-dried tomatoes, a sprinkle of garlic powder, Italian seasoning, and salt and pepper to taste. Stir the mixture for another 1-2 minutes to marry the flavors beautifully. This flavorful filling is the heart of your Starbucks Spinach Feta Wrap, packed with the essence of the Mediterranean.

Step 4: Create the Egg Patty
Pour egg whites over the cooked spinach mixture in the skillet. Stir gently to combine, then cover the skillet with a lid and let it cook for about 3-4 minutes, allowing the egg to set and form a delicious savoury patty. This gives your wrap a hearty protein boost that is essential for a fulfilling breakfast.

Step 5: Assemble the Wrap
Once the egg patty is cooked, lay a lavash wrap flat on a clean surface. Carefully place the egg and spinach mixture in the center, then sprinkle shredded mozzarella and crumbled feta generously on top. This layered combination will ensure that your Starbucks Spinach Feta Wrap is both cheesy and nutritious.

Step 6: Roll It Up
Gently roll the lavash wrap tightly like a burrito, making sure to tuck in the sides to seal the filling inside. Once rolled, lightly spray the outside with cooking spray for even browning. This step ensures that your wrap retains its shape while baking, creating the perfect bite.

Step 7: Bake to Perfection
Place the rolled wrap seam-side down on the prepared baking sheet. Bake in the preheated oven for 5-10 minutes, flipping halfway through until the wrap is golden and crisp. You’ll know it’s done when the outside is beautifully browned, and the cheese is melted, creating a warm, inviting finish to your Starbucks Spinach Feta Wrap.

Step 8: Serve Warm
Remove the wrap from the oven and let it sit for a minute before slicing it in half. Serve warm, perhaps alongside fresh fruit or a light salad for a complete meal. Relish the flavors of your homemade Starbucks Spinach Feta Wrap as you enjoy every scrumptious bite!

How to Store and Freeze Starbucks Spinach Feta Wrap

Fridge: Store uneaten wraps in an airtight container for up to 5-7 days. This will keep them fresh and ready for quick breakfasts.

Freezer: For longer storage, tightly wrap the prepared wraps in plastic wrap or aluminum foil and freeze for up to 3 months. This makes meal prep super convenient!

Reheating: To reheat from frozen, bake at 350°F for about 15-20 minutes, or use an air fryer for a crispy finish. Enjoy your delicious Starbucks Spinach Feta Wrap anytime!

Make Ahead Options

These Homemade Starbucks Spinach Feta Wraps are perfect for meal prep enthusiasts! You can sauté the spinach and mix it with the sun-dried tomatoes, seasonings, and egg whites up to 24 hours in advance, storing the mixture in an airtight container in the fridge. The assembled wraps can also be rolled and refrigerated for up to 3 days. To maintain quality, be sure to place parchment paper between wraps to prevent sticking. When you’re ready to enjoy, simply bake the wraps at 400°F (200°C) for 5-10 minutes, flipping halfway, until they’re golden brown and crisp. This way, you can savor a hearty breakfast with minimal effort on busy mornings!

Expert Tips for Starbucks Spinach Feta Wrap

  • Sauté Spinach Well: Make sure to fully wilt the spinach to eliminate excess water, ensuring a crisp wrap that won’t get soggy.

  • Perfect Egg Patty: Allow the egg whites to set completely; stirring too much can prevent a firm patty from forming.

  • Choose Your Wrap: For a gluten-free option, opt for gluten-free lavash or a large, whole grain wrap to suit your dietary needs.

  • Flavor Variations: Experiment with different cheeses or herbs to customize your Starbucks Spinach Feta Wrap, making each batch uniquely yours.

  • Meal Prep Efficiency: Consider making several wraps at once to store in the fridge or freezer; reheat easily in the oven or air fryer for quick breakfasts.

  • Don’t Skip the Cooking Spray: Spraying the outside of the wrap ensures a beautifully golden brown finish, maximizing taste and presentation.

What to Serve with High-Protein Copycat Starbucks Spinach Feta Wrap

Elevate your breakfast experience with delightful sides and drinks that complement this Mediterranean-inspired wrap perfectly.

  • Fresh Fruit Salad: A vibrant medley of seasonal fruits adds sweetness and a refreshing crunch alongside the savory wrap.

  • Greek Yogurt: Creamy and tangy, a dollop of Greek yogurt on the side enhances the wrap’s Mediterranean flavors and boosts its protein content.

  • Zesty Cucumber Salad: This light and crunchy salad, drizzled with lemon vinaigrette, brings brightness and a refreshing contrast to the wrap.

  • Herbed Quinoa: Fluffy quinoa tossed with fresh herbs and olive oil creates a nutty flavor and adds texture, completing a nutritious breakfast spread.

  • Herbal Tea: A warm cup of herbal tea not only soothes but also harmonizes beautifully with the Mediterranean spices in the wrap.

  • Smoothie: A fruit and spinach smoothie can serve as a nutritious drink that echoes the wrap’s flavors while providing an extra boost.

  • Light Green Salad: A simple salad with mixed greens, cherry tomatoes, and a light dressing offers a crisp, fresh balance to the hearty wrap.

  • Sparkling Water: A refreshing glass of sparkling water with a splash of lemon cleanses the palate and keeps the meal light and invigorating.

Starbucks Spinach Feta Wrap Variations

Feel free to get creative and adapt this recipe to suit your taste buds or dietary needs!

  • Gluten-Free: Use a gluten-free wrap or lettuce leaves for a low-carb option, keeping all the Mediterranean flavors intact.
  • Dairy-Free: Swap mozzarella and feta with dairy-free alternatives for a vegan-friendly delight that remains rich and cheesy.
  • Spicy Kick: Add some diced jalapeños or a sprinkle of red pepper flakes to the filling for a spicier version that delivers an extra punch!
  • Herb Lovers: Experiment with fresh herbs like basil, dill, or cilantro to elevate the flavor profile and add a burst of freshness.
  • Different Greens: Instead of spinach, try arugula or Swiss chard for variety and a slight change in flavor.
  • Protein Boost: Add cooked chicken or turkey for an even higher protein content, making it a more substantial meal for busy mornings.
  • Flavorful Cheese: Swap out mozzarella for pepper jack or goat cheese for additional flavor dimensions and creaminess.
  • Nutty Twist: Incorporate some chopped nuts like walnuts or pine nuts for delightful crunch and an added layer of nutrition.

These variations offer endless possibilities to ensure that your homemade Starbucks Spinach Feta Wrap can be customized to your heart’s content! Enjoy experimenting with different combinations. If you’re in the mood for another cheesy recipe, don’t miss out on these wonderful Cheesy Spinach Artichoke bites!

Starbucks Spinach Feta Wrap Recipe FAQs

What is the best way to select fresh spinach for my wrap?
Absolutely! Look for spinach leaves that are vibrant green and crisp. Avoid any that have dark spots or wilting, as these indicate age. If you’re opting for kale instead, choose leaves that are firm and have a deep color.

How should I store my Starbucks Spinach Feta Wrap leftovers?
You can store uneaten wraps in an airtight container in the fridge for up to 5-7 days. This will keep them fresh and make for a quick grab-and-go breakfast option. I often use meal prep containers for easy access during busy mornings.

Can I freeze my Starbucks Spinach Feta Wrap?
Very much! For freezing, tightly wrap each prepared and cooled wrap in plastic wrap or aluminum foil, and place them in a freezer-safe bag. They can be stored for up to 3 months. To reheat from frozen, simply bake them at 350°F for about 15-20 minutes for a crispy result.

What should I do if my wrap turns soggy?
To prevent a soggy wrap, it’s essential to sauté the spinach thoroughly until all the water evaporates. If you find your wraps are still soggy after baking, check if you’ve overstuffed them—less is often more when it comes to the filling!

Are there any dietary considerations for the Starbucks Spinach Feta Wrap?
Yes! This recipe can be easily adapted for different dietary needs. For a gluten-free version, opt for gluten-free lavash or a large, whole grain wrap. Additionally, using dairy-free mozzarella and vegan feta allows those with dairy allergies to enjoy this delicious wrap as well. Don’t hesitate to mix and match based on your preferences!

How long can I keep the filling in the fridge before using it?
You can store any leftover filling in an airtight container in the fridge for up to 3 days. This makes it easy to assemble fresh wraps throughout the week. Just reheat the filling in a skillet before rolling it up, and you’re good to go!

Starbucks Spinach Feta Wrap

Homemade Starbucks Spinach Feta Wrap You’ll Love

Enjoy a quick and delicious Starbucks Spinach Feta Wrap, packed with Mediterranean flavors and protein for a satisfying breakfast.
Prep Time 10 minutes
Cook Time 15 minutes
Total Time 25 minutes
Servings: 2 wraps
Course: Breakfast
Cuisine: Mediterranean
Calories: 350

Ingredients
  

For the Wrap
  • 1 large Lavash Wrap or burrito-style wrap
For the Filling
  • 1 tablespoon Oil from Sun-Dried Tomatoes olive oil can be used as substitute
  • 2 cups Fresh Spinach kale can be used for a twist
  • 1/2 cup Sun-Dried Tomatoes fresh tomatoes can be used if needed
  • 1 teaspoon Garlic Powder use fresh minced garlic for stronger flavor
  • 1 teaspoon Italian Seasoning make your own blend for uniqueness
  • to taste Salt & Pepper adjust to preference
For the Protein
  • 1 cup Egg Whites whole eggs can be used for richer flavor
  • 1 cup Shredded Mozzarella dairy-free mozzarella can be swapped
  • 1/2 cup Crumbled Feta vegan feta is a good alternative

Equipment

  • Skillet
  • Oven
  • Baking Sheet
  • Parchment Paper

Method
 

Step-by-Step Instructions
  1. Preheat your oven to 400°F (200°C) and line a baking sheet with parchment paper.
  2. In a skillet, heat a tablespoon of oil from sun-dried tomatoes over medium heat. Add fresh spinach and sauté for about 2-3 minutes until wilted.
  3. Mix in sun-dried tomatoes, garlic powder, Italian seasoning, and salt and pepper. Stir for another 1-2 minutes.
  4. Pour egg whites over the spinach mixture in the skillet, cover with a lid and let cook for 3-4 minutes.
  5. Lay a lavash wrap flat and place the egg and spinach mixture in the center. Sprinkle mozzarella and feta on top.
  6. Roll the lavash wrap tightly like a burrito, ensuring to tuck in the sides. Lightly spray with cooking spray.
  7. Place the wrap seam-side down on the baking sheet and bake for 5-10 minutes until golden.
  8. Remove from the oven, let sit for a minute, slice in half, and serve warm.

Nutrition

Serving: 1wrapCalories: 350kcalCarbohydrates: 35gProtein: 25gFat: 15gSaturated Fat: 5gPolyunsaturated Fat: 2gMonounsaturated Fat: 8gSodium: 600mgPotassium: 500mgFiber: 4gSugar: 3gVitamin A: 1200IUVitamin C: 15mgCalcium: 250mgIron: 3mg

Notes

Sautéing the spinach well prevents a soggy wrap. Experiment with different cheeses for varied flavor.

Tried this recipe?

Let us know how it was!

Sausage and Cream Cheese Biscuit Bliss in Just 30 Minutes

As I was preparing for a cozy brunch with friends, I had a mini crisis: what could I whip up that would wow everyone without spending hours in the kitchen? That’s when these delightful Sausage and Cream Cheese Biscuits came to mind. With only four ingredients, they’re not just quick to make, but also incredibly satisfying as a hearty breakfast or finger-licking appetizer. Imagine soft, pillowy biscuits enveloping a creamy, savory filling—pure bliss! The blend of cream cheese with zesty sausage makes them a guaranteed crowd-pleaser. Plus, you can easily freeze any leftovers for a busy weeknight meal. Curious how quickly you can bring this simple yet delicious dish to your table? Let’s dive into the recipe!

Why Are These Biscuits So Irresistible?

Simplicity at Its Finest: With only four ingredients, you can create an impressive dish that doesn’t require expert cooking skills.

Quick to Make: In just 30 minutes, you can serve warm, savory biscuits that will steal the show.

Creamy and Savory: The combination of cream cheese and bold sausage filling creates an unforgettable flavor explosion.

Versatile Delight: Great for breakfast, an appetizer, or even a midnight snack! Pair with a side of scrambled eggs for a complete meal or enjoy with a fresh salad.

Make-Ahead Magic: Freeze extras for a quick, weeknight meal that saves time without skimping on taste. Trust me, your taste buds won’t be able to resist!

Sausage and Cream Cheese Biscuit Ingredients

For the Biscuit Base

  • Ground Breakfast Sausage – Provides a savory, hearty flavor; Italian sausage can add a spicy kick if you like a little heat.
  • Refrigerated Biscuits (Large “Grands”) – Forms the base and outer layer; you can use homemade biscuit dough for a fresh touch.

For the Filling

  • Cream Cheese – Adds rich creaminess and binds everything together; Neufchâtel cheese is a lighter alternative if desired.
  • Shredded Cheddar Cheese – Offers added flavor and richness; feel free to swap for any melty cheese like Monterey Jack or pepper jack for a different taste.

This delightful Sausage and Cream Cheese Biscuit recipe will have you amazed at how deliciously simple home-cooked meals can be!

Step‑by‑Step Instructions for Sausage and Cream Cheese Biscuits

Step 1: Cook the Sausage
Begin by heating a large skillet over medium heat, then add the ground breakfast sausage. Cook for about 5-7 minutes, breaking it apart with a spatula, until it’s browned and no longer pink. Ensure it’s well cooked, then drain any excess grease from the skillet to keep your Sausage and Cream Cheese Biscuits light and fluffy.

Step 2: Prepare Cream Cheese Mixture
Once your sausage is cooked, transfer it to a large mixing bowl to cool slightly. Add in the softened cream cheese and shredded cheddar cheese, mixing thoroughly until the ingredients are completely combined and creamy. This flavorful mixture is the heart of your Sausage and Cream Cheese Biscuits, so make sure it’s evenly blended for maximum taste.

Step 3: Prepare Muffin Tin
While the mixture cools, preheat your oven to 350°F (175°C). Grab a muffin tin and spray it generously with nonstick cooking spray to prevent sticking. Now, take one large refrigerated biscuit, pressing it into the bottom of each muffin cup, making sure to cover the base and part of the sides to create a nice little pocket for your filling.

Step 4: Fill Biscuits
Spoon the creamy sausage and cheese mixture into each biscuit-lined cup generously, being careful not to overfill. Aim for a rounded tablespoon of filling in each one. As you prepare your Sausage and Cream Cheese Biscuits, make sure the mixture is evenly distributed to ensure consistent flavor and texture in every bite.

Step 5: Bake
Place the muffin tin in the preheated oven and bake for about 18-20 minutes, or until the tops of the biscuits are golden brown and the filling is bubbling slightly. The delightful aroma of your Sausage and Cream Cheese Biscuits will fill your kitchen, providing a warm invitation to gather around the table.

Step 6: Serve
Once baked, remove the muffin tin from the oven and allow it to cool for a few minutes. Carefully run a butter knife around the edges to loosen each biscuit before gently lifting them out. Serve your warm Sausage and Cream Cheese Biscuits immediately, and enjoy the comforting blend of flavors with family and friends!

Storage Tips for Sausage and Cream Cheese Biscuits

Room Temperature: Store any leftover Sausage and Cream Cheese Biscuits at room temperature for up to 2 hours to keep them safe and delicious.

Fridge: If you want to keep them for longer, place the biscuits in an airtight container in the fridge for up to 3 days. Reheat gently in the oven to restore their fluffy texture.

Freezer: These biscuits can be frozen for up to 3 months! Just place them in a freezer-safe container or bag. Thaw in the fridge overnight before reheating.

Reheating: To bring back the warmth, simply reheat from frozen in the oven, adding a few extra minutes to the cook time for the perfect snack or meal!

Make Ahead Options

These Sausage and Cream Cheese Biscuits are perfect for meal prep enthusiasts! You can prepare the sausage and cream cheese filling up to 24 hours in advance by mixing it as directed and storing it in an airtight container in the refrigerator. The refrigerated biscuits can be kept in their packaging until you’re ready to use them. To maintain quality, be sure to cover the filling to prevent drying out. On the day you plan to serve, simply press the biscuits into a muffin tin, fill them with the prepped mixture, and bake as directed for a delightful, warm treat that’s just as delicious as if made fresh!

What to Serve with Sausage and Cream Cheese Biscuits

As the aroma of freshly baked biscuits fills your home, think about pairing these savory bites with delightful accompaniments to create a satisfying meal.

  • Scrambled Eggs: Soft, fluffy scrambled eggs add a protein boost and complement the creamy filling of the biscuits beautifully. You can even season them with a sprinkle of fresh herbs for added flavor.

  • Fresh Fruit Salad: The sweetness of a vibrant fruit salad brings a refreshing contrast to the savory richness of the biscuits. Try a mix of melons, berries, and citrus for a colorful presentation.

  • Crisp Green Salad: A light salad tossed with a zesty vinaigrette can provide a perfect balance to the biscuit’s hearty texture. Look for seasonal greens to keep it fresh and exciting.

  • Maple Syrup Drizzle: For a unique touch, drizzle warm maple syrup over your biscuits before serving. The sweetness perfectly enhances the savory flavors and creates an indulgent treat for brunch.

  • Buttery Corn on the Cob: Grilled or steamed corn brings a play of textures and an added sweetness that complements the biscuits wonderfully, making it feel like a cozy summer meal.

  • Lightly Roasted Vegetables: Roasting seasonal veggies like zucchini, bell peppers, and asparagus brings out their natural sweetness, providing a wholesome side that pairs nicely with the buttery biscuits.

  • Iced Coffee or Tea: Enjoy these biscuits with a refreshing glass of iced coffee or a fruity iced tea. Both drinks offer a cool, thirst-quenching balance to even the heartiest of bites.

  • Homemade Jam: Serve with a side of tart jam, like raspberry or peach, to spread on the biscuits. It’s a delightful way to elevate your savory biscuits into a breakfast sensation.

Expert Tips for Sausage and Cream Cheese Biscuits

  • Properly Soften Cream Cheese: Ensure your cream cheese is at room temperature to blend smoothly with the other ingredients, creating that delectable filling.

  • Avoid Overfilling: Be mindful not to overfill the muffin cups. This prevents the mixture from spilling over during baking and helps the biscuits rise perfectly.

  • Check Biscuit Moisture: If using homemade dough, be cautious with moisture levels. Too much liquid can lead to soggy biscuits instead of the fluffy texture you want for your Sausage and Cream Cheese Biscuits.

  • Bake Until Golden: Keep an eye on your biscuits while baking. The perfect golden-brown color indicates they’re ready, providing that delightful crunch on the outside.

  • Experiment with Ingredients: Don’t hesitate to try different kinds of cheese or sausage! Using spicy or flavored sausage can elevate your Sausage and Cream Cheese Biscuits to a whole new level.

Sausage and Cream Cheese Biscuit Variations

Feel free to get creative with these delightful Sausage and Cream Cheese Biscuits, adding your own personal touch to make them even more fabulous!

  • Spicy Twist: Stir in finely diced jalapeños for an exciting kick that will awaken your taste buds. The lingering heat perfectly complements the creamy filling.

  • Lean Option: Substitute turkey sausage to create a lighter version without sacrificing flavor. These biscuits remain tasty and satisfying while being a bit healthier.

  • Herb-Infused: Mix in some fresh herbs, like chives or parsley, to enhance the flavor profile with a refreshing note. It adds a garden freshness, making each bite feel vibrant.

  • Cheese Variety: Swap the shredded cheddar for other melty cheeses like Monterey Jack or pepper jack. Each cheese brings its own unique profile, so feel free to experiment!

  • Add Veggies: Stir in some finely chopped spinach or bell peppers. This not only boosts the nutrition but also introduces pleasing colors and textures.

  • Sweet Touch: For a delightful contrast, consider adding a hint of honey or maple syrup to the sausage mixture. It balances the savory with a touch of sweetness that’s irresistible.

  • Herbed Cream Cheese: Use flavored cream cheese instead of plain. Options like garlic and herb or garden vegetable can amplify the taste without extra effort!

Try out these variations and enjoy transforming your Sausage and Cream Cheese Biscuits into a new favorite! And if you’re looking to explore more delightful dishes, don’t miss out on our classic Sausage Tortellini Soup or the heartwarming flavors of a Sausage and Rice Skillet.

Sausage and Cream Cheese Biscuits Recipe FAQs

How do I select the right ground sausage for my biscuits?
Absolutely! For the best flavor, look for a ground breakfast sausage that has a nice mix of seasoning and fat. If you prefer a little more heat, Italian sausage is a great spicy alternative. Just check the label for any added sugars or preservatives you might want to avoid.

How should I store leftover Sausage and Cream Cheese Biscuits?
Very! You can store leftover biscuits in an airtight container at room temperature for up to 2 hours. For longer storage, place them in the fridge for up to 3 days. Just remember to reheat them gently in the oven to maintain that fluffy texture.

Can I freeze these biscuits for later?
Absolutely! You can freeze your Sausage and Cream Cheese Biscuits for up to 3 months. Just let them cool completely, then place them in a freezer-safe container or bag. When ready to enjoy, thaw them overnight in the fridge, then reheat in the oven to restore their warmth and flavor.

What if my cream cheese is too cold to mix properly?
If your cream cheese is too cold, it might not mix well, resulting in clumps. To soften it quickly, cut it into smaller chunks and microwave it for about 15-20 seconds. Keep an eye on it to avoid melting! Mixing until smooth is important for that creamy filling.

Are there any dietary considerations I should know about?
Yes! If you’re serving these biscuits to guests with dietary restrictions, you can easily swap out ingredients. For a lighter option, use Neufchâtel cheese in place of cream cheese, and consider turkey or chicken sausage instead of pork. Always check labels for allergens like gluten or dairy!

What should I do if my biscuits overflow during baking?
Don’t worry! If you accidentally overfill your biscuit cups, you can gently remove them from the oven and use a spoon to scoop out excess filling before putting them back in to finish baking. It’s a little extra work, but it ensures each bite is perfectly balanced!

Sausage and Cream Cheese Biscuit

Sausage and Cream Cheese Biscuit Bliss in Just 30 Minutes

Delightful Sausage and Cream Cheese Biscuits are quick to make and perfect for breakfast or appetizers.
Prep Time 10 minutes
Cook Time 20 minutes
Total Time 30 minutes
Servings: 12 biscuits
Course: Breakfast
Cuisine: American
Calories: 220

Ingredients
  

For the Biscuit Base
  • 1 pound Ground Breakfast Sausage Italian sausage can add a spicy kick if you like a little heat.
  • 1 can Refrigerated Biscuits (Large “Grands”) You can use homemade biscuit dough for a fresh touch.
For the Filling
  • 8 ounces Cream Cheese Neufchâtel cheese is a lighter alternative if desired.
  • 1 cup Shredded Cheddar Cheese Feel free to swap for any melty cheese like Monterey Jack or pepper jack.

Equipment

  • Large skillet
  • Mixing Bowl
  • Muffin Tin
  • nonstick cooking spray

Method
 

Step-by-Step Instructions for Sausage and Cream Cheese Biscuits
  1. Begin by heating a large skillet over medium heat, then add the ground breakfast sausage. Cook for about 5-7 minutes, breaking it apart with a spatula, until browned and no longer pink. Drain any excess grease.
  2. Transfer the cooked sausage to a large mixing bowl to cool slightly. Add in the softened cream cheese and shredded cheddar cheese, mixing thoroughly until combined and creamy.
  3. Preheat your oven to 350°F (175°C). Spray a muffin tin generously with nonstick cooking spray. Press a large refrigerated biscuit into the bottom of each muffin cup to create a pocket.
  4. Spoon the creamy sausage and cheese mixture into each biscuit-lined cup without overfilling. Aim for a rounded tablespoon of filling per cup.
  5. Bake for about 18-20 minutes, or until the tops are golden brown and the filling is bubbling slightly.
  6. Remove the muffin tin from the oven and let it cool for a few minutes. Run a butter knife around the edges to loosen each biscuit, then lift them out. Serve warm.

Nutrition

Serving: 1biscuitCalories: 220kcalCarbohydrates: 15gProtein: 10gFat: 15gSaturated Fat: 8gCholesterol: 40mgSodium: 600mgPotassium: 150mgFiber: 1gSugar: 1gVitamin A: 500IUCalcium: 100mgIron: 1mg

Notes

Store leftovers at room temperature for up to 2 hours, in the fridge for up to 3 days, or freeze for up to 3 months.

Tried this recipe?

Let us know how it was!

Baked Maple Donut Bars for Cozy Mornings Everyone Loves

The aroma of warm maple syrup wafting through my kitchen can turn even the dullest of mornings into a cozy celebration. Today, I’m excited to share my recipe for Soft Baked Maple Donut Bars, a scrumptious blend of tender, cake-like goodness with just a whisper of cinnamon. These delightful bars are not only incredibly easy to whip up—a perfect solution for those busy mornings—but they also make for a fun weekend treat that everyone will adore. In just about 50 minutes, you can serve up these comforting breakfast bars that strike the right balance between indulgent and sensible. Ready to turn your kitchen into a delightful haven? Let’s dive in!

Why Are These Donut Bars Irresistible?

Tender, Cake-like Goodness: The Soft Baked Maple Donut Bars are rich and soft, providing that satisfying bite that every donut lover craves. Easy to Make: These bars come together in just one bowl, making them perfect for busy days or impromptu brunch gatherings. Deliciously Versatile: Customize with chocolate chips or nuts to create a truly unique treat! Perfect for Sharing: Cut them into smaller pieces for a fun, shareable breakfast or snack. For a delightful pairing, consider serving with a cup of coffee or tea, much like you would with our Comforting Charm Baked options!

Baked Maple Donut Bars Ingredients

For the Bars

  • Unsalted Butter (1/2 cup) – Provides a rich, creamy foundation for the batter, ensuring a light and tender texture. Substitution: Use margarine for a dairy-free option.
  • Granulated Sugar (1/2 cup) – Adds sweetness and contributes to the classic tender crumb of the bars.
  • Light Brown Sugar (1/4 cup) – Offers a hint of molasses and depth of flavor while keeping the bars moist.
  • Eggs (2 large) – Act as a binding agent, essential for the structure and stability of the bars.
  • Pure Maple Syrup (1/2 cup) – Infuses the batter with true maple warmth and sweetness, key for flavor. Substitution: Use agave syrup if maple syrup is unavailable, though flavor will differ.
  • Vanilla Extract (1 tablespoon) – Enhances the flavors with its sweet aroma, contributing to overall taste.
  • All-Purpose Flour (2 cups) – Forms the backbone of the bars, giving them structure while ensuring a tender crumb.
  • Baking Powder (1 teaspoon) – Acts as a leavening agent to lift the bars gently and evenly.
  • Baking Soda (1/2 teaspoon) – Works alongside the baking powder for additional lift and contributes to the golden hue.
  • Salt (1/2 teaspoon) – Balances sweetness and enhances flavor.
  • Ground Cinnamon (1 teaspoon) – Adds warm, spicy undertones that beautifully complement the maple flavor.
  • Milk (1/2 cup) – Contributes moisture and helps achieve a silky batter.
  • Sour Cream (1/4 cup) – Introduces a subtle tang and extra richness, keeping the bars tender. Substitution: Greek yogurt or buttermilk can be used as alternatives.

For the Glaze

  • Powdered Sugar (1 cup) – Serves as the base for the smooth maple glaze, contributing to its sweetness and texture.
  • Additional Maple Syrup (2 tablespoons) – Enhances the glaze with maple flavor.
  • Milk (1-2 tablespoons) – Adjusts the consistency of the glaze to ensure smoothness.
  • Pinch of Salt – Balances sweetness in the glaze.
  • Vanilla Extract (1/4 teaspoon) – Adds aromatic sweetness to the glaze.

These Baked Maple Donut Bars are sure to warm your hearts and satisfy your sweet cravings!

Step‑by‑Step Instructions for Baked Maple Donut Bars

Step 1: Preheat and Prepare
Begin by preheating your oven to 350°F (175°C). While the oven warms up, take a 9×13 inch baking pan and line it with parchment paper for easy removal of your delicious Baked Maple Donut Bars later. Make sure the parchment paper hangs slightly over the edges, creating a neat handle you can use to lift the bars after baking.

Step 2: Cream the Butters and Sugars
In a large mixing bowl, cream together the softened unsalted butter, granulated sugar, and light brown sugar using an electric mixer on medium speed for about 3-5 minutes. You’re looking for a fluffy, pale mixture that has doubled in volume. This step is vital for creating the tender texture in your bars—so whip it well until the mixture is light and airy!

Step 3: Add the Eggs and Extracts
Next, add the eggs, one at a time, mixing thoroughly after each addition until fully incorporated. This helps build the structure of your Baked Maple Donut Bars. Then, blend in the pure maple syrup and vanilla extract until the mixture is smooth and well-combined, releasing a heavenly aroma that fills your kitchen!

Step 4: Combine the Dry Ingredients
In a separate bowl, whisk together the all-purpose flour, baking powder, baking soda, salt, and ground cinnamon. Make sure there are no lumps, as this prevents the bars from developing an uneven texture. Gradually introduce this dry mixture to your wet ingredients, alternating with the milk and sour cream, mixing just until everything is combined without overworking the batter.

Step 5: Pour and Smooth the Batter
Carefully pour the batter into the prepared baking pan, using a spatula to smooth the top evenly. This ensures that your Baked Maple Donut Bars bake uniformly and look great upon serving. Take a moment to appreciate the luscious, thick batter before transferring it to the oven.

Step 6: Bake to Perfection
Place the baking pan in the preheated oven and bake for 20-25 minutes. Keep an eye on them, and test for doneness by inserting a toothpick into the center; it should come out clean or with a few moist crumbs. The edges will turn a light golden brown when ready, indicating a soft and tender texture within.

Step 7: Cool the Bars
Once baked, remove the pan from the oven and let it cool in the pan on a wire rack. This is crucial as cooling prevents sogginess in your Baked Maple Donut Bars. Allow them to cool for about 15-20 minutes; you want them to continue setting but still warm for glazing.

Step 8: Prepare the Glaze
While the bars cool, whisk together the powdered sugar, additional maple syrup, milk, a pinch of salt, and vanilla extract in a small bowl. Aim for a smooth, pourable consistency—add more milk if necessary. This delightful glaze will add an irresistible finish to your bars, so take your time ensuring it’s well combined.

Step 9: Glaze and Slice
After the bars have cooled, drizzle the homemade glaze generously over the top, allowing it to flow down the sides for a beautiful finish. Let the glaze set for about 10 minutes before slicing into squares or rectangles. This makes for neat, clean cuts, perfect for serving your delightful Baked Maple Donut Bars!

Baked Maple Donut Bars: Customization Delights

Embrace the joy of making these Soft Baked Maple Donut Bars uniquely your own, filling your kitchen with delightful aromas and flavors!

  • Gluten-Free: Substitute all-purpose flour with a 1:1 gluten-free flour blend for a gluten-free version without sacrificing taste.
  • Nutty Twist: Fold in ½ cup of chopped walnuts or pecans for added crunch and a nutty flavor that pairs beautifully with maple.
  • Chocolaty Delight: Mix in ½ cup of chocolate chips to create a decadent chocolate-maple experience that everyone will love.
  • Cinnamon Sugar Crust: Before baking, sprinkle a mixture of cinnamon and sugar over the top for a sweet, crunchy layer that adds extra deliciousness.
  • Fruity Addition: Stir in ½ cup of dried cranberries or blueberries for a fruity burst that beautifully complements the maple flavor.
  • Dairy-Free: Swap the milk and sour cream with your favorite non-dairy alternatives, such as almond milk and coconut yogurt for a dairy-free treat.
  • Spiced Flavor: Experiment with spices like nutmeg or cardamom to give your bars a more complex flavor profile that dances on your palate.
  • Maple Cream Cheese Frosting: Top with a maple cream cheese frosting instead of the glaze for an indulgent variation that’s perfect for special occasions.

These variations will inspire you to make each batch of Baked Maple Donut Bars something fresh and exciting! For more delightful breakfast ideas, check out our Baked Salmon Honey for a savory twist or treat yourself to our Turtle Bars Decadent for dessert!

What to Serve with Soft Baked Maple Donut Bars

Pairing these delightful bars with complementary sides will elevate your breakfast experience to a new level of cozy comfort.

  • Fresh Fruit Salad: A colorful mix of seasonal fruits adds a refreshing, bright contrast, balancing out the sweetness of the donut bars.
  • Vanilla Yogurt: Creamy and tangy yogurt enhances the maple flavor while providing a pleasant texture. Consider adding a drizzle of honey for extra sweetness!
  • Coffee or Tea: A steaming cup of coffee or tea is the perfect companion, bringing warmth and depth to your brunch spread—curl up and enjoy that comforting vibe!
  • Eggs Benedict: The richness of poached eggs and hollandaise sauce creates a delightful savory counterpart to your sweet bars. It’s a brunch classic that will impress guests!
  • Cinnamon Sugar Toast: Simple yet nostalgic, this sweet-toast combination echoes the warm flavors found in the bars. Serve it alongside for a cozy breakfast experience.
  • Maple Bacon Burritos: Savory and sweet, this filling dish packs protein and flavor, creating an irresistible breakfast duo. They’re hearty and satisfying—perfect for those who love a full spread!
  • Chocolate Milkshake: Indulge in a sweet treat by pairing with a creamy chocolate milkshake for a delightful contrast. It evokes the joy of childhood—who wouldn’t want a milkshake with their breakfast?
  • Chai Latte: The spiced warmth of a chai latte complements the cinnamon notes of the bars beautifully, making for a comforting, aromatic beverage to sip on.

Storage Tips for Baked Maple Donut Bars

Room Temperature: Store the bars in an airtight container at room temperature for up to 3 days to maintain their freshness and soft texture.

Fridge: For extended freshness, refrigerate the Baked Maple Donut Bars for up to 1 week. Allow them to come to room temperature before serving for the best flavor.

Freezer: If you want to store them longer, freeze the bars for up to 3 months. Wrap each bar tightly in plastic wrap and place them in a freezer-safe bag.

Reheating: To enjoy them warm, microwave for 10-15 seconds or place in a preheated oven at 350°F (175°C) for a few minutes, ensuring they stay soft and delicious!

Make Ahead Options

These Soft Baked Maple Donut Bars are perfect for meal prep, allowing you to savor homemade goodness even on your busiest days! You can mix the batter and refrigerate it for up to 24 hours before baking, ensuring the flavors meld beautifully. Alternatively, you can bake the bars ahead of time and store them in an airtight container at room temperature for up to 3 days. To maintain their moistness, be sure to cool them completely before sealing the container. When ready to enjoy, simply drizzle the glaze over them once they’ve cooled, and you’ll have delightful breakfast treats ready to impress without any last-minute fuss!

Expert Tips for Baked Maple Donut Bars

  • Don’t Overmix: Avoid overmixing the batter after adding the flour. This will keep your bars light and fluffy, achieving that perfect tender texture.

  • Check for Doneness: Use a toothpick to test the center of the bars about 20 minutes into baking. If it comes out clean or with a few moist crumbs, they’re ready!

  • Cool Properly: Let the bars cool in the pan on a wire rack. This prevents them from becoming soggy and helps achieve that desirable soft texture.

  • Quality Ingredients: Use high-quality pure maple syrup for an authentic flavor. This can significantly elevate your baked maple donut bars from ordinary to extraordinary!

  • Glaze Setting Time: Allow the glaze to set fully before slicing. This will help get clean cuts and maintain the beautiful presentation of your delicious bars.

Baked Maple Donut Bars Recipe FAQs

How do I know if my ingredients are ripe or good to use?
For the freshest flavors and the best outcomes, it’s crucial to use quality ingredients. Check your eggs are fresh by placing them in water; if they sink, they’re good! Maple syrup should be pure and free of added sugars. When selecting butter, pick a good quality unsalted version for the best taste.

How should I store my Baked Maple Donut Bars?
Store your bars in an airtight container at room temperature for up to 3 days. To extend their shelf life, you can refrigerate them for up to a week. Just remember to allow them to come to room temperature before serving to keep that lovely softness!

Can I freeze the Baked Maple Donut Bars?
Absolutely! To freeze, wrap each bar tightly in plastic wrap and place them in a freezer-safe bag. They can be frozen for up to 3 months. When you’re ready to enjoy, thaw them in the refrigerator overnight, or for a quick warm-up, pop them in the microwave for 10-15 seconds before serving!

What if my Baked Maple Donut Bars come out too dense?
If your bars turn out denser than anticipated, remember a couple of things: avoid overmixing the batter once you add the flour, as this can activate the gluten and result in a tougher texture. Also, ensure you’re measuring your flour correctly—too much flour can lead to dense bars. Use the spoon-and-level method: spoon the flour into the measuring cup and level it with a knife instead of scooping directly from the bag.

Are there any dietary considerations I should know?
For those with dairy allergies, feel free to substitute unsalted butter with margarine or a dairy-free alternative. The sour cream can easily be replaced with Greek yogurt or buttermilk for a similar texture. If you’re concerned about gluten, you can use a gluten-free flour blend, but be wary of the texture changes; you may need to adjust the liquid content slightly.

What’s the best way to drizzle the glaze over the Baked Maple Donut Bars?
After cooling your bars, pour the glaze into a small bowl or cup to make it easier to drizzle. Use a spoon or a piping bag to create beautiful drizzles. Allow the glaze to flow over the edges, giving your treat that lovely, appetizing finish! Let the glaze set for about 10 minutes before cutting for cleaner, prettier slices.

Baked Maple Donut Bars

Baked Maple Donut Bars for Cozy Mornings Everyone Loves

Delightful Baked Maple Donut Bars that transform mornings into cozy celebrations. Soft, easy to make, and perfect for sharing.
Prep Time 15 minutes
Cook Time 25 minutes
Cooling Time 20 minutes
Total Time 50 minutes
Servings: 12 bars
Course: Dessert
Cuisine: American
Calories: 200

Ingredients
  

For the Bars
  • 1/2 cup Unsalted Butter Substitution: Use margarine for a dairy-free option.
  • 1/2 cup Granulated Sugar
  • 1/4 cup Light Brown Sugar
  • 2 large Eggs
  • 1/2 cup Pure Maple Syrup Substitution: Use agave syrup if maple syrup is unavailable, though flavor will differ.
  • 1 tablespoon Vanilla Extract
  • 2 cups All-Purpose Flour
  • 1 teaspoon Baking Powder
  • 1/2 teaspoon Baking Soda
  • 1/2 teaspoon Salt
  • 1 teaspoon Ground Cinnamon
  • 1/2 cup Milk
  • 1/4 cup Sour Cream Substitution: Greek yogurt or buttermilk can be used as alternatives.
For the Glaze
  • 1 cup Powdered Sugar
  • 2 tablespoons Additional Maple Syrup
  • 1-2 tablespoons Milk Adjusts the consistency of the glaze.
  • Pinch of Salt
  • 1/4 teaspoon Vanilla Extract

Equipment

  • 9x13-inch baking pan
  • Mixing Bowl
  • Electric mixer
  • whisk
  • spatula

Method
 

Step-by-Step Instructions
  1. Preheat your oven to 350°F (175°C) and line a 9x13 inch baking pan with parchment paper.
  2. Cream together the softened unsalted butter, granulated sugar, and light brown sugar until fluffy.
  3. Add the eggs one at a time, mixing thoroughly, then blend in the pure maple syrup and vanilla extract.
  4. Whisk together the all-purpose flour, baking powder, baking soda, salt, and ground cinnamon in a separate bowl. Gradually combine with wet ingredients, alternating with milk and sour cream.
  5. Pour the batter into the prepared baking pan and smooth the top evenly.
  6. Bake for 20-25 minutes, testing for doneness with a toothpick.
  7. Cool in the pan on a wire rack for about 15-20 minutes.
  8. Whisk together the glaze ingredients until smooth, then drizzle over the cooled bars.
  9. Allow the glaze to set for about 10 minutes before slicing into squares or rectangles.

Nutrition

Serving: 1barCalories: 200kcalCarbohydrates: 30gProtein: 2gFat: 9gSaturated Fat: 5gCholesterol: 35mgSodium: 150mgPotassium: 70mgFiber: 1gSugar: 12gVitamin A: 200IUCalcium: 30mgIron: 0.5mg

Notes

These Baked Maple Donut Bars are perfect for busy mornings and are versatile to customize with add-ins like chocolate chips or nuts.

Tried this recipe?

Let us know how it was!