Get my cookbooks

Cajun Garlic Chicken Rotini Skillet for Ultimate Comfort Dinner

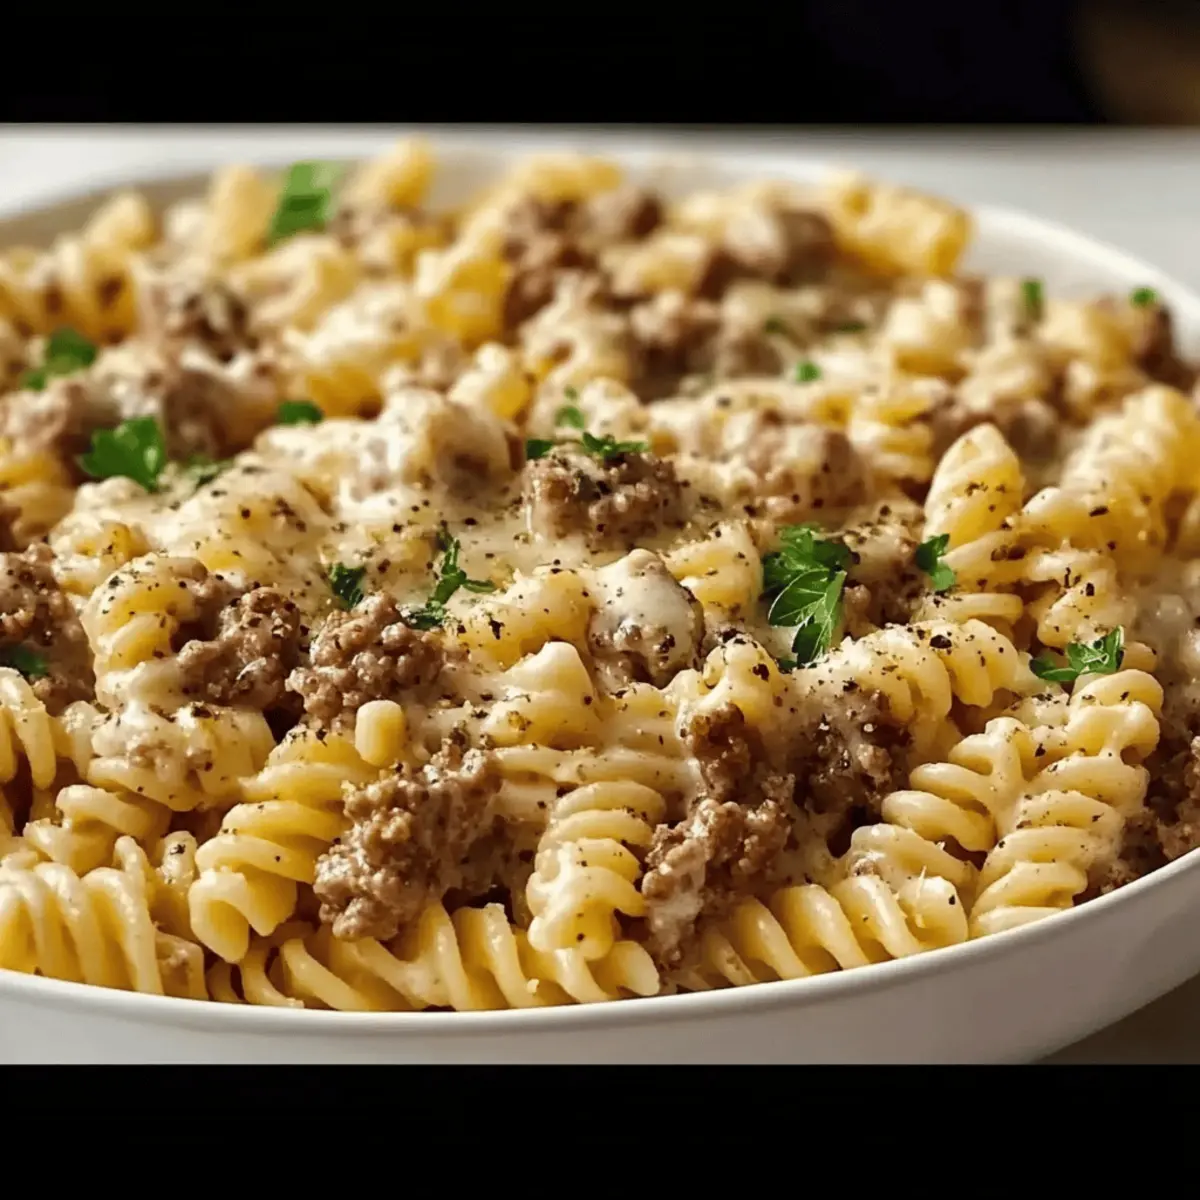
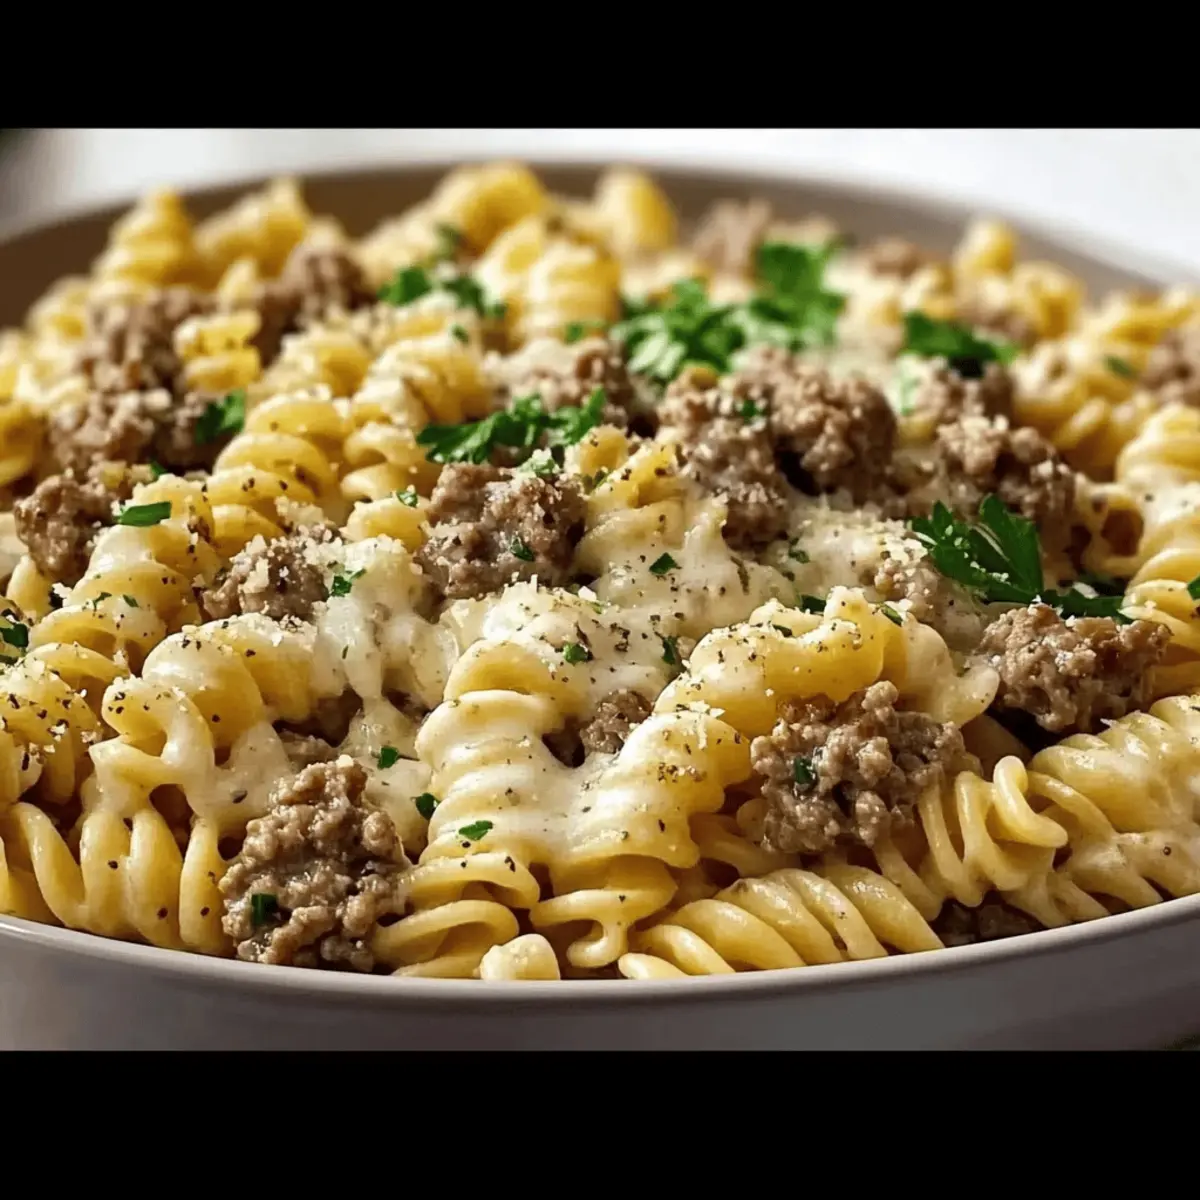
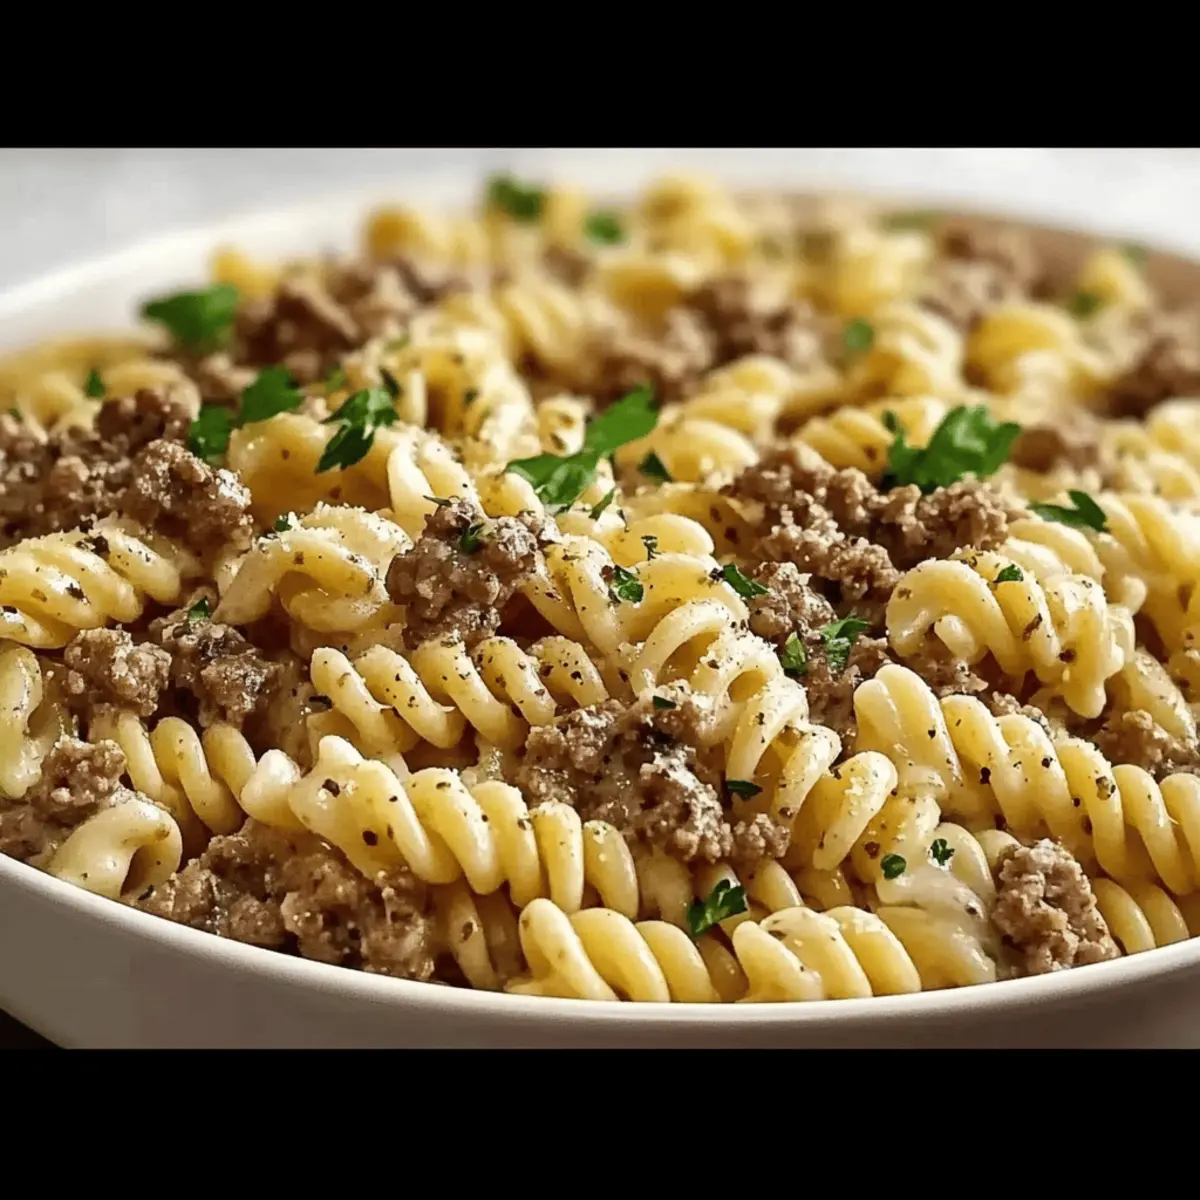
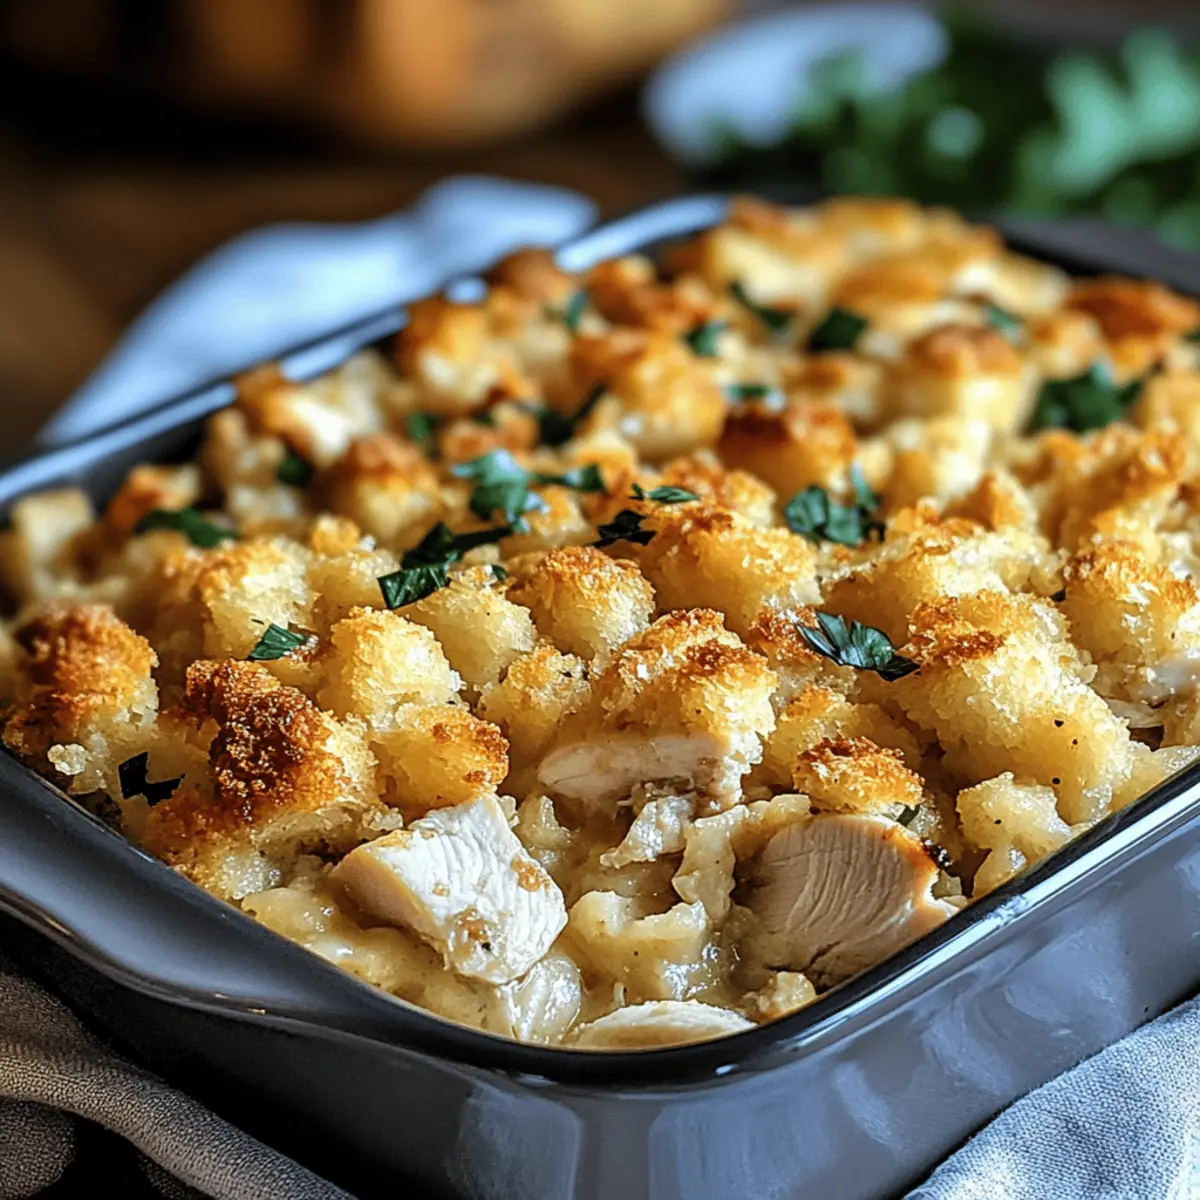
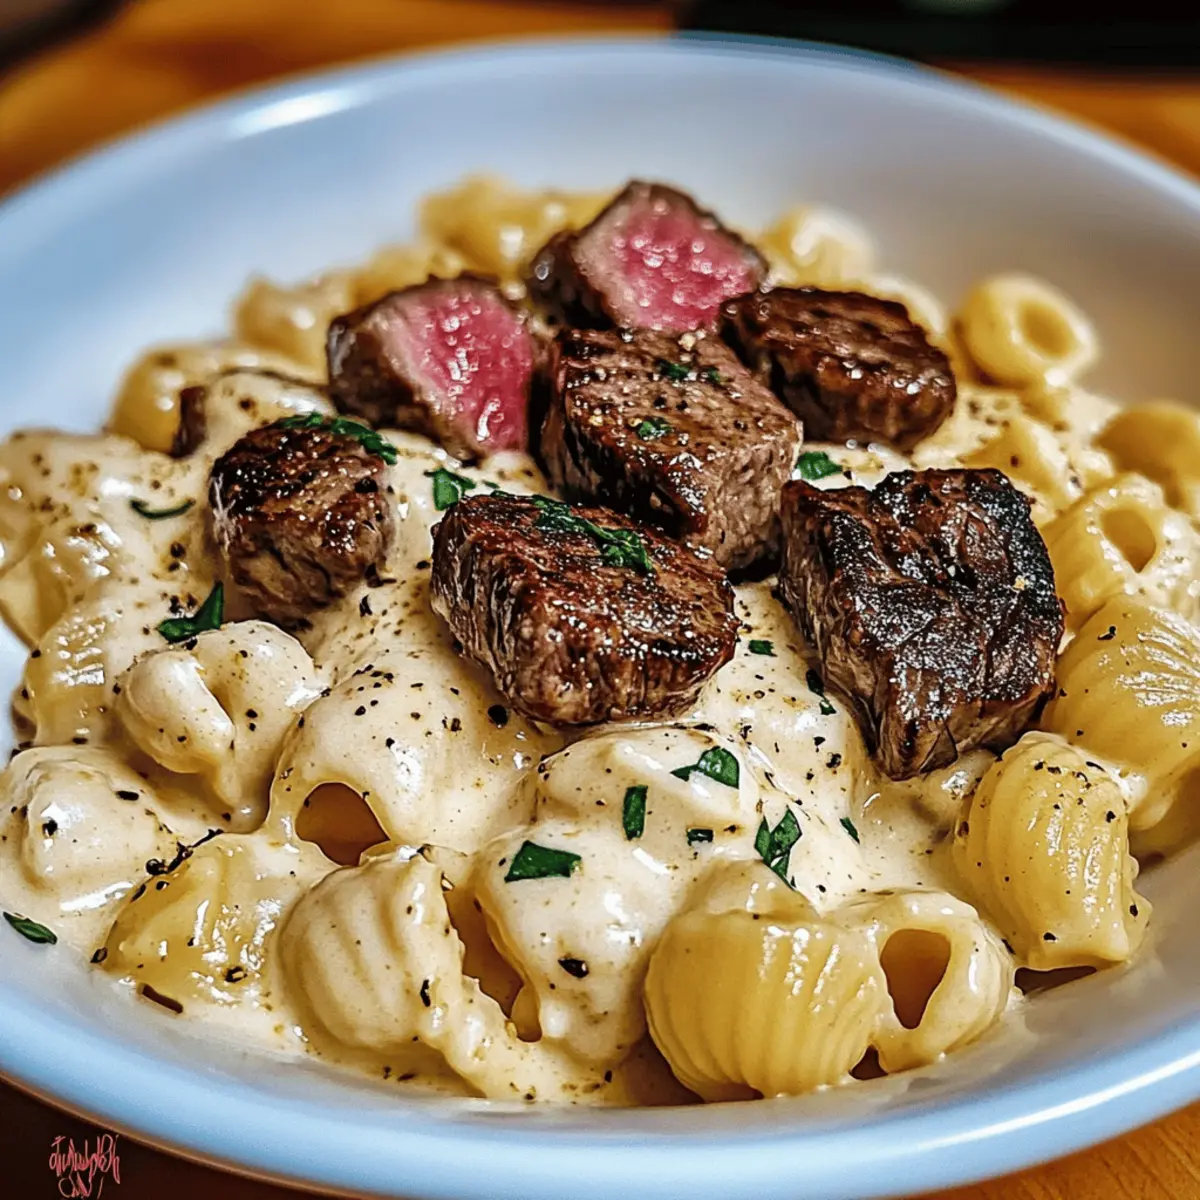
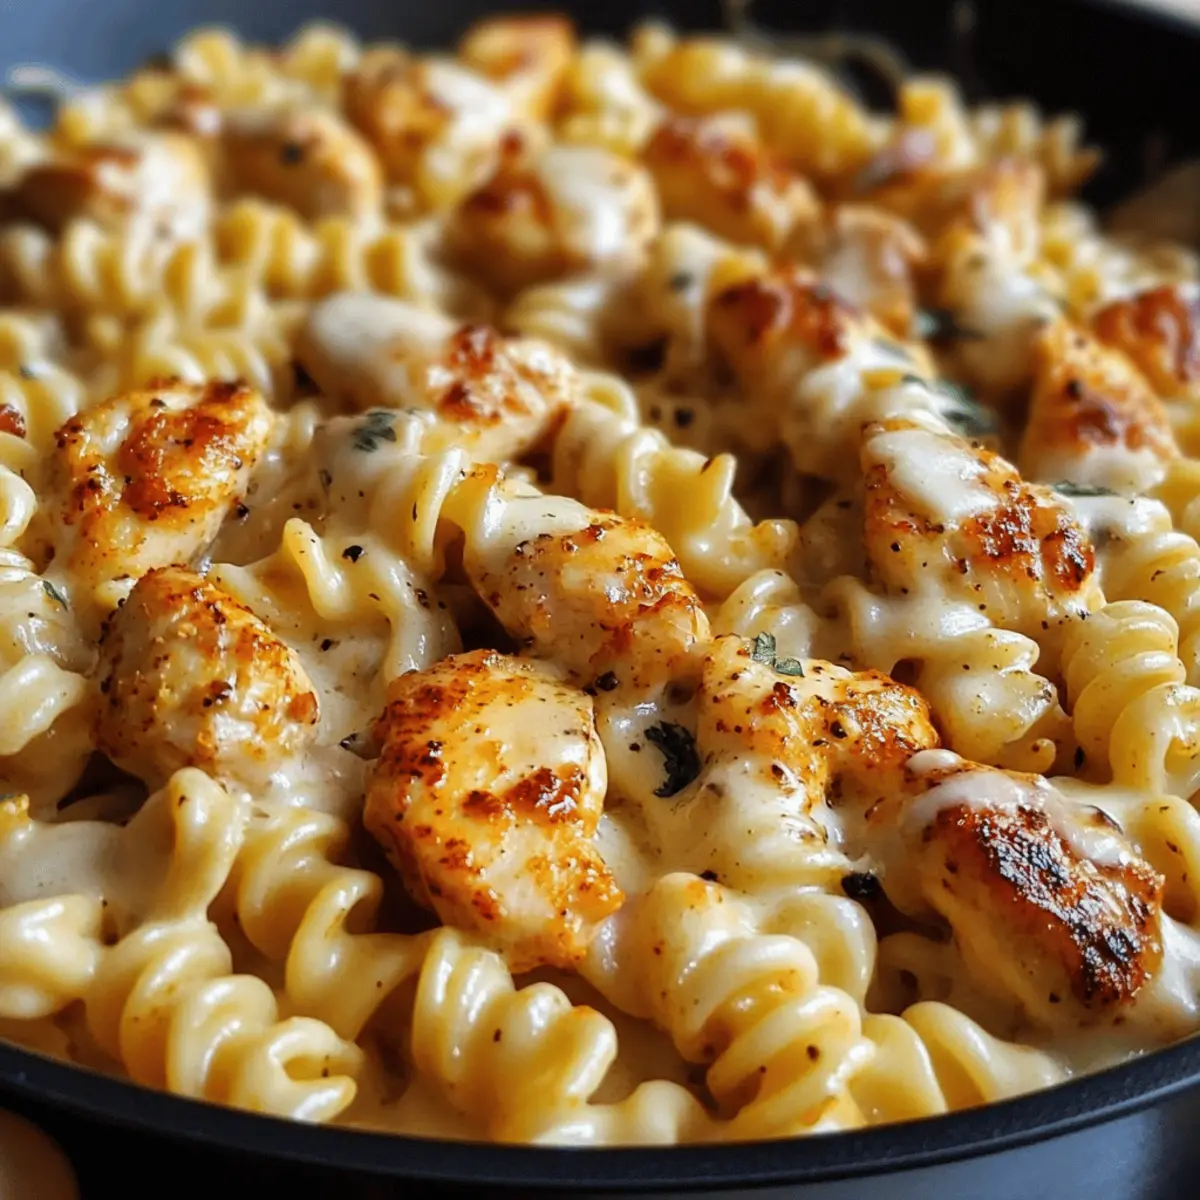
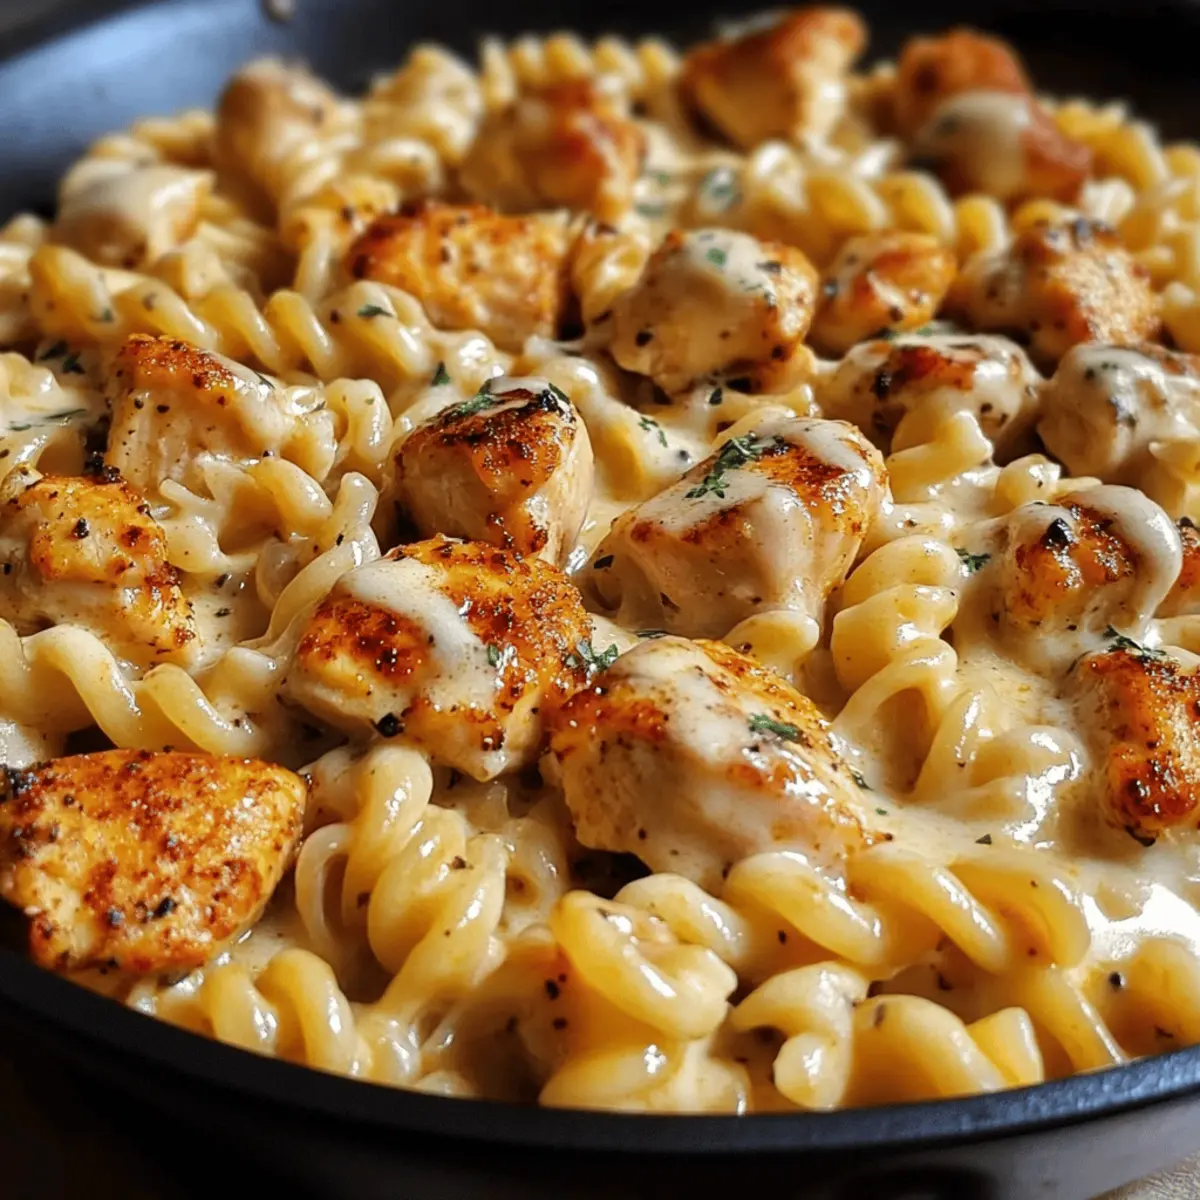
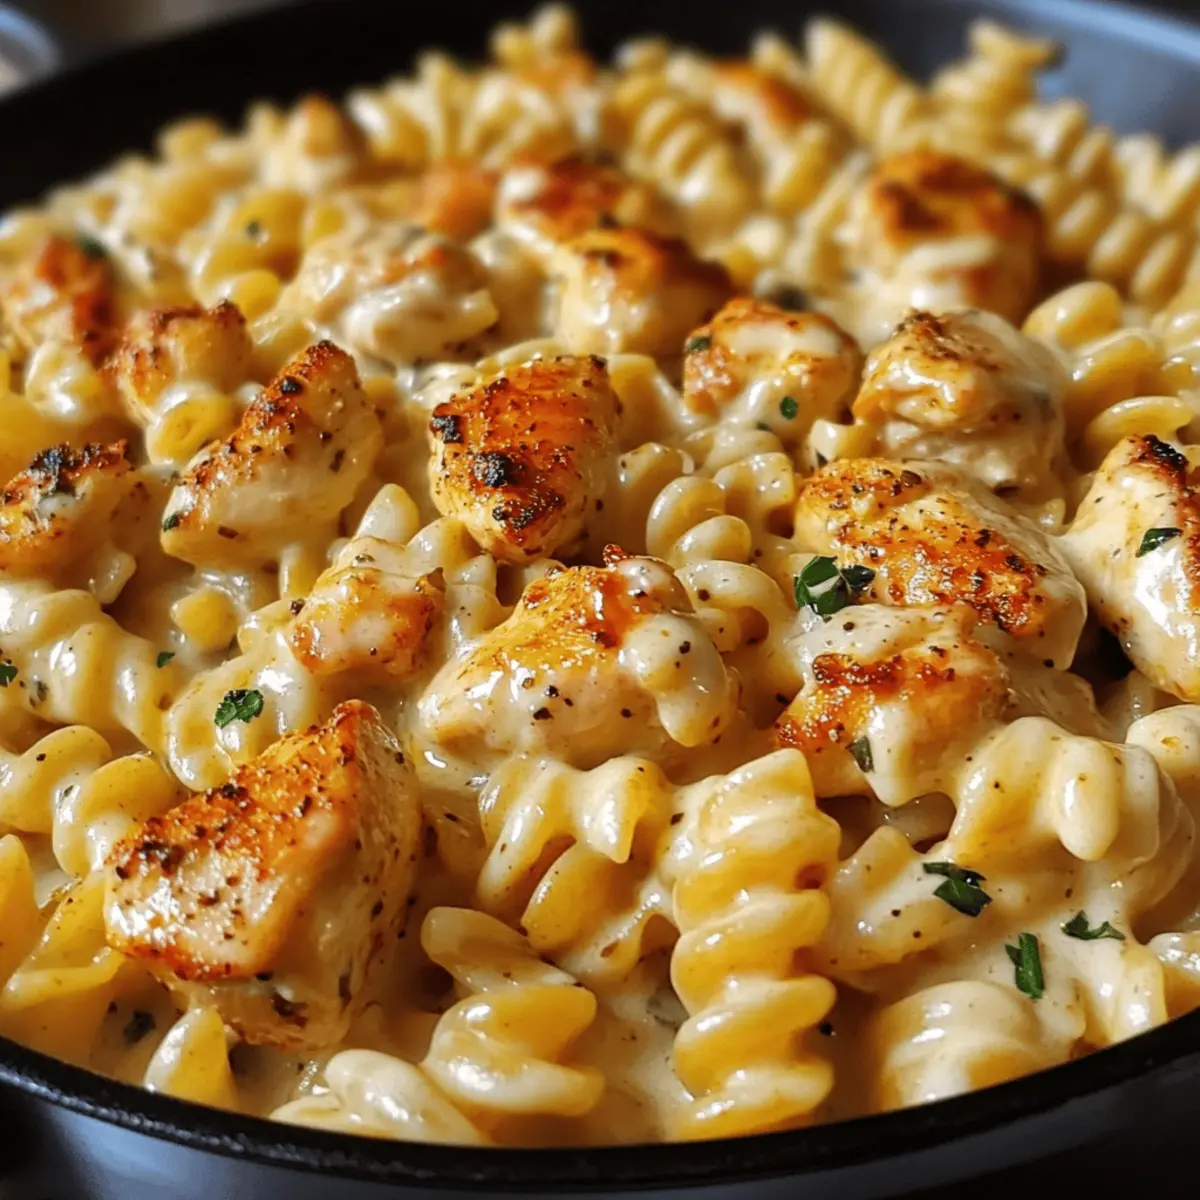
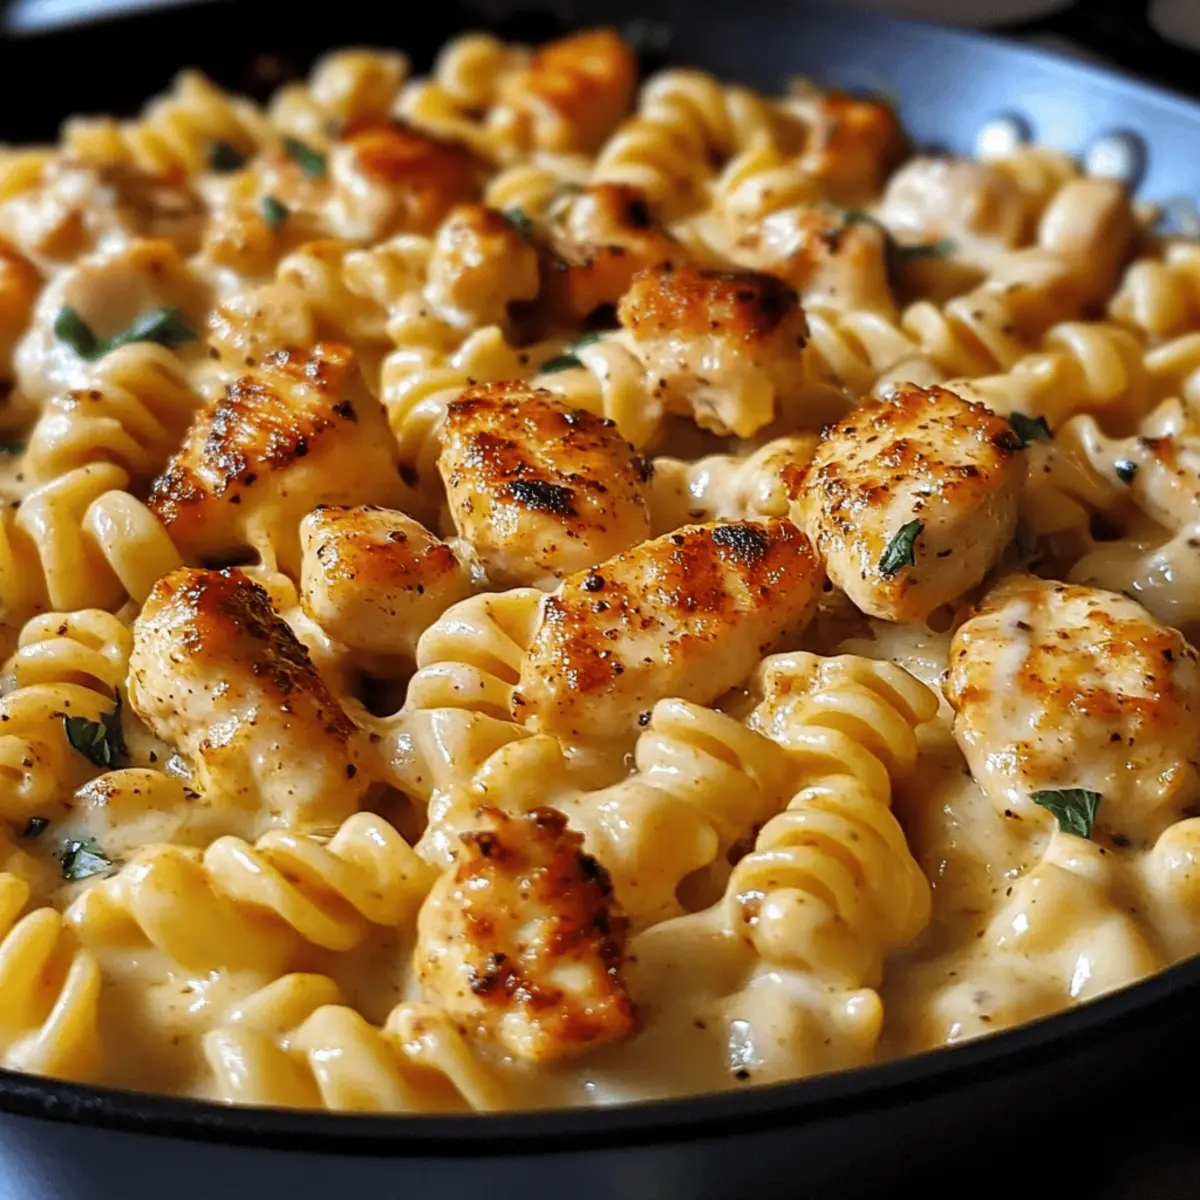
As the aroma of garlic mingles with the spices of Cajun cooking wafts through my kitchen, I can’t help but feel a sense of excitement. Today, I’m diving into a delicious whirlwind with my Creamy Cheesy Cajun Garlic Chicken Rotini. This dish is not just a quick dinner solution; it’s a one-skillet wonder that transforms a busy weeknight into something special. The blend of tender chicken, creamy sauce, and perfectly cooked rotini makes for an incredibly satisfying meal that can be customized to your heart’s content. Plus, whether you’re feeding a crowd or enjoying a night in, this recipe readily adapts to suit your needs. Curious about how to spice up your dinner routine? Let’s get cooking!

Why is Cajun Garlic Chicken Rotini So Special?

Flavor Explosion: The harmonious mix of Cajun spices and creamy garlic sauce elevates this dish to new heights, making every bite a delightful journey.

One-Skillet Wonder: With everything cooked in just one skillet, cleanup is a breeze, letting you focus on enjoying your time with family and friends.

Customizable Delight: Easily switch up ingredients, with options for vegetarian swaps or different pastas. Your creativity is the only limit!

Quick and Easy: This recipe is a lifesaver for busy weeknights, whipping up a satisfying dinner in under 30 minutes.

Crowd-Pleasing Appeal: Whether it’s a family meal or a casual gathering, the rich flavors and creamy goodness are sure to impress everyone at the table.

Dive into this recipe and discover why it’s become my go-to choice! If you’re also in the mood for more garlic goodness, don’t forget to check out my Garlic Parmesan Chicken or Garlic Butter Baked Chicken for satisfying meals that the whole family will love!

Cajun Garlic Chicken Rotini Ingredients

• Get ready to create a hearty meal!

For the Skillet

  • Boneless, Skinless Chicken Breasts – The star of this dish, cut into bite-sized chunks for quick cooking.
  • Rotini Pasta – The perfect vessel for sauce; feel free to swap it with penne or farfalle for a different texture.
  • Olive Oil – Essential for cooking the chicken; adds flavor and richness.
  • Cajun Seasoning – Brings that signature kick; adjust the amount based on your desired spice level.
  • Garlic Powder – For an added layer of garlic flavor in the sauce.
  • Onion Powder – Enhances the taste with depth and warmth.
  • Salt and Pepper – Must-have basics that elevate the overall flavor.
  • Garlic (minced) – Fresh garlic provides a robust aroma and punch in the creamy sauce.
  • Butter – Sauté the garlic and contribute to the sauce’s richness.
  • Heavy Cream – Creates a luscious base for the sauce; you can use light cream for a lighter option.
  • Chicken Broth – Infuses flavor and keeps the dish moist.

For the Cheesy Finish

  • Shredded Mozzarella, Grated Parmesan, Cheddar Cheese – This blend of cheeses creates a wonderfully creamy and savory bite; feel free to experiment with others!
  • Fresh Parsley – Adds a pop of color and fresh flavor on top of your finished dish.

Dive into this recipe and transform your dinner routine with the comforting warmth of Cajun Garlic Chicken Rotini—your family will be asking for seconds!

Step‑by‑Step Instructions for Cajun Garlic Chicken Rotini

Step 1: Cook the Pasta
Begin by boiling a large pot of salted water over high heat. Once the water reaches a rolling boil, add the rotini pasta and cook according to package instructions until al dente, approximately 8–10 minutes. Drain the pasta in a colander and set it aside, ensuring it’s not overcooked, as it will continue to cook in the skillet with the Cajun Garlic Chicken.

Step 2: Cook the Chicken
In a large skillet, heat 2 tablespoons of olive oil over medium-high heat. Season the bite-sized chicken pieces with Cajun seasoning, garlic powder, onion powder, salt, and pepper. Cook the chicken in the skillet for 6–7 minutes, stirring occasionally, until golden brown and fully cooked. Once done, remove the chicken from the skillet and set it aside, keeping it warm.

Step 3: Make the Creamy Sauce
Using the same skillet, reduce the heat to medium and add 2 tablespoons of butter. Once melted, add the minced garlic, stirring for about 30 seconds until fragrant. Pour in 1 cup of chicken broth and 1 cup of heavy cream, bringing the mixture to a gentle simmer. Allow it to simmer for 3–4 minutes until slightly thickened, stirring constantly to prevent sticking.

Step 4: Add the Cheese
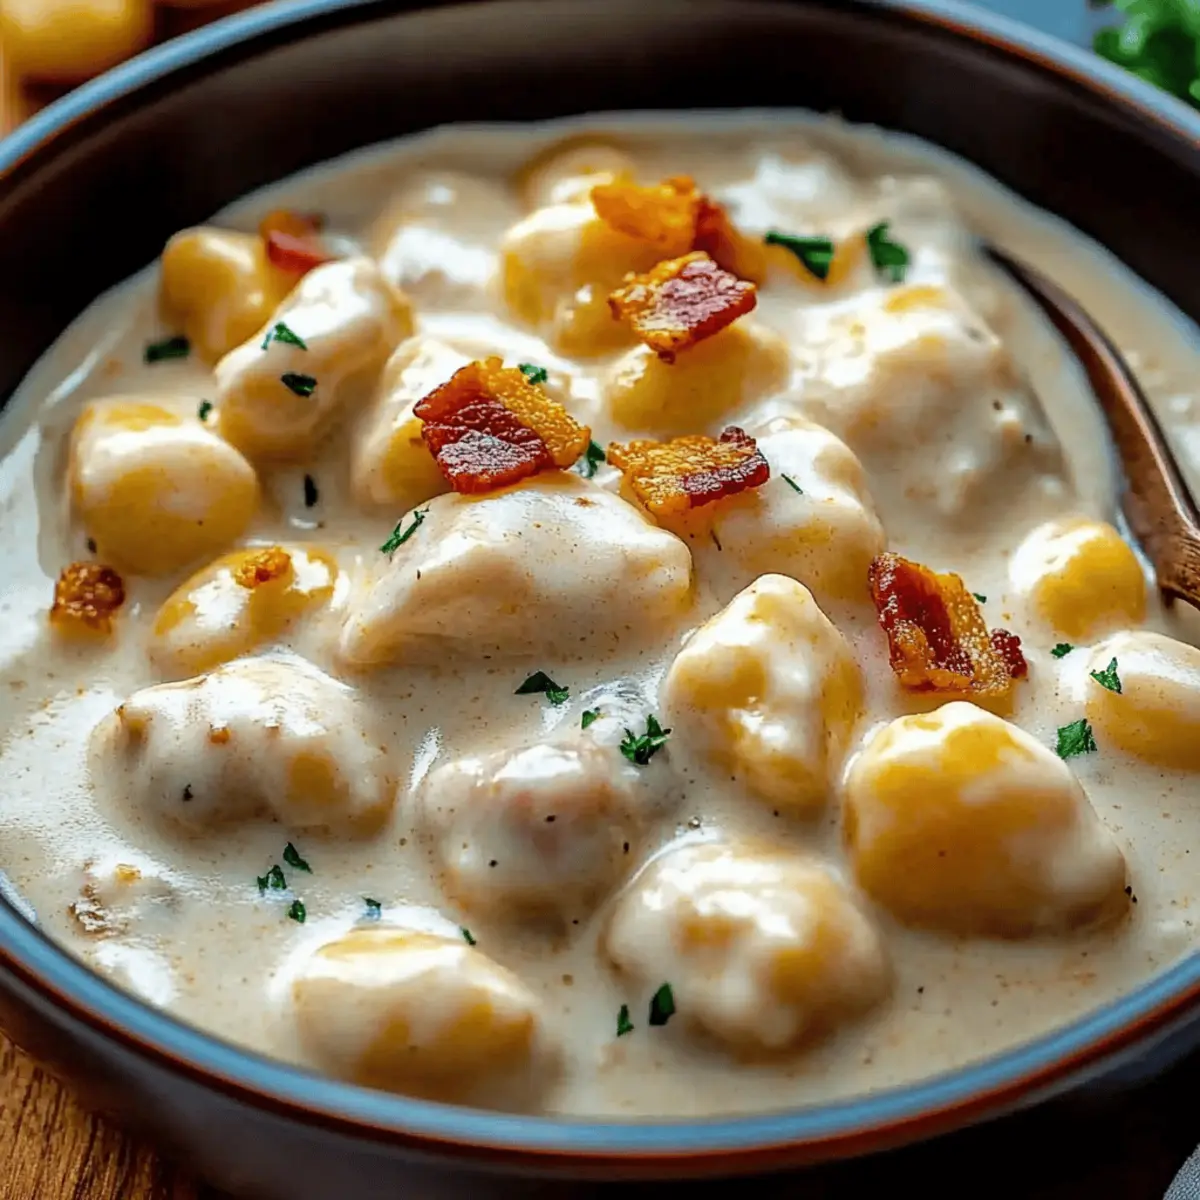
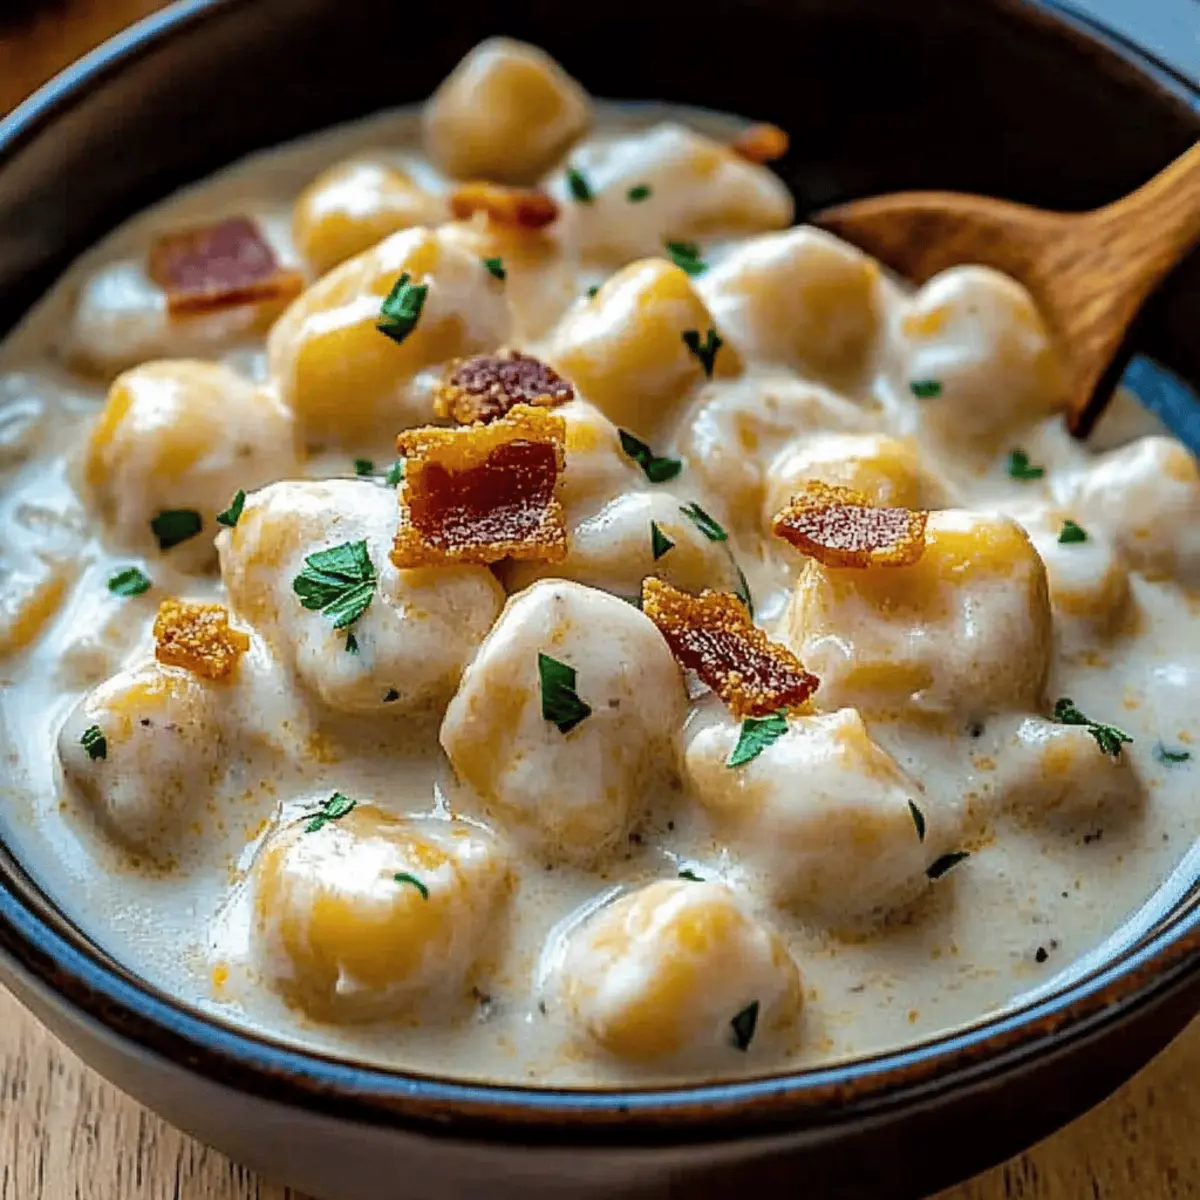
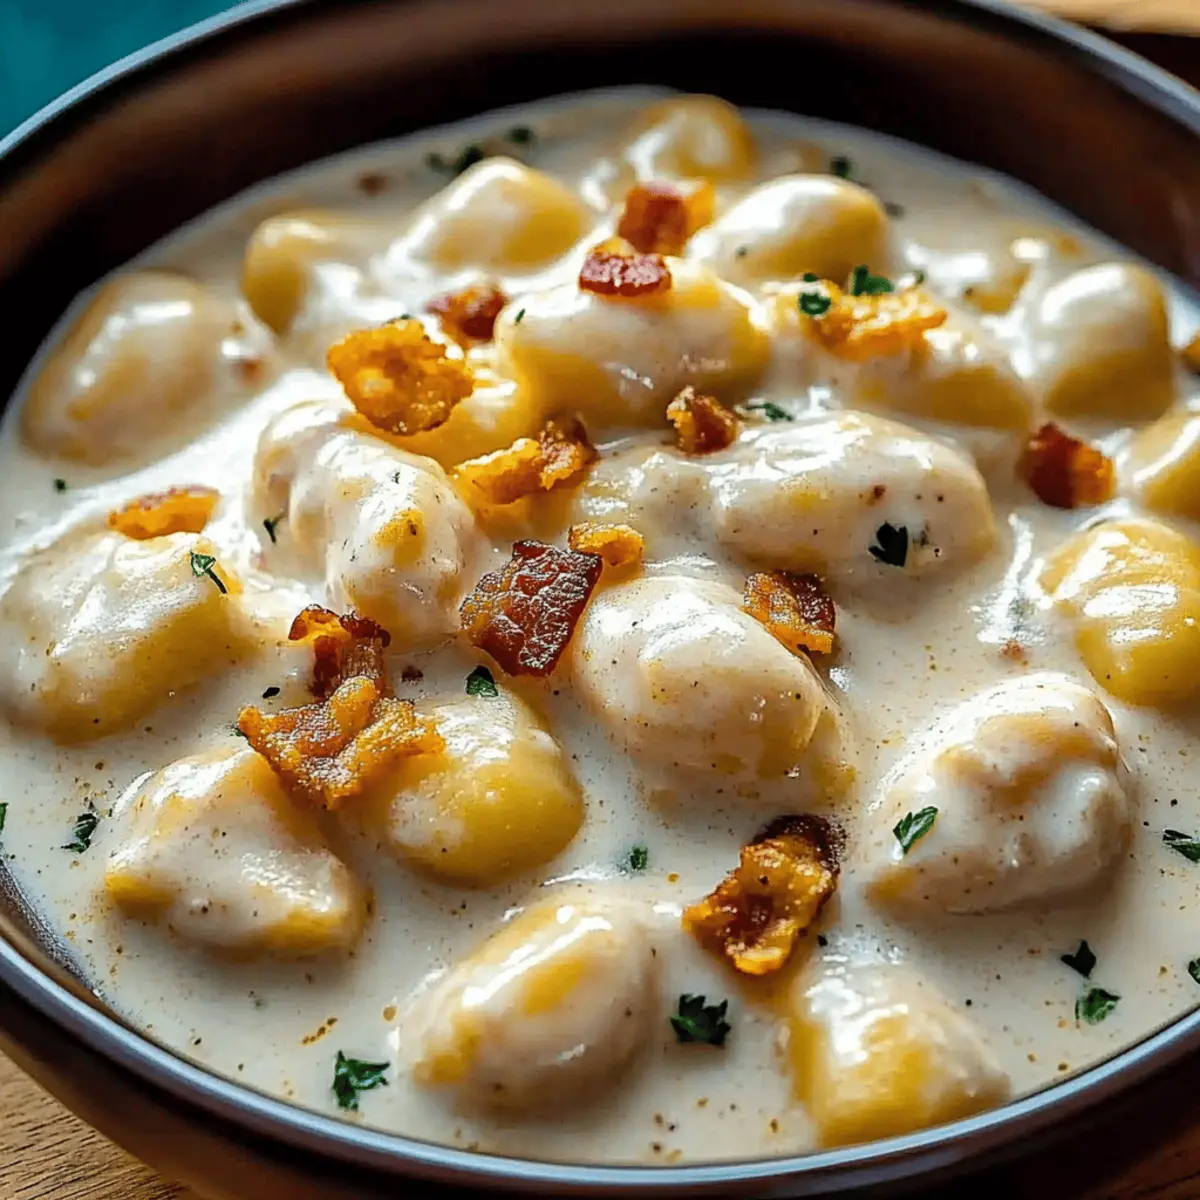
Stir in 1 cup of shredded mozzarella, 1/2 cup of grated Parmesan, and 1/2 cup of cheddar cheese into the creamy sauce, mixing until completely melted and smooth. The cheese should create a rich and velvety texture, which forms the perfect coating for your Cajun Garlic Chicken Rotini.

Step 5: Combine & Simmer
Return the cooked chicken and rotini to the skillet with the creamy cheese sauce. Toss everything together, ensuring the pasta and chicken are well-coated. Allow the mixture to simmer for an additional 2–3 minutes on low heat, allowing the flavors to meld beautifully.

Step 6: Serve
Remove the skillet from the heat and garnish with fresh parsley, adding a vibrant touch to your Cajun Garlic Chicken Rotini. For even more cheesiness, sprinkle some additional cheese on top. Serve hot, and watch as everyone digs into this comforting and delicious skillet meal!

How to Store and Freeze Cajun Garlic Chicken Rotini

  • Fridge: Store leftovers in an airtight container in the fridge for up to 3 days. This helps keep your Cajun Garlic Chicken Rotini fresh and ready for quick meals.

  • Freezer: Freeze portions in freezer-safe containers or bags for up to 2 months. Make sure to cool the dish completely before packing to preserve texture and flavor.

  • Thawing: Thaw frozen rotini overnight in the fridge before reheating. This not only ensures even heating but also keeps the creamy sauce intact.

  • Reheating: When ready to enjoy, reheat on the stovetop over low heat, adding a splash of chicken broth or milk to regain creaminess.

Cajun Garlic Chicken Rotini Variations

Feel free to mix things up and make this dish uniquely yours with these exciting variations!

  • Vegetarian: Replace chicken with sautéed veggies, like bell peppers and zucchini, for a colorful, meatless option.

  • Cheese Variants: Try swapping mozzarella with Gouda or Gruyère for a wonderful twist on flavor and creaminess. They add a lovely depth that transforms every bite.

  • Pasta Choices: Switch out the rotini for different pasta shapes, like penne or farfalle, to give the dish a fresh perspective and texture. Each shape holds sauce differently!

  • Add-ins: Incorporate sautéed mushrooms, fresh spinach, or sun-dried tomatoes to elevate the flavor profile and nutritional value. Layering in these ingredients offers a feast of color and taste.

  • Gluten-Free: Use gluten-free pasta to make this dish suitable for those with dietary restrictions. Many excellent brands ensure you won’t miss the traditional pasta texture.

  • Spicy Kick: If you crave heat, add diced jalapeños or increase the Cajun seasoning. Feel the spice dance on your palate for a truly fiery meal!

  • Creamy Swap: For a lighter version, substitute heavy cream with light cream or a dairy alternative like coconut milk without compromising richness.

  • Meal Prep: Whip up a big batch and freeze individual servings for busy nights. Just reheat and relish a comforting dish without much fuss!

With these variations, you can tailor this Cajun Garlic Chicken Rotini to every palate, just like my family loves diving into different cheese mixtures or vegetables! For more delightful garlic-inspired recipes, check out my Garlic Butter Baked Chicken or Cheesy Garlic Chicken wraps for even more flavorful options!

Expert Tips for Cajun Garlic Chicken Rotini

  • Cook Pasta Perfectly: Ensure your rotini is just al dente to avoid it becoming mushy in the skillet. It will absorb some sauce, so don’t overcook!

  • Season Generously: Cajun seasoning can vary in spiciness, so taste as you go! Adjust according to your heat preference to create a Cajun Garlic Chicken Rotini that suits your palate.

  • Melt Cheese Slowly: Add cheese to the creamy sauce when it’s on low heat. This helps to achieve that silky, creamy finish without clumping.

  • Fresh Garlic is Key: Using fresh minced garlic instead of garlic powder will give your sauce a richer flavor. Don’t skip this step for maximum aroma!

  • Customize with Add-ins: Feel free to throw in sautéed vegetables like bell peppers or spinach to enhance nutrition and flavor. Your Cajun Garlic Chicken Rotini will thank you!

  • Reheat with Care: If you have leftovers, reheat slowly on low heat and splash in a little chicken broth or milk to maintain that creamy goodness.

Make Ahead Options

These Cheesy Cajun Garlic Chicken Rotini Skillet meals are perfect for meal prep enthusiasts! You can cook the rotini pasta up to 24 hours in advance; just be sure to drain it well to prevent stickiness. Additionally, the chicken can be cooked and stored in the fridge for up to 3 days—just sauté it until fully cooked, allow it to cool, and refrigerate in an airtight container. When you’re ready to serve, simply reheat the chicken, mix it with the creamy sauce, and toss in the cooked pasta, adding a splash of chicken broth if needed to maintain that creamy texture. This way, you’ll enjoy a flavorful, comforting dinner with minimal effort during your busy week!

What to Serve with Cheesy Cajun Garlic Chicken Rotini Skillet

Create a delightful dining experience that turns a simple skillet dish into a gourmet meal!

  • Garlic Bread: A scrumptious side that complements the creamy sauce, adding crunch and furthering the garlic flavor profile.

  • Light Green Salad: Crisp greens tossed with a tangy vinaigrette offer a refreshing contrast against the richness of the Cajun Garlic Chicken Rotini skillet.

  • Steamed Broccoli: Tender, bright broccoli provides a nutritious touch and lovely color on the plate, balancing out the dish’s richness.

  • Roasted Brussels Sprouts: Their earthy flavor pairs nicely with the spices in your skillet, creating an irresistible combination.

  • Cheesy Cauliflower Bake: For the cheese lovers, this creamy bake will amplify the cheesy goodness while providing a satisfying alternative to traditional side dishes.

  • Crispy Baked Sweet Potato Fries: With their hint of sweetness, these fries add a delightful crunch that contrasts beautifully with the creamy rotini.

Elevate your dinner experience with these pairings, and watch as your family and friends savor every bite!

Cajun Garlic Chicken Rotini Recipe FAQs

How do I choose the right ingredients for Cajun Garlic Chicken Rotini?
Absolutely! For the best results, select fresh, boneless, skinless chicken breasts that are firm and slightly moist. When choosing your pasta, look for rotini with a nice curvature to hold onto the sauce, but feel free to experiment with penne or fusilli if you prefer. Make sure your Cajun seasoning is fresh as well—it should have a vibrant color and a strong aroma!

How can I store leftover Cajun Garlic Chicken Rotini?
Very simply! Store leftover Cajun Garlic Chicken Rotini in an airtight container in the fridge for up to 3 days. This keeps it fresh and ready for a quick meal. If you’ll not be eating it within this time frame, I recommend freezing portions instead for up to 2 months to maintain its delicious flavors.

What are the best methods for freezing this dish?
Definitely! Here’s how to freeze your Cajun Garlic Chicken Rotini: First, let it cool completely before transferring it to freezer-safe containers or resealable bags. Be sure to press out as much air as possible to prevent freezer burn. Label your containers with the date, and freeze. When you’re ready to enjoy, simply thaw it overnight in the refrigerator.

Any tricks for reheating leftovers without losing creaminess?
Of course! When reheating Cajun Garlic Chicken Rotini, place it in a skillet over low heat and add a splash of chicken broth or milk. This helps to restore the creaminess and prevents it from becoming dry. Stir gently and heat thoroughly for about 5-7 minutes, being careful not to let it burn.

Can I make Cajun Garlic Chicken Rotini allergy-friendly?
Absolutely! To make this dish more inclusive, consider using gluten-free pasta options available in stores. For lactose intolerance, substitute heavy cream with coconut milk or a dairy-free cream alternative, and use dairy-free cheese varieties for a delicious taste without the dairy. Always check ingredient labels for potential allergens!

What if I like it spicier?
Very good question! If you’re looking for an extra kick, increase the amount of Cajun seasoning or add some red pepper flakes during cooking. Another option is to incorporate diced jalapeños or a dash of hot sauce into the sauce for that fiery flavor. Enjoy experimenting with it!

Cajun Garlic Chicken Rotini

Cajun Garlic Chicken Rotini Skillet for Ultimate Comfort Dinner

Cajun Garlic Chicken Rotini is a creamy one-skillet pasta dish, featuring tender chicken and a flavor-packed garlic sauce.
Prep Time 10 minutes
Cook Time 20 minutes
Total Time 30 minutes
Servings: 4 servings
Course: Pasta
Cuisine: Cajun
Calories: 640

Ingredients
  

For the Skillet
  • 1 pound Boneless, Skinless Chicken Breasts cut into bite-sized chunks
  • 8 ounces Rotini Pasta or swap with penne or farfalle
  • 2 tablespoons Olive Oil for cooking chicken
  • 2 teaspoons Cajun Seasoning adjust based on spice preference
  • 1 teaspoon Garlic Powder
  • 1 teaspoon Onion Powder
  • 1 teaspoon Salt
  • 1/2 teaspoon Black Pepper
  • 4 cloves Garlic minced
  • 2 tablespoons Butter
  • 1 cup Heavy Cream or use light cream
  • 1 cup Chicken Broth
For the Cheesy Finish
  • 1 cup Shredded Mozzarella can experiment with other cheeses
  • 1/2 cup Grated Parmesan
  • 1/2 cup Cheddar Cheese
  • 1/4 cup Fresh Parsley for garnish

Equipment

  • Large skillet
  • Pot for boiling pasta

Method
 

Cooking Steps
  1. Boil a large pot of salted water, add rotini pasta and cook until al dente, about 8–10 minutes. Drain and set aside.
  2. In a skillet, heat olive oil over medium-high heat. Season chicken with Cajun seasoning, garlic powder, onion powder, salt, and pepper. Cook for 6–7 minutes until fully cooked.
  3. In the same skillet, reduce heat to medium, add butter, and sauté minced garlic for 30 seconds. Stir in chicken broth and cream, bring to a simmer for 3–4 minutes.
  4. Add mozzarella, Parmesan, and cheddar cheese, mixing until melted and smooth.
  5. Toss in cooked chicken and rotini, coat with sauce, and simmer for 2–3 minutes.
  6. Garnish with fresh parsley and serve hot.

Nutrition

Serving: 1plateCalories: 640kcalCarbohydrates: 45gProtein: 42gFat: 36gSaturated Fat: 18gPolyunsaturated Fat: 1gMonounsaturated Fat: 5gCholesterol: 150mgSodium: 800mgPotassium: 600mgFiber: 3gSugar: 2gVitamin A: 800IUVitamin C: 10mgCalcium: 350mgIron: 3mg

Notes

For even more flavor, consider adding sautéed vegetables like bell peppers or spinach.

Tried this recipe?

Let us know how it was!

Buffalo Chicken Sliders: Flavorful Bites for Game Day Fun

Game day is around the corner, and I can already smell the tantalizing aroma of Spicy Buffalo Chicken Sliders wafting through the air! These bite-sized wonders are not only a perfect appetizer for gatherings but also a satisfying main dish that will surely please everyone at your table. The juicy, shredded chicken, slathered in Frank’s hot buffalo sauce, paired with melty cheese, comes together in an explosion of flavor and comfort. Plus, whipping up a batch is a breeze—great for meal prep and a fantastic way to escape the fast-food rut. Are you ready for an irresistible treat that might just become your new go-to recipe? Let’s dive in!

Why are Buffalo Chicken Sliders a Must-Try?

Flavor Explosion: With a perfect blend of spicy sauce and melty cheese, these sliders deliver a taste that will make your taste buds dance.

Crowd-Pleasing Delight: Whether it’s game day or a family dinner, they cater to everyone’s cravings and ensure no one leaves hungry.

Easy Preparation: Simple to make, these sliders are ideal for both novice cooks and seasoned chefs looking for a quick meal option.

Meal Prep Friendly: Make a batch in advance and pop them in the oven when you’re ready to serve.

Versatile Options: Experiment with different toppings or sauces – such as adding jalapeños for an extra kick or serving with fresh veggies.

Elevate your game day menu with these scrumptious Buffalo Chicken Sliders that are sure to impress!

Buffalo Chicken Sliders Ingredients

For the Sliders

Slider Buns – Provide a sturdy base; whole wheat or gluten-free options are perfect for dietary needs.
Shredded Chicken – The star protein in this recipe; substitute with shredded turkey for a lighter option.
Frank’s Hot Buffalo Sauce – Infuses that signature spicy flavor; adjust to suit your heat preference.
Ranch Dressing – Adds creaminess and balances heat; blue cheese dressing can be used for a sharper taste.
Salt – Enhances overall flavors; opt for less if you’re watching sodium intake.
Ground Black Pepper – Introduces warmth and depth; freshly ground delivers the best flavor.
Garlic Powder – Gives a savory kick; try fresh minced garlic for added intensity.
Paprika – Brings color and mild warmth; swap for smoked paprika if you prefer a deeper flavor.
Shredded Cheese – Melts beautifully, creating a gooey topping; mozzarella provides mildness while cheddar adds sharpness.
Garlic Butter – Perfect for brushing on top for extra flavor; olive oil with garlic is a great dairy-free alternative.
Italian Seasoning – Uplifts the dish with aromatic herbs; it can be skipped if you don’t have any.

For Toppings (Optional)

Lettuce or Cabbage – Adds crunch and freshness; perfect for a satisfying texture contrast.
Jalapeños – For those who crave more heat; fresh slices or pickled varieties work beautifully.
Fresh Veggies – Serve with celery and carrot sticks for a delightful, healthy crunch alongside your sliders.

Dive into the flavor-packed world of Buffalo Chicken Sliders that will leave everyone asking for more!

Step‑by‑Step Instructions for Buffalo Chicken Sliders

Step 1: Preheat the Oven
Begin by preheating your oven to 350°F (175°C). While it’s heating, line a 9×9 baking sheet with parchment paper to prevent sticking and ensure a clean release of your Buffalo Chicken Sliders after baking. This will be the base where your delicious sliders come together!

Step 2: Prepare the Chicken Mixture
In a large mixing bowl, thoroughly combine the shredded chicken with Frank’s hot buffalo sauce, ranch dressing, salt, black pepper, garlic powder, and paprika. Stir until the chicken is well-coated, and the ingredients are evenly incorporated. This flavorful mixture will be the star of your sliders, so make sure every bite is packed with taste.

Step 3: Assemble the Sliders
Take the bottom halves of your slider buns and place them neatly on the prepared baking sheet. Generously spoon the spicy chicken mixture onto each bottom bun, ensuring an even distribution for all sliders. This way, every bite will be bursting with that delectable buffalo flavor your friends and family will love!

Step 4: Add Cheese and Top Buns
Sprinkle shredded cheese generously over the chicken mixture on each slider. After that, carefully place the top halves of the slider buns over the cheese. This layer of cheese will melt beautifully, adding a nice gooey texture to your finished Buffalo Chicken Sliders, making them even more irresistible.

Step 5: Prepare the Garlic Butter
In a small bowl, mix melted garlic butter with a dash of garlic powder and Italian seasoning. Using a pastry brush, lavishly brush this flavorful mixture over the top of the slider buns. This will create a lovely golden crust that adds both flavor and aesthetic appeal to your sliders.

Step 6: Bake the Sliders
Cover the baking sheet tightly with aluminum foil and place it in the preheated oven. Bake for 15 minutes, allowing the flavors to meld. After this initial baking, carefully remove the foil and continue baking for an additional 5-10 minutes, or until the tops are golden brown and the cheese has melted beautifully.

Step 7: Serve Your Sliders
Once baked, take the sliders out of the oven and let them cool for a few minutes before slicing them into individual portions. Serve them warm, perhaps alongside celery and carrot sticks, with your favorite dipping sauces. These Buffalo Chicken Sliders are now ready to delight your guests or family with their incredible flavors!

Storage Tips for Buffalo Chicken Sliders

  • Room Temperature: Best enjoyed fresh, but if left out, sliders can be at room temperature for up to 2 hours. After this, store leftovers promptly to maintain safety.

  • Fridge: Store any leftover Buffalo Chicken Sliders in an airtight container in the refrigerator for up to 3 days. If possible, keep separated from toppings to retain texture.

  • Freezer: To freeze, wrap sliders tightly in plastic wrap, then place them in a freezer-safe bag. They can be frozen for up to 3 months. Thaw in the fridge overnight when ready to use.

  • Reheating: Reheat sliders in the oven at 350°F for about 10-15 minutes, covered with foil to prevent drying out. Enjoy the gooey, cheesy goodness of your Buffalo Chicken Sliders!

What to Serve with Spicy Buffalo Chicken Sliders

Elevate your slider feast with delightful sides and drinks that perfectly complement their flavor and create a memorable meal experience.

  • Creamy Coleslaw: A cool, crisp side that adds crunch and balances the heat of the sliders, making each bite refreshing.

  • Garlic Parmesan Fries: These crispy fries offer a delicious contrast to the soft sliders and enhance the savory elements of your meal.

  • Crispy Veggie Sticks: Fresh celery and carrot sticks provide crunch and color while serving as the perfect healthful complement to your sliders.

  • Buffalo Cauliflower Bites: Vegetarian and packed with flavor, these spicy bites echo the sliders’ deliciousness while offering an exciting alternative.

  • Cheesy Nachos: Layered with cheese and jalapeños, these indulgent nachos are a fun and flavorful side that takes the meal to another level.

  • Refreshing Beverage: Pair with a cool beer, lemonade, or sparkling water for a refreshing contrast that helps balance the sliders’ heat.

  • Chocolate Chip Cookies: Finish off the feast with warm chocolate chip cookies, a comforting sweet treat that everyone will adore after those spicy flavors.

Make Ahead Options

These Spicy Buffalo Chicken Sliders are a lifesaver for busy weeknights! You can prepare the chicken mixture up to 24 hours in advance; simply combine the shredded chicken, Frank’s hot buffalo sauce, ranch dressing, and seasonings in a bowl. Store this flavorful mix in an airtight container in the refrigerator to keep it fresh. When you’re ready to enjoy the sliders, take the mixture out and assemble it on the slider buns just before baking to ensure the buns stay fluffy and prevent sogginess. Bake as directed, and you’ll have mouthwatering Buffalo Chicken Sliders that taste just as delicious as if they were made fresh!

Buffalo Chicken Sliders: Customize Your Dish

Feel free to put your own spin on this delicious recipe—let your creativity shine through every bite!

  • Shredded Beef: Swap shredded chicken for tender, spicy shredded beef to add a delicious twist.
  • Turkey Delight: Use shredded turkey instead of chicken for a lighter option without sacrificing flavor.
  • Heat Level: For spice enthusiasts, increase the amount of Frank’s hot buffalo sauce or add diced jalapeños.
  • Cheese Medley: Mix different cheeses such as pepper jack and provolone for a unique, melty experience.
  • BBQ Style: Replace buffalo sauce with your favorite barbecue sauce for a smoky, sweet flavor profile.
  • Veggie Boost: Add sautéed veggies like bell peppers or onions for extra texture and nutrition.
  • Grilled Chicken: Consider using grilled chicken breast for a smoky, charred flavor that pairs perfectly with the spicy sauce.
  • Fresh Crunch: Serve with a side of fresh veggies, like celery and carrot sticks, alongside creamy ranch or blue cheese dressing.

Feeling inspired? These adaptable sliders are your gateway to culinary creativity! If you’re looking for more delicious recipes, don’t miss out on the tasty Sizzling Chicken Pepper or Garlic Chicken Gnocchi for even more flavor options!

Expert Tips for Buffalo Chicken Sliders

  • Prevent Soggy Buns: Assemble sliders right before baking to keep the buns from getting mushy. Prep the chicken filling in advance for best results.

  • Personalize the Heat: Adjust the amount of Frank’s hot buffalo sauce according to your spice tolerance. Start with less and add more if you crave extra heat.

  • Cool Before Serving: Allow sliders to cool slightly after baking to avoid burns from the hot cheese and sauce, ensuring a delightful experience.

  • Add Texture: Incorporate fresh toppings like shredded lettuce or crunchy cabbage for an exciting contrast to the creamy filling of your Buffalo Chicken Sliders.

  • Double the Recipe: Considering their popularity, make a larger batch to ensure there are enough sliders to satisfy everyone during your gatherings!

Buffalo Chicken Sliders Recipe FAQs

What is the best way to select ripe ingredients for Buffalo Chicken Sliders?
Absolutely! For the best Buffalo Chicken Sliders, look for slider buns that are soft and pillowy without any dark spots. The shredded chicken should be tender and moist, ideally from a freshly cooked roast or rotisserie chicken. If using cheese, opt for freshly shredded for better melting; avoid pre-packaged shredded cheese, which often contains anti-caking agents.

How should I store leftover Buffalo Chicken Sliders?
You can store any leftover Buffalo Chicken Sliders in an airtight container in the refrigerator for up to 3 days. To maintain the best texture, keep the sliders separate from any toppings you might have used. If you’re enjoying them after a get-together, pop them in the fridge within 2 hours to keep them safe.

Can Buffalo Chicken Sliders be frozen?
Yes! To freeze, wrap the assembled but uncooked sliders tightly in plastic wrap, ensuring there are no air pockets. Place them in a freezer-safe bag to protect against freezer burn. They can be kept frozen for up to 3 months. When you’re ready to enjoy them, thaw the sliders overnight in the fridge before baking.

What if my sliders turn out soggy?
To avoid soggy sliders, it’s important not to assemble them too far ahead of baking. If you find your sliders are still soggy after baking, try to bake them a bit longer uncovered to crisp them up. Also, using thicker buns can help as they tend to hold up better against moisture.

Are there any dietary considerations when making Buffalo Chicken Sliders?
Certainly! For those with gluten sensitivities, you can use gluten-free slider buns. If you’re watching your calories or fat intake, consider using shredded turkey or a low-fat ranch dressing. Always check the ingredients of the sauces, as they may contain allergens like dairy or gluten, depending on the brand.

Buffalo Chicken Sliders

Buffalo Chicken Sliders: Flavorful Bites for Game Day Fun

Buffalo Chicken Sliders are a must-try for game days, combining spicy sauce and melty cheese for a crowd-pleasing appetizer.
Prep Time 20 minutes
Cook Time 25 minutes
Total Time 45 minutes
Servings: 12 sliders
Course: Appetizers
Cuisine: American
Calories: 290

Ingredients
  

For the Sliders
  • 12 sliders Slider Buns Whole wheat or gluten-free options work well.
  • 3 cups Shredded Chicken Substitute with shredded turkey for a lighter option.
  • 1 cup Frank's Hot Buffalo Sauce Adjust to your heat preference.
  • 1/2 cup Ranch Dressing Blue cheese dressing can be used as an alternative.
  • 1 teaspoon Salt Use less if watching sodium intake.
  • 1/2 teaspoon Ground Black Pepper Freshly ground is best.
  • 1 teaspoon Garlic Powder Fresh minced garlic can be substituted.
  • 1 teaspoon Paprika Smoked paprika can be used for deeper flavor.
  • 2 cups Shredded Cheese Mozzarella or cheddar can be used.
  • 1/4 cup Garlic Butter Olive oil with garlic serves as a dairy-free alternative.
  • 1 teaspoon Italian Seasoning Optional ingredient.
For Toppings (Optional)
  • 1 cup Lettuce or Cabbage Adds crunch and freshness.
  • 1/2 cup Jalapeños Fresh or pickled varieties can be used.
  • 1 cup Fresh Veggies Serve with celery and carrot sticks.

Equipment

  • Oven
  • 9x9 Baking Sheet
  • Mixing Bowl
  • Pastry Brush

Method
 

Step‑by‑Step Instructions
  1. Preheat your oven to 350°F (175°C) and line a 9x9 baking sheet with parchment paper.
  2. In a large mixing bowl, combine shredded chicken with Frank's hot buffalo sauce, ranch dressing, salt, black pepper, garlic powder, and paprika.
  3. Place the bottom halves of the slider buns on the prepared baking sheet and evenly distribute the chicken mixture on each.
  4. Sprinkle shredded cheese over the chicken mixture and place the top halves of the slider buns on top.
  5. Mix melted garlic butter with garlic powder and Italian seasoning, then brush over the tops of the slider buns.
  6. Cover with aluminum foil and bake for 15 minutes, then remove the foil and continue baking for an additional 5-10 minutes.
  7. Let the sliders cool for a few minutes before slicing and serving warm.

Nutrition

Serving: 1sliderCalories: 290kcalCarbohydrates: 28gProtein: 16gFat: 15gSaturated Fat: 8gPolyunsaturated Fat: 1gMonounsaturated Fat: 7gCholesterol: 45mgSodium: 800mgPotassium: 250mgFiber: 1gSugar: 2gVitamin A: 300IUVitamin C: 2mgCalcium: 200mgIron: 1mg

Notes

Assemble sliders just before baking to prevent soggy buns. Customize the heat level with Frank's hot buffalo sauce to suit your taste.

Tried this recipe?

Let us know how it was!

Creamy Beef and Rotini Recipe to Warm Your Soul

The savory scent of garlic wafts through my kitchen as I prepare a dish that has quickly become a family favorite: Creamy Beef and Rotini in Garlic Parmesan Sauce. This Beef and Rotini Recipe is a delightful twist on traditional Italian comfort food, transforming humble ingredients into a rich, satisfying meal in just 30 minutes. Perfect for busy weeknights, it’s the kind of dish that brings everyone together, enticing them to the dinner table with its mouthwatering aroma. Not only is it quick to whip up, but the creamy texture and hearty flavors make it an irresistible crowd-pleaser. Are you ready to discover a simple recipe that will have your family asking for seconds?

Why is this Beef and Rotini Recipe a must-try?

Quick and Easy: This dish comes together in just 30 minutes, making it ideal for busy weeknights when time is tight.

Flavor Explosion: The rich garlic and creamy parmesan flavors create a deliciously satisfying meal that warms the heart.

Crowd-Pleaser: Loved by adults and kids alike, it’s a perfect family-friendly dish that keeps everyone coming back for more.

Versatile Options: With quick swaps like ground turkey or added veggies, you can easily customize this recipe.

Comforting Texture: The combination of creamy sauce and tender rotini offers a delightfully indulgent texture that feels like a warm hug.

Pair it with crispy garlic bread or a fresh and zesty Caesar salad to elevate your meal experience!

Beef and Rotini Recipe Ingredients

• Elevate your dish with these essentials!

For the Pasta

  • Rotini Pasta – A charming shape that grips the creamy sauce beautifully.

For the Meat

  • Ground Beef – Adds hearty protein and a rich flavor that deepens the sauce.

For the Sauce

  • Olive Oil – A healthy, flavorful fat used for sautéing; choose extra virgin for a richer taste.
  • Garlic (4 cloves, minced) – Provides the aromatic backbone; fresh garlic brings out the best flavors!
  • Heavy Cream (1 cup) – The creamy base of the sauce; it’s essential for that luscious texture.
  • Grated Parmesan Cheese (1 cup) – Adds a salty, nutty flavor, crucial for the depth in your Beef and Rotini Recipe.
  • Italian Seasoning (1 teaspoon) – Enhances the overall flavor; feel free to adjust based on your taste.
  • Salt and Pepper (to taste) – Essential for seasoning; start low and adjust as needed.

For Garnish

  • Fresh Parsley – Brightens the dish with a pop of color and fresh flavor; a little goes a long way!

Step‑by‑Step Instructions for Creamy Beef and Rotini Recipe

Step 1: Cook Pasta
In a large pot, bring salted water to a rolling boil. Add the rotini pasta and cook according to the package instructions, about 8-10 minutes, until al dente. You want it firm yet tender to hold the creamy sauce well later. Once cooked, drain the pasta and set it aside, making sure to save a cup of pasta water for potential sauce adjustments.

Step 2: Sauté Beef
While your pasta cooks, heat a generous tablespoon of olive oil in a large skillet over medium heat. Add the ground beef, breaking it apart with a spatula as it cooks. Stir frequently for about 5-7 minutes, or until the beef is browned with no pink remaining. This step builds the flavor foundation for your Beef and Rotini Recipe.

Step 3: Add Garlic
Once the beef is browned, stir in the minced garlic, allowing it to cook for 1-2 minutes until fragrant and golden. Be careful not to burn the garlic, as it can turn bitter. Season with salt, pepper, and Italian seasoning, stirring well to combine. This is where the delicious aroma begins to fill your kitchen!

Step 4: Make Sauce
Pour in the heavy cream, adjusting the heat to bring the mixture to a gentle simmer. Stir frequently to incorporate the cream with the beef. Gradually sprinkle in the grated parmesan cheese, mixing continuously until thickened and creamy, about 3-5 minutes. The sauce should coat the back of a spoon, creating that luscious texture that defines our Creamy Beef and Rotini Recipe.

Step 5: Combine
Add the drained rotini directly into the skillet with the cream sauce, tossing everything together to ensure each piece of pasta is well-coated. If the sauce seems too thick, add a splash of the reserved pasta water to reach the desired consistency. Let it heat through for a minute to absorb all those delightful flavors.

Step 6: Serve
Spoon the Beef and Rotini into bowls while hot, garnishing with chopped fresh parsley and a sprinkle of additional parmesan if desired. The combination of creamy sauce, tender pasta, and savory beef creates a comforting dish that’s inviting and sure to please everyone around the table.

Make Ahead Options

These Creamy Beef and Rotini in Garlic Parmesan Sauce are perfect for meal prep enthusiasts! You can cook the rotini pasta and ground beef up to 24 hours in advance, refrigerating both separately to maintain texture. When you’re ready to serve, simply reheat the beef and add minced garlic, then pour in the heavy cream to create that luscious sauce again. Toss in the cooked rotini and parmesan, just like you would if you had just made the dish from scratch, and voilà! This approach ensures that your dinner is not only quick but also just as delicious as when freshly prepared—saving you time on busy weeknights while still delivering comforting flavors.

Expert Tips for Beef and Rotini Recipe

Use Fresh Ingredients: Fresh garlic and high-quality parmesan make a noticeable difference in flavor; they elevate your Beef and Rotini Recipe to new heights.

Avoid Boiling Cream: Always heat the heavy cream gently to prevent it from separating; a simmer works best to achieve that creamy consistency.

Perfect Cheese Melting: Remove the skillet from heat before adding cheese to ensure it’s melted smoothly, creating a luxurious sauce for your pasta.

Pasta Consistency: Reserve some pasta water before draining; it can help adjust the sauce’s thickness, ensuring every piece of rotini is perfectly coated.

Customize Wisely: Feel free to mix in your favorite vegetables or swap meat types, but stick to the foundational flavors to keep the essence of the Beef and Rotini Recipe intact.

How to Store and Freeze Beef and Rotini Recipe

Fridge: Keep leftovers in an airtight container for up to 3 days. This will help maintain the creamy texture of the sauce, which is essential for your Beef and Rotini Recipe.

Freezer: If you want to freeze, transfer the cooled dish to a freezer-safe container. It can be stored for up to 3 months. To reheat, thaw overnight in the fridge before warming gently on the stove.

Reheating: When ready to enjoy, reheat on low heat while stirring in a splash of milk or cream to restore the sauce’s creaminess. Avoid boiling to keep the consistency smooth.

Make-Ahead: You can prepare the Beef and Rotini Recipe in advance and store it in the fridge for a quick meal later in the week; just make sure to consume it within the recommended timeframe!

What to Serve with Creamy Beef and Rotini in Garlic Parmesan Sauce

The perfect sides can elevate this creamy pasta dish into a full culinary experience that your family will cherish.

  • Crispy Garlic Bread:
    An irresistible pairing that offers crunch and a burst of garlic flavor, perfect for scooping up extra sauce.

  • Caesar Salad:
    The freshness of romaine and tangy dressing cuts through the richness of the pasta, creating a refreshing balance.

  • Roasted Vegetables:
    A colorful medley of carrots, zucchini, and bell peppers adds nutrients and provides a delightful contrast to the creamy textures.

  • Steamed Broccoli:
    Bright green broccoli florets bring a touch of color and a slight crunch, amplifying the nutritional value of your meal.

  • Italian Antipasto Platter:
    A selection of cured meats, cheeses, and olives adds a flavorful, gourmet touch that’s ideal for sharing and complements Italian flair.

  • Chardonnay or Pinot Grigio:
    A chilled glass of white wine enhances the savory notes of the dish, creating a sophisticated dining experience.

Serving any of these delightful options alongside your Beef and Rotini Recipe will not only fill your table but will surely fill your hearts with warmth and comfort.

Beef and Rotini Recipe Variations & Substitutions

Feel free to put your personal spin on this dish and make it truly yours with these delightful variations!

  • Turkey Swap: Substitute ground turkey for beef for a leaner and lighter option without sacrificing flavor.
  • Sausage Flavor: Use Italian sausage for a spicy kick; it adds a fantastic depth to the sauce.
  • Veggie Boost: Incorporate vegetables like spinach or bell peppers to enhance nutrition and color; they’ll blend beautifully.
  • Gluten-Free Alternative: Opt for gluten-free rotini to cater to dietary needs without losing that comforting pasta texture.
  • Creamy Twist: For a unique flavor, add a touch of cream cheese into the sauce for an even richer, tangy taste.
  • Herb Infusion: Enhance the flavor by mixing in fresh herbs like basil or oregano; they’ll elevate the dish beautifully!
  • Extra Crunch: Top with crispy breadcrumbs or toasted nuts for an exciting texture contrast that adds a delightful crunch.
  • Spicy Kick: Sprinkle in some red pepper flakes for a bit of heat; this will elevate your Beef and Rotini Recipe to a whole new level.

If you’re looking for more delectable dinner ideas, check out our mouthwatering recipes like Sticky Beef Noodles or the comforting Korean Ground Beef Bowl. They’ve all got unique twists you might enjoy!

Beef and Rotini Recipe FAQs

What type of rotini pasta works best for this dish?
I recommend using standard rotini pasta, as its spiral shape holds onto the sauce beautifully, ensuring every delicious bite is coated. Whole wheat rotini can also be a great healthy alternative, offering additional fiber while still complementing the creamy sauce perfectly.

How should I store leftovers from the Beef and Rotini Recipe?
To maintain freshness, store any leftover Beef and Rotini in an airtight container in the refrigerator for up to 3 days. Make sure to allow it to cool fully before sealing to prevent condensation, which can affect the sauce’s texture. Reheat over low heat to keep the sauce creamy!

Can I freeze the Beef and Rotini Recipe?
Absolutely! To freeze this delicious meal, first, allow it to cool completely and then transfer it into a freezer-safe container. It can be kept in the freezer for up to 3 months. When you’re ready to enjoy it, thaw it overnight in the fridge and reheat on low, stirring in a splash of milk or cream to restore its creamy consistency.

What if my sauce is too thick after cooking?
If your sauce seems too thick, don’t worry! Simply add a splash of the reserved pasta water gradually while stirring until you reach your desired consistency. This will not only loosen the sauce but also enhance the flavor, ensuring each piece of rotini is perfectly coated.

Is this Beef and Rotini Recipe suitable for people with dietary restrictions?
While it contains dairy, you can easily adapt this recipe to accommodate various dietary preferences. For a gluten-free version, opt for gluten-free rotini, and for a lighter option, use lean ground turkey instead of beef. If allergies are a concern, please check the labels for any hidden allergens, especially in the pasta and cheese.

Can I add vegetables to this Beef and Rotini Recipe?
Very much! Adding vegetables is a great way to enhance the nutritional profile of the dish. I often recommend stirring in fresh spinach or mushrooms to the sauce during the last few minutes of cooking. This not only adds flavor but also brings a pop of color and extra nutrients.

Beef and Rotini Recipe

Creamy Beef and Rotini Recipe to Warm Your Soul

This Beef and Rotini Recipe is a delightful twist on traditional Italian comfort food, perfect for busy weeknights.
Prep Time 10 minutes
Cook Time 20 minutes
Total Time 30 minutes
Servings: 4 servings
Course: Pasta
Cuisine: Italian
Calories: 550

Ingredients
  

For the Pasta
  • 8 oz Rotini Pasta A charming shape that grips the creamy sauce beautifully.
For the Meat
  • 1 lb Ground Beef Adds hearty protein and a rich flavor.
For the Sauce
  • 2 tbsp Olive Oil Choose extra virgin for a richer taste.
  • 4 cloves Garlic Minced for best flavor.
  • 1 cup Heavy Cream Essential for that luscious texture.
  • 1 cup Grated Parmesan Cheese Adds a salty, nutty flavor.
  • 1 tsp Italian Seasoning Enhances overall flavor.
  • to taste Salt and Pepper For seasoning.
For Garnish
  • 1/4 cup Fresh Parsley Chopped, for garnish.

Equipment

  • Large pot
  • Large skillet

Method
 

Step-by-Step Instructions for Creamy Beef and Rotini Recipe
  1. In a large pot, bring salted water to a rolling boil. Add the rotini pasta and cook according to the package instructions, about 8-10 minutes, until al dente. Drain the pasta, saving a cup of pasta water.
  2. While your pasta cooks, heat a tablespoon of olive oil in a large skillet over medium heat. Add the ground beef, breaking it apart while it cooks. Stir frequently for about 5-7 minutes until browned.
  3. Once the beef is browned, stir in minced garlic and cook for 1-2 minutes until fragrant. Season with salt, pepper, and Italian seasoning.
  4. Pour in the heavy cream and bring to a gentle simmer. Stir in the grated parmesan cheese until thickened and creamy, about 3-5 minutes.
  5. Add the drained rotini to the skillet, tossing to coat in the cream sauce. Add reserved pasta water if the sauce is too thick.
  6. Spoon the Beef and Rotini into bowls, garnishing with chopped fresh parsley and additional parmesan if desired.

Nutrition

Serving: 1bowlCalories: 550kcalCarbohydrates: 45gProtein: 30gFat: 30gSaturated Fat: 15gPolyunsaturated Fat: 0.5gMonounsaturated Fat: 12gCholesterol: 95mgSodium: 600mgPotassium: 600mgFiber: 3gSugar: 2gVitamin A: 500IUVitamin C: 1mgCalcium: 350mgIron: 3mg

Notes

Use fresh ingredients for the best flavor. Avoid boiling cream to keep the sauce from separating. Reserve pasta water for sauce adjustments.

Tried this recipe?

Let us know how it was!

Essential Chicken & Stuffing Casserole for Cozy Nights

As I stood in my kitchen, surrounded by the warm aroma of simmering chicken and savory spices, a comforting thought washed over me: nothing beats a home-cooked meal. That’s where Dolly’s Chicken and Stuffing Casserole comes into play—a true Southern delight that brings people together. This dish isn’t just about taste; it’s about creating memories with loved ones around the dinner table. Boasting a creamy filling enriched with juicy chicken and a golden, crispy topping, this casserole is perfect for any occasion. Not only is it a comforting option that warms the soul, but it’s also incredibly versatile, allowing for gluten-free and make-ahead variations to suit every guest’s needs. Ready to dive into a dish that feels like a warm hug? Let’s get started on this deliciously nostalgic adventure!

Why is This Casserole a Must-Try?

Comforting, hearty flavors: Dolly’s Chicken and Stuffing Casserole combines savory chicken and a crispy stuffing topping, making it a go-to dish for cozy nights. Versatile options: Customize it with cornbread stuffing or make it gluten-free to cater to all dietary preferences. Easy preparation: With pre-cooked chicken and simple ingredients, you can whip this up quickly for weekday dinners or holiday gatherings. Perfect for meal prep: Prepare in advance, refrigerate, or freeze for a home-cooked meal ready whenever you need it! For lighter pairings, serve it with a crisp green salad or a warming bowl of Tuscan Chicken Soup.

Chicken & Stuffing Casserole Ingredients

For the Casserole

  • Pre-cooked Chicken – You can save time by using rotisserie chicken for a tender, juicy base.
  • Stuffing Mix – Choose traditional or cornbread for a delightful flavor; gluten-free options are available too!
  • Cream of Chicken Soup or Greek Yogurt – Provides creaminess; Greek yogurt is a healthier substitute.
  • Low-Sodium Chicken Broth – Keeps the filling moist; using low-sodium varieties enhances healthiness.
  • Butter – Adds richness and helps achieve that crispy topping; feel free to adjust based on dietary needs.

Optional Add-ins

  • Steamed Vegetables – Toss in some broccoli or carrots for extra nutrition and flavor depth!
  • Cranberries – Add these for a festive twist, especially if you’re using turkey instead of chicken.
  • Herbs and Spices – Spice it up with sage or thyme to enhance the comforting flavors of your Chicken & Stuffing Casserole.

Step‑by‑Step Instructions for Dolly’s Chicken and Stuffing Casserole

Step 1: Prepare Creamy Base
In a large mixing bowl, combine the shredded pre-cooked chicken, cream of chicken soup, and low-sodium chicken broth. Stir well until the mixture is smooth and evenly combined, ensuring every piece of chicken is coated. This creamy base will be the heart of your Chicken & Stuffing Casserole, so take your time and enjoy the blending of flavors.

Step 2: Layer Ingredients
Once your creamy chicken mixture is ready, spread it evenly into a greased 9×13 inch baking dish. Using a spatula, ensure that the filling reaches all corners. Next, sprinkle the stuffing mix generously over the top of the creamy layer. This will create a delightful contrast between the rich filling and the crispy topping that everyone loves.

Step 3: Optional Butter Drizzle
For an extra touch of richness and to encourage a golden brown topping, melt about 2 tablespoons of butter and drizzle it evenly over the stuffing layer. This step is optional, but it guarantees a crispy texture that elevates your Chicken & Stuffing Casserole to comfort food perfection.

Step 4: Bake
Preheat your oven to 350°F (175°C). Once the oven is hot, place the casserole in the center rack and bake for 35-40 minutes. You’ll know it’s ready when the top is golden brown and you can see bubbly edges. The aroma will fill your kitchen, teasing everyone with the flavors to come.

Step 5: Check Doneness
After baking, remove your Chicken & Stuffing Casserole from the oven. To check if it’s done, insert a sharp knife in the center—the casserole should feel firm, and hot steam should rise as it’s sliced. Make sure the internal temperature reaches 165°F to ensure everything is safely cooked through.

Step 6: Let It Rest
Before diving in, let the casserole rest for about 5-10 minutes. This allows the flavors to settle and makes serving easier. The layers will firm up slightly, making it perfect for slicing into generous portions. Enjoy the anticipation as you prepare to serve this comforting dish!

How to Store and Freeze Chicken & Stuffing Casserole

  • Room Temperature: It’s best to avoid leaving the casserole out at room temperature for more than 2 hours to prevent spoilage.

  • Fridge: Store leftover Chicken & Stuffing Casserole in an airtight container in the refrigerator for up to 3 days. Reheat in the oven until heated through.

  • Freezer: This casserole is freezer-friendly for up to 2 months. Wrap tightly in plastic wrap and aluminum foil before freezing. Thaw overnight in the fridge before baking.

  • Reheating: When ready to enjoy, preheat your oven to 350°F (175°C) and bake for about 25-30 minutes or until heated through, ensuring that it reaches an internal temperature of 165°F.

Chicken & Stuffing Casserole Variations

Feel free to explore these delightful twists on the classic recipe that’ll make your taste buds dance!

  • Cornbread Stuffing: Swap traditional stuffing for cornbread for a subtly sweet and buttery flavor. It’s a wonderful way to twist this casserole into a new favorite.

  • Add Turkey: For a festive flair, use turkey instead of chicken and toss in some dried cranberries. This pairs beautifully for holiday gatherings!

  • Vegetable Boost: Mix in some steamed broccoli or green beans for a healthy crunch. This adds not only nutrition but also lovely color to your casserole.

  • Dairy-Free Option: Substitute Greek yogurt with dairy-free sour cream or almond yogurt. This allows the dish to remain creamy while catering to lactose-intolerant guests.

  • Low-Sodium Swap: Use homemade salt-free chicken broth and low-sodium soup options. These swaps help keep the flavor rich without overwhelming saltiness.

  • Spicy Kick: For heat lovers, add a pinch of cayenne pepper or crushed red pepper flakes to the creamy mixture. This election introduces a warming spice to comfort food.

  • Herbed Twist: Introduce fresh herbs like rosemary or thyme to the chicken mixture. Fresh herbs brighten the whole dish and bring it to life.

For some extra variety on your dinner table, why not pair this casserole with a refreshing side of Blt Chicken Salad? It adds a light touch to balance the richness of the casserole!

Expert Tips for Chicken & Stuffing Casserole

  • Avoid Soggy Stuffing: To prevent soggy stuffing, be mindful of the moisture content in your creamy filling; avoid adding too much broth.

  • Use Pre-cooked Chicken: For a quick prep, opt for pre-cooked chicken like rotisserie; raw chicken requires careful layering and baking time adjustments.

  • Season Wisely: Enhance flavors by adding herbs like thyme or sage; avoid blandness, especially with gluten-free stuffing options that can be less flavorful.

  • Check Temperature: Always ensure your casserole reaches an internal temperature of 165°F for safe consumption, especially if using any raw chicken.

  • Cool Before Serving: Allow the casserole to rest for 5-10 minutes before serving; this helps set the layers and makes for easier slicing.

  • Freezer Friendly: This Chicken & Stuffing Casserole can be made ahead and frozen for up to two months. Thaw overnight in the fridge before baking for a cozy meal anytime!

Make Ahead Options

Dolly’s Chicken and Stuffing Casserole is the ultimate solution for busy nights, allowing you to enjoy homemade comfort food without the hassle. You can prepare the creamy chicken mixture and layer it with stuffing up to 24 hours in advance. Simply cover the assembled casserole tightly with plastic wrap and refrigerate it. When you’re ready to serve, remove the wrap and bake in a preheated oven at 350°F (175°C) for 40-45 minutes, ensuring it reaches a bubbly state and the top is golden brown. For longer storage, this casserole can also be frozen for up to two months; just thaw overnight in the fridge before baking. This advance prep lets you savor a delicious home-cooked meal with minimal effort!

What to Serve with Dolly’s Chicken and Stuffing Casserole?

Pairing the rich, creamy flavors of Dolly’s Chicken and Stuffing Casserole with complementary sides will elevate your meal and create a delightful dining experience.

  • Crisp Green Salad: A refreshing mix of greens, cucumbers, and cherry tomatoes brightens up the meal, balancing the casserole’s richness.
  • Roasted Vegetables: Caramelized carrots, zucchini, and brussels sprouts provide a sweet contrast and add a colorful touch to your table.
  • Garlic Bread: Warm, toasty garlic bread offers a satisfying crunch, making it perfect for soaking up the delicious creamy filling.
  • Potato Wedges: Crispy baked potato wedges add texture and heartiness, making each bite an unforgettable comfort experience.
  • Warm Applesauce: Sweetened applesauce pairs beautifully, providing a touch of sweetness that complements the savory casserole wonderfully.
  • Corn on the Cob: Juicy, buttery corn brings an element of traditional Southern flavor to your meal, enhancing the comforting vibe.
  • Spiced Apple Cider: Sip on this warm, fragrant drink to cozy up the atmosphere, perfect for holidays or chilly nights.
  • Cheesy Broccoli: Steamed broccoli with melted cheese offers a delicious way to sneak in some greens and adds flavor depth.

Chicken & Stuffing Casserole Recipe FAQs

What type of chicken is best for this casserole?
Absolutely! I recommend using pre-cooked chicken, like rotisserie, for a juicy base that saves time. You can also use shredded chicken you’ve cooked in advance. If you prefer to use raw chicken, make sure to layer it properly and adjust the baking time—just keep an eye on that internal temperature to reach 165°F!

How should I store leftovers of the Chicken & Stuffing Casserole?
Very easy! Store any leftovers in an airtight container in the refrigerator for up to 3 days. When you’re ready to enjoy, simply reheat it in the oven until it’s heated through and bubbly. I often cover it with aluminum foil to prevent drying out.

Can I freeze Chicken & Stuffing Casserole?
Yes, absolutely! This casserole is freezer-friendly for up to 2 months. To freeze, wrap it tightly with plastic wrap and then aluminum foil to avoid freezer burn. When you’re ready to enjoy it, thaw it overnight in the fridge before baking. This will keep all those delicious flavors intact!

What if my stuffing ends up soggy?
To prevent a soggy stuffing top, make sure you don’t add too much liquid when mixing your creamy base. If you’re using raw chicken, layer it carefully to prevent excess moisture. While baking, leave it uncovered so that it can achieve that lovely crispiness.

Are there any dietary considerations I should keep in mind?
For those with dietary restrictions, you can easily make this Chicken & Stuffing Casserole gluten-free by using gluten-free stuffing mixes. If dairy is a concern, substitute Greek yogurt for cream of chicken soup. For low-sodium options, choose low-sodium broth and watch the butter quantity. Always check ingredient labels for allergens if you’re serving guests!

Can I prepare the Chicken & Stuffing Casserole ahead of time?
Yes, you can prepare this dish up to 24 hours in advance. Assemble your casserole, cover tightly with plastic wrap, and refrigerate until you’re ready to bake. This is a great way to ensure you have a comforting meal ready after a busy day without much fuss!

Chicken & Stuffing Casserole

Essential Chicken & Stuffing Casserole for Cozy Nights

Dolly’s Chicken & Stuffing Casserole is a comforting dish that brings people together, perfect for cozy nights and versatile enough for any dietary preference.
Prep Time 10 minutes
Cook Time 40 minutes
Resting Time 10 minutes
Total Time 1 hour
Servings: 6 servings
Course: Casserole
Cuisine: Southern
Calories: 350

Ingredients
  

For the Casserole
  • 4 cups Pre-cooked Chicken Use rotisserie chicken for convenience.
  • 1 box Stuffing Mix Traditional or cornbread, gluten-free options available.
  • 1 can Cream of Chicken Soup Greek yogurt can be used as a substitute.
  • 1 cup Low-Sodium Chicken Broth Keeps the filling moist.
  • 2 tablespoons Butter Optional for extra richness.
Optional Add-ins
  • 1 cup Steamed Vegetables Broccoli or carrots for added nutrition.
  • 1/2 cup Cranberries For a festive twist.
  • 1 tablespoon Herbs and Spices Sage or thyme to enhance flavors.

Equipment

  • 9x13 inch baking dish
  • Mixing Bowl
  • spatula

Method
 

Step‑by‑Step Instructions
  1. In a large mixing bowl, combine the shredded pre-cooked chicken, cream of chicken soup, and low-sodium chicken broth. Stir until smooth.
  2. Spread the creamy chicken mixture into a greased 9x13 inch baking dish.
  3. Sprinkle the stuffing mix over the creamy layer.
  4. Melt about 2 tablespoons of butter and drizzle over the stuffing layer for a golden topping.
  5. Preheat your oven to 350°F (175°C) and bake for 35-40 minutes until golden brown.
  6. Remove from oven and check doneness with a sharp knife. It should feel firm, and the internal temperature should be 165°F.
  7. Let the casserole rest for about 5-10 minutes before serving.

Nutrition

Serving: 1servingCalories: 350kcalCarbohydrates: 30gProtein: 25gFat: 15gSaturated Fat: 7gPolyunsaturated Fat: 2gMonounsaturated Fat: 6gCholesterol: 70mgSodium: 700mgPotassium: 450mgFiber: 2gSugar: 1gVitamin A: 10IUVitamin C: 4mgCalcium: 5mgIron: 10mg

Notes

This casserole can be made ahead and frozen for up to two months. Thaw overnight before baking. Store leftovers in an airtight container for up to 3 days.

Tried this recipe?

Let us know how it was!

Cream Cheese Chicken Taquitos: Crispy Comfort in Every Bite

As the sizzle of oil fills the kitchen and a delicious aroma wafts through the air, my heart races with the anticipation of what’s to come. Cream Cheese Chicken Taquitos are more than just a dish; they’re a cozy, crowd-pleasing delight that transports me back to joyful gatherings with family and friends. The creamy, rich filling perfectly enveloped in a crispy tortilla offers comfort food vibes with a fun twist that everyone loves. Whether you’re hosting a casual get-together or simply craving a tasty snack, these taquitos are a breeze to whip up. Plus, you can customize them to your heart’s content, making them a versatile option for any palate. Ready to dive into this delicious adventure? Let’s get cooking!

Why Are Cream Cheese Chicken Taquitos Irresistible?

Crispy, each taquito offers a satisfying crunch that perfectly contrasts with the creamy filling inside. Flavor-packed, the combination of spices and cream cheese creates a delightful taste experience. Customizable, you can easily swap fillings for personal preferences, from spicy to savory options. Time-saving, these taquitos can be prepped in advance, perfect for last-minute gatherings. Crowd-pleasing, they appeal to both kids and adults alike, making them a hit at any event. Serve them with your favorite dips for an unforgettable treat!

Cream Cheese Chicken Taquitos Ingredients

For the Taquitos
Cream Cheese – Adds a creamy texture and tanginess; substitute with queso blanco or ricotta for a lighter flavor.
Chicken (cooked, shredded) – The main protein; any cooked chicken works well, but rotisserie chicken makes it even easier.
Tortillas – The base for these crispy treats; use flour tortillas for a softer texture or corn tortillas for a gluten-free option.

For Coating (optional)
Cheese – Enhances flavor and adds crispiness when fried; opt for melting cheeses like cheddar or Monterey Jack.

For Seasoning
Spices (cumin, chili powder, etc.) – Adds depth and warmth; adjust according to spice preference or use taco seasoning for convenience.

For Garnishes
Garnishes (cilantro, tomatoes, lime) – Infuse freshness and color; add your favorite toppings like avocado or jalapeños for extra flair.

These Cream Cheese Chicken Taquitos are sure to become a favorite, offering delicious comfort food in every bite!

Step‑by‑Step Instructions for Cream Cheese Chicken Taquitos

Step 1: Prepare the Filling
In a mixing bowl, combine the cream cheese, shredded chicken, and your choice of spices. Use a fork to thoroughly blend the ingredients until well combined and creamy, about 2–3 minutes. This filling should be smooth and homogenous, making it easy to fill the tortillas later on.

Step 2: Assemble the Taquitos
Lay out your tortillas on a clean surface. Spoon a generous amount of the creamy chicken mixture onto one side of each tortilla, then roll tightly, tucking the ends as you go to secure the filling. Use a little cream cheese as a glue on the edges to help seal them tightly; set aside for frying.

Step 3: Heat the Oil
In a large skillet, pour enough oil to cover the bottom (about ½ inch deep) and heat it over medium heat until shimmering, around 350°F. To test, drop in a small piece of tortilla; it should sizzle immediately. Maintaining the right temperature is key for perfectly crispy taquitos, so keep an eye on it!

Step 4: Fry the Taquitos
Carefully place the assembled taquitos seam-side down in the hot oil, ensuring they are not overcrowded in the skillet. Fry for about 2–3 minutes per side, turning until they are golden brown and crispy. Use tongs for easy flipping and to avoid splashes.

Step 5: Drain and Serve
Once golden and crisp, remove the taquitos from the skillet and transfer them to a paper towel-lined plate to drain excess oil. Let them cool just for a moment before serving. These Cream Cheese Chicken Taquitos are best enjoyed hot, served with your favorite toppings and dipping sauces for a delightful crunch!

Expert Tips for Cream Cheese Chicken Taquitos

Choose Fresh Ingredients: Use high-quality cream cheese and fresh spices for the best flavor. Stale or expired ingredients can lead to muted taste.

Avoid Overfilling: Don’t oversaturate the tortillas with filling; it may cause them to break while frying. A thin line of filling works best!

Maintain Oil Temperature: Make sure your oil is at the right temperature for frying. Too hot can burn the taquitos, while too cool will make them greasy.

Serve Immediately: For maximum crispiness, serve your Cream Cheese Chicken Taquitos right after frying. Reheating may lead to sogginess.

Experiment With Fillings: Feel free to mix and match fillings! Add sautéed vegetables or different cheeses for a personalized twist on this classic dish.

How to Store and Freeze Cream Cheese Chicken Taquitos

Fridge: Store leftover taquitos in an airtight container for up to 3 days. This keeps them fresh, although they may lose some crispiness.

Freezer: For best results, freeze uncooked taquitos on a parchment-lined tray until solid, then transfer to a zip-top bag for up to 3 months. Fry straight from frozen when ready to enjoy!

Reheating: If reheating cooked taquitos, place them in a preheated oven at 350°F (175°C) for about 10–15 minutes to regain crispiness. Avoid microwave reheating, which can make them soggy.

Preparation Ahead: You can prepare and assemble the Cream Cheese Chicken Taquitos in advance, making them a convenient option for busy weeknights or unexpected guests!

Cream Cheese Chicken Taquitos Variations

Feel free to get creative with this recipe and tailor it to your desires; the possibilities are endless!

  • Vegetarian: Substitute shredded chicken with black beans or sautéed mushrooms for a meatless delight. Packed with flavor, they’ll satisfy every guest.
  • Spicy Kick: Add diced jalapeños or a dash of hot sauce to the filling for a fiery twist. This variation can awaken your taste buds, bringing delightful heat to each bite.
  • Cheesy Bliss: Mix in additional cheeses like pepper jack or feta for a savory surprise that melts beautifully inside the taquitos. Each bite becomes a gooey adventure.
  • Crunchy Veggie: Incorporate sautéed bell peppers, onions, and corn into the filling for a textural contrast that adds flavor and nutrition. Fresh veggies brighten up each mouthful.
  • Baked Option: Instead of frying, brush the taquitos with olive oil and bake at 400°F (200°C) for 15–20 minutes until golden and crispy. A healthier, delightful twist is always welcome!
  • Herb Infusion: Stir in fresh herbs like cilantro or parsley to the filling for a burst of freshness that elevates the taste. This aromatic detail makes a wonderful impact.
  • Crispy Coating: Before frying, dip the taquitos in egg wash and coat with breadcrumbs for an extra crunch. This delicious layer adds a satisfying texture to the classic recipe.

For a taste still reminiscent of home, serve these variations with a side of refreshing BLT Chicken Salad or some flavorful Sizzling Chicken Pepper Stir-Fry for a complete meal that satisfies!

Make Ahead Options

These Cream Cheese Chicken Taquitos are perfect for meal prep enthusiasts! You can prepare the filling and assemble the taquitos up to 24 hours in advance. Simply mix the cream cheese, shredded chicken, and spices, and then roll them in tortillas. Store them tightly wrapped in plastic wrap in the refrigerator to keep them fresh. When you’re ready to enjoy, just heat oil in a skillet and fry the taquitos until golden brown — no need to thaw! This way, you’ll have delicious, homemade appetizers ready in no time, saving you precious minutes during busy weeknights without sacrificing flavor and quality!

What to Serve with Cream Cheese Chicken Taquitos

The sizzle of crispy taquitos is only the beginning—let’s explore the perfect sides and dips to create a delightful feast.

  • Guacamole: Creamy and rich, this classic dip adds freshness and a buttery texture that balances the crispy taquitos beautifully.
  • Salsa Verde: The tangy, herbal notes of salsa verde elevate the flavors of the taquitos, adding a bright and zesty kick with each bite.
  • Mexican Rice: Fluffy and flavorful, this side dish complements the taquitos perfectly while providing a satisfying, hearty addition to your meal.
  • Black Beans: Hearty and nutrient-packed, seasoned black beans offer a lovely contrast to the taquitos’ crunch, combining well with their flavors.
  • Corn Salad: A refreshing mix of sweet corn, tomatoes, and cilantro, this vibrant salad adds a crisp texture and a touch of sweetness to your plate.
  • Crispy Tortilla Chips: Perfect for scooping, serve these alongside a variety of dips for a fun and interactive appetizer spread, enhancing the party atmosphere.
  • Pineapple Agua Fresca: A refreshing drink that balances the savory taquitos; the sweet and tangy notes make it a delightful complement to every bite.
  • Chocolate Flan: For dessert, this velvety flan brings a luscious finish to your meal; it’s a sweet, smooth contrast to the savory taquitos.
  • Frozen Margaritas: Keep the fiesta going with a chilled margarita; its fruity flavors can elevate the enjoyment of your delicious taquitos.
  • Fresh Fruit Salad: Light and refreshing, a colorful array of seasonal fruits will cleanse the palate and end the meal on a sweet note.

Cream Cheese Chicken Taquitos Recipe FAQs

How do I select the best ingredients for my taquitos?
Absolutely! For the cream cheese, choose a brand that’s fresh and avoid any that have a grainy texture, which indicates age. When selecting chicken, cooked rotisserie chicken is a great option for convenience. As for tortillas, look for ones with a pliable texture; if they’re cracking or dry in the package, they won’t roll well.

How should I store leftover taquitos?
I recommend placing any leftover Cream Cheese Chicken Taquitos in an airtight container in the refrigerator, where they will stay fresh for up to 3 days. This helps maintain their taste, although they may lose some of their crispy outer texture.

Can I freeze my taquitos for later?
Absolutely! For freezing, lay the uncooked taquitos on a parchment-lined baking sheet in a single layer. Freeze them until solid, about 1-2 hours, then transfer them to a zip-top freezer bag for up to 3 months. When you’re ready to enjoy them, just fry them straight from frozen; they usually take an extra minute or two to cook through perfectly!

What should I do if my taquitos are falling apart while frying?
That’s a common concern! To prevent this, make sure not to overfill each tortilla. A thin line of filling is ideal; if you’re still having trouble, try sealing the edges with a bit more cream cheese. Finally, ensure your oil is at the right temperature—too cold can make them soggy, while too hot can lead to burnt taquitos.

Are these taquitos safe for pet consumption?
Very! While the Cream Cheese Chicken Taquitos are intended for humans, they can be shared with pets in moderation. However, it’s best to avoid giving them any taquitos with spices or sauces. Stick to plain, cooked chicken for a tasty pet treat instead.

Can I customize the spices used in taquitos?
Definitely! I encourage you to play with the spices to match your taste preferences. You might opt for a milder taco seasoning for family-friendly flavor or add cayenne pepper for a spicy kick. Adjusting the spices not only tailors the taste but also makes the dish uniquely yours!

Cream Cheese Chicken Taquitos

Cream Cheese Chicken Taquitos: Crispy Comfort in Every Bite

Discover the joy of Cream Cheese Chicken Taquitos, a crowd-pleasing appetizer that offers crispy comfort in every bite.
Prep Time 15 minutes
Cook Time 10 minutes
Total Time 25 minutes
Servings: 4 taquitos
Course: Appetizers
Cuisine: Mexican
Calories: 250

Ingredients
  

For the Taquitos
  • 8 oz Cream Cheese Substitute with queso blanco or ricotta for a lighter flavor.
  • 2 cups Chicken (cooked, shredded) Rotisserie chicken makes it easier.
  • 8 pieces Tortillas Use flour tortillas for a softer texture or corn tortillas for gluten-free.
For Coating (optional)
  • 1 cup Cheese Opt for melting cheeses like cheddar or Monterey Jack.
For Seasoning
  • 1 tbsp Spices (cumin, chili powder, etc.) Adjust according to spice preference or use taco seasoning.
For Garnishes
  • 1 cup Garnishes (cilantro, tomatoes, lime) Add toppings like avocado or jalapeños for extra flair.

Equipment

  • Large skillet
  • Mixing Bowl
  • Tongs
  • paper towels

Method
 

Step-by-Step Instructions
  1. In a mixing bowl, combine the cream cheese, shredded chicken, and your choice of spices. Use a fork to blend until creamy, about 2–3 minutes.
  2. Lay out tortillas on a clean surface. Spoon the creamy chicken mixture onto one side of each tortilla, then roll tightly, tucking the ends to secure the filling.
  3. In a large skillet, pour enough oil to cover the bottom (about ½ inch deep) and heat over medium heat until shimmering (around 350°F).
  4. Carefully place the taquitos seam-side down in the hot oil, frying for about 2–3 minutes per side until golden brown and crispy.
  5. Remove the taquitos from the oil and transfer to a paper towel-lined plate to drain excess oil. Cool slightly before serving.

Nutrition

Serving: 2taquitosCalories: 250kcalCarbohydrates: 30gProtein: 15gFat: 10gSaturated Fat: 5gPolyunsaturated Fat: 1gMonounsaturated Fat: 4gCholesterol: 40mgSodium: 300mgPotassium: 200mgFiber: 2gSugar: 1gVitamin A: 500IUVitamin C: 2mgCalcium: 200mgIron: 1.5mg

Notes

These taquitos are versatile and can be customized with different fillings to suit your taste. Serve with your favorite dips for extra enjoyment.

Tried this recipe?

Let us know how it was!

Savory Ground Beef Rice Casserole for Cozy Family Nights

As the rich aroma of caramelized onions fills my kitchen, I can’t help but feel warmth wrapping around me like a cozy blanket. This French Onion Ground Beef and Rice Casserole is my go-to dish for those busy weeknights when I crave something hearty without spending hours over the stove. Packed with savory ground beef, fluffy rice, and the comforting essence of French onion soup, this meal will have your family gathered around the table, eager for seconds. Plus, it’s not only a delightful crowd-pleaser but also incredibly simple to prepare. With just one dish to clean up, you’ll have more time to relax after dinner. Ready to create a dish that brings comfort and joy to your home? Let’s dive into this satisfying recipe!

Why is this casserole a must-try?

Hearty Comfort: The French onion flavor combined with ground beef and rice creates a rich, satisfying meal that screams comfort food.

Family Favorite: Known to bring everyone to the table, this casserole is perfect for busy weeknights and pleasing even the pickiest eaters.

One-Dish Wonder: With everything cooking in a single dish, cleanup is a breeze, giving you more time to unwind after a delicious meal.

Flavorful Layers: Each bite is packed with the savory essence of caramelized onions and creamy, melted cheese, making this dish irresistible.

Versatile Options: Want to make it your own? Swap in brown rice or add fresh veggies to adapt this recipe to your family’s taste.

Don’t forget to check out my Tater Tot Casserole for another easy, hearty meal!

Ground Beef Rice Casserole Ingredients

Here’s everything you need to whip up this delightful casserole that’s sure to become a family favorite!

For the Casserole

  • Ground Beef – Provides a rich, meaty base for the casserole; you can also substitute with lean ground turkey for a lighter dish.
  • French Onion Soup – Acts as the flavor foundation, adding depth and onion goodness; feel free to use homemade or store-bought varieties.
  • Rice – Soaks up the delicious broth, making the dish hearty and filling; instant or long-grain white rice works great, just adjust cooking times accordingly.
  • Shredded Cheese – Melts to create a creamy topping; cheddar or mozzarella works best, and mixing different cheeses adds extra flavor.
  • Onion – Adds sweetness and texture; sautéing enhances these qualities beautifully.
  • Garlic Powder – Essential for seasoning; it brings out the savory profile of the ground beef.
  • Salt – Key for flavor balance; make sure to adjust to taste.
  • Pepper – Adds a nice kick to round out the flavors!

This Ground Beef Rice Casserole is not just a meal; it’s a warm embrace for your taste buds. Happy cooking!

Step‑by‑Step Instructions for French Onion Ground Beef and Rice Casserole

Step 1: Cook the Ground Beef
In a large skillet over medium heat, brown 1 pound of ground beef, breaking it up with a spatula as it cooks. Continue until the beef is no longer pink, about 7-10 minutes. Once cooked, drain any excess grease and set the beef aside, allowing it to cool slightly while you prepare the next steps.

Step 2: Sauté the Onion
In the same skillet, add a tablespoon of oil or butter and heat over medium. Add one chopped onion, sautéing until it becomes soft and golden, about 5-7 minutes. Stir occasionally to prevent sticking, allowing the natural sugars in the onion to caramelize, enhancing the flavor of your French Onion Ground Beef and Rice Casserole.

Step 3: Mix Ingredients
In a large mixing bowl, combine the cooked ground beef, sautéed onions, 1 cup of uncooked rice, a can of French onion soup, 1 teaspoon of garlic powder, salt, and pepper to taste. Mix everything thoroughly until well combined, ensuring that the rice is evenly coated with the flavorful mixture, preparing it for baking.

Step 4: Assemble Casserole
Transfer the hearty mixture into a greased 9×13 inch casserole dish, spreading it out evenly. Top with 1-2 cups of shredded cheese, covering the surface generously. This layer of melted cheese will create a deliciously creamy topping, making your Ground Beef Rice Casserole both pleasing to the eye and the palate.

Step 5: Bake
Cover the casserole dish with foil and place it in a preheated oven at 350°F (175°C). Bake for 30 minutes to create a warm, bubbling base. After this time, carefully remove the foil and bake for an additional 10-15 minutes, or until the cheese is melted and lightly golden on top, signaling it’s ready to serve.

Step 6: Serve
Once out of the oven, let the casserole sit for about 5-10 minutes. This resting time helps everything set, making it easier to slice and serve. Scoop generous portions of this French Onion Ground Beef and Rice Casserole onto plates, enjoying the comforting layers of flavor and texture that make this dish a true family favorite.

Make Ahead Options

This Ground Beef Rice Casserole is an excellent choice for meal prep, saving you time on busy weeknights. You can prepare the casserole mixture (cooked ground beef, sautéed onions, uncooked rice, and French onion soup) and refrigerate it up to 24 hours in advance. For optimal flavor and freshness, store the mixture in an airtight container to prevent moisture loss. When you’re ready to bake, simply transfer the mixture to a greased casserole dish, sprinkle with cheese, and bake directly from the fridge (adding a few extra minutes to the cooking time as needed). This way, you’ll enjoy a satisfying, hearty meal that’s just as delicious as freshly made, all with minimal effort!

Expert Tips for Ground Beef Rice Casserole

  • Quality Beef: Use 80/20 ground beef for optimal flavor and moisture; leaner cuts may dry out during cooking.

  • Rice Choice: Instant rice is convenient, but long-grain adds more texture; adjust the baking time if you switch types.

  • Onion Sautéing: Don’t rush the onion sauté; the golden color adds vital sweetness and enhances the casserole’s flavor profile.

  • Cheese Layer: For a perfect melted cheese crust, avoid browning it too much during the final baking phase to prevent burning.

  • Storage Tips: Store leftovers in an airtight container in the fridge for up to three days, and reheat gently in the oven for best results.

  • Variations: Feel free to add your favorite veggies like peas or spinach for an extra nutritional boost in this Ground Beef Rice Casserole.

Ground Beef Rice Casserole Variations

Feel free to make this comforting casserole your own—get creative and enjoy every bite!

  • Brown Rice: Swap in brown rice for a nuttier flavor and additional nutrients. It adds a lovely texture twist that makes every forkful satisfying.

  • Vegetable Boost: Add frozen peas, corn, or spinach for a pop of color and extra nutrition. This simple addition helps make dinner even more wholesome.

  • Cheese Medley: Experiment with different cheese blends like gouda or pepper jack for a unique flair. Each cheese brings its own character, enhancing the overall flavor profile.

  • Spicy Kick: For a zesty twist, toss in diced jalapeños or red pepper flakes. This variation will keep your taste buds on their toes with a delightful heat!

  • Creamy Texture: Mix in cream cheese or sour cream for a rich and creamy consistency. This twist adds an indulgent touch that makes the dish even more crowd-pleasing.

  • Herb Infusion: Sprinkle in fresh herbs like thyme or parsley for a fragrant lift. Not only do they add flavor, but they also enhance the visual appeal of your casserole.

  • Sweet Onions: Use Vidalia onions instead of yellow onions for a sweeter taste. Their natural sweetness perfectly complements the savory elements in the casserole.

  • Meat Variation: For a twist on the meaty base, try ground turkey or chicken as a leaner option. This change keeps your dish hearty while lightening it up just a bit.

Don’t forget to enjoy this fabulous casserole alongside a simple green salad or pair it with my comforting Tater Tot Casserole for a cozy family night!

How to Store and Freeze Ground Beef Rice Casserole

Fridge: Store leftovers in an airtight container for up to 3 days. Make sure it’s cooled to room temperature before sealing to prevent condensation.

Freezer: This casserole can be frozen for up to 1 month. Wrap it tightly in plastic wrap and then foil to protect it from freezer burn.

Reheating: When you’re ready to enjoy your Ground Beef Rice Casserole again, thaw it overnight in the fridge, then reheat in the oven at 350°F (175°C) covered with foil until heated through, about 25-30 minutes.

Serving: For best flavor and texture, allow the casserole to sit at room temperature for a few minutes after reheating before serving.

What to Serve with French Onion Ground Beef and Rice Casserole

As you gather around the table, think about complementing this hearty casserole with delightful sides that enhance your meal experience.

  • Simple Green Salad: Fresh greens with a light vinaigrette provide a crisp contrast to the creamy casserole. The tanginess brightens the dish.

  • Crusty Bread: Serve warm, crusty bread for dipping into the rich, savory sauce of the casserole. It’s perfect for soaking up every last bite.

  • Roasted Vegetables: Colors and flavors from roasted seasonal veggies enhance the meal’s sensory appeal, adding nutrients and heartiness. A mix of carrots, bell peppers, and zucchini works wonderfully.

  • Garlic Breadsticks: Soft, buttery breadsticks with a hint of garlic bring a comforting element. They’re perfect for savoring alongside this ground beef rice casserole.

  • Creamy Coleslaw: A refreshing coleslaw introduces a crunchy texture and a cooling element, balancing the dish’s warmth and richness beautifully.

  • Savory Mushroom Gravy: Ladle a warm mushroom gravy over the casserole for an extra layer of flavor. It’s a wonderful touch for mushroom lovers!

  • Apple Crisp: For dessert, serve a warm apple crisp sprinkled with cinnamon; the sweetness and warmth create a satisfying ending to your cozy meal.

  • Red Wine: Enjoy a glass of medium-bodied red wine, like Merlot or Pinot Noir. It complements the casserole’s savory flavors beautifully.

Ground Beef Rice Casserole Recipe FAQs

What type of ground beef is best for this casserole?
Absolutely! For optimal flavor and moisture, I recommend using 80/20 ground beef. This blend contains enough fat to ensure the meat stays juicy throughout cooking. Leaner cuts, such as 93/7, can dry out and lose flavor, making your casserole less satisfying.

How should I store leftovers from the casserole?
Very simple! Allow your Ground Beef Rice Casserole to cool to room temperature before storing. Place it in an airtight container and keep it in the fridge for up to 3 days. This ensures it stays fresh and delicious for your next meal!

Can I freeze the casserole?
You absolutely can! This casserole is perfect for freezing. Just wrap it tightly in plastic wrap followed by aluminum foil to protect it from freezer burn. It will nicely keep in the freezer for up to 1 month. When you’re ready to enjoy it, thaw it in the fridge overnight before reheating.

What are some possible substitutions for the ingredients?
I often make adjustments based on what I have on hand! You can swap ground beef for ground turkey or even chicken to lighten things up. If you prefer a heartier dish, try using brown rice instead of white. And don’t hesitate to toss in veggies, like frozen peas or spinach, for added nutrition.

How can I prevent the cheese from burning during baking?
To achieve that perfect melted cheese crust without burning, avoid exposing the cheese layer to too much heat. Cover the casserole with foil for the first half of the baking time. This allows the cheese to melt without browning too much. Remove the foil only in the last 10-15 minutes to achieve that delightful golden crust.

Is this casserole suitable for families with dietary restrictions?
Always check your ingredients! For those with gluten sensitivities, make sure to use gluten-free French onion soup and verify the rice is gluten-free as well. If you have family members with dairy allergies, consider substitutes such as nutritional yeast or dairy-free cheese alternatives to keep everyone happy at the table.

Ground Beef Rice Casserole

Savory Ground Beef Rice Casserole for Cozy Family Nights

This Ground Beef Rice Casserole is a comforting and hearty dish that brings the family together over delightful flavors.
Prep Time 15 minutes
Cook Time 45 minutes
Resting Time 10 minutes
Total Time 1 hour 10 minutes
Servings: 6 servings
Course: Casserole
Cuisine: American
Calories: 450

Ingredients
  

For the Casserole
  • 1 pound Ground Beef or lean ground turkey for a lighter dish
  • 1 can French Onion Soup homemade or store-bought
  • 1 cup Rice instant or long-grain white rice
  • 1-2 cups Shredded Cheese cheddar or mozzarella
  • 1 medium Onion chopped
  • 1 teaspoon Garlic Powder for seasoning
  • Salt to taste
  • Pepper to taste

Equipment

  • Large skillet
  • Mixing Bowl
  • casserole dish

Method
 

Step-by-Step Instructions
  1. In a large skillet over medium heat, brown the ground beef, breaking it up with a spatula until no longer pink, about 7-10 minutes. Drain excess grease and set aside.
  2. In the same skillet, heat a tablespoon of oil or butter. Add the chopped onion and sauté until soft and golden, about 5-7 minutes.
  3. In a mixing bowl, combine the cooked beef, sautéed onions, rice, French onion soup, garlic powder, salt, and pepper. Mix thoroughly.
  4. Transfer the mixture into a greased 9x13 inch casserole dish, spread evenly, and top with shredded cheese.
  5. Cover with foil and bake at 350°F (175°C) for 30 minutes. Remove foil and bake for an additional 10-15 minutes until cheese is melted and golden.
  6. Let the casserole sit for 5-10 minutes before serving to allow it to set. Scoop onto plates and enjoy!

Nutrition

Serving: 1servingCalories: 450kcalCarbohydrates: 40gProtein: 30gFat: 20gSaturated Fat: 10gPolyunsaturated Fat: 2gMonounsaturated Fat: 10gCholesterol: 80mgSodium: 800mgPotassium: 500mgFiber: 2gSugar: 2gVitamin A: 500IUVitamin C: 5mgCalcium: 200mgIron: 3mg

Notes

Ensure to store leftovers in an airtight container in the fridge for up to 3 days and reheat gently in the oven for best results.

Tried this recipe?

Let us know how it was!

Steak Bites & Pasta in Creamy Garlic Butter Bliss

As the aroma of sizzling steak wafts through the kitchen, my heart skips a beat, knowing dinner will be a savory delight. Today, I’m excited to share my recipe for Steak Bites and Shell Pasta in Garlic Butter Alfredo Sauce—a comforting meal that brings a smile to every table. This dish is not just a quick 30-minute solution for busy weeknights; it’s also a customizable crowd-pleaser that can easily impress guests. Picture juicy, tender steak bites paired with creamy, garlic-infused pasta, creating a perfect harmony of flavors and textures that feels both indulgent and satisfying. Are you ready to elevate your dinner game with this scrumptious recipe? Let’s dive in!

Why is this recipe a must-try?

Indulgent Comfort Food: This dish is the ultimate comfort food, blending rich flavors with a creamy Alfredo sauce that hugs every piece of shell pasta.

Quick and Easy: Ready in just 30 minutes, it’s a lifesaver for busy nights when you crave something special without the wait.

Versatile Ingredients: With steak bites and customizable pasta shapes, this recipe allows you to experiment, ensuring everyone at the table is satisfied.

Crowd-Pleasing Delight: Impress guests with a restaurant-quality meal right from your kitchen! Pair it with an easy Garlic Butter Steak or a fresh salad for a complete experience.

Flavor Explosion: The combination of garlic butter and tender steak creates an unforgettable taste that elevates weeknight dinners to gourmet status!

Steak Bites & Pasta Ingredients

• Get ready to whip up a delicious meal with these essential ingredients.

For the Pasta

  • Shell Pasta – Provides a tender base that captures the creamy sauce beautifully.
  • Salt – Essential for seasoning the pasta water and enhancing flavor.

For the Steak Bites

  • Steak (Ribeye, Sirloin, or Filet Mignon) – Choose quality cuts for rich flavor and tenderness; cut into uniform pieces for even cooking.
  • Olive Oil – Ideal for searing steak, creating a delicious crust.

For the Creamy Alfredo Sauce

  • Butter – Adds richness and depth to the sauce; feel free to reduce it for a lighter option.
  • Garlic – Infuses the sauce with aromatic warmth; substitute garlic powder if necessary.
  • Heavy Cream – Forms the base of the Alfredo, yielding that luscious creaminess; half-and-half or whole milk can lighten it.
  • Parmesan Cheese – Provides a salty, nutty flavor while helping to thicken the sauce; swap for Pecorino Romano if preferred.
  • Black Pepper – Freshly ground for seasoning to elevate the flavors.

For Garnish

  • Fresh Parsley (optional) – Adds a pop of color and freshness to the dish; you can skip it if needed.

Embrace the savory indulgence of Steak Bites & Pasta that’s sure to delight your taste buds!

Step‑by‑Step Instructions for Steak Bites & Pasta

Step 1: Cook the Pasta
Bring a large pot of salted water to a rolling boil over high heat. Add shell pasta and cook for about 7-9 minutes or until al dente, stirring occasionally. Once cooked, reserve ½ cup of pasta water in a bowl, then drain the rest in a colander, letting the steam escape. Set the cooked shell pasta aside for later.

Step 2: Prepare the Steak Bites
While the pasta cooks, pat the steak pieces dry with paper towels, then season generously with salt and pepper. Heat olive oil in a large skillet over medium-high heat until shimmering. Add the steak bites to the pan, searing them for 2-3 minutes on each side until they’re nicely browned. Transfer the steak to a plate and cover it loosely with foil to keep warm.

Step 3: Make the Alfredo Sauce
In the same skillet, lower the heat to medium and add butter. Once melted, add minced garlic and sauté for about 1 minute until fragrant, being careful not to burn it. Next, pour in the heavy cream, stirring constantly, and bring it to a gentle simmer for about 2-3 minutes. Gradually whisk in Parmesan cheese until the sauce is smooth and creamy, seasoning with salt and freshly ground pepper to taste.

Step 4: Combine Pasta and Sauce
Add the drained shell pasta to the skillet with the Alfredo sauce, tossing gently to coat every piece. If the sauce is too thick, gradually stir in the reserved pasta water until you reach the desired consistency. Cook for an additional 1-2 minutes, allowing the pasta to absorb the rich flavors of the creamy sauce.

Step 5: Serve and Garnish
To serve, plate a generous portion of the creamy shell pasta. Top it with the warm steak bites, drizzling any juices from the plate over the dish. Finish with a sprinkle of fresh parsley for color and added flavor, and enjoy your delicious Steak Bites & Pasta right away while it’s warm and comforting!

Make Ahead Options

These Steak Bites and Shell Pasta in Garlic Butter Alfredo Sauce are perfect for meal prep enthusiasts! You can prep the steak bites and garlic butter Alfredo sauce up to 3 days in advance, storing them separately in airtight containers in the refrigerator to maintain their deliciousness. Simply sear the steak and let it cool before refrigerating to prevent overcooking, while the sauce can be made and kept ready to reheat. When it’s time to serve, simply cook the shell pasta, then warm the sauce and steak together in a skillet, tossing everything until heated through for a fantastic meal that tastes just as good as when freshly made!

Expert Tips for Steak Bites & Pasta

  • Quality Beef Matters: Use high-quality steak cuts like Ribeye or Sirloin for delicious, tender bites that elevate your Steak Bites & Pasta.

  • Don’t Overcrowd the Pan: Sear steak pieces in batches to prevent steaming, ensuring they’re evenly browned and packed with flavor.

  • Adjust Seasoning Wisely: Season the steak generously with salt and pepper, but remember, you can always add more—taste as you go!

  • Perfect Sauce Consistency: If your Alfredo sauce thickens too much, mix in reserved pasta water gradually to achieve the ideal creamy texture.

  • Fresh Garlic Flavor: Sauté garlic until just fragrant; overcooking can lead to bitterness, so keep a close eye on it while it’s in the pan.

  • Customize as You Wish: Don’t hesitate to add veggies like spinach or sun-dried tomatoes to your Steak Bites & Pasta for extra flavor and nutrition!

How to Store and Freeze Steak Bites & Pasta

Fridge: Store any leftovers in an airtight container for up to 3 days. Reheat gently on the stove with a splash of cream to restore creaminess.

Freezer: For longer storage, freeze the steak bites and pasta separately in sealed bags or containers for up to 2 months. Thaw in the fridge before reheating.

Reheating: Reheat on the stove over low heat, adding reserved pasta water or cream as needed to achieve your desired consistency. Enjoy your delicious Steak Bites & Pasta warm!

Steak Bites & Pasta Adaptations

Feel free to get creative with this recipe; your kitchen is your playground, waiting to be filled with hearty flavors!

  • Vegetable Boost: Add sautéed spinach, peas, or sun-dried tomatoes to the pasta for a nutrient-packed twist. It adds color and nutrition, making every bite even more delightful.

  • Pasta Shape Swap: Swap shell pasta for penne or fettuccine if you’re in the mood for a different texture. Each pasta shape offers a unique experience, allowing you to personalize your dish.

  • Spicy Kick: Incorporate a hint of red pepper flakes or hot sauce for those who crave a bit of heat. This twist can awaken your taste buds and elevate the meal even further.

  • Dairy-Free Delight: Utilize coconut cream and nutritional yeast instead of heavy cream and Parmesan for a dairy-free version. Not only does this keep the flavors delicious, but it also caters to various dietary needs!

  • Add Fresh Herbs: Experiment with fresh herbs such as basil or chives in place of parsley to lend a vibrant freshness to the dish. These fragrant additions infuse new life into the creamy goodness.

  • Nutty Finish: Sprinkle some toasted pine nuts or walnuts over the top for added crunch and richness. It gives your dish an elegant touch while enhancing the flavor profile.

  • Decadent Mushroom Sauce: For a twist, consider adding sautéed mushrooms into the Alfredo sauce. Mushrooms bring an earthy richness that beautifully complements the steak and pasta.

For additional inspiration, why not serve this dish alongside an easy Garlic Butter Steak for a complete flavor-packed experience? Or, try a light side like a fresh Caesar salad to balance the creaminess. Each variation opens up a world of delectable possibilities, letting you make this meal your own!

What to Serve with Steak Bites and Shell Pasta in Garlic Butter Alfredo Sauce

Create a complete meal that delights the senses and satisfies every craving!

  • Garlic Bread: Perfectly toasted with a buttery, garlicky flavor, it’s a cozy addition that complements the rich pasta beautifully. Nothing beats the aroma of freshly baked garlic bread wafting through your home.

  • Caesar Salad: Crisp romaine lettuce, crunchy croutons, and creamy dressing provide a refreshing contrast to the indulgent pasta dish. A sprinkle of Parmesan ties it all together perfectly.

  • Roasted Asparagus: Tender asparagus spears, lightly seasoned and roasted, add an elegant touch and a pop of color, enhancing the meal’s visual appeal. The slight char from roasting brings out their natural sweetness.

  • Steamed Broccoli: A quick and nutritious option, the bright green florets not only add color but also a satisfying crunch that balances the creaminess of the pasta.

  • Wine Pairing: A smooth, fruity red wine like Merlot or a crisp Chardonnay elevates the dining experience, harmonizing beautifully with the flavors of the steak and creamy sauce.

  • Chocolate Mousse: For dessert, indulge in a light, airy chocolate mousse. Its richness will cap off the meal perfectly, leaving everyone satisfied but wanting just a bit more.

Transform your dining experience with these delicious pairings that create unforgettable moments around the table!

Steak Bites and Shell Pasta in Garlic Butter Alfredo Sauce Recipe FAQs

How do I select the best steak for this recipe?
Absolutely! Choose steak cuts that are known for tenderness and flavor, such as Ribeye, Sirloin, or Filet Mignon. Look for marbling—those little streaks of fat running through the meat—this ensures a juicier bite. Also, ensure the pieces are cut into uniform size, about 1 to 1.5 inches, for even cooking.

What’s the best way to store leftovers?
Very! Store any leftover Steak Bites and Pasta in an airtight container in the fridge. They will stay fresh for up to 3 days. When you’re ready to enjoy them again, simply reheat gently on the stove over low heat, adding a splash of heavy cream or reserved pasta water to restore the sauce’s creaminess.

Can I freeze Steak Bites and Pasta?
Definitely! For freezing, it’s best to keep the steak bites and pasta separate. Place in sealed, airtight containers or freezer-safe bags. They can be kept for up to 2 months. When you’re ready to eat, thaw them in the fridge overnight before reheating on the stove. Add a bit of cream or water to revive the sauce.

What should I do if the Alfredo sauce becomes too thick?
Oh, no worries! If your sauce thickens too much while cooking, simply stir in the reserved pasta water gradually. Start with a couple of tablespoons, mixing well, and continue adding until you reach your desired creamy consistency. Remember, you can always adjust, so add a little at a time!

Are there any dietary considerations I should keep in mind?
Certainly! If you’re serving guests with dietary restrictions, double-check any allergies related to dairy (from the cream and cheese) and gluten (from the pasta). For a gluten-free version, consider using gluten-free pasta. You can also reduce the butter and cream if you’re watching your fat intake, making this dish a bit lighter while still delicious.

Steak Bites & Pasta

Steak Bites & Pasta in Creamy Garlic Butter Bliss

Savor the delicious combination of Steak Bites & Pasta in a creamy garlic sauce, perfect for any dinner occasion.
Prep Time 10 minutes
Cook Time 20 minutes
Total Time 30 minutes
Servings: 4 servings
Course: Dinner
Cuisine: American
Calories: 650

Ingredients
  

For the Pasta
  • 8 ounces Shell Pasta
  • 1 tablespoon Salt for pasta water
For the Steak Bites
  • 1 pound Steak (Ribeye, Sirloin, or Filet Mignon) cut into uniform pieces
  • 2 tablespoons Olive Oil for searing
For the Creamy Alfredo Sauce
  • 4 tablespoons Butter can reduce for a lighter option
  • 3 cloves Garlic minced
  • 1 cup Heavy Cream or half-and-half
  • 1 cup Parmesan Cheese grated
  • 1 teaspoon Black Pepper freshly ground
For Garnish
  • 2 tablespoons Fresh Parsley optional for garnish

Equipment

  • Large pot
  • Large skillet
  • Colander
  • bowl

Method
 

Step-by-Step Instructions
  1. Bring a large pot of salted water to a rolling boil over high heat. Add shell pasta and cook for about 7-9 minutes or until al dente. Reserve ½ cup of pasta water, then drain the rest.
  2. While the pasta cooks, pat the steak pieces dry with paper towels and season generously with salt and pepper. Heat olive oil in a large skillet over medium-high heat. Add the steak bites, searing for 2-3 minutes on each side.
  3. In the same skillet, lower the heat and add butter. Once melted, add minced garlic and sauté for about 1 minute. Pour in heavy cream and bring it to a gentle simmer, then whisk in Parmesan cheese until smooth.
  4. Add the drained shell pasta to the skillet, tossing to coat. If the sauce thickens, stir in reserved pasta water to achieve the desired consistency. Cook for an additional 1-2 minutes.
  5. To serve, plate the creamy shell pasta, top with warm steak bites, drizzle any juices over the dish, and finish with a sprinkle of fresh parsley.

Nutrition

Serving: 1servingCalories: 650kcalCarbohydrates: 45gProtein: 35gFat: 40gSaturated Fat: 20gPolyunsaturated Fat: 3gMonounsaturated Fat: 15gCholesterol: 120mgSodium: 800mgPotassium: 500mgFiber: 2gSugar: 2gVitamin A: 500IUVitamin C: 2mgCalcium: 250mgIron: 3mg

Notes

Store leftovers in an airtight container for up to 3 days. Reheat gently on the stove with a splash of cream.

Tried this recipe?

Let us know how it was!

Creamy Crack Chicken Gnocchi: Your New Comfort Food Crush

As I stood in my kitchen, the scent of sizzling bacon and rich cream wafted through the air, instantly transporting me to cozy dinners filled with laughter. This is the magic of my Creamy Crack Chicken Gnocchi—a dish that effortlessly combines tender chicken, fluffy gnocchi, and a luscious, velvety sauce, all in just 30 minutes. Perfect for those hectic weeknights when you crave comfort food but don’t have time to spare, this recipe is also adaptable, easily accommodating dairy-free needs without sacrificing flavor. With each bite, you’ll find warmth and satisfaction, making it not just a meal but a moment to savor. Who’s ready to dive in and create a culinary masterpiece that will impress your family and friends?

Why is this dish a must-try?

Effortless Cooking: This Creamy Crack Chicken Gnocchi comes together in just 30 minutes, making it perfect for busy weeknights or last-minute dinner parties.

Hearty & Satisfying: With tender chicken, fluffy gnocchi, and a rich cream sauce, every bite feels like a warm hug on a plate.

Adaptable Options: Whether you need a dairy-free solution or want to incorporate seasonal veggies, this recipe welcomes your culinary creativity.

Crowd-Pleasing Flavor: The blend of crispy bacon and aromatic herbs elevates this dish from ordinary to extraordinary, making it a sure hit with family and friends.

Elevate Everyday Meals: If you’re exploring comforting recipes like Garlic Chicken Gnocchi or Crack Chicken Penne, this gnocchi is a delightful addition to your repertoire.

Creamy Crack Chicken Gnocchi Ingredients

For the Chicken

  • Chicken breasts – Keeps the dish hearty and protein-rich; poach in herb-infused water for juiciness.

For the Sauce

  • Lean smoked back bacon – Provides a savory, crispy texture that enhances flavor; can substitute with turkey bacon for a lighter option.
  • Low sodium chicken stock – Forms the base of the sauce; use vegetable stock for a vegetarian version.
  • 2% milk – Contributes creaminess to the sauce; substitute with unsweetened almond or soy milk for a dairy-free option.
  • Laughing Cow light cheese – Creates a velvety sauce; other soft cream cheeses can be substituted as well.
  • Cornstarch – Used as a thickening agent for the sauce.
  • Fresh grated cheddar – Melts beautifully, adding flavor and texture; substitute with any melting cheese like Monterey Jack.

For the Gnocchi

  • Potato gnocchi – Acts as the main body of the dish; fresh gnocchi are preferred for the best texture.

For the Aromatics

  • Shallot – Adds sweetness and depth to the sauce; can replace with onion if unavailable.
  • Garlic – Enhances flavor and aroma; fresh is best, but garlic powder can be used in a pinch.

For the Seasoning

  • Dried parsley, chives, onion powder, dill, garlic powder – Seasonings that enhance the overall flavor of the dish; adjust to taste.
  • Salt and pepper – Essential for seasoning to taste.

For Garnishing

  • Fresh parsley for garnish – Freshens up the dish before serving.

Add your own twist with this Creamy Crack Chicken Gnocchi recipe to make it a delight for your family!

Step‑by‑Step Instructions for Creamy Crack Chicken Gnocchi

Step 1: Poach the Chicken
In a pot, bring 2 cups of low sodium chicken stock to a gentle simmer over medium heat. Add the chicken breasts and poach for 10–12 minutes until they are cooked through and no longer pink in the center. Remove the chicken, let it rest, then slice and shred it into bite-sized pieces, setting aside for later.

Step 2: Cook the Bacon
Using the same skillet, add diced lean smoked back bacon and cook over medium heat until crispy, about 5–7 minutes. Once the bacon is golden brown, remove it from the skillet and set it aside on a paper towel to drain, keeping the flavorful fat in the pan for the next step.

Step 3: Sauté the Aromatics
In the leftover bacon fat, add chopped shallots and sauté for 3–4 minutes until they become soft and translucent. Stir in minced garlic and cook for an additional 30 seconds, allowing the garlic’s fragrant aroma to fill the kitchen. This layer of flavor will enhance your Creamy Crack Chicken Gnocchi.

Step 4: Prepare the Sauce
Pour in the remaining chicken stock and milk, then add lemon juice and your chosen seasonings. Whisk in Laughing Cow cheese and cornstarch, ensuring everything is well combined. Cook over medium heat until the mixture begins to bubble and the cheese melts into a creamy sauce, about 5 minutes.

Step 5: Add Gnocchi and Chicken
Fold in the potato gnocchi and shredded chicken, stirring gently to coat everything in the luscious sauce. Bring the mixture to a boil, then reduce the heat to low and let it simmer for 5 minutes until the gnocchi are tender and the sauce thickens to your desired consistency.

Step 6: Bake and Broil
Preheat your broiler to high. Transfer the Creamy Crack Chicken Gnocchi into a baking dish, sprinkle generously with grated cheddar cheese, and broil for 2–3 minutes until the cheese is melted and bubbly. Watch closely to avoid burning, and remove when golden brown.

Step 7: Garnish and Serve
Once out of the oven, sprinkle with crispy bacon bits and fresh chopped parsley for a pop of color and flavor. Serve your Creamy Crack Chicken Gnocchi immediately while it’s warm, and enjoy the delightful comforting flavors that fill your home.

How to Store and Freeze Creamy Crack Chicken Gnocchi

Fridge: Store leftovers in an airtight container for up to 3 days. Make sure to let the dish cool before sealing to prevent condensation.

Freezer: For prolonged storage, freeze in individual portions in airtight freezer bags for up to 2 months. Lay flat to save space, and thaw overnight in the fridge before reheating.

Reheating: Gently reheat on the stovetop with a splash of milk to restore creaminess, stirring frequently for even warming. Avoid using the microwave as it may alter the texture.

Reviving Leftovers: If your Creamy Crack Chicken Gnocchi appears dry upon reheating, add a little more milk or chicken stock to bring back its luscious consistency.

What to Serve with Creamy Crack Chicken Gnocchi

Imagine a cozy dinner table adorned with vibrant flavors, ready to be filled with love and laughter as you enjoy this hearty meal.

  • Garlic Bread: This classic choice is perfect for soaking up the rich cream sauce, elevating your dining experience with its crispy, buttery goodness.

  • Fresh Green Salad: A light and refreshing salad adds a crisp contrast to the creamy gnocchi, ensuring each bite remains balanced with textures and flavors.

  • Roasted Vegetables: Roasted seasonal veggies provide a delightful sweetness and a slightly charred essence, perfectly complementing the savory elements of the dish.

  • Creamy Coleslaw: The crunchy texture of coleslaw, paired with a tangy dressing, can cut through the richness of the gnocchi, adding a fun twist to your meal.

  • Sparkling Lemonade: A chilled glass of sparkling lemonade can brighten up your dinner, offering a refreshing citrus kick that pairs wonderfully with the creaminess of the dish.

  • Dessert: Chocolate Mousse: End the evening on a sweet note with a light chocolate mousse that contrasts well against the savory meal, keeping your guests delighted until the last bite.

Make Ahead Options

These Creamy Crack Chicken Gnocchi are a fantastic choice for meal prep aficionados! You can poach the chicken and cook the bacon up to 24 hours in advance, allowing you to refrigerate them separately in airtight containers to maintain their delicious qualities. Additionally, prepare the creamy sauce and refrigerate it for up to 3 days, just be sure to store it covered to prevent it from drying out. When you’re ready to enjoy your meal, simply reheat the sauce gently on the stove, add the cooked gnocchi and shredded chicken, and simmer until warmed through. This way, you’ll save time on busy weeknights without sacrificing flavor or texture!

Expert Tips for Creamy Crack Chicken Gnocchi

Perfectly Poached Chicken: Ensure the chicken is just cooked through; overcooked chicken will result in dryness, ruining your dish.

Fresh Gnocchi Key: Always choose fresh gnocchi for the best texture; they should float when fully cooked, indicating they’re ready to go.

Cheese Matters: Grate your own cheese instead of using pre-shredded; it melts better and offers a smoother sauce for your Creamy Crack Chicken Gnocchi.

Dairy Alternatives: If using dairy-free milk, make sure it’s unsweetened to avoid altering the flavor; this is essential for maintaining the richness.

Revive Leftovers: Gently reheat leftovers with a splash of milk; it helps restore creamy consistency without losing flavor or texture.

Creamy Crack Chicken Gnocchi Variations

Feel free to get creative with this dish and adjust it to your taste buds for a fun twist!

  • Dairy-Free: Substitute 2% milk with unsweetened almond or soy milk and use a dairy-free cream cheese. Enjoy the same creamy richness without dairy!

  • Vegetable Medley: Add spinach, mushrooms, or zucchini for a vibrant veggie boost. Not only will this give added nutrients, but it’ll also bring a pop of color to your plate!

  • Cheesy Delight: Experiment with various melting cheeses like Gruyère or Fontina. Each cheese brings a unique flavor profile, making every bite a delightful surprise.

  • Savory Herbs: Swap dried parsley and chives for fresh versions. Fresh herbs amplify the flavor, providing a fresh and aromatic touch to each serving.

  • Hearty Protein Boost: Consider using chicken thighs instead of breasts for a richer taste. Thighs are juicier and can give your gnocchi an extra layer of flavor.

  • Spice it Up: Add a pinch of crushed red pepper flakes for a subtle kick. Elevate your creamy sauce into something extraordinary with a hint of heat!

  • Pasta Alternative: Try using a different type of pasta such as penne or shells for a fun twist. This adaptation keeps the flavors intact while changing the texture!

  • Add Seafood: Toss in shrimp or scallops for a gourmet touch. The seafood will elevate the dish while maintaining the comforting vibe of your creamy sauce.

For a comforting meal like Sizzling Chicken Pepper, or a fresh salad like Blt Chicken Salad, keep these ideas in mind to enjoy a variety of flavors, every time you cook!

Creamy Crack Chicken Gnocchi Recipe FAQs

How do I choose the best chicken for this recipe?
Absolutely! For this Creamy Crack Chicken Gnocchi, I recommend using boneless, skinless chicken breasts. They are lean, cook quickly, and remain juicy when poached properly. Ensure the chicken is fresh, with no dark spots or an unpleasant odor, for the best flavor.

How should I store leftovers?
Very! Store your Creamy Crack Chicken Gnocchi in an airtight container in the refrigerator for up to 3 days. It’s best to let the dish cool completely before sealing to avoid condensation, which can make it soggy.

Can I freeze Creamy Crack Chicken Gnocchi?
Certainly! To freeze, portion the dish into airtight freezer bags or containers—laying them flat saves space. You can freeze it for up to 2 months. When ready to enjoy, thaw in the refrigerator overnight and reheat gently on the stovetop with a splash of milk to restore its creamy texture.

What if my sauce is too thick?
Oh no, but no worries! If your sauce turns out too thick while cooking, simply whisk in a bit more chicken stock or milk, a couple of tablespoons at a time, while stirring until you reach your desired consistency. This will help you achieve that luscious, creamy finish.

Does this dish accommodate dietary restrictions?
Absolutely! For a dairy-free version of Creamy Crack Chicken Gnocchi, substitute the milk with unsweetened almond or soy milk and replace the cheese with a plant-based alternative. Always check ingredient labels if you or your guests have specific allergies to ensure a safe and enjoyable meal.

Creamy Crack Chicken Gnocchi

Creamy Crack Chicken Gnocchi: Your New Comfort Food Crush

Creamy Crack Chicken Gnocchi is a delightful dish combining tender chicken, fluffy gnocchi, and a rich sauce, perfect for comforting weeknight dinners.
Prep Time 10 minutes
Cook Time 20 minutes
Total Time 30 minutes
Servings: 4 servings
Course: Dinner
Cuisine: American
Calories: 520

Ingredients
  

For the Chicken
  • 2 breasts Chicken breasts Poach in herb-infused water for juiciness.
For the Sauce
  • 150 grams Lean smoked back bacon Can substitute with turkey bacon.
  • 2 cups Low sodium chicken stock Use vegetable stock for a vegetarian version.
  • 1 cup 2% milk Substitute with unsweetened almond or soy milk for dairy-free.
  • 4 slices Laughing Cow light cheese Other soft cream cheeses can be substituted.
  • 2 tablespoons Cornstarch Used as a thickening agent.
  • 1 cup Fresh grated cheddar Substitute with any melting cheese like Monterey Jack.
For the Gnocchi
  • 500 grams Potato gnocchi Fresh gnocchi are preferred for the best texture.
For the Aromatics
  • 1 medium Shallot Can replace with onion if unavailable.
  • 2 cloves Garlic Fresh is best, but garlic powder can be used.
For the Seasoning
  • 1 teaspoon Dried parsley
  • 1 teaspoon Chives
  • 1 teaspoon Onion powder
  • 1 teaspoon Dill
  • 1 teaspoon Garlic powder
  • to taste Salt
  • to taste Pepper
For Garnishing
  • 2 tablespoons Fresh parsley For garnish.

Equipment

  • Pot
  • Skillet
  • baking dish

Method
 

Preparation Steps
  1. In a pot, bring 2 cups of low sodium chicken stock to a gentle simmer over medium heat. Add the chicken breasts and poach for 10–12 minutes until they are cooked through and no longer pink in the center. Remove the chicken, let it rest, then slice and shred it into bite-sized pieces, setting aside for later.
  2. Using the same skillet, add diced lean smoked back bacon and cook over medium heat until crispy, about 5–7 minutes. Once the bacon is golden brown, remove it from the skillet and set it aside on a paper towel to drain, keeping the flavorful fat in the pan.
  3. In the leftover bacon fat, add chopped shallots and sauté for 3–4 minutes until they become soft and translucent. Stir in minced garlic and cook for an additional 30 seconds.
  4. Pour in the remaining chicken stock and milk, then add lemon juice and your chosen seasonings. Whisk in Laughing Cow cheese and cornstarch, ensuring everything is well combined. Cook over medium heat until the mixture begins to bubble and the cheese melts into a creamy sauce, about 5 minutes.
  5. Fold in the potato gnocchi and shredded chicken, stirring gently to coat everything in the sauce. Bring the mixture to a boil, then reduce the heat to low and let it simmer for 5 minutes until the gnocchi are tender.
  6. Preheat your broiler to high. Transfer the Creamy Crack Chicken Gnocchi into a baking dish, sprinkle generously with grated cheddar cheese, and broil for 2–3 minutes until the cheese is melted and bubbly.
  7. Once out of the oven, sprinkle with crispy bacon bits and fresh chopped parsley for a pop of color and flavor.

Nutrition

Serving: 1servingCalories: 520kcalCarbohydrates: 45gProtein: 30gFat: 24gSaturated Fat: 11gPolyunsaturated Fat: 2gMonounsaturated Fat: 9gCholesterol: 110mgSodium: 800mgPotassium: 600mgFiber: 2gSugar: 4gVitamin A: 100IUVitamin C: 4mgCalcium: 250mgIron: 2mg

Notes

Ensure to poach chicken until just cooked to avoid dryness. Use fresh gnocchi for best texture. Grate cheese yourself for a smoother sauce. Store leftovers properly to maintain quality.

Tried this recipe?

Let us know how it was!

Mouthwatering French Dip Sandwiches You’ll Crave Tonight

As I pulled the roast from the oven, the aroma of perfectly seasoned beef wafted through my kitchen, creating an instant sense of comfort. There’s something truly magical about a Classic French Dip Sandwich, especially when it’s paired with a savory beef jus that beckons for a hearty, satisfying dip. This recipe not only offers a cozy meal that’s easy to whip up on busy weeknights, but it also impresses guests with its simple elegance. Whether you’re serving it at a family gathering or just treating yourself, these sandwiches promise a melt-in-your-mouth experience that balances both flavor and convenience beautifully. Ready to dive into the ultimate comfort food? Let’s get our hands deliciously messy with this delightful recipe!

Why Are French Dip Sandwiches Irresistible?

Irresistible Flavor: These sandwiches are packed with deep, rich flavors thanks to the savory beef and zesty jus.

Satisfying Texture: Enjoy a melt-in-your-mouth experience with tender beef nestled in a crispy toasted roll.

Easy to Make: Perfect for busy weeknights, this recipe requires minimal prep while delivering maximum satisfaction.

Crowd-Pleaser: Whether for a family dinner or casual gathering, French Dip Sandwiches are always a hit, just like the Blueberry French Toast or Creme Brulee French Toast!

Versatile Ingredients: Easily customize your creation with herbs, cheeses, or even brisket for a unique twist.

Get ready to savor every bite of this classic comfort food that everyone loves!

French Dip Sandwich Ingredients

For the Beef
Boneless Ribeye Loin or Sirloin (4-5 pounds) – The star of the sandwich; use ribeye for tender, juicy slices, or sirloin if you slice thinner for tenderness.
Kosher Salt (1 Tbsp) – Essential for enhancing the beef’s natural flavor.
Black Pepper (2 Tbsp) – Adds a delightful heat and depth of flavor.
Ground Oregano (1/2 tsp) – Infuses a hint of earthiness into the beef.
Ground Thyme (1/2 tsp) – Complements the beef beautifully with its aromatic essence.

For the Jus
Large Onions (2, thinly sliced) – They provide sweetness and texture to the jus.
Garlic (5 cloves, minced) – A must-have for boosting the flavor profile.
French Onion Soup Mix (1 packet, dry) – Simplifies flavor building with added convenience.
Beef Consommé (1 can) – Deepens the beef flavor; fundamental for your jus.
Beef Broth or Stock (1 cup) – Acts as the liquid foundation for your rich jus.
Dry Sherry or White Wine (1/4 cup, optional) – Optional but enhances the complexity of flavors.
Worcestershire Sauce (2 Tbsp) – Introduces umami richness that elevates your jus.
Soy Sauce (1 Tbsp) – Adds a savory note that perfectly balances the flavors.
Water (1 cup) – A balancing element to achieve the right consistency for the jus.

For the Sandwiches
Crusty Deli Rolls or Sub Rolls (10, toasted) – Choose sturdy rolls to cradle all that deliciousness without falling apart.

Embrace the cozy vibes of these French Dip Sandwiches with this enticing ingredient list. You’ll fall in love with the combination of flavors as you savor each bite!

Step‑by‑Step Instructions for French Dip Sandwiches

Step 1: Season the Beef
Begin by preheating your oven to 375°F. While it’s warming, combine kosher salt, black pepper, oregano, and thyme in a small bowl. Generously rub this seasoning blend all over the boneless ribeye loin or sirloin, ensuring every inch of the beef is coated. This crucial first step infuses the meat with flavor, setting the stage for your delicious French Dip Sandwiches.

Step 2: Roast the Beef
Place the seasoned beef on a roasting rack set inside a baking pan. Roast in the preheated oven until the internal temperature reaches 125-130°F for medium-rare, approximately 20-25 minutes. You’ll know it’s ready when the meat has a nice brown crust. Once done, carefully remove it from the oven and tent it with foil to rest, allowing the juices to redistribute for optimal tenderness.

Step 3: Prepare the Jus
In the same roasting pan used for the beef, add the thinly sliced onions and minced garlic. Sauté them in the flavorful drippings over medium heat until they turn golden brown, about 5-7 minutes. Next, stir in the French onion soup mix, beef consommé, beef broth, and optional dry sherry or white wine. Bring this mixture to a boil, then reduce the heat and let it simmer for 45 minutes, stirring occasionally.

Step 4: Strain the Jus
After simmering, carefully remove the pan from heat. Strain the liquid through a fine-mesh sieve into a bowl, discarding any solids. This step ensures a smooth and rich jus, perfect for dipping. You can set aside the cooked onions if you plan to use them in your sandwiches. This flavorful jus is essential for drenching your French Dip Sandwiches.

Step 5: Slice the Beef
Once the beef has rested for about 10-15 minutes, use a sharp knife to slice it thinly against the grain. Aim for about 1/4-inch thick slices for the most tender bites. This is key to ensuring that each sandwich is loaded with melt-in-your-mouth beef. With the jus prepared and beef sliced, you’re gearing up for the final delicious assembly.

Step 6: Assemble the Sandwiches
Take your toasted crusty deli rolls or sub rolls and pile generous portions of the sliced beef onto each roll. Top with a spoonful of the sautéed onions for added sweetness and texture. To complete your French Dip Sandwiches, serve them with a small bowl of the hot, rich jus on the side for dipping. This delightful combination is sure to be a hit at any meal!

French Dip Sandwiches Variations & Substitutions

Feel free to get creative with this classic dish and make it your own!

  • Brisket: Swap ribeye for brisket for a different texture that’s equally delicious. A slow-cooked brisket caramelizes beautifully and enhances the beefy depth of flavor.

  • Smoky Flavor: Add smoked paprika to the seasoning blend for a delightful hint of smokiness. This subtle twist elevates the taste without overwhelming the original essence.

  • Cheesy Goodness: Melt provolone, Swiss, or mozzarella cheese on top of the beef for a delightful cheesy variation. The gooey cheese melts into the beef, and when dunked in the rich jus, it’s pure bliss!

  • Herb Infusion: Experiment with different herbs like fresh rosemary or basil for a fragrant twist to the jus. Fresh herbs bring a new dimension that can truly transform the flavor profile and delight your palate.

  • Veggie Boost: Add thinly sliced bell peppers or mushrooms to the sauté for more texture and flavor in the jus. These additions provide a wonderful earthiness and extra nutrients.

  • Spicy Kick: For those who enjoy heat, incorporate sliced jalapeños or a dash of crushed red pepper flakes into the jus. This spicy addition is a fun way to warm things up!

  • Guinness Gravy: Swap out the beef broth with Guinness beer for a stout-flavored gravy when making your jus. This offers an incredibly rich and robust flavor that’s perfect for beer lovers.

  • Air Fryer Option: If you’re short on time, use an air fryer to quickly cook slices of beef. This method creates a crispy exterior while keeping the meat juicy inside and still loaded with flavor.

Feel free to mix and match any of these ideas to create a unique and satisfying version of French Dip Sandwiches that your family will love! And if you’re in the mood for more comforting dishes, check out this Sweet Escape Charm or try the French Onion Soup for another cozy meal.

How to Store and Freeze French Dip Sandwiches

Fridge: Store cooked beef and jus separately in airtight containers for up to 4 days to maintain freshness. This way, you can enjoy your French Dip Sandwiches again without compromising flavor.

Freezer: Freeze sliced beef and jus in airtight containers for up to 3 months. To reheat, thaw overnight in the refrigerator and warm gently on the stovetop to retain juiciness.

Reheating: Reheat the beef in the jus on low heat, stirring occasionally, until warmed through, ensuring each bite of your French Dip Sandwiches remains tender and flavorful.

Assemble Fresh: For the best taste, assemble sandwiches just before serving to keep the rolls crispy and avoid sogginess; combine fresh ingredients for that restaurant-quality experience at home.

Expert Tips for French Dip Sandwiches

Slicing Technique: Ensure your beef is sliced as thinly as possible against the grain; this enhances tenderness, making your French Dip Sandwiches truly melt-in-your-mouth.

Cooking Temperature: Use a meat thermometer to avoid overcooking; aim for a medium-rare finish at 125-130°F for optimal juiciness.

Resting Time: Don’t skip resting the beef covered with foil; this allows the juices to redistribute, ensuring each bite is flavorful and moist.

Jus Consistency: If your jus is too thin, simmer it longer to reduce; if too thick, add a bit of water or broth to reach your desired consistency.

Serving Fresh: Assemble sandwiches right before serving to prevent sogginess; keeping the toasted rolls separate from the jus until you’re ready to dig in ensures that delightful crunch.

Make Ahead Options

These French Dip Sandwiches are a fantastic option for meal prep, allowing you to enjoy hearty comfort food even on the busiest nights! You can prepare the beef and jus up to 4 days in advance. Simply season and roast the beef, then let it cool completely before slicing. Store the sliced beef and jus separately in airtight containers in the refrigerator to maintain their flavor and texture. When you’re ready to serve, just reheat the beef and jus gently on the stove over low heat, then assemble the sandwiches on toasted rolls. This way, your delicious French Dip Sandwiches will still be just as mouthwatering and satisfying!

What to Serve with Classic French Dip Sandwiches

There’s nothing like a hearty meal to fill your home with warmth and love, making mealtime truly special.

  • Crispy Sweet Potato Fries: The natural sweetness and crispy texture of these fries provide a delightful contrast to the savory sandwiches.
  • Garlic Butter Green Beans: Their fresh crunch and garlic richness enhance the meal’s robustness while adding a bright green element.
  • Classic Coleslaw: A tangy, crunchy slaw offers a refreshing counterbalance to the rich beef, creating a perfect harmony on your plate.
  • Creamy Macaroni and Cheese: A bowl of creamy mac adds comfort and nostalgia, bringing extra joy to each bite of your French Dip Sandwiches.
  • Mixed Green Salad: A fresh salad with vinaigrette cuts through the richness and prepares your palate for the next delicious bite.
  • Homemade Potato Chips: Thin, crunchy chips are perfect for a light munch while digging into those juicy sandwiches; the ideal snack to accompany your meal.
  • Iced Tea or Lemonade: Refreshing drinks like iced tea or lemonade brighten the meal and cleanse your palate between bites of decadent beef.
  • Chocolate Chip Cookies: End on a sweet note with warm chocolate chip cookies for a nostalgic dessert that everyone will love!

Whether you choose a refreshing salad or comforting fries, your French Dip Sandwiches will shine even brighter beside these delightful companions!

French Dip Sandwiches Recipe FAQs

How do I choose the right beef for French Dip Sandwiches?
Absolutely! For a delicious French Dip Sandwich, opt for boneless ribeye loin or sirloin. The ribeye offers a tender, juicy slice, while sirloin can be used but should be sliced thinly to maintain tenderness. Look for bright red, well-marbled cuts without dark spots; this indicates freshness.

How should I store leftover beef and jus?
Very! To preserve the flavor, store the cooked beef and jus separately in airtight containers in the fridge for up to 4 days. This ensures that you’ll be able to enjoy your French Dip Sandwiches again without compromising their deliciousness.

Can I freeze the beef and jus for later?
Absolutely! To freeze, slice the beef and place it in airtight containers along with the jus. They can be frozen for up to 3 months. When you’re ready to enjoy them again, thaw the beef in the refrigerator overnight and reheat gently on the stovetop, stirring occasionally for even warming.

What should I do if my jus is too thin or too thick?
No worries! If your jus is too thin, let it simmer on low heat a bit longer to reduce and thicken to your liking. Conversely, if it’s too thick, gradually add a splash of water or broth until you reach your desired consistency. This way, you’ll achieve that perfect dipping sauce every time!

Are there any dietary considerations I should be aware of?
Very! Keep in mind that this recipe includes beef, which may not be suitable for vegetarians or those with beef allergies. If you’re serving to guests, consider offering alternatives, such as a vegetarian roast or mushrooms sautéed in the jus, to accommodate different dietary preferences.

How can I avoid soggy sandwiches when serving?
Absolutely! To keep your French Dip Sandwiches from becoming soggy, assemble them just before serving. Serve the warm jus on the side, allowing everyone to dip their sandwiches freshly and maintaining the delightful crunch of the toasted rolls. Enjoy every last bite with perfect texture!

French Dip Sandwiches

Mouthwatering French Dip Sandwiches You’ll Crave Tonight

Enjoy delicious French Dip Sandwiches, adorned with savory beef and rich jus. Perfect for any mealtime cravings.
Prep Time 15 minutes
Cook Time 1 hour 15 minutes
Resting Time 15 minutes
Total Time 1 hour 45 minutes
Servings: 10 sandwiches
Course: Lunch
Cuisine: French
Calories: 450

Ingredients
  

For the Beef
  • 4-5 pounds Boneless Ribeye Loin or Sirloin Use ribeye for tender slices.
  • 1 Tbsp Kosher Salt For enhancing flavor.
  • 2 Tbsp Black Pepper Adds heat and depth.
  • 1/2 tsp Ground Oregano Infuses earthiness.
  • 1/2 tsp Ground Thyme Compliments beef.
For the Jus
  • 2 Large Onions Thinly sliced.
  • 5 cloves Garlic Minced.
  • 1 packet French Onion Soup Mix Dry, for convenience.
  • 1 can Beef Consommé Deepens flavor.
  • 1 cup Beef Broth or Stock Liquid foundation for jus.
  • 1/4 cup Dry Sherry or White Wine Optional.
  • 2 Tbsp Worcestershire Sauce Elevates flavor.
  • 1 Tbsp Soy Sauce Adds savory note.
  • 1 cup Water For consistency.
For the Sandwiches
  • 10 Crusty Deli Rolls or Sub Rolls Toasted.

Equipment

  • Oven
  • Roasting Pan
  • Baking Rack
  • Knife
  • fine mesh sieve
  • small bowl

Method
 

Step-by-Step Instructions
  1. Preheat your oven to 375°F. Combine kosher salt, black pepper, oregano, and thyme in a bowl and rub on the beef.
  2. Roast the beef on a rack in a baking pan until 125-130°F, about 20-25 minutes. Tent with foil to rest.
  3. In the roasting pan, sauté onions and garlic in drippings until golden. Stir in soup mix, consommé, broth, and simmer for 45 minutes.
  4. Strain the jus through a sieve into a bowl, discarding solids. Set aside onions if using in sandwiches.
  5. After resting, slice beef thinly against the grain into 1/4-inch thick slices.
  6. Assemble sandwiches with sliced beef, topped with sautéed onions and serve with hot jus.

Nutrition

Serving: 1sandwichCalories: 450kcalCarbohydrates: 42gProtein: 30gFat: 20gSaturated Fat: 8gPolyunsaturated Fat: 1gMonounsaturated Fat: 10gCholesterol: 80mgSodium: 1200mgPotassium: 500mgFiber: 2gSugar: 3gVitamin C: 2mgCalcium: 8mgIron: 15mg

Notes

For optimal tenderness, slice beef thinly against the grain and assemble sandwiches just before serving.

Tried this recipe?

Let us know how it was!

Savory Chicken Caesar Sandwich for Crisp, Creamy Bliss

As I unwrapped my lunch one sunny afternoon, the delightful crunch of fried chicken drew curious glances from colleagues around me. What they couldn’t resist was my Crispy Chicken Caesar Sandwich, a heavenly blend of classic Caesar salad flavors wrapped in a fulfilling, handheld meal. This recipe showcases golden-fried chicken with a crispy panko coating, crisp romaine lettuce, and a rich homemade Caesar dressing that brings everything together in absolute harmony. Not only is this sandwich surprisingly quick to prepare, but it also elevates any lunch or cozy dinner into a delicious culinary experience. Are you ready to leave fast food behind and indulge in this absolutely scrumptious creation? Let’s dive into the steps to make your new favorite sandwich!

Why is this Chicken Caesar Sandwich a must-try?

Satisfying Crunch: Each bite features crispy coated chicken that perfectly complements the freshness of the crisp romaine lettuce.
Homemade Goodness: You’ll love the rich flavor of the homemade Caesar dressing—so much better than store-bought!
Quick Prep: This recipe is simple and quick, making it ideal for busy weeknights or spontaneous lunches.
Flexibility: With easy substitutions, feel free to customize ingredients based on your preferences—try swapping chicken for tofu!
Crowd Pleaser: Perfect for gatherings, this sandwich is sure to impress friends and family, especially when served alongside crispy fries or a fresh salad.

Chicken Caesar Sandwich Ingredients

For the Dressing

  • Full-fat mayonnaise – Provides creaminess for the dressing; substitute with Greek yogurt for a lighter option.
  • Greek yogurt – Adds tanginess and lowers fat content; use sour cream if unavailable.
  • Dijon mustard – Offers depth of flavor; use yellow mustard for a milder taste.
  • Worcestershire sauce – Enhances umami; can be omitted for a vegetarian option.
  • Lemon juice – Adds acidity and brightness; substitute with vinegar if needed.
  • Parmesan cheese – Offers richness and flavor; Grana Padano can be used for a milder option.
  • Garlic cloves – Adds aromatic flavor; minced for better infusion.

For the Chicken

  • Chicken cutlets – The main protein; swap for chicken thighs or tenders for juiciness.
  • All-purpose flour – Used for breading; gluten-free flour can be an alternative.
  • Smoked paprika – Adds smokiness; regular paprika works as a milder substitute.
  • Eggs – Binds the coating; can be substituted with a flax egg for a vegan option.
  • Panko crumbs – Creates crunch; regular breadcrumbs yield a less crispy texture.
  • Dried parsley & oregano – Enhances breadcrumb flavor; substitute with Italian seasoning if preferred.

For the Assembly

  • Romaine hearts – The fresh crunch element; replace with any crispy lettuce like iceberg.
  • French baguettes – Provides structure; ciabatta or sourdough also work well.

Create your own version of the beloved Chicken Caesar Sandwich and elevate every bite!

Step‑by‑Step Instructions for Crispy Chicken Caesar Sandwich

Step 1: Prepare the Dressing
In a medium bowl, mix together ½ cup of full-fat mayonnaise, ¼ cup of Greek yogurt, 2 tablespoons of Dijon mustard, 1 tablespoon of Worcestershire sauce, 2 tablespoons of lemon juice, ¼ cup of grated Parmesan cheese, 2 minced garlic cloves, and salt and pepper to taste. Whisk until the mixture is smooth and creamy, then set aside to let the flavors meld.

Step 2: Dress the Romaine
Chop 2-3 cups of romaine hearts and place them in a large mixing bowl. Drizzle approximately 4-5 tablespoons of the prepared Caesar dressing over the romaine, tossing gently until evenly coated. Cover the bowl and refrigerate it for about 10-15 minutes, allowing the romaine to absorb the dressing while you prepare the chicken.

Step 3: Prep Chicken
Take 2-3 chicken cutlets and pound them to an even thickness using a meat mallet; this will ensure uniform cooking. Season both sides generously with salt and pepper. This step is vital for flavoring the chicken, which will be the star of your Crispy Chicken Caesar Sandwich.

Step 4: Set Up Breading Station
Prepare three shallow dishes for a smooth breading process: in the first dish, combine 1 cup of all-purpose flour and a pinch of salt and smoked paprika; in the second, whisk together 2 eggs; and in the third dish, mix 1 cup of panko crumbs, additional herbs, and ¼ cup of grated Parmesan cheese. Arrange these dishes in order to make breading the chicken easy and efficient.

Step 5: Bread Chicken
Take each seasoned chicken cutlet and dredge it in the flour mixture, shaking off any excess. Next, dip the floured cutlet into the whisked eggs, allowing any excess to drip off. Finally, coat the chicken with the panko crumb mixture, pressing lightly to adhere. Repeat this process with all chicken cutlets for a delightful crispy texture in your Chicken Caesar Sandwich.

Step 6: Fry Chicken
Heat a large skillet over medium heat and add enough oil to cover the bottom (approximately ½ inch deep). Once the oil is hot (about 350°F), carefully add the breaded chicken cutlets. Fry for 4-5 minutes on each side until they turn golden brown and crispy. Use a slotted spoon to transfer the cooked chicken to a wire rack to drain excess oil and maintain their crunch.

Step 7: Assemble Sandwiches
Slice your French baguettes in half lengthwise, then spread a generous amount of the remaining Caesar dressing on both sides. Place a crispy chicken cutlet in each baguette, top with the dressed romaine, and sprinkle with extra Parmesan cheese for that finishing touch. Serve immediately, enjoying the delightful layers of flavors in your homemade Chicken Caesar Sandwich.

Chicken Caesar Sandwich Variations

Feel free to get creative with your Chicken Caesar Sandwich—each variation adds a delightful twist to this classic favorite!

  • Vegetarian Twist: Swap chicken for crispy tofu or tempeh for a protein-packed vegetarian delight. The crunchy exterior complements the creamy dressing beautifully.

  • Gluten-Free Option: Use gluten-free breadcrumbs and flour to keep the crunch while making this sandwich suitable for gluten-sensitive friends without sacrificing flavor.

  • Different Breads: Try using ciabatta or sourdough instead of French baguettes for a unique flavor profile. Each bread adds its own character to the overall experience.

  • Add Avocado: Layer ripe avocado slices for a creamy texture and healthy fats. The addition of avocado complements the flavors and brings a fresh element to the sandwich.

  • Extra Crunch: Toss in some crispy bacon pieces for an indulgent, smoky flavor. The combination of crispy chicken and bacon will send your taste buds into overdrive.

  • Herbaceous Burst: Add fresh basil or cilantro to the dressed romaine for an aromatic touch. The herbs elevate the sandwich—making each bite feel vibrant and fresh.

  • Spicy Kick: Enhance the flavor with sriracha or a sprinkle of red pepper flakes in the dressing. This will add a gentle heat that makes the sandwich even more exciting.

  • Cheesy Goodness: Try adding different cheeses, such as mozzarella or blue cheese, for a burst of flavor. These cheeses can create a whole new dimension to your Chicken Caesar Sandwich, bringing fantastic richness to the dish.

Once you’ve experimented with these variations, consider serving your sandwich with refreshing sides like Blt Chicken Salad or crispy potato wedges for a complete meal. Happy cooking!

What to Serve with Crispy Chicken Caesar Sandwich

Elevate your meal experience with delightful sides that complement the savory goodness of this crispy chicken delight.

  • Crispy French Fries: The golden crunch of fries adds a satisfying texture that pairs perfectly with the creamy sandwich.
  • Garlic Parmesan Potato Wedges: Their crispy outside and tender inside echo the sandwich’s crunch while adding a savory garlic kick.
  • Refreshing Caesar Salad: Stay in theme with a light, classic Caesar salad that brightens up the meal with crunchy romaine and creamy dressing.
  • Coleslaw: A tangy, crunchy slaw introduces a fresh tang that balances the richness of the sandwich, making every bite delightful.
  • Roasted Vegetables: Flavorful roasted seasonal veggies add depth to your plate, providing a colorful and nutritious contrast to your sandwich.
  • Iced Lemonade: Complement the richness of the sandwich with a refreshing iced lemonade, creating a harmonious balance of sweet and tangy.
  • Craft Beer: For the adults, a light craft beer brings out the savory notes of the chicken while enhancing the meal’s overall experience.
  • Chocolate Chip Cookies: End on a sweet note with warm chocolate chip cookies to create a comforting, nostalgic finish to your meal.
  • Fruit Salad: A chilled fruit salad offers a fresh and light dessert option, cleansing the palate after the savory sandwich.

How to Store and Freeze Chicken Caesar Sandwich

Fridge: Store leftover components separately in airtight containers for up to 3 days to maintain freshness. The dressing can also last about a week.

Freezer: If you want to freeze the chicken, wrap cooked cutlets tightly in plastic wrap and aluminum foil for up to 2 months. Thaw in the fridge before reheating.

Reheating: To reheat the chicken, place it in a preheated oven (350°F) for about 10-15 minutes until heated through. Avoid microwaving to preserve crispiness.

Serving Suggestions: When ready to enjoy, assemble a fresh Chicken Caesar Sandwich just prior to serving, as this ensures the textures remain delightful.

Make Ahead Options

These Crispy Chicken Caesar Sandwiches are ideal for busy home cooks looking to save time without sacrificing flavor! You can prepare the Caesar dressing and refrigerate it for up to 3 days in advance, ensuring its flavors meld nicely. The romaine can be dressed and stored in an airtight container for up to 24 hours without losing its crunch. For the chicken, you can bread the cutlets up to 1 day ahead and keep them in the refrigerator, covered, to maintain their crispy coating. When you’re ready to cook, simply fry the chicken after letting it sit at room temperature for about 15 minutes for better cooking results. This way, you’ll enjoy a delicious homemade Chicken Caesar Sandwich with minimal effort on busy weeknights!

Expert Tips for Crispy Chicken Caesar Sandwich

  • Pound the Chicken: Ensure even cooking by pounding chicken cutlets to a uniform thickness; this keeps them juicy and tender.
  • Temperature Control: Maintain oil temperature at 350°F for the perfect crispy exterior; using a thermometer helps prevent greasy chicken.
  • Frying in Batches: Fry chicken cutlets in small batches to avoid overcrowding, which can lower oil temperature and create soggy breading.
  • Perfect Assembly: Assemble your Chicken Caesar Sandwich just before serving to prevent sogginess from the dressing and lettuce.
  • Customize It: Feel free to experiment with ingredient substitutions—like replacing chicken with tofu for a delightful vegetarian option.

Crispy Chicken Caesar Sandwich Recipe FAQs

How do I select ripe ingredients for my Chicken Caesar Sandwich?
Absolutely! For the best results, choose romaine hearts that are crisp and bright green without any wilting or dark spots. If you’re using lemons, look for ones that are heavy for their size and have a smooth skin—these will be juicier. For the chicken, opt for fresh cutlets with no discoloration or unpleasant odor.

What is the best way to store leftover Chicken Caesar Sandwich components?
Very! To keep everything fresh, store the chicken, dressing, and lettuce separately in airtight containers in the fridge. The cooked chicken will retain its flavor and moisture for up to 3 days, while the dressing can last up to 7 days. Keep the lettuce wrapped in a paper towel within a container to absorb moisture, ensuring freshness.

Can I freeze the Chicken Caesar Sandwich?
Definitely! If you want to freeze the cooked chicken cutlets, wrap them well in plastic wrap and then in aluminum foil to prevent freezer burn. They’ll keep for up to 2 months. When you’re ready to enjoy, thaw them in the refrigerator overnight and reheat the chicken in a preheated oven at 350°F for about 10-15 minutes, which helps maintain that delicious crispiness.

What should I do if my breading isn’t sticking to the chicken?
Don’t worry! If you find the breading isn’t adhering properly, it could be due to not enough moisture on the chicken. Make sure the chicken is well-coated in the egg mixture before dredging it in the breadcrumb mix. Additionally, gently pressing the breadcrumbs onto the chicken can help. If all else fails, you can add a bit more egg mixture or even a light spray of oil on the chicken before the breading process.

Are there any dietary considerations I should be aware of when making this sandwich?
Very much so! This Chicken Caesar Sandwich can be adapted for various dietary needs. If someone requires a gluten-free option, simply substitute regular flour and panko crumbs with gluten-free alternatives. For a vegetarian version, replace the chicken with crispy tofu, and make sure all condiments and toppings are free from animal products. Be mindful of any allergies to dairy, as the dressing and cheese can be substituted with non-dairy options.

Chicken Caesar Sandwich

Savory Chicken Caesar Sandwich for Crisp, Creamy Bliss

Indulge in a homemade Chicken Caesar Sandwich with crispy fried chicken, fresh romaine, and rich Caesar dressing for ultimate satisfaction.
Prep Time 20 minutes
Cook Time 20 minutes
Chilling Time 15 minutes
Total Time 55 minutes
Servings: 4 sandwiches
Course: Lunch
Cuisine: American
Calories: 550

Ingredients
  

Dressing
  • ½ cup full-fat mayonnaise
  • ¼ cup Greek yogurt or sour cream
  • 2 tablespoons Dijon mustard or yellow mustard
  • 1 tablespoon Worcestershire sauce optional
  • 2 tablespoons lemon juice or vinegar
  • ¼ cup grated Parmesan cheese or Grana Padano
  • 2 cloves garlic minced
Chicken
  • 2-3 pieces chicken cutlets or chicken thighs
  • 1 cup all-purpose flour or gluten-free flour
  • 1 teaspoon smoked paprika or regular paprika
  • 2 pieces eggs or flax egg
  • 1 cup panko crumbs or regular breadcrumbs
  • 1 tablespoon dried parsley or Italian seasoning
  • 1 tablespoon dried oregano or Italian seasoning
Assembly
  • 2-3 hearts romaine or iceberg lettuce
  • 2 pieces French baguettes or ciabatta, sourdough

Equipment

  • medium bowl
  • large mixing bowl
  • Meat mallet
  • Three shallow dishes
  • Skillet
  • slotted spoon
  • Wire rack
  • Oven

Method
 

Preparation Steps
  1. In a medium bowl, mix together mayonnaise, Greek yogurt, Dijon mustard, Worcestershire sauce, lemon juice, Parmesan, minced garlic, salt, and pepper until smooth. Set aside.
  2. Chop romaine and place in a large bowl. Drizzle with dressing, toss gently, cover, and refrigerate for 10-15 minutes.
  3. Pound chicken cutlets to an even thickness, season with salt and pepper.
  4. Prepare a breading station: 1st dish - combine flour, salt, and paprika; 2nd dish - whisk eggs; 3rd dish - mix panko, herbs, and Parmesan.
  5. Dredge each chicken cutlet in flour, dip in eggs, and coat with panko mixture.
  6. Heat oil in a skillet over medium heat. Fry chicken for 4-5 minutes on each side until golden brown. Drain on wire rack.
  7. Slice baguettes, spread dressing, add fried chicken, top with dressed romaine, and sprinkle with extra Parmesan. Serve immediately.

Nutrition

Serving: 1sandwichCalories: 550kcalCarbohydrates: 40gProtein: 30gFat: 25gSaturated Fat: 5gPolyunsaturated Fat: 1gMonounsaturated Fat: 3gCholesterol: 100mgSodium: 800mgPotassium: 600mgFiber: 3gSugar: 2gVitamin A: 150IUVitamin C: 10mgCalcium: 200mgIron: 2mg

Notes

Feel free to customize the sandwich with ingredient substitutions like tofu for a vegetarian option.

Tried this recipe?

Let us know how it was!

Stay Connected

Get recipes via email: