Get my cookbooks

Irresistible Buckeye Brownies to Satisfy Your Sweet Cravings

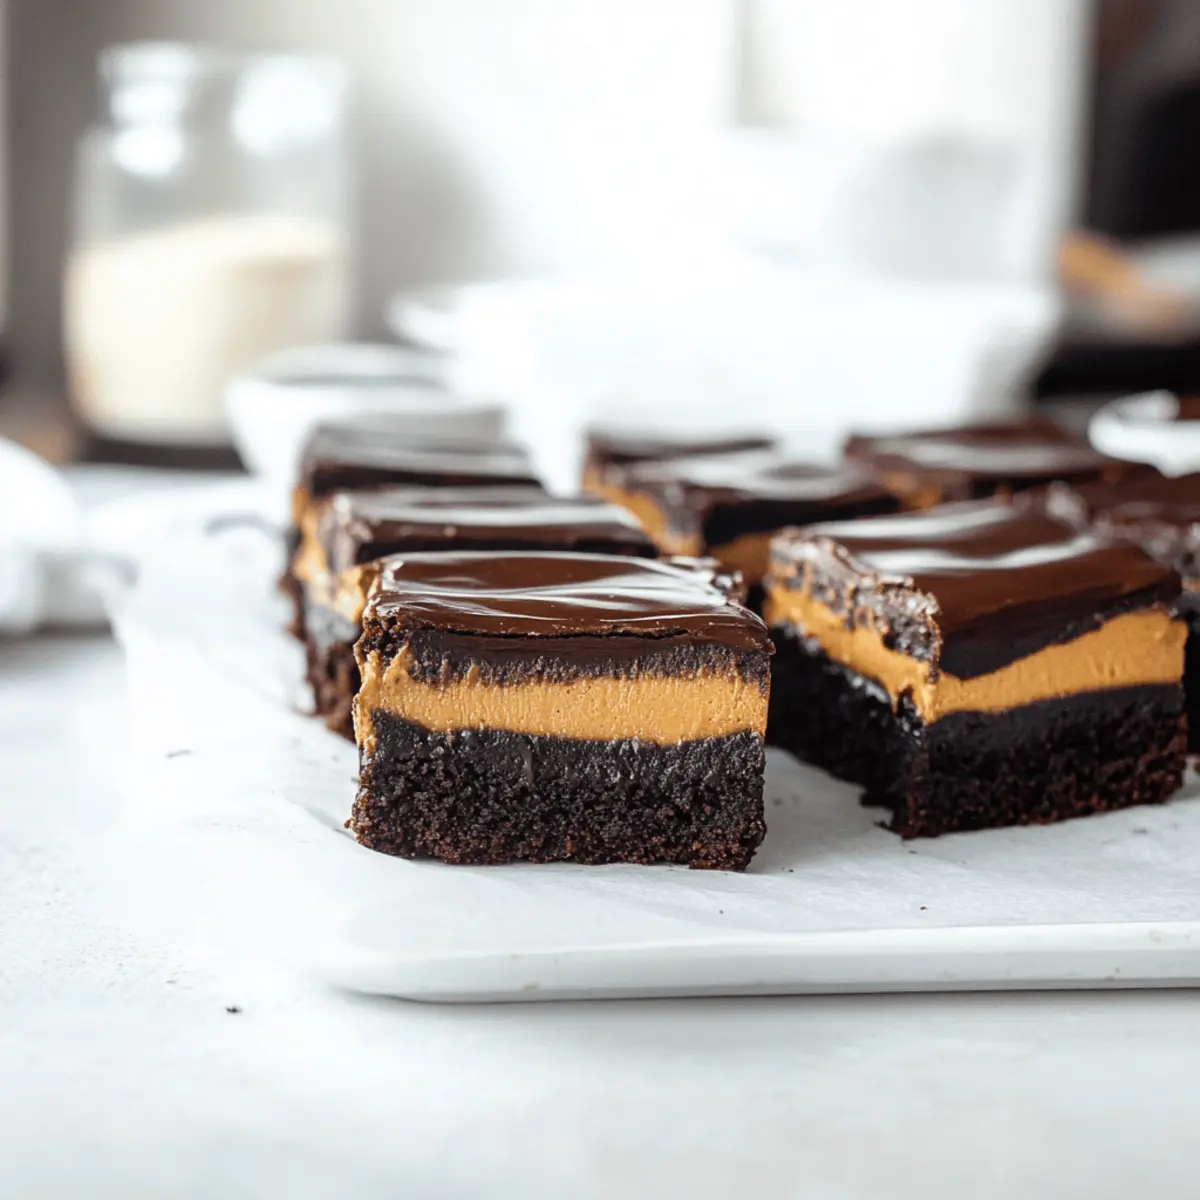
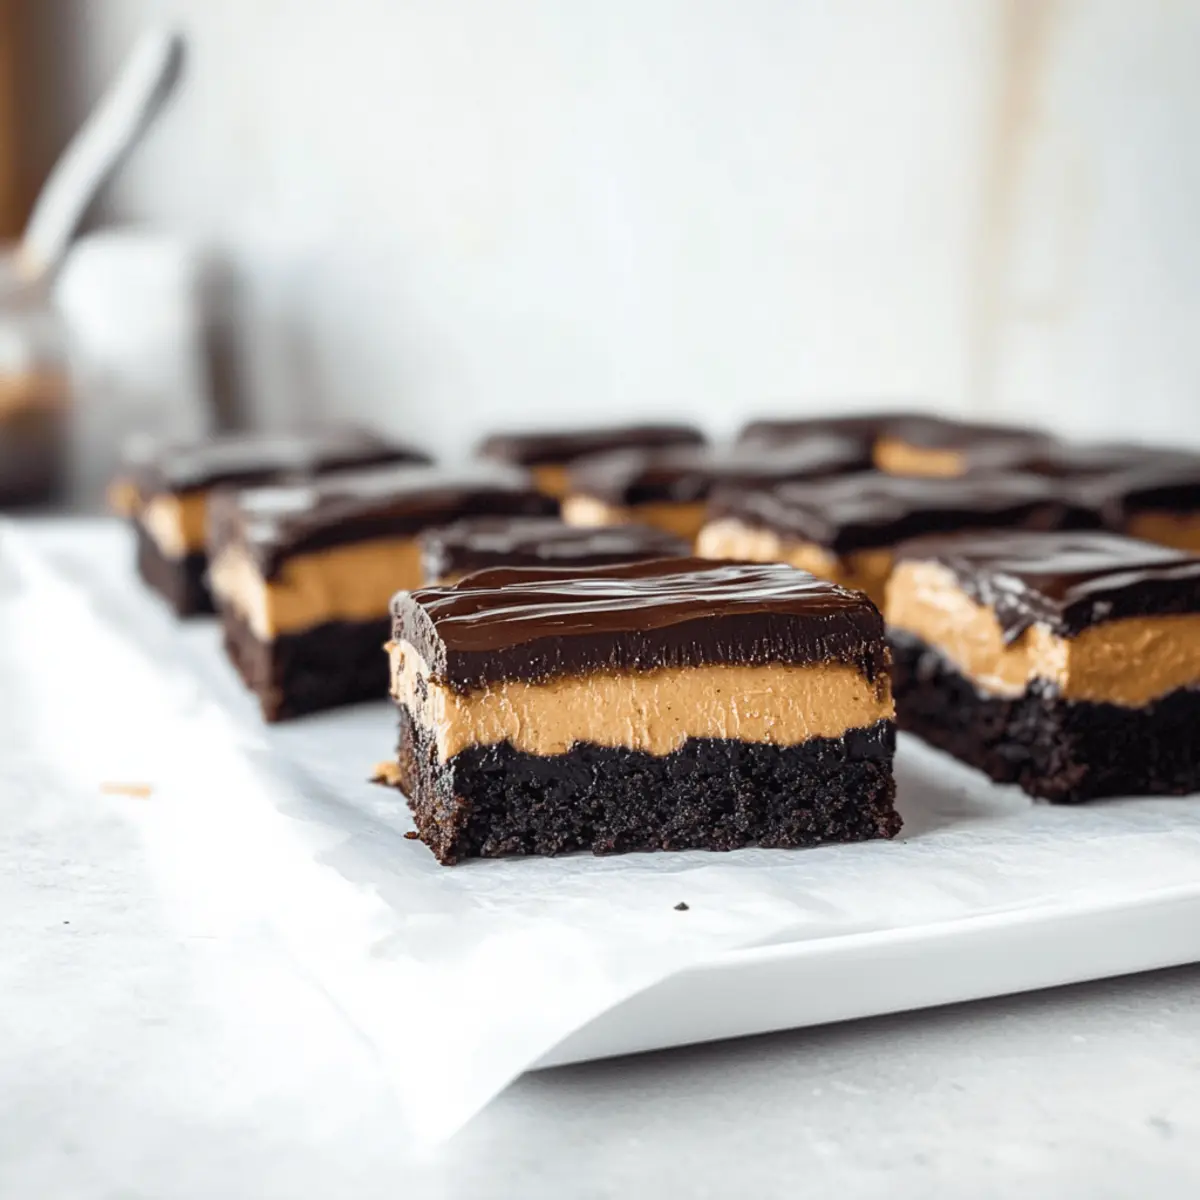
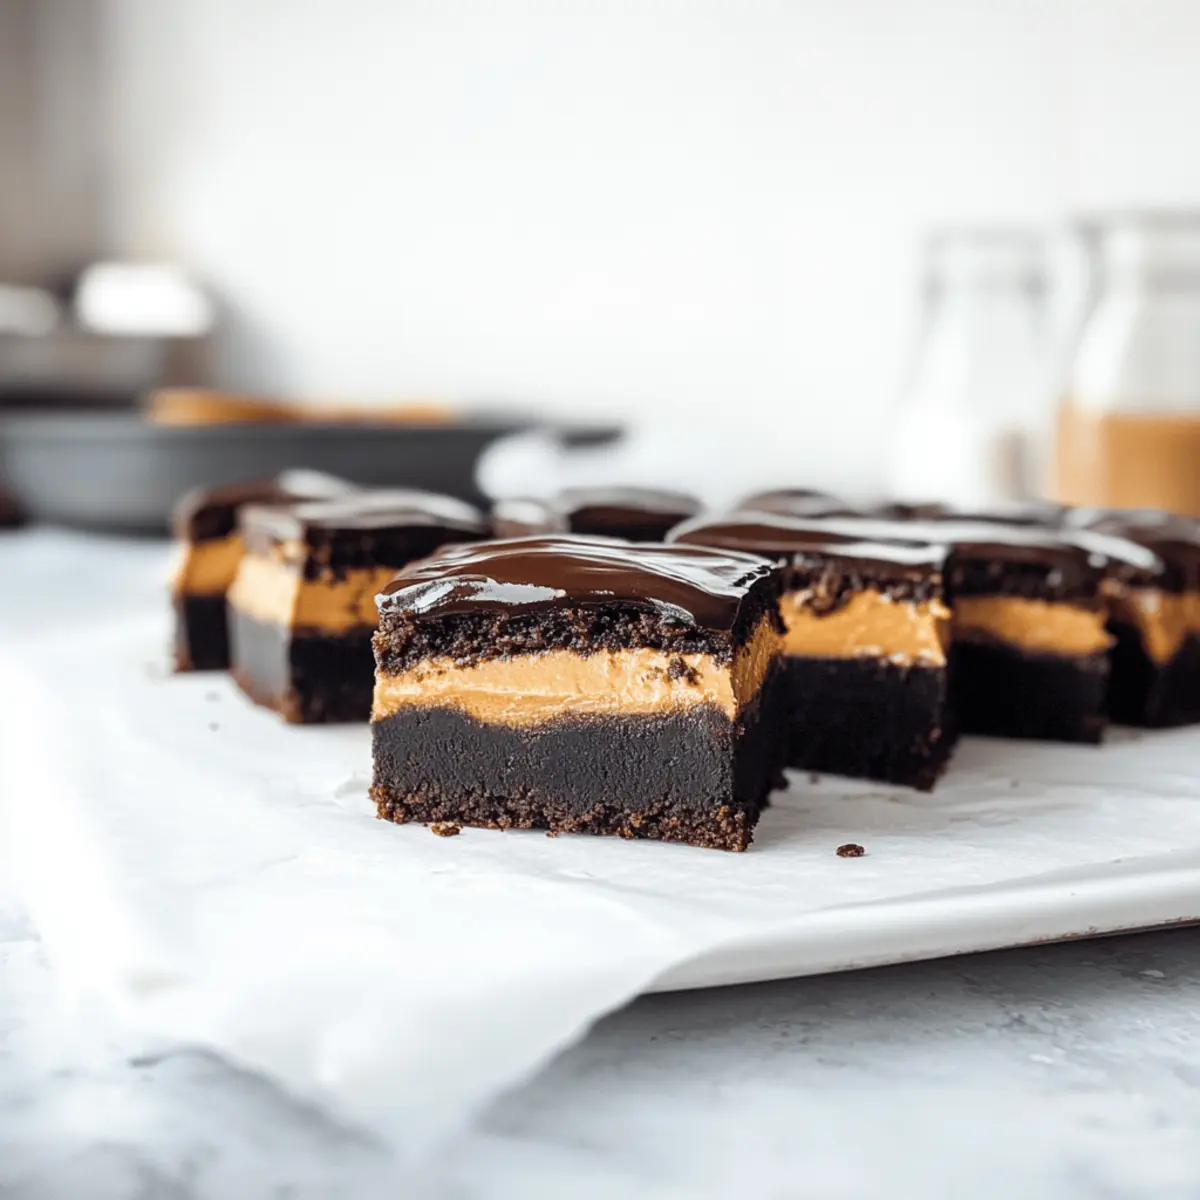
As I stood in my kitchen, the enticing aroma of melting chocolate filled the air, whisking me back to my childhood. It was time to create something truly special: Buckeye Brownies. These indulgent bites are perfect for peanut butter and chocolate lovers alike, capturing the essence of those beloved peanut butter cups in a rich, fudgy brownie form. Not only are these brownies incredibly easy to whip up, but they also make for an impressive dessert at gatherings and celebrations! Topped with a creamy peanut butter layer and drizzled with glossy chocolate ganache, each bite offers a delightful balance of sweetness that will leave you craving more. Curious about how to bring this heavenly dessert to life? Let’s dive into the recipe!

Why are Buckeye Brownies a must-try?

Deliciously Indulgent: These brownies are packed with rich flavors that seamlessly blend peanut butter and chocolate, making them an instant favorite for any sweet tooth.

Effortlessly Simple: With easy-to-follow steps, anyone can create these decadent treats, whether you’re a seasoned chef or a home cook looking to impress!

Versatility at its Best: Play with different nut butters, add caramel swirls, or make them gluten-free—this recipe allows you to get creative while keeping that delicious essence of Buckeye goodness.

Crowd-Pleaser: Perfect for gatherings, parties, or just a special treat at home, these brownies are sure to wow your friends and family. They also pair beautifully with coffee for an indulgent afternoon snack!

Make-Ahead Convenience: Whip them up two days in advance; they taste even better after chilling in the fridge and are ready when you are! This makes hosting stress-free and fun.

Get ready to dive into more comforting desserts; check out my classic chocolate chip cookies for another delightful treat!

Buckeye Brownies Ingredients

For the Brownie Base
Brownie Mix – Use a store-bought blend for an easier, fuss-free option, or whip up your favorite homemade recipe.

For the Peanut Butter Layer
Creamy Peanut Butter (1/2 cup) – This ingredient adds richness and creaminess; feel free to use crunchy peanut butter for added texture.
Unsalted Butter (4 tablespoons) – Enhances the creaminess of the peanut butter layer; margarine may work in a pinch.
Powdered Sugar (1 cup) – Sweetens the peanut butter layer and creates a smooth texture; no substitutions recommended here.
Pinch of Salt – Essential for balancing the sweetness of the peanut butter layer.
Vanilla Extract (1 teaspoon) – Adds depth to the flavor; always opt for pure vanilla extract for the best results.

For the Ganache
Semisweet Chocolate Chips (1 1/2 cups) – The main component for that luscious ganache; substitute with dark chocolate chips for a richer flavor.
Heavy Cream (3 tablespoons) – Creates a smooth ganache; coconut cream can be used for a dairy-free option.

Step‑by‑Step Instructions for Buckeye Brownies

Step 1: Prepare the Brownies
Preheat your oven to 350°F (175°C). Line an 8×8-inch baking pan with parchment paper for easy removal. If using a brownie mix, follow the package instructions to prepare the batter and pour it into the pan. Bake for 25-30 minutes until a toothpick inserted comes out with a few moist crumbs. Once baked, remove the brownies from the oven and let them cool completely on a wire rack.

Step 2: Make the Peanut Butter Layer
In a mixing bowl, combine ½ cup of creamy peanut butter and 4 tablespoons of room-temperature unsalted butter. Use an electric mixer to beat them together until the mixture is smooth and creamy, about 2-3 minutes. Gradually add 1 cup of powdered sugar, a pinch of salt, and 1 teaspoon of vanilla extract, mixing until fully incorporated. Spread this rich peanut butter layer evenly over the cooled brownies for a decadent treat.

Step 3: Prepare the Chocolate Ganache
In a microwave-safe bowl, add 1 ½ cups of semisweet chocolate chips and 3 tablespoons of heavy cream. Microwave in 30-second increments, stirring in between until the chocolate is fully melted and smooth, which should take about 1-2 minutes total. Once properly melted, pour the ganache over the peanut butter layer, gently spreading it out to cover the surface completely.

Step 4: Chill and Serve
Place the assembled Buckeye Brownies in the refrigerator and chill for at least 1 hour to allow the ganache to set properly. Once set, take them out of the fridge and carefully lift the brownies out of the pan using the parchment paper. Slice them into squares using a sharp knife, and prepare to serve these irresistible Buckeye Brownies at your next gathering or enjoy them as a sweet indulgence at home!

How to Store and Freeze Buckeye Brownies

Room Temperature: Store these brownies in an airtight container at room temperature for up to 3 days. Keep them in a cool, dry place to maintain their texture.

Fridge: For longer-lasting freshness, refrigerate the Buckeye Brownies in an airtight container for up to a week. This helps keep the ganache and peanut butter layer creamy.

Freezer: You can freeze the brownies for up to 3 months! Wrap each slice in plastic wrap, then store them in a freezer-safe bag or container to preserve their delightful flavors.

Reheating: Enjoy them cold or let them sit at room temperature for a few minutes. If you prefer them warm, microwave for about 10-15 seconds for a gooey treat!

Expert Tips for Buckeye Brownies

  • Cool Completely: Allow the brownies to cool completely before spreading the peanut butter layer; otherwise, it may melt and become a gooey mess.

  • Parchment Magic: Use parchment paper to line your pan for easy removal, preventing any heartbreaking stuck brownies.

  • Chill for Setting: Make sure to refrigerate the brownies long enough for the ganache to set. This helps create clean cuts for those perfect squares!

  • Melt with Care: When melting chocolate for ganache, stir often to avoid burning. Microwaving in short bursts helps keep the chocolate smooth.

  • Experiment with Nut Butters: Feel free to swap the creamy peanut butter for almond butter or sun butter to accommodate different tastes while keeping the delightful essence of Buckeye brownies.

Buckeye Brownies Variations & Substitutions

Feel free to get creative with these delightful brownies and make them uniquely yours!

  • Nut-Free: Use sun butter instead of peanut butter for a delicious alternative that’s safe for schools and nut-free gatherings. Your taste buds won’t know the difference!

  • Dairy-Free Option: Substitute heavy cream with coconut cream and chocolate chips with dairy-free chocolate chips for an indulgent treat without the dairy. The creamy texture remains, making it a win-win!

  • Crunchy Twist: Replace creamy peanut butter with crunchy peanut butter for added texture in each heavenly bite. This little change enhances the mouthfeel while staying true to the flavor profile.

  • Flavor Boost: Add a teaspoon of instant espresso powder into the brownie mix for a delightful mocha twist that elevates the chocolatey goodness. The boost of flavor creates a rich experience with every slice!

  • Caramel Surprise: Drizzle warm caramel sauce over the peanut butter layer before adding chocolate ganache for a sweet, gooey indulgence. This adds a lovely, sticky surprise to each bite.

  • Gluten-Free Bliss: Use a gluten-free brownie mix or your favorite homemade gluten-free flour blend to make these brownies accessible for gluten-sensitive friends. Everyone deserves a slice of this indulgence!

  • Spicy Kick: Toss in a pinch of cayenne pepper or a touch of chili powder to the brownie mix for a surprising twist that pairs beautifully with chocolate. It’s a delightful way to excite your taste buds!

  • Carnival Fun: Add colorful sprinkles onto the ganache before it sets for a festive touch that’s perfect for parties. These brownies will surely be the eye-catching star of your dessert table!

Don’t forget to check out my easy recipe for classic chocolate chip cookies for another delicious baking adventure!

Make Ahead Options

These Buckeye Brownies are perfect for meal prep enthusiasts! You can bake the brownie base up to 24 hours in advance and store it covered in the refrigerator to ensure freshness. Additionally, you can prepare the peanut butter layer and chocolate ganache ahead of time. Just keep them in separate airtight containers in the fridge for up to 3 days. To finish, spread the peanut butter layer over the cooled brownies and pour the ganache on top right before serving. This way, you’ll enjoy just as delicious brownies with minimal effort, making them a fantastic time-saving dessert option for busy weeknights or gatherings!

What to Serve with Decadent Buckeye Brownies?

Imagine pairing these heavenly brownies with delightful accompaniments that elevate your dessert experience to new heights.

  • Vanilla Ice Cream: The creamy, coolness of vanilla ice cream beautifully offsets the rich chocolate and peanut butter flavors.
  • Fresh Raspberries: Tart and juicy, raspberries offer a refreshing contrast to the sweet decadence of Buckeye Brownies.
  • Espresso or Coffee: A robust cup of coffee accentuates the rich cocoa notes and smooth ganache, enhancing your dessert moments.
  • Chocolate Sauce Drizzle: Double down on indulgence by drizzling warm chocolate sauce for a decadent finish—perfect for chocoholics!
  • Whipped Cream: Light and airy, whipped cream adds a lovely texture contrast, making every bite feel luxurious.
  • Peanut Butter Cup Milkshake: Blend your favorite ingredients into a milkshake for a nostalgic nod to peanut butter cups—decadent and delightful!
  • Caramel Sauce: A drizzle of sweet caramel brings a rich, buttery flavor that harmonizes beautifully with chocolate and peanut butter.
  • Chopped Nuts: Sprinkle chopped peanuts or pecans on top for a crunchy texture that enhances each brownie bite.
  • Banana Slices: Sliced bananas provide a soft, sweet contrast, balancing the richness of the brownies and making for a heavenly combination.
  • Mint Tea: A warm cup of mint tea offers a soothing finish, cleansing your palate after indulging in those luscious brownies.

Buckeye Brownies Recipe FAQs

What type of peanut butter is best for the peanut butter layer?
I always recommend using creamy peanut butter for a smooth and rich layer. If you prefer some crunch, feel free to switch it up with chunky peanut butter, which adds texture and a delightful surprise in every bite!

How do I store leftover Buckeye Brownies?
Keep your brownies in an airtight container at room temperature for up to 3 days. If you want them to last a bit longer, refrigerate them for up to a week. Just make sure they’re stored properly to keep that rich taste and texture intact.

Can I freeze Buckeye Brownies? How?
Absolutely! To freeze these brownies, wrap each square tightly in plastic wrap. Then, place them in a freezer-safe container or bag. They’ll keep well for up to 3 months. When you’re ready to enjoy them, simply let them thaw in the refrigerator overnight or at room temperature for a couple of hours.

What should I do if my chocolate ganache is too thick?
If your ganache is too thick to spread, that’s no problem! Simply add a bit more heavy cream to the mixture and gently reheat it in the microwave in 10-second increments, stirring until it’s smooth and easily spreadable again. This will ensure you have that glossy finish!

Are these brownies suitable for those with nut allergies?
If you’re accommodating nut allergies, I suggest substituting the peanut butter with sunflower seed butter or another nut-free option like soy nut butter. Just keep in mind that the flavor will slightly change, but the brownies will still be deliciously indulgent!

Can I use a different chocolate type for the ganache?
You sure can! While semisweet chocolate chips are the classic choice, you can use dark chocolate chips for a richer flavor. If you prefer milk chocolate, that’s also an option—just adjust the sweetness if needed, as milk chocolate tends to be sweeter than semisweet.

These Buckeye Brownies are sure to satisfy your sweet cravings! Enjoy making them and sharing the joy with loved ones.

Buckeye Brownies

Irresistible Buckeye Brownies to Satisfy Your Sweet Cravings

Delicious Buckeye Brownies that perfectly blend chocolate and peanut butter for the ultimate dessert experience.
Prep Time 20 minutes
Cook Time 30 minutes
Chill Time 1 hour
Total Time 1 hour 50 minutes
Servings: 12 slices
Course: Dessert
Cuisine: American
Calories: 250

Ingredients
  

For the Brownie Base
  • 1 box Brownie Mix Use a store-bought blend
For the Peanut Butter Layer
  • 1/2 cup Creamy Peanut Butter Crunchy peanut butter can be used
  • 4 tablespoons Unsalted Butter Room temperature
  • 1 cup Powdered Sugar No substitutions recommended
  • 1 pinch Salt For balancing sweetness
  • 1 teaspoon Vanilla Extract Opt for pure vanilla
For the Ganache
  • 1 1/2 cups Semisweet Chocolate Chips Can substitute with dark chocolate chips
  • 3 tablespoons Heavy Cream Coconut cream for dairy-free option

Equipment

  • 8x8 inch baking pan
  • Mixing Bowl
  • Electric mixer
  • microwave-safe bowl
  • spatula
  • Parchment Paper
  • Sharp knife

Method
 

Step-by-Step Instructions for Buckeye Brownies
  1. Preheat your oven to 350°F (175°C). Line an 8x8-inch baking pan with parchment paper. Prepare the brownie batter as directed on the package and pour into the pan. Bake for 25-30 minutes until a toothpick comes out with moist crumbs. Let cool completely on a wire rack.
  2. In a bowl, combine ½ cup of creamy peanut butter and 4 tablespoons of unsalted butter. Beat until smooth, about 2-3 minutes. Gradually add 1 cup of powdered sugar, a pinch of salt, and 1 teaspoon of vanilla, mixing until fully incorporated. Spread the peanut butter layer evenly over the cooled brownies.
  3. In a microwave-safe bowl, combine 1 ½ cups of semisweet chocolate chips and 3 tablespoons of heavy cream. Microwave in 30-second increments, stirring until melted and smooth. Pour ganache over the peanut butter layer, spreading to cover completely.
  4. Chill the brownies in the refrigerator for at least 1 hour to set the ganache. Lift out using parchment paper, slice into squares, and serve.

Nutrition

Serving: 1sliceCalories: 250kcalCarbohydrates: 30gProtein: 4gFat: 13gSaturated Fat: 5gPolyunsaturated Fat: 3gMonounsaturated Fat: 2gCholesterol: 10mgSodium: 150mgPotassium: 150mgFiber: 2gSugar: 18gVitamin A: 200IUCalcium: 40mgIron: 1mg

Notes

For perfect results, allow brownies to cool completely before adding the peanut butter layer. Refrigerate to set ganache for clean cuts.

Tried this recipe?

Let us know how it was!

Crockpot Steak and Potato Bliss for Easy Comfort Nights

The aroma of sizzling steak and the comforting scent of creamy potatoes has an uncanny ability to evoke memories of gatherings around the dinner table. That’s exactly what I felt while perfecting my Crockpot Loaded Steak and Potato Bake. This slow cooker masterpiece is a total game-changer for busy weeknights, bringing family comfort food to your kitchen with barely any effort. With its hearty layers of tender steak, soft potatoes, and gooey cheese, it not only pleases the palate but is also budget-friendly and highly customizable. Whether you prefer a classic cheddar topping or experimenting with fresh vegetables, this dish has room for your personal touch. Are you ready to transform your dinner game and fill your home with an irresistible aroma that’ll keep everyone coming back for seconds?

Why is this Crockpot recipe a must-try?

Simplicity Neatly Packaged: With minimal prep time and just a few layers in the crockpot, this recipe is designed for everyone, from busy families to novice cooks.

Flavor Explosion: The savory combination of steak, tender potatoes, and melted cheese creates an irresistible taste that will have your family and friends raving.

Customizable Delight: Whether you want to swap steak for chicken or add in your favorite veggies, the possibilities are endless, ensuring that each meal can feel refreshingly new!

Perfect for Leftovers: Not only does this dish taste amazing, but it can also be easily stored and reheated, lending itself to delicious lunches or quick dinners throughout the week.

Crowd-Pleasing Comfort Food: Serve it at your next gathering, and watch as everyone digs in with smiles on their faces—this dish is bound to become a family favorite, just like our Potato Bacon Soup!

Crockpot Steak and Potato Ingredients

For the Base
Steak – Choose sirloin or chuck for the best tenderness and flavor.
Potatoes – Russet or Yukon Gold are perfect for soaking up those delicious juices.

For the Toppings
Cheese – Sharp cheddar melts beautifully, but feel free to experiment with Monterey Jack for a twist.
Bacon – Adds a savory crunch; turkey bacon is a lighter alternative if you prefer.
Green Onions – These bring a fresh bite and vibrant color to your dish.

For Flavoring
Garlic – Fresh garlic enhances the depth of flavor in your crockpot steak and potato bake.
Salt & Pepper – A must-have to season to perfection.
Paprika – This adds a smoky touch that elevates the comforting profile of the dish.

Optional Add-Ins
Vegetables – Bell peppers and mushrooms can be tossed in for extra nutrients and flavor variations.
Additional Cheese – Layer on more right before serving for a gooey finish.

Feel free to mix and match ingredients as you whip up this delightful Crockpot Loaded Steak and Potato Bake, and don’t forget—customization is the name of the game!

Step‑by‑Step Instructions for Crockpot Loaded Steak and Potato Bake

Step 1: Preparation
Start by cutting your steak into bite-sized pieces, ensuring they are uniform for even cooking. Then, wash and dice your potatoes into small cubes, keeping the skin on for extra flavor. This step will take about 10–15 minutes and sets the foundation for your Crockpot Loaded Steak and Potato Bake.

Step 2: Layering Ingredients
In your crockpot, begin layering the diced potatoes evenly across the bottom. Next, add a layer of the steak pieces on top, followed by a sprinkle of garlic, salt, pepper, and paprika. To create a melty texture, generously sprinkle cheese over this layer. Repeat the layering process until all ingredients are used, finishing with a layer of bacon on top.

Step 3: Cooking the Dish
Cover the crockpot with its lid and set it to cook on low for 6–8 hours or on high for 3–4 hours. Check for doneness when the steak is fork-tender and the potatoes are soft. During this time, your kitchen will fill with enticing aromas, hinting at the deliciousness of your Crockpot Loaded Steak and Potato Bake.

Step 4: Finishing Touches
When the cooking time is up, remove the lid and sprinkle more cheese on the top layer. Allow it to melt for a few minutes while everything cools slightly. This will enhance the gooey texture and create a beautiful finish to your dish. Finally, garnish with chopped green onions before serving to add a fresh touch and extra color.

Step 5: Serving and Storing
Once garnished, scoop out portions of your Crockpot Loaded Steak and Potato Bake and serve it warm alongside your favorite side salad or crusty bread. If you have any leftovers, store them in an airtight container in the fridge, where they’ll remain fresh for up to 3 days. Enjoy the deliciousness again for lunch or dinner!

Expert Tips for Crockpot Steak and Potato Bake

Uniform Cuts: Make sure to cut your steak and potatoes into even sizes. This ensures that everything cooks uniformly, making your crockpot steak and potato bake perfectly tender.

Pre-Warm the Crockpot: If you’re in a rush, pre-warm your crockpot before adding the ingredients. This can cut down on cooking time without sacrificing flavor.

Cheese Choices: Don’t hesitate to mix cheeses! Combining sharp cheddar with Monterey Jack can add unique flavors and enhance the gooey texture of your dish.

Experiment with Veggies: Elevate your dish by adding vegetables like bell peppers or mushrooms for extra nutrition and variety. Just make sure they are chopped evenly.

Storage Tips: Leftovers can be kept in an airtight container in the fridge for up to 3 days. Reheat gently to maintain the flavors and textures of your crockpot steak and potato bake.

Garnishing Matters: Fresh green onions not only add crunch but also color to your dish. Always include them just before serving for that extra pop!

Make Ahead Options

These Crockpot Loaded Steak and Potato Bakes are a fantastic option for meal prep enthusiasts! You can assemble the entire dish (except for the cheese and bacon) up to 24 hours in advance and store it in the refrigerator. Simply layer the diced potatoes, steak, and seasonings in the crockpot and cover tightly. To maintain quality and prevent browning, sprinkle a bit of lemon juice over the potatoes before layering. When you’re ready to cook, just add the cheese and bacon on top, cover, and set your crockpot to cook on low for 6–8 hours. This way, you can enjoy a warm, hearty meal with minimal effort on busy nights!

Storage Tips for Crockpot Loaded Steak and Potato Bake

Fridge: Store leftovers in an airtight container for up to 3 days to maintain freshness. Make sure to allow it to cool to room temperature before sealing.

Freezer: This dish can be frozen for up to 2 months. Portion it into airtight freezer-safe containers, allowing some space for expansion as it freezes.

Reheating: When ready to enjoy leftovers, thaw overnight in the fridge if frozen. Reheat in the microwave or on the stovetop, adding a splash of water or broth to prevent drying out.

Serving After Storage: Garnish with fresh green onions right before serving to add brightness and flavor to your reheated Crockpot Loaded Steak and Potato Bake.

What to Serve with Crockpot Loaded Steak and Potato Bake

Enhance your meal experience with delightful sides that complement the comfort of your slow-cooked creation.

  • Garlic Bread: Perfect for scooping up gooey cheese and tender steak, garlic bread adds a crunchy contrast to the dish’s richness.
  • Mixed Green Salad: A fresh salad with crisp greens, cucumber, and tomatoes offers a bright, refreshing balance to the hearty bake.
  • Steamed Broccoli: This vibrant green vegetable pairs beautifully, adding a light and nutritious element to your dinner plate.
  • Coleslaw: A tangy, crunchy slaw provides a refreshing counterpoint, enhancing the overall flavor profile while adding texture.
  • Creamy Mashed Potatoes: For the ultimate comfort combination, buttery mashed potatoes bring a classic touch, harmonizing well with the steak and cheese.
  • Red Wine: A glass of rich red wine elevates the meal, enhancing the savory flavors while providing a lush velvety finish to each bite.
  • Chocolate Lava Cake: Cap off the evening with a warm and gooey lava cake for a decadent sweet ending that complements the heartiness of the bake.
  • Roasted Carrots: Sweet, tender carrots add a caramelized goodness, balancing savory elements while providing a pop of color on your table.
  • Baked Beans: These sweet and smoky beans create a classic pairing, evoking the comfort of home-cooked meals that the whole family will love.
  • Cheesy Corn Casserole: Serving this sweet and savory side dish alongside the crockpot meal creates an irresistible spread of flavors and textures.

Crockpot Steak and Potato Customizations

Personalizing your dish can elevate this comforting bake to new heights of deliciousness—let’s explore some enticing variations!

  • Vegetarian: Replace steak with hearty mushrooms or lentils for a tasty plant-based dish that still has depth.

  • Cheese Swap: Try using a combination of gooey mozzarella and tangy feta for an exciting flavor profile twist.

  • Spicy Kick: Add diced jalapeños or a sprinkle of red pepper flakes to bring some heat and awaken your taste buds!

  • Herb Infusion: Incorporate fresh herbs like rosemary or thyme to enhance flavors and add an aromatic touch.

  • Creamy Comfort: For a richer dish, mix in a dollop of sour cream or cream cheese while layering the ingredients.

  • Smoky Flavor: Use smoked paprika instead of regular for a subtle warmth that transforms the taste experience.

  • Additional Veggies: Toss in diced bell peppers or sweet corn for a pop of color and extra nutrition, turning this meal into a veggie lover’s dream!

  • Budget-Friendly: Swap the steak for shredded rotisserie chicken or canned beans to keep it cost-effective while still satisfying.

Try out these adaptations, and make this Crockpot Loaded Steak and Potato Bake your own! And if you’re in the mood for comfort food, don’t forget to check out my Cheesy Hamburger Potato Soup for another hearty option.

Crockpot Loaded Steak and Potato Bake Recipe FAQs

Which steak is best for this recipe?
Absolutely! For the best results, I recommend using sirloin or chuck steak as they provide tenderness and richness. If you’re feeling adventurous, ribeye can also add a deliciously juicy flavor. Just remember to cut it into uniform bite-sized pieces to ensure even cooking!

How should I store leftovers?
Very simple! Store any leftovers in an airtight container and refrigerate them for up to 3 days. Make sure the dish has cooled to room temperature before sealing it to maintain its freshness.

Can I freeze the Crockpot Loaded Steak and Potato Bake?
Definitely! This comforting dish can be frozen for up to 2 months. To do this, portion it into airtight, freezer-safe containers, leaving some space for expansion as it freezes. When you’re ready to enjoy it, thaw overnight in the fridge before reheating.

What if my potatoes turn mushy?
Good question! To avoid mushy potatoes, make sure you cut them into even-sized pieces, about an inch in size. It’s also essential not to overcook—check for doneness at the 6-hour mark on low or 3-hour mark on high. When you see soft, fork-tender potatoes, you’re ready to dig in!

Are there any dietary considerations for this recipe?
Definitely! This recipe is naturally gluten-free, but always double-check the labels on ingredients like broth or sauces to be sure. If you’re concerned about allergies, turkey bacon can be swapped for regular bacon, which is a lighter option. Plus, feel free to incorporate your favorite veggies for added nutrients!

Crockpot Steak and Potato

Crockpot Steak and Potato Bliss for Easy Comfort Nights

This Crockpot Steak and Potato recipe offers a comforting, customizable dish perfect for busy evenings.
Prep Time 15 minutes
Cook Time 8 hours
Total Time 8 hours 15 minutes
Servings: 6 servings
Course: Dinner
Cuisine: American
Calories: 550

Ingredients
  

For the Base
  • 2 lbs Steak (sirloin or chuck)
  • 4 medium Potatoes (Russet or Yukon Gold)
For the Toppings
  • 2 cups Cheese (sharp cheddar or Monterey Jack) shredded
  • 8 slices Bacon or turkey bacon for a lighter option
  • 4 count Green Onions chopped
For Flavoring
  • 4 cloves Garlic minced
  • 1 tsp Salt
  • 1 tsp Pepper
  • 1 tsp Paprika
Optional Add-Ins
  • 1 cup Vegetables (bell peppers or mushrooms) chopped
  • 1 cup Additional Cheese for layering before serving

Equipment

  • Crockpot

Method
 

Preparation
  1. Cut your steak into bite-sized pieces and wash and dice your potatoes into small cubes.
Layering Ingredients
  1. Layer diced potatoes in the crockpot, followed by steak, garlic, salt, pepper, paprika, and cheese. Repeat until all ingredients are used, finishing with bacon on top.
Cooking the Dish
  1. Cover and cook on low for 6-8 hours or on high for 3-4 hours until steak is fork-tender and potatoes are soft.
Finishing Touches
  1. Remove lid, add more cheese on top, and allow it to melt before garnishing with green onions.
Serving and Storing
  1. Scoop portions and serve warm. Store leftovers in an airtight container in the fridge for up to 3 days.

Nutrition

Serving: 1servingCalories: 550kcalCarbohydrates: 45gProtein: 40gFat: 25gSaturated Fat: 10gPolyunsaturated Fat: 5gMonounsaturated Fat: 10gCholesterol: 90mgSodium: 800mgPotassium: 1200mgFiber: 5gSugar: 2gVitamin A: 300IUVitamin C: 15mgCalcium: 300mgIron: 5mg

Notes

Ensure uniform cuts for even cooking, and feel free to customize ingredients according to your taste preferences.

Tried this recipe?

Let us know how it was!

Irresistible Baked Ziti Recipe for Cozy Family Dinners

As I stirred the bubbling pot, the rich aroma of marinara sauce mixed with melting cheese took me back to cherished family dinners. This Best Ever Baked Ziti Recipe is a symphony of cozy flavors that transforms any kitchen into a warm, inviting haven. Designed for those seeking comfort food with minimal fuss, this ultimate baked ziti is not only quick to prepare but also endlessly customizable. Whether you’re feeding a crowd or enjoying a quiet night in, it’s a hearty meal that leaves everyone asking for seconds. Plus, with easy vegetarian options, it makes the perfect solution for any dietary need. Ready to bring some delicious nostalgia to your table? Let’s dive into this recipe that’ll have you savoring every cheesy bite!

Why Is Baked Ziti So Loved?

Comforting, Familiar Flavors: The rich layers of cheese and savory marinara create a dish that feels like a warm hug for your taste buds.

Easy and Quick: Perfect for weeknight dinners, this recipe comes together swiftly, letting you enjoy meaningful time with family.

Customizable to Your Taste: Want to sneak in some veggies? Feel free to swap ingredients for a personalized touch.

Crowd-Pleaser: Whether for a cozy family meal or a gathering with friends, baked ziti always garners compliments and satisfied smiles.

Leftover Friendly: Store leftovers easily in the fridge and relish delightful meals for days—just reheat and enjoy!

If you’re also looking for a comforting dish that’s equally delightful, check out my [Garlic Butter Baked] and [Cheesy Hamburger Food] recipes!

Baked Ziti Ingredients

For the Pasta
Ziti Pasta – This is the heart of the dish; you can swap with penne or rigatoni for a slight twist!

For the Sauce
Marinara Sauce – It adds a rich, tangy flavor; using homemade enhances depth, though store-bought works beautifully too.
Garlic – Fresh garlic gives a fantastic aroma; if you’re in a pinch, garlic powder can substitute well.
Onion – Creates the base flavor; shallots are a sweet alternative that also works wonderfully.

For the Cheesy Filling
Ricotta Cheese – This introduces creaminess; for a lighter version, cottage cheese can be a great alternative.
Mozzarella Cheese – Melty and gooey, fresh mozzarella elevates the dish to new heights!
Parmesan Cheese – Provides a lovely salty depth; you can substitute with Pecorino Romano if desired.

For the Protein
Ground Beef or Italian Sausage – Adds hearty flavor; swap with sautéed vegetables or lentils for a delicious vegetarian option.

For Topping & Seasoning
Fresh Basil – This adds a touch of freshness; while dried basil is fine, nothing beats the flavor of fresh!
Salt & Pepper – Essential for enhancing all the flavors in your baked ziti.

Feel free to customize your baked ziti for a delicious and personalized meal that everyone will adore!

Step‑by‑Step Instructions for Best Ever Baked Ziti Recipe

Step 1: Preheat the Oven and Cook Pasta
Begin by preheating your oven to 375°F (190°C). In a large pot, bring salted water to a rolling boil and add the ziti pasta. Cook until al dente, typically about 8-10 minutes. Once cooked, drain the pasta and set it aside, allowing it to cool slightly while you prepare the meat sauce.

Step 2: Brown the Meat
In a large skillet over medium heat, add your ground beef or Italian sausage. Cook until the meat is browned and crumbly, usually around 5-7 minutes. As it cooks, make sure to break it apart with a spatula. Once nicely browned, drain any excess fat to keep your best-ever baked ziti deliciously creamy without being greasy.

Step 3: Make the Sauce
Stir in your marinara sauce with the cooked meat in the skillet. Allow this mixture to simmer on low heat for about 5 minutes to combine the flavors. You’ll know it’s ready when the sauce is heated through and bubbling gently, filling your kitchen with an inviting aroma that sets the stage for your baked ziti recipe.

Step 4: Combine Cheese and Pasta
In a large mixing bowl, combine the cooked ziti pasta, ricotta cheese, half of the mozzarella, half of the Parmesan, and fresh basil. Stir everything together until the pasta is well-coated with the cheese mixture, creating a tantalizing blend of textures and flavors that will be the foundation of your finished baked ziti.

Step 5: Layer the Dish
In a spacious baking dish, spread half of the meat sauce on the bottom. Next, layer half of the pasta and cheese mixture on top of it. Repeat this process, creating another layer of meat sauce followed by the remaining pasta mixture. This layering technique helps to infuse each bite with the rich flavors of the best-ever baked ziti.

Step 6: Add the Final Toppings
Top your assembled baked ziti with the remaining mozzarella and Parmesan cheese, ensuring an even spread for a deliciously gooey finish. Cover the dish tightly with aluminum foil to help retain moisture. Place it in the preheated oven and bake for 25 minutes until heated through and the cheese starts to melt.

Step 7: Finish Baking
After the initial baking time, carefully remove the foil and continue to bake for another 15 minutes. Watch as your best-ever baked ziti turns beautifully golden and bubbling. It’s done when the cheese is melted and slightly crispy on top, ready to be brought to the table and served to your eager family.

How to Store and Freeze Baked Ziti

Fridge: Keep leftover baked ziti in an airtight container for up to 3 days. This ensures it stays fresh and flavorful for your next cozy meal.

Freezer: For longer storage, freeze the baked ziti in a freezer-safe container for up to 2 months. Just use plastic wrap and foil to cover it tightly to prevent freezer burn.

Reheating: To reheat, thaw overnight in the fridge, then bake in a preheated oven at 350°F (175°C) until heated through, around 20-30 minutes. Enjoy the comfort of your baked ziti recipe all over again!

Make-Ahead Tip: Assemble the baked ziti up to 24 hours in advance. Cover and refrigerate before baking; adjust the baking time if it’s coming straight from the fridge!

Expert Tips for Baked Ziti

Perfect Pasta: Ensure pasta is cooked al dente; it will continue cooking in the oven and helps maintain the perfect texture in your baked ziti.

Layering Matters: For even distribution of flavors, alternate layers of meat sauce and pasta mixture, ensuring each bite is deliciously balanced.

Remove the Foil: Cover the dish with foil for the first part of baking to prevent sticking, but uncover it later to achieve that golden, crispy top that everyone loves.

Customize to Taste: Feel free to add your favorite veggies like spinach or mushrooms to enhance nutrition and personalize your baked ziti recipe.

Storage Savvy: Store leftovers in an airtight container in the fridge for up to three days, making it easy to enjoy this comfort food again.

Make Ahead Options

These Best Ever Baked Ziti are perfect for meal prep enthusiasts! You can prepare the entire dish up to 24 hours in advance by assembling it and covering it tightly with aluminum foil before refrigerating. For optimal flavor, ensure the assembled ziti is cooled before refrigerating. If you prefer to prep the components separately, cook the pasta and brown the meat up to 3 days ahead, storing them in airtight containers in the fridge. When you’re ready to bake, simply layer the ingredients and pop the dish in the oven, adding an extra 10 minutes to the baking time to ensure everything is heated through. This way, you can enjoy a homemade meal with minimal effort, saving you precious time on busy weeknights!

Baked Ziti Recipe Variations

Feel free to explore creative twists and substitutions that will make this baked ziti recipe your own!

  • Vegetarian Swap: Replace ground meat with sautéed bell peppers, mushrooms, or lentils for a hearty, plant-based option. A medley of veggies creates a vibrant and colorful dish.

  • Cheese Twist: Use a blend of different cheeses like gouda or cheddar for an entirely unique flavor. Mixing in smoked cheeses can elevate the comfort of each bite.

  • Spicy Kick: Add crushed red pepper flakes or diced jalapeños to the meat sauce for a bit of heat. This spicy twist will awaken your taste buds and add excitement to this classic dish.

  • Gluten-Free: Substitute ziti pasta with gluten-free pasta varieties to accommodate dietary restrictions. The creamy sauce and toppings will still shine through, keeping everyone happy!

  • Creamy Addition: Stir in a couple of spoonfuls of cream cheese or sour cream for an ultra-creamy filling. This addition will enhance the richness and make every bite more indulgent.

  • Herb Infusion: Enhance flavor by adding fresh herbs like parsley or oregano into the cheese mixture. The fresh herbs will add brightness and elevate the dish with delightful aromas.

  • Layer It Up: Boost nutrition by adding layers of sautéed spinach or zucchini between pasta layers. This adds texture and nutrition that harmonizes beautifully with the rich cheese.

If you’re in the mood for something equally comforting, try my [Baked Salmon Honey] or treat yourself to some [Mexican Taco Soup] alongside this indulgent ziti!

What to Serve with Best Ever Baked Ziti

Creating a memorable meal is all about delightful pairings that elevate your dining experience.

  • Garlic Bread: The perfect crunchy side, allowing you to soak up every delicious drop of sauce. A classic that never disappoints!
  • Fresh Green Salad: Light and crisp, this salad adds a refreshing contrast to the richness of the baked ziti. Consider adding tomatoes, cucumbers, and a tangy vinaigrette for an invigorating balance.
  • Roasted Vegetables: Seasonal veggies roasted to perfection bring color and crunch to your plate, complementing the creamy ziti while adding nutritional value.
  • Caesar Salad: Creamy dressing and crunchy croutons make this a favorite. It’s a delightful side that pairs beautifully with the cheesy pasta dish to satisfy all appetites.
  • Bruschetta: Toasted bread topped with fresh tomatoes and basil offers a burst of freshness, harmonizing wonderfully with the savory ziti.
  • Red Wine: A glass of rich red wine, such as Chianti or Merlot, enhances the flavors of your baked ziti, creating a warm and inviting atmosphere for your dinner.
  • Tiramisu: End your meal on a sweet note with this creamy coffee-infused dessert, providing a delightful contrast to the hearty pasta.
  • Lemon Sorbet: For a palate cleanser, serve this light, zesty sorbet. It refreshes the taste buds after your comforting baked ziti, making for a well-rounded meal.
  • Stuffed Mushrooms: These savory bites filled with garlic, herbs, and cheese add a delicious appetizer option, perfect for sharing before diving into the main event.

Best Ever Baked Ziti Recipe FAQs

How do I know when my ziti pasta is perfectly cooked?
Absolutely! You want to aim for al dente, which means the pasta should be firm to the bite. This usually takes about 8-10 minutes of boiling in salted water. Take a taste test a minute or two before the package time is up to ensure you catch it at just the right moment.

What is the best way to store leftover baked ziti?
Very good question! Leftovers should be stored in an airtight container in the fridge, where they’ll remain fresh for up to 3 days. Just make sure to let it cool completely before sealing, as this helps prevent moisture buildup.

Can I freeze baked ziti, and if so, how?
Absolutely! For freezing, transfer the assembled but unbaked ziti to a freezer-safe dish. Cover it tightly with plastic wrap followed by aluminum foil to prevent freezer burn and keep it delicious. Your baked ziti can be stored in the freezer for up to 2 months! When you’re ready to enjoy it, just thaw it overnight in the fridge, then bake at 350°F (175°C) for about 30-40 minutes until bubbling.

What are some common issues I might encounter while making baked ziti?
I often hear of a few hiccups! One common issue is the pasta getting mushy. To prevent this, always cook your ziti al dente so it retains some firmness during baking. Also, if your baked dish ends up dry, it might be due to insufficient sauce. Make sure you have enough marinara blending with the pasta and cheese mixture. Finally, if your cheese isn’t bubbling and golden by the end, try removing the foil for the last 10-15 minutes of baking!

Are there any dietary considerations I should keep in mind?
Definitely! If you’re cooking for a crowd, it’s great to take allergies or dietary preferences into account. You can easily make this a vegetarian dish by swapping ground meat for sautéed veggies or lentils. If anyone has dairy restrictions, consider using dairy-free cheese alternatives which work quite well in baked ziti. Always check ingredient labels, especially for store-bought marinara, to ensure they are allergy-friendly.

Can I add vegetables to my baked ziti?
The more the merrier! Feel free to sneak in some chopped spinach, bell peppers, or even zucchini for added nutrition. Simply sauté them in your skillet along with the meat before mixing them into the sauce. It’s a great way to customize the dish while making it a bit healthier!

Baked Ziti Recipe

Irresistible Baked Ziti Recipe for Cozy Family Dinners

This Baked Ziti Recipe is a cozy dish that's quick to prepare and endlessly customizable, perfect for family dinners.
Prep Time 20 minutes
Cook Time 45 minutes
Total Time 1 hour 5 minutes
Servings: 6 servings
Course: Pasta
Cuisine: Italian
Calories: 450

Ingredients
  

For the Pasta
  • 16 oz Ziti Pasta Can substitute with penne or rigatoni
For the Sauce
  • 24 oz Marinara Sauce Homemade or store-bought
  • 4 cloves Garlic Fresh or garlic powder
  • 1 medium Onion Shallots can be used as a substitute
For the Cheesy Filling
  • 15 oz Ricotta Cheese Use cottage cheese for a lighter version
  • 16 oz Mozzarella Cheese Fresh mozzarella preferred
  • 1 cup Parmesan Cheese Pecorino Romano can be used as a substitute
For the Protein
  • 1 lb Ground Beef or Italian Sausage Can substitute with sautéed vegetables or lentils
For Topping & Seasoning
  • 1 cup Fresh Basil Dried basil is acceptable but fresh is recommended
  • to taste Salt
  • to taste Pepper

Equipment

  • Large pot
  • Large skillet
  • baking dish
  • Mixing Bowl

Method
 

Step‑by‑Step Instructions
  1. Preheat your oven to 375°F (190°C). Cook ziti pasta in salted boiling water until al dente, about 8-10 minutes. Drain and set aside.
  2. In a skillet, cook brown ground beef or Italian sausage over medium heat for 5-7 minutes, draining any excess fat.
  3. Stir in marinara sauce with cooked meat in the skillet and simmer on low for about 5 minutes.
  4. Combine cooked ziti pasta, ricotta, half of the mozzarella, half of the Parmesan, and fresh basil in a mixing bowl.
  5. In a baking dish, spread half of the meat sauce, layer half of the pasta mixture, then repeat.
  6. Top with remaining mozzarella and Parmesan cheese. Cover with foil and bake for 25 minutes.
  7. Remove foil and bake for an additional 15 minutes until the cheese is melted and bubbly.

Nutrition

Serving: 1servingCalories: 450kcalCarbohydrates: 50gProtein: 25gFat: 15gSaturated Fat: 7gPolyunsaturated Fat: 1gMonounsaturated Fat: 3gCholesterol: 55mgSodium: 800mgPotassium: 600mgFiber: 3gSugar: 4gVitamin A: 500IUVitamin C: 2mgCalcium: 300mgIron: 3mg

Notes

Customize your baked ziti by adding vegetables like spinach or mushrooms for added nutrition.

Tried this recipe?

Let us know how it was!

Pumpkin S’mores Cookies: Fall’s Ultimate Cozy Delight

As the leaves turn and the air crispens, I find myself drawn to the cozy allure of the season, where every bite is a warm hug. Enter Pumpkin S’mores Cookies—my delightful twist on classic s’mores that perfectly captures those autumn vibes! This easy-to-make recipe brings together rich pumpkin, aromatic spices, and gooey marshmallows, transforming each cookie into a soft, chewy wonder. They’re not only a crowd-pleaser ideal for gatherings or casual snacks, but they’re also a nostalgic nod to the campfire treats we all love, now made for the cozy comforts of home. Ready to elevate your fall baking game? Let’s dive into this scrumptious recipe together!

Why are Pumpkin S’mores Cookies perfect?

Cozy Fall Flavors: These cookies beautifully blend pumpkin, warm spices, and nostalgic s’mores elements, making them the perfect treat for autumn.

Easy to Make: With straightforward instructions, you can whip up these delicious cookies quickly, earning you major baking cred without a ton of prep!

Crowd-Pleasing Delight: Perfect for parties or cozy family gatherings, these cookies are bound to be a hit and leave everyone asking for more.

Versatile Options: Feel free to mix things up by using different types of chocolate chips or flavored graham crackers. Love the combination? For more fun fall desserts, check out Blueberry Breakfast Cookies or Joumou Haitian Pumpkin.

Unique Texture: With a chewy center and fluffy bites, they rival the best dessert bars and s’mores combined—truly a treat to savor!

Pumpkin S’mores Cookies Ingredients

  • For the Batter

  • Unsalted Butter – Provides richness and moisture; substitute with vegan butter for a dairy-free option.

  • Brown Sugar – Adds depth of flavor and moisture to the cookies; for a lighter taste, use all granulated sugar.

  • Granulated Sugar – Balances sweetness and aids in browning.

  • Pumpkin Puree – Essential for flavor and moisture; use 100% pure pumpkin puree, avoiding pumpkin pie filling.

  • Egg – Binds the ingredients and adds necessary moisture.

  • Vanilla Extract – Enhances the overall flavor profile beautifully.

  • All-Purpose Flour – Provides the structure of the cookies; swap with gluten-free flour at a 1:1 ratio.

  • Baking Soda – Acts as a leavening agent, helping the cookies rise and become fluffy.

  • Pumpkin Pie Spice – Adds warm, rich fall flavors; can be substituted with individual spices like cinnamon, nutmeg, or ginger.

  • Salt – Elevates flavor and balances the sweetness.

  • For the S’mores Twist

  • Chocolate Chips – Offer richness and sweetness; feel free to experiment with dark, white, or milk chocolate chips.

  • Mini Marshmallows – Contribute a gooey texture; consider using non-melting vegan marshmallows for a different texture.

  • Graham Crackers – Provide that classic s’mores flavor; can be crushed for more crunch or left in pieces for texture.

  • Optional Additions

  • Orange Food Coloring – Use sparingly for visual appeal, if desired.

These Pumpkin S’mores Cookies ingredients not only make for a delightful treat but also encapsulate the cozy essence of fall. Enjoy the baking!

Step‑by‑Step Instructions for Pumpkin S’mores Cookies

Step 1: Preheat and Prepare
Begin by preheating your oven to 350°F (175°C) while you line a baking sheet with parchment paper. This preparation ensures your Pumpkin S’mores Cookies bake evenly and don’t stick. Having everything ready makes the mixing process smoother and more enjoyable, allowing you to focus on that delicious pumpkin flavor!

Step 2: Creaming the Butters and Sugars
In a large mixing bowl, cream together the softened unsalted butter, brown sugar, and granulated sugar using a hand mixer or your stand mixer. Beat on medium speed for about 2–3 minutes until the mixture becomes light and fluffy. This step is crucial, as it helps incorporate air into the dough, leading to cookies that are soft and airy.

Step 3: Mix in the Pumpkin and Egg
Add the pumpkin puree, egg, and vanilla extract to your creamed mixture. If you’re using orange food coloring for a pop of fun, add it here too. Mix on low speed until all ingredients are well blended, roughly 1–2 minutes. The batter should be smooth and creamy, indicative of the wonderful flavor that makes these Pumpkin S’mores Cookies so delightful!

Step 4: Combine Dry Ingredients
In a separate bowl, whisk together the all-purpose flour, baking soda, pumpkin pie spice, and salt. Gradually incorporate this dry mixture into your wet mixture, mixing on low speed until just combined. Be careful not to overmix, as this will keep your cookies tender and prevent them from becoming tough.

Step 5: Fold in the S’mores Elements
Now it’s time for the fun! Gently fold in the chocolate chips, mini marshmallows, and crushed graham crackers using a spatula. This method ensures that the mix-ins are evenly distributed without destroying the fluffy texture of your dough. The combination of these ingredients will bring that classic s’mores experience into your cookies.

Step 6: Scoop and Shape
Using a cookie scoop or two spoons, drop generous amounts of dough onto the prepared baking sheet, spacing them about 2 inches apart. For an extra treat, top each dough ball with a few more mini marshmallows, chocolate chips, and graham cracker pieces. This adds a deliciously gooey and crunchy texture to your baked cookies.

Step 7: Bake to Perfection
Place the baking sheet in your preheated oven and bake for 12-14 minutes. You’ll know your Pumpkin S’mores Cookies are done when the edges are lightly golden, but the centers still appear soft. Try to avoid overbaking to maintain a chewy texture, reminiscent of classic s’mores.

Step 8: Cooling Time
Once baked, allow your cookies to cool on the baking sheet for 5 minutes before carefully transferring them to a wire rack. This slight cooling helps them set up without falling apart. After a few minutes on the rack, let them cool completely, enhancing the flavors as they settle.

Step 9: Serve and Share
Your warm, inviting Pumpkin S’mores Cookies are now ready to be enjoyed! Serve them at room temperature for the best flavor, and watch as they disappear! Whether for an event or a cozy family night, these cookies are sure to be a crowd-pleaser, bringing the magic of fall straight to your home.

What to Serve with Pumpkin S’mores Cookies

As you bake up a batch of these delightful treats, consider how to create an irresistible autumn-inspired feast.

  • Vanilla Ice Cream: A scoop of creamy vanilla ice cream perfectly balances the warm, rich flavors of the cookies, adding delightful creaminess to each bite. The contrast of hot and cold is comforting and provides that extra touch of indulgence.

  • Caramel Drizzle: A warm caramel sauce drizzled over the cookies adds a luscious sweetness that enhances the pumpkin and chocolate notes. This touch not only elevates the flavors but also creates a pleasing presentation.

  • Chocolate Milkshake: Pair with a rich chocolate milkshake for a nostalgic treat that enhances the s’mores theme. The sweetness of the shake complements the cookie’s richness, making it a match made in dessert heaven.

  • Chai Latte: The spices in a warm chai latte harmonize beautifully with the flavors of the cookies. This delightful beverage offers a cozy atmosphere, perfect for enjoying these pumpkin treats during chilly evenings.

  • Spiced Apple Cider: A piping hot cup of spiced apple cider brings in fall vibes and complements the spices in the cookies. The combination together makes you feel wrapped in warmth, like a favorite sweater on a crisp autumn day.

  • Mini Pumpkin Pies: Serve alongside mini pumpkin pies for that double pumpkin delight! Their creamy texture and aromatic spices keep the flavor theme consistent, creating a memorable dessert spread.

  • Whipped Cream Topping: A dollop of homemade whipped cream adds lightness and richness, balancing the cookie’s chewiness. Your guests will love the fluffy addition, making each bite even more indulgent!

  • Nutty Trail Mix: As a savory contrast, a small bowl of nutty trail mix can provide a crunchy element that complements the soft texture of the cookies. The variety of flavors keeps things interesting and can include seasonal nuts like pecans or walnuts.

  • Dark Hot Chocolate: Sip on some rich dark hot chocolate for an extra luxurious experience. The intense chocolaty flavor pairs harmoniously with the pumpkin s’mores cookies, enhancing the overall sweetness.

  • Bourbon Cocktail: For the adults, a bourbon-based cocktail can add a sophisticated twist to your dessert pairing. Its warm undertones marry well with the flavors of pumpkin and spice.

Make Ahead Options

These Pumpkin S’mores Cookies are a fantastic choice for meal prep, making your busy weeknights a breeze! You can prepare the cookie dough up to 24 hours in advance by mixing all the ingredients and storing it in an airtight container in the refrigerator. For even more convenience, consider scooping the dough into balls and placing them on a baking sheet, then cover and refrigerate. When you’re ready to bake, simply take them out and let them sit at room temperature for about 10-15 minutes before popping them into the oven. This method keeps the cookies just as delicious, with that delightful soft, chewy texture!

Pumpkin S’mores Cookies Variations & Substitutions

Feel free to let your culinary creativity shine by customizing these cookies to fit your taste and dietary needs!

  • Dairy-Free: Substitute unsalted butter with vegan butter for a delightful dairy-free treat.
  • Flour-Free: Use almond flour or coconut flour for a gluten-free version; adjust liquid as needed.
  • Chocolate Lovers: Switch milk chocolate chips for dark or white chocolate for a different flavor profile.
  • Extra Crunch: Stir in toffee bits or crushed pretzels alongside graham crackers for added texture and a sweet-salty twist!
  • Pumpkin Spice Boost: Increase pumpkin pie spice for a richer pumpkin flavor or use individual spices like cardamom and cloves.
  • Reduced Sugar: Use applesauce or mashed bananas to replace some of the sugar for a healthier alternative.
  • Caramel Drizzle: Add a drizzle of caramel sauce on top after baking for an indulgent finishing touch.
  • Heating It Up: For a spicy kick, incorporate a pinch of cayenne pepper to heat up the flavors!

As you experiment with your favorite flavors, remember that these cookies are all about the cozy essence of fall. Don’t forget to pair them with a scoop of ice cream for an indulgent dessert experience, or check out our Blueberry Breakfast Cookies or Joumou Haitian Pumpkin for more delightful treats that celebrate the season!

Expert Tips for Pumpkin S’mores Cookies

  • Use Softened Butter: Ensure your butter is at room temperature for easy creaming; overly soft butter can lead to flatter cookies.

  • Avoid Overmixing: Mix the dough until just combined to keep your Pumpkin S’mores Cookies tender and chewy.

  • Right Cooling Time: Let cookies cool on the baking sheet briefly to prevent them from breaking, as they are fragile while hot.

  • Customize Your Spices: Don’t hesitate to add more pumpkin pie spice if you crave a stronger flavor; it can enhance the warming essence of the cookies.

  • Freezing Tips: Unbaked cookie dough can be stored in the freezer for up to a year; baked cookies will keep for four months—perfect for future fall cravings!

How to Store and Freeze Pumpkin S’mores Cookies

Room Temperature: Store cookies in an airtight container for up to 3 days to maintain their soft, chewy texture.

Fridge: If you want to extend freshness, refrigerate them for up to a week. Just be sure to keep them in a sealed container to avoid drying out.

Freezer: For longer storage, freeze baked Pumpkin S’mores Cookies in a single layer on a baking sheet for about 2 hours, then transfer to an airtight container or bag, where they can last for up to 4 months.

Reheating: To enjoy them warm, simply microwave individual cookies for about 10-15 seconds. If frozen, let them thaw in the fridge overnight before reheating.

Pumpkin S’mores Cookies Recipe FAQs

What type of pumpkin puree should I use?
Absolutely! You should use 100% pure pumpkin puree for the best flavor and moisture. Avoid pumpkin pie filling, as it contains added spices and sugars that can affect the final taste and texture of your cookies.

How should I store my Pumpkin S’mores Cookies?
For optimal freshness, store your cookies in an airtight container at room temperature for up to 3 days. If you want them to last longer, refrigerate them in a sealed container for up to a week. This keeps them soft and prevents them from drying out!

Can I freeze these cookies?
Very! To freeze baked Pumpkin S’mores Cookies, place them in a single layer on a baking sheet for about 2 hours until firm, then transfer them to an airtight container or bag. They can be stored for up to 4 months. When ready to eat, just thaw them overnight in the refrigerator and warm them briefly in the microwave.

What should I do if my dough is too sticky?
If your dough seems too sticky, don’t worry! You can sprinkle a little extra flour while mixing, about one tablespoon at a time, until the consistency is manageable. Just be mindful not to add too much, as it can lead to drier cookies. If you’re using very moist pumpkin puree, this adjustment can help achieve that perfect dough consistency.

Are there any allergy considerations for this recipe?
Absolutely! If you’re baking for someone with gluten sensitivities, you can substitute all-purpose flour with a gluten-free flour mix at a 1:1 ratio. Also, for cookie lovers who are vegan, consider utilizing dairy-free substitutes such as vegan butter and non-dairy chocolate chips to avoid common allergens!

How can I tell when my cookies are done baking?
You’ll know your Pumpkin S’mores Cookies are ready when the edges are lightly golden, while the centers should still appear soft. Baking for 12-14 minutes usually does the trick, but every oven is different, so keep an eye on them to ensure they maintain that perfect chewy texture!

Pumpkin S’mores Cookies

Pumpkin S'mores Cookies: Fall’s Ultimate Cozy Delight

Pumpkin S’mores Cookies blend cozy fall flavors and nostalgic s’mores elements, perfect for any autumn gathering.
Prep Time 15 minutes
Cook Time 14 minutes
Cooling Time 5 minutes
Total Time 34 minutes
Servings: 24 cookies
Course: Dessert
Cuisine: American
Calories: 150

Ingredients
  

For the Batter
  • 1 cup Unsalted Butter softened
  • 1 cup Brown Sugar
  • 1 cup Granulated Sugar
  • 1 cup Pumpkin Puree 100% pure
  • 1 large Egg
  • 1 teaspoon Vanilla Extract
  • 2 cups All-Purpose Flour or gluten-free flour
  • 1 teaspoon Baking Soda
  • 2 teaspoons Pumpkin Pie Spice or individual spices
  • 1/2 teaspoon Salt
For the S'mores Twist
  • 1 cup Chocolate Chips dark, white, or milk chocolate
  • 1 cup Mini Marshmallows or non-melting vegan marshmallows
  • 1 cup Graham Crackers crushed or in pieces
Optional Additions
  • 1 drop Orange Food Coloring if desired

Equipment

  • Mixing Bowl
  • Baking Sheet
  • Parchment Paper
  • Cookie Scoop
  • Hand mixer

Method
 

Step-by-Step Instructions
  1. Preheat your oven to 350°F (175°C) and line a baking sheet with parchment paper.
  2. Cream together the softened butter, brown sugar, and granulated sugar until light and fluffy.
  3. Add the pumpkin puree, egg, and vanilla extract, mixing until well blended.
  4. Whisk together the flour, baking soda, pumpkin pie spice, and salt in a separate bowl.
  5. Gradually incorporate the dry mixture into the wet mixture until just combined.
  6. Fold in the chocolate chips, mini marshmallows, and crushed graham crackers.
  7. Drop generous amounts of dough onto the prepared baking sheet, spacing them 2 inches apart.
  8. Bake for 12-14 minutes until the edges are golden and the centers are soft.
  9. Allow to cool on the baking sheet for 5 minutes before transferring to a wire rack.
  10. Serve warm or at room temperature and enjoy your cozy cookies!

Nutrition

Serving: 1cookieCalories: 150kcalCarbohydrates: 22gProtein: 1gFat: 7gSaturated Fat: 4gPolyunsaturated Fat: 0.5gMonounsaturated Fat: 2.5gCholesterol: 10mgSodium: 80mgPotassium: 60mgFiber: 1gSugar: 10gVitamin A: 20IUCalcium: 1mgIron: 2mg

Notes

These cookies are perfect for gatherings and can be customized with various chocolate and graham cracker options.

Tried this recipe?

Let us know how it was!

Crispy Air Fryer Apple Fries That Make Snacks Irresistible

As I reached into the basket filled with bright, crisp apples, a wave of nostalgia washed over me—those sweet moments of autumn when golden leaves danced to the ground, and the air was filled with the warmth of baking treats. This recipe for Crispy Air Fryer Apple Fries with Cinnamon Sugar is my modern twist on those cherished memories, bringing you a delightful snack that’s as quick as it is delicious. With the air fryer working its magic, you’ll enjoy a speedy preparation that transforms juicy apples into a light, crunchy treat that’s gluten-free friendly. Whether served as an indulgent dessert or a playful after-school snack, these apple fries boast a satisfying crunch on the outside and tender goodness within. What’s your favorite way to enjoy apples? Let’s dive into these easy, irresistible fries!

Why Are These Apple Fries So Special?

Crispy Texture: The air fryer ensures a satisfying crunch while keeping the inside juicy and tender.
Versatile Variations: Swap in different apples or dipping sauces like caramel or vanilla yogurt to suit your taste.
Quick and Easy: Preparation requires minimal effort, making snack time a breeze.
Guilt-Free Indulgence: Enjoy a lighter take on classic apple desserts without compromising flavor. Perfect if you’re looking for delicious snacks like Crispy Feta Fried Eggs or Crispy Chilli Beef!
Fall-Inspired Delight: This recipe brings the warmth of autumn right into your kitchen, ideal for gatherings or cozy nights in.

Crispy Air Fryer Apple Fries Ingredients

For the Apple Fries

  • Apples – Choose fresh varieties like Granny Smith for a tart bite or Honeycrisp for natural sweetness.
  • All-Purpose Flour – This helps to give structure and is crucial for the coating; use gluten-free flour if you need a gluten-free option.
  • Eggs – These are essential for binding the breadcrumbs to the apple slices, ensuring they stay crispy.
  • Panko Breadcrumbs – For a deliciously crunchy exterior; if unavailable, regular breadcrumbs work as a substitute.

For the Cinnamon Sugar Coating

  • Cinnamon – Adds a warm and inviting flavor that enhances the sweetness of the apples.
  • Granulated Sugar – Balances the spice with sweetness, perfectly complementing the crispy air fryer apple fries.

For Cooking

  • Cooking Spray – Lightly misting the apple fries achieves that desired crispiness during air frying.

For Dipping

  • Dipping Sauces (Optional) – Consider caramel sauce for a decadent treat or vanilla yogurt for a lighter option; they add a delightful flavor boost!

Step‑by‑Step Instructions for Crispy Air Fryer Apple Fries

Step 1: Prepare Apples
Begin by washing your fresh apples thoroughly and then slice them into wedges about ½ inch thick. Make sure to remove the cores and seeds, leaving you with clean, vibrant fruit pieces. As you work, keep the apple wedges in a bowl to prevent browning, preparing them for coating and air frying into crispy air fryer apple fries.

Step 2: Cinnamon-Sugar Mixture
In a small bowl, combine granulated sugar and ground cinnamon. Mix well until the sugar is evenly coated with cinnamon, creating a fragrant blend that will enhance the flavor of your crispy air fryer apple fries. Set this mixture aside, as it will be a delightful finishing touch after the apples are cooked.

Step 3: Breading Station Setup
Prepare three shallow bowls for the breading station: one filled with all-purpose flour, another containing beaten eggs, and the last with panko breadcrumbs mixed with half of the cinnamon-sugar blend. This organized setup ensures a smooth assembly line for coating the apple wedges evenly and thoroughly, leading to the perfect crunch.

Step 4: Coat Apples
Take each apple wedge and first dredge it in the flour, shaking off any excess. Next, dip the floured wedge into the beaten eggs to ensure proper adhesion. Finally, roll it in the panko breadcrumb mixture, pressing gently to help the coating stick. Repeat this process, ensuring all apple wedges are evenly coated; this step is crucial for achieving crispy air fryer apple fries.

Step 5: Preheat Air Fryer
Preheat your air fryer to 375°F (190°C) for about 3 minutes. This essential step allows the air fryer to reach the right cooking temperature, ensuring that your crispy air fryer apple fries will cook evenly and develop a beautiful golden color.

Step 6: Air Fry
Arrange the coated apple wedges in a single layer in the air fryer basket. Lightly spray them with cooking spray to promote a crispy exterior. Air fry the wedges for 8-10 minutes, flipping them halfway through, until they are golden brown and crispy. Keep an eye on them to ensure they do not over-brown.

Step 7: Final Touch
Once your apple fries are cooked and smelling amazing, carefully remove them from the air fryer. Immediately sprinkle the remaining cinnamon-sugar mixture over the hot apple fries while they are still warm, allowing the sweet flavors to melt into the crispy coating. Serve your crispy air fryer apple fries right away with your choice of dipping sauces.

What to Serve with Crispy Air Fryer Apple Fries

Nothing pairs better with these delightful apple fries than a mix of sweet and savory accompaniments to elevate your snacking experience.

  • Vanilla Yogurt Dip: A light and creamy contrast, this dip enhances the sweetness of the apple fries while keeping it refreshing.
  • Caramel Sauce: Drizzling warm caramel over the fries offers a rich and indulgent twist that’s perfect for satisfying your sweet tooth.
  • Crunchy Granola: Sprinkle some granola on top for added texture; the oats and nuts add a delightful crunch that complements the softness of the apples.
  • Cheese Platter: A variety of cheeses, like sharp cheddar or creamy brie, pairs beautifully with the sweet apples and adds a savory note to your snack.
  • Homemade Whipped Cream: Light and fluffy, this addition makes your apple fries feel like a decadent dessert—perfect for sharing!
  • Cinnamon Tea: Sip on a warm cup of cinnamon tea to echo the sweet spice in the apple fries, creating a cozy atmosphere for your snack time.
  • Fresh Fruit Salad: A vibrant and colorful fruit salad balances the sweetness, adding a burst of freshness alongside the crunchy fries.
  • Chai Latte: The fragrant blend of spices in a chai latte complements the cinnamon coating beautifully, making for a comforting beverage pairing.
  • Peanut Butter: A small dish of creamy or crunchy peanut butter will surprise your taste buds, giving each bite a nutty richness.
  • Chocolate Dipping Sauce: For chocolate lovers, a side of melted chocolate provides an irresistible option that takes these apple fries to the next level!

How to Store and Freeze Crispy Air Fryer Apple Fries

Fridge: Store any leftovers in an airtight container in the fridge for up to 3 days. Just remember, they may lose some crispiness over time.

Freezer: If you want to freeze them, place the breaded but un-cooked apple fries in a single layer on a baking sheet and freeze for about 2 hours. Once frozen, transfer them to a freezer bag and store for up to 3 months.

Reheating: For the best texture, reheat the crispy air fryer apple fries directly in the air fryer at 375°F (190°C) for about 3-5 minutes until heated through and crispy again.

Make Ahead: You can prepare the apple fries by coating them in advance and store them in the fridge for up to a day. Just air fry them when you’re ready to enjoy the delicious crunchy treat!

Crispy Air Fryer Apple Fries Variations

Feel free to get creative with this recipe and tailor it to your taste buds!

  • Apple Variety: Try using different apple types, such as Fuji or Gala, to explore new flavor profiles.

  • Gluten-Free Option: Substitute all-purpose flour with gluten-free flour and panko for a gluten-free treat without sacrificing crunch.

  • Sweetness Level: For more sweetness, consider dipping your apple fries in honey or maple syrup.

  • Savory Twist: Add a pinch of sea salt or cayenne pepper to the cinnamon-sugar mixture for a savory spice kick, balancing the sweetness beautifully.

  • Coconut Coating: Mix shredded coconut into the panko breadcrumbs for an exotic flavor and delightful texture. You’ll be surprised at the tropical essence!

  • Chocolate Drizzle: After baking, drizzle melted dark chocolate over the fries for an indulgent twist that brings a rich flavor contrast against the sweetness of the apples.

  • Creamy Dips: Explore lighter dips such as Greek yogurt mixed with vanilla and a hint of lemon for a refreshing complement to the apple fries.

These variations can elevate the experience of your crispy air fryer apple fries! If you’re seeking more delicious snack inspiration, check out the indulgent Crispy Chilli Chicken Home or the delightful Katsu Bowls Meal. Happy cooking!

Expert Tips for Crispy Air Fryer Apple Fries

Apple Selection: Choose firm apples like Granny Smith or Honeycrisp to ensure they hold their shape and provide the best crunch in your crispy air fryer apple fries.

Avoid Overcrowding: Don’t overcrowd the air fryer basket; this will lead to soggy fries. Work in batches for even cooking and maximum crispiness.

Watch Cooking Times: Every air fryer can vary, so keep a close eye on your apple fries. Check them a couple of minutes before the recommended cooking time to avoid over-browning.

Proper Coating: For the crispiest results, make sure the apple wedges are well-coated in the panko mixture. A thick layer will enhance that delightful crunch!

Dipping Sauce Variety: Feel free to experiment with different dipping sauces such as peanut butter or chocolate sauce; they can elevate your crispy air fryer apple fries to a whole new level!

Make Ahead Options

These Crispy Air Fryer Apple Fries are perfect for busy home cooks looking to save time without sacrificing taste! You can prepare the apple wedges and coat them with flour, egg, and breadcrumbs up to 24 hours in advance. Simply place the breaded apple fries in an airtight container and refrigerate them to maintain their crispiness. When you’re ready to enjoy, preheat the air fryer, and then air fry the prepared apple fries—aim for about 8-10 minutes until they’re golden and crispy. By prepping ahead, you’ll have a delightful snack ready in no time, making your busy weeknights a little easier and tastier!

Crispy Air Fryer Apple Fries Recipe FAQs

What type of apples are best for this recipe?
Absolutely! I recommend using firm apples like Granny Smith for a tart flavor or Honeycrisp for sweetness. These varieties hold their shape during cooking and provide the perfect texture for crispy air fryer apple fries.

How do I store leftover apple fries?
To enjoy your delicious snacks later, store any leftovers in an airtight container in the fridge for up to 3 days. Keep in mind that they may lose some of their crispiness, so reheating them in the air fryer will help bring back that delightful crunch!

Can I freeze the apple fries?
Of course! To freeze, first place the breaded but uncooked apple fries in a single layer on a baking sheet. Freeze for about 2 hours until solid, then transfer them to a freezer bag. They can be stored for up to 3 months. It’s a fantastic way to prep ahead for quick snacks!

Why are my apple fries soggy after cooking?
Very often, sogginess occurs from overcrowding the air fryer basket. To achieve that crispy texture, arrange the apple fries in a single layer and cook in batches if necessary. Also, make sure to coat the apple slices properly with breadcrumbs for the best crunch!

Are these apple fries gluten-free?
Absolutely! To make the crispy air fryer apple fries gluten-free, simply substitute the all-purpose flour with your favorite gluten-free flour blend and ensure the panko breadcrumbs are gluten-free as well. It’s an easy adjustment for everyone to enjoy!

Can I prepare the apple fries in advance?
Yes, indeed! You can bread the apple wedges a day in advance. Just keep them in the fridge until you’re ready to cook. That way, when snack time rolls around, you can easily air fry them for a quick and crispy treat!

Crispy Air Fryer Apple Fries

Crispy Air Fryer Apple Fries That Make Snacks Irresistible

Crispy Air Fryer Apple Fries are a quick and delightful snack that brings warmth and nostalgia to your table.
Prep Time 15 minutes
Cook Time 10 minutes
Total Time 25 minutes
Servings: 4 servings
Course: Dessert
Cuisine: American
Calories: 150

Ingredients
  

For the Apple Fries
  • 4 apples Fresh apples (Granny Smith or Honeycrisp)
  • 1 cup All-Purpose Flour Gluten-free flour for a gluten-free option
  • 2 large Eggs Beaten
  • 1 cup Panko Breadcrumbs Regular breadcrumbs can be used as a substitute
For the Cinnamon Sugar Coating
  • 1 tablespoon Cinnamon
  • 3 tablespoons Granulated Sugar
For Cooking
  • 1 spray Cooking Spray For misting the apple fries
For Dipping
  • Dipping Sauces (Optional) Consider caramel or vanilla yogurt

Equipment

  • Air Fryer

Method
 

Step-by-Step Instructions
  1. Prepare Apples: Wash your fresh apples, slice them into wedges about ½ inch thick, and keep them in a bowl to prevent browning.
  2. Cinnamon-Sugar Mixture: In a bowl, combine granulated sugar and ground cinnamon, and set aside.
  3. Breading Station Setup: Prepare three bowls with flour, beaten eggs, and panko breadcrumbs mixed with half of the cinnamon-sugar blend.
  4. Coat Apples: Dredge each apple wedge in flour, dip in eggs, and roll in panko mixture, ensuring even coating.
  5. Preheat Air Fryer: Preheat your air fryer to 375°F (190°C) for about 3 minutes.
  6. Air Fry: Arrange coated apple wedges in a single layer in the air fryer and spray with cooking spray. Air fry for 8-10 minutes, flipping halfway.
  7. Final Touch: Remove apple fries and sprinkle with cinnamon-sugar mixture while warm; serve immediately with dipping sauces.

Nutrition

Serving: 1servingCalories: 150kcalCarbohydrates: 30gProtein: 2gFat: 3gMonounsaturated Fat: 1gCholesterol: 60mgSodium: 125mgPotassium: 150mgFiber: 2gSugar: 10gVitamin A: 50IUVitamin C: 5mgCalcium: 20mgIron: 0.5mg

Notes

For the crispiest result, work in batches and avoid overcrowding the air fryer basket.

Tried this recipe?

Let us know how it was!

Delicious Dairy-Free Pumpkin Pie Dip for Cozy Fall Gatherings

As the leaves turn and the air gets crisp, I can’t help but find myself daydreaming about cozy gatherings filled with laughter and warmth. That’s where this creamy Dairy-Free Pumpkin Pie Dip comes into play—capturing all the essence of fall’s favorite dessert without the fuss of baking. In just 5 minutes, you can whip up this velvety delight, making it a perfect addition to any holiday party or casual get-together. Not only does it cater to dairy-free and gluten-free diets, but its lightened-up sweetness allows everyone to indulge without guilt. So, who’s ready to dip into this autumn-inspired treat and impress your friends and family with a healthy spin on a classic favorite?

Why is this dip a fall favorite?

Creamy, delightful taste: You’ll experience the comforting flavors of pumpkin pie without the heavy calories or dairy.
Quick prep: In just 5 minutes, you can create a delicious treat that’s perfect for gatherings.
Crowd-pleaser: This Dairy-Free Pumpkin Pie Dip wows family and friends, making it a standout at Thanksgiving or Halloween parties.
Versatile pairing: Enjoy it with apple slices, graham crackers, or even as a spread on toast!

For more seasonal delights, check out my delicious Joumou Haitian Pumpkin or lighten up dessert time with Key Lime Pie.

Dairy-Free Pumpkin Pie Dip Ingredients

  • For the Base

  • Vanilla Coconut Yogurt – This creamy base provides sweetness; any vanilla yogurt can be a suitable substitute.

  • Pumpkin Puree – The star ingredient that gives this dip its rich flavor; make sure it’s pure pumpkin puree and not pie filling.

  • For the Flavor

  • Almond Butter – Adds creaminess and healthy fats; feel free to swap in peanut butter or sunbutter if desired.

  • Honey or Maple Syrup – Sweetens the dip; use maple syrup for a vegan option.

  • Vanilla Extract – Enhances the overall flavor profile, making each bite more delightful.

  • Pumpkin Pie Spice – This spice blend infuses a taste of autumn into each scoop.

  • Cinnamon – Adds a warm depth to the dip’s flavor, making it even more comforting.

Dive into this Dairy-Free Pumpkin Pie Dip and enjoy a healthy celebration of fall flavors!

Step‑by‑Step Instructions for Dairy-Free Pumpkin Pie Dip

Step 1: Combine the Base Ingredients
In a medium mixing bowl, add 1 cup of vanilla coconut yogurt and 1 cup of pure pumpkin puree. Using a spatula, mix these two ingredients together until they are well-blended, achieving a smooth and creamy consistency. This step is crucial as it creates the foundation of your Dairy-Free Pumpkin Pie Dip. Set aside the bowl for the next step.

Step 2: Add Creaminess and Sweetness
Introduce 1/4 cup of almond butter and 2-3 tablespoons of honey or maple syrup to the bowl. Stir well until the ingredients are fully incorporated and you can’t see any separation. This combination will provide a deliciously creamy texture and a touch of sweetness that balances the flavors of the dip. Ensure it looks velvety and uniform before moving on.

Step 3: Spice It Up
Next, incorporate 1 teaspoon of vanilla extract, 1 teaspoon of pumpkin pie spice, and 1/2 teaspoon of cinnamon. Using a hand mixer, blend these additions into the mixture until fully smooth. This step not only enhances the flavor profile of your Dairy-Free Pumpkin Pie Dip but also infuses it with the warm spices that signal fall is here. The mixture should smell fragrant and inviting.

Step 4: Chill for Flavor Fusion
Transfer the combined mixture into an airtight container or bowl, covering it tightly. Place it in the refrigerator to chill for at least 1 hour, allowing the flavors to meld beautifully. The chilling process is vital for achieving the best taste and texture, making your dip feel sumptuous and refreshing when served.

Step 5: Serve and Enjoy
Once chilled, give your Dairy-Free Pumpkin Pie Dip a quick stir for the final blend and transfer it to a serving dish. Optionally, sprinkle a little extra pumpkin pie spice on top for that festive touch. This creamy dip pairs wonderfully with apple slices, cinnamon sugar chips, or graham crackers, adding a delightful crunch to contrast its lusciousness.

How to Store and Freeze Dairy-Free Pumpkin Pie Dip

Fridge: Store your Dairy-Free Pumpkin Pie Dip in an airtight container in the refrigerator for up to 3-5 days. This will keep it fresh and ready for your next snack or gathering.

Freezer: Avoid freezing the dip, as it can affect the texture when thawed. Instead, enjoy it fresh for the best taste and consistency.

Reheating: You won’t need to reheat this dip, but if you prefer serving it at room temperature, let it sit out for a short time before serving.

Make Ahead Options

This Dairy-Free Pumpkin Pie Dip is a dream for busy home cooks looking to save time while still impressing guests! You can prepare the dip up to 24 hours in advance, giving the flavors ample time to meld. Start by combining the ingredients as instructed and transfer the mixture into an airtight container. Refrigerate it right away to keep it fresh and delicious. When you’re ready to serve, simply give it a quick stir and transfer it to a serving dish. This way, you can enjoy the same creamy and flavorful dip with minimal effort on the day of your gathering, allowing you more time to relax and savor the festivities!

Dairy-Free Pumpkin Pie Dip Variations

Feel free to get creative and make this dip your own—there’s nothing quite like a personalized twist to enhance the flavors!

  • Nut Free: Use sunflower seed butter instead of almond butter to keep the creamy texture while avoiding nuts. This variation opens up the dip to those with nut allergies while still being deliciously satisfying.

  • Vegan Option: Swap honey for maple syrup, making this dip completely vegan. It’s a simple adjustment that retains the sweetness without compromising on taste!

  • Spice It Up: Add a pinch of cayenne pepper or a few drops of hot sauce for a little kick. This unexpected twist will tantalize your taste buds and impress those who enjoy a flavorful heat.

  • Extra Creamy: Mix in a splash of coconut cream for an even richer dip. This makes the dip velvety and indulgent, enhancing the overall texture while keeping it dairy-free.

  • Choco-Pumpkin Delight: Stir in mini dark chocolate chips for a surprising chocolatey element. The sweet chocolate paired with pumpkin spice creates an irresistible flavor combination.

  • Fruitful Twist: Incorporate finely chopped apples or pears for a fresh crunch. This adds both texture and a burst of natural sweetness, making it fun and unique!

  • Pumpkin Spice Lovers: Boost the flavor by adding an extra teaspoon of pumpkin pie spice or try using chai spice for a different seasonal spin. The more spice, the more it feels like fall!

For more delightful fall recipes, don’t forget to check out my cozy Shepherds Pie Soup or indulge your sweet tooth with these refreshing Key Lime Pie treats. Happy cooking!

Expert Tips for Dairy-Free Pumpkin Pie Dip

  • Chilling Matters: Allow the dip to chill for at least 1 hour. This step allows the flavors to meld, enhancing its taste and texture.

  • Smooth Finish: Use a hand mixer instead of a whisk for a perfectly creamy consistency. This makes all the difference in your Dairy-Free Pumpkin Pie Dip.

  • Flavor Boosting: Consider making the dip a day ahead. The extra time in the fridge deepens the flavors, ensuring your guests will be impressed!

  • Proper Storage: Keep leftovers in an airtight container in the fridge for 3-5 days. Avoid freezing, as it may compromise the texture of the dip.

  • Customizing Options: Don’t hesitate to swap almond butter with your favorite nut or seed butter, adjusting to your dietary needs and preferences.

What to Serve with Dairy-Free Pumpkin Pie Dip

Indulge in a delightful spread that pairs perfectly with this creamy, autumn-inspired dip for a memorable celebration.

  • Crispy Apple Slices: The crispness of apples provides a refreshing contrast to the smooth dip, enhancing each bite with a burst of juiciness.

  • Cinnamon Sugar Chips: Sweet, crunchy chips add a festive touch and a delightful sweetness that complements the rich pumpkin flavor.

  • Graham Crackers: These offer a sweet, crunchy texture that balances the creaminess of the dip, making each scoop a delightful treat.

  • Pecan Pie Bites: Combining the flavors of pecans and pumpkin, these mini desserts create a comforting theme that’s perfect for fall gatherings.

  • Carrot and Celery Sticks: Their crunchiness adds a fresh element that brightens up the richness of the Dairy-Free Pumpkin Pie Dip while providing a healthy option.

  • Hot Apple Cider: A warm beverage like apple cider enhances the cozy vibe, making your snack time feel festive and welcoming.

  • Pumpkin Spice Latte: This beloved fall drink resonates with the dip’s flavors, creating a harmonious experience for every autumn lover.

Dairy-Free Pumpkin Pie Dip Recipe FAQs

How do I select ripe pumpkin puree?
When choosing pumpkin puree, look for cans labeled as “100% pure pumpkin” rather than “pumpkin pie filling,” which contains added sugars and spices. The puree should have a smooth, thick consistency and a rich, orange color. If you’re using fresh pumpkin, opt for a small to medium-sized sugar pumpkin, which is sweeter and denser than larger varieties.

How should I store leftover Dairy-Free Pumpkin Pie Dip?
Keep your Dairy-Free Pumpkin Pie Dip in an airtight container in the refrigerator. It should stay fresh for about 3 to 5 days. Just be sure to stir it well before serving again, as the ingredients may separate slightly over time.

Can I freeze Dairy-Free Pumpkin Pie Dip?
I don’t recommend freezing this dip, as the creamy texture may change once thawed. If you really want to make a batch ahead of time, consider making your dip fresh instead and enjoying it within a few days for the best flavor and consistency!

What if my dip is too thin or too thick?
If your dip comes out too thin, try adding a bit more almond butter or coconut yogurt to thicken it up. Blend until smooth. If it’s too thick, you could stir in a splash of almond milk or additional pumpkin puree until you achieve the desired consistency. The key is to adjust it gently while mixing!

Is this dip suitable for allergies?
Absolutely! This Dairy-Free Pumpkin Pie Dip is perfect for many dietary considerations; however, if you have nut allergies, you can use sunbutter or tahini instead of almond butter. Always check labels on ingredients you’re using to ensure they meet your dietary needs, and feel free to customize with safe alternatives!

What can I serve with Dairy-Free Pumpkin Pie Dip?
This dip pairs beautifully with an array of dippers! I recommend crispy apple slices, graham crackers, or even cinnamon sugar chips for an added sweetness. You could also try serving it with pretzels for a salty contrast! The more the merrier—get creative with your favorite snacks!

Dairy-Free Pumpkin Pie Dip

Delicious Dairy-Free Pumpkin Pie Dip for Cozy Fall Gatherings

This Dairy-Free Pumpkin Pie Dip captures the essence of fall’s favorite dessert, ready in just 5 minutes and perfect for gatherings.
Prep Time 5 minutes
Chilling Time 1 hour
Total Time 1 hour 5 minutes
Servings: 8 servings
Course: Dessert
Cuisine: American
Calories: 150

Ingredients
  

For the Base
  • 1 cup Vanilla Coconut Yogurt Any vanilla yogurt can be a suitable substitute.
  • 1 cup Pumpkin Puree Make sure it's pure pumpkin puree and not pie filling.
For the Flavor
  • 1/4 cup Almond Butter Feel free to swap in peanut butter or sunbutter if desired.
  • 2-3 tablespoons Honey or Maple Syrup Use maple syrup for a vegan option.
  • 1 teaspoon Vanilla Extract
  • 1 teaspoon Pumpkin Pie Spice
  • 1/2 teaspoon Cinnamon

Equipment

  • Mixing Bowl
  • spatula
  • Hand mixer
  • airtight container

Method
 

Step-by-Step Instructions
  1. In a medium mixing bowl, add 1 cup of vanilla coconut yogurt and 1 cup of pure pumpkin puree. Mix until smooth.
  2. Introduce 1/4 cup of almond butter and 2-3 tablespoons of honey or maple syrup to the bowl. Stir until fully incorporated.
  3. Incorporate 1 teaspoon of vanilla extract, 1 teaspoon of pumpkin pie spice, and 1/2 teaspoon of cinnamon. Blend until smooth.
  4. Transfer the mixture into an airtight container and chill in the refrigerator for at least 1 hour.
  5. Once chilled, stir the dip and transfer it to a serving dish. Optionally, sprinkle extra pumpkin pie spice on top.

Nutrition

Serving: 1servingCalories: 150kcalCarbohydrates: 15gProtein: 3gFat: 9gSaturated Fat: 2gPolyunsaturated Fat: 1gMonounsaturated Fat: 6gSodium: 50mgPotassium: 200mgFiber: 2gSugar: 7gVitamin A: 3000IUVitamin C: 3mgCalcium: 50mgIron: 1mg

Notes

Allow the dip to chill for at least 1 hour to enhance its taste and texture. For a smooth finish, use a hand mixer instead of a whisk.

Tried this recipe?

Let us know how it was!

Melt-in-Your-Mouth French Butter Cake Recipe for Every Occasion

As I watched the golden crust of my French Butter Cake rise in the oven, the buttery aroma filled my kitchen, wrapping me in a cozy embrace. This French Butter Cake recipe is my secret weapon for effortlessly impressing friends and family with its melt-in-your-mouth texture that perfectly balances sweetness. It’s not just a dessert; it’s a delightful celebration of simplicity, making it ideal for any occasion—whether you’re enjoying a slice with a morning coffee or dazzling guests after dinner. Plus, it’s vegetarian-friendly and quick to whip up, so even the busiest home chefs can master this elegant treat. Are you ready to discover how to bake a cake that feels like a warm hug?

Why is French Butter Cake So Irresistible?

Indulgent, this French Butter Cake is a luscious experience with every bite, featuring a rich buttery flavor that feels like a taste of heaven. Easy to make, even novice bakers can whip it up in no time! Versatile, it pairs beautifully with tea or coffee, making it perfect for breakfast or dessert. Light and airy, its melt-in-your-mouth texture sets it apart from ordinary cakes. And if you’re feeling adventurous, try variations like folding in fresh berries or adding a sprinkle of cinnamon for a delightful twist!

French Butter Cake Ingredients

• Discover the essential components for this delightful treat!

For the Batter

  • Granulated Sugar – Provides sweetness; substitute brown sugar for a richer flavor.
  • Unsalted Butter – Central to the cake’s buttery flavor; if using salted butter, reduce added salt.
  • Eggs – Adds structure and richness; ensure they are at room temperature.
  • Vanilla Extract – Enhances overall flavor; can be replaced with almond extract for a different taste.
  • Cake Flour – Provides a light texture; can use all-purpose flour but this may result in a denser cake.
  • Baking Powder – Acts as a leavening agent for fluffiness; ensure it’s fresh for the best results.
  • Salt – Balances sweetness; necessary even in sweet recipes.
  • Sour Cream – Adds moisture and richness; can substitute with Greek yogurt or non-dairy yogurt alternatives.

Enjoy baking this French Butter Cake recipe that will surely become a family favorite!

Step‑by‑Step Instructions for French Butter Cake Recipe

Step 1: Preheating and Preparing the Pan
Begin by preheating your oven to 350°F (175°C). While the oven warms up, take a 9×9-inch baking dish and grease it generously with unsalted butter or non-stick spray to ensure your French Butter Cake releases easily once baked. This preparation is essential for achieving a beautiful, golden crust.

Step 2: Creaming Sugar and Butter
In a large mixing bowl, combine the granulated sugar and melted butter. Using an electric mixer, beat the mixture on medium speed for about 1 minute until it turns light and airy. This incorporation of air is crucial as it helps create a tender and fluffy texture in your cake.

Step 3: Adding Eggs and Vanilla
Next, add the eggs one at a time to the sugar-butter mixture, mixing thoroughly after each addition to ensure they are fully combined. Then, pour in the vanilla extract and continue mixing until everything is well blended. You’ll want a smooth, homogenous batter at this stage, rich with flavor.

Step 4: Mixing Dry Ingredients
In a separate bowl, sift together the cake flour, baking powder, and salt, ensuring no lumps remain. Gradually add this dry mixture to your wet ingredients, mixing gently until just combined. Be careful not to overmix; you’re aiming for a smooth batter without any visible flour, which keeps the cake light and fluffy.

Step 5: Incorporating Sour Cream
Gently fold the sour cream into your batter using a spatula. This step will lend additional moisture and richness to your French Butter Cake, making it even more delectable. Ensure that the sour cream is evenly mixed in without overworking the batter, preserving its airy texture.

Step 6: Baking the Cake
Pour the cake batter into the prepared 9×9-inch dish, spreading it evenly with a spatula. To add a touch of sweetness on top, sprinkle 2 tablespoons of sugar evenly across the batter. Place the dish in the preheated oven and bake for 30 to 35 minutes, or until you see a golden top and a toothpick inserted into the center comes out clean.

Step 7: Cooling and Serving
Once baked, remove the French Butter Cake from the oven and let it cool in the dish for about 10 minutes. After cooling, carefully slice the cake into squares. It’s now ready to serve, providing a melt-in-your-mouth experience perfect for breakfast, tea time, or dessert.

Make Ahead Options

These French Butter Cake delights are perfect for meal prep enthusiasts! You can make the batter up to 24 hours in advance; simply store it in an airtight container in the refrigerator. Additionally, you can also bake the cake ahead of time and let it cool completely before wrapping it tightly in plastic wrap. This allows it to be stored at room temperature for up to 3 days or refrigerated for a week. To maintain its moist texture, avoid cutting the cake until just before serving. When you’re ready to serve, simply slice and enjoy this melt-in-your-mouth treat, just as delicious as freshly baked!

What to Serve with French Butter Cake

A slice of French Butter Cake is the perfect starting point for a deliciously satisfying meal or dessert experience.

  • Fresh Berries: The tartness of fresh berries like raspberries or blueberries beautifully contrasts with the cake’s buttery richness, offering a refreshing bite.

  • Whipped Cream: A dollop of freshly whipped cream adds a light, airy texture that enhances the cake’s moist crumb, making each bite even more delightful. The creaminess livens up the flavors, creating a perfectly balanced indulgence.

  • Vanilla Ice Cream: The cold creaminess of vanilla ice cream against the warm cake is a match made in dessert heaven. The sweetness complements the cake’s buttery flavor, making it a heavenly duo.

  • Coffee or Espresso: A steaming cup of coffee or espresso elevates the cake’s rich flavors, creating a delightful harmony that warms your heart while savoring every bite.

  • Chocolate Ganache: Drizzling chocolate ganache over the cake adds a decadent touch. Its smooth, rich texture brings an extra layer of indulgence that chocolate lovers will adore.

  • Caramel Sauce: A drizzle of warm caramel sauce can transform each slice into a luxurious treat, with its gooey sweetness pairing perfectly with the cake’s tender crumb.

  • Herbal Tea: A soothing cup of herbal tea, like chamomile or peppermint, provides a gentle flavor contrast, making it an ideal accompaniment after a fulfilling meal.

  • Lemon Slice: A wedge of lemon on the side adds a zesty brightness that cuts through the cake’s richness, offering a refreshing palate cleanser.

  • Fruit Salad: A vibrant fruit salad can complement the cake nicely, adding refreshing juiciness and a variety of textures to the dining experience.

  • Sparkling Water with Mint: Pairing the cake with sparkling water infused with fresh mint gives this dessert an elegant twist, leaving you feeling refreshed with each bite.

Expert Tips for French Butter Cake

  • Room Temperature Eggs: Use eggs that are at room temperature for better mixing and a smoother batter; cold eggs can cause the batter to curdle.

  • Measure Flour Correctly: Always spoon and level your flour when measuring; packing it can lead to a denser cake that lacks the desired fluffiness of a French Butter Cake.

  • Fresh Ingredients: Ensure your baking powder is fresh for maximum leavening power. Old baking powder can result in a flat cake.

  • Avoid Overmixing: Mix the batter just until combined after adding dry ingredients; overmixing can lead to a tough texture instead of the light and airy feel you want.

  • Cooling Time: Allow the cake to cool in the pan for a few minutes before slicing it. This prevents it from crumbling and helps maintain its beautiful shape.

  • Storage Smartly: Store your French Butter Cake in an airtight container at room temperature to maintain moisture; it’ll keep the cake delicious for days!

How to Store and Freeze French Butter Cake

Room Temperature: Keep your French Butter Cake in an airtight container at room temperature for up to 3 days to retain its moistness.

Fridge: If you want to extend its freshness, refrigerate the cake in an airtight container for up to a week, ensuring it stays soft and delicious.

Freezer: For longer storage, freeze the cake wrapped tightly in plastic wrap and then in aluminum foil for up to 2 months. Thaw in the fridge before enjoying.

Reheating: When ready to serve, reheat slices in the microwave for about 10-15 seconds for a warm treat that feels like fresh from the oven!

French Butter Cake Recipe Variations

Feel free to explore these delightful twists to make this French Butter Cake uniquely yours!

  • Berry-Filled: Fold in fresh raspberries or blueberries to the batter for a fruity burst of flavor. The tartness of the berries beautifully complements the rich cake.

  • Spiced Delight: Add a teaspoon of cinnamon or a pinch of nutmeg for a warm, aromatic twist. These spices elevate the cake’s comforting essence, perfect for cozy evenings.

  • Nutty Crunch: Incorporate chopped almonds or pecans for added texture. The crunch contrasts with the soft crumb, making each bite a delightful surprise.

  • Almond Essence: Swap vanilla extract with almond extract for a unique aromatic experience. This variation introduces a nutty fragrance sure to impress your guests.

  • Chocolaty Indulgence: Drizzle with chocolate ganache or melt some chocolate chips into the batter for an ooey-gooey treat. This luxurious addition guarantees smiles all around.

  • Citrus Zing: Add some fresh orange or lemon zest to the batter for a bright, zesty note. The citrus adds a refreshing touch that invigorates the overall flavor profile.

  • Vegan-Friendly: Substitute eggs with flaxseed meal mixed with water and dairy ingredients with almond or coconut milk. This variation ensures everyone can enjoy the cake!

  • Frosting Fun: Top with a light cream cheese icing or a dusting of powdered sugar for an elegant finish. The sweetness of the frosting pairs wonderfully with the buttery cake.

Want more delicious ideas? You can explore an inviting recipe like Cowboy Butter Chicken for a hearty meal alongside your cake or enjoy a sweet brunch with Blueberry French Toast. With these variations, your culinary creativity knows no bounds!

French Butter Cake Recipe FAQs

What type of butter should I use?
I recommend using unsalted butter for the best flavor. If you only have salted butter on hand, just reduce the added salt in the recipe to maintain the right balance in flavor.

How do I know when my eggs are the right temperature?
To bring your eggs to room temperature, simply take them out of the fridge about 30 minutes before baking. Alternatively, you can place them in a bowl of warm water for about 10-15 minutes. This helps them incorporate better into the batter, giving your French Butter Cake that desired fluffy texture.

How should I store my French Butter Cake?
If keeping at room temperature, store it in an airtight container for up to 3 days. For longer freshness, refrigerate it for up to a week. Just make sure your container is airtight to prevent drying out, which can ruin its delightful texture.

Can I freeze leftover cake? How?
Absolutely! To freeze your French Butter Cake, wrap it well in plastic wrap followed by aluminum foil to prevent freezer burn. It can be stored for up to 2 months. When you’re ready to enjoy, simply thaw it in the fridge overnight, and reheat slices in the microwave for about 10-15 seconds for a fresh-out-of-the-oven feel.

What if my cake doesn’t rise properly?
If your French Butter Cake doesn’t rise as expected, it could be due to expired baking powder or overmixing the batter. Always check the freshness of your baking powder, and remember to mix the batter just until combined, as overmixing can lead to a denser cake.

Is this recipe suitable for people with dairy allergies?
Great question! While this recipe is not dairy-free, you can substitute the butter with a dairy-free alternative like coconut oil or a plant-based butter and replace sour cream with non-dairy yogurt. This way, you can still enjoy a delicious version of this French Butter Cake while catering to dietary restrictions.

French Butter Cake Recipe

Melt-in-Your-Mouth French Butter Cake Recipe for Every Occasion

This French Butter Cake recipe offers a melt-in-your-mouth texture, balancing sweetness, and is perfect for any occasion.
Prep Time 15 minutes
Cook Time 35 minutes
Cooling Time 10 minutes
Total Time 1 hour
Servings: 9 slices
Course: Dessert
Cuisine: French
Calories: 250

Ingredients
  

For the Batter
  • 1 cup Granulated Sugar Provides sweetness; substitute brown sugar for a richer flavor.
  • 1/2 cup Unsalted Butter Central to the cake’s buttery flavor.
  • 3 large Eggs Ensure they are at room temperature.
  • 2 teaspoons Vanilla Extract Enhances overall flavor; can replace with almond extract.
  • 1 1/2 cups Cake Flour Provides a light texture.
  • 1 tablespoon Baking Powder Acts as a leavening agent for fluffiness.
  • 1/2 teaspoon Salt Balances sweetness.
  • 1 cup Sour Cream Adds moisture and richness.

Equipment

  • 9x9-inch baking dish
  • Mixing Bowl
  • Electric mixer
  • spatula

Method
 

Baking Instructions
  1. Preheat your oven to 350°F (175°C) and grease a 9x9-inch baking dish.
  2. In a large mixing bowl, combine the granulated sugar and melted butter. Beat on medium speed for about 1 minute until light and airy.
  3. Add the eggs one at a time, mixing thoroughly after each addition. Then, pour in the vanilla extract and mix until well blended.
  4. In a separate bowl, sift together the cake flour, baking powder, and salt. Gradually add this dry mixture to the wet ingredients, mixing gently.
  5. Gently fold the sour cream into the batter, ensuring it is evenly mixed in.
  6. Pour the cake batter into the prepared dish, sprinkle 2 tablespoons of sugar on top, and bake for 30 to 35 minutes.
  7. Once baked, allow to cool in the dish for about 10 minutes before slicing into squares.

Nutrition

Serving: 1sliceCalories: 250kcalCarbohydrates: 34gProtein: 3gFat: 12gSaturated Fat: 7gPolyunsaturated Fat: 1gMonounsaturated Fat: 4gCholesterol: 55mgSodium: 150mgPotassium: 120mgSugar: 15gVitamin A: 300IUCalcium: 20mgIron: 1mg

Notes

Ensure all ingredients are fresh for the best results. Store in an airtight container.

Tried this recipe?

Let us know how it was!

Decadent Carrot Cake Cheesecake for Ultimate Dessert Bliss

Wrapped in a swirl of creamy cheesecake and decadently spiced carrot cake, this Ultimate Carrot Cake Cheesecake is a celebration of flavors that I simply can’t resist. The moment you slice into this beauty, you’re greeted with contrasting textures and tempting layers that make it the star of any dessert table. Not only is it a visual showstopper, but this recipe is also a dream for busy home chefs craving an impressive yet easy-to-make indulgence. Picture yourself sharing slices with family and friends, all while knowing you’ve created something unforgettable. So, what’s your favorite way to enjoy a slice of cake—plain or dressed up with a dollop of frosting?

Why is This Carrot Cake Cheesecake Special?

Indulgence at Its Finest: This recipe combines the best of both worlds—creamy cheesecake and spiced carrot cake.
Effortless Elegance: Perfect for impressing guests without the hassle, it’s easy enough for any home chef!
Flavor Explosion: Each slice boasts a delightful contrast of textures and flavors with spiced layers and smooth frosting.
Versatile Treat: Serve it as a festive dessert or a cozy coffee companion, perfect for any occasion.
Make-Ahead Magic: Simply prepare it the day before, allowing the flavors to meld for a truly memorable treat.
Experience the magic of this Ultimate Carrot Cake Cheesecake, a dessert that’s bound to be a crowd favorite, just like our Carrot Cake Cheesecake and Strawberry Cheesecake Dump Cake.

Carrot Cake Cheesecake Ingredients

For the Cheesecake Layer

  • Cream cheese (16 oz) – Main component for cheesecake, providing creaminess. Use softened cream cheese for easier mixing.
  • White granulated sugar (1/2 cup) – Sweetens the cheesecake filling. Can substitute with coconut sugar for a healthier option.
  • Sour cream (1/2 cup) – Adds moisture and tanginess; can substitute with Greek yogurt.
  • Heavy cream (1/4 cup) – Enriches the cheesecake for a smoother texture. Light cream can be a lighter alternative.
  • Pure vanilla extract (1 tsp) – Adds depth of flavor. Ensure it’s pure for the best taste.
  • Large eggs (2) – Provides structure and richness to the cheesecake. Room temperature eggs mix more evenly.

For the Carrot Cake Layer

  • All-purpose flour (1 3/4 cup) – Provides structure to the carrot cake. Substitute with gluten-free flour for a gluten-free option.
  • Baking powder (1 tsp) & Baking soda (1/2 tsp) – Leavening agents for the cake layers.
  • Salt (1/2 tsp) – Enhances flavor in both cheesecake and cake.
  • Ground cinnamon (1 1/2 tsp), Ground nutmeg (1/4 tsp), Ground ginger (1/2 tsp) – Spices that add warmth and depth to the carrot cake.
  • Oil (1/2 cup) – Keeps the carrot cake moist; can use canola or vegetable oil.
  • Brown sugar (1/2 cup) – Adds moisture and a hint of molasses flavor. Light or dark brown sugar can be used interchangeably.
  • Grated carrots (1 cup) – Main flavor component of the carrot cake; freshly grated gives the best texture.

For the Frosting

  • Unsalted butter (3/4 cup) – Used for frosting; room temperature for easy blending.
  • Powdered sugar (1 3/4 cup) – Sweetens and thickens the frosting. Sifting prevents clumping.

Elevate your dessert game with this delightful Carrot Cake Cheesecake—a true crowd-pleaser that combines the best elements of two beloved desserts!

Step‑by‑Step Instructions for Carrot Cake Cheesecake

Step 1: Preheat the Oven
Begin by preheating your oven to 350°F (175°C). While the oven heats up, prepare a 9-inch springform pan by spraying it with non-stick cooking spray and lining the bottom with parchment paper. This ensures your Carrot Cake Cheesecake releases easily after baking and allows for a clean presentation.

Step 2: Prepare the Cheesecake Batter
In a large mixing bowl, beat 16 ounces of softened cream cheese and 1/2 cup of granulated sugar together for 2 minutes until smooth and creamy. Next, add in 1/2 cup sour cream, 1/4 cup heavy cream, and 1 teaspoon pure vanilla extract. Mix until you achieve a silky consistency, then gently incorporate 2 large eggs on low speed until just combined—overmixing can compromise the cheesecake’s texture.

Step 3: Make the Carrot Cake Batter
In another bowl, sift together 1 3/4 cups of all-purpose flour, 1 teaspoon baking powder, 1/2 teaspoon baking soda, 1/2 teaspoon salt, and your chosen spices: 1 1/2 teaspoons ground cinnamon, 1/4 teaspoon nutmeg, and 1/2 teaspoon ginger. In a separate bowl, whisk together 1/2 cup of oil, 1/2 cup of brown sugar, and 1/2 cup of granulated sugar. Stir in 1/2 cup of sour cream, 1 teaspoon vanilla extract, 1 cup of grated carrots, and the eggs before folding in the dry ingredients until just combined.

Step 4: Layer the Batters
Begin layering your Carrot Cake Cheesecake by pouring half of the carrot cake batter into the prepared springform pan. Next, spoon in 1/3 of the cheesecake batter, spreading gently to create a distinct layer. Repeat this process with the remaining carrot cake batter and cheesecake mixture, ending with cheesecake on top. Avoid swirling the layers to maintain their beautiful separation.

Step 5: Bake the Cheesecake
Place the layered batter in the preheated oven and bake for 45 to 55 minutes. You’ll know it’s done when the center has a slight jiggle, while the edges are set. After baking, allow the cheesecake to cool completely in the pan for about an hour, then refrigerate for at least 6 hours or ideally overnight to develop its rich flavors fully.

Step 6: Make the Frosting
While your Carrot Cake Cheesecake chills, prepare the cream cheese frosting. In a mixing bowl, beat 3/4 cup of room-temperature unsalted butter with an electric mixer until creamy and fluffy. Gradually add in 1 3/4 cups of powdered sugar and 1 teaspoon of vanilla extract, continuing to beat until the frosting reaches a smooth and spreadable consistency, free of lumps.

Step 7: Frost and Serve
Once the cheesecake has chilled thoroughly, carefully remove it from the springform pan. Use a spatula to spread the cream cheese frosting uniformly over the top, ensuring a classy finish. For an optional decorative touch, you can garnish with fresh grated carrots or chopped nuts. Slice and serve your delightful Carrot Cake Cheesecake, and prepare to impress your friends and family!

Variations & Substitutions for Carrot Cake Cheesecake

Feel free to get creative with this Carrot Cake Cheesecake; customization can tailor the flavors to your preferences!

  • Pineapple Twists: Substitute half of the grated carrots with crushed pineapple for added moisture and a hint of tropical flavor. This variation adds a delightful sweetness that pairs beautifully with the spices.

  • Nutty Texture: Add toasted walnuts or pecans to the batter for a crunchy texture. Not only do they add an appealing crunch, but they also enhance the earthy flavors of the carrot cake.

  • Spice It Up: Experiment with different spices like cardamom or allspice to add a unique flavor twist. A mere pinch can elevate the entire dessert, creating an aromatic experience; just be sure to balance with the existing spices.

  • Dairy-Free Delight: Swap the cream cheese and heavy cream with dairy-free alternatives like cashew cream or coconut cream. This is perfect for anyone looking for a lactose-free option without sacrificing creaminess.

  • Gluten-Free Cake: Change the all-purpose flour with gluten-free flour blend to cater to gluten sensitivities. Many blends on the market work great and provide the same fluffy texture!

  • Sweetness Substitute: For a healthier option, use coconut sugar instead of granulated sugar. This will give your Carrot Cake Cheesecake a more caramel-like flavor while being granulated enough for texture.

  • Low-Fat Version: Substitute the heavy cream with low-fat yogurt or use half the amount of oil in the cake layer. You maintain moisture while cutting down additional fats.

  • Flavor Infusions: Add a splash of orange or lemon zest to amplify the flavors and brighten up the overall taste of the cheesecake. It’s a refreshing twist that brings the cake to life.

Explore these variations to create a Carrot Cake Cheesecake that’s uniquely yours! Whether you’re experimenting for a special occasion or simply whipping up dessert for the family, these tweaks can make it even more delightful. And if you’re in the mood for another flavor adventure, try our Strawberry Cheesecake or Nutella Pancakes Blend for more sweet inspiration!

Expert Tips for Carrot Cake Cheesecake

  • Room Temperature Ingredients: Ensure all your ingredients are at room temperature to create a smoother, creamier batter for the best Carrot Cake Cheesecake.
  • Avoid Overmixing: When combining your egg mixture for both layers, mix just until incorporated. Overmixing can result in cracks and a dense texture.
  • Layer Carefully: Pour the batters slowly to maintain the integrity of the layers. Avoid swirling them together to achieve that beautiful marbled effect.
  • Check for Doneness: Keep an eye on the cheesecake as it bakes. The center should slightly jiggle when it’s done. Overbaking will alter its creamy texture.
  • Chill Overnight: Although it’s tempting to dig in right away, chilling overnight helps the flavors meld together beautifully for a richer taste.

How to Store and Freeze Carrot Cake Cheesecake

Fridge: Store your Carrot Cake Cheesecake in an airtight container for up to 5 days. This keeps it fresh and luscious for dessert cravings throughout the week.

Freezer: For longer storage, wrap individual slices tightly in plastic wrap and then place in a freezer-safe container. It can be frozen for up to 30 days.

Thawing: When ready to enjoy, simply remove from the freezer and let the cheesecake slices thaw in the fridge overnight for the best texture and flavor.

Reheating: If you prefer your cheesecake slightly warmed, you can microwave a slice for about 10-15 seconds. Enjoy the creamy goodness!

What to Serve with Carrot Cake Cheesecake

Indulging in a slice of this delightful dessert invites a world of pairing possibilities that elevate your meal experience.

  • Fresh Fruit Salad: A medley of seasonal fruits brings brightness and a refreshing contrast to the creamy richness of the cheesecake.

  • Vanilla Ice Cream: The classic creamy scoop melts beautifully atop warm slices, adding a delightful temperature and flavor contrast.

  • Spicy Ginger Cookies: These add a crunchy texture and zesty flavor that echoes the warming spices in the cheesecake.

  • Caramel Drizzle: Drizzling caramel sauce elevates the sweetness, creating a sophisticated twist that complements the carrot cake’s spice.

  • Nutty Granola: Sprinkle a handful on top for an unexpected crunch that works harmoniously with the smooth cheesecake layer.

  • Chai Tea or Coffee: A warm cup enhances the spices and makes the perfect pairing for enjoying this delightful dessert after dinner.

Imagine serving this showstopper with one of these charming accompaniments—each bite is a celebration of flavor!

Make Ahead Options

These Ultimate Carrot Cake Cheesecake layers are perfect for busy home cooks looking to save time without compromising flavor! You can prepare the cheesecake and carrot cake batters up to 24 hours in advance and store them separately in the refrigerator, covered tightly to maintain freshness. For the best results, mix the cheesecake batter and carrot cake batter before layering, as this keeps the flavors vibrant. Once ready to bake, layer the batters and bake as instructed. Allow the cheesecake to cool and then refrigerate for at least 6 hours or overnight for optimal taste. When you’re ready to enjoy, simply frost and serve your beautifully consolidated dessert, impressing everyone with minimal last-minute effort!

Carrot Cake Cheesecake Recipe FAQs

What is the best way to select ripe carrots for my Carrot Cake Cheesecake?
When choosing carrots, look for those that are firm and bright in color, avoiding any that are limp or have dark spots all over. Fresh, vibrant carrots will provide the best flavor and texture for your cheesecake. If possible, go for organic options as they often have better taste and fewer pesticides.

How should I store my Carrot Cake Cheesecake?
Store your cheesecake in an airtight container in the refrigerator for up to 5 days. It’s delightful after a few days as the flavors develop further. Just make sure it’s well-covered to avoid any absorption of other fridge odors.

Can I freeze Carrot Cake Cheesecake, and if so, how?
Absolutely! To freeze your Carrot Cake Cheesecake, wrap individual slices tightly in plastic wrap, ensuring there’s no air trapped. Then, place them in a freezer-safe container or bag. This allows for hassle-free dessert enjoyment for up to 30 days. When you’re ready to indulge, simply thaw the slices overnight in the refrigerator before serving.

What should I do if my cheesecake is cracking after baking?
Cracking can happen, but it’s not a lost cause! To minimize this issue, ensure your ingredients are at room temperature and avoid overmixing your batter. If cracking occurs, you can always cover it up with frosting or a delicious topping, adding to the visual appeal of your Carrot Cake Cheesecake.

Is it safe for pets if I accidentally drop some cake?
While the ingredients in Carrot Cake Cheesecake aren’t toxic to pets, the high sugar and cream cheese content can lead to stomach upset. It’s best to keep this dessert away from pets and opt for pet-friendly treats instead. Always keep an eye on your furry friends during cooking!

What’s the best way to achieve a creamy texture for my cheesecake?
To achieve that luxurious creamy texture, ensure all your ingredients, especially the cream cheese and eggs, are at room temperature before mixing. This step is critical for a smooth batter and helps prevent any lumps in your Carrot Cake Cheesecake. Mix the ingredients slowly and avoid overbeating to keep the mixture airy.

Carrot Cake Cheesecake

Decadent Carrot Cake Cheesecake for Ultimate Dessert Bliss

A delightful blend of creamy cheesecake and spiced carrot cake, this Carrot Cake Cheesecake is an unforgettable treat.
Prep Time 30 minutes
Cook Time 55 minutes
Chilling Time 6 hours
Total Time 7 hours 25 minutes
Servings: 12 slices
Course: Dessert
Cuisine: American
Calories: 400

Ingredients
  

For the Cheesecake Layer
  • 16 oz cream cheese softened
  • 1/2 cup white granulated sugar can substitute with coconut sugar
  • 1/2 cup sour cream can substitute with Greek yogurt
  • 1/4 cup heavy cream can use light cream
  • 1 tsp pure vanilla extract ensure it's pure for best taste
  • 2 large eggs room temperature
For the Carrot Cake Layer
  • 1 3/4 cup all-purpose flour can substitute with gluten-free flour
  • 1 tsp baking powder
  • 1/2 tsp baking soda
  • 1/2 tsp salt
  • 1 1/2 tsp ground cinnamon
  • 1/4 tsp ground nutmeg
  • 1/2 tsp ground ginger
  • 1/2 cup oil canola or vegetable
  • 1/2 cup brown sugar light or dark can be used
  • 1 cup grated carrots freshly grated
For the Frosting
  • 3/4 cup unsalted butter room temperature
  • 1 3/4 cup powdered sugar sifting prevents clumping

Equipment

  • 9-inch springform pan
  • Mixing bowls
  • Electric mixer
  • sifter

Method
 

Baking Steps
  1. Preheat your oven to 350°F (175°C) and prepare a 9-inch springform pan.
  2. Beat cream cheese and sugar together until smooth. Add sour cream, heavy cream, and vanilla, then mix in eggs.
  3. Sift together the flour, baking powder, baking soda, salt, and spices, then prepare wet ingredients in another bowl before combining.
  4. Layer the carrot cake batter and cheesecake mixture into the pan, ending with cheesecake on top.
  5. Bake for 45 to 55 minutes until the center jiggles slightly; cool in the pan for an hour, then refrigerate for at least 6 hours.
  6. Prepare frosting by beating butter and adding powdered sugar; spread over chilled cheesecake.
  7. Remove the cheesecake from the pan, slice, and serve.

Nutrition

Serving: 1sliceCalories: 400kcalCarbohydrates: 50gProtein: 6gFat: 20gSaturated Fat: 12gPolyunsaturated Fat: 1gMonounsaturated Fat: 6gCholesterol: 100mgSodium: 200mgPotassium: 150mgFiber: 1gSugar: 30gVitamin A: 500IUVitamin C: 1mgCalcium: 80mgIron: 1mg

Notes

For best results, use room temperature ingredients and avoid overmixing to maintain the cheesecake's texture.

Tried this recipe?

Let us know how it was!

Creamy Homemade Tomato Soup to Warm Your Winter Evenings

As the wind howls outside, I can’t help but think of my favorite winter ritual: curling up with a steaming bowl of Homemade Tomato Soup. This creamy, comforting dish blends vibrant canned tomatoes with a hint of fresh basil, creating an inviting aroma that fills the kitchen and warms the soul. What I adore about this soup is not only how quick it is to prepare—ready in just 40 minutes—but also its versatility, easily adapted for both vegan and dairy-free diets. It’s perfect for a laid-back dinner or as a cozy companion to a chilly evening by the fire. So, are you ready to create a bowl of warmth and comfort that you’ll enjoy over and over again?

Why Choose Homemade Tomato Soup?

Comforting and Quick to Prepare: This creamy homemade tomato soup is the ultimate winter cozy dish, ready in just 40 minutes.

Versatile and Adaptable: Easily customize for dietary needs, whether you’re going dairy-free or vegan.

Rich in Flavor: Using quality canned tomatoes and fresh basil gives it a robust, mouthwatering taste that outshines any takeout option.

Perfect Pairing: Enjoy it with a gooey grilled cheese sandwich or crusty garlic bread for that ideal comfort food experience.

Nutrient-Rich: Packed with vitamins and fiber, it’s a dish that warms both your heart and your health—unlike quick fast food choices.

Whip up this cozy bowl and don’t forget to try it alongside a warm slice of Homemade Parmesan Crusted chicken for a delightful meal!

Homemade Tomato Soup Ingredients

For the Soup

  • Canned Crushed Tomatoes – Serve as the main flavor base; choose good quality, preferably low-sodium for a healthier dish.
  • Tomato Paste – Deepens the soup’s richness; while there’s no direct substitute, adding more crushed tomatoes can work in a pinch.
  • Vegetable Broth – Provides essential liquid and depth; opt for low-sodium varieties to control sodium intake.
  • Onion – Offers natural sweetness and texture; can be replaced with leeks or shallots if desired.
  • Carrots – Adds sweetness and a subtle crunch to balance the flavors; essential for a hearty feel in the soup.
  • Fresh Basil – Gives the soup its fresh and aromatic character; if fresh isn’t available, use dried basil, but reduce the amount.
  • White Wine – Introduces acidity and brightness to the dish; Chardonnay is an excellent choice, or replace it with extra broth and a splash of apple cider vinegar.
  • Heavy Cream or Plant-Based Milk – Provides creaminess; for dairy-free, almond, oat, or coconut milk are great alternatives (be aware that coconut may change the flavor).

Optional Garnishes

  • Fresh Basil Leaves – Use for a fresh touch and vibrant presentation; can enhance the aroma right before serving.
  • Croutons or Toasted Bread – Adds texture and crunch; try adding garlic for an extra flavor boost.
  • Red Pepper Flakes – For a spicy kick, sprinkle on top just before serving to awaken the taste buds.

Create your cozy bowl of Homemade Tomato Soup today, and embrace the warmth that comes with each spoonful!

Step‑by‑Step Instructions for Creamy Homemade Tomato Soup

Step 1: Sauté Aromatics
In a large pot, heat a splash of olive oil over medium heat. Add finely chopped onion and diced carrots, sautéing for about 5-7 minutes until they soften and become translucent. Stir occasionally to avoid browning and ensure even cooking, as this step builds a flavorful base for your creamy homemade tomato soup.

Step 2: Build the Flavor
Once the onions and carrots are tender, stir in the crushed tomatoes and tomato paste, mixing well to combine. Pour in a splash of white wine, allowing it to cook for 2-3 minutes until mostly evaporated, then add the vegetable broth. This mixture should be bubbling gently; let it simmer on low heat for 15 minutes, developing those rich flavors.

Step 3: Blend for Creaminess
After simmering, remove the pot from the heat and let it cool slightly for a minute. Using an immersion blender (or carefully transferring to a standard blender), blend the soup until smooth and creamy. Ensure there are no lumps for that velvety texture, which is essential in achieving the perfect creamy homemade tomato soup.

Step 4: Stir in Creaminess
Return the blended soup to the pot over low heat. Stir in your choice of heavy cream or plant-based milk, incorporating it thoroughly into the soup. Allow it to warm through for about 5 minutes, giving it a gentle stir occasionally as you watch the color turn rich and inviting.

Step 5: Season to Taste
Taste your soup and adjust the flavors by seasoning with salt and freshly cracked pepper according to your preference. If desired, you can add a pinch of sugar in case the acidity of the tomatoes is too strong. This final adjustment will enhance the overall flavor profile of your creamy homemade tomato soup just before serving.

Homemade Tomato Soup Variations

Feel free to explore these delightful alternatives and elevate your homemade tomato soup experience!

  • Dairy-Free: Replace heavy cream with almond or oat milk for a lighter, vegan-friendly option without compromising creaminess.
  • Vegan Twist: Swap out white wine for additional vegetable broth and a splash of apple cider vinegar to keep the flavors bright and the dish vegan-friendly.
  • Spicy Kick: Add red pepper flakes when sautéing onions for a zesty burst that ignites the taste buds.
  • Extra Veggies: Toss in diced bell peppers or celery during sautéing for a colorful, nutrient-rich enhancement to your soup.
  • Cashew Cream: Blend soaked cashews with water for a rich and nutty cream substitute in your vegan version—perfect for adding depth and creaminess!
  • Herb Infusion: Try adding a teaspoon of dried oregano or thyme alongside fresh basil for extra layers of flavor, making your soup more aromatic and robust.
  • Crunchy Topping: Top your soup with homemade croutons or a sprinkle of toasted seeds for that delightful contrast in texture—pair this with a side of Potato Bacon Soup for a satisfying meal.
  • Creamy Tomato Basil Blend: Blend in a handful of fresh spinach at the end for a pop of color, nutrients, and a subtle earthy taste without affecting the familiar tomato essence.

Embrace these variations and find your perfect comfort soup concoction that will warm your heart this winter!

Expert Tips for Homemade Tomato Soup

  • Fresh Herbs Matter: Always use fresh basil when possible; its bright flavor elevates your homemade tomato soup and adds depth to the dish.

  • Avoid Overcooking: Don’t let the onions and carrots brown too much; they should be just softened to avoid bitterness, ensuring a sweet and rich foundation.

  • Cream Type Choice: When making dairy-free versions, lean towards almond or oat milk for a neutral flavor, while keeping in mind that coconut can impart a stronger taste.

  • Adjusting for Acidity: If your soup ends up too tart, balance it out by adding a pinch of sugar to mitigate acidity, ensuring a harmonious flavor in your homemade tomato soup.

  • Immersion Blender Benefits: Using an immersion blender not only gives you a smoother texture but also saves you from the hassle of transferring hot soup to a regular blender.

  • Extra Flavor Layers: Enhance your soup by sautéing red pepper flakes with the onions for a kick, or consider adding roasted garlic for a delightful, aromatic hint.

What to Serve with Creamy Tomato Soup

Indulging in a bowl of velvety tomato soup could inspire delightful pairings that elevate your dining experience.

  • Grilled Cheese Sandwich: A classic companion, this gooey delight offers a perfect contrast in texture, ideal for dipping in the creamy warmth of the soup.

  • Crusty Garlic Bread: The crunch of garlic bread complements the soup’s creamy texture. It’s also great for soaking up every last drop!

  • Fresh Salad: A bright arugula salad with lemon vinaigrette adds a refreshing element, balancing the richness of the soup and enhancing its flavors.

  • Roasted Vegetables: Sweet, caramelized veggies like bell peppers and zucchini bring extra depth and a hint of earthiness, making your meal more robust.

  • Cheesy Quesadillas: With gooey melty cheese and crispy tortillas, these provide a hearty option to accompany the soup’s rich creaminess, plus they are fun to dip!

  • Mini Caprese Skewers: Bright, fresh flavors of mozzarella, cherry tomatoes, and basil drizzled with balsamic glaze create a festive finger food that pairs beautifully.

  • Savory Scones: Cheddar or herb scones offer a delightful variation, providing a moist and crumbly texture that perfectly complements the comforting soup.

  • Chardonnay: A glass of chilled Chardonnay serves as an exquisite accompaniment, balancing the acidity of the tomatoes while enhancing the overall dining experience.

Each pairing adds a unique twist and enjoyment, making your cozy night in even more memorable!

Make Ahead Options

These Homemade Tomato Soup meal prep options will save you time on busy weeknights! You can sauté the onions and carrots up to 24 hours in advance and refrigerate them. This method enhances their flavor and allows you to skip the time-consuming first step when you’re ready to cook. Additionally, you can blend the soup and store it in the refrigerator for up to 3 days—just add the cream or plant-based milk before reheating for that perfect creamy texture. For the best quality, store the soup in an airtight container to maintain freshness and prevent contamination. When you’re ready to serve, simply warm it on the stovetop and adjust the seasoning as needed for a cozy bowl of homemade tomato soup that’s just as delicious as when freshly made!

How to Store and Freeze Homemade Tomato Soup

  • Fridge: Store your homemade tomato soup in an airtight container for up to 3-4 days. Allow the soup to cool completely before sealing to maintain freshness.

  • Freezer: For extended storage, freeze the soup in portioned airtight containers or freezer bags for up to 3 months. Remember to leave space at the top of the container, as the soup will expand when frozen.

  • Reheating: When ready to enjoy, thaw in the refrigerator overnight, then reheat gently on the stovetop over low heat, stirring occasionally to ensure even warming and a smooth texture.

  • Avoid Repeated Refreezing: It’s best to avoid refreezing previously thawed soup, as this can affect the texture and flavor. Enjoy your delicious homemade tomato soup at its best!

Creamy Tomato Soup Recipe FAQs

What type of canned tomatoes should I use for the best flavor?
Absolutely, when it comes to canned tomatoes, aim for high-quality crushed tomatoes, preferably low-sodium varieties. This ensures that your homemade tomato soup is both flavorful and healthier.

How long can I store homemade tomato soup in the fridge?
You can store your homemade tomato soup in an airtight container in the refrigerator for up to 3-4 days. Just make sure to let it cool completely before sealing it to preserve its freshness.

Can I freeze homemade tomato soup? If so, how?
Very! To freeze your homemade tomato soup, let it cool down and then pour it into airtight containers or freezer bags, leaving a little space at the top to allow for expansion. You can freeze it for up to 3 months. When ready to enjoy, thaw it in the fridge overnight and reheat it on the stovetop for the best texture.

What should I do if my soup is too tart?
If your soup is tasting overly tart, no worries! You can add a pinch of sugar to balance the acidity. Stir well and taste again; sometimes, a small adjustment can make a world of difference in your creaminess and flavor.

Can I use this soup as a base for other dishes?
Absolutely! This creamy tomato soup is versatile; you can use it as a base for casseroles or pasta dishes. Just layer cooked pasta in the soup for a delightful one-pot meal or mix in cooked grains to enhance its richness.

Are there any dietary considerations for this recipe?
Yes, this homemade tomato soup is naturally vegan and gluten-free! For those with nut allergies, be cautious if using plant-based milk; opt for rice milk or soy milk instead of almond or coconut milk. Enjoy comforting meals without compromising dietary needs!

Homemade Tomato Soup

Creamy Homemade Tomato Soup to Warm Your Winter Evenings

This Homemade Tomato Soup is creamy, comforting, and quick to prepare, perfect for winter evenings.
Prep Time 15 minutes
Cook Time 25 minutes
Total Time 40 minutes
Servings: 4 bowls
Course: Dinner
Cuisine: American
Calories: 250

Ingredients
  

For the Soup
  • 28 oz Canned Crushed Tomatoes Choose good quality, preferably low-sodium
  • 2 tbsp Tomato Paste Deepens the soup's richness
  • 4 cups Vegetable Broth Opt for low-sodium varieties
  • 1 medium Onion Can be replaced with leeks or shallots
  • 2 medium Carrots Adds sweetness and texture
  • 1 cup Fresh Basil Substitute dried basil if fresh is unavailable
  • 0.5 cup White Wine Chardonnay is a great choice
  • 1 cup Heavy Cream or Plant-Based Milk For dairy-free use almond, oat, or coconut milk
Optional Garnishes
  • 1 cup Fresh Basil Leaves For vibrant presentation
  • 1 cup Croutons or Toasted Bread Add garlic for extra flavor
  • to taste Red Pepper Flakes Sprinkle for a spicy kick

Equipment

  • Large pot
  • Immersion blender

Method
 

Step‑by‑Step Instructions
  1. In a large pot, heat a splash of olive oil over medium heat. Add finely chopped onion and diced carrots, sauté for about 5-7 minutes until softened.
  2. Stir in the crushed tomatoes and tomato paste, then add a splash of white wine, cooking for 2-3 minutes. Finally, add the vegetable broth and let it simmer on low heat for 15 minutes.
  3. Remove from heat and blend the soup until smooth using an immersion blender.
  4. Return the blended soup to low heat and stir in your choice of heavy cream or plant-based milk.
  5. Season to taste with salt and pepper. Add a pinch of sugar if the soup is too acidic.

Nutrition

Serving: 1bowlCalories: 250kcalCarbohydrates: 30gProtein: 5gFat: 12gSaturated Fat: 7gPolyunsaturated Fat: 1gMonounsaturated Fat: 3gCholesterol: 35mgSodium: 500mgPotassium: 800mgFiber: 4gSugar: 6gVitamin A: 2500IUVitamin C: 20mgCalcium: 100mgIron: 2mg

Notes

Fresh herbs elevate the flavor; avoid overcooking onions and carrots to maintain sweetness. Store in an airtight container for up to 3-4 days, or freeze for longer storage.

Tried this recipe?

Let us know how it was!

Braised Pork Shoulder: Cozy Comfort for Fall Feasts

As the crisp air of fall settles in, I can’t help but crave the comforting embrace of a home-cooked meal. Enter my Apple Cider Braised Pork Shoulder—a one-pot wonder that fills your kitchen with an irresistible aroma and promises to warm you from the inside out. This cozy fall recipe showcases juicy pork, slow-cooked to perfection in a luscious blend of fresh apple cider, tender apples, and a bouquet of aromatic herbs. One of the best perks? It’s not only budget-friendly but also a delightful dish that impresses friends and family alike. Whether you’re gathered around the table for a rustic dinner or simply enjoying a quiet evening at home, this braised pork shoulder is the ultimate comfort food that’s sure to brighten your day. Ready to dive into a recipe that delivers both hearty flavors and an easy prep? Let’s get started!

Why is This Braised Pork Shoulder Special?

Comforting, this recipe is perfect for chilly evenings, delivering warmth in every bite. One-Pot Meal means easy cleanup, giving you more time to relax. Versatile Options allow for different cooking methods, whether you prefer slow cooking or using an Instant Pot. The Rich Flavors from apple cider and fresh herbs create a delightful balance that will amaze your taste buds. Plus, it’s a Budget-Friendly dish that doesn’t skimp on impressing your guests—just like my Savory Brown Sugar Pork Chops!

Braised Pork Shoulder Ingredients

• Let’s create a comforting dish!

  • For the Pork

  • Pork Shoulder (4-5 lb) – The main protein; using bone-in enhances the flavor and tenderness.

  • Neutral Oil (2 tbsp) – Ideal for searing the pork; can be swapped for canola or vegetable oil if needed.

  • For the Braising Liquid

  • Fresh Apple Cider (2 cups) – Adds a lovely sweetness and depth; do avoid vinegar as a substitute.

  • Chicken Stock or Broth (2 cups) – Infuses richness and flavor; vegetable stock is a lighter alternative.

  • Dijon Mustard (2 tbsp) – Uplifts the flavor profile with a tangy kick.

  • Dehydrated Minced Onion (1 tbsp) – Introduces onion flavor; if unavailable, use 1.5 tsp onion powder instead.

  • For the Aromatics

  • Head of Garlic (1) – Provides richness; just cut the top to expose the cloves for better flavor infusion.

  • Fresh Rosemary Sprigs (3) – An aromatic must-have; dried rosemary (1 tbsp) can be used in a pinch.

  • Fresh Thyme Sprigs (4) – Adds a fragrant touch; substitute with dried thyme (1 tsp) if needed.

  • Red Onion (1, cut into thick slices) – Contributes sweetness and texture; feel free to use yellow onion as well.

  • For the Apples

  • Firm Apples (2, peeled and cut into wedges) – Infuses sweetness and texture; Honeycrisp or Pink Lady are excellent choices for this braised pork shoulder.

With these ingredients at hand, you’re all set to create a fall feast that wraps you in warmth and comfort!

Step‑by‑Step Instructions for Apple Cider Braised Pork Shoulder

Step 1: Preheat the Oven
Begin by preheating your oven to 325°F (160°C). This temperature is perfect for braising and will ensure even cooking. While the oven heats up, you can prepare your pork shoulder by trimming any excess fat. If you prefer, cut the pork into four large pieces for quicker cooking, or keep it whole if it’s bone-in.

Step 2: Season the Pork
Season your pork shoulder generously with salt and pepper to enhance its flavor. The seasoning will penetrate the meat as it cooks, creating a savory base. This step is crucial for developing the dish’s overall taste, so don’t hesitate to be generous. Once seasoned, the pork is ready for searing.

Step 3: Sear the Pork
In a large Dutch oven, heat 2 tablespoons of neutral oil over medium-high heat until shimmering. Carefully add the pork shoulder to the pot, searing each piece for 4–5 minutes per side until beautifully browned. This caramelization will add depth and richness to the braising process. Once browned, remove the pork and set it aside.

Step 4: Prepare the Braising Liquid
In a bowl, whisk together 2 cups of fresh apple cider, 2 cups of chicken stock, 2 tablespoons of Dijon mustard, and 1 tablespoon of dehydrated minced onion. This aromatic braising liquid will create the perfect balance of sweetness and savory notes for your Apple Cider Braised Pork Shoulder. Set the mixture aside while you prepare the pot.

Step 5: Assemble the Ingredients
Place the seared pork back into the Dutch oven, making sure it sits snugly. Add the head of garlic, along with the sprigs of fresh rosemary and thyme. These herbs will infuse the dish with fragrant aromas as it cooks. Pour the prepared braising liquid over the pork, ensuring it is well coated for optimal flavor.

Step 6: Braise in the Oven
Cover the Dutch oven with its lid and place it in the preheated oven. Allow the pork to braise for 3 hours, flipping it halfway through for even cooking. The pork should become fork-tender as it absorbs the flavors from the braising liquid and herbs. This slow process is essential for achieving that melt-in-your-mouth texture.

Step 7: Check for Tenderness
After 2.5 hours of cooking, gently check the pork for tenderness. When it’s nearly fork-tender, add thick slices of red onion and apple wedges to the pot. This addition brings more sweetness and texture to your braised pork shoulder while allowing them to cook evenly in the aromatic liquid.

Step 8: Finish Braising
Continue to braise the pork for an additional 30–45 minutes until it is completely tender and pulls apart easily. This step will ensure that the apples and onions soften and enhance the overall flavor of the dish. Be mindful not to rush this process; the longer it cooks, the better the flavors meld together.

Step 9: Rest the Pork
Once fully cooked, carefully remove the pork shoulder from the oven and let it rest in the braising liquid for 30 minutes. This resting period allows the juices to redistribute throughout the meat, making it even more succulent. As it rests, squeeze the softened garlic into the broth to enhance the flavor of your braising liquid.

Step 10: Serve and Enjoy
After resting, your Apple Cider Braised Pork Shoulder is ready to be served! Pull apart the tender pork and plate it with the braised apples and onions, drizzled with the delicious broth. This dish pairs wonderfully with mashed potatoes or creamy polenta, so you can savor every drop of that rich, flavorful sauce.

Braised Pork Shoulder: Customize for You

Embrace the joy of creativity in the kitchen with these delightful variations and substitutions! Each option lets you tailor the dish to your taste buds and dietary needs.

  • Different Apples: Swap firm apples for Fuji or Gala, adding a unique flavor twist that complements the dish beautifully.

  • Other Meats: Try substituting with beef chuck roast or lamb shoulder for a deliciously different take on the braised experience!

  • Instant Pot Alternative: For a quicker version, cook in an Instant Pot; follow the same steps but adjust cooking time to about 60 minutes under pressure.

  • Vegetarian Style: Replace the pork with hearty mushrooms and use vegetable stock for a rich, satisfying plant-based meal. You won’t miss the meat with such robust flavors!

  • Spicy Kick: Add diced jalapeños or a sprinkle of red pepper flakes to the braising liquid for a spicy twist that will awaken your taste buds.

  • Herb Variations: Experiment with different fresh herbs like sage or oregano to create an aromatic profile that sings to your preferences.

  • Sweet Swap: A dash of maple syrup can boost the sweetness if you prefer a richer glaze. Blend it in with your braising liquid for that extra layer of flavor.

For more inspiration, take a look at my Savory Brown Sugar Pork Chops to see how flexibility can enhance your cooking!

I hope these variations inspire you to make the recipe your own and embrace the warmth of comfort food this fall!

Expert Tips for Braised Pork Shoulder

  • Choose Quality Meat: Use bone-in pork shoulder for the best flavor; it results in a richer, more succulent dish compared to boneless cuts.

  • Sear to Perfection: Don’t rush the searing process! Taking your time to achieve a deep brown crust will enhance the overall flavor of your braised pork shoulder.

  • Watch the Tenderness: If using boneless pork, keep an eye on cooking time, aiming for fork-tender texture around the 2.5-hour mark to avoid overcooking.

  • Trim Excess Fat: Reducing excess fat before cooking helps prevent greasiness—be mindful to keep enough for flavor, but trim away excess to keep it light.

  • Layer Your Ingredients: Place aromatics like garlic and herbs under the pork before adding liquid; this technique infuses deep, fragrant flavors as they braise.

  • Don’t Skip Resting: Allow your pork to rest in the braising liquid for 30 minutes post-cooking; this step ensures juicy, tender results that amplify the flavor.

What to Serve with Apple Cider Braised Pork Shoulder

As you savor the juicy, tender pork steeped in warm spices and apple sweetness, consider enhancing your meal with these delightful pairings.

  • Creamy Mashed Potatoes: Perfect for soaking up the rich, flavorful broth, these smooth potatoes bring a comforting staple to your table.

  • Roasted Brussels Sprouts: Their crispy edges and slight bitterness balance the sweetness of the cider, adding a nutty flavor that complements the pork beautifully.

  • Fresh Green Salad: A crisp salad with mixed greens and a tangy vinaigrette adds brightness and a refreshing contrast to the heartiness of the dish.

  • Garlic Bread: This classic side not only provides a delightful crunch but also offers additional texture to mop up those savory juices.

  • Caramelized Apples: Enhanced with a pinch of cinnamon, these sweet, buttery apples echo the dish’s flavors, creating a lovely bridge between savory and sweet.

  • Apple Cider Sangria: This fragrant drink, combined with seasonal fruits, echoes the dish’s apple notes while keeping the celebration of fall alive.

  • Honey Roasted Carrots: Naturally sweet and slightly charred, they add a pop of color and taste that balances the savory richness of the pork.

Elevate your dining experience with these pairings, making your Apple Cider Braised Pork Shoulder the star of the cozy fall feast.

How to Store and Freeze Braised Pork Shoulder

Fridge: Store leftover braised pork shoulder in an airtight container for up to 4-6 days. Make sure to keep the meat submerged in the leftover braising liquid to maintain moisture and flavor.

Freezer: Freeze braised pork shoulder in freezer-safe containers for up to 3 months. Make sure to let the pork cool completely before sealing to avoid ice crystals, which can affect texture.

Reheating: When ready to enjoy, reheat gently on the stove or in the oven at 300°F until warmed through. If the sauce has thickened, add a splash of apple cider or broth to loosen it up and keep it succulent.

Make-Ahead: This braised pork shoulder actually tastes even better the next day, making it a perfect dish to prepare in advance for family gatherings or meal prep!

Make Ahead Options

These Apple Cider Braised Pork Shoulders are perfect for meal prep enthusiasts! You can season and sear the pork up to 24 hours in advance; simply refrigerate it (this helps to enhance the flavor) until you’re ready to braise. The braising liquid can also be whisked together and stored in the fridge for up to 3 days. When you’re ready to serve, just place the pork back in the Dutch oven, pour the cold braising liquid over it, and braise as directed. With these make ahead options, you’ll save valuable time during busy weeknights while still enjoying restaurant-quality results that are just as delicious!

Apple Cider Braised Pork Shoulder Recipe FAQs

How do I choose the right apples for this recipe?
Absolutely! For the best flavor, you want to select firm apples. Varieties like Honeycrisp or Pink Lady work beautifully, as they provide a sweet contrast to the savory pork. Look for apples that are crisp, free of bruises, and have vibrant color; avoid overripe ones, which may turn mushy during cooking.

How should I store leftovers of braised pork shoulder?
Leftovers can be stored in an airtight container in the fridge for 4-6 days. It’s important to keep the meat submerged in the braising liquid to maintain moisture and flavor. When you’re ready to eat, simply reheat gently on the stovetop or in the oven, making sure it doesn’t dry out!

Can I freeze braised pork shoulder?
Yes! You can freeze your braised pork shoulder in freezer-safe containers for up to 3 months. Firstly, let it cool completely before sealing. To thaw, place it in the fridge overnight. When ready to enjoy, reheat gently, adding a splash of apple cider or broth if needed to keep it juicy.

What if my braised pork isn’t tender after 3 hours?
Very! If your pork isn’t fork-tender after the initial braising time, simply cover it and continue cooking, checking every 15-30 minutes. Remember, cooking times can vary based on the size of the pork shoulder. Adding a little more stock or cider can help keep it moist during this time.

Is this dish safe for pets?
Typically, it’s best to avoid sharing this dish with pets. The garlic and onions can be toxic to dogs and cats, so it’s important to keep them away from your braised pork. Always check ingredients before sharing home-cooked meals with your furry friends!

How can I adjust this recipe for dietary restrictions?
If you’re looking to make this recipe more inclusive, you can substitute regular chicken stock with a low-sodium, gluten-free version or vegetable stock for a lighter option. Additionally, ensure the Dijon mustard is gluten-free if necessary. The recipe is versatile enough to allow for these adjustments while still delivering fantastic flavor!

Braised Pork Shoulder

Braised Pork Shoulder: Cozy Comfort for Fall Feasts

This Apple Cider Braised Pork Shoulder recipe is a perfect budget-friendly dish that warms you up in the fall with rich flavors and easy prep.
Prep Time 30 minutes
Cook Time 3 hours
Resting Time 30 minutes
Total Time 4 hours
Servings: 6 servings
Course: Dinner
Cuisine: American
Calories: 400

Ingredients
  

For the Pork
  • 4-5 lb Pork Shoulder Bone-in enhances flavor and tenderness
  • 2 tbsp Neutral Oil Can substitute with canola or vegetable oil
For the Braising Liquid
  • 2 cups Fresh Apple Cider Do not substitute with vinegar
  • 2 cups Chicken Stock or Broth Vegetable stock is a lighter alternative
  • 2 tbsp Dijon Mustard Uplifts flavor profile
  • 1 tbsp Dehydrated Minced Onion Can substitute with 1.5 tsp onion powder
For the Aromatics
  • 1 Head of Garlic Cut the top to expose cloves
  • 3 sprigs Fresh Rosemary Can substitute with 1 tbsp dried rosemary
  • 4 sprigs Fresh Thyme Can substitute with 1 tsp dried thyme
  • 1 Red Onion Cut into thick slices; yellow onion can be used
For the Apples
  • 2 Firm Apples Peeled and cut into wedges; Honeycrisp or Pink Lady recommended

Equipment

  • Dutch oven

Method
 

Step-by-Step Instructions
  1. Preheat your oven to 325°F (160°C). Trim excess fat from the pork, or cut it into four large pieces if you prefer quicker cooking.
  2. Season the pork shoulder generously with salt and pepper.
  3. Heat 2 tablespoons of neutral oil in a large Dutch oven over medium-high heat. Sear the pork shoulder until browned, about 4-5 minutes per side.
  4. In a bowl, whisk together fresh apple cider, chicken stock, Dijon mustard, and dehydrated minced onion.
  5. Place the seared pork in the Dutch oven. Add garlic, rosemary, thyme, and pour the braising liquid over the pork.
  6. Cover the Dutch oven and braise in the oven for 3 hours, flipping halfway through.
  7. After 2.5 hours, check pork tenderness; add slices of red onion and apple wedges into the pot.
  8. Braise for another 30-45 minutes until the pork is tender and pulls apart easily.
  9. Remove the pork and let it rest in the braising liquid for 30 minutes.
  10. Pull apart the pork and serve with braised apples and onions, drizzled with broth.

Nutrition

Serving: 1servingCalories: 400kcalCarbohydrates: 20gProtein: 30gFat: 25gSaturated Fat: 10gPolyunsaturated Fat: 2gMonounsaturated Fat: 8gCholesterol: 100mgSodium: 800mgPotassium: 600mgFiber: 2gSugar: 8gVitamin A: 500IUVitamin C: 5mgCalcium: 40mgIron: 2mg

Notes

Allow leftovers to rest in the braising liquid for optimal moisture and flavor. This braised pork shoulder can be refrigerated for 4-6 days and frozen for up to 3 months.

Tried this recipe?

Let us know how it was!

Stay Connected

Get recipes via email: