Get my cookbooks

Fluffy Strawberry Shortcake Salad That Will Delight Your Tastebuds

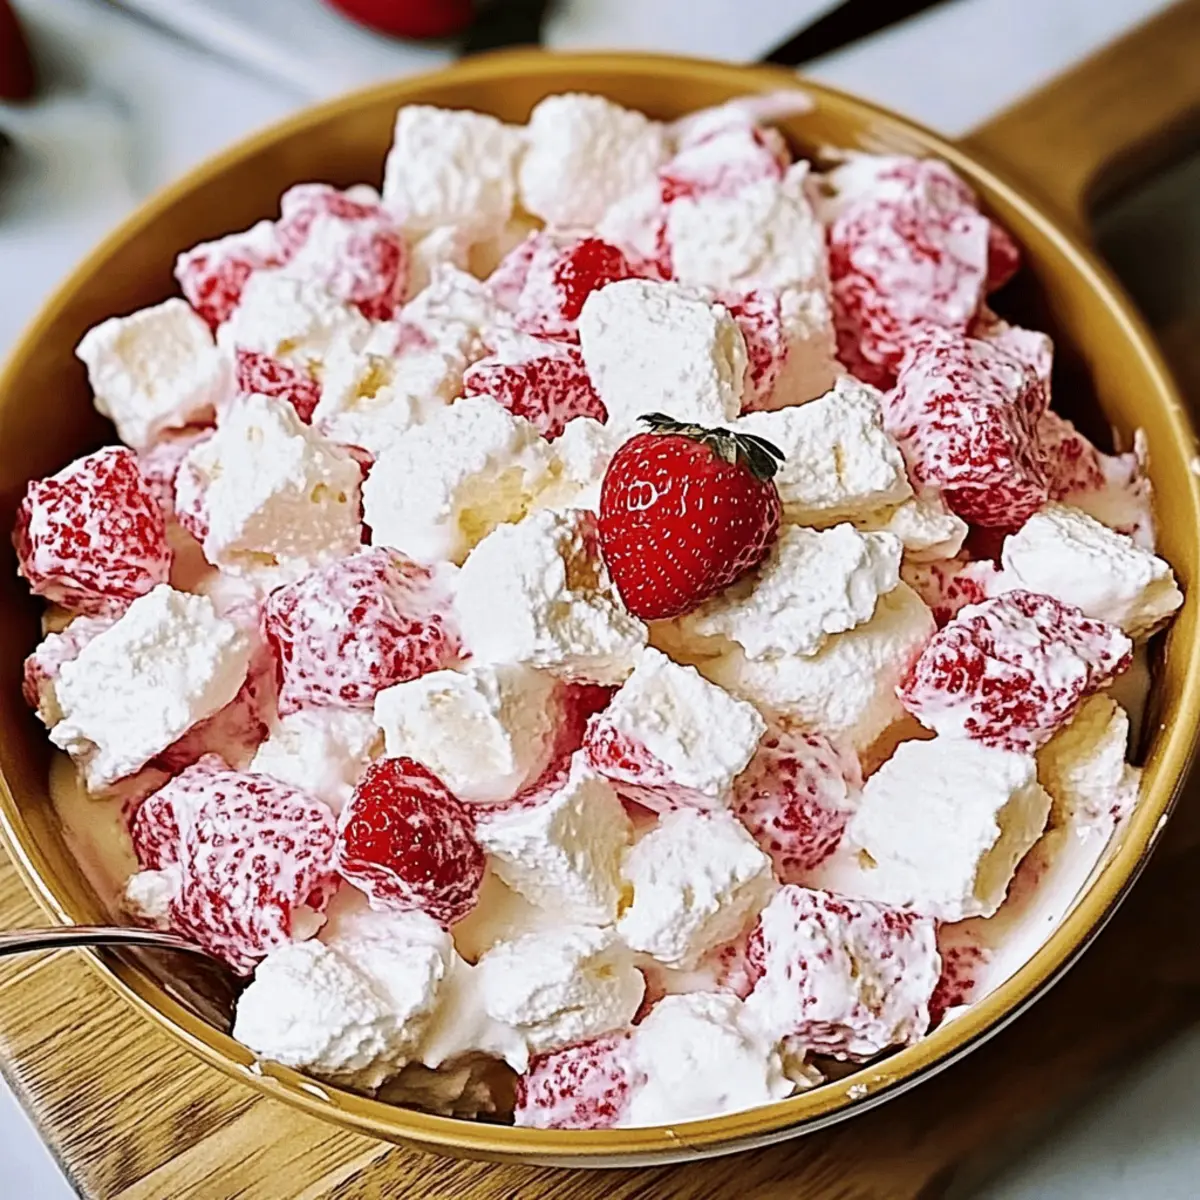
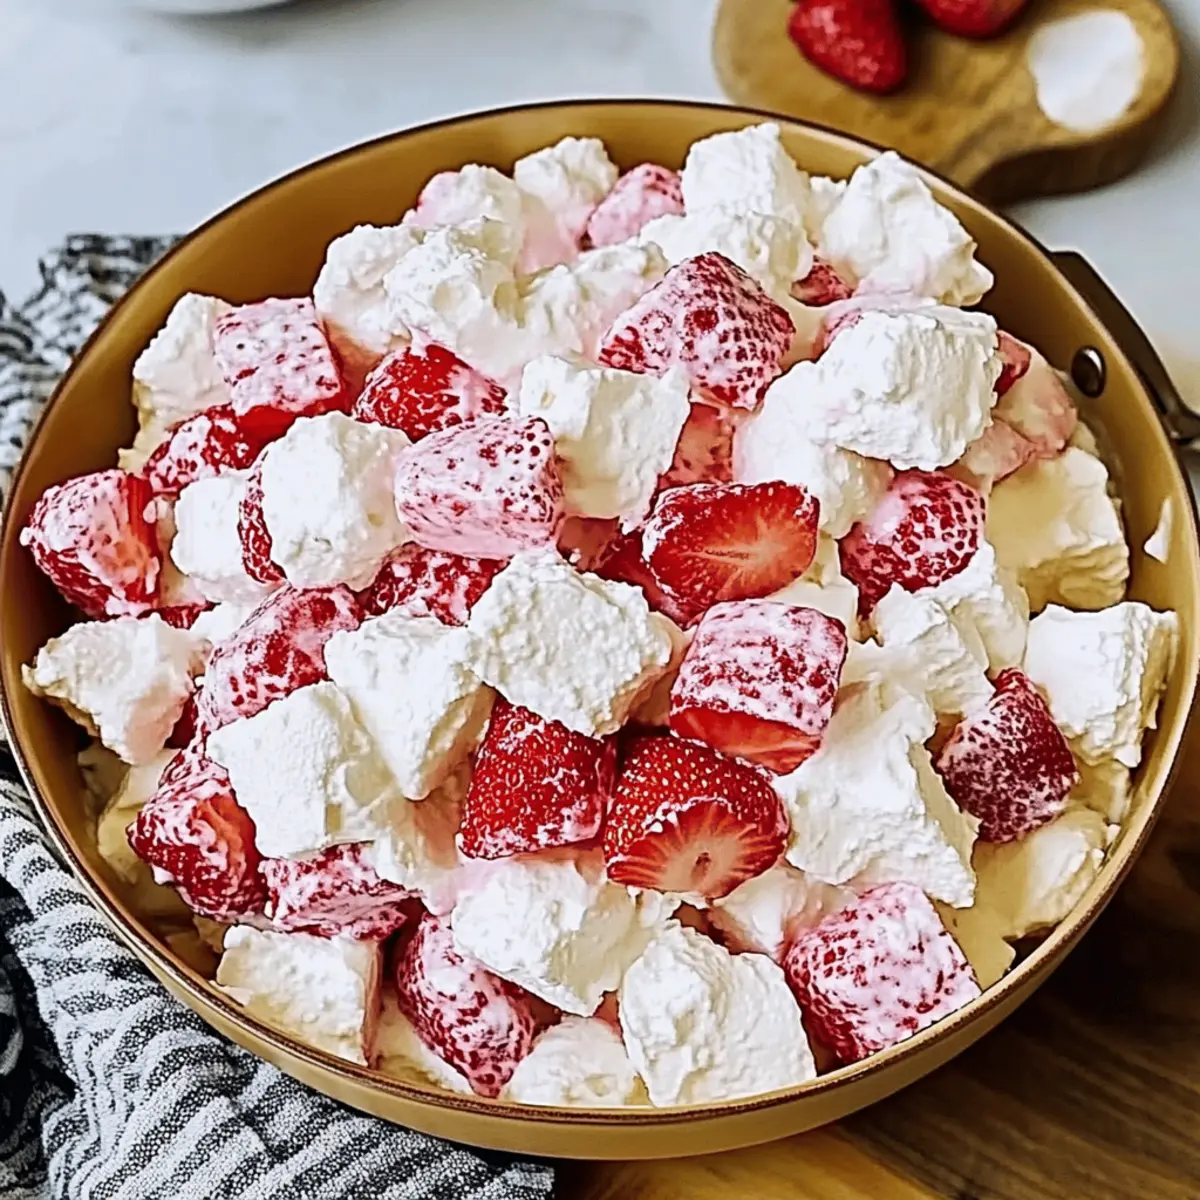
As the warm sun filters through my kitchen window, the scent of ripe strawberries ignites a joyful memory of summer picnics and family gatherings. Enter my delightful Strawberry Shortcake Fluff Salad! This fluffy, fruity treat brings together the sweetness of fresh strawberries, the airy charm of marshmallows, and the comforting richness of cake, creating a dessert that’s not just easy to prepare but also perfect for impressing guests. With options for gluten-free, vegan, and low-carb adaptations, this Strawberry Fluff Salad caters to all diet preferences, making it a crowd-pleaser at any occasion. Are you ready to create a burst of summer flavor on your table?

Why is this salad a must-try?

Fluffy, fruity bliss: The light texture of whipped cream and marshmallows mingles perfectly with fresh strawberries, creating a delightful dessert.
Crowd-pleaser: Its colorful presentation and nostalgic flavor make it a hit at any gathering, rivaling even a classic Strawberry Cheesecake.
Customizable options: Catering to all diets, you can easily whip up gluten-free, vegan, or low-carb variations, ensuring everyone can indulge.
Quick and easy: With just a few simple steps, you can enjoy this scrumptious Strawberry Shortcake Fluff Salad without spending hours in the kitchen. Plus, it’s perfect for warm weather!
Perfectly shareable: Serve this delightful salad in individual cups, and watch smiles light up faces—it’s ideal for family barbecues or a weekend brunch!

Strawberry Shortcake Fluff Salad Ingredients

For the Salad Base

  • Fresh Strawberries (2 pints) – Use ripe, aromatic strawberries for the sweetest flavor; frozen strawberries can substitute when fresh are out of season.
  • Pound Cake or Angel Food Cake (½ loaf) – This provides structure to your salad; consider using vanilla wafers for a lighter alternative.

For the Creamy Mixture

  • Mini Marshmallows (10.5 oz) – Adds sweet chewiness to the fluff; diced apples can offer a refreshing crunch instead.
  • Whipped Cream Topping (8 oz) – For a creamy and smooth texture, homemade whipped cream brings richer flavor compared to pre-made varieties.
  • Sweetened Condensed Milk (14 oz) – Enhances the creaminess; swap it with evaporated milk for a lighter option.

Optional Add-ins

  • Cinnamon or Nutmeg – Sprinkle in for a warm seasonal flavor twist; these spices pair beautifully with the fruity notes of the salad.
  • Fresh Mint Leaves – For garnish, they add a burst of color and a refreshing touch, elevating your salad’s presentation.

This Strawberry Shortcake Fluff Salad brims with delightful flavors and textures, perfect for hot summer days or festive gatherings!

Step‑by‑Step Instructions for Strawberry Shortcake Fluff Salad

Step 1: Prepare the Cake Base
Start by slicing the pound or angel food cake in half horizontally, then cut it into 1½ inch cubes. This gives a perfect bite-sized structure to the Strawberry Shortcake Fluff Salad. Spread the cake cubes evenly on a baking sheet and set them aside while you prepare the creamy mixture.

Step 2: Whip Creamy Mixture
In a large mixing bowl, combine the whipped topping and sweetened condensed milk. Using a whisk or an electric mixer, beat the mixture on medium speed until it turns smooth and creamy, which should take about 2-3 minutes. This creamy base will add rich flavor and help bind all ingredients in the salad together.

Step 3: Add Marshmallows
Once your creamy mixture is smooth, gently fold in the mini marshmallows. Use a spatula to ensure they’re evenly distributed throughout the fluff, maintaining the airiness of the mixture. This adds a delightful sweetness and chewy texture to your Strawberry Shortcake Fluff Salad, enhancing its overall enjoyment.

Step 4: Incorporate Strawberries
Next, wash and slice the fresh strawberries, ensuring they’re vibrant and ripe for best flavor. Fold them gently into the marshmallow mixture, taking care not to break the berries. This step infuses the salad with refreshing berry goodness, creating a beautiful color contrast that’s sure to delight.

Step 5: Combine With Cake
Now it’s time to add the prepared cake cubes to the mixture. Gently fold the cake into the strawberry fluff, ensuring even distribution without over-mixing. The cake should be well-coated in the creamy mixture, forming a light and fluffy dessert base that’s both visually appealing and delicious.

Step 6: Chill
After mixing, cover the bowl with plastic wrap or a lid and place it in the refrigerator. Let it chill for at least 2 hours, allowing the flavors to meld and the textures to soften slightly. This step is crucial for enhancing the taste of your Strawberry Shortcake Fluff Salad, making it a delightful treat.

Step 7: Serve
When ready to serve, spoon the chilled Strawberry Shortcake Fluff Salad into individual bowls or cups. Garnish with additional strawberries or fresh mint leaves for a pop of color and freshness. Serve cold and enjoy this refreshing and indulgent dessert within 1-3 days for the best flavor and freshness.

Strawberry Shortcake Salad Variations

Feel free to make this delightful dessert your own with these fun twists and substitutions.

  • Gluten-Free: Use a gluten-free vanilla cake to keep it light and fluffy without the wheat. This ensures everyone can indulge happily!

  • Vegan: Swap in coconut whipped cream and use vegan condensed milk for a luscious, plant-based version. It’s just as creamy and delightful.

  • Low-Carb: Opt for a low-carb cake and omit the marshmallows to make a dessert that still satisfies without the carbs. You could even add some berries for an extra burst of joy!

  • Spice it Up: Add a sprinkle of cinnamon or nutmeg to the whipping cream mixture for a warm, seasonal twist. These spices harmonize beautifully with the strawberries.

  • Tropical Twist: Incorporate diced pineapple or mango along with the strawberries for a bright and tropical flavor profile. You’ll find yourself dreaming of sunshine with each bite!

  • Nutty Crunch: Mix in some chopped nuts like almonds or pecans for a delightful crunch. They’ll add texture and flavor that brings another level of enjoyment.

  • Extra Creamy: For a richer taste, replace regular whipped topping with mascarpone cheese. It gives a comforting, decadent twist that’s hard to resist.

  • Layered Delight: Serve it in individual glasses layered with crumbled cookies or graham crackers for an easy, eye-catching presentation, reminiscent of a classic Strawberry Cheesecake.

No matter which variation you choose, your Strawberry Shortcake Fluff Salad will be a hit at any gathering! Don’t forget to check out my recipe for a Strawberry Cheesecake Dump Cake for another delightful dessert option!

How to Store and Freeze Strawberry Shortcake Fluff Salad

  • Fridge: Store in an airtight container for up to 3 days to maintain freshness. Gently stir before serving to revive the fluffy texture.

  • Freezer: While not recommended, if you freeze it, it may alter the texture. Store in a suitable container for up to 2 months; thaw in the fridge overnight.

  • Reheating: There’s no need to reheat this dish; it’s best enjoyed chilled as a refreshing dessert.

  • Leftover Innovations: If you have leftovers, consider repurposing them as a topping for pancakes or adding them to yogurt for a delicious breakfast twist!

Expert Tips for Strawberry Shortcake Fluff Salad

  • Choose Ripe Strawberries: The flavor of your salad depends on sweet, ripe strawberries. Check for bright red color and a fresh aroma; avoid overly soft ones.

  • Gentle Mixing: When combining the creamy mixture with cake and strawberries, fold gently to maintain the airiness of the whipped topping. Over-mixing can result in a dense texture.

  • Chill Time: Allow your Strawberry Shortcake Fluff Salad to chill for at least 2 hours. This melds flavors and enhances the overall taste; it’s worth the wait!

  • Presentation Matters: For an elegant touch, serve in clear cups or glass parfaits. Layer with mint leaves or more strawberries to make it visually stunning.

  • Storage Tips: Keep leftovers in an airtight container in the fridge. Stir gently before serving again, and be sure to enjoy within 1-3 days for optimal freshness.

Make Ahead Options

These Strawberry Shortcake Fluff Salad preparations are perfect for busy home cooks looking to save time during meal planning! You can prepare the creamy mixture (whipped topping combined with sweetened condensed milk) and store it in the refrigerator for up to 24 hours. Additionally, you can slice the fresh strawberries a day in advance; however, to maintain their vibrant color and prevent browning, it’s best to refrigerate them in water. On serving day, simply fold in the mini marshmallows and cake cubes into the prepped creamy mixture, add the strawberries, and let it chill for a couple of hours before serving. Enjoy a delightful dessert that tastes just as fresh and delicious as if you made it all in one go!

What to Serve with Strawberry Shortcake Fluff Salad

The bright, sweet flavors of this fluffy dessert call for delightful companions that enhance its charm while embracing summer vibes.

  • Creamy Vanilla Ice Cream: This classic pairing adds a rich, velvety texture that complements the lightness of the fluff salad, creating a heavenly combination.
  • Lightly Toasted Pound Cake: A warm slice on the side offers a subtle sweetness and a lovely crunch, beautifully contrasting the creamy salad. Make it yourself for an extra touch!
  • Fresh Mint-Infused Lemonade: The refreshing zesty notes of mint lemonade brighten the palate, making it a delightful drink to sip between spoonfuls of fluff.
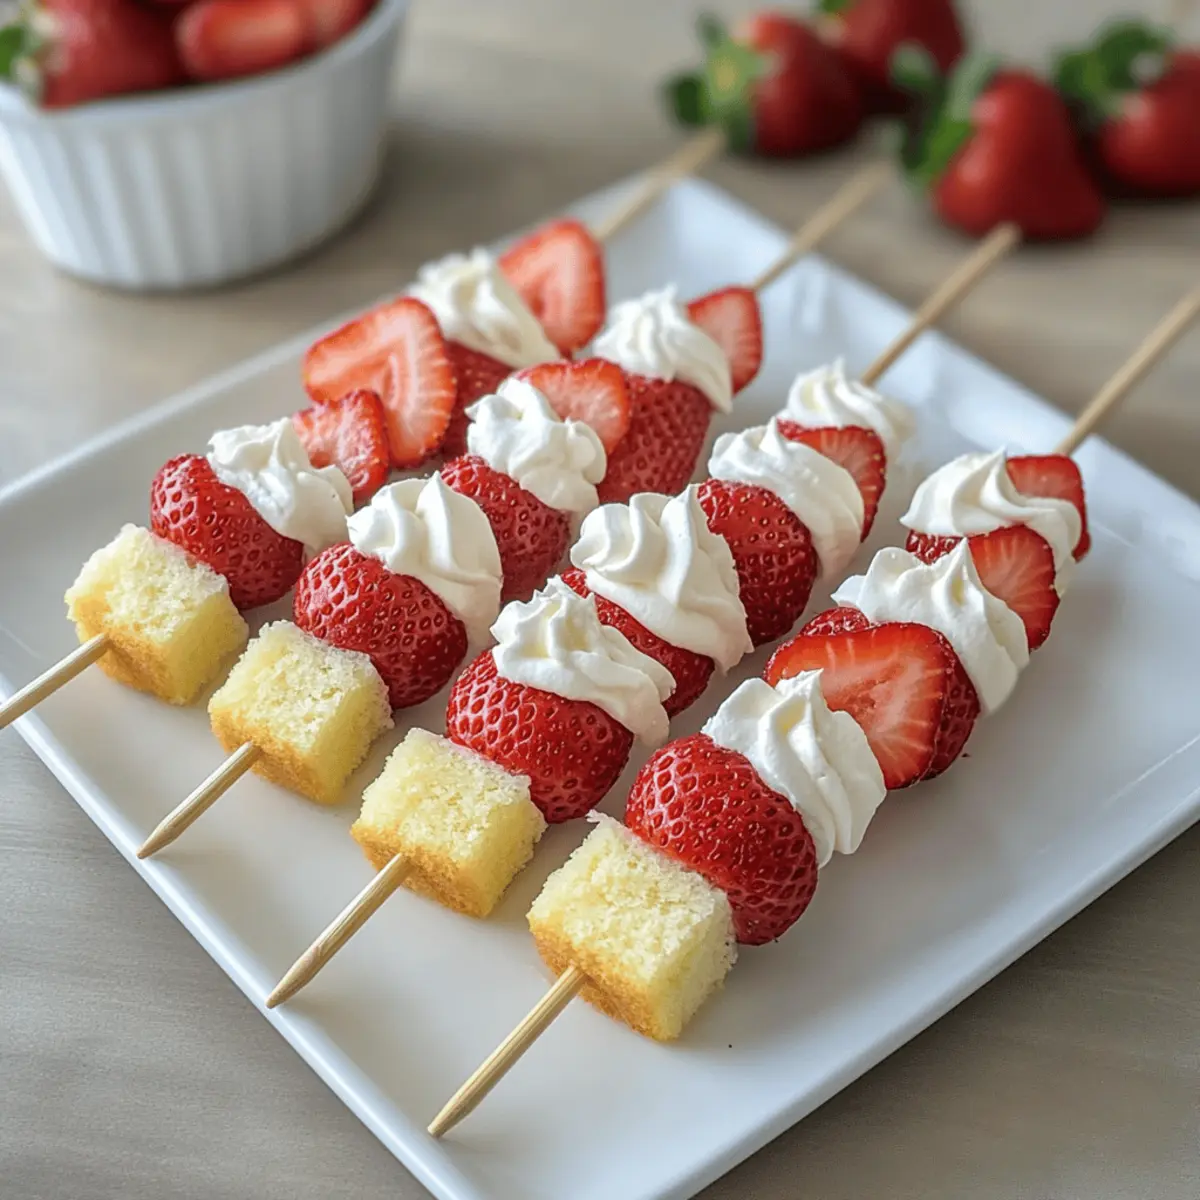
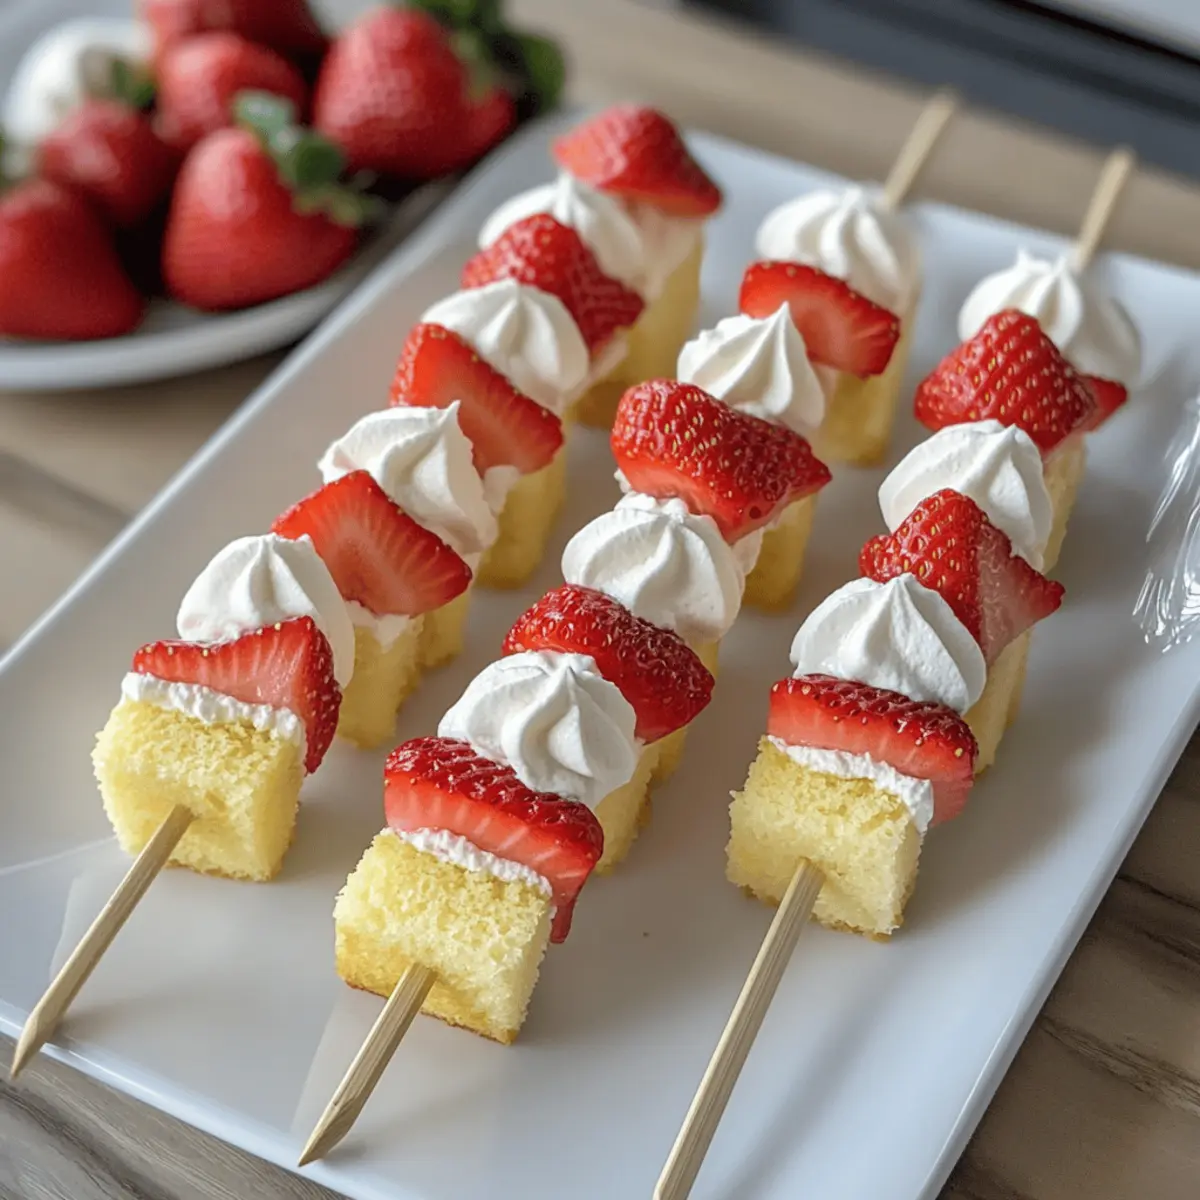
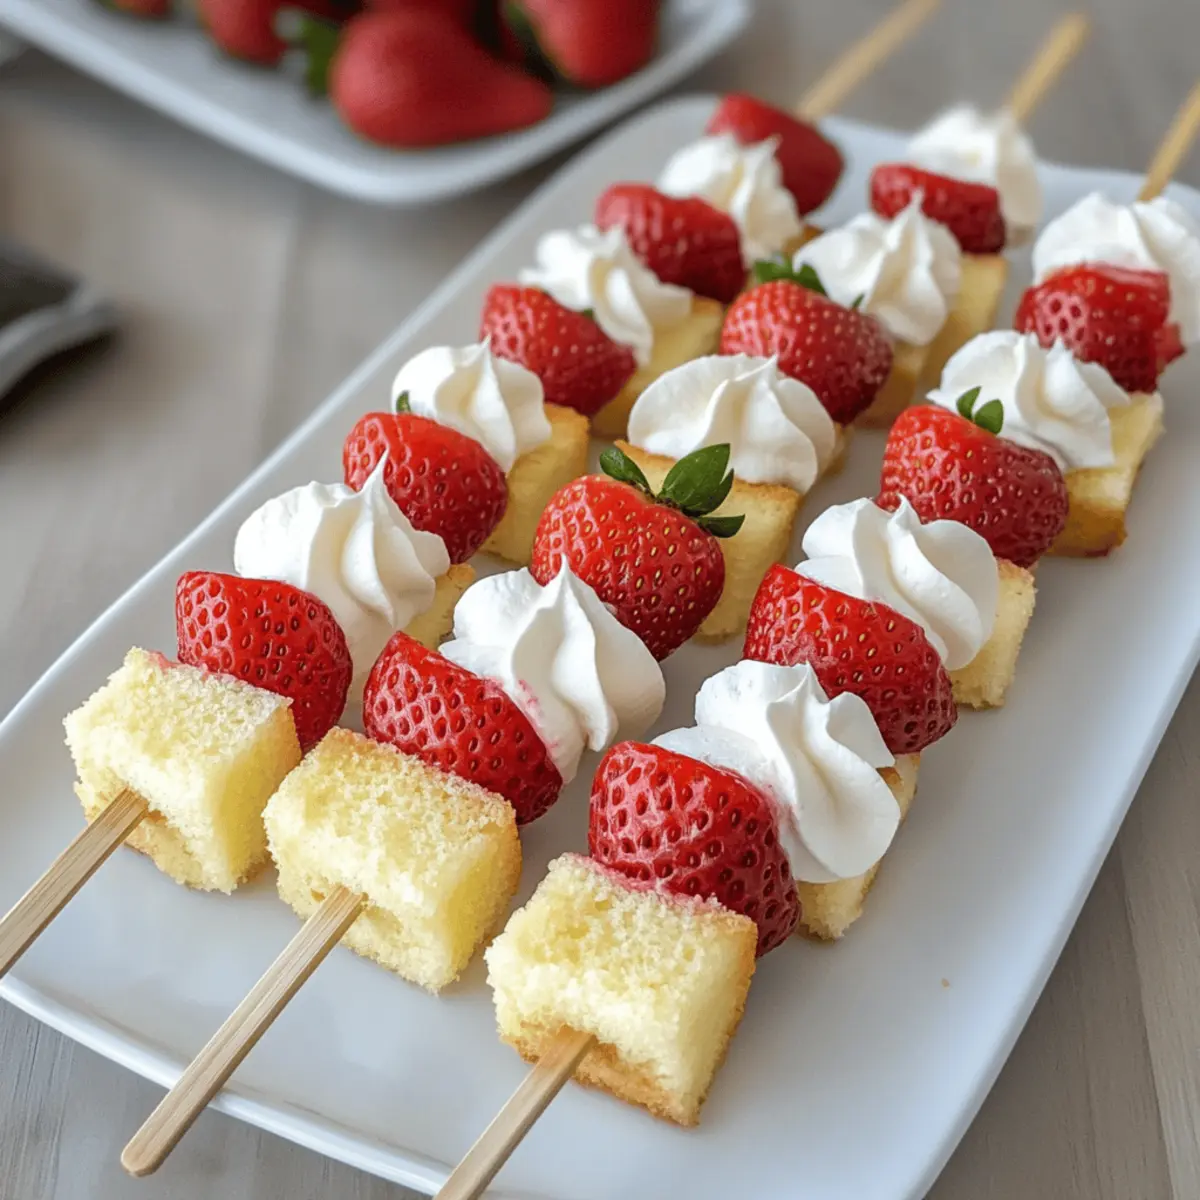
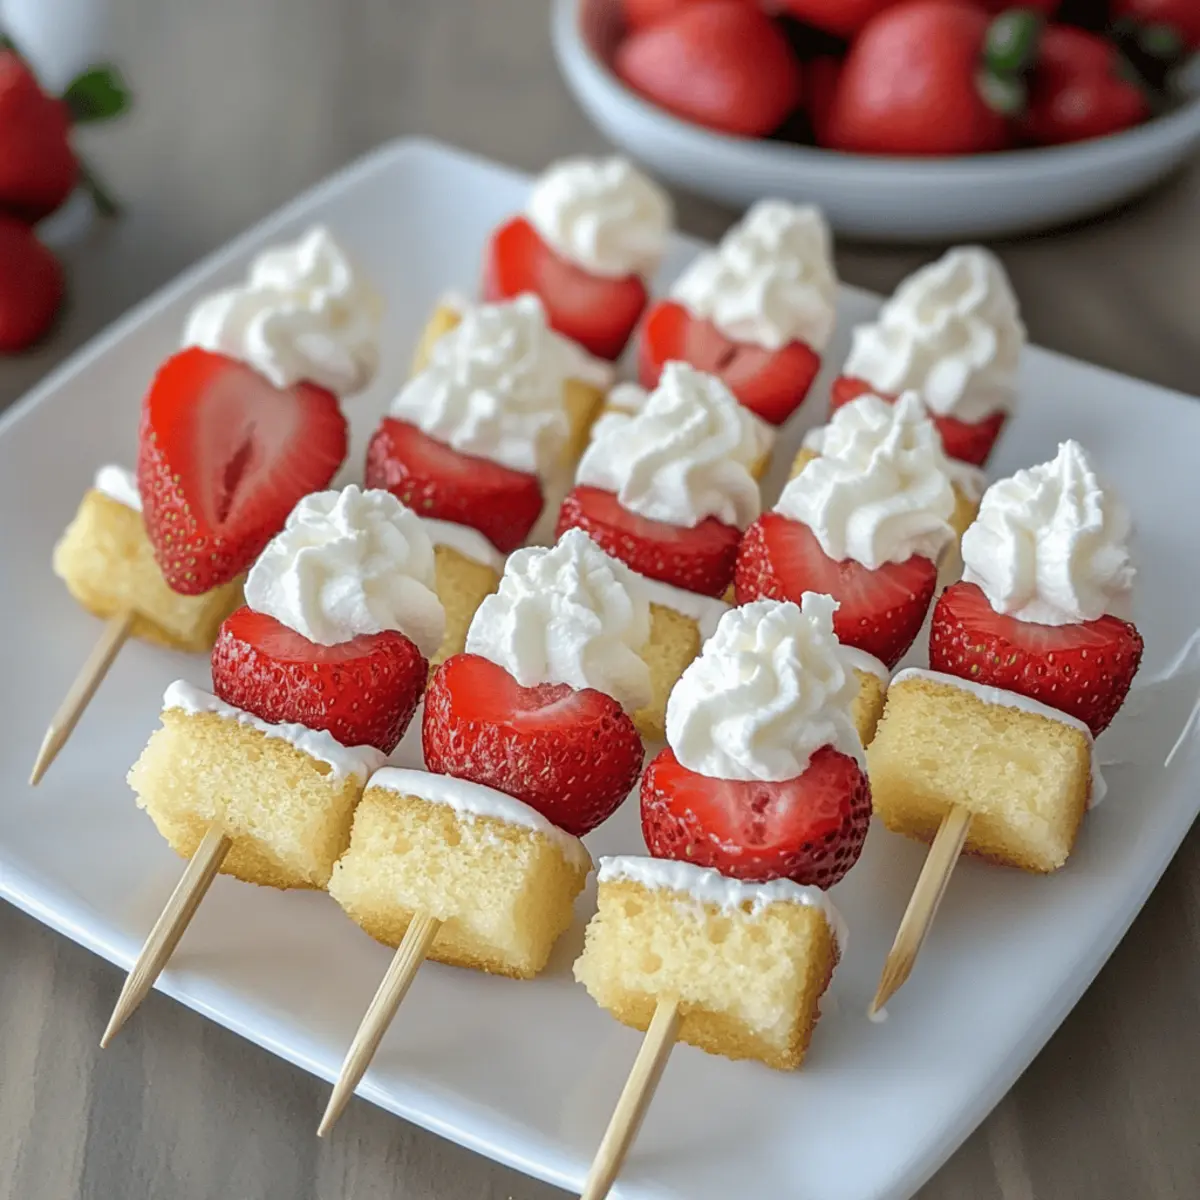
  • Homemade Fruit Skewers: Skewers featuring a mix of berries and other juicy fruits bring a colorful, refreshing crunch to each bite, enhancing the overall experience.
  • Chocolate-Dipped Strawberries: Add a touch of indulgence to your dessert spread—these sweet treats are not only visually appealing but also provide a playful bite of flavor.
  • Mini Cheesecake Bites: The creamy richness of cheesecake perfectly contrasts with the fluffy dessert, making these perfect for a more decadent finish to your meal.
  • Sparkling Water with Lime Zest: This thirst-quencher balances the sweetness of the salad with its invigorating fizziness, ensuring a refreshing sip after each indulgent bite.

Strawberry Shortcake Fluff Salad Recipe FAQs

What should I look for when selecting strawberries?
Absolutely! When choosing fresh strawberries, look for bright red, firm, and fragrant berries. Avoid those that are overly soft or have dark spots all over, as they may be overripe. If fresh strawberries aren’t available, frozen strawberries can be a great substitute—just be sure to thaw them and drain off any excess liquid to maintain the salad’s texture.

How do I store Strawberry Shortcake Fluff Salad?
Very good question! Store the Strawberry Shortcake Fluff Salad in an airtight container in the refrigerator for up to 3 days. It’s important to stir it gently before serving to reincorporate the ingredients, ensuring it keeps its fluffy, delightful texture.

Can I freeze Strawberry Shortcake Fluff Salad?
While it’s not recommended, if you find yourself with excess salad, you can freeze it. Place it in a suitable container and store for up to 2 months. When you’re ready to enjoy, thaw it overnight in the refrigerator. Just keep in mind that the texture may change after freezing.

What if my whipped cream topping is too runny?
If your whipped cream topping turns out runny, it may not have been whipped enough. To fix this, you can whip it further—if using heavy cream, beat it until stiff peaks form. Alternatively, you can add a bit of powdered sugar or instant pudding mix to stabilize it, which will also enhance the flavor!

Are there any dietary considerations for pets or allergies?
Yes, it’s essential to be mindful! While Strawberry Shortcake Fluff Salad is delicious for humans, avoid sharing it with pets, especially due to ingredients like sweetened condensed milk and marshmallows. Furthermore, if anyone has allergies to dairy, gluten, or specific fruits, ensure to substitute ingredients accordingly (like using coconut whipped cream or gluten-free cake) to keep everyone safe!

Can I make variations of this salad to cater to different diets?
Of course! You can go ahead and create gluten-free versions by using gluten-free cake; for vegan options, substitute with coconut whipped cream and vegan condensed milk. If you’re looking for a low-carb alternative, simply pick a low-carb cake and omit the marshmallows. The more the merrier when it comes to recipe customization!

Strawberry Shortcake Salad

Fluffy Strawberry Shortcake Salad That Will Delight Your Tastebuds

Delight in this Strawberry Shortcake Salad, a fluffy dessert combining fresh strawberries, marshmallows, and cake for a refreshing treat.
Prep Time 30 minutes
Chill Time 2 hours
Total Time 2 hours 30 minutes
Servings: 8 cups
Course: Dessert
Cuisine: American
Calories: 220

Ingredients
  

Salad Base
  • 2 pints Fresh Strawberries Use ripe, aromatic strawberries for the sweetest flavor.
  • 0.5 loaf Pound Cake or Angel Food Cake This provides structure to your salad.
Creamy Mixture
  • 10.5 oz Mini Marshmallows Adds sweet chewiness to the fluff.
  • 8 oz Whipped Cream Topping Homemade whipped cream is recommended.
  • 14 oz Sweetened Condensed Milk Enhances the creaminess.
Optional Add-ins
  • Cinnamon or Nutmeg Use for a warm seasonal flavor twist.
  • Fresh Mint Leaves For garnish.

Equipment

  • Mixing Bowl
  • whisk
  • spatula
  • Baking Sheet
  • Plastic Wrap

Method
 

Preparation Steps
  1. Slice the pound or angel food cake in half horizontally, then cut it into 1½ inch cubes. Set aside.
  2. In a large mixing bowl, combine the whipped topping and sweetened condensed milk. Beat on medium speed until smooth and creamy, about 2-3 minutes.
  3. Fold in the mini marshmallows gently, ensuring they’re evenly distributed throughout the fluff.
  4. Wash and slice the fresh strawberries. Fold them gently into the marshmallow mixture.
  5. Add the prepared cake cubes to the mixture and gently fold to combine.
  6. Cover the bowl with plastic wrap and refrigerate for at least 2 hours.
  7. Spoon the chilled salad into individual bowls or cups and garnish with strawberries or fresh mint leaves.

Nutrition

Serving: 1cupCalories: 220kcalCarbohydrates: 34gProtein: 3gFat: 9gSaturated Fat: 5gCholesterol: 30mgSodium: 100mgPotassium: 150mgFiber: 1gSugar: 18gVitamin A: 500IUVitamin C: 30mgCalcium: 50mgIron: 1mg

Notes

Store leftovers in an airtight container in the fridge for up to 3 days. Stir gently before serving again.

Tried this recipe?

Let us know how it was!

Creamy Pork Tenderloin: Your 30-Minute Dinner Game-Changer

As the savory scent of my Creamy Pork Tenderloin fills the kitchen, I can’t help but feel a wave of comfort wash over me. This recipe marries tender pork with a velvety creamy sauce, creating a deliciously satisfying meal in just 30 minutes. Perfect for busy weeknights or when you have guests, this one-pan wonder is both easy to prepare and impressive enough to elevate any dinner occasion. Plus, you can opt for a dairy-free version without sacrificing flavor! Whether you’re a passionate home-chef or someone simply seeking a delightful escape from fast food, this dish is sure to bring joy to your table. Who’s ready to dive into this creamy deliciousness?

Why Is Creamy Pork Tenderloin Your Best Choice?

Simplicity at its Core: This recipe is designed for busy lives, as it’s ready in just 30 minutes and requires minimal clean-up thanks to its one-pan approach.

Rich, Flavorful Sauce: The creamy sauce elevates the dish, infusing every bite with deep, mouthwatering flavors.

Versatile Meal Options: Serve it over mashed potatoes, rice, or pasta for a comforting twist, or pair it with steamed veggies for a lighter option.

Dairy-Free Option: Easily switch to coconut cream to enjoy a delicious, creamy flavor without the dairy—perfect for those with dietary restrictions.

Quick Crowd-Pleaser: Impress family and guests alike with an elegant meal that feels special but requires little effort.

This Creamy Pork Tenderloin is not just a meal; it’s a delightful escape from the ordinary. Click here for comfort food inspiration with this delicious Chicken Noodle Soup!

Creamy Pork Tenderloin Ingredients

For the Pork

  • Pork Tenderloin – Tender and cooks quickly; substitute with chicken breast if needed, adjusting cook times accordingly.

For the Sauce

  • Heavy Cream – Adds richness to the sauce; for a lighter option, use half-and-half or try coconut cream for a dairy-free alternative.
  • Chicken Broth – Provides depth of flavor; vegetable broth can substitute for a lighter alternative.
  • Thyme – Enhances aroma and flavor; if you need a substitute, use rosemary or Italian seasoning cautiously.
  • Dijon Mustard (optional) – Adds a delightful tang to the sauce.

For Cooking

  • Olive Oil or Butter – Used for searing the pork, creating a flavorful crust.
  • Garlic (2 cloves) – Provides aromatic depth to the sauce.
  • Onion (1 small) – Contributes base flavors; optional but recommended for added sweetness.

This Creamy Pork Tenderloin recipe is your go-to for a quick, elegant meal, ready in just 30 minutes!

Step‑by‑Step Instructions for Creamy Pork Tenderloin

Step 1: Prep the Pork
Begin by patting the pork tenderloin dry with paper towels to ensure a perfect sear. Season generously with salt and pepper on all sides. This simple step enhances the flavor and texture, setting the stage for your Creamy Pork Tenderloin. Set the meat aside while you prepare your cooking equipment.

Step 2: Heat the Skillet
In a large skillet, heat a tablespoon of olive oil or butter over medium-high heat until shimmering. This usually takes about 1-2 minutes. You want the oil hot enough to create a nice crust when you sear the pork. Ensure your skillet is large enough to accommodate the tenderloin without crowding.

Step 3: Sear the Pork
Carefully place the seasoned pork tenderloin in the hot skillet. Sear for about 3-4 minutes on each side until it develops a beautiful golden-brown crust. Use tongs to turn the meat, ensuring even cooking. Once browned, remove the pork from the skillet and let it rest on a cutting board, allowing the juices to redistribute.

Step 4: Sauté Aromatics
In the same skillet, add the minced garlic and chopped onion, sautéing for 1-2 minutes until fragrant and the onion becomes translucent. Scrape up any browned bits left from the pork with a wooden spoon, as these will add depth of flavor to your sauce. This step is essential for building the savory foundation of your Creamy Pork Tenderloin.

Step 5: Deglaze the Pan
Pour in 1 cup of chicken broth, using your spoon to scrape up those delicious caramelized bits from the bottom of the pan. Bring the mixture to a simmer and let it cook for about 2-3 minutes. This will concentrate the flavors, creating a rich base for your creamy sauce.

Step 6: Make the Creamy Sauce
Reduce the heat to medium-low and stir in 1 cup of heavy cream, along with Dijon mustard and fresh thyme. Allow the mixture to simmer for 4-5 minutes, stirring occasionally, until it thickens slightly. You’ll know it’s ready when the sauce coats the back of a spoon and takes on a luscious, creamy consistency ideal for drenching your pork.

Step 7: Return the Pork
Return the seared pork tenderloin to the skillet, ensuring it’s well-coated in the creamy sauce. Heat everything together for an additional 2-3 minutes, allowing the pork to warm through and absorb the flavors of the sauce. As the pork heats, the creamy consistency enhances every bite of the dish.

Step 8: Final Touches
Taste your sauce and adjust the seasoning with more salt and pepper if needed. Once satisfied, garnish with fresh parsley for a pop of color and freshness. Serve your delicious Creamy Pork Tenderloin over buttery mashed potatoes, rice, or pasta to soak up the velvety sauce, and relish the cozy, inviting flavors of this delightful meal.

Storage Tips for Creamy Pork Tenderloin

Fridge: Store leftovers in an airtight container for up to 2 days. Reheat gently on the stovetop or in the microwave until warmed through to maintain tenderness.

Freezer: This dish can be frozen for up to 3 months! Ensure it’s in a freezer-safe container. Thaw in the fridge overnight before reheating for optimal flavor and texture.

Reheating: When reheating, add a splash of chicken broth or cream to the skillet to help loosen the sauce and prevent stickiness. This way, your Creamy Pork Tenderloin will stay saucy and delicious!

Avoiding Storage Issues: To maintain the best quality, never refreeze pork that has already been thawed, and try to consume within the recommended timeframes for the best taste experience.

Make Ahead Options

These Creamy Pork Tenderloin are perfect for meal prep enthusiasts! You can season and sear the pork tenderloin up to 24 hours in advance, simply refrigerating it in an airtight container to maintain quality. Additionally, the creamy sauce can be made ahead and stored in the refrigerator for up to 3 days; just reheat gently on the stovetop. When ready to serve, warm the sauce and return the pork to it for 2-3 minutes, ensuring it’s heated through while retaining its juicy tenderness. By prepping these components in advance, you’ll enjoy a quick, elegant meal with minimal effort on busy nights!

Creamy Pork Tenderloin Variations

Feel free to customize your Creamy Pork Tenderloin and add your own twist to this delightful dish!

  • Dairy-Free: Swap heavy cream with coconut cream for a creamy richness without dairy. It offers a touch of tropical flavor!
  • Herb Swap: Use fresh rosemary or tarragon instead of thyme. These herbs provide a beautiful aromatic profile that adds a unique flair.
  • Heat Boost: Sprinkle in some red pepper flakes for a subtle kick. It’s a great way to warm up your countertop cooking without overpowering it.
  • Mushroom Medley: Sauté sliced mushrooms with garlic for earthy depth. Their silky texture enhances the overall creaminess of the sauce.
  • Leafy Greens: Incorporate fresh spinach or kale right before serving for a pop of color and an added nutritional boost.
  • Citrus Zest: A hint of lemon or orange zest can brighten the sauce, giving it a refreshing, zesty finish. Just a sprinkle does wonders!
  • Smoky Flavor: Introduce a dash of smoked paprika to add warmth and a smoky dimension. It pairs beautifully with the pork and the creamy sauce.
  • Nutty Toppings: Sprinkle chopped toasted walnuts or almonds over the finished dish for added texture and flavor contrast. A delightful crunch makes every bite exciting!

Looking for more inspiration? You might also want to try this enticing Sausage Tortellini Soup or a comforting bowl of Potato Bacon Soup. Enjoy creating your perfect version!

What to Serve with Creamy Pork Tenderloin

As you savor the luscious flavors of your tender pork in creamy sauce, consider these delightful companions to complete your meal.

  • Buttery Mashed Potatoes: The rich creaminess of mashed potatoes absorbs the sauce beautifully, making every bite irresistible. Their velvety texture enhances the comforting experience of your main dish.

  • Steamed Asparagus: Fresh and crisp, asparagus adds a vibrant crunch and a burst of color to your plate. Its slightly bitter notes contrast well with the creamy richness, creating a balanced bite.

  • Garlic Bread: Perfect for mopping up every last drop of that heavenly sauce, garlic bread offers a satisfying crunch. The buttery, garlicky flavor pairs wonderfully with the savory notes of the pork.

  • Roasted Brussels Sprouts: Crispy on the outside and tender inside, these little green gems are a delicious complement. Drizzling with balsamic glaze will add tang, enhancing the overall flavor profile.

  • Rice Pilaf: Fragrant and fluffy rice pilaf serves as a lovely backdrop for your pork. With its subtle flavors, it will soak up the creamy sauce, making it a crowd-pleaser.

  • Side Salad: A simple fresh salad with mixed greens, cherry tomatoes, and a light vinaigrette can cleanse the palate. The freshness contrasts nicely with the richness of the creamy pork tenderloin.

  • Chardonnay: A chilled glass of Chardonnay with its fruity and oaky notes will harmonize beautifully with the dish. Sipping this wine elevates the dining experience, making the evening feel special.

  • Chocolate Mousse: For dessert, indulge in a light chocolate mousse. Its airy texture and rich chocolate flavor will conclude your meal on a decadent note, leaving everyone satisfied.

Expert Tips for Creamy Pork Tenderloin

  • Searing Success: Ensure the pork is completely dry before searing to achieve that perfect golden crust, bringing out the best in your Creamy Pork Tenderloin.

  • Monitor Cooking Times: If using chicken breast instead, keep an eye on cooking times, as it cooks faster than pork, which may lead to dryness.

  • Taste and Adjust: Always taste your sauce before serving and adjust seasoning as needed; a little extra salt or pepper can elevate the dish’s flavor significantly.

  • Use Fresh Herbs Wisely: Opt for fresh thyme when possible for a vibrant flavor, but if using dried, remember that less is more to avoid overpowering the sauce.

  • Allow for Resting: Let the pork rest after cooking to retain moisture and ensure a juicy bite every time; this small step can make a big difference in your final dish.

  • Proper Storage: Store leftover Creamy Pork Tenderloin in an airtight container in the fridge for the best quality; it will taste best when consumed within two days.

Creamy Pork Tenderloin Recipe FAQs

How do I choose the perfect pork tenderloin?
Absolutely! Look for pork tenderloins that are firm, with a pinkish-red hue and no dark spots all over. The meat should feel moist but not slimy. If you’re in a grocery store, don’t hesitate to ask the butcher for a fresh piece!

What is the best way to store leftovers from the Creamy Pork Tenderloin?
Store any leftovers in an airtight container in the fridge for up to 2 days. Reheating gently on the stovetop or microwave will help maintain the tenderness. Just remember to add a bit of chicken broth or cream to keep it moist when you reheat!

Can I freeze this dish, and if so, how?
Yes, you can freeze your Creamy Pork Tenderloin! Ensure it’s in a freezer-safe container or wrap it tightly in foil. It can stay fresh in the freezer for up to 3 months. For reheating, just thaw it overnight in the fridge, then gently warm it up in a skillet, adding a splash of broth to keep the sauce creamy.

What if I need a dairy-free version of this recipe?
Very! You can easily switch out the heavy cream for coconut cream. Simply substitute an equal amount; this will give you a creamy texture while keeping it dairy-free. Just keep in mind that the coconut flavor will slightly alter the final taste!

Why is my sauce not thickening as expected?
No problem! If your sauce isn’t thickening, try letting it simmer for a bit longer and keep stirring. If it’s still too thin, whisk a teaspoon of cornstarch or flour with a tablespoon of water to make a slurry. Add it to your sauce and simmer for a couple of minutes until it thickens to the desired consistency.

Are there any dietary restrictions I should be aware of when serving this dish?
Absolutely! Since this Creamy Pork Tenderloin contains dairy and meat, it’s important to consider guests with lactose intolerance or those following a vegetarian or vegan diet. Providing a dairy-free substitute and a vegetarian option, like a hearty mushroom-based dish, can make everyone feel included at the table!

Creamy Pork Tenderloin

Creamy Pork Tenderloin: Your 30-Minute Dinner Game-Changer

Enjoy a quick and delicious Creamy Pork Tenderloin dish that brings comfort and flavor to your dinner table in just 30 minutes.
Prep Time 10 minutes
Cook Time 20 minutes
Total Time 30 minutes
Servings: 4 servings
Course: Dinner
Cuisine: American
Calories: 450

Ingredients
  

For the Pork
  • 1 pound Pork Tenderloin Tender and cooks quickly; substitute with chicken breast if needed.
For the Sauce
  • 1 cup Heavy Cream Adds richness; for a lighter option, use half-and-half or coconut cream for dairy-free.
  • 1 cup Chicken Broth Provides depth; can substitute with vegetable broth.
  • 1 teaspoon Thyme Enhances flavor; rosemary or Italian seasoning can be used if needed.
  • 1 tablespoon Dijon Mustard Optional; adds tang to the sauce.
For Cooking
  • 1 tablespoon Olive Oil or Butter For searing the pork.
  • 2 cloves Garlic Provides aromatic depth.
  • 1 small Onion Optional; contributes sweetness.

Equipment

  • Skillet

Method
 

Step-by-Step Instructions for Creamy Pork Tenderloin
  1. Pat the pork tenderloin dry and season with salt and pepper on all sides.
  2. Heat olive oil or butter in a skillet over medium-high heat until shimmering.
  3. Sear the pork tenderloin for 3-4 minutes on each sideuntil golden brown. Remove and let it rest.
  4. In the same skillet, sauté minced garlic and chopped onion for 1-2 minutes until fragrant.
  5. Deglaze the pan with chicken broth, scraping up browned bits, and simmer for 2-3 minutes.
  6. Stir in heavy cream, Dijon mustard, and thyme. Simmer for 4-5 minutes until thickened.
  7. Return pork to the skillet, coat with the sauce, and heat for 2-3 minutes.
  8. Adjust seasoning and garnish with fresh parsley. Serve over mashed potatoes, rice, or pasta.

Nutrition

Serving: 1servingCalories: 450kcalCarbohydrates: 10gProtein: 35gFat: 30gSaturated Fat: 15gPolyunsaturated Fat: 3gMonounsaturated Fat: 12gCholesterol: 105mgSodium: 600mgPotassium: 800mgFiber: 1gSugar: 1gVitamin A: 500IUVitamin C: 2mgCalcium: 50mgIron: 3mg

Notes

Store leftovers in an airtight container for up to 2 days. Reheat gently to maintain tenderness.

Tried this recipe?

Let us know how it was!

Succulent Baked Pork Chops with Maple Mustard Glaze

As I was flipping through an old family recipe book, I stumbled upon an unassuming gem: Maple Mustard Baked Pork Chops. The heady mix of sweet maple syrup and tangy mustard immediately sparked my taste buds, making me yearn for that delicious balance of flavors. This one-skillet dish is not just a time-saver, perfect for busy weeknights; it’s also packed with nutritious goodness, ensuring you and your loved ones enjoy a satisfying meal without the hassle of complicated cleanup. Whether you crave a sweet and spicy kick or want to experiment with fresh herbs, this versatile recipe has got you covered. Curious how this delightful meal can transform your dinner table? Let’s dive in!

Why Are Baked Pork Chops So Irresistible?

Simplicity at Its Best: This one-skillet dish is a breeze to prepare, making it ideal for those hectic weeknights when you want to whip up something delicious without the mess.

Bold Flavor Explosion: The enticing combination of maple syrup and Dijon mustard creates an irresistible glaze that entertains your palate with each bite.

Versatile Variations: Whether you’re craving a Sweet and Spicy twist or prefer to sprinkle in some fresh herbs, this recipe easily adapts to suit your cravings.

High-Protein Delight: With juicy pork chops, you’re not only indulging but also nourishing your body with a protein-packed meal! Need more ideas? Check out our Sweet Savory Brown recipe for another savory option!

Crowd-Pleasing Dish: Perfect for family dinners or gatherings, these baked pork chops are sure to impress even the pickiest eaters!

Baked Pork Chops Ingredients

For the Pork Chops
Bone-in Pork Chops – Main protein that provides flavor and texture; can use boneless chops, adjusting cooking time.
Olive Oil – For searing the pork chops; any vegetable oil can be a great substitute.

For the Glaze
Pure Maple Syrup – Adds sweetness and deep flavor; honey or agave syrup can replace it in a pinch.
Dijon Mustard – Contributes tang and depth to the glaze; yellow mustard works for a milder taste.
Whole Grain Mustard – Enhances texture and adds complexity; feel free to omit if preferred.
Minced Garlic – Infuses the dish with rich flavor; fresh garlic brings out the best in this glaze.
Fresh Rosemary and Thyme – These herbs lend aromatic notes; substitute with other fresh herbs like sage or Italian seasoning if desired.
Salt and Pepper – Essential for seasoning to enhance flavors.

For Cooking
Chicken Broth – Helps keep the pork moist during baking while adding flavor.

Step‑by‑Step Instructions for Maple Mustard Baked Pork Chops

Step 1: Preheat the Oven
Begin by preheating your oven to 375°F (190°C). This temperature is crucial for achieving the perfect baked pork chops that are juicy and tender. While the oven heats, you can prepare your glaze and get the pork chops ready, making sure everything flows smoothly.

Step 2: Prepare the Glaze
In a medium-sized bowl, combine pure maple syrup, Dijon mustard, whole grain mustard, minced garlic, fresh rosemary, thyme, salt, and pepper. Whisk thoroughly until well mixed. This flavorful glaze will elevate your Maple Mustard Baked Pork Chops, enhancing both their taste and appearance as it caramelizes in the oven.

Step 3: Season the Pork Chops
Pat the bone-in pork chops dry with paper towels and season both sides generously with salt and pepper. This step is essential for maximizing flavor. As you season, visualize searing the chops to golden perfection—a delicious contrast to the sweet glaze that awaits.

Step 4: Sear the Chops
Heat olive oil in an oven-safe skillet over medium-high heat. Once hot, carefully add the seasoned pork chops, searing them for about 3-4 minutes on each side until they develop a golden-brown crust. This not only locks in moisture but also adds a beautiful texture to your baked pork chops.

Step 5: Add the Glaze and Broth
Pour the prepared maple mustard glaze over the seared pork chops, ensuring they are evenly coated. Then, add chicken broth around the chops in the skillet. This broth will infuse moisture into the dish as it bakes, keeping the pork tender and flavorful.

Step 6: Bake the Chops
Transfer the skillet to your preheated oven and bake for 20-25 minutes. To ensure perfect doneness, use a meat thermometer; the internal temperature should reach 145°F (63°C). You’ll know your Maple Mustard Baked Pork Chops are ready when they are juicy and glazed with a beautiful caramelized sheen.

Step 7: Rest and Garnish
Once baked, remove the skillet from the oven and let the pork chops rest for 5 minutes. This resting time allows the juices to redistribute, ensuring each bite is succulent. As a finishing touch, garnish with fresh parsley and rosemary before serving for an extra pop of color and flavor.

Expert Tips for Baked Pork Chops

  • Rest the Chops: Let pork chops rest at room temperature for 30 minutes before cooking to ensure they cook evenly and stay juicy.

  • Use a Meat Thermometer: Aim for an internal temperature of 145°F (63°C) for perfectly cooked baked pork chops; this prevents overcooking.

  • Experiment with Glaze: Don’t hesitate to tweak the glaze by adding your favorite spices or experimenting with alternative sweeteners for unique flavors.

  • Searing Technique: Make sure the skillet is hot before adding the chops; a good sear locks in moisture, keeping the pork tender.

  • Marinade Ahead: For enhanced flavor, marinate the pork chops in the maple mustard mixture for several hours or overnight before cooking.

Make Ahead Options

These Maple Mustard Baked Pork Chops are perfect for meal prep enthusiasts! You can marinate the pork chops in the delightful maple mustard glaze for up to 24 hours in advance, ensuring the flavors deeply infuse the meat. Simply combine all marinade ingredients and coat the chops before refrigerating. If you’re short on time, preparing the glaze ahead and storing it separately allows for quick assembly on busy weeknights. When you’re ready to enjoy, sear the marinated pork chops and follow the baking instructions, resulting in succulent, juicy chops that taste just as delicious as if they were made fresh! This method not only saves time but guarantees a satisfying meal with minimal effort.

What to Serve with Maple Mustard Baked Pork Chops

When sitting down to enjoy the delightful flavors of your baked pork chops, it’s essential to create a well-rounded meal that complements the sweet and tangy glaze.

  • Creamy Mashed Potatoes: Their velvety texture balances the savory flavors, soaking up the delicious sauce from the pork chops perfectly.
  • Roasted Asparagus: The bright, crisp textures of roasted asparagus add a fresh crunch, enhancing the meal’s overall variety and vibrancy.
  • Honey-Glazed Carrots: Sweet yet earthy, honey-glazed carrots echo the maple syrup’s sweetness while providing a beautiful color contrast on your plate.
  • Garlic Butter Green Beans: Tender green beans sautéed in garlic butter not only add freshness but also create a harmonious flavor profile that complements the pork.
  • Warm Dinner Rolls: Soft, warm rolls are perfect for mopping up any leftover glaze, creating a comforting end to your meal.
  • Herbed Quinoa Salad: This light and nutritious salad adds a nutty flavor and chewy texture, providing a great contrast to the tender pork.
  • Crisp Apple Salad: A refreshing salad with tart apples and crunchy walnuts brings a delightful crunch and a touch of acidity, brightening the meal.
  • Chardonnay Wine: A glass of chilled Chardonnay provides a crisp, fruity note that enhances the dish’s flavors while inviting warmth to your dining experience.
  • Chocolate Mousse for Dessert: End on a sweet note with rich chocolate mousse, offering deep flavors that beautifully contrast the lightness of the pork dish.

Storage Tips for Baked Pork Chops

Fridge: Store leftover baked pork chops in an airtight container for up to 3 days. This will help maintain their juicy flavor and prevent drying out.

Freezer: If you want to keep your baked pork chops longer, freeze them wrapped tightly in plastic wrap and foil for up to 3 months. Thaw in the fridge overnight before reheating.

Reheating: To reheat, warm the pork chops in a skillet over medium heat for a few minutes on each side until heated through. This will help retain their tenderness, making your Baked Pork Chops just as delicious as day one!

Make-Ahead Tips: Consider marinating the pork chops in the maple mustard mixture overnight for even richer flavors, ready for quick cooking the next day!

Baked Pork Chops Variations & Substitutions

Feel free to customize these baked pork chops and make them your own with these delightful variation ideas!

  • Sweet and Spicy: Add hot sauce or red pepper flakes to the glaze for a fiery kick that balances the sweetness beautifully. This twist is perfect for those who enjoy a little heat in their meals.

  • Herb Lovers: Experiment with fresh herbs like oregano or basil if rosemary and thyme aren’t your favorites. Each herb brings its own unique flavor, elevating your dish in unexpected ways.

  • Dijon Swap: If Dijon mustard isn’t on hand, yellow mustard will impart a milder taste while still enhancing the glaze. This makes for an easier, accessible option that won’t sacrifice flavor.

  • Alternative Sweeteners: Use honey or agave syrup in place of maple syrup for a different profile. This swap gives you that touch of sweetness while introducing alternative flavors you may enjoy.

  • Boneless Chops: Try using boneless pork chops if you’re short on time—they cook faster and cut down on prep while still being deliciously juicy. Just make sure to adjust the cooking time accordingly!

  • Citrus Zest: Add a sprinkle of lemon or orange zest to the glaze for an aromatic twist; it brightens up the dish and perfectly complements the savory flavors.

  • Smoky Flavor: Incorporate smoked paprika into the glaze for an added depth that brings a delightful smokiness to your skillet. It’s an unexpected spin that smoky flavor aficionados will appreciate.

  • Nutty Crunch: Top your finished dish with chopped nuts like pecans or almonds for an enjoyable crunch that contrasts the tender pork and rich glaze.

With these suggested variations, you can explore your creativity and make this dish fit your family’s tastes. And if you’re in the mood for something different, consider checking out our Garlic Butter Baked chicken for another comforting and flavorful home-cooked meal!

Maple Mustard Baked Pork Chops Recipe FAQs

How do I select the best pork chops for this recipe?
Absolutely! For the best taste and texture, look for bone-in pork chops that are about 1-inch thick. They should have a nice pink color and some marbling for added juiciness. Avoid chops with dark spots or excessive liquid in the packaging, as these can indicate spoilage. If you’re aiming for quicker cooking, boneless chops can also work well, but adjust the cooking time accordingly.

What’s the best way to store leftover baked pork chops?
Very good question! Store leftover baked pork chops in an airtight container in the fridge for up to 3 days. Make sure they cool down to room temperature before sealing them tightly to retain moisture. For longer storage, consider freezing the chops wrapped in plastic wrap and aluminum foil—this can keep them fresh for up to 3 months.

Can I freeze baked pork chops? If so, how?
Absolutely! Freezing is a great option. To freeze your baked pork chops, allow them to cool completely first. Then, wrap each chop individually in plastic wrap for added protection against freezer burn. After that, place them in a heavy-duty freezer bag or an airtight container. For best results, consume them within 3 months. When you’re ready to enjoy them, simply thaw them in the fridge overnight, then reheat in a skillet for juiciness!

What if my pork chops are overcooked? How can I salvage them?
Don’t worry, it happens to the best of us! If your pork chops turn out overcooked, try slicing them thinly and adding them to a flavorful sauce or broth, which can help introduce moisture back into the meat. Alternatively, consider using them in a stir-fry or a casserole dish. For future cooking, always use a meat thermometer to ensure they reach an internal temperature of 145°F (63°C) to avoid overcooking.

Is this recipe suitable for people with dietary restrictions, such as allergies?
Great consideration! This recipe features several ingredients that could cause allergies, including mustard and chicken broth. If you or your guests have allergies, consider using alternative ingredients such as an allergy-friendly mustard and vegetable broth instead. Always double-check the labels for allergens, especially for any additional herbs or seasonings you plan on using. Enjoy your delicious meal worry-free!

How can I enhance the flavors of my baked pork chops?
Very creative! For enhanced flavors, marinating the pork chops in the maple mustard glaze for several hours or overnight can do wonders. Additionally, feel free to add spices like smoked paprika or even a splash of apple cider vinegar to the glaze for an acidic contrast. Experiment with different fresh herbs to find your favorite combination!

Baked Pork Chops

Succulent Baked Pork Chops with Maple Mustard Glaze

Delicious Baked Pork Chops glazed with a sweet and tangy Maple Mustard blend, perfect for a quick dinner.
Prep Time 15 minutes
Cook Time 25 minutes
Resting Time 5 minutes
Total Time 45 minutes
Servings: 4 chops
Course: Dinner
Cuisine: American
Calories: 300

Ingredients
  

For the Pork Chops
  • 4 pieces Bone-in Pork Chops Can use boneless chops, adjusting cooking time.
  • 2 tablespoons Olive Oil Can substitute with any vegetable oil.
For the Glaze
  • 1/2 cup Pure Maple Syrup Can replace with honey or agave syrup.
  • 2 tablespoons Dijon Mustard Yellow mustard works for a milder taste.
  • 1 tablespoon Whole Grain Mustard Feel free to omit if preferred.
  • 2 cloves Minced Garlic Fresh garlic is best.
  • 1 teaspoon Fresh Rosemary Can substitute with other fresh herbs.
  • 1 teaspoon Fresh Thyme Can substitute with other fresh herbs.
  • 1 teaspoon Salt
  • 1/2 teaspoon Pepper
For Cooking
  • 1/2 cup Chicken Broth Helps keep the pork moist.

Equipment

  • Oven-safe skillet

Method
 

Step-by-Step Instructions
  1. Preheat your oven to 375°F (190°C).
  2. In a medium-sized bowl, combine pure maple syrup, Dijon mustard, whole grain mustard, minced garlic, fresh rosemary, thyme, salt, and pepper. Whisk until well mixed.
  3. Pat the bone-in pork chops dry and season both sides with salt and pepper.
  4. Heat olive oil in an oven-safe skillet over medium-high heat. Add the pork chops, searing for 3-4 minutes on each side until browned.
  5. Pour the glaze over the seared pork chops, then add chicken broth around the chops in the skillet.
  6. Transfer the skillet to your preheated oven and bake for 20-25 minutes until internal temperature reaches 145°F (63°C).
  7. Remove from the oven and let the pork chops rest for 5 minutes before serving. Garnish with fresh parsley and rosemary.

Nutrition

Serving: 1chopCalories: 300kcalCarbohydrates: 12gProtein: 30gFat: 15gSaturated Fat: 4gPolyunsaturated Fat: 1gMonounsaturated Fat: 9gCholesterol: 80mgSodium: 600mgPotassium: 500mgSugar: 8gCalcium: 2mgIron: 4mg

Notes

Rest pork chops at room temperature for 30 minutes before cooking for even cooking and juiciness.

Tried this recipe?

Let us know how it was!

Strawberry Shortcake Kabobs: Your New Favorite Summer Treat

Stepping into the warmth of summer, I can almost hear the laughter and see the sun-drenched gatherings filled with friends and family enjoying delicious treats. One of my go-to favorites during these delightful days is Strawberry Shortcake Kabobs. These vibrant skewers effortlessly blend juicy strawberries, soft cake, and fluffy whipped cream into a fun, easy-to-make dessert that’s perfect for any picnic or barbecue. Not only do these kabobs add a playful twist to a classic summer dessert, but their lightweight nature ensures you can indulge without the guilt. Plus, they’re wonderfully customizable—swap in your favorite fruits or cakes for a personalized touch. What variations will you dream up to make these kabobs your own?

Why Will You Love These Kabobs?

Easy to Make: You don’t need chef-level skills to whip up these delightful Strawberry Shortcake Kabobs. With just a few ingredients and simple steps, you’ll impress your guests in no time!

Light and Refreshing: Perfect for summer parties, they’re a guilt-free indulgence that won’t weigh you down. With juicy strawberries and fluffy whipped cream, they’re a light yet satisfying treat.

Customizable Fun: Whether you want to swap strawberries for peaches or use angel food cake instead of pound cake, these kabobs are a blank canvas for your creativity. You can make them uniquely yours!

Picnic-Packed: Easy to transport and serve, they’re a picnic’s best friend, adding a touch of fun to any outdoor gathering.

Crowd-Pleasing: Kids and adults alike will love this playful dessert that brings a smile to everyone’s face! Pair these kabobs with a classic Strawberry Cheesecake for a delightful dessert spread.

Strawberry Shortcake Kabobs Ingredients

For the Kabobs

  • Fresh Strawberries – Choose ripe, juicy strawberries for the best flavor and sweetness in your kabobs.
  • Shortcake or Pound Cake – This serves as the delightful base; store-bought is great for convenience, but homemade adds a personal touch.
  • Whipped Cream – Essential for that classic strawberry shortcake flavor, you can make your own or use store-bought for ease.

For Assembling

  • Skewers – Opt for sturdy bamboo or metal skewers to ensure your kabobs hold together well during assembly and serving.

Feel free to mix and match with your favorite toppings and cake types to really make these Strawberry Shortcake Kabobs your own!

Step‑by‑Step Instructions for Strawberry Shortcake Kabobs

Step 1: Prepare the Strawberries
Start by washing your fresh strawberries under cool water to remove any dirt. Hull the strawberries by removing their green tops, and if they are large, slice them in half to create bite-sized pieces. This step is crucial for ensuring even assembly and easy eating. Set the prepared strawberries aside on a paper towel to absorb any excess moisture while you prepare the cake.

Step 2: Prepare the Cake
If you’re using homemade shortcake or pound cake, bake it according to your favorite recipe and allow it to cool completely. Once cooled, slice the cake into uniform cubes, approximately 1-inch in size. These cake pieces will serve as the delightful base for your Strawberry Shortcake Kabobs, adding texture and flavor that perfectly complements the strawberries.

Step 3: Assemble the Kabobs
Grab your sturdy skewers and begin assembling your Strawberry Shortcake Kabobs. Start by threading a strawberry onto the skewer, followed by a cube of cake, and then another strawberry. Alternate between strawberries and cake cubes, filling each skewer with 3-4 of each. Aim for a colorful presentation with vibrant red strawberries and golden cake pieces, making them visually appealing for your summer gatherings.

Step 4: Add the Whipped Cream
Once your kabobs are assembled, drizzle whipped cream over the skewers for a creamy finish. Alternatively, you can serve the whipped cream on the side as a dip, allowing everyone to add their desired amount. This enhances the classic strawberry shortcake flavor while keeping your Strawberry Shortcake Kabobs light and fun.

Step 5: Serve and Enjoy
Your delicious Strawberry Shortcake Kabobs are now ready to be enjoyed! These kabobs can be served immediately for the best texture. If making ahead, keep them in the fridge until it’s time to serve, but remember to add the whipped cream just before serving to prevent sogginess. Perfectly refreshing and delightful, they are sure to be a hit at any summer gathering.

Make Ahead Options

These Strawberry Shortcake Kabobs are ideal for meal prep, saving you valuable time during busy summer days! You can prepare the strawberries (washed and hulled) and the cake cubes up to 24 hours in advance; simply refrigerate them in separate airtight containers to maintain freshness. When ready to serve, thread the strawberries and cake onto the skewers, adding a drizzle of whipped cream just before enjoying to prevent the cake from becoming soggy. This will ensure your kabobs stay just as delicious, light, and visually appealing, making it easy to impress your guests with minimal effort. Enjoy the convenience of having a delightful dessert ready to go!

How to Store and Freeze Strawberry Shortcake Kabobs

Fridge: Store assembled kabobs in an airtight container in the refrigerator for up to 3 hours. This keeps them fresh but best enjoyed immediately for optimal texture.

Freezer: For longer storage, individually wrap kabobs in plastic wrap and place them in a freezer-safe bag. They can be frozen for up to 1 month but will lose some texture when thawed.

Reheating: If desired, gently thaw frozen kabobs in the fridge overnight before serving. Drizzle fresh whipped cream just prior to serving to maintain that delightful creaminess.

What to Serve with Strawberry Shortcake Kabobs?

Dive into the ultimate summer dessert experience by pairing these delightful treats with sides that enhance their fresh, fruity flavors.

  • Refreshing Fruit Salad: A mix of seasonal fruits adds a colorful, bright complement to the kabobs, enhancing the summer vibe. Toss in some mint for an added burst of freshness.

  • Vanilla Ice Cream: The creaminess of vanilla ice cream pairs beautifully with the lightness of the kabobs, making each bite a creamy delight. Serve it alongside for dipping or on the side for an indulgent treat.

  • Sparkling Lemonade: This effervescent beverage is perfect for summer gatherings, providing a zesty contrast to the sweetness of the kabobs. A slice of lemon adds a lovely touch for an eye-catching presentation.

  • Grilled Peaches: The warm, caramelized flavor of grilled peaches complements the strawberries perfectly, offering guests a mouthwatering mix of hot and cold textures. Drizzle with honey for an extra layer of sweetness.

  • Mini Cheesecakes: Miniature cheesecakes serve as a rich counterbalance to the strawberry kabobs, allowing guests to indulge in two distinct flavors. These decadent bites will surely delight your guests.

  • Chocolate Dipping Sauce: A silky chocolate sauce provides a decadent option for drizzling over the kabobs or serving as a dip, creating an irresistible marriage of flavors and textures that everyone will adore.

These thoughtful pairings will elevate your dessert experience, making your summer gatherings unforgettable!

Expert Tips for Strawberry Shortcake Kabobs

  • Choose the Right Strawberries: Opt for firm, ripe strawberries to maintain their shape during assembly. This prevents squishing and ensures each kabob is visually appealing.

  • Sturdy Skewers: Use quality bamboo or metal skewers to support the kabobs. This prevents breakage and allows for easier handling when serving guests.

  • Cake Consistency: If you make homemade cake, allow it to cool completely before cutting into cubes. This will help the cake pieces hold their shape and not crumble when skewered.

  • Whipped Cream Timing: Avoid soggy kabobs by adding whipped cream just before serving. This keeps the texture light and ensures a fresh taste with every bite.

  • Creative Variations: Don’t be afraid to mix it up! Swap strawberries for other fruits or experiment with different cake types for your own unique take on these Strawberry Shortcake Kabobs.

Strawberry Shortcake Kabobs Variations

Feel free to let your creativity shine while customizing these kabobs; your tastebuds will thank you!

  • Fruit Swap: Replace strawberries with peaches, blueberries, or even watermelon for a fresh twist that brings summer vibes. Each fruit offers a unique sweetness and texture that can elevate your kabob experience.

  • Cake Choice: Use angel food cake or sponge cake instead of shortcake for a lighter, airier treat. The delicate texture complements the juicy fruit perfectly without overwhelming the palate.

  • Flavored Whipped Cream: Amp up the creaminess by trying flavored whipped cream, like vanilla or coconut. This small addition can add an exciting flavor dimension that transforms your kabobs from delicious to truly sensational.

  • Chocolate Drizzle: For a decadent touch, drizzle melted chocolate over the assembled kabobs. The rich flavor of chocolate pairs beautifully with fresh fruit and give a gourmet touch that guests will adore.

  • Nutty Crunch: Sprinkle chopped nuts, like almonds or walnuts, between layers for a satisfying crunch. This not only adds texture but also a nutty flavor that beautifully complements the sweetness of the fruit.

  • Ginger Kick: Add thin slices of fresh ginger to the fruit for a zesty kick. The warmth of ginger adds a delightful contrast to the sweetness, creating a sophisticated flavor profile.

  • Spiced Sugar: Toss the strawberries in a pinch of cinnamon sugar before skewering. This enhances the natural sweetness and adds an intriguing warmth that makes these kabobs extra special.

  • Savory Twist: Replace the whipped cream with a dollop of mascarpone cheese mixed with a bit of honey for a creamy, slightly tangy alternative. It’s another way to play with flavor that makes your kabobs stand out.

Whether you choose to go with a classic or mix things up, these Strawberry Shortcake Kabobs are the perfect canvas for your culinary creativity! If you’re a fan of layering delicious flavors, you might also enjoy making some delightful Strawberry Cheesecake Dump for a rich dessert experience that pairs wonderfully with your kabobs. Another great option to look into is the delightful Steak Shrimp Kabobs for a savory complement to balance out all that sweetness. Happy cooking!

Strawberry Shortcake Kabobs Recipe FAQs

What should I look for when selecting strawberries?
Absolutely! When choosing strawberries, you want to pick ones that are ripe, firm, and vibrant in color. Look for strawberries that are shiny and free from dark spots or bruises, as these can indicate overripeness. Ripe strawberries will give you the sweetest flavor and juiciness that perfectly complements your kabobs!

How should I store leftover kabobs?
Very well! If you have any leftover assembled kabobs, store them in an airtight container in the refrigerator. They can last up to 3 hours before the cake starts to lose its texture. For the best experience, it’s best to serve them fresh, but if you need to store them, keep whipped cream separate and add it just before serving.

Can I freeze Strawberry Shortcake Kabobs?
Certainly! To freeze your kabobs, wrap each one individually in plastic wrap. Then, place them in a freezer-safe bag or container, ensuring you remove as much air as possible. They can be stored for up to 1 month. To enjoy, simply thaw them in the refrigerator overnight and drizzle whipped cream on top just before serving for that fresh taste!

What if my cake crumbles when I cut it?
No worries at all! If you’re using a homemade shortcake or pound cake and it’s crumbling, ensure you allow it to cool completely before cutting it into cubes. For a firmer texture, you might also consider using a firmer cake like a pound cake, or even chilling the cake briefly in the fridge before cutting to help it hold its shape better during assembly.

Are these kabobs suitable for kids or those with allergies?
Absolutely! These Strawberry Shortcake Kabobs can be a fun treat for kids! However, if anyone has allergies, be mindful of the cake and whipped cream ingredients. You can always switch to gluten-free options for the cake or use dairy-free whipped cream for those with specific dietary restrictions. The customizable nature of these kabobs makes accommodating various needs easy and delightful!

Strawberry Shortcake Kabobs

Strawberry Shortcake Kabobs: Your New Favorite Summer Treat

Discover Strawberry Shortcake Kabobs, a refreshing summer treat that blends juicy strawberries, soft cake, and whipped cream for a delightful dessert.
Prep Time 15 minutes
Total Time 15 minutes
Servings: 6 kabobs
Course: Dessert
Cuisine: American
Calories: 150

Ingredients
  

For the Kabobs
  • 1 pound Fresh Strawberries Choose ripe, juicy strawberries for the best flavor.
  • 1 loaf Shortcake or Pound Cake Store-bought is great for convenience.
  • 1 cup Whipped Cream Use homemade or store-bought.
For Assembling
  • 6 units Skewers Opt for sturdy bamboo or metal skewers.

Equipment

  • skewers

Method
 

Step-by-Step Instructions for Strawberry Shortcake Kabobs
  1. Prepare the Strawberries: Wash strawberries under cool water, hull, and slice if large. Set aside on a paper towel.
  2. Prepare the Cake: Bake cake if homemade and allow to cool. Slice into 1-inch cubes.
  3. Assemble the Kabobs: Thread strawberries and cake cubes onto skewers, alternating between them.
  4. Add the Whipped Cream: Drizzle whipped cream over skewers or serve on the side.
  5. Serve and Enjoy: Serve immediately or refrigerate until time to serve, adding whipped cream just before serving.

Nutrition

Serving: 1kabobCalories: 150kcalCarbohydrates: 20gProtein: 2gFat: 7gSaturated Fat: 4gMonounsaturated Fat: 3gCholesterol: 25mgSodium: 50mgPotassium: 150mgFiber: 1gSugar: 12gVitamin A: 200IUVitamin C: 15mgCalcium: 30mgIron: 0.5mg

Notes

Best enjoyed immediately for optimal texture. Customize with other fruits or cakes as desired.

Tried this recipe?

Let us know how it was!

Tender Smothered Pork Chops in Creamy Comfort Sauce

The aroma of a warm, cozy meal filling your home is unmatched, and that’s exactly what you’ll experience with these Easy Crock Pot Smothered Pork Chops. As I toss those tender, succulent pork chops into my slow cooker, I can already envision how this creamy, flavorful dish will save the day on those busy evenings. What I love most about this recipe is that it’s not just a delightful family-friendly meal; it’s one you can set and forget, letting the crock pot work its magic. Plus, it’s a comfort food classic that pairs perfectly with mashed potatoes or rice, making it a dinner hero worthy of your table. Are you ready to transform your dinner routine with this cozy recipe? Let’s dive in!

Why are Smothered Pork Chops a Family Favorite?

Tenderness is key: Slow cooking ensures your pork chops become melt-in-your-mouth delicious, creating a dish that everyone will linger over. Creamy sauce magic: The blend of cream of mushroom and onion soups adds an irresistible richness that enhances the overall flavor. Versatile pairing options: Whether served with mashed potatoes, rice, or egg noodles, this recipe adapts beautifully to your sides. Time-saving convenience: Simply set your crock pot and let it do the work while you relax. Plus, check out our Sweet Savory Brown recipe for another fantastic pork dish! Your family will thank you for this comforting meal at the end of a busy day.

Smothered Pork Chops Ingredients

• Discover the essentials of creating your favorite creamy comfort dish!

For the Pork Chops

  • Boneless Pork Chops – Tender and juicy, these are the star of the dish; consider bone-in for richer flavor.

For the Creamy Sauce

  • Cream of Mushroom Soup – Adds creaminess and depth; you can substitute with homemade or dairy-free alternatives.
  • Cream of Onion Soup – Enhances flavor harmony; it can also be replaced with a similar soup.
  • Beef Broth – Infuses a hearty flavor; chicken or vegetable broth can be used if preferred.

For the Aromatics

  • Onions – Freshly sliced elevates flavor; pre-chopped can save time.
  • Garlic – Fresh minced garlic adds zesty aroma; garlic powder works for quick preparation.

For the Cooking Process

  • Olive Oil – Essential for searing, helping to lock in moisture and flavor.
  • Salt, Pepper, and Paprika – Key seasonings for enhancing taste; adjust to your family’s preference.

Step‑by‑Step Instructions for Easy Crock Pot Smothered Pork Chops

Step 1: Preparation
Start by seasoning your boneless pork chops with salt, pepper, and paprika on both sides. This simple step will enhance the flavors of your Easy Crock Pot Smothered Pork Chops. Allow the seasoning to sit for a few minutes, letting the spices really penetrate the meat for a richer taste.

Step 2: Searing
Heat a tablespoon of olive oil in a skillet over medium heat. Once hot, carefully add the pork chops and sear them for 2-3 minutes on each side until they are golden brown and have a nice crust. This will lock in the moisture and flavor, ensuring that your pork chops are ultra-tender after cooking.

Step 3: Sautéing
In the same skillet, add the sliced onions and minced garlic. Sauté for about 3-4 minutes, stirring occasionally, until the onions are soft and translucent. This step not only deepens the flavors but also adds a lovely aroma to your Easy Crock Pot Smothered Pork Chops.

Step 4: Sauce Preparation
In a separate bowl, combine the cream of mushroom soup, cream of onion soup, beef broth, Worcestershire sauce, and dried thyme. Stir well until the mixture is smooth and fully blended. This creamy sauce will be poured over the pork chops and is what makes this dish so comforting and rich.

Step 5: Crock Pot Assembly
Place the seared pork chops at the bottom of your crock pot. Pour the creamy sauce over them, ensuring they are well coated. Then, top with the sautéed onions and garlic, distributing them evenly. This layer of sauce will create a wonderful base for your Easy Crock Pot Smothered Pork Chops to simmer in.

Step 6: Cooking
Cover the crock pot and set it to cook on low for 6-7 hours or on high for 3-4 hours. Avoid lifting the lid during cooking, as this can let out the steam needed for tender chops. When done, the pork should be fork-tender, flavorful, and full of that creamy sauce you’ve prepared.

Step 7: Final Touches
Once cooked, gently stir the sauce before serving the Easy Crock Pot Smothered Pork Chops. Taste and adjust the seasoning if needed. For an added touch of freshness, you can garnish with chopped parsley. Now, serve this warm and comforting dish over mashed potatoes, rice, or egg noodles, and savor the deliciousness!

Expert Tips for Smothered Pork Chops

  • Searing is Crucial: Searing the pork chops locks in moisture and enhances flavor, ensuring your smothered pork chops are juicy and delicious.

  • Trust the Timer: Avoid lifting the lid while cooking! Keeping the steam inside is key for achieving fork-tender pork chops.

  • Adjust Cooking Time for Frozen Chops: If using frozen pork chops, increase the cooking time. Cook on high for 4-5 hours or low for 7-8 hours for best results.

  • Substitutions Allowed: Feel free to use homemade or non-dairy soups in place of cream of mushroom and onion; this keeps the dish adaptable for various dietary needs.

  • Last-Minute Seasoning: Before serving, taste the sauce and adjust the seasoning if needed; a little salt or pepper can make a big difference in flavor!

  • Serving Ideas: Pair smothered pork chops with mashed potatoes, rice, or egg noodles for a comforting meal that’s always a family favorite.

Smothered Pork Chops Variations & Substitutions

Customize your smothered pork chops with these delicious twists, enhancing flavor and accommodating dietary preferences!

  • Dairy-Free: Substitute cream soups with homemade cashew or coconut milk-based versions for a creamy texture.
  • Herb Infusion: Add fresh rosemary or thyme to the sauce for an aromatic twist that elevates the dish’s flavor profile.
  • Spicy Kick: Incorporate a teaspoon of red pepper flakes or a dash of hot sauce for a delightful heat that contrasts the creaminess.
  • Vegetarian Delight: Replace pork chops with hearty portobello mushrooms or eggplant for a satisfying vegetarian version, utilizing vegetable broth.
  • Extra Veggies: Mix in diced carrots or bell peppers with the onions for added sweetness and a pop of color, making it visually appealing.
  • Slow Cooked Variations: Try adding sweet potatoes or butternut squash to the crock pot for a comforting touch that rounds out the meal.
  • Smoky Flavor: Use smoked paprika instead of regular paprika for a subtle smokiness, or add a touch of liquid smoke to the sauce.
  • Mushroom Medley: Combine different types of mushrooms like shiitake, cremini, or porcini for an umami-rich sauce that your family will love.

Now that you’ve got a list of scrumptious variations, why not serve these tender smothered pork chops over a bed of buttery mashed potatoes? For another delightful dinner idea, don’t forget to check out our recipe for Sweet Savory Brown pork chops that will surely impress!

What to Serve with Easy Crock Pot Smothered Pork Chops

Indulging in these creamy, savory pork chops invites you to create a delightful meal that engages all the senses.

  • Creamy Mashed Potatoes: A classic choice, their rich texture soaks up the delicious sauce beautifully, creating pure comfort in every bite.
  • Steamed Broccoli: The tender, vibrant florets add a touch of freshness, balancing the heaviness of the pork with their bright, earthy flavor.
  • Garlic Bread: Perfect for mopping up every bit of that creamy sauce, its crispy, buttery layers will add a lovely crunch to your meal.
  • Sweet Corn: The natural sweetness contrasts wonderfully with the savory pork, offering a comforting side that brings a little sunshine to your plate.
  • Fresh Garden Salad: Light and crisp, a salad with mixed greens and a tangy vinaigrette adds a refreshing counterpoint to the hearty pork.
  • Egg Noodles: Soft and silky, these noodles serve as a fantastic base for the rich sauce, enhancing the overall warmth of the dish.
  • Roasted Carrots: Tender and caramelized, their natural sweetness complements the flavors, providing a delightful mix of textures.
  • Apple Sauce: This fruity side brings a sweet-tart contrast to the meal, a nostalgic pairing that adds an unexpected twist.
  • Iced Tea or Lemonade: Refreshing drinks offer hydration and a crisp taste that balances the richness of the dish perfectly.

Make Ahead Options

These Easy Crock Pot Smothered Pork Chops are perfect for meal prep enthusiasts looking to simplify busy evenings! You can season and sear the pork chops up to 24 hours in advance, then refrigerate them until you’re ready to cook. Moreover, you can also combine the creamy sauce ingredients and store them in an airtight container for up to 3 days. When you’re ready to enjoy your dish, simply pour the sauce over the pork chops in the crock pot, add sautéed onions and garlic, and set your cooker to the desired setting. This way, you’ll have delicious, comforting chops waiting for you after a long day, just as you envisioned!

How to Store and Freeze Smothered Pork Chops

  • Fridge: Store leftovers in an airtight container for up to 3 days. This keeps your smothered pork chops fresh and ready for another comforting meal.
  • Freezer: For longer storage, freeze your pork chops in a freezer-safe container for up to 3 months. Make sure to label with the date for easy tracking.
  • Reheating: Thaw frozen smothered pork chops in the fridge overnight. Reheat gently in the microwave or on the stovetop with a splash of broth to maintain moisture.
  • Keep the Sauce: Always store the sauce separately if possible; mixing it with the pork chops can lead to a soggier texture upon reheating.

Easy Crock Pot Smothered Pork Chops Recipe FAQs

How can I select the best pork chops for this recipe?
Absolutely! When choosing pork chops, opt for boneless for tenderness, or consider bone-in for added flavor. Look for cuts with a nice pink color and minimal dark spots; they should feel firm to the touch. Fresh pork chops are the best choice, but if you can only find frozen, they will work just fine—just adjust the cooking time as needed!

What is the best way to store leftovers from this dish?
Very good question! To keep your Easy Crock Pot Smothered Pork Chops fresh, place them in an airtight container and store in the refrigerator for up to 3 days. If you want to enjoy them later, consider freezing; just make sure to let them cool completely before transferring to a freezer-safe container.

How do I freeze smothered pork chops properly?
Freezing is a great way to save extra portions! First, allow the smothered pork chops to cool completely. Then, place each portion in a freezer-safe container or heavy-duty freezer bag, removing as much air as possible. Label with the date, and freeze for up to 3 months. When you’re ready to enjoy, simply thaw in the refrigerator overnight and reheat with a splash of broth to retain that creamy goodness!

What if my pork chops turn out tough?
If your pork chops seem tough, it’s likely due to cooking them at too high of a temperature or not allowing them to cook long enough. Slow cooking is crucial for tenderness! Next time, make sure to use the low setting for 6-7 hours and resist the urge to lift the lid during cooking—keeping that steam inside is vital for melt-in-your-mouth chops.

Are there any dietary considerations I should think about?
Absolutely! If you’re cooking for someone with dietary restrictions, feel free to substitute the cream of mushroom and onion soups with homemade versions or non-dairy options. Additionally, if anyone in your home has allergies, always check the labels on your ingredients, especially broths and canned soups. This ensures everyone can enjoy your comforting meal without worry!

Can I use different types of broth in this recipe?
Yes! While beef broth adds a deep, rich flavor, you can absolutely use chicken or vegetable broth for a lighter option. Each will enhance the dish in its unique way, so feel free to experiment based on your family’s preferences!

Smothered Pork Chops

Tender Smothered Pork Chops in Creamy Comfort Sauce

Tender Smothered Pork Chops are a comforting dish that everyone's family will enjoy.
Prep Time 20 minutes
Cook Time 6 hours 30 minutes
Total Time 6 hours 50 minutes
Servings: 4 chops
Course: Dinner
Cuisine: American
Calories: 350

Ingredients
  

For the Pork Chops
  • 4 chops Boneless Pork Chops Bone-in for richer flavor
For the Creamy Sauce
  • 1 can Cream of Mushroom Soup Substitute with homemade or dairy-free alternatives
  • 1 can Cream of Onion Soup Can replace with a similar soup
  • 1 cup Beef Broth Chicken or vegetable broth can be used if preferred
For the Aromatics
  • 1 large Onion Freshly sliced or pre-chopped
  • 2 cloves Garlic Minced or garlic powder for quick preparation
For the Cooking Process
  • 1 tablespoon Olive Oil Essential for searing
  • 1 teaspoon Salt Adjust to preference
  • 1 teaspoon Pepper Adjust to preference
  • 1 teaspoon Paprika Adjust to preference

Equipment

  • Crock-Pot
  • Skillet

Method
 

Step-by-Step Instructions
  1. Season the boneless pork chops with salt, pepper, and paprika on both sides.
  2. Heat olive oil in a skillet over medium heat and sear the pork chops for 2-3 minutes on each side until golden brown.
  3. Sauté sliced onions and minced garlic in the same skillet for about 3-4 minutes until soft and translucent.
  4. Combine cream of mushroom soup, cream of onion soup, beef broth, Worcestershire sauce, and dried thyme in a separate bowl and stir until smooth.
  5. Place seared pork chops in the crock pot, pour the creamy sauce over them, and top with sautéed onions and garlic.
  6. Cover and cook on low for 6-7 hours, or on high for 3-4 hours.
  7. Once cooked, gently stir the sauce and serve the pork chops over mashed potatoes, rice, or egg noodles.

Nutrition

Serving: 1chopCalories: 350kcalCarbohydrates: 12gProtein: 30gFat: 20gSaturated Fat: 5gPolyunsaturated Fat: 0.5gMonounsaturated Fat: 10gCholesterol: 90mgSodium: 800mgPotassium: 600mgFiber: 1gSugar: 2gVitamin A: 300IUVitamin C: 5mgCalcium: 20mgIron: 3mg

Notes

Always store the sauce separately for best texture upon reheating.

Tried this recipe?

Let us know how it was!

Hearty Potatoes and Smoked Sausage for Cozy Nights

There’s something magical about the aroma of roasted potatoes mingling with the smoky scent of sausage wafting through your kitchen. As I was experimenting one evening, I stumbled upon the combination of Cheesy Ranch Potatoes and Smoked Sausage, and I knew I had struck gold. This hearty one-pan meal is not just a delight for your taste buds but also a lifesaver on busy weeknights when you crave something comforting yet effortless. With crispy potatoes that soak up all that zesty ranch goodness, paired with savory sausage and melted cheese, it’s a dish that beckons for customization. You can easily adapt it to fit your preferences—add your favorite veggies or swap out the sausage for a lighter option. So, are you ready to dive into this delightful recipe that turns everyday ingredients into family favorites? Let’s get cooking!

Why Will You Love This Dish?

Simplicity at Its Finest: This one-pan meal requires minimal prep and clean-up, making it perfect for busy weeknights.

Bold, Flavorful Experience: Infused with zesty ranch seasoning and gooey cheese, each bite delivers a delightful explosion of flavor that everyone will love.

Customizable Creativity: Feel free to personalize your creation—swap smoked sausage for turkey sausage or toss in fresh vegetables for extra color and nutrition.

Comforting & Satisfying: Imagine tender, crispy potatoes paired with smoky sausage, evoking warmth and comfort with every serving.

Plus, if you’re in the mood for more hearty meals, don’t miss out on this Creamy Parmesan Italian Sausage Ditalini Soup or try the Cajun Sausage Pasta for an extra kick.

Potatoes and Smoked Sausage Ingredients

• Dive into the fantastic flavors of Cheesy Ranch Potatoes and Smoked Sausage with these essential ingredients.

For the Potatoes

  • Potatoes – The heart of the dish, providing that perfect texture—use sweet potatoes for a healthier twist!
  • Olive Oil – Essential for roasting, it gives potatoes that golden crunch—feel free to replace with melted butter for a richer flavor.

For the Smoked Sausage

  • Smoked Sausage – Brings a smoky, savory punch to the dish—turkey sausage is a great lighter alternative!

For the Flavor

  • Ranch Seasoning – This zesty blend elevates the entire dish, so consider using homemade ranch for a fresh touch!
  • Garlic Powder – Adds a delightful depth of flavor—fresh minced garlic can make it even more aromatic.

For the Cheesy Topping

  • Cheese – Melty and comforting, it ties everything together—opt for cheddar or pepper jack for an extra kick!

Step‑by‑Step Instructions for Cheesy Ranch Potatoes and Smoked Sausage

Step 1: Preheat the Oven
Start by preheating your oven to 450°F (232°C). This high temperature is essential for achieving perfectly crisp potatoes. While the oven warms up, gather your other ingredients, ensuring you have everything ready for the upcoming steps. This will make the cooking process smooth and enjoyable, setting the stage for your Cheesy Ranch Potatoes and Smoked Sausage.

Step 2: Prepare the Ingredients
Wash and dice your potatoes into even, bite-sized pieces to ensure they cook evenly. For the smoked sausage, slice it into similarly sized chunks. This uniformity will enhance the overall cooking process, allowing all ingredients to roast beautifully. As you prepare, imagine the delightful combination of flavors about to unfold in your dish.

Step 3: Combine the Potatoes
In a large mixing bowl, toss the diced potatoes with olive oil, ranch seasoning, and garlic powder. Ensure each piece is well coated with the seasoning for maximum flavor. Once thoroughly combined, transfer the potatoes onto a baking sheet, spreading them out evenly. This creates space for the potatoes to crisp up nicely in the oven, forming the base of your Cheesy Ranch Potatoes and Smoked Sausage.

Step 4: Add the Smoked Sausage
Evenly distribute the sliced smoked sausage over the seasoned potatoes on the baking sheet. This careful arrangement helps the sausage release its smoky flavor while roasting, allowing it to infuse into the potatoes. The contrast of colors and textures will make this one-pan meal even more inviting as you prepare to place it in the oven.

Step 5: Roast the Mixture
Place the baking sheet in the preheated oven and roast for 30-45 minutes. Stir the mixture halfway through to ensure even cooking and crispy edges. Keep an eye on the potatoes; they should be golden and crisp when done, while the sausage gets beautifully heated through. This roasting process is where the magic happens, transforming your ingredients into a savory delight.

Step 6: Add the Cheese
During the last 5 minutes of baking, sprinkle your choice of cheese generously over the roasted potatoes and sausage. Close the oven door quickly to maintain the temperature, allowing the cheese to melt and become bubbly. This will add an indulgent layer to your Cheesy Ranch Potatoes and Smoked Sausage, creating a delicious, gooey topping that is hard to resist.

Step 7: Serve and Enjoy
Once everything is beautifully roasted and the cheese is melty, remove the dish from the oven. Allow it to cool slightly before serving. Consider garnishing with fresh herbs or additional ranch dressing for an extra touch. Serve your hearty Cheesy Ranch Potatoes and Smoked Sausage warm, and enjoy the comforting flavors that will surely bring smiles to your table.

How to Store and Freeze Cheesy Ranch Potatoes

Fridge: Store leftovers in an airtight container for up to 3 days. This will keep your Cheesy Ranch Potatoes and Smoked Sausage fresh and ready for quick meals.

Freezer: For longer storage, freeze portions in freezer-safe bags for up to 2 months. Make sure to label the bags with the date to track freshness.

Reheating: To reheat, place it in the oven at 350°F (175°C) for about 15-20 minutes, or until heated through. This method retains the dish’s crispy texture.

Thawing Tip: If frozen, thaw overnight in the refrigerator before reheating to ensure even cooking and avoid a soggy texture.

Potatoes and Smoked Sausage Variations

Feel free to experiment and customize this comforting dish to match your taste buds and dietary needs!

  • Sweet Potato Swap: Substitute regular potatoes with sweet potatoes for a touch of sweetness and added nutrition.
  • Turkey Sausage Twist: Use turkey sausage instead of smoked sausage for a lighter version that still packs plenty of flavor.
  • Veggies Galore: Add bell peppers, zucchini, or broccoli for extra color and nutrients; they will roast beautifully alongside the potatoes.
  • Spicy Kick: For those who crave heat, toss in red pepper flakes or sliced jalapeños to spice things up a notch!
  • Creamy Finish: Don’t hold back on the creaminess—top each serving with a dollop of sour cream or drizzle ranch dressing for extra richness.
  • Cheesy Delight: Experiment with different cheeses like pepper jack for a spicier finish or a blend of cheeses for depth.
  • Herbed Variation: Infuse fresh herbs such as thyme, rosemary, or parsley to elevate the flavor profile; fresh ingredients make all the difference.
  • One-Pan Classic: Serve it as a full meal by pairing with a side of Parmesan Chicken Potatoes or alongside a crisp salad for a delightful balance.

By making these variations, your Cheesy Ranch Potatoes and Smoked Sausage will never feel boring—let your creativity shine!

Make Ahead Options

These Cheesy Ranch Potatoes and Smoked Sausage are perfect for meal prep enthusiasts! You can dice the potatoes and slice the smoked sausage up to 24 hours in advance. Simply store them separately in airtight containers in the refrigerator to maintain their freshness. Additionally, combine the olive oil, ranch seasoning, and garlic powder ahead of time and refrigerate that mixture to deepen the flavors. When you’re ready to cook, just toss the prepped ingredients together, spread them on the baking sheet, and roast as instructed. This way, you can enjoy a comforting, homemade meal with minimal effort, making busy weeknights a breeze!

Expert Tips for Cheesy Ranch Potatoes

  • Uniform Cuts: Ensure potatoes are cut into uniform pieces to guarantee they cook evenly, avoiding undercooked or burnt edges.

  • Stirring Reminder: Stir the mixture halfway through roasting to achieve crispy potatoes and well-heated sausage, preventing any soggy sections.

  • Cheese Timing: Keep an eye on the cheese during the final minutes of baking; it can burn quickly once it starts to melt over the potatoes and smoked sausage.

  • Veggie Add-ins: Feel free to add vegetables like bell peppers or broccoli for extra color and nutrition; just adjust the roasting time slightly if needed.

  • Make-Ahead Flavor: For deeper flavor, marinate the diced potatoes in ranch seasoning and olive oil for a few hours or overnight before baking.

What to Serve with Cheesy Ranch Potatoes and Smoked Sausage

Elevate your meal experience with delightful sides and pairings that enhance the hearty ensemble of flavors and textures.

  • Crispy Green Salad: A fresh, tangy salad complements the richness of the dish, providing a light crunch that balances the creamy potatoes.

  • Steamed Broccoli: Tender broccoli adds a vibrant color and nutritious element, harmonizing with the savory sausage and cheesy goodness.

  • Garlic Breadsticks: Soft, buttery breadsticks are perfect for soaking up the residual ranch and cheese, making each bite more indulgent.

  • Sweet Corn on the Cob: The natural sweetness of corn beautifully contrasts with the smoky sausage and savory potatoes, creating a delightful burst of flavor.

  • Apple Sauce: This unexpected pairing brings a refreshing sweetness that cuts through the richness, providing a pleasantly surprising twist.

  • Chilled White Wine: A crisp Sauvignon Blanc pairs well, enhancing the flavors of the sausage and ranch while adding a sophisticated touch to your meal.

  • Chocolate Chip Cookies: Finish off with warm, gooey cookies to celebrate a cozy dinner, offering a comforting sweetness that rounds out the meal perfectly.

Cheesy Ranch Potatoes and Smoked Sausage Recipe FAQs

What type of potatoes should I use?
Absolutely! The best potatoes for this dish are russet or Yukon golds, as they provide a fluffy interior and crispy exterior. If you want a healthier twist, sweet potatoes work wonderfully too, adding a subtle sweetness that complements the savory sausage.

How should I store leftover Cheesy Ranch Potatoes?
Very! Store any leftovers in an airtight container in the fridge for up to 3 days. This keeps them fresh. When you’re ready to enjoy them again, I recommend reheating in the oven at 350°F (175°C) for about 15-20 minutes for the crispiest results.

Can I freeze Cheesy Ranch Potatoes and Smoked Sausage?
Definitely! To freeze, allow the dish to cool completely, then portion it into freezer-safe bags or containers, ensuring to label them with the date. They can be frozen for up to 2 months. When you’re ready to eat them, allow them to thaw overnight in the fridge, then reheat in the oven at 350°F (175°C) for about 15-20 minutes until hot and crispy.

What if my potatoes aren’t cooking evenly?
Not to worry! If you find that some pieces are cooking faster than others, it might be due to their size. To achieve evenly cooked potatoes, make sure to dice them into uniform, bite-sized pieces. And don’t forget to stir the mixture halfway through roasting to promote even crisping.

Are there any dietary considerations for this recipe?
Absolutely! For those with dietary restrictions, consider using turkey sausage instead of traditional smoked sausage for a lighter option. Additionally, if you’re vegetarian, you can replace the sausage with plant-based sausage or skip it altogether. Just be sure to check the ranch seasoning for any hidden allergens if serving to friends or family with food sensitivities.

Can I customize the flavors or add vegetables?
Very much so! Feel free to add in bell peppers, broccoli, or any other favorite veggies before roasting to enhance the dish’s nutrition and flavor profile. If you like a little heat, red pepper flakes or jalapeños can give it an extra kick! The more the merrier when it comes to making this dish your own!

Potatoes and Smoked Sausage

Hearty Potatoes and Smoked Sausage for Cozy Nights

Indulge in the flavors of Potatoes and Smoked Sausage with this hearty one-pan meal, perfect for busy weeknights.
Prep Time 15 minutes
Cook Time 45 minutes
Cooling Time 5 minutes
Total Time 1 hour 5 minutes
Servings: 4 servings
Course: Dinner
Cuisine: American
Calories: 450

Ingredients
  

For the Potatoes
  • 4 cups Potatoes Diced, use sweet potatoes for a healthier twist.
  • 3 tablespoons Olive Oil Can substitute with melted butter for richer flavor.
For the Smoked Sausage
  • 1 pound Smoked Sausage Turkey sausage can be used for a lighter option.
For the Flavor
  • 2 tablespoons Ranch Seasoning Homemade ranch can add freshness.
  • 1 teaspoon Garlic Powder Fresh minced garlic can enhance flavor.
For the Cheesy Topping
  • 1 cup Cheese Cheddar or pepper jack for an extra kick.

Equipment

  • Oven
  • Baking Sheet
  • Mixing Bowl

Method
 

Cooking Instructions
  1. Preheat your oven to 450°F (232°C).
  2. Wash and dice your potatoes into bite-sized pieces and slice the smoked sausage into chunks.
  3. Toss the diced potatoes with olive oil, ranch seasoning, and garlic powder in a mixing bowl. Transfer them to a baking sheet.
  4. Spread the sliced smoked sausage evenly over the seasoned potatoes on the baking sheet.
  5. Roast for 30-45 minutes, stirring halfway through, until the potatoes are golden and crisp.
  6. Sprinkle cheese over the roasted mix during the last 5 minutes of baking and allow it to melt.
  7. Remove the dish from the oven, cool slightly, and serve warm.

Nutrition

Serving: 1servingCalories: 450kcalCarbohydrates: 50gProtein: 20gFat: 22gSaturated Fat: 8gPolyunsaturated Fat: 2gMonounsaturated Fat: 12gCholesterol: 60mgSodium: 900mgPotassium: 950mgFiber: 5gSugar: 3gVitamin A: 10IUVitamin C: 30mgCalcium: 15mgIron: 10mg

Notes

For extra flavor, marinate potatoes in ranch seasoning and olive oil a few hours or overnight before baking. Add vegetables for extra nutrition and adjust roasting time accordingly.

Tried this recipe?

Let us know how it was!

Savory Pork Tenderloin with Creamy Dijon Sauce Delight

Amidst the clatter of pots and pans, I found myself reaching for the pork tenderloin, a cut often overlooked but renowned for its buttery tenderness. As I prepared my Best-Ever Pork Tenderloin with Dijon Cream Sauce, I could already envision smiles around the dinner table. This dish is not only a showstopper, but it’s also easy to whip together in just 30 minutes—perfect for those of us who value both flavor and efficiency. The creamy Dijon sauce transforms each bite into an elegant experience, making it ideal for everything from weeknight meals to special occasions. And the best part? The leftovers—if there are any—reheat beautifully, ensuring you can savor the savory magic long after the oven is turned off. How do you think your loved ones will react to this delightful upgrade from the usual fare?

Why Should You Try Pork Tenderloin?

Simplicity at its finest: This recipe takes just 30 minutes to prepare, making it an ideal choice for busy weeknights. Elegant flavors are brought to life with the rich creamy Dijon sauce that elevates each bite into a gourmet experience. Crowd-pleaser potential is high; whether it’s a family dinner or a special gathering, this pork tenderloin is sure to impress. Versatility is key—serve it alongside creamy mashed potatoes or a fresh salad for a complete meal. And don’t forget, it’s a wonderful way to break free from fast food and indulge in something truly delightful! If you’re looking for quick and savory recipes, you might also enjoy these Sweet and Savory Brown Sugar Pork Chops or Honeybun Carrot Cake for dessert!

Pork Tenderloin with Sauce Ingredients

For the Marinade

  • Pork Tenderloin – The star of the dish; its buttery tenderness shines through when properly cooked.
  • Dijon Mustard – Adds a zesty punch and tanginess to the marinade, enhancing the overall flavor profile.

For the Creamy Sauce

  • Heavy Cream – Provides a luscious texture to the sauce; substitute half-and-half for a lighter version without sacrificing creaminess.
  • Garlic – Essential for aromatic depth; fresh garlic infuses your sauce with inviting flavors.
  • Chicken Broth – Contributions to the sauce’s savory base; vegetable broth can be used for a lighter touch.

Cooking Essentials

  • Olive Oil – Perfect for searing the pork; it adds richness and helps prevent sticking.
  • Salt & Pepper – Fundamental for enhancing the pork’s natural flavors; adjust according to your taste preference.

Indulge in this Pork Tenderloin with Sauce that’s not only a feast for your taste buds but also a joy to prepare!

Step‑by‑Step Instructions for Best-Ever Pork Tenderloin with Dijon Cream Sauce

Step 1: Prepare Oven and Dish
Begin by preheating your oven to 400°F (200°C). While the oven heats, spray a baking dish or an oven-safe skillet with nonstick cooking spray to ensure easy release later. This step is crucial for the Best-Ever Pork Tenderloin with Dijon Cream Sauce, as a well-prepped dish will aid even cooking and make your cleanup a breeze.

Step 2: Season Pork
Pat the pork tenderloin dry with paper towels to help the seasoning adhere better. Then, rub a generous amount of salt and pepper all over the meat, followed by an even coat of Dijon mustard. This seasoning process adds depth to the flavors and sets the stage for the succulent pork tenderloin that will be enhanced further by the creamy sauce.

Step 3: Sear Pork
In a large, oven-safe skillet, heat a couple of tablespoons of olive oil over medium-high heat. Once hot, carefully place the seasoned pork tenderloin in the skillet and sear each side for about 3-4 minutes, or until golden brown. This browning not only keeps the juices in but also adds a rich flavor that will complement the Dijon cream sauce.

Step 4: Roast
After searing, transfer the skillet directly to the preheated oven and roast the pork for 15-20 minutes. Keep an eye on it until the internal temperature reaches 145°F (63°C). Your pork tenderloin should be juicy and tender, an alluring centerpiece for your dinner table, while the smell wafting through your kitchen will be irresistible.

Step 5: Make Sauce
Once the pork is beautifully cooked, remove it from the oven and let it rest on a cutting board. In the same skillet, without cleaning it, sauté minced garlic over medium heat until fragrant, about 1 minute. Then, pour in chicken broth, heavy cream, and a touch more Dijon mustard, stirring until the sauce is well combined and thickened, blending the delicious flavors together.

Step 6: Serve
Slice the rested pork into medallions and arrange them on plates. Generously drizzle the creamy Dijon sauce over the pork slices for an elegant touch. This final step transforms your dish into a masterpiece, inviting everyone to dive into your Best-Ever Pork Tenderloin with Dijon Cream Sauce, ready to impress family and friends alike.

What to Serve with Best-Ever Pork Tenderloin with Dijon Cream Sauce

To create a beautifully balanced meal that delightfully complements the tender pork and its rich sauce, consider these delectable side dishes.

  • Creamy Mashed Potatoes: These velvety potatoes soak up the savory Dijon sauce perfectly, offering a comforting, satisfying element to the plate. Plus, their buttery texture pairs beautifully with the tender pork.

  • Roasted Vegetables: Caramelized carrots, Brussels sprouts, and parsnips bring a sweet, earthy contrast to the creamy sauce. The slight crunch adds textural variety alongside the succulent pork.

  • Garlic Green Beans: Sautéed green beans with a hint of garlic provide a fresh, crisp taste that lightens the overall meal. Their green color adds a pop of vibrancy to your plate.

  • Fresh Arugula Salad: A simple arugula salad dressed with lemon vinaigrette cuts through the richness of the cream sauce. The slight bitterness of arugula balances the dish wonderfully.

  • Crispy Baguette: Serve warm, crusty baguette slices to dip into the delectable sauce. This bread adds an inviting crunch and a chance to savor every drop of flavor.

  • Chardonnay: A chilled glass of Chardonnay elevates the dining experience, providing a crisp, fruity note that complements the Dijon in the sauce. It’s a delightful pairing with the tender pork.

Enjoy your meal bursting with flavors and textures, and watch as it enhances the enticing experience of your Best-Ever Pork Tenderloin with Dijon Cream Sauce!

Pork Tenderloin with Sauce Variations

Feel free to put your personal twist on this scrumptious dish, enhancing flavors and exploring new ideas.

  • Herbed Marinade: Add fresh herbs like rosemary or thyme to elevate the aromatic profile, making each bite sing with flavor.

  • Wine Infusion: For a twist on the sauce, deglaze the skillet with white wine before adding the cream, creating a sophisticated depth.

  • Spicy Kick: Stir in a teaspoon of Dijon or whole grain mustard for extra heat, balancing the creamy richness with a delightful zing.

  • Veggie Boost: Toss in sautéed mushrooms or spinach into the sauce for added texture and a nutritious boost—you’ll love the earthy notes!

  • Low-Fat Option: Substitute heavy cream with Greek yogurt for a lighter sauce that retains creaminess while cutting calories—simplicity without compromise!

If you’re looking to spice things up, try this delightful Korean BBQ Meatballs with Spicy Mayo, which will tantalize your taste buds.

  • Nutty Flavor: Incorporate toasted walnuts or pecans into your sauce to achieve a rich, nutty flavor that will make each bite truly memorable.

  • Sweetness Balance: For a hint of sweetness, a tablespoon of honey or maple syrup in the sauce will complement the tangy mustard beautifully, creating a well-rounded dish.

Embrace your creativity and make this Pork Tenderloin with Sauce truly yours!

How to Store and Freeze Pork Tenderloin with Sauce

  • Fridge: Store leftover pork tenderloin in an airtight container for up to 3 days. Make sure to drizzle some of the creamy Dijon sauce over the pork to keep it moist.

  • Freezer: If you want to freeze the leftover pork tenderloin, wrap it tightly in foil or plastic wrap, then place it in a freezer-safe bag. It can be frozen for up to 3 months.

  • Reheating: To enjoy the savory goodness of your pork tenderloin with sauce again, reheat it gently in the oven at 300°F (150°C) for about 15-20 minutes, or until warmed through. This method helps preserve the tenderness.

  • Thawing: When ready to use frozen tenderloin, thaw it in the fridge overnight before reheating, ensuring a safe and delicious meal awaits.

Make Ahead Options

These Best-Ever Pork Tenderloin with Dijon Cream Sauce are a lifesaver for busy home cooks looking to simplify meal prep! You can season and marinate the pork tenderloin up to 24 hours in advance, allowing those flavors to develop beautifully. Additionally, the creamy Dijon sauce can be prepared ahead and stored in the refrigerator for up to 3 days; just reheat gently before drizzling over the sliced pork. To maintain quality, keep the pork wrapped tightly in plastic or stored in an airtight container to prevent drying out. When you’re ready to serve, simply roast the marinated tenderloin and top it with the warmed sauce for a delightful meal that’s just as delicious as when freshly made!

Expert Tips for Pork Tenderloin with Sauce

  • Choose the Right Cut: Always select pork tenderloin for the best texture and flavor; avoid using pork loin or shoulder as they can dry out.

  • Make Time to Marinate: For the most flavorful pork, marinate the tenderloin for at least an hour, or even overnight if time allows.

  • Resting is Key: After cooking, let the pork rest for at least 10 minutes before slicing; this helps the juices redistribute for juicy meat.

  • Use a Meat Thermometer: To ensure perfect doneness, use a meat thermometer. The pork should reach an internal temperature of 145°F to keep it tender.

  • Skillet Selection: Consider using a cast-iron skillet for optimal heat retention during searing, which can lead to beautifully browned meat.

Pork Tenderloin with Sauce Recipe FAQs

What is the best way to select pork tenderloin?
Absolutely! When choosing pork tenderloin, look for a cut that is pinkish-red in color with a bit of marbling. Avoid any that have dark spots or excessive liquid in the packaging. The tenderloin should feel firm to the touch and be about 1 to 1.5 pounds in size for optimal cooking.

How should I store leftover pork tenderloin?
Leftover pork tenderloin should be stored in an airtight container in the refrigerator for up to 3 days. To keep the meat moist, drizzle a bit of the creamy Dijon sauce over the pork before sealing the container. This will help maintain its juicy goodness and flavor when you’re ready to enjoy it again!

Can I freeze pork tenderloin with sauce?
Very! To freeze your pork tenderloin, wrap it tightly in aluminum foil or plastic wrap, then place it in a freezer-safe bag. It can remain frozen for about 3 months. Be sure to label the bag with the date so you can keep track of its freshness. When you’re ready to use it, thaw it in the fridge overnight for the best results!

What should I do if my pork tenderloin is tough after cooking?
If your pork tenderloin turns out tough, it may have been overcooked. Always use a meat thermometer to check for doneness; it should reach 145°F (63°C). To salvage tough pork, try slicing it thinly against the grain and serving it with plenty of sauce, which helps add moisture and flavor!

Are there any dietary concerns I should be aware of with this recipe?
This recipe contains dairy from the heavy cream and Dijon mustard, so it’s important to note if you or your guests have any lactose intolerances or dairy allergies. For a dairy-free option, consider substituting the heavy cream with a plant-based alternative, like coconut milk, and opt for a mustard that doesn’t contain dairy products. Always check labels to ensure safety!

How long does it take to marinate the pork for the best flavor?
I recommend marinating your pork tenderloin for at least 1 hour, but for those who want to deepen the flavors, overnight is even better! Simply coat the tenderloin in Dijon mustard and any additional spices, then wrap it tightly and place it in the fridge, allowing the flavors to meld beautifully.

Pork Tenderloin with sauce

Savory Pork Tenderloin with Creamy Dijon Sauce Delight

A delicious Pork Tenderloin with sauce that showcases buttery tenderness and a rich creamy Dijon sauce, perfect for any occasion.
Prep Time 10 minutes
Cook Time 20 minutes
Resting Time 10 minutes
Total Time 30 minutes
Servings: 4 slices
Course: Dinner
Cuisine: American
Calories: 320

Ingredients
  

For the Marinade
  • 1 pound Pork Tenderloin The star of the dish.
  • 2 tablespoons Dijon Mustard Adds zesty punch.
For the Creamy Sauce
  • 1 cup Heavy Cream For luscious texture.
  • 2 cloves Garlic Minced, essential for flavor.
  • 1 cup Chicken Broth Base for the sauce.
Cooking Essentials
  • 2 tablespoons Olive Oil For searing.
  • 1 teaspoon Salt To taste.
  • 1 teaspoon Black Pepper To taste.

Equipment

  • Oven
  • Skillet
  • meat thermometer

Method
 

Step‑by‑Step Instructions
  1. Preheat oven to 400°F (200°C) and prepare the baking dish with nonstick spray.
  2. Pat the pork dry and season with salt, pepper, and Dijon mustard.
  3. Sear the pork in olive oil for 3-4 minutes per side until golden brown.
  4. Roast the pork in the oven for 15-20 minutes until it reaches 145°F (63°C).
  5. Make the sauce by sautéing garlic in the skillet, then adding broth and cream.
  6. Slice pork and drizzle with the creamy Dijon sauce before serving.

Nutrition

Serving: 1sliceCalories: 320kcalCarbohydrates: 5gProtein: 30gFat: 20gSaturated Fat: 10gPolyunsaturated Fat: 2gMonounsaturated Fat: 8gCholesterol: 100mgSodium: 600mgPotassium: 500mgSugar: 1gVitamin A: 500IUCalcium: 50mgIron: 2mg

Notes

Consider marinating the pork for extra flavor; letting it rest post-cooking is key to juiciness.

Tried this recipe?

Let us know how it was!

Nourishing French Garlic Soup for Heartfelt Comfort

As the crisp autumn air settles in, the allure of a hearty bowl of Country French Garlic Soup wraps around me like a warm hug. This traditional French delight transforms simple garlic cloves into a silky, nourishing masterpiece that’s perfect for those chilly nights when comfort food is an absolute must. Packed with wholesome ingredients, this soup not only brings warmth to your table but also brings people together, making it an ideal starter or a cozy main event. With a delightful, creamy texture and rich garlic aroma, it’s an exciting way to elevate your culinary repertoire effortlessly. Who could resist the charm of a homemade broth bubbling away, filling your kitchen with a tantalizing fragrance? Join me as we explore this classic recipe that offers both simplicity in preparation and deep satisfaction in every spoonful!

Why Is This Soup Irresistible?

Comforting, with its rich garlic aroma and creamy texture, this French Garlic Soup warms both body and soul, making it a go-to for cozy evenings. Simple preparation pairs perfectly with everyday ingredients, ensuring anyone can create this masterpiece. Versatile enough for starters or as a main dish, it easily adapts to include greens or heartiness like beans. Plus, it’s the ultimate crowd-pleaser—perfect for gatherings or family dinners and perfect alongside a fresh green salad or paired with Cheesy Garlic Chicken. Dive into this soup for a flavorful escape that embraces the essence of warmth and nourishment!

French Garlic Soup Ingredients

• Here’s what you need to create this flavorful classic:

For the Soup Base

  • Garlic – The star of this dish, providing a deep, sweet, and nutty flavor when cooked.
  • Olive Oil – Essential for sautéing and enhancing the overall flavor.
  • Onion – Builds savory depth, crucial for a flavorful foundation.
  • Butter – Adds richness and a silky texture to the soup.
  • Chicken or Vegetable Broth – Use high-quality broth as your flavorful liquid medium.
  • Fresh Thyme – Infuses lovely aromatics; substitute with dried thyme (1/3 amount) if necessary.
  • Bay Leaves – Contributes complexity to the broth; remember to remove before serving.
  • Salt and Pepper – Essential to ensure the soup is well-seasoned.

For the Creaminess

  • Egg Yolks – Provides a custard-like texture and richness; a great alternative to cream.
  • Parmesan Cheese – The finishing touch that adds umami; goat cheese can work for a different flavor.

For Serving

  • Crusty Bread – Perfect for scooping and adding texture; ideally toasted.
  • Fresh Parsley – An optional garnish that adds a pop of color and freshness.

Step‑by‑Step Instructions for French Garlic Soup

Step 1: Sauté the Aromatics
In a large pot, heat 2 tablespoons of olive oil and 2 tablespoons of butter over medium heat until the butter is melted and foamy. Add one chopped onion and sauté for about 5 minutes, stirring occasionally, until the onion is soft and translucent. This flavorful base is essential for your French Garlic Soup, creating a lovely aroma in your kitchen.

Step 2: Add Garlic
Stir in 12 to 15 peeled garlic cloves, cooking for 2-3 minutes until they become fragrant and are lightly golden. Keep an eye on them, stirring frequently to prevent burning. This step transforms the garlic, releasing its sweet, nutty flavor, and it’s this transformation that makes your French Garlic Soup truly special.

Step 3: Combine with Broth
Pour in 4 cups of chicken or vegetable broth, and add 2 sprigs of fresh thyme and 2 bay leaves for depth of flavor. Increase the heat to bring the mixture to a boil, then reduce to a gentle simmer. Allow the broth to simmer for 30 minutes, allowing all the wonderful flavors to meld beautifully, creating a comforting base for your soup.

Step 4: Season the Soup
After simmering, carefully remove the thyme sprigs and bay leaves from the pot. Season your French Garlic Soup with salt and pepper to taste, enhancing the comforting flavors you’ve built up. As you stir, you’ll notice the rich aroma filling your kitchen, inviting everyone to the table.

Step 5: Incorporate Creaminess
In a bowl, whisk together 2 egg yolks and ½ cup of grated Parmesan cheese. Slowly temper this mixture with a ladle of hot soup to avoid scrambling the eggs. Then, whisk the tempered mixture back into the pot, stirring continuously to create a silky texture in your French Garlic Soup. Simmer gently for another 5 minutes until slightly thickened.

Step 6: Serve the Soup
Ladle the hot soup into bowls and serve it immediately with crusty bread, perfect for dipping. If desired, sprinkle some fresh parsley on top for a touch of color and vibrancy. This step completes your nourishing French Garlic Soup, a comforting dish that’s sure to warm hearts and tummies alike.

What to Serve with Rustic Country French Garlic Soup

A comforting bowl of rich soup deserves delightful companions that enhance its warmth and flavor.

  • Crusty Bread: Perfect for dipping, this bread adds a delightful texture, elevating the soup experience.
  • Simple Green Salad: A fresh salad with a tangy vinaigrette provides a bright contrast, balancing the soup’s richness.
  • Roasted Chicken: Juicy roast chicken complements the soup beautifully, creating a heartwarming meal that’s sure to please.
  • Herbed Croutons: Crunchy and flavorful, they add a satisfying bite while soaking up the garlic goodness.
  • Savory Cheese Platter: A selection of robust cheeses, such as aged cheddar or creamy Brie, enriches the meal with varied textures.
  • Steamed Asparagus: Lightly seasoned asparagus introduces a fresh, crisp element that pairs perfectly with the soup’s velvety texture.
  • Chardonnay: A glass of chilled Chardonnay enhances the meal’s elegance and matches the flavor profile of the garlic soup.
  • Chocolate Tart: For dessert, a rich chocolate tart offers a decadent end, contrasting the soup’s warm comfort with sweet indulgence.

How to Store and Freeze French Garlic Soup

Fridge: Store any leftover French Garlic Soup in an airtight container for up to 3 days. Be sure to cool it down completely before sealing to maintain freshness.

Freezer: For longer storage, freeze the soup in freezer-safe containers for up to 2 months. Leave some space at the top to allow for expansion as it freezes.

Reheating: When ready to enjoy, thaw the soup in the fridge overnight and reheat gently on the stovetop, stirring to ensure the creamy texture remains intact.

Make-Ahead Tips: You can prepare the soup base ahead of time, refrigerating it for up to 2 days. Add the egg yolks just before serving for optimal creaminess.

Expert Tips for French Garlic Soup

  • Use Fresh Garlic: Fresh garlic is crucial for building flavor in your French Garlic Soup. Avoid dried garlic as it won’t deliver the same richness.

  • Proper Tempering: Remember to temper the egg yolks before adding to the hot soup; this prevents curdling and ensures a silky texture.

  • Adjust Consistency: For a thicker soup, blend a portion of it after removing bay leaves; return to the pot to infuse flavor while maintaining some texture.

  • Choose Quality Broth: A high-quality chicken or vegetable broth elevates the taste of your soup. Homemade broth is best, but store-bought works in a pinch.

  • Season Gradually: Seasoning your soup is essential. Start with less salt and pepper, tasting as you go to achieve a balanced flavor without overpowering the garlic essence.

  • Storing Leftovers: If you have leftover soup, reheat it gently to avoid scrambling the eggs, maintaining the beautiful creamy texture you’ve created.

Make Ahead Options

Preparing your Country French Garlic Soup in advance is a fantastic way to save time and ensure a comforting meal awaits when life gets busy. You can make the soup base (steps 1-4) and refrigerate it for up to 3 days. Just be sure to cool the soup completely before refrigerating to maintain its quality. On the day of serving, simply reheat the soup gently, then follow steps 5 and 6 to incorporate the egg yolk mixture, stirring continuously to achieve that silky texture. By prepping ahead, you’ll experience minimal effort when it’s time to indulge in this rich and nourishing soup, allowing you to enjoy cozy flavors without the rush!

French Garlic Soup Variations & Substitutions

Feel free to get creative with this delightful soup by customizing it to your taste and dietary needs!

  • Heartier Addition: Incorporate cooked white beans or diced potatoes for extra substance. These additions turn your soup into a filling meal, perfect for those chilly nights.

  • Greens Boost: Stir in handfuls of fresh spinach or kale just before serving. This sneaky upgrade adds vibrant color and nutritional benefits without changing the beloved garlicky flavor.

  • Roasted Garlic Twist: Roast the garlic first for a sweeter, caramelized flavor. Baking transforms the garlic into a mellow delight that shifts the soup into gourmet territory.

  • Spicy Kick: Add a pinch of red pepper flakes or a dash of hot sauce for a little heat. This twist is a warm embrace for your taste buds, making the soup even more comforting.

  • Creamy Alternatives: Swap out egg yolks for heavy cream or a dairy-free alternative like coconut cream to keep it rich while catering to different dietary preferences. Both options will provide that luscious mouthfeel.

  • Herb Variations: Experiment with fresh herbs like rosemary or sage instead of thyme for a unique aromatic experience. Each herb brings a distinct personality, allowing you to play with flavors.

  • Truffle Elegance: Drizzle some truffle oil on top for a luxurious finish. This small addition transforms your ordinary French Garlic Soup into an extraordinary indulgence, impressing guests at your next dinner party.

Enjoy the versatility of this French Garlic Soup by mixing and matching these variations! And if you’re looking for side accompaniment, why not try pairing it with some Cheesy Garlic Chicken or a warm slice of Garlic Parmesan Chicken for a delightful meal?

French Garlic Soup Recipe FAQs

How do I select the best garlic for this soup?
Absolutely! Look for garlic bulbs that are firm and plump, without any dark spots or mold. The cloves should feel compact and not have sprouted shoots. Freshness is key, as older garlic may lose its characteristic flavor.

What’s the best way to store leftover French Garlic Soup?
Store any leftover French Garlic Soup in an airtight container in the refrigerator for up to 3 days. Be sure to let it cool completely before sealing it. This will ensure it retains its vibrant flavors and creamy texture!

Can I freeze French Garlic Soup, and how?
Yes, you can! To freeze, pour the cooled soup into freezer-safe containers or freezer bags, leaving at least an inch of space at the top for expansion. It can be frozen for up to 2 months. When you’re ready to enjoy it, thaw it overnight in the refrigerator, then gently reheat on the stovetop, stirring frequently to keep the creamy texture intact.

What should I do if my soup is too garlicky?
If you find that your French Garlic Soup has an overwhelming garlic flavor, try adding a bit more broth or even a diced potato to balance it out. Stirring in a splash of cream (if you’re not strictly adhering to the egg yolk base) can also help mellow the garlic intensity!

Is this soup suitable for someone with egg allergies?
If you or someone you are serving has an egg allergy, you can substitute the egg yolks with heavy cream or a dairy-free alternative like coconut cream. Just stir it in after removing the soup from heat to maintain the desired creaminess.

How should I serve French Garlic Soup for a gathering?
The more, the merrier! Serve the soup in warm bowls with toasted crusty bread on the side for dipping. You can also offer toppings like croutons, a sprinkle of fresh parsley, or extra Parmesan cheese to let guests customize their bowls to their taste.

French Garlic Soup

Nourishing French Garlic Soup for Heartfelt Comfort

Enjoy a creamy and aromatic French Garlic Soup, perfect for chilly nights and family gatherings.
Prep Time 10 minutes
Cook Time 45 minutes
Total Time 55 minutes
Servings: 4 bowls
Course: Appetizers
Cuisine: French
Calories: 300

Ingredients
  

For the Soup Base
  • 12-15 cloves Garlic peeled
  • 2 tablespoons Olive Oil for sautéing
  • 1 large Onion chopped
  • 2 tablespoons Butter for richness
  • 4 cups Chicken or Vegetable Broth high-quality
  • 2 sprigs Fresh Thyme or 1/3 dried thyme
  • 2 leaves Bay Leaves remove before serving
  • to taste Salt
  • to taste Pepper
For the Creaminess
  • 2 Egg Yolks
  • 1/2 cup Parmesan Cheese grated
For Serving
  • 1 loaf Crusty Bread ideally toasted
  • to taste Fresh Parsley optional garnish

Equipment

  • Large pot

Method
 

Step-by-Step Instructions for French Garlic Soup
  1. In a large pot, heat olive oil and butter over medium heat until melted and foamy. Sauté chopped onion for about 5 minutes until soft and translucent.
  2. Stir in peeled garlic cloves, cooking for 2-3 minutes until fragrant and lightly golden.
  3. Pour in chicken or vegetable broth, and add fresh thyme and bay leaves. Bring to a boil, then reduce to a simmer for 30 minutes.
  4. Remove thyme sprigs and bay leaves. Season with salt and pepper to taste.
  5. Whisk together egg yolks and grated Parmesan in a bowl. Temper with a ladle of hot soup, then whisk back into the pot and simmer for another 5 minutes.
  6. Ladle the hot soup into bowls and serve immediately with crusty bread and optional parsley.

Nutrition

Serving: 1bowlCalories: 300kcalCarbohydrates: 35gProtein: 10gFat: 15gSaturated Fat: 6gPolyunsaturated Fat: 2gMonounsaturated Fat: 7gCholesterol: 125mgSodium: 800mgPotassium: 600mgFiber: 2gSugar: 2gVitamin A: 500IUVitamin C: 10mgCalcium: 150mgIron: 2mg

Notes

Use fresh garlic and high-quality broth for best results. Adjust consistency by blending a portion if desired.

Tried this recipe?

Let us know how it was!

Parmesan Pork Chops That Crunch with Every Bite

As I rummaged through my pantry one evening, I stumbled upon a forgotten block of Parmesan cheese—its nutty aroma igniting my culinary creativity. That’s when I knew it was time to whip up a batch of Easy Crispy Parmesan Baked Pork Chops! This recipe has a beautiful blend of crispy panko and savory cheese, making it a foolproof winner for busy weeknights or cozy family dinners. Imagine treating your loved ones to perfectly baked pork chops that are juicy on the inside and satisfyingly crunchy on the outside—what’s not to love? Plus, these easy-to-make chops are perfect for pairing with everything from roasted veggies to creamy mashed potatoes, offering a delightful burst of flavor. Curious about how to make this delicious dish a star at your dinner table? Let’s dive into cooking!

Why Are These Parmesan Pork Chops Amazing?

Irresistibly Crunchy: The crispy panko breadcrumb coating offers a satisfying crunch that pairs perfectly with the savory pork flavor.

Quick and Easy: With just a few steps, you can have dinner ready in under 30 minutes, making it ideal for busy weeknights.

Family-Friendly: Packed with flavor, these pork chops are sure to be a hit with everyone at the table. They’re delightful enough that even children will love them!

Versatile Pairings: Serve them with your favorites like creamy mashed potatoes or a fresh salad for a well-rounded meal.

Better for You: Baked, not fried, these pork chops offer a healthier alternative to fast food without sacrificing flavor or crunch.

Get ready to impress your family with these Easy Crispy Parmesan Baked Pork Chops!

Parmesan Pork Chops Ingredients

For the Pork Chops

  • Pork Chops – Bone-in chops retain flavor and moisture, but boneless can work with a shorter cooking time.

For the Coating

  • Parmesan Cheese – Freshly grated adds a rich flavor and texture; you can swap it with pecorino Romano for a similar taste.
  • Panko Breadcrumbs – Creates that irresistible crunch; regular breadcrumbs are a substitute but with less crispiness.
  • Eggs – They help the coating stick; substitute with a flax egg or yogurt for an alternative binding agent.

For Flavoring

  • Italian Seasoning – Adds aromatic depth; feel free to use fresh herbs, tripling the amount of dried herbs for equivalent flavor.
  • Garlic Powder, Onion Powder, Paprika, Salt, Black Pepper – Adjust these spices to your liking for the perfect balance of flavors.

For Cooking

  • Olive Oil or Butter – These fats promote browning and enhance crispiness for the perfect bake.

Each ingredient plays a crucial role in achieving these delectable Parmesan Pork Chops that crunch with every bite!

Step‑by‑Step Instructions for Easy Crispy Parmesan Baked Pork Chops

Step 1: Preheat the Oven
Begin by preheating your oven to 400°F (200°C). While it warms up, prepare a baking dish by lightly greasing it with olive oil or lining it with foil for easy cleanup. This step ensures that your Parmesan Pork Chops will bake evenly and develop that enticing golden crust.

Step 2: Prepare the Egg Wash
In a shallow bowl, whisk together a couple of eggs until the mixture is smooth and lightly frothy. This will act as your egg wash, helping the crunchy coating adhere beautifully to the pork chops. Having this step ready will streamline the coating process to make your cooking experience faster and smoother.

Step 3: Mix the Coating Ingredients
In a separate bowl, combine freshly grated Parmesan cheese, panko breadcrumbs, garlic powder, onion powder, Italian seasoning, paprika, salt, and black pepper. Stir these ingredients together until they are evenly distributed. This aromatic blend creates the flavorful and crispy coating that makes your Easy Crispy Parmesan Baked Pork Chops truly irresistible!

Step 4: Coat the Pork Chops
Take each pork chop and dip it first into the prepared egg wash, allowing any excess egg to drip off. Then, gently press the chop into the breadcrumb and cheese mixture, ensuring an even coating on all sides. This step is key to achieving that delicious crunch that defines your Parmesan Pork Chops.

Step 5: Arrange the Chops in the Baking Dish
Once coated, transfer your pork chops to the greased baking dish, spacing them out so they don’t touch. Drizzle a bit of olive oil or melted butter over the top of each chop to enhance browning and crispiness during baking. This will help achieve that mouthwatering crunch you crave!

Step 6: Bake Until Perfect
Place the baking dish in the preheated oven and bake the pork chops for 20-25 minutes. You’ll know they’re done when the internal temperature reaches 145°F (63°C) and the crust turns a golden brown. For an extra crispy finish, broil them for an additional 1-2 minutes, keeping a close eye to prevent burning.

Step 7: Rest Before Serving
Once out of the oven, let your Easy Crispy Parmesan Baked Pork Chops rest for 5 minutes. This important step allows the juices to redistribute, ensuring every bite is tender and juicy. If desired, garnish with fresh parsley for a pop of color and added flavor before serving.

Make Ahead Options

These Easy Crispy Parmesan Baked Pork Chops are a fantastic option for meal prep, making your busy weeknights a breeze! You can coat the pork chops and refrigerate them for up to 24 hours before baking, which not only saves time but also allows the flavors to meld beautifully. To maintain quality, ensure they are well-covered to prevent drying out. When you’re ready to bake, take them out and let them sit at room temperature for about 15 minutes before placing them in the oven. This simple tip results in perfectly juicy pork chops that are just as delicious as if freshly made, ready to impress your family with minimal effort!

Variations & Substitutions for Parmesan Pork Chops

Feel free to make these delicious pork chops your own with these easy swaps and additions!

  • Dairy-Free: Use nutritional yeast instead of Parmesan for a cheesy flavor without the dairy, perfect for a plant-based option.

  • Gluten-Free: Substitute panko with gluten-free breadcrumbs or crushed almonds for a nutty crunch without gluten. This alternative still delivers that satisfying texture.

  • Herb Infusion: Swap out Italian seasoning for your favorite fresh herbs like rosemary or thyme, giving the pork chops a fragrant twist that enhances their flavor profile.

  • Spicy Kick: Add red pepper flakes to the breadcrumb mixture for a spicy touch that elevates the pork chops with warmth and zing! A hint of heat makes each bite exciting.

  • Citrus Zest: Incorporate lemon or orange zest into the breadcrumb coating for a refreshing brightness that balances the rich flavors of the pork and cheese. It’s a simple way to elevate the dish!

  • Cheese Options: Experiment with different cheeses like aged Cheddar or Gouda for unique taste variations. Each cheese brings its own character, adding complexity to the flavors.

  • Marinade Magic: Marinate the pork chops in buttermilk or a mixture of yogurt and spices for an extra tender result. The acidity helps achieve juiciness while adding a flavor boost.

While you’re updating your recipe, why not serve these alongside a refreshing salad or pair them with my delectable Garlic Parmesan Chicken? Enjoy crafting your culinary adventure!

What to Serve with Easy Crispy Parmesan Baked Pork Chops

Imagine your dinner plate alive with vibrant colors and mouthwatering flavors, perfectly complementing the crispy goodness of pork chops.

  • Creamy Mashed Potatoes: The buttery, smooth texture of mashed potatoes provides a luscious contrast to the crunchy pork, making each bite delightful.

  • Roasted Vegetables: Seasonal veggies like carrots and Brussels sprouts, roasted until tender, add sweetness and a hint of smokiness that balances the savory chops beautifully.

  • Fresh Garden Salad: A crisp salad with mixed greens, cucumbers, and tangy vinaigrette brightens up the meal, offering a refreshing crunch alongside the richness of the pork.

  • Garlic Bread: The garlicky, buttery flavors of toasted bread are irresistible and perfect for sopping up any savory drippings on your plate.

  • Honey Glazed Carrots: The sweet glaze on roasted carrots enhances the savory chops, while their vibrant color adds a visual appeal to your meal.

  • Crispy Brussels Sprouts: Their crunchy, caramelized edges and slightly bitter taste provide a delightful contrast to the richness of the Parmesan, creating a well-rounded dish.

  • Zesty Coleslaw: A tangy slaw made with cabbage and a light dressing adds brightness and crunch, cleansing your palate between bites of the flavorful pork.

  • Chardonnay or Pinot Grigio: A glass of chilled white wine brings a refreshing acidity that elevates the entire dining experience, making every bite even more enjoyable.

  • Chocolate Mousse: For dessert, a rich chocolate mousse rounds off the meal with a touch of indulgence, perfectly balancing the savory notes of the main course.

Storage Tips for Parmesan Pork Chops

Fridge: Store cooked Parmesan Pork Chops in an airtight container in the refrigerator for up to 3 days. This helps retain their freshness and flavor.

Freezer: For longer storage, freeze the pork chops individually wrapped in plastic wrap and then in a freezer bag for up to 3 months. This maintains their quality and prevents freezer burn.

Reheating: To reheat, place the thawed pork chops in a 350°F (175°C) oven for about 10-15 minutes, until warmed through and crispy. This ensures they stay delicious!

Make-Ahead Tip: You can coat the pork chops and store them in the fridge for up to 24 hours before baking. Just make sure to bring them to room temperature before cooking for the best results.

Expert Tips for Parmesan Pork Chops

  • Choose Quality Pork: Select bone-in pork chops for enhanced flavor and moisture. Boneless chops can be used but require less cooking time.

  • Fresh Ingredients: Use freshly grated Parmesan cheese for the best flavor. Pre-packaged options may not provide the same richness in your baked pork chops.

  • Don’t Rush the Coating: Ensure you press the breadcrumb mixture firmly onto the pork chops for an even, crispy coating. Skipping this can lead to uneven crispiness.

  • Watch the Oven: Keep an eye on the baking time; broiling at the end can improve crispiness but requires close monitoring to avoid burning.

  • Let Them Rest: Always allow the pork chops to rest for 5 minutes after baking. This step redistributes the juices, ensuring a juicy interior in your Parmesan Pork Chops.

Easy Crispy Parmesan Baked Pork Chops Recipe FAQs

What type of pork chops should I use for Parmesan Pork Chops?
Absolutely, bone-in pork chops are recommended for their flavor and moisture retention! If you opt for boneless chops, just reduce the cooking time to ensure they stay juicy.

How should I store leftover Parmesan Pork Chops?
Store your cooked Parmesan Pork Chops in an airtight container in the refrigerator for up to 3 days. This keeps them fresh and flavorful, ready for a tasty reheating!

Can I freeze cooked pork chops?
Yes, you can! Wrap each pork chop individually in plastic wrap, then place them in a freezer bag. They can be frozen for up to 3 months. To enjoy, simply thaw in the fridge overnight and reheat in the oven at 350°F (175°C) for 10-15 minutes for that delightful crunch.

What can I do if my pork chops are dry?
If your pork chops turn out dry, it might be because they were overcooked. Consider using a meat thermometer to check for the perfect internal temperature of 145°F (63°C). Remember, letting them rest for 5 minutes after baking helps retain moisture.

Are there any dietary considerations for Parmesan Pork Chops?
Yes! If anyone in your household has a dairy allergy, you can use dairy-free cheese alternatives in place of the Parmesan cheese. Also, ensure that the breading is gluten-free if needed—look for gluten-free panko or bread crumbs!

Can I prepare the pork chops ahead of time?
Absolutely! You can coat the pork chops and refrigerate them for up to 24 hours before baking. Just be sure to let them come to room temperature for best results right before you bake them.

Parmesan Pork Chops

Parmesan Pork Chops That Crunch with Every Bite

These Parmesan Pork Chops are irresistibly crunchy, quick to make, and a family favorite.
Prep Time 10 minutes
Cook Time 25 minutes
Resting Time 5 minutes
Total Time 40 minutes
Servings: 4 chops
Course: Dinner
Cuisine: American
Calories: 350

Ingredients
  

For the Pork Chops
  • 4 pieces Pork Chops Bone-in recommended for moisture
For the Coating
  • 1 cup Parmesan Cheese Freshly grated preferred
  • 1 cup Panko Breadcrumbs Regular breadcrumbs can be substituted
  • 2 large Eggs Can substitute with flax egg or yogurt
For Flavoring
  • 1 tablespoon Italian Seasoning Feel free to use fresh herbs
  • 1 teaspoon Garlic Powder
  • 1 teaspoon Onion Powder
  • 1 teaspoon Paprika
  • 1 teaspoon Salt Adjust to taste
  • 1/2 teaspoon Black Pepper Adjust to taste
For Cooking
  • 2 tablespoons Olive Oil Or butter for enhanced crispiness

Equipment

  • Oven
  • baking dish
  • Shallow bowl
  • Mixing Bowl

Method
 

Cooking Instructions
  1. Preheat your oven to 400°F (200°C) and prepare a baking dish.
  2. In a shallow bowl, whisk together the eggs.
  3. In a mixing bowl, combine Parmesan cheese, panko breadcrumbs, garlic powder, onion powder, Italian seasoning, paprika, salt, and black pepper.
  4. Dip each pork chop into the egg wash, then coat with the breadcrumb mixture.
  5. Arrange the coated chops in the greased baking dish and drizzle with olive oil or melted butter.
  6. Bake for 20-25 minutes until the internal temperature reaches 145°F (63°C). Broil for 1-2 minutes for extra crispiness if desired.
  7. Let the pork chops rest for 5 minutes before serving.

Nutrition

Serving: 1chopCalories: 350kcalCarbohydrates: 16gProtein: 35gFat: 18gSaturated Fat: 7gPolyunsaturated Fat: 1gMonounsaturated Fat: 10gCholesterol: 125mgSodium: 600mgPotassium: 500mgFiber: 1gSugar: 1gVitamin A: 500IUCalcium: 300mgIron: 2mg

Notes

Select bone-in chops for enhanced flavor and moisture. Use freshly grated Parmesan for better quality.

Tried this recipe?

Let us know how it was!

Pretzel Crusted Chicken: Your Family’s New Dinner Favorite

The sound of crunching pretzels fills the kitchen as I prepare our newest family favorite: Pretzel-Crusted Chicken with Broccoli. It’s amazing how such a simple twist on a classic dish can take weeknight dinners to a whole new level! This recipe not only delivers a delightful crunch but also brings together juicy chicken cutlets and vibrant broccoli for a family-friendly meal that everyone will savor. With quick prep that fits seamlessly into even the busiest evenings, it’s a fun way to enjoy comfort food without the hassle of takeout. Plus, it’s a crowd-pleaser, making it perfect for sharing with friends or cozy family gatherings. Curious how to create this crunchy delight in your own kitchen? Let’s dive into the recipe together!

Why Is This Recipe So Popular?

Simplicity at Its Best: This Pretzel-Crusted Chicken is a breeze to prepare, making it ideal for busy weeknights.

Crowd-Pleaser: The crispy pretzel coating and tender chicken are sure to satisfy both kids and adults.

Nutritious Side: Paired with vibrant broccoli, this dish not only tastes great but also packs in the vitamins.

Versatile Option: Feel free to swap in other veggies like green beans or use crushed cornflakes for an alternative crunch!

Quick Prep: With just a handful of easy-to-find ingredients, you’ll have this delightful dish ready in no time—perfect for busy families!

Let this be your go-to recipe for family dinners, and make it alongside other favorites like Parmesan Crusted Chicken or Sizzling Chicken Pepper!

Pretzel Crusted Chicken Ingredients

For the Chicken
Chicken Cutlets – A great source of protein, about 1 1/2 lb. can be used, or turkey cutlets for a lovely variation.
Kosher Salt – Enhances flavor; adjust to your taste for the perfect seasoning.
Black Pepper – Use freshly ground for the best flavor and a touch of spice.

For the Coating
Spicy Brown Mustard – Gives depth and tang; Dijon mustard is a lighter alternative if preferred.
Mayonnaise – Adds creaminess to the coating; substitute with Greek yogurt for a healthier twist.
Honey – Provides natural sweetness that balances flavors wonderfully; can use maple syrup as a natural substitute.
All-Purpose Flour – This helps the coating stick; for a gluten-free option, swap it with gluten-free flour.
Pretzel Twists (finely crushed) – Creates that beloved crunchy crust; panko breadcrumbs can be a unique alternative for texture.
Salted Butter – Gives richness, but feel free to use unsalted butter or margarine if you like.
Olive Oil – Perfect for frying, adds flavor, and promotes browning; vegetable oil is a neutral alternative here.

For the Broccoli
Broccoli (cut into florets) – A nutritious side dish, bursting with vitamins; substitute with green beans or asparagus for a delightful change.

This Pretzel Crusted Chicken promises a fun and crunchy dinner experience that you’ll want to serve again and again!

Step‑by‑Step Instructions for Pretzel Crusted Chicken

Step 1: Prep Chicken
Start by seasoning approximately 1 ½ pounds of chicken cutlets with kosher salt and freshly ground black pepper. Make sure to coat both sides evenly, enhancing the flavor. Set the seasoned chicken aside while you prepare the coating mixture, allowing the flavors to absorb into the meat.

Step 2: Make Dipping Mixture
In a medium bowl, combine 2 tablespoons of spicy brown mustard, 3 tablespoons of mayonnaise, and 1 tablespoon of honey. Whisk these ingredients together until the mixture is smooth and well-blended. This creamy concoction will add a delightful tang to your Pretzel-Crusted Chicken, creating a flavor explosion when cooked.

Step 3: Coat Chicken
Dredge each seasoned chicken cutlet in ¼ cup of all-purpose flour, ensuring an even coating. Then, dip the floured cutlet into the mustard mixture, allowing any excess to drip off. Finally, coat the chicken with approximately 1 cup of finely crushed pretzel twists, pressing gently to ensure the pretzels adhere well to the surface.

Step 4: Cook Chicken
Heat a large skillet over medium-high heat and add 2 tablespoons of olive oil along with 1 tablespoon of salted butter. Once the butter is melted and begins to bubble, carefully add the coated chicken cutlets to the skillet. Cook for about 5-7 minutes on each side, or until the chicken is golden brown and the internal temperature reaches 165°F.

Step 5: Steam Broccoli
While the chicken is cooking, prepare your broccoli florets. In a separate pot, bring about an inch of water to a boil. Add the broccoli, cover, and steam for about 5 minutes or until the florets are bright green and tender-crisp. This not only adds color to your plate but also provides a nutritious side to your Pretzel-Crusted Chicken.

Step 6: Serve
Once the chicken is perfectly cooked and the broccoli is steamed, arrange both on plates. Consider serving any remaining honey-mustard sauce on the side for dipping. Your Pretzel-Crusted Chicken with vibrant broccoli is now ready to enjoy, offering a delightful crunch and juicy flavor that the whole family will love!

Expert Tips for Pretzel Crusted Chicken

Achieve Perfect Crunch: Ensure your oil is hot enough before adding the chicken. This allows for a beautifully crispy pretzel coating without being greasy.

Don’t Overcrowd: Avoid placing too many chicken cutlets in the skillet at once. This helps maintain oil temperature and prevents sogginess.

Check Doneness: Use a meat thermometer to ensure chicken reaches 165°F for safe consumption. This guarantees juicy, tender meat every time.

Customize Your Crust: Feel free to mix in some grated cheese or spices into the pretzel crust for an extra layer of flavor on your Pretzel Crusted Chicken!

Steam Timing: Steam broccoli while the chicken cooks for a perfectly timed side that remains bright and tender, complementing the meal beautifully.

Storage Tips: Store any leftovers in an airtight container in the fridge for up to 3 days. Reheat in the oven to keep that delightful crunch intact.

Pretzel Crusted Chicken Variations

Get ready to make this Pretzel-Crusted Chicken uniquely yours with a few simple tweaks that amplify flavor and excitement!

  • Gluten-Free: Use gluten-free flour and substitute crushed pretzels with gluten-free breadcrumbs for a satisfying crunch!

  • Healthier Swap: Replace mayonnaise with Greek yogurt to cut calories while keeping the creaminess intact. It’s a delightful change that adds protein!

  • Cheese Lover’s Dream: Stir in grated Parmesan or shredded mozzarella into the pretzel crust for a cheesy surprise that melts beautifully during cooking. You won’t regret this indulgent twist!

  • Spice It Up: Add a pinch of cayenne pepper or paprika to your mustard mixture for a spicy kick that brings an exciting heat to each bite.

  • Veggie Options: Swap out broccoli for asparagus or green beans. Each choice brings its own vibrant color and nutritional boost!

  • Crunchy Alternative: Instead of pretzel twists, try using crushed cornflakes for a different texture that still delivers that satisfying crunch everyone loves.

  • Zesty Marinade: Give chicken a flavor boost by marinating it in the honey-mustard mixture for an hour before coating, enriching the taste throughout.

  • Baked Variation: Want to lighten it up? Bake your pretzel-crusted chicken at 400°F for 20-25 minutes, turning halfway for a healthier twist that still boasts amazing crunch.

Let your creativity flow with these variations—each one promises a delightful twist! If you’re looking for other great family dinners, try out Chilli Chicken Takeout or consider the comforting warmth of Tuscan Chicken Soup.

Make Ahead Options

These Pretzel-Crusted Chicken cutlets are perfect for meal prep enthusiasts! You can season and coat the chicken up to 24 hours in advance and store it in an airtight container in the refrigerator to enhance the flavors. Additionally, you can steam the broccoli ahead of time and refrigerate it for up to 3 days to save time during a busy weeknight. When ready to serve, simply reheat the chicken in a skillet to maintain the crispy crust, then warm the broccoli in the microwave or on the stovetop until heated through. This way, you’ll have a quick, hassle-free dinner that’s just as delicious!

What to Serve with Pretzel-Crusted Chicken?

Imagine sitting down to dinner, the table set with delightful sides that dance with flavors, all ready to complement that crunchy chicken perfection.

  • Creamy Mashed Potatoes: Their velvety texture and rich flavor create a warm contrast to the crunchy chicken. A sprinkle of chives adds a fresh kick.

  • Garlic Roasted Asparagus: This vibrant side brings a tender, roasted goodness that enhances the savory notes of the chicken. Plus, the bright color adds visual appeal!

  • Honey-Mustard Dipping Sauce: A perfect accompaniment for those who crave a little extra zing. The sweet and tangy flavor complements the pretzel crust beautifully, making each bite even more delicious.

  • Crispy Sweet Potato Fries: These offer a sweet, crunchy contrast that pairs well with the seasoned chicken. Dip them in the same honey-mustard sauce for a delightful combo!

  • Coleslaw with Apple: A refreshing crunch from cabbage and apples balances the richness of the chicken. The light dressing adds a zesty flair that everyone will love.

  • Herbed Quinoa Salad: Light and nutty, this nutrient-packed salad infused with herbs and lemon pairs wonderfully, adding a touch of brightness to your meal.

Pairing these delightful sides with your Pretzel-Crusted Chicken transforms an ordinary dinner into an unforgettable feast, perfect for family gatherings or cozy evenings at home!

How to Store and Freeze Pretzel-Crusted Chicken

Fridge: Store leftovers in an airtight container for up to 3 days. This helps maintain the flavors and texture of your Pretzel-Crusted Chicken.

Freezer: If you wish to freeze, wrap the cooled chicken tightly in plastic wrap followed by foil to prevent freezer burn. It can be stored for up to 2 months.

Reheating: For the best texture, reheat in a preheated oven at 350°F for about 15-20 minutes or until heated through, restoring that delightful crunch.

Broccoli Storage: If you have steamed broccoli leftovers, store it separately in an airtight container in the fridge for up to 2 days. Reheat gently to avoid overcooking.

Pretzel-Crusted Chicken Recipe FAQs

How do I select the best chicken cutlets?
Absolutely! When choosing chicken cutlets, look for meat that is pale pink and firm to the touch. Avoid any cutlets that show signs of discoloration or have dark spots. Fresh cutlets will have a clean, mild smell and should ideally be sourced from a reliable butcher or grocery store.

What’s the best way to store leftovers?
Very! After enjoying your meal, store any leftover Pretzel-Crusted Chicken in an airtight container in the fridge for up to 3 days. This storage method keeps the flavors intact while maintaining the chicken’s texture. When you’re ready to enjoy it again, just reheat in the oven for the best results.

Can I freeze Pretzel-Crusted Chicken?
You bet! To freeze, first, allow the chicken to cool completely. Then, wrap each piece tightly in plastic wrap and place it in a freezer-safe bag or container. It can be stored in the freezer for up to 2 months. When you’re ready to eat, simply thaw overnight in the fridge and reheat in the oven at 350°F for about 15-20 minutes.

What should I do if the pretzel coating isn’t sticking?
Not a problem! If you find the pretzel coating isn’t sticking well, make sure to fully coat the chicken in flour first, as this helps create a great surface for the mustard mixture to adhere. Additionally, after dipping in the mustard mixture, ensure you press the crushed pretzels firmly onto the chicken—this extra bit of pressure helps them cling on better while frying.

Are there any dietary considerations for this recipe?
Absolutely! If you’re concerned about allergens, make sure to check that your pretzels and mustard are free from ingredients like gluten and dairy, particularly if you’re serving someone with allergies. You can easily make the recipe gluten-free by substituting all-purpose flour with gluten-free flour and using gluten-free pretzels. Enjoy the crunch without worry!

How do I keep the broccoli vibrant and tender?
Great question! To keep your broccoli bright and tender, steam it only until it turns bright green and is just fork-tender—about 5 minutes is usually perfect. An easy way is to place it in boiling water, cover, and remove from heat as soon as it’s done. Immediately transfer to ice water to stop the cooking process if you want to be extra cautious!

Pretzel Crusted Chicken

Pretzel Crusted Chicken: Your Family's New Dinner Favorite

Enjoy this Pretzel Crusted Chicken, a delightful crunchy dish that combines juicy chicken cutlets with vibrant broccoli, perfect for family dinners.
Prep Time 15 minutes
Cook Time 15 minutes
Total Time 30 minutes
Servings: 4 servings
Course: Dinner
Cuisine: American
Calories: 400

Ingredients
  

For the Chicken
  • 1.5 lb Chicken Cutlets or turkey cutlets
  • Kosher Salt to taste
  • Black Pepper freshly ground
For the Coating
  • 2 tbsp Spicy Brown Mustard or Dijon mustard
  • 3 tbsp Mayonnaise or Greek yogurt
  • 1 tbsp Honey or maple syrup
  • 0.25 cup All-Purpose Flour or gluten-free flour
  • 1 cup Pretzel Twists (finely crushed) or panko breadcrumbs
  • 1 tbsp Salted Butter or unsalted butter
  • 2 tbsp Olive Oil or vegetable oil
For the Broccoli
  • Broccoli (cut into florets) or green beans/asparagus

Equipment

  • Large skillet
  • medium bowl
  • pot for steaming

Method
 

Step-by-Step Instructions
  1. Season approximately 1 ½ pounds of chicken cutlets with kosher salt and freshly ground black pepper. Coat both sides evenly.
  2. In a medium bowl, combine 2 tablespoons of spicy brown mustard, 3 tablespoons of mayonnaise, and 1 tablespoon of honey. Whisk until smooth.
  3. Dredge each seasoned chicken cutlet in ¼ cup of all-purpose flour, dip in mustard mixture, and coat with 1 cup of crushed pretzel twists.
  4. Heat a large skillet over medium-high heat, add 2 tablespoons of olive oil and 1 tablespoon of salted butter. Add chicken cutlets and cook for 5-7 minutes on each side until golden brown.
  5. In a separate pot, bring an inch of water to a boil. Add broccoli, cover, and steam for about 5 minutes until tender-crisp.
  6. Arrange the cooked chicken and broccoli on plates. Serve remaining honey-mustard sauce on the side.

Nutrition

Serving: 1pieceCalories: 400kcalCarbohydrates: 30gProtein: 35gFat: 20gSaturated Fat: 8gPolyunsaturated Fat: 3gMonounsaturated Fat: 8gCholesterol: 100mgSodium: 800mgPotassium: 600mgFiber: 4gSugar: 5gVitamin A: 15IUVitamin C: 100mgCalcium: 4mgIron: 10mg

Notes

Store leftovers in an airtight container for up to 3 days. Reheat in the oven for best results.

Tried this recipe?

Let us know how it was!

Stay Connected

Get recipes via email: