Get my cookbooks

Mouthwatering Chicken Tikka Masala You’ll Love to Make at Home

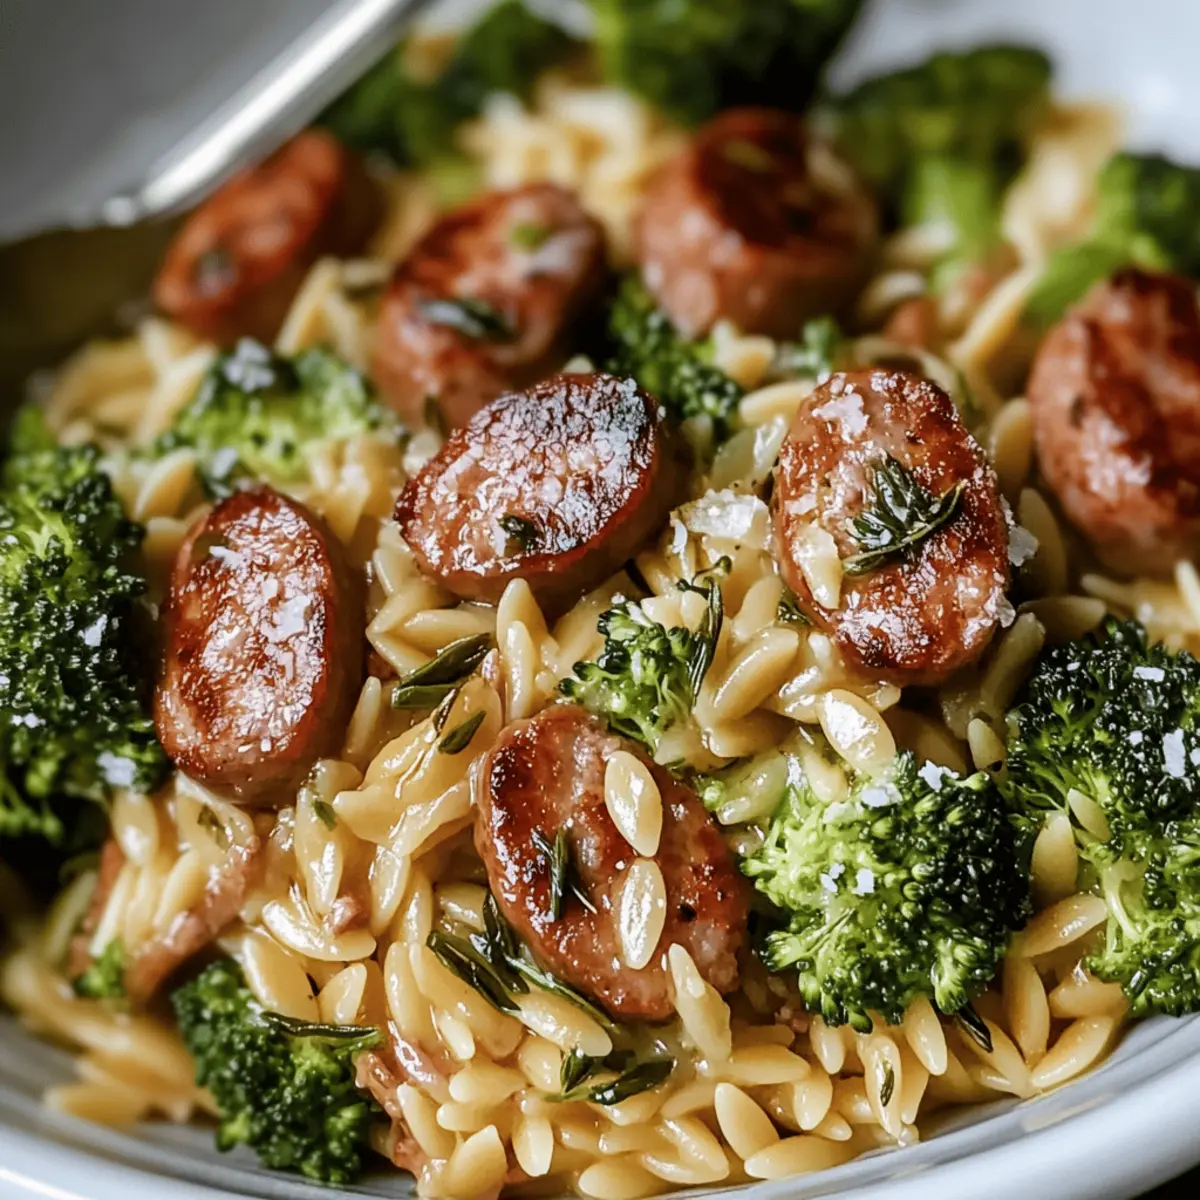
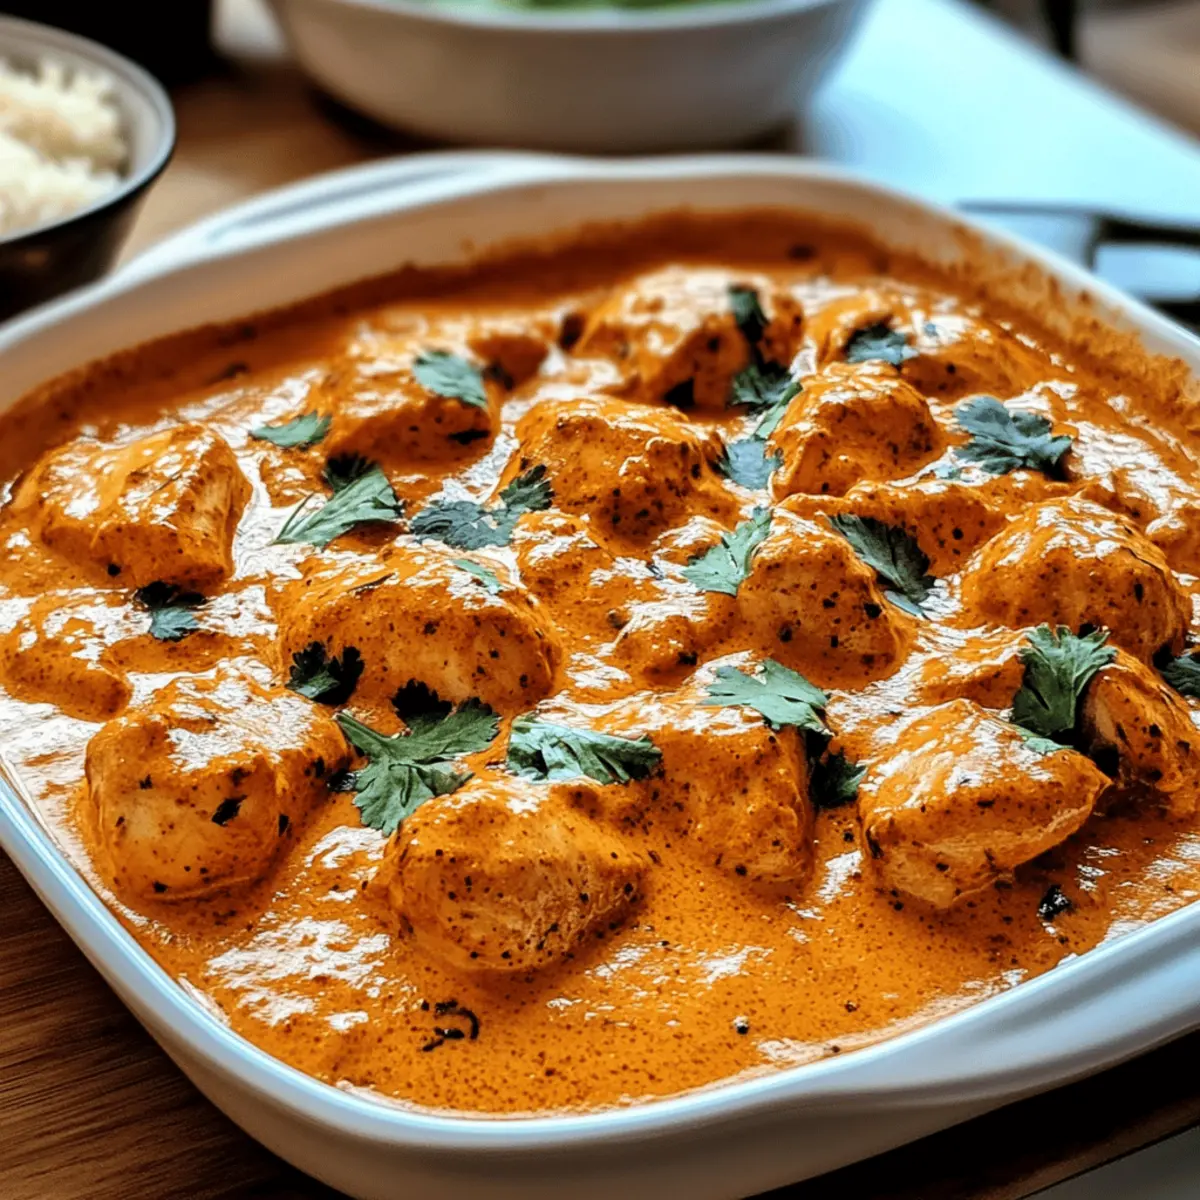
As the spices dance in the air, I can’t help but feel excitement—it’s finally time to whip up my favorite comfort food: Gordon Ramsay’s Chicken Tikka Masala. This Indian-inspired dish brings together marinated chicken coated in a creamy, homemade masala sauce that’s simply irresistible. Not only is it a satisfying meal you can prepare in under an hour, but it also features a dairy-free option for those who need it. Whether you’re a cooking pro or just starting out, this recipe is designed to take you on a delicious culinary journey right in your own kitchen. Are you ready to impress your loved ones with this restaurant-quality dish? Let’s dive in!

Why is Chicken Tikka Masala a Must-Try?

Unforgettable Flavor: This recipe is packed with aromatic spices and a creamy, rich sauce that will transport your taste buds straight to India.

Quick Prep Time: Get this delicious dish on your table in under an hour, making it perfect for busy weeknights or last-minute dinner guests.

Versatile Options: Enjoy the flexibility of using chicken, tofu, or even paneer, so everyone at the table can dig in.

Dairy-Free Adaptation: With the option to swap heavy cream for coconut milk, it’s accessible for those following a dairy-free lifestyle.

Crowd-Pleasing Appeal: Impress family and friends with a restaurant-quality meal that’s great for entertaining or cozy family dinners.

For more culinary inspiration, check out the Chilli Chicken Takeout or whip up a quick Sizzling Chicken Pepper that the whole family will love.

Chicken Tikka Masala Ingredients

For the Marination

  • Chicken Breasts/Thighs – Boneless and skinless pieces ensure optimal texture in your Chicken Tikka Masala.
  • Greek Yogurt – A tenderizing marinade base; swap for dairy-free yogurt for a delicious vegan alternative.
  • Lemon Juice – Adds a zesty kick that balances the rich flavors in the dish.
  • Ginger-Garlic Paste – Provides essential aromatic depth; fresh ginger and garlic can be used if needed.
  • Turmeric Powder – Infuses warmth and stunning golden color in your masala.
  • Garam Masala – This spice blend is the key to achieving that rich, complex flavor.
  • Ground Cumin & Coriander – They add a beautiful earthy note to the marinade.
  • Smoked Paprika – Introduces a subtle smokiness that enhances the overall flavor profile.
  • Chili Powder – Adjust to control the spice level according to your preference.

For the Masala Sauce

  • Onion, Garlic, and Ginger – The aromatic base that forms the heart of your flavorful masala sauce.
  • Tomato Paste & Crushed Tomatoes – Provides body and acidity, essential for a well-balanced sauce.
  • Heavy Cream/Coconut Milk – Adds luxurious creaminess; opt for coconut milk for a dairy-free option.
  • Butter/Ghee – Drizzles richness into the sauce, making it irresistible.
  • Sugar (optional) – A touch of sweetness that helps balance the acidity of the tomatoes.
  • Salt and Pepper – Fundamental seasonings that enhance all the flavors.

For Garnish

  • Fresh Cilantro – A sprinkle adds a pop of freshness that brightens the dish.
  • Additional Lemon Juice – A dash at the end elevates the overall flavors to new heights.

Now that you have everything you need, you’re just a step away from making your own delightful Chicken Tikka Masala!

Step‑by‑Step Instructions for Chicken Tikka Masala

Step 1: Marinate the Chicken
In a large bowl, combine Greek yogurt, lemon juice, ginger-garlic paste, turmeric, garam masala, cumin, coriander, smoked paprika, chili powder, and a pinch of salt. Cut the boneless chicken into bite-sized chunks, ensuring they’re evenly coated in the marinade. Cover the bowl with plastic wrap and refrigerate for at least 1 hour, ideally overnight, to infuse the flavors into the chicken thoroughly.

Step 2: Cook the Chicken
Preheat your oven to 400°F (200°C). If you prefer, you can also use a non-stick pan. Spread the marinated chicken chunks evenly on a baking sheet or place them in the hot pan. Bake or sear for 15–20 minutes until the chicken is cooked through and reaches an internal temperature of 165°F (74°C). Let the chicken rest while you prepare the masala sauce, allowing the juices to settle.

Step 3: Prepare Masala Sauce
In a large saucepan, melt butter or ghee over medium heat. Add finely chopped onions and sauté until they turn golden brown, about 5–7 minutes, stirring frequently. Introduce minced garlic and ginger, cooking for another minute until aromatic. Then mix in the tomato paste and spices, allowing them to toast for 2 minutes to elevate the flavors of your Chicken Tikka Masala sauce.

Step 4: Simmer the Sauce
Pour in the crushed tomatoes and stir well, letting the mixture cook for 10 minutes on a gentle simmer. If the sauce appears thick, add a splash of water to reach your desired consistency. Taste the sauce and adjust the salt or spices, ensuring a balanced flavor profile that complements the marinated chicken perfectly.

Step 5: Combine and Thicken
Once the sauce is simmered, slowly stir in heavy cream or coconut milk, ensuring it blends well. Bring the sauce back to a gentle simmer over low heat. Add the seared chicken pieces, allowing them to soak up the delicious flavors and warm through for 5 additional minutes. This step is crucial for the Chicken Tikka Masala to become creamy and flavorful.

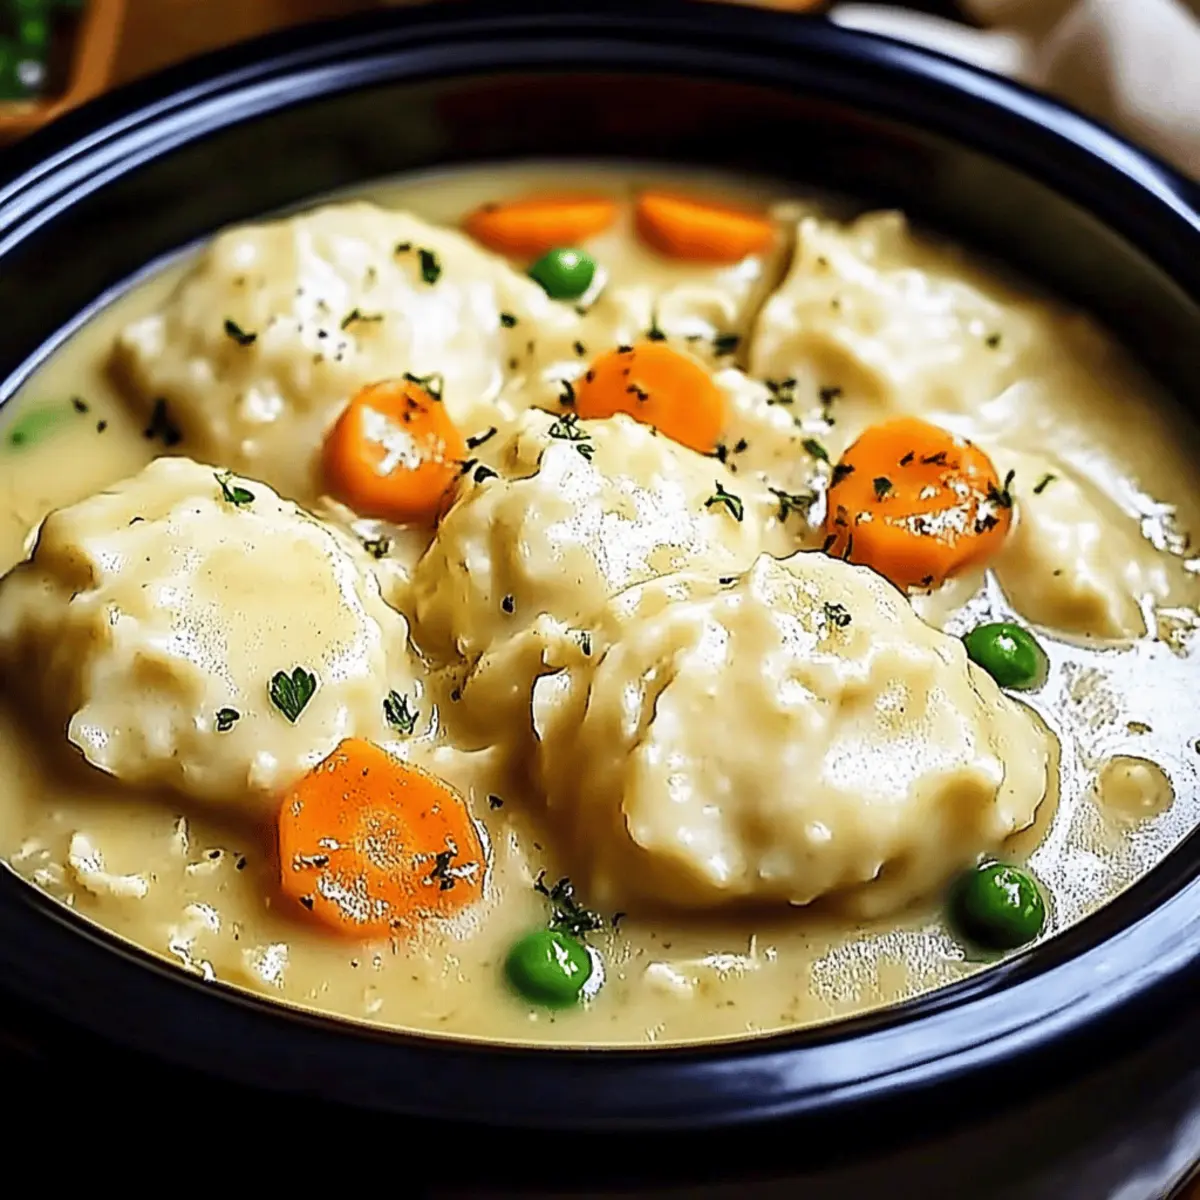
Step 6: Garnish and Serve
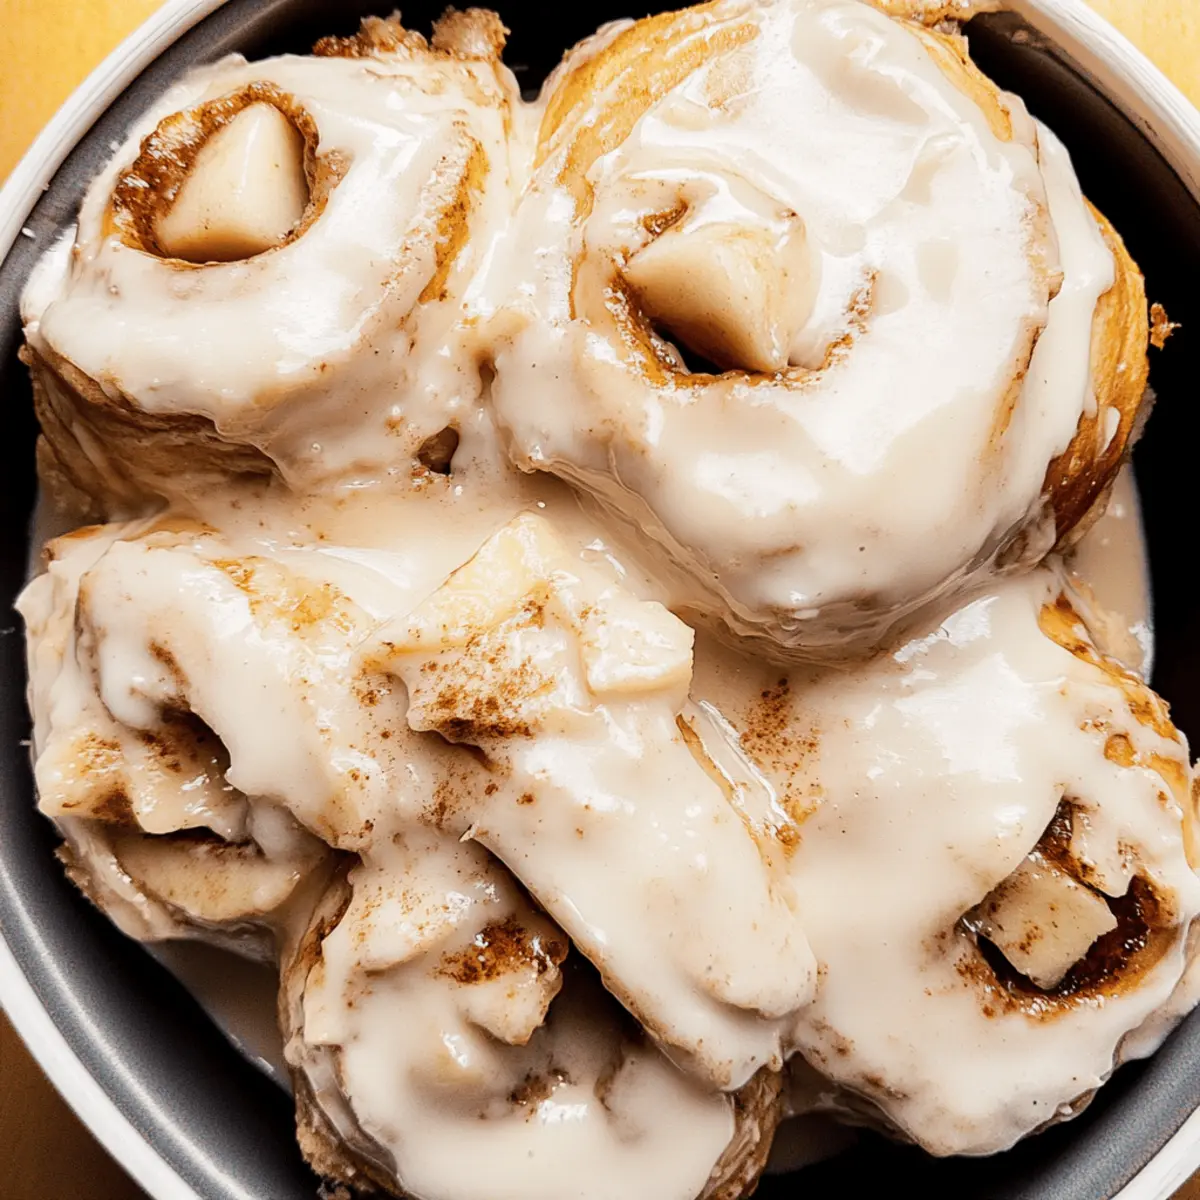
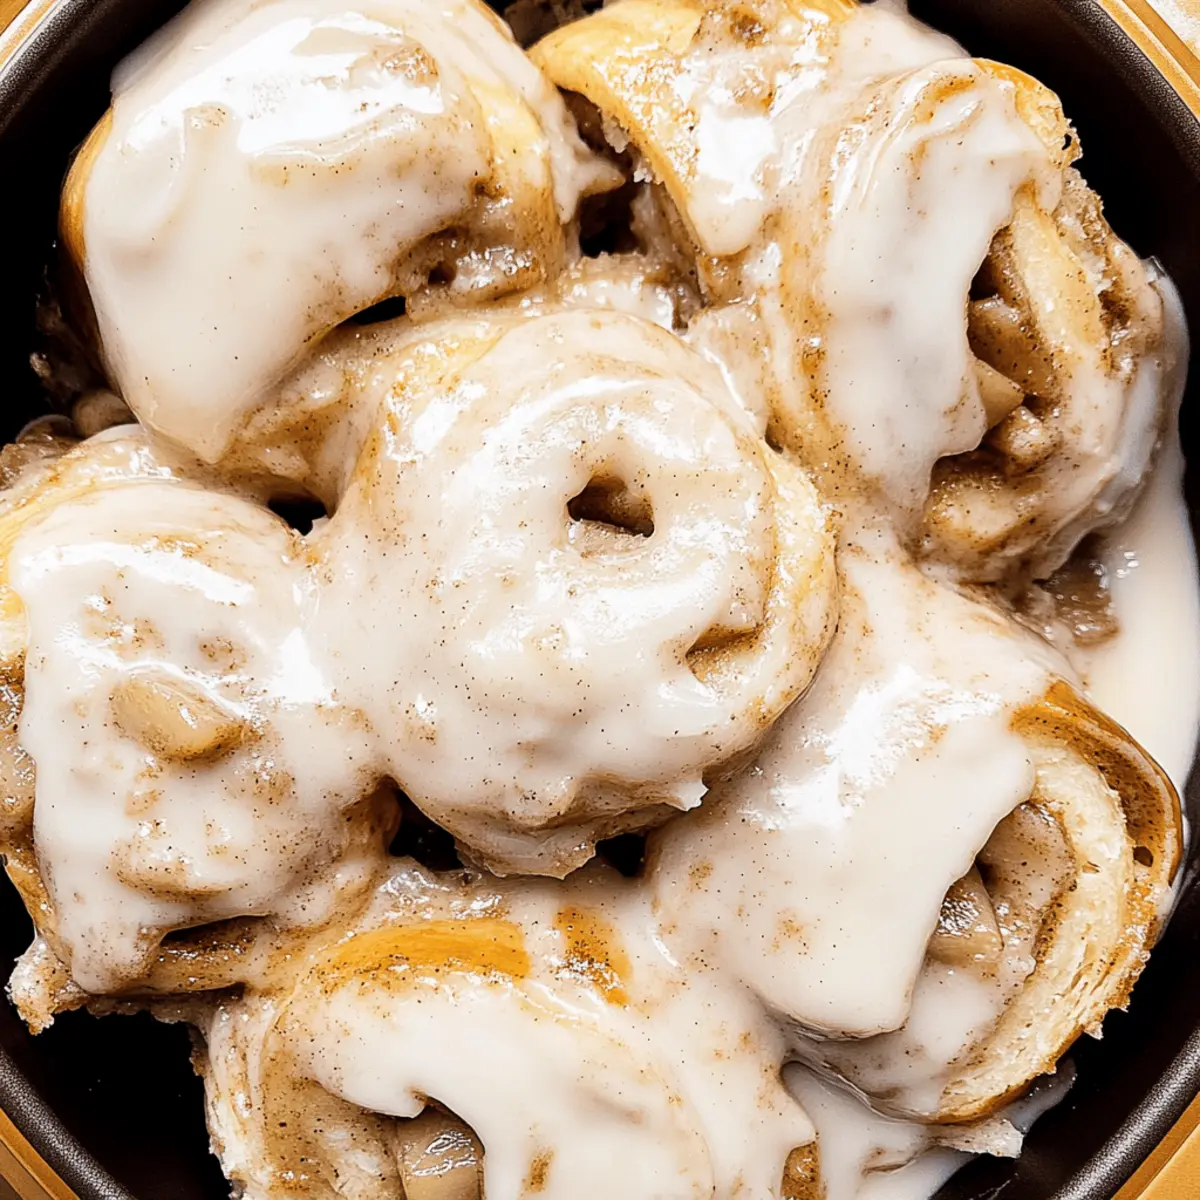
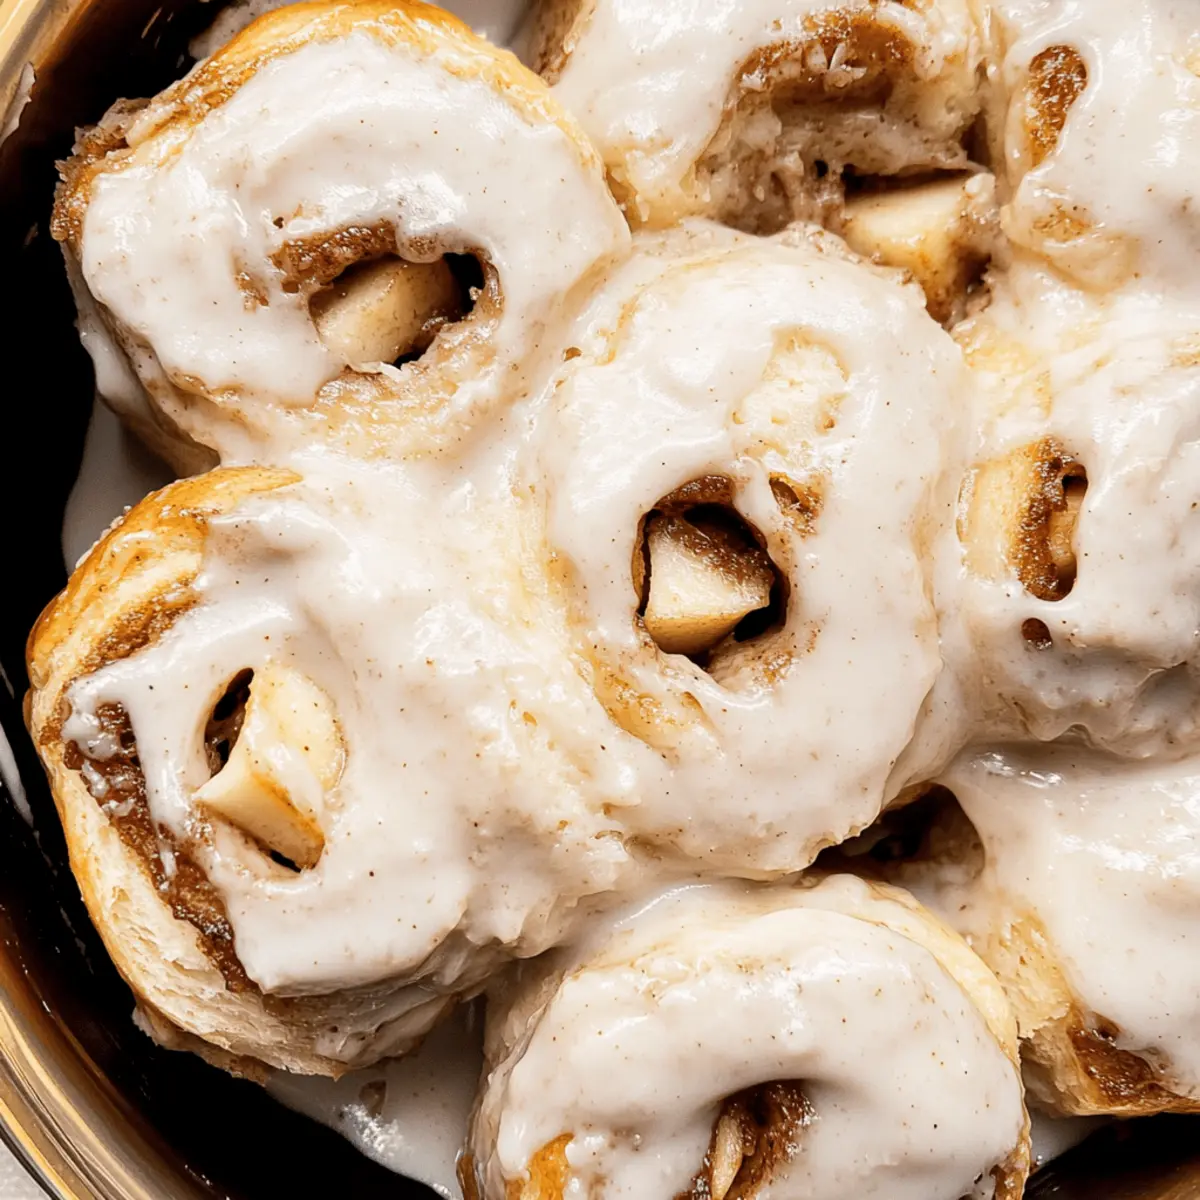
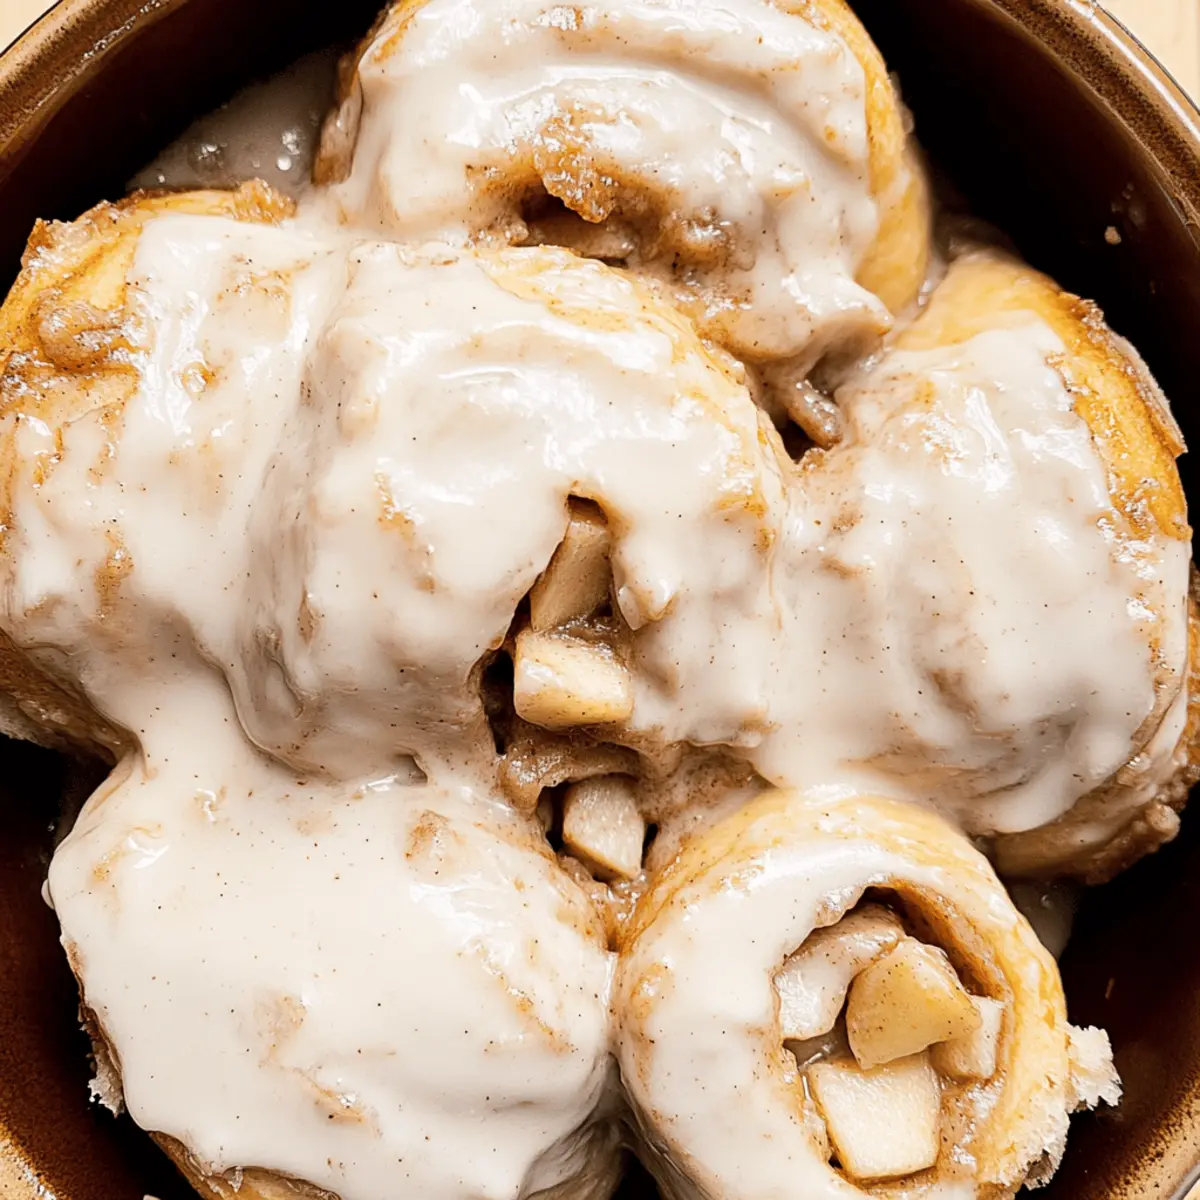
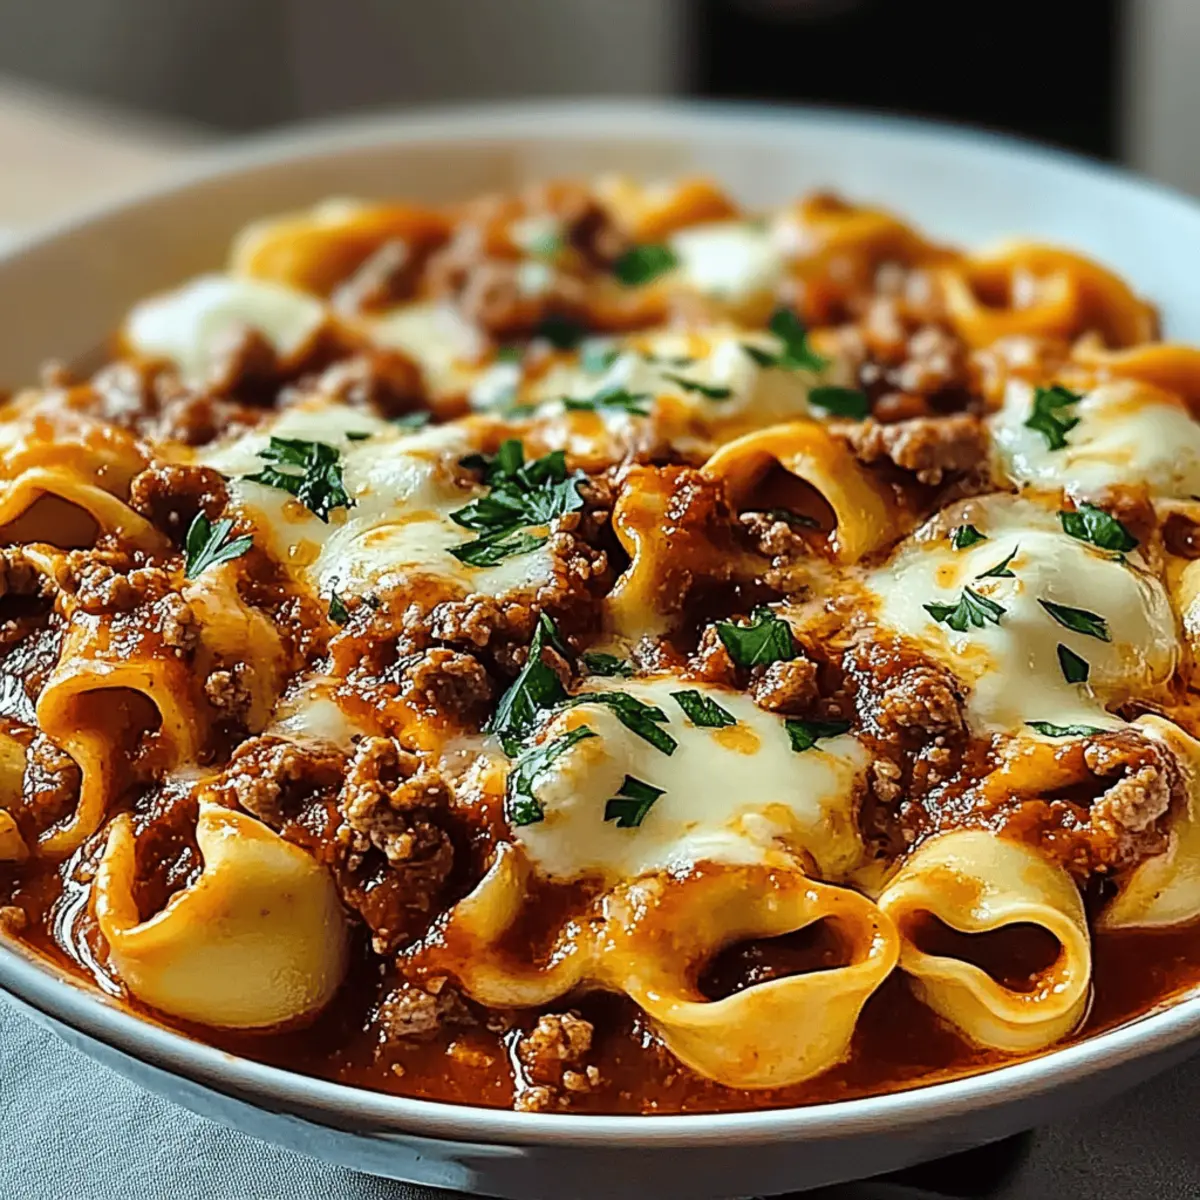
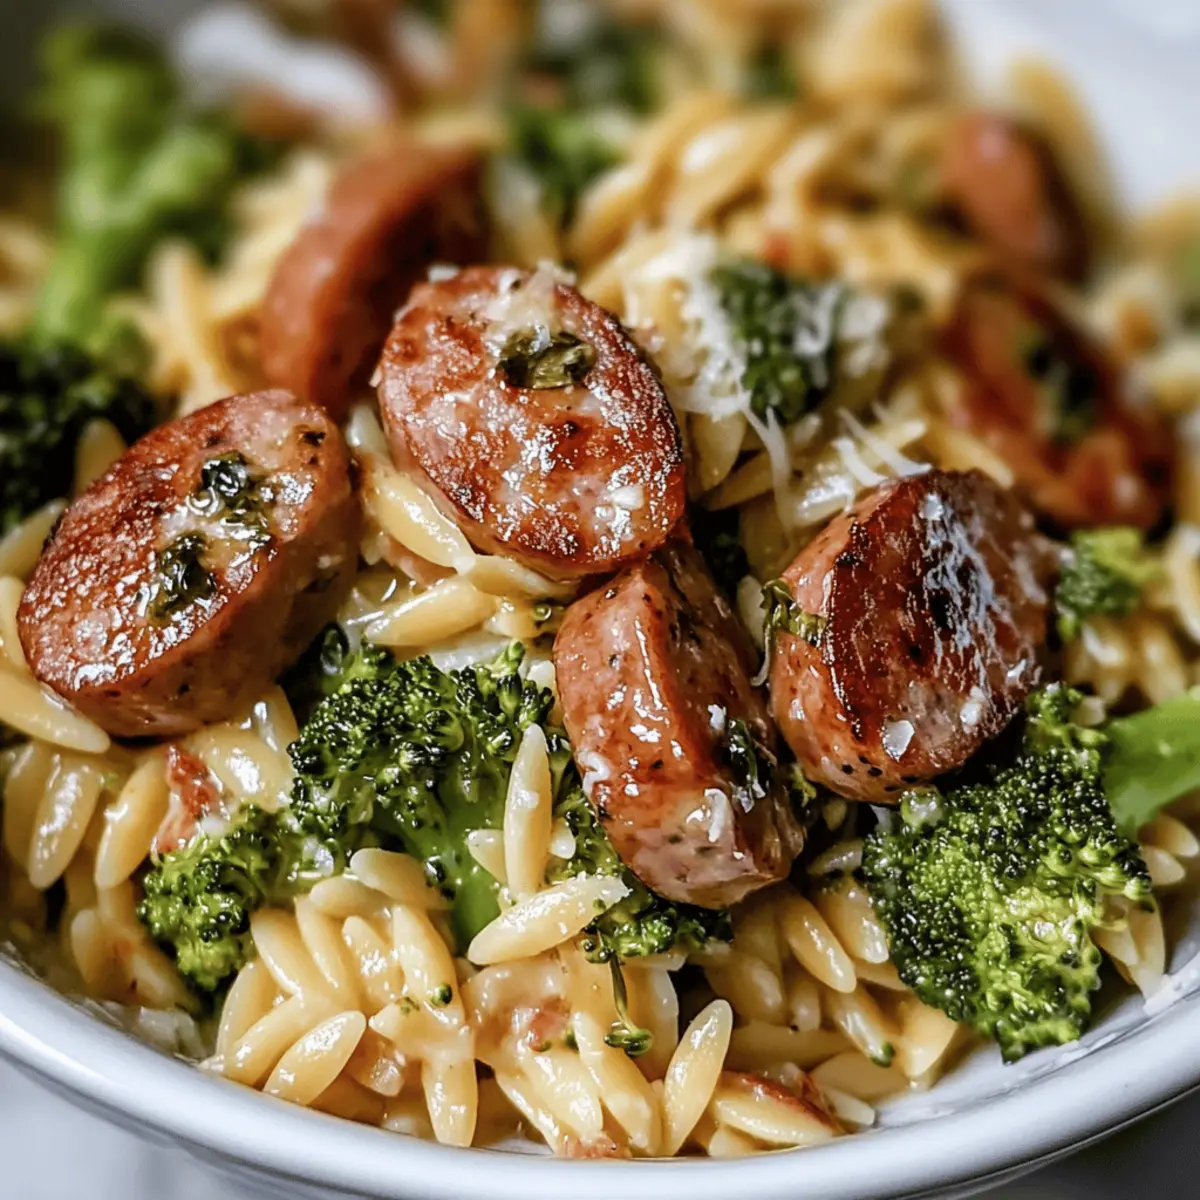
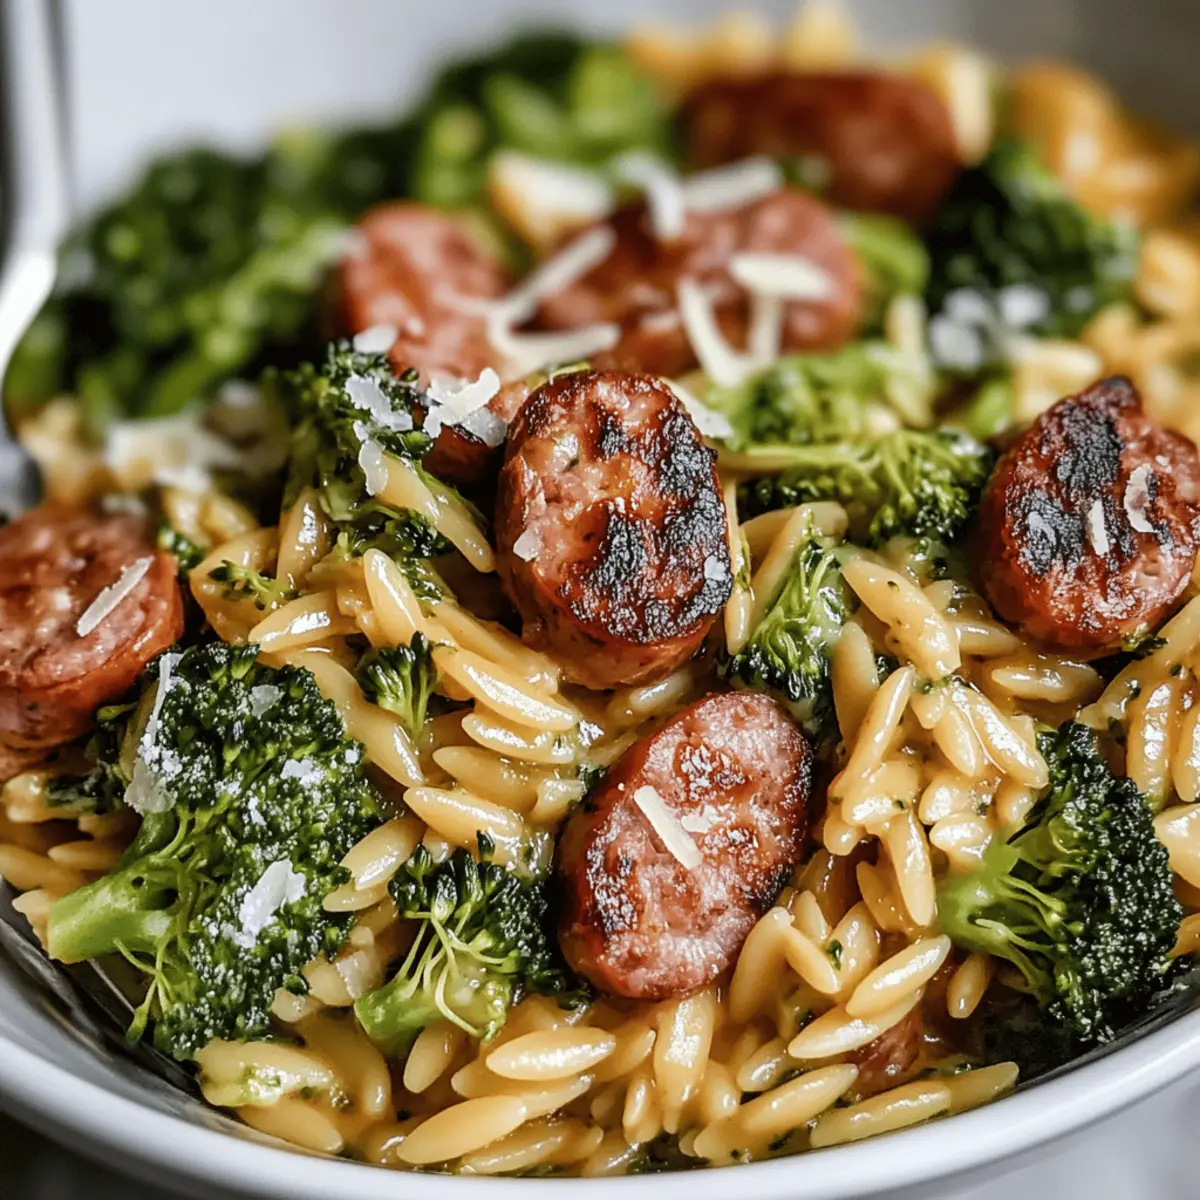
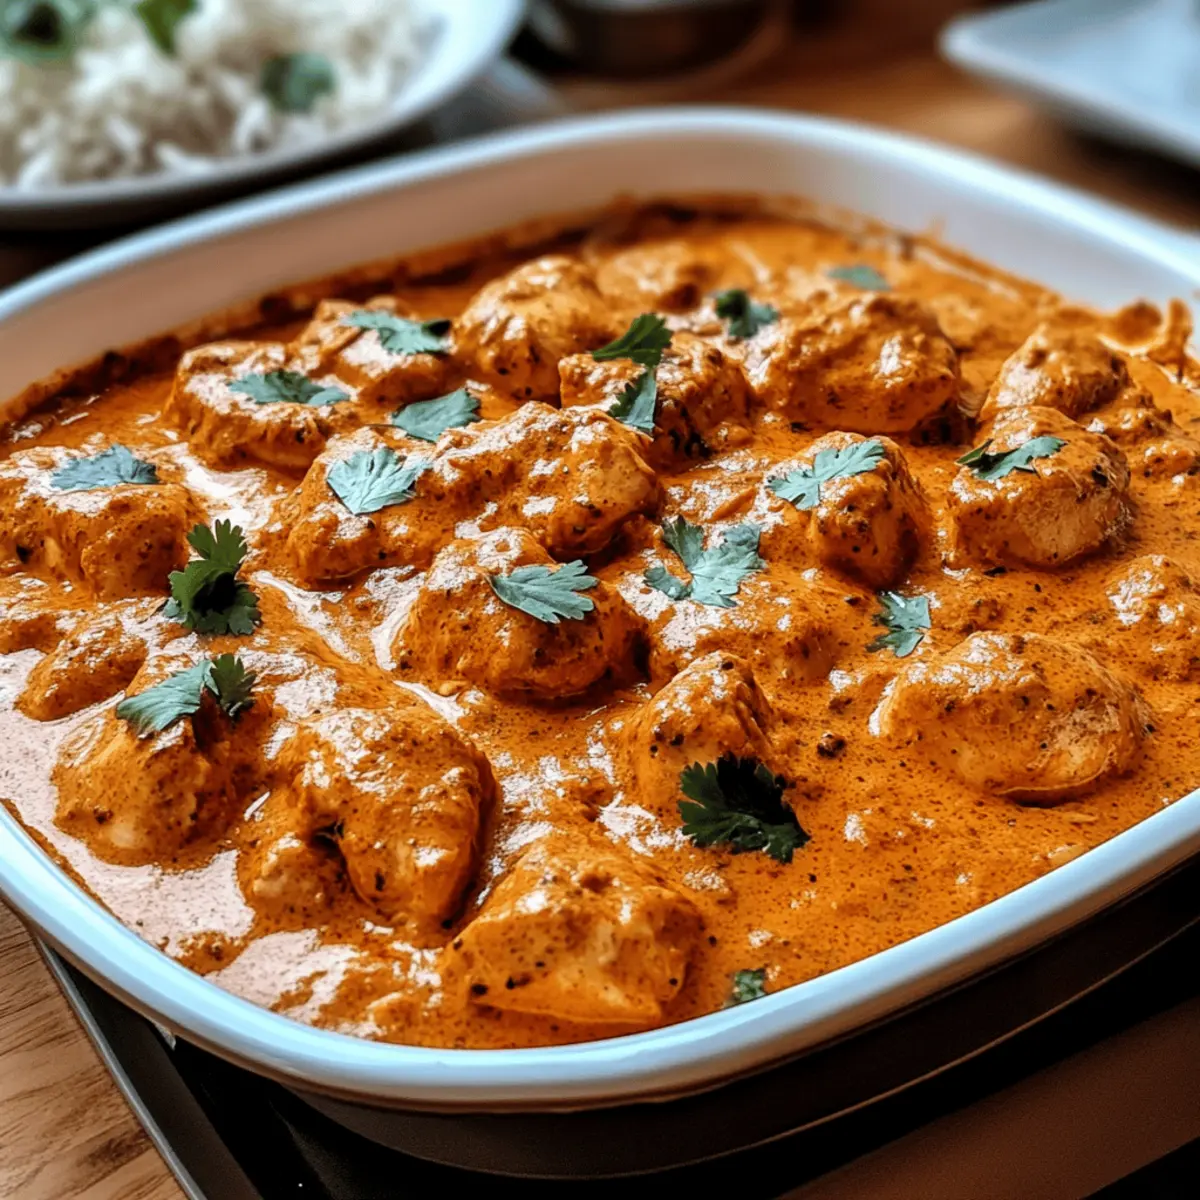
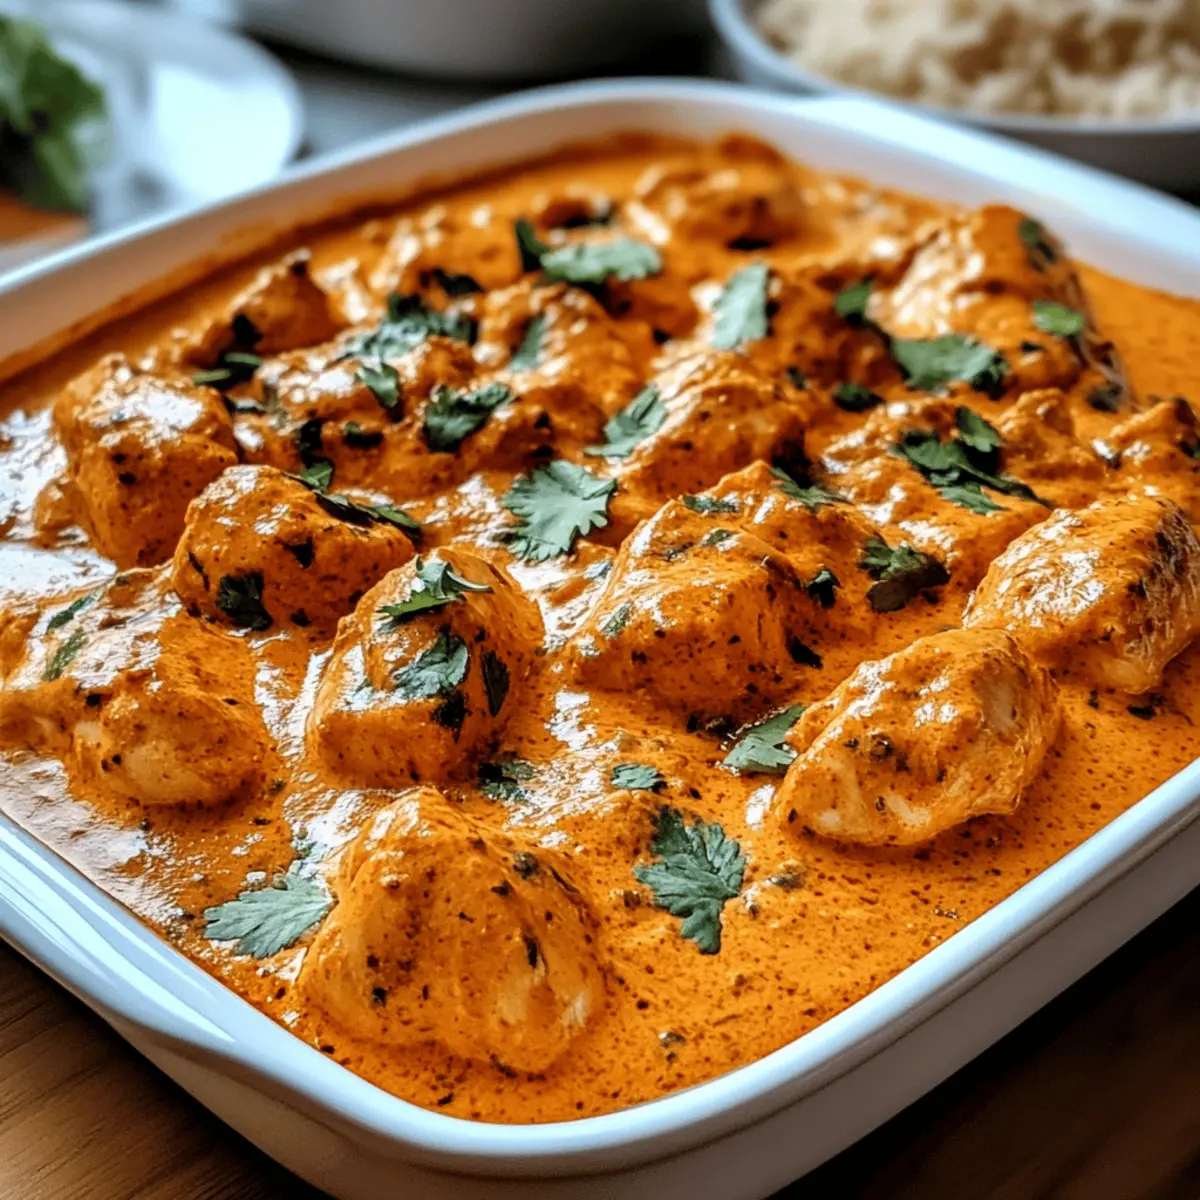
Remove the Chicken Tikka Masala from heat. Finish with a sprinkle of fresh cilantro and a squeeze of lemon juice to brighten the dish. Serve it hot with fluffy basmati rice, warm naan, or roti to soak up all that creamy goodness. Embrace the delightful aroma and enjoy a homemade taste of Indian cuisine right from your kitchen!

Chicken Tikka Masala Variations & Substitutions

Feel free to explore these creative twists to make this delightful recipe truly your own!

  • Vegetarian Option: Substitute chicken with paneer or tofu for a delectable meatless meal that’s just as satisfying.

  • Spice It Up: Add fresh green chilies or cayenne pepper for an extra kick if you love your dishes with a fiery touch.

  • Nutty Flavor: Incorporate ground cashews or almonds into the sauce for a creamy, nutty richness that elevates the dish.

  • Herb Infusion: Experiment by adding fresh herbs like mint or basil for a refreshing twist that compliments the spices beautifully.

  • Coconut Bliss: Swap heavy cream for full-fat coconut milk not only for a dairy-free option but also for a tropical twist.

  • Flavorful Veggies: Toss in bell peppers, peas, or spinach during the sauce simmering stage for added nutrition and bursts of color.

  • Smoky Essence: Try using smoked chicken or grilling your chicken before adding to the sauce to introduce a delightful smoky nuance.

  • Curry Blend: For a different flavor profile, substitute the garam masala with a curry powder blend to change things up without losing the essence of the dish.

Feeling inspired? A colorful serving of Chicken Tikka Masala pairs beautifully with fluffy basmati rice or warm naan. If you’re in the mood for more culinary delights, check out the hearty Tuscan Chicken Soup or try a zesty BLT Chicken Salad that will impress at your next lunch gathering!

Make Ahead Options

These Chicken Tikka Masala preparations are perfect for meal prep enthusiasts looking to save time during busy weeknights! You can marinate the chicken up to 24 hours in advance, allowing the flavors to deeply infuse. Simply mix the marinade and coat the chicken, then refrigerate it until you’re ready to cook. Additionally, you can prepare the masala sauce up to 3 days ahead; just sauté your aromatics and spices, then store it in an airtight container in the fridge. When you’re ready to serve, heat the sauce, add the cooked chicken, and simmer for a quick finish. This approach ensures your Chicken Tikka Masala is just as delicious and ready to enjoy with minimal hassle!

What to Serve with Gordon Ramsay’s Chicken Tikka Masala

Elevate your dining experience by pairing this flavorful dish with delightful sides that complement its richness.

  • Basmati Rice:
    Fluffy basmati rice absorbs the luscious sauce, providing a perfect canvas for the bold flavors of the Chicken Tikka Masala.

  • Naan Bread:
    Soft, warm naan makes the ideal tool for scooping up the creamy masala, enhancing each savory bite and creating a satisfying experience.

  • Cucumber Raita:
    This refreshing yogurt-based side balances the dish’s spices, bringing a cool and creamy contrast that’s simply delightful.

  • Roasted Vegetables:
    Add a medley of roasted veggies for a touch of sweetness and crunch, rounding out your meal with nutritious and flavorful elements.

  • Lemon Wedges:
    A squeeze of fresh lemon brightens the richness of the dish, elevating the flavors and bringing a vibrant zing.

  • Mango Chutney:
    This sweet and tangy condiment pairs beautifully with the spiciness of the Chicken Tikka Masala, offering a flavorful balance on the palate.

  • Mint Tea:
    A soothing cup of mint tea serves as a calming conclusion to your meal, enhancing the Indian dining experience while aiding digestion.

How to Store and Freeze Chicken Tikka Masala

Fridge: Store leftovers in an airtight container for up to 3 days. Gently reheat on the stove or in the microwave, adding a splash of water or cream to maintain the creamy texture.

Freezer: Freeze Chicken Tikka Masala in a sealed container for up to 3 months. Thaw overnight in the fridge before reheating on the stovetop to ensure even warming.

Reheating: Reheat on low heat, stirring occasionally. If the sauce thickens, add a little coconut milk or water to regain its velvety consistency.

Make-Ahead Tip: Prepare the marinated chicken a day in advance and store it in the fridge, making it easy to cook the Chicken Tikka Masala on your busy days.

Expert Tips for Chicken Tikka Masala

  • Marination Time Matters: Allowing the chicken to marinate for at least 1 hour infuses rich flavors; overnight is even better for tenderness.
  • Sear for Flavor: Searing the chicken enhances the flavor through caramelization. Don’t skip this step for a restaurant-quality taste.
  • Simmer Gently: After adding cream, keep the temperature low to prevent the sauce from boiling, which can cause separation in your Chicken Tikka Masala.
  • Adjust Spice Levels: Customize the heat by altering the amount of chili powder according to your taste preferences—start small and add more gradually.
  • Fresh Garnish Counts: Finish with fresh cilantro and a squeeze of lemon juice to brighten and elevate the finished dish’s flavor.

Chicken Tikka Masala Recipe FAQs

How do I choose ripe chicken for Tikka Masala?
When selecting chicken for your Tikka Masala, look for boneless, skinless breasts or thighs that are firm and pink without any dark spots or off odors. Fresh chicken should also feel moist but not slimy.

What is the best way to store leftover Chicken Tikka Masala?
Store leftover Chicken Tikka Masala in an airtight container in the refrigerator for up to 3 days. Be sure to let it cool to room temperature before sealing it, which helps prevent spoilage. To reheat, you can use the stove or microwave, adding a splash of water or cream to ensure the sauce remains creamy.

Can I freeze Chicken Tikka Masala?
Absolutely! To freeze, let the Chicken Tikka Masala cool completely and transfer it to a freezer-safe container. It can be frozen for up to 3 months. When you’re ready to enjoy it, thaw it overnight in the refrigerator and reheat gently on the stovetop, stirring occasionally to keep the sauce smooth.

What if my Chicken Tikka Masala sauce is too thick?
If your sauce is thicker than desired, simply add a splash of chicken broth, coconut milk, or water while reheating. Stir until you reach your preferred consistency. If needed, you can also add a touch more cream to maintain that velvety texture.

Are there any dietary considerations for this recipe?
Yes, if you’re catering to dietary needs, you can easily make this Chicken Tikka Masala dairy-free by substituting regular Greek yogurt with a dairy-free yogurt and using coconut milk instead of heavy cream. Always check labels for allergens if you’re serving friends or family with food sensitivities.

How long can I keep marinated chicken before cooking it?
For best results, marinate your chicken for at least 1 hour and up to 24 hours in the refrigerator. The longer it marinates, the more flavorful and tender it will become! Just remember to keep it covered in an airtight container to avoid cross-contamination.

Chicken Tikka Masala

Mouthwatering Chicken Tikka Masala You'll Love to Make at Home

This Chicken Tikka Masala recipe features marinated chicken in a creamy, homemade masala sauce that will become your favorite comfort food.
Prep Time 10 minutes
Cook Time 30 minutes
Marination Time 1 hour
Total Time 1 hour 40 minutes
Servings: 4 servings
Course: Dinner
Cuisine: Indian
Calories: 400

Ingredients
  

For the Marination
  • 1 pound Boneless Chicken Breasts/Thighs Cut into bite-sized chunks
  • 1 cup Greek Yogurt Swap for dairy-free yogurt for a vegan alternative
  • 2 tablespoons Lemon Juice
  • 1 tablespoon Ginger-Garlic Paste Fresh ginger and garlic can be used if needed
  • 1 teaspoon Turmeric Powder
  • 2 tablespoons Garam Masala
  • 1 teaspoon Ground Cumin
  • 1 teaspoon Ground Coriander
  • 1 teaspoon Smoked Paprika
  • 1 teaspoon Chili Powder Adjust to taste
For the Masala Sauce
  • 1 large Onion Finely chopped
  • 2 cloves Garlic Minced
  • 1 tablespoon Ginger Minced
  • 2 tablespoons Tomato Paste
  • 1 can Crushed Tomatoes 14 oz can
  • 1/2 cup Heavy Cream Swap for coconut milk for a dairy-free option
  • 2 tablespoons Butter/Ghee
  • 1 teaspoon Sugar Optional
For Garnish
  • 2 tablespoons Fresh Cilantro Chopped
  • 1 tablespoon Additional Lemon Juice

Equipment

  • Large bowl
  • Baking Sheet
  • Saucepan

Method
 

Marination and Cooking
  1. In a large bowl, combine Greek yogurt, lemon juice, ginger-garlic paste, turmeric, garam masala, cumin, coriander, smoked paprika, chili powder, and a pinch of salt. Add the cut chicken, ensuring it's evenly coated. Cover and refrigerate for at least 1 hour, ideally overnight.
  2. Preheat your oven to 400°F (200°C). Spread marinated chicken on a baking sheet or sear in a hot pan. Bake or sear for 15–20 minutes until cooked through. Let the chicken rest.
  3. In a saucepan, melt butter or ghee over medium heat. Add chopped onions and sauté until golden brown (5–7 minutes), then add garlic and ginger for another minute.
  4. Mix in tomato paste and spices, toasting for 2 minutes. Add crushed tomatoes and cook for 10 minutes on a gentle simmer. Adjust the sauce's thickness with water if needed.
  5. Slowly stir in cream or coconut milk and bring to a gentle simmer. Add the chicken and warm through for 5 minutes. Ensure the sauce is creamy and flavorful.
  6. Remove from heat. Garnish with cilantro and a squeeze of lemon juice. Serve hot with rice, naan, or roti.

Nutrition

Serving: 1servingCalories: 400kcalCarbohydrates: 20gProtein: 30gFat: 25gSaturated Fat: 15gPolyunsaturated Fat: 1gMonounsaturated Fat: 7gCholesterol: 120mgSodium: 600mgPotassium: 700mgFiber: 3gSugar: 5gVitamin A: 1000IUVitamin C: 5mgCalcium: 120mgIron: 3mg

Notes

This recipe offers a delectable balance of spices and creaminess, perfect for impressing guests or as a weeknight dinner.

Tried this recipe?

Let us know how it was!

Delicious Apple Pie Cinnamon Rolls for Cozy Mornings

The scent of cinnamon and baked apples wafting through the air is enough to make anyone’s heart skip a beat. If you’re seeking a delightful way to elevate your breakfast game, let me introduce you to my Vegan Apple Pie Cinnamon Rolls. These sweet rolls are not just a treat for the taste buds; they are a warm hug on a plate, bringing comfort with each gooey bite. The best part? They’re entirely dairy-free and can be prepped overnight, making mornings feel effortless and indulgent. Imagine waking up to a fresh batch of these soft, fluffy rolls topped with a spiced maple glaze, ready to be savored with family and friends. Ready to bring a touch of homemade magic into your kitchen? Let’s get rolling!

Why are Apple Pie Cinnamon Rolls special?

Warmth and Comfort: These Vegan Apple Pie Cinnamon Rolls combine the cozy flavors of classic apple pie and cinnamon rolls, creating a delightful experience for your taste buds.

Effortless Preparation: With the option for overnight prep, you can wake up to a stress-free baking experience, perfect for busy mornings.

Food Allergy Friendly: Completely vegan and dairy-free, these rolls cater to diverse dietary needs without sacrificing flavor.

Versatile Idea: Don’t stop at apples—try swapping in pears or nuts for a creative spin! You can even opt for a gluten-free version by using a baking mix.

Irresistible Glaze: The spiced maple glaze takes each roll to another level, ensuring every bite melts in your mouth.

Indulge in this recipe and pair it with a scoop of vegan ice cream or serve it warm drizzled with a little extra glaze, just like in my beloved Key Lime Pie!

Apple Pie Cinnamon Rolls Ingredients

For the Dough
Organic All-Purpose Flour – Provides structure to the dough; can substitute with all-purpose flour if needed.
Artisan Bread Flour – Enhances tenderness for a brioche-like texture; all-purpose flour can replace it but may change the final outcome.
Rapid Rise Yeast – Activates quickly for a fluffy dough; using Active Dry Yeast will require longer rising times.
WARM Water – Activates the yeast effectively; ensure it’s warm but not hot to keep your yeast alive.
Organic Brown Sugar – Imparts sweetness and moisture to the dough.

For the Filling
Apple Pie Spice Blend – Brings warm apple pie flavors; a homemade option is to mix cinnamon, nutmeg, allspice, and ground cloves.
Peeled & Diced Apples – Provide delightful filling flavor; a mix of Gala and Granny Smith apples is suggested for the best taste.
Vegan Salted Butter – Adds richness to both dough and filling; regular vegan butter works too if salt is added separately.

For the Glaze
Powdered Sugar – Adds sweetness and creaminess to the glaze.
Pure Maple Syrup – A delicious sweetener for the glaze that enhances the overall flavor profile.
Vanilla Extract – Elevates the rich flavor throughout.
Almond Milk (or Plant-Based Milk) – Helps to blend all glaze ingredients smoothly for a silky finish.

Discover the joy of making these apple pie cinnamon rolls, perfect for cozy mornings!

Step‑by‑Step Instructions for Vegan Apple Pie Cinnamon Rolls

Step 1: Prepare Dough
In a mixing bowl, combine 1/4 cup warm water with 1 tablespoon organic brown sugar and 1 packet of rapid rise yeast. Allow this mixture to sit for about 5–10 minutes until it becomes frothy. In a separate bowl, whisk together 2 cups of organic all-purpose flour, 1 cup artisan bread flour, and a pinch of salt. Gradually stir in 1 cup almond milk, 1/4 cup melted vegan salted butter, and 1 teaspoon vanilla extract. Mix until a dough forms.

Step 2: Knead the Dough
Transfer the dough onto a floured surface and knead for about 5–10 minutes until it’s smooth and elastic. If the dough feels sticky, sprinkle a little extra flour as needed. Shape the dough into a ball and place it in a greased bowl, cover with a towel, and set in a warm place to rise for about 1 hour, or until it doubles in size.

Step 3: Make Apple Filling
While the dough rises, prepare the filling by creaming together 1/4 cup softened vegan butter, 1/4 cup brown sugar, and 2 tablespoons apple pie spice in a bowl. Peel and dice 2 cups of apples into small pieces—using a mix of Gala and Granny Smith for balanced flavors. Stir the diced apples into the spiced sugar mixture until well combined, then set aside.

Step 4: Assemble Rolls
Once the dough has risen, punch it down gently to release air. Roll it out on a lightly floured surface into a large rectangle, about 12×18 inches. Spread the apple filling evenly over the dough, ensuring it reaches the edges. Starting from one long side, roll the dough tightly into a log shape. Pinch the seam to seal and slice into 1.5-inch pieces to create your Vegan Apple Pie Cinnamon Rolls.

Step 5: Second Rise
Arrange the sliced rolls in a greased baking dish, leaving space between each for expansion. Cover the dish with a towel and let the rolls rise in a warm area for about 20 minutes, or until they puff up slightly. This second rise is crucial for achieving fluffy, delightful Apple Pie Cinnamon Rolls.

Step 6: Bake
Preheat your oven to 350°F (175°C). When ready, place the rolls in the oven and bake for 35–40 minutes, or until they are golden brown on top and the aroma of cinnamon fills the air. Keep an eye on the rolls as they approach 35 minutes to avoid over-browning.

Step 7: Make Glaze
While the rolls are baking, prepare the spiced maple glaze. In a bowl, whisk together 1 cup powdered sugar, 1/4 cup pure maple syrup, 1 teaspoon vanilla extract, and 2 tablespoons almond milk. Beat until the mixture is smooth and creamy, adjusting with more milk if necessary for the desired consistency.

Step 8: Glaze Rolls
Once the Vegan Apple Pie Cinnamon Rolls have baked, let them cool in the dish for about 10 minutes. Drizzle half of the glaze over the rolls, allowing it to absorb in for extra sweetness. Then, top with the remaining glaze just before serving, ensuring a gooey, delectable finish to your delightful apple pie cinnamon rolls.

Expert Tips for Apple Pie Cinnamon Rolls

  • Water Temperature Matters: Ensure your warm water is around 110°F (43°C). If it’s too hot, it could kill the yeast, ruining your dough.

  • Knead Well: Knead the dough for a good 5–10 minutes until it’s smooth and elastic. This develops gluten, providing the rolls with the perfect fluffy texture.

  • Mind the Rising Time: Don’t rush the rising process; allow the dough to double in size for the best results. A warm spot in your kitchen helps greatly!

  • Use Dental Floss for Slicing: For clean cuts, use unflavored dental floss instead of a knife. This prevents squishing your beautiful rolls.

  • Check for Perfectly Baked Rolls: Keep an eye on the rolls towards the end of baking to prevent over-browning; golden brown should be your goal for these delightful Apple Pie Cinnamon Rolls.

Storage Tips for Apple Pie Cinnamon Rolls

Room Temperature: Store your apple pie cinnamon rolls covered at room temperature for up to 3 days to maintain their softness and flavor.

Fridge: If you’d like to keep them longer, refrigerate the rolls for up to 1 week, but ensure they’re wrapped tightly to prevent drying out.

Freezer: For longer storage, freeze the baked cinnamon rolls in an airtight container for up to 2 months. Let them cool completely before freezing to retain quality!

Reheating: When ready to enjoy, reheat thawed rolls in the oven at 350°F (175°C) for about 10 minutes for that fresh-baked taste, or microwave for 30 seconds until warm.

Make Ahead Options

These Vegan Apple Pie Cinnamon Rolls are ideal for meal prep, making your mornings effortlessly sweet! You can prepare the dough and filling up to 24 hours in advance. After kneading the dough, simply cover and refrigerate it overnight. In the morning, allow the dough to come to room temperature before rolling it out and assembling the rolls. To maintain their fluffy texture, ensure they are well-covered during the rise time. You can also assemble the rolls completely, place them in a greased pan, cover tightly, and refrigerate for up to 3 days. When ready to bake, let them rise for about 20 minutes, then pop them into the oven for freshly baked, deliciously gooey rolls!

Apple Pie Cinnamon Rolls Variations

Feel free to mix and match these delightful twists to make the Vegan Apple Pie Cinnamon Rolls your own!

  • Gluten-Free: Replace both flours with a gluten-free baking mix for a gluten-free version that doesn’t skimp on flavor. You’ll still enjoy that airy, fluffy texture!

  • Fruit Swap: Switch out the apples for juicy pears or add chopped walnuts for a delightful crunch. Each option offers a new flavor layer that keeps things exciting!

  • Extra Spice: For an added kick, sprinkle in some ginger or allspice to the filling. This spicy twist enhances the traditional apple pie flavor profile.

  • Air-Fried Delights: Prefer a quicker method? Preheat your air fryer to 360°F and bake for about 8 minutes. Air-frying gives them a lovely crispy finish!

  • Maple Walnut Glaze: Swap half of the almond milk in the glaze for more maple syrup or crushed walnuts. This adds richness and depth to each sweet bite.

  • Chocolate Drizzle: Drizzle melted vegan chocolate over the finished rolls for a decadent touch. Chocolate and apple create a dreamy dessert combo you won’t forget!

  • Cinnamon Sugar Crust: Before the second rise, sprinkle a mixture of cinnamon and sugar over the rolled dough for an irresistible crust. Every bite will be bursting with gooey sweetness!

  • Dairy-Free Cream Cheese: Mix in some dairy-free cream cheese in your filling for a creamy layer that pairs beautifully with the spiced apples, creating a rich texture.

Ready to elevate your breakfast experience? These delightful variations are sure to please everyone at the table! Don’t forget to check out other delicious ideas like helping your family enjoy Apple Crisp Cinnamon or indulge in a cozy Foster Cinnamon Rolls!

What to Serve with Vegan Apple Pie Cinnamon Rolls?

Imagine your kitchen filled with the sweet, spiced aroma of freshly baked rolls, now let’s elevate this experience with perfect pairings!

  • Fresh Fruit Salad: Light and refreshing, a mix of seasonal fruits balances the sweetness of the rolls. Think of juicy berries and zesty citrus!

  • Coconut Yogurt: Creamy and subtly sweet, a dollop of coconut yogurt adds a delightful creaminess while keeping it dairy-free.

  • Chai Latte: Warm spices in a chai latte complement the flavors of the cinnamon rolls beautifully. Sip on this cozy beverage while enjoying your treats.

  • Maple Pecan Granola: Crunchy granola adds texture and pairs perfectly with a drizzle of extra maple syrup, enhancing the rolls’ glaze without overpowering them.

  • Nutty Vegan Ice Cream: A scoop of almond or cashew ice cream creates a creamy contrast to the warm rolls. Enjoy the melty goodness as it blends with the sweet flavors!

  • Sweetened Almond Milk: Served chilled or warm, this dairy-free milk option acts as a great pairing, enhancing the rolls by balancing their sweet warmth.

Serve your Vegan Apple Pie Cinnamon Rolls with any of these delightful options for a cozy, comforting experience that your family will cherish!

Vegan Apple Pie Cinnamon Rolls Recipe FAQs

What type of apples are best for the filling?
I recommend using a combination of Gala and Granny Smith apples for a balanced flavor—Gala offers sweetness, while Granny Smith adds a nice tartness that elevates the overall filling. If you’re in the mood for a twist, try using other fruits like pears or even adding chopped nuts for extra texture!

How should I store my Vegan Apple Pie Cinnamon Rolls?
Store your apple pie cinnamon rolls covered at room temperature for up to 3 days for the best texture. If you need to keep them longer, refrigerate them wrapped tightly for up to 1 week. For longer storage, freeze the baked rolls in an airtight container for up to 2 months. Make sure they are completely cooled before freezing!

Can I freeze the cinnamon rolls before or after baking?
You can freeze the baked cinnamon rolls after cooling completely. For an unbaked option, assemble the rolls, then freeze them before the second rise. When you’re ready to enjoy, allow them to thaw in the fridge overnight, then bring to room temperature and let them rise before baking. This method retains freshness and flavors beautifully!

What if my dough is too sticky?
Absolutely! If your dough is sticky, it’s often just a matter of adding a small amount of flour gradually while kneading. Aim for a smooth and elastic texture; don’t be shy to sprinkle flour onto the surface as needed. If you’ve added too much liquid, you may have to adjust with a little more flour to achieve the right consistency!

Can I make these rolls gluten-free?
Very! To make gluten-free Vegan Apple Pie Cinnamon Rolls, simply replace both the all-purpose and bread flour with a gluten-free baking mix. Be sure to check that all other ingredients are gluten-free as well for a safe and delicious treat!

How do I know when my cinnamon rolls are done baking?
Keep an eye on your rolls towards the end of the baking time; they should turn golden brown and feel slightly firm to the touch. Insert a toothpick into the center—if it comes out clean or with a few moist crumbs, they’re ready to come out of the oven!

Apple Pie Cinnamon Rolls

Delicious Apple Pie Cinnamon Rolls for Cozy Mornings

These Vegan Apple Pie Cinnamon Rolls combine cozy flavors of apple pie and cinnamon rolls, creating a delightful breakfast treat.
Prep Time 1 hour
Cook Time 40 minutes
Rising Time 1 hour
Total Time 2 hours 40 minutes
Servings: 12 rolls
Course: Dessert
Cuisine: Vegan
Calories: 250

Ingredients
  

For the Dough
  • 2 cups Organic All-Purpose Flour Can substitute with all-purpose flour if needed.
  • 1 cup Artisan Bread Flour All-purpose flour can replace it but may change the final outcome.
  • 1 packet Rapid Rise Yeast Using Active Dry Yeast will require longer rising times.
  • 1/4 cup WARM Water Ensure it's warm but not hot to keep your yeast alive.
  • 1/4 cup Organic Brown Sugar Imparts sweetness and moisture to the dough.
For the Filling
  • 2 tablespoons Apple Pie Spice Blend A homemade option is to mix cinnamon, nutmeg, allspice, and ground cloves.
  • 2 cups Peeled & Diced Apples A mix of Gala and Granny Smith suggested for the best taste.
  • 1/4 cup Vegan Salted Butter Regular vegan butter works too if salt is added separately.
For the Glaze
  • 1 cup Powdered Sugar Adds sweetness and creaminess to the glaze.
  • 1/4 cup Pure Maple Syrup A delicious sweetener for the glaze.
  • 1 teaspoon Vanilla Extract Elevates the rich flavor throughout.
  • 2 tablespoons Almond Milk (or Plant-Based Milk) Helps to blend all glaze ingredients smoothly.

Equipment

  • Mixing Bowl
  • baking dish
  • Floured Surface
  • whisk

Method
 

Step-by-Step Instructions for Vegan Apple Pie Cinnamon Rolls
  1. In a mixing bowl, combine 1/4 cup warm water with 1 tablespoon organic brown sugar and 1 packet of rapid rise yeast. Allow this mixture to sit for about 5–10 minutes until it becomes frothy.
  2. In a separate bowl, whisk together 2 cups of organic all-purpose flour, 1 cup artisan bread flour, and a pinch of salt. Gradually stir in 1 cup almond milk, 1/4 cup melted vegan salted butter, and 1 teaspoon vanilla extract. Mix until a dough forms.
  3. Transfer the dough onto a floured surface and knead for about 5–10 minutes until it's smooth and elastic. Shape the dough into a ball and place it in a greased bowl, cover with a towel, and set in a warm place to rise for about 1 hour.
  4. While the dough rises, prepare the filling by creaming together 1/4 cup softened vegan butter, 1/4 cup brown sugar, and 2 tablespoons apple pie spice in a bowl.
  5. Peel and dice 2 cups of apples into small pieces. Stir the diced apples into the spiced sugar mixture until well combined.
  6. Once the dough has risen, punch it down gently to release air. Roll it out on a lightly floured surface into a large rectangle, about 12x18 inches. Spread the apple filling evenly over the dough.
  7. Starting from one long side, roll the dough tightly into a log shape. Pinch the seam to seal and slice into 1.5-inch pieces.
  8. Arrange the sliced rolls in a greased baking dish, leaving space between each for expansion. Cover the dish with a towel and let the rolls rise in a warm area for about 20 minutes.
  9. Preheat your oven to 350°F (175°C). When ready, place the rolls in the oven and bake for 35–40 minutes.
  10. While the rolls are baking, prepare the spiced maple glaze by whisking together 1 cup powdered sugar, 1/4 cup pure maple syrup, 1 teaspoon vanilla extract, and 2 tablespoons almond milk.
  11. Once the Vegan Apple Pie Cinnamon Rolls have baked, let them cool in the dish for about 10 minutes. Drizzle half of the glaze over the rolls.

Nutrition

Serving: 1rollCalories: 250kcalCarbohydrates: 45gProtein: 3gFat: 8gSaturated Fat: 2gSodium: 200mgPotassium: 100mgFiber: 1gSugar: 10gVitamin C: 2mgCalcium: 2mgIron: 4mg

Notes

Store the rolls covered at room temperature for up to 3 days, or refrigerate for up to 1 week. Freeze for longer storage in an airtight container for up to 2 months.

Tried this recipe?

Let us know how it was!

Crunchy Bagel Chex Mix: A Savory Snack You Can’t Resist

Amid the hustle and bustle of everyday life, I often find myself craving a snack that’s not only scrumptious but also elevates those mundane moments. Enter my Homemade Everything Bagel Chex Mix—a perfect blend of crunchy nuts, savory pretzel sticks, and Chex cereals, all wrapped in the delightful seasoning of Everything Bagel magic. When the urge for a flavorful bite strikes, this easy-to-make treat has your back, effortlessly catering to both party vibes and Netflix binges. What I love most is that it’s not just a tasty indulgence; it’s also vegan and can be adapted for special diets, making it the ultimate versatile snack. Ready to discover the joy of munching without guilt? Buckle up, because this Chex Mix is about to become your new go-to!

Why is this Bagel Chex Mix a must-try?

Addictive Crunch: This Homemade Everything Bagel Chex Mix offers an irresistible crunch that you’ll find hard to resist!

Flavor Explosion: The everything bagel seasoning delivers a delicious blend of savory spices, making each bite an adventure for your taste buds.

Dietary Flexibility: Perfect for everyone, it’s easily adaptable to be dairy-free or vegan without losing flavor.

Ultimate Snack for Any Occasion: Whether you’re hosting a party or enjoying a night in, this mix is the ideal companion—always a crowd-pleaser!

Make Ahead and Store: Prepare a big batch and enjoy it over weeks—just store it in an airtight container to keep it fresh!

Quick and Easy: With minimal prep time and effortless baking, you’ll have a scrumptious treat ready in no time. For more fun snack ideas, check out my favorite homemade snacks.

Bagel Chex Mix Ingredients

For the Base

  • Corn Chex cereal – A crunchy staple that adds great texture and structure; perfect for gluten-free diets when labeled.
  • Wheat Chex cereal – Offers a nutty flavor; swap with additional corn or rice Chex for a gluten-free option.
  • Rice Chex cereal – Complements the mix by binding the ingredients together beautifully.

For the Crunch

  • Mini salted pretzels – These bring a delightful saltiness and extra crunch; opt for gluten-free pretzels if needed.
  • Mini pretzel sticks – An additional source of crunch that enhances the overall experience.
  • Mixed nuts – Nutrient-packed with protein and healthy fats; feel free to personalize with your favorites like cashews or almonds.

For the Flavor

  • Unsalted butter – Richly bases the seasoning mix; substitute with dairy-free butter for a vegan adaptation.
  • Everything Bagel Seasoning – The star of the mix, delivering a burst of flavor; adjust as per your taste preferences.
  • Worcestershire sauce – Adds a savory umami twist; ensure a vegan version is used for vegan diets.

This Homemade Everything Bagel Chex Mix is not only delicious but also customizable, perfect for any snacking occasion!

Step‑by‑Step Instructions for Homemade Everything Bagel Chex Mix

Step 1: Prepare the Sauce Mixture
In a medium bowl, melt unsalted butter in the microwave for about 30 seconds. Once melted, mix in Worcestershire sauce and Everything Bagel seasoning, stirring until the ingredients are fully combined. This savory blend will serve as the flavorful coating for your Homemade Everything Bagel Chex Mix, ensuring every bite is bursting with flavor.

Step 2: Preheat Oven
Preheat your oven to 300°F (150°C) while you prepare your mix. Line a large baking sheet with parchment paper, making it easy to bake and clean up later. If you’re making a larger batch, consider preparing two sheets to allow for even spreading and optimal crispiness of your Bagel Chex Mix.

Step 3: Mix Dry Ingredients
In a large mixing bowl, combine Corn Chex, Wheat Chex, Rice Chex cereals, mini salted pretzels, and mixed nuts. Stir gently to incorporate all ingredients, being careful to minimize breaking the Chex cereals for that delightful crunch. This step sets the base for your Homemade Everything Bagel Chex Mix, ensuring a great texture and variety of flavors.

Step 4: Combine Everything
Pour the melted sauce mixture over the dry ingredients, making sure to coat everything evenly. Use a spatula or wooden spoon to carefully fold the mixture until all pieces are thoroughly coated in the savory seasoning. This ensures that your Bagel Chex Mix is full of flavor in every bite.

Step 5: Bake
Spread the mixture evenly across the prepared baking sheet. Place it in the preheated oven and bake for 40-45 minutes, stirring every 15 minutes to promote even cooking and prevent burning. You’ll know your Bagel Chex Mix is done when it turns a lovely golden brown color, indicating perfect crispness.

Step 6: Cool and Serve
Once baked, remove the Chex Mix from the oven and let it cool on the baking sheet for about 10 minutes. This cooling period will help it crisp up even more. After cooling, transfer your delightful Homemade Everything Bagel Chex Mix to a serving bowl or store it in an airtight container for later enjoyment.

Expert Tips for Bagel Chex Mix

  • Check Often: Stir the mix every 15 minutes during baking to prevent burning, especially towards the end; this ensures an even crunch for your Bagel Chex Mix.

  • Parchment Paper: Always line your baking sheet with parchment paper for easy cleanup and to prevent sticking. This tip saves time and effort after enjoying your snack!

  • Adapt to Tastes: Feel free to personalize your Bagel Chex Mix by experimenting with different nuts or spices; this creates a unique flavor profile that your friends will love.

  • Cooling Time: Don’t rush the cooling process. Allowing your Chex Mix to cool on the baking sheet helps it become even crispier before serving.

  • Storage Love: Keep your Bagel Chex Mix in an airtight container at room temperature; it stays fresh for up to 2 months, letting you enjoy it whenever cravings strike!

Make Ahead Options

These Homemade Everything Bagel Chex Mix are perfect for busy cooks looking to streamline their meal prep! You can prepare the dry components—Corn Chex, Wheat Chex, Rice Chex, pretzels, and mixed nuts—up to 3 days in advance, storing them in an airtight container to maintain their crunch. The flavorful sauce can be mixed and refrigerated for up to 24 hours before you’re ready to bake. When it’s time to serve, simply combine the dry ingredients with the sauce, bake for 40-45 minutes, and you’ll have a delicious snack ready in no time! This makes the Bagel Chex Mix the ideal choice for parties or snacking during the week.

Bagel Chex Mix Variations & Substitutions

Feel free to get creative with this Bagel Chex Mix and tailor it to your taste buds and dietary needs!

  • Dairy-Free: Use dairy-free butter or coconut oil instead of regular butter for a vegan version that maintains rich flavor.

  • Gluten-Free: Replace Wheat Chex with additional Corn or Rice Chex or choose certified gluten-free pretzels to keep the crunch intact.

  • Spicy Kick: Stir in a teaspoon of cayenne pepper or red pepper flakes for an exciting heat that livens up your snack.

  • Nut-Free: Swap mixed nuts with pumpkin seeds or sunflower seeds for a nut-free alternative that doesn’t sacrifice nutrition.

  • Sweet & Savory: Drizzle a bit of honey or maple syrup over the mix after baking for that perfect sweet and salty contrast, creating fun flavor layers.

  • Herb Boost: Add dried herbs like rosemary or thyme to the seasoning mix to elevate the aroma and add fresh, savory notes.

  • Cheesy Twist: Sprinkle nutritional yeast over the final mix for a cheesy flavor, perfect for those who love a cheesy touch without dairy.

  • Party-Friendly: Enhance the mix with mini chocolate chips or dried fruit after baking for a colorful and festive touch that pleases everyone.

Whether you’re looking for a savory crunch or experimenting with flavors, this Bagel Chex Mix is versatile enough to satisfy any craving! If you need more inspiration, check out my snack ideas or explore additional options in my homemade snacks collection.

What to Serve with Homemade Everything Bagel Chex Mix

Elevate your snacking experience with delightful accompaniments that enhance the savory magic of this irresistible treat.

  • Creamy Hummus: A smooth and creamy dip that pairs beautifully, balancing the crunch with rich flavors for a satisfying snack attack.

  • Classic Veggies & Dip: Fresh cucumber, carrots, and bell peppers with ranch or tzatziki are refreshing and healthy, providing a lovely contrast to the bagel-infused crunch.

  • Cheese Platter: Include assorted cheeses like sharp cheddar or creamy brie, which complement the savory notes of the Chex Mix while adding a luscious texture.

  • Fruity Salsa: A sweet and tangy mango or pineapple salsa adds bright flavors and freshness, lightening the snack table while echoing those warm everything bagel spices.

  • Sparkling Lemonade: A bubbly drink with a hint of citrus refreshes the palate and enhances the overall snacking experience during any gathering.

  • Chocolate-Covered Pretzels: For those with a sweet tooth, combining sweet and salty will be a treat, creating a delightful contrast to your savory Chex Mix.

  • Beer or Cider Pairing: A cold beer or crisp apple cider can elevate those flavors, making the mix the perfect pair for casual gatherings or movie nights.

  • Mini Caprese Skewers: Add a fresh twist with mozzarella, basil, and cherry tomatoes drizzled with balsamic glaze, blending fresh flavors with the crunch of your Chex Mix.

How to Store and Freeze Bagel Chex Mix

Room Temperature: Store your Bagel Chex Mix in an airtight container at room temperature for up to 2 months to keep it crunchy and fresh.

Freezer: For longer storage, freeze the mix in a ziplock bag or airtight container for up to 4 months; this keeps the flavors intact for your future snacking delight.

Reheating: If you prefer a warm and toasty mix, reheat in a single layer on a baking sheet at 300°F (150°C) for about 10-15 minutes to restore its crunch.

Labeling: Always label your containers with the date; this helps you keep track of freshness and enjoy your favorite Bagel Chex Mix at its best!

Homemade Everything Bagel Chex Mix Recipe FAQs

How do I choose the right Chex cereals?
When selecting Chex cereals, look for the specific types that appeal to you. Corn Chex is gluten-free and offers a great crunch, while Wheat Chex adds a nutty flavor. For gluten-free options, ensure they’re labeled as such. If you’re opting for a more customized touch, swap in additional Rice Chex or another gluten-free cereal mix that suits your taste!

How should I store my Bagel Chex Mix?
To keep your Homemade Everything Bagel Chex Mix fresh, store it in an airtight container or a ziplock bag at room temperature for up to 2 months. This way, it’ll stay crunchy and flavorful. If you can resist the temptation, making a bigger batch lets you stock up for those moments when snacking is a must!

Can I freeze my Chex Mix?
Absolutely! You can freeze your Bagel Chex Mix for up to 4 months. To do this, simply transfer the cooled mix into a ziplock bag or airtight container, squeezing out any excess air to prevent freezer burn. When you’re ready to enjoy it, just take it out and let it thaw at room temperature or reheat it in the oven for that fresh-from-the-oven crunch. Just spread it out on a baking sheet at 300°F (150°C) for about 10-15 minutes.

What if my Chex Mix burns in the oven?
If you notice your Bagel Chex Mix turning darker than a nice golden brown, it’s best to keep an eye on it in the last few minutes of baking. Baking perfection is all about those minute details! If it does burn slightly, try to salvage the unburned parts. Remember to stir the mix every 15 minutes for even cooking and keep the oven time true to the recipe for next time!

Is this Chex Mix safe for my pets?
While your Homemade Everything Bagel Chex Mix is delicious for humans, it’s important to note that the high salt content from pretzels and certain seasonings may not be suitable for pets. Always check before sharing snacks with your furry friends, and keep this savory delight to yourself for the best enjoyment!

Can I make this recipe vegan?
Yes, making your Bagel Chex Mix vegan is easy! Substitute unsalted butter with dairy-free butter. Just ensure that your Worcestershire sauce is vegan, as some brands contain anchovies. The Everything Bagel seasoning remains the same, but feel free to adjust the flavors how you like—they’ll still yield a scrumptious snack!

Bagel Chex Mix

Crunchy Bagel Chex Mix: A Savory Snack You Can't Resist

Try this Homemade Everything Bagel Chex Mix for a delicious and versatile snack that's vegan and perfect for any occasion.
Prep Time 15 minutes
Cook Time 45 minutes
Cooling Time 10 minutes
Total Time 1 hour 10 minutes
Servings: 10 cups
Course: Appetizers
Cuisine: American
Calories: 200

Ingredients
  

For the Base
  • 3 cups Corn Chex cereal gluten-free when labeled
  • 3 cups Wheat Chex cereal swap with additional corn or rice Chex for gluten-free
  • 3 cups Rice Chex cereal
For the Crunch
  • 2 cups Mini salted pretzels opt for gluten-free if needed
  • 2 cups Mini pretzel sticks
  • 2 cups Mixed nuts personalize with favorites like cashews or almonds
For the Flavor
  • 1/2 cup Unsalted butter substitute with dairy-free butter for vegan
  • 1/4 cup Everything Bagel Seasoning adjust to taste
  • 2 tablespoons Worcestershire sauce ensure a vegan version for vegan diets

Equipment

  • Baking Sheet
  • Mixing Bowl
  • spatula

Method
 

Step-by-Step Instructions
  1. In a medium bowl, melt unsalted butter in the microwave for about 30 seconds. Mix in Worcestershire sauce and Everything Bagel seasoning.
  2. Preheat your oven to 300°F (150°C) and line a baking sheet with parchment paper.
  3. In a large mixing bowl, combine Corn Chex, Wheat Chex, Rice Chex cereals, mini salted pretzels, and mixed nuts. Stir gently.
  4. Pour the melted sauce mixture over the dry ingredients, coating everything evenly.
  5. Spread the mixture across the baking sheet and bake for 40-45 minutes, stirring every 15 minutes.
  6. After baking, let it cool on the baking sheet for about 10 minutes.

Nutrition

Serving: 1cupCalories: 200kcalCarbohydrates: 25gProtein: 5gFat: 10gSaturated Fat: 2gPolyunsaturated Fat: 3gMonounsaturated Fat: 3gCholesterol: 10mgSodium: 300mgPotassium: 150mgFiber: 2gSugar: 1gCalcium: 2mgIron: 6mg

Notes

Store your Bagel Chex Mix in an airtight container at room temperature for up to 2 months.

Tried this recipe?

Let us know how it was!

Cheesy Potato Onion Puff Pastries You’ll Crave Every Time

As I took my first bite of these Cheesy Vegan Potato and Onion Puff Pastries, the crispy exterior crumbled delightfully, revealing a warm, soothing filling. It’s the kind of comfort food that makes you want to curl up with a good book, yet also the perfect finger food for gatherings. These pastries blend creamy mashed potatoes with sweet, caramelized onions and melty vegan cheese, all wrapped in golden, flaky puff pastry. Not only are they easy to whip up for a snack or appetizer, but they also offer versatility—swap in sweet potatoes for a twist or add your favorite herbs for a personalized touch. Best of all, they’re entirely plant-based, making them a crowd-pleaser for everyone at the table. Are you ready to impress your friends and family with this delightful treat?

Why are These Pastries So Irresistible?

Flaky Delight: Each bite of these Potato Onion Puff Pastries reveals a perfectly flaky texture that’s hard to resist.

Comforting Filling: The combination of creamy mashed potatoes, caramelized onions, and melty vegan cheese creates a warm, inviting flavor that will satisfy any craving.

Versatile Swaps: Want to mix it up? Try using sweet potatoes instead or experimenting with different herbs and spices for a unique twist.

Quick to Prepare: These pastries come together in no time, making them an ideal choice for both impromptu gatherings and planned dinners.

Crowd-Pleaser: Their plant-based goodness means everyone will enjoy them, whether they’re vegan or not; they’re simply that tasty! Check out more ideas like Potato Bacon Soup if you want to complement this delightful dish with another hearty option.

Potato Onion Puff Pastries Ingredients

For the Pastry
Puff Pastry – A flaky, buttery base; opt for vegan or gluten-free varieties as needed.

For the Filling
Potatoes – The heart of the filling; provides creaminess and heartiness. Sweet potatoes can be substituted for a unique flavor.
Onions – Caramelized for sweetness and depth; shallots can be swapped for a milder taste.
Vegan Cheese – Adds a creamy, melty texture; shredded mozzarella-style or cheddar-style is recommended.

For Topping
Sesame Seeds – Adds texture and an appealing crunch; feel free to toast them for extra flavor.
Herbs – Fresh herbs elevate flavor; customize with your favorites for an aromatic finish.

These Potato Onion Puff Pastries are sure to be a hit!

Step‑by‑Step Instructions for Cheesy Vegan Potato and Onion Puff Pastries

Step 1: Prepare the Filling
Begin by peeling and chopping your potatoes into even chunks. Boil them in a pot of salted water for about 15-20 minutes until soft and fork-tender. Meanwhile, in a skillet, caramelize sliced onions over medium heat, stirring occasionally for about 10-15 minutes until golden and sweet. Once the potatoes are cooked, drain and mash them, then mix in the caramelized onions and your choice of vegan cheese until the filling is creamy and well combined.

Step 2: Roll Out the Puff Pastry
Preheat your oven to 400°F (200°C) to ensure it’s ready for baking later. Roll out your puff pastry on a lightly floured surface until it’s about 1/8-inch thick. Cut the pastry into evenly sized squares around 4×4 inches in size. Make sure you have enough squares to cover the filling completely. This will be the delightful outer layer of your Potato Onion Puff Pastries.

Step 3: Assemble the Pastries
Place a generous scoop of the creamy filling in the center of each pastry square. Fold the pastry over to create a triangle or rectangle, covering the filling completely. Press the edges firmly together to seal. For a decorative touch and to ensure a tight seal, use a fork to crimp the edges. This step is key to keeping that delicious filling secure while baking.

Step 4: Prepare for Baking
Transfer the assembled puff pastries to a parchment-lined baking sheet. To give them a beautiful golden brown finish, brush the tops gently with plant-based milk. Sprinkle sesame seeds and your favorite herbs on top for an added touch of flavor and visual appeal. This step not only enhances the appearance but also adds delicious crunch.

Step 5: Bake to Perfection
Slide the baking sheet into your preheated oven and bake for 20-25 minutes. Watch closely as the pastries puff up beautifully and turn golden brown. The aroma that wafts through your kitchen will be irresistible, indicating that these Cheesy Vegan Potato and Onion Puff Pastries are almost ready to enjoy!

Step 6: Cool and Serve
Once baked, remove the pastries from the oven and let them cool for a few minutes on a wire rack. This will help maintain their flakiness. Serve them warm as a scrumptious snack or appetizer, and watch as everyone eagerly reaches for these delightful Potato Onion Puff Pastries.

How to Store and Freeze Potato Onion Puff Pastries

Fridge: Keep cooled pastries in an airtight container for up to 3 days. This helps maintain their delightful texture and flavor.

Freezer: To preserve these delicious Potato Onion Puff Pastries, freeze them unbaked for up to 3 months. Arrange on a baking sheet, freeze until solid, then transfer to a freezer bag.

Reheating: When ready to enjoy, bake from frozen at 400°F (200°C) for about 25-30 minutes or until golden brown and puffy. Avoid using the microwave to maintain flakiness.

Expert Tips for Potato Onion Puff Pastries

Roll Thin: Ensure the puff pastry is rolled thin to achieve optimal crispiness. Thicker pastry may result in a doughy texture.

Seal Edges Well: Press edges firmly with a fork to prevent leakage during baking. Gaps can allow filling to ooze out, ruining the pastry.

Make-Ahead Option: Refrigerate assembled but unbaked pastries for several hours or freeze for up to 3 months. This allows for easy prep in advance.

Reheat Properly: For a crispy finish, avoid microwaving leftovers; reheat in the oven for a few minutes instead. This maintains the flaky texture.

Flavor Boosts: Experiment with different herbs and spices in your filling to elevate the taste of your Potato Onion Puff Pastries—freshness makes all the difference!

What to Serve with Cheesy Vegan Potato and Onion Puff Pastries

The perfect meal is all about balance, and these delightful pastries can shine alongside a variety of companion dishes.

  • Fresh Garden Salad: A light, crisp salad with mixed greens and a tangy vinaigrette complements the richness of the pastries beautifully. The refreshing crunch enhances the overall meal experience.

  • Vegan Dipping Sauce: A creamy avocado or tahini dip adds an extra layer of flavor and decadence that pairs perfectly with the flaky texture of your pastries.

  • Roasted Vegetables: Seasoned roasted veggies bring a warm, earthy contrast that enhances the savory element of the potato onion puff pastries. Their caramelization echoes that of the onions, creating a harmonious dish.

  • Herbed Quinoa: Fluffy quinoa with herbs can serve as a nutritious and filling side. Its mild flavor allows the pastries to stand out while providing a hearty base.

  • Savory Tomato Soup: A warm, comforting bowl of seasoned tomato soup rounds out your dining experience and balances the dish’s richness with its tangy freshness.

  • Chilled White Wine or Sparkling Water: For a refreshing drink, serve chilled white wine or sparkling water with a splash of lemon. Both options enliven the flavors of the dish while keeping the meal light and enjoyable.

  • Chocolate Avocado Mousse: Finish off with a decadent yet healthy dessert. This silky mousse provides a satisfying conclusion without being overly heavy, enhancing your meal’s plant-based appeal.

Potato Onion Puff Pastry Variations

Feel free to get creative with these delectable puff pastries; there are endless ways to make them your own!

  • Sweet Potato: Substitute regular potatoes with sweet potatoes for a hint of sweetness and a vibrant color contrast.
  • Shallots: Swap caramelized onions for shallots for a more delicate, slightly sweeter flavor.
  • Spicy Kick: Add chopped jalapeños or crushed red pepper flakes to the filling for a delightful kick that spices things up. Heat lovers will rejoice!
  • Creamy Spinach: Mix in steamed, chopped spinach with the filling for added nutrients and a comforting green touch.
  • Fresh Herbs: Experiment with different herbs, like thyme or rosemary, to personalize the flavor profile and add freshness.
  • Chickpea Delight: Blend in mashed chickpeas for extra protein and a heartier texture that complements the other ingredients beautifully.
  • Vegan Parmesan: Sprinkle some vegan parmesan cheese on top before baking for a savory twist and extra flavor enhancement.
  • Mediterranean Flair: Incorporate sun-dried tomatoes or olives into the filling for a Mediterranean-inspired version bursting with robust flavors.

No matter how you twist this recipe, you’ll end up with a comforting dish that can effortlessly fit any occasion. For more culinary inspirations, I recommend trying these Cheesy Hamburger Potato or even a hearty Potato Bacon Soup. Enjoy your cooking adventure!

Make Ahead Options

These Cheesy Vegan Potato and Onion Puff Pastries are perfect for meal prep enthusiasts looking to save time during busy weeknights! You can prepare the filling (creamy mashed potatoes, caramelized onions, and vegan cheese) up to 24 hours in advance; simply store it in an airtight container in the refrigerator. The assembled but unbaked pastries can be refrigerated for up to 3 days. Cover them tightly to prevent drying out, or freeze for up to 3 months for longer storage. When you’re ready to serve, brush with plant-based milk, sprinkle with sesame seeds and herbs, then bake directly from the fridge or freezer, increasing the baking time if coming from frozen, for delicious results that are just as scrumptious as if made fresh!

Cheesy Vegan Potato and Onion Puff Pastries Recipe FAQs

What type of potatoes should I use for the filling?
Absolutely! For the filling, I recommend using starchy potatoes like Russets or Yukon Golds, as they create a creamy texture when mashed. If you’re feeling adventurous, you can substitute sweet potatoes for a sweeter, more vibrant flavor.

How should I store leftover puff pastries?
Very! Store any cooled pastries in an airtight container in the refrigerator for up to 3 days. This ensures they stay fresh and delicious. Just remember to reheat them in the oven for a few minutes to restore their crispiness before serving.

Can I freeze the puff pastries, and if so, how?
Definitely! To freeze, arrange the assembled but unbaked Potato Onion Puff Pastries on a baking sheet and freeze until solid. Once frozen, transfer them to a freezer bag or airtight container. They can be stored in the freezer for up to 3 months. When you’re ready to bake, just pop them in the oven directly from the freezer without thawing for about 25-30 minutes at 400°F (200°C) until golden brown.

What if my puff pastry doesn’t rise properly in the oven?
Great question! Lack of rise can sometimes be due to the pastry being too thick. Ensure your puff pastry is rolled to about 1/8-inch thickness. Also, make sure your oven is preheated properly before baking. If you’re still having issues, double-check the expiration date on your puff pastry, as older pastry may not puff well.

Are these pastries suitable for people with allergies?
Very much so! These Cheesy Vegan Potato and Onion Puff Pastries are plant-based, making them a fantastic option for vegans. However, if you have nut allergies, ensure your vegan cheese doesn’t contain nuts, as some brands do. Always read labels if you’re serving guests with dietary restrictions!

Potato Onion Puff Pastries

Cheesy Potato Onion Puff Pastries You'll Crave Every Time

Delight in these Cheesy Potato Onion Puff Pastries, a comforting and versatile vegan snack perfect for gatherings.
Prep Time 30 minutes
Cook Time 25 minutes
Total Time 55 minutes
Servings: 4 pastries
Course: Appetizers
Cuisine: Vegan
Calories: 220

Ingredients
  

For the Pastry
  • 1 package Puff Pastry Vegan or gluten-free varieties.
For the Filling
  • 2 cups Potatoes Can substitute with sweet potatoes.
  • 1 cup Onions Caramelized.
  • 1 cup Vegan Cheese Shredded mozzarella-style or cheddar-style.
For Topping
  • 2 tablespoons Sesame Seeds Toasted for extra flavor.
  • 1 tablespoon Herbs Customize with your favorites.

Equipment

  • Pot For boiling potatoes.
  • Skillet For caramelizing onions.
  • Oven For baking pastries.
  • Rolling Pin For rolling out puff pastry.
  • Baking Sheet For placing assembled pastries.

Method
 

Step-by-Step Instructions
  1. Prepare the Filling: Peel and chop potatoes into chunks, boil in salted water for 15-20 minutes, and mash. Caramelize onions in a skillet for 10-15 minutes.
  2. Roll Out the Puff Pastry: Preheat oven to 400°F (200°C) and roll out pastry until 1/8-inch thick, cutting into 4x4 inch squares.
  3. Assemble the Pastries: Place filling in the center of each square, fold and seal edges, crimping with a fork.
  4. Prepare for Baking: Brush tops with plant-based milk, sprinkle with sesame seeds and herbs.
  5. Bake to Perfection: Bake in preheated oven for 20-25 minutes until golden brown.
  6. Cool and Serve: Let cool slightly on a wire rack before serving warm.

Nutrition

Serving: 1pastryCalories: 220kcalCarbohydrates: 30gProtein: 4gFat: 10gSaturated Fat: 2gPolyunsaturated Fat: 1gMonounsaturated Fat: 3gSodium: 300mgPotassium: 200mgFiber: 3gSugar: 2gVitamin A: 10IUVitamin C: 15mgCalcium: 5mgIron: 8mg

Notes

For best results, roll the pastry thin and seal edges well to prevent leakage during baking.

Tried this recipe?

Let us know how it was!

Irresistible Baked Eggs Napoleon with Crispy Potato Layers

As the sun rises on a lazy weekend morning, I find myself captivated by the beauty of a dish that feels like an occasion in itself: Baked Eggs Napoleon. Picture delicate stacks of crispy Yukon Gold potatoes, layered high and perfectly crowned with a runny yolk that is simply irresistible. This elegant breakfast transforms the ordinary into a gourmet brunch experience, perfect for impressing family and friends without the fuss. With its ease of preparation and remarkable presentation, you’ll be amazed at how this dish can bring a touch of sophistication to your table. Not only is it vegetarian-friendly, but the possibilities for customization are endless—add your favorite cheeses or vegetables to make it uniquely yours! So, are you ready to elevate your breakfast game with this visually stunning creation? Let’s dive in!

Why is Baked Eggs Napoleon a Must-Try?

Indulge in a delightful experience with Baked Eggs Napoleon! This dish is perfect for impressing guests, transforming a simple brunch into a sophisticated affair. Versatility is key, as you can easily customize it with seasonal vegetables or your favorite cheeses, making it appealing for everyone. Time-saving preparation allows you to assemble the potato stacks ahead of time, so you can enjoy leisurely mornings with your loved ones. With its elegant presentation and rich flavors, this dish elevates ordinary eggs to a whole new level. If you love innovative breakfasts, you’ll also appreciate the charm of my Comforting Charm Baked recipe or the zing of Baked Salmon Honey as delightful alternatives!

Baked Eggs Napoleon Ingredients

• Get ready to create this elegant breakfast masterpiece!

For the Potato Base

  • Yukon Gold Potatoes – Thinly sliced for crispy layers and the main structure of this dish.
  • Olive Oil or Melted Butter – Coats the potatoes to enhance flavors; use coconut oil for a dairy-free option.
  • Garlic Powder – Adds depth to the flavor profile; feel free to substitute with fresh garlic.
  • Dried Thyme – Provides a lovely herbal aroma; fresh thyme can be used for an extra burst of flavor.
  • Salt and Black Pepper – Essential seasonings that bring out the best in your ingredients.

For the Cheese Layers

  • Gruyere or Swiss Cheese – Offers creaminess and richness; try cheddar or vegan cheese as substitutes.
  • Parmesan Cheese – A flavor booster for that umami kick; omit it for a vegan version.

For the Eggs and Garnish

  • Large Eggs – Adds protein and richness; consider egg substitutes for a vegan-friendly option.
  • Heavy Cream (Optional) – Enhances egg creaminess; simply omit for a lighter dish.
  • Fresh Chives or Green Onions – Brightens the dish with fresh flavor and color.
  • Fresh Parsley – Elevates the presentation and adds a burst of freshness to each bite.
  • Smoked Paprika (Optional) – Provides visual appeal and a smoky undertone that complements the eggs.

For Serving

  • Hollandaise Sauce (Optional) – A rich topping that elevates this Baked Eggs Napoleon, perfect for special occasions.

Step‑by‑Step Instructions for Baked Eggs Napoleon

Step 1: Prepare Potatoes
Begin by preheating your oven to 400°F (200°C). Using a mandoline, slice the Yukon Gold potatoes very thinly to ensure they bake evenly. Soak the potato slices in cold water for about 15 minutes to remove excess starch, which helps them become crispy. After soaking, drain and thoroughly dry the potatoes using a clean kitchen towel.

Step 2: Season Potatoes
In a large mixing bowl, toss the dried potato slices with olive oil, garlic powder, dried thyme, salt, and black pepper. Make sure each slice is evenly coated; this will enhance the flavor of your Baked Eggs Napoleon. Let the seasoned potatoes sit for a few minutes to allow the flavors to meld while you prepare for assembly.

Step 3: Assemble Stacks
Lightly grease a muffin tin and start layering the seasoned potato slices into each cup, creating a stack. Sprinkle a small amount of Gruyere or Swiss cheese between each layer of potatoes for added richness. Aim for about three to four layers in each muffin tin cup to achieve a beautiful tower.

Step 4: Initial Bake
Once assembled, place the muffin tin in the preheated oven and bake the potato stacks for 35-40 minutes. Keep an eye out for the potatoes to turn golden brown and crispy on the edges—this is key for your Baked Eggs Napoleon. At the halfway mark, rotate the tin for even browning.

Step 5: Add Eggs
After the initial baking, carefully remove the muffin tin from the oven. Crack a large egg into the center of each crispy potato stack. Be gentle, ensuring the yolk stays whole. The egg will serve as the crowning glory in your Baked Eggs Napoleon, providing a delicious, runny yolk that elevates the dish.

Step 6: Final Bake
Return the muffin tin to the oven and bake for an additional 8-10 minutes. You’re looking for the egg whites to be set while the yolks remain slightly runny, so keep an eye on them. The overall visual should showcase the charming contrast of crispy potato and sunny yolk atop each stack.

Step 7: Garnish & Serve
Once baked to perfection, remove the Baked Eggs Napoleon from the oven. Garnish with freshly chopped chives, parsley, and a sprinkle of smoked paprika, if desired. For an elegant touch, drizzle with hollandaise sauce before serving immediately. This delightful dish is best enjoyed fresh, showcasing its glorious layers and creamy yolk.

Baked Eggs Napoleon Variations

Feel free to explore these delightful twists to personalize your Baked Eggs Napoleon experience!

  • Hearty Version: Layer thinly sliced deli ham and Swiss cheese between the potatoes for an added savory boost. The delightful combination enriches the flavor, transforming it into a robust breakfast option.

  • Vegetarian Option: Include sautéed spinach, mushrooms, and sun-dried tomatoes for a flavor-packed meal. This twist infuses the dish with freshness and a medley of colors—perfect for those who love a veggie-packed brunch!

  • Luxurious Twist: Top with smoked salmon and poached eggs, drizzled with hollandaise sauce. This indulgent variation brings elegance and sophistication to your plate, creating a breakfast that feels extra special.

  • Spicy Version: Season potatoes with cumin and chili powder, layered with pepper jack cheese and topped with avocado. The heat and creaminess balance beautifully, offering a playful take that spice lovers will adore.

  • Cheese Lover’s Delight: Use a mix of mozzarella, cheddar, and feta for a cheesy explosion. Each slice will offer a rich, gooey experience, elevating the comfort factor while still being utterly satisfying.

  • Mediterranean Magic: Swap in feta cheese and add roasted red peppers and black olives. This Mediterranean-inspired version delivers a burst of flavor that’s refreshing and vibrant, perfect for brunch or any time of day.

  • Quinoa Boost: Incorporate cooked quinoa between the potato layers for added texture and protein. This surprising twist not only enhances nutrition but also offers an interesting bite that complements the soft egg topping beautifully.

  • Herb Infusion: Try adding fresh basil and oregano for an aromatic variation. The fragrant herbs elevate the overall flavor profile, making each bite reminiscent of a garden-fresh delight.

If you’re a fan of savory baked delicacies, you might also enjoy my Garlic Butter Baked chicken or the vibrant flavors of Crispy Feta Fried Eggs for your next meal!

Expert Tips for Baked Eggs Napoleon

  • Uniform Slices: Ensure potatoes are sliced evenly using a mandoline; uneven slices can lead to varying textures when baking.
  • Watch the Eggs: For perfectly runny yolks, monitor the final bake closely, checking at the 8-minute mark to prevent overcooking.
  • Make Ahead: Assemble potato stacks the night before and store in the refrigerator. Just add an extra 5 minutes to bake time in the morning.
  • Serve Fresh: Enjoy Baked Eggs Napoleon immediately for the best texture; reheating may result in a soggy potato base.
  • Layer Creatively: Feel free to add vegetables or different cheese varieties to customize your Baked Eggs Napoleon to suit your palate.

What to Serve with Baked Eggs Napoleon

Transform your breakfast table into a delightful feast with the perfect accompaniments!

  • Fresh Fruit Salad: A medley of seasonal fruits adds a refreshing brightness, balancing the rich layers of the Baked Eggs Napoleon.

  • Crispy Bacon: The crispy, savory crunch of bacon complements the creamy eggs beautifully, providing a satisfying contrast in textures.

  • Breakfast Sausage Links: Juicy and savory, sausage links bring a classic breakfast flair that pairs perfectly with the elegance of this dish.

  • Roasted Asparagus: Tender asparagus drizzled with olive oil and a hint of lemon offers a deliciously fresh counterpart to the hearty baked eggs.

  • Mixed Green Salad: A light, peppery arugula or mixed green salad dressed with a vinaigrette introduces brightness and a burst of flavor alongside the rich potatoes.

  • Herbed Scones: Light and flaky scones escape the ordinary breakfast roll, adding a charming touch to your brunch table, perfect for mopping up any flavorful sauces.

How to Store and Freeze Baked Eggs Napoleon

  • Room Temperature: Baked Eggs Napoleon is best enjoyed fresh and should not be left out for more than 2 hours to maintain safety and flavor.
  • Fridge: If you have leftovers, store the Baked Eggs Napoleon in an airtight container in the fridge for up to 3 days. Reheat in the oven or microwave until warmed through.
  • Freezer: To freeze, assemble only the potato base and store in a freezer-safe container for up to 2 months. Reheat directly from frozen, adding eggs when ready to bake fresh.
  • Reheating: Reheat leftovers in the oven at 350°F (175°C) until heated throughout for the best texture, ensuring the crispy layers are revived.

Make Ahead Options

Baked Eggs Napoleon is perfect for meal prep, allowing busy home cooks to enjoy elegant breakfasts on hectic mornings! You can prepare the potato stacks up to 24 hours in advance by following the initial assembly steps, then cover and refrigerate until you’re ready to bake. When it’s time to cook, simply add a few extra minutes to the bake time (around 5-10 minutes) to ensure the potatoes heat through and regain that delightful crispiness. Keep in mind that for the best quality, it’s recommended to crack the eggs into the stacks just before baking to prevent sogginess. This way, you’ll enjoy just as delicious and visually appealing Baked Eggs Napoleon without the morning rush!

Baked Eggs Napoleon Recipe FAQs

How do I select the perfect Yukon Gold potatoes?
Absolutely! Look for potatoes that are firm and smooth, avoiding any with dark spots or blemishes. The perfect Yukon Golds for this dish should be medium-sized with a beautiful golden color and no signs of sprouting.

How should I store leftover Baked Eggs Napoleon?
Very important! If you have leftovers, place them in an airtight container in the refrigerator. They will stay fresh for up to 3 days. When you’re ready to enjoy them again, you can gently reheat them in the oven at 350°F (175°C) until warmed throughout.

Can I freeze Baked Eggs Napoleon?
Certainly! To freeze, I recommend only assembling the potato base and not adding eggs initially. Place the assembled stacks in a freezer-safe container for up to 2 months. When ready to bake, reheat in the oven straight from the freezer, adding eggs afterward and following the baking instructions.

My egg whites are overcooked, but I want runny yolks! How can I avoid this?
The key to perfect eggs is monitoring closely! I suggest checking your Baked Eggs Napoleon at the 8-minute mark during the final bake. If the whites are set, but the yolks still jiggle, they’re ready to come out. Timing can vary slightly based on your oven, so keep an eye on them!

Can I make this dish vegan-friendly? What are the substitutions?
Absolutely! For a vegan option, use egg substitute products such as aquafaba or a prepared egg replacer. I also recommend substituting the heavy cream with a non-dairy alternative like coconut cream or leaving it out entirely. You can use vegan cheese options to keep the dish fully plant-based.

Can pets share this dish?
It’s best to keep this dish away from your furry friends! While the potatoes may be fine, the cheeses and seasonings (like garlic and onions) can be harmful to pets. It’s always safer to stick to their specific food for a treat!

Baked Eggs Napoleon

Irresistible Baked Eggs Napoleon with Crispy Potato Layers

Elevate your breakfast with Baked Eggs Napoleon, featuring crispy layers of Yukon Gold potatoes and perfectly runny yolks.
Prep Time 30 minutes
Cook Time 50 minutes
Total Time 1 hour 20 minutes
Servings: 4 servings
Course: Breakfast
Cuisine: American
Calories: 300

Ingredients
  

For the Potato Base
  • 4 medium Yukon Gold Potatoes Thinly sliced for crispy layers.
  • 2 tablespoons Olive Oil Or melted butter.
  • 1 teaspoon Garlic Powder Substitute with fresh garlic if desired.
  • 1 teaspoon Dried Thyme Fresh thyme can be used.
  • 1 teaspoon Salt
  • 1/2 teaspoon Black Pepper
For the Cheese Layers
  • 1 cup Gruyere or Swiss Cheese Or substitute with cheddar or vegan cheese.
  • 1/4 cup Parmesan Cheese Omit for a vegan version.
For the Eggs and Garnish
  • 4 large Eggs Consider egg substitutes for a vegan-friendly option.
  • 1/4 cup Heavy Cream Optional for enhanced creaminess.
  • 2 tablespoons Fresh Chives Chopped.
  • 2 tablespoons Fresh Parsley Chopped.
  • 1 teaspoon Smoked Paprika Optional.
For Serving
  • 1/2 cup Hollandaise Sauce Optional topping.

Equipment

  • Oven
  • Muffin Tin
  • mandoline
  • large mixing bowl

Method
 

Step-by-Step Instructions
  1. Preheat your oven to 400°F (200°C). Slice the Yukon Gold potatoes thinly and soak them in cold water for 15 minutes.
  2. Toss the dried potato slices with olive oil, garlic powder, thyme, salt, and pepper.
  3. Layer the seasoned potato slices into a greased muffin tin, adding cheese between layers.
  4. Bake the stacks for 35-40 minutes until golden brown and crispy.
  5. Crack an egg into each potato stack and return to the oven for another 8-10 minutes.
  6. Garnish with chives, parsley, and smoked paprika. Serve immediately, drizzled with hollandaise sauce if desired.

Nutrition

Serving: 1servingCalories: 300kcalCarbohydrates: 25gProtein: 10gFat: 20gSaturated Fat: 8gPolyunsaturated Fat: 2gMonounsaturated Fat: 5gCholesterol: 210mgSodium: 400mgPotassium: 600mgFiber: 3gSugar: 2gVitamin A: 600IUVitamin C: 15mgCalcium: 200mgIron: 2mg

Notes

For best texture, enjoy Baked Eggs Napoleon fresh. Consider customizing with different vegetables or cheeses.

Tried this recipe?

Let us know how it was!

Cozy Beefy Tortellini Bake for Heartwarming Nights

The scent of bubbling cheese and savory meat wafting from the oven instantly transforms my kitchen into a cozy haven. Today, I’m excited to share my beloved Beefy Tortellini Bake, a dish that wraps you in warmth and nostalgia, perfect for those chilly evenings when comfort food is a must. With its easy prep, this bake is not only a crowd-pleaser but also offers the flexibility to switch out ground beef for turkey or chicken for a lighter twist. Feeling adventurous? A vegetarian option awaits with meat-free sausage or mushrooms for the plant lovers among us. Gather your loved ones around the table and enjoy the heartwarming experience of this delightful dish—curious about what’s coming out of the oven? Let’s dive into the magic of cooking!

Why is Beefy Tortellini Bake So Irresistible?

Comforting flavors blend seamlessly in this Beefy Tortellini Bake, making it the ultimate cold-night dish. Quick prep means you’ll spend less time in the kitchen and more time enjoying with family or friends. Versatile by nature, you can easily swap beef for ground turkey, chicken, or even a meat-free option. Cheesy goodness topped with mozzarella creates a golden crust that’s utterly satisfying. Whether it’s for a cozy game night or a family dinner, this dish will quickly become a favorite, just like this Sausage Tortellini Soup or Cheesy Spinach Bake.

Beefy Tortellini Bake Ingredients

• Discover the essential components for this comforting dish!

For the Bake

  • Ground Beef – Rich flavor. Substitute with ground turkey or chicken for a lighter option.
  • Cheese-Filled Tortellini – Main component that adds texture; fresh or frozen works well.
  • Marinara Sauce – Provides moisture and flavor; use store-bought or homemade.
  • Shredded Mozzarella Cheese – Creates a gooey topping; fresh mozzarella can elevate the dish.
  • Italian Seasoning – Adds depth with a blend of herbs; fresh herbs are preferred for heightened flavor.
  • Grated Parmesan Cheese – Flavorful and gives a lovely crust when baked.

For the Aroma

  • Olive Oil – For sautéing vegetables and meat, enhancing overall flavor.
  • Garlic – Enhances taste and aroma; use fresh or pre-minced for convenience.
  • Chopped Onion – Sweetness and flavor base when sautéed; yellow onions recommended.

Now that you have the ingredient list, you’re all set to create your delightful Beefy Tortellini Bake!

Step‑by‑Step Instructions for Beefy Tortellini Bake

Step 1: Preheat and Prepare
Preheat your oven to 375°F (190°C). While the oven warms up, grab a 9×13-inch baking dish and spray it generously with nonstick cooking spray to ensure nothing sticks during baking. This will help keep your Beefy Tortellini Bake gooey, cheesy, and delightful!

Step 2: Sauté Onions
In a large skillet, heat a tablespoon of olive oil over medium heat. Add the chopped onion and sauté for about 3-5 minutes until they become translucent and fragrant. You want them soft and slightly golden, creating a sweet flavor base for your Beefy Tortellini Bake.

Step 3: Brown the Beef
Next, add minced garlic and the ground beef to the skillet. Use a wooden spoon to break the meat apart as it cooks. Stir and cook until the beef is browned, about 5-7 minutes, and no longer pink. The rich aroma will start to fill your kitchen, setting the stage for this comforting dish.

Step 4: Combine Marinara and Seasoning
Once the beef is browned, stir in the marinara sauce and Italian seasoning. Let this mixture simmer for about 5 minutes, allowing the flavors to meld beautifully. You should see the sauce bubbling slightly, which will ensure it’s ready to coat the tortellini perfectly.

Step 5: Cook the Tortellini
While the meat mixture simmers, bring a pot of salted water to a boil and cook the cheese-filled tortellini according to the package instructions, typically around 3-5 minutes until al dente. Drain the tortellini and give it a quick rinse under cold water to stop the cooking process.

Step 6: Mix Tortellini with Meat Sauce
Now it’s time to bring this Beefy Tortellini Bake together! In the large skillet, gently fold the cooked tortellini into the meat sauce until well-coated. This ensures every bite is bursting with flavor and makes preparation so much easier!

Step 7: Transfer and Top
Carefully transfer the tortellini and beef mixture into your prepared baking dish, spreading it evenly. Generously sprinkle shredded mozzarella cheese on top, creating a gooey topping that will melt beautifully during baking.

Step 8: Bake to Perfection
Place the baking dish in the preheated oven and bake for 25-30 minutes. You’ll know it’s done when the cheese is melted and bubbly, with a lovely golden color on top. The enticing aroma will signal that your Beefy Tortellini Bake is ready to serve!

What to Serve with Beefy Tortellini Bake

Looking to elevate your dining experience alongside this cheesy, hearty main dish?

  • Garlic Bread: The perfect complement, its crunchy exterior and soft center are great for soaking up the rich marinara sauce.
  • Caesar Salad: Crisp romaine with creamy dressing brings freshness and a delightful crunch, balancing the dish’s comforting richness.
  • Steamed Broccoli: A pop of vibrant green on your plate, adding a nutritious element while its mild flavor pairs effortlessly with the bake.
  • Roasted Veggies: An assortment of seasonal vegetables brings texture and sweetness, enhancing the overall flavor profile of your meal.
  • Antipasto Platter: A delightful selection of cured meats, cheeses, and olives interrupts the heartiness of the bake with bright, tangy flavors.
  • Red Wine: A glass of bold, fruity red enhances the savory experience of the Beefy Tortellini Bake and rounds out the meal perfectly.
  • Chocolate Mousse: For dessert, this velvety, rich treat is a dreamy end to your hearty dinner, offering a sweet touch that contrasts beautifully.
  • Herbed Rice: Fluffy rice infused with fresh herbs or lemon zest complements the dish’s flavors while providing a comforting backdrop.
  • Coleslaw: Crunchy and zesty coleslaw can add a refreshing bite, cleansing the palate between bites of cheesy goodness.
  • Apple Crisp: For a warming dessert option, this sweet and slightly tart dish offers a comforting conclusion to your culinary journey.

Expert Tips for the Best Beefy Tortellini Bake

  • Cook Tortellini Al Dente: Ensure the tortellini is cooked al dente as it will continue to cook in the oven, preventing an overly soft texture.
  • Sauce Choice Matters: For a deeper flavor, try a homemade marinara sauce instead of store-bought. Adjust seasonings to your preference!
  • Cheese Variations: Experiment with cheese—mix different types like provolone or cheddar for a unique twist on your Beefy Tortellini Bake.
  • Don’t Skip the Herbs: Fresh herbs can elevate the dish; if using dried, adjust quantities as they are more potent.
  • Layer for Greatness: For an extra cheesy crust, reserve a bit of mozzarella to sprinkle on top halfway through baking.
  • Let It Rest: Allow the bake to sit for 5-10 minutes after removing from the oven. This helps with serving and improves texture.

Make Ahead Options

These Beefy Tortellini Bake preparations are a lifesaver for busy weeknights! You can sauté the onions, garlic, and ground beef up to 24 hours in advance, allowing you to simply refrigerate the mixture for easy use later. Additionally, you can cook the tortellini and combine it with the meat mixture, keeping it stored in the fridge for up to 3 days. To maintain quality, ensure it’s covered tightly to prevent drying out and refrigerate promptly. When you’re ready to serve, transfer the mixture to a baking dish, top with mozzarella, and bake as directed for perfect, bubbly results just as delicious as when made fresh!

How to Store and Freeze Beefy Tortellini Bake

Fridge: Store leftovers in an airtight container for up to 3 days. This keeps your Beefy Tortellini Bake fresh and tasty for your next comforting meal.

Freezer: For longer storage, freeze the casserole after baking. Wrap it tightly in plastic wrap and foil for up to 2 months.

Reheating: When ready to enjoy, thaw in the fridge overnight. Reheat in the oven at 350°F (175°C) until heated through, about 20-25 minutes.

Portioning: Consider freezing individual portions for convenient, quick meals on busy nights. Just pop in the microwave for an easy dinner!

Beefy Tortellini Bake Variations & Substitutions

Feel free to make this delicious Beefy Tortellini Bake your own with these tasty variations!

  • Ground Turkey: Swap ground beef for ground turkey to create a lighter, yet equally flavorful dish.
  • Chicken Twist: For a unique twist, use ground chicken instead; it adds a delicate flavor that pairs beautifully with the sauce.
  • Vegetarian Delight: Replace meat with meat-free sausage or mushrooms for a hearty vegetarian version that everyone will love.
  • Additional Veggies: Stir in some spinach or diced bell peppers during the sautéing step to boost nutrition and add vibrant colors. This not only enhances flavor but also makes your dish look appealing!
  • Cheese Mix-Up: Try different cheeses like provolone or ricotta for a delicious new layer of flavor. Mixing mozzarella with other cheeses can create a gourmet touch.
  • Spice It Up: Add crushed red pepper flakes for a subtle kick, or sauté some spicy Italian sausage for an extra punch of heat.
  • Tortellini Alternatives: Use any pasta you have on hand, like penne or shells, if tortellini isn’t available, ensuring you still enjoy this comforting dish.
  • Fresh Herbs Burst: Use fresh basil or parsley instead of Italian seasoning for a burst of freshness. Add them just before serving for the best flavor!

Feeling inspired? Customize this bake to match your favorite flavors, and for more comforting recipes, be sure to check out my Baked Salmon Honey or Garlic Butter Baked dishes!

Beefy Tortellini Bake Recipe FAQs

What type of tortellini is best for the Beefy Tortellini Bake?
For the best flavor and texture, I recommend using cheese-filled tortellini. Fresh tortellini can elevate the dish, but if you’re short on time, frozen tortellini works well too—just be sure to adjust cooking times as needed!

How should I store leftovers of the Beefy Tortellini Bake?
Absolutely! Store any leftovers in an airtight container in the fridge for up to 3 days. This way, you can enjoy the comforting flavors again soon! When you’re ready to reheat, pop it in the oven at 350°F for about 20 minutes for the best results.

Can I freeze the Beefy Tortellini Bake?
Yes! For longer storage, freeze your Beefy Tortellini Bake after baking. Wrap the dish tightly in plastic wrap and then in foil to prevent freezer burn. It can stay fresh for up to 2 months. When you’re ready to enjoy it, thaw it in the fridge overnight and reheat in the oven at 350°F for 20-25 minutes until hot.

What if I want to make the Beefy Tortellini Bake vegetarian?
Very! To create a vegetarian version, simply substitute the ground beef with meat-free sausage or sautéed mushrooms. You might also consider adding extra veggies like spinach or zucchini for added nutrition and flavor. It’s a delightful way to cater to plant-based diets!

How can I ensure my Beefy Tortellini Bake doesn’t turn out too soggy?
Great question! Make sure to cook the tortellini just until al dente, as it will cook further in the oven. Additionally, let the dish rest for about 5-10 minutes after baking. This resting time allows the flavors to meld and reduces excess moisture, giving you a perfect, not soggy, bake!

Beefy Tortellini Bake

Cozy Beefy Tortellini Bake for Heartwarming Nights

This Beefy Tortellini Bake offers comforting flavors, quick prep, and versatile options for heartwarming nights.
Prep Time 20 minutes
Cook Time 30 minutes
Resting Time 10 minutes
Total Time 1 hour
Servings: 6 servings
Course: Casserole
Cuisine: Italian
Calories: 500

Ingredients
  

For the Bake
  • 1 pound Ground Beef Rich flavor. Substitute with ground turkey or chicken for a lighter option.
  • 20 ounces Cheese-Filled Tortellini Fresh or frozen works well.
  • 24 ounces Marinara Sauce Use store-bought or homemade.
  • 2 cups Shredded Mozzarella Cheese Fresh mozzarella can elevate the dish.
  • 1 tablespoon Italian Seasoning Fresh herbs are preferred for heightened flavor.
  • 1/2 cup Grated Parmesan Cheese Flavorful and gives a lovely crust when baked.
For the Aroma
  • 1 tablespoon Olive Oil For sautéing vegetables and meat.
  • 2 cloves Garlic Use fresh or pre-minced for convenience.
  • 1 medium Chopped Onion Yellow onions recommended.

Equipment

  • 9x13 inch baking dish
  • Large skillet
  • Pot

Method
 

Step-by-Step Instructions
  1. Preheat your oven to 375°F (190°C) and spray a 9x13-inch baking dish with nonstick cooking spray.
  2. In a large skillet, heat a tablespoon of olive oil over medium heat. Add the chopped onion and sauté for about 3-5 minutes until translucent.
  3. Add minced garlic and ground beef to the skillet, stirring until the beef is browned, about 5-7 minutes.
  4. Stir in marinara sauce and Italian seasoning, letting it simmer for about 5 minutes.
  5. Cook tortellini in salted boiling water according to package instructions (3-5 minutes), then drain and rinse.
  6. Fold the cooked tortellini into the meat sauce until well-coated.
  7. Transfer mixture into the prepared baking dish and sprinkle shredded mozzarella cheese on top.
  8. Bake for 25-30 minutes until the cheese is melted and bubbly.

Nutrition

Serving: 1servingCalories: 500kcalCarbohydrates: 45gProtein: 30gFat: 25gSaturated Fat: 10gPolyunsaturated Fat: 1gMonounsaturated Fat: 10gCholesterol: 80mgSodium: 800mgPotassium: 600mgFiber: 3gSugar: 5gVitamin A: 20IUVitamin C: 10mgCalcium: 25mgIron: 15mg

Notes

Let the bake sit for 5-10 minutes after baking for better serving and texture.

Tried this recipe?

Let us know how it was!

Creamy Chicken Sausage Broccoli Orzo for Cozy Nights

As I savored every bite of a busy weeknight’s culinary triumph, I couldn’t help but feel a rush of warmth from the creamy goodness of my One-Pan Chicken Sausage Broccoli Orzo. This delightful dish fuses tender orzo pasta with juicy chicken sausage and vibrant broccoli, all cooked in one skillet for an effortless cleanup. Not only is it ready in under 30 minutes, but it also brings a family-friendly charm that will have everyone asking for seconds. Whether you prefer turkey sausage for a lighter option or want to sneak in some asparagus instead of broccoli, this recipe is wonderfully adaptable. Ready to create a delicious and cozy dinner that will transform your weeknight routine? Let’s dive in!

Why is This Sausage Broccoli Orzo Special?

Easy, one-pan meal: This recipe ensures your dinner comes together in a single skillet, making prep and cleanup a breeze.
Versatile ingredients: Swap chicken sausage for turkey or veggie options, and experiment with seasonal vegetables like asparagus or cauliflower.
Comforting flavors: The creamy combination of orzo, juicy sausage, and tender broccoli creates a warm, inviting dish that feels like a hug in a bowl.
Family-friendly: Even picky eaters will love this meal, thanks to its familiar ingredients and mouthwatering taste. Pair it with a side of garlic bread or a fresh salad for a complete feast!
Quick preparation: Ready in under 30 minutes, it’s perfect for busy weeknights when you need a satisfying meal without the hassle.

Chicken Sausage Broccoli Orzo Ingredients

• Gather what you need for this delightful dish!

For the Sausage

  • Chicken Sausage – This is your main protein, but feel free to substitute with turkey sausage or veggie sausage for a lighter or plant-based option.

For the Pasta

  • Orzo Pasta – The heartiness of orzo is key; it can also be swapped with ditalini or pastina—just adjust your cooking time accordingly.

For the Vegetables

  • Broccoli – Bright and fresh, it adds vibrant color; frozen broccoli is a great time-saver here, just be sure to cook it a bit longer for tenderness.

For the Creaminess

  • Parmesan (Shredded) – Adds a rich depth of flavor; if you don’t have it, pecorino can work in its place.

For the Broth

  • Chicken Bone Broth – This savory cooking liquid infuses flavor; regular chicken stock can be used if needed.

For Sautéing

  • Olive Oil – Vital for sautéing, it helps the sausage brown beautifully.

For Flavor Enhancements

  • Garlic (Chopped) – Enhances the overall flavor profile; fresh minced garlic packs the best punch.
  • Black Pepper and Kosher Salt – Essential seasonings; adjust according to your taste preference.

This tasty Chicken Sausage Broccoli Orzo recipe is not only easy to make, but it’s also a delicious way to enjoy dinner in just one pan!

Step‑by‑Step Instructions for Chicken Sausage Broccoli Orzo

Step 1: Heat the Oil
Start by heating a splash of olive oil in a large skillet over medium-high heat. Once the oil shimmers, it’s time to add your sliced chicken sausage. Make sure the sausage pieces are spaced out to ensure they get that beautiful golden brown color, which should take about 2-3 minutes on each side.

Step 2: Sauté the Sausage
Allow the chicken sausage to sizzle and brown until they develop a crispy exterior. As the sausage cooks, the enticing aroma will fill your kitchen—this is a good sign! Once browned, remove the sausages from the pan and set them aside while leaving the flavorful oil behind for the next step.

Step 3: Toast the Garlic
In the same skillet, stir in chopped garlic over medium heat. Toast the garlic for about 1 minute until it becomes fragrant but not burnt. This step infuses the dish with aromatic flavor and sets the foundation for your Chicken Sausage Broccoli Orzo.

Step 4: Add Broccoli and Season
Next, toss in your chopped broccoli along with a pinch of kosher salt and freshly cracked black pepper. Sauté for about 5 minutes, stirring occasionally, until the broccoli turns bright green and becomes tender. This vibrant color signals that it’s time to move to the next step.

Step 5: Pour in Broth and Orzo
Now, pour in the chicken bone broth and bring it to a gentle boil. Once bubbling, stir in the orzo pasta, making sure it’s evenly distributed throughout the mixture. Reduce the heat to low and cover the skillet, allowing it to simmer for about 10-15 minutes until the orzo is soft and has absorbed most of the liquid.

Step 6: Mix in Parmesan
After the orzo reaches desired tenderness, stir in the shredded parmesan cheese until it melts into the creamy texture of the dish. This adds depth and richness to your Chicken Sausage Broccoli Orzo. If the mixture seems too thick, feel free to splash in a bit more broth to loosen it up.

Step 7: Serve and Enjoy
Remove the skillet from heat and serve the chicken sausage broccoli orzo immediately. For an extra touch, top with additional parmesan and a sprinkle of cracked black pepper. This comforting one-pan meal is ready to enjoy with family and friends!

Make Ahead Options

Preparing your Chicken Sausage Broccoli Orzo ahead of time is a game-changer for busy weeks! You can chop the broccoli and slice the chicken sausage up to 24 hours in advance, storing them in airtight containers in the refrigerator to keep them fresh. Moreover, you can cook the orzo and mix it with the broth, letting it cool, and refrigerate it for up to 3 days. When it’s time to serve, simply reheat everything in a skillet over medium heat, adding a splash of broth to maintain creaminess and prevent drying out. This way, you’ll enjoy the same comforting flavors without the last-minute rush, making weeknight dinners a breeze!

What to Serve with Sausage Broccoli Orzo

Looking to elevate your one-pan meal experience? Discover delightful pairings that beautifully complement the rich flavors of this dish.

  • Garlic Bread: The warm, buttery goodness of garlic bread makes for the perfect vehicle to scoop up that creamy orzo.

  • Crisp Green Salad: A fresh salad, with peppery arugula and zesty vinaigrette, offers a refreshing contrast to the richness of the orzo.

  • Roasted Asparagus: Tender roasted asparagus adds a delightful crunch and brings vibrant color to your dinner table.

  • Steamed Green Beans: Lightly steamed green beans maintain a fresh bite while enhancing the meal’s freshness.

  • Lemon Wedge: A simple squeeze of lemon over the dish adds brightness and lifts all those delicious flavors.

  • Sparkling Water: A chilled glass of sparkling water with a slice of lemon or cucumber refreshes the palate between bites.

  • Parmesan Crisps: Crunchy, cheesy parmesan crisps offer a delightful textural contrast with salty flavor notes that marry well.

  • Chocolate Mousse: For dessert, a light and airy chocolate mousse rounds off the meal with a touch of indulgence, leaving everyone satisfied.

Each of these pairings beautifully enhances the savory flavors and warm comfort of your Sausage Broccoli Orzo, turning a delightful dish into a complete dining experience!

Expert Tips for Chicken Sausage Broccoli Orzo

Don’t Overcrowd the Pan: Ensure the sausage slices have space to brown properly; overcrowding can cause steaming instead of crispy edges.

Adjust Liquid When Reheating: When warming up leftovers, add a splash of broth or water to keep the Chicken Sausage Broccoli Orzo creamy and moist.

Experiment with Herbs: Fresh herbs can elevate your dish; add chopped parsley or basil after cooking to brighten the flavors in your one-pan meal.

Check Orzo Frequently: Stir occasionally while the orzo simmers; this helps prevent sticking and ensures even cooking.

Balance Flavors: Taste and adjust seasoning as needed; a little extra salt or pepper can enhance the dish’s overall flavor profile.

How to Store and Freeze Chicken Sausage Broccoli Orzo

Fridge: Keep leftover chicken sausage broccoli orzo in an airtight container for up to 3 days. Reheat gently on the stovetop, adding a splash of broth to maintain creaminess.

Freezer: For longer storage, freeze in individual portions. Use freezer-safe containers and enjoy within 2-3 months for the best quality.

Thawing: When ready to eat, thaw overnight in the fridge or use the microwave’s defrost setting. Reheat thoroughly before serving.

Reheating: To reheat, add a little broth or water in a pan over low heat to prevent drying out and to bring back that creamy texture!

Chicken Sausage Broccoli Orzo Variations

Feel free to customize and make this dish uniquely yours with these fun ideas!

  • Turkey Sausage: Swap chicken sausage for turkey sausage for a leaner option that still delivers robust flavor.

  • Veggie Sausage: Opt for a plant-based sausage if you’re looking for a delightful vegetarian alternative—perfect for those meatless nights!

  • Asparagus: Replace broccoli with asparagus for a delightful crunch and a touch of seasonal flair. Fresh asparagus pairs beautifully with the creamy orzo!

  • Cauliflower: Sub in cauliflower for a mild, tender veggie that soaks up the yummy flavors of the broth.

  • Spinach Twist: Add a handful of fresh spinach right before serving for a vibrant pop of color and an extra nutrient boost.

  • Zesty Lemon: A squeeze of lemon juice or a sprinkle of zest right before serving can enliven the flavors and brighten up the dish.

  • Cherry Tomatoes: Toss in some halved cherry tomatoes during the last few minutes of cooking for a burst of juiciness and added color.

  • Spicy Kick: If you love some heat, add a pinch of red pepper flakes when cooking the garlic for an exciting flavor boost.

And if you’re looking for more budget-friendly and hearty meal ideas, check out recipes like Chilli Chicken Takeout or the comforting Garlic Chicken Gnocchi that will keep your home-cooked dinners exciting!

Chicken Sausage Broccoli Orzo Recipe FAQs

How do I choose the best chicken sausage for this recipe?
Absolutely! When selecting chicken sausage, look for plump links that are free from any dark spots or odors. Fresh chicken sausage should feel firm but not overly tough. If you’re opting for turkey or veggie sausage, consider brands with minimal fillers, as they can provide a cleaner taste and better texture in your dish. Always check the expiration date too!

How should I store leftover Chicken Sausage Broccoli Orzo?
Store any leftover chicken sausage broccoli orzo in an airtight container in the fridge for up to 3 days. When reheating, I recommend adding a splash of broth or water to restore its creamy consistency. Heat it gently over low heat on the stovetop, stirring occasionally to ensure even warming.

Can I freeze chicken sausage broccoli orzo?
Yes, you can absolutely freeze this dish! For the best results, let the orzo cool completely before portioning it into freezer-safe containers. It will keep well for up to 2-3 months. When you’re ready to enjoy it, thaw the container overnight in the fridge or use the microwave’s defrost setting. Reheat on the stovetop, adding a little broth as necessary to maintain its creamy texture.

What should I do if the orzo absorbs too much liquid while cooking?
Very good question! If you find that the orzo absorbs too much liquid and appears dry while it’s cooking, simply add extra broth a little at a time as needed. Stir well and check the consistency. You want it to be creamy, so don’t hesitate to splash in more broth or water until it’s just right!

Are there any dietary considerations for this recipe?
I often make this dish with family and friends who have different dietary needs! For a healthier twist, consider using turkey sausage or a plant-based sausage option. If you have gluten sensitivities, substitute the orzo for gluten-free pasta—just be sure to adjust cooking times according to the package instructions. If preparing for young children or pets, be cautious with salt levels. Always consult with a doctor or nutritionist if allergies are a concern.

Can I add other vegetables to chicken sausage broccoli orzo?
The more, the merrier! Feel free to mix in seasonal vegetables like asparagus, spinach, or even cauliflower. Just remember to adjust cooking time—cooking delicate greens like spinach towards the end will keep them vibrant. A squeeze of fresh lemon juice or a sprinkle of zest can really brighten up the flavors too!

Chicken Sausage Broccoli Orzo

Creamy Chicken Sausage Broccoli Orzo for Cozy Nights

Enjoy a creamy Chicken Sausage Broccoli Orzo, perfect for cozy nights and family-friendly meals.
Prep Time 10 minutes
Cook Time 20 minutes
Total Time 30 minutes
Servings: 4 servings
Course: Dinner
Cuisine: American
Calories: 450

Ingredients
  

For the Sausage
  • 1 pound Chicken Sausage Can substitute with turkey or veggie sausage
For the Pasta
  • 1 cup Orzo Pasta Can swap with ditalini or pastina
For the Vegetables
  • 2 cups Broccoli Fresh or frozen works
For the Creaminess
  • 1 cup Parmesan (Shredded) Pecorino can be used as a substitute
For the Broth
  • 3 cups Chicken Bone Broth Regular chicken stock can be used
For Sautéing
  • 2 tablespoons Olive Oil
For Flavor Enhancements
  • 3 cloves Garlic (Chopped) Fresh minced garlic is best
  • to taste Black Pepper
  • to taste Kosher Salt

Equipment

  • Large skillet

Method
 

Step-by-Step Instructions
  1. Heat a splash of olive oil in a large skillet over medium-high heat. Add sliced chicken sausage, cooking until golden brown, about 2-3 minutes on each side.
  2. Remove the sausages from the pan, leaving the oil. Sauté garlic in the same skillet for about 1 minute until fragrant.
  3. Add chopped broccoli, kosher salt, and black pepper. Sauté for about 5 minutes until the broccoli is bright green and tender.
  4. Pour in the chicken bone broth and bring to a gentle boil. Add the orzo pasta, stir well, and cover. Simmer for about 10-15 minutes until the orzo is soft.
  5. Stir in the shredded parmesan cheese until melted. Adjust consistency with more broth if needed.
  6. Serve immediately, topped with additional parmesan and cracked black pepper.

Nutrition

Serving: 1bowlCalories: 450kcalCarbohydrates: 40gProtein: 25gFat: 20gSaturated Fat: 9gPolyunsaturated Fat: 1gMonounsaturated Fat: 8gCholesterol: 70mgSodium: 800mgPotassium: 600mgFiber: 3gSugar: 2gVitamin A: 500IUVitamin C: 50mgCalcium: 200mgIron: 2mg

Notes

This dish can be made with different types of sausage or seasonal vegetables for variation.

Tried this recipe?

Let us know how it was!

Crockpot Chicken and Dumplings: Cozy Comfort in a Bowl

As the storm rumbles outside, I hear the comforting sound of a slow cooker bubbling away in the kitchen, filling the air with warmth and nostalgia. This isn’t just any meal—it’s my go-to recipe for Crockpot Chicken and Dumplings. There’s something truly special about how this hearty comfort food comes together effortlessly, transforming simple ingredients into a cozy feast. With the convenience of a slow cooker, you can set it and forget it, making it perfect for busy days or lazy weekends. Enjoy fluffy biscuit dumplings floating in a creamy broth filled with tender chicken and vibrant veggies—ready to savor when you are. Are you ready to discover the secret to the ultimate feel-good dinner?

Why is this recipe a must-try?

Simplicity at Its Best: You can create a hearty, comforting meal with minimal effort by using just a handful of ingredients and your trusty slow cooker.

Flavorful Wholesomeness: Infused with spices and aromatic vegetables, each bite of this Crockpot Chicken and Dumplings is a warm hug that nurtures the soul.

Versatile Options: Feel free to swap in gluten-free alternatives or get creative with your veggie mix—this recipe adapts to what you have on hand!

Perfect for Meal Prep: Make a big batch and enjoy leftovers for several cozy meals throughout the week. It pairs beautifully with a side salad or some crusty bread for dipping, just like my Oven Chicken Rice or Forgotten Chicken Rice.

Crowd-Pleaser: Whether it’s a family dinner or a gathering with friends, this dish will impress everyone at the table, making it an instant favorite!

Crockpot Chicken and Dumplings Ingredients

Discover the magic of making cozy comfort food!

For the Chicken Mixture

  • Chicken – 2 lbs boneless, skinless breasts or thighs; thighs offer extra flavor and tenderness.
  • Chicken broth – 4 cups low-sodium; helps create the creamy broth while keeping the salt in check.
  • Cream of chicken soup – 1 can (10.5 oz); adds richness to the broth, or substitute with cream of mushroom for variety.
  • Cream of celery soup – 1 can (10.5 oz, optional); brightens the flavor profile with a unique twist.
  • Onion – 1 small, diced; brings sweetness and depth to the dish.
  • Garlic – 2 cloves, minced; enhances flavor with its robust aroma.
  • Carrots – 3 medium, sliced; adds natural sweetness, texture, and nutrition.
  • Dried thyme – 1 tsp; a key herb for that earthy, aromatic kick.
  • Black pepper – 1/2 tsp; adds mild heat, so feel free to adjust to your preference.
  • Salt – 1 tsp or to taste; essential to elevate the overall flavor of Crockpot Chicken and Dumplings.
  • Poultry seasoning – 1/2 tsp (optional); for an extra layer of herbaceous goodness.

For the Dumplings

  • Refrigerated biscuit dough – 1 can (16.3 oz); creates fluffy dumplings, or feel free to make your own from scratch!

For the Final Touch

  • Frozen peas – 1 cup; added for quick cooking, color, and sweetness.
  • Chopped fresh parsley – 2 tbsp, for garnish; adds a fresh pop to brighten up the dish.

This ingredient list is your ticket to a warm bowl of heartiness!

Step‑by‑Step Instructions for Crockpot Chicken and Dumplings

Step 1: Prepare Chicken Mixture
Start by placing your boneless, skinless chicken in the slow cooker. Pour in the chicken broth and cream of chicken soup, mixing gently to combine. Layer the diced onion, sliced carrots, minced garlic, dried thyme, black pepper, salt, and optional poultry seasoning over the chicken. Cover and cook on low for 6-7 hours or on high for 3-4 hours, until the chicken is tender and easily shredded.

Step 2: Shred Chicken
Once the cooking time is up and the chicken is fork-tender, use two forks to shred the chicken right inside the crockpot. Stir the shredded chicken into the creamy broth, allowing the flavors to meld together beautifully. This step enhances the Crockpot Chicken and Dumplings, ensuring every bite is packed with flavor.

Step 3: Add Dumplings
Cut the refrigerated biscuit dough into 1-inch chunks and drop them evenly over the chicken and broth mixture. Press the dough pieces down slightly into the liquid, then cover the slow cooker. Cook on high for an additional hour until the dumplings are puffy and cooked through, giving the dish a delightful fluffy texture.

Step 4: Final Touch
Ten minutes before serving, stir in the frozen peas for a pop of color and sweetness. Give the mixture a gentle stir to combine everything, and garnish with freshly chopped parsley for a touch of brightness. Your delicious Crockpot Chicken and Dumplings are now ready to be served!

Make Ahead Options

These Crockpot Chicken and Dumplings are perfect for meal prep enthusiasts! You can prepare the chicken mixture (excluding the dumplings and peas) up to 24 hours in advance. Simply combine the chicken, broth, soups, onions, carrots, garlic, and seasonings in your slow cooker, then refrigerate the mixture overnight. This not only saves time but also allows the flavors to meld beautifully. When you’re ready to cook, just pop the crockpot in and follow the final steps, adding the dumplings and peas during the last hour of cooking. This way, you’ll still achieve that warm, hearty goodness with minimal fuss, making dinner a breeze after a busy day!

Crockpot Chicken and Dumplings Variations

Feel free to get creative with your Crockpot Chicken and Dumplings, transforming it into a personalized delight for your taste buds!

  • Gluten-Free: Use gluten-free cream soup and biscuits for a comforting meal that’s safe for gluten-sensitive diets.

  • Veggie Boost: Substitute the classic carrots and peas with chopped green beans, corn, or even diced bell peppers for extra nutrition.

  • Herb Infusion: Add a touch of fresh herbs like rosemary or parsley during the last hour of cooking for elevated flavor and vibrant aroma.

  • Crispy Topping: For a crunchy twist, add crushed crackers or seasoned breadcrumbs on top of the dumplings during the last 10-15 minutes.

  • Dairy-Free: Swap cream of chicken soup for a dairy-free alternative, like coconut milk or a homemade cashew cream.

  • Wine Addition: Introduce a splash of white wine or gear your dish towards a richer flavor by adding a dollop of Dijon mustard for depth.

  • Spicy Kick: Add in red pepper flakes or a few dashes of hot sauce to turn up the heat level, delighting those who crave spice.

For more heartwarming ideas, check out my easy Parmesan Crusted Chicken or give my delicious Korean Fried Chicken a try! They’re both perfect companions to help you enjoy homemade meals beyond just the cozy crockpot classics.

Expert Tips for Crockpot Chicken and Dumplings

  • Lid Etiquette: Avoid lifting the lid during the last hour of cooking; this helps maintain Steam, ensuring fluffy dumplings.
  • Chicken Shredding: Make sure the chicken is fully cooked before shredding it—perfectly tender chicken should easily pull apart with a fork.
  • Customize Wisely: While you can add extra vegetables like green beans or corn, be mindful of the overall volume. Too much can disrupt the balance of the Crockpot Chicken and Dumplings.
  • Biscuit Dough Choices: If you prefer homemade biscuits, use your favorite recipe for a personal touch, but ensure they are cooked through before serving.
  • Flavor Boost: For a deeper flavor, consider sautéing the onion and garlic before adding them to the slow cooker.

Storage Tips for Crockpot Chicken and Dumplings

  • Fridge: Store leftovers in an airtight container; they will stay fresh for up to 3 days. Reheat gently on the stove or in the microwave until warmed through.
  • Freezer: Freeze portions in airtight containers or freezer bags for up to 3 months. Thaw in the fridge overnight before reheating for the best texture.
  • Reheating: When reheating, add a splash of chicken broth if the mixture seems too thick, ensuring that the creamy consistency of the Crockpot Chicken and Dumplings is preserved.
  • Make-Ahead: This dish is perfect for meal prep—prepare it in advance and freeze for quick, hearty dinners on busy nights!

What to Serve with Crockpot Chicken and Dumplings

Looking to complete your cozy meal experience? Here are some delightful pairings that elevate your dinner to new heights while tantalizing your taste buds.

  • Crusty Bread: A warm, sliced baguette or sourdough complements the creamy broth perfectly, perfect for soaking up every last drop.

  • Side Salad: A fresh garden salad with a light vinaigrette adds a crisp, refreshing contrast to the rich flavors of the chicken and dumplings. The crunchiness boosts the meal’s texture and brightness.

  • Steamed Green Beans: Tender, lightly salted green beans offer vibrant color and a fresh bite, creating a delicate balance with the hearty dumplings.

  • Garlic Bread: Buttery, garlicky bread delivers that comforting, savory touch, enhancing the comforting flavors of the chicken dish while inviting you to indulge.

  • Coleslaw: A tangy coleslaw provides a crunchy, zesty counterpoint to the creamy chicken and dumplings, brightening up each mouthful and adding a playful twist.

  • Sizzling Sausages: For meat lovers, a side of lightly grilled or pan-fried sausages can introduce a savory punch, making the meal more decadent.

  • Apple Crisp: Finish off your meal with a warm slice of homemade apple crisp, its sweetness and cinnamon spice dancing on your palate—an ode to homestyle comfort.

  • Iced Tea: For a refreshing drink option, serve a chilled glass of iced tea, which helps cleanse your palate and keeps the meal light without overpowering its flavors.

Crockpot Chicken and Dumplings Recipe FAQs

How do I choose the best chicken for this recipe?
Absolutely! For the best flavor and tenderness in your Crockpot Chicken and Dumplings, I recommend using boneless, skinless chicken thighs. They hold moisture better during slow cooking and add a richer taste compared to chicken breasts. If you use breasts, just be sure not to overcook them, as they can dry out easily.

How should I store leftovers?
Leftovers of your Crockpot Chicken and Dumplings can be stored in an airtight container in the refrigerator for up to 3 days. To reheat, simply warm it gently on the stove or in the microwave until heated through. This way, you can still enjoy that cozy comfort even a few days later!

Can I freeze Crockpot Chicken and Dumplings?
Yes, you can definitely freeze this dish! I recommend dividing it into portions and placing them in airtight containers or freezer bags. It can be stored in the freezer for up to 3 months. When you’re ready to enjoy it again, thaw it overnight in the fridge and reheat, adding a splash of chicken broth if needed to restore its creamy consistency.

What should I do if my dumplings are not cooking properly?
The key to perfectly fluffy dumplings is to avoid lifting the lid during the last hour of cooking. If they turn out dense, it might be because the dough was pressed down too firmly or the lid was lifted too soon. Make sure the liquid is at a gentle simmer and that you’ve followed the cooking time. If in doubt, try making your dumplings a bit smaller the next time for a lighter texture.

Is this recipe suitable for gluten-free diets?
Very! You can easily adapt this recipe for gluten-free diets by using gluten-free biscuit dough and cream soups. Just be sure to check that all ingredients are certified gluten-free to avoid any hidden gluten sources. This way, everyone at your table can enjoy the comforting flavors without worry!

Crockpot Chicken and Dumplings

Crockpot Chicken and Dumplings: Cozy Comfort in a Bowl

Enjoy this Crockpot Chicken and Dumplings recipe for easy comfort food that warms the soul.
Prep Time 15 minutes
Cook Time 6 hours
Total Time 6 hours 15 minutes
Servings: 6 servings
Course: Dinner
Cuisine: American
Calories: 450

Ingredients
  

For the Chicken Mixture
  • 2 lbs boneless, skinless chicken breasts or thighs thighs offer extra flavor and tenderness
  • 4 cups low-sodium chicken broth helps create the creamy broth
  • 1 can cream of chicken soup 10.5 oz
  • 1 can cream of celery soup 10.5 oz, optional
  • 1 small onion, diced brings sweetness and depth
  • 2 cloves garlic, minced enhances flavor
  • 3 medium carrots, sliced adds natural sweetness
  • 1 tsp dried thyme a key herb
  • 1/2 tsp black pepper adjust to preference
  • 1 tsp salt or to taste
  • 1/2 tsp poultry seasoning optional
For the Dumplings
  • 1 can refrigerated biscuit dough 16.3 oz
For the Final Touch
  • 1 cup frozen peas for color and sweetness
  • 2 tbsp chopped fresh parsley for garnish

Equipment

  • Slow Cooker

Method
 

Step-by-Step Instructions
  1. Place chicken in the slow cooker. Pour in chicken broth and cream of chicken soup, and mix gently. Layer onion, carrots, garlic, thyme, pepper, salt, and optional poultry seasoning. Cover and cook on low for 6-7 hours or high for 3-4 hours.
  2. Once the chicken is tender, shred it inside the crockpot and stir into the broth.
  3. Cut biscuit dough into 1-inch chunks and drop over the chicken mixture. Press down slightly, cover, and cook on high for an additional hour.
  4. Ten minutes before serving, stir in frozen peas and garnish with parsley before serving.

Nutrition

Serving: 1servingCalories: 450kcalCarbohydrates: 45gProtein: 30gFat: 20gSaturated Fat: 10gPolyunsaturated Fat: 2gMonounsaturated Fat: 8gCholesterol: 90mgSodium: 800mgPotassium: 600mgFiber: 3gSugar: 4gVitamin A: 2000IUVitamin C: 10mgCalcium: 50mgIron: 2mg

Notes

Store leftovers in an airtight container for up to 3 days or freeze for up to 3 months. Reheat gently and add broth if needed.

Tried this recipe?

Let us know how it was!

Irresistible Apple Galette Recipe: Quick, Homemade Fall Treat

As the leaves begin to fall and the air turns crisp, my kitchen transforms into a cozy haven filled with the warm aroma of baking apples. This Easy Rustic Apple Galette Recipe is my go-to dessert, effortlessly combining a buttery, flaky crust with a perfectly spiced apple filling. What I love most is its simplicity—this rustic dessert requires minimal fuss, making it the ideal choice for Thanksgiving gatherings or any autumn occasion. Plus, it’s a showstopper that’s sure to impress your guests without keeping you locked in the kitchen for hours. Are you ready to create a dessert that captures the essence of fall and warms hearts? Let’s dive into this delightful recipe together!

Why is this Apple Galette a must-try?

Simplicity shines: This easy-to-make Apple Galette delivers all the cozy flavors of fall without a tedious pie assembly.
Wholesome goodness: Utilizing fresh apples and warm spices, you’ll savor a delightful taste that sparks nostalgia.
Versatile option: Swap apples for pears or mix in some cranberries for a new twist; your creativity knows no bounds!
Crowd-pleaser: Serve it warm with vanilla ice cream, and watch your guests rave about it, just like they do for my popular Cheesy Hamburger Potato dish.
Quick and dependable: With straightforward ingredients and minimal prep time, this galette seamlessly fits into any holiday or cozy evening bake.

Apple Galette Ingredients

For the Crust
Pie Crust – Use store-bought for convenience or make your own for a homemade touch.

For the Filling
Baking Apples – 1 ½ pounds, peeled and sliced; a mix of Granny Smith and Honeycrisp gives a sweet-tart balance.
Brown Sugar – 5 tablespoons; this adds rich sweetness to complement the apples.
Lemon Juice – 1 tablespoon; brightens the flavors and balances sweetness.
Cornstarch – 2 teaspoons; thickens the juices from the apples to prevent a soggy crust.
Ground Cinnamon – 1 teaspoon; infuses warmth and adds classic apple pie flavor.
Ground Ginger – ½ teaspoon; brings depth and a zesty kick to the filling.
Fine Sea Salt – 1/8 teaspoon; enhances the overall flavor of the apples.
Vanilla Extract – ½ teaspoon; adds a lovely aromatic quality to the sweet filling.

For the Topping
Egg Wash – 1 beaten egg mixed with 1 ½ teaspoons water, for that perfect golden crust.
Coarse Sugar – A sprinkle on the crust for delightful sweetness and crunch.
Apricot Jam – 1 tablespoon, thinned with water for a glossy finish on the baked apples.

Optional Serving
Vanilla Ice Cream – An irresistible accompaniment to enhance the dessert experience and bring it all together.

Now that you have your ingredients ready, let’s embark on the journey to create this delightful Apple Galette Recipe that will surely become a beloved staple in your home!

Step‑by‑Step Instructions for Easy Rustic Apple Galette Recipe

Step 1: Preheat Your Oven
Begin by preheating your oven to 375°F (190°C). While the oven heats, line a baking sheet with parchment paper to prevent sticking and make cleanup easier. This simple step ensures that when you’re ready to bake your Apple Galette, the heat will be just right to achieve that perfect golden crust.

Step 2: Prepare the Apple Filling
In a large mixing bowl, toss together 1 ½ pounds of peeled and sliced baking apples with 5 tablespoons of brown sugar, 1 tablespoon of lemon juice, 2 teaspoons of cornstarch, 1 teaspoon of ground cinnamon, ½ teaspoon of ground ginger, 1/8 teaspoon of fine sea salt, and ½ teaspoon of vanilla extract. Allow the mixture to sit for about 10 minutes, which helps the flavors meld beautifully, creating a delicious filling.

Step 3: Roll Out the Pie Crust
On a lightly floured surface, roll out your pie crust into a 13-inch circle, aiming for a uniform thickness. Transfer the rolled crust carefully onto the prepared baking sheet. This rustic Apple Galette will showcase the beautiful crust, so take your time to ensure the edges are neat and the center is large enough to hold your apple filling.

Step 4: Assemble the Galette
Spoon the prepared apple filling into the center of the rolled crust, leaving a 2-inch border around. The filling should be heaped slightly, allowing room for it to bubble as it bakes. This rustic presentation is key to the charm of the Easy Rustic Apple Galette, creating a lovely centerpiece for your dessert table.

Step 5: Fold the Dough Edges
Gently fold the edges of the dough over the apples, creating pleats as you go to form a beautiful crust around the filling. This method not only looks appealing but also helps keep the juices contained, allowing the flavor to concentrate as it bakes. Ensure the pleats are secure, as this will help hold in the delicious apple filling during baking.

Step 6: Brush with Egg Wash
Prepare an egg wash by combining 1 beaten egg with 1 ½ teaspoons of water. Using a pastry brush, evenly coat the exposed crust with the egg wash, giving it a rich golden color as it bakes. Sprinkle a bit of coarse sugar over the surface for an added sweet crunch, enhancing the overall texture of your Apple Galette.

Step 7: Bake Until Golden
Carefully place the assembled galette in the preheated oven and bake for 50-60 minutes. Keep an eye on it, and look for a golden-brown crust with bubbling filling as indicators of doneness. The aroma wafting through your kitchen will surely tempt your taste buds!

Step 8: Glaze the Apples
Once baked, let your Apple Galette cool slightly on a wire rack. In a small bowl, mix 1 tablespoon of apricot jam with a splash of water. Using a pastry brush, gently brush this mixture over the warm apples for a glossy finish that makes your dessert shine with an inviting glow.

Step 9: Serve and Enjoy
Slice your warm Apple Galette into generous wedges and serve it as is, or offer a scoop of vanilla ice cream alongside for that comforting, creamy contrast. This delightful dessert is perfect for any autumn gathering, bringing warmth and joy to your table.

Storage Tips for Apple Galette

Room Temperature: Store leftover Apple Galette in a cool, dry place for up to 3 days, covering lightly with foil to maintain its texture without trapping moisture.

Fridge: For longer freshness, refrigerate the galette in an airtight container for up to 5 days. Reheat in the oven at 350°F for about 10-15 minutes to restore its crispy crust.

Freezer: To freeze, wrap slices individually in plastic wrap, then place them in a heavy-duty freezer bag. The galette can be frozen for up to 3 months; thaw overnight in the fridge before reheating.

Reheating: Warm the galette in the oven, or for a quick microwave option, heat each slice for about 30 seconds until warmed through, but expect a softer crust.

Make Ahead Options

These Easy Rustic Apple Galette Recipe components are perfect for meal prep, allowing you to save time during busy weeknights or holiday gatherings. You can prepare the apple filling up to 24 hours in advance by tossing the sliced apples with brown sugar, lemon juice, cornstarch, cinnamon, ginger, and salt before refrigerating it in an airtight container. For the crust, if you’re making a homemade one, you can roll it out and refrigerate it for up to 3 days; simply cover it tightly with plastic wrap to maintain its texture. When you’re ready to bake the Apple Galette, let the filling sit at room temperature for about 10 minutes to come back to life, then proceed to assemble and bake as directed. This prep strategy will ensure your galette is just as delicious without the last-minute rush!

What to Serve with Easy Rustic Apple Galette

Warm aromas of baked apples will fill your home, beckoning loved ones to enjoy a cozy and heartwarming meal together.

  • Vanilla Ice Cream: A scoop of creamy goodness perfectly contrasts the warm, spiced apple filling, elevating each bite to dessert heaven.
  • Whipped Cream: Light and airy, it adds a luscious layer of sweetness that complements the galette’s rustic flavors without overwhelming them.
  • Caramel Sauce: Drizzling a bit of homemade or store-bought caramel sauce adds decadence to your dessert, enhancing the sweetness of the apples.
  • Cinnamon Sugar Crusties: Serve small cinnamon-sugar dusted pastries alongside, revisiting the comforting flavors of fall and balancing the galette’s textures.
  • Coffee: A steaming cup of coffee brings a cozy warmth, enhancing the experience and providing a perfect balance to the sweetness of the galette.
  • Apple Cider: Warm spiced apple cider creates a delightful nod to the main ingredient and makes for a drink that warms the soul alongside dessert.
  • Cheese Plate: Introducing a selection of sharp cheddar or a creamy Brie can provide a savory contrast to the sweetness of the galette, pleasing a variety of palates.
  • Fresh Fruit: Pair your galette with a light fruit salad featuring citrus and berries for a refreshing contrast to the rich dessert.
  • Chocolate Drizzle: Enhance the dessert experience by adding a chocolate drizzle for a delightful twist that combines flavors and textures beautifully.

Apple Galette Recipe Variations

Feel free to sprinkle your personal touch on this delightful Apple Galette, transforming it to fit your taste!

  • Pear Swap: Substitute pears for apples to create a sweet and juicy twist that’s equally comforting.
  • Spice Variations: Add a touch of nutmeg or allspice for a warm, cozy flavor profile that enhances the apple filling.
  • Nuts and Crunch: Toss in a handful of sliced almonds or walnuts to lend a delightful crunch and nutty flavor.
  • Cranberry Addition: Mix in dried cranberries for a tart burst of flavor, creating a beautiful balance with the sweetness.
  • Chocolate Drizzle: Top your galette with a drizzle of chocolate sauce for a decadent touch that chocolate lovers will adore.
  • Maple Sweetness: Substitute brown sugar with maple syrup in the filling for a unique twist that offers an earthy sweetness.
  • Savory Spin: Incorporate a sprinkle of cheese, like sharp cheddar, for a surprising sweet-savory experience reminiscent of my comforting Cheesy Hamburger Potato.
  • Different Fruits: Experiment with mixing in other fruits, such as peaches or berries, to create a vibrant medley of flavors that brighten your galette.

The beauty of this Apple Galette recipe lies in its versatility, much like enjoying a warm bowl of Broccoli Cheddar Soup or a hearty Mexican Taco Soup. Let your culinary creativity shine!

Expert Tips for Apple Galette Recipe

Chill the Dough: Ensure your pie crust is chilled before rolling it out. This helps maintain the flaky texture, preventing it from getting too soft during preparation.

Don’t Overfill: Be mindful of the amount of apple filling you add. Leaving a 2-inch border around the edges prevents overcrowding and allows for lovely pleats in the crust.

Use a Baking Stone: If available, bake your Apple Galette on a baking stone. It provides even heat and helps achieve a crispier bottom crust, enhancing the dessert’s overall texture.

Brush Generously: Apply the egg wash thoroughly to achieve that golden crust. The coarse sugar topping adds a delightful crunch and enhances the visual appeal of the galette.

Experiment with Flavors: Don’t hesitate to mix in variations, such as apricots or pears, to suit your palate. This Apple Galette Recipe is versatile, allowing for endless creativity!

Apple Galette Recipe FAQs

What type of apples should I use for the filling?
Absolutely! For the best flavor and texture in your Apple Galette, I recommend a mix of tart and sweet apples. Granny Smith apples provide a delightful tartness, while Honeycrisp apples add sweetness and crispness. Using about 1 ½ pounds of these baking apples will create a balanced filling that’s both delicious and well-textured.

How should I store leftover Apple Galette?
You can keep any leftover Apple Galette at room temperature for up to 3 days. Just lightly cover it with foil to avoid moisture buildup. If you want it to last longer, store it in an airtight container in the refrigerator for up to 5 days. When you’re ready to enjoy it again, simply reheat it in the oven at 350°F for about 10-15 minutes to restore that lovely crispy crust!

Can I freeze my Apple Galette?
Very! Freezing is a great option if you want to preserve your Apple Galette. Wrap individual slices in plastic wrap and then place them in a heavy-duty freezer bag. This way, they can be frozen for up to 3 months. When you’re ready to indulge, just thaw overnight in the fridge and reheat in the oven for the best texture.

What if the crust becomes soggy while baking?
If your Apple Galette crust turns out soggy, it might be due to overfilling or using overly juicy apples. To avoid this, make sure to add the right amount of cornstarch—2 teaspoons will help thicken the juices. Additionally, avoid adding too much filling that could leak out. If you do find yourself with a wet crust, try baking it a little longer at a slightly lower temperature, keeping an eye on the crust to prevent burning.

Are there any dietary considerations for this recipe?
The Apple Galette is a wonderful treat, but it does contain gluten from the pie crust. If you’re making it for someone with gluten sensitivities, there are great gluten-free pie crust options available in stores! For dairy-free needs, you could substitute the butter used in homemade crusts with a plant-based butter. Always be sure to check for any allergens in the ingredients, especially if serving to others.

Apple Galette Recipe

Irresistible Apple Galette Recipe: Quick, Homemade Fall Treat

This Apple Galette Recipe is a quick and easy dessert that showcases a buttery crust and spiced apples, perfect for fall gatherings.
Prep Time 30 minutes
Cook Time 1 hour
Cooling Time 10 minutes
Total Time 1 hour 40 minutes
Servings: 8 slices
Course: Dessert
Cuisine: American
Calories: 250

Ingredients
  

For the Crust
  • 1 unit Pie Crust Store-bought or homemade
For the Filling
  • 1.5 pounds Baking Apples Peeled and sliced; mix of Granny Smith and Honeycrisp
  • 5 tablespoons Brown Sugar For sweetness
  • 1 tablespoon Lemon Juice Balances sweetness
  • 2 teaspoons Cornstarch Thickens apple juices
  • 1 teaspoon Ground Cinnamon For warmth
  • 0.5 teaspoon Ground Ginger Adds depth
  • 0.125 teaspoon Fine Sea Salt Enhances flavor
  • 0.5 teaspoon Vanilla Extract For aroma
For the Topping
  • 1 unit Egg Wash 1 beaten egg mixed with 1 ½ teaspoons water
  • 1 tablespoon Coarse Sugar For sweetness and crunch
  • 1 tablespoon Apricot Jam Thinned with water for a glossy finish
Optional Serving
  • 1 scoop Vanilla Ice Cream Optional accompaniment

Equipment

  • Oven
  • Mixing Bowl
  • Rolling Pin
  • Baking Sheet
  • Parchment Paper
  • Pastry Brush

Method
 

Step-by-Step Instructions
  1. Preheat your oven to 375°F (190°C) and line a baking sheet with parchment paper.
  2. In a large bowl, toss together the apple filling ingredients and let sit for about 10 minutes.
  3. Roll out the pie crust into a 13-inch circle and transfer it to the prepared baking sheet.
  4. Spoon the apple filling into the center, leaving a 2-inch border.
  5. Fold the dough edges over the apples, creating pleats.
  6. Brush the exposed crust with the egg wash and sprinkle with coarse sugar.
  7. Bake in the preheated oven for 50-60 minutes until golden and bubbly.
  8. Mix apricot jam with water and brush it over the warm apples for a glossy finish.
  9. Slice and serve warm, optionally with vanilla ice cream.

Nutrition

Serving: 1sliceCalories: 250kcalCarbohydrates: 34gProtein: 2gFat: 12gSaturated Fat: 7gPolyunsaturated Fat: 0.5gMonounsaturated Fat: 4gCholesterol: 90mgSodium: 150mgPotassium: 100mgFiber: 2gSugar: 15gVitamin A: 300IUVitamin C: 5mgCalcium: 20mgIron: 1mg

Notes

Ensure to chill the dough before rolling for a flaky texture. Don't overfill the galette to prevent spills during baking.

Tried this recipe?

Let us know how it was!

Crispy Air Fryer Churro Bites – A Sweet Bite of Bliss

You won’t believe how easy it is to whip up these Sweet Air Fryer Churro Bites! With their perfectly crispy exterior and soft, gooey center, these treats are a delightful homage to the fairground favorite we all adore. Using an air fryer, this recipe combines convenience with indulgence, allowing you to satisfy those sweet cravings without the messy deep frying. Plus, this kid-friendly dessert is ready in just a fraction of the time, making it perfect for busy weekdays or surprise weekend snacks. Whether you’re hosting a movie night or looking for an easy dessert to impress family, these churro bites will bring smiles all around. So, are you ready to dive into the deliciousness that awaits?

Why Are Air Fryer Churro Bites So Amazing?

Simplicity at its Finest: Whipping up these churro bites requires minimal fuss; a few simple ingredients are all you need for an authentic taste.
Crispy Perfection: The air fryer gives you that sought-after crunch without the extra oil, making each bite divine!
Kid-Friendly Fun: These treats are perfect for little hands, making family baking sessions a joy—especially when coated in cinnamon sugar!
Quick Preparation: In just 30 minutes, you can serve up a batch of warm churro bites that will have everyone coming back for more. Want more fun finger foods? Try these Garlic Salmon Bites next!
Versatile Dipping Options: Pair these churros with chocolate sauce or caramel for a delightful treat that’s just right for any occasion.

Air Fryer Churro Bites Ingredients

For the Dough
All-Purpose Flour – Provides structure and texture for the churros, ensuring the perfect consistency.
Water – Hydrates the dough; achieving just the right amount ensures smoothness.
Unsalted Butter – Adds richness and flavor; for extra crispiness, brush melted butter on top before air frying.
Salt – Balances sweetness and enhances flavor, making each bite delightful.
Sugar – Sweetens the dough and aids in browning during the cooking process.
Vanilla Extract – Infuses the churro dough with a warm, aromatic flavor.
Large Egg – Binds the mixture, helping the churros hold their shape perfectly.

For the Coating
White Sugar – Contributes to the sweetness, making these churros irresistible.
Cinnamon Powder – Adds the classic churro flavor and spice to the coating, enhancing the overall taste.

Dive into these Air Fryer Churro Bites, and let the flavors take you back to childhood memories of fairground treats!

Step‑by‑Step Instructions for Easy Air Fryer Churro Bites

Step 1: Boil the Mixture
In a medium saucepan, combine 1 cup of water, 1/4 cup of unsalted butter, 1/4 teaspoon of salt, and 2 tablespoons of sugar. Heat over medium-high until it reaches a vigorous boil, stirring occasionally. This step is crucial for melting the butter and dissolving the sugar. Once boiling, remove the pan from heat and prepare to add the dry ingredients.

Step 2: Create the Dough
Reduce the heat to low and gradually add 1 cup of all-purpose flour to the boiling mixture, stirring constantly with a wooden spoon or spatula. Mix until the dough pulls away from the sides of the pan and forms a cohesive ball, about 1-2 minutes. The dough should be smooth and slightly sticky—this will be the foundation of your Air Fryer Churro Bites.

Step 3: Incorporate the Egg and Vanilla
Allow the dough to cool for about 5 minutes, then add 1 large egg and 1 teaspoon of vanilla extract. Mix vigorously until the egg is fully incorporated, and the dough becomes smooth and glossy. This addition will help the churros maintain their shape while cooking. Make sure there are no visible egg streaks before moving on to the next step.

Step 4: Preheat the Air Fryer
Preheat your air fryer to 375°F (190°C) for approximately 5 minutes to ensure it’s hot and ready for the churro dough. While the air fryer is preheating, prepare your air fryer basket by spraying it with nonstick cooking spray. This prevents sticking and ensures that your Easy Air Fryer Churro Bites come out perfectly crisp.

Step 5: Pipe the Churro Dough
Transfer the churro dough into a piping bag fitted with a star tip. Carefully pipe small twists of dough about 2 inches long into the prepared air fryer basket, ensuring there’s enough space between each piece to allow for even cooking. Avoid overcrowding, as this could lead to steaming instead of frying.

Step 6: Brush with Butter and Air Fry
Lightly brush the piped churros with melted butter to enhance their crispiness. Air fry the churro bites for 10 to 12 minutes, or until they are golden brown and puffed. Keep an eye on them through the air fryer window; they should appear crisp and slightly inflated. This step is essential for achieving that mouthwatering texture.

Step 7: Coat in Cinnamon Sugar
Once cooked, carefully remove the churro bites from the air fryer and immediately toss them in a mixture of 1/2 cup of white sugar and 1 tablespoon of cinnamon in a shallow bowl. This will coat the churros while they are still warm, allowing the cinnamon-sugar to adhere perfectly to each bite, giving you those delightful and sweet flavors of classic churros.

What to Serve with Easy Air Fryer Churro Bites

Indulging in these crispy, cinnamon-sugar coated treats brings the joy of fairground flavors right to your kitchen.

  • Chocolate Dipping Sauce: A rich, warm chocolate sauce adds a luxurious touch that’s irresistible for dipping.

  • Dulce de Leche: This sweet caramel-like sauce complements the churros beautifully, enhancing their sweetness while adding a creamy texture.

  • Cinnamon Cream Cheese Frosting: This creamy, tangy dip takes churro bites to the next level with its delightful balance of flavors.

  • Mexican Hot Chocolate: Serve with a cup of this spiced hot chocolate, offering a cozy and indulgent drink pairing.

  • Fresh Berries: Light, juicy berries provide a refreshing contrast to the rich churros, balancing sweetness with their tartness.

  • Whipped Cream: Soft and airy, a dollop of whipped cream enhances the churros’ sweet flavor while adding a luxurious texture contrast.

  • Coffee: A warm cup of coffee complements the sweet churros perfectly, providing a delightful pairing for a relaxed afternoon snack.

  • Vanilla Ice Cream: For a dessert extravaganza, serve churro bites alongside a scoop of vanilla ice cream, melting into warm, sugary bliss.

Storage Tips for Air Fryer Churro Bites

Room Temperature: Store leftover churro bites in an airtight container at room temperature for up to 2 days to maintain freshness and flavor.

Fridge: For longer storage, place churro bites in a sealed container in the fridge for up to 5 days. Reheat in the air fryer at 350°F (175°C) for about 3–5 minutes to restore their crispiness.

Freezer: If you want to keep them for a longer period, freeze churro bites in a freezer-safe bag or container for up to 2 months. Thaw in the fridge overnight before reheating.

Reheating: To enjoy your Air Fryer Churro Bites at their best, reheat in the air fryer for about 2–4 minutes until warm and crispy again.

Air Fryer Churro Bites Variations

Feel free to embrace your culinary creativity with these adaptable takes on your churro bites!

  • Flavor Twist: Add Almond Extract to the dough for a nutty surprise that beautifully complements the cinnamon sugar.

  • Chocolate Drizzle: Top with a warm Chocolate Sauce after cooking for an indulgent finish that’s sure to impress chocolate lovers.

  • Spicy Kick: Sprinkle Cayenne Pepper into the cinnamon sugar for a sweet and spicy pairing that’ll awaken your taste buds.

  • Nutty Crunch: Mix in Chopped Nuts (like pecans or walnuts) to the dough for added texture and flavor—perfect for those who love a bit of bite!

  • Gluten-Free: Substitute with Gluten-Free All-Purpose Flour to enjoy similarly delectable churros without the gluten; just check your flour’s texture to maintain dough consistency.

  • Dairy-Free: Use Coconut Oil instead of butter and non-dairy milk to create a delightful dairy-free version that still tastes as good as the original.

  • Powdered Sugar Coating: Instead of cinnamon sugar, toss the churro bites in Powdered Sugar for a light, sweet dusting that keeps them looking fancy.

Explore these variations to make your air fryer churro bites truly your own! For a savory option perfect for gatherings, don’t miss out on these Garlic Salmon Bites or consider pairing them with some rich and garlicky sauces like in the Comfort Garlic Butter.

Expert Tips for Air Fryer Churro Bites

  • Dough Consistency: Ensure the dough is smooth and well-mixed; an overly dry dough will make it hard to pipe, while a wet mixture may not hold its shape.
  • Piping Technique: Use a star tip for an authentic churro shape and a better outer texture; avoid overcrowding in the air fryer to prevent steaming.
  • Cinnamon Sugar Coating: For optimal flavor, coat churro bites in cinnamon sugar while they’re warm to help the mixture stick better.
  • Air Frying Time: Keep a close eye on your churros as they cook; slight variations in air fryer models can affect cooking time.
  • Batch Cooking: Fry churros in batches to ensure even crispiness; this avoids moisture buildup that can happen if the basket is overcrowded.

Make Ahead Options

These Sweet Air Fryer Churro Bites are an excellent choice for meal prep, saving you time on busy weeknights! You can prepare the churro dough up to 24 hours in advance; simply store it in an airtight container in the refrigerator. This helps maintain its fresh texture. When you’re ready to serve, let the dough come to room temperature for about 30 minutes, then pipe and air fry as directed. To enhance quality, brush the churros with melted butter before frying, ensuring they achieve that perfect crispiness. With these make-ahead tips, you’ll enjoy delightful churro bites without any last-minute stress!

Air Fryer Churro Bites Recipe FAQs

What type of flour is best for churro bites?
You should use all-purpose flour for the best texture in your Air Fryer Churro Bites. Avoid bread or pastry flour, as they can alter the consistency and flavor of the churros.

How should I store leftover churro bites?
Leftover churro bites can be stored in an airtight container at room temperature for up to 2 days. For longer storage, keep them in the refrigerator for up to 5 days, but do remember that they may lose some crispiness.

Can I freeze churro bites?
Absolutely! You can freeze churro bites for up to 2 months. Just place them in a freezer-safe bag or container, ensure they are well-sealed, and label with the date. To reheat, simply thaw them in the fridge overnight and warm in the air fryer at 350°F (175°C) for about 3–5 minutes to regain their crispy texture.

What should I do if the churro dough is too dry or too wet?
If your dough is too dry, consider adding a tablespoon of water and mixing well until it reaches the desired consistency. For a too-wet dough, add a bit more flour until it forms a smooth, pipeable texture. Remember, achieving the right dough consistency is critical for successful churro bites!

Are Air Fryer Churro Bites safe for my pets?
While churro bites are delicious for us, they are not suitable for pets. The sugar and butter content can be harmful to animals, so it’s best to keep these delightful treats just for your two-legged friends!

Air Fryer Churro Bites

Crispy Air Fryer Churro Bites – A Sweet Bite of Bliss

Enjoy easy, delicious Air Fryer Churro Bites with a crispy exterior and gooey center—perfect for sweet cravings!
Prep Time 15 minutes
Cook Time 12 minutes
Cooling Time 5 minutes
Total Time 30 minutes
Servings: 6 bites
Course: Dessert
Cuisine: American
Calories: 120

Ingredients
  

For the Dough
  • 1 cup All-Purpose Flour Provides structure and texture
  • 1 cup Water Hydrates the dough
  • 1/4 cup Unsalted Butter Adds richness
  • 1/4 teaspoon Salt Enhances flavor
  • 2 tablespoons Sugar Sweetens the dough
  • 1 teaspoon Vanilla Extract Infuses flavor
  • 1 large Egg Binds the mixture
For the Coating
  • 1/2 cup White Sugar Adds sweetness
  • 1 tablespoon Cinnamon Powder Adds spice

Equipment

  • Air Fryer
  • medium saucepan
  • Piping bag with star tip

Method
 

Step-by-Step Instructions
  1. In a medium saucepan, combine 1 cup of water, 1/4 cup of unsalted butter, 1/4 teaspoon of salt, and 2 tablespoons of sugar. Heat over medium-high until it reaches a boil, stirring occasionally.
  2. Reduce the heat to low and gradually add 1 cup of all-purpose flour, stirring constantly until the dough pulls away from the sides of the pan.
  3. Allow the dough to cool for about 5 minutes, then add 1 large egg and 1 teaspoon of vanilla extract. Mix until smooth.
  4. Preheat your air fryer to 375°F (190°C) for about 5 minutes and prepare the basket with nonstick cooking spray.
  5. Transfer the churro dough into a piping bag. Pipe small twists of dough about 2 inches long into the prepared air fryer basket.
  6. Lightly brush the piped churros with melted butter. Air fry for 10 to 12 minutes until golden brown.
  7. Remove the churro bites and toss in a mixture of 1/2 cup of white sugar and 1 tablespoon of cinnamon immediately.

Nutrition

Serving: 1biteCalories: 120kcalCarbohydrates: 18gProtein: 1gFat: 6gSaturated Fat: 4gMonounsaturated Fat: 2gCholesterol: 30mgSodium: 50mgPotassium: 40mgSugar: 8gVitamin A: 200IUCalcium: 10mgIron: 0.5mg

Notes

For best results, ensure the dough is not too dry or too wet, and pipe the churros with enough space between them to avoid steaming.

Tried this recipe?

Let us know how it was!

Stay Connected

Get recipes via email: