Get my cookbooks

Spicy Southern Cheesy Chicken Spaghetti Casserole Bliss

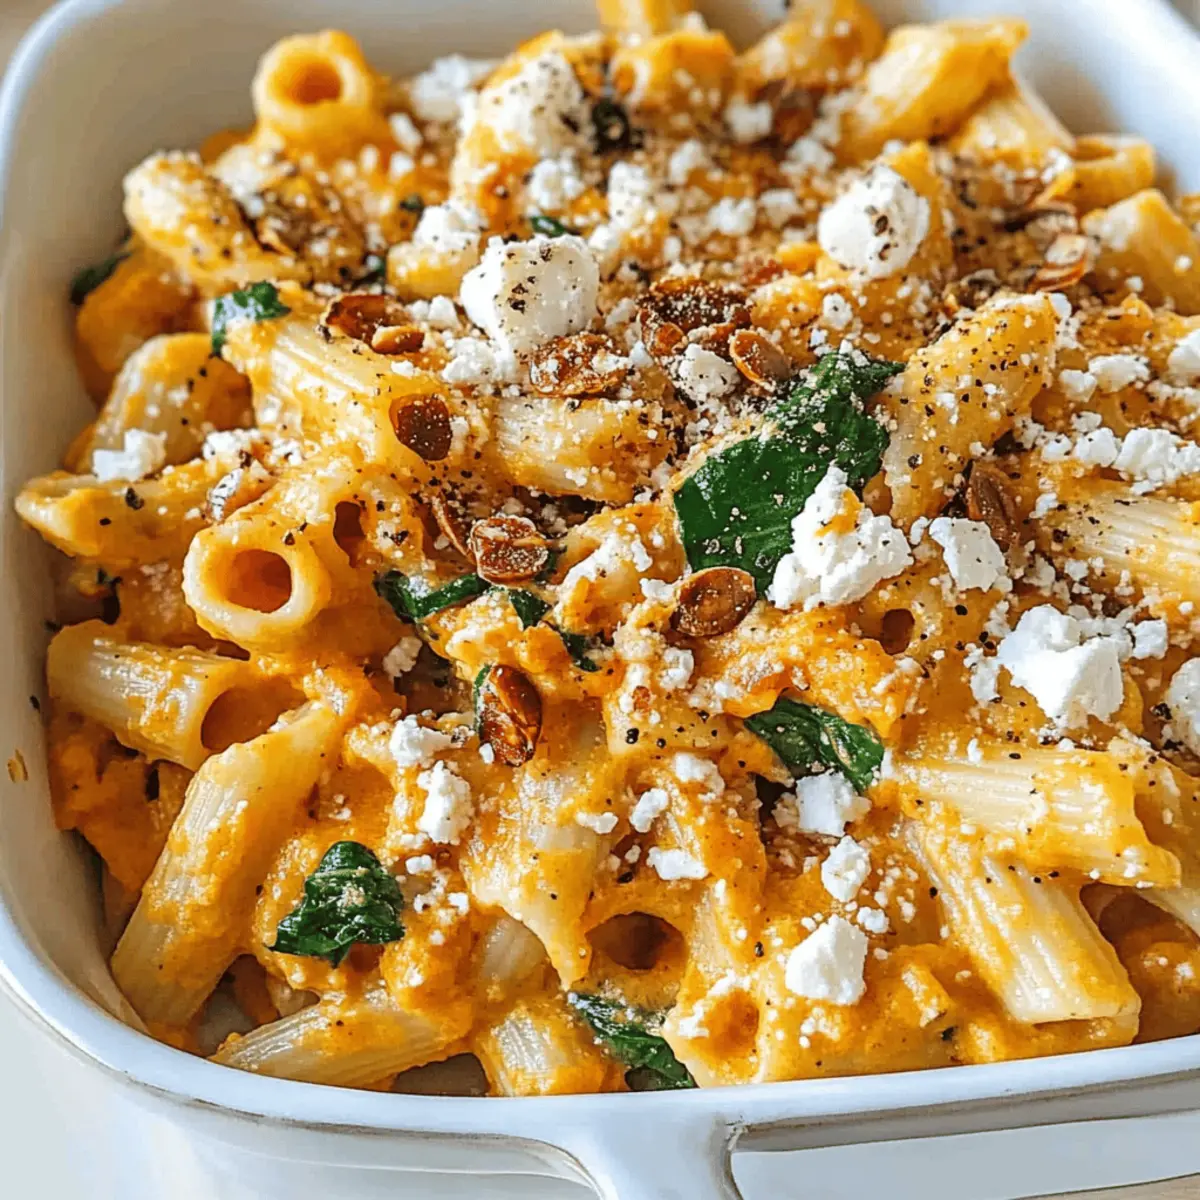
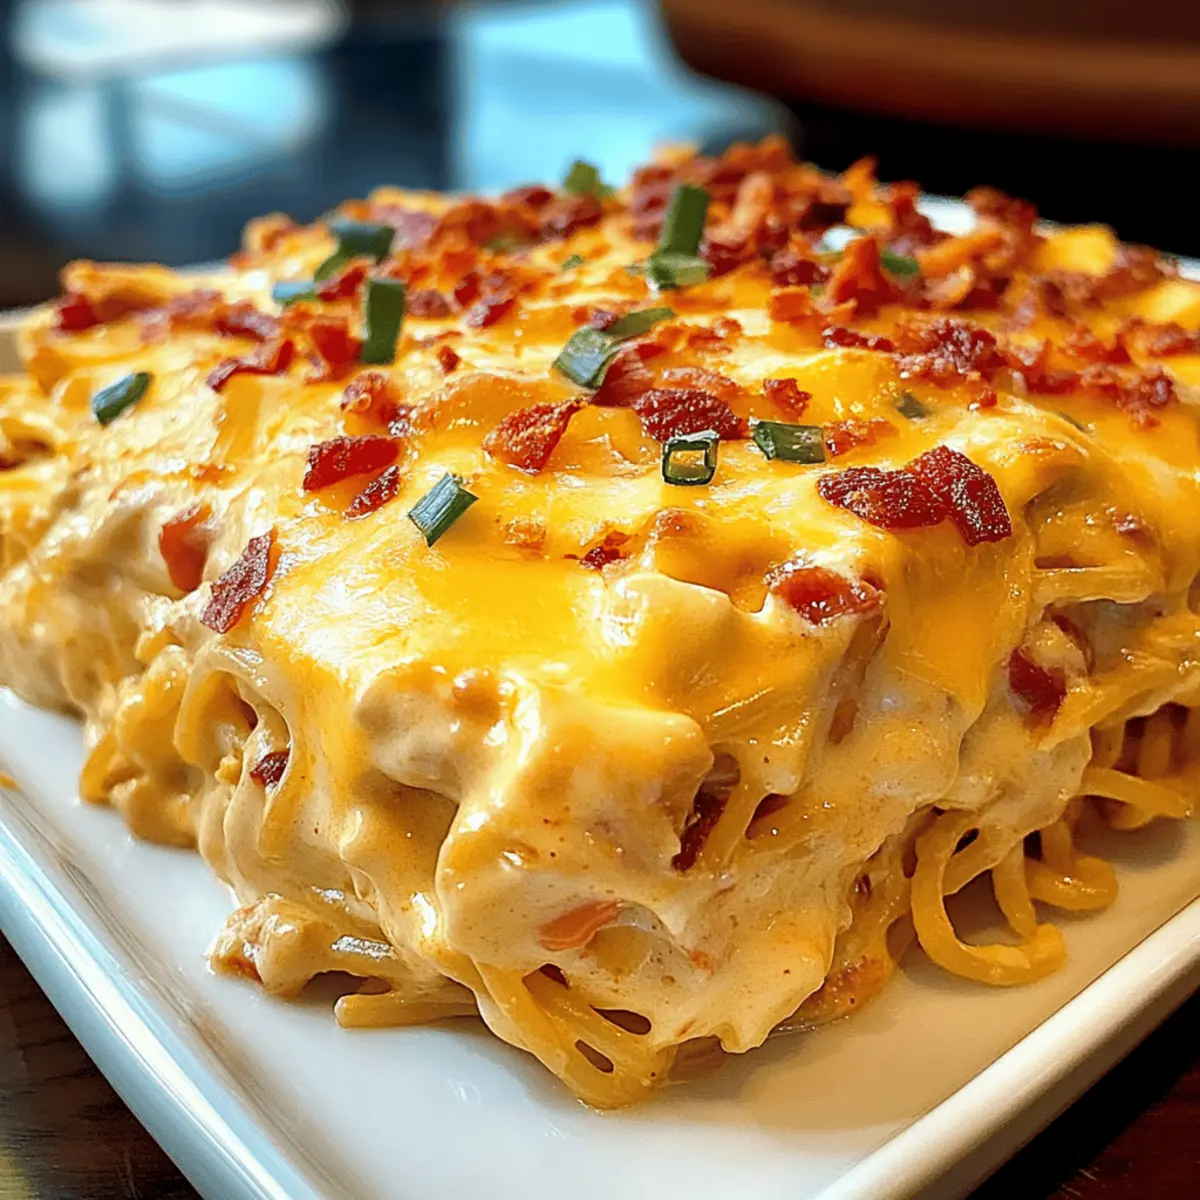
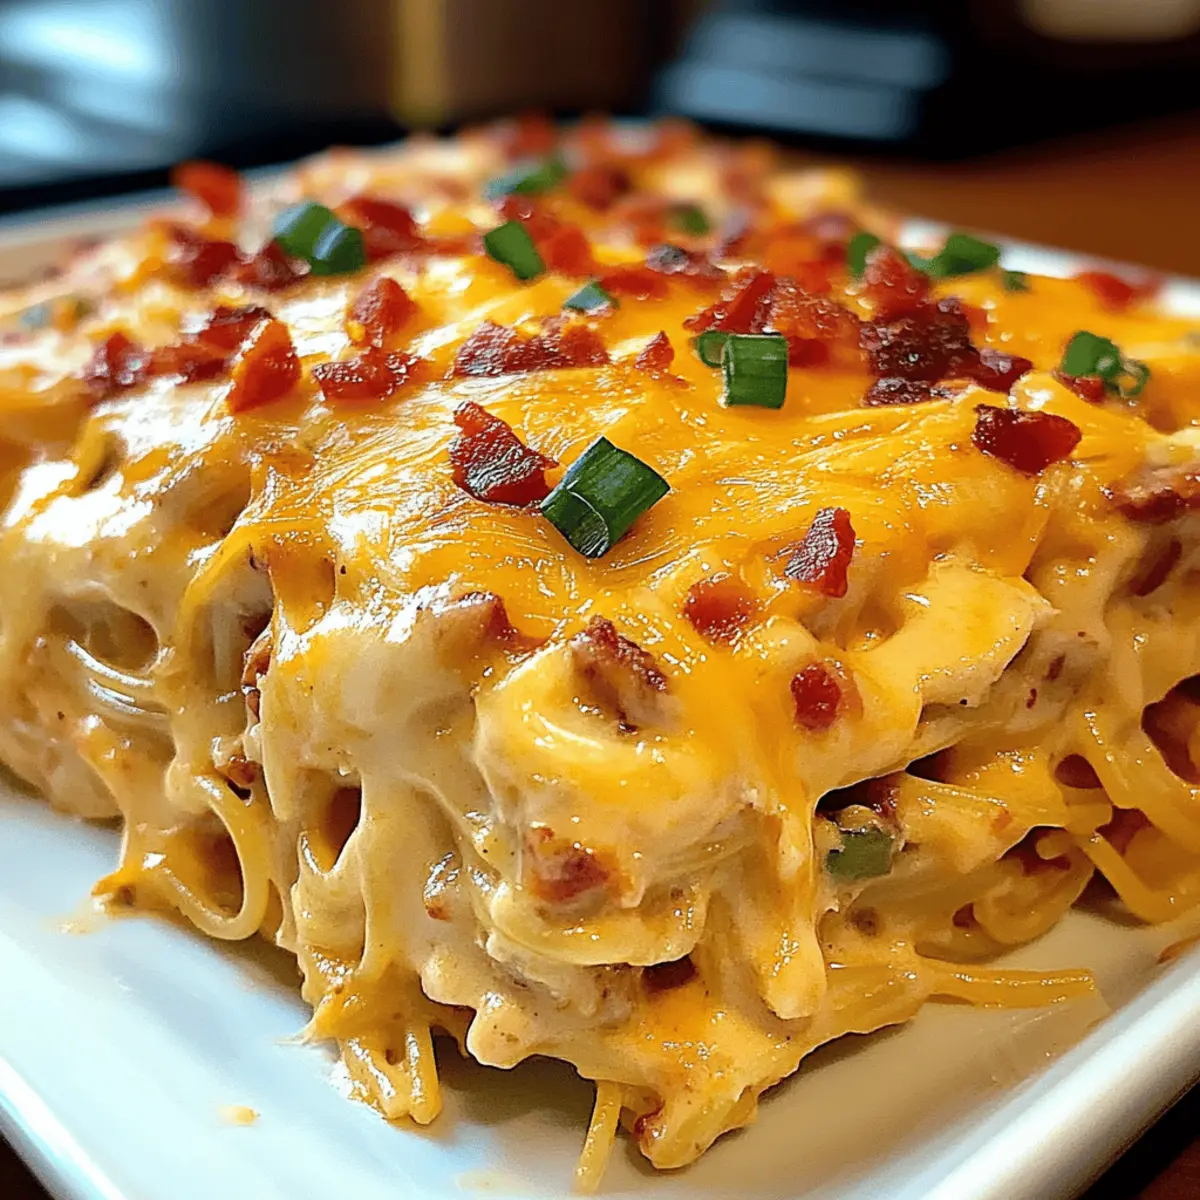
The sweet, spicy aroma wafted through my kitchen as I pulled my Spicy Southern Cheesy Chicken Spaghetti Casserole from the oven, instantly igniting a flood of good memories. This creamy, crowd-pleasing dish balances tender chicken with a kick of zesty flavors, making it an irresistible comfort food that’s perfect for weeknight dinners or family gatherings. What I love most about this casserole is its flexibility—whether you’re feeding a group or just craving something warm and satisfying, it’s easily customizable to suit your taste. Plus, it comes together in just a snap, allowing you to reclaim your evenings from the fast-food frenzy. Are you ready to embrace the comforting goodness of Southern cuisine? Let’s dive in and create a dish that will have everyone asking for seconds!

Why You’ll Love This Casserole?

Simplicity and Speed: With minimal prep and just a few ingredients, this dish comes together effortlessly.

Flavor Explosion: The combination of creamy cheese, zesty spices, and tender chicken creates an unforgettable taste that’ll keep you coming back for more.

Customizable Delight: Easily swap out ingredients, like experimenting with Cheesy Low Casserole for a lighter twist or adding shrimp for a seafood spin based on your mood.

Crowd-Pleasing Comfort: Perfect for feeding hungry families or unexpected guests; everyone will adore this rich, hearty casserole.

Meal Prep-Friendly: Make it ahead of time and simply pop it in the oven when needed—ideal for busy weeknights!

Spicy Southern Cheesy Chicken Spaghetti Casserole Ingredients

For the Casserole

  • Chicken Breasts – Tender protein that provides structure; feel free to substitute with shrimp or mushrooms for a delightful twist.
  • Spaghetti – The perfect base that adds sustaining carbs; consider using gluten-free pasta for a dietary alternative.
  • Sharp Cheddar Cheese – This cheese delivers that creamy, rich flavor; swap it for cream cheese for extra richness or mozzarella for a milder taste.
  • Fresh Bell Peppers – They add vibrant color and texture; zucchini or broccoli can be great nutritious additions.
  • Cream of Chicken Soup – Acts as the creamy binder; for a vegetarian option, use mushroom soup or a light homemade white sauce.
  • Paprika – Enhances warmth and color; using smoked paprika will give a deliciously different flavor profile.
  • Cayenne Pepper – Provides a kick of heat; adjust to your taste or omit for a milder casserole.
  • Garlic Powder – Boosts flavor depth; consider fresh garlic for a more robust taste.
  • Green Onions – Offer a fresh, mild onion flavor; chives can be a lovely substitute, or you can simply omit them if you prefer.

Step‑by‑Step Instructions for Spicy Southern Cheesy Chicken Spaghetti Casserole

Step 1: Preheat the Oven
Begin by preheating your oven to 350°F (175°C). While the oven warms up, grab a large casserole dish and generously grease it with cooking spray or butter to prevent sticking. This will ensure that your Spicy Southern Cheesy Chicken Spaghetti Casserole comes out easily once it’s baked, creating that perfect golden crust.

Step 2: Cook the Chicken
In a large pot over medium heat, cook the chicken breasts for 6-7 minutes on each side until they are golden brown and fully cooked through. Use a meat thermometer to ensure they reach at least 165°F (74°C). Once cooked, remove the chicken from the pot and let it rest on a plate for a few minutes before shredding it into bite-sized pieces.

Step 3: Boil the Spaghetti
In a separate pot, bring salted water to a boil and cook the spaghetti for 8-10 minutes, or until it reaches an al dente texture. Be careful not to overcook it, as it will continue to soften in the oven. Once cooked, drain the spaghetti and set it aside to cool, preventing it from becoming mushy in the Spicy Southern Cheesy Chicken Spaghetti Casserole.

Step 4: Mix the Ingredients
In a large mixing bowl, combine the shredded chicken, cooked spaghetti, cream of chicken soup, chopped bell peppers, paprika, cayenne pepper, garlic powder, and half of the sharp cheddar cheese. Stir everything together until well-mixed and coated evenly, bringing the vibrant flavors of the casserole to life.

Step 5: Assemble the Casserole
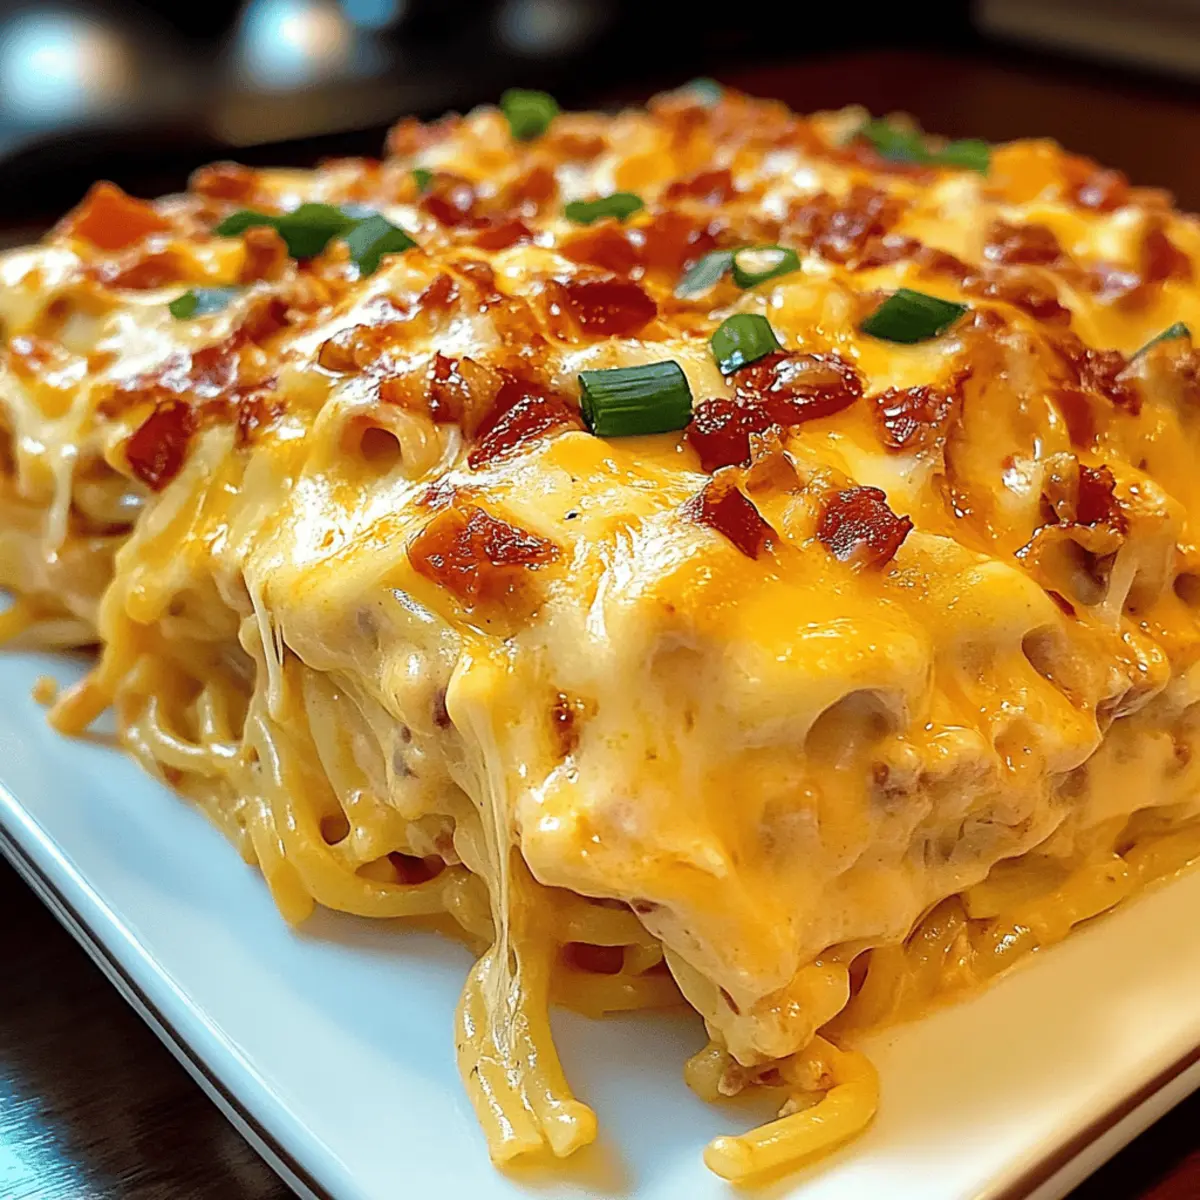
Carefully transfer the chicken and spaghetti mixture into the greased casserole dish, spreading it out evenly. Top the mixture with the remaining shredded cheddar cheese, ensuring it covers everything for that deliciously gooey finish. This step is key to achieving the creamy goodness that defines your Spicy Southern Cheesy Chicken Spaghetti Casserole.

Step 6: Bake and Serve
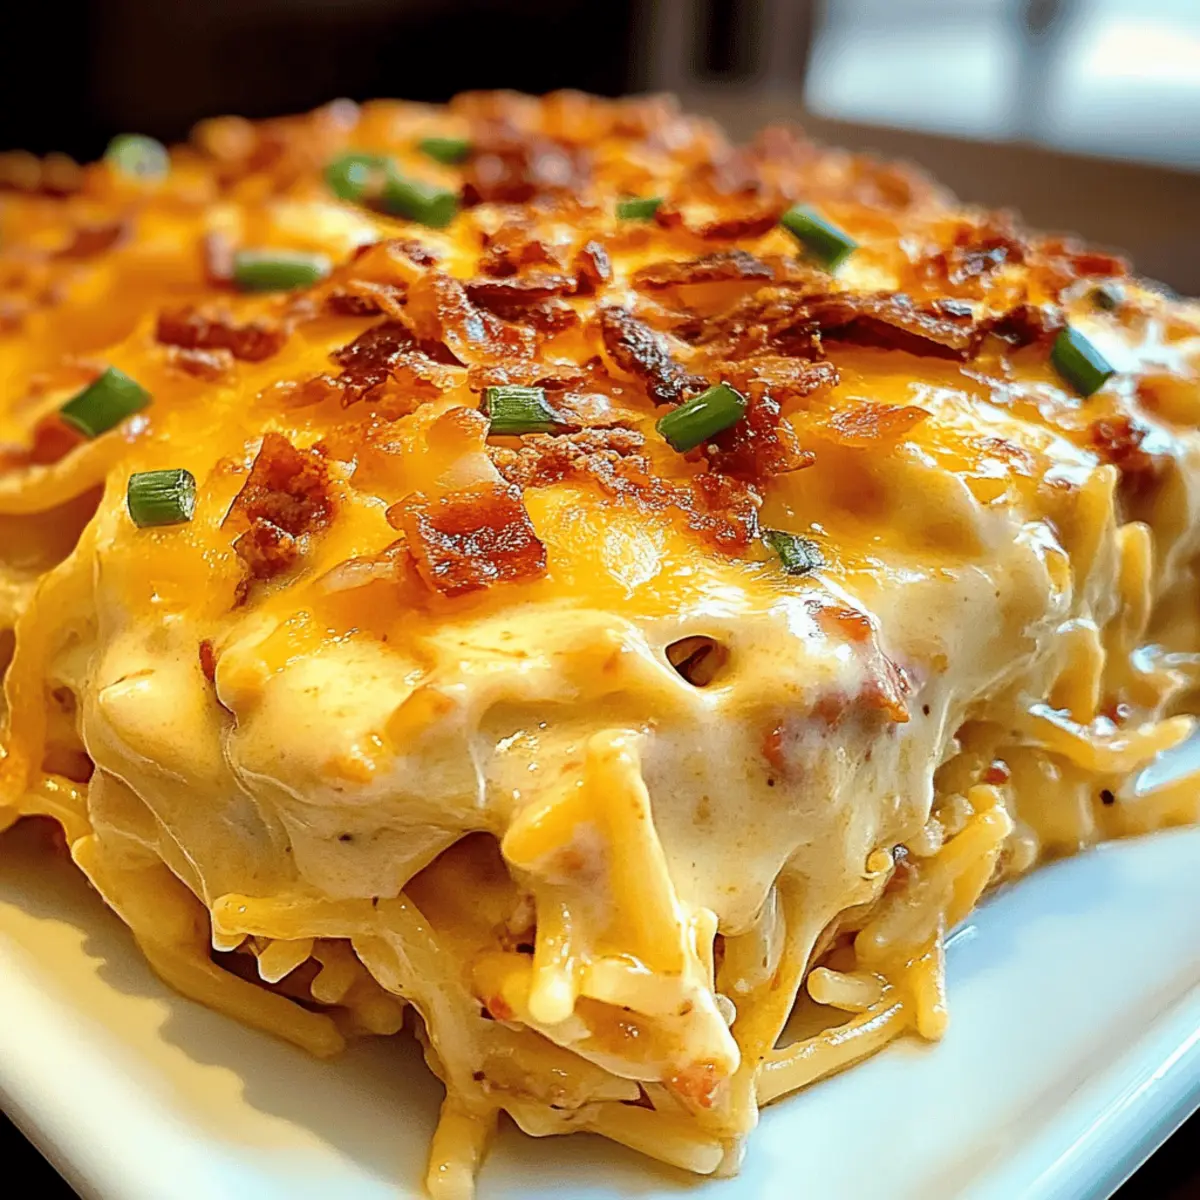
Place the casserole in the preheated oven and bake for 25-30 minutes. You’ll know it’s ready when you see it bubbling around the edges and the cheese has turned a beautiful golden brown. After removing the casserole, let it rest for 5 minutes before garnishing with chopped green onions to add a pop of color and freshness before serving.

Expert Tips for Spicy Southern Cheesy Chicken Spaghetti Casserole

  • Perfectly Cooked Chicken: Ensure chicken reaches an internal temperature of 165°F; undercooked chicken can ruin your casserole and leave you with unsafe bites.

  • Al Dente Pasta: Make sure to cook spaghetti al dente; it should be firm to the bite to hold its texture in the casserole. Overcooking can lead to mushy results.

  • Rest Time: Allow the casserole to rest for 5 minutes after baking; this helps the flavors meld together and makes serving easier.

  • Cheese Choices: Experiment with different cheeses; using pepper jack or adding cream cheese can elevate the flavor profile of your Spicy Southern Cheesy Chicken Spaghetti Casserole.

  • Vegetable Variations: Feel free to sneak in extra veggies like spinach or zucchini; they enhance nutrition without overpowering the flavor.

  • Customize the Spice: Adjust the cayenne pepper to your liking; you can always add more for a stronger kick, but start with less if you’re sensitive to heat.

Spicy Southern Cheesy Chicken Spaghetti Casserole Variations

Feel free to personalize your Spicy Southern Cheesy Chicken Spaghetti Casserole while embracing flavors that excite your palate!

  • Seafood Delight: Swap chicken for shrimp or crab for a delightful seafood twist that adds a fresh touch. The added seafood will bring a new layer of flavor that’s sure to be a hit at the dinner table.

  • Vegetarian Wonder: Use a medley of colorful veggies like zucchini, mushrooms, and spinach instead of chicken, making it a veggie-packed delight. This version is not only nutritious but also showcases the versatility of the dish.

  • Gluten-Free: Substitute regular spaghetti with gluten-free pasta to cater to dietary needs. This small change ensures everyone can enjoy the creamy goodness of the casserole without gluten-related worries.

  • Extra Creamy: Replace sharp cheddar with cream cheese for an ultra-creamy texture. This variation creates an indulgent, velvety experience that transforms every bite into sheer comfort.

  • Cheese Swap: Try mozzarella or pepper jack cheese instead of cheddar for a different flavor profile. Each cheese brings its unique creaminess and character, making your casserole uniquely yours.

  • Kick of Heat: Add diced jalapeños or use spicy pepper jack cheese to crank up the heat level. This fiery variation is perfect for spice lovers and adds a spicy flair to each mouthful.

  • Herbaceous Flavor: Toss in some fresh herbs like thyme or basil for an aromatic boost. This simple addition provides a fragrant layer that brightens the entire dish and elevates its charm.

  • Smoky Twist: Use smoked paprika instead of regular paprika to enhance the depth of flavor. This substitution infuses the casserole with a delightful smokiness that beautifully complements the creamy base.

For more ways to customize your casseroles, explore how the Cheesy Garlic Chicken can inspire different flavors, or jazz up your dish with ideas from the Cheesy Spinach Artichoke. Each variation invites creativity in the kitchen!

What to Serve with Spicy Southern Cheesy Chicken Spaghetti Casserole

Whether you’re bringing the family together or hosting friends for a cozy gathering, elevating your meal with delightful pairings can turn a great dish into an unforgettable dining experience.

  • Garlic Bread: Offers a crunchy contrast and buttery richness that complements the cheese beautifully while making every bite even more satisfying.

  • Crisp Green Salad: A refreshing mix of greens and veggies provides a light, crunchy contrast to the casserole’s creamy texture, adding brightness to your plate.

  • Coleslaw: The cool, tangy crunch of coleslaw perfectly balances the rich and spicy flavors of your casserole, creating a harmonious taste experience.

  • Roasted Vegetables: Think seasonal veggies drizzled in olive oil; their caramelized sweetness adds depth and a healthy element to your meal, rounding it out perfectly.

  • Cornbread Muffins: These fluffy delights add a Southern twist, with a slightly sweet flavor that pairs wonderfully with the spicy casserole’s kick.

  • Iced Tea: Sweetened or unsweetened, a tall glass of iced tea provides a refreshing, cooling contrast that enhances the spice without overshadowing it.

  • Peach Cobbler: Treat your guests to a classic Southern dessert; the warm, sweet, and slightly tangy flavors of peach cobbler are the perfect way to end your meal.

How to Store and Freeze Spicy Southern Cheesy Chicken Spaghetti Casserole

Fridge: Store leftovers in an airtight container for up to 3 days. Reheat in the microwave or oven until heated through, ensuring the cheese is melty and creamy again.

Freezer: This casserole can be frozen for up to 2 months. Cool completely, then wrap it tightly in plastic wrap and foil before placing it in the freezer.

Reheating: When ready to enjoy, thaw overnight in the fridge. Bake frozen casserole directly from the freezer, adding an extra 10-15 minutes to the cooking time until bubbly and golden.

Make-Ahead: Prepare the casserole a day in advance and refrigerate before baking. This allows the flavors to develop more deeply, making your Spicy Southern Cheesy Chicken Spaghetti Casserole even more delicious!

Make Ahead Options

These Spicy Southern Cheesy Chicken Spaghetti Casserole preparations are perfect for busy home cooks looking to save time! You can prepare the entire casserole up to 24 hours in advance—simply assemble all the ingredients and cover it tightly with plastic wrap or foil before refrigerating. If you want to take it a step further, you can also cook the chicken and pasta, then store them separately in the fridge for up to 3 days, mixing them with the other ingredients just before baking. To maintain its delicious quality, avoid overcooking the spaghetti, and always let the casserole rest for a few minutes after baking to help consolidate flavors. When you’re ready to serve, simply pop it in the oven and bake, and you’ll have a mouthwatering dish that’s just as delightful as when freshly made!

Spicy Southern Cheesy Chicken Spaghetti Casserole Recipe FAQs

What type of chicken should I use for the casserole?
Absolutely! I recommend using boneless, skinless chicken breasts as they shred beautifully and provide a tender bite. If you prefer a lighter option, shredded rotisserie chicken can save you time without sacrificing flavor. For a vegetarian spin, try replacing the chicken with sautéed mushrooms or a mix of your favorite vegetables.

How should I store leftover casserole?
Very! You can store any leftovers in an airtight container in the fridge for up to 3 days. Make sure it’s completely cooled before sealing it to maintain the best texture. When you’re ready to enjoy it again, simply pop it in the microwave or oven until heated through.

Can I freeze Spicy Southern Cheesy Chicken Spaghetti Casserole?
Yes, indeed! To freeze, first let the casserole cool completely. Wrap it tightly in plastic wrap followed by aluminum foil to prevent freezer burn. It can be kept in the freezer for up to 2 months. When you’re ready to cook it, thaw overnight in the fridge and bake directly from the freezer, adding about 10-15 extra minutes to the baking time to ensure it’s heated all the way through.

What should I do if the casserole is too dry after baking?
No worries at all! If you find that your casserole is a bit dry, consider adding a splash of chicken broth or cream before reheating. This moisture will help revive the creamy texture. Always remember to keep an eye on baking times as overbaking can lead to dryness.

Are there any dietary considerations I should keep in mind?
Great question! If you’re cooking for someone with food allergies, be mindful of the cream of chicken soup, which contains gluten and dairy. You can easily substitute with a homemade white sauce or a vegan cream soup for a dairy-free option. Additionally, opt for gluten-free pasta if gluten is a concern. Always check labels for hidden allergens to keep everyone safe and satisfied.

Can I make this casserole ahead of time?
Absolutely! You can prepare your Spicy Southern Cheesy Chicken Spaghetti Casserole a day ahead. Simply assemble it in the casserole dish and cover it tightly with plastic wrap or foil before refrigerating. When you’re ready to bake, just remove the cover and pop it in the oven—get ready for those flavors to meld beautifully while it bakes!

Spicy Southern Cheesy Chicken Spaghetti Casserole

Spicy Southern Cheesy Chicken Spaghetti Casserole Bliss

A comforting Spicy Southern Cheesy Chicken Spaghetti Casserole with tender chicken and zesty flavors.
Prep Time 15 minutes
Cook Time 30 minutes
Resting Time 5 minutes
Total Time 50 minutes
Servings: 6 servings
Course: Casserole
Cuisine: Southern
Calories: 450

Ingredients
  

For the Casserole
  • 4 boneless chicken breasts Chicken Breasts Can substitute with shrimp or mushrooms.
  • 12 ounces Spaghetti Gluten-free pasta is an alternative.
  • 2 cups Sharp Cheddar Cheese Can substitute with cream cheese or mozzarella.
  • 1 cup Fresh Bell Peppers Zucchini or broccoli are great nutritious additions.
  • 1 can Cream of Chicken Soup Vegetarian option: mushroom soup or homemade white sauce.
  • 1 teaspoon Paprika Smoked paprika adds a different flavor.
  • 1/2 teaspoon Cayenne Pepper Adjust according to taste.
  • 1 teaspoon Garlic Powder Fresh garlic can be used for a robust taste.
  • 1/4 cup Green Onions Chives can be substituted or omitted.

Equipment

  • Oven
  • Large pot
  • casserole dish
  • Mixing Bowl

Method
 

Directions
  1. Preheat your oven to 350°F (175°C) and grease a large casserole dish.
  2. Cook chicken breasts in a large pot over medium heat for 6-7 minutes on each side until golden brown.
  3. Boil salted water and cook spaghetti for 8-10 minutes until al dente, then drain and cool.
  4. Combine shredded chicken, cooked spaghetti, cream of chicken soup, chopped bell peppers, paprika, cayenne pepper, garlic powder, and half of the sharp cheddar cheese in a mixing bowl.
  5. Transfer the mixture to the greased casserole dish and top with the remaining cheddar cheese.
  6. Bake in the preheated oven for 25-30 minutes until bubbling and golden brown. Let rest for 5 minutes before serving.

Nutrition

Serving: 1servingCalories: 450kcalCarbohydrates: 40gProtein: 30gFat: 20gSaturated Fat: 10gPolyunsaturated Fat: 1gMonounsaturated Fat: 5gCholesterol: 70mgSodium: 800mgPotassium: 600mgFiber: 2gSugar: 3gVitamin A: 500IUVitamin C: 30mgCalcium: 300mgIron: 2mg

Notes

Customize with different vegetables or cheeses, and adjust the spice levels according to your taste.

Tried this recipe?

Let us know how it was!

Irresistible Pumpkin Feta Pasta for Cozy Fall Nights

As the crisp fall air slips in, I find myself reaching for cozy, comforting meals that warm both belly and heart. Enter my Creamy Pumpkin Feta Pasta, a dish that embodies the spirit of the season. This delightful recipe seamlessly combines the sweet, earthy notes of pumpkin with the tangy creaminess of feta, wrapping pasta in a hug of flavor that’s perfect for a quick weeknight dinner or a fabulous gathering with friends. Plus, it’s a vegetarian dish with options for a vegan twist, making it a versatile plate everyone will savor. Have you ever experienced the magic of transforming simple ingredients into something extraordinary?

Why is Pumpkin Feta Pasta a Must-Try?

Comforting and Cozy: This dish is the essence of fall, warming your soul with its creamy texture and rich flavors.

Easy to Make: With minimal prep and straightforward steps, you can whip up this delightful meal in no time, even on busy weeknights.

Flavor Explosion: The sweet pumpkin paired with tangy feta creates a unique taste sensation that is bound to impress your family and friends.

Versatile Options: Feel free to customize by adding greens or proteins, such as grilled chicken or even experimenting with a vegan version for plant-based diets. If you’re looking to explore more comforting recipes, don’t miss out on my Creamy Marry Me Shrimp Pasta or the warmth of Joumou Haitian Pumpkin Soup.

Crowd-Pleasing Appeal: Whether it’s a cozy family dinner or a larger gathering, this dish is sure to win hearts and satisfy appetites!

Pumpkin Feta Pasta Ingredients

• For the base of this delicious meal, ensure to have all the elements ready!

For the Pasta

  • Pasta – 1 pound; use penne or rigatoni for optimal sauce coverage.

For the Sauce

  • Pumpkin Puree – 15-ounce can; choose pure pumpkin and not pie filling for the right flavor.
  • Feta Cheese – 4 ounces, crumbled; adds a delightful tang, but feel free to swap with goat cheese if you desire.
  • Heavy Cream – 1/2 cup; gives the sauce its signature creaminess.
  • Parmesan Cheese – 1/4 cup, grated; enhances the overall umami vibe of the dish.
  • Garlic – 2 cloves, minced; infuses the sauce with aromatic goodness.
  • Olive Oil – 1/4 cup; perfect for sautéing the onions for a rich flavor.

For the Aromatics

  • Fresh Sage – 1/4 cup, chopped (or 1 tablespoon dried); brings in warm, earthy notes.
  • Onion – 1 small, finely chopped; this is the base flavor for the sauce.

For the Flavor Boost

  • Salt and Black Pepper – To taste; essential for elevating all the flavors.
  • Red Pepper Flakes – 1/4 teaspoon (optional); a little heat can balance the sweetness beautifully.

For the Garnish

  • Pumpkin Seeds (Pepitas) – 1/4 cup, toasted; adds a lovely crunch on top of your creamy pumpkin feta pasta.
  • Butter – 2 tablespoons; if you’re feeling indulgent, it adds a finishing richness.

For Adjusting Consistency

  • Vegetable Broth/Pasta Water – 1/2 cup; use to achieve your desired sauce thickness.

Get ready to unveil a cozy Italian gem that’s bound to warm hearts with every bite of this Pumpkin Feta Pasta!

Step‑by‑Step Instructions for Pumpkin Feta Pasta

Step 1: Sauté the Base
In a large skillet, heat ¼ cup of olive oil over medium heat. Once shimmering, add 1 small finely chopped onion and sauté until translucent and softened, about 5-7 minutes. The onion should be soft and fragrant, laying a flavorful foundation for your creamy Pumpkin Feta Pasta.

Step 2: Add Aromatics
Stir in 2 minced garlic cloves and ¼ cup of chopped fresh sage. Continue to sauté for another minute until the garlic is fragrant, being careful not to let it brown. The aroma will fill your kitchen, signaling that the base for your delicious sauce is coming together beautifully.

Step 3: Incorporate Pumpkin
Next, add a 15-ounce can of pumpkin puree to the skillet, stirring well. Cook for 2-3 minutes, allowing the pumpkin to heat through and meld with the sautéed onion and garlic. The mixture should be warm and bright orange, creating a delightful vision of autumn in your pan.

Step 4: Make It Creamy
Pour in ½ cup of heavy cream and add ¼ cup of grated Parmesan cheese. Stir continuously until smooth and the cheese has melted into the sauce. The mixture should be creamy and richly flavored, perfectly setting the stage for your Pumpkin Feta Pasta.

Step 5: Season the Sauce
Season the sauce with salt, black pepper to taste, and a pinch of optional red pepper flakes for a hint of heat. Mix well to ensure the flavors are evenly distributed. The sauce should taste well-balanced, with the creamy pumpkin and tangy feta as the stars of your dish.

Step 6: Simmer for Depth
Reduce the heat to low and let the sauce simmer for 10-15 minutes, stirring occasionally. This allows the flavors to deepen and meld. You can adjust the sauce’s thickness by adding vegetable broth or reserved pasta water as needed for a silky texture.

Step 7: Cook the Pasta
In a large pot, bring salted water to a boil. Cook 1 pound of your chosen pasta (penne or rigatoni) according to package instructions until al dente. Reserve ½ cup of the pasta cooking water, then drain the pasta while keeping it slightly firm, as it will continue to cook once combined with the sauce.

Step 8: Combine Pasta and Sauce
Add the drained pasta directly into the skillet with your creamy pumpkin sauce. Toss well to coat each piece of pasta generously in the sauce. If the sauce is too thick, gently stir in some of the reserved pasta water until you reach your desired consistency.

Step 9: Fold in Feta
Carefully fold in half of the crumbled 4 ounces of feta cheese, allowing it to mix into the warm pasta. This will add a delightful creaminess and tang to your Pumpkin Feta Pasta while leaving some feta intact for garnish.

Step 10: Drizzle Butter
For a finishing touch, drizzle 2 tablespoons of melted butter over the pasta, tossing to blend. This adds a layer of richness that complements the creamy pumpkin sauce beautifully, enhancing the dish’s overall indulgence.

Step 11: Serve and Garnish
Serve your warm Pumpkin Feta Pasta immediately, garnished with the remaining crumbled feta and toasted pumpkin seeds for a delightful crunch. The comforting colors and textures will beckon you and your loved ones to gather around the table and enjoy this seasonal delight.

What to Serve with Creamy Pumpkin Feta Pasta

As the leaves turn and the air crispens, pairing dishes with your creamy creation can elevate your dining experience to heartwarming perfection.

  • Garlicky Breadsticks: Crisp and buttery, they offer a delightful crunch that complements the velvety sauce beautifully—perfect for soaking up every last bite!

  • Fresh Arugula Salad: Peppery and bright, this salad adds a refreshing counterpoint to the creamy richness, with a simple vinaigrette dressing that ties it all together.

  • Roasted Brussels Sprouts: A side of caramelized Brussels sprouts brings earthy tones and a satisfying crunch, balancing the sweetness of the pumpkin and the tangy feta.

  • Crispy Sage Chips: Infusing the warm, herbal notes of sage matches beautifully with the pasta, creating an aromatic experience with each blissful bite.

  • Warm Apple Crisp: For dessert, this classic treat harmonizes wonderfully—its cozy, spiced flavors will sweeten the finish to your fall-inspired meal.

  • Red Wine: A glass of light-bodied red wine enhances the dish’s flavors while imparting a warmth that rounds out the cozy dining experience.

These pairings create a symphony of flavors that finalize your meal into a comforting embrace, encouraging cherished moments shared around the table.

Make Ahead Options

These Creamy Pumpkin Feta Pasta preparations are perfect for busy home cooks seeking to save time during the week! You can prepare the sauce, including the sautéed onion, garlic, pumpkin puree, cream, and feta, up to 3 days in advance. Simply refrigerate it in an airtight container until you’re ready to enjoy. Additionally, cook the pasta ahead of time and store it separately for up to 24 hours; make sure to toss it with a little olive oil to prevent sticking. When you’re ready to serve, simply heat the sauce over low heat, combine it with freshly cooked pasta, and drizzle with melted butter for that rich, comforting taste, making weeknight dinners effortless and delicious!

Expert Tips for Pumpkin Feta Pasta

  • Creamy Consistency: Stir continuously while melting the cheese to ensure a smooth, clump-free sauce for your Pumpkin Feta Pasta.

  • Adjust Slowly: When thicken your sauce, add pasta water or broth gradually to avoid over-thickening.

  • Bold Flavors: Consider browning the butter before adding it, which will give your dish a nutty depth of flavor that enhances the overall experience.

  • Mix Well: Ensure all pasta is evenly coated in the sauce by tossing thoroughly, so every bite is bursting with flavor.

  • Fresh Herbs: For a more vibrant taste, sprinkle on fresh sage or thyme right before serving to elevate the dish.

  • Quick Storage: Leftover sauce can be stored for up to 3 days in the refrigerator—reheat and enjoy a quick meal later!

How to Store and Freeze Pumpkin Feta Pasta

Fridge: Store any leftover Pumpkin Feta Pasta in an airtight container for up to 3 days. Reheat gently on the stove or in the microwave, adding a splash of water or broth to loosen the sauce.

Freezer: If you want to enjoy this dish later, freeze the pasta without the feta for up to 2 months. Thaw in the fridge overnight and reheat, then stir in fresh feta before serving.

Reheating: When reheating, do so on low heat to prevent the sauce from separating. Add a little bit of cream or broth to revive its creamy texture.

Airtight Storage: Ensure all storage containers are airtight to maintain the freshness of the flavors and textures in your Pumpkin Feta Pasta.

Pumpkin Feta Pasta Variations & Substitutions

Feel free to explore these delightful twists to make the Pumpkin Feta Pasta your own, adding a bit of your personal touch!

  • Spice Level: Add a pinch of cayenne or extra red pepper flakes for a delightful kick that contrasts beautifully with the creaminess.

  • Leafy Greens: Toss in fresh spinach or kale to infuse your dish with vibrant greens and extra nutrition, enhancing both flavor and texture.

  • Protein Boost: For a heartier meal, include grilled chicken, Italian sausage, or sautéed shrimp that bring additional flavor and satisfaction to every bite.

  • Cheesy Variations: Swap feta for ricotta for a creamier texture, or introduce creamy blue cheese for a bolder flavor adventure!

  • Vegan Delight: Embrace a vegan twist by substituting heavy cream with coconut cream and omitting cheese entirely, while using nutritional yeast for a cheesy flavor.

  • Nuts for Crunch: Sprinkle toasted pine nuts or walnuts as a garnish for added crunch and a wonderful nutty flavor that complements the pumpkin.

  • Herb Infusions: Try using fresh thyme or rosemary in place of sage for a different area of flavor that lifts the whole dish to new heights.

  • Seasonal Twist: Experiment by adding chopped roasted butternut squash for an additional layer of earthy sweetness, making this dish even more fall-inspired.

Each variation not only enhances your dish but also tells a story of your culinary creativity. As you enjoy this cozy pasta, you might also find joy in other comforting recipes like my dreamy Cajun Sausage Pasta or the delicious Feta Fried Eggs, perfect for soothing those fast-food cravings and warming your home!

Pumpkin Feta Pasta Recipe FAQs

How do I select ripe pumpkin for the recipe?
Absolutely! When choosing fresh pumpkin, look for one that’s firm, symmetrical, and has a deep, rich color. Avoid any with dark spots all over or soft patches, as these can indicate overripeness or rot. If using canned pumpkin, make sure it’s pure pumpkin puree and not pumpkin pie filling for the best flavor in your pasta.

What are the best storage methods for leftover Pumpkin Feta Pasta?
Leftover Pumpkin Feta Pasta can be stored in an airtight container in the fridge for up to 3 days. Just reheat gently on the stove or in the microwave, adding a splash of broth or cream to maintain that delightful creamy consistency. If you’re going to finish it later, ensure it’s cooled completely before sealing.

Can I freeze Pumpkin Feta Pasta for later use?
Absolutely! To freeze, it’s best to store the Pasta without the feta added. Place the cooled dish in an airtight container or a freezer-safe bag, squeezing out as much air as possible, and freeze for up to 2 months. To reheat, thaw in the fridge overnight and then warm on low heat, stirring in fresh feta right before serving for that lovely creamy touch.

What should I do if my sauce turns out too thick?
If you find your Pumpkin Feta Pasta sauce is too thick, don’t worry! Simply add a bit of the reserved pasta water or vegetable broth, a little at a time, stirring until you reach the desired consistency. This is very helpful, as you want the sauce to cling perfectly to the pasta while being creamy—not gloppy!

Are there any dietary considerations I need to be aware of?
Great question! This dish is vegetarian, making it suitable for many diets. If you have dairy allergies, you can easily create a vegan version by substituting the heavy cream with a plant-based alternative like coconut cream and omitting the feta cheese. Opt for nutritional yeast for a cheesy flavor instead. Always be mindful of allergies when serving to others!

Pumpkin Feta Pasta

Irresistible Pumpkin Feta Pasta for Cozy Fall Nights

Delight in this Pumpkin Feta Pasta, a cozy dish perfect for fall nights and gatherings.
Prep Time 10 minutes
Cook Time 30 minutes
Total Time 40 minutes
Servings: 4 servings
Course: Pasta
Cuisine: Italian
Calories: 550

Ingredients
  

For the Pasta
  • 1 pound Pasta Penne or rigatoni preferred
For the Sauce
  • 15 ounce Pumpkin Puree Pure pumpkin, not pie filling
  • 4 ounce Feta Cheese Crumbled
  • 1/2 cup Heavy Cream For creaminess
  • 1/4 cup Parmesan Cheese Grated
  • 2 cloves Garlic Minced
  • 1/4 cup Olive Oil For sautéing
For the Aromatics
  • 1/4 cup Fresh Sage Chopped or 1 tablespoon dried
  • 1 small Onion Finely chopped
For the Flavor Boost
  • Salt and Black Pepper To taste
  • 1/4 teaspoon Red Pepper Flakes Optional
For the Garnish
  • 1/4 cup Pumpkin Seeds (Pepitas) Toasted
  • 2 tablespoons Butter For richness
For Adjusting Consistency
  • 1/2 cup Vegetable Broth/Pasta Water To adjust sauce thickness

Equipment

  • Large skillet
  • Large pot
  • airtight container

Method
 

Step-by-Step Instructions
  1. In a large skillet, heat ¼ cup of olive oil over medium heat. Add the chopped onion and sauté until translucent, about 5-7 minutes.
  2. Stir in minced garlic and chopped fresh sage. Sauté for another minute until fragrant.
  3. Add the pumpkin puree, stirring well and cook for 2-3 minutes until heated through.
  4. Pour in the heavy cream and add grated Parmesan cheese. Stir until smooth and the cheese has melted.
  5. Season the sauce with salt, black pepper, and red pepper flakes. Mix well.
  6. Reduce heat to low and let the sauce simmer for 10-15 minutes, adjusting thickness with broth or pasta water as needed.
  7. In a large pot, bring salted water to a boil. Cook the pasta according to package instructions until al dente.
  8. Add the drained pasta directly into the skillet with the sauce and toss to coat.
  9. Fold in half of the crumbled feta cheese.
  10. Drizzle melted butter over the pasta and toss to blend.
  11. Serve immediately, garnished with remaining feta and toasted pumpkin seeds.

Nutrition

Serving: 1servingCalories: 550kcalCarbohydrates: 60gProtein: 18gFat: 26gSaturated Fat: 15gPolyunsaturated Fat: 2gMonounsaturated Fat: 8gCholesterol: 80mgSodium: 450mgPotassium: 550mgFiber: 4gSugar: 5gVitamin A: 600IUVitamin C: 5mgCalcium: 250mgIron: 3mg

Notes

Leftover sauce can be stored for 3 days in an airtight container. Reheat gently before serving. For freezing, omit feta and freeze for up to 2 months.

Tried this recipe?

Let us know how it was!

Creamy Marry Me Pumpkin Chicken Pasta to Warm Your Heart

As the aroma of spices and creamy pumpkin fills the kitchen, I can’t help but feel that comforting embrace of fall. Today, I’m thrilled to share my Marry Me Pumpkin Chicken Pasta recipe—an enchanting dish that brings warmth and cheer to any weeknight dinner. With its rich, velvety sauce and tender chicken, this creamy pasta not only captures the essence of the season but does so in just 30 minutes! Perfect for lovers of cozy meals and great for those busy evenings when you want to impress—this recipe is a true crowd-pleaser. Whether you’re looking to savor a delightful family dinner or share a little romance over candlelight, this pasta is bound to spark joy and satisfaction at your table. Are you ready to dive into this autumnal delight? Let’s get cooking!

Why is This Pasta Recipe So Special?

Simplicity: You’ll love how quick and easy this recipe is, making it perfect for a weeknight dinner in just 30 minutes!

Creamy Indulgence: The rich pumpkin sauce is both comforting and decadent, a delicious way to embrace the flavors of fall.

Flavorful Combinations: With tender chicken, aromatic garlic, and a whisper of herbs, each bite is a delightful taste experience that will impress your family and friends.

Versatile Options: Customize your meal by swapping chicken for shrimp or experiment with different pasta shapes to keep it exciting every time.

Crowd-Pleaser: This dish is not only a hit with adults but also a great choice for kids, making it a perfect family favorite. Pair it with a fresh side salad or some warm garlic bread for a complete meal, just like I suggest in my BLT Chicken Salad recipe for a refreshing crunch!

Marry Me Pumpkin Chicken Pasta Ingredients

For the Pasta
Pasta (Spaghetti, Linguine, or Bucatini) – Choose your favorite for the perfect base that holds the creamy sauce beautifully.

For the Chicken
Boneless, Skinless Chicken Breasts – The main protein; thighs can be used for extra richness if preferred.
Salt and Pepper – Essential seasonings to enhance the chicken’s flavor before cooking.
Olive Oil – Ideal for searing the chicken; vegetable oil works as a good substitute.

For the Sauce
Salted Butter – Adds richness to the sauce; unsalted can be used but adjust salt accordingly.
Garlic (Minced) – Infuses the sauce with aromatic depth, enhancing overall flavor.
Chicken Broth – The liquid base; vegetable broth can be a great alternative for a vegetarian version.
Dried Thyme – Provides herbal notes; feel free to use fresh thyme for an extra kick.
Dried Sage – Complements the pumpkin flavor perfectly; rosemary can be swapped in a pinch.
Crushed Red Pepper Flakes – Adds a gentle heat; adjust to taste or omit for a milder version.
Canned Pumpkin Purée – Gives the sauce its creamy texture and delicious fall flavor; butternut squash purée is a great alternative.
Heavy Cream – Ensures creaminess in the sauce; half-and-half can lighten it up if desired.
Grated Parmesan Cheese – Adds a salty, nutty flavor; Pecorino is a tasty substitute for a sharper taste.
Grated Mozzarella Cheese – Melts beautifully into the sauce for extra creaminess; omit for a dairy-free version.

For Garnish
Chopped Fresh Parsley or Microgreens – Brightens the dish and adds a splash of color to your table.

This Marry Me Pumpkin Chicken Pasta is the comfort food you’ve been looking for, ready to warm your heart and your home!

Step‑by‑Step Instructions for Marry Me Pumpkin Chicken Pasta

Step 1: Sear Chicken
Begin by seasoning the boneless, skinless chicken breasts with salt and pepper to enhance their natural flavor. In a large skillet, heat 2 tablespoons of olive oil over medium-high heat. Once hot, add the chicken to the pan and sear for 5-6 minutes on each side until golden brown and cooked through. Remove the chicken from the pan and let it rest on a cutting board for 10 minutes, allowing the juices to settle.

Step 2: Cook Pasta
While the chicken rests, bring a large pot of salted water to a boil. Add your choice of pasta—spaghetti, linguine, or bucatini—and cook according to package instructions until al dente, which usually takes around 8-10 minutes. Once done, drain the pasta and quickly toss it with a drizzle of olive oil to prevent sticking. Set the pasta aside to keep it warm.

Step 3: Sauté Garlic
In the same skillet used for searing the chicken, reduce the heat to medium and add 2 tablespoons of salted butter. Allow the butter to melt completely, then add minced garlic to the pan, sautéing it for about 1 minute or until fragrant. Stir constantly to prevent the garlic from burning, as you want to capture its aromatic depth to elevate your Marry Me Pumpkin Chicken Pasta.

Step 4: Make Sauce
Pour in 1 cup of chicken broth while scraping up any browned bits from the pan with a wooden spoon. Bring the mixture to a gentle simmer, then add 1 teaspoon of dried thyme, 1 teaspoon of dried sage, and a pinch of crushed red pepper flakes. Whisk in 1 cup of canned pumpkin purée and 1 cup of heavy cream, stirring until well-combined. Taste the sauce and adjust the seasoning with salt and pepper as desired.

Step 5: Combine
After the sauce has thickened slightly, return the cooked pasta and sliced seared chicken to the skillet. Gently toss everything together for 2-3 minutes over low heat, ensuring the pasta is fully coated with the creamy pumpkin sauce and the chicken is heated through. This step is crucial for allowing all the flavors in your Marry Me Pumpkin Chicken Pasta to meld perfectly.

Step 6: Serve and Garnish
Once everything is well incorporated, remove the skillet from heat. Serve the Marry Me Pumpkin Chicken Pasta immediately, garnishing each plate with a sprinkle of grated Parmesan cheese and chopped fresh parsley or microgreens for a pop of color. This final touch not only beautifies the dish but also adds a fresh flavor that ties this comforting meal together beautifully.

What to Serve with Creamy Marry Me Pumpkin Chicken Pasta

As you relish the warm and flavorful embrace of creamy pumpkin chicken pasta, consider these delightful side dishes to complete your meal experience.

  • Garlic Bread:
    A warm, buttery side that adds a crunchy texture, perfect for soaking up the delicious sauce.

  • Mixed Green Salad:
    Crisp greens tossed in a light vinaigrette provide a refreshing contrast to the creamy richness of the pasta.

  • Roasted Brussels Sprouts:
    Caramelized and slightly crispy, these add a savory note that complements the sweetness of the pumpkin.

  • Butternut Squash Soup:
    A seasonal favorite that echoes the flavors of the pasta, bringing extra warmth and comfort to the table.

  • Crispy Sage Potatoes:
    Golden and salty, these potatoes offer a delightful crunch and play beautifully with the pasta’s creamy components.

  • Chardonnay:
    A glass of chilled Chardonnay enhances the dish with its fruity notes, balancing the richness of the meal.

Each of these pairings elevates your dining experience, making your evening more special and memorable. Enjoy!

Make Ahead Options

These Marry Me Pumpkin Chicken Pasta preparations are perfect for busy weeknights, allowing you to save time while still delivering a comforting meal! You can prepare the creamy pumpkin sauce and cook the chicken up to 3 days in advance; simply refrigerate each component in airtight containers. When you’re ready to serve, cook your pasta fresh, as it holds up better and offers a perfect texture. To ensure the sauce stays rich and delicious, gently reheat it on the stove, adding a splash of chicken broth if needed. Combining everything just before serving will give you that delightful taste and aroma, making this dish just as satisfying and inviting!

Marry Me Pumpkin Chicken Pasta Variations

Feel free to make this delightful recipe your own by trying out these exciting variations!

  • Dairy-Free: Substitute heavy cream and cheeses with coconut milk and nutritional yeast for a creamy, non-dairy alternative. You’ll still get that comforting texture without any dairy!

  • Veggie Boost: Toss in fresh spinach or roasted red peppers for added nutrition and vibrant color. These vegetables not only enhance the dish but also add layers of flavor that will surprise and delight.

  • Spicy Kick: Add diced jalapeños or a splash of hot sauce to the sauce for a spicy twist that warms the soul. This adjustment works wonders to tantalize your taste buds, ideal for those who love a little heat.

  • Pasta Swap: Use whole wheat or gluten-free pasta for a healthier or diet-friendly option. Not only does this cater to different dietary needs, but it also changes up the overall texture of the dish.

  • Shrimp or Tofu: Swap out chicken for shrimp or tofu to create a delightful seafood or plant-based version. Either option brings a unique flavor profile that transforms the pasta in a whole new way.

  • Herb Infusion: Try using fresh herbs like basil or sage instead of dried thyme and sage for a bolder, fresher flavor. The aromatic quality of fresh herbs can elevate this dish into an elegant feast for special occasions.

  • Nutty Flavor: Add toasted pine nuts or walnuts on top for a crunchy texture and nutty flavor. This step not only enhances the dish’s appeal but also adds healthy fats and the perfect crunchy contrast to the creamy pasta.

Pair your creative dish with a light side, like a fresh spinach salad, or a comforting soup such as Tuscan Chicken Soup, to complement the flavors and expand your feast! Enjoy the culinary adventure!

Storage Tips for Marry Me Pumpkin Chicken Pasta

Room Temperature: Store leftovers at room temperature for no more than 2 hours after cooking to maintain freshness.

Fridge: Keep the Marry Me Pumpkin Chicken Pasta in an airtight container in the fridge for up to 3 days. Reheat gently on the stove or microwave until warmed through.

Freezer: For longer storage, freeze in a sealed, freezer-safe container for up to 3 months. Thaw overnight in the fridge before reheating for the best texture.

Reheating: When reheating, add a splash of chicken broth or water to the pasta to restore creaminess, then heat on low until warmed, stirring occasionally.

Tips for the Best Marry Me Pumpkin Chicken Pasta

  • Quality Ingredients: Use fresh, high-quality chicken and seasonal pumpkin purée for maximum flavor; it truly makes a difference in your Marry Me Pumpkin Chicken Pasta.

  • Proper Searing: Ensure the pan is hot before adding chicken; this creates a lovely crust and enhances flavor. Avoid overcrowding the pan to ensure even cooking.

  • Watch the Pasta: Cook your pasta al dente—this helps it absorb the sauce better without becoming mushy. Remember, it will continue to cook when added to the sauce.

  • Adjust Seasonings: Don’t hesitate to taste your sauce as you cook! Adjust salt, pepper, and spices to suit your palate, elevating your Marry Me Pumpkin Chicken Pasta to perfection.

  • Thicker Sauce Tip: For a creamier, thicker sauce, let it simmer a bit longer. This allows the flavors to develop and the sauce to cling beautifully to the pasta.

  • Garnishing Love: Don’t skip the garnishes! Fresh parsley or microgreens not only add color but also enhance the visual appeal and freshness of the finished dish.

Marry Me Pumpkin Chicken Pasta Recipe FAQs

How do I choose the best pumpkin for this recipe?
For the best results, opt for canned pumpkin purée, which offers consistent flavor and texture. If you prefer fresh pumpkin, look for small, sugar pumpkins or pie pumpkins, which are sweeter and creamier. Avoid larger carving pumpkins, as they tend to be more watery and less flavorful.

What is the best way to store leftover Marry Me Pumpkin Chicken Pasta?
Absolutely! Store your leftovers in an airtight container in the fridge for up to 3 days. If you plan to reheat, it’s best to warm them on the stove over low heat to preserve the creamy texture. You can also add a splash of chicken broth to help restore the sauce’s richness.

Can I freeze Marry Me Pumpkin Chicken Pasta?
Yes, you can! To freeze, portion the pasta into airtight, freezer-safe containers and label them. It stays fresh for up to 3 months. When you’re ready to enjoy it again, thaw overnight in the fridge and reheat gently on the stove, adding a touch of cream or broth to make it creamy again.

What should I do if the sauce is too thick?
Very! If your sauce turns out too thick, simply add a little chicken broth or water—start with a couple of tablespoons—while reheating to achieve your desired consistency. Stir gently to combine, and it will loosen right up!

Are there any dietary considerations for Marry Me Pumpkin Chicken Pasta?
Of course! For a gluten-free version, swap regular pasta for your favorite gluten-free alternative. To make it vegetarian, replace the chicken with sautéed mushrooms or a plant-based protein source, and use vegetable broth instead of chicken broth. Always check labels for any hidden allergens, especially with cheese and creamy ingredients.

What if my chicken isn’t cooking evenly?
That’s an important point! Ensure your skillet is hot enough before adding the chicken to achieve a good sear. If the pieces are overcrowded in the pan, they might steam instead of sear. Cook them in batches if necessary, and always check for doneness using a meat thermometer; it should read 165°F (74°C) to ensure safety.

Marry Me Pumpkin Chicken Pasta

Creamy Marry Me Pumpkin Chicken Pasta to Warm Your Heart

Creamy Marry Me Pumpkin Chicken Pasta captures the essence of fall with its rich sauce and tender chicken, perfect for a cozy dinner.
Prep Time 10 minutes
Cook Time 20 minutes
Total Time 30 minutes
Servings: 4 servings
Course: Pasta
Cuisine: Italian
Calories: 550

Ingredients
  

For the Pasta
  • 8 oz Pasta (Spaghetti, Linguine, or Bucatini)
For the Chicken
  • 2 lbs Boneless, Skinless Chicken Breasts
  • 1 tsp Salt
  • 1 tsp Pepper
  • 2 tbsp Olive Oil
For the Sauce
  • 4 tbsp Salted Butter Unsalted can be used, adjust salt accordingly
  • 2 cloves Garlic (Minced)
  • 1 cup Chicken Broth Vegetable broth can be used for vegetarian version
  • 1 tsp Dried Thyme Use fresh for extra kick
  • 1 tsp Dried Sage Can be swapped with rosemary
  • 1 pinch Crushed Red Pepper Flakes Adjust to taste
  • 1 cup Canned Pumpkin Purée Butternut squash purée can be used
  • 1 cup Heavy Cream Half-and-half can be used for a lighter version
  • 1/2 cup Grated Parmesan Cheese Pecorino is a substitute
  • 1/2 cup Grated Mozzarella Cheese Omit for dairy-free version
For Garnish
  • 1/4 cup Chopped Fresh Parsley or Microgreens

Equipment

  • Large skillet
  • Large pot
  • Wooden spoon

Method
 

Step-by-Step Instructions
  1. Season the chicken breasts with salt and pepper. Heat the olive oil in a large skillet over medium-high heat. Sear the chicken for 5-6 minutes on each side until golden brown. Remove and let rest for 10 minutes.
  2. Bring a large pot of salted water to a boil. Cook the pasta according to package instructions until al dente, usually 8-10 minutes. Drain and toss with olive oil.
  3. In the same skillet, melt the salted butter, then add minced garlic and sauté for about 1 minute until fragrant.
  4. Pour in the chicken broth, scrape up any browned bits. Add thyme, sage, and crushed red pepper. Whisk in pumpkin purée and heavy cream, stir until combined and season to taste.
  5. Return the pasta and sliced chicken to the skillet. Toss for 2-3 minutes over low heat to coat everything in sauce.
  6. Serve immediately, garnished with grated Parmesan and chopped parsley or microgreens.

Nutrition

Serving: 1servingCalories: 550kcalCarbohydrates: 45gProtein: 30gFat: 25gSaturated Fat: 15gPolyunsaturated Fat: 3gMonounsaturated Fat: 10gCholesterol: 100mgSodium: 800mgPotassium: 600mgFiber: 4gSugar: 4gVitamin A: 1500IUVitamin C: 2mgCalcium: 200mgIron: 2mg

Notes

For best flavor, use fresh ingredients and taste as you cook to adjust seasonings.

Tried this recipe?

Let us know how it was!

Creamy Pumpkin Gnocchi with Spinach and Italian Sausage Bliss

As the leaves turn and the air grows crisp, there’s an undeniable urge to cozy up with a comforting meal that warms both the belly and soul. My Creamy Pumpkin Gnocchi with Spinach and Italian Sausage is the perfect antidote to busy weeknights; it bursts with autumn flavors and can be whipped up in just 35 minutes! Picture tender, pillowy gnocchi enveloped in a luscious pumpkin sauce, balanced beautifully by seasoned sausage and vibrant spinach—the effortless way to impress guests or satisfy your own cravings. Plus, this dish is not only quick and easy, but it also serves as a wonderful canvas for any dietary preferences you might have. Are you ready to dive into this culinary embrace?

Why is This Gnocchi Recipe a Must-Try?

Comforting, flavorful indulgence: This Creamy Pumpkin Gnocchi with Spinach and Italian Sausage delivers a hug-in-a-bowl experience that’s hard to resist.
Quick and easy: Whip it up in just 35 minutes, making it the perfect solution for busy weeknights.
Adaptable to your needs: With simple ingredient swaps, you can easily customize this dish to fit any dietary preference, whether you want it plant-based or gluten-free.
Savory, vibrant balance: The combination of the rich pumpkin sauce, hearty sausage, and fresh spinach creates a delightful harmony of flavors and textures.
Wow your guests: Serve this beautifully plated meal at your next gathering and watch as it becomes an instant hit, reminiscent of comforting Italian cuisine. If you love comforting meals, don’t forget to check out my Sausage Tortellini Soup or the enticing Cheesy Spinach Artichoke for more cozy ideas!

Creamy Pumpkin Gnocchi Ingredients

Discover how simple it is to bring the flavors of fall to your table with this delightful dish!

For the Gnocchi

  • 1 lb (450 g) potato gnocchi – The soft and pillowy base, these gnocchi soak up the creamy pumpkin sauce perfectly.

For the Sauce

  • 2 tablespoons olive oil – Ideal for sautéing, this oil adds a fruity flavor to the dish.
  • 8 oz (225 g) Italian sausage – Gives a savory richness; crumbling it ensures even cooking. For a lighter option, consider ground turkey or a plant-based sausage.
  • 1 cup pumpkin puree – The star of the sauce, it provides creaminess and a lovely autumn flavor. You can also use butternut squash puree as a substitute.
  • 1/2 cup heavy cream – This ingredient creates a rich texture; opt for half-and-half or coconut milk for a lighter alternative.
  • 1/4 cup grated Parmesan cheese – Adds a salty depth; switch to nutritional yeast for a dairy-free version.
  • 2 cloves garlic, minced – Introduces aromatic goodness to the sauce.
  • 1/4 teaspoon nutmeg – This spice perfectly complements the pumpkin, enhancing its flavor.
  • Salt and pepper to taste – Essential for balancing the flavors.

For the Fresh Touch

  • 2 cups fresh spinach leaves – Lends a vibrant color and mild taste to balance the richness of the sauce.
  • Fresh parsley or basil (optional) – A sprinkle of these herbs enhances freshness and visual appeal.

This Creamy Pumpkin Gnocchi with Spinach and Italian Sausage is sure to make your tastebuds dance while warming your heart!

Step‑by‑Step Instructions for Creamy Pumpkin Gnocchi with Spinach and Italian Sausage

Step 1: Cook the Gnocchi
Begin by boiling a large pot of salted water over high heat. Once the water reaches a rolling boil, add the potato gnocchi and cook according to the package instructions, usually about 2-3 minutes until they float to the surface. Once done, carefully drain the gnocchi and set them aside, ensuring they’re not soggy for the Creamy Pumpkin Gnocchi with Spinach and Italian Sausage.

Step 2: Sauté the Sausage
In a large skillet, heat 2 tablespoons of olive oil over medium-high heat. Add the crumbled Italian sausage to the skillet, cooking it for about 5-7 minutes, or until it’s well browned and cooked through. Stir occasionally to break it up into smaller pieces. Once cooked, transfer the sausage to a bowl and set it aside for later.

Step 3: Aromatic Garlic Sauté
In the same skillet used for the sausage, add the minced garlic. Sauté over medium heat for about 1 minute until fragrant, taking care not to let it burn. This aromatic base will elevate the flavor of your Creamy Pumpkin Gnocchi with Spinach and Italian Sausage, setting a delicious tone for the sauce.

Step 4: Prepare the Pumpkin Sauce
Lower the heat to medium-low and add 1 cup of pumpkin puree, 1/2 cup of heavy cream, 1/4 cup of grated Parmesan cheese, 1/4 teaspoon of nutmeg, and season with salt and pepper to taste. Stir continuously for about 3-4 minutes until the sauce is smooth and warmed through. This rich, creamy sauce is the heart of your dish, enveloping the gnocchi perfectly.

Step 5: Combine Gnocchi and Spinach
Add the cooked gnocchi and 2 cups of fresh spinach leaves to the skillet with the pumpkin sauce. Gently toss everything together for 2-3 minutes until the spinach wilts and everything is heated through, ensuring that the gnocchi are well coated in the creamy sauce for the ultimate flavor experience.

Step 6: Mix in the Sausage
Return the sautéed Italian sausage to the skillet, folding it into the gnocchi and sauce. Cook for an additional 1-2 minutes until everything is thoroughly combined and heated through. The union of flavors in this Creamy Pumpkin Gnocchi with Spinach and Italian Sausage is sure to create a comforting and satisfying dish.

Step 7: Serve and Garnish
Once heated through, spoon the gnocchi into serving bowls. Optionally, garnish with fresh parsley or basil for an added touch of color and freshness. Serve immediately and enjoy the warmth and deliciousness of your homemade Creamy Pumpkin Gnocchi with Spinach and Italian Sausage!

Helpful Tricks for Creamy Pumpkin Gnocchi

  • Drain Well: Make sure to drain the gnocchi promptly after cooking to avoid them becoming soggy in the Creamy Pumpkin Gnocchi with Spinach and Italian Sausage.
  • Cook Thoroughly: Brown the sausage well to enhance its flavor; undercooked sausage can lead to a bland dish.
  • Stir Continuously: When adding the sauce ingredients, keep stirring to achieve a smooth and creamy texture without lumps.
  • Taste as You Go: Adjust seasoning with salt and pepper as you cook, ensuring every bite of your Creamy Pumpkin Gnocchi is perfectly balanced.
  • Add Spinach Last: Toss in the spinach towards the end of cooking to retain its vibrant color and ensure it doesn’t overcook.

Make Ahead Options

These Creamy Pumpkin Gnocchi with Spinach and Italian Sausage are perfect for meal prep! You can prepare the pumpkin sauce (with the heavy cream, parmesan, and spices) up to 24 hours in advance; simply refrigerate it in an airtight container to maintain its creamy texture. Additionally, you can cook the gnocchi and spinach ahead of time—store them separately to prevent sogginess. When you’re ready to serve, gently reheat the sauce on the stove over low heat, add the cooked gnocchi and spinach, and cook until heated through for a comforting, delicious meal that takes minimal effort on busy weeknights.

What to Serve with Creamy Pumpkin Gnocchi with Spinach and Italian Sausage

Elevate your dining experience by pairing this creamy delight with sides that complement its rich flavors beautifully.

  • Garlic Bread: The warm, crusty bread is perfect for soaking up every drop of the creamy pumpkin sauce, enhancing your meal with its buttery aroma.
  • Mixed Green Salad: A refreshing salad with a zesty vinaigrette balances the richness of the gnocchi, offering a crunchy contrast that revitalizes each bite.
  • Roasted Brussels Sprouts: These caramelized delights add a nutty flavor that harmonizes with the pumpkin, creating an earthy symphony that’s simply unforgettable.
  • Crispy Kale Chips: These add a satisfying crunch while their savory notes complement the creamy richness of the gnocchi, presenting a delightful texture contrast.
  • Wine Pairing: Serve with a glass of Chardonnay; its buttery notes elevate the autumnal flavors and provide a luxurious feel to the meal.
  • Pumpkin Spice Dessert: A slice of pumpkin pie or pumpkin muffins encourages the season’s spirit and sweetens your dining experience, making it a perfect end to the evening.

How to Store and Freeze Creamy Pumpkin Gnocchi

Fridge: Store leftovers in an airtight container for up to 3 days, keeping your Creamy Pumpkin Gnocchi fresh and delicious for quick meals.

Freezer: If you want to save a portion, freeze the gnocchi and sauce separately in freezer-safe containers for up to 2 months.

Reheating: When ready to enjoy, reheat on the stove over low heat, adding a splash of cream to restore the sauce’s creamy consistency.

Avoid sogginess: Remember to drain gnocchi thoroughly before storing to maintain their delightful texture!

Creamy Pumpkin Gnocchi with Spinach Variations

Feel free to let your culinary creativity shine by customizing this comforting dish to suit your tastes and dietary needs!

  • Vegetarian: Omit the sausage and add bell peppers or mushrooms for a satisfying veggie twist. A medley of colorful vegetables not only enhances flavor, but also brings an inviting vibrancy to your dish!
  • Spicy: Kick up the heat with red pepper flakes or swap in a spicy Italian sausage. This fiery enhancement not only adds warmth but also gives your meal an adventurous twist.
  • Gluten-Free: Substitute the potato gnocchi with your favorite gluten-free pasta. It’s a great way to enjoy this dish without sacrificing flavor.
  • Dairy-Free: Use coconut milk instead of heavy cream and nutritional yeast in place of Parmesan. This keeps the rich creaminess while ensuring it’s free of dairy, perfect for those with dietary restrictions.
  • Herb-Infused: Add fresh herbs like thyme or sage to the sauce for a delightful aromatic flavor burst. These herbs pair beautifully with pumpkin and elevate the overall taste profile, making each bite extra special.
  • Pumpkin Spice: Enhance the autumn feel even more by adding a pinch of cinnamon along with the nutmeg. This additional spice brings a warm depth, embracing the season fully!
  • Pasta Alternative: Try tortellini instead of gnocchi for a fun shape change. Tender cheese-filled tortellini will soak up that delectable sauce, creating a different yet equally satisfying experience.
  • Creamy Variations: Replace half of the heavy cream with pureed cauliflower for a lighter sauce that remains velvety. This swap adds nutrition without compromising on that delightful creaminess you crave.

Feel inspired to explore these variations! And if you’re looking for more cozy recipe ideas, don’t miss my delicious Potato Bacon Soup or the comforting Heartwarming Comfort Sausage. Each offers a unique twist, perfect for cozy nights!

Creamy Pumpkin Gnocchi with Spinach and Italian Sausage Recipe FAQs

What type of pumpkin puree should I use?
Absolutely! Opt for canned pumpkin puree for convenience, as it’s easily found in stores and offers a consistent flavor. If you’re feeling adventurous, you can roast fresh pumpkin or butternut squash, scoop out the flesh, and blend it until smooth. This fresh option can provide a different texture and taste, making your Creamy Pumpkin Gnocchi even more special!

How can I properly store leftover Creamy Pumpkin Gnocchi?
For sure! Store your leftovers in an airtight container in the fridge for up to 3 days. Just remember to reheat it gently on the stove over low heat, adding a splash of cream to bring back the luscious texture of the sauce. This way, you’ll have a second helping that feels just as comforting as the first!

Can I freeze Creamy Pumpkin Gnocchi?
Yes, indeed! To freeze, place the cooked gnocchi and sauce separately in freezer-safe containers. They can last for up to 2 months in the freezer. To reheat, thaw in the fridge overnight, then warm on the stovetop, mixing in a splash of cream to revive the sauce’s creaminess. Just remember to ensure the gnocchi are well-drained before freezing for the best texture!

What should I do if my sauce turns out too thick?
If your sauce seems too thick, don’t worry! Simply add a splash of vegetable broth or water to thin it out while stirring continuously until you reach your desired consistency. You could even add a touch of extra cream for added richness. The creamy sauce should coat the gnocchi perfectly, enhancing your delightful dining experience.

Are there any dietary alternatives for this recipe?
Very much so! To make this Creamy Pumpkin Gnocchi plant-based, substitute the Italian sausage with crumbled tofu or cooked lentils and replace heavy cream with coconut milk or a nut-based cream. Additionally, if you’re aiming to make it gluten-free, look for gluten-free gnocchi options on the market. Feel free to customize it to fit your dietary needs and still enjoy a delicious, comforting meal!

Creamy Pumpkin Gnocchi with Spinach and Italian Sausage

Creamy Pumpkin Gnocchi with Spinach and Italian Sausage Bliss

This creamy pumpkin gnocchi with spinach and Italian sausage is a comforting dish perfect for busy weeknights.
Prep Time 10 minutes
Cook Time 25 minutes
Total Time 35 minutes
Servings: 4 servings
Course: Pasta
Cuisine: Italian
Calories: 520

Ingredients
  

For the Gnocchi
  • 1 lb potato gnocchi The soft and pillowy base.
For the Sauce
  • 2 tablespoons olive oil Ideal for sautéing.
  • 8 oz Italian sausage Gives a savory richness.
  • 1 cup pumpkin puree The star of the sauce.
  • 1/2 cup heavy cream Creates a rich texture.
  • 1/4 cup grated Parmesan cheese Adds salty depth.
  • 2 cloves garlic, minced Introduces aromatic goodness.
  • 1/4 teaspoon nutmeg Enhances pumpkin flavor.
  • Salt and pepper to taste Essential for balancing.
For the Fresh Touch
  • 2 cups fresh spinach leaves Lends vibrant color.
  • Fresh parsley or basil (optional) Enhances freshness.

Equipment

  • Large pot
  • Skillet
  • Colander
  • Wooden spoon

Method
 

Directions
  1. Begin by boiling a large pot of salted water over high heat. Once boiling, add the potato gnocchi and cook for 2-3 minutes until they float. Drain and set aside.
  2. In a large skillet, heat olive oil over medium-high heat. Add crumbled Italian sausage and cook for 5-7 minutes until browned. Transfer to a bowl.
  3. In the same skillet, add minced garlic and sauté over medium heat for about 1 minute until fragrant.
  4. Lower the heat to medium-low and add pumpkin puree, heavy cream, Parmesan cheese, and nutmeg. Stir for 3-4 minutes until smooth.
  5. Add cooked gnocchi and fresh spinach to the skillet, gently toss for 2-3 minutes until spinach wilts.
  6. Return the sautéed Italian sausage to the skillet, mixing until heated through for about 1-2 minutes.
  7. Spoon the gnocchi into serving bowls and optionally garnish with fresh parsley or basil. Serve immediately.

Nutrition

Serving: 1servingCalories: 520kcalCarbohydrates: 60gProtein: 20gFat: 25gSaturated Fat: 10gPolyunsaturated Fat: 2gMonounsaturated Fat: 10gCholesterol: 60mgSodium: 800mgPotassium: 600mgFiber: 4gSugar: 6gVitamin A: 5000IUVitamin C: 20mgCalcium: 200mgIron: 3mg

Notes

Make sure to drain the gnocchi promptly after cooking to avoid them becoming soggy.

Tried this recipe?

Let us know how it was!

Delicious No Bake Pumpkin Patch Cookies for Easy Fall Fun

As the leaves transform into vibrant shades of orange and gold, my kitchen comes alive with the sweet promise of fall. This season, I’m all about making memories, and what better way to do that than with these lovely No Bake Pumpkin Patch Cookies? Perfect for little hands to get involved in decorating, these no-bake cookies are not only easy to whip up, but they’re also a delightful addition to your Halloween festivities or cozy autumn gatherings. With a creamy chocolate coating and adorable pumpkin candy accents, they’re bound to be a hit at any table. Plus, the quick prep means you’ll have more time to savor the fun! Curious about how to make these whimsical treats? Let’s dive in!

Why are No Bake Pumpkin Patch Cookies a must-try?

Whimsical Creativity: These cookies invite creativity as kids can join in decorating their own pumpkin patches.
Time-Saving Delight: With no baking required, you can whip these up in under 30 minutes—perfect for busy fall days!
Fun Flavor Experience: The creamy chocolate coating paired with chewy pumpkin candies creates an irresistible contrast.
Versatile Treat: Perfect for Halloween parties, family gatherings, or simply as a sweet surprise in lunchboxes. Check out these festive Pumpkin Patch Cookies for more autumn fun!
Crowd-Pleasing Appeal: Their adorable look and delicious taste ensure they’ll be a favorite with friends and family alike!

No Bake Pumpkin Patch Cookies Ingredients

• Gather everything you need to create these delightful treats!

For the Cookie Base

  • Vanilla and Chocolate Sandwich Creme Cookies – This serves as the sweet and crunchy foundation of your cookies; feel free to mix different flavors for variety.

For the Chocolate Coating

  • White Melting Chocolate – It’s the creamy glaze that enhances sweetness; orange candy melts can also be used for a playful hue.
  • Orange Food Coloring – A fun addition to give your white chocolate a festive pumpkin vibe; optional if you prefer vibrant candy melts.

For the Topping

  • Mellowcreme Pumpkin Candies – These are the fun-sized embellishments that add charm and a chewy texture to your creations.

Dive into making your No Bake Pumpkin Patch Cookies, and watch the smiles appear at your fall gatherings!

Step‑by‑Step Instructions for No Bake Pumpkin Patch Cookies

Step 1: Prepare Baking Sheet
To start, line a baking sheet or pan with parchment paper, ensuring it’s smooth and wrinkle-free. This will prevent your delightful No Bake Pumpkin Patch Cookies from sticking as they cool. Set it aside where you can easily access it once you’re ready to dip those cookies in chocolate.

Step 2: Make Cookie Crumbs
Next, take 2 to 3 sandwich cookies and carefully remove the cream filling. Place the cookie halves into a ziplock bag and crush them into fine crumbs using a rolling pin or your hands—this should take about 2-3 minutes. You want a fine texture that will resemble dirt when you sprinkle it over your cookies!

Step 3: Melt Chocolate
In a microwave-safe bowl, add white melting chocolate and heat it in 1-minute intervals, stirring well between each session, until the chocolate is smooth and fluid—this should take around 2-3 minutes total. If you’d like a festive touch, mix in a few drops of orange food coloring to tint the chocolate, giving your cookies that iconic pumpkin hue.

Step 4: Dip Cookies
Once the chocolate is ready, take each sandwich cookie and dip it into the melted chocolate, ensuring it’s fully coated. Use a fork to lift the cookie out, gently shaking it to remove any excess chocolate, creating a smooth and even coating that beautifully covers your No Bake Pumpkin Patch Cookies.

Step 5: Decorate
While the chocolate coating is still wet, generously sprinkle the cookie crumbs over the top, mimicking the look of soil. Immediately place a Mellowcreme Pumpkin Candy on top for an adorable finishing touch, ensuring each cookie resembles a mini pumpkin patch. This step adds character and fun to your delightful treats!

Step 6: Chill
Once decorated, carefully transfer the cookies to the refrigerator to set the chocolate. Let them chill for about 10-15 minutes until the chocolate is firm to the touch. This crucial step allows your No Bake Pumpkin Patch Cookies to hold their shape and be ready for serving at your fall festivities!

Storage Tips for No Bake Pumpkin Patch Cookies

Room Temperature: Store cookies in an airtight container at room temperature for up to 3-4 days to keep them fresh and delicious.

Refrigerator: If you prefer a firmer texture, you can refrigerate the cookies for up to a week. Just ensure they are covered to prevent drying out.

Freezer: For longer storage, freeze the cookies in a single layer in a freezer-safe container for up to 3 months. Thaw them at room temperature before serving.

Reheating: While these No Bake Pumpkin Patch Cookies are best enjoyed chilled or at room temperature, if needed, allow them to sit out for 15-20 minutes before serving.

Expert Tips for No Bake Pumpkin Patch Cookies

  • Chocolate Melting Method: Use short intervals when melting chocolate to prevent scorching; it’s better to stop before completely melted and let residual heat finish the job.

  • Crunchy Base Suggestion: If using sandwich cookies with cream, make sure to crush them finely; larger pieces won’t stick to the chocolate coating as well.

  • Creative Decoration: Mix up your toppings! Replace the Mellowcreme Pumpkin Candies with candy corn or Halloween-themed sprinkles for fun variations.

  • Storing Cookies: Ensure the cookies are in an airtight container to maintain freshness and prevent them from becoming soggy, keeping your No Bake Pumpkin Patch Cookies delightful for days!

  • Allergy Awareness: If you’re accommodating dietary preferences, consider using gluten-free cookies or dairy-free chocolate options.

No Bake Pumpkin Patch Cookies Variations

Feel free to get creative and customize these delicious cookies to suit your taste and dietary needs!

  • Gluten-Free: Use gluten-free sandwich cookies to create a similar taste and texture without the gluten. Everyone can enjoy this treat!

  • Dairy-Free Delight: Substitute the white chocolate with dairy-free chocolate for a vegan-friendly option that still satisfies that sweet tooth.

  • Flavored Chocolate: Instead of plain white chocolate, try using milk or dark chocolate for a richer flavor that will tantalize your taste buds.

  • Festive Sprinkles: Swap out the Mellowcreme pumpkin candies for colored sprinkles or candy corn to give your cookies a fun and vibrant twist.

  • Nutty Crunch: Add crushed nuts, like peanuts or pecans, to the cookie crumbs for an added crunch that enhances the texture.

  • Pumpkin Spice Kick: Mix a little pumpkin spice into the melted chocolate for a warm, seasonal flavor that complements the fall theme beautifully.

  • Miniature Size: Make smaller versions of the cookies for bite-sized treats that are perfect for parties or lunchboxes.

These variations not only ensure everyone can indulge, but they also open up a world of flavors. Enjoy contemplating your next creation, and don’t forget to serve these next to some warm, hearty Joumou Haitian Pumpkin Soup for a perfectly cozy fall feast!

Make Ahead Options

These No Bake Pumpkin Patch Cookies are a fantastic choice for meal prep, allowing you to enjoy more time with family during the busy fall season! You can prepare the cookie base up to 24 hours in advance by dipping them in the melted chocolate, then decorating them right before serving. Simply store the dipped cookies in an airtight container in the refrigerator to maintain their freshness. When you’re ready to impress your guests, sprinkle the crushed cookie crumbs and place the cheerful pumpkin candies on top just before presenting. This not only saves you time but ensures your treats are just as delightful and visually appealing!

What to Serve with Cute and Easy No Bake Pumpkin Patch Cookies

Nothing complements the joyful spirit of autumn quite like a spread that enhances these delightful, no-bake treats!

  • Creamy Pumpkin Soup: The smooth, velvety texture of pumpkin soup elevates the dessert experience while keeping the fall theme alive.
  • Crispy Apple Chips: Sweet and crunchy, these apple chips provide a refreshing contrast that pairs brilliantly with the rich chocolate cookies. A perfect nibble while gathering around the table!
  • Spiced Hot Cider: A warm cup of spiced cider infused with cinnamon and cloves creates a cozy atmosphere, making it an ideal drink alongside your cookies.
  • Chocolate Dipped Pretzels: The salty crunch of pretzels adds a different texture and a flicker of flavor contrast, tantalizing the palate between bites of sweet cookies.
  • Whipped Cream: Light and fluffy, whipped cream brings a touch of elegance. Serve it on the side for dipping or dolloping on each cookie!
  • Festive Fruit Platter: A colorful array of seasonal fruits such as pears and pomegranates not only adds sweetness but also introduces a burst of freshness to balance the richer flavors.
  • Vanilla Ice Cream: Creamy and cold, a scoop of vanilla ice cream serves as a delightful counterpart to the warm flavors of fall cookies. Let the melting mixture blend on your palate!
  • Mini Pumpkin Muffins: These little muffins echo the cookie’s flavors, making them a fantastic addition to your fall treat table. Plus, they are easy to grab and enjoy!

No Bake Pumpkin Patch Cookies Recipe FAQs

How do I choose the right sandwich cookies for the base?
Absolutely! For the No Bake Pumpkin Patch Cookies, I recommend using vanilla and chocolate sandwich cookies to create a delightful flavor contrast. Look for cookies that are crisp but not overly crumbly, as they should hold their shape when dipped in chocolate. If you’re feeling adventurous, try different flavors or brands to find your family’s favorite!

How should I store my No Bake Pumpkin Patch Cookies?
You can store these delightful No Bake Pumpkin Patch Cookies in an airtight container at room temperature for about 3-4 days. If you want to keep them fresh longer, refrigerating them will also work—just keep them sealed to avoid them drying out!

Can I freeze the No Bake Pumpkin Patch Cookies?
Absolutely! To freeze your No Bake Pumpkin Patch Cookies, arrange them in a single layer on a baking sheet and freeze until solid. Once frozen, transfer them to a freezer-safe container or ziplock bag, ensuring they are well-sealed. They’ll keep well for up to 3 months! When you’re ready to enjoy them, simply let them thaw at room temperature for about 20-30 minutes.

What should I do if my chocolate coating isn’t smooth?
If your chocolate coating isn’t turning out smooth, it might be due to overheating. Melt the chocolate in 1-minute intervals and stir between each session until it’s fully melted and just smooth. If it seizes, add a teaspoon of vegetable oil or shortening and stir until smooth. Fresh chocolate often works best, so keep an eye on the melting process!

Are these cookies safe for pets or people with allergies?
While these cookies are a fun treat for people, they include ingredients like chocolate and candies that aren’t safe for pets. If you have allergies, be sure to review the ingredients carefully or opt for gluten-free sandwich cookies and dairy-free chocolate coatings as alternatives. It’s always wise to accommodate dietary needs to keep everyone in the family happy!

No Bake Pumpkin Patch Cookies

Delicious No Bake Pumpkin Patch Cookies for Easy Fall Fun

Delight in these No Bake Pumpkin Patch Cookies, perfect for easy fall fun and Halloween festivities.
Prep Time 30 minutes
Chill Time 15 minutes
Total Time 45 minutes
Servings: 12 cookies
Course: Dessert
Cuisine: American
Calories: 150

Ingredients
  

For the Cookie Base
  • 16 cookies Vanilla and Chocolate Sandwich Creme Cookies Feel free to mix different flavors for variety.
For the Chocolate Coating
  • 1 cup White Melting Chocolate Can use orange candy melts for a playful hue.
  • 1 teaspoon Orange Food Coloring Optional for a festive touch.
For the Topping
  • 1 cup Mellowcreme Pumpkin Candies For decoration and chewy texture.

Equipment

  • microwave-safe bowl
  • Rolling Pin
  • Ziplock Bag
  • Baking Sheet
  • Parchment Paper
  • Fork

Method
 

Preparation Steps
  1. Line a baking sheet with parchment paper and set aside.
  2. Crush 2 to 3 sandwich cookies in a ziplock bag into fine crumbs.
  3. Melt white chocolate in a microwave-safe bowl in 1-minute intervals until smooth.
  4. Dip each sandwich cookie into the melted chocolate and shake off excess.
  5. Sprinkle cookie crumbs over the chocolate-coated cookies and place a Mellowcreme Pumpkin Candy on top.
  6. Transfer cookies to the refrigerator to chill for 10-15 minutes until chocolate is firm.

Nutrition

Serving: 1cookieCalories: 150kcalCarbohydrates: 20gProtein: 1gFat: 7gSaturated Fat: 3gMonounsaturated Fat: 3gSodium: 50mgPotassium: 30mgSugar: 10gIron: 2mg

Notes

Store cookies in an airtight container at room temperature for 3-4 days or refrigerate for up to a week.

Tried this recipe?

Let us know how it was!

Delicious Easy Fall Snack Mix: Your Go-To Sweet & Salty Treat

As the leaves begin to fall and the air turns crisp, I find myself drawn to the kitchen, eager to whip up something that encapsulates the spirit of autumn. This Easy Fall Snack Mix is my go-to creation when I need a quick treat that delivers a perfectly balanced sweet and salty flavor. With a delightful medley of Chex, pretzels, and treats like candy corn and M&Ms, this no-bake recipe is not only a breeze to prepare but also an instant crowd-pleaser at every gathering—from Halloween parties to cozy movie nights at home. You’re going to love how easy it is to customize this mix to suit your taste! What delightful twists will you add to make it your own?

What Makes This Snack Mix Special?

Customization Galore: This Easy Fall Snack Mix is easily tailored to fit any palate, whether you want to swap in your favorite candies or nuts. Quick and Effortless: With no baking required, you can have this delicious treat ready in minutes—perfect for unexpected guests! Sweet and Salty Delight: Each handful perfectly balances flavors, making it irresistible for all ages. Party-Ready: Ideal for game days or Halloween festivities, this mix is sure to impress. Plus, if you enjoy making party snacks, check out our Taco Sticks Snack for more great ideas!

Easy Fall Snack Mix Ingredients

For the Base
Crispix or Chocolate Chex – Adds a crunchy base; substitute with traditional Chex cereal for a different flavor profile.
Pretzels – Provide a salty crunch; consider using white chocolate-covered or plain for variety.

For the Sweetness
Candy Corn – Offers sweetness and seasonal color; can be replaced with any favorite candy for personal touch.
Candy Pumpkins – Enhance the fall theme; regular candy gummies could also be used as an alternative.
Peanut M&M’s – Contribute flavor and texture; substitute with plain or almond M&M’s as preferred.
Regular M&M’s – Adds color and sweetness; feel free to use any brand of chocolate candy you like.
Rolos – Introduce a chewy caramel aspect; could be swapped for chocolate-covered caramels.

For the Crunch
Caramel Corn – Provides a sweet crunch; air-popped popcorn with caramel could be an alternative if needed.
Peanuts – Add protein and extra crunch; substitute with any nuts or seeds to suit different taste preferences.

Step‑by‑Step Instructions for Easy Fall Snack Mix

Step 1: Gather Ingredients
Begin by collecting all your ingredients for the Easy Fall Snack Mix. You’ll need Crispix or Chocolate Chex, pretzels, candy corn, candy pumpkins, peanut M&M’s, regular M&M’s, Rolos, caramel corn, and peanuts. Once gathered, set a large mixing bowl on your countertop to prepare for mixing these delicious components.

Step 2: Combine Dry Ingredients
In your large bowl, add the Crispix or Chocolate Chex and pretzels as the crunchy base. Gently toss these ingredients together to combine their delightful textures. Take a moment to appreciate the colorful mix taking shape, setting a vibrant tone for your Easy Fall Snack Mix.

Step 3: Add Sweet Components
Next, incorporate the candy corn, candy pumpkins, peanut M&M’s, and regular M&M’s into the bowl. With a wooden spoon or spatula, carefully fold the mixture to evenly distribute the sweet treats throughout the crunchy base. This step brings a joyful burst of color and flavor to your fall snack mix.

Step 4: Introduce Chewy Delights
Now, it’s time to add the Rolos to the bowl, enhancing your Easy Fall Snack Mix with their chewy caramel goodness. Gently fold them into the mix, ensuring they’re well-distributed but without breaking them apart. The aroma of caramel blending with the other ingredients will invigorate your senses.

Step 5: Finish with Crunchy Elements
Sprinkle in the caramel corn and peanuts, adding a perfect balance of sweetness and hearty crunch to the mix. Give everything one last gentle toss to combine all elements evenly, creating a visually appealing and deliciously fragrant treat. Pay attention to the colors blending harmoniously.

Step 6: Serve and Enjoy
Transfer your Easy Fall Snack Mix to a large serving bowl or individual cups for a more personalized touch. If desired, place it on a festive table for your gathering, inviting friends and family to indulge in this sweet and salty autumn treat. Enjoy the smiles it brings as everyone snags a handful!

Expert Tips for Easy Fall Snack Mix

Storage Secrets: Use an airtight container to keep your Easy Fall Snack Mix fresh and crunchy for weeks.

Chill the Chocolate: When using chocolate elements, keep them in a cool area to prevent melting; nobody likes a gooey mess!

Custom Blends: Feel free to substitute ingredients based on personal preferences or dietary needs. This flexibility makes your snack mix unique!

Mind the Freshness: If making ahead, avoid adding perishable items like fresh nuts until just before serving to maintain freshness.

Mixing Textures: Aim for a balanced combination of crunchy, chewy, and sweet elements to satisfy all your cravings!

How to Store and Freeze Easy Fall Snack Mix

Room Temperature: Store your Easy Fall Snack Mix in an airtight container at room temperature for up to one month without losing its delightful crunch.

Fridge: While refrigeration isn’t necessary, if you live in a warm climate, you can keep it in the fridge to maintain freshness for about two weeks.

Freezer: For longer storage, transfer the mix to a freezer-safe container, where it can last for up to three months. Just let it thaw at room temperature before enjoying!

Reheating: This snack mix is best enjoyed fresh and at room temperature; avoid reheating, as it may alter the texture and flavors.

Easy Fall Snack Mix Variations

Feel free to get creative and make this Easy Fall Snack Mix truly yours with these delightful adjustments!

  • Sweet & Chewy: Add mini marshmallows or pumpkin-flavored marshmallows for a seasonal twist. They’ll bring an extra sugary kick and a soft texture!

  • Nutty Delight: Swap in almonds or pecans for more depth in flavor. Each nut type offers a unique crunch that can elevate your mix even further.

  • Fruity Touch: Use gummy candies instead of chocolate for a brighter, fruitier taste. Experimenting with different flavors can turn this mix into a fruity explosion!

  • Spicy Kick: Add a few spicy pumpkin seeds for a delightful heat that balances the sweetness. Spice lovers will appreciate this unexpected twist!

  • Cereal Switch-Up: Try using fruity cereals like Fruity Pebbles in place of Crispix for a pop of color and a fun taste change. It makes for the perfect colorful party mix!

  • Trail Mix Style: Incorporate dried fruits like cranberries or raisins for a chewy, chewy texture and additional flavors. They’ll enhance the wholesome aspect of your snack.

  • Chocolate Lovers: Replace Rolos with chocolate-covered pretzels to amp up the chocolate flavor. Each handful will provide a delightful crunch and a satisfying sweetness.

  • Savory Bits: Mix in some cheese crackers or popcorn for a savory element that beautifully contrasts with the sweet components. It’s a delightful surprise in every bite!

If you’re feeling adventurous, be sure to check out our Taco Sticks Snack for another fun recipe to try!

Make Ahead Options

These Easy Fall Snack Mix options are perfect for busy home cooks looking to save time! You can prep the dry ingredients—including Crispix, pretzels, candy corn, and M&Ms—up to 3 days in advance. Simply mix them in a large bowl and store in an airtight container at room temperature to maintain their crunch. When ready to serve, incorporate the softer elements like Rolos and caramel corn, which are best added just before sharing to keep them fresh. This way, you’ll ensure every bite remains just as delicious, ready to delight your guests with minimal effort!

What to Serve with Easy Fall Snack Mix

As the autumn chill sets in, complement your delicious snack mix with delightful pairings that will warm the heart and satisfy the senses.

  • Warm Apple Cider: The cozy spices in warm apple cider enhance the autumn flavors, making it a comforting beverage alongside your mix.

  • Pumpkin Bread: A slice of soft pumpkin bread brings in those quintessential fall spices, creating a beautifully comforting combo.

  • Charcuterie Board: Pairing with a selection of cheeses and cured meats provides a savory contrast, balancing the sweet and salty notes of the snack mix.

  • Miniature Pies: Bite-sized caramel apple or pecan pies evoke the spirit of fall in each delicious morsel, adding festive elegance to your gathering.

  • Roasted Squash Salad: A fresh salad with roasted squash, nuts, and cranberries brings a hearty texture and nuttiness, enhancing the overall snacking experience.

  • Toasted Marshmallow Hot Chocolate: This indulgent drink’s sweetness and warmth contrast perfectly with the crunchy, sweet elements of the mix, making for a cozy, sweet afternoon treat.

  • Homemade Trail Mix: Craft another unique blend using nuts, seeds, and dried fruits for a balanced and nutritious alternative, adding a new texture to enjoy.

  • S’mores Dip: The gooey, chocolatey goodness of s’mores dip creates a fun, interactive dessert experience that everyone will love, bringing out the inner kid!

Easy Fall Snack Mix Recipe FAQs

What is the best way to choose ripe ingredients for my snack mix?
Absolutely! When selecting ingredients like candy pumpkins or candy corn, look for vibrant colors without any dark spots or signs of damage. Fresh pretzels should be crispy, and if using nuts, choose ones that are crunchy and free from any soft or rancid spots. A little attention goes a long way in ensuring a delicious mix!

How should I store my Easy Fall Snack Mix, and how long will it last?
For optimal freshness, store your Easy Fall Snack Mix in an airtight container at room temperature for up to one month. If you live in a warm climate, refrigeration isn’t necessary, but keeping it in the fridge can maintain its freshness for about two weeks. Just ensure it’s sealed properly to avoid softening.

Can I freeze my Easy Fall Snack Mix?
Very! For longer storage, you can freeze your Easy Fall Snack Mix. Transfer it to a freezer-safe container or resealable bag, squeezing out as much air as possible to prevent freezer burn. It can last up to three months in the freezer. When you’re ready to enjoy, simply let it thaw at room temperature before serving.

What should I do if my snack mix turns soggy?
Oh no! If your Easy Fall Snack Mix has turned soggy, it might be due to moisture from certain ingredients. To revive it, spread the mix on a baking sheet in a single layer and bake it at 350°F (175°C) for about 10 minutes. Keep a close eye on it to avoid browning! Once cooled, store it in an airtight container for crunch.

Are there any dietary considerations I should keep in mind?
Absolutely! If you’re serving this mix to guests, be mindful of common allergens. Nuts can be a concern, so consider using seeds like sunflower seeds as an alternative. Also, ensure that any chocolate or candy you’re using meets any dietary restrictions, like being nut-free or gluten-free, to cater to everyone’s needs.

Can I make this Easy Fall Snack Mix ahead of time?
Very much so! You can prepare your Easy Fall Snack Mix up to a week in advance. Just remember to store it properly in an airtight container to maintain its crunch. To keep it extra fresh, hold off on adding any perishable ingredients until just before serving, ensuring all your guests enjoy it at its best!

Easy Fall Snack Mix

Delicious Easy Fall Snack Mix: Your Go-To Sweet & Salty Treat

Easy Fall Snack Mix is a perfectly balanced sweet and salty treat, ideal for gatherings and movie nights.
Prep Time 10 minutes
Total Time 10 minutes
Servings: 8 cups
Course: Appetizers
Calories: 250

Ingredients
  

For the Base
  • 2 cups Crispix or Chocolate Chex Substitute with traditional Chex cereal if desired.
  • 2 cups Pretzels Consider using white chocolate-covered or plain.
For the Sweetness
  • 1 cup Candy Corn Can be replaced with any favorite candy.
  • 1 cup Candy Pumpkins Regular candy gummies could also be used.
  • 1 cup Peanut M&M's Substitute with plain or almond M&M's.
  • 1 cup Regular M&M's Feel free to use any brand of chocolate candy.
  • 1 cup Rolos Could be swapped for chocolate-covered caramels.
For the Crunch
  • 2 cups Caramel Corn Air-popped popcorn with caramel could be an alternative.
  • 1 cup Peanuts Substitute with any nuts or seeds.

Equipment

  • large mixing bowl

Method
 

Step-by-Step Instructions for Easy Fall Snack Mix
  1. Gather all your ingredients for the Easy Fall Snack Mix and set a large mixing bowl on your countertop.
  2. In your large bowl, add the Crispix or Chocolate Chex and pretzels as the crunchy base. Gently toss these ingredients together.
  3. Next, incorporate the candy corn, candy pumpkins, peanut M&M's, and regular M&M's into the bowl. Carefully fold the mixture to evenly distribute.
  4. Add the Rolos to the bowl, gently folding them into the mix without breaking them apart.
  5. Sprinkle in the caramel corn and peanuts, giving everything one last gentle toss to combine evenly.
  6. Transfer your Easy Fall Snack Mix to a serving bowl or individual cups and enjoy!

Nutrition

Serving: 1cupCalories: 250kcalCarbohydrates: 35gProtein: 5gFat: 12gSaturated Fat: 2gPolyunsaturated Fat: 3gMonounsaturated Fat: 7gSodium: 150mgPotassium: 150mgFiber: 2gSugar: 12gCalcium: 2mgIron: 4mg

Notes

Use an airtight container to keep your Easy Fall Snack Mix fresh and crunchy for weeks. Customize ingredients based on personal preferences.

Tried this recipe?

Let us know how it was!

Soft and Savory Breakfast Rolls You’ll Want Every Morning

As the morning sun filters through the kitchen window, I find myself smiling at a plate of Soft and Savory Breakfast Rolls, each one a cozy bundle of deliciousness. These rolls are not only easy to whip up but also offer a customizable feast for the senses, perfect for busy weekdays or leisurely brunch gatherings. Layered with fluffy scrambled eggs, flavorful sausage, and gooey melted cheddar, then drizzled with a rich cheese sauce, they deliver the ultimate morning comfort. Plus, they can be prepped ahead, making them a lifesaver for those mornings when time just slips away. What will you fill your rolls with—classic sausage or perhaps something a little more adventurous? Let’s dive in and make breakfast extraordinary!

Why Are Breakfast Rolls a Game Changer?

Endless customizations: These breakfast rolls can be tailored to your taste, whether you crave spicy jalapeños or zesty feta and olives. Make-ahead magic: Perfect for busy mornings, prep them the night before and bake fresh in the morning. Gooey goodness: The rich cheese sauce adds a decadent touch to every bite. Crowd-pleaser: Serve them at brunch gatherings, and watch everyone come back for seconds. Simplicity: Using refrigerated crescent dough ensures a hassle-free experience, leaving you more time to enjoy your delicious creation. Mix and match your fillings and experience a cozy breakfast like never before!

Breakfast Rolls Ingredients

• Get ready to whip up these delightful breakfast rolls!

For the Filling

  • Ground Breakfast Sausage – Provides savory flavor and protein; substitute with turkey sausage or crumbled bacon for a lighter option.
  • Large Eggs – Acts as a binding agent, adding moisture; egg whites can be used for a lighter version.
  • Shredded Cheddar Cheese – Offers a rich, creamy texture; Monterey Jack or pepper jack can add a flavorful twist.

For the Dough

  • Refrigerated Crescent Roll Dough – Forms the base for quick and convenient rolls; feel free to use homemade dough if you prefer.

For the Cheese Sauce

  • Butter – Adds richness to the sauce; can be swapped for margarine if desired.
  • All-Purpose Flour – Thickens the cheese sauce; use gluten-free flour for a gluten-free version.
  • Milk – The liquid base for a creamy sauce; any type of milk, including plant-based options, can be substituted.
  • Additional Cheddar Cheese (for sauce) – Fortifies the sauce with extra creaminess for irresistible gooeyness.

For Seasoning and Garnish

  • Salt and Pepper – Enhance the overall taste; consider adding garlic powder or paprika for extra flavor.
  • Chopped Parsley or Green Onions – Adds freshness and color; switch to chives for variety.

These Breakfast Rolls promise a satisfying start to your day, and the possibilities are endless!

Step‑by‑Step Instructions for Soft and Savory Breakfast Rolls

Step 1: Cook the Sausage
In a large skillet over medium heat, add the ground breakfast sausage. Cook for about 5-7 minutes, breaking it apart with a spatula until it’s browned and fully cooked. Once it’s perfectly browned, drain any excess grease to keep your Soft and Savory Breakfast Rolls from becoming soggy.

Step 2: Scramble the Eggs
In a separate pan, crack and whisk 4 large eggs over medium heat. Stir constantly for about 3-5 minutes until the eggs are just set but still soft, ensuring they don’t overcook. Season with salt and pepper to taste, then remove from the heat and set aside, allowing the flavors to meld before adding to the rolls.

Step 3: Prepare the Dough
On a lightly floured surface, unroll the refrigerated crescent roll dough. Using a rolling pin, flatten the dough into one large rectangle. This will serve as the cozy blanket for your filling. Spread the scrambled eggs evenly across the dough, followed by the cooked sausage, and then sprinkle the shredded cheddar cheese on top for that irresistible, gooey experience.

Step 4: Roll It Up
Carefully roll the dough tightly from the longer side to form a log. Ensure it’s snug to maintain the shape of your Soft and Savory Breakfast Rolls. Slice the log into 1-inch rounds and arrange them, cut side up, in a greased baking dish, allowing a little space between each roll to promote even baking.

Step 5: Bake to Perfection
Preheat your oven to 350°F (175°C). Once heated, place your baking dish in the oven and bake the rolls for about 20-25 minutes. Keep an eye on them; they should turn golden brown and puff up nicely. This is where your kitchen will be filled with mouthwatering aromas, signaling that breakfast is almost ready!

Step 6: Make the Cheese Sauce
While the rolls are baking, prepare the cheese sauce. In a saucepan over medium heat, melt 3 tablespoons of butter. Stir in 3 tablespoons of all-purpose flour, cooking for about 1 minute until bubbly. Gradually whisk in 2 cups of milk and 1 cup of shredded cheddar cheese, cooking until the sauce is smooth and thickened, about 4-5 minutes.

Step 7: Finish and Serve
Once the rolls are done baking, remove them from the oven and pour the warm cheese sauce generously over the top. Garnish with chopped parsley or green onions for a pop of color and freshness. Your Soft and Savory Breakfast Rolls are now ready to be served, bringing warmth and comfort to your breakfast table!

What to Serve with Soft and Savory Breakfast Rolls

Elevate your breakfast experience with delightful pairings that harmonize beautifully with these warm, cheesy rolls.

  • Fresh Fruit: A colorful fruit salad brings a refreshing contrast, balancing the richness of the rolls. Seasonal fruits like berries, melons, or citrus can brighten your plate.
  • Mixed Green Salad: A crisp salad dressed in a light vinaigrette provides a crunchy texture that complements the soft rolls perfectly. Top it with nuts for an added crunch.
  • Breakfast Potatoes: Crispy potatoes, either hash browns or home fries, offer a satisfying crunch and heartiness, enhancing the morning meal. They can be seasoned to your liking, adding an extra flavor layer.
  • Coffee: A warm cup of freshly brewed coffee pairs wonderfully, cutting through the richness of the cheese and sausage, awakening your senses.
  • Smoothies: A smoothie, loaded with spinach and banana, gives you a nutritious boost and a hint of sweetness, making for a delightful drink alongside your rolls.
  • Cinnamon Rolls: For those who enjoy an extra treat, a small cinnamon roll offers a perfect sweet counterpoint, perfect for a cozy brunch vibe.
  • Flavored Cream Cheese: Spread this delightful topping on the rolls for an extra layer of flavor. Options like chive or herb cream cheese can elevate each bite!
  • Sparkling Water: A bubbly drink refreshes the palette, making it a nice option for brunch festivities, especially garnished with a slice of lemon or lime.

Make Ahead Options

These Soft and Savory Breakfast Rolls are perfect for busy weeknights and can be assembled in advance for effortless morning pleasure! You can prepare them up to 24 hours ahead of time by following these simple steps: once you’ve rolled and sliced the dough, cover the baking dish tightly with plastic wrap and refrigerate until you’re ready to bake. To maintain their fluffy texture, make sure to prevent air exposure by wrapping well. When it’s time to enjoy, simply pop them in a preheated oven at 350°F (175°C) and bake for 20-25 minutes until golden. This way, you’ll have a warm, delicious breakfast ready in no time!

Expert Tips for Breakfast Rolls

  • Don’t Overcook Eggs: Avoid dry scrambled eggs by slightly undercooking them; they’ll continue to cook while baking in the rolls.
  • Drain the Sausage Well: Properly draining the cooked sausage helps prevent overly moist rolls and guarantees a better texture.
  • Chill Before Slicing: If the crescent dough feels too soft, chilling the assembled log for a few minutes can make it easier to slice evenly.
  • Control Fillings: Keep fillings to a moderate amount. Overfilling can lead to uneven baking and messy rolls; stick to the suggested portions.
  • Cover if Browning: If the tops of your Breakfast Rolls brown too quickly, loosely cover them with foil to ensure they bake all the way through without burning.

How to Store and Freeze Breakfast Rolls

Fridge: Store leftover Breakfast Rolls in an airtight container for up to 3 days. Reheat in the microwave for a quick meal, or pop them in the oven for a few minutes to crisp them up.

Freezer: For longer storage, freeze unbaked Breakfast Rolls. Place them on a baking sheet to freeze individually, then transfer to a freezer bag for up to 2 months. Bake from frozen, adding a few extra minutes to the baking time.

Make-Ahead: Assemble the rolls and refrigerate overnight. Bake them fresh in the morning for a hassle-free breakfast option that’s ready to impress.

Reheating: To reheat leftover rolls, warm them in the microwave or bake in a preheated oven at 350°F (175°C) until heated through, ensuring the cheese sauce remains creamy and delicious.

Breakfast Rolls Variations & Substitutions

Get ready to elevate your breakfast rolls with these easy and tantalizing swaps and twists!

  • Meat-Free: Swap out the sausage for sautéed vegetables like spinach, mushrooms, or bell peppers for a delicious vegetarian version. Imagine savory flavors bursting in every bite!

  • Spicy Kick: For a zesty twist, add jalapeños and pepper jack cheese to your filling. This will bring a delightful heat that packs a punch, perfect for those who love bold flavors!

  • Mediterranean Delight: Mix feta cheese, diced tomatoes, and Kalamata olives for a fresh Mediterranean flair. Each roll will transport you to sunny shores with its delightful, tangy taste.

  • Tortilla Upgrade: Instead of using crescent roll dough, experiment with soft flour tortillas. You’ll achieve a different texture, and they’re an easy, chewy alternative that can hold all those scrumptious fillings.

  • Sweet & Savory: Create a breakfast roll with cream cheese, chopped strawberries or blueberries, and a sprinkle of powdered sugar. Sweeten your mornings for a delightful treat!

  • Cheesy Bliss: Go wild with a variety of cheeses! Blend in mozzarella or havarti for a unique cheesiness that melts beautifully—who could resist that?

  • Herb Infusion: Add fresh herbs like basil or dill to your filling for a burst of flavor. This simple addition transforms the ordinary into something extraordinary!

  • Queso Drizzle: Top off your rolls with a zesty spicy queso instead of the traditional cheese sauce. Imagine the creamy, cheesy richness while enjoying every comforting bite.

For more delicious twists, check out Banana Blueberry Breakfast or explore the irresistible flavors in Foster Cinnamon Rolls. Customize to your heart’s desire and make these breakfast rolls your own!

Soft and Savory Breakfast Rolls Recipe FAQs

What type of ground sausage should I use for these breakfast rolls?
Absolutely! You can use ground breakfast sausage for that classic flavor, but feel free to swap it with turkey sausage or crumbled bacon for a lighter or different taste. Just ensure that you cook the sausage until it’s browned and thoroughly drained to prevent soggy rolls.

How should I store leftover breakfast rolls?
For the best results, place any leftover Breakfast Rolls in an airtight container and store them in the refrigerator for up to 3 days. When reheating, either microwave them for a quick meal or pop them in the oven at 350°F (175°C) for 10-15 minutes to re-crisp the edges.

Can I freeze these breakfast rolls?
Absolutely, you can freeze unbaked Breakfast Rolls! After assembling and slicing them, place them on a baking sheet to freeze individually. Once firm, transfer them to a freezer bag and they’ll keep for up to 2 months. To bake, just add a few extra minutes to the original baking time—these rolls will still turn out soft and delightful!

What’s the best way to avoid soggy rolls?
Very! To ensure your rolls stay perfectly fluffy and not soggy, make sure to cook the sausage thoroughly and drain any excess grease. It’s also a good idea to avoid overfilling the rolls; this can prevent them from baking evenly. Follow the recommended filling amounts, and you’ll be in good shape!

Are there any dietary considerations I should be aware of?
Yes, indeed! If you’re cooking for someone with allergies, double-check that all ingredients are safe for them. For a gluten-free version, simply substitute all-purpose flour and crescent roll dough with a suitable gluten-free option. Additionally, you can make adjustments like using egg whites for a lighter roll or plant-based milk in your cheese sauce. It’s always best to tailor these delicious breakfast rolls to meet everyone’s needs!

Breakfast Rolls

Soft and Savory Breakfast Rolls You’ll Want Every Morning

These Breakfast Rolls are soft, savory delights filled with eggs, sausage, and cheese, perfect for any morning.
Prep Time 15 minutes
Cook Time 25 minutes
Total Time 40 minutes
Servings: 8 rolls
Course: Breakfast
Cuisine: American
Calories: 320

Ingredients
  

For the Filling
  • 1 lb Ground Breakfast Sausage Substitute with turkey sausage or crumbled bacon for a lighter option.
  • 4 large Large Eggs Egg whites can be used for a lighter version.
  • 1 cup Shredded Cheddar Cheese Monterey Jack or pepper jack can add a flavorful twist.
For the Dough
  • 1 pkg Refrigerated Crescent Roll Dough Feel free to use homemade dough if you prefer.
For the Cheese Sauce
  • 3 tbsp Butter Can be swapped for margarine if desired.
  • 3 tbsp All-Purpose Flour Use gluten-free flour for a gluten-free version.
  • 2 cups Milk Any type of milk, including plant-based options, can be substituted.
  • 1 cup Additional Cheddar Cheese Fortifies the sauce with extra creaminess.
For Seasoning and Garnish
  • to taste Salt and Pepper Consider adding garlic powder or paprika for extra flavor.
  • to taste Chopped Parsley or Green Onions Switch to chives for variety.

Equipment

  • Skillet
  • pan
  • Rolling Pin
  • baking dish
  • Saucepan

Method
 

Step‑by‑Step Instructions
  1. In a large skillet over medium heat, add the ground breakfast sausage. Cook for about 5-7 minutes until browned and fully cooked. Drain any excess grease.
  2. In a separate pan, crack and whisk 4 large eggs over medium heat. Stir constantly for about 3-5 minutes until just set but still soft. Season with salt and pepper, then set aside.
  3. On a lightly floured surface, unroll the refrigerated crescent roll dough and flatten into one large rectangle. Spread the scrambled eggs evenly, followed by the cooked sausage and shredded cheddar cheese.
  4. Carefully roll the dough tightly from the longer side to form a log. Slice the log into 1-inch rounds and arrange them, cut side up, in a greased baking dish.
  5. Preheat your oven to 350°F (175°C). Bake the rolls for about 20-25 minutes until golden brown and puffed.
  6. While the rolls are baking, prepare the cheese sauce by melting 3 tablespoons of butter in a saucepan, whisking in 3 tablespoons of flour, then gradually adding 2 cups of milk and 1 cup of shredded cheddar.
  7. Once the rolls are done baking, remove from the oven and pour warm cheese sauce over the top. Garnish with chopped parsley or green onions.

Nutrition

Serving: 1rollCalories: 320kcalCarbohydrates: 30gProtein: 18gFat: 18gSaturated Fat: 10gPolyunsaturated Fat: 1gMonounsaturated Fat: 4gCholesterol: 190mgSodium: 680mgPotassium: 200mgFiber: 1gSugar: 2gVitamin A: 800IUCalcium: 200mgIron: 1.5mg

Notes

Make ahead by assembling the rolls and refrigerating overnight. Bake fresh in the morning.

Tried this recipe?

Let us know how it was!

Delicious Raspberry Chia Pudding for a Healthy Start

As I poured the vibrant raspberry puree into the mixing bowl, I couldn’t help but smile at the promise of a delightful treat on the horizon. This Healthy Vegan Raspberry Chia Pudding has quickly become a staple in my kitchen, not only for its refreshing taste but also for the joy it brings to my mornings. With just 10 minutes of prep time and no cooking involved, it’s the perfect solution for busy days when you crave something wholesome yet indulgent. Plus, it’s vegan and gluten-free, making it a guilt-free way to kickstart your day or satisfy a sweet tooth, all while being packed with nutrients. Will you try making this delicious pudding for a healthy breakfast, snack, or even dessert?

Why choose Raspberry Chia Pudding?

Vibrant, Nutritious Flavor: This Raspberry Chia Pudding bursts with a fruity sweetness that’s both refreshing and satisfying.

Quick and Easy: In just 10 minutes, you can whip up a delicious, no-cook meal that’s perfect for busy mornings.

Versatile Variations: Enjoy the option of switching up flavors! Try it with strawberries or blueberries to suit your taste.

Healthy and Wholesome: Packed with omega-3 fatty acids and fiber, it’s a guilt-free indulgence that nourishes your body.

Crowd Pleaser: Whether for breakfast, a snack, or dessert, this pudding is sure to impress family and friends alike! Dive into this delightful treat and consider checking out our article on Healthy Vegan Breakfast Ideas for more inspiration.

Raspberry Chia Pudding Ingredients

For the Pudding Base
Raspberries – Use fresh for a vibrant flavor, or thaw frozen ones for convenience.
Almond Milk – This creamy base can be swapped with any plant-based milk or full-fat coconut milk for extra richness.
Chia Seeds – These tiny powerhouses thicken your pudding into a delightful gel-like consistency.

For Sweetness and Flavor
Maple Syrup – This natural sweetener complements the tartness of the raspberries beautifully; feel free to substitute with agave or honey for a non-vegan option.
Vanilla Extract – A splash of high-quality 100% pure vanilla elevates the flavor of your raspberry chia pudding to the next level.

Enjoy crafting this healthy treat that’s not just fun to make but absolutely vibrant and delicious!

Step‑by‑Step Instructions for Raspberry Chia Pudding

Step 1: Blend the Raspberry Milk
In a blender, combine 1 cup of fresh or thawed raspberries, 1 cup of almond milk, 2 tablespoons of maple syrup, and 1 teaspoon of vanilla extract. Blend on high for about 30 seconds until the mixture is smooth and creamy. The vibrant raspberry milk should have a rich color, indicating a perfect blend, ready to infuse your chia pudding with delicious flavor.

Step 2: Mix in the Chia Seeds
In a medium-sized mixing bowl, pour the raspberry milk blend over 1/4 cup of chia seeds. Whisk the mixture vigorously for about a minute, ensuring the chia seeds are evenly distributed and well incorporated. You’ll notice the chia seeds begin to absorb the liquid, as they start to thicken the pudding into a gel-like texture, creating an enticing visual anticipation for the final product.

Step 3: Refrigerate
Cover the bowl with plastic wrap or a lid, and place it in the refrigerator. Allow the chia pudding to chill for at least 1 hour, but preferably overnight for optimal texture. The pudding will become thick and creamy as the chia seeds absorb the raspberry milk, resulting in a delightful consistency that’s a feast for both the eyes and the palate.

Step 4: Serve Your Pudding
Once chilled, remove the Raspberry Chia Pudding from the refrigerator. Give it a gentle stir to ensure it’s smooth, and then serve it in individual bowls or jars. Top each pudding with your choice of fresh fruit, a sprinkle of granola, or a dollop of coconut yogurt. The vibrant color and texture will invite everyone to enjoy this healthy and delicious treat!

Storage Tips for Raspberry Chia Pudding

Fridge: Store your Raspberry Chia Pudding in an airtight container in the fridge for up to 5 days. This makes it a fantastic make-ahead option for busy mornings or afternoon snacks.

Reheating: It’s not recommended to heat chia pudding, as it’s best served cold. If you prefer a warmer treat, consider gently warming a portion in the microwave; however, this may alter the texture slightly.

Avoid Freezing: Avoid freezing the finished pudding, as this can negatively affect the chia’s gel-like consistency. Fresh is always best!

Serving Suggestions: Before serving after storage, give the pudding a gentle stir to reincorporate any liquid that may have separated, ensuring your Raspberry Chia Pudding remains creamy and delicious!

Raspberry Chia Pudding Variations

Feel free to get creative with this delightful Raspberry Chia Pudding! There’s no wrong way to enjoy it.

  • Berry Swap: Substitute raspberries with strawberries, blueberries, or blackberries for a fruity twist. Each berry brings its own unique flavor profile!

  • Nutty Touch: Add a tablespoon of almond or peanut butter for creamy richness that boosts protein content. It creates a delightful nutty flavor that pairs beautifully with the pudding.

  • Coconut Cream: Swap almond milk for coconut milk for a tropical flair. The creaminess adds richness, making each bite feel indulgent!

  • Spicy Kick: Sprinkle a pinch of cinnamon or nutmeg to spice things up. These warming flavors elevate the comfort level of your pudding.

  • Sweetness Variation: Instead of maple syrup, use honey or agave syrup to alter the sweetness level. Adjust according to your taste preferences!

  • Chocolate Lovin’: Stir in a tablespoon of cocoa powder or cacao nibs for a chocolatey variation that’s a treat for chocolate lovers. A delicious blend of fruity and chocolatey!

  • Chia Delight: Use other seeds like flaxseed for texture and added nutrients. They’ll bring a new crunch while enhancing the health benefits of your pudding.

  • Layered Beauty: Create layers of pudding with granola and yogurt for a stunning parfait that’s not just delicious but also visually appealing. It’s a showstopper for gatherings!

Let your imagination run wild with these twists. Don’t forget to check out our article on Vegan Breakfast Ideas, which includes even more ways to start your day right!

Make Ahead Options

These delightful Raspberry Chia Puddings are perfect for meal prep enthusiasts looking to save time! You can prepare the raspberry milk mix (1 cup of raspberries, 1 cup of almond milk, 2 tablespoons of maple syrup, and 1 teaspoon of vanilla) up to 24 hours in advance. Simply blend the ingredients and store them in an airtight container in the refrigerator. When you’re ready to serve, whisk in the chia seeds and let the mixture sit overnight (or for at least 1 hour) to thicken. This way, you ensure the pudding remains just as deliciously creamy and refreshing on your busy mornings. Embrace this make-ahead charm and enjoy your nutritious Raspberry Chia Pudding without any last-minute fuss!

What to Serve with Raspberry Chia Pudding?

Elevate your Raspberry Chia Pudding experience with delightful pairings that bring harmony to your meal.

  • Granola Topping: A crunchy sprinkle of granola adds delightful texture, balancing the creamy pudding with its nutty flavors and satisfying crunch.

  • Fresh Berries: A medley of fresh berries—strawberries, blueberries, or blackberries—enhances the fruity burst, harmonizing with the raspberry essence beautifully.

  • Coconut Yogurt: A dollop of coconut yogurt creates a rich, creamy layer that complements the pudding’s velvety texture while amplifying the tropical twist.

  • Nut Butter Swirl: A spoonful of almond or peanut butter introduces a creamy richness, enhancing the flavor and increasing the pudding’s protein content.

  • Banana Slices: Luscious banana slices add natural sweetness and a delightful creaminess that makes each bite a comforting experience.

  • Chilled Herbal Tea: A glass of refreshing herbal tea, like chamomile or mint, offers a soothing contrast and makes for a delightful breakfast pairing.

  • Almond Milk: A chilled glass of unsweetened almond milk is a perfect beverage complement, bringing a nutty flavor that enhances the overall taste experience.

  • Cold Brew Coffee: For those needing a caffeine kick, a glass of iced coffee becomes an energizing companion to your meal, balancing the sweetness of the pudding.

  • Dark Chocolate Shavings: A sprinkle of dark chocolate shavings over the top brings a touch of indulgence, perfectly contrasting with the raspberry’s tart flavor.

Expert Tips for Raspberry Chia Pudding

  • Choose Fresh Berries: Use fresh raspberries for the best flavor; frozen berries can be thawed, but the taste may be slightly muted.

  • Perfect Consistency: For a creamier pudding, let it sit in the refrigerator overnight. This helps the chia seeds absorb more liquid and results in a thicker texture.

  • Avoid Clumping: Stir the chia seeds into the raspberry milk for at least a minute to prevent clumps. This ensures that your Raspberry Chia Pudding turns out smooth and luscious.

  • Flavor Variations: Feel free to experiment by substituting raspberries with other berries to create unique flavor combinations, keeping it exciting and fresh every time!

  • Storage Tips: Store leftovers in an airtight container in the fridge for up to 5 days. Just give it a good stir before serving again!

Raspberry Chia Pudding Recipe FAQs

How do I choose ripe raspberries?
Absolutely! For the best flavor, choose fresh raspberries that are vibrant and plump. Look for berries that have a rich red color without dark spots or signs of mold. If you’re using frozen raspberries, thaw them completely before blending for the best texture and taste.

How should I store Raspberry Chia Pudding?
You can store your Raspberry Chia Pudding in an airtight container in the fridge for up to 5 days. This makes it an excellent make-ahead option for busy mornings. Just give it a gentle stir before serving to reincorporate any liquid that may have separated.

Can I freeze Raspberry Chia Pudding?
It’s not recommended to freeze the finished chia pudding, as freezing can negatively affect its gel-like texture. If you want to prepare it ahead of time, consider preparing the ingredients separately and blending them fresh, but enjoy your chia pudding within a few days for the best experience.

What should I do if my chia pudding isn’t thickening?
Very! If your pudding isn’t thickening properly after refrigeration, you may not have let it sit long enough. For a proper gel-like consistency, allow it to chill for at least 1 hour, but overnight is ideal. If it’s still too runny, try adding a few more chia seeds (start with 1 tablespoon) and let it sit for another 30 minutes to thicken up.

Can I make this recipe nut-free?
Certainly! If you’re looking to make a nut-free version, simply substitute almond milk with oat milk or coconut milk. Both options provide a lovely creamy base that pairs wonderfully with the raspberry flavor, keeping your pudding deliciously rich without any nuts.

Is this recipe suitable for my pet?
Definitely not! While raspberries in moderation can be safe for dogs, chia seeds could potentially cause digestive issues in pets. Always consult your veterinarian before giving any human food to your furry friends as part of their diet, ensuring their safety and well-being.

Raspberry Chia Pudding

Delicious Raspberry Chia Pudding for a Healthy Start

This Vegan Raspberry Chia Pudding is a refreshing, nutritious treat that makes for a healthy breakfast or snack.
Prep Time 10 minutes
Chilling Time 1 hour
Total Time 1 hour 10 minutes
Servings: 2 bowls
Course: Breakfast
Cuisine: Vegan
Calories: 150

Ingredients
  

For the Pudding Base
  • 1 cup Raspberries Fresh or thawed from frozen
  • 1 cup Almond Milk Can substitute with any plant-based milk
  • 1/4 cup Chia Seeds
For Sweetness and Flavor
  • 2 tablespoons Maple Syrup Can substitute with agave or honey
  • 1 teaspoon Vanilla Extract 100% pure

Equipment

  • blender
  • Mixing Bowl
  • whisk

Method
 

Step‑by‑Step Instructions
  1. Blend the Raspberry Milk: In a blender, combine raspberries, almond milk, maple syrup, and vanilla extract. Blend on high for about 30 seconds until smooth.
  2. Mix in the Chia Seeds: Pour the raspberry milk blend over chia seeds in a bowl. Whisk for about a minute until well incorporated.
  3. Refrigerate: Cover the bowl and place it in the refrigerator for at least 1 hour, preferably overnight.
  4. Serve Your Pudding: Once chilled, give the pudding a stir and serve in bowls. Top with fresh fruit, granola, or yogurt.

Nutrition

Serving: 1bowlCalories: 150kcalCarbohydrates: 20gProtein: 4gFat: 7gSaturated Fat: 0.5gPolyunsaturated Fat: 1gMonounsaturated Fat: 5gSodium: 50mgPotassium: 300mgFiber: 6gSugar: 6gVitamin A: 100IUVitamin C: 15mgCalcium: 120mgIron: 1mg

Notes

Store leftovers in an airtight container in the fridge for up to 5 days. Stir before serving.

Tried this recipe?

Let us know how it was!

Harry Potter Creamy Butterbeer Cheesecake for Magical Moments

As I stood in my kitchen, the sweet aroma of butterscotch wafting through the air, I felt as if I had been transported to the whimsical halls of Hogwarts. This Harry Potter Creamy Butterbeer Cheesecake is not just any dessert—it’s a magical experience wrapped in a buttery graham cracker crust. This delightful cheesecake offers an easy-to-follow recipe that’s perfect for impressing friends at parties or indulging your sweet tooth after a long day. With its rich, velvety texture and enchanting blend of vanilla and butterscotch flavors, you’re sure to turn any gathering into a celebration. Curious to see how this fantastical treat comes together? Let’s dive into this spellbinding recipe!

Why is this cheesecake so magical?

Indulgent Flavor: The combination of rich butterscotch and creamy vanilla creates a dessert that’s truly enchanting.
Simple Preparation: With easy-to-follow steps, even novice bakers can create this stunning cheesecake in no time.
Perfect for Celebrations: Whether it’s a birthday party or a cozy movie night, this cheesecake is bound to be a crowd-pleaser.
Versatile Serving Options: Pair it with your favorite wizarding-themed drinks, like a glass of Butterbeer or a warm cup of tea.
Make-Ahead Friendly: It’s perfect for prepping in advance, allowing you to enjoy the festivities without any last-minute stress.

Harry Potter Creamy Butterbeer Cheesecake Ingredients

For the Crust
Graham Cracker Crumbs – This base adds a crunchy texture; substitute with cookie crumbs for a twist.
Unsalted Butter – Binds the crust together; use salted butter for an extra flavor kick.

For the Cheesecake Filling
Cream Cheese – Key to achieving creaminess and structure; ensure it’s softened to avoid lumps.
Granulated Sugar – Sweetens your cheesecake; can be replaced with a sugar substitute for a lighter option.
Vanilla Extract – Enhances the flavor profile; opt for pure vanilla for the best aroma.
Butterscotch Sauce – The star flavor of this cheesecake; consider homemade for a richer taste.
Eggs – Essential for stabilization and setting; room temperature eggs blend more smoothly.
Heavy Whipping Cream – Adds richness and a smooth texture; substitute with half-and-half for a lighter version.

For Garnishing
Whipped Cream – A delightful topping that boosts presentation; optional but delicious.
Butterscotch Bits (optional) – Perfect for garnish; can swap out for chocolate chips for a different flair.

Now that you have all the enchanting ingredients, you’re one step closer to creating this unforgettable Harry Potter Creamy Butterbeer Cheesecake!

Step‑by‑Step Instructions for Harry Potter Creamy Butterbeer Cheesecake

Step 1: Preheat the Oven
Begin your magical baking journey by preheating your oven to 325°F (160°C). This ensures a perfectly baked cheesecake that sets beautifully. While the oven heats, gather all your ingredients and equipment—make sure to have a springform pan ready to cradle your delicious creation!

Step 2: Prepare the Cheesecake Filling
In a large mixing bowl, combine softened cream cheese and granulated sugar. Use a handheld mixer on medium speed to blend until the mixture is smooth and creamy, which should take about 2-3 minutes. The key to a lump-free batter is ensuring your cream cheese is adequately softened and mixing thoroughly, creating the luscious filling for your Harry Potter Creamy Butterbeer Cheesecake.

Step 3: Melt the Butterscotch Sauce
In a small saucepan over low heat, melt the unsalted butter. Once it’s fully melted, stir in the butterscotch sauce until you have a rich, combined mixture. This only takes a few minutes, and you’ll know it’s ready when the sauce is warm and smooth—it’s the magical flavor base of your cheesecake!

Step 4: Make the Crust
In a separate bowl, mix the graham cracker crumbs with the melted butter and a pinch of sugar until the crumbs are well coated. Press this mixture firmly into the bottom of your springform pan, creating an even layer. You’ll want to ensure it’s tightly packed, which sets the stage for a sturdy crust after baking—perfect for your Harry Potter Creamy Butterbeer Cheesecake.

Step 5: Combine Fillings
Now, pour the heated butterscotch sauce into the cream cheese mixture and blend until fully incorporated. Add in the vanilla extract and eggs, ensuring each addition is mixed in well. The mixture should be velvety and creamy, resembling a luscious butterscotch batter. This step is essential to capture the enchanting flavors of your cheesecake!

Step 6: Bake the Cheesecake
Pour the creamy filling over the prepared crust in the springform pan. Place it in the preheated oven and bake for 50-60 minutes. You’ll know it’s done when the edges are set and the center has a slight jiggle—this indicates a perfectly creamy texture, essential for your Harry Potter Creamy Butterbeer Cheesecake experience.

Step 7: Cool and Refrigerate
Once baked, remove the cheesecake from the oven and let it cool at room temperature for about an hour. This cooling period helps prevent cracking as it sets. Afterward, wrap it tightly and refrigerate for at least four hours, or overnight if you can resist—this wait allows the flavors to meld beautifully for maximum indulgence.

Step 8: Garnish and Serve
When ready to serve, take the cheesecake out of the fridge and remove the sides of the springform pan. Top your masterpiece with a generous dollop of whipped cream and sprinkle butterscotch bits for an extra touch of magic. Slice into pieces and enjoy your enchanting Harry Potter Creamy Butterbeer Cheesecake, see it vanish within moments at your gathering!

Harry Potter Creamy Butterbeer Cheesecake Variations

Feel free to get creative and customize this dreamy cheesecake to suit your palate!

  • Cinnamon Twist: Add a pinch of cinnamon to the graham cracker crust mixture for a warm, spiced flavor that awakens the senses. This subtle change adds complexity while maintaining the beloved buttery notes.

  • Chocolate Delight: Swap out butterscotch sauce for chocolate sauce for a rich, decadent twist. The combination of chocolate and cream cheese creates an indulgent experience, perfect for chocolate lovers!

  • Nutty Crunch: Incorporate finely chopped nuts into the crust for a delightful texture. Almonds or pecans can add a lovely crunch and depth, enhancing the overall enjoyment of every bite.

  • Salted Caramel: Change the topping to salted caramel drizzle instead of butterscotch bits for a sweet and savory balance that dances across the taste buds. This variation adds a touch of gourmet flair!

  • Fruity Surprise: Top the cheesecake with fresh fruit like raspberries or strawberries for a refreshing contrast that brightens the dessert. The juicy fruit provides a beautiful presentation and a burst of flavor.

  • Boozy Option: For an adult-only twist, add a splash of whiskey or spiced rum to the filling for a hint of warmth and festive zing. Just be mindful to adjust the sweetness if necessary.

  • Vegan Alternative: Make a dairy-free version using plant-based cream cheese and coconut milk instead of heavy cream. This swap creates a light cheesecake that doesn’t compromise on flavor, perfect for vegan dessert lovers.

In addition to these variations, if you love creative desserts, you might also enjoy my recipe for a Strawberry Cheesecake Dump or perhaps a classic Strawberry Cheesecake for another spin on deliciousness! Each option is worth exploring for a memorable dessert experience.

How to Store and Freeze Harry Potter Creamy Butterbeer Cheesecake

Fridge: Store your cheesecake in an airtight container for up to one week. This keeps it fresh and preserves its delightful creaminess.

Freezer: If you have leftovers, wrap the cheesecake tightly in plastic wrap, then in aluminum foil, and freeze for up to one month. Thaw it overnight in the fridge before serving.

Serving Tips: After removing from the fridge or freezer, allow the cheesecake to come to room temperature for about 30 minutes for the best texture and flavor.

Reheating: There’s no need to reheat cheesecake; serve it chilled for the best experience of the Harry Potter Creamy Butterbeer Cheesecake!

What to Serve with Harry Potter Creamy Butterbeer Cheesecake

Imagine the scene: friends gather around the table, laughter fills the air, and the sweet aroma of butterscotch dances in the room, making every bite of dessert even more delightful.

  • Butterscotch Sauce: Drizzling extra butterscotch on top adds a luxurious touch, enhancing the dessert’s enchanting flavor and charm.

  • Hot Chocolate: A steaming cup of rich hot chocolate creates a cozy pairing, giving that warm, comforting winter feel to your magical dessert experience.

  • Vanilla Ice Cream: The creamy vanilla ice cream melts beautifully against the cheesecake, providing a delightful contrast in temperature and texture.

  • Spiced Apple Cider: This warm, spiced beverage complements the sweet flavors of the cheesecake while evoking comforting fall memories.

  • Brownies: Individually portioned brownies add a decadent chocolate contrast, pleasing chocolate lovers and providing a delicious texture variation.

  • Cheesecake Bites: Serve miniature cheesecake bites dusted with cinnamon for a playful twist, ensuring everyone at your gathering can indulge in a bit more sweetness.

  • Sparkling Water with Lime: A refreshing beverage with a splash of citrus brightens up the table, perfectly cutting through the richness of the cheesecake.

  • Ginger Snap Cookies: The spiciness of ginger snap cookies creates an alluring contrast, adding a crunchy element that complements the creamy cheesecake beautifully.

Each pairing enhances the Harry Potter Creamy Butterbeer Cheesecake experience, turning your gathering into a magical culinary adventure.

Make Ahead Options

These Harry Potter Creamy Butterbeer Cheesecake treats are perfect for meal prep, saving you time and stress! You can prepare the crust and cheesecake filling up to 24 hours in advance. Just make the crust, press it into your springform pan, and refrigerate. For the filling, mix the cream cheese, sugar, butterscotch sauce, and eggs, then store it covered in the fridge until you’re ready to bake. This way, the filling stays fresh and your crust remains intact. When it’s time to bake, simply pour the filling over the crust and follow the baking instructions. You’ll have a delightful dessert ready with minimal effort and just as delicious as if it were made fresh!

Expert Tips for Harry Potter Creamy Butterbeer Cheesecake

  • Softened Cheese: Ensure your cream cheese is completely softened to avoid lumps, which can ruin the smooth texture of your cheesecake.

  • Checking Doneness: Look for a slight jiggle in the center when baking. This indicates a creamy, perfectly set Harry Potter Creamy Butterbeer Cheesecake that won’t be overcooked.

  • Cooling Time: Allow the cheesecake to cool slowly at room temperature before refrigerating to prevent cracks on the surface, keeping your dessert looking pristine.

  • Refrigeration Magic: Refrigerate for at least four hours or overnight before serving. This time helps all the flavors meld together for maximum deliciousness.

  • Presentation Tips: For an enchanting touch, top with fresh whipped cream and sprinkle butterscotch bits or chocolate chips, making it visually appealing and irresistible!

Harry Potter Creamy Butterbeer Cheesecake Recipe FAQs

What type of butterscotch sauce should I use?
Absolutely! You can use store-bought butterscotch sauce for convenience, but I recommend making your own for an extra-rich flavor. Simply melt 1 cup of brown sugar with 1/2 cup of butter over low heat, then stir in 1/2 cup of heavy cream until smooth. This homemade version adds a delightful depth to your cheesecake!

How should I store leftover cheesecake?
Very simply! Keep your Harry Potter Creamy Butterbeer Cheesecake in an airtight container in the refrigerator for up to one week. Make sure it’s tightly covered to maintain its creamy texture and prevent any unwanted odors from mixing in.

Can I freeze this cheesecake?
Yes! If you have leftover cheesecake, wrap it securely in plastic wrap, followed by aluminum foil. It can be frozen for up to one month. When you’re ready to indulge again, simply thaw it overnight in the refrigerator before serving for the best taste and texture.

What if my cheesecake cracks during baking?
No worries—this happens sometimes! To help prevent cracking, ensure you do not bake the cheesecake at too high a temperature. If it does crack, you can cover it with whipped cream or butterscotch bits to disguise the imperfection—trust me, no one will mind once they taste it!

Are there any dietary considerations?
Of course! This cheesecake is vegetarian-friendly; however, be mindful of any dairy allergies when using cream cheese and heavy whipping cream. You can also look for non-dairy cream cheese and whipping cream alternatives if needed, allowing everyone to enjoy a slice of this magical treat!

How do I know when the cheesecake is done baking?
Great question! The key is to look for a slight jiggle in the center of your Harry Potter Creamy Butterbeer Cheesecake. It should be set around the edges while the middle has a soft wobble, which indicates it will have that creamy, luscious texture we all love.

Harry Potter Creamy Butterbeer Cheesecake

Harry Potter Creamy Butterbeer Cheesecake for Magical Moments

Experience the enchanting flavors of Harry Potter Creamy Butterbeer Cheesecake, a magical dessert with butterscotch and vanilla that delights every occasion.
Prep Time 30 minutes
Cook Time 1 hour
Cooling Time 4 hours
Total Time 5 hours 30 minutes
Servings: 12 slices
Course: Dessert
Cuisine: American
Calories: 350

Ingredients
  

For the Crust
  • 1 cup Graham Cracker Crumbs Can substitute with cookie crumbs for a twist.
  • 1/2 cup Unsalted Butter Use salted butter for extra flavor.
For the Cheesecake Filling
  • 16 oz Cream Cheese Ensure it's softened to avoid lumps.
  • 3/4 cup Granulated Sugar Can be replaced with a sugar substitute.
  • 1 tablespoon Vanilla Extract Opt for pure vanilla for best aroma.
  • 1/2 cup Butterscotch Sauce Consider homemade for a richer taste.
  • 3 large Eggs Room temperature eggs blend more smoothly.
  • 1 cup Heavy Whipping Cream Substitute with half-and-half for a lighter version.
For Garnishing
  • 1 cup Whipped Cream Optional but delicious.
  • 1/2 cup Butterscotch Bits Can swap out for chocolate chips.

Equipment

  • Oven
  • Mixing Bowl
  • Handheld Mixer
  • Springform Pan
  • Saucepan

Method
 

Step-by-Step Instructions
  1. Preheat your oven to 325°F (160°C).
  2. In a large mixing bowl, combine softened cream cheese and granulated sugar. Use a handheld mixer to blend until smooth, about 2-3 minutes.
  3. In a saucepan over low heat, melt the unsalted butter, then stir in the butterscotch sauce until combined.
  4. In a separate bowl, mix graham cracker crumbs with melted butter and a pinch of sugar, then press into the springform pan.
  5. Pour the butterscotch sauce into the cream cheese mixture and blend. Add vanilla extract and eggs, mixing well.
  6. Pour the filling over the crust and bake for 50-60 minutes or until edges are set and center jiggles slightly.
  7. Let the cheesecake cool at room temperature for an hour, then refrigerate for at least four hours, or overnight.
  8. Remove from the fridge, top with whipped cream and butterscotch bits, slice, and serve.

Nutrition

Serving: 1sliceCalories: 350kcalCarbohydrates: 30gProtein: 5gFat: 25gSaturated Fat: 15gCholesterol: 95mgSodium: 230mgPotassium: 120mgFiber: 1gSugar: 20gVitamin A: 800IUCalcium: 80mgIron: 0.5mg

Notes

Ensure cream cheese is completely softened to avoid lumps. Refrigerate overnight for best flavor.

Tried this recipe?

Let us know how it was!

Dark Chocolate Butterbeer: Your Cozy Indulgence Awaits

As I sat down to enjoy a cozy evening, I stumbled upon the perfect drink—Dark Chocolate Butterbeer. This enchanting twist on the classic Butterbeer is not just a treat; it’s a delightful embrace of nostalgia wrapped in a cup. With its warm, creamy texture and deep chocolate flavor, it’s a fantastic way to elevate any gathering or movie night, making it suitable for both kids and adults. What’s great is how effortlessly you can adapt it into a non-alcoholic version for the little ones, or spice things up with a splash of your favorite rum for the grown-ups. So, whether you’re dreaming of Hogwarts or simply want to indulge a little, let’s dive into this magical recipe that will surely charm every palate. Are you ready to stir up some magic in your kitchen?

Why is Dark Chocolate Butterbeer a Must-Try?

Comforting Indulgence: This drink blends warm, creamy textures with the rich flavor of dark chocolate, instantly wrapping you in a cozy hug.

Versatility: Whether you choose the non-alcoholic version for a family movie night or add a splash of rum for adult gatherings, it fits every occasion beautifully.

Easy to Whip Up: With just a few simple ingredients, you can create a delightful drink that will impress guests without spending hours in the kitchen.

Unique Flavor Combo: The harmonious mix of butterscotch and dark chocolate creates a delightful fusion, setting it apart from ordinary hot chocolate. Dive into this magical experience and discover why this drink is a favorite among fans of themed treats and indulgent desserts! And if you love creative drinks, check out my recipe for Easter Chocolate Lasagna that pairs perfectly with this cozy beverage!

Dark Chocolate Butterbeer Ingredients

For the Chocolate Base
Heavy Cream – Provides a rich, creamy base; substitute with coconut cream for a dairy-free version.
Dark Chocolate Chips – Offers deep chocolate flavor and smooth texture; chopped dark chocolate can be used as an alternative.
Butterscotch Syrup – Adds sweetness and a caramel-like flavor; can be substituted with homemade butterscotch or caramel syrup.
Unsalted Butter – Enhances creaminess and richness; use margarine or a vegan butter alternative for dairy-free options.
Vanilla Extract – Adds aromatic flavor; good-quality vanilla or vanilla bean paste can enhance the taste.

For the Drink
Cream Soda – Provides sweetness and carbonation; ginger ale or sparkling water with vanilla extract can serve as substitutes.

For the Topping
Whipped Cream – Topping for added richness; use dairy-free whipped cream for a vegan option.
Shaved Dark Chocolate – Garnish to enhance appearance and flavor; cocoa powder can be an alternative for garnish.

Dive into the delightful world of indulgence with Dark Chocolate Butterbeer, perfect for cozy gatherings and parties!

Step‑by‑Step Instructions for Dark Chocolate Butterbeer

Step 1: Make the Chocolate Base
In a saucepan over low heat, combine 2 cups heavy cream, ½ cup dark chocolate chips, ¼ cup butterscotch syrup, and 2 tablespoons unsalted butter. Stir continuously for about 5-7 minutes until everything is melted and smooth, allowing the mixture to become velvety and thick. Once combined, remove from heat and stir in 1 teaspoon of vanilla extract to enhance the flavor.

Step 2: Prepare to Serve
Allow the chocolate mixture to cool for about 5-10 minutes while you prepare the serving glasses. Set out 4 large heatproof glasses, ensuring they are ready to hold your Dark Chocolate Butterbeer. This brief cooling period is crucial, as it prevents the cream soda from losing too much fizz when combined.

Step 3: Add Cream Soda
Pour equal amounts of the cooled chocolate mixture into each glass, filling them about halfway. Then, gently top off each glass with 2 cups of cream soda, pouring slowly to maintain the carbonation. Stir lightly to combine—the result should be a frothy, rich appearance that showcases the dark chocolate swirls throughout.

Step 4: Optional Alcoholic Version
For an extra kick in your Dark Chocolate Butterbeer, add 1 to 2 ounces of dark rum or bourbon to each glass before topping with cream soda. Stir gently to mix in the alcohol, making sure not to disturb the delicate froth. This adult version brings a delightful warmth that perfectly complements the chocolate flavors.

Step 5: Garnish
To elevate your drink, top each glass with a generous dollop of whipped cream, allowing it to cascade down the chocolate base beautifully. Finish by sprinkling shaved dark chocolate or cocoa powder on top, creating a stunning visual and adding an extra layer of rich flavor to your Dark Chocolate Butterbeer.

Step 6: Serve
Your Dark Chocolate Butterbeer is now ready to enjoy! Serve immediately while the drinks are warm or let them come to room temperature if preferred. This delightful drink pairs wonderfully with themed snacks, making it a cozy indulgence perfect for gatherings or a magical movie night.

What to Serve with Dark Chocolate Butterbeer?

The warmth and depth of this indulgent drink beckon for delightful pairings to elevate your experience.

  • Themed Cupcakes: Tempting treats like chocolate-flavored cupcakes with butterscotch frosting mirror the flavors of your drink, enhancing the overall magical theme.

  • Popcorn Bar: A variety of flavored popcorn, such as caramel or chocolate drizzle, offers a delightful crunch that complements the smoothness of the butterbeer.

  • Chewy Caramel Cookies: The rich, buttery taste of these cookies pairs perfectly, adding a sweet and chewy texture that harmonizes well with the creamy drink.

  • Light Cheese Platter: A selection of mild cheeses adds a contrasting savory element, balancing the sweetness of the Dark Chocolate Butterbeer beautifully.

  • Vanilla Ice Cream Floats: For an extra indulgent twist, serve your drink over a scoop of vanilla ice cream, creating a luxurious float that everyone will adore.

  • Family Movie Night: Set the stage for a cozy gathering by pairing this drink with a family-favorite film, wrapping everyone in warmth and nostalgia.

  • Dark Chocolate Mousse: A luxurious dessert that plays on the deep chocolate flavors, it is rich and decadent, creating a delightful capstone to your indulgent experience.

Expert Tips for Dark Chocolate Butterbeer

  • Quality Counts: Use high-quality dark chocolate for a richer, more decadent flavor in your Dark Chocolate Butterbeer. Avoid lower-quality chips that may not melt smoothly.
  • Mixing Method: When adding cream soda, pour gently to preserve the carbonation and prevent fizz overflow. This ensures your drink maintains its delightful frothy texture.
  • Make-Ahead Advantage: Prepare the chocolate base up to a day in advance. Store it in the refrigerator and reheat gently before serving to save time on special occasions.
  • All Ages Enjoy: For a family-friendly option, simply skip the alcohol and let everyone enjoy the deliciously creamy flavors of this indulgent beverage.
  • Garnishing Tips: Experiment with toppings! Try flavored whipped cream or even a sprinkle of sea salt to enhance the overall flavor profile of your Dark Chocolate Butterbeer.

How to Store and Freeze Dark Chocolate Butterbeer

Fridge: Store any leftover Dark Chocolate Butterbeer in an airtight container in the refrigerator for up to 1 day.

Freezer: While not recommended for freezing due to texture changes, you can freeze the chocolate base in ice cube trays for up to 3 months.

Reheating: If prepared ahead, gently reheat the chocolate base on the stove over low heat, stirring until smooth before combining with cream soda.

Serving Reminder: When serving, always add cream soda fresh to maintain its fizzy goodness; do not freeze the entire drink.

Make Ahead Options

These indulgent Dark Chocolate Butterbeer drinks are perfect for meal prep enthusiasts! You can make the chocolate base up to 24 hours in advance by combining the heavy cream, dark chocolate chips, butterscotch syrup, and unsalted butter in a saucepan, then refrigerating it once cooled. Just reheating this mixture gently on the stove or in the microwave (being cautious to avoid overheating) ensures it remains just as delicious. When you’re ready to serve, simply pour the chocolate base into your glasses, top with cream soda, and garnish with whipped cream and shaved chocolate for a delightful treat. This prep-ahead approach saves you time, allowing you to enjoy more magical moments with loved ones while still delivering a show-stopping beverage!

Dark Chocolate Butterbeer Variations

Feel free to let your creativity shine and customize this delectable drink in ways that suit your taste!

  • Non-Alcoholic: Simply omit the alcohol for a family-friendly version; it’s delicious without the spirits! This makes it perfect for all ages.
  • Spiced Twist: Add 1-2 ounces of spiced rum for a warm holiday flavor that complements the chocolate beautifully. The hint of spice elevates the drink, making it feel extra cozy.
  • Seasonal Flavors: Swap the butterscotch syrup for peppermint or hazelnut syrup during the holidays, creating a festive vibe that transports you to winter wonderlands.
  • Vegan Delight: Replace heavy cream with coconut cream and use vegan whipped cream for a plant-based indulgence that everyone will enjoy. It’s rich and satisfying!
  • Rich and Creamy: For an ultra-decadent treat, substitute half the cream with full-fat coconut milk while keeping the rest the same. This addition further enhances the luxurious texture.
  • Flavored Whipped Cream: Get creative with flavored whipped cream by infusing it with vanilla bean or a splash of caramel sauce, enhancing the experience with every sip.
  • Choco-Mint: Add a drop or two of mint extract into the chocolate base for a refreshing choco-mint version; it’s a delightful twist that’s simply irresistible!
  • Fruity Fizz: For a burst of flavor, mix in a splash of cherry soda or raspberry soda before serving; this fruity addition gives your drink an exciting lift.

It’s always fun to experiment, so why not try pairing your Dark Chocolate Butterbeer with some delicious Chocolate Chip Pancakes or even a slice of rich Chocolate Fudge Cupcakes? The combinations are endless, and your guests will appreciate the thoughtful touches!

Dark Chocolate Butterbeer Recipe FAQs

What type of dark chocolate is best for Dark Chocolate Butterbeer?
Absolutely! For the richest flavor, I recommend using high-quality dark chocolate with at least 60% cacao. This chocolate not only melts beautifully, enhancing the overall taste but also gives your drink that deep, indulgent chocolate flavor that pairs perfectly with the butterscotch syrup.

How should I store leftover Dark Chocolate Butterbeer?
Very important! Store any leftover Dark Chocolate Butterbeer in an airtight container in the refrigerator for up to 1 day. When you’re ready to enjoy it again, gently reheat just the chocolate base on the stove over low heat, stirring until smooth. Always add cream soda fresh to maintain its fizzy goodness!

Can I freeze the chocolate base for Dark Chocolate Butterbeer?
Absolutely, you can freeze the chocolate base! Pour the cooled mixture into ice cube trays, and freeze for up to 3 months. When you’re ready to use it, thaw overnight in the refrigerator and then gently reheat on the stove. This way, you can whip up a delicious drink whenever you crave it—just remember to add cream soda fresh.

What if I have allergies to some ingredients in this recipe?
If you have allergies or dietary considerations, there are several substitutions you can use! For a dairy-free version, substitute heavy cream with coconut cream and use dairy-free whipped cream. If you’re avoiding gluten or sugar, there are gluten-free and sugar-free options for both butterscotch syrup and cream soda. Always double-check ingredient labels to ensure they’re safe for you.

How can I adjust the sweetness if it’s too sweet?
If you find your Dark Chocolate Butterbeer is a bit too sweet for your taste, you can do a couple of things! Consider reducing the amount of butterscotch syrup you use, or swap it for a homemade version with less sugar. Additionally, you can balance the sweetness by adding a small pinch of salt to the chocolate base, which enhances the flavors and reduces the perception of sweetness.

Dark Chocolate Butterbeer

Dark Chocolate Butterbeer: Your Cozy Indulgence Awaits

Experience the nostalgic warmth of Dark Chocolate Butterbeer, a creamy and rich drink perfect for cozy gatherings.
Prep Time 10 minutes
Cook Time 7 minutes
Cooling Time 10 minutes
Total Time 27 minutes
Servings: 4 cups
Course: Drinks
Cuisine: British
Calories: 300

Ingredients
  

For the Chocolate Base
  • 2 cups heavy cream substitute with coconut cream for a dairy-free version
  • ½ cup dark chocolate chips chopped dark chocolate can be used as an alternative
  • ¼ cup butterscotch syrup can be substituted with homemade butterscotch or caramel syrup
  • 2 tablespoons unsalted butter use margarine or a vegan butter alternative for dairy-free options
  • 1 teaspoon vanilla extract good-quality vanilla or vanilla bean paste can enhance the taste
For the Drink
  • 2 cups cream soda ginger ale or sparkling water with vanilla extract can serve as substitutes
For the Topping
  • 1 cup whipped cream use dairy-free whipped cream for a vegan option
  • to taste shaved dark chocolate cocoa powder can be an alternative for garnish

Equipment

  • Saucepan
  • heatproof glasses

Method
 

Step-by-Step Instructions
  1. In a saucepan over low heat, combine 2 cups heavy cream, ½ cup dark chocolate chips, ¼ cup butterscotch syrup, and 2 tablespoons unsalted butter. Stir continuously for about 5-7 minutes until everything is melted and smooth, allowing the mixture to become velvety and thick. Once combined, remove from heat and stir in 1 teaspoon of vanilla extract to enhance the flavor.
  2. Allow the chocolate mixture to cool for about 5-10 minutes while you prepare the serving glasses. Set out 4 large heatproof glasses, ensuring they are ready to hold your Dark Chocolate Butterbeer.
  3. Pour equal amounts of the cooled chocolate mixture into each glass, filling them about halfway. Then, gently top off each glass with 2 cups of cream soda, pouring slowly to maintain the carbonation. Stir lightly to combine.
  4. For an extra kick, add 1 to 2 ounces of dark rum or bourbon to each glass before topping with cream soda. Stir gently to mix in the alcohol.
  5. Top each glass with a generous dollop of whipped cream and sprinkle with shaved dark chocolate or cocoa powder.
  6. Serve immediately while the drinks are warm or let them come to room temperature if preferred.

Nutrition

Serving: 1cupCalories: 300kcalCarbohydrates: 35gProtein: 4gFat: 15gSaturated Fat: 9gMonounsaturated Fat: 5gCholesterol: 40mgSodium: 100mgPotassium: 200mgFiber: 1gSugar: 25gVitamin A: 500IUCalcium: 50mgIron: 1mg

Notes

This delightful drink pairs wonderfully with themed snacks, making it a cozy indulgence perfect for gatherings or a magical movie night.

Tried this recipe?

Let us know how it was!

Stay Connected

Get recipes via email: