Get my cookbooks

Hearty Eggs Benedict Casserole for Effortless Brunch Fun

Nothing says “weekend brunch” quite like the delightful aroma of a bubbling Eggs Benedict Casserole wafting through your kitchen. This make-ahead marvel brings together the rich flavors of classic Eggs Benedict—creamy eggs, savory meats, and hearty English muffins—into one satisfying dish that’s perfect for gatherings or quiet mornings alike. With this recipe, you’ll experience the joy of serving something truly special without the fuss of individual plating. Plus, it’s endlessly customizable—whether you prefer switching up the meats or making it vegetarian, you can tailor it to your heart’s content. What’s your favorite twist on this hearty brunch classic?

Why Will You Love This Casserole?

Simplicity: This recipe is a breeze to whip up, making it perfect for those busy mornings when you want to impress without stress.

Endless Customization: Whether you’re in the mood for ham, bacon, or a veggie twist with sautéed spinach, this Eggs Benedict Casserole allows you to get creative!

Make-Ahead Convenience: Prepping this dish the night before means you can enjoy leisurely brunch time without the morning rush.

Crowd-Pleasing: Ideal for family gatherings or friend get-togethers, everyone will love this hearty dish—no one can resist those creamy, savory layers!

Versatile Pairings: Serve it alongside a refreshing fruit salad or classic mimosas for a truly delightful brunch experience, elevating your meal from ordinary to exceptional.

Healthier Options: With gluten-free variations and the choice to use egg whites, you can enjoy this indulgent dish while keeping it on the lighter side if you choose!

Eggs Benedict Casserole Ingredients

For the Casserole

  • Eggs – Provide essential protein and serve as the binding agent for the casserole.
  • Milk – Adds creaminess and richness, creating a custard-like consistency.
  • Dijon Mustard – Adds tanginess that balances the richness of the dish.
  • Garlic Powder – Enhances the savory flavor profile without the prep work of fresh garlic.
  • Onion Powder – Contributes savory notes that deepen the overall flavor.
  • Swiss Cheese – Provides creamy texture and melts well for a gooey casserole.
  • Diced Ham or Canadian Bacon – Adds a meaty element that complements the eggs.
  • English Muffins – Serve as the base, soaking up the custard mixture.
  • Chives – Offer fresh flavor and visual appeal as a garnish.

For Customizations

  • Vegetables – Add sautéed spinach or mushrooms for a tasty vegetarian twist.
  • Different Cheeses – Experiment with cheddar or Gruyère for varying flavors.
  • Gluten-Free Muffins – Use gluten-free versions to accommodate dietary needs.

Step‑by‑Step Instructions for Eggs Benedict Casserole

Step 1: Preheat the Oven
Start by preheating your oven to 350°F (175°C). This will ensure your Eggs Benedict Casserole bakes evenly and comes out perfectly fluffy and golden. Grab a reliable oven thermometer to double-check the temperature, ensuring your warm kitchen is ready to embrace the rich, savory flavors that are about to fill the air.

Step 2: Prepare the Baking Dish
Next, grease a large baking dish generously with butter or cooking spray. This crucial step will prevent your casserole from sticking and ensure that every bite of the delectable Eggs Benedict Casserole comes out smoothly. Use a spatula to spread the grease evenly, covering all corners and edges of the dish.

Step 3: Whisk the Egg Mixture
In a mixing bowl, whisk together 8 eggs, 2 cups of milk, and a tablespoon of Dijon mustard until the mixture is frothy and well-combined. Add in 1 teaspoon each of garlic powder and onion powder, along with salt and pepper to taste. This creamy custard base is essential for binding the casserole together and delivering that signature taste, so whisk enthusiastically!

Step 4: Assemble the Base
Layer 4 cups of cubed English muffins evenly in the greased dish, creating a hearty base for your casserole. Sprinkle 1 to 2 cups of diced ham or Canadian bacon over the muffin cubes, distributing them evenly. This meaty component is what makes the Eggs Benedict Casserole so satisfying, giving it that classic brunch flavor everyone loves.

Step 5: Pour the Egg Mixture
Carefully pour the prepared egg mixture over the muffin and meat layers, ensuring it’s evenly distributed. Use a spatula to gently press down the muffin cubes into the egg mixture to allow them to soak up the custard fully. This ensures every bite is packed with flavor, making your casserole a crowd-pleaser.

Step 6: Cover and Bake
Cover the dish tightly with aluminum foil and place it in the preheated oven. Bake for 30 minutes to allow the casserole to set and cook through while maintaining moisture. This step is crucial for ensuring a fluffy texture; check to see the edges are just beginning to puff up slightly as the timer approaches.

Step 7: Uncover and Brown
After 30 minutes, carefully remove the foil from the dish and continue baking for an additional 15-20 minutes. Keep an eye on the casserole; it should turn golden brown and puff up nicely. This finishing touch gives your Eggs Benedict Casserole a beautiful presentation and irresistible crunchy top.

Step 8: Prepare the Hollandaise Sauce
While the casserole is finishing up, prepare the Hollandaise sauce. In a mixing bowl, whisk together 3 egg yolks and 1 tablespoon of lemon juice until light and frothy. Gradually add in 1/2 cup of hot melted butter while whisking continuously until the sauce is emulsified and creamy. Season to taste with salt and pepper, elevating the final dish.

Step 9: Serve and Garnish
Once your Eggs Benedict Casserole is done baking, allow it to cool slightly for about 5-10 minutes before cutting into squares. Serve hot, drizzled generously with the homemade Hollandaise sauce and garnished with fresh chives for a lovely finishing touch. This hearty casserole is now ready to delight your guests at brunch!

Eggs Benedict Casserole Variations

Feel free to get creative with your Eggs Benedict Casserole—there’s a whole world of delicious customization waiting for you!

  • Vegetarian Swap: Skip the meat and load up with sautéed spinach, mushrooms, or roasted bell peppers for a hearty, meat-free option.

  • Gluten-Free: Replace English muffins with gluten-free varieties so everyone can savor this delightful brunch dish without worry.

  • Cheese Variety: Try swapping Swiss cheese for pepper jack or feta to bring in a new flavor profile that adds a bit of zing.

Indulge in the creamy richness of a molded casserole while exploring different textures and tastes. You might even discover a new favorite combination!

  • Extra Heat: Add a pinch of red pepper flakes or some diced jalapeños for a spicy kick that will wake up your taste buds.

  • Savory Herbs: Fresh herbs like thyme or parsley can elevate the dish substantially, adding vibrant flavors that make every bite sing.

  • Bacon Lovers: Mix in crispy bacon bits instead of ham or Canadian bacon to crank up the savory profile.

  • International Inspiration: Consider drizzling with a chipotle or curry-spiced sauce instead of the traditional Hollandaise for a global flavor journey!

With your new knowledge of variations, don’t forget that this Eggs Benedict Casserole pairs beautifully with a fresh fruit salad or a classic mimosa for the ultimate brunch experience!

Expert Tips for Eggs Benedict Casserole

Whisk Well: Ensure your eggs are whisked until frothy for maximum fluffiness. This helps create that light texture you crave in an Eggs Benedict Casserole.

Don’t Rush Baking: Covering with foil for the first half of baking retains moisture. Remind yourself to wait this crucial step to avoid dryness.

Use a Glass Dish: Opt for a glass baking dish for evenly cooked results. This helps prevent overcooking and keeps every bite deliciously moist.

Hollandaise Rescue: If your Hollandaise sauce curdles, don’t panic! Simply whisk in a splash of cold water to restore the emulsion and get that creamy goodness back.

Prep Ahead: Make your casserole the night before, refrigerate, and pop it in the oven in the morning. It makes serving this dish as easy as pie!

Storage Tips for Eggs Benedict Casserole

Fridge: Store the casserole covered in the refrigerator for up to 3 days. Make sure it’s airtight to maintain the freshness and avoid absorbing any odors.

Freezer: If you want to keep it longer, freeze portions in airtight containers for up to 2 months. This makes for a quick reheat option when you crave your Eggs Benedict Casserole!

Reheating: To reheat, simply thaw in the fridge overnight and warm in the oven at 350°F (175°C) for about 20-30 minutes, until heated through. Cover with foil to retain moisture.

Make-Ahead Tip: You can prepare the casserole the night before and refrigerate it before baking to save time in the morning!

What to Serve with Eggs Benedict Casserole

Elevate your brunch experience with delightful pairings that complement the rich flavors and comforting textures of this satisfying dish.

  • Fresh Fruit Salad: Bright, juicy fruits add a refreshing contrast to the creamy casserole, balancing richness with natural sweetness.
  • Classic Mimosas: A bubbly combination of champagne and orange juice perfectly complements the indulgent flavors of the casserole, adding a festive touch.
  • Bloody Marys: These savory cocktails bring a zesty kick to your brunch table, brightening up each bite of the hearty Eggs Benedict Casserole.
  • Crispy Hash Browns: The crunchy texture of golden hash browns creates a delightful contrast to the soft casserole, enhancing your meal with extra comfort.
  • Sautéed Spinach: Adding sautéed spinach introduces a vibrant, earthy element while boosting the health factor—perfect for balancing the richness of the casserole.
  • Cheesy Garlic Bread: The warm, toasty bread with garlic and cheese offers an irresistible addition, providing an enjoyable, crunchy texture alongside each creamy mouthful.
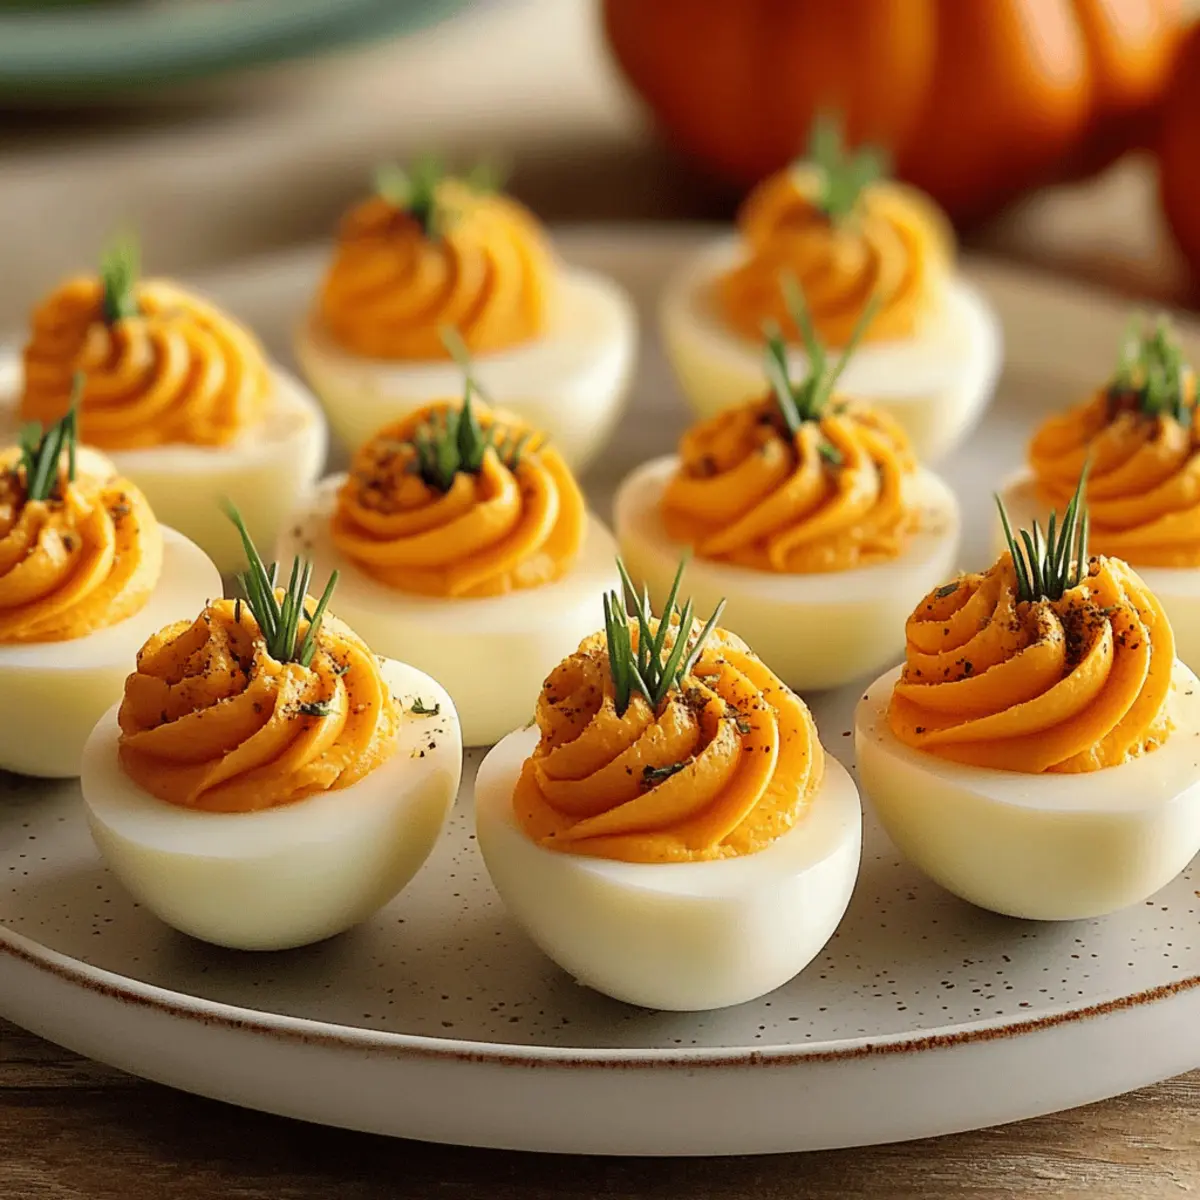
  • Deviled Eggs: These bite-sized treats echo the egg theme while adding a flavorful twist, making them an ideal appetizer for your festive brunch spread.
  • Mini Croissants: Light and buttery, mini croissants create an elegant touch and pair wonderfully with the casserole while inviting additional fillings, like preserves or butter.
  • Greek Yogurt Parfaits: Layering yogurt with berries and granola makes for a light yet satisfying end to your meal, bringing a healthy sweetness that complements the casserole beautifully.

Make Ahead Options

Preparing the Eggs Benedict Casserole ahead of time is a wonderful way to simplify your brunch plans! You can assemble the entire casserole up to 24 hours before baking. Just follow the preparation steps until you pour the egg mixture over the layers. Then, cover tightly with foil and refrigerate to preserve freshness and prevent drying out. When you’re ready to serve, simply remove it from the fridge and add an extra 5-10 minutes to the bake time to ensure it heats through properly. This way, you’ll enjoy all the rich flavors of this beloved dish without the morning rush, making it a perfect choice for busy weekends!

Eggs Benedict Casserole Recipe FAQs

How do I choose the right ingredients for my Eggs Benedict Casserole?
Absolutely! When selecting your ingredients, ensure that your eggs are fresh—look for a clean, uncracked shell and a sell-by date within a few weeks. For English muffins, choose those that are firm with no dark spots; they should feel a bit spongy. The milk should be whole or half-and-half for creaminess, but if you’re looking for a lighter version, you can opt for skim or low-fat milk. Fresh ingredients yield the best flavor!

What’s the best way to store my leftover Eggs Benedict Casserole?
Very! Store any leftovers in an airtight container in the refrigerator for up to 3 days. Make sure it’s covered well to prevent it from drying out or absorbing other odors. If you’d like to keep it for longer, you can freeze portions in airtight containers or freezer bags. It’ll stay fresh for up to 2 months. Just remember to label them!

Can I freeze the Eggs Benedict Casserole, and if so, how?
Of course! To freeze, prepare the casserole but avoid baking it. Instead, cover it tightly with plastic wrap and then aluminum foil to prevent freezer burn. You can freeze it for up to 2 months. When you’re ready to enjoy it, thaw in the fridge overnight, then bake as directed, adding a few extra minutes to ensure it’s heated through. This method will keep it delicious and ready for a future brunch!

What should I do if my casserole is too soggy after baking?
If your Eggs Benedict Casserole comes out soggy, it may be due to over-soaking the English muffins or a too-runny egg mixture. In the future, make sure to press the muffins down gently when soaking them in the egg mixture, but not overly so. You can return a soggy casserole to the oven for another 5-10 minutes uncovered to dry it out a bit. It should firm up as it bakes more!

Are there any dietary considerations for pets or allergies to keep in mind?
Definitely! Always check for allergies with your guests, especially regarding the ingredients like dairy or eggs. If someone has a gluten intolerance, opt for gluten-free English muffins. As for pets, while eggs are safe for dogs in small amounts, be cautious of giving them rich sauces like Hollandaise that contain butter and spices. Always consult your vet if unsure about feeding them human food.

Can I make this Eggs Benedict Casserole vegetarian-friendly?
Absolutely! To create a vegetarian version, simply omit the meats like ham or Canadian bacon and add your favorite sautéed vegetables, such as spinach or mushrooms, for added flavor and texture. You might also consider incorporating some diced tomatoes for a fresh twist! This makes the dish just as hearty and satisfying while being meat-free.

Eggs Benedict Casserole

Hearty Eggs Benedict Casserole for Effortless Brunch Fun

Enjoy a delightful Eggs Benedict Casserole, combining creamy eggs, savory meats, and hearty muffins for a perfect brunch dish.
Prep Time 20 minutes
Cook Time 45 minutes
Total Time 1 hour 5 minutes
Servings: 8 slices
Course: Breakfast
Cuisine: American
Calories: 350

Ingredients
  

For the Casserole
  • 8 pieces Eggs Provide essential protein
  • 2 cups Milk Adds creaminess and richness
  • 1 tablespoon Dijon Mustard Adds tanginess
  • 1 teaspoon Garlic Powder Enhances savory flavor
  • 1 teaspoon Onion Powder Contributes savory notes
  • 2 cups Swiss Cheese Provides creamy texture
  • 1-2 cups Diced Ham or Canadian Bacon Adds meaty element
  • 4 cups English Muffins Serve as the base
  • 1/4 cup Chives Offer fresh flavor
For Customizations
  • Vegetables For sautéed spinach or mushrooms
  • Different Cheeses Such as cheddar or Gruyère
  • Gluten-Free Muffins To accommodate dietary needs

Equipment

  • baking dish
  • Mixing Bowl
  • whisk
  • spatula

Method
 

Step‑by‑Step Instructions
  1. Preheat your oven to 350°F (175°C).
  2. Grease a large baking dish generously with butter or cooking spray.
  3. Whisk together 8 eggs, 2 cups of milk, and a tablespoon of Dijon mustard, along with garlic powder, onion powder, salt, and pepper.
  4. Layer 4 cups of cubed English muffins in the dish and add 1 to 2 cups of diced ham or Canadian bacon.
  5. Pour the egg mixture over the muffin and meat layers.
  6. Cover the dish with aluminum foil and bake for 30 minutes.
  7. After 30 minutes, uncover and bake for an additional 15-20 minutes until golden brown.
  8. Prepare the Hollandaise sauce by whisking together 3 egg yolks and 1 tablespoon of lemon juice, then slowly add 1/2 cup of hot melted butter.
  9. Serve the casserole hot with Hollandaise sauce and garnish with fresh chives.

Nutrition

Serving: 1sliceCalories: 350kcalCarbohydrates: 30gProtein: 20gFat: 18gSaturated Fat: 9gPolyunsaturated Fat: 1gMonounsaturated Fat: 6gCholesterol: 210mgSodium: 800mgPotassium: 350mgFiber: 2gSugar: 3gVitamin A: 15IUVitamin C: 2mgCalcium: 20mgIron: 8mg

Notes

This make-ahead casserole is perfect for brunch gatherings and can be customized with various meats and cheeses.

Tried this recipe?

Let us know how it was!

Cinnamon Roll French Toast: Rise and Shine with Sweet Bliss

As I whipped up breakfast this morning, the delightful scent of warm cinnamon wafted through my home, instantly lifting my spirits. The star of the show? My indulgent Cinnamon Roll French Toast, a perfect blend of two beloved breakfast staples that never fail to impress. With its crispy exterior and soft, custardy center, this dish not only transforms everyday mornings into a little celebration but also provides a comforting escape from the mundane. Easy to prepare and oh-so-satisfying, this recipe is a fantastic way to elevate your breakfast or brunch experience. Ready to indulge in a scrumptious plate that will have everyone asking for seconds? Let’s dive in!

Why is Cinnamon Roll French Toast a Must-Try?

Comfort Food at its finest: This Cinnamon Roll French Toast blends the best qualities of two beloved breakfast dishes, ensuring every bite is both comforting and satisfying.

Quick and Easy: With minimal prep time and simple ingredients, you can whip up this dish in no time, making it perfect for busy mornings or leisurely weekends.

Crowd-Pleasing Delight: Whether it’s a family gathering or brunch with friends, this recipe is sure to impress and leave everyone craving more.

Customize It: Feel free to switch up the bread to brioche or challah for even richer flavors, or throw in some chocolate chips for a sweet surprise!

For delicious alternatives, don’t forget to check out my recipes for Crisp Cinnamon Roll or Sweet Escape Toast.

Cinnamon Roll French Toast Ingredients

For the Custard

  • Cinnamon Swirl Bread – Ensures a sweet, fluffy base; slightly stale bread absorbs custard better for a delightful texture.
  • Eggs – Acts as a binding agent, adding richness; consider flax eggs as a vegan alternative.
  • Milk – Introduces creaminess to the custard; almond or oat milk works wonderfully for a dairy-free version.
  • Vanilla Extract – Enhances the flavor profile; opt for pure vanilla for the best results, but imitation can suffice in a pinch.
  • Ground Cinnamon – Offers the signature, warm flavor; feel free to adjust based on your personal taste preference.
  • Ground Nutmeg – Provides a lovely depth; it’s optional, but don’t omit it if you enjoy the warmth it brings.

For the Glaze

  • Powdered Sugar – Sweetens and brings the glaze together; substitute with coconut sugar if you’re looking for a different sweetness profile.
  • Butter/Oil – Helps achieve that crispy exterior; any neutral oil is a great dairy-free alternative.

This Cinnamon Roll French Toast is sure to create joyous breakfast moments in your home!

Step‑by‑Step Instructions for Cinnamon Roll French Toast

Step 1: Prepare the Custard
In a medium bowl, whisk together eggs, milk, vanilla extract, ground cinnamon, and optional nutmeg until the mixture is smooth and well-combined. Aim for a creamy consistency that will soak into the cinnamon swirl bread. This custard will be the heart of your Cinnamon Roll French Toast, giving it that rich flavor and alluring aroma.

Step 2: Heat the Skillet
Place a medium skillet over medium heat and add butter or oil, allowing it to melt until it becomes bubbly. Make sure the skillet is adequately heated, as this will create that coveted crispy exterior for your French toast. You’ll know it’s ready when the butter is sizzling, filling your kitchen with a warm, inviting scent.

Step 3: Dip the Bread
Take your slices of slightly stale cinnamon swirl bread and dip each piece into the prepared custard mixture. Make sure to coat both sides gently, allowing any excess to drip back into the bowl. This step is crucial for achieving that delightful custard-soaked center in your Cinnamon Roll French Toast.

Step 4: Cook the French Toast
Carefully place the dipped bread slices into the hot skillet. Cook each piece for 2-3 minutes on one side, or until golden brown and crispy, then flip to cook the other side for an additional 2-3 minutes. Adjust the heat if necessary to prevent burning; you want a beautifully caramelized finish that highlights the rich flavors of the custard.

Step 5: Prepare the Creamy Glaze
While the French toast is cooking, whisk together powdered sugar, a splash of milk, and a dash of vanilla extract in a small bowl until smooth and creamy. Adjust the consistency with more milk if needed; it should be pourable but thick enough to cling to your delicious Cinnamon Roll French Toast. This glaze will take your dish to the next level.

Step 6: Serve and Enjoy
Once all the slices are golden brown and crispy, transfer them to plates and generously drizzle the creamy glaze over the warm French toast. Serve immediately while they’re still hot for the best experience. This blissful Cinnamon Roll French Toast is ready to be savored, making your breakfast a special occasion!

How to Store and Freeze Cinnamon Roll French Toast

Room Temperature: Serve warm for the best flavor; if leftovers remain, they can be kept at room temperature for about 1 hour before refrigeration.

Fridge: Store any uneaten Cinnamon Roll French Toast in an airtight container in the fridge for up to 3 days. Reheat in a skillet or microwave before serving.

Freezer: For longer storage, freeze individual slices wrapped tightly in plastic wrap, then placed in a freezer-safe bag for up to 2 months. Thaw and reheat as needed.

Reheating: To reheat, pop slices in the toaster or warm them in a skillet over low heat until heated through, restoring that crispy texture.

What to Serve with Cinnamon Roll French Toast

Elevate your breakfast experience by pairing this indulgent dish with complementary sides and drinks that enhance its warmth and sweetness.

  • Crispy Bacon: This savory addition balances out the sweetness, providing a satisfying contrast that everyone loves. The crispy texture makes each bite more exciting!

  • Maple Syrup: A classic choice that enhances the flavor profile with its rich, sweet taste. Drizzle it over your French toast for that classic breakfast feel.

  • Fresh Fruit Salad: Light and refreshing, a medley of seasonal fruits brightens up your plate and adds a burst of color and flavor. The natural sweetness complements the richness of the French toast beautifully!

  • Greek Yogurt: Creamy and tangy, a dollop of Greek yogurt adds a nutritious touch and creamy texture that contrasts beautifully with the cinnamon roll flavors.

  • Vanilla Ice Cream: For a decadent treat, serve a scoop of vanilla ice cream on the side. The cold creaminess pairs delightfully with the warm, gooey French toast—perfect for a brunch indulgence!

  • Chai Latte: A warm, spiced latte enriched with spices like cinnamon complements the flavors of the dish while adding a cozy beverage option.

  • Chocolate-Covered Strawberries: For a touch of sweetness, serve chocolate-covered strawberries alongside your French toast. The rich chocolate elevates the dish from breakfast to a special occasion.

  • Herbal Tea: A calming cup of herbal tea, such as chamomile or mint, adds a soothing element to your meal while cleansing your palate between bites.

Expert Tips for Cinnamon Roll French Toast

  • Stale Bread: Use slightly stale cinnamon swirl bread for optimal custard absorption; fresh bread can become too soggy.

  • Heat Management: Monitor the skillet’s heat closely to avoid burning; adjust the temperature as needed for even cooking and a perfect golden crust.

  • Customize Flavors: Experiment with the nutmeg and cinnamon quantity to suit your taste; don’t hesitate to add a pinch or two for extra warmth.

  • Perfect Glaze: While whisking your glaze, adjust the milk consistency carefully; it should be smooth but thick enough to cling to the French toast without pooling on the plate.

  • Serving Warm: Serve your Cinnamon Roll French Toast immediately after cooking for the best texture and taste; the warm custardy center is truly a delight!

Make Ahead Options

These Cinnamon Roll French Toast slices are perfect for meal prep enthusiasts! You can prepare the custard mix up to 24 hours in advance, allowing the flavors to meld together beautifully. Simply whisk together the eggs, milk, vanilla, cinnamon, and nutmeg, and store it in an airtight container in the refrigerator. Additionally, you can soak the slices of cinnamon swirl bread in the custard overnight (though it’s best to add them to the custard just before cooking to retain a crispy texture). When you’re ready to serve, just heat the skillet and cook the soaked bread, knowing your breakfast will be just as delicious as if you made it fresh that morning!

Cinnamon Roll French Toast Variations

Feel free to get creative with this recipe and make it your own with delightful twists and substitutions!

  • Brioche or Challah: Use these rich breads for a more indulgent flavor, elevating your breakfast experience.
    A slight sweetness paired with a buttery texture will take your French toast to luxurious new heights.

  • Dairy-Free Delight: Swap out regular milk for almond, coconut, or oat milk for a creamy, dairy-free custard alternative.
    Your taste buds will not miss the dairy, and this version caters to a wider audience without sacrificing flavor!

  • Vegan-Friendly Fix: Replace eggs with flax eggs (1 tablespoon flaxseed meal + 2.5 tablespoons water per egg) for a plant-based option.
    This simple swap allows everyone to join in on this delicious breakfast treat while keeping it cruelty-free.

  • Flavor Boosts: Toss in chocolate chips, fresh blueberries, or raspberries into the custard for a burst of sweetness and vibrant color.
    These fruit additions not only enhance the taste but also make your dish more visually appealing for that perfect brunch photo!

  • Nutty Twist: Top your French toast with crushed nuts like pecans or walnuts for added crunch and a pleasing nutty flavor.
    If you love texture, this is the perfect way to elevate your dish and provide extra nutrition without overwhelming the sweetness.

  • Spicy Kick: Add a pinch of cayenne pepper or a sprinkle of chili flakes to the custard for a surprising twist of heat.
    This unexpected flavor combination leaves a lingering warmth that balances beautifully with the sweetness of the glaze.

  • Maple Fusion: Instead of a glaze, drizzle pure maple syrup over the top for an authentic touch and natural sweetness.
    This classic option not only enhances the flavor but also brings a luscious stickiness to your French toast, making it even more irresistible!

  • Sweetened Glaze Variations: Try using honey or agave syrup instead of powdered sugar in the glaze for a different flavor profile.
    This change will provide a lovely depth while keeping it simple and sweet, perfect for those looking for healthier alternatives.

Why not pair your Cinnamon Roll French Toast with a delightful side of Blueberry French Toast or indulge in a Creme Brulee French for a decadent brunch experience? The possibilities are endless!

Cinnamon Roll French Toast Recipe FAQs

How do I select the right cinnamon swirl bread?
Absolutely! Look for cinnamon swirl bread that is slightly stale as it absorbs the custard mixture better, giving you a fluffier texture in the final dish. Fresh bread can become soggy and may not hold its shape well during cooking. If you can’t find cinnamon swirl bread, brioche or challah works wonderfully as alternatives.

What is the best way to store leftover Cinnamon Roll French Toast?
Very! Leftover Cinnamon Roll French Toast can be stored in an airtight container in the refrigerator for up to 3 days. To keep it fresh, make sure to let it cool to room temperature before sealing. When you’re ready to enjoy it again, simply reheat in the microwave or on a skillet for that lovely crispy exterior.

Can I freeze Cinnamon Roll French Toast?
Absolutely! For freezing, wrap individual slices tightly in plastic wrap and place them in a freezer-safe bag. This method allows you to keep them for up to 2 months. When you’re ready to enjoy, thaw in the refrigerator overnight and reheat in a toaster or skillet before serving for best results.

What should I do if my French toast is soggy?
If your Cinnamon Roll French Toast turns out soggy, it could be due to using fresh bread or soaking it too long in the custard mixture. To correct this, ensure you’re using slightly stale bread, and dip each slice briefly in the custard—just enough to coat without over-soaking. Adjust your cooking time, ensuring each slice gets a beautiful golden brown finish.

Are there any dietary considerations for this recipe?
Very! This Cinnamon Roll French Toast can easily be made vegan by substituting eggs with flax eggs (1 tablespoon of ground flaxseed mixed with 2.5 tablespoons of water equals one egg) and using almond or oat milk. If you’re considering sugar alternatives, powdered sugar can be swapped with coconut sugar. Always check the labels of your bread for any allergens, especially if you’re serving guests.

Cinnamon Roll French Toast

Cinnamon Roll French Toast: Rise and Shine with Sweet Bliss

Cinnamon Roll French Toast is a delightful breakfast that combines the best of two beloved dishes, making every bite a comforting treat.
Prep Time 10 minutes
Cook Time 10 minutes
Total Time 20 minutes
Servings: 4 slices
Course: Breakfast
Cuisine: American
Calories: 300

Ingredients
  

For the Custard
  • 4 slices Cinnamon Swirl Bread Slightly stale for better absorption.
  • 3 Eggs Can use flax eggs for a vegan option.
  • 1 cup Milk Almond or oat milk for dairy-free.
  • 1 teaspoon Vanilla Extract Use pure vanilla if possible.
  • 1 teaspoon Ground Cinnamon Adjust to taste.
  • 1/4 teaspoon Ground Nutmeg Optional for added flavor.
For the Glaze
  • 1 cup Powdered Sugar Can substitute with coconut sugar.
  • 2 tablespoons Butter/Oil Use neutral oil for dairy-free.

Equipment

  • medium bowl
  • Skillet
  • whisk
  • Measuring cups and spoons

Method
 

Step-by-Step Instructions
  1. In a medium bowl, whisk together eggs, milk, vanilla extract, ground cinnamon, and optional nutmeg until smooth.
  2. Heat a medium skillet over medium heat and add butter or oil until melted and bubbly.
  3. Dip each slice of cinnamon swirl bread into the custard mixture, coating both sides.
  4. Cook the dipped bread slices in the skillet for 2-3 minutes on each side until golden brown.
  5. In a small bowl, whisk together powdered sugar, a splash of milk, and a dash of vanilla until creamy.
  6. Drizzle the creamy glaze over the warm French toast before serving.

Nutrition

Serving: 1sliceCalories: 300kcalCarbohydrates: 40gProtein: 6gFat: 12gSaturated Fat: 6gPolyunsaturated Fat: 2gMonounsaturated Fat: 4gCholesterol: 100mgSodium: 400mgPotassium: 250mgFiber: 2gSugar: 15gVitamin A: 500IUVitamin C: 1mgCalcium: 150mgIron: 1mg

Notes

For optimal results, use slightly stale bread and serve immediately for the best texture and flavor.

Tried this recipe?

Let us know how it was!

Warm Spiced Pumpkin Oatmeal for a Cozy Fall Morning

As the first chill of autumn settles in, there’s something extra comforting about a cozy bowl of Warm Spiced Pumpkin Oatmeal. This creamy delight, infused with the irresistible aromas of cinnamon and nutmeg, quickly transforms a busy morning into a heartfelt experience. Not only is this recipe a quick breakfast option—ready in just minutes—but it also packs a nutritious punch, making it a perfect start to your day. Whether you’re whipping it up for yourself or looking to impress guests on a leisurely weekend, this oatmeal is sure to wrap you in warmth. Ready to dive into a deliciously wholesome start? Let’s get cooking!

Why is this oatmeal recipe a must-try?

Comforting Bliss: This Warm Spiced Pumpkin Oatmeal is like a hug in a bowl, perfect for those crisp fall mornings.

Quick & Easy: With just a few simple ingredients, you can whip up a nutritious breakfast in minutes, saving you time during busy weekdays.

Versatile Delight: You can easily customize this oatmeal with your favorite toppings or make it vegan-friendly by substituting the milk—flexibility at its best!

Nourishing Ingredients: Packed with fiber and vitamins, this oatmeal not only tastes great but also fuels your day with sustained energy.

Autumn’s Essence: Infused with cozy spices and pumpkin, it captures the essence of the season, making it a beloved dish in many households, just like this Heartwarming Comfort Sausage recipe.

Enjoy a nourishing and delightful breakfast that you’ll want to make again and again!

Warm Spiced Pumpkin Oatmeal Ingredients

For the Base

  • Rolled Oats – The heart of this recipe, providing that comforting texture. Substitute with steel-cut oats, but adjust cooking time and liquid.
  • Milk – Gives creaminess; any non-dairy milk works perfectly for a vegan version.
  • Pumpkin Purée – Adds that delicious fall flavor; just ensure it’s 100% pure pumpkin purée, not the pie filling.

For Sweetness and Spice

  • Maple Syrup – Naturally sweetens the dish, but feel free to swap with honey or a sugar substitute if desired.
  • Ground Cinnamon – Infuses warmth and classic autumn flavor.
  • Ground Nutmeg – Delivers a nutty, aromatic essence, perfect for cozy mornings.
  • Ground Ginger – Provides a hint of zesty heat that enhances the warm spices.
  • Pinch of Salt – A crucial ingredient to elevate all the flavors in this Warm Spiced Pumpkin Oatmeal.

Step‑by‑Step Instructions for Warm Spiced Pumpkin Oatmeal

Step 1: Combine Base Ingredients
In a medium saucepan, combine 1 cup of rolled oats, 2 cups of milk (or your preferred non-dairy milk), a pinch of salt, and your spices: 1 teaspoon of ground cinnamon, ½ teaspoon of ground nutmeg, and ¼ teaspoon of ground ginger. Stir gently to mix and ensure the oats are well-coated in the spices and liquid for an even flavor.

Step 2: Bring to a Simmer
Place the saucepan over medium heat and gradually bring the mixture to a gentle simmer. Watch as the liquid begins to bubble around the edges, stirring occasionally to prevent sticking. This process usually takes about 3-4 minutes and fills your kitchen with the inviting scent of autumn spices.

Step 3: Cook the Oats
Once simmering, reduce the heat to low and continue cooking the oatmeal for about 5-7 minutes. Ensure that you stir frequently, allowing the oats to absorb the liquid and soften. You’ll know it’s ready when the mixture has thickened, and the oats are creamy and tender, creating a luscious texture.

Step 4: Add the Stars
Remove the saucepan from the heat, then stir in ½ cup of 100% pure pumpkin purée and 2 tablespoons of maple syrup (or your favorite sweetener). Mix well until the pumpkin is fully incorporated, adding a beautiful orange hue to your Warm Spiced Pumpkin Oatmeal, and welcoming a delightful taste of fall.

Step 5: Let It Rest
Let your oatmeal sit off the heat for a few minutes. This resting period allows the flavors to meld and the oatmeal to thicken slightly, resulting in a creamier finish that enhances the overall experience. The aroma will be utterly irresistible, inviting you to indulge.

Step 6: Serve and Garnish
Scoop the warm oatmeal into bowls, and feel free to get creative with garnishes! You can add chopped nuts, a drizzle of maple syrup, or even a dollop of yogurt for added creaminess. Enjoy your Warm Spiced Pumpkin Oatmeal that’s perfect for cozy autumn mornings!

Expert Tips for Warm Spiced Pumpkin Oatmeal

  • Choose Quality Pumpkin: Always opt for 100% pure pumpkin purée to ensure the best flavor and texture in your warm spiced pumpkin oatmeal. Avoid pumpkin pie filling, which has additional sugars and spices.

  • Microwave Method: In a hurry? Combine all ingredients in a large bowl, microwave in 1-minute intervals, stirring in between to prevent overflows.

  • Adjust Consistency: If your oatmeal becomes too thick after storage, simply reheat with a splash of milk or water until you reach the desired creaminess.

  • Flavor Boosts: Try adding a pinch of cloves or allspice to the mix for an extra depth of flavor that enhances the cozy vibe of your warm spiced pumpkin oatmeal.

  • Topping Ideas: Don’t hesitate to get creative with toppings! Fresh fruits, chia seeds, or even a sprinkle of dark chocolate can elevate your breakfast experience.

Warm Spiced Pumpkin Oatmeal Variations

Feel free to personalize your oatmeal with these delicious twists that will make every bowl a unique experience!

  • Dairy-Free: Substitute regular milk with almond or oat milk for a creamy vegan-friendly option that still tastes indulgent.
  • Protein-Packed: Stir in a scoop of your favorite protein powder before cooking to boost the nutritional value and keep you full longer. Blend it well for a smooth finish.
  • Nutty Sensation: Add a handful of chopped walnuts or pecans right before serving. The crunchiness adds a delightful texture that contrasts beautifully with the creamy oatmeal.
  • Sweetness Switch: Explore different sweeteners! Use agave syrup or date syrup instead of maple syrup for a new layer of flavor that’s still perfectly sweet.
  • Fruit Fusion: Top your oatmeal with fresh slices of banana or berries for a burst of freshness and a vibrant pop of color. Each bite becomes a delightful medley of flavors!
  • Spiced Up: If you like a little kick, add a pinch of cayenne pepper or crushed red pepper flakes to the mixture while it cooks. The warmth will pleasantly surprise you, making each spoonful exciting.
  • Pumpkin Pie Twist: Replace some of the pumpkin purée with sweet potato purée for a unique flavor variation that still keeps that comforting fall essence. It’s like a cozy hug for your taste buds!
  • Cocoa Delight: For a chocolate lover’s twist, stir in a tablespoon of cocoa powder for a rich, chocolatey oatmeal that still maintains its warm spiced charm. It’s a decadent breakfast treat!

Enjoy crafting your perfect bowl of Warm Spiced Pumpkin Oatmeal, and don’t forget to check out a cozy favorite like Tuscan Chicken Soup for a hearty meal later!

Storage Tips for Warm Spiced Pumpkin Oatmeal

Fridge: Store leftover oatmeal in an airtight container in the refrigerator for up to 3 days.

Freezer: Freeze individual portions in airtight containers or freezer-safe bags for up to 2 months. Thaw in the fridge overnight before reheating.

Reheating: When ready to enjoy, reheat the oatmeal on the stovetop or in the microwave, adding a splash of milk or water to restore creaminess as the oats absorb liquid over time.

Serving Suggestions: Feel free to enhance your warmed oatmeal with fresh toppings, such as nuts or a drizzle of maple syrup, to make it feel freshly made!

Make Ahead Options

These Warm Spiced Pumpkin Oatmeal bowls are perfect for meal prep enthusiasts! You can cook the oatmeal base (rolled oats, milk, and spices) up to 24 hours in advance; just follow the first three steps before letting it cool, then refrigerate. To maintain quality, store in an airtight container, and when you’re ready to serve, reheat with a splash of milk or water to achieve your desired consistency. For even more convenience, you can also measure out and combine your dry ingredients (oats and spices) in advance, making mornings a breeze. Simply add the pumpkin purée and maple syrup after reheating, and you’ll enjoy a warm, comforting breakfast in no time!

What to Serve with Warm Spiced Pumpkin Oatmeal

Embrace the cozy essence of autumn by creating a complete breakfast experience that tantalizes your senses.

  • Creamy Almond Yogurt: A dollop adds a rich creaminess, perfectly balancing the warm spices and enhancing the delightful texture. It’s a nutritious way to start your day!

  • Chopped Nuts: Toasted pecans or walnuts provide a crunchy texture that contrasts beautifully with the soft oatmeal. Sprinkle a handful on top for an extra dose of healthy fats.

  • Fresh Berries: Raspberries or blueberries bring a burst of freshness, cutting through the warming spices and adding a touch of natural sweetness. They’re the perfect seasonal pairing!

  • Maple Syrup Drizzle: Elevate your oatmeal with an extra drizzle of maple syrup, enhancing the sweetness and inviting flavors. It’ll make each bite feel like a treat!

  • Cinnamon Apple Slices: Lightly sautéed apple slices with cinnamon echo the flavors of the oatmeal, adding a warm fruitiness that feels like a hug in a bowl.

  • Spiced Chai Latte: A cup of this aromatic drink complements the cozy spices in your oatmeal, creating a comforting breakfast duo sure to warm you from the inside out.

  • Coconut Granola: For a delightful crunch, sprinkle coconut granola on top. It adds a wonderful layer of flavor and texture that ties together the whole meal.

  • Peanut Butter Swirl: A spoonful of peanut butter brings rich creaminess and nutty undertones, uplifting the entire dish with a satisfying indulgence.

Warm Spiced Pumpkin Oatmeal Recipe FAQs

How do I select the best pumpkin purée?
Absolutely! Always choose 100% pure pumpkin purée for this recipe, which will give your Warm Spiced Pumpkin Oatmeal the best flavor and texture. Avoid pumpkin pie filling, as it contains added sugars and spices that can alter the intended taste of your dish.

What’s the best way to store leftovers?
For sure! Store leftover oatmeal in an airtight container in the refrigerator for up to 3 days. Simply reheat using a splash of milk or water to restore creaminess, as oats tend to absorb liquid over time. If you have a busy week ahead, it’s perfect for meal prep!

Can I freeze Warm Spiced Pumpkin Oatmeal?
Very much! This oatmeal freezes beautifully. Divide individual portions into airtight containers or freezer-safe bags, and they’ll stay fresh for up to 2 months. When you’re ready to eat, just thaw overnight in the fridge and reheat on the stovetop or in the microwave, adding a bit of liquid as needed.

What if my oatmeal turns too thick during storage?
Don’t worry! If your oatmeal is thicker than you prefer after storage, simply add a splash of milk or water when reheating to reach your desired consistency. It’s normal for oats to absorb liquid, and this little trick will bring back that lovely creamy texture!

Is this recipe suitable for my vegan diet?
Absolutely! To enjoy a vegan version of this Warm Spiced Pumpkin Oatmeal, just substitute the regular milk with any non-dairy milk like almond, oat, or soy milk. This way, you can savor the rich flavors while adhering to your dietary needs!

What are some great topping ideas?
The more the merrier! You can top your oatmeal with chopped nuts for crunch, a drizzle of maple syrup for extra sweetness, or even a dollop of yogurt for creaminess. Fresh fruits or a sprinkle of cinnamon can also add a delightful finishing touch!

Warm Spiced Pumpkin Oatmeal

Warm Spiced Pumpkin Oatmeal for a Cozy Fall Morning

Warm Spiced Pumpkin Oatmeal is a comforting breakfast that embraces fall flavors, perfect for busy mornings or a cozy weekend.
Prep Time 10 minutes
Cook Time 10 minutes
Resting Time 5 minutes
Total Time 25 minutes
Servings: 2 bowls
Course: Breakfast
Cuisine: American
Calories: 300

Ingredients
  

For the Base
  • 1 cup rolled oats Can substitute with steel-cut oats, adjust cooking time and liquid.
  • 2 cups milk Any non-dairy milk works for a vegan version.
  • 1 pinch salt
  • 1 teaspoon ground cinnamon
  • ½ teaspoon ground nutmeg
  • ¼ teaspoon ground ginger
For Sweetness and Spice
  • ½ cup pumpkin purée Ensure it's 100% pure pumpkin purée.
  • 2 tablespoons maple syrup Can substitute with honey or sugar substitute.

Equipment

  • medium saucepan

Method
 

Step-by-Step Instructions
  1. In a medium saucepan, combine rolled oats, milk, a pinch of salt, ground cinnamon, ground nutmeg, and ground ginger. Stir gently to mix.
  2. Place the saucepan over medium heat and gradually bring the mixture to a gentle simmer, stirring occasionally.
  3. Once simmering, reduce the heat to low and cook the oatmeal for about 5-7 minutes, stirring frequently until thickened.
  4. Remove from heat and stir in pumpkin purée and maple syrup until fully incorporated.
  5. Let sit off the heat for a few minutes to allow flavors to meld.
  6. Scoop into bowls and garnish with your favorite toppings.

Nutrition

Serving: 1bowlCalories: 300kcalCarbohydrates: 45gProtein: 10gFat: 8gSaturated Fat: 3gPolyunsaturated Fat: 1gMonounsaturated Fat: 4gCholesterol: 5mgSodium: 150mgPotassium: 400mgFiber: 6gSugar: 15gVitamin A: 800IUVitamin C: 2mgCalcium: 300mgIron: 2mg

Notes

Feel free to customize with toppings like chopped nuts, fruits, or a drizzle of extra maple syrup.

Tried this recipe?

Let us know how it was!

Delicious Pumpkin Patch Deviled Eggs for Your Autumn Gatherings

“Can I just say how much I adore Halloween? Not only do I get to see adorable costumes, but it’s also a fantastic excuse to get creative in the kitchen! This time, I’m bringing a festive twist to a classic favorite with my Pumpkin Patch Deviled Eggs. These delightful little appetizers are not only visually stunning, resembling cute little pumpkins, but they also promise to whip up in no time—making them perfect for your autumn gatherings. Whether you’re hosting a family get-together or looking to impress friends at a holiday party, these deviled eggs offer that ideal combination of creamy richness and fall warmth. Ready to dive into a recipe that’s as fun to make as it is to eat? Let’s get started!”

Why are These Deviled Eggs a Must-Try?

Festive Appeal: These Pumpkin Patch Deviled Eggs aren’t just delicious—they’re a feast for the eyes! Their pumpkin shape makes them the perfect conversation starter at any autumn gathering.

Quick and Easy: With simple steps and minimal fuss, you’ll have a stunning appetizer ready in no time. Who doesn’t love a recipe that’s both impressive and quick?

Flavorful Filling: The creamy yolk mixture, with a hint of tang from mustard and the warmth of paprika, offers a delightful burst of flavor in every bite.

Versatile Decoration: Get creative! Swap chives for colorful veggies to represent pumpkin stems or go spicy with some hot sauce for those who crave a kick.

Crowd Favorite: Whether it’s a family gathering, Halloween bash, or Thanksgiving feast, these deviled eggs will be the hit of the table, just like my Joumou Haitian Pumpkin soup!

Pumpkin Patch Deviled Eggs Ingredients

For the Filling
Large Eggs – The main component providing the base; use fresh eggs for easier peeling.
Mayonnaise – Adds creaminess and richness to the filling; substitute with Greek yogurt for a lighter version.
Yellow Mustard – Provides tanginess that balances the richness of the mayonnaise.
Salt – Enhances the overall flavor of the filling; adjust to taste.
Black Pepper – Adds mild spiciness for depth of flavor.
Paprika – Offers warmth and color; lightly dust for extra visual appeal.
Orange Food Coloring (optional) – Enhances the vibrant pumpkin color of the filling; use sparingly.

For the Decoration
Fresh Chives – Used for making “stems” and as garnish; substitute with parsley or dill for a different flavor.

These Pumpkin Patch Deviled Eggs are an easy, festive appetizer, perfect for your autumn gatherings!

Step‑by‑Step Instructions for Pumpkin Patch Deviled Eggs

Step 1: Boil Eggs
Begin by carefully arranging your large eggs in a single layer in a saucepan, making sure they aren’t overcrowded. Cover them with cold water, ensuring there’s about an inch above the eggs. Bring the water to a rolling boil over medium-high heat. Once boiling, remove the saucepan from heat and cover with a lid, letting the eggs sit for 10 minutes to achieve perfectly cooked yolks.

Step 2: Ice Bath
While the eggs are resting, prepare an ice bath by filling a large bowl with ice and cold water. After the 10 minutes are up, use a slotted spoon to transfer the hot eggs from the saucepan to the ice bath. Allow the eggs to chill for about 5 minutes, which will help stop the cooking process and make peeling much easier.

Step 3: Peel Eggs
Once the eggs are cool, gently crack each egg by rolling it on a clean surface to loosen the shell. Peel the eggs under cool running water to help remove stubborn bits of shell. You should aim for smooth, unblemished whites, which will create an appealing base for your Pumpkin Patch Deviled Eggs.

Step 4: Prep Filling
Next, carefully slice each egg in half lengthwise and gently scoop out the yolks into a mixing bowl. Mash the yolks with a fork until smooth, then mix in mayonnaise, yellow mustard, salt, black pepper, paprika, and a few drops of orange food coloring if desired. Blend until you have a creamy, pumpkin-colored filling that’s well-combined and deliciously flavored.

Step 5: Pipe Filling
To create the charming pumpkin look of the deviled eggs, place the smooth yolk mixture into a piping bag fitted with a star tip. Carefully pipe the filling into each egg white half, starting from the center and working your way outwards to form a lovely dome shape. The texture should resemble the rise and fall of a cute pumpkin, so take your time to achieve that festive form.

Step 6: Decorate
Now it’s time to add the finishing touches! Using a sharp knife or toothpick, make small ridges on the filling to give your deviled eggs a textured appearance resembling pumpkin grooves. Finally, insert pieces of fresh chives into the top of each egg to act as stems, giving them that adorable final touch for your Pumpkin Patch Deviled Eggs.

Step 7: Chill
To enhance the flavors and allow the shapes to set beautifully, refrigerate your decorated Pumpkin Patch Deviled Eggs for at least 30 minutes before serving. This not only helps meld the flavors together but also makes them a delightful, cool treat for your guests during autumn gatherings!

What to Serve with Pumpkin Patch Deviled Eggs

Looking to create a full meal that captures the spirit of fall and satisfies your guests?

  • Roasted Chicken: This savory dish complements the creamy richness of the deviled eggs, bringing a juicy contrast to your spread.

  • Hearty Stew: A warm bowl of hearty stew adds comforting flavors and textures, making it a cozy companion for your festive appetizer.

  • Autumn Salad: A fresh salad with mixed greens, apples, and nuts provides a fresh crunch, enhancing the overall dining experience with a burst of color.

  • Dinner Rolls: Soft and buttery rolls bring a delightful softness against the spices of the deviled eggs. Perfect for soaking up flavors!

  • Light Hard Cider: This refreshing drink pairs beautifully, cutting through the richness of the eggs while embracing the essence of fall.

  • Pumpkin Pie: End on a sweet note with classic pumpkin pie, keeping the autumn theme alive and surely satisfying everyone’s sweet tooth.

Whether it’s a family gathering or a holiday party, these pairings will elevate your Pumpkin Patch Deviled Eggs to the center of attention!

Make Ahead Options

These Pumpkin Patch Deviled Eggs are ideal for meal prepping! You can prepare the egg yolk filling up to 3 days in advance, storing it in an airtight container in the refrigerator. To maintain quality and prevent browning, press a piece of plastic wrap directly onto the surface of the filling before sealing the container. You can also boil and peel the eggs 1-2 days ahead, storing the whites in a covered container with a damp paper towel for moisture retention. When you’re ready to serve, simply pipe the creamy filling into the egg whites, decorate, and chill for at least 30 minutes to enhance the flavors. Enjoy the time-saving benefits while impressing your guests with these stunning appetizers!

Expert Tips for Pumpkin Patch Deviled Eggs

Perfect Timing: Ensure you follow the boiling and resting times carefully; overcooking can result in unwanted green rings around the yolks.

Smooth Filling: For a velvety texture, mash the yolks thoroughly and consider straining the mixture through a fine-mesh sieve.

Piping Technique: Use steady pressure when piping the filling to achieve a consistent pumpkin shape—practice makes perfect!

Color Carefully: If using orange food coloring, add it gradually. Too much can alter the flavor, so start with a drop!

Freshness Matters: For easier peeling, opt for slightly older eggs (7-10 days), which typically have larger air pockets.

Pumpkin Patch Deviled Eggs Variations

Feel free to unleash your creativity with these delicious ideas to customize your Pumpkin Patch Deviled Eggs!

  • Spicy Kick: Add cayenne pepper or a few drops of your favorite hot sauce to the yolk mixture for a delightful heat that balances the creaminess. Your guests who love a bit of spice will thank you!

  • Healthier Swap: Try Greek yogurt in place of mayonnaise for a lighter version. This not only reduces fats but also adds a protein boost, making these goodies just a touch healthier without sacrificing flavor.

  • Colorful Stems: Swap chives for thin slices of colorful carrots or bell peppers to add a playful twist. This vibrant addition makes your deviled eggs even more appealing on the plate!

  • Gourmet Flavor: Incorporate fresh herbs like dill or basil into the filling for an aromatic twist. This will elevate your deviled eggs to gourmet status, perfect for impressing those special guests.

  • Nutty Boost: Stir in crushed walnuts or pecans into the yolk mixture for added texture and a delightful nutty flavor. It not only enhances taste but also brings in a satisfying crunch.

  • Cheddar Delight: Mix in shredded cheddar cheese for a creamy, cheesy experience. This unexpected ingredient can be a surprise hit at your autumn gatherings, adding depth to your eggs!

  • Festive Garnish: Create a charming display by surrounding the deviled eggs with small gourds or autumn leaves on the platter. This not only sets the mood but attracts attention to your lovely dish, just like with my Feta Fried Eggs.

  • Savory Spin: For a twist on flavors, try adding a spoonful of sriracha to your filling for a smoky taste that blends well with the savory ingredients.

With these variations, your Pumpkin Patch Deviled Eggs will be ready to capture the hearts and taste buds of everyone at the table! Enjoy customizing and celebrating the flavors of autumn!

How to Store and Freeze Pumpkin Patch Deviled Eggs

Fridge: Store leftover Pumpkin Patch Deviled Eggs in an airtight container for up to 2 days. They are best enjoyed within 24 hours for freshness and optimal flavor.

Make-Ahead: You can prepare the egg filling 2-3 days in advance. Just keep it stored separately in the fridge, then pipe it into the egg whites just before serving for the best presentation.

Freezer: While deviled eggs don’t freeze well due to their texture, you can freeze the yolk filling in a sealed zip-top bag for up to 2 months. Thaw in the fridge overnight before piping.

Reheating: Since deviled eggs are best served chilled, no reheating is necessary. Simply enjoy them cold after chilling!

Pumpkin Patch Deviled Eggs Recipe FAQs

How do I select the best eggs for deviled eggs?
Absolutely! For making Pumpkin Patch Deviled Eggs, choose fresh large eggs. Fresh eggs are easier to peel after boiling. If possible, select eggs that are 7-10 days old, as they will have larger air pockets, making them easier to peel after cooking.

How long can I store leftover deviled eggs?
Very! You can keep your leftover Pumpkin Patch Deviled Eggs stored in an airtight container in the refrigerator for up to 2 days. However, they’re best enjoyed within 24 hours for maximum freshness, flavor, and visual appeal.

Can I make the filling ahead of time?
Absolutely! The filling for your Pumpkin Patch Deviled Eggs can be prepared in advance—up to 2-3 days ahead. Just keep the mixture in the refrigerator and store it in a tightly sealed container. Pipe it into the egg whites right before serving to maintain their festive look!

What’s the best way to freeze deviled eggs?
While the finished deviled eggs don’t freeze well due to their texture, you can freeze the yolk filling! Simply place it in a sealed zip-top bag, removing as much air as possible, and freeze for up to 2 months. When ready to use, thaw it in the refrigerator overnight, then pipe it into the egg whites for a fresh serving.

How can I prevent the yolks from turning green?
Absolutely! To avoid the dreaded green ring around your yolks, be sure not to overcook the eggs. Follow the boiling instructions closely: after bringing the water to a boil, remove the saucepan from heat and cover for exactly 10 minutes. Using an ice bath immediately afterward will also help prevent any color changes.

Are there any dietary considerations for these deviled eggs?
Very! If you have guests with dietary restrictions, you can easily modify the Pumpkin Patch Deviled Eggs. Substitute mayonnaise with Greek yogurt for a lighter option, and always check for any allergies to the ingredients like eggs or mustard. For pet safety, never feed your dog or cat these eggs, as ingredients like mayonnaise are not recommended for them.

Pumpkin Patch Deviled Eggs

Delicious Pumpkin Patch Deviled Eggs for Your Autumn Gatherings

These Pumpkin Patch Deviled Eggs are a delightful twist on a classic, perfect for autumn gatherings.
Prep Time 15 minutes
Cook Time 10 minutes
Chilling Time 30 minutes
Total Time 55 minutes
Servings: 12 eggs
Course: Appetizers
Cuisine: American
Calories: 70

Ingredients
  

For the Filling
  • 6 large Eggs Use fresh eggs for easier peeling.
  • 1/4 cup Mayonnaise Substitute with Greek yogurt for a lighter version.
  • 1 tablespoon Yellow Mustard Provides tanginess.
  • 1 teaspoon Salt Adjust to taste.
  • 1/4 teaspoon Black Pepper Adds mild spiciness.
  • 1 teaspoon Paprika Lightly dust for extra visual appeal.
  • 1 drop Orange Food Coloring Optional, use sparingly.
For the Decoration
  • 1/4 cup Fresh Chives Used for making 'stems'.

Equipment

  • Saucepan
  • Mixing Bowl
  • Piping Bag

Method
 

Preparation Steps
  1. Boil Eggs: Arrange eggs in a single layer in a saucepan, cover with cold water, and bring to a boil. Remove from heat, cover, and let sit for 10 minutes.
  2. Ice Bath: Prepare an ice bath and transfer eggs to chill for 5 minutes.
  3. Peel Eggs: Crack and peel eggs under cool running water.
  4. Prep Filling: Slice eggs in half, scoop out yolks, and mash with mayonnaise, mustard, salt, pepper, paprika, and food coloring.
  5. Pipe Filling: Place yolk mixture in a piping bag and pipe into egg whites.
  6. Decorate: Make ridges on the filling and add chives as stems.
  7. Chill: Refrigerate decorated eggs for at least 30 minutes before serving.

Nutrition

Serving: 1eggCalories: 70kcalCarbohydrates: 1gProtein: 6gFat: 5gSaturated Fat: 1.5gPolyunsaturated Fat: 0.5gMonounsaturated Fat: 2.5gCholesterol: 186mgSodium: 150mgPotassium: 60mgVitamin A: 250IUCalcium: 20mgIron: 0.5mg

Notes

These deviled eggs are best enjoyed within 24 hours for freshness and optimal flavor.

Tried this recipe?

Let us know how it was!

Hocus Pocus Punch: A Fun Nonalcoholic Halloween Delight

With a whirl of colorful ingredients, my kitchen transformed into a bubbly cauldron brimming with delight. The star of the show? Hocus Pocus Punch, a kid-friendly Halloween elixir that promises to cast a spell on every little witch and wizard at your gathering! Combining sweet mango nectar with zesty citrus sodas and a hint of refreshing mint, this nonalcoholic punch is a breeze to whip up and guaranteed to be a hit. Not only does it enchant the senses with its vibrant colors, but it also keeps the spirits high, warming hearts and fostering laughter. As the fruity fizz dances in each cup, the playful gummy eyeballs add that perfect spooky touch—making every sip an adventure. Are you ready to conjure up some fun in your kitchen this Halloween season?

What Makes Hocus Pocus Punch Special?

Kid-Friendly Delight: This punch is perfect for children and adults alike, infusing every gathering with joy and laughter.
Effervescent Fun: Its fizzy texture captivates both the young and the young at heart, making it a refreshing choice for any Halloween celebration.
Simple Steps: Quick and easy to prepare, you’ll spend less time in the kitchen and more time enjoying the festivities.
Customizable Flavors: Feel free to mix up the flavors with variations like pineapple nectar or sparkling water, catering to everyone’s taste buds.
Festive Garnish: The playful gummy eyeballs or worms not only elevate the presentation but also add a whimsical touch to your spooky soirée.
Pair this punch with other festive treats or check out my guide on Halloween party ideas for more inspiration!

Hocus Pocus Punch Ingredients

For the Base
Mango Nectar – Provides a sweet and tropical flavor that forms the punch’s base; substitute with pineapple nectar for a different taste.
Lemon-Lime Soda – Adds fizzy carbonation and zesty notes; use lemon-lime sparkling water for a less sweet version.
Orange Soda – Contributes sweetness and depth to the flavor profile; can be replaced with passion fruit soda for a tropical twist.

For the Garnish
Fresh Mint Leaves – Offers a cooling herbal note that enhances the drink’s refreshing qualities; add extra mint sprigs for a more intense flavor.
Gummy Eyeballs or Worms – Fun Halloween-themed garnish that adds playfulness to the presentation; optional but highly recommended for thematic flair.

To Serve
Ice Cubes – Essential for chilling the punch; ensures the drink remains refreshing.

Conjure up this Hocus Pocus Punch for a festive touch at your Halloween gathering!

Step‑by‑Step Instructions for Hocus Pocus Punch

Step 1: Prepare the Mint
In a large pitcher, take a handful of fresh mint leaves and gently bruise them with a wooden spoon. Press down firmly for about 10–15 seconds to release the fragrant oils, enhancing the herbal notes in your Hocus Pocus Punch. This simple step adds an aromatic quality that will enrich the overall flavor profile.

Step 2: Mix the Base
Pour in 4 cups of mango nectar and 2 cups of orange soda into the pitcher, stirring gently to blend the flavors. Allow the vibrant orange mixture to come together for about 30 seconds, ensuring the sweetness of the mango pairs beautifully with the zesty orange. This step creates a delightful foundation for your punch.

Step 3: Add the Fizz
Next, slowly pour 2 cups of lemon-lime soda into the punch mixture. To preserve the carbonation, stir lightly for around 15 seconds until just combined. Watch as the bubbles rise and dance in the pitcher, contributing to the effervescent quality that makes Hocus Pocus Punch so enchanting.

Step 4: Chill with Ice
Now it’s time to keep your punch icy cold! Add 2 cups of ice cubes to the pitcher, stirring gently for about 10 seconds. This will ensure the Hocus Pocus Punch maintains its refreshing chill, ready for your guests to enjoy. The ice also helps blend the flavors further, creating a cohesive drink.

Step 5: Garnish Creatively
For a whimsical touch, float gummy eyeballs or worms on top of the punch. Scatter about 10 pieces across the surface, allowing them to bob and enhance the spooky theme. This final touch transforms your Hocus Pocus Punch into a festive centerpiece at any Halloween gathering, enticing little witches and wizards alike.

Step 6: Serve with Style
To present your punch, pour it into clear cups or mini cauldrons, showcasing its vibrant orange color. Serve immediately, encouraging your guests to grab a drink and enjoy the fizzy, fruity delight of Hocus Pocus Punch. Watching their eyes light up will make the effort truly rewarding!

Hocus Pocus Punch Variations & Substitutions

Feel free to sprinkle your own magic into the Hocus Pocus Punch and customize it to your liking with these delightful ideas!

  • Pineapple Nectar: Swap out mango nectar for pineapple nectar to introduce a tangy-sweet flavor that offers a tropical twist. Your guests will love this refreshing change!

  • Passion Fruit Soda: Replace orange soda with passion fruit soda for a beautifully exotic twist that enhances the fruity profile. The new flavor will transport you straight to an island paradise.

  • Sparkling Water: Use lemon-lime sparkling water instead of sodas for a lighter, less sweet punch. This is perfect for those who prefer a bubbly drink without the added sugars.

  • Cucumber Slice Infusion: Add slices of cucumber to the mix for an unexpected refreshing undertone. This little twist brings a garden-fresh vibe that will surprise and delight everyone!

  • Herbal Variations: Experiment with herbs like basil or thyme alongside the mint for a sophisticated flair. This botanical touch adds a unique aroma that will enchant your senses.

  • Heat It Up: For an adult version, you can add a splash of your favorite spirit, like rum or vodka, to elevate the punch. A little kick can turn this festive drink into a lively party pleaser!

  • Customize Your Garnish: Instead of gummy eyeballs or worms, top your punch with fruit slices or edible flowers for a seasonal flair. They add a beautiful touch while still being playful!

  • Chill in Advance: Make your punch base and freeze it into ice cubes to maintain its fizz and prevent dilution. It’s a clever way to keep the party punch refreshing and flavorful!

These variations are just a sprinkle of the creative ideas you can try. Perfect for pairing with other Halloween treats, this punch can be served alongside festive snacks. Don’t forget to check out my recommendations for Halloween party ideas to make your gathering an unforgettable one!

What to Serve with Hocus Pocus Punch

Creating the ultimate Halloween spread takes a dash of creativity and a sprinkle of delight!

  • Spooky Spider Cupcakes: Moist chocolate cupcakes topped with black frosting and edible spiders make for an eerie yet delicious dessert, perfect alongside the punch.

  • Witch’s Brew Cheese Balls: Savory cheese balls adorned with herbs and spices resemble little cauldrons, adding a tangy crunch that balances the sweet fizz of the punch.

  • Crispy Witches’ Broomsticks: Pretzel sticks wrapped in string cheese not only serve as tasty finger food but also add a fun, whimsical touch that kids will love.

  • Ghostly Fruit Salad: A medley of seasonal fruits cut into ghost shapes offers a refreshing contrast to the punch’s sweetness while keeping the ghostly theme alive.

  • Chocolate Dipped Apples: Sweet and crunchy apples drizzled with chocolate make for a festive yet simple treat that complements the punch’s fruity essence beautifully.

  • Frighteningly Good Popcorn Mix: A blend of caramel popcorn, candy corn, and chocolate-covered pretzels creates a sweet and salty snack mix to keep spirits high while sipping on Hocus Pocus Punch!

Expert Tips for Hocus Pocus Punch

  • Pre-Chill Ingredients: Make sure to chill your mango nectar and sodas beforehand for a bubbly punch that’s refreshing right from the start.
  • Mind the Mix: To maintain carbonation, always add the lemon-lime soda slowly and stir gently. Avoid over-mixing!
  • Fresh Ice Only: Add fresh ice cubes moments before serving to keep the Hocus Pocus Punch frosty without dilution.
  • Garnish with Care: If using gummy garnishes, place them on top right before serving to keep their shape intact—no one wants a sad, melted eyeball!
  • Taste as You Go: Feel free to taste-test throughout the mixing process. Adjust sweetness or add more mint to achieve your perfect flavor!

How to Store and Freeze Hocus Pocus Punch

Fridge: Keep any leftover Hocus Pocus Punch in an airtight container in the fridge for up to 3 days. Store without ice to prevent dilution.

Freezer: For longer storage, pour the punch into ice cube trays or silicone molds and freeze. Use within 1 month for best flavor.

Reheating: When ready to serve, thaw the punch in the fridge overnight, then mix gently with fresh soda before serving to revive its fizz.

Make-Ahead Tip: Prepare the punch base (without ice and garnishes) up to 24 hours in advance, refrigerating it until party time for a quick and easy festive drink!

Make Ahead Options

These Hocus Pocus Punch preparations are perfect for busy home cooks looking to save time! You can mix the punch base (mango nectar, orange soda, and mint) up to 24 hours in advance. Just refrigerate it to ensure maximum freshness and taste. Avoid adding the lemon-lime soda and ice until you’re ready to serve to maintain the fizzy quality. When it’s time to delight your guests, simply pour in the lemon-lime soda, stir gently, and add ice right before serving. This way, you’ll have a spellbinding punch that’s just as enchanting as if you made it right before the party!

Hocus Pocus Punch Recipe FAQs

What type of mango nectar should I use for the Hocus Pocus Punch?
Go for a sweet and natural mango nectar to create a rich base for your punch. If you can’t find mango nectar, pineapple nectar is a great substitute that maintains that tropical vibe!

How long can I store leftover Hocus Pocus Punch?
Absolutely! You can keep any leftover punch in an airtight container in the fridge for up to 3 days. Just remember to store it without ice to prevent it from getting watered down. When you’re ready to enjoy it again, make a fresh batch of ice!

Can I freeze Hocus Pocus Punch?
Yes, you can! For freezing, pour the punch into ice cube trays or silicone molds to make ice cubes. Just remember to use it within 1 month for the best flavor. When you’re ready to enjoy, thaw in the fridge overnight and mix with fresh soda for that delightful fizz!

What should I do if my Hocus Pocus Punch loses its fizz?
No worries! If your punch starts to lose its effervescence, gently mix in some fresh lemon-lime soda just before serving. This will help reinvigorate the bubbly delight. Also, to maintain carbonation, always add the soda slowly and avoid stirring too vigorously.

Is this recipe allergy-friendly?
While the Hocus Pocus Punch is generally safe for kids and most adults, always check the labels on your juices and sodas for allergens. For example, some people may have sensitivities to certain food dyes in gummy garnishes. For a safer option, you can always use fresh fruit as a garnish instead of candy!

Hocus Pocus Punch

Hocus Pocus Punch: A Fun Nonalcoholic Halloween Delight

Hocus Pocus Punch is a delightful nonalcoholic beverage that blends sweet mango nectar, zesty citrus sodas, and refreshing mint, perfect for Halloween gatherings.
Prep Time 15 minutes
Total Time 15 minutes
Servings: 8 cups
Course: Drinks
Calories: 120

Ingredients
  

For the Base
  • 4 cups mango nectar or substitute with pineapple nectar
  • 2 cups orange soda can be replaced with passion fruit soda
  • 2 cups lemon-lime soda or use lemon-lime sparkling water
For the Garnish
  • 1 bunch fresh mint leaves add extra sprigs for more flavor
  • 10 pieces gummy eyeballs or worms optional but recommended for thematic flair
To Serve
  • 2 cups ice cubes essential for chilling the punch

Equipment

  • pitcher
  • Wooden spoon
  • Measuring cups

Method
 

Step-by-Step Instructions for Hocus Pocus Punch
  1. In a large pitcher, take a handful of fresh mint leaves and gently bruise them with a wooden spoon for about 10–15 seconds to release the fragrant oils.
  2. Pour in 4 cups of mango nectar and 2 cups of orange soda into the pitcher, stirring gently to blend.
  3. Slowly pour 2 cups of lemon-lime soda into the mixture, stirring lightly for 15 seconds.
  4. Add 2 cups of ice cubes to the pitcher, stirring gently for about 10 seconds.
  5. Float gummy eyeballs or worms on top of the punch, scattering about 10 pieces across the surface.
  6. Pour the punch into clear cups or mini cauldrons and serve immediately.

Nutrition

Serving: 1cupCalories: 120kcalCarbohydrates: 30gSodium: 10mgSugar: 28gVitamin C: 10mg

Notes

Make sure to chill your ingredients beforehand for a refreshing punch. Taste-test throughout the mixing process to adjust sweetness to your liking.

Tried this recipe?

Let us know how it was!

Pumpkin S’mores Bars: Deliciously Cozy Fall Indulgence

As the leaves begin to change and a chill settles in the air, there’s something truly magical about the aroma of baking pumpkin treats wafting through the house. And that’s exactly the vibe of these Pumpkin S’mores Bars! This deliciously cozy recipe brings together the essence of classic s’mores with a pumpkin spice twist, perfect for welcoming autumn flavors. Not only are these bars a delightful crowd-pleaser, but they also come together with minimal fuss, making them ideal for those unexpected gatherings or a cozy night in. So, are you ready to create a sweet, seasonal adventure in your kitchen? Let’s dive into this recipe for the ultimate Pumpkin S’mores Bars!

Why Are Pumpkin S’mores Bars a Must-Try?

Warm, Cozy Flavors: The blend of pumpkin and spices brings comforting fall flavors into every bite.
Decadence Made Easy: With just a few simple ingredients, creating a show-stopping dessert has never been so achievable.
Crowd Pleaser: Perfect for gatherings, these bars will have everyone asking for seconds!
Versatile Additions: Feel free to mix in nuts or a dash of extra spice to customize them to your taste.
No Fuss Required: Minimal prep and cleanup make these bars a go-to recipe for busy weeks.

Want to try more delicious seasonal treats? Check out these Turtle Bars Decadent or warm lentil goodness with Joumou Haitian Pumpkin soup!

Pumpkin S’mores Bars Ingredients

• Get ready to satisfy your cravings!

For the Batter

  • Unsalted Butter – Adds moistness and richness; browning it enhances flavor.
  • Granulated Sugar – Provides sweetness and aids in achieving that perfect structure.
  • Brown Sugar – Enhances moisture with a touch of subtle molasses flavor.
  • Pumpkin Puree – Serves as the moisture-rich flavor base; opt for canned for convenience.
  • Vanilla Extract – Introduces deep, aromatic layers of flavor.
  • Kosher Salt – Perfectly balances the sweetness for a well-rounded taste.
  • Large Egg – Gives the bars structure and binds all ingredients together.
  • All-Purpose Flour – Essential for creating the bar’s delightful shape and sturdiness.
  • Baking Powder – Acts as a leavening agent, promoting rise and texture.
  • Pumpkin Pie Spice – Adds that signature warm spice flavor; cinnamon is a great substitute.

For the Filling

  • Chocolate Chips – Provides that rich, melty chocolate goodness; use chocolate bars for chunkier bites.
  • Marshmallow Fluff – Acts as the sweet, gooey filling; adjust the amount for more or less sweetness.

Give yourself the treat you deserve with these delightful Pumpkin S’mores Bars and dive into the fall spirit in your kitchen!

Step‑by‑Step Instructions for Pumpkin S’mores Bars

Step 1: Preheat the Oven
Begin by preheating your oven to 350°F (175°C). While it warms up, prepare a 9×13 inch baking pan by lightly spraying it with nonstick cooking spray or lining it with parchment paper for easy removal later on. This ensures your Pumpkin S’mores Bars don’t stick and come out perfectly every time.

Step 2: Mix Dry Ingredients
In a medium bowl, whisk together 1 ½ cups of all-purpose flour, 1 teaspoon of baking powder, and 1 tablespoon of pumpkin pie spice. These ingredients will form the flavorful backbone of your Pumpkin S’mores Bars. Set this mixture aside to allow the flavors to meld while you prepare the wet ingredients in the next step.

Step 3: Combine Wet Ingredients
In a large mixing bowl, combine ½ cup of melted unsalted butter with ½ cup of granulated sugar and ½ cup of brown sugar. Beat until the mixture is smooth and creamy. Next, add in 1 egg, 1 cup of pumpkin puree, 1 teaspoon of vanilla extract, and a pinch of kosher salt, mixing until everything is well incorporated and smooth for your deliciously warm and cozy bars.

Step 4: Incorporate Dry Ingredients
Gradually add the dry mixture from Step 2 into the bowl with the wet ingredients. Gently stir until just combined—be careful not to overmix! You want to maintain a slight denseness in the batter to ensure a fudgy yet rich texture in your Pumpkin S’mores Bars. This is key for that perfect baked goodness.

Step 5: Layer in the Pan
Spread ⅓ to ½ of the prepared batter evenly on the bottom of your baking pan. Then, sprinkle a generous layer of chocolate chips and dollops of marshmallow fluff over the batter. Now pour the remaining batter on top, spreading it gently to cover the filling, creating a delightful surprise when you cut into the bars.

Step 6: Bake
Place the layered pan into the preheated oven and bake for approximately 30 to 50 minutes, depending on your oven’s performance. Keep an eye on them—your Pumpkin S’mores Bars are ready when a toothpick inserted in the center comes out clean or with a few moist crumbs. This ensures a perfectly baked center without drying them out.

Step 7: Cool & Slice
Once baked, remove the pan from the oven and allow it to cool completely. This step is crucial for easy slicing—be patient! Once cooled, lift the bars from the pan using the edges of the parchment paper (if used), and cut into squares. Your Pumpkin S’mores Bars are now ready to be enjoyed!

Variations & Substitutions for Pumpkin S’mores Bars

Feel free to get creative with these Pumpkin S’mores Bars and make them your own with delightful twists and substitutions!

  • Add Nuts: Fold in some chopped walnuts or pecans for a delightful crunch and additional flavor. Nuts not only add texture but elevate the overall taste experience!
  • Gluten-Free Option: Swap out all-purpose flour for a gluten-free blend to accommodate dietary preferences without sacrificing flavor.
  • Spice Variation: Experiment with different spices like ginger or chai spice instead of pumpkin pie spice for an exciting twist on the traditional flavor.
  • Non-Dairy Alternative: Replace the butter with coconut oil and use dairy-free chocolate chips for a deliciously creamy, plant-based treat.
  • Increase Chocolate: If you love chocolate, add more chocolate chips or even chunks of your favorite chocolate bars for an extra decadent bite.
  • Nut Butter Swirl: For added flavor and nutrients, consider swirling in some peanut butter or almond butter before baking. This adds a delicious nutty dimension to the bars.
  • Savory Twist: Add a pinch of sea salt on top before baking for a sweet-and-savory combination that balances the sweetness beautifully.

Want more delectable ideas? You might enjoy these Turtle Bars Decadent or explore the warm flavors of Joumou Haitian Pumpkin soup for a cozy meal companion!

How to Store and Freeze Pumpkin S’mores Bars

Room Temperature: Store in an airtight container at room temperature for up to 3 days. This keeps the bars soft and chewy, ready to enjoy anytime!

Fridge: For longer freshness, refrigerate the Pumpkin S’mores Bars in an airtight container for up to a week. Just allow them to come to room temperature before serving for the best texture.

Freezer: These bars can be frozen for up to 2 months. Wrap individual bars in plastic wrap and place them in a freezer-safe bag. Thaw overnight in the fridge before enjoying!

Reheating: If you prefer them warm, microwave for about 10-15 seconds before serving. This revives their gooey texture and brings back that fresh-out-of-the-oven feel!

Make Ahead Options

These Pumpkin S’mores Bars are perfect for meal prep enthusiasts! You can mix the batter up to 24 hours in advance and refrigerate it (this helps the flavors meld beautifully). Additionally, layer the chocolate chips and marshmallow fluff in the pan and cover it tightly with plastic wrap for up to 3 days before baking. When you’re ready to enjoy your bars, simply spread the top layer of batter and bake as directed. To maintain the quality, ensure they are stored in an airtight container for freshness. With these make-ahead options, you can have a delicious dessert ready with minimal effort, saving you time during those busy weeknights!

Expert Tips for Pumpkin S’mores Bars

  • Monitor Baking Time: Check your Pumpkin S’mores Bars after 30 minutes to avoid overbaking, which can lead to dry bars. A toothpick should come out clean or with a few moist crumbs.

  • Cool Completely: Allowing the bars to cool fully before slicing is crucial for clean cuts. This prevents the bars from crumbling apart when you serve them.

  • Adjust Fillings: Customize with more or less chocolate chips and marshmallow fluff to match your sweet tooth. It’s all about finding your perfect balance!

  • Use Parchment Paper: Lining your pan with parchment paper makes for easier removal and less time spent cleaning. Just lift the bars out when cool!

  • Experiment with Spices: Don’t hesitate to mix in additional spices like cinnamon or ginger to enhance the pumpkin flavor and add a personal touch.

What to Serve with Pumpkin S’mores Bars

As the warmth of pumpkin spice fills your home, you might wonder what delightful accompaniments can elevate your Pumpkin S’mores Bars experience.

  • Whipped Cream: A dollop of sweet, airy whipped cream adds a light contrast to the rich bars, enhancing their cozy flavors beautifully.
  • Vanilla Ice Cream: Serve alongside vanilla ice cream for a classic, creamy pairing that melts into every bite, making it an indulgent dessert experience.
  • Hot Chocolate: A warm cup of hot chocolate brings nostalgic s’mores vibes, perfect for chilly autumn evenings while enjoying a treat.
  • Coffee: The bitterness of a freshly brewed coffee balances out the sweetness, making it a delightful pairing any time of day.
  • Pumpkin Spice Latte: For ultimate fall indulgence, serve with this seasonal favorite to enhance those pumpkin spice notes.
  • Salted Caramel Drizzle: A drizzle of salted caramel adds a sweet, salty twist that beautifully complements the gooey marshmallow and chocolate.
  • Spiced Apple Cider: This warm, spiced drink offers a fruity contrast that brightens the decadent flavors of your bars. Enjoy it for a cozy vibe!
  • Chopped Nuts Topping: Sprinkling some chopped pecans or walnuts adds crunch and enhances the overall texture experience.
  • Fresh Fruit Salad: A light, fresh fruit salad adds a refreshing, citrusy element that can balance out the richness, making it a perfect pairing.

Pumpkin S’mores Bars Recipe FAQs

How do I choose the right pumpkin puree?
Absolutely! When selecting pumpkin puree, I recommend opting for pure pumpkin that’s either canned or homemade. Look for labels that specifically say “100% pumpkin” without any additives. A good visual cue is a deep orange color without any watery consistency. If using fresh pumpkin, roast it until soft, then blend it into a smooth puree.

How should I store leftover Pumpkin S’mores Bars?
To keep your Pumpkin S’mores Bars fresh, store them in an airtight container at room temperature for up to 3 days. If you’d like them to last longer, refrigerate them for up to 1 week. Just remember, those bars are best enjoyed at room temperature for that perfect chewy consistency!

Can I freeze these bars?
Yes, indeed! To freeze your Pumpkin S’mores Bars, wrap them individually in plastic wrap and place them in a freezer-safe bag. They can be frozen for up to 3 months. When you’re ready to enjoy, simply thaw in the fridge overnight, and then pop them in the microwave for 10-15 seconds for that delightful gooey finish.

What should I do if my bars turn out dry?
Very! If your Pumpkin S’mores Bars come out dry, they may have been overbaked or too much flour was used. To avoid this in the future, monitor the baking closely and test with a toothpick after 30 minutes. If it comes out clean or with just a few moist crumbs, it’s time to take them out. Make sure to also measure flour properly, using the spoon-and-level method for accuracy.

Can I make these bars gluten-free?
Absolutely! For a gluten-free option, substitute all-purpose flour with a 1:1 gluten-free flour blend. This works wonderfully and will give you the same soft, chewy texture. Just ensure that your other ingredients, like baking powder and chocolate chips, are also gluten-free. Enjoy your seasonal treat with confidence!

Are there any allergy considerations with this recipe?
Yes, it’s essential to consider allergies, especially to common ingredients like eggs and chocolate. For egg-free bars, you can substitute one egg with 1/4 cup of unsweetened applesauce or a flaxseed meal mix (1 tablespoon ground flaxseed + 3 tablespoons water). Additionally, if you’re using chocolate chips, look for dairy-free varieties to accommodate dairy allergies.

Pumpkin S'mores Bars

Pumpkin S'mores Bars

Delight in these Pumpkin S'mores Bars, a cozy fall indulgence combining classic s'mores with a pumpkin spice twist.
Prep Time 15 minutes
Cook Time 40 minutes
Cooling Time 30 minutes
Total Time 1 hour 25 minutes
Servings: 12 bars
Course: Dessert
Cuisine: American
Calories: 200

Ingredients
  

For the Batter
  • 0.5 cups Unsalted Butter melted
  • 0.5 cups Granulated Sugar
  • 0.5 cups Brown Sugar
  • 1 cups Pumpkin Puree canned for convenience
  • 1 tablespoon Vanilla Extract
  • 1 teaspoon Kosher Salt
  • 1 large Egg
  • 1.5 cups All-Purpose Flour
  • 1 teaspoon Baking Powder
  • 1 tablespoon Pumpkin Pie Spice cinnamon is a substitute
For the Filling
  • 1 cups Chocolate Chips or chocolate bars for chunks
  • 1 cups Marshmallow Fluff adjust amount for sweetness

Equipment

  • 9x13-inch baking pan
  • Mixing bowls
  • whisk
  • spatula

Method
 

Step-by-Step Instructions
  1. Preheat your oven to 350°F (175°C) and prepare a 9x13 inch baking pan.
  2. In a medium bowl, whisk together 1 ½ cups of all-purpose flour, 1 teaspoon of baking powder, and 1 tablespoon of pumpkin pie spice.
  3. In a large mixing bowl, combine ½ cup of melted unsalted butter, ½ cup of granulated sugar, and ½ cup of brown sugar until smooth. Add in 1 egg, 1 cup of pumpkin puree, 1 teaspoon of vanilla extract, and a pinch of kosher salt, mixing well.
  4. Gradually add the dry mixture from Step 2 into the bowl with the wet ingredients and stir until just combined.
  5. Spread ⅓ to ½ of the prepared batter at the bottom of your baking pan, sprinkle chocolate chips and dollops of marshmallow fluff, then pour remaining batter to cover.
  6. Bake in the preheated oven for 30 to 50 minutes. Check with a toothpick for doneness.
  7. Cool completely before slicing into squares for serving.

Nutrition

Serving: 1barCalories: 200kcalCarbohydrates: 30gProtein: 2gFat: 9gSaturated Fat: 5gPolyunsaturated Fat: 1gMonounsaturated Fat: 3gCholesterol: 40mgSodium: 150mgPotassium: 100mgFiber: 1gSugar: 15gVitamin A: 100IUVitamin C: 2mgCalcium: 2mgIron: 4mg

Notes

Store in an airtight container for up to 3 days at room temperature. For longer freshness, refrigerate for up to a week or freeze for up to 2 months.

Tried this recipe?

Let us know how it was!

Pumpkin Spice Caramel Tarts Recipe: A Cozy Fall Delight

As the leaves turn and the air grows crisp, there’s something magical about the scent of pumpkin spice wafting through the kitchen. This Pumpkin Spice Caramel Tarts Recipe brings the essence of fall right to your table, transporting you to cozy afternoons filled with laughter and warmth. Perfect for gatherings or a comforting treat after a long day, these tarts offer the delightful combination of a flaky crust, velvety pumpkin filling, and rich caramel topping. Plus, the best part? They come together surprisingly easily, making them a go-to for both seasoned bakers and newcomers alike. Are you ready to experience a sweet indulgence that captures the season’s charm? Let’s dive into creating this mouthwatering dessert!

Why Try Pumpkin Spice Caramel Tarts?

Fall’s Favorite Flavor: These tarts capture the essence of autumn, combining pumpkin spice and caramel in every bite.

Deliciously Easy: With straightforward ingredients and simple steps, even beginners can master this delightful treat.

A Treat for Everyone: Gluten-free and dairy-free options ensure that your guests can indulge without worry.

Crowd-Pleasing Delight: Perfect for gatherings, these tarts pair beautifully with coffee or warm spiced drinks, making them a must-try at your next event!

Innovative Twist: Not just a classic dessert, they bring a refined twist to pumpkin pie, elevating your fall dessert game. Plus, check out our Cheesy Hamburger Potato Soup for another cozy, crowd-pleasing favorite!

Pumpkin Spice Caramel Tarts Ingredients

For the Tart Shells

  • Tart Shells – Use store-bought or homemade; blind bake to achieve that perfect crispiness.

For the Filling

  • Pumpkin Puree – Provides moisture and flavor; opt for unsweetened canned or fresh puree for the best results.
  • Eggs – Adds richness and structure; make sure they’re at room temperature for a smooth blend.
  • Heavy Cream – Enhances the richness of the filling; substitute with coconut cream for a delightful dairy-free option.
  • Pumpkin Spice – Infuses that classic fall flavor; create your own blend with equal parts cinnamon, nutmeg, ginger, and cloves if needed.

For the Caramel Layer

  • Caramel Sauce – Adds sweetness and a gooey texture; use homemade caramel or maple syrup for a unique twist.

Optional Garnish

  • Extra Caramel Drizzle – Enhances presentation and flavor; serve warm for a delightful finishing touch.

Dive into this Pumpkin Spice Caramel Tarts Recipe and enjoy the warmth of fall in every bite!

Step‑by‑Step Instructions for Pumpkin Spice Caramel Tarts Recipe

Step 1: Prepare Tart Shells
Begin by preheating your oven to 375°F (190°C). If you’re using homemade pastry for the tart shells, roll it out and fit it into your tart pan, then poke the bottom with a fork. Blind bake the shells for about 15 minutes until they are lightly golden and set. Remove them from the oven and allow to cool while you prepare the filling.

Step 2: Make Filling
In a mixing bowl, whisk together 1 cup of pumpkin puree, 2 eggs, 1/2 cup of heavy cream, and 2 teaspoons of pumpkin spice until well combined and smooth. The mixture should be creamy and velvety. This aromatic filling will bring the essence of fall to your Pumpkin Spice Caramel Tarts. Once mixed, set aside as you layer in the caramel.

Step 3: Layer Caramel
Carefully pour a generous layer of caramel sauce into each cooled tart shell, filling them about halfway. The caramel should be thick and oozy, creating a luscious base for your filling. With the caramel in place, gently pour the prepared pumpkin filling over the caramel, ensuring even distribution across all tarts.

Step 4: Bake
Place the filled tart shells into the preheated oven and bake for approximately 25 minutes. You’re looking for the edges to turn golden brown while the filling sets and appears slightly firm in the center but still a little wobbly. This step enhances the flavors, creating a wonderful blend in your Pumpkin Spice Caramel Tarts.

Step 5: Cool
Once baked, remove the tarts from the oven and let them cool at room temperature for about 30 minutes. This cooling process allows the caramel to set properly and meld with the pumpkin filling. For optimal flavor, chill the tarts in the refrigerator for at least an hour before serving, enhancing the delicious taste and texture.

Pumpkin Spice Caramel Tarts Variations

Feel free to unleash your creativity with these delightful tarts and customize them to your heart’s content! Each variation will offer a unique twist on the classic flavors you love.

  • Dairy-Free: Substitute heavy cream with coconut cream for a luscious, creaminess without the dairy. You’ll hardly notice the difference!

  • Gluten-Free: Use gluten-free tart shells or pastry dough, ensuring everyone can enjoy these scrumptious treats. They taste just as amazing!

  • Chocolate Layer: Add a layer of dark chocolate beneath the caramel for a rich, indulgent flavor. The chocolate pairs beautifully with the spices.

  • Add Nutmeg: Spice it up even more by incorporating an additional sprinkle of nutmeg into the filling. This enhances that warm, cozy flavor.

  • Flavored Extracts: Experiment with extracts like almond or vanilla for a unique flavor profile. A splash of something unexpected can elevate the tarts!

  • Caramel Drizzle: Consider drizzling a little darker caramel or even butterscotch sauce on top before serving. It adds a touch of elegance and more sweetness.

  • Mini Tarts: Use a muffin tin to create mini tarts! They make perfect bite-sized treats for gatherings, ensuring everyone gets a taste.

  • Pumpkin Pie Spice Blend: If you want a twist on traditional pumpkin spice, create your own blend with equal parts cinnamon, nutmeg, ginger, and allspice for a different flavor depth.

For even more cozy recipes, try out our Joumou Haitian Pumpkin for a delightful twist on the flavors of fall or check out the comforting Cheesy Hamburger Potato Soup for hearty warmth! Happy baking!

Storage Tips for Pumpkin Spice Caramel Tarts

Fridge: Store in an airtight container in the refrigerator for up to 3 days to maintain freshness and prevent drying out.

Freezer: For longer storage, freeze tarts in a single layer, wrapped tightly in plastic wrap and aluminum foil, for up to 1 month.

Thawing: When ready to enjoy, thaw in the fridge overnight before serving for the best texture and flavor.

Reheating: To serve warm, gently reheat in the oven at 300°F (150°C) for 10-15 minutes, ensuring the caramel stays gooey and delicious.

Make Ahead Options

These Pumpkin Spice Caramel Tarts are perfect for meal prep enthusiasts! You can prepare the tart shells and filling up to 24 hours in advance to save time on busy days. Simply blind bake the tart shells and let them cool completely before refrigerating. Prepare the pumpkin filling and store it in an airtight container in the refrigerator to maintain its creamy texture. When you’re ready to serve, layer the caramel into the cooled shells, pour the prepared filling on top, and bake as per the recipe instructions. This way, you’ll enjoy all the delicious flavors fresh out of the oven with minimal effort!

Expert Tips for Pumpkin Spice Caramel Tarts

Blind Bake Success: Ensure you blind bake the tart shells properly; this prevents a soggy bottom and maintains that delightful crispiness.

Room Temperature Eggs: Using eggs at room temperature helps to create a smoother filling, avoiding any lumps.

Caramel Layering: Pouring caramel first allows it to meld beautifully with the pumpkin filling, enhancing the overall texture of your tarts.

Cooling Is Key: Patience is vital! Allow the tarts to cool completely to ensure a set filling; rushing can lead to an undesirable runny texture.

Flavor Adjustments: Don’t hesitate to adjust the sweetness of the caramel; using a stevia-based brown sugar can make these Pumpkin Spice Caramel Tarts more health-conscious.

What to Serve with Pumpkin Spice Caramel Tarts

As the pumpkin spice wafts through your home, think of delightful companions to elevate your dessert experience.

  • Whipped Cream: A dollop of freshly whipped cream adds a creamy lightness to each rich bite, enhancing the dessert’s indulgence.

  • Salted Caramel Sauce: Drizzling extra caramel sauce on top highlights the sweet-salty contrast, making each tart even more irresistible.

  • Spiced Chai Latte: Sipping a warm spiced chai perfectly complements the flavors of the tarts, creating a cozy beverage pairing that warms your soul.

  • Cinnamon Ice Cream: The creamy texture and cinnamon notes in the ice cream harmonize beautifully with the spiced filling, offering a cooling contrast.

  • Hazelnut Coffee: Enjoying a cup of nutty hazelnut coffee pairs well, accentuating the caramel and pumpkin flavors for a perfect afternoon treat.

  • Cranberry Sauce: Tart and sweet, this fruity accompaniment adds a fresh burst of flavor that cuts through the richness of the tarts.

  • Apple Cider: A glass of chilled or warm apple cider brings a seasonal beverage to the table, enhancing your autumnal experience with complementary flavors.

  • Pumpkin Spice Hot Chocolate: Sipping on this delectable drink as you savor the tarts brings the essence of fall to every taste bud, wrapping you in warmth and sweetness.

Pumpkin Spice Caramel Tarts Recipe FAQs

How do I select the best pumpkin puree?
Absolutely! When choosing pumpkin puree, opt for organic or canned varieties that contain 100% pumpkin with no additives. Fresh puree is fantastic too! Just make sure to steam or roast genuine pumpkins until they’re tender, then blend until smooth. This ensures a pure flavor that elevates your tarts!

How should I store the Pumpkin Spice Caramel Tarts?
Store these delectable tarts in an airtight container in the refrigerator for up to 3 days. This keeps them fresh and helps maintain their creamy consistency. If you have leftovers or want to make them ahead of time, they freeze beautifully for up to 1 month! Make sure to wrap each tart in plastic wrap, then foil, to prevent freezer burn.

Can I freeze the Pumpkin Spice Caramel Tarts?
The more the merrier! To freeze, place the tarts in a single layer on a baking sheet until firm, then wrap securely in plastic wrap followed by aluminum foil. This helps maintain taste and texture. When ready to enjoy, simply thaw them overnight in the refrigerator before serving, and they’ll taste just as delightful.

What should I do if my filling is too runny?
No worries! If your filling turns out runny, it could be due to rushing the cooling process or undercooking the tarts. For next time, ensure that the tarts bake until the edges are golden brown and firm. If it still seems too runny, consider adding a bit more pumpkin puree or an extra egg to the mixture. This will help thicken it up without compromising the flavor!

Are there any allergy considerations for the Pumpkin Spice Caramel Tarts?
Definitely! When serving these tarts, keep in mind that they contain eggs and dairy in the heavy cream. For dairy-free options, try substituting with coconut cream and using dairy-free caramel. Always be cautious of gluten as well; opt for gluten-free tart shells to make sure everyone can enjoy this treat safely.

What if my tart shells become soggy after baking?
Very! To avoid soggy tart shells, always blind bake them first—this means baking the pastry unfilled to set the crust. Make sure to poke holes in the base before baking, which allows steam to escape. If they do become soggy, putting the baked shells back in the oven for a few minutes can help crisp them up again before adding your delicious filling.

Pumpkin Spice Caramel Tarts Recipe

Pumpkin Spice Caramel Tarts Recipe: A Cozy Fall Delight

Indulge in these delightful Pumpkin Spice Caramel Tarts that bring the essence of fall to your table.
Prep Time 15 minutes
Cook Time 25 minutes
Cooling Time 30 minutes
Total Time 1 hour 10 minutes
Servings: 12 tarts
Course: Dessert
Cuisine: American
Calories: 200

Ingredients
  

For the Tart Shells
  • 12 pieces Tart Shells Use store-bought or homemade; blind bake for crispiness.
For the Filling
  • 1 cup Pumpkin Puree Use unsweetened canned or fresh puree.
  • 2 large Eggs Make sure they’re at room temperature.
  • 1/2 cup Heavy Cream Substitute with coconut cream for a dairy-free option.
  • 2 teaspoons Pumpkin Spice Create your own blend if needed.
For the Caramel Layer
  • 1 cup Caramel Sauce Use homemade or maple syrup for a twist.
Optional Garnish
  • 1 cup Extra Caramel Drizzle Serve warm for delightful finishing touch.

Equipment

  • Oven
  • Mixing Bowl
  • Tart pan

Method
 

Step-by-Step Instructions
  1. Preheat your oven to 375°F (190°C). Roll out homemade pastry for the tart shells and fit into your tart pan. Blind bake for 15 minutes until lightly golden.
  2. In a mixing bowl, whisk together pumpkin puree, eggs, heavy cream, and pumpkin spice until smooth. Set aside.
  3. Pour a generous layer of caramel sauce into each cooled tart shell, filling halfway. Then gently pour the pumpkin filling over the caramel.
  4. Bake in the preheated oven for about 25 minutes. Look for edges golden brown while the filling sets slightly firm but wobbly.
  5. Allow the tarts to cool at room temperature for 30 minutes. Chill in the refrigerator for at least an hour before serving.

Nutrition

Serving: 1tartCalories: 200kcalCarbohydrates: 30gProtein: 3gFat: 10gSaturated Fat: 5gPolyunsaturated Fat: 1gMonounsaturated Fat: 3gCholesterol: 40mgSodium: 150mgPotassium: 120mgFiber: 2gSugar: 15gVitamin A: 1200IUVitamin C: 1mgCalcium: 30mgIron: 1mg

Notes

Blind bake the tart shells properly to prevent a soggy bottom. Using room temperature eggs helps create a smoother filling.

Tried this recipe?

Let us know how it was!

Pumpkin Cinnamon Rolls with Irresistible Brown Butter Frosting

As the leaves start to turn golden and the air fills with the scent of cinnamon, I can’t help but reflect on those cozy autumn mornings spent in the kitchen. That’s when I discovered the magic of Pumpkin Cinnamon Rolls. These delightful treats bring an irresistible warmth that makes waking up a little easier, especially with their soft, pillowy dough and the rich, nutty notes of brown butter cream cheese frosting. Not only are they a head-turning addition to your fall brunches, but they’re also a fantastic make-ahead option—perfect for those leisurely weekend breakfasts or holiday gatherings. There’s truly nothing like the joy of sharing freshly baked rolls with loved ones. Curious yet about how to create this heavenly experience in your own kitchen? Let’s dive into this delicious recipe!

Why Are Pumpkin Cinnamon Rolls So Special?

Cozy Comfort: These Pumpkin Cinnamon Rolls are perfect for fall, enveloping you in the warm flavors of autumn spices, making mornings feel extra special.

Make-Ahead Magic: Prepare them the night before for a quick and delightful breakfast, ideal for holiday gatherings or lazy weekends.

Unique Flavor: The inclusion of brown butter in the frosting adds a nutty depth, elevating the traditional cinnamon roll to new heights.

Crowd-Pleaser: These rolls are sure to impress family and friends, making any brunch unforgettable. Pair them with a warm cup of coffee or Foster Cinnamon Rolls for an extra treat!

Endless Variations: Feel free to get creative! Substitute pumpkin for sweet potato or add chocolate chips to the filling for a delicious twist.

Get ready to indulge in these delectable rolls and embrace the cozy vibes of fall!

Pumpkin Cinnamon Rolls Ingredients

• Dive into the perfect blend of flavors with these Pumpkin Cinnamon Rolls, featuring a delightful balance of spices and sweetness!

For the Dough

  • Granulated Sugar – Sweetens the dough; you can substitute with brown sugar for a deeper flavor.
  • Brown Sugar – Adds moisture and complexity; opt for light brown for the best consistency.
  • Pure Pumpkin Puree – Provides a rich pumpkin flavor; using canned puree makes preparation a breeze.
  • Butter – Ensures richness in both dough and frosting; stick with unsalted butter for better control over salt.
  • Milk Powder – Increases tenderness; if unavailable, simply replace it with more milk.
  • Active Dry Yeast – Helps achieve fluffy rolls; ensure it’s fresh for optimal rising.
  • Salt – Key for enhancing all flavors; both regular table salt and kosher salt work well.
  • Pumpkin Pie Spice – Adds warmth and seasonal flavor; or mix cinnamon, ginger, nutmeg, and allspice as a substitute.

For the Frosting

  • Cream Cheese – Base for frosting; full-fat cream cheese will give you the creamiest result.
  • Confectioners Sugar – Sweetens the frosting; adjust according to your desired sweetness.
  • Brown Butter – Adds a nutty flavor to the frosting; make sure to brown it slowly to avoid burning.

Now that you’re equipped with these ingredients, you’re all set to create the ultimate Pumpkin Cinnamon Rolls that will undoubtedly become a beloved fall favorite!

Step‑by‑Step Instructions for Pumpkin Cinnamon Rolls

Step 1: Prepare Dough
In a mixing bowl, combine 1/4 cup of warm water, 1 tablespoon of granulated sugar, and 2 teaspoons of active dry yeast. Allow it to sit for 5-10 minutes until foamy. Then, stir in 1 cup of pure pumpkin puree, 1/2 cup of melted unsalted butter, and 1/4 cup of milk powder. Gradually mix in 3-4 cups of all-purpose flour until a soft dough forms.

Step 2: Knead the Dough
Turn the dough onto a floured surface and knead for about 8-10 minutes until it becomes smooth and elastic. The dough should be slightly tacky but not sticky. If it’s too sticky, add a bit more flour a tablespoon at a time. Once kneaded, shape the dough into a ball, and place it in a greased bowl, covering it with a damp cloth.

Step 3: First Rise
Allow the dough to rise in a warm, draft-free area for 1 to 2 hours, or until it has doubled in size. It should feel light and airy when poked. This rise is crucial for fluffy Pumpkin Cinnamon Rolls, so be patient as the yeast works its magic!

Step 4: Make the Filling
In a separate bowl, mix 1 cup of brown sugar and 2 tablespoons of pumpkin pie spice with 1/2 cup of softened unsalted butter until creamy. This filling will add a sweet and fragrant layer to the rolls. Be sure the mixture is well combined for even distribution of flavor when you spread it on the dough.

Step 5: Shape Rolls
Once the dough has risen, punch it down gently to release air. Roll it out on a floured surface into a large rectangle (about 12×18 inches). Spread the filling evenly over the dough, leaving a 1-inch border. Starting from one long side, tightly roll the dough into a log and cut it into 12-15 even slices to create individual rolls.

Step 6: Second Rise
Place the cut rolls in a greased baking pan, ensuring they are close together, but not touching. Cover with a kitchen towel and let them rise again in a warm spot for about 30-60 minutes, or until puffy and nearly doubled in size. They will rise beautifully and will have a delightful, airy texture after baking.

Step 7: Bake the Rolls
Preheat your oven to 350°F (175°C). Once preheated, bake the Pumpkin Cinnamon Rolls for 25-30 minutes, or until they are golden brown and fragrant. Keep an eye on them toward the end of baking; a light golden color indicates they’re ready to come out and delight your senses!

Step 8: Prepare Frosting
While the rolls are baking, prepare the brown butter cream cheese frosting. In a mixing bowl, beat together 8 ounces of cream cheese, 1/2 cup of softened brown butter, and 2 cups of confectioners sugar until smooth and creamy. The frosting should be rich and spreadable—you can taste test to adjust the sweetness as desired!

Step 9: Frost and Serve
As soon as the Pumpkin Cinnamon Rolls come out of the oven, let them cool for about 10 minutes. Generously spread the warm rolls with the brown butter cream cheese frosting, allowing it to melt slightly into the rolls. Serve them warm and bask in the delightful aroma of this seasonal treat!

How to Store and Freeze Pumpkin Cinnamon Rolls

Room Temperature: Allow the rolls to cool completely before storing. Keep them in an airtight container at room temperature for up to 3 days.

Fridge: For longer freshness, store the Pumpkin Cinnamon Rolls in the fridge in an airtight container for up to 5 days. Reheat in the microwave for a couple of seconds before serving.

Freezer: You can freeze unbaked rolls by placing them in a single layer on a baking sheet until firm, then transfer to a freezer bag for up to 3 months. Bake straight from frozen, allowing a little extra time for baking.

Reheating: To enjoy leftover rolls, gently reheat in the oven at 350°F (175°C) for about 10 minutes, or microwave for 15-20 seconds until warmed through.

Pumpkin Cinnamon Rolls Variations

Feel free to get creative with these delightful rolls and explore flavors that ignite your palate!

  • Sweet Potato Swap: Substitute pumpkin puree with sweet potato puree for a slightly different, yet equally delicious, flavor profile.
  • Chocolate Lovers: Add dark chocolate or white chocolate chips into the filling for a decadent twist that takes these rolls to the next level.
  • Nutty Texture: Incorporate chopped nuts like pecans or walnuts in the filling for an added crunch that complements the softness of the rolls beautifully.
  • Fruity Surprise: Toss in raisins or cranberries for a burst of fruity flavor, balancing out the spiciness of the cinnamon and pumpkin.
  • Maple Glaze: Replace the cream cheese frosting with a maple glaze made of powdered sugar mixed with maple syrup for a subtle sweetness.
  • Spicy Kick: Add a pinch of cayenne or a dash of finely chopped fresh ginger to the filling for a hint of warmth and excitement.
  • Vegan Delight: Use coconut cream instead of cream cheese and substitute plant-based butter and milk for an entirely vegan version.
  • Savory Twist: Incorporate herbs like rosemary into the dough for a tonal shift that plays beautifully against the pumpkin—a perfect side for a savory brunch!

Feeling inspired? You might also like to serve your Pumpkin Cinnamon Rolls alongside a comforting bowl of Joumou Haitian Pumpkin Soup for a delightful brunch experience that celebrates the best of fall flavors!

Make Ahead Options

These Pumpkin Cinnamon Rolls are a fantastic make-ahead option that can save you precious time during busy mornings! You can prepare the dough and shape the rolls up to 24 hours in advance. Simply follow the recipe instructions up to the second rise, cover the pan tightly with plastic wrap, and refrigerate. When you’re ready to bake, allow the rolls to come to room temperature and rise for about 30-60 minutes before baking. If you prefer, you can also freeze the shaped rolls for up to 3 months; just bake them directly from frozen, adding a few extra minutes to the baking time. This way, you can enjoy soft, warm Pumpkin Cinnamon Rolls whenever the craving hits, without compromising on flavor or quality!

Expert Tips for Pumpkin Cinnamon Rolls

  • Yeast Activation: Always use warm (not hot) water when activating the yeast. Too hot can kill it, preventing your rolls from rising.
  • Frost with Care: Ensure your brown butter isn’t burnt; use medium heat and a thermometer to achieve the perfect golden color for your frosting.
  • Kneading Tips: If your dough feels sticky, gradually add flour, one tablespoon at a time, until it reaches just the right tackiness for fluffy pumpkin cinnamon rolls.
  • Rising Time: Don’t rush the rising processes! Both rises are crucial for achieving that light, airy texture—patience is key here.
  • Serving Warm: These rolls are best served warm—think comfort food! To reheat, place in the oven for a few minutes to bring back that just-baked softness.

What to Serve with Pumpkin Cinnamon Rolls

As you dig into the delightful warmth of these pillowy rolls, consider pairing them with complementary sides and drinks that elevate your cozy experience.

  • Creamy Chai Latte: The spiced flavors in chai perfectly match the pumpkin and cinnamon, enhancing each bite with warmth and comfort.

  • Savory Breakfast Casserole: A hearty egg dish adds protein and balances the sweetness of the rolls, making for a filling breakfast.

  • Fresh Fruit Salad: Bright, juicy fruits introduce a refreshing contrast, cleansing the palate and adding a burst of color to your breakfast table.

  • Maple-Glazed Bacon: The sweet and salty combination creates a delightful contrast to the rolls, making each bite a flavor adventure.

  • Pumpkin Spice Coffee: This aromatic coffee reinforces your pumpkin theme and is the ideal beverage to accompany your sweet rolls.

Imagine sipping your warm drink and enjoying the delicious flavors mingling with the sweet, spiced rolls—pure fall bliss!

  • Spiced Apple Cider: A warm cup of cider infused with cinnamon deepens the autumnal feel and offers a comforting beverage choice.

  • Whipped Cream Topping: A dollop of lightly sweetened whipped cream brings extra richness and balance to the cinnamon rolls, transforming them into a splendid dessert.

  • Maple Syrup Drizzle: A drizzle of pure maple syrup enhances the sweetness and adds a luxurious touch to each bite, creating pure joy.

  • Butter Pecan Ice Cream: For a unique twist, serve the rolls warm with a scoop of butter pecan ice cream for a decadent dessert experience.

Treat yourself and your loved ones by combining these flavors with your homemade Pumpkin Cinnamon Rolls, creating memories one bite at a time!

Pumpkin Cinnamon Rolls Recipe FAQs

How do I choose the best pumpkin puree for my Pumpkin Cinnamon Rolls?
Absolutely! For the best flavor and texture in your rolls, I recommend using canned pure pumpkin puree. Just be sure to avoid pumpkin pie filling, as it contains added sugars and spices. If you prefer fresh pumpkin, roast it until tender, then blend it into a smooth puree!

What’s the best way to store leftover Pumpkin Cinnamon Rolls?
After they cool completely, store the rolls in an airtight container at room temperature for up to 3 days. For longer freshness, you can refrigerate them for up to 5 days. Just pop them in the microwave for a few seconds before enjoying!

Can I freeze unbaked Pumpkin Cinnamon Rolls? How?
Very! To freeze unbaked rolls, cut them into individual portions and place them on a baking sheet lined with parchment paper. Freeze them until firm, then transfer to a freezer bag for up to 3 months. When you’re ready to bake, no thawing necessary; place them directly into the oven and add about 5-10 extra minutes to the baking time.

What can I do if my dough doesn’t rise?
If your dough hasn’t risen after 1-2 hours, it may be due to old yeast or the water being too hot or cold. Make sure your yeast is fresh and your water is warm, not hot—about 100°F (37°C). If necessary, let the dough rise in a warm, draft-free area, perhaps in an oven turned off with the light on for warmth.

Are these Pumpkin Cinnamon Rolls suitable for a gluten-free diet?
While this recipe contains all-purpose flour, you can make it gluten-free! Substitute the flour with a gluten-free all-purpose blend that includes xanthan gum for structure. Just make sure all your other ingredients are gluten-free as well!

Can I make variations of these Pumpkin Cinnamon Rolls?
Absolutely! Feel free to experiment by replacing pumpkin puree with sweet potato for a different flavor or adding chocolate chips or nuts in the filling for added texture. The more the merrier when it comes to customization!

Pumpkin Cinnamon Rolls

Pumpkin Cinnamon Rolls with Irresistible Brown Butter Frosting

Delight in the warm flavors of Pumpkin Cinnamon Rolls, complemented by rich brown butter frosting - the perfect fall breakfast treat.
Prep Time 1 hour
Cook Time 30 minutes
Rising Time 2 hours
Total Time 3 hours 30 minutes
Servings: 12 rolls
Course: Breakfast
Cuisine: American
Calories: 350

Ingredients
  

For the Dough
  • 1/4 cup Warm Water
  • 1 tablespoon Granulated Sugar for activating yeast
  • 2 teaspoons Active Dry Yeast ensure freshness
  • 1 cup Pure Pumpkin Puree canned is fine
  • 1/2 cup Unsalted Butter, melted
  • 1/4 cup Milk Powder can substitute with milk
  • 3-4 cups All-Purpose Flour add gradually
  • 1 teaspoon Salt
  • 1 tablespoon Pumpkin Pie Spice or substitute spices
For the Frosting
  • 8 ounces Cream Cheese full-fat for creaminess
  • 1/2 cup Brown Butter browned slowly
  • 2 cups Confectioners Sugar adjust sweetness to taste

Equipment

  • Mixing Bowl
  • Baking Pan
  • Oven
  • Rolling Pin
  • whisk

Method
 

Step-by-Step Instructions
  1. In a mixing bowl, combine warm water, granulated sugar, and active dry yeast. Allow to sit for 5-10 minutes until foamy.
  2. Stir in pumpkin puree, melted unsalted butter, and milk powder. Gradually mix in all-purpose flour until a soft dough forms.
  3. Turn the dough onto a floured surface and knead for 8-10 minutes until smooth and elastic. Shape into a ball and place in a greased bowl, covering with a damp cloth.
  4. Let the dough rise in a warm place for 1 to 2 hours, until doubled in size.
  5. In a separate bowl, mix brown sugar, pumpkin pie spice, and softened unsalted butter until creamy for the filling.
  6. Once risen, punch the dough down gently and roll it out into a large rectangle. Spread the filling over the dough and roll into a log, cutting into 12-15 slices.
  7. Place the rolls in a greased baking pan, cover, and let rise for 30-60 minutes until puffy.
  8. Preheat oven to 350°F (175°C). Bake for 25-30 minutes until golden brown.
  9. Prepare the frosting by beating cream cheese, brown butter, and confectioners sugar until smooth.
  10. Allow rolls to cool for about 10 minutes and generously spread with the brown butter frosting.

Nutrition

Serving: 1rollCalories: 350kcalCarbohydrates: 50gProtein: 4gFat: 15gSaturated Fat: 9gPolyunsaturated Fat: 1gMonounsaturated Fat: 5gCholesterol: 30mgSodium: 260mgPotassium: 150mgFiber: 2gSugar: 25gVitamin A: 750IUVitamin C: 2mgCalcium: 50mgIron: 1mg

Notes

Best served warm. Adjust frosting sweetness to preference. Can be refrigerated or frozen.

Tried this recipe?

Let us know how it was!

Hearty Lasagna Soup with Bow Tie Pasta for Comfort Nights

There’s nothing quite like a comforting bowl of Hearty Lasagna Soup with Bow Tie Pasta to bring the family together after a long day. Imagine the rich, cheesy flavors of your favorite lasagna transformed into a warm, hearty soup that’s ready in just 30 minutes! This quick, one-pot meal is perfect for those busy weeknights when you crave something satisfying without the fuss of layering. Plus, with minimal prep and cleanup, you’ll find yourself falling head over heels for this comfort food. So grab your ingredients and let’s simmer up a delicious version of lasagna that will have everyone asking for seconds. What surprises will you add to your soup?

What makes this lasagna soup special?

Comforting, Familiar Flavors: This Hearty Lasagna Soup combines the beloved taste of lasagna with the ease of a soup, making it a cozy family favorite.

Quick and Easy: Whip up this dish in just 30 minutes, perfect for your busy weeknights!

One-Pot Wonder: Enjoy minimal cleanup with everything cooked in a single pot, leaving you more time to relax.

Versatile Ingredients: Feel free to add veggies, switch up the pasta, or even use turkey instead of beef for a lighter twist, just like our tasty Cajun Sausage Pasta.

Crowd-Pleasing Nutrition: Packed with protein and veggies, this meal satisfies cravings while providing hearty nourishment for every member of the family.

Get ready to elevate your dinner game with this creamy, cheesy delight that brings joy to the table!

Lasagna Soup with Bow Tie Pasta Ingredients

• All the essentials for your soup!

For the Soup Base

  • Ground Beef – Provides rich flavor and protein; for best results, use 80/20 to keep it juicy, or substitute with turkey for a lighter option.
  • Olive Oil – Vital for sautéing ingredients and enhancing flavor; consider using a flavored oil for an extra touch.
  • Onion – Imparts sweetness and depth; yellow or white onions work best in this recipe.
  • Garlic – The aromatic hero! Fresh garlic elevates the taste—choose whole cloves instead of pre-minced for the best flavor.
  • Diced Tomatoes – Forms the flavorful soup base; fresh or canned, adjust sodium levels as needed.
  • Tomato Sauce/Puree – Thickens everything up and adds richness; crushed tomatoes make a great substitute for a chunkier texture.
  • Tomato Paste – Concentrates the flavors beautifully; it’s essential for depth but can be omitted only if necessary.
  • Chicken Stock – The broth foundation; low-sodium options provide better salt control.
  • Italian Herb Blend – Delivers that classic lasagna flavor; if you have fresh herbs, feel free to substitute!

For the Pasta

  • Bow Tie Pasta – Adds a fun texture while soaking up all the delicious flavors; other shapes work too—just adjust your cooking time accordingly.

For the Creamy Finish

  • Ricotta Cheese – Infuses creaminess; stir into individual bowls for a lovely smooth texture.
  • Mozzarella Cheese – Melts perfectly for a creamy topping; fresh or shredded will do the trick based on your preference.
  • Parmesan Cheese – Sprinkles on top add savory goodness right before serving.
  • Fresh Parsley – Not just for garnish! This bright addition enhances presentation and flavor beautifully.

With these ingredients collected, you’re all set to create a comforting dish of Lasagna Soup with Bow Tie Pasta that your family will adore!

Step‑by‑Step Instructions for Hearty Lasagna Soup with Bow Tie Pasta

Step 1: Heat the Base
Begin by heating a 4.5 quart soup pot over medium-high heat. Add a drizzle of olive oil and allow it to warm until it shimmers. This will create the ideal environment for sautéing the ingredients, helping to develop rich flavors in your Hearty Lasagna Soup with Bow Tie Pasta.

Step 2: Brown the Beef and Aromatics
Once the oil is hot, add the ground beef, diced onion, and minced garlic to the pot. Cook for about 5-7 minutes, stirring often, until the beef is browned and the onions are transparent, with a hint of caramelization. This melding of flavors is crucial for a delicious base for your soup.

Step 3: Drain and Add Tomatoes
After browning the meat, carefully drain any excess fat from the pot. Stir in the diced tomatoes, tomato sauce, and chicken stock, mixing well. This combination forms the heart of your soup, so make sure everything is well blended and incorporated before moving on to the next step.

Step 4: Incorporate Herbs and Pasta
Next, sprinkle in the Italian herb blend along with salt and pepper to taste. Now, add the bow tie pasta, stirring to combine. Bring the mixture to a boil, then reduce the heat to a simmer. Let it cook for 10-15 minutes, until the pasta is al dente and flavors meld beautifully in your Hearty Lasagna Soup.

Step 5: Finish with Cheese
Once the pasta is tender, remove the pot from the heat. Stir in the ricotta, mozzarella, and parmesan cheese until melted and creamy. The cheese enriches the soup, making it more decadent. Serve immediately, garnished with fresh parsley for a final touch that adds both flavor and freshness.

How to Store and Freeze Lasagna Soup with Bow Tie Pasta

Fridge: Store leftover lasagna soup in an airtight container for up to 4 days. When reheating, add a splash of broth or water to maintain its delicious creamy consistency.

Freezer: Freeze without pasta for up to 3 months; when ready to enjoy, thaw overnight in the refrigerator. Reheat thoroughly before serving, adding fresh pasta during the last 10-12 minutes for the best texture.

Airtight Storage: Ensure the soup is completely cooled before transferring to containers. Use freezer-safe bags or containers to prevent freezer burn and preserve flavor.

Reheating: When reheating, gently warm on the stove over medium heat, stirring occasionally to ensure even heating throughout the dish.

Lasagna Soup with Bow Tie Pasta Variations

Feel free to let your creativity shine as you customize your Lasagna Soup to fit your taste and dietary needs!

  • Turkey Swap: Replace ground beef with ground turkey for a leaner option while still maintaining that savory flavor.
  • Plant-Based Option: Use a plant-based meat alternative to make this soup vegan-friendly, ensuring everyone at the table can enjoy it.
  • Pasta Variety: Switch out bow tie pasta for your favorite shape—shells or macaroni add a delightful twist! Just remember to adjust the cooking time accordingly.
  • Veggie Boost: Toss in fresh spinach or zucchini for added nutrition that seamlessly incorporates into the soup; it sounds fancy but is surprisingly simple!
  • Extra Spice: For those who enjoy a bit of heat, add red pepper flakes or Italian sausage to spice things up and create a bold flavor profile.
  • Cheesy Delight: Stir in a blend of shredded cheeses for extra creaminess. A combination of cheddar and mozzarella can bring a unique twist to the classic flavor!
  • Creamy White Sauce: For a richer soup, try adding a splash of heavy cream towards the end; it creates a silky texture that elevates the dish!
  • Herbal Infusion: Swap the Italian herb blend for fresh herbs like basil and oregano to brighten the flavor and add a burst of freshness.

Your soup is a canvas! For more inspiration, check out our Potato Bacon Soup or dive into a comforting bowl of Shepherd’s Pie Soup to explore more flavorful variations!

Expert Tips for Hearty Lasagna Soup

  • Pasta Timing: Avoid mushy pasta: Add the bow tie pasta in the last 10–12 minutes of cooking to maintain texture in your lasagna soup.
  • Layering Flavors: Taste as you go: Adjust seasoning before serving, keeping in mind the sodium from broth and tomatoes—this enhances the overall flavor of the soup.
  • Cheese Integration: Smooth finish: For the best creamy texture, stir in ricotta and shredded mozzarella individually rather than mixing them all at once.
  • Storage Tips: Freshness matters: Store leftovers in an airtight container for up to 4 days. Reheat with a splash of chicken stock or water to keep the consistency just right.

What to Serve with Hearty Lasagna Soup with Bow Tie Pasta

Indulge in a comforting meal experience by pairing delicious sides and treats that beautifully complement your rich, cheesy soup.

  • Crusty Garlic Bread: A classic pairing, this bread adds a satisfying crunch and garlic flavor that perfectly balances the soup’s hearty richness.
  • Mixed Green Salad: Fresh, crisp greens provide a vibrant contrast to the warm soup, making each bite refreshing and light while enhancing the meal with added nutrients.
  • Warm Dinner Rolls: Soft, pillowy rolls are perfect for dipping, soaking up the sumptuous broth, and providing a delightful texture alongside the soup.
  • Caesar Salad: The creamy dressing and crunchy croutons create a nice textural variation that elevates your dining experience while harmonizing with the flavors of the soup.
  • Italian Breadsticks: Add a fun element to the dinner! Their gentle chewiness serves as a fantastic vessel for sopping up that cheesy goodness in your bowl.
  • Red Wine: A dry red wine, like Chianti, opens up the flavors beautifully, enhancing every sip at the table and pairing delightfully with the meaty notes of the soup.
  • Chocolate Mousse: Finish your meal on a sweet note with a rich, velvety dessert that contrasts with the savory elements of the lasagna soup, making it a perfect finale.

These delightful accompaniments ensure a well-rounded dinner that brings the family together, creating a cozy atmosphere filled with comfort and love.

Make Ahead Options

These Hearty Lasagna Soup with Bow Tie Pasta are perfect for meal prep enthusiasts! You can prepare the soup base (ground beef, onions, garlic, and tomatoes) up to 24 hours in advance by sautéing and then refrigerating it in an airtight container. Additionally, the cheese mix (ricotta, mozzarella, and parmesan) can be combined ahead of time and stored separately. When it’s time to serve, simply reheat the soup base on the stovetop, bring it to a boil, and cook the pasta in the simmering broth for about 10-12 minutes until tender. This way, you’ll enjoy a just-as-delicious lasagna soup with minimal effort, perfect for those busy weeknights!

Hearty Lasagna Soup with Bow Tie Pasta Recipe FAQs

How do I choose the right ground beef for my lasagna soup?
For the best flavor and juiciness, I recommend using 80/20 ground beef. If you’re looking for a leaner option, turkey or 85/15 beef works well, just be sure to add a little extra oil to the pan when browning to keep it moist and flavorful.

What is the best way to store leftover lasagna soup?
You can store leftover lasagna soup in an airtight container in the fridge for up to 4 days. When you’re ready to enjoy it again, simply reheat on the stove with a splash of broth or water to maintain that creamy consistency we all love!

Can I freeze my lasagna soup?
Absolutely! You can freeze lasagna soup without the pasta for up to 3 months. Make sure to cool the soup completely before transferring it to airtight freezer-safe containers or bags. When you’re ready to eat, thaw it overnight in the fridge, reheat thoroughly, and then add fresh pasta during the last 10-12 minutes of cooking for that perfect al dente texture.

What should I do if my soup is too thick?
If you find your soup has thickened too much, don’t worry! Just add a little extra chicken broth or water until it reaches your desired consistency. Stir it well and let it simmer for a few minutes to bring everything together nicely.

Is this recipe suitable for my family with dietary restrictions?
You can definitely adapt the Hearty Lasagna Soup. For gluten-free options, swap out the bow tie pasta for a gluten-free pasta shape. To accommodate dairy sensitivities, you can opt for vegan cheeses or simply omit the ricotta and mozzarella, while adding in more flavorful herbs and spices to enrich the soup.

How can I spice up my lasagna soup?
For a little kick, feel free to add red pepper flakes or sauté some Italian sausage with the ground beef. You could also mix in some chopped spinach or zucchini to give it an extra nutritional boost without sacrificing flavor!

Lasagna Soup with Bow Tie Pasta

Hearty Lasagna Soup with Bow Tie Pasta for Comfort Nights

A comforting bowl of Lasagna Soup with Bow Tie Pasta that brings family together after a long day.
Prep Time 10 minutes
Cook Time 20 minutes
Total Time 30 minutes
Servings: 6 servings
Course: Dinner
Cuisine: Italian
Calories: 400

Ingredients
  

For the Soup Base
  • 1 pound Ground Beef Use 80/20 for best results or turkey for a lighter option.
  • 1 tablespoon Olive Oil Consider using flavored oil.
  • 1 medium Onion Yellow or white onions work best.
  • 3 cloves Garlic Use fresh, whole cloves for best flavor.
  • 14.5 ounces Diced Tomatoes Fresh or canned, adjust sodium as needed.
  • 15 ounces Tomato Sauce/Puree Crushed tomatoes can be used for a chunkier texture.
  • 2 tablespoons Tomato Paste Essential for depth but can be omitted if necessary.
  • 4 cups Chicken Stock Low-sodium options are preferred.
  • 1 tablespoon Italian Herb Blend Fresh herbs can be substituted.
For the Pasta
  • 8 ounces Bow Tie Pasta Other shapes can be used; adjust cooking time accordingly.
For the Creamy Finish
  • 15 ounces Ricotta Cheese Stir into individual bowls for smooth texture.
  • 1 cup Mozzarella Cheese Fresh or shredded based on preference.
  • 1/4 cup Parmesan Cheese Sprinkle on top before serving.
  • 1/4 cup Fresh Parsley For garnish and added flavor.

Equipment

  • 4.5 quart soup pot

Method
 

Step-by-Step Instructions
  1. Heat a 4.5 quart soup pot over medium-high heat. Add olive oil and warm until it shimmers.
  2. Add ground beef, diced onion, and minced garlic. Cook for 5-7 minutes until the beef is browned and onions are transparent.
  3. Drain excess fat. Stir in diced tomatoes, tomato sauce, and chicken stock. Mix well.
  4. Add Italian herb blend along with salt and pepper. Then add bow tie pasta. Bring to a boil, then reduce to a simmer. Cook for 10-15 minutes until pasta is al dente.
  5. Remove from heat. Stir in ricotta, mozzarella, and parmesan cheese until melted and creamy. Serve garnished with fresh parsley.

Nutrition

Serving: 1cupCalories: 400kcalCarbohydrates: 30gProtein: 25gFat: 18gSaturated Fat: 8gPolyunsaturated Fat: 1gMonounsaturated Fat: 7gCholesterol: 70mgSodium: 800mgPotassium: 600mgFiber: 4gSugar: 6gVitamin A: 15IUVitamin C: 20mgCalcium: 25mgIron: 15mg

Notes

For best creamy texture, stir in cheese individually rather than mixing all at once.

Tried this recipe?

Let us know how it was!

Baked Pumpkin Donuts With Maple Cinnamon Glaze Bliss

As the leaves crunch underfoot and the air begins to crisp, there’s nothing quite like the heartwarming aroma of freshly baked treats filling your kitchen. That’s when I find myself reaching for my beloved recipe for Baked Pumpkin Donuts with Maple Cinnamon Glaze. These delightful donuts not only capture all the cozy flavors of fall, but they’re also a quick breakfast solution that you can whip up in just 30 to 40 minutes. Imagine serving these soft, tender morsels to your loved ones while savoring the sweet, spicy notes of pumpkin and warm maple glaze! They’re perfect for busy mornings or lazy weekend brunches, and they’re vegetarian-friendly too. Ready to indulge your taste buds? Let’s dive into this delightful recipe together!

Why Are These Donuts a Must-Bake?

Deliciously Easy: These Baked Pumpkin Donuts are a breeze to make, requiring just a few simple ingredients and minimal prep time. Perfect for beginners and seasoned bakers alike!

Flavors of Fall: The warm pumpkin spices and sweet maple glaze create a seasonal celebration for your taste buds—one bite will transport you to cozy autumn days.

Versatile Options: Adapt the recipe to your liking with options like nutty toppings, chocolate chips, or unique glaze flavors, ensuring everyone at your breakfast table is satisfied.

Healthy Indulgence: With wholesome ingredients like pumpkin puree, these donuts provide a guilt-free way to enjoy a sweet treat while adding nutrition to your mornings.

Perfect for Sharing: Whether for cozy family breakfast gatherings or delightful brunch parties, these donuts are sure to impress your guests—serve alongside fresh fruit or a warm beverage for a comforting spread!

Baked Pumpkin Donuts Ingredients

For the Donuts

  • All-Purpose Flour – Provides structure; switch to a gluten-free blend for a different option.
  • Baking Powder – Helps the donuts rise; no need for substitutes here.
  • Pumpkin Pie Spice – Adds traditional fall flavor; substitute with a homemade mix if desired.
  • Ground Nutmeg – Enhances the spice profile; you can omit it for a milder taste.
  • Salt – Balances the sweetness; essential for flavor enhancement.
  • Pumpkin Puree – Adds moisture and rich flavor; use pure pumpkin puree—not pie filling!
  • Brown Sugar – Contributes sweetness and caramel notes; coconut sugar is a healthier alternative.
  • Milk – Adds moisture; any type of milk (like almond or soy) can be used.
  • Egg – Binds ingredients and adds moisture; a flax egg works for a vegan option.
  • Unsalted Butter – Provides richness and flavor; substitute with coconut oil for dairy-free.
  • Vanilla Extract – Enhances overall flavor; no substitutes necessary.

For the Maple Cinnamon Glaze

  • Powdered Sugar – Forms the base of the glaze; essential for that sweet coating.
  • Ground Cinnamon – Adds depth to the glaze flavor; feel free to omit if not needed.
  • Maple Syrup – Sweetens the glaze while offering a delightful taste; you can substitute with honey or agave syrup if preferred.

These baked pumpkin donuts with maple cinnamon glaze are not just a delicious treat; they’re a cozy celebration of fall, ready to charm your breakfast table. Enjoy the comforting flavors while knowing you can whip them up in no time!

Step‑by‑Step Instructions for Baked Pumpkin Donuts With Maple Cinnamon Glaze

Step 1: Preheat the Oven
Start by preheating your oven to 350°F (177°C) and prepare your 6-count donut pan by spraying it with nonstick spray to ensure easy release. Make sure the pan is well-coated to prevent sticking. This step sets the stage for your Baked Pumpkin Donuts, ensuring they bake evenly and come out fluffy.

Step 2: Mix the Dry Ingredients
In a large mixing bowl, whisk together the all-purpose flour, baking powder, pumpkin pie spice, ground nutmeg, and salt. This dry mixture is the foundation for your donuts, so make sure it’s well combined to distribute the leavening agents and spices evenly. You’ll want to see a light, airy blend as you mix.

Step 3: Combine the Wet Ingredients
In a separate bowl, combine the pumpkin puree, brown sugar, milk, egg, melted butter, and vanilla extract. Mix these ingredients until the mixture is smooth and homogenous. You’re creating a rich, moist batter for your Baked Pumpkin Donuts, so ensure no lumps remain and all the flavors are well integrated.

Step 4: Blend Wet and Dry Mixtures
Gently fold the wet ingredients into the dry mixture, stirring until just combined. Be careful not to overmix, as this can lead to dense donuts. You want to see a batter that is slightly lumpy but cohesive, ensuring your donuts will have that delightful light texture when baked.

Step 5: Fill the Donut Pan
Spoon the batter into the prepared donut pan, filling each cavity about two-thirds full. An easy way to do this is by using a piping bag or a ziplock bag with the corner snipped off. This ensures even, perfectly shaped Baked Pumpkin Donuts that rise nicely during baking.

Step 6: Bake the Donuts
Place the filled donut pan in the preheated oven and bake for 10-12 minutes. You’ll know they’re done when a toothpick inserted into the center comes out clean, and the edges start to look lightly golden. These visual cues will help ensure your donuts are perfectly baked and ready for cooling.

Step 7: Cool the Donuts
Once baked, allow the donuts to cool in the pan for about 5 minutes. This initial cooling helps them stabilize before transferring. After that, gently flip them onto a wire rack to cool completely, which is crucial before glazing, ensuring a better texture without melting the glaze.

Step 8: Prepare the Maple Cinnamon Glaze
While the donuts cool, prepare the glaze by whisking together the powdered sugar, ground cinnamon, maple syrup, and milk in a small bowl. Adjust the amount of milk as needed to achieve your desired glaze thickness. A smooth, pourable consistency will coat the donuts beautifully, enhancing their flavor perfectly.

Step 9: Glaze the Donuts
Once the donuts are completely cool, dip the tops into the maple cinnamon glaze. Allow the excess to drip off before placing them back on the wire rack. This step creates a lovely sweet coating that hardens slightly as it sets, adding the finishing touch to your Baked Pumpkin Donuts.

Step 10: Let the Glaze Set
Allow the glazed donuts to sit for about 10-15 minutes so the glaze can set properly. This will ensure that the glaze doesn’t run off when you serve them. Once set, your Baked Pumpkin Donuts With Maple Cinnamon Glaze are ready to enjoy—perfect for sharing with family or indulging yourself!

Baked Pumpkin Donuts Variations & Substitutions

Feel free to play around with these ideas to make this scrumptious recipe even more special and suited to your taste!

  • Dairy-Free: Substitute regular milk with almond or oat milk, and use coconut oil instead of butter for a creamy, dairy-free treat.
  • Gluten-Free: Swap all-purpose flour for a gluten-free flour blend. This way, everyone can enjoy these delightful donuts!
  • Spicy Glaze: Add a pinch of cayenne or ginger to the glaze for a warm kick that perfectly complements the pumpkin’s sweetness.
  • Nutty Crunch: Fold in chopped pecans or walnuts into the batter for added texture and a nutty flavor to elevate your donut experience.
  • Chocolate Lovers: Incorporate mini chocolate chips into the batter, creating a rich, decadent twist on classic pumpkin flavor.
  • Maple-Lemon Glaze: Replace maple syrup with a blend of lemon juice and honey to create a zesty, refreshing glaze!
  • Apple-Cinnamon: Add diced apples to the batter and use a sprinkle of cinnamon instead of pumpkin pie spice for a delicious fall flavor fusion.
  • Mini Muffins: Use a mini muffin pan instead of a donut pan for tiny, bite-sized treats that are perfect for kids or snacks!

Enjoy creating these unique versions while still embracing the cozy flavors of fall! And if you’re interested in more autumn-inspired delights, check out my recipe for Bananas Foster Cinnamon or indulge in a comforting charm with Baked Ham and Cheese Croissants. Happy baking!

Make Ahead Options

These Baked Pumpkin Donuts with Maple Cinnamon Glaze are perfect for meal prep! You can prepare the donut batter up to 24 hours in advance by mixing the dry ingredients and storing them separately. The wet ingredients can be combined and refrigerated for optimal results. When you’re ready to bake, simply mix both components and fill your donut pan. The finished donuts can also be glazed up to 3 days in advance; just store them in an airtight container to maintain their quality. For the best texture, reheat slightly before serving, allowing the warm, spiced flavor to envelop your kitchen once more—just as delightful as the first bake!

Expert Tips for Baked Pumpkin Donuts

  • Cool Before Glazing: Allow donuts to cool completely to prevent the glaze from melting off and losing that beautiful finish.

  • Don’t Overmix: Gently fold the wet and dry ingredients together; overmixing can lead to dense, heavy donuts instead of light and fluffy ones.

  • Mind the Bake Time: If using a mini muffin pan, shorten the baking time to about 6-8 minutes to achieve the perfect texture for your baked pumpkin donuts.

  • Thick Glaze Preference: Adjust the milk in your maple cinnamon glaze to reach your desired thickness; thicker glazes cling better to the donuts!

  • Flavor Variations: Feel free to add chocolate chips or nuts to the donut batter for an extra twist on the classic baked pumpkin donuts with maple cinnamon glaze.

How to Store and Freeze Baked Pumpkin Donuts

Fridge: Keep your baked pumpkin donuts in an airtight container, where they will stay fresh for up to 2 days. This helps retain their soft, moist texture.

Freezer: Freeze the donuts in a single layer on a baking sheet before transferring them to a ziplock bag. They will keep well for up to 3 months. Allow them to thaw before glazing.

Reheating: To enjoy your donuts warm, reheat them in the microwave for 10-15 seconds. This brings back their delightful texture, making them taste freshly baked again.

Glazing: If you freeze your donuts, wait to glaze them until after they’ve thawed. This prevents the glaze from becoming too runny and ensures the best presentation for your baked pumpkin donuts with maple cinnamon glaze.

What to Serve With Baked Pumpkin Donuts with Maple Cinnamon Glaze

Pairing these delightful donuts with the right sides creates a cozy breakfast experience that everyone will cherish.

  • Fresh Fruit: Slices of apples or pears add a refreshing crunch and balance the sweetness of the donuts.
  • Warm Beverage: A cup of spiced chai tea or creamy latte complements the flavors beautifully, enhancing that comforting morning vibe.
  • Cream Cheese Spread: A dollop of cream cheese adds a tangy richness that pairs perfectly with the sweet, spiced donuts.
  • Yogurt Parfait: Layer Greek yogurt with granola and berries for a nutritious, texturally varied side that will keep you full and satisfied.
  • Cinnamon Sugar Toast: A sprinkle of cinnamon sugar on toast echoes the flavors of the donuts, creating a delightful breakfast theme.
  • Homemade Granola: Serve with a topping of nutty granola to add crunch and an irresistible flavor contrast to the fluffy donuts.

Baked Pumpkin Donuts with Maple Cinnamon Glaze Recipe FAQs

What type of pumpkin puree should I use?
Absolutely use pure pumpkin puree! Always look for 100% pumpkin without any added sugars or spices; avoid pumpkin pie filling, as it contains added sweeteners and flavorings that can throw off your donut’s taste.

How should I store leftover donuts?
To keep your baked pumpkin donuts fresh, place them in an airtight container at room temperature for up to 2 days. For longer storage, you can freeze them—see below for those instructions!

Can I freeze these donuts?
Yes, you can freeze your baked pumpkin donuts with maple cinnamon glaze! First, let them cool completely on a wire rack. Place them in a single layer on a baking sheet and freeze until solid (about 1-2 hours). Then, transfer to a ziplock bag for up to 3 months. When you’re ready to enjoy them, simply thaw at room temperature or microwave for 10-15 seconds.

What should I do if my donuts are too dense?
If you find your donuts came out too dense, likely, they were overmixed. Remember to gently fold the wet and dry ingredients together without stirring too vigorously! Also, ensure your baking powder is fresh for the best rise.

Are these donuts safe for pets?
It’s best to keep baked pumpkin donuts away from pets. The sugar and other ingredients like chocolate (if added) can be harmful to them. However, plain pumpkin puree can be a healthy treat for dogs in moderation, as it’s high in fiber!

Can I make these donuts vegan or gluten-free?
Very much so! For a vegan option, use a flax egg (1 tablespoon ground flaxseed mixed with 2.5 tablespoons water) instead of an egg, and substitute the butter with coconut oil. For gluten-free donuts, swap in a gluten-free all-purpose flour blend and ensure your baking powder is gluten-free as well.

Baked Pumpkin Donuts With Maple Cinnamon Glaze

Baked Pumpkin Donuts With Maple Cinnamon Glaze Bliss

Delight in these Baked Pumpkin Donuts With Maple Cinnamon Glaze, a quick and cozy fall treat perfect for breakfast.
Prep Time 15 minutes
Cook Time 12 minutes
Cooling Time 5 minutes
Total Time 32 minutes
Servings: 6 donuts
Course: Breakfast
Cuisine: American
Calories: 180

Ingredients
  

For the Donuts
  • 1 1/2 cups All-Purpose Flour Can use gluten-free blend
  • 2 teaspoons Baking Powder
  • 1 teaspoon Pumpkin Pie Spice Homemade mix can be used
  • 1/4 teaspoon Ground Nutmeg Optional
  • 1/2 teaspoon Salt
  • 1 cup Pumpkin Puree Use pure pumpkin puree
  • 3/4 cup Brown Sugar Coconut sugar as healthier alternative
  • 1/2 cup Milk Any type of milk can be used
  • 1 large Egg Flax egg for vegan option
  • 1/4 cup Unsalted Butter Can substitute with coconut oil
  • 1 teaspoon Vanilla Extract
For the Maple Cinnamon Glaze
  • 1 cup Powdered Sugar
  • 1/2 teaspoon Ground Cinnamon Optional
  • 2 tablespoons Maple Syrup Can substitute with honey
  • 1-2 tablespoons Milk Adjust for desired glaze thickness

Equipment

  • Donut pan
  • Mixing bowls
  • whisk

Method
 

Preparation
  1. Preheat the oven to 350°F (177°C) and prepare the 6-count donut pan with nonstick spray.
  2. In a large bowl, whisk together the flour, baking powder, pumpkin pie spice, ground nutmeg, and salt.
  3. In a separate bowl, mix pumpkin puree, brown sugar, milk, egg, melted butter, and vanilla extract until smooth.
  4. Fold the wet ingredients into the dry mixture until just combined.
  5. Spoon the batter into the donut pan, filling each cavity two-thirds full.
  6. Bake for 10-12 minutes, or until a toothpick inserted comes out clean.
  7. Cool in the pan for 5 minutes, then transfer to a wire rack to cool completely.
  8. Prepare the glaze by whisking powdered sugar, ground cinnamon, maple syrup, and milk to your desired thickness.
  9. Once cooled, dip the tops of the donuts in the glaze and allow excess to drip off.
  10. Let the glazed donuts sit for 10-15 minutes to set the glaze.

Nutrition

Serving: 1donutCalories: 180kcalCarbohydrates: 28gProtein: 2gFat: 7gSaturated Fat: 4gPolyunsaturated Fat: 0.5gMonounsaturated Fat: 2gCholesterol: 30mgSodium: 150mgPotassium: 120mgFiber: 1gSugar: 10gVitamin A: 400IUVitamin C: 1mgCalcium: 50mgIron: 1mg

Notes

Allow donuts to cool completely before glazing to ensure the glaze sets properly. Adjust baking times if using a mini muffin pan.

Tried this recipe?

Let us know how it was!

Stay Connected

Get recipes via email: