Get my cookbooks

Fall for This Irresistible Pumpkin Juice Recipe Today

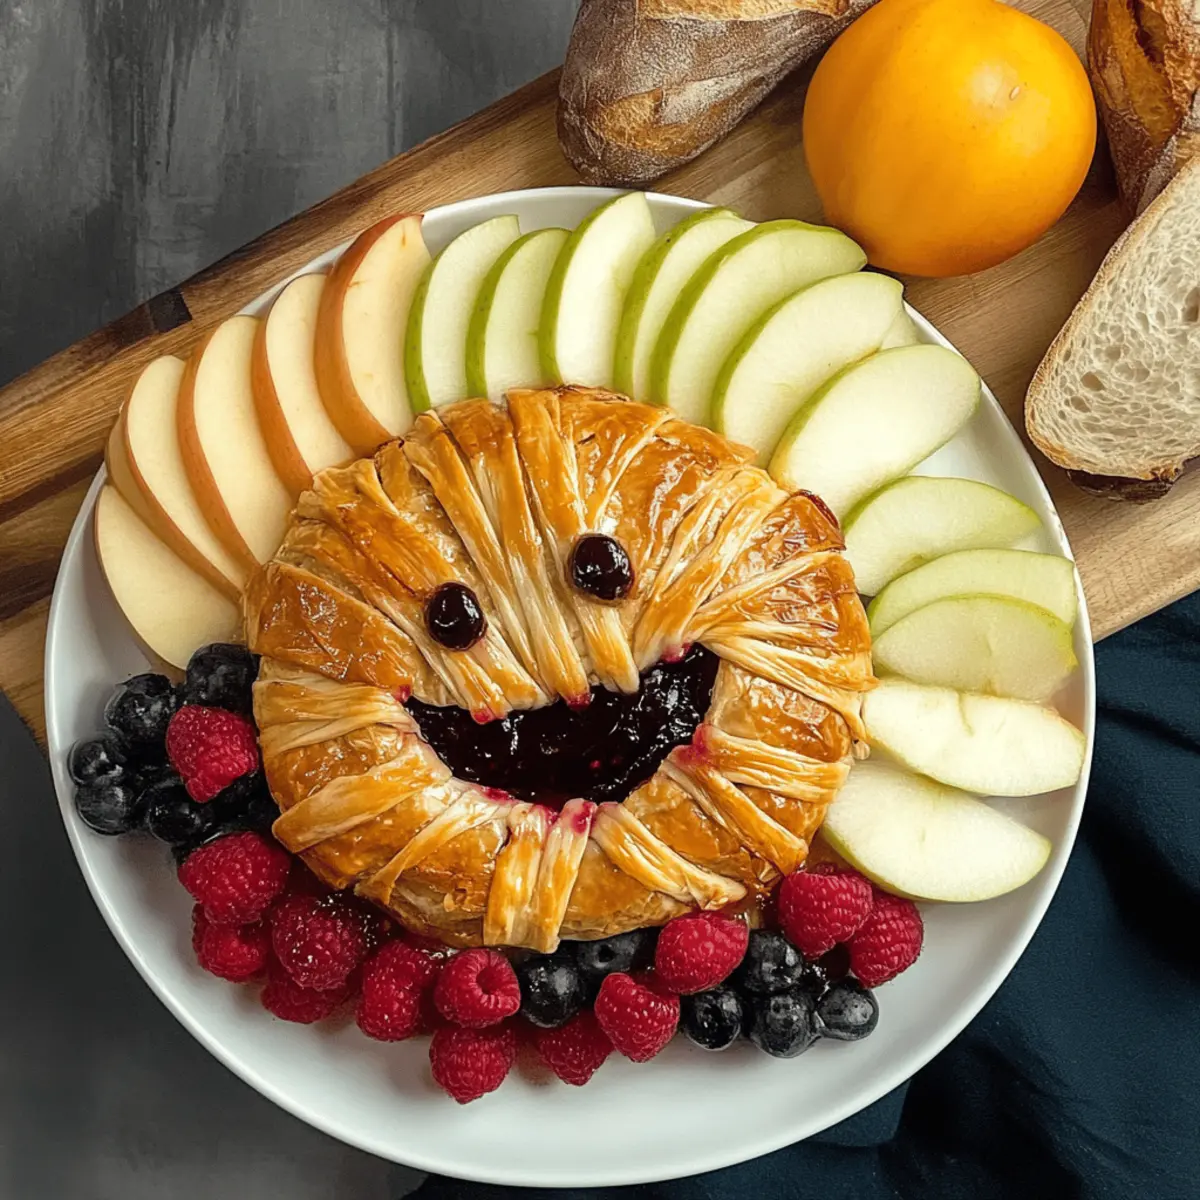
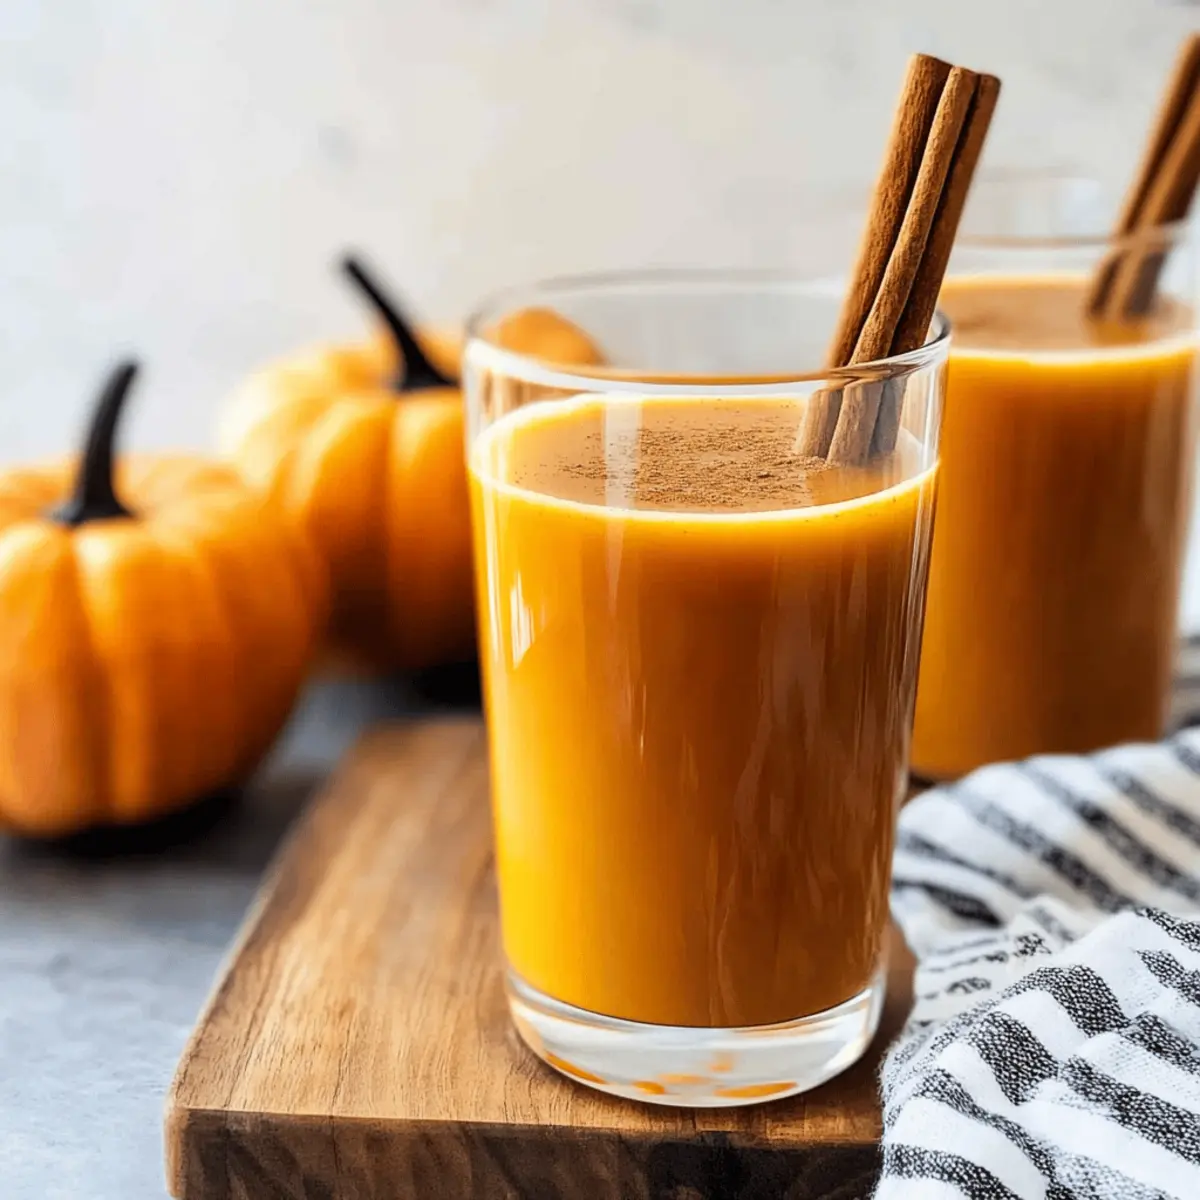
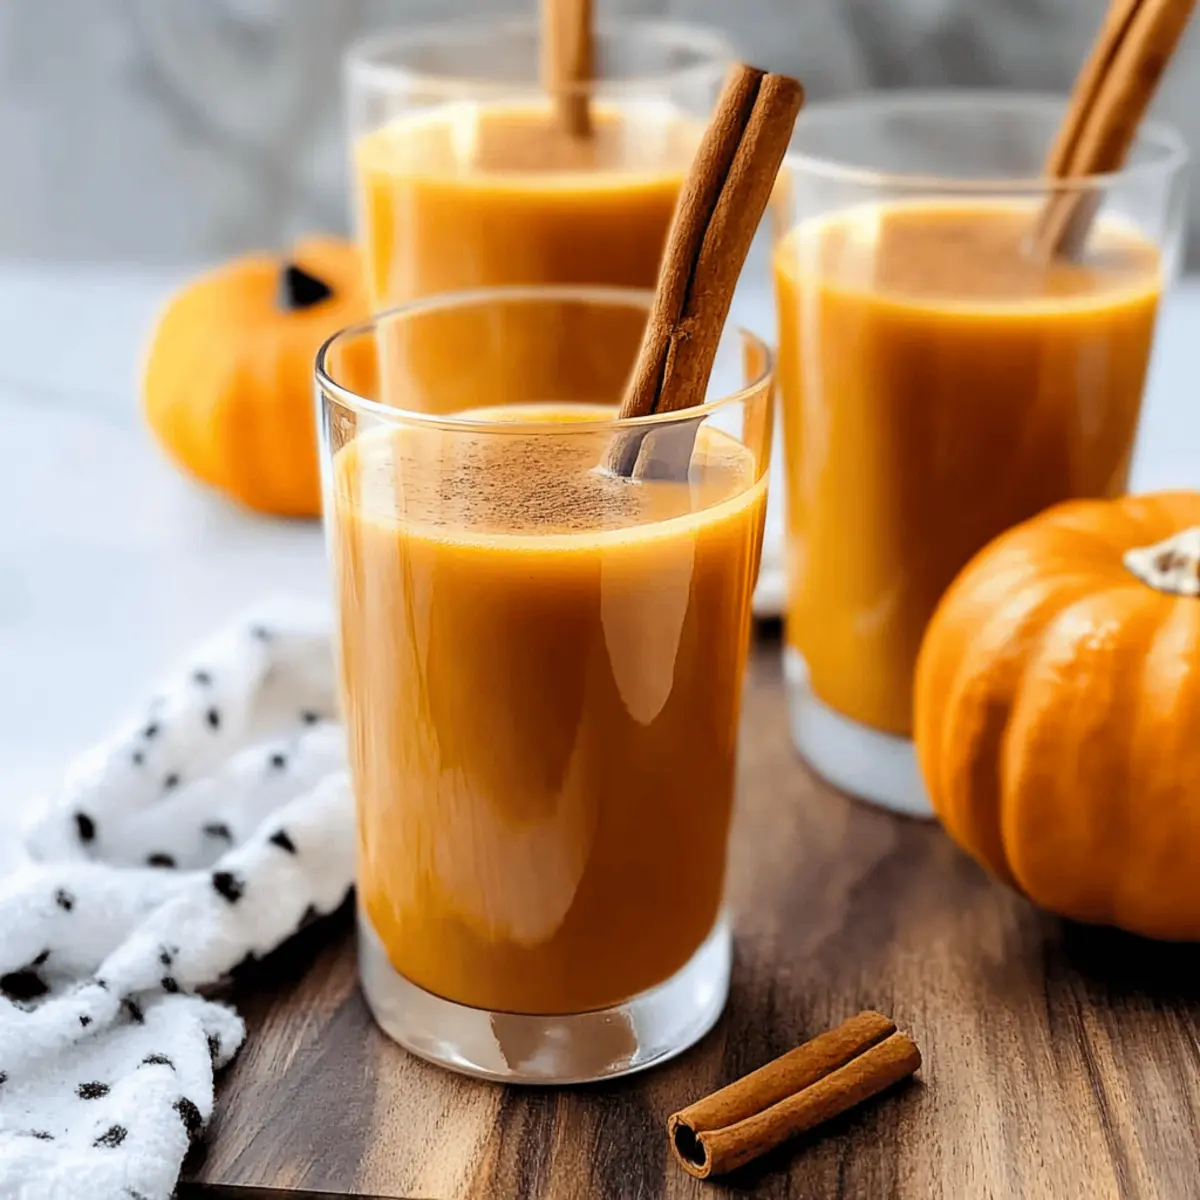
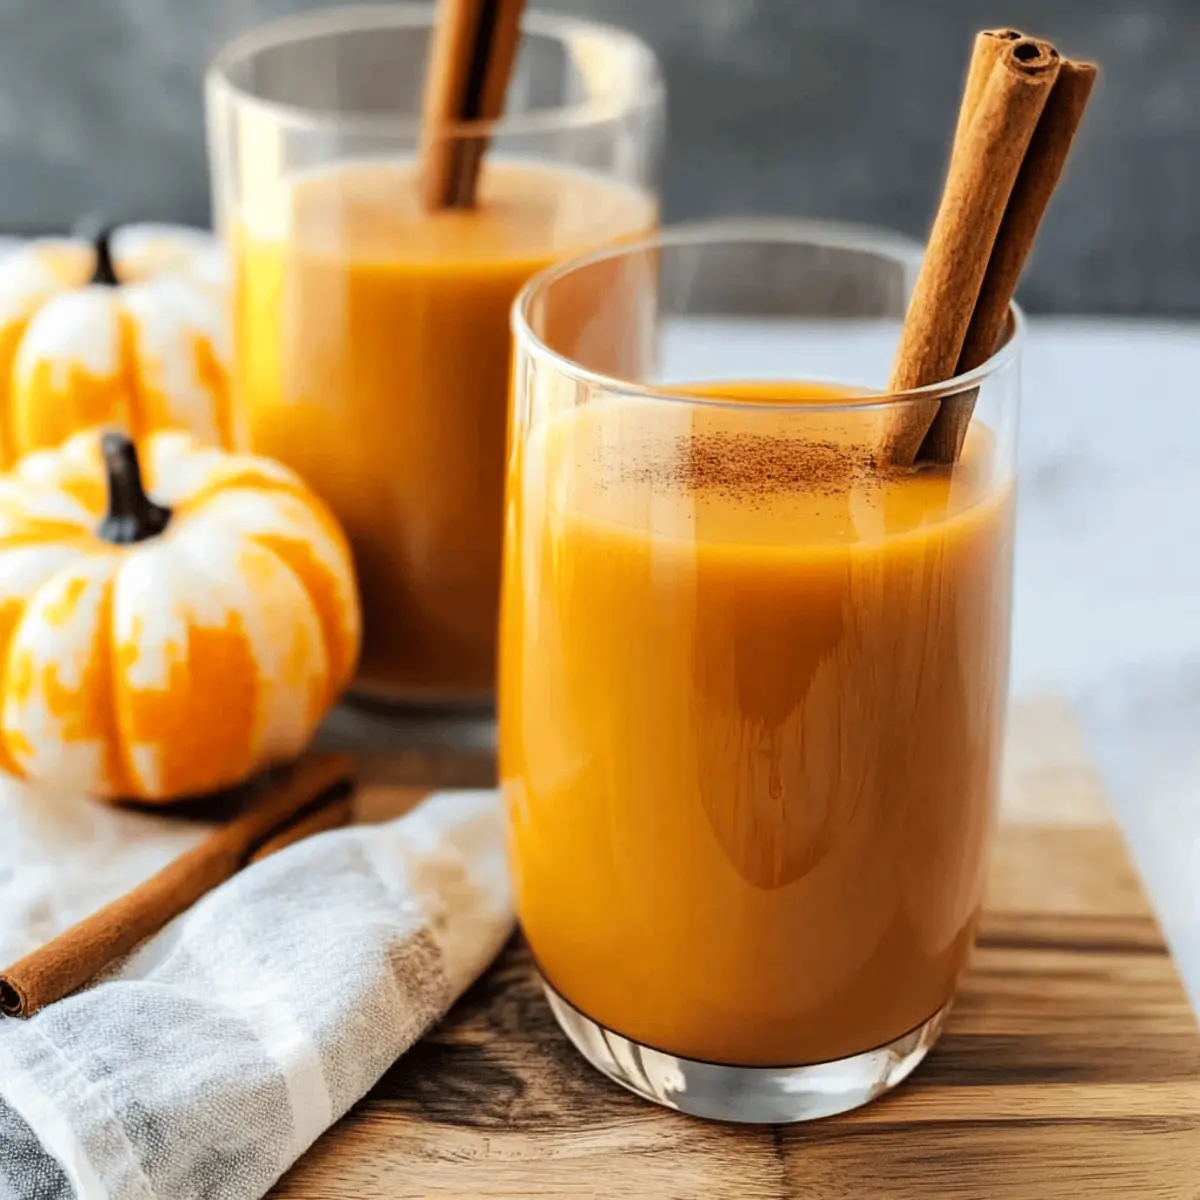
As the crisp air of Fall settles in, I find myself drawn to cozy rituals that celebrate the season. One such ritual is whipping up a batch of Harry Potter-inspired Pumpkin Juice, a heartwarming and non-alcoholic beverage that celebrates the enchanting flavors of autumn. This delightful Pumpkin Juice Recipe combines the rich taste of real pumpkin with the sweetness of fresh apple cider and spices that warm the soul. It’s quick to prepare—perfect for those busy Halloween gatherings or Thanksgiving feasts—and surprisingly versatile, whether you serve it chilled over ice or warm for snuggly nights in. Are you ready to brew your own magical concoction? Let’s dive into this seasonal treat!

Why Is This Pumpkin Juice a Must-Try?

Magical Blend: This Pumpkin Juice Recipe captures the essence of fall with its enchanting mix of spices and pumpkin, echoing the whimsical world of Harry Potter.

Versatile Enjoyment: Serve it cold for festive gatherings or warm it up for cozy evenings; this drink adapts to any occasion!

Simple Ingredients: Using staple items like apple cider and pumpkin puree, you can whip up this delightful beverage with ease, even on busy days.

Kid-Friendly Delight: It’s a non-alcoholic treat, making it perfect for all ages—everyone will enjoy its sweet and spicy flavors!

Make-Ahead Convenience: Prepare it in advance to enhance its delicious flavors. Store in the fridge for a refreshing drink ready to go whenever you are!

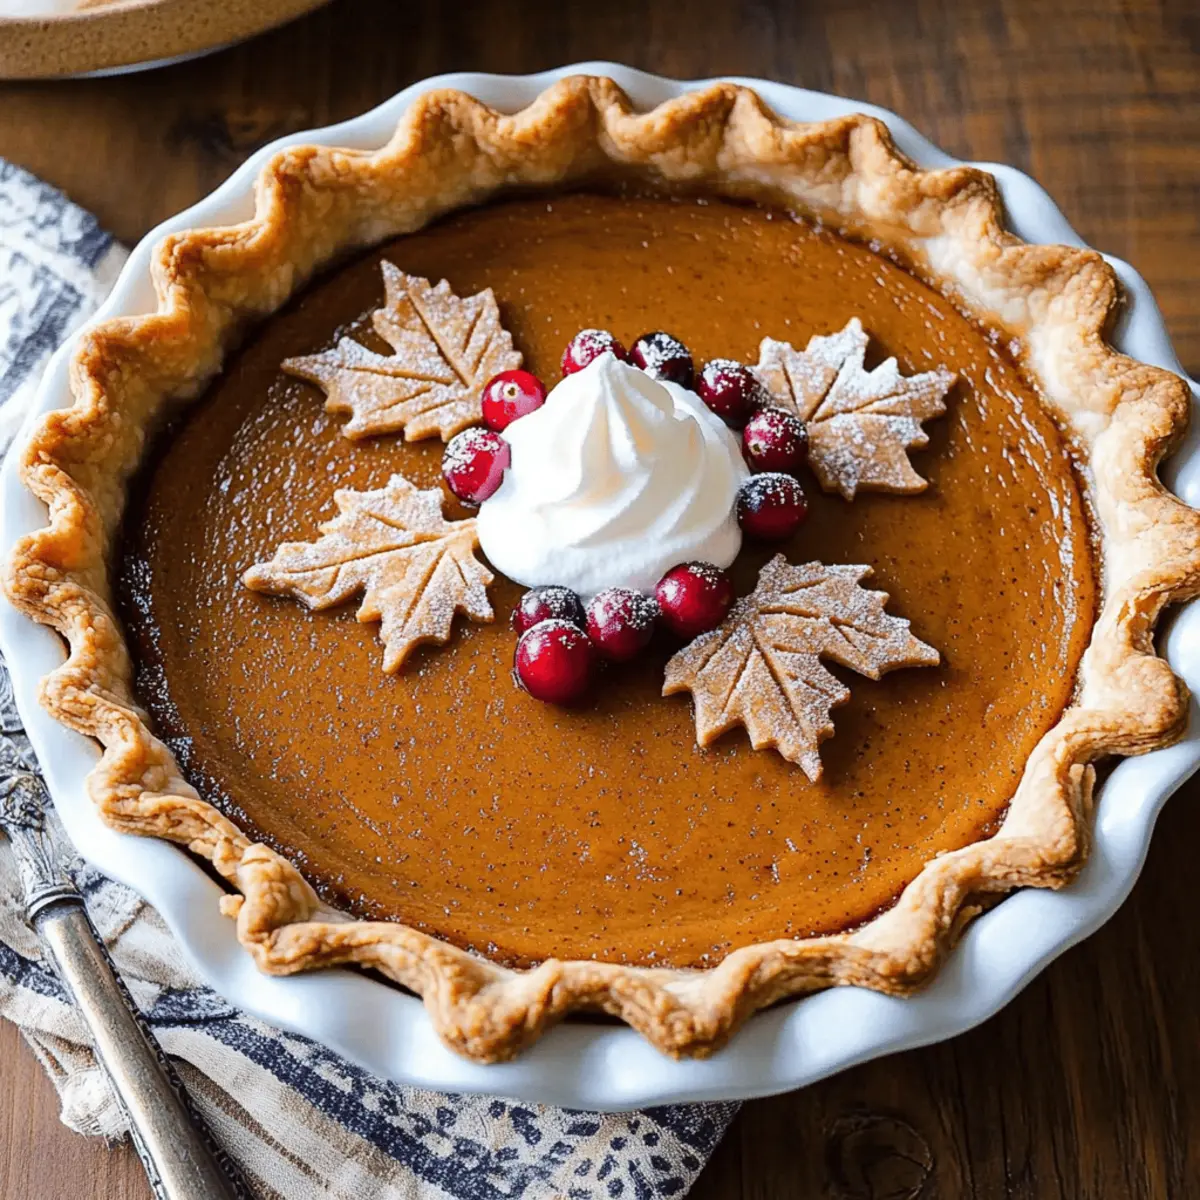
Don’t forget to try this recipe alongside my Joumou Haitian Pumpkin for a truly comforting meal this season.

Pumpkin Juice Ingredients

• To create your own magical Pumpkin Juice Recipe, gather these delightful ingredients!

For the Base

  • Apple Cider – Provides the base flavor and sweetness; fresh, unfiltered cider gives the best taste.
  • Pumpkin Puree – Adds a rich, creamy texture and delicious pumpkin flavor; canned puree is super convenient, but homemade is fantastic too!
  • Apricot, Peach, or Pear Nectar – Contributes sweetness and fruitiness; if you don’t have these, feel free to swap in any other fruit juice!

For the Sweetness

  • Brown Sugar – Enhances sweetness and richness; adjust the amount according to your taste preference.

For the Spices

  • Ground Cinnamon – Offers warmth and spice depth; can substitute with pumpkin pie spice if you want a shortcut!
  • Ground Nutmeg – Adds a nutty flavor note; freshly grated nutmeg brings a wonderful aroma.
  • Ground Ginger – Infuses a zesty warmth; adjust to your liking, using either powdered or fresh ginger.
  • Ground Allspice – Provides a unique, warm spice blend; it’s optional, but highly recommended for that extra complexity!

For the Finish

  • Vanilla Extract – Enhances the overall flavor profile; for the best results, use pure vanilla extract.

Gather these ingredients and get ready to create a delightful potion that embodies the essence of autumn in every sip!

Step‑by‑Step Instructions for Pumpkin Juice Recipe

Step 1: Combine Ingredients
In a large pot, blend together 4 cups of apple cider, 1 cup of pumpkin puree, and 1 cup of apricot nectar. Add in 1/2 cup of brown sugar, 1 teaspoon of ground cinnamon, 1/2 teaspoon of ground nutmeg, 1 teaspoon of ground ginger, and 1/4 teaspoon of ground allspice. Stir well until the mixture is smooth and all ingredients are fully incorporated.

Step 2: Heat the Mixture
Place the pot over medium heat and gently warm the mixture. Keep an eye on it, stirring occasionally, until it begins to bubble, which should take about 5–7 minutes. You’ll know it’s ready when you see small bubbles forming around the edges, releasing that tantalizing aroma of fall spices.

Step 3: Simmer for Flavor
Once it reaches a boil, reduce the heat to low and let the pumpkin juice simmer for 10 to 15 minutes. Stir occasionally during this time to ensure the flavors meld beautifully. The mixture should thicken slightly and develop a rich, warm color, filling your kitchen with a festive scent.

Step 4: Add Vanilla Extract
After simmering, remove the pot from heat and stir in 2 teaspoons of pure vanilla extract. This adds a lovely depth of flavor to your pumpkin juice, beautifully balancing the sweetness and spices. Let it sit for a few moments to allow the vanilla to infuse into the mixture.

Step 5: Cool and Serve
Allow the pumpkin juice to cool to room temperature, then refrigerate until completely chilled if you prefer a cold beverage. Alternatively, you can serve it warm right away by ladling it into mugs. Rich and creamy, this Pumpkin Juice Recipe can be enjoyed at any temperature depending on your mood!

What to Serve with Harry Potter-Inspired Pumpkin Juice

Imagine the enchanting ambiance of fall as you cozy up with this delightful beverage, perfectly complementing your seasonal fare.

  • Warm Cinnamon Buns: Their sweet, sticky dough paired with spices mirrors the pumpkin juice’s warmth, creating a harmony of flavors, perfect for breakfast or dessert.

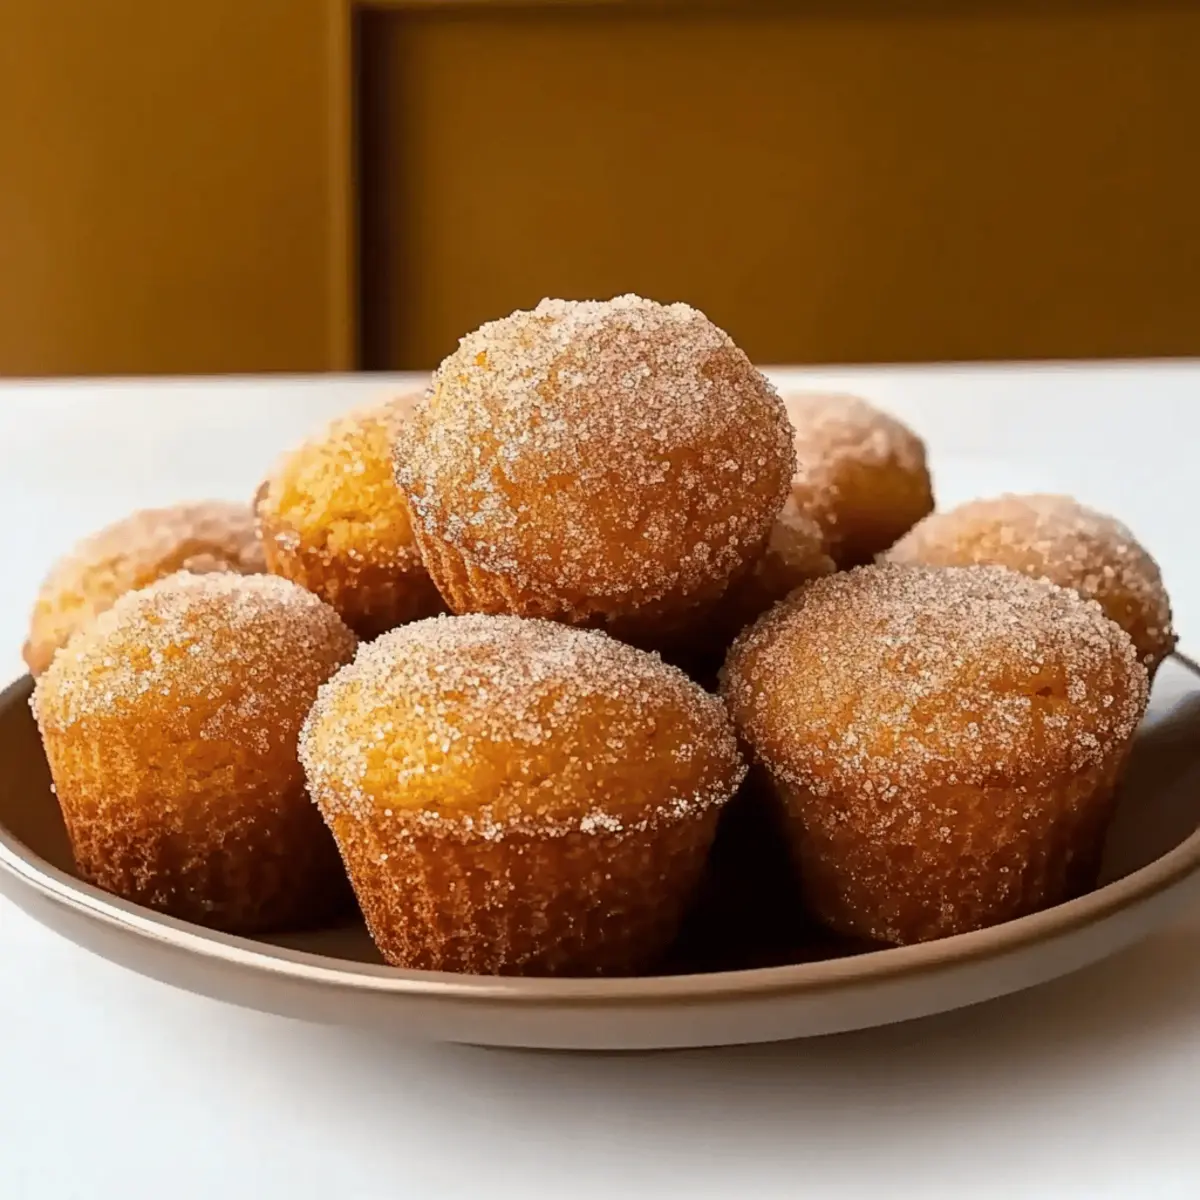
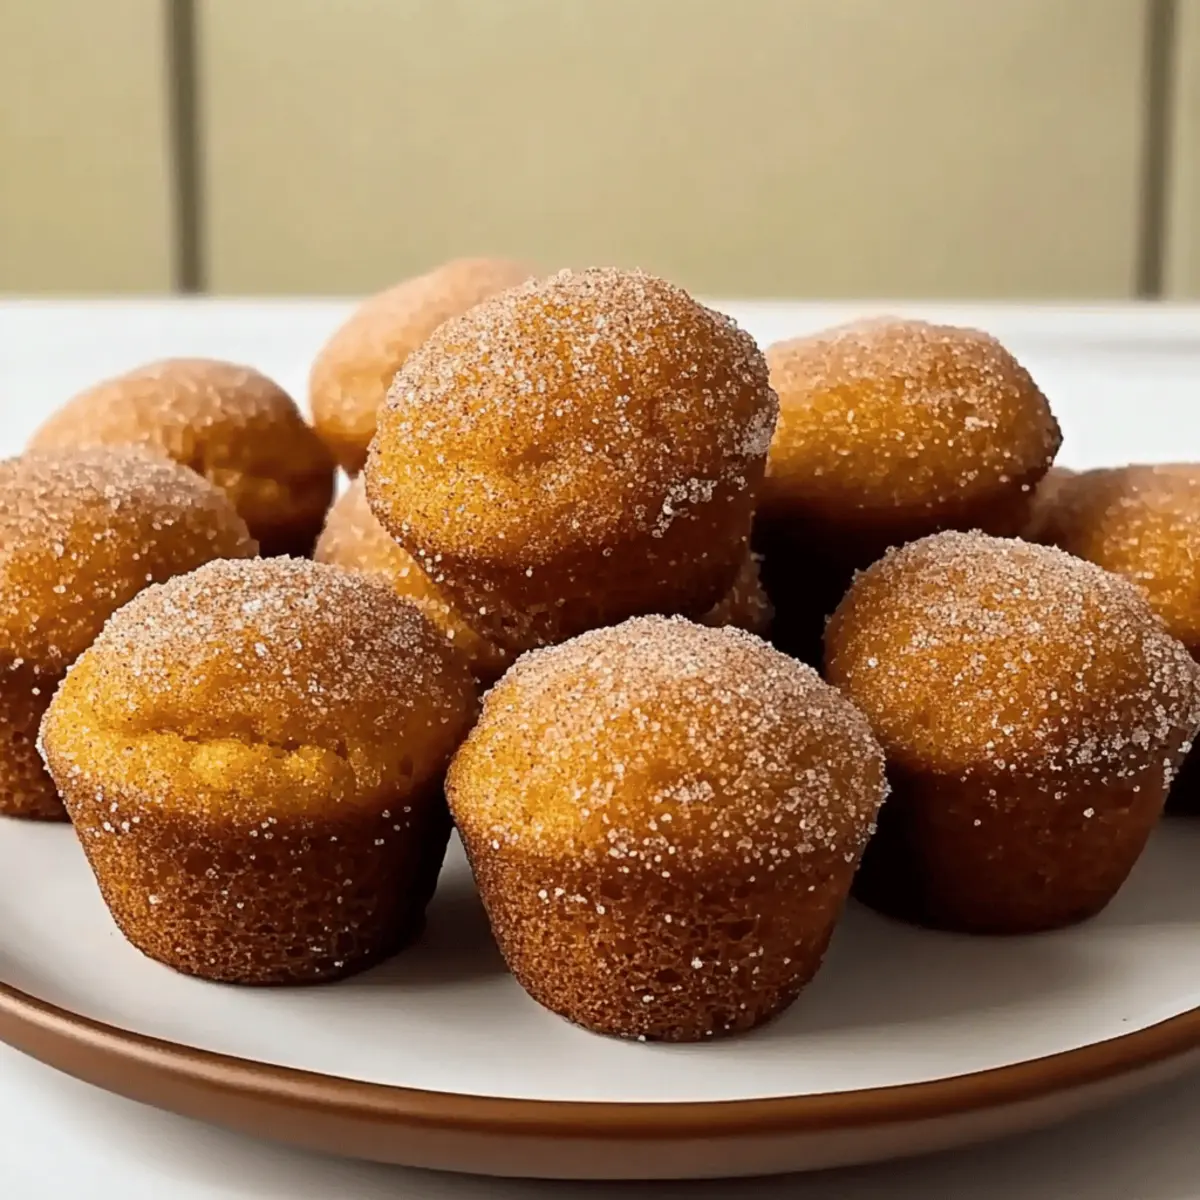
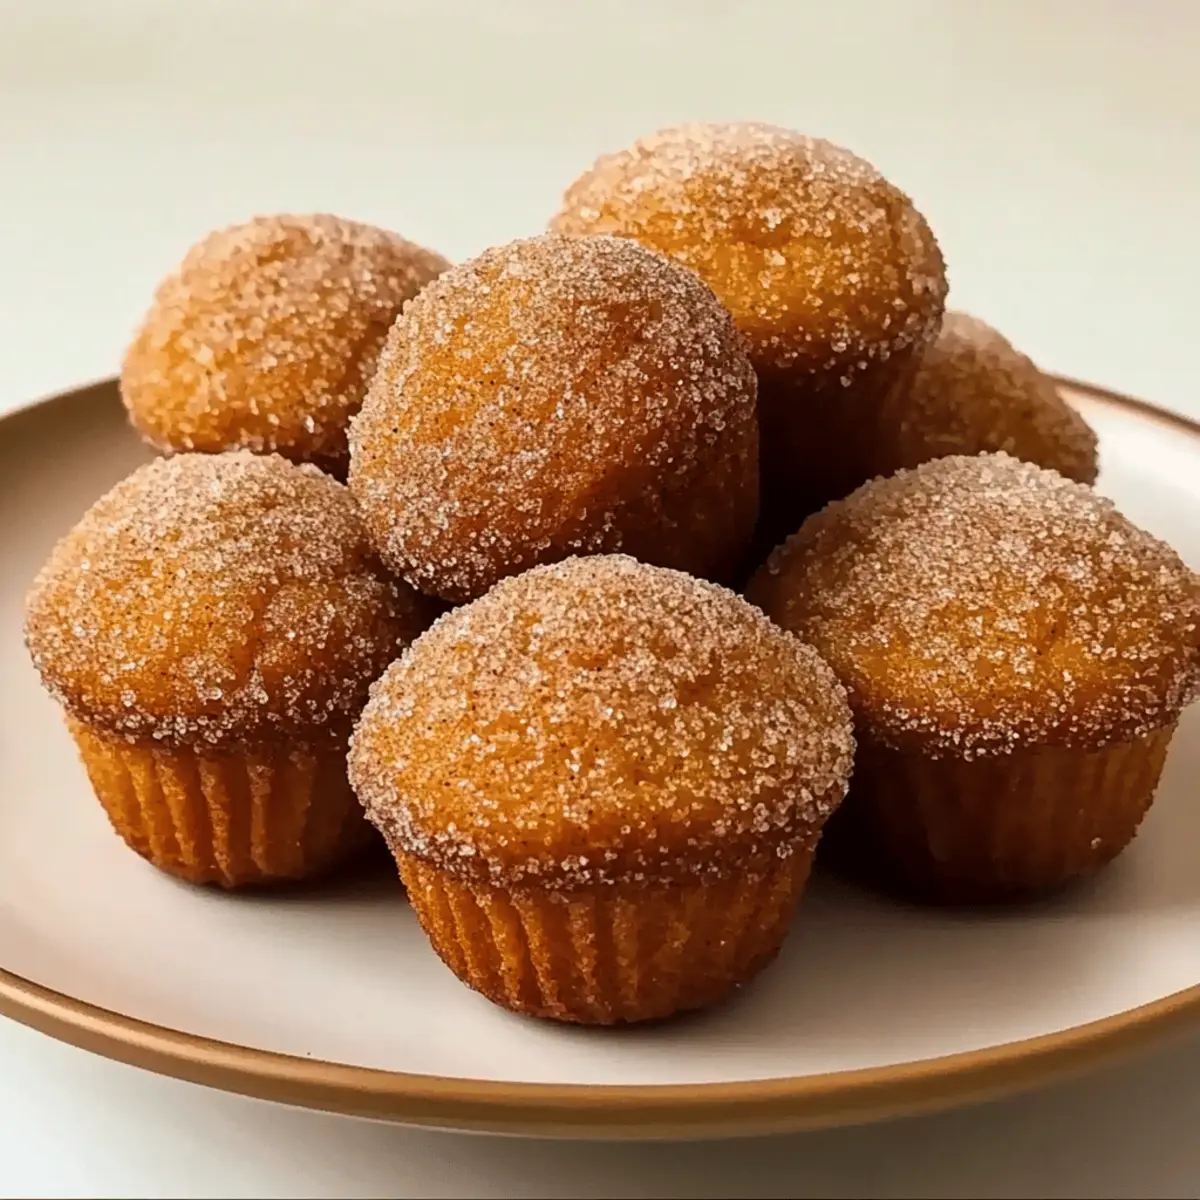
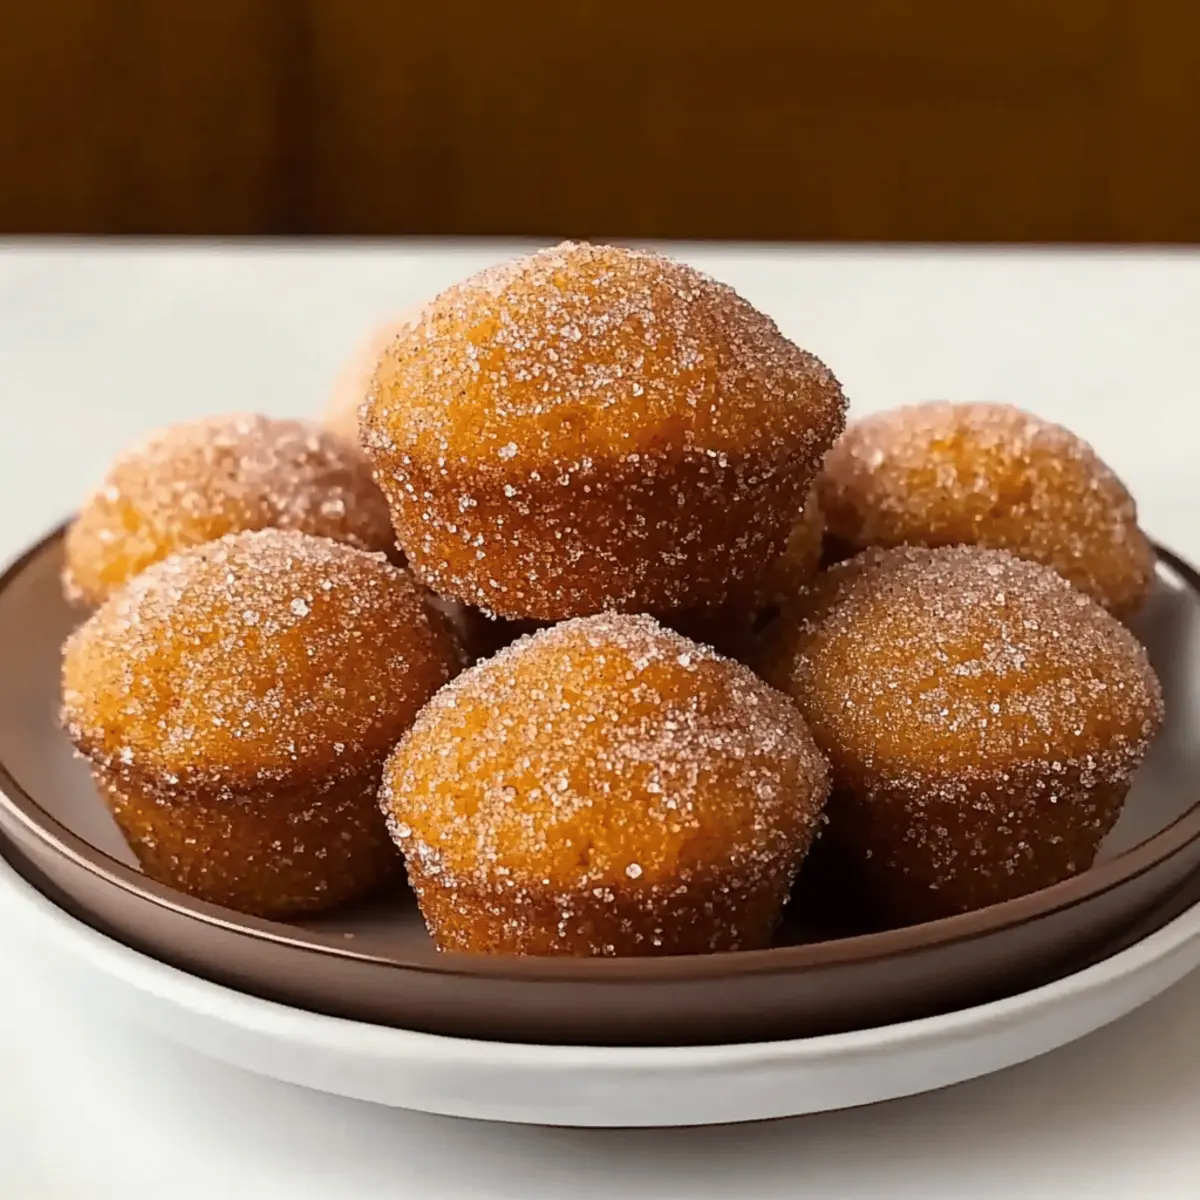
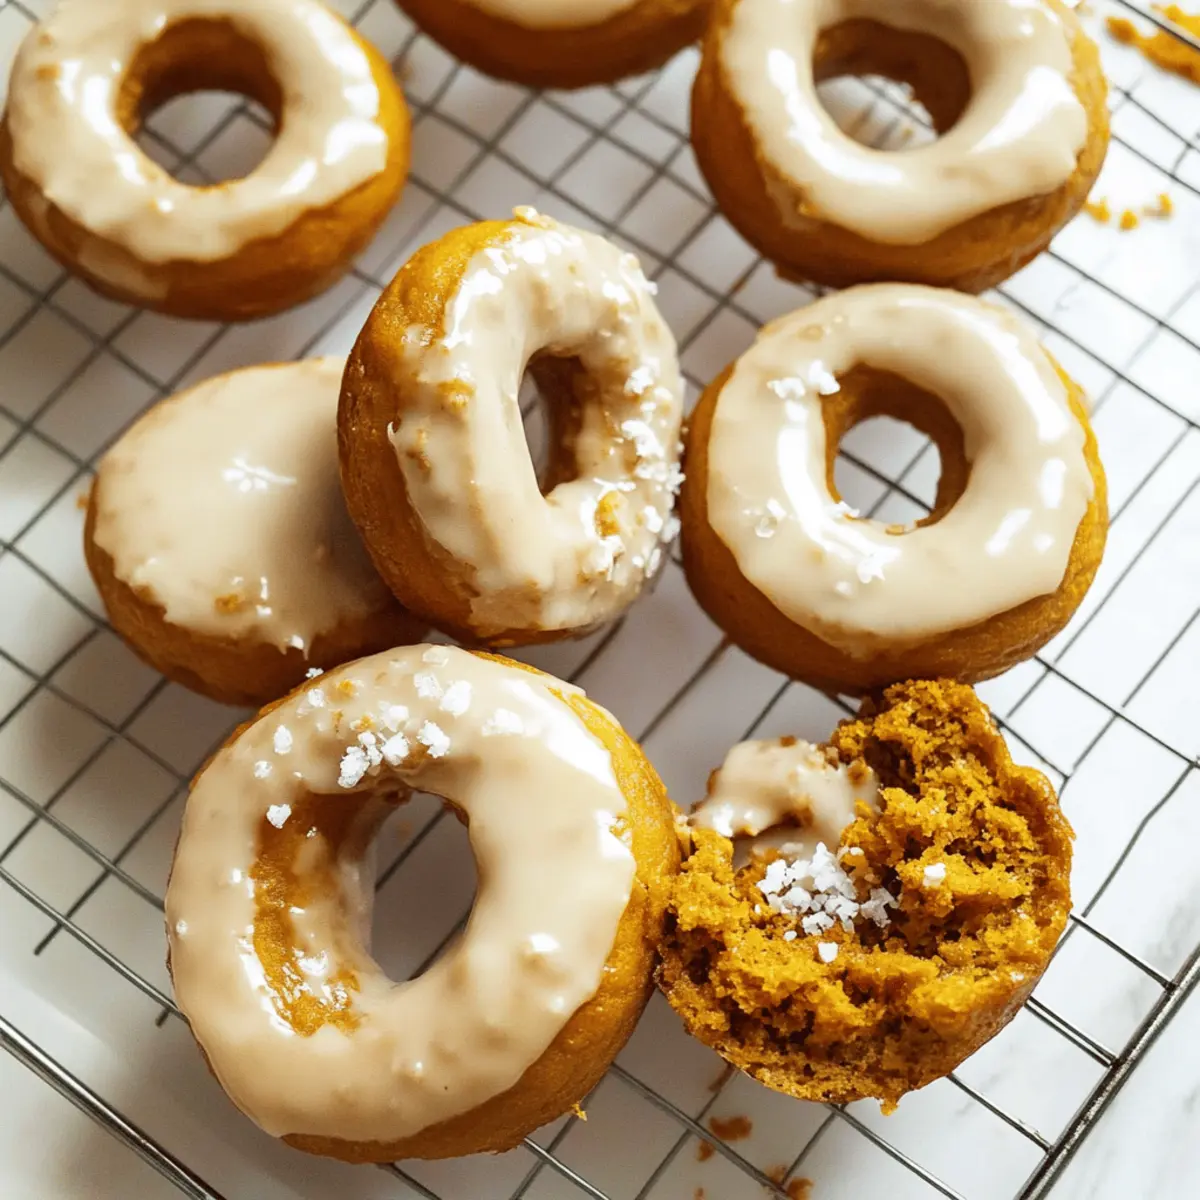
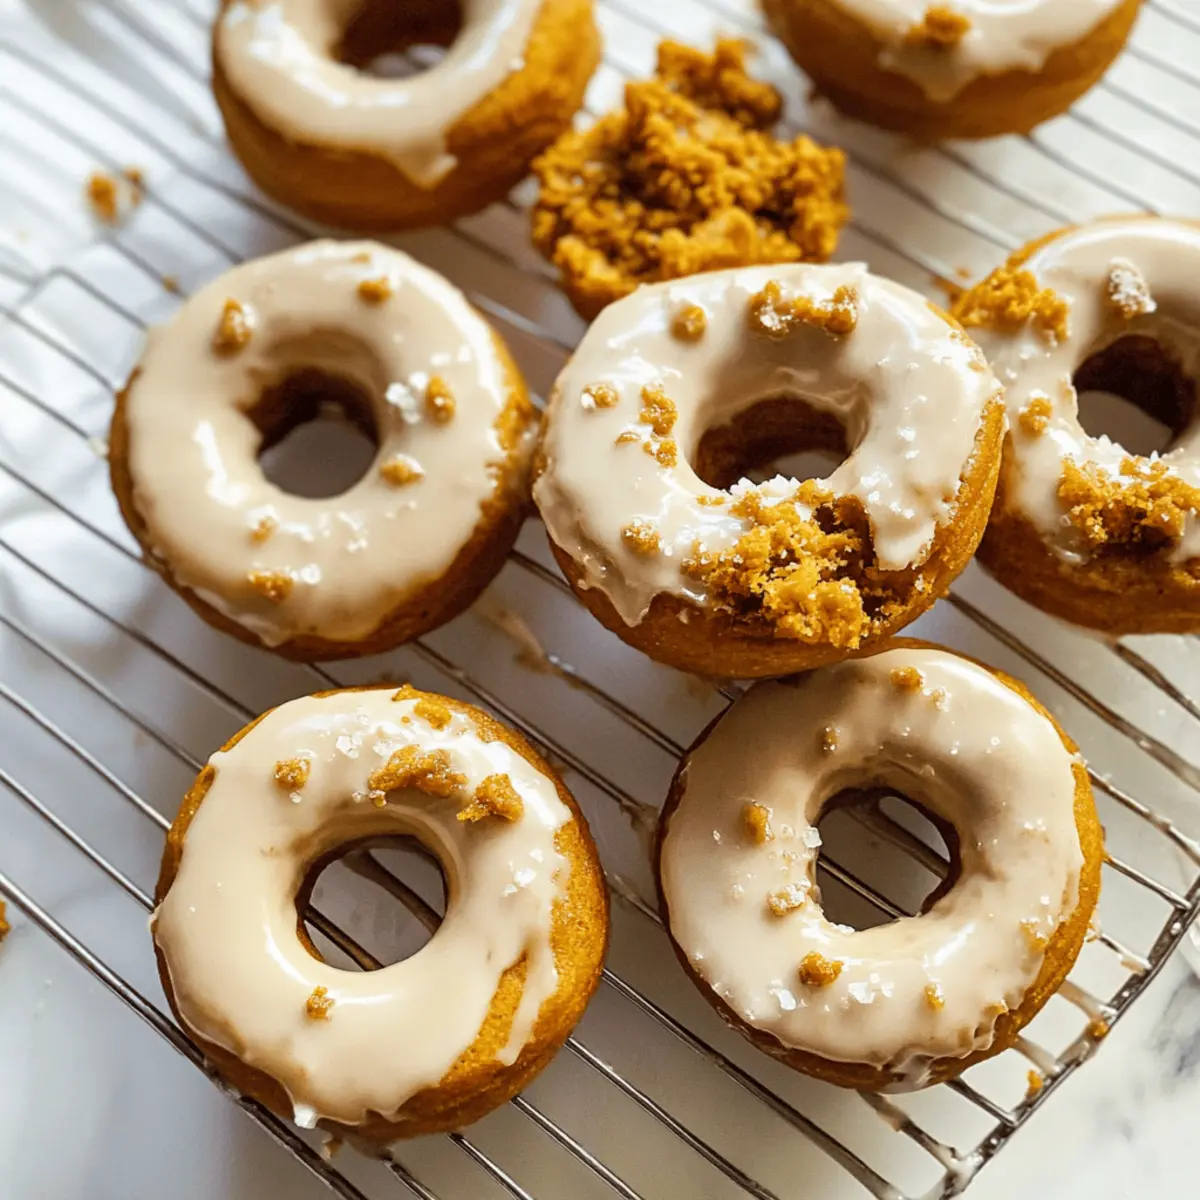
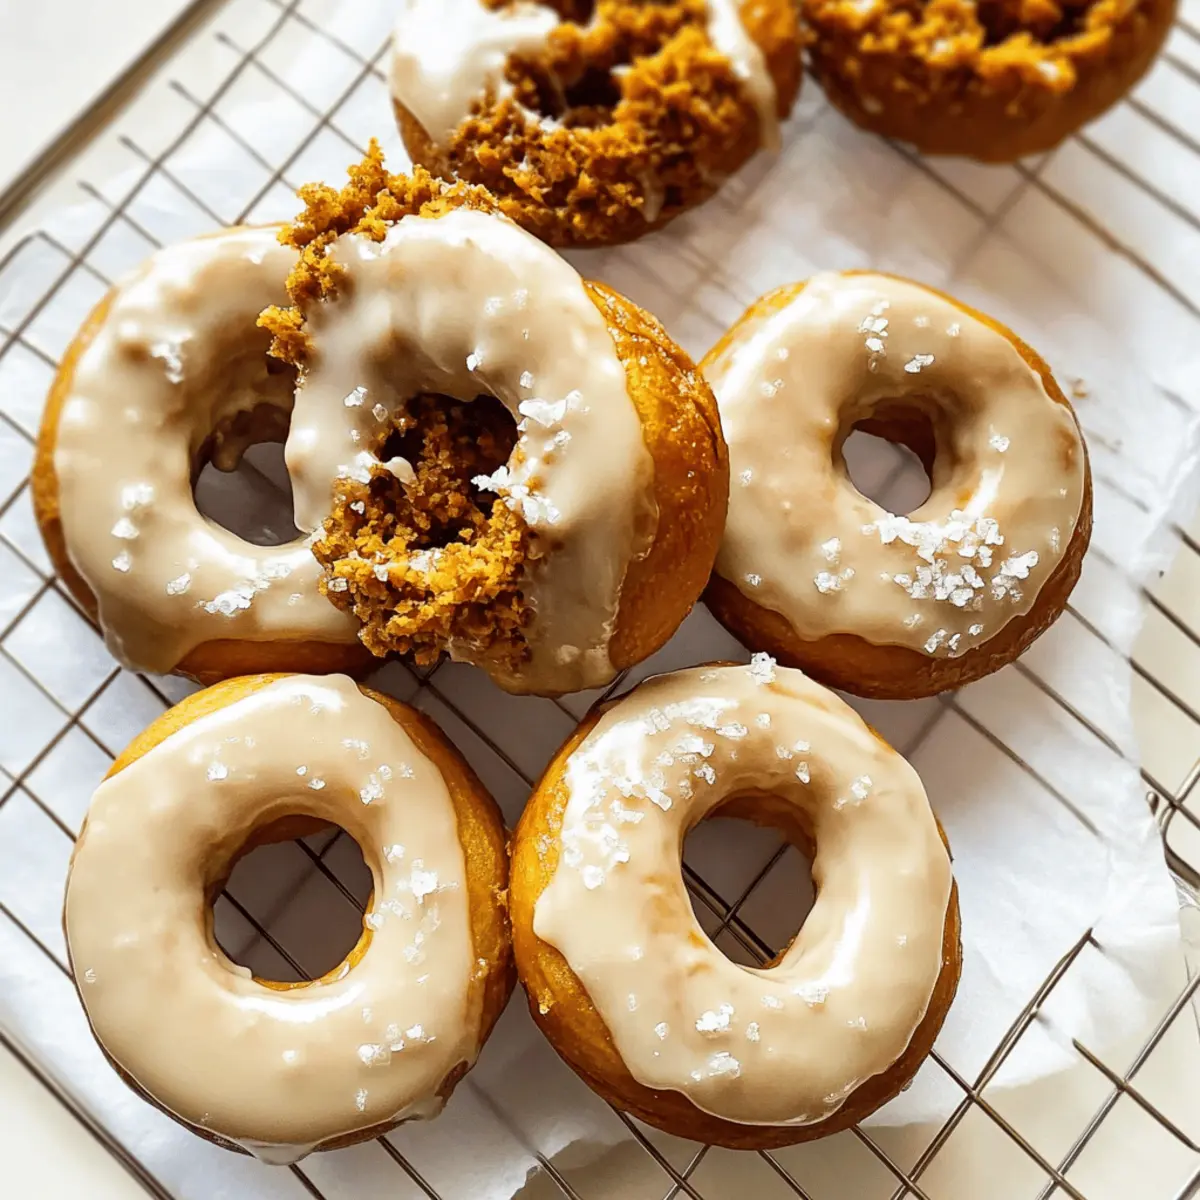
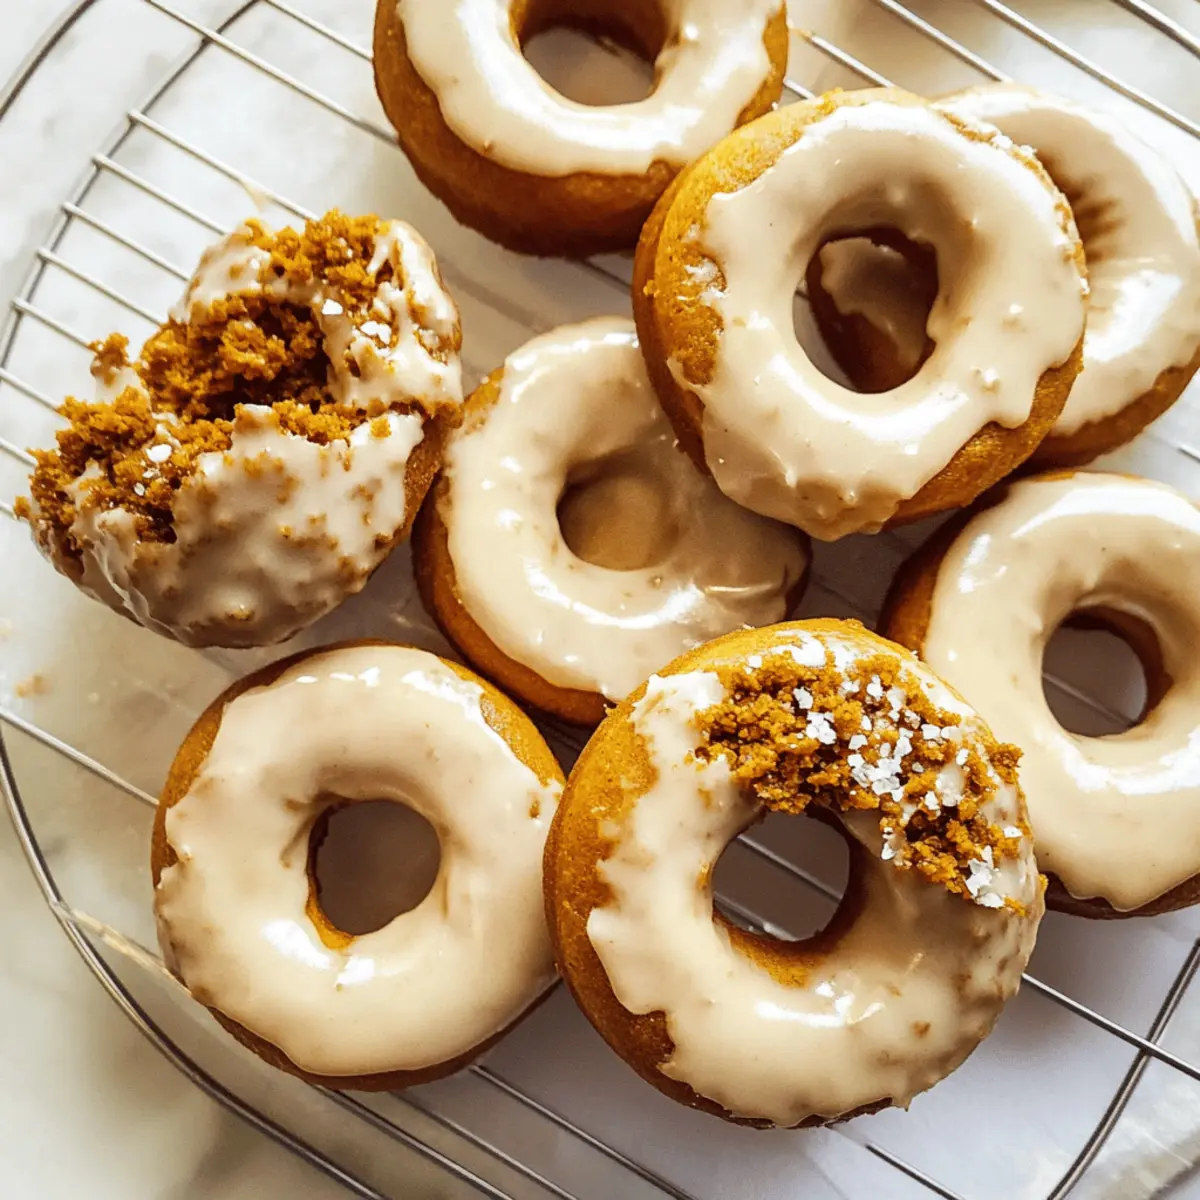
  • Spiced Apple Cider Donuts: These fluffy, spiced treats are a fantastic juxtaposition to the smoothness of the pumpkin juice, making your gathering irresistibly festive.

  • Roasted Butternut Squash Soup: A smooth and creamy soup that brings out the earthy notes of pumpkin, both comforting and nourishing, ideal for those cool fall evenings.

  • Savory Cheddar Biscuits: Crispy on the outside and soft within, these cheesy delights pair well with the rich spices in pumpkin juice, making a delightful snack.

  • Fall Harvest Salad: A mix of greens with roasted apples, nuts, and cranberries adds a fresh crunch that complements the warmth of the juice, perfect for balancing flavors on the table.

  • Bourbon 8-Mile: For an adult twist, this spiced bourbon cocktail echoes the flavors of the pumpkin juice; the warmth from the drink makes it a suitable pair for chilly nights.

  • Candy Corn Fudge: Add a sweet touch with this festive treat, contrasting the slightly spiced notes of the pumpkin juice, whimsical and perfect for Halloween.

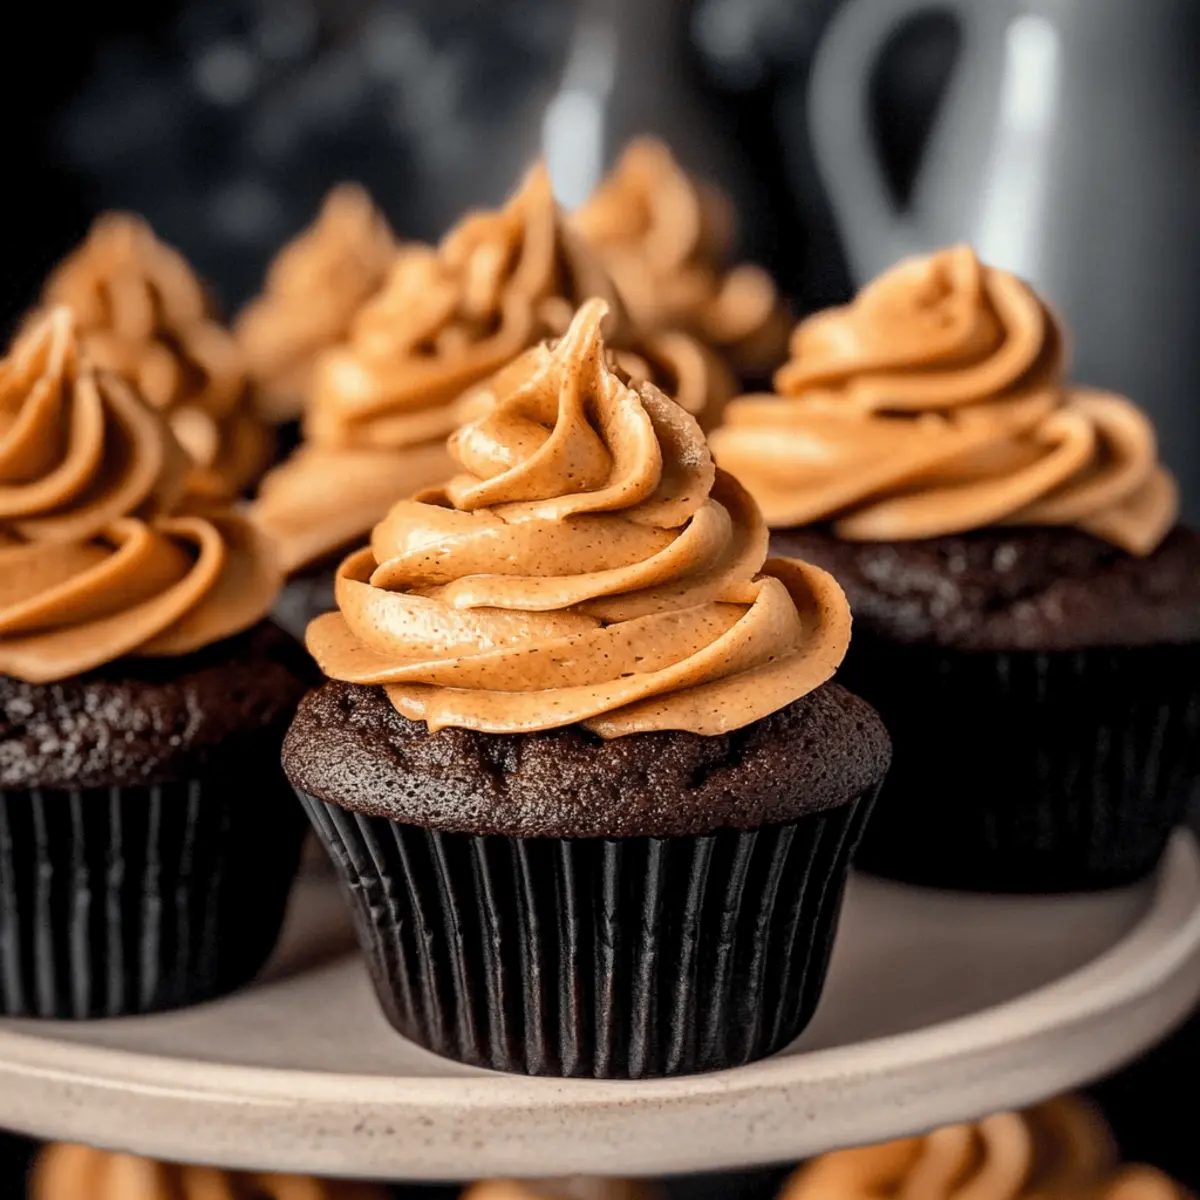
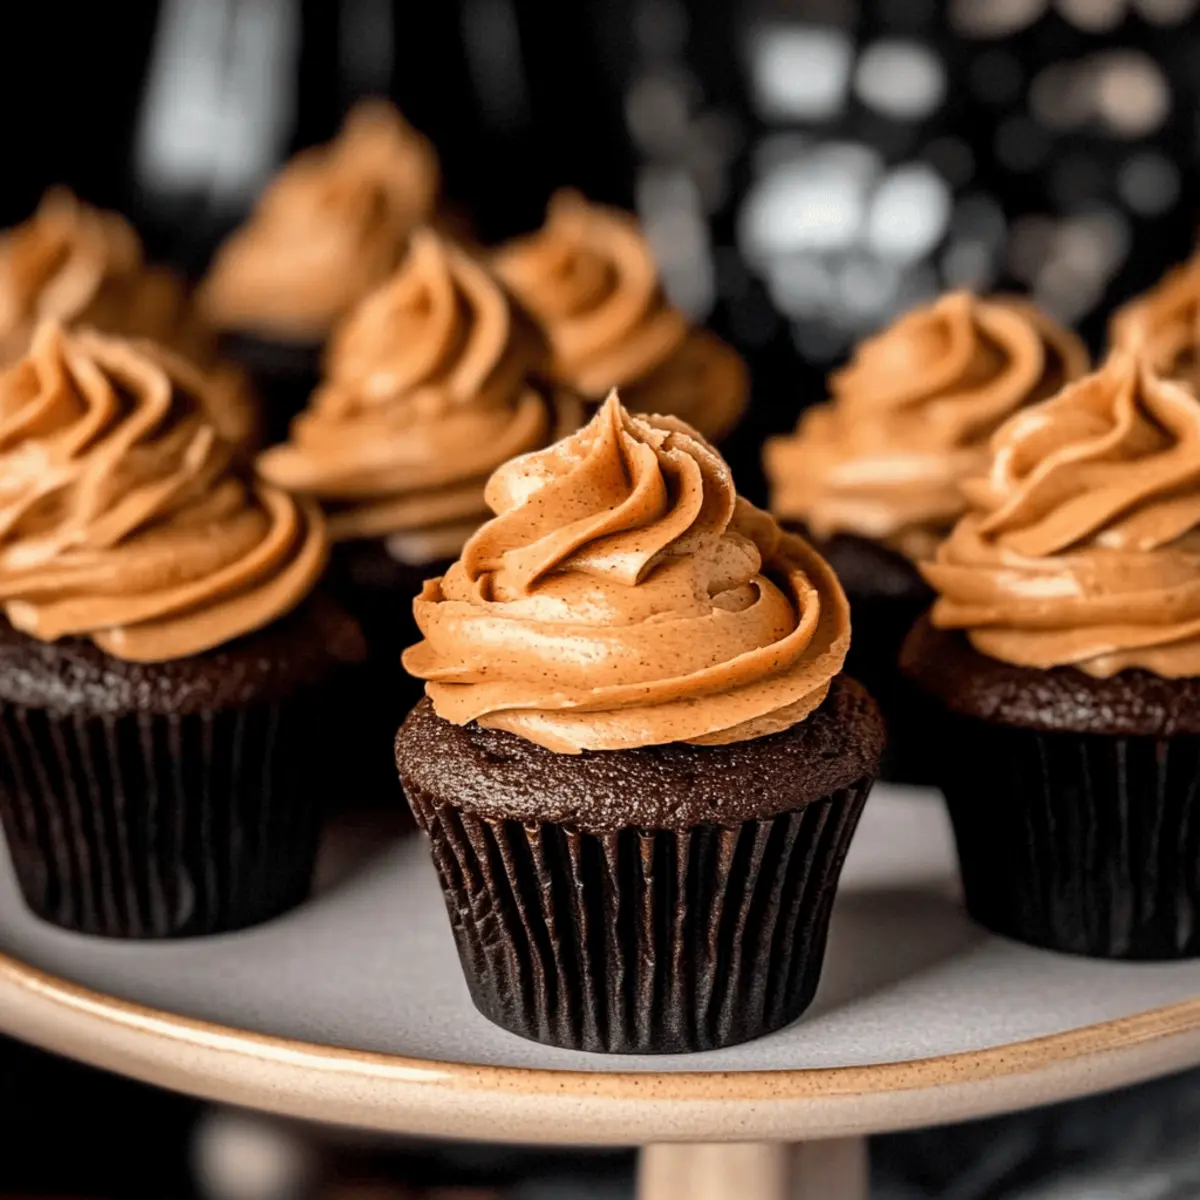
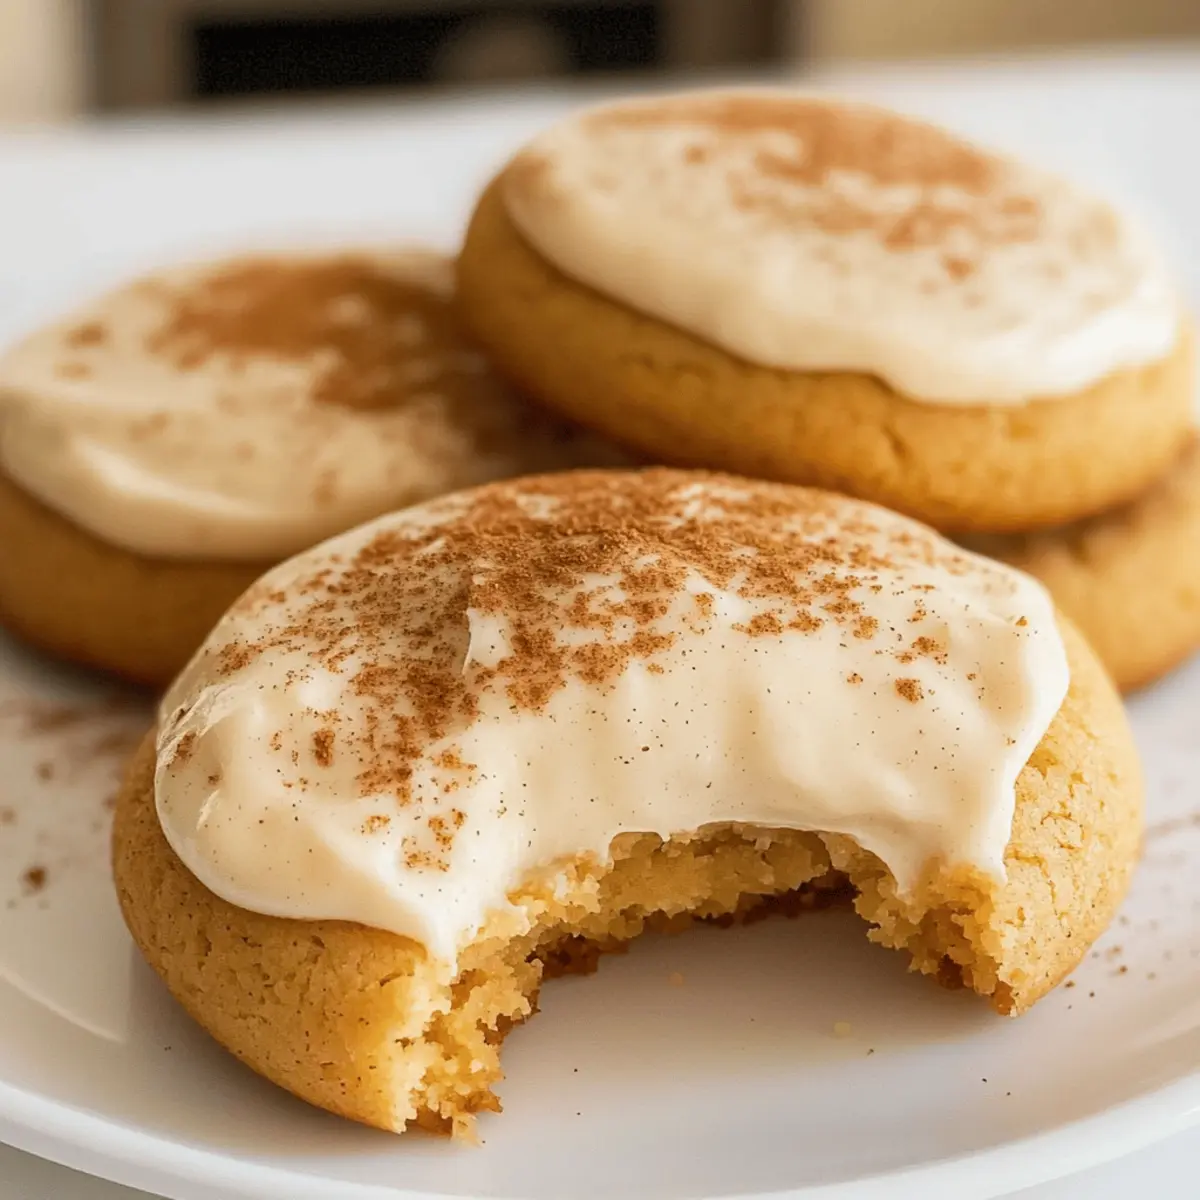
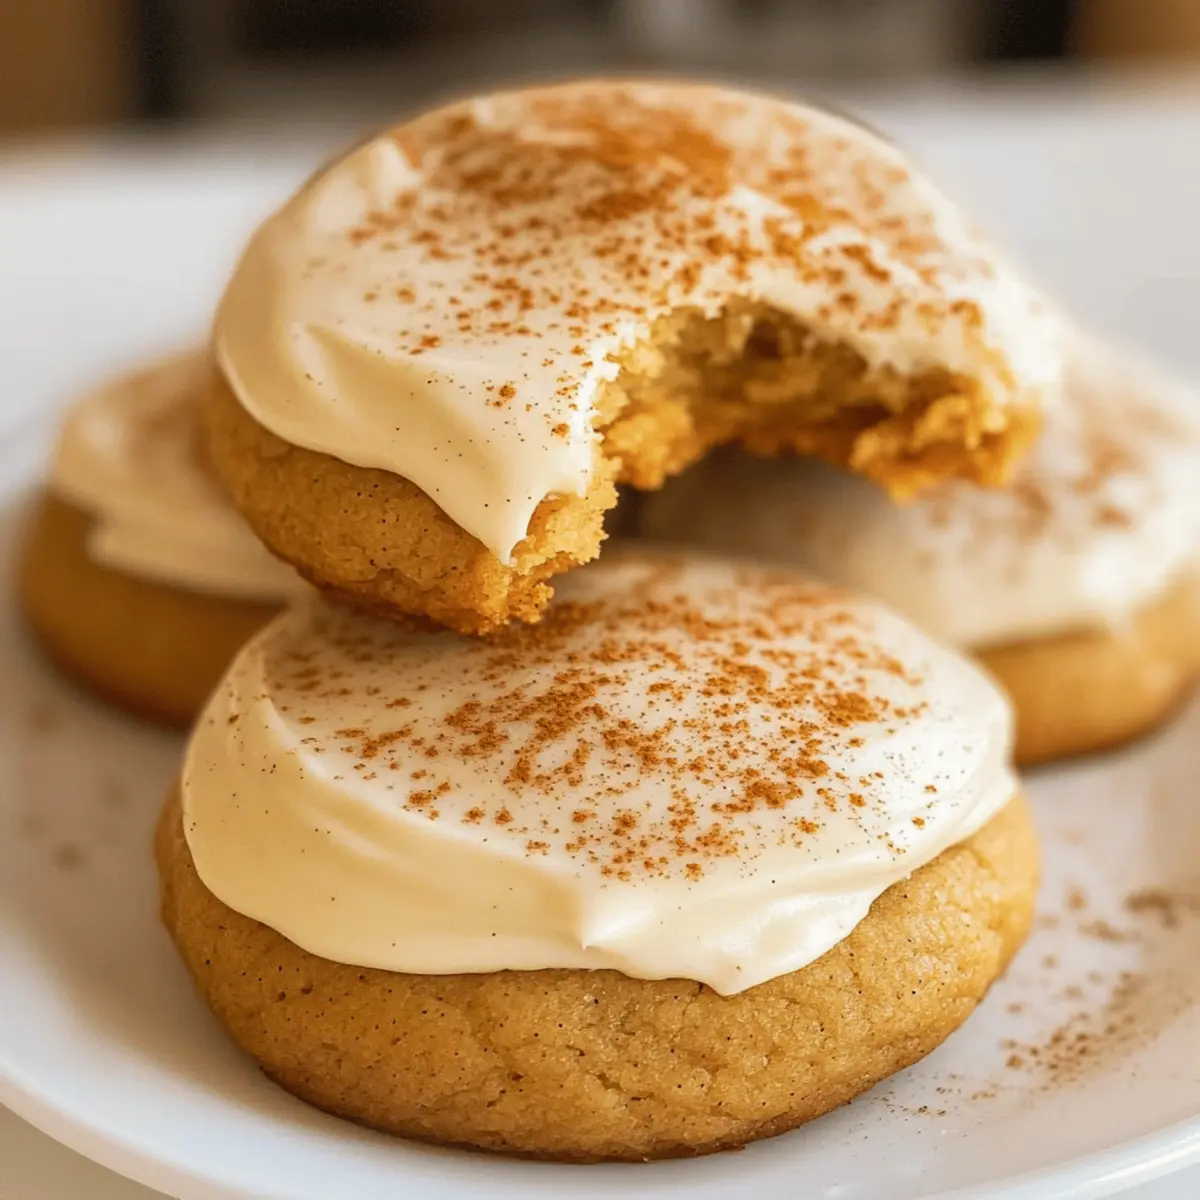
  • Pumpkin Spice Cupcakes: Populate your dessert table with these moist cupcakes that double up on pumpkin flavor, echoing the essence of the juice while creating a sweet finish.

Expert Tips for the Best Pumpkin Juice

Simmer for Flavor: Letting your pumpkin juice simmer helps the flavors meld beautifully, creating a rich and aromatic drink that’s sure to impress.

Adjust Sweetness: Be mindful of the apple cider’s sweetness; tweak the brown sugar accordingly to achieve your desired sweetness in the Pumpkin Juice Recipe.

Chill or Heat: Decide whether you want to serve your pumpkin juice chilled or warm. Both options are delightful, so pick depending on the occasion!

Storage Savvy: Store any leftover juice in a pitcher in the refrigerator for up to a week. The flavors deepen over time, making it even tastier.

Experiment with Spices: Don’t hesitate to play around with spices; adding a pinch of cardamom or clove can elevate your pumpkin juice with unique flavors!

Make Ahead Options

These Pumpkin Juice delights are perfect for meal prep enthusiasts looking to save time! You can prepare the mixture (apple cider, pumpkin puree, nectar, and spices) up to 24 hours in advance, allowing the flavors to meld beautifully. Simply combine all the ingredients in a pot and refrigerate the mixture until you’re ready to cook. When it’s time to serve, heat the mixture over medium, simmering for 10-15 minutes, and stir in the vanilla extract. This way, you can enjoy a heartwarming beverage that’s just as delicious as when made fresh, making it ideal for those busy fall days when you want to savor every sip without the rush!

How to Store and Freeze Pumpkin Juice

Fridge: Store your Pumpkin Juice in an airtight pitcher for up to 1 week. With each passing day, the flavors deepen, enhancing your cozy fall experience.

Freezer: For longer preservation, freeze the juice in an airtight container for up to 3 months. Leave some space at the top to allow for expansion during freezing.

Reheating: If frozen, thaw in the fridge overnight. To enjoy warm, gently heat the juice on the stove over low heat, stirring until warmed through without boiling.

Pumpkin Juice Recipe Variations

Feel free to craft this Pumpkin Juice Recipe to perfectly suit your taste and pantry!

  • Pear Cider: Substitute apple cider with pear cider for a delightful, fruity twist that adds a refreshing flavor profile. Pear brings a sophisticated sweetness—perfect for those cozy gatherings!

  • Spiced Delight: Add a pinch of cardamom or cloves to the spice mix for an exciting new layer of warmth. This can elevate your drink, bringing in more aromatic complexity!

  • Less Sweet: For a lighter version, reduce or omit the brown sugar, or even use a natural sweetener like agave. This lets the pure flavors of pumpkin and spice shine through without overwhelming sweetness.

  • Creamy Addition: Enhance the creaminess by stirring in a splash of coconut milk or almond milk. This not only adds richness but also introduces a lovely nutty flavor.

  • Fruity Fusion: Incorporate pureed fruits like mango or peach for a burst of tropical flavor. Blend in the fruit with the other ingredients to keep it smooth and delightful.

Don’t forget to enjoy your pumpkin juice with a cozy meal like my Cozy Broccoli Cheddar or share it alongside Cheesy Hamburger Potato for an unforgettable autumn experience!

Pumpkin Juice Recipe FAQs

How do I choose the best apple cider for my pumpkin juice?
Absolutely! For the best flavor in your Pumpkin Juice Recipe, choose fresh, unfiltered apple cider. Look for a cider that is sweet, with a bright, vibrant color. Avoid those with added preservatives or artificial flavors, as they can affect the taste of your final beverage.

How long can I store pumpkin juice in the fridge?
You can store your Pumpkin Juice in an airtight pitcher in the fridge for up to 1 week. With each passing day, the flavors actually deepen, creating a more complex and delightful drink. If you notice any changes in color or smell, it’s best to discard it.

Can I freeze pumpkin juice, and if so, how?
Yes, you can absolutely freeze your Pumpkin Juice! Pour the juice into an airtight container, leaving about an inch of space at the top since the liquid expands when frozen. It will stay fresh for up to 3 months. When you’re ready to enjoy it, thaw it in the fridge overnight. Here’s how to reheat it: pour the thawed juice into a pot and heat gently over low heat, stirring until warmed through—avoid boiling!

What should I do if my pumpkin juice is too sweet?
Very! If your Pumpkin Juice ends up too sweet, you can balance it by adding a splash of lemon juice or some unsweetened apple juice. Another excellent option is to increase the amount of spices (like ginger or cinnamon) to help offset the sweetness. Remember, you can always adjust ingredients during preparation!

Are there any dietary considerations I should keep in mind?
Definitely! If you’re serving Pumpkin Juice to children or those watching their sugar intake, you can reduce the brown sugar or even omit it if your apple cider is sweet enough. For those with allergies, make sure to notify your guests as some might have sensitivities to certain spices or the nectar you choose to use. Always taste and adjust according to your needs!

Pumpkin Juice Recipe

Fall for This Irresistible Pumpkin Juice Recipe Today

Experience the charming flavors of autumn with this Pumpkin Juice Recipe, perfect for cozy gatherings or festive meals.
Prep Time 10 minutes
Cook Time 15 minutes
Cooling Time 30 minutes
Total Time 55 minutes
Servings: 4 cups
Course: Drinks
Cuisine: American
Calories: 140

Ingredients
  

For the Base
  • 4 cups apple cider fresh, unfiltered for best taste
  • 1 cup pumpkin puree canned or homemade
  • 1 cup apricot, peach, or pear nectar can substitute with other fruit juices
For the Sweetness
  • 0.5 cups brown sugar adjust according to taste
For the Spices
  • 1 teaspoon ground cinnamon or pumpkin pie spice
  • 0.5 teaspoon ground nutmeg freshly grated preferred
  • 1 teaspoon ground ginger powdered or fresh
  • 0.25 teaspoon ground allspice optional but recommended
For the Finish
  • 2 teaspoons vanilla extract use pure extract for best results

Equipment

  • Large pot

Method
 

Step-by-Step Instructions
  1. In a large pot, blend together 4 cups of apple cider, 1 cup of pumpkin puree, and 1 cup of apricot nectar. Add in 1/2 cup of brown sugar, 1 teaspoon of ground cinnamon, 1/2 teaspoon of ground nutmeg, 1 teaspoon of ground ginger, and 1/4 teaspoon of ground allspice. Stir well until the mixture is smooth and all ingredients are fully incorporated.
  2. Place the pot over medium heat and gently warm the mixture. Keep stirring occasionally until it begins to bubble, about 5–7 minutes.
  3. Once it reaches a boil, reduce heat to low and let the pumpkin juice simmer for 10 to 15 minutes, stirring occasionally.
  4. After simmering, remove from heat and stir in 2 teaspoons of pure vanilla extract.
  5. Allow the pumpkin juice to cool to room temperature before refrigerating until chilled, or serve warm right away.

Nutrition

Serving: 1cupCalories: 140kcalCarbohydrates: 36gSodium: 10mgPotassium: 200mgFiber: 1gSugar: 30gVitamin A: 500IUVitamin C: 2mgCalcium: 20mgIron: 0.5mg

Notes

For best flavor, allow the juice to sit for a bit to let the spices meld together. Store any leftovers in the fridge for up to a week.

Tried this recipe?

Let us know how it was!

Chicken Bacon Ranch Stromboli: Dinner That Delivers Comfort

As I rolled out the dough, the tantalizing aroma of crispy bacon wafted through my kitchen, instantly brightening my mood. This Chicken Bacon Ranch Stromboli is my go-to recipe when I want to turn simple, everyday ingredients into an unforgettable family meal. With a delightful combination of tender chicken, savory bacon, and tangy ranch sauce, it’s not only a crowd-pleaser but also boasts the benefit of being incredibly easy to prepare. Imagine slicing into a golden, crispy exterior to reveal a warm, cheesy center—perfect for any gathering or a cozy night in. Ready to dive into this ultimate comfort food? Let me guide you through the steps to create your new favorite dish!

Why is This Stromboli So Irresistible?

Deliciously Comforting: This Chicken Bacon Ranch Stromboli wraps all your favorite flavors in one golden, crispy package—delighting your taste buds with every bite!

Quick and Easy: Perfect for busy weeknights, this recipe comes together in no time, making homemade meals simple and stress-free.

Customizable Goodness: Feel free to swap ingredients, like using turkey bacon or adding veggies, giving you and your family endless meal possibilities.

Crowd-Pleasing Appeal: Serve this dish at gatherings or family dinners, and watch as everyone savors every last slice—it’s guaranteed to be a hit!

Serve & Enjoy: Pair it with a fresh salad or some garlic bread to elevate your dining experience, just like with our tasty Potato Bacon Soup. Your cozy dinner is only a roll away!

Chicken Bacon Ranch Stromboli Ingredients

  • For the Dough
    Pizza Dough – Main structure for the stromboli; use homemade or store-bought for convenience. Roll the dough thin for a better texture.

  • For the Filling
    Shredded Chicken (2 cups) – A hearty protein source; opt for pre-cooked or leftover chicken for ease.
    Crispy Bacon Bits (1/2 cup) – Adds delightful crunch and flavor; turkey bacon is a great, lighter alternative.
    Shredded Mozzarella Cheese (1 cup) – Infuses the stromboli with creaminess; you can swap with provolone or cheddar for variety.
    Ranch Dressing (1/4 cup) – Introduces creamy tanginess to the filling; consider homemade ranch for a personal touch.

  • For the Finish
    Egg (1 for egg wash) – Ensures a beautifully golden crust; substitute with olive oil for a vegan option.
    Optional Herbs for Garnish – Elevates flavor and appearance; try chopped parsley or chives for a fresh touch.

With these key ingredients in hand, you’re well on your way to crafting a delicious Chicken Bacon Ranch Stromboli that will warm your heart and satisfy your loved ones!

Step‑by‑Step Instructions for Chicken Bacon Ranch Stromboli

Step 1: Preheat the Oven
Begin by preheating your oven to 425°F (or 400°F if you prefer a softer crust). This step is crucial for achieving that perfect golden brown exterior on your Chicken Bacon Ranch Stromboli. Make sure your oven is fully heated before placing your stromboli inside; this will help it cook evenly and create a delicious, crispy finish.

Step 2: Roll Out the Dough
On a clean, flat surface, generously flour your countertop to prevent sticking, then roll out your pizza dough into a large rectangle, about ¼ inch thick. Aim for an even thickness throughout to ensure consistent cooking. You should have a nice, pliable canvas ready to hold all the tasty fillings of your Chicken Bacon Ranch Stromboli.

Step 3: Spread the Ranch Dressing
Evenly spread the ranch dressing across the rolled-out dough, leaving about a half-inch border around the edges. Use the back of a spoon to smooth it out for an even coat. This creamy layer will add a delicious tanginess that enhances the flavors of the chicken and bacon as they bake together in the stromboli.

Step 4: Add the Filling
Now, layer your shredded chicken, crispy bacon bits, and shredded mozzarella cheese evenly over the ranch dressing. Make sure to distribute the ingredients as evenly as possible to avoid clumping in one spot. This delicious combination creates the hearty filling of your Chicken Bacon Ranch Stromboli, promising rich flavors in every bite.

Step 5: Roll the Stromboli
Carefully roll the dough away from you, tucking the filling in as you go to create a tight log shape. Once rolled, pinch the edges tightly to seal and prevent any filling from leaking out during baking. This step is essential for maintaining the deliciousness inside and achieving the perfect, bite-sized pieces when slicing.

Step 6: Prepare for Baking
Brush the outside of the rolled stromboli with an egg wash made from a beaten egg, giving it that beautiful golden color as it bakes. If you’re opting for a vegan version, a light coating of olive oil works well too. This shiny coating is what makes your Chicken Bacon Ranch Stromboli look as delightful as it tastes.

Step 7: Bake the Stromboli
Transfer the prepared stromboli onto a parchment-lined baking sheet, ensuring it’s positioned seam-side down to help keep the filling secure. Bake in the preheated oven for 20-25 minutes, or until the dough is golden brown and crispy. Keep an eye on it as it bakes to achieve the perfect crust.

Step 8: Let it Rest
Once baked, remove the Chicken Bacon Ranch Stromboli from the oven and let it rest for 5-10 minutes. This resting period allows the fillings to set and makes slicing much easier without spilling. Use this time to prepare your favorite sides or dips for a truly enjoyable dining experience.

Step 9: Slice and Serve
After the resting period, use a sharp knife to slice the stromboli into portions. Each slice should showcase the mouthwatering layers of chicken, bacon, cheese, and ranch dressing. Serve warm, perhaps with a fresh salad or some garlic bread on the side, and watch as everyone enjoys this comforting and satisfying dish!

Make Ahead Options

These Chicken Bacon Ranch Stromboli are perfect for meal prep enthusiasts! You can assemble the stromboli up to 24 hours in advance. Prepare the dough and fillings as instructed, then wrap the assembled stromboli tightly in plastic wrap and refrigerate until ready to bake. This not only saves you time on busy weeknights but also helps the flavors meld beautifully. When you’re ready to enjoy, simply remove it from the fridge, brush with the egg wash, and bake as directed—your family will be thrilled with the warm, cheesy goodness just like it was freshly made!

Chicken Bacon Ranch Stromboli Variations

Feel free to explore these delightful variations and customize the Chicken Bacon Ranch Stromboli to suit your taste buds and dietary needs!

  • Vegetarian Option: Swap chicken and bacon for roasted vegetables or plant-based proteins like chickpeas for a tasty twist. A medley of peppers, zucchini, and mushrooms can add both flavor and texture.

  • Cheese Variety: Experiment with different cheese blends such as cheddar or pepper jack to create a unique flavor profile. Combining cheeses can make each bite even more exciting!

  • Extra Veggies: Add chopped spinach, bell peppers, or onions to the filling for an explosion of color and nutrition. These additions not only boost health benefits but also enhance the dish visually.

  • Spicy Kick: Incorporate sliced jalapeños or a sprinkle of red pepper flakes for a bit of heat. This fiery twist can take your stromboli to another level, perfect for spice lovers!

  • Homemade Ranch: Make your own ranch dressing for a fresher taste. Using fresh herbs and quality ingredients not only elevates flavor but also personalizes your stromboli experience.

  • Dough Alternatives: Try using whole wheat or cauliflower pizza dough for a healthier alternative. These variations can bring in new textures and flavors, making your dish more exciting!

  • Flavorful Dips: Serve with a side of marinara sauce or garlic butter for dipping. This adds an extra layer of flavor and makes each slice even more enjoyable, reminiscent of enjoying a slice of classic pizza!

For more comforting soups to pair with your crusty creation, consider my Potato Bacon Soup or my cheesy Tuscan Chicken Soup for an ultimate cozy dinner!

How to Store and Freeze Chicken Bacon Ranch Stromboli

  • Fridge: Store leftover Chicken Bacon Ranch Stromboli in an airtight container for up to 3-4 days. Reheat in the oven at 350°F for about 10-15 minutes to retain its crispy texture.

  • Freezer: For longer preservation, wrap the stromboli tightly in plastic wrap or aluminum foil, then place it in a freezer-safe bag. It can be frozen for up to 2 months.

  • Reheating: Thaw the frozen stromboli in the fridge overnight. Reheat in the oven at 350°F for 20-25 minutes or until heated through for the best quality.

  • Serving Tips: Slice the stromboli before freezing to make reheating individual portions easier.

What to Serve with Chicken Bacon Ranch Stromboli

Complete your cozy dining experience with flavorful sides that enhance the joy of this delicious stromboli!

  • Garlic Bread:
    This toasty treat pairs perfectly with the creamy filling, offering a crunchy contrast that can’t be resisted. Just imagine dipping warm, buttery garlic bread into savory ranch sauce.

  • Crisp Garden Salad:
    A fresh mix of greens and vibrant vegetables lightens up the meal. Toss in a flavorful vinaigrette to complement the rich flavors of the stromboli.

  • Creamy Coleslaw:
    The cool, creamy texture of coleslaw balances the warmth of the stromboli, adding a delightful crunch and a touch of sweetness to each bite.

  • Baked Potato Wedges:
    Crispy on the outside and fluffy on the inside, these wedges make a great side for dipping in ranch dressing, echoing the flavors of the main dish.

  • Vegetable Medley:
    Roasted seasonal veggies bring vibrant color and nutrition to your plate. Their natural sweetness complements the savory elements of the stromboli beautifully.

  • Warm Tomato Soup:
    This classic pairing is no surprise! The comforting heat and acidity of tomato soup contrast deliciously with the hearty, cheesy stromboli, creating a nostalgic combination.

  • Chilled Sparkling Water:
    Offer your guests a refreshing drink to cleanse their palate between bites. The effervescence adds a bubbly zing that enhances the overall dining experience.

Enhance your gathering with these flavorful accompaniments, and watch as everyone enjoys your Chicken Bacon Ranch Stromboli even more!

Expert Tips for Chicken Bacon Ranch Stromboli

  • Dough Thickness: Ensure the pizza dough is rolled out evenly to avoid weak spots that could lead to filling leaks during baking. A consistent thickness is key for great texture.

  • Pre-Cooked Ingredients: For convenience, use pre-cooked chicken and crispy bacon bits. Pat them dry to avoid a soggy filling, enhancing the Chicken Bacon Ranch Stromboli’s overall texture.

  • Chill Before Baking: If you’re making the stromboli ahead of time, consider chilling it before baking. This will help the flavors meld while making it easier to slice after baking.

  • Fresh Ingredients: Always opt for fresh ingredients when possible—this boosts flavor and quality, resulting in a more enjoyable Chicken Bacon Ranch Stromboli.

  • Watch Your Stuffing: Avoid overstuffing the stromboli to ensure it cooks evenly. Balance the filling ingredients to create an ideal ratio of flavor in every slice.

Chicken Bacon Ranch Stromboli Recipe FAQs

How do I choose the right pizza dough?
When selecting pizza dough for your Chicken Bacon Ranch Stromboli, look for dough that’s fresh and pliable. You can opt for homemade dough or store-bought varieties, but make sure it’s at room temperature for easier rolling. If using frozen dough, give it enough time to thaw and rise, ideally overnight in the fridge, or at least 2-3 hours at room temperature.

What’s the best way to store leftover stromboli?
To store leftover Chicken Bacon Ranch Stromboli, place it in an airtight container or wrap it tightly in plastic wrap. It can be stored in the fridge for up to 3-4 days. You can reheat it at 350°F for about 10-15 minutes—this method keeps the crust crispy and the filling warm and gooey!

Can I freeze Chicken Bacon Ranch Stromboli?
Absolutely! To freeze your Chicken Bacon Ranch Stromboli, let it cool completely after baking. Wrap it tightly in plastic wrap or aluminum foil, and then place it in a freezer-safe bag. It can be frozen for up to 2 months. When you’re ready to enjoy it, thaw it overnight in the refrigerator, then reheat in the oven at 350°F for about 20-25 minutes or until heated through.

What if my stromboli leaks while baking?
If your Chicken Bacon Ranch Stromboli leaks during baking, don’t worry too much! This can happen if the dough isn’t sealed tightly or if it’s overstuffed. For future attempts, ensure that the edges are tightly pinched and consider using less filling. If you see any filling leaking during the bake, you can manage it by placing a baking sheet underneath to catch any drips.

Are there any dietary considerations I should keep in mind?
Definitely! If you’re cooking for people with dietary restrictions, there are several modifications you can consider for your Chicken Bacon Ranch Stromboli. You can use turkey bacon for a leaner option or substitute the chicken with plant-based proteins for a vegetarian version. Always check for any allergies related to ranch dressing ingredients; making homemade dressing can allow you to avoid allergens commonly found in store-bought varieties.

Chicken Bacon Ranch Stromboli

Chicken Bacon Ranch Stromboli: Dinner That Delivers Comfort

This Chicken Bacon Ranch Stromboli is an easy, comforting dish that combines tender chicken, crispy bacon, and tangy ranch, perfect for family meals.
Prep Time 15 minutes
Cook Time 25 minutes
Resting Time 10 minutes
Total Time 50 minutes
Servings: 8 slices
Course: Dinner
Cuisine: American
Calories: 350

Ingredients
  

For the Dough
  • 1 package Pizza Dough Use homemade or store-bought.
For the Filling
  • 2 cups Shredded Chicken Opt for pre-cooked or leftover.
  • 1/2 cup Crispy Bacon Bits Turkey bacon can be used.
  • 1 cup Shredded Mozzarella Cheese Swap with provolone or cheddar if desired.
  • 1/4 cup Ranch Dressing Homemade ranch can be used.
For the Finish
  • 1 large Egg For egg wash, or use olive oil for vegan option.
  • Optional Herbs for Garnish Try chopped parsley or chives.

Equipment

  • Oven
  • Rolling Pin
  • Baking Sheet
  • Parchment Paper
  • Mixing Bowl

Method
 

Step‑by‑Step Instructions for Chicken Bacon Ranch Stromboli
  1. Preheat your oven to 425°F or 400°F for a softer crust.
  2. On a floured surface, roll out the pizza dough into a rectangle about ¼ inch thick.
  3. Spread ranch dressing evenly across the dough, leaving a half-inch border.
  4. Layer shredded chicken, bacon bits, and mozzarella over the ranch dressing.
  5. Roll the dough away from you, tucking in the filling to create a tight log.
  6. Brush the outside with an egg wash for a golden color, or use olive oil.
  7. Transfer to a parchment-lined baking sheet, seam-side down, and bake for 20-25 minutes until golden brown.
  8. Let the stromboli rest for 5-10 minutes before slicing.
  9. Slice and serve warm, optionally pairing with salad or garlic bread.

Nutrition

Serving: 1sliceCalories: 350kcalCarbohydrates: 40gProtein: 20gFat: 15gSaturated Fat: 7gCholesterol: 70mgSodium: 800mgPotassium: 300mgFiber: 2gSugar: 1gVitamin A: 5IUVitamin C: 2mgCalcium: 15mgIron: 10mg

Notes

This dish can be made ahead of time and chilled before baking, enhancing flavor meld and making slicing easier.

Tried this recipe?

Let us know how it was!

Decadent Chocolate Pumpkin Cupcakes: Fall’s Best Treat

As the crisp air begins to hint at the arrival of fall, I can’t help but crave something warm and sweet to brighten up my kitchen. Enter these delightful Chocolate Pumpkin Cupcakes, the perfect treat to celebrate the season. Combining rich black cocoa powder with luscious pumpkin puree, this recipe offers a moist bite that is both indulgent and comforting. One of the best perks? These cupcakes are incredibly easy to make, and the pumpkin spice cream cheese frosting adds an irresistible finish that has become a crowd favorite at my gatherings. Whether you’re whipping these up for a cozy night in or a festive celebration, you’ll find that they vanish faster than you can say “seasonal bliss.” Ready to dive into a flavorful autumn experience?

Why will you adore these cupcakes?

Moist, Irresistible Texture: These Chocolate Pumpkin Cupcakes boast a delightfully moist interior, thanks to the pumpkin puree, ensuring every bite melts in your mouth.

Rich Flavor: The deep chocolate from black cocoa powder pairs beautifully with warm pumpkin spice, creating a rich flavor profile that celebrates fall.

Easy to Make: With simple ingredients and straightforward steps, even those new to baking can create these delicious treats.

Versatile Frosting: The creamy pumpkin spice cream cheese frosting adds a velvety touch, but feel free to experiment with a light whipped cream topping for a unique twist!

Perfect for Any Occasion: Ideal for cozy gatherings, holiday parties, or a simple afternoon treat, these cupcakes are sure to impress everyone. Pair them with a hot cup of coffee or tea for the ultimate experience!

Make-Ahead Friendly: You can easily bake and freeze these cupcakes for up to two months. Just frost them once thawed, and you’re ready to wow your guests!

If you’re still in the mood for something sweet, try my Chocolate Chip Pancakes or my indulgent Chocolate Fudge Cupcakes. Happy baking!

Chocolate Pumpkin Cupcake Ingredients

• Make these cupcakes a seasonal delight!

For the Cupcakes

  • Unsalted Butter – Adds moisture and richness; substitute with vegan butter for a dairy-free option.
  • Granulated Sugar – Provides sweetness and contributes to the cupcake’s texture.
  • Eggs – Essential for structure and binding; no substitutes recommended for best results.
  • Vanilla Extract – Enhances flavor; consider swapping with almond extract for a different twist.
  • Whole Milk – Adds moisture; can be replaced with almond milk or any milk alternative.
  • Sour Cream – Boosts moisture and density; Greek yogurt works well as a substitute.
  • Canned Pumpkin Puree – Imparts fall flavor and moisture; Libby’s is recommended for consistency.
  • All-Purpose Flour – Builds structure; can experiment with gluten-free flour, but results may vary.
  • Black Cocoa Powder – Gives a rich chocolate flavor; regular cocoa powder can be used, but expect a milder taste.
  • Pumpkin Pie Spice – Adds warmth to the cupcakes; can be made at home or replaced with cinnamon, nutmeg, ginger, and allspice in equal proportions.
  • Baking Powder & Baking Soda – Crucial for leavening and achieving soft cupcakes.
  • Salt – Enhances overall flavor; essential for balance.

For the Cream Cheese Frosting

  • Cream Cheese (Cold) – Adds tanginess and richness to the frosting; mascarpone can be used for a different flavor.
  • Powdered Sugar – Sweetens the frosting and helps achieve the desired smooth consistency.

Now that you have all the ingredients ready, let’s transform your kitchen into a cozy bakery and whip up those delicious Chocolate Pumpkin Cupcakes that fill your home with warmth and sweetness!

Step‑by‑Step Instructions for Chocolate Pumpkin Cupcakes

Step 1: Preheat the Oven
Begin by preheating your oven to 350°F (175°C). While the oven warms up, prepare a standard cupcake pan by lining it with paper liners. This will help prevent the cupcakes from sticking and make for easy serving. The heat will ensure your Chocolate Pumpkin Cupcakes rise beautifully!

Step 2: Cream Butter & Sugar
In a large mixing bowl, combine the softened unsalted butter and granulated sugar. Using an electric mixer, beat the mixture on medium speed for about 1-2 minutes until it becomes light and fluffy. This step is crucial as it creates the foundation for a moist texture in your cupcakes, so look for a pale color and airy consistency.

Step 3: Incorporate Eggs & Vanilla
Next, add one room temperature egg, an egg yolk, and the vanilla extract to the creamed mixture. Continue mixing on low speed until everything is well combined and smooth. This will help bind the ingredients together, creating a rich batter for your Chocolate Pumpkin Cupcakes, so ensure there are no lumps left behind.

Step 4: Mix Wet Ingredients
Now, blend in the whole milk, sour cream, and the canned pumpkin puree. Mix until all the wet ingredients are combined and the batter is smooth. The pumpkin puree not only adds flavor but also contributes moisture, making your cupcakes delectably soft. You should see a rich, orange-hued batter when done.

Step 5: Combine Dry Ingredients
In a separate bowl, whisk together the all-purpose flour, black cocoa powder, pumpkin pie spice, baking powder, baking soda, and salt. This step ensures that all the dry ingredients are evenly mixed and helps avoid clumps. You’ll want a uniform mixture that will enhance the texture and flavor of your Chocolate Pumpkin Cupcakes.

Step 6: Mix Batter
Gradually add the dry mixture to the wet ingredients, mixing slowly until well-combined. Be careful not to overmix; stop as soon as you see no dry flour. The batter for your Chocolate Pumpkin Cupcakes should be thick, yet pourable, ensuring a delightful rise and fluffy texture during baking.

Step 7: Bake
Using a spoon or ice cream scoop, fill the lined cupcake cups about three-quarters full with the batter. Place the pan in the preheated oven and bake for 17-19 minutes. You’ll know they are done when a toothpick inserted in the center comes out clean, indicating perfectly risen cupcakes.

Step 8: Cool
Once baked, remove the cupcake pan from the oven and let it cool in the pan for about 5 minutes. Then, transfer the cupcakes to a wire rack to cool completely. This step is essential to achieve the final texture, ensuring your Chocolate Pumpkin Cupcakes don’t get soggy.

Step 9: Prepare Frosting
While the cupcakes cool, prepare the cream cheese frosting. Start by drying the canned pumpkin puree with paper towels to reduce moisture. Beat the softened butter in a mixing bowl until fluffy, then mix in the cold cream cheese and the dried pumpkin, followed by the pumpkin pie spice. Gradually add powdered sugar until the frosting is light and fluffy.

Step 10: Frost Cupcakes
Once your Chocolate Pumpkin Cupcakes are completely cooled, generously pipe or spread the cream cheese frosting on top. Use a piping bag or a simple offset spatula for this step. The creamy frosting beautifully complements the moist cupcakes, creating an enticing autumn treat that’s sure to impress!

What to Serve with Chocolate Pumpkin Cupcakes

Indulge in the ultimate fall experience by pairing these delightful cupcakes with complementary sides and beverages that enhance their festive flair.

  • Creamy Mashed Potatoes: The buttery, savory flavor of creamy mashed potatoes creates a delightful contrast to the sweetness of the cupcakes. Perfect for a cozy fall dinner!

  • Spiced Apple Cider: Warm spiced apple cider adds a comforting touch, echoing the pumpkin spice in the cupcakes while enveloping you in autumn aromas.

  • Roasted Brussels Sprouts: The slight bitterness of roasted Brussels sprouts balances the sweetness of the cupcakes, providing a textural variety that is refreshing.

  • Chocolate Drizzle Ice Cream: A scoop of vanilla or chocolate drizzle ice cream offers a rich and creamy counterpart, making the cupcakes feel truly decadent.

  • Pumpkin Spice Latte: A classic seasonal favorite, this coffee drink beautifully complements the pumpkin flavor in the cupcakes while adding a lovely warmth to your taste experience.

  • Salted Caramel Sauce: Drizzling a touch of salted caramel over your cupcakes enhances their sweetness while adding an irresistible salty contrast that pleases the palate.

Chocolate Pumpkin Cupcakes Variations

Feel free to get creative with these variations to elevate your Chocolate Pumpkin Cupcakes into a personalized delight!

  • Dairy-Free: Replace unsalted butter with vegan butter and cream cheese with a dairy-free cream cheese alternative for a guilt-free treat.
    If you still want that creamy texture, try a coconut cream frosting for a delightful twist!

  • Gluten-Free: Use a 1-to-1 gluten-free flour blend to enjoy these cupcakes without gluten.
    This way, you won’t miss any flavor or moisture, and your friends with dietary restrictions will be thrilled!

  • Nutty Flavor: Add 1/2 cup chopped walnuts or pecans to the batter for a delightful crunch.
    This addition not only enhances the texture but also gives the cupcakes a deep, rustic flavor.

  • Spiced Up: Incorporate 1/2 teaspoon of cayenne pepper, along with your pumpkin pie spice, to add a subtle heat.
    The warmth of the spices combined with the pumpkin is sure to awaken your senses!

  • Decadent Chocolate Chips: Fold in 1 cup of dark chocolate chips into the batter for a gooey chocolate surprise.
    These melty morsels will create an even more indulgent experience with every bite!

  • Mocha Lovers: Swap half of the pumpkin puree for brewed coffee or espresso for a mocha spin.
    This twist turns your cupcakes into a rich chocolate coffee treat, perfect for caffeine aficionados.

  • Creamy Whipped Topping: Instead of cream cheese frosting, try a light whipped cream frosting for a fresh taste.
    You could even add a dash of vanilla or pumpkin spice to the whipped cream for a seasonal touch!

For more sweet inspirations, try your hand at my delightful Chocolate Fudge Cupcakes or indulge in some Chocolate Granola Cups with Peanut Butter Filling. Happy baking!

Make Ahead Options

These Chocolate Pumpkin Cupcakes are a fantastic choice for meal prep, allowing you to enjoy homemade treats without last-minute stress! You can bake the cupcakes themselves up to 2 days in advance and store them in an airtight container at room temperature to maintain their moisture. For even longer storage, freeze the unfrosted cupcakes for up to 2 months—just thaw them at room temperature before frosting. Additionally, the cream cheese frosting can be made up to 24 hours ahead of time; just refrigerate it in a tightly sealed container. When you’re ready to serve, frost the cooled cupcakes, and you’ll have an irresistible fall dessert that tastes just as fresh and delightful!

How to Store and Freeze Chocolate Pumpkin Cupcakes

Room Temperature: Keep unfrosted Chocolate Pumpkin Cupcakes in an airtight container at room temperature for up to 2 days. This helps maintain their moistness and flavor.

Fridge: Once frosted, store the cupcakes in an airtight container in the refrigerator for up to 3 days. Let them reach room temperature before serving for the best taste.

Freezer: These cupcakes can be frozen without frosting for up to 2 months. Wrap each cupcake in plastic wrap, then place them in a freezer bag. Thaw at room temperature and frost before serving.

Reheating: If desired, warm slightly in the microwave for about 10-15 seconds to enhance the chocolate flavor before serving.

Expert Tips for Chocolate Pumpkin Cupcakes

  • Room Temperature Ingredients: Ensure all wet ingredients, especially eggs and cream cheese, are at room temperature to achieve the best texture and consistency for your Chocolate Pumpkin Cupcakes.

  • Dry Pumpkin Puree: Thoroughly dry the pumpkin puree with paper towels before using it in the frosting. This prevents a runny consistency that can occur with excess moisture.

  • Avoid Overmixing: When combining the wet and dry ingredients, mix just until incorporated. Overmixing can lead to tough cupcakes, so be gentle for a light and fluffy texture.

  • Proper Cooling: Allow the cupcakes to cool completely on a wire rack before frosting. This prevents the frosting from melting and ensures a beautiful presentation.

  • Chill Soft Frosting: If your cream cheese frosting becomes too soft while piping, place it in the fridge for a brief period. Chilling it will firm up the frosting, making it easier to work with and pipe beautifully.

Chocolate Pumpkin Cupcakes Recipe FAQs

What type of pumpkin puree should I use for the cupcakes?
I recommend using Libby’s canned pumpkin puree for the best consistency and flavor. Homemade pumpkin puree can be tricky as it tends to have more moisture, which might affect the final texture of your cupcakes. Look for a smooth, thick consistency for optimal results!

How should I store leftover Chocolate Pumpkin Cupcakes?
Once frosted, store your Chocolate Pumpkin Cupcakes in an airtight container in the refrigerator for up to 3 days. It’s best to let them come to room temperature before serving to enjoy their full flavor and moist texture. If you prefer them at room temperature, keep unfrosted cupcakes in an airtight container at room temperature for up to 2 days.

Can I freeze these cupcakes?
Absolutely! You can freeze these cupcakes without frosting for up to 2 months. Wrap each cupcake tightly with plastic wrap and then place them in a freezer bag or airtight container. When you’re ready to enjoy them, simply thaw at room temperature and frost afterward.

What if my frosting becomes too soft?
If your cream cheese frosting becomes soft while piping, don’t worry! Just place it in the fridge for about 15-20 minutes. This chilling will firm it up and make it much easier to work with. If it’s too runny, drying the pumpkin puree beforehand is also key to achieving the right frosting consistency.

Are there any allergy considerations for this recipe?
Definitely! This recipe contains eggs, dairy, and gluten. For a dairy-free alternative, you can use vegan butter and almond milk. If you have a gluten sensitivity, consider testing with a gluten-free flour blend, though the results may vary. Always check all ingredients for potential allergens to ensure safe consumption.

What can I substitute if I don’t have black cocoa powder?
If you find yourself without black cocoa powder, you can substitute it with regular cocoa powder. However, keep in mind that it will create a lighter color and a milder chocolate flavor. If you love a deeper flavor, consider using a combination of 1 part regular cocoa and 1 part dark cocoa powder for a richer taste!

Chocolate Pumpkin Cupcakes

Decadent Chocolate Pumpkin Cupcakes: Fall's Best Treat

These Chocolate Pumpkin Cupcakes combine rich cocoa and pumpkin for a moist, delicious treat perfect for fall.
Prep Time 20 minutes
Cook Time 19 minutes
Cooling Time 5 minutes
Total Time 44 minutes
Servings: 12 cupcakes
Course: Dessert
Cuisine: American
Calories: 250

Ingredients
  

For the Cupcakes
  • 1 cup Unsalted Butter softened
  • 1.5 cups Granulated Sugar
  • 2 large Eggs room temperature
  • 1 teaspoon Vanilla Extract
  • 1 cup Whole Milk or milk alternative
  • 0.5 cup Sour Cream or Greek yogurt
  • 1 cup Canned Pumpkin Puree recommend Libby's
  • 1.5 cups All-Purpose Flour
  • 0.5 cups Black Cocoa Powder
  • 1 teaspoon Pumpkin Pie Spice
  • 1 teaspoon Baking Powder
  • 0.5 teaspoon Baking Soda
  • 0.5 teaspoon Salt
For the Cream Cheese Frosting
  • 8 oz Cream Cheese cold
  • 2 cups Powdered Sugar

Equipment

  • Oven
  • Cupcake pan
  • Mixing bowls
  • Electric mixer
  • Piping Bag
  • Wire rack

Method
 

Cupcake Instructions
  1. Preheat your oven to 350°F (175°C) and line a cupcake pan with paper liners.
  2. In a large bowl, cream together softened butter and sugar until light and fluffy.
  3. Beat in eggs and vanilla extract until smooth and well combined.
  4. Blend in milk, sour cream, and pumpkin puree until smooth.
  5. In a separate bowl, whisk together flour, cocoa powder, pumpkin pie spice, baking powder, baking soda, and salt.
  6. Gradually add the dry ingredients to the wet ingredients, mixing until just combined.
  7. Fill the cupcake liners about three-quarters full and bake for 17-19 minutes.
  8. Allow to cool in the pan for 5 minutes before transferring to a wire rack.
  9. Prepare the frosting by beating cream cheese until fluffy, then add powdered sugar until smooth.
  10. Frost the cooled cupcakes generously with cream cheese frosting.

Nutrition

Serving: 1cupcakeCalories: 250kcalCarbohydrates: 35gProtein: 3gFat: 12gSaturated Fat: 7gPolyunsaturated Fat: 0.5gMonounsaturated Fat: 1gCholesterol: 40mgSodium: 200mgPotassium: 150mgFiber: 1gSugar: 18gVitamin A: 500IUCalcium: 40mgIron: 1mg

Notes

For best texture, ensure ingredients are at room temperature. Allow cupcakes to cool completely before frosting for a better presentation.

Tried this recipe?

Let us know how it was!

Sweet Mini Pumpkin Muffins: Cozy Fall Bites You’ll Love

As the leaves start to change color and the air turns crisp, there’s nothing quite like the smell of freshly baked treats filling your home. That’s exactly what you’ll get with these Sweet Mini Pumpkin Muffins—ideal for cozy gatherings or an easy snack on the go! Whipping up a batch is a breeze, making them perfect for busy weeknights or those lazy Sunday mornings. Not only are they delightful and family-friendly, but they also freeze beautifully, ready to brighten up any day with the essence of fall. What’s your favorite way to enjoy a mini muffin? Let’s dive into this delicious recipe!

Why are Sweet Mini Pumpkin Muffins irresistible?

Warm, cozy flavors: These mini muffins are bursting with the essence of fall, featuring spices like cinnamon and nutmeg that wrap you in comfort with every bite.
Quick & easy preparation: They come together in no time, making them the perfect choice for busy schedules or last-minute gatherings.
Family-friendly treat: Kids and adults alike will love these delightful, bite-sized goodies — they’re perfect for lunchboxes or cozy coffee breaks!
Freezer-friendly: Make a big batch to enjoy later! Just freeze them for a sweet snack anytime.
Customizable goodness: Add chocolate chips or nuts for an extra special twist, or enjoy them as-is with a drizzle of maple syrup.

Sweet Mini Pumpkin Muffin Ingredients

For the Muffins
Canned Pumpkin Puree – Use plain pumpkin puree to ensure your sweet mini pumpkin muffins are flavorful and moist.
All-Purpose Flour – Provides structure; can be substituted with whole wheat flour for a healthier twist.
Granulated Sugar – Adds just the right amount of sweetness; feel free to use brown sugar for a deeper flavor.
Light Brown Sugar – Enhances sweetness and moisture; can be substituted with more granulated sugar if needed.
Egg – Binds the ingredients and helps the muffins rise; make sure it’s at room temperature for best results.
Milk – Adds richness and moisture; can also be replaced with non-dairy milk or buttermilk.
Baking Powder – Helps your sweet mini pumpkin muffins rise; always check it’s fresh for optimal results.
Ground Cinnamon – Infuses the muffins with warm spice; feel free to adjust based on your preference.
Ground Ginger – Adds a zesty kick; optional if you prefer a milder flavor.
Allspice – Delivers a unique flavor blend; can be swapped with nutmeg or omitted if desired.
Ground Nutmeg – Adds warmth to the muffins; adjust according to your spice tolerance.
Ground Cloves – Offers a rich depth of flavor; a little goes a long way!
Salt – Balances the sweetness, ensuring a well-rounded taste.
Butter – Provides richness; use unsalted and let it cool slightly before adding to the mix.

For the Cinnamon Sugar Coating
Granulated Sugar – Sweetens and adds to the decadent coating; combine with cinnamon for that classic flavor.
Ground Cinnamon – Provides the perfect spice to roll your muffins in; adjust to your personal preference.
Melted Butter – Helps the cinnamon sugar adhere beautifully to your muffins.

Get ready to bake some delightful sweet mini pumpkin muffins that will fill your home with the warmth of autumn!

Step‑by‑Step Instructions for Sweet Mini Pumpkin Muffins

Step 1: Preheat Your Oven
Begin by preheating your oven to 375°F (190°C). While the oven warms up, take a moment to grease your mini muffin pan to ensure easy removal of your sweet mini pumpkin muffins later. A light coating of butter or non-stick spray will work perfectly.

Step 2: Whisk the Dry Ingredients
In a large mixing bowl, whisk together the all-purpose flour, baking powder, ground cinnamon, ground ginger, allspice, nutmeg, cloves, and salt until smooth and lump-free. This simple step is key to ensuring your muffins rise beautifully and have a light texture. Set this dry mixture aside for now.

Step 3: Blend the Wet Ingredients
In a separate bowl, combine melted unsalted butter, granulated sugar, light brown sugar, and the room-temperature egg. Whisk these together until the mixture is smooth and well-combined. Next, add in the canned pumpkin puree and milk, stirring everything together until the mixture is nice and creamy.

Step 4: Combine Wet and Dry Mixtures
Gently fold the dry ingredients into the wet mixture a little at a time. Stir until just combined, but avoid overmixing to keep your sweet mini pumpkin muffins fluffy. The batter should be somewhat thick but fully incorporated, with no dry flour visible.

Step 5: Fill the Muffin Pan
Using a spoon or a small scoop, fill each muffin well about two-thirds full with the batter. This helps prevent overflow during baking, allowing your muffins to rise perfectly. Once filled, you can give the pan a gentle tap on the counter to eliminate any air bubbles.

Step 6: Bake the Muffins
Place the mini muffin pan in the preheated oven and bake for 10 to 12 minutes. Keep an eye on them; your sweet mini pumpkin muffins are done when they are lightly golden on top and spring back when pressed with a finger.

Step 7: Cool the Muffins
Once baked, remove the muffin pan from the oven and let it cool for about 5 minutes. This short cooling period allows the muffins to firm up slightly. After that, carefully transfer them to a wire rack to cool completely.

Step 8: Prepare the Cinnamon Sugar Coating
In the meantime, create a delicious cinnamon sugar coating by mixing granulated sugar and ground cinnamon in a small bowl. In another bowl, place melted butter, which will help the cinnamon sugar stick to your muffins beautifully.

Step 9: Coat the Muffins
Once the muffins have cooled slightly, dip each muffin in the melted butter, ensuring they are well-coated, then roll them in the cinnamon sugar mixture. This final touch adds a sweet crunch that complements the soft, spiced muffins perfectly.

How to Store and Freeze Sweet Mini Pumpkin Muffins

Room Temperature: Store in an airtight container at room temperature for up to 3 days. Enjoy them fresh for that delightful homemade taste.

Fridge: If you prefer, you can refrigerate the muffins for up to a week. Just ensure they are in an airtight container to keep them moist.

Freezer: For longer storage, freeze sweet mini pumpkin muffins in a freezer-safe bag for up to 3 months. Thaw at room temperature or microwave for a quick snack.

Reheating: When ready to enjoy, reheat in the microwave for about 10-15 seconds, or warm them in the oven at 350°F (175°C) for a few minutes until heated through.

Make Ahead Options

These Sweet Mini Pumpkin Muffins are perfect for meal prep enthusiasts! You can prepare the dry ingredients up to 3 days in advance by whisking together the flour, baking powder, and spices, then store them in an airtight container. Additionally, you can mix the wet ingredients, including the butter, sugars, pumpkin puree, and milk, and refrigerate them for up to 24 hours. When you’re ready to bake, simply combine the wet and dry mixes and proceed with filling your muffin pan. This method saves time on busy mornings while ensuring your muffins remain just as delicious and fluffy!

Expert Tips for Sweet Mini Pumpkin Muffins

  • Avoid Overmixing: Gently combine wet and dry ingredients to keep your muffins fluffy. Overmixing will lead to dense muffins instead of light, airy bites.

  • Room Temperature Ingredients: Ensure your egg and milk are at room temperature before mixing. This helps to create a smoother batter, leading to a better texture in your sweet mini pumpkin muffins.

  • Watch the Baking Time: Keep an eye on your muffins, checking for doneness at 10 minutes. They can dry out quickly; take them out when they’re lightly golden and spring back when pressed.

  • Proper Filling: Fill muffin wells only 2/3 full to prevent overflow during baking. This ensures you achieve perfectly shaped sweet mini pumpkin muffins every time.

  • Cooling Time: Allow the muffins to cool in the pan briefly before transferring to a wire rack. This helps them hold their shape while cooling, making them easier to handle.

What to Serve with Sweet Mini Pumpkin Muffins?

These delightful bites are perfect for building a cozy fall meal that warms the heart and elevates your gatherings.

  • Warm Maple Syrup: Drizzle over the muffins for a luscious sweetness that enhances their pumpkin flavor—perfect for breakfast or brunch!

  • Creamy Yogurt Parfait: Layer with yogurt and mixed berries for a balanced, nutritious snack that complements the muffins’ spiced sweetness.

  • Spiced Apple Cider: A mug of warm apple cider brings out the seasonal flavors and aromas, creating a comforting drink to sip alongside.

  • Dairy-Free Whipped Cream: Light, fluffy, and sweet, this topping adds a lovely creaminess that pairs beautifully with the muffins’ warm spices.

  • Fresh Fruit Salad: Bright, fresh fruits create a refreshing contrast to the rich flavors of the muffins, making for a colorful, healthful side.

  • Cinnamon-Sugar Tortilla Chips: Bake crispy tortilla chips dusted with cinnamon sugar for a crunchy treat that echoes the muffin coating—delicious alongside!

  • Decadent Hot Chocolate: Indulge in a warm cup of indulgent hot chocolate, which pairs wonderfully and completes the cozy fall experience.

  • Roasted Chestnuts: For a taste of holiday comfort, serve roasted chestnuts—nutty and warm, they offer a delightful texture contrast to the muffins.

Sweet Mini Pumpkin Muffins Variations

Feel free to get creative and tweak these muffins to fit your taste buds!

  • Chocolate Chip Surprise: Add a handful of chocolate chips to the batter for a delightful sweet twist. The melted chocolate adds a rich flavor that’s simply irresistible!

  • Whole Wheat Twist: Substitute half of the all-purpose flour with whole wheat flour for a heartier muffin. This variation gives a nutty flavor and extra fiber without compromising on taste.

  • Maple Glaze: Drizzle with a warm maple glaze for added sweetness. Just mix powdered sugar with maple syrup until smooth, and pour it over the cooled muffins.

  • Nutty Crunch: Incorporate chopped walnuts or pecans for a delightful crunch. The added texture complements the soft muffins and enhances the flavor profile beautifully.

  • Dairy-Free Delight: Replace milk with almond or oat milk and use coconut oil instead of butter. This is a wonderful way for lactose-free friends to enjoy these muffins!

  • Spicy Kick: Boost the spice level by adding a pinch of cayenne or curry powder. This surprising twist will have your taste buds dancing, bringing a whole new dimension to your fall treat.

  • Fruit Fusion: Fold in a half cup of dried cranberries or raisins for a fruity touch. Not only do they add sweetness, but they also bring a little chewiness to each bite.

  • Pumpkin Cream Cheese: For an extra indulgent treat, add dollops of cream cheese filling in the center. Simply beat cream cheese with a little sugar and vanilla and swirl into the batter before baking.

These variations keep things exciting and allow you to customize your Sweet Mini Pumpkin Muffins to your heart’s desire! Enjoy experimenting, and if you’re looking for more flavor-packed ideas, consider trying Sweet Savory Brown or Sweet Chili Chicken for your next family meal.

Sweet Mini Pumpkin Muffins Recipe FAQs

What type of pumpkin puree should I use?
Absolutely! It’s best to use plain canned pumpkin puree to ensure your Sweet Mini Pumpkin Muffins are both flavorful and moist. Avoid pumpkin pie filling, as it contains added sugars and spices that can alter the muffins’ taste.

How long can I store the muffins, and what’s the best method?
You can store your muffins in an airtight container at room temperature for up to 3 days. For longer freshness, you can refrigerate them for up to a week. Just remember to keep them sealed tight to retain moisture!

Can I freeze Sweet Mini Pumpkin Muffins? How do I do it?
Yes, you can! To freeze these muffins, let them cool completely first. Then, place them in a freezer-safe bag, removing as much air as possible, and freeze for up to 3 months. When you’re ready to enjoy, simply thaw them at room temperature or pop them in the microwave for a quick snack.

What if my muffins turn out dense or dry?
Not to worry! If your muffins are dense, it may be due to overmixing the batter—mix gently. For dry muffins, you might have baked them a little too long. Always check at the 10-minute mark! To salvage dense muffins, try slicing them in half, adding a bit of butter or cream cheese, and enjoying them that way.

Are these muffins safe for my dog to eat?
It’s best to avoid giving these muffins to your furry friends. They contain sugar and spices that may not be suitable for dogs. Always keep an eye on human treats to ensure they stay safe and healthy for your pets!

Sweet Mini Pumpkin Muffins

Sweet Mini Pumpkin Muffins: Cozy Fall Bites You'll Love

Enjoy these Sweet Mini Pumpkin Muffins, perfect for cozy gatherings or a quick snack with warm, comforting flavors.
Prep Time 15 minutes
Cook Time 12 minutes
Cooling Time 5 minutes
Total Time 32 minutes
Servings: 12 muffins
Course: Breakfast
Cuisine: American
Calories: 150

Ingredients
  

For the Muffins
  • 1 cup Canned Pumpkin Puree Use plain pumpkin puree
  • 1 cup All-Purpose Flour Can substitute with whole wheat flour
  • 1/2 cup Granulated Sugar Feel free to use brown sugar
  • 1/2 cup Light Brown Sugar Can substitute with more granulated sugar
  • 1 large Egg At room temperature
  • 1/2 cup Milk Can use non-dairy milk or buttermilk
  • 1 tsp Baking Powder Ensure it's fresh
  • 1 tsp Ground Cinnamon Adjust according to preference
  • 1/2 tsp Ground Ginger Optional
  • 1/2 tsp Allspice Can be swapped with nutmeg
  • 1/4 tsp Ground Nutmeg Adjust according to spice tolerance
  • 1/4 tsp Ground Cloves A little goes a long way
  • 1/4 tsp Salt Balances sweetness
  • 1/4 cup Butter Unsalted, let it cool slightly
For the Cinnamon Sugar Coating
  • 1/2 cup Granulated Sugar For coating
  • 1 tsp Ground Cinnamon Adjust to preference
  • 2 tbsp Melted Butter

Equipment

  • Mini muffin pan
  • Mixing bowls
  • whisk

Method
 

Step‑By‑Step Instructions
  1. Preheat your oven to 375°F (190°C) and grease your mini muffin pan.
  2. Whisk together flour, baking powder, cinnamon, ginger, allspice, nutmeg, cloves, and salt in a bowl.
  3. In another bowl, blend melted butter, granulated sugar, brown sugar, and egg until smooth. Add pumpkin puree and milk, stirring until creamy.
  4. Gently fold the dry ingredients into the wet mixture until just combined.
  5. Fill each muffin well about two-thirds full and gently tap the pan to eliminate air bubbles.
  6. Bake for 10 to 12 minutes until lightly golden and springy.
  7. Allow muffins to cool for about 5 minutes, then transfer to a wire rack.
  8. Mix sugar and cinnamon for the coating. Melt butter in a bowl.
  9. Dip muffins in melted butter and roll in the cinnamon sugar mixture.

Nutrition

Serving: 1muffinCalories: 150kcalCarbohydrates: 24gProtein: 2gFat: 6gSaturated Fat: 4gPolyunsaturated Fat: 0.5gMonounsaturated Fat: 2gCholesterol: 30mgSodium: 150mgPotassium: 85mgFiber: 1gSugar: 10gVitamin A: 900IUVitamin C: 0.5mgCalcium: 20mgIron: 0.5mg

Notes

Enjoy them fresh or store for later to savor the flavors of fall anytime!

Tried this recipe?

Let us know how it was!

Baked Pumpkin Donuts with Maple Glaze: Your Fall Delight

The aroma of warm spices wafting through your kitchen is a sensory invitation to indulge in the cozy comfort of fall. Today, I’m excited to share my recipe for Easy Baked Pumpkin Donuts with Salted Maple Glaze, a delightful treat that’s perfect for lazy weekend mornings or autumn brunches. These donuts are not only a healthier alternative, being baked instead of fried, but they also come together effortlessly without the need for a mixer. With just the right amount of sweetness from the maple glaze and a warm, spiced flavor from the pumpkin and cinnamon, these baked pumpkin donuts are sure to impress your friends and family. So, why not carve out a little time in your day for these deliciously soft, fluffy delights? Are you ready to transform your kitchen into the ultimate fall haven?

Why are baked pumpkin donuts irresistible?

Deliciously Flavorful: Each bite bursts with the rich spices of cinnamon and pumpkin pie spice, making these donuts the epitome of fall baking.
Easy to Make: No mixer needed! This straightforward recipe is perfect for both novice and experienced bakers alike.
Healthier Option: Baked instead of fried, these donuts offer a lighter dessert, allowing you to indulge guilt-free.
Versatile Treat: Enjoy them warm, with a salted maple glaze, or switch it up by serving as muffins!
Perfect for Sharing: Bake a batch for breakfasts or brunch gatherings, and watch your friends and family swoon over this seasonal delight.
For more cozy recipes, check out my Comforting Charm Baked Ham and Cheese Croissants and Joumou Haitian Pumpkin Soup.

Baked Pumpkin Donuts Ingredients

• Get ready to bake!

For the Donuts

  • All-Purpose Flour – Provides structure and texture; can substitute with gluten-free flour for a gluten-free option.
  • Baking Powder – Acts as a leavening agent to keep the donuts fluffy.
  • Baking Soda – Works with the acidity in the pumpkin to help the donuts rise.
  • Cinnamon – Infuses warm, aromatic notes that enhance the pumpkin flavor.
  • Pumpkin Pie Spice – Adds a delightful autumnal flavor profile that’s irresistible.
  • Salt – Balances sweetness and elevates flavors throughout the donuts.
  • Unsalted Butter – Brings richness and moisture to each bite.
  • Canned Pumpkin Puree – Key ingredient that gives the donuts their moist texture and characteristic pumpkin flavor; ensure you use pure pumpkin, not pie filling.
  • Brown Sugar – Adds sweetness and a deep, molasses-like flavor that enhances the dessert experience.
  • Egg – Binds the ingredients together, achieving the right texture.
  • Vanilla Extract – Adds a lovely depth of flavor that’s hard to resist.

For the Maple Glaze

  • Powdered Sugar – Serves as the base for the glaze, ensuring smooth sweetness.
  • Maple Syrup – Infuses the glaze with a rich, distinct flavor; makes everything feel like fall!
  • Milk – Thins the glaze to the perfect consistency; any non-dairy milk works as a substitute.
  • Salt – Enhances the maple flavor, ensuring a balanced and delicious glaze.

Step‑by‑Step Instructions for Baked Pumpkin Donuts with Maple Glaze

Step 1: Preheat the Oven
Begin by preheating your oven to 350°F (177°C). While the oven warms up, grease two 6-cup donut pans with non-stick spray or melted butter to ensure easy release after baking. This will help your baked pumpkin donuts maintain their lovely shape once they’re done.

Step 2: Prepare Dry Ingredients
In a medium mixing bowl, whisk together the all-purpose flour, baking powder, baking soda, cinnamon, pumpkin pie spice, and salt. This combination not only enhances the flavor of your baked pumpkin donuts but also acts as the foundation for your batter. Set this mixture aside while you prepare the wet ingredients.

Step 3: Combine Wet Ingredients
In a large bowl, mix together the melted unsalted butter, canned pumpkin puree, brown sugar, egg, and vanilla extract using a whisk until the mixture becomes smooth and well blended. The pumpkin puree is essential for achieving the moistness that makes these donuts irresistible, so ensure everything is combined thoroughly.

Step 4: Make the Batter
Gently add the dry ingredient mixture to the bowl containing the wet ingredients. With a spatula, stir until just combined—be careful not to overmix, as you want your baked pumpkin donuts to remain fluffy and airy. The batter should be slightly thick but smooth, indicating it’s ready for the pans.

Step 5: Fill Pans
Using either a spoon or a piping bag, carefully pour the donut batter into the greased cavities of the donut pans, filling each about two-thirds full. This allows space for the baked pumpkin donuts to rise without overflowing. Make sure the batter is evenly distributed to ensure even baking.

Step 6: Bake
Place the filled donut pans in the preheated oven and bake for 9-11 minutes, or until the edges are lightly browned and a toothpick inserted in the center comes out clean. Keep an eye on them as they bake, the aroma of pumpkin and spices will fill your kitchen, promising a delicious treat.

Step 7: Cool the Donuts
Once baked, remove the pans from the oven and allow the donuts to cool in the pans for 2-3 minutes. After cooling slightly, carefully transfer each donut to a wire rack to cool completely. This step is crucial to ensure that the glaze adheres well without melting.

Step 8: Prepare the Glaze
In a medium bowl, whisk together the powdered sugar and maple syrup. Gradually add milk, a little at a time, until reaching your desired glaze thickness. It should be smooth yet thick enough to coat the baked pumpkin donuts without dripping excessively, giving them that perfect sweet finish.

Step 9: Glaze Donuts
Once the donuts are completely cool, dip the tops into the maple glaze, allowing any excess glaze to drip off. Place the glazed donuts back on the wire rack to let the glaze set, which should take just a few minutes. This final touch transforms your baked pumpkin donuts into a delectable treat that’s visually inviting and tasty!

Storage Tips for Baked Pumpkin Donuts

Room Temperature: Store your baked pumpkin donuts at room temperature for up to 1-2 days in an airtight container to keep them fresh and moist.

Fridge: If you plan to enjoy them longer, the donuts can be refrigerated for up to a week. Just ensure they are in a sealed container to prevent drying out.

Freezer: For long-term storage, freeze glazed or unglazed donuts for up to 3 months. Wrap each donut tightly in plastic wrap, then place them in a freezer-safe bag.

Reheating: To enjoy your frozen baked pumpkin donuts, thaw them at room temperature, then warm in the microwave for about 10-15 seconds or in the oven at 350°F (177°C) for a few minutes.

Make Ahead Options

These Easy Baked Pumpkin Donuts with Salted Maple Glaze are perfect for meal prep enthusiasts! You can mix the donut batter up to 24 hours in advance and store it covered in the refrigerator. For best results, fill the donut pans and refrigerate them as they are; this helps them hold their shape and rise beautifully when baked. You can also prepare the maple glaze ahead of time and refrigerate it for up to 3 days; simply re-whisk before dipping the cooled donuts. When you’re ready to bake, just take the batter out of the fridge, bake as directed, and glaze them after they cool—resulting in fresh, delightful donuts with minimal morning fuss!

Expert Tips for Baked Pumpkin Donuts

  • Cool Completely: Ensure your baked pumpkin donuts are fully cooled before glazing. This prevents the glaze from melting and ensures a beautiful finish.

  • Thick Glaze: Add milk to your glaze gradually, aiming for a semi-thick consistency. A too-thin glaze may not adhere properly, so take it slow!

  • Avoid Overmixing: When combining wet and dry ingredients, stir until just combined. Overmixing can lead to dense donuts instead of light and airy baked pumpkin delights.

  • Substitutions: If you’re going gluten-free, swirl in gluten-free flour! Ensure it’s a 1:1 blend for best results.

  • Use a Muffin Tin: Don’t have a donut pan? No problem! This batter can be baked in a muffin tin for delightful pumpkin muffins.

What to Serve with Baked Pumpkin Donuts with Maple Glaze

Indulging in these fluffy delights fresh from the oven is only the beginning of your culinary adventure.

  • Fresh Brewed Coffee: The rich, deep flavors of coffee beautifully complement the warm spices in the donuts, creating a cozy pairing for breakfast.

  • Autumn Fruit Salad: A mix of crisp apples and juicy pears tossed with a honey-lemon dressing adds freshness and balances the sweetness, enhancing the fall vibes.

  • Cinnamon Sugar Coated Pecans: Crunchy and slightly sweet, these pecans provide a delightful texture contrast, while the cinnamon ties the flavors of the meal together harmoniously.

  • Whipped Cream or Greek Yogurt: A dollop of either serves as a creamy accompaniment, enriching each bite with an extra layer of indulgence without overwhelming the palate.

  • Caramel Sauce: Drizzling a touch of caramel over your baked pumpkin donuts adds a decadent twist, making them feel even more like a special treat.

  • Spiced Apple Cider: Warm spiced apple cider served alongside adds a comforting autumn touch, immersing you fully in the flavors of the season.

Baked Pumpkin Donuts Variations & Substitutions

Feel free to get creative and personalize your baked pumpkin donuts with these delightful variations!

  • Gluten-Free: Substitute all-purpose flour with gluten-free flour (such as Bob’s Red Mill 1:1) for a perfect gluten-free treat.
  • Muffins: Bake the batter in a muffin tin instead of donut pans for about 20 minutes—quicker and just as tasty!
  • Choco-Pumpkin: Add semi-sweet chocolate chips to the batter for a rich, indulgent twist that chocolate lovers will adore.
  • Nutty Delight: Mix in chopped pecans or walnuts for a crunchy texture that complements the soft pumpkin perfectly.
  • Spiced Up: Increase the amount of pumpkin pie spice or add a pinch of nutmeg for an extra kick of comforting flavor.
  • Cinnamon Sugar: Skip the glaze and instead sprinkle warm donuts with cinnamon sugar for a delightful alternative.
  • Caramel Drizzle: Top with a warm caramel drizzle for a decadent, sweet finish that will make every bite irresistible.

Looking for more delicious ideas? Try enhancing your breakfast table with a side of Garlic Butter Baked Chicken or savoring the sweet warmth of Carrot Cake Cheesecake alongside your favorite morning beverage!

Baked Pumpkin Donuts with Maple Glaze Recipe FAQs

What type of pumpkin puree should I use?
Absolutely! For the best flavor and texture, use canned pumpkin puree that is pure pumpkin—not pumpkin pie filling, which contains added sugars and spices. If you’re feeling adventurous, you can also make your own puree by roasting and blending fresh pumpkin.

How should I store leftover baked pumpkin donuts?
You can store your baked pumpkin donuts at room temperature for up to 1-2 days in an airtight container to maintain freshness. For longer storage, they can be refrigerated for up to a week. Just be sure they’re sealed well, so they don’t dry out!

Can I freeze my baked pumpkin donuts?
Very much so! To freeze, wrap each baked pumpkin donut tightly in plastic wrap, then place them in a freezer-safe bag. They can be frozen for up to 3 months. When you’re ready to enjoy, simply thaw them at room temperature and warm them in the microwave for about 10-15 seconds, or in an oven preheated to 350°F (177°C) for a few minutes.

What should I do if my donuts are too dense?
If your baked pumpkin donuts turn out dense, it may be due to overmixing the batter or using too much flour. Always stir the wet and dry ingredients until just combined to keep them airy! If you’re still facing problems, ensure your baking powder and baking soda are fresh. Using leveled measurements for dry ingredients helps achieve the right texture.

Are these donuts suitable for people with gluten sensitivities?
Yes! You can easily make gluten-free baked pumpkin donuts by substituting all-purpose flour with a 1:1 gluten-free flour blend, such as Bob’s Red Mill. This way, everyone can indulge in this fall treat! Just be sure to read the labels to check for cross-contamination if you have severe allergies.

Can pets eat baked pumpkin donuts?
While pumpkin itself is generally safe for pets in moderation, the ingredients in these donuts (like sugar, butter, and other additives) are not suitable for animals. It’s best to keep these delicious baked pumpkin donuts as a human treat!

Baked Pumpkin Donuts with Maple Glaze

Baked Pumpkin Donuts with Maple Glaze

Enjoy the delightful taste of these Baked Pumpkin Donuts with Maple Glaze, perfect for fall treats.
Prep Time 15 minutes
Cook Time 11 minutes
Cooling Time 5 minutes
Total Time 31 minutes
Servings: 12 donuts
Course: Dessert
Cuisine: American
Calories: 210

Ingredients
  

For the Donuts
  • 2 cups All-Purpose Flour can substitute with gluten-free flour for a gluten-free option
  • 1 tbsp Baking Powder
  • 1 tsp Baking Soda
  • 1 tbsp Cinnamon
  • 1 tbsp Pumpkin Pie Spice
  • 1 tsp Salt
  • 1/2 cup Unsalted Butter melted
  • 1 cup Canned Pumpkin Puree ensure you use pure pumpkin, not pie filling
  • 3/4 cup Brown Sugar
  • 1 Egg
  • 1 tsp Vanilla Extract
For the Maple Glaze
  • 1 cup Powdered Sugar
  • 1/4 cup Maple Syrup
  • 2-3 tbsp Milk any non-dairy milk works as a substitute
  • 1 pinch Salt

Equipment

  • donut pans
  • Mixing bowls
  • whisk
  • spatula
  • Wire rack

Method
 

Step‑by‑Step Instructions
  1. Preheat your oven to 350°F (177°C) and grease two 6-cup donut pans.
  2. In a medium mixing bowl, whisk together the all-purpose flour, baking powder, baking soda, cinnamon, pumpkin pie spice, and salt.
  3. In a large bowl, mix together melted butter, pumpkin puree, brown sugar, egg, and vanilla extract until smooth.
  4. Gently fold the dry ingredients into the wet mixture until just combined.
  5. Fill the donut pans about two-thirds full with the batter.
  6. Bake for 9-11 minutes, or until lightly browned and a toothpick comes out clean.
  7. Cool the donuts in the pan for 2-3 minutes before transferring to a wire rack.
  8. Whisk together powdered sugar, maple syrup, and add milk gradually until desired thickness is reached.
  9. Dip the cooled donuts into the glaze and allow excess to drip off before setting on a wire rack.

Nutrition

Serving: 1donutCalories: 210kcalCarbohydrates: 32gProtein: 2gFat: 9gSaturated Fat: 5gPolyunsaturated Fat: 0.5gMonounsaturated Fat: 3gCholesterol: 25mgSodium: 150mgPotassium: 100mgFiber: 1gSugar: 10gVitamin A: 300IUVitamin C: 1mgCalcium: 15mgIron: 0.7mg

Notes

Ensure your donuts are completely cooled before glazing to achieve the best results.

Tried this recipe?

Let us know how it was!

Pumpkin Spice Sugar Cookies That Melt in Your Mouth

As I sink my teeth into a warm, spiced cookie, I can’t help but feel a wave of autumn nostalgia wash over me. These Pumpkin Spice Sugar Cookies with Cream Cheese Frosting embody the cozy essence of fall with every delightful bite. Not only are they quick to whip up for your next family gathering, but their soft texture combined with that luscious cream cheese frosting makes for an irresistible sweet treat. Plus, they’re incredibly versatile—you can tweak the spice level or try different frosting options to make them your own. So, are you ready to fill your kitchen with the mouthwatering aroma of pumpkin and spice this season?

Why Are Pumpkin Spice Sugar Cookies Irresistible?

Irresistible Flavor: The delightful harmony of pumpkin and warm spices creates a comforting taste that’s perfect for fall.
Easy to Make: With just a few simple steps and common ingredients, you can whip these cookies up in no time!
Family Favorite: These cookies will quickly become a beloved treat for family gatherings or cozy nights at home.
Versatile Options: Feel free to experiment with frosting types or spice levels, allowing you to customize each batch to your liking. If you enjoy cookies, you may also love these Blueberry Breakfast Cookies for a quick, delicious snack.
Perfect Pairing: Enjoy these cookies with coffee or tea, making them an ideal treat for any occasion.

Pumpkin Spice Sugar Cookies Ingredients

• Get ready to embrace fall!

For the Cookies

  • All-Purpose Flour – Provides structure; feel free to substitute with gluten-free flour if needed.
  • Baking Powder – Allows the cookies to rise, ensuring a soft texture.
  • Pumpkin Pie Spice – Infuses that warm fall flavor; you can make your own blend using cinnamon, nutmeg, and ginger.
  • Canned Pumpkin Puree – Moisture and pumpkin flavor are key; fresh pumpkin can be used too, though it needs extra prep.
  • Melted Butter – Adds richness; swap for coconut oil to make it dairy-free.
  • Granulated Sugar – Sweetens the cookies; brown sugar gives a deeper flavor.
  • Egg – Binds all ingredients together; consider a flax egg for a vegan alternative.
  • Vanilla Extract – Enhances overall flavor; only omit if necessary.

For the Cream Cheese Frosting

  • Cream Cheese – Creates a smooth, rich frosting; vegan cream cheese works great as a substitute.
  • Powdered Sugar – Adds sweetness and thickens the frosting; alternative sweeteners can be used.

Now that you have the ingredients for these delicious Pumpkin Spice Sugar Cookies, let’s turn those ingredients into a memorable autumn treat!

Step‑by‑Step Instructions for Pumpkin Spice Sugar Cookies

Step 1: Preheat the Oven
Begin by preheating your oven to 350°F (175°C). This temperature ensures that your Pumpkin Spice Sugar Cookies will bake evenly and achieve that delightful golden edge. While the oven heats up, gather your baking sheets and line them with parchment paper for easy cleanup and to prevent sticking.

Step 2: Mix Wet Ingredients
In a large mixing bowl, combine the melted butter, canned pumpkin puree, granulated sugar, egg, and vanilla extract. Use a whisk or electric mixer to blend these ingredients until the mixture is smooth and creamy. This step is crucial as it creates the base for the soft texture of your cookies.

Step 3: Combine Dry Ingredients
In a separate bowl, mix together the all-purpose flour, baking powder, pumpkin pie spice, and a pinch of salt. Gradually add this dry mixture to your wet ingredients, stirring gently until a cohesive dough forms. Make sure not to overmix; you want the dough to be thick yet pliable for your Pumpkin Spice Sugar Cookies.

Step 4: Chill the Dough
Cover the bowl with plastic wrap and refrigerate the dough for about 25 minutes. Chilling is essential as it helps the cookies maintain their shape while baking, leading to a soft, thick texture. This step also enhances the flavors, allowing the spices and pumpkin to meld beautifully.

Step 5: Shape the Cookies
Once chilled, use a tablespoon to scoop out portions of dough and roll them into balls, about 1.5 to 2 tablespoons each. Place these balls on the prepared parchment-lined baking sheets, leaving space between them since they will spread slightly during baking. The dough should be a lovely orange hue, reflecting its pumpkin content.

Step 6: Bake the Cookies
Carefully slide the baking sheets into your preheated oven and bake for approximately 18 minutes. Watch for the edges to turn a light golden brown while the centers remain soft. This is the perfect moment to take them out, as they will continue to firm up while cooling on the sheet.

Step 7: Cool the Cookies
After baking, let the cookies cool on the baking sheet for about 5 minutes. Then, transfer them to a wire rack to cool completely. This cooling process is vital as it prepares the cookies for the luscious cream cheese frosting that will elevate their flavor.

Step 8: Make the Frosting
In a clean bowl, whip together cream cheese and softened butter until smooth. Gradually add powdered sugar and a splash of vanilla extract, mixing until the frosting reaches a creamy consistency. Keep this frosting chilled until your Pumpkin Spice Sugar Cookies have completely cooled to avoid any runniness.

Step 9: Frost the Cookies
Once the cookies are cool, generously spread the cream cheese frosting on top of each cookie. For an added touch, sprinkle a little extra pumpkin pie spice or cinnamon on top before serving. The creamy frosting complements the spiced cookies perfectly, making each bite a true autumn delight.

What to Serve with Pumpkin Spice Sugar Cookies with Cream Cheese Frosting

As the scent of warm spices envelops your kitchen, let’s create a complete fall celebration around these delightful cookies.

  • Creamy Mashed Potatoes: The rich, buttery flavor of mashed potatoes brings a comforting heartiness, balancing the sweetness of the cookies beautifully.

  • Spiced Apple Cider: Warm spiced cider with hints of cinnamon and nutmeg adds an aromatic drink that perfectly complements the cookies’ flavors.

  • Roasted Brussels Sprouts: Their crispy texture and slight bitterness provide a delightful contrast to the sweet cream cheese frosting while embracing fall’s bountiful harvest.

  • Pumpkin Soup: A velvety pumpkin soup adds a smooth, savory note that enhances the cookie’s pumpkin flavors, creating a festive harmony.

  • Caramelized Pecans: These crunchy nuts drizzled with caramel bring a sweet, nutty contrast that feels luxurious alongside the cookies.

  • Chocolate Chip Ice Cream: A scoop of chocolate chip ice cream drizzled with caramel sauce brings a play of temperature and creaminess that takes your sweet treat experience to the next level.

  • Cinnamon Tea: Sipping warm cinnamon tea while enjoying your cookies will amplify those fall spices, providing a cozy warmth to each moment.

  • Pecan Pie Bars: The rich, gooey texture of pecan pie bars introduces a new element of indulgence that pairs delightfully with your moist cookies.

  • Pumpkin Spice Latte: Your own delicious pumpkin spice latte will echo the flavors of the cookies, keeping the cozy vibe going strong.

Indulging in these pairings will certainly create a warm and festive atmosphere perfect for sharing with loved ones!

Storage Tips for Pumpkin Spice Sugar Cookies

Fridge: Store the cookies in an airtight container in the refrigerator for up to 5 days. This keeps the cream cheese frosting fresh and maintains the soft texture of the cookies.

Freezer: Freeze the Pumpkin Spice Sugar Cookies individually wrapped in plastic wrap or in a freezer-safe bag for up to 3 months. To enjoy, simply thaw in the fridge overnight before frosting or serving.

Reheating: If desired, gently reheat cookies in the microwave for 10-15 seconds to bring back their soft, warm goodness. Avoid overheating to prevent the frosting from melting.

Tips for Frosting Storage: Keep any extra cream cheese frosting in the fridge for up to 1 week. Stir well before using, and feel free to spread it on fresh cookies as a delightful treat!

Pumpkin Spice Sugar Cookies Variations

Let your creativity shine as you customize these delightful cookies with exciting twists and substitutions!

  • Gluten-Free: Substitute all-purpose flour with a gluten-free blend to enjoy delicious cookies without the gluten.
  • Dairy-Free: Use coconut oil instead of melted butter and a vegan cream cheese for the frosting. They’ll still taste divine!
  • Nutty Delight: Add chopped walnuts or pecans to the cookie dough for a satisfying crunch that pairs beautifully with the spices.
  • Alternate Frosting: Try a simple vanilla glaze or a chocolate frosting for a sweet twist that will surprise your taste buds.
  • Spice It Up: Increase the pumpkin pie spice or add a pinch of cayenne for a delightful kick that warms with every bite.
  • Sugar Swap: Use brown sugar instead of granulated sugar for a rich, deep flavor that enhances the fall vibes wonderfully.
  • Pumpkin Bliss: Fold in chocolate chips or butterscotch chips for an indulgent addition that makes these cookies irresistible.
  • Layered Cookies: Create a sandwich version by spreading frosting between two cookies; it adds an extra touch of heaven!

These variations allow you to personalize your Pumpkin Spice Sugar Cookies, making them truly special for your family gatherings. For more delightful recipes, don’t miss checking out this wonderfully cozy Joumou Haitian Pumpkin Soup or savoring the sweetness of Savory Brown Sugar Pork Chops. Enjoy your baking adventure!

Make Ahead Options

These Pumpkin Spice Sugar Cookies are perfect for meal prep, allowing you to enjoy them fresh with minimal effort on busy days! You can prepare the dough up to 24 hours in advance by mixing all the ingredients and chilling it in the refrigerator. This chilling not only helps the flavors meld but also ensures the cookies maintain their delightful texture. Just before baking, scoop and roll the dough into balls, place them on parchment-lined baking sheets, and bake as directed. For the cream cheese frosting, you can make it ahead and refrigerate it for up to 3 days. Just give it a gentle stir before frosting the cookies to ensure it’s spreadable. Enjoy the convenience of these cookies while still savoring their homemade warmth!

Expert Tips for Pumpkin Spice Sugar Cookies

  • Chill the Dough: Allowing your dough to chill for at least 25 minutes is crucial. It prevents spreading, resulting in perfectly thick Pumpkin Spice Sugar Cookies.
  • Use Parchment Paper: Line your baking sheets with parchment paper to avoid sticking and make cleanup a breeze, ensuring every cookie comes out intact.
  • Frost When Cool: Always wait for your cookies to cool completely before frosting them. This avoids runny cream cheese frosting, giving you beautiful, finished treats.
  • Adjust the Spices: Feel free to tweak the amount of pumpkin pie spice to suit your taste. Don’t hesitate to add a bit more for a bolder flavor profile!
  • Variations Galore: Explore different frosting options such as a vanilla glaze or chocolate ganache, enhancing your Pumpkin Spice Sugar Cookies with a new twist.

Pumpkin Spice Sugar Cookies Recipe FAQs

How do I choose the right pumpkin for my cookies?
Absolutely! When selecting pumpkin for your Pumpkin Spice Sugar Cookies, look for canned pumpkin puree—not pumpkin pie filling, as that contains added sugar and spices. If you prefer using fresh pumpkin, select a sugar pumpkin, also known as a pie pumpkin. These are smaller, sweeter, and have a smoother texture, which will enhance the flavor of your cookies.

How should I store my cookies to keep them fresh?
To keep your Pumpkin Spice Sugar Cookies delicious and soft, store them in an airtight container in the refrigerator for up to 3-5 days. This helps preserve the cream cheese frosting as well as the cookie’s chewy texture. Be sure to separate layers with parchment paper to prevent sticking!

Can I freeze these Pumpkin Spice Sugar Cookies?
Yes, you can! To freeze, place the cooled cookies in a single layer on a baking sheet and freeze until solid. Then, transfer them to an airtight freezer bag or container. They can be frozen for up to 3 months. When you’re ready to enjoy, simply thaw in the refrigerator overnight. If you want a warm cookie, pop them in the microwave for about 10-15 seconds.

What should I do if my cookies spread too much while baking?
If your Pumpkin Spice Sugar Cookies spread too much during baking, it might be due to the dough not being chilled long enough or the oven being too hot. Make sure to chill the dough for at least 25 minutes and check the oven temperature with an oven thermometer. Another tip is to keep the dough balls somewhat taller rather than wider on the baking sheet, which can help them hold their shape better.

Are there any dietary considerations for these cookies?
Certainly! If you’re making these cookies for someone with dietary restrictions, you can easily adjust the recipe. Substitute the butter with coconut oil for a dairy-free version, use a flax egg in place of a regular egg for vegan options, and swap the cream cheese for vegan cream cheese alternatives in the frosting. Just be sure to choose alternative sweeteners if any prefers to avoid sugar.

How long will the cream cheese frosting last once made?
The cream cheese frosting can be stored in the refrigerator for up to one week. Make sure it’s in a tightly sealed container. Before using, let it come to room temperature and mix it well, as it may firm up while chilled. It’s perfect for spreading on fresh cookies or even as a dip for fruits!

Pumpkin Spice Sugar Cookies

Pumpkin Spice Sugar Cookies That Melt in Your Mouth

Delight in these Pumpkin Spice Sugar Cookies with Cream Cheese Frosting, a perfect treat for fall.
Prep Time 15 minutes
Cook Time 18 minutes
Chilling Time 25 minutes
Total Time 58 minutes
Servings: 24 cookies
Course: Dessert
Cuisine: American
Calories: 120

Ingredients
  

For the Cookies
  • 2 cups All-Purpose Flour Feel free to substitute with gluten-free flour if needed.
  • 1 tbsp Baking Powder Allows the cookies to rise, ensuring a soft texture.
  • 2 tbsp Pumpkin Pie Spice Infuses that warm fall flavor.
  • 1 cup Canned Pumpkin Puree Moisture and pumpkin flavor are key.
  • 1/2 cup Melted Butter Adds richness; swap for coconut oil to make it dairy-free.
  • 1 cup Granulated Sugar Sweetens the cookies.
  • 1 large Egg Binds all ingredients together; consider a flax egg for a vegan alternative.
  • 1 tsp Vanilla Extract Enhances overall flavor.
For the Cream Cheese Frosting
  • 8 oz Cream Cheese Creates a smooth, rich frosting.
  • 2 cups Powdered Sugar Adds sweetness and thickens the frosting.

Equipment

  • Mixing Bowl
  • whisk
  • Baking Sheets
  • Parchment Paper
  • Wire rack

Method
 

Step-by-Step Instructions
  1. Preheat your oven to 350°F (175°C). Line baking sheets with parchment paper.
  2. In a large mixing bowl, combine melted butter, canned pumpkin puree, granulated sugar, egg, and vanilla extract. Blend until smooth.
  3. In a separate bowl, mix together flour, baking powder, pumpkin pie spice, and a pinch of salt. Gradually add to the wet ingredients.
  4. Cover the bowl with plastic wrap and refrigerate the dough for about 25 minutes.
  5. Scoop out portions of dough and roll them into balls. Place them on prepared baking sheets.
  6. Bake for approximately 18 minutes until edges are golden brown.
  7. Let the cookies cool on the baking sheet for 5 minutes before transferring to a wire rack.
  8. In a bowl, whip together cream cheese and softened butter until smooth. Add powdered sugar and vanilla extract.
  9. Spread the cream cheese frosting on cooled cookies and sprinkle with pumpkin pie spice if desired.

Nutrition

Serving: 1cookieCalories: 120kcalCarbohydrates: 18gProtein: 1gFat: 6gSaturated Fat: 4gMonounsaturated Fat: 2gCholesterol: 20mgSodium: 100mgPotassium: 50mgSugar: 8gVitamin A: 10IUCalcium: 2mgIron: 2mg

Notes

These Pumpkin Spice Sugar Cookies with Cream Cheese Frosting are perfect for fall gatherings. Adjust spice levels according to taste.

Tried this recipe?

Let us know how it was!

Delicious Pumpkin French Toast for Cozy Fall Mornings

As the crisp autumn air settles in, the kitchen calls for something warm and comforting—enter my Vegan Pumpkin French Toast! Every bite of this dish brings you the rich taste of pumpkin puree accented with delightful pumpkin pie spices, creating an instant classic that’s perfect for fall mornings. What I love most about this recipe is how effortlessly it comes together in under 30 minutes, making it a fantastic option for those busy days when a cozy breakfast is still a must. Plus, it caters to vegan diets and can easily be adapted for gluten-free folks too! So, are you ready to infuse your morning routine with the essence of the season? Let’s dive into this delightful recipe that promises to warm both your heart and taste buds.

Why is Pumpkin French Toast a Must-Try?

Irresistible Flavor: The warm, spice-infused notes of pumpkin pie make every bite a celebration of fall.
Quick and Easy: Ready in under 30 minutes, it’s perfect for busy mornings.
Vegan and Gluten-Free Options: Enjoy this dish without compromise—accommodating diverse dietary needs with ease.
Comfort Food Vibes: A fluffy and golden exterior promises a satisfying experience that rivals any café version.
Customizable Delight: Experiment by swapping in sweet potatoes or adding nut butter for a twist that’s uniquely yours. Serve it warm topped with whipped coconut cream or fresh fruits for an extra treat that’s sure to impress! For similar cozy recipes, check out my Blueberry French Toast or the indulgent Creme Brulee French Toast.

Pumpkin French Toast Ingredients

• Get ready to create a fall favorite with this Pumpkin French Toast recipe!

For the Custard

  • Pumpkin Puree – Provides rich flavor and moisture; you can use mashed sweet potato if needed.
  • Non-Dairy Yogurt (or Eggs) – Adds creaminess and binds the mixture; swap for regular yogurt/eggs for non-vegan versions.
  • Oat or Almond Milk – Acts as the base liquid; feel free to substitute with regular milk for a creamy touch.
  • Vanilla Extract – Boosts flavor and aroma, adding warmth to your dish.
  • Pumpkin Pie Spices (cinnamon, nutmeg, ginger, cloves) – Infuses autumnal flavors; pre-mixed pumpkin spice works wonderfully too.
  • Maple Syrup (optional) – Adds a sweet touch; honey or agave can be delicious alternatives.

For the Bread

  • Bread (regular or gluten-free) – Forms the foundation of this delicious Pumpkin French Toast; pick your favorite variety for best texture.
  • Vegan Butter or Oil – Ensures a golden, crispy finish; regular butter is an option if not vegan.

Embrace the essence of fall with this scrumptious Pumpkin French Toast that is not only quick to prepare but also delights every palate!

Step‑by‑Step Instructions for Pumpkin French Toast

Step 1: Prepare Custard
In a mixing bowl, combine the pumpkin puree, non-dairy yogurt (or eggs), oat or almond milk, vanilla extract, and pumpkin pie spices. Whisk the mixture until it becomes smooth and well-blended, ensuring an even distribution of flavors. This fragrant custard will be the heart of your Pumpkin French Toast, so make sure it’s creamy and a little thick for the best results.

Step 2: Heat Skillet
Place a non-stick skillet over medium heat and melt vegan butter or oil until it’s sizzling and evenly coats the base. This should take about 1-2 minutes. A properly heated pan is crucial for achieving that golden-brown crust on your Pumpkin French Toast, so keep an eye out for a light shimmer on the melted fat before adding the bread.

Step 3: Dip Bread
Take 2-3 slices of your chosen bread and immerse them in the custard mixture, ensuring they are fully coated. Allow them to soak for about 20-30 seconds, letting the bread absorb the custard. Carefully place the soaked bread in the hot skillet, arranging them so they don’t overlap, which helps achieve even cooking.

Step 4: Cook
Fry the bread in the skillet for about 2-3 minutes on one side, keeping an eye on the color. Once the underside is golden brown, gently flip each slice using a spatula to cook the other side. Allow them to fry for another 2-3 minutes until both sides are beautifully crisp and fragrant, filling your kitchen with the delightful aroma of pumpkin spices.

Step 5: Serve
Once cooked, transfer the Pumpkin French Toast to a plate. Repeat the process with the remaining bread slices until all are cooked. For an extra touch, serve warm with optional toppings like a dusting of cinnamon, powdered sugar, or a drizzle of maple syrup. This cozy breakfast is now ready to be enjoyed, bringing the essence of fall to your table!

How to Store and Freeze Pumpkin French Toast

  • Fridge: Store leftover slices in an airtight container for up to 3 days. This helps maintain their delicious flavor and fluffy texture.
  • Freezer: For longer storage, freeze individual slices by wrapping them tightly in plastic wrap, followed by aluminum foil. They can last for up to 2 months.
  • Reheating: To enjoy, simply reheat in a toaster or skillet on medium heat until warmed through. For best results, add a touch of vegan butter while reheating to restore that golden crisp.
  • Serving Suggestions: Enhance the reheated Pumpkin French Toast with a drizzle of maple syrup or a sprinkle of cinnamon to revive its cozy flavors!

Expert Tips for Pumpkin French Toast

  • Custard Soak Time: Allow the bread to soak longer in the custard for a richer flavor and moisture absorption; aim for about 30 seconds to 1 minute.
  • Skillet Temperature: Ensure your skillet is hot enough to create a crispy crust—look for a gentle shimmer on the melted butter or oil before adding the bread.
  • Batch Cooking: Avoid overcrowding the skillet; cook in batches for even browning and to prevent steaming your Pumpkin French Toast.
  • Bread Choice: Use stale or day-old bread for better absorption of the custard, leading to a fluffy interior and crispy exterior.
  • Topping Variations: Experiment with toppings like whipped coconut cream, fresh berries, or a sprinkle of nuts to elevate your breakfast experience.

Make Ahead Options

These Vegan Pumpkin French Toast are perfect for meal prep enthusiasts! You can prepare the custard mixture up to 24 hours in advance, whisking together pumpkin puree, non-dairy yogurt, milk, spices, and maple syrup, then refrigerate it in an airtight container. Additionally, you can slice your bread a few hours prior to cooking to save time. When you’re ready to serve, simply dip your soaked bread in the custard and pan-fry as instructed for that golden-brown crust. This way, you’ll enjoy a cozy, flavorful breakfast that’s just as delicious as if it were fresh made! By prepping ahead, you’ll have a delightful fall morning treat with minimal effort during busy weekdays.

What to Serve with Pumpkin French Toast?

Warm up your breakfast table with delightful pairings that highlight the cozy vibes of autumn.

  • Crispy Bacon or Vegan Sausage: Adds a savory crunch that beautifully contrasts the sweet, creamy texture of the toast.
  • Whipped Coconut Cream: A light and airy topping that adds a touch of creaminess while keeping it dairy-free and indulgent.
  • Fresh Berries: Bright and juicy, they offer a refreshing burst of flavor that balances the richness of the pumpkin.
  • Maple Syrup Drizzle: The classic sweet addition—its warm, rich flavor enhances each bite, bringing out the best in every slice.
  • Almond Milk Latte: A perfect drink pairing, its nutty flavors elevate the meal and keep the fall spirit alive.
  • Chai-Spiced Tea: Infused with warm spices, it complements the pumpkin pie spices in the toast, creating a harmonious breakfast experience.

As the leaves turn, these delicious accompaniments will surely elevate your Pumpkin French Toast into a magical morning feast!

Variations & Substitutions for Pumpkin French Toast

Feel free to let your creativity flourish and make this delightful vegan Pumpkin French Toast your own!

  • Sweet Potato Swap: Replace pumpkin puree with sweet potato puree for a subtly different yet deliciously sweet flavor.

  • Almond Butter Boost: Stir a tablespoon of almond butter into the custard mix for a nutty twist that adds creaminess and protein.

  • Banana Option: Use mashed overripe bananas instead of pumpkin for a naturally sweet and banana-flavored French toast.

  • Dairy Free: For non-vegan versions, simply substitute non-dairy yogurt and milk with regular yogurt and milk for a traditional approach.

  • Gluten-Free Bread: Use your favorite gluten-free bread in place of regular bread to maintain its delightful fluffiness without gluten.

  • Extra Spices: Add a sprinkle of nutmeg and ginger for an even warmer kick! This enhances the cozy fall vibes.

  • Cinnamon Swirl Bread: For a fun flavor layer, use cinnamon swirl bread to infuse each bite with extra sweetness and spice.

  • Heat it Up: For those who crave a bit of heat, add a pinch of cayenne pepper or some chopped jalapeños to the custard for a unique twist.

Each of these variations can breathe new life into the classic dish. Pair your Pumpkin French Toast with some whipped coconut cream or fresh berries for a breakfast that’s not just a meal, but an experience that warms your soul. For more delightful breakfast ideas, don’t miss out on my Sweet Escape Toast or the indulgent French Onion Soup Meatloaf.

Pumpkin French Toast Recipe FAQs

How do I select the perfect pumpkin puree?
Absolutely! When choosing pumpkin puree, look for a can that specifies 100% pumpkin without added sugars or spices. If you’re using fresh pumpkin, opt for small sugar pumpkins, as they are sweeter and less watery. Avoid pumpkins with dark spots or damage, as they can affect the flavor and texture.

What’s the best way to store leftover Pumpkin French Toast?
Leftover slices can be stored in an airtight container in the fridge for up to 3 days. If you want to enjoy them later, allow them to cool completely before sealing them up. To reheat, just pop them in the toaster or skillet on medium heat until warmed through—this keeps them fluffy!

Can I freeze Pumpkin French Toast?
Certainly! To freeze, wrap individual slices of cooked Pumpkin French Toast tightly in plastic wrap and then in foil to prevent freezer burn. They can be frozen for up to 2 months. When you’re ready to enjoy, simply reheat them in the toaster or on a skillet, adding a little vegan butter for that lovely golden crisp.

What should I do if my French Toast sticks to the skillet?
Very common! Make sure your skillet is adequately hot and well-coated with oil or vegan butter before adding the bread. If it’s sticking, allow it to cook a little longer without moving it; once it’s ready, it should naturally release from the pan. Cooking in batches can also help prevent overcrowding, allowing each slice plenty of space to cook properly.

Are there any allergy considerations with this recipe?
Of course! This recipe is naturally vegan and can be gluten-free if you choose the right bread. Always double-check the ingredients in your chosen bread and non-dairy yogurt, as some can contain allergens. For nut allergies, opt for oat milk instead of almond milk, ensuring a safe and delicious breakfast for everyone!

Pumpkin French Toast

Delicious Pumpkin French Toast for Cozy Fall Mornings

Enjoy a delightful Vegan Pumpkin French Toast recipe that brings the essence of fall to your mornings with rich pumpkin flavor and spices.
Prep Time 10 minutes
Cook Time 20 minutes
Total Time 30 minutes
Servings: 4 slices
Course: Breakfast
Cuisine: Vegan
Calories: 180

Ingredients
  

For the Custard
  • 1 cup Pumpkin Puree Can substitute with mashed sweet potato
  • 1/2 cup Non-Dairy Yogurt Can swap for regular yogurt or eggs
  • 1 cup Oat or Almond Milk Regular milk can be used
  • 1 teaspoon Vanilla Extract
  • 1 tablespoon Pumpkin Pie Spices Cinnamon, nutmeg, ginger, cloves can be used
  • 2 tablespoons Maple Syrup Optional; honey or agave can be alternatives
For the Bread
  • 4 slices Bread Regular or gluten-free
  • 2 tablespoons Vegan Butter or Oil Use regular butter if not vegan

Equipment

  • Skillet
  • Mixing Bowl
  • whisk

Method
 

Step-by-Step Instructions for Pumpkin French Toast
  1. In a mixing bowl, combine the pumpkin puree, non-dairy yogurt, oat or almond milk, vanilla extract, and pumpkin pie spices. Whisk until smooth and creamy.
  2. Place a skillet over medium heat and melt vegan butter until sizzling.
  3. Immerse 2-3 slices of bread in the custard mixture, letting it soak for 20-30 seconds. Place the soaked bread in the hot skillet.
  4. Cook for 2-3 minutes on one side until golden, then flip and cook for another 2-3 minutes.
  5. Transfer to a plate and serve warm with optional toppings like cinnamon, powdered sugar, or maple syrup.

Nutrition

Serving: 1sliceCalories: 180kcalCarbohydrates: 29gProtein: 4gFat: 5gSaturated Fat: 1gPolyunsaturated Fat: 0.5gMonounsaturated Fat: 2gSodium: 200mgPotassium: 150mgFiber: 3gSugar: 5gVitamin A: 100IUVitamin C: 2mgCalcium: 4mgIron: 6mg

Notes

Let the bread soak longer for a richer flavor. Use stale bread for better absorption.

Tried this recipe?

Let us know how it was!

Indulge in the Best Pumpkin Pie Recipe for Fall Bliss

As I stood in my kitchen, the cozy aroma of cinnamon and nutmeg wrapped around me like a warm blanket, I realized it was time for one of my all-time favorites: the Great Pumpkin Pie Recipe. This dessert isn’t just a Thanksgiving classic; it effortlessly marries tradition with a touch of creativity, making it perfect for any autumn gathering. The beauty of this pie lies in its rich, smooth filling, nestled atop a flaky homemade crust and topped with whipped cream and sugared cranberries. Not only does it bring warmth and comfort, but it also provides a delightful surprise with its unique blend of spices. Plus, the variations you can explore—from mini pumpkin pies to chai meringue pie—are endless! Are you ready to create a dessert that will make your kitchen the heart of the celebration?

Why is Pumpkin Pie a Crowd-Pleaser?

Irresistible Flavors: The blend of warm spices like cinnamon and nutmeg creates a comforting taste that everyone loves.
Customization Options: With variations like mini pumpkin pies or pecan praline pumpkin pie, there’s something for every palate.
Effortless Elegance: This recipe transforms simple ingredients into a stunning centerpiece for your holiday table, just like in my Cheesy Hamburger Potato Soup.
Perfect for Any Occasion: While it’s a Thanksgiving staple, this pie delights at any autumn gathering.
Time-Saving Delight: It can be made in advance and stored, letting you focus on enjoying the festivities!

Pumpkin Pie Recipe Ingredients

For the Filling

  • Pumpkin Puree – Canned pumpkin is preferred for sturdiness and smoothness, making it perfect for our pumpkin pie recipe.
  • Granulated Sugar – This adds the sweet base to your filling; for a richer flavor, consider using light brown sugar.
  • Brown Sugar – Enhances the sweetness with a delightful hint of molasses; feel free to replace it with more granulated sugar if needed.
  • Spices (Cinnamon, Ginger, Nutmeg, Cloves, & Black Pepper) – Together, they create a warm, spiced profile, where the black pepper adds a surprising depth to the pie.
  • Eggs – These help bind the ingredients and give the filling a luxurious texture; they should be well-beaten before adding to the mixture.
  • Heavy Cream – Adds creaminess to the filling; if you’re looking for a lighter version, feel free to substitute with milk.
  • Cornstarch – Ensures a smooth filling consistency; you can omit it if you prefer a denser pie.

For the Crust

  • All-Purpose Flour – The backbone of your pie crust; ensure it’s well-measured for the perfect flaky texture.
  • Butter – Use unsalted butter for a rich flavor; cold butter is key to achieving flakiness in the crust.
  • Shortening – Aids in creating a tender crust; using a mix of shortening and butter yields the best results.
  • Salt – Balances the sweetness of the pie filling, enhancing overall flavor.
  • Ice Water – Helps bind the crust together without making it tough; add it gradually until the dough comes together.

To Serve

  • Whipped Cream – A creamy topping that complements the pumpkin pie perfectly; consider sweetening it with a little powdered sugar.
  • Sugared Cranberries – They add a pop of color and a burst of tartness, making your dessert visually appealing and deliciously refreshing!

Step‑by‑Step Instructions for The Great Pumpkin Pie Recipe

Step 1: Prepare the Pie Crust
Begin by making your flaky pie crust. In a large bowl, mix all-purpose flour and a pinch of salt, then cut in cold butter and shortening until the mixture resembles coarse crumbs. Gradually add ice water, mixing until dough forms. Roll out the dough on a floured surface and fit it into a 9-inch pie dish, gently pressing the sides and trimming the excess.

Step 2: Blind Bake Crust
Preheat your oven to 375°F (190°C). To ensure a crispy crust for your Great Pumpkin Pie, blind bake it for about 10-15 minutes. This involves lining the crust with parchment paper, filling it with pie weights or dried beans, and placing it in the preheated oven until set. The edges should begin to turn golden, signaling readiness.

Step 3: Mix Filling
While the crust cools, prepare the filling for your pumpkin pie. In a large mixing bowl, whisk together the pumpkin puree, granulated sugar, brown sugar, and spices, making sure everything is fully combined. Then, add in the well-beaten eggs, heavy cream, and cornstarch, whisking until the mixture is smooth and creamy, creating the perfect pumpkin pie filling.

Step 4: Fill Brushed Crust
Once the crust has cooled slightly, carefully remove the parchment and weights. Pour the smooth pumpkin filling into the pre-baked crust, using a spatula to ensure even distribution. The vibrant orange color should fill the crust beautifully, hinting at the delicious flavors that await. Preheat your oven again to 350°F (175°C) for the baking stage.

Step 5: Bake
Place the filled pie in the center of your oven and bake for 55-60 minutes. The filling should be set around the edges but still slightly wobbly in the center when you gently shake the pie. Keep a close eye on it towards the end, as you want to avoid overbaking, which may lead to cracks forming in your pumpkin pie.

Step 6: Cool & Serve
Remove your pumpkin pie from the oven and let it cool completely to room temperature for at least 4 hours. This cooling period allows the filling to firm up, making it easier to slice. Once cooled, serve your pumpkin pie with dollops of whipped cream and optional sugared cranberries, adding a festive touch to your dessert table.

Make Ahead Options

These pumpkin pies are perfect for busy home cooks looking to save time this holiday season! You can prepare the pie crust up to 3 days in advance and store it wrapped in plastic in the refrigerator to keep it fresh. Additionally, the filling can be made and refrigerated for up to 24 hours. Just whisk together the pumpkin puree, sugars, spices, eggs, and cream, then pour it into the pre-baked crust when you’re ready to bake. To maintain the quality, ensure the crust is fully cooled before adding the filling. When it’s time to serve, simply bake the pie as directed and enjoy a delicious homemade dessert with minimal effort!

How to Store and Freeze Pumpkin Pie

Fridge: Store leftover pumpkin pie in the refrigerator, covered, for up to 3 days to maintain freshness and flavor.

Freezer: To enjoy your pumpkin pie later, freeze it tightly wrapped in plastic wrap and foil for up to 2 months.

Thawing: When ready to serve, thaw your frozen pumpkin pie overnight in the fridge to preserve its creamy texture.

Reheating: If desired, gently warm slices in the oven at 350°F for about 10-15 minutes or enjoy cold for a refreshing treat!

What to Serve with The Great Pumpkin Pie

As the aroma of your freshly baked pumpkin pie fills the room, let’s explore delightful pairings to create a complete fall feast.

  • Whipped Cream:
    Nothing says pumpkin pie quite like a cloud of sweet whipped cream on top, enhancing its creamy texture and adding a delightful sweetness.

  • Sugared Cranberries:
    These bright, tart gems provide a refreshing contrast to the rich pie, both in flavor and presentation—perfect for holiday gatherings!

  • Coffee or Spiced Tea:
    A warm drink can elevate the entire experience. The bold flavors of coffee or aromatic spiced tea pair beautifully with the pie’s warm spices.

  • Ginger Snap Cookies:
    Adding a crunchy texture, ginger snaps echo the spices in your pumpkin pie, creating harmony and a delightful crunch with each bite.

  • Creamy Vanilla Ice Cream:
    A scoop of vanilla ice cream on the side adds an indulgent creaminess, melting gently into the warm pumpkin filling for an irresistible treat.

  • Pecan Pie Bites:
    For guests who crave more sweets, mini pecan pie bites create a textural contrast to your pumpkin creation, bringing a bit of nutty crunch.

  • Nutty Coconut Cake:
    Add a touch of tropical flair with a moist coconut cake. Its lightness and nutty flavor complement the warm spices of the pumpkin pie.

  • Pear Cinnamon Muffins:
    The soft, delicate muffins infused with cinnamon will resonate with the flavors of your pumpkin pie, making for a cozy autumn pairing.

  • Apple Cider:
    Serve a chilled or warm apple cider alongside for a festive fall vibe; its fruity sweetness perfectly balances the spices in the pie.

Expert Tips for the Best Pumpkin Pie

Perfect Timing: Remove the pie from the oven while the center is still slightly jiggly; it will continue to set as it cools, preventing cracks.

Chill Out: Ensure your pumpkin pie cools completely for at least 4 hours before slicing; this helps achieve clean cuts and a nice presentation.

Mix Well: Whisk the filling ingredients thoroughly to avoid lumps; a smooth mixture leads to a creamy and delightful pumpkin pie recipe.

Watch the Spices: Use freshly ground black pepper sparingly for a complex flavor; too much can overpower the warm spices that should shine through.

Decorative Touch: Use leftover dough to create decorative pie crust accents, such as leaves or shapes, adding visual appeal to your pumpkin pie.

Storage Savvy: Store any leftovers in the refrigerator, covered, for up to 3 days; it can also freeze well for up to 2 months, retaining its delicious flavors.

Pumpkin Pie Recipe Variations & Substitutions

Unlock a world of delicious possibilities by customizing your pumpkin pie just the way you like it!

  • Mini Pumpkin Pies: Use muffin tins to create adorable, bite-sized versions—perfect for sharing at gatherings.
  • Pecan Praline Topping: Elevate your pie with a crunchy layer of pecans and caramel for a sweet surprise in every slice.
  • Chai Spice Twist: Infuse your filling with chai spices like cardamom and allspice for a cozy, aromatic kick that warms the soul.
  • Pumpkin Cheesecake Pie: Blend cream cheese into the filling for a rich, creamy twist that combines two beloved desserts in one.
  • Healthier Version: Swap heavy cream for coconut milk and use honey or maple syrup instead of granulated sugar for a dairy-free treat.
  • Hand Pies: Turn this comforting classic into portable hand pies. Simply use your dough to wrap around the filling and bake until golden.
  • Chocolate Drizzle: Drizzle melted dark chocolate over slices for chocolate lovers—it pairs wonderfully with the spices and sweetness!
  • Savory Version: Add a pinch of cheese or herbs for an unexpected savory pumpkin pie that sparks conversation at the table.

For more delightful recipe ideas, explore my Shepherds Pie Soup to warm up on chilly nights, or create a seasonal feast with my Joumou Haitian Pumpkin Soup. The variations are endless, so don’t hesitate to get creative in the kitchen!

The Great Pumpkin Pie Recipe FAQs

What type of pumpkin is best for making pumpkin pie?
For the best results, I recommend using canned pumpkin puree, as it has a sturdy texture and smooth consistency ideal for pie filling. Fresh pumpkin can be used, but it often yields a grainy texture that may not be as enjoyable in your pie.

How should I store leftover pumpkin pie?
Absolutely! Store any leftover pumpkin pie in the refrigerator, covered with plastic wrap or aluminum foil, for up to 3 days. If you’re hosting a gathering and want to make your pie in advance, this is a great option to keep it fresh and delicious.

Can I freeze pumpkin pie? How do I do it?
Yes, you can freeze pumpkin pie for up to 2 months! To do so, first allow your pie to cool completely. Then, wrap it tightly in plastic wrap followed by a layer of aluminum foil to prevent freezer burn. When you’re ready to enjoy it, simply thaw the pie overnight in the fridge before serving. If you’re feeling indulgent, you can reheat slices in a preheated oven at 350°F for 10-15 minutes to warm it up.

What’s the best way to avoid cracks in my pumpkin pie?
To avoid cracking, it’s essential to remove your pie from the oven while the center is still slightly jiggly; the filling will continue to set as it cools. Also, be sure to whisk your filling until smooth to prevent lumps, and avoid overbaking, which can lead to an overly dry texture.

Can I make this pumpkin pie recipe gluten-free?
Very much! To make a gluten-free version of the pumpkin pie, you can simply use a gluten-free pie crust or a crumb crust made with gluten-free cookies. Additionally, you can verify that the cornstarch you use is certified gluten-free to ensure that every ingredient aligns with your dietary needs.

Is pumpkin pie safe for my pets?
While the filling itself contains no toxic ingredients, it’s essential to remember that dogs and cats have different dietary needs. Small amounts may be safe for your pets, but always consult with your veterinarian before sharing any new foods with them. Avoid giving them any sugar or spices, as those can be harmful to them.

Pumpkin Pie Recipe

Indulge in the Best Pumpkin Pie Recipe for Fall Bliss

Experience the delightful flavors of this Pumpkin Pie Recipe, perfect for any autumn gathering.
Prep Time 30 minutes
Cook Time 1 hour
Cooling Time 4 hours
Total Time 5 hours 30 minutes
Servings: 8 slices
Course: Dessert
Cuisine: American
Calories: 320

Ingredients
  

Filling
  • 1 can Pumpkin Puree Canned is preferred for sturdiness
  • 3/4 cup Granulated Sugar For a richer flavor, consider light brown sugar
  • 1/4 cup Brown Sugar Enhances sweetness with a hint of molasses
  • 1 tbsp Cinnamon
  • 1/2 tbsp Ginger
  • 1/2 tsp Nutmeg
  • 1/4 tsp Cloves
  • 1/4 tsp Black Pepper Adds surprising depth
  • 3 Eggs Should be well-beaten
  • 1 cup Heavy Cream Can substitute with milk for a lighter version
  • 2 tbsp Cornstarch Ensures smooth filling consistency
Crust
  • 2 1/2 cups All-Purpose Flour
  • 1 cup Butter Use unsalted, cold for flakiness
  • 1/2 cup Shortening Mixing yields best results
  • 1/2 tsp Salt Balances sweetness
  • 6-8 tbsp Ice Water Add until dough comes together
To Serve
  • 1 cup Whipped Cream Can be sweetened with powdered sugar
  • 1/2 cup Sugared Cranberries Adds visual appeal and tartness

Equipment

  • 9-inch Pie Dish
  • Mixing bowls
  • whisk
  • Rolling Pin
  • Parchment Paper

Method
 

Prepare the Pie Crust
  1. In a large bowl, mix all-purpose flour and a pinch of salt, then cut in cold butter and shortening until the mixture resembles coarse crumbs. Gradually add ice water, mixing until dough forms. Roll out the dough on a floured surface and fit it into a 9-inch pie dish, gently pressing the sides and trimming the excess.
Blind Bake Crust
  1. Preheat your oven to 375°F (190°C). Lining the crust with parchment, fill it with pie weights or dried beans, and place it in the preheated oven for about 10-15 minutes until set.
Mix Filling
  1. In a large mixing bowl, whisk together pumpkin puree, granulated sugar, brown sugar, and spices. Add in well-beaten eggs, heavy cream, and cornstarch, whisking until smooth.
Fill Brushed Crust
  1. Once the crust has cooled slightly, remove the parchment and weights. Pour the smooth pumpkin filling into the pre-baked crust.
Bake
  1. Bake for 55-60 minutes at 350°F (175°C) until filling is set around the edges but slightly wobbly in the center.
Cool & Serve
  1. Let the pie cool completely to room temperature for at least 4 hours. Serve with dollops of whipped cream and optional sugared cranberries.

Nutrition

Serving: 1sliceCalories: 320kcalCarbohydrates: 45gProtein: 4gFat: 15gSaturated Fat: 9gPolyunsaturated Fat: 1gMonounsaturated Fat: 5gCholesterol: 70mgSodium: 220mgPotassium: 350mgFiber: 2gSugar: 25gVitamin A: 180IUVitamin C: 2mgCalcium: 2mgIron: 8mg

Notes

Ensure the pie cools completely for perfect presentation and avoid cracks by removing it from the oven when slightly wobbly in the center.

Tried this recipe?

Let us know how it was!

Mummy Baked Brie: A Creepy-Creative Halloween Treat

As I sifted through my pantry for Halloween party ideas, my eyes fell on a wheel of brie just waiting to be transformed into something magical. Enter the Mummy Baked Brie—a fun and festive Halloween appetizer that’s not only a cheeky twist on your classic cheese board but also incredibly easy to make! Wrapped in a flaky puff pastry and oozing creamy goodness, this dish can be customized with your favorite jam, elevating your gathering with a delightful balance of sweet and savory flavors. Plus, it’s a great conversation starter and a guaranteed crowd-pleaser, making it perfect for any autumnal celebration. Are you ready to delve into this spooky yet scrumptious creation? Let’s get cooking!

Why Is Mummy Baked Brie a Must-Try?

Adorable Presentation: The mummy wrap creates an eye-catching centerpiece that will steal the show at any Halloween gathering.

Rich, Creamy Texture: That melty brie paired with a flakey puff pastry is a match made in heaven, offering a delightful contrast with every bite.

Customizable Flavors: Whether you prefer sour cherry, raspberry, or even fig jam, this recipe allows for personalization to suit every palate. Try pairing it with a side of sliced apples, like in my Garlic Butter Baked Chicken for a lovely balance of sweetness!

Quick and Easy: With minimal prep time, you can whip this delight up in less than 30 minutes, making it a lifesaver for last-minute entertaining.

Crowd Favorite: Its unique yet accessible flavors are sure to impress your guests, making it a hit at any Halloween celebration. Don’t forget to serve it alongside a charming spread, like a Comforting Charm Baked cheese board!

Mummy Baked Brie Ingredients

For the Brie
Brie Wheel – This main cheese melts beautifully; you can substitute with Camembert for a similar creamy texture.

For the Jam
Sour Cherry Jam – Its tartness complements the cheese perfectly; try raspberry or blackberry jam for a tasty twist.

For the Pastry
Puff Pastry – The flaky wrap creates the mummy effect; be sure it’s fully thawed before using.

For Egg Wash
Egg – An egg wash gives the pastry a gorgeous golden brown color; substitute with milk for a dairy-free option.

For Serving
Sliced Baguette (optional) – Adds a crunchy contrast; crackers or crostini work as great alternatives.
Sliced Apples/Pears (optional) – Fresh fruit balances the richness of the cheese; seasonal varieties are recommended.
Grapes and Blueberries (optional) – These garnishes enhance color and freshness, making your presentation pop!

Step‑by‑Step Instructions for Mummy Baked Brie

Step 1: Prep the Brie
Start by freezing the brie wheel for 15 minutes; this will help maintain its shape when baked. Once chilled, carefully slice off the top ½ inch to expose the creamy center, and spread your choice of sour cherry jam generously over the exposed surface. This savory-sweet layer will enhance the flavors in your Mummy Baked Brie.

Step 2: Roll Out the Puff Pastry
Next, take the thawed puff pastry and roll it out on a lightly floured surface into a rectangle measuring approximately 14 x 11 inches. Ensure the dough is smooth and even, as this will be the cozy blanket for your Mummy Baked Brie. Place the brie, jam-side up, right in the center of the pastry to get ready for wrapping.

Step 3: Wrap the Brie
With the brie in the center, slice the pastry into long strips, about 1 inch wide, down the sides of the dough. Begin folding these strips over the brie, alternating from side to side to create a criss-cross “mummy” effect. Use shorter pastry strips to create a head wrap at the top; this fun detail adds to the spooky look of your Mummy Baked Brie.

Step 4: Prepare to Bake
Transfer the wrapped brie onto a baking tray lined with parchment paper; this keeps everything from sticking and makes for easy cleanup. Brush the top and edges generously with egg wash to achieve that beautifully golden crust. This step not only adds color but also helps the pastry seal tightly around the cheese.

Step 5: Bake and Enjoy
Preheat your oven to 375°F (190°C) and bake the Mummy Baked Brie for 20-25 minutes. Keep an eye on it, looking for a rich golden brown color on the pastry, indicating it’s ready. Once baked, remove it from the oven and let it cool slightly to avoid any burns while serving.

Step 6: Serve with Flair
As a final touch, add edible eyes to your Mummy Baked Brie for a fun and festive appearance. Serve this delightful creation warm alongside sliced baguette and fresh fruits like apples or pears for a crisp contrast. Gather your loved ones, and prepare to share this cheerful Halloween treat!

Storage Tips for Mummy Baked Brie

Fridge: Store any leftover Mummy Baked Brie in an airtight container and refrigerate for up to 2 days. This will help keep it fresh while retaining its creamy texture.

Freezer: For longer storage, you can freeze the wrapped brie before baking. Just ensure it’s well wrapped in plastic, then aluminum foil, for up to 3 months. Thaw in the fridge before baking.

Reheating: To reheat, place the Mummy Baked Brie in a preheated oven at 350°F (175°C) for 10-15 minutes until warmed through and the pastry regains its crispiness.

Serving Suggestions: Enjoy your Mummy Baked Brie warm, alongside sliced baguette or fresh fruits for a delightful snack that’s sure to impress!

What to Serve with Mummy Baked Brie?

As you gather around the table for Halloween festivities, complement the delightful flavors of this spooky appetizer with enchanting sides and drinks that enhance your gathering’s magic.

  • Crispy Sliced Baguette: The crunchiness of toasted baguette slices offers the perfect contrast to the creamy brie, ideal for scooping up every gooey bite.
  • Fresh Apple Slices: Sweet and tart, these will balance the richness of the cheese while adding a refreshing crunch to your plate. Pairing apples with brie is a classic that never disappoints!
  • Savory Charcuterie Board: Enhance your spread with assorted cured meats, dried fruits, and nuts. The variety of flavors and textures will keep your guests coming back for more.
  • Roasted Pumpkin Soup: A warm bowl of this seasonal favorite can be the ultimate comforting companion, providing soothing warmth against the cool autumn weather.
  • Spiced Cranberry Sauce: Adding a side of tangy cranberry sauce can elevate the flavor profile, introducing a sweet and zesty element that complements the brie beautifully.
  • Festive Mulled Wine: For a cozy drink option, serve warm mulled wine infused with spices like cinnamon and cloves, wrapping your gathering in inviting autumn aromas.
  • Caramelized Pear Salad: This salad, with its lightly sweetened pears and nutty dressing, creates a delicious contrast that harmonizes with the creamy, savory brie and adds an elegant touch to your buffet.

Mummy Baked Brie Variations

Feel free to make this delightful recipe your own by incorporating these tasty twists and swaps!

  • Cheese Swap: Try using goat cheese for a tangy flavor, or cheddar for a sharper taste. Each cheese brings its own character to the dish.

  • Jam Alternatives: Switch sour cherry jam for fig spread for a uniquely sweet depth, or opt for a spiced apple jam for a cozy autumn vibe.

  • Herb Infusion: Mix in some fresh herbs like rosemary or thyme with the jam for an aromatic enhancement. This addition creates a fragrant layer of flavor that will surprise your palate.

  • Additional Toppings: Sprinkle with crushed pecans or walnuts before wrapping for a delightful crunch. The texture contrast between the creamy cheese and nuts is simply divine!

  • Heat Factor: Add a drizzle of hot honey or sprinkle red pepper flakes on top before baking for a spicy kick. This twist will impress any heat lover in your crowd.

  • Serving Accents: Include crackers or crostini for added variety; they provide different textures to accompany your Mummy Baked Brie. You can even serve it with a side of seasonal fruits that complement the cheese and jam.

  • Make It Savory: Instead of traditional jams, use a savory onion chutney for a gourmet touch. This creates a sophisticated flavor profile perfect for a more elegant gathering.

Feel inspired? Customize your Mummy Baked Brie with these variations and serve it alongside ideas like a Baked Salmon with Honey Mustard Sauce or a collection of tempting cheeses on a Comforting Charm Baked cheese board. Let your creativity shine this Halloween!

Expert Tips for Mummy Baked Brie

  • Chilling is Key: To avoid a runaway brie, freeze the cheese for at least 15 minutes so it keeps its shape when baked.

  • Perfect Pastry Cuts: Use a sharp knife for slicing the puff pastry; dull blades can tear the dough and ruin your mummy’s appearance.

  • Jam Variations: Don’t hesitate to try different jams! Experimenting with toppings like raspberry or fig can change the flavor profile and make your Mummy Baked Brie uniquely yours.

  • Baking Time Check: Monitor the pastry closely during the last 5 minutes; once it turns a deep golden brown, it’s time to take it out to prevent overcooking.

  • Join the Fun: Get your little ones involved in adding the edible eyes and crafting a spooky atmosphere; it’s a fantastic way to make cooking a family affair.

Make Ahead Options

These Mummy Baked Brie are perfect for meal prep enthusiasts looking to save time on busy days! You can assemble the entire wrapped brie up to 24 hours in advance, simply covering it tightly with plastic wrap to prevent drying out. If you’re planning to prep further ahead, consider freezing the wrapped brie instead; it can be stored for up to 3 months—just be sure to thaw it in the refrigerator overnight before baking. When you’re ready to serve, just brush it with the egg wash and bake it at 375°F (190°C) for 20-25 minutes until golden brown. This way, you’ll ensure the flavors remain just as delicious and your guests will be wowed by the wonderful presentation with minimal effort!

Mummy Baked Brie Recipe FAQs

What type of brie should I use for Mummy Baked Brie?
Using a standard brie wheel is ideal for this recipe because it melts beautifully, creating that creamy, gooey center we love. If you’re looking for a similar but slightly different flavor profile, you can substitute it with Camembert, which offers a similar texture and an earthy taste.

How should I store leftover Mummy Baked Brie?
You can keep any leftovers in an airtight container in the fridge for up to 2 days. Just make sure to store it properly to maintain its creamy texture and delicious flavor. If you have some left over, it’s best enjoyed warm, so you might want to reheat it as instructed below for the best experience.

Can I freeze Mummy Baked Brie?
Absolutely! You can freeze the wrapped brie before baking. First, wrap it tightly in plastic wrap, followed by aluminum foil to prevent freezer burn. It can be stored this way for up to 3 months. When you’re ready to enjoy, simply thaw it in the fridge overnight before baking it as per the original instructions.

What should I do if my pastry looks too dark before the cheese is melted?
If your pastry is getting too dark, but the cheese isn’t melting yet, you can cover the top loosely with aluminum foil to prevent further browning. Lower the oven temperature slightly to around 350°F (175°C) and continue baking until the cheese is melted and ooey-gooey. This way, you’ll have a gorgeous pastry without overcooking it!

Are there any dietary concerns I should be aware of with this recipe?
Good question! The Mummy Baked Brie contains dairy, so it’s not suitable for those with lactose intolerance or a dairy allergy. If you need a non-dairy option, consider using a dairy-free cheese designed for melting, and use milk instead of egg for the wash. Always check labels on pre-made ingredients like puff pastry for any allergens.

Can I use different jams for a different flavor profile?
Absolutely! This recipe is perfect for experimenting. You can try raspberry or blackberry jam for a sweeter twist, or even a fig spread for a touch of sophistication. Just remember that the sweetness of the jam should complement the rich flavor of the brie, so feel free to get creative and find what works best for your taste buds!

Mummy Baked Brie

Mummy Baked Brie: A Creepy-Creative Halloween Treat

Mummy Baked Brie is a fun and festive Halloween appetizer that combines creamy brie with flaky pastry, customizable with various jams for a delightful experience.
Prep Time 15 minutes
Cook Time 25 minutes
Total Time 40 minutes
Servings: 8 servings
Course: Appetizers
Cuisine: Halloween
Calories: 350

Ingredients
  

For the Brie
  • 1 wheel Brie Cheese Can substitute with Camembert.
For the Jam
  • 1 jar Sour Cherry Jam Other options: raspberry or blackberry jam.
For the Pastry
  • 1 sheet Puff Pastry Ensure it's fully thawed before using.
For the Egg Wash
  • 1 large Egg Substitute with milk for a dairy-free option.
For Serving
  • 1 loaf Sliced Baguette Optional; crackers or crostini also work.
  • 2 cups Sliced Apples/Pears Seasonal varieties recommended.
  • 1 cup Grapes Optional, for garnishing.
  • 1 cup Blueberries Optional, for garnishing.

Equipment

  • Baking Tray
  • Parchment Paper
  • Sharp knife

Method
 

Step-by-Step Instructions
  1. Start by freezing the brie wheel for 15 minutes to help maintain its shape when baked. Slice off the top ½ inch to expose the creamy center, and spread sour cherry jam over it.
  2. Roll out the thawed puff pastry into a rectangle measuring approximately 14 x 11 inches on a lightly floured surface.
  3. Slice the pastry into long strips, about 1 inch wide, on each side, and fold these strips over the brie to create a mummy effect.
  4. Transfer the wrapped brie onto a baking tray lined with parchment paper and brush with egg wash.
  5. Preheat the oven to 375°F (190°C) and bake for 20-25 minutes until golden brown.
  6. Add edible eyes to the Mummy Baked Brie and serve warm alongside sliced baguette and fresh fruits.

Nutrition

Serving: 1servingCalories: 350kcalCarbohydrates: 30gProtein: 8gFat: 24gSaturated Fat: 12gPolyunsaturated Fat: 1gMonounsaturated Fat: 10gCholesterol: 80mgSodium: 350mgPotassium: 200mgFiber: 1gSugar: 3gVitamin A: 500IUVitamin C: 2mgCalcium: 200mgIron: 1mg

Notes

Chilling the brie before baking helps maintain its shape. Experiment with different jams for unique flavor profiles.

Tried this recipe?

Let us know how it was!

Gooey Coffee Caramel Cake: Indulge Your Sweet Tooth Today

The aroma of freshly brewed coffee wafted through my kitchen, a comforting embrace that promised to transform an ordinary afternoon into something special. That’s when the idea for my Gooey Coffee Caramel Cake sparked—an indulgent dessert that combines rich coffee flavors with luscious caramel for a truly unforgettable treat. Perfect for those moments when you crave a unique pick-me-up, this delightful cake not only satisfies your sweet tooth but also impresses guests at any gathering. It’s a fun and quick way to create a comforting dessert that pairs beautifully with a scoop of vanilla ice cream or a dollop of whipped cream. Isn’t it time to elevate your baking game with this scrumptious twist on a classic coffee treat?

Why is this cake a must-try?

Indulgent Pleasure: Every bite of this Gooey Coffee Caramel Cake is filled with a delightful mix of rich coffee and sweet caramel that creates an indulgent treat beyond ordinary desserts.

Easy to Create: With simple, everyday ingredients and straightforward instructions, even beginner bakers can craft this delicious cake without stress.

Versatile Options: Want to mix things up? You can make this cake your own by adding nuts for crunch or using espresso for a bolder coffee flavor.

Perfect for Sharing: This cake is the ideal centerpiece for any gathering. Serve it warm and watch your friends and family dive in, especially when paired with a scoop of ice cream or a dollop of whipped cream.

Quick to Make: In just over an hour, you can go from oven to table, making it a quick and satisfying solution for any sweet craving!

Gooey Coffee Caramel Cake Ingredients

Unlock the secret to this delicious dessert!

For the Cake

  • Flour – Essential for providing structure; for a gluten-free version, use gluten-free flour.
  • Sugar – Adds sweetness and moisture; brown sugar enhances the caramel flavor.
  • Baking Powder & Baking Soda – These are critical leavening agents; ensure they’re fresh for the best rise.
  • Salt – Enhances and balances flavor; using kosher salt results in a milder taste.
  • Butter (softened) – Contributes richness and moisture; margarine can work as a dairy-free substitute.
  • Egg – Acts as a binding agent; aquafaba is a great vegan alternative.
  • Brewed Coffee – The flavor backbone of this cake; espresso can be used for a bolder taste.
  • Buttermilk – Adds moisture and a touch of tanginess; you can substitute it with Greek yogurt or milk with vinegar.
  • Vanilla Extract – Enhances flavor; opt for pure vanilla extract for superior quality.

For the Caramel

  • Brown Sugar – Provides sweetness and depth; in a pinch, white sugar can be used.
  • Heavy Cream – Delivers creaminess for the caramel sauce; feel free to substitute with coconut cream for a dairy-free option.

For the Coffee Drizzle

  • Brewed Coffee – Infuses the drizzle with flavor; use strong brewed coffee for the best impact.
  • Powdered Sugar – Adds sweetness and allows for easy mixing; there are no real substitutes for this.

Topping Suggestions

  • Whipped Cream – A dollop of whipped cream on top makes this indulgent dessert even more delightful.
  • Vanilla Ice Cream – A scoop of ice cream elevates the experience and creates the perfect sweet pairing!

Dive into this Gooey Coffee Caramel Cake and satisfy your cravings today!

Step‑by‑Step Instructions for Gooey Coffee Caramel Cake

Step 1: Preheat and Prepare
Begin by preheating your oven to 350°F (175°C). While the oven warms up, grease and flour a 9×9-inch baking pan, ensuring that the surfaces are adequately coated to prevent sticking. This preparation step is crucial for achieving a beautiful, easy-to-remove Gooey Coffee Caramel Cake.

Step 2: Make the Cake Batter
In a large mixing bowl, whisk together the flour, sugar, baking powder, baking soda, and salt until combined. In a separate bowl, beat the softened butter and egg together until fluffy, then stir in the brewed coffee, buttermilk, and vanilla extract. Combine the dry ingredients with the wet mixture and mix until smooth, creating a rich batter filled with coffee flavor.

Step 3: Bake the Cake
Pour the prepared batter into your greased baking pan, spreading it evenly with a spatula. Place the pan in the preheated oven and bake for 25–30 minutes, or until a toothpick inserted in the center comes out clean. Once baked, allow the cake to cool in the pan for 10 minutes before transferring it to a wire rack to cool completely.

Step 4: Prepare the Caramel Sauce
For the luscious caramel sauce, combine brown sugar, butter, and heavy cream in a medium saucepan. Stir the mixture over medium heat until it begins to simmer, about 3–4 minutes. Watch closely as it thickens to the perfect consistency, then mix in the vanilla extract and a pinch of salt. Set the caramel aside to cool slightly before using.

Step 5: Make the Coffee Drizzle
In a bowl, mix together the brewed coffee and powdered sugar until you achieve a smooth drizzle consistency. The glaze should be pourable but thick enough to create beautiful, contrasting patterns when drizzled over the cake. Set this aside while you prepare to assemble the dessert.

Step 6: Assemble the Cake
Once the cooled cake is ready, use a skewer or fork to poke holes gently across the surface—this allows the delicious caramel sauce to seep in. Pour the warm caramel sauce evenly over the cake, ensuring it fills the holes, creating a gooey and indulgent experience, essential for the Gooey Coffee Caramel Cake.

Step 7: Add the Coffee Drizzle
After the caramel has soaked in, carefully drizzle the prepared coffee mixture over the top of the cake, creating decorative lines that enhance visual appeal. This layer adds a delightful finish, introducing even more coffee flavor to your indulgent dessert.

Step 8: Serve & Enjoy
Finally, slice the cake into generous pieces and serve it warm or at room temperature. For an even more decadent treat, top each slice with a dollop of whipped cream or a scoop of vanilla ice cream. Now, gather your loved ones and enjoy the sumptuous layers of your Gooey Coffee Caramel Cake!

Make Ahead Options

These Gooey Coffee Caramel Cake preparations are perfect for busy home cooks looking to save time during the week! You can prepare the cake itself up to 24 hours in advance and store it, tightly wrapped, at room temperature. Additionally, the caramel sauce can be made up to 3 days ahead; simply refrigerate it in an airtight container until you’re ready to use. To finish the cake, reheat the caramel gently before pouring it over the cake to ensure it remains gooey and delicious. This way, you not only have a delectable dessert ready to go but also save precious time on busy days, making indulgence easy and enjoyable!

What to Serve with Gooey Coffee Caramel Cake?

Create the perfect cozy gathering around this delightful dessert that beautifully captures the essence of rich coffee and sweet caramel.

  • Creamy Vanilla Ice Cream: The cool creaminess perfectly balances the warm, gooey cake, enhancing the overall indulgence.
  • Whipped Cream Delight: A fluffy dollop adds lightness, making every bite of the cake even more decadent and airy.
  • Caramel Drizzle: Elevate the cake with extra caramel on top; it’s an irresistible enhancement that highlights the cake’s flavors.
  • Fresh Berries: Juicy strawberries or tart raspberries introduce a refreshing contrast, cutting through the sweetness while adding color.
  • Espresso or Coffee: Brew a cup of strong coffee or espresso to intensify the flavors already present in the cake—it’s a coffee lover’s dream!
  • Chocolate Ganache: For the chocolate enthusiasts, a warm ganache drizzled on top creates a luscious layer of chocolatey goodness.
  • Nutty Crunch: Sprinkle chopped walnuts or pecans on top for an added layer of texture that complements the gooey layers of the cake.
  • Coconut Whipped Cream: For a lighter, tropical twist, use coconut whipped cream, adding a subtle flavor pairing that your guests will adore.
  • Sweet Liqueurs: Pair with a splash of coffee liqueur for an adult dessert experience that enhances each bite, perfect for after-dinner enjoyment.

How to Store and Freeze Gooey Coffee Caramel Cake

  • Room Temperature: Store the cake in an airtight container for up to 3 days to maintain its moistness and flavor.

  • Fridge: If you’re keeping it longer, place it in the refrigerator for up to a week. Be sure to use a covered container to prevent drying out.

  • Freezer: For longer storage, you can freeze the cake for up to 3 months. Wrap it tightly in plastic wrap, then in aluminum foil, to prevent freezer burn.

  • Reheating: Thaw the frozen cake in the fridge overnight, and reheat individual slices gently in the microwave for about 10-15 seconds for a warm, gooey experience.

Expert Tips for Gooey Coffee Caramel Cake

  • Room Temperature Ingredients: Ensure all ingredients are at room temperature to help them blend better, creating a smoother batter for your Gooey Coffee Caramel Cake.

  • Careful Poking: When poking holes in the cake, use a skewer or fork gently to avoid tearing the cake, ensuring the caramel soaks in properly.

  • Watch the Caramel: Keep a close eye on your caramel as it cooks; it should bubble gently and thicken without turning too dark to prevent bitterness.

  • Cool Properly: Allow your cake to cool completely on a wire rack for the best texture before adding the caramel sauce; this helps maintain the cake’s moisture.

  • Adapt the Flavor: Feel free to substitute brewed coffee with espresso for a more intense coffee flavor and consider adding nuts for a delightful crunch.

Gooey Coffee Caramel Cake Variations

Feel free to personalize your indulgent treat with these delightful twists for your Gooey Coffee Caramel Cake!

  • Espresso Boost: Swap brewed coffee for espresso for an even bolder coffee flavor that coffee lovers will adore. The richness will elevate each bite.

  • Nutty Texture: Incorporate chopped walnuts or pecans into the batter for added crunch and an earthy flavor. These little gems introduce a heartiness that complements the sweetness perfectly.

  • Chocolate Delight: Mix in chocolate chips for a luscious chocolate-coffee version. The gooey chocolate melts beautifully alongside the caramel and coffee, creating a marvelous harmony.

  • Dairy-Free Option: Replace the heavy cream with coconut cream in the caramel sauce. This adds a tropical hint and makes your cake dairy-free without sacrificing richness.

  • Decadent Frosting: Top your cake with a rich chocolate ganache for an extra layer of indulgence. The combination of coffee, caramel, and chocolate takes this dessert to a whole new level!

  • Spiced Variation: Enhance the flavor with a pinch of cinnamon or nutmeg in the batter. These warm spices weave their charm through the cake, adding depth to each slice.

  • Fruit Flare: Blend in seasonal fruits like raspberries or sliced bananas for a burst of freshness. The acidity of the fruit balances the rich flavors beautifully.

  • Coffee Liqueur Drizzle: Add a splash of coffee liqueur to the caramel for an adult twist. The distinct flavor will give your cake a sophisticated edge, perfect for gatherings!

Feel inspired? Try these variations and make your Gooey Coffee Caramel Cake uniquely yours! If you’re interested in other scrumptious dessert ideas, consider checking out my delightful Honeybun Carrot Cake or a refreshing Strawberry Cheesecake Dump. Your sweet adventures await!

Gooey Coffee Caramel Cake Recipe FAQs

What type of coffee works best for this cake?
Absolutely! For a robust flavor, I recommend using freshly brewed coffee. If you’re looking for a more intense kick, using espresso is the way to go. It deepens the coffee notes in the cake, making every bite richer and more indulgent.

How do I store leftover Gooey Coffee Caramel Cake?
You can store the cake in an airtight container at room temperature for up to 3 days. If you want to keep it longer, refrigerate it for up to a week. Just ensure it’s covered to prevent it from drying out. It’s perfect for enjoying a slice later!

Can I freeze the Gooey Coffee Caramel Cake? If so, how?
Certainly! To freeze, wrap the cooled cake tightly in plastic wrap and then in aluminum foil to prevent freezer burn. It can be frozen for up to 3 months. When you’re ready to enjoy, simply thaw the cake in the refrigerator overnight, then reheat individual slices in the microwave for about 10-15 seconds for that delightful gooeyness!

What should I do if my cake doesn’t rise properly?
Very often, this happens due to old leavening agents. Make sure your baking powder and baking soda are fresh for the best results. Also, be careful not to over-mix your batter, as this can cause the cake to become dense. Remember, a light hand leads to a fluffy cake!

Is there a way to make this cake gluten-free?
Of course! You can easily substitute regular flour with a gluten-free flour blend for a delicious gluten-free version of the Gooey Coffee Caramel Cake. Just ensure the blend you choose contains xanthan gum or another binding agent for the best texture.

Can I give this cake to my pets?
I advise against sharing this cake with pets, as it contains ingredients like chocolate (if you decide to add chocolate chips) and sugar, which can be harmful to them. It’s always best to stick to treats specifically made for your furry friends!

Gooey Coffee Caramel Cake

Gooey Coffee Caramel Cake: Indulge Your Sweet Tooth Today

This Gooey Coffee Caramel Cake combines rich coffee flavors with luscious caramel for an unforgettable dessert experience.
Prep Time 15 minutes
Cook Time 30 minutes
Cooling Time 10 minutes
Total Time 55 minutes
Servings: 12 slices
Course: Dessert
Cuisine: American
Calories: 350

Ingredients
  

For the Cake
  • 1 cup Flour Use gluten-free flour for a gluten-free version.
  • 1 cup Sugar Brown sugar enhances the caramel flavor.
  • 1 tbsp Baking Powder Ensure it's fresh for the best rise.
  • 1 tsp Baking Soda Ensure it's fresh for the best rise.
  • 1 tsp Salt Using kosher salt results in a milder taste.
  • 1/2 cup Butter (softened) Margarine can work as a dairy-free substitute.
  • 1 large Egg Aquafaba is a great vegan alternative.
  • 1 cup Brewed Coffee Espresso can be used for a bolder taste.
  • 1 cup Buttermilk You can substitute with Greek yogurt or milk with vinegar.
  • 1 tbsp Vanilla Extract Opt for pure vanilla extract for superior quality.
For the Caramel
  • 1 cup Brown Sugar In a pinch, white sugar can be used.
  • 1/2 cup Heavy Cream Substitute with coconut cream for a dairy-free option.
For the Coffee Drizzle
  • 1/2 cup Brewed Coffee Use strong brewed coffee for the best impact.
  • 1 cup Powdered Sugar There are no real substitutes for this.
Topping Suggestions
  • 1 cup Whipped Cream A dollop of whipped cream enhances the dessert.
  • 1 cup Vanilla Ice Cream A scoop of ice cream creates the perfect pairing!

Equipment

  • 9x9-inch baking pan
  • Mixing bowls
  • whisk
  • spatula
  • Saucepan

Method
 

Step-by-Step Instructions
  1. Preheat your oven to 350°F (175°C). Grease and flour a 9×9-inch baking pan.
  2. In a large mixing bowl, whisk together the flour, sugar, baking powder, baking soda, and salt until combined.
  3. In a separate bowl, beat the softened butter and egg together until fluffy, then stir in the brewed coffee, buttermilk, and vanilla extract.
  4. Combine the dry ingredients with the wet mixture and mix until smooth.
  5. Pour the prepared batter into your greased baking pan and bake for 25–30 minutes.
  6. Allow the cake to cool in the pan for 10 minutes before transferring it to a wire rack.
  7. For the caramel sauce, combine brown sugar, butter, and heavy cream in a saucepan over medium heat.
  8. Stir until simmering and thickened, then mix in vanilla extract and a pinch of salt.
  9. Mix brewed coffee and powdered sugar until smooth for the coffee drizzle.
  10. Poke holes in the cooled cake and pour the warm caramel sauce evenly over it.
  11. Drizzle the coffee mixture over the top of the cake.
  12. Slice the cake and serve it warm or at room temperature, topped with whipped cream or ice cream.

Nutrition

Serving: 1sliceCalories: 350kcalCarbohydrates: 45gProtein: 3gFat: 18gSaturated Fat: 10gPolyunsaturated Fat: 2gMonounsaturated Fat: 5gCholesterol: 55mgSodium: 180mgPotassium: 220mgFiber: 1gSugar: 30gVitamin A: 500IUCalcium: 50mgIron: 1mg

Notes

Ensure all ingredients are at room temperature for smoother batter. Watch caramel closely to prevent bitterness.

Tried this recipe?

Let us know how it was!

Stay Connected

Get recipes via email: