Get my cookbooks

Warm Pumpkin Chai Cinnamon Rolls for Cozy Autumn Mornings

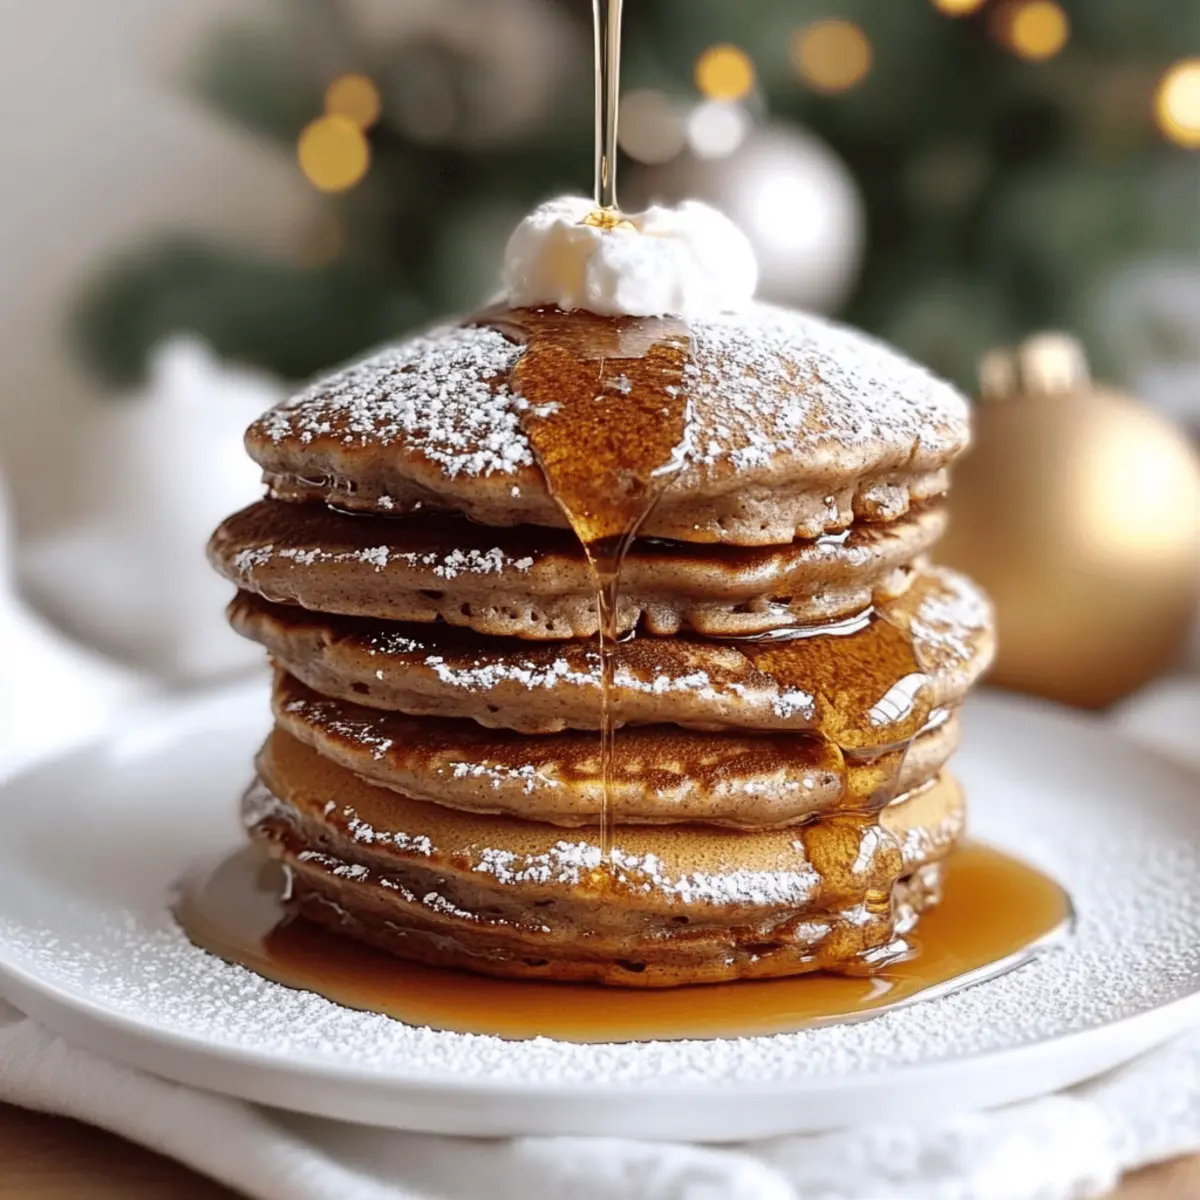
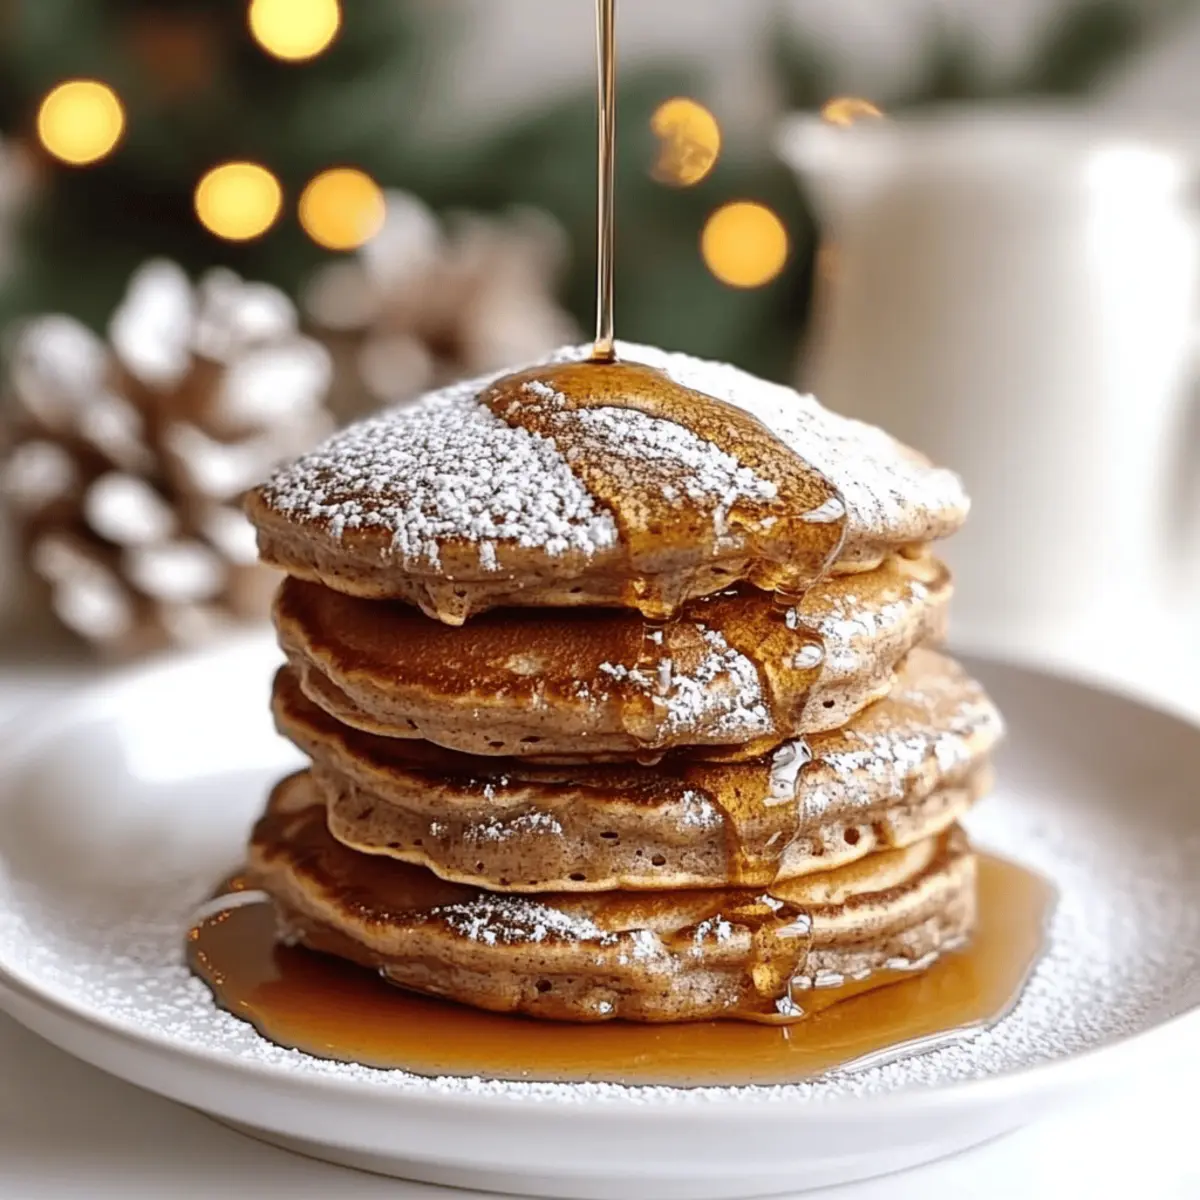
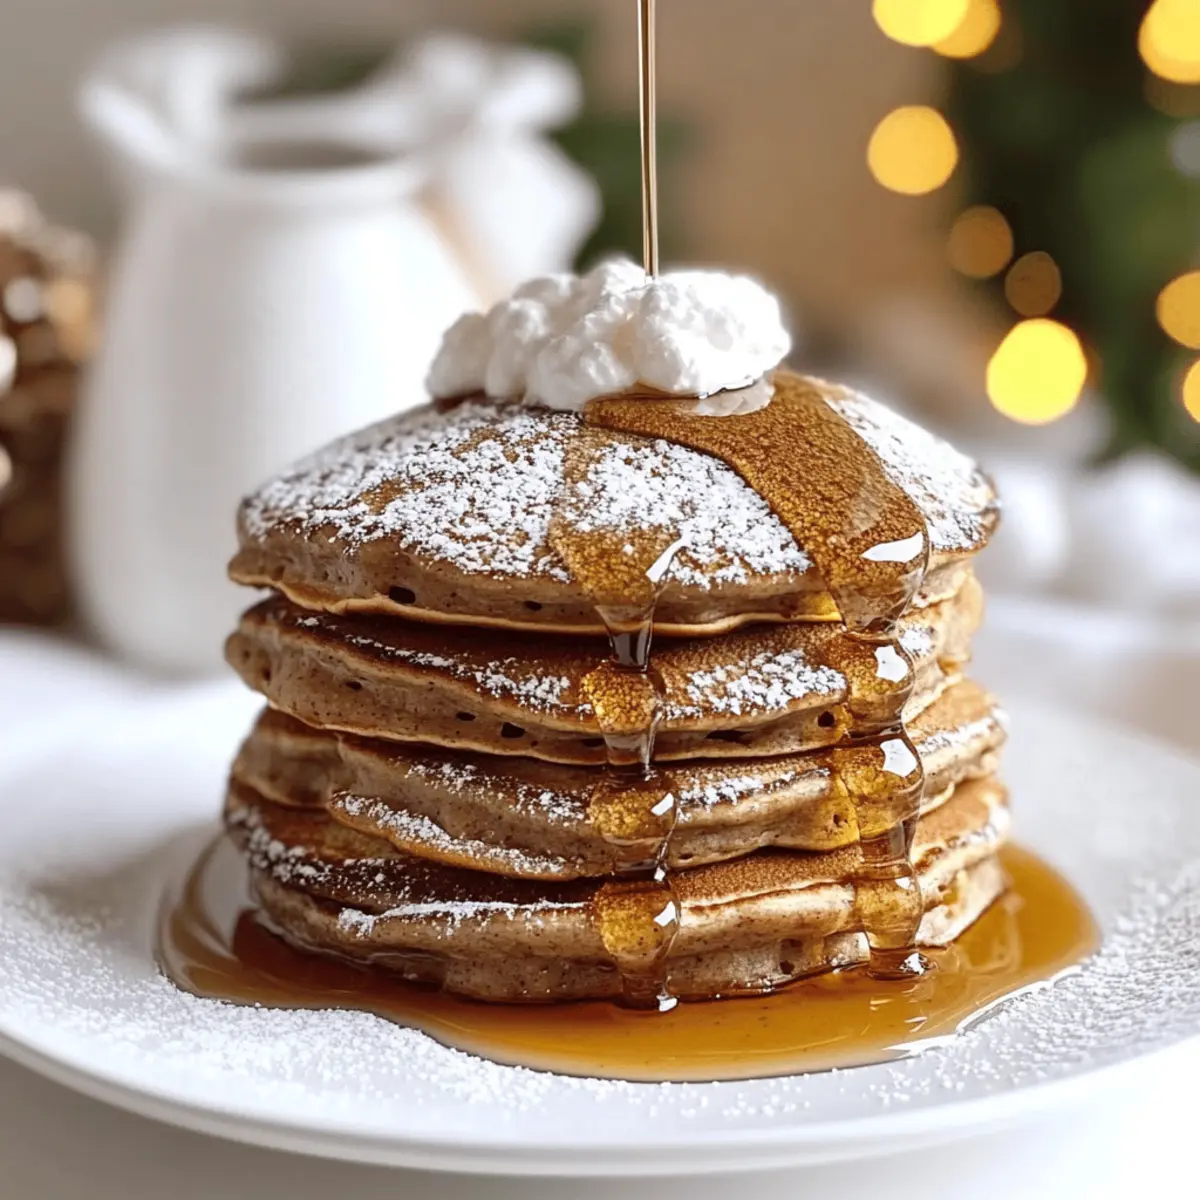
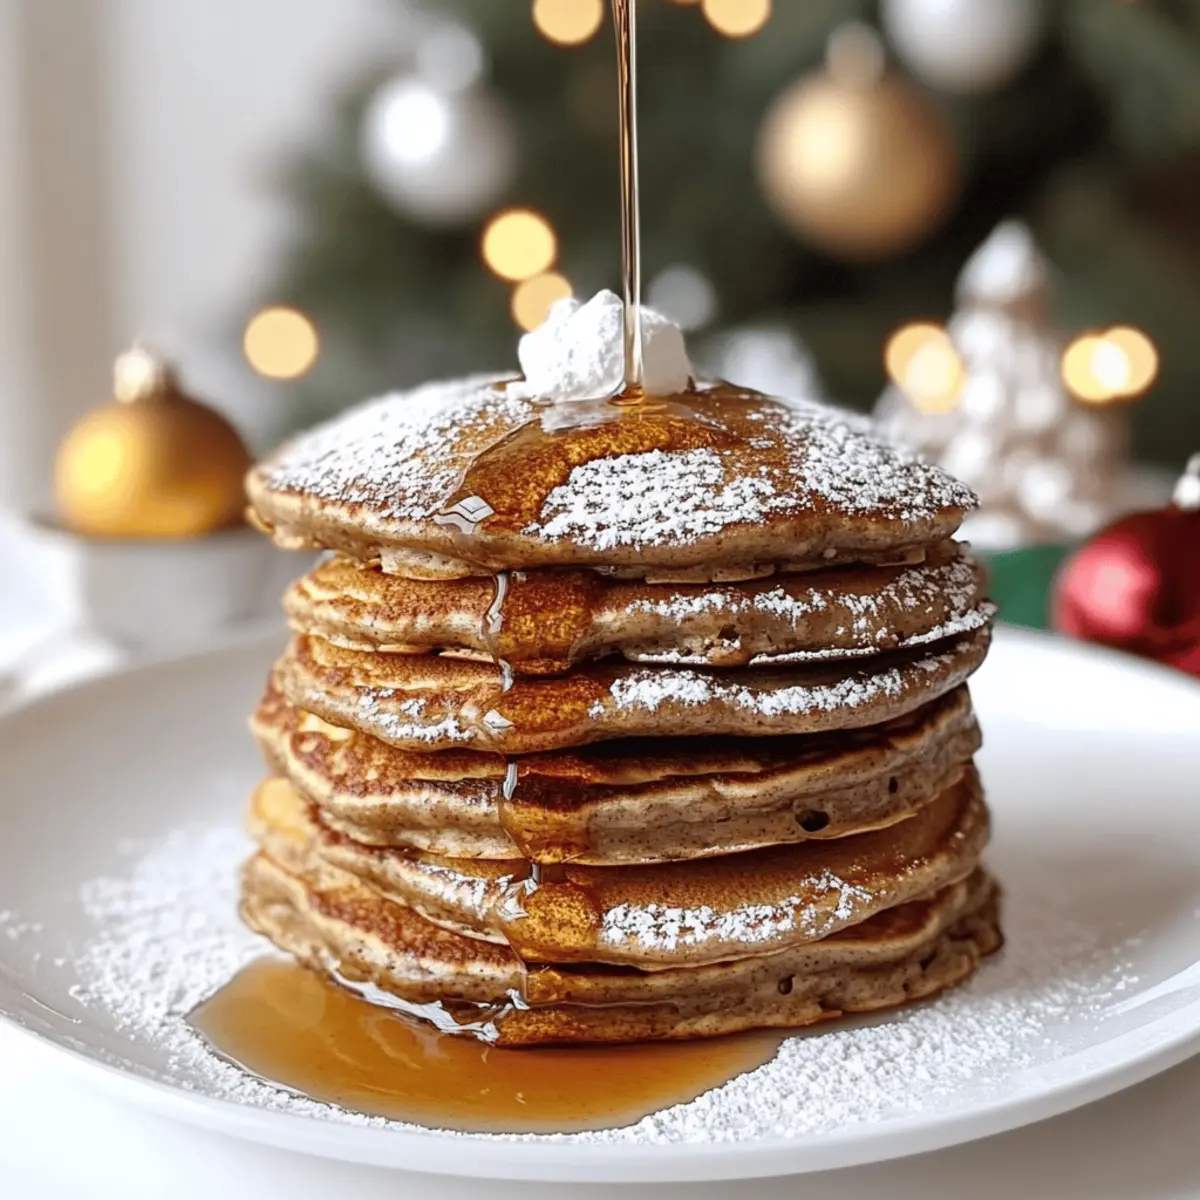
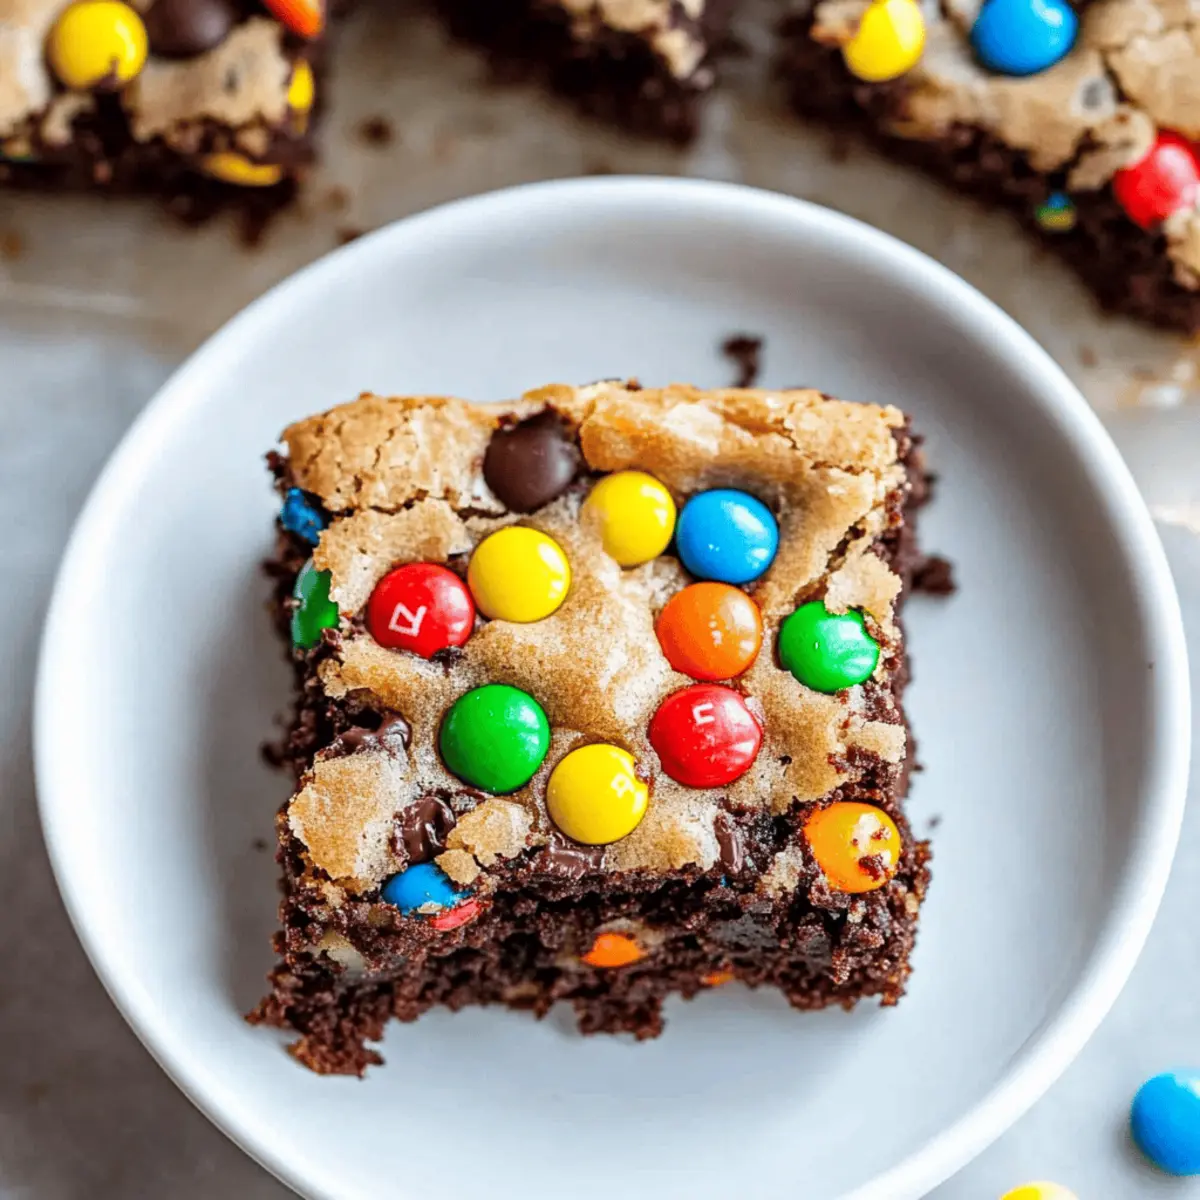
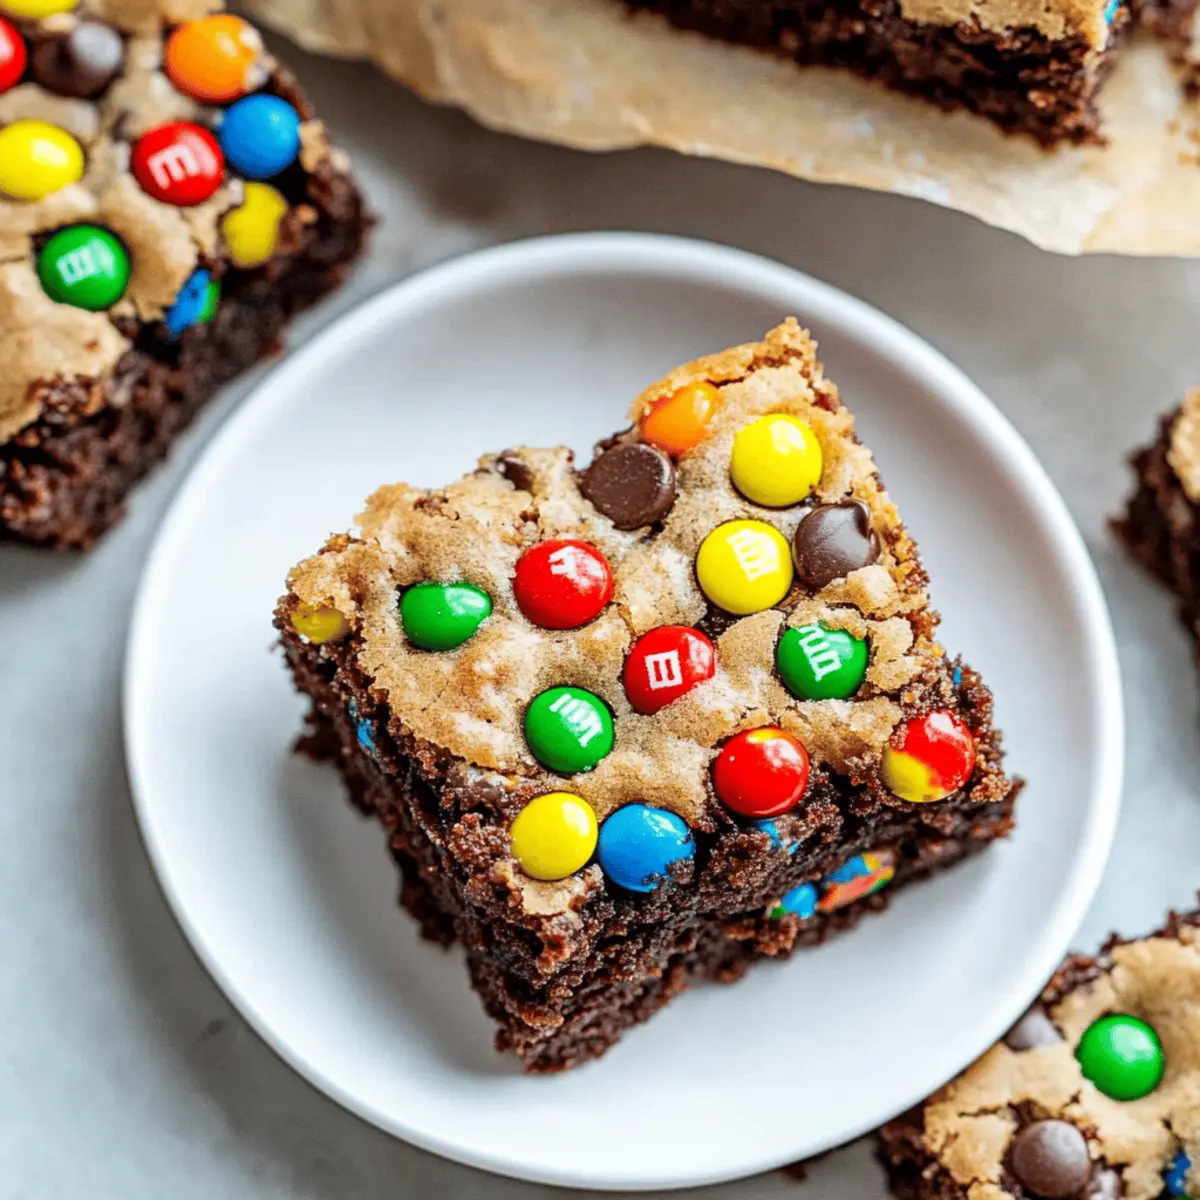
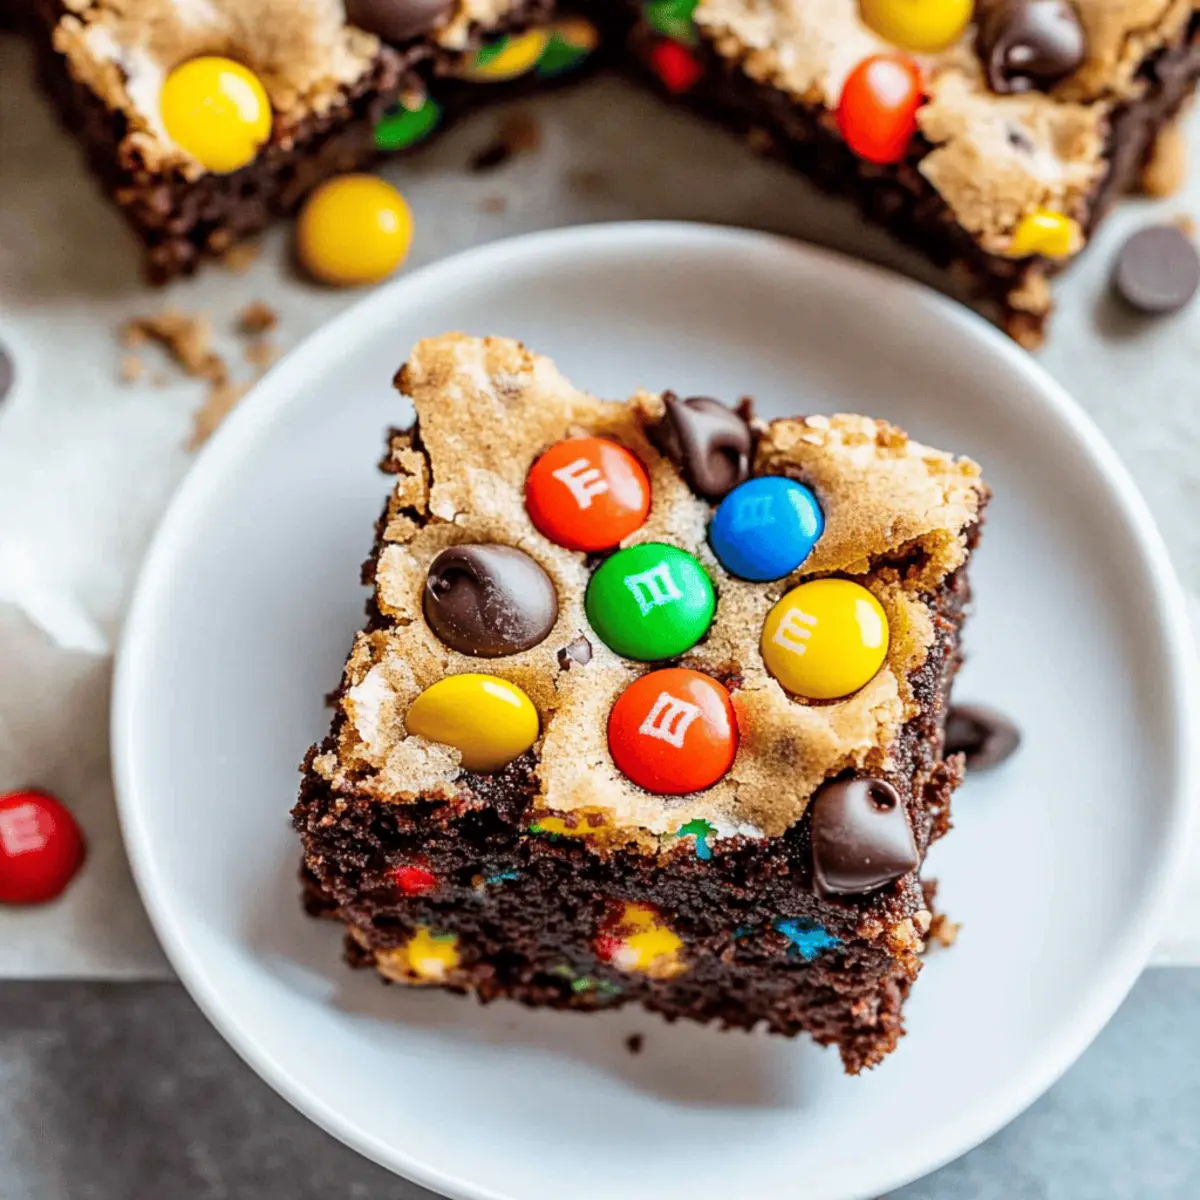
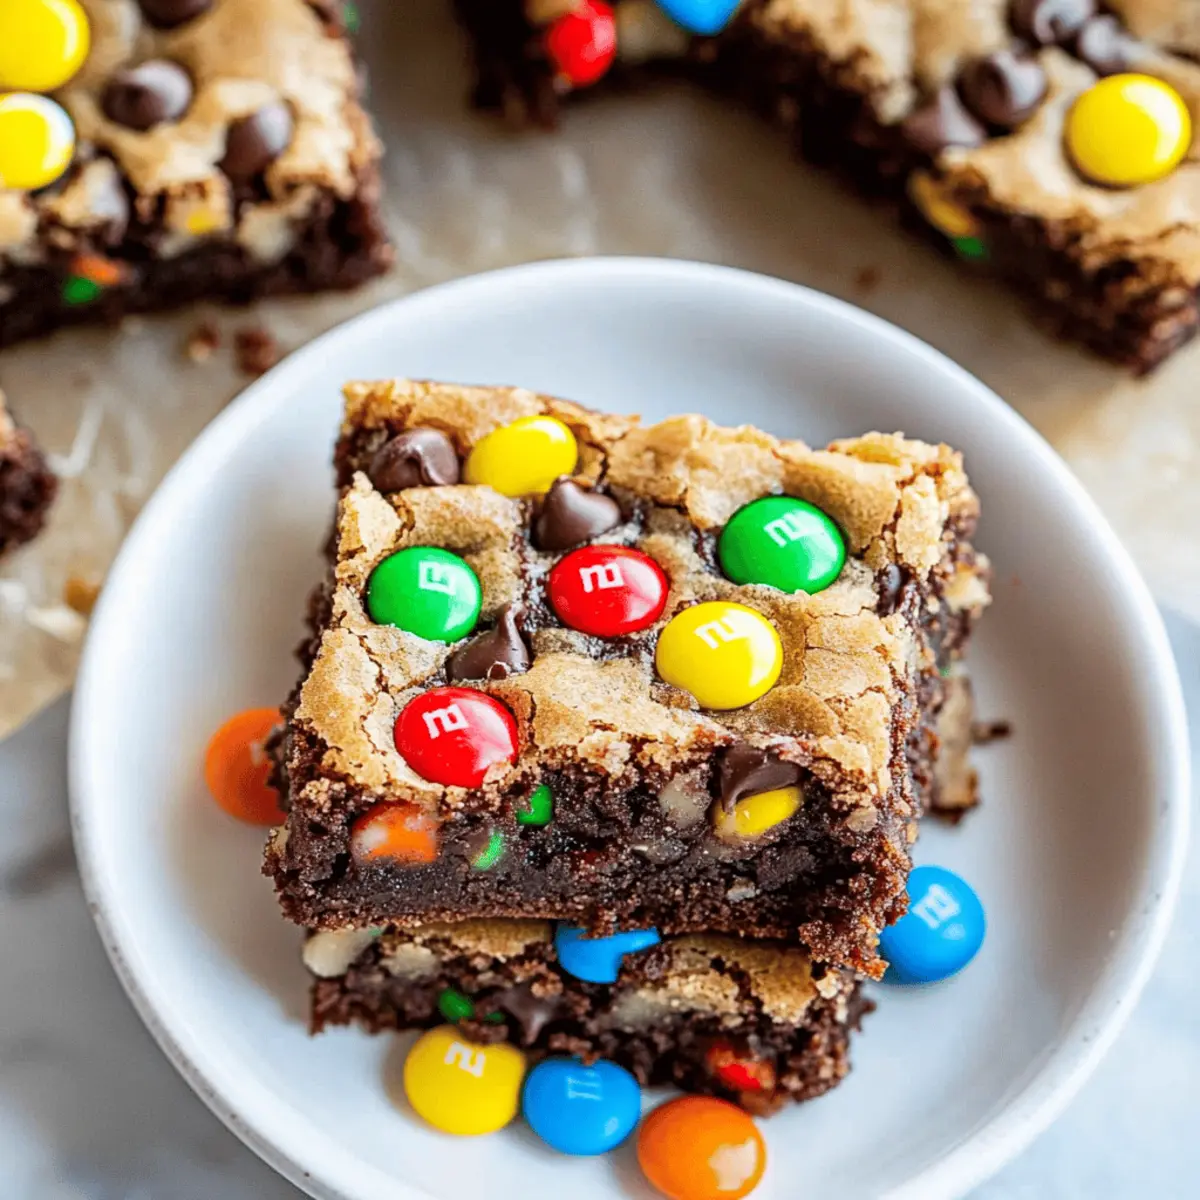
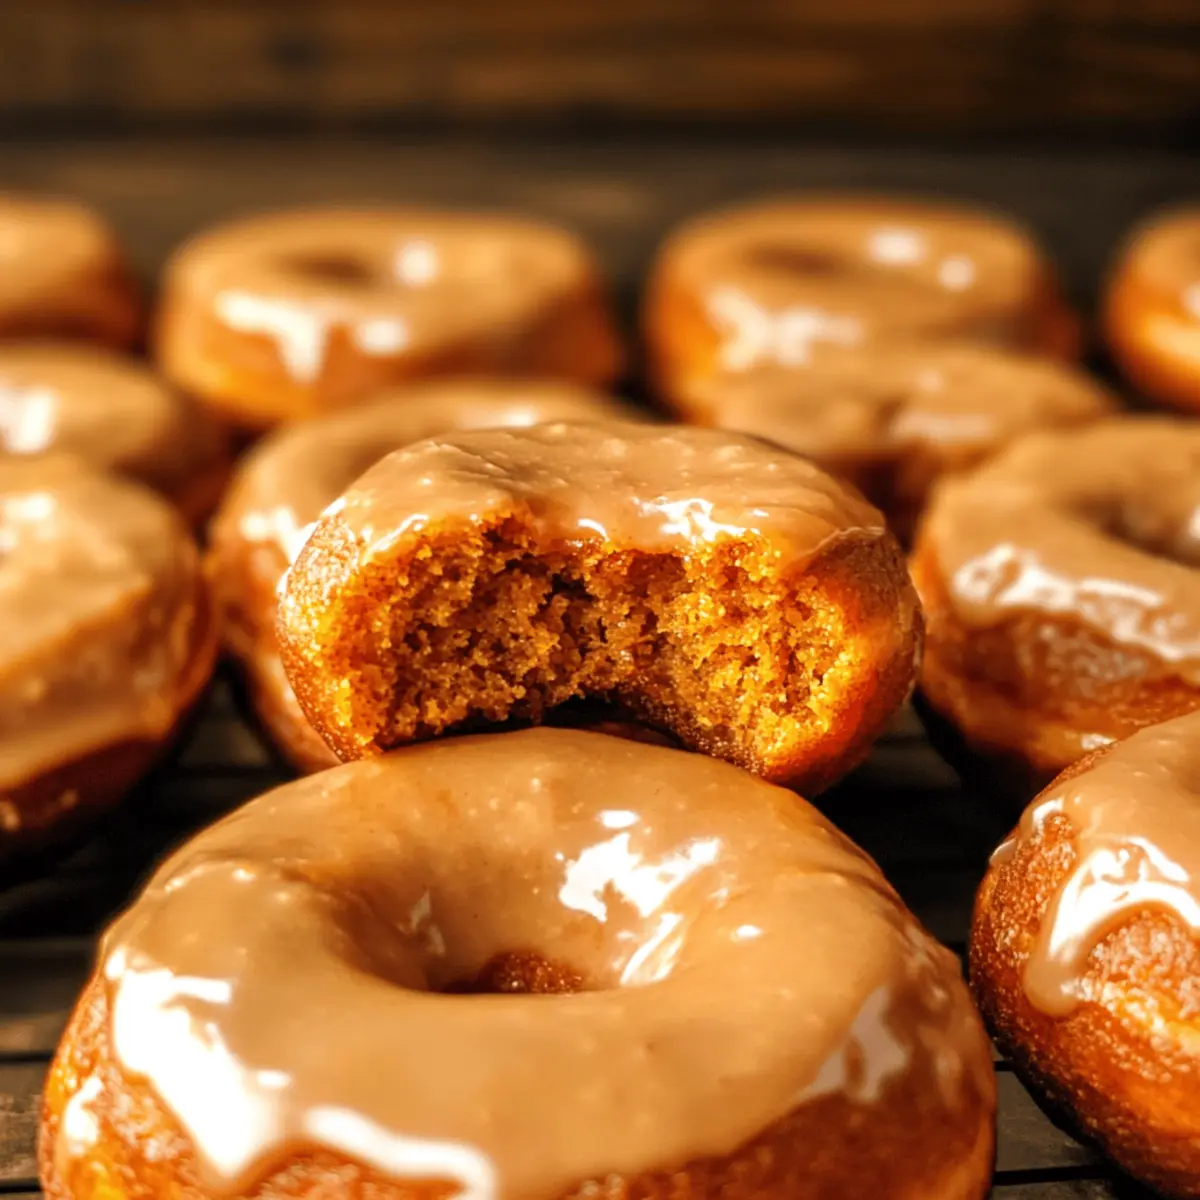
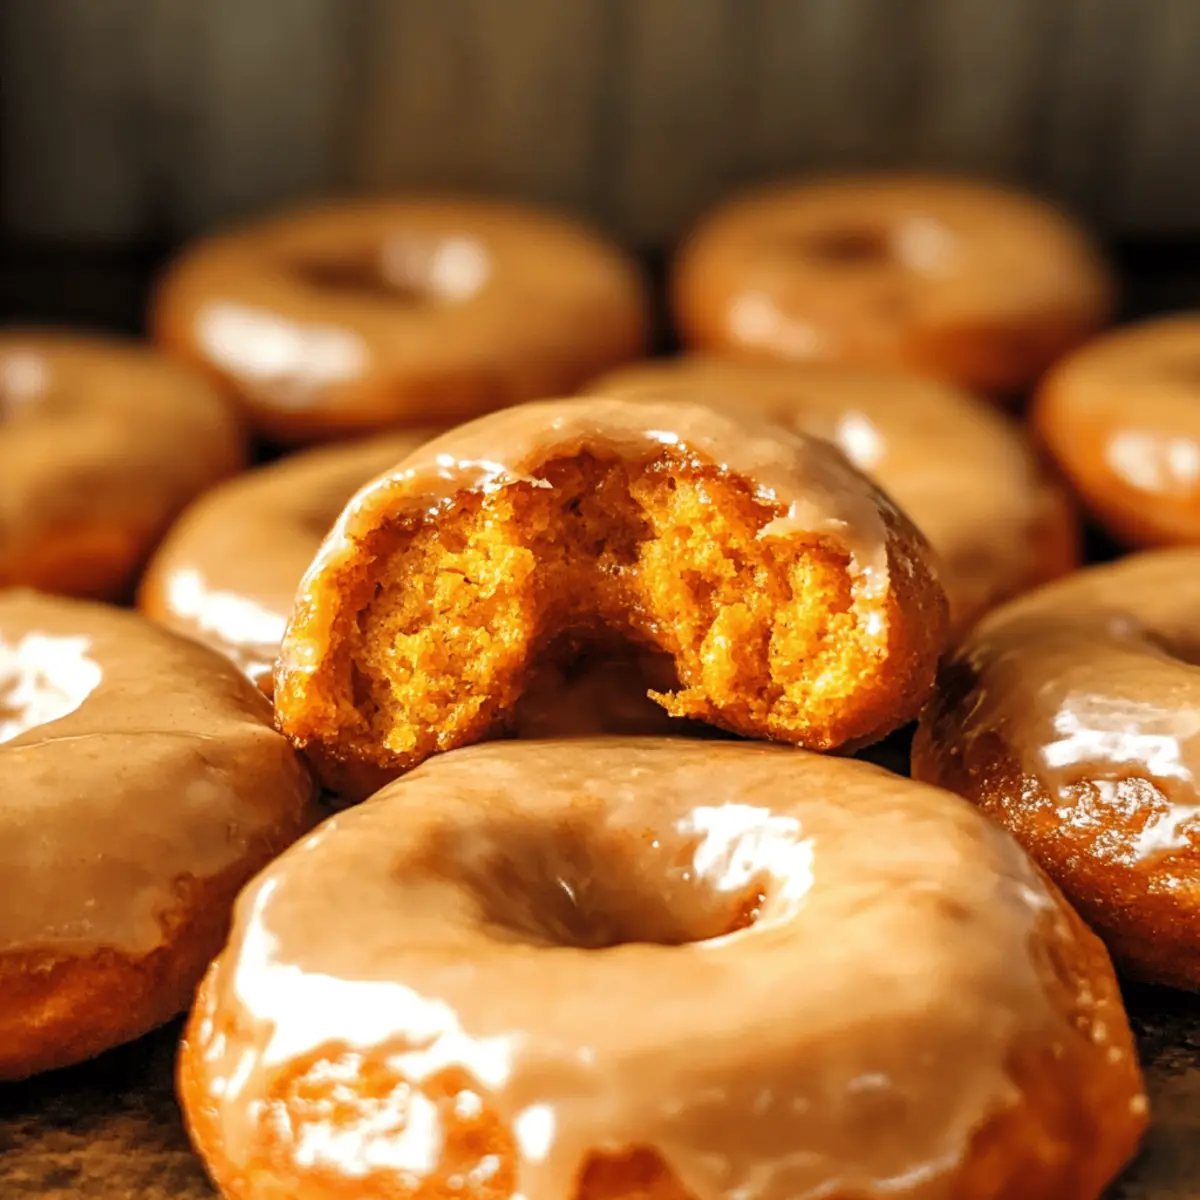
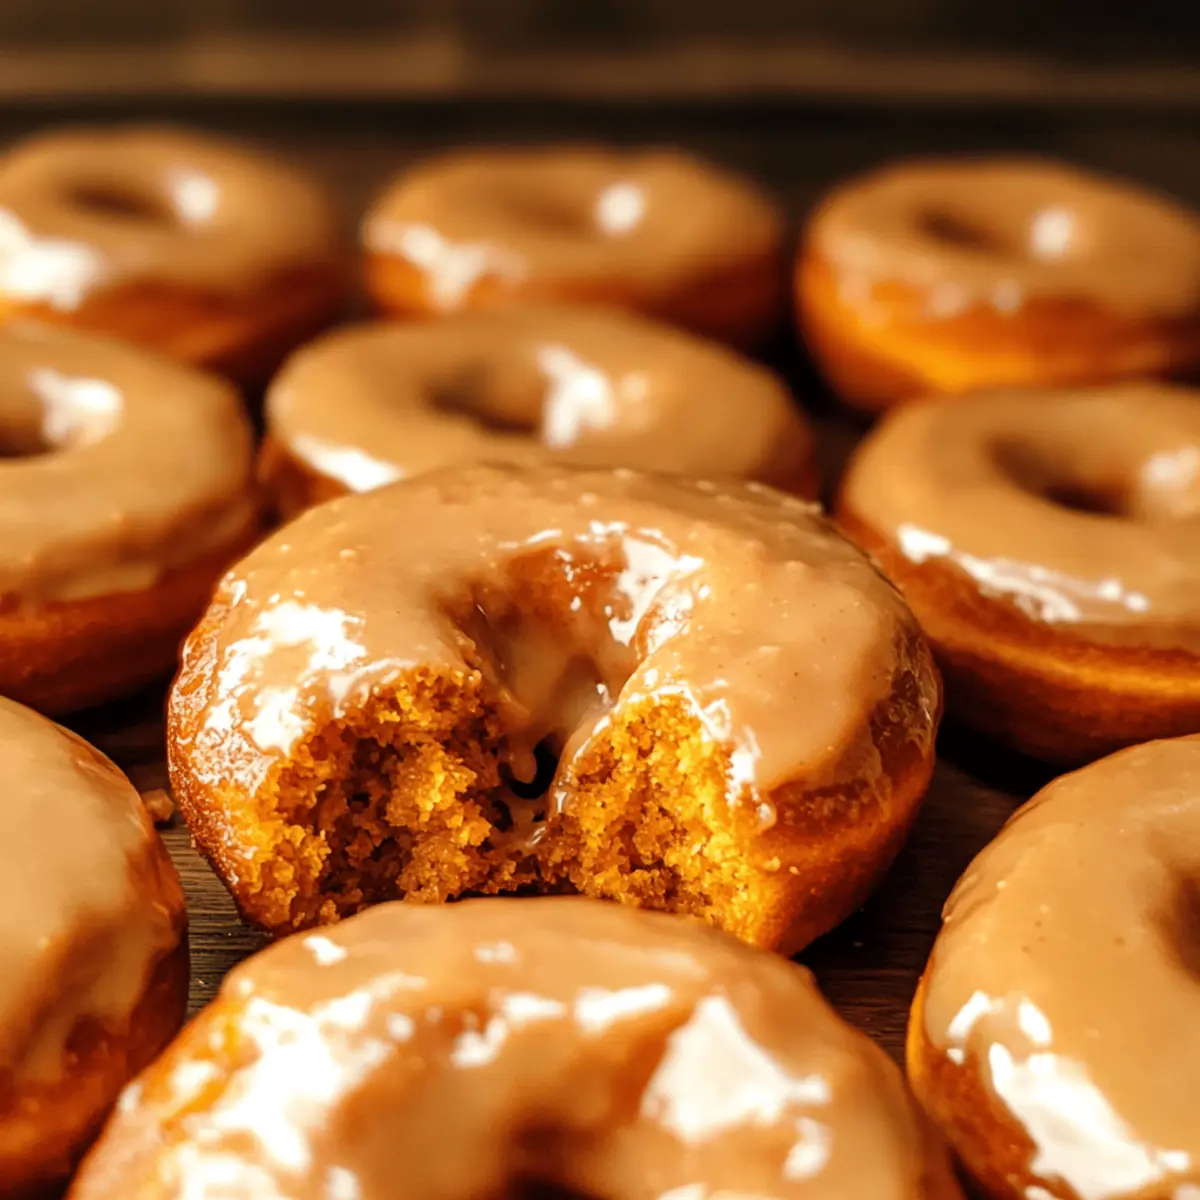
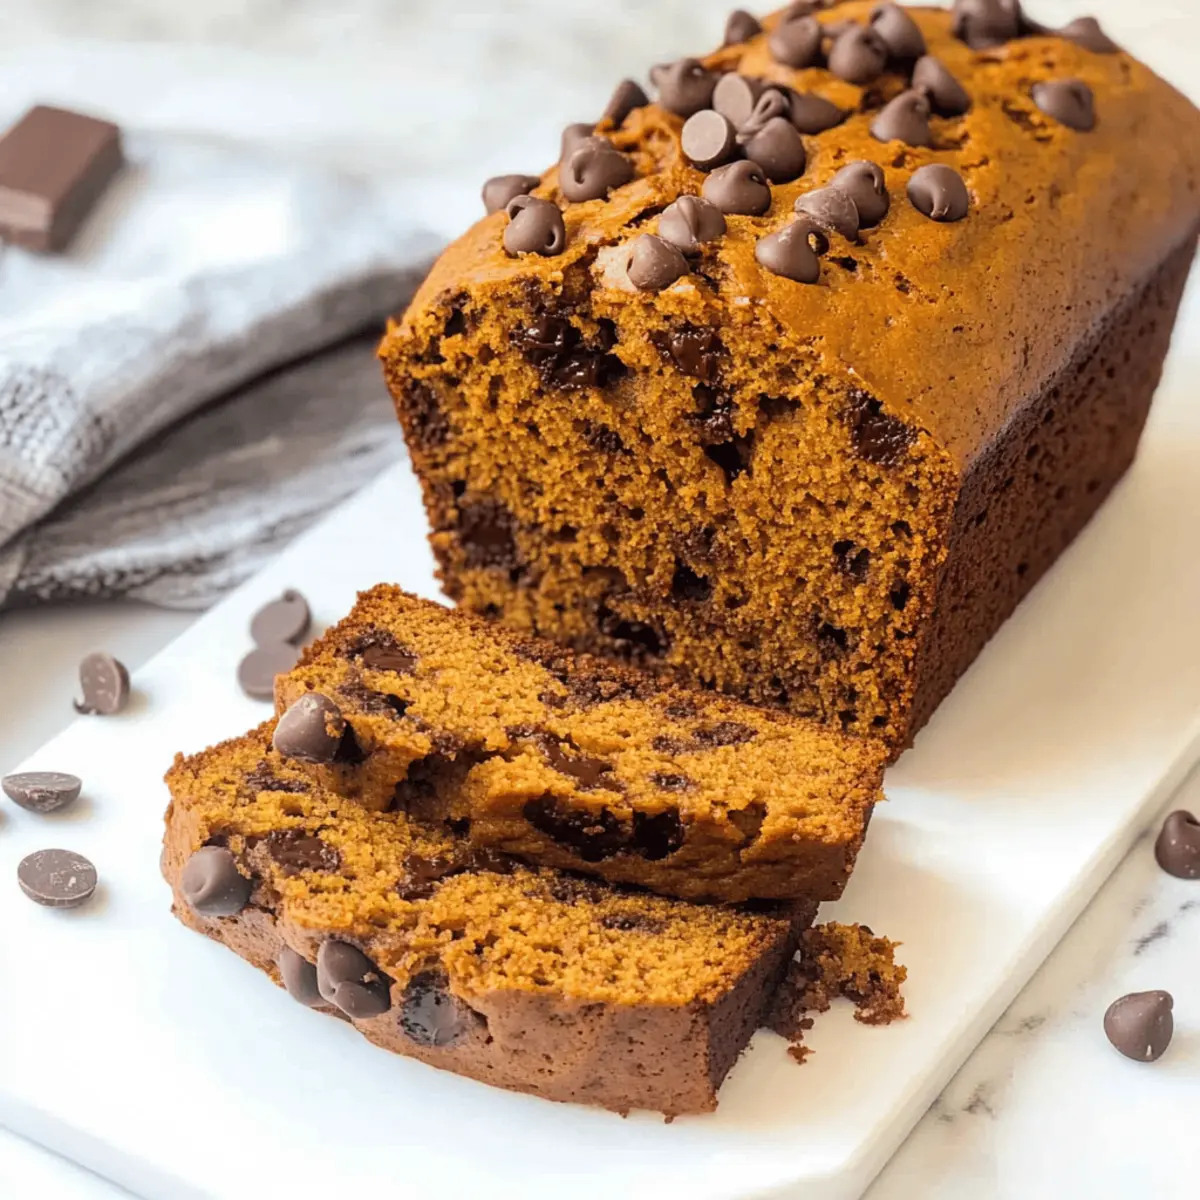
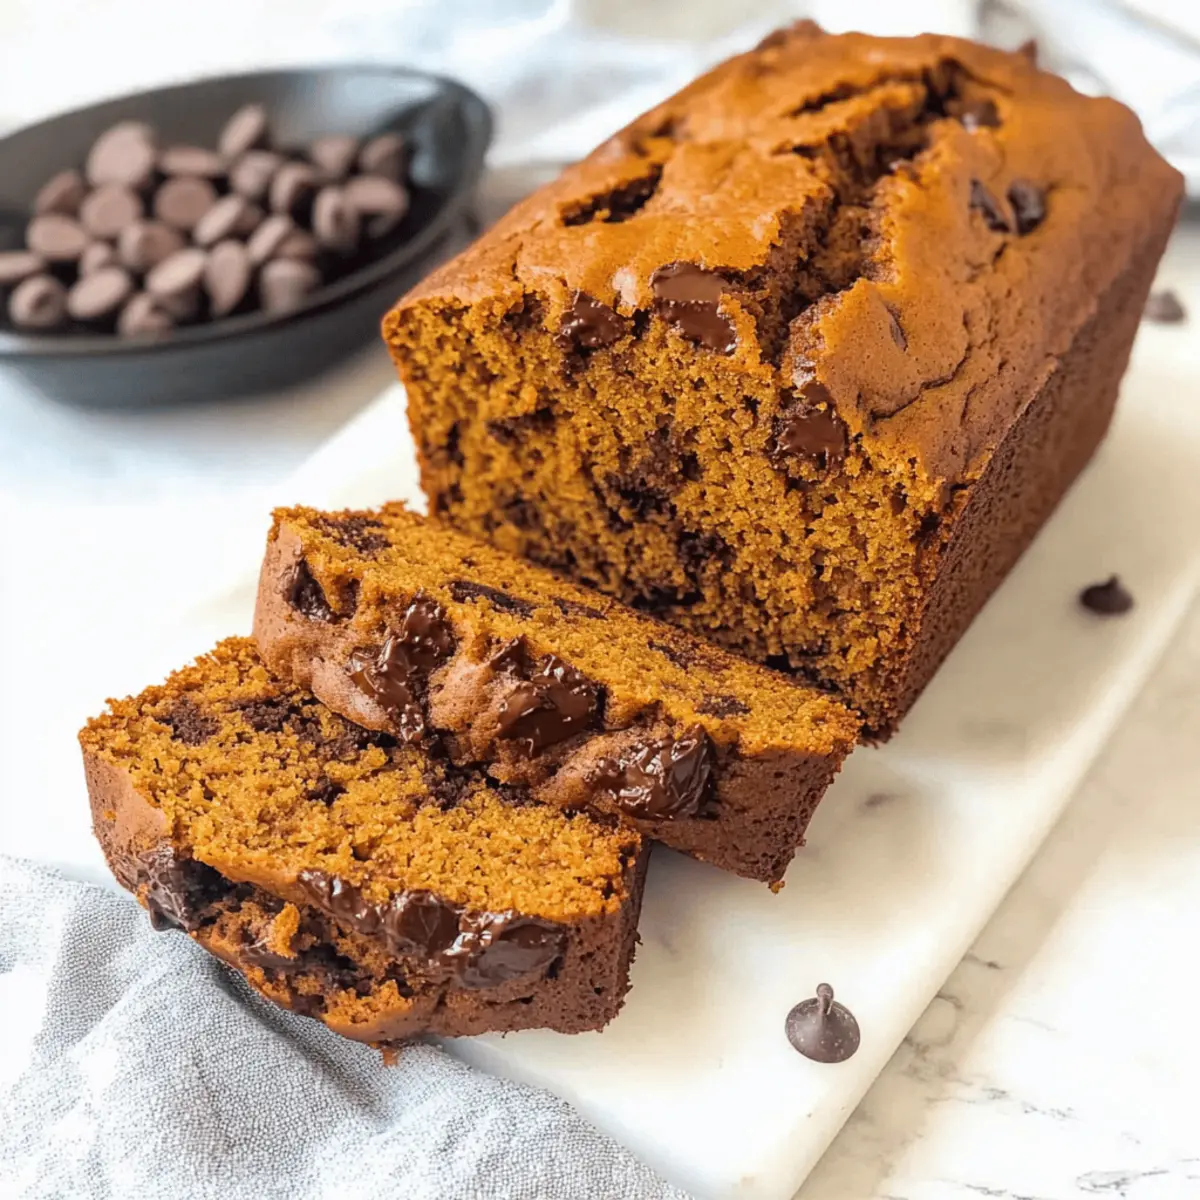
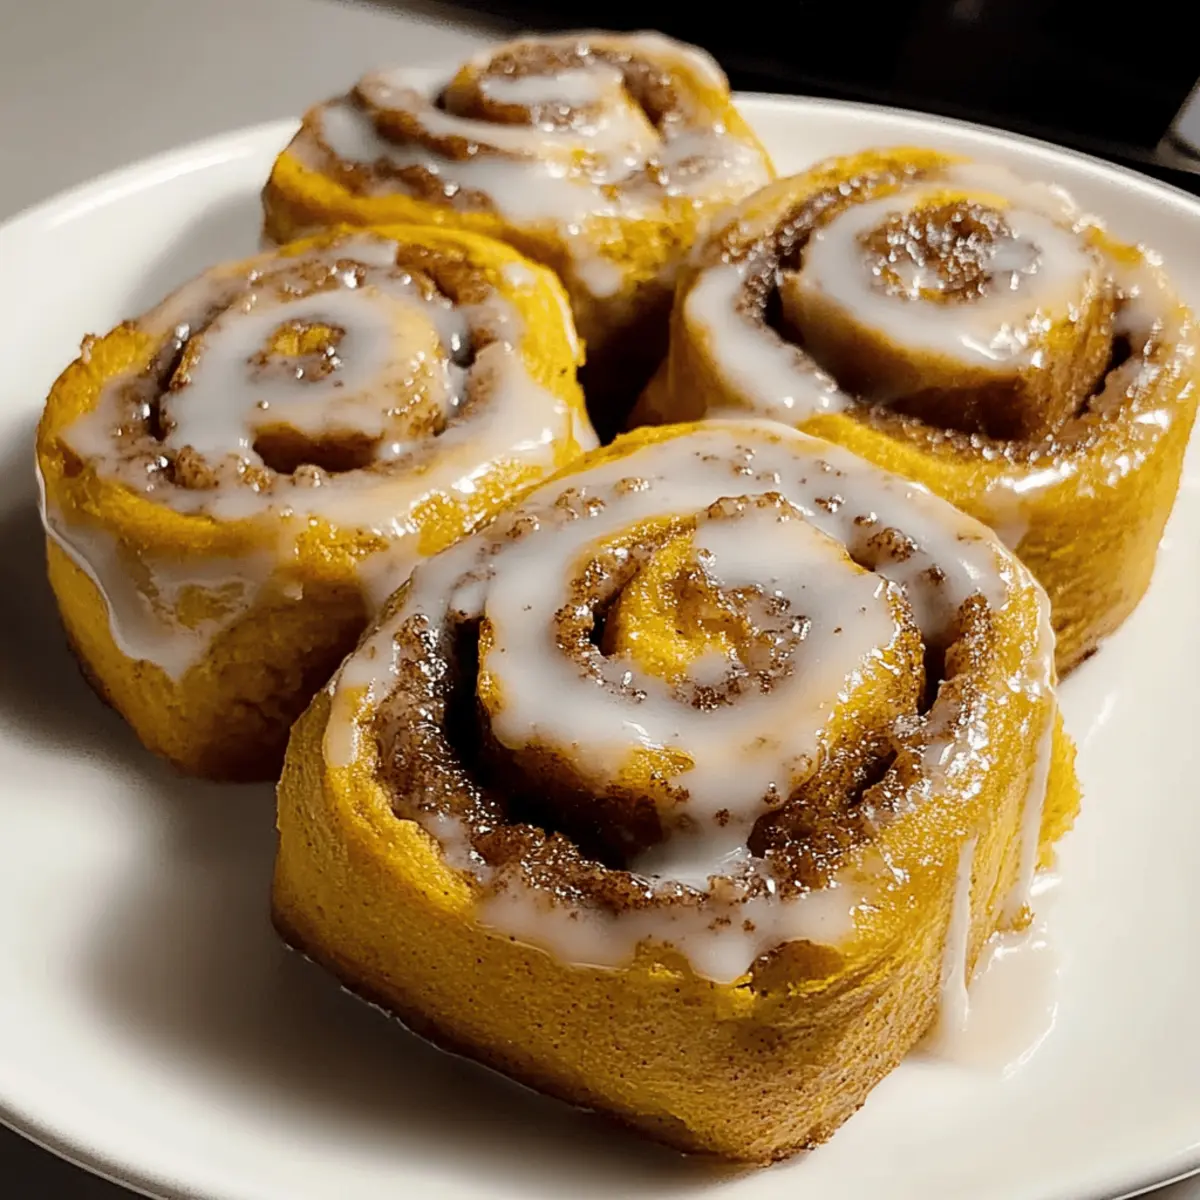
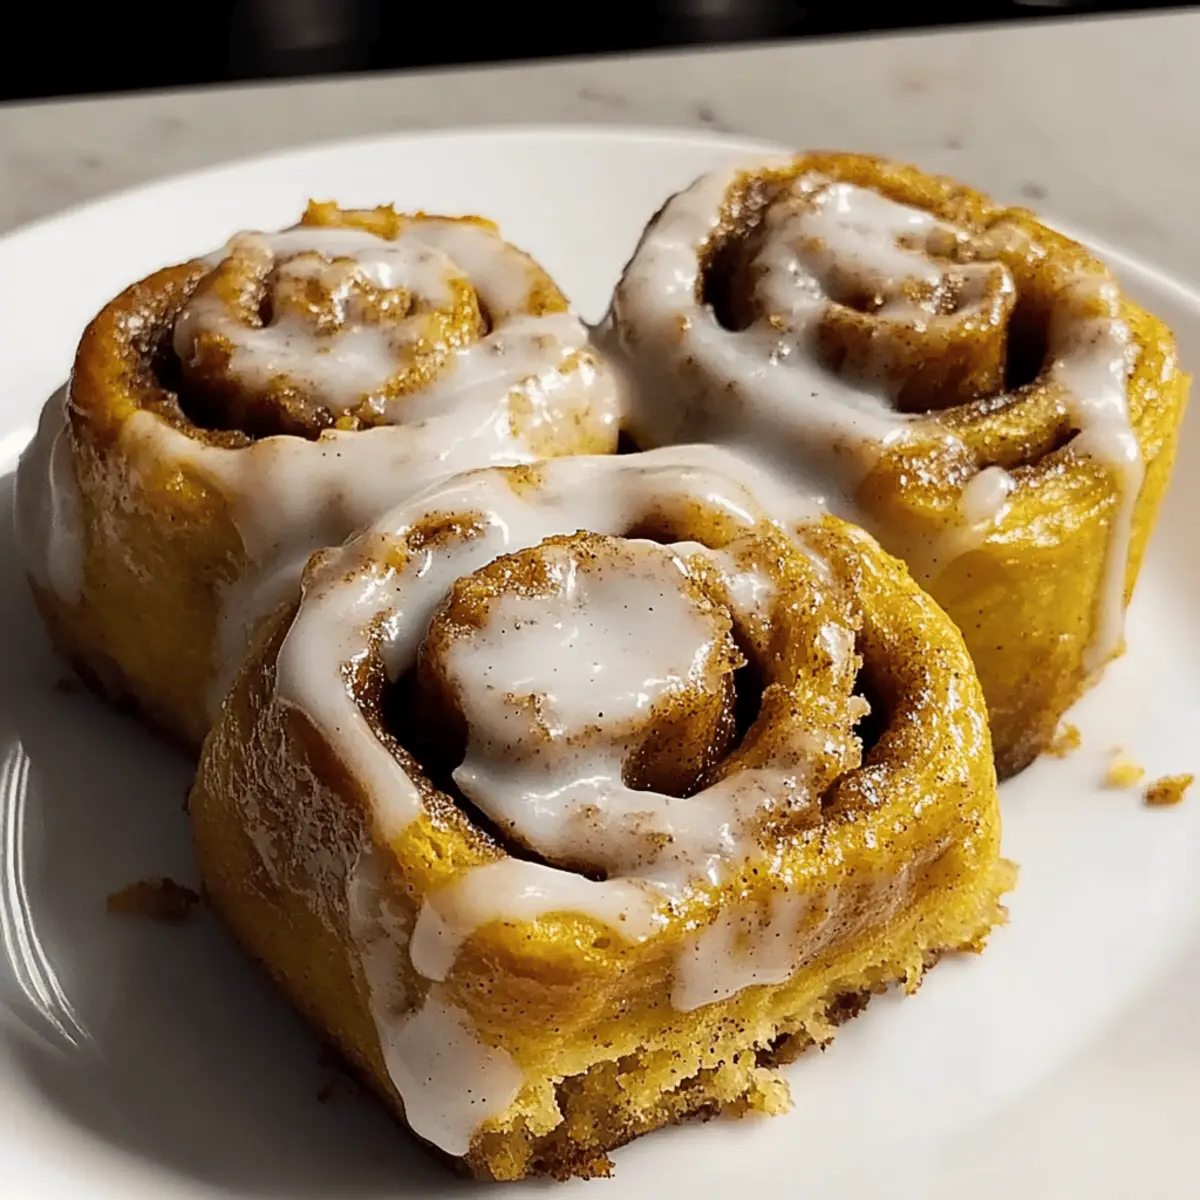
As the first hints of autumn lightly brush against the warm summer air, I find myself craving the cozy, inviting scents of fall baking. Enter my Pumpkin Chai Cinnamon Rolls—your new favorite breakfast treat! This delightful recipe marries the comforting embrace of pumpkin with the warm, aromatic notes of chai spices. Not only are these rolls a feast for the senses, but they also boast a quick prep time, making them perfect for busy mornings or leisurely brunches with loved ones. Each soft, fluffy roll is a little hug of warmth, topped with a luscious creamy icing that ties everything together beautifully. Ready to fill your kitchen with the scent of spice and sweetness? Let’s dive into making these homemade rolls that are sure to become a seasonal staple!

Why Make Pumpkin Chai Cinnamon Rolls?

Warm, Cozy Flavors: These rolls blend pumpkin and chai spices for a deliciously comforting treat, perfect for chilly mornings.

Quick and Easy: With a short prep time, you can whip up these delightful rolls even on busy days!

Soft, Fluffy Texture: Expect a pillowy dough that melts in your mouth, enhanced by a gooey, spiced filling.

Versatile Options: Customize your rolls with nuts, raisins, or different spices to fit your taste—try Pumpkin Chai Cinnamon Rolls with a twist!

Crowd-Pleasing Delight: Serve warm at brunch or cozy gatherings, and watch them disappear as loved ones savor each bite. Don’t forget to pair them with a cup of chai or coffee for the ultimate experience!

Ingredients

• Here’s everything you need for Pumpkin Chai Cinnamon Rolls.

For the Dough

  • All-Purpose Flour – Provides structure and chewiness to the rolls; a gluten-free blend can work if needed.
  • Active Dry Yeast – Essential for leavening and creating fluffy rolls; always check for freshness.
  • Warm Water – Activates the yeast; aim for a temperature of 100–110°F.
  • Pumpkin Puree – Adds moisture and natural sweetness, giving the rolls their signature flavor; fresh pumpkin can also be used as a substitute.
  • Whole Milk – Contributes to the dough’s richness; consider almond or oat milk for a dairy-free variation.
  • Unsalted Butter – Enhances flavor and texture; feel free to substitute with vegan butter for a non-dairy option.
  • Granulated Sugar – Sweetens the dough and aids yeast activation; light brown sugar can provide a deeper flavor.
  • Salt – Highlights flavors and strengthens gluten.
  • Egg – Binds ingredients together; a flax egg is a great vegan alternative.
  • Chai Spice Mix – Infuses the rolls with aromatic warmth; you can swap it with a homemade mix including cinnamon and ginger, with cardamom and cloves in lesser amounts.

For the Filling

  • Softened Butter – A critical ingredient for spreading on the dough to enhance flavor.
  • Brown Sugar – Adds sweetness and a mellow richness to the filling.
  • Ground Cinnamon – The classic spice that brings warmth and familiarity to the rolls.

For the Icing

  • Powdered Sugar – The base for a sweet and creamy icing; adjustments can be made for dietary needs.
  • Cream Cheese – Gives a tangy twist to the icing; substitute with dairy-free cream cheese if desired.
  • Vanilla Extract – Adds depth and flavor to the icing, enhancing the overall sweetness.

Now that you have all your ingredients ready, you’re one step closer to enjoying those cozy, aromatic Pumpkin Chai Cinnamon Rolls!

Step‑by‑Step Instructions for Pumpkin Chai Cinnamon Rolls

Step 1: Activate the Yeast
Begin by dissolving the active dry yeast in warm water, ensuring the water temperature is around 100–110°F. Allow the mixture to sit for 5–10 minutes, until it becomes foamy and bubbly, indicating that the yeast is active. This step is crucial for creating the fluffy texture in your Pumpkin Chai Cinnamon Rolls.

Step 2: Prepare the Dough Mixture
In a large mixing bowl, combine pumpkin puree, whole milk, melted unsalted butter, granulated sugar, salt, and the egg. Stir until well blended, then gently fold in the chai spice mix to infuse the mixture with warm flavors. This combination will not only provide moisture but also enrich the dough for your Pumpkin Chai Cinnamon Rolls.

Step 3: Combine Yeast and Dough
Once your yeast mixture is foamy, add it into the pumpkin mixture, stirring to combine everything evenly. Gradually incorporate the all-purpose flour, about one cup at a time, until a soft dough forms. Your dough should be slightly sticky but manageable, perfect for the next stage of your Pumpkin Chai Cinnamon Rolls.

Step 4: Knead the Dough
Transfer the dough to a floured surface and knead for about 8 minutes. Aim for a smooth and elastic texture, which will be essential for the fluffiness of your rolls. Once kneaded, place the dough in a greased bowl, cover it with a damp cloth, and let it rise in a warm area for 1 to 1.5 hours, or until doubled in size.

Step 5: Prepare the Filling
While the dough rises, prepare your filling. In a separate bowl, mix softened butter, brown sugar, ground cinnamon, and additional chai spice until fully combined. This creamy mixture will create a heavenly spiced interior for each Pumpkin Chai Cinnamon Roll, enhancing their delightful flavor.

Step 6: Shape the Rolls
After the dough has risen, punch it down gently and roll it out on a floured surface into a rectangle, about 12×18 inches. Spread the filling evenly over the dough, leaving a small border around the edges. This ensures a perfect swirl and holds the filling inside as you roll up your Pumpkin Chai Cinnamon Rolls.

Step 7: Roll and Slice
Starting from one long edge, roll the dough tightly into a log, ensuring a snug fit. Using a sharp knife or kitchen string, cut the log into 12 equal pieces, each about 1.5 inches thick. Place the slices cut-side up in a greased baking dish, leaving space between each roll for further rising.

Step 8: Allow the Rolls to Rise Again
Cover the baking dish with a clean towel and let the rolls rise for another 30 minutes in a warm, draft-free space. You should notice them getting puffy and expanding, which is an exciting sign that your Pumpkin Chai Cinnamon Rolls are on their way to becoming irresistible.

Step 9: Bake the Rolls
Preheat your oven to 375°F (190°C). Once preheated, bake the rolls for 20 to 25 minutes or until they turn golden brown on top. The aroma of spicy pumpkin should fill your kitchen, signaling that your Pumpkin Chai Cinnamon Rolls are almost ready!

Step 10: Prepare the Icing
While the rolls are baking, prepare the icing by mixing powdered sugar, softened cream cheese, and vanilla extract in a bowl until smooth and creamy. This sweet drizzle will complement the warm spices and creaminess of your rolls perfectly once they cool.

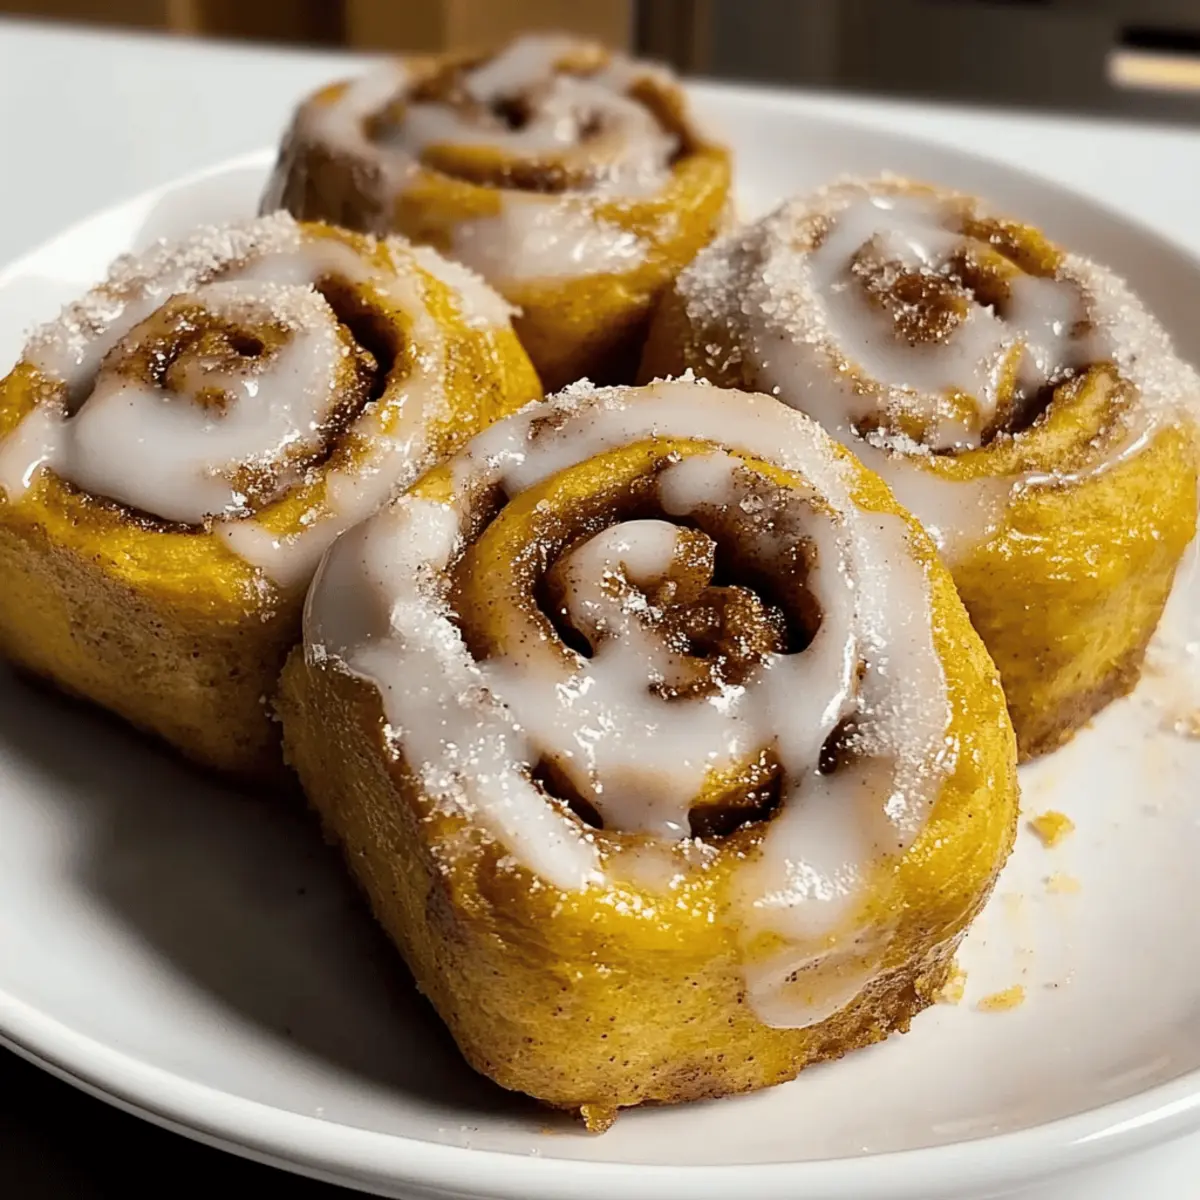
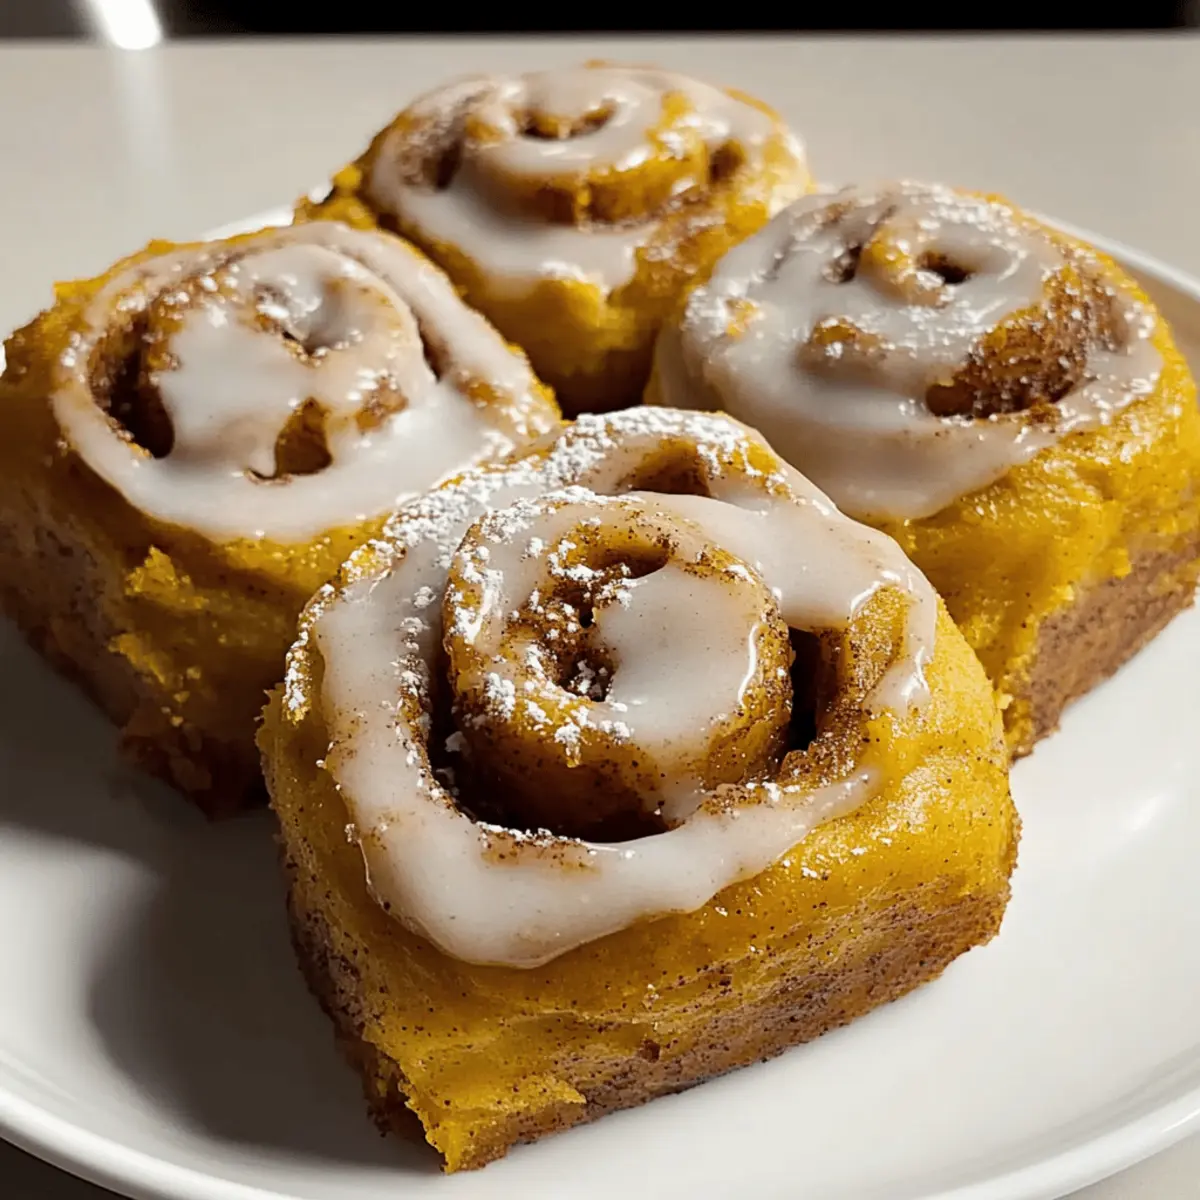
Step 11: Ice the Rolls
After baking, allow your Pumpkin Chai Cinnamon Rolls to cool in the pan for about 10 minutes. Once slightly cooled, drizzle the icing generously over the warm rolls. The icing will melt slightly into the soft rolls, creating a delightful finish to your cozy autumn treat.

What to Serve with Pumpkin Chai Cinnamon Rolls

Indulge your senses with delightful pairings that will elevate your Pumpkin Chai Cinnamon Rolls into a full-bodied meal experience.

  • Chai Tea: A classic complementary drink, the spiced warmth of chai tea harmonizes beautifully with the roll’s flavors, enhancing your cozy morning vibe.

  • Fresh Fruit Salad: A burst of brightness from juicy fruits like oranges and apples adds refreshing contrast, balancing the rich sweetness of the rolls.

  • Vanilla Yogurt: Creamy and tangy yogurt offers a delightful counterpoint, enriching each bite while maintaining a light texture perfect for brunch.

  • Maple Glazed Bacon: The savory, smoky notes of bacon paired with a sweet maple glaze provide a delectable contrast, ensuring a satisfying, hearty experience.

  • Coffee: Whether hot or iced, the robust flavor of coffee pairs perfectly, balancing the sweetness of the rolls while providing an energizing lift for your day.

  • Cream Cheese Frosting Dip: For an indulgent treat, serve a small bowl of cream cheese frosting for dipping. It adds a sweet twist and makes each bite even more decadent!

  • Spiced Pumpkin Smoothie: Enjoy a healthy and delicious spiced pumpkin smoothie to echo the flavor of your rolls while providing a nutritious option to start your day.

Pumpkin Chai Cinnamon Rolls Variations

Feel free to explore your creativity in the kitchen with these delightful twists on the classic recipe!

  • Sweet Potato Twist: Substitute pumpkin puree with sweet potato puree for a richer, earthy flavor that still holds that cozy essence.

  • Nutty Filling: Add chopped walnuts or pecans in the filling for a delightful crunch that complements the soft rolls beautifully. The mix of textures makes each bite interesting and satisfying.

  • Dairy-Free Delight: Use almond or oat milk and vegan butter instead of regular dairy to create delicious vegan Pumpkin Chai Cinnamon Rolls, perfect for family members with dietary restrictions.

  • Spice it Up: Swap the chai spice mix for your favorite spices like nutmeg and allspice, or even add a pinch of cayenne pepper for a surprising kick!

  • Fruit Infusion: Toss in some raisins or cranberries to the filling for a sweet burst of flavor that brightens the overall experience. This addition complements the rich spices perfectly.

  • Caramel Influence: Drizzle some caramel sauce over the rolls before icing them for an indulgent treat that’s hard to resist. It adds a layer of sweetness that harmonizes with the spiced bread.

  • Ginger Snap Flavor: Enhance your chai spice mix with a teaspoon of ground ginger for a bold, zesty warmth that erupts with every mouthful, reminiscent of homemade ginger snaps.

  • Cinnamon Roll Casserole: If you’re short on time, try baking the mixture as a casserole instead. Layer slices in a baking dish and pour a custard mixture over it for a unique spin that pairs well with brunch gatherings. Check out my delicious Apple Crisp Cinnamon recipe for inspiration!

Get creative, enjoy the process, and let your kitchen fill with the warm scents of your customized Pumpkin Chai Cinnamon Rolls!

Make Ahead Options

These Pumpkin Chai Cinnamon Rolls are perfect for meal prep enthusiasts! You can prepare the dough and filling up to 24 hours in advance by mixing the dough and letting it rise. Once it’s ready, cover the bowl tightly with plastic wrap and refrigerate to maintain its quality. Additionally, you can assemble the rolls and place them in a greased baking dish, then cover and refrigerate them overnight before their second rise. When you’re ready to enjoy, simply take them out, allow the rolls to rise for about 30 minutes at room temperature, preheat your oven to 375°F (190°C), and bake them until golden brown. This way, you’ll have fresh, warm Pumpkin Chai Cinnamon Rolls ready to savor with minimal morning effort!

Storage Tips for Pumpkin Chai Cinnamon Rolls

Room Temperature: Store uneaten rolls in an airtight container at room temperature for up to 2 days; this keeps them soft and flavorful.

Fridge: If you want to keep your Pumpkin Chai Cinnamon Rolls longer, refrigerate them for up to a week in an airtight container. Reheat in the microwave or oven for a cozy treat.

Freezer: Freeze the rolls individually wrapped in plastic wrap and then in foil for up to 3 months. Thaw in the fridge overnight before reheating for the best taste.

Reheating: To enjoy warm rolls later, preheat your oven to 350°F (175°C) and heat them for 10-15 minutes, or microwave for 20-30 seconds until warmed through.

Expert Tips for Pumpkin Chai Cinnamon Rolls

Fresh Yeast Matters: Always ensure your active dry yeast is fresh. If in doubt, proof it in warm water and look for a bubbly reaction!

Knead Thoroughly: Knead the dough until smooth and elastic for the best texture. This step is vital for achieving those soft Pumpkin Chai Cinnamon Rolls!

Perfect Rising Conditions: Create a warm, draft-free environment for rising. Try using a slightly warmed oven to help your dough double in size efficiently.

Don’t Rush the Steps: Allow for both rises; skipping them will lead to denser rolls. Patience is key for deliciously fluffy cinnamon rolls.

Customization is Key: Feel free to add nuts, raisins, or switch up the spices to make these Pumpkin Chai Cinnamon Rolls uniquely yours!

Storage Essentials: Keep any leftover rolls in an airtight container at room temperature for up to 2 days, but they’re best enjoyed fresh!

Pumpkin Chai Cinnamon Rolls Recipe FAQs

How do I select the perfect pumpkin for this recipe?
Absolutely! When choosing a pumpkin, look for one that is heavy for its size with a smooth, firm skin. Avoid pumpkins with dark spots or blemishes, as these can indicate decay. Small sugar pumpkins or pie pumpkins are ideal for their sweetness and better consistency for puree.

What’s the best way to store the Pumpkin Chai Cinnamon Rolls?
To keep your rolls fresh, store them in an airtight container at room temperature for up to 2 days. If you need longer storage, refrigerate them for up to a week. Just remember to reheat them gently before enjoying again!

Can I freeze Pumpkin Chai Cinnamon Rolls?
Yes, you can! For freezing, wrap each roll individually in plastic wrap and then in aluminum foil. This method prevents freezer burn and keeps them fresh for up to 3 months. When you’re ready to enjoy, simply thaw them overnight in the fridge and reheat in the oven at 350°F (175°C) for about 10-15 minutes.

Why didn’t my rolls rise properly?
Great question! If your rolls didn’t rise well, it could be due to the yeast being expired or not properly activated. Always proof your yeast in warm water for about 5-10 minutes—look for it to become foamy. Additionally, ensure your dough is kept in a warm, draft-free environment while it’s rising.

Are these rolls suitable for those with dietary restrictions?
Very! You can customize your Pumpkin Chai Cinnamon Rolls to cater to various dietary needs. Use a gluten-free flour blend for a gluten-free version, substitute the egg with a flax egg for a vegan alternative, and choose almond or oat milk alongside vegan butter for a dairy-free option. Just be sure to check all ingredient labels for hidden allergens!

Pumpkin Chai Cinnamon Rolls

Warm Pumpkin Chai Cinnamon Rolls for Cozy Autumn Mornings

These Pumpkin Chai Cinnamon Rolls are the perfect blend of cozy flavors, ideal for chilly mornings.
Prep Time 30 minutes
Cook Time 25 minutes
Rising Time 1 hour 30 minutes
Total Time 2 hours 25 minutes
Servings: 12 rolls
Course: Breakfast
Cuisine: American
Calories: 280

Ingredients
  

For the Dough
  • 4 cups All-Purpose Flour A gluten-free blend can work if needed.
  • 2 teaspoons Active Dry Yeast Always check for freshness.
  • 1.5 cups Warm Water Temperature around 100–110°F.
  • 1 cup Pumpkin Puree Fresh pumpkin can also be used.
  • 1 cup Whole Milk Consider almond or oat milk for a dairy-free option.
  • 1/2 cup Unsalted Butter Melted.
  • 1/2 cup Granulated Sugar Light brown sugar can provide a deeper flavor.
  • 1 teaspoon Salt
  • 1 large Egg A flax egg is a great vegan alternative.
  • 2 tablespoons Chai Spice Mix Can swap with a homemade mix.
For the Filling
  • 1/2 cup Softened Butter
  • 1/2 cup Brown Sugar
  • 2 tablespoons Ground Cinnamon
For the Icing
  • 2 cups Powdered Sugar Adjustments can be made for dietary needs.
  • 8 ounces Cream Cheese Substitute with dairy-free cream cheese if desired.
  • 1 teaspoon Vanilla Extract

Equipment

  • Mixing Bowl
  • baking dish
  • Rolling Pin
  • Oven
  • Sharp knife

Method
 

Step-by-Step Instructions
  1. Activate the yeast by dissolving the active dry yeast in warm water and letting it sit for 5–10 minutes until foamy.
  2. Prepare the dough mixture by combining pumpkin puree, whole milk, melted butter, sugar, salt, and egg. Fold in chai spice mix.
  3. Combine yeast mixture with dough mixture, adding all-purpose flour gradually until a soft dough forms.
  4. Knead the dough on a floured surface for about 8 minutes until smooth and elastic. Let it rise in a greased bowl for 1 to 1.5 hours.
  5. Prepare the filling by mixing softened butter, brown sugar, ground cinnamon, and chai spice until combined.
  6. Shape the rolls by rolling the dough into a rectangle, spreading the filling, and rolling tightly into a log.
  7. Cut the log into 12 equal pieces and place in a greased baking dish.
  8. Let the rolls rise again for another 30 minutes in a warm, draft-free space.
  9. Bake at 375°F (190°C) for 20–25 minutes until golden brown.
  10. Prepare the icing by mixing powdered sugar, softened cream cheese, and vanilla until smooth.
  11. Ice the rolls after baking, allowing the icing to melt slightly for a delightful finish.

Nutrition

Serving: 1rollCalories: 280kcalCarbohydrates: 43gProtein: 4gFat: 12gSaturated Fat: 7gPolyunsaturated Fat: 1gMonounsaturated Fat: 4gCholesterol: 30mgSodium: 180mgPotassium: 100mgFiber: 1gSugar: 10gVitamin A: 200IUVitamin C: 1mgCalcium: 50mgIron: 1mg

Notes

Customize your rolls with nuts or raisins as desired. For the best results, ensure your yeast is fresh and allow for both rises.

Tried this recipe?

Let us know how it was!

Slytherin Dark Mint Chocolate Cheesecake Pops for Magical Treats

As I stood in my kitchen, warmth from the stove mixing with the cool breeze from the open window, a memory tugged at my heart—how every Wizarding World night always featured some magical treat. These Slytherin Dark Mint Chocolate Cheesecake Pops are an homage to that whimsical spirit. Imagine a luscious blend of rich dark chocolate and refreshing mint, entwined in a no-bake delight that’s both elegant and easy to whip up. Not only do these pops bring a stunning presentation to your next Harry Potter-themed gathering, but they also make for a sweet snack that fits perfectly into a busy weeknight. Ready to bear the house colors and treat yourself to a little magic? Let’s dive into this enchanting dessert that’s sure to impress!

Why Are These Pops So Irresistible?

Decadent Flavor: The rich combination of dark chocolate and fresh mint elevates typical cheesecake bites into a luxurious dessert experience.

No-Bake Ease: This quick recipe takes minimal effort, perfect for busy days yet delivers impressive results, just like my Chocolate Fudge Cupcakes.

Themed Fun: Ideal for Harry Potter-themed parties, these cheesecake pops spark joy and excitement among fans of all ages.

Crowd-Pleasing Treat: With their vibrant look and magical charm, they are sure to impress guests, leaving them eager for your next gathering.

Customizable Delight: You can easily tweak the flavors or decorations; consider experimenting with different cookie bases or flavors to make them your own.

Slytherin Dark Mint Chocolate Cheesecake Pops Ingredients

For the Cheesecake Filling

  • Cream Cheese (8 oz) – Provides a rich, creamy base for the pops; use full-fat for optimal texture.
  • Granulated Sugar (¼ cup) – Adds sweetness; adjust to taste if desired.
  • Mint Extract (1 tsp) – Infuses the cheesecake with refreshing mint flavor; substitute with vanilla extract for a different profile.
  • Crushed Chocolate Sandwich Cookies (1 cup, e.g., Oreos) – Acts as a base and adds chocolate richness; use gluten-free cookies for a gluten-free option.
  • Melted Dark Chocolate (½ cup) – Binds the mixture while adding richness; ensure it is high-quality for the best flavor.

For the Coating

  • Dark Chocolate (12 oz) – Creates a beautiful outer shell; can be swapped with milk chocolate for a sweeter taste.
  • Coconut Oil (1 tbsp) – Thins the melted chocolate for smooth dipping; substitute with vegetable oil if necessary.
  • Mint Extract (1–2 tsp, optional) – Enhances the mint flavor in the chocolate coating; omit for a subtler taste.

For Decoration

  • Green Candy Melts or Tinted White Chocolate – For delightful decorative drizzle; use food coloring for a more vibrant look.
  • Silver Edible Glitter or Dragees – Adds a touch of elegance and magical flair; ensure they are food-safe.

Step‑by‑Step Instructions for Slytherin Dark Mint Chocolate Cheesecake Pops

Step 1: Prepare Filling
In a mixing bowl, beat 8 ounces of softened cream cheese with ¼ cup of granulated sugar until the mixture is smooth and creamy, about 2-3 minutes. Next, add 1 teaspoon of mint extract and mix well. Gently fold in 1 cup of crushed chocolate sandwich cookies and ½ cup of melted dark chocolate until fully incorporated. Chill the mixture in the refrigerator for 30 minutes to firm it up.

Step 2: Shape Pops
Once the cheesecake filling is chilled and firm, scoop out small portions (about 1-1.5 inches) and roll them into balls using your hands. Insert lollipop sticks into each ball, then arrange the pops on a parchment-lined baking sheet. Place the sheet in the freezer for at least 1 hour to allow the pops to set firmly.

Step 3: Melt Chocolate Coating
While the pops are freezing, prepare the chocolate coating. In a microwave-safe bowl, combine 12 ounces of dark chocolate with 1 tablespoon of coconut oil. Heat in 30-second intervals, stirring well after each, until the mixture is completely smooth and glossy. If you desire a stronger mint flavor, stir in 1 teaspoon of mint extract.

Step 4: Coat Pops
Remove the frozen cheesecake pops from the freezer. Dip each pop into the melted chocolate coating, ensuring it’s fully covered and gently tapping off any excess chocolate. Place the coated pops back on the parchment-lined sheet. Allow the coating to set for a few minutes before proceeding to the next step.

Step 5: Decorate
Once the chocolate coating has set, it’s time to add a magical touch! Melt green candy melts or tinted white chocolate in a separate bowl, and drizzle it over each pop using a fork or piping bag. Finally, sprinkle silver edible glitter or dragees on top for an enchanting finish. Let the decorations set completely before serving.

What to Serve with Slytherin Dark Mint Chocolate Cheesecake Pops

Indulging in these decadent cheesecake pops creates the perfect moment for pairing delicious flavors and textures that enchant your taste buds.

  • Rich Hot Chocolate: A warm, velvety drink will contrast wonderfully with the cool cheesecake pops while enhancing the chocolate flavor.

  • Fresh Minty Mojito: This refreshing cocktail echoes the pops’ minty essence, making for an invigorating addition to your dessert table.

  • Creamy Vanilla Ice Cream: The smooth vanilla ice cream complements the rich chocolate and mint, while its cold creaminess enhances the dessert experience.

  • Coffee or Espresso: A bold cup of coffee balances the sweetness of the pops, providing a delightful contrast that’s sure to awaken the senses.

  • Chocolate Dipped Strawberries: Continuing the chocolate theme, these elegant treats add freshness and a hint of fruitiness that harmonizes beautifully with the cheesecake.

  • Minty Green Smoothie: A light and healthy option, this smoothie can be a delightful palate cleanser between bites of the rich pops.

These delightful pairings will not only enhance your experience of Slytherin Dark Mint Chocolate Cheesecake Pops but also add a touch of magic to any gathering!

Expert Tips for Slytherin Dark Mint Chocolate Cheesecake Pops

  • Chill, Chill, Chill: Always ensure the cheesecake mixture is thoroughly chilled and firm before shaping to avoid breaks during the rolling process.

  • Freeze for Stability: Make sure to freeze the pops for a full hour before dipping. This helps maintain their shape and prevents them from melting in the warm chocolate.

  • Perfect Chocolate Coating: Use high-quality dark chocolate for the best flavor. Be mindful not to overheat it; a gentle approach will keep it smooth and glossy.

  • Avoid Excess Chocolate: After dipping, gently tap the pops against the bowl to remove any excess chocolate, ensuring a clean finish.

  • Get Creative with Decor: Feel free to experiment with toppings! Different sprinkles or patterns can make your Slytherin Dark Mint Chocolate Cheesecake Pops uniquely yours.

Make Ahead Options

These Slytherin Dark Mint Chocolate Cheesecake Pops are perfect for busy home cooks looking to save time without sacrificing taste! You can prepare the cheesecake filling (cream cheese, sugar, mint extract, crushed cookies, and melted chocolate) up to 24 hours in advance; simply chill it in the refrigerator until you’re ready to shape the pops. Once shaped and frozen, the cheesecake balls can remain in the freezer for up to 3 weeks. To finish, just melt the dark chocolate coating and dip the frozen pops as instructed, and your magical dessert will be just as delicious and ready to impress at a moment’s notice!

Slytherin Dark Mint Chocolate Cheesecake Pops Variations

Feel free to unleash your creativity as you explore these delightful twists to enhance your cheesecake pops!

  • Milk Chocolate: For a sweeter touch, swap the dark chocolate coating with milk chocolate for a delightful contrast.
    Enjoy a sweeter dessert that still maintains the refreshing mint flavor.

  • Vanilla Extract: Replace mint extract with vanilla or almond extract for a uniquely delicious flavor shift.
    This change offers a warm, cozy taste sure to please diverse palates.

  • Gluten-Free Options: Use gluten-free sandwich cookies to cater to gluten-sensitive friends and family without compromising flavor.
    Deliciousness meets inclusivity, making everyone feel welcome at your table.

  • Peppermint Crunch: Toss in crushed peppermint candies or cookies into the filling for an extra minty crunch.
    This adds both texture and enhanced mint flavor, bringing an exciting twist to each bite.

  • Nutty Delight: Include finely chopped nuts or nut butters in the filling for added flavor and texture depth.
    Think toasted walnuts or almond butter swirls—each bite becomes an adventure in flavor.

Have you ever tried pairing these pops with hot cocoa? Just imagine the warmth and indulgence! For another delightful treat, check out my Chocolate Granola Cups that make the perfect complement to these pops.

  • Decadent Drizzle: Opt for a mix of colored white chocolate for a stunning decorative drizzle.
    Not only does it look spectacular, but it also adds a delightful sweetness to each pop.

  • Spicy Mint: For a fun twist, add a pinch of cayenne powder to the chocolate coating for a hint of heat.
    This unexpected surprise will wow your taste buds and might just spark some magical conversations!

You’re now ready to create variations that reflect your personal taste and impress your guests! Whether you take inspiration from these ideas or invent your own twists, have fun making this recipe your own while celebrating the world of Harry Potter!

Storage Tips for Slytherin Dark Mint Chocolate Cheesecake Pops

Fridge: Store the cheesecake pops in an airtight container in the fridge for up to 1 week. This keeps them fresh and delicious for when you crave a magical treat.

Freezer: For longer storage, freeze the pops by placing them in a single layer on a baking sheet until solid, then transfer them to a freezer-safe container for up to 1 month.

Thawing: To enjoy frozen Slytherin Dark Mint Chocolate Cheesecake Pops, simply move them to the fridge for a few hours before serving; this allows them to thaw beautifully without compromising texture.

Reheating: There’s no need to reheat these pops; enjoy them cold for a refreshing dessert experience straight from the fridge or freezer!

Slytherin Dark Mint Chocolate Cheesecake Pops Recipe FAQs

What kind of cream cheese should I use for the cheesecake filling?
I recommend using full-fat cream cheese for the best texture and richness in your cheesecake pops. Reduced-fat versions can lead to a less creamy result. Make sure the cream cheese is softened beforehand for easy mixing.

How should I store Slytherin Dark Mint Chocolate Cheesecake Pops?
Store the pops in an airtight container in the fridge for up to 1 week. If you’d like to keep them longer, you can freeze them. To do this, place them in a single layer on a baking sheet until solid, then transfer them to a freezer-safe container. They will stay fresh for up to 1 month!

Can I freeze the cheesecake pops?
Absolutely! To freeze, place your shaped pops on a parchment-lined baking sheet and freeze until solid, about 1 hour. Once firm, transfer them to a freezer-safe container, separating layers with parchment paper. This method helps them maintain their shape, flavor, and texture. When you’re ready to enjoy them, thaw them in the fridge for a few hours.

What do I do if the chocolate coating is too thick?
If your chocolate coating is too thick to dip smoothly, don’t worry! Simply add a tablespoon of coconut oil and melt it together in the microwave, stirring until it reaches a pourable consistency. This way, it will cover your pops beautifully without clumping.

Are there any dietary considerations for these cheesecake pops?
These pops are vegetarian, but keep in mind they contain dairy and gluten if using traditional cookies. For gluten-free options, swap the chocolate sandwich cookies with gluten-free varieties. If serving to kids or pets, be cautious of the mint extract, as it can upset a pet’s stomach. Always double-check ingredient labels for allergies.

Slytherin Dark Mint Chocolate Cheesecake Pops

Slytherin Dark Mint Chocolate Cheesecake Pops for Magical Treats

Slytherin Dark Mint Chocolate Cheesecake Pops are a no-bake dessert combining rich dark chocolate and refreshing mint for a magical treat.
Prep Time 30 minutes
Chilling Time 30 minutes
Total Time 1 hour
Servings: 12 pops
Course: Dessert
Cuisine: Wizarding World
Calories: 180

Ingredients
  

For the Cheesecake Filling
  • 8 oz Cream Cheese Provides a rich, creamy base; use full-fat for optimal texture.
  • ¼ cup Granulated Sugar Adjust to taste if desired.
  • 1 tsp Mint Extract Infuses refreshing mint flavor.
  • 1 cup Crushed Chocolate Sandwich Cookies Acts as a base; use gluten-free cookies for a gluten-free option.
  • ½ cup Melted Dark Chocolate Ensure high-quality for best flavor.
For the Coating
  • 12 oz Dark Chocolate Creates a beautiful outer shell.
  • 1 tbsp Coconut Oil Thins chocolate for smooth dipping.
  • 1–2 tsp Mint Extract Optional for enhanced mint flavor.
For Decoration
  • 1 pkg Green Candy Melts or Tinted White Chocolate For delightful decorative drizzle.
  • to taste Silver Edible Glitter or Dragees Ensure they are food-safe.

Equipment

  • Mixing Bowl
  • microwave-safe bowl
  • lollipop sticks
  • Parchment Paper

Method
 

Step-by-Step Instructions
  1. In a mixing bowl, beat cream cheese with granulated sugar until smooth, about 2-3 minutes. Add mint extract and mix well. Fold in crushed cookies and melted dark chocolate until fully incorporated. Chill for 30 minutes.
  2. Scoop out small portions and roll into balls. Insert lollipop sticks into each ball and arrange on a parchment-lined baking sheet. Freeze for at least 1 hour.
  3. In a microwave-safe bowl, combine dark chocolate and coconut oil. Heat in 30-second intervals, stirring until smooth. Stir in mint extract if desired.
  4. Dip each frozen cheesecake pop into the melted chocolate coating, ensuring full coverage. Tap off excess chocolate and place back on the lined sheet.
  5. Drizzle melted green candy melts or tinted white chocolate over each pop. Sprinkle with silver edible glitter or dragees. Let set completely before serving.

Nutrition

Serving: 1popCalories: 180kcalCarbohydrates: 24gProtein: 2gFat: 9gSaturated Fat: 5gPolyunsaturated Fat: 1gMonounsaturated Fat: 3gCholesterol: 30mgSodium: 80mgPotassium: 120mgFiber: 1gSugar: 15gVitamin A: 250IUCalcium: 30mgIron: 1mg

Notes

Ensure the cheesecake mixture is thoroughly chilled before shaping. Use high-quality dark chocolate for best results and enjoy these pops cold.

Tried this recipe?

Let us know how it was!

Gingerbread Pancakes Recipe for a Cozy Holiday Morning

There’s something magical about waking up on a cold winter morning and treating yourself to a cozy feast. This holiday season, I’m thrilled to share my Gingerbread Pancakes Recipe—a delightful twist on traditional pancakes that combines the warming spices of ginger, cinnamon, and molasses into every fluffy bite. Perfect for Christmas breakfast or a winter brunch, these pancakes not only fill your home with a cozy aroma but also bring loved ones together around the table. They come together quickly, making them an effortless choice for busy mornings, while also offering a festive touch to your usual breakfast routine. Curious about how to make these delicious treats? Let’s dive in!

Why Are These Pancakes a Must-Try?

Cozy comfort: These gingerbread pancakes offer a heartwarming twist on a breakfast favorite, invoking holiday cheer with every bite.
Quick and easy: With simple steps, you can whip up a delicious breakfast in no time, perfect for busy holiday mornings.
Aromatic delight: The spices create an inviting aroma, transforming your kitchen into a warm, festive haven that beckons family members to the table.
Versatile options: Mix in chocolate chips or dried cranberries, or serve them topped with whipped cream for a delightful indulgence—all while keeping it festive.
Stay prepared: These pancakes store well in the fridge or freezer, making them a savvy way to enjoy breakfast without the fuss on busy days. If you’re in the mood for something creamy and comforting, don’t forget to check out my recipe for Cheesy Hamburger Potato Soup.

Gingerbread Pancakes Ingredients

• Explore these must-have ingredients for a delightful gingerbread pancakes experience!

For the Batter

  • Flour – Provides structure for the pancakes; substitute with whole wheat flour for a healthier option.
  • Baking Powder – Helps pancakes rise and become fluffy; no substitutions needed for this essential ingredient.
  • Gingerbread Spice Mix – Adds the signature warm flavors (ginger, nutmeg, cinnamon); use pumpkin pie spice as a substitute for a similar taste.
  • Eggs – Bind ingredients together and contribute to fluffiness; for a vegan alternative, use flax eggs (1 tbsp flaxseed meal + 2.5 tbsp water = 1 egg).
  • Milk – Provides moisture; substitute with any milk alternative (almond, oat) for a dairy-free option.
  • Molasses – Contributes essential sweetness and depth of flavor for a true gingerbread profile; you can use honey or agave syrup, though flavors may differ slightly.
  • Butter – Adds richness and flavor; for a dairy-free option, substitute with coconut oil.

For Serving

  • Maple Syrup – Enhance the pancakes with a drizzle of the classic sweetener for a festive touch.
  • Powdered Sugar – A light dusting adds a beautiful, snowy look that feels perfect for the holiday season.

This Gingerbread Pancakes Recipe is sure to bring warmth and joy to your holiday mornings!

Step‑by‑Step Instructions for Gingerbread Pancakes Recipe

Step 1: Prepare the Dry Ingredients
In a large mixing bowl, whisk together 1 cup of flour, 2 teaspoons of baking powder, and your gingerbread spice mix until well combined. The spices will blend beautifully, creating an inviting aroma as you mix. This step ensures your gingerbread pancakes will have that delightful holiday flavor. Set this bowl aside while you work on the wet ingredients.

Step 2: Mix the Wet Ingredients
In a separate bowl, crack 2 eggs and whisk them together with 1 cup of milk, 1/4 cup of molasses, and 2 tablespoons of melted butter until fully combined. The mixture should be smooth and slightly frothy. This blend is key to achieving the perfect fluffy texture in your gingerbread pancakes. Gradually moving forward will keep your batter light and airy.

Step 3: Combine the Mixtures
Carefully pour the wet mixture into the bowl with the dry ingredients. Gently stir with a spatula until just combined; remember, it’s okay if the batter remains slightly lumpy. Overmixing can lead to dense pancakes, so be cautious and mix until you see no dry flour. The batter should be thick yet pourable, ready for cooking.

Step 4: Preheat the Skillet
Place a nonstick skillet or griddle on the stove over medium heat and allow it to warm up. Lightly grease the surface with a small amount of butter or cooking spray, ensuring even cooking and easy flipping. You’ll know the skillet is ready when a few drops of water dance across the surface. This will prepare the foundation for your gingerbread pancakes.

Step 5: Cook the Pancakes
Using a 1/4 cup measuring cup, pour batter onto the hot skillet for each pancake. Allow space between each pancake and cook for about 2-3 minutes. Watch for bubbles forming on the surface; once they appear and the edges look set, it’s time to flip. Cook for an additional 2 minutes until both sides achieve a lovely golden-brown color.

Step 6: Serve Warm
Once your gingerbread pancakes are cooked, stack them high on a plate. Drizzle generously with maple syrup and sprinkle a bit of powdered sugar for a festive presentation. These pancakes can be served immediately while warm, ensuring everyone enjoys that cozy, spiced flavor. Feel free to add your favorite toppings, like whipped cream or fresh fruit, for a delightful touch!

Make Ahead Options

These delightful Gingerbread Pancakes are perfect for busy holiday mornings and can be made ahead to save time! You can prepare the dry ingredients (1 cup of flour, 2 teaspoons of baking powder, and your gingerbread spice mix) up to 24 hours in advance by storing them in an airtight container to preserve freshness. Additionally, you can whisk together the wet ingredients (eggs, milk, molasses, and melted butter) and refrigerate them for up to 3 days. When you’re ready to cook, simply combine both mixtures, and cook right away for fluffy pancakes just as delicious as if made fresh! These make-ahead options make holiday breakfast a breeze while keeping the festive spirit alive.

Expert Tips for Gingerbread Pancakes Recipe

  • Mix with Care: Avoid overmixing the batter; it should remain slightly lumpy to ensure fluffy gingerbread pancakes.
  • Heat Control: Adjust the skillet temperature as needed; pancakes should cook evenly and turn golden brown without burning.
  • Adjust Thickness: If your batter is too thick, stir in a little extra milk to reach the desired consistency for perfect pancakes.
  • Serving Fresh: For the best taste, serve gingerbread pancakes warm off the skillet, topped with maple syrup and a sprinkle of powdered sugar.
  • Storage Tips: Store any leftovers in an airtight container in the fridge for up to 3 days or freeze them for up to 1 month. Reheat to enjoy!

What to Serve with Gingerbread Pancakes

Create a festive breakfast spread that will warm hearts and please palates this holiday season.

  • Creamy Whipped Cream: A dollop of rich whipped cream adds a luscious, decadent touch that perfectly balances the spiced pancakes. It’s an inviting addition that encourages everyone to indulge a little.
  • Fresh Berries: Juicy strawberries or blueberries provide a refreshing burst of flavor, cutting through the sweetness while adding vibrant color to your table. The contrast of the warm pancakes and cool fruit is simply delightful.
  • Crispy Bacon: The savory, smoky flavor of crispy bacon pairs beautifully with the sweetness of gingerbread pancakes, creating a balanced and satisfying meal. Plus, who can resist the combo of sweet and savory?
  • Maple Syrup: A classic choice, warm maple syrup drizzled over the pancakes enhances their flavor with its sweet, earthy notes, making every bite irresistibly delicious.
  • Spiced Apple Cider: A warm mug of spiced apple cider complements the gingerbread flavors, with its fragrant spices bringing a cozy feel to your holiday brunch. Sip slowly and enjoy the season!
  • Chocolate Chips: Sprinkling chocolate chips into the batter or on top adds a touch of sweetness and fun, appealing to both kids and adults alike. They melt slightly, creating delightful gooey pockets of chocolate in every bite.
  • Nutty Granola: Serving sprinkled granola on top adds crunch and texture, along with a hearty dose of nuts and oats that make the meal feel wholesome. It’s an unexpected yet delightful twist, bringing a satisfying crunch.
  • Cinnamon Sugar Pecans: Sweet, spiced pecans provide an excellent crunchy garnish that enhances the warm flavors of the pancakes. Just a handful will elevate your breakfast experience!
  • Hot Cocoa: Keep the festive spirit alive with mugs of hot cocoa, adding a sweet, chocolatey comfort to this delightful morning gathering that everyone will love!

How to Store and Freeze Gingerbread Pancakes

Fridge: Store leftover gingerbread pancakes in an airtight container for up to 3 days to preserve their delicious flavor and moisture.

Freezer: For longer storage, place pancakes in a single layer on a baking sheet, freeze until solid, then transfer to a freezer bag for up to 1 month.

Reheating: Reheat pancakes in a toaster or microwave until warmed through. Add a drizzle of maple syrup just before serving to restore that festive touch.

Gingerbread Pancakes Recipe Variations

Feel free to customize these gingerbread pancakes to suit your taste preferences and dietary needs for that extra festive flair.

  • Whole Wheat Option: Substitute all-purpose flour with whole wheat flour for a heartier pancake that’s still deliciously comforting.
  • Vegan Delight: Replace eggs with flax eggs (1 tbsp flaxseed meal + 2.5 tbsp water = 1 egg) and use almond milk for a completely plant-based pancake.
  • Spicy Kick: Stir in a dash of cayenne pepper or crushed red pepper flakes to the batter for a surprising spicy twist.
  • Fruity Flavor: Mix in chopped apples or pears for a fresh, fruity addition that complements the warming spices perfectly. Imagine taking a bite and finding a sweet surprise!
  • Nutty Goodness: Add chopped nuts like pecans or walnuts into the batter for an added crunch and rich flavor. They pair beautifully with the spices.
  • Decadent Chocolate: Fold in chocolate chips or chunks before cooking to create a chocolatey twist that will please both kids and adults alike.
  • Decadent Topping: Enhance your stack with a dollop of whipped cream and a sprinkle of crushed ginger snap cookies for a festive crunch.
  • Decadent Syrup: Experiment with flavored syrups like caramel or gingerbread syrup to elevate the sweetness and flavor profile, making every bite unforgettable.

For more cozy recipes, why not try out my Cheesy Hamburger Potato Soup or enjoy a delicious serving of Fat Burning Soup for a healthy twist?

Gingerbread Pancakes Recipe FAQs

How do I know if my spices are fresh enough for the gingerbread spice mix?
Absolutely! Spices should have a vibrant color and strong aroma. If they smell dull or lack fragrance, it’s time to replace them. Ground spices typically last about 2-3 years, while whole spices can last longer. For the best flavor, consider purchasing fresh spices or grinding whole ones just before use.

How should I store leftover gingerbread pancakes?
You can store leftover gingerbread pancakes in an airtight container in the refrigerator for up to 3 days. To maintain their freshness, make sure they are completely cool before sealing them up to prevent moisture buildup.

Can I freeze gingerbread pancakes, and if so, how?
Very! To freeze gingerbread pancakes, place them in a single layer on a baking sheet and freeze until solid. Once they’re frozen, transfer the pancakes to a freezer-safe bag or container and store for up to 1 month. When you’re ready to enjoy them, simply reheat in a toaster or microwave. This makes for a quick and cozy breakfast all season long!

What should I do if my pancake batter is too thick?
If you find your batter is too thick, no worries! Just gently stir in a little extra milk, a tablespoon at a time, until you reach your desired consistency. This simple adjustment ensures your pancakes remain fluffy and tender when cooked.

Are there any dietary considerations for this gingerbread pancakes recipe?
Absolutely! This gingerbread pancakes recipe can be easily modified for various dietary needs. For a vegan alternative, use flax eggs (1 tablespoon flaxseed meal mixed with 2.5 tablespoons water equals 1 egg) and any plant-based milk. If someone has allergies, make sure to skip ingredients like eggs or butter and choose suitable substitutes like coconut oil for butter and any safe flour alternatives.

What toppings go best with gingerbread pancakes?
The more the merrier! Classic choices include a drizzle of maple syrup and a light dusting of powdered sugar that adds a festive flair. You might also consider adding whipped cream, honey, or whatever fresh fruits you love—like bananas, strawberries, or cranberries—to elevate the experience!

Gingerbread Pancakes Recipe

Gingerbread Pancakes Recipe for a Cozy Holiday Morning

Enjoy these Gingerbread Pancakes for a cozy holiday morning, combining warming spices and fluffy texture for a delightful breakfast.
Prep Time 10 minutes
Cook Time 15 minutes
Total Time 25 minutes
Servings: 4 pancakes
Course: Breakfast
Cuisine: American
Calories: 180

Ingredients
  

For the Batter
  • 1 cup flour substitute with whole wheat flour for a healthier option
  • 2 teaspoons baking powder essential for fluffiness
  • 1 tablespoon gingerbread spice mix or pumpkin pie spice as a substitute
  • 2 large eggs or use flax eggs for a vegan option
  • 1 cup milk substitute with any milk alternative for a dairy-free option
  • 1/4 cup molasses or honey/agave syrup as alternatives
  • 2 tablespoons butter or substitute with coconut oil for dairy-free
For Serving

Equipment

  • Mixing Bowl
  • whisk
  • Skillet
  • Measuring cups
  • spatula

Method
 

Step-by-Step Instructions
  1. In a large mixing bowl, whisk together 1 cup of flour, 2 teaspoons of baking powder, and your gingerbread spice mix until well combined.
  2. In a separate bowl, crack 2 eggs and whisk them together with 1 cup of milk, 1/4 cup of molasses, and 2 tablespoons of melted butter until fully combined.
  3. Carefully pour the wet mixture into the bowl with the dry ingredients. Gently stir with a spatula until just combined.
  4. Place a nonstick skillet or griddle on the stove over medium heat and allow it to warm up. Lightly grease the surface.
  5. Using a 1/4 cup measuring cup, pour batter onto the hot skillet for each pancake and cook for about 2-3 minutes.
  6. Once cooked, stack the pancakes and drizzle generously with maple syrup and sprinkle powdered sugar on top.

Nutrition

Serving: 1pancakeCalories: 180kcalCarbohydrates: 30gProtein: 4gFat: 6gSaturated Fat: 3gPolyunsaturated Fat: 0.5gMonounsaturated Fat: 2gCholesterol: 40mgSodium: 250mgPotassium: 150mgFiber: 1gSugar: 8gVitamin A: 200IUCalcium: 150mgIron: 1.5mg

Notes

Store leftovers in an airtight container for up to 3 days or freeze for up to 1 month.

Tried this recipe?

Let us know how it was!

Monster Cookie Fudgy Brownies: Irresistibly Decadent Delight

As I pulled the warm, gooey Monster Cookie Fudgy Brownies from the oven, a wave of nostalgia hit me—memories of family gatherings and the sweet chaos of kids running around, all drawn in by the aroma of freshly baked treats. This delightful recipe marries the irresistible richness of fudgy brownies with the playful, chewy texture of monster cookies, creating a dessert that is not only a visual masterpiece but a flavor explosion with every bite. With a quick prep time and a guaranteed crowd-pleaser status, these brownies will make you the hero of your next family feast. Ready to whip up a batch that combines chocolate chips, peanut butter, and colorful mini M&Ms? Let’s dive into this layered delight!

Why Are These Brownies So Irresistible?

Decadent Layers: The rich fudgy base meets chewy cookie perfection, showcasing a mouthwatering contrast that chocolate lovers crave.
Family-Friendly Fun: Kids will love the colorful mini M&Ms, making these brownies a hit during family gatherings or school events.
Quick and Easy: This recipe combines simple ingredients and straightforward steps, ensuring you can whip up a batch in no time. Don’t forget, if you’re looking for even more quick treats, try my delightful Blueberry Breakfast Cookies!
Versatile Variations: Want to switch things up? Experiment with cookie butter or gluten-free flour to suit different tastes and dietary needs.
Nostalgic Appeal: A delightful blend of childhood favorites, each bite will take you back to those simple, joyful moments filled with homemade goodness.

Monster Cookie Fudgy Brownies Ingredients

For the Brownie Layer

  • White Granulated Sugar – Enhances sweetness; consider using brown sugar for a deeper flavor.
  • Large Eggs (2) & Egg Yolk (1) – Provide structure and moisture; using room temperature eggs will help them mix better.
  • Unsalted Butter (5 tbsp) – Adds richness; can substitute with coconut oil for a dairy-free option.
  • Canola or Vegetable Oil (1/3 cup) – Adds moisture and tenderness; olive oil may change the flavor slightly.
  • Pure Vanilla Extract (2 tsp) – Enhances overall flavor; ensure it’s pure for the best results.
  • All-Purpose Flour (1/2 cup brownie) – Provides structure; remember to spoon and level to avoid dryness.
  • Unsweetened Cocoa Powder (3/4 cup) – Boosts chocolate flavor; Dutch process cocoa offers a richer taste.
  • Cornstarch (1 tbsp + 1 tsp) – Tenderizes texture; can swap for arrowroot powder if needed.
  • Salt (1/4 tsp brownie) – Balances the sweetness.
  • Semi-Sweet & Milk Chocolate Chips (1/2 cup each) – Adds richness; using dark chocolate chips can reduce sweetness.

For the Monster Cookie Layer

  • All-Purpose Flour (1/2 cup) – Provides structure; the same leveling note applies here.
  • Cornstarch (1 tsp) – Helps tenderize the cookies.
  • Baking Soda (1/2 tsp) – Acts as a leavening agent for a chewy texture.
  • Baking Powder (1/8 tsp) – Adds fluffiness; a little goes a long way!
  • Salt (1/4 tsp) – Enhances flavor.
  • Unsalted Butter (1/4 cup) – Balances flavors and adds moisture.
  • Brown Sugar (1/3 cup) – Increases softness and adds depth to sweetness.
  • White Granulated Sugar (1/8 cup) – Provides an extra boost of sweetness.
  • Creamy Peanut Butter (1/4 cup) – Contributes flavor and chewiness; swap with sunbutter for nut-free.
  • Large Egg (1) – Binds all ingredients together.
  • Quick Oats (1/2 cup) – Adds nice texture; old-fashioned oats could yield a chewier result.
  • Mini Chocolate Chips & Mini M&Ms (1/2 cup each) – Offer bursts of chocolate and vibrant color; a delicious topping that enhances the fun!

Let’s get ready to mix these layers to make your Monster Cookie Fudgy Brownies a memorable treat!

Step‑by‑Step Instructions for Monster Cookie Fudgy Brownies

Step 1: Prepare Monster Cookie Dough
In a medium bowl, combine the flour, cornstarch, baking soda, baking powder, and salt to create a dry mixture. In a larger bowl, cream together the unsalted butter, brown sugar, white sugar, and creamy peanut butter until fluffy and light. Add the vanilla extract and egg, mixing until well combined, then gradually incorporate the dry mixture. Stir in the oats, mini chocolate chips, and mini M&Ms, then chill the dough in the refrigerator for 40 minutes.

Step 2: Make Brownies
Preheat your oven to 325°F (163°C) and line a 9×9 inch baking pan with parchment paper, lightly greasing the sides. In a medium bowl, whisk together the flour, cocoa powder, cornstarch, and salt. In a mixer, beat together the sugars and eggs for about 5 minutes until fluffy and pale. Mix in the melted unsalted butter, oil, and vanilla, then fold in the dry ingredients. Pour the brownie batter into the prepared pan and spread it evenly before baking for 15 minutes to set slightly.

Step 3: Assemble and Bake
Once the brownie base has set, flatten the chilled monster cookie dough into discs and evenly layer it over the partially baked brownies. Gently press the cookie dough down to ensure it adheres to the brownie layer. Bake the assembled dessert for an additional 20-30 minutes, or until the top no longer jiggles and is a light golden brown. Allow the pan to cool completely before proceeding to slice into decadent squares.

How to Store and Freeze Monster Cookie Fudgy Brownies

Room Temperature: Keep the brownies in an airtight container at room temperature for up to 5 days to maintain their soft, fudgy texture.

Fridge: For longer storage, place the brownies in the fridge, where they can last up to 1 week. Be sure to let them come to room temperature for the best texture before serving.

Freezer: Freeze the brownies by wrapping them tightly in plastic wrap and then placing them in a freezer-safe bag. They will stay fresh for up to 3 months. Thaw in the fridge or at room temperature before enjoying.

Reheating: If you prefer them warm, simply reheat in the microwave for a few seconds. Enjoy your delicious Monster Cookie Fudgy Brownies!

Make Ahead Options

These Monster Cookie Fudgy Brownies are perfect for those busy days when time is tight but you still want to indulge in something homemade! You can prepare the brownie base and chill it in the fridge up to 3 days in advance, then simply bake the brownies before adding the monster cookie layer. Similarly, you can also make the monster cookie dough and refrigerate it overnight; this will allow the flavors to meld beautifully. When you’re ready to assemble, just spread the chilled cookie dough over the partially baked brownie layer, and finish baking. These tips ensure your brownies remain just as delicious while saving you precious time!

Expert Tips for Monster Cookie Fudgy Brownies

  • Chill the Dough: Ensure to chill the monster cookie dough for 40 minutes; this helps maintain its shape and prevents spreading too much during baking.

  • Avoid Overmixing: Mix the brownie batter just until combined to keep them rich and fudgy. Overmixing can lead to tougher brownies.

  • Check Your Oven: Double-check your oven temperature with an oven thermometer; uncertainties in temperature can lead to uneven baking of those delicious Monster Cookie Fudgy Brownies.

  • Cooling Time: Resist the temptation to cut into the brownies immediately. Allow them to cool completely to enhance their fudginess and flavor.

  • Use Quality Chocolate: Opt for high-quality chocolate chips or cocoa powder; the better the ingredients, the more delightful the flavor in every bite.

Monster Cookie Fudgy Brownies Variations

Feel free to explore creative twists to make these brownies uniquely yours!

  • Nut-Free: Swap creamy peanut butter with sunbutter for a delicious, nut-free alternative. Enjoy the same texture without the nuts.

  • Gluten-Free: Use certified gluten-free flour blends to make your brownies gluten-free. Your friends with dietary restrictions will thank you!

  • Flavor Boost: Add a pinch of espresso powder to the brownie batter for an enhanced chocolate flavor. This little addition can elevate the taste to gourmet levels.

  • Chewy Perfection: Substitute quick oats with old-fashioned oats for a heartier, chewier cookie layer. The texture difference will enchant your family.

  • Candy Variations: Instead of mini M&Ms, try using other colorful candies like Reese’s Pieces or Skittles. Each bite becomes a flavor surprise!

  • Fruity Twist: Toss in some dried fruit like cherries or cranberries for a fruity flavor burst. This adds a touch of tartness to balance the sweetness.

  • S’mores Inspired: Layer mini marshmallows and crushed graham crackers on top of the brownie layer before adding cookie dough. The result will be a delightful s’mores experience!

  • Ice Cream Delight: Serve these brownies warm with a scoop of vanilla ice cream on top and a drizzle of chocolate sauce for an indulgent treat. It enhances the overall experience wonderfully!

If you’re looking for even more delicious desserts, don’t forget to check out my delightful Blueberry Breakfast Cookies for a quick and tasty treat!

What to Serve with Monster Cookie Fudgy Brownies

Indulging in these rich brownies is great, but pairing them with delightful accompaniments takes your dessert game to a whole new level.

  • Vanilla Ice Cream: The creamy texture balances the fudgy brownies perfectly. A scoop of ice cream on warm brownies creates a delightful contrast.

  • Chocolate Sauce: Drizzle warm chocolate sauce over your brownies for an extra layer of decadence. The rich flavor enhances the chocolatey goodness and adds a touch of indulgence.

  • Whipped Cream: Light and fluffy whipped cream adds an airy texture that complements the dense brownies. Top with chocolate shavings for a classy presentation!

  • Fresh Berries: Juicy raspberries or strawberries provide a refreshing burst of flavor. Their tartness cuts through the sweetness and elevates each bite.

  • Peanut Butter Drizzle: For peanut butter lovers, a warm drizzle of peanut butter adds a rich, nutty flavor that’s irresistible. It’s like an extra hug for the brownies!

  • Coconut Macaroons: These chewy delights are an unexpected match. Their sweetness and coconut flavor add an exotic flair to your dessert spread, making it fun and festive.

  • Hot Chocolate: Pair your brownies with a cozy cup of hot chocolate for the ultimate indulgent experience. This duo is perfect for chilly evenings or holiday gatherings.

Monster Cookie Fudgy Brownies Recipe FAQs

How do I know when my brownie layer is fully cooked?
You want to bake the brownie layer until it’s set but still has a slight jiggle in the center. Check around the 15-minute mark – if it’s just firm and doesn’t appear wet, it’s ready for the cookie layer.

What if my monster cookie dough is too sticky?
If your monster cookie dough feels sticky, don’t worry! Chill the dough for a bit longer to firm it up. Alternatively, you can sprinkle a little extra flour, one tablespoon at a time, until you achieve a manageable consistency.

How should I store my Monster Cookie Fudgy Brownies?
Store your brownies in an airtight container at room temperature for up to 5 days. If you want to preserve their fresh taste longer, refrigerate them for up to a week, but allow them to come to room temperature before serving for the best texture.

Can these brownies be frozen?
Absolutely! To freeze, wrap your brownies tightly in plastic wrap, then place them in a freezer-safe bag. They will stay fresh for up to 3 months. When you’re ready to indulge, simply thaw them in the fridge overnight or at room temperature for a couple of hours.

Are there any allergy considerations for this recipe?
Yes, if you’re making these brownies for someone with nut allergies, you can substitute the creamy peanut butter with sunbutter or a seed butter alternative. Always double-check the ingredient labels to ensure they’re allergy-friendly!

Can I use gluten-free flour for this recipe?
Certainly! You can swap both the brownie and cookie layers with a gluten-free flour blend. Just make sure to check the packaging for any specific measurements or additional binding agents needed to achieve the perfect texture.

Monster Cookie Fudgy Brownies

Monster Cookie Fudgy Brownies: Irresistibly Decadent Delight

Indulge in these Monster Cookie Fudgy Brownies, a perfect blend of rich chocolate and playful cookie flavors.
Prep Time 40 minutes
Cook Time 35 minutes
Chill Time 40 minutes
Total Time 1 hour 55 minutes
Servings: 16 squares
Course: Dessert
Calories: 200

Ingredients
  

For the Brownie Layer
  • 1 cup White Granulated Sugar Consider using brown sugar for a deeper flavor.
  • 2 large Eggs Provide structure and moisture.
  • 1 Egg Yolk Provides structure and moisture.
  • 5 tbsp Unsalted Butter Adds richness.
  • 1/3 cup Canola or Vegetable Oil Adds moisture and tenderness.
  • 2 tsp Pure Vanilla Extract Enhances overall flavor.
  • 1/2 cup All-Purpose Flour Provides structure.
  • 3/4 cup Unsweetened Cocoa Powder Boosts chocolate flavor.
  • 1 tbsp Cornstarch Tenderizes texture.
  • 1/4 tsp Salt Balances the sweetness.
  • 1/2 cup Semi-Sweet Chocolate Chips Adds richness.
  • 1/2 cup Milk Chocolate Chips Adds richness.
For the Monster Cookie Layer
  • 1/2 cup All-Purpose Flour Provides structure.
  • 1 tsp Cornstarch Helps tenderize the cookies.
  • 1/2 tsp Baking Soda Acts as a leavening agent.
  • 1/8 tsp Baking Powder Adds fluffiness.
  • 1/4 tsp Salt Enhances flavor.
  • 1/4 cup Unsalted Butter Balances flavors and adds moisture.
  • 1/3 cup Brown Sugar Increases softness.
  • 1/8 cup White Granulated Sugar Provides an extra boost of sweetness.
  • 1/4 cup Creamy Peanut Butter Contributes flavor and chewiness.
  • 1 large Egg Binds all ingredients together.
  • 1/2 cup Quick Oats Adds nice texture.
  • 1/2 cup Mini Chocolate Chips Offers bursts of chocolate.
  • 1/2 cup Mini M&Ms Offers vibrant color.

Equipment

  • 9x9-inch baking pan
  • Mixing bowls
  • whisk
  • mixer
  • Parchment Paper

Method
 

Step-by-Step Instructions
  1. In a medium bowl, combine the flour, cornstarch, baking soda, baking powder, and salt to create a dry mixture. In a larger bowl, cream together the unsalted butter, brown sugar, white sugar, and creamy peanut butter until fluffy and light. Add the vanilla extract and egg, mixing until well combined, then gradually incorporate the dry mixture. Stir in the oats, mini chocolate chips, and mini M&Ms, then chill the dough in the refrigerator for 40 minutes.
  2. Preheat your oven to 325°F (163°C) and line a 9x9 inch baking pan with parchment paper, lightly greasing the sides. In a medium bowl, whisk together the flour, cocoa powder, cornstarch, and salt. In a mixer, beat together the sugars and eggs for about 5 minutes until fluffy and pale. Mix in the melted unsalted butter, oil, and vanilla, then fold in the dry ingredients. Pour the brownie batter into the prepared pan and spread it evenly before baking for 15 minutes to set slightly.
  3. Once the brownie base has set, flatten the chilled monster cookie dough into discs and evenly layer it over the partially baked brownies. Gently press the cookie dough down to ensure it adheres to the brownie layer. Bake the assembled dessert for an additional 20-30 minutes, or until the top no longer jiggles and is a light golden brown. Allow the pan to cool completely before proceeding to slice into decadent squares.

Nutrition

Serving: 1squareCalories: 200kcalCarbohydrates: 26gProtein: 3gFat: 10gSaturated Fat: 5gPolyunsaturated Fat: 2gMonounsaturated Fat: 2gCholesterol: 25mgSodium: 90mgPotassium: 150mgFiber: 1gSugar: 15gVitamin A: 200IUCalcium: 20mgIron: 1mg

Notes

Chill the monster cookie dough for 40 minutes to maintain shape, avoid overmixing the brownie batter, check your oven accuracy, and allow brownies to cool completely for the best texture.

Tried this recipe?

Let us know how it was!

Deliciously Colorful Halloween Bark That’s Super Easy to Make

As the cool autumn air begins to weave its way through the trees, a hint of mischief fills the atmosphere. It’s the perfect season for indulgent treats like Easy Halloween Bark, where creative cooking meets festive fun! This delightful recipe combines creamy white chocolate with vibrant candy melts and playful sprinkles, making it not just a holiday favorite but also an effortlessly engaging project for the whole family. Not only is it quick to prepare, but it also serves as a gorgeous centerpiece for parties or a delicious gift for friends. With endless customization options for colors and toppings, you can let your imagination run wild! Ready to unleash a little Halloween magic in your kitchen? Let’s dive into this colorful, crunchy delight!

Why is Halloween Bark so irresistible?

Easy to Make: The straightforward process requires minimal cooking skills, allowing everyone to join in the fun, from kids to seasoned chefs.

Colorful Fun: A vibrant mix of candy melts creates a treat that’s as visually appealing as it is delicious, perfect for impressing guests or bringing holiday cheer to any gathering.

Endless Customization: You can easily swap out colors and toppings to match different holidays or personal tastes, making it a versatile go-to for all occasions.

Quick to Prepare: In just under an hour, you can whip up this delightful treat, making it an excellent last-minute option for parties or surprise gifts.

Crowd Pleaser: Whether shared with kids at home or served at a Halloween bash, this bark is guaranteed to steal the show and delight everyone who tries it!

Halloween Bark Ingredients

• Create your delightful Halloween Bark with these simple ingredients!

For the Bark

  • White Chocolate Chips (24 ounces) – Provides a sweet and creamy base; substitute with white chocolate bars if you prefer a richer flavor.
  • Black Candy Melts (2 ounces) – Adds a spooky color; feel free to use any color you like based on your theme.
  • Purple Candy Melts (2 ounces) – Brightens up the festive look; other colors can replace them to match different celebrations.
  • Orange Candy Melts (2 ounces) – Essential for that Halloween vibe; can be swapped with food coloring mixed into white chocolate if necessary.

For the Toppings

  • Halloween Sprinkles – Brings fun and excitement; alternatively, use small candies like M&Ms for extra crunch and color.
  • Food Coloring – An optional ingredient for custom candy melt shades to enhance creativity in your Halloween Bark.

With these ingredients, you’re on your way to crafting a deliciously festive treat that’s sure to wow!

Step‑by‑Step Instructions for Halloween Bark

Step 1: Prepare Your Workspace
Start by lining a large baking sheet with a Silpat mat or parchment paper, ensuring that it’s flat and corners are secured. This will help prevent the Halloween Bark from sticking. With your workspace ready, gather all necessary ingredients for a smooth, enjoyable cooking experience.

Step 2: Melt the White Chocolate
Place 24 ounces of white chocolate chips in a heat-proof bowl over a pot of simmering water. Stir frequently for about 5–7 minutes, or until the chocolate is fully melted and smooth. Be cautious to avoid any steam contacting the chocolate, which can cause it to seize up, ensuring a silky base for your Halloween Bark.

Step 3: Melt the Candy Melts
In separate bowls, place 2 ounces each of black, purple, and orange candy melts. Use the double boiler method to melt them, stirring gently for 3–5 minutes until each color is smooth and glossy. Alternatively, you may microwave them in 30-second intervals, stirring in between, for convenient melting without constant supervision.

Step 4: Spread the White Chocolate
Once melted, pour the smooth white chocolate onto the lined baking sheet, using a spatula to spread it evenly to about 1/4-inch thickness. This will form the base of your Halloween Bark, creating a perfect canvas for the colorful candy layers to come.

Step 5: Swirl in the Candy Melts
Drop spoonfuls of the melted candy melts onto the white chocolate. Using a toothpick, swirl the colors together gently to create a marbled effect. Take care not to overmix, as you want to see distinct colored swirls in the finished Halloween Bark.

Step 6: Add Toppings
Now it’s time to have some fun! Sprinkle your choice of Halloween sprinkles and candies over the top of the chocolate mixture, ensuring a generous and festive decoration. This not only adds color but also extra crunch for a delightful texture in each bite of your Halloween Bark.

Step 7: Set the Bark
Place the prepared baking sheet in the refrigerator for about 30 minutes or leave it at room temperature for about 2 hours. You’ll know it’s ready when the chocolate is fully hardened and feels firm to the touch. This step is key for achieving that satisfying snap when you break the bark.

Step 8: Cut into Pieces
Once the Halloween Bark has set, remove it from the refrigerator. Carefully lift the edges of the parchment paper to transfer the bark to a cutting board. Use a sharp knife to cut it into approximately 16 pieces of desired size, showcasing the vibrant colors and festive shapes within each piece.

Make Ahead Options

These Easy Halloween Bark treats are perfect for meal prep enthusiasts! You can melt the white chocolate and candy melts, then store them separately in airtight containers for up to 3 days. Just remember to refrigerate the melted candies to maintain their texture. On the day you plan to serve, simply follow the last steps: spread the melted white chocolate, swirl in the candy, and add your favorite sprinkles. Once set—either in the fridge for 30 minutes or at room temperature for 2 hours—cut the bark into pieces, and you’ll have a festive treat ready to impress guests without the stress, making it an ideal option for busy weeknights or holiday gatherings!

How to Store and Freeze Halloween Bark

Room Temperature: Store Halloween Bark in an airtight container at room temperature for up to 2-3 weeks, ensuring it remains fresh and crunchy.

Fridge: For longer storage, place the container in the fridge. This can extend the shelf life to about 4 weeks, but be mindful that it may lose some crunchiness.

Freezer: If you want to keep it even longer, you can freeze Halloween Bark for up to 3 months. Wrap it tightly in plastic wrap and then place it in a freezer-safe bag to prevent freezer burn.

Reheating: Avoid reheating; instead, let frozen bark thaw in the fridge overnight. Enjoy the delightful crunch without compromising its texture!

What to Serve with Easy Halloween Bark?

To create a whimsical gathering that celebrates the spirit of Halloween, consider these delightful pairings!

  • Festive Fruit Salad: A colorful mix of autumn fruits adds a fresh, juicy contrast, brightening your spread and offering a refreshing palate cleanse after the sweet bark.

  • Pumpkin Spice Latte: This warm, spiced drink complements the sweetness of the bark perfectly, evoking cozy vibes and the essence of fall in every comforting sip.

  • Ginger Snap Cookies: With their crunchy texture and spicy kick, these cookies provide a lovely contrast to the sweet, creamy bark, inviting guests to savor both treats.

  • Chocolate-Covered Pretzels: Combining salty and sweet, they add a crunchy bite alongside the Halloween Bark, making for the ultimate snack pairing.

  • Candy Corn Cupcakes: A whimsical dessert that ties back to classic Halloween flavors, these cupcakes delight with their sweetness while coordinating beautifully with your Halloween-themed treats.

  • Apple Cider Float: A refreshing twist! Top warm apple cider with a scoop of vanilla ice cream for a cozy drink that matches the festive vibes of the Halloween Bark.

Bring together these delicious complements to make your Halloween celebration even more magical!

Halloween Bark: Fun Variations Await!

Feel free to get creative with your Halloween Bark to enhance flavors and textures that suit your family’s taste!

  • Dairy-Free: Swap white chocolate chips with dairy-free chocolate chips for a delicious vegan version.
  • Nutty Twist: Add chopped nuts like almonds or pecans for an extra crunchy texture; they pair wonderfully with the sweetness.
  • Extra Flavor: Mix in a teaspoon of vanilla or almond extract with the melted chocolate for a delightful flavor boost.
  • Spicy Kick: Sprinkle a pinch of cayenne or chili powder on top before it sets for a surprising twist; the heat beautifully contrasts with the sweetness!
  • Fruit Fun: Toss in dried fruit like cranberries or cherries among the sprinkles for a chewy surprise in each bite.
  • Colorful Celebration: Use pastel candy melts for Easter or red and blue melts for the Fourth of July—this bark can be festive all year round!
  • Layered Delight: Create two layers by letting the first layer set partially, spreading a second color of melted chocolate over it before topping with sprinkles.
  • Chocolate Lovers: Mix dark or milk chocolate into the white chocolate blend to achieve a rich, decadent flavor that chocolate enthusiasts will adore.

With so many options, you can make this Halloween Bark uniquely yours—let your imagination run wild and enjoy making it with your loved ones! If you’re interested in more festive ideas, check out our guide on holiday treat decoration techniques and our collection of creative bark recipes.

Expert Tips for Halloween Bark

  • Melt Order Matters: Start with the candy melts first since they set slower than white chocolate, ensuring a smoother mixing process.

  • Heat Control: Use a double boiler or microwave, keeping an eye on the timing; overheating can cause chocolate to seize, ruining your Halloween Bark.

  • Toothpick Technique: When swirling the candy melts, use a light hand to create distinct swirls. Overmixing will give you muddy colors instead of vibrant, festive patterns.

  • Storing Wisely: To keep your Halloween Bark fresh, store it in an airtight container at room temperature, where it can last for 2-3 weeks without losing its crunch.

  • Mix It Up: Don’t hesitate to experiment with seasonal themes by changing the colors or toppings; this allows you to enjoy Halloween Bark for various celebrations throughout the year!

Halloween Bark Recipe FAQs

What kind of white chocolate should I use for Halloween Bark?
Absolutely! You can use either white chocolate chips or bars for your Halloween Bark. Chocolate bars will provide a richer flavor, while chips melt smoothly and are easier to find in stores. Just make sure they don’t contain any additives that could affect the melting process!

How should I store my Halloween Bark?
To keep your Halloween Bark fresh, store it in an airtight container at room temperature for up to 2-3 weeks. If you want it to last longer, placing it in the refrigerator can extend its shelf life to about 4 weeks. However, keep in mind that refrigeration might make the bark slightly less crunchy.

Can I freeze Halloween Bark?
Yes, you can freeze Halloween Bark! To do this, wrap it tightly in plastic wrap, ensuring there’s no air exposure, and then place it in a freezer-safe bag. It will maintain its quality for up to 3 months. When you want to enjoy it, simply let it thaw in the fridge overnight.

What can I do if my candy melts are not melting properly?
Very! If your candy melts aren’t melting smoothly, make sure you’re using a double boiler method or microwave them in short intervals. Stir frequently to avoid overheating. If they seize, you can add a small teaspoon of vegetable oil to help restore smoothness, but be careful not to add too much!

Are there any dietary considerations for Halloween Bark?
Definitely important! While this recipe is vegetarian, always check for specific dietary needs. If you have a nut allergy, ensure that the chocolate and candy melts are nut-free. If you’re making it for kids or pets, be cautious with any toppings, like sprinkles or gummies, that may contain allergens.

Halloween Bark

Deliciously Colorful Halloween Bark That's Super Easy to Make

This Halloween Bark combines creamy white chocolate and vibrant candy melts for festive fun.
Prep Time 15 minutes
Cook Time 15 minutes
Setting Time 30 minutes
Total Time 1 hour
Servings: 16 pieces
Course: Dessert
Cuisine: American
Calories: 200

Ingredients
  

For the Bark
  • 24 ounces White Chocolate Chips Substitute with white chocolate bars if preferred.
  • 2 ounces Black Candy Melts Feel free to use any color.
  • 2 ounces Purple Candy Melts Other colors can replace them.
  • 2 ounces Orange Candy Melts Can be swapped with food coloring.
For the Toppings
  • Halloween Sprinkles Use small candies like M&Ms for crunch.
  • Food Coloring Optional for custom shades.

Equipment

  • Baking Sheet
  • Silpat mat or parchment paper
  • Heat-proof bowl
  • spatula
  • Toothpick
  • Knife

Method
 

Step-by-Step Instructions
  1. Line a large baking sheet with a Silpat mat or parchment paper.
  2. Melt 24 ounces of white chocolate chips over simmering water, stirring until smooth.
  3. In separate bowls, melt 2 ounces each of black, purple, and orange candy melts using the double boiler method.
  4. Pour the melted white chocolate onto the lined baking sheet and spread it evenly.
  5. Drop spoonfuls of the melted candy melts onto the white chocolate and swirl them together.
  6. Sprinkle Halloween sprinkles and candies over the chocolate mixture.
  7. Refrigerate for about 30 minutes or let it set at room temperature for 2 hours.
  8. Once set, lift the bark using parchment and cut into about 16 pieces.

Nutrition

Serving: 1pieceCalories: 200kcalCarbohydrates: 28gProtein: 2gFat: 10gSaturated Fat: 6gMonounsaturated Fat: 4gCholesterol: 10mgSodium: 30mgPotassium: 50mgSugar: 20gCalcium: 2mgIron: 2mg

Notes

Store in an airtight container at room temperature for 2-3 weeks. For longer storage, refrigerate or freeze.

Tried this recipe?

Let us know how it was!

Pumpkin Spice Churros with Velvety Brown Sugar Caramel

As the leaves begin to change and the air turns crisp, there’s nothing quite like the warm embrace of Pumpkin Spiced Churros with Decadent Brown Sugar Caramel. When I first bit into one of these delightful treats, I was swept away by the comforting blend of spices that scream fall. Not only are these churros perfectly crispy on the outside and soft on the inside, but they also come together quickly—a must for anyone eager to trade fast food for a homemade dessert. And let’s not forget the rich brown sugar caramel that elevates every bite into a moment of pure bliss. Are you ready to take your taste buds on a cozy autumn adventure? Let’s dive in!

Why love these Pumpkin Spice Churros?

Warm, Cozy Flavors: Each bite is infused with pumpkin spice, capturing the essence of fall and wrapping you in nostalgia.

Quick and Easy: These churros can be prepared in under an hour, making them a perfect choice for spontaneous gatherings or cozy nights in.

Crowd-Pleasing Delight: They’re always a hit at parties, giving guests a taste of comfort that leaves them wanting more, just like my Shawarma Bowl Flavorful dish.

Irresistibly Dippable: The pairing with velvety brown sugar caramel adds a decadent touch, transforming your dessert into an experience worth sharing.

Versatile Treats: From Thanksgiving gatherings to family movie nights, they fit right into any occasion and can even be stored for later indulgence!

Pumpkin Spice Churros Ingredients

• Ready to delight your taste buds with Pumpkin Spice Churros? Here’s what you’ll need!

For the Brown Sugar Caramel

  • Dark Brown Sugar – Adds a rich depth of sweetness; substitute with light brown sugar for a lighter flavor.
  • Heavy Cream – Ensures a creamy texture for the caramel; no substitutes recommended.
  • Kosher Salt – Balances sweet flavors; regular table salt can be used, but reduce the amount slightly.
  • Unsalted Butter – Brings richness to the caramel; if using salted butter, omit added salt.
  • Vanilla Extract – Introduces a delightful floral note; consider Mexican vanilla for an extra flavor boost.

For the Churros

  • Cane Sugar – Used for rolling the churros; granulated sugar works as a substitute.
  • Pumpkin Spice – Essential for that fall flavor; no substitutes recommended to maintain authenticity.
  • Cinnamon – Enhances the warm spiced profile; nutmeg can be used for a different twist.
  • Water – The base for your churro dough; no substitutions needed.
  • Unbleached All-Purpose Flour – Provides structure; use gluten-free flour for a similar texture.
  • Large Egg – Key for binding the dough; no substitutes as it’s crucial for consistency.
  • Canola Oil – Ideal for frying; alternative options include vegetable or peanut oil.

Step‑by‑Step Instructions for Pumpkin Spiced Churros

Step 1: Make Brown Sugar Caramel
In a medium saucepan over high heat, combine dark brown sugar, heavy cream, and a pinch of kosher salt. Stir continuously for about 5 minutes until the mixture thickens and bubbles. Once the caramel reaches a glossy, thick consistency, remove it from the heat. Add unsalted butter and vanilla extract, stirring until completely melted. Allow it to cool slightly before transferring to an airtight jar.

Step 2: Prepare Spiced Sugar
In a shallow dish, mix together cane sugar, pumpkin spice, and a pinch of kosher salt to create the spiced sugar mixture. Set this aside as you will use it to coat the churros once they are fried. The sugar should have a fragrant aroma from the pumpkin spice, giving you a preview of the delicious Pumpkin Spiced Churros to come.

Step 3: Make Churro Dough
In a medium saucepan over medium heat, combine water, sugar, a pinch of salt, and unsalted butter. Stir until boiling, then reduce the heat to low. In a separate bowl, whisk together unbleached all-purpose flour, pumpkin spice, and cinnamon. Carefully add the flour mixture to the boiling mixture, stirring vigorously until it forms a coherent dough ball. Allow it to cool for about 5 minutes, giving it time for easier handling.

Step 4: Add Wet Ingredients
Once the dough has cooled slightly, incorporate a beaten large egg and a splash of vanilla extract into the mixture. Mix thoroughly until you achieve a smooth and consistent dough, ensuring there are no lumps. This step is crucial for the creamy texture of your Pumpkin Spiced Churros that will be crispy on the outside and soft on the inside.

Step 5: Fry Churros
In a deep skillet, heat canola oil to 350°F (175°C), ensuring it’s hot enough for frying. Using a piping bag fitted with a star tip, pipe 5 to 6-inch lengths of churro dough directly into the hot oil. Cut the dough with scissors, frying for about 2 minutes on each side until golden brown. Once cooked, transfer the churros to a plate lined with paper towels to drain excess oil, ensuring they stay crispy.

Step 6: Coat and Serve
Immediately after frying, roll each churro in the prepared spiced sugar mixture, coating them generously for that perfect sweet crunch. Serve the warm Pumpkin Spiced Churros alongside the decadent brown sugar caramel for dipping, allowing their delightful flavors to shine. These treats are perfect for sharing at gatherings or cozy nights in, bringing warmth and sweetness to any occasion.

Pumpkin Spice Churros Variations

Feel free to explore your creativity with these Pumpkin Spice Churros, adding your own flair to this delightful treat!

  • Chocolate Twist: Add ¼ cup cocoa powder to the churro dough for a delicious chocolatey version. The chocolate pairs wonderfully with the pumpkin spice and caramel.

  • Nutty Flavor: Mix in ¼ cup finely chopped nuts, such as pecans or walnuts, into the dough for added texture and a nutty crunch. It’s a delightful surprise with each bite.

  • Coconut Sugar: Substitute cane sugar with coconut sugar for a unique flavor twist while making them a bit healthier. The slight caramel taste of coconut sugar deepens the complexity!

  • Spicy Kick: Add a pinch of cayenne or chili powder to the sugar mixture for an unexpected kick that perfectly complements the sweetness. The warmth will keep you cozy!

  • Cinnamon Sugar: Enhance the churros with a cinnamon sugar sprinkle after frying. Simply combine sugar and ground cinnamon for added sweetness and aroma.

  • Fruit-filled Surprise: Pipe some apple or pumpkin puree into the center of each churro before frying for a sweet fruit surprise inside. It’s like having two desserts in one!

  • Herbal Infusion: Include a touch of fresh rosemary or thyme into the batter for an intriguing herbaceous flavor that contrasts beautifully with the sweet caramel.

These variations ensure that you can enjoy these Pumpkin Spice Churros in multiple ways, just like enjoying a warm cup of Joumou Haitian Pumpkin soup or a delightful Shawarma Bowl Flavorful for a complete cozy experience.

Make Ahead Options

These Pumpkin Spice Churros are an excellent choice for meal prep, making your autumn gatherings a breeze! You can prepare the churro dough and refrigerate it for up to 8 hours without compromising quality. Simply store it in an airtight container to keep the moisture intact. Additionally, whip up the rich brown sugar caramel 1-2 days in advance and refrigerate it in a covered jar; it’ll remain just as delicious! When you’re ready to serve, heat the caramel gently and fry the churros fresh from the fridge for that signature crispy texture. This way, you can enjoy warm, delightful Pumpkin Spice Churros without any last-minute hassle!

Expert Tips for Pumpkin Spice Churros

  • Perfect Piping Height: Use a piping bag with a star tip to create that classic churro shape. The star tip helps the sugar adhere beautifully.

  • Avoid Sogginess: Don’t double the batter; excess moisture from the eggs can lead to soggy churros. Stick to the given quantity for best results.

  • Oil Temperature Check: Always check the oil temperature before frying! If it’s not hot enough, the churros may absorb too much oil and lose their crispiness.

  • Quick Cooling Technique: Allow the churro dough to cool for just 5 minutes before adding the egg. This prevents cooking the egg and ensures your Pumpkin Spice Churros are light and airy.

  • Flavor Variations: Feeling adventurous? Add a tablespoon of cocoa powder to the dough for chocolate-spiced churros, giving them a delightful twist.

What to Serve with Pumpkin Spiced Churros with Decadent Brown Sugar Caramel

As the warmth of pumpkin spice fills the air, it’s time to create the perfect ensemble that takes your dessert experience to the next level.

  • Creamy Vanilla Ice Cream: The cool, creamy texture complements the warm churros beautifully, creating a pleasing contrast of temperatures.

  • Rich Hot Chocolate: A steaming mug of hot chocolate adds a decadent touch, enhancing the cozy autumn feel of your meal.

  • Spiced Apple Cider: This drink offers a warm, fruity balance that pairs perfectly with the churros’ crispy texture and spiced flavor.

  • Whipped Cream: Light and airy whipped cream provides a delightful topping, adding an extra layer of richness without overpowering the flavors.

  • Maple Syrup: A drizzle of pure maple syrup brings a natural sweetness that elevates the churros’ flavors while adding a touch of fall.

  • Pumpkin Pie: For those who can’t get enough pumpkin, serve these churros alongside slices of classic pumpkin pie, doubling down on your fall flavors.

  • Pecan Pie: The nutty sweetness of pecans perfectly contrasts the churros, creating a dessert table that celebrates the season.

  • Chai Tea: The warm spices of chai tea meld beautifully with the pumpkin spice churros, offering a soothing beverage option to round out your meal.

Storage Tips for Pumpkin Spice Churros

  • Room Temperature: Enjoy your Pumpkin Spice Churros fresh for the best flavor and texture. If you need to store them, keep them at room temperature for up to 1 day in a cool, dry place.

  • Fridge: If you have leftovers, refrigerate the churros in an airtight container for up to 3 days to maintain freshness. Reheat gently in the microwave to regain some crispiness.

  • Freezer: For longer storage, freeze the churros in a single layer on a baking sheet. Once frozen, transfer them to a freezer bag for up to 2 months. Reheat directly from frozen in the oven at 350°F (175°C) for about 10-15 minutes.

  • Caramel Storage: The brown sugar caramel can be stored in an airtight container in the fridge for up to 2 weeks. Reheat in a small saucepan over low heat, stirring until warm before serving.

Pumpkin Spice Churros with Velvety Brown Sugar Caramel Recipe FAQs

How do I choose the right ripeness of pumpkin for this recipe?
Absolutely! For the best results, opt for a sugar pumpkin or pie pumpkin—these are sweeter and have a smoother texture. When selecting, look for firm pumpkins with a hard, blemish-free skin. Avoid any with soft spots or dark blemishes, as these indicate overripeness.

What is the best way to store leftover churros?
The more the merrier! For maximum freshness, keep your Pumpkin Spice Churros at room temperature for up to 1 day in a cool, dry place. If you need to store them longer, place them in an airtight container in the fridge for up to 3 days. Reheat gently in the microwave to restore some of their original crispiness!

Can I freeze the churros for later enjoyment?
Absolutely! To freeze your churros, lay them out on a baking sheet in a single layer and freeze them until solid. Once frozen, transfer them to a freezer bag or airtight container. They’ll keep well for up to 2 months. To enjoy, reheat them directly from frozen in the oven at 350°F (175°C) for about 10-15 minutes to regain that crispy texture.

What should I do if my churro dough is too runny?
No worries! If your dough is too runny, it could be due to excess moisture. To fix this, add a couple of tablespoons of flour gradually until you reach the right consistency—firm enough to hold its shape but still smooth. Make sure your wet ingredients are measured accurately when you prepare the dough.

Can I make these churros gluten-free?
Very much so! If you’d like to prepare gluten-free Pumpkin Spice Churros, simply substitute the unbleached all-purpose flour with a gluten-free flour blend. Make sure it includes xanthan gum if your blend doesn’t include it naturally to help mimic the structure and texture of traditional flour.

Is it safe to serve these churros to dogs?
While your furry friends might be curious about that sweet smell, it’s best to keep these treats away from them. The spices and sugar can upset a dog’s stomach. Additionally, the fried texture can pose a choking hazard, so save these delightful churros just for you and your family!

Pumpkin Spice Churros

Pumpkin Spice Churros with Velvety Brown Sugar Caramel

Delightful Pumpkin Spice Churros paired with rich brown sugar caramel for a cozy autumn dessert experience.
Prep Time 30 minutes
Cook Time 20 minutes
Cooling Time 5 minutes
Total Time 55 minutes
Servings: 8 churros
Course: Dessert
Cuisine: American
Calories: 150

Ingredients
  

For the Brown Sugar Caramel
  • 1 cup Dark Brown Sugar Substitute with light brown sugar for a lighter flavor.
  • 1/2 cup Heavy Cream No substitutes recommended.
  • 1 teaspoon Kosher Salt Regular table salt can be used, but reduce the amount slightly.
  • 2 tablespoons Unsalted Butter If using salted butter, omit added salt.
  • 1 teaspoon Vanilla Extract Consider Mexican vanilla for extra flavor.
For the Churros
  • 1 cup Cane Sugar Granulated sugar works as a substitute.
  • 2 teaspoons Pumpkin Spice No substitutes recommended.
  • 1 teaspoon Cinnamon Nutmeg can be used for a different twist.
  • 1 cup Water No substitutions needed.
  • 1 cup Unbleached All-Purpose Flour Use gluten-free flour for a similar texture.
  • 1 Large Egg No substitutes as it’s crucial for consistency.
  • 2 cups Canola Oil Alternative options include vegetable or peanut oil.

Equipment

  • medium saucepan
  • Piping Bag
  • deep skillet

Method
 

Step‑by‑Step Instructions
  1. In a medium saucepan over high heat, combine dark brown sugar, heavy cream, and a pinch of kosher salt. Stir continuously for about 5 minutes until the mixture thickens and bubbles. Once the caramel reaches a glossy, thick consistency, remove it from the heat. Add unsalted butter and vanilla extract, stirring until completely melted. Allow it to cool slightly before transferring to an airtight jar.
  2. In a shallow dish, mix together cane sugar, pumpkin spice, and a pinch of kosher salt to create the spiced sugar mixture. Set this aside as you will use it to coat the churros once they are fried.
  3. In a medium saucepan over medium heat, combine water, sugar, a pinch of salt, and unsalted butter. Stir until boiling, then reduce the heat to low. In a separate bowl, whisk together unbleached all-purpose flour, pumpkin spice, and cinnamon. Carefully add the flour mixture to the boiling mixture, stirring vigorously until it forms a coherent dough ball. Allow it to cool for about 5 minutes.
  4. Incorporate a beaten large egg and a splash of vanilla extract into the dough mixture. Mix thoroughly until you achieve a smooth and consistent dough, ensuring there are no lumps.
  5. In a deep skillet, heat canola oil to 350°F (175°C). Using a piping bag fitted with a star tip, pipe 5 to 6-inch lengths of churro dough into the hot oil. Cut the dough with scissors, frying for about 2 minutes on each side until golden brown.
  6. Immediately after frying, roll each churro in the spiced sugar mixture, coating them generously. Serve warm with the brown sugar caramel for dipping.

Nutrition

Serving: 1churroCalories: 150kcalCarbohydrates: 23gProtein: 1gFat: 6gSaturated Fat: 4gPolyunsaturated Fat: 0.5gMonounsaturated Fat: 1.5gCholesterol: 30mgSodium: 80mgPotassium: 40mgFiber: 1gSugar: 7gCalcium: 1mgIron: 4mg

Notes

For the best results, monitor oil temperature and do not double the batter to avoid soggy churros.

Tried this recipe?

Let us know how it was!

Deliciously Creamy Indian Pumpkin Curry You’ll Love

The aroma of warm spices swirling through my kitchen instantly transports me to evenings spent around my grandmother’s table, sharing stories over comforting bowls of curry. This Creamy Vegan Indian Pumpkin Curry (Rasedar Kaddu) encapsulates the very essence of those cherished moments, offering a deliciously creamy vegan delight that’s both gluten-free and incredibly satisfying. With just 10 minutes of prep and 20 minutes of cooking, it’s a weeknight lifesaver that brings a taste of India to your dinner table without the fuss. Not only is it a hearty one-pot meal, but it’s also a canvas for creativity—think of adding spinach or chickpeas for a delightful twist. Ready to discover how to whip up this cozy dish? Let’s dive into the magic of Indian flavors!

Why is Indian Pumpkin Curry so special?

Comforting Flavors: This Indian Pumpkin Curry is rich and creamy, thanks to coconut milk, creating an inviting dish that warms the soul.

One-Pot Wonder: With minimal cleanup, it’s the ideal choice for a quick weeknight meal. Just pop everything in your Instant Pot and let it work its magic!

Versatile Options: Want to switch it up? Add spinach or chickpeas for extra nutrition and heartiness, ideal for those who love experimenting with flavors.

Nutrient-Packed: Each serving provides approximately 236 calories, making it not only delicious but also a filling and nutritious option.

Cultural Comfort: Embrace the joy of Indian home cooking with this delightful recipe. You can feel the warmth of the season with every hearty scoop, just like in Joumou Haitian Pumpkin during special occasions.

Indian Pumpkin Curry Ingredients

For the Curry
Pumpkin – The star ingredient that brings sweetness and creaminess to this Indian Pumpkin Curry.
Avocado Oil – Ideal for sautéing; any cooking oil can be used as a substitute.
Black Mustard Seeds – Adds a flavorful crunch; can be replaced with brown mustard seeds if necessary.
Fennel Seeds – Imparts an aromatic flavor; feel free to omit for a simpler taste.
Kashmiri Dried Chillies – Provides color and mild spiciness; red chili flakes can replace them based on your heat preference.
Garlic – Fresh garlic is recommended for depth of flavor in the curry.
Fresh Ginger – Adds warmth and freshness; use it sparingly to avoid overpowering the dish.
Onion – Finely chopped to create a sweet and foundational flavor for the curry base.
Spice Mix (Coriander, Cumin, Chili Powder, Turmeric, Garam Masala) – Essential for seasoning the curry; adjust according to your taste preferences.
Curry Leaves – Enhance the authentic South Indian flavor; can be skipped if you don’t have any on hand.
Tomatoes – Fresh tomatoes contribute acidity and body; canned can work in a pinch.
Water – Helps adjust the curry’s consistency; use as needed.
Coconut Milk – Creates the rich creaminess of the curry; you can modify the amount for a thicker texture.
Lemon Juice – Brightens the dish; adjust to taste for the perfect balance.
Cilantro – Freshly chopped for garnish, adding a touch of color and freshness.

This collection of ingredients sets the stage for the delightful, cozy experience that is Indian Pumpkin Curry. Don’t forget to embrace the creativity of this dish!

Step‑by‑Step Instructions for Indian Pumpkin Curry

Step 1: Prepare the Pumpkin
Begin by washing and dicing the pumpkin into 1.5-inch pieces, peeling it if you prefer a smoother texture. Make sure to remove any seeds, as this will enhance the creamy consistency of your Indian Pumpkin Curry. Set the diced pumpkin aside as you get your pot ready.

Step 2: Sauté the Spices
Set your Instant Pot to sauté mode and add 2 tablespoons of avocado oil. Once hot, toss in 1 teaspoon of black mustard seeds, 1 teaspoon of fennel seeds, and 2-3 Kashmiri dried chilies. Sauté for about 30 seconds until the mustard seeds crackle and the spices become fragrant, filling your kitchen with warm, enticing aromas.

Step 3: Aroma Boost
Immediately add 2 minced garlic cloves and 1 tablespoon of freshly grated ginger to the pot. Sauté for about 15 seconds, stirring constantly to prevent burning, until the garlic is golden and aromatic. This step will create a flavorful foundation for your Indian Pumpkin Curry.

Step 4: Add Onions
Next, stir in 1 finely chopped onion and cook for 3-4 minutes until the onion is softened and golden brown. If it starts to stick, add a splash of water to loosen it up. This ingredient builds sweetness and depth, crucial for your curry base.

Step 5: Spice it Up
Stir in 1 tablespoon each of ground coriander, cumin, chili powder, turmeric, and garam masala, along with a few curry leaves if available. Sauté for an additional 30 seconds to bloom the spices, allowing their flavors to deepen and blend beautifully into the mixture.

Step 6: Tomato Integration
Incorporate 2 chopped tomatoes into the pot and cook for 3-4 minutes until softened and starting to break down. If it seems too thick, add a little water to adjust the consistency. This will enrich your curry with acidity and body, enhancing the overall flavor profile.

Step 7: Pump Up the Pumpkin
Now, add the diced pumpkin and a generous pinch of salt, stirring well to combine. Cook for 2 minutes, allowing the pumpkin to absorb the flavors, ensuring that it will be perfectly seasoned as it cooks through in the next steps.

Step 8: Pressure Cooking
Pour in enough water to immerse the pumpkin and stir in 1 teaspoon of garam masala. Cancel the sauté mode, close the lid, and set the Instant Pot to pressure cook on normal for 2-3 minutes with the vent sealed. This quick cooking method ensures the pumpkin becomes tender without losing its texture.

Step 9: Natural Pressure Release
Once the cooking time is up, let the pressure release naturally for about 5 minutes before carefully opening the lid. This technique allows the flavors to meld together beautifully while the remaining pressure ensures a tender pumpkin.

Step 10: Creamy Finish
Switch to sauté mode again and simmer for another 2-4 minutes, stirring gently before adding 1 cup of coconut milk. Be careful not to let it boil; this keeps the curry creamy and prevents any curdling. Lastly, squeeze in some lemon juice for brightness and stir gently to combine.

Step 11: Garnish and Serve
Spoon your deliciously creamy Indian Pumpkin Curry into serving bowls and garnish with freshly chopped cilantro. This vibrant touch enhances both visual appeal and flavor, making it a comforting and enchanting dish that your family and friends will love.

What to Serve with Creamy Vegan Indian Pumpkin Curry

Transform your dinner into a complete feast with these delightful pairings that complement the rich flavors of this comforting dish.

  • Fluffy Basmati Rice: The light texture of basmati rice soaks up the creamy sauce, offering a satisfying balance to the dish. It’s the classic companion that never fails to enhance your curry experience.

  • Warm Naan Bread: This soft and pillowy bread is perfect for scooping up every last bit of curry. The slight char and chewy texture add both flavor and comfort to your meal.

  • Cucumber Raita: A cooling yogurt side sprinkled with spices refreshes your palate, providing a nice counterpoint to the textures and warmth of the curry.

  • Methi Paratha: These flaky, layered flatbreads infused with fenugreek flavor bring a delightful herbal note that complements the dish beautifully—not to mention they are simply delicious on their own!

  • Spiced Chickpeas: For a protein-packed side, serve crispy spiced chickpeas seasoned with cumin and coriander. Their crunchy texture adds a lovely contrast to the creamy curry.

  • Mint Lemonade: This refreshing drink combines mint and lemon, making it an ideal pairing to cleanse the palate and invigorate your senses alongside the flavors of the curry.

  • Simple Green Salad: Tossed with a light vinaigrette, a salad with crisp greens and a few crunchy vegetables offers a fresh element that brightens your meal.

  • Coconut Sorbet: Finish on a sweet note with a scoop of coconut sorbet. Its creamy, tropical flavors play off the curry’s coconut milk base, creating a delightful harmony of flavors to conclude your meal.

Make Ahead Options

These Creamy Vegan Indian Pumpkin Curry preparations are perfect for busy weeknights! You can chop the pumpkin and onions and store them in airtight containers for up to 24 hours in the refrigerator, ensuring maximum freshness and flavor retention. The spice mix can also be pre-combined and kept in a sealed jar, ready to go. When you’re ready to serve, simply sauté the prepared ingredients as directed, then follow the cooking steps to bring the curry to life. This advanced prep saves time and effort, allowing you to enjoy a comforting dish that’s just as delicious as if you made it from scratch in one go!

Indian Pumpkin Curry Variations & Substitutions

Explore the delightful ways to customize your Indian Pumpkin Curry! Let your creativity flow as you elevate the flavors and ingredients of this heartwarming dish.

  • Spinach Boost: Add a handful of fresh spinach towards the end of cooking for a vibrant color and extra nutrition.

  • Chickpea Power: Stir in a cup of canned chickpeas after pressure cooking to turn this dish into a protein-packed delight.

  • Seafood Twist: Mix in cooked prawns or crab for a luxurious touch. The seafood’s sweetness complements the pumpkin beautifully.

  • Nutty Flavor: Toss in a handful of chopped cashews or almonds for added crunch and richness. They provide a lovely contrast to the creamy sauce and make your curry more satisfying.

  • Zesty Touch: Add a splash of lime juice instead of lemon for a unique tanginess that brightens the entire dish.

  • Heat Level: Adjust spiciness by adding fresh green chilies or more red chili flakes to match your heat preference. Spice lovers will appreciate the extra kick!

  • Coconut Varieties: Use coconut cream instead of coconut milk for an ultra-creamy texture that transforms your curry into an indulgent experience. This variation is perfect for special occasions.

  • Herbal Notes: Experiment with fresh herbs like basil or mint in place of cilantro for a refreshing twist. These herbs add an unexpected layer of flavor that can elevate your dining experience.

Feel free to explore additional flavors and textures! Whichever path you choose, whether it’s adding extra greens like in our Joumou Haitian Pumpkin or sweet chickpeas, you’ll find yourself falling in love with your homemade Indian Pumpkin Curry all over again.

Expert Tips for Indian Pumpkin Curry

Chunky Texture: Keep it chunky: Avoid puréeing the curry; retaining some pumpkin pieces gives a lovely texture and heartiness to your Indian Pumpkin Curry.

Gentle Simmer: No boiling: When you add coconut milk, let it simmer gently. Boiling can cause it to curdle, compromising the creaminess of your dish.

Timing Matters: Perfectly cooked pumpkin: Watch the clock! Cook the pumpkin just until tender but not mushy to maintain its shape and flavor in the curry.

Taste as You Go: Adjust flavors: Don’t hesitate to taste and adjust seasonings before the final simmer. This ensures a perfectly balanced and full-flavored Indian Pumpkin Curry.

Creative Add-ins: Explore variations: Add spinach, kale, or chickpeas for extra nutrition and variety, allowing you to customize your curry to your liking.

How to Store and Freeze Indian Pumpkin Curry

Fridge: Keep your Indian Pumpkin Curry in an airtight container for up to 3 days. Reheat gently on the stovetop or in the microwave, adding a splash of water as needed to maintain creaminess.

Freezer: This curry can be frozen for up to 3 months. Make sure to store it in a freezer-safe container, leaving some space for expansion. Thaw overnight in the fridge before reheating.

Reheating: Warm the thawed curry on the stovetop over low heat, stirring occasionally. Avoid boiling to prevent curdling of the coconut milk, ensuring your dish remains creamy and delicious.

Indian Pumpkin Curry Recipe FAQs

How do I choose the right pumpkin for this curry?
Absolutely! When selecting a pumpkin, look for one that is heavy for its size and has a matte skin rather than shiny. Varieties like sugar or pie pumpkins are ideal due to their sweet flavor and creamy texture. Avoid any with dark spots or blemishes, which could indicate spoilage.

How should I store leftover Indian Pumpkin Curry?
Very! Store your Indian Pumpkin Curry in an airtight container in the refrigerator for up to 3 days. To reheat, do so gently on the stovetop over low heat, adding a little water if necessary to maintain the creamy consistency.

Can I freeze Indian Pumpkin Curry?
Absolutely! Transfer the cooled curry into a freezer-safe container, leaving some room for expansion. It can be frozen for up to 3 months. For best results, thaw overnight in the fridge before reheating gently on the stovetop.

What can I do if my curry is too thick?
If you find your curry is thicker than desired, simply stir in a splash of water or vegetable broth gradually to reach your preferred consistency. Heat it gently to combine the flavors without boiling to maintain the creamy texture.

Is this Indian Pumpkin Curry safe for pets or people with allergies?
Always double-check! This curry is vegan and gluten-free, making it suitable for various dietary preferences. However, if you’re serving this dish to someone with allergies, be cautious about ingredients like coconut milk or any substitutes you might use. It’s always best to consult with them beforehand.

Can I add different vegetables or proteins to this curry?
The more the merrier! Feel free to add vegetables like spinach or kale for nutrition. Chickpeas make a great protein addition, and for a seafood twist, you can add cooked prawns. Just ensure that the cooking time adjusts accordingly for any added ingredients.

Indian Pumpkin Curry

Deliciously Creamy Indian Pumpkin Curry You'll Love

Experience the comforting flavors of Indian Pumpkin Curry, a creamy vegan dish that brings warmth and satisfaction to your dinner table.
Prep Time 10 minutes
Cook Time 20 minutes
Total Time 30 minutes
Servings: 4 bowls
Course: Dinner
Cuisine: Indian
Calories: 236

Ingredients
  

For the Curry
  • 1 medium Pumpkin diced into 1.5-inch pieces
  • 2 tablespoons Avocado Oil or any cooking oil
  • 1 teaspoon Black Mustard Seeds or brown mustard seeds
  • 1 teaspoon Fennel Seeds optional
  • 2-3 whole Kashmiri Dried Chillies or red chili flakes
  • 2 cloves Garlic minced
  • 1 tablespoon Fresh Ginger grated
  • 1 medium Onion finely chopped
  • 1 tablespoon ground Coriander
  • 1 tablespoon ground Cumin
  • 1 tablespoon Chili Powder
  • 1 teaspoon Turmeric
  • 1 tablespoon Garam Masala plus 1 teaspoon for pressure cooking
  • 6-8 leaves Curry Leaves optional
  • 2 medium Tomatoes chopped
  • 1-2 cups Water as needed
  • 1 cup Coconut Milk for creaminess
  • 1 tablespoon Lemon Juice adjust to taste
  • 1/4 cup Cilantro freshly chopped for garnish

Equipment

  • Instant Pot

Method
 

Step-by-Step Instructions for Indian Pumpkin Curry
  1. Begin by washing and dicing the pumpkin into 1.5-inch pieces, peeling it if you prefer a smoother texture. Remove any seeds and set the diced pumpkin aside.
  2. Set your Instant Pot to sauté mode and add 2 tablespoons of avocado oil. Once hot, toss in 1 teaspoon of black mustard seeds, 1 teaspoon of fennel seeds, and 2-3 Kashmiri dried chilies. Sauté for about 30 seconds until the mustard seeds crackle.
  3. Add 2 minced garlic cloves and 1 tablespoon of freshly grated ginger to the pot. Sauté for about 15 seconds until the garlic is golden.
  4. Stir in 1 finely chopped onion and cook for 3-4 minutes until softened and golden brown. If it starts to stick, add a splash of water.
  5. Stir in 1 tablespoon each of ground coriander, cumin, chili powder, turmeric, and garam masala, along with a few curry leaves if available. Sauté for 30 seconds.
  6. Incorporate 2 chopped tomatoes and cook for 3-4 minutes until softened. If too thick, add a little water.
  7. Add the diced pumpkin and a pinch of salt, stirring well to combine. Cook for 2 minutes.
  8. Pour in enough water to immerse the pumpkin and stir in 1 teaspoon of garam masala. Close the lid and set to pressure cook on normal for 2-3 minutes.
  9. Once the cooking time is up, let pressure release naturally for about 5 minutes before carefully opening the lid.
  10. Switch to sauté mode again and simmer for another 2-4 minutes before adding 1 cup of coconut milk. Stir gently to combine.
  11. Spoon your Indian Pumpkin Curry into serving bowls and garnish with freshly chopped cilantro.

Nutrition

Serving: 1bowlCalories: 236kcalCarbohydrates: 30gProtein: 3gFat: 12gSaturated Fat: 6gPolyunsaturated Fat: 0.5gMonounsaturated Fat: 5gSodium: 400mgPotassium: 575mgFiber: 4gSugar: 6gVitamin A: 500IUVitamin C: 15mgCalcium: 50mgIron: 1mg

Notes

Keep it chunky for texture, and avoid boiling the coconut milk.

Tried this recipe?

Let us know how it was!

Fluffy Vegan Pumpkin Donuts in Just 30 Minutes

As I take my first bite, the soft, fluffy texture of these Vegan Pumpkin Donuts transports me to a cozy fall morning, where the air is crisp and the leaves are a symphony of colors. Made with wholesome ingredients and a delightful cinnamon maple glaze, they’re not just a delicious treat; they’re a quick, easy option ready in just 30 minutes! These donuts are perfect for anyone looking to elevate their baked goods game and impress friends and family alike—vegan or not. The warm spices and sweet glaze create a comforting joy that’s hard to resist. Curious about how to whip up this delightful treat? Let’s dive into the recipe!

Why Are These Donuts a Must-Try?

Quick Preparation: You can enjoy these Vegan Pumpkin Donuts in just 30 minutes—perfect for busy mornings or spontaneous cravings!

Fluffy and Delicious: Each bite reveals a light and airy texture that melts in your mouth, simple yet satisfying enough to please everyone.

Seasonal Vibes: Infused with warm autumn spices, they capture the essence of fall, making them a go-to treat for family gatherings or cozy afternoons.

Customizable Options: Easily adapt the recipe to be gluten-free or oil-free based on your dietary needs, ensuring everyone at the table can enjoy them.

Pair these delightful treats with a warm beverage or consider a luscious Joumou Haitian Pumpkin soup for a cozy meal! Furthermore, proper storage keeps these gems fresh, letting you savor them longer.

Vegan Pumpkin Donuts Ingredients

Get ready to whip up some delightful Vegan Pumpkin Donuts with these simple ingredients!

For the Donuts

  • All-Purpose Flour – Provides structure; for a gluten-free version, substitute with gluten-free flour.
  • Light Brown Sugar – Adds sweetness and moisture; coconut sugar works well as a less processed option.
  • Baking Powder – Essential for fluffy texture; ensure it’s fresh for optimal rise.
  • Pumpkin Pie Spice – Brings warm flavor; if in a pinch, use 1 tsp cinnamon, ½ tsp ground ginger, and ¼ tsp nutmeg.
  • Salt – Enhances flavor and balances sweetness; don’t skip this step!
  • Melted Vegan Butter – Adds richness; can be replaced with applesauce or vegan yogurt for an oil-free option.
  • Pumpkin Puree – Delivers natural sweetness and moisture; canned pumpkin works perfectly.
  • Oat Milk – Acts as a dairy alternative; any non-dairy milk can easily be substituted.
  • Pure Vanilla Extract – For a fragrant aroma and flavor; opt for pure extract for the best taste.

For the Glaze

  • Powdered Sugar – Sweetens the glaze; use powdered coconut sugar for a less processed alternative.
  • Pure Maple Syrup – Offers a distinct flavor; honey can be used if not strictly vegan.
  • Ground Cinnamon – Adds an extra touch of spice to the glaze, enhancing overall flavor.

With these ingredients on hand, making your Vegan Pumpkin Donuts will be a breeze, transforming your kitchen into an aromatic haven this fall. Enjoy every moment of baking!

Step‑by‑Step Instructions for Vegan Pumpkin Donuts

Step 1: Preheat and Prepare
Begin by preheating your oven to 350°F (175°C). While the oven warms up, prepare your donut pan by generously spraying it with non-stick cooking spray to ensure the vegan pumpkin donuts release easily after baking.

Step 2: Mix Dry Ingredients
In a large mixing bowl, whisk together 1 cup of all-purpose flour, 3/4 cup of light brown sugar, 2 teaspoons of baking powder, 1 teaspoon of pumpkin pie spice, and a pinch of salt. Make sure the ingredients are well combined to ensure an even flavor throughout the donuts.

Step 3: Combine Wet Ingredients
In a separate bowl, mix together 1/4 cup of melted vegan butter, 1 cup of pumpkin puree, 1/4 cup of oat milk, and 1 teaspoon of pure vanilla extract. Stir until smooth and creamy, allowing the melted butter to blend well with the pumpkin and milk for optimal moisture.

Step 4: Combine Wet and Dry Mixtures
Add the wet mixture to the dry ingredients, stirring gently until just combined. Be careful not to overmix; a few lumps are perfectly fine! This creates the fluffy texture that your vegan pumpkin donuts will have once baked.

Step 5: Fill the Donut Pan
Spoon the batter into the prepared donut pan, filling each cavity about 2/3 full. Alternatively, you can use a piping bag for a cleaner fill. Ensure each donut shape is even to promote uniform baking, making your vegan pumpkin donuts look stunning.

Step 6: Bake to Perfection
Place the filled donut pan in the preheated oven and bake for 10-12 minutes. You’ll know they’re ready when the edges turn golden and a toothpick inserted comes out clean. Keep an eye on them to avoid overbaking!

Step 7: Prepare the Glaze
While the donuts cool slightly, prepare the glaze by whisking together 1 cup of powdered sugar, 2 tablespoons of pure maple syrup, 1/2 teaspoon of ground cinnamon, and 1-2 tablespoons of oat milk. Adjust the consistency to your liking, thicker for dipping or thinner for drizzling.

Step 8: Glaze and Cool
Once the vegan pumpkin donuts have cooled for about 5 minutes, dip the tops into the warm glaze and place them on a wire rack. Allow the glaze to harden for about 15 minutes before serving, giving the donuts a beautiful finish that enhances their fall flavors.

Storage Tips for Vegan Pumpkin Donuts

Room Temperature: Store your Vegan Pumpkin Donuts in a single layer at room temperature for up to 2-3 days. This keeps them fresh and soft.

Fridge: If you need them to last longer, refrigerate the donuts in an airtight container for up to 5 days. Just remember to let them come to room temperature before enjoying to regain their fluffy texture.

Freezer: For longer storage, freeze the donuts in a freezer-safe container for up to 2 months. Wrap them individually in plastic wrap and place them in a zip-top bag to prevent freezer burn.

Reheating: To enjoy them warm, heat the thawed donuts in the microwave for about 10-15 seconds or in a toaster oven at low heat until warmed through.

Variations & Substitutions for Vegan Pumpkin Donuts

Get ready to play with flavors and textures! You can easily personalize these delightful donuts to suit your taste or dietary needs.

  • Gluten-Free: Substitute all-purpose flour with gluten-free flour blend for a delightful gluten-free treat without sacrificing flavor.
  • Oil-Free: Replace melted vegan butter with unsweetened applesauce or vegan yogurt to create an even lighter donut.
  • Sweetener Swap: Use coconut sugar instead of light brown sugar for a less processed sweetness that boosts the flavor profile.
  • Milk Options: Change the oat milk to almond or soy milk based on your preference for a unique taste experience.
  • Spice It Up: Experiment by adding a touch of cayenne pepper to the batter for a surprising hint of heat that perfectly complements the pumpkin.
  • Nutty Addition: Mix in chopped walnuts or pecans for a delicious crunch that adds a lovely texture to each bite.
  • Muffin Variation: Transform the donut batter into muffins by increasing the baking time to 20 minutes for another yummy twist on the original recipe.
  • Flavorful Glaze: For a different glaze, try a vanilla glaze or sprinkle with cinnamon sugar after baking for a sweet, crunchy finish.

As you explore these variations, don’t forget to check out our Joumou Haitian Pumpkin soup for a delightful complement to your donut adventure. Embrace the joy of cooking and let your creativity shine!

Make Ahead Options

These Vegan Pumpkin Donuts are perfect for meal prep, allowing you to enjoy fresh-baked goodies any day of the week! You can prepare the donut batter up to 24 hours in advance—just mix the dry ingredients and the wet ingredients separately, then combine them when you’re ready to bake. If you’d prefer to glaze them freshly, simply store the cooled donuts in an airtight container at room temperature for up to 3 days or refrigerate them for up to 5 days. For the best quality, avoid glazing the donuts until you’re ready to serve, ensuring they stay just as delicious and fresh!

Expert Tips for Vegan Pumpkin Donuts

Grease the Pan: Ensure the donut pan is well-greased to prevent sticking. A sticky donut can ruin the fluffy texture you desire!

Fresh Ingredients: Always check that your baking powder is fresh before using. Old leavening agents can result in dense donuts instead of light and airy ones.

Avoid Overmixing: Gently combine wet and dry ingredients until just mixed. Overmixing can lead to tough donuts instead of the desired fluffiness in your Vegan Pumpkin Donuts.

Cool Before Glazing: Let the donuts cool slightly before glazing. This helps the glaze adhere better and prevents it from soaking into the warm donuts.

Store Properly: Store donuts in an airtight container, in a single layer, to maintain their glaze integrity and avoid sogginess.

What to Serve with Fluffy Vegan Pumpkin Donuts?

Cozy up with a complete fall-inspired meal that beautifully complements the warm spices of your homemade donuts.

  • Chai Tea: A spiced, warm beverage that enhances the donut’s comforting flavors. Sip on this aromatic drink while enjoying your treat!

  • Cinnamon Applesauce: Complement the spices in the donuts with homemade applesauce that adds a luscious fruity layer. It’s a great way to introduce fresh elements.

  • Maple-Glazed Pecans: For added crunch, sprinkle some maple-glazed pecans on the side. Their sweetness aligns perfectly, creating a delightful textural contrast.

  • Pumpkin Spice Latte: Elevate your experience with this classic autumn drink. The rich coffee combined with pumpkin spice mirrors the donut’s flavors perfectly!

  • Creamy Vegan Yogurt: A delicious, tangy contrast to the sweet donuts. Serve it plain or topped with a hint of maple syrup for an extra treat.

  • Spiced Oatmeal: A bowl of warm, spiced oatmeal can create a heartwarming breakfast option alongside the donuts. It presents a cozy start to your day.

  • Hot Chocolate: Rich and velvety, hot chocolate offers a decadent pairing. Consider adding a sprinkle of cinnamon to tie in with the donuts’ flavor profile.

These pairings not only enhance the joy of savoring vegan pumpkin donuts but also create a heartwarming meal that friends and family will adore.

Vegan Pumpkin Donuts Recipe FAQs

How do I choose the best pumpkin puree for this recipe?
Absolutely! Opt for 100% pure pumpkin puree, which is readily available in cans at most grocery stores. Avoid pie filling, as it’s often loaded with sugar and spices not meant for this recipe. If you’re feeling adventurous, you can make your own puree by roasting a small pie pumpkin until soft, scraping out the flesh, and blending it smooth!

How should I store my vegan pumpkin donuts?
You can store your Vegan Pumpkin Donuts in a single layer at room temperature for up to 2-3 days in an airtight container. If you want to keep them fresh for longer, refrigerate them for up to 5 days. Just let them come back to room temperature before enjoying.

Can I freeze these donuts?
Absolutely! To freeze your Vegan Pumpkin Donuts, let them cool completely, then wrap each donut individually in plastic wrap. Place them in a freezer-safe zip-top bag to prevent freezer burn. They can be frozen for up to 2 months. When you’re ready to enjoy, thaw them overnight in the refrigerator or microwave them for 10-15 seconds for a fresh taste!

What should I do if my donuts stick to the pan?
If your donuts stick to the pan, it’s usually due to insufficient greasing. Always ensure your pan is thoroughly greased before filling. If they still stick, run a butter knife around the edges to gently loosen them. Ensure your oven’s temperature is accurate; baking at too high or too low of a temperature can also contribute to sticking.

Can I make these vegan pumpkin donuts gluten-free?
Very! To make your Vegan Pumpkin Donuts gluten-free, simply substitute all-purpose flour with a gluten-free flour blend. Many blends work nicely, but make sure it contains xanthan gum for that fluffy texture. Additionally, check your baking powder to ensure it’s gluten-free, as some brands may contain trace amounts.

Are these donuts safe for pets or those with allergies?
While Vegan Pumpkin Donuts are made with wholesome ingredients, they are not suitable for pets, especially dogs, due to sugar and potential allergens like oat milk. If you or someone you love has food allergies, take precautions by reviewing ingredient labels, especially for gluten or nut allergies. Always remember, making donuts at home allows you to control what goes into them!

Vegan Pumpkin Donuts

Fluffy Vegan Pumpkin Donuts in Just 30 Minutes

Enjoy these Vegan Pumpkin Donuts, a quick and fluffy treat infused with autumn spices and topped with a delightful glaze.
Prep Time 15 minutes
Cook Time 12 minutes
Cooling Time 15 minutes
Total Time 30 minutes
Servings: 12 donuts
Course: Dessert
Cuisine: Vegan
Calories: 150

Ingredients
  

For the Donuts
  • 1 cup All-Purpose Flour Substitute with gluten-free flour for gluten-free option.
  • 3/4 cup Light Brown Sugar Coconut sugar works as a less processed option.
  • 2 teaspoons Baking Powder Ensure it's fresh for optimal rise.
  • 1 teaspoon Pumpkin Pie Spice Or use 1 tsp cinnamon, ½ tsp ground ginger, and ¼ tsp nutmeg.
  • 1 pinch Salt Enhances flavor and balances sweetness.
  • 1/4 cup Melted Vegan Butter Can be replaced with applesauce or vegan yogurt for oil-free.
  • 1 cup Pumpkin Puree Canned pumpkin works perfectly.
  • 1/4 cup Oat Milk Any non-dairy milk can be substituted.
  • 1 teaspoon Pure Vanilla Extract Opt for pure extract for the best taste.
For the Glaze
  • 1 cup Powdered Sugar Use powdered coconut sugar for a less processed alternative.
  • 2 tablespoons Pure Maple Syrup Honey can be used if not strictly vegan.
  • 1/2 teaspoon Ground Cinnamon Enhances overall flavor of the glaze.

Equipment

  • Donut pan
  • Mixing bowls
  • whisk

Method
 

Step-by-Step Instructions
  1. Preheat your oven to 350°F (175°C) and prepare your donut pan with non-stick cooking spray.
  2. In a large mixing bowl, whisk together flour, brown sugar, baking powder, pumpkin pie spice, and salt.
  3. In another bowl, mix melted vegan butter, pumpkin puree, oat milk, and vanilla extract until smooth.
  4. Combine wet ingredients with dry ingredients, stirring until just mixed.
  5. Spoon batter into prepared donut pan, filling each cavity about 2/3 full.
  6. Bake for 10-12 minutes until golden and a toothpick comes out clean.
  7. Prepare glaze by whisking powdered sugar, maple syrup, ground cinnamon, and oat milk.
  8. Dip the tops of cooled donuts into the glaze and allow to harden for about 15 minutes.

Nutrition

Serving: 1donutCalories: 150kcalCarbohydrates: 30gProtein: 2gFat: 4gSaturated Fat: 1gPolyunsaturated Fat: 0.5gMonounsaturated Fat: 2gSodium: 150mgPotassium: 100mgFiber: 1gSugar: 10gVitamin A: 100IUVitamin C: 2mgCalcium: 10mgIron: 0.5mg

Notes

Grease the pan well, check the freshness of ingredients, avoid overmixing, cool before glazing, and store properly for best results.

Tried this recipe?

Let us know how it was!

Soft, Chewy Brown Butter Apple Blondies to Savor Today

The sweet sound of crisp autumn leaves crunching underfoot always pulls me into the kitchen. With the season comes the perfect reason to celebrate cozy flavors, and nothing does it better than these delightful Brown Butter Apple Blondies. Soft and chewy, this recipe is a harmonious blend of rich brown butter and warm, cinnamon-spiced apples that brings a nostalgic aroma wafting through your home. Not only are these blondies irresistibly easy to whip up, but they also make for an impressive dessert that’s sure to crown any gathering. Indulging in these treats feels like a warm hug on a chilly evening—perfect for dessert lovers seeking comfort without the fuss. Are you ready to dive into this deliciously unique sweet treat? Let’s get baking!

Why Are These Blondies So Irresistible?

Rich, Nutty Flavor: The brown butter brings a nutty depth that transforms ordinary blondies into something extraordinary.
Cinnamon-Spiced Perfection: Infused with warm cinnamon, these blondies are a comforting bite of fall nostalgia.
Soft and Chewy: Each piece is satisfyingly soft and chewy, perfect for dessert enthusiasts who crave texture.
Easily Customizable: Feel free to mix in walnuts or chocolate chips for a personal touch, making every batch your own!
Quick to Make: This recipe comes together effortlessly, so you can enjoy homemade indulgence without spending hours in the kitchen. Whether served warm with a scoop of vanilla ice cream or enjoyed on their own, these Brown Butter Apple Blondies are sure to delight your friends and family.

Brown Butter Apple Blondies Ingredients

For the Blondies
Brown Butter – Brings a rich, nutty flavor; crucial for depth in your Brown Butter Apple Blondies.
Granulated Sugar – Sweetens the batter; for added moisture, swap with brown sugar.
Brown Sugar – Adds caramel-like richness; enhances both flavor and moisture in the blondies.
Eggs – Essential for binding ingredients; they provide the structure needed for ideal texture.
All-Purpose Flour – Forms the base of the batter; you can substitute with whole wheat flour for a healthier option.
Baking Powder – Helps the blondies rise; ensures a soft, tender texture.
Salt – Balances sweetness and enhances flavor overall.
Apple (Granny Smith recommended) – Introduces moisture and a delightful tartness; feel free to choose any preferred baking apple instead.
Cinnamon – Infuses warmth and spice; perfectly complements the flavor of the apples.

For the Icing
Brown Butter – Enhances the icing’s flavor with its nuttiness; makes it a perfect topping for these blondies.
Powdered Sugar – Provides sweetness and a lovely texture for the icing.
Milk – Helps achieve the desired consistency; adjust as needed to reach your preferred thickness.

Now that you have gathered all the essential ingredients, let’s dive into the delightful process of crafting these Brown Butter Apple Blondies!

Step‑by‑Step Instructions for Brown Butter Apple Blondies

Step 1: Prepare the Brown Butter
In a medium saucepan, melt 1 cup of butter over medium heat, stirring continuously. Keep an eye on the butter as it foams and then becomes clear; watch for the milk solids to turn golden brown, releasing a nutty aroma, which should take about 5–8 minutes. Once browned, remove it from heat and let it cool slightly before mixing with the sugars.

Step 2: Combine Ingredients
In a mixing bowl, whisk together the browned butter and your choice of granulated and brown sugars until the mixture is smooth and creamy. Incorporate 2 eggs one at a time, whisking until fully combined. Gradually add the dry ingredients, which include all-purpose flour, baking powder, salt, and cinnamon, mixing gently until just combined without overmixing, to keep the blondies soft and chewy.

Step 3: Incorporate Apples
Carefully fold in 2 cups of chopped apples, like Granny Smith, ensuring they’re evenly dispersed throughout the batter. This will allow the moisture from the apples to infuse the blondies. Make sure not to overmix; you want those apple pieces to remain intact, contributing to the delightful texture of your Brown Butter Apple Blondies.

Step 4: Bake
Preheat your oven to 350°F (175°C). Spread the batter evenly into a lined 9×13-inch baking pan, smoothing the top with a spatula. Bake for 30–35 minutes, or until the edges are set and a toothpick inserted into the center comes out clean with a few moist crumbs. Keep an eye on the edges for a light golden color to avoid over-baking.

Step 5: Cool and Ice
Once baked, remove the pan from the oven and allow the blondies to cool in the pan for at least 30 minutes. While cooling, you can prepare the brown butter icing by whisking together additional browned butter, powdered sugar, and milk until smooth. Drizzle the icing over the cooled blondies before slicing into squares for a sweet finishing touch.

Brown Butter Apple Blondies Variations

Feel free to get creative with these chewy treats—your kitchen is your playground!

  • Different Apples: Swap Granny Smith for Honeycrisp or Fuji apples for a sweeter twist to complement the blondies.

  • Nuts Galore: Toss in walnuts or pecans for a delightful crunch that adds texture and nutty flavor to each bite.

  • White Chocolate Chips: Mix in some white chocolate chips for a rich sweetness that beautifully contrasts the tart apples.

  • Omit the Icing: For a lower-sugar option, leave off the icing and enjoy the blondies as they are—still deliciously sweet and indulgent!

  • Cream Cheese Frosting: Substitute the brown butter icing with a tangy cream cheese frosting for a flavorful contrast that will wow your taste buds.

  • Pumpkin Spice Variants: Add pumpkin spice instead of cinnamon for a warm, autumn-inspired flavor that transports you right to a cozy café.

  • Extra Spice: Boost the spice level by adding a pinch of nutmeg or ginger to the batter for an exciting flavor profile.

  • Baked with Love: For an extra comforting dessert, pair these blondies with a scoop of vanilla ice cream and a drizzle of caramel sauce—it’s a match made in heaven!

With so many options, every batch of these Brown Butter Apple Blondies can be a delightful surprise!

What to Serve with Brown Butter Apple Blondies

Embrace the cozy flavors of fall with delightful pairings that will elevate your indulgent treat to a full culinary experience.

  • Vanilla Ice Cream: A scoop on top adds creamy richness and a contrasting chill to the warm, gooey blondies.
  • Whipped Cream: Light and airy, this topping enhances the sweetness and provides a luscious layer of flavor.
  • Caramel Sauce: Drizzling warm caramel over the blondies deepens the sweetness and adds an irresistible gooeyness.
  • Freshly Brewed Coffee: The bitterness of coffee cuts through the sweetness, making it a perfect partner for these decadent treats.
  • Spiced Chai Latte: The warm spices in chai mirror the cinnamon in the blondies, creating a harmonious flavor connection.
  • Candied Pecans: These crunchy bits introduce a delightful texture and a hint of nuttiness that complements the apple flavor beautifully.
  • Apple Cider: A glass of chilled apple cider brings a refreshing touch while echoing the flavors of fresh apples in your blondies.
  • Chocolate Sauce: For a decadent twist, chocolate sauce brings a rich contrast, appealing to chocolate lovers.
  • Maple Syrup: A drizzle adds a unique sweetness, enhancing the flavors of brown butter and apple for a delightful fusion.

With these delightful accompaniments, your Brown Butter Apple Blondies’ appeal will surely reach new heights, creating memorable moments with family and friends around the dessert table.

Make Ahead Options

These Brown Butter Apple Blondies are perfect for meal prep, allowing you to save time on busy weeknights! You can make the batter and refrigerate it for up to 24 hours before baking. Just be sure to cover it tightly to maintain moisture and prevent any browning of the apples. Additionally, you can slice and freeze the baked blondies for up to 3 months; simply wrap them in plastic wrap and place them in an airtight container. When you’re ready to serve, thaw at room temperature and drizzle with brown butter icing before enjoying these delightful treats. This way, you’ll have soft and chewy blondies on hand whenever that sweet craving strikes!

How to Store and Freeze Brown Butter Apple Blondies

Airtight Container: Store your blondies in an airtight container at room temperature for up to 3 days to maintain freshness and flavor.

Refrigerator: If you want to keep them longer, transfer to the fridge, where they can stay good for up to a week. Just remember to cover them well!

Freezer: For longer storage, freeze your Brown Butter Apple Blondies for up to 3 months. Wrap each piece tightly in plastic wrap and place them in a freezer-safe container.

Reheating: To enjoy them warm, thaw in the fridge overnight, then gently reheat in the microwave or oven until warm for that fresh-baked experience.

Expert Tips for Brown Butter Apple Blondies

Perfect Brown Butter: Take your time when browning butter; it should be a deep golden color with a nutty aroma. Over-browning can lead to a burnt taste.

Room Temperature Eggs: Make sure your eggs are at room temperature to ensure they incorporate smoothly into the batter, resulting in the best texture for your Brown Butter Apple Blondies.

Chop Apples Evenly: Cut your apples into small, uniform pieces, which will help them cook evenly within the blondies, enhancing the texture and flavor throughout.

Keep It Soft: Avoid overmixing the batter once you add the dry ingredients; this keeps the blondies soft and chewy rather than tough.

Check for Doneness: Start checking your blondies a few minutes before the minimum baking time; they should be set at the edges but still slightly soft in the middle for that perfect chewy bite.

Brown Butter Apple Blondies Recipe FAQs

What type of apples are best for this recipe?
Absolutely! I recommend using tart apples like Granny Smith for the best balance of sweetness. However, you can also substitute with Honeycrisp or Fuji apples for a sweeter option. Choose firm apples that won’t turn mushy while baking.

How should I store my Brown Butter Apple Blondies?
To keep your blondies fresh, store them in an airtight container at room temperature for up to 3 days. If you prefer to keep them longer, transfer to the refrigerator where they will remain tasty for up to a week. Just make sure to cover them well to prevent drying out.

Can I freeze Brown Butter Apple Blondies?
Sure! You can freeze your blondies for up to 3 months. Wrap each piece tightly in plastic wrap and place them in a freezer-safe container. When you’re ready to enjoy them again, thaw them overnight in the fridge, then reheat gently in the microwave or oven for that fresh-baked flavor.

What should I do if my blondies turn out dry?
Oh no! If your blondies come out dry, it’s likely due to over-baking. Always check a few minutes before the minimum baking time. If you find your blondies have already dried out, consider serving them with a scoop of ice cream or drizzle more icing for added moisture.

Can I use whole wheat flour instead of all-purpose flour?
Very! You can absolutely swap all-purpose flour for whole wheat flour for a healthier twist. Just keep in mind that this might slightly alter the texture, making them a bit firmer, so it’s a good idea to check them for doneness earlier than usual.

Are these blondies safe for pets?
No, it’s best to keep these treats away from pets, particularly dogs. The ingredients, especially the brown sugar and butter, may not be suitable for them. Always ensure to share human foods that are safe for your furry friends!

Brown Butter Apple Blondies

Soft, Chewy Brown Butter Apple Blondies to Savor Today

Enjoy the warm, nostalgic flavors of Brown Butter Apple Blondies, a perfect dessert for any gathering.
Prep Time 15 minutes
Cook Time 35 minutes
Cooling Time 30 minutes
Total Time 1 hour 20 minutes
Servings: 12 squares
Course: Dessert
Cuisine: American
Calories: 200

Ingredients
  

For the Blondies
  • 1 cup Brown Butter Brings a rich, nutty flavor
  • 1 cup Granulated Sugar Sweetens the batter
  • 1/2 cup Brown Sugar Adds caramel-like richness
  • 2 large Eggs Essential for binding
  • 2 cups All-Purpose Flour Forms the base of the batter
  • 1 teaspoon Baking Powder Helps the blondies rise
  • 1/2 teaspoon Salt Balances sweetness
  • 2 cups Apple (Granny Smith recommended) Introduces moisture and tartness
  • 1 teaspoon Cinnamon Infuses warmth and spice
For the Icing
  • 1/4 cup Brown Butter Enhances the icing's flavor
  • 1 cup Powdered Sugar Provides sweetness for the icing
  • 2 tablespoons Milk Helps achieve desired consistency

Equipment

  • medium saucepan
  • Mixing Bowl
  • 9x13-inch baking pan

Method
 

Step‑by‑Step Instructions for Brown Butter Apple Blondies
  1. In a medium saucepan, melt 1 cup of butter over medium heat, stirring continuously until browned.
  2. In a mixing bowl, whisk together the browned butter and sugars until smooth. Incorporate 2 eggs one at a time.
  3. Gradually add flour, baking powder, salt, and cinnamon, mixing gently until just combined.
  4. Carefully fold in 2 cups of chopped apples, ensuring even distribution without overmixing.
  5. Preheat oven to 350°F (175°C). Spread batter in a lined 9x13-inch baking pan and bake for 30–35 minutes.
  6. Remove from the oven and let cool for 30 minutes. Prepare icing by combining brown butter, powdered sugar, and milk.
  7. Drizzle icing over cooled blondies and slice into squares.

Nutrition

Serving: 1squareCalories: 200kcalCarbohydrates: 28gProtein: 2gFat: 10gSaturated Fat: 6gPolyunsaturated Fat: 1gMonounsaturated Fat: 3gCholesterol: 40mgSodium: 150mgPotassium: 80mgFiber: 1gSugar: 15gVitamin A: 300IUVitamin C: 2mgCalcium: 30mgIron: 1mg

Notes

Store in an airtight container for up to 3 days, or refrigerate for up to a week. Freeze for longer storage.

Tried this recipe?

Let us know how it was!

Pumpkin Chocolate Chip Bread: Fall’s Irresistible Sweet Treat

Autumn whispers its arrival with the crisp air and kaleidoscope of colors, inviting us to savor the season through our kitchens. Just the thought of baking fills me with joy, especially when it comes to my homemade Pumpkin Chocolate Chip Bread. This recipe is a delightful twist on traditional quick bread, merging the warm, inviting flavors of pumpkin spice with pockets of rich chocolate. With its easy prep and the ability to use up an entire can of pumpkin puree, this bread is a guilt-free indulgence that minimizes waste—perfect for busy days when you crave comfort without the hassle. Trust me, your home will smell like a cozy café and your friends will be lining up for seconds. Are you ready to fill your kitchen with fall’s finest aroma? Let’s dive into this baking adventure!

Why is Pumpkin Chocolate Chip Bread Irresistible?

Moist and Flavorful: This bread boasts an irresistibly moist texture thanks to the pumpkin puree, creating a cake-like delight that is hard to resist.

Easy to Make: Perfect for busy homemakers, this recipe requires minimal fuss—simply mix, pour, and bake for an impressive result.

Fall Spice Heaven: With a harmonious blend of warm spices like cinnamon and nutmeg, each bite captures the essence of autumn.

Chocolatey Goodness: Generous doses of melty chocolate chips elevate this quick bread, ensuring delightful pockets of sweetness throughout.

Versatile Delight: Whether enjoyed as breakfast with a smear of cream cheese or as an afternoon snack, this bread fits any occasion.
Experience this delicious combination for yourself and consider making a batch of Easter Chocolate Lasagna for dessert, too!

Pumpkin Chocolate Chip Bread Ingredients

For the Bread

  • All-Purpose Flour – Provides structure and body to the bread; swap for a gluten-free blend if needed.
  • Cinnamon – Adds warmth and depth; feel free to use pumpkin pie spice for an alternative.
  • Nutmeg – Contributes a nutty aroma; using fresh nutmeg enhances the flavor.
  • Allspice – Introduces a blend of flavors reminiscent of multiple spices; can be omitted if unavailable.
  • Cloves – Provides a strong, aromatic flavor; use sparingly as it can easily overpower other spices.
  • Baking Soda – Acts as the leavening agent for a nice rise; ensure it’s fresh for best results.
  • Baking Powder – Works with baking soda for a lighter texture in the bread.
  • Salt – Balances sweetness; essential for enhancing flavors in the pumpkin chocolate chip bread.
  • Granulated Sugar – Sweetens and adds moisture; can replace with coconut sugar for a healthier option.
  • Light Brown Sugar – Adds richness and moisture; substitute with more granulated sugar if desired.
  • Vegetable Oil – Keeps the bread moist; melted coconut oil can provide a unique flavor twist.
  • Large Eggs – Binds ingredients together and adds moisture; flax eggs can replace for a vegan version.
  • Pumpkin Puree – The star ingredient for moisture and flavor; ensure you’re using pure pumpkin, not pie filling.
  • Water – Adjusts batter consistency; milk can be used for added creaminess.
  • Chocolate Chips – Provides that sweet, melty surprise in every slice; dark chocolate is a great option for a richer taste.

Step‑by‑Step Instructions for Pumpkin Chocolate Chip Bread

Step 1: Preheat the Oven
Begin by preheating your oven to 350°F (175°C) and line two 8×4-inch loaf pans with parchment paper. This will prevent the bread from sticking and ensure easy removal once baked. Preparing the pans in advance allows for a smooth transition when you pour in the batter later.

Step 2: Mix the Dry Ingredients
In a spacious mixing bowl, whisk together 2 cups of all-purpose flour, 1 teaspoon each of cinnamon, nutmeg, allspice, and cloves along with 1 teaspoon of baking soda, 1 teaspoon of baking powder, and ½ teaspoon of salt. Mixing the dry ingredients first ensures that the spices and leavening agents are evenly distributed, setting the foundation for your flavorful Pumpkin Chocolate Chip Bread.

Step 3: Combine the Wet Ingredients
In a separate bowl, mix 1 cup of granulated sugar, ½ cup of light brown sugar, and ¾ cup of vegetable oil until the mixture is light and creamy. Then, add in 2 large eggs, 1 cup of pumpkin puree, and ¼ cup of water, whisking until smooth. This step is essential for creating a moist and well-blended batter that enhances the rich flavors of the pumpkin.

Step 4: Make the Batter
Gently fold the wet ingredients into the dry mixture using a spatula, stirring just until combined. Be careful not to overmix, as this can affect the texture of your Pumpkin Chocolate Chip Bread. Once the batter is slightly lumpy, fold in 1 cup of chocolate chips, ensuring they are evenly distributed throughout the mixture for delightful bursts of sweetness.

Step 5: Pour and Bake
Divide the batter evenly between the prepared loaf pans, smoothing the tops for an even bake. Place the pans in your preheated oven and bake for 55 to 65 minutes, or until a skewer inserted into the center comes out clean with a few crumbs clinging to it. As the bread bakes, your kitchen will be filled with a comforting autumn aroma.

Step 6: Cool and Serve
Allow the Pumpkin Chocolate Chip Bread to cool in the pans for about 30 minutes. Then, gently transfer the loaves to a wire rack to cool completely before slicing. This resting period helps to set the texture and makes for easier slicing. Serve warm or at room temperature, and savor the delightful combination of pumpkin and chocolate in every bite!

Pumpkin Chocolate Chip Bread Variations

Feel free to elevate this delightful bread with some fun twists and swaps that cater to your taste buds!

  • Dairy-Free: Substitute milk with almond or oat milk and use dairy-free chocolate chips for a rich, creamy option that’s perfect for those avoiding dairy.

  • Gluten-Free: Replace all-purpose flour with a gluten-free baking blend to create a delicious, hearty loaf suitable for those with gluten sensitivities.

  • Add Some Zest: Incorporate a tablespoon of orange zest into the batter for a bright, citrusy contrast that complements the warm spices beautifully.

  • Nutty Goodness: Swap out half of the chocolate chips for walnuts or pecans to create a satisfying crunch while adding heart-healthy fats.

  • Pumpkin Spice Boost: Intensify the flavor by adding an extra teaspoon of pumpkin pie spice, capturing that beloved fall flavor in every bite.

  • Mini Loaves: Bake in mini loaf pans for smaller portions, perfect for gifting or enjoying single slices throughout the week.

  • Spicy Kick: For a touch of warmth, add a pinch of cayenne pepper or a teaspoon of ginger. This unexpected heat works wonderfully with the sweetness of the chocolate and pumpkin.

  • Sweet Swaps: Replace granulated sugar with maple syrup for a natural sweetness, lending a lovely flavor twist to your bread.

Ready to combine some of these variations into your baking? You might also enjoy pairing your warm slice with some delightful cream cheese or butter! Or perhaps try this comforting Joumou Haitian Pumpkin to warm your soul as the weather cools!

Make Ahead Options

These Pumpkin Chocolate Chip Bread are perfect for meal prep enthusiasts! You can mix the dry ingredients (flour, spices, baking soda, baking powder, and salt) and store them in an airtight container up to 3 days in advance. Additionally, you can combine the wet ingredients (sugars, oil, eggs, pumpkin puree, and water) and refrigerate them for up to 24 hours. When you’re ready to bake, simply combine the wet and dry mixtures, fold in the chocolate chips, and bake as directed. This way, you save time without sacrificing flavor—your Pumpkin Chocolate Chip Bread will be just as delicious and perfect for busy weeknights!

Expert Tips for Pumpkin Chocolate Chip Bread

  • Egg Beating: Ensure the eggs are beaten until pale, which contributes to a light and fluffy texture in your pumpkin chocolate chip bread.

  • Fresh Pumpkin: If using fresh pumpkin, make sure it’s fully pureed for a consistent batter. Chunky puree can lead to uneven baking.

  • Check Doneness Early: Baking times can vary; if your oven runs hot, start checking for doneness around the 50-minute mark to avoid overbaking.

  • Storing Properly: Keep the bread in an airtight container to maintain its moisture, prolonging freshness for days.

  • Flavor Boost: Add a teaspoon of vanilla extract to the wet ingredients for an extra layer of delightful flavor in your pumpkin chocolate chip bread.

How to Store and Freeze Pumpkin Chocolate Chip Bread

Room Temperature: Keep the bread in an airtight container at room temperature for up to 3 days for optimal freshness.

Fridge: For extended storage, wrap the bread tightly in plastic wrap and keep it in the fridge for up to a week. This helps retain moisture.

Freezer: To freeze, wrap slices or entire loaves tightly in plastic wrap, then in foil, for up to 3 months. Thaw at room temperature before serving.

Reheating: Warm individual slices in the microwave for 10-15 seconds or toast in the oven for a few minutes to revive the delicious flavor of your Pumpkin Chocolate Chip Bread.

What to Serve with Pumpkin Chocolate Chip Bread

When it comes to creating a heartwarming autumn meal, a slice of this delightful bread is just the beginning!

  • Cream Cheese Spread: Adds a creamy, tangy finish that perfectly complements the sweetness of the bread. A dollop of this creamy goodness elevates every bite.

  • Apple Cider: Its crisp, refreshing flavor pairs beautifully with the warm spices of the bread, making it the perfect autumn beverage choice.

  • Warm Vanilla Butter: A blend of softened butter and vanilla creates a sumptuous spread. The luxurious taste of this combination enhances every slice of pumpkin chocolate chip bread.

  • Pumpkin Spice Latte: This cozy beverage echoes the comforting flavors of the bread. Sip it alongside for a truly seasonal indulgence.

  • Mixed Nut Medley: Offer a crunchy contrast with toasted pecans or walnuts on the side. Their earthy flavors provide a delightful texture balance.

  • Olive Oil Drizzle: Drizzling a bit of good-quality olive oil offers a savory touch that amplifies the richness of the bread’s chocolate chips.

  • Dark Chocolate Ganache: If you’re in the mood for something decadent, a light drizzle of rich ganache ties in the chocolate for an extra indulgence.

  • Maple Syrup: A touch of maple syrup gives a lovely sweetness and is especially scrumptious when paired with a warm slice.

  • Homemade Whipped Cream: A fluffy dollop adds a sweet and airy touch, enhancing your experience as you enjoy each slice.

  • Sliced Pears: Fresh, juicy pear slices add a refreshing contrast to the rich flavors of the pumpkin chocolate chip bread—perfect for balancing sweetness!

Pumpkin Chocolate Chip Bread Recipe FAQs

What type of pumpkin puree should I use?
Absolutely, when making your Pumpkin Chocolate Chip Bread, ensure you use pure pumpkin puree rather than pumpkin pie filling. The latter contains added spices and sugars that could alter the flavor and texture of your bread. Canned pumpkin puree is convenient, but if you prefer, you can use fresh pumpkin that’s been roasted and pureed until smooth.

How should I store my Pumpkin Chocolate Chip Bread?
For optimal freshness, keep your Pumpkin Chocolate Chip Bread in an airtight container at room temperature for up to 3 days. If you need to extend its shelf life, wrap it tightly in plastic wrap and place it in the refrigerator, where it will stay fresh for up to a week.

Can I freeze Pumpkin Chocolate Chip Bread?
Yes! Freezing is a fantastic way to preserve your Pumpkin Chocolate Chip Bread. Wrap the entire loaf or individual slices tightly in plastic wrap, then cover them in aluminum foil. This will keep your bread frozen for up to 3 months. To enjoy, simply thaw at room temperature or reheat slices in the microwave for about 10-15 seconds to restore their warmth and flavor.

What should I do if my bread is too dense?
If you find your Pumpkin Chocolate Chip Bread is denser than expected, it could be due to overmixing the batter or using too much flour. To prevent this, mix until just combined and consider spooning the flour into the measuring cup rather than scooping it out directly. Also, make sure your baking soda and baking powder are fresh; old leavening agents can lead to inadequate rising.

Can I modify this recipe for dietary restrictions?
Very! This Pumpkin Chocolate Chip Bread is quite adaptable. You can substitute the all-purpose flour with a gluten-free blend for a gluten-free version. If you need it to be vegan, replace the eggs with flax eggs (one tablespoon of ground flaxseed mixed with three tablespoons of water equals one egg) and use vegetable oil. Additionally, be sure to select dairy-free chocolate chips to accommodate those dairy restrictions.

How long can I keep it in the freezer?
I recommend consuming your frozen Pumpkin Chocolate Chip Bread within 3 months for the best quality. However, it can be safe beyond that timeframe; the texture and flavors may just decline slightly. When ready to serve, allowing it to thaw overnight in the refrigerator or at room temperature makes for easy and delicious enjoyment.

Pumpkin Chocolate Chip Bread

Pumpkin Chocolate Chip Bread: Fall's Irresistible Sweet Treat

Enjoy the warm flavors of Pumpkin Chocolate Chip Bread, a delightful treat perfect for fall.
Prep Time 15 minutes
Cook Time 1 hour 5 minutes
Cooling Time 30 minutes
Total Time 1 hour 50 minutes
Servings: 12 slices
Course: Dessert
Cuisine: American
Calories: 220

Ingredients
  

For the Bread
  • 2 cups All-Purpose Flour Swap for gluten-free blend if needed.
  • 1 teaspoon Cinnamon Can use pumpkin pie spice as alternative.
  • 1 teaspoon Nutmeg Using fresh nutmeg enhances the flavor.
  • 1 teaspoon Allspice Can be omitted if unavailable.
  • 1 teaspoon Cloves Use sparingly as it easily overpowers.
  • 1 teaspoon Baking Soda Ensure it's fresh for best results.
  • 1 teaspoon Baking Powder
  • ½ teaspoon Salt Essential for enhancing flavors.
  • 1 cup Granulated Sugar Can replace with coconut sugar.
  • ½ cup Light Brown Sugar Substitute with more granulated sugar if desired.
  • ¾ cup Vegetable Oil Melted coconut oil can provide a unique flavor twist.
  • 2 large Eggs Can use flax eggs for a vegan version.
  • 1 cup Pumpkin Puree Use pure pumpkin, not pie filling.
  • ¼ cup Water Milk can be used for added creaminess.
  • 1 cup Chocolate Chips Dark chocolate is a great option.

Equipment

  • Mixing bowls
  • loaf pans
  • whisk
  • spatula

Method
 

Step‑by‑Step Instructions for Pumpkin Chocolate Chip Bread
  1. Preheat your oven to 350°F (175°C) and line two 8x4-inch loaf pans with parchment paper.
  2. In a mixing bowl, whisk together 2 cups of all-purpose flour, 1 teaspoon each of cinnamon, nutmeg, allspice, cloves, baking soda, baking powder, and ½ teaspoon of salt.
  3. In a separate bowl, mix 1 cup of granulated sugar, ½ cup of light brown sugar, and ¾ cup of vegetable oil until creamy. Then add in 2 large eggs, 1 cup of pumpkin puree, and ¼ cup of water, whisking until smooth.
  4. Gently fold the wet ingredients into the dry mixture using a spatula, then fold in 1 cup of chocolate chips.
  5. Divide the batter between the prepared loaf pans and bake for 55 to 65 minutes or until a skewer comes out clean.
  6. Allow the bread to cool in the pans for about 30 minutes before transferring to a wire rack to cool completely.

Nutrition

Serving: 1sliceCalories: 220kcalCarbohydrates: 33gProtein: 3gFat: 9gSaturated Fat: 1.5gPolyunsaturated Fat: 0.5gMonounsaturated Fat: 7gCholesterol: 30mgSodium: 150mgPotassium: 120mgFiber: 1gSugar: 12gVitamin A: 800IUVitamin C: 1mgCalcium: 20mgIron: 1.5mg

Notes

For extra flavor, consider adding a teaspoon of vanilla extract to the wet ingredients.

Tried this recipe?

Let us know how it was!

Stay Connected

Get recipes via email: