Get my cookbooks

Irresistibly Soft Chocolate Chip Cookie Bars You’ll Love

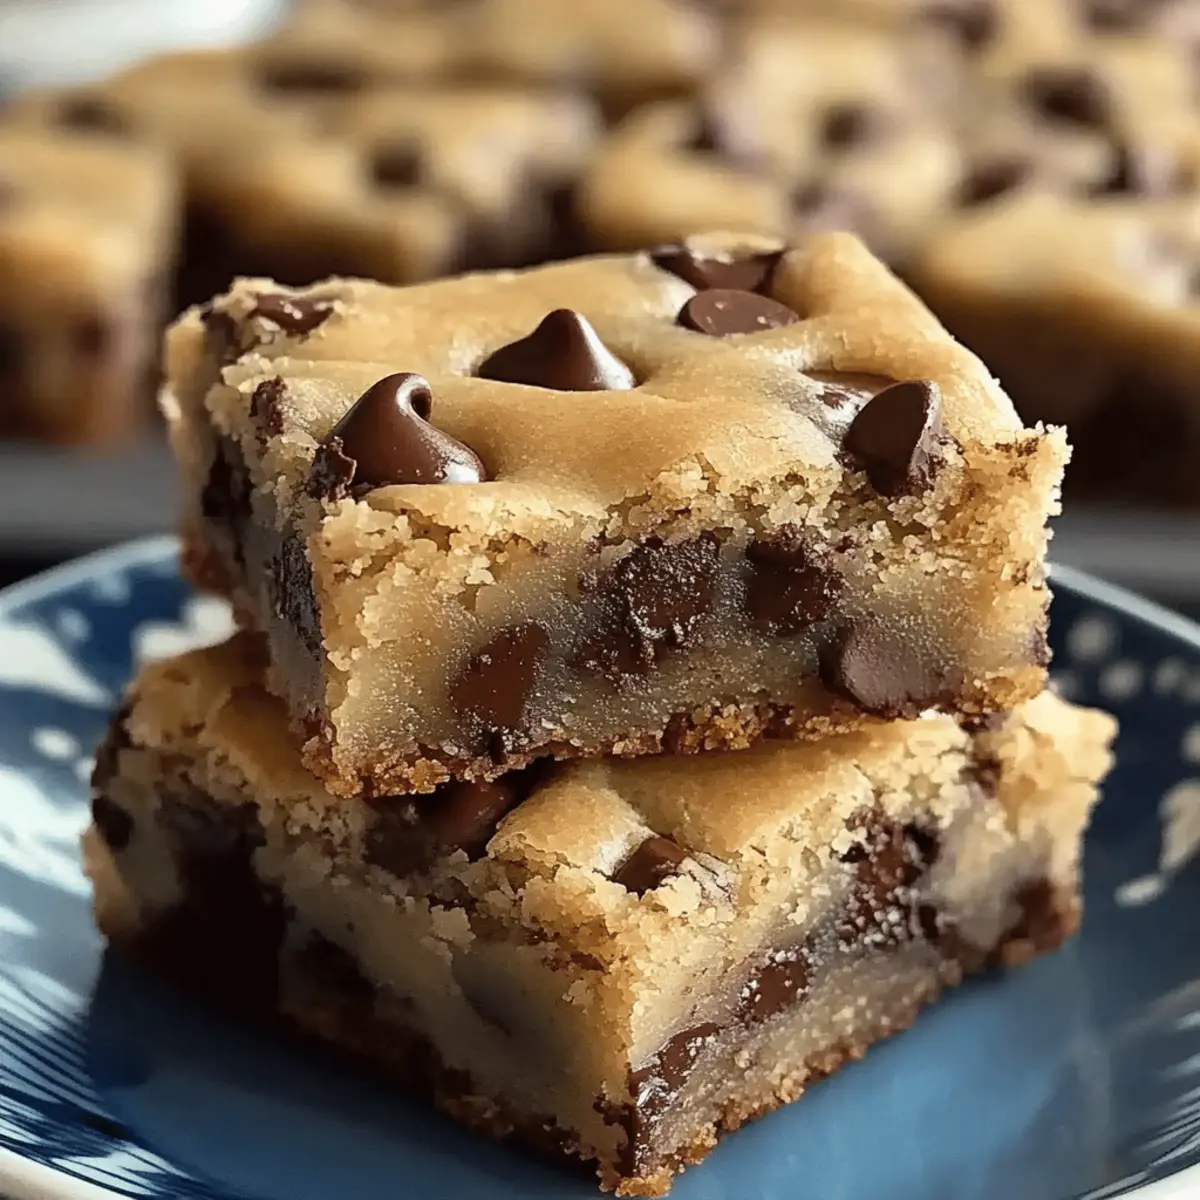
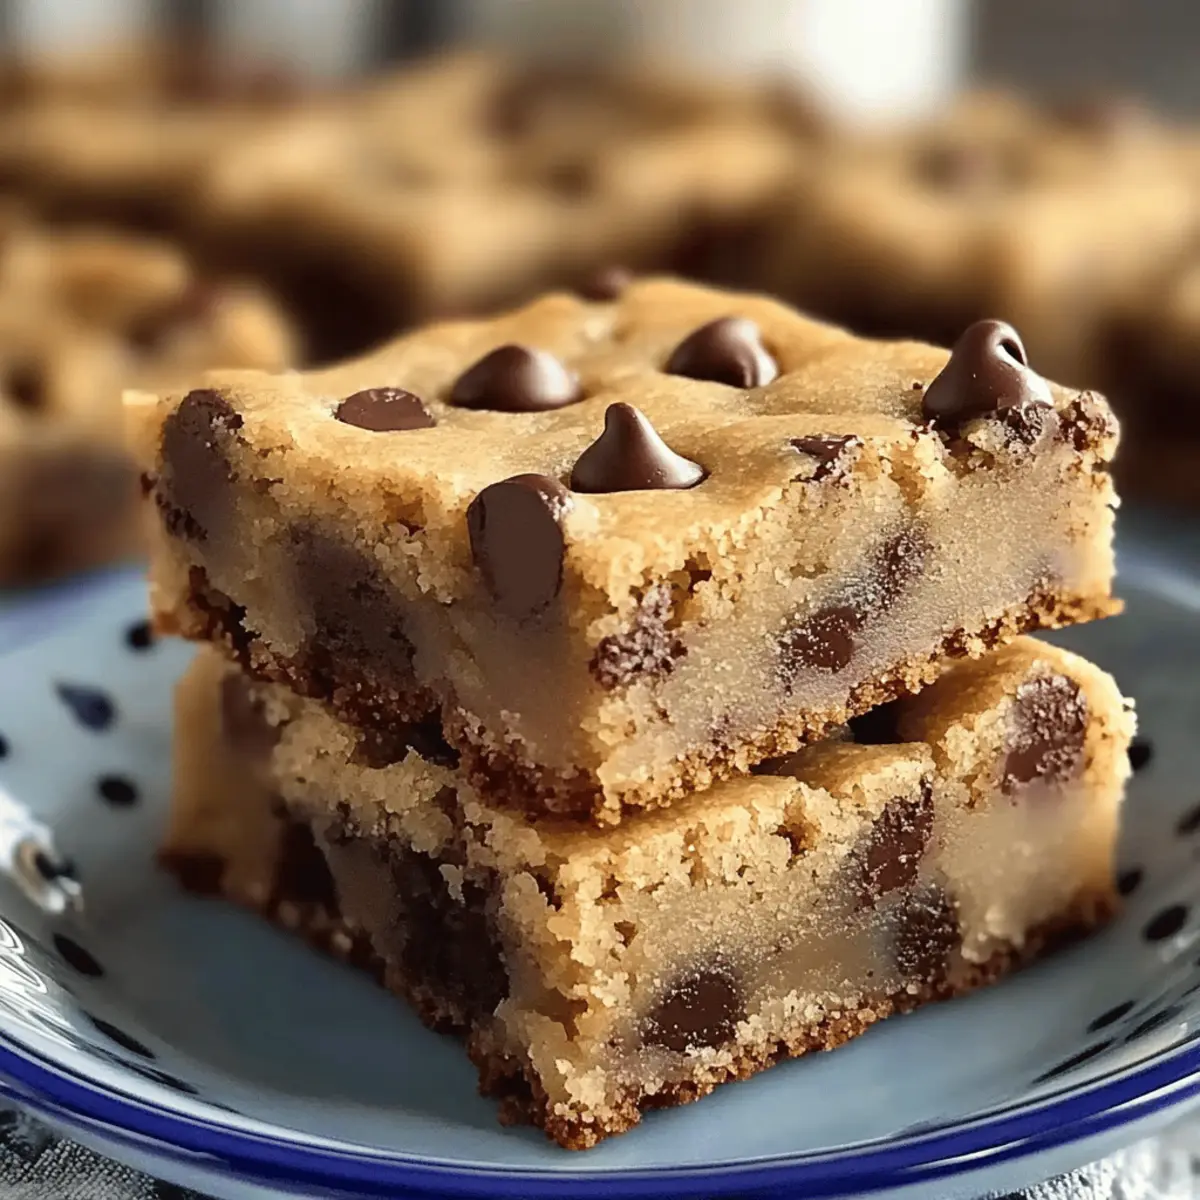
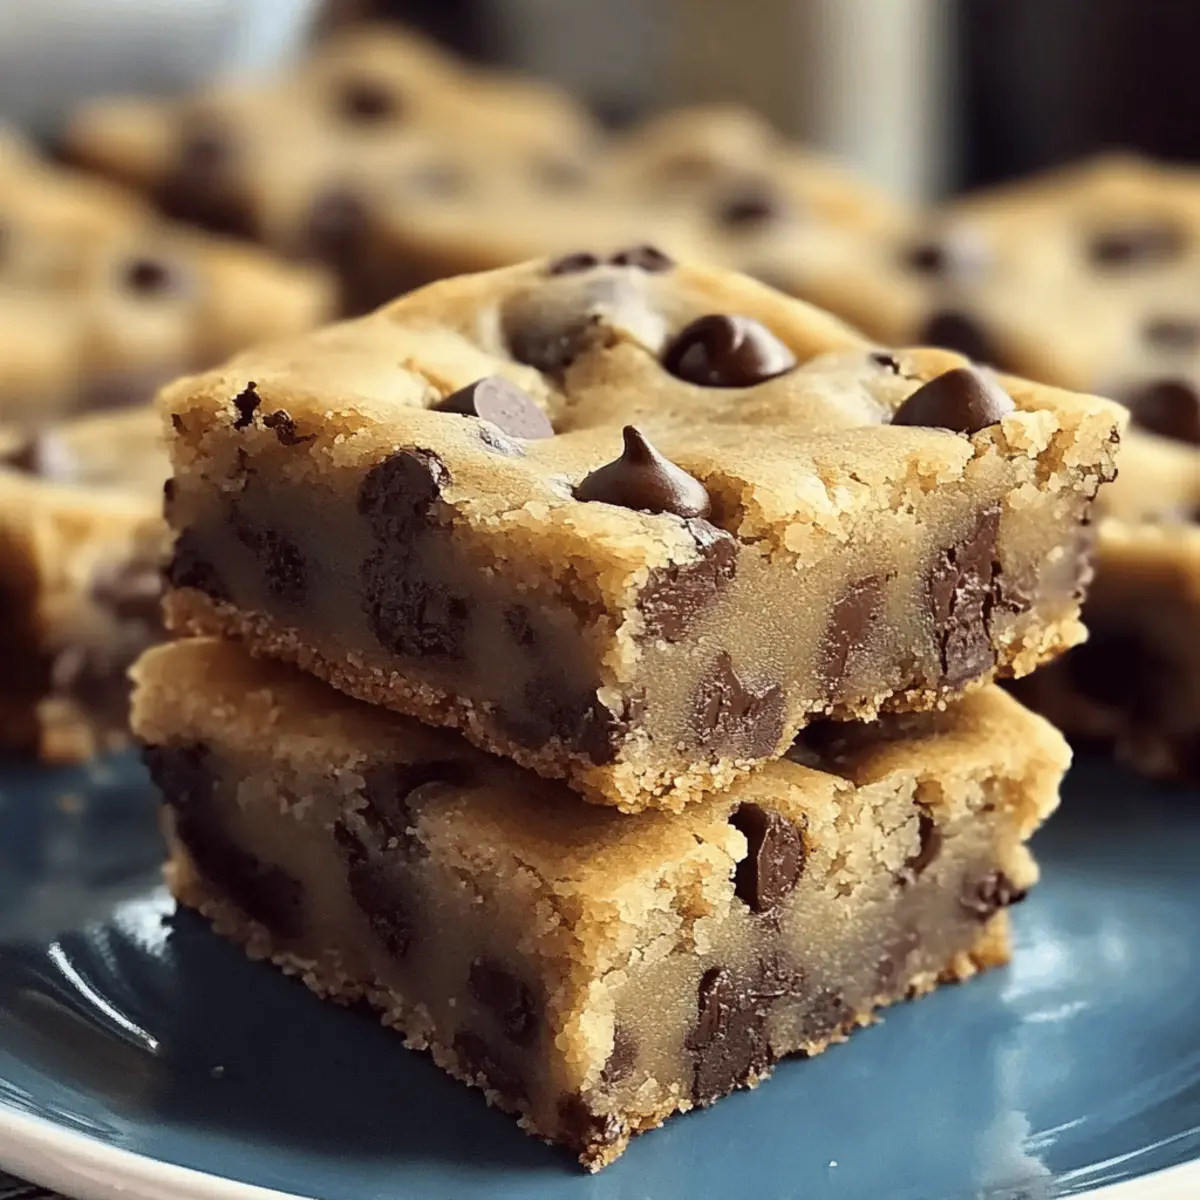
As I sifted through my kitchen cabinets one gray afternoon, the comforting thought of baking cookie bars popped into my mind. These Melt-in-Your-Mouth Chocolate Chip Cookie Bars strike the perfect balance between nostalgia and simplicity, bringing the delightful essence of classic chocolate chip cookies to a more convenient format. They’re not just quick to whip up but also make for an incredible crowd-pleaser for gatherings or cozy nights in. Whether you’re a novice baker or a seasoned pro, this recipe guarantees satisfying results that will leave everyone going back for seconds. Ready to create a treat that warms the heart and fills the home with irresistible aromas? Trust me, you won’t want to miss this!

What makes these cookie bars irresistible?

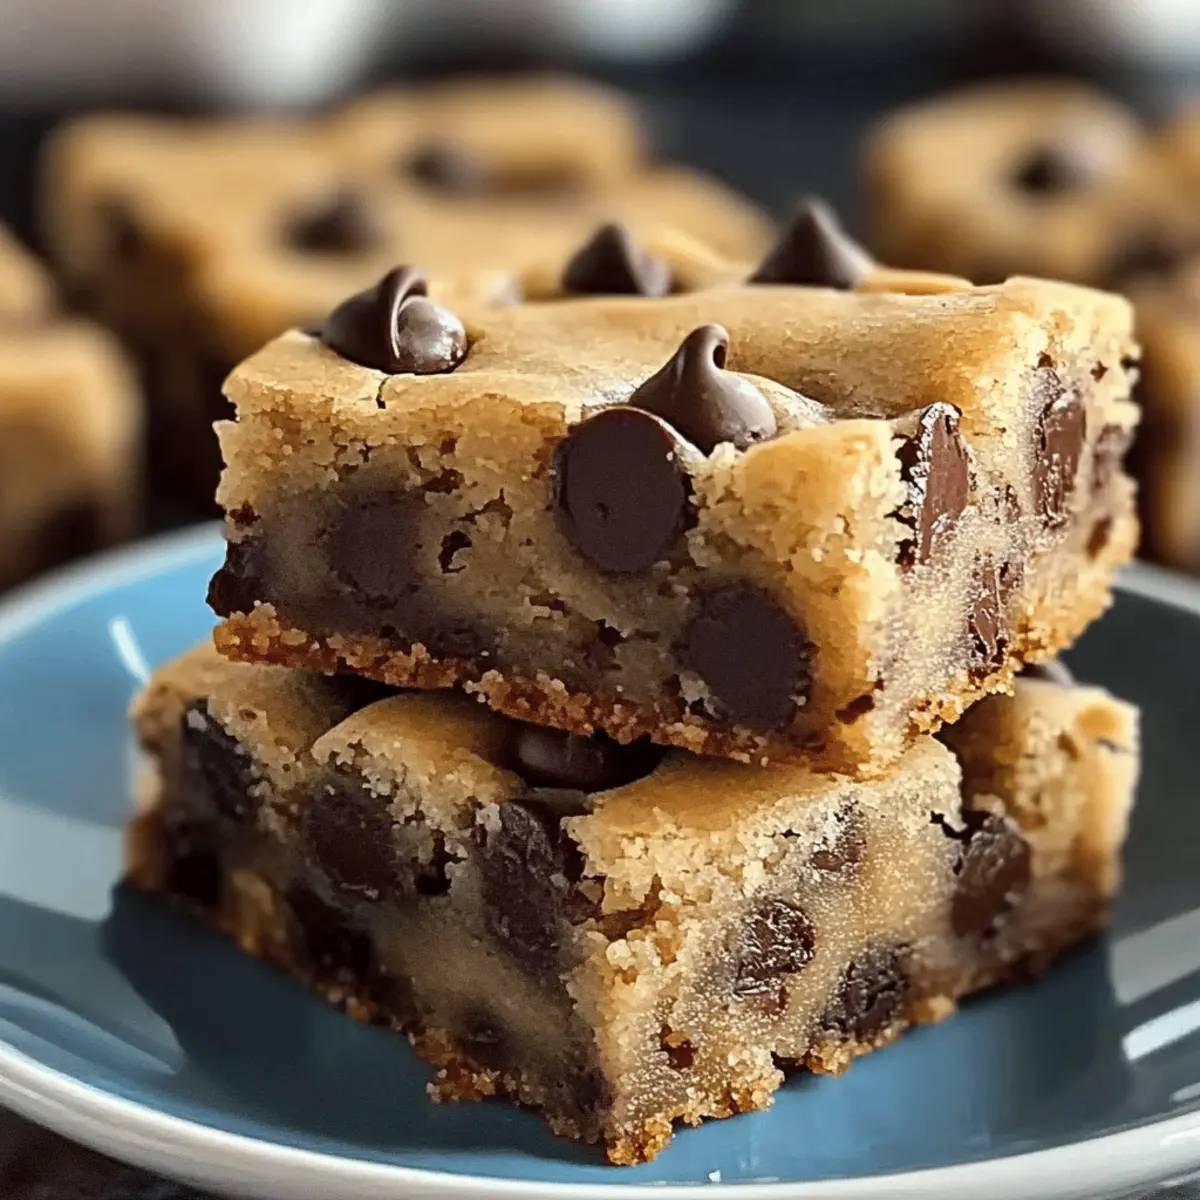
Simplicity and ease: Baking these Melt-in-Your-Mouth Chocolate Chip Cookie Bars requires minimal effort, allowing you to enjoy homemade goodness in no time. Comforting aroma: As they bake, your kitchen will fill with the nostalgic scent of sweet chocolate, making it hard for anyone to resist. Crowd-pleasing delight: Perfect for parties or family gatherings, these bars are sure to be a hit, much like my Chocolate Fudge Cupcakes. Loaded with chocolate: With pockets of melted chocolate chips in each bite, the rich flavor elevates your dessert game to new heights. Versatile option: Feel free to mix in your favorite nuts or dried fruits for even more delicious variations!

Chocolate Chip Cookie Bars Ingredients

• Here’s everything you need to whip up these delightful cookie bars.

For the Dough

  • Unsalted Butter – 1 cup (226g) for moisture and flavor; remember to use it slightly cooled for the best texture.
  • Light Brown Sugar – 1 cup (200g) adds richness; can swap with dark brown sugar for a deeper caramel flavor.
  • Granulated Sugar – ½ cup (100g) sweetens the mix and helps structure the bars.
  • Eggs – 2 large for binding the ingredients together while enriching the flavor.
  • Vanilla Extract – 2 tsp enhances the cookie bars’ flavor; feel free to substitute with almond extract for a twist.
  • All-Purpose Flour – 2¼ cups (280g) gives the bars structure; it’s best not to substitute for perfect texture.
  • Salt – ½ tsp balances the sweetness; kosher or sea salt are great alternatives.
  • Baking Soda – ½ tsp acts as a leavening agent; check for freshness to ensure the best rise.
  • Semi-Sweet Chocolate Chips – 2 cups (340g) provide that melty goodness; you can use dark or white chocolate chips if you prefer.

Optional Mix-Ins

  • Nuts or Dried Fruit – Adding these can give texture and flavor; consider walnuts or cranberries for a fun twist.

These melt-in-your-mouth Chocolate Chip Cookie Bars are sure to become a favorite in your baking repertoire!

Step‑by‑Step Instructions for Melt-in-Your-Mouth Chocolate Chip Cookie Bars

Step 1: Preheat Your Oven
Begin by preheating your oven to 350°F (175°C). This temperature creates the perfect environment for your melt-in-your-mouth chocolate chip cookie bars to bake evenly. While the oven heats up, take a 9×13-inch pan and either grease it lightly or line it with parchment paper for easy removal of the bars later.

Step 2: Mix the Wet Ingredients
In a large mixing bowl, combine 1 cup of slightly cooled melted unsalted butter, 1 cup of light brown sugar, and ½ cup of granulated sugar. Whisk these ingredients together until you achieve a smooth mixture. As the butter and sugars blend, add in 2 large eggs and 2 teaspoons of vanilla extract, continuing to whisk until everything is well-combined and creamy.

Step 3: Combine the Dry Ingredients
In a separate bowl, whisk together 2¼ cups of all-purpose flour, ½ teaspoon of salt, and ½ teaspoon of baking soda. This ensures the leavening agent is evenly distributed. Gradually incorporate this dry mixture into the wet ingredients using a spatula, mixing gently until just combined. Be careful not to overmix, as you want to preserve that delightful chewy texture in your cookie bars.

Step 4: Fold in the Chocolate Chips
Once the batter is ready, it’s time to add the star of the show! Carefully fold in 2 cups of semi-sweet chocolate chips. Ensure they are evenly distributed throughout the dough for that melty chocolaty goodness in every bite. The dough should feel thick and sticky, promising a delicious outcome when baked.

Step 5: Press the Dough into the Pan
Transfer the cookie dough into your prepared 9×13-inch pan. Use a spatula or your hands to press the dough down evenly, smoothing the surface with gentle pressure. Make sure the dough reaches the corners and edges of the pan for even baking. At this point, you may also sprinkle some extra chocolate chips on top for an extra touch of indulgence.

Step 6: Bake the Cookie Bars
Place the pan in the preheated oven and bake for about 28-32 minutes. You’ll know they’re done when the edges turn golden brown and a toothpick inserted into the center comes out clean or with a few moist crumbs. Keep an eye on the bars to prevent overbaking, which could lead to a dry texture rather than the desired soft, gooey center.

Step 7: Cool and Cut
Once baked, remove the chocolate chip cookie bars from the oven and allow them to cool in the pan for at least 20 minutes. This is essential for them to set properly. When they’re cool enough to handle, slice into squares for perfect portions. These cookie bars will be soft and delightful, ready to serve to family and friends!

What to Serve with Melt-in-Your-Mouth Chocolate Chip Cookie Bars

The decadent experience of cookie bars can be elevated with the right accompaniments, creating a delightful celebration of flavors and textures.

  • Classic Ice Cream: A scoop of vanilla or chocolate ice cream complements the warm, gooey bars perfectly for the ultimate indulgence.

  • Rich Hot Chocolate: Serve with a steaming cup of hot chocolate, where each sip enhances the chocolatey goodness of the cookie bars.

  • Fresh Berries: Bright, tart berries like raspberries or strawberries add a refreshing contrast to the sweetness, balancing the flavors beautifully.

  • Whipped Cream Topping: A dollop of lightly sweetened whipped cream on top adds a light and airy touch, making each bite even more luxurious.

  • Nutty Trail Mix: For a crunchy contrast, serve with a side of nutty trail mix, offering a delightful textural harmony alongside your soft cookie bars.

  • Espresso or Coffee: A strong cup of espresso or rich coffee pairs exceptionally well, enhancing the chocolate and bringing out the warm, comforting vibes.

  • Milk: Simple yet classic, an icy glass of milk is a must-have; it’s the perfect pairing for dunking and enjoying those gooey bites!

  • Chocolate Sauce Drizzle: Drizzling some warm chocolate sauce over the top makes everything even more decadent and irresistible.

With these delightful additions, your melt-in-your-mouth cookie bars transform into a glorious dessert experience that friends and family will rave about!

How to Store and Freeze Chocolate Chip Cookie Bars

Room Temperature: Keep your cookie bars in an airtight container at room temperature for up to 1 week to maintain their soft and gooey texture.

Fridge: If you prefer an extra chewy bite, store the bars in the fridge for up to 2 weeks. Simply allow them to come to room temperature before serving.

Freezer: For longer storage, freeze the cookie bars wrapped tightly in plastic wrap and then in aluminum foil for up to 3 months. Thaw in the fridge overnight before enjoying.

Reheating: To restore that fresh-baked softness, microwave individual bars for 10-15 seconds. Enjoy that melty chocolate goodness again!

Make Ahead Options

These Melt-in-Your-Mouth Chocolate Chip Cookie Bars are perfect for meal prep enthusiasts! You can prepare the dough up to 24 hours in advance by mixing the wet and dry ingredients and refrigerating the combined batter in an airtight container. This not only saves time on busy baking days but also allows the flavors to meld beautifully. If you’re looking to prep even further, you can bake the bars and store them in an airtight container at room temperature for up to 3 days. Just remember to cool them completely before storing to maintain that gooey texture. When ready to serve, simply slice into squares and enjoy that homemade goodness with minimal effort!

Chocolate Chip Cookie Bars Variations

Feel free to let your creativity shine while customizing these delightful treats!

  • Gluten-Free: Use almond flour instead of all-purpose flour to create a gluten-free version of these cookie bars.

  • Nutty Delight: Mix in 1 cup of chopped nuts such as walnuts or pecans for a crunchy texture and added richness.

  • Dried Fruit Twist: Add 1 cup of dried fruit, like cranberries or cherries, for a chewy sweetness that complements the chocolate perfectly.

  • White Chocolate Switch: Swap semi-sweet chocolate chips for white chocolate chips for a sweeter, creamier flavor.

  • Flavor Boost: Replace vanilla extract with almond extract for a nutty twist that enhances the overall flavor profile.

  • Layered Bars: Create a decadent twist by layering caramel or peanut butter between two layers of cookie dough for a surprising delight.

  • Spiced Up: Add a teaspoon of cinnamon or a pinch of nutmeg to the dry ingredients for a warmth that melds beautifully with chocolate.

  • Stuffed Surprise: Try stuffing the bars with crushed candy bars or your favorite chocolate treats for an extra layer of joy in every bite!

By mixing and matching these variations, you can transform your Chocolate Chip Cookie Bars into something uniquely your own! Want more sweet inspiration? Check out these Chocolate Fudge Cupcakes or these Chocolate Granola Cups for additional dessert ideas!

Expert Tips for Chocolate Chip Cookie Bars

  • Melted Butter Magic: Use melted butter that’s slightly cooled for optimal flavor and chewiness; this prevents the eggs from cooking prematurely.

  • Mixing Matters: Avoid overmixing the dough; just combine until no flour streaks remain. This ensures your cookie bars maintain that soft, chewy texture.

  • Top It Off: For a bakery-style appearance, press additional chocolate chips into the top before baking; adjust the baking time based on your preferred gooeyness.

  • Watch the Time: Keep a close eye on your bars while baking. Underbaking results in gooey centers, while overbaking can lead to dryness, ruining the charm of these chocolate chip cookie bars.

  • Storage Savvy: Store leftover bars in an airtight container at room temperature for up to a week. To restore their gooey texture, microwave individual pieces for 10-15 seconds.

Melt-in-Your-Mouth Chocolate Chip Cookie Bars Recipe FAQs

How do I choose ripe and fresh chocolate chips?
Absolutely! When selecting chocolate chips, look for bags that have a good seal and no signs of damage. Check the expiration date; the fresher, the better! The best chocolate chips will have a shiny surface and scent of rich chocolate. Always use semi-sweet for that classic flavor, but if you’re feeling adventurous, dark or white chocolate can add a delightful twist.

What is the best way to store leftover chocolate chip cookie bars?
Very! To keep your chocolate chip cookie bars soft and fresh, store them in an airtight container at room temperature for up to 1 week. If you prefer a chewier texture, refrigerate them, allowing them to warm to room temperature before enjoying. When storing, ensure layers are separated with parchment paper to avoid sticking.

Can I freeze chocolate chip cookie bars?
Of course! To freeze your delicious cookie bars, first, wrap them tightly in plastic wrap, followed by a layer of aluminum foil to prevent freezer burn. They can last up to 3 months in the freezer. When you’re ready to enjoy them, thaw overnight in the fridge and warm them up in the microwave for an indulgent treat.

What should I do if my cookie bars are too gooey or undercooked?
No worries! If your bar is too gooey in the center, it’s likely that they need a little more baking time. Return them to the oven and keep a close eye on them, checking every few minutes. You want the edges to be golden brown while the center should still be slightly soft but not raw. If they came out too dry, consider reducing the baking time next time or using slightly less flour.

Are chocolate chip cookie bars safe for people with nut allergies?
Absolutely! If baking for someone with nut allergies, ensure you use nut-free ingredients and always double-check the labels on all your products, especially chocolate chips. You can also create a nut-free version by avoiding any mix-ins that could contain nuts, and feel free to add in alternatives like seeds or dried fruits for extra flavor without the risk!

Can I modify the recipe for dietary preferences, like gluten-free?
Very much so! To adapt the chocolate chip cookie bars for a gluten-free diet, substitute the all-purpose flour with a gluten-free flour blend. I recommend using a blend that includes xanthan gum to help maintain structure. Adjusting baking times might be necessary based on the blend used, so keep an eye on texture while baking.

Chocolate Chip Cookie Bars

Irresistibly Soft Chocolate Chip Cookie Bars You'll Love

These Chocolate Chip Cookie Bars are a nostalgic treat that everyone will love, combining the classic flavors of chocolate chip cookies in a convenient bar format.
Prep Time 15 minutes
Cook Time 30 minutes
Cooling Time 20 minutes
Total Time 1 hour 5 minutes
Servings: 16 bars
Course: Dessert
Calories: 200

Ingredients
  

For the Dough
  • 1 cup unsalted butter slightly cooled
  • 1 cup light brown sugar can swap with dark brown sugar
  • 1/2 cup granulated sugar
  • 2 large eggs
  • 2 tsp vanilla extract can substitute with almond extract
  • 2 1/4 cups all-purpose flour do not substitute
  • 1/2 tsp salt kosher or sea salt are good alternatives
  • 1/2 tsp baking soda check for freshness
  • 2 cups semi-sweet chocolate chips can use dark or white chocolate chips
Optional Mix-Ins
  • nuts or dried fruit consider walnuts or cranberries

Equipment

  • 9x13-inch pan
  • Mixing Bowl
  • whisk
  • spatula

Method
 

Step-by-Step Instructions
  1. Preheat your oven to 350°F (175°C) and prepare a 9x13-inch pan by greasing it or lining it with parchment paper.
  2. In a large mixing bowl, combine melted unsalted butter, light brown sugar, and granulated sugar. Whisk until smooth, then add eggs and vanilla extract, and mix until creamy.
  3. In a separate bowl, whisk together all-purpose flour, salt, and baking soda. Gradually mix the dry ingredients into the wet mixture until just combined.
  4. Fold in the semi-sweet chocolate chips evenly throughout the dough.
  5. Transfer the cookie dough into your prepared pan, pressing it down evenly and smoothing the surface.
  6. Bake in the preheated oven for about 28-32 minutes, or until the edges are golden brown and a toothpick inserted comes out clean.
  7. Allow the bars to cool in the pan for at least 20 minutes before slicing into squares.

Nutrition

Serving: 1barCalories: 200kcalCarbohydrates: 30gProtein: 2gFat: 10gSaturated Fat: 6gPolyunsaturated Fat: 1gMonounsaturated Fat: 3gCholesterol: 25mgSodium: 90mgPotassium: 80mgFiber: 1gSugar: 12gVitamin A: 300IUCalcium: 20mgIron: 1mg

Notes

Store leftover bars in an airtight container at room temperature for up to a week. Microwave individual pieces for 10-15 seconds to restore gooeyness.

Tried this recipe?

Let us know how it was!

White Chocolate Pumpkin Snickerdoodles to Savor This Fall

As the days grow shorter and the air turns crisp, there’s nothing quite like a freshly baked cookie to evoke the warm essence of fall. Enter my White Chocolate Pumpkin Snickerdoodles—a delightful blend of soft, chewy textures and the comforting aromas of cinnamon and pumpkin. These easy cookies celebrate the best flavors of the season, making them a perfect treat for any holiday gathering. Not only do they come together effortlessly, but they’re also a crowd-pleaser, ensuring that everyone leaves your kitchen with a smile. Why settle for fast food when you can indulge in these warm, homemade delights? Ready to bake something that whispers autumn magic in every bite?

Why Are These Cookies a Fall Must-Have?

Irresistible Flavors: Each bite bursts with spiced pumpkin and creamy white chocolate, celebrating the essence of fall.

Easy to Make: No complicated techniques here—just pure, simple baking joy that even novice bakers can master!

Chewy Delight: Enjoy the soft, chewy texture that beckons you back for just one more—seriously, who can resist?

Perfect for Sharing: These cookies are a guaranteed hit at any gathering. Pair them with a steaming mug of hot cocoa for the ultimate cozy experience.

Versatile Treat: Switch it up by using milk chocolate or mix-ins like nuts to personalize your batch, just like in my Chocolate Fudge Cupcakes.

Get ready to embrace fall flavors with every delicious bite!

White Chocolate Pumpkin Snickerdoodle Ingredients

Here’s what you’ll need to create these delightful cookies:

For the Batter

  • Salted Butter – Provides richness and moisture; use unsalted if you prefer control over the salt.
  • Light Brown Sugar – Adds sweetness and moisture for a soft cookie texture.
  • Granulated Sugar – Balances sweetness and contributes to a perfect cookie texture.
  • Large Egg – Acts as a binder for structure and richness.
  • Pumpkin Puree – Infuses moisture and delivers that signature pumpkin flavor.
  • Vanilla Extract – Brightens and enhances the overall flavor profile.
  • All-Purpose Flour – Offers the structure necessary for cookies to hold their shape.
  • Baking Soda – A leavening agent that provides lift to the cookies.
  • Pumpkin Spice Instant Pudding Mix – Adds flavor and moisture; butterscotch pudding can replace it if needed.
  • Ground Cinnamon – Brings warmth and spice, perfect for the fall season.
  • Pumpkin Pie Spice – Amplifies the complexity of fall flavors, making every bite special.
  • Salt – Counterbalances the sweetness for a well-rounded taste.
  • White Chocolate Chips – Offers a creamy sweetness; consider milk chocolate chips as a tasty alternative.

For the Topping

  • Cinnamon Sugar Mixture – Sprinkles beautifully on top to add a delightful crunch and spiced flavor to the cookies.

With these ingredients, you’re all set to whip up a batch of White Chocolate Pumpkin Snickerdoodles that will make your home smell like a cozy autumn day!

Step‑by‑Step Instructions for White Chocolate Pumpkin Snickerdoodles

Step 1: Preheat and Prepare
Begin by preheating your oven to 375°F (190°C). While it heats, take two large baking sheets and line them with parchment paper to prevent sticking. This will ensure that your White Chocolate Pumpkin Snickerdoodles bake evenly and come off the sheets effortlessly when they’re done.

Step 2: Cream the Butter and Sugars
In the bowl of a stand mixer, combine softened salted butter, light brown sugar, and granulated sugar. Using the paddle attachment, cream them together on medium speed until the mixture is light and fluffy, which should take about 2-3 minutes. The combination should look pale and slightly increased in volume, creating a perfect base for your cookies.

Step 3: Add Wet Ingredients
Now, add one large egg, pumpkin puree, and vanilla extract to the creamed mixture. Beat on medium speed until just combined, ensuring the mixture is smooth and there are no lumps of pumpkin. The batter will have a lovely, inviting aroma, hinting at the fall flavors to come in your delicious White Chocolate Pumpkin Snickerdoodles.

Step 4: Combine Dry Ingredients
In a separate mixing bowl, whisk together all-purpose flour, baking soda, pumpkin spice instant pudding mix, ground cinnamon, pumpkin pie spice, and salt. This blend of dry ingredients creates the perfect harmony of flavors and texture for your cookies. Gradually add this dry mixture into the wet ingredients, mixing on low speed until just combined to avoid overworking the dough.

Step 5: Fold in the Chocolate Chips
Once the dough is formed, gently fold in the white chocolate chips using a spatula or wooden spoon. This step is crucial to ensure even distribution of the sweet, creamy morsels throughout the cookie dough, providing delightful bites with every cookie you bake.

Step 6: Scoop and Sprinkle
Grab a cookie scoop and portion out the dough onto the prepared baking sheets, spacing the balls about 2 inches apart. Once they are all on the sheets, sprinkle each dough ball generously with the cinnamon sugar mixture. This will create a lovely crunchy exterior that enhances the flavors of your White Chocolate Pumpkin Snickerdoodles.

Step 7: Bake to Perfection
Place the baking sheets into the preheated oven and bake for about 10 minutes. Keep an eye on them; you’ll want to remove the cookies when the edges are lightly golden, while the centers might look a bit soft. This contrast in texture is key to achieving that chewy, decadent cookie you’re after.

Step 8: Cool and Enjoy
After baking, allow the cookies to cool on the baking sheets for a few minutes before transferring them to a wire rack. Let them cool completely, as this helps them set further. You’ll be greeted by the warm, inviting scent of your freshly baked White Chocolate Pumpkin Snickerdoodles—perfect for sharing, or keeping all to yourself!

Make Ahead Options

These White Chocolate Pumpkin Snickerdoodles are perfect for meal prep enthusiasts looking to save time without sacrificing flavor! You can prepare the cookie dough up to 24 hours in advance by mixing all the ingredients and then refrigerating it. Simply scoop the dough onto baking sheets, cover with plastic wrap, and pop them in the fridge overnight. This helps the flavors meld beautifully while also maintaining the ideal texture. When it’s time to bake, just preheat your oven and sprinkle the cinnamon sugar on top before cooking. Your cookies will be just as delicious, offering that cozy fall taste with minimal effort!

What to Serve with White Chocolate Pumpkin Snickerdoodles

As the aroma of these cookies fills your kitchen, imagine elevating your fall gatherings with delightful pairings that enhance every bite.

  • Creamy Hot Chocolate: The rich, chocolatey warmth complements the spiced cookies perfectly, making your treats even more indulgent.

  • Pumpkin Spice Latte: The classic fall drink pairs beautifully; its warm flavors echo the pumpkin in your cookies, creating a cozy experience.

  • Vanilla Ice Cream: A scoop of this creamy treat alongside warm cookies enhances the textures and adds a delightful cold contrast.

  • Chai Tea: Spiced and fragrant, chai tea’s flavor profile balances the sweetness of the cookies, offering a cozy, aromatic pairing for a chilly day.

  • Apple Cider: The crisp, tangy flavors of apple cider play off the pumpkin, creating a refreshing and seasonal twist that’s perfect for fall.

  • Buttermilk Pancakes: Enjoy these fluffy discs as an alternate breakfast option alongside cookies for a sweet brunch of fall flavors.

  • Cheesecake Bites: Mini cheesecakes atop a graham cracker crust can bring a creamy sweetness that beautifully contrasts the spices of your snickerdoodles.

  • Raspberry Sorbet: Its light tartness cuts through the richness of the cookies, providing a refreshing palate cleanser.

  • Pumpkin Cream Cheese Muffins: A flavorful nod to the season, these muffins echo the flavors of your cookies for the ultimate fall brunch idea.

White Chocolate Pumpkin Snickerdoodles Variations

Dive into the delightful world of customization, where every bite becomes a personal creation that excites the senses!

  • Dairy-Free: Swap butter with coconut or plant-based butter to enjoy a lighter version of these cookies.
    For those who are lactose intolerant or simply prefer plant-based options, this simple switch retains the creamy goodness without compromise.

  • Nutty Delight: Add chopped pecans or walnuts for a satisfying crunch and added flavor depth.
    The nuts will bring a lovely toasted taste and texture, making every cookie feel even more indulgent.

  • Gluten-Free: Replace all-purpose flour with a gluten-free flour blend for a safe option for those avoiding gluten.
    With the right blend, your cookies will still achieve that soft, chewy magic everyone loves.

  • Spice It Up: Increase the ground cinnamon or add a pinch of cayenne pepper for an unexpected flavor burst and warmth.
    This twist creates a surprising kick that pairs beautifully with the sweet pumpkin essence, making your cookies truly unforgettable.

  • Brown Butter: For a deeper flavor, brown the butter before mixing—it adds a rich, nutty taste and an aroma that’s irresistible.
    The extra richness transforms your cookies and provides a gourmet touch without much effort!

  • Pumpkin Pie Swirls: Incorporate swirls of pumpkin pie filling into the dough for bursts of flavor.
    It adds an appealing visual and a delicious surprise of flavor that epitomizes fall.

  • Choco-Chip Fusion: Mix in some dark chocolate chips along with white chocolate for a harmonious blend of flavors.
    The bittersweet chocolate beautifully balances the sweetness, creating a multi-layered taste experience.

  • Cinnamon Roll Variation: Roll the cookie dough in cinnamon-sugar before baking for an extra sweet crunch.
    This creates a lovely crispy exterior that enhances the warm, spicy flavors typical of a fall treat, making it truly divine.

Feel free to explore these variations and make the recipe your own! You could even enjoy them with a cozy cup of Joumou Haitian Pumpkin soup on a chilly afternoon for the full fall experience.

Expert Tips for White Chocolate Pumpkin Snickerdoodles

  • Use Pure Pumpkin Puree: Ensure you’re using pure pumpkin puree, not pumpkin pie filling, to get the authentic taste and texture in your cookies.

  • Chill the Dough: For a thicker cookie, chill the dough for 30 minutes before scooping. This helps the cookies hold their shape while baking.

  • Don’t Overmix: Mix the wet and dry ingredients until just combined. Overmixing can lead to dense cookies instead of the tender White Chocolate Pumpkin Snickerdoodles you desire.

  • Check Ovens Carefully: Keep an eye on your cookies after about 8 minutes of baking. Oven temperatures can vary, and you want the edges to be golden but the centers to remain soft.

  • Store Right: Store cookies in an airtight container at room temperature for up to 7 days. Keeping them sealed preserves their softness, making each bite a delight!

How to Store and Freeze White Chocolate Pumpkin Snickerdoodles

Room Temperature: Store cookies in an airtight container for up to 7 days. This keeps them soft and fresh, perfect for those cozy fall moments.

Fridge: If you prefer, you can refrigerate the cookies for up to 10 days. Just be sure to seal them properly to avoid absorbing any odors.

Freezer: For longer storage, freeze the cookies in a single layer on a baking sheet before transferring them to a freezer-safe container. They will last up to 3 months.

Reheating: To enjoy your White Chocolate Pumpkin Snickerdoodles warm, reheat them in the oven at 350°F (175°C) for about 5 minutes. This revives their soft, chewy texture—just like fresh out of the oven!

White Chocolate Pumpkin Snickerdoodles Recipe FAQs

What type of pumpkin puree should I use?
Absolutely! It’s important to choose pure pumpkin puree for your White Chocolate Pumpkin Snickerdoodles, not pumpkin pie filling. The pie filling contains added sugars and spices that can alter the flavor and texture of your cookies, making them less than ideal.

How should I store my cookies to keep them soft?
To keep your cookies soft, I recommend storing them in an airtight container at room temperature for up to 7 days. If you want to extend their freshness, storing them in the refrigerator for up to 10 days is a great option too, just ensure they’re sealed tightly to avoid any unwanted odors.

Can I freeze these cookies?
Absolutely! To freeze your White Chocolate Pumpkin Snickerdoodles, start by placing them in a single layer on a baking sheet and freeze them until firm. Once frozen, transfer the cookies to a freezer-safe container or zip-top bag, making sure to separate layers with parchment paper. They will keep well for up to 3 months. When you’re ready to enjoy them, simply reheat in the oven at 350°F (175°C) for about 5 minutes for that fresh-baked taste.

What can I do if my cookies turn out too flat?
If your cookies spread more than you’d like, this can be due to several factors. Make sure you have the correct measurements of flour and sugar—flour gives structure and can prevent flatness. Also, if your butter is too soft or melted when you start, that can lead to spreading as well. Chilling the dough for about 30 minutes before baking can help maintain their shape!

Any dietary considerations I should keep in mind?
Very! If you’re baking for someone with a nut allergy, be cautious with your choices as there are mix-ins suggested like nuts. Similarly, for those avoiding dairy, consider using dairy-free butter and chocolate chips. Always double-check labels if allergies are a concern!

How can I achieve a thicker cookie?
For those who love a thicker White Chocolate Pumpkin Snickerdoodle, chilling the cookie dough for at least 30 minutes before scooping it onto the baking sheets is a fantastic tip! This prevents them from spreading too much while baking, giving you that ideal chewy texture you crave.

White Chocolate Pumpkin Snickerdoodles

White Chocolate Pumpkin Snickerdoodles to Savor This Fall

Delight in the flavors of fall with these White Chocolate Pumpkin Snickerdoodles—soft, chewy cookies infused with pumpkin and chocolate.
Prep Time 15 minutes
Cook Time 10 minutes
Cooling Time 10 minutes
Total Time 35 minutes
Servings: 24 cookies
Course: Dessert
Cuisine: American
Calories: 150

Ingredients
  

For the Batter
  • 1 cup Salted Butter Use unsalted if preferred
  • 1 cup Light Brown Sugar
  • 1 cup Granulated Sugar
  • 1 large Large Egg
  • 1 cup Pumpkin Puree
  • 1 teaspoon Vanilla Extract
  • 2 cups All-Purpose Flour
  • 1 teaspoon Baking Soda
  • 1 package Pumpkin Spice Instant Pudding Mix Butterscotch pudding can replace it
  • 1 teaspoon Ground Cinnamon
  • 1 teaspoon Pumpkin Pie Spice
  • 1/2 teaspoon Salt
  • 1 cup White Chocolate Chips Milk chocolate chips can be used
For the Topping
  • 1/4 cup Cinnamon Sugar Mixture For sprinkling on top

Equipment

  • Stand mixer
  • Baking Sheets
  • Parchment Paper
  • Cookie Scoop

Method
 

Step‑by‑Step Instructions
  1. Preheat your oven to 375°F (190°C) and line two large baking sheets with parchment paper.
  2. Cream the softened salted butter, light brown sugar, and granulated sugar together until light and fluffy, about 2-3 minutes.
  3. Add the large egg, pumpkin puree, and vanilla extract to the creamed mixture and beat until just combined.
  4. In a separate bowl, whisk together the all-purpose flour, baking soda, pudding mix, ground cinnamon, pumpkin pie spice, and salt. Gradually mix into the wet ingredients until just combined.
  5. Fold in the white chocolate chips gently with a spatula until evenly incorporated.
  6. Scoop the dough onto the prepared baking sheets, spacing them 2 inches apart. Sprinkle each ball with the cinnamon sugar mixture.
  7. Bake for about 10 minutes, removing when the edges are lightly golden and the centers are soft.
  8. Cool on the baking sheets for a few minutes before transferring to a wire rack to cool completely.

Nutrition

Serving: 1cookieCalories: 150kcalCarbohydrates: 20gProtein: 2gFat: 7gSaturated Fat: 4gMonounsaturated Fat: 3gCholesterol: 20mgSodium: 90mgPotassium: 50mgSugar: 10gVitamin A: 10IUCalcium: 1mgIron: 3mg

Notes

Use pure pumpkin puree for the best flavor and chill the dough for thicker cookies if desired. Store in an airtight container for freshness.

Tried this recipe?

Let us know how it was!

Healthy Cucumber Pasta Salad That Screams Summer Freshness

As I reached for the crisp cucumbers in my garden, I felt that familiar thrill of summer’s bounty about to become something special. Enter the Healthy Cucumber Pasta Salad—a refreshing summer dish that’s light on the palate but heavy on satisfaction. Not only is this salad incredibly quick to whip up, but it also requires no oven, making it your go-to choice for a breezy, sunny day. Imagine combining pasta, fresh veggies, and a creamy dressing that ties everything together beautifully, perfect for picnics, barbecues, or simply a light dinner at home. Plus, it’s a fantastic make-ahead meal that allows flavors to meld overnight. Are you ready to dive into this delicious dish that will make you forget all about fast food?

Why Is This Salad So Refreshing?

Bright, Fresh Ingredients: The Healthy Cucumber Pasta Salad is a delightful symphony of fresh cucumbers and al dente pasta that captures the essence of summer.

No Cooking Required: With zero oven time, you can enjoy a delicious meal during those hot summer days without breaking a sweat.

Quick Preparation: Whip up this salad in under 30 minutes, making it the perfect option for last-minute gatherings or everyday dinners.

Versatile and Customizable: Feel free to add your favorite vegetables or proteins for a unique twist—try adding some cherry tomatoes or even grilled chicken from your next barbecue.

Ideal for Meal Prep: Prepare this salad ahead of time, allowing the flavors to meld beautifully while keeping the cucumbers and pasta fresh and crispy. Perfect for packing alongside Cajun Sausage Pasta for lunch!

In just a few simple steps, you can create a light meal that will impress family and friends alike!

Healthy Cucumber Pasta Salad Ingredients

• Get ready to mix freshness with flavor!

For the Pasta

  • Pasta – Choose any shape you enjoy; cooking it al dente will keep the texture delightful.

For the Vegetables

  • Cucumber – Opt for English cucumbers for their sweetness; if using regular ones, peel and seed them for the best taste.
  • Onion – Soaking in cold water will mellow the sharp flavor, making it more pleasant in your salad.

For the Creamy Dressing

  • Greek Yogurt or Mayonnaise – This forms the creamy base; Greek yogurt is a lighter option!
  • Vinegar – Adds the tang; apple cider or white wine vinegar works beautifully.
  • Seasonings – Customize with salt, pepper, or herbs to match your taste preferences.

This Healthy Cucumber Pasta Salad is a refreshing way to enjoy summer dining!

Step‑by‑Step Instructions for Healthy Cucumber Pasta Salad

Step 1: Prepare Dressing
In a small bowl, combine your choice of Greek yogurt or mayonnaise with vinegar and your selected seasonings. Whisk together until the mixture is smooth and creamy, and there are no lumps remaining. Set the dressing aside to allow the flavors to meld together while you prepare the other ingredients.

Step 2: Soak Onion
Slice the onion thinly and place it in a bowl of cold water. Allow it to soak for about 10 minutes; this will help reduce its sharp flavor and make it more palatable in your Healthy Cucumber Pasta Salad. Once soaked, drain the onions and set them aside.

Step 3: Cook Pasta
Bring a pot of salted water to a rolling boil and add your pasta of choice. Cook according to package instructions until the pasta is al dente, usually around 8-10 minutes. Drain the pasta and immediately rinse it under cold water to halt the cooking process, ensuring it remains firm and chewy.

Step 4: Prepare Cucumbers
While the pasta cools, take the cucumbers and slice them thinly, removing any seeds if using regular cucumbers for a better texture. This step is vital as it prevents excess moisture in your Healthy Cucumber Pasta Salad, keeping it crisp and refreshing. Set the sliced cucumbers aside.

Step 5: Combine Ingredients
In a large mixing bowl, combine the cooled pasta, drained onions, and the prepared cucumber slices. Gently fold the ingredients together with a spatula, making sure not to break the pasta while ensuring everything is evenly distributed for optimal flavor and texture.

Step 6: Dress Salad
Pour the creamy dressing over the combined pasta, onions, and cucumbers. Using a spatula, carefully toss everything together until all ingredients are well-coated with the dressing. This will create a deliciously creamy base that enhances the freshness of your Healthy Cucumber Pasta Salad.

Step 7: Chill
Cover the bowl with plastic wrap or a lid and refrigerate the salad for at least 40 minutes before serving. This chilling period is essential for enhancing the flavors and allowing the ingredients to meld together, resulting in a refreshing dish that’s perfect for summer gatherings.

What to Serve with Healthy Cucumber Pasta Salad

Elevate your dining experience by pairing this refreshing salad with complementary dishes that enhance its vibrant flavors and textures.

  • Grilled Chicken Skewers: Juicy, marinated chicken adds a hearty balance to the light salad, perfect for summer barbecues.
  • Fruit Salad: A colorful medley of seasonal fruits provides a sweet contrast and adds a refreshing touch to your meal.
  • Corn on the Cob: Grilled or boiled corn brings a sweet crunch that pairs beautifully with the creamy pasta.
  • Caprese Skewers: Fresh mozzarella, basil, and tomatoes offer a bright, herbaceous flavor that complements the salad’s crispness.
  • Chilled Lemonade: This zesty drink refreshes your palate and enhances the salad’s lightness, making it a perfect summer companion.
  • Garlic Bread: The crispy, buttery texture of garlic bread adds an irresistible crunch, perfect for scooping up leftover salad.

With these delicious pairings, your Healthy Cucumber Pasta Salad transforms into a delightful summer feast that everyone will love!

Healthy Cucumber Pasta Salad Variations

Feel free to get creative with your Healthy Cucumber Pasta Salad, letting your taste buds dance with each delicious twist!

  • Dairy-Free: Substitute the creamy dressing with a vegan yogurt or a tahini-based sauce for a delightful dairy-free twist.

  • Add Protein: Toss in grilled chicken or chickpeas for a protein boost that turns your salad into a hearty meal.

  • Spicy Kick: Incorporate diced jalapeños or a dash of hot sauce into the dressing for that extra zing your taste buds will crave.

  • Herb-Infused: Sprinkle in fresh herbs like dill or basil to elevate the flavor profile, creating a garden-fresh sensation with every bite.

  • Nutty Crunch: Add a handful of toasted pine nuts or slivered almonds for a delightful crunch that complements the creamy dressing beautifully.

  • Citrus Burst: Squeeze fresh lemon or lime juice over the salad before serving to awaken the ingredients, enriching the flavors with a bright, zesty lift.

  • Colorful Veggies: Include shredded carrots or radishes for an appealing pop of color and a satisfying crunch that enhances the overall texture.

Feel free to explore these variations or enjoy your Healthy Cucumber Pasta Salad as is. It pairs beautifully with grilled dishes like this Cajun Sausage Pasta for a complete and delightful summer feast!

How to Store and Freeze Healthy Cucumber Pasta Salad

Fridge: Store leftover salad in an airtight container for up to 3 days. This keeps the flavors fresh and allows for easy access during the week.

Freezer: It’s not recommended to freeze this salad as the cucumbers will lose their crispness upon thawing, negatively affecting the texture.

Reheating: If you’ve set some pasta aside, simply warm it gently on the stovetop or microwave, then mix it with fresh cucumbers and dressing for a revived dish that’s as good as new!

Make-Ahead: For best results, prepare the dressing and pasta separately. Combine them with cucumbers only an hour before serving to maintain that delightful crunch in your Healthy Cucumber Pasta Salad.

Make Ahead Options

These Healthy Cucumber Pasta Salad preparations are a lifesaver for busy home cooks! You can prepare the dressing and cook the pasta up to 24 hours in advance and store them separately in the refrigerator. For optimal freshness, slice the cucumbers just a few hours before serving to maintain their crunch. Soak the onions in cold water to mellow their flavor and keep them ready in the fridge. When it’s time to serve, simply combine the pasta, cucumbers, onions, and dressing in a large bowl, toss them together gently, and let the salad chill for at least 40 minutes. This way, you’ll have a delightful meal or side dish ready to impress without any last-minute stress!

Expert Tips for Healthy Cucumber Pasta Salad

Salt the Cucumbers: Sprinkle salt on cucumber slices and let them drain for 10-15 minutes to avoid a watery salad.

Perfect Pasta Texture: Avoid overcooking the pasta; it should be al dente for the best bite in your Healthy Cucumber Pasta Salad.

Chill Before Serving: Allow the salad to chill for at least 40 minutes to enhance the flavors—this is vital for a refreshing taste!

Customize Ingredients: Feel free to experiment with additional veggies like bell peppers or radishes to add color and crunch to the salad.

Timing for Mixing: Mix the salad no earlier than 2 hours before serving to keep cucumbers crunchy and fresh.

Healthy Cucumber Pasta Salad Recipe FAQs

What type of cucumbers should I use for this salad?
You should use English cucumbers for their sweetness and minimal seeds. If you prefer regular cucumbers, it’s best to peel and seed them first to eliminate any bitterness and excess moisture.

How long can I store the Healthy Cucumber Pasta Salad in the fridge?
Store your salad in an airtight container for up to 3 days. This allows you to enjoy the fresh flavors throughout the week while keeping the ingredients crisp and tasty.

Can I freeze the Healthy Cucumber Pasta Salad?
It’s not recommended to freeze this salad, as the cucumbers will become mushy and lose their refreshing crunch once thawed. Instead, enjoy it fresh, and if you need to make it ahead of time, keep the dressing and cucumbers separate until just before serving.

Why is my Healthy Cucumber Pasta Salad watery?
This can happen if you didn’t drain the cucumbers properly. Always salt cucumber slices and let them drain for about 10-15 minutes before adding them to the salad. This will prevent excess moisture and keep your dish fresh and crisp!

How can I customize the dressing for more flavor?
Absolutely! You can switch Greek yogurt for mayo for a different taste, or add herbs like dill or basil for a fresh kick. A teaspoon of Dijon mustard can also add an interesting tang to your dressing!

Can I serve this salad to guests with allergies?
Always check ingredient labels to ensure they are safe for your guests. If you have guests with dairy allergies, I recommend using a dairy-free yogurt alternative for the dressing. This way, everyone can enjoy the Healthy Cucumber Pasta Salad without worries!

Healthy Cucumber Pasta Salad

Healthy Cucumber Pasta Salad That Screams Summer Freshness

A refreshing Healthy Cucumber Pasta Salad that’s light on the palate but heavy on satisfaction, perfect for summer dining.
Prep Time 30 minutes
Cook Time 10 minutes
Chilling Time 40 minutes
Total Time 1 hour 20 minutes
Servings: 4 servings
Course: Salad
Cuisine: American
Calories: 200

Ingredients
  

For the Pasta
  • 2 cups Pasta Any shape, cooked al dente
For the Vegetables
  • 2 cups Cucumber English cucumbers preferred
  • 1 small Onion Soaked in cold water
For the Creamy Dressing
  • 1 cup Greek Yogurt Or mayonnaise
  • 2 tablespoons Vinegar Apple cider or white wine vinegar
  • to taste Seasonings Salt, pepper, or herbs

Equipment

  • Mixing Bowl
  • small bowl
  • Pot
  • spatula
  • Colander

Method
 

Preparation
  1. In a small bowl, combine Greek yogurt or mayonnaise with vinegar and seasonings. Whisk until smooth and set aside.
  2. Slice onion thinly and soak in cold water for 10 minutes, then drain.
  3. Cook pasta in salted boiling water until al dente (8-10 minutes), then rinse under cold water.
  4. Slice cucumbers thinly, removing seeds if using regular ones, and set aside.
  5. In a large mixing bowl, combine pasta, drained onions, and cucumber slices. Fold gently.
  6. Pour the dressing over the pasta mixture and carefully toss until all ingredients are coated.
  7. Cover and refrigerate for at least 40 minutes before serving.

Nutrition

Serving: 1servingCalories: 200kcalCarbohydrates: 30gProtein: 8gFat: 6gSaturated Fat: 1gPolyunsaturated Fat: 1gMonounsaturated Fat: 3gCholesterol: 2mgSodium: 300mgPotassium: 250mgFiber: 2gSugar: 3gVitamin A: 10IUVitamin C: 20mgCalcium: 4mgIron: 6mg

Notes

Sprinkle salt on cucumbers and let them drain for 10-15 minutes to avoid a watery salad. Customize with additional vegetables as desired.

Tried this recipe?

Let us know how it was!

Deliciously Authentic Birria Tacos for Taco Night Bliss

The rich aroma of spices fills my kitchen as I dive into making my Fave Birria Tacos, a culinary journey that transports me straight to the vibrant streets of Mexico. These tacos are not just a meal; they’re an experience—think tender, shredded beef enveloped in crispy tortillas, each bite oozing warm, melted cheese. What I absolutely adore about this recipe is its versatility; you can easily swap the beef for chicken, lamb, or even jackfruit for a delightful vegan alternative. Plus, they’re make-ahead friendly, making dinner a breeze on busy nights. If you’ve been yearning for comfort food that dazzles without the guilt of fast food, you’ve stumbled upon the right spot. Ready to explore the magic of Birria Tacos? Let’s jump into the flavors you’ll love!

Why are Birria Tacos a must-try?

Irresistible Flavor: Each bite is a fusion of spice and savory goodness, thanks to the vibrant blend of chiles and herbs.

Versatile Choices: Enjoy a range of meat options—beef, chicken, or even jackfruit for a delicious vegan treat!

Make-Ahead Magic: Perfect for busy lifestyles, you can prepare the ingredients in advance and enjoy taco night bliss at your convenience.

Comforting Experience: Crispy tortillas filled with tender meat and melted cheese redefine comfort food, making each meal a delightful occasion.

Don’t forget, if you’re in the mood for some mouthwatering uniqueness, check out my delicious Birria Tacos Culinary venture into the heart of home-cooked flavors!

Birria Tacos Ingredients

For the Chili Paste

  • Dried Guajillo Peppers – These provide essential heat and depth of flavor; feel free to substitute with other dried chiles if needed.
  • Dried Ancho Chiles – Adds a sweetness that beautifully balances the overall flavor profile.
  • Chipotle Peppers in Adobo – Introduces a delicious smokiness and spicy element to your tacos.

For the Meat & Sauce

  • Organic Chuck Roast Beef – The main protein, tenderizes perfectly during cooking; can be swapped for chicken, lamb, or goat for variety.
  • Organic Beef Stock – Use for roasting and adding richness; water can work as a substitute in a pinch.
  • Apple Cider Vinegar – Balances all the flavors with a touch of acidity.
  • Onion (chopped) – A base flavor that provides aromatic depth.
  • Garlic cloves – Enhances the savory quality of the dish.
  • Crushed Tomatoes – Adds acidity and body to the rich sauce.

Herbs & Spices

  • Bay Leaves – Infuse a subtle herbal note into the dish.
  • Mexican Oregano – Elevates the traditional flavor profile that birria tacos are known for.
  • Dried Thyme – Brings an earthy flavor to the mix.
  • Cumin – Adds warmth and a hint of spice.
  • Ground Cinnamon – Provides a distinctive subtle sweetness and complexity.
  • Smoked Paprika – Contributes additional smokiness that enhances the overall taste.
  • Ground Allspice – Introduces hints of warmth and spice complexity.

For Assembly & Serving

  • Extra Virgin Olive Oil – Great for sautéing and enriching flavors.
  • Sea Salt & Black Pepper – Essential for seasoning your beef to perfection.
  • Garlic Powder – Elevates the meat flavor during the searing process.
  • Fresh Cilantro (chopped) – A bright and fresh topping that rounds out the flavors.
  • Organic Corn Tortillas – Ideal for holding all the tasty fillings; opt for gluten-free varieties if required.
  • Shredded Oaxaca Cheese – Melts beautifully for a creamy, delightful texture; vegan cheese makes a fantastic substitute here.

With these Birria Tacos ingredients, you’re one step closer to creating a truly unforgettable taco night! Prepare to delight your family with the burst of flavors and textures that await you.

Step‑by‑Step Instructions for Authentic Birria Tacos

Step 1: Prepare Chili Paste
Begin by soaking 4-6 dried guajillo and ancho chiles in 2 cups of beef stock for about 15 minutes, or until softened. Once they’re pliable, blend the chiles with 2 chipotle peppers in adobo, 1 chopped onion, 3 garlic cloves, and 1 can of crushed tomatoes until smooth. This rich chili paste lays the flavorful foundation for your birria tacos.

Step 2: Sear the Meat
Preheat your oven to 300°F (150°C). In a large pot, heat 2 tablespoons of extra virgin olive oil over medium-high heat. Generously season 3-4 pounds of organic chuck roast with sea salt, black pepper, and garlic powder, then sear the meat for about 5 minutes per side until it develops a deep golden crust. This step locks in essential flavors for your Birria Tacos!

Step 3: Create the Base
Remove the beef from the pot and add your prepared chili paste. Sauté it gently for about 3 minutes, allowing the spices to bloom. Then, add the reserved beef stock from soaking the chiles, along with 1 tablespoon of apple cider vinegar, 2 bay leaves, and 1 teaspoon each of cumin, dried thyme, and Mexican oregano. Stir well to combine.

Step 4: Braise
Return the seared chuck roast to the pot, ensuring it’s submerged in the sauce. Cover the pot and place it in the preheated oven to braise for about 2.5 hours, or until the beef is fork-tender. This slow cooking renders the meat rich and tasty, creating the perfect base for your birria tacos.

Step 5: Shred Meat
Once tender, remove the pot from the oven and carefully take out the beef. Allow it to cool slightly before shredding with two forks to achieve a pulled texture. Ensure some of the flavorful sauce remains to enhance the juiciness of your filling for the delicious Birria Tacos.

Step 6: Assemble Tacos
In a shallow dish, pour some of the flavorful consomé from the pot. Quickly dip each organic corn tortilla in the consomé before frying. In a skillet, add a little oil and fry the tortillas for about 1-2 minutes per side until golden and crisp, then fill them with shredded beef, onion, fresh cilantro, and shredded Oaxaca cheese.

Step 7: Serve
Serve your tasty Birria Tacos with extra consomé on the side for dipping. Add toppings like pico de gallo and lime wedges to enhance the experience. These tacos will tantalize your taste buds and transport you to the vibrant streets of Mexico!

Expert Tips for the Best Birria Tacos

  • Chili Paste Perfection: Blend until smooth for a cohesive flavor. Chunky paste can lead to uneven tastes in your Birria Tacos.

  • Meat Substitutions: Feel free to swap the beef for lamb, chicken, or vegan jackfruit, but adjust seasoning to bring out their unique flavors.

  • Tortilla Technique: Use two corn tortillas per taco for added support. This prevents sogginess and keeps them sturdy while you pile on the fillings.

  • Braising Benefits: Make sure the beef is submerged fully during braising. This ensures maximum flavor absorption, enhancing the overall experience.

  • Crispy Assembly: Quickly dip tortillas in consomé instead of soaking them. A quick dip keeps your tacos crisp and delightful!

  • Leftover Love: Store leftover birria separately from tortillas to preserve texture. Reheat in the oven for the best results!

What to Serve with Authentic Birria Tacos

The vibrant flavors of crispy, cheesy Birria Tacos create an irresistible culinary experience that deserves amazing companions!

  • Pico de Gallo: Fresh and zesty, this salsa adds a bright crunch that contrasts beautifully with the rich flavors of the tacos.

  • Lime Wedges: A sprinkle of citrus elevates each bite, enhancing the savory richness with a refreshing zing.

  • Refried Beans: Creamy and hearty, these add a comforting texture and a boost of protein, making for a satisfying meal.

  • Spanish Rice: Fluffy and flavorful, this classic side balances the savory elements of your tacos, completing the feast with a comforting touch.

  • Mexican Street Corn (Elote): Sweet, smoky, and creamy, this dish brings a colorful, fiesta-like flair that perfectly complements your tacos.

  • Cilantro Lime Rice: Light and fragrant, the citrus notes enhance the tacos while providing a refreshing base.

  • Avocado Slices or Guacamole: Creamy goodness that adds richness and a luxurious texture, enhancing every bite of taco deliciousness.

  • Beer or Horchata: Pair your meal with a cold Mexican beer for a lively contrast or horchata for a sweet and creamy refuge from the spice.

  • Churros or Flan: For dessert, these sweet treats round off your taco night delightfully, offering a perfect end to a flavorful meal.

How to Store and Freeze Birria Tacos

Fridge: Store leftover Birria Tacos in an airtight container for up to 3-4 days. Keep the filling and tortillas separate to prevent sogginess.

Freezer: For prolonged storage, freeze shredded beef and sauce together in a freezer-safe container for up to 3 months. Thaw overnight in the fridge before reheating.

Reheating: Reheat tacos in the oven at 350°F for about 10-15 minutes until heated through. Crisp up tortillas in a skillet for extra crunch if desired.

Make-Ahead Tip: Prep ingredients in advance—store chili paste and shredded beef in the fridge until you’re ready to assemble your delicious Birria Tacos!

Birria Tacos Variations & Substitutions

Feel free to let your creativity shine with these delightful twists on my favorite Birria Tacos!

  • Chicken Swap: Use shredded chicken for a lighter option. It’s just as flavor-packed and perfect for those who prefer poultry.
    There’s something special about the way the spices meld with tender chicken, creating a comforting new take on a classic.

  • Lamb Delight: Switch out beef for succulent lamb to experience a richer flavor profile. This variation brings a unique twist that truly sings with the spices.
    Imagine the melt-in-your-mouth texture combined with the savory essence—perfection for lamb lovers!

  • Jackfruit Magic: For a vegan version, replace meat with shredded jackfruit sautéed with spices. It absorbs flavors beautifully and provides a satisfying texture.
    Adding a zesty slaw can elevate this variation, offering a pleasant crunch to every bite!

  • Vegan Cheese: Swap shredded Oaxaca cheese for a tasty vegan cheese. There are so many delightful options available today that melt beautifully in your tacos.
    This simple substitution means everyone can join in on the taco night fun without compromising on flavor!

  • Spicy Kick: Add diced jalapeños or finely chopped serrano peppers to the meat mixture for an extra layer of heat.
    The little burn from these peppers creates a vibrant taste experience that your heat-loving friends will adore.

  • Cheese Varieties: Experiment with different cheese types such as Monterey Jack or Pepper Jack for a unique flavor twist.
    The melty goodness will infuse your tacos with surprise flavors, making each bite an adventure in taste.

  • Vibrant Veggies: Toss in sautéed bell peppers or zucchini for added texture and nutritional value.
    These fresh additions not only boost the color of your dish but also create a delightful crunch alongside the rich flavors.

  • Corn Tortilla Alternatives: If you’re in the mood for something different, try using flour tortillas or lettuce wraps for a fresh take.
    These alternatives can cater to different preferences, making taco night even more customizable!

Don’t forget to check out my favorite Birria Tacos Culinary creation for more inspiration and delightful tips that will elevate your taco game!

Make Ahead Options

Birria Tacos are perfect for meal prep, allowing you to enjoy delicious flavors with minimal weekday hassle! You can prepare the chili paste and braise the chuck roast up to 24 hours in advance. Simply soak the dried chiles and blend them with the other ingredients, then marinate the meat in the chili sauce and refrigerate. When you’re ready to serve, reheat the beef in the oven until warmed through and proceed to assemble the tacos with fresh tortillas, cheese, and toppings. Store any leftover ingredients in airtight containers in the fridge for up to 3 days to maintain their quality. By prepping in advance, you can savor restaurant-quality Birria Tacos with ease on busy nights!

My Fave Birria Tacos Recipe FAQs

What types of meat can I use for Birria Tacos?
Absolutely! While I love using organic chuck roast beef, you can easily swap it out for chicken, lamb, goat, or even a delightful jackfruit for a vegan option. Each meat brings its unique flavor profile, so don’t hesitate to explore!

How should I store leftover Birria Tacos?
To keep your leftover Birria Tacos fresh, store them in an airtight container in the fridge for up to 3-4 days. I recommend separating the filling from the tortillas to prevent them from becoming soggy. This way, you can enjoy that crispy texture again when you reheat them!

Can I freeze Birria Tacos?
Yes, indeed! To freeze, place your shredded beef and sauce together in a freezer-safe container, and they will last for up to 3 months. When you’re ready to enjoy your delicious Birria Tacos again, simply thaw them overnight in the fridge. Reheat in the oven at 350°F for about 10-15 minutes until heated through.

What can I do if my sauce is too thick?
If you find your sauce a bit too thick after cooking, simply add a little beef stock or water to reach your desired consistency. Remember to taste as you go—season if needed! This will help balance all the rich flavors without compromising the dish.

Are Birria Tacos suitable for a gluten-free diet?
Yes! To make your Birria Tacos gluten-free, ensure you use organic corn tortillas, which are naturally gluten-free. Just double-check the packaging to prevent any cross-contamination. Enjoy this tasty treat without worry!

How do I maximize the flavor of the chili paste?
For the most flavorful chili paste, make sure to soak your dried chiles in warm beef stock until softened and thoroughly blend them with the garlic, onions, and tomatoes until perfectly smooth. This step is crucial, as a smooth paste ensures a balanced flavor infusion throughout your Birria Tacos!

Birria Tacos

Deliciously Authentic Birria Tacos for Taco Night Bliss

Experience the rich flavors of Birria Tacos, with tender beef, crispy tortillas, and melted cheese in every bite.
Prep Time 30 minutes
Cook Time 2 hours 30 minutes
Total Time 3 hours
Servings: 4 tacos
Course: Dinner
Cuisine: Mexican
Calories: 350

Ingredients
  

For the Chili Paste
  • 4-6 pieces Dried Guajillo Peppers Provide heat and depth of flavor.
  • 4-6 pieces Dried Ancho Chiles Adds sweetness to balance flavor.
  • 2 pieces Chipotle Peppers in Adobo Introduces smokiness.
For the Meat & Sauce
  • 3-4 pounds Organic Chuck Roast Beef Main protein, or substitute with chicken, lamb, or goat.
  • 2 cups Organic Beef Stock Use for roasting.
  • 1 tablespoon Apple Cider Vinegar Balances flavors.
  • 1 medium Onion (chopped) Aromatic depth.
  • 3 cloves Garlic cloves Enhances savory quality.
  • 1 can Crushed Tomatoes Adds acidity and body.
Herbs & Spices
  • 2 pieces Bay Leaves Infuse herbal note.
  • 1 tablespoon Mexican Oregano Elevates traditional flavor.
  • 1 teaspoon Dried Thyme Adds earthy flavor.
  • 1 teaspoon Cumin Adds warmth.
  • 1 teaspoon Ground Cinnamon Distinctive sweetness.
  • 1 teaspoon Smoked Paprika Contributes smokiness.
  • 1 teaspoon Ground Allspice Adds warmth and spice.
For Assembly & Serving
  • 2 tablespoons Extra Virgin Olive Oil For sautéing.
  • 1 teaspoon Sea Salt For seasoning.
  • 1 teaspoon Black Pepper For seasoning.
  • 1 teaspoon Garlic Powder Enhances meat flavor.
  • 1/4 cup Fresh Cilantro (chopped) For topping.
  • 12 pieces Organic Corn Tortillas Opt for gluten-free if required.
  • 2 cups Shredded Oaxaca Cheese Melts beautifully; vegan cheese as a substitute.

Equipment

  • Large pot
  • Skillet
  • blender

Method
 

Step-by-Step Instructions
  1. Prepare the chili paste by soaking the chiles and blending with other ingredients.
  2. Sear the meat in a pot, seasoning well and ensuring a golden crust forms.
  3. Create the base by adding your chili paste and spices to the pot.
  4. Braise the meat in the oven until it's fork-tender.
  5. Shred the meat once it's tender, ensuring to keep some sauce for juiciness.
  6. Assemble tacos by frying tortillas in consomé and filling them.
  7. Serve tacos with extra consomé and toppings.

Nutrition

Serving: 1tacoCalories: 350kcalCarbohydrates: 30gProtein: 25gFat: 15gSaturated Fat: 6gPolyunsaturated Fat: 2gMonounsaturated Fat: 7gCholesterol: 80mgSodium: 800mgPotassium: 600mgFiber: 5gSugar: 2gVitamin A: 300IUVitamin C: 10mgCalcium: 200mgIron: 3mg

Notes

Make these Birria Tacos ahead of time for a convenient dinner option, ideal for busy nights.

Tried this recipe?

Let us know how it was!

Blueberry Buttermilk Pancake Casserole: A Breakfast Dream!

As I poured the fluffy batter into the baking dish, the vibrant purple-blue of fresh blueberries caught my eye, promising a burst of sweetness in every bite. This Blueberry Buttermilk Pancake Casserole marries comfort with ease, transforming a classic breakfast indulgence into a no-fuss bake that impresses everyone at the table. Perfect for busy weekdays or leisurely weekend brunches, this dish boasts the comfort of traditional pancakes with the added convenience of baking. It’s not just a crowd-pleaser; it’s also highly customizable—swap blueberries for your favorite fruits or add a sprinkle of cinnamon for an extra touch. Who wouldn’t want to wake up to a warm, inviting aroma wafting through the kitchen? Are you ready to discover how simple it is to whip up this delightful breakfast dish?

Why You’ll Crave This Casserole?

Irresistible Fluffiness: Imagine sinking your fork into a soft, fluffy slice—this casserole delivers that pancake experience without the griddle fuss!

Endless Customization: Feel free to switch up the fruit or add a dash of cinnamon for a flavor twist that suits your taste.

Quick and Easy: With straightforward steps, this dish cuts down on prep time—perfect for busy mornings or unexpected brunch guests.

Family Favorites: Everyone at the table will adore this warm, sweet creation, guaranteed to become a family favorite.

For another delicious breakfast option, don’t forget to check out my Banana Blueberry Breakfast or try an unforgettable treat with my Apple Crisp Casserole. You’ll love having these delightful recipes in your meal rotation!

Blueberry Buttermilk Pancake Casserole Ingredients

For the Batter

  • All-purpose flour – Provides structure; feel free to substitute with whole wheat flour for a healthier twist.
  • Baking powder – This leavening agent ensures fluffiness, so always check for freshness!
  • Baking soda – Works alongside the buttermilk to create a tender texture.
  • Salt – Don’t skip this; it enhances all the flavors beautifully.
  • Granulated sugar – Adds just the right amount of sweetness; brown sugar can deepen the flavor profile.
  • Eggs – They bind and enrich the batter; for a vegan version, try flax eggs.
  • Buttermilk – Infuses moisture and tang; if unavailable, use a mix of milk and vinegar or yogurt.
  • Unsalted butter – Contributes richness; swap for coconut oil for a dairy-free alternative.
  • Vanilla extract – Acts as a flavor enhancer; opt for pure vanilla for the best taste.

For the Blueberry Filling

  • Fresh blueberries – They provide the star flavor for this casserole; feel free to substitute with your favorite berries!
  • Lemon juice – Brightens the filling, balancing sweetness perfectly.
  • Cornstarch – Helps thicken the blueberry mixture for a luscious filling.

For the Glaze (Optional)

  • Powdered sugar – Ideal for a simple glaze; consider using stevia or a sugar substitute for a healthier choice.
  • Buttermilk – Gives the glaze its creamy consistency; you can replace it with milk if needed.

For Serving

  • Maple syrup – A classic pairing, providing extra sweetness with each slice.
  • Whipped cream – Adds a lovely creaminess that complements the blueberry flavor.
  • Fresh mint leaves – Perfect for a pop of color and a refreshing note to the dish.

Step‑by‑Step Instructions for Blueberry Buttermilk Pancake Casserole

Step 1: Prepare the Blueberry Filling
Begin by placing 3 cups of fresh blueberries, ¼ cup of granulated sugar, and 1 tablespoon of lemon juice in a medium saucepan over medium heat. Stir the mixture until it begins to simmer gently, allowing the blueberries to release their juices. Once bubbling, create a cornstarch slurry with 1 tablespoon of cornstarch and 2 tablespoons of water, mixing until smooth, and then stir this into the blueberry mix until it thickens, about 2 minutes.

Step 2: Make the Pancake Batter
In a large mixing bowl, whisk together 1 ½ cups of all-purpose flour, 2 tablespoons of baking powder, ½ teaspoon of baking soda, ½ teaspoon of salt, and 2 tablespoons of sugar. In a separate bowl, combine 2 large eggs, 1 ¼ cups of buttermilk, ¼ cup of melted unsalted butter, and 1 teaspoon of vanilla extract. Gently mix the wet ingredients into the dry ingredients, ensuring not to overmix; a few lumps are perfectly fine for a fluffy Blueberry Buttermilk Pancake Casserole.

Step 3: Assemble the Casserole
Preheat your oven to 375°F (190°C) and grease a 9×13-inch baking dish with non-stick spray or butter. Pour half of the pancake batter into the dish, spreading it evenly across the bottom. Spoon the prepared blueberry filling generously over this layer, allowing it to distribute evenly for a delightful burst of flavor throughout the casserole. Finally, layer the remaining pancake batter on top, covering the blueberry filling completely.

Step 4: Bake
Carefully place the assembled casserole into the preheated oven and bake for approximately 30-35 minutes. Keep an eye on it as it bakes; it’s ready when the top is golden brown and a toothpick inserted in the center comes out clean. The casserole should have a fluffy, custardy texture inside, inviting you to dig in.

Step 5: Prepare Glaze (Optional)
While the casserole bakes, you can prepare an optional glaze by mixing 1 cup of powdered sugar with 2 tablespoons of buttermilk and ½ teaspoon of vanilla extract in a small bowl. Stir until the mixture is smooth and glossy. This glaze adds an extra layer of sweetness that beautifully complements the warm Blueberry Buttermilk Pancake Casserole.

Step 6: Serve
Once baked, allow the casserole to cool for about 5-10 minutes to set before slicing. Serve warm, offering your guests optional toppings such as maple syrup, whipped cream, or fresh mint leaves for a pop of color and flavor. Share the warmth of your Blueberry Buttermilk Pancake Casserole with family and friends, and enjoy this delightful breakfast treat!

Helpful Tricks for Blueberry Buttermilk Pancake Casserole

  • Avoid Overmixing: Gently combine wet and dry ingredients. Overmixing can lead to a dense casserole instead of the fluffy texture you desire.

  • Fresh Ingredients: Always check the freshness of your baking powder and baking soda. Fresh ingredients are vital for achieving a light and airy Blueberry Buttermilk Pancake Casserole.

  • Cooling Time: Allow the casserole to cool for 5-10 minutes before slicing. This helps set the texture and makes for cleaner cuts when serving.

  • Customize Your Fruit: Don’t hesitate to swap blueberries for your favorite fruits like raspberries or strawberries. This allows you to tailor the dish to your family’s taste!

  • Keep an Eye on Baking: Ovens can vary in temperature; check your casserole a few minutes before the recommended baking time to ensure it doesn’t overbake.

How to Store and Freeze Blueberry Buttermilk Pancake Casserole

Fridge: Store any leftover Blueberry Buttermilk Pancake Casserole in an airtight container in the fridge. It will stay fresh for up to 3 days.

Freezer: For longer storage, wrap individual slices tightly in plastic wrap and place them in a freezer-safe bag. They can be frozen for up to 2 months.

Reheating: To reheat, simply thaw overnight in the fridge, then warm in the oven at 350°F (175°C) for about 15-20 minutes, or until heated through.

Make-Ahead: You can assemble the casserole the night before, refrigerate it, and bake right in the morning for an effortless breakfast treat!

Blueberry Buttermilk Pancake Casserole Variations

Feel free to get creative with this recipe and explore delightful twists to make it your own!

  • Fruit Swaps: Substitute blueberries with raspberries, strawberries, or even diced peaches for a fresh seasonal taste. Each fruit brings its unique sweetness and character, transforming the casserole entirely!

  • Dairy-Free: Use almond milk or coconut milk in place of buttermilk and swap unsalted butter for coconut oil to make this dish dairy-free and just as delicious.

  • Whole Grain: Switch all-purpose flour for whole wheat flour or oat flour for a heartier, fiber-rich option that’s still fluffy and satisfying.

  • Sweetener Switch: Replace granulated sugar with maple syrup or honey for a natural sweetness or go sugar-free with stevia or monk fruit sweetener to cater to healthier diets.

  • Nutty Crunch: Stir in chopped pecans, walnuts, or even some granola into the batter for an added crunch and delightful texture that contrasts beautifully with the soft pancakes.

  • Spice It Up: Add a teaspoon of cinnamon or nutmeg to the batter to bring warmth and depth to the flavor profile, perfect for cozy mornings.

  • Chocolate Delight: Fold in mini chocolate chips for a sweeter take that kids— and adults—will love. They melt just enough to provide a rich surprise in every bite!

For another delicious breakfast option, try my Banana Blueberry Breakfast or an unforgettable treat with my Apple Crisp Casserole. Your brunch table will be spoiled for choices!

What to Serve with Blueberry Buttermilk Pancake Casserole

Imagine a comforting breakfast table, brimming with delightful companions that elevate every slice of this delicious casserole.

  • Crisp Bacon: The salty crunch of crispy bacon provides a savory contrast, enhancing the sweetness of the blueberries beautifully.

  • Fresh Fruit Salad: A vibrant medley of seasonal fruits adds refreshing brightness and balances the richness of the casserole.

  • Greek Yogurt: Creamy and tangy, Greek yogurt brings a velvety texture that perfectly complements the fluffy pancake layers, offering a protein boost too.

  • Honey-Butter Spread: A drizzle of honey-infused butter adds a decadent touch, making each bite even more indulgent and delightful.

  • Maple Syrup: The classic choice! A generous drizzle of pure maple syrup crowns your serving, enhancing the sweetness and nostalgia of breakfast.

  • Coffee or Tea: Paired with a steaming cup of coffee or tea, these beverages create a perfect breakfast ambiance, warming you from the inside out.

  • Whipped Cream: A dollop of freshly whipped cream adds luscious creaminess that pairs wonderfully with warm blueberry flavors, creating a decadent finish.

  • Fresh Mint Leaves: Sprinkled on top, fresh mint adds a pop of color and a refreshing, aromatic touch that brightens the dish.

  • Lemon Curd: For a zesty twist, a spoonful of lemon curd brings an exciting contrast to the sweetness, brightening up your breakfast experience.

  • Chocolate Chips: Folded into the batter or sprinkled on top, chocolate chips will satisfy your sweet tooth, making for a delightful mashup of flavors.

Make Ahead Options

These Blueberry Buttermilk Pancake Casserole are perfect for meal prep enthusiasts! You can prepare the blueberry filling and pancake batter up to 24 hours in advance, storing them in separate airtight containers in the refrigerator. To maintain freshness, cover the pancake batter tightly to prevent oxidation. You can even assemble the complete casserole the night before, then cover and refrigerate it overnight. When you’re ready to serve, simply bake the casserole at 375°F (190°C) for about 35-40 minutes, adding an extra few minutes if it’s chilled. This simple prep allows for a warm, delicious breakfast with minimal morning effort, ensuring your family can enjoy this delightful dish without fuss!

Blueberry Buttermilk Pancake Casserole Recipe FAQs

What kind of blueberries should I use for the casserole?
Absolutely! For the best flavor, I recommend using fresh blueberries. Look for firm, plump berries that have a deep purple-blue color without any dark spots. If fresh blueberries aren’t available, feel free to use frozen ones, but be sure to thaw and drain them beforehand.

How long can I store leftovers in the fridge?
You can keep any leftover Blueberry Buttermilk Pancake Casserole in an airtight container in the refrigerator for up to 3 days. Just make sure it’s cooled completely before sealing to help maintain its texture.

Can I freeze the casserole, and how?
Yes, you can freeze it! Cut the casserole into individual slices, wrap each piece tightly in plastic wrap, and place them in a freezer-safe bag. It will stay fresh for up to 2 months. To reheat, just thaw the slices in the fridge overnight, then warm them in the oven at 350°F (175°C) for about 15-20 minutes.

What should I do if my pancake casserole turns out dense?
Very good question! If your casserole turns out dense, it might be due to overmixing the batter. Remember, a few lumps in the batter are perfectly fine! If you find yourself with a denser texture next time, focus on mixing the ingredients gently until just combined. Also, ensure your baking powder and baking soda are fresh; they play a key role in the fluffiness!

Can I make this recipe vegan or gluten-free?
Of course! To make a vegan version, substitute the eggs with flax eggs (1 tablespoon ground flaxseed mixed with 3 tablespoons water per egg) and use almond milk mixed with a little vinegar in place of buttermilk. For gluten-free options, you can replace the all-purpose flour with a gluten-free flour blend, making sure it has a binding agent like xanthan gum included.

Will it still taste great if I use different fruits?
Absolutely, the more the merrier! You can easily customize this dish with fruits like raspberries, strawberries, or even peaches. Just remember to adjust the sugar depending on the sweetness of your chosen fruit. Enjoy experimenting with your favorite flavors in every bite!

Blueberry Buttermilk Pancake Casserole Recipe FAQs

Blueberry Buttermilk Pancake Casserole

Blueberry Buttermilk Pancake Casserole: A Breakfast Dream!

This Blueberry Buttermilk Pancake Casserole is an easy, delicious fusion of comfort and convenience, perfect for any breakfast occasion.
Prep Time 15 minutes
Cook Time 35 minutes
Cooling Time 10 minutes
Total Time 1 hour
Servings: 8 slices
Course: Breakfast
Cuisine: American
Calories: 250

Ingredients
  

For the Batter
  • 1.5 cups All-purpose flour Feel free to substitute with whole wheat flour for a healthier twist.
  • 2 tablespoons Baking powder Ensure freshness for optimal fluffiness.
  • 0.5 teaspoons Baking soda Works with buttermilk for a tender texture.
  • 0.5 teaspoons Salt Enhances flavors beautifully.
  • 2 tablespoons Granulated sugar Brown sugar can be used for deeper flavor.
  • 2 large Eggs For a vegan version, consider flax eggs.
  • 1.25 cups Buttermilk Substitute with milk and vinegar or yogurt if unavailable.
  • 0.25 cups Unsalted butter Melted; coconut oil can be used for a dairy-free option.
  • 1 teaspoon Vanilla extract Opt for pure vanilla for best flavor.
For the Blueberry Filling
  • 3 cups Fresh blueberries Feel free to substitute with your favorite berries.
  • 0.25 cups Granulated sugar Balances sweetness perfectly.
  • 1 tablespoon Lemon juice Brightens the filling.
  • 1 tablespoon Cornstarch Helps thicken the blueberry mixture.
For the Glaze (Optional)
  • 1 cup Powdered sugar Consider using stevia for a healthier choice.
  • 2 tablespoons Buttermilk Can be replaced with milk.
For Serving
  • to taste Maple syrup A classic pairing for extra sweetness.
  • to taste Whipped cream Adds creaminess that complements blueberry flavor.
  • to taste Fresh mint leaves For a pop of color and refreshing note.

Equipment

  • medium saucepan
  • large mixing bowl
  • 9x13 inch baking dish

Method
 

Step-by-Step Instructions for Blueberry Buttermilk Pancake Casserole
  1. Prepare the Blueberry Filling: In a saucepan, combine 3 cups of blueberries, ¼ cup sugar, and 1 tablespoon lemon juice over medium heat. Stir until simmering. Mix 1 tablespoon cornstarch with 2 tablespoons water and add it to the blueberries until thickened, about 2 minutes.
  2. Make the Pancake Batter: In a bowl, whisk together 1.5 cups flour, 2 tablespoons baking powder, ½ teaspoon baking soda, ½ teaspoon salt, and 2 tablespoons sugar. In another bowl, combine 2 eggs, 1.25 cups buttermilk, ¼ cup melted butter, and 1 teaspoon vanilla. Mix wet ingredients into dry, combining gently.
  3. Assemble the Casserole: Preheat the oven to 375°F (190°C) and grease a baking dish. Pour half of the batter into the dish, spread evenly, then add blueberry filling, and top with the remaining batter.
  4. Bake: Place in the oven and bake for approximately 30-35 minutes. It's done when golden brown and a toothpick comes out clean.
  5. Prepare Glaze (Optional): While the casserole bakes, mix 1 cup powdered sugar with 2 tablespoons buttermilk and ½ teaspoon vanilla until smooth.
  6. Serve: Allow casserole to cool for 5-10 minutes before slicing. Serve warm with maple syrup, whipped cream, or mint leaves.

Nutrition

Serving: 1sliceCalories: 250kcalCarbohydrates: 40gProtein: 6gFat: 8gSaturated Fat: 4gPolyunsaturated Fat: 1gMonounsaturated Fat: 2gCholesterol: 60mgSodium: 300mgPotassium: 150mgFiber: 2gSugar: 10gVitamin A: 200IUVitamin C: 5mgCalcium: 100mgIron: 1mg

Notes

Avoid overmixing the batter for fluffy results. Use fresh baking powder and soda. Customize the fruits to your preference and check for doneness in your oven.

Tried this recipe?

Let us know how it was!

Comforting Easy Chicken Noodle Soup with Egg Noodles Delight

The aroma of tender chicken simmering in a hearty broth is like a warm hug on a chilly day. Cooking my Easy Chicken Noodle Soup with Egg Noodles has become a comforting escape from the chaos of modern life. This one-pot wonder is not just family-friendly but also ready in under an hour—perfect for those busy weeknights when you crave something homey yet quick. With its tender chicken, vibrant vegetables, and chewy egg noodles, it’s as nurturing as it is delightful. Plus, this recipe simplifies clean-up, letting you savor each cozy spoonful without the usual fuss. For a dish that warms both your soul and your kitchen, how can you resist uncovering the secrets to this timeless classic?

Why is this Chicken Noodle Soup Special?

Comforting Flavors: Each bowl bursts with rich and savory goodness, making it a go-to choice for all ages.
One-Pot Wonder: Minimal cleanup is required, so you can enjoy more time with family after dinner.
Quick Preparation: In under an hour, you’ll have a hearty meal that feels like a warm hug on a chilly evening.
Customizable Delight: Add in extras like spinach or peas to cater to your personal taste, keeping every meal fresh.
Nutrient-Rich: Packed with protein and vitamins, this soup is both delicious and nourishing — a perfect balance for any weeknight!
If you love comforting soups, check out my Chicken Noodle Soup for another easy meal!

Easy Chicken Noodle Soup Ingredients

For the Soup Base
Olive Oil – Adds fat and flavor; can substitute with vegetable oil.
Yellow Onion – Aromatic base for flavor; can substitute with shallots or leeks.
Carrots – Adds sweetness and texture; substitute with parsnips for a different flavor.
Celery – Contributes crunch and aromatic flavor; can omit if not available.
Minced Garlic – Enhances overall flavor; fresh garlic is preferred, but garlic powder works too.
Chicken Broth/Stock – This is the soup’s foundation; use homemade or store-bought for convenience.
Boneless, Skinless Chicken Breasts/Thighs – Main protein source; rotisserie chicken is a convenient option.
Freshly Cracked Black Pepper – Adds warmth and seasoning; adjust to your taste preferences.
Kosher Salt – Essential for flavor enhancement; can use table salt but reduce the amount.

For the Herbs
Dried Oregano – Adds herbaceous notes; substitute with Italian seasoning for an alternative flavor.
Minced Fresh Thyme – Infuses a floral, savory note; dried thyme can be used but adjust the quantity.
Bay Leaves – Provide depth of flavor during cooking; don’t forget to remove before serving!

For the Noodles
Egg Noodles – The main carbohydrate for the soup; feel free to substitute with any small pasta if desired.

With these Easy Chicken Noodle Soup ingredients on hand, you’re one step closer to enjoying a cozy, comforting bowl that’s sure to warm up your weeknight meals!

Step‑by‑Step Instructions for Easy Chicken Noodle Soup with Egg Noodles

Step 1: Sauté the Aromatics
In a large Dutch oven, heat 2 tablespoons of olive oil over medium heat. Once the oil shimmers, add the diced onion, sliced carrots, and diced celery. Sauté these vegetables for about 4 minutes until they begin to soften and the onion becomes translucent, filling your kitchen with a delightful aroma.

Step 2: Add Garlic and Seasonings
Stir in 3 cloves of minced garlic and cook for an additional minute, just until fragrant. This step ensures that the garlic releases its wonderful flavor without burning. Then, sprinkle in 1 teaspoon of dried oregano, half a teaspoon of kosher salt, and freshly cracked black pepper to taste, stirring everything together to combine the flavors.

Step 3: Pour in the Broth and Chicken
Next, pour in 8 cups of chicken broth or stock, bringing the mixture to a gentle simmer. Add in 1 pound of boneless, skinless chicken breasts or thighs, along with 2 minced fresh thyme sprigs and 2 bay leaves. Allow the soup to simmer, covered, for about 15 minutes, until the chicken is tender and fully cooked.

Step 4: Shred the Chicken
Once the chicken is cooked through, carefully remove it from the pot and place it on a cutting board. Use two forks to shred the chicken into bite-sized pieces. Return the shredded chicken back into the pot, mixing it well with the broth and vegetables, creating a comforting base for your Easy Chicken Noodle Soup with Egg Noodles.

Step 5: Cook the Egg Noodles
Increase the heat to bring the soup to a low boil, then add in 2 cups of egg noodles. Cook the noodles for 6 to 7 minutes, stirring occasionally, until they are al dente. Keep an eye on the noodles as they absorb some of the broth, ensuring you achieve that delightful, hearty consistency.

Step 6: Final Adjustments and Serve
Once the noodles are cooked, taste and adjust the seasoning if necessary, adding more salt or pepper as desired. Remove the bay leaves, and if desired, garnish your soup with freshly chopped parsley for a pop of color. Serve your Easy Chicken Noodle Soup warm, paired with crusty bread or crackers for that perfect comforting meal.

Expert Tips for Easy Chicken Noodle Soup

Flavor Boost: Use homemade broth if possible: It enriches the soup with deeper, more authentic flavors compared to store-bought.

Careful Cooking: Avoid overcooking the noodles: They can become mushy if left in broth too long, especially when reheating leftovers.

Chicken Choices: Talk to your local butcher for better chicken: Fresh chicken will give a juicier texture compared to frozen.

Herb Freshness: Use fresh herbs when available: This elevates the taste profile significantly over dried herbs.

Prep Ahead: Chop vegetables in advance: This speeds up your cooking time, making meal prep during busy weeknights a breeze.

With these expert tips, you’ll ensure your Easy Chicken Noodle Soup with Egg Noodles turns out perfectly each time!

Easy Chicken Noodle Soup Variations

Feel free to sprinkle your own magic into this comforting soup and make it uniquely yours!

  • Gluten-Free: Swap egg noodles with gluten-free pasta to enjoy the same cozy flavors without the gluten.
  • Extra Veggies: Toss in chopped spinach or kale during the last few minutes of cooking for added nutrition and a vibrant color boost.
  • Protein Twist: Use shredded rotisserie chicken or leftover turkey for a quick protein fix that’s packed with flavor.
  • Spicy Kick: Add a dash of cayenne pepper or a few sliced jalapeños for a warm heat that tantalizes the taste buds.
  • Coconut Flare: Stir in a splash of coconut milk for a creamy texture and a slightly sweet flavor that elevates your soup experience.
  • Zesty Herb: Replace dried oregano with fresh basil or cilantro for a fragrant twist that freshens the palette.
  • Mushroom Magic: Incorporate sautéed mushrooms for a delicious umami depth that enriches the broth perfectly.
  • Citrus Brighten: Just before serving, squeeze in a bit of fresh lemon juice to brighten the flavors and add a refreshing zing.

For even more heartwarming inspiration, try our Chicken Noodle Soup or check out how to make a lovely Tuscan Chicken Soup that your family will adore.

Make Ahead Options

These Easy Chicken Noodle Soup with Egg Noodles are perfect for meal prep enthusiasts! You can chop your veggies (onion, carrots, celery) and refrigerate them for up to 3 days in advance, ensuring they stay fresh and ready to go. Additionally, you can cook the chicken and broth base ahead of time, retaining all those delicious flavors, and store it in the fridge for up to 24 hours. When ready to serve, simply bring the soup back to a simmer, add in the noodles, and cook them until al dente. This thoughtful prep not only saves time but provides just as delicious results when it’s time for dinner!

How to Store and Freeze Easy Chicken Noodle Soup

Fridge: Store in an airtight container for up to 5 days to maintain freshness, ensuring the soup is completely cooled before sealing.

Freezer: Freeze without noodles for up to 3 months; noodles may become mushy when thawed. Add freshly cooked noodles when reheating for the best texture.

Reheating: Reheat on the stovetop over medium heat, adding extra broth if needed to achieve the desired consistency of your Easy Chicken Noodle Soup.

What to Serve with Easy Chicken Noodle Soup with Egg Noodles

Warm, comforting meals deserve delightful companions that’ll take your dinner experience to a whole new level.

  • Crusty Artisan Bread: This bread’s crunchy exterior and soft interior are perfect for soaking up the savory broth, enhancing every bite.

  • Garlic Breadsticks: Their buttery, garlicky flavor pairs beautifully with the richness of the soup, making it feel like a cozy feast. They’re also fun to dip!

  • Mixed Green Salad: A fresh salad adds a refreshing crunch and balances the warmth of the soup. Toss in a tangy vinaigrette for extra zest.

  • Steamed Broccoli: Tender steamed broccoli contributes bright color and a nutritious crunch, making it a lovely complement to the soft noodles.

  • Cheesy Croutons: Crispy, cheesy croutons add a fun texture twist to each spoonful, elevating the comfort of your meal while adding a delightful crunch.

  • Apple Crisp: End on a sweet note with a warm, spiced apple crisp. Its comforting flavor profile echoes that of the soup and adds a homely touch.

  • Lemonade Iced Tea: This refreshing drink offers a sweet and tangy balance to the rich and warm soup, perfect for quenching your thirst!

Easy Chicken Noodle Soup with Egg Noodles Recipe FAQs

How should I select ripe vegetables for this soup?
Absolutely! Choose firm carrots and celery with vibrant colors and no dark spots. For onions, look for those that feel heavy for their size and have dry, papery skins. Fresh garlic should feel firm and not sprout; if it does, it’s best to skip it for your Easy Chicken Noodle Soup.

What are the best storage methods for leftover soup?
Very! Store your Easy Chicken Noodle Soup in an airtight container. It will stay fresh in the refrigerator for up to 5 days. Ensure the soup is cooled to room temperature before sealing to prevent condensation. This helps to keep the flavors intact and prevents spoilage, allowing you to enjoy your delicious leftovers!

Can I freeze this soup?
Definitely! You can freeze your Easy Chicken Noodle Soup without the noodles for up to 3 months. When properly stored in a freezer-safe container, it will maintain its taste and texture. When you’re ready to enjoy it, simply thaw it in the refrigerator overnight and add fresh, cooked noodles just before serving to keep them from getting mushy!

What should I do if my noodles become mushy during cooking?
Don’t worry! If your noodles turn out mushy, it happens to the best of us. To prevent this, be sure to cook the noodles just until al dente, as they’ll continue to soften while sitting in the broth after cooking. If mushy noodles happen, you can try straining the soup and adding freshly cooked noodles just before serving for better texture.

Are there any dietary considerations for this recipe?
Very much so! This Easy Chicken Noodle Soup is generally family-friendly, but if you’re making it for those with allergies, be cautious with the chicken and broth. For gluten-sensitive individuals, use gluten-free pasta instead of egg noodles. For a dairy allergy, avoid adding any cream. Always check labels for hidden allergens if using store-bought ingredients.

How can I enhance the flavor of my chicken noodle soup?
Absolutely! Want to take your soup to the next level? Try adding a splash of lemon juice or a dash of hot sauce for brightness and a slight kick. Fresh herbs, like parsley or dill, added right before serving can also elevate the dish. If you’re feeling adventurous, toss in a handful of spinach or kale for added nutrition—it’s a great way to customize your Easy Chicken Noodle Soup!

Easy Chicken Noodle Soup with Egg Noodles

Comforting Easy Chicken Noodle Soup with Egg Noodles Delight

This Easy Chicken Noodle Soup with Egg Noodles is a comforting dish, ready in under an hour—perfect for busy weeknights.
Prep Time 15 minutes
Cook Time 30 minutes
Total Time 45 minutes
Servings: 6 bowls
Course: Dinner
Cuisine: American
Calories: 350

Ingredients
  

For the Soup Base
  • 2 tablespoons Olive Oil can substitute with vegetable oil
  • 1 medium Yellow Onion can substitute with shallots or leeks
  • 2 medium Carrots substitute with parsnips for a different flavor
  • 2 stalks Celery can omit if not available
  • 3 cloves Minced Garlic fresh garlic is preferred, but garlic powder works too
  • 8 cups Chicken Broth/Stock use homemade or store-bought for convenience
  • 1 pound Boneless, Skinless Chicken Breasts/Thighs rotisserie chicken is a convenient option
  • 1 teaspoon Freshly Cracked Black Pepper adjust to your taste preferences
  • 1/2 teaspoon Kosher Salt can use table salt but reduce the amount
For the Herbs
  • 1 teaspoon Dried Oregano substitute with Italian seasoning for an alternative flavor
  • 2 sprigs Minced Fresh Thyme dried thyme can be used but adjust the quantity
  • 2 leaves Bay Leaves provide depth of flavor during cooking; don't forget to remove before serving
For the Noodles
  • 2 cups Egg Noodles feel free to substitute with any small pasta if desired

Equipment

  • Dutch oven

Method
 

Step-by-Step Instructions
  1. In a large Dutch oven, heat 2 tablespoons of olive oil over medium heat. Once the oil shimmers, add the diced onion, sliced carrots, and diced celery. Sauté these vegetables for about 4 minutes until they begin to soften and the onion becomes translucent.
  2. Stir in 3 cloves of minced garlic and cook for an additional minute. Then, sprinkle in 1 teaspoon of dried oregano, half a teaspoon of kosher salt, and freshly cracked black pepper to taste, stirring everything together to combine the flavors.
  3. Pour in 8 cups of chicken broth or stock, bringing the mixture to a gentle simmer. Add in 1 pound of boneless, skinless chicken breasts or thighs, along with 2 minced fresh thyme sprigs and 2 bay leaves. Allow the soup to simmer, covered, for about 15 minutes.
  4. Once the chicken is cooked through, carefully remove it from the pot and place it on a cutting board. Use two forks to shred the chicken into bite-sized pieces. Return the shredded chicken back into the pot.
  5. Increase the heat to bring the soup to a low boil, then add in 2 cups of egg noodles. Cook the noodles for 6 to 7 minutes, stirring occasionally, until they are al dente.
  6. Once the noodles are cooked, taste and adjust the seasoning if necessary. Remove the bay leaves, and garnish your soup with freshly chopped parsley if desired. Serve warm.

Nutrition

Serving: 1bowlCalories: 350kcalCarbohydrates: 40gProtein: 25gFat: 10gSaturated Fat: 2gPolyunsaturated Fat: 2gMonounsaturated Fat: 5gCholesterol: 70mgSodium: 800mgPotassium: 650mgFiber: 3gSugar: 3gVitamin A: 900IUVitamin C: 6mgCalcium: 40mgIron: 2mg

Notes

Use homemade broth for deeper flavor. Avoid overcooking noodles to maintain texture.

Tried this recipe?

Let us know how it was!

Gordon Ramsay Beef Barley Soup Recipe for Cozy Nights

The moment you take a sip of this Hearty Gordon Ramsay Beef Barley Soup, you’re transported to a cozy bistro warmed by rich aromas and the comforting sound of bubbling broth. This recipe is not just about combining ingredients; it’s about embracing a nourishing experience that feels like a tight hug on a chilly day. Packed with tender beef, vibrant vegetables, and chewy barley, this dish stands as a reprieve from fast food, giving you a satisfying meal in less than two hours. Plus, the expert techniques shared here ensure you’ll impress friends and family with flavors that rival your favorite restaurant. Curious how to achieve that perfect balance of savory depth? Let’s dive into this heartwarming soup, step by step!

What makes this soup irresistible?

Heartwarming Comfort: This Gordon Ramsay Beef Barley Soup combines a rich array of flavors, creating a dish that envelops you in warmth. Simplicity in Preparation: The straightforward steps make it accessible for any home chef, no matter your experience level. Hearty Ingredients: Each spoonful is packed with tender beef, crunchy vegetables, and chewy barley for delightful texture. Versatile Variations: Customize it with your favorite veggies or grains, making it your own! If you’re also seeking cozy options, try the Shepherds Pie Soup for another comforting experience. Crowd-Pleasing Appeal: Wow your friends and family with this bistro-worthy soup, perfect for any gathering!

Gordon Ramsay Beef Barley Soup Ingredients

• Dive into the comforting depths of flavor with this delightful recipe!

For the Soup Base

  • Beef Chuck – Perfectly sear this primary protein for a rich flavor.
  • Olive Oil – Essential for cooking; it helps to enhance the savory profile during the searing process.
  • Onion – Provides a sweet, aromatic foundation for the soup.
  • Celery – Adds a delightful crunch and aromatic note.
  • Carrots – Infuse natural sweetness and vibrant color into the simmering broth.
  • Garlic – Enhances flavor; add at the end of sautéing to keep it fragrant.
  • Dry Red Wine – Use for deglazing; it deepens the flavor of your Gordon Ramsay Beef Barley Soup.
  • Low-Sodium Beef Broth – This savory base provides moisture and rich flavor.
  • Worcestershire Sauce – Elevates umami richness, bringing the entire dish together.
  • Fresh Thyme – Infuses the soup with an aromatic essence during cooking.

For the Soup Texture

  • Pearled Barley – Adds hearty chewiness and thickens the soup beautifully.
  • Salt and Pepper – Essential seasonings; adjust according to your taste.

For the Finishing Touch

  • Parsley – Adds a fresh pop of color and brightness just before serving.

Step‑by‑Step Instructions for Gordon Ramsay Beef Barley Soup Recipe

Step 1: Sear the Beef
In a heavy Dutch oven, heat a splash of olive oil over medium-high heat. Pat the beef chuck dry with paper towels and season generously with salt and pepper. Sear the beef in hot oil until each side is golden brown, about 3-4 minutes per side. Remove the beef and set it aside, letting the flavorful bits remain in the pot.

Step 2: Sauté Vegetables
In the same Dutch oven, add chopped onion, diced celery, and sliced carrots. Sauté the mixture, stirring occasionally for about 5-6 minutes until the vegetables soften and the onions become translucent. Add minced garlic, cooking for an additional minute until fragrant. This aromatic base will enhance your Gordon Ramsay Beef Barley Soup’s flavor.

Step 3: Deglaze with Wine
Increase the heat to high and pour in a generous splash of dry red wine. Use a wooden spoon to scrape the browned bits from the bottom of the pot as the wine bubbles. Allow the wine to reduce by half, which should take about 3-4 minutes, until the aroma is robust and your kitchen is filled with delicious scents.

Step 4: Build and Simmer
Return the seared beef to the pot, along with the low-sodium beef broth, Worcestershire sauce, and fresh thyme. Bring the mixture to a vigorous boil, then reduce the heat to low, allowing it to simmer gently. Cover the pot and let the soup cook for about 45 minutes, until the beef is tender and the flavors meld beautifully.

Step 5: Cook the Barley
Once the beef is tender, stir in the pearled barley and maintain a low simmer. Allow the soup to continue cooking for an additional 45–60 minutes, stirring occasionally. The barley will absorb liquid and thicken the soup; check for doneness and your desired texture, as it should be chewy but not mushy.

Step 6: Finish the Soup
Taste the Gordon Ramsay Beef Barley Soup and adjust the seasoning with more salt and pepper if necessary. If the soup is too thick, stir in additional broth or hot water to achieve your preferred consistency. Just before serving, mix in freshly chopped parsley for a vibrant finish that brightens the dish and enhances the overall flavor.

Make Ahead Options

Preparing your Gordon Ramsay Beef Barley Soup in advance is a fantastic way to save time during busy weeknights! You can chop the vegetables (onion, celery, carrots, and garlic) and even sear the beef up to 24 hours ahead. Store these ingredients in airtight containers in the refrigerator to maintain their freshness. The soup itself can be reheated and enjoyed for up to 3 days after cooking, with flavors deepening over time. When you’re ready to serve, simply simmer the soup to heat through, and stir in the freshly cooked barley just before serving to ensure it retains a perfect texture. You’ll delight in the comfort of a homemade meal with minimal effort!

What to Serve with Gordon Ramsay Beef Barley Soup

Embrace the heartwarming experience of this cozy soup with delightful accompaniments that enhance your meal.

  • Crusty Bread: The perfect vehicle for sopping up every last drop of this rich soup; its crunchy exterior complements the tender flavors beautifully.
  • Side Salad: A refreshing mix of greens balances the soup’s warmth with crisp textures and bright flavors, making it a well-rounded meal.
  • Garlic Bread: This buttery, toasty addition introduces a savory bite that pairs wonderfully with the soup’s robust essence, elevating your dining experience.
  • Steamed Green Beans: Crisp and slightly sweet, green beans add a fresh pop of color and a nutritious touch, contrasting the soup’s richness perfectly.
  • Cheddar Biscuits: Flaky and cheesy, these biscuits bring a comforting touch and are a delightful way to indulge while enjoying the soup.
  • Red Wine: A glass of full-bodied red wine complements the hearty beef flavors, enhancing the overall experience of warmth and nourishment.
  • Apple Crisp: For a sweet finish, this warm dessert adds a deliciously tart contrast to the meal, wrapping up a cozy evening with delightful flavors.

Gordon Ramsay Beef Barley Soup Variations

Feel free to explore these delightful variations that will make your Gordon Ramsay Beef Barley Soup even more irresistible!

  • Brisket Lover: Swap beef chuck for brisket for a deeper, more savory flavor. Remember to adjust your cooking time for tenderness.
  • Hulled Barley Choice: Use hulled barley instead of pearled for a nuttier taste and slightly chewier texture. Just keep an eye on the cooking time.
  • Vegetarian Twist: Swap beef broth with vegetable broth and replace beef with mushrooms for a hearty vegan version that doesn’t skimp on flavor.
  • Add Spices: Sprinkle some smoked paprika or cayenne pepper to introduce an unexpected kick and a warm, smoky aroma.
  • Variety of Greens: Toss in some kale or spinach just before serving for an extra dose of vitamins and a beautiful burst of color.
  • Heavy Cream Finish: For a silky touch, add a splash of heavy cream right before serving to elevate the richness of your soup.
  • Change the Veggies: Swap carrots for parsnips or add some diced potatoes for an aromatic twist that enhances your soup’s heartiness.

Whether you decide to stick with the classic or go for a unique spin, this soup pairs wonderfully with a crusty bread or a light salad. If you’re looking for more comforting options, you might enjoy a warm bowl of Cheeseburger Soup Comforting or Italian Penicillin Soup. Enjoy your culinary adventure!

How to Store and Freeze Gordon Ramsay Beef Barley Soup

Fridge: Store your Gordon Ramsay Beef Barley Soup in an airtight container for up to 3 days. The flavors will meld and deepen during refrigeration, making it even more delicious when reheated.

Freezer: For longer storage, freeze the soup in portion-sized containers for up to 3 months. Be sure to leave some headspace at the top of each container, as the soup will expand as it freezes.

Reheating: When ready to enjoy, thaw the soup overnight in the fridge. Reheat on the stovetop over medium heat, stirring occasionally, until heated through. You can add a bit of broth or water to loosen the texture if needed.

Avoid Overheating: While reheating, avoid bringing it to a boil, as this can cause the barley to become too mushy and lose its delightful chewiness.

Expert Tips for Gordon Ramsay Beef Barley Soup Recipe

  • Perfectly Sear Beef: Always ensure beef chuck is dry before searing. This maximizes flavor and prevents it from steaming.
  • Don’t Skip Deglazing: Skipping the wine deglazing step can result in a less flavorful broth. Take your time to scrape up those browned bits!
  • Barley Timing: Add pearled barley later in the cooking process. This helps maintain its chewy texture and prevents overcooking.
  • Season Gradually: Taste as you go! Adjust salt and pepper at the end to achieve the perfect seasoning for your Gordon Ramsay Beef Barley Soup.
  • Store with Care: Store leftovers in an airtight container and let cool completely first. This helps preserve the soup’s rich flavors and texture.

Gordon Ramsay Beef Barley Soup Recipe FAQs

What type of beef is best for this soup?
Absolutely, using beef chuck is ideal because it becomes tender and flavorful during cooking. You can also use brisket for a richer taste. Just ensure to cut it into cubes and adjust cooking times if using a tougher cut.

How should I store leftover Beef Barley Soup?
Once cooled, transfer your Gordon Ramsay Beef Barley Soup to an airtight container. It stays fresh in the refrigerator for up to 3 days. Storing it allows the flavors to deepen, making it even more scrumptious when reheated.

Can I freeze Beef Barley Soup?
Yes! It freezes wonderfully for up to 3 months. Pour the soup into freezer-safe containers, leaving about an inch of space at the top to allow for expansion. When you’re ready to enjoy, simply thaw it overnight in the fridge and reheat on the stove.

My soup is too thick—what should I do?
Very common! If your soup thickens more than you’d like after cooking or refrigeration, gradually stir in some broth or water to reach your desired consistency. Reheat gently over medium heat, stirring to combine. This should restore your delicious texture!

Is this soup suitable for those with dietary restrictions?
Definitely! This recipe can easily be adjusted for dietary needs. If you’re cooking for someone with gluten sensitivity, consider substituting pearled barley with quinoa or rice. Always check labels for any allergy concerns, especially with broth and Worcestershire sauce.

What should I do if my barley is too mushy?
If you find that your barley has become too mushy while cooking, try reducing cooking time and ensure that it is added later in the process next time. It should be added after the beef has cooked for 45 minutes to maintain that lovely chewiness. Remember to stir occasionally and taste as you go for the perfect texture.

Gordon Ramsay Beef Barley Soup Recipe

Gordon Ramsay Beef Barley Soup Recipe for Cozy Nights

Enjoy this Gordon Ramsay Beef Barley Soup Recipe, perfect for cozy nights with hearty flavors and comforting warmth.
Prep Time 20 minutes
Cook Time 2 hours
Total Time 2 hours 20 minutes
Servings: 4 bowls
Course: Dinner
Cuisine: American
Calories: 350

Ingredients
  

For the Soup Base
  • 2 pounds Beef Chuck Perfectly sear for rich flavor.
  • 2 tablespoons Olive Oil Essential for cooking.
  • 1 medium Onion Provides sweet, aromatic foundation.
  • 2 stalks Celery Adds delightful crunch.
  • 2 medium Carrots Infuse natural sweetness and color.
  • 4 cloves Garlic Enhances flavor.
  • 1 cup Dry Red Wine For deglazing.
  • 6 cups Low-Sodium Beef Broth Provides moisture and flavor.
  • 2 tablespoons Worcestershire Sauce Elevates umami richness.
  • 2 teaspoons Fresh Thyme Infuses aromatic essence.
For the Soup Texture
  • 1 cup Pearled Barley Adds hearty chewiness.
  • to taste Salt Essential seasoning.
  • to taste Pepper Essential seasoning.
For the Finishing Touch
  • 1/4 cup Parsley Fresh pop of color before serving.

Equipment

  • Dutch oven

Method
 

Step-by-Step Instructions
  1. In a heavy Dutch oven, heat a splash of olive oil over medium-high heat. Pat the beef chuck dry with paper towels and season generously with salt and pepper. Sear the beef in hot oil until each side is golden brown, about 3-4 minutes per side. Remove the beef and set it aside, letting the flavorful bits remain in the pot.
  2. In the same Dutch oven, add chopped onion, diced celery, and sliced carrots. Sauté the mixture, stirring occasionally for about 5-6 minutes until the vegetables soften and the onions become translucent. Add minced garlic, cooking for an additional minute until fragrant.
  3. Increase the heat to high and pour in a generous splash of dry red wine. Use a wooden spoon to scrape the browned bits from the bottom of the pot as the wine bubbles. Allow the wine to reduce by half, about 3-4 minutes.
  4. Return the seared beef to the pot, along with the low-sodium beef broth, Worcestershire sauce, and fresh thyme. Bring the mixture to a vigorous boil, then reduce the heat to low, allowing it to simmer gently for about 45 minutes.
  5. Once the beef is tender, stir in the pearled barley and maintain a low simmer. Allow the soup to continue cooking for an additional 45–60 minutes, stirring occasionally.
  6. Taste the soup and adjust the seasoning with more salt and pepper if necessary. If the soup is too thick, stir in additional broth or hot water. Just before serving, mix in freshly chopped parsley.

Nutrition

Serving: 1bowlCalories: 350kcalCarbohydrates: 40gProtein: 30gFat: 10gSaturated Fat: 2gMonounsaturated Fat: 4gCholesterol: 80mgSodium: 700mgPotassium: 800mgFiber: 6gSugar: 4gVitamin A: 300IUVitamin C: 5mgCalcium: 30mgIron: 3mg

Notes

Store leftovers in an airtight container for up to 3 days. Freeze in portion-sized containers for up to 3 months.

Tried this recipe?

Let us know how it was!

Creamy Pumpkin Bolognese: Your New Fall Comfort Food Delight

On a brisk autumn evening, nothing beats the cozy embrace of a comforting bowl of pasta. Enter my Creamy Pumpkin Bolognese, a dish that elevates the classic Bolognese to new heights with the addition of earthy pumpkin and zesty sun-dried tomatoes. This recipe is not only a delightful twist on traditional comfort food, but it’s also a healthy option that’s packed with vegetables and creamy goodness without the heavy cream. Whether you’re entertaining guests or simply craving a nourishing meal, this dish brings people together at the table with ease. Plus, it’s customizable—swap out proteins or pasta to fit your personal taste. Who else is ready to dive into this warm bowl of happiness?

Why is Pumpkin Bolognese a Must-Try?

Nourishing Comfort: This Creamy Pumpkin Bolognese combines wholesome ingredients, creating a dish that’s not just comforting but also packed with nutrients.

Versatile Options: Easily tailor this recipe to your taste! Swap lentils for meat for a vegetarian delight, or choose your favorite pasta to make it uniquely yours.

Rich, Savory Depth: The blend of pumpkin and sun-dried tomatoes delivers a flavor profile reminiscent of a decadent vodka sauce, making every bite rich and satisfying.

Quick and Easy: Whipping up this dish doesn’t take hours! Enjoy a hearty and delicious meal in no time, perfect for busy weeknights.

Crowd-Pleasing Favorite: Serve it at dinner parties or cozy family gatherings, and watch it disappear from the table. Pair it with a slice of crusty bread or a fresh salad for a complete meal!

For another comforting dish, don’t forget to check out my recipe for Joumou Haitian Pumpkin, which similarly showcases pumpkin in a delightful way.

Pumpkin Bolognese Ingredients

For the Sauce
Olive Oil – Adds richness and helps sauté vegetables; any cooking oil can work as a substitute.
Sun-Dried Tomatoes – Provide a tangy, umami flavor; fresh tomatoes can be used for a lighter taste.
Garlic – Enhances flavor and aroma; fresh is best or use garlic powder if necessary.
Sage Leaves – Adds an earthy, aromatic note; can be substituted with dried sage or Italian seasoning.
Pumpkin Puree – Adds creaminess and nutrients; canned pumpkin offers convenience year-round.
Low Sodium Chicken Broth or Vegetable Broth – Adds depth; homemade or store-bought works well, and low sodium is ideal for salt control.
Dried Basil – Imparts a hint of Italian flavor; fresh basil may be used, but increase the amount due to its milder taste.
Ground Cinnamon – Adds warmth; feel free to omit if it’s not your preference.

For the Protein
Lean Ground Beef, Ground Turkey, Chicken, or Lentils – Your main protein source; lentils make a fantastic vegetarian option.

For the Vegetables
Onion – The base aromatic that adds sweetness; any onion type is fine, with shallots being a suitable alternative.
Carrots – Provide natural sweetness and texture; any variety works, and baby carrots can save prep time.
Celery Stalks – Adds crunch and subtle flavor; omit if necessary or substitute with extra carrots.

For the Sauce Consistency
Dry White Wine – Deglazes the pan and adds acidity; use broth or vinegar as alternatives if avoiding alcohol.
Crushed Tomatoes – The base of the sauce, providing essential moisture and flavor; opt for no-salt-added for better control over seasoning.
Milk of Choice – Contributes creaminess; use any non-flavored option to keep the taste balanced.
Ground Black Pepper – Adds seasoning to taste; adjust according to preference.

For Serving
Pasta – The main carbohydrate component; feel free to use regular, whole wheat, gluten-free, or chickpea pasta.
Parmesan Cheese – For garnish, adding umami flavor; vegan cheese can be substituted for a non-dairy option.

This Pumpkin Bolognese is set to wow your taste buds with its incredible flavors! Enjoy the delightful journey into comforting, homemade goodness.

Step‑by‑Step Instructions for Pumpkin Bolognese

Step 1: Prepare Sauce Base
In a large saucepan, heat 2 tablespoons of olive oil over medium heat. Add 1/2 cup of chopped sun-dried tomatoes, 3 minced garlic cloves, and 5 fresh sage leaves; cook for about 1 minute until fragrant. Stir in 1 cup of pumpkin puree, 2 cups of low-sodium chicken broth, 1 tablespoon of dried basil, and a pinch of ground cinnamon. Bring to a simmer and allow to cook for roughly 15 minutes, stirring occasionally.

Step 2: Cook Meat
In a separate skillet, heat a drizzle of olive oil over medium-high heat. Add 1 pound of lean ground beef (or ground turkey, chicken, or lentils for a vegetarian option) and cook until browned, approximately 6-8 minutes, breaking it into smaller pieces. Drain any excess liquid and set the meat aside while you prepare the vegetables.

Step 3: Sauté Vegetables
In the same skillet, add another splash of olive oil and toss in 1 chopped onion, 2 diced carrots, and 2 diced celery stalks. Sauté the mixture for about 8-10 minutes, stirring often, until the vegetables are softened and fragrant, taking on a light golden color. This preparation sets the flavorful base for your Pumpkin Bolognese.

Step 4: Combine
Once the vegetables are ready, return the cooked meat to the vegetable mixture in the skillet. Pour in 1/2 cup of dry white wine to deglaze the pan, scraping up any tasty bits stuck to the bottom. Next, add 1 can (about 28 ounces) of crushed tomatoes, stirring well to combine all the elements together.

Step 5: Blend
After the pumpkin sauce has simmered and thickened, carefully pour it into a blender or use an immersion blender for convenience. Blend until completely smooth, then incorporate this creamy pumpkin mixture back into the meat and vegetable pot, stirring until everything is evenly combined for a luscious Pumpkin Bolognese.

Step 6: Finish Sauce
Stir in 1 cup of your milk of choice for a rich texture and season with ground black pepper to taste. Reduce the heat to low and let the sauce simmer gently for 30 minutes to 1 hour, allowing flavors to meld beautifully. If the sauce thickens too much, add more broth until your desired consistency is achieved.

Step 7: Cook Pasta
While the sauce simmers, bring a pot of salted water to a boil. Cook your preferred pasta according to the package instructions, usually around 8-10 minutes for al dente. Once drained, serve the pasta topped generously with the creamy Pumpkin Bolognese sauce, finishing with a sprinkle of Parmesan cheese for added flavor.

Expert Tips for Pumpkin Bolognese

Simmer Longer: Allow the sauce to simmer for at least 30 minutes to deepen the flavors of your Pumpkin Bolognese.

No Flavored Milk: Stick to non-flavored milk options to maintain the intended flavor profile of your creamy sauce.

Adjust Thickness: If your sauce becomes too thick, simply add a bit of broth during simmering to achieve your desired consistency.

Fresh Ingredients: Whenever possible, use fresh garlic and herbs to enhance the overall taste of your dish; they greatly elevate the flavor.

Don’t Rush the Veggies: Sauté your onions, carrots, and celery until they’re soft and fragrant. This step builds a rich base for your Bolognese.

What to Serve with Creamy Pumpkin Bolognese Pasta

Cozy up to a complete meal that enchants the senses, bringing warmth and joy to your table.

  • Garlic Bread: Freshly baked garlic bread complements the sauce’s richness, perfect for soaking up every bit of flavor.

  • Arugula Salad: A light arugula salad with lemon vinaigrette adds a refreshing crunch, balancing the creamy texture of the Bolognese beautifully.

  • Roasted Brussels Sprouts: Crispy roasted Brussels sprouts provide a nutty flavor and slight char, enhancing the savory notes of the dish.

  • Creamy Polenta: Silky polenta serves as a comforting base, inviting the sauce to cling and create a luscious bite with every spoonful.

  • Sautéed Spinach: Lightly sautéed spinach adds a vibrant pop of color and earthy flavor, rounding out your meal with healthy greens.

  • Chardonnay: A chilled glass of Chardonnay pairs wonderfully, echoing the rich flavors while offering a smooth finish to each bite.

  • Pumpkin Spice Muffins: For dessert, serve moist pumpkin spice muffins for a sweet conclusion that ties in the seasonal flavors.

Indulge in these pairings to create a warm, inviting dinner that celebrates the delightful essence of your creamy Pumpkin Bolognese!

How to Store and Freeze Pumpkin Bolognese

Fridge: Store leftover Pumpkin Bolognese in an airtight container in the refrigerator for up to 4 days. Reheat on the stovetop over low heat, adding a splash of broth if needed.

Freezer: Freeze portions of Pumpkin Bolognese in freezer-safe containers for up to 3 months. Thaw overnight in the fridge before reheating for a convenient meal.

Reheating: When ready to enjoy, reheat on the stovetop over medium heat, stirring occasionally. Add a touch of milk to restore creaminess if desired.

Airtight Storage: Ensure your containers are completely sealed to prevent freezer burn and maintain the rich flavors of your pumpkin goodness!

Make Ahead Options

These Creamy Pumpkin Bolognese meals are perfect for making ahead, relieving the stress of busy weeknights! You can prepare the sauce up to 3 days in advance; simply cook and cool it before transferring to an airtight container for refrigeration. If you want even more convenience, you can also sauté the vegetables and cook your choice of protein ahead of time. On the day you plan to serve, just reheat the sauce on the stovetop, cook your pasta (which only takes about 10 minutes), and combine everything for a delightful, hearty meal that’s just as delicious as when made fresh. Enjoy saving time without compromising flavor!

Pumpkin Bolognese Variations & Substitutions

Feel free to twist this recipe to suit your taste buds and dietary needs, making it even more delightful!

  • Vegetarian Delight: Swap ground meat for cooked lentils for a hearty vegetarian option.

  • Whole Wheat Pasta: Use whole wheat or gluten-free pasta for healthier, alternative carb options, adding a nutty flavor that enhances the dish.

  • Herb Options: Try fresh thyme or oregano instead of dried basil for a slightly different herbaceous aroma that marries beautifully with pumpkin.

  • Nutty Flavor Boost: Add a tablespoon of toasted pine nuts or walnuts into the sauce for a crunchy texture and delightful nuttiness.

  • Creamy Vegan Twist: Use coconut milk instead of regular milk for a creamy, dairy-free option that brings a subtle sweetness.

  • Spicy Kick: Sprinkle in some red pepper flakes or add diced jalapeños for a little heat, balancing the sweet pumpkin flavor beautifully.

  • Delicious Variants: Swap crushed tomatoes for fire-roasted tomatoes for a smoky flavor explosion in each bite, reminiscent of cozy campfire dinners.

  • Additional Veggies: Mix in some spinach or kale towards the end of cooking for added nutrition and a pop of color, turning your dish into a veggie-packed feast!

Transforming your classic Pumpkin Bolognese can open up a world of flavors just like my crowd-pleasing Joumou Haitian Pumpkin, which also brings pumpkin into a deliciously unique dish! Let your creativity flow and enjoy your new masterpiece!

Pumpkin Bolognese Recipe FAQs

Why is it important to choose ripe ingredients for Pumpkin Bolognese?
Absolutely! Using ripe ingredients means you’re picking the best flavors possible. For instance, when choosing fresh tomatoes, look for those that are firm but slightly yielding, without dark spots all over. This ensures a sweeter, more vibrant flavor in your sauce. Fresh herbs should also be vibrant in color; wilted leaves indicate they are past their prime.

How should I store leftover Pumpkin Bolognese?
For short-term storage, place leftover Pumpkin Bolognese in an airtight container, and keep it in the refrigerator for up to 4 days. Before serving, reheat it gently on the stovetop over low heat, adding a splash of broth to maintain its creamy texture.

Can I freeze Pumpkin Bolognese for later use?
Definitely! To freeze, allow the Pumpkin Bolognese to cool completely, then transfer it into freezer-safe containers or resealable plastic bags. It can be frozen for up to 3 months. When you’re ready to enjoy, simply thaw it overnight in the fridge, then reheat on the stovetop over medium heat, stirring occasionally for even warming.

What if my Pumpkin Bolognese turns out too thick?
No worries! If your sauce is thicker than desired, just add a bit more broth or milk slowly while stirring, until you reach your preferred consistency. This is also a great time to adjust seasoning, adding more salt or pepper to taste.

Are there any dietary considerations for Pumpkin Bolognese?
For those with allergies or dietary restrictions, you can easily modify this recipe. For a gluten-free option, choose gluten-free pasta. If avoiding animal products, replace meat with cooked lentils, and use plant-based milk and cheese. Always check labels for any allergens in pre-packaged ingredients like broths and sauces.

Can I use other proteins in Pumpkin Bolognese?
Very much so! Aside from ground beef or turkey, feel free to use chicken, pork, or even a plant-based protein like lentils for a vegetarian twist. Each option brings its own unique flavor and texture, so mix and match according to your family’s preferences!

Pumpkin Bolognese

Creamy Pumpkin Bolognese: Your New Fall Comfort Food Delight

Creamy Pumpkin Bolognese is a nourishing and flavorful twist on traditional Bolognese, perfect for autumn.
Prep Time 10 minutes
Cook Time 1 hour
Simmering Time 30 minutes
Total Time 1 hour 40 minutes
Servings: 4 servings
Course: Pasta
Cuisine: Italian
Calories: 450

Ingredients
  

For the Sauce
  • 2 tablespoons Olive Oil Adds richness and helps sauté vegetables
  • 0.5 cup Sun-Dried Tomatoes Provide a tangy, umami flavor
  • 3 cloves Garlic Enhances flavor and aroma
  • 5 leaves Sage Leaves Adds an earthy, aromatic note
  • 1 cup Pumpkin Puree Adds creaminess and nutrients
  • 2 cups Low Sodium Chicken Broth Adds depth
  • 1 tablespoon Dried Basil Imparts a hint of Italian flavor
  • 1 pinch Ground Cinnamon Adds warmth
For the Protein
  • 1 pound Lean Ground Beef Main protein source, lentils make a great vegetarian option.
For the Vegetables
  • 1 chopped Onion Adds sweetness
  • 2 diced Carrots Provide natural sweetness and texture
  • 2 stalks Celery Adds crunch and subtle flavor
For the Sauce Consistency
  • 0.5 cup Dry White Wine Deglazes the pan and adds acidity
  • 28 ounces Crushed Tomatoes The base of the sauce
  • 1 cup Milk of Choice Contributes creaminess
  • to taste Ground Black Pepper Adds seasoning
For Serving
  • 1 pasta Pasta Main carbohydrate component
  • to taste Parmesan Cheese For garnish, adding umami flavor

Equipment

  • Saucepan
  • Skillet
  • blender

Method
 

Step-by-Step Instructions
  1. Heat 2 tablespoons of olive oil over medium heat in a large saucepan. Add 1/2 cup of chopped sun-dried tomatoes, 3 minced garlic cloves, and 5 fresh sage leaves; cook for about 1 minute until fragrant. Stir in 1 cup of pumpkin puree, 2 cups of low-sodium chicken broth, 1 tablespoon of dried basil, and a pinch of ground cinnamon. Bring to a simmer and allow to cook for roughly 15 minutes, stirring occasionally.
  2. In a separate skillet, heat a drizzle of olive oil over medium-high heat. Add 1 pound of lean ground beef (or ground turkey, chicken, or lentils for a vegetarian option) and cook until browned, approximately 6-8 minutes, breaking it into smaller pieces. Drain any excess liquid and set the meat aside.
  3. In the same skillet, add another splash of olive oil and toss in 1 chopped onion, 2 diced carrots, and 2 diced celery stalks. Sauté for about 8-10 minutes, stirring often, until the vegetables are softened and fragrant.
  4. Return the cooked meat to the vegetable mixture in the skillet. Pour in 1/2 cup of dry white wine to deglaze the pan, scraping up any tasty bits stuck to the bottom. Add 1 can (about 28 ounces) of crushed tomatoes, stirring well to combine.
  5. Pour the pumpkin sauce into a blender and blend until smooth. Incorporate this creamy mixture back into the meat and vegetable pot.
  6. Stir in 1 cup of your milk of choice and season with ground black pepper to taste. Reduce heat to low and let the sauce simmer gently for 30 minutes to 1 hour.
  7. Meanwhile, bring a pot of salted water to a boil. Cook your preferred pasta according to the package instructions, usually around 8-10 minutes for al dente. Serve the pasta topped generously with the creamy Pumpkin Bolognese sauce and finish with a sprinkle of Parmesan cheese.

Nutrition

Serving: 1servingsCalories: 450kcalCarbohydrates: 50gProtein: 25gFat: 15gSaturated Fat: 4gPolyunsaturated Fat: 0.5gMonounsaturated Fat: 10gCholesterol: 85mgSodium: 400mgPotassium: 800mgFiber: 6gSugar: 8gVitamin A: 5000IUVitamin C: 10mgCalcium: 200mgIron: 3mg

Notes

Store leftover Pumpkin Bolognese in an airtight container in the refrigerator for up to 4 days. Freeze portions for up to 3 months.

Tried this recipe?

Let us know how it was!

Mediterranean Chicken Gyros with Creamy Feta Tzatziki Bliss

As the scent of garlic and herbs fills my kitchen, I can’t help but feel transported to a sunny Mediterranean marketplace. Today, I’m sharing a delightful recipe for Mediterranean Chicken Gyros with Creamy Feta Tzatziki, a dish that beautifully balances flavor and convenience—perfect for those busy weeknights or weekend gatherings! With marinated chicken nestled in warm pita and that luscious, creamy tzatziki sauce, you’ll find it’s an incredibly satisfying meal that your family will adore. Plus, this recipe not only offers a quick prep time but also gives your taste buds a vibrant escape to Greece without leaving home. Curious about how to create this deliciousness? Let’s dive in!

Why will you adore these gyros?

Satisfying flavors unite in this Mediterranean chicken gyros recipe, bringing a taste of Greece right to your dining table. Fresh ingredients like garlic, oregano, and creamy feta tzatziki elevate the dish, ensuring your family and friends will be asking for seconds. Quick prep time makes it ideal for busy evenings—who doesn’t love a meal that comes together in a flash? Comforting warmth of the grilled chicken and pita creates a delightful experience reminiscent of sun-soaked markets. Pair with a refreshing side like a Greek salad or roasted vegetables for the perfect meal. You’ll feel like a culinary star with every bite!

Mediterranean Chicken Gyros Ingredients

Discover the essential ingredients for delightful Mediterranean Chicken Gyros with Creamy Feta Tzatziki.

For the Chicken

  • Boneless, skinless chicken breast – This is your main protein; opt for the freshest cuts for the best results.
  • Olive oil – Adds a luxurious richness; can be substituted with avocado oil if desired.
  • Garlic (minced) – Infuses savory depth; feel free to adjust the amount based on your preference.
  • Dried oregano – Essential for that Mediterranean touch; fresh oregano can substitute, but use less.
  • Salt and pepper – Key for seasoning; tailor to your taste for the perfect flavor balance.

For the Tzatziki

  • Medium cucumber (grated) – Provides that refreshing crunch; zucchini is a great substitute if needed.
  • Full-fat Greek yogurt – Creates a creamy base; steer clear of low-fat options to maintain texture.
  • Crumbled feta cheese – Adds a wonderful tang; can be omitted for a dairy-free alternative.
  • Lemon juice – Brightens up the sauce; fresh juice makes a significant difference.

For the Assembly

  • Pita bread – Wraps around your flavorful filling; you can also try flatbread, naan, or tortillas as alternatives.

Step‑by‑Step Instructions for Mediterranean Chicken Gyros with Creamy Feta Tzatziki

Step 1: Marinate Chicken
In a mixing bowl, combine olive oil, minced garlic, dried oregano, salt, and pepper to create a flavorful marinade. Add the boneless, skinless chicken breasts, ensuring each piece is generously coated. Cover the bowl with plastic wrap and refrigerate for at least 30 minutes, but ideally, let it marinate for up to 2 hours or overnight for maximum flavor infusion.

Step 2: Prepare Tzatziki
While the chicken marinates, prepare the creamy feta tzatziki. Grate the medium cucumber, then sprinkle it with salt and let it sit for 10 minutes to draw out excess moisture. Afterward, squeeze the cucumber to remove any liquid. In a separate bowl, mix together full-fat Greek yogurt, crumbled feta cheese, fresh lemon juice, and the drained cucumber. Season to taste and refrigerate until serving.

Step 3: Grill Chicken
Preheat your grill pan or outdoor grill to medium-high heat, ensuring it’s hot enough to create nice grill marks. Place the marinated chicken breasts on the grill and cook for 6-7 minutes per side, or until the internal temperature reaches 75°C (165°F). Once cooked, remove the chicken from the heat and let it rest for a few minutes before slicing it thinly.

Step 4: Warm Pita
While the chicken rests, warm the pita bread to enhance its flavor and texture. On the grill, place the pita for about 1 minute on each side, until it’s soft and has grill marks. You can also use a skillet for this step if preferred, heating until each side is warm and pliable.

Step 5: Assemble Gyros
To bring together your Mediterranean Chicken Gyros, lay a warm pita flat on a plate. Add the sliced grilled chicken to the center, followed by your choice of fresh toppings such as diced tomatoes, shredded lettuce, and red onions. Drizzle with the creamy feta tzatziki, fold the pita to create a delicious wrap, and serve immediately, perhaps alongside extra tzatziki for dipping.

Expert Tips for the Best Mediterranean Chicken Gyros

  • Marinate Longer: For optimal flavor, allow the chicken to marinate longer. Overnight is ideal, creating a more tender and flavorful result.

  • Check Doneness: Use a meat thermometer to ensure chicken reaches 75°C (165°F). This will prevent dry or undercooked portions in your Mediterranean Chicken Gyros.

  • Drain Cucumber: Grate and drain the cucumber well to avoid watery tzatziki. This ensures your sauce remains creamy and thick.

  • Prepare Ahead: Make tzatziki and marinate chicken a day in advance for easy meal prep. It’ll save you time and enhance the flavors.

  • Warm Pita Properly: A quick grill on the pita adds flavor and softness. Don’t skip this step for the perfect wrap!

What to Serve with Mediterranean Chicken Gyros with Creamy Feta Tzatziki

Explore the perfect accompaniments that will transform your Mediterranean feast into a memorable culinary experience.

  • Greek Salad: A vibrant mix of tomatoes, cucumbers, and olives, adding a refreshing crunch that complements the rich flavors of the gyros.

  • Roasted Vegetables: Seasoned with olive oil and herbs, these tender veggies offer a delightful contrast to the soft pita and grilled chicken, filling your meal with color and flavor.

  • Falafel Bites: Crispy on the outside and soft within, these chickpea wonders add an irresistible texture and heartiness to your plate, beautifully harmonizing with the tzatziki.

  • Hummus Dip: A creamy and rich chickpea spread, hummus serves as a delicious dip for pita bread, enhancing the Mediterranean experience with every bite.

  • Tzatziki Dip: Don’t forget about the extra tzatziki for dipping! This creamy cucumber sauce pools beautifully around each sliced gyro, inviting second helpings.

  • Pineapple Mint Lemonade: This refreshing beverage brightens the savory meal, bringing a sweet and tangy taste that keeps your palate dancing in delight.

  • Baklava: For a sweet touch, serve this classic dessert; its flaky layers and honey-soaked nuts provide the perfect ending to a Mediterranean feast, delighting your taste buds.

Storage Tips for Mediterranean Chicken Gyros

Fridge: Store leftover Mediterranean Chicken Gyros in an airtight container for up to 3 days. Reheat the chicken and warm pita separately before serving.

Freezer: Place sliced grilled chicken in a freezer-safe bag and freeze for up to 3 months. Thaw overnight in the fridge before reheating, ensuring it’s heated through before serving.

Tzatziki: Keep tzatziki in a sealed container in the fridge for 2-3 days. Give it a good stir before serving, and add a splash of lemon juice if it thickens.

Reheating: Reheat chicken in a skillet or microwave until warmed through for the best texture. Enjoy it with freshly warmed pita for a delightful meal experience!

Mediterranean Chicken Gyros with Creamy Feta Tzatziki Variations

Feel free to get creative with your Mediterranean Chicken Gyros, customizing them to suit your tastes!

  • Dairy-Free Option: Substitute feta cheese with a dairy-free cheese or omit it entirely to enjoy a lighter tzatziki.

  • Spicy Kick: Add some crushed red pepper flakes or a drizzle of harissa sauce to your tzatziki for a heat boost that will awaken your senses.

  • Extra Crunch: Incorporate diced bell peppers or sliced radishes as toppings for a burst of color and crunch in your gyros.

  • Herb Infusion: Mix in chopped fresh herbs like dill or mint to the tzatziki, adding a refreshing twist that echoes Mediterranean gardens.

  • Whole Wheat Pita: For a healthier alternative, switch out traditional pita for whole wheat or low-carb options, keeping the flavor while enhancing nutrition.

  • Vegetarian Delight: Swap chicken for grilled portobello mushrooms or crispy chickpeas for a vegetarian treat that still delivers satisfying texture and flavor.

  • Zesty Citrus: A splash of orange juice in your tzatziki can create a refreshing zing, elevating each bite with a unique twist.

  • Curry Twist: Try incorporating curry powder into your chicken marinade for a delightful fusion of Mediterranean and Indian flavors that surprises the palate.

Each variation offers a unique avenue to explore, and don’t forget to grace these gyros with an accompanying side: perhaps a refreshing Greek salad or a platter of roasted vegetables alongside your gyros for a feast that celebrates flavor and creativity!

Make Ahead Options

These Mediterranean Chicken Gyros with Creamy Feta Tzatziki are perfect for meal prep, allowing you to enjoy delicious homemade food even on your busiest nights! You can marinate the chicken up to 24 hours in advance; simply mix the olive oil, garlic, oregano, salt, and pepper, coat the chicken, then refrigerate it in an airtight container. The tzatziki can also be prepared 1-2 days ahead—just grate the cucumber, drain it, and mix it with the yogurt, feta, and lemon juice before chilling. To ensure quality, store each component separately until ready to assemble, so everything stays fresh. When you’re ready to serve, simply grill the marinated chicken, warm the pita, and assemble your gyros for a delightful meal with minimal effort!

Mediterranean Chicken Gyros with Creamy Feta Tzatziki Recipe FAQs

What type of chicken should I use for the gyros?
I recommend using boneless, skinless chicken breasts for the gyros. Fresh chicken works best to ensure a tender and juicy texture. If you prefer dark meat, boneless, skinless chicken thighs can offer a richer flavor as well!

How should I store leftovers from the Mediterranean Chicken Gyros?
Store any leftover gyros in an airtight container in the refrigerator for up to 3 days. It’s best to reheat the chicken separately and warm the pita bread before serving. This will help maintain the delicious texture of the ingredients!

Can I freeze the grilled chicken?
Absolutely! To freeze the grilled chicken, slice it and place it in a freezer-safe bag. It can be stored for up to 3 months. Just thaw it in the refrigerator overnight before reheating to ensure even cooking. Always make sure it’s heated through before serving.

What’s the best way to prevent watery tzatziki?
To prevent your tzatziki from becoming watery, after grating the cucumber, sprinkle it with salt and let it sit for about 10 minutes to draw out excess liquid. Then, squeeze the cucumber gently to remove as much moisture as possible before mixing it into the yogurt and feta. This ensures a thick and creamy sauce!

Are there any dietary considerations for pets or allergies?
If you have pets, avoid giving them any tzatziki containing garlic, as it can be harmful to dogs and cats. Additionally, for any allergies, be cautious with the feta cheese—consider using a dairy-free alternative if you’re serving someone with a dairy allergy. Always communicate with guests regarding ingredients used.

Mediterranean Chicken Gyros with Creamy Feta Tzatziki

Mediterranean Chicken Gyros with Creamy Feta Tzatziki Bliss

Delight in Mediterranean Chicken Gyros with Creamy Feta Tzatziki, balancing flavors and convenience for a satisfying meal.
Prep Time 30 minutes
Cook Time 14 minutes
Marinating Time 2 hours
Total Time 2 hours 44 minutes
Servings: 4 gyros
Course: Dinner
Cuisine: Mediterranean
Calories: 450

Ingredients
  

For the Chicken
  • 1 pound boneless, skinless chicken breast Opt for the freshest cuts.
  • 2 tablespoons olive oil Can substitute with avocado oil.
  • 3 cloves garlic (minced) Adjust amount based on preference.
  • 1 teaspoon dried oregano Substitute with fresh oregano if needed.
  • to taste salt and pepper Key for seasoning.
For the Tzatziki
  • 1 medium cucumber (grated) Zucchini can substitute if needed.
  • 1 cup full-fat Greek yogurt Avoid low-fat options for best texture.
  • 1/2 cup crumbled feta cheese Can be omitted for dairy-free option.
  • 1 tablespoon lemon juice Fresh juice is recommended.
For the Assembly
  • 4 pieces pita bread Flatbread, naan, or tortillas can be used.

Equipment

  • Grill Pan
  • Mixing Bowl
  • Knife
  • Cutting board

Method
 

Step-by-Step Instructions
  1. In a mixing bowl, combine olive oil, minced garlic, dried oregano, salt, and pepper to marinate chicken. Cover and refrigerate for at least 30 minutes, up to 2 hours.
  2. Grate the cucumber, sprinkle with salt, let sit for 10 minutes, then squeeze out moisture. In another bowl, mix Greek yogurt, feta, lemon juice, and drained cucumber.
  3. Preheat grill to medium-high. Grill chicken for 6-7 minutes per side until cooked through. Let it rest before slicing thinly.
  4. Warm pita bread on the grill for 1 minute on each side until soft.
  5. Assemble by laying pita flat, adding chicken, and topping with tzatziki and fresh toppings. Wrap and serve immediately.

Nutrition

Serving: 1gyrosCalories: 450kcalCarbohydrates: 35gProtein: 35gFat: 20gSaturated Fat: 5gPolyunsaturated Fat: 0.5gMonounsaturated Fat: 14gCholesterol: 90mgSodium: 700mgPotassium: 600mgFiber: 2gSugar: 3gVitamin A: 1000IUVitamin C: 3mgCalcium: 150mgIron: 2mg

Notes

For optimal flavor, marinate chicken overnight. Drain cucumber well for a thick tzatziki. Reheat chicken and pita before serving leftovers.

Tried this recipe?

Let us know how it was!

Creamy Homemade Pumpkin Milk for Cozy Fall Vibes

There’s something special about the comforting aroma of pumpkin that instantly brings fall to mind. With this recipe for Easy Homemade Pumpkin Milk, I’ve captured that essence in a creamy, delicious drink that’s perfect for chilly mornings or cozy afternoons. Made with just five wholesome ingredients, this vegan delight is not only quick to whip up but also a fantastic dairy-free alternative. The rich flavors blend beautifully in your morning coffee or can be enjoyed on their own, making it a versatile addition to your autumn repertoire. Plus, it’s refined sugar-free and full of nutrients, so you can indulge guilt-free! Aren’t you curious to try this delightful seasonal treat?

Why is Homemade Pumpkin Milk a Must-Try?

Simplicity at its Best: This recipe requires just five simple ingredients that you probably have on hand, making it easy to enjoy a taste of fall anytime.
Rich, Creamy Texture: The blend of almond milk and pumpkin purée creates a satisfyingly smooth consistency that delights your palate.
Versatile Flavor: Whether in a morning latte, over oatmeal, or simply enjoyed chilled, it’s a perfect companion for various dishes.
Healthier Choice: Packed with vitamins A and C, it’s a nutritious upgrade to your typical sweetened beverages without the guilt.
Crowd Pleaser: Perfect for serving family and friends, this vegan treat is bound to impress anyone seeking a cozy autumn experience.

For more comforting delights, be sure to check out my Joumou Haitian Pumpkin or enjoy a classic Homemade Corned Beef alongside your pumpkin milk!

Homemade Pumpkin Milk Ingredients

For the Base

  • Unsweetened, Plain Almond Milk – This acts as the creamy base for your homemade pumpkin milk. Substitute with any non-dairy milk like oat or soy if desired.
  • Pumpkin Purée – The star of the show, providing that signature autumn flavor. Ensure you use pure pumpkin purée, not pumpkin pie filling, for an authentic taste.

For Sweetness and Flavor

  • Maple Syrup – Adds a touch of natural sweetness; can be substituted with agave syrup or omitted altogether for a less sweet drink.
  • Vanilla Extract – Infuses the milk with lovely depth; feel free to swap it with almond extract for a different but equally delightful flavor.

For Spice & Extra Creaminess

  • Pumpkin Pie Spice – This warm blend enhances the flavor, making your homemade pumpkin milk truly festive. If you don’t have it, a mix of cinnamon and nutmeg works just as well.
  • Ice (if needed) – Perfect for serving your pumpkin milk cold; blend with ice for a refreshing frappé experience.

Now that you have all the essential ingredients, get ready to indulge in the dreamy richness of your homemade pumpkin milk!

Step‑by‑Step Instructions for Homemade Pumpkin Milk

Step 1: Blend Ingredients
In a high-speed blender, combine 2 cups of unsweetened almond milk, 1 cup of pumpkin purée, 2 tablespoons of maple syrup, 1 teaspoon of vanilla extract, and 1 teaspoon of pumpkin pie spice. Ensure everything is added smoothly, and get ready to create a delightful homemade pumpkin milk that captures the essence of fall.

Step 2: Blend Until Smooth
Secure the lid on the blender and blend the mixture on high for 20-30 seconds. Watch as the ingredients blend into a creamy, vibrant orange milk. The goal is to achieve a completely smooth consistency, with no visible lumps remaining from the pumpkin purée.

Step 3: Serve or Store
Once blended, pour the homemade pumpkin milk into a glass filled with ice for a refreshing cold drink, or transfer it to an airtight container. If you prefer to enjoy it warm, you can gently heat the milk on the stove, taking care not to boil it. Homemade pumpkin milk can be stored in the refrigerator for up to five days.

Step 4: Final Touches
For an extra touch of indulgence, top your homemade pumpkin milk with a dollop of coconut whipped cream and a light sprinkle of cinnamon before serving. This is a wonderful way to enhance the autumnal vibes and make it a true treat for cozy gatherings or personal moments of bliss.

Make Ahead Options

These Easy Homemade Pumpkin Milk recipes are perfect for meal prep enthusiasts looking to save time during busy weeks! You can blend the ingredients and store the pumpkin milk in an airtight container in the refrigerator for up to five days. To maintain its creamy texture, give the milk a good shake before serving, as separation may occur. You can also prepare the pumpkin purée and mix it with the spices in advance—just keep it sealed in the fridge for up to 3 days. When you’re ready to enjoy, simply pour it over ice or gently warm it up on the stove, and you’ll have a delightful fall beverage ready to savor with minimal effort!

How to Store and Freeze Homemade Pumpkin Milk

Fridge: Store your homemade pumpkin milk in an airtight container for up to five days. Make sure to shake well before using, as separation may occur.

Freezer: For longer storage, freeze the pumpkin milk in ice cube trays or sealed containers. It can last up to three months; just let it thaw in the refrigerator before using.

Reheating: To enjoy your pumpkin milk warm, gently heat it on the stove over low heat, stirring frequently to avoid boiling.

Serving Tips: Consider pouring the thawed pumpkin milk over iced coffee or oatmeal for a delightful twist on your favorite dishes!

Homemade Pumpkin Milk Variations & Substitutions

Feel free to explore these exciting twists and substitutions to make your homemade pumpkin milk uniquely yours!

  • Creamy Coconut: Use coconut milk instead of almond milk for an ultra-rich and tropical flavor. The lush creaminess enhances the cozy vibes of fall.

  • Nut-Free Alternative: Replace almond milk with oat milk or rice milk to keep it nut-free while still enjoying a silky smooth texture.

  • Sweet Spice: For a spicier flavor boost, add an extra teaspoon of pumpkin pie spice or incorporate a pinch of ginger or cloves for additional warmth.

  • Protein Power: Mix in a scoop of your favorite protein powder, perfect for a post-workout refreshment that keeps you fueled throughout the day.

  • No Sweetener: Omit maple syrup altogether for a naturally creamy version; the pumpkin itself has enough sweetness to shine through on its own.

  • Dairy-Free Whipped Topping: Top your pumpkin milk with a dollop of coconut whipped cream for an indulgent treat that’s still completely dairy-free. The light, airy texture complements the creamy milk beautifully.

  • Flavor Boost: Swap vanilla extract for almond extract for a nutty twist that pairs well with the pumpkin and spices.

  • Warm Frappe: Blend with ice for a frappé-like drink, and consider adding a little cinnamon for a refreshing, iced treat that still embodies autumn!

As you savor this delightful seasonal drink, don’t forget to check out my Joumou Haitian Pumpkin for a comforting soup option or explore a classic Homemade Corned Beef that makes a satisfying main dish choice alongside your cozy pumpkin milk!

What to Serve with Easy Homemade Pumpkin Milk?

Enjoying a cozy cup of creamy pumpkin milk can become an even more delightful experience when paired with the right treats.

  • Fluffy Pancakes: Serve these light and airy pancakes drizzled with maple syrup for a sweet morning treat that complements the milk’s flavors.
  • Spiced Waffles: Crispy on the outside and soft on the inside, these waffles are perfect for soaking up the rich pumpkin flavors, creating a satisfying breakfast.
  • Oatmeal Bowl: Top a warm bowl of oatmeal with pumpkin milk, fresh fruits, or nuts to enhance its texture while balancing its decadent taste.
  • Vegan Muffins: Pair with a soft, warm muffin like banana or pumpkin; they’re delightful alongside your homemade pumpkin milk, perfect for snacks or breakfast.
  • Cinnamon Sugar Toast: Crunchy toast sprinkled with cinnamon sugar makes a great accompaniment, adding sweetness that echoes the autumn spice of your drink.
  • Chai Latte: For those who love a spiced drink, a homemade chai latte offers an aromatic partner, enhancing the cozy vibes of pumpkin milk.
  • Apple Crisp: The warm, gooey goodness of apple crisp provides a comforting dessert to enjoy after your beverage, blending beautifully with the pumpkin theme.
  • Popcorn: Lightly seasoned popcorn serves as a perfect crunchy snack, offering a delightful contrast to the creamy, smooth pumpkin milk experience.

Expert Tips for Homemade Pumpkin Milk

  • Use Pure Pumpkin: Make sure to select pure pumpkin purée, as pumpkin pie filling may contain added sugars and spices that alter the taste.

  • Adjust Sweetness: Before serving, taste your homemade pumpkin milk to check sweetness levels; you can easily add more maple syrup or omit it for a less sweet option.

  • Blend Thoroughly: Ensure your mixture is completely smooth; blend for the full 20-30 seconds to avoid any lumps from the pumpkin purée, creating a velvety texture.

  • Serve Warm or Cold: For a cozy treat, gently warm your pumpkin milk before serving, but avoid boiling to maintain creaminess; if iced, blend with ice for a refreshing drink.

  • Customize Flavors: Feel free to increase the pumpkin pie spice for extra warmth, or try swapping in almond extract for a unique twist on your homemade pumpkin milk.

Homemade Pumpkin Milk Recipe FAQs

What type of pumpkin purée should I use?
Absolutely! Look for pure pumpkin purée, as it’s the star ingredient for your homemade pumpkin milk. Avoid pumpkin pie filling as it often contains added sugars and spices that can alter the flavor profile you’re aiming for.

How long can I store homemade pumpkin milk?
You can store your homemade pumpkin milk in an airtight container in the refrigerator for up to five days. I recommend giving it a good shake before each use since separation may occur due to the natural ingredients.

Can I freeze homemade pumpkin milk?
Yes! To freeze your homemade pumpkin milk, pour it into ice cube trays or sealable containers. It will last up to three months in the freezer. When you’re ready to use it, simply thaw it in the refrigerator overnight, and remember to shake it well before serving!

What should I do if my pumpkin milk is too thick?
If you find your pumpkin milk is thicker than you’d like, it’s an easy fix! Just blend in a bit more almond milk, a splash at a time, until you reach your desired consistency. This way, you’ll maintain that creamy texture while enjoying your homemade pumpkin milk.

Are there any dietary considerations for homemade pumpkin milk?
Very! This recipe is vegan, paleo, gluten-free, nut-free, and refined sugar-free, making it suitable for many dietary restrictions. It’s always wise to double-check the labels on your ingredients to ensure they align with any allergies or dietary needs you may have.

How can I customize the flavor of my pumpkin milk?
The more the merrier! You can increase the amount of pumpkin pie spice for a bolder flavor or experiment with different extracts like almond for a unique twist. You can also add a scoop of protein powder or even a pinch of cayenne pepper for an extra kick. Enjoy the creative process!

Homemade pumpkin milk

Creamy Homemade Pumpkin Milk for Cozy Fall Vibes

Enjoy homemade pumpkin milk, a creamy and delicious drink perfect for fall, with just five wholesome ingredients.
Prep Time 5 minutes
Total Time 5 minutes
Servings: 4 cups
Course: Drinks
Cuisine: Vegan
Calories: 100

Ingredients
  

For the Base
  • 2 cups Unsweetened, Plain Almond Milk Can substitute with any non-dairy milk
  • 1 cup Pumpkin Purée Use pure pumpkin purée
For Sweetness and Flavor
  • 2 tablespoons Maple Syrup Can substitute with agave or omit
  • 1 teaspoon Vanilla Extract Can substitute with almond extract
For Spice & Extra Creaminess
  • 1 teaspoon Pumpkin Pie Spice Can use cinnamon and nutmeg instead
  • Ice If serving cold

Equipment

  • High-speed blender

Method
 

Step-by-Step Instructions
  1. In a high-speed blender, combine 2 cups of unsweetened almond milk, 1 cup of pumpkin purée, 2 tablespoons of maple syrup, 1 teaspoon of vanilla extract, and 1 teaspoon of pumpkin pie spice.
  2. Secure the lid on the blender and blend the mixture on high for 20-30 seconds until smooth.
  3. Pour the homemade pumpkin milk into a glass filled with ice, or transfer it to an airtight container for storage.
  4. For a special touch, top with coconut whipped cream and a sprinkle of cinnamon before serving.

Nutrition

Serving: 1cupCalories: 100kcalCarbohydrates: 22gProtein: 2gFat: 2gSodium: 150mgPotassium: 200mgFiber: 2gSugar: 10gVitamin A: 100IUVitamin C: 4mgCalcium: 30mgIron: 6mg

Notes

Shake well before using if stored in the fridge. Can be frozen for up to three months.

Tried this recipe?

Let us know how it was!

Stay Connected

Get recipes via email: