Get my cookbooks

Delicious Iced Pumpkin Cream Chai Tea Latte Recipe You’ll Love

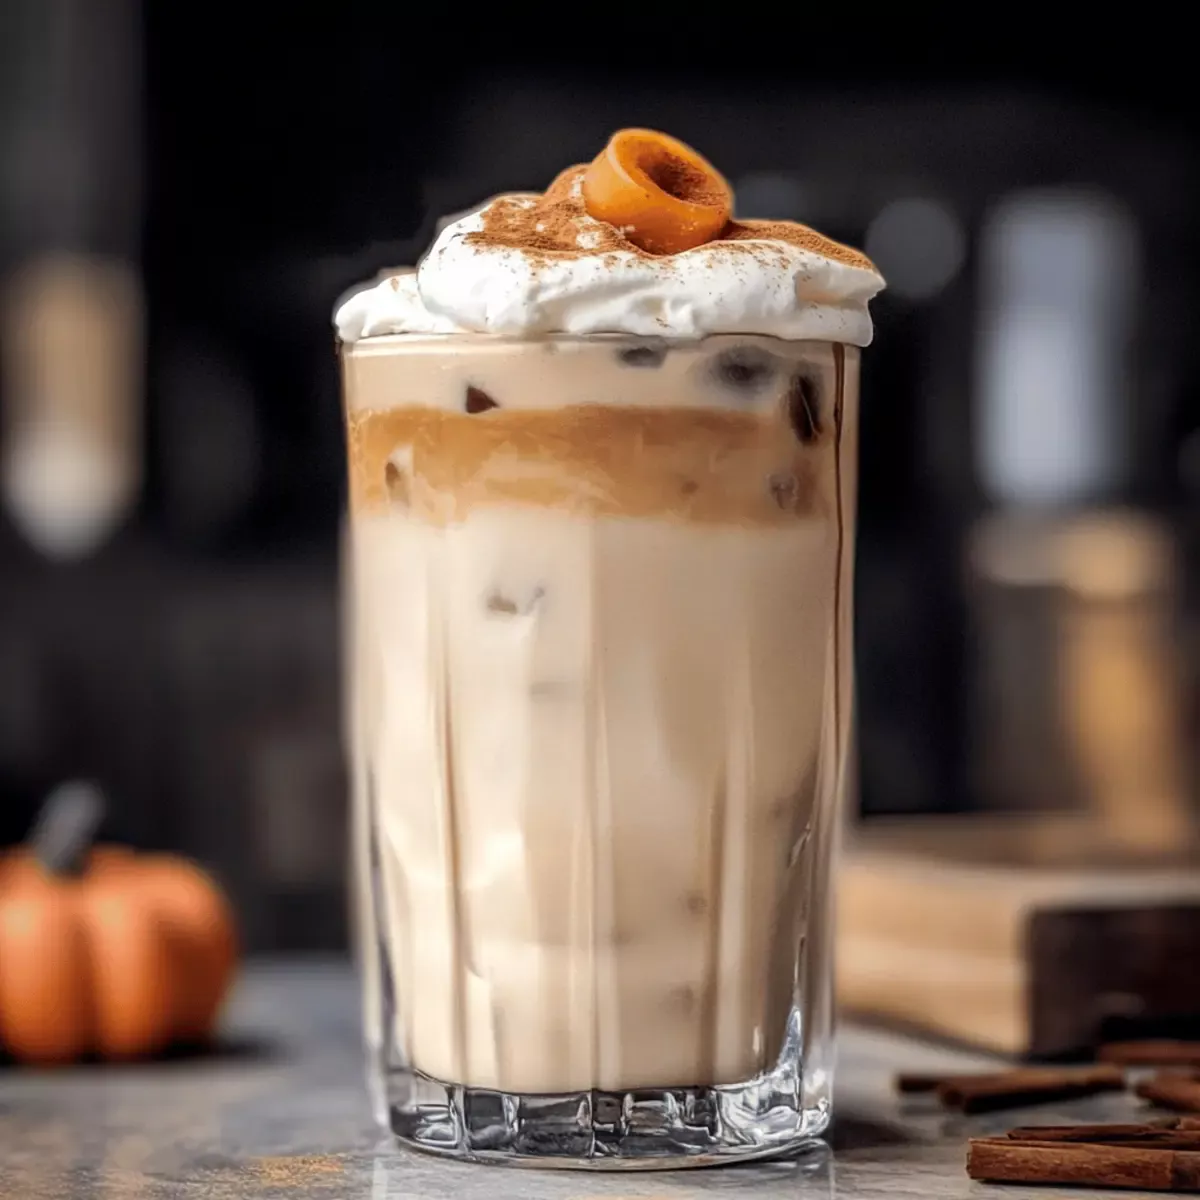
The air is crisp, and the leaves are starting to fall—it’s the perfect time to sip on something cozy and delicious. Today, I’m thrilled to share my version of the Iced Pumpkin Cream Chai Tea Latte, a delightful vegan Starbucks copycat. This homemade indulgence not only saves you money but also lets you take control of the ingredients. With creamy oat milk, fresh pumpkin puree, and warming chai spices, it’s a sip of fall that you can make right in your kitchen. Plus, it’s a wonderful crowd-pleaser for gatherings or a special treat for yourself! Curious how to whip up this delightful drink? Let’s dive into the details!

Why is this Iced Latte so Special?

Unique Flavor Fusion: The combination of creamy oat milk and pumpkin puree results in a satisfying beverage that bursts with fall flavor.

Vegan and Dairy-Free: Indulge without guilt! This drink accommodates dietary needs while still delivering that luxurious creaminess.

Quick and Easy: With just a few steps, you can have a delightful sip of this iced treat ready in no time, perfect for busy days or spontaneous cravings.

Versatile Ingredients: Feel free to swap in your favorite non-dairy milk or sweeteners, allowing for personalized flavor profiles that suit your tastes. For a cozy pairing, enjoy it alongside a slice of pumpkin bread.

Crowd-Pleasing Appeal: Whether it’s a gathering with friends or a cozy afternoon at home, this latte is sure to impress and bring everyone together.

Iced Pumpkin Cream Chai Tea Latte Ingredients

For the Pumpkin Sweet Cream
Full-Fat Coconut Milk – Provides creaminess and richness to the pumpkin sweet cream. Substitution: Use heavy cream for a richer flavor.
Maple Syrup – Adds sweetness and depth. Substitution: Vanilla syrup can be used for an alternative flavor.
Pumpkin Puree – The star ingredient, adding a seasonal flavor and creamy texture. Note: Ensure it’s pure pumpkin puree, not pumpkin pie filling.
Pumpkin Pie Spice – Enhances the seasonal flavor profile with warm spice notes. Substitution: Use a mix of cinnamon, nutmeg, and ginger if unavailable.
Vanilla Extract – Adds flavor complexity to the sweet cream. Optional ingredient that can be omitted.

For the Latte
Oat Milk – Used to thin the pumpkin cream to a pourable consistency and for a creamy base in the latte. Substitution: Any non-dairy milk can work, like almond or soy milk.
Chai Tea Concentrate – The main liquid component, offering spicy and warm flavors. Note: Ensure it’s a vegan-friendly version without honey.
Ice – Used to chill the drink.

Step‑by‑Step Instructions for Iced Pumpkin Cream Chai Tea Latte

Step 1: Prepare the Pumpkin Sweet Cream
In a mixing jar, combine ½ cup full-fat coconut milk, 2 tablespoons of maple syrup, ¼ cup pumpkin puree, ½ teaspoon pumpkin pie spice, and, if desired, ½ teaspoon vanilla extract. Whisk until smooth and creamy, about 2-3 minutes. The mixture should have a velvety texture, with the vibrant orange color of pumpkin shining through. This luscious sweet cream will be the star of your Iced Pumpkin Cream Chai Tea Latte.

Step 2: Froth the Mixture
Using a frother or hand mixer, froth the pumpkin sweet cream for about 1-2 minutes until it thickens and forms a light foam. If you find the mixture too thick, add a splash of oat milk to achieve a pourable consistency. The goal is to create a rich, velvety texture without losing the essence of the pumpkin flavor, so it remains a beautiful topping for your latte.

Step 3: Assemble the Latte
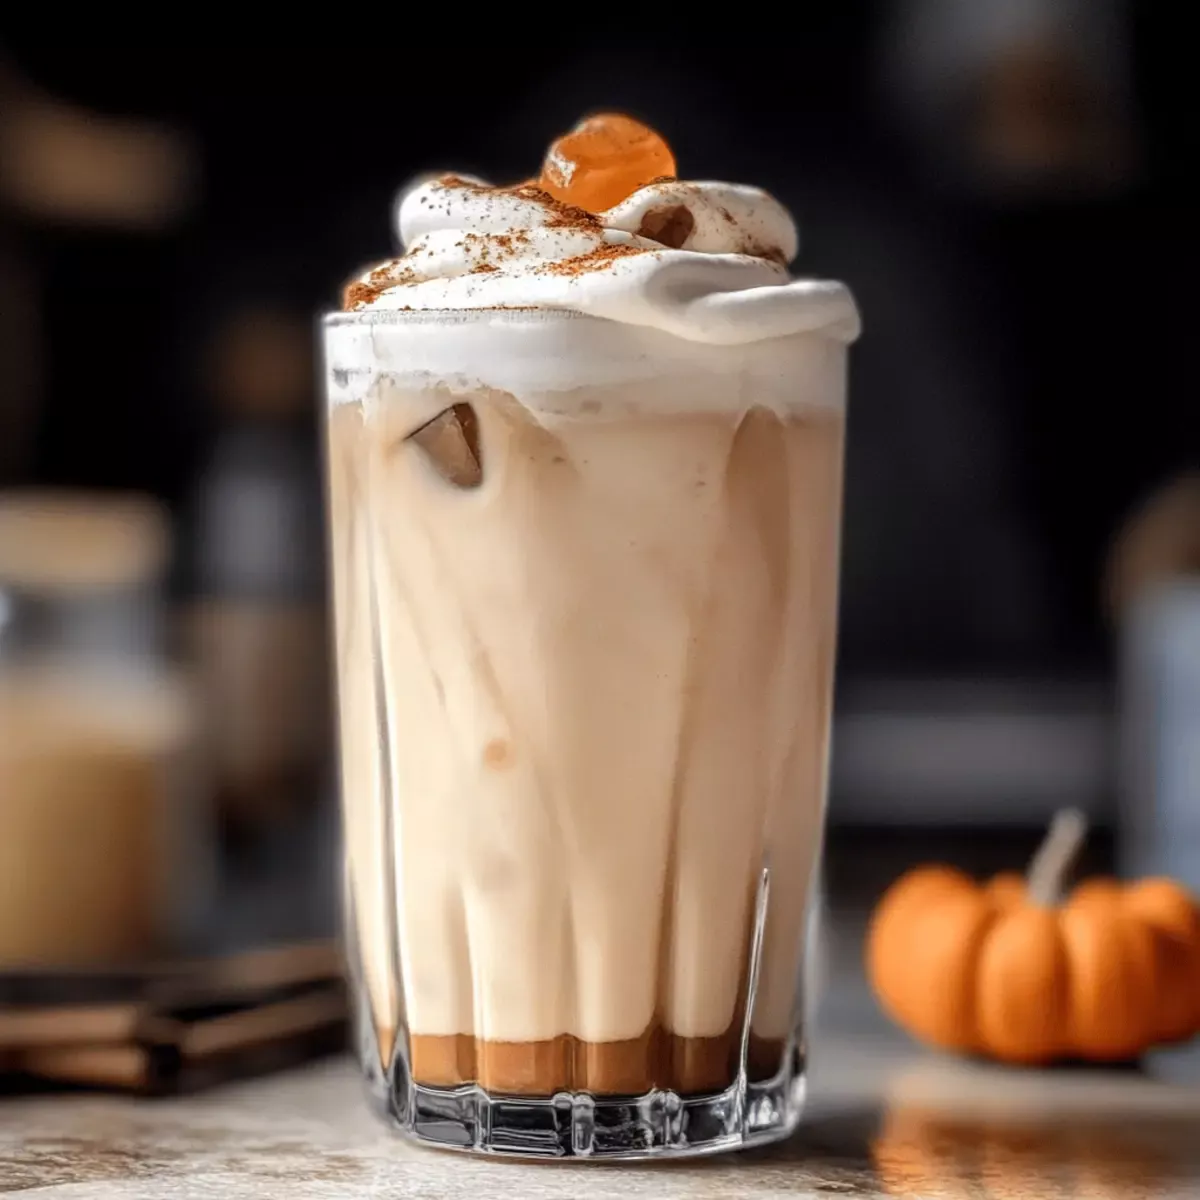
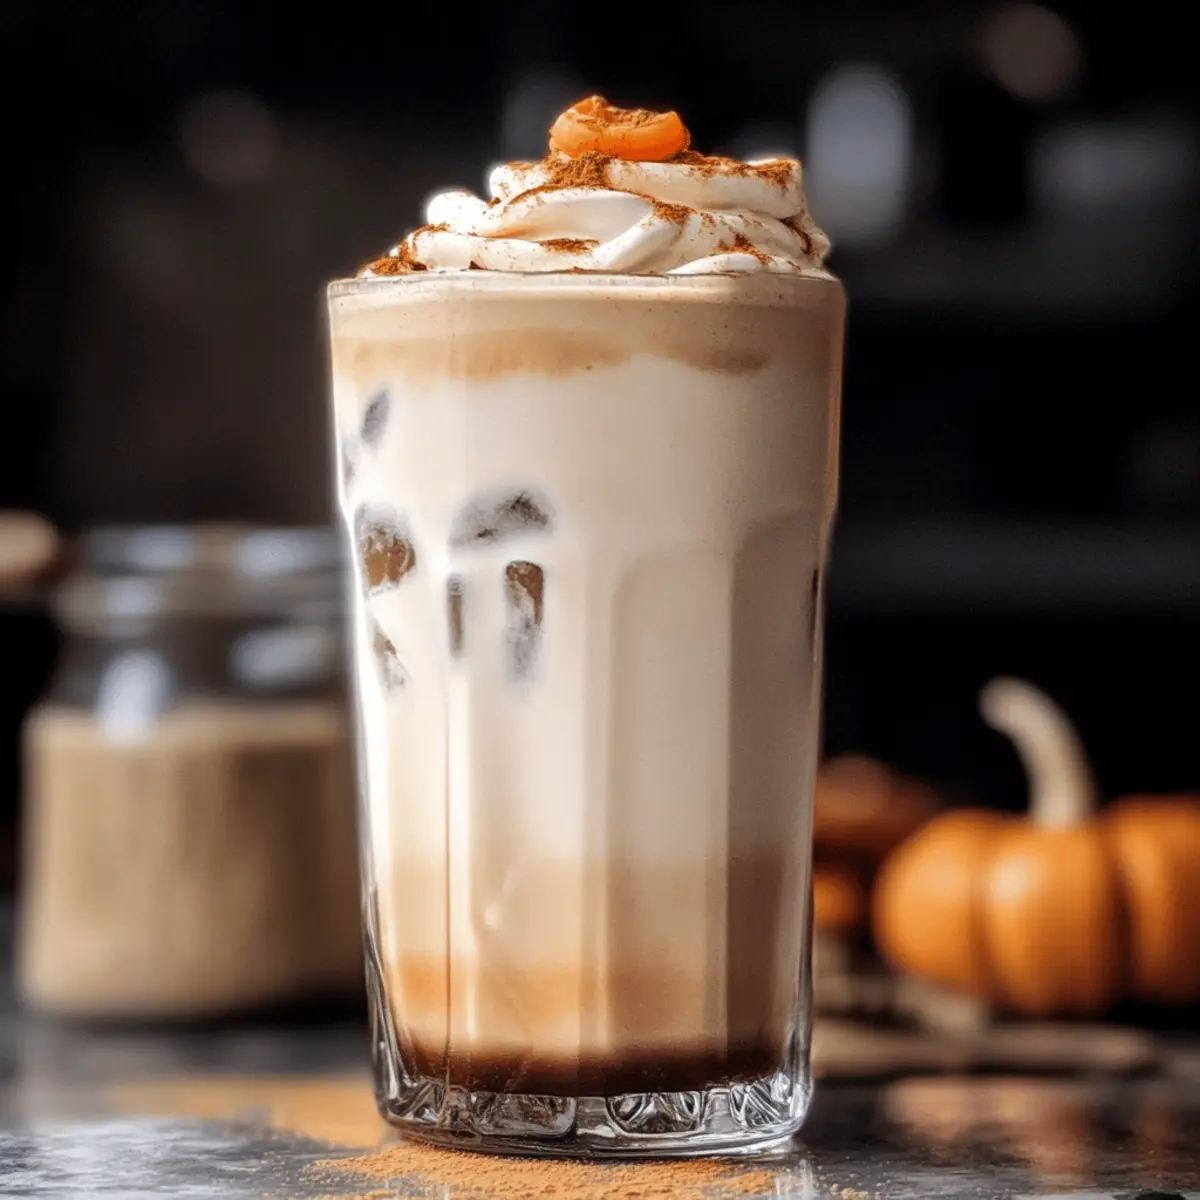
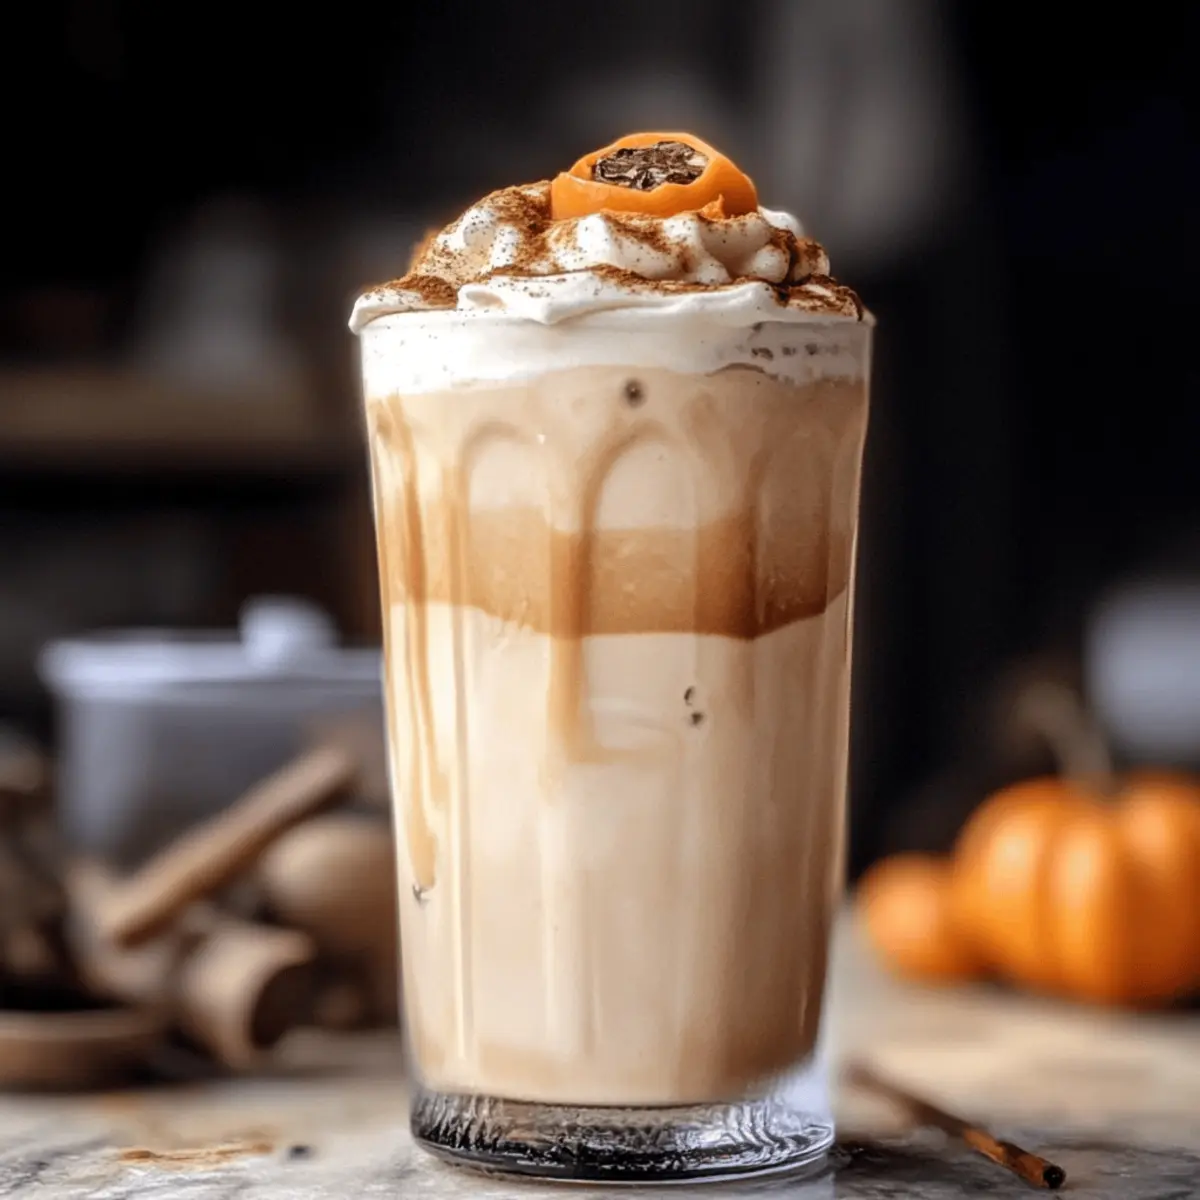
Fill a tall glass with ice cubes, about halfway. Pour in 1 cup of chai tea concentrate, letting the ice chill it for a refreshing moment. Then, add ¼ to ½ cup of oat milk to taste, gently mixing with a spoon. The chai should remain at the bottom, creating a beautiful layered look. This serves as a delicious base for your Iced Pumpkin Cream Chai Tea Latte.

Step 4: Top with Sweet Cream
Spoon the whipped pumpkin sweet cream generously over the iced chai milk mixture, allowing it to spill slightly over the edges for a stunning presentation. For an extra touch, sprinkle a pinch of pumpkin pie spice on top. Serve immediately to ensure you enjoy the delightful chilly and creamy contrast in every sip of your Iced Pumpkin Cream Chai Tea Latte.

Storage Tips for Iced Pumpkin Cream Chai Tea Latte

  • Fridge: Store the pumpkin sweet cream in an airtight container in the refrigerator for up to 7 days. It maintains its creaminess for a delicious Iced Pumpkin Cream Chai Tea Latte at any time.
  • Freezer: If you have leftover pumpkin sweet cream, you can freeze it for up to 3 months. Pour into ice cube trays for easy portioning when you’re ready to enjoy.
  • Reheating: If you’d like to warm your latte, simply heat the chai tea concentrate and oat milk before combining. The pumpkin cream is best served cold and frothy, so avoid reheating it directly.
  • Freshness Tip: For optimal flavor and freshness, assemble the entire drink close to when you plan to enjoy it, especially during warmer months.

What to Serve with Iced Pumpkin Cream Chai Tea Latte

Warm up your kitchen and taste buds as you explore delightful pairings for your creamy iced treat!

  • Pumpkin Bread: This seasonal favorite echoes the pumpkin flavors beautifully, offering a soft and moist texture that complements the latte’s creaminess. A slice of warm, spiced pumpkin bread is the perfect sidekick to your drink.

  • Cinnamon Sugar Donuts: The sweet, warm cinnamon sugar coating provides a delightful crunch that contrasts perfectly with the smooth latte. Each bite is a cozy reminder of fall, blending seamlessly with the chai spices.

  • Maple Pecan Scones: The nutty flavor and crumbly texture of these scones add a satisfying crunch while the maple syrup notes enhance the latte’s sweetness. Perfect for a leisurely breakfast or brunch spread.

  • Apples with Almond Butter: Crisp, fresh apple slices paired with nutty almond butter provide a refreshing crunch that balances the creamy drink. This is a healthy option that adds a refreshing element to your meal.

  • Roasted Sweet Potatoes: Their natural sweetness and crisp edges pair perfectly with the chai’s spiced warmth. Roasting brings out their flavor, making them a delightful side that’s also full of nutrients.

  • Chai Spiced Cookies: A gentle sweetness and warm spices resonate with the flavors of your drink, creating a harmonious and comforting combo. These cookies are perfect for a sweet snack alongside your latte.

  • Hazelnut Coffee: For those who cherish bold flavors, a cup of rich hazelnut coffee alongside enhances the chai’s spices while offering an additional caffeine kick. Perfect for a mid-afternoon pick-me-up!

  • Vegan Chocolate Cake: Decadent yet light, a slice of this cake brings a rich texture and sweetness that playfully contrasts with the spiced latte, making every bite and sip a joyful experience!

Sip your Iced Pumpkin Cream Chai Tea Latte while savoring these delicious pairings, and you’ll bring the warmth of fall into every moment.

Expert Tips for the Best Iced Pumpkin Cream Chai Tea Latte

  • Quality Ingredients: Using fresh pumpkin puree significantly enhances flavor; avoid canned varieties with added sugars or spices for the best results.
  • Sweetness Balance: Adjust the sweetness by adding more maple syrup or vanilla syrup according to your taste preferences; it’s easy to make it perfect for you!
  • Frothing Technique: Ensure the pumpkin sweet cream is frothed to a smooth consistency; if too thick, add oat milk a little at a time until desired texture is reached.
  • Layering Beauty: For a visually stunning latte, pour the chai tea concentrate first, then the oat milk, and top it with the pumpkin cream for layers that impress.
  • Serving Suggestions: Pair this Iced Pumpkin Cream Chai Tea Latte with a light breakfast pastry or pumpkin bread for a complete fall-inspired experience!

Iced Pumpkin Cream Chai Tea Latte Variations

Customize this delightful drink to suit your taste buds or dietary needs with these easy variations!

  • Nutty Almonds: Swap oat milk for almond milk for a delightful hint of nuttiness.
  • Spicy Kick: Add a pinch of cayenne pepper or nutmeg to the sweet cream for a warming twist. A little heat can make this drink even more comforting!
  • Sweeter Dreams: Experiment with agave syrup or honey for natural sweetness; try combining different sweeteners for a unique flavor.
  • Creamy Coconut: Use cream of coconut instead of coconut milk for an ultra-rich and sweet sweet cream layer.
  • Chai Tea Twist: Try using a different type of tea concentrate, like matcha or turmeric, to switch up the flavor profile.
  • Pumpkin Chunky: Consider folding in real pumpkin pieces or puree into the latte before adding ice for a thicker texture.
  • Frothy Whip: Top the latte with dairy-free whipped cream for an extra indulgent finish. It’s like a party on top of your drink!
  • Coffee Boost: Add a shot of espresso or cold brew coffee to the chai mix for a caffeine boost that packs a punch.

Don’t forget to pair your latte with a slice of pumpkin bread or some of my favorite Mexican Soup for a cozy, fall-inspired meal! Enjoy crafting your perfect iced autumn treat!

Make Ahead Options

These Iced Pumpkin Cream Chai Tea Lattes are perfect for meal prep enthusiasts! You can prepare the pumpkin sweet cream up to 3 days in advance by mixing together the full-fat coconut milk, maple syrup, pumpkin puree, pumpkin pie spice, and vanilla extract in a jar. Store it in an airtight container in the refrigerator to maintain its creamy texture. When you’re ready to enjoy your latte, froth the sweet cream, assemble the iced drink with fresh chai tea concentrate and oat milk, and top it off with the prepared cream. This way, you can savor the comforting flavors of fall without the fuss during your busy week!

Iced Pumpkin Cream Chai Tea Latte Recipe FAQs

What type of pumpkin puree should I use?
It’s essential to use pure pumpkin puree, not pumpkin pie filling, which contains added spices and sugars. Look for the label to confirm it’s 100% pumpkin, as this will ensure you get the rich pumpkin flavor needed for your iced latte.

How long can I store the pumpkin sweet cream?
You can store the pumpkin sweet cream in an airtight container in the refrigerator for up to 7 days. Just give it a good stir before using it again, as separation may occur. If you want to keep it longer, freezing is also an option!

Can I freeze the pumpkin sweet cream?
Absolutely! Pour the leftover pumpkin sweet cream into ice cube trays and freeze for up to 3 months. Once frozen, pop the cubes into a bag or container for easy access whenever you want to whip up your Iced Pumpkin Cream Chai Tea Latte. Just thaw as needed!

What if my pumpkin sweet cream is too thick?
If you find your pumpkin sweet cream is too thick, no worries! Simply add a splash of oat milk, and whisk or froth again until you achieve a silky, pourable consistency. Aim for a texture that flows easily over your chai latte without losing its delightful creaminess.

Is this recipe suitable for those with allergies?
This Iced Pumpkin Cream Chai Tea Latte is vegan and dairy-free, making it a fantastic option for those with lactose intolerance or who follow a vegan diet. However, be cautious with the sweeteners; if you’re allergic to specific ingredients, always check labels before use!

Can I adjust the sweetness of my latte?
Absolutely! You can easily adjust the sweetness by adding more maple syrup or vanilla syrup to suit your taste preferences. Start with a small amount and mix, tasting as you go to reach your perfect level of sweetness for the Iced Pumpkin Cream Chai Tea Latte.

Iced Pumpkin Cream Chai Tea Latte

Delicious Iced Pumpkin Cream Chai Tea Latte Recipe You’ll Love

Enjoy a rich Iced Pumpkin Cream Chai Tea Latte that's vegan, easy to make, and perfect for fall.
Prep Time 15 minutes
Frothing Time 2 minutes
Total Time 17 minutes
Servings: 2 glasses
Course: Drinks
Cuisine: American, Vegan
Calories: 250

Ingredients
  

For the Pumpkin Sweet Cream
  • 1/2 cup full-fat coconut milk Substitution: Use heavy cream for a richer flavor.
  • 2 tablespoons maple syrup Substitution: Vanilla syrup can be used for an alternative flavor.
  • 1/4 cup pumpkin puree Ensure it's pure pumpkin puree, not pumpkin pie filling.
  • 1/2 teaspoon pumpkin pie spice Substitution: Use a mix of cinnamon, nutmeg, and ginger if unavailable.
  • 1/2 teaspoon vanilla extract Optional ingredient that can be omitted.
For the Latte
  • 1 cup oat milk Substitution: Any non-dairy milk can work, like almond or soy milk.
  • 1 cup chai tea concentrate Ensure it's a vegan-friendly version without honey.

Equipment

  • Mixing jar
  • Frother
  • Tall glass

Method
 

Step-by-Step Instructions
  1. In a mixing jar, combine 1/2 cup of full-fat coconut milk, 2 tablespoons of maple syrup, 1/4 cup of pumpkin puree, 1/2 teaspoon of pumpkin pie spice, and 1/2 teaspoon of vanilla extract. Whisk until smooth and creamy, about 2-3 minutes.
  2. Using a frother or hand mixer, froth the pumpkin sweet cream for about 1-2 minutes until it thickens and forms a light foam.
  3. Fill a tall glass with ice cubes, pour in 1 cup of chai tea concentrate, add 1/4 to 1/2 cup of oat milk to taste, gently mixing.
  4. Spoon the whipped pumpkin sweet cream generously over the iced chai milk mixture, adding a pinch of pumpkin pie spice on top.

Nutrition

Serving: 1glassCalories: 250kcalCarbohydrates: 30gProtein: 2gFat: 13gSaturated Fat: 11gPolyunsaturated Fat: 1gMonounsaturated Fat: 1gSodium: 20mgPotassium: 300mgFiber: 2gSugar: 10gVitamin A: 100IUVitamin C: 2mgCalcium: 10mgIron: 4mg

Notes

For optimal flavor, use fresh pumpkin puree and adjust sweetness to taste. This latte pairs well with a light breakfast pastry.

Tried this recipe?

Let us know how it was!

Creamy Apple Butter Cheesecake That No One Can Resist

As I stood in my kitchen, the scent of cinnamon wafted through the air, instantly transporting me to cozy autumn afternoons spent baking pies with my grandmother. That nostalgic feeling inspired my latest creation: a no-bake Apple Butter Cheesecake. This delightful dessert features a buttery graham cracker crust and a smooth, creamy filling that perfectly marries warm spices with rich apple butter. The best part? It requires minimal prep time and is ideal for making ahead—simply let it chill while you attend to your guests. Whether it’s a holiday gathering or a simple family dinner, this cheesecake is sure to impress everyone at the table. Curious how to whip up this creamy dream? Let’s dive into the recipe!

Why Is This Apple Butter Cheesecake Irresistible?

Irresistible Indulgence: This cheesecake’s creamy texture combined with the sweet apple butter delivers a flavor experience that’s pure bliss.
No-Bake Convenience: Skip the oven! With minimal prep required, this no-bake dessert fits perfectly into your busy schedule.
Seasonal Surprise: Its warm spices and apple butter swirl capture the essence of fall, making it a festive treat year-round.
Crowd-Pleasing Delight: Serve this at gatherings, and watch everyone come back for seconds—no one can resist its charm!
Versatile Options: Feel free to switch things up—try using a flavored crust or alternate butters for a personal twist. If you’re in the mood for more delightful desserts, take a peek at my recipes for Apple Crisp Cinnamon and Strawberry Cheesecake Dump.

Apple Butter Cheesecake Ingredients

For the Crust

  • Graham Cracker Crumbs – Provides structure and a sweet, crunchy base; you can use a store-bought graham cracker crust if desired, though it won’t include cinnamon flavor.
  • Cinnamon – Enhances the flavor of the crust, adding warmth; omit for no spice flavor.
  • Unsalted Butter – Binds the crust ingredients together for a cohesive texture; can use salted butter if unsalted is unavailable.

For the Filling

  • Cream Cheese – Main component for the cheesecake filling, providing texture and flavor; ensure it is room temperature for easy mixing.
  • Granulated Sugar – Sweetens the filling, balancing the tartness of the apple butter; use a sugar alternative for a lower-calorie version.
  • Heavy Cream – Adds richness and stability to the filling; half-and-half can be used for a lighter option but may affect texture.
  • Fresh Lemon Juice – Brightens the flavor of the cheesecake, enhancing overall taste; use bottled lemon juice if fresh is not available but fresh is preferable.
  • Apple Butter – Key flavor component, providing sweetness and moisture; you can also use pumpkin butter for a seasonal variation.

Step‑by‑Step Instructions for Apple Butter Cheesecake

Step 1: Prep the Springform Pan
Start by spraying a 9-inch springform pan generously with nonstick cooking spray. This ensures that your delicious Apple Butter Cheesecake will easily release once set. Set the pan aside, ready for the crust that will provide a delightful crunch and a base for your creamy filling.

Step 2: Make the Crust
In a medium bowl, combine the graham cracker crumbs with the warm cinnamon, stirring well to distribute the spice evenly. Next, pour in the melted unsalted butter and mix until the crumbs are thoroughly coated. Firmly press this mixture into the bottom and halfway up the sides of the prepared springform pan. Chill in the refrigerator while you prepare the filling.

Step 3: Prepare the Filling
In a large mixing bowl, use an electric mixer to beat the room-temperature cream cheese and granulated sugar together until the mixture becomes smooth and creamy. This should take about 2 to 3 minutes. Then, gradually add the heavy cream and fresh lemon juice, continuing to beat for an additional 1 to 2 minutes until fluffy and thickened, creating the perfect filling for your Apple Butter Cheesecake.

Step 4: Combine
Carefully pour the creamy cheesecake mixture into the chilled crust, smoothing the top with a spatula. Then, dollop the apple butter over the cheesecake filling. Using a knife or skewer, swirl the apple butter into the filling gently to create beautiful patterns without disrupting the crust underneath. This step enhances both the presentation and flavor of your cheesecake.

Step 5: Chill
Cover the springform pan with plastic wrap and place it in the refrigerator. Allow the Apple Butter Cheesecake to chill for at least 6 hours, or preferably overnight. This chilling time allows the flavors to meld beautifully and ensures the cheesecake sets perfectly, achieving that delightful creamy texture.

Step 6: Serve
Once your cheesecake has chilled and is set, carefully remove the sides of the springform pan. Slice into generous pieces and serve chilled. The creamy filling alongside the warm apple butter swirl offers a heavenly dessert experience that is sure to impress friends and family alike.

What to Serve with No-Bake Apple Butter Cheesecake

Creating a delightful spread to complement your dessert will leave a lasting impression on your guests!

  • Crisp Green Apples: Their tartness balances the sweetness of the cheesecake, adding a refreshing crunch to each bite. Pairing them with a sprinkle of cinnamon elevates the theme and connects with the apple butter.

  • Whipped Cream: A dollop of freshly made whipped cream provides a light, airy contrast to the rich cheesecake, enhancing its creamy texture. It also allows for customization with a sprinkle of cinnamon or nutmeg on top.

  • Caramel Sauce: Drizzling warm caramel adds a luscious sweetness and a gourmet touch, creating a delightful flavor harmony that compliments the apple butter beautifully.

  • Coffee or Espresso: Serving a freshly brewed cup of dark coffee or espresso helps to cut through the richness of the cheesecake, providing a comforting end to your meal. The warmth and depth of flavor can enhance the overall dessert experience.

  • Spiced Nuts: Roasted spiced nuts introduce a crunchy element, with flavors that perfectly align with the warm spices of the cheesecake. Their saltiness adds balance and an irresistible crunch.

  • Autumn Fruit Salad: A medley of pears, grapes, and pomegranate seeds tossed with a touch of honey brightens up the palate and adds beautiful color to your dessert table. This vibrant salad offers a refreshing contrast.

  • Hot Cider: A warm cup of spiced apple cider brings seasonal warmth and ties back to the apple theme, creating a cozy atmosphere for your gathering. Its spices echo the flavors within the cheesecake too!

Make Ahead Options

These no-bake Apple Butter Cheesecakes are perfect for meal prep, allowing you to enjoy a delicious dessert without last-minute stress! You can prepare the crust and filling up to 24 hours in advance. Simply mix the graham cracker crumbs and butter, press into the pan, and refrigerate it. The filling can also be made a day ahead—just beat the cream cheese mixture as instructed and store it in the fridge. When it’s time to serve, dollop the apple butter and swirl it into the cheesecake just before chilling for a minimum of 6 hours, or overnight. This ensures your cheesecake remains just as delicious and stunning as if it were freshly made!

Expert Tips for Apple Butter Cheesecake

  • Room Temperature Cream Cheese: Ensure your cream cheese is at room temperature for easy blending, which results in a silky-smooth filling without lumps.
  • Chill Time Matters: For the best flavor and texture, allow your Apple Butter Cheesecake to chill overnight; this helps the flavors to meld and the cheesecake to set firmly.
  • Swirling Technique: When swirling in the apple butter, use a gentle hand to avoid disturbing the crust while creating a beautiful pattern in your cheesecake.
  • Temperature Check: If you want to ensure a perfectly set cheesecake, use an instant-read thermometer to check that the filling reaches around 150°F before chilling.
  • Crust Consistency: Press the graham cracker crust firmly into the pan to avoid crumbly pieces when slicing; a well-packed crust holds its shape beautifully.

How to Store and Freeze Apple Butter Cheesecake

Fridge: Store in an airtight container for up to 3 days. This keeps the Apple Butter Cheesecake fresh and delicious, maintaining its creamy texture.

Freezer: For longer storage, wrap individual slices in plastic wrap and place them in a freezer-safe container. It can last up to 2 months.

Thawing: To enjoy frozen slices, transfer them to the fridge overnight to thaw before serving. This ensures the cheesecake maintains its delightful flavor and texture.

Reheating: There’s no need to reheat this no-bake cheesecake—enjoy it chilled for the best experience!

Apple Butter Cheesecake Variations & Substitutions

Feel free to get creative and make this cheesecake your own—the possibilities are delightfully endless!

  • Pumpkin Butter: Replace apple butter with pumpkin butter for a warm, autumnal twist that’s beautifully seasonal.
  • Nutty Crunch: Add chopped pecans or walnuts to the crust for a delightful crunch that contrasts with the creamy filling.
  • Chocolate Indulgence: Stir in mini chocolate chips to the cheesecake mixture for a chocolaty surprise that pairs well with apple flavors.
  • Vegan Version: Use a vegan cream cheese alternative and coconut cream for a delicious no-bake cheesecake that everyone can enjoy.
  • Flavorful Crust: Experiment with ginger snap crumbs instead of graham cracker crumbs for a spicy, zesty twist.
  • Cinnamon Swirl: Enhance the flavor profile by adding a touch of cinnamon directly to the cream cheese filling for extra warmth.
  • Fruit Infusion: Top the cheesecake with fresh apple slices, drizzled with caramel sauce for a stunning presentation and an added layer of flavor.
  • Spice it Up: For those who enjoy some heat, sprinkle in a dash of cayenne pepper into the filling—it creates an unexpected yet complementary flavor burst!

No matter how you choose to customize your Apple Butter Cheesecake, it’s sure to be a hit! If you’re in the mood for more tasty treats, check out my recipes for Comfort Garlic Butter and Cowboy Butter Chicken.

Apple Butter Cheesecake Recipe FAQs

What should I look for when selecting apple butter?
When choosing apple butter, look for a rich, deep brown color with a smooth and thick consistency. It should smell sweet and warm, with hints of spices. If you see any dark spots or separation in the jar, it might not be fresh. I recommend checking for a low sugar content for a more natural flavor that truly shines in the cheesecake!

How should I store leftovers?
To store your Apple Butter Cheesecake, cover it tightly in an airtight container and place it in the refrigerator. It will stay fresh for up to 3 days, so you can enjoy those leftover slices guilt-free! Just make sure you keep it covered to preserve its delightful texture.

Can I freeze Apple Butter Cheesecake?
Absolutely! To freeze your Apple Butter Cheesecake, I suggest slicing it first for convenience. Wrap each slice tightly in plastic wrap, then place them in a freezer-safe container or a heavy-duty freezer bag. It can be frozen for up to 2 months. Just remember to label the container with the date so you know when it was made!

What can I do if my cheesecake doesn’t set properly?
If your cheesecake doesn’t seem to set well, don’t worry! This can happen if the ingredients were not chilled enough or if the cream cheese was too warm. To troubleshoot, make sure the cream cheese is at room temperature and the heavy cream is cold. If it’s already chilled and still not firming up, try putting it back in the fridge for a few more hours—or overnight! You can also add a bit more heavy cream to increase its consistency when mixing.

Is there a way to modify this recipe for dietary restrictions?
Yes, definitely! For a gluten-free version, substitute gluten-free graham cracker crumbs for the crust. If you need a lower-calorie option, consider using a sugar alternative in the filling. For dairy-free, you can use a cream cheese alternative made from nuts or tofu and a coconut whipped cream for the topping. Always ensure any swaps you make are suitable for those you are serving!

Can pets safely eat apple butter?
While apple butter isn’t toxic to pets, it often contains added sugars and spices that can upset their stomachs. It’s best to keep apple butter away from your furry friends. If you want to treat your pet, consider offering a small piece of plain apple instead!

Apple Butter Cheesecake

Creamy Apple Butter Cheesecake That No One Can Resist

This no-bake Apple Butter Cheesecake is a creamy delight that combines warm spices and rich apple butter for an irresistible dessert experience.
Prep Time 20 minutes
Chill Time 6 hours
Total Time 6 hours 20 minutes
Servings: 8 slices
Course: Dessert
Cuisine: American
Calories: 350

Ingredients
  

For the Crust
  • 1 cup Graham Cracker Crumbs Provides structure and a sweet, crunchy base.
  • 1 teaspoon Cinnamon Enhances the flavor of the crust.
  • 5 tablespoons Unsalted Butter Melted, binds the crust ingredients together.
For the Filling
  • 16 ounces Cream Cheese Ensure it is room temperature for easy mixing.
  • 1 cup Granulated Sugar Sweetens the filling.
  • 1 cup Heavy Cream Adds richness to the filling.
  • 2 tablespoons Fresh Lemon Juice Brightens the flavor of the cheesecake.
  • 1 cup Apple Butter Key flavor component.

Equipment

  • 9-inch springform pan
  • Electric mixer
  • Mixing Bowl
  • spatula

Method
 

Preparation Steps
  1. Prep the Springform Pan by spraying a 9-inch pan generously with nonstick cooking spray.
  2. Make the Crust by combining graham cracker crumbs and cinnamon in a bowl, then add melted butter and mix well. Press into the springform pan and chill.
  3. Prepare the Filling by mixing cream cheese and sugar until smooth, then add heavy cream and lemon juice, beating until fluffy.
  4. Combine by pouring the cheesecake mixture into the crust and dolloping apple butter on top. Swirl gently to create patterns.
  5. Chill by covering the pan and refrigerating for at least 6 hours or overnight.
  6. Serve by removing the sides of the springform pan, slicing, and serving chilled.

Nutrition

Serving: 1sliceCalories: 350kcalCarbohydrates: 30gProtein: 4gFat: 24gSaturated Fat: 15gCholesterol: 80mgSodium: 200mgPotassium: 140mgFiber: 1gSugar: 22gVitamin A: 10IUVitamin C: 2mgCalcium: 6mgIron: 4mg

Notes

Allow cream cheese to reach room temperature for easier blending. For the best flavor, chill overnight before serving.

Tried this recipe?

Let us know how it was!

Sautéed Zucchini and Corn: A Fresh Summer Delight

The moment that summer sun begins to shine, I can’t help but crave the vibrant dishes that celebrate fresh produce. One of my absolute favorites is this Quick and Flavorful Sautéed Zucchini and Corn. In just 20 minutes, tender zucchini meets sweet corn in a delightful one-pan meal that’s as easy to make as it is beautiful to serve. This vegetarian side dish is perfect alongside grilled meats or enjoyed on its own as a satisfying, meatless option. Imagine the warm, comforting aroma of garlic and fresh basil wafting through your kitchen, inviting loved ones to gather around the table. Ready to elevate your summer cooking with a dish that brings the season’s best flavors together? Let’s dive in!

Why is this dish a summer must?

Freshness at its finest: The vibrant combination of zucchini and corn captures the essence of summer in every bite.

Quick preparation: With just 20 minutes needed, this dish suits busy evenings or spontaneous gatherings perfectly.

Versatile base: Easily customize with your favorite vegetables, proteins, or herbs for endless variations, such as adding black beans for a Southwestern flair or serving it over rice for a complete meal.

Crowd-pleaser: Whether served at a barbecue with grilled chicken or enjoyed simply as a warm salad, it’s sure to delight everyone.

Nutritious benefits: Packed with fiber and vitamins from fresh produce, this dish is light yet satisfying, making it a healthy choice even on a busy weeknight. For similar fresh ideas, check out my Street Corn Chicken or Potato Bacon Soup recipes!

Sautéed Zucchini and Corn Ingredients

For the Sauté

  • Butter – Adds richness and flavor; use olive oil for a dairy-free option.
  • Olive Oil – Prevents butter from burning; enhances flavor and texture.
  • Fresh Corn – Provides natural sweetness; frozen kernels make a great substitute.
  • Zucchini – Acts as a base for texture; choose firm, unblemished zucchinis.
  • Garlic – Infuses the dish with savory notes; fresh minced garlic is preferred.

Seasonings

  • Sea Salt – Enhances the sweetness of corn; adjust to taste based on dietary needs.
  • Pepper – Adds a mild heat; use freshly cracked for the best flavor.

For Garnish

  • Fresh Basil – Brightens and complements the veggies; feel free to substitute with parsley or chives.
  • Parmesan Cheese – Adds richness and creaminess; skip for a dairy-free version.

Elevate your summer cooking with these simple yet flavorful ingredients that make the Sautéed Zucchini and Corn dish a joyful celebration of seasonal produce!

Step‑by‑Step Instructions for Sautéed Zucchini and Corn

Step 1: Heat the Pan
Begin by placing a 12-inch skillet over medium-high heat. Add 1 tablespoon of butter to the skillet and let it melt until it becomes foamy, which typically takes about 1-2 minutes. Once the butter is melting, pour in 1 tablespoon of olive oil to prevent burning and enhance the flavor. Swirl the mixture to combine.

Step 2: Sauté the Corn
Raise the heat to high and carefully add 2 cups of fresh corn kernels into the hot pan. Let the corn cook undisturbed for about 3 minutes until it begins to char slightly, adding a lovely sweetness. You’ll want to look for a golden-brown color starting to appear on the corn to indicate it’s ready for the next step.

Step 3: Stir and Cook the Corn
After the initial cooking time, stir the corn thoroughly and allow it to sauté for an additional 3 minutes. You want the corn to be cooked through and caramelized, achieving a nice even golden hue while maintaining a slight crispness. Keep an eye on it to ensure nothing sticks to the pan.

Step 4: Add the Zucchini
Next, add 2 medium-sized zucchini, sliced into half-moon shapes, to the skillet with the corn. Allow the zucchini to rest and cook undisturbed for about 4 minutes. This helps develop a nice char and golden-brown edges, enhancing the flavor of your Sautéed Zucchini and Corn dish.

Step 5: Stir and Sauté Together
After the zucchini has cooked undisturbed, give it a stir and sauté the mixture for another 4 minutes. You want both the zucchini and corn to be tender yet slightly crisp, perfectly golden, and well combined. It’s those vibrant colors coming together that will really capture the essence of summer.

Step 6: Add Garlic for Flavor
Now it’s time to introduce the aromatics! Incorporate 2 cloves of minced garlic into the mixture, stirring constantly for about 1 minute. The garlic should become fragrant without burning—this step infuses your sautéed zucchini and corn with a rich, savory aroma.

Step 7: Season to Taste
Remove the skillet from the heat and season the sauté with a sprinkle of sea salt and freshly cracked pepper, adjusting to your personal preference. The seasonings should enhance the natural sweetness of the corn while balancing the flavors of the zucchini perfectly.

Step 8: Garnish and Serve
Finally, fold in a handful of fresh basil leaves, allowing their fragrance to marry with the vegetables. For an extra touch of creaminess, sprinkle some grated Parmesan cheese on top. Your flavorful Sautéed Zucchini and Corn is now ready to be plated and enjoyed, either warm or at room temperature!

Expert Tips for Sautéed Zucchini and Corn

  • Avoid Overcrowding: Sauté in batches if necessary; overcrowding the pan can lead to steaming rather than a beautiful golden-brown finish.

  • Choose Fresh Ingredients: Use the freshest zucchini and corn to elevate flavors. Fresh vegetables bring a vibrant taste and texture that’s essential to this sautéed zucchini and corn dish.

  • Mind the Heat: Ensure the pan is adequately heated before adding corn; this helps in achieving that lovely caramelization that enhances sweetness.

  • Add Brightness: For an added layer of flavor, consider squeezing fresh lemon juice over the dish just before serving, brightening the overall taste.

  • Skip Pre-Salting: Avoid salting zucchini before cooking, as it can draw out excessive moisture, resulting in a soggy outcome instead of that delightful crispness.

How to Store and Freeze Sautéed Zucchini and Corn

Fridge: Store leftovers in an airtight container for up to 3 days. Reheat gently on the stovetop or in the microwave, adding a splash of water to retain moisture.

Freezer: For longer storage, freeze the sautéed zucchini and corn in a freezer-safe container for up to 2 months. Label and date the container for easy identification.

Reheating: When ready to enjoy, thaw in the fridge overnight and then reheat on low heat in a skillet until warmed through; stir in fresh basil just before serving for extra flavor.

Airtight Storage: To maintain the best texture and flavor, ensure the dish is fully cooled before sealing it in. This helps prevent freezer burn for your delicious sautéed zucchini and corn.

Sautéed Zucchini and Corn Variations

Feel free to explore your creativity with this recipe by incorporating various ingredients and flavors that excite your palate!

  • Add Bell Peppers: Introduce diced bell peppers for a colorful, sweet crunch that complements the zucchini beautifully. The vibrant hues will make your dish even more appealing!

  • Southwestern Twist: Mix in black beans and a dash of cumin for a hearty, flavor-packed version. This twist will warm up those summer evenings with a delightful kick.

  • Fresh Herb Frenzy: Swap the basil for herbs like dill or cilantro to give it a fresh, unique flavor. Each herb offers a different aromatic experience!

  • Creamy Alternatives: Substitute parmesan with crumbled feta or goat cheese for a tangy twist. The creaminess will beautifully meld with the vegetables, creating a rich mouthfeel.

  • Zesty Lemon Addition: Squeeze fresh lemon juice over the dish before serving for an extra burst of brightness. It enhances flavors, making everything pop!

  • Serve with Rice: Make this dish a complete meal by serving it over cooked rice or quinoa. This simple addition will transform it into a satisfying vegetarian main course.

  • Protein-Packed Version: Toss in cooked shrimp or grilled chicken for a heartier meal. Not only does this enhance the textures, but it also makes it more filling!

  • Heat It Up: For those who enjoy a little spice, sprinkle red pepper flakes or add diced jalapeños for a fiery kick. Turn up the heat, and let your taste buds dance!

Embrace your culinary spirit, and take inspiration from these variations. For more delightful one-pan ideas, consider trying my Korean Ground Meal for a quick-fix dinner or my comforting Forgotten Chicken Rice for busy weeknights!

Make Ahead Options

These Sautéed Zucchini and Corn are perfect for meal prep enthusiasts! You can slice the zucchini and prepare the corn (either fresh or frozen) up to 24 hours in advance, storing them separately in airtight containers in the refrigerator to maintain freshness. Additionally, you can mince the garlic ahead of time and keep it in a sealed container. When you’re ready to serve, simply heat the skillet, add the butter and oil, sauté the corn, zucchini, and garlic as directed. This way, you’ll save precious cooking time during busy weeknights while still enjoying all the vibrant flavors of this delightful dish, just as delicious as if made fresh!

What to Serve with Quick and Flavorful Sautéed Zucchini and Corn

Dive into a delicious meal that complements the bright, fresh flavors of sautéed zucchini and corn with these delightful pairings!

  • Grilled Chicken: Juicy and flavorful, this protein pairs perfectly with the lightness of the sauté, creating a balanced dish.

  • Cilantro-Lime Quinoa: The nutty flavor of quinoa adds a wonderful texture and supports the fresh ingredients beautifully.

  • Caprese Salad: With tomatoes, mozzarella, and basil, this Italian classic brings a refreshing contrast that enhances the summer vibe.

  • Cornbread: A slice of warm, buttery cornbread provides a comforting contrast, soaking up the dish’s delightful juices.

  • Lemon Herb Couscous: Light and fluffy, the citrusy notes of couscous tie together the freshness of zucchini and corn with a zesty kick.

  • Roasted Shrimp Tacos: The slightly smoky flavor of the shrimp complements the sweet corn while the tacos provide a fun and interactive meal.

  • Watermelon Feta Salad: The sweetness of juicy watermelon and the creaminess of feta create a refreshing side that highlights summer flavors.

  • Chilled White Wine: A crisp, chilled Sauvignon Blanc elevates the meal with its bright acidity and herbaceous notes, bringing everything together beautifully.

Sautéed Zucchini and Corn Recipe FAQs

What’s the best way to select zucchini and corn?
Absolutely! When choosing zucchini, look for firm, unblemished vegetables with smooth skin. This indicates freshness; avoid ones with dark spots or soft areas. For corn, opt for ears with tightly packed kernels and bright green husks. If you’re going for frozen corn, ensure it’s without added sugars or preservatives for the best flavor.

How should I store leftovers of sautéed zucchini and corn?
You can store leftovers in an airtight container in the fridge for up to 3 days. I recommend reheating them gently on the stovetop or in the microwave. Add a splash of water during reheating to keep them moist and delicious!

Can I freeze sautéed zucchini and corn?
Yes, you can freeze it! Once the dish has completely cooled, transfer it to a freezer-safe container, ensuring you label and date it. It will keep well for up to 2 months. For reheating, let it thaw overnight in the fridge and then warm it gently in a skillet over low heat, stirring in fresh basil for that bright touch before serving.

What if my zucchini turns out soggy?
Very! If your zucchini becomes soggy, it might be due to excess moisture during cooking. To avoid this, do not salt the zucchini before cooking; instead, salt it right after you turn off the heat. Another tip is to sauté in batches without overcrowding the pan, which helps each piece cook evenly and retain its texture.

Are there any dietary considerations I should keep in mind?
Definitely! This dish is naturally vegetarian, and you can make it dairy-free by substituting the butter with olive oil and skipping the parmesan cheese. If anyone has allergies, always double-check the ingredients like butter and cheese or consider alternatives like plant-based cheese or nutritional yeast for a similar flavor.

Can I customize this recipe with other vegetables?
Absolutely! The more the merrier! You can add bell peppers, red onions, or even some cherry tomatoes for extra color and flavor. Feel free to incorporate your favorite proteins, such as cooked black beans for a heartier dish or add a pinch of herbs and spices to tailor it to your taste!

Sautéed Zucchini and Corn

Sautéed Zucchini and Corn: A Fresh Summer Delight

Sautéed Zucchini and Corn is a quick and flavorful summer dish that combines fresh produce in a delightful one-pan meal.
Prep Time 10 minutes
Cook Time 10 minutes
Total Time 20 minutes
Servings: 4 servings
Course: Dinner
Cuisine: Vegetarian
Calories: 150

Ingredients
  

For the Sauté
  • 1 tablespoon Butter Adds richness and flavor; use olive oil for a dairy-free option.
  • 1 tablespoon Olive Oil Prevents butter from burning; enhances flavor and texture.
  • 2 cups Fresh Corn Provides natural sweetness; frozen kernels make a great substitute.
  • 2 medium Zucchini Acts as a base for texture; choose firm, unblemished zucchinis.
  • 2 cloves Garlic Infuses the dish with savory notes; fresh minced garlic is preferred.
Seasonings
  • to taste Sea Salt Enhances the sweetness of corn; adjust to taste based on dietary needs.
  • to taste Pepper Adds a mild heat; use freshly cracked for the best flavor.
For Garnish
  • a handful Fresh Basil Brightens and complements the veggies; feel free to substitute with parsley or chives.
  • optional Parmesan Cheese Adds richness and creaminess; skip for a dairy-free version.

Equipment

  • 12-inch skillet

Method
 

Step-by-Step Instructions for Sautéed Zucchini and Corn
  1. Begin by placing a 12-inch skillet over medium-high heat. Add 1 tablespoon of butter to the skillet and let it melt until it becomes foamy, which typically takes about 1-2 minutes. Once the butter is melting, pour in 1 tablespoon of olive oil to prevent burning and enhance the flavor. Swirl the mixture to combine.
  2. Raise the heat to high and carefully add 2 cups of fresh corn kernels into the hot pan. Let the corn cook undisturbed for about 3 minutes until it begins to char slightly, adding a lovely sweetness. You’ll want to look for a golden-brown color starting to appear on the corn to indicate it’s ready for the next step.
  3. After the initial cooking time, stir the corn thoroughly and allow it to sauté for an additional 3 minutes. You want the corn to be cooked through and caramelized, achieving a nice even golden hue while maintaining a slight crispness.
  4. Next, add 2 medium-sized zucchini, sliced into half-moon shapes, to the skillet with the corn. Allow the zucchini to rest and cook undisturbed for about 4 minutes, developing a nice char and golden-brown edges.
  5. After the zucchini has cooked undisturbed, give it a stir and sauté the mixture for another 4 minutes until both the zucchini and corn are tender yet slightly crisp and perfectly golden.
  6. Incorporate 2 cloves of minced garlic into the mixture, stirring constantly for about 1 minute until the garlic becomes fragrant without burning.
  7. Remove the skillet from the heat and season the sauté with a sprinkle of sea salt and freshly cracked pepper, adjusting to your personal preference.
  8. Finally, fold in a handful of fresh basil leaves, and sprinkle some grated Parmesan cheese on top if desired. Your flavorful Sautéed Zucchini and Corn is now ready to be plated and enjoyed!

Nutrition

Serving: 1plateCalories: 150kcalCarbohydrates: 20gProtein: 4gFat: 7gSaturated Fat: 3gPolyunsaturated Fat: 1gMonounsaturated Fat: 3gCholesterol: 10mgSodium: 200mgPotassium: 300mgFiber: 3gSugar: 5gVitamin A: 500IUVitamin C: 30mgCalcium: 80mgIron: 1mg

Notes

Store leftovers in an airtight container for up to 3 days. Freeze in a freezer-safe container for up to 2 months.

Tried this recipe?

Let us know how it was!

Spiced Orange Drizzle Cupcakes That Brighten Your Day

As I stood in my kitchen, the unmistakable scent of fresh oranges wafted through the air, bringing a nostalgic warmth that instantly lifted my spirits. I had just whipped up a batch of Spiced Orange Drizzle Cupcakes, and let me tell you, these delightful treats are anything but ordinary. Not only is each cupcake perfectly moist and infused with zesty orange flavor, but they also come topped with a creamy cream cheese frosting that’s sure to impress your holiday guests. Whether you’re hosting a festive gathering or just craving a cozy afternoon sweet, these cupcakes are a simple way to add a touch of sophistication to your baking. Plus, they’re so easy to prepare that even beginner bakers can shine. Curious about how to make your own batch of these delightful cupcakes? Let’s dive into the recipe!

Why Are These Cupcakes So Irresistible?

Moist and Flavorful: Each bite of these Spiced Orange Drizzle Cupcakes offers a delightful combination of zesty orange and warm spices that will tantalize your taste buds.

Effortless Preparation: With simple ingredients and easy-to-follow steps, this recipe is perfect for bakers of all skill levels.

Versatile Variations: Feel free to experiment with different cream cheese frosting flavors or even opt for a simple glaze to suit your taste.

Showstopper Appeal: The beautiful presentation of these cupcakes makes them a stunning centerpiece for any holiday gathering. Enjoy them with a comforting cup of tea or coffee, and they’ll be the talk of the table!

Make Ahead Magic: Bake a few days ahead, and drizzle for added flavor, frosting just before serving for a perfectly fresh treat. Interested in more sweet delights? Check out my Chocolate Fudge Cupcakes for another crowd-pleaser!

Spiced Orange Drizzle Cupcake Ingredients

For the Cupcakes

  • Unsalted Butter (175g) – Provides moisture and richness; substitute with margarine for a dairy-free option.
  • Golden Caster Sugar (175g) – Adds sweetness and helps create a tender crumb; regular granulated sugar can be used.
  • Self Raising Flour (175g) – Provides the necessary rise; a gluten-free flour blend could be substituted for a gluten-free version.
  • Ground Cinnamon (1 tsp) – Adds warm spice notes; can be substituted with nutmeg for a different flavor profile.
  • Ground Ginger (1/4 tsp) – Enhances the spice complexity; omit if preferred.
  • Ground Nutmeg (1/4 tsp) – Deepens the spiced flavor; can be replaced with allspice for variation.
  • Baking Powder (1 tsp) – Ensures proper leavening; not needed if using self-raising flour.
  • Large Eggs (2) – Provides structure and moisture; flax eggs can be an alternative for vegan versions.
  • Zest from 1 Large Orange – Infuses the cake with refreshing citrus notes; ensure it’s finely grated.
  • Milk (1/3 cup) – Adds moisture to the batter; use plant-based milk for a dairy-free option.
  • Vanilla (1 tsp) – Enhances flavor complexity; can substitute with almond extract for a different flavor.

For the Drizzle

  • Juice from 1 Large Orange – Acts as the moisture infusion for the drizzle.
  • Sugar (to taste) – Balances the tartness of the orange juice; adjust according to sweetness preference.

For the Frosting

  • Cream Cheese (225g) – Delivers a creamy texture to the frosting; use vegan cream cheese for a dairy-free option.
  • Unsalted Butter (75g) – Adds richness to the frosting; substitute with vegan butter if needed.
  • Powdered Sugar (2 cups) – Provides sweetness and stabilizes the frosting; adjust quantity based on desired sweetness.
  • Vanilla Extract (1/2 tsp) or Seeds from 1 Vanilla Pod – Enhances flavor; use either based on availability.

Get ready to bake some delightful Spiced Orange Drizzle Cupcakes that will light up your kitchen this holiday season! 🍊✨

Step‑by‑Step Instructions for Spiced Orange Drizzle Cupcakes

Step 1: Preheat the Oven
Begin by preheating your oven to 350°F (175°C). While the oven warms, line a cupcake tray with cupcake liners to prepare for your batter. This simple preparation sets the stage for your soon-to-be irresistible Spiced Orange Drizzle Cupcakes, ensuring they bake uniformly and are easy to remove.

Step 2: Cream the Butter and Sugar
In a large mixing bowl, cream together 175g of unsalted butter and 175g of golden caster sugar using an electric mixer at medium speed. Beat the mixture until it becomes light and fluffy, which should take about 4 to 5 minutes. You’ll know it’s ready when the mixture has a pale color and a creamy texture.

Step 3: Add Wet Ingredients
Next, add 2 large eggs, the zest of 1 large orange, and 1 teaspoon of vanilla extract to the creamed butter and sugar. Beat the mixture until all the ingredients are well combined, scraping down the sides of the bowl as needed. This will infuse your cupcakes with delightful flavors, making them the stars of your dessert table.

Step 4: Combine Dry Ingredients
In a separate bowl, whisk together 175g of self-raising flour, 1 teaspoon of baking powder, 1 teaspoon of ground cinnamon, 1/4 teaspoon of ground ginger, and 1/4 teaspoon of ground nutmeg. This aromatic mix of dry ingredients ensures your Spiced Orange Drizzle Cupcakes rise beautifully and have a warming spice depth.

Step 5: Mix Dry and Wet Ingredients
Gradually add the dry mixture to the wet mixture, alternating with 1/3 cup of milk, and mix on low speed until just combined. Be careful not to overmix, as this can lead to dense cupcakes. The batter should be smooth but with a few small lumps remaining, giving the cupcakes their signature light texture.

Step 6: Fill the Cupcake Liners
Spoon the batter into the prepared cupcake liners, filling each about two-thirds full. This allows enough room for the cupcakes to rise without overflowing. Aim for a level top, as this ensures even baking and an attractive presentation once baked.

Step 7: Bake the Cupcakes
Place the filled cupcake tray in the preheated oven and bake for 18 to 20 minutes. Keep an eye on them: they’re ready when a toothpick inserted into the center comes out clean and they bounce back when lightly touched. The warm aroma of oranges will fill your kitchen!

Step 8: Create the Orange Drizzle
While the cupcakes cool, prepare the orange drizzle. Combine the juice from 1 large orange with sugar to taste in a small bowl. Stir until the sugar dissolves, creating a sticky, sweet syrup that will soak into the cupcakes, enhancing their citrus flavor.

Step 9: Drizzle Over the Cupcakes
Once the cupcakes have cooled completely, use a toothpick or skewer to poke small holes in the tops. Drizzle the freshly made orange syrup generously over each cupcake, allowing it to seep into the holes. This adds moisture and an extra burst of citrus to your already delightful Spiced Orange Drizzle Cupcakes.

Step 10: Make the Cream Cheese Frosting
In a mixing bowl, beat together 225g of cream cheese, 75g of unsalted butter, 2 cups of powdered sugar, and 1/2 teaspoon of vanilla extract until the mixture is smooth and creamy. Make sure there are no lumps for a beautiful, velvety texture that will top your cupcakes perfectly.

Step 11: Frost the Cupcakes
Once the orange drizzle has set, pipe the cream cheese frosting onto the cooled cupcakes. You can use a piping bag for precise decoration or simply spread it on with a spatula for a more rustic look. Each dollop of frosting will beautifully complement the citrusy sweetness of your Spiced Orange Drizzle Cupcakes.

Step 12: Serve and Enjoy
With your cupcakes elegantly frosted, they are now ready to be served! Present your Spiced Orange Drizzle Cupcakes on a lovely platter and enjoy the delightful combination of flavors. Perfect for any festive occasion, they are bound to be a hit with family and friends alike!

Spiced Orange Drizzle Cupcakes Variations

Feel free to let your creativity shine as you explore these delightful variations on the classic Spiced Orange Drizzle Cupcakes, each offering a unique twist!

  • Dairy-Free: Substitute cream cheese and butter with vegan alternatives for a deliciously creamy vegan frosting. You’re sure to impress everyone, even non-vegans!

  • Gluten-Free: Use a gluten-free flour blend instead of self-raising flour to create a light and fluffy texture that everyone can enjoy. Fresh orange flavor shines through, ensuring no one misses the gluten!

  • Nutty Addition: Toss in some chopped walnuts or pecans for a delicious crunch and a nutty flavor that compliments the sweetness of the orange. The added texture makes every bite even more special.

  • Flavor Boost: Experiment with adding a splash of almond extract in place of vanilla for a fragrant surprise in the frosting. It harmonizes beautifully with the citrus notes.

  • Citrus Infusion: Try substituting the orange zest with lemon or lime zest for a refreshingly different citrus spin on your cupcakes. Each citrus brings its own unique personality that will tickle your taste buds.

  • Orange Chocolate Combo: Mix in some mini chocolate chips or drizzle melted dark chocolate over the top for a decadent chocolate-orange twist. It’s a match made in heaven for chocolate lovers!

  • Mini Version: Make mini cupcakes instead for perfect bite-sized treats that are ideal for parties. Just adjust baking time to about 12-15 minutes; you’ll have a delightful platter to share!

  • Frosted Glaze: Instead of cream cheese frosting, top with a simple glaze made from powdered sugar and orange juice for an easier and lighter finish that still delivers on sweetness and flavor.

Feel inspired by these variations? You might also enjoy trying these ideas in my Chocolate Fudge Cupcakes for another flavorful twist!

How to Store and Freeze Spiced Orange Drizzle Cupcakes

Room Temperature: Store cupcakes in an airtight container at room temperature for up to 5 days to keep them fresh and moist. Avoid exposing them to sunlight or heat sources.

Fridge: If you prefer, you can refrigerate the cupcakes in an airtight container for up to 7 days. Note that refrigerated cupcakes may lose some moisture.

Freezer: To freeze, wrap the cupcakes tightly in plastic wrap and place them in a freezer-safe container. They can be frozen for up to 3 months. For best taste, thaw them in the fridge overnight before serving.

Reheating: If desired, warm the cupcakes in the microwave for 10-15 seconds to enjoy a fresh from the oven feel.

Make Ahead Options

These Spiced Orange Drizzle Cupcakes are a fantastic choice for busy home cooks looking to save time without sacrificing flavor! You can bake and drizzle the cupcakes up to 3 days ahead of time; just be sure to store them in an airtight container to retain their moisture. The final step of frosting them can be done right before serving for the best presentation and freshness. To maintain quality, allow the cupcakes to cool completely before drizzling and keep the cream cheese frosting refrigerated until you’re ready to pipe it on. This way, your delightful cupcakes will be just as delicious when it’s time to enjoy them!

What to Serve with Spiced Orange Drizzle Cupcakes

Elevate your dessert experience by pairing these delightful cupcakes with complementary flavors and textures for a truly memorable treat.

  • Fresh Fruit Salad: A vibrant mix of seasonal fruits adds a refreshing contrast to the zesty sweetness of the cupcakes. The natural juices help cleanse the palate.

  • Creamy Vanilla Ice Cream: The rich and creamy vanilla brings out the flavors of orange, making each bite a luscious delight. Serve it alongside your cupcakes for a classic combination.

  • Herbal Tea: A fragrant cup of chamomile or green tea soothes and balances the sweetness, creating a cozy after-dinner experience perfect for gatherings.

  • Sparkling Water with Citrus Segments: Refreshing and slightly tangy, this drink complements the citrus notes beautifully while cleansing the palate between bites.

  • Caramel Sauce Drizzle: For an extra touch of decadence, drizzle warm caramel over the frosted cupcakes, adding a sweet, buttery flavor that pairs well with the orange essence.

  • Walnut Crumble: Sprinkle crunchy walnut pieces on top of the frosting to introduce a delightful textural contrast, enhancing both taste and appearance.

  • Glass of Prosecco: The bubbly nature of Prosecco makes it a festive choice, enhancing the overall experience with its crisp, fruity notes.

  • Chocolate-Covered Strawberries: Decadent yet light, these treats offer a sweet contrast to the citrus cupcakes while adding a touch of elegance to your dessert table.

  • Dark Chocolate Shavings: Garnish your cupcakes with dark chocolate shavings for a rich flavor contrast that balances the sweetness and adds a touch of sophistication.

Expert Tips for Spiced Orange Drizzle Cupcakes

Room Temperature Ingredients: Ensure all ingredients are at room temperature for better emulsion and a fluffier cupcake.

Avoid Overmixing: Mix the batter just until combined to prevent dense cupcakes; a few lumps are perfectly fine.

Cool Completely: Allow the cupcakes to cool completely before frosting to keep the cream cheese from melting and sliding off.

Customize Your Drizzle: Adjust the sugar in the orange drizzle to suit your taste; some may prefer it sweeter, while others will enjoy a more tart flavor.

Give It Time: Let the orange drizzle soak into the cupcakes for at least 15 minutes before frosting for maximum flavor absorption.

Creative Variations: Don’t hesitate to experiment with different cream cheese frosting flavors or even add a sprinkle of nuts on top for texture!

Spiced Orange Drizzle Cupcakes Recipe FAQs

How do I choose the right oranges for my cupcakes?
Absolutely! For the best flavor, look for firm, bright oranges without any dark spots or blemishes. The zest and juice from freshly picked oranges will enhance the cupcakes’ citrusy notes. If you can, smell the oranges as well; a fragrant orange often indicates it’s ripe and flavorful.

How should I store my Spiced Orange Drizzle Cupcakes?
To keep your cupcakes fresh, store them in an airtight container at room temperature for up to 5 days. Avoid leaving them in direct sunlight or heat, as this can dry them out. If you’re making them ahead of time, consider refrigerating them for up to 7 days, though they might lose a bit of moisture.

Can I freeze the Spiced Orange Drizzle Cupcakes?
Yes, you can! To freeze, wrap each cupcake tightly in plastic wrap, then place them in a freezer-safe container. They’ll stay fresh for up to 3 months. When you’re ready to enjoy them, simply thaw in the refrigerator overnight. I often find that warming them in the microwave for 10-15 seconds gives them a fresh-from-the-oven feel!

What if my cupcakes come out dense?
Very! If your cupcakes turn out dense, it may be due to overmixing the batter or using cold ingredients straight from the fridge. To prevent this, mix until just combined and ensure all ingredients are at room temperature before beginning the recipe. Additionally, make sure you’re using the correct measurements of self-raising flour and baking powder to ensure the right rise!

Are there any dietary considerations for these cupcakes?
The Spiced Orange Drizzle Cupcakes can accommodate various dietary needs! You can easily make them dairy-free by substituting unsalted butter with margarine or vegan butter and using vegan cream cheese for the frosting. Gluten-free flour can replace the self-raising flour for those with gluten sensitivities. Always double-check ingredient labels for allergens and modifications.

Can I make variations of the cream cheese frosting?
Absolutely! Feel free to play around with your frosting flavors. You can add melted chocolate, espresso powder, or even citrus zest to your cream cheese frosting for a fun twist. For a lighter option, consider using a simple orange glaze instead of the frosting!

Spiced Orange Drizzle Cupcakes

Spiced Orange Drizzle Cupcakes That Brighten Your Day

Delight in these moist Spiced Orange Drizzle Cupcakes topped with creamy frosting for your next gathering.
Prep Time 20 minutes
Cook Time 20 minutes
Cooling Time 15 minutes
Total Time 55 minutes
Servings: 12 cupcakes
Course: Dessert
Cuisine: Baking
Calories: 250

Ingredients
  

For the Cupcakes
  • 175 g Unsalted Butter Provides moisture and richness; substitute with margarine for a dairy-free option.
  • 175 g Golden Caster Sugar Adds sweetness and helps create a tender crumb; regular granulated sugar can be used.
  • 175 g Self Raising Flour Provides the necessary rise; a gluten-free flour blend could be substituted for a gluten-free version.
  • 1 tsp Ground Cinnamon Adds warm spice notes; can be substituted with nutmeg for a different flavor profile.
  • 1/4 tsp Ground Ginger Enhances the spice complexity; omit if preferred.
  • 1/4 tsp Ground Nutmeg Deepens the spiced flavor; can be replaced with allspice for variation.
  • 1 tsp Baking Powder Ensures proper leavening; not needed if using self-raising flour.
  • 2 large Eggs Provides structure and moisture; flax eggs can be an alternative for vegan versions.
  • 1 zest Large Orange Infuses the cake with refreshing citrus notes; ensure it’s finely grated.
  • 1/3 cup Milk Adds moisture to the batter; use plant-based milk for a dairy-free option.
  • 1 tsp Vanilla Enhances flavor complexity; can substitute with almond extract for a different flavor.
For the Drizzle
  • 1 juice Large Orange Acts as the moisture infusion for the drizzle.
  • Sugar Balances the tartness of the orange juice; adjust according to sweetness preference.
For the Frosting
  • 225 g Cream Cheese Delivers a creamy texture to the frosting; use vegan cream cheese for a dairy-free option.
  • 75 g Unsalted Butter Adds richness to the frosting; substitute with vegan butter if needed.
  • 2 cups Powdered Sugar Provides sweetness and stabilizes the frosting; adjust quantity based on desired sweetness.
  • 1/2 tsp Vanilla Extract Enhances flavor; use either vanilla extract or seeds from a vanilla pod based on availability.

Equipment

  • Cupcake Tray
  • Mixing bowls
  • Electric mixer
  • Piping Bag

Method
 

Step‑by‑Step Instructions
  1. Preheat your oven to 350°F (175°C). Line a cupcake tray with cupcake liners.
  2. Cream together 175g of unsalted butter and 175g of golden caster sugar until light and fluffy.
  3. Add 2 large eggs, the zest of 1 large orange, and 1 tsp of vanilla extract to the mixture and combine.
  4. Whisk together 175g of self-raising flour, 1 tsp of baking powder, 1 tsp of ground cinnamon, 1/4 tsp of ground ginger, and 1/4 tsp of ground nutmeg in a separate bowl.
  5. Gradually add the dry mixture to the wet mixture, alternating with 1/3 cup of milk, mixing until just combined.
  6. Spoon the batter into the prepared cupcake liners, filling each about two-thirds full.
  7. Place the cupcake tray in the oven and bake for 18 to 20 minutes or until a toothpick comes out clean.
  8. Combine the juice from 1 large orange with sugar to taste in a bowl for the drizzle.
  9. Poke small holes in the cooled cupcakes and drizzle the orange syrup over them.
  10. Beat together 225g of cream cheese, 75g of unsalted butter, 2 cups of powdered sugar, and 1/2 tsp of vanilla extract until smooth.
  11. Pipe the cream cheese frosting onto the cupcakes once the drizzle has set.
  12. Serve your cupcakes on a platter and enjoy!

Nutrition

Serving: 1cupcakeCalories: 250kcalCarbohydrates: 35gProtein: 3gFat: 12gSaturated Fat: 7gPolyunsaturated Fat: 1gMonounsaturated Fat: 3gCholesterol: 40mgSodium: 150mgPotassium: 100mgFiber: 1gSugar: 20gVitamin A: 300IUVitamin C: 5mgCalcium: 20mgIron: 1mg

Notes

Ensure ingredients are at room temperature for better emulsion. Avoid overmixing to keep a light texture. Allow cupcakes to cool completely before frosting.

Tried this recipe?

Let us know how it was!

Irresistibly Creamy Best Scalloped Sweet Potatoes for Holidays

Have you ever stumbled upon a dish that instantly transforms your holiday table into a feast for the eyes? Buttery scalloped sweet potatoes take center stage in my kitchen during Thanksgiving and Christmas, and for good reason! This sweet potato recipe combines thin medallions of creamy sweet potatoes with a rich brown sugar sauce that’s perfectly spiced with cinnamon, nutmeg, and cloves. Topped with toasted mini marshmallows and crunchy pecans, it’s a showstopper that strikes a beautiful balance between sweetness and savory goodness. Not only does it come together quickly, but it also stands out as a crowd-pleasing side that will surely delight your guests. Curious how to make this stunning dish? Let’s dive in!

Why Choose Scalloped Sweet Potatoes?

Unforgettable Flavor: The combination of buttery sweet potatoes and a rich brown sugar sauce infused with warm spices creates a taste sensation that will have your guests asking for seconds.

Visually Stunning: Topped with toasted mini marshmallows and crunchy pecans, this dish adds both color and texture to your holiday table, making it an eye-catching centerpiece.

Quick & Easy: With simple ingredients and straightforward instructions, you can whip this up in no time—ideal for busy holiday cooking!

Versatile Side: Perfectly complements a variety of main dishes, from spiral ham to roasted turkey, making it a must-have for any festive occasion.

This recipe is sure to elevate your holiday meals, so if you love delightful side dishes, you might also enjoy our Sweet Chili Chicken or the Comfort Garlic Potatoes.

Best Scalloped Sweet Potatoes Ingredients

• Dive into the delightful flavors of these scalloped sweet potatoes!

For the Sweet Potatoes

  • Medium-Sized Sweet Potatoes – Peel and slice into thin medallions for the perfect texture and sweetness.
  • Unsalted Butter – This rich ingredient creates the luscious sauce base. If needed, use salted butter and skip the extra salt.
  • Brown Sugar – Adds sweetness and depth; you can swap light or dark brown sugar as you desire.
  • Water – Essential for dissolving and blending the sauce ingredients smoothly.

For the Spice Blend

  • Ground Cinnamon – This warm spice enhances the sweetness of the sweet potatoes beautifully.
  • Ground Cloves – Offers a cozy flavor that complements the dish’s main ingredients.
  • Ground Nutmeg – Adds a nutty, slightly sweet note that rounds out the spice profile.
  • Salt – A pinch balances the sweetness and elevates the overall taste.

For the Topping

  • Chopped Pecans – Provides nuttiness and a delightful crunch. If you prefer, walnuts can be used instead.
  • Mini Marshmallows – Sweeten the dish and add a chewy, gooey finish when toasted.

This recipe for best scalloped sweet potatoes is sure to impress at your holiday gathering!

Step‑by‑Step Instructions for Best Scalloped Sweet Potatoes

Step 1: Preheat the Oven
Begin by preheating your oven to 400°F (200°C). This ensures that once your buttery scalloped sweet potatoes are ready to bake, they will enter a perfectly heated environment for even cooking. While the oven warms up, gather your ingredients and prep your baking dish for a smooth cooking process.

Step 2: Prepare the Sweet Potatoes
Peel and carefully slice medium-sized sweet potatoes into thin medallions, aiming for a uniform thickness of about 1/8 inch. This ensures they cook evenly and meld beautifully with the rich sauce. Once sliced, layer the medallions in a pie dish, creating an artful arrangement that showcases their lovely colors and textures.

Step 3: Make the Sauce
In a small saucepan, combine 1/2 cup of unsalted butter, 3/4 cup of brown sugar, and 1/4 cup of water. Add in 1/2 teaspoon of ground cinnamon, 1/4 teaspoon of ground cloves, 1/4 teaspoon of ground nutmeg, and a pinch of salt. Heat the mixture over medium heat, stirring gently until the butter melts and the ingredients blend into a smooth, glossy sauce.

Step 4: Coat the Sweet Potatoes
Brush approximately 3/4 of the melted sauce over the sliced sweet potatoes in the pie dish. Ensure each medallion is well-coated to absorb the rich flavors. Cover the dish tightly with aluminum foil, which will trap steam and promote tender, perfectly cooked scalloped sweet potatoes. Place it in the preheated oven and bake for 45-50 minutes, or until the sweet potatoes are fork-tender.

Step 5: Add the Toppings
After baking, carefully remove the foil from the dish and drizzle the reserved sauce over the sweet potatoes. Sprinkle the chopped pecans and mini marshmallows evenly on top, creating an inviting contrast in both flavor and texture. This step gives the dish a beautiful finishing touch while adding a delightful crunch.

Step 6: Broil for a Perfect Finish
Switch the oven setting to broil and return the scalloped sweet potatoes to the oven. Broil for 1-2 minutes, monitoring closely until the mini marshmallows turn golden brown and slightly toasted. This step enhances their sweetness and adds that appealing, gooey texture that pairs so well with the sweet potatoes.

Step 7: Let Cool Before Serving
Once toasted to perfection, remove the dish from the oven and allow the scalloped sweet potatoes to cool for 10-15 minutes. This cooling period helps the flavors settle and the dish to firm up slightly, making it easier to serve. Enjoy serving this stunning side dish as a highlight of your holiday feast!

What to Serve with Buttery Scalloped Sweet Potatoes with Marshmallows and Pecans

Buttery scalloped sweet potatoes create a beautifully balanced meal when paired with complementary sides and delightful beverages.

  • Spiral Ham: This savory and smoky centerpiece adds a meaty contrast, enhancing the natural sweetness of the scalloped potatoes.
  • Roasted Turkey: A classic holiday pairing, tender turkey drizzled with rich gravy beautifully offsets the creamy sweet potatoes.
  • Green Beans Almondine: Crisp-tender green beans tossed with butter and almonds introduce freshness and a satisfying crunch to your plate.
  • Cranberry Sauce: The tartness of homemade cranberry sauce brightens the meal and offers a refreshing contrast to the dish’s sweetness.

A light and zesty salad, such as a mixed greens salad with a citrus vinaigrette, can also create a nice balance, introducing a burst of freshness to each bite.

  • Apple Cider: Serve chilled or warm with spices; this refreshing drink complements the flavors of the sweet potatoes beautifully.
  • Pumpkin Pie: End your holiday meal on a sweet note with this classic dessert, echoing the seasonal flavors found in your scalloped sweet potatoes.

Best Scalloped Sweet Potatoes Variations

Feel free to mix things up with these exciting twists to your scalloped sweet potatoes!

  • Lighter Version: Reducing the brown sugar or using a natural sweetener can keep the dish delicious without the guilt. Your holiday guests will appreciate a healthier option without sacrificing flavor!

  • Spicy Kick: Add a pinch of cayenne pepper to the sauce for a surprising heat that perfectly complements the sweetness of the potatoes. It’s a creative way to add dimension to your dish!

  • Whipped Cream Delight: Swap mini marshmallows for crème fraîche or whipped cream for a unique creamy finish. This change will yield a luscious texture that’s simply irresistible.

  • Herb Infusion: Incorporate fresh herbs like thyme or rosemary into the sauce for a fragrant twist. This adds an aromatic layer that transforms your sweet potato dish into something extraordinary.

  • Creamy Touch: Mix in a splash of heavy cream or a dollop of sour cream to the sauce for a richer, creamier base. This custardy twist results in a decadent experience for your taste buds.

  • Nutty Variations: If pecans aren’t your favorite, substitute with walnuts or even slivered almonds for a different nutty flavor and texture. Each option brings its unique character to your scalloped potatoes.

  • Flavor Adventure: Infuse the brown sugar mixture with orange or maple syrup for an exciting boost! This slight shift elevates the overall taste profile, weaving sweet citrus or deep caramel notes into the dish.

Don’t forget, while you’re at it, to explore our Sweet Escape Charm for a breakfast treat or try the Parmesan Chicken Potatoes for another comforting side!

Make Ahead Options

These Irresistibly Creamy Best Scalloped Sweet Potatoes are perfect for meal prep enthusiasts! You can slice the sweet potatoes and soak them in water up to 24 hours in advance to prevent browning. Prepare the buttery brown sugar sauce and store it in the refrigerator for up to 3 days. When you’re ready to cook, simply layer the soaked sweet potato medallions in the dish, brush with the sauce, cover with foil, and bake as directed. This method ensures that your dish is just as delicious with fresh flavors while saving you precious time during busy holiday cooking. Enjoy stress-free holiday meals without sacrificing taste!

Expert Tips for Best Scalloped Sweet Potatoes

  • Even Slices: Using a mandoline slicer ensures uniform thickness of sweet potato medallions, leading to even cooking and better texture.

  • Prevent Browning: If you’re prepping in advance, soak the sweet potato slices in water to stop them from browning before baking.

  • Watch the Broil: Keep a close eye on the mini marshmallows while broiling; they can go from golden to burnt in seconds!

  • Taste Adjustments: Feel free to reduce the brown sugar for a lighter version, or swap in a natural sweetener to suit your preferences.

  • Nut Variations: If you’re out of pecans, walnuts make a delicious alternative that still delivers delightful crunch in the best scalloped sweet potatoes.

How to Store and Freeze Best Scalloped Sweet Potatoes

Fridge: Leftover scalloped sweet potatoes can be stored in an airtight container in the refrigerator for up to 3-5 days. Ensure they are cooled to room temperature before sealing.

Freezer: For longer storage, freeze the scalloped sweet potatoes in a freezer-safe container or bag, separating layers with parchment paper. They will retain good quality for up to 2 months.

Reheating: To reheat, thaw overnight in the refrigerator if frozen, then warm in the oven at 350°F until heated through. Microwaving is also an option for quick reheating, but the oven helps maintain that lovely texture.

Avoid Overcrowding: When reheating, make sure to avoid crowding the dish. This will ensure even heating and preserve the delightful texture of your best scalloped sweet potatoes.

Best Scalloped Sweet Potatoes Recipe FAQs

How do I choose ripe sweet potatoes?
Absolutely! Look for sweet potatoes that are firm, smooth, and free of dark spots or soft spots. Those with rough skin or any signs of sprouting or blemishes should be avoided. Medium-sized sweet potatoes are ideal for this recipe, as they ensure even cooking when sliced.

What’s the best way to store leftover scalloped sweet potatoes?
Very! Leftovers can be stored in an airtight container in the refrigerator for up to 3-5 days. It’s best to cool the dish to room temperature before sealing. Reheat in the microwave for best results, or warm in the oven at 350°F for a more gentle reheating method.

Can I freeze scalloped sweet potatoes?
Absolutely! To freeze your scalloped sweet potatoes, allow them to cool completely. Then, transfer them to a freezer-safe container or bag, separating layers with parchment paper. They will stay fresh for up to 2 months. When ready to eat, thaw in the refrigerator overnight and then reheat as directed.

What should I do if my sweet potatoes seem mushy after baking?
That’s a common concern! If your sweet potatoes have become mushy, they might have been overcooked. Next time, check for fork-tenderness around the 45-minute mark, since cooking times can vary based on thickness. If they are too soft, avoid covering the dish too tightly with foil to allow some steam escape.

Are scalloped sweet potatoes safe for pets?
While sweet potatoes are generally safe for dogs and other pets, it’s best to avoid the added butter and sugar. Always consult with your vet regarding your pets’ dietary needs before introducing any new foods. For a pet-friendly treat, you can offer them plain cooked sweet potato in moderation!

Best Scalloped Sweet Potatoes

Irresistibly Creamy Best Scalloped Sweet Potatoes for Holidays

Experience the best scalloped sweet potatoes with buttery layers and rich spices, perfect for holiday feasts.
Prep Time 20 minutes
Cook Time 50 minutes
Cooling Time 15 minutes
Total Time 1 hour 25 minutes
Servings: 8 servings
Course: Casserole
Cuisine: American
Calories: 280

Ingredients
  

For the Sweet Potatoes
  • 4 medium Sweet Potatoes Peeled and sliced into thin medallions
  • 1/2 cup Unsalted Butter Can substitute with salted butter
  • 3/4 cup Brown Sugar Light or dark as desired
  • 1/4 cup Water
For the Spice Blend
  • 1/2 teaspoon Ground Cinnamon
  • 1/4 teaspoon Ground Cloves
  • 1/4 teaspoon Ground Nutmeg
  • 1 pinch Salt
For the Topping
  • 1/2 cup Chopped Pecans Can substitute with walnuts
  • 2 cups Mini Marshmallows

Equipment

  • Pie dish
  • Saucepan
  • Mandoline slicer

Method
 

Directions
  1. Preheat your oven to 400°F (200°C). Gather your ingredients and prep your baking dish.
  2. Peel and slice the sweet potatoes into thin medallions, then layer them in a pie dish.
  3. In a saucepan, combine the butter, brown sugar, water, cinnamon, cloves, nutmeg, and salt. Heat until the butter melts.
  4. Brush 3/4 of the melted sauce over the sweet potatoes and cover with aluminum foil. Bake for 45-50 minutes.
  5. After baking, drizzle reserved sauce over sweet potatoes and sprinkle with pecans and mini marshmallows.
  6. Switch to broil and broil for 1-2 minutes until mini marshmallows turn golden brown.
  7. Allow the dish to cool for 10-15 minutes before serving.

Nutrition

Serving: 1servingCalories: 280kcalCarbohydrates: 45gProtein: 3gFat: 12gSaturated Fat: 7gPolyunsaturated Fat: 2gMonounsaturated Fat: 3gCholesterol: 30mgSodium: 200mgPotassium: 450mgFiber: 5gSugar: 20gVitamin A: 15000IUVitamin C: 20mgCalcium: 40mgIron: 1mg

Notes

Ensure even thickness of sweet potato slices for optimal cooking. Store leftovers in an airtight container for up to 3-5 days in the fridge.

Tried this recipe?

Let us know how it was!

Homemade Vegan Sausage Cheese Balls That Everyone Will Love

As I rummaged through my pantry one afternoon, a delightful recipe idea sparked: Homemade Vegan Sausage Cheese Balls. With vibrant flavors and a tender, cheesy texture, these delightful bites are not just delicious but also easy to whip up for any gathering. This crowd-pleaser is perfect for anyone craving a guilt-free snack that fits seamlessly into a vegan or plant-based lifestyle. Their crispy exterior and savory filling make them a standout appetizer, ensuring that you’ll keep people coming back for more. Plus, they’re quick to prepare, helping you enjoy more time with loved ones and less time fussing over the stove. Are you ready to discover how simple and satisfying these vegan bites can truly be?

Why are these vegan bites a must-try?

Irresistible Flavor: Each bite bursts with a savory combo of spices that dance on your palate, making them a hit at any gathering.

Ease of Preparation: You’ll love how simple it is to whip up these Homemade Vegan Sausage Cheese Balls, letting you spend more time enjoying them with friends!

Crowd-Pleasing Appeal: Even non-vegans will rave about these delicious morsels, making them the perfect party appetizer.

Versatile Pairing Options: Serve them with your favorite dips like marinara or spicy sriracha mayo, or enjoy them on their own for a delightful snack.

Make-Ahead Friendly: Prepare a batch ahead of time and freeze them for a quick go-to snack that satisfies your cravings!

Homemade Vegan Sausage Cheese Balls Ingredients

For the Batter

  • Plain Flour – A base ingredient for binding and forming the cheese balls.
  • Baking Powder – A leavening agent that provides a light texture during baking.
  • Salt – An essential flavor enhancer that brings out the savory notes.
  • Smoked Paprika – Adds a smoky depth and vibrant color for a delicious kick.
  • Garlic Powder – Infuses with rich, aromatic flavor that elevates every bite.
  • Ground Black Pepper – Offers a mild heat that complements the other spices.
  • Plant-Based Ground Sausage (e.g., Lightlife Gimme Lean) – The main protein source that gives these cheese balls a savory flavor and texture.
  • Dairy-Free Cheddar Shreds (e.g., Follow Your Heart or Violife) – Essential for achieving that cheesy taste without dairy.
  • Non-Dairy Milk – Starts with 1/2 cup for moisture; adjust as needed for the right dough consistency.

These Homemade Vegan Sausage Cheese Balls are not only scrumptious but also packed with plant-based goodness!

Step‑by‑Step Instructions for Homemade Vegan Sausage Cheese Balls

Step 1: Preheat the Oven
Begin by preheating your oven to 375°F (190°C). This ensures that the oven is at the perfect temperature for baking the Homemade Vegan Sausage Cheese Balls, allowing them to develop that desirable crispy exterior while remaining tender inside. While the oven heats, prepare your ingredients to streamline the process.

Step 2: Combine Dry Ingredients
In a large mixing bowl, whisk together the plain flour, baking powder, salt, smoked paprika, garlic powder, and ground black pepper. Stir thoroughly for about 1-2 minutes until all dry ingredients are well integrated. This step is crucial, as it ensures the flavors are evenly distributed, creating a delightful taste in each bite of your vegan sausage cheese balls.

Step 3: Add Wet Ingredients and Sausage
Next, incorporate the plant-based ground sausage and dairy-free cheese shreds into the dry mixture. Pour in 1/2 cup of non-dairy milk to start. Using your hands, mix everything together gently yet thoroughly, breaking up the sausage as you go. If the mixture feels too dry, don’t hesitate to add a splash more non-dairy milk to achieve a slightly sticky dough that’s easy to work with.

Step 4: Form the Cheese Balls
Once your mixture is well combined, dampen your hands slightly to prevent sticking. Scoop out portions and roll them into 1½-inch balls, ensuring they are compact but not overly squeezed. This method will help create a consistent size and texture in your Homemade Vegan Sausage Cheese Balls, making them cook evenly and look appealing.

Step 5: Arrange on Baking Sheet
Line a baking sheet with parchment paper to prevent sticking. Carefully place your rolled cheese balls on the sheet, making sure to space them apart to allow for even baking. Aim for about 2 inches between each ball, which will help them crisp up nicely in the oven without merging together.

Step 6: Bake to Perfection
Place the baking sheet with your Homemade Vegan Sausage Cheese Balls in the preheated oven. Bake for 20-23 minutes, or until they are golden brown and firm to the touch. Keep an eye on them as they bake; you want that beautiful crispy exterior while ensuring they remain fluffy on the inside.

Step 7: Cool Before Serving
Once baked, remove the cheese balls from the oven and let them cool on the baking sheet for about 5 minutes. This cooling period allows them to set further and makes them easier to handle. After cooling slightly, they’re ready to serve warm, perfect for any gathering or as a delightful snack.

What to Serve with Homemade Vegan Sausage Cheese Balls

Delight guests with a beautifully balanced meal that complements these savory, cheesy bites and enhances your gathering experience.

  • Creamy Vegan Ranch: This tangy dip elevates the cheese balls’ flavors, adding a refreshing touch that contrasts beautifully with the crispy texture.

  • Marinara Sauce: A classic pairing, its rich tomato flavor offers a vibrant contrast, making each bite more delightful while bringing out the savory notes.

  • Spicy Sriracha Mayo: A bold sauce with a kick! This creamy, spicy combination adds excitement and pairs perfectly for those craving a bit of heat.

  • Fresh Veggie Platter: Crunchy veggies like carrots and cucumbers provide a refreshing contrast to the warm, cheesy bites, balancing the meal with a crisp, refreshing texture.

  • Quinoa Salad: The nutty flavor and chewy texture of quinoa, mixed with bright herbs, create a wholesome side that complements the savory bites beautifully.

  • Crisp Green Salad: A light salad with a zesty vinaigrette can balance the richness of the cheese balls, providing a fresh and satisfying counterpoint.

  • Herbed Garlic Bread: This warm, crispy bread enhances the overall experience, allowing guests to enjoy a delightful bite amidst the savory sausage balls.

  • Chilled Sparkling Water: To cleanse the palate, a refreshing drink offers a bubbly contrast that keeps the meal light and enjoyable without overpowering the flavors.

How to Store and Freeze Homemade Vegan Sausage Cheese Balls

Fridge: Store the Homemade Vegan Sausage Cheese Balls in an airtight container for up to 5 days. This keeps them fresh and ready for quick snacking!

Freezer: For longer storage, freeze the cheese balls in a single layer on a baking sheet before transferring them to a freezer-safe bag. They can be stored for up to 3 months.

Reheating: To enjoy the cheese balls again, reheat them in the oven at 350°F (175°C) for about 10-15 minutes until they regain their crispy texture. Avoid microwaving to prevent sogginess!

Thawing: If frozen, thaw the Homemade Vegan Sausage Cheese Balls in the fridge overnight before reheating for the best results.

Make Ahead Options

These Homemade Vegan Sausage Cheese Balls are perfect for meal prep, saving you valuable time on busy weeknights! You can prepare the mixture and form the balls up to 24 hours in advance. Simply roll them into balls, then place them on a lined baking sheet and refrigerate until you’re ready to bake. Alternatively, you can freeze the formed balls for up to 3 months. To maintain their crispy texture, freeze them in a single layer before transferring them to a sealed container. When you feel like enjoying these delights, bake directly from frozen at 375°F (190°C) for about 25-30 minutes until golden brown. Enjoy hassle-free, delicious appetizers with minimal effort!

Expert Tips for Homemade Vegan Sausage Cheese Balls

Moisture Control: Start with only 1/2 cup of non-dairy milk to avoid excess moisture. Gradually add more if needed to achieve the right dough consistency.

Room Temperature Ingredients: Allow the plant-based sausage to reach room temperature before mixing. This helps blend it seamlessly with the dry ingredients for better flavor integration.

Chill Before Baking: For a more defined shape, chill the formed balls in the refrigerator for 15-20 minutes before baking to prevent spreading.

Compact Rolling: Pack the mixture firmly yet gently while rolling to avoid crumbling. This ensures the Homemade Vegan Sausage Cheese Balls hold their shape while baking.

Even Spacing: When placing the cheese balls on the baking sheet, ensure they are spaced adequately to allow for even cooking and crispy edges.

Homemade Vegan Sausage Cheese Balls Variations

Feel free to personalize your vegan sausage cheese balls with these delightful twists that’ll bring new flavors and surprises to your table!

  • Herby Boost: Add a couple of tablespoons of finely chopped fresh herbs like parsley or chives for a burst of freshness. The added aroma will elevate your bites even further, making each one a mini garden of flavor!

  • Zesty Kick: Incorporate a dash of crushed red pepper flakes or cayenne pepper into the mixture for added heat. This fiery twist awakens the taste buds, ensuring a lively experience with every mouthful.

  • Smoky Touch: Swap regular smoked paprika for chipotle powder to give your cheese balls an intense smoky flavor. It’s a beautiful way to deepen the flavor profile and impress guests who enjoy a bolder taste.

  • Flavor Variation: Try different brands or varieties of plant-based sausage to discover new flavor combinations. With so many options available, you may stumble onto a version that quickly becomes your all-time favorite!

  • Cheese Variety: Experiment with various types of dairy-free cheese to give your cheese balls a unique twist. From a spicy pepper jack to a rich mozzarella, the flavor possibilities are endless!

  • Nutty Addition: Mix in some ground flaxseed or nutritional yeast for an added depth of flavor and a nutritional boost. Not only do they enhance the taste, but they also add a touch of heartiness that folks will crave.

  • Sweet Surprise: For a contrast to the savory taste, fold in a tablespoon of maple syrup right into the mixture. This subtle hint of sweetness balances the flavors and may just be the secret ingredient that leaves everyone guessing!

Embrace the creativity in your kitchen, and don’t forget to check out other delicious recipes like Parmesan Italian Sausage or Heartwarming Comfort Sausage to further delight your palate.

Homemade Vegan Sausage Cheese Balls Recipe FAQs

How can I tell if the ingredients are ripe or fresh?
For the best flavor, choose plant-based sausage that’s fresh, with no off smells or dark spots on the packaging. The dairy-free cheese should be creamy and easy to shred, not hard or dried out. Pay attention to the expiry dates on all packaged ingredients, and trust your instincts—if it doesn’t look or smell right, it might be best to pass!

What’s the best way to store leftover cheese balls?
Absolutely! Store the Homemade Vegan Sausage Cheese Balls in an airtight container in the fridge for up to 5 days. Just make sure they’re completely cool before sealing to avoid condensation, which can make them soggy. This way, you’ll have a delicious snack ready whenever you need a quick bite.

How do I freeze the cheese balls for later use?
Very simple! Start by rolling the cheese balls as per the directions. Place them in a single layer on a baking sheet and freeze for about 1-2 hours until firm. Once frozen, transfer them to a freezer-safe bag or container. They can be stored for up to 3 months. When you’re ready to enjoy, there’s no need to thaw—just bake from frozen, adding a few extra minutes to the baking time!

What if my cheese balls spread out during baking?
If you notice your Homemade Vegan Sausage Cheese Balls spreading, don’t worry! This usually happens due to excess moisture in the dough. To avoid this, chill the formed balls in the refrigerator for 15-20 minutes before baking. This step will help them firm up and hold their shape during the baking process.

Can these cheese balls accommodate special dietary needs?
Of course! These Homemade Vegan Sausage Cheese Balls are naturally dairy-free and have no animal products, making them suitable for vegans. If you have nut allergies, ensure that your non-dairy milk is nut-free—soy or oat milk are great alternatives. Additionally, always check ingredient labels for any hidden allergens to keep everyone safe.

How can I customize the flavors?
Absolutely! You can jazz up your cheese balls by experimenting with different brands of plant-based sausages for varied flavors. Adding chopped herbs like parsley or dill, or incorporating other spices like cayenne pepper for some heat, will allow you to create a unique flavor profile that’s perfect for your tastebuds!

Homemade Vegan Sausage Cheese Balls

Homemade Vegan Sausage Cheese Balls That Everyone Will Love

Homemade Vegan Sausage Cheese Balls are a delicious, guilt-free snack perfect for any gathering.
Prep Time 15 minutes
Cook Time 23 minutes
Cooling Time 5 minutes
Total Time 43 minutes
Servings: 6 balls
Course: Appetizers
Cuisine: Vegan
Calories: 120

Ingredients
  

For the Batter
  • 2 cups Plain Flour
  • 1 tbsp Baking Powder
  • 1 tsp Salt
  • 1 tsp Smoked Paprika
  • 1 tsp Garlic Powder
  • 1 tsp Ground Black Pepper
  • 1 3/4 Plant-Based Ground Sausage (e.g., Lightlife Gimme Lean)
  • 1 cup Dairy-Free Cheddar Shreds (e.g., Follow Your Heart or Violife)
  • 1/2 cup Non-Dairy Milk Adjust as needed for right dough consistency

Equipment

  • Mixing Bowl
  • Baking Sheet
  • Parchment Paper

Method
 

Step-by-Step Instructions
  1. Preheat the oven to 375°F (190°C).
  2. In a large mixing bowl, whisk together the plain flour, baking powder, salt, smoked paprika, garlic powder, and ground black pepper.
  3. Incorporate the plant-based ground sausage and dairy-free cheese shreds, then pour in 1/2 cup of non-dairy milk to start and mix gently.
  4. Dampen your hands and roll the mixture into 1½-inch balls.
  5. Line a baking sheet with parchment paper and place the cheese balls on it, spaced 2 inches apart.
  6. Bake for 20-23 minutes until golden brown and firm to the touch.
  7. Let cool on the baking sheet for about 5 minutes before serving.

Nutrition

Serving: 1ballCalories: 120kcalCarbohydrates: 15gProtein: 3gFat: 6gSaturated Fat: 1gPolyunsaturated Fat: 0.5gMonounsaturated Fat: 3gSodium: 200mgPotassium: 150mgFiber: 2gSugar: 1gCalcium: 5mgIron: 5mg

Notes

Store in an airtight container for up to 5 days, or freeze for up to 3 months. Reheat in the oven at 350°F (175°C) for 10-15 minutes.

Tried this recipe?

Let us know how it was!

Spicy Jalapeño Popper Soup with Grilled Cheese Dippers Bliss

A whiff of spicy, cheesy goodness wafts through the air as I stir a bubbling pot of my Spicy Jalapeño Popper Soup with Grilled Cheese Dippers. There’s something magical about blending the creamy warmth of classic jalapeño poppers into a comforting soup format, perfect for those chilly evenings or unexpected gatherings. This recipe is not just a taste sensation—it’s a stellar crowd-pleaser that’s both quick to prepare and customizable to suit any palate, especially with options for spice and dietary preferences. Plus, who could resist pairing a luscious soup with crispy grilled cheese dippers? Trust me, this cozy dish is bound to become your new go-to. Ready to take your taste buds on a delightful adventure? Let’s dive into the recipe!

Why is this soup so amazing?

Customizable: The beauty of this Spicy Jalapeño Popper Soup lies in its versatility; you can easily adjust the spice level or switch to a vegetarian version.
Creamy Bliss: A rich blend of cheeses and cream creates a luscious texture that’s simply irresistible, perfect for any cheese lover!
Quick and Easy: This warm and comforting dish can be prepared in no time, making dinner a breeze or a fantastic last-minute party treat.
Crowd-Pleasing: Serve it to friends and family, and watch how everyone eagerly digs into their bowls and enjoys the crunchy grilled cheese dippers! Pair it with Cheeseburger Soup Comforting for a delightful meal combo.
Meal Prep Friendly: Make it ahead of time, and refrigerate for easy reheating—perfect for busy weekdays! Don’t forget to check out my Honeybun Carrot Cake with Cheesecake Filling for a sweet finish to your meal.

Spicy Jalapeño Popper Soup Ingredients

• Prepare to spice up your cooking with these must-have ingredients!

For the Soup

  • Butter – Adds richness and flavor; can substitute with olive oil for a lighter option.
  • Onion (1 medium, diced) – Provides flavor and sweetness; substitute shallots for a milder taste.
  • Garlic (4 cloves, minced) – Adds aromatic depth; use garlic powder in a pinch if needed.
  • Chicken Broth (4 cups) – Forms the soup’s delicious base; use vegetable broth for a vegetarian version.
  • Milk/Heavy Cream (2 cups) – Brings creaminess to the dish; dairy-free alternatives like coconut milk work well too.
  • Cream Cheese (8 oz, softened) – Contributes to the creamy texture; can substitute with additional shredded cheese for extra cheesiness.
  • Shredded Cheddar Cheese (1 cup) – Adds classic cheesy flavor; a sharper cheddar enhances the taste.
  • Shredded Monterey Jack Cheese (1 cup) – Offers a creamy texture; replace with Pepper Jack for more spice if desired.
  • Jalapeños (4-5, chopped, seeds removed for mild heat) – Provides the signature heat and flavor; add more jalapeños or hot sauce for extra spiciness.
  • Cooked Chicken (1/2 cup, diced) – Adds protein; omit entirely for a vegetarian option.
  • Salt and Pepper – Enhances flavor; adjust to your liking.

For the Dippers

  • Bread (4 slices, for dippers) – Forms the delightful grilled cheese dippers; choose any type like whole wheat or sourdough for more flavor.
  • Additional Butter (4 tablespoons, softened for grilling) – Ensures crispy grilled cheese; margarine can be used as a substitute.

Optional Garnishes

  • Fresh cilantro or green onions – Adds a fresh finish to your soup; perfect for a pop of color and flavor.

With these ingredients, you’re well on your way to creating an unforgettable Spicy Jalapeño Popper Soup with Grilled Cheese Dippers. Enjoy the cooking adventure!

Step‑by‑Step Instructions for Spicy Jalapeño Popper Soup with Grilled Cheese Dippers

Step 1: Sauté Aromatics
In a large pot over medium heat, melt 2 tablespoons of butter. Add the diced onion and minced garlic, cooking for 3-4 minutes until the onion is translucent and fragrant. This aromatic base creates the heart of your Spicy Jalapeño Popper Soup, adding rich flavors to the dish.

Step 2: Build the Soup Base
Next, pour in 4 cups of chicken broth and 2 cups of milk (or heavy cream) into the pot. Stir to combine, and bring the mixture to a gentle simmer. Allow it to cook for about 5-7 minutes, letting the flavors meld together beautifully as the soup warms up.

Step 3: Add the Cheeses
Gradually add 1 cup each of shredded cheddar and Monterey Jack cheese, stirring continuously until the cheeses are fully melted and the soup is creamy. The cheeses enhance the comforting nature of your Spicy Jalapeño Popper Soup, providing a rich texture and delicious flavor.

Step 4: Incorporate the Heat
Fold in the chopped jalapeños and 1/2 cup of diced cooked chicken (if using), adjusting the seasoning with salt and pepper to your taste. Allow the soup to simmer for an additional 3-5 minutes, ensuring it becomes heated through and coats the back of a spoon with its velvety richness.

Step 5: Prepare the Grilled Cheese Dippers
While the soup is simmering, butter one side of each of the 4 slices of bread with the remaining softened butter. Layer shredded cheese between two slices and place them in a skillet over medium heat, grilling until golden brown, about 3-4 minutes per side. This will create crispy grilled cheese dippers to complement your soup perfectly.

Step 6: Serve and Garnish
Ladle the warm Spicy Jalapeño Popper Soup into bowls, and feel free to garnish with fresh cilantro or green onions for a burst of color and flavor. Serve with the crispy grilled cheese dippers on the side, and dive into the comforting goodness of this delightful meal.

Expert Tips for Spicy Jalapeño Popper Soup

  • Avoid Curdling: When reheating your Spicy Jalapeño Popper Soup, keep it on low heat and stir frequently to prevent curdling of the dairy.
  • Adjust Thickness: If the soup thickens after refrigerating, simply add more milk or broth while reheating to achieve your desired consistency.
  • Spice Control: For a milder soup, be sure to remove the seeds from the jalapeños and start with fewer peppers before gradually adding more.
  • Bread Choice: Choose thicker slices of bread for your grilled cheese dippers for a heartier bite; they’ll hold up better when dipping!
  • Customize Protein: Feel free to add cooked bacon or sausage for an extra layer of flavor if you’re not going vegetarian; otherwise, skip the chicken for a lighter soup.
  • Garnishing Tips: A sprinkle of fresh cilantro or a dollop of sour cream adds a lovely finishing touch that brightens your dish beautifully!

How to Store and Freeze Spicy Jalapeño Popper Soup

Fridge: Refrigerate leftover Spicy Jalapeño Popper Soup in an airtight container for up to 3 days. Keep the dippers separate to maintain their crispiness.

Freezer: For long-term storage, freeze the soup in individual portions using freezer-safe containers for up to 3 months. Thaw overnight in the fridge before reheating.

Reheating: When ready to enjoy, gently reheat the soup on low heat, stirring frequently to avoid curdling, and add a splash of milk or broth if needed to restore the creamy texture.

Dippers Storage: Grilled cheese dippers can be stored separately in an airtight container for up to 2 days; reheat them in a skillet to regain their crunchiness.

Spicy Jalapeño Popper Soup Variations

Feel free to mix it up and craft this dish to your liking with these delicious variations!

  • Vegetarian Option: Substitute chicken broth with vegetable broth and omit the chicken for a delightful meat-free soup.
    A vegetarian twist doesn’t mean sacrificing flavor; you’ll still enjoy that creamy, comforting essence.

  • Cheese Swap: Experiment with different cheese blends such as Gruyère or smoked Gouda for unique flavors.
    Mixing cheeses can elevate your soup and create an indulgent, gourmet experience!

  • Extra Heat: Add additional jalapeños or a splash of your favorite hot sauce for a spicier kick.
    If you’re a heat seeker, you’ll relish the fiery boost that’ll make this soup truly sing!

  • Creamy Dairy-Free: Use coconut milk or cashew cream instead of heavy cream for a rich dairy-free option.
    This version still delivers a creamy texture while keeping it compliant for those avoiding dairy.

  • Crunchy Toppings: Top your soup with crispy bacon bits or crushed tortilla chips for that perfect crunch.
    The added texture contrasts beautifully with the smooth soup, making every spoonful exciting!

  • Lentils for Protein: Incorporate cooked lentils or beans instead of chicken to boost protein and fiber.
    This heart-healthy addition packs a punch, keeping you satisfied while remaining plant-based.

  • Mild Flavor: For milder spice, roast the jalapeños before adding them to the soup to reduce their heat.
    Roasting softens the punch while still allowing the jalapeños to infuse their flavor into the dish.

  • Flavorful Herbs: Stir in fresh cilantro or a hint of lime juice just before serving for extra zest.
    The freshness of herbs elevates the dish, brightening the creamy soup and enhancing its overall appeal.

With these variations in mind, it’s time to swirl your own unique touch into this Spicy Jalapeño Popper Soup. Enjoy every spoonful! And if you’re looking for more comforting dishes, you might fancy pairing it with Tuscan Chicken Soup or indulge in some Honey Banana Grilled Cheese for a sweet twist!

Make Ahead Options

These Spicy Jalapeño Popper Soup with Grilled Cheese Dippers are perfect for busy home cooks looking to save time without sacrificing flavor! You can prepare the soup base (steps 1-4) up to 3 days in advance. Simply refrigerate the cooled soup in an airtight container. For best quality, allow the soup to cool completely before refrigerating to prevent condensation. When ready to serve, reheat gently over low heat, adding a splash of milk or broth if it thickens. The grilled cheese dippers can also be made up to 24 hours ahead; just assemble and refrigerate, grilling them just before serving for that crispy goodness. Enjoy a comforting, hassle-free meal with your family!

What to Serve with Spicy Jalapeño Popper Soup with Grilled Cheese Dippers

As you dip into a bowl of velvety soup, consider these delightful companions to enhance your meal experience.

  • Crispy Garden Salad: A light, refreshing salad adds a crunchy contrast, enhancing the flavors of the soup with fresh greens and tangy vinaigrette.
  • Zesty Cornbread: Sweet and slightly spicy cornbread complements the soup’s heat, offering a satisfying texture and additional flavor profile.
  • Roasted Veggies: Tossed with olive oil and herbs, roasted veggies provide a hearty side that balances the creaminess of the soup with earthy flavors.
  • Avocado Toast: Creamy avocado atop crusty bread brings an added layer of richness, perfect for dipping in the spicy goodness of your soup.
  • Pickled Jalapeños: For those who crave more heat, serving tangy pickled jalapeños on the side can elevate the spice level to your liking.
  • Chilled White Wine: A crisp, chilled Sauvignon Blanc harmonizes beautifully with the peppery notes of jalapeños, making for a refreshing drink pairing.
  • Homemade Tortilla Chips: Crunchy chips are perfect for scooping up the soup or enjoying with sides, adding a fun texture to your meal!
  • Chocolate Chip Cookies: End your delicious experience with soft, warm cookies—a sweet treat that complements the soup’s rich flavors perfectly.
  • Sparkling Water with Lime: Refreshing and bubbly, this drink cleanses the palate, allowing the robust flavors of the soup to shine through after each sip.

Spicy Jalapeño Popper Soup with Grilled Cheese Dippers Recipe FAQs

What kind of jalapeños should I use?
Absolutely go for fresh jalapeños! Look for firm ones that are bright in color, avoiding any with dark spots or wrinkles. If you’re aiming for a milder soup, make sure to remove the seeds and membranes, as these parts hold the most heat.

How long can I store the soup in the fridge?
You can refrigerate your Spicy Jalapeño Popper Soup in an airtight container for up to 3 days. I often prepare a batch ahead of time to enjoy later during busy weekdays!

Can I freeze this soup? If so, how?
Yes, you can freeze your soup! Allow it to cool completely before transferring it into freezer-safe containers. Portioning it can be very handy! It can be frozen for up to 3 months. When you’re ready to enjoy it, simply thaw it overnight in the fridge and reheat gently on the stove, adding a splash of milk or broth if needed.

What can I do if the soup thickens after refrigeration?
If your soup thickens up after being in the fridge, don’t worry! Reheat it over low heat and gradually stir in some milk or broth until you reach your desired consistency. This will help restore its creamy texture.

Are there any dietary considerations I should keep in mind?
Certainly! For a vegetarian version, swap the chicken broth with vegetable broth and omit the chicken. If you have lactose intolerance, consider using coconut milk and dairy-free cream cheese alternatives. Always keep an eye out for personal allergies, particularly with the cheeses.

How should I store the grilled cheese dippers?
For best results, store your grilled cheese dippers in an airtight container for up to 2 days. To recapture that delightful crispiness, reheat them in a skillet over medium heat until they are golden and crunchy again. The more, the merrier when it comes to enjoying delicious dippers with your soup!

Spicy Jalapeño Popper Soup with Grilled Cheese Dippers

Spicy Jalapeño Popper Soup with Grilled Cheese Dippers Bliss

A comforting bowl of Spicy Jalapeño Popper Soup paired with crispy grilled cheese dippers, perfect for chilly evenings and customizable for any palate.
Prep Time 15 minutes
Cook Time 20 minutes
Total Time 35 minutes
Servings: 4 bowls
Course: Dinner
Cuisine: American
Calories: 450

Ingredients
  

Soup Ingredients
  • 2 tablespoons Butter Can substitute with olive oil.
  • 1 medium Onion, diced Substitute shallots for milder taste.
  • 4 cloves Garlic, minced Garlic powder can be used if needed.
  • 4 cups Chicken Broth Use vegetable broth for vegetarian version.
  • 2 cups Milk/Heavy Cream Dairy-free alternatives like coconut milk work.
  • 8 oz Cream Cheese, softened Can substitute with additional shredded cheese.
  • 1 cup Shredded Cheddar Cheese A sharper cheddar enhances taste.
  • 1 cup Shredded Monterey Jack Cheese Replace with Pepper Jack for more spice.
  • 4-5 Jalapeños, chopped Seeds removed for mild heat.
  • 1/2 cup Cooked Chicken, diced Omit for vegetarian option.
  • Salt and Pepper To taste.
Dipper Ingredients
  • 4 slices Bread Choose any type like whole wheat or sourdough.
  • 4 tablespoons Additional Butter, softened For grilling.
Optional Garnishes
  • Fresh cilantro or green onions For garnish.

Equipment

  • Large pot
  • Skillet

Method
 

Soup Instructions
  1. Melt 2 tablespoons of butter in a large pot over medium heat. Add diced onion and minced garlic. Cook for 3-4 minutes until translucent.
  2. Pour in 4 cups of chicken broth and 2 cups of milk. Stir and bring to a gentle simmer. Cook for 5-7 minutes.
  3. Gradually add 1 cup each of shredded cheddar and Monterey Jack cheese, stirring until melted and creamy.
  4. Fold in chopped jalapeños and diced cooked chicken, seasoning with salt and pepper. Simmer for another 3-5 minutes.
  5. For dippers, butter one side of each slice of bread. Layer shredded cheese between two slices and grill in a skillet until golden brown.
  6. Ladle soup into bowls. Garnish with fresh cilantro or green onions and serve with grilled cheese dippers.

Nutrition

Serving: 1bowlCalories: 450kcalCarbohydrates: 30gProtein: 20gFat: 25gSaturated Fat: 15gPolyunsaturated Fat: 2gMonounsaturated Fat: 8gCholesterol: 70mgSodium: 800mgPotassium: 600mgFiber: 3gSugar: 5gVitamin A: 20IUVitamin C: 30mgCalcium: 25mgIron: 10mg

Notes

Store leftovers in an airtight container in the fridge for up to 3 days. For longer storage, freeze in individual portions for up to 3 months.

Tried this recipe?

Let us know how it was!

Vegan Pumpkin Ricotta Stuffed Shells for Cozy Fall Nights

As the leaves change and the air turns crisp, I’ve found myself craving the warm embrace of comfort food, and these Vegan Pumpkin Ricotta Stuffed Shells are right at the top of my list! With a luscious filling that combines creamy tofu ricotta, vibrant pumpkin, and aromatic spices, this dish perfectly captures the essence of fall. Not only are they surprisingly easy to whip up, but they also make for a crowd-pleasing centerpiece at any gathering, turning your holiday table into a feast of flavors. Whether you’re a seasoned chef or just venturing into vegan cooking, these shells promise to impress and satisfy everyone. Curious how to turn simple ingredients into a delightful dish? Let’s dive in!

Why are these shells so irresistible?

Unique Flavor Combination: The interplay between creamy tofu ricotta and rich pumpkin creates a delightfully unique flavor profile that celebrates the season.

Easy to Prepare: Even novice cooks can master this recipe, making it a perfect choice for those new to vegan cooking.

Versatile Serving Options: Pair these shells with a simple salad or crusty bread for a well-rounded meal that pleases every palate.

Impressive Presentation: Their stunning appearance makes these shells a showstopper at any gathering. If you’re looking for more crowd-pleasers, check out my Joumou Haitian Pumpkin or Stuffed Bell Peppers recipes!

Crowd-Pleasing Comfort: These shells combine nostalgic comfort food with healthy ingredients, ensuring every bite is both satisfying and nourishing.

With these reasons in mind, you’ll soon see why this recipe has quickly become a fall favorite!

Vegan Pumpkin Ricotta Stuffed Shells Ingredients

For the Shells
Jumbo Pasta Shells – Ideal for holding the creamy filling; choose your favorite brand.
Olive Oil – Helps prevent sticking and enhances flavor; avocado oil is a great alternative.

For the Filling
Tofu Ricotta – Made with extra firm tofu, nutritional yeast, and spices; cashew ricotta is an excellent soy-free option.
Canned Pumpkin Puree – Delivers that delicious fall flavor and creamy texture; use homemade pumpkin puree if you prefer.
Freshly Grated Nutmeg – Adds a warm, earthy sweetness; ground nutmeg works in a pinch, but fresh is always best.
Vegan Parmesan Cheese – Offers a savory flavor to the filling; leave it out for a nut-free version.

For the Sauce
Fresh Sage Leaves – Brighten up the dish and add an aromatic touch; dried sage can be used if needed.
Onions – Sautéed for a base layer of flavor in the béchamel sauce; yellow or white onions work well.
Garlic – Adds depth of flavor to the sauce; fresh minced garlic is preferred for the best taste.
Flour – Used to thicken the béchamel sauce; any all-purpose flour will do.
Coconut Milk – Provides creaminess to the sauce; for a nut-free alternative, try soy milk.

Make sure to gather everything you need for these Vegan Pumpkin Ricotta Stuffed Shells, and get ready to create a delightful fall dish that will be the star of your table!

Step‑by‑Step Instructions for Vegan Pumpkin Ricotta Stuffed Shells

Step 1: Cook Pasta Shells
Begin by bringing a large pot of salted water to a rolling boil. Carefully add the jumbo pasta shells and cook them for 8-10 minutes until al dente, ensuring they remain firm to the bite. Once cooked, drain the shells in a colander and drizzle them with a little olive oil to keep them from sticking together as they cool.

Step 2: Prepare Tofu Ricotta
In a food processor, combine the drained extra firm tofu, nutritional yeast, garlic powder, onion powder, salt, pepper, olive oil, lemon zest, and juice. Blend these ingredients until they reach a chunky-smooth consistency, making sure the mixture is well combined. This creamy tofu ricotta will serve as the foundation for your Vegan Pumpkin Ricotta Stuffed Shells filling.

Step 3: Make Filling
In a medium mixing bowl, fold together the prepared tofu ricotta with the canned pumpkin puree, freshly grated nutmeg, and vegan parmesan cheese. Mix until all ingredients are evenly incorporated, creating a rich and creamy filling. This flavorful mixture will pack the perfect punch inside each shell, making your dish a delightful and hearty option for any fall gathering.

Step 4: Prepare Garlic Béchamel Sauce
In a saucepan over medium heat, add a drizzle of olive oil and sauté finely chopped onions until they become soft and translucent, about 4-5 minutes. Stir in minced garlic and cook for an additional minute. Gradually whisk in flour, creating a roux, then slowly pour in coconut milk, whisking until the sauce thickens, roughly 6-8 minutes. Season with salt and pepper to taste for extra flavor.

Step 5: Assemble Dish
Preheat your oven to 350°F (175°C). Spread a layer of the garlic béchamel sauce at the bottom of a baking dish. Take each cooked pasta shell and fill it generously with the pumpkin ricotta mixture. Arrange the stuffed shells in the baking dish, pouring any remaining sauce over the top and garnishing with fresh sage leaves for an aromatic touch.

Step 6: Bake
Transfer the assembled dish to the preheated oven and bake for 22-25 minutes, or until the top is bubbly and light golden brown. Keep an eye on the Vegan Pumpkin Ricotta Stuffed Shells as they bake, looking for a deliciously crispy top. Once finished, remove from the oven, allow them to cool slightly, and enjoy the warm, comforting flavors of fall!

Vegan Pumpkin Ricotta Stuffed Shells Variations

Feel free to mix things up and explore your creativity with these shells for a personalized touch!

  • Herb Swap: Substitute thyme for sage to introduce a different, earthy herbal flavor. It complements the pumpkin beautifully, providing a fresh twist.

  • Cheesy Extra Creamy: Blend half ricotta cheese with extra firm tofu in the filling to boost creaminess. This combination enhances richness, making every bite a luscious delight.

  • Green Goodness: Add chopped spinach to the pumpkin ricotta for a pop of color and an extra nutrition boost. The spinach adds a fresh flavor and a vibrant contrast.

  • Spice it Up: Incorporate a dash of cayenne pepper or red pepper flakes for a hint of heat. This will create a delightful interplay between sweet pumpkin and spicy warmth.

  • Nut-Free Option: If you prefer a nut-free dish, simply omit the vegan parmesan cheese from the filling. You won’t miss out on flavor; the pumpkin and spices are just divine!

  • Gourmet Touch: Finish with a drizzle of truffle oil before serving for a touch of luxury that elevates the entire dish. It adds an exquisite aroma that’s sure to impress.

Explore these variations to find your perfect match! And if you’re in the mood for more delightful recipes, don’t forget to check out my delicious Joumou Haitian Pumpkin and Stuffed Bell Peppers!

Expert Tips for Vegan Pumpkin Ricotta Stuffed Shells

  • Al Dente Shells: Cook your pasta shells just until al dente. They’ll soften more during baking, so keeping them slightly firm ensures perfect texture.

  • Use Fresh Nutmeg: Freshly grated nutmeg adds depth to your filling. If you only have ground nutmeg, use it, but know that fresh provides a more vibrant flavor.

  • Prevent Mushiness: Avoid overcooking the shells to prevent them from becoming mushy. A short boil and a drizzle of olive oil will keep them together nicely.

  • Filling Storage: Store any leftover filling and garlic béchamel sauce separately in the refrigerator for up to three days. This way, you can whip up another delicious batch soon!

  • Garnish for Flavor: Don’t skip the fresh sage leaves on top. They not only add an impressive look but also enhance the overall flavor of your Vegan Pumpkin Ricotta Stuffed Shells.

Storage Tips for Vegan Pumpkin Ricotta Stuffed Shells

Fridge: Store leftovers in an airtight container for up to 5 days. This helps maintain the flavors and freshness of the Vegan Pumpkin Ricotta Stuffed Shells.

Freezer: For longer storage, place stuffed shells in a single layer in a freezer-safe container. They can be frozen for up to 2 months. Just make sure to wrap them well to prevent freezer burn.

Reheating: To reheat, place frozen or refrigerated shells in a baking dish, drizzle with extra béchamel sauce, and cover with foil. Bake at 350°F (175°C) for 25-30 minutes, until heated through.

Assembly Tip: If you don’t want to freeze the entire dish, keep extra filling and béchamel sauce separate in the fridge to enjoy with fresh pasta shells later!

Make Ahead Options

These Vegan Pumpkin Ricotta Stuffed Shells are a fantastic meal prep option that can save you valuable time on busy weeknights! You can prepare the tofu ricotta and filling up to 3 days in advance by storing them in an airtight container in the refrigerator. Additionally, assemble the entire dish (without baking) and refrigerate it for up to 24 hours before popping it into the oven. To maintain quality, prevent the pasta from drying out by covering the dish tightly with foil before refrigerating. When you’re ready to enjoy, simply bake straight from the fridge at 350°F (175°C) for 25-30 minutes until heated through and bubbly. Indulge in comforting and flavorsome Vegan Pumpkin Ricotta Stuffed Shells with minimal effort!

What to Serve with Vegan Pumpkin Ricotta Stuffed Shells

Transform your dining experience with these delightful pairings that create a warm, inviting atmosphere perfect for cozy gatherings.

  • Garlic Bread: Crunchy and buttery, garlic bread complements the creamy filling, adding a satisfying texture to each bite.

  • Mixed Green Salad: A vibrant salad with fresh greens and a light vinaigrette provides a refreshing contrast to the richness of the dish. Tossing in some pear slices or walnuts adds a lovely autumnal touch.

  • Roasted Brussels Sprouts: These slightly bitter, caramelized veggies create a beautiful balance with the sweet pumpkin filling, enhancing your meal’s complexity and taste.

  • Buttery Corn on the Cob: Sweet and juicy corn on the cob is a classic side, adding sweetness that pairs perfectly with savory stuffed shells.

  • Chilled White Wine: A crisp white wine like Pinot Grigio elevates the entire meal, highlighting the dish’s flavors while keeping your palate refreshed.

  • Pumpkin Spice Latte: Cap off the meal with a cozy pumpkin spice latte, perfectly complementing the fall flavors and ensuring a delightful finish.

Each of these accompaniments celebrates the essence of autumn and enhances the comfort factor of the Vegan Pumpkin Ricotta Stuffed Shells, making every bite a celebration. Enjoy!

Vegan Pumpkin Ricotta Stuffed Shells Recipe FAQs

What type of pumpkin should I use for this recipe?
Absolutely! Canned pumpkin puree works perfectly for the filling, but if you prefer, you can make your own by roasting and pureeing fresh pumpkin. Just be sure the pumpkin is cooked until soft, then blend until smooth for that creamy texture we love!

How long can I store the Vegan Pumpkin Ricotta Stuffed Shells in the fridge?
You can store leftovers in an airtight container in the refrigerator for up to 5 days. Just remember to allow them to cool completely before storing to keep them fresh!

Can I freeze the stuffed shells before baking?
Very! To freeze, assemble the stuffed shells and place them in a single layer in a freezer-safe container. You can freeze them for up to 2 months. When you’re ready to enjoy them, just bake directly from the freezer, adding extra time to ensure they’re heated through!

What should I do if my shells break during cooking?
Don’t worry, it happens to the best of us! If your shells break while cooking, gently patch them up with a bit of the filling mixture. Alternatively, you can use the broken pieces in the initial layer of your baking dish, making the layering even more interesting.

Is this recipe suitable for those with soy allergies?
Definitely! If you’re avoiding soy, simply substitute the tofu ricotta with a nut-based option like cashew or almond ricotta. It adds a deliciously creamy texture without the allergens, allowing everyone to enjoy this Vegan Pumpkin Ricotta Stuffed Shells dish.

How do I prevent my stuffed shells from becoming mushy?
To keep your shells perfectly al dente, boil them just until tender, but still firm to the bite—around 8-10 minutes usually does the trick! A drizzle of olive oil post-drain helps prevent sticking and keeps your shells intact while cooking!

Vegan Pumpkin Ricotta Stuffed Shells

Vegan Pumpkin Ricotta Stuffed Shells for Cozy Fall Nights

Delicious Vegan Pumpkin Ricotta Stuffed Shells that combine creamy tofu ricotta and pumpkin, perfect for fall nights.
Prep Time 30 minutes
Cook Time 35 minutes
Total Time 1 hour 5 minutes
Servings: 4 servings
Course: Pasta
Cuisine: Vegan
Calories: 320

Ingredients
  

For the Shells
  • 12 pieces Jumbo Pasta Shells Choose your favorite brand.
  • 1 tablespoon Olive Oil Can substitute with avocado oil.
For the Filling
  • 1 cup Tofu Ricotta Made with extra firm tofu, nutritional yeast, and spices.
  • 1 cup Canned Pumpkin Puree Use homemade if preferred.
  • 1/4 teaspoon Freshly Grated Nutmeg Ground nutmeg is a substitute.
  • 1/2 cup Vegan Parmesan Cheese Omit for a nut-free version.
For the Sauce
  • 1/4 cup Fresh Sage Leaves Dried sage can be used.
  • 1 medium Onion Yellow or white onions work well.
  • 2 cloves Garlic Fresh minced garlic is preferred.
  • 2 tablespoons Flour Any all-purpose flour will do.
  • 1 cup Coconut Milk Try soy milk for a nut-free alternative.

Equipment

  • Large pot
  • Colander
  • Food Processor
  • Saucepan
  • baking dish

Method
 

Cooking and Assembly
  1. Bring a large pot of salted water to a boil. Add the jumbo pasta shells and cook for 8-10 minutes until al dente. Drain and drizzle with olive oil.
  2. In a food processor, combine tofu, nutritional yeast, garlic powder, onion powder, salt, pepper, olive oil, lemon zest, and juice until chunky-smooth.
  3. In a bowl, fold together tofu ricotta, pumpkin puree, nutmeg, and parmesan until well mixed.
  4. In a saucepan, heat olive oil and sauté chopped onions until softened. Add garlic, then whisk in flour and gradually pour in coconut milk, stirring until thickened.
  5. Preheat oven to 350°F. Spread béchamel sauce in a baking dish, fill shells with pumpkin mixture, place them in the dish, and pour remaining sauce over top.
  6. Bake for 22-25 minutes until bubbly and golden brown. Allow to cool slightly before serving.

Nutrition

Serving: 1servingCalories: 320kcalCarbohydrates: 45gProtein: 12gFat: 12gSaturated Fat: 4gPolyunsaturated Fat: 1gMonounsaturated Fat: 5gSodium: 400mgPotassium: 600mgFiber: 5gSugar: 4gVitamin A: 3000IUVitamin C: 5mgCalcium: 150mgIron: 2mg

Notes

Store leftovers in an airtight container for up to 5 days. For longer storage, freeze in a single layer for up to 2 months.

Tried this recipe?

Let us know how it was!

Creamy Easy Clam Chowder in a Bread Bowl for Cozy Nights

As I scrolled through old family photos, I stumbled upon a gem: a winter gathering where we all crowded around bowls brimming with a creamy, comforting clam chowder, nestled safely in warm bread bowls. That cozy meal sparked laughter and conversation, making chilly days feel like a warm embrace. Today, I’m sharing my version of this nostalgic dish—Easy Clam Chowder in a Bread Bowl. Perfect for family gatherings, this recipe brings both warmth and a bit of fun to the table. Not only is it simple to prepare, but serving chowder in an edible bowl elevates the experience while minimizing cleanup. With hearty flavors and a creamy texture that will soothe your soul, you may find this comfort food becoming a regular on your menu. Curious about how to recreate this cozy classic? Let’s dive in!

Why is this chowder a must-try?

Comforting and delicious, this Easy Clam Chowder in a Bread Bowl is sure to become a family favorite! Effortless preparation makes it accessible for cooks of all levels, while rich, creamy flavors tantalize the taste buds. Versatile options allow for customization—try adding corn or mixed seafood for a twist. Plus, serving it in an edible bowl brings a fun, unique touch that impresses guests. Perfect for chilly nights, this dish is not just a meal; it’s a warm invitation to gather around the table and share stories, much like my beloved Chicken Shawarma Bowl does!

Easy Clam Chowder Ingredients

• Get ready to flavor your soup!

For the Chowder

  • Canned Clams (minced and whole) – Choose high-quality canned clams for the best briny flavor.
  • Bacon Fat (or rendered pork fat) – This adds delicious richness; feel free to substitute with butter for a lighter chowder.
  • Onion – Essential for a fragrant base in the chowder.
  • Celery – Adds a lovely crunch and savory note to the mix.
  • Garlic – Elevates the flavor profile, making every spoonful delightful.
  • Thyme (fresh) – Infuses an herbal aroma; you can add more for an extra flavor punch.
  • Clam Juice and Chicken Stock – The foundational liquids for depth; swap with vegetable stock if desired.
  • Russet Potatoes – Contributes heartiness and texture; Yukon gold can create a creamier finish.
  • All-Purpose Flour – Used for the roux, crucial for thickening the chowder.
  • Salted Butter – A must for the roux; can be exchanged for unsalted if preferred.
  • Heavy Cream – Adds indulgent creaminess—remember to add it at the end of cooking!
  • Flat-leaf Parsley – Use it as a garnish for a fresh, vibrant finish.
  • Bread Bowls – Choose crusty artisan bread to elevate your chowder experience.

Enjoy crafting your very own Easy Clam Chowder in a Bread Bowl using these ingredients!

Step‑by‑Step Instructions for Easy Clam Chowder in a Bread Bowl

Step 1: Sauté Aromatics
In a large soup pot, heat 2 tablespoons of bacon fat over medium-high heat until shimmering, about 1 minute. Add 1 chopped onion, 1 diced celery stalk, and 1 teaspoon of fresh thyme, sautéing for 2-3 minutes until the onion becomes translucent. This aromatic base will create a delicious depth for your Easy Clam Chowder.

Step 2: Cook Garlic
Stir in 2 minced garlic cloves and cook for an additional minute, allowing the garlic to become fragrant but not browned. The combination of sautéed vegetables will enhance the flavor profile of your chowder. Keep stirring to coat everything evenly as it cooks.

Step 3: Add Liquids and Potatoes
Pour in 2 cups of clam juice and 2 cups of chicken stock, then add 2 cups of cubed russet potatoes. Season the mixture with salt and pepper to taste, and toss in a bay leaf for added flavor. Bring it to a boil while occasionally stirring, which should take around 10 minutes.

Step 4: Create the Roux
While the chowder is boiling, melt 4 tablespoons of salted butter in a separate saucepan over medium heat. Whisk in 1/4 cup of all-purpose flour, cooking for about 2-3 minutes to create a roux that will thicken your chowder. Stir continuously to prevent burning, ensuring a smooth mixture.

Step 5: Incorporate the Cream
Gradually whisk in 1 cup of heavy cream to the roux until fully combined and slightly thickened. This creamy mixture will become the luxurious base for your Easy Clam Chowder. Remove from heat to keep the cream from curdling as you wait for the chowder to finish cooking.

Step 6: Combine Chowder and Roux
Once your chowder is boiling again, lower the heat and stir in the roux mixture, ensuring everything is well combined. Reduce the heat to medium-low and let it simmer for 15 minutes, allowing the flavors to meld together, stirring occasionally until the chowder thickens to your desired consistency.

Step 7: Add Clams
Introduce 2 cans of drained clams into the pot, stirring gently to incorporate them without breaking them up. Heat through for another 2-3 minutes, just until the clams are warmed, avoiding overcooking. The clams will enhance the seafood flavor of your scrumptious Easy Clam Chowder.

Step 8: Final Touches
Remove the bay leaf and stir in 1/4 cup of chopped flat-leaf parsley for a fresh finish. Taste the chowder, adjusting the seasoning with more salt and pepper if necessary. Your chowder is now ready to serve, overflowing with creaminess and hearty flavors.

Step 9: Serve in Bread Bowls
Carefully ladle the hot clam chowder into your prepared bread bowls, allowing the crusty bread to soak up some of the delicious broth. Serve immediately while it’s still hot, presenting not just a meal, but a comforting experience in every bite of your Easy Clam Chowder in a Bread Bowl.

Easy Clam Chowder in a Bread Bowl Variations

Feel free to unleash your creativity while preparing this dish—after all, cooking is all about making it your own!

  • Bacon-Free: Substitute bacon fat with olive oil or butter for a lighter flavor.

  • Seafood Medley: Use mixed seafood like shrimp or scallops instead of clams for a flavor-packed twist. This transforms your chowder into an oceanic delight that’s sure to impress!

  • Veggie Boost: Add fresh corn or diced carrots for added sweetness and vibrant color. These additions make the chowder feel even heartier and more satisfying.

  • Dairy-Free: Swap the heavy cream for coconut milk for a creamy, dairy-free option. Just be sure to adjust the seasonings to balance the sweetness of the coconut!

  • Spicy Kick: Toss in a pinch of cayenne pepper or a few dashes of hot sauce to elevate the heat level. This adds a bold, warming dimension that pairs surprisingly well with clam chowder.

  • Twisted Bread Bowl: Instead of traditional bread, try serving in soft focaccia or sourdough bowls for a flavor experience as delightful as the chowder itself.

  • Thicker Texture: Incorporate more potatoes or a blended potato option to create an ultra-thick chowder. This is perfect when you crave a satisfying, stick-to-your-ribs meal not just perfect for a busy weeknight, but also for cozy gatherings.

Ready for a delightful variation experience? While you’re here, consider pairing it with a refreshing side salad of mixed greens or even an irresistible Turtle Bars dessert for a feast that will leave everyone smiling!

What to Serve with Easy Clam Chowder in a Bread Bowl

Pairing your chowder with the right sides can elevate your cozy meal into a true delight.

  • Mixed Green Salad: A crisp salad with a light vinaigrette adds freshness that balances the richness of the chowder.

  • Oyster Crackers: These tiny, crunchy delights offer a fun contrast in texture, perfect for sprinkling on top of your chowder.

  • Garlic Bread: Warm, buttery garlic bread complements the flavors, making each bite even more indulgent.

  • Steamed Asparagus: Tender spears provide a bright pop of color and a slight crunch, enhancing your plate’s vibrancy.

  • Coleslaw: A refreshing and tangy slaw adds crunch and a touch of acidity, cutting through the creaminess.

  • Chardonnay: A glass of chilled Chardonnay pairs beautifully, bringing out the savory notes while offering a refreshing sip between bites.

  • Chocolate Chip Cookies: For a sweet ending, warm cookies add nostalgia and comfort, rounding out your meal perfectly.

  • Fruit Sorbet: A light, fruity sorbet can cleanse the palate beautifully after the rich chowder, adding a refreshing finish to your meal.

Make Ahead Options

These Easy Clam Chowder in a Bread Bowl are perfect for busy home cooks looking to save time! You can prepare the chowder base (excluding clams and cream) up to 3 days in advance. Simply sauté the aromatics and cook the potatoes, then cool and refrigerate in an airtight container. When you’re ready to enjoy your chowder, reheat the mixture on the stove, add the drained clams and cream, and heat through for about 5 minutes before serving. This method ensures you maintain the creamy texture and rich flavors, giving you delicious clam chowder with minimal effort on busy weeknights!

Expert Tips for Easy Clam Chowder

  • Quality Clams: Always use high-quality canned clams to enhance flavor and texture. Cheaper options can leave a metallic taste, which you want to avoid in your Easy Clam Chowder.
  • Roux Perfection: Cook your roux for 2-3 minutes to eliminate any raw flour taste. This crucial step ensures a smooth texture in your chowder.
  • Careful with Cream: Add heavy cream at the end of cooking to prevent curdling. Keep the heat low to maintain its luxurious creaminess in the chowder.
  • Don’t Overcook Clams: Add clams during the last few minutes of cooking to avoid a chewy texture. This preserves the sweet, tender bite you crave in your Easy Clam Chowder.
  • Bacon Substitute: If you prefer a lighter option, use olive oil in place of bacon fat for a delicious alternative without sacrificing flavor.

How to Store and Freeze Easy Clam Chowder

Fridge: Store leftover chowder in an airtight container for up to 4 days. This keeps your Easy Clam Chowder fresh and ready to reheat!

Freezer: You can freeze the chowder for up to 3 months. Make sure to use a freezer-safe container and leave some space at the top since it may expand.

Reheating: When reheating, thaw overnight in the fridge and warm gently on the stove over low heat. Stir in a splash of cream if needed, to restore creaminess.

Serving in Bread Bowls: For the best experience, assemble your chowder in a fresh bread bowl just before serving, as freezing the bread may impact its texture.

Easy Clam Chowder in a Bread Bowl Recipe FAQs

How do I choose the best canned clams for my chowder?
Absolutely! Look for high-quality canned clams that are packed in water or clam juice. Avoid those in brine, as they can have a metallic taste that could affect your chowder’s flavor. When selecting, ensure they have a good balance of both minced and whole clams for varied textures.

What is the best way to store leftover clam chowder?
Store leftover clam chowder in an airtight container in the fridge for up to 4 days. Let it cool completely before sealing to avoid condensation.

Can I freeze my Easy Clam Chowder?
Yes, you can freeze it! Transfer the cooled chowder into a freezer-safe container, leaving about an inch of space at the top for expansion. It will stay fresh for up to 3 months. When you’re ready to enjoy it again, thaw it overnight in the fridge and reheat gently on the stove, adding a splash of cream if needed.

What should I do if my chowder is too thick?
If you find your chowder too thick, don’t worry! Simply stir in a bit of clam juice or chicken stock until you reach your desired consistency. Heat it over medium-low heat and continue stirring until everything is well combined. This keeps your chowder creamy without losing its flavor.

Is this recipe suitable for those with allergies?
Absolutely! However, it’s essential to check the labels on your ingredients carefully. Canned clams may contain allergens, and if you’re substituting bacon fat, use a safe alternative like vegetable oil for a lighter version. Always consider any specific dietary needs for guests!

Easy Clam Chowder in a Bread Bowl

Creamy Easy Clam Chowder in a Bread Bowl for Cozy Nights

Enjoy this Easy Clam Chowder in a Bread Bowl, a comforting dish perfect for cozy dining experiences.
Prep Time 20 minutes
Cook Time 40 minutes
Total Time 1 hour
Servings: 4 bowls
Course: Dinner
Cuisine: American
Calories: 450

Ingredients
  

For the Chowder
  • 2 cups clam juice Use high-quality clam juice
  • 2 cups chicken stock Can substitute with vegetable stock
  • 2 cups russet potatoes Cubed
  • 1 chopped onion Essential for a fragrant base
  • 1 stalk celery Diced
  • 2 cloves garlic Minced
  • 2 tablespoons bacon fat Or rendered pork fat
  • 1 teaspoon thyme Fresh
  • 4 tablespoons salted butter Can substitute with unsalted
  • 1/4 cup all-purpose flour For thickening the chowder
  • 1 cup heavy cream Add at the end of cooking
  • 1/4 cup flat-leaf parsley Chopped for garnish
  • 2 cans canned clams Drained
  • 4 slices bread bowls Crusty artisan bread is recommended

Equipment

  • Large soup pot
  • separate saucepan
  • whisk
  • ladle

Method
 

Step-by-Step Instructions
  1. Sauté 2 tablespoons of bacon fat over medium-high heat, add 1 chopped onion, 1 diced celery stalk, and 1 teaspoon of fresh thyme, and sauté until the onion is translucent.
  2. Stir in 2 minced garlic cloves and cook for an additional minute.
  3. Pour in 2 cups of clam juice and 2 cups of chicken stock; add 2 cups of cubed russet potatoes, season, and bring it to a boil.
  4. Melt 4 tablespoons of salted butter in a separate saucepan and whisk in 1/4 cup of all-purpose flour, cooking for 2-3 minutes.
  5. Gradually whisk in 1 cup of heavy cream to the roux until fully combined.
  6. Once boiling, stir in the roux mixture, reduce heat, and simmer for 15 minutes.
  7. Introduce 2 cans of drained clams and heat through for 2-3 minutes.
  8. Remove the bay leaf and stir in 1/4 cup of chopped flat-leaf parsley.
  9. Ladle the hot chowder into prepared bread bowls and serve immediately.

Nutrition

Serving: 1bowlCalories: 450kcalCarbohydrates: 45gProtein: 15gFat: 25gSaturated Fat: 15gPolyunsaturated Fat: 5gMonounsaturated Fat: 3gCholesterol: 70mgSodium: 800mgPotassium: 600mgFiber: 3gSugar: 2gVitamin A: 700IUVitamin C: 15mgCalcium: 150mgIron: 2mg

Notes

For best results, serve the chowder in fresh bread bowls just before serving to maintain texture.

Tried this recipe?

Let us know how it was!

Cozy Up with Spiced Sourdough Pumpkin French Toast

As the crisp air settles in and leaves turn golden, my kitchen transforms into a cozy haven filled with warm aromas. One of my favorite fall breakfasts is Spiced Sourdough Pumpkin French Toast, a dish that dances perfectly between sweet and savory. Thick slices of tangy sourdough bread, soaked in a silky pumpkin custard infused with warm spices like cinnamon and nutmeg, create an irresistible morning treat. It’s not only easy to whip up during a busy weekday, but it also shines at any gathering—making it the ultimate comfort food for the season. Whether you savor it drizzled with maple syrup or topped with fresh fruit, each bite is like a hug on a plate. Are you ready to embrace the flavors of autumn with me?

Why Is This Breakfast a Must-Try?

Comforting Warmth: There’s nothing like the cozy aroma of spiced pumpkin that fills your home as this dish cooks!

Easy Preparation: With simple ingredients and quick steps, this Spiced Sourdough Pumpkin French Toast is perfect for a busy morning or a leisurely weekend brunch.

Versatile Topping Options: Whether you prefer maple syrup, whipped cream, or fresh berries, you can customize this recipe to suit your taste and make it your own.

Sourdough Superiority: The use of tangy sourdough not only enhances the flavor but also gives a delightful texture that pairs beautifully with the custardy pumpkin mixture.

Harvest Flavor: Capture the essence of fall in every bite—it’s like enjoying a slice of pumpkin pie for breakfast! Dive into the seasonal goodness, and if you’re looking for more delicious fall recipes, check out my Blueberry French Toast and Sweet Escape Toast.

Spiced Sourdough Pumpkin French Toast Ingredients

For the Custard

  • Sourdough Bread – Use day-old or slightly stale sourdough for the best texture that won’t fall apart.
  • Eggs – Adds richness to the custard; substitute with flax eggs for a vegan version.
  • Milk of Choice – Dairy or plant-based milk provides creaminess in the custard.
  • Canned Pumpkin – Brings moisture and seasonal flavor; swap for pureed butternut squash if needed.
  • Pure Vanilla Extract – Enhances the flavor profile; always choose pure over imitation for best results.
  • Maple Syrup – Adds natural sweetness; honey or agave syrup can be good substitutes.
  • Pumpkin Pie Spice or Chai Blend – A blend of warm spices that elevates the dish; customize with your favorite spices.
  • Butter – Essential for cooking; use coconut oil for a dairy-free option.

Optional Enhancements

  • Sourdough Starter Discard – If you have it, this adds depth to the flavor; can be omitted if unavailable.

Enjoy this Spiced Sourdough Pumpkin French Toast as a seasonal delight that warms both your heart and home!

Step‑by‑Step Instructions for Spiced Sourdough Pumpkin French Toast

Step 1: Prepare Bread
Slice 12 pieces of day-old sourdough bread into thick slices, approximately ¾ to 1 inch each. This ensures that the slices maintain their structure during soaking in the custard. Arrange the slices on a baking sheet, ready to soak up the flavorful custard mixture that will elevate your Spiced Sourdough Pumpkin French Toast.

Step 2: Mix Custard
In a large mixing bowl, whisk together the eggs, milk, canned pumpkin, pure vanilla extract, maple syrup, and your choice of pumpkin pie spice until smooth and fully combined. This rich custard is the heart of your dish, so ensure there are no lumps from the pumpkin. Once ready, let it sit briefly while you prepare to cook.

Step 3: Preheat Skillet
Heat a skillet over medium to medium-low heat, and add a generous pat of butter to coat the surface as it melts. The butter will add a lovely flavor and prevent sticking. Keep an eye on the skillet; it should be warm enough to sizzle when you add the soaked bread but not so hot that it burns the custard.

Step 4: Coat Bread
Dip each slice of sourdough into the custard mixture, allowing it to soak for about 30 seconds on each side. Be sure not to over-soak; you want a nice coating without the bread becoming too soggy. Place the coated slices aside on a plate while you repeat the process for all the slices, ensuring they retain their fluffy texture.

Step 5: Cook Toast
Carefully place the soaked slices in the preheated skillet, cooking them for about 2 to 5 minutes on each side. Flip them when the bottoms are golden brown and crispy, creating a beautiful caramelization. The slices should be puffed and fragrant, ready to become your delightful Spiced Sourdough Pumpkin French Toast.

Step 6: Serve
Once golden brown on both sides, transfer the toast to a warm plate. Serve your Spiced Sourdough Pumpkin French Toast immediately, accompanied by optional toppings such as maple syrup, fresh whipped cream, or seasonal fruits. Enjoy this cozy fall treat warm, taking in the delightful aromas that fill your kitchen!

Expert Tips for Spiced Sourdough Pumpkin French Toast

  • Use Day-Old Bread: Always opt for day-old sourdough; it absorbs the custard perfectly without falling apart. Fresh bread can lead to soggy results.

  • Mix Well: Ensure the pumpkin puree is fully whisked into the egg mixture to avoid any lumpy custard. This guarantees a smooth and even flavor throughout!

  • Control the Heat: Maintain a medium-low heat while cooking to prevent burning the custard’s sugars. This will help achieve a perfectly caramelized exterior.

  • Soak, But Don’t Soak Too Much: Dip each slice just long enough to coat them; about 30 seconds per side is ideal. Over-soaking can lead to overly mushy bread.

  • Customize with Spices: Feel free to adjust the amounts of pumpkin pie spice or add your favorite spices to personalize the flavor of your Spiced Sourdough Pumpkin French Toast.

  • Add Toppings: Explore various toppings like fresh berries or yogurt to bring a refreshing contrast to the rich custard. Don’t forget the maple syrup for that sweet finish!

How to Store and Freeze Spiced Sourdough Pumpkin French Toast

Fridge: Store leftovers in an airtight container in the fridge for up to 3 days. Layer the slices with parchment paper to prevent sticking and keep them fresh.

Freezer: For longer storage, freeze portions of the Spiced Sourdough Pumpkin French Toast for up to 3 months. Wrap each slice tightly in plastic wrap and place them in a freezer-safe bag.

Reheating: Reheat in a toaster or toaster oven for best results, or use the microwave for a quick option, ensuring to check the temperature to enjoy it warm and cozy again!

Spiced Sourdough Pumpkin French Toast Variations

Feel free to let your creativity shine by customizing this delicious recipe to suit your taste buds!

  • Dairy-Free: Substitute regular milk with almond, oat, or coconut milk for a creamy yet dairy-free alternative. This will still keep the custard rich and delightful!

  • Gluten-Free: Opt for gluten-free bread to enjoy the flavors without the gluten. Make sure to choose a dense bread that can soak up the custard without falling apart.

  • Pumpkin Bliss: If you’re in the mood for an extra pumpkin punch, double the amount of canned pumpkin in the custard mix. It adds a delightful moistness and flavor!

  • Nutty Addition: Stir in a handful of chopped pecans or walnuts into the custard mixture. They will toast beautifully while cooking and add a satisfying crunch!

  • Sweet Heat: Add a pinch of cayenne pepper or red pepper flakes to the custard to give your dish a spicy kick that beautifully contrasts the sweet flavors.

  • Cinnamon Swirl: Drizzle a quick cinnamon sugar mix over the top of the toast as it cooks for a delightful crispy sweetness. Consider pairing it with the rich flavor of a spiced chai blend!

  • Fruit Fusion: Top your French toast with seasonal fruits like sautéed apples or pears for a delicious fruity twist. Fresh berries also add a vibrant touch and sweetness!

For more delightful breakfast inspirations, don’t miss my Creme Brulee French Toast or indulge in a comforting bowl of Joumou Haitian Pumpkin Soup. Enjoy the endless possibilities with your Spiced Sourdough Pumpkin French Toast!

What to Serve with Spiced Sourdough Pumpkin French Toast

As you prepare to indulge in this fall-inspired breakfast, think about delightful pairings that will elevate your meal experience.

  • Crispy Bacon: The salty, savory crunch of bacon complements the sweetness of the French toast, creating a contrast that’s sure to please every palate.

  • Fresh Fruit Salad: A mix of vibrant fruits like apples, pears, and pomegranate adds a refreshing lightness and burst of color to your breakfast table.

  • Whipped Cream: Light and airy, this creamy topping makes each bite feel indulgent, while hints of vanilla and sweetness bring harmony to the flavors.

  • Maple Syrup Drizzle: Rich and sweet, real maple syrup enhances the Thanksgiving-like flavors, perfectly complementing the spiced pumpkin custard flavor.

  • Vanilla Yogurt: A dollop of creamy yogurt introduces a tangy contrast, complimenting the sweetness of the toast while adding a protein-rich element for a well-rounded breakfast.

  • Chai Tea: A warm cup of spiced chai brings cozy warmth and aromatic flavors, harmonizing beautifully with your delectable French toast.

  • Pumpkin Spiced Latte: Enjoy the ultimate fall experience with a rich latte, echoing the flavors of your breakfast dish and enveloping you in warmth.

  • Nutty Granola: For a delicious crunch, a sprinkle of granola atop your toast creates a delightful texture contrast while evoking a wholesome flavor.

Consider these pairings to craft a cozy, comforting breakfast that envelops you in the spirit of the season, making your morning truly special!

Make Ahead Options

These Spiced Sourdough Pumpkin French Toast slices are perfect for meal prep enthusiasts! You can whip up the custard mixture and soak the sourdough slices up to 24 hours in advance, making your morning routine a breeze. Simply prepare the custard, coat the bread, and layer it in an airtight container in the fridge. To maintain their delightful texture, ensure the slices aren’t overly soaked before refrigerating. When you’re ready to enjoy, just heat a skillet over medium heat and cook the prepped toast for 2-5 minutes on each side until golden brown. Your cozy breakfast will be just as delicious and warming as if made fresh!

Spiced Sourdough Pumpkin French Toast Recipe FAQs

What type of sourdough bread should I use?
Always opt for day-old or slightly stale sourdough for the best results. Fresh sourdough, while tempting, may fall apart when soaked in the custard. Day-old bread maintains its integrity and allows the custard to soak in without becoming overly soggy.

How do I store leftovers?
Store any uneaten Spiced Sourdough Pumpkin French Toast in an airtight container in the fridge for up to 3 days. I like to layer the slices with parchment paper to prevent them from sticking together and keep them fresh and delicious.

Can I freeze this French toast?
Absolutely! You can freeze portions of your Spiced Sourdough Pumpkin French Toast for up to 3 months. First, wrap each slice tightly in plastic wrap, then place them in a freezer-safe bag. This method prevents freezer burn, ensuring you can enjoy this cozy dish later.

What if my custard mixture is lumpy?
If your custard has lumps, don’t fret! Simply whisk the mixture more vigorously to break them up, or use an immersion blender for a super smooth consistency. It’s crucial to mix the pumpkin puree well into the egg mixture to ensure a creamy texture throughout.

Are there any dietary considerations for this recipe?
Yes! If you or someone you know has dietary restrictions, you can easily modify the recipe. Substitute the eggs with flax eggs (1 tablespoon of ground flaxseed combined with 3 tablespoons of water equals one egg) for a vegan option. Similarly, you can use plant-based milk and coconut oil instead of dairy products. Always ensure your maple syrup and other ingredients are labelled gluten-free if necessary.

How do I know when the French toast is cooked perfectly?
Look for a golden brown color on both sides, which usually takes about 2 to 5 minutes per side on a medium-low heat. The exterior should be caramelized and crispy, while the inside remains soft and custardy. It’s a delightful balance that brings out the best flavors of fall!

Spiced Sourdough Pumpkin French Toast

Cozy Up with Spiced Sourdough Pumpkin French Toast

Spiced Sourdough Pumpkin French Toast is a perfect fall breakfast with tangy sourdough and warm spices.
Prep Time 10 minutes
Cook Time 15 minutes
Total Time 25 minutes
Servings: 4 slices
Course: Breakfast
Cuisine: American
Calories: 300

Ingredients
  

For the Custard
  • 12 slices day-old sourdough bread thick slices, approximately ¾ to 1 inch
  • 4 large eggs or flax eggs for vegan version
  • 1 cup milk of choice dairy or plant-based
  • 1 cup canned pumpkin or pureed butternut squash
  • 1 teaspoon pure vanilla extract always choose pure over imitation
  • ¼ cup maple syrup or honey/agave syrup as substitutes
  • 2 teaspoons pumpkin pie spice or chai blend customize with favorite spices
  • 2 tablespoons butter or coconut oil for dairy-free option
Optional Enhancements
  • 1 cup sourdough starter discard adds depth to flavor; optional

Equipment

  • Skillet
  • Mixing Bowl
  • Baking Sheet

Method
 

Step-by-Step Instructions
  1. Slice the sourdough bread into thick slices, approximately ¾ to 1 inch each, and arrange on a baking sheet.
  2. In a mixing bowl, whisk together the eggs, milk, canned pumpkin, vanilla extract, maple syrup, and pumpkin pie spice until smooth.
  3. Preheat a skillet over medium to medium-low heat and add butter to coat the surface.
  4. Dip each slice of bread into the custard mixture for about 30 seconds on each side.
  5. Place the soaked slices in the skillet, cooking for 2 to 5 minutes on each side until golden brown.
  6. Once cooked, transfer the toast to a warm plate and serve immediately with optional toppings.

Nutrition

Serving: 1sliceCalories: 300kcalCarbohydrates: 45gProtein: 8gFat: 12gSaturated Fat: 7gPolyunsaturated Fat: 1gMonounsaturated Fat: 3gCholesterol: 180mgSodium: 250mgPotassium: 300mgFiber: 3gSugar: 8gVitamin A: 3500IUVitamin C: 2mgCalcium: 150mgIron: 2mg

Notes

Enjoy this Spiced Sourdough Pumpkin French Toast warm, embracing the flavors of autumn.

Tried this recipe?

Let us know how it was!

Stay Connected

Get recipes via email: