Get my cookbooks

Pico de Gallo: Fresh Salsa with a Zesty Garlic Twist

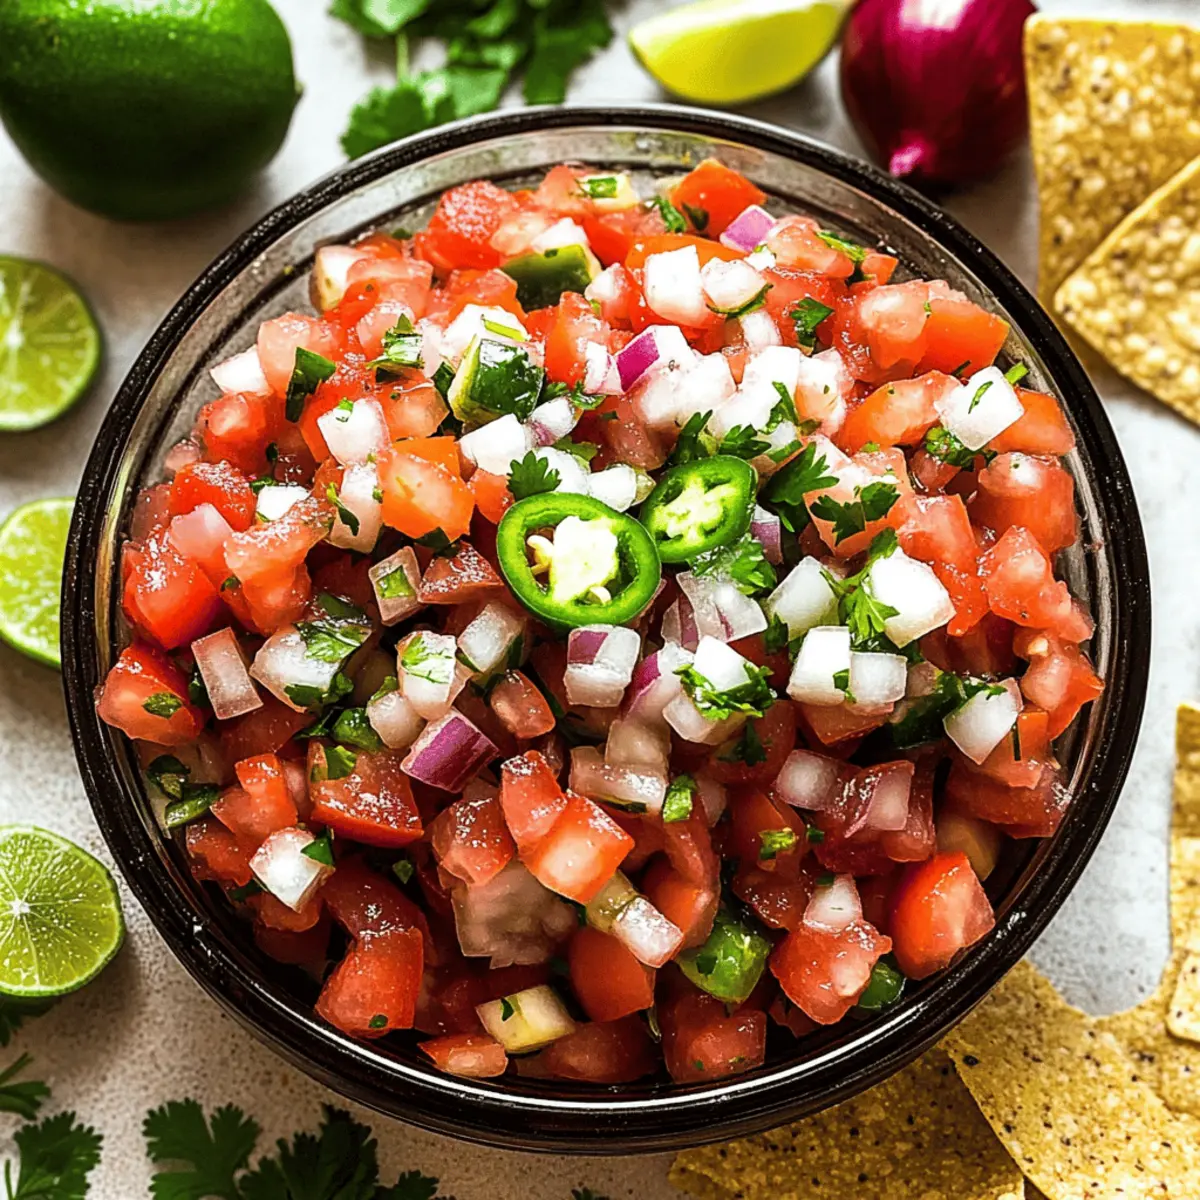
As I chopped vibrant Roma tomatoes and reached for the fresh cilantro, I could already smell the tantalizing combination of zesty and savory wafting through my kitchen. This easy Pico de Gallo recipe, with its delightful twist of garlic, transforms any meal into a vibrant celebration of Mexican flavors. Not only is this salsa incredibly simple to throw together, but it’s also a versatile gem that pairs beautifully with everything from tortilla chips to tacos. With each colorful scoop, you’ll offer your friends and family a refreshing bite that’s as good for casual snacking as it is for summer barbecues. Are you ready to elevate your next dish with this mouthwatering salsa? Let’s dive in!

Why is Pico de Gallo a Must-Try?

Freshness in every bite: Made with ripe Roma tomatoes, zesty lime, and aromatic garlic, this Salsa Fresca bursts with vibrant flavors.

Quick and Easy: With just a few simple steps, you can whip up this delicious dip in no time. It’s perfect for busy weeknights or impromptu gatherings!

Versatile for any occasion: Whether served with tortilla chips, as a topping for tacos, or alongside grilled chicken, this salsa complements a variety of dishes.

Crowd-Pleasing Favorite: Impress your friends and family with this authentic Mexican dish that never fails to disappear at parties!

For more fresh, mouthwatering recipes, check out our guide on vegetarian dips.

Pico de Gallo Ingredients

• Here’s what you’ll need for this fresh, zesty salsa!

For the Salsa

  • Roma Tomatoes – Providing sweetness and juiciness; seed them to avoid excess liquid.
  • Onion – Adds sharpness and depth; use white onion for a more traditional flavor.
  • Jalapeños – Brings heat and spice; adjust quantity based on your heat preference.
  • Fresh Cilantro – Offers a fresh, herbal note; substitute with parsley for a milder flavor.
  • Lime Juice – Provides acidity and balance; freshly squeezed is recommended for the best taste.
  • Garlic (added twist) – Enhances flavor complexity; minced for maximum impact.
  • Salt – Essential for making flavors pop; adjust to taste.

Enjoy creating this flavorful Pico de Gallo and let it bring a touch of freshness to your meals!

Step‑by‑Step Instructions for Pico de Gallo

Step 1: Prep Your Veggies
Start by washing all of your fresh ingredients thoroughly. Carefully seed the Roma tomatoes to avoid excess liquid, then dice them into small cubes. Next, finely chop the white onion and jalapeños, adjusting the amount of jalapeños based on your heat preference. Mince the garlic and chop the fresh cilantro so that everything is ready for mixing.

Step 2: Mix the Base
In a medium-sized mixing bowl, combine the chopped onion, minced jalapeños, fresh lime juice, minced garlic, and a pinch of salt. Stir the mixture gently to blend the flavors together. Let this marinate for about 5–10 minutes, allowing the sharpness of the onion to mellow and the spices to infuse, creating a zesty base for your Pico de Gallo.

Step 3: Add the Rest
Once the base has marinated, gently fold in the diced tomatoes and chopped cilantro. Be careful as you combine the ingredients to avoid crushing the tomatoes, which should remain vibrant and juicy. Taste the mixture and adjust the salt and lime juice as necessary to achieve your desired flavor balance in your fresh Pico de Gallo.

Step 4: Serve
For the best presentation, use a slotted spoon to serve the Pico de Gallo, minimizing excess liquid that might pool at the bottom of your bowl. Enjoy your salsa immediately for maximum freshness, or let it chill in the refrigerator for about 15 minutes to meld the flavors further. This fresh salsa is perfect as a dip or topping to elevate any dish!

How to Store and Freeze Pico de Gallo

Fridge: Store leftover Pico de Gallo in an airtight container in the refrigerator for up to 4 days. Just give it a gentle stir before serving.

Freezer: Avoid freezing as it alters the fresh texture of the salsa. Pico de Gallo is best enjoyed fresh for maximum flavor and crunch.

Room Temperature: If you’re serving it at a gathering, keep it out for no more than 2 hours to maintain freshness.

Make-Ahead Tips: You can prepare your Pico de Gallo a few hours in advance; just let it chill in the fridge for around 15 minutes before serving to enhance those zesty flavors.

Expert Tips for Pico de Gallo

  • Use Chilled Ingredients: Start with cold tomatoes and cilantro for a refreshing taste. Chilling can enhance the salsa’s overall freshness!

  • Seed Your Tomatoes: This crucial step prevents watery salsa. It ensures your Pico de Gallo maintains the perfect chunky texture without excess liquid.

  • Let It Rest: Allowing the salsa to sit for at least 15 minutes before serving enhances flavor blending, making every bite delicious.

  • Avoid Over-Mixing: Gently fold ingredients and avoid crushing the tomatoes. This preserves the salsa’s vibrant texture and keeps it visually appealing.

  • Adjust Spice Levels: Customize your Pico de Gallo by tweaking the amount of jalapeños. Start small, and taste as you go to find your perfect heat!

  • Fresh is Best: Always opt for fresh ingredients when making Pico de Gallo. The quality of your produce directly affects the salsa’s flavor!

Make Ahead Options

These Pico de Gallo preparations are perfect for busy home cooks looking to save time yet still enjoy fresh flavors! You can chop the tomatoes, onion, jalapeños, cilantro, and mince the garlic up to 24 hours in advance; simply refrigerate them in an airtight container. For the best quality, mix the salsa ingredients together—excluding the tomatoes and cilantro—for up to 3 days; add those just before serving to maintain that delightful crunch. When you’re ready to serve, gently fold in the fresh diced tomatoes and cilantro, adjust the seasoning, and enjoy your vibrant Pico de Gallo, ready to elevate any meal with minimal effort!

What to Serve with Authentic Pico de Gallo?

Add some excitement to your next meal with these delightful pairings that perfectly complement your zesty salsa.

  • Tortilla Chips: Crispy and crunchy, they provide the perfect vehicle to scoop up your flavorful Pico de Gallo.

  • Soft Tacos: Fill corn tortillas with grilled chicken or veggies and top with Pico de Gallo for a fresh burst of flavor.

  • Grilled Shrimp: The smokiness of grilled shrimp beautifully contrasts with the bright, tangy salsa, creating a harmonious taste experience.

  • Avocado Toast: Spread ripe avocado on toasted bread and finish with a generous spoonful of Pico de Gallo for an elevated brunch treat.

  • Nachos Supreme: Layer tortilla chips with cheese, beans, and jalapeños, then top with Pico de Gallo for an irresistible game-day snack.

  • Quesadillas: Melty cheese and savory fillings paired with fresh Pico de Gallo create a delightful explosion of flavors in each bite.

  • Chilled White Wine: A refreshing glass of Sauvignon Blanc enhances the salsa’s zesty notes, making for a delightful pairing.

You’re sure to impress your family and friends with these fantastic combinations that elevate your Pico de Gallo experience!

Pico de Gallo Variations & Substitutions

Feel free to explore and personalize this Pico de Gallo recipe to suit your taste buds and culinary adventures!

  • Dairy-Free: For a creamy twist, add diced avocado which adds richness without dairy. This smooth addition enhances the texture beautifully.

  • Sweet Addition: Consider incorporating diced mango or pineapple for a fruity sweetness that perfectly balances the tangy lime. This tropical flair transforms your salsa into something truly special!

  • Extra Spicy: For those who love more heat, try adding finely chopped habanero instead of jalapeños. It brings an exhilarating kick and a vibrant orange hue that’s eye-catching.

  • Herb Swap: If cilantro isn’t your favorite, fresh parsley makes for a milder herb that complements the other flavors without overpowering them. The freshness remains intact!

  • The Smoky Twist: Mix in a dash of smoked paprika or chipotle powder to give your Pico de Gallo a smoky flavor, which adds an unexpected richness to your salsa.

  • Crunch Boost: Toss in some diced bell peppers for a delightful crunch and a pop of color. It’s a great way to diversify the texture while keeping it fresh.

  • Onion Swap: Red onion offers a sweeter, milder flavor compared to white onion, giving your salsa a jolt of color and a different taste profile altogether. Try it for a refreshing change!

For more ways to jazz up your meals, check out our delicious ideas for vegetarian dips or explore the world of savory toppings with this delightful Guacamole recipe. Enjoy your culinary journey!

Pico de Gallo Recipe FAQs

What should I look for when selecting Roma tomatoes?
Absolutely! When choosing Roma tomatoes, look for ones that are firm to the touch and have a rich, red color. Avoid tomatoes with dark spots or blemishes, as these indicate overripeness. Fresh, juicy Roma tomatoes are the backbone of a great Pico de Gallo.

How should I store leftover Pico de Gallo?
You can store leftover Pico de Gallo in an airtight container in the refrigerator for up to 4 days. Make sure to give it a gentle stir before serving, as the ingredients may settle. This way, you will retain the flavors and textures for that fresh taste with every bite!

Can I freeze Pico de Gallo?
It’s best to avoid freezing Pico de Gallo, as the textures of the fresh ingredients – especially the tomatoes – can change dramatically. If you still want to store it for later use, consider making a batch of roasted tomato salsa instead, which freezes beautifully for up to 3 months!

What if my salsa is too watery?
No worries! If your Pico de Gallo ends up watery, the main culprit is often the tomatoes. To fix this, you can drain some of the excess liquid before serving or stir in a bit of finely diced bell pepper to absorb the moisture. Also, make sure to seed the tomatoes next time to maintain that perfect salsa consistency.

Is Pico de Gallo suitable for people with dietary restrictions?
Very much so! Pico de Gallo is naturally vegetarian and gluten-free, making it a perfect addition for various diets. However, if you’re sensitive to certain ingredients, like onions or spicy jalapeños, you can easily customize your recipe. Simply substitute these with bell peppers or skip them to suit your palate!

Can I prepare Pico de Gallo ahead of time?
Definitely! You can prepare your Pico de Gallo a few hours ahead of serving. Just let it chill in the fridge for around 15 minutes before serving to enhance those zesty flavors. This allows the ingredients to meld beautifully together, providing an even more delightful experience for your guests!

Pico de Gallo

Pico de Gallo: Fresh Salsa with a Zesty Garlic Twist

A vibrant Pico de Gallo recipe with garlic that enhances any meal experience.
Prep Time 15 minutes
Marinating Time 10 minutes
Total Time 25 minutes
Servings: 4 cups
Course: Appetizers
Cuisine: Mexican
Calories: 40

Ingredients
  

For the Salsa
  • 3 cups Roma Tomatoes Seed them to avoid excess liquid.
  • 1 cup White Onion Adds sharpness and depth.
  • 1 count Jalapeños Adjust quantity based on heat preference.
  • 1 cup Fresh Cilantro Substitute with parsley for milder flavor.
  • 1 count Lime Juice Freshly squeezed is recommended.
  • 2 cloves Garlic Minced for maximum flavor impact.
  • 1 teaspoon Salt Adjust to taste.

Equipment

  • Mixing Bowl
  • Knife
  • Cutting board

Method
 

Step‑by‑Step Instructions
  1. Wash all fresh ingredients thoroughly, seed the Roma tomatoes, and dice them into small cubes.
  2. Finely chop the white onion and jalapeños, and mince the garlic and chop the fresh cilantro.
  3. In a mixing bowl, combine chopped onion, minced jalapeños, lime juice, minced garlic, and salt. Stir gently and let marinate for 5-10 minutes.
  4. Gently fold in the diced tomatoes and chopped cilantro, adjusting salt and lime juice to taste.
  5. Serve with a slotted spoon to minimize liquid, and enjoy fresh or chill for 15 minutes.

Nutrition

Serving: 1cupCalories: 40kcalCarbohydrates: 10gProtein: 1gFat: 0.5gSodium: 200mgPotassium: 200mgFiber: 2gSugar: 3gVitamin A: 10IUVitamin C: 20mgCalcium: 2mgIron: 3mg

Notes

For best freshness, use chilled ingredients and let the salsa rest for at least 15 minutes before serving.

Tried this recipe?

Let us know how it was!

Chicken Alfredo Monkey Bread: Comfort Food Redefined

As I pulled my freshly baked Chicken Alfredo Monkey Bread from the oven, the warm aroma enveloped the kitchen, inviting everyone to gather around. This dish is not just a meal; it’s a sensational blend of creamy Alfredo sauce, tender chicken, and fluffy biscuit pieces that come together in a delightful, pull-apart form. Perfect for anyone who craves comforting homemade food, this recipe is quick to whip up and guaranteed to be a hit with your family and friends. Whether served as a main course or a fun appetizer, the combination of cheesy goodness and hearty ingredients makes it a wonderful alternative to fast food. Are you ready to dive into this delicious twist on a classic?

What makes this dish so special?

Unique Presentation: The Chicken Alfredo Monkey Bread offers a fun, interactive way to enjoy a classic meal; no utensils necessary!

Time-Saving Delight: With rotisserie chicken and refrigerated dough, this recipe comes together effortlessly, perfect for busy weeknights.

Cheesy Goodness: With layers of melted mozzarella and Parmesan, each pull apart reveals a deliciously cheesy bite that will have everyone coming back for seconds.

Crowd-Pleaser: Ideal for gatherings, this dish is sure to impress guests, making it a great alternative to traditional appetizers.

Versatile Twist: Feel free to customize by swapping sauces or adding vegetables, allowing you to make it your own. Embrace comfort food at its finest with this creative spin! Want more easy and delicious recipes? Check out my Bbq Chicken Grilled or Tuscan Chicken Soup.

Chicken Alfredo Monkey Bread Ingredients

Delight your taste buds with this comforting dish!

For the Chicken Mixture

  • Cooked Chicken (2 cups) – Rotisserie chicken is an excellent time-saver, adding protein and body.
  • Alfredo Sauce (1 cup) – Use store-bought or homemade for a richer, fresher taste.
  • Garlic Powder (1 teaspoon) – Adds depth; fresh garlic could enhance the flavor even more.
  • Italian Seasoning (1 teaspoon) – Enhances the overall flavor profile; you can substitute with herbs like oregano or basil.
  • Salt and Pepper – To taste; balances the flavors perfectly.

For the Dough Base

  • Refrigerated Biscuit Dough (3 cups) – Provides a fluffy texture; Pillsbury Grands work well for this recipe.

For the Cheesy Layer

  • Shredded Mozzarella Cheese (1 cup) – Enhances the cheesy flavor and adds a creamy texture.
  • Grated Parmesan Cheese (1/2 cup) – For added cheesiness and a lovely savory crust, use finely grated for better melting.

For the Garnish

  • Fresh Parsley, chopped (1/4 cup) – A sprinkle adds freshness and color to your delightful dish.

Enjoy the process and the result! This Chicken Alfredo Monkey Bread is sure to be a favorite.

Step‑by‑Step Instructions for Chicken Alfredo Monkey Bread

Step 1: Preheat the Oven
Begin by preheating your oven to 375°F (190°C). This essential step ensures even baking and helps achieve that perfect golden-brown crust for your Chicken Alfredo Monkey Bread. While the oven warms up, gather your ingredients to streamline the cooking process.

Step 2: Prepare the Chicken Mixture
In a large mixing bowl, combine 2 cups of shredded cooked chicken, 1 cup of Alfredo sauce, 1 teaspoon of garlic powder, 1 teaspoon of Italian seasoning, and a pinch of salt and pepper. Stir the mixture thoroughly until the chicken is well coated with the creamy sauce, inviting delightful flavors that will elevate your monkey bread.

Step 3: Cut the Biscuit Dough
Open your package of refrigerated biscuit dough and place each biscuit on a cutting board. Using a sharp knife, cut each biscuit into quarters. This simple step increases the surface area, allowing the chicken and sauce to absorb into the dough, making every bite of Chicken Alfredo Monkey Bread deliciously flavorful.

Step 4: Combine Ingredients
Add the quartered biscuit pieces to the chicken mixture in the bowl. Gently toss the biscuit dough with the chicken and sauce until each piece is coated evenly. This blending ensures that the flavors meld beautifully, creating a rich and mouthwatering base for your monkey bread.

Step 5: Add Cheese
Fold in 1 cup of shredded mozzarella cheese along with half of the 1/2 cup of grated Parmesan cheese into the chicken and biscuit mixture. Mixing in the cheese creates gooey, flavorful pockets throughout the Chicken Alfredo Monkey Bread, making it irresistibly cheesy and satisfying.

Step 6: Assemble in the Pan
Prepare a bundt pan by greasing it generously with cooking spray or butter. Pour half of the chicken and biscuit mixture into the pan, then sprinkle the remaining Parmesan cheese on top. Add the rest of the mixture, smoothing it gently, ensuring an even distribution to allow for even cooking and a lovely finish.

Step 7: Bake
Slide the bundt pan into the preheated oven and bake for 25-30 minutes. Keep an eye on your creation; it’s ready when the top is golden brown, and a toothpick inserted comes out clean. The enticing aroma of your Chicken Alfredo Monkey Bread will fill your kitchen, hinting at the delightful meal ahead.

Step 8: Cool and Serve
After baking, allow the Chicken Alfredo Monkey Bread to cool in the pan for about 5 minutes. This resting time helps the structure set. Next, invert the pan onto a serving platter, gently releasing the bread. Garnish with chopped fresh parsley for a pop of color and freshness before serving this delightful dish to family and friends.

What to Serve with Chicken Alfredo Monkey Bread

Elevate your meal experience with delightful pairings that perfectly complement the cozy allure of warm, cheesy monkey bread.

  • Garden Salad: A fresh garden salad adds crisp, refreshing notes to contrast the rich flavors, providing a light and vibrant touch to your dining experience. Toss in some cherry tomatoes and cucumbers for extra color!

  • Garlic Bread: The buttery, garlicky goodness of fresh garlic bread is the ideal companion for dipping into the creamy Alfredo sauce. It’s like an invitation to enjoy each bite to the fullest!

  • Steamed Broccoli: Bright green steamed broccoli not only adds nutritious value but also brings a lovely texture and mild flavor that balances the richness of the monkey bread.

  • Caprese Skewers: These vibrant skewers of fresh mozzarella, basil, and ripe tomatoes offer a burst of freshness. Drizzle with balsamic glaze for an extra gourmet touch that’s sure to impress.

  • Champagne or Sparkling Wine: A glass of bubbly adds a festive flair to your meal, enhancing the celebration of flavors. The acidity cuts through the creaminess and makes each bite even more enjoyable.

  • Chocolate Mousse: End your meal on a sweet note with a light chocolate mousse. Its airy texture and rich chocolaty flavor make it a perfect dessert option to conclude your comforting feast.

  • Fruit Salad: A colorful fruit salad offers a refreshing contrast, ensuring your taste buds are not overwhelmed by richness. Consider a medley of berries and melons to bring a touch of sweetness.

Expert Tips for Chicken Alfredo Monkey Bread

  • Mix Thoroughly: Ensure the cooked chicken is well combined with the Alfredo sauce for balanced flavor distribution throughout the Chicken Alfredo Monkey Bread.

  • Keep Dough Cold: Chill the biscuit dough before cutting, as this helps maintain its fluffy texture when baked, avoiding a dense result.

  • Grease Generously: Don’t skimp on greasing your bundt pan. This step is crucial for the easy release of your delicious monkey bread after baking.

  • Cool Briefly: Let the bread cool for at least 5 minutes before inverting it onto a platter. This helps keep it intact and prevents collapsing.

  • Storage Tips: If you have leftovers, store them in an airtight container in the refrigerator for up to 3 days, reheating gently in the oven or microwave to retain texture.

Chicken Alfredo Monkey Bread Variations

Feel free to get creative with this comforting Chicken Alfredo Monkey Bread recipe! Let your taste buds guide you as you explore these delightful twists.

  • Vegetarian Delight: Swap out the chicken for grilled vegetables like zucchini, bell peppers, or mushrooms to create a colorful and satisfying vegetarian option. You’ll still enjoy all the creamy goodness of the Alfredo sauce.

  • Cheese Lovers: Mix in some cheddar or gouda cheese along with mozzarella for an even cheesier experience. The combination of flavors will take your monkey bread to a whole new level!

  • Spicy Kick: Add red pepper flakes to the chicken mixture for a hint of heat or incorporate some jalapeños for a zestier bite. Let the fun unfold as your dish excites the palate!

  • Flavorful Pesto: Try replacing the Alfredo sauce with pesto to create a vibrant and herbaceous twist. This change adds depth and freshness, transforming your monkey bread into a savory sensation.

  • Herb Infusion: Infuse fresh herbs like thyme or basil into the biscuit dough or the chicken mixture for extra depth of flavor. This creates a fragrant balance that elevates the comfort food experience.

  • Bacon Bliss: For a smoky addition, fold in cooked bacon pieces with the chicken mixture; the salty crunch complements the creamy texture beautifully and will please any bacon lover.

  • Whole Wheat Swap: Use whole wheat biscuit dough instead of refrigerated dough for a healthier, heartier option. This variation not only adds fiber but also provides a delightful nutty flavor.

Want more irresistible dishes to satiate your hunger? Check out my delicious Sizzling Chicken Pepper or try a tasty serving of Garlic Chicken Gnocchi for a satisfying meal!

How to Store and Freeze Chicken Alfredo Monkey Bread

Fridge: Store leftovers in an airtight container in the refrigerator for up to 3 days. This will help keep your Chicken Alfredo Monkey Bread fresh and delicious.

Freezer: For longer storage, wrap the cooled monkey bread tightly in plastic wrap and place it in a freezer bag. It can be frozen for up to 3 months.

Reheating: To reheat, thaw overnight in the fridge, then warm in the oven at 350°F (175°C) for 10-15 minutes until heated through, restoring its delightful pull-apart texture.

Make Ahead Options

These Chicken Alfredo Monkey Bread make-ahead options are perfect for busy home cooks looking to save time during the week! You can fully prepare the chicken mixture (shredded chicken, Alfredo sauce, garlic powder, Italian seasoning, salt, and pepper) and store it in the refrigerator for up to 3 days. Additionally, you can cut the biscuit dough into quarters and keep it in an airtight container in the fridge for up to 24 hours. When you’re ready to bake, simply combine the prepped chicken mixture with the biscuit pieces, fold in the cheese, assemble in the bundt pan, and bake as directed. This way, you’ll have a delicious, homemade meal ready with minimal effort and just as tasty as when made fresh!

Chicken Alfredo Monkey Bread Recipe FAQs

What kind of chicken should I use?
Absolutely! For the Chicken Alfredo Monkey Bread, shredded cooked chicken works best. I often use rotisserie chicken because it saves time and adds great flavor. If you’re looking to make it healthier, feel free to use grilled chicken breasts.

How should I store leftovers?
Leftovers should be placed in an airtight container and stored in the refrigerator for up to 3 days. Make sure to let it cool completely before storing to prevent condensation, which can make the bread soggy.

Can I freeze Chicken Alfredo Monkey Bread?
Certainly! To freeze your Chicken Alfredo Monkey Bread, first let it cool completely. Then, wrap it tightly in plastic wrap and place it in a freezer bag. It can be kept frozen for up to 3 months. When you’re ready to enjoy it, thaw it overnight in the refrigerator and reheat in the oven.

Why is my monkey bread dense or hard?
Very good question! If your Chicken Alfredo Monkey Bread turns out dense, it could be due to overmixing the dough or not properly cutting the biscuits. Make sure you only toss the ingredients until just combined; overmixing can create a tough texture. Also, keeping the biscuit dough cold helps maintain a light and fluffy structure when baked.

Can my pets eat Chicken Alfredo Monkey Bread?
It’s best to avoid sharing this dish with pets. The garlic and seasoning can be harmful to them, and the creamy sauce might upset their stomach. Always stick to pet-friendly treats when it comes to feeding your furry friends!

What variations can I try for different dietary needs?
Feel free to customize this recipe! For a vegetarian option, consider replacing the chicken with grilled vegetables or a meat substitute. You can also experiment with sauces—think pesto or a homemade marinara for a different flavor profile. Just remember that the key to keeping it delicious is balancing textures and flavors!

Chicken Alfredo Monkey Bread

Chicken Alfredo Monkey Bread: Comfort Food Redefined

Enjoy this Chicken Alfredo Monkey Bread, a delightful comfort food made with Alfredo sauce, chicken, and biscuit dough.
Prep Time 15 minutes
Cook Time 30 minutes
Cooling Time 5 minutes
Total Time 50 minutes
Servings: 6 servings
Course: Dinner
Cuisine: American
Calories: 400

Ingredients
  

For the Chicken Mixture
  • 2 cups Cooked Chicken Rotisserie chicken is an excellent time-saver, adding protein and body.
  • 1 cup Alfredo Sauce Use store-bought or homemade for a richer, fresher taste.
  • 1 teaspoon Garlic Powder Adds depth; fresh garlic could enhance the flavor even more.
  • 1 teaspoon Italian Seasoning Enhances the overall flavor profile; you can substitute with herbs like oregano or basil.
  • Salt and Pepper To taste; balances the flavors perfectly.
For the Dough Base
  • 3 cups Refrigerated Biscuit Dough Provides a fluffy texture; Pillsbury Grands work well for this recipe.
For the Cheesy Layer
  • 1 cup Shredded Mozzarella Cheese Enhances the cheesy flavor and adds a creamy texture.
  • 1/2 cup Grated Parmesan Cheese Use finely grated for better melting.
For the Garnish
  • 1/4 cup Fresh Parsley, chopped Adds freshness and color.

Equipment

  • Bundt pan
  • Mixing Bowl
  • Sharp knife
  • Oven

Method
 

Step-by-Step Instructions for Chicken Alfredo Monkey Bread
  1. Preheat your oven to 375°F (190°C).
  2. In a large mixing bowl, combine 2 cups of shredded cooked chicken, 1 cup of Alfredo sauce, 1 teaspoon of garlic powder, 1 teaspoon of Italian seasoning, and a pinch of salt and pepper. Stir thoroughly.
  3. Open your package of refrigerated biscuit dough and cut each biscuit into quarters.
  4. Add the quartered biscuit pieces to the chicken mixture and gently toss until each piece is coated evenly.
  5. Fold in 1 cup of shredded mozzarella cheese along with 1/4 cup of grated Parmesan cheese into the mixture.
  6. Prepare a bundt pan by greasing it and pour half of the chicken and biscuit mixture into the pan, sprinkle the remaining Parmesan cheese on top, then add the rest of the mixture.
  7. Bake for 25-30 minutes until the top is golden brown and a toothpick comes out clean.
  8. Allow the bread to cool in the pan for about 5 minutes. Invert onto a serving platter and garnish with chopped fresh parsley.

Nutrition

Serving: 1servingCalories: 400kcalCarbohydrates: 30gProtein: 25gFat: 20gSaturated Fat: 10gCholesterol: 90mgSodium: 800mgPotassium: 300mgFiber: 2gSugar: 2gVitamin A: 500IUCalcium: 300mgIron: 2mg

Notes

Ensure the cooked chicken is well combined with the Alfredo sauce for balanced flavor distribution throughout the dish. Store leftovers in an airtight container in the refrigerator for up to 3 days. For longer storage, wrap tightly and freeze for up to 3 months.

Tried this recipe?

Let us know how it was!

Roasted Sweet Potatoes with Cinnamon & Honey: Cozy Comfort Food

As I stood in my kitchen, the warm, nutty aroma of cinnamon swirling through the air, I couldn’t help but smile; Roasted Sweet Potatoes with Cinnamon & Honey transform ordinary moments into cozy celebrations. This dish blends the distinct sweetness of tender sweet potatoes with a drizzle of honey and the comforting spice of cinnamon—making it a delightful choice for both busy weeknights and festive gatherings. Not only is it quick to whip up, but it’s also a fantastic way to coax the family into the kitchen, creating memorable meals together. Plus, it’s incredibly versatile; feel free to try different varieties of sweet potatoes or sneak in seasonal veggies! Curious about how this easy recipe can become your new go-to comfort food? Let me share the magic of this dish with you!

Why are Roasted Sweet Potatoes Irresistible?

Flavor Explosion: These roasted sweet potatoes are a sweet-and-savory masterpiece, thanks to the aromatic blend of honey and cinnamon. Quick and Easy: With just a few simple steps, you can have a delicious side dish ready in under 30 minutes. Versatile Delight: Customize by adding your favorite root veggies or nuts for extra texture! Plus, they pair beautifully with dishes like Cajun Honey Butter Salmon or Comfort Garlic Potatoes. Healthy Choice: Packed with nutrients and fiber, they’re a guilt-free addition to your meals. Crowd-Pleaser: Guaranteed to impress at family dinners and gatherings, making them an instant favorite!

Roasted Sweet Potatoes with Cinnamon & Honey Ingredients

For the Roasted Sweet Potatoes

  • Sweet Potatoes – The star of the dish, contributing natural sweetness and comforting texture; feel free to explore purple or white varieties for exciting flavors.
  • Olive Oil – Drizzled to add richness and achieve that lovely caramelization; can be swapped for vegetable oil if desired.
  • Honey – A gentle sweetener that amplifies flavors; consider maple syrup for a plant-based version.
  • Ground Cinnamon – This spice marries beautifully with sweet potatoes, but don’t hesitate to try nutmeg for a unique twist.
  • Salt – A crucial component that enhances the dish’s overall flavor without overwhelming the sweetness.

Optional Garnish

  • Fresh Parsley – Chopped for a pop of color and freshness, elevating your Roasted Sweet Potatoes with Cinnamon & Honey presentation.

These ingredients come together to create a delightful dish you’ll want to make time and time again!

Step‑by‑Step Instructions for Roasted Sweet Potatoes with Cinnamon & Honey

Step 1: Preheat the Oven
Begin by preheating your oven to 425°F (220°C). This ensures an ideal cooking temperature for the sweet potatoes, allowing them to roast evenly and develop that sought-after caramelization. As the oven warms, take a moment to gather your ingredients and equipment, including a large mixing bowl and a parchment-lined baking sheet, setting the stage for a delicious dish.

Step 2: Prepare the Sweet Potatoes
Peel and cube your sweet potatoes into even bite-sized pieces, ensuring they roast uniformly. In your large mixing bowl, combine these sweet potato cubes with a generous drizzle of olive oil, honey, ground cinnamon, and a pinch of salt. Toss everything together with your hands until the sweet potatoes are beautifully coated, making sure each piece glistens with the sweet and savory mixture.

Step 3: Arrange on Baking Sheet
Transfer the coated sweet potatoes onto the prepared parchment-lined baking sheet, spreading them out in a single layer. This step is crucial for achieving that perfect roasting effect, as overcrowding can lead to steaming instead. Ensure that the pieces have a bit of space between them, allowing hot air to circulate and create a golden-brown finish on each cube.

Step 4: Roast the Sweet Potatoes
Place the baking sheet in the preheated oven and roast the sweet potatoes for 25-30 minutes. Halfway through cooking, give them a gentle stir to promote even browning and tenderness. Watch for them to turn a lovely golden hue, and check that they are fork-tender—this means they’re perfectly caramelized and ready to delight your taste buds.

Step 5: Serve and Garnish
Once roasted, carefully remove the sweet potatoes from the oven and transfer them to a serving dish. To add a fresh touch, sprinkle with chopped parsley for a vibrant pop of color that contrasts beautifully with the golden-brown sweet potatoes. Your Roasted Sweet Potatoes with Cinnamon & Honey are now ready to be shared, warming hearts and taste buds alike!

Expert Tips for Roasted Sweet Potatoes

  • Uniform Sizes: Ensure sweet potatoes are cut into similar sizes for even roasting. This prevents some pieces from being undercooked or overcooked.

  • Coating with Love: Toss the sweet potatoes with your hands. This fun step guarantees every piece is coated in the honey and cinnamon blend, enhancing the flavor of your roasted sweet potatoes with cinnamon & honey.

  • Perfectly Done: Check for doneness by piercing with a fork. They should be perfectly soft and caramelized for that satisfying treat.

  • Space it Out: Make sure to arrange the sweet potatoes on the baking sheet with room to breathe. Overcrowding can lead to steaming instead of roasting, affecting the desired texture.

  • Creative Variations: Don’t hesitate to mix in seasonal veggies or spices for a twist. For example, try adding a pinch of cayenne for a surprising kick!

Roasted Sweet Potatoes with Cinnamon & Honey Variations

Feel free to get creative and make this dish your own with these delightful twists!

  • Different Sweet Potatoes: Substitute classic orange sweet potatoes with purple or white ones for unique flavors that surprise every time.

  • Nutty Crunch: Add a handful of chopped pecans or walnuts before roasting to introduce a satisfying crunch that complements the sweet potatoes’ softness.

  • Veggie Medley: Toss in diced carrots or parsnips; their slight earthiness marries wonderfully with the sweet flavors, elevating your dish to new heights.

  • Spicy Kick: A dash of cayenne pepper will add a tantalizing heat, making each bite a flavor adventure that contrasts beautifully with the sweet elements.

  • Herb Infusion: Try adding fresh herbs like rosemary or thyme for a fragrant herbal note that transforms the profile of your roasted sweet potatoes. The aroma alone is enough to bring everyone to the table!

  • Maple Sweetness: For a vegan option, swap honey for maple syrup; it brings a deeper, richer sweetness that complements the sweet potatoes sensationally.

  • Syrupy Drizzle: After roasting, drizzle with a balsamic reduction for an unexpected sweet-and-sour twist that enhances the savory richness of your sweet potatoes.

  • Cheesy Finish: Top with crumbled feta or goat cheese before serving. The creaminess of the cheese elevates the flavors, making it a crowd-favorite side dish!

These variations not only cater to your personal taste but also present an exciting opportunity to impress your loved ones. Perfect alongside dishes such as Baked Salmon Honey or served with a light salad, your Roasted Sweet Potatoes with Cinnamon & Honey will never feel ordinary!

What to Serve with Roasted Sweet Potatoes with Cinnamon & Honey

Elevate your dining experience with delightful pairings that complement the sweet and savory magic of roasted sweet potatoes.

  • Grilled Chicken: Tender, juicy chicken offers a perfect protein balance to the sweetness, making it an ideal main dish that everyone loves.
  • Garlic Butter Shrimp: The savory garlic and rich butter sauce juxtapose beautifully with the sweet potatoes, creating a harmonious flavor dance.
  • Mixed Greens Salad: A refreshing salad with crunchy greens, nuts, and a light vinaigrette adds a crisp texture and balances the dish’s richness.
  • Roasted Brussels Sprouts: Earthy brussels sprouts, slightly charred, pair marvelously with sweet potatoes, creating a satisfying medley of flavors.
  • Cranberry Sauce: A tart and tangy cranberry sauce drizzled over the sweet potatoes enhances the sweetness while adding a festive touch to your meal.
  • Creamy Goat Cheese: Crumbled goat cheese adds a creamy, tangy element that elevates the dish with its luxurious texture and flavor contrast.
  • Sparkling Water with Lime: A refreshing drink choice that cleanses the palate, allowing the sweet flavors of the dish to shine through.
  • Chocolate Chip Cookies: End the meal on a sweet note with warm, gooey cookies, completing your comforting dining experience with a delightful dessert.

Storage Tips for Roasted Sweet Potatoes with Cinnamon & Honey

Fridge: Store leftovers in an airtight container for up to 3 days. Reheat gently in the microwave or oven to preserve the sweet flavor and tender texture.

Freezer: Freeze in a single layer on a baking sheet before transferring to a freezer-safe bag. Enjoy your Roasted Sweet Potatoes with Cinnamon & Honey within 2-3 months for the best quality.

Reheating: Reheat in a preheated oven at 350°F (175°C) until warmed through, about 10-15 minutes. This retains their deliciously caramelized exterior.

Room Temperature: Serve at room temperature within 2 hours of cooking for optimal taste. Beyond that, refrigerate to maintain freshness and avoid spoilage.

Make Ahead Options

These Roasted Sweet Potatoes with Cinnamon & Honey are perfect for meal prep enthusiasts! You can peel and cube the sweet potatoes up to 24 hours in advance, storing them in an airtight container in the refrigerator to maintain their freshness. Additionally, you can mix the olive oil, honey, cinnamon, and salt beforehand and store this flavored coating separately to prevent sogginess. When you’re ready to serve, simply toss the sweet potatoes with the mixture and roast them right before mealtime. This way, you’ll enjoy the same deliciously caramelized flavor without the fuss, freeing up your busy weeknights for family time!

Roasted Sweet Potatoes with Cinnamon & Honey Recipe FAQs

How do I choose the right sweet potatoes?
When selecting sweet potatoes for this recipe, look for ones that are firm, smooth, and free from dark spots or blemishes. A good rule of thumb is to choose medium-sized sweet potatoes, as they usually have the best balance of sweetness and texture. If you’re feeling adventurous, try purple or white sweet potatoes—each type brings a unique flavor profile to your dish!

What’s the best way to store leftovers?
Absolutely! To keep your Roasted Sweet Potatoes with Cinnamon & Honey fresh, store any leftovers in an airtight container in the fridge. They will stay good for up to 3 days. Just reheat them in the microwave or oven until warmed through for the best flavor and texture. If you prefer, you can also freeze them!

Can I freeze roasted sweet potatoes?
Yes, you can! To freeze your sweet potatoes, spread them out in a single layer on a baking sheet and place them in the freezer for about an hour. Once they are frozen, transfer them into a freezer-safe bag or container. They can be stored in the freezer for 2-3 months. Just remember to reheat them in a preheated oven for about 10-15 minutes at 350°F (175°C) when you’re ready to enjoy them again!

What if my sweet potatoes are not cooking evenly?
If you notice some pieces are cooking faster than others, it could be due to unevenly sized cubes. To avoid this, make sure to cut your sweet potatoes into similar sizes before roasting. If some pieces still seem tougher, simply give them a gentle stir halfway through the baking time to encourage even cooking. Remember, the ultimate goal is fork-tender, caramelized perfection!

Are there any dietary restrictions I should consider?
Definitely! This dish is naturally vegetarian and can be made vegan by substituting honey with maple syrup. If you’re serving them to kids or pets, double-check for any allergies related to ingredients like sweet potatoes or honey. Always feel free to adjust the recipe to suit your guests’ dietary needs!

Can I customize this recipe with other vegetables?
The more the merrier! Feel free to mix in other root vegetables like carrots or parsnips for added flavor and texture. For a creative twist, consider adding a splash of cayenne pepper for a hint of heat, or nuts and seeds for some crunch! These variations not only enhance the dish but also make it a unique dining experience each time you prepare it.

Roasted Sweet Potatoes with Cinnamon & Honey

Roasted Sweet Potatoes with Cinnamon & Honey

Roasted Sweet Potatoes with Cinnamon & Honey is a quick, delightful dish that brings cozy comfort to any meal.
Prep Time 10 minutes
Cook Time 30 minutes
Total Time 40 minutes
Servings: 4 portions
Course: Dinner
Cuisine: American
Calories: 150

Ingredients
  

For the Roasted Sweet Potatoes
  • 4 medium Sweet Potatoes can explore purple or white varieties
  • 2 tablespoons Olive Oil can be swapped for vegetable oil
  • 2 tablespoons Honey consider maple syrup for a plant-based version
  • 1 teaspoon Ground Cinnamon can try nutmeg for a unique twist
  • 1 teaspoon Salt enhances overall flavor
Optional Garnish
  • 2 tablespoons Fresh Parsley chopped for garnish

Equipment

  • Oven
  • Mixing Bowl
  • Baking Sheet

Method
 

Directions
  1. Preheat your oven to 425°F (220°C). Gather your ingredients and equipment.
  2. Peel and cube the sweet potatoes. In a mixing bowl, combine sweet potatoes with olive oil, honey, cinnamon, and salt, tossing to coat.
  3. Transfer the coated sweet potatoes to a parchment-lined baking sheet, spreading them in a single layer.
  4. Roast in the oven for 25-30 minutes, stirring halfway through until fork-tender and golden.
  5. Remove from oven, transfer to a serving dish, and garnish with chopped parsley.

Nutrition

Serving: 1cupCalories: 150kcalCarbohydrates: 35gProtein: 2gFat: 3gSaturated Fat: 0.5gPolyunsaturated Fat: 0.2gMonounsaturated Fat: 2gSodium: 200mgPotassium: 500mgFiber: 5gSugar: 10gVitamin A: 10000IUVitamin C: 25mgCalcium: 40mgIron: 0.8mg

Notes

Ensure uniform sizes for even roasting and avoid overcrowding on the baking sheet.

Tried this recipe?

Let us know how it was!

Super Tender Crockpot Beef Short Ribs for Effortless Comfort

The aroma wafting through my kitchen instantly transported me to cozy family gatherings filled with laughter and shared stories. This is the magic of my Super Tender Crockpot Beef Short Ribs—a dish that brings warmth and elegance to any special occasion. With only ten minutes of prep time, this slow cooker marvel transforms bone-in beef short ribs into tender, succulent delights that fall off the bone, all while you sip coffee or catch up on your favorite show. Not only does it free you from the stress of complicated cooking, but it also creates a centerpiece meal that will impress your loved ones. Wouldn’t you love to spoil your family with a comforting dish that feels as fancy as a night out? Stay with me to discover how to craft this effortless holiday gem!

Why Are These Short Ribs So Irresistible?

Tenderness: These short ribs are cooked low and slow, resulting in meat that’s unbelievably tender and flavorful, making every bite melt in your mouth.

Flavorful Sauce: With the inclusion of fresh herbs, garlic, and optional red wine, the sauce elevates the dish to new heights. Pair it with some mashed sweet potatoes, and you’ll have a gourmet experience at home!

Time-Saving: Just 10 minutes of prep time means you can focus on other holiday preparations, all while your crockpot does the heavy lifting.

Versatility: Feel free to swap in your favorite veggies or herbs. Whether it’s Mongolian Ground Beef or a twist on traditional New England fare, these ribs can easily adapt to your palate.

Crowd-Pleasing: Perfect for family gatherings or intimate dinners, these beef short ribs are sure to impress without the stress. Prepare to be asked for seconds!

Super Tender Crockpot Beef Short Ribs Ingredients

For the Short Ribs

  • Bone-In Beef Short Ribs – The star of the dish, these provide robust flavor and become fall-off-the-bone tender with slow cooking.
  • Beef Broth – Adds depth and richness to the sauce; opt for low-sodium broth for a healthier meal.
  • Bay Leaf – Infuses flavor into the cooking liquid; don’t forget to remove it before serving!
  • Fresh Thyme Sprigs – Offers fragrant herbal notes; use dried thyme if fresh isn’t on hand.

For the Vegetables

  • Baby Carrots – Introduces a touch of natural sweetness and pleasing texture; substitute with root vegetables like parsnips if desired.
  • Mushrooms (sliced) – Adds an earthy flavor that enhances the beef; swap with cremini mushrooms for a different twist.

For the Sauce

  • Tomato Paste – Contributes richness and umami to the sauce, making it more profound in flavor.
  • Minced Garlic – Elevates the dish with its aromatic qualities; fresh garlic is the best choice for maximum taste.
  • Red Wine (optional) – Enhances the sauce’s complexity; replace it with additional beef broth or water to keep it alcohol-free.

For Cooking

  • Unsalted Butter – Gives a luscious richness that deepens the flavor; olive oil can be an effective substitute for a lighter option.
  • Salt & Pepper – Essential for seasoning; adjust to taste to ensure all the flavors shine through.

With these Super Tender Crockpot Beef Short Ribs ingredients ready, you’re set to create a remarkable meal that celebrates both flavor and ease. Enjoy the journey in the kitchen!

Step‑by‑Step Instructions for Super Tender Crockpot Beef Short Ribs

Step 1: Season the Ribs
Begin by generously seasoning 2 to 3 pounds of bone-in beef short ribs with salt and pepper. Use your hands to ensure an even coating, allowing the flavors to penetrate the meat. This step is crucial for building a robust flavor foundation in your Super Tender Crockpot Beef Short Ribs.

Step 2: Brown the Ribs
In a large skillet, heat 1 tablespoon of unsalted butter over medium heat until melted and bubbly. Add the seasoned short ribs, browning them for about 20 seconds on each side until nicely caramelized. This process helps develop rich flavors that will enhance the final dish. Once browned, transfer the ribs to your crockpot.

Step 3: Add the Vegetables
In the same crockpot, add approximately 3 cups of baby carrots and sliced mushrooms. These vegetables not only provide texture but also absorb the delightful flavors during cooking. Spread them evenly around the browned short ribs to ensure a balanced mix of ingredients in your Super Tender Crockpot Beef Short Ribs.

Step 4: Mix the Sauce Ingredients
In a separate bowl, combine 2 cups of beef broth, 1 tablespoon of tomato paste, 2 minced garlic cloves, 1 bay leaf, and several sprigs of fresh thyme. If you’re using red wine, add 1 cup to this mixture. Stir thoroughly to create a rich, flavorful sauce that will infuse the meat and vegetables as they cook.

Step 5: Combine and Cook
Pour the sauce over the beef and vegetables in the crockpot, ensuring everything is well-covered. Cover the crockpot with its lid, setting it to cook on low heat for about 8 hours. The slow, low cooking allows the beef to become incredibly tender, with meat that easily falls off the bone.

Step 6: Remove and Serve
After 8 hours, check the tenderness of the beef; it should be fork-tender and ready to serve. Carefully remove the short ribs and vegetables using a slotted spoon, and discard the bay leaf and thyme sprigs. Plate the ribs alongside the vegetables for a beautiful presentation of your Super Tender Crockpot Beef Short Ribs.

Step 7: Drizzle with Sauce
Before serving, feel free to reserve some of the cooking liquid to create a sumptuous drizzle over the dish. This enhances the flavor even more and creates a lovely finishing touch. Pair your short ribs with mashed sweet potatoes or roasted vegetables to create a comforting, elegant meal ideal for special occasions.

Super Tender Crockpot Beef Short Ribs Variations

Customize these mouthwatering short ribs for your family’s taste and preferences!

  • Red Wine Substitute: Use more beef broth or water instead of red wine for a non-alcoholic version. This will still keep the sauce rich and flavorful.

  • Vegetable Swap: Replace baby carrots with parsnips or turnips for a delightful twist. Each vegetable adds a unique flavor and texture to the dish, making it even more special.

  • Herb Alternatives: Try rosemary or oregano in place of thyme for a fragrant variation. Herbs can significantly impact the flavor profile, inviting a whole new culinary experience.

  • Spice it Up: Add crushed red pepper flakes for a mild heat. This variation can easily elevate the dish and surprise your guests with a pleasant kick!

  • Mushroom Mix: Incorporate a mix of mushrooms such as shiitake or portobello for deeper earthy flavors. Mushrooms bring a wonderful umami punch that will complement the rich beef beautifully.

  • Sweeten the Deal: Add a tablespoon of brown sugar to the sauce for a touch of sweetness that balances the savory flavors. It melds seamlessly into the rich sauce, enhancing the overall taste.

  • Thickened Gravy: Reserve some of the cooking liquid, then thicken it with a cornstarch slurry for a luscious gravy. Drizzling this over mashed potatoes or sweet potatoes is a game-changer!

  • Cultural Twist: Make it Italian by adding in some chopped olives or capers for a briny flavor contrast. This unique approach can transport your taste buds to a different culture, making for an exciting mealtime!

Whether you’re serving these alongside delightful mashed sweet potatoes or exploring new flavor profiles, you’ll find that these short ribs are perfect for every occasion. If you’re looking to explore more flavor-packed options, why not try some Korean Ground Beef or Sticky Beef Noodles?

What to Serve with Super Tender Crockpot Beef Short Ribs

Creating a complete meal around these stunning beef short ribs can transform your dining experience into something unforgettable and flavorful.

  • Creamy Mashed Sweet Potatoes: The perfect balance of sweet and savory, these mashed potatoes provide comfort and a touch of elegance to your plate. The creamy texture pairs wonderfully with the rich rib sauce.

  • Garlic Butter Roasted Baby Potatoes: Crisp on the outside and fluffy within, these potatoes absorb the herby sauces from the short ribs, enhancing each bite. Toss them with fresh herbs for added flavor!

  • Garlicky Green Beans: Lightly sautéed in garlic and olive oil, these green beans bring a vibrant, fresh contrast to the richness of the beef. Their slight crunch creates a delightful textural difference!

  • Herb-Infused Rice Pilaf: Fluffy rice with a hint of fresh herbs can soak up the luscious sauce, creating a satisfying bite every time. It’s a subtle, yet effective, addition to complete your meal.

  • Classic Caesar Salad: Crisp romaine leaves with creamy dressing and tangy parmesan offer a refreshing palate cleanser that perfectly balances the richness of the short ribs. Add crunchy croutons for extra texture!

  • Red Wine: A glass of full-bodied red wine, like Cabernet Sauvignon, beautifully complements the depth of flavor in your short ribs. It creates an overall dining experience that feels luxurious and comforting.

  • Chocolate Lava Cake: To finish off the meal on a sweet note, this indulgent dessert provides a rich, gooey center that contrasts wonderfully with the savory ribs. Perfect for impressing your dinner guests!

Make Ahead Options

These Super Tender Crockpot Beef Short Ribs are a dream for meal prep! You can season the ribs and even brown them in advance, storing them in your refrigerator for up to 24 hours. Additionally, chop your baby carrots and mushrooms, and keep them in an airtight container to maintain freshness. When you’re ready to cook, simply place the ribs and veggies in the crockpot, add your sauce, and let it work its magic for about 8 hours on low. This way, you can enjoy a gourmet meal without the stress, all while savoring the delightful aroma wafting through your home!

How to Store and Freeze Super Tender Crockpot Beef Short Ribs

Fridge: Store leftover short ribs in an airtight container in the fridge for up to 4 days. Make sure to include some of the cooking sauce for added moisture.

Freezer: For longer storage, freeze the short ribs in an airtight container for up to 2 months. Ensure they are well-wrapped to protect against freezer burn.

Reheating: Reheat your Super Tender Crockpot Beef Short Ribs in a microwave or oven. If reheating in the oven, cover with foil and heat at 350°F until warmed through, about 20 mins.

Expert Tips for Super Tender Crockpot Beef Short Ribs

  • Avoid Overcrowding: Ensure there’s enough space for the short ribs in the crockpot; overcrowding can prevent even cooking and tenderness.

  • Browning Benefits: While optional, browning the ribs before slow cooking significantly enhances the overall depth of flavor. Don’t skip this step for the best results!

  • Sauce Thickness: Reserve some cooking liquid to drizzle over the ribs; if desired, thicken it with a cornstarch slurry to create a beautiful sauce that clings to the meat.

  • Tenderness Test: Always check for tenderness towards the end of the cooking time; if it’s not fork-tender, continue cooking. Slow and low is the key for these Super Tender Crockpot Beef Short Ribs.

  • Flavor Variations: Feel free to swap herbs and vegetables based on what you love—experimenting is half the fun and can lead to delightful new flavors!

Super Tender Crockpot Beef Short Ribs Recipe FAQs

How do I choose the best beef short ribs?
When selecting beef short ribs, look for pieces with a good amount of marbling and a pinkish-red color. This marbling ensures tenderness during cooking. If the meat has dark spots all over, it might not be the freshest. Aim for bone-in ribs for maximum flavor and try to choose pieces that are about the same size for even cooking.

How should I store leftover short ribs?
Absolutely! Store leftover short ribs in an airtight container in the fridge for up to 4 days. To maintain their juicy texture, it’s a good idea to include some of the cooking sauce with the ribs. Just make sure they’re cooled beforehand to prevent condensation.

Can I freeze the leftover short ribs?
Yes, you can freeze your Super Tender Crockpot Beef Short Ribs! Place the ribs in an airtight container or a heavy-duty freezer bag, ensuring you remove as much air as possible. They can be frozen for up to 2 months. When ready to enjoy, thaw them overnight in the fridge, and reheat using your microwave or oven.

What should I do if the beef isn’t tender after cooking?
If your beef short ribs aren’t fork-tender after 8 hours, don’t worry! Simply cover the crockpot and continue cooking on low for an additional hour. The key to tenderness lies in cooking low and slow, so patience is essential. Also, ensure the lid stays on to trap steam during the cooking process.

Are there any dietary considerations for this recipe?
Yes! This recipe contains ingredients that may not be suitable for some individuals. For instance, if anyone in your family has a gluten allergy, choose gluten-free beef broth. If you’re using red wine, feel free to replace it with additional beef broth or water. Always check labels for hidden allergens, especially if you’re serving this dish to guests.

Can dogs eat beef short ribs?
While dogs can enjoy plain, cooked beef as a treat, avoid giving them the short ribs with seasoning or sauce. The spices and herbs (like garlic) can be harmful to dogs. Always consult with a veterinarian before sharing any new food with your pet to ensure it’s safe for them!

Super Tender Crockpot Beef Short Ribs

Super Tender Crockpot Beef Short Ribs for Effortless Comfort

Experience the magic of Super Tender Crockpot Beef Short Ribs, a dish that delivers warmth and elegance with minimal effort.
Prep Time 10 minutes
Cook Time 8 hours
Total Time 8 hours 10 minutes
Servings: 6 ribs
Course: Dinner
Cuisine: American
Calories: 350

Ingredients
  

For the Short Ribs
  • 2-3 pounds Bone-In Beef Short Ribs
  • 2 cups Beef Broth Opt for low-sodium broth
  • 1 leaf Bay Leaf Remove before serving
  • 4 sprigs Fresh Thyme Use dried thyme if fresh isn't available
For the Vegetables
  • 3 cups Baby Carrots Substitute with parsnips if desired
  • 8 ounces Mushrooms (sliced) Cremini mushrooms can be used as a substitute
For the Sauce
  • 1 tablespoon Tomato Paste
  • 2 cloves Minced Garlic Fresh garlic is preferable
  • 1 cup Red Wine (optional) Replace with broth or water for alcohol-free
For Cooking
  • 1 tablespoon Unsalted Butter Olive oil can be a substitute
  • to taste Salt
  • to taste Pepper

Equipment

  • Crockpot
  • Skillet

Method
 

Step-by-Step Instructions
  1. Begin by generously seasoning the beef short ribs with salt and pepper.
  2. In a large skillet, heat unsalted butter and brown the ribs.
  3. Add baby carrots and sliced mushrooms to the crockpot.
  4. Combine beef broth, tomato paste, minced garlic, bay leaf, and thyme in a bowl, and add optional red wine.
  5. Pour the sauce over the beef and vegetables in the crockpot, and cook on low for about 8 hours.
  6. After 8 hours, check the tenderness of the beef; it should be fork-tender.
  7. Remove the ribs and vegetables, and discard the bay leaf and thyme sprigs. Plate for serving.
  8. Reserve some cooking liquid for drizzling before serving.

Nutrition

Serving: 1ribsCalories: 350kcalCarbohydrates: 15gProtein: 30gFat: 20gSaturated Fat: 8gPolyunsaturated Fat: 2gMonounsaturated Fat: 10gCholesterol: 90mgSodium: 650mgPotassium: 900mgFiber: 3gSugar: 5gVitamin A: 500IUVitamin C: 15mgCalcium: 50mgIron: 3mg

Notes

These ribs can be paired with mashed sweet potatoes or roasted vegetables for a complete meal.

Tried this recipe?

Let us know how it was!

Quick and Creamy Thai Coconut Curry Soup You’ll Love

As I stirred the vibrant vegetables in the pot, the air filled with an intoxicating blend of spices that instantly transported me to a bustling Thai street market. This 30-Minute Thai Coconut Curry Soup is not just a comforting bowl of goodness; it’s a celebration of quick, wholesome cooking that brings joy to the dinner table. With its creamy coconut broth embracing tender bell peppers and carrots, it’s a delightful gluten-free, vegetarian dish that satisfies both the body and soul. Whether you’re looking to transform a hectic weeknight into a soothing experience or seeking a versatile vegan recipe that everyone will love, this soup has you covered. Ready to discover the secret to whipping up this colorful, flavorful masterpiece in just half an hour? Let’s dive in!

Why is This Thai Coconut Curry Soup a Must-Try?

Quick Cooking: In just 30 minutes, you can create a restaurant-quality dish right at home.
Creamy Goodness: The luxurious coconut milk offers a velvety texture, making every spoonful a delight.
Flavor Explosion: With the bold spices from red curry paste, your taste buds will dance with delight.
Vegetarian-Friendly: This soup is not only vegan but also gluten-free, catering to a variety of dietary needs.
Customizable: Whether you prefer adding tofu or extra veggies, it’s effortlessly adjustable to satisfy everyone’s palate. Enjoy it solo, or pair it with crusty bread for a complete meal that everyone at the table will love! Dive into this quick culinary adventure and don’t forget to check out our other delicious soups like the Potato Bacon Soup or Sausage Tortellini Soup for more hearty options.

Thai Coconut Curry Soup Ingredients

Unlock the vibrant flavors of this delightful dish with these essential ingredients!

For the Soup Base
Vermicelli Noodles – Provide the foundation for a satisfying soup; feel free to swap with any noodles of your choice.
Vegetable Broth – The essential liquid that builds the soup’s heart; you can use chicken broth if you’re not keeping it vegetarian.
Coconut Milk – Adds creaminess and richness, lending a dreamy texture to the soup; opt for full-fat for that extra luxurious feel.

For the Vegetables
Red Bell Pepper – Offers sweetness and a lovely crunch; green bell pepper can be used for a less sweet option.
Yellow Bell Pepper – Brings both flavor and vibrant color to the dish; orange bell pepper is a perfect substitute.
Celery – Adds a refreshing crunch and savory notes; replace with leeks for a unique twist.
Carrots – Infuse sweetness and texture; dice them thinly for faster cooking.
Red Onion – Enhances flavor depth for a well-rounded taste; sweet onions or shallots can work in a pinch.

For the Flavor Profile
Thai Red Curry Paste – The star ingredient that delivers heat and robust flavor; vegetarian brands are available or you can make your own.
Garlic – Introduces aromatic notes; minced garlic enhances the infusion of flavors.
Ginger – Fresh grated ginger adds warmth and depth; ground ginger can be a quick substitute.

For Finishing Touches
Cilantro or Parsley – Brightens the dish and balances flavors; Thai basil can also be an aromatic alternative.
Lime – Adds a refreshing acidity; lemon juice can serve as a suitable substitute.
Salt and Pepper – Essential for seasoning to taste; adjust based on the saltiness of your broth.
Oil – Used for cooking the vegetables; choose a neutral oil for the best flavor.

Step‑by‑Step Instructions for Thai Coconut Curry Soup

Step 1: Prep Vegetables
In a large pot, heat a tablespoon of oil over medium heat. Add diced red and yellow bell peppers, chopped red onion, celery, and thinly sliced carrots, stirring occasionally. Sauté the vegetables for about 3-4 minutes until they begin to soften and the onions become translucent, creating a vibrant base for your Thai Coconut Curry Soup.

Step 2: Flavor Base
Stir in 2 tablespoons of Thai red curry paste, minced garlic, and grated ginger into the sautéed vegetables. Continue cooking for an additional 1-2 minutes, stirring frequently, until the mixture is fragrant and the spices start to bloom. This step infuses the foundation of your soup with a rich, aromatic flavor profile.

Step 3: Simmer Broth
Pour in 4 cups of vegetable broth and bring the mixture to a gentle boil over medium-high heat. Once boiling, reduce the heat to low and let it simmer for about 10-15 minutes. During this time, the flavors will meld beautifully, making your Thai Coconut Curry Soup hearty and comforting.

Step 4: Cook Noodles
While the broth simmers, bring a separate pot of water to a boil for cooking the vermicelli noodles. Add the noodles and cook for just 1-2 minutes until al dente. Drain the noodles and rinse them under cold water to stop the cooking process, ensuring they stay perfectly chewy when combined with the soup.

Step 5: Combine and Thicken
Return to the simmering broth, and stir in 1 can of coconut milk, letting it blend seamlessly into the soup. Allow the mixture to simmer for an additional 10 minutes, stirring occasionally, until the soup thickens slightly and reaches a creamy, luxurious texture. This will elevate your Thai Coconut Curry Soup to a whole new level of richness.

Step 6: Finish Soup
Remove the pot from the heat and stir in the cooked vermicelli noodles, along with a handful of chopped cilantro and the juice of one lime. Season the soup with salt and pepper to taste, adjusting according to your preferences. This step brings in freshness and brightness, enhancing the overall flavor of your soup.

Step 7: Serve Hot
Ladle the delicious Thai Coconut Curry Soup into bowls and enjoy it immediately. For added flair, garnish with extra cilantro and lime wedges. This vibrant, comforting dish is perfect for sharing, and each spoonful is sure to bring warmth and joy to your dining experience.

What to Serve with Thai Coconut Curry Soup

Create a delightful dining experience by pairing this comforting soup with complementary sides and flavors.

  • Crusty Bread: Slice up a fresh baguette or sourdough to soak up the aromatic broth completely. It adds a satisfying crunch that contrasts beautifully with the soup’s creaminess.

  • Cilantro Lime Rice: Refreshing and zesty, this side enhances the flavors of the soup. The brightness of lime and freshness of cilantro tie the meal together beautifully.

  • Roasted Vegetable Medley: A mix of seasonal veggies like zucchini, sweet potatoes, and broccoli adds earthy flavors and additional texture. The slight caramelization creates a lovely balance with the soup’s spices.

  • Thai Spring Rolls: Light and crisp, these rolls filled with fresh veggies and served with a tangy dipping sauce make for a fabulous contrast. They elevate the meal with a burst of flavor and crunch.

  • Mango Salad: The sweetness of mango combined with crunchy vegetables and a tangy dressing provides a fresh contrast to the rich soup. It’s a vibrant addition that brightens your plate.

  • Cold Coconut Drink: Quench your thirst with a refreshing coconut drink or a light iced tea. The subtle sweetness can enhance the soup’s savory notes.

  • Lime Sorbet: For dessert, a scoop of lime sorbet offers a refreshing palate cleanser. Its citrusy zing perfectly complements the warming soup and rounds out the meal beautifully.

Thai Coconut Curry Soup Variations

Feel free to put your own spin on this delicious Thai Coconut Curry Soup for a personalized experience!

  • Protein Boost: Add tofu or chickpeas for a protein-packed dish. They not only enhance texture but also make the meal more filling.
  • Vegetable Medley: Toss in spinach or mushrooms for added nutritional variety. They blend well and soak up the delicious flavors of the broth.
  • Broth Upgrade: Use chicken broth instead of vegetable broth for a non-vegetarian twist. This will create a deeper, richer flavor.
  • Noodle Choice: Swap vermicelli noodles for rice noodles or even zoodles for a gluten-free, low-carb option that still delivers a great base.
  • Spice it Up: Increase the heat by adding sliced jalapeños or a dash of sriracha. This will give your soup a spicy kick that some diners will love!
  • Herb Variation: Experiment with basil in place of cilantro for an aromatic twist. The different herbal notes can elevate the whole dish.
  • Acidity Kick: Instead of lime, try lemon juice for a slightly different tang that brightens the flavors.
  • Creamier Texture: Use full-fat coconut cream for a richer and creamier soup experience. The texture will be undeniably luxurious!

Don’t forget to check out our other comforting soups like the Potato Bacon Soup or Sausage Tortellini Soup for more delicious ideas to warm your heart and home!

Expert Tips for the Best Thai Coconut Curry Soup

  • Noodle Separation: Always cook the vermicelli noodles separately to avoid them becoming mushy. This ensures a delightful texture in your Thai Coconut Curry Soup.

  • Fresh Flavors: Use fresh ginger and minced garlic for the best flavor infusion. Dried alternatives can alter the soup’s richness and aroma.

  • Heat Control: Adjust the amount of red curry paste based on your spice preference. Start with a smaller amount and add more if desired for a balanced heat level.

  • Ingredient Prep: Dice vegetables uniformly for even cooking. Thinly cut carrots and bell peppers will soften quickly and harmonize perfectly in your soup.

  • Topping Variations: Experiment with different herbs and garnishes like Thai basil or crushed peanuts for added texture and flavor. They can elevate your Thai Coconut Curry Soup even further!

Make Ahead Options

These Thai Coconut Curry Soup preparations are perfect for busy weeknights! You can chop all the vegetables (bell peppers, onion, celery, and carrots) up to 24 hours in advance and store them in an airtight container in the refrigerator to maintain freshness. The soup base can also be made up to 3 days ahead by cooking it, allowing it to cool completely, and then refrigerating it. To enjoy, simply reheat the soup on the stove until warmed through, then add the cooked vermicelli noodles and stir in the coconut milk, cilantro, and lime juice just before serving. This way, you’ll savor all the deliciousness of a freshly made Thai Coconut Curry Soup with minimal effort!

Storage Tips for Thai Coconut Curry Soup

Fridge: Store your Thai Coconut Curry Soup in an airtight container for up to 3-4 days. Make sure it cools completely before sealing to maintain freshness.

Freezer: For longer storage, freeze the soup without the noodles for up to 3 months. This prevents the noodles from becoming mushy upon reheating; just cook them separately when you’re ready to enjoy the soup.

Reheating: To reheat, thaw the soup in the refrigerator overnight and warm it gently on the stove. Add freshly cooked vermicelli noodles before serving to keep them perfect.

Leftover Noodles: If you have leftover noodles, store them separately in the fridge and incorporate as needed for a delightful quick meal.

Thai Coconut Curry Soup Recipe FAQs

How do I choose ripe vegetables for my Thai Coconut Curry Soup?
Absolutely! For the best results, select vibrant, firm vegetables. Bell peppers should be shiny without dark spots, while carrots should be crisp and bright. Ideally, onions should feel heavy for their size and have a strong aroma; avoid any with soft spots for quality.

What’s the best way to store leftover Thai Coconut Curry Soup?
You can store your Thai Coconut Curry Soup in an airtight container in the fridge for up to 3-4 days. Be sure to let it cool completely before sealing it to preserve freshness. If you’re saving leftovers, it’s best to refrigerate the soup separately from the noodles to keep everything in great shape.

Can I freeze Thai Coconut Curry Soup, and how should I do it?
Definitely! To freeze your Thai Coconut Curry Soup, allow it to cool completely, then transfer to freezer-safe containers without the noodles to avoid mushiness. It can be frozen for up to 3 months. When you’re ready to enjoy it, simply thaw overnight in the fridge and reheat on the stovetop. Cook fresh vermicelli noodles separately to serve with the thawed soup.

What should I do if my soup is too spicy?
Very! If you find the soup too spicy, you can mellow it out by adding a bit more coconut milk, which cools the heat while maintaining the creamy texture. You can also dilute the soup with additional vegetable broth. Just be sure to adjust the seasoning afterwards to keep the flavor balanced!

Are there any dietary considerations I should keep in mind for this recipe?
Absolutely! This Thai Coconut Curry Soup is gluten-free, vegetarian, and vegan-friendly. However, if you have allergies, ensure the red curry paste doesn’t contain any fish sauce, which can be common in some brands. Always check the labels, especially for those with specific dietary restrictions or allergies.

How can I troubleshoot if my soup is too thick or too thin?
If your soup turns out thicker than desired, simply stir in a little vegetable broth or water until it reaches your preferred consistency. If it’s too thin, continue simmering for a few more minutes to help it thicken. Remember to give it a taste and adjust the flavors as you modify the consistency!

Thai Coconut Curry Soup

Quick and Creamy Thai Coconut Curry Soup You’ll Love

This 30-Minute Thai Coconut Curry Soup combines vibrant vegetables and creamy coconut broth for a comforting, gluten-free, vegetarian dish.
Prep Time 10 minutes
Cook Time 20 minutes
Total Time 30 minutes
Servings: 4 bowls
Course: Dinner
Cuisine: Thai
Calories: 250

Ingredients
  

Soup Base
  • 4 cups Vegetable Broth Can substitute with chicken broth.
  • 1 can Coconut Milk Use full-fat for richer texture.
  • 4 oz Vermicelli Noodles Swap with any noodles of your choice.
Vegetables
  • 1 each Red Bell Pepper Can substitute with green bell pepper.
  • 1 each Yellow Bell Pepper Orange bell pepper can be used as well.
  • 1 cup Celery Replace with leeks if desired.
  • 2 each Carrots Dice thinly for faster cooking.
  • 1 each Red Onion Sweet onions or shallots can work.
Flavor Profile
  • 2 tbsp Thai Red Curry Paste Adjust based on spice preference.
  • 3 cloves Garlic Minced.
  • 1 tbsp Fresh Grated Ginger Ground ginger can be a substitute.
Finishing Touches
  • 1 cup Cilantro or Parsley Thai basil can be used as an alternative.
  • 1 each Lime Juice adds a refreshing acidity.
  • to taste Salt Adjust according to broth's saltiness.
  • to taste Pepper For seasoning.
  • 1 tbsp Neutral Oil For cooking vegetables.

Equipment

  • Large pot
  • separate pot for noodles
  • Cutting board
  • Knife

Method
 

Preparation Steps
  1. In a large pot, heat oil over medium heat. Add diced red and yellow bell peppers, chopped red onion, celery, and sliced carrots. Sauté for 3-4 minutes until softened.
  2. Stir in Thai red curry paste, minced garlic, and grated ginger. Cook for an additional 1-2 minutes until fragrant.
  3. Pour in vegetable broth and bring to a gentle boil. Reduce heat to low and simmer for 10-15 minutes.
  4. Cook vermicelli noodles in a separate pot of boiling water for 1-2 minutes until al dente, then drain and rinse.
  5. Stir in coconut milk and let the soup simmer for another 10 minutes until slightly thickened.
  6. Remove from heat and stir in cooked vermicelli noodles, chopped cilantro, and lime juice. Season with salt and pepper.
  7. Ladle into bowls and garnish with extra cilantro and lime wedges. Serve hot.

Nutrition

Serving: 1bowlCalories: 250kcalCarbohydrates: 35gProtein: 5gFat: 12gSaturated Fat: 10gPolyunsaturated Fat: 1gMonounsaturated Fat: 1gSodium: 800mgPotassium: 600mgFiber: 3gSugar: 4gVitamin A: 500IUVitamin C: 50mgCalcium: 40mgIron: 2mg

Notes

Cook noodles separately to maintain texture. Use fresh ingredients for best flavor and adjust spice levels as needed.

Tried this recipe?

Let us know how it was!

Comforting Creamy Potato & Dill Soup for Cozy Nights

As I stirred the pot, the aromatic scent of fresh dill whisked me back to my grandmother’s kitchen, where she lovingly prepared her signature Creamy Potato Dill Soup, or Zupa Koperkowa. This delightful dish marries the comforting creaminess of potatoes with the vibrant, grassy notes of dill, creating a symphony of flavors that warms both the body and soul. Not only is this soup a gluten-free option, but it also offers an effortless way to impress your family or entertain guests with minimal fuss. Perfect for a cozy lunch or as a light starter at dinner, it’s a dish that effortlessly transcends seasons. What’s your favorite way to enjoy this comforting classic? Let’s dive into this delectable recipe together!

Why is This Soup So Special?

Comforting familiarity: This Creamy Potato Dill Soup brings back nostalgic memories of home-cooked meals, just like grandma used to make.
Herbaceous delight: The fresh dill infuses a unique flavor, elevating this soup above ordinary potato dishes.
Easy to customize: Whether you prefer chicken or vegetable broth, you can make it your own with simple substitutions.
Quick preparation: In under 30 minutes, you can create a delicious pot of this cozy goodness, perfect when you’re short on time.
Crowd-pleaser: Serve it at dinner parties or family lunches, and watch everyone enjoy each savory spoonful—just like with Potato Bacon Soup!
Nourishing and wholesome: With its gluten-free ingredients and rich vitamins, you can indulge guilt-free.

Creamy Potato & Dill Soup Ingredients

For the Soup Base
Fresh Dill – Use about 3.5 ounces (100 g); fresh dill is key for that authentic flavor; dried won’t cut it.
Potatoes – Go for Yukon Gold or Russet; they provide the heartiness that makes this soup so comforting.
Stock (Chicken or Vegetable) – This forms the flavorful base; homemade is great, but boxed works in a pinch.
Onion (optional) – Diced and sautéed, it enhances the flavor but can be skipped for a simpler broth.

For the Creamy Finish
Heavy Cream – Adds richness and a silky texture; alternatively, half-and-half is lighter but still delicious.

Remember, whipping up this Creamy Potato & Dill Soup is a delightful way to enjoy a comforting bowl of goodness!

Step‑by‑Step Instructions for Creamy Potato & Dill Soup

Step 1: Prepare Your Pot
Begin by taking a heavy-bottomed pot or Dutch oven, at least 3 quarts in size, to ensure even cooking. Heat the pot over medium heat for a few minutes until it’s warm. A good-quality pot will help prevent sticking, creating a delightful base for your Creamy Potato & Dill Soup.

Step 2: Sauté the Onions
If you choose to use onions, add 1 diced onion to the warm pot. Sauté them for about 3–5 minutes, stirring occasionally, until they become translucent and fragrant. This step will enhance the soup’s flavor profile, setting the stage for the addition of your hearty potatoes.

Step 3: Add the Potatoes
Incorporate 2 pounds of chopped Yukon Gold or Russet potatoes into the pot. Stir them in and let them cook for 2–3 minutes alongside the onions, allowing their edges to sear slightly. This brief sautéing will help infuse the potatoes with the aromatic flavors of the onions and prepare them for the next stage.

Step 4: Pour in the Stock
Carefully add 4 to 6 cups of chicken or vegetable stock to the pot, enough to cover the potatoes completely. Raise the heat to bring the mixture to a boil. Once bubbling, reduce the heat to a simmer and cook uncovered for about 15–20 minutes, or until the potatoes are tender when pierced with a fork.

Step 5: Incorporate Dill and Cream
After the potatoes have softened, stir in 3.5 ounces of chopped fresh dill and 1 cup of heavy cream. The vibrant green of the dill will contrast beautifully with the creamy soup as you mix everything together. Let it simmer for an additional 5 minutes, allowing the flavors to meld before moving on to the next step.

Step 6: Blend for Desired Texture
For a smooth and velvety consistency, use an immersion blender directly in the pot and blend until desired creaminess is achieved. If you prefer a chunkier texture in your Creamy Potato & Dill Soup, choose to leave some potato bits intact; the choice is yours!

Step 7: Taste and Adjust Seasonings
Finally, taste your soup and adjust the seasonings as needed, adding salt and pepper according to your preference. This important step will customize your Creamy Potato & Dill Soup to perfection, ensuring a delightful balance of flavors that will warm your heart.

Step 8: Serve Hot
Ladle the hot soup into bowls and consider garnishing with extra dill or a drizzle of cream for presentation. Serve immediately, and enjoy the warm, inviting flavors of your homemade Creamy Potato & Dill Soup with crusty bread for a complete meal!

Expert Tips for Creamy Potato & Dill Soup

  • Use Fresh Dill: The fresh dill is crucial for that vibrant flavor. Avoid dried dill, as it won’t provide the same depth in your Creamy Potato & Dill Soup.

  • Potato Selection: Stick with Yukon Gold or Russet potatoes for the best texture; other varieties may not yield the same creaminess.

  • Simmering Time: Don’t rush the simmering process. Allow the potatoes to cook properly until tender, as undercooked potatoes will affect the soup’s consistency.

  • Texture Preference: Decide on a smooth or chunky soup before blending. If you enjoy texture, reserve some potatoes and mash them to stir back in for added heartiness.

  • Storage Advice: Your Creamy Potato & Dill Soup can be stored in the fridge for up to 3 days. Ensure it cools completely before sealing to maintain freshness.

Make Ahead Options

These Creamy Potato Dill Soup (Zupa Koperkowa) options are perfect for busy home cooks looking to save time during the week! You can chop the potatoes and prepare the broth up to 24 hours in advance; simply store them separately in the refrigerator to maintain freshness. If using onions, sauté them ahead as well, then cool and refrigerate. When you’re ready to serve, combine these ingredients in a pot, add the fresh dill and cream, and follow the blending instructions. This way, you’ll have a comforting meal on the table with minimal effort, just as delicious as if made fresh on the day!

What to Serve with Creamy Potato Dill Soup?

Dive into a delightful pairing that will elevate your soup experience into a full meal that’s comforting and satisfying.

  • Crusty Bread: Perfect for dipping, this warm, rustic bread complements the creamy texture of the soup beautifully.
  • Mixed Green Salad: A fresh salad with a tangy vinaigrette adds brightness and balances the richness of the soup.
  • Grilled Cheese Sandwich: The melty, savory cheese combined with crispy bread creates a nostalgic and indulgent duo with the soup.
  • Roasted Vegetables: These add a hearty element and earthy flavors that enhance the overall meal experience.
  • Steamed Asparagus: Lightly seasoned asparagus provides a fresh crunch, contrasting the creamy soup while infusing seasonal freshness.
  • Savory Scones: A dill or cheese scone can harmonize with the flavors in the soup, offering a delightful twist to your meal.
  • Herbed Quinoa: This light, fluffy side dish introduces an excellent nutty flavor while being nutritious and gluten-free.
  • Chilled White Wine: A crisp Sauvignon Blanc complements the herbal notes of the soup, making it perfect for a light lunch gathering.
  • Lemon Sorbet: For dessert, this refreshing ending cleanses the palate and leaves you with a beautiful citrus aftertaste.

Embrace the comfort of these pairings to create a memorable meal that your family will love!

How to Store and Freeze Creamy Potato & Dill Soup

Fridge: Store any leftovers in a sealed container for up to 3 days. Ensure the soup has cooled completely before refrigerating to maintain its creamy texture.

Freezer: For longer storage, freeze the soup in airtight containers for up to 3 months. Allow the soup to cool completely before transferring, making sure to leave some space for expansion.

Reheating: When ready to enjoy, thaw in the refrigerator overnight and reheat gently on the stove over low heat, stirring often. For the best results, add a splash of cream to restore creaminess.

Creamy Potato & Dill Soup Variations

Feel free to get creative with this recipe, infusing your own twists and turns that will enchant your taste buds.

  • Lower-Carb: Cauliflower
    Swap potatoes with cauliflower for a lighter, low-carb version—just blend until smooth for that creamy finish!

  • Herb Swap: Tarragon or Thyme
    Replace fresh dill with tarragon or thyme to explore a delightful variation of flavor. Each herb brings its own personality to this dish!

  • Vegetarian Twist: Vegetable Stock
    Use vegetable stock instead of chicken stock for a fully vegetarian experience without compromising on taste. Trust me, it’s just as comforting!

  • Cheesy Goodness: Parmesan
    Stir in grated Parmesan for a rich, cheesy flavor that complements the dill beautifully. This twist will make your soup feel even more indulgent!

  • Spicy Kick: Red Pepper Flakes
    Add a sprinkle of red pepper flakes for a hint of heat, turning your comforting bowl into a fiery delight. Perfect for those who like to spice things up!

  • Creamy Alternative: Coconut Milk
    For a dairy-free option, substitute heavy cream with coconut milk, adding a subtle sweetness that pairs wonderfully with potatoes.

  • Texture Boost: Croutons
    Top your soup with homemade croutons for a satisfying crunch, enhancing both flavor and texture while adding that delightful contrast to the creamy base.

  • Flavor Depth: Lemon Zest
    A touch of lemon zest at the end brightens up the flavors while balancing the richness, bringing a refreshing twist to this classic comfort food.

Enjoy experimenting with these variations, and if you’re looking for more cozy inspirations, why not try my Cheesy Hamburger Potato Soup or dive into a bowl of hearty Sausage Tortellini Soup? Each option offers a unique warmth that’s perfect for chilly nights!

Creamy Potato Dill Soup Recipe FAQs

How do I choose the right dill for this soup?
Absolutely! Fresh dill is essential for that vibrant flavor in your Creamy Potato Dill Soup. Aim for about 3.5 ounces (100 g) of fresh dill and avoid dried dill, as it won’t provide the same aromatic qualities and depth in taste.

How should I store leftovers?
You can refrigerate any leftover Creamy Potato Dill Soup in a sealed container for up to 3 days. Make sure it has cooled completely before sealing to maintain that creamy texture and prevent condensation.

Can I freeze this soup?
Very! To freeze your Creamy Potato Dill Soup, allow it to cool completely before transferring to airtight containers. It can be stored in the freezer for up to 3 months. Just remember to leave a little space at the top of the container for expansion!

What should I do if my soup is too thick?
If your Creamy Potato Dill Soup turns out too thick for your liking, don’t worry! Simply add a bit of additional stock or cream, stirring to incorporate until you reach your desired consistency. Just keep taste-testing along the way to ensure the flavors remain balanced.

Is this soup suitable for those with dietary restrictions?
Yes, indeed! This Creamy Potato Dill Soup is naturally gluten-free and vegetarian-friendly if you opt for vegetable stock. Always double-check labels, especially on stock brands and cream alternatives, to ensure they meet your dietary needs.

What if my potatoes cook unevenly?
For an even-cooking experience, make sure to cut your potatoes into uniform pieces. If you find some are undercooked after simmering, let the soup simmer a bit longer, stirring occasionally to prevent sticking. It’s important to give all the flavors time to meld together beautifully!

Creamy Potato & Dill Soup

Comforting Creamy Potato & Dill Soup for Cozy Nights

This Creamy Potato & Dill Soup combines creamy potatoes and fresh dill, creating a comforting dish for any season.
Prep Time 10 minutes
Cook Time 20 minutes
Total Time 30 minutes
Servings: 4 bowls
Course: Soup
Cuisine: American
Calories: 350

Ingredients
  

For the Soup Base
  • 3.5 ounces Fresh Dill fresh dill is key for that authentic flavor
  • 2 pounds Potatoes Yukon Gold or Russet preferred
  • 4-6 cups Stock Chicken or vegetable stock
  • 1 medium Onion diced, optional
For the Creamy Finish
  • 1 cup Heavy Cream adds richness and a silky texture

Equipment

  • heavy-bottomed pot or Dutch oven

Method
 

Step-by-Step Instructions for Creamy Potato & Dill Soup
  1. Begin by taking a heavy-bottomed pot or Dutch oven, at least 3 quarts in size, to ensure even cooking. Heat the pot over medium heat for a few minutes until it's warm.
  2. If you choose to use onions, add 1 diced onion to the warm pot. Sauté them for about 3–5 minutes, stirring occasionally, until they become translucent and fragrant.
  3. Incorporate 2 pounds of chopped Yukon Gold or Russet potatoes into the pot. Stir them in and let them cook for 2–3 minutes alongside the onions.
  4. Carefully add 4 to 6 cups of chicken or vegetable stock to the pot. Raise the heat to bring the mixture to a boil. Once bubbling, reduce the heat to a simmer and cook uncovered for about 15–20 minutes.
  5. After the potatoes have softened, stir in 3.5 ounces of chopped fresh dill and 1 cup of heavy cream. Let it simmer for an additional 5 minutes, allowing the flavors to meld.
  6. For a smooth and velvety consistency, use an immersion blender directly in the pot and blend until desired creaminess is achieved.
  7. Finally, taste your soup and adjust the seasonings as needed, adding salt and pepper according to your preference.
  8. Ladle the hot soup into bowls and consider garnishing with extra dill or a drizzle of cream for presentation. Serve immediately.

Nutrition

Serving: 1bowlCalories: 350kcalCarbohydrates: 30gProtein: 5gFat: 24gSaturated Fat: 15gPolyunsaturated Fat: 1gMonounsaturated Fat: 7gCholesterol: 80mgSodium: 600mgPotassium: 850mgFiber: 4gSugar: 2gVitamin A: 1000IUVitamin C: 25mgCalcium: 200mgIron: 2mg

Notes

Your Creamy Potato & Dill Soup can be stored in the fridge for up to 3 days. For longer storage, freeze the soup in airtight containers for up to 3 months.

Tried this recipe?

Let us know how it was!

Creamy Cucumber Shrimp Salad for a Refreshing Summer Lunch

As the sun climbs higher, I often crave something light yet fulfilling to keep me energized throughout the day. That’s where this Creamy Cucumber Shrimp Salad comes into play! Imagine a mix of tender shrimp and crisp cucumbers, all dressed in a creamy, zesty sauce that delivers a refreshing crunch with every bite. This dish is not only gluten-free and low-carb but also packed with a satisfying 28g of protein per serving—perfect for those warm summer days when you want a meal that doesn’t weigh you down. Whether you’re prepping it for a laid-back lunch or a lively picnic, this salad is sure to impress. Ready to discover how simple it is to whip up this delightful dish? Let’s dive in!

Why is this salad a summer favorite?

Refreshing, the Creamy Cucumber Shrimp Salad is a go-to for warm days, combining succulent shrimp with crisp cucumbers for a satisfying crunch. Quick and Easy, this salad requires minimal cooking and can be prepped in under 30 minutes, perfect for busy weeknights. Adaptable, feel free to swap out proteins or add seasonal veggies, making it versatile for any taste. Nutrient-packed, with 28g of protein and low in carbs, it fits seamlessly into healthy eating plans, especially for those following keto or gluten-free diets. Enjoy it alongside light options like Shrimp Avocado Bowls or Blt Chicken Salad for a complete meal that celebrates summer’s bounty!

Creamy Cucumber Shrimp Salad Ingredients

For the Salad
Large Raw Shrimp – Choose 21–30 count shrimp for the best texture and flavor in your Creamy Cucumber Shrimp Salad.
English Cucumber – This cucumber variety has fewer seeds and stays crisp, adding that refreshing crunch.
Celery – Finely diced, it adds extra crunch and a hint of flavor, balancing the main ingredients beautifully.

For the Dressing
Mayonnaise – The creamy base; swap with light mayo if you prefer a lower-calorie option.
Greek Yogurt – Adds tanginess and creaminess while boosting the protein content, making it a fantastic choice for your salad.
Chives & Dill – Fresh herbs enhance the flavor; feel free to substitute with tarragon or basil based on your preference.
Lemon Juice – Brightens the dish with acidity, enhancing the overall taste profile.
Dijon Mustard – Essential for emulsifying the dressing, giving it a smooth finish.
Kosher Salt & Pepper – A sprinkle of these basic seasonings elevates the flavors in your salad.

Optional Add-Ins
Mango Chunks – For a tropical twist, mix in sweet mango chunks that pair wonderfully with shrimp.
Roasted Asparagus or Bell Peppers – These veggies can add color and crunch, making your salad even more delightful.

Get ready to enjoy a light yet satisfying meal that dances on your palate and keeps you energized all day!

Step‑by‑Step Instructions for Creamy Cucumber Shrimp Salad

Step 1: Boil Shrimp
In a large pot, bring salted water to a rolling boil over high heat. Once boiling, carefully add the large raw shrimp, allowing them to cook for about 2–3 minutes. Watch for the shrimp to turn pink and opaque, signaling they are done. Then, remove them from the heat immediately.

Step 2: Shock in Ice Bath
To stop the cooking process and retain the shrimp’s tender texture, transfer them into a bowl filled with ice water. Let them chill for about 2-3 minutes until thoroughly cooled. Afterward, use paper towels to pat the shrimp dry, ensuring there’s no excess moisture that could make your Creamy Cucumber Shrimp Salad watery.

Step 3: Make the Dressing
In a spacious mixing bowl, whisk together the mayonnaise, Greek yogurt, lemon juice, Dijon mustard, chopped chives, dill, kosher salt, and pepper until smooth and fully combined. This creamy dressing will form the delectable base of your salad, enhancing the flavors of the shrimp and veggies.

Step 4: Prep Veggies
While the dressing comes together, thinly slice the English cucumber and finely dice the celery. Take a moment to blot any excess moisture from the cucumber slices using paper towels; this will help keep your salad crisp. The vibrant veggies will add a refreshing crunch to the Creamy Cucumber Shrimp Salad.

Step 5: Combine & Chill
Gently fold the dried shrimp, prepared cucumber, and celery into the dressing, ensuring everything is evenly coated. Cover the bowl with plastic wrap and refrigerate for at least 30 minutes. This chilling step is vital, allowing the flavors to meld beautifully in your Creamy Cucumber Shrimp Salad.

Step 6: Serve & Enjoy
Once chilled, give the salad a quick stir to ensure ingredients are well mixed. Serve your Creamy Cucumber Shrimp Salad in lettuce cups for an elegant presentation or alongside toasted sourdough for a satisfying lunch. The cool, creamy, and flavorful delight is now ready to impress!

How to Store and Freeze Creamy Cucumber Shrimp Salad

  • Fridge: Store your Creamy Cucumber Shrimp Salad in an airtight container for up to 3 days. This keeps it fresh, while the flavors continue to meld.
  • Freezer: For long-term storage, freeze the shrimp separately from the dressing and veggies for up to 2 months. Thaw in the fridge before combining again.
  • Reheating: Since this salad is best enjoyed cold, avoid reheating. Just give it a stir after chilling to refresh the flavors before serving.
  • Make-Ahead Tips: Prepare the shrimp and dressing a day in advance for easy assembly. Combine with the veggies just before serving to maintain crispness.

What to Serve with Creamy Cucumber Shrimp Salad

Looking to elevate your dining experience with delightful pairings that complement your refreshing dish?

  • Crusty Baguette: A warm, crusty baguette pairs wonderfully, perfect for soaking up the creamy dressing and adds a satisfying chewiness.
  • Avocado Salad: Creamy avocado tossed with lime brings a burst of freshness, balancing the richness of the shrimp salad. It adds a lovely, creamy texture, making every bite even more delectable.
  • Lemon Garlic Quinoa: Nutty quinoa flavored with lemon and garlic is not only wholesome but brings a flavorful contrast, enhancing the protein-packed shrimp salad beautifully.
  • Crispy Kale Chips: These crunchy delights add a healthy twist and a fun texture that contrasts nicely with the creamy shrimp. They also provide a delightful crunch, making your meal exciting.
  • Mango Salsa: A sweet and zesty mango salsa creates a vibrant contrast to the salad and delivers a tropical flair, enhancing every bite with a fruity punch.
  • Iced Herbal Tea: A chilled glass of herbal tea with citrus undertones refreshes the palate and complements the salad’s zesty notes, making it an ideal drink choice.
  • Fruit Skewers: Light, colorful fruit skewers packed with seasonal fruits provide a sweet touch, making a delightful contrast to the savory shrimp salad. They’re also visually inviting for any gathering.
  • Almond or Walnut Brittle: A sweet, crunchy brittle can serve as a delightful dessert, providing a perfect ending to your meal with its contrasting textures.

Make Ahead Options

These Creamy Cucumber Shrimp Salads are ideal for meal prep enthusiasts looking to save time during busy weeks! You can prepare the shrimp up to 24 hours in advance, chilling them well after cooking and storing them in an airtight container in the refrigerator. Additionally, the dressing can be whisked together and refrigerated for up to 3 days separately, allowing flavors to develop while maintaining freshness. When ready to serve, simply combine the chilled shrimp with the veggies and dressing, ensuring to blot any excess moisture from the cucumber beforehand to keep your salad crispy. By prepping this way, you’ll enjoy a delightful, refreshing meal with minimal last-minute effort.

Creamy Cucumber Shrimp Salad Variations

Feel free to get creative with your Creamy Cucumber Shrimp Salad! There are so many delightful twists waiting to be tried.

  • Chicken Swap: Replace shrimp with cooked chicken for a satisfying twist that still packs a protein punch.
    Variations on proteins can transform this salad into a whole new experience, making it perfect for different cravings.

  • Herb Change: Substitute chives and dill with cilantro for a fresh, Mexican-inspired flavor that brightens up the dish.
    The aromatic notes of cilantro bring a new dimension, creating a vibrant combination perfect for summer days.

  • Tropical Addition: Add mango chunks and a sprinkle of jerk seasoning for an exotic Caribbean flair that brings warmth to your plate.
    This sweet and spicy combo invites a fun twist to your meal, reminiscent of sun-soaked beaches.

  • Colorful Crunch: Mix in roasted asparagus or blanched bell peppers for an extra layer of color and crunch.
    These vegetables not only enhance the look of your salad but also add wonderful texture and nutrients.

  • Low-Carb Option: Serve your salad in lettuce cups instead of a bowl for a low-carb and refreshing, crunchy alternative.
    This presentation feels fresh and light—perfect for those looking to keep it simple while enjoying a classic dish.

  • Flavor Infusion: For additional zest, marinate shrimp in lime juice and chili powder before cooking.
    This little step infuses bold flavors, elevating your creamy salad to new heights that would impress any guest.

  • Dairy-Free Dressing: Swap Greek yogurt for a dairy-free alternative like coconut yogurt to keep it creamy without the dairy.
    This version offers a unique twist that caters to those with dietary preferences, allowing everyone to enjoy.

Enjoy experimenting with these variations! And if you’re looking for more delightful seafood inspiration, don’t miss out on the refreshing Shrimp Avocado Bowls or the sumptuous Marry Shrimp Pasta for more culinary adventures!

Expert Tips for Creamy Cucumber Shrimp Salad

  • Dry Shrimp Thoroughly: Pat shrimp with paper towels to eliminate excess moisture; this prevents a watery dressing and enhances flavor.
  • Chill Time Matters: Allowing the salad to chill for at least 30 minutes intensifies the flavors. Tasting it after 2 hours will reveal an even richer blend.
  • Cucumber Care: Be cautious not to overload on cucumbers; too many can release water and dilute the dressing’s taste. Stick to one medium cucumber for best results.
  • Experiment with Herbs: While chives and dill are classic, don’t hesitate to try basil or cilantro for a refreshing twist in your Creamy Cucumber Shrimp Salad.
  • Protein Swaps: This salad can be adaptable; use cooked chicken or add in some crab meat to change things up while keeping it satisfying.

Creamy Cucumber Shrimp Salad Recipe FAQs

How do I select the best shrimp for this salad?
Absolutely! When choosing shrimp, look for large raw shrimp within the 21-30 count range for optimal texture and flavor. Fresh shrimp should have a mild ocean fragrance, and their shells should be firm and shiny, without any dark spots or off-putting smells.

What’s the best way to store leftovers?
For your Creamy Cucumber Shrimp Salad, store it in an airtight container in the refrigerator for up to 3 days. To maintain freshness, it’s a good idea to keep the shrimp and dressing separate from the cucumbers and celery until you’re ready to enjoy it again.

Can I freeze shrimp salad for later use?
Certainly! To freeze, do so by separating the shrimp from the dressing and vegetables. Place them in a freezer-safe container or bag for up to 2 months. When you’re ready to enjoy, simply thaw in the refrigerator overnight and then mix with fresh veggies before serving.

What if my salad seems too watery?
Very good question! A watery salad often results from excess moisture in the shrimp or cucumbers. Be sure to pat the shrimp dry after their ice bath and gently blot any excess water from the cucumber slices. If it’s already too late, try adding a bit more mayonnaise or Greek yogurt to the dressing to help with consistency.

Is this salad suitable for people with certain dietary restrictions?
Yes, indeed! This Creamy Cucumber Shrimp Salad is gluten-free, low-carb, and high-protein, which fits nicely within meal prep and keto diets. However, be cautious with allergies; ensure that the shrimp and dressing ingredients have no cross-contamination, particularly if you have shellfish or dairy allergies in your household. Feel free to substitute Greek yogurt with a dairy-free option if needed!

Creamy Cucumber Shrimp Salad

Creamy Cucumber Shrimp Salad for a Refreshing Summer Lunch

Enjoy this Creamy Cucumber Shrimp Salad, a light yet fulfilling dish perfect for summer with succulent shrimp and crisp cucumbers.
Prep Time 15 minutes
Cook Time 3 minutes
Chill Time 30 minutes
Total Time 48 minutes
Servings: 4 servings
Course: Salad
Cuisine: American
Calories: 300

Ingredients
  

For the Salad
  • 1 lb Large Raw Shrimp Choose 21–30 count for best texture and flavor.
  • 1 English Cucumber Has fewer seeds, stays crisp.
  • 1 stalk Celery Finely diced for extra crunch.
For the Dressing
  • 1/2 cup Mayonnaise Can swap with light mayo for lower calories.
  • 1/2 cup Greek Yogurt Boosts protein content.
  • 2 tbsp Chives Fresh herbs enhance flavor.
  • 2 tbsp Dill Substitute with tarragon or basil if preferred.
  • 2 tbsp Lemon Juice Brightens the dish.
  • 1 tbsp Dijon Mustard Essential for emulsifying the dressing.
  • 1 tsp Kosher Salt Basic seasoning.
  • 1 tsp Pepper Basic seasoning.
Optional Add-Ins
  • 1 cup Mango Chunks For a tropical twist.
  • 1 cup Roasted Asparagus or Bell Peppers Adds color and crunch.

Equipment

  • Large pot
  • Mixing Bowl
  • Ice Bath Bowl
  • Plastic Wrap

Method
 

Step-by-Step Instructions
  1. In a large pot, bring salted water to a rolling boil over high heat. Add the large raw shrimp and cook for about 2–3 minutes until pink and opaque. Remove from heat.
  2. Transfer shrimp to a bowl filled with ice water to stop the cooking process and retain their texture. Chill for 2-3 minutes and pat dry.
  3. In a mixing bowl, whisk together mayonnaise, Greek yogurt, lemon juice, Dijon mustard, chives, dill, salt, and pepper until smooth.
  4. Thinly slice the English cucumber and finely dice the celery. Blot excess moisture from the cucumber slices with paper towels.
  5. Gently fold shrimp, cucumber, and celery into the dressing until evenly coated. Cover and refrigerate for at least 30 minutes.
  6. After chilling, stir the salad and serve in lettuce cups or alongside toasted sourdough.

Nutrition

Serving: 1plateCalories: 300kcalCarbohydrates: 10gProtein: 28gFat: 18gSaturated Fat: 3gPolyunsaturated Fat: 1gMonounsaturated Fat: 14gCholesterol: 200mgSodium: 600mgPotassium: 400mgFiber: 2gSugar: 4gVitamin A: 500IUVitamin C: 10mgCalcium: 40mgIron: 2mg

Notes

For best results, dry shrimp thoroughly to prevent watery dressing and chill salad for more intense flavors.

Tried this recipe?

Let us know how it was!

Spooky Peanut Butter Spider Cookies for Halloween Delights

As the first leaves of fall begin to crunch underfoot, I feel a spark of excitement for the upcoming Halloween festivities. Enter my delightful Peanut Butter Spider Cookies, a perfect blend of sweetness and spookiness that’s sure to capture the playful spirit of the season. These cookies are not just adorable but also incredibly easy to whip up—ideal for those busy evenings when you’re juggling treats for school parties or family gatherings. Each soft and chewy cookie, crowned with a mini Reese’s cup and chocolate legs, becomes a show-stopping delight that even the pickiest snackers won’t resist. Who wouldn’t want to share these cute, eerie bites at their Halloween gathering? Ready to scare up some fun in the kitchen?

Why Are Peanut Butter Spider Cookies Special?

Simplicity: This recipe is a breeze, making it perfect for both novice and experienced bakers.

Adorable Presentation: With their spooky spider design, these cookies are sure to be a hit at Halloween parties, captivating both kids and adults.

Flavor Fusion: The rich peanut butter pairs beautifully with the chocolate, creating a delightful sweet and nutty experience.

Versatility: You can swap peanut butter for almond butter or make them gluten-free without losing any taste!

Make-Ahead Option: Prepare the dough in advance and keep it in your freezer for instant Halloween cheer anytime.

Crowd-Pleaser: These cookies are not just fun to make but are also a guaranteed hit, making them perfect for school events or family gatherings.

Peanut Butter Spider Cookies Ingredients

For the Cookie Base
Unsalted Butter – Provides richness and moisture; use room temperature for best results.
Brown Sugar – Adds sweetness and a hint of caramel flavor; perfect for that chewy texture.
Granulated Sugar – Essential for sweetness and helps stabilize the cookie structure.
Creamy Peanut Butter – Main flavor component offering a nutty taste; avoid natural peanut butter for consistency.
Large Egg – Binds ingredients together and aids in rising.
Vanilla Extract – Enhances the overall flavor profile of the cookies.
All-Purpose Flour – Gives structure to the cookies; can be substituted with gluten-free flour like King Arthur’s 1:1 blend if desired.
Baking Soda – Helps cookies rise and achieve a fluffy texture.
Baking Powder – Provides additional lift for perfectly soft cookies.
Salt – Balances sweetness and enhances the overall flavor.
Granulated Sugar (for rolling) – Coats the cookies for a delightful, sweet outer crunch.

For the Decorations
Mini Reese’s Peanut Butter Cups – Serve as the eye-catching centerpiece of the cookies.
Semi-Sweet Chocolate Chips – Perfect for creating spider legs and attaching candy eyes.
Candy Eyeballs – A fun decorative element to complete the spooky spider theme.

These Peanut Butter Spider Cookies are not only easy to make but also offer a delightful and creative twist for your Halloween celebrations!

Step‑by‑Step Instructions for Peanut Butter Spider Cookies

Step 1: Chill Reese’s
Begin your Halloween baking by unwrapping 24 mini Reese’s peanut butter cups and placing them in the freezer. This chilling step, which should take roughly 30 minutes, will help them hold their shape when added to the warm cookies later.

Step 2: Prep Oven
While the Reese’s cups chill, preheat your oven to 350°F (175°C). This temperature is crucial for achieving perfectly baked peanut butter spider cookies that are soft in the center with a slightly crispy edge. Prepare a baking sheet by lining it with parchment paper to prevent sticking.

Step 3: Cream Butter and Sugars
In a mixing bowl, beat together ½ cup of softened unsalted butter, ½ cup of brown sugar, and ¼ cup of granulated sugar using a hand mixer or stand mixer. Mix until the mixture is light and fluffy, about 2-3 minutes. The whipped texture should look creamy and pale, creating a luscious base for your cookie dough.

Step 4: Add Wet Ingredients
Incorporate 1 cup of creamy peanut butter, 1 large egg, and 1 teaspoon of vanilla extract into your butter-sugar mixture. Mix on medium speed until everything is well combined, approximately 1-2 minutes. The mixture should be smooth and uniform, giving your cookies their delightful nutty flavor.

Step 5: Combine Dry Ingredients
In a separate bowl, whisk together 1 ¼ cups of all-purpose flour, 1 teaspoon of baking soda, ½ teaspoon of baking powder, and a pinch of salt. Gradually add this dry mix to your wet mixture, stirring until just combined. Be careful not to overmix; your dough should be soft and slightly sticky, perfect for shaping.

Step 6: Form Cookies
Using a tablespoon, scoop out portions of dough and roll them into balls about 1 inch in diameter. Roll each ball in granulated sugar for a sweet outer crunch. Place the sugar-coated cookie balls onto your prepared baking sheet, leaving roughly 2 inches between them for spreading.

Step 7: Bake
Bake your peanut butter spider cookies in the preheated oven for 8-11 minutes. Keep an eye on them—they should be lightly golden on the edges but still soft in the center. The sweet aroma of peanut butter and sugar will fill your kitchen, creating a delightful anticipation for the spooky treats to come.

Step 8: Cool & Add Reese’s
Remove the freshly baked cookies from the oven and allow them to cool on the baking sheet for about 15-20 minutes. Once they are cool enough to handle, gently press a chilled Reese’s cup into the center of each cookie, letting it sink slightly for a perfect spider body.

Step 9: Melt Chocolate
Melt ½ cup of semi-sweet chocolate chips in the microwave, heating in 20-second intervals and stirring until smooth. With a spoon or piping bag, create spider legs by drizzling the melted chocolate over each cookie. Quickly place candy eyeballs on top of the Reese’s before the chocolate hardens to complete the fun spider look.

Peanut Butter Spider Cookies Variations

Feel free to mix things up and make these cookies uniquely yours—your creativity will shine through with every bite!

  • Nut-Free: Swap peanut butter for sunflower seed butter for a fun, nut-free alternative. It’s just as creamy and delicious!
  • Gluten-Free: Use a gluten-free flour blend, like King Arthur’s 1:1, to ensure everyone can enjoy these spooky treats without concern.
  • Dairy-Free: Go dairy-free by using vegan butter and dairy-free chocolate chips; the cookies will still taste phenomenal!
  • Flavor Twist: Add a pinch of cinnamon or pumpkin spice for an irresistible fall flavor that perfectly complements Halloween festivities.
  • Extra Crunch: Stir in chopped peanuts or walnuts into the dough for a delightful crunch that brings a new texture to each bite.
  • Chocolate Lovers: Use dark chocolate for the legs instead of semi-sweet for an indulgent treat. The deeper flavor adds a special touch.
  • Candy Corn Decoration: Instead of candy eyeballs, try using candy corn to give your cookies an extra festive Halloween vibe. Everyone will love the new look!
  • Spicy Kick: For those who enjoy a little heat, incorporate a touch of cayenne pepper into the cookie dough for a surprising twist.

These cookie variations can turn a delightful treat into a unique celebration of flavors! And if you’re inclined to enjoy more creative cookies, consider these Blueberry Breakfast Cookies for breakfast, or perhaps the delicious dishes featured in Cowboy Butter Chicken. Your options are endless!

Storage Tips for Peanut Butter Spider Cookies

Room Temperature: Store your Peanut Butter Spider Cookies in an airtight container at room temperature for up to 3 days to maintain freshness and flavor.

Freezer: If you want to keep them longer, freeze the cookies for up to 3 months. Layer them with parchment paper in a freezer-safe container to prevent sticking.

Reheating: When you’re ready to enjoy frozen cookies, allow them to thaw at room temperature for about 30 minutes. If you prefer warm cookies, reheat them in the microwave for a few seconds.

Make-Ahead Option: You can also prepare the cookie dough in advance and freeze it. Shape the dough into balls, place them on a baking sheet, and freeze until firm. Then transfer to a ziplock bag for easy baking later!

What to Serve with Peanut Butter Spider Cookies

As the scent of freshly baked cookies wafts through your home, it’s the perfect moment to think about what delightful sides and sips will elevate your Halloween festivities.

  • Glass of Milk: A classic pairing! Rich, cold milk beautifully balances the sweetness of the cookies, making every bite even more delicious.

  • Spooky Punch: A vibrant, fruity punch with gummy worms or eyeball candies adds a playful touch to your Halloween gathering. It’s a fun, thematic drink that complements the cookies perfectly.

  • Chocolate-Covered Pretzels: Salty and sweet, these crunchy treats provide a satisfying contrast to the soft, chewy cookie. They can also be shaped into weird formations for added Halloween fun!

  • Caramel Apple Slices: Crisp apple slices drizzled with caramel sauce deliver a fresh, fruity element that cuts through the richness of the cookies. They’re a seasonal favorite that guests will love.

  • Pumpkin Spice Latte: For a cozy touch, serve a warm pumpkin spice latte that echoes the flavors of fall. The creamy drink enhances the overall autumn vibe of your Halloween spread.

  • Meringue Ghosts: Light and airy, these cookie-ish treats not only add a bit of whimsy to your dessert table but also create an interesting textural contrast when enjoyed alongside spider cookies.

  • Candy Corn Medley: A mix of candy corn, nuts, and chocolate bits can make for a delightful sweet-and-salty nibble. It’s an easy way to celebrate Halloween flavors while snacking.

  • Pomegranate Seeds: Their bright color and juicy burst add a lovely freshness that lightens up your cookie treat. Plus, they bring a seasonal twist without overshadowing the cookies!

These suggestions will not only enhance the spooky charm of your Peanut Butter Spider Cookies but also create a festive atmosphere your friends and family will adore.

Make Ahead Options

These Peanut Butter Spider Cookies are a fantastic treat to prepare in advance, saving you time on busy days! You can mix the cookie dough and refrigerate it for up to 3 days or freeze it for up to 3 months. Just scoop the dough into balls, roll them in sugar, and store them in an airtight container or freezer bag. When you’re ready to bake, simply preheat your oven and bake the frozen cookies straight from the freezer for a few extra minutes. For the best quality, avoid adding the Reese’s cups and decorations until just before serving, ensuring your cookies are just as fresh and delightful as the moment you baked them!

Expert Tips for Peanut Butter Spider Cookies

Chill the Reese’s: Always freeze the mini Reese’s cups before baking; this prevents them from melting too much and losing their shape.

Roll in Sugar: Don’t skip rolling the cookie dough balls in granulated sugar; it adds a delightful crunch to the outer layer.

Avoid Overmixing: Be cautious not to overmix your dough; it can make the cookies tough instead of soft and chewy.

Use Room Temperature Ingredients: Ensure your butter and egg are at room temperature for better mixing, resulting in a smoother cookie dough.

Cooling Time: Allow the cookies to cool properly before pressing in the Reese’s; this helps avoid breaking and maintains their shape.

Storage Tips: Keep your Peanut Butter Spider Cookies in an airtight container at room temperature for up to three days, or freeze for longer freshness.

Peanut Butter Spider Cookies Recipe FAQs

How do I choose ripe ingredients for Peanut Butter Spider Cookies?
Absolutely! When selecting peanut butter, opt for creamy varieties without added sugar for the best consistency. Ensure your unsalted butter is at room temperature, as this helps create a fluffy dough. For eggs, use large eggs stored in a cool place—check for freshness by placing them in water; if they sink, they’re good to go!

How should I store my Peanut Butter Spider Cookies and for how long?
Very simply! Store your Peanut Butter Spider Cookies in an airtight container at room temperature for up to 3 days. To keep them fresh longer, layer them with parchment paper and place them in the fridge. The flavor and texture will remain delightful.

Can I freeze these cookies for later?
Absolutely! To freeze your Peanut Butter Spider Cookies, place them in a single layer in a freezer-safe container lined with parchment paper, ensuring they don’t stick together. You can freeze them for up to 3 months. When you’re ready to enjoy some cookie goodness, simply thaw them at room temperature for about 30 minutes.

What if my cookies turned out flat?
No worries! If your cookies ended up flat, it could be due to not using enough flour or the baking soda being expired. Make sure to properly measure your flour; using the spoon-and-level method is best. Always check the expiration dates on your baking soda and powder to ensure they are active. If flattening happens again, consider chilling the dough for about 30 minutes before baking.

Are there any dietary considerations with Peanut Butter Spider Cookies?
Indeed! For those with nut allergies, substitute peanut butter with sunflower seed butter for a similar taste without the allergens. If gluten is a concern, use a gluten-free flour blend—like King Arthur’s 1:1 flour—to create a safe treat for everyone. Always double-check the packaging for hidden ingredients, especially in candy decorations!

Can pets eat these cookies?
Absolutely not! While peanut butter is safe for dogs in moderation, the sugars and chocolate in these cookies can be harmful to pets. Always keep baked goods out of reach from furry friends to keep them safe and healthy. Instead, consider making special pet-friendly treats if you want to share the fun!

Peanut Butter Spider Cookies

Spooky Peanut Butter Spider Cookies for Halloween Delights

Delight in these Peanut Butter Spider Cookies, combining sweetness and spookiness for Halloween fun.
Prep Time 30 minutes
Cook Time 11 minutes
Cooling Time 20 minutes
Total Time 1 hour 1 minute
Servings: 24 cookies
Course: Dessert
Calories: 150

Ingredients
  

For the Cookie Base
  • 0.5 cups Unsalted Butter room temperature
  • 0.5 cups Brown Sugar packed
  • 0.25 cups Granulated Sugar
  • 1 cups Creamy Peanut Butter not natural
  • 1 large Egg
  • 1 teaspoon Vanilla Extract
  • 1.25 cups All-Purpose Flour can use gluten-free
  • 1 teaspoon Baking Soda
  • 0.5 teaspoon Baking Powder
  • 1 pinch Salt
  • 0.25 cups Granulated Sugar for rolling
For the Decorations
  • 24 units Mini Reese’s Peanut Butter Cups chilled
  • 0.5 cups Semi-Sweet Chocolate Chips
  • 24 units Candy Eyeballs

Equipment

  • Mixing Bowl
  • Hand mixer
  • Baking Sheet
  • Parchment Paper
  • Microwave
  • Ziplock Bag

Method
 

Step‑by‑Step Instructions
  1. Chill Reese's: Unwrap and freeze 24 mini Reese's peanut butter cups for about 30 minutes.
  2. Prep Oven: Preheat your oven to 350°F (175°C) and line a baking sheet with parchment paper.
  3. Cream Butter and Sugars: Beat together unsalted butter, brown sugar, and granulated sugar until light and fluffy.
  4. Add Wet Ingredients: Mix in creamy peanut butter, egg, and vanilla extract until well combined.
  5. Combine Dry Ingredients: Whisk together flour, baking soda, baking powder, and salt, then gradually mix into wet ingredients.
  6. Form Cookies: Scoop dough and roll into 1-inch balls; roll in granulated sugar before placing on the baking sheet.
  7. Bake: Bake for 8-11 minutes until lightly golden on edges. Cool on baking sheet for 15-20 minutes.
  8. Cool & Add Reese's: Once cool enough, press a chilled Reese's cup into the center of each cookie.
  9. Melt Chocolate: Melt semi-sweet chocolate chips and drizzle to create spider legs, adding candy eyeballs before it hardens.

Nutrition

Serving: 1cookieCalories: 150kcalCarbohydrates: 19gProtein: 3gFat: 7gSaturated Fat: 3gPolyunsaturated Fat: 1gMonounsaturated Fat: 3gCholesterol: 15mgSodium: 100mgPotassium: 100mgFiber: 1gSugar: 10gVitamin A: 200IUCalcium: 20mgIron: 0.5mg

Notes

These cookies can be prepared ahead of time and stored in an airtight container for freshness. Allow to cool completely before adding decorations.

Tried this recipe?

Let us know how it was!

Sautéed Spinach and Mushrooms for a Quick Flavor Boost

As I stood in my kitchen, the vibrant greens of fresh spinach caught my eye, beckoning me to whip up something quick yet satisfying. That’s when I decided on Sautéed Spinach and Mushrooms, a dish that celebrates simplicity without sacrificing taste. In just 10 minutes, you can savor the earthy notes of cremini mushrooms paired with the fresh zing of garlic and lemon. Not only is this meal incredibly swift to prepare, but it also makes an adaptable companion for busy weeknights or a gourmet touch to your favorite pizzas. Designed to delight vegetarians, vegans, and gluten-free food lovers alike, let’s dive into this recipe and discover how easily you can elevate your home cooking. What will you pair your sautéed delight with tonight?

Why is this sautéed dish so beloved?

Ease of Preparation: This dish requires minimal cooking skills, making it accessible for anyone looking to whip up a quick meal.

Rich Flavor Profile: The combination of earthy mushrooms and zesty lemon creates a delightful harmony that brings your taste buds to life.

Versatility: Pair it with grilled meats, toss it into pasta, or serve it alongside your favorite wraps—the options are endless!

Healthy Benefits: Packed with nutrients, this recipe is a smart choice for those following vegetarian, vegan, or Mediterranean diets.

Quick and Convenient: Ready in just 10 minutes, it’s perfect for busy weeknights when you need a meal that doesn’t sacrifice flavor.

Try serving it with a side of Potato Bacon Soup for a hearty dinner or use it as a topping on your next pizza for an extra gourmet touch!

Sautéed Spinach and Mushrooms Ingredients

For the Sauté
Fresh Spinach – A nutrient-rich leafy green that provides vibrant color and health benefits.
Cremini Mushrooms – Offers an earthy flavor; feel free to swap with white button or shiitake mushrooms for variety.
Garlic – Fresh minced garlic gives depth and richness to the dish.
Olive Oil – Use extra virgin for sautéing, enhancing the flavor and providing healthy fats.
Kosher Salt – Essential for seasoning, it amplifies the natural flavors of the sautéed spinach and mushrooms.
Black Pepper – Freshly ground adds a subtle heat and aroma.
Lemon Juice – Brightens the dish with a tangy kick; fresh juice is best for optimal flavor.
Parmesan Cheese (optional) – Adds a creamy, umami richness; can be omitted for a vegan option.

Step‑by‑Step Instructions for Sautéed Spinach and Mushrooms

Step 1: Prepare the Mushrooms
Begin by cleaning 8 ounces of cremini mushrooms with a damp cloth to remove any dirt. Slice the mushrooms thinly for even cooking. The mushrooms should be uniform in size to ensure they sauté uniformly. Set them aside while you prepare your sauté pan for cooking this delicious sautéed spinach and mushrooms dish.

Step 2: Heat the Olive Oil
In a large sauté pan, pour in 2 tablespoons of extra virgin olive oil and place it over medium-high heat. Allow the oil to heat for about 1 minute until it shimmers, indicating it’s hot enough for sautéing. This is essential for achieving golden, flavorful mushrooms that serve as the star of the sautéed spinach and mushrooms.

Step 3: Sauté the Mushrooms
Once the oil is hot, add the sliced mushrooms to the pan, spreading them out evenly. Sauté for about 4 minutes, stirring frequently until they’re golden brown and tender. Look for a caramelized color, which deepens their earthy flavor while you cook the sautéed spinach and mushrooms.

Step 4: Season the Mushrooms
After 4 minutes, season the mushrooms generously with kosher salt and freshly ground black pepper to taste. Continue cooking for an additional 2 minutes to meld the flavors; the mushrooms should be soft and aromatic by now—perfectly tender for your sautéed spinach and mushrooms.

Step 5: Add Garlic
Stir in 2 cloves of minced garlic and cook for another 1 minute. You’ll know it’s ready when the kitchen fills with the delicious aroma of the garlic. Be careful not to burn the garlic, as it can turn bitter, which would affect your delightful sautéed spinach and mushrooms.

Step 6: Incorporate the Spinach
Now, add about 8 cups of fresh spinach to the pan. It will seem like a mountain in the pan, but it will wilt down significantly. Sauté for about 2 minutes, tossing the spinach with the mushrooms until it’s wilted and vibrant in color. This is the perfect moment to embrace the harmony of flavors in your sautéed spinach and mushrooms.

Step 7: Finish with Lemon Juice
Remove the pan from heat and squeeze in the juice of half a lemon, stirring well to combine. This brightens the dish with acidity and enhances the earthy tones of the mushrooms and spinach. Taste and adjust seasoning if necessary, and prepare for your amazing sautéed spinach and mushrooms to shine at your dinner table.

Step 8: (Optional) Add Parmesan
For those who want an extra layer of richness, sprinkle freshly grated Parmesan cheese over the sautéed spinach and mushrooms just before serving. This optional step adds a creamy umami flavor, making this dish a vibrant side or topping for various meals. Enjoy the delightful fusion of flavors!

Sautéed Spinach and Mushrooms Variations

Feel free to explore these delightful twists that can elevate your sautéed spinach and mushrooms, adding new layers of flavor and texture!

  • Colorful Veggies: Add bell peppers or zucchini for a colorful addition. Their sweetness complements the earthy mushrooms beautifully!

  • Mushroom Medley: Swap in portobello or shiitake mushrooms for a heartier bite. Their unique textures will give your dish a delicious twist!

  • Creamy Dream: Stir in a splash of coconut milk or cashew cream for a rich, creamy version. It transforms this dish into a cozy, comforting treat.

  • Spice It Up: For those who crave heat, sprinkle in some red pepper flakes or add jalapeños. A little spice can elevate the flavor profile wonderfully.

  • Nutty Crunch: Toss in some toasted pine nuts or almonds for a crispy texture. It adds a lovely crunch that contrasts with the softness of the sautéed greens.

  • Italian Flair: Mix in some Italian herbs, such as oregano or basil, for a Mediterranean flair. These herbs harmonize beautifully with the garlic and lemon!

  • Pair with Pasta: Serve your sautéed spinach and mushrooms over pasta. It makes for a tasty, filling meal that’s quick and satisfying!

  • Perfect for Pizza: Use the sautéed mixture as a gourmet topping for your homemade pizza. The flavors meld beautifully with mozzarella and tomato sauce, making a delightful dinner.

Try serving this alongside our Cheesy Spinach Artichoke dish or incorporating it into a hearty Bacon Soup Comfort to fuel your culinary adventures!

What to Serve with Quick and Delicious Sautéed Spinach and Mushrooms

Pairing your sautéed delight with complementary sides can elevate your meal to new heights.

  • Creamy Mashed Potatoes: The buttery smoothness of mashed potatoes contrasts beautifully with the earthy flavors of the sautéed dish, making each bite simply irresistible.

  • Garlic Bread: This crunchy, buttery treat provides a delightful texture that perfectly complements the soft sautéed spinach and mushrooms for a satisfying dining experience.

  • Grilled Chicken: Lean and flavorful, the char-grilled notes from the chicken enhance the savoriness of the sauté, creating a balanced plate that guests will love.

  • Quinoa Salad: Light and fresh, a lemony quinoa salad adds a bright twist, harmonizing with the citrusy notes from your sautéed creation and offering added nutrition.

  • Roasted Vegetables: Vibrant, caramelized veggies provide a savory crunch while keeping the meal colorful and diverse, all backed by robust seasonal flavors.

  • Fresh Garden Salad: Crisp, garden-fresh greens tossed with a light vinaigrette will offer a refreshing contrast; the acidity enhances the richness of the sautéed spinach and mushrooms.

  • Red Wine: A glass of smooth red wine ties the meal together beautifully, complementing earthy flavors, while its richness accents the sautéed dish and enhances dining pleasure.

  • Chocolate Mousse: For those with a sweet tooth, a velvety chocolate mousse makes for an elegant and indulgent dessert that follows the earthy notes of the main dish, wrapping up the meal with satisfaction.

Make Ahead Options

These Sautéed Spinach and Mushrooms are perfect for meal prep enthusiasts! You can wash and slice the cremini mushrooms and store them in the fridge for up to 3 days in an airtight container, preventing them from browning. Additionally, you can pre-mince the garlic and keep it in a small container for overnight flavor preservation. When you’re ready to serve, simply heat the olive oil, sauté the mushrooms for about 4 minutes, then add the garlic and spinach as directed. This prep-ahead strategy not only saves you time but ensures the dish remains just as fresh and delicious, making it an ideal choice for busy weeknights!

Storage Tips for Sautéed Spinach and Mushrooms

Fridge: Store leftovers in an airtight container, where they’ll stay fresh for up to 4 days. This way, you can easily enjoy your sautéed spinach and mushrooms again!

Freezer: Freezing is not recommended for this dish, as it can become watery upon thawing. Instead, savor your sautéed creation within the freshness window mentioned.

Reheating: To reheat, place the leftover sautéed spinach and mushrooms in a skillet over low heat. Stir gently until warmed throughout, allowing the flavors to meld once again.

Expert Tips for Sautéed Spinach and Mushrooms

  • Proper Mushroom Cooking: Ensure the mushrooms are well-cooked and tender; undercooking can lead to excess moisture ruining your sautéed spinach and mushrooms.

  • Avoid Excessive Water: Don’t freeze this dish; it can become watery. Store it in an airtight container and enjoy within 4 days for the best experience.

  • Season at the End: Taste and adjust your seasoning at the end of cooking to ensure a balanced flavor profile in your sautéed spinach and mushrooms.

  • Garlic Timing: Add garlic towards the end of cooking to prevent it from burning, which can turn bitter and spoil the delightful taste of your dish.

  • Experiment with Greens: Feel free to mix in different leafy vegetables—like Swiss chard or kale—for a unique spin on your sautéed spinach and mushrooms.

Sautéed Spinach and Mushrooms Recipe FAQs

What type of spinach is best for sautéing?
Absolutely! Any fresh spinach variety works well, but I recommend using baby spinach for its tender leaves and mild flavor. Look for vibrant green leaves without any dark spots or wilting, as freshness is key to a delicious sautéed spinach and mushrooms dish.

How should I store leftover sautéed spinach and mushrooms?
To keep your sautéed spinach and mushrooms fresh, store them in an airtight container in the refrigerator for up to 4 days. Just be sure to cool the dish completely before sealing to avoid excess moisture buildup, which can make the dish soggy.

Can I freeze sautéed spinach and mushrooms?
While you might be tempted to freeze it, I wouldn’t recommend it! Freezing can cause the dish to become watery upon thawing, affecting its texture and flavor. Instead, enjoy your leftovers within the 4-day window for the best experience.

Why are my mushrooms releasing too much water?
A common issue when cooking mushrooms is overcrowding the pan. Make sure to leave enough space for the mushrooms to sauté properly, allowing moisture to escape. If you notice they’re still releasing excess water, try raising the heat slightly to promote better evaporation during cooking.

Is this recipe suitable for people with dietary restrictions?
Very! The sautéed spinach and mushrooms recipe is vegetarian, vegan, gluten-free, and dairy-free. If you’re concerned about dairy, simply omit the optional Parmesan cheese for a totally vegan dish. Always double-check ingredient labels if you have specific allergies.

How can I add more flavor to this dish?
To elevate the taste, consider adding a splash of vegetable broth while cooking or tossing in some red pepper flakes for a bit of heat. You can also mix in additional vegetables like bell peppers or zucchini, or top the final dish with freshly chopped herbs like parsley or basil for extra freshness. Enjoy trying out various flavor combinations to make this sautéed spinach and mushrooms your own!

Sauteed Spinach and Mushrooms

Sautéed Spinach and Mushrooms for a Quick Flavor Boost

Sautéed Spinach and Mushrooms is a quick and flavorful dish, ideal for busy weeknights and versatile enough for various pairings.
Prep Time 5 minutes
Cook Time 5 minutes
Total Time 10 minutes
Servings: 4 servings
Course: Appetizers
Cuisine: Mediterranean
Calories: 150

Ingredients
  

For the Sauté
  • 8 ounces Cremini Mushrooms Sliced thinly
  • 2 tablespoons Olive Oil Extra virgin for sautéing
  • 2 cloves Garlic Minced
  • 8 cups Fresh Spinach Will wilt down significantly
  • Kosher Salt Kosher Salt To taste
  • Black Pepper Black Pepper Freshly ground, to taste
  • 1/2 medium Lemon Juice Freshly squeezed
  • Parmesan Cheese Optional, for serving

Equipment

  • Large sauté pan

Method
 

Step‑by‑Step Instructions
  1. Clean the cremini mushrooms with a damp cloth and slice thinly. Set aside.
  2. In a sauté pan, heat olive oil over medium-high heat until shimmering.
  3. Add the sliced mushrooms to the pan, sauté for about 4 minutes until golden brown and tender.
  4. Season the mushrooms with kosher salt and black pepper, continue cooking for an additional 2 minutes.
  5. Stir in minced garlic and cook for another minute until fragrant.
  6. Add fresh spinach to the pan and sauté for about 2 minutes until wilted.
  7. Remove from heat and add lemon juice, stirring to combine.
  8. Sprinkle with Parmesan cheese before serving if desired.

Nutrition

Serving: 1servingCalories: 150kcalCarbohydrates: 10gProtein: 5gFat: 12gSaturated Fat: 2gPolyunsaturated Fat: 0.5gMonounsaturated Fat: 9gCholesterol: 5mgSodium: 300mgPotassium: 500mgFiber: 4gSugar: 2gVitamin A: 2800IUVitamin C: 30mgCalcium: 100mgIron: 3mg

Notes

Store leftovers in an airtight container in the fridge for up to 4 days. Reheat gently over low heat.

Tried this recipe?

Let us know how it was!

Healthy Shrimp Stir Fry With Noodles: Ready in 30 Minutes

As the aroma of garlic sizzles in the pan, I can’t help but smile—this is the magic of a homemade meal coming to life. Today, I’m excited to share my Quick and Healthy Shrimp Stir Fry with Noodles, a vibrant dish that effortlessly blends succulent shrimp and a rainbow of fresh veggies into a one-pan wonder. In just 30 minutes, you’ll have a delicious, nutrient-packed dinner that’s quicker than takeout and far healthier to boot! Picture yourself gathering around the table, serving this colorful stir fry that’s not only easy to whip up after a busy day but also customizable to suit your tastes. What veggies or noodles will you experiment with tonight?

What makes this stir fry unforgettable?

Quick, nutritious meal: Prepare this delightful Shrimp Stir Fry With Noodles in just 30 minutes, making it the perfect solution for busy weeknights.
Flavor explosion: The combination of hoisin sauce and savory shrimp creates a robust taste that will satisfy your cravings.
One-pan convenience: Say goodbye to multi-dish cleanup; everything cooks together in one easy pan.
Versatile and customizable: Feel free to mix up the veggies or switch to your favorite noodles—think Dragon Noodles Colorful or even Chicken Pepper Stir if you’re in the mood for chicken.
Crowd-pleaser: This dish is sure to impress family and friends, making it an ideal option for gatherings or simple family dinners!

Shrimp Stir Fry With Noodles Ingredients

For the Noodles
Fresh Hokkien stir-fry noodles – The perfect base for this dish, offering a chewy texture; you can substitute with dry lo mein noodles or spaghetti if necessary.

For the Sauce
Hoisin sauce – Adds a layer of sweetness and depth that elevates the dish.
Reduced sodium soy sauce – Imparts essential seasoning; can be swapped with tamari for a gluten-free option.
Sesame oil – Infuses a delightful nutty aroma; use olive oil if sesame oil is unavailable.
Reduced sodium chicken broth – Enhances flavor while keeping sodium low; substitute with vegetable broth for a vegetarian option.
Cornstarch – Essential for thickening the sauce, though arrowroot powder can serve as a substitute.

For the Stir Fry
Vegetable oil – Necessary for cooking the shrimp and veggies efficiently.
Medium or large shrimp – The star protein of the dish, ensuring tenderness and flavor.
Broccoli florets – Packed with nutrients and adds a satisfying crunch; snap peas or asparagus can be great substitutes.
Red bell pepper – Brings a pop of sweetness and color; green bell pepper can replace it if needed.
Carrots (julienned/shredded) – Adds a hint of sweetness and texture; zucchini is a good alternative.
Scallions – Contributes a fresh, mild onion flavor that enhances the dish.
Garlic (minced) – Enriches the aroma and depth of flavor in each bite.

Optional Garnishes
Sliced scallions and sesame seeds – Perfect for adding texture and a decorative touch to your Shrimp Stir Fry With Noodles.

Step‑by‑Step Instructions for Shrimp Stir Fry With Noodles

Step 1: Prepare Noodles
Begin by cooking fresh Hokkien stir-fry noodles according to the package instructions—typically boiling them for about 3-5 minutes until tender. Once cooked, drain the noodles in a colander, and set them aside, ensuring they’re not sticky.

Step 2: Make the Sauce
In a mixing bowl, whisk together hoisin sauce, reduced sodium soy sauce, sesame oil, chicken broth, and cornstarch until smooth. This should take about 2 minutes. Reserve a portion of the sauce for later use, ensuring you have a flavorful coating ready to enhance your Shrimp Stir Fry With Noodles.

Step 3: Cook Shrimp
Heat 1 tablespoon of vegetable oil in a large wok or skillet over medium-high heat. Once the oil shimmers, add the medium or large shrimp, cooking for about 2 minutes until they turn opaque and pink. Remove the shrimp from the pan, placing them on a plate to rest.

Step 4: Sauté Broccoli
In the same skillet, add another tablespoon of oil, then toss in the broccoli florets. Sauté for approximately 3-4 minutes until they begin to char slightly; this adds a delightful flavor. To soften the broccoli, add a splash of water and cover for another 1-2 minutes until tender-crisp.

Step 5: Sauté Peppers and Carrots
Next, incorporate the julienned red bell pepper and carrots into the pan. Stir-fry these vibrant vegetables for about 3-4 minutes until they are crisp-tender yet still bright in color. This step enhances the overall visual appeal of your Shrimp Stir Fry With Noodles.

Step 6: Aromatics
Push the sautéed vegetables to one side of the skillet and add the scallion whites and minced garlic to the pan. Cook for approximately 30 seconds or until the garlic becomes fragrant and golden, imbuing your dish with wonderful aroma.

Step 7: Combine
Return the cooked shrimp and reserved vegetables to the skillet. Pour in the remaining sauce and toss everything together for about 1 minute over heat, ensuring every bite is evenly coated. The sauce will thicken slightly, creating a glossy finish on the Shrimp Stir Fry With Noodles.

Step 8: Garnish and Serve
Remove the pan from heat and sprinkle sliced scallion greens and sesame seeds over the stir fry for a touch of elegance. Serve your vibrant Shrimp Stir Fry With Noodles immediately and savor the delightful mixture of flavors and textures.

Shrimp Stir Fry With Noodles Variations

Customize your Shrimp Stir Fry with Noodles to suit your taste preferences and dietary needs—let your creativity shine through!

  • Protein Swap: Replace shrimp with chicken, beef, or tofu for a delightful twist and to suit your family’s favorite proteins. It’s an easy way to add variety.
  • Veggie Upgrade: Use seasonal veggies like snap peas, mushrooms, or bok choy for added nutrients and freshness, ensuring every bite is bursting with flavor.
  • Low-Carb Option: Substitute traditional noodles with zucchini noodles or cauliflower rice for a lighter, healthier dish that’s equally satisfying.
  • Spicy Kick: Add red pepper flakes or a drizzle of Sriracha during cooking for a fiery flavor that ignites your taste buds and heats things up.
  • Herbaceous Twist: Toss in fresh herbs like basil or cilantro right before serving to elevate the freshness and introduce bright, aromatic notes.
  • Citrus Zest: Squeeze fresh lime or lemon juice over your dish just before serving for a zesty finish that brightens the overall flavor profile.
  • Nutty Flavor: Include a handful of chopped peanuts or cashews when garnishing for an added crunch and a delightful nuttiness that enhances the dish.
  • Saucy Variations: Explore different sauce options by swapping hoisin sauce with teriyaki or sweet chili sauce for distinct flavor experiences each time!

If you’re looking for more delicious ideas, consider trying Sticky Beef Noodles or a classic Shrimp Scampi Pasta—each offers a unique flavor journey!

What to Serve with Shrimp Stir Fry with Noodles

Capture the essence of a delightful meal by pairing your colorful stir fry with equally delicious sides that enhance its flavors.

  • Steamed Dumplings: These little pockets of joy add a soft, warm contrast to the crunchy stir fry, creating a satisfying balance.

  • Crispy Spring Rolls: Light and crunchy, these rolls bring texture and a hint of freshness that complements the vibrant veggies in your dish.

  • Garlic Fried Rice: A fragrant and buttery side dish, the savory notes of fried rice beautifully harmonize with the sweet hoisin sauce in your stir fry.

  • Zesty Cucumber Salad: This refreshing salad provides a crisp, cool counterpart to the hot stir fry, while a touch of vinegar lifts the flavors.

  • Sesame Green Beans: Sautéed and sprinkled with sesame seeds, these tender green beans add a delightful nutty crunch—perfect alongside the noodles.

  • Chilled Tofu Salad: For a protein boost, a chilled tofu salad dressed in soy sauce and sesame oil pairs wonderfully, adding depth without overshadowing your main dish.

  • Soda or Iced Tea: A light, fizzy soda or a refreshing iced tea can cleanse the palate and enhance the overall dining experience.

  • Mango Sticky Rice: For a sweet finish, this classic Thai dessert brings a luscious, creamy sweetness that perfectly rounds off your meal.

Storage Tips for Shrimp Stir Fry With Noodles

Fridge: Store leftovers in an airtight container in the refrigerator for up to 3 days to maintain freshness and quality.

Freezer: For longer storage, freeze the stir fry in a freezer-safe container for up to 2 months.

Reheating: When ready to enjoy, reheat in a pan over low heat, stirring occasionally to prevent overcooking the shrimp.

Airtight Guidance: Always keep your Shrimp Stir Fry With Noodles sealed tight to prevent freezer burn and preserve flavor.

Expert Tips for Shrimp Stir Fry With Noodles

Prep in Advance: Gather all your ingredients before starting to cook. This will help you keep the pace, ensuring the stir-fry remains fresh and crunchy.

Avoid Overcrowding: Don’t cram the ingredients into the pan. This can lead to steaming instead of sautéing, which will affect the texture of your Shrimp Stir Fry With Noodles.

Noodle Know-How: If using dry noodles, make sure to cook them thoroughly before adding to the stir fry. Under-cooked noodles can be rubbery and unpleasant.

Spice It Up: For a kick, add red pepper flakes or a splash of Sriracha when cooking the veggies. This can elevate your Shrimp Stir Fry With Noodles to a whole new level of flavor!

Storage Savvy: Leftovers can be stored for up to three days in an airtight container. When reheating, use low heat to maintain the dish’s integrity instead of overcooking the shrimp.

Make Ahead Options

These Shrimp Stir Fry With Noodles are a fantastic option for meal prep enthusiasts! You can chop all your vegetables (like broccoli, bell peppers, and carrots) up to 3 days in advance and store them in an airtight container in the refrigerator. Additionally, prepare the sauce (hoisin, soy sauce, sesame oil, and chicken broth) up to 24 hours ahead to allow the flavors to meld. When you’re ready to cook, simply heat oil in your pan, sauté the shrimp and veggies, and then stir in the prepped sauce and cooked noodles for quick and delicious results. This approach ensures everything remains fresh and just as delicious, making your busy weeknights a breeze!

Shrimp Stir Fry With Noodles Recipe FAQs

What type of shrimp should I use?
Absolutely! For the best flavor and texture, I recommend using medium or large shrimp. Fresh or frozen both work, just make sure they’re peeled and deveined. If buying fresh, look for bright, translucent bodies with a mild sea scent—avoid shrimp that appear dull or have a strong fishy odor.

How can I store leftovers?
Certainly! Store any leftovers of your Shrimp Stir Fry With Noodles in an airtight container in the refrigerator for up to 3 days. It’s best to cool the dish first before sealing to maintain optimal freshness. Just remember to reheat it gently over low heat on the stovetop to keep all the flavors and textures intact!

Can I freeze this stir fry?
Very much so! To freeze your Shrimp Stir Fry With Noodles, let it cool completely before transferring it to a freezer-safe container. It will keep well for up to 2 months. When ready to enjoy, allow it to thaw in the refrigerator overnight, and then reheat it in a pan on low heat. Stir gently to ensure even warming without overcooking the shrimp.

What should I do if my sauce is too thick?
If you find that the sauce for your Shrimp Stir Fry With Noodles is too thick, don’t fret! Simply add a splash of chicken or vegetable broth to loosen it up. Heat it gently while stirring until it reaches your desired consistency. Remember, you can always add liquid, but you can’t take it away, so make small adjustments at a time!

Can I add other vegetables?
Definitely! The beauty of stir fry lies in its versatility. Feel free to substitute the broccoli and bell peppers with whatever’s in season or what you have on hand—snap peas, asparagus, or even bok choy work wonderfully. Just make sure to keep the cooking times in mind to maintain the crunchy texture for every vegetable you add.

Is this recipe suitable for gluten-sensitive diets?
Yes, indeed! To make your Shrimp Stir Fry With Noodles gluten-free, you can substitute the reduced sodium soy sauce with tamari. Additionally, check that your noodles are labeled as gluten-free if necessary. By making these simple swaps, you can ensure everyone enjoys this delicious meal without worries!

Shrimp Stir Fry With Noodles

Healthy Shrimp Stir Fry With Noodles: Ready in 30 Minutes

Quick and healthy Shrimp Stir Fry With Noodles combines vibrant veggies and succulent shrimp for a nutritious dinner.
Prep Time 10 minutes
Cook Time 20 minutes
Total Time 30 minutes
Servings: 4 servings
Course: Dinner
Cuisine: Asian
Calories: 350

Ingredients
  

For the Noodles
  • 10 oz Fresh Hokkien stir-fry noodles Substitute with dry lo mein noodles or spaghetti if necessary.
For the Sauce
  • 3 tbsp Hoisin sauce
  • 2 tbsp Reduced sodium soy sauce Can be swapped with tamari for gluten-free option.
  • 1 tbsp Sesame oil Use olive oil if sesame oil is unavailable.
  • 1 cup Reduced sodium chicken broth Substitute with vegetable broth for vegetarian option.
  • 1 tbsp Cornstarch Arrowroot powder can serve as a substitute.
For the Stir Fry
  • 2 tbsp Vegetable oil Necessary for cooking.
  • 1 lb Medium or large shrimp Ensure tenderness and flavor.
  • 2 cups Broccoli florets Substitutes include snap peas or asparagus.
  • 1 whole Red bell pepper Green bell pepper can be used as a replacement.
  • 1 whole Carrot (julienned/shredded) Zucchini is a good alternative.
  • 2 whole Scallions Contributes fresh flavor.
  • 2 cloves Garlic (minced) Enriches aroma.
Optional Garnishes
  • Sliced scallions Perfect for texture.
  • Sesame seeds Ideal for decoration.

Equipment

  • large wok or skillet

Method
 

Step-by-Step Instructions
  1. Begin by cooking fresh Hokkien stir-fry noodles according to the package instructions—typically boiling them for about 3-5 minutes until tender. Drain and set aside.
  2. In a mixing bowl, whisk together hoisin sauce, reduced sodium soy sauce, sesame oil, chicken broth, and cornstarch until smooth. Reserve a portion of the sauce for later use.
  3. Heat 1 tablespoon of vegetable oil in a large wok or skillet over medium-high heat. Add the shrimp, cooking for about 2 minutes until they turn opaque and pink. Remove from the pan.
  4. Add another tablespoon of oil to the skillet, then toss in the broccoli florets. Sauté for approximately 3-4 minutes until they begin to char slightly.
  5. Incorporate the julienned red bell pepper and carrots into the pan, stir-frying for about 3-4 minutes until crisp-tender.
  6. Push the sautéed vegetables to one side of the skillet and add the scallion whites and minced garlic. Cook for approximately 30 seconds until fragrant.
  7. Return the cooked shrimp and reserved vegetables to the skillet. Pour in the remaining sauce and toss for about 1 minute over heat.
  8. Remove from heat and sprinkle sliced scallion greens and sesame seeds over the stir fry. Serve immediately.

Nutrition

Serving: 1servingCalories: 350kcalCarbohydrates: 40gProtein: 25gFat: 10gSaturated Fat: 1gPolyunsaturated Fat: 2gMonounsaturated Fat: 5gCholesterol: 150mgSodium: 700mgPotassium: 500mgFiber: 3gSugar: 5gVitamin A: 1200IUVitamin C: 60mgCalcium: 50mgIron: 2mg

Notes

Gather all ingredients before starting to cook for freshness. Avoid overcrowding the pan for perfect texture.

Tried this recipe?

Let us know how it was!

Stay Connected

Get recipes via email: