As I rummaged through my fridge in search of a new twist on dessert, the sight of a forgotten zucchini caught my eye. It’s crazy how versatile this humble veggie can be, and that’s how I stumbled upon my new favorite treat: soft and chewy Zucchini Cookies. This delightful recipe cleverly masks the taste of zucchini, making it an irresistible snack for anyone, from picky eaters to health enthusiasts. Packed with hearty oats and rich chocolate chips, these cookies are not just a fun way to sneak in some extra veggies; they’re also incredibly quick to whip up! Whether you’re looking for a comforting afternoon treat or a healthier dessert to share with loved ones, you’ll find these cookies hit the spot. Curious to find out how to make them? Let’s dive in!

Why Sneak Zucchini into Cookies?
Deliciously Hidden Veggies: These Zucchini Cookies let you indulge in a treat while sneaking in some veggies—perfect for kids or adults who may shy away from greens!
Quick and Easy: With minimal prep time, you can whip up these cookies in no time, making them a perfect choice for last-minute dessert cravings.
Chewy Texture and Chocolatey Goodness: The combination of oats and chocolate chips creates a delightful chewy texture, while the hidden zucchini ensures every bite remains irresistibly moist.
Versatile Recipe: Mix in your favorite nuts or swap chocolate chips for dried fruits to create your unique variation! Looking for a quick breakfast option? Check out these scrumptious Blueberry Breakfast Cookies.
Family-Friendly Treat: These cookies are sure to please everyone in the house, proving that healthy snacks can be utterly delicious! Whether enjoyed warm from the oven or stored for later, they’re sure to become a household favorite.
Zucchini Cookie Ingredients
For the Batter
• Unsalted Butter (1 cup/226 g) – Provides richness and moisture. Tip: Use softened for easy mixing.
• Dark Brown Sugar (1 cup/200 g) – Adds depth of flavor and moisture. Alternative: Light brown sugar can be used.
• Granulated Sugar (½ cup/100 g) – Contributes sweetness and balance.
• Large Eggs (2) – Binds the ingredients and adds moisture. Tip: Room temperature helps emulsification.
• Vanilla Extract (1½ tsp) – Enhances overall flavor profile.
• All-Purpose Flour (2¼ cups/280 g) – Provides structure and stability. Tip: Can substitute with gluten-free flour.
• Baking Soda (1 tsp) – Leavening agent for rise.
• Salt (¾ tsp) – Balances the sweetness.
• Ground Cinnamon (1 tsp, optional) – Adds warmth to flavor. Optional for those who prefer a less spicy cookie.
For the Veggies
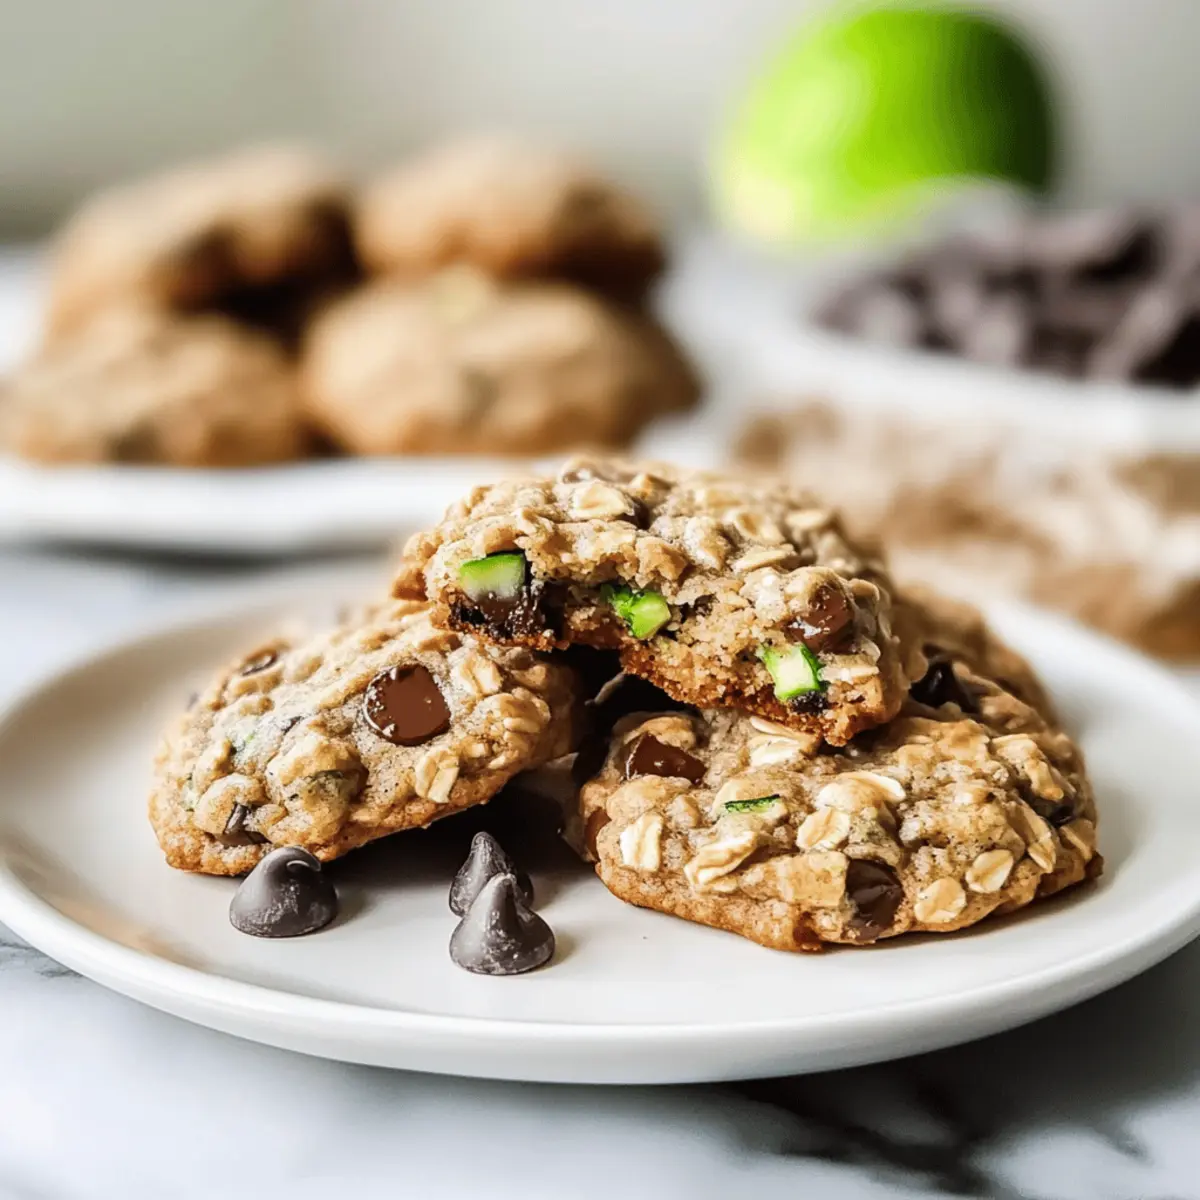
• Shredded Zucchini (1 cup/133 g) – Adds moisture without overt zucchini flavor. Prep Note: Blot excess moisture before measuring.
For the Chewy Texture
• Old-Fashioned Rolled Oats (3 cups/285 g) – Imparts chewy texture and heartiness.
• Semisweet Chocolate Chips (2 cups) – Provides sweetness and richness. Tip: Reserve some for topping cookies after baking for a decorative touch.
Step‑by‑Step Instructions for Soft and Chewy Zucchini Oatmeal Chocolate Chip Cookies
Step 1: Preheat and Prepare
Start by preheating your oven to 350°F (175°C). While the oven heats up, line a baking sheet with parchment paper to prevent sticking. This will help your soft and chewy zucchini cookies bake evenly and slide off easily once they’re ready.
Step 2: Cream the Butter and Sugars
In a large mixing bowl, beat together 1 cup of softened unsalted butter, 1 cup of dark brown sugar, and ½ cup of granulated sugar using an electric mixer. Continue mixing until the mixture is creamy and well combined, which should take about 2-3 minutes. This step creates a fluffy base for your zucchini cookies.
Step 3: Incorporate Eggs and Vanilla
Add in 2 large eggs and 1½ teaspoons of vanilla extract to the creamed mixture. Mix until fully incorporated and smooth, which should take about 1-2 minutes. The eggs will help bind the ingredients together while enhancing the flavor of your tasty zucchini cookies.
Step 4: Whisk Dry Ingredients
In a separate bowl, whisk together 2¼ cups of all-purpose flour, 1 teaspoon of baking soda, ¾ teaspoon of salt, and optional 1 teaspoon of ground cinnamon. This mixture provides the structure and flavor needed for your cookies. Ensure everything is well mixed to evenly distribute the baking soda and salt.
Step 5: Combine Wet and Dry Mixtures
Gradually add the dry ingredient mixture into the wet ingredients, mixing gently until just combined. Avoid overmixing, as you want your zucchini cookies to remain soft and chewy. The texture should start to come together beautifully without lumps of flour.
Step 6: Fold in Zucchini, Oats, and Chocolate Chips
Gently fold in 1 cup of shredded zucchini, followed by 3 cups of old-fashioned rolled oats and 2 cups of semisweet chocolate chips. Make sure everything is evenly distributed throughout the dough. The hidden zucchini adds moisture, maintaining the cookie’s delightful texture.
Step 7: Chill the Dough
Cover the bowl with plastic wrap or a clean kitchen towel, then chill the dough in the refrigerator for 30 minutes. This step is crucial for the flavors to meld and makes scooping the dough easier for your zucchini cookie delights.
Step 8: Scoop onto Baking Sheet
Once chilled, use a cookie scoop or spoon to drop dough onto the prepared baking sheet, leaving at least 2 inches between each scoop for spreading. Aim for a nice mound, as these will become soft and chewy zucchini cookies and spread while baking.
Step 9: Bake the Cookies
Place the baking sheet in the preheated oven and bake for 12-13 minutes, or until the edges are golden and the centers appear soft. Keep an eye on them; you want that perfect light golden brown outside while remaining soft inside.
Step 10: Cool and Serve
Once baked, remove the cookies from the oven and allow them to cool on the baking sheet for a few minutes before transferring them to a wire rack. This brief cooling period helps them set up perfectly, ready to be enjoyed as delightful zucchini cookies for all to love.
Zucchini Cookies Variations & Substitutions
Feel free to let your creativity run wild with these options to customize your zucchini cookies!
-
Chocolate Swap: Try dark chocolate or milk chocolate chips for a different flavor profile. Each brings a distinct sweetness that can truly shake things up!
-
Nutty Delight: Add chopped walnuts or pecans for added crunch and a delightful nutty flavor. These nuts can give your cookies a satisfying texture and a boost in heartiness.
-
Fruit Fusion: Mix in dried fruits like cranberries or raisins for unexpected bursts of sweetness. The fruity addition beautifully complements the rich chocolate flavor—perfect for adventurous taste buds!
-
Gluten-Free Option: Substitute gluten-free flour to cater to gluten-sensitive folks without sacrificing flavor. This small change makes the cookies accommodating for various dietary needs while keeping them delicious!
-
Cinnamon Twist: Up the spice level with an extra sprinkle of pumpkin spice or nutmeg for a cozy twist. These warm spices can elevate your zucchini cookies, making them feel even more seasonally festive!
-
Coconut Connection: Add shredded unsweetened coconut to enhance texture and flavor. The coconut lends a tropical vibe that pairs surprisingly well with the chocolate chips!
-
Heat it Up: For those who enjoy a little kick, throw in a pinch of cayenne pepper or red pepper flakes to the dough. The heat will subtly elevate your cookies and surprise your taste buds!
-
Homemade Delights: If you’re adventurous, consider whipping up a batch of oatmeal cookies alongside your zucchini cookies using similar ingredients. This gives you a delightful variety—check out these delicious Blueberry Breakfast Cookies for more inspiration!
Make Ahead Options
These soft and chewy Zucchini Cookies are perfect for busy home cooks looking to save time during the week! You can prepare the dough up to 24 hours in advance by mixing all the ingredients, then chilling it in the refrigerator. This helps the flavors meld beautifully while keeping your cookies delightful and soft once baked. Additionally, you can shred and blot excess moisture from the zucchini ahead of time (just store it in an airtight container), allowing for an even quicker assembly when you’re ready to bake. When it’s time to enjoy your Zucchini Cookies, simply scoop and bake as directed, and you’ll have a delicious treat ready in no time!
What to Serve with Soft and Chewy Zucchini Oatmeal Chocolate Chip Cookies
These delectable cookies can shine even brighter when paired with the right accompaniments that complement their sweet, tender goodness.
-
Vanilla Ice Cream: A scoop of creamy vanilla ice cream adds a delightful contrast, creating a dreamy dessert experience. The coolness of the ice cream perfectly balances the warmth of the freshly baked cookies.
-
Fresh Berries: Bright and juicy berries like strawberries or raspberries provide a burst of freshness, cutting through the sweetness while adding a vibrant color to your dessert spread.
-
Milk or Almond Milk: A classic choice, a glass of milk enhances the cookies’ chocolatey flavors and makes every bite feel indulgent. For a lighter option, almond milk complements the dish beautifully.
-
Drizzled Chocolate Sauce: For a rich and decadent touch, drizzle warm chocolate sauce over the cookies. This extra layer of chocolate makes them irresistible and extra indulgent.
-
Chopped Nuts: Adding chopped walnuts or pecans not only introduces a lovely crunch but also enhances the cookies’ wholesome vibe, making them feel even heartier.
-
Cinnamon Sugar Dusted Doughnuts: Pair with freshly baked doughnuts coated in cinnamon sugar for a sweet treat feast. The warm spices echo the cinnamon in the cookies, making for a comforting treat combo.
Each of these pairings enhances the enjoyment of your zucchini cookies, transforming your snack into a delightful experience everyone will cherish!
Expert Tips for Zucchini Cookies
-
Shred Zucchini Finely: To better hide the zucchini, shred it finely using a food processor. Just be careful not to over-process, which can add too much moisture.
-
Blot Excess Moisture: Before measuring, blot shredded zucchini with paper towels to remove extra liquid. This helps prevent soggy cookies.
-
Chill the Dough: Allowing the dough to chill for 30 minutes helps flavors develop and makes it easier to scoop. If it feels too hard, let it sit out for a few minutes.
-
Uniform Scoops: For consistent baking, use a cookie scoop to drop the dough onto the baking sheet. This ensures even size and texture in your zucchini cookies.
-
Store Wisely: Keep cookies in an airtight container at room temperature for up to 5 days. For longer freshness, consider refrigerating them.
How to Store and Freeze Zucchini Cookies
Room Temperature: Store your zucchini cookies in an airtight container at room temperature for up to 5 days. This keeps them soft and chewy, perfect for snacking.
Fridge: For extended freshness, place the cookies in the refrigerator. They can last up to 7 days without compromising flavor or texture. Just allow them to come to room temperature before serving for the best experience.
Freezer: Freeze zucchini cookies in a single layer on a baking sheet for an hour before transferring them to an airtight freezer bag. They can be kept frozen for up to 3 months, making it easy to enjoy them whenever a craving strikes.
Reheating: To enjoy cookies that taste freshly baked, microwave them for about 10-15 seconds or warm them in an oven at 350°F (175°C) for a few minutes before serving.

Zucchini Cookies Recipe FAQs
How do I select the best zucchini for this recipe?
Absolutely! When choosing zucchini for your cookies, look for firm, unblemished ones that are medium in size. Ideally, you want zucchini that feels heavy for its size and has a shiny skin. Avoid any with dark spots or soft patches, as they may be overripe and can affect the texture of your cookies.
What’s the best way to store zucchini cookies?
Very good question! Store your zucchini cookies in an airtight container at room temperature, and they’ll stay fresh for up to 5 days. If you want them to last longer, feel free to keep them in the refrigerator for up to 7 days. Just allow them to sit out for a moment to reach room temperature before enjoying for the best flavor experience!
Can I freeze zucchini cookies for later?
Absolutely! To freeze your cookies, first place them in a single layer on a baking sheet and freeze them for an hour. Then, transfer the cookies to an airtight freezer bag or container, making sure to remove as much air as possible before sealing. These cookies can be frozen for up to 3 months! Whenever you’re ready to enjoy them, just thaw at room temperature or warm in the microwave for a few seconds.
My cookies turned out too dry; what could have gone wrong?
Great question! If your zucchini cookies come out too dry, it’s likely due to one of a few common issues. First, make sure to measure your flour accurately—using too much can lead to a dry cookie. Also, be careful with the moisture content of the shredded zucchini; if it wasn’t blotted properly, it could have affected the batter’s moisture balance. Adding a couple more tablespoons of shredded zucchini can help next time. Make sure to follow the chilling step as well; it helps the flavors meld perfectly!
Are these cookies suitable for someone with gluten sensitivity?
Yes! You can make these zucchini cookies gluten-free by substituting the all-purpose flour with a gluten-free flour blend. Just keep in mind that some gluten-free flours absorb moisture differently, so you may need to adjust the quantity slightly. As always, be sure to check the labels on all ingredients to ensure they meet your dietary needs!
Can I add nuts or other ingredients to the zucchini cookies?
The more the merrier! You can customize your zucchini cookies with nuts like walnuts or pecans for a delightful crunch, or even mix in dried fruits like cranberries or raisins. Just make sure to adjust the total volume of add-ins to maintain the dough consistency. Enjoy getting creative with your ingredients!

Sneaky Zucchini Cookies That Kids Will Love and Devour
Ingredients
Equipment
Method
- Preheat your oven to 350°F (175°C) and line a baking sheet with parchment paper.
- In a large mixing bowl, beat together 1 cup of softened unsalted butter, 1 cup of dark brown sugar, and ½ cup of granulated sugar until creamy (about 2-3 minutes).
- Add in 2 large eggs and 1½ teaspoons of vanilla extract to the creamed mixture and mix until smooth (1-2 minutes).
- In a separate bowl, whisk together 2¼ cups of all-purpose flour, 1 teaspoon of baking soda, ¾ teaspoon of salt, and 1 teaspoon of ground cinnamon.
- Gradually add the dry mixture into the wet ingredients, mixing gently until just combined.
- Fold in 1 cup of shredded zucchini, 3 cups of oats, and 2 cups of chocolate chips until evenly distributed.
- Cover the bowl and chill the dough in the refrigerator for 30 minutes.
- Scoop dough onto the prepared baking sheet, leaving 2 inches between each scoop.
- Bake for 12-13 minutes or until the edges are golden and centers are soft.
- Allow cookies to cool on the baking sheet for a few minutes before transferring to a wire rack.