Get my cookbooks

Pizza Muffins with Biscuits: Easy, Cheesy Family Fun

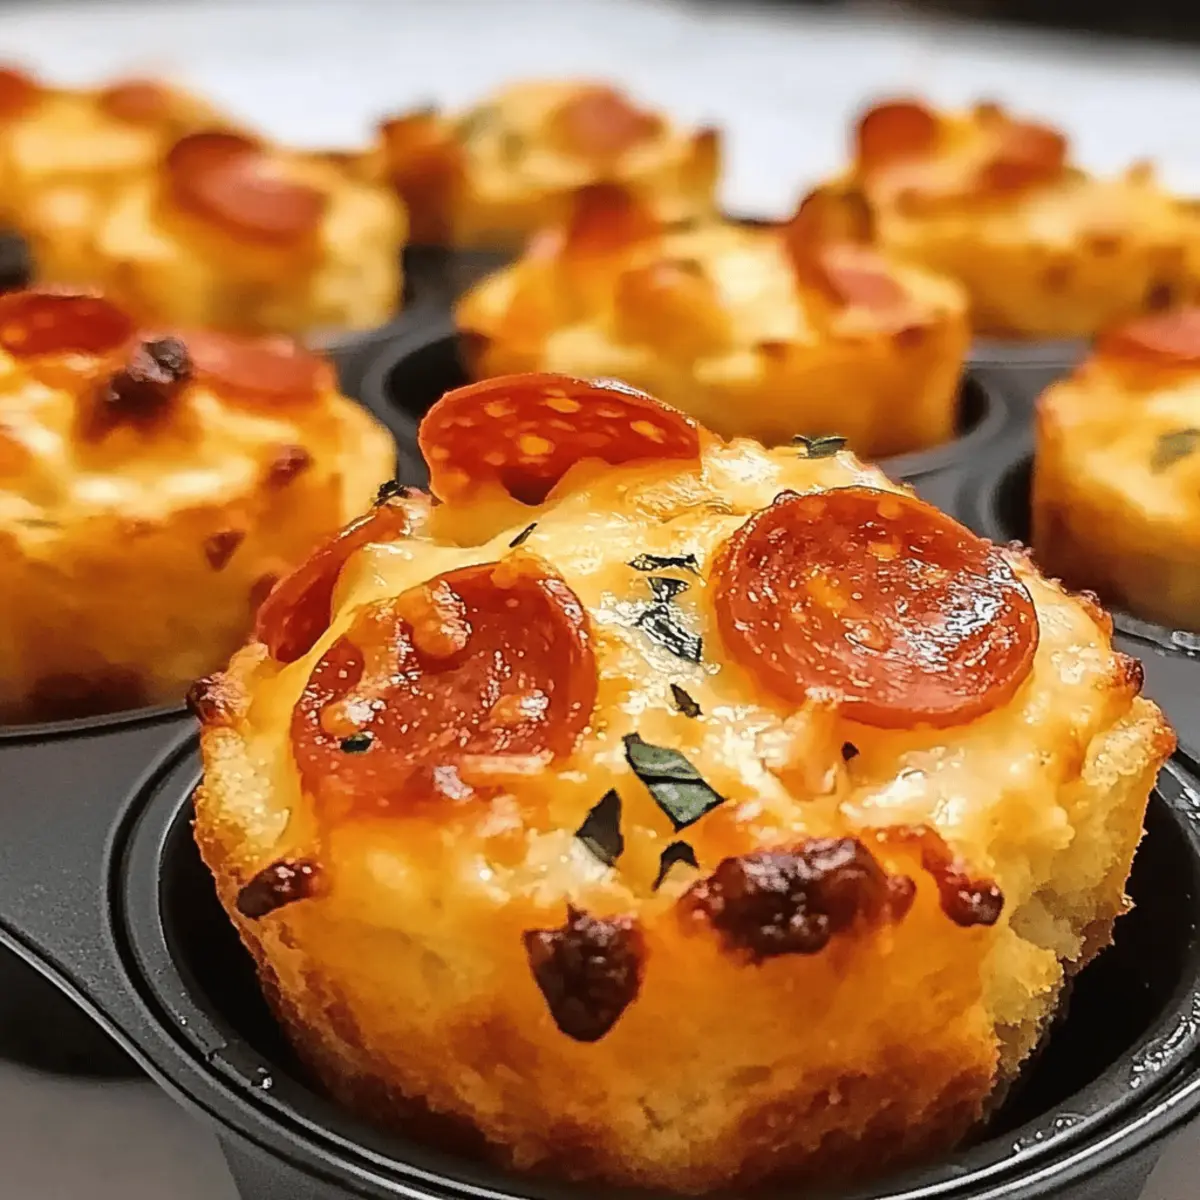
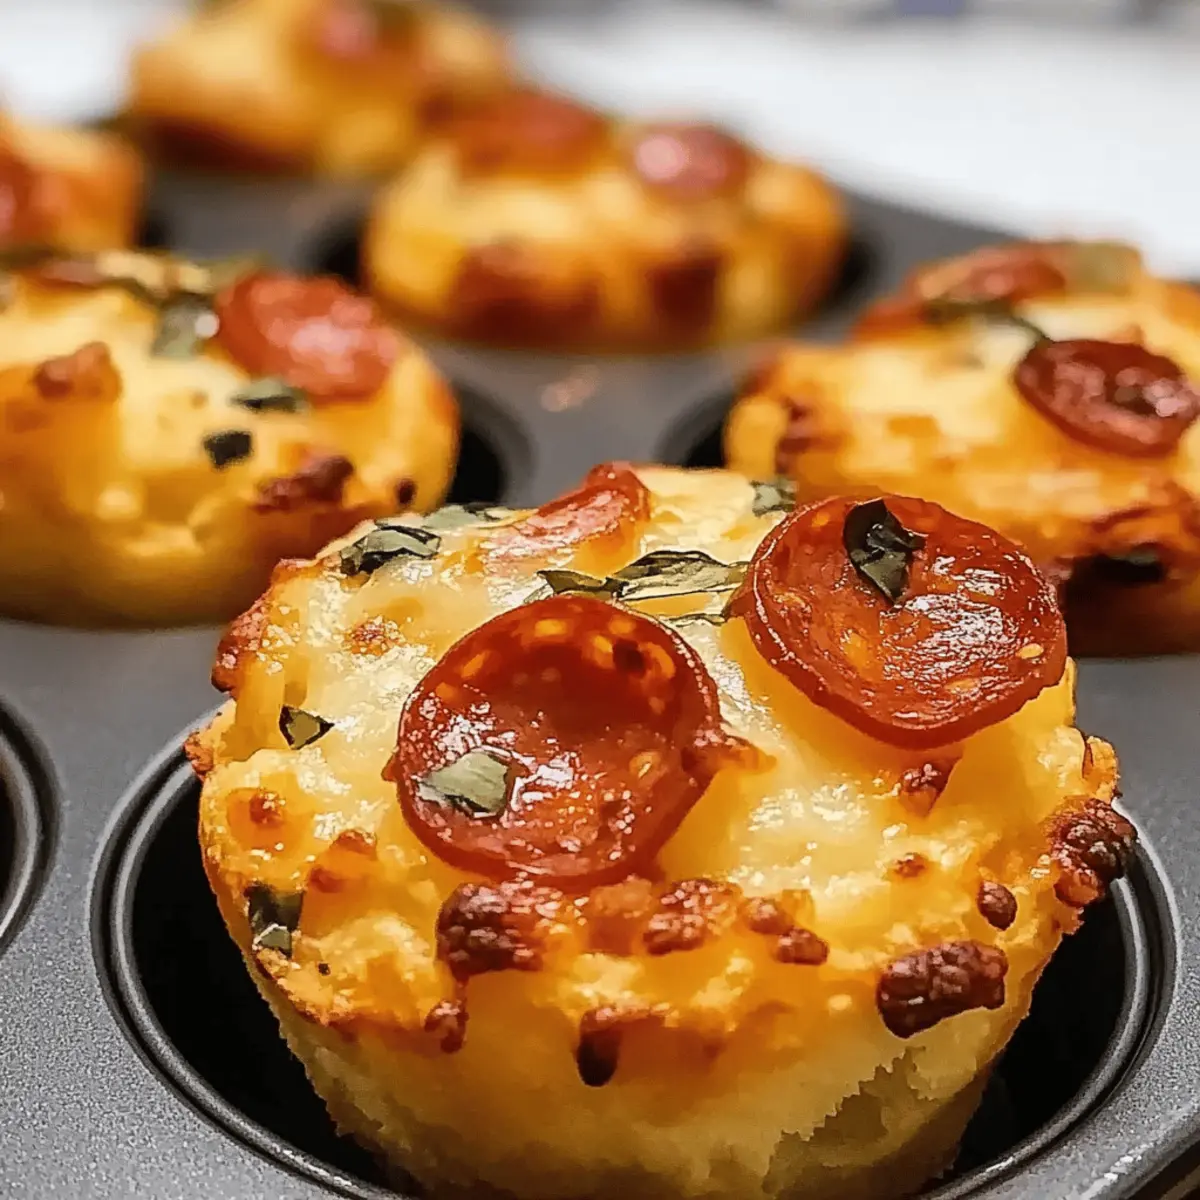
The savory aroma of baking pizza muffins wafting through the kitchen is enough to make anyone’s mouth water. These Easy Pizza Muffins with Biscuits are not just fun to make; they’re a delightful treat that will bring smiles to your entire family. In less than 35 minutes, you can transform a few simple ingredients into customizable, kid-friendly bites that are perfect for busy weeknights or weekend gatherings. Picture soft biscuit cups filled with gooey cheese and your choice of toppings—these muffins are the ultimate solution to thwart fast food cravings while still delivering a taste of comfort that everyone will love. Curious about how to whip up this deliciously easy recipe? Let’s dive in and get baking!

Why Will You Love Pizza Muffins?

Kid-Friendly Fun: These Easy Pizza Muffins with Biscuits are perfect for getting the kids involved in the kitchen. It’s a playful way to make food together, ensuring they will love every bite!

Quick and Easy: Ready in just 35 minutes, this recipe is a lifesaver for those busy weeknights or last-minute gatherings. No more waiting for delivery when you can enjoy hot pizza muffins fresh from your oven!

Customizable Delight: With endless toppings like veggies, sausage, or even BBQ chicken, you can tailor each muffin to suit everyone’s taste. These muffins encourage creativity, making every meal unique and exciting.

Comforting and Delicious: The warm, gooey filling encased in a flaky biscuit shell brings a homestyle feel to any table. Serve them with a side of marinara for dipping, and watch them disappear!

Perfect for Leftovers: If you have any muffins left, no worries! They can easily be stored and reheated later, making them an ideal snack or meal on the go. Enjoy these with the comforting vibes of Tuscan Chicken Soup for a complete family feast!

Pizza Muffins with Biscuits Ingredients

• Easy and delicious ingredients for a family favorite!

For the Muffins

  • Refrigerated Biscuits – The foundation of your muffins, these create a soft, flaky shell.
  • Pizza Sauce – Adds moisture and flavor; feel free to swap it out for marinara sauce if you prefer.
  • Shredded Cheese – Use mozzarella or a blend for a creamy, melty experience that binds everything together.
  • Pepperoni – A classic topping that adds savory flavor; try substituting with veggies or cooked sausage for variety.

For Customization

  • Optional Toppings – Personalize your muffins with favorites like olives, mushrooms, or bell peppers for a fun twist!

Step‑by‑Step Instructions for Pizza Muffins with Biscuits

Step 1: Preheat Oven
Begin by preheating your oven to 375°F (190°C). This ensures that your Pizza Muffins will bake evenly and achieve that golden-brown perfection. While the oven is warming up, gather your muffin tin and grease it lightly with cooking spray or oil to prevent sticking later on.

Step 2: Prepare Biscuits
Open the refrigerated biscuit package and separate the biscuits. Using a rolling pin, flatten each biscuit round to about 1/4 inch thick. Carefully press each flattened biscuit into the muffin tin wells, ensuring the biscuit forms a cup shape that will hold your scrumptious filling.

Step 3: Fill Muffins
Spoon a generous amount of pizza sauce into each biscuit cup, allowing it to fill the base without overflowing. Next, sprinkle a good helping of shredded cheese over the sauce, followed by your choice of toppings, such as pepperoni. This layering creates a burst of flavor in every bite of your Pizza Muffins.

Step 4: Seal Muffins
To secure your filling, gently pinch the edges of the biscuit dough together, forming a tight “cup” around the toppings. This step is crucial to prevent any delicious sauce from leaking during baking. You want the muffins to hold their shape and contain all that cheesy goodness!

Step 5: Bake
Carefully place your muffin tin in the preheated oven and bake for approximately 20 minutes. Keep an eye on them towards the end; they’re ready when they turn golden brown and the cheese is bubbling delightfully. The aroma of your Pizza Muffins will fill the kitchen!

Step 6: Cool and Serve
Once baked, remove the muffin tin from the oven and let the Pizza Muffins cool for a few minutes. This cooling time helps the biscuits set, making them easier to remove from the tin. Serve them warm, perhaps with a side of marinara sauce for dipping, and watch your family enjoy this easy treat!

Make Ahead Options

These Easy Pizza Muffins with Biscuits are a fantastic choice for meal prep, allowing you to save time on busy weeknights! You can prep the biscuits by forming the cups and adding the pizza sauce, cheese, and toppings up to 24 hours in advance—just cover them tightly with plastic wrap and refrigerate to keep them fresh. Alternatively, if you whip up a large batch, freeze unbaked muffins for up to 3 months, then pop them in the oven directly from the freezer. When you’re ready to serve, bake them until golden and bubbly, ensuring they remain just as delicious. This prep-ahead method not only streamlines your cooking process but also guarantees a delightful meal without the last-minute rush!

Pizza Muffins with Biscuits Variations

Feel free to play around with these delightful variations to tailor your Pizza Muffins to your family’s taste buds!

  • Veggie Lovers: Replace pepperoni with chopped bell peppers, olives, or spinach for a colorful and nutritious twist. Each bite bursts with fresh flavor!

  • BBQ Chicken: Swap the pizza sauce for BBQ sauce and add shredded cooked chicken for a tangy surprise. Your taste buds will dance with this scrumptious combination.

  • Cheesy Twist: Experiment with different cheeses like pepper jack or gouda for a unique flavor profile. Mixing cheeses can elevate the dish to new delicious heights.

  • Spice it Up: Add diced jalapeños or crushed red pepper flakes for a spicy kick. If you love heat, this variation will keep your taste buds tingling!

  • Breakfast Muffins: Turn these into breakfast muffins by adding scrambled eggs and cooked breakfast sausage. Perfect for a hearty start to your day!

  • Mediterranean Option: Top with feta cheese, sun-dried tomatoes, and artichoke hearts for a Mediterranean vibe. This twist takes your pizza muffins to a different culinary destination.

  • Herb Infusion: Sprinkle some dried oregano or Italian seasoning into your biscuit mix for an herbal boost. It’s an easy way to add depth to the flavor profile!

  • Mini Muffins: Make bite-sized versions by using a mini muffin tin. The little ones will love these fun, snackable treats, perfect for lunchboxes or parties!

Pair these variations with a side of Shrimp Avocado Bowls with Mango Salsa for a light and refreshing meal or dip them in Steak Country Gravy for a comforting experience. Enjoy the creativity!

How to Store and Freeze Pizza Muffins with Biscuits

Fridge: Store leftover pizza muffins in an airtight container for up to 3 days. This keeps them fresh, so you can enjoy their cheesy goodness later!

Freezer: For longer storage, freeze the muffins individually wrapped in plastic wrap or placed in a freezer-safe bag. They can last up to 2 months without losing flavor.

Reheating: To reheat, bake muffins in a preheated oven at 350°F (175°C) for about 10-15 minutes until warmed through. This ensures they stay crispy on the outside and gooey on the inside.

Make-Ahead Tip: Consider making a double batch of these pizza muffins with biscuits. They freeze beautifully and make for quick meals or snacks anytime!

What to Serve with Easy Pizza Muffins with Biscuits

Nothing pairs better with cheesy creativity than a range of delightful sides and dips that will make your meal completely satisfying!

  • Marinara Sauce: A classic dip that adds a rich, tangy flavor, perfect for scooping up those gooey muffin bites.
  • Fresh Salad: A crisp green salad with cherry tomatoes and cucumbers adds a refreshing crunch, balancing the cheesiness of the muffins.
  • Garlic Breadsticks: These buttery, flavorful breadsticks bring a touch of nostalgia, complementing the Italian flair of the muffins beautifully.
  • Veggie Platter: Crisp carrots, celery, and bell peppers provide a colorful, crunchy contrast, making the meal a feast for the eyes and the palate.
  • Fruit Skewers: Juicy melon, strawberries, and grapes offer a sweet finish that cleanses the palate after the savory muffins.
  • Homemade Ranch Dressing: Creamy and herby, this dressing creates a fun dip for your muffins while enhancing their flavor.
  • Lemonade or Iced Tea: Refreshing and thirst-quenching, these drinks are the perfect companions to your pizza muffin joy, keeping the mood light and fun.
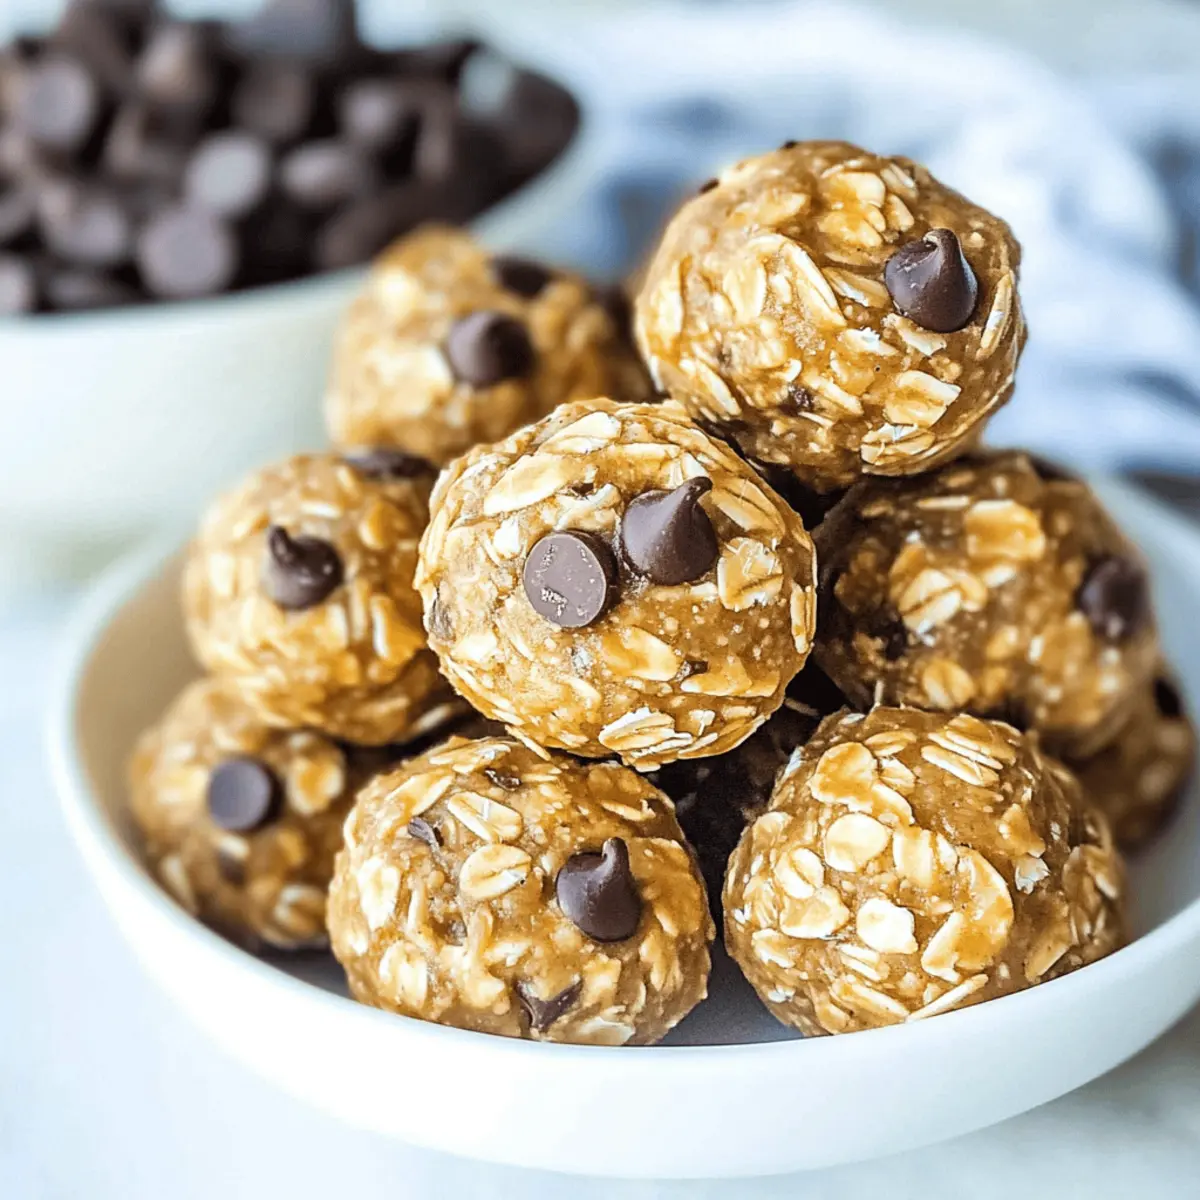
  • Chocolate Chip Cookies: Sweet, warm cookies are the ultimate kid-friendly dessert that will have everyone smiling after their cheesy meal.
  • Zucchini Fries: Baked crispy fries made from zucchini bring an unexpected twist while providing a healthy, crunchy side for the meal.

Expert Tips for Pizza Muffins

  • Choose the Right Biscuits: Use the thick refrigerated biscuits to ensure your Pizza Muffins with Biscuits hold their shape during baking, preventing spills.

  • Layering is Key: Spoon pizza sauce and cheese generously but avoid overfilling to keep the muffins intact. A little goes a long way!

  • Experiment with Toppings: Get creative! Try different cheeses or toppings like veggies and sausage. This adds flair while accommodating various tastes.

  • Storage Made Simple: If you have leftovers, store them in an airtight container in the fridge for up to 3 days, so you can enjoy them later!

  • Reheat for Best Results: To retain that deliciousness, reheat the muffins in the oven rather than the microwave. This keeps them crispy and warm.

Pizza Muffins with Biscuits Recipe FAQs

How do I choose the right biscuits for pizza muffins?
Absolutely! For the best results, choose refrigerated biscuits that are thick and flaky. This will ensure that your Pizza Muffins with Biscuits hold their shape during baking, preventing spills or sogginess. Look for brands that are labeled as “grand” or “fluffy” as they often have a better structure.

How do I store leftover pizza muffins?
Very good question! Store any leftover pizza muffins in an airtight container in the refrigerator for up to 3 days. This helps keep them moist and preserves that delicious cheesy flavor, so they’re ready for you to enjoy as a quick snack or meal.

Can I freeze pizza muffins? How do I do that?
Definitely! To freeze your pizza muffins, first let them cool completely after baking. Then, wrap each muffin individually in plastic wrap or place them in a freezer-safe bag. They can last up to 2 months in the freezer. For the best preservation, try to remove as much air as possible before sealing.

What can I do if my muffins overflow during baking?
If your muffins overflow during baking, don’t panic! This can happen if they’re overly filled with sauce or toppings. Next time, try to fill the biscuit cups about two-thirds full, allowing room for the cheese to melt and expand. You may also want to consider using a muffin tin with deeper wells for more secure baking.

Are there any allergy concerns with this recipe?
Very important to consider! Pizza Muffins with Biscuits may contain common allergens such as gluten (from the biscuits), dairy (from cheese), and possibly meats if you add pepperoni or other toppings. Always check ingredient labels and feel free to swap ingredients to accommodate dietary restrictions, like using gluten-free biscuits or dairy-free cheese.

Can I incorporate healthier toppings into the muffins?
Absolutely! There are many ways to make your muffins healthier while still being delicious. Consider adding sliced mushrooms, bell peppers, or spinach for more veggies. You could also use lower-fat cheese options or substitute the pepperoni for leaner meats like turkey sausage. This way, you tailor the recipe to fit your family’s preferences while boosting the nutrition!

Pizza Muffins with Biscuits

Pizza Muffins with Biscuits: Easy, Cheesy Family Fun

Enjoy easy, tasty Pizza Muffins with Biscuits that are customizable and perfect for family meals.
Prep Time 15 minutes
Cook Time 20 minutes
Cooling Time 5 minutes
Total Time 35 minutes
Servings: 12 muffins
Course: Appetizers
Cuisine: American
Calories: 150

Ingredients
  

For the Muffins
  • 1 can Refrigerated Biscuits Soft, flaky shell base
  • 1 cup Pizza Sauce Or substitute with marinara sauce
  • 1 cup Shredded Cheese Mozzarella or cheese blend
  • 1 cup Pepperoni Savory topping, can substitute with veggies
For Customization
  • Optional Toppings Like olives, mushrooms, or bell peppers

Equipment

  • Muffin Tin
  • Rolling Pin

Method
 

Step-by-Step Instructions
  1. Preheat your oven to 375°F (190°C) and grease the muffin tin.
  2. Flatten each biscuit round to about 1/4 inch thick and press into the muffin tin wells.
  3. Fill each biscuit cup with pizza sauce, followed by a generous amount of shredded cheese and toppings.
  4. Pinch the edges of the biscuit dough together to secure the filling.
  5. Bake for approximately 20 minutes until golden brown and cheese is bubbling.
  6. Let cool for a few minutes before serving with marinara sauce for dipping.

Nutrition

Serving: 1muffinCalories: 150kcalCarbohydrates: 18gProtein: 6gFat: 6gSaturated Fat: 2gPolyunsaturated Fat: 1gMonounsaturated Fat: 1gCholesterol: 10mgSodium: 300mgPotassium: 120mgSugar: 1gVitamin A: 200IUCalcium: 150mgIron: 1mg

Notes

Leftovers can be stored in an airtight container in the fridge for up to 3 days. Reheat in the oven for best results.

Tried this recipe?

Let us know how it was!

Pumpkin Cinnamon Roll Muffins that Will Warm Your Heart

With a cozy aroma that envelops your kitchen, these Pumpkin Cinnamon Roll Muffins are about to become your new fall obsession. Imagine the deliciously soft muffin base infused with pumpkin goodness and swirled with sweet cinnamon, each bite drizzled with a creamy glaze that feels like a warm hug. The beauty of this recipe lies in its simplicity; you can whip up these delightful treats in under 30 minutes, making them a perfect fuss-free option for breakfast or an afternoon pick-me-up. Plus, they’re vegetarian and don’t require any yeast, so even the beginner bakers will shine with this recipe. Are you ready to fill your home with a delicious scent and treat yourself to a muffin that captures the essence of autumn? Let’s dive in!

Why Are Pumpkin Cinnamon Roll Muffins Irresistible?

Quick to Make: Ready in under 30 minutes, these muffins are perfect for your busy mornings or spontaneous baking sessions.

Delicious Flavor Fusion: The combination of pumpkin puree and warm cinnamon delivers a cozy taste that will transport you straight to fall.

No Yeast Needed: Enjoy the fluffy texture without the hassle of yeast; this recipe is designed for easy baking.

Versatile Enjoyment: Whether paired with coffee for breakfast or served at brunch, they’re guaranteed to please any crowd.

Comforting Texture: Soft, moist muffins with sweet cinnamon swirls topped with a luscious cream cheese glaze create a delightful treat that feels indulgent yet comforting, similar to a classic cinnamon roll.

If you’re in the mood for more cozy treats, check out my Crisp Cinnamon Roll or indulge with Foster Cinnamon Rolls.

Pumpkin Cinnamon Roll Muffin Ingredients

For the Muffins

  • Canned Pumpkin Puree – Adds moisture and flavor; use plain, not pie filling, for best results.
  • Melted Butter – Provides fat for richness; can be substituted with vegetable oil if needed.
  • Granulated Sugar – Adds sweetness to balance the flavors.
  • Large Egg – Acts as a binder for a well-structured muffin.
  • Vanilla Extract – Enhances the muffins’ overall flavor profile.
  • All-Purpose Flour – Provides structure; for a gluten-free option, use a 1:1 gluten-free flour blend.
  • Baking Soda & Baking Powder – Essential leavening agents for a light and fluffy texture.
  • Salt – Enhances the overall flavor of the muffins.
  • Ground Cinnamon – Infuses warmth and spice, integral to that cozy fall taste.

For the Cinnamon Swirl

  • Melted Butter – Helps the swirl adhere beautifully to the muffin batter.
  • Brown Sugar – Adds a touch of sweetness along with deep caramel notes.
  • Ground Cinnamon – Boosts the cinnamon flavor in the delightful swirl.

For the Cream Cheese Glaze

  • Powdered Sugar – Sweetens and thickens the glaze for a perfect finish.
  • Vanilla Extract – Enhances the glaze’s flavor to tie everything together.
  • Milk – Adjusts the consistency of the glaze; add more for a thinner texture.

Now, let’s get ready to bake those delicious Pumpkin Cinnamon Roll Muffins that will fill your kitchen with the enchanting aromas of fall!

Step‑by‑Step Instructions for Pumpkin Cinnamon Roll Muffins

Step 1: Prep Oven & Muffin Tin
Start by preheating your oven to 350°F (175°C). While the oven warms up, grease a muffin tin with cooking spray or butter, ensuring each cup is well-coated to prevent sticking. This step is crucial for achieving perfectly baked Pumpkin Cinnamon Roll Muffins that pop right out when done.

Step 2: Mix Wet Ingredients
In a large mixing bowl, combine canned pumpkin puree, melted butter, granulated sugar, a large egg, and vanilla extract. Whisk these ingredients together until you have a smooth and homogeneous mixture. This flavorful wet base will bring the cozy essence of fall to your muffins, setting the stage for delectable cinnamon swirls.

Step 3: Combine Dry Ingredients
In a separate bowl, whisk together all-purpose flour, baking soda, baking powder, salt, and ground cinnamon. Make sure to mix thoroughly to break up any lumps. This will provide your Pumpkin Cinnamon Roll Muffins with the perfect structure, allowing them to rise beautifully as they bake.

Step 4: Combine Mixtures
Gradually add the dry ingredient mixture into the wet ingredients, folding gently until just combined. Be careful not to overmix—the batter should be slightly lumpy, which ensures your muffins stay fluffy and tender. Now you have a deliciously rich batter, ready to be swirled with cinnamon goodness.

Step 5: Prepare Swirl Mixture
In a small bowl, whisk together melted butter, brown sugar, and ground cinnamon until smooth. This combination will create that aromatic swirl that turns your Pumpkin Cinnamon Roll Muffins into a delightful treat. Set aside the swirl mixture, as you’ll incorporate it into the muffin batter shortly.

Step 6: Fill Muffin Tins
Spoon the muffin batter into the prepared muffin cups, filling them about two-thirds full. Next, drop spoonfuls of the cinnamon swirl mixture on top of each muffin cup. Using a knife or toothpick, gently swirl the cinnamon mixture into the batter without completely mixing, creating beautiful swirls that will add flavor and charm.

Step 7: Bake
Place the muffin tin in the preheated oven and bake for 20-25 minutes. Your Pumpkin Cinnamon Roll Muffins are done when a toothpick inserted into the middle of a muffin comes out clean or with just a few moist crumbs. They’ll have a lovely golden-brown hue and a mouthwatering aroma wafting through your kitchen.

Step 8: Prepare Glaze
While the muffins cool, whisk together powdered sugar, milk, and vanilla extract in a small bowl until smooth. Adjust the consistency by adding more milk if necessary to achieve a pourable glaze. This sweet topping will complement the flavors of your Pumpkin Cinnamon Roll Muffins perfectly.

Step 9: Drizzle Glaze
Once your muffins have cooled for about 10-15 minutes, drizzle your cream cheese glaze generously over the top of each muffin. Let the glaze set slightly before serving, as this will enhance both the presentation and taste. Now your delightful Pumpkin Cinnamon Roll Muffins are ready to be enjoyed!

Expert Tips for Pumpkin Cinnamon Roll Muffins

  • Don’t Overmix: Mixing only until combined keeps your muffins fluffy; overmixing can lead to dense results.
  • Swirl Technique: Use a knife to lightly swirl the cinnamon mixture; too much mixing may lose the lovely cinnamon design and flavor.
  • Cool Before Glazing: Allow muffins to cool before drizzling the cream cheese glaze; otherwise, the glaze will slide right off instead of adorning your muffins beautifully.
  • Check Doneness: Use a toothpick for testing; muffins are done when it comes out clean or with a few moist crumbs. This ensures perfectly baked Pumpkin Cinnamon Roll Muffins!
  • Custom Decor: Feel free to sprinkle some extra cinnamon or chopped nuts on top of the glaze for added texture and visual appeal.

Pumpkin Cinnamon Roll Muffins Variations

Feel free to customize these muffins to suit your tastes or dietary needs; the possibilities are endless!

  • Nut Butter Switch: Substitute regular butter with almond or peanut butter for a unique nutty flavor. It’ll give a rich twist that pairs beautifully with pumpkin.

  • Choco-Lovers Delight: Stir in some mini chocolate chips into the batter for an indulgent treat. The melty chocolate adds a delightful surprise in every bite!

  • Spice It Up: Add a teaspoon of nutmeg or ginger along with the cinnamon for an extra layer of flavor. These warm spices deepen the autumn essence of your muffins.

  • Gluten-Free Option: Replace all-purpose flour with a 1:1 gluten-free flour blend. Enjoy the same fluffy texture while accommodating gluten sensitivities.

  • Sweeten the Deal: Swap granulated sugar for brown sugar, or even try coconut sugar, for a lighter caramel taste. This subtle change enhances the overall flavor profile.

  • Fruity Flavor: Toss in some dried cranberries or raisins to the batter for a fruity burst. This adds a chewy texture and a hint of tartness to balance the sweetness.

  • Cream Cheese Surprise: Mix some cream cheese into the batter for added moisture and a creamy texture. This twist makes your muffins even more indulgent.

  • Pumpkin Spice Latte: Stir in a teaspoon of espresso powder for a coffee-infused treat. Pair these muffins with your favorite coffee for a cozy morning ritual.

These versatile variations will keep your baking fresh and exciting! And if you’re looking for more comforting recipes, consider trying my Sweet Escape Toast or the flavorsome Joumou Haitian Pumpkin.

What to Serve with Pumpkin Cinnamon Roll Muffins

Imagine a warm gathering filled with laughter and the aroma of fresh muffins wafting through the air—these delightful treats are just the beginning!

  • Creamy Mashed Potatoes: The buttery richness of creamy mashed potatoes balances the sweet spices of the muffins, creating a comforting duo that feels like home.
  • Spiced Apple Cider: Serve warm spiced apple cider alongside for a festive touch that pairs perfectly with the fall flavors of pumpkin and cinnamon.
  • Maple Glazed Bacon: The savory, smoky notes of maple glazed bacon complement the sweet muffins, making for a balanced sweet and salty breakfast experience.
  • Butternut Squash Soup: A steaming bowl of velvety butternut squash soup enhances the warm, cozy feeling with its creamy texture and subtle spices—perfect for a fall brunch.
  • Autumn Salad: A fresh salad with mixed greens, cranberries, and walnuts adds a burst of freshness, counteracting the sweetness of the muffins and creating a delightful harmony.
  • Rich Coffee: Enjoy your muffins with a cup of rich, aromatic coffee; the bitterness of the brew beautifully contrasts the sweet, creamy glaze.
  • Vanilla Ice Cream: For a dessert twist, serve these muffins warmed with a scoop of vanilla ice cream—a decadent treat that will satisfy any sweet tooth.

Each pairing enhances the flavors of the Pumpkin Cinnamon Roll Muffins while inviting warmth and comfort to your dining experience!

How to Store and Freeze Pumpkin Cinnamon Roll Muffins

  • Room Temperature: Store muffins in an airtight container for up to 2 days. They’ll remain soft and flavorful, perfect for a quick snack or breakfast on the go.
  • Fridge: If you prefer, you can refrigerate them for up to 4 days; just be aware they may lose some of their moist texture. Wrap them in plastic for best results.
  • Freezer: For longer storage, freeze unfrosted muffins in an airtight freezer bag for up to 3 months. Thaw at room temperature and add the glaze just before serving for a fresh taste.
  • Reheating: Reheat muffins in the microwave for 10-15 seconds or in the oven at 350°F (175°C) for about 5-10 minutes to restore their cozy warmth. Enjoy those delightful Pumpkin Cinnamon Roll Muffins anytime!

Make Ahead Options

These Pumpkin Cinnamon Roll Muffins are perfect for busy home cooks looking to save time! You can prepare the muffin batter up to 24 hours in advance; simply mix the wet and dry ingredients, cover the bowl with plastic wrap, and refrigerate to keep the flavors fresh. Additionally, the cinnamon swirl mixture can be made a day ahead and stored in the fridge as well. When you’re ready to bake, just stir the batter gently, fill the muffin tins, and add the swirl before baking as instructed. This way, you’ll have freshly baked muffins that taste just as delightful, with all the comforting flavors of autumn, without the morning rush!

Pumpkin Cinnamon Roll Muffins Recipe FAQs

What kind of pumpkin puree should I use?
Absolutely! It’s essential to use canned pumpkin puree rather than pumpkin pie filling. Pure pumpkin provides the right texture and flavor to your muffins, ensuring they taste rich and cozy without added spices or sweeteners.

How should I store the muffins, and for how long?
To keep your Pumpkin Cinnamon Roll Muffins fresh, store them in an airtight container at room temperature for up to 2 days. If you choose to refrigerate them, they’ll last up to 4 days but may lose some moisture. For best results, wrap them in plastic wrap before placing them in a container.

Can I freeze Pumpkin Cinnamon Roll Muffins?
Yes, you can! I often make a batch and freeze unfrosted muffins for up to 3 months. Simply place them in an airtight freezer bag, and when you’re ready to enjoy, thaw them at room temperature and add the cream cheese glaze just before serving. This way, you’ll have delicious muffins ready in a flash!

What should I do if my muffins come out dense?
Very good question! If your muffins are dense, it may be due to overmixing the batter. Remember to mix just until the ingredients are combined, as the more you mix, the denser they can become. Also, check your leavening agents (baking soda and baking powder) for freshness, as old ingredients can impact rise and fluffiness.

Are these muffins safe for pets or certain allergies?
While the Pumpkin Cinnamon Roll Muffins are vegetarian, they contain common allergens such as eggs and dairy in the glaze. It’s important to keep these away from pets, especially dogs, as ingredients like chocolate can be harmful. If you’re making these for someone with allergies, consider making a version without these ingredients or substituting allergens with safe alternatives.

How can I tell when my muffins are done baking?
To check for doneness, insert a toothpick into the center of a muffin. If it comes out clean or with just a few moist crumbs, they’re ready! It usually takes about 20-25 minutes. However, ovens can vary, so keep an eye on them as they bake for the perfect texture.

Pumpkin Cinnamon Roll Muffins

Pumpkin Cinnamon Roll Muffins that Will Warm Your Heart

Discover the comforting flavors of Pumpkin Cinnamon Roll Muffins, a delightful treat perfect for fall.
Prep Time 10 minutes
Cook Time 25 minutes
Cooling Time 15 minutes
Total Time 50 minutes
Servings: 12 muffins
Course: Breakfast
Cuisine: American
Calories: 200

Ingredients
  

For the Muffins
  • 1 cup Canned Pumpkin Puree Use plain, not pie filling
  • 1/3 cup Melted Butter Can be substituted with vegetable oil
  • 3/4 cup Granulated Sugar
  • 1 large Egg Acts as a binder
  • 1 tsp Vanilla Extract Enhances flavor
  • 2 cups All-Purpose Flour Use gluten-free flour blend for a gluten-free option
  • 1 tsp Baking Soda
  • 1 tsp Baking Powder
  • 1/2 tsp Salt
  • 1 tsp Ground Cinnamon Integral to cozy fall taste
For the Cinnamon Swirl
  • 2 tbsp Melted Butter
  • 1/4 cup Brown Sugar Adds caramel notes
  • 1 tbsp Ground Cinnamon Boosts flavor
For the Cream Cheese Glaze
  • 1 cup Powdered Sugar
  • 1 tsp Vanilla Extract Enhances flavor
  • 2 tbsp Milk Add more for a thinner glaze

Equipment

  • Oven
  • Muffin Tin
  • Mixing bowls
  • whisk
  • Spoon
  • Knife

Method
 

Step-by-Step Instructions for Pumpkin Cinnamon Roll Muffins
  1. Preheat your oven to 350°F (175°C) and grease a muffin tin.
  2. In a large bowl, mix pumpkin puree, melted butter, sugar, egg, and vanilla until smooth.
  3. In a separate bowl, whisk flour, baking soda, baking powder, salt, and cinnamon.
  4. Gradually combine the dry ingredients with the wet mixture until just combined.
  5. In a small bowl, whisk together melted butter, brown sugar, and cinnamon for the swirl.
  6. Fill muffin cups about 2/3 full with batter and add spoonfuls of swirl mixture on top; swirl gently.
  7. Bake for 20-25 minutes until a toothpick comes out clean. Let cool briefly.
  8. Whisk together powdered sugar, milk, and vanilla for glaze; drizzle over muffins once cooled.

Nutrition

Serving: 1muffinCalories: 200kcalCarbohydrates: 30gProtein: 2gFat: 9gSaturated Fat: 5gPolyunsaturated Fat: 0.5gMonounsaturated Fat: 3gCholesterol: 30mgSodium: 150mgPotassium: 100mgFiber: 1gSugar: 15gVitamin A: 500IUVitamin C: 1mgCalcium: 20mgIron: 1mg

Notes

Allow muffins to cool before glazing to prevent the glaze from sliding off. Optionally, sprinkle with cinnamon or nuts.

Tried this recipe?

Let us know how it was!

Irresistible Fresh Fig and Honey Tart for Effortless Indulgence

The aroma of freshly baked tart wafting through the kitchen is a memory I cherish, and it’s time to recreate that bliss with a Fresh Fig and Honey Tart. This dessert is a beautiful harmony of ripe, juicy figs and golden honey nestled in delicate puff pastry—a quick prep that feels effortlessly elegant. Ideal for gatherings or a sweet finish after your dinner, this recipe offers a delightful way to impress without spending hours in the kitchen. The best part? It’s incredibly simple to whip up, making it perfect for a busy evening or an unexpected craving. How has your relationship with figs changed over time, and do you think this tart could become a new favorite?

Why will you love this tart?

Simplicity at Its Best: This Fresh Fig and Honey Tart is effortless to whip up, making it perfect for busy nights or surprise guests.

Sweet, Juicy Goodness: The ripe figs meld beautifully with honey, creating a luscious filling that your taste buds will adore.

Flaky Texture: With a golden puff pastry base, every bite offers a satisfying crunch, complimenting the decadent filling perfectly.

Versatile Options: Not a fig fan? Substitute with pears or apples for delightful variations!

Crowd-Pleasing Dessert: It’s bound to impress at gatherings, and compliments a scoop of vanilla ice cream or a dollop of whipped cream from your favorite recipe.

Quick Prep: With minimal time spent in the kitchen, you can enjoy your homemade dessert in under an hour—perfect for indulging when cravings strike!

Fresh Fig and Honey Tart Ingredients

For the Tart Base

  • Puff Pastry – Use a sheet of thawed puff pastry as the light, flaky crust that holds all the sweet goodness.

For the Filling

  • Fresh Figs – The star ingredient! Use ripe figs for natural sweetness; pears can be a delightful substitute.
  • Honey – This adds luscious sweetness; opt for local honey for richer flavor, or use agave syrup for a vegan option.
  • Lemon Juice – Fresh lemon juice brightens the dessert; you can use bottled lemon juice if you’re short on time.
  • Vanilla Extract – Pure vanilla extract enhances the flavor remarkably; vanilla essence is a suitable substitute.
  • Cinnamon (optional) – Adds warmth and depth to the filling; nutmeg can also be a great alternative if you prefer.

For the Finish

  • Egg (for egg wash) – This gives your tart a shiny, golden finish; milk can be used for a vegan brush.
  • Powdered Sugar (for dusting, optional) – A light sprinkle adds a beautiful presentation; skip it if simplicity is your style.

Whether you’re preparing a fresh fig and honey tart for a get-together or a quiet night in, these ingredients come together to create a sumptuous treat that everyone will adore!

Step‑by‑Step Instructions for Fresh Fig and Honey Tart

Step 1: Preheat Oven
Begin by preheating your oven to 400°F (200°C). This ensures that your Fresh Fig and Honey Tart bakes evenly and reaches that delightful golden finish. While the oven heats, gather your ingredients and ensure your puff pastry has fully thawed on the counter, making it easier to handle.

Step 2: Prepare Puff Pastry
On a lightly floured surface, unfold and roll out the thawed puff pastry. Carefully fit it into a tart pan, pressing it into the corners and trimming any excess. Prick the bottom with a fork to prevent bubbling, which helps create a perfectly flaky crust that will hold the sweet fig filling beautifully.

Step 3: Make Filling
In a mixing bowl, combine the fresh figs, honey, lemon juice, vanilla extract, and cinnamon if using. Toss gently until all the figs are beautifully coated with the sweet mixture, ensuring each slice will burst with flavor. This fragrant filling will transform your tart into a delightful sweet treat.

Step 4: Assemble Tart
Evenly pour the fig mixture into the prepared puff pastry shell, spreading it out with a spatula if needed. Make sure the figs are nicely arranged to create a beautiful visual appeal once baked. This step is crucial for achieving that lovely texture and flavor balance in your Fresh Fig and Honey Tart.

Step 5: Chill
Refrigerate the tart for about 10 minutes. This short chilling time allows the pastry to firm up slightly and helps maintain its structure during baking, ensuring that your tart emerges with a crispy crust that perfectly complements the sweet, juicy fig filling.

Step 6: Egg Wash
While the tart chills, beat an egg in a small bowl to create your egg wash. After chilling, gently brush the edges of the pastry with the beaten egg, giving it a beautiful, glossy finish once baked. If you prefer a vegan option, you can brush with milk instead.

Step 7: Bake
Carefully place the tart in the preheated oven and bake for 30-35 minutes. Keep an eye on it—you’re looking for a golden-brown crust and tender figs that are bubbling slightly. The aroma of the Fresh Fig and Honey Tart baking will fill your kitchen with warmth and sweetness.

Step 8: Cool
Once baked to a golden perfection, remove the tart from the oven and let it cool in the pan for 15-20 minutes. This cooling step helps the tart set up nicely. Afterward, transfer it onto a wire rack to cool completely, allowing the flaky pastry to maintain its crispness.

Step 9: Serve
When ready to serve, consider dusting your Fresh Fig and Honey Tart with powdered sugar for an elegant touch. Slice it into wedges and serve warm or at room temperature, perhaps with a scoop of vanilla ice cream or a dollop of whipped cream to elevate your dessert experience.

Expert Tips for Fresh Fig and Honey Tart

  • Thawing Puff Pastry: Ensure the puff pastry is fully thawed before rolling it out to avoid tearing. A chilled pastry can lead to uneven baking.

  • Choosing Figs: Look for ripe figs that yield slightly when pressed. Unripe figs can be firm and less flavorful, affecting the tart’s overall sweetness.

  • Egg Wash Application: Brush a light layer of egg wash on the pastry edges to avoid a soggy crust; excessive wash can make it greasy, impacting the tart’s texture.

  • Cooling Patiently: Allow your Fresh Fig and Honey Tart to cool adequately in the pan to set properly. Cutting too soon can lead to a messy presentation.

  • Serving Suggestions: Cut your tart after cooling, and consider serving it with a scoop of vanilla ice cream or whipped cream for a delightful contrast to the sweet, juicy filling.

Make Ahead Options

These Fresh Fig and Honey Tarts are a fantastic option for meal prep, allowing you to save precious time during busy evenings! You can prepare the puff pastry crust up to 24 hours in advance—just roll it out and fit it into the tart pan, then cover it with plastic wrap and refrigerate. The fig filling can also be made and stored separately in an airtight container for up to 3 days, ensuring the fruit remains vibrant and juicy. When you’re ready to bake, simply assemble the tart with the filling, brush on the egg wash, and bake as instructed. This way, you’ll achieve that wonderfully golden, flaky crust and sweet fig flavor with minimal effort!

What to Serve with Fresh Fig and Honey Tart

Complement your Fresh Fig and Honey Tart with delightful additions that will elevate your dessert experience. Taste the harmony of flavors and textures that will leave your guests enchanted.

  • Creamy Vanilla Ice Cream: A scoop of smooth vanilla ice cream adds a rich contrast to the sweet fig tart, creating a luxurious pairing. The cold creaminess balances the warmth of the tart beautifully.

  • Whipped Cream: A dollop of lightly sweetened whipped cream enhances the tart’s sweetness while adding a cloud-like texture that melts in your mouth. It’s like a soft embrace for every slice.

  • Mint Tea: Sipping on fresh mint tea after enjoying the tart cleanses the palate and adds a refreshing finish. Its herbal notes will beautifully resonate with the honey’s sweet warmth.

  • Balsamic Glaze Drizzle: A drizzle of balsamic reduction over the tart can add a tangy contrast, enhancing the figs’ sweetness. The flavor combination is gourmet and adds an impressive flair to your presentation.

  • Toasted Almonds: Sprinkling toasted almond slivers over individual servings adds a delightful crunch that complements the tender figs and flaky pastry. This adds dimension and makes each bite more exciting.

  • Fresh Berries: A side of juicy, seasonal berries like raspberries or blueberries brings a tartness that cuts through the sweetness, creating a balanced dessert plate that’s vibrant and refreshing.

  • Sparkling Wine: Pair your dessert with a glass of sparkling wine for a celebratory touch. The effervescence will cleanse the palate while enhancing the figs’ rich flavor with its fruity notes.

  • Dark Chocolate Shavings: Adding shavings of dark chocolate creates a luxurious touch, contrasting beautifully with the sweetness of the fig tart while enriching your dessert experience.

  • Lemon Sorbet: For a light and refreshing option, serve a scoop of lemon sorbet alongside. The bright citrus flavor will cleanse the palate and elevate the sweetness of the tart with a zesty twist.

Fresh Fig and Honey Tart Variations

Feel free to customize your Fresh Fig and Honey Tart for an even more delightful experience tailored to your taste buds!

  • Pear Swap: Substitute pears for figs if you’re looking for a slightly different fruitiness. Both are equally delicious and offer a soft texture.

  • Nutty Crunch: Add chopped walnuts or almonds to the fig filling to introduce a delightful crunch. It creates a stunning textural contrast that elevates every bite.

  • Vegan Delight: Use agave syrup instead of honey and replace the egg wash with a simple spritz of milk. Your tart will still shine and delight!

  • Cinnamon Twist: Instead of cinnamon, try adding a pinch of cardamom for an exotic flavor profile. This subtle spice can transform your dessert into something uniquely aromatic.

  • Fruity Burst: Incorporate a variety of fruits like blueberries or raspberries along with the figs for a fruity medley. This will enhance the tart’s sweetness and visual appeal.

  • Gourmet Drizzle: Drizzle with a balsamic reduction before serving. This touch of acidity pairs wonderfully with the sweet figs and adds a gourmet flair.

  • Caramel Touch: For a sweet twist, drizzle caramel sauce over the tart just before serving. It heightens the indulgent nature of the dessert wonderfully.

  • Chocolate Surprise: Add small chocolate chips into the fig filling for a rich and decadent addition that will enchant dessert lovers!

Storage Tips for Fresh Fig and Honey Tart

Fridge: Store your Fresh Fig and Honey Tart in the refrigerator, covered loosely with plastic wrap or aluminum foil, for up to 3 days to maintain freshness.

Freezer: If you’d like to keep it longer, freeze slices in an airtight container or wrapped tightly in plastic wrap for up to 2 months. To reheat, allow thawing in the fridge overnight and warm in the oven.

Room Temperature: It’s best served at room temperature or slightly warm; if left out, consume within 2 hours to maintain quality.

Reheating: To revive the flaky texture, reheat in a 350°F (175°C) oven for about 10-15 minutes, just until warmed through. Avoid microwaving, as it can make the pastry soggy.

Fresh Fig and Honey Tart Recipe FAQs

What should I look for when selecting fresh figs?
Absolutely! When choosing fresh figs, look for those that are plump and slightly soft to the touch, indicating ripeness. Avoid figs that have dark spots all over or feel overly squishy, as these may be past their prime. If fresh figs are hard to find, ripe pears or apples can be substituted beautifully in this recipe.

How should I store the Fresh Fig and Honey Tart?
After making your Fresh Fig and Honey Tart, store any leftovers in the refrigerator, covered loosely with plastic wrap or aluminum foil. This will help maintain freshness for up to 3 days. For optimal texture, I recommend reheating it in a 350°F (175°C) oven for about 10-15 minutes before serving.

Can I freeze my Fresh Fig and Honey Tart?
Yes! If you want to keep your tart longer, you can freeze slices in an airtight container or wrapped tightly in plastic wrap for up to 2 months. To reheat, thaw them overnight in the fridge and warm them in the oven at 350°F (175°C) for about 10-15 minutes until they’re just warmed through.

What if my puff pastry tears while preparing?
Very often! If your puff pastry tears, don’t worry. You can simply patch it by rolling out a small piece of pastry to fit the tear and pressing it together lightly. This keeps your dessert looking lovely and intact while baking. Remember to handle the pastry gently, especially when it’s cold.

Is this tart suitable for people with allergies?
Great question! The Fresh Fig and Honey Tart contains gluten from the puff pastry, eggs in the egg wash, and honey. If you have gluten or egg allergies, I recommend using gluten-free puff pastry and brushing with milk or a non-dairy milk option for a vegan-friendly alternative. Always check ingredient labels to ensure safety!

Can I make this tart ahead of time?
Yes, you can! I often prepare the filling and assemble the tart ahead of time, chilling it until you’re ready to bake. This allows you to enjoy your baking in two simple steps: prepping earlier and then baking just before serving. Enjoy the delightful process!

Fresh Fig and Honey Tart

Irresistible Fresh Fig and Honey Tart for Effortless Indulgence

This Fresh Fig and Honey Tart is a wonderfully simple dessert combining ripe figs and honey in a flaky pastry.
Prep Time 15 minutes
Cook Time 35 minutes
Chilling Time 10 minutes
Total Time 1 hour
Servings: 8 slices
Course: Dessert
Cuisine: American
Calories: 250

Ingredients
  

For the Tart Base
  • 1 sheet Puff Pastry thawed
For the Filling
  • 6 pieces Fresh Figs ripe
  • 1/4 cup Honey or agave syrup for vegan option
  • 1 tablespoon Lemon Juice fresh
  • 1 teaspoon Vanilla Extract or essence
  • 1/2 teaspoon Cinnamon optional
For the Finish
  • 1 large Egg for egg wash
  • 1 tablespoon Powdered Sugar for dusting, optional

Equipment

  • Oven
  • Tart pan
  • Mixing Bowl
  • spatula
  • Wire rack

Method
 

Preparation
  1. Preheat your oven to 400°F (200°C).
  2. On a lightly floured surface, unfold and roll out the thawed puff pastry into a tart pan.
  3. In a mixing bowl, combine fresh figs, honey, lemon juice, vanilla extract, and cinnamon. Toss to coat.
  4. Evenly pour the fig mixture into the puff pastry shell.
  5. Refrigerate the tart for about 10 minutes.
  6. Beat an egg to create an egg wash and brush the edges of the pastry.
  7. Bake the tart for 30-35 minutes until golden brown.
  8. Let the tart cool for 15-20 minutes in the pan before transferring to a wire rack.
  9. Serve warm or at room temperature, optionally dusting with powdered sugar.

Nutrition

Serving: 1sliceCalories: 250kcalCarbohydrates: 35gProtein: 3gFat: 12gSaturated Fat: 5gPolyunsaturated Fat: 1gMonounsaturated Fat: 4gCholesterol: 40mgSodium: 150mgPotassium: 150mgFiber: 2gSugar: 15gVitamin A: 200IUVitamin C: 2mgCalcium: 20mgIron: 1mg

Notes

Store the tart in the refrigerator for up to 3 days. For longer storage, freeze slices for up to 2 months.

Tried this recipe?

Let us know how it was!

Piecaken: The Ultimate Layered Dessert to Wow Your Guests

Just when I thought my dessert game couldn’t get any more exciting, I stumbled across the piecaken—a glorious hybrid that’s taking holiday baking to new heights! This Thanksgiving, why settle for a cake or a pie when you can delight your guests with both in one stunning dessert? My piecaken features a moist spice cake enveloping a delicious apple pie, making it not only an impressive centerpiece but also an easy dessert to whip up. With minimal fuss and a unique flavor combination, this recipe will ensure your holiday gathering is truly unforgettable. Are you ready to wow your family with this delightful fusion? Let’s dive into the recipe!

Why Is Piecaken the Ultimate Dessert?

Uniqueness: The piecaken is the perfect blend of cake and pie, offering a delightful twist that will leave your guests speechless.

Ease of Preparation: Despite its impressive appearance, this dessert is surprisingly easy to whip up, making it ideal for busy holiday baking sessions.

Crowd-Pleasing Flavor: The warm spices of the cake paired with a sweet apple pie create a harmonious flavor explosion that everyone will adore.

Versatile Options: Switch things up with future variations like chocolate or pumpkin pie, keeping your dessert table fresh and exciting.

Perfect for Sharing: Serve this stunning centerpiece at family gatherings or holiday parties, and watch as it becomes the star of the show!

Piecaken Ingredients

Unlock the secrets to creating this stunning dessert!

For the Cake

  • Brown Sugar – Adds sweetness and a rich, caramel-like flavor; light brown sugar can also work.
  • Sugar – Balances the flavors for a lovely sweetness; consider using coconut sugar for a healthier option.
  • Flour – Provides structure for the cake; all-purpose flour or gluten-free flour ensures everyone can enjoy it.
  • Cinnamon – Enhances the flavor of both the cake and pie; you can substitute with nutmeg or pumpkin spice for a twist.
  • Butter – Imparts moisture and richness to the cake; feel free to use vegan butter for a dairy-free version.
  • Eggs – Essential for structure and moisture; swap with flax or chia seeds for a vegan alternative.
  • Vanilla Extract – Infuses a warm, inviting flavor; almond extract can add a unique twist.
  • Sour Cream – Contributes moisture and a tender texture; Greek yogurt is a great substitute.

For the Pie

  • Sugar – Sweetens the pie filling; use granulated sugar to keep it simple.
  • Cornstarch – Acts as a thickening agent for the pie filling; arrowroot powder can be a perfect alternative.
  • Ice Water – Binds the dough together without making it slippery; try cold lemonade for a hint of flavor.
  • Apples – The star of your pie filling; choose firm apples like Granny Smith for the best results.

For the Frosting

  • Powdered Sugar – Sweetens and thickens the frosting; grind granulated sugar if needed.
  • Butter – Provides a creamy base for the frosting; use vegan butter for a dairy-free option.
  • Milk – Thin the frosting to your desired consistency; non-dairy milk works just as well.
  • Cinnamon – Adds that warm, cozy flavor; it pairs perfectly with the piecaken.

With this pecan piecaken, you’ll create a delicious dessert that brings smiles to every gathering, turning the ordinary into the extraordinary!

Step‑by‑Step Instructions for Piecaken

Step 1: Prepare the Pie Filling
Preheat your oven to 400°F (200°C) to get it hot and ready for baking. In a large mixing bowl, combine the brown sugar, sugar, flour, cornstarch, and cinnamon. Peel, core, and slice your firm apples into thin pieces, then gently fold them into the sugar mixture until well coated.

Step 2: Make the Pie Crust
In a separate bowl, cut cold butter into the flour until the mixture resembles coarse crumbs. Gradually add ice water, stirring until the dough begins to clump together. Roll out the dough to fit your pie plate, carefully place the bottom crust in the dish, and fill it with the apple mixture. Cover with a top crust, cut slits for steam, and bake for 45-55 minutes until golden brown and bubbly.

Step 3: Cool the Pie
Once baked, remove the pie from the oven and let it cool completely on a wire rack. This step is essential as it helps the pie set and makes it easier to handle when assembling your piecaken. The cooling process may take around an hour, so be patient as the enticing aroma fills your kitchen.

Step 4: Prepare the Cake Batter
Preheat your oven to 350°F (175°C) for the cake. In a mixing bowl, whisk together the flour, baking powder, baking soda, and your choice of spices. In another bowl, cream softened butter with the sugars until light and fluffy. Add eggs, vanilla extract, and sour cream, then combine the wet and dry ingredients until just mixed.

Step 5: Assemble the Piecaken
Take a buttered springform pan and pour half of the prepared cake batter into the bottom. Carefully turn the cooled pie upside down and place it in the center of the batter. Pour the remaining cake batter over the pie, ensuring it is fully covered for even baking.

Step 6: Bake the Piecaken
Bake the assembled piecaken in your preheated oven at 350°F (175°C). After 35 minutes, check for doneness, and if the top is browning too quickly, gently cover it with foil. The piecaken should bake for an additional 40-50 minutes until a toothpick inserted into the center comes out clean.

Step 7: Frost the Piecaken
Once baked, allow the piecaken to cool in the pan for at least 30 minutes before transferring it to a wire rack. Prepare the frosting by mixing softened butter, powdered sugar, milk, vanilla extract, and cinnamon until smooth and creamy. Once the piecaken is completely cool, frost the top generously for a delicious finish.

Step 8: Optional Crumb Topping
For an extra layer of flavor, melt some butter and combine it with flour, sugar, and cinnamon to create a crumb topping. Sprinkle this delightful mixture over the frosting before serving for added texture and sweetness that complements the piecaken beautifully.

Piecaken: Creative Twists to Customize

Feel free to get creative and tailor this piecaken to your favorite flavors or dietary needs!

  • Pumpkin Pie: Swap the apple pie for a luscious pumpkin pie for the ultimate autumnal treat.

  • Chocolate Pie: For a rich twist, replace the apple filling with a decadent chocolate pie that will satisfy all chocolate lovers.

  • Gluten-Free: Use a gluten-free flour blend in both the cake and pie crusts to accommodate gluten-sensitive guests without sacrificing taste.

  • Dairy-Free: Substitute butter with coconut oil and use dairy-free milk for the frosting, making this a delightfully indulgent vegan option.

  • Add Nuts: Incorporate chopped pecans or walnuts into the cake batter for an extra crunch and rustic charm. They pair beautifully with both apple and pumpkin fillings.

  • Spiked Flavor: Enhance the warm spices by adding a splash of bourbon or rum to the frosting or filling for a festive kick that’s perfect for holiday gatherings.

  • Caramel Drizzle: Elevate your piecaken with a warm caramel sauce drizzled over the top before serving. It’s the perfect finishing touch that adds sweetness and decadence.

  • Layering Flavors: Consider alternating between different layers of pie and cake, such as using chocolate cake with pumpkin pie and a hint of ginger frosting for a thrilling flavor explosion.

Experiment and enjoy transforming your piecaken into a dessert that reflects your unique tastes and style! If you’re interested in some side dishes to accompany your piecaken, check out our delightful Thanksgiving side dishes for more inspiration.

How to Store and Freeze Piecaken

Fridge: Store leftover piecaken wrapped in foil or plastic wrap in the refrigerator for up to 3 days. This keeps the cake moist and flavors intact.

Freezer: For longer storage, wrap slices of piecaken tightly in plastic wrap, then aluminum foil. Freeze for up to 2 months. Thaw overnight in the fridge before serving.

Reheating: Warm individual slices in the microwave for about 20-30 seconds or bake at 350°F (175°C) for 10-15 minutes, ensuring the piecaken is heated through. Enjoy this delightful dessert even days later!

Expert Tips for Piecaken

Timing is Key: Ensure you bake the piecaken just right; under-baking leaves raw batter while over-baking dries it out.

Monitor the Temperature: Use an oven thermometer for precision; uneven temperatures can ruin your piecaken.

Roll the Dough Thin: A thinner crust enhances flavor and texture; consider adding a hint of cinnamon to the pie crust.

Prevent Over-Browning: If the top browns too quickly, cover with foil; baking strips can also help maintain an even bake.

Cool Completely: Cool your pie thoroughly before assembly; this helps prevent any sogginess in the piecaken layers.

What to Serve with Delicious Piecaken?

Transform your piecaken into a memorable feast with these delightful pairings that enhance its flavors and charm.

  • Vanilla Ice Cream: A scoop of creamy vanilla ice cream drizzled on warm piecaken creates a decadent contrast that’ll have everyone coming back for seconds.
  • Caramel Sauce: Drizzle warm caramel over each slice for a sweet touch that perfectly complements the spice notes in the cake.
  • Whipped Cream: Light and airy, whipped cream adds a delightful texture, balancing the rich flavors of the piecaken beautifully.
  • Cranberry Sauce: For a tangy twist, a dollop of homemade cranberry sauce cuts through the sweetness, adding a festive flair to your dessert.
  • Hot Apple Cider: Enhance the autumn vibes with a warm cup of apple cider, its spices echoing the flavors in your piecaken for a harmonious pairing.
  • Chocolate Ganache: Luxurious and rich, a drizzle of silky chocolate ganache makes your piecaken even more indulgent—perfect for chocoholics!
  • Pumpkin Spice Latte: For an added holiday touch, pair your dessert with a pumpkin spice latte, embracing the seasonal flavors in every bite.
  • Gingersnap Cookies: Serve with crunchy gingersnap cookies to introduce a delightful crunch that complements the soft layers of your piecaken.
  • Pecan Pie Bites: Encourage choice by offering bite-sized pecan pies alongside your piecaken, inviting guests to mix flavors and textures in each bite.
  • Honeycrisp Apples: Fresh, crisp apple slices will brighten the table and add a refreshing contrast to the warm, spiced piecaken.

Make Ahead Options

Busy home cooks will love the convenience of preparing the piecaken ahead of time! You can make the apple pie filling and pie crust up to 24 hours in advance. Simply refrigerate them separately to maintain freshness. Additionally, the cake batter can be prepared and stored in the fridge for up to 3 days; just be sure to cover it tightly to prevent drying out. When you’re ready to bake, layer the pie filling within the cake batter and bake as instructed. This make-ahead strategy not only saves you valuable time but also ensures you can enjoy the holiday festivities without stress, yielding a piecaken that’s just as delightful!

Piecaken Recipe FAQs

What type of apples should I use for the pie filling?
For the best results, choose firm apples like Granny Smith or Honeycrisp that hold their shape while baking. These apples provide the perfect balance of tartness and sweetness, ensuring your piecaken is deliciously flavorful.

How should I store leftover piecaken?
Absolutely! Store any leftover piecaken wrapped in foil or plastic wrap in the refrigerator for up to 3 days. This helps maintain moisture and flavor, allowing you to enjoy your dessert for a little longer.

Can I freeze piecaken, and if so, how?
Very much so! To freeze, wrap individual slices of piecaken tightly in plastic wrap, followed by aluminum foil. You can freeze it for up to 2 months. When you’re ready to enjoy it again, simply thaw overnight in the fridge, and it’ll be just as delicious!

What should I do if my piecaken is undercooked in the middle?
If your piecaken is undercooked, don’t worry! Just cover the top with foil to prevent over-browning, and return it to the oven for an additional 10-15 minutes. Check for doneness by inserting a toothpick; it should come out clean when the cake is fully baked.

Are there any allergy considerations when making piecaken?
Yes, definitely! If you’re making piecaken for guests with dietary restrictions, you can use gluten-free flour for a gluten-free version, swap eggs for flax or chia seeds for a vegan option, and choose vegan butter to accommodate dairy allergies. Always check for any specific allergies related to your ingredients.

Can I prepare piecaken in advance?
You sure can! I often make piecaken a day before the event, letting it chill overnight in the fridge. This not only saves time on the day of your gathering but also allows the flavors to meld beautifully, making it even more delicious!

Piecaken Recipe FAQs

Piecaken

Piecaken: The Ultimate Layered Dessert to Wow Your Guests

Piecaken combines cake and pie into one stunning dessert, perfect for impressing guests this holiday season.
Prep Time 30 minutes
Cook Time 1 hour 45 minutes
Cooling Time 1 hour
Total Time 3 hours 15 minutes
Servings: 12 slices
Course: Dessert
Cuisine: American
Calories: 450

Ingredients
  

For the Cake
  • 1 cup Brown Sugar Adds sweetness and a rich flavor
  • 1 cup Sugar Consider using coconut sugar for a healthier option
  • 2 cups Flour Use all-purpose or gluten-free flour
  • 2 tsp Cinnamon You can substitute with nutmeg or pumpkin spice
  • 1/2 cup Butter Use vegan butter for a dairy-free version
  • 3 large Eggs Swap with flax or chia seeds for a vegan alternative
  • 1 tsp Vanilla Extract Almond extract can add a unique twist
  • 1 cup Sour Cream Greek yogurt is a great substitute
For the Pie
  • 1 cup Sugar Sweetens the pie filling; use granulated sugar
  • 2 tbsp Cornstarch Acts as a thickening agent
  • 1/4 cup Ice Water Try cold lemonade for a hint of flavor
  • 6 cups Apples Choose firm apples like Granny Smith
For the Frosting
  • 2 cups Powdered Sugar Grind granulated sugar if needed
  • 1/2 cup Butter Use vegan butter for a dairy-free option
  • 1/4 cup Milk Non-dairy milk works just as well
  • 1 tsp Cinnamon Adds cozy flavor to the frosting
Optional Crumb Topping
  • 1/4 cup Butter Melted for crumb topping
  • 1/2 cup Flour Combined with sugar and cinnamon
  • 1/4 cup Sugar For the topping
  • 1 tbsp Cinnamon Enhances flavor of topping

Equipment

  • Mixing bowls
  • Springform Pan
  • whisk
  • Rolling Pin
  • Oven
  • Wire rack

Method
 

Preparation
  1. Preheat your oven to 400°F (200°C) and prepare the pie filling by mixing brown sugar, sugar, flour, cornstarch, and cinnamon.
  2. Peel, core, and slice the apples, then fold into the sugar mixture.
  3. Make the pie crust by cutting cold butter into flour until coarse crumbs form, then add ice water and mix.
  4. Roll out the dough, place in the pie dish, fill with apples, cover with top crust, and bake for 45-55 minutes.
  5. Cool the pie on a wire rack completely.
  6. Preheat your oven to 350°F (175°C) for the cake.
  7. Whisk flour, baking powder, baking soda, and spices in one bowl, and cream butter with sugars in another until fluffy.
  8. Add eggs, vanilla extract, and sour cream, then mix wet and dry ingredients.
  9. Pour half of the cake batter into a buttered springform pan, place the cooled pie on top, and cover with remaining batter.
  10. Bake the piecaken for 35 minutes, then check and cover with foil if browning too quickly, bake for an additional 40-50 minutes.
  11. Cool in the pan for at least 30 minutes, then prepare frosting by mixing softened butter, powdered sugar, milk, and cinnamon.
  12. Frost the cooled piecaken generously and, if using, sprinkle optional crumb topping before serving.

Nutrition

Serving: 1sliceCalories: 450kcalCarbohydrates: 60gProtein: 5gFat: 22gSaturated Fat: 12gPolyunsaturated Fat: 0.5gMonounsaturated Fat: 10gCholesterol: 70mgSodium: 150mgPotassium: 150mgFiber: 2gSugar: 30gVitamin A: 300IUVitamin C: 5mgCalcium: 20mgIron: 1mg

Notes

Cool your pie thoroughly before assembly to prevent sogginess. Monitor baking times closely for perfect results.

Tried this recipe?

Let us know how it was!

Creamy Zucchini Soup That Changes How You Love Veggies

As I sliced the bright green zucchini, a simple yet delightful thought struck me: summer is an invitation to celebrate the garden’s bounty. This Creamy Zucchini Soup with White Beans captures that spirit perfectly—just imagine a velvety texture that dances on your taste buds. Not only is it packed with wholesome ingredients, but it’s also gluten-free, vegetarian, and offers a vegan option, making it a great choice for everyone at the table. The best part? This soup comes together in just a matter of minutes and freezes beautifully, assuring that you can savor summer’s flavors long after the season fades. Ready to whip up a bowl of pure comfort? Let’s dive into this delightful recipe that’s sure to become a family favorite!

Why Is This Zucchini Soup So Special?

Simplicity makes this soup a go-to recipe, requiring just a handful of fresh ingredients. Creamy Texture from the white beans elevates the dish, ensuring it’s more than just your average veggie soup. Healthy and Wholesome, it’s gluten-free, vegetarian, and versatile enough to be made vegan. Quick to Prepare, you can enjoy it on busy weeknights or impress guests at summer gatherings. Plus, it freezes beautifully, letting you save summer flavors for chilly days ahead! If you love satisfying and delectable options, this is one zucchini recipe you won’t want to miss!

Zucchini Soup Ingredients

Here are the essential ingredients you’ll need to create this delicious creamy zucchini soup.

For the Soup

  • Olive Oil (2 tablespoons) – Adds flavor and aids in sautéing; can substitute with butter for a richer taste.
  • Zucchini (4 medium, approx. 2 pounds) – The main ingredient providing bulk and texture; trim ends and cut into large chunks.
  • Yellow Onion (1 small, chopped) – Adds sweetness and depth of flavor; no substitution recommended.
  • Garlic (4 cloves, minced) – A flavor booster essential for savory dishes; no substitution recommended.
  • Vegetable Broth (4 cups) – Provides liquid and flavor base; can substitute with chicken broth for a non-vegetarian option.
  • Kosher Salt (1 teaspoon) – Enhances flavors; feel free to adjust to taste.
  • Black Pepper (1/2 teaspoon) – Adds a slight heat; adjust to your taste preferences.
  • Dried Thyme (1/2 teaspoon) – Infuses the soup with herbal flavor; can substitute with dried oregano or Italian seasoning.
  • Cannellini Beans (30 oz, rinsed and drained) – Thickens the soup and adds creaminess; other white beans can also be used.
  • Lemon Juice (1 to 2 tablespoons) – Brightens the overall flavor; adjust based on your preference.
  • Heavy Cream (1/2 cup, optional) – Adds richness; can be replaced with Greek yogurt, sour cream, or coconut milk for a lighter version.

For Garnish (Optional)

  • Fresh Herbs – Basil, dill, or parsley will give a fresh finish.
  • Parmesan Cheese – Adds additional flavor as a topping.
  • Homemade Croutons – Offers texture and crunch to your bowl of soup.

Enjoy your journey in creating this hearty and creamy zucchini soup!

Step‑by‑Step Instructions for Creamy Zucchini Soup with White Beans

Step 1: Sauté the Aromatics
In a large pot, heat 2 tablespoons of olive oil over medium heat. Once shimmering, add 1 small chopped yellow onion and sauté for about 5 minutes until the onion is tender and translucent. Incorporate 4 minced garlic cloves and cook for an additional minute, stirring frequently until fragrant, ensuring the base of your creamy zucchini soup is packed with flavor.

Step 2: Cook the Zucchini
Add 4 medium zucchini chunks, 4 cups of vegetable broth, 1 teaspoon of kosher salt, 1/2 teaspoon of black pepper, and 1/2 teaspoon of dried thyme to the pot. Increase the heat until the mixture reaches a gentle boil. Immediately reduce the heat to low, cover the pot, and let simmer for 15-20 minutes, or until the zucchini is tender and easily pierced with a fork, creating a beautiful base for your soup.

Step 3: Add the Creaminess
Stir in 30 oz of rinsed and drained cannellini beans and 1 to 2 tablespoons of lemon juice to the pot. Allow the mixture to heat through for about 2 minutes. Using an immersion blender, blend the soup until it reaches a smooth, creamy consistency. Adjust seasoning as necessary, enhancing the flavor of your zucchini soup to your liking, and incorporate heavy cream if you desire extra richness.

Step 4: Final Touches and Serve
Once your creamy zucchini soup is blended smoothly, serve it hot in bowls. For a delightful finish, garnish with fresh herbs like basil or parsley, a sprinkle of Parmesan cheese, and a few homemade croutons for added texture. Enjoy this vibrant and satisfying dish that transforms the way you experience zucchini!

How to Store and Freeze Zucchini Soup

Fridge: Keep your creamy zucchini soup in an airtight container for up to 5 days. Let it cool completely before storing to maintain freshness.

Freezer: Freeze the soup in airtight containers or heavy-duty freezer bags for up to 3 months. Leave space for expansion to prevent bursting.

Reheating: Thaw overnight in the fridge and reheat on the stove top or microwave. Stir well to ensure even heating and restore the creamy texture.

Serving: Consider garnishing with fresh herbs or croutons after reheating to enhance the delightful flavors of your zucchini soup.

Make Ahead Options

These creamy zucchini soup preparations are perfect for busy weeknights! You can chop the zucchini and onion up to 24 hours in advance and store them in an airtight container in the refrigerator to save time. Additionally, you can sauté the aromatics (onion and garlic) and blend the soup up to 3 days ahead, keeping it in the fridge in a sealed container. To maintain quality, avoid adding heavy cream until just before serving, as this will help prevent curdling. When you’re ready to enjoy your creamy zucchini soup, simply reheat on the stovetop, blend in the cream, and garnish with fresh herbs for a delightful finish.

Expert Tips for Creamy Zucchini Soup

  • Sautéing Is Key: Sauté the onion and garlic until softened to develop rich flavors that serve as a solid base for your zucchini soup.
  • Don’t Skip the Beans: Cannellini beans create the velvety texture you desire. Substitute carefully to retain creaminess without compromising taste.
  • Blend Smoothly: Use an immersion blender for convenience, blending until creamy. If using a traditional blender, do so in small batches to avoid mess.
  • Adjust Seasoning: Always taste and adjust seasoning before serving. A pinch more salt or a dash of lemon juice can elevate your zucchini soup beautifully.
  • Garnish for Greatness: Fresh herbs and croutons not only enhance presentation but also add texture and flavor to every bowl.

What to Serve with Creamy Zucchini Soup with White Beans

Ready to craft the perfect meal to complement your vibrant creamy zucchini soup?

  • Crusty Bread: Ideal for dipping, the rustic texture pairs beautifully with the velvety soup, making every spoonful satisfying.

  • Garden Salad: A light, refreshing salad with crisp greens and a citrus vinaigrette will contrast the creamy soup, enhancing the dining experience.

  • Grilled Cheese Sandwich: The warm, melty cheese and toasted bread bring a nostalgic comfort, balancing the freshness of your zucchini soup.

  • Roasted Vegetables: Savory, caramelized veggies like bell peppers and carrots add rich flavors and texture alongside the smoothness of the soup.

  • Cauliflower Rice: This low-carb option provides a unique texture that aligns with the wholesome ingredients of your soup, making it a great sidekick.

  • Herbed Quinoa: Nutty quinoa seasoned with fresh herbs adds a wholesome grain boost, enriching your meal while keeping it light and healthy.

  • Sparkling Lemonade: A refreshing, bubbly drink will elevate your meal, introducing a zesty kick that complements the creamy elements of the soup.

  • Chocolate Avocado Mousse: For dessert, this rich and creamy mousse provides a decadent finish that echoes the soup’s creamy base, making for a lovely sweet ending.

Variations on Zucchini Soup

Take this creamy zucchini soup to new heights by exploring delightful customization options!

  • Yellow Squash: Substitute zucchini with yellow squash for a sweeter, milder flavor profile. The result is a lovely golden hue that’s just as satisfying.

  • Quinoa Boost: Add cooked quinoa or rice for heartiness and texture. This boost not only enhances nutrition but also keeps your meal filling and satisfying.

  • Spicy Kick: Incorporate cumin or red pepper flakes for a touch of heat that will awaken your taste buds. Create a cozy bowl perfect for those who love a little spice in their soups.

  • Herb Freshness: Experiment with fresh herbs like basil or cilantro instead of the usual thyme. This twist brings a burst of freshness that can transform your soup moment.

  • Creamy Dairy-Free: For a vegan alternative, swirl in coconut milk instead of heavy cream. Enjoy a rich and creamy soup that’s bursting with flavor!

  • Cheesy Flavor: Add nutritional yeast or a sprinkle of vegan cheese to boost umami without compromising the diet. It creates a beautiful, cheesy flavor while keeping it plant-based.

  • Texture Adventure: Top your soup with crispy chickpeas or toasted nuts for an added crunch. This contrast enhances the overall experience with each spoonful.

  • Smoky Infusion: Smoked paprika can bring a depth of flavor that elevates your creamy zucchini soup to a whole new level. Pair it with a side of crusty bread for the ultimate experience!

Why not make it a cozy evening by serving your customizable bowl alongside a fresh salad and some homemade croutons? If you’re seeking more comforting but easy options, check out Mexican Soup Flavorful or the heartwarming Potato Bacon Soup. Each variation invites you to create a unique twist wrapped in love and warmth!

Creamy Zucchini Soup with White Beans Recipe FAQs

What type of zucchini should I use for this soup?
Absolutely! Look for firm, medium-sized zucchini without any dark spots or blemishes. They should feel heavy for their size, indicating freshness. Smaller zucchini tend to have better flavor and texture, while larger ones may have more seeds and be sponge-like inside. For the best results, pick organic if available!

How long can I store the zucchini soup in the fridge?
You can store your creamy zucchini soup in an airtight container for up to 5 days in the refrigerator. Make sure to let it cool completely before sealing to lock in freshness. If you want to enjoy it later, freezing is also a fantastic option!

Can I freeze creamy zucchini soup? How do I do that?
Yes! You can freeze this soup for up to 3 months. Simply cool it down completely and then transfer it into airtight containers or heavy-duty freezer bags. Don’t forget to leave some space at the top for expansion. When you’re ready to enjoy it again, thaw the soup overnight in the refrigerator, then reheat it gently on the stovetop or in the microwave while stirring to restore its creamy texture.

What if my soup is too thick after blending?
Very! If your zucchini soup turns out thicker than expected after blending, don’t worry. Just add some more vegetable broth or water a little at a time, stirring until you achieve your desired consistency. Remember, it’s always easier to add more liquid than to try to thicken it up if it’s too thin!

Is this zucchini soup suitable for a vegan diet?
Absolutely! This soup is vegetarian and can easily be made vegan by leaving out the heavy cream and using a dairy-free alternative like coconut milk or almond yogurt. Just make sure the vegetable broth you choose is also vegan, and you’ll have a hearty, delicious meal that everyone can enjoy!

Can I make this soup ahead of time?
Very much so! Prepare this delightful creamy zucchini soup ahead of time and store it in the fridge for up to 5 days, or even make a larger batch and freeze portions for later. It’s perfect for busy weeknights or when you want to impress guests without the last-minute fuss. Just reheat and garnish before serving for a comforting dish!

Zucchini Soup

Creamy Zucchini Soup That Changes How You Love Veggies

This creamy zucchini soup is a delightful blend of fresh ingredients, perfect for summer, and is gluten-free, vegetarian, with a vegan option.
Prep Time 10 minutes
Cook Time 20 minutes
Total Time 30 minutes
Servings: 6 cups
Course: Dinner
Cuisine: American
Calories: 250

Ingredients
  

For the Soup
  • 2 tablespoons Olive Oil Can substitute with butter.
  • 4 medium Zucchini Trim ends and cut into large chunks.
  • 1 small Yellow Onion Chopped.
  • 4 cloves Garlic Minced.
  • 4 cups Vegetable Broth Can substitute with chicken broth.
  • 1 teaspoon Kosher Salt Adjust to taste.
  • 1/2 teaspoon Black Pepper Adjust to taste.
  • 1/2 teaspoon Dried Thyme Can substitute with oregano.
  • 30 oz Cannellini Beans Rinsed and drained.
  • 1 to 2 tablespoons Lemon Juice Adjust based on preference.
  • 1/2 cup Heavy Cream Optional; can substitute with Greek yogurt.
For Garnish (Optional)
  • Fresh Herbs Basil, dill, or parsley.
  • Parmesan Cheese As a topping.
  • Homemade Croutons For added texture.

Equipment

  • Large pot
  • Immersion blender

Method
 

Step-by-Step Instructions
  1. In a large pot, heat 2 tablespoons of olive oil over medium heat. Once shimmering, add 1 small chopped yellow onion and sauté for about 5 minutes until the onion is tender and translucent. Incorporate 4 minced garlic cloves and cook for an additional minute, stirring frequently until fragrant.
  2. Add 4 medium zucchini chunks, 4 cups of vegetable broth, 1 teaspoon of kosher salt, 1/2 teaspoon of black pepper, and 1/2 teaspoon of dried thyme to the pot. Increase the heat until the mixture reaches a gentle boil. Reduce the heat to low, cover the pot, and let simmer for 15-20 minutes, or until the zucchini is tender.
  3. Stir in 30 oz of rinsed and drained cannellini beans and 1 to 2 tablespoons of lemon juice to the pot. Allow the mixture to heat through for about 2 minutes. Using an immersion blender, blend the soup until it reaches a smooth, creamy consistency.
  4. Once your creamy zucchini soup is blended smoothly, serve it hot in bowls. Garnish with fresh herbs, a sprinkle of Parmesan cheese, and homemade croutons.

Nutrition

Serving: 1cupCalories: 250kcalCarbohydrates: 30gProtein: 10gFat: 10gSaturated Fat: 5gPolyunsaturated Fat: 1gMonounsaturated Fat: 3gCholesterol: 15mgSodium: 800mgPotassium: 600mgFiber: 7gSugar: 3gVitamin A: 500IUVitamin C: 15mgCalcium: 100mgIron: 2mg

Notes

This soup freezes beautifully and can be stored in an airtight container for up to 3 months.

Tried this recipe?

Let us know how it was!

Crockpot Chicken & Gravy That’s a Busy Night Game-Changer

As the sun dipped below the horizon, the comforting aroma of dinner wafted through my kitchen—an unmistakable sign that my day was about to get a whole lot better. That’s the magic of this Easy 3-Ingredient Slow Cooker Chicken & Gravy. With a tender chicken that practically shreds itself and a rich, velvety gravy, it has quickly become my secret weapon for busy weeknights. Enjoying this delightful dish is a breeze; just toss everything in the slow cooker, and you’ll be rewarded with a hearty meal that’ll keep your family smiling. Not only does this recipe save you time and effort, but it’s also incredible at pleasing even the pickiest eaters. Ready to discover how easy comfort food can be? Let’s dive in!

Why is this chicken & gravy a must-try?

Ease of Preparation: With only three ingredients, this recipe is perfect for both novice cooks and busy home chefs who want a delicious meal without the fuss.

Flavor-Packed: The creamy gravy envelops the shredded chicken, ensuring every bite is a savory delight that feels like a warm hug.

Customizable: Feel free to pair this dish with fluffy rice, mashed potatoes, or even cauliflower rice for a gluten-free alternative—flexibility at its finest!

Family-Friendly: Kids love it, making it the ideal dinner choice that steers clear of fast food and offers wholesome goodness at the dinner table.

Perfect for Leftovers: Whip this up in advance and store leftovers for up to three days, making meals simpler throughout the week. If you’re looking for another quick and satisfying meal, try my BBQ Chicken Grilled Cheese Sandwich or a refreshing BLT Chicken Salad to keep variety alive!

Crockpot Chicken & Gravy Ingredients

• Here’s what you need for your flavorful Crockpot Chicken & Gravy!

For the Chicken

  • Boneless Skinless Chicken Breasts – The star of the show; tender and shreddable after cooking. You can swap this for chicken thighs if you prefer!

For the Gravy

  • Unsalted Cream of Chicken Soup – Offers a rich and creamy base; stick to unsalted to manage your sodium intake better.
  • Chicken Gravy Mix – A convenience item that intensifies the gravy’s flavor; choose your favorite variety for a personal touch.

Optional Liquid

  • Water or Chicken Broth (½ cup) – Adds a thinner consistency to your gravy if desired; feel free to skip if you prefer a thicker sauce.

For Serving

  • Hot Steamed Rice – The perfect complement to soak up that luscious gravy; alternatively, use mashed potatoes or cauliflower rice for a gluten-free option.

Step‑by‑Step Instructions for Crockpot Chicken & Gravy

Step 1: Prepare the Chicken
Start by seasoning your boneless skinless chicken breasts with salt and pepper to enhance the flavor. Place the seasoned chicken in your slow cooker, arranging them evenly at the bottom. This ensures that they cook uniformly, absorbing the delicious flavors of the gravy that will be added later.

Step 2: Mix the Gravy Ingredients
In a medium-sized bowl, whisk together the unsalted cream of chicken soup and the chicken gravy mix until well combined. If you prefer a thinner gravy, add ½ cup of water or chicken broth to the mixture and stir until smooth. The consistency should be creamy and easily pourable, ready to envelop your chicken in the slow cooker.

Step 3: Combine in the Slow Cooker
Pour the rich soup mixture over the chicken in the slow cooker, making sure to coat each piece. Spread it evenly to ensure that every bit of chicken is covered in this luscious gravy. The combination of flavors will meld beautifully as it cooks, creating a comforting and hearty dish that’s full of flavor.

Step 4: Cook the Chicken
Cover the slow cooker with its lid and set to cook on LOW for 4 to 6 hours. During this time, the chicken will become tender and easily shred with a fork. You’ll know it’s ready when the chicken is no longer pink in the center and flakes apart effortlessly, releasing an inviting aroma.

Step 5: Shred the Chicken
Once cooked, carefully remove the lid, taking care to avoid steam. Using two forks, shred the chicken directly in the slow cooker, stirring it into the gravy for distribution. The shredded chicken will absorb even more flavor from the gravy, creating a mouthwatering mixture that’s perfect for serving.

Step 6: Serve and Enjoy
Spoon the tender shredded chicken and gravy over a bed of hot steamed rice or your choice of side. The creamy, flavorful gravy will soak into the rice, providing each bite with a delightful taste of comfort. Consider adding a side of vegetables for a complete meal that everyone will love.

Expert Tips for Crockpot Chicken & Gravy

  • Choose Quality Chicken: Using fresh boneless skinless chicken breasts ensures tender and juicy results. Frozen chicken may require adjustments in cooking time.

  • No Water Needed: When using unsalted cream of chicken soup, avoid adding water; use it directly from the can for the best creamy consistency.

  • Mix Wisely: Stick to dry chicken gravy mix only; don’t prepare it in advance as it will lose its potency in flavor.

  • Shredding Technique: For perfectly shredded chicken, use two forks and shred directly in the slow cooker, allowing it to absorb the rich gravy.

  • Customize the Gravy: Feel free to switch up your chicken gravy mix depending on your taste preference to elevate this Crockpot Chicken & Gravy to new heights.

  • Make It Gluten-Free: To make this dish gluten-free, opt for gluten-free cream of chicken soup and serve over cauliflower rice for a delightful twist.

Make Ahead Options

These Easy Slow Cooker Chicken & Gravy are perfect for meal prep! You can season and place the chicken breasts in the slow cooker up to 24 hours in advance, ensuring a quick start to your cooking. Additionally, mix the cream of chicken soup and chicken gravy mix ahead of time, storing it in the refrigerator until you’re ready to cook. This will maintain the flavors and texture of the gravy. When you’re ready to enjoy this comforting meal, simply pour the gravy mixture over the chicken and cook on LOW for 4-6 hours. The best part? This delicious dish is just as comforting when reheated, making dinner a breeze on busy nights!

What to Serve with Easy 3-Ingredient Slow Cooker Chicken & Gravy

Add vibrant sides and delicious drinks to elevate your dinner table experience with this comforting dish.

  • Fluffy Mashed Potatoes: The creamy, buttery texture of mashed potatoes perfectly complements the savory gravy, creating a dream team of comfort food.

  • Green Beans Almondine: Crisp-tender green beans with a hint of toasted almonds provide a refreshing contrast, balancing the richness of the chicken and gravy.

  • Roasted Asparagus: Smoky, charred asparagus adds an earthy flavor and bright color, making your plate visually stunning and nutritionally well-rounded.

  • Buttered Corn: Sweet, succulent corn adds a pop of sweetness that rounds out the savory elements while being a favorite for all ages.

  • Crispy Garlic Bread: A crunchy side of garlic bread is perfect for soaking up every last drop of that rich gravy, ensuring no flavor goes uneaten.

  • Classic Caesar Salad: The crisp romaine lettuce, crunchy croutons, and creamy dressing add a tangy brightness, providing a delightful contrast to the hearty chicken dish.

  • Apple Crisp: Finish off the meal with a warm apple crisp; the sweet, cinnamon-spiced dessert introduces a comforting warmth that will leave everyone smiling.

How to Store and Freeze Crockpot Chicken & Gravy

Fridge: Store any leftovers in an airtight container for up to 3 days. Reheat gently on the stove or in the microwave before serving.

Freezer: For longer storage, freeze in individual portions for up to 3 months. Ensure it’s completely cool before transferring to freezer-safe bags.

Thawing: To thaw, move the frozen Crockpot Chicken & Gravy to the fridge overnight. Reheat gently on low heat, stirring occasionally, until warmed through.

Reheating: When reheating, add a splash of water or chicken broth if the gravy seems too thick, ensuring a creamy texture.

Crockpot Chicken & Gravy Variations

Feel free to experiment and make this comforting dish your own—the possibilities are endless!

  • Dairy-Free: Swap the cream of chicken soup for a dairy-free alternative like coconut cream soup for a lighter touch.

  • Vegetable Boost: Add a cup of frozen mixed vegetables to the slow cooker for added nutrition and a pop of color. This not only enhances the meal but makes it heartier too.

  • Spicy Twist: Sprinkle in some red pepper flakes or a dash of hot sauce to kick up the heat. It’s a simple way to add a little zing and excitement to your plate!

  • Herbed Flavor: Incorporate fresh herbs like rosemary or thyme when cooking to infuse the chicken with fragrant flavor. These herbs can elevate the dish and provide an elegant finish.

  • Serve on Noodles: Instead of rice, serve the chicken and gravy over egg noodles for a comforting, hearty pasta meal that feels like a warm hug.

  • Make it a Casserole: Combine the shredded chicken with cooked rice, top with cheese, and bake for a scrumptious casserole that brings the whole family together.

  • Pulled Chicken Sandwiches: Shred the cooked chicken, then serve it on toasted buns with coleslaw for easy pulled chicken sandwiches; a tasty twist that gives a whole new vibe to the meal.

  • Colorful Side: Pair with roasted asparagus or green beans for a colorful plate that not only looks fantastic but adds nutritional value too. If you want more ideas, check out my delicious Tuscan Chicken Soup for a warm, inviting side!

Crockpot Chicken & Gravy Recipe FAQs

What type of chicken is best for this recipe?
Absolutely! Boneless skinless chicken breasts are the star of the show due to their tender and shreddable nature. However, you can also substitute with chicken thighs if you prefer richer flavor and even more juiciness, as they hold up wonderfully in the slow cooker.

How should I store leftovers of Crockpot Chicken & Gravy?
To store leftovers, transfer the chicken and gravy to an airtight container and place it in the refrigerator. It should stay fresh for up to 3 days. When you’re ready to enjoy it again, simply reheat gently on the stove or in the microwave, stirring occasionally until heated through.

Can I freeze this dish and how?
Of course! To freeze Crockpot Chicken & Gravy, allow it to cool completely before portioning it into freezer-safe bags or containers. Label them with the date, and it will keep well for up to 3 months. When you’re ready to eat, thaw in the refrigerator overnight and reheat on low heat, stirring occasionally for even warmth.

What if my gravy ends up too thick?
Very! If your gravy becomes too thick while reheating, just add a splash of water or a bit of chicken broth to reach your desired consistency. Mix well while heating to keep it creamy and delightful.

Are there any dietary considerations with this recipe?
Certainly! For those with gluten sensitivities, opt for gluten-free cream of chicken soup and gluten-free chicken gravy mix. Serve over cauliflower rice for a full gluten-free experience. Always read labels to ensure there are no hidden allergens, especially for those sensitive to certain ingredients.

How can I customize this recipe?
Feel free to make this dish your own! Adding frozen vegetables like peas or carrots to the slow cooker can give you a complete meal in one pot. You can also experiment with different gravy mixes for unique flavors, making every batch distinctly yours!

Crockpot Chicken & Gravy

Crockpot Chicken & Gravy That's a Busy Night Game-Changer

This Crockpot Chicken & Gravy is a busy night game-changer, featuring tender chicken and rich gravy for a quick, family-friendly dinner.
Prep Time 10 minutes
Cook Time 5 hours
Total Time 5 hours 10 minutes
Servings: 4 servings
Course: Dinner
Cuisine: American
Calories: 400

Ingredients
  

For the Chicken
  • 2 pounds Boneless Skinless Chicken Breasts You can swap this for chicken thighs if you prefer!
For the Gravy
  • 1 can Unsalted Cream of Chicken Soup Stick to unsalted to manage your sodium intake better.
  • 1 packet Chicken Gravy Mix Choose your favorite variety for a personal touch.
  • 0.5 cup Water or Chicken Broth Adds a thinner consistency to your gravy if desired.
For Serving
  • 4 cups Hot Steamed Rice Alternatively, use mashed potatoes or cauliflower rice for a gluten-free option.

Equipment

  • Slow Cooker

Method
 

Step-by-Step Instructions
  1. Season the boneless skinless chicken breasts with salt and pepper and place them in the slow cooker.
  2. Whisk together the unsalted cream of chicken soup and chicken gravy mix in a bowl. Add the optional water or broth for a thinner gravy.
  3. Pour the gravy mixture over the chicken, ensuring all pieces are coated.
  4. Cover and cook on LOW for 4 to 6 hours until the chicken is tender.
  5. Shred the chicken with two forks directly in the slow cooker, mixing it into the gravy.
  6. Serve the shredded chicken and gravy over hot steamed rice.

Nutrition

Serving: 1servingCalories: 400kcalCarbohydrates: 45gProtein: 30gFat: 10gSaturated Fat: 3gPolyunsaturated Fat: 1gMonounsaturated Fat: 4gCholesterol: 90mgSodium: 800mgPotassium: 600mgFiber: 1gSugar: 2gVitamin A: 2IUCalcium: 2mgIron: 8mg

Notes

Store leftovers in an airtight container for up to 3 days. For longer storage, freeze in individual portions for up to 3 months.

Tried this recipe?

Let us know how it was!

Moist and Sweet Cinnamon Apple Bread to Delight Your Day

As the chilly winds of fall begin to swirl around, I find myself yearning for that comforting aroma of cinnamon and apples wafting through my kitchen. This Easy Cinnamon Apple Bread perfectly captures the essence of the season, transforming simple ingredients into a moist and inviting loaf that feels like a warm hug in dessert form. With quick prep time and a delightful cinnamon glaze, it’s a crowd-pleaser that serves beautifully for breakfast or as a sweet afternoon snack. Imagine slicing into this golden-brown bread, each piece revealing a tender crumb filled with juicy apple chunks—what’s not to love? Let’s dive into this delicious recipe and create a treat that will fill your home with the spirit of fall!

Why is Cinnamon Apple Bread a must-try?

Irresistible Aroma: The rich scent of cinnamon and baked apples will fill your kitchen, making it hard to resist a warm slice fresh out of the oven.
Moist Texture: Each bite is soft and moist, boasting a delightful crumb that’s perfect for any occasion—breakfast, snack, or dessert.
Quick & Easy: This recipe is straightforward and quick to prepare, making it an ideal choice for busy days or last-minute gatherings.
Versatile Appeal: Enjoy it as is, or dress it up with a dollop of whipped cream or a scoop of vanilla ice cream for a dessert experience.
Perfect for Sharing: Bring this delightful loaf to your next brunch or family gathering and watch it disappear in no time; it’s a real crowd-pleaser! If you love nostalgic flavors, try pairing this with a warm cup of coffee or even consider adding a twist like in Bananas Foster Cinnamon for a unique experience.

Cinnamon Apple Bread Ingredients

• Get ready to create a delicious treat with these wholesome ingredients!

For the Bread

  • All-purpose flour – Forms the structure of the bread; you can substitute with a gluten-free blend if desired.
  • Baking powder – Acts as a leavening agent for a light and airy texture; this ingredient is crucial for rising.
  • Salt – Enhances the bread’s overall flavor; standard table salt works, but can be omitted for low-sodium diets.
  • Unsalted butter – Adds richness and moisture; feel free to use margarine or a vegan alternative.
  • Granulated sugar – Sweetens your bread beautifully; brown sugar will give a more caramel-like flavor if you prefer.
  • Vanilla extract – Lends a lovely aroma; almond extract can be substituted for a different, nutty profile.
  • Large eggs – Binds ingredients together for a cohesive batter; you can try flaxseed meal or applesauce for an eggless option.
  • Milk – Provides essential moisture; any type, including non-dairy such as almond or oat milk, will work.
  • Light brown sugar – Adds sweetness with a hint of molasses flavor; regular sugar can be a simple swap.
  • Ground cinnamon – Offers that warm, cozy spice flavor essential to this recipe; there’s no substitute for that comforting essence.
  • Large apple – Infuses natural sweetness and moisture into the loaf; a Honeycrisp or Granny Smith variety works best.

For the Topping

  • Brown sugar – Combines with cinnamon for a delightful crunchy topping; can be omitted for a simpler version.
  • Ground cinnamon – Brings a sweet and spicy crunch to the top of your loaf, elevating the overall taste.

For the Glaze

  • Confectioners’ sugar – Adds the perfect sweetness and smooth finish; consider using brown sugar for more depth.
  • Ground cinnamon – Reinforces the signature spice flavor; you can adjust to taste.
  • Water – Helps mix the glaze to your desired consistency; milk can be used for a creamier texture.

Dive into the heart of fall with this Cinnamon Apple Bread—your family will thank you!

Step‑by‑Step Instructions for Cinnamon Apple Bread

Step 1: Preheat and Prepare the Pan
Start by preheating your oven to 350°F (175°C). While the oven warms, grease and flour an 8.5 x 4.5 inch loaf pan. This ensures that the Cinnamon Apple Bread will easily release after baking, allowing for that perfect golden-brown crust.

Step 2: Mix Dry Ingredients
In a medium bowl, combine 2 cups of all-purpose flour, 2 teaspoons of baking powder, and ½ teaspoon of salt. Use a whisk to blend these dry ingredients together, ensuring there are no lumps. Set this mixture aside as it will provide the structure for your delicious Cinnamon Apple Bread.

Step 3: Cream the Butter and Sugar
In a large mixing bowl, beat together ½ cup of unsalted butter and 1 cup of granulated sugar using an electric mixer. Continue mixing for about 3-4 minutes until the mixture turns pale and creamy. This step is crucial for incorporating air, making your bread light and airy.

Step 4: Incorporate the Eggs
Add 2 large eggs to the butter and sugar mixture, one at a time. Mix well after each addition until fully incorporated. This will bind your ingredients together, creating a cohesive batter for the Cinnamon Apple Bread that holds all its delightful flavors.

Step 5: Combine Wet and Dry Ingredients
Gradually stir in half of your reserved flour mixture along with ½ cup of milk to the creamed mixture. Mix until just combined, then repeat with the remaining flour and milk. Be careful not to overmix, as this can lead to a denser bread.

Step 6: Prepare the Apple Mixture
In a separate bowl, mix 1 cup of chopped apple (peeled and cored) with ½ cup of light brown sugar and 2 teaspoons of ground cinnamon. Gently coating the apple pieces in this sweet mixture will enhance their flavor and create pockets of sweetness in the bread.

Step 7: Layer the Batter and Apples
Pour half of the batter into the prepared loaf pan, spreading it evenly to form the base. Next, layer half of the apple mixture on top, then use a knife to swirl gently. This creates beautiful swirls of flavor that highlight the Cinnamon Apple Bread’s essence.

Step 8: Add Remaining Batter and Topping
Carefully pour the remaining batter over the apple layer. Top with the rest of the apple mixture, and again swirl gently to distribute evenly. For an extra crunch, mix 2 tablespoons of brown sugar with 1 teaspoon of cinnamon, sprinkling this topping over the batter before baking.

Step 9: Bake to Perfection
Place the loaf pan in the preheated oven and bake for 45-55 minutes. Check for doneness by inserting a toothpick into the center; it should come out clean or with just a few crumbs clinging. The Cinnamon Apple Bread will turn a delightful golden brown and fill your kitchen with an irresistible aroma.

Step 10: Cooling Down
Once baked, remove the bread from the oven and allow it to cool in the pan for about 15-20 minutes. This cooling period helps set the bread structure. Afterward, gently transfer it to a wire rack to cool completely before glazing.

Step 11: Drizzle the Glaze
Prepare the glaze by mixing 1 cup of confectioners’ sugar, 1 teaspoon of ground cinnamon, and enough water to achieve a smooth consistency. Once the bread is completely cooled, drizzle the glaze over the top, enhancing both its flavor and visual appeal for your Cinnamon Apple Bread.

Make Ahead Options

These delicious Cinnamon Apple Bread loaves are perfect for meal prep lovers! To save time on busy mornings, you can prepare the batter up to 24 hours in advance and refrigerate it (this helps prevent the apples from browning). Simply mix the dry ingredients and wet ingredients separately, then combine when ready to bake. You can also chop the apples and mix them with sugar and cinnamon ahead of time and store them in an airtight container in the fridge for up to 3 days. When you’re ready to serve, just layer the apple mixture into the batter and bake as instructed; you’ll enjoy a cozy, fresh-baked loaf with minimal fuss!

What to Serve with Easy Cinnamon Apple Bread

Pairing this delightful bread with complementary sides will create a comforting and memorable meal experience.

  • Creamy Mashed Potatoes: A side of fluffy mashed potatoes brings a rich, buttery contrast to the sweet notes of cinnamon apple.
  • Sautéed Green Beans: These fresh, crisp green beans add a delightful crunch and brightness, enhancing the overall meal.
  • Warm Apple Cider: Sip on this spiced beverage to amplify those cozy apple and cinnamon flavors, making every bite feel like a hug.
  • Vanilla Ice Cream: A scoop of creamy vanilla ice cream melting over warm bread creates a luscious flavor bridge that sweetens the experience.
  • Toasted Nuts: Sprinkle some toasted walnuts or pecans on top for a satisfying crunch, adding depth to each moist slice of bread.
  • Yogurt Parfait: Pair with creamy yogurt layered with granola and fruits for a fresh touch that balances the warm spices beautifully.
  • Coffee or Tea: A warm cup of coffee or herbal tea enhances your experience, elevating the comforting, nostalgic flavors of cinnamon and apples.
  • Cinnamon Sugar Doughnuts: For a treat, serve mini cinnamon sugar doughnuts alongside for a fun, sweet twist that pairs perfectly with your bread!

How to Store and Freeze Cinnamon Apple Bread

Room Temperature: Keep the bread in an airtight container for up to 2-3 days to maintain its delightful moisture and flavor.

Fridge: If you want to extend shelf life, store it in the fridge for up to a week; however, it may lose some moisture when chilled.

Freezer: For longer storage, wrap the loaf tightly in plastic wrap and then in aluminum foil. It can be frozen for up to 1-2 months without sacrificing taste.

Reheating: To enjoy a warm slice, simply thaw overnight in the fridge and reheat in the microwave for 15-20 seconds or in a toaster oven until warm.

Expert Tips for Cinnamon Apple Bread

  • Avoid Overmixing: When combining the wet and dry ingredients, mix until just combined to keep your Cinnamon Apple Bread light and tender.
  • Use Balanced Apples: Choose apples that are similar in size for uniform cooking; Honeycrisp and Granny Smith work great for their sweetness and texture.
  • Monitor Baking Time: Check your loaf around the 45-minute mark. If it browns too quickly, loosely cover with foil to prevent burning while baking through.
  • Check Internal Temp: Ensure the bread reaches an internal temperature of 200°F (93°C) for the best texture and doneness; this ensures it’s perfectly baked.
  • Customize Your Glaze: Adjust your glaze’s thickness to your liking—add water for a thinner glaze or more confectioners’ sugar for a richer coating on your Cinnamon Apple Bread.

Cinnamon Apple Bread Variations

Feel free to get creative with this delightful recipe and customize it to suit your tastes!

  • Fruit Swap: Replace apples with diced pears or a mix of berries for a fresh twist that’s equally delicious. Each fruit brings its own unique sweetness to the loaf.
  • Nutty Addition: Toss in chopped walnuts or pecans for added crunch and flavor depth. These nuts complement the softness of the bread beautifully, giving each bite a delightful texture.
  • Streusel Topping: Add a crunchy streusel topping made from flour, sugar, and butter for an irresistible sweet crunch on top. This decadent finish will make your bread feel more like a dessert.
  • Extra Spice: Mix in a pinch of nutmeg or cardamom alongside the cinnamon for a warm, fragrant complexity. Experiment with spices to create a warming aroma that fills your home as it bakes.
  • Gluten-Free Option: Substitute the all-purpose flour with a gluten-free baking blend for everyone to enjoy this comforting loaf. It’s encouraged to find blends tailored for bread for the best results!
  • Dairy-Free Delight: Use a vegan butter and a non-dairy milk, like almond or oat milk, for a fully dairy-free version. You won’t sacrifice flavor while accommodating dietary preferences.
  • Flavor Boost: Stir in some grated orange or lemon zest into the batter for a refreshing citrus note that brightens the flavors in your bread. The citrus will add a lovely balance to the rich sweetness of the apples.

By experimenting with these variations, your Cinnamon Apple Bread will never be boring! For those who want inspiration, check out my take on Apple Crisp Cinnamon or indulge in the flavor-packed Bananas Foster Cinnamon for even more delightful ideas. Happy baking!

Cinnamon Apple Bread Recipe FAQs

What types of apples are best for Cinnamon Apple Bread?
Absolutely! For the best flavor and texture, I’d recommend using firm varieties like Honeycrisp or Granny Smith. They hold their shape well when baked, providing juicy bites without turning mushy. Aim for about 1 cup of peeled and chopped apples, equal to one large apple (around 3.5 inches in diameter).

How should I store leftover Cinnamon Apple Bread?
To keep your bread fresh, store it in an airtight container at room temperature for 2-3 days. If you want to extend its shelf life, refrigerate it for up to a week, but be aware that refrigeration can sometimes make the bread a bit drier.

Can Cinnamon Apple Bread be frozen?
The more the merrier! To freeze your delicious loaf, tightly wrap it in plastic wrap, then in aluminum foil to prevent freezer burn. It can be stored in the freezer for up to 1-2 months. When you’re ready to enjoy, simply thaw in the fridge overnight and reheat for that fresh-baked taste.

Why is my Cinnamon Apple Bread dense?
To avoid a dense loaf, be careful not to overmix the batter after adding the dry ingredients. Another common culprit is adding too much flour—using a kitchen scale for precision can help. If your apples are too wet or your measuring cups are packed down, that could also affect the texture, so make sure to fluff your flour before measuring.

Are there any dietary considerations for this recipe?
Very much! If you’re looking to make this recipe suitable for certain diets, you can easily find alternatives. For gluten-free adjustments, just swop the all-purpose flour with a gluten-free blend. To make it vegan, you can replace the eggs with flaxseed meal (1 tablespoon mixed with 2.5 tablespoons of water equals one egg) and use a plant-based milk. Always check ingredient labels to avoid potential allergens!

Can I use a different glaze for my Cinnamon Apple Bread?
Absolutely! If you’re looking for a twist, consider using a vanilla glaze made from powdered sugar, a splash of vanilla extract, and milk instead of water. You can customize the sweetness and thickness according to your personal preference—perfect for tailoring to your taste buds!

Cinnamon Apple Bread

Moist and Sweet Cinnamon Apple Bread to Delight Your Day

This Cinnamon Apple Bread is a moist and delightful treat perfect for breakfast and snacks.
Prep Time 15 minutes
Cook Time 55 minutes
Cooling Time 20 minutes
Total Time 1 hour 30 minutes
Servings: 8 slices
Course: Breakfast
Cuisine: American
Calories: 230

Ingredients
  

For the Bread
  • 2 cups all-purpose flour Can substitute with gluten-free blend
  • 2 teaspoons baking powder Leavening agent for texture
  • 0.5 teaspoon salt Can omit for low-sodium diets
  • 0.5 cups unsalted butter Can use margarine or vegan alternative
  • 1 cup granulated sugar Can substitute with brown sugar
  • 1 teaspoon vanilla extract Almond extract can be used
  • 2 large eggs Flaxseed meal or applesauce can be used for eggless option
  • 0.5 cups milk Any type, including non-dairy
  • 0.5 cups light brown sugar Can use regular sugar
  • 2 teaspoons ground cinnamon Essential for flavor
  • 1 large apple Honeycrisp or Granny Smith recommended
For the Topping
  • 2 tablespoons brown sugar For crunchy topping
  • 1 teaspoon ground cinnamon For topping
For the Glaze
  • 1 cup confectioners' sugar Can use brown sugar for depth
  • 1 teaspoon ground cinnamon Adjust to taste
  • 1 tablespoon water Add for desired consistency

Equipment

  • Loaf Pan
  • Mixing bowls
  • Electric mixer
  • whisk

Method
 

Instructions
  1. Preheat your oven to 350°F (175°C) and grease and flour an 8.5 x 4.5 inch loaf pan.
  2. In a medium bowl, mix 2 cups of all-purpose flour, 2 teaspoons of baking powder, and ½ teaspoon of salt.
  3. In a large bowl, cream together ½ cup of unsalted butter and 1 cup of granulated sugar for 3-4 minutes until pale and creamy.
  4. Add 2 large eggs one at a time, mixing well after each addition.
  5. Gradually mix in half of the flour mixture and then ½ cup of milk, followed by the rest of the flour and milk, being careful not to overmix.
  6. In a separate bowl, mix 1 cup of chopped apple with ½ cup of light brown sugar and 2 teaspoons of ground cinnamon.
  7. Pour half of the batter into the prepared pan, then layer half of the apple mixture, swirling gently.
  8. Pour the remaining batter over the apple layer, top with the remaining apple mixture, and swirl again.
  9. Mix 2 tablespoons of brown sugar with 1 teaspoon of cinnamon and sprinkle on top.
  10. Bake for 45-55 minutes, checking doneness with a toothpick.
  11. Cool in the pan for 15-20 minutes, then transfer to a wire rack.
  12. For the glaze, mix 1 cup of confectioners’ sugar, 1 teaspoon of ground cinnamon, and enough water for smooth consistency, then drizzle over the cooled bread.

Nutrition

Serving: 1sliceCalories: 230kcalCarbohydrates: 32gProtein: 3gFat: 10gSaturated Fat: 6gMonounsaturated Fat: 4gCholesterol: 50mgSodium: 200mgPotassium: 120mgFiber: 1gSugar: 14gVitamin A: 300IUVitamin C: 2mgCalcium: 30mgIron: 1mg

Notes

Best enjoyed with a warm cup of coffee; can be stored in an airtight container for 2-3 days or frozen for up to 1-2 months.

Tried this recipe?

Let us know how it was!

High Protein Creamy Beef Pasta That’s Ready in 30 Minutes

As I stirred the pot, the rich aroma of garlic and browning beef filled my kitchen, instantly transporting me to comforting family dinners of my childhood. This High Protein Creamy Beef Pasta is a modern twist on those cherished meals, designed for busy weeknights when you crave something hearty yet quick. With the incredible creaminess from Greek yogurt and the savory notes of Parmesan, this dish offers a delightful way to fuel your day without compromising on flavor. It’s not just delicious; it also packs a protein punch, making it a satisfying choice for the whole family. Plus, the prep time is a mere breeze, allowing you to transition from kitchen to table in no time. Are you ready to discover a weeknight hero that transforms your dinner routine?

Why is this pasta a weeknight winner?

Creamy Indulgence: This High Protein Creamy Beef Pasta envelops tender noodles in a velvety sauce that delights your taste buds. Quick Prep Time: Ready in just 30 minutes, it’s perfect for busy evenings when time is short but flavor is essential. Protein-Packed Benefit: With lean beef and Greek yogurt, it’s nutritious yet satisfying—ideal for post-workout meals. Versatile Options: Customize with veggies like spinach or bell peppers for added nutrition. Family-Friendly Appeal: A delicious hit with both kids and adults, this dish transforms weeknight dinners into cherished family gatherings. Don’t forget to try it alongside a side of Cheesy Protein Egg for a complete meal!

High Protein Creamy Beef Pasta Ingredients

For the Pasta
Pasta – Use penne or fettuccine, but feel free to opt for gluten-free alternatives if needed.

For the Protein Sauce
Lean Ground Beef – This main protein source brings hearty flavor; for a lighter version, try turkey or chicken.
Greek Yogurt – A creamy thickening agent that also boosts protein; sour cream or cottage cheese can be used as substitutes.
Parmesan Cheese – Adds richness to the sauce; for a saltier kick, consider using grated Pecorino Romano.
Diced Tomatoes – These introduce moisture and flavor; canned or fresh work beautifully.

For Flavor Boost
Garlic – Fresh minced garlic enhances the overall flavor; garlic powder can be a quicker substitute.
Onion – Sweetness and depth come from the onion; shallots or green onions can serve as delicious alternatives.
Italian Seasoning – A blend that brings warmth; if you’re out, dried oregano and basil do the trick.
Salt and Pepper – Essential for taste adjustment; add to your liking.

Enjoy diving into this delightful High Protein Creamy Beef Pasta that promises to transform your dinner into something extraordinary!

Step‑by‑Step Instructions for High Protein Creamy Beef Pasta

Step 1: Cook the Pasta
Begin by bringing a large pot of salted water to a rolling boil over high heat. Add your choice of pasta, such as penne or fettuccine, and cook according to the package instructions until al dente, usually around 8-10 minutes. Once cooked, drain the pasta in a colander and set aside, allowing it to steam off while you prepare the sauce.

Step 2: Brown the Beef
In a large skillet, heat a drizzle of olive oil over medium heat. Add the lean ground beef to the skillet, breaking it apart with a spatula as it cooks. Sauté for about 5-7 minutes, or until the beef is browned and no longer pink. Make sure to drain any excess fat for a lighter dish before proceeding to the next step.

Step 3: Sauté Aromatics
With the skillet still on medium heat, add the diced onion and minced garlic to the browned beef. Cook for around 3-4 minutes, stirring frequently, until the onion becomes translucent and the garlic is fragrant. This will deepen the flavor profile of your High Protein Creamy Beef Pasta, making it truly appetizing.

Step 4: Combine Ingredients
Stir in the diced tomatoes, bringing in a pop of color and moisture to the skillet mixture. Next, add the cooked pasta, Greek yogurt, and Italian seasoning; mix everything thoroughly until well combined. You should see the vibrant colors meld together, creating a deliciously creamy sauce that clings to the pasta beautifully.

Step 5: Add Cheese
Sprinkle in the grated Parmesan cheese to the skillet, stirring as it melts into the creamy sauce. This step infuses the dish with rich flavor while enhancing its creamy texture. Season the mixture with salt and pepper to taste, ensuring every bite of your High Protein Creamy Beef Pasta is flavorful and satisfying.

Step 6: Serve and Garnish
Once your High Protein Creamy Beef Pasta is well-combined and heated through, transfer it to individual plates or a serving dish. Feel free to garnish with additional Parmesan or fresh herbs for a burst of flavor. This dish not only looks delightful but also smells incredible, ready to impress your family at dinnertime.

What to Serve with High Protein Creamy Beef Pasta

Elevate your dining experience with delightful side dishes that balance flavors and textures beautifully!

  • Garlic Bread: Perfectly toasted, buttery slices add a crunchy contrast to the creamy pasta, making each bite a pleasure. Dip them in any leftover sauce for extra indulgence!

  • Crisp Green Salad: A refreshing mix of romaine, cherry tomatoes, and a zesty vinaigrette offers a light counterpart to the hearty main dish, cleansing the palate between savory bites.

  • Steamed Broccoli: Bright green florets bring a splash of color and nutritional goodness, plus their mild flavor pairs nicely with the savory beef sauce.

  • Roasted Vegetables: Try a medley of bell peppers, zucchini, and carrots for a sweet and earthy taste that complements the pasta’s rich creaminess. Their caramelization adds depth.

  • Cheesy Protein Egg Bake: For breakfast lovers, this protein-packed dish makes a wonderful pairing for a hearty dinner, ensuring everyone is satisfied and energized.

  • Crisp White Wine: A chilled glass of Pinot Grigio or Sauvignon Blanc enhances the creamy pasta’s richness, while balancing the meal with its crisp acidity.

  • Chocolate Mousse: A light yet decadent dessert that rounds off the meal beautifully, its airy texture complements the heartiness of the pasta and satisfies your sweet tooth.

Prepare to enjoy this High Protein Creamy Beef Pasta with these delightful accompaniments that make every dinner special!

Expert Tips for High Protein Creamy Beef Pasta

Perfect Pasta Consistency: Ensure you cook the pasta just until al dente, as it will continue to soften when mixed with the sauce.

Meat Alternatives: If you’re looking to lower fat content, swapping lean ground beef for ground turkey or chicken can give similar results.

Creamy Texture Boost: For extra creaminess, mix in a dollop of cream cheese while combining the ingredients—especially if the sauce feels too thin.

Fresh vs. Dried Herbs: Fresh garlic and onions make a noticeable difference in flavor. If you’re in a pinch, dried alternatives work, but the taste won’t be as rich.

Drain Properly: Make sure to drain excess fat from the browned beef to prevent a greasy sauce in your High Protein Creamy Beef Pasta.

High Protein Creamy Beef Pasta Variations

Feel free to personalize and elevate your High Protein Creamy Beef Pasta experience with these tasty twists!

  • Lean Ground Turkey: Swap out the ground beef for turkey for a lighter option that’s just as delicious. The flavor remains robust while reducing fat content.

  • Vegetarian Delight: Substitute the meat with hearty lentils or chickpeas to create a satisfying vegetarian version packed with protein and fiber.

  • Creamy Dairy-Free: For a dairy-free dish, replace Greek yogurt and Parmesan with coconut cream and nutritional yeast. This variation adds a whole new flavor profile!

  • Veggie Boost: Toss in a handful of fresh spinach or roasted bell peppers for vibrant color and extra nutrients. They will cook down beautifully, adding both flavor and crunch.

  • Spicy Kick: Add crushed red pepper flakes or diced jalapeños into the mix for an extra layer of heat. This small tweak packs a flavorful punch that spice lovers will adore!

  • Herbaceous Twist: Experiment with fresh herbs like basil or parsley to enhance the dish’s aroma and flavor profile. A sprinkle of fresh herbs right before serving makes all the difference!

  • Zesty Lemon: Drizzle fresh lemon juice over the finished pasta for a bright zing that balances the creamy richness perfectly. This is particularly refreshing on warmer nights.

  • Cheesy Layering: For an ultra-cheesy experience, layer in some mozzarella or ricotta before serving. It will melt beautifully and take this dish to the next creamy level!

Don’t forget, if you want to explore more delicious flavors, check out my Cajun Sausage Pasta and the delightful Marry Shrimp Pasta. The options are endless, and the kitchen is your playground!

Storage Tips for High Protein Creamy Beef Pasta

Fridge: Store leftovers in an airtight container for up to 3 days to maintain freshness. Be sure to cool it down to room temperature before sealing.

Freezer: If you want to keep it longer, freeze the pasta in a freezer-safe container for up to 3 months. Thaw overnight in the fridge when you’re ready to enjoy again.

Reheating: Reheat gently in the microwave or on the stovetop, adding a splash of water or broth to the sauce to help restore its creamy texture.

Serving Again: Before serving, taste and adjust the seasoning if necessary; the flavors may mellow after storage, but the High Protein Creamy Beef Pasta will still be delicious!

Make Ahead Options

Preparing High Protein Creamy Beef Pasta in advance can save you precious time during busy weeknights! You can brown the ground beef and sauté the onions and garlic up to 48 hours ahead. Simply store the mixture in an airtight container in the refrigerator. Additionally, you can cook the pasta up to 24 hours in advance and toss it with a little olive oil to prevent sticking. When you’re ready to serve, combine the beef mixture with the cooked pasta, diced tomatoes, Greek yogurt, and Parmesan. Heat everything gently on the stovetop until warmed through, ensuring each bite remains just as delicious and creamy as when freshly made.

High Protein Creamy Beef Pasta Recipe FAQs

Which type of pasta should I use for this recipe?
You can use penne or fettuccine for your High Protein Creamy Beef Pasta, but if you’re following a gluten-free diet, feel free to opt for gluten-free pasta alternatives. Just make sure to follow the package instructions for cooking times, as they can vary.

How should I store leftovers of the High Protein Creamy Beef Pasta?
Store any leftovers in an airtight container in the refrigerator for up to 3 days. Allow the pasta to cool to room temperature before sealing. When ready to reheat, you can use a microwave or stovetop, adding a splash of water or broth to help restore its creamy texture.

Can I freeze the High Protein Creamy Beef Pasta?
Absolutely! To freeze, place the cooled pasta in a freezer-safe container or bag, ensuring it’s airtight. It can be frozen for up to 3 months. When you’re ready to enjoy it again, simply thaw overnight in the refrigerator and reheat as needed.

What if my sauce seems too thin or not creamy enough?
If you find your sauce isn’t thick enough, here’s a step-by-step fix:

  1. Add Cream Cheese: While combining ingredients, stir in a block of cream cheese.
  2. Heat Gently: Allow it to melt into the sauce while stirring; this will create a richer consistency.
  3. Adjust Ingredients: If needed, mix in a bit more Greek yogurt or Parmesan cheese to enhance creaminess.
    This method will transform your sauce into a delightful, thick coating for your pasta!

Are there any dietary considerations I should be aware of?
If you’re preparing this dish for someone with dietary restrictions, you can easily swap out the lean ground beef for ground turkey or chicken for a lighter option. Greek yogurt can also be replaced with sour cream or cottage cheese, depending on dietary preferences or allergies. Always double-check the labels if you’re catering to allergies!

High Protein Creamy Beef Pasta

High Protein Creamy Beef Pasta That's Ready in 30 Minutes

This High Protein Creamy Beef Pasta is a quick and hearty meal that combines lean beef with creamy Greek yogurt for a flavorful twist.
Prep Time 10 minutes
Cook Time 20 minutes
Total Time 30 minutes
Servings: 4 servings
Course: Pasta
Cuisine: Italian
Calories: 450

Ingredients
  

For the Pasta
  • 8 ounces penne or fettuccine gluten-free alternatives optional
For the Protein Sauce
  • 1 pound lean ground beef or turkey/chicken for lighter version
  • 1 cup Greek yogurt can substitute with sour cream or cottage cheese
  • 1/2 cup Parmesan cheese can use grated Pecorino Romano
  • 1 can diced tomatoes canned or fresh
For Flavor Boost
  • 3 cloves garlic fresh minced or garlic powder
  • 1 medium onion or shallots/green onions
  • 1 teaspoon Italian seasoning or dried oregano and basil
  • to taste salt
  • to taste pepper

Equipment

  • Large pot
  • Large skillet
  • Colander
  • spatula

Method
 

Step‑by‑Step Instructions
  1. Cook the Pasta: Bring a large pot of salted water to a boil. Add pasta and cook until al dente, about 8-10 minutes. Drain and set aside.
  2. Brown the Beef: Heat olive oil in a large skillet over medium heat. Add ground beef, breaking it apart, and sauté until browned and no longer pink, about 5-7 minutes. Drain excess fat.
  3. Sauté Aromatics: Add diced onion and minced garlic to the beef. Cook until onion is translucent and garlic is fragrant, about 3-4 minutes.
  4. Combine Ingredients: Stir in diced tomatoes, then add cooked pasta, Greek yogurt, and Italian seasoning. Mix thoroughly until well combined.
  5. Add Cheese: Stir grated Parmesan into the skillet, allowing it to melt into the sauce. Season with salt and pepper to taste.
  6. Serve and Garnish: Transfer to plates or serving dish and garnish with additional Parmesan or fresh herbs as desired.

Nutrition

Serving: 1servingCalories: 450kcalCarbohydrates: 40gProtein: 35gFat: 18gSaturated Fat: 7gCholesterol: 85mgSodium: 600mgPotassium: 600mgFiber: 3gSugar: 4gVitamin A: 500IUVitamin C: 5mgCalcium: 200mgIron: 3mg

Notes

Store leftovers in an airtight container for up to 3 days. Reheat gently with a splash of water or broth if needed.

Tried this recipe?

Let us know how it was!

Oatmeal Peanut Butter Energy Bites for Quick, Yummy Fuel

In a bustling household, the afternoon slump hits harder than a dreary Monday morning, and you need an instant pick-me-up. Enter my Oatmeal Peanut Butter Energy Bites—a no-bake wonder that transforms those tired moments into a snack-filled delight! These bites are not only easy to whip up in just 10 minutes, but they also pack a nutritious punch with wholesome oats and creamy peanut butter, making them a perfect guilt-free treat for both adults and kids. Sweetened naturally with honey and dotted with mini chocolate chips, these energy bites offer the right combination of flavor and fun. Whether you need a quick energy boost pre-workout or a healthy option for lunchboxes, you’re going to want to keep this recipe at your fingertips. Curious about how to turn simple ingredients into tasty snacks that keep you fueled? Let’s dive in!

Why Make Oatmeal Peanut Butter Energy Bites?

Simplicity at its Best: Whipping up these energy bites takes just 10 minutes, making them an ideal quick snack solution.

Nutritious Fuel: Packed with wholesome oats and creamy peanut butter, they provide essential nutrients to power you through your day.

Guilt-Free Indulgence: Naturally sweetened with honey and enhanced by chocolate chips, these bites are a delightful treat without the guilt.

Versatile Options: Feel free to mix in your favorite ingredients like almonds, dried fruits, or chia seeds to customize your bites.

Perfect for All Ages: These energy bites are not only great for adults but also loved by kids, making them an easy go-to for lunchboxes and post-school snacks.

If you’re looking for more quick and tasty options, check out my Granola Cups Peanut for an additional treat or the rich flavors of Comfort Garlic Butter for a savory meal idea!

Oatmeal Peanut Butter Energy Bites Ingredients

For the Base
Old-Fashioned Oats – Provides the chewy foundation; use gluten-free oats for a gluten-free option.
Creamy Peanut Butter – Binds ingredients and adds healthy fats; try crunchy peanut butter for extra texture.

For Sweetness and Flavor
Mini Chocolate Chips – Adds indulgence; substitute with regular or dark chocolate chips as you like.
Honey – A natural sweetener that helps bind the mixture; you can swap it with maple syrup.
Ground Cinnamon – Enhances flavor with warm notes, perfectly complementing the chocolate and peanut butter.
Vanilla Extract – Deepens sweetness and rounds out the flavors beautifully.

These Oatmeal Peanut Butter Energy Bites are the perfect blend of wholesome ingredients to keep your energy up throughout the day!

Step‑by‑Step Instructions for Oatmeal Peanut Butter Energy Bites

Step 1: Mix Ingredients Together
In a large mixing bowl, combine 1 cup of old-fashioned oats, 1/2 cup of creamy peanut butter, 1/3 cup of honey, 1/2 cup of mini chocolate chips, 1/2 teaspoon of ground cinnamon, and 1 teaspoon of vanilla extract. Use a sturdy spatula or wooden spoon to blend everything thoroughly until fully combined, and you can see the chocolate chips evenly dispersed, which should take about 2-3 minutes.

Step 2: Form into Bites
With clean hands or a mini ice cream scoop, take portions of the mixture and roll them into bite-sized balls, about 1 inch in diameter. You should yield around 15 energy bites. As you shape them, ensure they hold together securely and feel slightly sticky but firm, which typically takes another 3-4 minutes.

Step 3: Chill to Firm Up
Place the rolled Oatmeal Peanut Butter Energy Bites on a baking tray lined with parchment paper, ensuring they have some space between them. Refrigerate these bites for at least 30 minutes or until they feel firm to the touch. This chilling process allows them to set and makes them easier to handle when snacking.

Step 4: Store Properly
Once firm, transfer the energy bites to an airtight container. You can store them in the refrigerator where they will stay fresh for up to 10 days. This makes it super easy to grab a nutritious snack whenever the afternoon slump hits. Enjoy them straight from the fridge or bring them along on your busy days!

Expert Tips for Oatmeal Peanut Butter Energy Bites

  • Moisture Matters: If the mixture seems dry, add a teaspoon of extra honey to ensure your Oatmeal Peanut Butter Energy Bites are tasty and stick together well.

  • Shape Variations: For a fun twist, press the mixture into an 8×8-inch baking dish, chill, and then cut into bars instead of traditional bites.

  • Kid-Friendly Additions: Make these snacks engaging for kids by mixing in mini M&Ms or colorful sprinkles for a delightful twist.

  • Ingredient Swaps: Feel free to substitute peanut butter with almond or sunflower seed butter to create delicious variations while keeping the recipe simple and healthy.

  • Add Texture: Incorporate chopped nuts or seeds for extra crunch and protein, enhancing both texture and nutritional value of your energy bites.

How to Store and Freeze Oatmeal Peanut Butter Energy Bites

Fridge: Keep your Oatmeal Peanut Butter Energy Bites in an airtight container in the refrigerator for up to 10 days. This ensures they stay fresh and ready for snacking.

Freezer: For longer storage, freeze the bites in a single layer on a baking sheet before transferring them to a freezer-safe bag. They can last up to 3 months in the freezer.

Reheating: Enjoy them straight from the fridge or let them sit at room temperature for a few minutes before serving. There’s no need to heat these no-bake delights!

Tip: For optimal taste, consume frozen bites within a month or two, and allow them to thaw in the fridge overnight for the best texture.

Oatmeal Peanut Butter Energy Bites Variations

Explore mouthwatering twists on your Oatmeal Peanut Butter Energy Bites that will delight your taste buds!

  • Nut-Free: Swap peanut butter for sunflower seed butter for a delicious alternative, perfect for school lunches or nut-free environments.
  • Chocolate Lovers: Mix in cocoa powder with the base ingredients for a rich, chocolatey flavor that will satisfy your sweet tooth.
  • Protein Boost: Add a scoop of protein powder to enhance nutritional value; it’ll keep you fueled and ready for anything!
  • Fruity Delight: Toss in dried fruits like cranberries or apricots for a burst of sweetness and chewiness, bringing a lively contrast to the bites.
  • Cinnamon Raisin: Mix in raisins and an extra dash of cinnamon for a flavorful combination that echoes classic oatmeal raisin cookies.
  • Crunch Factor: Incorporate chopped nuts such as almonds or walnuts for an added crunch, enhancing both texture and protein.
  • Creamy Or Crunchy: Experiment with either creamy or crunchy peanut butter; the latter adds a delightful texture to each bite.
  • Puffed Rice Surprise: Fold in some puffed rice or quinoa for extra crunch and a unique twist, making your energy bites truly stand out.

Feel free to get creative with your variations! If you want to spice things up with savory flavors, consider trying my delicious Cowboy Butter Chicken for a fun meal after enjoying these delightful energy bites!

Make Ahead Options

These Oatmeal Peanut Butter Energy Bites are perfect for busy home cooks looking to save time during hectic weeks! You can prepare the mixture up to 24 hours in advance, storing it in the refrigerator until you’re ready to form the bites. Just mix all your ingredients well and then cover the bowl with plastic wrap. When you’re ready to serve, simply roll them into bite-sized balls and chill for at least 30 minutes to firm up. This method ensures they stay just as delicious while saving you precious time on busy days. Enjoy a nutritious snack that’s ready to go whenever you need it!

What to Serve with Oatmeal Peanut Butter Energy Bites?

These delightful energy bites are perfect on their own, but with a few extra elements, you can create a satisfying, full meal experience.

  • Fresh Fruit Salad: A vibrant mix of seasonal fruits adds brightness and hydration, balancing the rich flavors of the energy bites.
  • Yogurt Parfait: Layer creamy yogurt with granola and fresh berries for a refreshing contrast that enhances the energy boosts.
  • Nutty Trail Mix: Combine almonds, walnuts, and dried fruit to create a crunchy complement that offers extra energy and texture alongside your bites.
  • Smoothies: A banana or berry smoothie can create a light and nutritious pairing, ideal for breakfast or a post-workout snack.
  • Rice Cakes with Nut Butter: Spread peanut or almond butter on rice cakes for an airy, crunchy base that amplifies the flavors of your bites.
  • Herbal Tea: A warm cup of chamomile or peppermint tea can be the perfect calming companion, especially during those cozy moments at home.
  • Nut Butter Dip: For those who crave extra indulgence, serving the bites with a side of chocolate or caramel dip can create a fun treat experience.
  • Dark Chocolate Squares: Pairing these energy bites with a couple of squares of dark chocolate can enhance the richness while providing antioxidants.

These ideas make for delightful combinations that always satisfy! Enjoy your healthy snacking adventure!

Oatmeal Peanut Butter Energy Bites Recipe FAQs

What type of oats should I use for Oatmeal Peanut Butter Energy Bites?
Absolutely! Old-fashioned oats are the best choice as they provide the chewy structure that holds these bites together. If you’re looking for a gluten-free option, just make sure to select certified gluten-free oats.

How should I store the energy bites, and how long will they last?
You can store your Oatmeal Peanut Butter Energy Bites in an airtight container in the refrigerator for up to 10 days. This keeps them fresh and perfect for snacking at any time!

Can I freeze Oatmeal Peanut Butter Energy Bites?
Certainly! For longer storage, you can freeze the energy bites. Start by placing them in a single layer on a baking sheet and freeze until solid, about 1-2 hours. Then, transfer them to a freezer-safe bag. These bites can be stored in the freezer for up to 3 months—just thaw them in the fridge overnight before enjoying!

What should I do if the mixture feels too dry?
If you find that your mixture is crumbly or feels dry, don’t worry! Simply add an additional teaspoon of honey or a splash of water to achieve the right consistency. Mixing in a little more peanut butter is another great option for adding moisture.

Are there any allergy considerations for this recipe?
Yes! Since this recipe contains peanut butter, it’s important to be aware of nut allergies. If you or someone you are serving has a peanut allergy, consider using sunflower seed butter or almond butter as an alternative. And if you’re making these for kids, be cautious with mix-ins like chocolate chips that may contain allergens.

Can I customize the ingredients in these energy bites?
Absolutely! Feel free to get creative by adding in your favorite mix-ins. You can incorporate chopped nuts, dried fruits like raisins or cranberries, or even seeds like chia or flaxseed for added nutrition and flavor. Experimenting is a great way to make these energy bites your own!

Oatmeal Peanut Butter Energy Bites

Oatmeal Peanut Butter Energy Bites for Quick, Yummy Fuel

Delicious Oatmeal Peanut Butter Energy Bites provide a quick, healthy snack for energy boosts.
Prep Time 10 minutes
Chill Time 30 minutes
Total Time 40 minutes
Servings: 15 bites
Course: Snack
Cuisine: American
Calories: 120

Ingredients
  

For the Base
  • 1 cup Old-Fashioned Oats Use gluten-free oats for a gluten-free option.
  • 1/2 cup Creamy Peanut Butter Try crunchy peanut butter for extra texture.
For Sweetness and Flavor
  • 1/2 cup Mini Chocolate Chips Substitute with regular or dark chocolate chips as you like.
  • 1/3 cup Honey You can swap it with maple syrup.
  • 1/2 teaspoon Ground Cinnamon Enhances flavor with warm notes.
  • 1 teaspoon Vanilla Extract Deepens sweetness and rounds out the flavors beautifully.

Equipment

  • Mixing Bowl
  • spatula
  • Measuring cups
  • Parchment Paper
  • airtight container

Method
 

Step-by-Step Instructions
  1. In a large mixing bowl, combine 1 cup of old-fashioned oats, 1/2 cup of creamy peanut butter, 1/3 cup of honey, 1/2 cup of mini chocolate chips, 1/2 teaspoon of ground cinnamon, and 1 teaspoon of vanilla extract. Use a sturdy spatula or wooden spoon to blend everything thoroughly until fully combined, which should take about 2-3 minutes.
  2. With clean hands or a mini ice cream scoop, take portions of the mixture and roll them into bite-sized balls, about 1 inch in diameter. You should yield around 15 energy bites, ensuring they hold together securely.
  3. Place the rolled energy bites on a baking tray lined with parchment paper and refrigerate for at least 30 minutes until they feel firm to the touch.
  4. Once firm, transfer the energy bites to an airtight container. Store them in the refrigerator for up to 10 days.

Nutrition

Serving: 1biteCalories: 120kcalCarbohydrates: 15gProtein: 3gFat: 6gSaturated Fat: 1gPolyunsaturated Fat: 1gMonounsaturated Fat: 4gSodium: 30mgPotassium: 140mgFiber: 2gSugar: 5gCalcium: 2mgIron: 4mg

Notes

For optimal taste, consume frozen bites within a month or two and allow them to thaw in the fridge overnight for the best texture.

Tried this recipe?

Let us know how it was!

Zesty Pickled Jalapenos Ready in Just 10 Minutes

The satisfying crunch of crisp vegetables is one of life’s simple pleasures, and I couldn’t be more excited to share this 10-Minute Quick Pickled Jalapenos recipe with you! In just a heartbeat, you can transform fresh jalapenos into zesty refrigerator pickles that add a pop of flavor to everything from tacos to salads. With only a handful of ingredients and zero preservatives, this easy recipe not only elevates your dishes but also brings a homemade touch to your kitchen. Whether you’re a spice enthusiast or just looking for a fun way to liven up your meals, these vibrant green gems are a game changer. Can you resist the temptation to dive in once they’re ready? Let’s get started!

Why are Quick Pickled Jalapenos Essential?

Simplicity: This 10-minute recipe means enjoying homemade pickles is easier than ever! Just a few steps stand between you and that fiery crunch.

Fresh Ingredients: With wholesome jalapenos and natural flavors, say goodbye to store-bought versions packed with preservatives.

Flavor Explosion: The perfect balance of tangy, spicy, and slightly sweet makes these pickled jalapenos an irresistible topping for all your favorite dishes.

Versatility: Use them on salads, tacos, or sandwiches—these vibrant pickles fit seamlessly into countless recipes.

Crowd-Pleaser: Impress your friends and family with this homemade treat that’s guaranteed to add excitement to any meal; they’ll be asking for more!

Pickled Jalapenos Ingredients

Experience the magic of quick pickles with these vibrant jalapenos!

For the Brine

  • Water – Allows the brine to form; essential for pickling.
  • White Vinegar – Gives acidity; substitute with apple cider vinegar for a sweeter twist.
  • Kosher Salt or Sea Salt – Elevates flavor and preserves the jalapenos; avoid table salt if possible.
  • Sugar – Balances heat and acidity; feel free to adjust for more spiciness.

For the Vegetables

  • Jalapeno Peppers – Key ingredient; fresh ones deliver the best crunch. Consider Serrano for extra heat!
  • Garlic Cloves – Infuses the pickles with aromatic goodness; increase if you love garlic!

Step‑by‑Step Instructions for 10-Minute Quick Pickled Jalapenos

Step 1: Prepare the Brine
In a medium-sized non-reactive pot, combine water, white vinegar, kosher salt, sugar, and crushed garlic cloves. Stir well until the salt and sugar are fully dissolved, setting the stage for your zesty pickled jalapenos. This initial mixture will create a fragrant and tangy brine, so make sure everything is well mixed before moving on.

Step 2: Add the Jalapenos
Thinly slice fresh jalapenos, discarding the stems and seeds if you prefer less heat. Add the sliced jalapenos to your pot of brine, and bring the mixture to a brisk boil over medium-high heat. Once boiling, keep an eye on the vibrant green peppers as they begin to soften, turning from bright to a dull green in about 5 minutes.

Step 3: Simmer to Perfection
After the jalapenos have reached that dull green hue, reduce the heat to medium-low and let the mixture simmer gently for another 5 minutes. This simmering allows the jalapenos to soak up the flavors of the brine while still keeping a delightful crunch. Stir occasionally to ensure even exposure to the heat.

Step 4: Transfer to Jars
Once the jalapenos are properly infused, carefully pour them along with the brine into a clean mason jar. Use a funnel if necessary to avoid spills. Ensure that the jalapenos are completely submerged in the brine; you can add extra vinegar if needed to achieve this. Observing the vibrant layers will get your taste buds excited!

Step 5: Cool and Seal
Leave the mason jar at room temperature until it cools down, which should take about 15-20 minutes. Then, secure the lid tightly. Your quick pickled jalapenos are technically ready to enjoy after cooling, but allowing them to chill in the refrigerator for at least an hour will enhance their flavors even more, letting you dive into that zesty goodness.

Step 6: Store and Enjoy
Store your pickled jalapenos in the refrigerator, where they can stay fresh for up to a month. Remember to use clean utensils whenever scooping them out to ensure they remain delicious and safe. Flavorful and versatile, these quick pickles will add a delightful kick to your favorite dishes, ensuring they become a kitchen staple!

Expert Tips for Quick Pickled Jalapenos

  • Cleanliness Counts: Ensure jars and utensils are thoroughly cleaned before use; this prevents spoilage and keeps your pickled jalapenos fresh longer.

  • Control the Heat: Taste your jalapenos before pickling; if they feel too spicy, remove the seeds for a milder flavor, allowing everyone to enjoy!

  • Variations are Fun: Don’t hesitate to mix in other vegetables like carrots or red onions for added color and flavor in your quick pickles.

  • Adjust to Your Taste: Feel free to modify the sugar level in the brine to achieve your desired balance of spice and sweetness.

  • Storage Reminder: For the best results, consume your pickled jalapenos within one month; check for any unusual growths before enjoying.

What to Serve with 10-Minute Quick Pickled Jalapenos

These zesty little gems will take your meals to a whole new level, adding joy and excitement with every bite!

  • Tacos: Layering these quick pickled jalapenos on tacos brings a delightful crunch and a kick of spice that complements savory meats beautifully. Imagine diving into a taco, enhanced by bright, tangy flavors that dance on your palate!

  • Grain Bowls: Add vibrant color and flavor to any grain bowl, making your meal not only more nutritious but also visually stunning. The pickles provide a refreshing contrast to the hearty grains and proteins.

  • Nachos: Elevate your nacho game by sprinkling quick pickled jalapenos over the top. Their tangy bite cuts through the richness of melted cheese and creamy guacamole, creating a perfect harmony of flavors and textures.

  • Sandwiches: Slipping these crunchy jalapenos into your favorite sandwiches offers a spicy twist that enlivens every layer. From classic deli stacks to veggie subs, they bring a burst of freshness and vibrancy.

  • Salads: Toss these pickles into summer salads for an unexpected pop of flavor and a crunchy texture. They work particularly well with bean salads or grain-based salads, adding a lively zing.

  • Serving with Drinks: Pair your pickled jalapenos with a crisp, refreshing beer or a zesty margarita. The cooling beverage balances the heat beautifully, making for a satisfying meal experience.

  • Charcuterie Boards: Don’t forget to add these vibrant pickles to your charcuterie board. They stand out next to cheeses and cured meats, offering a spicy contrast that keeps guests coming back for more!

Storage Tips for Pickled Jalapenos

Fridge: Store your pickled jalapenos in an airtight glass jar, ensuring they’re submerged in the brine. They’ll stay fresh for up to 1 month in the refrigerator.

Room Temperature: Avoid keeping pickled jalapenos at room temperature, as this can lead to spoilage. Always refrigerate after preparing.

Reheating: If adding to hot dishes, like tacos or grain bowls, there’s no need to reheat; simply add them directly for a fresh burst of flavor.

Check Freshness: Before consuming, inspect for any unusual growths or odors. Homemade pickles are best enjoyed within a month for optimal flavor and crunch.

Quick Pickled Jalapenos Variations

Customize your pickled jalapenos with these fun twists and substitutions to create your own flavor adventure!

  • Dairy-Free: Enjoy these pickles as is; they are naturally free from dairy and perfect for any diet.
  • Serrano Swap: Replace jalapenos with Serrano peppers for an extra kick; they give a different yet delightful heat profile.
  • Garlic Lovers: Add a few more garlic cloves for an even bolder flavor; garlic becomes wonderfully sweet as it pickles, enhancing the taste.
  • Vinegar Variety: Try apple cider vinegar instead of white vinegar for a sweeter, fruitier taste that can brighten up your dishes.
  • Sweetener Switch: Use honey or agave syrup instead of sugar for a natural sweetness that pairs beautifully with the heat of the jalapenos.
  • Flavorful Add-Ins: Toss in sliced carrots or red onions for a colorful mix; they absorb the brine well and add more crunch.
  • Herb Infusion: Include fresh herbs such as dill or coriander in the brine for an aromatic lift; a little freshness goes a long way.
  • Heat Adjustments: For milder pickles, use fewer jalapenos or deseed them before pickling; perfect for those who enjoy just a hint of spice.

Feel free to explore other vegetables, too! For example, pickling cucumbers using the same method can really expand your homemade pickles universe. Enjoy the process and let your creativity shine!

Make Ahead Options

These Quick Pickled Jalapenos are perfect for meal prep enthusiasts! You can prepare the brine (water, vinegar, salt, sugar, and garlic) up to 24 hours in advance and store it in an airtight container in the refrigerator. Slice the jalapenos ahead of time, but to maintain their vibrant crunch, it’s best to wait to add them to the brine until you’re ready to pickle. When you are ready to enjoy, simply bring the brine to a boil, add the sliced jalapenos, simmer for 5 minutes, and follow the remaining steps. This way, you’ll have flavorful, zesty pickles ready in no time—just as delicious as if made fresh!

Quick Pickled Jalapenos Recipe FAQs

What is the best way to choose jalapenos for pickling?
When selecting jalapenos, look for firm, glossy peppers without blemishes or soft spots. Fresh, vibrant green jalapenos ensure a crunchy texture in your pickles. If you prefer a different heat level, Serrano peppers are a great alternative.

How long can I store pickled jalapenos in the refrigerator?
You can keep your delicious quick pickled jalapenos stored in an airtight glass jar in the refrigerator for up to 1 month. Make sure they remain submerged in the brine for optimum freshness. Always use clean utensils to prolong their shelf life and prevent spoilage.

Can you freeze pickled jalapenos?
Absolutely! To freeze pickled jalapenos, follow these simple steps: First, transfer your pickled jalapenos along with their brine into a freezer-safe container. Leave about an inch of space at the top for expansion. Seal tightly and freeze them. They can last up to 3 months. When ready to use, simply thaw them in the refrigerator overnight before enjoying.

What should I do if my pickled jalapenos lose their crunch?
If your pickled jalapenos start to lose their crunch, it could be due to overcooking during the pickling process. To keep them crispy, limit the boiling time and avoid simmering for longer than necessary. If you’re looking for added crunch, consider using fresh lime juice in the brine instead of some vinegar.

Are pickled jalapenos safe for pets?
While jalapenos are safe for humans, they can be spicy for pets and may not be suitable for dogs or cats. Always avoid giving your pets any spicy or seasoned foods, and consult your veterinarian if you have questions about their diet.

What are some ways to use quick pickled jalapenos?
These zesty pickled jalapenos are incredibly versatile! Enjoy them on tacos, burritos, or nachos for added heat. They also liven up salads, sandwiches, and grain bowls. You can even use them as a topping for pizzas or in savory stir-fries. The more, the merrier!

Pickled Jalapenos

Zesty Pickled Jalapenos Ready in Just 10 Minutes

Quick and easy pickled jalapenos, perfect for adding zest to any dish.
Prep Time 10 minutes
Cook Time 10 minutes
Cooling Time 20 minutes
Total Time 40 minutes
Servings: 4 jars
Course: Appetizers
Cuisine: Mexican
Calories: 50

Ingredients
  

For the Brine
  • 1 cup Water
  • 1 cup White Vinegar Substitute with apple cider vinegar for sweetness
  • 2 tablespoons Kosher Salt or Sea Salt Avoid table salt if possible
  • 1 tablespoon Sugar Adjust for more spiciness
For the Vegetables
  • 6 pieces Jalapeno Peppers Fresh for best crunch; Serrano for extra heat
  • 2 cloves Garlic Increase if you love garlic

Equipment

  • Medium-sized non-reactive pot
  • Mason jar
  • Funnel

Method
 

Step-by-Step Instructions
  1. In a medium-sized non-reactive pot, combine water, white vinegar, kosher salt, sugar, and crushed garlic cloves. Stir well until the salt and sugar are fully dissolved.
  2. Thinly slice fresh jalapenos, discarding the stems and seeds if you prefer less heat. Add the sliced jalapenos to your pot of brine and bring the mixture to a brisk boil.
  3. Once boiling, reduce heat to medium-low and let the mixture simmer gently for another 5 minutes, stirring occasionally.
  4. Carefully pour the jalapenos along with the brine into a clean mason jar. Ensure the jalapenos are fully submerged.
  5. Leave the mason jar at room temperature until it cools down for about 15-20 minutes before sealing.
  6. Store your pickled jalapenos in the refrigerator. They will stay fresh for up to a month.

Nutrition

Serving: 1jarCalories: 50kcalCarbohydrates: 12gProtein: 1gSodium: 800mgPotassium: 200mgFiber: 2gSugar: 2gVitamin A: 100IUVitamin C: 30mgCalcium: 20mgIron: 0.5mg

Notes

For best results, consume your pickled jalapenos within one month, checking for any unusual growths before enjoying.

Tried this recipe?

Let us know how it was!

Stay Connected

Get recipes via email: