Get my cookbooks

Irresistible Keto Philly Cheesesteak Rolls for Easy Comfort Cooking

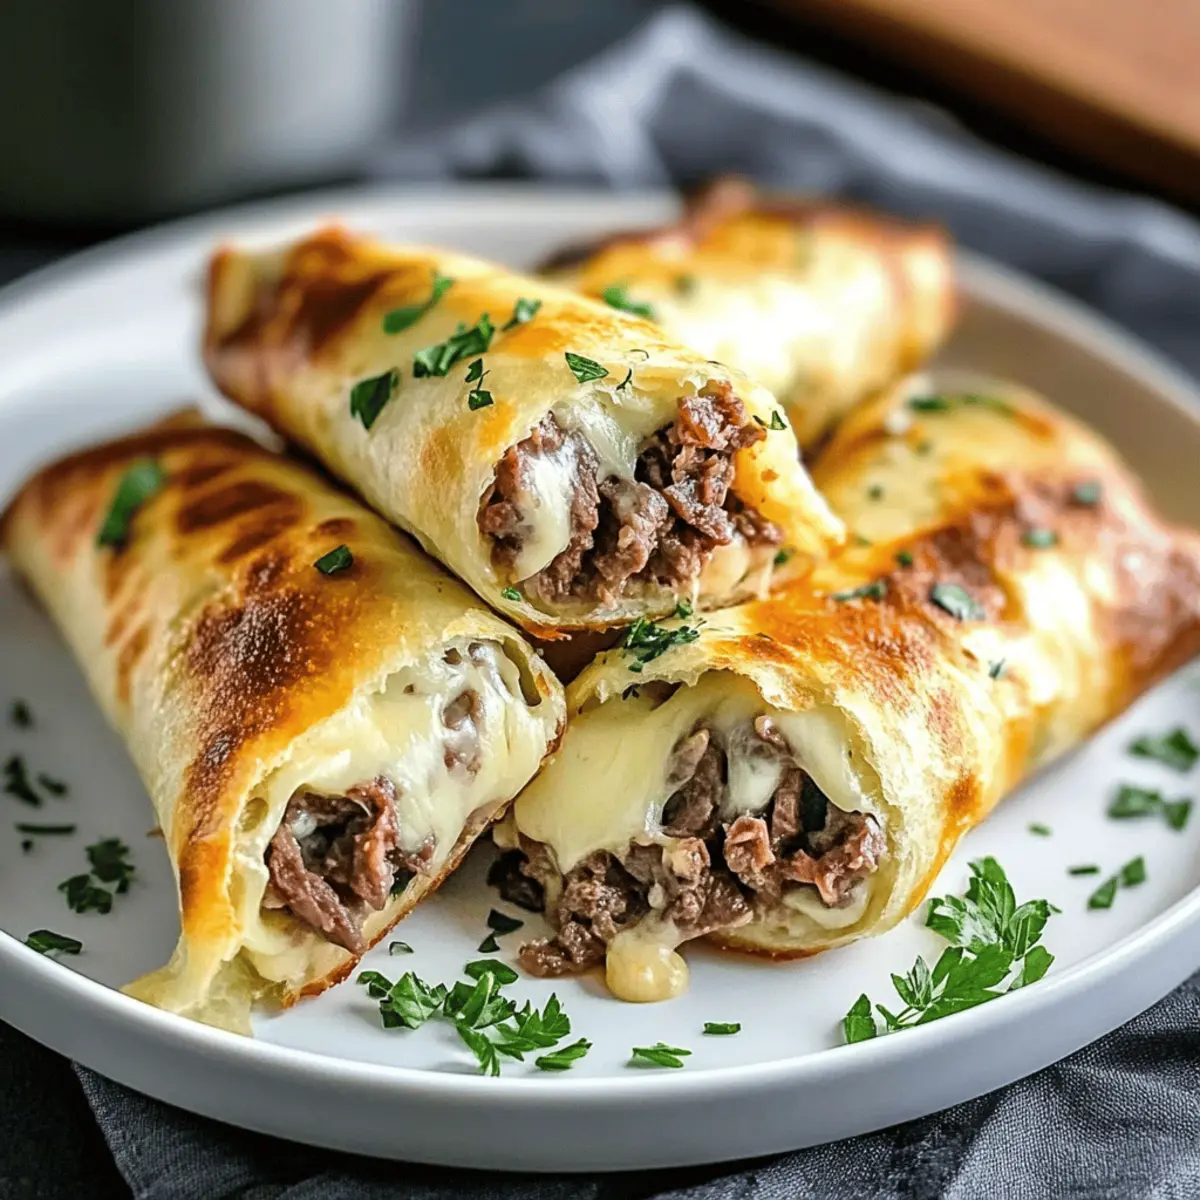
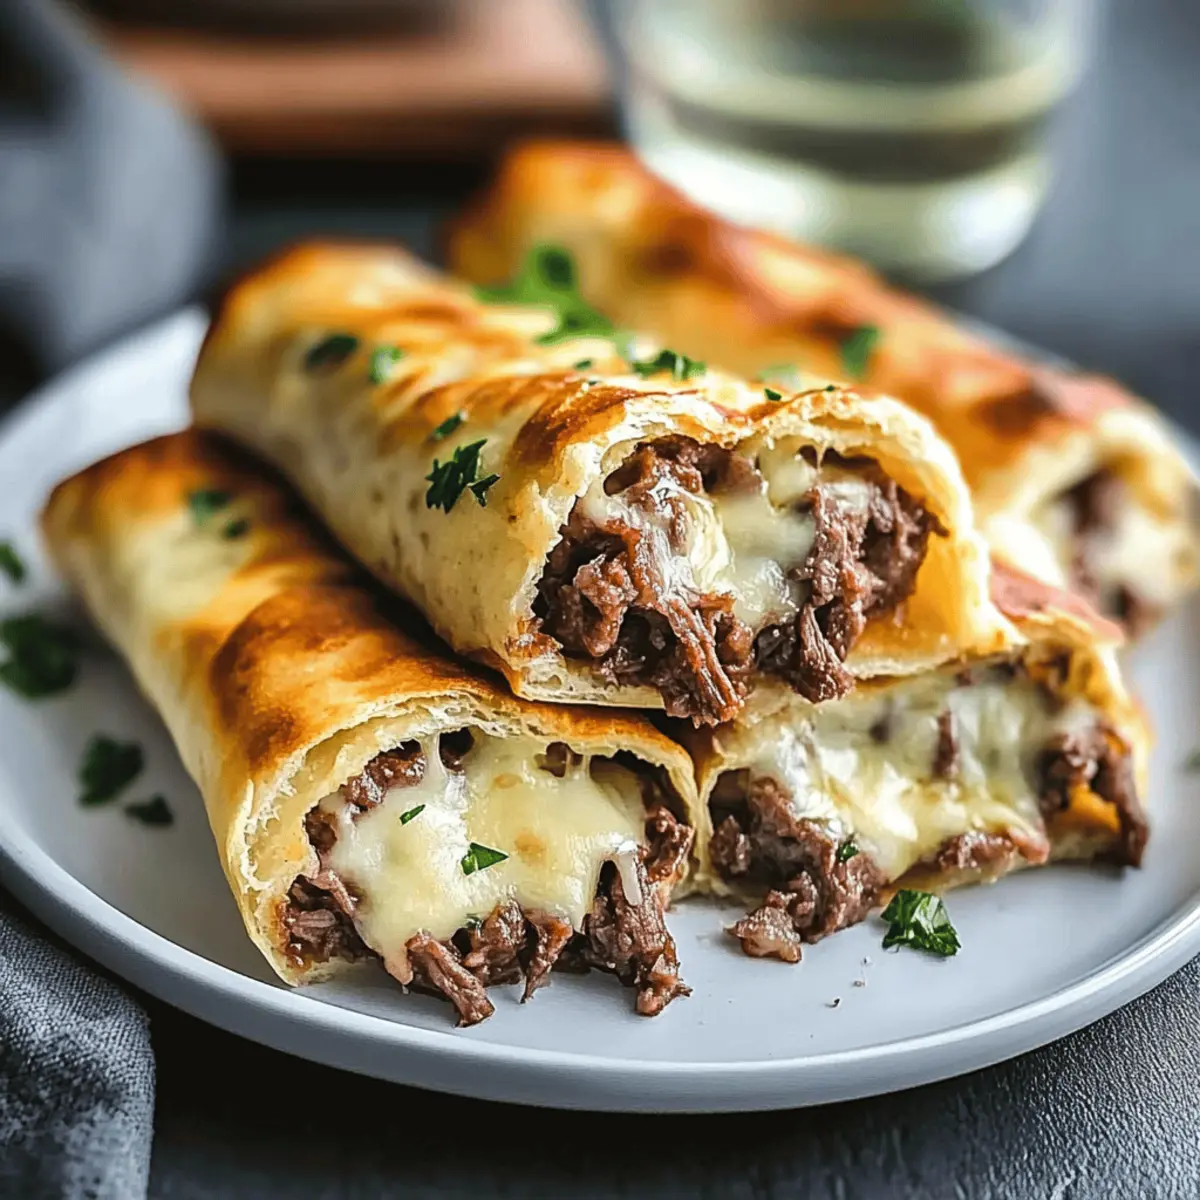
There’s something truly magical about sinking your teeth into a warm, cheesy roll that tastes just like a classic Philly cheesesteak—the comfort food we crave, but often feel guilty indulging in. That’s why I’m excited to share my recipe for Keto Philly Cheesesteak Rolls—a deliciously low-carb twist on this beloved dish that comes together in under 30 minutes. Perfect for meal prep, these customizable rolls allow you to adjust the fillings to match your pantry staples, satisfying even the heartiest cravings without veering off your keto journey. Ready to elevate your weeknight dinners with a dish that’s both comforting and guilt-free? Let’s dive into this delectable adventure!

Why Choose Keto Philly Cheesesteak Rolls?

Irresistible flavor: Every bite delivers the rich, savory essence of a classic cheesesteak without the carbs!

Quick prep time: Take less than 30 minutes from kitchen to table, making this recipe a go-to for busy weeknights.

Customizable delights: Whether you’re in the mood for different cheeses or extra veggies, these rolls adapt to suit your taste and pantry.

Meal prep friendly: Perfect for batch cooking, they store well and reheat beautifully in an air fryer or oven—ideal for lunchboxes!

Family-approved: Even non-keto eaters will rave about these satisfying rolls. Pair them with a fresh salad for a complete meal. Enjoy a delightful recipe that rivals even Foster Cinnamon Rolls in craveability!

Keto Philly Cheesesteak Rolls Ingredients

For the Dough

  • Cheese (Monterey Jack, cheddar, or provolone) – Provides gooey texture and flavor; feel free to substitute with dairy-free cheese for a plant-based alternative.
  • Coconut flour (if using fathead dough) – Acts as the gluten-free base; use only 1/4 to 1/3 cup per cup of almond flour to maintain consistency.
  • Eggs – Binds ingredients together, adding richness; essential for dough structure and cannot be substituted without altering texture significantly.

For the Filling

  • Ground beef or thinly sliced ribeye/sirloin – Adds rich, savory filling; consider substituting with chicken or turkey for a lighter option.

Optional Additions

  • Sautéed bell peppers or onions – These can enhance the filling with added flavor and nutrition; customize according to your preferences.
  • Herbs and spices – Experiment with different seasonings to adjust the flavor profile and make your Keto Philly Cheesesteak Rolls even more delicious!

These Keto Philly Cheesesteak Rolls promise to be a hit, fulfilling cravings and keeping your meal prep exciting!

Step‑by‑Step Instructions for Keto Philly Cheesesteak Rolls

Step 1: Preheat and Prepare
Begin by preheating your oven to 350°F (175°C). While the oven heats up, line a baking sheet with parchment paper to prevent sticking and make cleanup easier. Once prepared, set the baking sheet aside and gather your ingredients for the dough and filling, ensuring you have everything ready for a smooth cooking experience.

Step 2: Make the Dough
In a mixing bowl, combine your choice of cheese (Monterey Jack, cheddar, or provolone) with coconut flour and eggs to create the dough for the Keto Philly Cheesesteak Rolls. Mix well until a smooth and sticky consistency forms, which typically takes about 5 minutes. If you’re using fathead dough, make sure it’s well combined—this will serve as the perfect low-carb base for your cheesy rolls.

Step 3: Cook the Meat
In a skillet over high heat, add a drizzle of oil and the ground beef or thinly sliced ribeye/sirloin. Cook the meat for about 5-7 minutes, stirring frequently until it is no longer pink and starts to brown. If you desire, toss in sautéed bell peppers or onions in the last couple of minutes for added flavor and nutrition, making your Keto Philly Cheesesteak Rolls even more satisfying.

Step 4: Assemble the Rolls
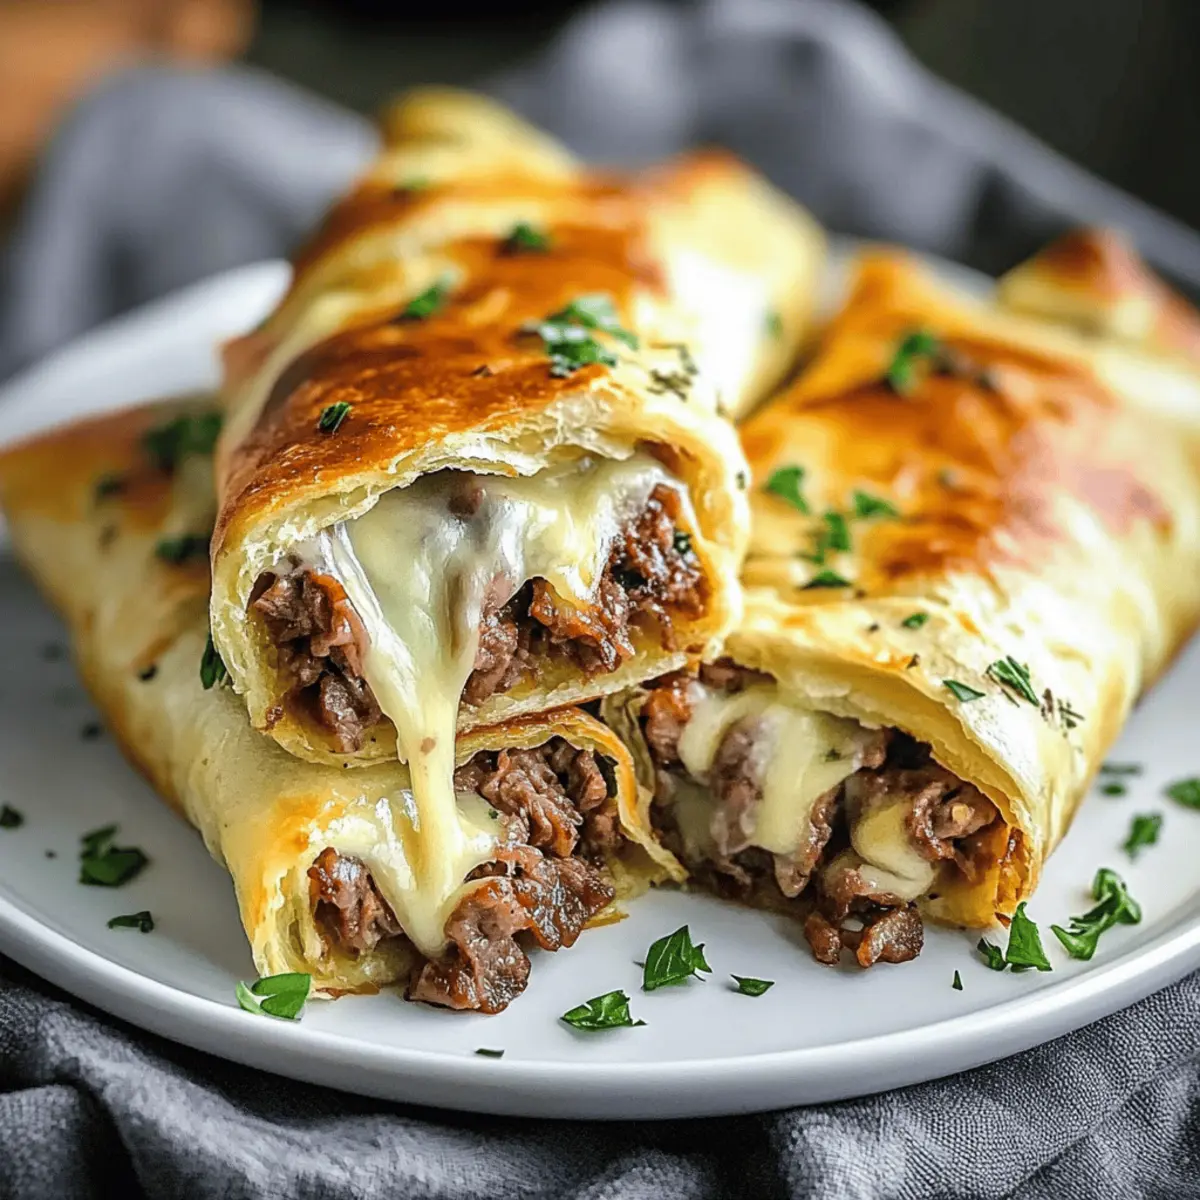
Once the meat is cooked, remove the skillet from the heat and allow it to cool slightly. On a clean, flat surface, take a portion of the dough and roll it out into a rectangular shape, about ¼ inch thick. Spoon a generous amount of the meat mixture onto the center, followed by a sprinkle of cheese, then carefully fold the dough over the filling to form a roll, pinching the edges to seal.

Step 5: Bake the Rolls
Place the assembled Keto Philly Cheesesteak Rolls seam-side down on the prepared baking sheet. Bake in the preheated oven for approximately 15-20 minutes, or until the rolls turn a golden brown, signifying they are cooked through. Keep an eye on them towards the end of baking to achieve that perfect crispy exterior while ensuring that the cheese inside melts beautifully.

Step 6: Cool and Serve
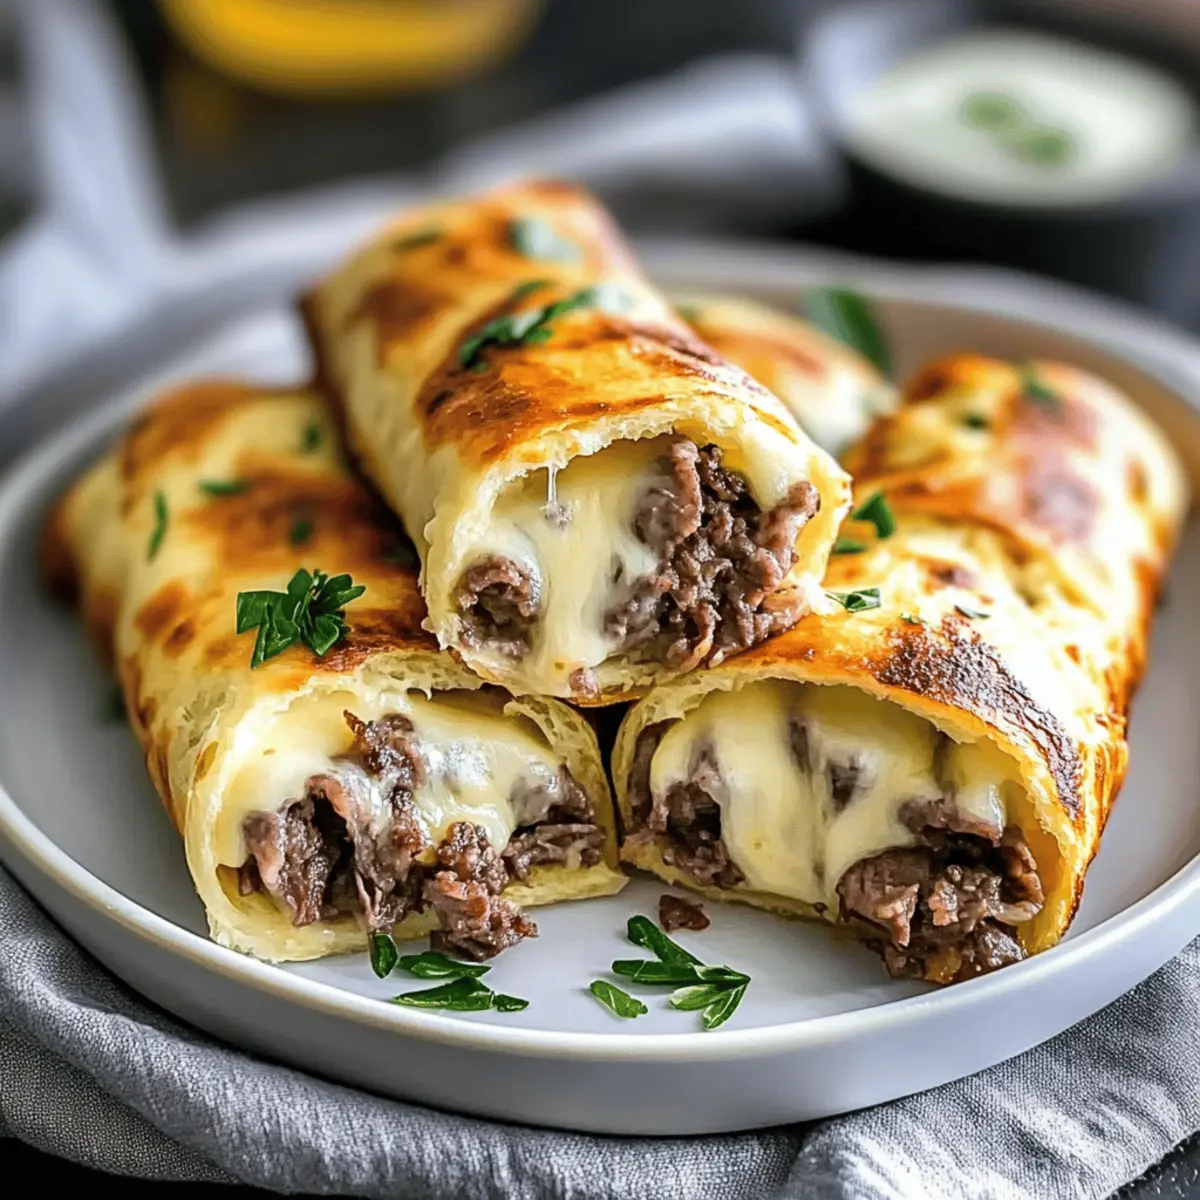
After baking, remove the rolls from the oven and let them cool for about 5 minutes on the baking sheet. This cooling period allows the cheese to set slightly, ensuring the rolls hold their shape when you cut into them. Serve these delicious Keto Philly Cheesesteak Rolls warm, with your favorite dipping sauce or paired with a fresh salad for a satisfying meal.

Expert Tips for Keto Philly Cheesesteak Rolls

Cheese Selection: Ensure you choose high-fat cheese like Monterey Jack or cheddar for optimal melting and flavor. Low-fat options may result in a less satisfying texture.

Dough Consistency: For the perfect Keto Philly Cheesesteak Rolls, ensure the dough is well-blended and not too dry. If it feels crumbly, add a touch more cheese.

Filling Variations: Don’t hesitate to customize the filling! Adding sautéed peppers, onions, or even mushrooms can enhance flavors while keeping it keto-friendly.

Baking Time: Keep a close eye towards the end of baking; golden brown is your best indicator for perfectly cooked rolls. Overbaking can lead to a dry texture.

Meal Prep Fun: These rolls are great for meal prep. Make a batch ahead of time and store them in the fridge for up to 3 days. Reheat in the oven or air fryer for the best results!

Make Ahead Options

These Keto Philly Cheesesteak Rolls are perfect for busy weeknights! You can prepare the dough and filling up to 24 hours in advance, making meal prep a breeze. Simply assemble the rolls in advance, then wrap them tightly in plastic wrap and refrigerate. This helps keep them fresh without losing quality. When you’re ready to enjoy your delicious rolls, bake them directly from the fridge, adding an extra few minutes to the cooking time if needed. For longer storage, feel free to freeze the assembled rolls for up to 3 months; just remember to thaw them overnight in the refrigerator before baking. With these make-ahead options, you’ll have a satisfying meal ready in no time!

Keto Philly Cheesesteak Rolls Variations

Feel free to get creative and tailor these delicious rolls to your unique tastes and preferences!

  • Cheese Swap: Try gouda or mozzarella for a different flavor profile. These cheeses melt beautifully and provide a rich, creamy texture.

  • Vegetable Boost: Add sautéed bell peppers or onions to enhance the filling’s flavor. This not only adds nutrition but also brings out lovely sweetness in your rolls.

  • Spicy Kick: Incorporate jalapeños or red pepper flakes for an extra spicy twist. It’s a fun way to amp up the flavors and enjoy some heat!

  • Herb Infusion: Experiment with fresh herbs like oregano or thyme for a fragrant burst of flavor. A simple addition can elevate the taste, making your rolls unforgettable.

  • Meat Alternatives: Substitute the beef with ground turkey or even shredded chicken for a lighter option. These variations still deliver on the flavor while changing up the protein source.

  • Nutritional Yeast: Sprinkle nutritional yeast into your cheese mixture for a cheesy, nutty flavor without extra carbs. It’s a great way to keep your rolls flavorful while being keto-friendly.

  • Mini-Sized Treats: Turn this recipe into bite-sized rolls for appetizers. Perfect for parties or snacking, these mini delights are sure to impress everyone!

  • Saucy Additions: Drizzle some sugar-free ketchup or homemade spicy sauce on top before serving. It can bring every bite together for a delightful flavor explosion.

Don’t forget, if you’re looking for another comforting treat, check out these heavenly Foster Cinnamon Rolls for a sweet twist! Customize and enjoy your Keto Philly Cheesesteak Rolls to the fullest—baking is all about fun and creativity!

What to Serve with Keto Philly Cheesesteak Rolls?

These delicious rolls are perfect for filling your home with warm aromas and comfort, inviting everyone to gather around the table.

  • Fresh Green Salad: A crisp salad brightens the meal, offering a refreshing contrast to the rich, cheesy rolls. Toss in avocado or nuts for added texture!

  • Garlic Butter Zucchini Noodles: Elegant and low-carb, these tender noodles absorb garlic goodness, creating a wonderful side that complements the savory filling.

  • Spicy Dill Pickles: The crunch and tang of pickles add an exciting zest that cuts through the richness of the rolls, making each bite even more enjoyable.

  • Cauliflower Rice: Light and fluffy, cauliflower rice is a fantastic side that keeps your meal keto-friendly, allowing the flavors of the rolls to shine through.

  • Broccoli with Cheese Sauce: The creamy, cheesy sauce over tender broccoli provides additional richness while keeping the meal satisfying and comforting.

  • Wine Pairing: A bold red wine like Cabernet Sauvignon enhances the flavors of the savory rolls and pairs beautifully with the richness of the cheese and beef.

  • Sugar-Free Chocolate Mousse: For dessert, this luscious mousse wraps up your meal on a sweet note without derailing your keto efforts.

How to Store and Freeze Keto Philly Cheesesteak Rolls

Fridge: Store cooled Keto Philly Cheesesteak Rolls in an airtight container for up to 3 days. This keeps them fresh and ready for quick meals.

Freezer: For longer storage, freeze the rolls individually wrapped in plastic wrap, then place them in a freezer bag. They can be frozen for up to 3 months without losing flavor.

Reheating: When you’re ready to enjoy the rolls, reheat them in the oven at 350°F (175°C) for about 10 minutes, or until warmed through. An air fryer also works well for a crispy finish!

Thawing: If frozen, thaw the rolls in the fridge overnight before reheating for the best texture and taste.

Keto Philly Cheesesteak Rolls Recipe FAQs

What type of cheese is best for Keto Philly Cheesesteak Rolls?
Absolutely! Opt for high-fat cheeses like Monterey Jack, cheddar, or provolone as they melt beautifully and provide that gooey texture we crave. Avoid low-fat cheeses, as they may not melt well and could lead to a less satisfying outcome.

How should I store my Keto Philly Cheesesteak Rolls?
For the best results, store cooled rolls in an airtight container in the refrigerator for up to 3 days. This keeps them fresh and ready for quick meals, ensuring you always have a satisfying option at hand.

Can I freeze Keto Philly Cheesesteak Rolls for later?
Yes, you can! To freeze, wrap each roll individually in plastic wrap, then place them in a freezer bag. They can be stored in the freezer for up to 3 months. Just make sure to label your bag with the date!

What’s the best way to reheat frozen rolls?
When you’re ready to enjoy your frozen rolls, first thaw them in the fridge overnight for the best texture. Reheat in the oven at 350°F (175°C) for about 10 minutes or until warmed through, making sure they regain that delightful, crispy exterior!

Can I make substitutions for dietary restrictions?
Very much so! Ground beef can be swapped for chicken or turkey to lighten them up. If you need a dairy-free option, substitute the cheese with a plant-based cheese alternative. These rolls can be personalized to accommodate various dietary needs while still keeping them keto-friendly!

Are there any common issues when making these rolls?
One common issue is achieving the right dough consistency. If your dough feels crumbly or too dry, try adding a bit more cheese to bind it together effectively. Also, keep a close eye on the baking time; golden brown is the goal, and overbaking can lead to a dryer texture. Happy cooking!

Keto Philly Cheesesteak Rolls

Irresistible Keto Philly Cheesesteak Rolls for Easy Comfort Cooking

Delicious Keto Philly Cheesesteak Rolls offer a low-carb twist on the classic dish, perfect for satisfying cravings without guilt.
Prep Time 10 minutes
Cook Time 20 minutes
Cooling Time 5 minutes
Total Time 35 minutes
Servings: 4 rolls
Course: Dinner
Cuisine: American
Calories: 320

Ingredients
  

For the Dough
  • 1 cup Cheese (Monterey Jack, cheddar, or provolone) Feel free to substitute with dairy-free cheese.
  • 1/4 cup Coconut flour Use only 1/4 to 1/3 cup per cup of almond flour for consistency.
  • 2 large Eggs Essential for dough structure.
For the Filling
  • 1 lb Ground beef or thinly sliced ribeye/sirloin Substitute with chicken or turkey if desired.
Optional Additions
  • 1 cup Sautéed bell peppers or onions Customize according to your taste.
  • Herbs and spices Experiment with different seasonings.

Equipment

  • Oven
  • Skillet
  • Mixing Bowl
  • Baking Sheet
  • Parchment Paper

Method
 

Step-by-Step Instructions
  1. Preheat your oven to 350°F (175°C) and line a baking sheet with parchment paper.
  2. In a mixing bowl, combine cheese, coconut flour, and eggs to create the dough.
  3. In a skillet, cook ground beef or sliced ribeye/sirloin over high heat for 5-7 minutes until browned.
  4. Roll out the dough into a rectangular shape, add meat mixture and cheese, then fold and seal.
  5. Place rolls seam-side down on baking sheet and bake for 15-20 minutes until golden brown.
  6. Cool rolls for about 5 minutes on the baking sheet before serving.

Nutrition

Serving: 1rollCalories: 320kcalCarbohydrates: 6gProtein: 25gFat: 22gSaturated Fat: 10gCholesterol: 150mgSodium: 600mgPotassium: 300mgFiber: 3gSugar: 1gVitamin A: 500IUVitamin C: 5mgCalcium: 200mgIron: 2mg

Notes

Perfect for meal prep, these rolls store well and reheat beautifully. Store in the fridge for up to 3 days or freeze for up to 3 months.

Tried this recipe?

Let us know how it was!

Savory Stuffed Italian Meatloaf Your Family Will Love

The aroma of Italian herbs wafts through the kitchen, instantly transporting me to a sun-drenched villa in Tuscany. This Stuffed Italian Meatloaf with Cheesy Herb Filling is not just a meal—it’s my secret weapon in the quest for family-friendly dinners that wow everyone at the table. With its comforting blend of savory meat and melty cheese, this dish is meal-prep friendly and offers endless customization options, allowing you to tailor it to your family’s taste buds. Whether you’re inviting friends for dinner or treating your loved ones to a warming weeknight feast, this recipe will fill your home with warmth and joy. Ready to discover how easily you can impress everyone with each slice? Let’s dive in!

Why is this meatloaf a must-try?

Comforting, Italian Inspiration: This Stuffed Italian Meatloaf is a delightful twist on the classic, infused with aromatic Italian herbs and delicious cheese.
Endless Customization: Feel free to swap fillings – incorporate your favorite vegetables or cheeses, making it perfect for picky eaters!
Effortless Meal Prep: Assemble ahead of time for a stress-free dinner; it’s as simple as popping it into the oven!
Family-Friendly Favorite: With flavors that even the kids will love, it’s bound to become a household staple. Pair it with garlic bread for a complete Italian feast, just like you would with Italian Penicillin Soup or Stuffed Bell Peppers.
Satisfying Texture: The combination of crispy edges and a gooey, cheesy center creates a comforting contrast that will leave everyone asking for seconds!

Stuffed Italian Meatloaf Ingredients

• Dive into the savory realm of Stuffed Italian Meatloaf where flavors come together harmoniously!

For the Meatloaf

  • Ground Beef – The hearty backbone of the dish, use 80/20 for juicy results.
  • Breadcrumbs – Keep the meatloaf tender; consider gluten-free options if needed.
  • Eggs – Essential for binding; enriches the meat mixture for optimal softness.
  • Garlic Powder – Adds a robust depth of flavor to elevate each bite.
  • Onion Powder – Sweet and savory, it enhances the overall taste of the meatloaf.
  • Italian Seasoning – A fragrant blend of basil, oregano, and thyme for that Italian flair.
  • Salt & Pepper – These key seasonings awaken all other flavors in the meatloaf.

For the Cheese Filling

  • Mozzarella Cheese – Melts beautifully; adds a creamy texture under all that savory goodness.
  • Parmesan Cheese – A sharp and nutty flavor that enhances the richness of the filling.
  • Spinach (optional) – Pack a nutritious punch and a pop of color; a great way to sneak in veggies.

For the Topping

  • Marinara Sauce – Classic tomato sauce that brings it all together with a delicious tang.

Step‑by‑Step Instructions for Stuffed Italian Meatloaf

Step 1: Preheat the Oven
Begin by preheating your oven to 375°F (190°C). This ensures that your Stuffed Italian Meatloaf bakes evenly and develops a beautiful golden crust. While the oven heats up, gather your ingredients and prepare a baking sheet lined with parchment paper for easy cleanup.

Step 2: Mix the Meatloaf Ingredients
In a large bowl, combine the ground beef, breadcrumbs, eggs, garlic powder, onion powder, Italian seasoning, salt, and pepper. Gently mix the ingredients using your hands or a spatula until just combined, ensuring not to overmix, as this can lead to a dense meatloaf. The mixture should be cohesive yet still tender.

Step 3: Prepare the Cheese Filling
In a separate bowl, stir together the mozzarella cheese, Parmesan cheese, and the optional spinach. This creamy, cheesy filling will be the luscious heart of your Stuffed Italian Meatloaf, lending it flavor and moisture. Make sure to combine the ingredients well for an even distribution of cheese throughout.

Step 4: Shape the Meatloaf
On the prepared baking sheet, flatten the meat mixture into a rectangle about ½ inch thick. Use your hands to press it down evenly, creating a spacious area in the center for your cheese filling. Leaving about an inch of space around the edges, you’ll form the base for your stunning Stuffed Italian Meatloaf.

Step 5: Add the Filling
Spread the cheese filling evenly across the center of the flattened meat mixture, ensuring it reaches close to the edges. This gooey filling is what makes the meatloaf delightful and unexpected. Take your time to place the filling generously, but avoid overstuffing to prevent any leakage during baking.

Step 6: Roll the Meatloaf
Carefully roll the meat mixture away from you, similar to making a jelly roll, tucking in the filling as you go. Make sure the edges are sealed tightly to prevent any of that delicious cheese from escaping while baking. Place the rolled meatloaf seam-side down on the baking sheet.

Step 7: Bake the Meatloaf
Transfer the Stuffed Italian Meatloaf to your preheated oven and bake for 45-50 minutes. Use a meat thermometer to check that the internal temperature reaches 160°F (71°C) for safe consumption. The outside should be a lovely, golden brown, and the cheese inside should be deliciously melted.

Step 8: Add Marinara Sauce
In the final 10 minutes of baking, remove the meatloaf and spread a generous layer of marinara sauce on top. Return it to the oven to heat the sauce through, adding extra flavor while ensuring that the meatloaf remains moist. This step enhances your dish with that classic Italian touch.

Step 9: Rest Before Slicing
Once baked, remove the Stuffed Italian Meatloaf from the oven and let it rest for about 10 minutes. This resting period allows the juices to redistribute, making each slice tender and juicy. After resting, cut into thick slices to reveal the beauty of the cheesy filling inside and enjoy!

Stuffed Italian Meatloaf Variations

Feel free to explore delightful twists and substitutions for your Stuffed Italian Meatloaf, making it truly your own!

  • Cheese Swap: Replace mozzarella with provolone or a blend of Italian cheeses for different flavors.
  • Veggie Boost: Add finely chopped mushrooms or bell peppers to the meat mixture for other textures and added nutrients.

For a touch of freshness, consider adding sautéed zucchini or roasted red peppers. These additions not only enhance the flavor but also create a colorful presentation that family and guests will admire.

  • Lean Option: Substitute ground beef for ground turkey or chicken, adding a bit of olive oil to keep it moist.
  • Spicy Kick: Mix in red pepper flakes or diced jalapeños for a fiery twist that elevates the flavor profile.

Pair your spicy twist with a refreshing salad or a cool yogurt dip on the side to balance the heat.

  • Herb Infusion: Experiment with different herbs like fresh basil or parsley instead of the traditional Italian seasoning for a fragrant twist.
  • Gluten-Free: Use gluten-free breadcrumbs to cater to dietary needs while still enjoying the same great taste.

By making just a few simple changes, you can transform this dish to match your family’s preferences or dietary restrictions. It’s the versatility of your Stuffed Italian Meatloaf that helps it shine, much like the beloved Onion Soup Meatloaf that brings comfort in a new way. Enjoy creating a version that everyone will love!

Make Ahead Options

Preparing your Stuffed Italian Meatloaf ahead of time is a fantastic way to save valuable time on busy weeknights! You can assemble the entire meatloaf up to 24 hours in advance; simply wrap it tightly in plastic wrap and refrigerate until you’re ready to bake. For even longer storage, consider freezing the unbaked meatloaf for up to 3 months—just remember to thaw it overnight in the fridge before cooking. When you’re ready to enjoy, simply pop it in the preheated oven and bake as directed, ensuring to check that the internal temperature reaches 160°F (71°C) for perfectly delicious results. By prepping ahead, you’ll have a comforting family meal ready to go with minimal fuss!

What to Serve with Stuffed Italian Meatloaf

Imagine a delicious spread that perfectly complements the warm, cheesy delight of your meatloaf, making every bite an extraordinary experience.

  • Creamy Mashed Potatoes: The smooth, buttery texture adds a comforting contrast to the meatloaf, perfectly soaking up any extra marinara.
  • Garlic Bread: Crispy and aromatic, it provides an irresistible crunch and enhances the Italian theme, ideal for mopping up saucy goodness.
  • Sautéed Green Beans: Crisp-tender and vibrant, they add a fresh, seasonal crunch that balances the richness of the meatloaf.
  • Fresh Garden Salad: A light medley of greens and seasonal veggies brightens the plate and refreshes the palate between bites.
  • Roasted Vegetables: Caramelized flavors enhance the savory notes of the meatloaf, offering a delightful mix of textures and tastes.
  • Italian-Style Risotto: Creamy and cheesy, this comforting dish elevates your meal, echoing the flavors found in the meatloaf.

Pair your Stuffed Italian Meatloaf with a crisp glass of red wine for an extra touch of Italian flair, and finish off with a slice of angel food cake for a delightful dessert!

How to Store and Freeze Stuffed Italian Meatloaf

  • Fridge: Store leftover Stuffed Italian Meatloaf in an airtight container for up to 4 days. This keeps the moisture in and the flavors fresh.

  • Freezer: For longer storage, freeze the uncooked meatloaf tightly wrapped in plastic wrap and aluminum foil for up to 3 months. Thaw overnight in the fridge before cooking.

  • Reheating: To reheat, place slices in the oven at 350°F (175°C) for about 20 minutes until heated through, or microwave for quicker results.

  • Make-Ahead: Assemble your Stuffed Italian Meatloaf the day before, cover, refrigerate, and bake when ready for a stress-free dinner option!

Expert Tips for Stuffed Italian Meatloaf

  • Avoid Overmixing: Mixing the meat too much can result in a dense meatloaf. Gently combine the ingredients to maintain a light texture.

  • Check Temperature: Use a meat thermometer to ensure your Stuffed Italian Meatloaf reaches an internal temperature of 160°F (71°C). This guarantees it’s safe and perfectly cooked.

  • Seal It Well: Make sure the edges of the meatloaf are tightly sealed to prevent the cheese filling from leaking during baking. Patch any weak spots with extra meat.

  • Customize Filling: Feel free to switch up the filling with your favorite cheeses or vegetables, ensuring everyone in the family gets their preferred flavors.

  • Resting Time: Always let the meatloaf rest for 10 minutes after baking. This helps the juices redistribute for a moist, flavorful dish.

Stuffed Italian Meatloaf Recipe FAQs

Do I need to use ripe ingredients for this Stuffed Italian Meatloaf?
Absolutely! Fresh and good-quality ingredients make all the difference in flavor. For instance, choose 80/20 ground beef for optimal juiciness, and if using spinach, ensure it’s vibrant green and not wilted. Fresh herbs can dramatically elevate your dish!

How should I store leftover Stuffed Italian Meatloaf?
For best results, store leftover Stuffed Italian Meatloaf in an airtight container in the refrigerator for up to 4 days. If you find yourself with lots of leftovers, simply slice the meatloaf and place it in individual containers for easy lunches throughout the week!

Can I freeze Stuffed Italian Meatloaf?
Yes! To freeze, tightly wrap the uncooked meatloaf in plastic wrap followed by aluminum foil to protect against freezer burn. It can be stored for up to 3 months. When you’re ready to cook, simply thaw it overnight in the fridge before baking as per the recipe instructions.

What should I do if my meatloaf falls apart while rolling?
If your meatloaf mixture is too loose, it may fall apart during rolling. In this case, add a few more breadcrumbs to help bind it together. When rolling, make sure to shape it gently but firmly, and use additional meat to patch any tears. Practice makes perfect!

Are there any dietary considerations I should keep in mind?
Definitely! If anyone in your household has allergies, keep in mind that gluten-free breadcrumbs can be used as a substitute. You can also replace ground beef with ground turkey or chicken if you prefer a leaner option. Always double-check the cheese options to suit lactose intolerance or dietary restrictions.

Is it better to bake the meatloaf covered or uncovered?
I recommend baking your Stuffed Italian Meatloaf uncovered for the best texture. This allows the meatloaf to develop a beautiful, golden-brown crust while the cheese filling remains deliciously gooey. If you find it browning too quickly, feel free to loosely cover it with aluminum foil during baking.

Stuffed Italian Meatloaf

Savory Stuffed Italian Meatloaf Your Family Will Love

This Stuffed Italian Meatloaf combines savory flavors and melty cheese for a family-friendly dinner that wows, making it a must-try recipe.
Prep Time 30 minutes
Cook Time 50 minutes
Resting Time 10 minutes
Total Time 1 hour 30 minutes
Servings: 6 slices
Course: Dinner
Cuisine: Italian
Calories: 350

Ingredients
  

For the Meatloaf
  • 1 lb Ground Beef Use 80/20 for juicy results
  • 1 cup Breadcrumbs Consider gluten-free options if needed
  • 2 large Eggs Essential for binding
  • 1 teaspoon Garlic Powder Adds depth of flavor
  • 1 teaspoon Onion Powder Enhances overall taste
  • 2 teaspoons Italian Seasoning A blend of basil, oregano, and thyme
  • 1 teaspoon Salt
  • 1 teaspoon Pepper
For the Cheese Filling
  • 1 cup Mozzarella Cheese Melts beautifully
  • 0.5 cup Parmesan Cheese Enhances richness
  • 1 cup Spinach Optional, for added nutrition
For the Topping
  • 1 cup Marinara Sauce Classic tomato sauce

Equipment

  • Oven
  • Large bowl
  • Baking Sheet
  • Parchment Paper
  • meat thermometer

Method
 

Preparation Steps
  1. Preheat your oven to 375°F (190°C) and prepare a baking sheet lined with parchment paper.
  2. In a large bowl, combine ground beef, breadcrumbs, eggs, garlic powder, onion powder, Italian seasoning, salt, and pepper. Mix gently.
  3. In a separate bowl, mix mozzarella cheese, Parmesan cheese, and spinach to make the cheese filling.
  4. Flatten the meat mixture into a rectangle on the baking sheet, leaving space in the center for the cheese filling.
  5. Spread the cheese filling evenly across the center of the meat mixture.
  6. Carefully roll the meatloaf, ensuring the filling is tucked inside and the edges are sealed.
  7. Place the rolled meatloaf seam-side down on the baking sheet and bake for 45-50 minutes.
  8. In the last 10 minutes of baking, add marinara sauce on top and return to the oven.
  9. Once done, let the meatloaf rest for about 10 minutes before slicing.

Nutrition

Serving: 1sliceCalories: 350kcalCarbohydrates: 15gProtein: 30gFat: 20gSaturated Fat: 10gPolyunsaturated Fat: 2gMonounsaturated Fat: 5gCholesterol: 120mgSodium: 600mgPotassium: 500mgFiber: 1gSugar: 2gVitamin A: 500IUVitamin C: 5mgCalcium: 150mgIron: 3mg

Notes

Customize the filling with your favorite vegetables or cheeses. Always let the meatloaf rest before slicing for better texture.

Tried this recipe?

Let us know how it was!

Salted Honey Pie: Sweet Harmony in Every Delicious Bite

As I pulled my Salted Honey Pie from the oven, the sweet aroma enveloped the room, igniting a wave of nostalgia for family gatherings and warm summer evenings. This delectable dessert, a creamy custard nestled in a flaky butter crust, strikes the perfect balance between sweet and salty, making it a delightful treat for any occasion. The magic happens when caramelized honey meets a sprinkle of flaky sea salt, creating an unforgettable flavor combination that will leave your taste buds dancing with joy. Not only is this pie a crowd-pleaser, but it’s also surprisingly easy to whip up, making it an ideal choice for both novice cooks and seasoned chefs alike. Ready to indulge in a slice of comfort? Let’s dive into the irresistible world of Salted Honey Pie and discover how to bring this mouthwatering dessert to your kitchen!

Why is Salted Honey Pie Irresistible?

Comforting Experience: This pie offers a delightful blend of creamy custard and a crunchy, buttery crust. The balance of flavors between sweet honey and a hint of salt creates a symphony for your taste buds.

Effortless Elegance: With its simple ingredients, this dessert is easy enough for beginners yet impressively sophisticated for any gathering. Make-ahead convenience means you can prepare it and let the flavors deepen overnight!

Crowd Favorite: Serve it chilled with a dollop of whipped cream or alongside vanilla ice cream for a truly indulgent experience. For those who love a little twist, try experimenting with seasonal zests or flavors.

This Salted Honey Pie will undoubtedly become a beloved staple in your dessert repertoire, just like my Honey Banana Grilled cheese sandwich or Cajun Honey Butter salmon!

Salted Honey Pie Ingredients

For the Custard Filling

  • Heavy Cream – Provides richness and a velvety texture; if needed, substitute with whole milk mixed with a bit of butter.
  • Brown Sugar – Adds sweetness and depth of flavor; light brown sugar works if dark is unavailable.
  • Honey – Contributes a unique floral sweetness; using high-quality honey enhances the overall taste of your Salted Honey Pie.
  • Egg Yolks – Essential for custard texture and richness; avoid overwhisking to prevent curdling.

For the Pie Crust

  • Butter – Necessary for a flaky pie crust; choose unsalted butter for better control of salt levels.

For Topping

  • Flaky Sea Salt – Enhances sweetness by contrast; kosher salt can be used in a pinch, but adjust the quantity accordingly.

Step‑by‑Step Instructions for Salted Honey Pie

Step 1: Prepare the Pie Crust
Begin by preheating your oven to 375°F (190°C). Roll out your chilled butter pie crust on a lightly floured surface until it’s about 1/8 inch thick. Carefully transfer the rolled crust into a 9-inch pie dish, gently pressing it into the sides. Trim any excess and crimp the edges for a decorative touch. Pre-bake the crust for 15-20 minutes, until it turns lightly golden.

Step 2: Make the Custard Filling
In a large mixing bowl, whisk together 1 ½ cups of heavy cream, ½ cup of brown sugar, ½ cup of honey, and four egg yolks. Ensure the mixture is smooth and creamy, taking care not to overwhisk to prevent curdling. The rich mixture should have a velvety texture and a slight sheen. Set aside while your pre-baked crust cools slightly.

Step 3: Combine and Bake
Once the crust has cooled, pour the custard filling into the crust, ensuring an even distribution. Place the pie on the middle oven rack and bake at 375°F (190°C) for 30-35 minutes. Keep an eye out for the filling to be set around the edges but still slightly wobbly in the center. The aroma of the caramelizing honey will fill your kitchen!

Step 4: Cool and Serve
After baking, remove the pie from the oven and allow it to cool at room temperature for about 1 hour. Once cooled, sprinkle the top generously with flaky sea salt, enhancing the pie’s flavor. For the best texture and taste, chill the pie in the refrigerator for at least 2 hours before serving, allowing the custard to fully set.

Make Ahead Options

These Salted Honey Pies are perfect for busy weeknights or gatherings! You can prepare the custard filling up to 24 hours in advance by whisking together the heavy cream, brown sugar, honey, and egg yolks. Place it in an airtight container and refrigerate to maintain its richness and prevent curdling. The pie crust can also be pre-baked and stored in the fridge for up to 3 days, neatly covered to keep it fresh and crisp. When you’re ready to serve, simply pour the chilled custard filling into the crust, bake it until just set, cool, sprinkle with flaky sea salt, and enjoy your delicious Salted Honey Pie with minimal effort!

What to Serve with Salted Honey Pie

Indulging in a slice of Salted Honey Pie creates a delightful moment, but pairing it with the right accompaniments elevates the experience even more.

  • Whipped Cream: An airy dollop adds a light texture and balances the pie’s sweetness with its rich creaminess.

  • Vanilla Ice Cream: The classic combo! Creamy vanilla ice cream melts beautifully with the warm pie, bringing extra indulgence with every bite.

  • Fresh Berries: A tangy burst from fresh raspberries or strawberries contrasts the pie’s sweetness and adds a pop of color to your plate.

  • Chocolate Drizzle: A luxurious drizzle of dark chocolate brings a rich flavor depth, creating a sweet and savory pairing that feels indulgent.

  • Espresso or Coffee: A warm cup of espresso beautifully complements the custard’s richness, enhancing the overall flavor experience with its bitter notes.

  • Lemon Zest: A sprinkle of lemon zest on top brightens each slice, introducing a vibrant freshness that cuts through the sweetness.

  • Almond Biscotti: Crunchy almond biscotti serves as a wonderful dipping companion, adding texture and a nutty contrast that pairs beautifully with the creamy custard.

  • Sparkling Wine: A bubbly rosé or prosecco refreshes the palate, making this a delightful pairing for celebrations or relaxed evenings alike.

  • Pecan Topping: For added crunch, sprinkle some toasted pecans over each slice—they’ll boost the nutty flavors and create an exciting texture contrast.

Salted Honey Pie Variations & Substitutions

Feel free to give your Salted Honey Pie a personal twist and indulge your taste buds with these delightful variations!

  • Vegan Option: Substitute honey with agave syrup for a plant-based alternative; keep in mind the custard won’t be traditional.
  • Flavor Boost: Add a splash of vanilla extract to the custard for a wonderful complexity in every bite.
  • Zesty Surprise: Incorporate a hint of lemon or orange zest for a refreshing brightness that beautifully balances the sweetness.
  • Nutty Crust: Swap the butter in your pie crust for almond or hazelnut butter for a unique nutty flavor that complements the filling.
  • Spiced Delight: Mix in ground cinnamon or nutmeg into the custard for a warm, cozy spice that takes you back to your favorite holiday gatherings.
  • Chocolate Drizzle: Drizzle melted dark chocolate over the cooled pie for a decadent addition that elevates the dessert to a whole new level.
  • Creamy Twist: Use coconut cream instead of heavy cream for an exotic flair and a subtly tropical flavor profile that pairs beautifully with honey.
  • Salt Crust: Experiment with a touch of crushed pretzels in your pie crust for a salty crunch that enhances the sweet and salty harmony of the pie.

Ready to spice up your Salted Honey Pie experience? Enjoy these variations, and remember, just like my Baked Salmon Honey recipe, there are endless possibilities to explore!

How to Store and Freeze Salted Honey Pie

Fridge: Store leftover Salted Honey Pie in the refrigerator, covered with plastic wrap or foil, for up to 3 days. Serving it chilled enhances its flavors.

Freezer: For longer storage, freeze the pie uncut, tightly wrapped in plastic and then aluminum foil, for up to 2 months. Thaw it in the fridge overnight before serving.

Reheating: If you prefer a warm slice, reheat individual portions in the microwave for 15-20 seconds or place in a preheated oven at 350°F (175°C) for 10-15 minutes.

Wrapping: Always ensure the pie is completely cooled before covering it to prevent condensation and sogginess. This way, you’ll keep the delightful texture intact!

Expert Tips for Salted Honey Pie

  • Avoid Overbaking: Be careful not to overbake the pie; it should jiggle slightly in the center when done, ensuring a creamy texture in your salted honey pie.

  • Quality Honey Matters: For a deeper honey flavor, opt for high-quality, flavorful honey. This will elevate the pie’s overall taste significantly.

  • Cool Completely: Allow the pie to cool completely before slicing. This step ensures neat pieces and prevents the custard from running.

  • Experiment with Flavors: Feel free to add a dash of vanilla extract to enhance the custard’s complexity, adding another delightful layer to your salted honey pie.

  • Make-Ahead Convenience: Prepare the pie a day in advance to let the flavors meld and improve, making it a hassle-free dessert for any occasion.

Salted Honey Pie Recipe FAQs

How do I choose the right honey for this recipe?
Absolutely! When selecting honey for your Salted Honey Pie, go for a high-quality, flavorful honey, preferably local. Look for honey that has a rich, golden color and a pronounced floral aroma. This will not only enhance the flavor but also give your pie that delectable sweetness charmed with nuances.

How should I store leftover Salted Honey Pie?
Very! Leftover Salted Honey Pie can be stored in the refrigerator, covered with plastic wrap or foil, for up to 3 days. Make sure it’s chilled before serving to enhance the flavors. Just remember to use a gentle touch when slicing to maintain that smooth custard!

Can I freeze Salted Honey Pie?
Yes, you can! For best quality, freeze the pie uncut. Wrap it tightly in plastic wrap and then aluminum foil to prevent freezer burn. It can be stored for up to 2 months. When you’re ready to enjoy it, simply thaw it in the fridge overnight. You’ll have that delightful custard just waiting for you!

What should I do if the custard filling curdles?
Oh no! If your custard filling curdles, don’t panic. This can happen if you overwhisk the egg yolks or if the mixture gets too hot too quickly. To save it, try straining the mixture through a fine sieve to remove any curds before baking. In the future, whisk gently and ensure your ingredients are at room temperature before combining to keep everything silky smooth.

Is there a vegan alternative for this Salted Honey Pie?
Absolutely! You can substitute honey with agave syrup for a vegan-friendly version, keeping in mind that it will alter the traditional texture slightly. Use a combination of coconut cream and cornstarch instead of heavy cream and egg yolks to create a custard-like filling. It’s a delightful twist for those who prefer plant-based desserts!

What can I do if the pie crust is too tough?
Very! If you find your pie crust to be tough, it may be due to overworking the dough or not enough moisture added. Make sure to handle the dough gently and chill the crust before rolling. Next time, consider adding a tablespoon of cold water at a time to help retain that tender flakiness. Enjoy the process!

Salted Honey Pie

Salted Honey Pie: Sweet Harmony in Every Delicious Bite

Salted Honey Pie is a creamy custard dessert that balances sweet and salty flavors in a flaky butter crust.
Prep Time 45 minutes
Cook Time 35 minutes
Cooling Time 2 hours
Total Time 3 hours 20 minutes
Servings: 8 slices
Course: Dessert
Cuisine: American
Calories: 320

Ingredients
  

For the Custard Filling
  • 1 ½ cups Heavy Cream Can be substituted with whole milk mixed with butter
  • ½ cup Brown Sugar Use light brown sugar if dark is unavailable
  • ½ cup Honey High-quality honey enhances flavor
  • 4 large Egg Yolks Avoid overwhisking to prevent curdling
For the Pie Crust
  • 1 cup Butter Use unsalted for better salt control
For Topping
  • 1 teaspoon Flaky Sea Salt Kosher salt can be used but adjust quantity

Equipment

  • Oven
  • 9-inch Pie Dish
  • Mixing Bowl
  • whisk
  • Rolling Pin

Method
 

Step-by-Step Instructions
  1. Preheat oven to 375°F (190°C). Roll out chilled butter pie crust to 1/8 inch thick and transfer to a 9-inch pie dish. Pre-bake for 15-20 minutes until golden.
  2. In a mixing bowl, whisk together heavy cream, brown sugar, honey, and egg yolks until smooth and creamy. Set aside.
  3. Pour custard filling into the cooled crust and bake for 30-35 minutes until edges are set but center is slightly wobbly.
  4. Cool pie at room temperature for 1 hour, then sprinkle with flaky sea salt. Chill in the refrigerator for at least 2 hours before serving.

Nutrition

Serving: 1sliceCalories: 320kcalCarbohydrates: 35gProtein: 4gFat: 19gSaturated Fat: 11gCholesterol: 115mgSodium: 150mgPotassium: 150mgSugar: 20gVitamin A: 500IUCalcium: 50mgIron: 1mg

Notes

This pie is perfect chilled, served with whipped cream or ice cream. Experiment with flavors by adding seasonal zests or a dash of vanilla extract.

Tried this recipe?

Let us know how it was!

Creamy Ranch Chicken Crock Pot for Effortless Comfort Meals

The slow cooker beeped softly, heralding the end of a long workday, and I felt a wave of relief wash over me. There’s something magical about tossing ingredients into a pot and letting them meld together while I tackle my to-do list. This Creamy Ranch Chicken Crock Pot recipe is my go-to meal for busy weeknights, combining tender chicken with zesty ranch seasoning for a comforting dish that practically makes itself. Plus, it’s an ideal dish for anyone looking to trade in fast food for a home-cooked delight—easy to prep and packed with flavor! Are you ready to savor every bite of this creamy goodness? Let’s dive in!

Why is this Ranch Chicken Recipe a Must-Try?

Ease of Preparation: With minimal chopping and no elaborate techniques, this recipe is perfect for anyone, from beginner cooks to seasoned chefs.

Flavor Explosion: The zesty ranch seasoning mingles with the creamy sauce, resulting in a mouthwatering blend that will have your taste buds dancing.

Versatile Dish: Serve it over rice, mashed potatoes, or in wraps; this meal adapts effortlessly to fit your preferences, just like our delicious Chilli Chicken Takeout!

Crowd-Pleaser: It’s a surefire hit for family dinners and gatherings, making it the ultimate comfort food that everyone will love.

Meal Prep Friendly: Make it ahead of time, then simply reheat—ideal for those busy week nights when you need something quick yet satisfying! Don’t forget to check out my Tuscan Chicken Soup for more comforting meal solutions!

Ranch Chicken Crock Pot Ingredients

• Let’s gather everything you need for a delicious meal!

For the Chicken

  • Boneless Chicken Breasts – Tender and lean; you can substitute chicken thighs for extra juiciness.

For the Creamy Base

  • Ranch Seasoning Mix – Packed with flavor; using ranch dressing is an option but may lighten the flavor.
  • Cream of Chicken Soup – Provides depth and creaminess; consider a non-dairy version for a dairy-free option.
  • Chicken Broth – Adds moisture; vegetable broth can make this dish vegetarian-friendly.
  • Sour Cream – Enhances the creaminess; cream cheese can be used for a richer texture.

For Flavor Boost

  • Garlic Powder – A key flavor enhancer; fresh garlic can elevate the taste even more.
  • Onion Powder – A flavor complement; fresh onions can be used if you prefer a fresher taste.
  • Black Pepper – For seasoning; adjust according to your spice preferences.

Optional Enhancements

  • Olive Oil – Optional for searing the chicken beforehand, which can add depth to the dish.
  • Shredded Cheddar Cheese – Garnish for added flavor and richness; a tasty touch!
  • Fresh Parsley – Brightens up the plate, making it not just tasty but visually appealing.

This Ranch Chicken Crock Pot recipe is easy to whip up and guarantees creamy, savory goodness in every bite!

Step‑by‑Step Instructions for Ranch Chicken Crock Pot

Step 1: Prepare Chicken (Optional)
If you desire extra flavor, start by heating a tablespoon of olive oil in a skillet over medium heat. Sear the boneless chicken breasts for 2-3 minutes on each side until they are golden brown. This step enhances the depth of flavor for your Ranch Chicken Crock Pot dish, but feel free to skip it if you’re short on time!

Step 2: Combine Ingredients
In a spacious crockpot, combine one can of cream of chicken soup, a packet of ranch seasoning mix, and a cup of chicken broth. Add garlic powder, onion powder, and a dash of black pepper to the mix, stirring thoroughly until all ingredients are well incorporated. This creamy base is the perfect start for your Ranch Chicken Crock Pot, creating a rich, flavorful sauce.

Step 3: Add Chicken
Place the seared (or unseared) chicken breasts into the crockpot, ensuring each piece is submerged and coated in the creamy ranch mixture. The sauce will envelop the chicken as it cooks, infusing it with wonderful flavors. Cover the crockpot with its lid to retain heat and steam throughout the cooking process.

Step 4: Cook
Set your crockpot to cook on low for 6-7 hours or on high for 3-4 hours. The chicken is done when it becomes tender and easily shreds with a fork. Keep an eye on it, as the goal is tender, juicy chicken without overcooking.

Step 5: Shred Chicken
Once cooked, use two forks to shred the chicken directly in the crockpot. As you do this, stir the meat into the creamy sauce, allowing it to absorb all that delicious flavor. This will give your Ranch Chicken Crock Pot an irresistibly creamy texture that everyone will love.

Step 6: Add Sour Cream
Stir in half a cup of sour cream into the shredded chicken mixture, blending it until the sauce is creamy and smooth. This final addition will elevate the richness and offer a beautiful, velvety texture to your Ranch Chicken Crock Pot, making it a truly comforting meal.

Step 7: Serve
To serve, garnish your Ranch Chicken with shredded cheddar cheese and freshly chopped parsley for an extra pop of color and flavor. Drizzle over some of the creamy sauce and accompany it with your choice of rice, mashed potatoes, or in wraps. Dive into this delicious meal and enjoy!

Expert Tips for Ranch Chicken Crock Pot

  • Searing Chicken: For maximum flavor, sear the chicken before cooking. It adds depth that enhances the taste of your Ranch Chicken Crock Pot.

  • Avoid Overcooking: Check for doneness at the lower end of the cooking time. Overcooked chicken can turn dry; aim for tender and juicy!

  • Thick Sauce Fix: If your sauce thickens too much during reheating, simply add a splash of chicken broth to restore creaminess without losing flavor.

  • Ingredient Substitutions: Don’t shy away from substitutions! Use chicken thighs for extra juiciness or swap out chicken broth for vegetable broth to create a vegetarian version.

  • Vegetable Boost: Consider adding frozen peas or carrots to the crockpot in the last hour of cooking for a nutritious, all-in-one meal.

  • Meal Prep Made Easy: Combine ingredients the night before and refrigerate the crockpot insert. Just plug it in before work for a hot dinner waiting for you!

What to Serve with Creamy Ranch Chicken Crock Pot

As the comforting aroma of succulent ranch chicken fills your home, it’s time to think about what flavorful companions can complete your meal.

  • Fluffy Rice: Perfectly cooked white or brown rice serves as a delicious base that absorbs the creamy sauce, creating a satisfying harmony of textures.

  • Garlic Mashed Potatoes: The velvety mashed potatoes add a rich and creamy contrast, making the meal even more indulgent and comforting alongside the ranch chicken.

  • Steamed Broccoli: A pop of green never hurt! The slight crunch and fresh flavor of steamed broccoli balance the richness of the dish while providing a nutrition boost.

  • Crispy Roasted Vegetables: Toss carrots, bell peppers, and zucchini in olive oil and roast until caramelized; their sweetness complements the savory chicken beautifully.

  • Buttery Corn on the Cob: This classic side adds a touch of sweetness that enhances the flavors of the ranch, creating a delightful summer vibe on your dinner table.

  • Crunchy Garden Salad: A simple salad with fresh greens, cucumbers, and a light vinaigrette offers a refreshing contrast to the creamy richness of the chicken, adding crispness to each bite.

  • Warm Dinner Rolls: Knocking on the door of carb heaven, fluffy rolls are perfect for soaking up any leftover ranch sauce on your plate, rounding out the meal with a delightful touch.

  • Homemade Coleslaw: The crunchy cabbage toss adds a bright, tangy flair that beautifully contrasts the creamy chicken, giving an exciting texture variation to the meal.

  • Light White Wine: A glass of chilled Sauvignon Blanc or Chardonnay enhances the flavors, creating a lovely dining experience alongside your ranch chicken masterpiece.

  • Chocolate Lava Cake: For a sweet finish, indulge in a rich chocolate lava cake that melts in your mouth, leaving everyone craving just one more bite after a hearty meal.

How to Store and Freeze Ranch Chicken Crock Pot

Fridge: Store leftovers in an airtight container for up to 3 days. This way, you can enjoy the creamy ranch goodness again without any fuss!

Freezer: For long-term storage, freeze in a heavy-duty freezer bag or container for up to 3 months. Just be sure to portion it out for easy reheating later!

Reheating: When ready to enjoy your Ranch Chicken Crock Pot again, thaw overnight in the fridge, then reheat gently on the stove or in the microwave, adding a splash of chicken broth if the sauce thickens.

Make-Ahead: Combine the ingredients the night before and refrigerate them in your crockpot insert. Just set it to cook in the morning for a hassle-free dinner!

Ranch Chicken Crock Pot Variations

Feel free to explore these creative twists to make this recipe fit your taste and dietary needs!

  • Dairy-Free: Swap the sour cream for dairy-free yogurt or coconut cream for a rich, creamy texture.

  • Vegetable Boost: Add frozen vegetables like peas or carrots in the last hour of cooking for a nutritious one-pot meal. They’ll soak up those delicious flavors!

  • Casserole Style: Transform your dish into a warming casserole by topping with breadcrumbs and cheddar cheese, then baking until golden. It’s a delightful twist!

  • Spicy Kick: For those who enjoy heat, mix in cayenne pepper or a splash of hot sauce to the sauce for a lively kick.

  • Whole Grain Option: Serve over quinoa or farro instead of rice for added texture and nutrition; it complements the creamy chicken beautifully.

  • Slow-Cooked Chicken Thighs: Try using chicken thighs instead of breasts. They are juicier and add even more flavor to your creamy sauce as they slowly cook down.

  • Herb Infusion: Incorporate fresh herbs like thyme or rosemary into your sauce for an extra layer of aromatic flavor. It elevates the dish to a new level of gourmet!

  • Add Bacon: Crumble crispy bacon on top before serving for an irresistible smoky crunch; it’s a savory addition that will enhance every bite.

These variations can transform your Ranch Chicken Crock Pot into an entirely new meal—perfect for making it a favorite in your weekly rotation! Happy cooking, and for more comfort food ideas, don’t miss our BBQ Chicken Grilled Cheese Sandwich! Enjoy!

Make Ahead Options

These Creamy Ranch Chicken Crock Pot ingredients are perfect for meal prep enthusiasts! You can combine the ranch seasoning mix, cream of chicken soup, chicken broth, garlic powder, onion powder, and black pepper up to 24 hours in advance, storing the mixture in the crockpot insert in the refrigerator. This not only saves time but also enhances the flavors as they marinate together. When it’s time to cook, simply add the boneless chicken breasts, cover, and let the slow cooker do its magic. For any leftovers, refrigerate in an airtight container for up to 3 days—just add a splash of chicken broth when reheating to maintain that creamy goodness. Enjoy the convenience of a homemade meal without the last-minute hustle!

Ranch Chicken Crock Pot Recipe FAQs

What type of chicken should I use?
I recommend using boneless chicken breasts for a lean and tender result, but boneless chicken thighs can add even more juiciness. Both options will absorb the delicious ranch flavor beautifully!

How do I store leftovers?
Store any leftover Ranch Chicken Crock Pot in an airtight container in the refrigerator for up to 3 days. This way, you can enjoy the creamy, flavorful goodness again without any fuss!

Can I freeze Ranch Chicken Crock Pot?
Absolutely! To freeze, place the chicken in a heavy-duty freezer bag or airtight container, ensuring it’s sealed well. It can last up to 3 months in the freezer. When you’re ready to enjoy, thaw it overnight in the fridge and reheat gently.

What if my sauce is too thick after cooking?
If your sauce thickens too much when reheating, simply add a splash of chicken broth to restore its creamy consistency. This will help keep the flavor intact while making the sauce easy to enjoy again.

Is this recipe suitable for special diets?
You can easily make this Ranch Chicken Crock Pot recipe vegetarian by substituting chicken broth with vegetable broth and using non-dairy cream of chicken soup. Additionally, always double-check ingredient labels for allergens to ensure safety for anyone with dietary restrictions.

Can I add vegetables to the dish?
Definitely! I often add frozen peas or carrots during the last hour of cooking for a nutritious twist. You can also toss in other favorite veggies. This makes it a complete meal while enhancing both the flavor and nutrition!

Ranch Chicken Crock Pot

Creamy Ranch Chicken Crock Pot for Effortless Comfort Meals

This Creamy Ranch Chicken Crock Pot recipe combines tender chicken with zesty ranch seasoning for an easy, comforting dinner.
Prep Time 15 minutes
Cook Time 6 hours
Total Time 6 hours 15 minutes
Servings: 6 servings
Course: Dinner
Cuisine: American
Calories: 450

Ingredients
  

For the Chicken
  • 2 pounds Boneless Chicken Breasts Chicken thighs can be used for extra juiciness.
For the Creamy Base
  • 1 packet Ranch Seasoning Mix Using ranch dressing is an option but may lighten the flavor.
  • 1 can Cream of Chicken Soup Consider a non-dairy version for a dairy-free option.
  • 1 cup Chicken Broth Vegetable broth can make this dish vegetarian-friendly.
  • 1/2 cup Sour Cream Cream cheese can be used for a richer texture.
For Flavor Boost
  • 1 teaspoon Garlic Powder Fresh garlic can elevate the taste.
  • 1 teaspoon Onion Powder Fresh onions can be used if preferred.
  • 1 teaspoon Black Pepper Adjust according to your spice preferences.
Optional Enhancements
  • 1 tablespoon Olive Oil Optional for searing the chicken beforehand.
  • 1 cup Shredded Cheddar Cheese Garnish for added flavor.
  • 1/4 cup Fresh Parsley For garnish.

Equipment

  • Crockpot

Method
 

Step-by-Step Instructions for Ranch Chicken Crock Pot
  1. Heat olive oil in a skillet, sear the chicken breasts for 2-3 minutes on each side until golden brown (optional).
  2. Combine cream of chicken soup, ranch seasoning mix, chicken broth, garlic powder, onion powder, and black pepper in a crockpot.
  3. Place the seared chicken breasts in the crockpot, coating them with the creamy ranch mixture.
  4. Cook on low for 6-7 hours or on high for 3-4 hours until chicken is tender.
  5. Shred the chicken in the crockpot with two forks and stir it into the creamy sauce.
  6. Stir in the sour cream until smooth and creamy.
  7. Garnish with shredded cheddar cheese and fresh parsley, and serve over rice or mashed potatoes.

Nutrition

Serving: 1servingCalories: 450kcalCarbohydrates: 12gProtein: 34gFat: 30gSaturated Fat: 15gPolyunsaturated Fat: 2gMonounsaturated Fat: 9gCholesterol: 110mgSodium: 900mgPotassium: 500mgSugar: 2gVitamin A: 600IUVitamin C: 1mgCalcium: 150mgIron: 1mg

Notes

This recipe is easy to whip up and guarantees creamy, savory goodness in every bite.

Tried this recipe?

Let us know how it was!

Slow Cooker Beef Manhattan: Comfort Food Made Easy

The aroma of beef simmering slowly in a rich gravy is enough to transport me to the coziest corners of my kitchen. This Slow Cooker Beef Manhattan is my go-to recipe for busy weeknights and lazy Sundays alike. With tender, shredded beef over creamy mashed potatoes, it’s comfort food that really delivers on flavor with minimal effort. The beauty of this dish lies not just in its hearty warmth, but also in its versatility. You can modify the ingredients to suit your pantry, from swapping vegetables to adjusting the broth type. Plus, it’s perfect for feeding a family or impressing friends at gatherings. Who can resist a meal that allows you to set it and forget it? Ready to dive into the ultimate slow cooker experience? Let’s get cooking!

Why Is This Recipe a Must-Try?

Comforting Simplicity: This Slow Cooker Beef Manhattan keeps meal prep effortless, perfect for busy days or laid-back weekends.

Flavor-Packed Goodness: The rich gravy and tender beef create a mouthwatering combination that’s hard to resist.

Versatile Ingredients: Feel free to customize by swapping vegetables, or use chicken broth for a lighter twist—adaptability at its finest!

Crowd-Pleasing Appeal: Ideal for family dinners or gatherings, it’s a dish everyone will rave about.

Time-Saving Wonder: Just set it and enjoy the delicious aroma filling your home, leaving you free to focus on other things.

For another fantastic slow cooker meal, check out my Korean Ground Beef recipe!

Slow Cooker Beef Manhattan Ingredients

For the Beef

  • Beef Chuck Roast – The main protein for this dish, ideal for shredding and lending tenderness due to marbling; substitute with brisket or round roast if needed.

For the Vegetables

  • Onions – A key flavor base that adds sweetness; try shallots for a milder taste.
  • Garlic – Enhances the overall flavor profile; garlic powder can be used for convenience.
  • Carrots – Adds a touch of sweetness and nutrition; feel free to swap in parsnips for variation.
  • Celery – Brings a crisp texture; you can replace it with fennel for a unique taste.
  • Bell Peppers – Adds color and flavor; use any peppers you have on hand for a twist.

For the Cooking Liquid

  • Beef Broth – Provides depth to the gravy and moisture for cooking; chicken or vegetable broth can be good lighter alternatives.

For the Mashed Potatoes

  • Mashed Potatoes – The creamy base that complements the beef; consider cauliflower mash for a low-carb option.

For Thickening

  • Cornstarch – Use this to thicken your gravy if you prefer a richer consistency; mix it with cold water before adding.

This Slow Cooker Beef Manhattan is the perfect dish to warm your heart and home, showcasing the beauty of comfort food!

Step‑by‑Step Instructions for Slow Cooker Beef Manhattan

Step 1: Prepare Ingredients
Start by seasoning your beef chuck roast with salt and pepper on all sides. Next, chop the onions, garlic, and any additional vegetables you plan to use, such as carrots, celery, and bell peppers. This preparation will help to layer the delicious flavors as your Slow Cooker Beef Manhattan cooks.

Step 2: Sear Beef (Optional)
To enhance the flavor, heat a skillet over medium-high heat and brown the seasoned beef roast on all sides, about 3-4 minutes per side until it develops a nice crust. Once seared, carefully transfer the roast to your slow cooker, allowing the drippings to add richness to the dish.

Step 3: Add Vegetables
Place the chopped onions and garlic in the slow cooker around the beef, followed by your diced carrots, celery, and bell peppers. The vegetables will infuse their flavors into the meat as they cook and create a delightful aroma in your kitchen.

Step 4: Pour Broth
Slowly pour the beef broth over the ingredients in the slow cooker, ensuring the meat and vegetables are well covered. If you’d like to enhance the dish further, sprinkle in additional seasonings like thyme or smoked paprika. This liquid will form the base of the rich gravy for your Slow Cooker Beef Manhattan.

Step 5: Cooking
Cover the slow cooker with its lid and cook on low for 8 hours or on high for 4 to 5 hours. The beef should become fork-tender, and the flavors will meld beautifully. Resist the urge to peek too often, as you want to maintain heat for the cooking process.

Step 6: Shred Beef
Once the beef is tender, carefully remove it from the slow cooker and place it on a cutting board. Using two forks, shred the beef into bite-sized pieces, then return it to the slow cooker, stirring it into the gravy. This ensures every bite of your Slow Cooker Beef Manhattan is bursting with flavor.

Step 7: Make Mashed Potatoes
While the beef is cooking, prepare your mashed potatoes. Boil peeled potatoes in salted water until fork-tender, about 15-20 minutes. Drain and mash them with butter, cream, and seasoning until smooth and creamy. This comforting side will pair perfectly with the savory beef.

Step 8: Serve
To serve, spoon a generous helping of mashed potatoes onto each plate. Top them with the tender shredded beef and drizzle with rich gravy from the slow cooker. This beautiful presentation of your Slow Cooker Beef Manhattan is sure to warm everyone’s hearts and fill their bellies!

Slow Cooker Beef Manhattan Variations

Feel free to customize your Slow Cooker Beef Manhattan and make it your own with these delicious ideas!

  • Vegetable Swap: Replace carrots and celery with mushrooms or green beans for a different texture and flavor.
  • Heat it Up: Add a touch of cayenne pepper or red pepper flakes to bring some heat to your dish—a perfect way to awaken your taste buds!
  • Sweet Twist: For a unique flavor, swap regular potatoes for sweet potatoes, adding a hint of natural sweetness to balance the savory beef.
  • Herb Infusion: Toss in fresh rosemary or thyme to elevate the aroma and flavor of your gravy. These herbs can transport your dish to a whole new level.
  • Gluten-Free Option: Use cornstarch to thicken the gravy for a gluten-free twist, ensuring everyone at the table can enjoy it.
  • Lighten Up: Substitute beef broth with chicken or vegetable broth for a lighter version that still packs a punch in flavor.
  • Creamy Addition: Stir in a dollop of sour cream or cream cheese into the mashed potatoes for an ultra-creamy texture that takes comfort food to new heights.
  • Steak Variation: If you’re feeling adventurous, try an alternative cut like flank steak or brisket, adjusting the cooking time as needed for tender results.

For more mouthwatering options, don’t miss my recipes for Sticky Beef Noodles or the delightful Chilli Beef Experience. These variations will keep your cooking exciting!

How to Store and Freeze Slow Cooker Beef Manhattan

Fridge: Store any leftovers in an airtight container for up to 3 days. This allows you to savor the delicious flavors of your Slow Cooker Beef Manhattan throughout the week.

Freezer: For longer storage, freeze the beef and gravy mixture in a freezer-safe container for up to 3 months. Make sure to leave some space for expansion as it freezes.

Reheating: To enjoy, thaw in the fridge overnight and reheat gently on the stovetop over low heat, or use the microwave until warmed through.

Mashed Potatoes: If you have leftover mashed potatoes, store them separately in the fridge for up to 3 days, reheating with a splash of milk for creaminess.

Make Ahead Options

These Slow Cooker Beef Manhattan preparations are perfect for busy home cooks looking to save time during the week! You can chop the onions, garlic, and other vegetables and store them in the fridge for up to 3 days in advance. Likewise, season the beef chuck roast and wrap it tightly in plastic wrap, allowing for up to 24 hours of marinating in the refrigerator. When you’re ready to serve, simply follow the cooking steps, adding the prepped ingredients into the slow cooker and letting it work its magic. This way, you’ll enjoy the same rich, comforting flavors with minimal effort—every bite just as delicious and satisfying as if made from scratch!

Expert Tips for Slow Cooker Beef Manhattan

  • Choose the Right Cut: Select a well-marbled beef chuck roast for maximum tenderness and flavor; avoid lean cuts that won’t break down as well.
  • Sear for Depth: Browning the beef before cooking adds rich layers of flavor; don’t skip this optional step for a truly hearty taste!
  • Adjust Seasonings: Always taste as you go. Gradually add herbs and spices, ensuring your Slow Cooker Beef Manhattan is balanced and packed with flavor.
  • Perfect Mashed Potatoes: Infuse your cream with herbs like rosemary or garlic while boiling for elevated flavors in your mashed potatoes.
  • Thickening Tips: If your gravy isn’t as thick as desired, mix cornstarch with cold water and stir it in during the last 30 minutes of cooking; this will enhance the texture beautifully.

What to Serve with Slow Cooker Beef Manhattan

Cozy up with a hearty meal that’s sure to warm your soul and satisfy your appetite.

  • Garlic Bread: The buttery, garlicky flavor of crispy bread perfectly complements the rich gravy of the beef, making each bite divine.
  • Fresh Side Salad: A crisp salad with leafy greens, cucumbers, and tomatoes adds freshness that balances the rich, savory flavors of the Slow Cooker Beef Manhattan.
  • Roasted Carrots: Sweet, caramelized carrots provide a delightful contrast in both flavor and texture, rounding out your meal with a touch of sweetness.
  • Buttery Corn on the Cob: Juicy corn on the cob adds a delightful crunch and vibrant color alongside your beef and potatoes, enhancing the overall dining experience.
  • Creamy Coleslaw: A tangy, crunchy coleslaw refreshes the palate and provides a delightful textural contrast to the tender beef and creamy mashed potatoes.
  • Red Wine: A glass of full-bodied red wine, such as Cabernet Sauvignon, pairs beautifully with the meal, enhancing the deep flavors of the beef and gravy.
  • Chocolate Cake: End your meal on a high note with a slice of rich chocolate cake, offering a sweet finale that echoes the comforting themes of your main dish.

Slow Cooker Beef Manhattan Recipe FAQs

How do I choose the right cut of beef for this recipe?
Absolutely! For the best results with your Slow Cooker Beef Manhattan, I recommend using a well-marbled cut like beef chuck roast. The marbling helps keep the meat tender and juicy as it cooks low and slow. If you’re looking for alternatives, you could also try brisket or round roast, but adjust the cooking time as needed since they can vary in tenderness.

What’s the best way to store leftovers?
Leftover Slow Cooker Beef Manhattan can be stored in an airtight container in the fridge for up to 3 days. Just make sure to let it cool down completely before sealing it up. This way, you can enjoy the delicious flavors again without losing quality!

Can I freeze this dish?
Yes, indeed! You can freeze the beef and gravy mixture in a freezer-safe container for up to 3 months. Be sure to leave a little space at the top of the container to allow for expansion as it freezes. To reheat, simply thaw it in the fridge overnight, then warm it gently on the stovetop or in the microwave until heated through.

What should I do if my gravy is too thin?
If your gravy isn’t as thick as you’d like, don’t worry! Just mix 1 tablespoon of cornstarch with 1 tablespoon of cold water until smooth. Stir this mixture into the slow cooker during the last 30 minutes of cooking, and you’ll see the gravy thicken beautifully. This step enhances the overall texture of your dish for that perfect, hearty feel.

Is this recipe suitable for those with dietary restrictions?
Very! The Slow Cooker Beef Manhattan can be easily adapted for different dietary needs. For a gluten-free option, ensure your beef broth is gluten-free. If you want to reduce carbs, consider replacing regular mashed potatoes with cauliflower mash. Just offer alternatives based on your guests’ needs, and everyone can enjoy this comforting meal.

How long does this dish take to cook?
The cooking time for your Slow Cooker Beef Manhattan will vary depending on your setting. If you choose to cook it on low, plan for about 8 hours; if you’re in a hurry, you can cook it on high for 4 to 5 hours. The key is to cook it until the beef is fork-tender, so make sure to check it for that perfect texture before serving!

Slow Cooker Beef Manhattan

Slow Cooker Beef Manhattan: Comfort Food Made Easy

This Slow Cooker Beef Manhattan offers comforting flavors with minimal effort, perfect for busy weeknights.
Prep Time 20 minutes
Cook Time 8 hours
Total Time 8 hours 20 minutes
Servings: 6 servings
Course: Dinner
Cuisine: American
Calories: 450

Ingredients
  

For the Beef
  • 3 pounds Beef Chuck Roast Ideal for shredding and tenderness.
For the Vegetables
  • 1 large Onion
  • 3 cloves Garlic
  • 3 medium Carrots
  • 2 stalks Celery
  • 2 medium Bell Peppers
For the Cooking Liquid
  • 4 cups Beef Broth Chicken or vegetable broth can be used as alternatives.
For the Mashed Potatoes
  • 2 pounds Mashed Potatoes Consider cauliflower mash for a low-carb option.
For Thickening
  • 2 tablespoons Cornstarch Mix with cold water before adding.

Equipment

  • Slow Cooker
  • Skillet

Method
 

Step‑by‑Step Instructions
  1. Start by seasoning your beef chuck roast with salt and pepper on all sides. Next, chop the onions, garlic, and any additional vegetables you plan to use, such as carrots, celery, and bell peppers.
  2. To enhance the flavor, heat a skillet over medium-high heat and brown the seasoned beef roast on all sides, about 3-4 minutes per side until it develops a nice crust. Once seared, carefully transfer the roast to your slow cooker.
  3. Place the chopped onions and garlic in the slow cooker around the beef, followed by your diced carrots, celery, and bell peppers.
  4. Slowly pour the beef broth over the ingredients in the slow cooker, ensuring the meat and vegetables are well covered.
  5. Cover the slow cooker with its lid and cook on low for 8 hours or on high for 4 to 5 hours.
  6. Once the beef is tender, carefully remove it from the slow cooker and place it on a cutting board. Shred the beef and return it to the slow cooker.
  7. Prepare your mashed potatoes by boiling peeled potatoes in salted water until fork-tender. Drain and mash with butter, cream, and seasoning.
  8. To serve, spoon mashed potatoes onto each plate, top with the shredded beef and drizzle with gravy.

Nutrition

Serving: 1plateCalories: 450kcalCarbohydrates: 40gProtein: 35gFat: 15gSaturated Fat: 6gPolyunsaturated Fat: 2gMonounsaturated Fat: 5gCholesterol: 100mgSodium: 900mgPotassium: 1200mgFiber: 4gSugar: 3gVitamin A: 300IUVitamin C: 15mgCalcium: 50mgIron: 4mg

Notes

This dish is perfect for modification based on available ingredients. Adjust seasonings to taste and enjoy the rich flavors.

Tried this recipe?

Let us know how it was!

Mediterranean Salad: Crunchy, Zesty Bliss on Your Plate

As I tossed together the vibrant colors of a Mediterranean Chopped Salad, the aroma of fresh herbs and zesty lemon wrapped around me like a warm embrace. This salad, with its crunchy romaine, sweet grape tomatoes, and briny Kalamata olives, has become a household staple for gatherings and meal prep alike. What I love most about this Mediterranean Salad is how effortlessly it transforms everyday ingredients into a dazzling dish that pleases every palate. It’s a vegetarian delight packed with plant-based protein from chickpeas, making it both nutritious and satisfying. Plus, the zesty dressing comes together in mere minutes, perfect for those busy weeknights or unexpected guests. Ready to elevate your next meal with this colorful creation? Let’s dive in!

Why is This Mediterranean Salad a Must-Try?

Simplicity in preparation makes this salad a breeze for anyone, whether you’re a seasoned chef or a kitchen novice. Fresh ingredients come together to create a vibrant explosion of flavors that brighten your meal. Versatility allows you to easily adapt it—add grilled chicken or shrimp for added protein or substitute quinoa for a gluten-free twist. Perfect for meal prep, this salad can be made ahead and enjoyed throughout the week. If you’re looking for more crowd-pleasers, consider pairing it with our delightful Mediterranean Herb Crusted Salmon or trying a refreshing BLT Chicken Salad!

Mediterranean Salad Ingredients

For the Salad Base

  • Romaine Lettuce – The crunchy foundation of your Mediterranean Salad that adds plenty of fiber.
  • Grape Tomatoes – These sweet gems add color and juiciness; quarter them for a stunning presentation.
  • Persian Cucumbers – Delivers a satisfying crispness; if not available, regular cucumbers work beautifully too.
  • Chickpeas (canned) – A plant-based protein source that makes this salad hearty; remember to rinse and drain them to reduce sodium.
  • Red Onions – Their sharp bite contrasts wonderfully with other flavors; chop them finely for an even taste.
  • Kalamata Olives – These briny beauties contribute a Mediterranean flair; you can swap them for green olives if you prefer a milder taste.
  • Feta Cheese – Adds a rich and creamy touch; crumbled goat cheese can be a delicious alternative if you’re in the mood for something different.
  • Parsley – Enhances freshness and garnishes the salad beautifully; feel free to substitute with dill if desired.

For the Dressing

  • Olive Oil – The luscious main fat in the dressing that enhances richness and flavor.
  • Lemon Juice – This ingredient brings brightness and acidity that ties everything together.
  • Dijon Mustard – Adds a delightful tang and depth; it’s a secret weapon in dressings like this!
  • Garlic Clove – Infuses the dressing with aromatic flavor; press it for maximum potency.
  • Oregano – Enhances the herby profile of your dressing; Italian seasoning is a suitable substitute if you’re out of oregano.
  • Salt & Black Pepper – Essential staples that amplify all the flavors throughout the salad.

Feel free to use this ingredient list as your guide to preparing a vibrant and wholesome Mediterranean Salad that’s sure to impress!

Step-by-Step Instructions for Mediterranean Chopped Salad

Step 1: Prepare the Vegetables
Begin by washing and drying the romaine lettuce, then chop it into bite-sized pieces, creating a crunchy base for your Mediterranean Salad. Quarter the grape tomatoes and chop the Persian cucumbers into small cubes for a refreshing crunch. Finely chop the red onions, ensuring an even distribution of flavor, and set each ingredient aside in bowls for easy assembly.

Step 2: Drain and Rinse the Chickpeas
Open the canned chickpeas and pour them into a colander. Rinse them thoroughly under cold water to remove excess sodium, then allow them to drain fully. This step not only enhances their flavor but also adds a delightful creaminess to your Mediterranean Chopped Salad. Transfer the drained chickpeas to a mixing bowl, ready to join the colorful array of veggies.

Step 3: Prepare the Olives and Feta
Slice the Kalamata olives in half, releasing their briny essence into the salad. In another bowl, crumble the feta cheese to your desired texture, adding a rich and creamy component to the dish. Both olives and feta are integral to achieving the authentic Mediterranean flavor you’re aiming for in this delightful salad.

Step 4: Make the Lemony Herb Dressing
In a small mason jar, combine 1/4 cup of olive oil, 3 tablespoons of fresh lemon juice, 1 teaspoon of Dijon mustard, and one pressed garlic clove. Add 1 teaspoon of dried oregano along with salt and black pepper to taste. Seal the jar and shake vigorously for about 30 seconds until the dressing is thoroughly emulsified and well-mixed. It should look smooth and glossy.

Step 5: Assemble the Salad
In a large salad bowl, start by layering the chopped romaine at the bottom. Next, add the quartered tomatoes, chopped cucumbers, chickpeas, red onions, Kalamata olives, and crumbled feta in an aesthetically pleasing manner. This step not only enhances the visual appeal but also ensures every bite of your Mediterranean Salad is flavorful and satisfying.

Step 6: Dress and Serve
Right before serving, drizzle the zesty lemony herb dressing evenly over the salad. Garnish with chopped parsley for a pop of color and freshness. Toss the salad gently to combine the flavors, ensuring all ingredients are coated with the dressing. Serve immediately to enjoy the crisp textures and vibrant flavors of your Mediterranean Chopped Salad!

Make Ahead Options

These Mediterranean Chopped Salad components are perfect for meal prep, saving you precious time during busy weeknights! You can chop the vegetables (romaine, tomatoes, cucumbers, and red onions) and store them in an airtight container in the refrigerator for up to 3 days, keeping them fresh and crunchy. The feta and olives can also be separately stored for added convenience. The zesty lemony herb dressing can be made in advance and refrigerated for up to 2 weeks, maintaining its vibrant flavor. When it’s time to serve, simply combine the ingredients in a bowl, drizzle the dressing over the top, and toss gently for a refreshing salad that tastes just as delicious as when freshly made.

Expert Tips for Mediterranean Salad

Chop Evenly: Ensuring all vegetables are chopped uniformly not only creates an appealing look but also enhances the texture of the Mediterranean Salad.

Separate Dressing: Store the dressing apart from the salad until serving to avoid soggy greens. This way, your salad stays crisp and fresh even after a few days.

Rinse Chickpeas: Don’t skip rinsing the canned chickpeas! This simple step removes excess sodium and helps enhance their flavor for your Mediterranean Salad.

Use Fresh Herbs: Whenever possible, opt for fresh parsley instead of dried for a burst of flavor and vibrancy in your salad. It truly elevates the dish!

Prepping Ahead: Prepare the dressing in advance and keep it in the fridge for up to three weeks. This makes meal prep easier and quicker for your Mediterranean Salad.

Mediterranean Salad Variations & Substitutions

Embrace your culinary creativity and make this Mediterranean Salad truly your own with these delightful twists!

  • Gluten-Free: Swap chickpeas for cooked quinoa to maintain a hearty texture while keeping it gluten-free. Quinoa offers a nutty flavor and extra protein, making the salad even more nutritious.

  • Creamy Avocado: Add diced avocado to infuse a rich, buttery texture and healthy fats. It pairs wonderfully with the zesty dressing and enhances the salad’s overall appeal.

  • Pasta Addition: Fold in cooked orzo or tiny pasta shapes for an intriguing twist and heartier meal. This adds a wonderful texture contrast to the fresh veggies, making it irresistible!

  • Herb Variations: Swap parsley for fresh basil or mint for a vibrant flavor update. These aromatic herbs can transport your Mediterranean experience straight to the sun-drenched coasts.

  • Spicy Kick: Sprinkle in red pepper flakes or sliced jalapeños for some heat. This adds a delightful contrast to the luscious creaminess of the feta cheese and avocado.

  • Cheese Options: For a different flavor profile, use crumbled goat cheese or even a dairy-free cheese alternative. Each brings its unique creaminess while complementing the fresh ingredients.

  • Roasted Veggies: Roast bell peppers, zucchini, or eggplant for a warm version of the salad. The caramelization adds depth and sophistication to the traditional flavors.

If you find yourself loving this Mediterranean delight, consider pairing it with our Mediterranean Herb Crusted Salmon or some crunchy BLT Chicken Salad for an unforgettable culinary journey!

What to Serve with Mediterranean Chopped Salad

Elevate your Mediterranean dining experience with these delightful accompaniments that perfectly complement this refreshing salad.

  • Grilled Chicken Skewers: Juicy, succulent chicken adds a smoky flavor that pairs beautifully with the salad’s fresh ingredients, making it perfect for a hearty meal.

  • Pita Bread: Warm, soft pita offers a satisfying chew to scoop up the salad, bridging the gap between crunchy and creamy in every bite.

  • Hummus Platter: A creamy, garlicky dip enhances the Mediterranean theme and provides an extra layer of richness while balancing the crispness of the salad.

  • Quinoa Tabbouleh: This fragrant, herby grain salad brings a nutty flavor and chewy texture, complementing the freshness of your Mediterranean salad seamlessly.

  • Roasted Vegetables: Seasoned, caramelized veggies add depth and richness, creating a wonderful contrast that enhances each refreshing bite of the chopped salad.

  • Lemonade or Sparkling Water: A refreshing drink with a hint of citrus serves to cleanse the palate and complements the zesty notes found in your Mediterranean Salad.

  • Baklava: For a sweet finish, this flaky pastry drizzled with honey and nuts transports your taste buds to the Mediterranean, rounding out the meal with delightful sweetness.

How to Store and Freeze Mediterranean Salad

Fridge: Keep leftover Mediterranean salad in an airtight container for up to 3-4 days. To maintain freshness, store the dressing separately until ready to serve.

Freezer: It’s not recommended to freeze the Mediterranean salad, as fresh vegetables lose texture and flavor when thawed.

Reheating: If you’ve added any cooked protein, like chicken or shrimp, reheat in a skillet or microwave before serving with the salad for a warm twist.

Make-Ahead Tips: Prepare the dressing and store it in the fridge for up to 3 weeks, making it easy to spruce up future salads with vibrant flavors!

Mediterranean Chopped Salad Recipe FAQs

How do I choose ripe ingredients for my Mediterranean salad?
Absolutely! For the best Mediterranean salad, select fresh, firm romaine lettuce without dark spots and vibrant grape tomatoes. The tomatoes should feel slightly give when gently pressed. Look for cucumbers that are free from blemishes and stay away from any soft spots. Rinse all vegetables thoroughly before use to ensure cleanliness.

How should I store leftovers from my Mediterranean salad?
Very! Store any leftover Mediterranean salad in an airtight container in the refrigerator for up to 3-4 days. To maintain that crispness, you’ll want to keep the dressing separate until you’re ready to serve. This prevents the greens from wilting, allowing you to enjoy that fresh crunch for several days!

Can I freeze my Mediterranean chopped salad?
Not really. Freezing is not recommended for Mediterranean salads, as the fresh vegetables like cucumbers and tomatoes can become mushy and lose their flavor when thawed. It’s best to enjoy this vibrant dish fresh, but you can prepare the dressing ahead of time and freeze it for up to 3 months. Just thaw in the refrigerator before using!

What if my salad turns out soggy?
No worries, it happens to the best of us! If your Mediterranean salad has become soggy, you can try a quick fix: gently blot the excess moisture with paper towels. To prevent this in the future, always store the dressing separately from the salad until serving. Consider tossing the salad with the dressing right before serving for maximum freshness.

Is this Mediterranean salad suitable for people with dietary restrictions?
Absolutely! This Mediterranean salad is vegetarian and can be adjusted for various dietary needs. If you have nut allergies, you’re in good shape since there are no nuts in the recipe. For lactose intolerance, simply substitute feta with a dairy-free cheese option or omit it altogether. It’s a delightful option for everyone to enjoy!

Mediterranean Salad

Mediterranean Salad: Crunchy, Zesty Bliss on Your Plate

This Mediterranean Salad is a vibrant and nutritious dish packed with fresh vegetables and chickpeas, perfect for gatherings or meal prep.
Prep Time 15 minutes
Total Time 15 minutes
Servings: 4 servings
Course: Salad
Cuisine: Mediterranean
Calories: 200

Ingredients
  

For the Salad Base
  • 1 head Romaine Lettuce chopped into bite-sized pieces
  • 1 cup Grape Tomatoes quartered
  • 1 cup Persian Cucumbers chopped into small cubes
  • 1 can Chickpeas rinsed and drained
  • 1/2 cup Red Onions finely chopped
  • 1/2 cup Kalamata Olives sliced
  • 1/2 cup Feta Cheese crumbled
  • 1/4 cup Parsley chopped
For the Dressing
  • 1/4 cup Olive Oil
  • 3 tablespoons Lemon Juice fresh
  • 1 teaspoon Dijon Mustard
  • 1 clove Garlic pressed
  • 1 teaspoon Oregano dried
  • to taste Salt
  • to taste Black Pepper

Equipment

  • Mixing Bowl
  • Mason jar
  • Colander
  • Cutting board
  • Knife

Method
 

Step-by-Step Instructions
  1. Wash and dry the romaine lettuce, chop into bite-sized pieces, and set aside.
  2. Quarter the grape tomatoes and chop Persian cucumbers into small cubes.
  3. Finely chop red onions and set aside.
  4. Drain and rinse the chickpeas under cold water.
  5. Slice the Kalamata olives in half, and crumble the feta cheese.
  6. In a mason jar, combine olive oil, lemon juice, Dijon mustard, garlic, oregano, salt, and black pepper. Shake until emulsified.
  7. Layer the romaine, tomatoes, cucumbers, chickpeas, red onions, olives, and feta in a salad bowl.
  8. Drizzle the dressing over the salad, garnish with parsley, and toss gently to combine.

Nutrition

Serving: 1servingCalories: 200kcalCarbohydrates: 24gProtein: 7gFat: 10gSaturated Fat: 2gPolyunsaturated Fat: 2gMonounsaturated Fat: 5gCholesterol: 10mgSodium: 300mgPotassium: 400mgFiber: 6gSugar: 3gVitamin A: 1500IUVitamin C: 30mgCalcium: 150mgIron: 2mg

Notes

Chop vegetables evenly for the best texture and appearance. Store dressing separately until serving to maintain freshness.

Tried this recipe?

Let us know how it was!

BBQ Chicken Coleslaw Wraps: Fresh Twist on a Classic Meal

With the sun shining and the grill heating up, there’s nothing quite like a delicious wrap to celebrate the flavors of summer. My BBQ Chicken Coleslaw Wraps are the perfect dish to bring together friends and family, transforming leftovers into a sensational meal in a matter of minutes. This versatile recipe allows you to customize each wrap to suit your taste, making it both economical and a guaranteed crowd-pleaser. Whether you’re hosting a casual backyard barbecue or looking for a quick weeknight dinner, these wraps deliver delightful smoky, tangy flavors with a refreshing crunch from the coleslaw. What flavor twist will you add to make it your own?

Why Choose BBQ Chicken Coleslaw Wraps?

Deliciously Versatile: This recipe is a playground for flavor! Customize your coleslaw with unique dressings or add your choice of veggies, making each wrap a personal creation.

Economical Delight: Utilizing leftover rotisserie chicken, these wraps transform what you have into a satisfying meal, reducing waste while maximizing taste.

Quick and Easy: Perfect for busy nights, these wraps come together in just minutes, so you can enjoy a tasty dinner without the fuss.

Perfect for Gatherings: Impress your guests at summer barbecues or casual get-togethers with a light yet hearty meal that appeals to everyone. Pair with some Sizzling Chicken Pepper for an unforgettable feast!

Healthy Option: Packed with protein and crunchy vegetables, these wraps are a nutritious choice that won’t compromise on flavor. You can even make them low-carb by swapping out tortillas for lettuce leaves.

Dive into the flavor and freshness of BBQ Chicken Coleslaw Wraps today, and experience how easy and delightful homemade food can be!

BBQ Chicken Coleslaw Wraps Ingredients

For the Chicken
Cooked Chicken – Use leftover rotisserie chicken for convenience or cook fresh chicken for optimal flavor.
BBQ Sauce – Choose your favorite brand or whip up a homemade version for that extra zing.

For the Coleslaw
Cabbage – Fresh green or red cabbage adds crunch; pre-shredded saves time.
Carrots – Adds natural sweetness; feel free to swap with shredded broccoli for a twist.
Mayonnaise – Creamy base for coleslaw; Greek yogurt serves as a lighter alternative.

For the Wrap
Tortillas – Choose flour or whole wheat; for a low-carb option, large lettuce leaves work wonderfully.

Transform these ingredients into delightful BBQ Chicken Coleslaw Wraps that are sure to impress your family and friends!

Step‑by‑Step Instructions for BBQ Chicken Coleslaw Wraps

Step 1: Prepare the Chicken
Start by shredding your leftover rotisserie chicken or cooking fresh chicken breasts. For cooking, heat it in a skillet over medium heat until it reaches an internal temperature of 165°F (about 7–10 minutes). Once cooked, combine the chicken with your favorite BBQ sauce in a mixing bowl, ensuring each piece is generously coated for a smoky flavor throughout your BBQ Chicken Coleslaw Wraps.

Step 2: Make the Coleslaw
In a large mixing bowl, combine shredded cabbage, carrots, and mayonnaise. Mix until everything is evenly coated, adding salt and vinegar to taste for extra zing. Let your coleslaw sit for about 10 minutes, allowing the flavors to meld while also giving time for the cabbage to soften slightly, making it a perfect crunchy counterpart in your wraps.

Step 3: Warm the Tortillas
To make your tortillas more pliable, warm them up briefly. You can do this by placing them in a dry skillet over low heat for about 30 seconds on each side or microwaving them for 10-15 seconds. This step is essential for preventing tears and ensuring that your BBQ Chicken Coleslaw Wraps roll up beautifully without falling apart.

Step 4: Assemble the Wraps
Lay a warmed tortilla flat on a clean surface. Spoon a generous amount of the BBQ chicken mixture into the center, followed by a hearty portion of coleslaw. Be careful not to overfill; aim for just enough to fold the tortilla comfortably. Wrap each one tightly by folding in the sides first and then rolling from the bottom upward, creating a neat parcel.

Step 5: Serve and Present
Once your BBQ Chicken Coleslaw Wraps are assembled, cut them diagonally in half for an attractive presentation. Arrange them on a platter, showcasing those vibrant colors of chicken and coleslaw. This final touch not only makes for an appealing dish but also invites everyone to dig in and enjoy the scrumptious layers of flavors packed inside each wrap.

BBQ Chicken Coleslaw Wraps: Creative Twists Ahead!

Feel free to put your personal spin on these BBQ Chicken Coleslaw Wraps; your culinary imagination is the only limit!

  • Spicy Kick: Add sriracha or diced jalapeños to the coleslaw for a fiery twist. This zesty addition will awaken your taste buds with every bite.

  • Crunchy Veggies: Toss in some chopped bell peppers or shredded broccoli to the coleslaw. The extra crunch beautifully complements the creamy texture and smoky chicken.

  • Herbed Variation: Substitute mayonnaise with cilantro lime dressing for a fresh flavor explosion. It adds a bright, herbaceous tone that dances on your palate.

  • Fiber Boost: Incorporate quinoa or brown rice into your wraps. It not only adds a hearty texture but also elevates the nutritional value of your meal.

  • Tortilla Alternatives: Try using pita bread or nori sheets instead of traditional tortillas. This variation lends an exciting twist, perfect for adventurous eaters seeking something new!

  • Sweet Twist: For a sweet touch, mix in diced apples or pineapple into the coleslaw. The juicy sweetness pairs perfectly with tangy BBQ chicken, creating a delightful contrast.

  • Lettuce Wraps: For a low-carb option, swap tortillas with large lettuce leaves. This refreshing change brings a lightness and crunch that’s simply irresistible.

  • Flavorful Sauces: Experiment with different BBQ sauces – think honey BBQ for sweetness or a touch of smoky chipotle for depth. Each choice transforms the dish into something uniquely yours.

Enjoy the process of making these BBQ Chicken Coleslaw Wraps your own by mixing and matching these variations. Who says wraps can’t be fun and creative? Dive into your kitchen and let the flavors surprise you! Enjoy them alongside a refreshing Blt Chicken Salad for a delightful meal experienceBlt Chicken Salad

What to Serve with BBQ Chicken Coleslaw Wraps

Looking to complete your meal with something delightful? These wraps are the perfect base for a colorful, satisfying dinner.

  • Crispy Sweet Potato Fries: The sweetness and texture of these fries pair beautifully with the savory chicken, adding a comforting crunch to your meal.

  • Refreshing Lemonade: A chilled glass of lemonade offers a zesty counterpoint to the smoky flavors of the wraps, keeping your palate refreshed.

  • Quinoa Salad: Light and nutritious, a quinoa salad with fresh veggies not only complements the wraps but enhances the meal’s vibrant colors.

  • Grilled Vegetables: A medley of charred bell peppers, zucchini, and asparagus brings a smoky depth, mirroring the BBQ elements while providing a healthy crunch.

  • Tropical Fruit Salad: Bright and juicy, this fruit salad adds a sweet, tangy note that contrasts wonderfully with the rich coleslaw and BBQ flavors.

  • Classic Coleslaw: For coleslaw lovers, a side of traditional coleslaw elevates the dish, bringing familiar, creamy notes to the BBQ Chicken Coleslaw Wraps.

  • Iced Tea: A cool, brewed iced tea – sweetened or unsweetened – makes for a refreshing drink option that pairs effortlessly with the warm wraps.

  • Chocolate Brownies: For dessert, fudgy brownies create a perfect sweet finishing touch after the savory satisfaction of your wraps.

How to Store and Freeze BBQ Chicken Coleslaw Wraps

Room Temperature: Enjoy your BBQ Chicken Coleslaw Wraps immediately for the best flavor. If left out, consume within 2 hours to ensure freshness.

Fridge: Store any leftover wraps tightly wrapped in foil or in an airtight container for up to 3 days. Reheat in a skillet to restore texture, if desired.

Freezer: For longer storage, freeze assembled wraps wrapped individually in plastic wrap and then in foil for up to 2 months. Thaw in the fridge overnight before reheating.

Reheating: To reheat, gently warm in a skillet over low heat until heated through, about 5-7 minutes. This ensures the wrap maintains its delicate texture while giving you a taste of homemade goodness!

Make Ahead Options

These BBQ Chicken Coleslaw Wraps are a fantastic choice for meal prep, allowing you to enjoy fresh, homemade flavors effortlessly during busy weeks! You can prepare the coleslaw up to 24 hours in advance; simply mix shredded cabbage, carrots, and mayonnaise in a sealed container and refrigerate. To keep your coleslaw crisp, wait to add any salt or vinegar until just before serving. You can also shred and coat your chicken with BBQ sauce ahead of time, as it will stay tasty for up to 3 days in the fridge. When it’s time to enjoy your meal, just assemble the wraps with warmed tortillas and enjoy a delicious, time-saving dish that’s just as delightful as if made fresh!

Expert Tips for BBQ Chicken Coleslaw Wraps

  • Proper Chicken Shredding: Make sure to shred the chicken into bite-sized pieces for even distribution in the wraps, enhancing each bite of your BBQ Chicken Coleslaw Wraps.

  • Coleslaw Softening: Allow the coleslaw to rest for at least 10 minutes before assembling; this helps the cabbage soften while enhancing flavor.

  • Tortilla Tactics: Always warm your tortillas before wrapping. This prevents them from tearing and ensures a smooth rolling experience for your BBQ Chicken Coleslaw Wraps.

  • Adjusting Seasoning: Taste your coleslaw dressing before mixing. This way, you can adjust flavors and avoid blandness, ensuring a delicious flavor burst in every wrap.

  • Make-Ahead Convenience: Prepare the coleslaw a day in advance and store it in the fridge. This not only saves time but allows flavors to meld beautifully!

BBQ Chicken Coleslaw Wraps Recipe FAQs

What type of chicken is best for BBQ Chicken Coleslaw Wraps?
Absolutely! Using leftover rotisserie chicken is a fantastic choice for convenience and flavor. If you prefer, you can also cook fresh chicken breasts, ensuring they reach an internal temperature of 165°F for safety. This also allows you to coat them well with your favorite BBQ sauce for that delightful smoky taste.

How do I store leftover BBQ Chicken Coleslaw Wraps?
Very simply! Store leftover wraps tightly wrapped in foil or in an airtight container in the fridge for up to 3 days. For the best texture, you may want to reheat them in a skillet to restore warmth and crispness before enjoying them again.

Can I freeze BBQ Chicken Coleslaw Wraps?
Absolutely! For longer storage, wrap assembled wraps individually in plastic wrap and then in foil. They can be frozen for up to 2 months. When you’re ready to enjoy them, thaw them in the fridge overnight and reheat gently in a skillet for about 5-7 minutes until warm and inviting.

What should I do if my coleslaw dressing is too acidic?
No worries! If you find your coleslaw dressing a tad too acidic, try adding a bit of sugar or honey to balance out the flavors. A teaspoon at a time will let you adjust to your taste without overpowering the other ingredients. Mixing well and letting it sit for a few more minutes will help meld the flavors.

What’s a good alternative for the wraps if I want a low-carb option?
The more the merrier! You can easily swap standard tortillas for large lettuce leaves, like romaine or butter lettuce. This not only reduces carbohydrates but also adds a fresh crunch that pairs beautifully with the BBQ chicken and coleslaw.

How can I customize my coleslaw for different flavors?
A fun twist! You can customize your coleslaw by adding different vegetables such as diced bell peppers, jalapeños for heat, or even swapping out the mayonnaise for a vinaigrette to change up the flavor entirely. The idea is to let your creativity shine, making each wrap uniquely your own!

BBQ Chicken Coleslaw Wraps

BBQ Chicken Coleslaw Wraps: Fresh Twist on a Classic Meal

Delicious BBQ Chicken Coleslaw Wraps bring a fresh twist to summer meals. Perfect for using leftovers, they're smoky, tangy, and customizable.
Prep Time 10 minutes
Cook Time 15 minutes
Coleslaw Resting Time 10 minutes
Total Time 35 minutes
Servings: 4 wraps
Course: Lunch
Cuisine: American
Calories: 320

Ingredients
  

For the Chicken
  • 2 cups Cooked Chicken shredded, leftover rotisserie or fresh
  • 1/2 cup BBQ Sauce your favorite brand
For the Coleslaw
  • 2 cups Cabbage shredded, green or red
  • 1 cup Carrots shredded
  • 1/2 cup Mayonnaise or Greek yogurt
For the Wrap
  • 4 pieces Tortillas flour or whole wheat, or lettuce leaves for low-carb

Equipment

  • Mixing Bowl
  • Skillet
  • tortilla warmer

Method
 

Step-by-Step Instructions
  1. Start by shredding your leftover rotisserie chicken or cooking fresh chicken breasts. Combine with BBQ sauce in a mixing bowl.
  2. Combine shredded cabbage, carrots, and mayonnaise in a large mixing bowl. Add salt and vinegar to taste. Let the coleslaw sit for about 10 minutes.
  3. Warm the tortillas briefly in a dry skillet over low heat for about 30 seconds on each side, or microwave for 10-15 seconds.
  4. Lay a warmed tortilla flat, spoon BBQ chicken mixture into the center, and add coleslaw. Wrap tightly by folding in the sides and rolling from the bottom.
  5. Cut the assembled wraps diagonally in half for presentation and arrange on a platter.

Nutrition

Serving: 1wrapCalories: 320kcalCarbohydrates: 30gProtein: 25gFat: 14gSaturated Fat: 3gPolyunsaturated Fat: 2gMonounsaturated Fat: 9gCholesterol: 60mgSodium: 700mgPotassium: 450mgFiber: 3gSugar: 5gVitamin A: 350IUVitamin C: 30mgCalcium: 50mgIron: 2mg

Notes

Shred chicken into bite-sized pieces for even distribution. Allow coleslaw to rest for better flavor before assembling.

Tried this recipe?

Let us know how it was!

California Roll Sushi Bowls: Fresh, Fun, and Flavorful Delight

“Can you believe how easy it is to whip up California Roll Sushi Bowls at home?” I overheard this excited exchange at my local farmer’s market recently, and it got me thinking about how this fresh and vibrant dish can transform your meals. Packed with creamy avocado, tender crab, and crunchy cucumber, these bowls are not only perfect for any lunch or dinner but also customizable to suit every palate. In just 30 minutes, you’ll be savoring a delicious meal made with fresh ingredients that leave fast food in the dust. The best part? These bowls make for a vibrant presentation and an effortless way to enjoy the classic sushi flavors you love. Ready to unleash your inner sushi chef? Let’s dive in!

Why Make California Roll Sushi Bowls?

Quick and Easy: In just 30 minutes, you can create a beautiful, gourmet meal right at home.
Fresh Ingredients: Customizable with your favorite toppings, ensuring every bite bursts with flavor.
Healthier Option: Packed with healthy fats from avocado and protein from crab meat, these bowls beat fast food any day.
Perfect Presentation: Impress your family and friends with the vibrant colors and appealing layers—great for gatherings!
Endless Variations: Swap in chicken, tofu, or extra veggies like bell peppers for a new twist, just like with my Shrimp Avocado Bowls or even a delectable Crisp Cinnamon Roll for dessert!

California Roll Sushi Bowls Ingredients

Elevate your homemade sushi experience with these fresh ingredients!

For the Rice
Sushi Rice – Use high-quality sushi rice for the best sticky texture that forms the base of your California Roll Sushi Bowls.
Rice Vinegar – Season the rice for that signature sushi flavor, balancing sweetness and acidity.
Sugar – Adds a touch of sweetness that enhances the flavor of the seasoned rice.
Salt – Essential for enhancing the overall taste of the rice.

For the Main Fillings
Imitation Crab Meat (or Real Crab) – Adds protein and traditional sushi flavor; swap for tofu or shrimp for a vegetarian or pescatarian twist.
Cucumber – Provides a refreshing crunch; can be replaced with carrots for added sweetness and texture.
Avocado – Contributes rich creaminess; ensure it’s ripe for the best flavor.

For the Topping
Soy Sauce – Classic seasoning to enhance the dish; use tamari for a gluten-free alternative.
Sriracha – Optional for a spicy kick—adjust according to your heat preference.
Sesame Seeds/Nori Strips – Sprinkle on top for added texture and flavor, elevating the presentation of your California Roll Sushi Bowls.

These fresh ingredients come together to create a delightful and satisfying meal that’s not only quick to prepare but also customizable to cater to all your cravings!

Step‑by‑Step Instructions for California Roll Sushi Bowls

Step 1: Prepare Sushi Rice
Begin by rinsing 1 cup of sushi rice under cold water until the water runs clear, eliminating excess starch. Then, combine the washed rice with 1.5 cups of water in a rice cooker or pot. Cook on medium heat until the water has absorbed (about 15-20 minutes) and the rice is tender yet still holds its shape. Fluff with a fork once done.

Step 2: Season Rice
Once the sushi rice has finished cooking, transfer it to a large bowl and let it cool slightly. While still warm, gently mix in 3 tablespoons of rice vinegar, 2 tablespoons of sugar, and 1 teaspoon of salt, ensuring even distribution. The rice should be glossy and slightly sticky, ideal for forming the base of your California Roll Sushi Bowls.

Step 3: Chop Vegetables
While your rice cools, take a sharp knife and slice half a cucumber into thin strips for crunch. Next, pit and dice one ripe avocado into cubes, keeping the pieces intact. Set both of these aside in a small bowl, ready to be added as fresh, vibrant toppings to your California Roll Sushi Bowls.

Step 4: Assemble Bowls
In individual serving bowls, start by layering a generous scoop of the seasoned sushi rice at the bottom. Top the rice with the cucumber strips, avocado cubes, and around 4 ounces of imitation crab meat or your choice of protein. Aim for a colorful arrangement that showcases the freshness of your ingredients, providing both visual appeal and taste.

Step 5: Drizzle Sauce
In a small bowl, whisk together soy sauce and sriracha (adjust to your spice preference) until well blended. Drizzle this flavorful mixture over the assembled bowls, enhancing the overall taste of the California Roll Sushi Bowls with the savory and spicy elements. Be sure to cover all the ingredients for maximum flavor.

Step 6: Serve Immediately
With your California Roll Sushi Bowls beautifully assembled, serve them immediately for the best experience. Enjoy the contrasting textures of creamy avocado, crunchy cucumber, and succulent crab, all over that perfect sushi rice. Each bite is a delicious blend of fresh flavors—ideal for sharing or savoring all on your own!

California Roll Sushi Bowls Variations

Feel free to let your creativity shine by customizing these California Roll Sushi Bowls to fit your taste buds!

  • Protein Swap: Replace imitation crab with cooked shrimp or marinated tofu for a different flavor profile. Both alternatives maintain delightful textures, making each bite equally satisfying.
  • Extra Veggies: Toss in additional vegetables, like bell peppers or sliced radishes, to enhance the crunch and nutritional value. Each colorful addition brings freshness and a delightful twist to the traditional bowl.
  • Sweet & Crunchy: Substitute cucumber with julienned carrots for a sweetness boost. The vibrant orange color adds a cheerful touch, perfect for brightening up your meal.
  • Dairy-Free Delight: Use coconut aminos instead of soy sauce for a dairy-free, soy-free option that retains the umami flavor you crave. It’s a wonderful alternative that caters to those with specific dietary restrictions.
  • Spicy Kick: For heat lovers, mix in chopped jalapeños or drizzle more sriracha on top of your assembled bowls. Adjust according to your preference for a delightful explosion of flavor!
  • Herbaceous Twist: Incorporate fresh herbs, such as cilantro or mint, for a fragrant touch. These herbs enhance the overall flavor while bringing a refreshing zing to your California Roll Sushi Bowls.
  • Crunchy Toppings: Consider adding crispy shallots or tempura flakes for an extra crunchy finish. The added texture elevates the dish and mirrors the delightful elements of traditional sushi rolls.
  • Alternative Base: Try using quinoa or cauliflower rice for a lighter twist. These bases offer unique flavors and textures, creating a healthier spin on your favorite sushi dish.

These variations not only keep your meal exciting but also allow you to enjoy flavors reminiscent of dishes like my delicious Chicken Katsu Bowls or even a warm Foster Cinnamon Rolls for dessert. Explore, mix, and match to find your ideal California Roll Sushi Bowls!

What to Serve with California Roll Sushi Bowls?

Imagine the satisfying crunch of fresh vegetables and the burst of flavor in every bite as you complete your California Roll Sushi Bowls meal.

  • Crispy Tempura Vegetables: Lightly battered and fried veggies add a delightful crunch that contrasts beautifully with the tenderness of the sushi bowls.
  • Miso Soup: A warm bowl of miso soup offers a comforting companion with its umami flavor profile, enhancing the Japanese-inspired meal.
  • Seaweed Salad: This refreshing salad, with its hint of sesame oil, provides a light, tangy palate cleanser between bites of rich sushi.
  • Edamame: Steamed and lightly salted, these protein-packed pods are perfect for snacking—bringing a satisfying texture to your meal.
  • Pickled Ginger: This zesty condiment not only cleanses the palate but also adds a bright flavor that pairs wonderfully with the savory elements of the bowl.
  • Chilled Green Tea: Refreshing and subtly sweet, a glass of chilled green tea complements the freshness of the ingredients while aiding digestion.
  • Sushi Rolls: Enjoy additional sushi rolls on the side, perhaps a spicy tuna or vegetable roll, to diversify the sushi experience and share the joy.
  • Fruit Sorbet: End your meal on a sweet, cool note with a scoop of fruit sorbet, providing a refreshing contrast to the savory bowls—perfect for cleansing the palate.

Make Ahead Options

California Roll Sushi Bowls are perfect for meal prep enthusiasts looking to save time during busy weeknights. You can prepare the sushi rice and chop your vegetables (cucumber and avocado) up to 24 hours in advance. Simply store the cooked sushi rice in an airtight container in the refrigerator to keep it fresh and avoid hardening. For the avocado, a squeeze of lemon juice will help prevent browning. When you’re ready to serve, layer the rice and veggies in bowls, add the imitation crab meat or your chosen protein, then drizzle with soy sauce and sriracha just before enjoying. This way, your California Roll Sushi Bowls will be just as delicious and visually appealing!

Expert Tips for California Roll Sushi Bowls

Use Fresh Ingredients: Always opt for the freshest avocado, crab, and vegetables. Stale items can ruin the vibrant flavors of your California Roll Sushi Bowls.

Don’t Overcook Rice: Aim for sticky yet distinct grains. Overcooked sushi rice becomes mushy, affecting the overall texture of your dish.

Cool Rice Before Assembly: Allow the seasoned rice to reach room temperature before layering. This step helps maintain the right consistency and flavor balance.

Layer for Presentation: Arrange ingredients artfully in the bowl. A visually appealing layout enhances the eating experience and showcases the freshness of your California Roll Sushi Bowls.

Adjust Spice Levels: Customize the amount of sriracha to fit your taste. Start small, and add gradually to avoid overwhelming the dish.

Experiment with Fillings: Feel free to swap out crab for shrimp or tofu for different flavor profiles. This flexibility makes your California Roll Sushi Bowls even more enjoyable!

How to Store and Freeze California Roll Sushi Bowls

Fridge: Store any leftovers in an airtight container for up to 3 days. Keep the ingredients separate, especially the avocado, which is best added fresh to avoid browning.

Freezer: Avoid freezing fully assembled bowls as the rice and fresh ingredients do not thaw well. However, you can freeze cooked sushi rice for up to 1 month—just reheat and assemble fresh ingredients when ready to eat.

Reheating: Gently reheat sushi rice in the microwave with a few drops of water to restore moisture. Assemble your California Roll Sushi Bowls with fresh toppings for the best flavor and texture.

Make-Ahead: Prep the sushi rice and chop vegetables a day in advance. Keep everything in separate containers in the fridge for easy assembly the next day!

California Roll Sushi Bowls Recipe FAQs

How do I select ripe avocados for my California Roll Sushi Bowls?
Absolutely! Look for avocados that yield slightly to gentle pressure without being overly soft. The skin should be dark and smooth. If you’re planning to use them a few days later, choose slightly firmer avocados and let them ripen at room temperature.

What is the best way to store leftovers of California Roll Sushi Bowls?
To store leftovers, I recommend placing them in an airtight container in the fridge for up to 3 days. Keep the avocado separate to prevent browning. When ready to eat again, just add fresh avocado for the best experience!

Can I freeze California Roll Sushi Bowls?
Avoid freezing fully assembled bowls, as fresh ingredients like avocado and cucumber don’t thaw well. However, you can freeze prepared sushi rice for up to 1 month. To do this, let the rice cool, then pack it into an airtight freezer-safe bag or container. When you’re ready for your sushi bowls, simply reheating the rice and adding fresh toppings is the way to go!

What should I do if my sushi rice ends up too sticky?
Very! If your sushi rice is too sticky, it might have been overcooked or packed too tightly. In the future, rinse the rice thoroughly before cooking and avoid stirring too much after it’s cooked. If it’s already sticky, you can try fluffing it gently with a fork and adding a little water as you reheat it to help separate the grains.

Are California Roll Sushi Bowls allergy-friendly?
Yes, you can make them allergen-friendly! For shellfish allergies, substitute imitation crab with cooked chicken, tofu, or cooked shrimp. Make sure to check your soy sauce or swap in tamari for a gluten-free option. Always confirm that specific brands of ingredients align with dietary needs!

How long does the sushi rice last once cooked?
Cooked sushi rice can be stored in the fridge for 3 to 4 days in an airtight container. Just be sure to keep it away from any strong-smelling foods, as rice can easily absorb odors.

California Roll Sushi Bowls

California Roll Sushi Bowls: Fresh, Fun, and Flavorful Delight

California Roll Sushi Bowls are a vibrant and customizable dish, combining fresh ingredients for a quick and healthy meal.
Prep Time 15 minutes
Cook Time 15 minutes
Cooling Time 5 minutes
Total Time 30 minutes
Servings: 2 bowls
Course: Lunch
Cuisine: Japanese
Calories: 350

Ingredients
  

For the Rice
  • 1 cup Sushi Rice
  • 1.5 cups Water
  • 3 tablespoons Rice Vinegar
  • 2 tablespoons Sugar
  • 1 teaspoon Salt
For the Main Fillings
  • 4 ounces Imitation Crab Meat (or Real Crab)
  • 1/2 whole Cucumber sliced into thin strips
  • 1 whole Avocado ripe, diced
For the Topping
  • 2 tablespoons Soy Sauce use tamari for gluten-free
  • 1 teaspoon Sriracha optional, adjust to taste
  • 1 tablespoon Sesame Seeds/Nori Strips for garnish

Equipment

  • Rice cooker
  • Sharp knife
  • Large bowl
  • small bowl

Method
 

Step-by-Step Instructions
  1. Rinse sushi rice under cold water until clear, then combine with water and cook until tender.
  2. Transfer cooked rice to a bowl, season with rice vinegar, sugar, and salt; mix gently.
  3. Chop cucumber and avocado into strips and cubes respectively, and set aside.
  4. Layer seasoned rice in bowls, then add cucumber, avocado, and imitation crab meat on top.
  5. Whisk soy sauce and sriracha together, drizzle over assembled bowls.
  6. Serve immediately and enjoy the fresh flavors!

Nutrition

Serving: 1bowlCalories: 350kcalCarbohydrates: 45gProtein: 15gFat: 10gSaturated Fat: 1gPolyunsaturated Fat: 1gMonounsaturated Fat: 6gCholesterol: 30mgSodium: 800mgPotassium: 450mgFiber: 5gSugar: 4gVitamin A: 100IUVitamin C: 10mgCalcium: 50mgIron: 2mg

Notes

Use fresh ingredients for best flavor. Adjust spice levels and toppings as desired.

Tried this recipe?

Let us know how it was!

Heavenly Fresh Peach Cobbler for Sweet Summer Memories

As I whisked together the ingredients for my Fresh Peach Cobbler, the sweet scent of ripe peaches filled my kitchen, instantly transporting me to summer afternoons spent with family. This dish, celebrated for its golden biscuit topping and warm, bubbling fruit, is much more than just a dessert; it’s a comforting tradition that draws everyone around the table. Not only is this fresh peach cobbler quick to prepare, but it also showcases the natural sweetness of seasonal peaches, making it an ideal choice for gatherings and potlucks. Imagine serving a warm slice topped with a scoop of vanilla ice cream—the ultimate crowd-pleaser. Are you ready to take a bite out of summer nostalgia?

Why is Fresh Peach Cobbler a Must-Try?

Irresistible, the warm aroma of baked peaches will draw everyone in. Foolproof recipe, even novice bakers will shine with this simple method! Crispy and fluffy, experience the delightful contrast of the golden biscuit topping and luscious peach filling. Versatile, feel free to swap out ripe peaches for plums or nectarines! For a twist, check out my tips on preparing [Shrimp Avocado Bowls](https://fhfoodhealth.com/shrimp-avocado-bowls-with-mango-salsa-are-delicious/) alongside this delightful dessert. Memory-making, each bite brings back cherished summertime moments with loved ones. This peach cobbler is sure to be the highlight of your next gathering!

Fresh Peach Cobbler Ingredients

For the Filling
Fresh Peaches – Ripe, freestone peaches lend natural sweetness and a juicy filling that shines in this fresh peach cobbler.
Granulated Sugar – This sweetens the filling and enhances the peaches; consider brown sugar for a richer flavor boost!
Cinnamon – A dash adds warmth and complements the fresh peaches beautifully; nutmeg also works for added spice.

For the Biscuit Topping
All-Purpose Flour – Provides structure for the biscuit; for a gluten-free option, try substituting it with gluten-free flour.
Baking Powder – This leavening agent ensures your biscuit topping rises to a delightful flakiness.
Salt – Just a pinch enhances the overall sweetness and flavor balance in the biscuit dough.
Unsalted Butter – Cold butter is key for a flaky texture, lending richness to the topping.
Whole Milk – Adds moisture to the biscuit; swap it out for almond milk or buttermilk as desired.

Optional Topping
Coarse Sugar – Sprinkling this on top before baking gives the cobbler a delightful sweet crunch!

Dive into making this fresh peach cobbler, and create a dessert that’s sure to charm everyone around your table!

Step‑by‑Step Instructions for Fresh Peach Cobbler

Step 1: Preheat and Prepare
Preheat your oven to 350°F (177°C). While it warms up, take a 9×13-inch baking dish and grease it lightly with butter. Once the oven is ready, add about ½ cup of unsalted butter to the dish, allowing it to melt as the oven heats. This step is essential for creating that golden, bubbly base for your fresh peach cobbler.

Step 2: Mix the Biscuit Batter
In a large mixing bowl, combine 1 cup of all-purpose flour, ½ cup of granulated sugar, 1 tablespoon of baking powder, and a pinch of salt. Stir the dry ingredients together until evenly mixed. Next, pour in 1 cup of whole milk, and mix until just combined; the batter should be thick yet pourable. This forms the flaky topping that will crown your fresh peach cobbler.

Step 3: Layer the Batter
Once your batter is ready, carefully pour it over the melted butter in the baking dish. Avoid stirring, as the butter will rise to the top during baking, creating a delightful crust. The layers are crucial here; the batter should be evenly spread out to ensure an even bake for your fresh peach cobbler.

Step 4: Prepare the Peach Filling
In another bowl, take about 4 cups of sliced ripe peaches and toss them with ¼ cup of sugar and 1 teaspoon of cinnamon. This mixture will form a luscious filling packed with flavor. Allow the peaches to sit for a few minutes to release their juices, enhancing the overall taste of the cobbler when baked.

Step 5: Add the Peach Layer
Now, gently spoon the peach mixture over the batter in the baking dish. No stirring is necessary; let the peaches rest on top to create a beautiful layer. As the fresh peach cobbler bakes, the filling will merge with the batter, resulting in a heavenly dessert that’s golden and bubbling.

Step 6: Bake to Perfection
Place your assembled cobbler in the preheated oven and bake for 45–50 minutes. Keep an eye on it; you’ll know it’s ready when the top turns a lovely golden brown and you see bubbly juices around the edges. This is the moment to savor the irresistible aroma wafting through your kitchen, a true sign of what’s to come.

Step 7: Cool and Serve
Once baked, remove your fresh peach cobbler from the oven and allow it to cool for 10-15 minutes. This cooling period lets the juices set for easier serving. Once ready, slice it up and pair with a scoop of vanilla ice cream or fresh whipped cream for an indulgent finish to this delightful summer dessert!

Expert Tips for Fresh Peach Cobbler

  • Choose Peaches Wisely: Use only ripe, freestone peaches for the best flavor; under-ripe or overly soft peaches can ruin your fresh peach cobbler’s texture.

  • Peeling Made Easy: For a smooth filling, use the boiling method to peel peaches quickly without fuss.

  • Test for Doneness: Always check the biscuit topping with a toothpick; it should come out clean or with just a few dry crumbs for optimal flakiness.

  • Extra Crunch: Sprinkle coarse sugar on top just before baking to offer a delightful crunch that elevates your fresh peach cobbler.

  • Don’t Stir: When layering peaches over the batter, resist the urge to mix. This keeps the layers separate for a beautiful presentation and ideal taste.

What to Serve with Fresh Peach Cobbler

Imagine delighting in the sweet warmth of summer as you pair your fresh peach cobbler with these perfect accompaniments.

  • Vanilla Ice Cream: Creamy and cool, it melts into the warm cobbler, creating a luxurious dessert experience.

  • Whipped Cream: Light and airy, a dollop of homemade whipped cream introduces a delightful contrast to the warm, rich flavors.

  • Fresh Berries: Strawberries or blueberries add a burst of freshness, enhancing the fruity notes of the peach cobbler.

  • Peach Sorbet: Intensifies the peach flavor while providing a refreshing, fruity complement that’s perfect for hot days.

  • Mint Leaves: A sprinkle of fresh mint on top adds a bright, herbal note that elevates your cobbler and brings visual flair.

  • Sweet Tea: A classic Southern drink, the gentle sweetness of iced tea pairs beautifully with the rich flavors of peach cobbler.

Indulging in these delightful pairings will transform your peach cobbler into a memorable feast that embraces the joys of summer!

Storage Tips for Fresh Peach Cobbler

Fridge: Store leftover fresh peach cobbler in an airtight container in the refrigerator for up to 5 days. This keeps it fresh and ready for a quick dessert fix!

Freezer: For longer storage, freeze the cobbler by wrapping it tightly in plastic wrap and then in aluminum foil. It can last up to 3 months in the freezer.

Reheating: To reheat, place slices of the cobbler in a preheated oven at 300°F (150°C) for about 15 minutes or microwave individual portions for about 30 seconds until warmed through.

Serving Tip: Enjoy your cobbler warm, topped with a scoop of ice cream or whipped cream for an extra indulgent treat!

Fresh Peach Cobbler Variations

Don’t be afraid to explore delightful tweaks that can make this fresh peach cobbler even more special!

  • Nutty Twist: Add ½ cup of toasted pecans or walnuts to the peach filling for a crunchy surprise. The nuts will bring a delightful texture and rich flavor to your cobbler.

  • Berry Blend: Incorporate 1 cup of fresh blueberries or blackberries alongside the peaches for a fruity medley. This combo creates bursts of flavor with each bite, making your dessert even more exciting!

  • Spiced Up: Sprinkle in a pinch of ginger or cardamom to the peach filling for a warm spice profile. The aromatic notes will transport your taste buds to another realm, elevating the comforting essence of this dish.

  • Dairy-Free: Substitute almond milk for whole milk and coconut oil for butter in the biscuit topping to keep it dairy-free. You won’t lose any of that coveted flakiness and richness!

  • Sweet Surprise: Swap out granulated sugar for honey or maple syrup in the filling to add a natural sweetness with a unique flavor twist. The subtle change will make your cobbler even more wholesome!

  • Tropical Vibes: Add in ½ cup of diced pineapple or mango to the peach filling. This little twist will introduce a bright, tropical zing that makes it perfect for summer gatherings.

  • Oat Topping: For a healthier crunch, mix ½ cup of oats into the biscuit topping recipe. This adds a hearty texture and a slightly nutty flavor, giving you the ultimate satisfying dessert experience.

  • Flavor Infusion: For an extra flavor boost, add a splash of vanilla or almond extract to the peach mixture. It will infuse an enticing aroma that your family will love.

Feel free to experiment and customize your fresh peach cobbler just the way you like it! And if you’re looking for a fresh take on peach-inspired dishes, don’t forget to explore my recipes for [Shrimp Avocado Bowls](https://fhfoodhealth.com/shrimp-avocado-bowls-with-mango-salsa-are-delicious/) and [Classic Peach Cobbler](https://fhfoodhealth.com/shrimp-avocado-bowls-with-mango-salsa-are-delicious/)!

Make Ahead Options

These Fresh Peach Cobblers are perfect for busy home cooks looking to save time! You can prepare the filling by slicing the peaches and mixing them with sugar and cinnamon up to 24 hours in advance. Store the mixture in an airtight container in the refrigerator to preserve its freshness. Additionally, you can also mix the biscuit topping ingredients and refrigerate the batter (but not combined with the butter). When you’re ready to bake, simply pour the batter over the melted butter, layer the peach filling on top without stirring, and pop it into the oven. This way, you’ll enjoy the comforting goodness of warm peach cobbler with minimal prep time!

Fresh Peach Cobbler Recipe FAQs

What kind of peaches should I use for this recipe?
Absolutely! For the best results, opt for ripe freestone peaches as they offer natural sweetness and are easy to slice. Look for peaches that yield slightly to pressure without being overly soft. Avoid those with dark spots or mushy areas, as they can negatively impact the dish.

How should I store leftover fresh peach cobbler?
Leftovers can be stored in an airtight container in the refrigerator for up to 5 days. It’s a great way to enjoy the cobbler at any time! Just make sure to let it cool completely before sealing it to maintain freshness. Reheat it in the oven or microwave when you’re ready to indulge again!

Can I freeze fresh peach cobbler?
Yes, you can! To freeze, wrap the cooled cobbler tightly in plastic wrap and then in aluminum foil, making sure it’s sealed well to avoid freezer burn. It can last up to 3 months in the freezer. When you’re ready to enjoy it, thaw overnight in the fridge and reheat at 300°F (150°C) for about 15 minutes before serving.

What if my biscuit topping doesn’t rise?
Very common! If your biscuit topping doesn’t rise, check your baking powder for freshness—expired baking powder may not work effectively. Also, ensure you’re not overmixing the batter; mixing just until combined can help maintain that airy texture needed for a perfect rise.

Is this fresh peach cobbler suitable for people with nut allergies?
Yes, it is! The ingredients in this fresh peach cobbler don’t require any nuts. However, always check your sugar and other ingredients for unexpected additives. If you’re using alternative milk, be sure it’s nut-free, like soy or coconut milk. This makes it a safe dessert option for many!

Fresh Peach Cobbler

Heavenly Fresh Peach Cobbler for Sweet Summer Memories

This Fresh Peach Cobbler features golden biscuit topping and warm, bubbling peaches, perfect for summer gatherings.
Prep Time 15 minutes
Cook Time 50 minutes
Cooling Time 15 minutes
Total Time 1 hour 20 minutes
Servings: 8 slices
Course: Dessert
Cuisine: American
Calories: 250

Ingredients
  

For the Filling
  • 4 cups Fresh Peaches, sliced Ripe, freestone peaches
  • ¼ cup Granulated Sugar
  • 1 teaspoon Cinnamon
For the Biscuit Topping
  • 1 cup All-Purpose Flour Substitute for gluten-free flour if needed
  • ½ cup Granulated Sugar
  • 1 tablespoon Baking Powder
  • 1 pinch Salt
  • ½ cup Unsalted Butter Cold and cubed
  • 1 cup Whole Milk Can substitute with almond milk or buttermilk
Optional Topping
  • 2 tablespoons Coarse Sugar For topping

Equipment

  • 9x13 inch baking dish
  • Mixing Bowl
  • whisk

Method
 

Step-by-Step Instructions for Fresh Peach Cobbler
  1. Preheat your oven to 350°F (177°C). Grease a 9x13-inch baking dish with butter and melt ½ cup of unsalted butter in it as the oven heats.
  2. In a large mixing bowl, combine 1 cup of all-purpose flour, ½ cup of granulated sugar, 1 tablespoon of baking powder, and a pinch of salt. Stir until mixed, then mix in 1 cup of whole milk until just combined.
  3. Pour the batter over the melted butter in the baking dish without stirring, ensuring an even layer.
  4. Toss 4 cups of sliced peaches with ¼ cup of sugar and 1 teaspoon of cinnamon. Let sit for a few minutes.
  5. Spoon the peach mixture over the batter in the baking dish, ensuring not to stir.
  6. Bake for 45–50 minutes until golden brown and bubbly.
  7. Remove from oven and let cool for 10-15 minutes before serving.

Nutrition

Serving: 1sliceCalories: 250kcalCarbohydrates: 36gProtein: 3gFat: 10gSaturated Fat: 6gPolyunsaturated Fat: 1gMonounsaturated Fat: 3gCholesterol: 25mgSodium: 200mgPotassium: 200mgFiber: 2gSugar: 15gVitamin A: 500IUVitamin C: 7mgCalcium: 40mgIron: 0.5mg

Notes

Top with vanilla ice cream or fresh whipped cream for an indulgent treat.

Tried this recipe?

Let us know how it was!

Crispy Chicken Tacos: Easy Baked Goodness for Taco Night

There’s something irresistibly satisfying about a perfectly crispy taco that just begs to be stuffed and devoured. My Crispy Chicken Tacos have quickly become a go-to dish during those hectic weeknights when time is of the essence but flavor can’t be compromised. With a base of tender shredded chicken, a sprinkle of cheese, and a warm embrace of toasted corn tortillas, these tacos come together in a flash. Not only are they a breeze to whip up, but they’re also family-friendly, making them a crowd-pleaser on any table. Imagine serving them with a zesty jalapeño ranch sauce and a burst of fresh toppings—what’s not to love? Ready to take your weeknight dinners to the next level? Let’s dive into this delightful recipe!

Why Are These Tacos So Loved?

Crispy Texture: Each bite of these tacos features a delightful crunch, making them irresistibly satisfying and fun to eat.
Quick and Easy: Whip these together in no time, perfect for those busy weeknight dinners when you want a homemade touch without all the fuss.
Flavorful Filling: Tender shredded chicken blended with zesty lime juice and savory taco seasoning creates a robust flavor profile that’s hard to resist.
Family-Friendly: Everyone loves tacos! Customize with your favorite toppings, from fresh pico de gallo to creamy guacamole, ensuring there’s something for everyone at the table.
Versatile Options: Feeling adventurous? Try swapping the chicken for shredded beef or beans for a delicious twist. For those seeking more crunch, pair them with Sizzling Chicken Pepper for a full feast!

Crispy Chicken Tacos Ingredients

• Get ready to create a taco night favorite with these must-have ingredients!

For the Chicken Filling
Shredded Rotisserie Chicken – A convenient protein that packs flavor; feel free to substitute with any cooked chicken.
Juice of 1 Lime – Brightens the dish and enhances flavors; lemon works as a quick substitute.
Taco Seasoning – Adds spice and depth; make your own at home for a personal twist.

For the Tacos
Corn Tortillas – The perfect base for your taco shells; flour tortillas are a tasty alternative for a different texture.
Avocado Oil – Ideal for greasing and brushing the tortillas, ensuring that perfect crispiness; olive oil can work in a pinch.

For the Cheesy Goodness
Shredded Cheddar Cheese – Melts beautifully to create a gooey texture; try Monterey Jack or a Mexican blend for variety.

For the Toppings
Jalapeño Ranch – Adds a creamy, tangy element that elevates your taco; any favorite dressing can serve in its place.
Shredded Lettuce, Pico de Gallo, Guacamole, Pickled Red Onions – Optional toppings that add freshness and crunch, perfect for custom creations!

Ready to assemble your Crispy Chicken Tacos? Let’s get cooking!

Step‑by‑Step Instructions for Crispy Chicken Tacos

Step 1: Preheat the Oven
Begin by preheating your oven to 425°F (220°C). This temperature is key for achieving that deliciously crispy exterior on your Crispy Chicken Tacos. As the oven heats up, you can gather your ingredients and prepare to create this tasty dish.

Step 2: Combine Filling Ingredients
In a medium-sized mixing bowl, combine shredded rotisserie chicken, the juice of one lime, and taco seasoning. Mix thoroughly until the chicken is evenly coated with the seasoning and lime juice, ensuring every bite bursts with flavor. This savory filling is the heart of your tacos!

Step 3: Prepare Tortillas
Take a stack of corn tortillas and wrap them in a clean kitchen towel. Microwave them for 45-60 seconds until they’re warm and pliable. This step is essential for folding without tearing, setting the stage for the crispy tacos you’ll make.

Step 4: Grease the Baking Sheet
Lightly grease a baking sheet with avocado oil using a brush or a paper towel. This will prevent any sticking and promote an even crispiness for your Crispy Chicken Tacos. Once greased, lay the warmed tortillas flat on the baking sheet.

Step 5: Fill the Tortillas
On one half of each tortilla, sprinkle one tablespoon of shredded cheddar cheese. Then, add two tablespoons of the seasoned chicken mixture and top with another tablespoon of cheese. This hearty filling ensures that each taco is loaded with flavor and delicious cheesy goodness.

Step 6: Fold and Brush
Carefully fold the tortillas over the filling, gently pressing to seal each taco. Once folded, brush the tops of the tacos with a little more avocado oil for an extra crispy finish. This small touch enhances both the texture and flavor of your Crispy Chicken Tacos.

Step 7: Bake the Tacos
Place the baking sheet in your preheated oven and bake for 17-20 minutes. Halfway through, flip the tacos to ensure they crisp evenly on both sides. Keep an eye on them, looking for that golden-brown color—this indicates they’re ready to come out!

Step 8: Prepare Toppings While Baking
While the tacos bake, prepare your toppings such as jalapeño ranch, shredded lettuce, pico de gallo, and guacamole. This way, everything is ready to serve as soon as the Crispy Chicken Tacos come out of the oven, making for a speedy and delightful meal.

Step 9: Serve and Enjoy
Once baked to a perfect crunch, remove the tacos from the oven and let them cool slightly. Plate the tacos alongside your prepared toppings. Feel free to customize each taco with your favorites for an incredible taco night experience that everyone will love!

How to Store and Freeze Crispy Chicken Tacos

Fridge: Store leftover Crispy Chicken Tacos in an airtight container for up to 2 days. This keeps them fresh while minimizing moisture loss.

Freezer: For longer storage, freeze cooked tacos in a single layer on a baking sheet before transferring to a freezer-safe bag. They’ll stay good for up to 3 months.

Reheating: To reheat, bake from frozen at 375°F (190°C) for about 15-20 minutes or until heated through and crispy, ensuring that every bite retains that satisfying crunch.

Freshness Tip: For optimal flavor, it’s best to store toppings separately and add them after reheating to maintain their freshness and texture.

Make Ahead Options

These Crispy Chicken Tacos are a fantastic option for meal prep, allowing you to enjoy the flavors of taco night without the last-minute scramble! You can prepare the chicken filling (shredded rotisserie chicken, lime juice, and taco seasoning) up to 3 days in advance; simply store it in an airtight container in the refrigerator. Additionally, you can fill the tortillas and store the assembled tacos (without baking) in the fridge for up to 24 hours; cover them tightly to prevent drying out. When you’re ready to enjoy your Crispy Chicken Tacos, simply brush them with avocado oil and bake as directed, and they’ll be just as delicious, crispy, and ready to impress your family!

Expert Tips for Crispy Chicken Tacos

  • Tortilla Temperature: Warm tortillas in the microwave before filling to avoid tearing; this makes them pliable and easier to fold.

  • Seal Properly: Ensure that the tortillas are pressed down firmly when folding to seal; this prevents openings during baking and keeps all the flavorful filling inside.

  • Adjust Crispiness: Keep an eye on baking time, as ovens vary. For extra crunch, add a couple of extra minutes, flipping halfway for even browning.

  • Use Fresh Ingredients: Fresh lime juice and high-quality taco seasoning elevate the flavor profile of the Crispy Chicken Tacos—don’t skip this step!

  • Experiment with Fillings: Get creative with your taco fillings! Try replacing shredded chicken with black beans or sautéed veggies for a delicious vegetarian alternative.

What to Serve with Crispy Chicken Tacos?

Add a burst of flavor and texture to your taco night experience with these delightful accompaniments.

  • Creamy Guacamole: This rich and creamy dip balances the crunch of the tacos, enhancing every bite with its smooth, buttery flavor. A must-have for any taco feast!

  • Zesty Pico de Gallo: Fresh diced tomatoes, onions, and cilantro give a vibrant, refreshing contrast, perfectly complementing the chicken and spices. This salsa packs a punch of flavor!

  • Crispy Corn Chips: Serve alongside for that delightful crunch, perfect for dipping in jalapeño ranch or scooping up leftover toppings. They add an extra layer of fun to your meal.

  • Spicy Jalapeño Ranch: Drizzle this tangy sauce over the tacos for an unexpected kick that brings everything together. It’s creamy with just the right amount of heat!

  • Mexican Street Corn: The sweet, smoky flavor and crispy texture of elote offer a delightful side that pairs beautifully with the savory tacos. It’s a crowd-pleaser that adds authenticity!

  • Chilled Mexican Black Beans: These seasoned beans are rich in protein and flavor, making them a hearty side that complements the crispy tacos perfectly. Plus, they add a nutritional boost!

  • Margaritas or Horchata: Pair your meal with a refreshing margarita for some zing or a sweet horchata to balance the spices. Both drinks enhance the festive vibe of taco night!

  • Flan or Tres Leches Cake: For dessert, indulge in a creamy flan or a moist tres leches cake to end the meal on a sweet note. It’s the perfect finish to a delicious taco spread!

Variations & Substitutions for Crispy Chicken Tacos

Customize your crispy chicken tacos with these delightful twists that will cater to every taste and dietary preference!

  • Vegetarian: Swap shredded chicken for black beans or sautéed vegetables like bell peppers and zucchini for a satisfying plant-based meal. Add a sprinkle of cumin to enhance the flavors!

  • Gluten-Free: Use gluten-free corn tortillas, ensuring everyone can join in the taco fun without worry. These alternatives still bring the same delightful crunch and flavor.

  • Spicy Kick: Incorporate diced jalapeños or a dash of hot sauce into the chicken mixture for an extra layer of heat. This fiery addition can turn these tacos into a zesty adventure!

  • Cheese Variety: Instead of cheddar, try Monterey Jack or a Mexican cheese blend for an interesting twist. Each option melts in a unique way, bringing new flavors to your tacos.

  • Taco Seasoning Twist: Make your own taco seasoning by combining chili powder, cumin, garlic powder, and onion powder. This homemade blend can elevate the taste, adding a personal touch!

  • Creamy Sauce Alternative: If jalapeño ranch isn’t your favorite, try a chipotle mayo or avocado crema for a creamy contrast to the crunchy tacos. These alternatives can add a whole new flavor experience.

  • Crispy Add-ins: Consider adding crushed tortilla chips inside the tacos for extra crunch and texture. This will make each bite a delightful surprise!

  • Serving Ideas: Pair your tacos with a vibrant side salad, like a refreshing cucumber and tomato salad, for an uplifting complement to the savory flavors.

Experimenting with these variations can lead to taco night becoming a creative culinary adventure! If you’re in the mood for more crispy dishes, consider trying Crispy Southern Fried Chicken or enjoy the sweetness of a BLT Chicken Salad.

Crispy Chicken Tacos Recipe FAQs

What should I look for when selecting chicken for the filling?
Absolutely! The best option is shredded rotisserie chicken—it’s convenient and packed with flavor. However, if you choose to cook chicken from scratch, look for boneless, skinless pieces that are tender and juicy. Ensure the meat has no dark spots or odd smells, which can indicate spoilage.

How do I store leftover crispy chicken tacos?
Very! Store leftover Crispy Chicken Tacos in an airtight container in the fridge for up to 2 days. This helps keep them fresh while minimizing moisture loss. If you want to retain their crunchiness, I recommend reheating them in the oven rather than the microwave.

Can I freeze cooked crispy chicken tacos?
Absolutely! To freeze, place cooked tacos in a single layer on a baking sheet. Once frozen, transfer them to a freezer-safe bag and they’ll stay good for up to 3 months. When ready to enjoy, re-bake them at 375°F (190°C) for 15-20 minutes until heated through and crispy!

What’s the best way to reheat leftover tacos for maximum crispiness?
For the best results, I recommend reheating in the oven. Preheat it to 375°F (190°C), then place the tacos on a baking sheet. Bake for about 10-15 minutes, flipping halfway through. This method helps recreate that delicious crunch while warming the filling nicely.

Are there any dietary considerations to keep in mind for crispy chicken tacos?
Certainly! If you’re accommodating dietary restrictions, ensure your taco seasoning is gluten-free, and use corn tortillas, which are naturally gluten-free. Also, check for potential allergens in toppings like cheese or ranch dressing. For a dairy-free option, try using plant-based cheese and creamy avocado spread instead.

Crispy Chicken Tacos

Crispy Chicken Tacos: Easy Baked Goodness for Taco Night

Enjoy these Crispy Chicken Tacos, a quick and flavorful dinner option that's sure to please the whole family.
Prep Time 20 minutes
Cook Time 20 minutes
Total Time 40 minutes
Servings: 4 tacos
Course: Dinner
Cuisine: Mexican
Calories: 250

Ingredients
  

For the Chicken Filling
  • 2 cups Shredded Rotisserie Chicken Feel free to substitute with any cooked chicken.
  • 1 each Juice of 1 Lime Lemon works as a quick substitute.
  • 2 tablespoons Taco Seasoning Make your own at home for a personal twist.
For the Tacos
  • 8 each Corn Tortillas Flour tortillas are a tasty alternative.
  • 2 tablespoons Avocado Oil Olive oil can work in a pinch.
For the Cheesy Goodness
  • 1 cup Shredded Cheddar Cheese Try Monterey Jack or a Mexican blend for variety.
For the Toppings
  • 1 cup Jalapeño Ranch Any favorite dressing can serve in its place.
  • 2 cups Shredded Lettuce
  • 1 cup Pico de Gallo
  • 1 cup Guacamole
  • 1/2 cup Pickled Red Onions

Equipment

  • Oven
  • Baking Sheet
  • Microwave
  • Mixing Bowl
  • Kitchen Towel
  • Brush

Method
 

Step-by-Step Instructions
  1. Preheat your oven to 425°F (220°C).
  2. In a medium-sized mixing bowl, combine shredded rotisserie chicken, the juice of one lime, and taco seasoning. Mix thoroughly until the chicken is evenly coated.
  3. Wrap a stack of corn tortillas in a clean kitchen towel and microwave for 45-60 seconds until warm and pliable.
  4. Lightly grease a baking sheet with avocado oil using a brush or paper towel. Lay the warmed tortillas flat on the baking sheet.
  5. On one half of each tortilla, sprinkle one tablespoon of shredded cheddar cheese and add two tablespoons of the seasoned chicken mixture, topping with another tablespoon of cheese.
  6. Carefully fold the tortillas over the filling, pressing to seal each taco. Brush the tops with avocado oil for extra crispiness.
  7. Bake in the preheated oven for 17-20 minutes, flipping halfway through for even crispness.
  8. While baking, prepare toppings like jalapeño ranch, shredded lettuce, pico de gallo, and guacamole.
  9. Once baked to a perfect crunch, remove the tacos and let cool slightly. Serve with prepared toppings.

Nutrition

Serving: 1tacoCalories: 250kcalCarbohydrates: 22gProtein: 16gFat: 12gSaturated Fat: 5gPolyunsaturated Fat: 2gMonounsaturated Fat: 4gCholesterol: 50mgSodium: 400mgPotassium: 300mgFiber: 2gSugar: 1gVitamin A: 500IUVitamin C: 10mgCalcium: 100mgIron: 2mg

Notes

For optimal flavor, store toppings separately and add them after reheating to maintain freshness.

Tried this recipe?

Let us know how it was!

Stay Connected

Get recipes via email: