Get my cookbooks

Crème Brûlée Cookies: Indulge in This Sweet Delight!

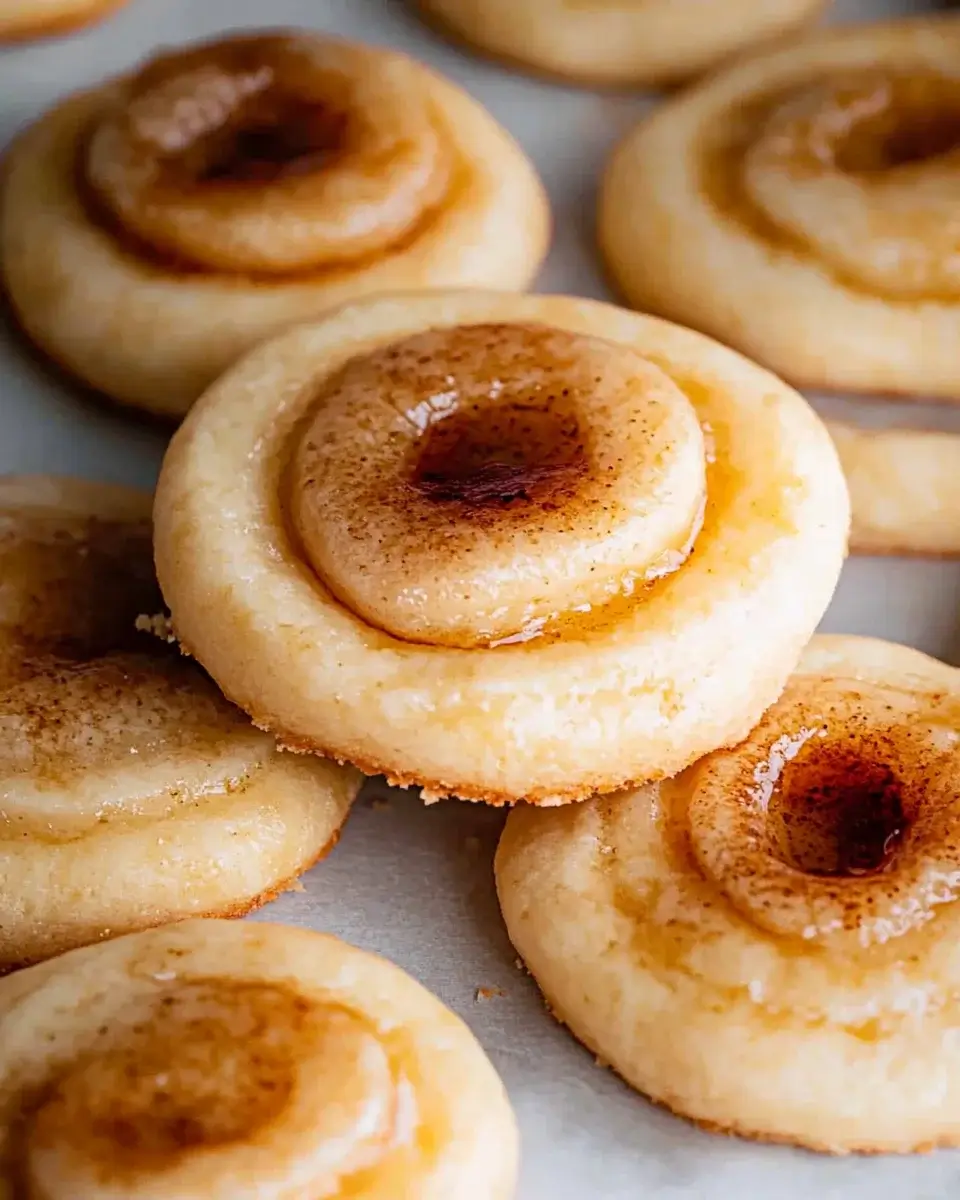
Introduction to Crème Brûlée Cookies

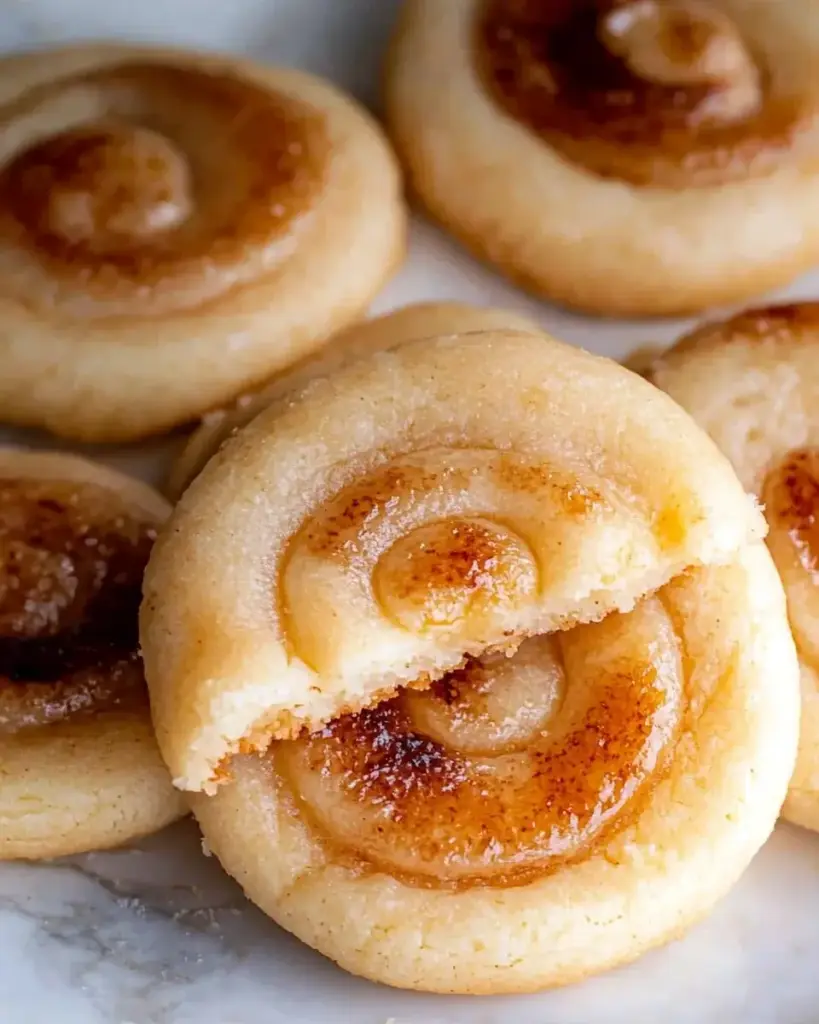
There’s something magical about the combination of creamy custard and a crispy sugar crust. Crème Brûlée Cookies bring that delightful experience right to your kitchen. These cookies are not just a treat; they’re a conversation starter, a sweet indulgence that can brighten any day. Whether you’re looking to impress guests or simply want a quick solution for a busy evening, this recipe is your ticket to dessert bliss. With just a few simple ingredients, you can create a batch of cookies that taste like they came straight from a French patisserie. Let’s dive into this delicious adventure!

Why You’ll Love This Crème Brûlée Cookies

Crème Brûlée Cookies are the perfect blend of simplicity and sophistication. They come together quickly, making them ideal for busy weeknights or last-minute gatherings. The rich, buttery flavor paired with that signature caramelized sugar topping creates a taste sensation that’s hard to resist. Plus, they’re a fun twist on a classic dessert, sure to impress anyone who takes a bite. You’ll find yourself making these cookies again and again!

Ingredients for Crème Brûlée Cookies

Gathering the right ingredients is the first step to creating these delightful Crème Brûlée Cookies. Here’s what you’ll need:

  • Unsalted butter: This is the base of your cookies, providing richness and flavor. Make sure it’s softened for easy mixing.
  • Granulated sugar: Sweetness is key! This sugar helps create that lovely texture and flavor.
  • Brown sugar: Packed brown sugar adds moisture and a hint of caramel flavor, enhancing the overall taste.
  • Large eggs: Eggs bind the ingredients together and contribute to the cookies’ chewy texture.
  • Vanilla extract: A splash of vanilla elevates the flavor profile, making your cookies taste even more indulgent.
  • All-purpose flour: The backbone of any cookie, flour gives structure and stability to your dough.
  • Baking soda: This leavening agent helps the cookies rise, creating a light and airy texture.
  • Salt: Just a pinch enhances the sweetness and balances the flavors.
  • Heavy cream: This is the secret ingredient that gives these cookies their rich, creamy essence, reminiscent of classic crème brûlée.
  • Granulated sugar (for topping): This is what you’ll caramelize to create that signature crispy crust on top.

For those looking to mix things up, consider adding a teaspoon of almond extract for a nutty twist or some chocolate chips for extra sweetness. You can find all the exact measurements at the bottom of the article, ready for printing!

How to Make Crème Brûlée Cookies

Step 1: Preheat and Prepare

Start by preheating your oven to 350°F. This ensures your cookies bake evenly. While the oven heats, line a baking sheet with parchment paper. This will prevent sticking and make cleanup a breeze. Trust me, your future self will thank you!

Step 2: Cream the Butter and Sugars

In a large mixing bowl, combine the softened unsalted butter, granulated sugar, and brown sugar. Using a hand mixer or stand mixer, beat them together until the mixture is light and fluffy. This step is crucial for achieving that melt-in-your-mouth texture!

Step 3: Add Eggs and Vanilla

Next, crack in the large eggs, adding them one at a time. Mix well after each addition to ensure they’re fully incorporated. Then, pour in the vanilla extract. This will infuse your cookies with a warm, inviting aroma that’s hard to resist.

Step 4: Combine Dry Ingredients

In a separate bowl, whisk together the all-purpose flour, baking soda, and salt. This helps to evenly distribute the leavening agent and ensures your cookies rise perfectly. It’s a simple step that makes a big difference in the final product!

Step 5: Mix Wet and Dry Ingredients

Gradually add the dry mixture to the wet ingredients. Mix until just combined; overmixing can lead to tough cookies. You want a soft, slightly sticky dough that will hold its shape when scooped. This is where the magic begins!

Step 6: Fold in Heavy Cream

Now, gently fold in the heavy cream. This is the secret to that rich, creamy flavor reminiscent of classic crème brûlée. Use a spatula to incorporate it without deflating the dough. You’ll notice the dough becoming smoother and more luxurious!

Step 7: Shape the Cookies

Using a cookie scoop or a tablespoon, drop rounded balls of dough onto the prepared baking sheet. Space them about 2 inches apart to allow for spreading. Don’t worry about making them perfect; the rustic look adds to their charm!

Step 8: Bake the Cookies

Place the baking sheet in the preheated oven and bake for 10-12 minutes. Keep an eye on them; the edges should be lightly golden while the centers remain soft. This contrast is what makes these cookies so delightful!

Step 9: Caramelize the Sugar

Once the cookies have cooled for about 5 minutes, sprinkle about 1 teaspoon of granulated sugar on top of each one. Using a kitchen torch, carefully caramelize the sugar until it forms a crispy, golden crust. If you don’t have a torch, broil them for a few minutes, watching closely!

Tips for Success

  • Make sure your butter is softened for easy creaming; it should be at room temperature.
  • Don’t overmix the dough; mix until just combined for tender cookies.
  • Use a kitchen scale for precise measurements, especially for flour.
  • Chill the dough for 30 minutes if it’s too sticky to handle.
  • Experiment with toppings like fresh fruit or chocolate drizzle for added flair!

Equipment Needed

  • Baking sheet: A standard baking sheet works well; a silicone mat can be a great alternative for easy cleanup.
  • Parchment paper: Use this to line your baking sheet; it prevents sticking and makes for easy removal.
  • Mixing bowls: A set of various sizes is handy for mixing ingredients.
  • Hand or stand mixer: Either will do for creaming the butter and sugars.
  • Cookie scoop: This helps portion the dough evenly; a tablespoon can work in a pinch.

Variations

  • Chocolate Chip Crème Brûlée Cookies: Add a cup of semi-sweet chocolate chips to the dough for a delightful twist on flavor.
  • Nutty Delight: Incorporate a teaspoon of almond extract and some chopped nuts for a crunchy texture and nutty flavor.
  • Gluten-Free Option: Substitute all-purpose flour with a gluten-free flour blend to make these cookies suitable for gluten-sensitive friends.
  • Fruit-Infused: Mix in dried fruits like cranberries or cherries for a burst of sweetness and color.
  • Spiced Variation: Add a pinch of cinnamon or nutmeg to the dough for a warm, spiced flavor that’s perfect for fall.

Serving Suggestions

  • Pair these Crème Brûlée Cookies with a scoop of vanilla ice cream for a decadent dessert experience.
  • Serve alongside a rich espresso or a cup of hot chocolate to enhance the flavors.
  • For a beautiful presentation, dust with powdered sugar and garnish with fresh berries.

FAQs about Crème Brûlée Cookies

Can I make Crème Brûlée Cookies ahead of time?

Absolutely! You can prepare the dough in advance and refrigerate it for up to 3 days. Just scoop and bake when you’re ready for fresh cookies!

What if I don’t have a kitchen torch?

No worries! You can caramelize the sugar by placing the cookies under the broiler for a few minutes. Just keep a close eye on them to prevent burning!

How should I store Crème Brûlée Cookies?

Store your cookies in an airtight container at room temperature for up to 3 days. They’re best enjoyed fresh, but they’ll still be tasty for a few days!

Can I freeze these cookies?

Yes! You can freeze the baked cookies for up to a month. Just make sure to let them cool completely before placing them in a freezer-safe container.

What makes these cookies different from regular cookies?

The addition of heavy cream gives Crème Brûlée Cookies their unique, rich flavor and texture, reminiscent of the classic dessert. Plus, that caramelized sugar topping adds a delightful crunch!

Final Thoughts

Creating Crème Brûlée Cookies is more than just baking; it’s an experience that brings joy to your kitchen. The rich, creamy flavor combined with that satisfying crunch of caramelized sugar makes each bite a little celebration. Whether you’re sharing them with friends or enjoying them solo, these cookies have a way of making ordinary moments feel special. Plus, the smiles they bring are worth every minute spent in the kitchen. So, roll up your sleeves, gather your ingredients, and let the sweet aroma fill your home. You’re in for a delightful treat that’s sure to impress!

jhessica

Crème Brûlée Cookies: Indulge in This Sweet Delight!

Indulge in the delightful taste of Crème Brûlée Cookies, a sweet treat that combines the classic flavors of crème brûlée with the beloved cookie.
Prep Time 20 minutes
Cook Time 12 minutes
Total Time 32 minutes
Servings: 24 cookies
Course: Dessert
Cuisine: French
Calories: 150

Ingredients
  

  • 1 cup unsalted butter softened
  • 1 cup granulated sugar
  • 1/2 cup brown sugar packed
  • 2 large eggs
  • 1 teaspoon vanilla extract
  • 2 1/2 cups all-purpose flour
  • 1 teaspoon baking soda
  • 1/2 teaspoon salt
  • 1/2 cup heavy cream
  • 1/4 cup granulated sugar for topping

Method
 

  1. Preheat your oven to 350°F. Line a baking sheet with parchment paper.
  2. In a large mixing bowl, cream together the softened butter, granulated sugar, and brown sugar until light and fluffy.
  3. Add the eggs one at a time, mixing well after each addition. Stir in the vanilla extract.
  4. In a separate bowl, whisk together the flour, baking soda, and salt.
  5. Gradually add the dry ingredients to the wet ingredients, mixing until just combined.
  6. Fold in the heavy cream until the dough is smooth.
  7. Using a cookie scoop or tablespoon, drop rounded balls of dough onto the prepared baking sheet, spacing them about 2 inches apart.
  8. Bake for 10-12 minutes, or until the edges are lightly golden.
  9. Remove from the oven and let the cookies cool on the baking sheet for 5 minutes before transferring them to a wire rack to cool completely.
  10. Once cooled, sprinkle about 1 teaspoon of granulated sugar on top of each cookie. Using a kitchen torch, carefully caramelize the sugar until it forms a crispy, golden crust.
  11. If you don’t have a torch, you can place the cookies under the broiler for a few minutes, watching closely to prevent burning.
  12. Serve immediately or store in an airtight container for up to 3 days.

Nutrition

Serving: 1cookieCalories: 150kcalCarbohydrates: 18gProtein: 2gFat: 7gSaturated Fat: 4gPolyunsaturated Fat: 2gCholesterol: 30mgSodium: 100mgSugar: 10g

Notes

  • For a twist, try adding a teaspoon of almond extract for a nutty flavor.
  • Mix in some chocolate chips for added sweetness.
  • Top the cookies with fresh fruit or a drizzle of chocolate sauce for a decadent dessert.

Tried this recipe?

Let us know how it was!

Slow Cooker Herb-Roasted Chicken: A Tender Delight!

Introduction to Slow Cooker Herb-Roasted Chicken

There’s something magical about the aroma of a slow-cooked meal wafting through the house.

When I think of comfort food, the *Slow Cooker Herb-Roasted Chicken* always comes to mind.

It’s not just a meal; it’s a warm hug on a plate.

Perfect for busy weeknights or a cozy Sunday dinner, this dish requires minimal effort while delivering maximum flavor.

Imagine coming home after a long day to find a tender, juicy chicken waiting for you.

This recipe is your ticket to impressing family and friends without spending hours in the kitchen.

Why You’ll Love This Slow Cooker Herb-Roasted Chicken

This *Slow Cooker Herb-Roasted Chicken* is a game changer for anyone juggling a busy life.

With just a few minutes of prep, you can set it and forget it, allowing the slow cooker to work its magic.

The result? A succulent, flavorful chicken that practically falls off the bone.

It’s the perfect dish for impressing guests or simply treating yourself after a long day.

Who knew comfort could be this easy?

Ingredients for Slow Cooker Herb-Roasted Chicken

Creating the perfect *Slow Cooker Herb-Roasted Chicken* starts with gathering the right ingredients.

Here’s what you’ll need:

  • Whole chicken: A 3 to 4-pound bird is ideal for this recipe. Look for one that’s fresh and free-range if possible for the best flavor.
  • Salt: Essential for enhancing the chicken’s natural flavors. It’s the foundation of seasoning.
  • Black pepper: Adds a subtle kick. Freshly ground is always a great choice.
  • Garlic powder: This brings a rich, savory depth to the dish without the fuss of fresh garlic.
  • Onion powder: A must-have for that sweet, aromatic flavor that complements the chicken beautifully.
  • Dried thyme: This herb adds an earthy note, reminiscent of cozy family dinners.
  • Dried rosemary: Its piney flavor pairs perfectly with chicken, giving it a rustic touch.
  • Paprika: For a hint of smokiness and a lovely color, paprika is a fantastic addition.
  • Olive oil: Helps the spices adhere to the chicken and adds richness.
  • Lemon: Halved and stuffed inside the chicken, it infuses a bright, zesty flavor.
  • Garlic cloves: Smashed and added for an aromatic punch that elevates the dish.
  • Onion: Quartered and stuffed inside the cavity, it adds sweetness and moisture.
  • Fresh herbs (optional): For garnish, fresh herbs like parsley or thyme can add a pop of color and freshness.

For exact measurements, check the bottom of the article where you can find everything available for printing.

With these ingredients, you’re well on your way to creating a mouthwatering meal that will have everyone asking for seconds!

How to Make Slow Cooker Herb-Roasted Chicken

Making a *Slow Cooker Herb-Roasted Chicken* is a straightforward process that yields delicious results.

Follow these simple steps, and you’ll have a tender, flavorful chicken ready to impress.

Step 1: Prepare the Chicken

Start by rinsing the whole chicken under cold water.

Pat it dry with paper towels to ensure the skin crisps up nicely.

Don’t forget to remove any giblets from the cavity; they can be saved for stock or discarded.

This step sets the stage for a perfectly seasoned bird.

Step 2: Season the Chicken

In a small bowl, mix together the salt, black pepper, garlic powder, onion powder, thyme, rosemary, and paprika.

This spice blend is the secret to a flavorful chicken.

Rub the olive oil all over the chicken, making sure to coat it evenly.

Then, generously sprinkle the spice mixture over the chicken, including inside the cavity.

This ensures every bite is packed with flavor.

Step 3: Stuff the Chicken

Now it’s time to add some aromatic goodness.

Place the halved lemon, smashed garlic cloves, and quartered onion inside the cavity of the chicken.

These ingredients will infuse the meat with a zesty, savory flavor as it cooks.

Trust me, this step is worth it!

Step 4: Slow Cook the Chicken

Place the chicken breast-side up in the slow cooker.

Cover it and set the cooking time: 6 to 8 hours on low or 4 to 5 hours on high.

The slow cooker will work its magic, transforming the chicken into a tender delight.

Just walk away and let it do its thing!

Step 5: Rest and Serve

Once the chicken reaches an internal temperature of 165°F, carefully remove it from the slow cooker.

Let it rest for about 10 minutes before carving.

This resting period allows the juices to redistribute, ensuring every slice is juicy.

Serve warm, garnished with fresh herbs if desired, and enjoy the fruits of your labor!

Tips for Success

  • Always pat the chicken dry before seasoning for better skin texture.
  • For extra flavor, marinate the chicken overnight with the spice mix.
  • Use a meat thermometer to ensure the chicken is cooked perfectly.
  • Feel free to add root vegetables around the chicken for a complete meal.
  • Don’t skip the resting time; it makes a big difference in juiciness.

Equipment Needed

  • Slow Cooker: A 6-quart model is ideal, but any size will work.
  • Meat Thermometer: Essential for checking doneness; a simple instant-read one is perfect.
  • Cutting Board: For carving the chicken; a sturdy one will do.
  • Sharp Knife: A good chef’s knife makes carving easier.

Variations

  • Herb Variations: Experiment with different herbs like oregano or basil for a unique flavor profile.
  • Spicy Kick: Add a teaspoon of cayenne pepper or chili powder to the spice mix for some heat.
  • Honey Glaze: Brush the chicken with honey during the last hour of cooking for a sweet, caramelized finish.
  • Vegetarian Option: Substitute the chicken with a whole cauliflower, using the same seasoning for a delicious plant-based dish.
  • Gluten-Free Gravy: Use the drippings to make a gluten-free gravy by thickening with cornstarch instead of flour.

Serving Suggestions

  • Classic Sides: Pair with roasted vegetables or creamy mashed potatoes for a comforting meal.
  • Fresh Salad: A crisp green salad with a tangy vinaigrette complements the rich flavors of the chicken.
  • Wine Pairing: Serve with a chilled Chardonnay or a light red like Pinot Noir.
  • Presentation: Garnish with fresh herbs and lemon wedges for a vibrant touch.

FAQs about Slow Cooker Herb-Roasted Chicken

As you embark on your culinary journey with this *Slow Cooker Herb-Roasted Chicken*, you might have a few questions. Here are some common queries that can help you along the way:

Can I use frozen chicken for this recipe?

While it’s best to use fresh chicken for optimal flavor and texture, you can use frozen chicken. Just ensure it’s fully thawed before seasoning and cooking. Cooking times may vary slightly, so check the internal temperature to ensure it reaches 165°F.

How do I store leftovers?

Leftover chicken can be stored in an airtight container in the refrigerator for up to 3 days. For longer storage, consider freezing it. Just make sure to shred or slice the chicken before freezing for easy use later.

What can I do with the leftover bones?

Don’t toss those bones! They can be used to make a rich homemade chicken broth. Just simmer them with water, vegetables, and herbs for a few hours, and you’ll have a delicious base for soups and stews.

Can I cook this chicken on high heat?

Yes, you can cook the *Slow Cooker Herb-Roasted Chicken* on high for 4 to 5 hours. However, cooking it on low for 6 to 8 hours allows the flavors to develop more fully and results in a more tender chicken.

What sides pair well with this chicken?

This chicken is versatile! Pair it with roasted vegetables, creamy mashed potatoes, or a fresh salad. The options are endless, making it a perfect centerpiece for any meal.

Final Thoughts

Cooking a *Slow Cooker Herb-Roasted Chicken* is more than just preparing a meal; it’s about creating memories.

The aroma that fills your home as it cooks is a reminder of family gatherings and shared laughter.

Each tender bite is a celebration of simple ingredients coming together to create something extraordinary.

Whether you’re serving it for a special occasion or a cozy weeknight dinner, this dish brings warmth and comfort to the table.

So, roll up your sleeves, embrace the process, and enjoy the delicious rewards of your culinary adventure!

jhessica

Slow Cooker Herb-Roasted Chicken: A Tender Delight!

A tender and flavorful slow-cooked herb-roasted chicken that is perfect for any occasion.
Prep Time 15 minutes
Course: Main Dish
Cuisine: American
Calories: 320

Ingredients
  

  • 3 to 4 pounds whole chicken
  • 2 teaspoons salt
  • 1 teaspoon black pepper
  • 1 teaspoon garlic powder
  • 1 teaspoon onion powder
  • 1 teaspoon dried thyme
  • 1 teaspoon dried rosemary
  • 1 teaspoon paprika
  • 1 tablespoon olive oil
  • 1 lemon halved
  • 4 cloves garlic smashed
  • 1 onion quartered
  • Fresh herbs optional, for garnish

Method
 

  1. Start by rinsing the whole chicken under cold water and patting it dry with paper towels. Remove any giblets from the cavity.
  2. In a small bowl, mix together the salt, black pepper, garlic powder, onion powder, thyme, rosemary, and paprika.
  3. Rub the olive oil all over the chicken, then generously sprinkle the spice mixture over the chicken, making sure to coat it evenly, including inside the cavity.
  4. Place the halved lemon, smashed garlic cloves, and quartered onion inside the cavity of the chicken.
  5. Place the chicken breast-side up in the slow cooker. Cover and cook on low for 6 to 8 hours or on high for 4 to 5 hours, until the chicken reaches an internal temperature of 165°F.
  6. Once cooked, carefully remove the chicken from the slow cooker and let it rest for about 10 minutes before carving. Serve warm, garnished with fresh herbs if desired.

Nutrition

Serving: 1servingCalories: 320kcalProtein: 30gFat: 22gSaturated Fat: 5gPolyunsaturated Fat: 17gCholesterol: 90mgSodium: 500mg

Notes

  • For extra crispy skin, place the cooked chicken under the broiler for 3-5 minutes after removing it from the slow cooker.
  • Try adding root vegetables like carrots or potatoes to the slow cooker for a complete meal. Just place them around the chicken before cooking.

Tried this recipe?

Let us know how it was!

Cranberry Almond Chicken Salad: A Flavorful Delight!

Introduction to Cranberry Almond Chicken Salad

There’s something special about a dish that combines sweet and savory flavors, and that’s exactly what you get with Cranberry Almond Chicken Salad. This recipe is a lifesaver for those busy days when you need a quick, nutritious meal that doesn’t skimp on taste. I remember the first time I made it; the vibrant colors and delightful crunch made it an instant hit at the dinner table. Whether you’re looking to impress your loved ones or simply want a refreshing lunch, this chicken salad is the perfect solution. Let’s dive into this delicious adventure!

Why You’ll Love This Cranberry Almond Chicken Salad

This Cranberry Almond Chicken Salad is a game-changer for anyone who craves flavor without the fuss. It’s quick to whip up, taking just 10 minutes of prep time. The combination of juicy chicken, crunchy almonds, and sweet-tart cranberries creates a taste explosion that’s hard to resist. Plus, it’s versatile enough to serve on a bed of greens, in a sandwich, or even as a wrap. You’ll find yourself making it again and again!

Ingredients for Cranberry Almond Chicken Salad

Gathering the right ingredients is key to making a fantastic Cranberry Almond Chicken Salad. Here’s what you’ll need:

  • Cooked chicken: Shredded or diced, this is the star of the show. Use leftover rotisserie chicken for a quick option.
  • Celery: Finely chopped, it adds a refreshing crunch that balances the sweetness of the cranberries.
  • Dried cranberries: These little gems bring a sweet and tangy flavor that elevates the dish.
  • Sliced almonds: For that satisfying crunch, almonds also add a nutty richness.
  • Mayonnaise: This creamy base binds everything together. You can swap half for Greek yogurt for a lighter version.
  • Dijon mustard: Just a tablespoon adds a zesty kick that enhances the overall flavor.
  • Lemon juice: A splash of acidity brightens the salad and balances the richness of the mayo.
  • Salt and black pepper: Essential for seasoning, these spices bring out the flavors of the other ingredients.
  • Garlic powder and onion powder: These add depth and a savory note without overpowering the dish.

Feel free to get creative! You can mix in diced apples or grapes for extra sweetness and crunch. For exact measurements, check the bottom of the article where you can find everything available for printing.

How to Make Cranberry Almond Chicken Salad

Creating this Cranberry Almond Chicken Salad is a breeze. With just a few simple steps, you’ll have a delicious dish ready to impress. Let’s get started!

Step 1: Combine the Chicken and Vegetables

In a large mixing bowl, toss together the shredded chicken, finely chopped celery, dried cranberries, and sliced almonds. The chicken provides a hearty base, while the celery adds a refreshing crunch. The cranberries bring a sweet-tart flavor, and the almonds contribute a satisfying crunch. Mix them gently, ensuring everything is evenly distributed. This is where the magic begins!

Step 2: Prepare the Dressing

In a separate small bowl, whisk together the mayonnaise, Dijon mustard, lemon juice, salt, black pepper, garlic powder, and onion powder. Aim for a smooth consistency. The mayonnaise acts as a creamy binder, while the mustard and lemon juice add a zesty kick. This dressing is what ties all the flavors together, so don’t rush this step!

Step 3: Mix Everything Together

Pour the dressing over the chicken mixture. Stir gently until everything is well coated. You want each piece of chicken and vegetable to be enveloped in that creamy goodness. This is where the flavors meld together, creating a delightful harmony. Trust me, your taste buds will thank you!

Step 4: Chill and Serve

Cover the bowl and refrigerate the salad for at least 30 minutes. This chilling time allows the flavors to develop and intensify. When you’re ready to serve, you can present the salad on a bed of greens, in a sandwich, or wrapped in a tortilla. The options are endless, and each bite will be a burst of flavor!

Tips for Success

  • Use leftover rotisserie chicken for a quick and easy option.
  • Chill the salad for at least 30 minutes to enhance the flavors.
  • Adjust the seasoning to your taste; don’t be afraid to experiment!
  • For extra crunch, add diced apples or grapes.
  • Store leftovers in an airtight container for up to three days.

Equipment Needed

  • Mixing bowl: A large bowl for combining ingredients. A sturdy pot can work in a pinch.
  • Whisk: Essential for mixing the dressing. A fork can also do the job.
  • Measuring cups: For precise ingredient amounts. Use a regular cup if you don’t have them.
  • Spatula: Great for folding ingredients together. A wooden spoon is a solid alternative.

Variations

  • Greek Yogurt Twist: Substitute half of the mayonnaise with Greek yogurt for a tangy, protein-packed version.
  • Fruit Fusion: Add diced apples or grapes for a burst of sweetness and extra crunch.
  • Nutty Delight: Experiment with different nuts like walnuts or pecans for a unique flavor profile.
  • Herb Infusion: Mix in fresh herbs like dill or parsley for an aromatic touch.
  • Spicy Kick: Add a dash of cayenne pepper or chopped jalapeños for a spicy twist.

Serving Suggestions

  • Serve the salad on a bed of mixed greens for a fresh presentation.
  • Pair it with whole-grain crackers for a satisfying crunch.
  • Enjoy with a chilled glass of iced tea or lemonade.
  • Wrap it in a tortilla for a portable lunch option.
  • Garnish with fresh herbs for an extra pop of color.

FAQs about Cranberry Almond Chicken Salad

Can I use canned chicken for this recipe?

Absolutely! Canned chicken is a convenient option. Just drain it well and shred it before mixing it into your salad. It saves time and still tastes great in this Cranberry Almond Chicken Salad.

How long can I store leftovers?

You can store leftovers in an airtight container in the fridge for up to three days. Just give it a good stir before serving again, as the ingredients may settle.

Can I make this salad ahead of time?

Yes! In fact, making it a day ahead allows the flavors to meld beautifully. Just keep it covered in the fridge until you’re ready to serve.

What can I serve with Cranberry Almond Chicken Salad?

This salad pairs wonderfully with whole-grain crackers, a side of fresh fruit, or even a light soup. It’s versatile enough to complement many dishes!

Is this salad suitable for meal prep?

Definitely! This Cranberry Almond Chicken Salad is perfect for meal prep. Just portion it out into containers for easy grab-and-go lunches throughout the week.

Final Thoughts

Creating this Cranberry Almond Chicken Salad is more than just a cooking task; it’s an experience filled with joy and flavor. Each bite is a delightful blend of textures and tastes that can brighten any meal. Whether you’re enjoying it solo or sharing it with friends and family, this salad brings a sense of satisfaction and comfort. It’s a reminder that simple ingredients can create something truly special. So, roll up your sleeves, embrace the process, and let this recipe become a staple in your kitchen. You’ll find yourself reaching for it time and again!

jhessica

Cranberry Almond Chicken Salad: A Flavorful Delight!

A delicious and refreshing chicken salad featuring the sweet and tangy flavors of cranberries and the crunch of almonds.
Prep Time 10 minutes
Total Time 40 minutes
Servings: 4 servings
Course: Salad
Cuisine: American
Calories: 350

Ingredients
  

  • 2 cups cooked chicken shredded or diced
  • 1 cup celery finely chopped
  • 1/2 cup dried cranberries
  • 1/2 cup sliced almonds
  • 1/2 cup mayonnaise
  • 1 tablespoon Dijon mustard
  • 1 tablespoon lemon juice
  • 1/2 teaspoon salt
  • 1/4 teaspoon black pepper
  • 1/4 teaspoon garlic powder
  • 1/4 teaspoon onion powder

Method
 

  1. In a large mixing bowl, combine the shredded chicken, chopped celery, dried cranberries, and sliced almonds.
  2. In a separate small bowl, whisk together the mayonnaise, Dijon mustard, lemon juice, salt, black pepper, garlic powder, and onion powder until smooth.
  3. Pour the dressing over the chicken mixture and stir until everything is well coated.
  4. Cover the bowl and refrigerate for at least 30 minutes to allow the flavors to meld.
  5. Serve the chicken salad on a bed of greens, in a sandwich, or in a wrap.

Nutrition

Serving: 1servingCalories: 350kcalCarbohydrates: 6gProtein: 28gFat: 24gSaturated Fat: 3gPolyunsaturated Fat: 21gCholesterol: 70mgSodium: 500mgFiber: 1gSugar: 6g

Notes

  • For a lighter version, substitute Greek yogurt for half of the mayonnaise.
  • For added crunch, mix in some diced apples or grapes.

Tried this recipe?

Let us know how it was!

Crispy Air Fryer Chicken: Discover the Ultimate Recipe!

Introduction to Crispy Air Fryer Chicken

There’s something magical about the aroma of crispy air fryer chicken wafting through the kitchen. It takes me back to family dinners where the table was filled with laughter and delicious food. This recipe is not just about satisfying your hunger; it’s a quick solution for those busy weeknights or a dish to impress your loved ones on the weekend. With just a handful of ingredients and minimal prep time, you can create a mouthwatering meal that’s both crispy and juicy. Trust me, your taste buds will thank you!

Why You’ll Love This Crispy Air Fryer Chicken

This crispy air fryer chicken is a game-changer for any home cook. It’s incredibly easy to whip up, making it perfect for those hectic evenings when time is tight. The air fryer delivers that satisfying crunch without the guilt of deep frying. Plus, the flavor is out of this world! You’ll enjoy juicy, tender chicken with a crispy exterior that will have everyone coming back for seconds.

Ingredients for Crispy Air Fryer Chicken

Gathering the right ingredients is the first step to creating your crispy air fryer chicken masterpiece. Here’s what you’ll need:

  • Bone-in, skin-on chicken thighs or drumsticks: These cuts are perfect for achieving that juicy interior and crispy skin. The bones add flavor and moisture.
  • Olive oil: A little oil helps the spices stick and promotes that golden-brown crispiness.
  • Garlic powder: This adds a savory depth that elevates the overall flavor profile.
  • Onion powder: A subtle sweetness complements the garlic, creating a well-rounded taste.
  • Smoked paprika: This spice brings a smoky richness that makes your chicken taste like it’s been grilled to perfection.
  • Dried oregano: A classic herb that adds a touch of earthiness and freshness.
  • Salt: Essential for enhancing all the flavors in your dish.
  • Black pepper: A dash of heat that balances the other spices.
  • Cayenne pepper (optional): If you like a kick, this will spice things up nicely!

Feel free to get creative! You can swap out the spices for your favorites or add fresh herbs if you have them on hand. For exact measurements, check the bottom of the article where you can find everything available for printing.

How to Make Crispy Air Fryer Chicken

Step 1: Preheat the Air Fryer

Preheating your air fryer is crucial for achieving that perfect crispy texture. It ensures the chicken starts cooking immediately, locking in moisture and flavor. Set your air fryer to 400°F (200°C) and let it warm up for about 5 minutes. This simple step makes a world of difference!

Step 2: Prepare the Marinade

In a large bowl, combine olive oil, garlic powder, onion powder, smoked paprika, dried oregano, salt, black pepper, and cayenne pepper. Each ingredient plays a role: the oil helps the spices adhere, while the spices infuse the chicken with flavor. Mix well until everything is combined, creating a delicious marinade that will elevate your crispy air fryer chicken.

Step 3: Marinate the Chicken

Add the chicken pieces to the marinade, tossing them until they’re evenly coated. Letting the chicken marinate for at least 15 minutes allows the flavors to penetrate deeply, resulting in tender, flavorful meat. If you have time, marinating longer will only enhance the taste!

Step 4: Arrange the Chicken in the Air Fryer

When placing the chicken in the air fryer basket, arrange them in a single layer. Avoid overcrowding, as this can lead to uneven cooking. If your air fryer is small, cook in batches. This way, every piece gets that coveted crispy finish!

Step 5: Cook the Chicken

Cook the chicken at 400°F (200°C) for 25-30 minutes. Flip the pieces halfway through to ensure even crispiness. Use a meat thermometer to check that the internal temperature reaches 165°F (75°C). This guarantees juicy chicken with a golden-brown exterior!

Step 6: Rest and Serve

Once cooked, remove the chicken from the air fryer and let it rest for 5 minutes. Resting allows the juices to redistribute, making each bite tender and flavorful. Now, it’s time to dig in and enjoy your crispy air fryer chicken!

Tips for Success

  • Pat the chicken dry with paper towels before marinating for extra crispiness.
  • Experiment with different spices to customize the flavor to your liking.
  • Don’t skip the resting time; it’s key for juicy chicken.
  • Use a meat thermometer to ensure perfect doneness every time.
  • Clean your air fryer basket after each use for optimal performance.

Equipment Needed

  • Air Fryer: The star of the show! Any model will do, but a larger basket allows for more chicken at once.
  • Mixing Bowl: A medium-sized bowl works best for combining your marinade.
  • Meat Thermometer: Essential for checking doneness; a simple instant-read thermometer is perfect.
  • Cooking Tongs: Handy for flipping the chicken and serving.
  • Paper Towels: Useful for drying the chicken before marinating.

Variations

  • Herb-Infused: Add fresh herbs like rosemary or thyme to the marinade for a fragrant twist.
  • Spicy Kick: Increase the cayenne pepper or add a splash of hot sauce for a fiery version.
  • Asian Flair: Incorporate soy sauce, ginger, and sesame oil for an Asian-inspired flavor profile.
  • Lemon Zest: Grate some lemon zest into the marinade for a bright, citrusy note.
  • Gluten-Free Breadcrumbs: For extra crunch, coat the chicken in gluten-free breadcrumbs before air frying.

Serving Suggestions

  • Classic Sides: Pair your crispy air fryer chicken with mashed potatoes or coleslaw for a comforting meal.
  • Fresh Salad: A light garden salad with a tangy vinaigrette complements the richness of the chicken.
  • Refreshing Drinks: Serve with iced tea or a cold beer to enhance the flavors.
  • Presentation: Garnish with fresh herbs or lemon wedges for a pop of color and freshness.

FAQs about Crispy Air Fryer Chicken

Can I use boneless chicken for this recipe?
Absolutely! Boneless chicken thighs or breasts can be used, but keep in mind that they may cook faster. Adjust the cooking time accordingly to ensure they don’t dry out.

How do I store leftovers?
Store any leftover crispy air fryer chicken in an airtight container in the refrigerator for up to 3 days. To reheat, pop them back in the air fryer for a few minutes to regain that crispy texture.

Can I make this recipe gluten-free?
Yes! This crispy air fryer chicken is naturally gluten-free. Just ensure that any additional ingredients, like sauces or marinades, are also gluten-free.

What can I serve with crispy air fryer chicken?
This dish pairs wonderfully with a variety of sides. Consider serving it with roasted vegetables, rice, or a fresh salad for a balanced meal.

How can I make the chicken spicier?
If you love heat, increase the cayenne pepper in the marinade or add your favorite hot sauce. You can also try using spicy seasoning blends for an extra kick!

Final Thoughts

Cooking crispy air fryer chicken is more than just a meal; it’s an experience that brings joy to the table. The satisfying crunch, the juicy interior, and the delightful aroma create a symphony of flavors that everyone will love. Whether it’s a weeknight dinner or a weekend gathering, this recipe is sure to impress. Plus, the ease of preparation means you can spend less time in the kitchen and more time enjoying the company of family and friends. So, roll up your sleeves, fire up that air fryer, and let the deliciousness unfold!

jhessica

Crispy Air Fryer Chicken: Discover the Ultimate Recipe!

A delicious and easy recipe for crispy air fryer chicken that is perfect for any meal.
Prep Time 15 minutes
Cook Time 30 minutes
Total Time 45 minutes
Servings: 4 servings
Course: Main Course
Cuisine: American
Calories: 350

Ingredients
  

  • 2 pounds bone-in skin-on chicken thighs or drumsticks
  • 1 tablespoon olive oil
  • 1 teaspoon garlic powder
  • 1 teaspoon onion powder
  • 1 teaspoon smoked paprika
  • 1 teaspoon dried oregano
  • 1 teaspoon salt
  • ½ teaspoon black pepper
  • ½ teaspoon cayenne pepper optional for heat

Method
 

  1. Preheat your air fryer to 400°F (200°C) for about 5 minutes.
  2. In a large bowl, combine the olive oil, garlic powder, onion powder, smoked paprika, dried oregano, salt, black pepper, and cayenne pepper. Mix well to create a marinade.
  3. Add the chicken pieces to the bowl and toss until they are evenly coated with the marinade. Let the chicken marinate for at least 15 minutes for better flavor.
  4. Arrange the chicken in a single layer in the air fryer basket, making sure not to overcrowd. You may need to cook in batches depending on the size of your air fryer.
  5. Cook the chicken for 25-30 minutes, flipping halfway through, until the chicken is golden brown and reaches an internal temperature of 165°F (75°C).
  6. Once cooked, remove the chicken from the air fryer and let it rest for 5 minutes before serving.

Nutrition

Serving: 1pieceCalories: 350kcalProtein: 28gFat: 25gSaturated Fat: 6gPolyunsaturated Fat: 19gCholesterol: 120mgSodium: 500mg

Notes

  • For extra crispiness, you can pat the chicken dry with paper towels before marinating.
  • If you prefer a different flavor profile, try adding your favorite herbs or spices, such as Italian seasoning or lemon zest, to the marinade.

Tried this recipe?

Let us know how it was!

Red Velvet Cheesecake Brownies: A Delicious Treat Awaits!

Introduction to Red Velvet Cheesecake Brownies

There’s something magical about the combination of red velvet and cheesecake, isn’t there?

When I first stumbled upon the idea of Red Velvet Cheesecake Brownies, I knew I had to try it.

These brownies are not just a dessert; they’re a celebration of flavors and textures that can brighten any day.

Whether you’re looking to impress your friends at a gathering or simply want a sweet treat after a long day, this recipe is your go-to.

With just a few simple ingredients, you can whip up a batch that will have everyone asking for seconds.

Why You’ll Love This Red Velvet Cheesecake Brownies

These Red Velvet Cheesecake Brownies are a delightful fusion of flavors that will make your taste buds dance.

They’re incredibly easy to make, perfect for those busy weeknights when you crave something sweet without the fuss.

The rich cream cheese layer adds a luxurious touch, making them feel special.

Plus, they’re visually stunning, so you can impress your guests without breaking a sweat.

What’s not to love?

Ingredients for Red Velvet Cheesecake Brownies

To create these luscious Red Velvet Cheesecake Brownies, you’ll need a handful of ingredients that come together to form a delightful treat.

Here’s what you’ll gather:

  • Unsalted butter: This is the base for your brownies, adding richness and moisture.
  • Granulated sugar: Sweetness is key! It balances the flavors and helps create that perfect chewy texture.
  • Large eggs: Eggs bind everything together, giving the brownies structure and a lovely lift.
  • Vanilla extract: A splash of vanilla enhances the overall flavor, making each bite more aromatic.
  • All-purpose flour: This is the backbone of your brownies, providing the necessary structure.
  • Cocoa powder: Just a tablespoon adds a subtle chocolate flavor that complements the red velvet.
  • Baking powder: This leavening agent helps the brownies rise, ensuring they’re not too dense.
  • Salt: A pinch of salt enhances the sweetness and balances the flavors.
  • Red food coloring: This is what gives your brownies that iconic red hue, making them visually stunning.
  • Cream cheese: The star of the cheesecake layer, it adds a creamy, tangy richness that pairs beautifully with the brownies.
  • Granulated sugar (for cheesecake layer): Sweetens the cream cheese, making it a delightful contrast to the brownie base.
  • Large egg (for cheesecake layer): This helps bind the cheesecake mixture, ensuring it’s smooth and creamy.
  • Vanilla extract (for cheesecake layer): Just like in the brownie mix, it adds depth to the cheesecake flavor.

For those who like to experiment, consider adding chocolate chips to the brownie batter for an extra indulgent touch.

You can find the exact measurements for each ingredient at the bottom of the article, ready for printing.

How to Make Red Velvet Cheesecake Brownies

Creating these Red Velvet Cheesecake Brownies is a delightful journey that combines rich flavors and textures.

Let’s dive into the steps that will lead you to this sweet masterpiece.

Step 1: Preheat the Oven

Start by preheating your oven to 350°F.

This step is crucial because it ensures even baking.

While the oven warms up, grease a 9×13-inch baking pan or line it with parchment paper.

This will make it easier to remove the brownies later.

Step 2: Mix the Wet Ingredients

In a large mixing bowl, combine the melted butter and granulated sugar.

Whisk them together until they’re well blended and smooth.

Next, add the eggs one at a time, mixing well after each addition.

This method helps incorporate air, giving your brownies a lovely lift.

Don’t forget to stir in the vanilla extract for that extra flavor boost!

Step 3: Combine the Dry Ingredients

In another bowl, whisk together the all-purpose flour, cocoa powder, baking powder, and salt.

Each of these dry ingredients plays a vital role.

Flour provides structure, cocoa adds a hint of chocolate, baking powder helps them rise, and salt enhances the sweetness.

Mix them well to ensure an even distribution.

Step 4: Combine Wet and Dry Mixtures

Now, gradually add the dry ingredients to the wet mixture.

Stir gently until just combined; overmixing can lead to dense brownies.

Once combined, it’s time to add the red food coloring.

Mix until the color is evenly distributed, creating that signature red hue.

Step 5: Prepare the Cheesecake Layer

In a separate bowl, beat the softened cream cheese and sugar until smooth.

This creamy mixture is what makes the cheesecake layer so delightful.

Add in the egg and vanilla extract, mixing until everything is well combined.

This layer will provide a rich contrast to the fudgy brownie base.

Step 6: Layer the Mixtures

Pour half of the red velvet batter into your prepared baking pan, spreading it evenly.

Next, carefully spread the cheesecake mixture over this layer.

Finally, spoon the remaining red velvet batter on top.

Use a knife or toothpick to swirl the two layers together for a beautiful marbled effect.

Step 7: Bake and Cool

Place the pan in the preheated oven and bake for 30-35 minutes.

To check for doneness, insert a toothpick into the center.

If it comes out clean, your brownies are ready!

Allow them to cool in the pan before cutting into squares.

This cooling time helps the flavors meld together beautifully.

Tips for Success

  • Use room temperature ingredients for a smoother batter.
  • Don’t skip the swirling step; it creates a stunning marbled effect.
  • Check for doneness a few minutes early to avoid overbaking.
  • Let the brownies cool completely for cleaner cuts.
  • Store leftovers in an airtight container to keep them fresh.

Equipment Needed

  • 9×13-inch baking pan: A standard size for brownies; you can use a glass or metal pan.
  • Mixing bowls: A set of various sizes will help with mixing wet and dry ingredients.
  • Whisk: Essential for blending ingredients smoothly; a fork works in a pinch.
  • Spatula: Perfect for spreading batter evenly; a spoon can also do the job.
  • Toothpick: For checking doneness; a knife can work too.

Variations

  • Chocolate Chip Delight: Add 1/2 cup of chocolate chips to the red velvet batter for an extra layer of indulgence.
  • Nuts for Crunch: Sprinkle crushed walnuts or pecans on top before baking for added texture and flavor.
  • Gluten-Free Option: Substitute all-purpose flour with a gluten-free blend to make these brownies suitable for gluten-sensitive friends.
  • Lower Sugar Version: Use a sugar substitute like Stevia or erythritol to reduce the sweetness without sacrificing flavor.
  • Vegan Twist: Replace eggs with flaxseed meal and use a plant-based cream cheese alternative for a vegan-friendly treat.

Serving Suggestions

  • Pair these brownies with a scoop of vanilla ice cream for a delightful contrast.
  • Serve with a drizzle of chocolate or cream cheese frosting for extra indulgence.
  • Accompany with a hot cup of coffee or a chilled glass of milk.
  • For a festive touch, garnish with fresh berries or mint leaves.

FAQs about Red Velvet Cheesecake Brownies

Can I make these Red Velvet Cheesecake Brownies ahead of time?

Absolutely! You can prepare the brownies a day in advance. Just store them in an airtight container in the fridge. This allows the flavors to meld beautifully, making them even more delicious!

What can I substitute for cream cheese in the cheesecake layer?

If you’re looking for a substitute, try using mascarpone cheese or a dairy-free cream cheese alternative. Both options will still give you that creamy texture and rich flavor.

How do I know when the brownies are done baking?

To check for doneness, insert a toothpick into the center. If it comes out clean or with a few moist crumbs, they’re ready! Remember, a little underbaking can keep them fudgy.

Can I freeze these brownies?

Yes, you can freeze them! Just wrap individual squares in plastic wrap and place them in a freezer-safe container. They’ll stay fresh for up to three months. Just thaw them in the fridge before serving.

What’s the best way to store leftover brownies?

Store any leftovers in an airtight container at room temperature for up to three days. If you want to keep them longer, refrigerate them for up to a week. Just make sure they’re well-sealed to maintain their moisture!

Final Thoughts

Baking these Red Velvet Cheesecake Brownies is more than just a culinary task; it’s an experience filled with joy and creativity.

The vibrant red color and creamy cheesecake layer make them a feast for the eyes and the palate.

Each bite is a delightful blend of flavors that can turn an ordinary day into something special.

Whether you’re sharing them with friends or savoring them solo, these brownies bring a sense of warmth and satisfaction.

So, roll up your sleeves, gather your ingredients, and let the magic of baking fill your kitchen with happiness!

jhessica

Red Velvet Cheesecake Brownies: A Delicious Treat Awaits!

Delicious Red Velvet Cheesecake Brownies with a rich cream cheese layer.
Prep Time 20 minutes
Cook Time 35 minutes
Total Time 55 minutes
Servings: 12 servings
Course: Dessert
Cuisine: American
Calories: 250

Ingredients
  

  • 1 cup unsalted butter melted
  • 2 cups granulated sugar
  • 4 large eggs
  • 1 teaspoon vanilla extract
  • 2 cups all-purpose flour
  • 1 tablespoon cocoa powder
  • 1 teaspoon baking powder
  • 1/2 teaspoon salt
  • 1 tablespoon red food coloring
  • 8 ounces cream cheese softened
  • 1/2 cup granulated sugar for cheesecake layer
  • 1 large egg for cheesecake layer
  • 1 teaspoon vanilla extract for cheesecake layer

Method
 

  1. Preheat the oven to 350°F. Grease a 9×13-inch baking pan or line it with parchment paper.
  2. In a large mixing bowl, combine the melted butter and sugar. Whisk until well blended.
  3. Add the eggs one at a time, mixing well after each addition, then stir in the vanilla extract.
  4. In another bowl, whisk together the flour, cocoa powder, baking powder, and salt.
  5. Gradually add the dry ingredients to the wet mixture, stirring until just combined. Mix in the red food coloring until evenly distributed.
  6. Pour half of the red velvet batter into the prepared baking pan, spreading it evenly.
  7. In a separate bowl, beat the softened cream cheese and sugar until smooth. Add the egg and vanilla extract, mixing until well combined.
  8. Spread the cheesecake mixture over the red velvet layer in the pan.
  9. Spoon the remaining red velvet batter over the cheesecake layer, using a knife or toothpick to swirl the two layers together for a marbled effect.
  10. Bake for 30-35 minutes, or until a toothpick inserted into the center comes out clean. Allow to cool in the pan before cutting into squares.

Nutrition

Serving: 1brownieCalories: 250kcalCarbohydrates: 30gProtein: 4gFat: 12gSaturated Fat: 7gPolyunsaturated Fat: 3gCholesterol: 70mgSodium: 150mgFiber: 1gSugar: 20g

Notes

  • For a richer flavor, add 1/2 cup of chocolate chips to the red velvet batter.
  • For a festive touch, sprinkle crushed walnuts or pecans on top before baking.

Tried this recipe?

Let us know how it was!

Savory Red Wine Braised Beef: A Comforting Classic Recipe

Introduction to Savory Red Wine Braised Beef

There’s something magical about the aroma of Savory Red Wine Braised Beef wafting through your home. It’s like a warm hug on a chilly evening, inviting you to gather around the table. This dish is perfect for those busy days when you want to impress your loved ones without spending hours in the kitchen. With tender beef, rich flavors, and a touch of elegance, it’s a comforting classic that brings everyone together. Whether it’s a family dinner or a cozy night in, this recipe is sure to become a favorite in your culinary repertoire.

Why You’ll Love This Savory Red Wine Braised Beef

This Savory Red Wine Braised Beef is a game-changer for your weeknight dinners. It’s incredibly easy to make, requiring minimal hands-on time while the oven does the heavy lifting. The rich, deep flavors develop beautifully as it cooks, making your home smell divine. Plus, it’s a dish that impresses without the fuss, perfect for both casual meals and special occasions. Trust me, your taste buds will thank you!

Ingredients for Savory Red Wine Braised Beef

Gathering the right ingredients is the first step to creating this mouthwatering dish. Here’s what you’ll need:

  • Beef Chuck Roast: This cut is perfect for braising, becoming tender and flavorful as it cooks.
  • Olive Oil: A staple for sautéing, it adds richness and helps brown the beef beautifully.
  • Onion: Diced onion brings sweetness and depth to the dish, enhancing the overall flavor.
  • Carrots: These add a subtle sweetness and a pop of color, making the dish visually appealing.
  • Celery: Diced celery contributes a fresh crunch and aromatic quality to the mix.
  • Garlic: Minced garlic infuses the dish with a robust flavor that complements the beef perfectly.
  • Red Wine: A good quality red wine, like Cabernet Sauvignon, is essential for that rich, savory sauce.
  • Beef Broth: This adds moisture and enhances the beefy flavor, making the sauce luscious.
  • Tomato Paste: A small amount adds depth and a hint of acidity, balancing the flavors.
  • Dried Thyme and Rosemary: These herbs bring an earthy aroma, elevating the dish to new heights.
  • Bay Leaf: A single bay leaf adds a subtle complexity to the braising liquid.
  • Salt and Pepper: Essential for seasoning, they help bring out the natural flavors of the ingredients.
  • Fresh Parsley: Chopped parsley is a lovely garnish that adds freshness and color when serving.

For those looking to experiment, consider adding mushrooms or potatoes for extra texture and flavor. You can find the exact measurements for these ingredients at the bottom of the article, ready for printing!

How to Make Savory Red Wine Braised Beef

Now that you have your ingredients ready, let’s dive into the heart of the matter: making this Savory Red Wine Braised Beef. Follow these steps, and you’ll be on your way to a delicious meal that warms the soul.

Step 1: Preheat the Oven

First things first, preheat your oven to 325°F (163°C). This temperature is perfect for braising, allowing the beef to become tender and flavorful as it cooks.

Step 2: Brown the Beef

In a large Dutch oven or heavy pot, heat the olive oil over medium-high heat. Season the beef pieces with salt and pepper. Add them to the pot in batches, making sure to brown all sides. This step is crucial; it locks in the flavors. Once browned, remove the beef and set it aside.

Step 3: Sauté the Vegetables

In the same pot, toss in the diced onion, carrots, and celery. Sauté for about 5 minutes until the vegetables soften. Their sweetness will enhance the dish. Add the minced garlic and cook for another minute, letting that aromatic goodness fill your kitchen.

Step 4: Add Tomato Paste

Next, stir in the tomato paste. Cook it for 1-2 minutes until it darkens slightly. This step adds depth to the sauce, making it rich and savory.

Step 5: Deglaze with Red Wine

Now, pour in the red wine, scraping the bottom of the pot to deglaze. This is where all those flavorful bits come into play. Bring it to a simmer and let it cook for about 5 minutes, allowing the alcohol to cook off and the flavors to meld.

Step 6: Combine Ingredients

Add the beef broth, thyme, rosemary, bay leaf, and the browned beef back into the pot. Stir everything together, ensuring the beef is well-coated in that luscious sauce.

Step 7: Braise in the Oven

Cover the pot with a lid and transfer it to the preheated oven. Braise for 2.5 to 3 hours, or until the beef is tender and easily shreds with a fork. The longer it cooks, the more flavorful it becomes.

Step 8: Final Touches

Once done, remove the pot from the oven. Discard the bay leaf and taste for seasoning. Adjust with salt and pepper as needed. This is your moment to shine, so make it perfect!

Tips for Success

  • Always brown the beef well; it enhances the flavor.
  • Use a good quality red wine for the best taste.
  • Don’t rush the braising process; low and slow is key.
  • Feel free to add extra veggies like mushrooms or potatoes for variety.
  • Let the dish rest for a few minutes before serving to allow flavors to meld.

Equipment Needed

  • Dutch Oven: Ideal for braising; a heavy pot with a lid works too.
  • Wooden Spoon: Perfect for stirring and scraping the pot.
  • Measuring Cups: For accurate liquid measurements.
  • Cutting Board: Essential for chopping vegetables.
  • Chef’s Knife: A sharp knife makes prep easier.

Variations

  • Red Wine Alternatives: If you prefer a different flavor, try using a fruity Merlot or a bold Zinfandel.
  • Herb Swaps: Experiment with fresh herbs like thyme or rosemary for a more vibrant taste.
  • Vegetarian Option: Substitute beef with hearty mushrooms or jackfruit for a plant-based twist.
  • Spicy Kick: Add a pinch of red pepper flakes for a subtle heat that complements the savory flavors.
  • Slow Cooker Method: For a hands-off approach, use a slow cooker on low for 6-8 hours instead of the oven.

Serving Suggestions

  • Mashed Potatoes: Creamy mashed potatoes are a classic pairing, soaking up the delicious sauce.
  • Crusty Bread: Serve with a loaf of crusty bread for dipping into the rich gravy.
  • Red Wine: A glass of the same red wine used in cooking enhances the meal.
  • Green Salad: A fresh green salad adds a crisp contrast to the hearty beef.
  • Garnish: Finish with a sprinkle of fresh parsley for a pop of color.

FAQs about Savory Red Wine Braised Beef

Can I use a different cut of beef for this recipe?

Absolutely! While beef chuck roast is ideal for braising, you can also use brisket or round. Just keep in mind that cooking times may vary depending on the cut.

What type of red wine should I use?

A good quality red wine, like Cabernet Sauvignon or Merlot, works best. Avoid cooking wines, as they often contain added salt and preservatives that can affect the flavor.

Can I make Savory Red Wine Braised Beef in a slow cooker?

Yes! For a slow cooker version, follow the same steps for browning the beef and sautéing the vegetables. Then, transfer everything to the slow cooker and cook on low for 6-8 hours.

How do I store leftovers?

Store any leftovers in an airtight container in the refrigerator for up to 3 days. Reheat gently on the stove or in the microwave, adding a splash of beef broth if needed.

Can I freeze Savory Red Wine Braised Beef?

Definitely! This dish freezes well. Just let it cool completely, then transfer to a freezer-safe container. It can be frozen for up to 3 months. Thaw in the fridge before reheating.

Final Thoughts

Cooking Savory Red Wine Braised Beef is more than just preparing a meal; it’s about creating memories. The rich aromas that fill your kitchen, the tender beef that melts in your mouth, and the smiles around the table all contribute to a heartwarming experience. This dish invites conversation and connection, making it perfect for family gatherings or cozy nights in. As you savor each bite, you’ll appreciate the love and effort that went into it. So, roll up your sleeves, embrace the process, and enjoy the delicious rewards of this comforting classic!

jhessica

Savory Red Wine Braised Beef: A Comforting Classic Recipe

A comforting classic recipe featuring tender beef braised in savory red wine and aromatic herbs.
Prep Time 20 minutes
Total Time 3 hours 20 minutes
Servings: 6 servings
Course: Main Course
Cuisine: American
Calories: 420

Ingredients
  

  • 2 pounds beef chuck roast trimmed and cut into 2-inch pieces
  • 2 tablespoons olive oil
  • 1 large onion diced
  • 2 carrots diced
  • 2 celery stalks diced
  • 4 cloves garlic minced
  • 2 cups red wine such as Cabernet Sauvignon
  • 2 cups beef broth
  • 2 tablespoons tomato paste
  • 2 teaspoons dried thyme
  • 2 teaspoons dried rosemary
  • 1 bay leaf
  • Salt and pepper to taste
  • Fresh parsley chopped (for garnish)

Method
 

  1. Preheat your oven to 325°F (163°C).
  2. In a large Dutch oven or heavy pot, heat the olive oil over medium-high heat. Season the beef pieces with salt and pepper, then add them to the pot in batches, browning on all sides. Remove the beef and set aside.
  3. In the same pot, add the diced onion, carrots, and celery. Sauté for about 5 minutes until the vegetables are softened. Add the minced garlic and cook for another minute.
  4. Stir in the tomato paste, cooking for 1-2 minutes until it darkens slightly.
  5. Pour in the red wine, scraping the bottom of the pot to deglaze. Bring to a simmer and let it cook for about 5 minutes.
  6. Add the beef broth, thyme, rosemary, bay leaf, and the browned beef back into the pot. Stir to combine.
  7. Cover the pot with a lid and transfer it to the preheated oven. Braise for 2.5 to 3 hours, or until the beef is tender and easily shreds with a fork.
  8. Remove the pot from the oven, discard the bay leaf, and taste for seasoning, adjusting with salt and pepper as needed.
  9. Serve hot, garnished with fresh parsley.

Nutrition

Serving: 1servingCalories: 420kcalCarbohydrates: 6gProtein: 36gFat: 26gSaturated Fat: 10gPolyunsaturated Fat: 16gCholesterol: 100mgSodium: 600mgFiber: 1gSugar: 2g

Notes

  • For a richer flavor, use a combination of red wine and a splash of balsamic vinegar.
  • Add mushrooms or potatoes to the braise for added texture and flavor.

Tried this recipe?

Let us know how it was!

Slow Cooker Chicken and Dumplings: A Cozy Comfort Food Delight

Introduction to Slow Cooker Chicken and Dumplings

There’s something magical about the aroma of Slow Cooker Chicken and Dumplings wafting through the house. It takes me back to my childhood, where cozy evenings were spent gathered around the dinner table, sharing stories and laughter. This recipe is a lifesaver for those busy days when you want to impress your loved ones without spending hours in the kitchen.

With just a few simple ingredients and a slow cooker, you can create a comforting meal that warms the heart and fills the belly. Trust me, this dish will quickly become a family favorite!

Why You’ll Love This Slow Cooker Chicken and Dumplings

This recipe is a game-changer for anyone juggling a busy schedule.

With minimal prep time, you can set it and forget it, allowing the slow cooker to work its magic.

The rich, savory flavors meld together beautifully, creating a dish that feels like a warm hug on a chilly evening.

Plus, it’s a one-pot wonder, making cleanup a breeze.

What’s not to love about that?

Ingredients for Slow Cooker Chicken and Dumplings

Gathering the right ingredients is the first step to creating this delightful dish.

Here’s what you’ll need:

  • Boneless, skinless chicken breasts: The star of the show! They become tender and juicy as they cook.
  • Carrots: These add a touch of sweetness and vibrant color to the dish.
  • Celery: A classic addition that brings crunch and depth of flavor.
  • Onion: This aromatic vegetable enhances the overall taste, making it more savory.
  • Chicken broth: The base of the dish, providing moisture and rich flavor.
  • Dried thyme: A fragrant herb that complements the chicken beautifully.
  • Garlic powder: For that extra kick of flavor without the fuss of fresh garlic.
  • Salt and pepper: Essential seasonings to enhance all the flavors.
  • Cream of chicken soup: This adds creaminess and richness, making the dish comforting.
  • Frozen peas: A pop of color and a burst of sweetness that balances the dish.
  • Biscuit mix: The secret to fluffy dumplings that soak up all the delicious broth.
  • Milk: Helps to create the perfect biscuit dough consistency.

Feel free to get creative!

For a creamier texture, consider adding an extra can of cream of chicken soup.

If you’re looking for a healthier option, swap the biscuit mix for whole wheat or gluten-free alternatives.

You can find the exact quantities for each ingredient at the bottom of the article, ready for printing!

How to Make Slow Cooker Chicken and Dumplings

Creating this comforting dish is a breeze.

Let’s break it down step by step, ensuring you have all the tips you need for success.

Step 1: Prepare the Chicken

Start by placing the boneless, skinless chicken breasts at the bottom of your slow cooker.

This is crucial because the chicken will soak up all the flavors from the broth and vegetables as it cooks.

Make sure to spread them out evenly for even cooking.

Step 2: Add Vegetables

Next, toss in the sliced carrots, celery, and chopped onion.

These veggies are not just for show; they add layers of flavor and texture.

The carrots bring sweetness, while the celery adds a nice crunch.

The onion? It’s the aromatic backbone of this dish.

Step 3: Pour in the Broth

Now, it’s time to pour in the chicken broth.

This is the heart of your Slow Cooker Chicken and Dumplings.

It provides moisture and richness, making every bite delicious.

Don’t forget to sprinkle in the dried thyme, garlic powder, salt, and pepper for seasoning.

These spices elevate the dish, creating a symphony of flavors.

Step 4: Cook the Chicken

Cover the slow cooker and set it to cook.

You can choose low for 6 to 7 hours or high for 3 to 4 hours.

Check for doneness by ensuring the chicken is no longer pink inside.

It should be tender and easy to shred.

Step 5: Shred the Chicken

Once the chicken is cooked, remove it from the slow cooker.

Using two forks, shred the chicken into bite-sized pieces.

This step is essential because it allows the chicken to absorb more of the broth and flavors when mixed back in.

Step 6: Add Cream of Chicken Soup and Peas

Return the shredded chicken to the slow cooker.

Now, stir in the cream of chicken soup and frozen peas.

The soup adds a creamy texture, while the peas provide a pop of color and sweetness.

Mix everything well to combine.

Step 7: Prepare the Biscuit Mixture

In a separate bowl, combine the biscuit mix and milk.

Stir until just combined; don’t overmix!

This mixture is what will create those fluffy dumplings that soak up all the delicious broth.

Step 8: Cook the Biscuits

Drop spoonfuls of the biscuit mixture over the chicken mixture in the slow cooker.

Cover and cook on high for an additional 30 minutes.

You’ll know they’re done when they’re fluffy and cooked through.

Serve hot, and enjoy the comforting goodness of your Slow Cooker Chicken and Dumplings!

Tips for Success

  • Prep your ingredients the night before to save time in the morning.
  • For extra flavor, sear the chicken in a skillet before adding it to the slow cooker.
  • Don’t skip the seasoning; it’s key to a delicious dish.
  • Check the biscuits a few minutes early to avoid overcooking.
  • Feel free to add your favorite herbs for a personal touch!

Equipment Needed

  • Slow Cooker: The star of the show! Any size will do, but a 6-quart is ideal.
  • Cutting Board: Essential for prepping your veggies and chicken.
  • Knife: A sharp one makes chopping a breeze.
  • Mixing Bowl: For combining the biscuit mix and milk.
  • Measuring Cups: Handy for accurate ingredient portions.

Variations

  • Herb-Infused: Add fresh herbs like rosemary or parsley for an aromatic twist.
  • Spicy Kick: Toss in some red pepper flakes or diced jalapeños for heat.
  • Vegetarian Option: Substitute chicken with chickpeas or tofu and use vegetable broth.
  • Cheesy Delight: Mix in shredded cheese before serving for a creamy, cheesy finish.
  • Whole Grain: Use whole wheat biscuit mix for a healthier, heartier dumpling.

Serving Suggestions

  • Side Salad: A crisp green salad with a tangy vinaigrette complements the richness of the dish.
  • Crusty Bread: Serve with warm, crusty bread for dipping into the savory broth.
  • Drink Pairing: A light white wine or iced tea balances the flavors beautifully.
  • Garnish: Fresh parsley or chives sprinkled on top adds a pop of color.

FAQs about Slow Cooker Chicken and Dumplings

Can I use frozen chicken for this recipe?

Absolutely! You can use frozen chicken breasts directly in the slow cooker. Just remember to increase the cooking time by about an hour to ensure they cook through properly.

How can I make this dish gluten-free?

To make your Slow Cooker Chicken and Dumplings gluten-free, simply swap the regular biscuit mix for a gluten-free version. This way, everyone can enjoy this comforting meal!

Can I add more vegetables?

Definitely! Feel free to toss in additional veggies like potatoes, green beans, or corn. They’ll add more flavor and nutrition to your dish.

How do I store leftovers?

Store any leftovers in an airtight container in the fridge for up to 3 days. Reheat gently on the stove or in the microwave, adding a splash of broth if needed.

Can I prepare this dish in advance?

Yes! You can prep all the ingredients the night before and store them in the fridge. Just throw everything in the slow cooker in the morning, and you’ll have a delicious meal waiting for you!

Final Thoughts

Cooking is more than just a task; it’s a way to connect with those we love.

Slow Cooker Chicken and Dumplings embodies that spirit perfectly.

With its rich flavors and comforting textures, this dish brings warmth to any table.

Whether you’re feeding a family or impressing friends, it’s a recipe that delivers every time.

Plus, the ease of preparation means you can focus on what truly matters—creating memories.

So, roll up your sleeves, grab that slow cooker, and let the magic happen.

You’ll find that this cozy meal is not just food; it’s a hug in a bowl.

Why You’ll Love This Slow Cooker Chicken and Dumplings

This dish is a lifesaver for busy weeknights.

With minimal effort, you can whip up a hearty meal that tastes like it’s been simmering all day.

The slow cooker does the heavy lifting, allowing you to focus on other things.

Plus, the rich, savory flavors meld together beautifully, making every bite a comforting experience.

It’s the perfect solution for satisfying cravings without the fuss!

Ingredients for Slow Cooker Chicken and Dumplings

Gathering the right ingredients is the first step to creating this delightful dish.

Here’s what you’ll need:

  • Boneless, skinless chicken breasts: The star of the show! They become tender and juicy as they cook.
  • Carrots: These add a touch of sweetness and vibrant color to the dish.
  • Celery: A classic addition that brings crunch and depth of flavor.
  • Onion: This aromatic vegetable enhances the overall taste, making it more savory.
  • Chicken broth: The base of the dish, providing moisture and rich flavor.
  • Dried thyme: A fragrant herb that complements the chicken beautifully.
  • Garlic powder: For that extra kick of flavor without the fuss of fresh garlic.
  • Salt and pepper: Essential seasonings to enhance all the flavors.
  • Cream of chicken soup: This adds creaminess and richness, making the dish comforting.
  • Frozen peas: A pop of color and a burst of sweetness that balances the dish.
  • Biscuit mix: The secret to fluffy dumplings that soak up all the delicious broth.
  • Milk: Helps to create the perfect biscuit dough consistency.

Feel free to get creative!

For a creamier texture, consider adding an extra can of cream of chicken soup.

If you’re looking for a healthier option, swap the biscuit mix for whole wheat or gluten-free alternatives.

You can find the exact quantities for each ingredient at the bottom of the article, ready for printing!

How to Make Slow Cooker Chicken and Dumplings

Creating this comforting dish is a breeze.

Let’s break it down step by step, ensuring you have all the tips you need for success.

Step 1: Prepare the Chicken

Start by placing the boneless, skinless chicken breasts at the bottom of your slow cooker.

This is crucial because the chicken will soak up all the flavors from the broth and vegetables as it cooks.

Make sure to spread them out evenly for even cooking.

A sprinkle of salt and pepper on top will enhance the flavor right from the start.

Step 2: Add Vegetables and Broth

Next, toss in the sliced carrots, celery, and chopped onion.

These veggies are not just for show; they add layers of flavor and texture.

The carrots bring sweetness, while the celery adds a nice crunch.

Pour in the chicken broth, ensuring it covers the vegetables and chicken.

This broth is the heart of your Slow Cooker Chicken and Dumplings, providing moisture and richness.

Step 3: Cook on Low

Cover the slow cooker and set it to cook on low for 6 to 7 hours or high for 3 to 4 hours.

The low setting allows the flavors to meld beautifully, while the high setting is perfect for a quicker meal.

Check for doneness by ensuring the chicken is no longer pink inside.

It should be tender and easy to shred.

Step 4: Make the Dumplings

In a separate bowl, combine the biscuit mix and milk.

Stir until just combined; don’t overmix!

This mixture is what will create those fluffy dumplings that soak up all the delicious broth.

Set it aside while the chicken cooks.

Step 5: Add Dumplings to the Slow Cooker

Once the chicken is cooked and shredded, return it to the slow cooker.

Now, drop spoonfuls of the biscuit mixture over the chicken and broth.

Make sure to space them out; they will expand as they cook.

Cover the slow cooker again and let it work its magic.

Step 6: Final Cooking Phase

Cook on high for an additional 30 minutes.

You’ll know the dumplings are done when they’re fluffy and cooked through.

The broth should be bubbling, and the aroma will be irresistible.

Serve hot, and enjoy the comforting goodness of your Slow Cooker Chicken and Dumplings!

Tips for Success

  • Prep your ingredients the night before to save time in the morning.
  • For extra flavor, sear the chicken in a skillet before adding it to the slow cooker.
  • Don’t skip the seasoning; it’s key to a delicious dish.
  • Check the dumplings a few minutes early to avoid overcooking.
  • Feel free to add your favorite herbs for a personal touch!

Equipment Needed

  • Slow Cooker: A 6-quart model is ideal, but any size works.
  • Cutting Board: Essential for prepping your veggies and chicken.
  • Knife: A sharp one makes chopping a breeze.
  • Mixing Bowl: For combining the biscuit mix and milk.
  • Measuring Cups: Handy for accurate ingredient portions.

Variations of Slow Cooker Chicken and Dumplings

  • Herb-Infused: Add fresh herbs like rosemary or parsley for an aromatic twist that elevates the dish.
  • Spicy Kick: Toss in some red pepper flakes or diced jalapeños for a heat that warms the soul.
  • Vegetarian Option: Substitute chicken with chickpeas or tofu and use vegetable broth for a hearty, plant-based meal.
  • Cheesy Delight: Mix in shredded cheese before serving for a creamy, cheesy finish that everyone will love.
  • Whole Grain: Use whole wheat biscuit mix for a healthier, heartier dumpling that adds a nutty flavor.
  • Asian Fusion: Incorporate soy sauce and ginger for a unique twist, and serve with green onions on top.

Serving Suggestions for Slow Cooker Chicken and Dumplings

  • Side Salad: A crisp green salad with a tangy vinaigrette pairs perfectly with the richness of the dish.
  • Crusty Bread: Serve with warm, crusty bread for dipping into the savory broth.
  • Drink Pairing: A light white wine or iced tea balances the flavors beautifully.
  • Garnish: Fresh parsley or chives sprinkled on top adds a pop of color and freshness.

FAQs about Slow Cooker Chicken and Dumplings

Can I use frozen chicken for this recipe?

Absolutely! You can use frozen chicken breasts directly in the slow cooker. Just remember to increase the cooking time by about an hour to ensure they cook through properly. This makes it even easier to whip up a comforting meal without any thawing hassle.

How can I make this dish gluten-free?

To make your Slow Cooker Chicken and Dumplings gluten-free, simply swap the regular biscuit mix for a gluten-free version. This way, everyone can enjoy this comforting meal without worry!

Can I add more vegetables?

Definitely! Feel free to toss in additional veggies like potatoes, green beans, or corn. They’ll add more flavor and nutrition to your dish, making it even heartier and more satisfying.

How do I store leftovers?

Store any leftovers in an airtight container in the fridge for up to 3 days. Reheat gently on the stove or in the microwave, adding a splash of broth if needed to keep it moist and delicious.

Can I prepare this dish in advance?

Yes! You can prep all the ingredients the night before and store them in the fridge. Just throw everything in the slow cooker in the morning, and you’ll have a delicious meal waiting for you when you get home!

Final Thoughts

Cooking is more than just a task; it’s a way to connect with those we love.

Slow Cooker Chicken and Dumplings embodies that spirit perfectly.

With its rich flavors and comforting textures, this dish brings warmth to any table.

Whether you’re feeding a family or impressing friends, it’s a recipe that delivers every time.

Plus, the ease of preparation means you can focus on what truly matters—creating memories.

So, roll up your sleeves, grab that slow cooker, and let the magic happen.

You’ll find that this cozy meal is not just food; it’s a hug in a bowl.

jhessica

Slow Cooker Chicken and Dumplings: A Cozy Comfort Food Delight

A cozy comfort food delight made with tender chicken, vegetables, and fluffy dumplings, all cooked in a slow cooker.
Prep Time 15 minutes
Servings: 6 servings
Course: Main Course
Cuisine: American
Calories: 350

Ingredients
  

  • 3 cups boneless skinless chicken breasts (about 1.5 pounds)
  • 1 cup carrots sliced
  • 1 cup celery sliced
  • 1 medium onion chopped
  • 4 cups chicken broth
  • 1 teaspoon dried thyme
  • 1 teaspoon garlic powder
  • Salt and pepper to taste
  • 1 can 10.5 ounces cream of chicken soup
  • 1 cup frozen peas
  • 1 cup biscuit mix
  • 2/3 cup milk

Method
 

  1. Place the chicken breasts in the bottom of the slow cooker.
  2. Add the carrots, celery, and onion on top of the chicken.
  3. Pour in the chicken broth and stir in the thyme, garlic powder, salt, and pepper.
  4. Cover and cook on low for 6 to 7 hours or on high for 3 to 4 hours, until the chicken is cooked through and tender.
  5. Once the chicken is cooked, remove it from the slow cooker and shred it with two forks.
  6. Return the shredded chicken to the slow cooker.
  7. Stir in the cream of chicken soup and frozen peas.
  8. In a separate bowl, mix the biscuit mix and milk until just combined.
  9. Drop spoonfuls of the biscuit mixture over the chicken mixture in the slow cooker.
  10. Cover and cook on high for an additional 30 minutes, or until the biscuits are cooked through.
  11. Serve hot and enjoy!

Nutrition

Serving: 1servingCalories: 350kcalCarbohydrates: 30gProtein: 25gFat: 12gSaturated Fat: 3gPolyunsaturated Fat: 9gCholesterol: 70mgSodium: 800mgFiber: 2gSugar: 3g

Notes

  • For a creamier texture, you can add an extra can of cream of chicken soup.
  • If you prefer a healthier option, substitute the biscuit mix with whole wheat or gluten-free biscuit mix.

Tried this recipe?

Let us know how it was!

Arugula Beet Salad with Goat Cheese: A Must-Try Delight!

Introduction to Arugula Beet Salad with Goat Cheese

There’s something magical about a salad that can brighten your day, and this Arugula Beet Salad with Goat Cheese does just that. I remember the first time I tasted roasted beets; their earthy sweetness paired with creamy goat cheese was a revelation. This salad is not just a quick solution for a busy day; it’s a delightful dish that can impress your loved ones at any gathering. With vibrant colors and fresh flavors, it’s a feast for the eyes and the palate. Let’s dive into this refreshing recipe that’s as easy to make as it is delicious!

Why You’ll Love This Arugula Beet Salad with Goat Cheese

This Arugula Beet Salad with Goat Cheese is a game-changer for your meal rotation. It’s quick to whip up, taking just about 15 minutes of prep time, and the flavors are simply out of this world. The combination of peppery arugula, sweet roasted beets, and tangy goat cheese creates a taste explosion. Plus, it’s a healthy option that doesn’t skimp on satisfaction. What’s not to love?

Ingredients for Arugula Beet Salad with Goat Cheese

Gathering the right ingredients is the first step to creating this vibrant Arugula Beet Salad with Goat Cheese. Here’s what you’ll need:

  • Arugula: This peppery green is the star of the show, adding a fresh and zesty flavor.
  • Beets: Roasted beets bring a natural sweetness and a beautiful color to the salad. They’re packed with nutrients, too!
  • Goat Cheese: Creamy and tangy, goat cheese adds a rich texture that complements the beets perfectly.
  • Walnuts: Chopped and toasted walnuts provide a delightful crunch and a nutty flavor that enhances the overall dish.
  • Balsamic Vinaigrette: This dressing ties everything together with its sweet and tangy notes. You can make your own or buy a good quality one.
  • Salt and Pepper: Simple seasonings that elevate the flavors of the salad.

For a twist, consider adding sliced apples or pears for extra sweetness. If you’re not a fan of goat cheese, feta is a great substitute that still offers a creamy texture. You can find the exact quantities for each ingredient at the bottom of the article, ready for printing!

How to Make Arugula Beet Salad with Goat Cheese

Creating this Arugula Beet Salad with Goat Cheese is a breeze. Follow these simple steps, and you’ll have a stunning dish ready in no time. Let’s get started!

Step 1: Roast the Beets

First, preheat your oven to 400°F. While it warms up, wrap each beet in aluminum foil. This keeps them moist while roasting. Place the wrapped beets on a baking sheet and roast for about 45-60 minutes. You’ll know they’re done when a fork easily pierces through. Once they’re tender, let them cool before peeling and slicing. The sweet aroma of roasted beets will fill your kitchen, making it hard to resist snacking!

Step 2: Prepare the Salad Base

In a large salad bowl, add 4 cups of washed and dried arugula. This peppery green is the perfect base for our salad. It’s light yet flavorful, providing a nice contrast to the sweetness of the beets. Once the beets are cool, slice them into thin rounds and toss them gently with the arugula. The vibrant colors will make your salad pop!

Step 3: Add Cheese and Nuts

Next, crumble 4 ounces of goat cheese over the salad. The creamy texture of the cheese pairs beautifully with the beets. Then, sprinkle 1/4 cup of chopped and toasted walnuts on top. These nuts add a satisfying crunch and a nutty flavor that elevates the dish. Trust me, this combination is a match made in heaven!

Step 4: Dress the Salad

Now it’s time to bring everything together. Drizzle 1/4 cup of balsamic vinaigrette over the salad. This dressing adds a sweet and tangy kick that ties all the flavors together. Toss the salad gently to ensure every bite is coated in that delicious vinaigrette. The colors and textures will make your mouth water!

Step 5: Season and Serve

Finally, season your salad with salt and pepper to taste. This simple step enhances all the flavors. Once seasoned, serve immediately. This Arugula Beet Salad with Goat Cheese is best enjoyed fresh, but it can also be made ahead of time. Just keep the dressing separate until you’re ready to serve. Enjoy every bite of this delightful dish!

Tips for Success

  • Use fresh arugula for the best flavor and texture.
  • Roast beets in advance to save time on busy days.
  • Toast walnuts in a dry skillet for extra crunch and flavor.
  • Experiment with different dressings to find your favorite combination.
  • For a meal prep option, keep the dressing separate until serving.

Equipment Needed

  • Oven: Essential for roasting beets; a toaster oven works too.
  • Baking Sheet: Use any flat, oven-safe dish for roasting.
  • Aluminum Foil: Keeps beets moist; parchment paper is a good alternative.
  • Salad Bowl: A large bowl for mixing; any mixing bowl will do.
  • Knife and Cutting Board: For slicing beets and cheese; a sturdy knife is key.

Variations of Arugula Beet Salad with Goat Cheese

  • Fruit Additions: Toss in sliced apples or pears for a sweet crunch that complements the beets.
  • Nut Alternatives: Swap walnuts for pecans or almonds for a different nutty flavor.
  • Herb Infusion: Add fresh herbs like basil or mint for an aromatic twist.
  • Grain Boost: Mix in cooked quinoa or farro for added protein and texture.
  • Vegan Option: Replace goat cheese with avocado or a vegan cheese alternative for a plant-based version.

Serving Suggestions for Arugula Beet Salad with Goat Cheese

  • Pair with Grilled Chicken: This salad complements grilled chicken perfectly for a hearty meal.
  • Serve with Crusty Bread: A slice of fresh baguette or sourdough enhances the dining experience.
  • Wine Match: A crisp white wine, like Sauvignon Blanc, pairs beautifully.
  • Presentation: Serve in a clear glass bowl to showcase the vibrant colors.

FAQs about Arugula Beet Salad with Goat Cheese

Can I make this Arugula Beet Salad with Goat Cheese ahead of time?

Absolutely! You can roast the beets in advance and store them in the fridge. Just keep the dressing separate until you’re ready to serve to maintain freshness.

What can I substitute for goat cheese?

If goat cheese isn’t your thing, feta cheese is a fantastic alternative. It offers a similar creamy texture with a slightly different flavor profile.

How can I make this salad more filling?

To amp up the protein, consider adding grilled chicken or chickpeas. Quinoa or farro can also provide a hearty base, making it a complete meal.

Is this salad suitable for meal prep?

Yes! This Arugula Beet Salad with Goat Cheese is great for meal prep. Just store the components separately and combine them when you’re ready to eat.

What dressing works best with this salad?

Balsamic vinaigrette is a classic choice, but feel free to experiment with lemon vinaigrette or a honey mustard dressing for a different twist!

Final Thoughts

Creating this Arugula Beet Salad with Goat Cheese is more than just preparing a meal; it’s about bringing joy to your table. The vibrant colors and delightful flavors make it a feast for both the eyes and the palate. Each bite is a celebration of freshness, with the peppery arugula, sweet beets, and creamy cheese dancing together in harmony. Whether you’re impressing guests or enjoying a quiet dinner at home, this salad is sure to elevate your dining experience. So, roll up your sleeves and dive into this culinary adventure—you won’t regret it!

jhessica

Arugula Beet Salad with Goat Cheese: A Must-Try Delight!

A refreshing and flavorful salad featuring arugula, roasted beets, and creamy goat cheese, perfect for any occasion.
Prep Time 15 minutes
Cook Time 1 hour
Total Time 1 hour 15 minutes
Servings: 4 servings
Course: Salad
Cuisine: American
Calories: 220

Ingredients
  

  • 4 cups arugula washed and dried
  • 2 medium beets roasted and sliced
  • 4 ounces goat cheese crumbled
  • 1/4 cup walnuts chopped and toasted
  • 1/4 cup balsamic vinaigrette
  • Salt and pepper to taste

Method
 

  1. Preheat your oven to 400°F. Wrap each beet in aluminum foil and roast for about 45-60 minutes, or until tender. Let them cool, then peel and slice.
  2. In a large salad bowl, combine the arugula and sliced beets.
  3. Add the crumbled goat cheese and toasted walnuts to the salad.
  4. Drizzle the balsamic vinaigrette over the salad and toss gently to combine.
  5. Season with salt and pepper to taste before serving.

Nutrition

Serving: 1servingCalories: 220kcalCarbohydrates: 10gProtein: 7gFat: 18gSaturated Fat: 5gPolyunsaturated Fat: 13gCholesterol: 15mgSodium: 150mgFiber: 3gSugar: 5g

Notes

  • For added sweetness, consider adding sliced apples or pears to the salad.
  • Substitute feta cheese for goat cheese for a different flavor profile.

Tried this recipe?

Let us know how it was!

Everything Bagel Breakfast Sandwich: A Must-Try Recipe!

Introduction to Everything Bagel Breakfast Sandwich

There’s something magical about the aroma of a freshly toasted everything bagel wafting through the kitchen. It takes me back to lazy Sunday mornings, where breakfast was a leisurely affair. The Everything Bagel Breakfast Sandwich is not just a meal; it’s a warm hug on a plate. Perfect for busy weekdays or a cozy weekend brunch, this sandwich combines fluffy scrambled eggs, melty cheese, and your choice of crispy bacon or savory sausage. It’s a quick solution for those hectic mornings when you need a hearty start or a dish to impress your loved ones. Trust me, they’ll be asking for seconds!

Why You’ll Love This Everything Bagel Breakfast Sandwich

This Everything Bagel Breakfast Sandwich is a game-changer for your morning routine. It’s incredibly easy to whip up, taking just 20 minutes from start to finish. The combination of flavors is simply irresistible—savory, cheesy, and a little crunchy from the bagel. Plus, it’s versatile! You can customize it with your favorite toppings or proteins. Whether you’re feeding a crowd or just yourself, this sandwich is sure to satisfy.

Ingredients for Everything Bagel Breakfast Sandwich

Gathering the right ingredients is key to crafting the perfect Everything Bagel Breakfast Sandwich. Here’s what you’ll need:

  • Everything Bagels: The star of the show! Their blend of sesame, poppy seeds, garlic, and onion adds a delightful crunch and flavor.
  • Large Eggs: These provide the fluffy, protein-packed filling. You can use egg whites for a lighter option.
  • Milk: A splash of milk makes the eggs creamier. Feel free to swap it with a non-dairy alternative if you prefer.
  • Salt and Pepper: Essential for seasoning. Adjust to your taste for that perfect flavor boost.
  • Cheddar Cheese: Melty and rich, it complements the eggs beautifully. Try pepper jack for a spicy kick!
  • Bacon or Sausage: Choose your favorite protein for that savory touch. Turkey bacon or veggie sausage are great alternatives.
  • Avocado: Sliced avocado adds creaminess and healthy fats. It’s a delicious addition that elevates the sandwich.
  • Chives or Green Onions: Optional, but they bring a fresh, oniony flavor that brightens up the dish.

For exact quantities, check the bottom of the article where you can find everything listed for easy printing. Happy cooking!

How to Make Everything Bagel Breakfast Sandwich

Creating the perfect Everything Bagel Breakfast Sandwich is a breeze. Follow these simple steps, and you’ll have a delicious breakfast ready in no time. Let’s get cooking!

Step 1: Whisk the Eggs

Start by cracking the large eggs into a medium bowl. Add a splash of milk, a pinch of salt, and a dash of pepper. Whisk everything together until it’s well combined. You want a nice, frothy mixture that promises fluffy scrambled eggs. This step is crucial for that creamy texture!

Step 2: Cook the Eggs

Next, heat a non-stick skillet over medium heat. Add a little butter or oil to prevent sticking. Once the skillet is hot, pour in your egg mixture. Gently stir the eggs with a spatula, scraping the bottom of the pan. Cook until the eggs are just set, about 3-4 minutes. Remember, you want them soft and fluffy, not overcooked!

Step 3: Prepare the Bagels

While the eggs are cooking, grab your toasted everything bagels. Place a slice of cheddar cheese on each half. The heat from the bagel will start to melt the cheese, creating a gooey layer that pairs perfectly with the eggs. It’s a little trick that makes a big difference!

Step 4: Assemble the Sandwich

Once the eggs are ready, divide them evenly among the bagel halves. Top each with crispy bacon or savory sausage, followed by slices of creamy avocado. If you’re feeling fancy, sprinkle some chopped chives or green onions on top. This adds a fresh kick that elevates the whole sandwich!

Step 5: Serve and Enjoy

Finally, close the sandwiches with the other half of the bagel. Serve them warm, and watch as everyone digs in. The combination of flavors and textures is simply irresistible. Enjoy your Everything Bagel Breakfast Sandwich with a side of fresh fruit or a hot cup of coffee!

Tips for Success

  • Use fresh everything bagels for the best flavor and texture.
  • Don’t overcook the eggs; they should be soft and fluffy.
  • Experiment with different cheeses for unique flavors.
  • Toast the bagels just before assembling for extra crunch.
  • Feel free to add your favorite veggies for added nutrition.

Equipment Needed

  • Non-stick Skillet: Essential for cooking the eggs without sticking. A regular skillet works too, just add more oil.
  • Medium Bowl: For whisking the eggs. Any mixing bowl will do.
  • Spatula: Perfect for scrambling eggs and flipping the sandwich. A wooden spoon can work in a pinch.
  • Toaster: For toasting the bagels. An oven can also do the job if you prefer.

Variations

  • Veggie Delight: Add sautéed spinach, bell peppers, or mushrooms for a nutritious twist.
  • Spicy Kick: Swap cheddar for pepper jack cheese and add jalapeños for some heat.
  • Herbed Up: Mix fresh herbs like basil or cilantro into the eggs for a burst of flavor.
  • Smoked Salmon: Replace bacon or sausage with smoked salmon for a luxurious touch.
  • Gluten-Free Option: Use gluten-free bagels to make this sandwich suitable for gluten-sensitive diets.

Serving Suggestions

  • Fresh Fruit: Serve with a side of mixed berries or sliced oranges for a refreshing contrast.
  • Coffee or Tea: Pair with a hot cup of coffee or your favorite tea to kickstart your morning.
  • Presentation: Serve on a colorful plate with a sprinkle of chives for a pop of color.

FAQs about Everything Bagel Breakfast Sandwich

Can I make the Everything Bagel Breakfast Sandwich ahead of time?

Absolutely! You can prepare the scrambled eggs and cook the bacon or sausage in advance. Just store them in the fridge and assemble the sandwich when you’re ready to eat. It’s a great way to save time on busy mornings!

What can I substitute for the eggs?

If you’re looking for an egg alternative, consider using tofu or chickpea flour to create a scramble. Both options are delicious and provide a good source of protein, making them perfect for a hearty breakfast sandwich.

How can I make this sandwich healthier?

To lighten things up, use whole grain or low-calorie bagels, swap out the cheese for a lighter option, and load up on veggies like spinach or tomatoes. You can also use turkey bacon or lean sausage for a healthier protein choice.

Can I freeze the Everything Bagel Breakfast Sandwich?

Yes, you can! Assemble the sandwiches, wrap them tightly in foil or plastic wrap, and freeze. When you’re ready to enjoy, just reheat in the oven or microwave until warmed through. It’s a fantastic meal prep option!

What drinks pair well with this breakfast sandwich?

A hot cup of coffee or a refreshing glass of orange juice complements the Everything Bagel Breakfast Sandwich perfectly. For a twist, try a smoothie with spinach and banana for a nutritious boost!

Final Thoughts

The Everything Bagel Breakfast Sandwich is more than just a meal; it’s a delightful experience that brings comfort and joy to your mornings. Each bite is a harmonious blend of flavors and textures, from the crispy bagel to the creamy avocado and fluffy eggs. Whether you’re enjoying it solo or sharing it with family, this sandwich has a way of making any breakfast feel special. It’s quick, satisfying, and endlessly customizable, making it a staple in my kitchen. So, grab your ingredients and treat yourself to a breakfast that’s sure to brighten your day!

jhessica

Everything Bagel Breakfast Sandwich: A Must-Try Recipe!

A delicious and hearty breakfast sandwich made with everything bagels, scrambled eggs, cheese, and your choice of bacon or sausage.
Prep Time 10 minutes
Cook Time 10 minutes
Total Time 20 minutes
Servings: 2 servings
Course: Breakfast
Cuisine: American
Calories: 550

Ingredients
  

  • 2 everything bagels split and toasted
  • 4 large eggs
  • 2 tablespoons milk
  • Salt and pepper to taste
  • 4 slices of cheddar cheese
  • 4 slices of cooked bacon or sausage patties
  • 1 avocado sliced
  • Fresh chives or green onions chopped (optional)

Method
 

  1. In a medium bowl, whisk together the eggs, milk, salt, and pepper until well combined.
  2. Heat a non-stick skillet over medium heat and add a little butter or oil. Pour in the egg mixture and cook, gently stirring, until the eggs are scrambled and just set, about 3-4 minutes.
  3. While the eggs are cooking, place a slice of cheddar cheese on each half of the toasted bagels.
  4. Once the eggs are done, divide them evenly among the bagel halves. Top each with bacon or sausage, avocado slices, and chopped chives or green onions if desired.
  5. Close the sandwiches with the other half of the bagel and serve warm.

Nutrition

Serving: 1sandwichCalories: 550kcalCarbohydrates: 30gProtein: 28gFat: 36gSaturated Fat: 15gPolyunsaturated Fat: 20gCholesterol: 300mgSodium: 800mgFiber: 3gSugar: 2g

Notes

  • For a lighter option, use egg whites instead of whole eggs and skip the cheese.
  • For added flavor, try adding a slice of tomato or a spread of cream cheese on the bagel before assembling the sandwich.

Tried this recipe?

Let us know how it was!

Honey Chipotle Chicken Rice Bowl: A Flavorful Delight!

Introduction to Honey Chipotle Chicken Rice Bowl

There’s something magical about a meal that brings together sweet and spicy flavors, and that’s exactly what you get with a Honey Chipotle Chicken Rice Bowl. This dish is not just a feast for the taste buds; it’s a quick solution for those busy weeknights when you want something delicious without spending hours in the kitchen.

Imagine the smoky aroma of grilled chicken mingling with a sweet honey chipotle sauce, all served over a fluffy bed of rice. It’s a dish that’s sure to impress your loved ones while keeping your cooking stress to a minimum.

Why You’ll Love This Honey Chipotle Chicken Rice Bowl

This Honey Chipotle Chicken Rice Bowl is a game-changer for your dinner routine. It’s incredibly easy to whip up, taking just 30 minutes from start to finish. The combination of sweet honey and smoky chipotle creates a flavor explosion that will have everyone coming back for seconds. Plus, it’s versatile enough to please picky eaters and adventurous palates alike, making it a perfect weeknight meal for the whole family.

Ingredients for Honey Chipotle Chicken Rice Bowl

Gathering the right ingredients is the first step to creating your Honey Chipotle Chicken Rice Bowl. Here’s what you’ll need:

  • Cooked white rice: The base of your bowl, providing a fluffy texture to soak up all that delicious sauce.
  • Boneless, skinless chicken breasts: Lean protein that grills beautifully and absorbs the flavors of the marinade.
  • Olive oil: Helps to keep the chicken moist and adds a touch of richness.
  • Salt and black pepper: Essential seasonings that enhance the overall flavor of the dish.
  • Garlic powder and onion powder: These spices add depth and a savory kick to the chicken.
  • Smoked paprika: This gives a subtle smokiness that complements the chipotle sauce perfectly.
  • Honey: The star of the show, providing sweetness that balances the heat of the chipotle.
  • Chipotle sauce: Adds that smoky, spicy flavor that makes this dish unforgettable.
  • Lime juice: A splash of acidity that brightens up the entire bowl.
  • Corn: Sweet and crunchy, it adds texture and a pop of color.
  • Black beans: Packed with protein and fiber, they make the dish heartier.
  • Avocado: Creamy slices that bring a cool contrast to the spicy chicken.
  • Diced tomatoes: Freshness and juiciness that lighten up the bowl.
  • Fresh cilantro: A sprinkle of this herb adds a burst of flavor and a touch of green.
  • Lime wedges: For serving, they add an extra zing when squeezed over the top.

For those looking to spice things up, consider adding diced jalapeños or a sprinkle of red pepper flakes. If you want a vegetarian option, swap the chicken for grilled tofu or tempeh and throw in some extra veggies like bell peppers or zucchini.

You can find the exact quantities for each ingredient at the bottom of the article, ready for printing!

How to Make Honey Chipotle Chicken Rice Bowl

Creating your Honey Chipotle Chicken Rice Bowl is a straightforward process that’s as enjoyable as it is delicious. Follow these simple steps, and you’ll have a mouthwatering meal ready in no time!

Step 1: Prepare the Sauce

Start by mixing the honey, chipotle sauce, and lime juice in a small bowl. This sauce is the heart of your dish, bringing together sweet and smoky flavors. Set it aside for now; it will be brushed on the chicken later. Trust me, the aroma alone will have your taste buds dancing!

Step 2: Grill the Chicken

Preheat your grill or grill pan over medium-high heat. While it heats up, season the chicken breasts with olive oil, salt, black pepper, garlic powder, onion powder, and smoked paprika. This seasoning blend is key to infusing flavor into the chicken.

Once the grill is hot, place the chicken on it. Grill for about 6-7 minutes on each side, or until the internal temperature reaches 165°F. During the last few minutes, brush that delicious honey chipotle sauce over the chicken. This step caramelizes the sauce, creating a sticky, flavorful coating that’s simply irresistible.

Step 3: Assemble the Bowl

After grilling, let the chicken rest for about 5 minutes before slicing it. This helps keep the juices locked in.

Now, it’s time to build your bowl! Start with a generous layer of cooked rice at the bottom. Then, add corn, black beans, and the sliced chicken on top. Don’t forget the avocado and diced tomatoes for freshness. Drizzle any remaining honey chipotle sauce over everything, and finish with a sprinkle of fresh cilantro. Serve with lime wedges on the side for that extra zing.

And there you have it—a vibrant, flavorful Honey Chipotle Chicken Rice Bowl that’s sure to impress!

Tips for Success

  • Let the chicken marinate in the honey chipotle sauce for at least 30 minutes for deeper flavor.
  • Use a meat thermometer to ensure your chicken is perfectly cooked at 165°F.
  • Feel free to customize toppings based on your preferences—think shredded cheese or sour cream!
  • For meal prep, store components separately and assemble just before serving.
  • Experiment with different grains like quinoa or brown rice for a twist!

Equipment Needed

  • Grill or Grill Pan: A stovetop grill pan works well if you don’t have an outdoor grill.
  • Meat Thermometer: Essential for checking chicken doneness; a simple knife can also work.
  • Mixing Bowl: Any bowl will do for combining your sauce ingredients.
  • Cutting Board: A sturdy surface for slicing the chicken.
  • Sharp Knife: For easy slicing of chicken and veggies.

Variations

  • Spicy Kick: Add diced jalapeños or a sprinkle of red pepper flakes for an extra heat boost.
  • Vegetarian Delight: Swap the chicken for grilled tofu or tempeh, and load up on extra veggies like bell peppers or zucchini.
  • Grain Swap: Try using quinoa or brown rice instead of white rice for a nuttier flavor and added nutrients.
  • Flavorful Additions: Incorporate roasted sweet potatoes or sautéed spinach for a heartier bowl.
  • Different Proteins: Use shrimp or steak instead of chicken for a different protein profile and taste.

Serving Suggestions

  • Side Salad: A light mixed greens salad with a citrus vinaigrette pairs beautifully.
  • Refreshing Drink: Serve with a cold Mexican lager or a zesty limeade for a refreshing touch.
  • Presentation: Use colorful bowls to showcase the vibrant ingredients and garnish with extra cilantro.

FAQs about Honey Chipotle Chicken Rice Bowl

Can I make the Honey Chipotle Chicken Rice Bowl ahead of time?

Absolutely! You can prepare the chicken and sauce in advance. Just store them separately in the fridge. When you’re ready to eat, grill the chicken and assemble the bowl. This makes it a great option for meal prep!

What can I substitute for chicken in this recipe?

If you’re looking for a vegetarian option, grilled tofu or tempeh works wonderfully. You can also use shrimp or steak for a different protein twist. Just adjust the cooking time accordingly!

How spicy is the Honey Chipotle Chicken Rice Bowl?

The spice level can be adjusted based on your preference. The chipotle sauce adds a nice kick, but if you want it spicier, consider adding diced jalapeños or a sprinkle of red pepper flakes. It’s all about your taste!

Can I use brown rice instead of white rice?

Definitely! Brown rice adds a nutty flavor and extra fiber. Just keep in mind that it may require a longer cooking time, so plan accordingly. Your bowl will still be delicious!

How do I store leftovers?

Store any leftovers in an airtight container in the fridge for up to three days. Reheat the chicken and rice separately to maintain their textures. Enjoy your flavorful meal again!

Final Thoughts

Creating a Honey Chipotle Chicken Rice Bowl is more than just cooking; it’s about bringing joy to your table. The blend of sweet and smoky flavors dances on your palate, making every bite a delightful experience.

Whether you’re impressing friends at a weekend gathering or simply enjoying a cozy dinner at home, this dish is sure to become a favorite. Plus, the ease of preparation means you can savor the moment without the stress. So, roll up your sleeves, fire up that grill, and let the flavors take you on a culinary adventure that’s both satisfying and memorable!

jhessica

Honey Chipotle Chicken Rice Bowl: A Flavorful Delight!

A delicious and spicy Honey Chipotle Chicken Rice Bowl that combines grilled chicken with a sweet and smoky sauce, served over a bed of rice with fresh toppings.
Prep Time 15 minutes
Cook Time 15 minutes
Total Time 30 minutes
Servings: 4 servings
Course: Main Course
Cuisine: Mexican
Calories: 550

Ingredients
  

  • 2 cups cooked white rice
  • 1 pound boneless skinless chicken breasts
  • 1 tablespoon olive oil
  • 1 teaspoon salt
  • 1 teaspoon black pepper
  • 1 teaspoon garlic powder
  • 1 teaspoon onion powder
  • 1 teaspoon smoked paprika
  • 1/2 cup honey
  • 1/4 cup chipotle sauce or adobo sauce from canned chipotles
  • 1 tablespoon lime juice
  • 1 cup corn canned or frozen
  • 1 cup black beans canned, rinsed and drained
  • 1 avocado sliced
  • 1/2 cup diced tomatoes
  • 1/4 cup chopped fresh cilantro
  • Lime wedges for serving

Method
 

  1. In a small bowl, mix together the honey, chipotle sauce, and lime juice. Set aside.
  2. Preheat a grill or grill pan over medium-high heat.
  3. Season the chicken breasts with olive oil, salt, pepper, garlic powder, onion powder, and smoked paprika.
  4. Grill the chicken for about 6-7 minutes on each side or until the internal temperature reaches 165°F.
  5. During the last few minutes of grilling, brush the honey chipotle sauce over the chicken.
  6. Remove the chicken from the grill and let it rest for 5 minutes before slicing.
  7. In serving bowls, layer the cooked rice, corn, black beans, sliced chicken, avocado, and diced tomatoes.
  8. Drizzle any remaining honey chipotle sauce over the top and garnish with fresh cilantro. Serve with lime wedges on the side.

Nutrition

Serving: 1bowlCalories: 550kcalCarbohydrates: 60gProtein: 30gFat: 18gSaturated Fat: 3gPolyunsaturated Fat: 15gCholesterol: 70mgSodium: 800mgFiber: 10gSugar: 30g

Notes

  • For a spicier kick, add diced jalapeños or a sprinkle of red pepper flakes.
  • To make it vegetarian, substitute the chicken with grilled tofu or tempeh and add extra veggies like bell peppers or zucchini.

Tried this recipe?

Let us know how it was!

Stay Connected

Get recipes via email: