Get my cookbooks

Big Kahuna Stack Sandwich: Your BBQ Dream Come True

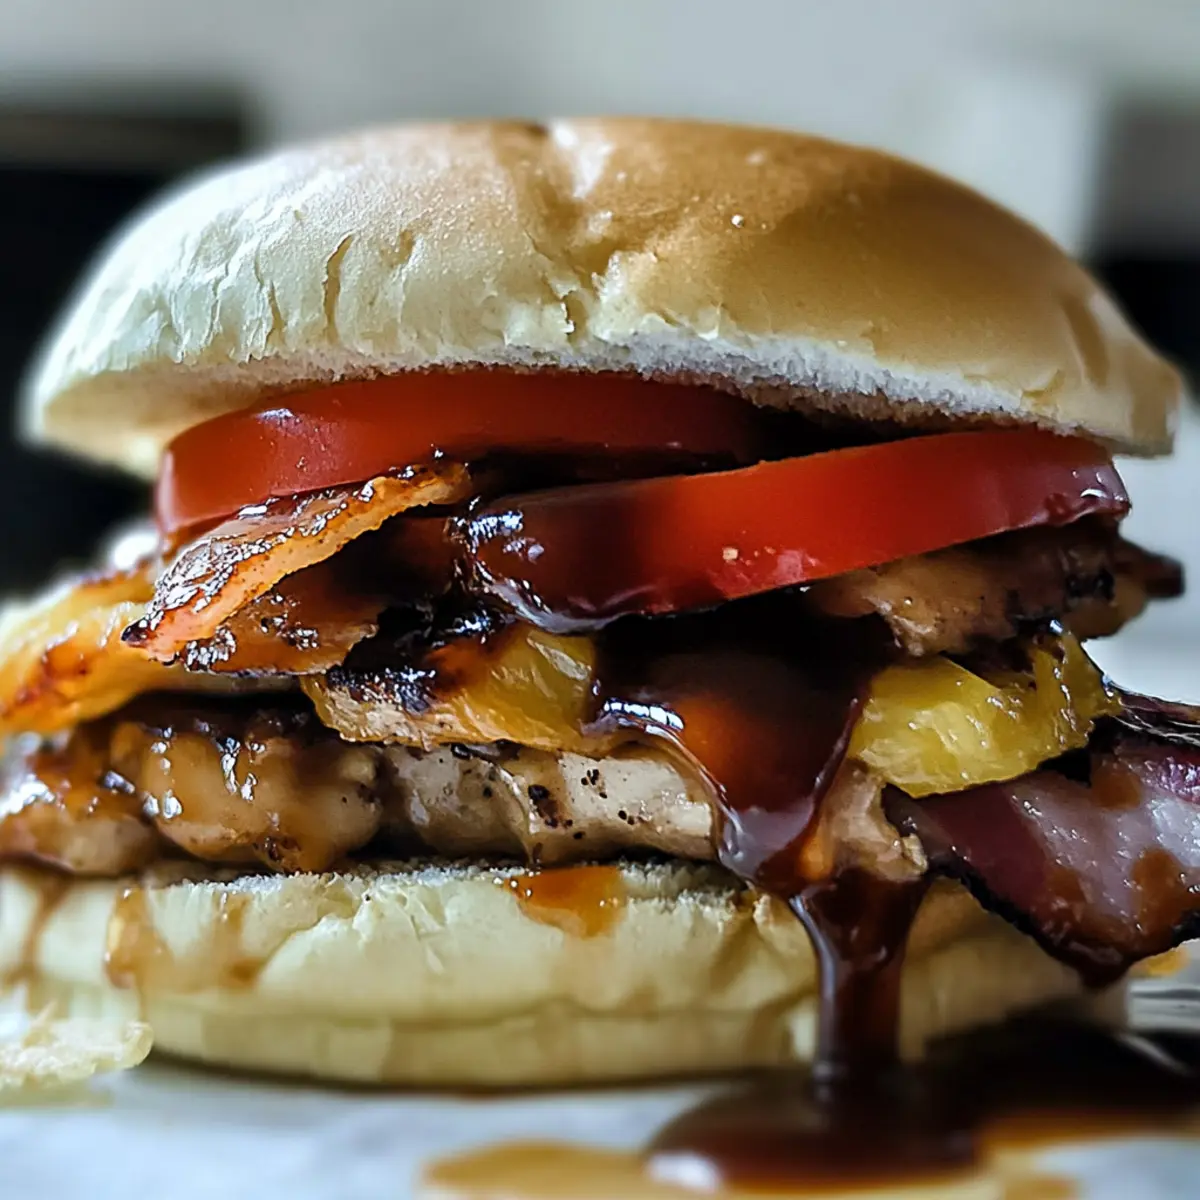
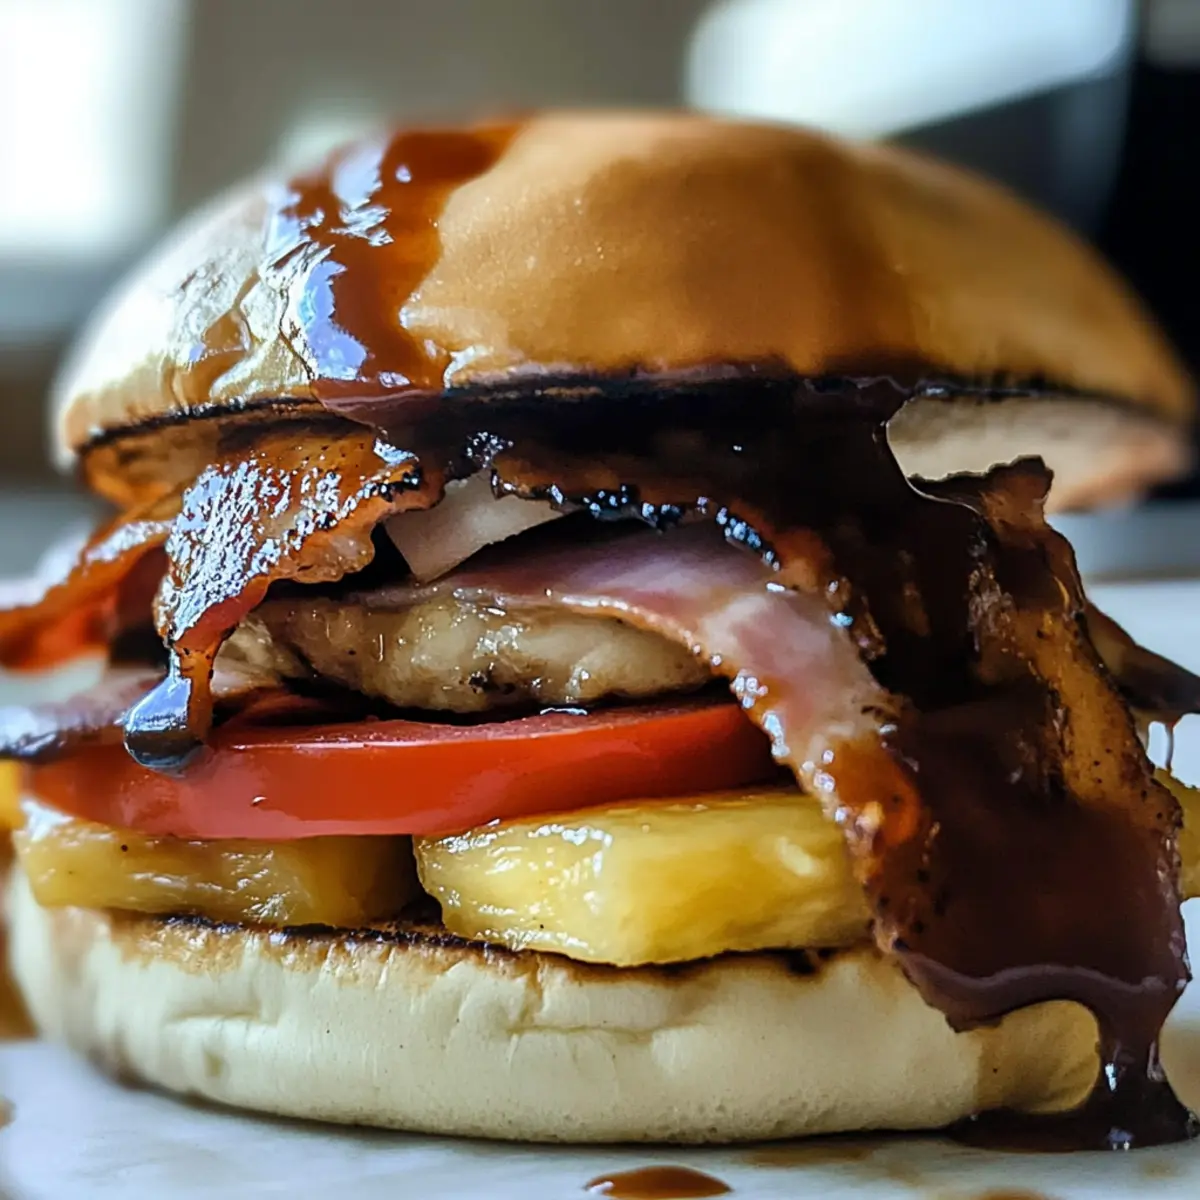
As the sun warms the grill and the scent of BBQ wafts through the air, I can’t help but feel excited about the flavors that await. Enter the Big Kahuna Stack Sandwich—a title that says it all. This hearty creation features succulent chicken thighs, crispy bacon, and savory ham, all embraced by the sweet allure of Big Kahuna Teriyaki sauce. Its high-protein layers not only make it a crowd-pleaser but also promise to keep hunger at bay during those long summer afternoons. Perfect for a backyard BBQ or a casual picnic, it’s one of those recipes that brings back the joys of outdoor grilling. So, are you ready to embark on this delicious journey? Let’s stack it up!

Why is This Sandwich a Must-Try?

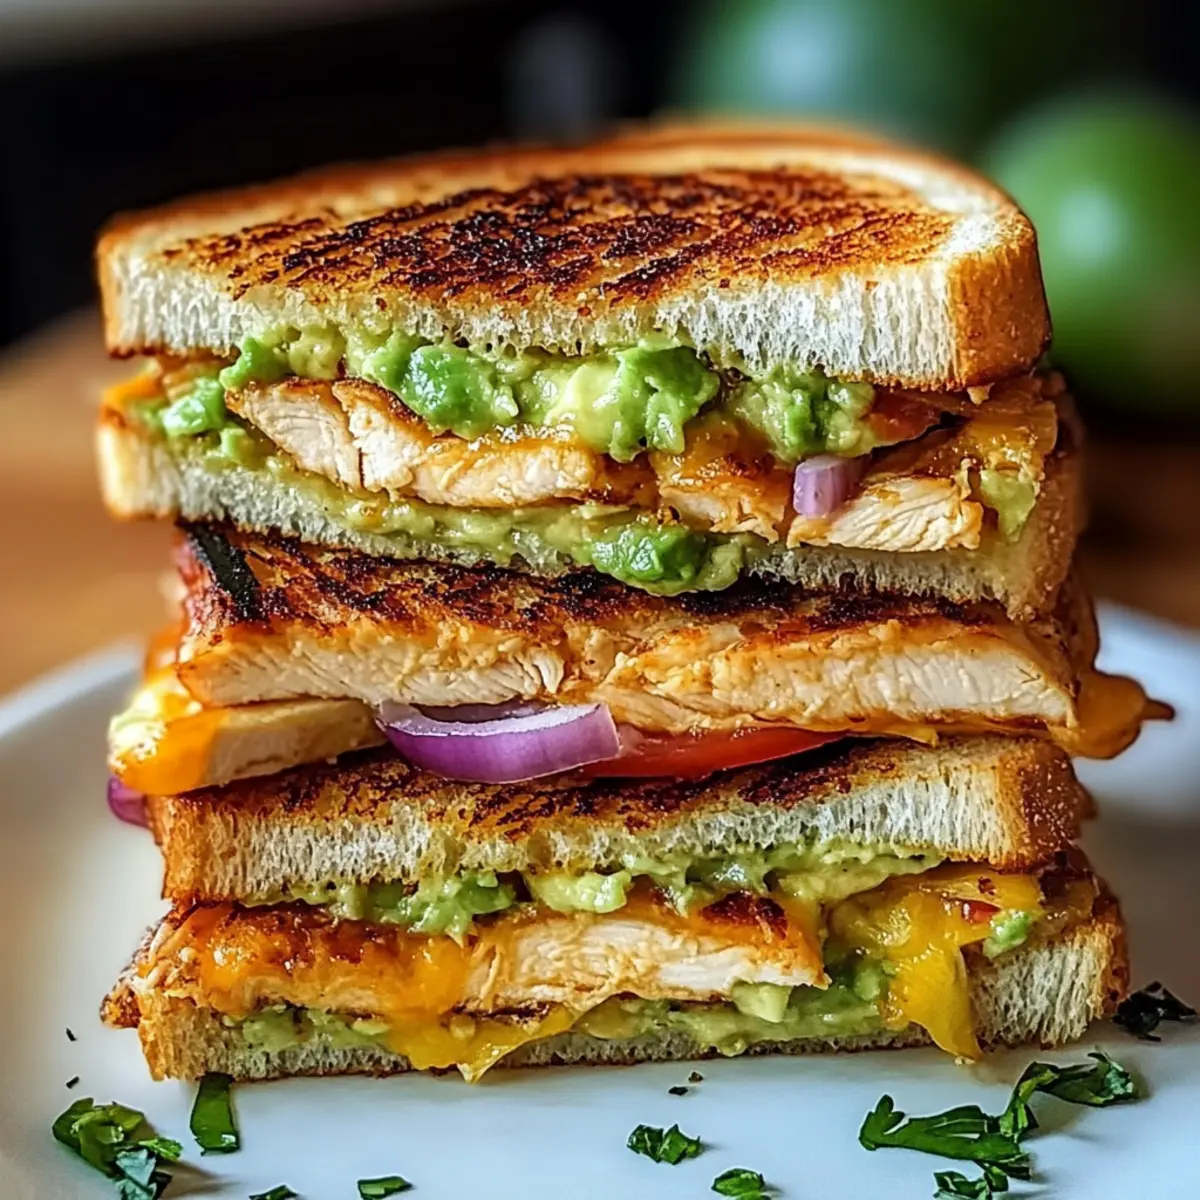
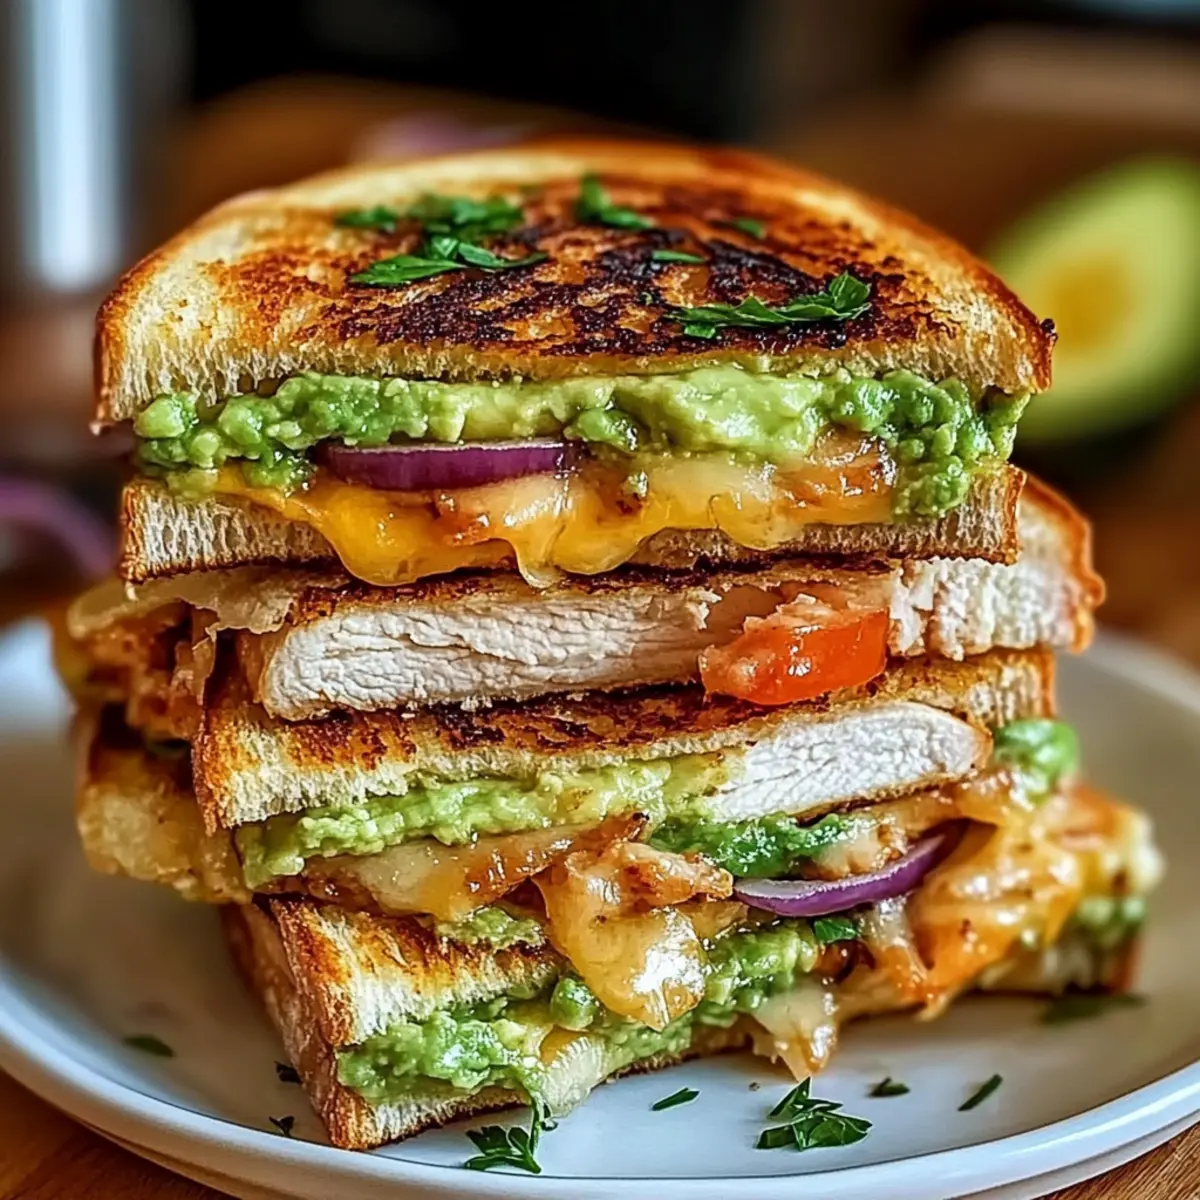
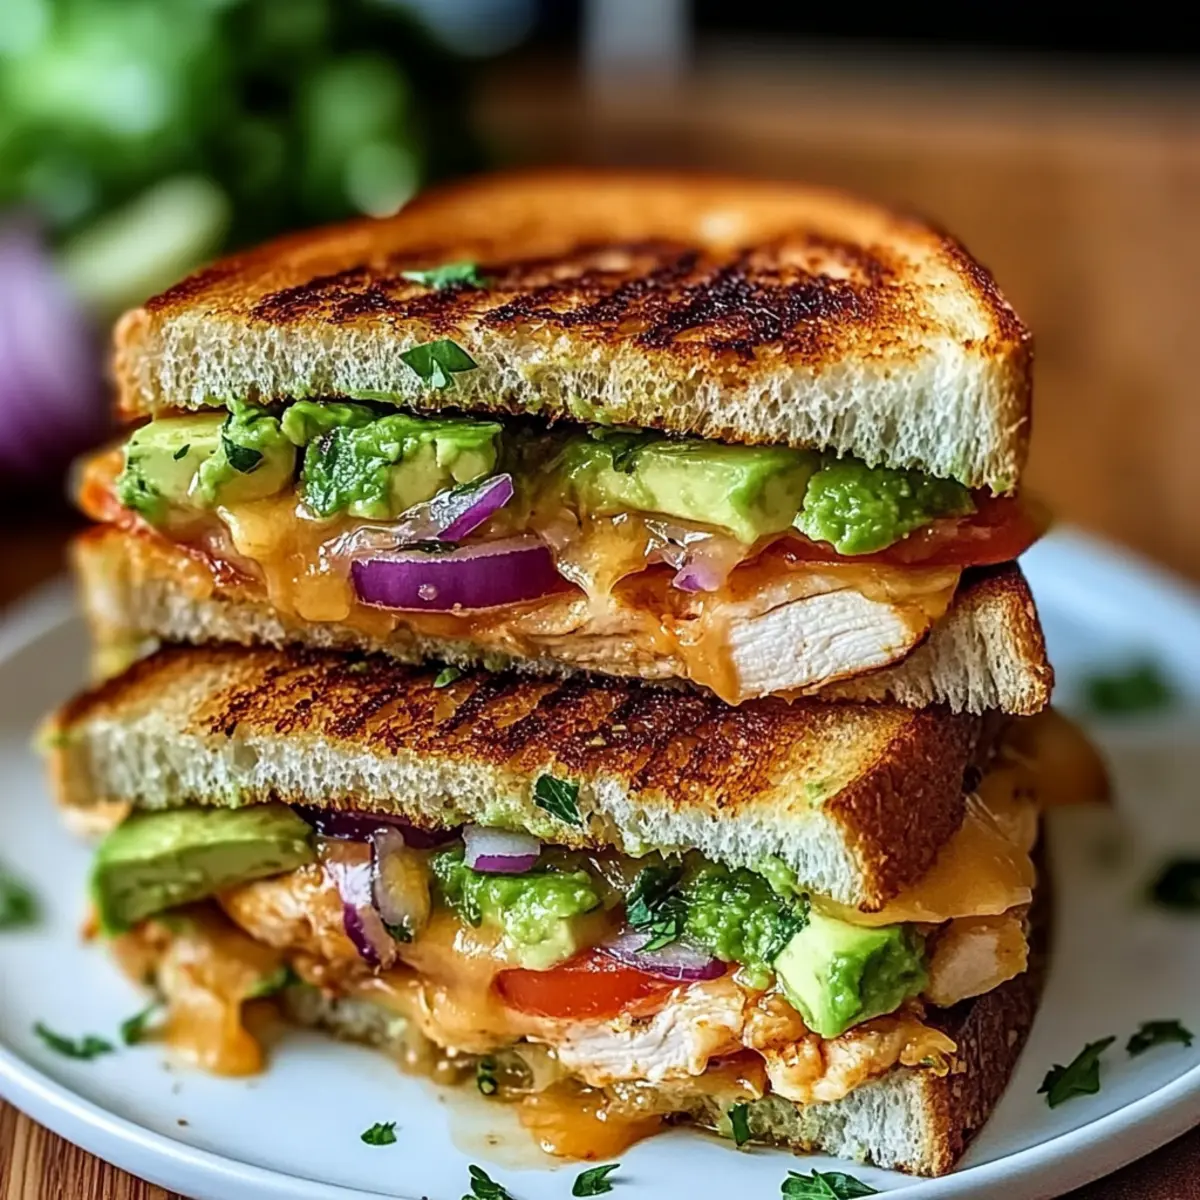
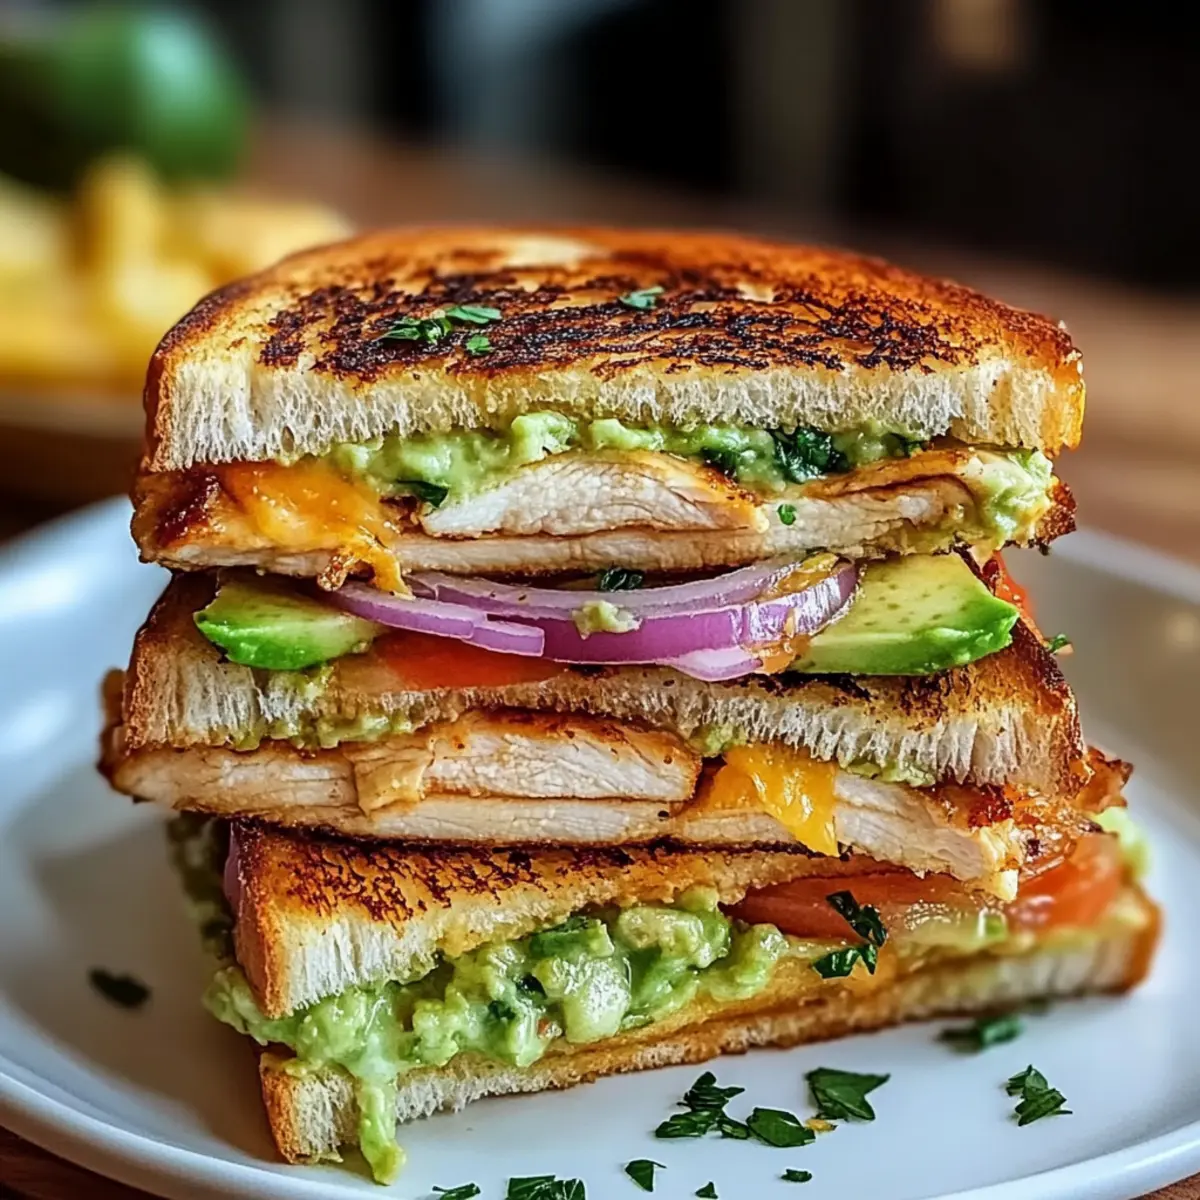
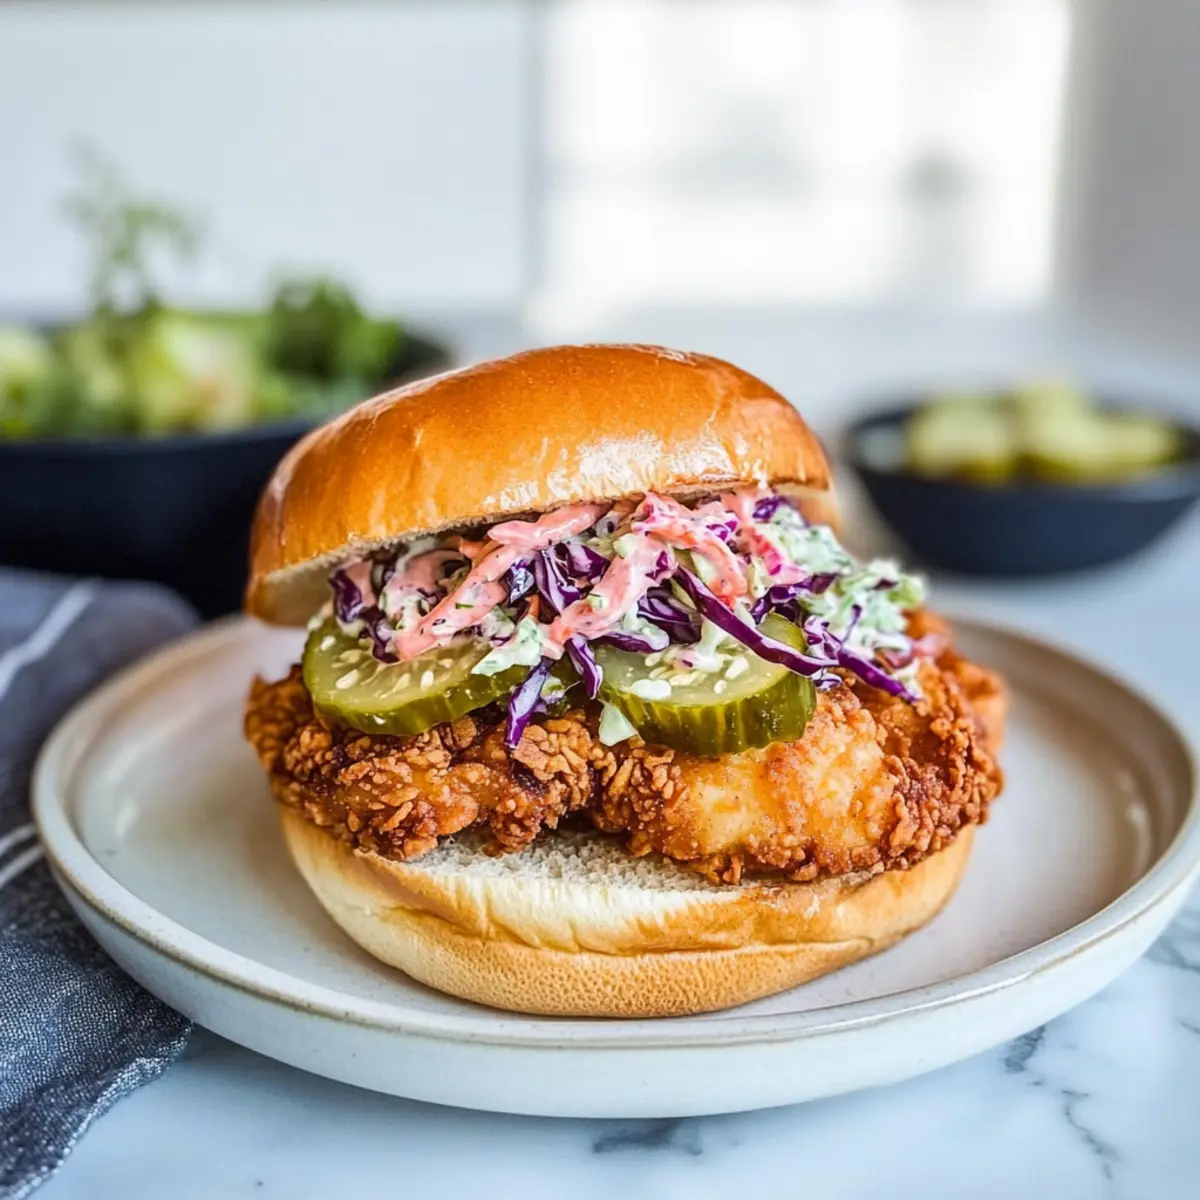
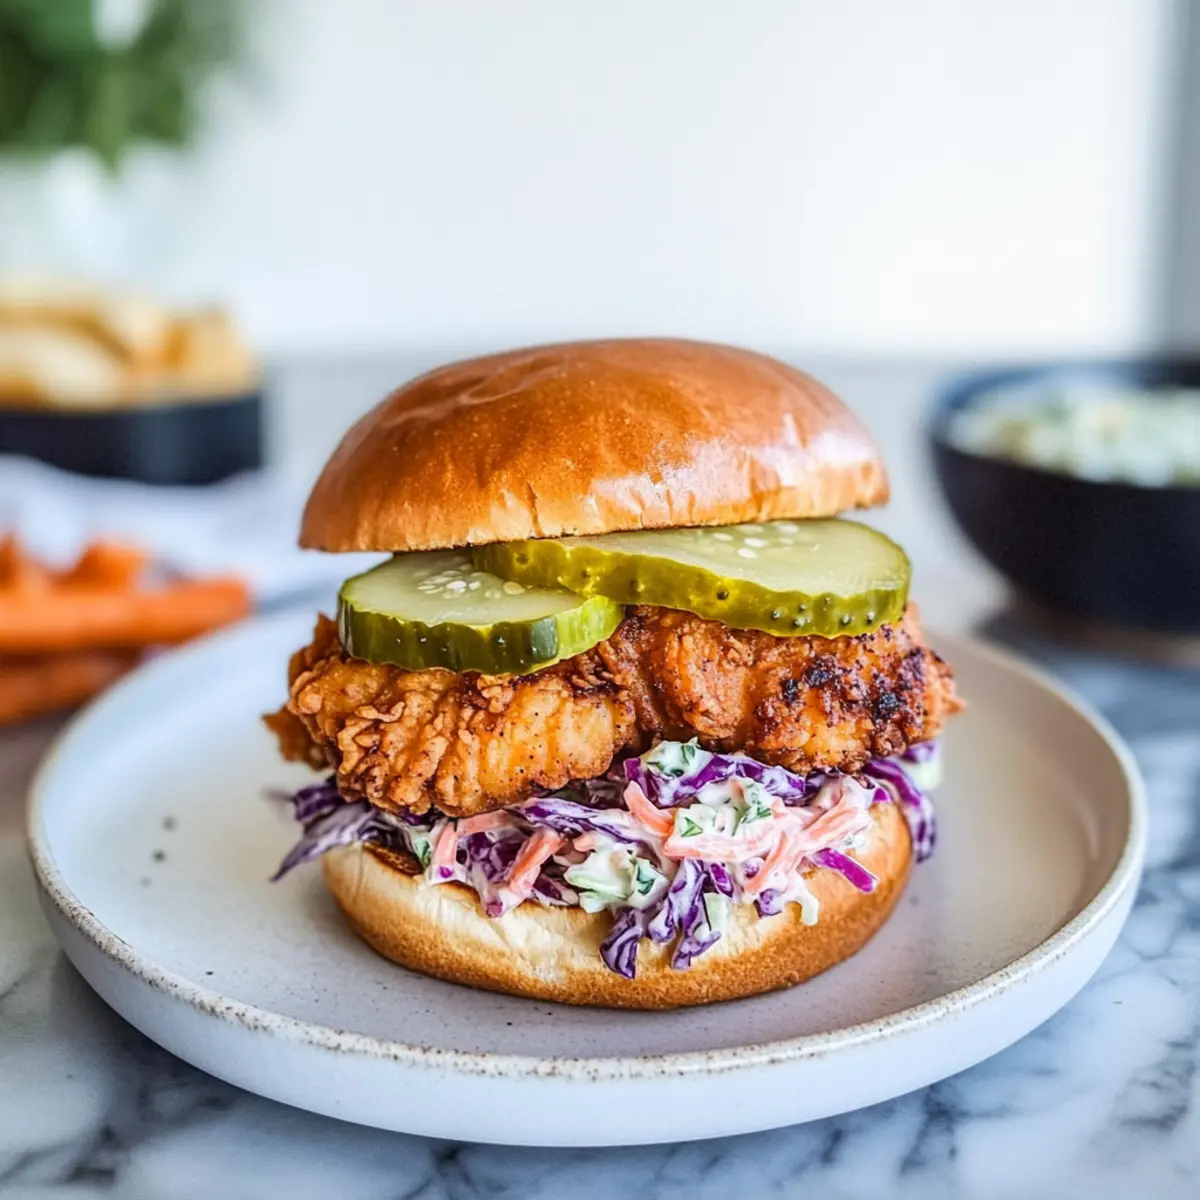
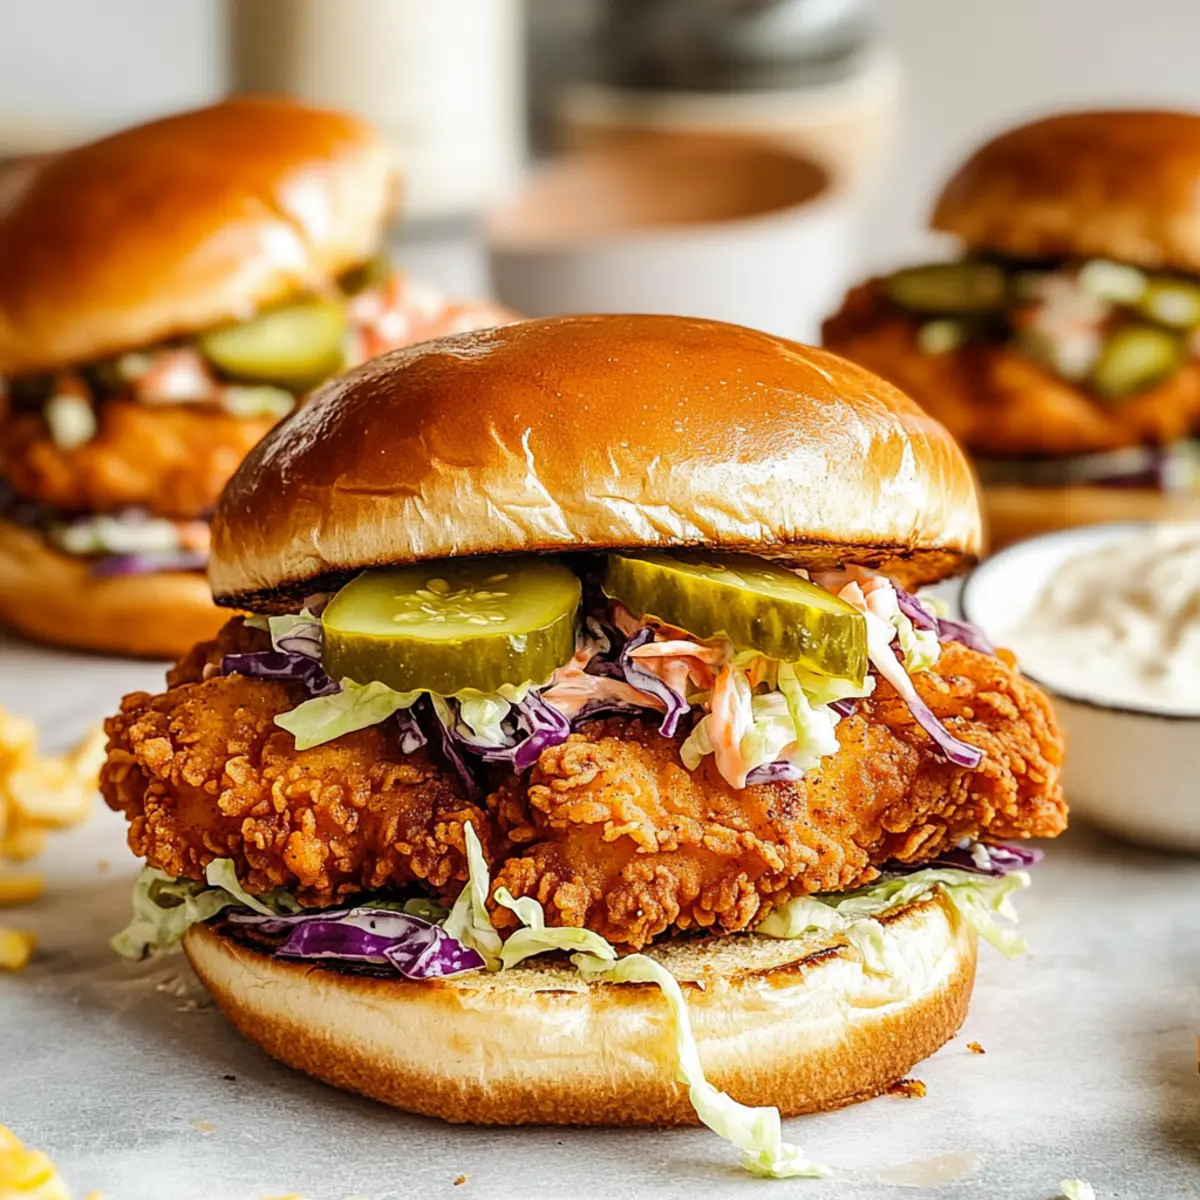
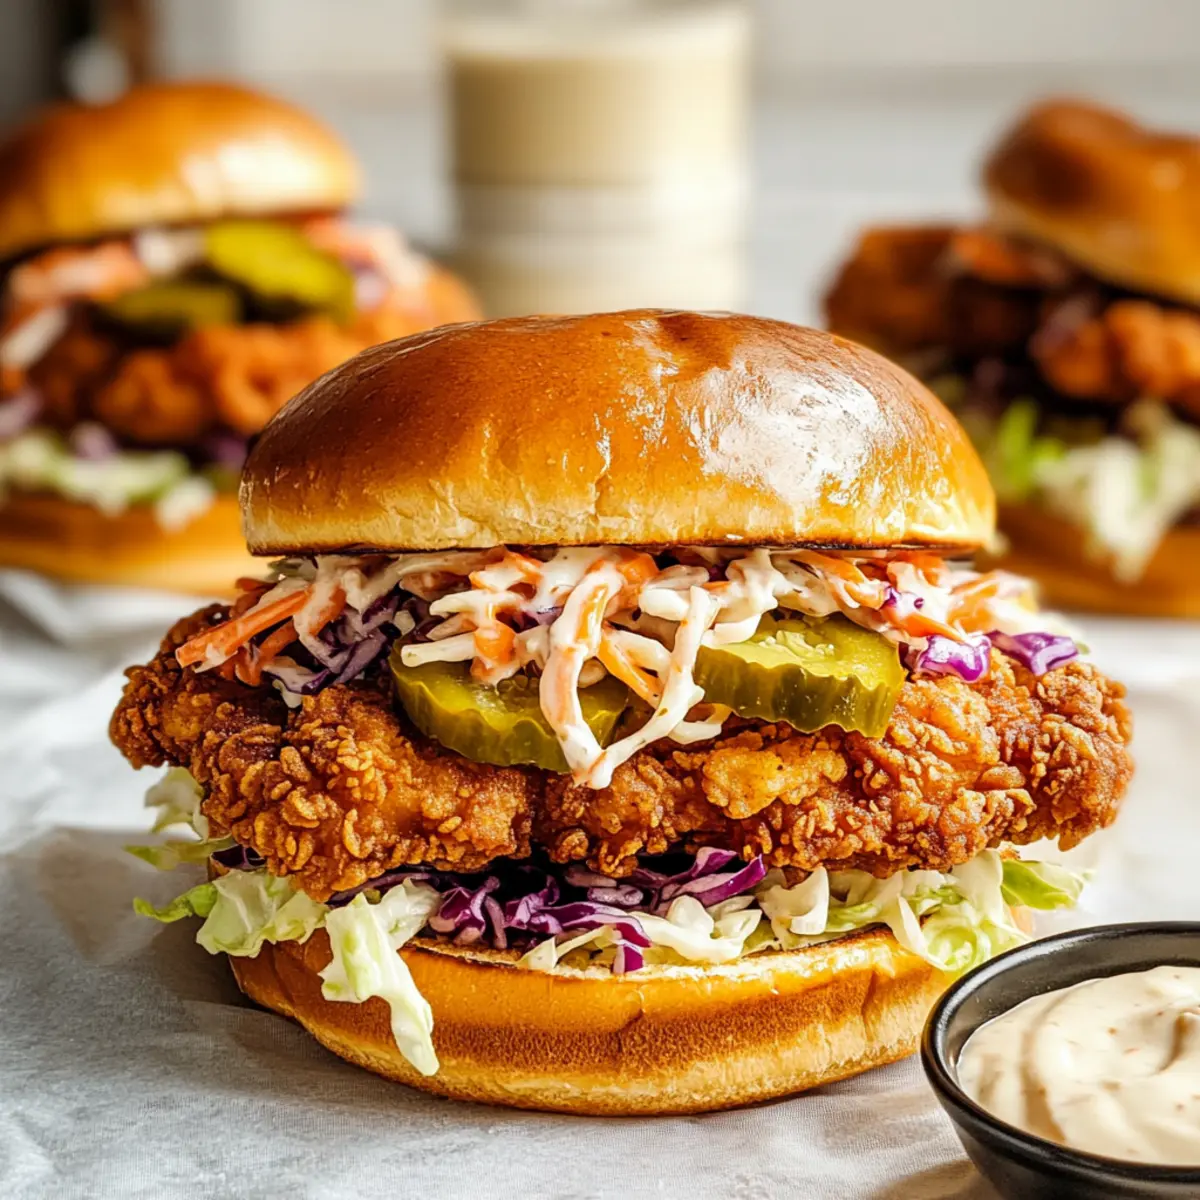
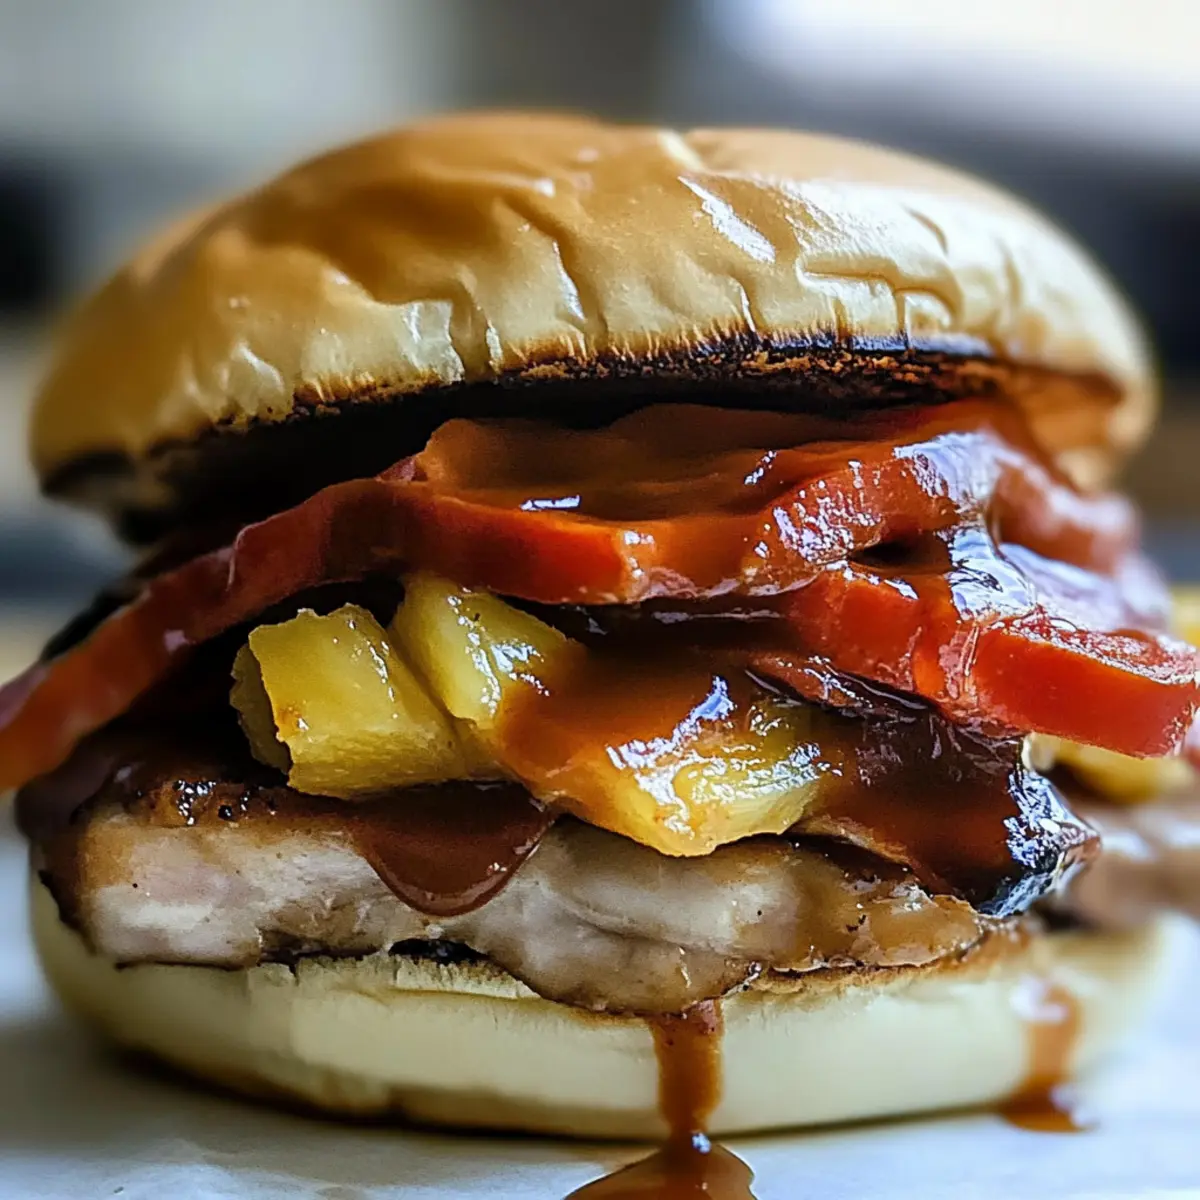
Layers of Flavor: Each bite of the Big Kahuna Stack Sandwich bursts with succulent chicken, smoky bacon, and savory ham, creating a medley of tastes that will keep you craving more.

Easy to Prepare: With simple steps and a straightforward grilling technique, you don’t need to be a culinary expert to master this delicious sandwich.

Grill-Ready Goodness: Ideal for summer gatherings, this dish is an instant hit at BBQs or picnics.

Customizable Options: Feel free to switch out proteins or sauces—perhaps try grilled shrimp or tofu for a fun twist!

Protein-Packed Delight: Packed with high-quality protein, this sandwich not only satisfies your hunger but also fuels your day.

Impressive Presentation: The vibrant colors from grilled pineapple and roasted red peppers make it visually appealing, perfect for impressing friends and family.

Big Kahuna Stack Sandwich Ingredients

Get ready to indulge in some serious BBQ flavor!

For the Sandwich

  • 4 Chicken Thighs (Boneless, Skinless) – Provides the main protein source; substitute with turkey thighs for a leaner option.
  • 12 Slices Bacon – Adds a crispy texture and smoky flavor; can be replaced with turkey bacon for a lighter variant.
  • 12 Oz Ham (Sliced) – Contributes saltiness and depth to the sandwich; use smoked ham for enhanced flavor.
  • 4 King’s Hawaiian Burger Buns – Offers a soft, slightly sweet base; regular burger buns can be used if a less sweet option is needed.

For the Toppings

  • 12 Oz Big Kahuna Teriyaki Sauce – The key sauce that infuses flavor into the meats; any teriyaki sauce can be substituted as desired.
  • 8 Oz Roasted Red Pepper (Canned or Fresh) – Provides sweetness and moisture; substitute with fresh bell peppers for a crunchier texture.
  • 8 Pineapple Slices – Adds sweetness and acidity; use fresh pineapple for a vibrant bite.

By gathering these ingredients, you’re well on your way to crafting a Big Kahuna Stack Sandwich that will impress your loved ones and tantalize your taste buds!

Step-by-Step Instructions for Big Kahuna Stack Sandwich

Step 1: Marinate the Meats
Begin by marinating the chicken thighs, bacon, and sliced ham in 8 ounces of Big Kahuna Teriyaki sauce. Combine them in a large bowl or resealable bag, ensuring all the meats are well coated. Let them sit in the refrigerator for at least 1 hour, allowing the flavors to deeply infuse. You can marinate longer for enhanced taste and tenderness.

Step 2: Preheat the Grill
While the meats are marinating, preheat your grill to medium-high heat, approximately 400°F. It’s important to achieve this temperature to ensure that your chicken and other ingredients cook evenly and develop those attractive grill marks. Prepare the grilling surface by cleaning the grates with a brush for optimal results.

Step 3: Grill the Chicken Thighs
Once the grill is heated, place the marinated chicken thighs on it. Grill them for about 6-7 minutes per side, or until they reach an internal temperature of 165°F. You’ll know they are done when they are golden brown and juices run clear. Remove the thighs and let them rest while you cook the rest of the ingredients.

Step 4: Grill the Bacon and Remaining Meats
Next, place the bacon, sliced ham, and pineapple rings on the grill. Cook the bacon until crispy, about 4-5 minutes, flipping halfway through. The ham should only need 2-3 minutes to heat—look for a slight char. Also, grill the pineapple slices for an additional 2-3 minutes until they get those lovely caramelized grill marks.

Step 5: Assemble the Sandwiches
Now it’s time to build your Big Kahuna Stack Sandwich! Start with the King’s Hawaiian burger buns and layer the grilled chicken thighs, crispy bacon, and slices of ham. Add the grilled pineapple and roasted red peppers on top, creating a visually colorful stack that looks irresistible.

Step 6: Finish with Teriyaki Sauce
Finally, drizzle any remaining Big Kahuna Teriyaki sauce over the assembled sandwiches for extra flavor. This final touch will enhance the taste profile and keep the layers moist as you prepare to serve. Your delightful Big Kahuna Stack Sandwiches are ready to impress family and friends!

Make Ahead Options

These Big Kahuna Stack Sandwiches are perfect for busy home cooks looking to save time during the week! You can marinate the chicken thighs, bacon, and ham in the Big Kahuna Teriyaki sauce up to 24 hours in advance, allowing the flavors to deepen. Additionally, grill the meats and pineapple slices a day ahead, then store them in the refrigerator for up to 3 days. When ready to serve, simply reheat the grilled components and assemble the sandwiches with the roasted red peppers and buns for a quick meal. This method ensures your sandwiches remain just as delicious and full of flavor while making meal prep a breeze!

Storage Tips for Big Kahuna Stack Sandwich

Fridge: Store any leftovers in an airtight container for up to 3 days. Ensure that the sandwich is tightly wrapped to maintain its freshness and prevent drying out.

Freezer: If you have grilled meats left, freeze them in a freezer-safe bag for up to 2 months. Just ensure they’re cooled beforehand to preserve texture and flavor.

Reheating: When ready to enjoy your sandwich again, reheat the grilled meats in the oven or a skillet until they’re warmed through. Avoid microwaving to prevent sogginess.

Assembling: For best taste, assemble the Big Kahuna Stack Sandwich just before serving. This keeps the ingredients fresh and the buns from getting soggy.

Expert Tips for Big Kahuna Stack Sandwich

  • Marination Magic: Ensure meats marinate for at least an hour; longer soaking means deeper flavor penetration, elevating your Big Kahuna Stack Sandwich.

  • Check Temperatures: Use a meat thermometer to verify your chicken reaches 165°F for safety. This prevents undercooked meals and keeps everyone happy!

  • Grill Prepping: Clean and coat your grill grates with oil before heating; this minimizes sticking and helps achieve those beautiful grill marks.

  • Layer Smartly: Layer ingredients securely to avoid spills while eating; a well-stacked sandwich makes for an enjoyable dining experience.

  • Fresh Ingredients: Opt for fresh pineapple and roasted red peppers—their brightness enhances the flavors and textures in your sandwich.

What to Serve with Big Kahuna Stack Sandwich

As you dig into the savory layers of your Big Kahuna Stack Sandwich, let’s explore some perfect pairings to elevate your meal experience.

  • Crispy Coleslaw: The crunch of refreshing coleslaw contrasts beautifully with the hearty sandwich, adding a bit of zing to every bite.

  • Grilled Corn on the Cob: Smoky and sweet, grilled corn complements the BBQ flavors of the sandwich while introducing a delightful charred texture.

  • Sweet Potato Fries: Crispy on the outside and tender on the inside, the natural sweetness of the fries balances the savory elements of the sandwich.

  • Zesty Potato Salad: A creamy, tangy potato salad can be a fantastic sidekick, cooling down the palate while enhancing the BBQ theme.

  • Fresh Fruit Salad: A mix of tangy and sweet fruits brings a refreshing brightness to your plate, balancing out the richness of the sandwich.

  • Iced Tea or Lemonade: These refreshing beverages offer a juicy tang that cleanses the palate perfectly between bites and keeps your summer vibe alive.

  • Chocolate Chip Cookies: For dessert, indulge in warm, gooey cookies that provide the ultimate sweet ending to your delicious BBQ feast.

With these delightful sides, your Big Kahuna Stack Sandwich dinner will be a crowd-pleasing success!

Big Kahuna Stack Sandwich Variations

Feel free to explore these delightful twists and turns to make the Big Kahuna Stack Sandwich your own!

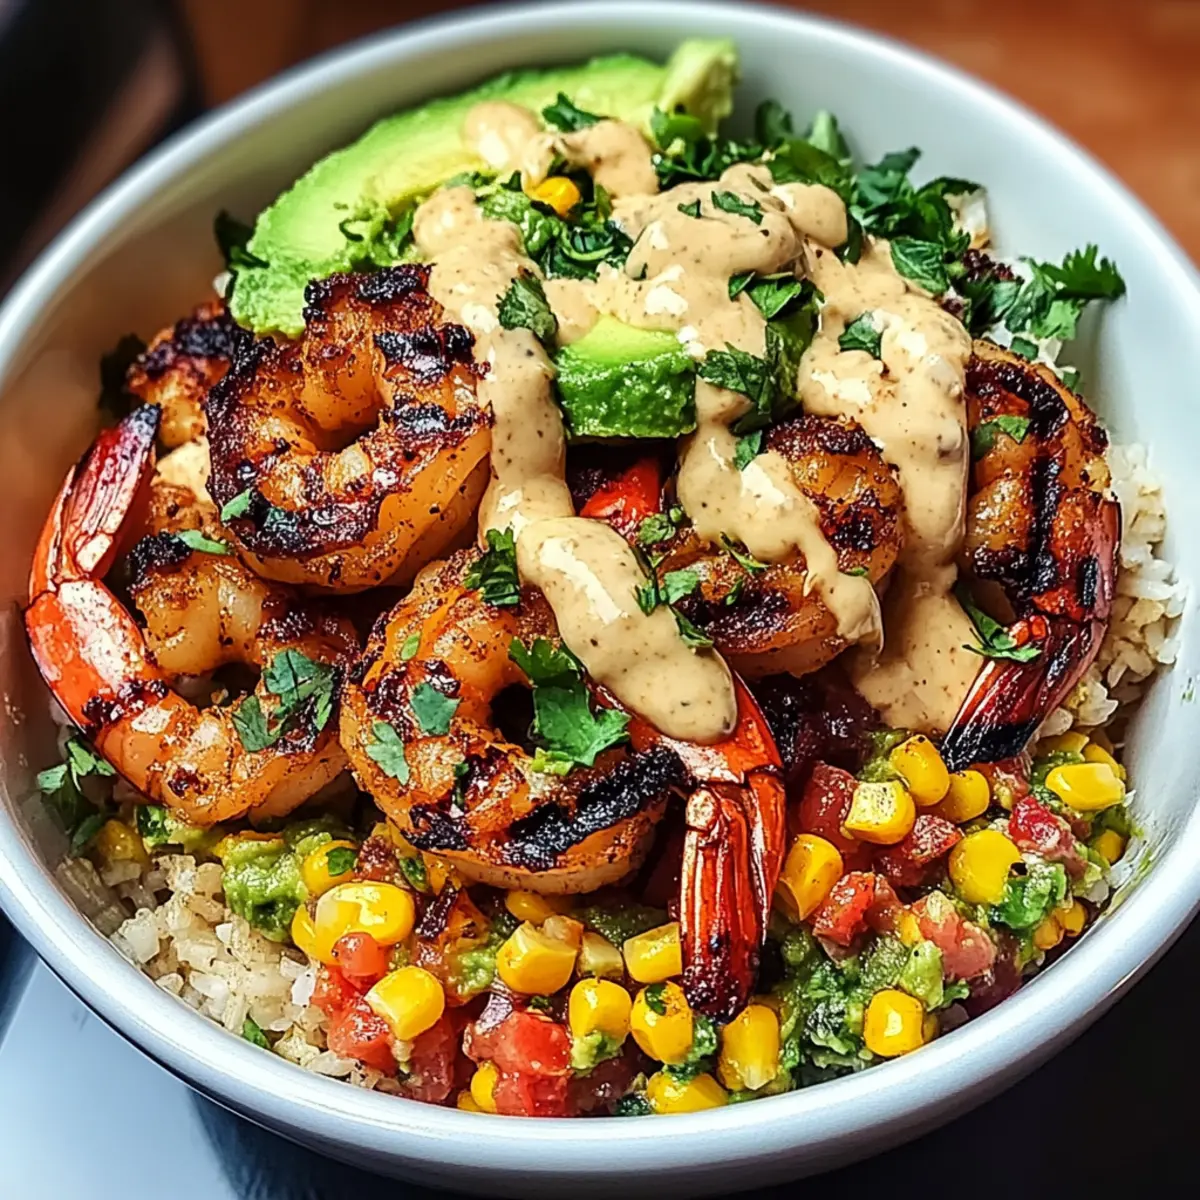
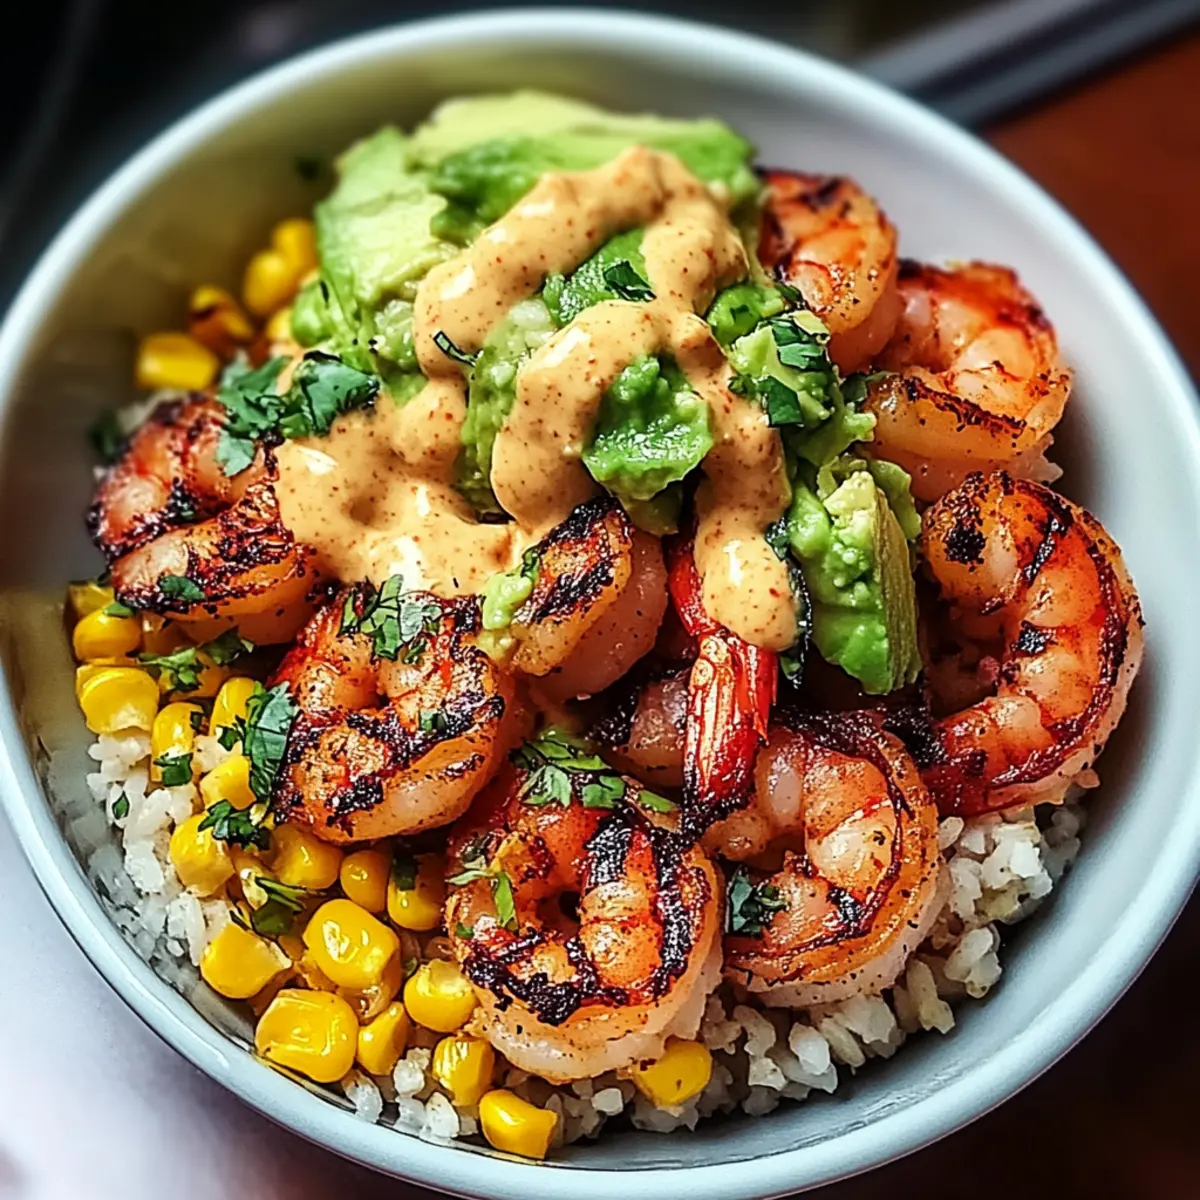
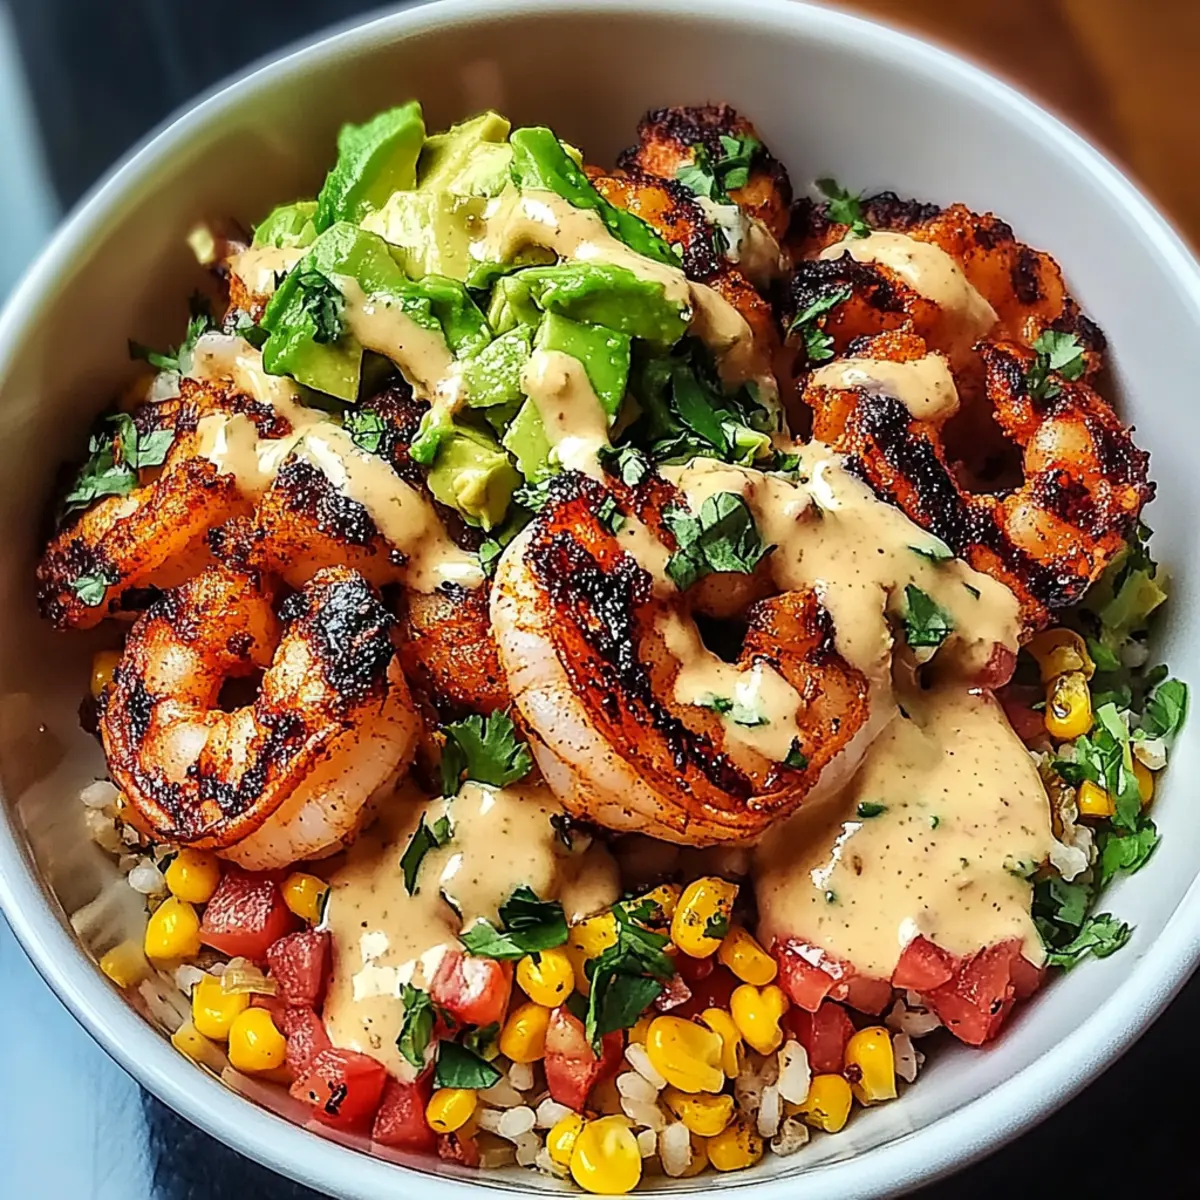
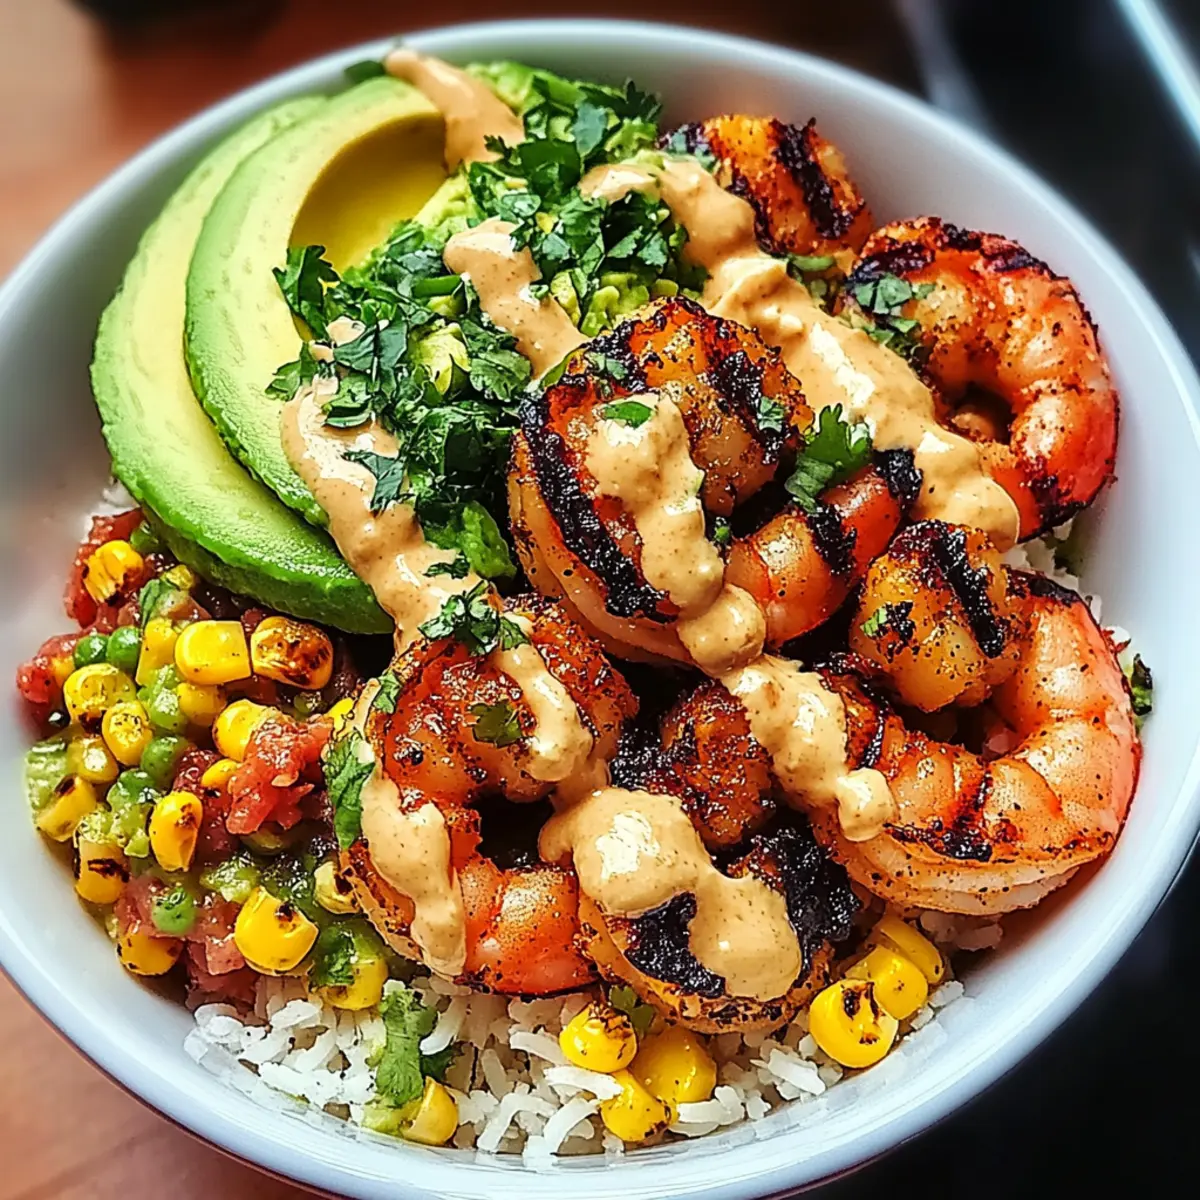
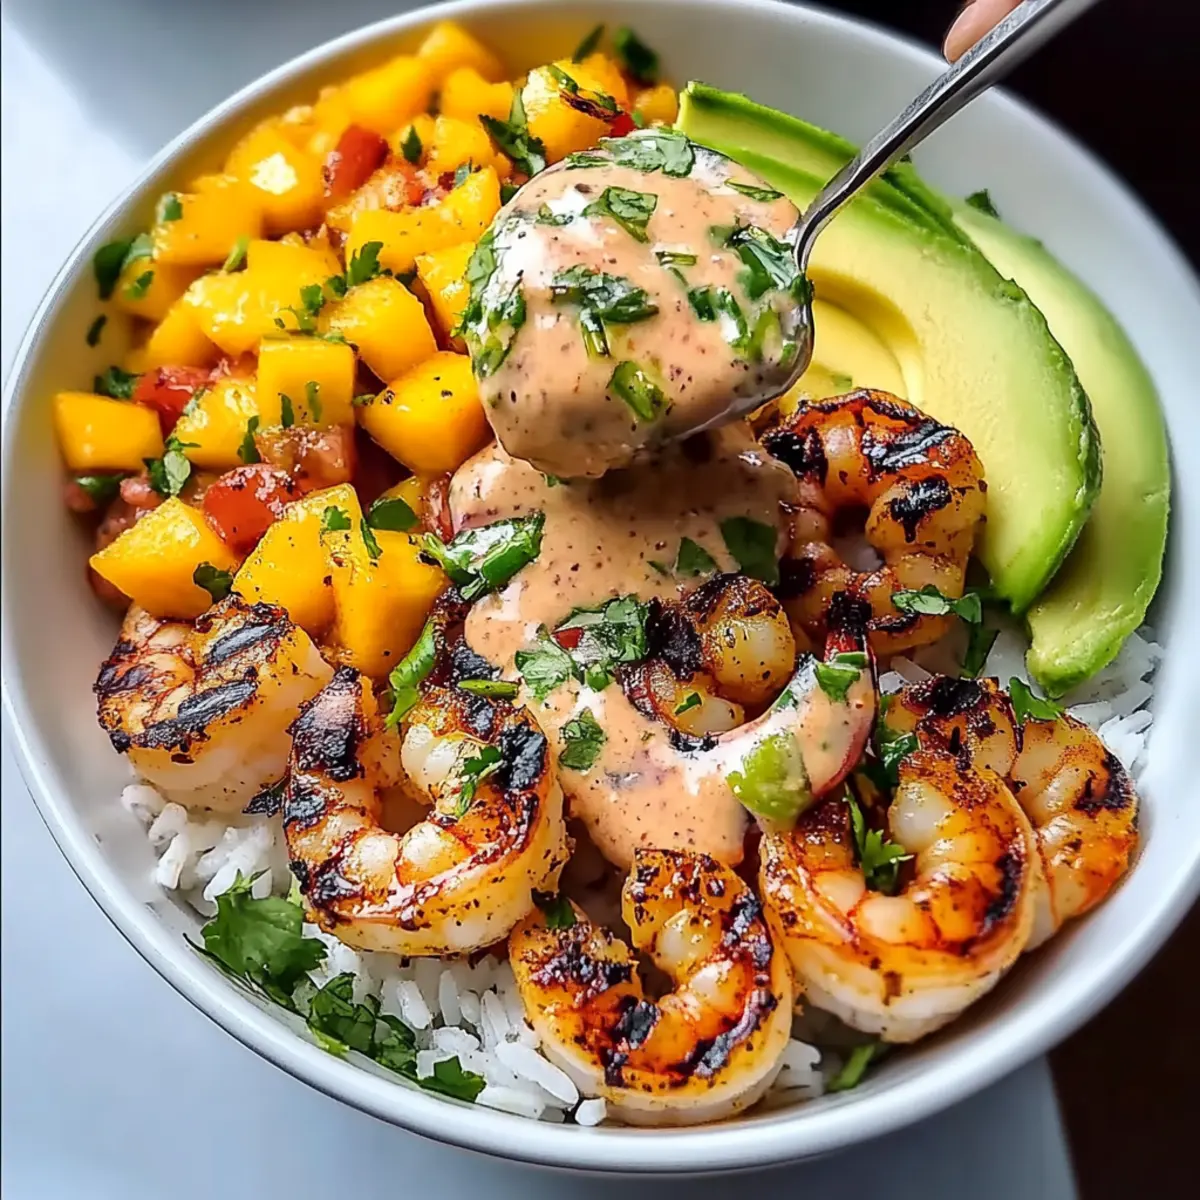
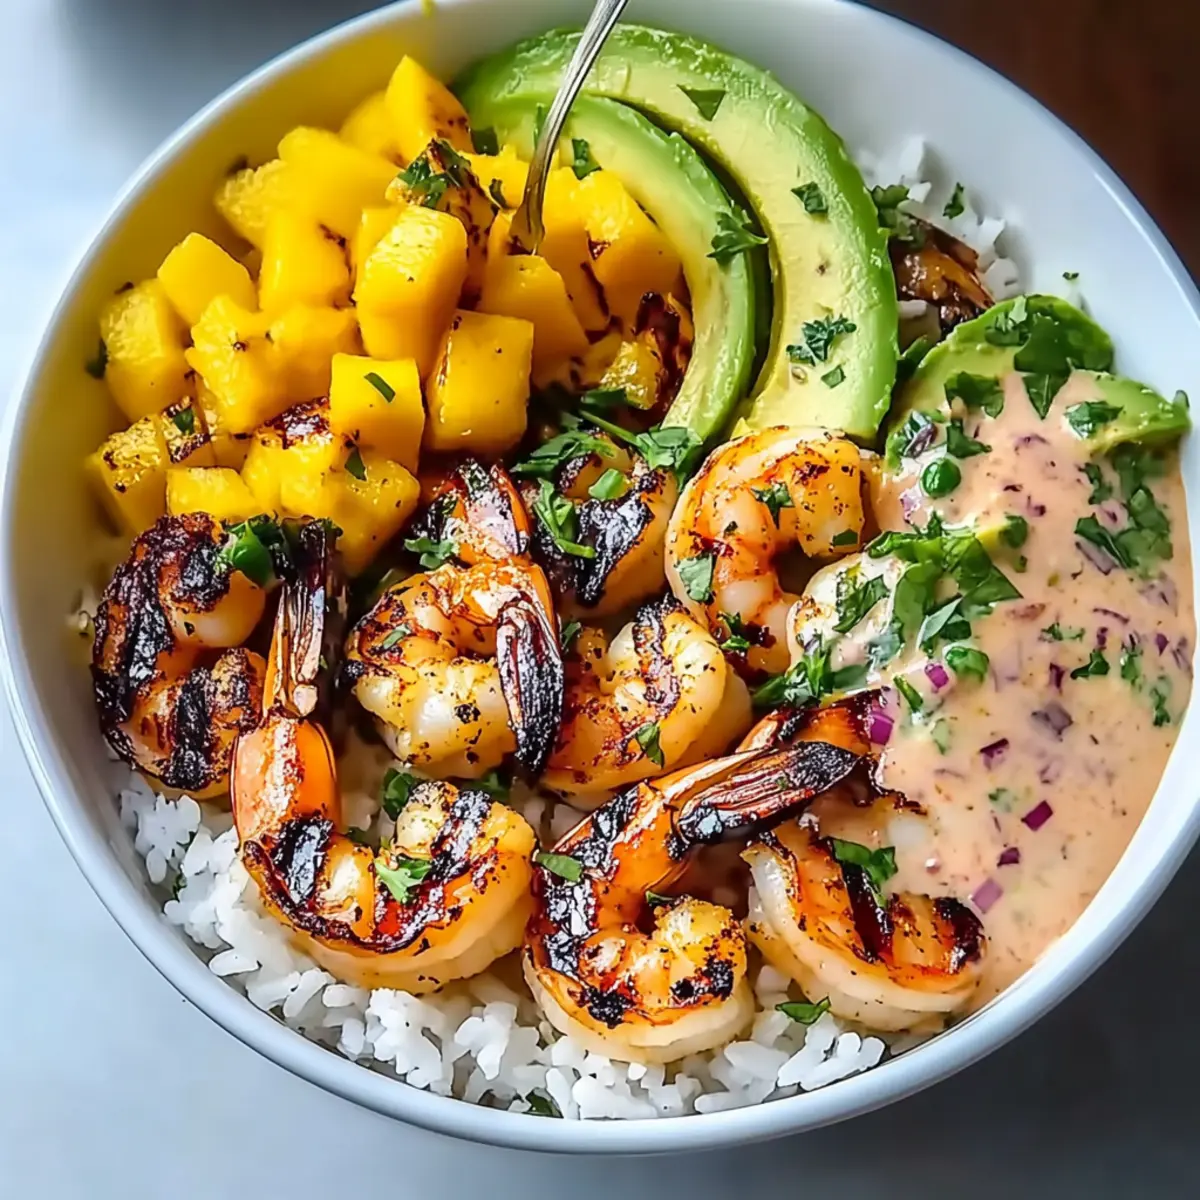
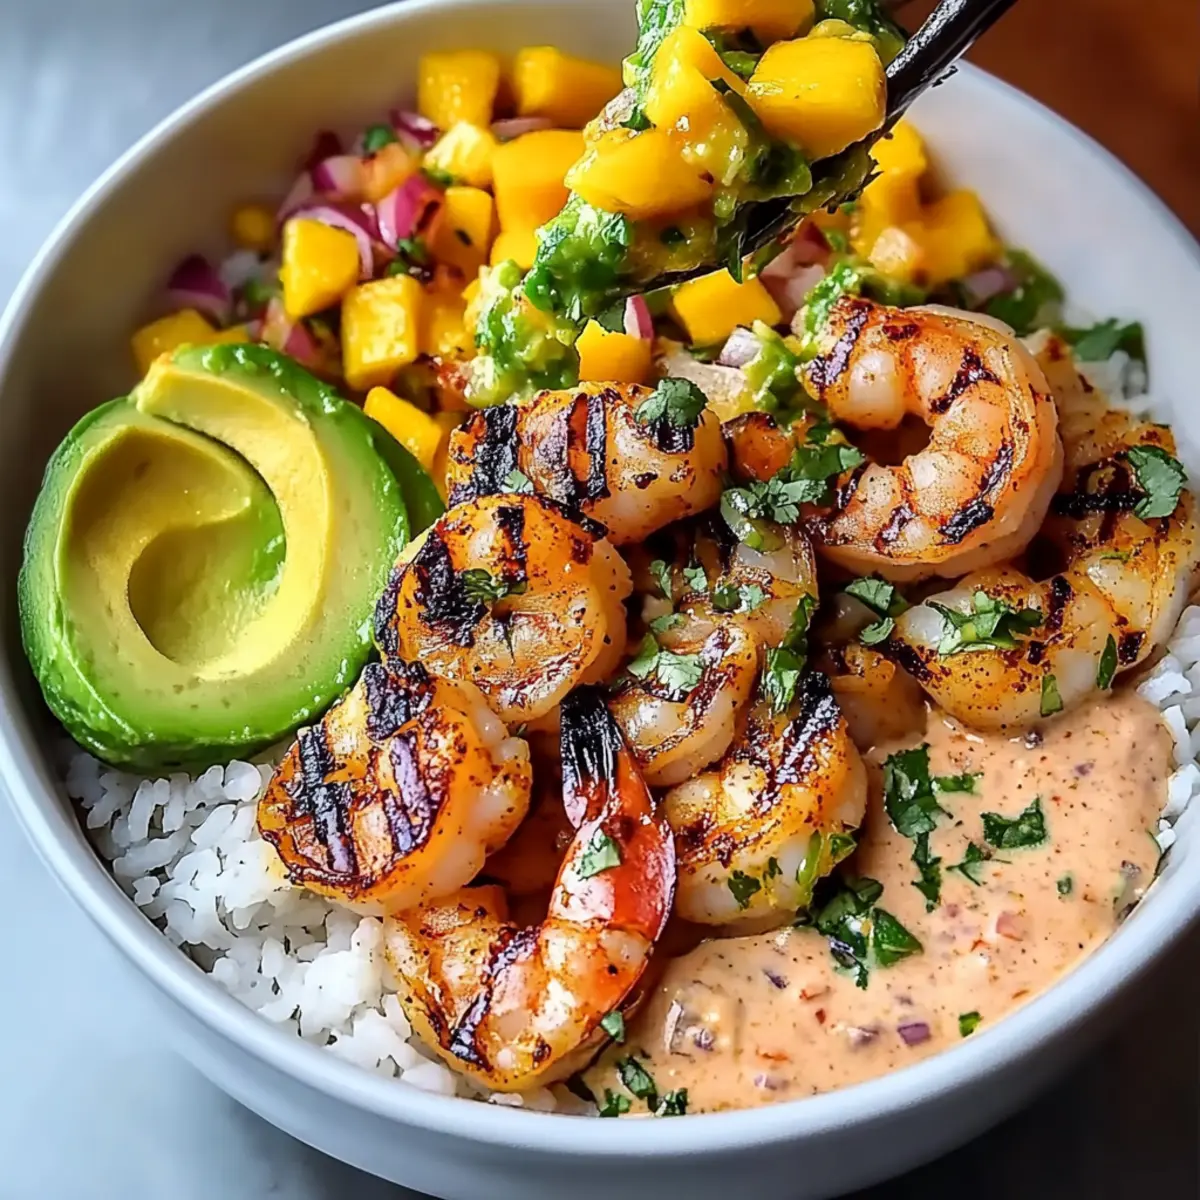
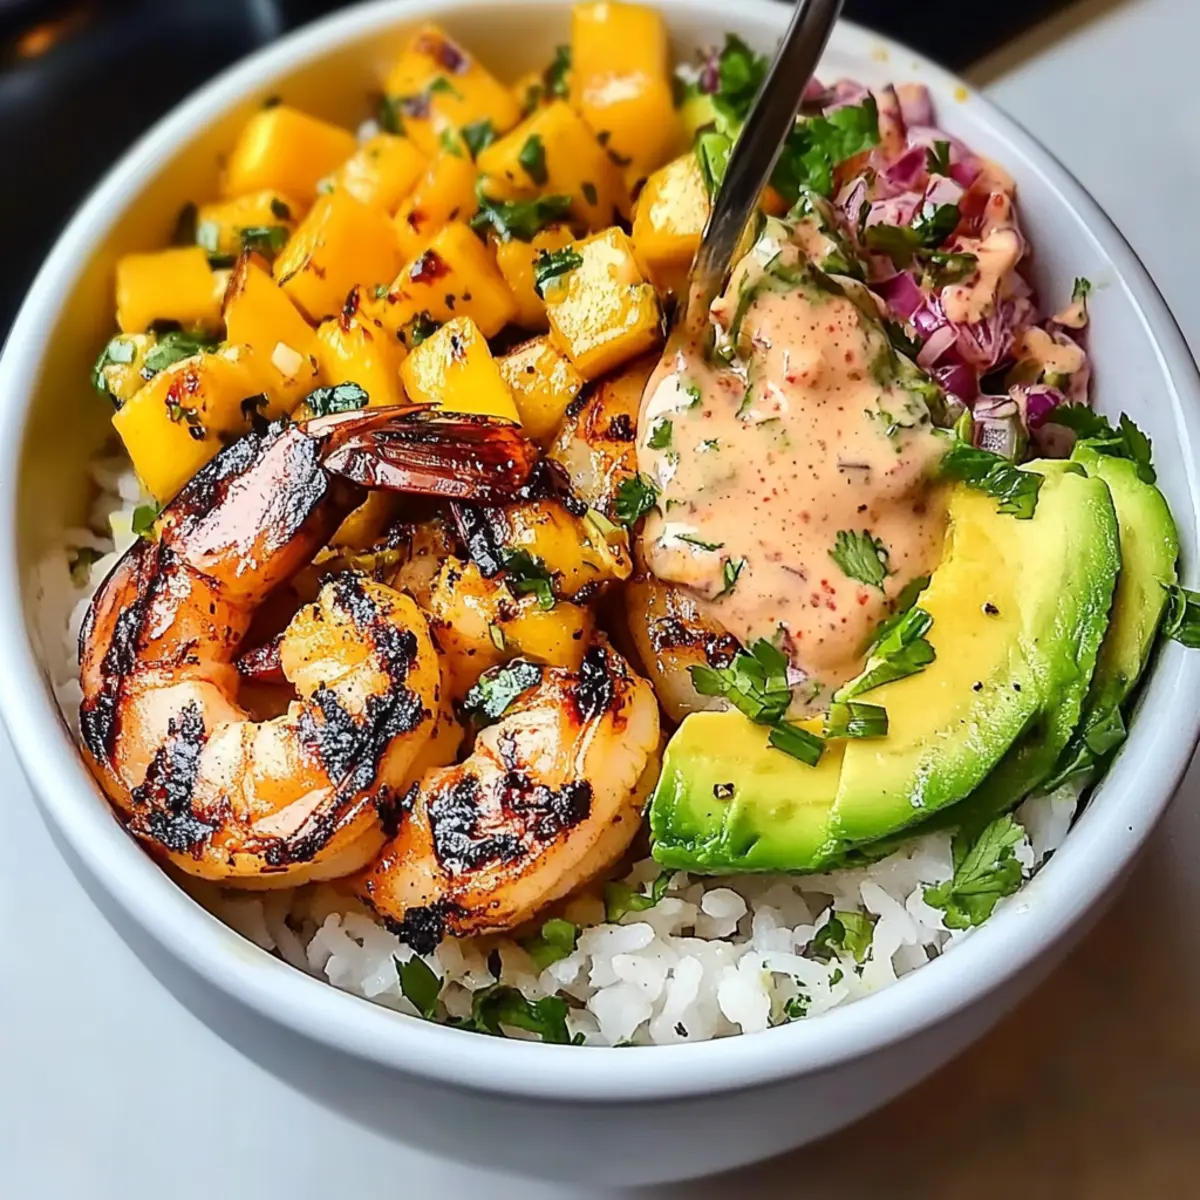
  • Seafood Swap: Replace chicken with grilled shrimp for a lighter, seafood-inspired version that’s deliciously juicy.
  • Vegetarian Delight: Use marinated tofu instead of meat for a plant-based feast, allowing the teriyaki sauce to shine through!
  • BBQ Bliss: Try BBQ sauce instead of teriyaki for a smoky twist that complements the bacon and ham beautifully.
  • Extra Crunch: Add crispy fried onions for an added texture and a touch of savory flavor that brings the whole sandwich alive.
  • Spicy Kick: Sprinkle some Sriracha over the top if you crave heat—this will create a bold contrast to the sweetness of pineapple.
  • Avocado Smoothness: Slice some creamy avocado to layer in, enhancing the sandwich’s richness while providing healthy fats.
  • Add Greens: Toss in some fresh spinach or arugula to introduce a refreshing peppery bite that balances the rich ingredients well.
  • Cheesy Goodness: Melt Swiss or provolone cheese on top of the meats before assembling for an indulgent layer of creaminess.

If you find yourself with leftover meat from your grilling adventures, use those delightful additions for a refreshing twist on meals throughout the week! Whether it’s a vibrant side salad with grilled chicken or a rich sandwich with ham and cheese, the options are endless.

Big Kahuna Stack Sandwich Recipe FAQs

What is the best way to select ripe ingredients for my Big Kahuna Stack Sandwich?
Absolutely! When choosing your chicken thighs, look for those that are plump and have a fresh, pinkish color. For ripe pineapple, opt for those with a sweet aroma and a slight give when pressed; dark spots on the skin can indicate overripeness. Fresh red peppers should be firm and shiny, with no wrinkles or blemishes.

How should I store leftovers from my Big Kahuna Stack Sandwich?
Be sure to store any leftover sandwich ingredients separately. The grilled meats can go into an airtight container in the refrigerator for up to 3 days. If you’re looking to keep them longer, freeze the cooled meats in a freezer-safe bag for up to 2 months. Remember to wrap or seal any buns in plastic wrap to maintain their texture and freshness.

Can I freeze my Big Kahuna Stack Sandwich?
Very! While fully assembled sandwiches can become soggy when frozen, it’s best to freeze only the grilled meats. Place them in a freezer-safe bag after they’ve cooled, and they can last for up to 3 months. When you’re ready, thaw the meat in the fridge overnight and reheat thoroughly on the grill or stovetop. Assemble your sandwich with fresh ingredients just before serving.

What common troubleshooting tips do you have for grilling the perfect meats?
I often find that marinating meats longer than recommended can elevate their flavor, but don’t skip the meat thermometer! Always ensure your chicken reaches an internal temperature of 165°F; it helps prevent foodborne illness. If your chicken isn’t cooking evenly, try adjusting your grill temperature and avoid opening the lid too often, which can cause heat loss.

Are there any dietary considerations for the Big Kahuna Stack Sandwich?
Yes! If you are concerned about allergies, ensure that your teriyaki sauce and other ingredients are free from allergens such as soy or gluten, if they apply. For dietary preferences, consider swapping meats for grilled tofu for a vegetarian version, and use fresh ingredients for a healthier option. Also, for our furry friends, avoid giving them any sandwich due to the presence of seasoning, sauces, and processed meats which can upset their stomachs.

Can I add or substitute any ingredients in the Big Kahuna Stack Sandwich?
Absolutely! The beauty of this sandwich lies in its versatility. For a seafood twist, feel free to substitute grilled shrimp for chicken. If you prefer a lighter option, turkey bacon works wonders, and you can always mix up the sauces—BBQ or honey mustard are fantastic alternatives that will give you a whole new flavor profile!

undefined

Big Kahuna Stack Sandwich: Your BBQ Dream Come True

The Big Kahuna Stack Sandwich is a high-protein BBQ delight featuring chicken thighs, bacon, and ham, all topped with Big Kahuna Teriyaki sauce.
Prep Time 15 minutes
Cook Time 30 minutes
Marinating Time 1 hour
Total Time 1 hour 45 minutes
Servings: 4 sandwiches
Course: Lunch
Cuisine: American
Calories: 750

Ingredients
  

For the Sandwich
  • 4 pieces Chicken Thighs (Boneless, Skinless) Substitute with turkey thighs for a leaner option.
  • 12 slices Bacon Replace with turkey bacon for a lighter variant.
  • 12 oz Ham (Sliced) Use smoked ham for enhanced flavor.
  • 4 pieces King's Hawaiian Burger Buns Regular burger buns can be used for a less sweet option.
For the Toppings
  • 12 oz Big Kahuna Teriyaki Sauce Any teriyaki sauce can be substituted as desired.
  • 8 oz Roasted Red Pepper Substitute with fresh bell peppers for a crunchier texture.
  • 8 slices Pineapple Use fresh pineapple for a vibrant bite.

Equipment

  • Grill
  • Large bowl
  • meat thermometer
  • Resealable Bag

Method
 

Instructions
  1. Marinate the chicken thighs, bacon, and sliced ham in 8 ounces of Big Kahuna Teriyaki sauce. Let them sit in the refrigerator for at least 1 hour.
  2. Preheat your grill to medium-high heat, approximately 400°F.
  3. Grill the marinated chicken thighs for about 6-7 minutes per side, or until they reach an internal temperature of 165°F.
  4. Grill the bacon, sliced ham, and pineapple rings. Cook the bacon until crispy, about 4-5 minutes, and the ham for 2-3 minutes.
  5. Assemble the sandwich with King's Hawaiian buns, grilled chicken thighs, bacon, ham, grilled pineapple, and roasted red peppers.
  6. Drizzle remaining Big Kahuna Teriyaki sauce over the assembled sandwiches.

Nutrition

Serving: 1sandwichCalories: 750kcalCarbohydrates: 45gProtein: 40gFat: 35gSaturated Fat: 10gPolyunsaturated Fat: 5gMonounsaturated Fat: 20gCholesterol: 120mgSodium: 1500mgPotassium: 800mgFiber: 3gSugar: 10gVitamin A: 100IUVitamin C: 15mgCalcium: 20mgIron: 10mg

Notes

Ensure meats marinate for at least an hour for deeper flavor. Assemble the sandwich just before serving to keep ingredients fresh.

Tried this recipe?

Let us know how it was!

Delicious Chicken Avocado Melt Sandwich in Just 30 Minutes

As I stood in my kitchen, a longing for that perfect sandwich struck me—something quick yet hearty to satisfy my cravings. Enter the Chicken Avocado Melt Sandwich! With tender grilled chicken, ripe avocado, and gooey melted cheese nestled between crispy slices of your favorite bread, this recipe is the answer to those busy weekdays when time is of the essence. It’s not only a delightful twist on the classic sandwich but also a wholesome choice that can be made gluten-free! Preparing this mouthwatering meal takes just minutes, ensuring that even the most hectic days can end on a delicious note. Who needs fast food when you can whip this up effortlessly? Ready to embrace an irresistible fusion of flavors? Let’s dive into this recipe that will leave you craving more!

Why is this sandwich a must-try?

Quick and Easy: This Chicken Avocado Melt Sandwich takes just 30 minutes to prepare, making it perfect for busy weeknights.

Hearty and Satisfying: With tender chicken and creamy avocado, it offers a satisfying meal that steers you away from unhealthy fast food.

Versatile Choices: Customize it to your taste by swapping proteins or using different cheeses. Check out our ideas for a Veggie Option!

Gooey Goodness: The melty cheese and crispy bread create a delightful texture that is sure to please everyone at the table.

Healthy Twist: Packed with nutrition, you can easily make it gluten-free and even add in more veggies for a well-rounded dish!

Chicken Avocado Melt Ingredients

For the Sandwich
Boneless Skinless Chicken Breasts – Provides lean protein; substitute with portobello mushrooms or crispy tofu for a vegetarian option.
Avocado – Adds creaminess and healthy fats; use ripe avocados for the best texture.
Cheese (Swiss, Cheddar, or Provolone) – Creates that irresistible melted layer; feel free to mix different cheeses for varied flavors.
Bread – The base of the sandwich for structure; opt for whole grain for a healthier version.

For the Spread
Mayonnaise – Adds moisture and creaminess; can be substituted with Greek yogurt for a lighter option.
Dijon Mustard – Provides a tangy kick; mustard can be omitted or exchanged with a different variety based on your preference.

For Freshness
Red Onion and Tomato – Offers freshness and crunch; you can add spinach or other veggies for enhanced nutrition.

For Cooking
Olive Oil or Butter – For cooking the chicken and grilling the sandwich; helps retain moisture and boosts flavor.

This Chicken Avocado Melt Sandwich is more than just another meal; it’s a heartfelt dish that brings joy and comfort to your table!

Step‑by‑Step Instructions for Chicken Avocado Melt Sandwich

Step 1: Season the Chicken
Generously season your boneless skinless chicken breasts with salt and pepper on both sides. Heat a skillet over medium-high heat and add a drizzle of olive oil. Allow it to heat up for about a minute until shimmering. This process brings out the flavors in the chicken and sets the stage for a delicious Chicken Avocado Melt Sandwich.

Step 2: Cook the Chicken
Carefully place the seasoned chicken breasts in the hot skillet. Cook for 6-7 minutes on each side until the chicken is golden brown and cooked through with no pink inside. Once done, transfer the chicken to a plate and let it rest for a few minutes. Resting helps retain the juices, ensuring a moist and satisfying sandwich.

Step 3: Prepare Your Veggies
While the chicken is resting, slice the ripe avocado, cheese, red onion, and fresh tomato. Aim for even slices to create a well-balanced bite in your Chicken Avocado Melt Sandwich. Set these aside and make sure all components are ready to assemble for efficiency—this is the fun part!

Step 4: Assemble the Sandwich
Spread a layer of mayonnaise and Dijon mustard on one side of each slice of your chosen bread. On two slices, layer in the sliced chicken, followed by avocado, cheese, red onion, and tomato. Top with the remaining slices of bread, mayo side down, creating a beautiful stack of flavors ready to be grilled.

Step 5: Grill the Sandwiches
Heat a clean skillet or grill pan over medium heat and add a bit of butter or olive oil to coat. Place the assembled sandwiches in the skillet and grill for 3-4 minutes on each side, pressing down gently with a spatula to ensure even melting of the cheese and a crisp, golden-brown exterior.

Step 6: Slice and Serve
Once the Chicken Avocado Melt Sandwiches are grilled to perfection, remove them from the skillet. Allow them to cool for about a minute before slicing. This brief cooling period helps set the layers and makes for easier handling. Serve warm, and enjoy the wonderful flavors of your homemade creation!

Make Ahead Options

These Chicken Avocado Melt Sandwiches are perfect for meal prep! You can season and cook the chicken up to 3 days in advance, allowing for quick assembly during busy nights. Simply refrigerate the cooked chicken in an airtight container to retain moisture. You can also slice the avocado, cheese, red onion, and tomato ahead of time; just keep the avocado in lemon juice to prevent browning. When ready to enjoy, assemble the sandwiches using the prepped ingredients, and grill them for about 3-4 minutes per side until golden brown and the cheese is melted. This way, you’ll have a delightful, homemade meal on the table in minutes, even on your busiest days!

Chicken Avocado Melt Variations

Feel free to get creative and make this sandwich your own with these exciting variations!

  • Veggie Delight: Swap chicken for grilled portobello mushrooms or crispy tofu for a hearty vegetarian option that still satisfies. You won’t miss the meat with the rich, umami flavors of the mushrooms.

  • Healthier Twist: Use whole grain bread instead of white and add fresh spinach or arugula along with reduced mayonnaise for an extra health boost. This can elevate your meal without sacrificing flavor.

  • Alternative Cheeses: Experiment with other cheese varieties like mozzarella for a gooey stretch or pepper jack for a spicy kick. Cheese is the heart of the sandwich, so don’t be shy!

  • Avocado Variations: Instead of sliced avocado, consider making an avocado spread by mashing it with lime juice and a pinch of salt. It’ll add a creamy zest to your sandwich!

  • Heat It Up: Add sliced jalapeños or a dash of hot sauce for those who crave a little heat. Spicy elements can elevate the overall flavor profile, making every bite a thrilling experience.

  • Brunch Upgrade: Transform the sandwich into a brunch delight by adding a fried egg on top. The runny yolk adds a rich texture that complements the creamy avocado beautifully.

  • Herbal Infusion: Toss in some fresh herbs like basil or cilantro for an aromatic twist. The freshness adds a vibrant layer of flavor to every bite—perfect for those warm, sunny days.

  • Cooking Style Variations: Try toasting the bread before assembling for an extra crunch or using a panini press for evenly melted cheese and a perfectly crispy exterior. It’s the little touches that make a difference!

Looking for even more ideas? Check out our suggestions for creative alternatives with a Veggie Option to spark your culinary imagination!

Expert Tips for Chicken Avocado Melt Sandwich

  • Rest the Chicken: Let the cooked chicken rest for a few minutes before slicing to retain its juices, ensuring your sandwich is perfectly moist.

  • Be Precise with Temperature: Avoid high heat while cooking the chicken; this prevents it from drying out, helping you achieve that juicy, tender texture in your Chicken Avocado Melt Sandwich.

  • Press Down Gently: When grilling, use a spatula to press down lightly on the sandwiches. This will promote even melting of the cheese and create a delightful crust.

  • Customize Your Flavors: Feel free to experiment with various cheeses and spreads to suit your taste! Mixing flavors can elevate your Chicken Avocado Melt Sandwich to new heights.

  • Prep Ahead: Prepare the chicken and slice your veggies in advance. This way, you can whip up this quick meal in just minutes on those busy nights!

What to Serve with Chicken Avocado Melt Sandwich

Enjoying a delightful meal is all about creating the perfect balance of flavors and textures that complement your main dish.

  • Crispy Sweet Potato Fries: These add a sweet and salty crunch that pairs beautifully with the sandwich’s creaminess, making every bite satisfying.
  • Simple Side Salad: A refreshing mix of greens, cucumbers, and a light vinaigrette keeps the meal light and healthy, balancing the richness of the melt.
  • Creamy Coleslaw: The crunchy texture and tangy flavor of coleslaw enhance the sandwich, offering a delightful contrast that is sure to please.
  • Roasted Vegetables: Seasoned and lightly caramelized veggies like zucchini or bell peppers bring warmth and earthy flavors, enriching the overall meal.
  • Chilled Gazpacho: A cold, refreshing soup made from juicy tomatoes and cucumbers serves as a perfect and vibrant appetizer to start your meal.
  • Sparkling Lemonade: A fizzy and citrusy beverage provides a bright and refreshing note that complements the savory notes of the sandwich.

Each pairing adds its unique flair, creating a meal that is not just easy to make but also a joy to savor!

How to Store and Freeze Chicken Avocado Melt Sandwich

Fridge: Store any leftover assembled sandwiches in an airtight container for up to 3 days. Place parchment paper between layers to prevent sogginess.

Freezer: If you’ve made extra sandwiches, wrap them tightly in plastic wrap and then foil, storing in the freezer for up to 2 months.

Reheating: Thaw in the refrigerator overnight, then reheat on a skillet over medium heat for 4-5 minutes per side until heated through and cheese melts. This way, you’ll enjoy the Chicken Avocado Melt Sandwich just as freshly made!

Fresh Assembly Tip: For best taste and texture, consider assembling the sandwich fresh rather than freezing it.

Chicken Avocado Melt Sandwich Recipe FAQs

What kind of avocado should I use?
Absolutely, using ripe avocados is key! Look for avocados that yield slightly when pressed—this indicates they’re perfect for mashing onto your sandwich. Avoid any with dark spots all over, as these might be overripe.

How long can I store leftover sandwiches?
Leftover assembled sandwiches can be stored in an airtight container in the fridge for up to 3 days. To prevent sogginess, place parchment paper between layers if you stack them.

Can I freeze Chicken Avocado Melt Sandwiches?
Yes, you can! If you’ve made extra sandwiches, wrap them tightly in plastic wrap, then in foil, and store them in the freezer for up to 2 months. For reheating, thaw in the refrigerator overnight and warm them on a skillet at medium heat for about 4-5 minutes per side until heated through and the cheese is melted.

What should I do if my chicken is overcooked and dry?
If you find that your chicken is too dry, you can moisten it by adding a bit of chicken broth or your favorite sauce while you reheat it on the skillet. Additionally, always remember to let the chicken rest after cooking—this helps retain the juices and gives you the tender texture you want!

Are there any allergies I should be aware of?
Absolutely! If you or your loved ones have allergies, it’s wise to consider common allergens in this sandwich. For instance, the cheese and mayonnaise can contain dairy, while bread may have gluten. Opt for gluten-free bread and vegan cheese if needed.

Can I customize the ingredients for dietary preferences?
Absolutely! This recipe is wonderfully versatile. If you want a vegetarian twist, swap the chicken for grilled portobello mushrooms or crispy tofu. You can also substitute the mayonnaise with a vegan alternative or Greek yogurt for a lighter yet creamy option. The more the merrier—get creative and make it your own!

undefined

Delicious Chicken Avocado Melt Sandwich in Just 30 Minutes

This Chicken Avocado Melt Sandwich offers a quick, hearty option for busy weeknights, packed with nutritious ingredients.
Prep Time 15 minutes
Cook Time 15 minutes
Resting Time 5 minutes
Total Time 30 minutes
Servings: 2 sandwiches
Course: Lunch
Cuisine: American
Calories: 450

Ingredients
  

For the Sandwich
  • 2 pieces Boneless Skinless Chicken Breasts substitute with portobello mushrooms or crispy tofu for vegetarian option
  • 1 large Avocado use ripe avocados for the best texture
  • 1 cup Cheese (Swiss, Cheddar, or Provolone) feel free to mix different cheeses
  • 4 slices Bread opt for whole grain for a healthier version
For the Spread
  • 2 tablespoons Mayonnaise can be substituted with Greek yogurt
  • 1 tablespoon Dijon Mustard can be omitted or exchanged
For Freshness
  • 1 small Red Onion sliced
  • 1 large Tomato sliced
For Cooking
  • 2 tablespoons Olive Oil or Butter

Equipment

  • Skillet
  • Cutting board
  • Knife
  • spatula

Method
 

Step-by-Step Instructions for Chicken Avocado Melt Sandwich
  1. Generously season your chicken breasts with salt and pepper. Heat a skillet over medium-high heat and add the olive oil. Allow it to heat up until shimmering.
  2. Carefully place the seasoned chicken in the hot skillet. Cook for 6-7 minutes on each side until golden brown and cooked through. Let it rest for a few minutes to retain juices.
  3. While the chicken is resting, slice the avocado, cheese, red onion, and tomato. Set aside for assembly.
  4. Spread mayo and Dijon mustard on one side of each bread slice. Layer the chicken, avocado, cheese, onion, and tomato on two slices, topping with the other slices, mayo side down.
  5. Heat a skillet or grill pan and add butter or oil. Grill sandwiches for 3-4 minutes per side until golden brown and cheese melts.
  6. Remove from skillet and let cool for a minute before slicing. Serve warm.

Nutrition

Serving: 1sandwichCalories: 450kcalCarbohydrates: 30gProtein: 30gFat: 22gSaturated Fat: 10gPolyunsaturated Fat: 3gMonounsaturated Fat: 12gCholesterol: 80mgSodium: 800mgPotassium: 800mgFiber: 5gSugar: 3gVitamin A: 700IUVitamin C: 10mgCalcium: 200mgIron: 2mg

Notes

Customize flavors with different cheeses and spreads; prep ahead to save time.

Tried this recipe?

Let us know how it was!

Grilled Shrimp Bowl with Avocado and Zesty Corn Salsa

The aroma of smoky grilled shrimp dancing on the grill fills my kitchen, instantly transporting me to sun-soaked summer gatherings. You can savor that feeling year-round with my Quick Grilled Shrimp Bowl featuring creamy avocado, zesty corn salsa, and a deliciously smooth sauce. This dish not only comes together in just 30 minutes, making it the ultimate go-to for quick meals, but it’s also healthy and fully customizable to suit your cravings. Whether you’re looking to impress at a dinner party or seeking a meal prepped lunch throughout the week, this bowl has you covered. Ready to dive into a fiesta of flavors that nourishes both body and soul? Let’s get cooking!

Why is this shrimp bowl a must-try?

Deliciously customizable: You can easily swap out shrimp for chicken or tofu, so everyone can enjoy it.
Health-conscious choice: Packed with protein and healthy fats, this bowl supports your wellness goals without sacrificing flavor.
Quick and convenient: Ready in just 30 minutes, it’s perfect for busy weeknights or meal prep.
Bursting with flavor: The combination of smoked paprika, zesty lime, and fresh ingredients creates a fiesta of tastes in every bite.
Colorful presentation: The vibrant colors from the corn salsa and avocado make it a feast for the eyes, ideal for impressing guests.
Elevate your meal game with this meal prep-friendly recipe that not only nourishes but also delights!

Grilled Shrimp Bowl Ingredients

Here’s what you’ll need:

For the Shrimp

  • Shrimp – The star of the show, bursting with protein; feel free to substitute with chicken or tofu if you prefer.
  • Olive Oil – This adds moisture and enhances flavor; no substitutions needed as it’s key for grilling.
  • Smoked Paprika – Infuses a smoky depth; use regular paprika if you want a milder taste.
  • Cumin – Adds earthy notes; it’s optional to skip if you don’t have it on hand.
  • Chili Powder – Offers a kick of heat; adjust the amount based on your spice tolerance.
  • Garlic Powder – Elevates flavor with a savory punch; fresh garlic can be used but may require timing adjustments.
  • Lime Juice – Brightens up all ingredients; can be swapped for lemon juice in a pinch.
  • Salt and Pepper – Basic seasonings that enhance flavors; adjust to suit your taste preferences.

For the Corn Salsa

  • Corn – Provides a sweet crunch; frozen corn works perfectly if fresh isn’t available.
  • Diced Red Bell Pepper – Adds sweetness and vibrant color; you can substitute with other bell peppers.
  • Chopped Green Onions – Brings a refreshing touch; red onion can be a viable alternative.
  • Chopped Cilantro – Imparts freshness; you may omit if cilantro isn’t your favorite.

For the Creamy Sauce

  • Mayo (or Greek yogurt) – The creamy base that adds richness; swap yogurt for a lighter option.
  • Hot Sauce – Optional for an extra kick; feel free to leave it out if you prefer a milder sauce.
  • Thickening Ingredients – Adjust with water as needed to reach your desired sauce consistency.

Dive into this Grilled Shrimp Bowl with Avocado, Corn Salsa, and Creamy Sauce, and let every bite bring you closer to culinary paradise!

Step-by-Step Instructions for Quick Grilled Shrimp Bowl with Avocado, Corn Salsa & Creamy Sauce

Step 1: Marinate Shrimp
In a large bowl, combine olive oil, smoked paprika, cumin, chili powder, garlic powder, lime juice, salt, and pepper. Stir well to blend all the seasonings. Add the shrimp, ensuring each piece is evenly coated, then cover and let marinate for 15–20 minutes at room temperature for maximum flavor.

Step 2: Prepare Corn Salsa
While the shrimp marinates, prepare the corn salsa. In a medium bowl, mix together the corn, diced red bell peppers, chopped green onions, cilantro, lime juice, and a pinch of salt. Stir to combine, ensuring each ingredient is well integrated. Cover and refrigerate until you’re ready to serve, allowing the flavors to meld.

Step 3: Prepare Avocado Mash
Next, scoop the ripe avocados into a separate bowl. Add lime juice, salt, and pepper, then mash with a fork to achieve a creamy yet slightly chunky consistency. Set this aside; this fresh avocado mash will add a rich texture to your Grilled Shrimp Bowl, complementing the other vibrant ingredients.

Step 4: Make Creamy Sauce
In another bowl, whisk together mayo (or Greek yogurt), lime juice, hot sauce (if using), garlic powder, smoked paprika, cilantro, and a pinch of salt. Adjust the sauce’s thickness by adding a little water as needed until it reaches your desired consistency. This zesty creamy sauce will tie all the flavors together perfectly.

Step 5: Grill Shrimp
Preheat your grill or grill pan to medium-high heat, ensuring it’s hot enough to sear the shrimp. Place the marinated shrimp on the grill, cooking for about 2–3 minutes on each side, or until they turn pink and develop a light char. Remove from the grill and let them rest for a moment, ensuring they remain juicy.

Step 6: Assemble Bowl
To assemble your Quick Grilled Shrimp Bowl, start with a generous base of rice or quinoa. Layer on the freshly made corn salsa, followed by a scoop of avocado mash. Nestle the grilled shrimp on top, and drizzle with the creamy sauce. Garnish with extra cilantro for a fresh, appealing finish.

How to Store and Freeze Grilled Shrimp Bowl

Fridge: Store leftover components in airtight containers for up to 3 days. Keep shrimp, corn salsa, and creamy sauce separate to maintain freshness and flavor.

Freezer: If needed, freeze the marinated shrimp and creamy sauce separately in airtight bags for up to 3 months. Thaw in the fridge overnight before grilling.

Reheating: Reheat the shrimp on a grill or skillet over medium heat until warmed through. Avoid microwaving, as it can make shrimp rubbery.

Assembly Tip: If you’ve stored components individually, assemble your Grilled Shrimp Bowl fresh, layering the ingredients just before serving for optimal taste and presentation.

What to Serve with Quick Grilled Shrimp Bowl with Avocado, Corn Salsa & Creamy Sauce

A vibrant grilled shrimp bowl deserves delightful companions that enhance its flavors and textures.

  • Cilantro Lime Rice: The zesty flavors of cilantro lime rice complement the shrimp beautifully, making every bite a refreshing experience.
  • Crunchy Tortilla Chips: Serve these for added texture and a satisfying crunch, perfect for scooping up that creamy sauce.
  • Garden Salad: A light, fresh salad with mixed greens and a citrus vinaigrette adds vibrancy and balances the richness of the bowl.
  • Grilled Vegetables: Seasonal veggies like zucchini and bell peppers, grilled with a dash of olive oil, bring an earthy contrast to the dish.
  • Black Bean Salsa: Spicy black bean salsa adds depth and hearty protein, inviting a delightful contrast to the sweet corn and creamy avocado.
  • Margaritas: A refreshing classic, the tangy citrus notes in a margarita pair beautifully with the smoky shrimp flavors.
  • Fruit Salad: A light fruit salad with mango and pineapple brings a sweet finish to your meal, cleansing the palate perfectly.
  • Cornbread: Warm cornbread served on the side brings a comforting and slightly sweet element that pairs well with the grilled shrimp.
  • Lime Sorbet: End your meal with a refreshing lime sorbet to mimic the zesty lime notes in the dish while satisfying your sweet tooth.

Variations & Substitutions for Grilled Shrimp Bowl

Feel free to get creative with this recipe, as customizing it can lead to delightful new flavor experiences!

  • Protein Swap: Substitute shrimp with chicken or tofu for a different take on this tasty dish.

  • Vegetable Boost: Add black beans, diced tomatoes, or jalapeños for an exciting mix of flavors and textures.

  • Grain Alternatives: Use quinoa, farro, or brown rice instead of white rice for a heartier base with additional nutrition.

  • Mexican Flair: Toss in some diced avocados or mango for a tropical twist—think of this bowl as a flavor fiesta!

  • Spice Level: Increase or decrease chili powder to match your heat tolerance or try adding a pinch of cayenne for an extra kick.

  • Dairy-Free Option: For a vegan creamy sauce, substitute mayo with a cashew cream or avocados to keep it rich and silky.

  • Herb Variations: Use fresh parsley or basil in place of cilantro if you’re not a fan; they provide a fresh aromatic touch.

  • Fruit Fusion: For a unique touch, add fresh pineapple or kiwi to your corn salsa for a sweet contrast to the savory shrimp.

Experimenting with these variations will undoubtedly make your Grilled Shrimp Bowl with Avocado a staple in your meal prep!

Expert Tips for the Best Grilled Shrimp Bowl

  • Marination Magic: Ensure shrimp are fully coated in the marinade; it’s essential for achieving maximum flavor. Don’t skip this step!
  • Cook Carefully: Avoid overcooking the shrimp; they should be pink and slightly charred for that tender, juicy bite.
  • Fresh Ingredients: Use fresh lime juice for the best flavor in your creamy sauce and corn salsa; it truly makes a difference!
  • Balance the Heat: Adjust the chili powder according to your spice preference; you can start with less and add more if desired.
  • Layering Flavors: Assemble your bowl in layers to balance flavors and textures; a pretty presentation makes every bite more enjoyable!
  • Storage Savvy: Store leftover components separately in airtight containers; this keeps everything fresh and ready for quick meals!

Make Ahead Options

These Quick Grilled Shrimp Bowls are ideal for meal prep, saving you precious time during busy weekdays! You can marinate the shrimp up to 24 hours in advance for deep flavor infusion. Prepare the corn salsa and creamy sauce beforehand, storing them in airtight containers in the refrigerator where they stay fresh for up to 3 days. For the avocado mash, to prevent browning, add a little extra lime juice and cover it tightly; it can be stored for up to 12 hours. When you’re ready to serve, simply grill the marinated shrimp and assemble your bowl with all the prepped ingredients, ensuring a fresh, delicious meal with minimal effort!

Grilled Shrimp Bowl with Avocado, Corn Salsa & Creamy Sauce Recipe FAQs

How do I select the best shrimp for this recipe?
Absolutely! When choosing shrimp, look for those that are firm and shiny, with a fresh sea smell. Avoid shrimp with dark spots all over their shells, as this may indicate spoilage. Frozen shrimp can also be a great option; just ensure they are properly thawed before marinating.

What is the best way to store leftovers from the Grilled Shrimp Bowl?
Very! Store the leftover components in airtight containers. The shrimp and creamy sauce can be stored for up to 3 days in the fridge when kept separate from the corn salsa and avocado mash to maintain freshness. This way, you can enjoy your delicious meal again without compromising on flavor!

Can I freeze the shrimp and sauce for later use?
Absolutely! If you’re not planning to eat everything right away, you can freeze the marinated shrimp and creamy sauce in airtight freezer bags for up to 3 months. To do this, prepare the shrimp in its marinade, seal in a freezer bag, and lay flat to freeze. For the creamy sauce, simply whisk it up, then store it in a separate bag. Thaw both in the fridge overnight before grilling.

What if my shrimp are overcooked?
Oh no! If your shrimp get accidentally overcooked, they might turn rubbery. To prevent this, watch them closely while grilling; they should only take about 2–3 minutes per side. If you find they are overcooked, serve with a lot of the creamy sauce, which can add moisture. Remember, shrimp should be pink and slightly charred but not tough.

Can I adjust the recipe for dietary restrictions?
Yes, indeed! This Grilled Shrimp Bowl is very versatile. If you have seafood allergies, substitute shrimp with chicken or tofu for another protein option. For gluten-free needs, serve it over quinoa or brown rice instead of traditional rice. Additionally, feel free to omit any ingredients such as cilantro if you don’t prefer them, ensuring the meal meets your needs and tastes.

How should I store the creamy sauce after preparation?
For sure! The creamy sauce can be stored in an airtight container in the refrigerator for up to 3 days. Be sure to give it a good stir before serving, as the ingredients might separate. If you’d like to keep it fresh longer, consider freezing it; just make sure to leave a little space in the container, as sauces can expand when frozen.

undefined

Grilled Shrimp Bowl with Avocado and Zesty Corn Salsa

Enjoy a delicious grilled shrimp bowl featuring customizable ingredients, healthy fats, and zesty flavors in just 30 minutes.
Prep Time 15 minutes
Cook Time 15 minutes
Marinating Time 20 minutes
Total Time 30 minutes
Servings: 4 bowl
Course: Dinner
Cuisine: Mexican
Calories: 350

Ingredients
  

For the Shrimp
  • 1 pound Shrimp Substitute with chicken or tofu if desired.
  • 2 tablespoons Olive Oil
  • 1 teaspoon Smoked Paprika Use regular paprika for a milder taste.
  • 1/2 teaspoon Cumin Optional.
  • 1/2 teaspoon Chili Powder Adjust for spice tolerance.
  • 1 teaspoon Garlic Powder Fresh garlic can be used.
  • 2 tablespoons Lime Juice Can substitute with lemon juice.
  • to taste Salt
  • to taste Pepper
For the Corn Salsa
  • 1 cup Corn Frozen corn works well.
  • 1 medium Diced Red Bell Pepper Substitute with other bell peppers.
  • 1/4 cup Chopped Green Onions Red onion can be used as an alternative.
  • 1/4 cup Chopped Cilantro Omit if not a cilantro fan.
For the Creamy Sauce
  • 1/2 cup Mayo (or Greek yogurt) Yogurt is a lighter option.
  • 1 teaspoon Hot Sauce Optional.
  • as needed Water To adjust sauce consistency.

Equipment

  • Grill
  • Mixing Bowl
  • whisk
  • Fork

Method
 

Step-by-Step Instructions
  1. Marinate shrimp: Combine olive oil, smoked paprika, cumin, chili powder, garlic powder, lime juice, salt, and pepper. Add shrimp and coat well. Let marinate for 15–20 minutes.
  2. Prepare corn salsa: Mix corn, diced red bell pepper, chopped green onions, cilantro, lime juice, and a pinch of salt in a bowl. Cover and refrigerate.
  3. Prepare avocado mash: Mash ripe avocados in a bowl with lime juice, salt, and pepper until creamy yet slightly chunky.
  4. Make creamy sauce: Whisk mayo (or Greek yogurt), lime juice, hot sauce, garlic powder, smoked paprika, cilantro, and salt. Adjust thickness with water as needed.
  5. Grill shrimp: Preheat grill to medium-high heat. Cook marinated shrimp for 2–3 minutes on each side until pink and charred. Let rest.
  6. Assemble bowl: Start with rice or quinoa, then layer corn salsa, avocado mash, grilled shrimp, and drizzle with creamy sauce. Garnish with cilantro.

Nutrition

Serving: 1bowlCalories: 350kcalCarbohydrates: 30gProtein: 25gFat: 15gSaturated Fat: 2gPolyunsaturated Fat: 3gMonounsaturated Fat: 10gCholesterol: 200mgSodium: 600mgPotassium: 600mgFiber: 6gSugar: 4gVitamin A: 10IUVitamin C: 40mgCalcium: 6mgIron: 15mg

Notes

Store leftovers separately in airtight containers for freshness. Reheat shrimp gently to avoid rubbery texture. Assemble bowls just before serving for best taste.

Tried this recipe?

Let us know how it was!

Mediterranean Shrimp Bowl with Sweet Mango Salsa Bliss

From the moment I tossed the succulent shrimp onto the grill, the air filled with the lively aromas of the Mediterranean. This Mediterranean Shrimp Bowl with Mango Salsa & Lime-Chili Sauce is a delightful escape from the ordinary, offering a vibrant mix of flavors and textures that awaken the senses. In just 30 minutes, you can whip up this healthy, gluten-free dish brimming with customized options to suit every palate—whether you’re in the mood for grilled chicken or a spicy vegan alternative. Not only does it come together quickly, but it also packs a punch of freshness, making it the perfect meal for busy weeknights or laid-back weekends. Are you ready to dive into a bowl that celebrates color and taste while fitting seamlessly into your busy lifestyle? Let’s get cooking!

Why Is This Bowl a Must-Try?

Quick Prep: This dish takes only 30 minutes, making it ideal for weeknight dinners when time is tight.

Endless Customization: With the option to swap shrimp for chicken, salmon, or plant-based proteins, everyone can enjoy their favorite flavors.

Bursting with Freshness: The combination of mango salsa and lime-chili sauce brings a refreshing twist that’s simply irresistible.

Gluten-Free Goodness: Perfect for those with gluten sensitivities, this bowl is both nourishing and satisfying.

Crowd-Pleaser: Assemble a colorful feast that’s sure to impress family and friends during gatherings.

Dive into a dish that’s packed with robust Mediterranean flavors by checking out this delicious gluten-free option!

Mediterranean Shrimp Bowl Ingredients

For the Shrimp

  • Shrimp – A key protein source; fresh or frozen will work, just be sure to thaw if frozen.
  • Olive Oil – Enhances moisture and cooking; feel free to substitute with avocado oil for a lighter option.
  • Garlic Powder – Infuses a savory depth; adjust according to your taste for a stronger or milder flavor.
  • Onion Powder – Adds a subtle sweetness; can be enhanced or reduced based on personal preference.
  • Salt – Essential seasoning to elevate all flavors; start with a pinch and adjust as needed.
  • Pepper – Brings warmth and slight heat; freshly ground will offer more robust flavor.

For the Mango Salsa

  • Mango – Provides a fresh, sweet contrast; diced pineapple can be used for a fun twist instead.
  • Red Onion – Adds crunch and sharpness; green onions can substitute for a milder flavor.
  • Cilantro – Brightens the dish with fresh herbaceous notes; parsley can be used if you prefer.
  • Lime Juice – Zesty acidity balances the sweetness; lemon juice is a great alternative if needed.
  • Jalapeño (optional) – Infuses a spicy kick; can be excluded or swapped for bell pepper for milder flavor.
  • Salt & Pepper – Enhances the overall taste; adjust according to your preference.

For the Lime-Chili Sauce

  • Mayonnaise – Adds creaminess to the sauce; Greek yogurt is a lighter alternative.
  • Sriracha – Delivers heat and tanginess; tailor it to your spice tolerance for the perfect kick.
  • Lime Juice – Brightens the sauce; use fresh for the best flavor.
  • Garlic Powder – Reinforces the savory taste; modify based on personal preference.
  • Onion Powder, Salt, Pepper – Fundamental seasonings that round out the sauce.

For the Base

  • Cooked Rice – A hearty foundation for the bowl; consider cauliflower rice for a low-carb option.
  • Avocado – Provides a creamy texture that balances the dish; no substitute provides the same richness.
  • Sesame Seeds/Pepitas (optional) – For garnishing; add crunch and a nutritious element to your bowl.

Embark on this culinary adventure and savor the delightful flavors with the Mediterranean Shrimp Bowl that everyone will love!

Step‑by‑Step Instructions for Mediterranean Shrimp Bowl with Mango Salsa & Lime-Chili Sauce

Step 1: Prepare the Shrimp
Start by tossing the peeled shrimp in a bowl with olive oil, garlic powder, onion powder, salt, and pepper until evenly coated. Preheat your grill or grill pan over medium-high heat, then place the shrimp on the grill. Cook for 2-3 minutes on each side, or until the shrimp turn pink and slightly caramelized, which adds a wonderful depth of flavor.

Step 2: Make the Mango Salsa
While the shrimp is cooking, prepare the mango salsa. In a medium bowl, combine diced mango, finely chopped red onion, chopped cilantro, lime juice, and jalapeño (if using). Season with salt and pepper to taste. Stir gently and let the salsa sit for at least 5 minutes, allowing the flavors to meld together, enhancing the delicious freshness of your Mediterranean Shrimp Bowl.

Step 3: Create the Lime-Chili Sauce
In another bowl, whisk together mayonnaise, Sriracha, lime juice, garlic powder, onion powder, and a pinch of salt and pepper until smooth and creamy. Taste it and adjust the Sriracha for your preferred spice level. This zesty lime-chili sauce will be the perfect finishing touch for your Mediterranean Shrimp Bowl, giving it a kick that complements the sweet mango salsa beautifully.

Step 4: Assemble the Bowls
Now, it’s time to assemble your Mediterranean shrimp bowls! Start with a generous scoop of cooked rice as your base in each bowl. Layer the grilled shrimp on top, followed by slices of creamy avocado. Spoon the vibrant mango salsa over the shrimp and rice, then drizzle with the zesty lime-chili sauce to tie everything together in delicious harmony.

Step 5: Garnish and Serve
Finally, add some finishing touches to your Mediterranean Shrimp Bowl. Garnish each bowl with a sprinkle of additional cilantro, lime wedges, and a dash of chili flakes or toasted sesame seeds for added crunch. Serve immediately, inviting everyone to enjoy this colorful, flavorful, and customizable feast that showcases the best of Mediterranean cuisine.

Storage Tips for Mediterranean Shrimp Bowl

Fridge: Store leftover shrimp, rice, and mango salsa in separate airtight containers for up to 3 days to maintain freshness and flavor.

Freezer: Freeze the cooked shrimp and rice together in an airtight container for up to 1 month. Thaw overnight in the fridge before reheating.

Reheating: Gently reheat the shrimp and rice in a skillet over medium heat or in the microwave until warmed through, ensuring not to overcook the shrimp again.

Avocado Storage: For any extra avocado slices, store in an airtight container with a squeeze of lime juice to prevent browning. Enjoy within 1-2 days.

Expert Tips for the Mediterranean Shrimp Bowl

  • Perfectly Cooked Shrimp: Aim for shrimp that are just pink and opaque. Overcooking will lead to a tough texture, ruining your Mediterranean shrimp bowl’s appeal.

  • Flavorful Salsa Resting: Allow your mango salsa to sit for at least 5 minutes before serving. This will enhance the flavors and meld the ingredients beautifully.

  • Store Strategically: To keep your avocado from browning, store it separately from the other ingredients in an airtight container. This maintains the quality of your Mediterranean shrimp bowl.

  • Customize to Taste: Don’t hesitate to adjust seasoning and spice levels as per your liking. Experiment with chopped herbs or various proteins to make the dish uniquely yours.

  • Smart Ingredient Swaps: If you don’t have something on hand, substitutes work wonders! Try Greek yogurt instead of mayonnaise for a lighter sauce without losing creaminess.

What to Serve with Mediterranean Shrimp Bowl with Mango Salsa & Lime-Chili Sauce?

Pairing your Mediterranean Shrimp Bowl with the right sides enhances flavor and texture, creating a delightful dining experience.

  • Cucumber-Tomato Salad: A refreshing blend that delivers crispness and acidity, balancing the shrimp’s richness.
  • Garlic Bread: Its warm, buttery texture makes a fantastic contrast to the vibrant flavors of the bowl.
  • Grilled Vegetable Skewers: Smoky and charred, these will enhance the Mediterranean theme while adding extra nutrients.
  • Quinoa Pilaf: Light and nutty, quinoa offers a healthy, protein-packed alternative to rice, adding delightful texture.
  • Roasted Chickpeas: Crunchy and seasoned, they provide a plant-based protein boost and a satisfying crunch.
  • Mint Lemonade: This zesty drink complements the lime-chili sauce perfectly, refreshing your palate between bites.
  • Chocolate Mousse: End your meal on a sweet note; its creamy decadence provides a luscious contrast to the savory bowl.

With these delightful pairings, create a feast that invites family and friends to savor every moment together!

Make Ahead Options

These Mediterranean Shrimp Bowls with Mango Salsa & Lime-Chili Sauce are a fantastic option for meal prep, saving you time on busy weeknights! You can prepare the shrimp by marinating them in olive oil, garlic powder, onion powder, salt, and pepper up to 24 hours in advance, ensuring they remain flavorful and tender. Additionally, the vibrant mango salsa can be made a day ahead and stored in the refrigerator; just give it a quick stir before serving to refresh the flavors. To maintain quality, store the avocado separately to prevent browning. When you’re ready to serve, simply grill the marinated shrimp, assemble the bowls over fresh rice, and drizzle with the zesty lime-chili sauce for quick, satisfying meals anytime!

Variations & Substitutions for Mediterranean Shrimp Bowl

Feel free to mix things up and create your own perfect Mediterranean experience with these fun variations!

  • Grilled Chicken: Swap shrimp for succulent grilled chicken for a satisfying option that everyone will enjoy.

  • Pan-Seared Salmon: Replace shrimp with pan-seared salmon fillets for a rich and flavorful protein that pairs beautifully with the mango salsa.

  • Crispy Tofu: For a bold vegan alternative, substitute shrimp with crispy tofu, marinated in your favorite spices for added flavor.

  • Carb-Light Base: Try cauliflower rice or a bed of leafy greens instead of traditional rice for a delicious low-carb twist that still delivers on taste.

  • Adjustable Spice: Play with the Sriracha heat level in the lime-chili sauce by adding more for a fiery kick or less for a more mild flavor.

  • Zesty Salsa Variations: Experiment with the mango salsa by swapping out mango for diced pineapple or even peaches for a delightful tropical twist.

  • Creamy Avocado Alternatives: If you’re looking for a dairy-free option, replace creamy avocado with silken tofu for that same smooth texture without the dairy.

  • Crunchy Toppings: Add toasted nuts or seeds like sunflower seeds or sliced almonds for a marvelous crunch that enhances every bite.

As you’re crafting your bowl, don’t hesitate to delve into the world of flavors—like trying this simple gluten-free option or adding a refreshing cucumber salad as a side! Exploring variations can unlock new favorites and delicious surprises. Happy cooking!

Mediterranean Shrimp Bowl with Mango Salsa & Lime-Chili Sauce Recipe FAQs

How do I select ripe mangoes for this recipe?
Absolutely! Look for mangoes that are slightly soft to the touch with a fruity aroma near the stem end. If they’re firm, let them sit at room temperature for a day or two until they ripen. This will ensure that your mango salsa is sweet and flavorful!

What’s the best way to store leftovers?
Very! Store leftover shrimp, rice, and mango salsa in separate airtight containers in the fridge for up to 3 days. This helps maintain the freshness and quality of each component. If you have any extra avocado, sprinkle some lime juice on it before sealing to delay browning.

Can I freeze the shrimp and rice?
Yes, you can! Freeze the cooked shrimp and rice together in an airtight container for up to 1 month. Just make sure to thaw them overnight in the fridge before reheating. When reheating, do so gently over medium heat in a skillet or in the microwave, ensuring the shrimp don’t overcook.

What if my shrimp turns out tough when cooked?
Don’t worry, this happens sometimes! To avoid tough shrimp, make sure you cook them just until they are pink and opaque. If you notice they’ve become rubbery, it’s a good indication they’ve been overcooked. Next time, try cooking them in smaller batches to ensure even cooking.

Are there any dietary considerations for this bowl?
Absolutely! This Mediterranean shrimp bowl is gluten-free and customizable for various dietary preferences. You can easily swap shrimp for grilled chicken, salmon, or a plant-based protein. Just take care when choosing condiments like Sriracha, as some brands may contain gluten or allergens.

How do I prevent the avocado from browning after slicing?
Great question! To keep your avocado fresh, store any leftover slices in an airtight container with a squeeze of lime juice. The acidity from the lime slows down the oxidation process, helping to keep your avocado looking and tasting fresh for an additional 1-2 days.

undefined

Mediterranean Shrimp Bowl with Sweet Mango Salsa Bliss

A vibrant Mediterranean Shrimp Bowl with Mango Salsa packed with freshness and customizable options, perfect for busy weeknights.
Prep Time 15 minutes
Cook Time 15 minutes
Total Time 30 minutes
Servings: 4 bowls
Course: Dinner
Cuisine: Mediterranean
Calories: 450

Ingredients
  

For the Shrimp
  • 1 pound shrimp fresh or thawed if frozen
  • 2 tablespoons olive oil or avocado oil
  • 1 teaspoon garlic powder
  • 1 teaspoon onion powder
  • 1 teaspoon salt adjust as needed
  • 1 teaspoon pepper freshly ground preferred
For the Mango Salsa
  • 1 cup mango diced
  • 1/4 cup red onion finely chopped
  • 1/4 cup cilantro chopped
  • 2 tablespoons lime juice
  • 1 small jalapeño optional, chopped
  • 1 teaspoon salt adjust to taste
  • 1 teaspoon pepper adjust to taste
For the Lime-Chili Sauce
  • 1/2 cup mayonnaise or Greek yogurt
  • 2 tablespoons Sriracha adjust for spice
  • 2 tablespoons lime juice fresh preferred
  • 1 teaspoon garlic powder
  • 1 teaspoon onion powder
  • 1 teaspoon salt adjust to taste
  • 1 teaspoon pepper adjust to taste
For the Base
  • 2 cups cooked rice or cauliflower rice
  • 1 medium avocado sliced
  • 2 tablespoons sesame seeds or pepitas optional, for garnishing

Equipment

  • Grill
  • Mixing bowls
  • Grill Pan

Method
 

Step-by-Step Instructions
  1. Prepare the shrimp by tossing it in a bowl with olive oil, garlic powder, onion powder, salt, and pepper. Preheat your grill or grill pan over medium-high heat and grill the shrimp for 2-3 minutes on each side until pink and caramelized.
  2. While the shrimp cooks, prepare the mango salsa by combining diced mango, red onion, cilantro, lime juice, and jalapeño in a bowl. Season with salt and pepper to taste and let it sit for at least 5 minutes.
  3. Create the lime-chili sauce by whisking together mayonnaise, Sriracha, lime juice, garlic powder, onion powder, salt, and pepper in another bowl until smooth. Adjust the Sriracha to your preferred spice level.
  4. Assemble the bowls by starting with cooked rice as the base, layering grilled shrimp on top, followed by avocado slices, mango salsa, and drizzling with lime-chili sauce.
  5. Garnish each bowl with additional cilantro, lime wedges, and a sprinkle of chili flakes or toasted sesame seeds. Serve immediately.

Nutrition

Serving: 1bowlCalories: 450kcalCarbohydrates: 38gProtein: 25gFat: 22gSaturated Fat: 3gPolyunsaturated Fat: 5gMonounsaturated Fat: 10gCholesterol: 150mgSodium: 700mgPotassium: 600mgFiber: 6gSugar: 5gVitamin A: 300IUVitamin C: 45mgCalcium: 80mgIron: 2mg

Notes

Customize seasoning and spice according to your taste. Store avocado separately to maintain freshness.

Tried this recipe?

Let us know how it was!

Comforting Orzo, Leek, and Dill Soup for Cozy Nights

The comforting aroma of freshly sautéed leeks mingling with the earthy scent of dill always draws me into the kitchen. One day, craving something warm yet light, I turned to my favorite bowl of Easy Orzo, Leek, and Dill Soup. This recipe quickly became a staple in my home – a wholesome dish filled with tender orzo, vibrant vegetables, and a hint of lemon that bursts with flavor. Not only is it a quick prep meal, perfect for hectic evenings, but it can also be customized with extras like grilled chicken or chickpeas if you’re feeling a bit heartier. With its balanced broth and delightful texture, this soup is the ultimate comfort food for any occasion. Ready to learn how to whip up this nourishing bowl of goodness?

Why is this soup a must-try?

Quick, this Easy Orzo, Leek, and Dill Soup comes together in no time, making it your go-to choice after a long day. Versatile, feel free to add your favorite proteins like grilled chicken or chickpeas for extra heartiness! Flavorful, the blend of fresh herbs and a zesty hint of lemon elevates the dish to a new level of comfort food. Nutritious, packed with wholesome ingredients, this soup warms both body and soul. Plus, it’s perfect alongside a side of crusty bread or a simple Greek salad for a complete meal!

Easy Orzo, Leek, and Dill Soup Ingredients

For the Soup

  • Olive Oil – Provides richness and helps to sauté vegetables; avocado oil can be a great alternative.
  • Red Onion – Adds sweetness and depth to the soup; yellow onion works if you need a common substitute.
  • Garlic Cloves – Infuses aromatic flavor; always opt for fresh over powder for the best results.
  • Carrot – Brings sweetness and color to the dish; celery can be used for a different base flavor.
  • Leek – Contributes a mild onion taste; remember to clean thoroughly to avoid any grit.
  • Dried Thyme – Adds an herby flavor; feel free to use fresh thyme if it’s available.
  • Orzo Pasta – The main ingredient providing texture; try gluten-free orzo made from rice or corn for an alternative.
  • Vegetable Broth – Forms the soup’s base; homemade broth truly enhances the flavor.
  • Fresh Dill Sprigs – Adds a bright and fresh herb flavor; parsley can work as a substitute if needed.
  • Salt & Pepper – Essential for seasoning to taste; adjust based on personal preference.
  • Lemon Juice – Brightens the flavor profile at the end; fresh lemon juice gives the best taste.

Optional Add-Ins

  • Grilled Chicken – Adds heartiness and protein; perfect for a more filling meal.
  • Chickpeas – A great plant-based protein option; throw them in for an easy boost.
  • Roasted Vegetables – Enhance nutrition and flavor with zucchini or bell peppers; also makes it more colorful.
  • Quinoa – Swap half of the orzo for this nutty grain for a different texture and added health benefits.

This Easy Orzo, Leek, and Dill Soup is not just comforting, but also allows you to get creative based on what you have on hand!

Step-by-Step Instructions for Easy Orzo, Leek, and Dill Soup

Step 1: Prepare the Vegetables
Begin by finely chopping one red onion and a couple of garlic cloves. Dice one carrot and thoroughly clean and slice the leek, using both the white and light green parts. This foundation will lend a savory sweetness to your Easy Orzo, Leek, and Dill Soup.

Step 2: Sauté the Base
In a large pot, heat 2 tablespoons of olive oil over medium heat. Add the chopped onions, garlic, diced carrot, and leeks. Sprinkle with salt and pepper, and sauté the mixture for about 6 minutes, stirring occasionally, until the vegetables are softened and aromatic, forming the flavor base of your soup.

Step 3: Prepare the Broth
While the vegetables are cooking, boil water in a separate kettle. Dissolve one vegetable broth cube in approximately 6 1/3 cups of boiling water to create a rich broth. This step adds depth to your Easy Orzo, Leek, and Dill Soup, ensuring it’s full of flavor.

Step 4: Add Orzo and Broth
Once your vegetables are tender, pour the hot broth into the pot. Add 1 cup of orzo pasta, along with 1 teaspoon of dried thyme. Stir well to combine all ingredients, allowing the flavors to merge beautifully as the soup begins to simmer, which should take about 2 minutes.

Step 5: Simmer the Soup
Increase the heat slightly until the soup reaches a gentle boil, then reduce the heat to low and cover the pot. Let the soup simmer for 12 minutes, stirring occasionally to prevent the orzo from sticking to the bottom. The pasta will cook to a perfect tender texture during this time.

Step 6: Final Touches
After simmering, taste the soup and adjust seasonings if necessary. Stir in the juice of one fresh lemon and a handful of fresh dill sprigs. This final addition brightens your Easy Orzo, Leek, and Dill Soup, enhancing the fragrant aroma just before serving.

Step 7: Serve and Enjoy
Ladle the soup into bowls and garnish with an extra drizzle of olive oil and more fresh dill if desired. Serve hot, alongside crusty bread or a simple Greek salad to complement this delightful, cozy dish.

What to Serve with Easy Orzo, Leek, and Dill Soup

Cozy up your meal with delightful sides that complement the warmth and flavor of this charming soup.

  • Crusty Bread: Perfect for dipping, a slice of freshly baked bread adds a comforting crunch and soaks up the delicious broth.

  • Simple Greek Salad: A refreshing contrast, this salad bursts with cucumbers, tomatoes, and feta, providing a zesty counterpart to the creamy orzo.

  • Garlic Breadsticks: Soft, buttery breadsticks infused with garlic create a wonderful pairing, complementing the rich flavors of the soup.

  • Roasted Vegetables: Seasoned and caramelized, veggies like carrots and zucchini enhance the nutrition while echoing the soup’s comforting essence.

  • Herbed Quinoa: Light and nutty, quinoa can be served on the side for a wholesome boost, balancing the flavors of the soup perfectly.

  • Lemonade or Iced Tea: A refreshing drink choice, the bright notes of lemonade or the subtle sweetness of iced tea provide a lovely contrast to the soup’s warmth.

  • Parmesan Crisps: Adding a cheesy crunch, these crisps offer a delightful texture and flavor contrast that pairs beautifully with the soft vegetables in the soup.

  • Chocolate Chip Cookies: For a sweet finish, these classic treats add a touch of nostalgia, making the meal feel extra special and comforting.

Make Ahead Options

This Easy Orzo, Leek, and Dill Soup is perfect for meal prep! You can chop the vegetables and refrigerate them for up to 3 days in an airtight container; this not only saves time but also allows the flavors to meld beautifully. Furthermore, consider cooking the orzo separately and storing it in the fridge for up to 24 hours to maintain its texture. When you’re ready to enjoy, simply sauté the vegetables, add your prepared broth, and mix in the cooked orzo. Finish by stirring in the fresh dill and lemon juice just before serving, ensuring your soup is just as delicious and vibrant as when freshly made!

Storage Tips for Easy Orzo, Leek, and Dill Soup

Fridge: Keep your soup in an airtight container for up to 4 days. A splash of broth when reheating will restore its consistency and flavor.

Freezer: For longer storage, freeze the soup in portion-sized containers for up to 3 months. Be aware that the orzo’s texture may change upon thawing.

Reheating: When reheating from the fridge or freezer, bring to a gentle simmer on the stove. Stir in a bit of hot broth if needed to avoid excessive thickening.

Leftover Enjoyment: If you have extras, add fresh herbs or lemon juice just before serving to uplift the flavors of your Easy Orzo, Leek, and Dill Soup!

Expert Tips for Easy Orzo, Leek, and Dill Soup

  • Perfect Timing: Avoid mushy orzo by adding it only in the last 10-12 minutes of cooking. This ensures a delightful texture for your Easy Orzo, Leek, and Dill Soup.
  • Thorough Cleaning: Clean leeks carefully, as grit can hide between layers. Rinse them well under cold water before slicing.
  • Fresh Herbs Last: To maintain their vibrant flavor, add fresh dill and lemon juice right before serving. This keeps your soup aromatic and bright.
  • Salt Mindfully: Adjust your salt after incorporating lemon juice, as it can change the soup’s seasoning balance. Start with less to avoid overpowering flavors.
  • Customize It: Feel free to boost nutrition by adding grilled chicken or chickpeas, creating a heartier variant of this already comforting dish.

Easy Orzo, Leek, and Dill Soup Variations

Feel free to let your creativity shine with these delightful twists to make this soup uniquely yours!

  • Protein-Packed: Add cooked grilled chicken or chickpeas for extra heartiness. This not only boosts the protein content but also makes the soup more filling.

  • Roasted Veggie Medley: Toss in roasted zucchini or bell peppers for added nutrition and flavor. The caramelization enhances the depth of your Easy Orzo, Leek, and Dill Soup.

  • Quinoa Twist: Swap half the orzo with cooked quinoa. This nutty grain will elevate the texture and nutrition profile beautifully.

  • Creamy Addition: Stir in a splash of cream or a dollop of sour cream for a luxurious creaminess. It takes comfort to a whole new level!

  • Spicy Kick: Sprinkle in some red pepper flakes for heat. If you love a bit of spice, this will awaken your taste buds while keeping the overall soup balanced.

  • Herb Variations: Try using fresh parsley or basil instead of dill for a completely different flavor profile. Each herb brings a unique taste that complements the broth beautifully.

  • Lemon Zest Boost: Add some lemon zest along with the juice for an extra burst of citrus flavor. It brightens the entire dish, making it refreshing.

  • Grain-free take: For a gluten-free option, switch the orzo with cauliflower rice. It keeps the soup light and adds a whole new playful texture!

For added inspiration, you can check out how to incorporate proteins in various ways through my Grilled Chicken Recipe or explore more hearty soups and make them your own with exciting ingredients. Enjoy cooking!

Easy Orzo, Leek, and Dill Soup Recipe FAQs

What type of leeks should I use?
When shopping for leeks, look for ones with firm, white stalks and vibrant green tops. Avoid any that show signs of wilting or dark spots. The green parts are perfectly edible; just be sure to clean them thoroughly as they can harbor grit.

How should I store leftover soup?
You can keep your Easy Orzo, Leek, and Dill Soup in an airtight container in the refrigerator for up to 4 days. To maintain flavor and consistency, add a splash of broth when reheating. This simple tip will help restore your soup to its delicious state!

Can I freeze this soup, and how?
Absolutely! You can freeze your soup in portion-sized containers for up to 3 months. Let the soup cool completely before transferring it to the containers. When ready to enjoy, thaw it in the fridge overnight and reheat gently on the stove; just be aware that the texture of the orzo might change a bit upon thawing.

How can I avoid mushy orzo in the soup?
To ensure perfectly cooked orzo, add it to the soup in the last 10-12 minutes of cooking. Stir occasionally during this time to prevent sticking. This method keeps the orzo tender but not overly soft, allowing it to hold its shape beautifully in the soup.

What dietary considerations should I keep in mind?
If you’re cooking for anyone with allergies, be cautious with garlic and onions, which are common allergens. For gluten-free options, you can easily substitute regular orzo with gluten-free orzo made from rice or corn without sacrificing flavor or texture. Always check ingredient labels or ask about food allergies when serving to guests.

undefined

Comforting Orzo, Leek, and Dill Soup for Cozy Nights

This Easy Orzo, Leek, and Dill Soup is a quick, wholesome dish that's perfect for cozy nights, combining tender orzo, vibrant vegetables, and a hint of lemon.
Prep Time 15 minutes
Cook Time 20 minutes
Total Time 35 minutes
Servings: 4 bowls
Course: Soup
Cuisine: American
Calories: 250

Ingredients
  

For the Soup
  • 2 tablespoons Olive Oil Avocado oil can be a substitute.
  • 1 piece Red Onion Can substitute with yellow onion.
  • 2 cloves Garlic Use fresh for best flavor.
  • 1 piece Carrot Celery can be used for a different flavor.
  • 1 piece Leek Clean thoroughly to avoid grit.
  • 1 teaspoon Dried Thyme Fresh thyme can be used.
  • 1 cup Orzo Pasta Try gluten-free orzo for an alternative.
  • 6.33 cups Vegetable Broth Homemade broth enhances flavor.
  • 3 sprigs Fresh Dill Parsley can be a substitute.
  • to taste Salt Adjust based on preference.
  • to taste Pepper Adjust based on preference.
  • 1 tablespoon Lemon Juice Fresh lemon juice gives the best taste.
Optional Add-Ins
  • 1 cup Grilled Chicken Adds protein and heartiness.
  • 1 can Chickpeas Great plant-based protein option.
  • 1 cup Roasted Vegetables Enhance nutrition and flavor.
  • 1/2 cup Quinoa Swap with half of the orzo.

Equipment

  • Large pot

Method
 

Step-by-Step Instructions
  1. Finely chop one red onion and two garlic cloves. Dice one carrot and thoroughly clean and slice the leek, using both the white and light green parts.
  2. In a large pot, heat 2 tablespoons of olive oil over medium heat. Add the chopped onions, garlic, diced carrot, and leeks. Sprinkle with salt and pepper, and sauté for about 6 minutes.
  3. Boil water in a separate kettle. Dissolve one vegetable broth cube in approximately 6 1/3 cups of boiling water.
  4. Pour the hot broth into the pot with the vegetables. Add 1 cup of orzo pasta and 1 teaspoon of dried thyme. Stir well and let it simmer.
  5. Increase the heat slightly until the soup reaches a gentle boil, then reduce the heat to low and cover the pot. Let it simmer for 12 minutes.
  6. Taste the soup and adjust seasonings if necessary. Stir in the juice of one fresh lemon and a handful of fresh dill sprigs.
  7. Ladle the soup into bowls and garnish with an extra drizzle of olive oil and more fresh dill if desired.

Nutrition

Serving: 1bowlCalories: 250kcalCarbohydrates: 40gProtein: 8gFat: 6gSaturated Fat: 1gPolyunsaturated Fat: 0.5gMonounsaturated Fat: 4gSodium: 500mgPotassium: 600mgFiber: 4gSugar: 2gVitamin A: 2000IUVitamin C: 5mgCalcium: 30mgIron: 1.5mg

Notes

Customize with extras like grilled chicken or chickpeas for a heartier meal. Perfect served with crusty bread or a Greek salad.

Tried this recipe?

Let us know how it was!

Crispy Chicken Caesar Sandwich: A Flavorful Homemade Delight

As I stood in my kitchen, the sizzling sound of chicken frying filled the air, reminding me why I love to cook. Today, I’m excited to share my version of the Crispy Chicken Caesar Sandwich, a delightful twist on the classic Caesar salad that seamlessly blends comfort and flavor. With crispy, golden-fried chicken cutlets, crunchy romaine, and a rich, creamy homemade dressing, this sandwich is not only incredibly satisfying but also an easy dinner or lunch option that can be whipped up in no time. Each bite delivers that ultimate handheld comfort, perfect for anyone yearning to escape the fast-food trap. Curious about how to bring this tasty creation to your table? Let’s dive into the delicious details!

Why is this sandwich a game-changer?

Crispy Delight: The perfectly fried chicken cutlets create a satisfying crunch that elevates this sandwich from ordinary to extraordinary.
Homemade Goodness: With a creamy dressing made from scratch, you’ll taste the difference that fresh ingredients make.
Quick and Easy: This recipe comes together seamlessly, making it ideal for busy weeknights or spontaneous lunch plans.
Crowd-Pleasing: Whether it’s for family dinners or casual gatherings, this sandwich is sure to impress and satisfy. Pair it with crispy fries for a complete meal, or if you’re looking for lighter options, check out our fresh side salad ideas for that perfect accompaniment!
Versatile Options: Feel free to mix it up with different proteins or veggie-forward variations to cater to every palate!

Crispy Chicken Caesar Sandwich Ingredients

For the Dressing
Full-fat Mayonnaise – Provides creaminess in the dressing; substitute with Greek yogurt for a lighter version.
Greek Yogurt – Adds tanginess and enhances the creamy dressing; can be replaced with sour cream.
Dijon Mustard – Imparts a slight tang and depth to the dressing; no direct substitution recommended but can be omitted for milder flavor.
Worcestershire Sauce – Contributes umami flavor to the dressing; use soy sauce as a vegetarian alternative.
Lemon Juice – Offers brightness and acidity to balance flavors; use vinegar if lemon is unavailable.
Parmesan Cheese – Adds cheesy flavor in the dressing and for topping; Grana Padano serves as a milder substitute.
Garlic Cloves – Adds aromatic flavor in the dressing; use garlic powder if fresh isn’t available (1/8 tsp per clove).
Sea Salt and Black Pepper – Essential for seasoning; adjust to taste.

For the Chicken
Chicken Cutlets – The main protein providing texture; for a quicker option, use pre-cut chicken.
All-Purpose Flour – Helps breading stick; gluten-free flour can substitute.
Smoked Paprika – Adds depth and smokiness to the flour mixture; regular paprika can be used for less smokiness.
Eggs – Binds the breading; can substitute with a flax egg for a vegan option.
Panko Crumbs and Breadcrumbs – Create a crispy coating for the chicken; gluten-free versions can be used.
Dried Parsley and Oregano – Enhance flavor in the coating mixture; use Italian seasoning if unavailable.

For the Sandwich
Romaine Hearts – Provides crunch and freshness in the sandwich; iceberg lettuce is a suitable alternative.
French Baguette – Ideal for holding toppings and providing a crunchy texture; ciabatta or sourdough can work as substitutes.

Discover the joy of creating a crispy Chicken Caesar Sandwich that’s not just a meal, but an experience of comfort and satisfaction!

Step‑by‑Step Instructions for Crispy Chicken Caesar Sandwich

Step 1: Prepare Caesar Dressing
In a medium bowl, combine full-fat mayonnaise, Greek yogurt, Dijon mustard, Worcestershire sauce, lemon juice, and minced garlic. Whisk until the mixture is smooth and creamy, integrating the flavors fully. Season with sea salt and black pepper to taste. Reserve a portion of this homemade dressing to toss with your romaine salad later.

Step 2: Prep Romaine Salad
Take your chopped romaine hearts and place them in a separate mixing bowl. Pour in the reserved Caesar dressing, tossing until the romaine is nicely coated. This step adds freshness and crunch to your sandwich. Chill the dressed romaine in the refrigerator while you prepare the crispy chicken.

Step 3: Prepare Chicken
Season your chicken cutlets with salt and black pepper, ensuring an even coating on both sides. If any cutlets are thicker than others, gently pound them to make them uniform for even cooking. This ensures that your chicken will fry up crisp and juicy, ideal for the Crispy Chicken Caesar Sandwich.

Step 4: Set Breading Station
Set up a breading station using three shallow plates. In the first plate, add all-purpose flour mixed with smoked paprika for flavor. The second plate should contain whisked eggs to bind the crust. In the third plate, combine panko crumbs, breadcrumbs, and dried herbs. This organized setup streamlines the breading process for your chicken.

Step 5: Bread Chicken
Take each seasoned chicken cutlet and dredge it in the flour mixture, shaking off any excess. Next, dip it into the egg, letting the excess drip off, and then press it into the breadcrumb mixture, ensuring a solid coating. This process builds a deliciously crispy exterior for your fried chicken.

Step 6: Fry Chicken
In a large skillet, heat enough oil to cover the bottom over medium heat. Once the oil is shimmering (ideally around 175-180°C or 350-360°F), carefully add the breaded chicken cutlets. Fry for about 4-5 minutes on each side until they are golden brown and cooked through. Use a wire rack to drain excess oil after frying.

Step 7: Assemble Sandwiches
Take your crusty French baguette and slice it open lengthwise. Spread a generous layer of reserved Caesar dressing inside both sides of the baguette. Layer in the crispy chicken cutlets and top them with the chilled romaine salad. For an extra touch, sprinkle more Parmesan cheese over the salad before closing the sandwich.

Step 8: Serve Immediately
Slice the sandwich into manageable portions, if desired, and serve the Crispy Chicken Caesar Sandwich immediately to enjoy its crispy texture and fresh flavors. Pair it with a side of fries or a light salad for a complete meal that’s satisfying and delightful!

Make Ahead Options

These Crispy Chicken Caesar Sandwiches are perfect for busy home cooks looking to save time during the week! You can prepare the homemade Caesar dressing and refrigerate it for up to 3 days in advance; simply store it in an airtight container to maintain its creamy texture. Additionally, you can bread the chicken cutlets and keep them covered in the fridge for up to 24 hours before frying, ensuring they stay fresh and ready to cook. When you’re ready to enjoy your sandwiches, simply fry the chicken and assemble them just before serving to retain that satisfying crunch. This way, you’ll have a delicious meal in no time, just as good as if you made it fresh!

Expert Tips for Crispy Chicken Caesar Sandwich

  • Avoid Sogginess: Assemble the sandwich just before serving and lightly toast the baguette to create a moisture barrier.
  • Uniform Chicken Thickness: Pound chicken cutlets to an even thickness for consistent cooking; this ensures each bite is perfectly juicy.
  • Oil Temperature Check: Maintain oil at 175-180°C (350-360°F) for the perfect crispy coating; too hot can burn the crust, while too cool leads to sogginess.
  • Fresh Dressing Matters: Homemade dressing makes all the difference; don’t skip on the quality of ingredients for that creamy flavor boost.
  • Layering Technique: Spread dressing on both the top and bottom of the baguette for enhanced flavor in every bite of your Crispy Chicken Caesar Sandwich.

Variations & Substitutions

Delight in the endless possibilities of the Crispy Chicken Caesar Sandwich, where each variation can transform your meal into something uniquely delicious!

  • Grilled Shrimp: Swap the chicken for grilled shrimp to bring a light, seafood twist—perfect for summer days!
  • Tofu Option: For a vegetarian delight, replace chicken with crispy tofu slices, enhancing the sandwich’s crunch and flavor.
  • Spinach or Kale: Use spinach or kale instead of romaine for a different leafy green experience packed with nutrients.
  • Add Avocado: Slice in some creamy avocado for an extra layer of richness and healthy fats that perfectly complement the sandwich.
  • Tomato Garnish: Fresh tomato slices can add juiciness and a pop of color, enhancing the overall visual and taste profile.
  • Heat It Up: Add sliced jalapeños or a drizzle of hot sauce to spice it up—perfect for those who enjoy a little kick!
  • Dairy-Free Dressing: Create a dairy-free sauce using tahini or cashew cream blended with garlic for those avoiding dairy. It still brings rich flavors!
  • Gluten-Free Bread: For a gluten-free option, enjoy this sandwich on gluten-free bread or lettuce wraps for a fresh twist.

Feel free to play with these options, and take a moment to explore our delicious side salad ideas to perfectly complement your Crispy Chicken Caesar Sandwich!

What to Serve with Crispy Chicken Caesar Sandwich

Elevate your meal with tasty sides that create a delightful balance alongside the crispy, rich flavors of this sandwich.

  • Crispy French Fries: The classic companion, their golden crunch pairs perfectly with the sandwich’s texture, offering a satisfying bite.

  • Fresh Side Salad: A light, crisp salad with mixed greens and a citrus vinaigrette complements the sandwich, enhancing freshness with each mouthful.

  • Garlic Bread: Rich and buttery garlic bread provides a wonderful contrast, and the aromatic flavors meld beautifully with the creamy dressing of the sandwich.

  • Sweet Potato Wedges: Their subtle sweetness and crispiness provide a delicious contrast to the savory flavors, making every bite a delightful experience.

  • Coleslaw: A tangy slaw introduces a refreshing crunch that balances the sandwich’s richness and adds vibrant color to your plate.

  • Iced Lemonade: This refreshing drink quenches thirst and its citrusy zing provides a bright lift against the creamy, savory notes of the sandwich.

  • Fruit Salad: A light medley of seasonal fruits offers a refreshing sweetness, cleansing the palate and rounding out the meal wonderfully.

Storage Tips for Crispy Chicken Caesar Sandwich

Room Temperature: Enjoy the sandwich immediately for the best crunch; if left out, consume within 2 hours.

Fridge: Leftover assembled sandwiches can be refrigerated for up to 1 day but may lose crispness; store the chicken and dressing separately for freshness.

Freezer: Fried chicken cutlets can be frozen for up to 3 months; wrap tightly in plastic wrap and foil for best results. Thaw before assembly.

Reheating: To re-crisp the chicken, bake in a preheated oven at 180°C (350°F) for 10-15 minutes; avoid microwaving to maintain the crispy texture of your Chicken Caesar Sandwich.

Crispy Chicken Caesar Sandwich Recipe FAQs

What kind of chicken should I use for this sandwich?
Absolutely! For the Crispy Chicken Caesar Sandwich, I recommend using chicken cutlets because they fry up beautifully, providing that perfect crunch. If you’re short on time, pre-cut chicken works great too. Just remember to season them well!

How can I ensure my chicken remains crispy after frying?
The key to keeping that heavenly crunch is to assemble your sandwich just before serving. After frying, allow the chicken to drain on a wire rack instead of paper towels, preventing it from steaming. Additionally, lightly toasting your bread can help create a moisture barrier that keeps everything deliciously crispy!

What are the best storage methods for leftovers?
Leftover assembled sandwiches can be refrigerated for up to 1 day, but they may lose their delightful crispness. To maintain quality, store the chicken and dressing separately from the bread. Fried chicken cutlets can be frozen for up to 3 months; just wrap them tightly in plastic wrap and foil. Thaw in the fridge before assembly for the best taste.

Can I substitute ingredients for dietary considerations?
Very! For a lighter dressing, Greek yogurt works brilliantly in place of full-fat mayonnaise. If you’re catering to gluten-free diets, simply swap all-purpose flour and breadcrumbs with their gluten-free counterparts. Additionally, you can replace eggs with a flax egg (1 tablespoon flaxseed meal + 2.5 tablespoons water, mixed and let to set) for a vegan option.

How can I tell if my oil is at the right temperature for frying?
Great question! To check if your oil is ready, use a cooking thermometer; you want it between 175-180°C (350-360°F). If you don’t have one, drop a small piece of bread in—the oil should bubble vigorously around it. This ensures your chicken fries up crispy without burning!

What should I serve with my Chicken Caesar Sandwich?
The more the merrier! This sandwich pairs beautifully with crispy French fries, potato wedges, or a fresh side salad to balance the richness. You can also serve it with a refreshing coleslaw or even a light soup for a complete meal that will impress anyone at the table.

undefined

Crispy Chicken Caesar Sandwich: A Flavorful Homemade Delight

This Crispy Chicken Caesar Sandwich elevates the classic Caesar salad into a satisfying meal with crispy chicken and homemade dressing.
Prep Time 15 minutes
Cook Time 20 minutes
Total Time 35 minutes
Servings: 4 sandwiches
Course: Lunch
Cuisine: American
Calories: 750

Ingredients
  

Dressing
  • 1 cup full-fat Mayonnaise
  • 1/2 cup Greek Yogurt or sour cream
  • 1 tbsp Dijon Mustard
  • 1 tbsp Worcestershire Sauce or soy sauce for vegetarian
  • 2 tbsp Lemon Juice or vinegar
  • 1/3 cup Parmesan Cheese or Grana Padano
  • 2 cloves Garlic or 1/4 tsp garlic powder
  • to taste Sea Salt
  • to taste Black Pepper
Chicken
  • 4 pieces Chicken Cutlets or pre-cut chicken
  • 1 cup All-Purpose Flour or gluten-free flour
  • 1 tsp Smoked Paprika or regular paprika
  • 2 large Eggs or flax egg
  • 1 cup Panko Crumbs and Breadcrumbs or gluten-free versions
  • 1 tbsp Dried Parsley or Italian seasoning
  • 1 tbsp Dried Oregano
Sandwich
  • 2 cups Romaine Hearts or iceberg lettuce
  • 1 loaf French Baguette or ciabatta/sourdough

Equipment

  • medium bowl
  • Shallow plates
  • Large skillet
  • Wire rack
  • Refrigerator

Method
 

Preparation
  1. In a medium bowl, combine full-fat mayonnaise, Greek yogurt, Dijon mustard, Worcestershire sauce, lemon juice, and minced garlic. Whisk until smooth and creamy, seasoning with salt and pepper to taste.
  2. Take your chopped romaine hearts, place them in a separate bowl, and toss with the reserved Caesar dressing. Chill in the refrigerator.
  3. Season chicken cutlets with salt and pepper. Pound thick cutlets to uniform thickness.
  4. Set up a breading station with flour and smoked paprika in one plate, whisked eggs in the second, and panko crumbs with herbs in the third.
  5. Dredge each chicken cutlet in the flour, dip in eggs, and then press into the breadcrumbs.
  6. Heat oil in a skillet. Fry chicken cutlets for about 4-5 minutes on each side until golden brown. Drain on a wire rack.
  7. Slice the baguette lengthwise, spread a layer of dressing inside, add chicken cutlets, and top with romaine salad. Optional: sprinkle with Parmesan.
  8. Slice into portions and serve immediately.

Nutrition

Serving: 1sandwichCalories: 750kcalCarbohydrates: 50gProtein: 30gFat: 45gSaturated Fat: 10gPolyunsaturated Fat: 4gMonounsaturated Fat: 20gCholesterol: 150mgSodium: 900mgPotassium: 700mgFiber: 4gSugar: 3gVitamin A: 2000IUVitamin C: 15mgCalcium: 300mgIron: 4mg

Notes

Assemble sandwiches just before serving to avoid sogginess. Lightly toast the baguette if desired.

Tried this recipe?

Let us know how it was!

Dill Pickle Brined Fried Chicken Sandwiches You’ll Crave

As I settled into my kitchen with a jar of zesty dill pickles and a craving for something extraordinary, the idea of Dill Pickle Brined Fried Chicken Sandwiches began to take shape. The combination of tangy pickle brine and crunchy fried chicken thighs promises not just a satisfying meal but also a burst of summer flavors that transport you straight to a backyard barbecue. With its wonderfully crispy coating and a delightful dill pickle slaw that brings a zing of freshness, this sandwich easily transforms any weekday dinner into a delicious celebration. Plus, the quick prep and mouthwatering crunch make it an undeniable crowd-pleaser! What will you pair with yours?

Why Will You Crave This Sandwich?

Flavor Explosion: Each bite of this sandwich delivers a tangy burst from the dill pickle brine that elevates the fried chicken to new heights.

Ultimate Crunch: A double coating gives you an irresistibly crispy texture that’ll leave you wanting more.

Zingy Slaw: The addition of crunchy dill pickle slaw adds a refreshing contrast that complements the savory chicken.

Quick Prep: With simple ingredients and straightforward steps, this recipe is a time-saver for busy weeknights.

Crowd-Pleasing Delight: Whether it’s a family dinner or a casual get-together, this sandwich is sure to impress everyone at the table.

Feel free to check out my guide on making homemade pickle brine to elevate this sandwich even further!

Dill Pickle Brined Fried Chicken Sandwich Ingredients

• Get ready to savor every bite!

For the Chicken

  • Boneless, Skinless Chicken Thighs – Tender and juicy; brining enhances their flavor and moisture.
  • Pickle Brine – Provides a flavorful marinade; replace standard saltwater brine with this zesty option.
  • Buttermilk – Ensures a moist coating and aids flour adherence; regular milk mixed with vinegar works well too.
  • Cayenne Pepper – Adds a gentle warmth; adjust to your spice preference.

For the Coating

  • Flour – Creates a crispy outer layer; gluten-free flour is a great alternative for those with dietary restrictions.
  • Vegetable Oil – Essential for frying, achieving that golden-brown perfection.

For the Slaw

  • Green and Purple Cabbage – Provides crunch and vibrant color for the slaw base.
  • Mayonnaise – Binds all ingredients together and adds creaminess; Greek yogurt can lighten up the slaw.
  • Dried Dill – Infuses flavor into both the chicken and slaw, while fresh dill can be used for an extra fresh taste.
  • Salt and Pepper – Essential seasonings to enhance your slaw with just the right amount of zesty flavor.

For Assembly

  • Brioche Buns – Soft and rich, they elevate your sandwich; feel free to swap in any soft sandwich bun.
  • Dill Pickle Slices – Essential for that signature crunch and tang that ties it all together.

Step‑by‑Step Instructions for Crunchy Dill Pickle Brined Fried Chicken Sandwiches

Step 1: Brine the Chicken
Start by submerging boneless, skinless chicken thighs in pickle brine within a covered bowl. Allow the chicken to sit in the brine for at least 8 hours or overnight in the refrigerator to ensure maximum tenderness and flavor absorption. The longer it brines, the juicier it becomes, so plan ahead for the best results.

Step 2: Prepare for Frying
Heat about 2 inches of vegetable oil in a Dutch oven over medium heat until it reaches 350°F. In a large bowl, mix together buttermilk, dried dill, and a pinch of cayenne pepper for extra warmth. On a separate plate, spread out a generous amount of flour, which will create that desirable crispy coating when frying the chicken.

Step 3: Dredge Chicken
Take each brined chicken thigh and dip it into the buttermilk mixture, ensuring it is fully coated. After that, transfer the chicken to the plate with flour and cover it thoroughly, shaking off any excess. For an extra crunch, repeat this process by dipping the chicken in the buttermilk once more before dredging it in flour again.

Step 4: Fry Chicken
Carefully place the double-coated chicken thighs into the hot oil, being sure not to overcrowd the pan. Fry the chicken for 8–10 minutes, turning gently halfway through, until it achieves a beautiful golden brown color and reaches an internal temperature of 165°F. Use a meat thermometer for accuracy, ensuring each piece is perfectly cooked.

Step 5: Make Dill Pickle Slaw
While the chicken is frying, prepare the crunchy dill pickle slaw. In a mixing bowl, whisk together mayonnaise, a splash of pickle brine, dried dill, salt, and pepper. Add the shredded green and purple cabbage, tossing well to coat everything in the creamy dressing. This refreshing slaw adds a zesty crunch that complements the fried chicken beautifully.

Step 6: Assemble Sandwiches
Once the chicken has cooled slightly, it’s time to assemble your sandwich. Start by spreading a thin layer of mayonnaise on the top of each soft brioche bun. Place a crispy fried chicken thigh on the bottom bun, then generously pile on the dill pickle slaw and add a few dill pickle slices for that signature tangy flair. Close the sandwich with the top bun, and it’s ready to serve!

Make Ahead Options

These Dill Pickle Brined Fried Chicken Sandwiches are a dream for meal prep! You can brine the chicken thighs up to 24 hours in advance, allowing them to soak up all that incredible flavor and moisture. Prepare the dill pickle slaw and keep it in an airtight container in the fridge for up to 3 days to maintain its crunchiness. When you’re ready to eat, simply dredge and fry the chicken for that delightful crispy texture. For the best results, reheat leftover fried chicken in the oven to keep it crunchy while assembling your sandwiches. You’ll enjoy all the marvelous flavors with minimal effort, making any busy weeknight feel special!

Storage Tips for Dill Pickle Brined Fried Chicken Sandwiches

Fridge: Store leftover fried chicken sandwiches in an airtight container for up to 3 days. However, to maintain the crunchy texture, it’s best to keep the chicken and slaw separate until ready to serve.

Freezer: If you want to save time, use leftover fried chicken. Store it in a freezer-safe container for up to 2 months. Reheat from frozen until it’s heated through and crispy.

Reheating: For optimal results, reheat the fried chicken in an oven at 375°F for 10-15 minutes, allowing it to regain its crispiness without becoming soggy.

Assembling Fresh: If you make the pickle brined chicken ahead of time, assemble sandwiches fresh when ready to eat for the best presentation and texture.

Dill Pickle Brined Chicken Variations

Get ready to explore delicious twists that will enhance your Dill Pickle Brined Fried Chicken Sandwich experience!

  • Spicy Slaw: Add a tablespoon of hot sauce to the slaw for an extra kick that pairs beautifully with the crunch of the chicken.
    Eager for heat? This little enhancement creates an exciting flavor dance in every bite.

  • Whole Wheat Buns: Swap traditional brioche for whole wheat buns for a fiber-rich option that’s equally tasty.
    Not only does this change provide a heartier feel, but it also caters to healthier eating habits, making your sandwich satisfying and nourishing.

  • Grilled Chicken: For a lighter variation, grill the chicken instead of frying it.
    Marinate it longer in the pickle brine to keep the flavors vibrant. This twist is perfect for hot summer days, adding a smoky finish.

  • Vegan Option: Use crispy, breaded eggplant or cauliflower instead of chicken to make a delightful vegan sandwich.
    Even without meat, the flavors from the dill pickle and slaw ensure everyone can enjoy this dish together!

  • Cheesy Add-On: Consider melting some cheddar or pepper jack cheese on top of the fried chicken before assembling the sandwich.
    This creamy addition creates a luscious texture that complements the crunch and tang of the pickles perfectly.

  • Sweet Pickles Alternative: For a sweeter change, use sweet pickle slices instead of dill pickles.
    This version appeals to those with a sweet tooth and provides a delightful play of flavor contrasting with the savory chicken.

  • Herbed Mayonnaise: Blend fresh herbs like basil or cilantro with mayonnaise for a fresh take on your sandwich spread.
    The herbed mayo will elevate the overall taste profile while maintaining that creamy richness we all love.

If you’re feeling adventurous, make your own homemade seasoning blend to sprinkle on the chicken before brining for an extra layer of flavor! And don’t forget, you can adapt this recipe with my guide on making homemade pickle brine for even more customization options!

Expert Tips for Dill Pickle Brined Fried Chicken Sandwiches

  • Oil Temperature: Ensure your oil is heated to exactly 350°F before frying; this prevents greasy chicken and guarantees a crispy finish.

  • Check Doneness: Use a meat thermometer to check that chicken reaches an internal temperature of 165°F—this ensures perfectly cooked fried chicken.

  • Brining Time: For the juiciest results, brine the chicken thighs for up to 24 hours; longer brining amplifies flavor and moisture.

  • Double Coating: Don’t skip the double coating of buttermilk and flour; it’s key for achieving that irresistible crunch in your fried chicken sandwich.

  • Chill the Slaw: Prepare the dill pickle slaw ahead of time and refrigerate for at least 30 minutes. This enhances the flavors and adds a nice chill to your sandwich.

  • Bun Choices: While brioche is classic, any soft sandwich bun works great—opt for whole wheat for a healthier twist in your dill pickle brined fried chicken sandwiches.

What to Serve with Crunchy Dill Pickle Brined Fried Chicken Sandwiches

Elevate your dining experience by discovering delightful pairings that complement the crispy flavors of your sandwich.

  • Fries: Classic, golden French fries add a satisfying crunch, perfect for dipping into ketchup or your favorite sauce.

  • Coleslaw: A creamy coleslaw provides a cool contrast, while the crunch complements the chicken’s texture. For an added twist, try a vinegar-based slaw.

  • Corn on the Cob: Sweet, buttery corn on the cob brings a nostalgic summer vibe, balancing out the savory elements of your meal.

  • Pickle Chips: Keep the pickle theme alive with crispy pickle chips; their tangy crunch perfectly pairs with the sandwich’s zesty flavors.

  • Watermelon Slices: Refreshing juicy watermelon offers a sweet palate cleanser that brightens your meal and adds a hint of summer joy.

  • Lemonade: A glass of homemade lemonade serves as a refreshing, zesty drink option, enhancing the tanginess of your meal for a delightful experience.

Dill Pickle Brined Fried Chicken Sandwiches Recipe FAQs

How do I select the best chicken for this recipe?
When making dill pickle brined fried chicken sandwiches, boneless, skinless chicken thighs are ideal due to their tenderness and moisture. If you prefer chicken breasts, just remember to brine them for a shorter time—about 4 to 6 hours is sufficient for breasts, as they can dry out more easily compared to thighs.

What is the best way to store leftovers?
For optimal storage, keep leftover fried chicken sandwiches in an airtight container in the fridge for up to 3 days. I recommend storing the chicken and slaw separately to maintain crispiness. This way, the chicken stays crunchy when you’re ready to enjoy it again!

Can I freeze the fried chicken?
Absolutely! To freeze the fried chicken, let it cool completely, then place it in a freezer-safe container. It can be stored for up to 2 months. When you’re ready to enjoy, reheating in the oven at 375°F for 10-15 minutes helps restore its crunchiness—just the way we love it!

What if my fried chicken isn’t crispy?
If your chicken comes out less crispy than expected, it might be due to the oil temperature being too low. Always ensure your oil is heated to 350°F before frying. Additionally, using a double coating of buttermilk and flour is essential for that crispy exterior—never skip this step!

Are there any dietary considerations I should keep in mind?
Yes! If you’re catering to dietary restrictions, consider using gluten-free flour to ensure the chicken coating is suitable for gluten-sensitive diets. For those watching their fat intake, substituting Greek yogurt for mayonnaise in the slaw is a fantastic way to lighten up the dish without sacrificing flavor.

Can I make this recipe ahead of time?
Certainly! You can prep the brined chicken a day ahead and keep it in the fridge overnight for the flavors to develop. Additionally, prepare the dill pickle slaw ahead of time and refrigerate it for at least 30 minutes. This resting period enhances flavor and ensures a refreshing bite when assembled later!

undefined

Dill Pickle Brined Fried Chicken Sandwiches You’ll Crave

A tangy, crispy delight featuring dill pickle brined fried chicken and refreshing slaw, perfect for dinner.
Prep Time 15 minutes
Cook Time 20 minutes
Brining Time 8 hours
Total Time 8 hours 35 minutes
Servings: 4 sandwiches
Course: Dinner
Cuisine: American
Calories: 650

Ingredients
  

For the Chicken
  • 1 pound Boneless, Skinless Chicken Thighs Tender and juicy
  • 2 cups Pickle Brine For marinating
  • 1 cup Buttermilk Can substitute with milk and vinegar mix
  • 1 teaspoon Cayenne Pepper Adjust to taste
For the Coating
  • 1 cup Flour Can use gluten-free flour
  • 2 cups Vegetable Oil For frying
For the Slaw
  • 2 cups Green and Purple Cabbage Shredded
  • 1/2 cup Mayonnaise Can use Greek yogurt
  • 1 teaspoon Dried Dill For flavor
  • 1 teaspoon Salt To taste
  • 1 teaspoon Pepper To taste
For Assembly
  • 4 pieces Brioche Buns Soft and rich
  • 1 cup Dill Pickle Slices For topping

Equipment

  • Dutch oven
  • Mixing bowls
  • meat thermometer
  • Plate

Method
 

Step-by-Step Instructions
  1. Brine the chicken by submerging the thighs in pickle brine for at least 8 hours or overnight.
  2. Prepare for frying by heating vegetable oil in a Dutch oven until it reaches 350°F. Mix buttermilk, dried dill, and cayenne in a bowl.
  3. Dredge chicken by dipping in buttermilk, coating in flour, and repeating for extra crunch.
  4. Fry the chicken in hot oil for 8-10 minutes until golden brown and internal temperature reaches 165°F.
  5. Make dill pickle slaw by mixing mayonnaise, a splash of pickle brine, dried dill, salt, and pepper with shredded cabbage.
  6. Assemble sandwiches by spreading mayonnaise on buns, adding fried chicken, slaw, and pickle slices before closing.

Nutrition

Serving: 1sandwichCalories: 650kcalCarbohydrates: 42gProtein: 28gFat: 40gSaturated Fat: 10gPolyunsaturated Fat: 5gMonounsaturated Fat: 15gCholesterol: 100mgSodium: 1200mgPotassium: 500mgFiber: 2gSugar: 4gVitamin A: 500IUVitamin C: 15mgCalcium: 50mgIron: 2mg

Notes

Oil should be heated to 350°F for best frying results. Allow slaw to chill before serving for enhanced flavors.

Tried this recipe?

Let us know how it was!

Savor the Heat: Nashville Hot Chicken Sandwiches Bliss

As I flipped through my favorite cookbook one rainy afternoon, a vibrant photo of Nashville Hot Chicken Sandwiches caught my eye, instantly sparking my craving for comfort food with a kick. This recipe is an ode to Southern cuisine, blending crispy fried chicken with a tantalizing balance of heat and sweetness. Perfect for a quick weeknight dinner or a gathering with friends, these spicy delights are as satisfying to make as they are to eat. Plus, they’re easily customizable—whether you prefer a little less heat or want to experiment with alternative toppings, the options are endless. Who’s ready to dive into the delicious world of Nashville Hot Chicken Sandwiches? Let’s embark on this flavorful journey together!

Why is this Nashville Hot Chicken So Special?

Bold, Flavorful Experience: Each bite of these sandwiches delivers a thrilling kick of spice that dances on your taste buds.
Crispy Perfection: The crunchy crust is a delightful contrast to the juicy chicken inside, making each mouthful a textural delight.
Endless Customization: Adjust the heat to your preference and vary the toppings; whether it’s fresh avocado or tangy jalapeños, the possibilities are endless.
Quick and Easy: This recipe is a time-saver for busy evenings, ready in no time without compromising on amazing flavor.
Crowd-Pleasing Comfort Food: These Nashville Hot Chicken Sandwiches are sure to impress family and friends, whether it’s a casual dinner or a backyard BBQ.

Nashville Hot Chicken Sandwich Ingredients

For the Chicken
Chicken Breasts – The base protein for the sandwich provides lean meat; can substitute with chicken thighs for a juicier flavor.
Buttermilk – For marinating the chicken and adding moisture; substitute with yogurt or a non-dairy milk mixed with vinegar for a dairy-free option.
Hot Sauce – Adds spiciness and depth; use your favorite brand and adjust for your desired heat level.
All-Purpose Flour – Used for dredging the chicken, creating a crispy outer layer; gluten-free flour can be used as a substitute.
Cornstarch (Optional) – Enhances the crispiness of the crust; you can substitute more flour if cornstarch is unavailable.
Spices (Cayenne, Garlic Powder, Salt, Black Pepper) – Season the chicken and enhance flavor; adjust spices for heat and flavor preference.
Frying Oil – Used for deep frying the chicken; choose a high smoke point oil like vegetable or peanut oil. Melted butter can also be used.

For the Hot Sauce
Brown Sugar – Adds sweetness to the hot sauce; can be omitted for less sweetness.
Chili Powder, Smoked Paprika – Increase flavor complexity in the sauce; optional but recommended for depth.

For Assembly
Burger Buns – Encase the chicken and toppings; can be substituted with gluten-free or whole grain buns.
Coleslaw, Mayonnaise, Pickles – Toppings that complement the heat of the chicken; choose store-bought or homemade versions as desired.

Dive into this vibrant flavor world with all the essential Nashville Hot Chicken Sandwich ingredients, and get ready for a spicy, soul-warming meal that’s bound to excite your taste buds!

Step‑by‑Step Instructions for Nashville Hot Chicken Sandwiches

Step 1: Prep the Chicken
Begin by slicing the chicken breasts in half horizontally to create cutlets that ensure quick cooking. Generously season both sides with salt and pepper to elevate the flavor. Visually, the chicken should glisten as the seasoning adheres. Set aside to allow the flavors to infuse while you prepare the marinade.

Step 2: Marinate
In a large bowl, combine buttermilk with your preferred hot sauce, ensuring a creamy consistency. Dip each seasoned chicken cutlet into this mixture, fully coating them for maximum moisture and flavor. Cover the bowl and let the chicken marinate for at least 30 minutes in the refrigerator, allowing the spices to penetrate the meat deeply.

Step 3: Dredge
Prepare a dredging station by mixing all-purpose flour, cornstarch (if using), and your selected spices in another bowl. Make sure the mixture looks even and well-blended. Remove the marinated chicken cutlets from their marinade, letting any excess liquid drip off, then coat them thoroughly in the flour mixture for a crispy outer layer.

Step 4: Fry
Heat your chosen frying oil in a large, deep skillet to 350°F (175°C), using a thermometer to monitor the temperature closely. Carefully place the coated chicken cutlets in the hot oil, frying for about 3 minutes on each side. You’re looking for a beautiful golden-brown color and an internal temperature reaching 165°F for safe, juicy chicken.

Step 5: Make Sauce
In a heatproof bowl, combine the hot cooking oil used for frying with brown sugar and any remaining spices, whisking until thoroughly blended. This mixture will form your Nashville hot sauce, which should appear shiny and vibrant. While the chicken is still sizzling, generously baste each piece with this flavorful sauce, enhancing the spicy profile.

Step 6: Assemble
To build your Nashville Hot Chicken Sandwich, take a toasted burger bun and spread a layer of creamy mayonnaise on the bottom half. Layer on the sauced fried chicken, followed by a generous serving of crunchy coleslaw and zesty pickles. Top with the other half of the bun, press gently, and your mouthwatering sandwich is ready to savor immediately!

How to Store and Freeze Nashville Hot Chicken Sandwiches

Fridge: Store any leftover Nashville Hot Chicken in an airtight container for up to 3 days. Reheat in an oven to maintain its crispy texture.

Freezer: If you want to freeze the fried chicken, wrap each piece tightly in foil or plastic wrap and place in a freezer-safe bag. It can be stored for up to 2 months.

Reheating: For best results, reheat frozen chicken in the oven at 375°F (190°C) for 20-25 minutes until heated through, ensuring the coating stays crispy.

Assembling Later: If you plan to assemble sandwiches later, keep ingredients like burger buns and coleslaw separate to prevent sogginess.

Nashville Hot Chicken Sandwich Variations

Feel free to get creative and personalize your Nashville Hot Chicken Sandwich experience with these delightful twists that are sure to excite your palate!

  • Thighs Instead of Breasts: Swap chicken breasts for thighs for a richer, juicier flavor that melts in your mouth. Each bite will be packed with even more moisture and taste!
  • Air Fryer Option: For a healthier version, use an air fryer to achieve that crispy goodness without deep frying. You’ll still get a crunchy exterior, but with less oil and guilt.
  • Add a Sweet Touch: Mix in some honey or maple syrup to your hot sauce for a delicate sweetness. The interplay of heat and sweetness can create a truly memorable flavor.
  • Spice It Up: Want more heat? Incorporate extra cayenne or a dash of your favorite hot pepper sauce into the marinade. Feel the exhilaration with each bite!
  • Go Dairy-Free: Substitute buttermilk with a blend of coconut milk and vinegar for a dairy-free option that doesn’t skimp on flavor. Enjoy a creamy marinade without any dairy worries.
  • Avocado Twist: Top your sandwich with creamy avocado slices for a luscious layer that adds richness and balances the spice perfectly. It’s the ultimate creamy counterpoint!
  • Bun Variety: Experiment with different types of buns, like whole grain or brioche, to bring a unique texture and flavor to your sandwich experience. It’s an easy way to elevate your dish!
  • Veggie Crunch: Add some crispy fried pickles or jalapeños on top for an extra crunch and a delightful surprise. Stretch your culinary creativity and impress your guests!

These variations can transform a classic dish into a personalized masterpiece. Looking for more exciting flavor combinations? Check out tips on how to make the best coleslaw here or learn about gluten-free frying alternatives in this article. Dive into these options and enjoy the flavorful world of Nashville Hot Chicken Sandwiches!

Expert Tips for Nashville Hot Chicken Sandwiches

  • Oil Temperature Matters: Ensure your frying oil is at 350°F before adding chicken; if it’s too cool, the coating will get soggy instead of crispy.
  • Press for Crunch: Firmly pressing the flour onto the chicken creates delightful “crispy bits” that enhance texture.
  • Control the Heat: If you’re sensitive to spice, start with half the cayenne and hot sauce, then add to taste after frying.
  • Storage Savvy: Store leftover chicken in an airtight container in the fridge for up to three days; for best texture, reheat in an oven or air fryer.
  • Customize with Ease: Feeling adventurous? Experiment with different toppings, like avocado or spicy jalapeños, to elevate your Nashville Hot Chicken Sandwich experience.

What to Serve With Nashville Hot Chicken Sandwiches

Create a feast filled with delightful textures and flavors to complement your spicy masterpiece.

  • Creamy Macaroni and Cheese: This classic side balances the spiciness of the sandwich with its rich, cheesy goodness, creating a comforting duo.
  • Crispy Waffle Fries: The crinkle-cut texture and light seasoning of waffle fries provide a satisfying crunch, perfect for scooping up extra sauce.
  • Tangy Coleslaw: A refreshing side that adds crunch and a sweet-tangy flavor, enhancing the sandwich without overpowering its heat.
  • Sweet Tea: Match the Southern vibe with a glass of refreshing sweet tea, its sweetness providing a perfect counterbalance to the spice.
  • Pickle Chips: Serve crispy, battered pickle chips on the side; their zesty tang complements the chicken and brings a delightful crunch.
  • Honey Glazed Cornbread: The sweet, fluffy cornbread adds a lovely contrast to the heat—a perfect bite that keeps you coming back for more.
  • Roasted Vegetables: A colorful medley of veggies like bell peppers and zucchini provides a healthy, flavorful contrast while adding vibrant color to your plate.
  • Beer or Cider: Pair with an ice-cold craft beer or a fruity cider to refresh your palate and enhance the overall eating experience.
  • Chocolate Chip Cookies: For dessert, indulge in warm chocolate chip cookies, offering a sweet end to the meal and a lovely endnote to the spicy kick.
  • Ice Cream Sundae: End on a creamy note with an indulgent ice cream sundae topped with caramel drizzle, balancing the earlier heat with sweet coolness.

Make Ahead Options

These Nashville Hot Chicken Sandwiches are fantastic for meal prep, making busy weeknights a breeze! You can marinate the chicken in the buttermilk and hot sauce up to 24 hours ahead, allowing the flavors to meld beautifully while juicy chicken maintains its tenderness. Additionally, you can dredge the chicken and store it in an airtight container in the refrigerator for up to 3 days. When it’s time to fry, simply heat your oil and cook the chicken until it’s golden and crispy. To ensure the best quality, reheat any leftovers in the oven for the ultimate crispy texture before assembling your sandwiches. Enjoy restaurant-quality flavors with minimal effort!

Nashville Hot Chicken Sandwiches Recipe FAQs

What type of chicken is best for Nashville Hot Chicken Sandwiches?
Absolutely! While chicken breasts are the traditional choice for a leaner option, I often recommend chicken thighs for their juicier texture and richer flavor which really enhances the overall sandwich experience.

How long can I store leftover Nashville Hot Chicken in the fridge?
You can store any leftover Nashville Hot Chicken in an airtight container for up to 3 days. For the best results, reheat it in an oven to help maintain the crispy exterior instead of using a microwave, which can make the chicken soggy.

Can I freeze Nashville Hot Chicken Sandwiches?
Yes, you can! To freeze the fried chicken, wrap each piece tightly in foil or plastic wrap, then place them in a freezer-safe bag. This way, your delightful spicy chicken can be stored for up to 2 months. When you’re ready to enjoy, simply reheat the chicken in the oven at 375°F (190°C) for about 20-25 minutes until heated through, ensuring that the coating stays beautifully crisp.

How can I adjust the spice level in Nashville Hot Chicken?
Very easily! If you’re not a fan of intense heat, start with half the recommended cayenne and hot sauce in both the marinade and the sauce. Taste as you go, adding more gradually until you reach your desired spice level. Remember, you can always add more, but it’s tough to tone it down once it’s mixed in!

What should I do if my chicken isn’t crispy enough?
Here’s a little troubleshooting advice: Ensure your frying oil is at the right temperature of 350°F (175°C) before you add the chicken. If the oil is too cool, the coating can become soggy. Additionally, pressing the flour mixture onto the chicken firmly helps create those desirable crispy bits, so don’t skip that step!

undefined

Savor the Heat: Nashville Hot Chicken Sandwiches Bliss

Experience the delightful kick of Nashville Hot Chicken Sandwiches with this flavorful recipe combining crispy fried chicken and tantalizing heat.
Prep Time 30 minutes
Cook Time 15 minutes
Marinating Time 30 minutes
Total Time 1 hour 15 minutes
Servings: 4 sandwiches
Course: Dinner
Cuisine: Southern
Calories: 520

Ingredients
  

For the Chicken
  • 2 pieces Chicken Breasts Can substitute with chicken thighs for a juicier flavor.
  • 1 cup Buttermilk Substitute with yogurt or non-dairy milk mixed with vinegar for a dairy-free option.
  • 2 tablespoons Hot Sauce Adjust for desired heat level.
  • 1 cup All-Purpose Flour Gluten-free flour can be used as a substitute.
  • 1/2 cup Cornstarch Optional for enhanced crispiness.
  • 1 teaspoon Cayenne Pepper Adjust spices for heat preference.
  • 1 teaspoon Garlic Powder
  • 1 teaspoon Salt
  • 1/2 teaspoon Black Pepper
  • 2 cups Frying Oil Use high smoke point oil.
For the Hot Sauce
  • 1 tablespoon Brown Sugar Omit for less sweetness.
  • 1 tablespoon Chili Powder Optional but recommended.
  • 1 tablespoon Smoked Paprika Optional but recommended.
For Assembly
  • 4 pieces Burger Buns Can use gluten-free or whole grain buns.
  • 1 cup Coleslaw Store-bought or homemade.
  • 1/2 cup Mayonnaise
  • 1/2 cup Pickles

Equipment

  • deep skillet
  • Thermometer
  • Large bowl

Method
 

Step-by-Step Instructions
  1. Slice the chicken breasts in half horizontally to create cutlets and season with salt and pepper.
  2. Combine buttermilk with hot sauce in a bowl, dip chicken cutlets and marinate for 30 minutes.
  3. Mix flour, cornstarch, and spices for dredging, then coat chicken cutlets.
  4. Heat oil to 350°F and fry the chicken for about 3 minutes on each side until golden brown.
  5. Combine hot cooking oil with brown sugar and spices to make the Nashville hot sauce, baste the fried chicken.
  6. Assemble the sandwich with mayonnaise, fried chicken, coleslaw, and pickles between burger buns.

Nutrition

Serving: 1sandwichCalories: 520kcalCarbohydrates: 44gProtein: 32gFat: 28gSaturated Fat: 7gPolyunsaturated Fat: 4gMonounsaturated Fat: 15gCholesterol: 90mgSodium: 1200mgPotassium: 600mgFiber: 3gSugar: 5gVitamin A: 500IUVitamin C: 5mgCalcium: 150mgIron: 3mg

Notes

Ensure oil temperature is monitored for crispy results and customize toppings to your liking.

Tried this recipe?

Let us know how it was!

Savory Cuban Casserole Ready in 30 Minutes for Busy Nights

Stepping into my kitchen, I find myself swept away by the rich, comforting aroma of my Quick and Easy Cuban Casserole. Inspired by the beloved Cuban sandwich, this dish transforms traditional flavors into a cozy casserole that practically begs to be savored. With a creamy blend of savory pulled pork, tangy mustard, and melty Swiss cheese all topped with crisp dill pickles, it’s a delightful way to elevate your weeknight meals. Best of all, it’s ready in just 30 minutes—perfect for those busy days when you’re craving something homemade yet hassle-free. Whether you have leftover pulled pork to use up or simply want a satisfying family dinner, this casserole brings a taste of Cuba right to your table. What creative twist will you add to make it your own?

Why is Cuban Casserole a Weeknight Winner?

Quick and Easy: This casserole comes together in just 30 minutes, making it the perfect solution for busy nights when you need a homemade meal fast.

Flavor Explosion: The delightful combination of savory pulled pork, tangy mustard, and creamy Swiss cheese creates a taste experience that will wow your family and guests alike.

Gluten-Free and Keto-Friendly: Enjoy a nourishing meal without compromising your dietary needs, perfect for those following a low-carb lifestyle.

Crowd-Pleaser: With its hearty ingredients and creamy texture, this dish is sure to be loved by both kids and adults, making it an excellent choice for family gatherings.

Versatile: Feel free to customize with ingredients you love, like roasted peppers or different cheeses. You can even explore variation ideas to give it your unique spin!

Cuban Casserole Ingredients

• Get ready to savor the essence of Cuba!

For the Base

  • Prepared Pulled Pork – This is your main protein source; for the best texture, use pork without sauce or shredded carnitas.
  • Sliced Ham – Adding heartiness and extra flavor, cut it into small pieces for easy mixing.
  • Shredded Swiss Cheese – This provides a rich and creamy texture; shred just before use for that perfect melt.

For the Creamy Sauce

  • Whipping Cream – This forms the base of the sauce; opt for heavy cream for a richer taste.
  • Cream Cheese – It adds thickness and creaminess; make sure it’s softened for smooth mixing.
  • Yellow Mustard – For tanginess and depth of flavor; feel free to adjust the amount to suit your taste.

For the Topping

  • Sliced Dill Pickles – These offer a fresh crunch and tartness; use fresh pickles for the best texture, and feel free to add more for garnish.

Embrace this exhilarating Cuban Casserole that brings the beloved flavors right to your dinner table, all while being gluten-free and keto-friendly!

Step‑by‑Step Instructions for Quick and Easy Cuban Casserole

Step 1: Preheat the Oven
Begin by preheating your oven to 375°F (190°C). This ensures that your Quick and Easy Cuban Casserole will bake evenly and achieve that golden, bubbly finish. While the oven is heating, gather your ingredients to streamline the cooking process.

Step 2: Prepare the Sauce
In a large oven-safe skillet, combine the whipping cream, softened cream cheese, and yellow mustard over medium heat. Stir continuously for about 3-5 minutes until the mixture is smooth and slightly thickened, resembling a creamy sauce. You’ll know it’s ready when it emits a gentle simmer and looks rich and velvety.

Step 3: Add the Meats and Cheese
Once your sauce is ready, fold in the prepared pulled pork, diced ham, half of the pickles, and half of the shredded Swiss cheese. Use a wooden spoon to mix thoroughly for another 2-3 minutes until all the ingredients are well combined and coated in the creamy sauce. The aroma will begin to fill your kitchen, hinting at the delightful flavors to come!

Step 4: Mix Well
Ensure everything is thoroughly combined by giving the mixture a good stir for about 1 minute. The Quick and Easy Cuban Casserole should now look hearty and delicious, with the meats and sauce evenly distributed. This step is crucial for achieving that delightful bite of flavor in every spoonful.

Step 5: Top the Casserole
Next, sprinkle the remaining shredded Swiss cheese evenly over the top of your casserole mixture. Then, arrange dollops of the remaining pickles on top, which will provide that irresistible crunch and tanginess. The visual appeal of the cheese will start to melt beautifully, enticing everyone around.

Step 6: Bake
Carefully transfer your skillet or dish to the preheated oven and bake for 20 minutes. Keep an eye on the casserole; look for the cheese to become bubbly and slightly golden at the edges. This is the perfect signal that your Quick and Easy Cuban Casserole is ready to be removed from the oven.

Step 7: Serve and Enjoy
Once baked, remove the casserole from the oven and let it sit for a few minutes to cool slightly. This will help set the layers and make serving easier. Scoop generous portions onto plates, and get ready to savor the comforting flavors of this delightful dish!

What to Serve with Quick and Easy Cuban Casserole

Imagine a meal where each bite is supported by complementary flavors and textures that make your heart sing.

  • Crispy Green Salad: A light and refreshing salad provides a perfect contrast to the creamy casserole, lifting the meal’s richness.
  • Garlic Breadsticks: The buttery, garlicky breadsticks are fantastic for soaking up the delicious creamy sauce, ensuring nothing goes to waste!
  • Roasted Vegetables: The earthiness of roasted carrots and bell peppers brings a homey appeal and a touch of sweetness to balance the savory casserole.
  • Coleslaw: A crunchy coleslaw with a zesty dressing adds a refreshing bite that heightens the flavor dynamics of the meal, making every mouthful exciting.
  • Black Beans: Offering a hearty side filled with fiber, seasoned black beans add depth and are a classic pairing with Cuban-inspired dishes.
  • Tropical Fruit Salad: Refreshing and vibrant, a medley of mango, pineapple, and kiwi adds a bright contrast to the dish’s savory notes.
  • Spanish Rice: This flavorful side combines nicely with the casserole, delivering a satisfying carb option that rounds out the dinner.
  • Cuban Mojito: Sip on this refreshing cocktail as you enjoy your meal; the minty lime enhances the flavors beautifully, making it a celebration in a glass.
  • Flan: This smooth, creamy dessert is a delightful way to end your meal, offering a sweet contrast to the savory casserole while embracing traditional Cuban flavor.

How to Store and Freeze Cuban Casserole

Fridge: Store leftovers in an airtight container in the fridge for up to 3 days. Reheat gently in the oven or microwave, replacing any top pickles for freshness.

Freezer: You can freeze the Cuban Casserole for up to 3 months. Make sure it’s fully cooled before placing it in a freezer-safe container. Thaw in the fridge overnight before reheating.

Reheating: When ready to enjoy, reheat the casserole in the oven at 350°F until heated through, about 20-30 minutes. This keeps the creamy texture intact while making it deliciously warm again.

Make Ahead Options

These Quick and Easy Cuban Casserole is a fantastic option for meal prep! You can assemble the casserole up to 24 hours in advance, storing it uncooked in the refrigerator (just be sure to cover it tightly). The ingredients will meld beautifully, enhancing the flavors. Alternatively, if you prefer, you can prep individual components like the cooked pulled pork and creamy sauce up to 3 days in advance. Just keep the sauce refrigerated in an airtight container. When you’re ready to eat, simply layer the ingredients in your baking dish, top with cheese and pickles, and bake as directed. Your casserole will be just as delicious, and you’ll save valuable time!

Expert Tips for Quick Cuban Casserole

  • Soften Cream Cheese: Ensure your cream cheese is at room temperature for seamless incorporation into the sauce, avoiding lumps.

  • Choose the Right Pork: Use pork without added sauce or plain carnitas for the best texture in your Cuban casserole.

  • Adjust Mustard: Feel free to tweak the amount of yellow mustard depending on your taste; a little can go a long way.

  • Bake Evenly: If your skillet isn’t oven-safe, transfer the casserole to a baking dish to ensure it bakes properly without sticking.

  • Add Fresh Veggies: Consider adding pre-cooked diced bell peppers or mushrooms for an additional burst of flavor and nutrition.

  • Reheat Smartly: When reheating leftovers, swap out the top pickles with fresh ones for optimal taste and texture in your quick Cuban casserole.

Variations & Substitutions for Cuban Casserole

Feel free to let your creativity shine as you customize this recipe to suit your taste buds!

  • Cheese Swap: Try using Pepper Jack for a spicy twist; its heat adds a flavorful kick to the dish.

  • Vegetarian Delight: Substitute pulled jackfruit for the meat, using a pinch of smoked paprika for a deeper flavor profile. This offers a wonderful texture and makes the casserole plant-based friendly!

  • Heat It Up: Add jalapeños or crushed red pepper flakes for those who enjoy a little extra warmth in their dishes. Spice lovers will appreciate the added zing!

  • Pasta Layer: Incorporate cooked gluten-free pasta into the mix for a heartier, comfort food feel that makes it even more filling.

  • Flavorful Add-ins: Toss in sautéed onions or bell peppers for added nutrients and a pop of colorful veggies. These ingredients bring both texture and a fresh flavor contrast.

  • Different Meats: Swap the pulled pork for shredded rotisserie chicken for a different take. It’s a great way to use up leftover chicken and still enjoy that savory flavor.

  • Zesty Kick: Mix some chipotle sauce into the creamy sauce to add smokiness and a flavorful depth that’s sure to impress.

  • Herbal Infusion: Add chopped fresh cilantro or parsley on top just before serving for a burst of freshness that elevates the entire dish.

Explore these ideas and find the combination that speaks to you. Each variation adds a little something special to your Cuban Casserole, keeping your dinners exciting and delightful!

Cuban Casserole Recipe FAQs

What type of pulled pork should I use for the casserole?
Absolutely! For the best texture and flavor in your Cuban Casserole, I recommend using plain pulled pork without sauce or shredded carnitas. The natural flavors of the pork shine through in the creamy sauce, creating a delicious combination that truly captures the essence of a Cuban sandwich.

How should I store leftovers from my Cuban Casserole?
You can store your Cuban Casserole leftovers in an airtight container in the fridge for up to 3 days. Just be sure to remove any top pickles to maintain their freshness. When you’re ready to enjoy the leftovers, simply reheat in the oven or microwave for a quick meal that tastes just as good as the first time!

Can I freeze the Cuban Casserole?
Yes, you can freeze your Cuban Casserole for up to 3 months! Make sure the casserole cools completely before transferring it to a freezer-safe container. To reheat, thaw it overnight in the fridge, then bake at 350°F until heated through, about 20-30 minutes. This helps retain the creamy texture while ensuring it’s deliciously warm again.

What should I do if my sauce is too thick?
If your sauce turns out too thick, don’t fret! Simply stir in a splash of extra whipping cream or broth over low heat until you reach your desired consistency. This should create a smooth, creamy sauce perfect for coating your ingredients. Remember, the sauce should be velvety, not watery!

Can I make the Cuban Casserole ahead of time?
Yes, you can prepare the casserole ahead of time! Simply assemble it as directed but don’t bake it. Cover it tightly with plastic wrap or aluminum foil and store it in the fridge for a maximum of 24 hours before baking. When you’re ready to serve, just pop it in the oven straight from the fridge, adding an extra few minutes to the baking time as needed.

Is this recipe suitable for those with dietary restrictions?
Very! This Cuban Casserole is gluten-free and keto-friendly, making it a great option for those who need to avoid gluten or follow a low-carb diet. However, always check labels for specific ingredient brands to ensure they meet your dietary needs. If you have allergies, consider substitutes, like dairy-free cream cheese, to make it suitable for everyone at the table.

undefined

Savory Cuban Casserole Ready in 30 Minutes for Busy Nights

A quick and easy Cuban casserole featuring savory pulled pork, tangy mustard, and Swiss cheese, ready in 30 minutes.
Prep Time 10 minutes
Cook Time 20 minutes
Total Time 30 minutes
Servings: 4 servings
Course: Casserole
Cuisine: Cuban
Calories: 400

Ingredients
  

For the Base
  • 2 cups Prepared Pulled Pork Use pork without sauce or shredded carnitas.
  • 1 cup Sliced Ham Cut into small pieces.
  • 2 cups Shredded Swiss Cheese Shred just before use.
For the Creamy Sauce
  • 1 cup Whipping Cream Opt for heavy cream for a richer taste.
  • 8 ounces Cream Cheese Softened for smooth mixing.
  • 3 tablespoons Yellow Mustard Adjust amount to taste.
For the Topping
  • 1 cup Sliced Dill Pickles Use fresh pickles for best texture.

Equipment

  • Oven-safe skillet

Method
 

Step‑by‑Step Instructions
  1. Preheat your oven to 375°F (190°C).
  2. In a large oven-safe skillet, combine the whipping cream, softened cream cheese, and yellow mustard over medium heat, stirring for 3-5 minutes until smooth.
  3. Fold in the prepared pulled pork, diced ham, half of the pickles, and half of the shredded Swiss cheese, mixing for another 2-3 minutes.
  4. Stir the mixture thoroughly for about 1 minute.
  5. Sprinkle the remaining shredded Swiss cheese and arrange dollops of the remaining pickles on top.
  6. Carefully transfer to the preheated oven and bake for 20 minutes until cheese is bubbly and golden.
  7. Remove from oven and let it sit for a few minutes before serving.

Nutrition

Serving: 1servingCalories: 400kcalCarbohydrates: 10gProtein: 25gFat: 30gSaturated Fat: 15gPolyunsaturated Fat: 2gMonounsaturated Fat: 10gCholesterol: 90mgSodium: 800mgPotassium: 600mgFiber: 1gSugar: 2gVitamin A: 800IUVitamin C: 5mgCalcium: 300mgIron: 2mg

Notes

Customize with your favorite ingredients like roasted peppers or different cheeses to make it your own.

Tried this recipe?

Let us know how it was!

Crispy Chicken Caesar Sandwich That Will Brighten Your Day

You know that satisfying moment when you take your first bite of a crispy fried chicken sandwich? That savory crunch, perfectly paired with creamy, tangy Caesar dressing, has a way of instantly transporting you to comfort-food heaven. My Ultimate Chicken Caesar Sandwich brings this beloved classic right to your kitchen table, transforming the traditional Caesar salad into a handheld delight that’s quick to prepare and oh-so-delicious. Whether you’re balancing a busy weeknight or hosting a casual get-together, this recipe suits any occasion, especially if you opt for crispy chicken tenders for a speedy shortcut. Imagine savoring a stack of crispy goodness encapsulated in a warm brioche bun, topped with fresh romaine and a delightful dressing – it’s the ultimate crowd-pleaser! Are you ready to upgrade your lunch game with this mouthwatering creation? Let’s dive in!

Why Will You Love This Sandwich?

Ultimate Flavor Explosion: The irresistible combination of crispy chicken and tangy Caesar dressing delivers a taste that will leave your taste buds dancing.

Quick Preparation: With the option for pre-made crispy chicken tenders, you can whip up this sandwich in no time, making it perfect for busy weeknights.

Versatile Options: Whether you prefer grilled chicken or a gluten-free bun, this recipe allows you to customize each sandwich to your liking.

Crowd-Pleasing Delight: Ideal for gatherings or a cozy dinner at home, everyone will enjoy the satisfying crunch and fresh flavors packed into every bite.

Simple Ingredients: With common kitchen staples, you can create a gourmet experience without the fuss. Enjoy this sandwich with a side of crispy fries or a refreshing green salad for the complete meal!

Chicken Caesar Sandwich Ingredients

For the Chicken
Boneless, Skinless Chicken Breasts – The heart of your sandwich; pound to 1/2-inch thickness for even cooking.
All-Purpose Flour – Provides a dry coating for the chicken; swap for gluten-free flour if needed.
Salt – Essential for flavor enhancement; a pinch goes a long way.
Black Pepper – Adds a mild kick to the breading; adjust to your taste.
Garlic Powder – Infuses a savory flavor; feel free to increase for more punch.
Paprika – Gives color and subtle warmth to your breading.
Large Eggs – Binds the breading; ensures a crisp coating sticks to the chicken.
Panko Breadcrumbs – Achieve that coveted crispiness; can substitute with regular breadcrumbs, although panko is preferred.
Grated Parmesan Cheese – Adds a nutty, salty flavor to both chicken and dressing.
Vegetable Oil – Crucial for frying; can replace with canola or peanut oil.

For the Dressing
Mayonnaise – The creamy base of your Caesar dressing; consider Greek yogurt for a lighter twist.
Lemon Juice – Brightens up the dressing; vinegar can be a quick substitute.
Dijon Mustard – Adds a tangy depth to your dressing’s flavor profile.
Garlic (minced) – Elevates the dressing’s flavor; fresh is best but powdered works in a pinch.
Worcestershire Sauce – Creates a rich umami essence; omit if you don’t have it on hand.

For the Assembly
Chopped Romaine Lettuce – Adds crunch and freshness to the sandwich; layer generously!
Sandwich Buns (Brioche or preferred) – Use for a sweet, soft delivery; can switch to whole grain or gluten-free if needed.

This Chicken Caesar Sandwich blends crispy goodness with creamy flavor, creating an unbeatable bite!

Step‑by‑Step Instructions for Ultimate Chicken Caesar Sandwich with Crispy Fried Chicken

Step 1: Prepare the Chicken
Begin by placing the boneless, skinless chicken breasts between two sheets of plastic wrap. Using a meat mallet or rolling pin, pound the chicken to an even 1/2-inch thickness. This ensures that your chicken cooks uniformly, leading to juicy, tender cutlets. Once pounded, season both sides with salt, black pepper, garlic powder, and paprika for a robust flavor.

Step 2: Set Up Breading Station
Create a breading station by arranging three shallow dishes. In the first dish, combine all-purpose flour seasoned with salt and pepper. In the second, beat the eggs until frothy. Lastly, in the third dish, mix panko breadcrumbs with grated Parmesan cheese. This setup makes it easy to coat each chicken cutlet thoroughly before frying for your Chicken Caesar Sandwich.

Step 3: Bread the Chicken
Take each chicken cutlet and dredge it in the seasoned flour, coating both sides completely. Next, dip the floured chicken into the beaten eggs, allowing any excess to drip off. Finally, coat the chicken in the panko-Parmesan mixture, pressing gently to ensure the breadcrumbs adhere well. This step creates the golden, crispy exterior you crave in a delicious Chicken Caesar Sandwich.

Step 4: Fry the Chicken
In a large skillet, heat about 1/2 inch of vegetable oil over medium-high heat until shimmering, which should take about 5 minutes. Carefully place the breaded chicken cutlets in the hot oil, frying them for 3-4 minutes on each side or until they are golden brown and reach an internal temperature of 165°F. Once cooked, transfer the cutlets to a wire rack to drain excess oil.

Step 5: Make the Dressing
While the chicken is frying, whip up your creamy Caesar dressing. In a bowl, combine mayonnaise, grated Parmesan, lemon juice, Dijon mustard, minced garlic, and Worcestershire sauce. Whisk until smooth and creamy, adjusting salt and pepper to taste. This dressing adds the perfect tang to your Chicken Caesar Sandwich, enhancing the flavors of the crispy chicken.

Step 6: Toast the Buns
Preheat your oven to 375°F or use a skillet over low heat to toast the sandwich buns. Lightly butter the cut sides, then place them face down until golden and crispy. This adds a lovely crunch to your Chicken Caesar Sandwich and ensures that the bun holds up against the creamy dressing and juicy chicken.

Step 7: Assemble the Sandwich
Spread a generous amount of the Caesar dressing on the bottom half of each toasted bun. Layer on a handful of chopped romaine lettuce for that refreshing crunch. Next, add the crispy fried chicken cutlet, and sprinkle additional Parmesan cheese on top for extra flavor. Finally, gently press the top bun down to secure the layers, and your Ultimate Chicken Caesar Sandwich is ready to serve!

Make Ahead Options

These Ultimate Chicken Caesar Sandwiches are perfect for meal prep enthusiasts looking to save time during busy weeknights! You can marinate and bread the chicken cutlets up to 24 hours in advance; simply cover them and refrigerate to ensure the breading stays crispy when cooked. The Caesar dressing can also be made ahead and stored in the fridge for up to 3 days; this allows the flavors to meld beautifully. When you’re ready to enjoy the sandwich, fry the chicken, toast the buns, and assemble just before serving for that fresh, hearty crunch. With these make-ahead tips, you’ll savor all the deliciousness without the stress!

How to Store and Freeze Chicken Caesar Sandwich

Room Temperature: Store any leftover ingredients separately at room temperature for up to 2 hours before refrigeration to keep freshness.

Fridge: Assembled sandwiches can be stored in an airtight container for up to 3 days. Reheating is recommended; warm the chicken in the oven to restore crispiness.

Freezer: For longer storage, freeze the cooked chicken cutlets individually wrapped for up to 3 months. Thaw in the fridge before reheating in the oven or air fryer for the best texture.

Reheating: To reheat assembled Chicken Caesar Sandwiches, place them in a 350°F oven for about 10 minutes to warm through without losing crispiness.

What to Serve with Ultimate Chicken Caesar Sandwich

Savoring a crispy chicken sandwich is always a delightful experience, but pairing it with the right sides elevates your meal to pure bliss.

  • Crispy French Fries: The perfect crunchy accompaniment, fries add a classic touch to your sandwich experience. They soak up any leftover dressing for a flavor boost!

  • Garlicky Toasted Bread: Serve slices of warm, crispy garlic bread on the side for an aromatic and buttery flavor that complements the sandwich beautifully.

  • Classic Coleslaw: With its crunchy texture and creamy dressing, coleslaw adds freshness and balances the rich flavors of the sandwich. It’s a match made in comfort-food heaven!

  • Simple Green Salad: A light, refreshing salad featuring mixed greens, cherry tomatoes, and your favorite vinaigrette introduces a crisp element that contrasts with the sandwich’s richness.

  • Sweet Potato Wedges: Baked sweet potato wedges bring a delightful sweetness that harmonizes with the savory chicken flavors. They’re a nutritious twist on classic fries!

  • Icy Lemonade: A cold glass of freshly squeezed lemonade perfectly cuts through the richness of the sandwich, leaving you refreshed and satisfied with each bite.

  • Chocolate Chip Cookies: End your meal on a sweet note with warm, gooey chocolate chip cookies that bring a comforting finish to your Chicken Caesar Sandwich feast.

Expert Tips for Chicken Caesar Sandwich

  • Frying Technique: Ensure you do not overcrowd the pan when frying the chicken to maintain oil temperature, which is key for achieving that crispy coating.

  • Keep Warm: If you’re preparing multiple sandwiches, keep fried chicken warm in a low-temperature oven (200°F) to maintain crispiness while you assemble.

  • Extra Crunch: For added texture, consider topping your sandwich with croutons or crispy bacon; they’ll bring a delightful crunch.

  • Flavor Variations: Spice lovers can incorporate red pepper flakes into the dressing, or try a spicy chicken breading for an exciting twist.

  • Lighter Options: To make a lighter version of the Chicken Caesar Sandwich, think about grilling the chicken instead, or swap the buns for tortillas for a fresh wrap-style meal.

Chicken Caesar Sandwich Variations

Feel free to explore these delicious twists and swaps that can elevate your Chicken Caesar Sandwich to new heights.

  • Crispy Chicken Tenders: Use pre-made crispy chicken tenders for a quick and easy alternative. Simply cook according to package instructions and assemble your sandwich for a speedy option.

  • Greek Yogurt Dressing: Swap mayonnaise for Greek yogurt in the dressing to lighten it up while still packing a creamy punch. This twist retains the tang while cutting calories, making it a guilt-free delight.

  • Grilled Chicken Option: For a healthier variation, grill your chicken instead of frying. Marinate it with olive oil, garlic, and herbs for added flavor before tossing it on the grill.

  • Buffalo Sauce Finish: For those who crave a bit of heat, toss your fried chicken in buffalo sauce before assembling. The spicy kick will definitely make your sandwich stand out!

  • Whole Grain Buns: Swap out your brioche buns for whole grain or gluten-free buns to accommodate dietary restrictions while adding fiber and nutrients to your meal.

  • Add-Ins for Extra Crunch: Consider adding crispy bacon or homemade croutons on your sandwich for an added layer of crunch and flavor. They’ll turn a standard sandwich into something extraordinary!

  • Caesar Wrap: Transform your sandwich into a wrap by using large tortillas instead of buns. Just layer your ingredients and roll it up for a convenient on-the-go option.

  • Parmesan Crust: Elevate the flavor of your chicken by creating a parmesan crust. Mix grated parmesan into your panko before breading for a cheesy, extra crispy finish.

No matter which variation you choose, these ideas will help you enjoy the comforting flavors of this Chicken Caesar Sandwich in delightful new ways. Enhance your meal even further with a side of crispy fries or a refreshing green salad for a complete dining experience!

Chicken Caesar Sandwich Recipe FAQs

How do I choose ripe ingredients for this sandwich?
Absolutely! When selecting your chicken breasts, look for ones that are plump and have a consistent pink color. For your lettuce, opt for vibrant green romaine with crisp leaves, avoiding any that are wilted or brown. If using fresh garlic, choose bulbs that are firm to the touch with no dark spots or sprouting.

What is the best way to store leftover Chicken Caesar Sandwiches?
Very good question! Store any assembled sandwiches in an airtight container in the fridge for up to 3 days. For the best texture, I recommend reheating the chicken in the oven at 350°F for about 10 minutes, rather than using a microwave, to restore that crispy goodness while warming up the sandwich.

Can I freeze the chicken cutlets for later use?
Absolutely! To freeze the cooked chicken cutlets, allow them to cool fully, then wrap each cutlet individually in plastic wrap, followed by aluminum foil. This prevents freezer burn and keeps them fresh for up to 3 months. When you’re ready to use them, thaw overnight in the fridge and reheat in the oven or air fryer for the best result.

What should I do if my chicken cutlets didn’t turn out crispy?
Don’t worry; it’s a common occurrence! If your cutlets are not crispy, it could be due to overcrowding the pan while frying, which lowers the oil temperature. Make sure to fry in batches, leaving space between each cutlet for the oil to circulate. Additionally, ensure your oil is hot enough before adding the chicken—this is typically when small bubbles form around the edge of the pan.

Are there any allergen considerations for this recipe?
Very much so! This Chicken Caesar Sandwich contains common allergens such as gluten (in the flour and buns), eggs (in the coating), and dairy (from the Parmesan and mayonnaise). For gluten-free options, you can use gluten-free flour and buns or fresh lettuce wraps. If there are egg allergies, try using a flaxseed or chia seed mixture for binding. Always check for allergy-friendly alternatives when preparing for guests.

Can I make a lighter version of the Chicken Caesar Sandwich?
Definitely! For a lighter take, you can grill or bake the chicken instead of frying it. Swap out the mayonnaise for Greek yogurt in your Caesar dressing to cut down on calories while still retaining that creamy texture. You could even use whole grain or gluten-free buns for a healthier alternative. Enjoy the process of making it your own!

undefined

Crispy Chicken Caesar Sandwich That Will Brighten Your Day

This Crispy Chicken Caesar Sandwich combines juicy chicken with tangy Caesar dressing, making it the perfect lunch option.
Prep Time 20 minutes
Cook Time 15 minutes
Total Time 35 minutes
Servings: 4 sandwiches
Course: Lunch
Cuisine: American
Calories: 650

Ingredients
  

For the Chicken
  • 1 pound Boneless, Skinless Chicken Breasts pounded to 1/2-inch thickness
  • 1 cup All-Purpose Flour seasoned with salt and pepper
  • 1 teaspoon Salt
  • 1 teaspoon Black Pepper adjust to taste
  • 1 teaspoon Garlic Powder increase for more punch
  • 1 teaspoon Paprika
  • 2 Large Eggs beaten
  • 1 cup Panko Breadcrumbs for crispiness
  • 1/2 cup Grated Parmesan Cheese
  • 1 cup Vegetable Oil for frying
For the Dressing
  • 1/2 cup Mayonnaise or Greek yogurt
  • 2 tablespoons Lemon Juice
  • 1 tablespoon Dijon Mustard
  • 2 cloves Garlic minced
  • 1 teaspoon Worcestershire Sauce optional
For the Assembly
  • 4 cups Chopped Romaine Lettuce
  • 4 buns Sandwich Buns (Brioche or preferred) or gluten-free if needed

Equipment

  • Large skillet
  • Baking Sheet
  • Meat mallet
  • shallow dishes
  • Mixing Bowl

Method
 

Preparation
  1. Pound chicken to 1/2-inch thickness and season with salt, black pepper, garlic powder, and paprika.
  2. Set up a breading station with three shallow dishes: flour, beaten eggs, and panko mixed with Parmesan.
  3. Dredge chicken in flour, dip in eggs, then coat with panko mixture.
  4. Fry chicken in hot oil for 3-4 minutes on each side until golden brown.
  5. Make the dressing by whisking together mayo, Parmesan, lemon juice, mustard, minced garlic, and Worcestershire sauce.
  6. Toast buns by buttering and heating until golden.
  7. Assemble the sandwich: spread dressing, add romaine, then crispy chicken, topping with more Parmesan.

Nutrition

Serving: 1sandwichCalories: 650kcalCarbohydrates: 40gProtein: 30gFat: 35gSaturated Fat: 10gPolyunsaturated Fat: 5gMonounsaturated Fat: 15gCholesterol: 180mgSodium: 900mgPotassium: 600mgFiber: 3gSugar: 2gVitamin A: 1200IUVitamin C: 10mgCalcium: 300mgIron: 3mg

Notes

Keep fried chicken warm in the oven while assembling multiple sandwiches for best results.

Tried this recipe?

Let us know how it was!

Stay Connected

Get recipes via email: