Get my cookbooks

BBQ Chicken Grilled Cheese Sandwich That’s Comfort in Every Bite

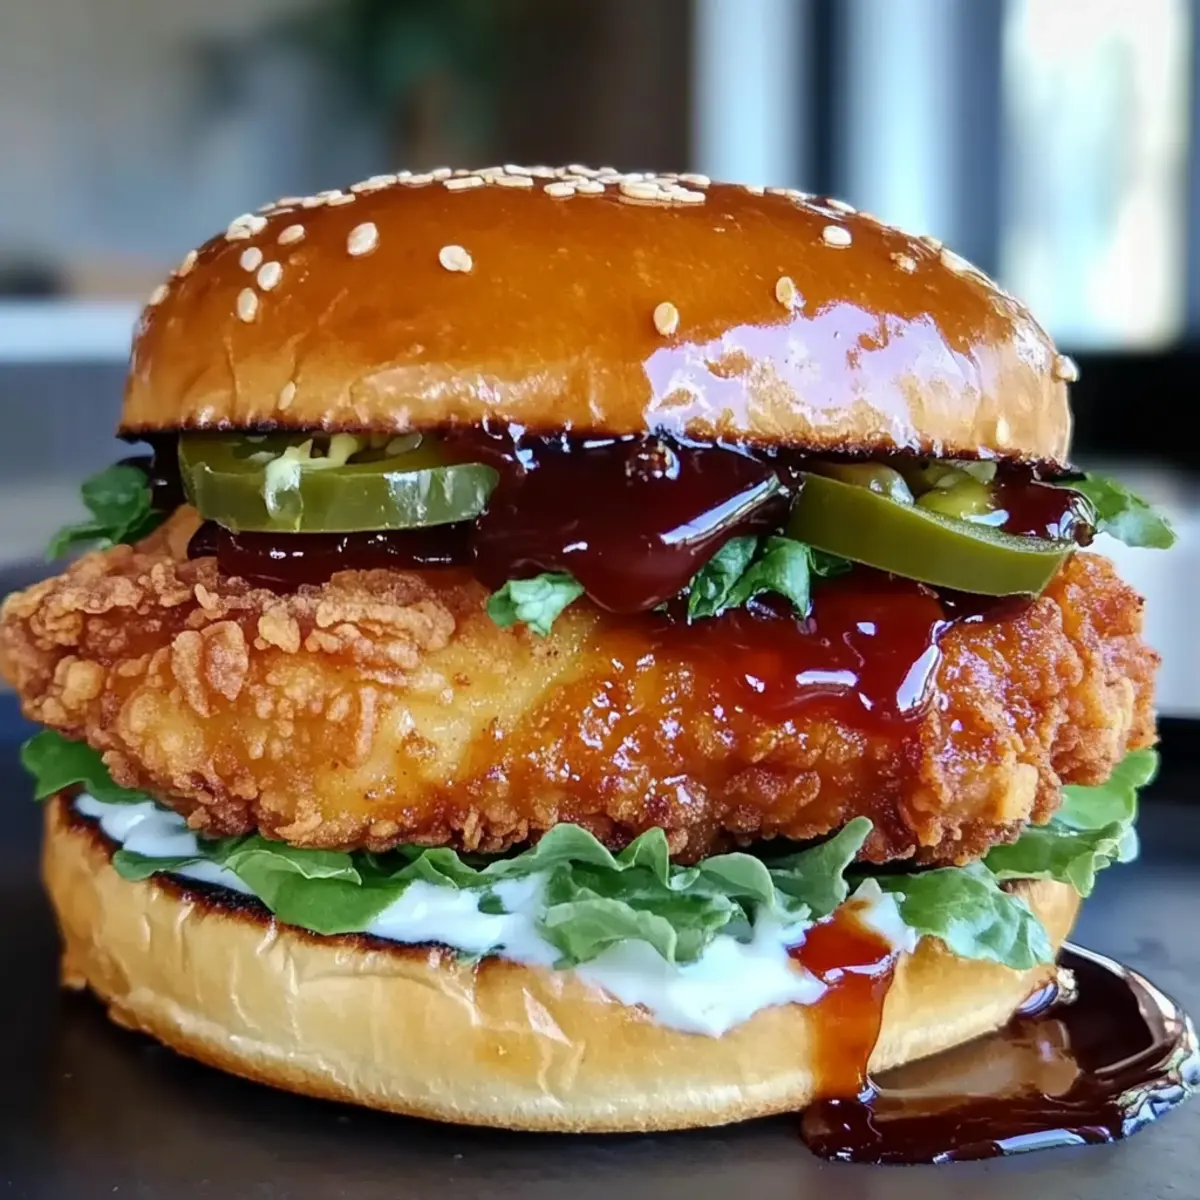
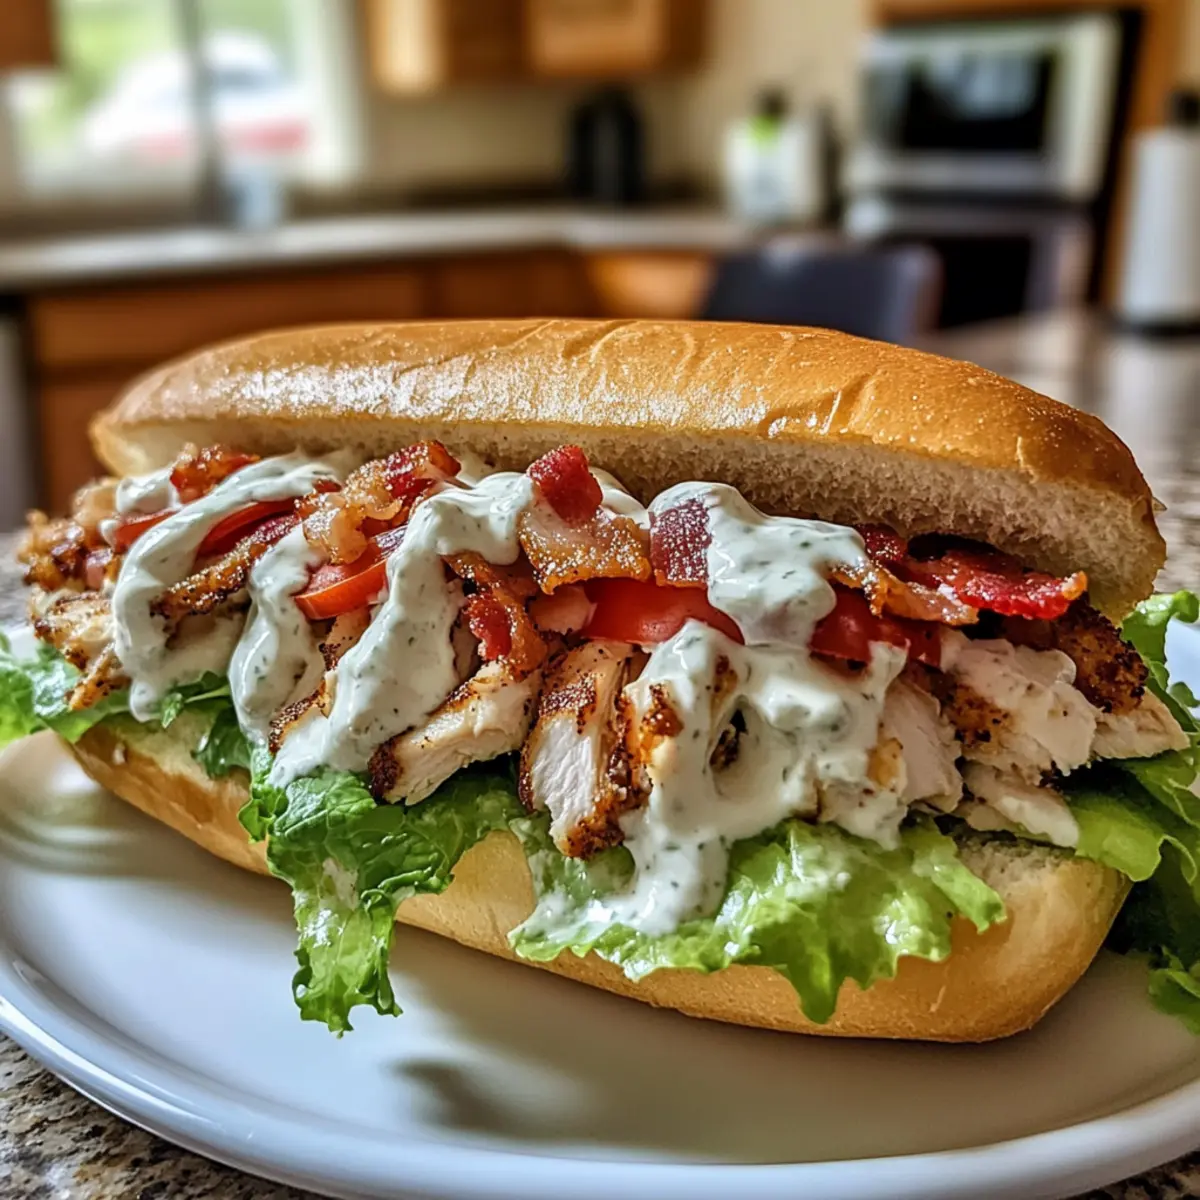
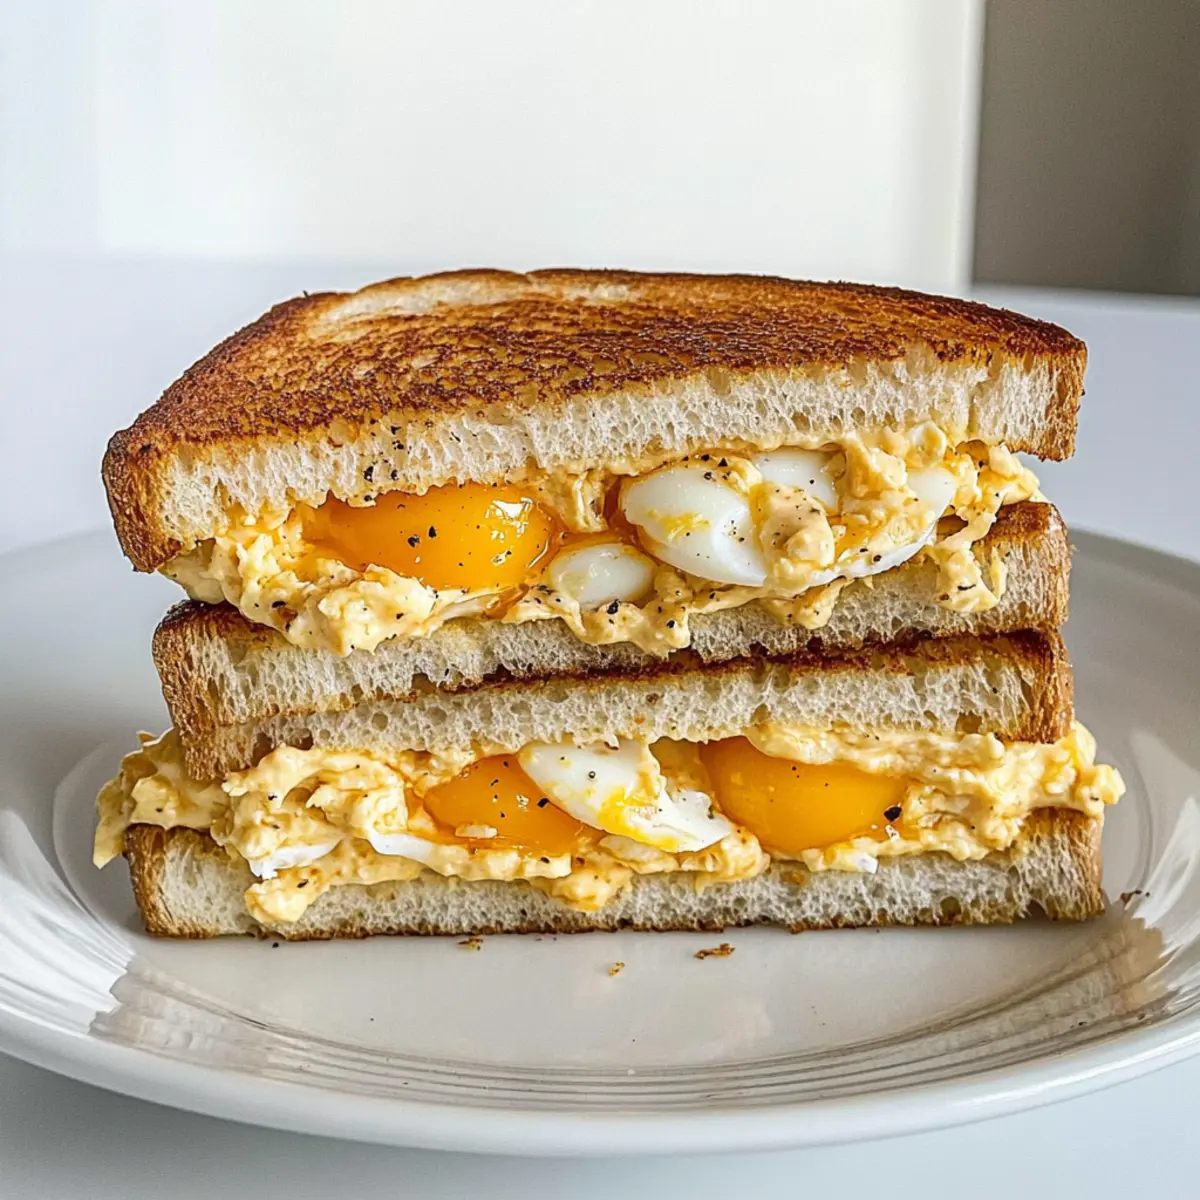
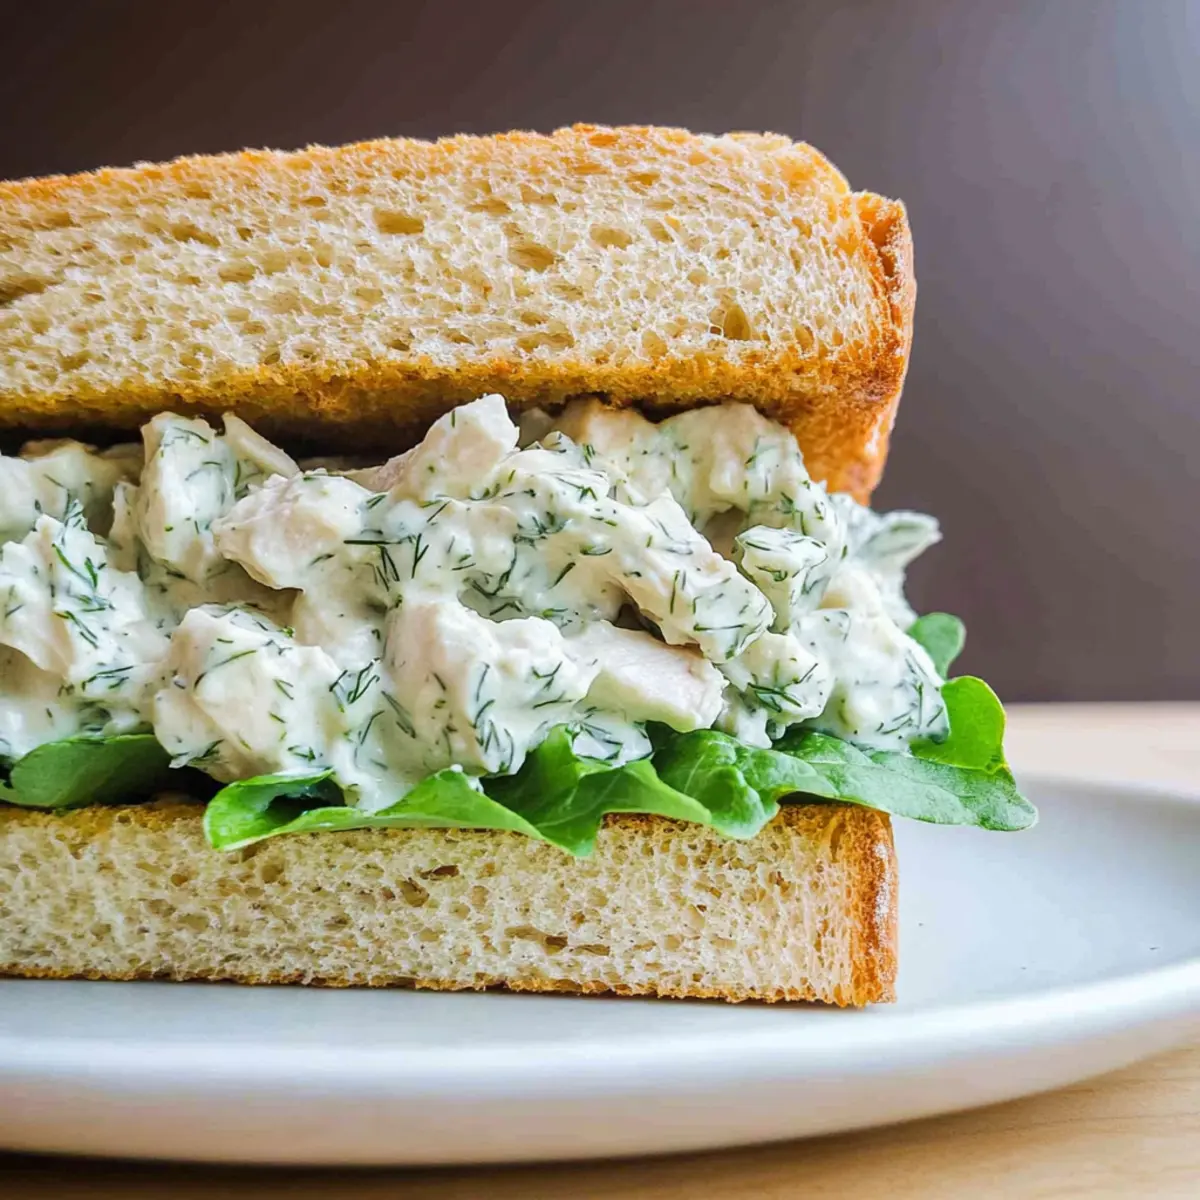
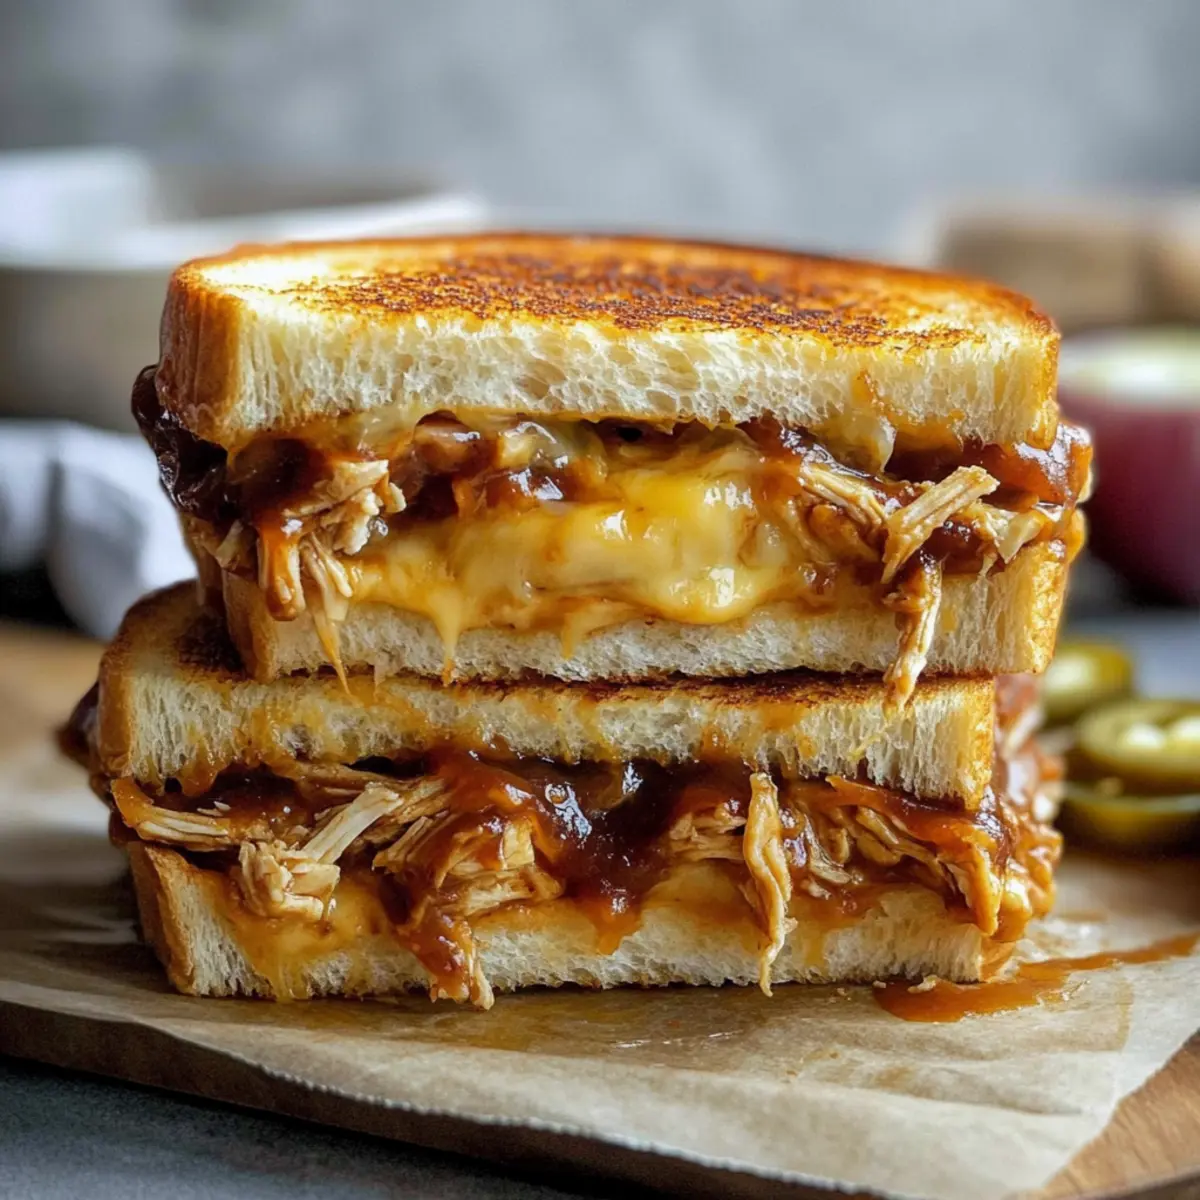
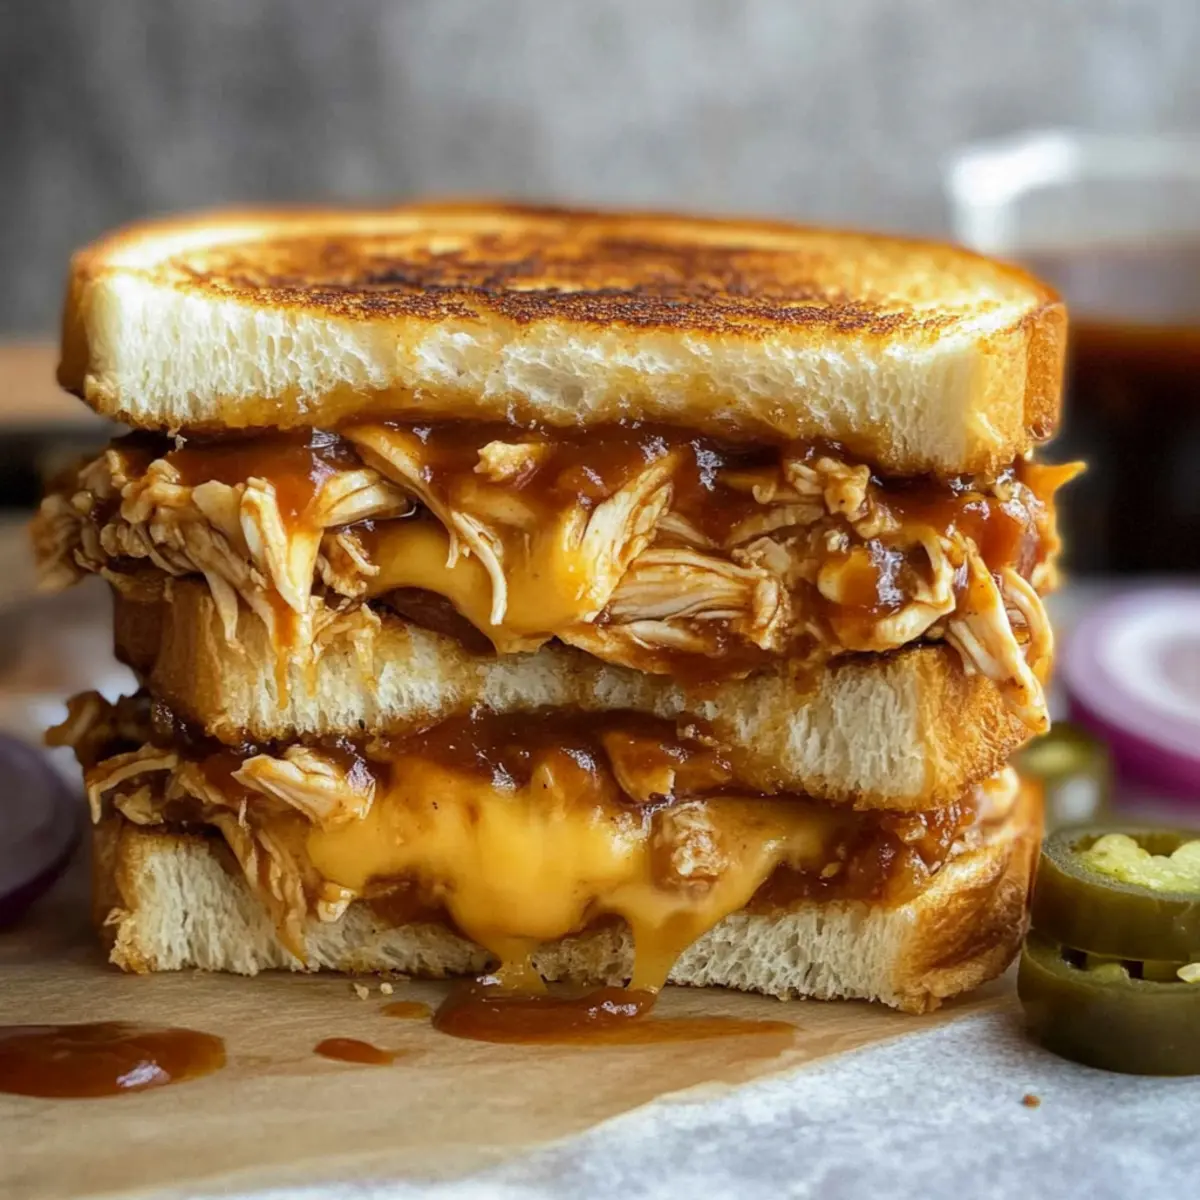
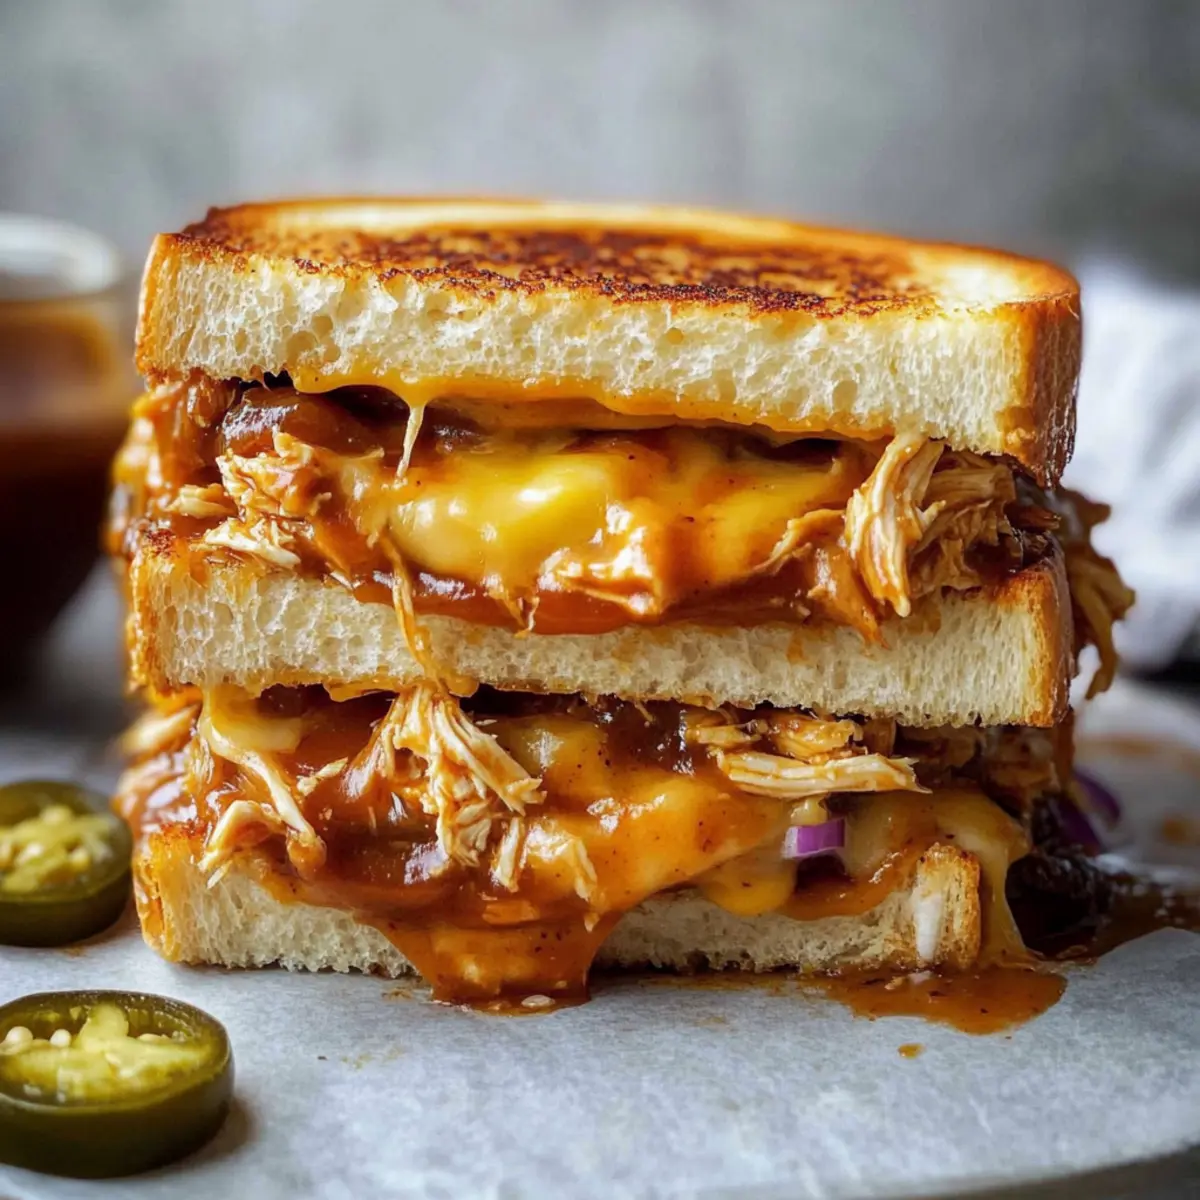
As the sizzling sound of butter meeting a hot pan fills my kitchen, I can’t help but smile at the unexpected joy that a BBQ Chicken Grilled Cheese Sandwich brings. This isn’t just any sandwich; it’s a heartwarming twist on comfort food that combines shredded chicken drenched in tangy BBQ sauce with layers of gooey melted cheese, all sandwiched between crispy, golden bread. In just 15-20 minutes, you can piece together a satisfying meal that not only satisfies cravings but also brings people together around the table. What I love most about this recipe is its versatility—whether you’re looking for a quick lunch or a delightful snack, it caters to everyone’s taste buds. Ready to fire up your grill and discover how easy it is to make this crowd-pleaser? Let’s dive in!

Why is This Sandwich So Irresistible?

Quick preparation: You can whip up this BBQ Chicken Grilled Cheese Sandwich in just 15-20 minutes, making it perfect for busy weeknights or a lazy weekend lunch.
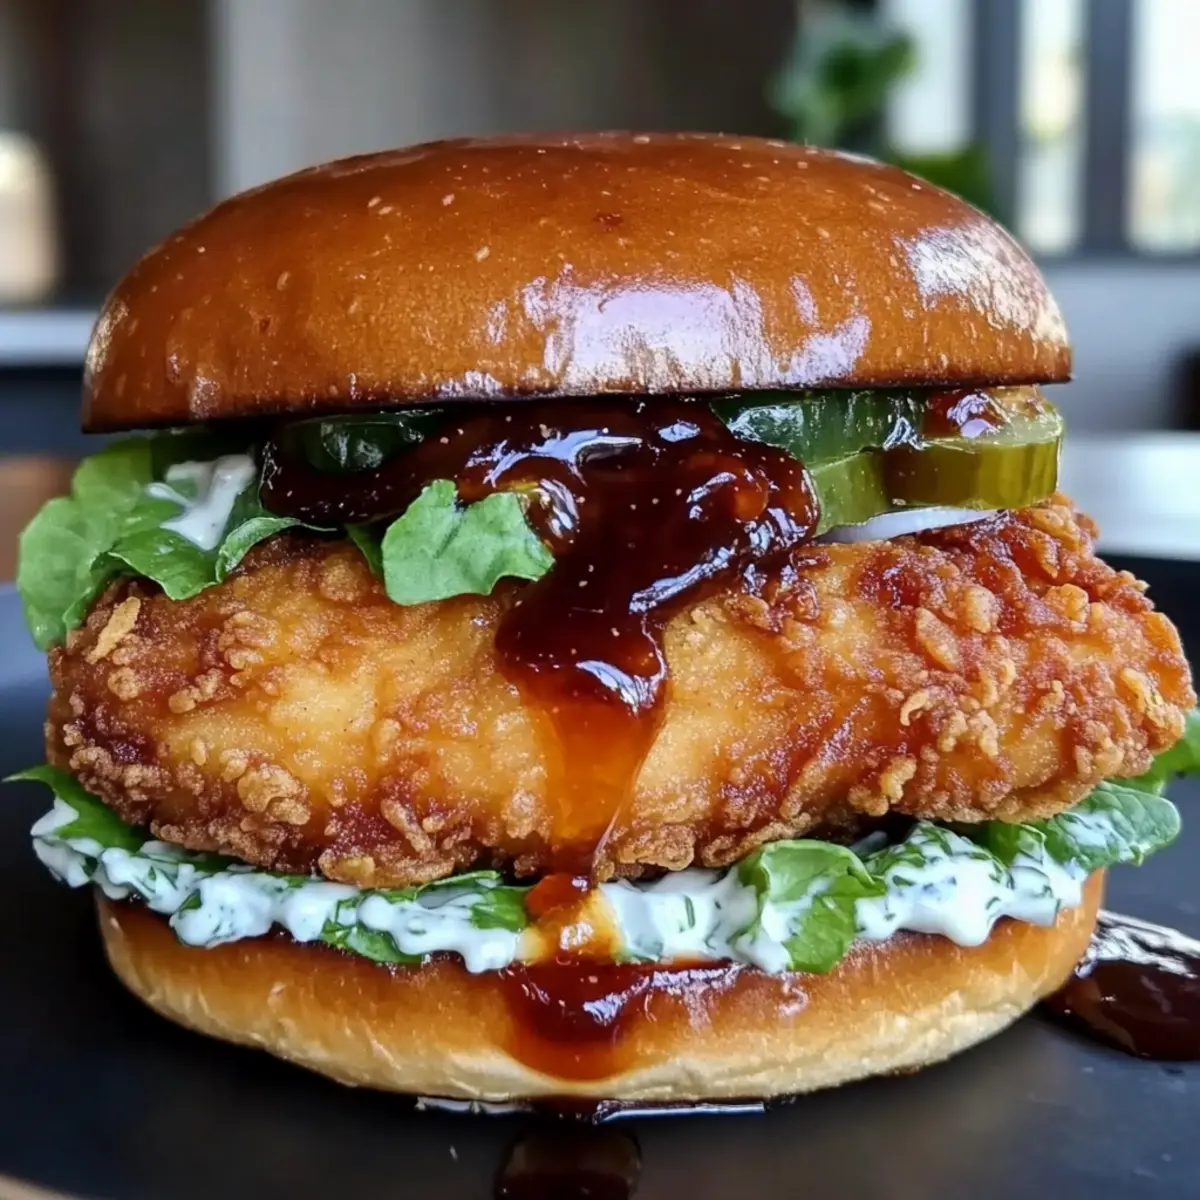
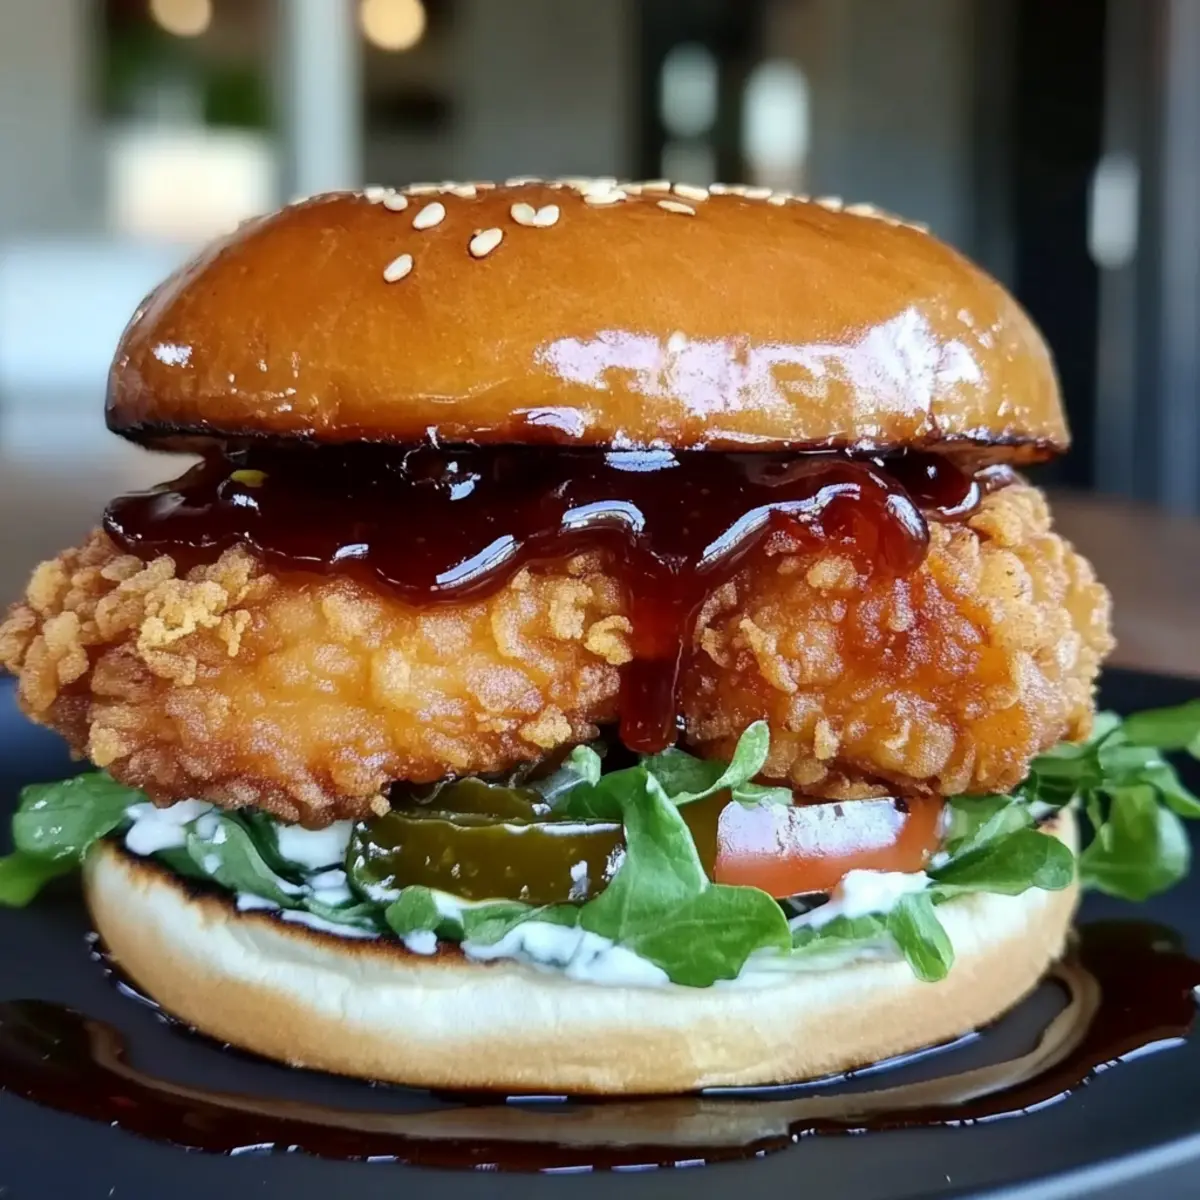
Flavor explosion: The blend of tangy BBQ sauce with creamy melted cheese creates an unbeatable combination that’s sure to please any palate.
Versatile options: Feel free to experiment with flavors—try swapping in spicy Pepper Jack or adding unique toppings to customize your sandwich. Check out our ideas for Chipotle Chicken Grilled Cheese for an exciting twist!
Crowd-pleaser: Kids and adults alike will adore this savory sandwich, making it ideal for family meals or casual gatherings.
Comfort food upgrade: You’re not just enjoying grilled cheese; you’re elevating a classic into something truly special.

BBQ Chicken Grilled Cheese Ingredients

Get ready to savor a delightful mix of flavors in this BBQ Chicken Grilled Cheese Sandwich!

For the Sandwich

  • Sourdough/Tiger/Giraffe Bread – Thick slices provide a sturdy structure for holding all that delicious filling.
  • Cooked Chicken (250g-300g) – Shredded for easy mixing with BBQ sauce; you can use leftover chicken or rotisserie for speed and convenience.
  • BBQ Sauce (160g) – This ingredient adds tang and moisture; choose your favorite flavor to customize the kick in your sandwich!
  • Monterey Jack Cheese – Melts beautifully for that creamy texture we all crave in a grilled cheese.
  • Cheddar Cheese – A sharp addition that enhances flavor; feel free to swap it with any cheese you love.
  • Red Onion (1/4 – 1/3 cup) – Offers a crunchy, tangy bite; spring onions are a great substitute if you prefer a milder taste.
  • Pickled Jalapeños (1/4 cup) – For those who enjoy a little heat; adjust the amount based on your spice tolerance.
  • Butter – Essential for grilling the sandwich to perfection, giving it that golden, crisp exterior.

This BBQ Chicken Grilled Cheese Sandwich is not just about the ingredients, but how each element comes together to create a comforting and scrumptious meal that’s perfect for any occasion!

Step‑by‑Step Instructions for BBQ Chicken Grilled Cheese Sandwich

Step 1: Prepare the Chicken Mixture
In a medium bowl, combine your shredded cooked chicken with BBQ sauce, pickled jalapeños, and finely chopped red onion. Mix until the chicken is thoroughly coated in the tangy sauce, ensuring even distribution of flavors. This step should take about 3-4 minutes. Once combined, set the mixture aside while you prepare the bread.

Step 2: Assemble the Sandwich
Begin by taking two thick slices of your chosen sourdough, tiger, or giraffe bread. Spread a generous layer of butter on one side of each slice. In a large, cold skillet, place one slice of bread butter-side down. Add a layer of Monterey Jack cheese followed by half of the BBQ chicken mixture, topped with a layer of sharp Cheddar cheese.

Step 3: Top and Heat
Carefully place another slice of buttered bread on top, butter-side up. Turn your skillet to medium heat, allowing the sandwich to start grilling gently. This will take about 3-4 minutes on each side, ensuring it cooks slowly enough to melt the cheese without burning the bread. Keep an eye on the color; you want a beautiful golden brown.

Step 4: Flip and Finish
After 3-4 minutes, check the underside of the sandwich; it should be golden and crisp. Using a spatula, carefully flip the sandwich to grill the other side. Cook for an additional 3-4 minutes until both sides are perfectly toasted and the cheese inside is wonderfully gooey. Remember, patience ensures the best melt!

Step 5: Slice and Serve
Once the BBQ Chicken Grilled Cheese Sandwich is golden brown and the cheese is melted, remove it from the skillet. Allow it to sit for a minute for easier slicing. Cut the sandwich in half, revealing the delicious layers inside. Serve hot alongside your favorite chips or sweet potato wedges for a satisfying meal.

What to Serve with BBQ Chicken Grilled Cheese Sandwich

Elevate your BBQ Chicken Grilled Cheese Sandwich experience with these delightful pairings that create a satisfying and delicious meal.

  • Tangy Salt & Vinegar Chips: These chips add a crunchy contrast and a punch of flavor that complements the richness of the sandwich beautifully. Paired together, you’ll enjoy a perfect balance of taste and texture.

  • Sweet Potato Wedges: Baked or fried, the natural sweetness of sweet potato wedges enhances the savory BBQ flavors, offering a comforting side that everyone will love.

  • Coleslaw: A refreshing coleslaw adds a crispy and creamy element, balancing the warm, gooey sandwich while providing a burst of brightness with each bite.

  • Crispy Pickles: The briny crunch of crispy pickles contrasts perfectly with the richness of the grilled cheese, making for a playful and satisfying bite.

  • Corn on the Cob: Grilled or boiled, sweet corn on the cob brings a seasonal, juicy sweetness that pairs wonderfully with the smoky BBQ flavors of the chicken.

  • Chilled Lemonade: A glass of refreshing lemonade acts as the perfect palate cleanser between bites, with its bright citrus notes enhancing your meal experience.

  • Chocolate Chip Cookies: For dessert, indulge in warm chocolate chip cookies to sweeten the meal. Their gooey centers and crispy edges provide delightful satisfaction after the savory sandwich.

  • Sparkling Water with Lime: This fizzy drink is light and refreshing, keeping the meal feeling fresh while the subtle lime adds an extra zing to your palate.

  • Garden Salad: A simple garden salad with fresh greens, tomatoes, and a light vinaigrette offers a crisp bite that contrasts beautifully with the indulgent sandwich, rounding out your plate.

How to Store and Freeze BBQ Chicken Grilled Cheese

Fridge: Store any leftover BBQ Chicken Grilled Cheese Sandwich in an airtight container for up to 3 days. For best results, reheat in a skillet to maintain crispiness.

Freezer: Wrap the sandwich individually in plastic wrap, then place it in a freezer bag for up to 2 months. Thaw in the fridge overnight before reheating.

Reheating: When ready to enjoy, reheat in a skillet on medium heat for 4-5 minutes per side or until warmed through and crispy.

Make-Ahead: Prepare the chicken filling in advance and store in the fridge for up to 3 days—just assemble and grill when you’re ready!

BBQ Chicken Grilled Cheese Variations

Customize your BBQ Chicken Grilled Cheese Sandwich delightfully and create your own flavor journey today!

  • Spicy Upgrade: Swap Monterey Jack for Pepper Jack cheese to give it an extra kick.

  • Meat Swap: Use shredded pork or beef instead of chicken for a hearty twist. Each protein brings a unique flavor and satisfaction.

  • Herb Infusion: Add a handful of fresh cilantro for a burst of freshness. It elevates the flavor and offers a refreshing contrast to the rich BBQ.

  • Crunch Factor: Throw in crispy bacon for added texture and a delightful smokiness. Who can resist bacon, right?

  • Smoky Flavor: Switch your BBQ sauce for smoked BBQ sauce for a deeper, more complex flavor profile. This subtle change can transform your entire sandwich!

  • Vegetarian Delight: Replace chicken with grilled vegetables like zucchini and bell peppers for a vibrant, colorful option that’s just as satisfying.

  • Cheese Medley: Experiment with different cheese blends, like a mixture of fontina and Gruyère, to create a gooey, rich experience.

  • Sweet Adventure: Add a layer of pineapple to give your grilled cheese a sweet and tangy flair. It’s a surprising combination that dazzles the taste buds!

As you explore these variations, remember to check out our recipe for Chipotle Chicken Grilled Cheese if you’re feeling adventurous! Each suggestion adds a personal touch, ensuring your BBQ Chicken Grilled Cheese is as special as you are.

Expert Tips for BBQ Chicken Grilled Cheese

  • Cold Pan Start: Begin with a cold pan to prevent burning and ensure the cheese melts evenly. This technique is vital for achieving that perfect gooeyness!
  • Thick Bread Slices: Use thick slices of your chosen bread to accommodate the filling without breaking apart, ensuring a delightful bite every time.
  • Cheese Pairing: Combining Monterey Jack with Cheddar enhances flavor and meltiness, but feel free to experiment with your favorite cheeses for a personal touch.
  • Adjusting Spice: For a milder sandwich, reduce the amount of pickled jalapeños or substitute with sweet peppers. Maintaining balance is key in your BBQ Chicken Grilled Cheese!
  • Handling Large Sandwiches: If making larger sandwiches, flip them gently to prevent spillage. A spatula can help maneuver them safely.
  • Make Ahead: Prepare the chicken mixture ahead of time, storing it in the fridge for up to 3 days to streamline your cooking process when cravings strike.

Make Ahead Options

These BBQ Chicken Grilled Cheese Sandwiches are perfect for meal prep enthusiasts! You can assemble the chicken mixture (shredded chicken, BBQ sauce, jalapeños, and red onion) up to 3 days in advance; just make sure to refrigerate it in an airtight container to keep it fresh. Alternatively, prepare the chicken and BBQ sauce combination and freeze it for up to 3 months. When you’re ready to enjoy, simply thaw the mixture overnight in the fridge, then layer it between your buttered bread with the cheese. Grill as directed for a deliciously comforting meal that’s just as wonderful as when made fresh, saving you time on busy weeknights!

BBQ Chicken Grilled Cheese Sandwich Recipe FAQs

What type of bread is best for this sandwich?
Sourdough, tiger, or giraffe bread works best for this BBQ Chicken Grilled Cheese Sandwich. Thicker slices provide a sturdy structure to hold the filling while getting beautifully crispy on the outside.

How do I store leftovers?
Store any leftover BBQ Chicken Grilled Cheese Sandwich in an airtight container in the fridge for up to 3 days. To reheat, use a skillet on medium heat to bring back that crispy texture, and enjoy it warm!

Can I freeze this sandwich?
Absolutely! Wrap the BBQ Chicken Grilled Cheese Sandwich individually in plastic wrap, then place it in a freezer bag. This will keep it fresh for up to 2 months. When ready to eat, thaw in the fridge overnight and reheat in a skillet for the best results.

What if my sandwich is getting too dark before the cheese melts?
If you notice that the bread is browning too quickly, lower the heat. A medium-low setting helps to ensure the cheese melts thoroughly without burning the bread. Patience here is key to achieving that perfect gooeyness!

Can I modify this recipe for dietary preferences?
Very! If you want to make it dairy-free, try using dairy-free cheese alternatives. You could substitute the chicken with grilled vegetables or use turkey if you’re trying to reduce calories. Just make sure to adjust BBQ sauce flavors accordingly!

What’s the best way to prepare the chicken for this recipe?
For quick preparation, you can use leftover cooked chicken or a rotisserie chicken, shredding it into bite-sized pieces. Alternatively, if you prefer making your own, cook raw chicken breasts by frying them until golden brown, then simmer in water or stock until fully cooked, around 15-20 minutes, before shredding.

undefined

BBQ Chicken Grilled Cheese Sandwich That's Comfort in Every Bite

Discover the joy of BBQ Chicken Grilled Cheese Sandwich, a heartwarming twist on comfort food with gooey cheese and BBQ chicken.
Prep Time 5 minutes
Cook Time 10 minutes
Total Time 15 minutes
Servings: 2 sandwiches
Course: Lunch
Cuisine: American
Calories: 550

Ingredients
  

For the Sandwich
  • 2 slices Sourdough/Tiger/Giraffe Bread Thick slices provide a sturdy structure.
  • 250-300 g Cooked Chicken Shredded for easy mixing.
  • 160 g BBQ Sauce Choose your favorite flavor.
  • 1 cup Monterey Jack Cheese Melts beautifully.
  • 1 cup Cheddar Cheese A sharp addition.
  • 1/4-1/3 cup Red Onion Chopped.
  • 1/4 cup Pickled Jalapeños Adjust based on spice tolerance.
  • 2 tablespoons Butter Essential for grilling.

Equipment

  • Skillet
  • medium bowl

Method
 

Step-by-Step Instructions
  1. In a medium bowl, combine shredded cooked chicken with BBQ sauce, pickled jalapeños, and finely chopped red onion. Mix until the chicken is thoroughly coated.
  2. Spread butter on one side of each slice of bread. In a cold skillet, place one slice of bread butter-side down. Add a layer of Monterey Jack cheese followed by half of the BBQ chicken mixture, topped with a layer of sharp Cheddar cheese.
  3. Carefully place another slice of buttered bread on top, butter-side up. Turn skillet to medium heat and grill for about 3-4 minutes on each side.
  4. After 3-4 minutes, flip the sandwich to grill the other side until both sides are toasted and cheese is melted, about another 3-4 minutes.
  5. Once golden brown and cheese is melted, remove from skillet, sit for a minute, then cut in half and serve.

Nutrition

Serving: 1sandwichCalories: 550kcalCarbohydrates: 42gProtein: 32gFat: 28gSaturated Fat: 15gPolyunsaturated Fat: 2gMonounsaturated Fat: 10gCholesterol: 85mgSodium: 900mgPotassium: 600mgFiber: 2gSugar: 8gVitamin A: 500IUVitamin C: 6mgCalcium: 400mgIron: 2mg

Notes

Enjoy your BBQ Chicken Grilled Cheese Sandwich hot alongside chips or sweet potato wedges.

Tried this recipe?

Let us know how it was!

30-Minute Thai Broiled Salmon with Sweet Chili Glaze

As I spooned the vibrant marinade over the tender salmon fillets, it struck me how such a simple dish could evoke the delightful flavors of Thai cuisine right at home. This Easy Thai Broiled Salmon in 30 Minutes is a game-changer for those busy weeknights when you crave something special without the fuss. Not only is it quick and easy to prepare, but it also brings together a stunning balance of sweet and spicy notes that your family will adore. Plus, it’s naturally gluten-free, making it a fantastic option for anyone wanting a healthier twist on dinner. Ready to elevate your weeknight meals and impress your loved ones? Let’s dive into this flavorful adventure together!

Why is this salmon recipe a must-try?

Simplicity at Its Best: This recipe takes just 30 minutes from start to finish, making it ideal for hectic weeknights.

Bursting with Flavor: The combination of sweet chili sauce and fresh ginger transforms simple salmon into a culinary delight that excites your taste buds.

Versatile Options: Feel free to substitute with Arctic Char or prepare it alongside fresh veggies for a hearty one-sheet meal.

Gluten-Free Goodness: With a quick tweak using coconut aminos, this dish remains gluten-free, perfect for those with dietary restrictions.

Impressive Yet Easy: You’ll serve a stunning gourmet dish that elevates your dinner table without the need for culinary skills. Enjoy this delightful experience that your family will rave about!

Thai Broiled Salmon Ingredients

• Elevate your meals effortlessly!

For the Salmon

  • Salmon (1½ lbs or four 6-oz pieces) – Choose skin on or off based on your preference for richness and texture.
  • Thai Sweet Chili Sauce (6 tablespoons) – This adds a sweet and tangy flair; opt for high-quality brands like Mae Ploy for the best flavor.
  • Soy Sauce (3 tablespoons) – Infuses umami; for a gluten-free option, substitute with coconut aminos.
  • Fresh Ginger (1 tablespoon, finely grated) – Fresh ginger brings vibrant spice; avoid powdered for optimal taste.
  • Scallions (2, green parts only) – Use these as a fresh garnish to brighten the dish and add color.

For Serving

  • Reserved Marinade (¼ cup) – Drizzle this over the finished dish for an extra burst of flavor that enhances the sweet chili salmon!

Step‑by‑Step Instructions for Easy Thai Broiled Salmon in 30 Minutes

Step 1: Preheat Your Broiler
Begin by adjusting your oven rack so it sits 5 to 6 inches from the broiler element. Preheat your broiler on high for about 10 minutes while you prepare the marinade. This ensures that your salmon will cook quickly and evenly, achieving that perfect caramelization on the outside while remaining tender inside.

Step 2: Prepare the Marinade
In a shallow dish, combine 6 tablespoons of Thai sweet chili sauce, 3 tablespoons of soy sauce, and 1 tablespoon of finely grated fresh ginger. Whisk the ingredients together until well blended. This flavorful marinade will infuse the salmon with the delightful Thai flavors that make this easy Thai broiled salmon so irresistible.

Step 3: Marinate the Salmon
Place the salmon fillets skin side up in the marinade, ensuring they are well-coated. Cover the dish and let the salmon marinate in the refrigerator for at least 1 hour; this allows the flavors to penetrate the fish. While the salmon marinates, the kitchen will fill with lovely aromas that hint at the delicious meal ahead.

Step 4: Prepare the Baking Sheet
Line a rimmed baking sheet with aluminum foil for easy cleanup, and spray it lightly with nonstick cooking spray. This step is essential to prevent the salmon from sticking while broiling, making it easier to transfer the fish to the platter later. Ensure the foil is smooth to maximize heat distribution during cooking.

Step 5: Broil the Salmon
Carefully transfer the marinated salmon fillets to the prepared baking sheet, skin side down. Drizzle a bit of the remaining marinade over the top of the fillets for an extra flavor boost. Broil the salmon for 6 to 10 minutes, keeping a close eye on it until it’s browned and nearly opaque in the center. The surface should be slightly caramelized, indicating your dish is almost ready.

Step 6: Serve with Style
Once broiling is complete, gently transfer the salmon to a serving platter. Drizzle with the reserved marinade for added flavor, and garnish with the green parts of 2 scallions for a pop of color. Serve the easy Thai broiled salmon immediately, and enjoy the delightful combination of sweet and spicy notes that will impress your family and friends.

How to Store and Freeze Thai Broiled Salmon

Fridge: Store leftover salmon in an airtight container for up to 2 days, ensuring it retains its moisture and flavor.

Freezer: You can freeze broiled salmon for up to 3 months. Wrap individual portions tightly in plastic wrap and then place in a freezer-safe bag to prevent freezer burn.

Reheating: For best results, reheat the salmon gently in the oven at 350°F (175°C) until warmed through, about 10-15 minutes, to keep it flaky and tender.

Serving Tips: If not served immediately, drizzle a bit of reserved Thai sweet chili sauce on top before reheating to refresh its delicious flavor.

Make Ahead Options

These Easy Thai Broiled Salmon fillets are perfect for meal prep enthusiasts! You can marinate the salmon in the sweet chili sauce and ginger mix up to 24 hours in advance (just be sure not to exceed that time to avoid overly salty fish). Simply place the salmon skin side up in the marinade and refrigerate it until you’re ready to cook. When it’s time to serve, just preheat your broiler, prepare the baking sheet, and broil the salmon for about 6-10 minutes. The fish will still be just as delicious and packed with flavor, ensuring your busy weeknights are streamlined while delivering a gourmet meal!

What to Serve with Easy Thai Broiled Salmon in 30 Minutes

Elevate your meal with delightful sides that complement the vibrant flavors of your salmon dish.

  • Jasmine Rice: This fragrant rice absorbs the sweet chili glaze beautifully, adding a comforting base to your dish.
  • Fresh Green Salad: A light salad with mixed greens and a citrus vinaigrette balances the rich flavors of the salmon for a refreshing bite. The crispness provides contrast, elevating the whole dining experience.
  • Roasted Broccoli: The nutty, caramelized edges of roasted broccoli enhance the umami flavors of the salmon, while offering a nutritious green element. Pair with a splash of lemon to brighten each bite.
  • Coconut Quinoa: This grain dish adds a nutty sweetness that echoes the flavors of Thai cuisine, providing a hearty side that’s gluten-free. It also brings a lovely texture that will keep everyone coming back for more.
  • Stir-Fried Vegetables: Quick-cooked bell peppers, snap peas, and carrots tossed in sesame oil can add a lovely crunch and color to your plate. Their lightly sweet notes play nicely with the sweet chili sauce.
  • Chilled White Wine: A crisp Sauvignon Blanc or a slightly sweet Riesling contrasts beautifully with the salmon’s flavors, enhancing the entire meal experience.
  • Mango Salsa: This refreshing sweet and spicy salsa brings a tropical flair that’s perfect for drizzling over the salmon or serving on the side, brightening your dinner with fresh ingredients.

Expert Tips for Thai Broiled Salmon

  • Marinade Timing: Don’t over-marinate: Let the salmon sit for just 1 hour to avoid excess saltiness; longer could change the texture.

  • Watch Your Broil: Perfect doneness: Broil until the salmon is just opaque in the center and caramelized on top for the best mouthfeel.

  • Foil Strategy: Prevent sticking: Lightly spray or use a nonstick foil to ensure the salmon slides off easily after broiling.

  • Salmon Variety: Try alternatives: If you’re feeling adventurous, swap salmon for Arctic Char or another firm fish for exciting variations!

  • Vegetable Booster: Add nutrition: Consider roasting some broccoli or bell peppers alongside the salmon on the baking sheet for a complete, gluten-free meal.

Variations & Substitutions for Thai Broiled Salmon

Customize your Thai broiled salmon experience with these exciting variations that will inspire your taste buds and elevate your meal!

  • Dairy-Free: Use coconut milk in the marinade instead of soy sauce for a creamier texture with tropical undertones.
    Experience a milder flavor while still keeping that lush, velvety glaze on the salmon.

  • Spicy Kick: Stir in chopped fresh chili or a teaspoon of sriracha for added heat in the marinade.
    This twist not only spices things up but can also balance the sweetness of the chili sauce, creating a delightful harmony!

  • Vegetable Boost: Broil some fresh asparagus or green beans on the same baking sheet for added nutrition and color.
    These veggies will soak up some of that delicious glaze and complement the salmon beautifully, making for a delightful one-pan dish!

  • Gluten-Free: Swap soy sauce with gluten-free tamari or coconut aminos to ensure this dish fits dietary needs.
    This way, you can enjoy all the flavor without compromising on your gluten-free lifestyle.

  • Herb Infusion: Toss in freshly chopped cilantro or basil before serving to brighten the dish.
    These herbs not only add freshness but make for a lovely presentation that elevates your dining experience.

  • Citrus Twist: Add a splash of lime or lemon juice to the marinade for a zesty flavor boost.
    This brightens the dish beautifully and contrasts wonderfully with the sweet chili sauce.

  • Fish Alternatives: Try using tilapia or cod instead of salmon for a different texture and flavor profile.
    Both are mild and will absorb the marinade beautifully, allowing you to cater to your family’s preferences.

  • Enhanced Umami: Mix in a bit of miso paste to the marinade for an even deeper, earthier flavor.
    This subtle adjustment introduces a warm umami richness that will elevate the overall taste of the dish to new heights!

Your journey into culinary creativity doesn’t stop here! For a delightful side, consider making a refreshing Thai cucumber salad or serve with a side of fluffy jasmine rice to soak up all that wonderful sauce!

Thai Broiled Salmon Recipe FAQs

How do I choose the best salmon for this recipe?
Absolutely! Look for fresh salmon fillets that are vibrant in color and have a clean, ocean-like smell. The flesh should be firm and spring back when pressed. If the skin is included, ensure it appears shiny and moist, not dry or dull. Always consider salmon labeled as sustainable or wild-caught for a tastier and healthier option.

How long can I store leftover Thai broiled salmon?
You can store leftover salmon in an airtight container in the refrigerator for up to 2 days. Make sure to let it cool to room temperature before sealing it, which helps maintain its moisture and flavor. To reheat, I recommend the oven to keep it flaky and delicious.

Can I freeze Thai broiled salmon?
Yes! You can freeze broiled salmon for up to 3 months. Wrap individual portions tightly in plastic wrap, then place them in a freezer-safe bag to reduce the risk of freezer burn. Make sure to label the bags with the date so you know when to enjoy them!

What should I do if my salmon is overcooked?
Overcooked salmon can become dry and tough, but there are ways to salvage it. If it’s only slightly overcooked, try serving it with a drizzle of extra sweet chili sauce or a squeeze of fresh lemon juice to add moisture. For more heavily cooked pieces, shred the salmon and mix it with a light mayonnaise or yogurt dressing for a tasty salmon salad!

Is this recipe safe for those with allergies?
Always check the labels when using soy sauce and sweet chili sauce, as they can contain gluten or allergens. For a gluten-free version, substitute soy sauce with coconut aminos, which works perfectly in this recipe. As always, if you’re cooking for someone with food allergies, it’s best to confirm the ingredients with them prior to preparing the meal.

What’s the best way to serve this dish?
Feel free to serve this lovely Thai broiled salmon over a bed of jasmine rice for a complete meal or alongside a fresh green salad. This not only enhances the flavor but also adds nutrition and a vibrant presentation. Enjoy this delightful dish with family and friends!

undefined

30-Minute Thai Broiled Salmon with Sweet Chili Glaze

This easy Thai broiled salmon offers a delightful balance of sweet and spicy flavors in just 30 minutes, perfect for busy weeknights.
Prep Time 10 minutes
Cook Time 10 minutes
Marinating Time 1 hour
Total Time 1 hour 20 minutes
Servings: 4 pieces
Course: Dinner
Cuisine: Thai
Calories: 250

Ingredients
  

For the Salmon
  • 1.5 lbs Salmon Choose skin on or off based on preference.
  • 6 tablespoons Thai Sweet Chili Sauce Opt for high-quality brands like Mae Ploy.
  • 3 tablespoons Soy Sauce For gluten-free, use coconut aminos.
  • 1 tablespoon Fresh Ginger Finely grated, avoid powdered for best flavor.
  • 2 Scallions Use green parts only for garnish.
For Serving
  • 0.25 cups Reserved Marinade Drizzle over the finished dish for added flavor.

Equipment

  • Oven
  • Baking Sheet
  • Aluminum foil
  • nonstick cooking spray
  • shallow dish

Method
 

Step‑by‑Step Instructions
  1. Preheat your broiler by adjusting your oven rack to sit 5 to 6 inches from the broiler element for about 10 minutes.
  2. Combine 6 tablespoons of Thai sweet chili sauce, 3 tablespoons of soy sauce, and 1 tablespoon of finely grated fresh ginger in a shallow dish and whisk until well blended.
  3. Place the salmon fillets skin side up in the marinade, ensuring they're well-coated, then cover and refrigerate for at least 1 hour.
  4. Line a rimmed baking sheet with aluminum foil and spray it lightly with nonstick cooking spray.
  5. Transfer the marinated salmon fillets to the prepared baking sheet, skin side down, and drizzle with remaining marinade. Broil for 6 to 10 minutes until browned and nearly opaque in the center.
  6. Transfer the salmon to a serving platter, drizzle with reserved marinade, and garnish with scallions. Serve immediately.

Nutrition

Serving: 1pieceCalories: 250kcalCarbohydrates: 8gProtein: 30gFat: 12gSaturated Fat: 2gPolyunsaturated Fat: 2gMonounsaturated Fat: 4gCholesterol: 70mgSodium: 800mgPotassium: 600mgSugar: 4gVitamin A: 2IUCalcium: 2mgIron: 4mg

Notes

Store leftover salmon in an airtight container for up to 2 days. For freezing, wrap individual portions tightly in plastic wrap and place in a freezer-safe bag.

Tried this recipe?

Let us know how it was!

Jalapeno Honey Fried Chicken Sandwich Your New Favorite Treat

As I stood in my kitchen, the smell of sizzling chicken filled the air, igniting a craving that couldn’t be ignored. There’s something truly magical about a homemade Spicy Jalapeno Honey Fried Chicken Sandwich that bridges the gap between comfort food and culinary adventure. The crispy golden-brown coating wraps around juicy chicken thighs, while a sweet and spicy jalapeno honey glaze adds just the right kick. Not only is this satisfying meal quick to whip up on a busy weeknight, but it also allows for endless customization, making it perfect for everyone at the table. Ready to elevate your meal game and indulge in a flavor explosion that pairs perfectly with crispy fries or a bright salad? Let’s dive into making your new favorite sandwich!

Why is this sandwich so special?

Uniquely Flavorful: This sandwich marries sweet and spicy in a way that delights the palate, making it unlike any fast-food option.

Crispy Perfection: The golden-brown coating creates a textural feast, with each bite offering an irresistible crunch that’s hard to resist.

Customizable Treat: Whether you love extra spice or prefer milder flavors, this recipe can adapt to your taste buds, making every version your own.

Quick and Easy: Whip this up in a pinch, perfect for busy weeknights or last-minute gatherings.

Crowd-Pleaser: Serve it at parties, and watch it disappear—everyone loves a good fried chicken sandwich! For more delicious ideas, check out our easy weeknight meals or explore our satisfying side dishes.

Jalapeno Honey Fried Chicken Sandwich Ingredients

For the Chicken
Chicken Thighs – Use thigh meat for juiciness or switch to chicken breasts for a leaner option.
Buttermilk – Tenderizes the chicken and adds flavor; can be replaced with regular milk mixed with a splash of vinegar.

For the Coating
Flour – All-purpose flour is ideal; substitute with cornstarch for a gluten-free option.
Cornstarch – Adds extra crunch to the coating; omit if using only flour.
Spices (salt, pepper, paprika, garlic powder) – Enhance the chicken’s flavor profile—feel free to modify as desired.

For the Glaze
Honey – Sweetens the glaze, complementing the spices; maple syrup is a great alternative for a different taste.
Jalapenos – Provides heat and flavor; adjust to your desired spice level, or use milder peppers for less heat.

For the Sandwich Assembly
Brioche Buns – Offers a soft structure; feel free to swap with any favorite bread type.
Oil (for frying) – Use high smoke-point oil like vegetable or canola; peanut oil gives added flavor.

Step‑by‑Step Instructions for Spicy Jalapeno Honey Fried Chicken Sandwich

Step 1: Marinate Chicken
In a large mixing bowl, combine the chicken thighs with buttermilk, salt, pepper, paprika, and garlic powder. Ensure each piece is well-coated and covered for the best flavor. Cover the bowl with plastic wrap and let it marinate in the refrigerator for at least 30 minutes, allowing the buttermilk to tenderize the chicken.

Step 2: Prepare Coating
While the chicken marinates, prepare your coating by mixing together the all-purpose flour and cornstarch in a separate shallow bowl. Add a pinch of salt, pepper, paprika, and garlic powder to enhance the flavor. This mixture will give your fried chicken that crave-worthy crunch when fried to golden perfection.

Step 3: Heat Oil
In a Dutch oven or deep skillet, pour in enough oil to reach a depth of about 2 inches and heat it over medium-high heat. Use a thermometer to monitor the temperature, aiming for around 350°F (175°C). When the oil shimmers and bubbles slightly when a breadcrumb is dropped in, it’s ready for frying.

Step 4: Coat Chicken
Remove the marinated chicken thighs from the buttermilk and let any excess liquid drip off. Dredge each piece in the flour mixture, pressing firmly to ensure an even coating. Shake off any excess flour before placing the chicken aside while you prepare to fry.

Step 5: Fry Chicken
Carefully place the coated chicken thighs into the hot oil, ensuring not to crowd the pan. Fry the chicken for about 6-8 minutes per side, or until the coating is golden brown and the internal temperature reaches 165°F (74°C). Use a slotted spoon to transfer the chicken to a wire rack, allowing excess oil to drain.

Step 6: Make Jalapeno Honey Glaze
In a small saucepan, combine honey and finely chopped jalapenos over low heat. Allow it to gently simmer for about 5 minutes, stirring occasionally. This infusion will create a sweet and spicy glaze that complements the flavors of your Spicy Jalapeno Honey Fried Chicken Sandwich beautifully.

Step 7: Assemble Sandwich
To assemble your sandwich, place a generous piece of hot fried chicken on the bottom half of a brioche bun. Drizzle the jalapeno honey glaze generously over the chicken, then add your favorite toppings, such as pickles, lettuce, or avocados, before placing the top bun on.

Step 8: Serve Immediately
Serve your homemade Spicy Jalapeno Honey Fried Chicken Sandwich hot for the best experience. Pair it with crispy fries or a fresh salad for a complete meal that’s sure to impress your family and friends.

What to Serve with Spicy Jalapeno Honey Fried Chicken Sandwich

Pairing your spicy creation with the right sides can turn a simple meal into an unforgettable experience.

  • Crispy Fries: The classic pairing that adds a satisfying crunch and absorbs any delicious remnants of glaze.

  • Coleslaw: A refreshing and crunchy counterpoint that complements the savory richness of the sandwich while cooling the spice.

  • Fresh Garden Salad: Light, crisp greens topped with zesty vinaigrette provide a bright contrast to the bold flavors of the sandwich. You’ll appreciate how the freshness balances the dish.

  • Sweet Potato Wedges: Baked or fried, their natural sweetness enhances the savory chicken and elevates the overall taste profile.

  • Pickles: Tangy and crisp, they offer an excellent bite that cuts through the richness of the fried chicken, adding an extra layer of flavor.

  • Iced Tea or Lemonade: Refreshing drinks like these cleanse the palate perfectly, enhancing every delicious bite of the spicy jalapeno honey fried chicken sandwich.

Expert Tips for Spicy Jalapeno Honey Fried Chicken Sandwich

  • Maintain Oil Temperature: Keep the oil at 350°F to ensure even frying. A thermometer is your best friend here to avoid soggy or burnt chicken.

  • Wire Rack is Key: Let the fried chicken rest on a wire rack after frying. This prevents moisture from making the coating lose its irresistible crunch.

  • Customize Spice Levels: Adjust the amount of jalapenos to tailor the heat to your preference. For milder flavors, substitute with bell peppers or omit them entirely.

  • Thighs or Breasts: While chicken thighs provide juicy flavor, feel free to use chicken breasts for a leaner version of this fried chicken sandwich.

  • Bun Choices Matter: Experiment with different buns! Whether you choose brioche, ciabatta, or even a whole-grain option, it’s all about what complements your spicy jalapeno honey fried chicken best.

Storage Tips for Jalapeno Honey Fried Chicken Sandwich

Fridge: Store leftover sandwiches in an airtight container for up to 2 days. Keeping them sealed helps maintain moisture and prevents the bread from becoming stale.

Freezer: If you’re not planning to eat the leftovers right away, freeze the fried chicken pieces separately in a freezer-safe bag for up to 2 months. Wrap them tightly to prevent freezer burn.

Reheating: To regain the sandwich’s crispiness, reheat the fried chicken in a preheated oven at 375°F (190°C) for 10-12 minutes. This method ensures a delightful crunch in your Spicy Jalapeno Honey Fried Chicken Sandwich.

Assembling Fresh: For the best taste, reassemble the sandwich with fresh buns and toppings right before serving. This way, you can enjoy a hot and delicious meal that tastes freshly made!

Make Ahead Options

These Spicy Jalapeno Honey Fried Chicken Sandwiches are perfect for meal prep enthusiasts looking to save time during busy weeknights! You can marinate the chicken thighs in buttermilk and spices up to 24 hours in advance for optimal flavor. Additionally, you can mix the flour and cornstarch coating ahead of time and store it in an airtight container. If you’re making the jalapeno honey glaze, this can be prepared up to 3 days beforehand and refrigerated—just warm it briefly before serving to maintain its delightful consistency. When ready to enjoy, fry the chicken fresh and assemble your sandwiches for restaurant-quality results with minimal effort!

Jalapeno Honey Fried Chicken Sandwich Variations

Feel free to personalize your sandwich experience with these exciting alternatives and swaps that elevate every bite!

  • Dairy-Free: Substitute buttermilk with almond or oat milk for a creamy taste without dairy.

  • Gluten-Free: Use a 1-to-1 gluten-free flour blend in place of all-purpose flour for the coating, ensuring everyone can enjoy this treat.

  • Spicy Twist: For a bolder kick, replace jalapenos with habaneros—just be ready for a wild ride!

  • Extra Crunch: Add crushed potato chips or panko breadcrumbs to the flour mixture for an even crunchier coating that will surprise your taste buds.

  • Sweet & Savory: Incorporate a spoonful of your favorite hot sauce into the jalapeno honey glaze for a delightful depth of flavor.

  • Gourmet Toppings: Elevate your sandwich by adding creamy avocado or fried egg on top, creating a rich and satisfying bite that’s simply irresistible.

  • Herb Infusion: Mix in fresh herbs like cilantro or basil into your glaze for a fragrant twist that beautifully complements the sweetness of honey.

  • Savory Sauce Swap: Replace the jalapeno honey glaze with a spicy aioli or sriracha mayo for a creamy, tangy touch that takes the sandwich in a new direction.

These options allow you to experiment and find your personal favorite combination, creating a sandwich that’s uniquely yours. And if you’re in the mood for more ways to spice up your meals, check out these easy weeknight meals or discover delightful satisfying side dishes to pair with your sandwich!

Jalapeno Honey Fried Chicken Sandwich Recipe FAQs

How do I choose the right jalapenos for this recipe?
Absolutely! When selecting jalapenos, look for firm, shiny peppers with a vibrant green color. Avoid any that have dark spots or are wrinkled, as those can indicate age. For a milder sandwich, consider using jalapenos that are slightly larger; they tend to be less spicy. If you prefer extra heat, try leaving the seeds in while preparing them!

How can I store leftovers of the Spicy Jalapeno Honey Fried Chicken Sandwich?
Very! After enjoying your delicious sandwiches, place any leftovers in an airtight container and store them in the refrigerator for up to 2 days. This keeps the chicken moist and the flavors intact. Alternatively, wrap the fried chicken separately in aluminum foil or plastic wrap before storing for even better results.

Can I freeze the fried chicken pieces?
Certainly! To freeze your fried chicken, allow it to cool completely before wrapping each piece in plastic wrap and placing it into a freezer-safe bag. Make sure to remove as much air as possible. You can freeze them for up to 2 months. When ready to eat, thaw in the refrigerator overnight before reheating.

What should I do if my chicken turns out soggy after frying?
Ah, don’t worry! If your chicken ends up soggy, it might be due to the oil being too cool or overcrowding the pan while frying. To troubleshoot next time, ensure that the oil reaches 350°F (175°C) before adding the chicken. Plus, after frying, place the chicken on a wire rack to allow excess oil to drip off, keeping that glorious crunch!

Is there a way to make this recipe gluten-free?
Absolutely! To create a gluten-free version of the Jalapeno Honey Fried Chicken Sandwich, simply substitute the all-purpose flour with cornstarch or a gluten-free all-purpose flour blend. Be sure to check that other ingredients like the buns and spices are also gluten-free so you can enjoy this flavorful meal with peace of mind!

Can I make this sandwich pet-friendly?
Sure! While the spicy elements aren’t suitable for pets, you can prepare a pet-friendly version by simply frying the chicken without any spices, just using a pinch of salt. Shred the cooked chicken without the glaze and serve it as a special treat for your furry friends—just ensure no bones are present before offering!

undefined

Jalapeno Honey Fried Chicken Sandwich Your New Favorite Treat

A delightful Spicy Jalapeno Honey Fried Chicken Sandwich with sweet and spicy elements, perfect for busy weeknights.
Prep Time 30 minutes
Cook Time 16 minutes
Marinating Time 30 minutes
Total Time 1 hour 16 minutes
Servings: 4 sandwiches
Course: Lunch
Cuisine: American
Calories: 500

Ingredients
  

For the Chicken
  • 1 pound Chicken Thighs or chicken breasts for a leaner option
  • 1 cup Buttermilk can replace with milk and vinegar mix
For the Coating
  • 1 cup Flour all-purpose flour or cornstarch for gluten-free
  • 1/4 cup Cornstarch omit if using only flour
  • to taste Spices (salt, pepper, paprika, garlic powder) modify as desired
For the Glaze
  • 1/2 cup Honey maple syrup is a good alternative
  • 2 tablespoons Jalapenos adjust for desired spice level
For the Sandwich Assembly
  • 4 Brioche Buns or any preferred bread type
  • 2 cups Oil high smoke-point oil like vegetable or canola

Equipment

  • Mixing Bowl
  • Shallow bowl
  • Dutch oven
  • Thermometer
  • Wire rack

Method
 

Marination and Preparation
  1. In a large mixing bowl, combine the chicken thighs with buttermilk and spices. Marinate for at least 30 minutes.
  2. Prepare the coating by mixing flour and cornstarch in a shallow bowl. Add spices for flavor.
  3. Heat oil in a Dutch oven over medium-high heat until it reaches 350°F (175°C).
Frying and Assembling
  1. Coat the marinated chicken in the flour mixture and shake off excess flour.
  2. Fry the chicken for 6-8 minutes per side until golden brown and cooked through.
  3. Combine honey and jalapenos in a saucepan over low heat and simmer for 5 minutes to create the glaze.
  4. Assemble sandwich with fried chicken, jalapeno honey glaze, and toppings on a brioche bun.
  5. Serve immediately for the best experience.

Nutrition

Serving: 1sandwichCalories: 500kcalCarbohydrates: 38gProtein: 25gFat: 28gSaturated Fat: 8gPolyunsaturated Fat: 2gMonounsaturated Fat: 16gCholesterol: 70mgSodium: 750mgPotassium: 500mgFiber: 2gSugar: 15gVitamin A: 500IUVitamin C: 2mgCalcium: 100mgIron: 2mg

Notes

Experiment with different spice levels and bun types to customize your sandwich experience.

Tried this recipe?

Let us know how it was!

Chopped Chicken Bacon Ranch Sub: A Flavorful 30-Minute Delight

The sizzle of the grill, the irresistible aroma of crispy bacon wafting through the kitchen—this is how I know I’m about to create something special. Today’s star is the Chopped Chicken Bacon Ranch Sub, a hearty sandwich that comes together in just 30 minutes. Whether you’re a busy home chef or someone seeking a satisfying meal without the drive-thru, you’ll appreciate how easily it comes together. The smoky grilled chicken, paired with crunchy bacon, fresh tomatoes, and creamy ranch dressing, makes it a versatile crowd-pleaser for any occasion. Plus, with gluten-free and low-lactose options to explore, everyone can enjoy this delicious twist on a classic favorite. Curious about how to make this mouthwatering sub uniquely yours? Let’s dive in!

Why is this sub so irresistible?

Simplicity: With just a handful of ingredients, you can whip up this delightful sandwich in 30 minutes, making it perfect for weeknight dinners or impromptu gatherings.

Flavor Explosion: The blend of smoky grilled chicken, crispy bacon, and tangy ranch dressing creates a taste sensation that’s both savory and satisfying.

Customizable: Feel free to swap toppings or substitute proteins, ensuring everyone can enjoy a version that fits their preferences—be it a low-lactose option or gluten-free sub rolls.

Crowd-pleaser: This sub is ideal for gatherings, offering a delicious way to please friends and family alike. Pair it with crinkle-cut fries or a light side salad for a complete meal!

Meal Prep Friendly: You can prepare the filling in advance, making it easy to create a quick but fulfilling meal when time is tight. Don’t forget to check out our tips on make-ahead recipes for more ideas!

Chopped Chicken Bacon Ranch Sub Ingredients

For the Filling

  • Boneless, Skinless Chicken Thighs – Juicier than breasts, these provide the perfect grilled texture.
  • Thick-Cut Bacon – The key to crispiness; thicker slices ensure a flavorful crunch.
  • Fresh Tomatoes – Use ripe, sliced tomatoes for added sweetness and juiciness.
  • Lettuce – Shredded romaine or iceberg gives a refreshing crunch to the sandwich.
  • Mozzarella Cheese – Adds creaminess; swap for cheddar if you prefer a sharper flavor.
  • Ranch Dressing – Ties all the delicious flavors together; try Greek yogurt ranch for a lighter twist.

For the Base

  • Sub Rolls – Choose your favorite rolls; toasting them ensures a delightful crunch.

For Seasoning

  • BBQ Rub – Infuses the chicken with mouthwatering flavor; select a blend you love.
  • Salt and Pepper – Essential for enhancing the overall taste—adjust to your liking.

Feel free to experiment with these ingredients to craft your perfect Chopped Chicken Bacon Ranch Sub!

Step‑by‑Step Instructions for Chopped Chicken Bacon Ranch Sub

Step 1: Prep the Chicken
Begin by patting the boneless, skinless chicken thighs dry with paper towels. Rub them generously with your favorite BBQ rub for flavor, then grill them over medium-high heat for 5-6 minutes on each side. You know they’re ready when the internal temperature reaches 165°F. Once cooked, remove from the grill and let rest for a few minutes before chopping.

Step 2: Toast the Rolls
While the chicken rests, prepare your sub rolls. Place them on the grill or in a preheated oven at 400°F for 3-5 minutes, until they are lightly toasted and golden brown. This step adds a delightful crunch to the Chopped Chicken Bacon Ranch Sub and helps prevent sogginess when filled.

Step 3: Chop the Ingredients
On a cutting board, start layering the chopped grilled chicken, crispy chopped thick-cut bacon, and sliced fresh tomatoes. Add a generous amount of shredded lettuce for that perfect crunch. Use two knives to chop everything together, ensuring that the ingredients remain slightly chunky for texture and mouthfeel.

Step 4: Combine and Season
Transfer the chopped chicken-bacon-tomato mixture into a large bowl. Sprinkle with salt and pepper to enhance the flavors, then add the mozzarella cheese and drizzle ranch dressing over the top. Chop the mixture a bit more to combine all the elements, allowing the creamy ranch dressing to blend beautifully with the chicken and bacon.

Step 5: Assemble the Sub
Now it’s time to bring everything together! Carefully scoop the generous mixture onto your toasted rolls, making sure to pack them for a satisfying bite. Serve immediately while the ingredients are fresh and the sub is warm, ready to be enjoyed by all.

Chopped Chicken Bacon Ranch Sub Variations

Feel free to let your creativity shine with these delicious twists on the classic sub, ensuring something for everyone’s palate!

  • Turkey Bacon: Swap the traditional bacon for turkey bacon for a lighter, equally crispy alternative that cuts down on fat.

  • Vegetarian Delight: Try grilled portobello mushrooms instead of chicken for a satisfying vegetarian option packed with flavor. You’ll love the meaty texture!

  • Cheese Swap: Use shredded cheddar instead of mozzarella to add a sharper, more robust flavor that really enhances the overall taste of your sub. Every bite will be a cheesy delight!

  • Spicy Added Punch: Toss in diced jalapeños for extra heat. This spicy kick is perfect for those who crave a little adventure in every meal.

  • Greek Yogurt Ranch: Substitute rich ranch dressing with Greek yogurt ranch for a lighter twist that still packs a creamy punch. It’s a perfect healthier option!

  • Gluten-Free Rolls: Go gluten-free by choosing your favorite gluten-free sub rolls. Everyone deserves a delicious sandwich, regardless of dietary needs!

  • Flavorful Rubs: Experiment with different BBQ rubs or even a dry ranch seasoning for the chicken to infuse distinct flavors and make the recipe uniquely yours. The options are endless!

For even more inspiration, try pairing your sub with some crinkle-cut fries to catch the excess ranch dressing, or a light salad to keep everything balanced. Whatever variations you choose, have fun and enjoy making this delightful Chopped Chicken Bacon Ranch Sub your own!

What to Serve with Chopped Chicken Bacon Ranch Sub

Elevate your sandwich experience by pairing it with delightful sides and complementary flavors.

  • Crinkle-Cut Fries: Perfect for catching extra ranch dressing, these crispy fries add a delicious crunch to your meal.
  • Light Side Salad: A simple mix of greens with balsamic dressing refreshes the palate, balancing the hearty flavors of the sub.
  • Dill Pickle Spears: The tanginess of dill pickles contrasts beautifully with the creamy ranch, adding a zesty bite.
  • Coleslaw: Creamy or vinegar-based coleslaw complements the sub’s richness while providing a crunchy texture.
  • Sweet Potato Fries: Slightly sweet and crispy, they offer a delightful alternative to traditional fries, enhancing the meal’s comfort.
  • Iced Tea or Lemonade: Refreshing drinks that provide a tangy counterpart to the savory sandwich, perfect for casual dining.
  • Chocolate Chip Cookies: End your meal on a sweet note; warm cookies are a comforting treat after a hearty sub.
  • Beer Pairings: A light lager or ale works well, balancing the rich flavors of the sandwich with crisp refreshing notes.

Make Ahead Options

These Chopped Chicken Bacon Ranch Subs are fantastic for meal prep, allowing you to enjoy them even on the busiest days! You can prepare the filling (chopped chicken, bacon, tomatoes, and cheese) up to 3 days in advance, storing it in an airtight container in the refrigerator to maintain quality. For best results, add the fresh lettuce and ranch dressing just before serving to keep that crunch. When you’re ready to enjoy your sub, simply reheat the filling in a pan or microwave until warmed through, and load it onto your toasted rolls for a quick, satisfying meal that tastes just as delicious as when freshly made!

Expert Tips for Chopped Chicken Bacon Ranch Sub

  • Choose Chicken Wisely: Opt for boneless, skinless chicken thighs instead of breasts for a juicier, flavorful filling.

  • Perfect Bacon Crispiness: Use thick-cut bacon for the ultimate crunchy texture, enhancing the sub’s delightful taste.

  • Prevent Sogginess: Toast the rolls thoroughly; this step is essential to keep your Chopped Chicken Bacon Ranch Sub perfectly crunchy.

  • Flavor Integration: Allow the chopped filling to rest for 5 minutes before assembling, letting the flavors meld beautifully together.

  • Fresh Veggies Last: Prep the filling in advance but add fresh lettuce and tomatoes just before serving to maintain that crisp crunch.

How to Store and Freeze Chopped Chicken Bacon Ranch Sub

Fridge: Store any leftover chopped filling in an airtight container in the fridge for up to 3 days. This helps keep the flavors fresh while maintaining texture.

Freezer: Freeze the chopped filling in an airtight container for up to 2 months. Thaw overnight in the refrigerator before reheating for the best results.

Assembling: If you plan to store, keep the sub rolls separate from the filling. This prevents the rolls from getting soggy, ensuring the ultimate Chopped Chicken Bacon Ranch Sub experience when you’re ready to enjoy.

Reheating: Reheat the filling in the microwave or on the stovetop until it’s warmed through. Assemble with fresh lettuce and tomatoes just before serving for optimal crunch!

Chopped Chicken Bacon Ranch Sub Recipe FAQs

How do I select ripe tomatoes for my sub?
Absolutely! When choosing tomatoes, look for ones that are firm but slightly soft to the touch, indicating ripeness. A vibrant red color and glossy skin are also good signs. Avoid any with dark spots or wrinkles, as these can indicate over-ripeness.

What’s the best way to store leftovers of the chopped filling?
Very good question! Store the chopped filling in an airtight container in the fridge for up to 3 days. To maintain freshness, keep it separate from the sub rolls until you’re ready to eat. This will help prevent sogginess and keep all the delicious flavors intact.

Can I freeze the chopped filling, and if so, how?
Yes, you can freeze the filling! Place it in an airtight container, ensuring there’s no excess air, and freeze for up to 2 months. To thaw, simply transfer it to the refrigerator overnight. When ready to use, reheat in the microwave or on the stovetop and assemble with fresh toppings.

What if my bacon doesn’t get crispy?
If your bacon isn’t crispy enough, try cooking it in a hot skillet over medium-high heat instead of grilling. Make sure to space the bacon slices apart and flip occasionally. This method allows for even cooking and better fat rendering, resulting in a delightfully crispy texture.

Are there any dietary considerations for this recipe?
Absolutely! If you’re looking for gluten-free options, swap regular sub rolls for gluten-free versions, which are widely available. For low-lactose diets, using lactose-free mozzarella or opting for Greek yogurt ranch can help cater to those with lactose sensitivity. Always check ingredient labels to ensure they meet your specific dietary needs.

Can I prepare the filling ahead of time?
Yes, you can! I often make the filling a day in advance. Just store it in the fridge and add the fresh vegetables right before serving. This way, you’ll have a quick and delicious meal ready to go without compromising on crispness!

undefined

Chopped Chicken Bacon Ranch Sub: A Flavorful 30-Minute Delight

Enjoy this Chopped Chicken Bacon Ranch Sub, a delicious and quick meal that combines grilled chicken, crispy bacon, and tangy ranch dressing.
Prep Time 10 minutes
Cook Time 20 minutes
Resting Time 5 minutes
Total Time 30 minutes
Servings: 4 subs
Course: Lunch
Cuisine: American
Calories: 550

Ingredients
  

For the Filling
  • 1 lb Boneless, Skinless Chicken Thighs Juicier than breasts
  • 6 slices Thick-Cut Bacon Key to crispiness
  • 2 medium Fresh Tomatoes Sliced
  • 1 cup Lettuce Shredded
  • 1 cup Mozzarella Cheese Can substitute with cheddar
  • 1/2 cup Ranch Dressing Greek yogurt ranch for a lighter twist
For the Base
  • 4 rolls Sub Rolls Toasted for crunch
For Seasoning
  • 1 tbsp BBQ Rub For chicken flavor
  • 1 tsp Salt
  • 1 tsp Pepper

Equipment

  • Grill
  • Oven
  • Cutting board
  • serving platter

Method
 

Step-by-Step Instructions
  1. Pat the chicken thighs dry and coat with BBQ rub, then grill for 5-6 minutes each side until cooked.
  2. Toast the sub rolls on the grill or in a preheated oven at 400°F for 3-5 minutes.
  3. Chop the grilled chicken, bacon, and tomatoes on a cutting board, then add lettuce.
  4. Combine the chopped mixture in a bowl, add salt, pepper, cheese, and ranch dressing.
  5. Assemble the mixture in the toasted rolls and serve immediately.

Nutrition

Serving: 1subCalories: 550kcalCarbohydrates: 40gProtein: 30gFat: 30gSaturated Fat: 10gPolyunsaturated Fat: 5gMonounsaturated Fat: 10gCholesterol: 90mgSodium: 1200mgPotassium: 600mgFiber: 3gSugar: 3gVitamin A: 15IUVitamin C: 25mgCalcium: 20mgIron: 15mg

Notes

Store leftover filling in an airtight container for up to 3 days. Freeze for up to 2 months, keeping rolls separate before serving.

Tried this recipe?

Let us know how it was!

Spicy Fried Egg Salad: Quick, Creamy, and Satisfying Delight

As I stood in the kitchen, the golden sunlight poured through the window, casting a warm glow on my favorite frying pan. It was time for something special, and this Spicy Fried Egg Salad with Spicy Mayo was calling my name! In just 15 minutes, I could create a dish that not only delivers bold flavors but also provides a comforting twist on traditional egg salad. What I adore about this recipe is its versatility; it’s a quick meal for those busy weekdays, and the crispy fried eggs add an exciting textural contrast to the creamy fillings. And let’s not forget, you can customize the heat level with sriracha or your favorite hot sauce! Ready to discover how easy it is to elevate your lunch game? Let’s dive into this delightful recipe!

Why is this salad a game changer?

Quick preparation means you can whip up this Spicy Fried Egg Salad in just 15 minutes, making it perfect for busy days. Creamy and crispy combine in a delightful way with the fried eggs enhancing the classic egg salad experience. Endless customization options allow you to tweak the spice level to suit your palate—whether you like it mild or fiery hot! Versatile serving ideas let you enjoy it on toast, crackers, or even fresh salad greens. Plus, it’s a crowd-pleaser that will impress family and friends alike, making it a go-to recipe in your kitchen.

Spicy Fried Egg Salad Ingredients

• Elevate your dish with these essentials!

For the Salad

  • Eggs – The star of your salad; fresh free-range eggs provide the best flavor and texture.
  • Cheese (1 slice) – Add a creamy richness; consider Swiss, provolone, or havarti for the finest touch.
  • Mayonnaise (1 tbsp) – The binding agent that ties everything together; Kewpie mayo adds a unique flavor twist.
  • Sriracha (1 tsp, optional) – For a spicy kick; customize the heat level to suit your taste.
  • Garlic Spread (1 tbsp) – Introduces a savory depth; try brands like Trader Joe’s or Whole Foods for a flavorful option.
  • Dijon Mustard (1 tsp) – A hint of tanginess that elevates the overall flavor profile.
  • Salt and Black Pepper – Use to your preference for seasoning; a pinch of salt enhances all flavors.

Enjoy crafting your perfect Spicy Fried Egg Salad!

Step‑by‑Step Instructions for Spicy Fried Egg Salad

Step 1: Heat the Pan
Begin by heating 2 tablespoons of oil in a frying pan over high heat for about 1-2 minutes. You’ll know the oil is ready when it shimmers and you can feel the heat radiating from the pan. This is essential for achieving the crispy edges that make your Spicy Fried Egg Salad a delight!

Step 2: Fry the Eggs
Carefully crack two eggs into the hot pan, ensuring they remain separate. Sprinkle with a pinch of salt and black pepper, enhancing the flavor. Allow the eggs to cook undisturbed for about 2 minutes until the whites are firm and crispy around the edges. Flip the eggs gently and cook for an additional 15 seconds if you prefer a runny yolk.

Step 3: Rest the Eggs
Once cooked to your desired doneness, remove the fried eggs from the pan and transfer them to a plate. Let them rest for about 1 minute, which will allow the yolks to set slightly and make them easier to handle for your Spicy Fried Egg Salad.

Step 4: Prepare the Bread
If you’re making a sandwich, it’s time to toast two slices of bread. Use your preferred method; a toaster works great or you can toast them in the same pan for added flavor. Aim for a golden-brown color, which will complement the creamy egg salad.

Step 5: Cut the Eggs
Place the fried eggs in a bowl and grab a pair of kitchen scissors. Carefully cut the eggs into bite-sized pieces, which not only makes for easier mixing but also adds a fun twist to your Spicy Fried Egg Salad.

Step 6: Mix the Ingredients
Add mayonnaise, sriracha (if using), garlic spread, and Dijon mustard to the bowl with the cut egg pieces. Mix everything together until well combined, ensuring that each bite is infused with flavor. Taste and adjust seasoning with salt and pepper as needed to enhance the overall taste.

Step 7: Serve and Enjoy
Scoop the creamy Spicy Fried Egg Salad onto your toasted bread or serve it as a dip with crackers. You can also enjoy it alongside a simple salad for a light yet satisfying meal. Feel free to get creative with your serving options!

Expert Tips for Spicy Fried Egg Salad

  • Hot Oil Essential: Ensure the oil is hot before adding the eggs to achieve those perfectly crispy edges that make your Spicy Fried Egg Salad stand out.

  • Customize Heat: Adjust the sriracha quantity to control spiciness; start with less and increase according to your taste preference.

  • Scissors Magic: Use kitchen scissors to cut the fried eggs easily into bite-sized pieces without mashing, keeping the texture intact.

  • Quick Mixing: When mixing ingredients, do so gently to maintain the integrity of the fried egg pieces while ensuring everything is well combined.

  • Storage Wisdom: Store any leftover egg salad in an airtight container in the fridge for up to 2 days; this allows the flavors to meld beautifully.

How to Store and Freeze Spicy Fried Egg Salad

Fridge: Keep leftover Spicy Fried Egg Salad in an airtight container for up to 2 days. This preserves freshness while allowing the flavors to meld beautifully.

Freezer: It’s best to avoid freezing this salad, as the texture of the fried eggs can change upon thawing, making them less appetizing.

Reheating: If you have chilled leftovers, enjoy them cold or let them sit at room temperature for a few minutes before serving again. A quick stir will help revitalize the creamy mixture.

Serving: The salad is versatile; serve it on fresh bread, crackers, or alongside a garden salad for a quick meal!

Make Ahead Options

This Spicy Fried Egg Salad is a fantastic choice for meal prep, saving you time on those busy days! You can fry the eggs and prepare the salad mixture (mayo, sriracha, garlic spread, and Dijon mustard) up to 24 hours in advance. Just cook the eggs, let them cool, and cut them into pieces before mixing them with the other ingredients. When you’re ready to eat, combine the egg mixture with your favorite bread or crackers. To maintain maximum freshness, store the salad in an airtight container in the refrigerator. Simply reassemble for serving, and you’ll enjoy a deliciously creamy and satisfying meal that tastes just as delightful as when you first prepared it!

Variations & Substitutions for Spicy Fried Egg Salad

Feel free to unleash your creativity and customize this spicy fried egg salad to suit your taste!

  • Greek Yogurt: Swap mayonnaise with Greek yogurt for a lighter, creamy alternative that packs a protein punch. It adds a refreshing tanginess!
  • Herb-Infused: Toss in some chopped fresh herbs like dill, cilantro, or chives for a burst of freshness that elevates the flavor profile even more.
  • Cheese Lovers: Experiment with different cheeses; try feta for a tangy kick or cream cheese for a smoother consistency. Each option brings its own charm.
  • Veggie Boost: Add diced tomatoes or avocados for extra creaminess and nutrients; their textures combine beautifully with the fried eggs.
  • Hot Sauce Variety: Switch out sriracha for different hot sauces; go for a smoky chipotle sauce for a unique flavor twist. The possibilities are endless!
  • Crunch Factor: Incorporate diced celery or bell peppers for added crunch and vibrant color. This adds a satisfying crunch in every bite.
  • Avocado Toast Twist: Serve your egg salad on slices of avocado toast instead of bread; it creates a delightful, healthy alternative that’s trendy and delicious.

By exploring these variations, you’re guaranteed a dish that’s not only scrumptious but also uniquely yours. Feeling adventurous? Try your favorite components from other recipes, like spicy avocado toast or even mix in some of your go-to veggies from a classic chicken salad. Enjoy cooking!

What to Serve with Spicy Fried Egg Salad?

Elevate your dining experience by pairing this dish with complementary flavors and textures that enhance every bite.

  • Crispy Toast: Perfect for adding a satisfying crunch, it serves as a sturdy vessel for your creamy salad.
  • Fresh Arugula Salad: The peppery bite of arugula balances the richness of the egg salad, making for a refreshing contrast.
  • Pickled Vegetables: Their tangy flavor provides an excellent counterpoint to the creamy texture; consider pickled cucumbers or jalapeños for a zesty kick.
  • Crunchy Tortilla Chips: Use them for scooping up the egg salad. The crunch pairs beautifully with the creaminess of the dish.
  • Sweet Potato Fries: Their natural sweetness complements the spicy flavors, creating a delightful balance with each bite.
  • Chilled White Wine: A crisp, dry white wine enhances the meal’s freshness while cutting through the richness of the egg salad.
  • Sliced Avocado: The buttery smoothness of avocado adds a luxurious element, making your dish feel even more gourmet.
  • Fruit Salad: A mix of seasonal fruits adds a sweet and refreshing touch, rounding out the meal nicely.

These pairings will not only broaden your palate but also turn your Spicy Fried Egg Salad into a memorable feast!

Spicy Fried Egg Salad Recipe FAQs

How do I know if my eggs are fresh?
Absolutely! To check if your eggs are fresh, place them in a bowl of water. Fresh eggs will sink and lay flat on the bottom, while older eggs will stand upright or float. Opt for free-range or organic eggs for the best flavor, as they often taste richer and creamier.

How should I store leftovers of Spicy Fried Egg Salad?
For storing leftovers, place your Spicy Fried Egg Salad in an airtight container, and keep it in the fridge for up to 2 days. It’s important to ensure it’s sealed well to maintain freshness. You’ll be pleasantly surprised how the flavors meld beautifully overnight, giving you a tasty treat for lunch!

Can I freeze Spicy Fried Egg Salad?
It’s best to avoid freezing this salad, as the texture of the fried eggs can change upon thawing, making them rubbery and less appetizing. Instead, enjoy it fresh and save leftovers for quick meals in the fridge. If you do find yourself with extra, consider making a small batch to minimize waste.

What if I want to make it a little less spicy for kids?
Very much so! If you’re cooking for kids or those who prefer milder flavors, simply reduce or omit the sriracha. You can also replace it with a bit of honey mustard for sweetness or even a splash of pickle juice for a tangy kick without the heat.

Can I make this salad in advance?
Absolutely! You can prepare the components separately to maintain freshness. Fry your eggs and store them in the fridge, mixing them with your salad dressing just before serving. This way, you’ll ensure they stay crispy, and it’ll take only moments to assemble when you’re ready to eat!

Can pets eat this salad?
While the ingredients in this Spicy Fried Egg Salad are generally safe for pets, it’s best to keep it away from them. The mayonnaise and spices may not sit well with their digestive systems. Always consult with your vet before sharing any human food with your furry friends!

undefined

Spicy Fried Egg Salad: Quick, Creamy, and Satisfying Delight

Create a delightful Spicy Fried Egg Salad in just 15 minutes for a satisfying, versatile lunch.
Prep Time 15 minutes
Cook Time 5 minutes
Resting Time 1 minute
Total Time 21 minutes
Servings: 2 servings
Course: Lunch
Cuisine: American
Calories: 350

Ingredients
  

For the Salad
  • 2 eggs Eggs fresh free-range for best flavor
  • 1 slice Cheese Swiss, provolone, or havarti recommended
  • 1 tbsp Mayonnaise Kewpie mayo suggested for unique flavor
  • 1 tsp Sriracha optional, adjust for spice level
  • 1 tbsp Garlic Spread try Trader Joe’s or Whole Foods
  • 1 tsp Dijon Mustard adds tanginess to the salad
  • to taste Salt
  • to taste Black Pepper

Equipment

  • Frying pan
  • kitchen scissors
  • Mixing Bowl
  • Toaster

Method
 

Preparation Steps
  1. Heat 2 tablespoons of oil in a frying pan over high heat for about 1-2 minutes.
  2. Carefully crack two eggs into the hot pan and season with salt and pepper. Cook undisturbed for about 2 minutes.
  3. Gently flip the eggs and cook for an additional 15 seconds if you prefer a runny yolk.
  4. Remove the fried eggs from the pan and let them rest for about 1 minute.
  5. Toast two slices of bread until golden brown.
  6. Cut the fried eggs into bite-sized pieces using kitchen scissors.
  7. Mix mayonnaise, sriracha, garlic spread, and Dijon mustard with the cut egg pieces in a bowl.
  8. Serve the Spicy Fried Egg Salad on toasted bread or as a dip with crackers.

Nutrition

Serving: 1servingCalories: 350kcalCarbohydrates: 20gProtein: 18gFat: 25gSaturated Fat: 8gPolyunsaturated Fat: 2gMonounsaturated Fat: 15gCholesterol: 370mgSodium: 600mgPotassium: 250mgFiber: 2gSugar: 1gVitamin A: 500IUVitamin C: 1mgCalcium: 150mgIron: 2mg

Notes

Adjust the sriracha quantity to control spiciness; store leftovers in an airtight container for up to 2 days.

Tried this recipe?

Let us know how it was!

Creamy Dill Chicken Salad Sandwich for a Perfect Summer Bite

As I stood in my kitchen, the sun streaming through the window, I couldn’t help but crave a light and simple meal. The stars aligned that day when I discovered the magic of a Creamy Dill Chicken Salad Sandwich. This delightful recipe combines the convenience of rotisserie chicken with a refreshing herb-infused dressing, making it an effortless choice for a busy summer lunch. With minimal prep time and all the flavors that beckon lazy picnics and backyard gatherings, it’s perfect for anyone looking to escape the clutches of fast food. Plus, it’s packed with protein thanks to the Greek yogurt, so you can indulge guilt-free. Ready to elevate your lunch game? Let’s dive into the irresistible world of creamy dill goodness!

Why Is This Summer Sandwich a Must-Try?

Unbeatable Flavor: This sandwich is packed with rich, herbaceous notes from fresh dill and a zesty ranch kick that takes your taste buds on a delightful journey.

Quick and Easy: With just a few simple ingredients, this recipe requires minimal prep time, making it perfect for busy days or impromptu picnics.

Protein-Packed: Using Greek yogurt and rotisserie chicken, you can enjoy a creamy filling without the guilt, keeping you satisfied without the heaviness of traditional mayo-based salads.

Versatile Options: Feel free to mix it up! Add crispy bacon for crunch, swap out the chicken for tuna, or toss in grapes for a touch of sweetness to suit your tastes.

Perfect for Any Occasion: Whether it’s a summer barbecue, lunch at the office, or a simple meal at home, this sandwich is sure to impress and please any crowd. Why not serve it alongside some crispy garlic chips or a fresh green salad?

Creamy Dill Chicken Salad Sandwich Ingredients

For the Dressing

  • Fat-Free Greek Yogurt – Adds creaminess and tang; substitute with low-fat yogurt for a richer flavor.
  • Mayonnaise – Provides moisture and richness; opt for light mayonnaise for a healthier version.
  • Distilled White Vinegar – Adds acidity to balance the flavors; lemon juice can be a substitute if desired.
  • Kosher Salt – Enhances flavor without overpowering; use sea salt as an alternative.
  • Fresh Ground Black Pepper – Adds warmth; white pepper can be used if preferred.
  • Garlic Powder – Provides a subtle garlic flavor profile; fresh minced garlic can be used for a stronger flavor.
  • Fresh Dill – Imparts a fresh herbaceous note crucial to the dish; dried dill can be substituted but use less due to potency.
  • Dijon Mustard – Contributes a hint of spice and depth; yellow mustard can replace it with less complexity.

For the Chicken Salad

  • Diced Shallots – Offers a mild onion flavor; substitute with red onion if shallots aren’t available.
  • Cooked Shredded Chicken – Acts as the base protein for the sandwich; rotisserie chicken is recommended for convenience and flavor.

For the Sandwich

  • Multigrain Bread – The sturdy foundation for the sandwich; whole grain or sourdough bread can be used for variation.
  • Lettuce – Adds crispness and freshness; any leafy greens could work as a substitute.

Step‑by‑Step Instructions for Creamy Dill Chicken Salad Sandwich

Step 1: Make the Dressing
In a medium mixing bowl, whisk together 1 cup of fat-free Greek yogurt, ¼ cup of mayonnaise, 1 tablespoon of distilled white vinegar, and a pinch of kosher salt. Add ½ teaspoon of fresh ground black pepper, 1 teaspoon of garlic powder, 2 tablespoons of freshly chopped dill, and 1 teaspoon of Dijon mustard. Mix until smooth and creamy, with a rich aroma that hints at the zesty flavors to come.

Step 2: Combine Ingredients
Gently fold in ¼ cup of diced shallots and 2 cups of cooked shredded rotisserie chicken into the dressing mixture. Use a spatula to ensure everything is evenly coated. You’ll know it’s ready when the chicken is fully covered in the creamy dressing, and the shallots blend seamlessly into this vibrant filling.

Step 3: Chill
Cover the chicken salad mixture with plastic wrap or transfer it to an airtight container, and refrigerate for at least 1 hour. This chilling time allows the flavors to meld beautifully, transforming the mixture into a deliciously cohesive filling that brims with freshness and zest when you finally assemble your Creamy Dill Chicken Salad Sandwich.

Step 4: Assemble Sandwiches
Once chilled, take your multigrain bread and spread a generous portion of the chicken salad mixture over one slice. Top with fresh lettuce leaves to add a crunchy layer. Place another slice of multigrain bread on top to create your sandwich, pressing down slightly to secure all the deliciousness inside.

Step 5: Serve
Cut each sandwich in half diagonally for a classic presentation or keep them whole for a rustic look. Serve immediately or store in the refrigerator if you’re preparing for later. Enjoy your Creamy Dill Chicken Salad Sandwich with a side of crispy garlic chips or a simple green salad for a refreshing meal.

Variations & Substitutions for Creamy Dill Chicken Salad Sandwich

Explore delightful twists on this creamy classic and make it your own!

  • Dairy-Free: Use avocado or hummus instead of Greek yogurt for a creamy texture, catering to dairy-free diets beautifully.

  • Tuna Twist: Substitute rotisserie chicken with canned tuna for a pescatarian option that maintains those amazing flavors.

  • Chickpea Delight: Replace chicken with mashed chickpeas for a plant-based version that’s just as satisfying and protein-rich.

  • Herb Switch-Up: Swap fresh dill for fresh basil or tarragon to elevate your herb profile and introduce a different flavor experience.

  • Crunchy Additions: Mix in chopped celery or diced apples for an extra crunch and unexpected sweetness. The interplay of textures will enhance each bite!

  • Spicy Kick: For an extra burst of flavor, add a dash of hot sauce or diced jalapeños to the mix. It will bring a zesty heat that complements the creamy elements perfectly.

  • Nutty Flavor: Toss in slivered almonds or walnuts for added crunch and a nutty flavor that harmonizes beautifully with the chicken salad.

  • Grapes & Nuts: Combine diced grapes and pecans for a sweet and savory twist that adds a delightful contrast to the dish. This sweet addition can really brighten up the flavors!

Don’t forget, you can always serve this delicious sandwich with crispy garlic chips, veggie sticks, or a simple green salad for a well-rounded meal that will impress.

Make Ahead Options

Preparing your Creamy Dill Chicken Salad Sandwich ahead of time can save you precious minutes during busy weekdays! You can mix the chicken salad filling (combining the Greek yogurt, mayonnaise, chicken, and seasonings) up to three days in advance. Just store it in an airtight container in the refrigerator to keep it fresh and flavorful. When you’re ready to assemble, take the chilled salad, spread it generously onto slices of your favorite multigrain bread, and add crisp lettuce. This way, you’ll have a delicious, ready-to-eat lunch that tastes just as delightful as if it were freshly made! Enjoy the freedom of meal prepping with this convenience!

What to Serve with Creamy Dill Chicken Salad Sandwich

A delightful summer meal awaits when you pair the perfect sides with this refreshing sandwich.

  • Crispy Garlic Chips: These chips bring a satisfying crunch that complements the creamy texture of the sandwich, enhancing every bite. Perfect for snacking!
  • Simple Green Salad: With mixed greens and a light vinaigrette, this refreshing salad adds a healthy, crisp element that balances the richness of the chicken salad.
  • Veggie Sticks: Carrot and cucumber sticks are vibrant and refreshing. Their natural crunch provides a delightful contrast to the creamy filling of the sandwich.
  • Potato Salad: A light, tangy potato salad with herbs can make a perfect pairing, serving as a hearty side that you can enjoy outdoors.
  • Watermelon Slices: Juicy watermelon adds a sweet, refreshing touch that’s ideal for summer lunches, balancing savory flavors beautifully.
  • Lemonade: A chilled glass of lemonade or iced tea can elevate your meal, offering a zesty, cool beverage that pairs wonderfully with the sandwich.
  • Fruit Salad: A bowl of fresh fruit can round out your meal, providing sweetness and a burst of freshness to accompany each sandwich bite.
  • Chips and Salsa: For a little kick, serve tortilla chips with salsa. This will add a fun crunch and zesty flavor to your lunch experience.

How to Store and Freeze Creamy Dill Chicken Salad Sandwich

Fridge: Store the chicken salad mixture in an airtight container in the refrigerator for up to 3 days. This keeps it fresh and helps the flavors develop.

Sandwiches: It’s best to assemble the sandwiches fresh. However, if you need to prepare them in advance, wrap tightly in plastic wrap or foil and refrigerate; consume within 1 day for optimal taste and texture.

Freezer: While it’s not recommended to freeze already assembled sandwiches, the chicken salad mixture can be frozen for up to 1 month. Thaw in the fridge before assembling your sandwiches.

Reheating: When enjoying the chicken salad as a meal later, you can serve it cold directly from the fridge or let it sit at room temperature for 15 minutes to soften before enjoying.

Expert Tips for Creamy Dill Chicken Salad Sandwich

  • Chill Time Matters: Allow the chicken salad to chill for at least one hour. This enhances the flavors, making the creamy dill dressing more pronounced.

  • Texture Boost: For an extra crunch, consider adding crispy bacon or diced celery. This not only elevates the taste but also gives a satisfying texture.

  • Seasoning Check: Always taste the mixture after chilling. You might want to adjust with more salt or pepper for that perfect flavor balance in your chicken salad.

  • Ingredient Freshness: Use fresh dill for the best flavor. If using dried dill, remember that it’s more potent—reduce the amount to prevent overpowering the dish.

  • Bread Choice: Opt for a hearty multigrain bread to hold up against the creamy filling. Whole grain or sourdough also works beautifully for different flavor profiles.

Creamy Dill Chicken Salad Sandwich Recipe FAQs

How do I select the best dill for my sandwich?
Absolutely! Fresh dill should be vibrant green with no dark spots or yellowing leaves. Look for a strong aroma, which indicates freshness. If using dried dill, remember it’s more concentrated—use about one-third of the amount to avoid overpowering flavors.

How should I store leftover chicken salad?
Store the chicken salad mixture in an airtight container in the refrigerator for up to 3 days. This keeps it fresh and allows the flavors to meld beautifully. If it starts to develop a strange smell or changes color, it’s best to discard it.

Can I freeze the creamy dill chicken salad mixture?
Yes, you can! To freeze, place the chicken salad mixture in a freezer-safe container, sealing it tightly to prevent any air from getting in. It will keep well for up to 1 month. When you’re ready to use it, simply thaw it overnight in the fridge and give it a good stir before assembling your sandwiches.

What should I do if my chicken salad is too salty?
Very! If you find the mixture too salty, consider adding a little more yogurt or mayonnaise to balance the saltiness. Alternatively, you can fold in some diced, uncooked potatoes or carrots to absorb excess salt. Let it rest for about 10 minutes before tasting again to see if it’s improved.

Can I make this sandwich vegetarian or suitable for my dietary restrictions?
Of course! Substitute the chicken with canned chickpeas or tuna for a vegetarian or pescatarian option. If you’re concerned about allergies, be sure to check that your mayo and yogurt don’t contain any allergens. For a nut-free option, just skip any nutty toppings like slivered almonds.

How should I serve this sandwich for picnics or gatherings?
For picnics, I recommend assembling sandwiches just before serving for the best texture. If you need to make them ahead, keep the chicken salad and bread separately, and assemble on-site. Wrap tightly in foil or use a sandwich container to prevent them from getting soggy before serving. Enjoy!

undefined

Creamy Dill Chicken Salad Sandwich for a Perfect Summer Bite

This Creamy Dill Chicken Salad Sandwich combines rotisserie chicken and a refreshing dressing, perfect for summer lunches.
Prep Time 15 minutes
Chill Time 1 hour
Total Time 1 hour 15 minutes
Servings: 2 sandwiches
Course: Lunch
Cuisine: American
Calories: 350

Ingredients
  

Dressing Ingredients
  • 1 cup fat-free Greek yogurt Substitute with low-fat yogurt for richer flavor.
  • ¼ cup mayonnaise Opt for light mayonnaise for a healthier version.
  • 1 tablespoon distilled white vinegar Lemon juice can be a substitute.
  • 1 pinch kosher salt Use sea salt as an alternative.
  • ½ teaspoon fresh ground black pepper White pepper can be used if preferred.
  • 1 teaspoon garlic powder Fresh minced garlic can be used for stronger flavor.
  • 2 tablespoons fresh dill Use less dried dill due to potency.
  • 1 teaspoon Dijon mustard Yellow mustard can replace it.
Chicken Salad Ingredients
  • ¼ cup diced shallots Substitute with red onion if shallots aren't available.
  • 2 cups cooked shredded rotisserie chicken Recommended for convenience and flavor.
Sandwich Ingredients
  • 4 slices multigrain bread Whole grain or sourdough can be used.
  • 1 cup lettuce Any leafy greens could work as a substitute.

Equipment

  • Mixing Bowl
  • spatula
  • airtight container
  • Knife

Method
 

Preparation Steps
  1. In a medium mixing bowl, whisk together Greek yogurt, mayonnaise, distilled white vinegar, and kosher salt.
  2. Add black pepper, garlic powder, dill, and Dijon mustard, mixing until smooth and creamy.
  3. Fold in diced shallots and shredded chicken until everything is evenly coated.
  4. Cover and refrigerate for at least 1 hour to allow flavors to meld.
  5. Spread chicken salad mixture over a slice of multigrain bread, top with lettuce, and place another slice on top.
  6. Cut sandwiches in half and serve immediately.

Nutrition

Serving: 1sandwichCalories: 350kcalCarbohydrates: 30gProtein: 27gFat: 12gSaturated Fat: 2gPolyunsaturated Fat: 1gMonounsaturated Fat: 2gCholesterol: 60mgSodium: 500mgPotassium: 600mgFiber: 5gSugar: 3gVitamin A: 15IUVitamin C: 10mgCalcium: 6mgIron: 10mg

Notes

Allow the chicken salad to chill for at least one hour to enhance flavors. For extra crunch, consider adding crispy bacon or diced celery.

Tried this recipe?

Let us know how it was!

Spicy Thai Peanut Noodles: Quick, Nutty Delight in 25 Minutes

When I first discovered the joy of Spicy Thai Peanut Noodles, it felt like unlocking a treasure chest of flavors. The combination of creamy peanut sauce with crisp vegetables creates a delicious harmony that dances on your palate. What makes this dish especially appealing is its remarkable versatility; whether you’re looking to whip up a quick weeknight dinner or impress your friends at a casual gathering, this recipe delivers in just 25 minutes! Packed with protein and vegetarian-friendly, these noodles can easily adapt to any dietary needs—gluten-free options included! Who knew that creating a satisfying and flavorful meal could be this effortless? Curious about how to make this scrumptious dish your own? Let’s dive in!

Why are Spicy Thai Peanut Noodles a must-try?

Quick Preparation: In just 25 minutes, you can have a flavorful meal on your table—perfect for busy weeknights!
Versatile Ingredients: Customize with your favorite veggies or switch to gluten-free noodles; this recipe adapts to your pantry.
Packed with Flavor: The nutty peanut sauce combined with fresh vegetables offers a deliciously satisfying taste that excites the palate.
Protein-Powered: With options for adding grilled chicken, shrimp, or tofu, you’ll enjoy a hearty meal that fuels you throughout the day.
Crowd-Pleaser: Ideal for impressing friends at gatherings or simply satisfying your family; everyone can find something to love in this dish!
Meal Prep Friendly: Make extra peanut sauce to use in salads or wraps throughout the week—check out my tips on meal prepping noodles for more!

Spicy Thai Peanut Noodles Ingredients

For the Noodles
Noodles – Any noodle type, including udon or gluten-free options, works well as the essential base for this dish.

For the Vegetables
Bell Peppers – Adds sweetness and crunch; substitute with any preferred vegetable like zucchini or snap peas.
Carrots – Provides natural sweetness and texture; you can use pre-sliced or frozen carrots if needed.
Green Onions – Offers a sharp, fresh flavor; adjust quantity to taste or replace with onion if preferred.
Cilantro – Adds a fresh herbal note; omit if you’re not a fan or replace with parsley.
Salted Roasted Peanuts – Contributes crunch and depth; feel free to use unsalted if desired.

For the Peanut Sauce
Creamy/Chunky Peanut Butter – Provides richness and creaminess; swap with almond butter or sunflower seed butter for allergy adjustments.
Soy Sauce – Adds saltiness and umami depth; tamari can be used for a gluten-free version.
Rice Wine Vinegar – Enhances acidity and brightness; substitute with distilled vinegar if preferred.
Sesame Oil – Imparts a rich, nutty flavor; omit if allergic or replace with olive oil.
Brown Sugar/Honey – Sweetens the dish; maple syrup makes a great vegan alternative.
Sambal/Sriracha – Introduces heat; adjust to taste or use a milder sauce for less spice.
Garlic – Adds depth and aroma; garlic powder can be used if fresh is unavailable.
Ginger – Brings a refreshing zing; substitute with ground ginger if needed.
Water – Adjusts the sauce consistency; use more or less based on your preference.

These Spicy Thai Peanut Noodles are not only quick to prepare, but they also allow for plenty of creativity in the kitchen!

Step‑by‑Step Instructions for Quick and Easy Spicy Thai Peanut Noodles

Step 1: Cook Noodles
Bring a large pot of water to a rolling boil over high heat. Add your chosen noodles and cook according to the package instructions, usually around 8–10 minutes, until al dente. Once cooked, drain the noodles in a colander and drizzle with a bit of oil to prevent sticking. Set them aside while you prepare the sauce and vegetables.

Step 2: Make Sauce
In a medium bowl, combine creamy peanut butter, soy sauce, rice wine vinegar, sesame oil, brown sugar or honey, sambal or sriracha, minced garlic, freshly grated ginger, and a splash of water. Whisk the ingredients together for about 2-3 minutes until the sauce is smooth and creamy. Adjust the consistency with more water if needed to make sure it will coat the noodles well.

Step 3: Stir-fry Veggies
Heat a large pan or wok over medium-high heat and add a tablespoon of oil. Once the oil is shimmering, toss in the sliced bell peppers and carrots, cooking for 3-5 minutes until they are tender-crisp. Fold in the chopped green onions for an additional minute, allowing their flavor to bloom and brighten the stir-fried mix.

Step 4: Combine
In the same pan with the stir-fried vegetables, add the cooked noodles along with the prepared peanut sauce. Carefully toss everything together for about 2-3 minutes using tongs, ensuring the noodles are well coated in that luscious sauce. Look for the noodles to become glossy and inviting, absorbing the delightful flavors.

Step 5: Garnish/Serve
Remove the pan from heat and serve the Spicy Thai Peanut Noodles immediately in warm bowls. Top generously with chopped cilantro and a sprinkle of salted roasted peanuts for added crunch. If desired, you can also drizzle with a bit of toasted sesame oil and an extra scattering of scallions for a pop of color and flavor.

How to Store and Freeze Spicy Thai Peanut Noodles

Fridge: Store leftovers in an airtight container for up to 2-3 days. This keeps your Spicy Thai Peanut Noodles fresh and flavorful.

Freezer: If you’d like to freeze the noodles, portion them into freezer-safe containers. They can last up to 2 months but may lose some texture upon reheating.

Reheating: Gently reheat on the stovetop with a splash of water to revive the sauce and prevent drying out. Stir frequently until warmed through.

Peanut Sauce Storage: The peanut sauce can be stored separately in an airtight container for up to a week, perfect for drizzling on salads or other dishes.

What to Serve with Spicy Thai Peanut Noodles?

Bring your dining experience to new heights by adding delightful sides to these flavor-packed noodles!

  • Steamed Broccoli: The tender, slightly crispy texture of broccoli adds a fresh green contrast to the nutty noodles.

  • Cucumber Salad: A light, refreshing cucumber salad with a tangy dressing complements the richness of the peanut sauce beautifully. Crisp and cool, it adds a delightful crunch!

  • Spring Rolls: Fresh or fried spring rolls filled with vegetables provide a delightful appetizer that echoes the Thai flavors of the main dish.

  • Sesame Green Beans: Sautéed green beans tossed with sesame seeds offer a nutty flavor that harmonizes with the peanut-based noodles, enhancing the overall experience.

  • Thai Iced Tea: Cool and sweet, this classic drink balances the spiciness of the noodles while adding an exotic twist with its rich flavors.

  • Fruit Sorbet: A light, fruity sorbet cleanses the palate after the robust flavors of the noodles, leaving you with a refreshing finish.

  • Chili Garlic Tofu: Adding protein, this crispy tofu offers robust flavor and a satisfying crunch, perfectly complementing the creamy sauce of the noodles.

Expert Tips for Spicy Thai Peanut Noodles

  • Noodle Choice: Use any noodle type, including gluten-free options like rice noodles or glass noodles for a delightful texture.
  • Vegetable Flexibility: Don’t hesitate to get creative! Mix in your favorite veggies or whatever you have on hand—it’ll add a personal touch.
  • Sauce Consistency: If your peanut sauce is too thick, whisk in more water gradually until smooth and able to coat the noodles nicely.
  • Adjust the Heat: Start with a small amount of sambal or sriracha; you can always add more heat as you go along, keeping it family-friendly!
  • Leftover Storage: Store any extra peanut sauce in an airtight container for up to a week—it’s great on salads or as a dip, making this recipe even more versatile!
  • Protein Boost: For added nutrition, incorporate grilled chicken, shrimp, or tofu—your spicy Thai peanut noodles will become a protein powerhouse!

Make Ahead Options

These Spicy Thai Peanut Noodles are ideal for meal prep, helping you save time during those busy weeknights! You can prepare the peanut sauce and chop all your vegetables up to 3 days in advance, storing them in airtight containers in the refrigerator to maintain freshness. The noodles can be cooked ahead of time as well; just toss them with a bit of oil to prevent sticking. When you’re ready to serve, simply stir-fry the veggies for a few minutes, add the pre-cooked noodles and peanut sauce, and mix everything until heated through. You’ll enjoy a quick, satisfying meal, just as delicious as when first made, with minimal effort!

Spicy Thai Peanut Noodles: Customization Ideas

Feel free to explore these delightful twists and substitutions to make the dish truly yours, tantalizing your taste buds!

  • Dairy-Free: Substitute any creamy ingredients like peanut butter with almond butter or sunflower seed butter to keep it smooth and nutty.
  • Protein-Packed: Toss in some grilled chicken or shrimp for extra protein, turning your dish into a hearty meal. Alternatively, plant-based eaters can use tofu or tempeh for a satisfying protein boost!
  • Heat Level: Adjust the spice by varying the amount of sambal or sriracha; use a milder hot sauce for a family-friendly touch.
  • Vegetable Variety: Feel free to swap bell peppers and carrots for your favorite veggies like broccoli, zucchini, or snap peas. It’s a fantastic way to clean out the fridge!
  • Quinoa Swap: For a low-carb option, substitute the noodles with quinoa, adding a nutty flavor while keeping it gluten-free.
  • Nut-Free: Skip the peanuts in your garnishing and switch to sunflower seeds for the same crunch without the allergens.
  • Sweet Alternatives: Use maple syrup instead of brown sugar or honey in your peanut sauce for a vegan twist that still retains sweetness.
  • Asian Fusion: Add elements like bok choy or snow peas for an even more vibrant Asian-inspired dish, amplifying both flavor and texture.

Such variations keep your meals exciting! If you’re interested in pairing your noodles with something light, check out my guide on preparing a refreshing cucumber salad that will beautifully complement this dish.

Spicy Thai Peanut Noodles Recipe FAQs

What type of noodles work best for Spicy Thai Peanut Noodles?
You can use any noodle type you prefer! Traditional options include udon or rice noodles, but you can also opt for gluten-free varieties like glass or cellophane noodles. All will provide a delicious base for the creamy peanut sauce.

How should I store leftovers of Spicy Thai Peanut Noodles?
Leftovers can be refrigerated in an airtight container for up to 2-3 days. When you’re ready to enjoy them again, simply reheat on the stovetop with a splash of water to help revive the sauce and keep the noodles from drying out. This way, you’ll maintain the delightful flavors and textures!

Can I freeze Spicy Thai Peanut Noodles?
Absolutely! To freeze, portion the noodles into freezer-safe containers, ensuring they’re well-sealed to prevent freezer burn. They can be stored for up to 2 months. When reheating, do so gently on the stove with a bit of water, stirring frequently to help loosen the sauce and restore the dish’s fresh appeal.

What should I do if my peanut sauce is too thick?
If you find that your peanut sauce has become too thick, no worries! Simply whisk in a little more water, one tablespoon at a time, until you reach your desired consistency. This should help make the sauce glossy and smooth, ensuring it coats the noodles beautifully.

Are there any allergy considerations with this recipe?
Yes, definitely! While peanuts are the star ingredient here, they can be a common allergy for many. If you’re cooking for someone with a nut allergy, you can substitute peanut butter with sunflower seed butter to maintain that creamy texture without the allergens. Additionally, be sure to check that your soy sauce is gluten-free if that’s a concern.

How can I customize Spicy Thai Peanut Noodles to suit my diet?
The beauty of this dish is its versatility! To make it vegan, simply swap honey for maple syrup and use tofu for protein. You can also play around with veggies based on your preferences or what you have on hand—zucchini, snap peas, or broccoli work beautifully!

undefined

Spicy Thai Peanut Noodles: Quick, Nutty Delight in 25 Minutes

Discover the joy of Spicy Thai Peanut Noodles with rich peanut sauce and crisp vegetables for a quick, delicious meal.
Prep Time 10 minutes
Cook Time 15 minutes
Total Time 25 minutes
Servings: 4 servings
Course: Lunch
Cuisine: Thai
Calories: 450

Ingredients
  

For the Noodles
  • 12 oz Noodles Any noodle type, including udon or gluten-free options
For the Vegetables
  • 1 cup Bell Peppers Sliced, substitute with any preferred vegetable
  • 1 cup Carrots Sliced or pre-sliced
  • 3 stalks Green Onions Chopped
  • 1/4 cup Cilantro Chopped, omit if not a fan
  • 1/2 cup Salted Roasted Peanuts Feel free to use unsalted
For the Peanut Sauce
  • 1/2 cup Creamy/Chunky Peanut Butter Swap with almond butter for allergy adjustments
  • 1/4 cup Soy Sauce Tamari for gluten-free version
  • 2 tbsp Rice Wine Vinegar Substitute with distilled vinegar if preferred
  • 1 tbsp Sesame Oil Omit if allergic or replace with olive oil
  • 1 tbsp Brown Sugar/Honey Maple syrup makes a great vegan alternative
  • 1 tbsp Sambal/Sriracha Adjust to taste
  • 2 cloves Garlic Minced, garlic powder can be used if fresh is unavailable
  • 1 tbsp Ginger Freshly grated or substitute with ground ginger
  • 1/4 cup Water Adjust sauce consistency

Equipment

  • Large pot
  • Colander
  • medium bowl
  • large pan or wok

Method
 

Step-by-Step Instructions
  1. Cook Noodles: Bring a large pot of water to a boiling point and add noodles. Cook according to package instructions for 8-10 minutes until al dente. Drain and drizzle with oil to prevent sticking. Set aside.
  2. Make Sauce: In a medium bowl, whisk together peanut butter, soy sauce, rice wine vinegar, sesame oil, brown sugar or honey, sambal or sriracha, garlic, ginger, and water until smooth and creamy.
  3. Stir-fry Veggies: Heat a large pan or wok over medium-high heat, add oil, then cook the bell peppers and carrots for 3-5 minutes. Add green onions and cook for another minute.
  4. Combine: In the same pan, add cooked noodles and peanut sauce, tossing everything together for 2-3 minutes until noodles are coated.
  5. Garnish/Serve: Serve immediately, topped with cilantro and peanuts. Optional: drizzle with sesame oil and additional green onions.

Nutrition

Serving: 1servingCalories: 450kcalCarbohydrates: 60gProtein: 15gFat: 20gSaturated Fat: 4gPolyunsaturated Fat: 6gMonounsaturated Fat: 8gSodium: 700mgPotassium: 500mgFiber: 5gSugar: 10gVitamin A: 900IUVitamin C: 30mgCalcium: 50mgIron: 2mg

Notes

Feel free to customize with your favorite veggies or protein like chicken, shrimp, or tofu.

Tried this recipe?

Let us know how it was!

30 Minute Mini Baked Chicken Tacos for a Flavorful Feast

As I was rummaging through my fridge one busy afternoon, I stumbled upon the perfect solution for a satisfying meal that wouldn’t take hours to prepare: Quick and Easy 30 Minute Mini Baked Chicken Tacos! With crispy corn tortillas enveloping creamy, rotisserie chicken filling, these tacos are a game-changer. They deliver all the comfort and flavor we crave without the hefty time commitment, making them ideal for those chaotic weeknight dinners. Plus, they’re a breeze to customize with your favorite toppings or add-ins, ensuring everyone at the table finds something to enjoy. So, are you ready to transform your Taco Tuesdays into a fun family feast?

Why are these tacos a game-changer?

Quick, perfect for those nights when time is tight. In just 30 minutes, you can whip up a delicious meal that tastes like it took hours to prepare.
Flexible, customize with your favorite toppings! From creamy guacamole to zesty salsas, these tacos invite creativity.
Flavor-packed, the combination of rotisserie chicken, spices, and gooey cheese creates a mouthwatering filling that satisfies every palate.
Crowd-pleaser, ideal for family gatherings or a casual dinner party, everyone will rave about these delightful mini tacos!
Comfort food, crispy, warm, and filled with all the deliciousness truly embodies the spirit of Taco Tuesday.

30 Minute Mini Baked Chicken Taco Ingredients

• Get ready to tantalize your taste buds!

For the Filling

  • Cooked Shredded Chicken – Rotisserie chicken is recommended for convenience and flavor.
  • Chili Powder – Adds heat and depth; taco seasoning can substitute for a quicker option.
  • Paprika – Contributes sweetness and vibrant color; smoked paprika brings a smoky touch.
  • Garlic Powder – Enhances the overall flavor profile and aroma.
  • Onion Powder – Complements the chicken with savory notes for a delicious depth of flavor.
  • Ground Cumin – Adds an earthy, warm flavor to the filling.
  • Oregano – Introduces herbaceous notes that elevate the dish.
  • Kosher Salt – An essential ingredient for enhancing all other flavors in the tacos.
  • Chopped Green Chiles – Adds mild heat and moisture; fresh or canned works well.
  • Sour Cream – Provides creaminess and tang to balance the spices; Greek yogurt is a great low-fat swap.
  • Monterey Jack Cheese – Melts beautifully, contributing richness; cheddar or a Mexican blend can also be used.

For the Tacos

  • Corn Tortillas – These delicious tortillas form the taco shells; heating them beforehand makes them pliable.
  • Olive Oil – Used for brushing tacos to achieve that delightful crispy texture when baked.

With these 30 Minute Mini Baked Chicken Tacos ingredients, you’ll create a scrumptious feast that friends and family will adore. Happy cooking!

Step‑by‑Step Instructions for Quick and Easy 30 Minute Mini Baked Chicken Tacos

Step 1: Preheat the Oven
Begin by preheating your oven to 425°F (220°C). While the oven heats up, prepare your baking sheets by spraying them lightly with olive oil to ensure your tacos come out crispy and golden. This step is essential to achieving that delightful crunch in your mini baked chicken tacos!

Step 2: Prepare the Filling
In a large mixing bowl, combine the cooked shredded chicken with chili powder, paprika, garlic powder, onion powder, ground cumin, oregano, and kosher salt. Use a fork to mix the ingredients well until your chicken is evenly coated with the spices. This flavor-packed filling is the heart of your quick and easy mini baked chicken tacos!

Step 3: Add Creaminess
Next, fold in the chopped green chiles, sour cream, and one cup of shredded Monterey Jack cheese into the chicken mixture until it’s creamy and well combined. This step adds a rich, smooth texture that balances the spices and enhances the overall flavor of your tacos!

Step 4: Fill the Tortillas
Grab your corn tortillas and place about a quarter cup of the chicken filling on one side of each tortilla. Top each filled tortilla with an additional tablespoon of cheese to elevate the cheesy goodness! Make sure the filling is spread evenly for balanced flavor in every bite.

Step 5: Fold and Brush
Gently fold the tortilla over the filling, creating a half-moon shape. Brush both sides of the folded tortilla with olive oil to achieve that perfect golden crispiness. This will also help seal in all the delicious flavors when you bake the mini tacos.

Step 6: Arrange on Baking Sheet
Arrange your filled and brushed tacos on the prepared baking sheets. Ensure they are placed side by side, but not overlapping, to allow even cooking. This is your chance to make sure every bit of your quick and easy 30 minute mini baked chicken tacos is cooked perfectly.

Step 7: Bake the Tacos
Pop the baking sheets into the preheated oven and bake for 12-15 minutes. Keep an eye on them; they should turn golden brown and become crisp along the edges. This is when the magic happens, transforming your assembled tacos into irresistible little packages of flavor!

Step 8: Cool Before Serving
Once baked to perfection, carefully remove the mini baked chicken tacos from the oven. Let them cool for a few minutes on the baking sheet to help enhance the crispiness before serving. This little wait ensures you don’t burn your tongue on that irresistible creamy filling!

Storage Tips for 30 Minute Mini Baked Chicken Tacos

Fridge: Store leftovers in an airtight container or wrapped in foil for up to 2-3 days. This will keep your mini baked chicken tacos fresh and ready for a quick snack!

Reheating: To enjoy a crispy texture, reheat in the oven at 350°F (175°C) for about 10 minutes. Avoid using a microwave as it may make the tortillas soggy.

Freezer: These mini tacos do not freeze well due to the filling; however, you can assemble them ahead of time, refrigerate, and bake just before serving for convenience.

Make-Ahead: Prepare the filling and tortillas in advance! Assemble and refrigerate, then bake fresh in 12-15 minutes when you’re ready to feast on these mouthwatering tacos.

Variations & Substitutions for Mini Baked Chicken Tacos

Feel free to let your creativity shine as you adapt these mini baked chicken tacos to your taste preferences and dietary needs!

  • Dairy-Free: Substitute dairy cheese with a plant-based alternative and use coconut yogurt for a creamy filling.
  • Spice Up: Add fresh jalapeños or a splash of hot sauce to the filling for an extra heat boost.
  • Vegetarian Delight: Swap shredded chicken for black beans or lentils, loading up on flavor and protein while keeping it meat-free.
  • Colorful Veggies: Incorporate chopped bell peppers, corn, or spinach into the filling for added nutrition and crunch.
  • Smoky Twist: Use smoked paprika instead of regular paprika, giving your tacos a deeper, more robust flavor.
  • Whole Wheat Tortillas: Opt for whole wheat or gluten-free tortillas for a healthier or gluten-friendly option.
  • Flavorful Marinade: Marinate the chicken in lime juice and cilantro before shredding to introduce a zesty, fresh taste.
  • Serving Suggestions: For a fun twist, serve these tacos with a side of mango salsa or guacamole for that extra burst of flavor.

By exploring these variations, you can create a taco experience that delights every palate at your table. Happy cooking!

What to Serve with 30 Minute Mini Baked Chicken Tacos

Elevate your family feast by pairing these delightful tacos with scrumptious side dishes and drinks that complement their tasty flavors!

  • Creamy Guacamole: A fresh, zesty dip that adds coolness and richness, perfect for balancing the spicy filling.

  • Mexican Street Corn Pasta Salad: Delightful with its sweet corn, creamy dressing, and fresh cilantro, it adds a refreshing crunch to your meal.

  • Cilantro Lime Rice: Fluffy rice with bright lime and earthy cilantro enhances the tacos’ flavors and brings a delightful freshness.

  • Pico de Gallo: This vibrant salsa with ripe tomatoes, onions, and cilantro provides a tasty burst of flavor that pairs perfectly with your tacos.

  • Sour Cream and Salsa Duo: Dive into a classic combination where the tangy sour cream and zesty salsa add layers of creaminess and spice.

  • Corn on the Cob: Sweet, juicy corn brushed with lime and chili powder complements the tacos with its vibrant texture and flavor.

  • Chips and Queso Dip: Warm cheese dip served with crunchy tortilla chips creates a fun, sharable starter that promises satisfaction before dinner.

  • Lime Margaritas: This refreshing drink balances the spices in the tacos while adding a festive touch to your meal.

Make Ahead Options

These 30 Minute Mini Baked Chicken Tacos are perfect for busy home cooks looking to simplify meal prep! You can assemble the tacos up to 24 hours in advance, placing them in a single layer on a baking sheet; this helps prevent them from sticking together. Cover the sheet tightly with plastic wrap to maintain freshness and prevent browning. When you’re ready to bake, simply remove the plastic wrap and bake them directly from the refrigerator for 12-15 minutes at 425°F (220°C) until they are golden brown and crispy. This makes for a hassle-free dinner, allowing you to enjoy delicious, homemade chicken tacos without the last-minute rush!

Expert Tips for Mini Baked Chicken Tacos

  • Tortilla Prep: Ensure you soften the tortillas for easier folding—microwave them in a damp paper towel for 30 seconds before filling.

  • Avoid Overfilling: Don’t stuff the tacos too full; about ¼ cup of filling keeps them from bursting and helps maintain that perfect crispy texture.

  • Baking Space: Make sure the tacos are placed with space on the baking sheet. This allows hot air to circulate for even cooking and optimum crispiness.

  • Serve Fresh: For the best experience, serve the tacos immediately after baking. They’re at their crispiest and most delicious right out of the oven.

  • Leftover Storage: If you have leftovers, wrap them in foil and refrigerate. To reheat, bake in the oven at 350°F (175°C) for about 10 minutes to regain that delightful crunch.

With these tips, your 30 Minute Mini Baked Chicken Tacos will shine at the dinner table!

30 Minute Mini Baked Chicken Tacos Recipe FAQs

What type of shredded chicken should I use?
Absolutely! For convenience and flavor, I recommend using rotisserie chicken. It saves time and adds a wonderful richness to your tacos. If you prefer, you can also cook and shred your own chicken breast, just ensure it’s seasoned well to match the flavor profile.

How should I store these mini baked chicken tacos?
Store any leftover tacos in an airtight container or tightly wrapped in foil in the fridge for up to 2-3 days. This way, you can enjoy them later without losing their deliciousness! Just remember, they’re best enjoyed fresh for that crispy texture!

Can I freeze the mini baked chicken tacos?
These mini tacos unfortunately don’t freeze well due to their chicken filling. However, you can assemble them ahead of time—simply refrigerate the formed tacos and bake them fresh just before serving. This will keep them crispy and full of flavor!

What if my tortillas keep ripping when I fold them?
Very valid concern! If your tortillas are ripping, they’re likely too stiff. I recommend softening them in a damp paper towel in the microwave for about 30 seconds before filling. This step will make them pliable, ensuring a perfect fold without any tears.

Is this recipe suitable for people with dietary restrictions?
Great question! If you have dietary considerations, consider using low-fat Greek yogurt instead of sour cream to cut calories. For gluten-free options, ensure you use gluten-free corn tortillas. Always double-check for allergens in pre-packaged ingredients, like the shredded cheese and green chiles.

How can I spice up the flavor of these mini tacos?
For an extra kick, you can mix diced jalapeños into the filling before baking! If you’re a fan of heat, you could also serve them with a spicy salsa or top them with freshly chopped cilantro for added freshness and vibrancy. The more the merrier when it comes to flavor!

undefined

30 Minute Mini Baked Chicken Tacos for a Flavorful Feast

Quick and easy mini baked chicken tacos that satisfy your cravings in just 30 minutes, perfect for family dinners.
Prep Time 10 minutes
Cook Time 15 minutes
Total Time 25 minutes
Servings: 4 tacos
Course: Dinner
Cuisine: Mexican
Calories: 250

Ingredients
  

For the Filling
  • 3 cups Cooked Shredded Chicken Rotisserie chicken is recommended.
  • 1 tablespoon Chili Powder Adds heat.
  • 1 teaspoon Paprika Smoked paprika brings a smoky touch.
  • 1 teaspoon Garlic Powder
  • 1 teaspoon Onion Powder
  • 1 teaspoon Ground Cumin
  • 1 teaspoon Oregano
  • 1 teaspoon Kosher Salt
  • 1 cup Chopped Green Chiles Fresh or canned.
  • 1 cup Sour Cream Greek yogurt is a great low-fat swap.
  • 1 cup Monterey Jack Cheese Can substitute with cheddar.
For the Tacos
  • 10 pieces Corn Tortillas Heating them beforehand makes them pliable.
  • 2 tablespoons Olive Oil For brushing tacos.

Equipment

  • Oven
  • Mixing Bowl
  • Baking Sheet

Method
 

Step-by-Step Instructions
  1. Preheat your oven to 425°F (220°C) and prepare your baking sheets by spraying them lightly with olive oil.
  2. In a large mixing bowl, combine the cooked shredded chicken with chili powder, paprika, garlic powder, onion powder, ground cumin, oregano, and kosher salt.
  3. Fold in the chopped green chiles, sour cream, and one cup of shredded Monterey Jack cheese into the chicken mixture.
  4. Place about a quarter cup of the chicken filling on one side of each tortilla and top with an additional tablespoon of cheese.
  5. Gently fold the tortilla over the filling and brush both sides with olive oil.
  6. Arrange your filled and brushed tacos on the prepared baking sheets.
  7. Bake for 12-15 minutes until golden brown and crisp along the edges.
  8. Remove from the oven and let cool for a few minutes before serving.

Nutrition

Serving: 1tacoCalories: 250kcalCarbohydrates: 20gProtein: 15gFat: 12gSaturated Fat: 5gPolyunsaturated Fat: 1gMonounsaturated Fat: 2gCholesterol: 40mgSodium: 600mgPotassium: 200mgFiber: 2gSugar: 1gVitamin A: 400IUVitamin C: 2mgCalcium: 150mgIron: 1mg

Notes

For best results, serve tacos immediately after baking for maximum crispiness.

Tried this recipe?

Let us know how it was!

Creamy Leftover Ham Noodle Casserole for Cozy Nights

As the aroma of baked pasta wafts through the kitchen, I can’t help but feel a surge of nostalgia for family gatherings filled with laughter and warmth. This Creamy Leftover Ham Noodle Casserole takes those cherished moments and puts them right on your dinner table. Packed with hearty chunks of leftover ham, this dish is an ideal way to transform your holiday remnants into a creamy, family-friendly meal that everyone will adore. Not only is it an easy one-dish wonder that requires minimal prep, but it’s also perfect for accommodating various dietary preferences with just a few simple twists—think roasted veggies or different cheeses! Are you ready to make your leftovers the star of the show? Let’s dive into this comforting casserole that will surely bring smiles around your table!

Why is this casserole a must-try?

Comforting, creamy goodness: The blend of smooth cheeses and rich cream of soup creates a nostalgic, heartwarming flavor profile that everyone craves.
Easy prep: With minimal cooking skills required, this recipe is perfect for busy weeknights or a cozy weekend dinner. Just throw everything together and let the oven do the magic!
Versatile: Feel free to swap the ham for chicken or add your favorite veggies to customize the dish to your family’s liking.
Meal prep friendly: Make this casserole ahead of time and refrigerate or freeze it. The flavors will deepen overnight, making the leftovers even more delicious!
Crowd pleaser: Perfectly suited for family gatherings, it’s sure to impress both kids and adults alike, making it a go-to recipe for any occasion!

Creamy Leftover Ham Noodle Casserole Ingredients

For the Casserole Base

  • Egg Noodles – Provides a sturdy base; cook slightly underdone to prevent mushiness.
  • Leftover Ham – Adds hearty protein and rich flavor; any type works except for thin deli slices.
  • Cream of Soup – Acts as a creamy binder; feel free to choose your favorite variation of soup.
  • Sour Cream – Contributes necessary richness; swap with Greek yogurt for a lighter touch.
  • Milk – Helps achieve the desired creamy consistency; whole milk is ideal, while lower-fat options may alter the texture.

For the Cheesy Layer

  • Cheese – Adds intense flavor and creaminess; mix 1.5 cups into the casserole and reserve 0.5 cups for topping for that perfect finish.

For the Topping

  • Butter – Used for breadcrumb richness, ensuring a crunchy topping.
  • Breadcrumbs – Provides texture; use Panko for extra crispiness to delight your taste buds.

Optional Add-ins

  • Frozen Peas – Offers a pop of color and nutrition; substitute with your preferred frozen vegetable if desired.
  • Seasonings (Salt, Pepper, etc.) – Enhances flavor; adjust based on preference and taste.

This Creamy Leftover Ham Noodle Casserole comes together beautifully and allows you to elevate leftover ham into a star-studded dish at your dinner table!

Step‑by‑Step Instructions for Creamy Leftover Ham Noodle Casserole

Step 1: Preheat and Prepare
Begin by preheating your oven to 375°F (190°C). While the oven is warming up, take a 9×13 inch baking dish and generously spray it with non-stick cooking spray to prevent sticking. This will set the stage for an easy cleanup and a beautifully cooked Creamy Leftover Ham Noodle Casserole.

Step 2: Cook the Noodles
Bring a large pot of salted water to a boil and add your egg noodles. Cook the noodles for 1-2 minutes less than the package instructions indicate, ensuring they are slightly underdone, as they will finish cooking in the oven. Once cooked, drain the noodles and set them aside to cool slightly while you prepare the sauce.

Step 3: Combine Sauce Ingredients
In a mixing bowl, combine the cream of soup, sour cream, and milk, whisking until smooth. This creamy mixture will bind everything together in your leftover ham noodle casserole. Add in your favorite seasonings, such as salt and pepper, to taste, and mix until well incorporated, creating a rich, flavorful sauce to enhance the dish.

Step 4: Mix in Ham and Cheese
Fold the diced leftover ham and 1.5 cups of cheese into the sauce mixture, followed by the cooked egg noodles. Use a spatula to gently combine everything, ensuring the noodles and ham are evenly coated in the creamy sauce. This step is essential for creating a harmonious blend of flavors throughout your casserole.

Step 5: Transfer to Baking Dish
Pour the ham and noodle mixture into the prepared baking dish, spreading it out evenly. Make sure every corner is filled with that delicious blend of creamy goodness and hearty ham. This will be the base of your Creamy Leftover Ham Noodle Casserole, ready to bake to perfection.

Step 6: Bake Covered
Cover the dish tightly with aluminum foil to retain the moisture and bake in the preheated oven for 30 minutes. This step ensures your casserole cooks evenly and develops those comforting flavors without drying out. As it bakes, the wonderful aroma will fill your kitchen!

Step 7: Add Topping and Finish Baking
After 30 minutes, remove the foil and sprinkle the remaining 0.5 cups of cheese over the top of the casserole. Return it to the oven for an additional 5 minutes, allowing the cheese to melt and become bubbly. This final touch creates a beautifully cheesy crust, making your Creamy Leftover Ham Noodle Casserole irresistibly inviting.

Step 8: Cool Before Serving
Once baked, take the casserole out of the oven and let it cool for about 10-15 minutes. This resting time allows the flavors to meld and helps the casserole set, making it easier to serve. Enjoy the delicious results of your labor, perfect for a cozy family dinner!

Expert Tips for Creamy Leftover Ham Noodle Casserole

  • Noodle Perfection: Avoid overcooking the egg noodles initially. They will continue to cook in the oven, ensuring they remain al dente in the final dish.

  • Smooth Sauce: Thoroughly mix the cream of soup, sour cream, and milk to prevent any lumps. An even consistency is key for a creamy leftover ham noodle casserole.

  • Resting Time: Allow the casserole to sit for 10-15 minutes after baking. This helps it set, making it easier to serve and enhancing the overall texture.

  • Final Cheese Layer: Sprinkle the remaining cheese on top during the last 5 minutes of baking. This gives a beautifully melted and bubbly finish that adds to the dish’s deliciousness.

  • Flavor Enhancement: Experiment with different seasonings to personalize your casserole. A touch of garlic powder or Italian herbs can elevate the creamy leftover ham noodle casserole even further!

What to Serve with Creamy Leftover Ham Noodle Casserole

As you prepare to dish out this comforting casserole, consider pairing it with delightful sides and drinks that will round out your meal beautifully.

  • Steamed Broccoli: Adds a vibrant green color and nutritional boost, perfectly balancing the rich flavors of the casserole. The slight crunch complements the creamy texture beautifully.

  • Garlic Bread: A warm and crusty side that’s perfect for scooping up the cheesy goodness, enhancing the overall comfort food experience with its buttery flavor.

  • Garden Salad: Fresh mixed greens and crunchy veggies provide a refreshing contrast to the hearty casserole, creating a lovely balance of flavors and textures on your plate.

  • Sweet Corn: The natural sweetness adds another layer of flavor, making it a great addition alongside the savory casserole. Plus, it’s a kid-friendly favorite!

  • Roasted Brussels Sprouts: Their crispy edges bring a delightful texture and earthy flavor, creating a delicious contrast to the creamy richness of the dish.

  • Red Wine: A light-bodied red like Pinot Noir pairs well, cutting through the richness and enhancing the dish’s comforting flavors.

  • Apple Crisp: For dessert, this warm, sweet treat offers a cozy ending to your meal, evoking cherished memories of family gatherings and holiday festivities.

Each of these pairing suggestions brings out the best in your Creamy Leftover Ham Noodle Casserole, helping to create a delightful dining experience everyone will savor!

Make Ahead Options

These Creamy Leftover Ham Noodle Casserole is perfect for those busy weeknights! You can prepare the entire casserole up to 24 hours ahead of time. Simply follow the instructions up until the point of baking, then cover it tightly with aluminum foil and refrigerate. This will allow the flavors to meld beautifully. When you’re ready to serve, bake it straight from the fridge, adding an extra 10-15 minutes to the cooking time. For those who like to plan even further ahead, you can also freeze it for up to 3 months in an airtight container. Just be aware that the noodles may be a bit softer when reheated, but it will still be just as delicious! Enjoy the time-saving benefits while treating your family to a comforting meal!

How to Store and Freeze Creamy Leftover Ham Noodle Casserole

  • Fridge: Store any leftovers in an airtight container for up to 4 days. The flavors deepen overnight, enhancing the taste of your creamy leftover ham noodle casserole.
  • Freezer: Freeze portions in airtight containers or freezer bags for up to 3 months. Expect slightly softer noodles upon reheating, but the flavors will remain delightful!
  • Reheating: Reheat in the microwave for 2-3 minutes or bake at 350°F (175°C) for about 20 minutes. Add a splash of milk to maintain creaminess if desired.
  • Make Ahead: Prepare the casserole ahead of time and refrigerate before baking. Just heat it up when ready to enjoy for an easy weeknight meal!

Variations & Substitutions

Feel free to mix things up and tailor this casserole to your family’s taste preferences—let your creativity flow!

  • Chicken Swap: Replace leftover ham with cooked chicken or turkey for a delightful twist. It’s a fantastic way to utilize other holiday leftovers!
  • Veggie Boost: Add in chopped carrots, bell peppers, or broccoli to increase the nutritional value and add a burst of color.
  • Cheese Variety: Experiment with different cheese types like sharp cheddar or creamy mozzarella for different flavor profiles. Each cheese brings its own unique richness!
  • Dairy-Free: Use coconut milk and a dairy-free cream of soup, along with a vegan cheese option, for a delicious plant-based version that everyone can enjoy.
  • Spicy Kick: For those who enjoy heat, incorporate diced jalapeños or a dash of hot sauce to elevate the flavor.
  • Herb Infusion: Enhance the dish’s aroma and taste by adding fresh herbs, such as thyme or parsley, either in the mix or as a garnish before serving.
  • Noodle Choices: To switch up the texture, try using gluten-free noodles or spiralized zucchini for a lighter take on this classic dish. Either option can be a refreshing change!

The versatility of this casserole allows you to cater to different dietary needs while still keeping that heartwarming comfort intact. Whether you lean into a different protein or play with flavors, the possibilities are endless!

Creamy Leftover Ham Noodle Casserole Recipe FAQs

What type of ham is best to use in this casserole?
Absolutely! The best choice for this casserole is any leftover ham, such as honey-baked or smoked. Aim to avoid thin deli slices, as they don’t hold their texture when mixed in. The heartiness of cooked ham creates a delicious flavor and chewy texture in every bite.

How should I store leftover casserole?
You can store any leftover creamy leftover ham noodle casserole in an airtight container in the fridge for up to 4 days. As the days pass, you’ll find that the flavors deepen, making it an even tastier treat to revisit!

Can this casserole be frozen?
Yes, you can freeze this casserole! To do this, portion it into airtight containers or freezer bags and store it for up to 3 months. Upon reheating, expect slightly softer noodles, but the overall flavors will still shine through.

What’s the best way to reheat the casserole?
Reheat your casserole in the microwave for 2-3 minutes or bake it in the oven at 350°F (175°C) for about 20 minutes. If you find it’s lacking creaminess during reheating, simply add a splash of milk to restore that delightful texture!

Are there any dietary considerations I should be aware of?
Great question! If you have specific allergies or dietary preferences, check the labels on your cream of soup and sour cream, as these can contain common allergens like dairy. For a lighter option, Greek yogurt makes a perfect substitute that’s often well-tolerated. You can also add your choice of frozen or fresh vegetables to suit dietary needs.

What can I do if my casserole seems too dry after baking?
If your casserole ends up a bit dry, don’t worry! Simply sprinkle some milk over the top before covering it with foil for reheating. This will help reintroduce moisture and create a creamy consistency that makes the dish comforting and delicious once more.

undefined

Creamy Leftover Ham Noodle Casserole for Cozy Nights

Transform your holiday remnants into a creamy, family-friendly meal with this leftover ham noodle casserole.
Prep Time 15 minutes
Cook Time 35 minutes
Cooling Time 15 minutes
Total Time 1 hour 5 minutes
Servings: 6 servings
Course: Casserole
Cuisine: American
Calories: 450

Ingredients
  

Casserole Base
  • 8 ounces egg noodles Cook slightly underdone
  • 2 cups leftover ham Any type except thin deli slices
  • 1 can cream of soup Choose your favorite variation
  • 1 cup sour cream Can swap with Greek yogurt
  • 1 cup milk Whole milk is ideal
Cheesy Layer
  • 2 cups cheese 1.5 cups mixed in, 0.5 cups reserved for topping
Topping
  • 2 tablespoons butter For breadcrumb richness
  • 1 cup breadcrumbs Panko for extra crispiness
Optional Add-ins
  • 1 cup frozen peas Substitute with your preferred frozen vegetable
  • seasonings (Salt, Pepper, etc.) Adjust based on preference

Equipment

  • 9x13 inch baking dish
  • Large pot
  • Mixing Bowl
  • spatula
  • Aluminum foil

Method
 

Preparation
  1. Preheat your oven to 375°F (190°C) and spray a baking dish with non-stick cooking spray.
  2. Cook the egg noodles in boiling salted water for 1-2 minutes less than package instructions, then drain.
  3. In a bowl, whisk together cream of soup, sour cream, and milk until smooth; season to taste.
  4. Fold in diced ham and 1.5 cups of cheese, then add cooked noodles and combine gently.
  5. Pour mixture into the prepared baking dish and spread evenly.
  6. Cover with aluminum foil and bake for 30 minutes.
  7. Remove foil, sprinkle remaining cheese on top, and bake uncovered for another 5 minutes.
  8. Cool for 10-15 minutes before serving.

Nutrition

Serving: 1servingCalories: 450kcalCarbohydrates: 40gProtein: 25gFat: 25gSaturated Fat: 12gPolyunsaturated Fat: 1gMonounsaturated Fat: 10gCholesterol: 70mgSodium: 900mgPotassium: 500mgFiber: 2gSugar: 3gVitamin A: 500IUVitamin C: 2mgCalcium: 300mgIron: 2mg

Notes

This casserole can be prepped ahead and stored in the refrigerator before baking.

Tried this recipe?

Let us know how it was!

Cheesy French Dip Tortilla Roll Ups for Ultimate Comfort

As the aroma of sizzling roast beef fills the kitchen, I can’t help but feel a wave of nostalgia wash over me. Those comforting evenings spent with family and friends, sharing laughter and good food, are some of my sweetest memories. Enter the Quick and Cheesy French Dip Tortilla Roll Ups—a delightful blend of everything you love about a classic French dip sandwich, reimagined as a quick, handheld treat. These savory roll-ups come together in just 25 minutes, making them an ideal choice for busy weeknights or casual get-togethers. With ooey-gooey mozzarella or provolone and the option to customize according to your taste, these are not just delicious but also low lactose and oh-so-easy to whip up. Ready to take your taste buds on a nostalgic journey? Let’s dive into this irresistible recipe!

Why Are These Roll Ups So Irresistible?

Quick and Easy: In just 25 minutes, you can have a delicious meal ready, perfect for those busy nights.
Customizable Flavors: Feel free to swap in your favorite cheese or add a kick with jalapeños for a personal touch!
Crowd Pleaser: Whether it’s a family dinner or game day, these roll-ups will surely impress everyone at the table.
Perfect Snack: Great for parties or casual gatherings, they’re handheld and easy to share. You might also enjoy our Savory Snack Ideas for more inspiration!
Comfort Food Vibes: These roll-ups capture the comforting essence of a French dip sandwich, making each bite a nostalgic delight.

Indulge in the crispy, gooey goodness that will leave you craving more!

Cheesy French Dip Tortilla Roll Ups Ingredients

Get ready to make these delicious roll-ups with the perfect ingredients!

For the Roll Ups

  • Roast Beef – Savory, juicy heart of the dish; use deli-style or leftover roast for convenience.
  • Shredded Mozzarella or Provolone – Provides gooey texture; mozzarella gives stretch, while provolone adds flavor.
  • Flour Tortillas – Forms the base; they are soft yet sturdy enough to hold the fillings without falling apart.
  • Melted Butter – Creates a golden, crispy exterior when brushed on the tortillas.
  • Garlic Powder – Adds a warm, aromatic depth to enhance the flavor profile.
  • Onion Powder – Essential for layering in savory goodness.
  • Dried Parsley – Offers a pop of color and a gentle herbal note to brighten the dish.

For the Au Jus

  • Beef Broth – The rich liquid base adds depth and richness for dipping.
  • Worcestershire Sauce – Enhances umami flavors, making the dipping sauce more complex.
  • Soy Sauce – Adds a savory kick to the au jus mix.
  • Garlic Powder and Onion Powder – Bolstering the flavors of the dipping sauce, making it even more delicious.
  • Salt & Pepper – Essential for balancing and seasoning to taste.

Enjoy crafting these Cheesy French Dip Tortilla Roll Ups that are perfect for a cozy meal or quick snack!

Step‑by‑Step Instructions for Quick and Cheesy French Dip Tortilla Roll Ups

Step 1: Preheat the Oven
Begin by preheating your oven to 375°F (190°C). While the oven heats up, line a baking sheet with parchment paper to prevent sticking and ensure easy cleanup. This is an essential first step in making those crispy, golden Cheesy French Dip Tortilla Roll Ups that you and your family will love.

Step 2: Assemble the Tortillas
Lay out your flour tortillas on a clean surface, ensuring they’re flat. Place a generous amount of roast beef down the center of each tortilla, followed by a sprinkle of shredded mozzarella or provolone cheese. This combination sets the stage for mouthwatering roll-ups, so be sure not to skimp on the ingredients for maximum flavor.

Step 3: Roll Up
Carefully fold the sides of each tortilla slightly inward, then roll them up tightly from the bottom to the top. This will secure the filling inside, ensuring your Cheesy French Dip Tortilla Roll Ups hold together beautifully during baking. Aim for a snug roll to keep the melted cheese and savory beef inside.

Step 4: Brush with Butter
Melt some butter in a small bowl and lightly brush it over each tortilla roll-up. Sprinkle garlic powder, onion powder, and dried parsley generously over the tops to add flavor and create an enticing golden crust. This step is crucial to ensure that your roll-ups have a delightful, crispy exterior.

Step 5: Bake the Roll Ups
Place the prepared roll-ups seam-side down on the lined baking sheet. Bake in the preheated oven for 12–15 minutes, or until the tortillas are golden brown and the cheese inside is bubbling. Keep an eye on them during the last few minutes to achieve that perfect crispy finish that’s so satisfying in these Cheesy French Dip Tortilla Roll Ups.

Step 6: Prepare the Au Jus
While the roll-ups are baking, heat up a saucepan over medium heat to prepare the au jus. Combine beef broth, Worcestershire sauce, soy sauce, garlic powder, onion powder, and a pinch of salt and pepper. Let it simmer gently for 5–7 minutes, stirring occasionally, until the flavors meld and the sauce is aromatic and ready for dipping.

Step 7: Serve and Enjoy
Once your Cheesy French Dip Tortilla Roll Ups are golden and crispy, remove them from the oven and let them cool for a minute. Cut each roll-up in half for easier dipping and serve them warm with the prepared au jus on the side. The combination of savory beef and melty cheese, paired with rich dipping sauce, will be a hit at your table!

Customizing Cheesy French Dip Tortilla Roll Ups

Feel free to explore your culinary creativity with these delightful roll-ups, turning each bite into a personal masterpiece!

  • Spicy Kick: Add sliced jalapeños or a drizzle of your favorite hot sauce inside for extra heat. A hint of spice can elevate the comforting flavors beautifully.
  • Cheese Swap: Try cheddar, Swiss, or pepper jack in place of provolone for a different flavor profile. Each cheese can bring a unique twist to the roll-ups!
  • Low-Carb Version: Use low-carb tortillas or even lettuce wraps to reduce carbs while still enjoying this tasty treat. This is perfect for those looking to cut back!
  • Veggie Delight: Incorporate sautéed bell peppers and onions for sweet and savory flavors. These veggies will add great texture and a delicious layer to your roll-ups.
  • Garlic Lovers: Mix in roasted garlic with the beef for a richer, deeper flavor. It brings a sweet, caramelized touch that’s oh-so-heavenly!
  • Herb Infusion: Experiment with fresh herbs like basil or cilantro sprinkled inside for a fresher taste. A little greenery can brighten up these roll-ups wonderfully!
  • Sweet Sauce: Drizzle barbecue sauce along with the au jus for a tangy-sweet depth that pairs wonderfully with savory beef. It’s a surprising yet delightful combination!
  • Extra Crispy: After baking, spray the roll-ups lightly with olive oil and broil for a couple of minutes for an ultra-crispy finish. This step adds an irresistible crunch that’s hard to beat!

Embrace these variations and let your imagination run wild! If you’re looking for more delicious ideas, be sure to check out our Savory Snack Ideas or explore ways to enhance flavor in your cooking journey.

What to Serve with Quick and Cheesy French Dip Tortilla Roll Ups

The joy of sharing a meal is magnified when you find the perfect accompaniments to vibrant flavors and cozy textures.

  • Crispy Sweet Potato Fries: Their natural sweetness balances the savory roll-ups, creating a harmonious flavor blend.

  • Garlic Parmesan Roasted Vegetables: A crunchy mix of veggies tossed in garlic and parmesan adds a nutritious contrast, enhancing the meal’s overall appeal.

Warm, roasted vegetables provide not only a delightful taste but also a colorful presentation that brightens your table.

  • Homemade French Onion Soup: With its rich, caramelized flavor and cheesy top, this classic dish echoes the essence of the roll-ups, making it a comforting duo.

  • Refreshing Garden Salad: A light mix of greens, cherry tomatoes, and a zesty dressing adds freshness that complements the warm, hearty flavors of the roll-ups.

  • Cooling Iced Tea: The crisp, refreshing notes of iced tea cleanse the palate, allowing you to savor each comforting bite of the roll-ups.

  • Light Red Wine: A fruity Merlot or smooth Pinot Noir enhances the rich umami of the roast beef, rounding out the meal beautifully.

  • Chocolate Chip Cookies: Sweet treats like these bring a nostalgic finish to the dining experience, continuing the comfort theme right through dessert.

Expert Tips for Cheesy French Dip Tortilla Roll Ups

  • Slicing Technique: Use thinly sliced roast beef to ensure easy rolling and even heating. This helps keep the roll-ups intact.
  • Avoid Overstuffing: Don’t add too much filling or your tortillas may tear during rolling or baking. Keep it simple for the best results.
  • Seam Sealing: Seal the seam with a sprinkle of cheese or a dab of butter to prevent unrolling during baking.
  • Easy Cleanup: Lining the baking tray with parchment paper not only prevents sticking but also makes cleanup a breeze after enjoying these delicious roll-ups.
  • Temp Check: Keep an eye on the oven towards the end of baking. You want a golden brown finish, so check frequently to avoid overbaking your cheesy roll-ups.

Make Ahead Options

These Quick and Cheesy French Dip Tortilla Roll Ups are a fantastic option for busy home cooks looking to streamline their meal prep. You can assemble the roll-ups and refrigerate them in an airtight container for up to 3 days. To maintain their crispy texture and gooey filling, simply brush them with melted butter before storing. When you’re ready to serve, bake them straight from the fridge for 12–15 minutes at 375°F (190°C), ensuring they’re golden brown and melty. For longer storage, you can freeze them after baking; just wrap them individually and they’ll stay fresh for up to 1 month. Enjoy quick weeknight meals with comforting flavors, all while saving precious time!

How to Store and Freeze French Dip Tortilla Roll Ups

  • Room Temperature: These roll-ups are best enjoyed fresh; however, if needed, they can sit out for no more than 2 hours before they should be refrigerated.

  • Fridge: Store leftover roll-ups in an airtight container for up to 3 days. Reheat in the oven at 350°F (175°C) for extra crispiness, keeping them wrapped in foil if needed.

  • Freezer: To freeze, wrap each roll-up tightly in plastic wrap or foil and store in an airtight container for up to 1 month. Thaw overnight in the fridge before reheating.

  • Reheating: For the best texture, reheat frozen roll-ups in the oven at 375°F (190°C) for about 15–20 minutes, or until heated through and the outside is crispy again. Enjoy your French Dip Tortilla Roll Ups!

French Dip Tortilla Roll Ups Recipe FAQs

What type of roast beef should I use?
Absolutely! For the best flavor and ease, I recommend using thinly sliced deli-style roast beef or leftover roast. This ensures your roll-ups are juicy and easy to roll, giving you that savory bite you’re aiming for.

How should I store leftover roll-ups?
I often make these roll-ups for parties, and if you have leftovers, simply store them in an airtight container in the fridge for up to 3 days. When you’re ready to enjoy them again, pop them in the oven at 350°F (175°C) to reheat for that crispy texture.

Can I freeze French Dip Tortilla Roll Ups?
Yes, you can! To freeze, wrap each roll-up individually in plastic wrap or foil, and then place them in an airtight container. They’ll keep well in the freezer for up to 1 month. When you’re ready to savor them, thaw overnight in the fridge and reheat in a preheated oven at 375°F (190°C) for 15–20 minutes until heated through.

What if my tortillas tear while rolling?
Oh no! If that happens, don’t worry. Make sure you’re using fresh, pliable tortillas. If they still tear, patch them up with a bit of cheese or extra filling at the seam to keep everything together. Also, try warming them slightly in the microwave before rolling; that helps soften them up!

Are these roll-ups suitable for those with lactose intolerance?
Yes, very! You can easily customize the cheese used in these roll-ups. For a low-lactose option, stick to mozzarella or choose lactose-free versions of your favorite cheeses. Just make sure to check the labels when shopping to ensure you’re choosing a suitable option.

How can I make the au jus even richer?
To elevate your au jus, consider adding a splash of red wine or a teaspoon of balsamic vinegar along with the basic ingredients. This will deepen the flavor and add a comforting complexity that pairs beautifully with the roll-ups. Enjoy experimenting!

undefined

Cheesy French Dip Tortilla Roll Ups for Ultimate Comfort

Quick and delightful Cheesy French Dip Tortilla Roll Ups that capture the essence of a classic French dip sandwich—perfect for a quick meal or snack.
Prep Time 10 minutes
Cook Time 15 minutes
Total Time 25 minutes
Servings: 4 roll ups
Course: Lunch
Cuisine: American
Calories: 320

Ingredients
  

For the Roll Ups
  • 8 ounces Roast Beef Deli-style or leftover for convenience
  • 1 cup Shredded Mozzarella or Provolone Use mozzarella for stretch, provolone for flavor
  • 4 Flour Tortillas Soft yet sturdy enough to hold fillings
  • 2 tablespoons Melted Butter For brushing on tortillas
  • 1 teaspoon Garlic Powder
  • 1 teaspoon Onion Powder
  • 1 tablespoon Dried Parsley For garnish
For the Au Jus
  • 1 cup Beef Broth
  • 1 tablespoon Worcestershire Sauce
  • 1 tablespoon Soy Sauce
  • 1 teaspoon Garlic Powder
  • 1 teaspoon Onion Powder
  • to taste Salt & Pepper For seasoning

Equipment

  • Oven
  • Baking Sheet
  • Saucepan

Method
 

Step‑by‑Step Instructions
  1. Preheat your oven to 375°F (190°C) and line a baking sheet with parchment paper.
  2. Lay out the flour tortillas and place roast beef and cheese down the center.
  3. Fold the sides inward and roll the tortillas up tightly.
  4. Brush melted butter over each roll-up and sprinkle with garlic powder, onion powder, and parsley.
  5. Place the roll-ups seam-side down on the baking sheet and bake for 12-15 minutes until golden brown.
  6. In a saucepan, combine beef broth, Worcestershire sauce, soy sauce, garlic powder, onion powder, salt and pepper, and let simmer for 5-7 minutes.
  7. Let the roll-ups cool, cut in half, and serve with the prepared au jus.

Nutrition

Serving: 1roll upCalories: 320kcalCarbohydrates: 25gProtein: 20gFat: 18gSaturated Fat: 10gPolyunsaturated Fat: 1gMonounsaturated Fat: 5gCholesterol: 60mgSodium: 800mgPotassium: 300mgFiber: 1gSugar: 1gVitamin A: 10IUCalcium: 15mgIron: 10mg

Notes

These roll-ups can be customized with different cheeses or added spices. Store leftovers in the fridge or freezer as indicated.

Tried this recipe?

Let us know how it was!

Stay Connected

Get recipes via email: