Get my cookbooks

Satisfy Mornings with a Hearty Tater Tot Breakfast Bowl

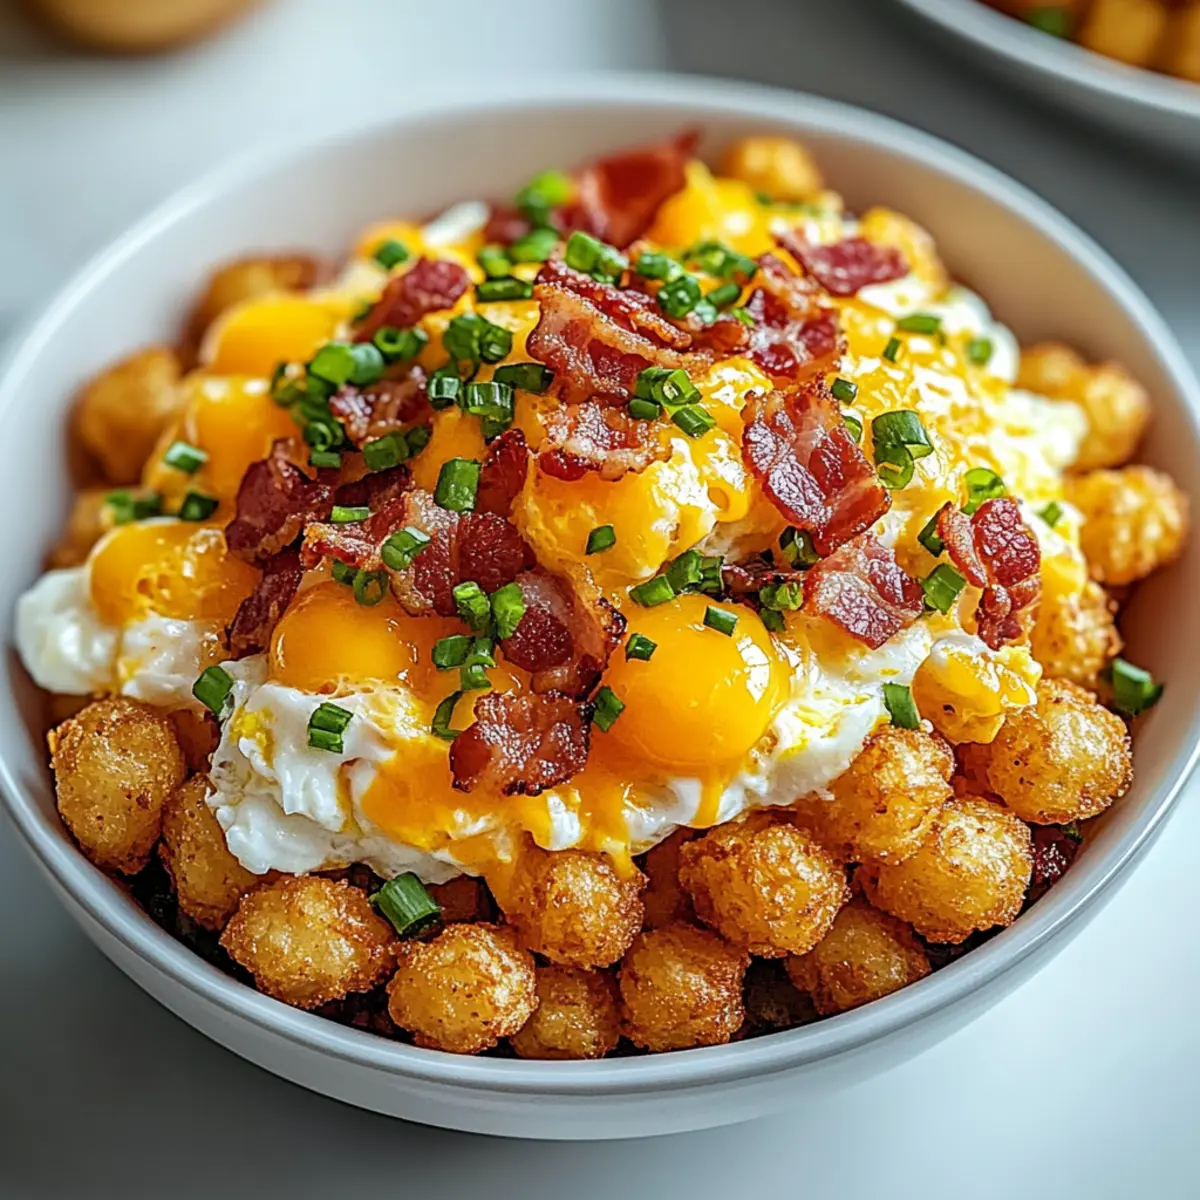
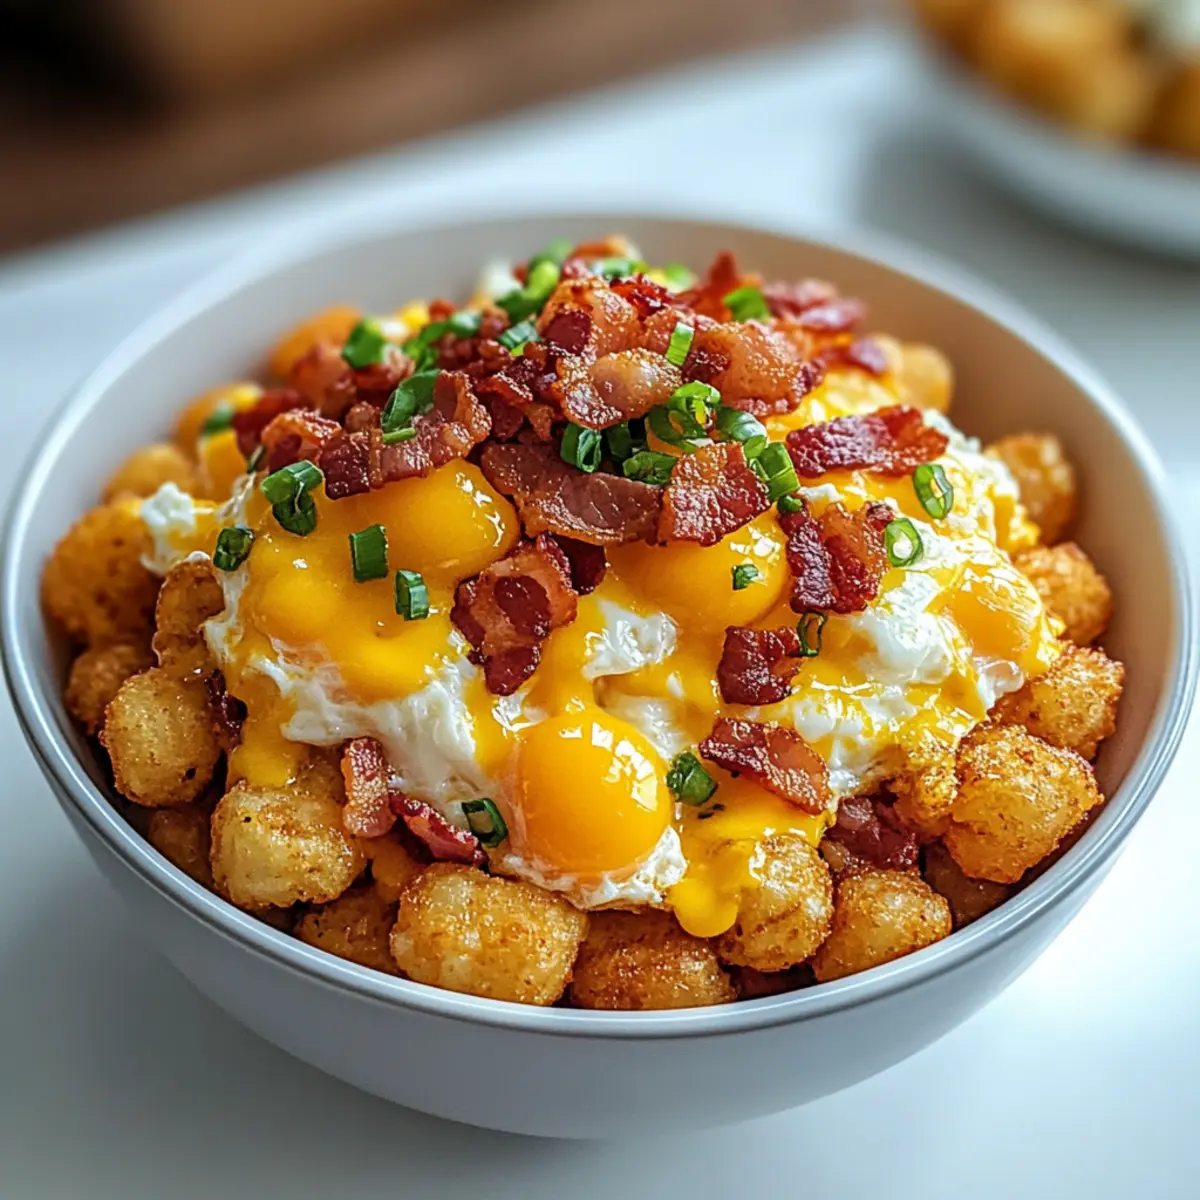
“Wake up to bliss with a bowl of comfort that’s as satisfying as a hug on a lazy morning! My Hearty Tater Tot Breakfast Bowl is a delightful medley of crispy tater tots, fluffy scrambled eggs, gooey cheese, and crunchy bacon, making it the ultimate breakfast indulgence. The best part? This dish is not just delicious but also quick to prepare, which means you can spend less time in the kitchen and more time enjoying brunch with loved ones. Plus, it’s fully customizable to suit your taste buds or dietary needs—add veggies for a healthy twist or swap in your favorite cheese for a unique kick. Ready to dive into the glorious layers of flavor? Let’s get cooking!”

Why is this breakfast bowl a must-try?

Comforting, Hearty Ingredients: This Tater Tot Breakfast Bowl combines crispy tater tots with fluffy scrambled eggs for the perfect meal that warms your soul.

Quick to Prepare: With minimal prep time, you’ll have a satisfying breakfast ready in no time—ideal for busy mornings or lazy brunches with friends.

Fully Customizable: Whether you want to add vibrant veggies or swap in your favorite cheese, this dish invites your creativity.

Crowd-Pleaser: It’s a surefire hit at gatherings or family breakfasts, reminiscent of casual comfort food like Shepherd’s Pie Soup.

Make-Ahead Friendly: Prepare components in advance and assemble just before serving for fresh, delicious bowls any day of the week!

Tater Tot Breakfast Bowl Ingredients

For the Base

  • Frozen Tater Tots – These provide the crispy foundation; use store-bought for maximum convenience.
  • Bacon – This crispy delight adds salty texture; feel free to replace it with turkey bacon or tempeh for a vegetarian twist.

For the Eggs

  • Eggs – They bring protein and creaminess to the bowl; substitute with egg whites for a lighter option.
  • Cheddar Cheese – Rich and melty, it enhances flavor; try mozzarella or pepper jack for a different touch.

For the Toppings

  • Green Onions – They add freshness and a mild onion flavor; chives can be used for a similar taste.
  • Hot Sauce (optional) – Drizzle for a spicy kick; avocado slices can also elevate the creaminess of the dish.

Step‑by‑Step Instructions for Tater Tot Breakfast Bowl

Step 1: Bake the Tater Tots
Preheat your oven to 425°F (220°C). Spread the frozen tater tots evenly on a baking sheet lined with parchment paper. Bake for 25–30 minutes until they are golden brown and crispy, flipping them halfway through for even cooking. You’ll know they’re done when they are irresistibly crunchy!

Step 2: Cook the Bacon
While the tater tots are baking, heat a skillet over medium heat. Add the bacon strips, cooking them for about 6–8 minutes until they become crispy and browned. Once cooked, transfer the bacon to a paper towel-lined plate to drain excess grease, leaving a few tablespoons of bacon drippings in the skillet for flavor.

Step 3: Scramble the Eggs
In the same skillet, reduce the heat to medium-low. Crack the eggs into a bowl, whisk them lightly with a splash of milk, salt, and pepper. Pour the mixture into the skillet, stirring gently for 3–5 minutes until the eggs are fluffy and slightly soft. Remove the skillet from the heat to prevent overcooking.

Step 4: Assemble the Bowl
Once the tater tots are baked to perfection, remove them from the oven. In a large serving bowl, layer the crispy tater tots as the base. Top them generously with the fluffy scrambled eggs, ensuring an even spread over the tots.

Step 5: Add Cheese and Bacon
While the eggs are still warm, sprinkle a heaping handful of cheddar cheese over the top, allowing it to melt. Crumble the crispy bacon over the cheese, adding a delightful crunch. The warm layers will create a lovely gooey texture.

Step 6: Finish with Green Onions
For a fresh finish, slice the green onions and sprinkle them over the assembly. They add a pop of color and flavor, enhancing the overall appeal of your Tater Tot Breakfast Bowl.

Step 7: Serve Immediately
It’s time to savor your creation! Serve the Tater Tot Breakfast Bowls immediately while they’re hot and the cheese is gooey. If desired, serve with a side of hot sauce or avocado slices for extra flavor and creaminess. Enjoy!

Tater Tot Breakfast Bowl Variations

Feel free to play with your Tater Tot Breakfast Bowl and make it uniquely yours—after all, a little culinary creativity goes a long way!

  • Vegetarian: Omit the bacon and replace it with a medley of sautéed bell peppers, spinach, or mushrooms. This adds color and extra nutrients for a fulfilling dish.
  • Dairy-Free: Swap out the cheese for a dairy-free alternative or nutritional yeast for a cheesy flavor without the milk. Even a drizzle of olive oil can enhance the taste beautifully.
  • Spicy: Stir in jalapeños or sprinkle crushed red pepper flakes into the scrambled eggs for an added kick. Spice lovers will appreciate this fiery twist!
  • Different Cheeses: Try swapping cheddar for gouda, feta, or pepper jack. Each cheese offers a distinct flavor that can dramatically transform your bowl.
  • Proteins Galore: Instead of bacon, opt for sausage or turkey bacon. If you’re in the mood for something different, crumbled tempeh or tofu makes a delightful vegetarian protein addition.
  • Breakfast Hash: Toss in cubed potatoes, sweet potatoes, or even hash browns while the tater tots bake. This adds a hearty element that complements the existing flavors beautifully.
  • Dressed Up: Consider topping with fresh avocado slices and a dollop of sour cream or Greek yogurt for creaminess that takes your breakfast to the next level!
  • Fresh Herbs: Enhance the flavor profile with fresh herbs like cilantro or parsley sprinkled on top. Freshness can elevate the entire dish, making it feel vibrant and delightful!

As you experiment, don’t forget to check out my Banana Blueberry Breakfast Cookies or the delicious Chicken Shawarma Bowl for more family-loved recipes to inspire your kitchen adventures!

Expert Tips for Tater Tot Breakfast Bowl

  • Perfectly Scrambled Eggs: Cook over medium-low heat and gently stir to avoid browning for a delightful texture in your Tater Tot Breakfast Bowl.

  • Crispy Tater Tots: Ensure you bake the tater tots until golden and crunchy, flipping them halfway through for even cooking and optimal crispiness.

  • Prep Ahead: Consider cooking components like tater tots, bacon, and eggs in advance. Store separately and assemble just before serving to maintain freshness.

  • Garnish Wisely: Use fresh green onions or even chives for a lovely pop of color and flavor; they elevate your Tater Tot Breakfast Bowl beautifully.

  • Personalize It: This dish is customizable! Add your favorite veggies or substitute cheeses to reflect your tastes and make it your own.

How to Store and Freeze Tater Tot Breakfast Bowl

Fridge: Store leftovers in an airtight container for up to 3 days. Separate the components to maintain the texture of the ingredients, especially the tater tots.

Freezer: For best results, freeze assembled bowls without toppings for up to 2 months. To reheat, thaw overnight in the fridge, then bake at 350°F (175°C) until heated through.

Reheating: Reheat individual servings in the microwave for 1–2 minutes or in the oven for 10–15 minutes. Add toppings like cheese or green onions just before serving for freshness.

Make-Ahead: Pre-cook each component—tater tots, bacon, and eggs. Store separately in the fridge for easy assembly and reheating on busy mornings, keeping your Tater Tot Breakfast Bowl deliciously warm.

What to Serve with Hearty Tater Tot Breakfast Bowl

Wake up your palate by pairing delightful sides that elevate your breakfast experience to new levels of comfort and joy!

  • Fresh Fruit Salad: The brightness of seasonal fruits adds a refreshing contrast to the warm, savory bowl; it’s the perfect palate cleanser.

  • Crispy Hash Browns: For those crispy-on-the-outside, tender-on-the-inside bites, hash browns offer a familiar breakfast note, enhancing the comfort factor of your hearty meal.

  • Avocado Slices: Creamy, rich avocado brings an indulgent twist; it balances the flavors while adding beautiful color and health benefits to your plate.

  • Breakfast Smoothie: A refreshing smoothie packed with spinach, banana, and yogurt provides a creamy complement to the hearty dish while boosting your nutrient intake for the day.

  • Savory Breakfast Sausages: These flavorful bites add a delightful richness, echoing the savory notes of bacon while offering an alternative protein option.

  • Herbed Cream Cheese Toast: Spread a sumptuous layer of herbed cream cheese on toasted bread to create a delightful crunch and add a silky contrast to the warm ingredients of the bowl.

Embrace the joy of a well-rounded breakfast by mixing and matching these delightful sides to create your perfect Tater Tot Breakfast Bowl experience.

Make Ahead Options

These Tater Tot Breakfast Bowls are perfect for meal prep enthusiasts! You can prepare the individual components in advance, saving you valuable time on busy mornings. Bake the tater tots up to 24 hours ahead and store them in an airtight container in the fridge for optimal crispiness. Cook the bacon and scramble the eggs, letting them cool, then refrigerate them separately for up to 3 days. When you’re ready to serve, simply reheat the tots in the oven for that crunch, warm the eggs and bacon in the microwave or skillet, and assemble your breakfast bowl. This way, you’ll enjoy delicious, hearty servings just as fresh as if made on the spot!

Tater Tot Breakfast Bowl Recipe FAQs

How do I choose the best frozen tater tots?
Absolutely! When selecting frozen tater tots, look for those that are a golden color without any dark spots. Choose a brand that has a reputation for crispiness, and try to pick ones with a short ingredient list for the best flavor. If you can, check reviews for the best recommendations!

How should I store leftover Tater Tot Breakfast Bowl?
For best results, store leftovers in an airtight container in the fridge for up to 3 days. I recommend separating the components, placing your tater tots in one container and scrambled eggs in another, to maintain their textures. This way, you’ll still enjoy the crispy bite of the tots when you reheat!

Can I freeze the Tater Tot Breakfast Bowl?
Very! To freeze, I suggest assembling the bowl without toppings (like cheese and green onions) and wrapping it tightly with plastic wrap or placing it in a freezer-safe container. It can last for up to 2 months. When you’re ready to enjoy, simply thaw it overnight in the fridge and reheat in the oven at 350°F (175°C) until warmed through.

Why are my scrambled eggs not fluffy in the Tater Tot Breakfast Bowl?
If your scrambled eggs turn out flat, it could be due to cooking them over too high heat. I recommend cooking over medium-low heat and stirring gently for 3-5 minutes. Adding a splash of milk or cream before cooking can also enhance fluffiness, making them light and airy.

Are there any dietary considerations for this recipe?
Yes, you can easily customize the Tater Tot Breakfast Bowl to suit different dietary needs! For a vegetarian version, simply omit the bacon and add more veggies like bell peppers or spinach. If allergies are a concern, you could use egg whites instead of whole eggs and check cheese packages for gluten or lactose-free options.

How do I reheat individual servings of the Tater Tot Breakfast Bowl?
To reheat, simply place an individual serving in the microwave for about 1-2 minutes or in the oven at 350°F (175°C) for 10-15 minutes until heated through. I recommend adding the toppings, like cheese and green onions, just before serving to keep them fresh and flavorful. Enjoy your delicious breakfast bowl!

Tater Tot Breakfast Bowl

Satisfy Mornings with a Hearty Tater Tot Breakfast Bowl

Wake up to bliss with a Tater Tot Breakfast Bowl, a delightful medley of crispy tater tots, fluffy scrambled eggs, gooey cheese, and crunchy bacon.
Prep Time 10 minutes
Cook Time 30 minutes
Total Time 40 minutes
Servings: 4 bowls
Course: Breakfast
Cuisine: American
Calories: 450

Ingredients
  

For the Base
  • 1 bag Frozen Tater Tots use store-bought for convenience
  • 6 slices Bacon can replace with turkey bacon or tempeh
For the Eggs
  • 4 large Eggs can substitute with egg whites
  • 1 cup Cheddar Cheese try mozzarella or pepper jack
For the Toppings
  • 2 stalks Green Onions chives can be used as an alternative
  • 1 bottle Hot Sauce optional, for a spicy kick

Equipment

  • Baking Sheet
  • Skillet
  • Mixing Bowl

Method
 

Bake the Tater Tots
  1. Preheat your oven to 425°F (220°C). Spread the frozen tater tots evenly on a baking sheet lined with parchment paper. Bake for 25–30 minutes until golden brown and crispy, flipping halfway through.
Cook the Bacon
  1. While the tater tots are baking, heat a skillet over medium heat. Add the bacon strips, cooking for 6–8 minutes until crispy. Transfer to a paper towel-lined plate.
Scramble the Eggs
  1. In the same skillet, reduce heat to medium-low. Whisk eggs with a splash of milk, salt, and pepper. Pour into skillet, stirring gently for 3–5 minutes until fluffy.
Assemble the Bowl
  1. Once baked, layer the crispy tater tots in a large serving bowl. Top with fluffy scrambled eggs.
Add Cheese and Bacon
  1. While the eggs are warm, sprinkle cheddar cheese over the top. Crumble crispy bacon on top.
Finish with Green Onions
  1. Slice green onions and sprinkle over the bowl.
Serve Immediately
  1. Serve the Tater Tot Breakfast Bowls while hot, optionally with hot sauce or avocado slices.

Nutrition

Serving: 1bowlCalories: 450kcalCarbohydrates: 40gProtein: 22gFat: 25gSaturated Fat: 10gPolyunsaturated Fat: 2gMonounsaturated Fat: 5gCholesterol: 200mgSodium: 800mgPotassium: 600mgFiber: 3gSugar: 1gVitamin A: 500IUVitamin C: 2mgCalcium: 300mgIron: 2mg

Notes

Customize your bowl with additional veggies or different cheeses to suit your taste!

Tried this recipe?

Let us know how it was!

Irresistible Potato, Egg, and Cheese Breakfast Tacos to Savor

The scent of toasted tortillas filled the air as I prepped my favorite breakfast dish, the Potato, Egg, and Cheese Breakfast Tacos. With a crisp outer layer and a tender, savory filling, these tacos redefine the morning rush, turning a quick meal into a delightful experience. What I love most about this recipe is its versatility; whether you’re feeding a crowd or savoring a quiet morning, these tacos are a fantastic, wallet-friendly way to start your day. Imagine whipping them up in under 30 minutes, leaving you time to sip your coffee and enjoy the moment. Plus, they are customizable, inviting you to jazz them up with your favorite toppings for a personal touch. Are you ready to spice up your breakfast routine? Let’s dive in!

Why Are These Tacos So Irresistible?

Satisfying and Quick: These Potato, Egg, and Cheese Breakfast Tacos are crafted to deliver a hearty meal without the fuss. Easy Customization: You can adapt the recipe tailored to your taste; throw in spinach, bell peppers, or your choice of cheese for added flair. Comfort Food: Imagine soft, fluffy fillings wrapped in crispy tortillas—every bite is a warm hug! Budget-Friendly: Utilizing simple ingredients makes these tacos easy on your wallet. Crowd-Pleaser: Whether you’re sharing with friends or enjoying solo, they’re sure to impress! Check out our Banana Blueberry Breakfast for more delicious morning ideas.

Potato, Egg, and Cheese Breakfast Tacos Ingredients

For the Filling
Potatoes – Provide heartiness and texture; you can substitute with sweet potatoes for a sweeter profile.
Eggs – Source of protein and creaminess; for a vegan option, use tofu or chickpea flour scramble.
Cheddar Cheese – Adds creaminess and flavor; substitute with mozzarella or a dairy-free cheese for dietary preferences.

For the Tortillas
Tortillas – Encase the filling, giving a base for the dish; corn or flour tortillas can be used, and use gluten-free options as needed.

For Seasoning
Salt & Pepper – Season to taste, enhancing all flavors; adjust based on dietary restrictions or preferences.

For the Spice
Hot Sauce or Jalapeños – Add spice and zest; omit for mild preferences or substitute with bell peppers for a sweeter heat.

Feel excited to whip up these Potato, Egg, and Cheese Breakfast Tacos that bring a satisfying start to any day!

Step‑by‑Step Instructions for Potato, Egg, and Cheese Breakfast Tacos

Step 1: Cook Potatoes
Begin by peeling and dicing about two medium potatoes into small cubes. Place them in a pot of salted water and bring it to a boil over high heat. Once boiling, reduce to medium heat and simmer for about 10-12 minutes, or until the potatoes are tender when pierced with a fork. Drain the potatoes thoroughly and set aside, ensuring they are dry to avoid a soggy filling.

Step 2: Scramble Eggs
In a non-stick skillet over low heat, add a splash of oil or a small pat of butter to ensure the eggs don’t stick. Crack in four large eggs and gently stir them with a spatula, allowing soft curds to form, which should take about 5-7 minutes. The eggs should look slightly runny; removing them from heat at this stage will ensure a creamy texture in your Potato, Egg, and Cheese Breakfast Tacos.

Step 3: Combine Filling
Once the eggs are ready, carefully add the cooked potatoes to the skillet and mix gently. Season the mixture with salt and pepper to taste, allowing the flavors to meld together for another minute or two on low heat. Be mindful not to over-stir, as you want to maintain the fluffy texture of the eggs within your filling.

Step 4: Prepare Tortillas
In a separate hot skillet, heat your tortillas, one at a time, over medium-high heat for about 30 seconds on each side. Watch for them to puff slightly and turn light golden brown, which indicates they’re perfectly crispy. This step adds a delightful crunch to your Potato, Egg, and Cheese Breakfast Tacos.

Step 5: Assemble Tacos
Lay each warmed tortilla flat and generously spoon the potato and egg mixture onto the center. Sprinkle a handful of shredded cheddar cheese on top while the filling is still warm, allowing it to melt slightly and create an ooey-gooey texture. Fold the tortillas over to encase the filling snugly.

Step 6: Add Toppings
Finally, customize your Potato, Egg, and Cheese Breakfast Tacos with all your favorite toppings; consider a drizzle of hot sauce, slices of jalapeños, or fresh herbs like cilantro for added flavor. Serve these warm, and watch everyone enjoy the delicious twist on breakfast!

Make Ahead Options

These Potato, Egg, and Cheese Breakfast Tacos are a fantastic choice for meal prepping! You can cook the potatoes and scramble the eggs up to 3 days in advance, allowing you to save precious morning time. Simply store the potato and egg mixture in an airtight container in the refrigerator to maintain freshness. When you’re ready to assemble your tacos, reheat the filling in a skillet until warmed through, and then heat the tortillas as directed. This method ensures that every bite remains just as delicious as when you first made them, allowing you to enjoy a quick, satisfying breakfast with minimal effort!

How to Store and Freeze Potato, Egg, and Cheese Breakfast Tacos

Fridge: Store leftover Potato, Egg, and Cheese Breakfast Tacos in an airtight container in the fridge for up to 3 days to maintain freshness.

Freezer: For longer storage, wrap the tacos tightly in foil or plastic wrap and freeze for up to 2 months. This keeps them flavorful and prevents freezer burn.

Reheating: When ready to enjoy, reheat frozen tacos in the oven at 350°F (175°C) for about 15-20 minutes or in the microwave for 1-2 minutes until heated through.

Preparation Tip: If meal prepping, assemble the filling separately and store it; warm it up before filling your tortillas for a quick and satisfying breakfast!

Expert Tips for Potato, Egg, and Cheese Breakfast Tacos

  • Perfect Potatoes: Make sure to cook the potatoes until fully tender before draining them; undercooked potatoes can ruin the filling’s texture.

  • Egg Royale: For the best scrambled eggs, resist the urge to over-stir; cooking them gently ensures a soft, creamy result in your Potato, Egg, and Cheese Breakfast Tacos.

  • Tortilla Crunch: Use a hot skillet to crisp the tortillas for only 30 seconds per side; this makes them golden without burning while adding great texture.

  • Flavor Boost: Don’t skip the seasoning! A pinch of salt and pepper enhances the overall flavor, making your tacos irresistibly tasty.

  • Prep Ahead: If making for busy mornings, assemble the filling in advance and store it in the fridge; reheat and fill tortillas just before serving for a quick breakfast.

Potato, Egg, and Cheese Breakfast Tacos Variations

Feel free to indulge in your creativity and make these Potato, Egg, and Cheese Breakfast Tacos uniquely yours with a variety of delightful twists!

  • Sweet Potatoes: Substitute regular potatoes with sweet potatoes for a hint of natural sweetness and extra nutrients.

  • Vegan Scramble: Replace eggs with a tofu or chickpea flour scramble for a plant-based alternative that’s just as satisfying.

  • Cheese Swap: Use mozzarella or a tangy goat cheese instead of cheddar for a different flavor profile that elevates each bite.

  • Herb Infusion: Add fresh herbs like cilantro or dill for bright notes that bring a refreshing touch to your tacos.

  • Spicy Surge: Kick up the heat by adding diced jalapeños or a splash of sriracha to the filling for a bold flavor experience.

  • Veggie Medley: Toss in sautéed spinach, mushrooms, or bell peppers for a nutrient boost that complements the creamy filling beautifully.

  • Crunchy Toppings: Top with crispy bacon bits or crumbled tortilla chips for an irresistible textural contrast in your breakfast tacos.

  • Salsa Fiesta: Serve these tacos with a side of fresh salsa or guacamole; it enhances the overall experience, making each bite even more delicious!

Explore these variations to find your favorite — your mornings will never be the same! And if you’re looking for more tasty ideas, our Croissant Breakfast Sandwich is worth a try.

What to Serve with Potato, Egg, and Cheese Breakfast Tacos

Start your day off right by creating a delightful breakfast spread that enhances the flavors of your tacos.

  • Fresh Salsa: A zesty, vibrant salsa adds a refreshing bite that complements the savory tacos beautifully. Its bright flavors will awaken your palate.

  • Sliced Avocado: Creamy avocado brings a rich, buttery texture that pairs perfectly with the crispy tortilla and fluffy filling. It’s a familiar companion that never disappoints.

  • Fruit Salad: Including a colorful fruit salad with berries and citrus can provide a sweet contrast to the tacos, adding a burst of freshness to your meal.

  • Refried Beans: Creamy refried beans serve as a hearty side, adding protein and a comforting element that pairs wonderfully with the taste of the tacos.

  • Potato Wedges: Crispy, seasoned potato wedges echo the flavor of the tacos while offering an extra crunchy texture. It’s a fun twist on the classic breakfast potato.

  • Coffee or Tea: A warm cup of coffee or your favorite herbal tea creates a cozy atmosphere, inviting you to savor each bite and sip as you start your day.

  • Omelet Bites: Mini omelet bites, filled with veggies or cheese, make for a delightful side dish and add a protein-packed element to your breakfast ensemble.

  • Chili con Queso: For those craving extra spice, a warm bowl of chili con queso can elevate your breakfast experience, pairing perfectly with the crunchy tortillas.

Enjoy the versatility of these accompaniments to make your Potato, Egg, and Cheese Breakfast Tacos not just a meal, but a delightful breakfast feast!

Potato, Egg, and Cheese Breakfast Tacos Recipe FAQs

How do I choose the best potatoes for this recipe?
Absolutely! Look for potatoes that are firm and free from dark spots or blemishes. Russets or Yukon Golds work beautifully due to their creamy texture when cooked. Sweet potatoes can also add a delightful sweetness if you’re in the mood for a twist!

How should I store leftover tacos?
No problem! Keep your leftover Potato, Egg, and Cheese Breakfast Tacos in an airtight container in the refrigerator for up to 3 days. Reheat them in the microwave or on a skillet, ensuring they’re heated through for the best taste.

Can I freeze these breakfast tacos?
Very easy! Wrap your assembled tacos tightly in foil or plastic wrap, and store them in the freezer for up to 2 months. To reheat, simply pop them in a preheated oven at 350°F (175°C) for 15-20 minutes or microwave them for 1-2 minutes until warmed through.

What should I do if my eggs turn out too dry?
Don’t worry, it happens to the best of us! If your eggs are too dry, the trick is to cook them on low heat and take them off the stove just before they finish cooking. This keeps them soft and creamy. You can also stir them gently to maintain moisture!

Are these tacos suitable for vegans?
Absolutely! For a vegan option, you can replace the eggs with a tofu scramble or chickpea flour scramble. Both are delicious alternatives that provide texture and protein, making your Potato, Egg, and Cheese Breakfast Tacos vegan-friendly without sacrificing flavor.

Can my dog eat these tacos?
It’s best to keep these tacos away from your pup due to the cheese and spices. While the potato and egg might be okay in small amounts, always consult your veterinarian for specific dietary questions related to your pet. Keeping our furry friends safe and healthy is a priority!

Potato, Egg, and Cheese Breakfast Tacos

Irresistible Potato, Egg, and Cheese Breakfast Tacos to Savor

Delicious Potato, Egg, and Cheese Breakfast Tacos for a quick, hearty meal any morning.
Prep Time 10 minutes
Cook Time 20 minutes
Total Time 30 minutes
Servings: 4 tacos
Course: Breakfast
Cuisine: Mexican
Calories: 320

Ingredients
  

For the Filling
  • 2 medium potatoes peeled and diced
  • 4 large eggs for a vegan option, use tofu or chickpea flour
  • 1 cup cheddar cheese or substitute with mozzarella or dairy-free cheese
For the Tortillas
  • 4 pieces tortillas corn or flour; gluten-free options are available
For Seasoning
  • salt to taste
  • pepper to taste
For the Spice
  • hot sauce or jalapeños; omit for milder flavor

Equipment

  • Pot
  • Non-stick skillet
  • spatula
  • hot skillet

Method
 

Step-by-Step Instructions
  1. Begin by peeling and dicing about two medium potatoes into small cubes. Place them in a pot of salted water and bring it to a boil over high heat. Once boiling, reduce to medium heat and simmer for about 10-12 minutes, or until the potatoes are tender when pierced with a fork. Drain the potatoes thoroughly and set aside.
  2. In a non-stick skillet over low heat, add a splash of oil or a small pat of butter. Crack in four large eggs and gently stir them with a spatula, allowing soft curds to form, which should take about 5-7 minutes. The eggs should look slightly runny; removing them from heat at this stage will ensure a creamy texture.
  3. Once the eggs are ready, add the cooked potatoes to the skillet and mix gently. Season the mixture with salt and pepper to taste, allowing the flavors to meld together for another minute or two on low heat.
  4. In a hot skillet, heat your tortillas, one at a time, over medium-high heat for about 30 seconds on each side, until they puff slightly and turn golden brown.
  5. Lay each warmed tortilla flat and spoon the potato and egg mixture onto the center. Sprinkle shredded cheddar cheese on top while the filling is warm to allow it to melt slightly.
  6. Customize your tacos with favorite toppings such as hot sauce, slices of jalapeños, or fresh herbs like cilantro.

Nutrition

Serving: 1tacoCalories: 320kcalCarbohydrates: 34gProtein: 12gFat: 15gSaturated Fat: 7gPolyunsaturated Fat: 1gMonounsaturated Fat: 6gCholesterol: 200mgSodium: 450mgPotassium: 500mgFiber: 3gSugar: 2gVitamin A: 300IUVitamin C: 30mgCalcium: 200mgIron: 2mg

Notes

Store leftover tacos in an airtight container in the fridge for up to 3 days or freeze for up to 2 months.

Tried this recipe?

Let us know how it was!

Chicken Cordon Bleu Quesadillas for Easy Comfort Food Bliss

Crispy, cheesy goodness wrapped in a warm tortilla—who could resist? That’s the magic of Chicken Cordon Bleu Quesadillas! This easy twist on a classic comfort food combines tender grilled chicken, savory deli ham, and melty Swiss cheese, all blanketed in golden, toasty perfection. The star of the show is the creamy Parmesan Dijon sauce that drizzles over each bite, adding a delightful tang that elevates this dish to a new level. Perfect for busy weeknights, this recipe not only delivers quick and satisfying results but also inspires creativity—whether you’re sticking to the classic flavors or experimenting with your favorite cheeses. Ready to transform your dinner routine with this delectable quesadilla? Let’s dive into making this delicious indulgence!

Why Are Chicken Cordon Bleu Quesadillas So Great?

Easy Preparation: These quesadillas come together in just 30 minutes, making them a perfect weeknight dinner solution.

Flavor Explosion: Each bite is bursting with savory ham, juicy chicken, and gooey cheese, enhanced by a creamy Parmesan Dijon sauce that’ll have your taste buds dancing!

Versatile Ingredients: Feel free to swap in your favorite cheeses or meats, like turkey or even a vegetarian option, for a customized experience.

Crowd-Pleasing Appeal: Ideal for families or gatherings, these quesadillas are sure to impress everyone at the table. Pair them with a fresh salad or veggie sticks for a complete meal that’s delicious and nutritious, just like my Blt Chicken Salad or Garlic Chicken Gnocchi.

Quick Cleanup: With minimal dishes used, you can spend more time enjoying your meal and less time cleaning up afterward!

Chicken Cordon Bleu Quesadillas Ingredients

For the Quesadillas
Flour Tortillas – Use 8-10 inch tortillas for optimal folding and filling.
Grilled Chicken Breast – Cooked, sliced chicken can be substituted with store-bought breaded chicken for convenience.
Deli Ham – Any type of deli ham works; turkey ham can be used as a lighter option.
Swiss or Provolone Cheese – Use shredded cheese for quicker melting; can substitute with other melty cheeses.
Toasted Breadcrumbs – Adds texture and crunch; can be homemade by baking processed bread heels.
Melted Butter – Olive oil could be a healthier substitute for browning the quesadilla.

For the Parmesan Dijon Sauce
Butter – Margarine may be used as a substitute for the sauce base fat.
Flour – Whole wheat flour can be used for a heartier texture as a thickening agent.
Milk – Non-dairy milk can work, though it may alter taste slightly; it serves as the liquid base.
Chicken Bouillon Cube – Adds depth of flavor; use vegetable bouillon for a vegetarian option.
Dijon Mustard – Yellow mustard can be used for a milder taste; it provides a tangy flavor component.
Hot Sauce – Optional for added spice; omit for a milder sauce if desired.
Parmesan Cheese – Grated or shredded form is ideal for richness and flavor in your Chicken Cordon Bleu Quesadillas.

Step‑by‑Step Instructions for Chicken Cordon Bleu Quesadillas

Step 1: Prepare the Sauce
In a saucepan over medium heat, melt 2 tablespoons of butter until bubbly. Whisk in 2 tablespoons of flour, cooking for about 1 minute until slightly golden. Gradually whisk in 1 cup of milk and add a chicken bouillon cube, continuing to whisk until the mixture thickens, about 5 minutes. Stir in 2 tablespoons of Dijon mustard, a dash of hot sauce if desired, and a generous ½ cup of Parmesan cheese until melted into a creamy sauce.

Step 2: Assemble the Quesadillas
In a large skillet, melt enough butter to coat the bottom over medium heat. Lay one flour tortilla in the skillet, then top with a handful of shredded Swiss cheese for a melty base. Layer on slices of grilled chicken and deli ham, followed by a sprinkle of toasted breadcrumbs, and drizzle with the creamy Parmesan Dijon sauce. Finish by adding another layer of cheese and placing a second tortilla on top.

Step 3: Cook Until Golden
Increase the heat to medium and cook the quesadilla for about 3-4 minutes, or until the bottom is golden brown and crispy. Carefully flip it using a spatula to avoid spilling the insides. Cook the other side for an additional 3-4 minutes, ensuring the cheese melts thoroughly and the tortilla becomes a delightful, golden brown color.

Step 4: Serve and Enjoy
Once both sides of the Chicken Cordon Bleu Quesadilla are perfectly crispy and the cheese is gooey, transfer the quesadilla to a cutting board. Allow it to cool for a minute before slicing it into wedges. Serve the quesadilla hot alongside the remaining creamy Parmesan Dijon sauce for dipping, allowing everyone to indulge in this cheesy, savory delight!

How to Store and Freeze Chicken Cordon Bleu Quesadillas

Fridge: Store leftover Chicken Cordon Bleu Quesadillas in an airtight container for up to 3 days. For best texture, reheat in a skillet over medium heat.

Freezer: If you want to freeze, wrap individual quesadillas tightly in plastic wrap, then place them in a freezer bag. They can last for up to 2 months.

Reheating: When ready to enjoy, thaw in the fridge overnight, then reheat in a skillet until heated through, ensuring the cheese is melty again for that delightful comfort food experience.

Leftover Sauce: Keep the creamy Parmesan Dijon sauce in a separate container; it can be refrigerated for up to a week. Reheat gently on the stove or microwave before serving.

Expert Tips for Chicken Cordon Bleu Quesadillas

Medium Heat: Avoid Burning: Cook your quesadillas over medium heat to achieve a perfect golden brown without burning the outside.

Half-Filling Method: Easier Flipping: If you tend to overfill, use a halves approach—add filling to just one side of the tortilla for easier flipping.

Homemade Breadcrumbs: Crisp Factor: Create homemade breadcrumbs from stale bread to add delightful texture; just process and bake until crispy.

Cheese Varieties: Get Creative: Don’t hesitate to mix cheeses like Cheddar or Pepper Jack for an extra flavor kick in your Chicken Cordon Bleu Quesadillas.

Sauce Consistency: Adjust To Taste: If your Parmesan Dijon sauce is too thick, thin it with a splash of milk until it reaches your desired creaminess for perfect drizzling!

Make Ahead Options

These Chicken Cordon Bleu Quesadillas are perfect for meal prep enthusiasts looking to save time during busy weeknights! You can prepare the creamy Parmesan Dijon sauce and store it in the refrigerator up to 3 days ahead of time; just make sure to reheat it gently to maintain its luscious texture. Additionally, you can pre-cook and slice the grilled chicken, and even layer all the quesadilla fillings inside the tortillas and wrap them tightly. Assemble them in advance and refrigerate for up to 24 hours. When ready to cook, simply heat them in a skillet until golden brown and crispy, ensuring that the cheesy filling melts perfectly. Enjoy your delicious, homemade quesadillas with minimal effort!

Chicken Cordon Bleu Quesadillas Variations

Feel free to get creative with these delicious twists that will elevate your quesadilla experience!

  • Dairy-Free: Substitute cheese with vegan cheese and use almond or soy milk for the sauce. You’ll still enjoy a creamy delight without dairy!

  • Gluten-Free: Swap regular tortillas for gluten-free tortillas. This simple switch allows everyone to indulge in these tasty quesadillas without worry.

  • Spicy Kick: Add sliced jalapeños or crushed red pepper flakes to the filling for a spicy twist. The heat will add an exciting punch to each bite!

  • BBQ Flavor: Drizzle BBQ sauce into the filling or swap the Dijon for BBQ sauce in the creamy sauce. This will bring a smoky, tangy flavor profile that’s oh-so delightful.

  • Veggie Lovers: Incorporate sautéed bell peppers and onions or even spinach for a pop of freshness and additional texture. More colors on your plate mean more nutrients!

  • Herb Infusion: Mix fresh herbs, such as thyme or oregano, into the creamy Parmesan Dijon sauce. This adds a fragrant layer of flavor while keeping things fresh!

  • Skip the Meat: For a heartwarming vegetarian option, replace chicken and ham with grilled mushrooms and roasted red peppers. The umami flavors will satisfy even the biggest meat lovers!

Just like I love to pair my quesadillas with a refreshing side salad, don’t forget to check out my delightful Blt Chicken Salad for a complete, satisfying meal experience. Enjoy the exploration of flavors!

What to Serve with Chicken Cordon Bleu Quesadillas

Looking to create a delightful meal that complements the rich flavors of your chicken quesadillas?

  • Simple Garden Salad: A fresh mix of greens adds a crisp, refreshing contrast, balancing the cheesy richness of the quesadillas perfectly.

  • Garlic Roasted Vegetables: Oven-roasted veggies like zucchini and bell peppers lend a smoky depth, enhancing the overall flavor of your meal.

  • Creamy Coleslaw: Creamy, tangy coleslaw provides an enjoyable crunch, making each bite of quesadilla even more satisfying against that cool, crunchy backdrop.

  • Sweet Corn on the Cob: The sweetness of corn on the cob is a classic pairing that rounds out the meal and adds a summertime feel to your dinner.

  • Zesty Lime Rice: Flavorful lime-infused rice brightens up your plate while adding a zesty twist that works beautifully with the savory quesadillas.

  • Homemade Salsa: Ditch the store-bought version for a fresh, homemade salsa bursting with tomatoes and cilantro for an added zing that complements the creamy sauce.

  • Fizzy Lemonade: A refreshing glass of fizzy lemonade pairs perfectly, cutting through the rich flavors and providing a refreshing balance.

  • Chocolate Mousse Cups: End your meal on a sweet note with indulgent chocolate mousse cups. The rich chocolate serves as a delightful contrast to the savory quesadillas.

Chicken Cordon Bleu Quesadillas Recipe FAQs

What type of tortillas should I use for Chicken Cordon Bleu Quesadillas?
I recommend using 8-10 inch flour tortillas for the best filling and folding experience. Flour tortillas are great because they hold up well when grilled and provide that perfect chewy texture that complements the cheesy filling. You can also use whole wheat tortillas for a healthier option or corn tortillas if you’re looking for a gluten-free alternative!

How do I store leftovers from Chicken Cordon Bleu Quesadillas?
Absolutely! Store your leftover Chicken Cordon Bleu Quesadillas in an airtight container in the fridge for up to 3 days. For the best reheating results, I suggest using a skillet over medium heat, which will keep them crispy rather than soggy. Just a few minutes on each side will bring back that beloved golden crunch!

Can I freeze Chicken Cordon Bleu Quesadillas?
Yes, you can! To freeze, tightly wrap individual quesadillas in plastic wrap and place them in a freezer-safe bag. They should keep well for up to 2 months. When you’re ready to enjoy them, thaw them in the fridge overnight, then reheat in a skillet until warmed through and the cheese is melty again—just like freshly made!

What should I do if the quesadillas are burning on the outside but not cooking through?
If you’re experiencing burning on the outside while the insides remain cold or not fully melted, it’s a sign that the heat is too high. Lower the heat to medium or medium-low. This allows the tortilla to cook through while avoiding burning the exterior. Also, make sure to flip gently so that nothing spills out, and feel free to cover the skillet for a minute to help retain heat, ensuring that the cheese melts beautifully!

Can I make Chicken Cordon Bleu Quesadillas vegetarian-friendly?
Very! You can easily adapt this recipe for a vegetarian option by replacing the chicken and ham with plant-based substitutes like grilled tofu or smoked vegan deli slices. Additionally, try adding extra veggies like spinach or peppers for more color and nutrition. Don’t forget to experiment with different cheese varieties, as they can drastically change the flavor profile of your quesadilla!

What types of cheese work best in Chicken Cordon Bleu Quesadillas?
I often use Swiss or Provolone cheese for that melty deliciousness, but feel free to get creative! Cheddar or Pepper Jack can add a spicy kick while maintaining that gooey texture! Just remember to shred the cheese for quicker melting and easier layering, ensuring each bite is packed with cheesy goodness.

Chicken Cordon Bleu Quesadillas

Chicken Cordon Bleu Quesadillas for Easy Comfort Food Bliss

Enjoy crispy Chicken Cordon Bleu Quesadillas, a delightful blend of grilled chicken, ham, and Swiss cheese, topped with a creamy Parmesan Dijon sauce.
Prep Time 10 minutes
Cook Time 20 minutes
Total Time 30 minutes
Servings: 4 quesadillas
Course: Dinner
Cuisine: American
Calories: 450

Ingredients
  

For the Quesadillas
  • 2 tablespoons Butter for cooking
  • 4 each Flour Tortillas 8-10 inch for optimal folding
  • 1 cup Grilled Chicken Breast cooked and sliced
  • 1 cup Deli Ham any type or turkey ham
  • 1 cup Swiss or Provolone Cheese shredded for quicker melting
  • ½ cup Toasted Breadcrumbs adds texture and crunch
For the Parmesan Dijon Sauce
  • 2 tablespoons Butter for the sauce base
  • 2 tablespoons Flour thickening agent
  • 1 cup Milk liquid base
  • 1 each Chicken Bouillon Cube adds depth of flavor
  • 2 tablespoons Dijon Mustard provides a tangy flavor
  • 1 dash Hot Sauce optional for added spice
  • ½ cup Parmesan Cheese grated or shredded for richness

Equipment

  • Saucepan
  • Skillet
  • spatula
  • Cutting board

Method
 

Step-by-Step Instructions
  1. In a saucepan over medium heat, melt 2 tablespoons of butter until bubbly. Whisk in 2 tablespoons of flour, cooking for about 1 minute until slightly golden. Gradually whisk in 1 cup of milk and add a chicken bouillon cube, continuing to whisk until the mixture thickens, about 5 minutes. Stir in 2 tablespoons of Dijon mustard, a dash of hot sauce if desired, and a generous ½ cup of Parmesan cheese until melted into a creamy sauce.
  2. In a large skillet, melt enough butter to coat the bottom over medium heat. Lay one flour tortilla in the skillet, then top with a handful of shredded Swiss cheese for a melty base. Layer on slices of grilled chicken and deli ham, followed by a sprinkle of toasted breadcrumbs, and drizzle with the creamy Parmesan Dijon sauce. Finish by adding another layer of cheese and placing a second tortilla on top.
  3. Increase the heat to medium and cook the quesadilla for about 3-4 minutes, or until the bottom is golden brown and crispy. Carefully flip it using a spatula to avoid spilling the insides. Cook the other side for an additional 3-4 minutes, ensuring the cheese melts thoroughly and the tortilla becomes a delightful, golden brown color.
  4. Once both sides of the Chicken Cordon Bleu Quesadilla are perfectly crispy and the cheese is gooey, transfer the quesadilla to a cutting board. Allow it to cool for a minute before slicing it into wedges. Serve the quesadilla hot alongside the remaining creamy Parmesan Dijon sauce for dipping.

Nutrition

Serving: 1quesadillaCalories: 450kcalCarbohydrates: 30gProtein: 25gFat: 25gSaturated Fat: 10gPolyunsaturated Fat: 3gMonounsaturated Fat: 7gCholesterol: 75mgSodium: 900mgPotassium: 400mgFiber: 2gSugar: 2gVitamin A: 20IUVitamin C: 2mgCalcium: 25mgIron: 10mg

Notes

For best results, use medium heat to cook the quesadillas and consider making homemade breadcrumbs for added texture.

Tried this recipe?

Let us know how it was!

Crispy Egg Salad: Your Healthy & Crunchy Lunch Fix!

As I stood in my kitchen, the aroma of something so familiar wafted in the air, igniting memories of sunny picnics and relaxed brunches. This isn’t just any egg salad—I’ve taken a classic recipe and transformed it into Crispy Egg Salad Cakes, where creamy goodness meets a satisfying crunch. These delightful cakes not only cater to those low-carb lifestyles with high protein and under 10 total carbs, but they also serve as an exciting alternative to traditional dishes. Perfect for a quick lunch or a sophisticated appetizer, you can easily customize them with fresh veggies or spices to suit your palate. Ready to step up your salad game? Let’s dive into this delectable recipe!

Why Is This Egg Salad So Special?

Unique Twist: These Crispy Egg Salad Cakes bring a delightful crunch that transforms a familiar favorite.
Low Carb Delight: With under 10 total carbs, they’re ideal for anyone pursuing a low-carb or keto lifestyle.
High Protein Power: Packed with protein, these cakes will keep you feeling satisfied longer.
Endless Customization: Feel free to add your favorite mix-ins, whether it’s a dash of hot sauce or some fresh veggies.
Quick & Easy: They come together in no time, making them perfect for a busy weekday lunch or an impressive appetizer.
Elevate your meals with these crispy cakes and check out my Cheesy Protein Egg Bake for more delicious egg-based recipes!

Crispy Egg Salad Ingredients

For the Cakes

  • Hard Boiled Eggs – the heart of this dish, providing essential protein and texture.
  • Low Moisture Mozzarella (1/2 cup, shredded) – adds creaminess and helps bind the cakes; substitute with cheddar for a sharper taste.
  • Parmesan (1/2 cup, grated) – offers a nutty flavor that enhances the salad; can be replaced with pecorino if you prefer more bite.
  • Mayonnaise (2 tablespoons) – contributes creaminess; use Greek yogurt for a lighter version.
  • Dijon Mustard (1 tablespoon) – brings in a zesty kick; yellow mustard is a great substitute if Dijon isn’t on hand.
  • Green Onions (1/2 cup, minced) – provides freshness and a mild onion taste; feel free to swap with chives for a subtler flavor.
  • Salt and Pepper (1/4 teaspoon each) – essential for flavor enhancement; adjust to suit your preference.

Optional Add-ins

  • Chopped Celery or Bell Peppers – for extra crunch and vibrant colors that make your Crispy Egg Salad sing.
  • Paprika or Cayenne – add a spicy twist to cater to your taste buds!
  • Feta Cheese – swap mozzarella for a tangy flavor that elevates the dish further!

With these simple, well-curated ingredients, you’re well on your way to making crispy, delightful egg salad cakes that will impress both friends and family!

Step‑by‑Step Instructions for Crispy Egg Salad Cakes

Step 1: Mix Ingredients
In a large mixing bowl, take your hard-boiled eggs and mash them with a fork until creamy, but still slightly chunky. Then, add in the shredded mozzarella, grated Parmesan, mayonnaise, Dijon mustard, and minced green onions. Season with salt and pepper, mixing everything thoroughly until well integrated, which should take about 2-3 minutes.

Step 2: Shape Cakes
With your mixture ready, it’s time to form the cakes! Use a 1/4 cup measuring cup to scoop out the mixture, then gently mold it into round discs about 1 inch thick. Place the formed cakes on a parchment-lined baking sheet, ensuring they are not overcrowded. This process should take around 5-7 minutes, and you should yield 6-8 cakes.

Step 3: Sear Cakes
Heat a non-stick skillet over medium-high heat and lightly spray it with cooking oil to prevent sticking. Once the pan is hot, carefully add the shaped cakes, ensuring they are spaced apart. Sear each cake for 1-2 minutes on each side or until they are golden brown and crispy. You may need to adjust the heat to avoid burning, aiming for that perfect crisp on the surface.

Step 4: Serve
Once all cakes are beautifully crisped, remove them from the skillet and place them on a serving platter or directly on fresh butter lettuce leaves for a clean presentation. You can also serve them topped on toasted bread if you prefer. Garnish with additional green onions or a sprinkle of paprika for an appealing finish, and enjoy these delightful Crispy Egg Salad Cakes!

Crispy Egg Salad: Delicious Customizations

Feel free to add your own twist to this crispy egg salad—let your creativity shine through the flavors!

  • Dairy-Free: Substitute mozzarella and Parmesan with nutritional yeast for that cheesy flavor while keeping it dairy-free.

  • Spicy Kick: Add cayenne pepper or Hot Sauce to the mix for a thrilling heat that tantalizes your taste buds.

  • Veggie Boost: Incorporate diced bell peppers or shredded carrots into the mixture for a vibrant crunch and extra nutrients.

  • Mediterranean Twist: Swap mayonnaise with tzatziki sauce and add feta cheese for a refreshing, tangy take on the classic.

  • Herb Infusion: Mix in chopped fresh dill or cilantro to brighten up the flavors, bringing a garden-fresh taste to your cakes.

  • Crunchy Add-ins: Include a handful of toasted nuts or seeds like sunflower seeds or walnuts for an exciting texture contrast.

  • Asian Flavor: Add sesame oil and green onions, and consider serving it atop a bed of leafy greens with a drizzle of soy sauce for an Asian-inspired version.

  • Sweet Surprise: A tiny dash of honey in the mix can create a delightful contrast with the salty ingredients, surprising your palate beautifully.

These variations offer endless possibilities to enjoy your Crispy Egg Salad Cakes in new and exciting ways! If you’re in the mood for a cheesy alternative, try my flavor-packed Cheesy Fried Egg Quesadilla. Enjoy experimenting!

Expert Tips for Crispy Egg Salad

  • Pan Readiness: Ensure your pan is very hot before adding the cakes; this helps achieve that perfect crispy texture.

  • Avoid Overcrowding: When searing the cakes, give them enough space in the pan to avoid steaming, which could lead to sogginess instead of crunch.

  • Let Them Brown: Don’t flip the cakes too early; letting them brown properly ensures a delicious crust. Patience is key!

  • Mix it Up: Feel free to experiment with different add-ins for your Crispy Egg Salad—like chopped celery or bell peppers—for an extra flavor boost.

  • Storage Advice: If making ahead, store in the fridge for up to 3 days. Reheat in a hot pan to regain that delightful crunch!

Make Ahead Options

These Crispy Egg Salad Cakes are perfect for meal prep enthusiasts! You can prepare the egg salad mixture up to 24 hours in advance; just store it in an airtight container in the refrigerator to maintain freshness. Form the cakes and sear them just before serving for that irresistible crispy texture, which is best achieved when cooked fresh. If you’d like to make them ahead entirely, you can cook the cakes and then refrigerate them for up to 3 days. When ready to enjoy, simply reheat them in a hot non-stick skillet for 2-3 minutes on each side until warmed through, and they’ll taste just as delicious as when first made!

What to Serve with Crispy Egg Salad Cakes

Elevate your meal by pairing these delightful crispy cakes with fresh and complementary sides that will tantalize your taste buds.

  • Creamy Avocado Toast: Creamy avocado adds healthy fats and a smooth texture that perfectly balances the crispy egg salad cakes. Serve on whole-grain bread for a nutritious crunch!

  • Zesty Coleslaw: A tangy, crunchy coleslaw offers a refreshing contrast and brightens the meal with its flavorful bite. Try adding some carrots and lemon juice for extra zing.

  • Garden Salad: A light, crisp salad with mixed greens, cherry tomatoes, and cucumbers provides a fresh, vibrant accompaniment. Drizzle with a tangy vinaigrette for a delightful touch.

  • Roasted Seasonal Vegetables: Roasted veggies like zucchini, bell peppers, and asparagus add a warm, savory element to your table. The natural sweetness enhances the flavors found in the egg salad.

  • Cauliflower Rice: For a low-carb option, serve your egg salad cakes on a bed of seasoned cauliflower rice. Its fluffy texture and mild flavor work well to catch every bit of deliciousness!

  • Sparkling Lemonade: A refreshing drink like sparkling lemonade complements the savory richness of your crispy cakes. The bright citrus notes will cleanse your palate beautifully between bites.

  • Fruit Salad: A side of sweet, juicy fruit salad can serve as a lovely contrast to the savory flavors of the egg salad. Mix in berries, melons, and mint for an invigorating twist.

How to Store and Freeze Crispy Egg Salad

Fridge: Store any leftover Crispy Egg Salad cakes in an airtight container for up to 3 days. Ensure they are cooled completely before sealing to avoid moisture buildup.

Freezer: For longer storage, freeze the baked cakes in a single layer on a parchment-lined tray. Once frozen, transfer them to a freezer-safe bag or container for up to 2 months.

Reheating: To enjoy the frozen cakes, thaw them in the fridge overnight. Reheat in a hot skillet for 2-3 minutes on each side to restore that wonderful crispiness.

Do Not Refreeze: Once thawed, do not refreeze the Crispy Egg Salad cakes to maintain their texture and taste quality.

Crispy Egg Salad Recipe FAQs

What kind of eggs should I use for the egg salad?
Absolutely! For the best results, use large, fresh eggs for hard-boiling. Look for eggs with clean shells and no cracks, as they are likely fresher. If you have access to organic or free-range eggs, those typically yield richer flavor and better texture in your Crispy Egg Salad cakes!

How long can I store leftover Crispy Egg Salad cakes?
Very! You can store leftover Crispy Egg Salad cakes in an airtight container in the fridge for up to 3 days. Make sure they have cooled completely before sealing. This ensures they maintain their delightful crispiness for your next meal.

Can I freeze Crispy Egg Salad cakes?
Absolutely! To freeze, spread the cakes in a single layer on a parchment-lined baking tray and freeze until solid. Then, transfer them to a freezer-safe bag or container. They can be kept for up to 2 months. Just be sure to thaw them in the fridge overnight before reheating!

What if my egg salad cakes are soggy?
No worries! If your cakes turn out soggy, it might be due to excess moisture. Ensure the cooked egg mixture is cool before shaping the cakes. When cooking, keep the pan hot and avoid overcrowding. If they still don’t crisp up, try adding a bit more cheese or breadcrumbs to absorb moisture.

Are there any dietary considerations for these cakes?
Very! These Crispy Egg Salad cakes are gluten-free and can easily be modified for dairy-free diets by using a dairy-free cheese substitute. Always double-check labels for allergens. If you’re preparing them for pets or guests, avoid ingredients like onions and garlic, which can be harmful to dogs.

How do I know when the cakes are cooked perfectly?
The more the merrier! Perfectly cooked Crispy Egg Salad cakes should be golden brown on the outside with a crispy texture. Sear them for 1-2 minutes on each side without flipping too soon. If they easily lift and have a nice golden crust, they’re ready to be enjoyed!

Crispy Egg Salad

Crispy Egg Salad: Your Healthy & Crunchy Lunch Fix!

Crispy Egg Salad Cakes offer a high protein, low carb alternative for a crunchy and satisfying lunch.
Prep Time 15 minutes
Cook Time 10 minutes
Total Time 25 minutes
Servings: 6 cakes
Course: Salad
Cuisine: American
Calories: 150

Ingredients
  

For the Cakes
  • 6 eggs Hard Boiled Eggs the heart of this dish, providing essential protein and texture.
  • 1/2 cup Low Moisture Mozzarella, shredded adds creaminess and helps bind the cakes; substitute with cheddar for a sharper taste.
  • 1/2 cup Parmesan, grated offers a nutty flavor that enhances the salad; can be replaced with pecorino if you prefer more bite.
  • 2 tablespoons Mayonnaise contributes creaminess; use Greek yogurt for a lighter version.
  • 1 tablespoon Dijon Mustard brings in a zesty kick; yellow mustard is a great substitute if Dijon isn't on hand.
  • 1/2 cup Green Onions, minced provides freshness and a mild onion taste; feel free to swap with chives for a subtler flavor.
  • 1/4 teaspoon Salt essential for flavor enhancement; adjust to suit your preference.
  • 1/4 teaspoon Pepper essential for flavor enhancement; adjust to suit your preference.
Optional Add-ins
  • Chopped Celery or Bell Peppers for extra crunch and vibrant colors.
  • Paprika or Cayenne add a spicy twist.
  • Feta Cheese swap mozzarella for a tangy flavor.

Equipment

  • Mixing Bowl
  • Non-stick skillet
  • Measuring cup
  • Parchment Paper

Method
 

Step-by-Step Instructions for Crispy Egg Salad Cakes
  1. In a large mixing bowl, mash hard-boiled eggs with a fork until creamy, but still slightly chunky. Add shredded mozzarella, grated Parmesan, mayonnaise, Dijon mustard, and minced green onions. Season with salt and pepper and mix thoroughly for 2-3 minutes.
  2. Use a 1/4 cup measuring cup to scoop out the mixture and mold it into round discs about 1 inch thick. Place the formed cakes on a parchment-lined baking sheet without overcrowding.
  3. Heat a non-stick skillet over medium-high heat and lightly spray with cooking oil. Carefully add the cakes and sear each for 1-2 minutes on each side until golden brown and crispy.
  4. Remove the cakes from the skillet and place them on a serving platter or fresh butter lettuce leaves. Garnish with green onions or a sprinkle of paprika if desired.

Nutrition

Serving: 1cakeCalories: 150kcalCarbohydrates: 7gProtein: 10gFat: 9gSaturated Fat: 3gCholesterol: 186mgSodium: 240mgPotassium: 190mgFiber: 1gSugar: 1gVitamin A: 500IUVitamin C: 2mgCalcium: 220mgIron: 1mg

Notes

Ensure your pan is hot for perfect crispiness. Avoid overcrowding the pan to prevent sogginess.

Tried this recipe?

Let us know how it was!

Crunchy Chinese Chicken Salad That’ll Brighten Your Day

As I stood at my kitchen counter, the afternoon sun streaming in, I suddenly craved a dish that was both refreshing and satisfying. That’s when I decided to whip up my Crunchy Chinese Chicken Salad with Ramen Noodles, a delightful fusion of sweet and savory flavors that captures summer in every bite. This recipe not only comes together in just 20 minutes, making it perfect for busy weeknights, but it also embraces the best of meal prep with customizable ingredients—just toss in leftover chicken or your favorite veggies! Whether you’re serving it at a potluck or enjoying it solo, this salad is a vibrant feast for the eyes and the palate. Are you ready to explore a bowl of crunch and color?

Why Is This Salad a Must-Try?

Freshness at Its Peak: This Crunchy Chinese Chicken Salad is the epitome of refreshment, combining vibrant ingredients for a delightful twist on a classic dish.

Quick Preparation: Ready in just 20 minutes, it’s perfect for those busy evenings when you crave something delicious without the fuss.

Endless Customization: Use leftover chicken or your favorite veggies, making it a sustainable option that’s as unique as your taste preferences!

Satisfying Crunch: With crispy ramen noodles adding texture, this salad stands out from the crowd, ensuring every bite is a satisfying experience.

Perfect for Meal Prep: Make ahead with ease! Just keep the dressing separate until serving to maintain that irresistible crunch, making this salad a go-to for lunch or dinner.

Crowd-Pleaser: Whether at a picnic or as a light dinner, this salad will impress your guests and leave them asking for the recipe—just like with my Tuscan Chicken Soup or Chilli Chicken Takeout.

Chinese Chicken Salad Ingredients

For the Salad
Finely chopped romaine or iceberg lettuce – Provides a crunchy base and is refreshing; substitute with chopped kale for a nutrient boost.
Shredded red cabbage – Adds color and extra crunch; could be replaced by green cabbage for a milder flavor.
Shredded chicken (leftover rotisserie or poached) – Adds protein and makes the salad hearty; use turkey for a different flavor or omit for a vegetarian option.
Jarred mandarin oranges (drained) – Introduces sweetness and a pop of citrus; fresh clementines can be used for a fresher taste.
Instant ramen packet (flavor packet discarded) – Provides crunch comparable to croutons; wonton strips or crispy rice noodles can be an alternative.
Shredded carrot – Offers additional texture and sweetness; substitute with sliced bell peppers for added color.
Sliced green onions – Adds a mild onion flavor and freshness; shallots can serve as a more pungent substitute.
Sliced almonds – Contributes nuttiness and crunch; can be replaced with cashews or sunflower seeds for different flavor profiles.

For the Dressing
Rice wine vinegar – Provides acidity to the dressing; apple cider vinegar can be used as a substitute.
Honey – Adds sweetness to balance flavors; agave syrup works as a vegan alternative.
Sesame oil – Enhances the salad with a nutty flavor; olive oil can be used for a milder taste, though not traditional.
Hoisin sauce – Adds a sweet and savory depth to the dressing; barbecue sauce can substitute if hoisin isn’t available.
Soy sauce – Provides saltiness and umami; tamari is a good gluten-free alternative.
Minced ginger and garlic – Boost flavor with aromatic components; they can be omitted, but they highly enrich the dish.
Vegetable oil – Helps emulsify the dressing; any neutral oil, like canola, can work here.

Enjoy crafting your refreshing Chinese Chicken Salad that’ll brighten your day!

Step‑by‑Step Instructions for Crunchy Chinese Chicken Salad with Ramen Noodles

Step 1: Prep Ingredients
Begin by finely chopping the romaine or iceberg lettuce and shredding the red cabbage and carrot. If using leftover chicken, shred it into bite-sized pieces. Make sure to drain the jarred mandarin oranges and set them aside. This vibrant medley of ingredients will form the refreshing base of your Crunchy Chinese Chicken Salad.

Step 2: Combine Salad
In a large mixing bowl, combine the chopped lettuce, shredded cabbage, shredded chicken, drained mandarin oranges, crushed ramen noodles, shredded carrots, sliced green onions, and sliced almonds. Gently mix these ingredients together until well combined, sending a delightful aroma wafting through your kitchen as you assemble this refreshing salad.

Step 3: Make Dressing
In a small bowl, whisk together the rice wine vinegar, honey, sesame oil, hoisin sauce, and soy sauce. Add the minced ginger and garlic for an aromatic kick, and then slowly drizzle in the vegetable oil while continuously whisking until the dressing is fully emulsified. This creamy dressing will add a rich flavor to your Crunchy Chinese Chicken Salad.

Step 4: Toss Salad
Just before serving, drizzle the freshly made dressing over the salad mixture in the large bowl. Using two large serving spoons, gently toss everything together until the salad is evenly coated in the dressing. Be careful not to crush the ramen noodles; you want that delightful crunch to remain intact.

Step 5: Serve and Enjoy
Dish up your Crunchy Chinese Chicken Salad immediately, ensuring it’s served chilled or at room temperature for the best flavor. This colorful dish is perfect for gatherings, potlucks, or even a delightful weeknight dinner. Enjoy the satisfying crunch and vibrant flavors with every bite!

How to Store and Freeze Chinese Chicken Salad

Fridge: Store leftovers in an airtight container for up to 2 days. Keep the dressing separate until you’re ready to serve to maintain the salad’s crunch.

Freezer: It’s not recommended to freeze Chinese Chicken Salad, as the veggies and ramen noodles don’t hold up well after thawing, losing their refreshing texture.

Reheating: If you have served leftover salad that needs a boost, try adding fresh greens or additional crunchy toppings to revive its vibrancy.

Make-Ahead Tips: You can prep the ingredients ahead of time. Just store them in separate containers in the fridge, but wait to mix them until serving for the freshest taste!

What to Serve with Crunchy Chinese Chicken Salad with Ramen Noodles

Elevate your meal experience with these delicious pairings that complement every bite of this vibrant salad.

  • Steamed Jasmine Rice: The fluffy texture of jasmine rice serves as a perfect canvas, absorbing flavors while adding heartiness to your meal.

  • Spring Rolls: These crunchy, fresh appetizers provide an excellent contrast to the salad’s textures and introduce a delightful pop of flavor.

  • Grilled Shrimp Skewers: The smoky char from grilled shrimp enhances the salad’s freshness, making for a balanced and satisfying plate.

  • Chilled Szechuan Noodles: With their spicy, nutty sauce, Szechuan noodles bring a zesty flair that harmonizes beautifully with the sweet tang of your salad.

  • Teriyaki Chicken: A touch of sweet and savory from teriyaki chicken complements the salad’s ingredients, creating a cohesive Asian-inspired meal.

  • Mango Smoothie: Refreshing and sweet, this smoothie adds an invigorating note that pairs deliciously with the salad’s crunchy goodness.

  • Sesame Ginger Dressing on Greens: A light side of mixed greens drizzled with sesame ginger dressing echoes the salad’s flavors without overpowering.

  • Fruit Salad: A mix of fresh fruits adds a bright, juicy element that balances the savory tones of your Chinese Chicken Salad.

  • Green Tea: This light and fragrant beverage enhances the meal with subtle notes while aiding digestion—an ideal companion to your flavorful salad.

Chinese Chicken Salad Variations & Substitutions

Feel free to explore these delightful twists that will make your Chinese Chicken Salad even more enjoyable and uniquely yours!

  • Vegetarian: Replace chicken with tofu or chickpeas for a hearty plant-based alternative. This not only satisfies your hunger but also brings a whole new texture to the dish.

  • Gluten-Free: Swap soy sauce for tamari or coconut aminos to make this dish gluten-free, allowing everyone to indulge in this flavorful salad without worry.

  • Nut-Free: Switch out sliced almonds for sunflower seeds or pumpkin seeds. This keeps the crunch while making the salad friendly for those with nut allergies.

  • Fruity Twist: Add fresh mango or pineapple chunks for a burst of tropical sweetness. This fruity addition harmonizes beautifully with the savory elements.

  • Creamy Upgrade: Consider topping your salad with sliced avocado or a dollop of creamy dressing. It’ll add richness and make each bite extra satisfying.

  • Spicy Kick: Incorporate a touch of sriracha or sliced jalapeños for those who crave heat. The fiery contrast can elevate the flavors and set your salad apart!

  • Additional Greens: Mix in some fresh spinach or kale for a nutrient boost. These greens bring vibrant color and added health benefits to your meal.

  • Asian Flavor Boost: Incorporate mandarin segments or toasted sesame seeds for an extra layer of flavor. These additions echo the traditional Asian flavors and enhance the overall experience.

Don’t forget, it can always be paired beautifully with dishes like my Garlic Chicken Gnocchi or a comforting bowl of Tuscan Chicken Soup. Let your creativity shine and enjoy every crunchy, refreshing bite of your customized salad!

Make Ahead Options

These Crunchy Chinese Chicken Salad preparations are perfect for busy cooks looking to save time during the week! You can chop the lettuce, cabbage, and carrots, and shred the chicken up to 24 hours in advance, storing them in airtight containers in the refrigerator to maintain freshness. The drained mandarin oranges and sliced almonds can also be prepped ahead, but keep them separate until you’re ready to serve. Just remember, for that undeniable crunch, hold off on mixing in the ramen noodles and dressing until serving time. By prepping these ingredients ahead, you’ll enjoy a vibrant, ready-to-toss meal that’s just as delicious, with minimal effort!

Expert Tips for Chinese Chicken Salad

  • Stay Crunchy: Keep the dressing separate until you’re ready to serve. This prevents the salad from getting soggy and maintains that delightful crunch from the ramen noodles.

  • Fresh Oranges: If using fresh oranges instead of jarred, segment them carefully. This ensures they’re juicy without making the salad soggy.

  • Crush with Care: When crushing the ramen, you can control the size by placing them in a bag or breaking them over the bowl directly. This allows you to achieve the perfect consistency without turning them into dust.

  • Veggie Swaps: Feel free to customize your salad by adding your favorite vegetables. Peppers or cucumbers can be great additions for even more crunch and color in your Chinese Chicken Salad.

  • Taste the Dressing: Always taste your dressing before adding it to the salad. Adjust the sweetness or acidity, if needed, to ensure it perfectly complements your dish.

  • Meal Prep Friendly: Prep the salad ingredients ahead of time and store them in the fridge. Just combine everything and add the dressing right before serving for a quick meal!

Chinese Chicken Salad Recipe FAQs

What type of lettuce works best for this salad?
Absolutely! Finely chopped romaine or iceberg lettuce provides a delightful crunch and refreshing base. If you want an extra nutrient boost, you can substitute with chopped kale. The key is to choose a lettuce that stays crisp when mixed with other ingredients.

How should I store leftovers of the salad?
Very! Store any leftovers in an airtight container in the fridge for up to 2 days. Remember to keep the dressing separate until you’re ready to enjoy the salad again. This simple step keeps the noodles crunchy and the veggies fresh!

Can I freeze Chinese Chicken Salad?
No, it’s not recommended to freeze this salad. The texture of the veggies and ramen noodles doesn’t hold well after thawing, leading to a mushy salad experience. Instead, prep the ingredients in advance and combine right before serving for optimal freshness.

What if I don’t have mandarin oranges on hand?
No worries! If you don’t have jarred mandarin oranges, fresh clementines make a lovely substitute, adding that perfect citrus sweetness. You could also try using chunks of fresh pineapple for an extra tropical twist.

What dietary considerations should I keep in mind?
If you’re preparing this salad for someone with food allergies, be cautious with ingredients like nuts. Slice the almonds can be exchanged for pumpkin seeds or sunflower seeds to accommodate nut allergies. Moreover, for vegetarian or vegan options, simply use tofu in place of chicken and agave syrup instead of honey for the dressing.

How can I enhance the dressing flavor?
Certainly! For a more robust flavor, taste the dressing before adding it to the salad. You can adjust the sweetness with more honey or balance the acidity with a touch more rice wine vinegar. Adding sesame seeds or a sprinkle of chili flakes can also elevate the dressing and add an extra kick to your Crunchy Chinese Chicken Salad!

Chinese Chicken Salad

Crunchy Chinese Chicken Salad That'll Brighten Your Day

This Chinese Chicken Salad is a refreshing and satisfying dish combining vibrant ingredients and crunchy ramen noodles, perfect for busy weeknights.
Prep Time 20 minutes
Total Time 20 minutes
Servings: 4 servings
Course: Salad
Cuisine: Chinese
Calories: 350

Ingredients
  

For the Salad
  • 4 cups finely chopped romaine or iceberg lettuce Substitute with chopped kale for a nutrient boost.
  • 2 cups shredded red cabbage Can be replaced by green cabbage for a milder flavor.
  • 2 cups shredded chicken (leftover rotisserie or poached) Use turkey for a different flavor or omit for a vegetarian option.
  • 1 cup jarred mandarin oranges Drained; fresh clementines can be used for a fresher taste.
  • 1 packet instant ramen Flavor packet discarded; provides crunch comparable to croutons.
  • 1 cup shredded carrot Substitute with sliced bell peppers for added color.
  • 1/2 cup sliced green onions Shallots can serve as a more pungent substitute.
  • 1/2 cup sliced almonds Can be replaced with cashews or sunflower seeds.
For the Dressing
  • 1/4 cup rice wine vinegar Apple cider vinegar can be used as a substitute.
  • 2 tablespoons honey Agave syrup works as a vegan alternative.
  • 2 tablespoons sesame oil Olive oil can be used for a milder taste.
  • 2 tablespoons hoisin sauce Barbecue sauce can be substituted.
  • 2 tablespoons soy sauce Tamari is a good gluten-free alternative.
  • 1 teaspoon minced ginger Can be omitted but enriches the dish.
  • 1 teaspoon minced garlic Can be omitted but enriches the dish.
  • 1/4 cup vegetable oil Can use any neutral oil, like canola.

Equipment

  • large mixing bowl
  • small bowl
  • whisk

Method
 

Step-by-Step Instructions
  1. Begin by finely chopping the romaine or iceberg lettuce and shredding the red cabbage and carrot. If using leftover chicken, shred it into bite-sized pieces. Make sure to drain the jarred mandarin oranges and set them aside.
  2. In a large mixing bowl, combine the chopped lettuce, shredded cabbage, shredded chicken, drained mandarin oranges, crushed ramen noodles, shredded carrots, sliced green onions, and sliced almonds. Gently mix these ingredients together until well combined.
  3. In a small bowl, whisk together the rice wine vinegar, honey, sesame oil, hoisin sauce, and soy sauce. Add the minced ginger and garlic for flavor, and then slowly drizzle in the vegetable oil while continuously whisking until the dressing is fully emulsified.
  4. Just before serving, drizzle the freshly made dressing over the salad mixture in the large bowl. Gently toss everything together until the salad is evenly coated in the dressing.
  5. Dish up your Crunchy Chinese Chicken Salad immediately, serving it chilled or at room temperature for best flavor.

Nutrition

Serving: 1servingCalories: 350kcalCarbohydrates: 30gProtein: 20gFat: 15gSaturated Fat: 2gPolyunsaturated Fat: 5gMonounsaturated Fat: 8gCholesterol: 40mgSodium: 600mgPotassium: 500mgFiber: 4gSugar: 8gVitamin A: 50IUVitamin C: 35mgCalcium: 80mgIron: 2mg

Notes

Keep the dressing separate until ready to serve to maintain crunch. Feel free to customize with your favorite veggies.

Tried this recipe?

Let us know how it was!

Southwest Chicken Salad: A Flavorful Fresh Twist

As I was juggling my busy schedule, I stumbled upon a brilliant idea for a quick yet satisfying meal that instantly transported me to sunny Southwest flavors. This Quick Southwest Chicken Salad is the answer to my craving for something hearty and refreshing while keeping my health goals in mind. With tender shredded chicken, zesty spices, and a colorful medley of vegetables, this dish can be prepared in just 10 minutes! Not only is it a wonderful meal prep option, but it’s also dairy-free and gluten-free—ensuring that everyone can join in on the deliciousness. Whether enjoyed on its own, nestled in a wrap, or heaped over crisp lettuce, this salad is a versatile gem. Ready to dive into a bowl of vibrant flavor? Let’s get started!

What makes this salad a must-try?

Quick Prep Time: In just 10 minutes, you can whip up this delightful dish, making it a no-fuss meal option during your busy week.

Flavor Explosion: The combination of zesty spices, fresh veggies, and tender chicken creates a refreshing fiesta for your taste buds.

Dairy-Free Delight: Enjoy a creamy texture without any dairy, making this salad perfect for those with dietary restrictions.

Versatile Serving Options: Serve it on its own, in a wrap, or on a bed of crisp lettuce—this dish adapts to fit any meal scenario.

Meal Prep Friendly: Ideal for lunch or dinner with 4-5 days of fridge life, this salad is a time-saving hero for your weekly meal planning.

For similar quick recipes, check out my Sizzling Chicken Pepper Stir-Fry or the flavorful Garlic Chicken Gnocchi Skillet.

Southwest Chicken Salad Ingredients

• Dive into the flavors of a Southwest Chicken Salad with this easy-to-follow ingredient list!

For the Salad

  • Cooked Shredded Chicken – Provides protein and structure; canned chicken is a convenient substitution.
  • Black Beans – Adds fiber and hearty texture; remember to rinse and drain for the best taste!
  • Corn – Sweetness and crunch; both canned and frozen corn work wonderfully.
  • Fresh Jalapeños – Adds a spicy kick; adjust the amount to your heat preference, or remove seeds for less spice.
  • Cherry Tomatoes – Juicy and refreshing; quarter them for even distribution in the salad.
  • Red Onion – Adds sharpness and crunch; chop finely to blend well without overwhelming flavors.
  • Pepitas (Pumpkin Seeds) – Offers added crunch and a nutty flavor; sunflower seeds are a fantastic alternative.

For the Dressing

  • Mayo or Greek Yogurt (Dairy-Free or Regular) – Creamy base for your dressing; Greek yogurt is a healthier choice with similar smoothness.
  • Fresh Lime Juice – Adds acidity and brightness; freshly squeezed lime enhances the overall flavor.
  • Chili Powder – Infuses the salad with depth and warmth; feel free to adjust this based on your spice tolerance.
  • Garlic Powder – Elevates the flavors; fresh garlic can be swapped in for a bolder taste.
  • Cumin – Provides warmth and earthiness, true to Southwest cuisine.
  • Paprika – Adds subtle depth and a hint of color; choose smoked paprika for an extra flavor boost.
  • Salt – Balances all the flavors beautifully; season to taste.

These ingredients come together for a delightful Southwest Chicken Salad that packs a punch in flavor while keeping things light and fresh! Happy cooking!

Step‑by‑Step Instructions for Southwest Chicken Salad

Step 1: Prepare the Dressing
In a medium bowl, whisk together the creamy base for your Southwest Chicken Salad by combining mayo or Greek yogurt, fresh lime juice, chili powder, garlic powder, cumin, paprika, and salt. Keep whisking until the mixture is smooth and slightly thickened, about 2 minutes. This zesty dressing will elevate the flavor of your salad, so ensure it’s well-combined.

Step 2: Combine the Salad Ingredients
In a large mixing bowl, add shredded chicken, rinsed black beans, sweet corn, diced jalapeños, quartered cherry tomatoes, chopped red onion, and pepitas. Gently toss the ingredients together with a large spoon for about 1-2 minutes until everything is evenly distributed and vibrant in color. Visualize a colorful fiesta waiting to be tossed with your dressing!

Step 3: Dress the Salad
Pour the prepared dressing over the salad mixture in the large bowl. With a gentle hand, stir the salad using a spatula or wooden spoon until all components are evenly coated in the creamy dressing. This should take about 1-2 minutes, ensuring that each bite of your Southwest Chicken Salad is flavorful and deliciously combined.

Step 4: Serve and Enjoy
Serve your vibrant Southwest Chicken Salad immediately for the freshest taste, either on its own or heaped into wraps or over crisp lettuce. If desired, garnish with extra pepitas or jalapeños for added crunch and spice. If enjoying later, refrigerate in an airtight container, but remember to mix again before serving to refresh the flavors!

Expert Tips for Southwest Chicken Salad

  • Ingredient Freshness: Always use fresh vegetables for the best taste and texture. Wilted or outdated ingredients can dull the vibrant flavors of your Southwest Chicken Salad.

  • Adjust the Spice: If you’re sensitive to heat, start with fewer jalapeños and add more gradually. This way, you can enjoy the flavors without overwhelming your palate.

  • Mix Just Before Serving: To retain the crunch and freshness, dress your salad right before serving. This prevents sogginess, especially if you plan to store any leftovers.

  • Customizable Crunch: Feel free to experiment with toppings! Add sliced radishes or diced bell peppers for extra texture and flavor that complements the core ingredients.

  • Storage Awareness: Store leftovers in an airtight container for up to 4-5 days. Just remember, the flavor improves over time, but avoid freezing due to potential dressing separation!

How to Store and Freeze Southwest Chicken Salad

Fridge: Store your Southwest Chicken Salad in an airtight container for up to 4-5 days. The flavors will continue to develop, making it a delicious leftover option.

Freezer: Avoid freezing this salad, as the mayo or yogurt dressing may separate and become watery when thawed, compromising the texture.

Reheating: If you prefer warm chicken in your salad, simply reheat the shredded chicken separately, allow it to cool slightly, and then combine it with the cold salad ingredients for a delightful contrast.

Mix Before Serving: Always mix the salad well before serving after storage to refresh the flavors and ensure an even distribution of dressing throughout the Southwest Chicken Salad.

What to Serve with Southwest Chicken Salad

This zesty yet hearty salad pairs beautifully with a variety of sides, complementing its vibrant flavors and refreshing crunch.

  • Crispy Tortilla Chips: They add a delightful crunch and are perfect for dipping into any extra dressing left on your plate.
  • Quinoa Salad: A fluffy, protein-packed side that balances the heartiness of chicken and beans while adding a nutty flavor.

For a touch of sweetness, consider a fresh fruit salad with juicy watermelon and berries. This refreshing combo creates a perfect contrast to the savory salad.

  • Lightly Grilled Vegetables: Their smoky flavor and tender texture harmonize beautifully with the spices in the salad, making each bite a star.

  • Mango Salsa: Sweet and tangy, this salsa brightens up each mouthful, enhancing the Southwest flair of your dish.

  • Cilantro Lime Rice: The bright, citrusy rice offers a perfect textural contrast to the chicken salad, creating a satisfying plate that feels like a celebration!

Enjoy a light sparkling water or a tropical iced tea alongside to elevate your meal experience!

Southwest Chicken Salad Variations

Get ready to make this delightful dish your own with some fun twists and substitutions!

  • Dairy-Free: Use dairy-free mayo or creamy avocado instead of regular mayo for a healthier option packed with flavor.

  • Gluten-Free: Double-check ingredients like dressings or store-bought components. Stick with gluten-free certified labels for seamless enjoyment.

  • Extra Heat: Add diced serrano peppers or a dash of hot sauce for a fiery kick that will make your taste buds dance!

  • Flavor Boost: Incorporate fresh cilantro or diced avocado for an earthy, rich layer that complements the spicy southwest profile beautifully.

  • Crunchy Twist: Swap pepitas for crispy tortilla strips to add a satisfying crunch while enhancing that taco-inspired vibe.

  • Veggie Variations: Experiment with additional veggies like diced cucumber or shredded carrots for extra color and crispness—each bite will be a delightful surprise!

  • Meal Prep Magic: Divide the salad into individual containers for easy grab-and-go lunches; it’s perfection on busy days!

  • Wrap It Up: Transform the salad into a wrap using a whole wheat or spinach tortilla, making it a portable, flavor-packed meal option.

For more ideas, consider trying my BBQ Chicken Grilled Cheese Sandwich for a comfort twist or dive into the warming Tuscan Chicken Soup for another delightful culinary journey!

Make Ahead Options

Preparing the Southwest Chicken Salad ahead of time is a fantastic way to save precious moments during your busy week! You can mix all salad ingredients—shredded chicken, black beans, corn, jalapeños, cherry tomatoes, red onion, and pepitas—up to 24 hours in advance. Just keep the dressing separate until you’re ready to serve, as this will help maintain the freshness and crunch of the veggies. When you’re ready to enjoy your salad, simply whisk together the dressing ingredients and mix them in before serving to ensure everything is evenly coated. This method keeps your Southwest Chicken Salad just as delicious while making mealtime a breeze!

Southwest Chicken Salad Recipe FAQs

What type of chicken should I use for the salad?
Absolutely! You can use cooked shredded chicken, which provides the perfect foundation for your Southwest Chicken Salad. If you’re in a hurry, canned chicken is a convenient option, but make sure to drain it well for the best texture.

How should I store leftovers?
To keep your Southwest Chicken Salad fresh, store it in an airtight container in the refrigerator for up to 4-5 days. The flavors will enhance as it sits, so don’t be surprised if it tastes even better the next day!

Can I freeze Southwest Chicken Salad?
It’s best to avoid freezing this salad due to the mayonnaise or yogurt dressing. Freezing may cause it to separate and become watery upon thawing. Instead, enjoy it fresh and store it in the fridge for delicious leftovers!

What if I want to adjust the spice level?
Very! Start with a small amount of jalapeños to suit your heat preference. You can always add more later to build up the spice. If it gets too spicy, serve with a dollop of sour cream or Greek yogurt to cool things down.

Are there any dietary considerations?
Yes! This Southwest Chicken Salad is naturally dairy-free and gluten-free, making it a great option for various diets. For those with allergies, ensure that any packaged ingredients (like canned beans or corn) are certified free of allergens. Always double-check the labels to be safe!

Southwest Chicken Salad

Southwest Chicken Salad: A Flavorful Fresh Twist

This Southwest Chicken Salad is a quick, dairy-free, and gluten-free meal packed with vibrant flavors and fresh ingredients.
Prep Time 10 minutes
Total Time 10 minutes
Servings: 4 servings
Course: Salad
Cuisine: Southwest
Calories: 350

Ingredients
  

For the Salad
  • 2 cups Cooked Shredded Chicken canned chicken is a convenient substitution
  • 1 can Black Beans rinsed and drained
  • 1 cup Corn canned or frozen
  • 1 medium Fresh Jalapeños adjust for heat preference
  • 1 cup Cherry Tomatoes quartered
  • 1/2 medium Red Onion finely chopped
  • 1/4 cup Pepitas (Pumpkin Seeds) sunflower seeds are an alternative
For the Dressing
  • 1/2 cup Mayo or Greek Yogurt dairy-free or regular
  • 2 tablespoons Fresh Lime Juice preferably freshly squeezed
  • 1 teaspoon Chili Powder adjust for spice tolerance
  • 1 teaspoon Garlic Powder fresh garlic can be used
  • 1 teaspoon Cumin
  • 1 teaspoon Paprika smoked paprika for extra flavor
  • 1 teaspoon Salt season to taste

Equipment

  • Mixing Bowl
  • whisk
  • spatula

Method
 

Step-by-Step Instructions
  1. In a medium bowl, whisk together mayo or Greek yogurt, fresh lime juice, chili powder, garlic powder, cumin, paprika, and salt until smooth and slightly thickened, about 2 minutes.
  2. In a large mixing bowl, add shredded chicken, rinsed black beans, sweet corn, diced jalapeños, quartered cherry tomatoes, chopped red onion, and pepitas. Gently toss for about 1-2 minutes.
  3. Pour the prepared dressing over the salad mixture and stir until all components are evenly coated.
  4. Serve immediately or refrigerate in an airtight container, mixing again before serving.

Nutrition

Serving: 1servingCalories: 350kcalCarbohydrates: 30gProtein: 25gFat: 18gSaturated Fat: 3gPolyunsaturated Fat: 2gMonounsaturated Fat: 12gCholesterol: 70mgSodium: 600mgPotassium: 800mgFiber: 8gSugar: 4gVitamin A: 30IUVitamin C: 40mgCalcium: 6mgIron: 15mg

Notes

For best flavor, use fresh vegetables. Adjust jalapeños for spice preference and dress right before serving to maintain freshness.

Tried this recipe?

Let us know how it was!

Ultimate Italian Grinder Salad Sandwich for Flavor Lovers

As I watched my favorite food enthusiast videos, a mouth-watering creation caught my eye—the Italian Grinder Salad Sandwich. This vibrant dish combines savory Italian meats, creamy provolone, and a refreshing salad nestled in a perfectly toasted sub roll. Not only is this recipe a crowd-pleaser for casual lunches and family dinners, but it also embodies versatility that makes it a great choice for gatherings or meal prep throughout the week. With quick preparation and delightful layers of flavor and texture, this sandwich elevates your usual mealtime into something truly special. Are you ready to experience a new favorite in your kitchen? Let’s dive into this delicious adventure together!

Why is this sandwich a must-try?

Bold flavors unite in this Italian Grinder Salad Sandwich, creating a mouthwatering experience that will excite your taste buds. Simplicity at its best: with easy-to-follow steps, you’ll have these sandwiches ready in no time! Versatile options: adjust ingredients to suit your taste or dietary needs—substitute proteins or add extra veggies! Crowd-pleaser: ideal for gatherings or meal prep, it’s sure to impress family and friends alike. If you’re craving something lighter, consider serving it with a side of our Blt Chicken Salad for a perfect balance. Embrace this delicious twist on a classic that everyone will love!

Italian Grinder Salad Sandwich Ingredients

• Get ready to create this delightful sandwich masterpiece!

For the Salad Dressing

  • Mayonnaise – Brings creaminess to the salad dressing; substitute with Greek yogurt for a lighter option.
  • Red Wine Vinegar – Adds tanginess to the dressing; can replace with apple cider vinegar for a milder flavor.
  • Garlic Powder – Enhances the salad’s flavor profile; fresh garlic can be used if preferred, but reduce quantity to avoid overpowering.
  • Oregano – Provides a herby depth; fresh oregano is a great substitute for a bolder flavor.
  • Salt & Pepper – Essential for seasoning both the salad and the sandwich; adjust to taste.

For the Sandwich

  • Shredded Lettuce – Adds crunch and freshness to the sandwich; substitutes: spinach or arugula for added flavor.
  • Sliced Red Onion – Contributes a sharp bite; can swap with green onions for a milder taste.
  • Banana Peppers – Offers a touch of heat and tanginess; jalapeños can be added for extra spiciness.
  • Salami, Pepperoni, Turkey – Provides the main protein and savory component; substitute turkey with ham or omit for a vegetarian version.
  • Provolone Cheese – Melts beautifully, adding richness; substitute with mozzarella for a milder flavor.
  • Tomato Slices – Adds freshness and juiciness; optional for those who prefer fewer toppings.
  • Grated Parmesan Cheese – Adds a final touch of flavor and texture; nutritional yeast can be used as a dairy-free alternative.

Step‑by‑Step Instructions for Italian Grinder Salad Sandwich

Step 1: Make the Grinder Salad
In a large mixing bowl, combine ½ cup of mayonnaise, 2 tablespoons of red wine vinegar, 1 teaspoon of garlic powder, and 1 teaspoon of dried oregano. Whisk these ingredients together until smooth and creamy. Season with salt and pepper to taste. Fold in 2 cups of shredded lettuce, ½ cup of sliced red onion, and ½ cup of sliced banana peppers until everything is well-coated and vibrant.

Step 2: Assemble Sandwiches
Take your sub rolls and lay them open on a clean cutting board. Layer 4 slices each of salami and pepperoni, followed by a layer of turkey on the bottom half of each roll. Then, add 2 slices of provolone cheese on top, ensuring even coverage for a delightful melt when broiled.

Step 3: Broil Sandwich
Preheat your oven’s broiler to high. Place the assembled sandwiches on a baking sheet lined with parchment paper to catch any drips. Broil the sandwiches for 2-3 minutes, keeping a close eye on them, until the cheese is melted and bubbly and the meats are slightly crisped.

Step 4: Top as Desired
Once the sandwiches are perfectly broiled, remove them carefully from the oven. Add slices of fresh tomatoes on top, and sprinkle with salt and pepper according to your taste. This will enhance the sandwich with freshness and flavor.

Step 5: Finish with Salad
Generously spoon the prepared grinder salad onto each sandwich, trying not to let it spill out too much. Lastly, finish off by sprinkling some grated Parmesan cheese on top for that extra touch of flavor and richness.

Step 6: Serve
Finally, close each sandwich, and if you prefer, cut them in half for easy handling. Serve immediately while everything is warm and the textures are delightful. The Italian Grinder Salad Sandwich is ready to be enjoyed!

Make Ahead Options

These Italian Grinder Salad Sandwiches are perfect for busy home cooks looking to save time during the week! You can prepare the grinder salad Up to 24 hours in advance by combining the dressing and vegetables and storing them in an airtight container in the refrigerator. To maintain freshness, keep the salad separate from the meats and cheeses until you are ready to assemble. The sandwich components can also be prepped a day ahead; simply layer the meats and cheeses in the sub rolls, wrap tightly, and refrigerate. When you’re ready to serve, broil the assembled sandwiches for 2-3 minutes until the cheese is melted, then top with the grinder salad and enjoy restaurant-quality results with minimal effort!

Helpful Tricks for Italian Grinder Salad Sandwich

  • Watch the Broiler: Keep a close eye on the oven while broiling to prevent burning; the cheese can turn from perfect to charred in seconds.
  • Balance Ingredients: Avoid overloading the sandwich with too many toppings; this helps maintain a delicious texture and flavor in your Italian Grinder Salad Sandwich.
  • Perfect Prep: For a great flavor hits, consider toasting the sub rolls slightly before assembling them; this adds a delightful crunch.
  • Creative Substitutions: Don’t hesitate to personalize your sandwich; swap out meats or add extra veggies to suit your preference!
  • Freshness Matters: Use fresh produce like lettuce and tomatoes for the best flavor; wilted greens can make your sandwich less appealing.

What to Serve with Italian Grinder Salad Sandwich

Imagine a lively gathering around your dining table, where flavors collide and every bite feels like a warm hug!

  • Kettle Chips: Crunchy and salty, they provide a satisfying contrast, making each bite a delightful experience.

  • Garlic Bread: A warm, buttery loaf enhances the Italian flavor theme and is perfect for mopping up any drippings.

  • Italian Pasta Salad: The flavors of olives, tomatoes, and herbs in this refreshing side balance the richness of the sandwich.

  • Fresh Fruit Salad: A juicy, sweet medley of seasonal fruits offers a vibrant contrast, cleansing the palate with each bite.

  • Classic Caesar Salad: Crisp romaine, creamy dressing, and parmesan elevate your meal with added texture and a touch of elegance.

  • Iced Lemonade: Refreshing and slightly tart, this drink complements the savory flavors, keeping you cool on warm days.

Enhance your dining experience by mixing and matching these sides with your Italian Grinder Salad Sandwich, turning a simple meal into a memorable feast!

Italian Grinder Salad Sandwich Variations

Feel free to explore these delightful twists and substitutions that will elevate your Italian Grinder Salad Sandwich and suit your taste!

  • Vegetarian Delight: Replace meats with grilled veggies, like zucchini and bell peppers, for a garden-fresh option. Your palate will love the vibrant colors and flavors!
  • Extra Spicy: Add sliced jalapeños or a spicy aioli to turn up the heat, giving your sandwich a tantalizing kick!
  • Cheesy Goodness: Swap provolone for gouda or feta cheese to introduce unique flavors to each bite. Trust me, cheese lovers will rejoice!
  • Crunchy Twist: Introduce pickles or a crunchy coleslaw for a new texture dimension, adding a delightful crunch to your sandwich experience.
  • Herbaceous Boost: Use fresh herbs instead of dried oregano or include basil and parsley to elevate freshness and flavor. The scent alone will entice!
  • Switching Proteins: Consider swapping turkey for ham or roast beef for a savory twist that adds a different richness to the overall taste.
  • Leafy Substitution: For a nutrient boost, try swapping shredded lettuce with arugula or spinach, introducing a peppery flavor that beautifully complements the other ingredients.
  • Dairy-Free Option: Use nutritional yeast instead of grated Parmesan for a dairy-free option that provides a similar umami kick to your sandwich. Enjoy without compromising on flavor!

Each variation offers a chance to customize and enhance your sandwich experience, making it uniquely yours. For a delightful side, consider serving it with a light salad or with our Honey Banana Sandwich. Enjoy the journey of flavors as you experiment!

How to Store and Freeze Italian Grinder Salad Sandwich

Fridge: Store any leftover Italian Grinder Salad Sandwich in an airtight container for up to 3 days. This keeps the flavors fresh while preventing sogginess.

Freezer: Wrap each sandwich tightly in plastic wrap and then in aluminum foil; freeze for up to 2 months. This method preserves the taste and texture for future enjoyment.

Reheating: To reheat, remove the wrapping, and place the sandwich on a baking sheet. Bake at 350°F (175°C) for about 15-20 minutes until warmed through and the cheese is melted.

Room Temperature: Enjoy your sandwich at room temperature for up to 2 hours if left out during a gathering. However, it’s best to refrigerate leftovers promptly for safety.

Italian Grinder Salad Sandwich Recipe FAQs

How do I choose the right ingredients for my Italian Grinder Salad Sandwich?
Absolutely! For the freshest flavors, select crisp, vibrant vegetables; look for lettuce that is bright green without any brown edges. For meats, opt for high-quality deli slices and make sure your provolone cheese is smooth and creamy. Additionally, check that banana peppers are firm and without dark spots; this will enhance the sandwich’s crunch!

How should I store leftovers from my Italian Grinder Salad Sandwich?
To keep your leftover sandwich fresh, place it in an airtight container and store it in the fridge for up to 3 days. This will help preserve the texture and prevent any sogginess from the dressing. Always remember to let it cool slightly before sealing it tightly to maintain optimal taste.

Can I freeze the Italian Grinder Salad Sandwich?
Certainly! For freezing, wrap each sandwich tightly in plastic wrap, then follow with aluminum foil to prevent freezer burn. This method allows you to store them for up to 2 months. When you’re ready to enjoy, simply unwrap and bake at 350°F (175°C) for about 15-20 minutes to reheat, ensuring the cheese melts beautifully.

What if my sandwich seems too soggy after being stored?
No worries! If you find your Italian Grinder Salad Sandwich is a bit soggy, I recommend reassembling it slightly before serving. Toast the bread separately to add some crispness, and keep the salad separate until ready to serve. This will help maintain that wonderful contrast of textures!

Are there any dietary considerations for the Italian Grinder Salad Sandwich?
Absolutely! If you’re making this sandwich for someone with dietary restrictions, there are many easy adaptations. For a vegetarian version, simply replace the meats with grilled veggies or chickpeas. If allergies are a concern, be sure to check the labels on mayonnaise and cheese for any allergens. Enjoy customizing this sandwich to suit everyone’s tastes!

Italian Grinder Salad Sandwich

Ultimate Italian Grinder Salad Sandwich for Flavor Lovers

Discover the Italian Grinder Salad Sandwich, a flavor-packed delight perfect for lunch or gatherings.
Prep Time 15 minutes
Cook Time 5 minutes
Total Time 20 minutes
Servings: 4 sandwiches
Course: Lunch
Cuisine: Italian
Calories: 550

Ingredients
  

Salad Dressing
  • ½ cup mayonnaise or Greek yogurt for lighter option
  • 2 tablespoons red wine vinegar or apple cider vinegar
  • 1 teaspoon garlic powder or fresh garlic, reduced quantity
  • 1 teaspoon oregano or fresh oregano
  • salt to taste
  • pepper to taste
Sandwich Ingredients
  • 2 cups shredded lettuce or spinach/arugula
  • ½ cup sliced red onion or green onions
  • ½ cup banana peppers or jalapeños for extra heat
  • 4 slices salami
  • 4 slices pepperoni
  • 4 slices turkey or ham/omit for vegetarian
  • 2 slices provolone cheese or mozzarella
  • 1 medium tomato sliced, optional
  • ¼ cup grated Parmesan cheese or nutritional yeast

Equipment

  • Mixing Bowl
  • Baking Sheet
  • whisk
  • Parchment Paper
  • Oven
  • Knife
  • Cutting board

Method
 

Step-by-Step Instructions
  1. In a large mixing bowl, combine mayonnaise, red wine vinegar, garlic powder, and oregano. Whisk until smooth. Season with salt and pepper. Fold in lettuce, red onion, and banana peppers until well-coated.
  2. Take sub rolls and lay them open. Layer with salami, pepperoni, and then turkey. Add provolone cheese.
  3. Preheat oven's broiler to high. Place sandwiches on a baking sheet lined with parchment paper. Broil for 2-3 minutes until cheese is melted.
  4. Remove from oven and top with tomato slices, sprinkling with salt and pepper.
  5. Spoon grinder salad onto each sandwich, sprinkling with grated Parmesan.
  6. Close each sandwich and cut in half if desired. Serve warm.

Nutrition

Serving: 1sandwichCalories: 550kcalCarbohydrates: 45gProtein: 25gFat: 30gSaturated Fat: 10gPolyunsaturated Fat: 2gMonounsaturated Fat: 15gCholesterol: 70mgSodium: 1200mgPotassium: 600mgFiber: 3gSugar: 5gVitamin A: 1500IUVitamin C: 15mgCalcium: 300mgIron: 2mg

Notes

For best flavor, use fresh ingredients and balance toppings for optimal texture.

Tried this recipe?

Let us know how it was!

Delicious BLT Wraps with Mayo for Quick Weeknight Meals

A delightful crunch of crispy bacon and juicy tomatoes wrapped snugly in soft tortillas brings a refreshing twist to the classic BLT—meet my Zesty BLT Wraps with Chipotle Mayo. This quick meal not only transforms your lunch game but also proves to be a perfect solution for those busy weeknights when homemade food feels like a luxury. Plus, these wraps are fully customizable, making them adaptable to whatever flavors you’re craving or the ingredients you have on hand. Whether you’re packing them for a picnic or enjoying them fresh at home, I promise these wraps will elevate your dining experience while shaving precious minutes off your prep time. Ready to unleash your inner chef and whip up something spectacular? Let’s dive into this easy recipe!

Why Are These BLT Wraps a Must-Try?

Convenience at Its Finest: These wraps can be assembled in just minutes, perfect for busy days when time is tight.

Crispy and Creamy Delight: Enjoy the mouthwatering combination of crispy bacon, fresh veggies, and creamy chipotle mayo that makes every bite a flavor explosion.

Customizable Goodness: Feel free to switch up ingredients! Try turkey bacon or add avocado for a creamy twist. The options are endless!

Great for Meal Prep: These wraps hold up beautifully in the fridge, making them ideal for lunches throughout the week.

Crowd-Pleasing Flavor: Whether for a family dinner or a picnic, these wraps are bound to impress everyone at your table. You can even pair them with a fresh pasta salad for a complete meal experience!

BLT Wraps with Mayo Ingredients

For the Wraps

  • Bacon – Offers a savory, crispy flavor; thick-cut bacon adds a heartier bite.
  • Tortillas – The base that holds your ingredients; whole wheat or gluten-free options can make it healthier.
  • Lettuce – Provides crunch and freshness; choose iceberg or romaine for the best texture.
  • Tomato – Adds juiciness and flavor; pat them dry to keep the wraps from getting soggy.
  • Cheese – Melts beautifully and enhances richness; cheddar works wonderfully but feel free to be creative.

For the Sauce

  • Chipotle Mayo – Delivers a delightful spicy kick that elevates the wraps; you can replace mayo with plain if you prefer less heat.
  • Optional Spices – Consider adding cayenne pepper for extra spice or smoked paprika for depth of flavor.

These Zesty BLT Wraps with Mayo are not only delicious but also highly customizable to fit your taste preferences. Enjoy every bite!

Step‑by‑Step Instructions for Zesty BLT Wraps with Chipotle Mayo

Step 1: Cook the Bacon
Heat a large skillet over medium-high heat. Add the bacon strips in a single layer, cooking for about 6-8 minutes until crispy and golden brown. Flip halfway through for even cooking. Once crispy, transfer the bacon to a plate lined with paper towels to drain any excess grease, ensuring it remains crunchy for your Zesty BLT Wraps.

Step 2: Melt the Cheese
In the same skillet, or you can use a microwave, take one tortilla and sprinkle with about 1/4 cup of shredded cheese. Heat the tortilla in the microwave for 1-2 minutes until the cheese is melted and bubbly. This will create a cheesy barrier that holds the filling together, enhancing the flavor of your wraps.

Step 3: Assemble the Filling
Once the cheese has melted, carefully layer on 1/4 of the crispy bacon, a handful of fresh lettuce, and several slices of juicy tomato on one side of the tortilla. Be sure to pat the tomatoes dry before adding to keep your Zesty BLT Wraps from becoming soggy. The freshness of the veggies complements the savory bacon beautifully.

Step 4: Roll the Wrap
To wrap your ingredients, fold in the sides of the tortilla towards the filling and then roll it tightly from the bottom up. Use a gentle pressure to keep everything snugly in place. This technique helps prevent any filling from spilling out, ensuring each bite is deliciously packed with flavor.

Step 5: Repeat the Process
Continue the same steps for the remaining tortillas, melting cheese, adding the filling, and rolling tightly. Each Zesty BLT Wrap with Chipotle Mayo can be customized based on your liking, so feel free to include your favorite extras like avocado or jalapeños during layering for added flavor!

Step 6: Slice and Serve
Once all wraps are assembled, use a sharp knife to cut each wrap in half diagonally for a neat presentation. Serve your Zesty BLT Wraps warm or at room temperature, perhaps with your favorite side like crispy potato chips or a fresh salad. Each bite will be a delightful fusion of flavors!

Step 7: Storing and Enjoying
If you have any leftovers, wrap them tightly in plastic wrap or store them in an airtight container in the fridge for up to 24 hours. This makes your Zesty BLT Wraps with Chipotle Mayo perfect for meal prep, ready to enjoy for lunch or a quick snack whenever you crave a tasty treat.

Storage Tips for BLT Wraps with Mayo

Room Temperature: Enjoy your BLT Wraps straight after assembly, but if left out, consume within 2 hours for best taste and safety.

Fridge: Store any assembled wraps in an airtight container for up to 24 hours. If storing ingredients separately, the cooked bacon lasts 4-5 days, keeping everything fresh.

Freezer: For freezer storage, wrap each individual BLT Wrap tightly in plastic wrap, then place in a freezer bag. These can be frozen for up to 1 month.

Reheating: When ready to enjoy frozen wraps, thaw overnight in the fridge and reheat in a microwave or skillet until warm, ensuring the flavors are fresh and delicious.

What to Serve with Zesty BLT Wraps with Chipotle Mayo

Elevate your meal experience by pairing these vibrant wraps with delightful sides that complement their flavors beautifully.

  • Crispy Potato Chips: The crunch and salty goodness perfectly balance the freshness of the wraps, making for a satisfying pairing.

  • Fresh Pasta Salad: A light and tangy pasta salad adds a refreshing contrast and greens to your meal, enhancing the overall dining experience.

  • Fruit Salad: Bright chunks of seasonal fruits provide a sweet touch that cuts through the savory flavors, adding a lovely burst of freshness.

  • Pickle Spears: The sharp acidity of pickles enhances the savory profile of the wraps, making each bite more vibrant and enjoyable.

  • Coleslaw: A creamy coleslaw complements the crunchy texture of the wraps with a tangy creaminess that’s hard to resist.

  • Iced Lemonade: Refreshing and tart lemonade is a delightful drink option that perfectly lifts the meal’s flavors and adds a touch of brightness.

Make Ahead Options

These Zesty BLT Wraps with Chipotle Mayo are perfect for meal prep, allowing you to save precious time on busy weeknights! You can prepare the components in advance: the bacon can be cooked and refrigerated for up to 5 days while the chipotle mayo can be made up to 3 days ahead. Assemble the wraps just before serving to maintain freshness; layer the bacon, lettuce, and tomatoes onto tortillas the night before and wrap tightly in plastic. To prevent sogginess, pat the tomatoes dry and avoid adding them until you’re ready to roll. With these simple steps, you can enjoy quick, delicious meals that are just as delightful as if they were made fresh that day!

BLT Wraps with Mayo Variations

Feel free to get creative with these wraps and bring your unique touch to the table!

  • Turkey Bacon: Swap out traditional bacon for turkey bacon to create a lighter version that still satisfies your savory cravings.

  • Avocado Add-in: Mashed or sliced avocado adds a creamy texture, making your wraps even more delightful and full of healthy fats.

  • Spicy Kick: Incorporate diced jalapeños for a robust heat that elevates the flavor profile of your wraps. Feel the zing with each bite!

  • Whole Wheat Tortillas: Opt for whole wheat tortillas to turn this dish into a more wholesome meal, offering extra fiber and nutrients.

  • Smoky Paprika: Mix in some smoked paprika with your chipotle mayo to deepen the flavor, giving your wraps an irresistible smoky undertone.

  • Cheese Variety: Experiment with different cheeses such as pepper jack for extra spice or goat cheese for a rich, tangy bite.

  • Fresh Greens: Swap lettuce with fresh spinach or even arugula to provide new textures and flavors, adding a touch of peppery zest.

  • Herb Infusion: Sprinkle in some fresh herbs like cilantro or basil to brighten the wraps and give them a fresh, vibrant feel.

These delightful variations will surely make your Zesty BLT Wraps with Chipotle Mayo experience even more exciting! If you’re in the mood for something versatile and delicious, try pairing them with a side of Garlic Chicken Wraps or a refreshing BLT Chicken Salad. Enjoy your culinary adventure!

Expert Tips for BLT Wraps with Mayo

  • Cool the Bacon: Allow the cooked bacon to cool slightly before adding it to the wraps. This will prevent your tortilla from getting soggy.

  • Pat Dry Tomatoes: Always pat your tomatoes dry after washing to keep them juicy but prevent the wraps from becoming too wet.

  • Don’t Overfill: Stick to about 1/4 cup of each filling. Too much filling can make wrapping difficult and lead to tearing.

  • Secure Properly: Wrap tortillas tightly and consider using toothpicks or parchment paper to hold them together, ensuring your BLT Wraps stay intact until served.

  • Customize with Ease: Feel free to swap ingredients based on your preference or dietary needs. This makes these BLT Wraps with Mayo adaptable for everyone!

Zesty BLT Wraps with Chipotle Mayo Recipe FAQs

How do I choose the right tomatoes for my BLT wraps?
Absolutely! Look for ripe tomatoes that are firm to the touch and bright in color. I recommend avoiding any tomatoes with dark spots or blemishes, as they might indicate overripeness. For the best flavor, heirloom or vine-ripened tomatoes often deliver that juicy burst you want in your wraps!

What’s the best way to store my Zesty BLT Wraps?
Very! If you plan to enjoy the wraps within a day, store them in an airtight container in the fridge for up to 24 hours. If you’re preparing them for the week, I suggest keeping the ingredients separate. The cooked bacon should last in the fridge for about 4-5 days, while the tortillas and other fresh ingredients fare better when combined only shortly before eating.

Can I freeze the assembled wraps?
Absolutely! To freeze your Zesty BLT Wraps, wrap each one tightly in plastic wrap. Place the wrapped wraps in a freezer bag designed for freezing to prevent freezer burn. You can keep them frozen for up to 1 month. When you’re ready to enjoy, simply thaw them overnight in the fridge and reheat in a microwave or skillet until warmed through. Easy peasy!

What should I do if my wraps are falling apart?
Don’t worry, it happens to the best of us! If your wraps are falling apart, here’s what you can do: ensure you’re not overfilling—the trick is to stick to about 1/4 cup of each ingredient. Also, make sure to roll them tightly, folding in the sides first before rolling from the bottom up. If needed, you can use toothpicks or parchment paper to help keep them secure until served.

Are there any dietary considerations for these wraps?
Very! If you’re catering to specific dietary needs, feel free to substitute the bacon with turkey bacon or a plant-based alternative. Additionally, you can use gluten-free tortillas for those avoiding gluten. If you have allergies to common ingredients like dairy, swap out cheese for avocado or another creamy spread, and use a dairy-free mayo for the chipotle sauce. There’s flexibility to make it work for everyone!

How can I prevent my tortilla from getting soggy?
Great question! To avoid a soggy tortilla, there are a couple of steps you can take. First, always pat your tomatoes dry before adding them to the wrap. Secondly, allow your bacon to cool slightly before it’s added—this simple step really helps maintain the tortilla’s integrity. And remember, less is more; stick to the recommended amounts of filling for best results!

BLT Wraps with Mayo

Delicious BLT Wraps with Mayo for Quick Weeknight Meals

A refreshing twist on the classic BLT, these wraps with mayo are customizable and perfect for quick meals.
Prep Time 10 minutes
Cook Time 10 minutes
Total Time 20 minutes
Servings: 4 wraps
Course: Lunch
Cuisine: American
Calories: 400

Ingredients
  

For the Wraps
  • 8 slices Bacon Thick-cut bacon for a heartier bite.
  • 4 pieces Tortillas Whole wheat or gluten-free options are available.
  • 2 cups Lettuce Iceberg or romaine provides the best texture.
  • 2 medium Tomatoes Pat them dry to avoid sogginess.
  • 1 cup Cheese Cheddar works best, but feel free to be creative.
For the Sauce
  • 1/2 cup Chipotle Mayo Can replace with plain mayo for less heat.
  • Optional Spices Consider cayenne pepper or smoked paprika.

Equipment

  • Large skillet
  • Microwave
  • Knife
  • paper towels

Method
 

Step-by-Step Instructions
  1. Heat a large skillet over medium-high heat. Cook bacon for 6-8 minutes until crispy.
  2. In the same skillet, melt cheese on a tortilla for 1-2 minutes until bubbly.
  3. Layer bacon, lettuce, and patted-dry tomato on the cheese-covered tortilla.
  4. Fold in the sides of the tortilla and roll tightly from bottom to top.
  5. Repeat with remaining tortillas and fillings.
  6. Slice each wrap in half diagonally for serving.
  7. Store leftovers tightly wrapped in the fridge for up to 24 hours.

Nutrition

Serving: 1wrapCalories: 400kcalCarbohydrates: 28gProtein: 20gFat: 25gSaturated Fat: 10gPolyunsaturated Fat: 5gMonounsaturated Fat: 8gCholesterol: 60mgSodium: 900mgPotassium: 500mgFiber: 3gSugar: 3gVitamin A: 900IUVitamin C: 10mgCalcium: 200mgIron: 2mg

Notes

These wraps can be customized with additional ingredients like turkey bacon or avocado.

Tried this recipe?

Let us know how it was!

Dill Pickle Chicken Salad: Creamy Crunch for Your Lunch

There I was, staring down at a mountain of leftover rotisserie chicken, when inspiration struck. What if I transformed that ordinary pile into something extraordinary? Enter my Savory Dill Pickle Chicken Salad—a creamy, tangy delight that immediately elevates your lunch game. This recipe isn’t just an easy lunch option; it’s a dreamy meal prep solution that balances crisp cucumbers and zesty dill pickles with tender chicken. Plus, it’s incredibly adaptable—perfect on its own, in a sandwich, or nestled within a lettuce wrap. Whether you’re targeting a busy workweek or craving a refreshing dish to impress, this salad is your secret weapon. Are you ready to dive into the recipe and discover new ways to savor those simple ingredients?

Why Choose Dill Pickle Chicken Salad?

Irresistible Flavor: The tangy dill pickles combined with creamy dressing create a zesty taste sensation that brightens up any lunch.

Quick and Easy: This recipe takes minimal time, making it perfect for those busy days when you need a satisfying meal in a flash.

Flexible and Adaptable: Serve it on toasted bread, inside a croissant, or enjoy it on a bed of crisp lettuce for a delightful twist.

Meal Prep Friendly: Make it ahead of time for a week’s worth of delicious lunches that keep well in the fridge, offering a fantastic option for meal planning.

Crowd-Pleasing Delicacy: Whether you’re hosting a casual gathering or sharing with family, this savory chicken salad is sure to impress, much like my Sizzling Chicken Pepper recipe!

Experience a new lunchtime favorite with this delightful Dill Pickle Chicken Salad that’s sure to become your go-to dish!

Dill Pickle Chicken Salad Ingredients

• This salad is not only delightful but simple too—let’s gather what you need!

For the Chicken Salad

  • Cooked Chicken – Use shredded rotisserie chicken for convenience or poached chicken for freshness.
  • Dill Pickles – Choose crunchy, tangy pickles; ensure they’re drained well to prevent a watery salad.
  • Onions (finely chopped) – Adds a subtle sweetness and enhances the overall flavor profile.
  • Celery (finely chopped) – Provides a refreshing crunch that beautifully balances the creaminess.

For the Dressing

  • Greek Yogurt – A healthier alternative that adds creaminess and tang; a must for flavor depth!
  • Mayonnaise – Enhances creaminess; adjust the amount to get your desired richness.
  • Mustard – Adds a zesty kick; yellow mustard works perfectly, but swap in Dijon for extra zing.
  • Chives – Imparts a mild onion flavor; fresh chives really elevate the dish.
  • Dill (fresh or dried) – Deepens the pickle essence; fresh dill brings vibrant flavor and brightness.
  • Salt and Pepper – Essential seasoning; taste as you go to get the perfect balance!

This Dill Pickle Chicken Salad is not just a meal—it’s a flavorful adventure waiting to happen!

Step‑by‑Step Instructions for Dill Pickle Chicken Salad

Step 1: Prep Chicken and Vegetables
In a large mixing bowl, combine your cooked and shredded chicken with the finely chopped onions and well-drained, diced dill pickles. Make sure all the ingredients are at room temperature before you start mixing to maintain the salad’s texture. Use a spatula to gently fold the ingredients together, ensuring even distribution of flavors.

Step 2: Make Dressing
In a separate bowl, whisk together the creamy dressing by combining Greek yogurt, mayonnaise, mustard, finely chopped chives, and dill. Add a pinch of salt and pepper to taste as you mix. Continue whisking until the dressing is smooth and creamy, ensuring all ingredients are amalgamated for a delightful flavor infusion in your Dill Pickle Chicken Salad.

Step 3: Combine
Carefully pour the dressing over the chicken and vegetable mixture. Using a spatula, gently fold the dressing into the salad until everything is well coated and harmoniously blended. Take your time during this step; the aim is to coat every piece without mashing the ingredients, retaining their delightful textures.

Step 4: Taste and Adjust
Once combined, it’s time to taste your Dill Pickle Chicken Salad. Check for seasoning and balance; if needed, add a little more salt or pepper to enhance the flavors. Don’t hesitate to tweak the dressing, perhaps adding a dash more mustard for that zesty kick, ensuring it’s perfectly tailored to your palate.

Step 5: Chill
Cover your mixing bowl with plastic wrap or transfer the salad to an airtight container. Place it in the refrigerator for at least 2 hours, or ideally overnight. This chilling time allows the flavors to meld beautifully, giving you a more flavorful and refreshing Dill Pickle Chicken Salad to enjoy later.

Step 6: Serve
When ready to serve, give the salad a gentle stir to re-incorporate any dressing that may have separated. Scoop generous portions onto croissants, toasted bread, or a bed of crisp lettuce. Each bite of your creamy dill pickle chicken salad will be an inviting burst of flavor, perfect for lunch.

Make Ahead Options

These Savory Dill Pickle Chicken Salad preparations are perfect for those busy home cooks looking to save time during the week! You can prepare the chicken salad mixture (without the dressing) up to 3 days in advance, storing it in an airtight container in the refrigerator. To maintain quality and prevent excess moisture, ensure the dill pickles are well-drained and patted dry before adding them to the salad. When you’re ready to enjoy, simply whisk together the dressing ingredients, combine everything, and chill for at least 2 hours for the flavors to meld beautifully. This way, you’ll have a delicious homemade lunch option ready to go without the fuss!

Storage Tips for Dill Pickle Chicken Salad

Fridge: Store your Dill Pickle Chicken Salad in an airtight container; it keeps well for up to 4 days. Make sure to stir before serving as ingredients may settle or separate.

Freezer: While it’s best enjoyed fresh, you can freeze portions of the salad for up to 2 months. Place it in a freezer-safe container and thaw in the fridge before serving.

Serving Temperature: Always serve chilled for the best flavor. If it has been stored in the fridge, it’s ready to go!

Reheating: This dish is best served cold; however, if you prefer it warm, gently heat the chicken in the microwave before mixing with the salad to maintain quality.

Dill Pickle Chicken Salad Variations

Feel free to explore these creative twists and substitutions to make this delightful chicken salad your own!

  • Dairy-Free: Replace Greek yogurt and mayonnaise with a blend of avocado and dairy-free yogurt for a creamy alternative.
  • Extra Crunch: Add diced apples or grapes for a sweet crunch that contrasts beautifully with the tangy pickles.
  • Spicy Kick: Mix in chopped jalapeños or a dash of sriracha to amp up the heat level and add an exciting twist.
  • Herb-Infused: Incorporate fresh parsley or basil for an aromatic flair that complements the dill and adds vibrant color.
  • Nutty Texture: Toss in some chopped walnuts or almonds for an extra crunch that enhances both texture and flavor.
  • Pickle Varieties: Experiment with sweet and spicy pickles instead of dill for a unique flavor profile that’s equally delicious.
  • Zesty Citrus: Squeeze lemon or lime juice into the dressing for a refreshing citrus zing that brightens all the flavors.
  • Savory Twist: Use shredded rotisserie chicken or leftover grilled chicken for an added depth of flavor, just like in my Chilli Chicken Takeout recipe!

Embrace your inner chef and make this salad your own while enjoying the combination of flavors that make it so special. Each variation adds its own charm, making mealtime a delightful experience!

Expert Tips for Dill Pickle Chicken Salad

  • Cool Chicken Completely: Always allow the shredded chicken to cool before mixing; hot chicken can cause the dressing to become runny.

  • Drain Pickles Thoroughly: Ensure your dill pickles are well-drained and patted dry to avoid a watery texture in your chicken salad.

  • Chill to Enhance Flavor: Let the salad sit in the fridge for at least 2 hours before serving—it allows the flavors to meld beautifully, making the salad even more delicious.

  • Adjust Ingredients to Taste: Don’t be afraid to tweak the dressing or seasoning! Taste and adjust salt, pepper, or mustard based on your personal preference to achieve the ultimate Dill Pickle Chicken Salad.

  • Store Properly: Keep leftovers in an airtight container in the fridge for up to 4 days. Stir before serving, as some separation may occur.

  • Get Creative with Add-ins: Feel free to add your favorite vegetables like bell peppers or even some nuts for added crunch and nutritional boost!

What to Serve with Savory Dill Pickle Chicken Salad

Picture a sunny day, a picnic blanket spread out, and the tangy aroma of chicken salad wafting through the air, inviting you to indulge in a feast of flavors.

  • Crispy Potato Chips: Perfect for that satisfying crunch and salty contrast, bringing a delightful textural element to your meal.

  • Fresh Garden Salad: A light, crisp salad with mixed greens and cherry tomatoes adds freshness without overpowering the creamy chicken salad.

  • Toasted Croissants: Flaky and buttery, they make for an indulgent delivery system for the chicken salad while adding a layer of sophistication.

  • Sliced Cucumbers: Serve them alongside for a refreshing crunch that complements the tangy flavors of the dill pickles in the salad.

  • Light Sauvignon Blanc: The crisp acidity of this wine enhances the tangy dressing and rounds out the meal beautifully.

  • Sweet Corn on the Cob: Grilled or boiled, the sweetness of corn contrasts nicely with the savory and tangy profile, creating a vibrant side.

  • Fruit Salad: A medley of seasonal fruits provides a refreshing, light counterpoint to the creamy texture. Try pineapple, berries, or melons for added sweetness.

  • Classic Coleslaw: The crunchy, creamy slaw adds an extra layer of flavor and texture that pairs wonderfully with the savory chicken salad.

Explore these delightful options and elevate your Dill Pickle Chicken Salad into a complete, satisfying meal!

Dill Pickle Chicken Salad Recipe FAQs

How do I select the best dill pickles for this recipe?
Absolutely! When choosing dill pickles, look for ones that are crisp and crunchy, avoiding those with dark spots all over, which indicate they may be past their prime. I recommend checking the label for ingredients to ensure they contain natural flavors without additives. Fresh, crunchy pickles will add that perfect tang and texture to your chicken salad.

How long can I store my Dill Pickle Chicken Salad in the fridge?
Very! You can store your delicious Dill Pickle Chicken Salad in an airtight container in the refrigerator for up to 4 days. Just give it a gentle stir before serving, as some liquid separation might occur. It’s best enjoyed cold, so keep it chilled until you’re ready to dive in!

Can I freeze Dill Pickle Chicken Salad?
Certainly! While it’s best enjoyed fresh, you can freeze the salad for up to 2 months. To freeze, place the salad in a freezer-safe container, ensuring it’s airtight. When you’re ready to enjoy it again, simply thaw it in the refrigerator overnight and give it a stir before serving to bring the flavors back together.

What should I do if my salad seems too watery?
Absolutely! If you find your chicken salad is too watery, it’s likely due to the dill pickles. To prevent this, ensure your pickles are thoroughly drained and patted dry before dicing. If it’s already made, you can drain excess liquid with a fine mesh strainer and add a bit more Greek yogurt or mayonnaise to reintroduce creaminess without sacrificing texture.

Is this recipe suitable for people with food allergies?
Very! This Dill Pickle Chicken Salad can be customized to accommodate various dietary needs. If you’re looking to adapt it for someone with a dairy allergy, consider using a dairy-free yogurt substitute for the Greek yogurt. Always check for allergies related to mustard and specific implement condiments, as these can vary between brands.

How can I make this salad more nutritious?
Absolutely! You can amp up the nutrition of your Dill Pickle Chicken Salad by adding in extra vibrant veggies like diced bell peppers, shredded carrots, or even some chopped spinach for added greens. For a crunchier texture, consider tossing in a handful of sunflower seeds or nuts, which not only adds flavor but also brings in healthy fats and protein!

Dill Pickle Chicken Salad

Dill Pickle Chicken Salad: Creamy Crunch for Your Lunch

A creamy, tangy Dill Pickle Chicken Salad that elevates your lunch game with crisp cucumbers and zesty pickles, perfect for meal prep.
Prep Time 15 minutes
Chill Time 2 hours
Total Time 2 hours 15 minutes
Servings: 4 servings
Course: Salad
Cuisine: American
Calories: 320

Ingredients
  

For the Chicken Salad
  • 2 cups cooked chicken shredded rotisserie or poached
  • 1 cup dill pickles diced and drained
  • 1/2 cup onions finely chopped
  • 1/2 cup celery finely chopped
For the Dressing
  • 1 cup Greek yogurt for creaminess
  • 1/2 cup mayonnaise adjust to desired richness
  • 1 tbsp mustard yellow or Dijon
  • 2 tbsp chives finely chopped
  • 1 tbsp dill fresh or dried
  • to taste salt
  • to taste pepper

Equipment

  • Mixing Bowl
  • whisk
  • spatula

Method
 

Step-by-Step Instructions
  1. In a large mixing bowl, combine your cooked and shredded chicken with the finely chopped onions and well-drained, diced dill pickles. Use a spatula to gently fold the ingredients together.
  2. In a separate bowl, whisk together the Greek yogurt, mayonnaise, mustard, finely chopped chives, and dill. Add a pinch of salt and pepper to taste.
  3. Carefully pour the dressing over the chicken and vegetable mixture. Gently fold the dressing into the salad until everything is well coated.
  4. Taste the salad and adjust seasoning if necessary by adding more salt, pepper, or mustard.
  5. Cover the bowl with plastic wrap or transfer the salad to an airtight container. Chill in the fridge for at least 2 hours or overnight.
  6. Before serving, give the salad a gentle stir and scoop onto croissants, toasted bread, or lettuce.

Nutrition

Serving: 1servingCalories: 320kcalCarbohydrates: 10gProtein: 25gFat: 20gSaturated Fat: 3gPolyunsaturated Fat: 2gMonounsaturated Fat: 5gCholesterol: 70mgSodium: 600mgPotassium: 300mgFiber: 2gSugar: 2gVitamin A: 500IUVitamin C: 4mgCalcium: 60mgIron: 1mg

Notes

This salad is perfect for meal prep and can be tailored with additional vegetables or nuts for extra flavor and crunch.

Tried this recipe?

Let us know how it was!

Cheesy Chicken Enchiladas That Melt in Your Mouth

As I walked into my kitchen, the warm aroma of spices and tender chicken filled the air, instantly transporting me to the lively streets of Mexico. Today, I’m thrilled to share my favorite recipe for Cheesy Chicken Enchiladas with Creamy Sauce. Not only do these enchiladas bring a delightful, restaurant-inspired twist to your dinner table, but they also come together in just 45 minutes! This makes them perfect for busy weeknights when you crave something comforting without the fuss. Packed with flavor and richness, they’re sure to become a family favorite that comforts the soul. Are you ready to create a meal that delights and satisfies? Let’s dive into this delicious journey together!

Why Are These Enchiladas Irresistible?

Deliciously Creamy: Each bite bursts with creamy goodness that hugs the chicken, making it a comforting dish for any night of the week.
Quick & Easy: In just 45 minutes, this recipe transforms simple ingredients into a meal that feels like a culinary masterpiece—perfect for busy schedules!
Family-Friendly: Guaranteed to please even the pickiest eaters, these cheesy chicken enchiladas offer a delightful balance of flavors that everyone will love.
Versatile Ingredients: Feel free to customize! Add your favorite vegetables or swap in different cheese to tailor these enchiladas.
Restaurant Quality: Elevate your home dining experience with this restaurant-inspired dish, bringing a taste of Mexico right to your kitchen.
Try serving with a side of Mexican rice for a delightful feast!

Cheesy Chicken Enchiladas Ingredients

Indulge in a symphony of flavors with these cheesy chicken enchiladas that are a perfect blend of comfort and satisfaction.

For the Filling

  • Olive Oil – Vital for sautéing the onions and enhancing overall flavor; can be substituted with canola oil for a more neutral taste.
  • Onions – Adds sweetness and depth to the filling; shallots can be used for a milder alternative.
  • Shredded Chicken – Delivers protein and heartiness; using rotisserie chicken saves time and adds convenience.
  • Cumin – A warm, earthy spice that amplifies flavor; no direct substitute, but chili powder can suffice in a pinch.
  • Chili Powder – Adds warmth and depth; try smoked paprika for a different flavor twist.
  • Salt and Pepper – Enhance all other flavors; adjust to your taste preference.
  • Flour Tortillas – Perfect for wrapping the filling; corn tortillas are an option but need warming to prevent cracking.

For the Sauce

  • Cheddar Cheese – Brings a creamy richness to the sauce; substitute with Pepper Jack for added heat.
  • Monterey Jack Cheese – Contributes to the gooey texture; feel free to mix with different cheese varieties for more flavor.
  • Sour Cream – Adds tanginess and creaminess; Greek yogurt can be a lighter substitute.
  • Heavy Cream – Creates an indulgently rich sauce; half-and-half works well for a lighter alternative.
  • Chicken Broth – Enhances the sauce flavor profoundly; vegetable broth makes it vegetarian-friendly.
  • Garlic Powder, Smoked Paprika, and Cayenne Pepper – These spices add layers of flavor; adjust cayenne to meet your spice preference.

For Garnish

  • Fresh Salsa – Adds freshness and a burst of flavor on top; diced tomatoes can be swapped based on personal taste.
  • Chopped Cilantro – Provides a fresh and vibrant finish; green onions also make a great substitute for garnish.

Step‑by‑Step Instructions for Cheesy Chicken Enchiladas

Step 1: Prepare Filling
In a large skillet, heat 2 tablespoons of olive oil over medium heat. Add 1 diced onion and sauté for about 5 minutes until it becomes translucent. Stir in 2 cups of shredded chicken, 1 teaspoon of cumin, 1 tablespoon of chili powder, and salt and pepper to taste. Cook for another 2-3 minutes, ensuring all ingredients are well combined and aromatic.

Step 2: Preheat Oven
While the filling is simmering, preheat your oven to 375°F (190°C). Grease a 9×13-inch baking dish with a little olive oil to prevent sticking, ensuring it’s ready for the enchiladas once assembled. This baking temperature will help achieve that golden, bubbly cheese topping you crave in these Cheesy Chicken Enchiladas.

Step 3: Assemble Enchiladas
Lay out 8 flour tortillas on a clean surface. Spoon about 1/4 cup of the chicken filling down the center of each tortilla, followed by a sprinkle of 1 cup of cheese. Carefully roll each tortilla tightly, placing them seam-side down in your prepared baking dish. Ensure they are snug but not overstuffed, creating an even layer for baking.

Step 4: Make Sauce
In a medium saucepan, whisk together 1 cup of sour cream, 1 cup of heavy cream, and 1 cup of chicken broth over medium heat. Gradually stir in 1 teaspoon of garlic powder, 1 teaspoon of smoked paprika, and a pinch of cayenne pepper. Continue stirring for about 5-7 minutes until the sauce thickens considerably and coats the back of a spoon.

Step 5: Bake
Once your sauce has thickened, pour it generously over the assembled enchiladas, making sure to cover them evenly. Sprinkle the remaining cheese on top, allowing it to melt beautifully. Place the baking dish in the preheated oven and bake for 20-25 minutes or until the cheese is bubbly and golden brown, signaling it’s ready to be enjoyed.

Step 6: Serve
After baking, let your Cheesy Chicken Enchiladas rest for about 5 minutes to allow flavors to meld. Top with fresh salsa and a sprinkle of chopped cilantro for brightness and additional flavor. Serve warm, and watch your family savor each creamy, cheesy bite!

What to Serve with Cheesy Chicken Enchiladas

There’s nothing quite like the joy of creating a vibrant meal around comforting flavors that draw everyone to the table.

  • Mexican Rice: A fluffy, cilantro-infused rice serves as a perfect base, balancing the creamy richness of the enchiladas beautifully.
  • Black Bean Salad: Fresh, zesty salad with black beans, corn, and avocado brings a crunchy texture and a refreshing contrast to the creamy dish.
  • Guacamole: This avocado-based dip adds creaminess with a punch of flavor, complementing the cheesy chicken enchiladas superbly.
  • Spanish Street Corn: Grilled corn smothered in lime and cotija cheese adds a sweet, smoky touch that elevates your meal to street-food status.
  • Chips and Salsa: Crunchy tortilla chips paired with a zesty salsa create an irresistible appetizer that gets everyone in the mood for the main event.
  • Margaritas: A tangy, refreshing margarita pairs perfectly with the enchiladas, enhancing the lively flavors of your dinner.
  • Fresh Fruit Salad: Bright, seasonal fruits offer a light, sweet contrast to the richness of the cheesy chicken enchiladas, making for a refreshing finish.
  • Flan: For dessert, this creamy caramel custard adds a touch of elegance and sweetness, rounding out your meal perfectly.
  • Ranch-Style Beans: A hearty side dish, these beans not only add protein but also pair wonderfully with the flavors of Mexican cuisine.
  • Cilantro Lime Dressing Salad: A crisp green salad drizzled with cilantro lime dressing delivers a bright, fresh complement to the savory enchiladas.

Cheesy Chicken Enchiladas Variations & Substitutions

Feel free to personalize your cheesy chicken enchiladas with these delightful twists and substitutions that will elevate your dish!

  • Spicy Cheese: Swap in Pepper Jack cheese for a zesty kick that tantalizes the taste buds. It adds a delightful heat without overwhelming the dish. This variation is perfect for spice lovers looking for a modern twist.
  • Vegetable Delight: Add black beans, bell peppers, or corn to the filling for an extra boost of nutrition and flavor. It makes your enchiladas heartier while adding vibrant colors to each bite.
  • Different Proteins: Substitute shredded beef or turkey if chicken isn’t your preferred option. Each protein brings its unique flavor, ensuring everyone at your table finds something they love.
  • Dairy-Free: Use cashew cream or a dairy-free yogurt in place of sour cream and heavy cream for a vegan-friendly version that doesn’t skimp on creaminess. This swap allows you to enjoy delicious enchiladas while accommodating dietary preferences.
  • Salsa Verde: Transform the sauce by using green salsa instead of sour cream for an extra tangy flavor that pairs beautifully with the chicken. Your enchiladas will take on a bright, fresh taste that’ll impress!
  • Zucchini Noodles: For a low-carb option, wrap the filling in zucchini slices instead of tortillas. It not only reduces carbs but also adds a unique twist to traditional enchiladas.
  • Experiment with Spices: Add chipotle powder or smoked paprika for an exciting flavor depth. This will elevate the dish and introduce a smoky dimension that’s truly irresistible.
  • Herb Boost: Sprinkle fresh herbs such as cilantro or parsley into the chicken filling for enhanced freshness. This addition brightens each bite and creates an appealing contrast with the creamy sauce.

Don’t forget to check out my variations of other popular dishes like Cheesy Garlic Chicken or try a comforting Cheesy Spinach Artichoke for a unique take on warm, cheesy goodness!

Storage Tips for Cheesy Chicken Enchiladas

  • Fridge: Store any leftover Cheesy Chicken Enchiladas in an airtight container for up to 3 days. Reheat in the microwave or oven until warmed through.
  • Freezer: For longer storage, freeze unbaked enchiladas wrapped tightly in plastic wrap and aluminum foil for up to 3 months. Thaw overnight in the fridge before baking.
  • Reheating: To reheat, place leftovers in a baking dish covered with foil and warm in the oven at 350°F (175°C) for about 15-20 minutes until heated through.
  • Make-Ahead: If preparing ahead, assemble the enchiladas without baking and refrigerate for up to 24 hours, ensuring they are covered to maintain moisture.

Make Ahead Options

These Cheesy Chicken Enchiladas are a fantastic option for meal prep, saving you precious time on busy weeknights! You can prepare the filling and assemble the enchiladas up to 24 hours in advance and store them in the refrigerator, covered tightly with plastic wrap to maintain freshness. Alternatively, if you want to prep even further ahead, they can be frozen unbaked for up to 3 months. Just be sure to wrap them securely in aluminum foil to prevent freezer burn. When you’re ready to enjoy, simply bake from frozen for an additional 10-15 minutes, or thaw overnight in the fridge before baking according to the original instructions. This way, you can indulge in delicious, homemade enchiladas with minimal evening effort!

Expert Tips for Cheesy Chicken Enchiladas

  • Warm Tortillas: Warm tortillas briefly in a dry skillet to prevent them from tearing while rolling, ensuring perfect cheesy chicken enchiladas.
  • Shred Chicken Easily: Use a stand mixer or two forks to shred your rotisserie chicken quickly; it saves time and keeps things messy-free!
  • Mixing Technique: Whisk your sauce continuously over medium-low heat to avoid separation and achieve that creamy, luscious texture.
  • Make Ahead: If you’re preparing these enchiladas ahead of time, cover them before baking and refrigerate for up to 24 hours or freeze for up to 3 months.
  • Cheese Variations: For a spicier kick, feel free to swap in Pepper Jack cheese—this little change creates a delightful twist on your cheesy chicken enchiladas!

Cheesy Chicken Enchiladas Recipe FAQs

How do I choose ripe ingredients for my enchiladas?
Absolutely! For the best flavor, select fresh ingredients. When choosing onions, look for firm, smooth skins without dark spots. Fresh chicken should be plump and have a clean scent. If you’re adding any vegetables, opt for those that are vibrant in color and free from blemishes.

What is the best way to store leftover Cheesy Chicken Enchiladas?
Very good question! Store leftover enchiladas in an airtight container in the fridge for up to 3 days. To reheat, simply microwave them or place in a preheated oven at 350°F (175°C) for around 15-20 minutes until warmed through and delicious!

Can I freeze Cheesy Chicken Enchiladas?
You certainly can! To freeze, wrap unbaked enchiladas tightly in plastic wrap and then in aluminum foil. This way, they can last for up to 3 months in the freezer. Thaw them overnight in the refrigerator before baking, following the original cooking instructions.

What should I do if my sauce is too thick?
No worries here! If your sauce turns out too thick, just whisk in a little more chicken broth, one tablespoon at a time, until you reach your desired consistency. Remember to do this over low heat, stirring constantly, to ensure everything is well blended.

Are these enchiladas suitable for people with dietary restrictions?
Absolutely! These Cheesy Chicken Enchiladas can accommodate various dietary needs. To make them gluten-free, simply use corn tortillas instead of flour ones. If someone is lactose intolerant, consider substituting with lactose-free cream and cheese alternatives. Always check ingredient labels for allergens and adjust as needed!

Cheesy Chicken Enchiladas

Cheesy Chicken Enchiladas That Melt in Your Mouth

Delicious Cheesy Chicken Enchiladas that combine creamy sauce and savory filling for a satisfying dinner experience.
Prep Time 15 minutes
Cook Time 30 minutes
Resting Time 5 minutes
Total Time 45 minutes
Servings: 4 enchiladas
Course: Dinner
Cuisine: Mexican
Calories: 450

Ingredients
  

For the Filling
  • 2 tablespoons Olive Oil Can be substituted with canola oil.
  • 1 Onion Diced; shallots can be used for a milder flavor.
  • 2 cups Shredded Chicken Using rotisserie chicken saves time.
  • 1 teaspoon Cumin No direct substitute.
  • 1 tablespoon Chili Powder Smoked paprika can be used for a different flavor.
  • Salt and Pepper Adjust to taste.
  • 8 Flour Tortillas Corn tortillas can be used but need warming.
For the Sauce
  • 1 cup Cheddar Cheese Pepper Jack can be used for added heat.
  • 1 cup Monterey Jack Cheese Mix with other cheese varieties for more flavor.
  • 1 cup Sour Cream Greek yogurt can be a lighter substitute.
  • 1 cup Heavy Cream Half-and-half works well for a lighter option.
  • 1 cup Chicken Broth Vegetable broth makes it vegetarian-friendly.
  • 1 teaspoon Garlic Powder
  • 1 teaspoon Smoked Paprika
  • 1 pinch Cayenne Pepper Adjust to your spice preference.
For Garnish
  • Fresh Salsa Diced tomatoes can be swapped if preferred.
  • Chopped Cilantro Green onions can be used as an alternative.

Equipment

  • Skillet
  • medium saucepan
  • baking dish

Method
 

Step-by-Step Instructions
  1. In a large skillet, heat 2 tablespoons of olive oil over medium heat. Add 1 diced onion and sauté for about 5 minutes until it becomes translucent. Stir in 2 cups of shredded chicken, 1 teaspoon of cumin, 1 tablespoon of chili powder, and salt and pepper to taste. Cook for another 2-3 minutes, ensuring all ingredients are well combined and aromatic.
  2. While the filling is simmering, preheat your oven to 375°F (190°C). Grease a 9x13-inch baking dish with a little olive oil to prevent sticking.
  3. Lay out 8 flour tortillas on a clean surface. Spoon about 1/4 cup of the chicken filling down the center of each tortilla, followed by a sprinkle of 1 cup of cheese. Carefully roll each tortilla tightly, placing them seam-side down in your prepared baking dish.
  4. In a medium saucepan, whisk together 1 cup of sour cream, 1 cup of heavy cream, and 1 cup of chicken broth over medium heat. Gradually stir in 1 teaspoon of garlic powder, 1 teaspoon of smoked paprika, and a pinch of cayenne pepper. Continue stirring for about 5-7 minutes until the sauce thickens.
  5. Once your sauce has thickened, pour it generously over the assembled enchiladas. Sprinkle the remaining cheese on top.
  6. Place the baking dish in the preheated oven and bake for 20-25 minutes or until the cheese is bubbly and golden brown.
  7. After baking, let your Cheesy Chicken Enchiladas rest for about 5 minutes. Top with fresh salsa and a sprinkle of chopped cilantro. Serve warm.

Nutrition

Serving: 1enchiladaCalories: 450kcalCarbohydrates: 30gProtein: 25gFat: 30gSaturated Fat: 15gPolyunsaturated Fat: 2gMonounsaturated Fat: 10gCholesterol: 80mgSodium: 900mgPotassium: 400mgFiber: 2gSugar: 3gVitamin A: 20IUVitamin C: 5mgCalcium: 25mgIron: 10mg

Notes

These enchiladas can be customized with various vegetables and cheese to suit your taste preferences.

Tried this recipe?

Let us know how it was!

Stay Connected

Get recipes via email: