Get my cookbooks

Miso Maple Glazed Chicken Wings: Sticky Sweet Perfection

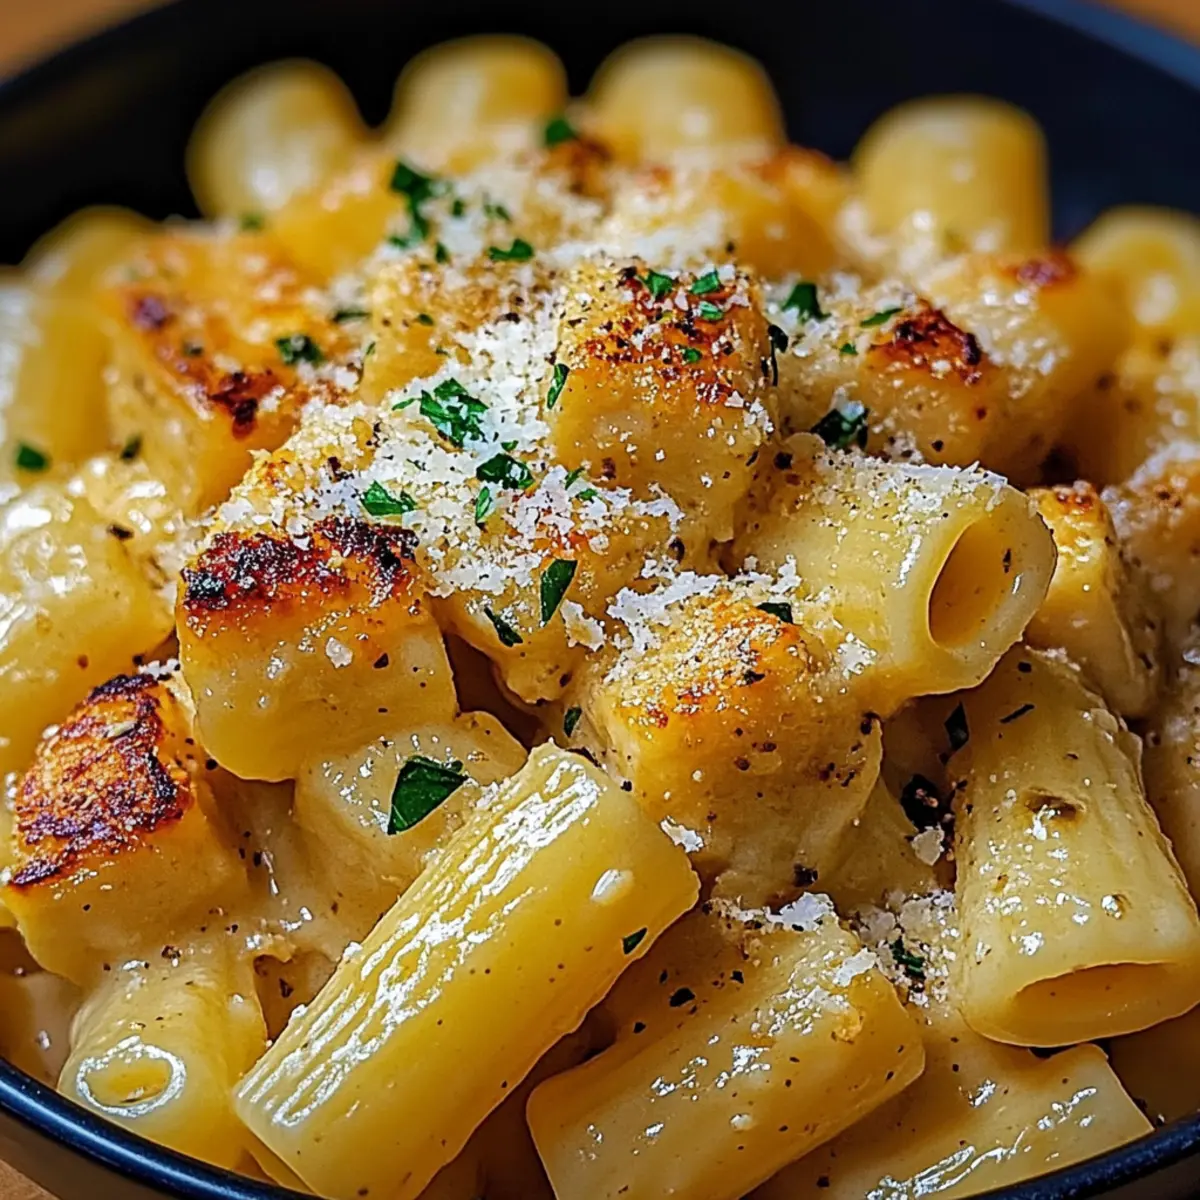
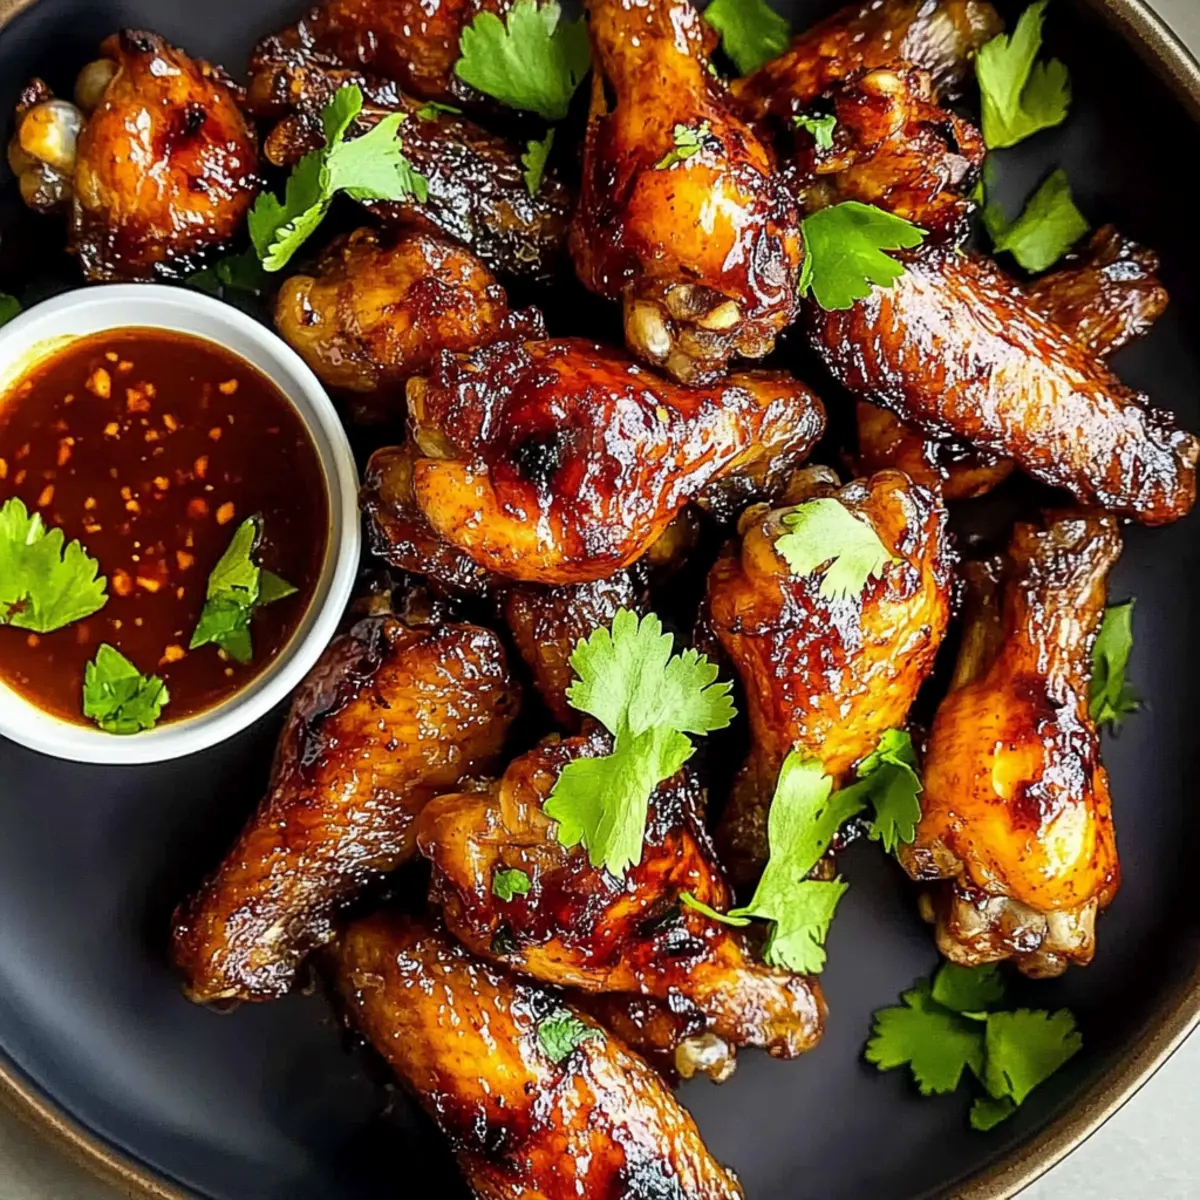
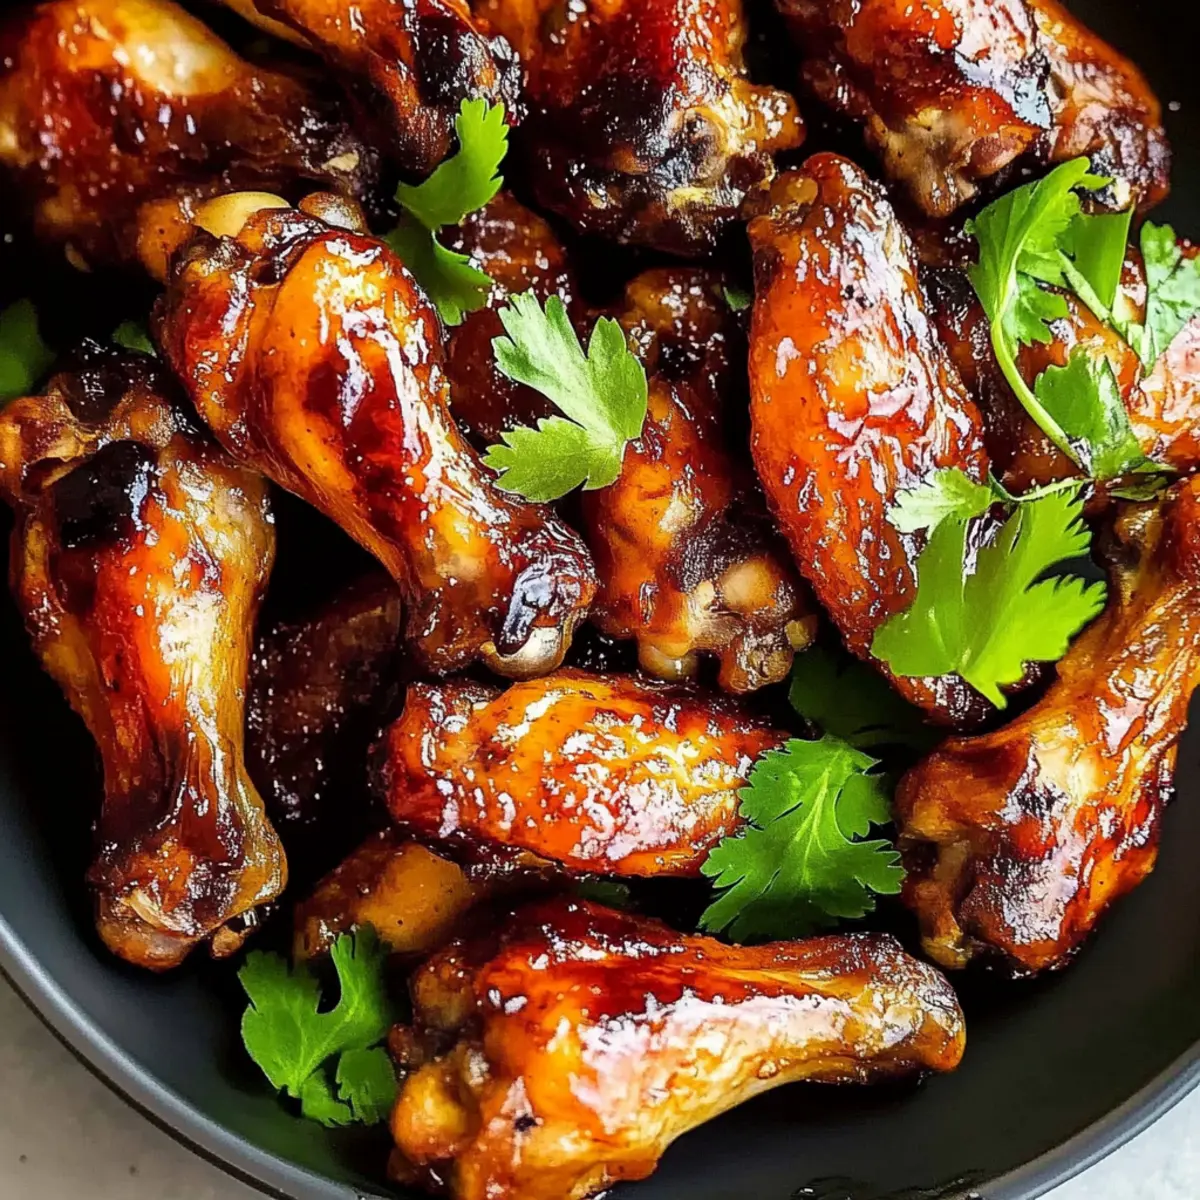
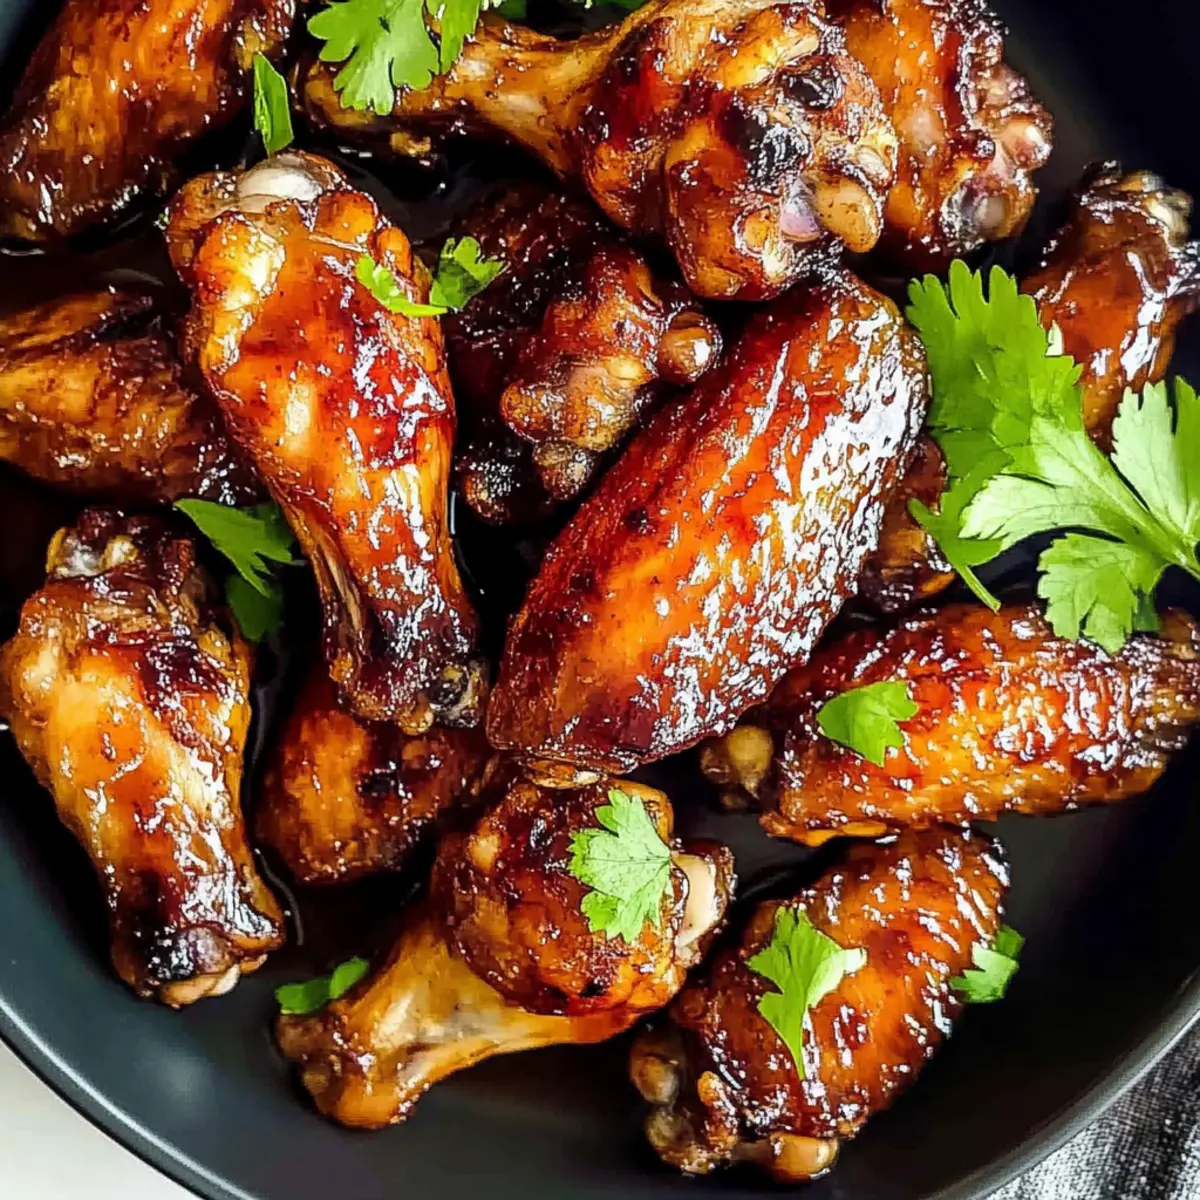
The aroma wafting from the oven is enough to make anyone weak in the knees. While prepping for game day, I discovered the perfect harmony of sweet and savory with my Miso Maple Glazed Chicken Wings. These delightful baked chicken wings combine the rich umami essence of miso with the warm sweetness of maple syrup, creating a finger-licking treat that’s hard to resist. One of the best parts? They’re not just delicious—they’re a breeze to whip up, ensuring you spend more time enjoying the game and less in the kitchen. Plus, they’re crowd-pleasers, making them the ideal appetizer for gatherings or a weekend snack. Curious how to achieve that perfect caramelization? Let’s dive into the recipe!

Why Are These Wings So Irresistible?

Sticky, Sweet Flavor: Each bite delivers a perfect blend of sweet maple and savory miso, guaranteed to tantalize your taste buds.
Easy to Make: With minimal prep and straightforward steps, you’ll have these wings ready before the game even starts!
Baked, Not Fried: Enjoy guilt-free indulgence as these wings are baked to crispy perfection, cutting out excess oil.
Versatile Cooking: Pair them effortlessly with your favorite sides, from spicy potato wedges to oven fries.
Crowd-Pleasing Snack: A guaranteed hit for gatherings, your friends will be raving about them long after the last wing is gone!

Miso Maple Glazed Chicken Wings Ingredients

For the Wings

  • Chicken Wings – These provide a tender and juicy base for our delicious glaze.

For the Glaze

  • Miso Paste – Adds a rich umami flavor; feel free to substitute with tahini or soy sauce for different nuances.
  • Maple Syrup – Sweetens the glaze and infuses it with a distinct flavor; honey can work as a substitute, but it will change the overall taste.
  • Rice Vinegar – Contributes acidity to balance the sweetness; if unavailable, white vinegar can be a suitable replacement.
  • Soy Sauce – Enhances umami while adding saltiness; use tamari for a gluten-free option.

Step‑by‑Step Instructions for Miso Maple Glazed Chicken Wings

Step 1: Preheat the Oven
Begin by preheating your oven to 200°C (390°F). This temperature will ensure that the Miso Maple Glazed Chicken Wings cook through properly and achieve that desirable caramelized finish. Getting your oven ready beforehand is crucial, so while it warms up, gather the rest of your ingredients and equipment.

Step 2: Prepare the Baking Sheet
Take a large baking sheet and line it with aluminum foil for easy cleanup. Then, spray the foil with cooking spray to prevent the wings from sticking. This simple step will ensure that your wings cook evenly and come off the baking sheet effortlessly once they are fully baked and glistening.

Step 3: Make the Glaze
In a mixing bowl, whisk together miso paste, maple syrup, rice vinegar, and soy sauce until smooth and well combined. The mixture should be glossy and fragrant, hinting at the sweet and savory delight to come. Taste the glaze and adjust if necessary, ensuring it’s balanced to your liking before adding it to the chicken wings.

Step 4: Coat the Chicken Wings
Pour three-quarters of the prepared glaze over the chicken wings in a separate bowl. Using your hands, coat the wings thoroughly, making sure each one is covered in the delicious miso maple mixture. This step allows the wings to soak up all the flavors, creating a truly luscious bite when they are done.

Step 5: Arrange on the Baking Sheet
Transfer the coated chicken wings to the prepared baking sheet, arranging them in a single layer with the skin side facing up. This positioning helps achieve that crispy finish. Brush any remaining glaze from the bowl over the tops of the wings to ensure every inch is jam-packed with flavor before baking.

Step 6: Bake the Wings
Slide the baking sheet into the preheated oven and bake the wings for 20-25 minutes. Keep an eye on them, and approximately every 5-7 minutes, brush the wings with the reserved glaze. This technique adds an extra layer of flavor and helps to achieve a beautiful caramelized color on your Miso Maple Glazed Chicken Wings.

Step 7: Check for Doneness
After about 25 minutes of baking, check that the wings are cooked through. The skin should be crispy and golden brown, while the internal temperature should reach 74°C (165°F) using a meat thermometer. This ensures they are safe to eat and packed with flavor.

Step 8: Garnish and Serve
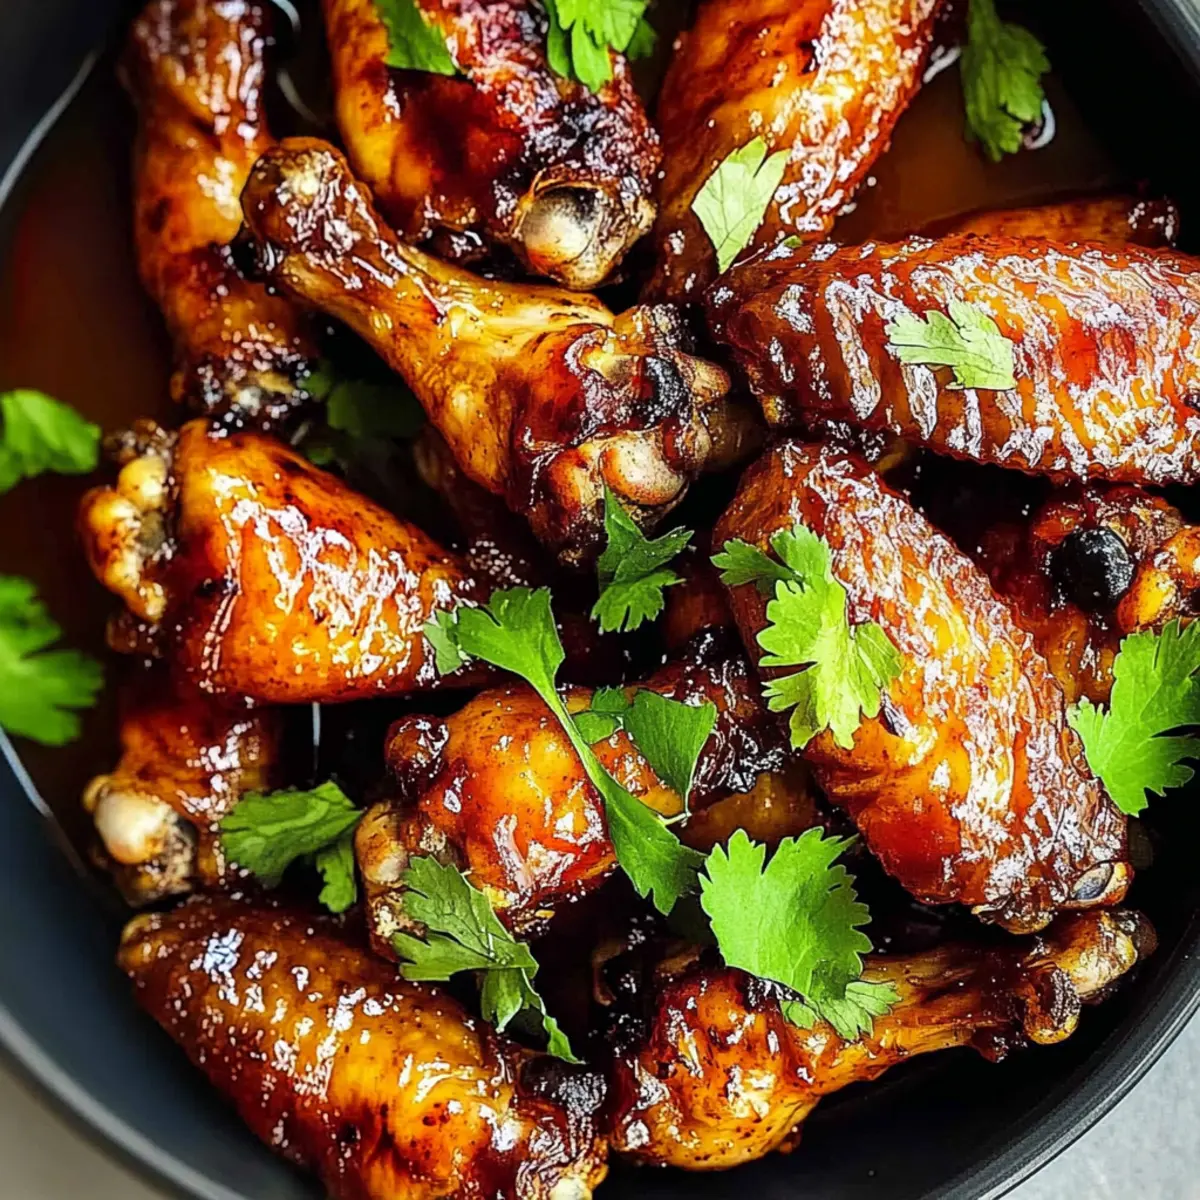
Once baked to perfection, remove the wings from the oven and let them rest for a few minutes. Garnish with fresh coriander or cilantro leaves for a pop of color and freshness. Serve these Miso Maple Glazed Chicken Wings warm, and watch everyone enjoy this delightful treat!

Expert Tips for Miso Maple Glazed Chicken Wings

  • Even Coating: Ensure wings are evenly coated with the glaze to maximize flavor. Use a large bowl for mixing to avoid any wing being left out.
  • Check Doneness: Use a meat thermometer to ensure the internal temperature reaches 74°C (165°F). This keeps your Miso Maple Glazed Chicken Wings safe and juicy.
  • Avoid Overcrowding: Don’t overcrowd the baking sheet! This allows the wings to crisp up nicely, preventing steaming, which can lead to soggy skin.
  • Rest Before Serving: Let the wings rest for a few minutes after baking. This enhances flavor absorption and allows for easier handling without burning fingers.
  • Taste the Glaze: Adjust the glaze as needed before coating the wings. A balanced flavor is key to making these delightful wings a true standout!

What to Serve with Miso Maple Glazed Chicken Wings

Picture a gathering with these irresistible wings filling the air with their sweet and savory aroma—now, let’s craft the perfect meal to accompany them!

  • Crispy Oven Fries: The crunch of golden fries adds texture and a satisfying bite, perfectly complementing the sticky glaze of the wings.
  • Garlicky Green Beans: A light and fresh side that balances the richness of the Miso Maple Glazed Chicken Wings, offering a green contrast that’s full of flavor.
  • Coleslaw: Creamy, tangy slaw brings a crispy crunch that pairs beautifully with the wings’ sweetness, creating a delightful textural harmony.
  • Spicy Potato Wedges: For a fiery kick, serve these wedges alongside the sweet wings for an exciting flavor experience that your guests will love.
  • Steamed Jasmine Rice: Light and fluffy, the rice offers a neutral base that allows the rich flavors of the wings to shine through, perfect for soaking up any extra glaze.
  • Iced Green Tea: Refreshing and slightly sweet, this drink complements the umami notes in the wings beautifully and rounds out the meal with a soothing finish.
  • Chocolate Brownies: End on a sweet note with fudgy brownies, providing a decadent contrast to the savory wings while satisfying any sweet tooth.
  • Grilled Corn on the Cob: The sweetness of grilled corn pairs perfectly with the wing’s glaze, adding a summer feel to your spread—delicious served buttery alongside!
  • Pickled Vegetables: Sharp and tangy, pickles cleanse the palate after the rich wings, ensuring each bite remains exciting and fresh.
  • Fruit Salad: A light and colorful fruit salad adds a refreshing sweetness, making it a perfect counterpart to the wings, ideal for balancing flavors during warm gatherings.

Miso Maple Glazed Chicken Wings Variations

Feel free to unleash your creativity and customize these wings to fit your taste buds perfectly!

  • Add Spice: Stir in some sriracha or chili paste into the glaze for a fiery kick that complements the sweetness beautifully.
  • Different Meat Cuts: Switch things up by using drumsticks or thighs instead of wings. You’ll find it adds a lovely juicy texture, with the glaze infusing into every bite.
  • Citrusy Twist: Incorporate freshly squeezed lime or lemon juice into the glaze for a refreshing, zesty flavor that cuts through the richness.
  • Herbaceous Notes: Sprinkle in some fresh herbs like thyme or rosemary before baking to add an aromatic touch that elevates the dish even further.
  • Vegan Delight: Use cauliflower florets instead of chicken for a delightful plant-based alternative that still allows for the delicious glaze to shine.
  • Fish Sauce Boost: For a more complex umami flavor, add a splash of fish sauce to the glaze. The saltiness enhances the overall taste while staying true to Asian cuisine roots.
  • Sweetened Variations: Experiment with brown sugar in place of maple syrup for a deeper, molasses-like sweetness that pairs wonderfully with the miso.
  • Tropical Flair: Try a hint of pineapple juice in your glaze, bringing in a tropical sweetness that’s perfect for summertime gatherings.

Don’t forget, these wings pair beautifully with sides like spicy potato wedges or a light Tuscan Chicken Soup, making your meal even more enjoyable! Explore and find your perfect twist!

How to Store and Freeze Miso Maple Glazed Chicken Wings

Fridge: Store leftovers in an airtight container for up to 3 days. This keeps your Miso Maple Glazed Chicken Wings fresh and ready for a quick snack or meal.

Freezer: If you want to save them for later, freeze the wings in a single layer on a baking sheet before transferring to a zip-top bag. They can be frozen for up to 3 months.

Reheating: For best results, reheat in the oven at 180°C (350°F) for 10-15 minutes to restore crispness. Microwave reheating is convenient but may result in sogginess.

Thawing: When ready to enjoy, thaw frozen wings in the fridge overnight for safe and easy meal prep before reheating.

Make Ahead Options

These Miso Maple Glazed Chicken Wings are perfect for meal prep, making your busy weeknights a breeze! You can prepare the glaze and coat the chicken wings up to 24 hours in advance, simply refrigerating them in an airtight container to maintain their delicious flavor. When you’re ready to serve, preheat your oven and bake them as directed—just remember to reserve some glaze for basting during the cook time! For optimal results, allow the wings to come to room temperature for about 15 minutes before baking to ensure even cooking. Your guests will enjoy these sticky, sweet delights just as much, with less work on your part!

Miso Maple Glazed Chicken Wings Recipe FAQs

How do I choose the best chicken wings?
Absolutely! Look for chicken wings that are plump and meaty with a good layer of skin. Avoid any with dark spots or an off smell, as these are signs of spoilage. Fresh wings should feel cold to the touch and have a slight gloss to them.

How should I store leftover Miso Maple Glazed Chicken Wings?
Store your delicious Miso Maple Glazed Chicken Wings in an airtight container in the fridge for up to 3 days. To keep them fresh, it’s best to allow the wings to cool before sealing them up. When you’re ready to indulge again, a quick reheat in the oven will bring back their delightful crispiness.

Can I freeze Miso Maple Glazed Chicken Wings?
Definitely! To freeze your wings, first arrange them in a single layer on a baking sheet lined with parchment paper. Freeze them for about 1 hour until solid, then transfer them to a zip-top bag. They can be frozen for up to 3 months. This method prevents them from sticking together, making it easy to grab just what you need later!

What if my wings are not cooking evenly?
Very! If you find your wings aren’t cooking evenly, it may be due to overcrowding on the baking sheet, which can trap steam and lead to sogginess. Ensure they are spread out in a single layer with space between each wing. Also, rotating the baking sheet halfway through the cooking process can help achieve that perfect, even bake.

Can I make these wings gluten-free?
Absolutely! To ensure your Miso Maple Glazed Chicken Wings are gluten-free, use tamari instead of regular soy sauce. Additionally, double-check that the miso paste you choose is gluten-free, as some brands might contain wheat. Your gluten-free friends will be glad you made these delicious modifications!

How do I know when my chicken wings are done cooking?
To check if your wings are cooked through and safe to eat, use a meat thermometer to measure the internal temperature; it should reach 74°C (165°F). Apart from temperature, the wings should also look golden brown and crispy on the outside. If they’re not quite there, give them a few extra minutes in the oven!

Miso Maple Glazed Chicken Wings

Miso Maple Glazed Chicken Wings: Sticky Sweet Perfection

Experience the perfect harmony of sweet and savory with Miso Maple Glazed Chicken Wings, a delightful and easy appetizer perfect for gatherings.
Prep Time 10 minutes
Cook Time 25 minutes
Resting Time 5 minutes
Total Time 40 minutes
Servings: 4 wings
Course: Appetizers
Cuisine: Japanese
Calories: 350

Ingredients
  

For the Wings
  • 2 pounds Chicken Wings These provide a tender and juicy base for our delicious glaze.
For the Glaze
  • 1/4 cup Miso Paste Adds a rich umami flavor; feel free to substitute with tahini or soy sauce for different nuances.
  • 1/4 cup Maple Syrup Sweetens the glaze and infuses it with a distinct flavor; honey can work as a substitute.
  • 2 tablespoons Rice Vinegar Contributes acidity to balance the sweetness; if unavailable, white vinegar can be a suitable replacement.
  • 2 tablespoons Soy Sauce Enhances umami while adding saltiness; use tamari for a gluten-free option.

Equipment

  • Oven
  • Mixing Bowl
  • Baking Sheet
  • Aluminum foil
  • Cooking Spray
  • meat thermometer

Method
 

Step-by-Step Instructions
  1. Preheat your oven to 200°C (390°F).
  2. Line a large baking sheet with aluminum foil and spray with cooking spray.
  3. In a mixing bowl, whisk together miso paste, maple syrup, rice vinegar, and soy sauce until smooth.
  4. Pour three-quarters of the glaze over the chicken wings and coat thoroughly.
  5. Arrange the coated chicken wings on the baking sheet skin side up and brush with remaining glaze.
  6. Bake for 20-25 minutes, brushing with the reserved glaze every 5-7 minutes.
  7. Check for doneness, ensuring the internal temperature reaches 74°C (165°F).
  8. Let the wings rest for a few minutes, then garnish with fresh coriander and serve warm.

Nutrition

Serving: 4wingsCalories: 350kcalCarbohydrates: 15gProtein: 25gFat: 20gSaturated Fat: 5gPolyunsaturated Fat: 1gMonounsaturated Fat: 3gCholesterol: 80mgSodium: 900mgPotassium: 300mgSugar: 10gCalcium: 15mgIron: 2mg

Notes

Ensure wings are evenly coated with the glaze for maximum flavor. Use a meat thermometer to check doneness and avoid overcrowding the baking sheet to ensure crispiness.

Tried this recipe?

Let us know how it was!

Easy Olive Garden Ravioli Carbonara for Cozy Nights

As I stood in the kitchen, the delightful aroma of sizzling pancetta wafted through the air, instantly transporting me to my favorite Italian eatery. That’s when I decided to whip up a comforting bowl of Olive Garden Ravioli Carbonara, a perfect fusion of classic Italian flavors and homey ease. This creamy dish, featuring cheese-filled ravioli and a rich sauce that comes together in just 25 minutes, is truly a weeknight lifesaver. Whether you’re in the mood for a quick meal after a long day or want to impress dinner guests with minimal fuss, this recipe checks all the boxes. With its indulgent creamy texture and crispy accents, you’ll find it hard to believe you created such restaurant-quality magic at home. Ready for a culinary adventure that warms the heart and pleases the palate? Let’s dive into the world of Ravioli Carbonara!

Why is this Ravioli Carbonara a must-try?

Cozy Comfort: This dish embodies warming flavors, perfect for a chilly evening or a quick weeknight meal.

Quick & Easy: Ready in just 25 minutes, it’s designed for those busy days when you crave delicious homemade pasta.

Decadently Creamy: The blend of heavy cream, Parmesan, and egg yolks creates a velvety sauce that clings beautifully to the ravioli.

Flavorful Fusion: Combining Italian tradition with American twists, this comforting recipe offers the best of both worlds—classic enough for purists yet accessible for all.

Versatile Options: Whether it’s fresh or frozen ravioli, this dish allows for creativity with substitutions like turkey bacon or veggie add-ins.

Crowd-Pleasing Delight: With its rich flavor and appealing presentation, this Ravioli Carbonara is sure to impress family and guests alike, making every meal feel special.

For tips on making this dish even better, check out our variations on pasta and add-ins that cater to everyone’s palate!

Olive Garden Ravioli Carbonara Ingredients

For the Ravioli
Cheese-Filled Ravioli – This tender pasta is the star, offering a hearty base that soaks up the sauce beautifully. Use fresh or frozen, depending on what you have on hand.

For the Sauce
Salt – Essential for flavoring the boiling water, ensuring your pasta is seasoned just right.
Pancetta or Bacon – Adds a savory, crispy texture; you can easily substitute bacon if pancetta isn’t available.
Garlic – Use minced garlic for an aromatic boost that elevates the entire dish.
Heavy Cream – Creates that luxuriously rich sauce you crave; for extra indulgence, stick to all cream.
Whole Milk – This is optional but can lighten the sauce a touch while retaining creaminess.
Parmesan Cheese – Freshly grated Parmesan brings a nutty flavor that enhances the dish’s richness.
Black Pepper – Adds a warm, spicy kick; adjust to your liking for a personalized touch.
Egg Yolks – Enriches the sauce and provides that silky smooth texture; temper them first to avoid curdling.
Unsalted Butter – Contributes to the sauce’s richness and helps it come together effortlessly.
Fresh Parsley – A sprinkle of this vibrant herb not only adds color but enhances the freshness of the dish.
Cracked Black Pepper – For that finishing touch of flavor, adding a delightful crunch on top.

Dive into the comforting embrace of Olive Garden Ravioli Carbonara with these simple yet essential ingredients!

Step‑by‑Step Instructions for Olive Garden Ravioli Carbonara

Step 1: Cook the Ravioli
Start by bringing a large pot of salted water to a vigorous boil. Once boiling, gently add the cheese-filled ravioli and cook according to package instructions—3–5 minutes for fresh ravioli and 8–10 minutes for frozen. Carefully reserve 120 ml of the cooking water for later and drain the ravioli, allowing them to sit briefly while you prepare the sauce.

Step 2: Prepare Pancetta/Bacon
In a large skillet, set over medium heat, add the diced pancetta or bacon. Sauté for about 4–5 minutes or until the meat is crispy and golden brown. Once done, use a slotted spoon to transfer the crispy bits to a paper towel-lined plate, leaving the rendered fat in the skillet to infuse the upcoming sauce with rich flavor.

Step 3: Make the Carbonara Sauce
In the same skillet with the remaining fat, melt 2 tablespoons of unsalted butter over medium heat. Add minced garlic and sauté for about 30 seconds, or until fragrant. Pour in the heavy cream and optional whole milk, stirring gently for 2–3 minutes until warmed through. Gradually mix in the grated Parmesan, black pepper, and salt until you have a smooth, velvety sauce.

Step 4: Temper the Egg Yolks
In a separate bowl, whisk together the egg yolks. To temper the yolks and prevent curdling, slowly add a few spoonfuls of the warm cream sauce into the yolks, mixing continuously. Once tempered, pour the mixture back into the skillet and cook for an additional 2 minutes over low heat, watching as the sauce thickens beautifully.

Step 5: Combine Ravioli and Sauce
Gently add the drained ravioli to the skillet with the carbonara sauce. Toss the pasta and the sauce together until the ravioli are fully coated. Add the cooked pancetta or bacon back into the skillet, and if the sauce is too thick, adjust the consistency by stirring in a bit of the reserved pasta water until desired.

Step 6: Garnish and Serve
Once everything is well combined, transfer the Olive Garden Ravioli Carbonara to serving plates. Finish with a generous sprinkle of extra Parmesan, fresh chopped parsley for a pop of color, and a few cracks of black pepper for an added kick. Serve immediately while the dish is still warm and inviting, perfect for a cozy night in.

What to Serve with Olive Garden Ravioli Carbonara

Creating the perfect dining experience around your Ravioli Carbonara elevates an already delightful meal to new heights.

  • Garlic Bread: A classic pairing, its buttery, garlicky goodness is perfect for soaking up that luscious sauce.
  • Crisp Garden Salad: Fresh greens with a tangy vinaigrette add a vibrant contrast, balancing the rich carbonara flavors.
  • Roasted Vegetables: Roasting enhances their natural sweetness, adding depth and a lovely texture that complements the pasta.
  • Italian Antipasto Platter: Featuring cured meats, cheeses, and olives, this appetizer sets a fun and inviting tone for your meal.
  • Red Wine Pairing: A glass of Chianti or Sangiovese will enhance the savory elements, deepening the dining experience.
  • Tiramisu for Dessert: End on a sweet note with this creamy, coffee-flavored treat—it’s a delightful finish to an Italian feast.
  • Lemon Sorbet: A refreshing palate cleanser that cuts through the richness of the Ravioli Carbonara, leaving you feeling satisfied yet light.
  • Sparkling Water: The effervescence provides a refreshing contrast, helping cleanse the palate between bites.
  • Cheesy Garlic Knots: Soft knots drizzled with garlic-infused butter and topped with cheese are irresistible and complement your Italian theme splendidly.

How to Store and Freeze Olive Garden Ravioli Carbonara

Refrigeration: Store leftovers in an airtight container in the fridge for up to 3 days. Ensure the dish is cooled to room temperature before sealing to keep it fresh.

Freezing: For long-term storage, freeze the Ravioli Carbonara in an airtight container or freezer bag for up to 2 months. Label the container with the date for easy reference.

Reheating: To reheat, thaw overnight in the fridge, then gently warm in a skillet over low heat, adding a splash of milk or cream to restore creaminess.

Avoiding Separation: When reheating, stir continuously to prevent the sauce from separating, ensuring that every bite of your Olive Garden Ravioli Carbonara remains creamy and delicious.

Make Ahead Options

These Olive Garden Ravioli Carbonara are perfect for busy home cooks looking to save time during the week! You can prepare the sauce (minus the egg yolks) up to 24 hours in advance by making it through Step 3. Just store it in an airtight container in the refrigerator. When you’re ready to serve, gently reheat the sauce in a skillet over low heat, temper the egg yolks, and mix them in (to prevent curdling). You can also cook the ravioli ahead of time and refrigerate them for up to 3 days. This way, all you need to do is combine the prepped components and warm them together, resulting in a comforting, restaurant-quality dish with minimal effort!

Expert Tips for Olive Garden Ravioli Carbonara

  • Cook Perfectly: Ensure the ravioli are cooked al dente—firm to the bite—for the best texture in your Olive Garden Ravioli Carbonara.

  • Crispy Pancetta: Don’t skip crisping the pancetta or bacon! It’s essential for adding texture and flavor that elevates your carbonara.

  • Tempering Egg Yolks: Always temper egg yolks with warm sauce before combining to avoid scrambling, ensuring a smooth, creamy sauce.

  • Adjusting Creaminess: For a richer sauce, stick with heavy cream only; feel free to experiment with milk if you prefer a lighter version.

  • Stirring Sauce Consistency: Use reserved pasta water gradually to adjust the sauce thickness; it should coat the ravioli without being watery.

  • Garnish for Freshness: Don’t forget the parsley and cracked pepper garnish—they add a wonderful freshness and finish to your Olive Garden Ravioli Carbonara.

Variations & Substitutions for Olive Garden Ravioli Carbonara

Ready to give your Ravioli Carbonara a personal twist? Let’s explore delightful variations that will awaken your creativity in the kitchen!

  • Tortellini Twist: Swap ravioli for cheese-filled tortellini for a delightful change in shape and flavor. Each bite brings a slightly different texture that’s equally satisfying.

  • Bacon Alternatives: Use turkey bacon or vegetarian bacon for a lighter or plant-based option. Both provide a unique flavor while keeping the dish indulgent yet healthier.

  • Extra Veggies: Toss in fresh spinach or peas for added color and nutrition. These vibrant vegetables not only enhance the dish visually but also bring a refreshing crunch.

  • Spicy Kick: Add a pinch of red pepper flakes to the sauce for a zesty twist. The subtle heat complements the creamy sauce beautifully, creating a balance of flavors.

  • Mushroom Umami: Stir in sautéed mushrooms for an earthy depth. They make the dish heartier and blend wonderfully with the creamy sauce, offering a comforting variation.

  • Nut-Free Option: Swap out Parmesan for nutritional yeast to create a nut-free vegan version. This will still provide a cheesy flavor while keeping the dish light and accessible for everyone.

  • Gourmet Finish: Add a touch of truffle oil before serving for a luxurious finish. Just a drizzle elevates your Ravioli Carbonara into a restaurant-quality experience at home.

  • Citrus Zing: Incorporate a bit of lemon zest to brighten the flavors. This subtle hint of citrus enhances the richness of the sauce, keeping it fresh and lively.

Feel free to experiment and create your version of this beloved dish! And if you’re looking for more inspiration, check our homemade pasta recipes for even more delicious ideas. Enjoy cooking!

Olive Garden Ravioli Carbonara Recipe FAQs

What type of ravioli should I use for this recipe?
Absolutely! Cheese-filled ravioli is the star of this dish, providing a hearty base that soaks up the creamy sauce beautifully. You can opt for fresh or frozen ravioli, depending on what you have on hand. Fresh ravioli will typically cook faster (about 3-5 minutes), while frozen ravioli usually takes around 8-10 minutes.

How should I store leftovers of Olive Garden Ravioli Carbonara?
For best results, store any leftovers in an airtight container in the refrigerator for up to 3 days. Make sure to let the dish cool to room temperature before sealing it away to retain freshness. When reheating, gently warm in a skillet over low heat and add a splash of milk or cream to restore that creamy texture.

Can I freeze Olive Garden Ravioli Carbonara?
Very much so! For long-term storage, freeze the Ravioli Carbonara in an airtight container or a freezer bag for up to 2 months. It’s a good idea to label the container with the date so you can keep track. When you’re ready to enjoy it, thaw overnight in the fridge, then reheat on low with some added milk or cream for the best taste.

What can I do if my sauce separates when reheating?
The more the merrier when it comes to stirring! When reheating, make sure to stir continuously over low heat. This helps to bring the sauce back together and prevents it from separating. If you notice a thicker consistency, simply add a little warm milk or pasta water to bring it back to that velvety smoothness.

Is there a way to customize the flavors in this recipe?
Absolutely! This recipe is very versatile. You can substitute pancetta with turkey bacon or even a vegetarian alternative if you’d like a lighter option. Additionally, consider adding veggies like spinach or peas for an extra nutritional boost. Have fun experimenting with flavors to make it your own!

Can pets eat Ravioli Carbonara leftovers?
Generally, it’s best to keep Ravioli Carbonara away from pets. Ingredients like garlic and onions can be harmful to them, and the richness of the dish might not sit well with their digestive systems. Always check with your veterinarian for specific dietary recommendations for your furry friends.

Olive Garden Ravioli Carbonara

Easy Olive Garden Ravioli Carbonara for Cozy Nights

This Olive Garden Ravioli Carbonara is a comforting and creamy dish ready in just 25 minutes, perfect for cozy nights.
Prep Time 10 minutes
Cook Time 15 minutes
Total Time 25 minutes
Servings: 4 servings
Course: Pasta
Cuisine: Italian
Calories: 450

Ingredients
  

For the Ravioli
  • 1 package Cheese-Filled Ravioli fresh or frozen
For the Sauce
  • 1 teaspoon Salt for boiling water
  • 4 oz Pancetta or Bacon diced
  • 2 cloves Garlic minced
  • 1 cup Heavy Cream for a rich sauce
  • 1/2 cup Whole Milk optional
  • 3/4 cup Parmesan Cheese freshly grated
  • 1 teaspoon Black Pepper adjust to taste
  • 2 large Egg Yolks tempered
  • 2 tablespoons Unsalted Butter for richness
  • 2 tablespoons Fresh Parsley chopped, for garnish
  • 1 teaspoon Cracked Black Pepper for garnish

Equipment

  • Large pot
  • Large skillet
  • slotted spoon
  • separate bowl

Method
 

Step-by-Step Instructions for Olive Garden Ravioli Carbonara
  1. Cook the ravioli in a large pot of boiling salted water according to package instructions, reserving 120 ml of cooking water before draining.
  2. In a skillet, sauté the diced pancetta or bacon over medium heat for 4–5 minutes until crispy, then transfer to a paper towel-lined plate.
  3. In the skillet, melt butter and sauté garlic until fragrant. Add cream and milk, then stir in Parmesan, black pepper, and salt to create a sauce.
  4. Temper the egg yolks with warm sauce, then mix back into the skillet and cook for 2 minutes until thickened.
  5. Combine the ravioli with the sauce and add cooked pancetta. Adjust thickness with reserved pasta water as needed.
  6. Serve garnished with Parmesan, parsley, and cracked black pepper.

Nutrition

Serving: 1servingCalories: 450kcalCarbohydrates: 45gProtein: 20gFat: 22gSaturated Fat: 12gPolyunsaturated Fat: 1gMonounsaturated Fat: 5gCholesterol: 135mgSodium: 800mgPotassium: 350mgFiber: 2gSugar: 2gVitamin A: 500IUVitamin C: 2mgCalcium: 300mgIron: 1mg

Notes

Store leftovers in an airtight container for up to 3 days. To freeze, use an airtight container for up to 2 months.

Tried this recipe?

Let us know how it was!

Creamy Shrimp Crab Lasagna: Your New Comfort Food Delight

There’s something undeniably magical about the combination of shrimp and crab nestled between layers of cheesy goodness. As I prepared this Creamy Shrimp Crab Lasagna with Alfredo Sauce, I felt a warm wave of nostalgia wash over me—reminding me of joyful family gatherings where every bite was a celebration of flavors. This indulgent, layered dish is not only a feast for the senses; it’s a convenient, crowd-pleasing recipe that can elevate any weeknight dinner or special occasion without the fuss. With its rich, creamy texture and mouthwatering seafood, it’s sure to be a hit with both seafood lovers and comfort food enthusiasts alike. Ready to dive into a delightful experience that will leave everyone asking for seconds? Let’s get cooking!

Why is Shrimp Crab Lasagna a must-try?

Indulgent layers: This Shrimp Crab Lasagna is a true celebration of flavors, featuring rich seafood nestled between creamy, cheesy layers. Crispy topping: The breadcrumb topping adds a delightful crunch, perfectly contrasting the creamy interior. Versatile delights: Feel free to swap in scallops or more shrimp for a customized touch. Crowd-pleaser: Ideal for gatherings, this dish caters to both seafood fans and comfort food lovers. For a perfect pairing, serve it alongside a refreshing salad with lemon vinaigrette or some classic garlic bread.

Shrimp Crab Lasagna Ingredients

For the Lasagna Layers

  • Lasagna Noodles – Provides structure and layers; use 12 sheets, cooked according to package directions.
  • Crab Meat – The main protein source that contributes rich seafood flavor; can substitute with imitation crab for a milder taste.
  • Shrimp – Adds texture and flavor; use 1 pound, peeled and deveined. Consider scallops as a substitute for an alternate seafood twist.

For the Cheese Mixture

  • Mozzarella Cheese – Melts beautifully and adds creaminess; use 2 cups shredded.
  • Ricotta Cheese – Brings a creamy texture to the filling; use 2 cups. Cottage cheese may be substituted, but it results in a thinner mixture.
  • Parmesan Cheese – Adds sharpness and flavor; use 1 cup grated, with additional cheese suggested for topping.

For the Alfredo Sauce

  • Heavy Cream – Enriches both the sauce and filling; use 1 cup for a decadent texture.
  • Alfredo Sauce – The key sauce for layering; use 4 cups for that signature creamy element. Homemade options with butter, cream, and Parmesan are highly recommended.

For Flavor Enhancement

  • Chili Flakes – Provides subtle heat; use 1/2 teaspoon, or adjust based on your spice preference.
  • Garlic – Enhances flavor; use 2 cloves, minced for an aromatic touch.
  • Olive Oil – For sautéing; use 2 tablespoons to help bring the garlic and seafood to life.
  • Black Pepper & Salt – Essential seasonings; add to taste.

For the Topping

  • Breadcrumb Topping – Creates a crispy texture; use 1/2 cup. You can substitute with more Parmesan for a cheesy crust if desired.

This Shrimp Crab Lasagna is sure to become a family favorite at your dinner table!

Step‑by‑Step Instructions for Shrimp Crab Lasagna

Step 1: Preheat the Oven
Begin by preheating your oven to 375°F (190°C). This temperature is perfect for baking your Creamy Shrimp Crab Lasagna, allowing it to reach optimal creamy texture and golden coloring. While the oven warms up, gather your ingredients and prepare your work area for an efficient cooking process.

Step 2: Cook the Lasagna Noodles
Cook the lasagna noodles according to the package instructions, usually around 8–10 minutes until al dente. Drain them well and lay them out on a clean surface to cool, ensuring they don’t stick together. This will create a manageable layer when assembling your Shrimp Crab Lasagna.

Step 3: Sauté Garlic and Shrimp
In a large skillet, heat 2 tablespoons of olive oil over medium heat. Add 2 minced garlic cloves and sauté for about 1 minute until fragrant. Next, toss in 1 pound of peeled and deveined shrimp, cooking for 3-4 minutes until they turn pink and are cooked through. This step infuses your seafood filling with a delightful garlicky flavor.

Step 4: Combine Seafood and Seasonings
Stir in 1 pound of crab meat, along with salt, black pepper, and 1/2 teaspoon of chili flakes to taste. Cook for an additional 2-3 minutes until the mixture is well-combined and heated through. This delicious combination becomes the heart of your Creamy Shrimp Crab Lasagna, bursting with sweet seafood goodness.

Step 5: Prepare the Cheese Mixture
In a mixing bowl, combine 2 cups of ricotta cheese, 1 cup of heavy cream, half a cup of grated Parmesan, and 1 cup of shredded mozzarella cheese. Blend these ingredients until smooth and creamy. This mixture will serve as a rich, flavorful layer in your lasagna, complementing the seafood beautifully.

Step 6: Start Assembling the Lasagna
Spread a thin layer of Alfredo sauce on the bottom of a 9×13-inch baking dish to prevent sticking. Begin layering your ingredients by placing lasagna noodles over the sauce, followed by the cheese mixture, seafood mixture, and more Alfredo sauce. Repeat these layers until you’ve used up all your ingredients, finishing with noodles and a generous layer of Alfredo sauce on top.

Step 7: Add Toppings
Sprinkle the remaining mozzarella cheese, additional grated Parmesan, and 1/2 cup of breadcrumbs over the top of your lasagna. This topping will become wonderfully crispy while baking, creating a delightful textural contrast to the creamy layers of your Shrimp Crab Lasagna.

Step 8: Bake the Lasagna
Cover the assembled dish loosely with aluminum foil and place it in the preheated oven. Bake for 25 minutes, then carefully remove the foil and continue baking for an additional 10-15 minutes. Look for a golden-brown, bubbling surface that indicates your Creamy Shrimp Crab Lasagna is perfectly done.

Step 9: Let It Rest
Once baked to perfection, remove the lasagna from the oven and allow it to rest for 10 minutes. This resting time helps the layers set and makes cutting and serving a breeze. It also allows the flavors to meld, enhancing the overall taste of your delicious Shrimp Crab Lasagna.

Step 10: Serve and Enjoy
After the resting period, slice your Creamy Shrimp Crab Lasagna into squares and serve warm. Consider garnishing with fresh parsley for a pop of color and freshness. Pair it with a crisp salad or garlic bread for a wonderful meal that your family will love!

Shrimp Crab Lasagna Variations & Substitutions

Feel free to play with these variations to create your perfect version of Shrimp Crab Lasagna, bringing your own unique touch to this dish!

  • Imitation Crab: Use imitation crab instead of real crab for a milder flavor and lower cost. It’s a great way to stretch your seafood while keeping the dish indulgent.

  • Extra Shrimp: Swap out some or all of the crab meat for additional shrimp for a flavorful seafood boost. More shrimp equals more delightful bites!

  • Scallops: Delve into the luxurious with scallops as a substitute for crab. They’ll bring a buttery richness that pairs wonderfully with the creamy layers.

  • Vegetable Lasagna: For a lighter twist, add layers of sautéed vegetables like spinach, zucchini, or mushrooms. This not only enhances flavor but adds a nutritious element to the dish.

  • Homemade Alfredo: Create a personalized touch by making your own Alfredo sauce using butter, cream, and cheese. It can elevate the flavors to suit your taste perfectly.

  • Gluten-Free Noodles: Use gluten-free lasagna noodles if you’re avoiding gluten. They hold up beautifully without sacrificing the structure of your dish.

  • Spice It Up: For an extra kick, toss in some diced jalapeños or a sprinkle of cayenne pepper. It’ll bring a surprising and exciting heat!

  • Cheesy Crust: Consider substituting breadcrumbs with more Parmesan cheese for a cheesier topping that takes the golden crust to a whole new level.

With endless possibilities, this Shrimp Crab Lasagna can always be adapted to fit your culinary desires. And if you’re eager for more delicious seafood ideas, try out our Shrimp Avocado Bowls or serve it alongside some classic Parmesan Roasted Shrimp for a truly seafood-filled feast!

What to Serve with Creamy Shrimp Crab Lasagna?

Indulging in a rich, velvety creation like this is always a delight, but what to pair with its layers of seafood magic?

  • Crisp Caesar Salad: Adds a refreshing crunch, balancing the creamy richness of the lasagna with crunchy romaine and zesty dressing.
  • Garlic Bread: A classic choice—warm, buttery slices filled with garlic flavor complement the lasagna beautifully, perfect for soaking up leftover sauce.
  • Roasted Zucchini Ribbons: These provide a lovely tender-crisp texture while introducing a subtly sweet freshness that balances the indulgence of the dish.
  • Lemon Vinaigrette Salad: A light, tangy side salad dressed in lemon vinaigrette brightens the palate, enhancing the seafood flavors without overpowering them.
  • Steamed Asparagus: Tender asparagus drizzled with olive oil brings a lovely earthy element, providing both elegance and a vibrant color contrast to your table.
  • Chilled White Wine (Pinot Grigio): A glass of chilled Pinot Grigio elevates the dining experience, its crisp notes pairing perfectly with the seafood layers of the lasagna.
  • Dessert: Tiramisu: Conclude your meal with a classic Italian dessert like tiramisu—its light espresso flavors provide a delightful sweet contrast to the savory main course.
  • Creamy Coleslaw: The crunch and tang of coleslaw offers a refreshing side that cuts through the richness of the lasagna for a perfect meal harmony.
  • Herbed Couscous: Fluffy couscous with fresh herbs can serve as a delightful bed for your lasagna, adding a unique twist and satisfying texture.

Helpful Tricks for Shrimp Crab Lasagna

  • Thorough Drainage: Ensure all seafood is well-drained before mixing. Excess liquid can make your lasagna watery, affecting the overall texture.

  • Rest Time: Let your lasagna rest for at least 10 minutes post-baking. This helps the layers firm up, making it easier to slice and serve without falling apart.

  • Make-Ahead Tip: Consider assembling your Shrimp Crab Lasagna a day in advance. Store it in the fridge, then bake it just before serving for a quick and convenient meal.

  • Freezing Options: Leftovers can be frozen tightly wrapped for up to two months. Thaw them in the fridge overnight before reheating for the best results.

  • Layer Smarter: For a twist, alternate layers with sautéed vegetables like spinach or zucchini. This adds a nutritious element while enhancing the flavors.

Make Ahead Options

These Creamy Shrimp Crab Lasagna layers are perfect for meal prep enthusiasts! You can assemble the entire lasagna up to 24 hours in advance and refrigerate it (just be sure to cover it tightly). To maintain the delightful texture, store the assembled layers in an airtight container to prevent drying out. When it’s time to bake, simply remove it from the fridge and pop it in the preheated oven, adding an extra 5-10 minutes to the baking time. This way, you can create a deliciously cheesy, seafood-infused dish that’s just as tasty and comforting when made ahead, allowing you more time to relax and enjoy your meal!

How to Store and Freeze Shrimp Crab Lasagna

  • Fridge: Store any leftovers in an airtight container in the fridge for up to 2 days. This keeps the flavors fresh while maintaining the creaminess of your Shrimp Crab Lasagna.

  • Freezer: For longer storage, wrap portions tightly in plastic wrap and aluminum foil or place them in freezer-safe containers. This allows you to freeze for up to 2 months.

  • Thawing: When ready to enjoy, thaw the lasagna in the fridge overnight to preserve its texture before reheating.

  • Reheating: Reheat individual servings in the microwave or place in an oven preheated to 350°F (175°C) until heated through, ensuring the layers remain intact and delicious.

Shrimp Crab Lasagna Recipe FAQs

What type of crab meat should I use for Shrimp Crab Lasagna?
You can use fresh crab meat for that wonderful briny flavor, but if you’re looking for something milder and more affordable, imitation crab works perfectly as well. The key is to use high-quality meat, ideally lump or backfin crab, which holds its texture beautifully in this creamy dish.

How long can I store leftover Shrimp Crab Lasagna in the fridge?
Leftover Shrimp Crab Lasagna can be stored in an airtight container in the fridge for up to 2 days. I recommend consuming it within this timeframe for the best taste and texture. Just reheat slices in the microwave or in an oven preheated to 350°F (175°C) until warmed through.

Can I freeze Shrimp Crab Lasagna, and if so, how?
Absolutely! For freezing, I suggest allowing the lasagna to cool completely after baking. Then, wrap portions tightly in plastic wrap and aluminum foil or use freezer-safe containers. You can freeze it for up to 2 months. When you’re ready to enjoy it, thaw in the refrigerator overnight before reheating.

What should I do if my lasagna turns out watery?
If your lasagna turns out watery, it’s likely because the seafood was not adequately drained or the sauce was too watery. To prevent this in the future, make sure to thoroughly drain your crab and shrimp, and if you’re using homemade Alfredo, ensure it’s thick enough before layering it in. Adding some breadcrumbs can help absorb extra moisture too!

Is this Shrimp Crab Lasagna suitable for those with seafood allergies?
This recipe is not suitable for anyone with seafood allergies, as it contains shrimp and crab. For a seafood-free version, you could experiment with vegetables like spinach and zucchini as a substitute, or even try a meat-based alternative such as cooked chicken or beef, while keeping the creamy cheese layers intact. Always check for specific ingredient allergies!

How can I make Shrimp Crab Lasagna healthier or lighter?
For a lighter version of Shrimp Crab Lasagna, consider using whole wheat lasagna noodles and replacing some of the heavy cream with a lower-fat option like evaporated milk. Additionally, incorporating vegetables such as spinach, squash, or mushrooms between layers can boost the nutritional profile without sacrificing flavor!

Shrimp Crab Lasagna

Creamy Shrimp Crab Lasagna: Your New Comfort Food Delight

Indulge in this Shrimp Crab Lasagna, a creamy and flavorful seafood delight that will be a hit at family gatherings.
Prep Time 20 minutes
Cook Time 40 minutes
Resting Time 10 minutes
Total Time 1 hour 10 minutes
Servings: 8 slices
Course: Pasta
Cuisine: Italian
Calories: 450

Ingredients
  

For the Lasagna Layers
  • 12 sheets Lasagna Noodles Cooked according to package directions
  • 1 pound Crab Meat Can substitute with imitation crab
  • 1 pound Shrimp Peeled and deveined; consider scallops as a substitute
For the Cheese Mixture
  • 2 cups Mozzarella Cheese Shredded
  • 2 cups Ricotta Cheese May substitute with cottage cheese
  • 1 cup Parmesan Cheese Grated; additional cheese suggested for topping
For the Alfredo Sauce
  • 1 cup Heavy Cream
  • 4 cups Alfredo Sauce Homemade options recommended
For Flavor Enhancement
  • 1/2 teaspoon Chili Flakes Adjust based on spice preference
  • 2 cloves Garlic Minced
  • 2 tablespoons Olive Oil For sautéing
  • Black Pepper Add to taste
  • Salt Add to taste
For the Topping
  • 1/2 cup Breadcrumb Topping Substitute with more Parmesan for cheesy crust

Equipment

  • 9x13 inch baking dish
  • Large skillet
  • Mixing Bowl

Method
 

Step-by-Step Instructions
  1. Preheat your oven to 375°F (190°C). Gather your ingredients and prepare your work area.
  2. Cook the lasagna noodles according to the package instructions, usually around 8–10 minutes until al dente. Drain well.
  3. In a large skillet, heat 2 tablespoons of olive oil over medium heat. Sauté 2 minced garlic cloves for about 1 minute. Add 1 pound of shrimp and cook until pink.
  4. Add 1 pound of crab meat, salt, black pepper, and 1/2 teaspoon chili flakes to the shrimp. Cook for an additional 2-3 minutes.
  5. In a mixing bowl, combine 2 cups of ricotta cheese, 1 cup of heavy cream, 1/2 cup of grated Parmesan, and 1 cup of shredded mozzarella. Blend until smooth.
  6. Spread a thin layer of Alfredo sauce at the bottom of a baking dish. Layer noodles, cheese mixture, seafood mixture, and more Alfredo sauce. Repeat layers.
  7. Top with remaining mozzarella, additional Parmesan, and 1/2 cup of breadcrumbs.
  8. Cover loosely with aluminum foil and bake for 25 minutes. Remove foil and bake for another 10-15 minutes until golden-brown.
  9. Remove from oven and let rest for 10 minutes before serving. Slice into squares and garnish with fresh parsley.

Nutrition

Serving: 1sliceCalories: 450kcalCarbohydrates: 30gProtein: 25gFat: 25gSaturated Fat: 15gPolyunsaturated Fat: 1gMonounsaturated Fat: 2gCholesterol: 150mgSodium: 800mgPotassium: 400mgFiber: 2gSugar: 3gVitamin A: 500IUVitamin C: 2mgCalcium: 300mgIron: 2mg

Notes

Ensure all seafood is well-drained to prevent a watery texture. Allow the lasagna to rest after baking for optimal slicing. Make ahead options available for convenience.

Tried this recipe?

Let us know how it was!

Cheesy Beef Tortellini Bake: Comfort Food in Every Bite

As the tantalizing aroma of this Cheesy Beef Tortellini Bake fills my kitchen, I can’t help but reminisce about cozy family dinners spent around the table. This dish is a symphony of creamy, cheesy pasta and savory beef, perfectly baked to golden perfection. It stands out as the ultimate comfort food, ideal for quick weeknight meals or nurturing gatherings with friends. What I love most is how versatile it is! You can easily customize the ingredients to suit your taste buds, whether you want to sneak in some vibrant veggies or swap the beef for a lighter option. Plus, its simple prep means you can get this mouthwatering dish on the table in no time! Are you ready to indulge in a culinary hug that will bring everyone together?

Why is this bake so irresistible?

Comforting, creamy goodness: This Cheesy Beef Tortellini Bake combines the warmth of melted cheese with savory beef and tender pasta, making it the perfect dish for cozy dinners.
Quick prep time: With minimal cooking required, you can whip it up in a snap—great for busy weeknights!
Customizable delight: Feel free to add your favorite vegetables or switch out the beef for turkey or a plant-based option to suit your family’s tastes.
Crowd-pleaser: Universally loved, it’s sure to impress both kids and adults alike!
Hearty leftovers: Enjoy the deliciousness again the next day—just reheat and savor! For even more cheesy goodness, check out my Cheesy Spinach Bake or Cheesy Hamburger Potato for your future dinner plans.

Cheesy Beef Tortellini Bake Ingredients

For the Bake
Ground Beef – Provides hearty protein and savory flavor; substitute with ground turkey or chicken for a leaner option.
Refrigerated Cheese Tortellini (20 oz) – Acts as the base, delivering a soft, cheesy pasta texture; frozen tortellini can be used; ensure to adjust cooking time.
Marinara Sauce (24 oz) – Adds acidity and depth to the dish; use a high-quality brand for the best flavor.
Heavy Cream (1 cup) – Contributes richness and creaminess to the sauce; you can replace it with half-and-half for a lighter version.
Shredded Mozzarella Cheese (2 cups) – Gives gooey, melty texture; an Italian blend can substitute for variety.
Grated Parmesan Cheese (1/2 cup) – Enhances savory depth.
Garlic Powder (1 teaspoon) – Adds aromatic flavor; fresh garlic can be used as an alternative.
Italian Seasoning (1 teaspoon) – Imparts herbal notes; adjust to taste or use fresh herbs for a flavor increase.
Salt and Pepper – Seasoning to taste.
Fresh Parsley (optional) – For garnish, providing a fresh touch.

Step‑by‑Step Instructions for Cheesy Beef Tortellini Bake

Step 1: Preheat the Oven
Begin your Cheesy Beef Tortellini Bake by preheating your oven to 375°F (190°C). This ensures a hot start for your dish, allowing the cheese to melt beautifully and the flavors to meld. Prepare a baking dish by lightly greasing it with cooking spray or a little olive oil for easy cleanup.

Step 2: Cook the Ground Beef
In a large skillet, heat over medium heat and add your ground beef. Cook for about 6-8 minutes, breaking it up with a spatula until it’s browned and fully cooked. Drain any excess fat to keep your bake light, then set the skillet aside, allowing the savory beef to cool slightly while you prepare the next steps.

Step 3: Prepare the Tortellini
Bring a large pot of salted water to a rolling boil. Add your refrigerated cheese tortellini and cook according to package instructions, usually around 3-5 minutes, until they are al dente. Drain the tortellini thoroughly and return them to the pot to keep warm while you mix the sauce.

Step 4: Mix the Sauce
In a large bowl, combine the marinara sauce, heavy cream, garlic powder, Italian seasoning, salt, and pepper. Whisk together until smooth and creamy, allowing the rich flavors to blend. This sauce will envelop the tortellini, giving your Cheesy Beef Tortellini Bake its deliciously creamy foundation.

Step 5: Combine Ingredients
In the greased baking dish, combine the drained tortellini with the browned ground beef and pour the creamy sauce over the top. Gently stir everything together to ensure the tortellini and beef are evenly coated in the flavorful mixture, bringing all the elements of your bake together.

Step 6: Add Cheese Toppings
Sprinkle the shredded mozzarella and grated Parmesan cheese generously over the top of the combined mixture. The cheese will melt into a gooey layer as the bake cooks, creating that irresistible, bubbly topping that makes your Cheesy Beef Tortellini Bake so appealing.

Step 7: Bake the Dish
Transfer the baking dish to your preheated oven and bake uncovered for 20-25 minutes, or until the cheese is melted, golden brown, and bubbly. Enjoy the enticing aroma that fills your kitchen as the bake cooks, letting it indicate that dinner is almost ready!

Step 8: Serve and Garnish
Once baked, remove the Cheesy Beef Tortellini Bake from the oven and allow it to cool slightly for about 5 minutes. Garnish with freshly chopped parsley for a touch of color and freshness before serving warm. Dive into this comforting dish that’s perfect for family gatherings or a cozy weeknight meal.

What to Serve with Cheesy Beef Tortellini Bake

As the comforting warmth of your cheesy bake fills the air, it’s time to think about perfect pairings that elevate the entire meal experience.

  • Garlic Bread: A crunchy, buttery side that’s perfect for mopping up the delicious sauce. It’s a classic that never disappoints!

  • Simple Green Salad: Crisp lettuce dressed in a light vinaigrette brings freshness and balances the richness of the bake. Add cherry tomatoes for a pop of color!

  • Roasted Vegetables: Caramelized seasonal veggies like zucchini, bell peppers, or broccoli provide a healthy crunch and colorful addition to your plate.

  • Creamy Coleslaw: This cool, crunchy salad offers a delightful contrast to the warm, gooey tortellini bake, adding both texture and flavor.

  • Steamed Asparagus: Lightly seasoned, tender asparagus spears add a beautiful, vibrant touch of green and enhance your meal’s aesthetic.

  • Pizza-flavored Side Dish: Think cheesy garlic knots or mini pizzas; they can be a fun addition that resonates with the tortellini theme everyone loves.

  • Fruit Tart or Cheesecake: Finish the meal with a light, sweet dessert. A slice of fruit tart or creamy cheesecake is just the right way to round off a hearty dinner.

Choose a few of these delightful pairings to create a memorable dining experience that the whole family will adore!

Cheesy Beef Tortellini Bake Variations

Feel the freedom to make this Cheesy Beef Tortellini Bake your own with these delightful twists!

  • Veggie Boost: Add nutritional power by mixing in spinach, mushrooms, or bell peppers for a colorful, healthful infusion that brightens every bite.

  • Meat Mastery: Swap ground beef for ground turkey, chicken, or even a plant-based option like lentils or tempeh. This change maintains that hearty feel while catering to diverse dietary needs.

  • Extra Creaminess: For a luscious texture, incorporate dollops of ricotta cheese. It elevates the richness and creates a wonderful creamy layer throughout.

  • Zesty Heat: Spice things up by throwing in some crushed red pepper flakes or diced jalapeños. These additions introduce a warm kick that makes the dish even more alluring.

  • Herb Twist: Swap Italian seasoning for fresh herbs like basil or oregano. Fresh herbs can introduce a vibrant aroma and flavor profile that’s simply irresistible.

  • Cheesy Fusion: Experiment with different cheeses like Gruyère or Pepper Jack instead of mozzarella for a unique flavor profile. This will create a delightful surprise in each forkful!

Don’t forget to complement your meal with a side salad or some warm garlic bread for a satisfying spread. For even more cheesy delights, consider exploring my recipes like the Cheesy Spinach Bake or the comforting Cheesy Hamburger Potato for your next family feast!

Make Ahead Options

These Cheesy Beef Tortellini Bake instructions are perfect for busy home cooks looking to save time! You can assemble the entire dish up to 24 hours in advance; simply cover it tightly with plastic wrap and refrigerate to keep it fresh and flavorful. To maintain the quality of your Cheesy Beef Tortellini Bake, avoid baking it while chilled straight from the fridge. Instead, allow it to sit at room temperature for about 30 minutes before popping it into a preheated oven. When you’re ready to enjoy, bake it for 25-30 minutes, adding a few extra minutes if you notice the cheese doesn’t melt as desired. This way, you can savor a hearty, comforting meal without the evening rush!

How to Store and Freeze Cheesy Beef Tortellini Bake

Fridge: Store leftovers in an airtight container for up to 3-4 days. Reheat in the microwave or oven until heated through to enjoy the comfort of this delicious dish again.

Freezer: For longer storage, pack the assembled Cheesy Beef Tortellini Bake in a freezer-safe container. It can be frozen for up to 3 months. Bake directly from frozen, adding extra time to ensure it’s heated thoroughly.

Reheating: When reheating, cover the dish with foil to prevent over-browning. Bake at 350°F (175°C) for about 25-30 minutes or until hot throughout, allowing the cheesy goodness to shine once more.

Expert Tips for Cheesy Beef Tortellini Bake

  • Quality Counts: Use high-quality marinara for enhanced flavor; this is crucial in your Cheesy Beef Tortellini Bake to achieve a rich, comforting taste.

  • Don’t Overcook: Avoid overcooking tortellini in boiling water; aim for al dente to maintain the perfect texture, preventing mushiness.

  • Make Ahead: For convenience, assemble the bake up to 24 hours in advance. If baking from the fridge, add 5-10 minutes to ensure thorough cooking.

  • Freezing Friendly: If desired, freeze the assembled dish in a freezer-safe container. Bake directly from frozen, adjusting the time as needed for a hassle-free meal.

  • Mix It Up: Customize the bake by adding fresh veggies like spinach or bell peppers. This not only enhances nutrition but adds exciting flavors!

Cheesy Beef Tortellini Bake Recipe FAQs

How do I choose the best ground beef for this recipe?
Absolutely! When selecting ground beef, aim for an 80/20 lean-to-fat ratio for a juicy and flavorful result. If you’re looking for a leaner option, ground turkey or chicken works beautifully and keeps the dish lighter while still offering great flavor.

What’s the best way to store leftovers of the Cheesy Beef Tortellini Bake?
Very! To store leftovers, let the dish cool completely, then transfer it to an airtight container. It will keep well in the refrigerator for up to 3-4 days. When you’re ready to enjoy it again, simply reheat it in the oven or microwave until warmed through.

Can I freeze the Cheesy Beef Tortellini Bake?
Yes, you can! To freeze, pack the assembled dish in a freezer-safe container, and it will last up to 3 months. To reheat, bake it directly from frozen at 375°F (190°C) for about 45-55 minutes, ensuring it’s heated through and the cheese is bubbly and golden.

What should I do if my tortellini are overcooked?
If your tortellini ends up overcooked and mushy, don’t worry! You can try using a slotted spoon to remove them and serve them with less sauce to minimize the impact. Next time, keep a close eye on the cooking time; they usually only take 3-5 minutes to cook until al dente.

Are there any dietary considerations I should keep in mind for my family?
Absolutely! If anyone has dairy allergies, consider using dairy-free cheese and cream substitutes. For gluten sensitivities, look for gluten-free tortellini options available in many stores. Always double-check ingredients for allergy safety, especially if serving to guests or children.

Can I add vegetables to the Cheesy Beef Tortellini Bake?
Certainly! Adding vegetables like spinach, bell peppers, or mushrooms is a great way to boost nutrition and flavor. Sauté them briefly before combining them with the other ingredients or simply stir them into the bake before topping with cheese for a delightful twist!

Cheesy Beef Tortellini Bake

Cheesy Beef Tortellini Bake: Comfort Food in Every Bite

Indulge in Cheesy Beef Tortellini Bake, the ultimate comfort food with creamy pasta and savory beef.
Prep Time 15 minutes
Cook Time 25 minutes
Cooling Time 5 minutes
Total Time 45 minutes
Servings: 6 servings
Course: Casserole
Cuisine: Italian
Calories: 480

Ingredients
  

For the Bake
  • 1 pound Ground Beef Substitute with ground turkey or chicken for a leaner option.
  • 20 oz Refrigerated Cheese Tortellini Frozen tortellini can be used; ensure to adjust cooking time.
  • 24 oz Marinara Sauce Use a high-quality brand for the best flavor.
  • 1 cup Heavy Cream You can replace it with half-and-half for a lighter version.
  • 2 cups Shredded Mozzarella Cheese An Italian blend can substitute for variety.
  • 1/2 cup Grated Parmesan Cheese
  • 1 teaspoon Garlic Powder Fresh garlic can be used as an alternative.
  • 1 teaspoon Italian Seasoning Adjust to taste or use fresh herbs for a flavor increase.
  • Salt Season to taste.
  • Pepper Season to taste.
  • Fresh Parsley Optional, for garnish.

Equipment

  • Large pot
  • Large skillet
  • baking dish
  • Mixing Bowl

Method
 

Step-by-Step Instructions
  1. Preheat your oven to 375°F (190°C) and grease a baking dish with cooking spray or olive oil.
  2. In a large skillet, cook the ground beef over medium heat for 6-8 minutes until browned. Drain excess fat.
  3. In a large pot, boil salted water and cook the cheese tortellini according to package instructions for 3-5 minutes, then drain and keep warm.
  4. In a large bowl, whisk together marinara sauce, heavy cream, garlic powder, Italian seasoning, salt, and pepper until smooth.
  5. Combine the drained tortellini with the ground beef in the baking dish, and pour the sauce over. Stir gently.
  6. Sprinkle shredded mozzarella and grated Parmesan cheese on top.
  7. Bake uncovered for 20-25 minutes until the cheese is melted and golden brown.
  8. Allow to cool for 5 minutes, then garnish with chopped parsley before serving.

Nutrition

Serving: 1servingCalories: 480kcalCarbohydrates: 40gProtein: 28gFat: 28gSaturated Fat: 14gPolyunsaturated Fat: 2gMonounsaturated Fat: 10gTrans Fat: 1gCholesterol: 90mgSodium: 900mgPotassium: 700mgFiber: 2gSugar: 6gVitamin A: 20IUVitamin C: 2mgCalcium: 300mgIron: 3mg

Notes

This dish can be customized by adding vegetables like spinach or bell peppers and is great for leftovers.

Tried this recipe?

Let us know how it was!

Garlic Butter Chicken with Rigatoni: Your New Comfort Meal

The hiss of garlic sizzling in butter offers a comforting invitation, igniting the senses as I prepare my favorite weeknight meal. This Garlic Butter Chicken with Rigatoni is an easy yet indulgent dish that transforms a simple dinner into a cozy culinary escape. The golden-brown chicken dances in a luscious garlic sauce, while the rigatoni soaks up every creamy bite, making it a crowd-pleaser that never fails to impress. Perfect for busy evenings or when you want to treat yourself, this recipe combines quick prep with downright deliciousness. Are you ready to bring a taste of Italy into your kitchen? Let’s dive into this creamy comfort dish together!

Why is this recipe a must-try?

Comforting flavors: This Garlic Butter Chicken with Rigatoni is the ultimate indulgence, delivering warm, savory notes straight to your table.
Quick to prepare: Ideal for busy evenings, you’ll have this enticing meal ready in about 30 minutes.
Crowd-pleaser: Impress family or guests with a dish that tastes restaurant-quality, yet is simple to make at home.
Versatile options: Whether you want to substitute chicken with shrimp or add a zesty kick with red pepper flakes, you can easily adapt it to suit your taste.
Perfect pairing: Complement your dish with a fresh side salad and some garlic bread for a complete indulgent experience! Check out my links to other favorites like Garlic Butter Baked and Cheesy Garlic Chicken for more delicious ideas.

Garlic Butter Chicken with Rigatoni Ingredients

For the Pasta
Rigatoni – Base of the dish; holds sauce well. Use any pasta shape if rigatoni isn’t available.

For the Chicken
Chicken Breast – Provides protein and substance; can be substituted with thighs for a richer taste.
Olive Oil – For cooking the chicken; can use avocado oil for a different flavor.
Salt and Black Pepper – Seasoning to enhance flavors; adjust to taste.
Italian Seasoning – Adds aromatic herbs; replace with oregano and basil if unavailable.

For the Sauce
Butter – Key component for the sauce; can use salted or unsalted as per preference.
Garlic (minced) – Primary flavoring; fresh garlic recommended for best taste.
Chicken Broth – Adds depth to the sauce; use vegetable broth for a vegetarian option.
Heavy Cream – Creates the creamy texture of the sauce; substitute with half-and-half for a lighter version.
Parmesan Cheese (grated) – Finishing touch for umami; can substitute with Pecorino Romano.
Fresh Parsley (chopped) – For garnish; can replace with basil for different flavor notes.
Red Pepper Flakes – Optional for heat; adjust to your spice preference.

Embrace the satisfaction of cooking and elevate your culinary repertoire with this Garlic Butter Chicken with Rigatoni—a dish that brings together rich flavors and comfort, all in under 30 minutes!

Step‑by‑Step Instructions for Garlic Butter Chicken with Rigatoni

Step 1: Cook the Rigatoni
Bring a large pot of salted water to a rolling boil, then add the rigatoni. Cook according to package instructions until al dente, usually about 10-12 minutes. Once done, reserve about ½ cup of the pasta water, then drain the rigatoni. Set it aside, ready to soak up that rich garlic butter sauce you’ll make shortly.

Step 2: Sear the Chicken
In a large skillet, heat a tablespoon of olive oil over medium-high heat. Season the chicken breasts with salt, black pepper, and Italian seasoning for flavor. Add the chicken to the skillet and cook for 5-7 minutes on each side, or until it’s golden brown and cooked through. Transfer the chicken to a plate and keep it warm while you prepare the sauce.

Step 3: Sauté the Garlic
Reduce the heat to medium, and in the same skillet, add a few tablespoons of butter. Once melted, add minced garlic and sauté for about 30 seconds until fragrant, stirring frequently to avoid burning. The aroma of the garlic will fill your kitchen, setting the stage for the creamy sauce to come in this Garlic Butter Chicken with Rigatoni.

Step 4: Create the Sauce Base
Pour in the chicken broth and bring it to a gentle simmer, scraping the bottom of the skillet to release any flavorful bits. Let the mixture simmer for about 2 minutes, stirring occasionally. This step infuses the sauce with the essence of the sautéed chicken, enhancing the overall taste of your dish.

Step 5: Thicken the Sauce
Now it’s time to make your sauce creamy! Add the heavy cream to the skillet, stirring well to combine. Allow the sauce to thicken for about 3-4 minutes, continuing to stir. You’ll know it’s ready when the surface bubbles gently, and it coats the back of a spoon.

Step 6: Finish the Sauce
Stir in the grated Parmesan cheese until it melts into the sauce, creating a luscious, creamy blend. If the sauce is too thick, gradually add some of the reserved pasta water to reach your desired consistency. This extra step ensures your Garlic Butter Chicken with Rigatoni has the perfect clinginess to the pasta.

Step 7: Combine the Chicken and Pasta
Return the golden chicken to the skillet with the sauce, then add the cooked rigatoni. Gently toss everything together until the pasta and chicken are well-coated in the garlicky goodness. Heat through for an additional minute so that every bite is warm and decadent.

Step 8: Garnish and Serve
Once everything is beautifully combined and heated, plate up your Garlic Butter Chicken with Rigatoni. Garnish with additional Parmesan, chopped fresh parsley, and a sprinkle of red pepper flakes if you like it spicy. Serve warm and watch your family dig into this comforting Italian-inspired dish!

Garlic Butter Chicken with Rigatoni Variations

Feel free to get creative with your Garlic Butter Chicken with Rigatoni! Each suggestion offers a unique twist that makes this dish truly your own.

  • Seafood Delight: Substitute chicken with grilled shrimp for a fresh, coastal twist. The shrimp pairs beautifully with the garlic butter sauce.
  • Veggie Paradise: Use sautéed mushrooms, bell peppers, or spinach instead of chicken for a hearty vegetarian option. Enhance your health while enjoying the same creamy flavor.
  • Dairy-Free: Replace heavy cream with coconut cream for a rich, non-dairy alternative. It adds a subtle sweetness that warms the heart.
  • Zesty Kick: Stir in diced sun-dried tomatoes or a splash of lemon juice for a vibrant flavor boost. The bright acidity cuts through the richness perfectly.
  • Pasta Options: Experiment with different pasta shapes, like penne or fettuccine, to find your favorite combo. Each shape offers a delightful twist on texture.
  • Cheese Swap: Try substituting Parmesan with Pecorino Romano for sharper notes. It adds a distinct flair that’s sure to impress cheese lovers.
  • Herb Infusion: Replace parsley with fresh basil or thyme to bring in new aromatic layers. The fragrances will transport you straight to Italy.
  • Spicy Heat: Adjust the heat level by increasing red pepper flakes or adding a dash of hot sauce. Elevate the dish to your desired spice level for a bold experience.

As you explore these delicious variations, don’t forget to check out my recipes for Garlic Butter Baked and Comfort Garlic Butter for more inspiration. Happy cooking!

What to Serve with Garlic Butter Chicken with Rigatoni

Get ready to complete your meal with these delightful pairings that enhance every bite of this sumptuous dish.

  • Garlic Bread: Perfect for soaking up that creamy sauce, crispy on the outside and soft on the inside, it’s a delightful sidekick to your meal.

  • Caesar Salad: The crisp, refreshing greens and zesty dressing provide a lovely contrast to the richness of the dish, balancing flavors beautifully.

  • Roasted Vegetables: Seasoned with Italian herbs, roasted veggies like zucchini and bell peppers add a vibrant splash of color and nutritious crunch.

  • Steamed Broccoli: This classic vegetable side is simple yet effective, offering a gentle bite that complements the rich pasta without overpowering it.

  • Wine Pairing – Pinot Grigio: A chilled glass of this light white wine cuts through the richness of the garlic butter sauce, enhancing your dining experience.

  • Lemon Sorbet: Clean and refreshing, serve this as a palate-cleanser after your meal—perfect for ending the evening on a light note.

  • Caprese Skewers: These bite-sized delights of mozzarella, basil, and cherry tomatoes bring brightness and acidity, pairing well with the creamy pasta.

Each of these options elevates your dining experience, inviting you and your loved ones to savor every moment spent around the table.

Expert Tips for Garlic Butter Chicken with Rigatoni

  • Fresh Garlic Matters: Using fresh minced garlic instead of pre-minced versions results in a more robust flavor enhancing your garlic butter chicken.
  • Monitor Sauce Consistency: Keep an eye on the thickness of your sauce. If it’s too thick, gradually add the reserved pasta water for the perfect creamy texture.
  • Cook Chicken Thoroughly: Ensure your chicken is fully cooked for safety and optimal juiciness before mixing it into the sauce, ensuring the garlic butter chicken is delicious and tender.
  • Season Well: Adjust the salt, pepper, and Italian seasoning to your taste. Proper seasoning enhances the dish’s flavor profile beautifully.
  • Experiment with Cheese: While Parmesan is traditional, don’t hesitate to try Pecorino Romano for a different twist, adding complexity to your garlic butter chicken with rigatoni.

Make Ahead Options

These Garlic Butter Chicken with Rigatoni are perfect for meal prep enthusiasts! You can fully prepare the sauce and cook the chicken up to 24 hours in advance. Simply store them in airtight containers in the refrigerator. To maintain the creamy texture, refrigerate the sauce without the pasta. When you’re ready to serve, just cook your rigatoni, reheat the sauce over low heat, adding a splash of chicken broth if needed, and then combine everything together. This make-ahead method ensures you can enjoy a comforting homemade meal on busy weeknights with minimal fuss and just as delicious results!

How to Store and Freeze Garlic Butter Chicken with Rigatoni

Fridge: Store leftovers in an airtight container for up to 3 days. Make sure to let it cool before sealing to maintain freshness.

Freezer: If you want to keep the garlic butter chicken longer, you can freeze it for up to 2 months. Portion it into freezer-safe containers, leaving space for expansion.

Reheating: When ready to enjoy, thaw overnight in the fridge, and reheat gently on the stove. Add a splash of broth or cream to help restore creaminess to the sauce.

Avoid Separation: To maintain a smooth sauce consistency, stir well during reheating and adjust with reserved pasta water if needed.

Garlic Butter Chicken with Rigatoni Recipe FAQs

What type of rigatoni is best for this recipe?
Absolutely! I recommend using any quality rigatoni that is sturdy and can hold up to the rich sauce. If you can’t find rigatoni, feel free to substitute with penne or farfalle. Just make sure the pasta shape you choose is robust enough to capture all that delicious garlic butter sauce.

How should I store leftovers of Garlic Butter Chicken with Rigatoni?
Very simply! Allow any leftovers to cool, then transfer them to an airtight container. They will stay fresh in the fridge for up to 3 days. If you’re not going to finish it within that timeframe, consider storing it in the freezer, where it can last up to 2 months. Just remember to label your container!

Can I freeze Garlic Butter Chicken with Rigatoni?
Absolutely! To freeze, portion the dish into freezer-safe containers, leaving a little space at the top for expansion. When you’re ready to enjoy it, thaw the containers in the refrigerator overnight. Reheat gently on the stove, adding a splash of chicken broth or cream to restore the creaminess of the sauce.

My sauce turned out too thick; what should I do?
Not to worry! If your sauce is too thick, simply take some of that reserved pasta water you kept aside and gradually stir it into the sauce until you achieve your desired consistency. This method not only helps thin out the sauce but also keeps it creamy and delicious!

Can I use a different type of cheese instead of Parmesan?
Absolutely! While Parmesan lends a lovely umami flavor, you can switch things up by using Pecorino Romano, which has a sharper taste. Alternatively, if you want a creamier texture, consider adding a mix of cream cheese and heavy cream along with the other ingredients for a unique twist.

Is this dish suitable for someone with dairy allergies?
While this Garlic Butter Chicken with Rigatoni contains dairy ingredients, you can make it dairy-free by substituting the butter with a plant-based margarine and omitting the heavy cream or using a dairy-free cream alternative. Just be mindful of the cheese, and consider nutritional yeast for that cheesy flavor without the dairy!

Garlic Butter Chicken with Rigatoni

Garlic Butter Chicken with Rigatoni: Your New Comfort Meal

This Garlic Butter Chicken with Rigatoni combines creamy indulgence with quick preparation for a delicious weeknight meal.
Prep Time 10 minutes
Cook Time 20 minutes
Total Time 30 minutes
Servings: 4 servings
Course: Pasta
Cuisine: Italian
Calories: 600

Ingredients
  

For the Pasta
  • 12 ounces Rigatoni Use any pasta shape if rigatoni isn't available.
For the Chicken
  • 2 pounds Chicken Breast Can be substituted with thighs for a richer taste.
  • 1 tablespoon Olive Oil Can use avocado oil for a different flavor.
  • 1 teaspoon Salt Adjust to taste.
  • 1 teaspoon Black Pepper Adjust to taste.
  • 1 teaspoon Italian Seasoning Replace with oregano and basil if unavailable.
For the Sauce
  • 4 tablespoons Butter Can use salted or unsalted as per preference.
  • 4 cloves Garlic Fresh minced garlic recommended for best taste.
  • 1 cup Chicken Broth Use vegetable broth for a vegetarian option.
  • 1 cup Heavy Cream Substitute with half-and-half for a lighter version.
  • 1/2 cup Parmesan Cheese Can substitute with Pecorino Romano.
  • 1/4 cup Fresh Parsley Can replace with basil for different flavor notes.
  • 1/4 teaspoon Red Pepper Flakes Optional for heat; adjust to your spice preference.

Equipment

  • Large pot
  • Skillet

Method
 

Step‑by‑Step Instructions
  1. Bring a large pot of salted water to a rolling boil, then add the rigatoni. Cook according to package instructions until al dente, usually about 10-12 minutes. Reserve ½ cup of the pasta water, then drain the rigatoni.
  2. In a large skillet, heat a tablespoon of olive oil over medium-high heat. Season the chicken breasts with salt, black pepper, and Italian seasoning. Cook for 5-7 minutes on each side until golden brown. Transfer chicken to a plate and keep warm.
  3. Reduce heat to medium, add butter to the same skillet. Once melted, add minced garlic and sauté for about 30 seconds until fragrant.
  4. Pour in chicken broth, bring to a gentle simmer, scraping the bottom of the skillet. Let it simmer for about 2 minutes.
  5. Add heavy cream to the skillet, stirring well. Allow the sauce to thicken for about 3-4 minutes.
  6. Stir in Parmesan cheese until melted. If the sauce is too thick, gradually add reserved pasta water.
  7. Return chicken to the skillet with sauce, add cooked rigatoni, and toss until well-coated.
  8. Plate up your dish, garnish with additional Parmesan, parsley, and red pepper flakes if desired. Serve warm.

Nutrition

Serving: 1servingCalories: 600kcalCarbohydrates: 42gProtein: 30gFat: 32gSaturated Fat: 20gCholesterol: 100mgSodium: 600mgPotassium: 700mgFiber: 3gSugar: 2gVitamin A: 500IUVitamin C: 2mgCalcium: 300mgIron: 2mg

Notes

Using fresh minced garlic enhances the flavor. Monitor sauce consistency and adjust with pasta water if needed. Adjust seasoning to your taste.

Tried this recipe?

Let us know how it was!

Slow Cooker Beef Manhattan: Ultimate Comfort in Every Bite

As the scent of slow-cooked beef wafts through the kitchen, I can’t help but feel a sense of nostalgia for family gatherings and those cozy evenings spent around the dinner table. This Hearty Slow Cooker Beef Manhattan is a love letter to comfort food, marrying tender beef chuck roast with rich, savory gravy and pillowy mashed potatoes. What’s captivating about this recipe is its effortless preparation – just set it and forget it while you go about your day. It’s a perfect choice for busy lives, ensuring everyone gets a wholesome, home-cooked meal without the fuss. Plus, the leftovers are just as amazing, making it an even better choice for meal prep. Who wouldn’t want to treat themselves to a warm bowl of delicious comfort, especially when it’s so easy to whip up? Are you ready to dive into this satisfying journey of flavor?

Why is Slow Cooker Beef Manhattan irresistible?

Nostalgic Flavor: This dish evokes the warmth of family dinners, wrapping you in a cozy embrace with its rich gravy and tender beef.

Effortless Cooking: Just toss the ingredients into the slow cooker and let it work its magic, freeing you to focus on what matters most.

Versatile Dish: While it’s perfect as is, you can easily adjust it—add vegetables or swap proteins for a fun twist.

Crowd-Pleasing: You won’t hear complaints at the dinner table; everyone loves a hearty meal like this.

Leftover Love: The flavors deepen after a night in the fridge, making it a great candidate for meal prep. Pair it with some hot rolls or even serve it as open-faced sandwiches for a delightful lunch! You may also find inspiration from other recipes like Sticky Beef Noodles or Korean Ground Beef for more delicious comfort food options.

Slow Cooker Beef Manhattan Ingredients

For the Beef
Beef chuck roast – Main protein source that tenderizes beautifully during slow cooking; you can substitute with brisket or round roast for different flavors.
Worcestershire sauce – Enhances the umami flavor, or you can opt for soy sauce if you need a substitute.

For the Gravy
Beef broth – Serves as a savory liquid base for the gravy; vegetable broth can be used for a lighter version.
Brown gravy mix – Thickens and flavors the gravy, ensuring you choose a gluten-free option if necessary, or try making your own homemade gravy!
Cornstarch (optional) – Thickens gravy if desired; mix it with water to create a slurry before adding for best results.

For the Vegetables
Onion – Adds sweet flavor and depth; yellow or white onions work best for this recipe.
Garlic powder – Provides aromatic flavor, but you can use fresh minced garlic for a punchier taste.

For Serving
Prepared mashed potatoes – Acts as the comforting side dish; instant mashed potatoes can be used for a quicker prep.
Salt and black pepper – Essential seasonings that should be adjusted according to your taste for that perfect finish.

Explore the deep flavors of Slow Cooker Beef Manhattan and enjoy the effortless cooking experience it provides!

Step‑by‑Step Instructions for Slow Cooker Beef Manhattan

Step 1: Prepare the Beef
Generously season the beef chuck roast with salt, black pepper, and garlic powder. This seasoning helps build a flavorful base for your Slow Cooker Beef Manhattan. Allow the roast to marinate for about 15 minutes, ensuring it’s well-coated. Prepping the beef this way will create a deliciously seasoned foundation for your comforting dish.

Step 2: Start Cooking
In the slow cooker, layer the sliced onions evenly at the bottom. Next, place the seasoned beef chuck roast on top of the onions; the slow cooking will ensure moisture and flavor circulate. Set the slow cooker to low heat, as we want the beef to become tender over several hours, releasing its juices into the dish.

Step 3: Mix and Pour
In a mixing bowl, combine the beef broth, brown gravy mix, and Worcestershire sauce, stirring until the gravy mix is fully dissolved. Pour this mixture carefully over the beef in the slow cooker. The liquid will enhance the beef’s flavor as it cooks, creating that rich, savory gravy that’s a hallmark of the Slow Cooker Beef Manhattan.

Step 4: Cook
Cover the slow cooker and set it to cook on low for about 8 hours. During this time, the beef will become fork-tender, and the flavors will meld beautifully. Make sure to resist the temptation to lift the lid too often, as this will release steam and prolong cooking time.

Step 5: Thicken Gravy (optional)
Once cooking is complete, carefully remove the beef from the slow cooker and set it aside on a cutting board. If you’ve chosen to thicken the gravy, whisk together a cornstarch slurry (equal parts cornstarch and water) and stir it into the gravy. Cook on high for 15 minutes, stirring frequently until it reaches the desired thickness. Return the shredded beef to the gravy and mix well.

Step 6: Serve
To serve your Slow Cooker Beef Manhattan, plate a generous scoop of prepared mashed potatoes as a bed for your beef. Shred the beef with two forks, place it on top of the potatoes, and ladle extra gravy all over. This delightful combination of tender beef, rich gravy, and creamy mashed potatoes makes for a comforting meal that the whole family will love.

What to Serve with Hearty Comfort Slow Cooker Beef Manhattan

Bring your family around the table for a comforting meal that’s both nostalgic and satisfying, paired perfectly with simple sides.

  • Creamy Mashed Potatoes: The rich, fluffy texture serves as a delicious base for the hearty beef and gravy combination.

  • Buttered Green Beans: These lightly seasoned green beans add a fresh, crisp element to balance the richness of the beef dish.

  • Garlic Toast: Crunchy on the outside and soft on the inside, this toast is perfect for soaking up the flavorful gravy.

  • Coleslaw: A bright, crunchy slaw brings a refreshing contrast and helps cut through the richness, making each bite satisfying.

  • Hot Dinner Rolls: Soft and warm rolls are ideal for mopping up leftover gravy, ensuring no flavor goes to waste.

  • Roasted Carrots: Sweet, caramelized carrots add a touch of natural sweetness, creating a delightful mix of flavors on your plate.

  • Side Salad: A simple mixed green salad with a light vinaigrette offers a fresh and zesty counterpart to the hearty meal.

  • Red Wine: Pairing this dish with a smooth red wine enhances the flavors beautifully, making it perfect for an evening family dinner.

  • Apple Crisp: End the meal on a sweet note with a warm apple crisp, providing cozy dessert satisfaction after a savory feast.

Expert Tips for Slow Cooker Beef Manhattan

  • Season Generously: Don’t skimp on seasoning your beef chuck roast; a proper coating of salt, pepper, and garlic powder enhances flavor significantly.

  • Low and Slow: Always cook on the low setting for tender meat; high heat may dry out the beef, ruining the dish’s texture.

  • Perfect Gravy: For a thicker gravy, whisk cornstarch with water before adding; do this after removing the beef to keep it tender.

  • Rest the Meat: Allow the cooked beef to rest for a few minutes before shredding. This helps maintain its juicy texture and flavor.

  • Keep it Simple: Avoid adding too many spices or extras. Focusing on quality ingredients like beef broth and Worcestershire sauce will yield the best Slow Cooker Beef Manhattan.

  • Leftover Magic: Store leftovers in an airtight container and reheat gently; the flavors improve overnight, making for a delightful next-day meal.

Make Ahead Options

Busy weeknights are no match for this Hearty Slow Cooker Beef Manhattan! You can marinate and season the beef chuck roast up to 24 hours in advance, allowing all those flavors to penetrate the meat and make it even more delicious. Additionally, you can chop the onions and store them in an airtight container in the fridge for up to 3 days. When you’re ready to serve, just layer the onions in the slow cooker, place the marinated beef on top, pour in the broth mixture, and cook on low for 8 hours. This way, you’ll have a comforting meal that’s just as fantastic as if you had made it fresh, saving you time and stress while still delivering an exceptional home-cooked experience!

Slow Cooker Beef Manhattan Variations

Feel free to let your creativity shine while making this delicious dish; customizing can lead to wonderful surprises!

  • Pork Swap: Substitute the beef chuck roast with pork shoulder for a subtly sweet flavor.

  • Vegetable Boost: Add chopped carrots, peas, or even bell peppers to create a colorful, hearty meal.

  • Creamy Twist: Stir in a dollop of sour cream or cream cheese to the gravy for added creaminess.

  • Herb Infusion: Enhance flavor with fresh herbs like thyme or rosemary; just toss them in at the beginning.

  • Spicy Kick: Add a splash of hot sauce or a pinch of red pepper flakes for a delightful heat that brings new life to your dish.

  • Asian-inspired: Use soy sauce instead of Worcestershire and serve over rice for a completely different take on comfort food.

  • Open-Faced Delight: Serve it on toasted bread for a delicious open-faced sandwich that’s perfect for lunch.

For even more culinary inspiration, check out the savory simplicity of Crispy Chilli Beef Experience or warm up with a bowl of Mongolian Ground Beef for a comforting twist!

How to Store and Freeze Slow Cooker Beef Manhattan

Fridge: Refrigerate leftovers in an airtight container for up to 3 days. Ensure the dish cools completely before sealing to maintain freshness.

Freezer: For longer storage, freeze the Slow Cooker Beef Manhattan in a freezer-safe container for up to 3 months. Portion out servings to make reheating easier.

Reheating: Thaw overnight in the fridge, then reheat on the stove over low heat, stirring occasionally until heated through. You can also microwave in short intervals, adding a splash of broth to maintain moisture.

Leftover Love: The flavors deepen after a night in the fridge, so making it ahead of time can result in even tastier leftovers. Enjoy!

Slow Cooker Beef Manhattan Recipe FAQs

What type of beef should I use for Slow Cooker Beef Manhattan?
Absolutely! The star of this dish is the beef chuck roast due to its marbling and tenderness after slow cooking. If you can’t find chuck, brisket or round roast are excellent substitutes that also yield great flavor and texture.

How do I store leftovers of Slow Cooker Beef Manhattan?
For optimal freshness, refrigerate any leftovers in an airtight container within two hours of cooking. The dish will stay fresh for up to 3 days. Just remember to let it cool completely before sealing the container to avoid moisture buildup!

Can I freeze Slow Cooker Beef Manhattan, and how should I do it?
Yes, you can! To freeze the dish, portion it into freezer-safe containers after it has cooled down completely. It can be frozen for up to 3 months. When you’re ready to enjoy it again, thaw it overnight in the refrigerator and reheat gently on the stovetop to maintain its delicious flavors.

What are some common issues when cooking this recipe, and how can I avoid them?
Very good question! One common issue is dry meat; always cook on low heat for the full 8 hours. High heat cooks the meat too quickly and strips it of moisture. Another note is to avoid lifting the slow cooker lid too often, as this lets steam escape and can prolong cooking time.

Are there any dietary considerations with this recipe?
Yes, if you’re cooking for someone with gluten allergies or dietary restrictions, opt for gluten-free brown gravy mix and beef broth. Always check ingredients in packaged goods as they can vary. If serving to pets, it’s best to keep the dish away, as ingredients like onions and garlic can be harmful to them.

Slow Cooker Beef Manhattan

Slow Cooker Beef Manhattan: Ultimate Comfort in Every Bite

This Slow Cooker Beef Manhattan recipe delivers ultimate comfort with tender beef, rich gravy, and creamy mashed potatoes—perfect for busy lives.
Prep Time 15 minutes
Cook Time 8 hours
Total Time 8 hours 15 minutes
Servings: 6 servings
Course: Dinner
Cuisine: American
Calories: 450

Ingredients
  

For the Beef
  • 3 pounds beef chuck roast can substitute with brisket or round roast
  • 2 tablespoons Worcestershire sauce can substitute with soy sauce
For the Gravy
  • 4 cups beef broth can use vegetable broth for a lighter version
  • 1 packet brown gravy mix choose gluten-free option if needed
  • 2 tablespoons cornstarch optional, mix with water to thicken
For the Vegetables
  • 1 large onion yellow or white works best
  • 1 teaspoon garlic powder can use fresh minced garlic as substitute
For Serving
  • 4 cups prepared mashed potatoes instant mashed can be used for quicker prep
  • to taste salt
  • to taste black pepper

Equipment

  • Slow Cooker

Method
 

Step-by-Step Instructions
  1. Generously season the beef chuck roast with salt, black pepper, and garlic powder, and allow to marinate for 15 minutes.
  2. Layer sliced onions at the bottom of the slow cooker, then place the seasoned beef on top. Set slow cooker to low heat.
  3. In a bowl, combine beef broth, brown gravy mix, and Worcestershire sauce, then pour over the beef.
  4. Cover and cook on low for about 8 hours until beef is fork-tender.
  5. Remove the beef, thicken gravy if desired with a cornstarch slurry, and return shredded beef to the gravy.
  6. Serve shredded beef over prepared mashed potatoes with extra gravy.

Nutrition

Serving: 1servingCalories: 450kcalCarbohydrates: 40gProtein: 30gFat: 20gSaturated Fat: 8gPolyunsaturated Fat: 1gMonounsaturated Fat: 10gCholesterol: 90mgSodium: 800mgPotassium: 900mgFiber: 4gSugar: 2gVitamin C: 2mgCalcium: 5mgIron: 15mg

Notes

Leftovers improve in flavor overnight; store in an airtight container for up to 3 days in the fridge or freeze for up to 3 months.

Tried this recipe?

Let us know how it was!

Creamy Chicken Tetrazzini Recipe for Ultimate Comfort Food

As I rummaged through my kitchen cupboards on a chilly evening, the only sound was the soft clink of my pots and pans, calling to me. That’s when I decided to create something cozy: an Easy, Creamy Gluten-Free Chicken Tetrazzini. This beloved dish not only wraps you in warmth but also delivers on flavor and comfort. With tender chicken, gluten-free noodles, and a rich, cheesy cream sauce, this casserole is perfect for weeknight dinners when you’re short on time. Plus, it’s incredibly versatile—great for using up leftover turkey or ham! If you’re looking to savor every bite while keeping it gluten-free, this recipe has got you covered. So, are you ready to turn your kitchen into a comfort food haven?

Why Is This Chicken Tetrazzini Amazing?

Ultimate Comfort: This creamy chicken tetrazzini is the definition of comfort food, offering a warm and satisfying meal that’s perfect for any cozy night in.

Gluten-Free Delight: Enjoy a classic dish without the gluten, making it suitable for everyone at the table.

Versatile Ingredients: Use leftover chicken, turkey, or even ham to whip up a delicious dish that reduces food waste.

Quick Preparation: With easy-to-follow steps, you can have this mouthwatering casserole ready in no time. Pair it with a fresh salad or some garlic bread for a complete meal! Whether you’re a busy chef or just looking for a great family recipe, this dish checks all the boxes. Enjoy the leftovers with delicious options like Crack Chicken Penne or Sweet Chili Chicken.

Chicken Tetrazzini Recipe Ingredients

Prepare your kitchen for a delightful culinary experience with these essential ingredients for the best chicken tetrazzini!

For the Casserole

  • 3 cups cooked and chopped chicken – Use leftover chicken or rotisserie for convenience in this chicken tetrazzini recipe.
  • 12 ounces gluten-free spaghetti noodles – Barilla brand is recommended for a great texture that holds up in the casserole.
  • 5 tablespoons unsalted butter – Split between sautéing mushrooms and creating a velvety sauce.
  • 1 pound mushrooms – Adds depth and flavor; feel free to use your favorite variety.
  • 3 cloves garlic – Minced for an aromatic kick that enhances the overall flavor.

For the Cream Sauce

  • ⅓ cup gluten-free all-purpose flour – This will thicken the sauce beautifully; select a blend that’s ideal for baking.
  • 1 teaspoon dried basil – A lovely herbaceous addition; fresh herbs can also shine through if you prefer!
  • 1 teaspoon dried oregano – Complements the basil well, adding an Italian flair.
  • ½ teaspoon garlic powder – Boosts the garlic flavor without adding texture from fresh garlic.
  • ⅛ teaspoon ground nutmeg – Lends warmth and a hint of sweetness to the creamy sauce.
  • ¾ teaspoon salt – Enhances all flavors; always adjust to suit your palate.
  • ⅛ teaspoon pepper – Adds a touch of mild heat; use freshly ground for better flavor.
  • 2 cups gluten-free chicken broth – Choose homemade or store-bought for the base of your sauce.
  • ¼ cup dry white wine – Optional, yet it enhances the sauce’s depth; feel free to skip if preferred.
  • 2 cups half and half – Creates that extra creamy texture; consider a dairy-free heavy cream for an alternative.
  • 1½ cup freshly grated mozzarella (divided) – Covers the casserole with a melty topping; shredded works best.
  • ¾ cup freshly grated Parmesan cheese (divided) – Provides a tangy sharpness, though Pecorino is another great choice.

With these dreamy ingredients at your fingertips, you’re one step closer to serving up a family favorite that warms the heart!

Step‑by‑Step Instructions for Extra Creamy Gluten-Free Chicken Tetrazzini Casserole

Step 1: Preheat and Prep
Begin by preheating your oven to 350ºF (175ºC). While the oven warms, prepare your chicken by either boiling, baking, or using precooked chicken for convenience. Ensure it’s cooked through and chopped into bite-sized pieces, ready to mingle with the other delicious elements in your chicken tetrazzini.

Step 2: Cook the Noodles
Boil a large pot of water, adding a pinch of salt. Once boiling, add the 12 ounces of gluten-free spaghetti noodles. Cook the noodles for only half the package time, stirring occasionally. They should be al dente. Drain the cooked noodles and rinse them under cold water to halt further cooking, ensuring optimal texture when baked.

Step 3: Sauté the Vegetables
In a large skillet, melt 1 tablespoon of unsalted butter over medium heat. Add 1 pound of sliced mushrooms and sauté for 5-7 minutes until they release their moisture and begin to brown. Stir in 3 minced garlic cloves and cook for an additional 30 seconds until fragrant. Remove from heat and set the mixture aside for later layering in the casserole.

Step 4: Make the Cream Sauce
In a medium saucepan, melt the remaining 4 tablespoons of unsalted butter over medium heat. Whisk in ⅓ cup of gluten-free all-purpose flour, along with 1 teaspoon of dried basil, 1 teaspoon of dried oregano, ½ teaspoon of garlic powder, ⅛ teaspoon of ground nutmeg, ¾ teaspoon of salt, and ⅛ teaspoon of pepper. Cook for about 30 seconds, stirring constantly to create a roux.

Step 5: Combine the Liquids
Slowly whisk in 2 cups of gluten-free chicken broth and ¼ cup of dry white wine (if using) into the roux you just made. Gradually incorporate 2 cups of half and half while whisking continuously. Bring the mixture to a gentle boil over medium heat, allowing it to thicken for 5-7 minutes. Once thickened, stir in ¾ cup of both mozzarella and Parmesan cheese until fully melted and creamy.

Step 6: Assemble the Casserole
In a 9×13 inch casserole dish, spread ½ cup of the creamy sauce on the bottom to prevent sticking. Layer half of the cooked spaghetti noodles over the sauce, followed by half of the cooked chicken and sautéed mushrooms mixture. Repeat this layering process, finishing with the remaining creamy sauce on top to ensure every bite of chicken tetrazzini is flavorful.

Step 7: Add the Cheese Topping
Sprinkle the remaining ¾ cup of mozzarella cheese and ¼ cup of Parmesan cheese evenly over the casserole. This top layer will create a delightful, golden, bubbling crust as it bakes. This final touch is key for a rich comfort food experience, so make sure it’s generously covered.

Step 8: Bake and Broil
Place the casserole in the preheated oven uncovered. Bake for 30-40 minutes, until the dish is hot and bubbly, and the cheese has melted beautifully. For an extra golden topping, you can switch to broil during the last 1-2 minutes, keeping a close eye to avoid burning, as this step creates that irresistible crispy crust.

Make Ahead Options

These Easy, Creamy Gluten-Free Chicken Tetrazzini Casserole is perfect for meal prep! You can prepare the chicken (about up to 3 days in advance) and cook the gluten-free noodles, then refrigerate them in an airtight container to maintain their quality. You might also want to sauté the mushrooms and garlic ahead of time; this can be done up to 24 hours before baking. When it’s time to serve, simply layer everything in the casserole dish as instructed, pour the cream sauce over, top with cheese, and bake it in the oven for about 30-40 minutes until bubbly and golden. This way, you enjoy the comfort of a homemade meal with minimal effort on busy nights!

What to Serve with Extra Creamy Gluten-Free Chicken Tetrazzini?

Enhance your dining experience with perfectly paired sides and drinks that complement the comforting flavors of your casserole.

  • Garlic Bread: The perfect pairing for scooping up creamy sauce while adding a satisfying crunch and aromatic flavor.

  • Roasted Green Beans: Crisp-tender green beans offer a fresh, bright element to balance the richness of the tetrazzini. Drizzle with lemon juice for an extra zing!

  • Caesar Salad: A classic salad adorned with crunchy croutons and tangy dressing adds a refreshing contrast to the creamy pasta. The crisp greens help lighten the meal wonderfully.

  • Steamed Broccoli: Mildly crisp broccoli not only adds color but also introduces a healthy, nutritious element, perfect for balancing the richness of the casserole.

  • Chardonnay: A chilled glass of Chardonnay’s bright acidity beautifully complements the creamy sauce, enriching the overall tasting experience with its fruity notes.

  • Apple Crisp: End on a sweet note with a warm, spiced apple crisp. Its crunchy topping and tender fruit create a delightful contrast to the savory tetrazzini, making for a comforting dessert.

How to Store and Freeze Chicken Tetrazzini

Fridge: Store leftover chicken tetrazzini in an airtight container for up to 4 days. Reheat individual portions in the microwave or oven until heated through, ensuring it stays creamy.

Freezer: This casserole is freezer-friendly! Wrap the dish tightly in plastic wrap and then in aluminum foil to prevent freezer burn. It can be frozen for up to 3 months.

Thawing: To enjoy your frozen chicken tetrazzini, transfer it to the fridge to thaw overnight before reheating. For a quicker method, you can reheat from frozen in the oven at 350°F for about 1 hour.

Reheating: Warm up leftover portions in the microwave or bake in the oven until bubbly. Adding a splash of milk or a bit of broth during reheating will help retain its creamy texture.

Tips for the Best Chicken Tetrazzini

  • Noodle Texture: Make sure to boil the gluten-free noodles only for half the recommended time to avoid a mushy casserole. This helps maintain a pleasant texture in your chicken tetrazzini.

  • Sauce Coating: Ensure all noodles are generously coated with sauce during layering. This prevents any dry spots in the casserole and guarantees every bite is heavenly!

  • Cheese Choice: For a melty topping, use freshly shredded mozzarella and Parmesan cheese. Pre-shredded varieties often have additives that prevent optimal melting.

  • Leftover Magic: Don’t hesitate to substitute chicken with leftover turkey or ham. It not only reduces waste but also adds a delightful twist to your chicken tetrazzini recipe.

  • Storage Tips: If you have leftovers, store them in an airtight container in the refrigerator for up to 4 days, or freeze for longer storage, ensuring it’s well-wrapped to avoid freezer burn.

Chicken Tetrazzini Recipe Variations

Feel free to personalize your chicken tetrazzini to suit your taste or whatever you have on hand—this dish is so versatile!

  • Turkey Swap: Substitute the chicken for an equal amount of cooked turkey. It’s perfect for utilizing holiday leftovers!
  • Ham Replacement: Use cooked ham in place of chicken for a savory twist. The flavors blend beautifully with the creamy sauce.
  • Mushroom Medley: Experiment with different mushroom varieties like shiitake or portobello for richer flavor and texture differences.
  • Spice It Up: Add a pinch of red pepper flakes for a hint of heat. It brings a delightful kick to every bite.
  • Herb Boost: Incorporate fresh herbs like rosemary or thyme to elevate the flavor. Fresh herbs can provide that garden-fresh taste!
  • Dairy-Free Delight: Use vegan butter, dairy-free heavy cream, and plant-based cheese alternatives for a creamy, gluten-free experience.
  • Nutty Flavor: For added richness, include a handful of toasted pine nuts or chopped pecans. This will give your tetrazzini a delightful crunch!
  • Broccoli Addition: Toss in steamed broccoli florets for a burst of color and nutrition. It’s an easy way to sneak in extra veggies.

With these fun variations, your chicken tetrazzini dinner can be anything but ordinary! Make sure to enjoy a cozy evening with this dish, alongside favorites like Creamy Crack Chicken Noodle or Sheet Pan Chicken.

Easy, Creamy Gluten-Free Chicken Tetrazzini Recipe FAQs

How do I choose the right chicken for this recipe?
Absolutely! Using cooked and chopped chicken significantly enhances this dish. You can opt for leftover roasted chicken, a store-bought rotisserie chicken, or simply cook boneless chicken breasts by boiling or baking them until they reach an internal temperature of 165°F (74°C). If you need a quick meal prep, I recommend using rotisserie for convenience and flavor.

What is the best way to store leftover chicken tetrazzini?
For sure! Store leftover chicken tetrazzini in an airtight container in the refrigerator for up to 4 days. When reheating, you can use a microwave or oven; just be sure to add a splash of milk or broth to keep it creamy. It’s best enjoyed fresh, but leftovers can be just as delightful with a little care!

Can I freeze chicken tetrazzini? If so, how?
Very much so! This casserole freezes beautifully. First, allow it to cool completely after cooking. Then, tightly wrap the dish with plastic wrap followed by aluminum foil to prevent freezer burn. You can freeze it for up to 3 months. When you’re ready to enjoy it, thaw the casserole in the fridge overnight before reheating, or bake it from frozen for about 1 hour at 350°F (175°C).

What if my sauce is too thick or too thin?
Great question! If the sauce is too thick, you can gently whisk in a little more chicken broth or half-and-half until it reaches your desired consistency. On the flip side, if it’s too thin, let it simmer on low heat for a few more minutes to thicken, whisking occasionally. This will help achieve the perfect creamy texture!

Are there any dietary considerations I should be aware of?
Definitely! This recipe is gluten-free, but if you’re accommodating allergies, ensure your gluten-free flour and broth are certified gluten-free. For dairy-free options, use vegan butter, dairy-free heavy cream, and a plant-based cheese alternative. Always check labels for any allergens, especially if cooking for guests with specific dietary needs.

Can I substitute the mushrooms in this recipe?
Certainly! If mushrooms aren’t your favorite, you can omit them or even substitute them with diced bell peppers or zucchini for a different flavor. You might also consider adding cooked spinach or broccoli for extra nutrients. The more the merrier, so feel free to experiment with your preferred veggies in this creamy chicken tetrazzini recipe!

Chicken Tetrazzini Recipe

Creamy Chicken Tetrazzini Recipe for Ultimate Comfort Food

This Chicken Tetrazzini Recipe is the ultimate comfort food with creamy, cheesy flavors and gluten-free ingredients.
Prep Time 15 minutes
Cook Time 40 minutes
Total Time 55 minutes
Servings: 6 servings
Course: Casserole
Cuisine: American
Calories: 400

Ingredients
  

For the Casserole
  • 3 cups cooked and chopped chicken Use leftover chicken or rotisserie for convenience.
  • 12 ounces gluten-free spaghetti noodles Barilla brand is recommended.
  • 5 tablespoons unsalted butter Split between sautéing mushrooms and making sauce.
  • 1 pound mushrooms Use your favorite variety.
  • 3 cloves garlic Minced for flavor.
For the Cream Sauce
  • cup gluten-free all-purpose flour Select a blend ideal for baking.
  • 1 teaspoon dried basil Fresh herbs can also be used.
  • 1 teaspoon dried oregano Adds Italian flair.
  • ½ teaspoon garlic powder
  • teaspoon ground nutmeg Lends warmth and sweetness.
  • ¾ teaspoon salt Adjust according to taste.
  • teaspoon pepper Use freshly ground for better flavor.
  • 2 cups gluten-free chicken broth Homemade or store-bought is fine.
  • ¼ cup dry white wine Optional.
  • 2 cups half and half Consider dairy-free heavy cream as an alternative.
  • cups freshly grated mozzarella Divided for topping.
  • ¾ cup freshly grated Parmesan cheese Divided for topping.

Equipment

  • Oven
  • Large pot
  • Large skillet
  • medium saucepan
  • casserole dish

Method
 

Step-by-Step Instructions
  1. Preheat oven to 350ºF (175ºC). Prep chicken, ensuring it's cooked and chopped into bite-sized pieces.
  2. Boil a large pot of water, adding a pinch of salt. Cook the gluten-free spaghetti noodles for half the package time. Drain and rinse under cold water.
  3. In a large skillet, melt 1 tablespoon of unsalted butter. Sauté the sliced mushrooms for 5-7 minutes, then add minced garlic and cook for 30 seconds.
  4. In a medium saucepan, melt the remaining 4 tablespoons of butter and whisk in flour, basil, oregano, garlic powder, nutmeg, salt, and pepper to create a roux.
  5. Slowly whisk in chicken broth and white wine (if using). Stir in half and half and bring to a gentle boil, cooking until thickened. Add mozzarella and Parmesan until melted.
  6. In a casserole dish, spread ½ cup of the creamy sauce on the bottom. Layer half of the noodles, chicken, and mushroom mixture. Repeat layers, finishing with sauce on top.
  7. Sprinkle remaining mozzarella and Parmesan cheese on top. Bake uncovered for 30-40 minutes until hot and bubbly.
  8. For a golden topping, broil for the last 1-2 minutes, watching closely to avoid burning.

Nutrition

Serving: 1cupCalories: 400kcalCarbohydrates: 45gProtein: 25gFat: 15gSaturated Fat: 8gPolyunsaturated Fat: 1gMonounsaturated Fat: 4gCholesterol: 70mgSodium: 800mgPotassium: 400mgFiber: 3gSugar: 2gVitamin A: 10IUVitamin C: 2mgCalcium: 20mgIron: 6mg

Notes

Store leftovers in an airtight container in the refrigerator for up to 4 days. Freezing is also an option; wrap tightly and consume within 3 months.

Tried this recipe?

Let us know how it was!

Tender Baked Parmesan Pork Chops for a Healthy Family Feast

As I rummaged through my pantry, the sight of a lonely block of Parmesan caught my eye, sparking an idea that transformed the evening’s dinner plans. Enter the Crispy Baked Parmesan Pork Chops—juicy, satisfying, and a game-changer for weeknight meals! This recipe marries the rich, cheesy goodness of Parmesan with perfectly baked pork chops, creating a dish that’s not only delicious but also healthier than its fried counterparts. With minimal oil and packed with protein, these chops are a family favorite that you can whip up in no time. Who wouldn’t want to trade in greasy takeout for a nourishing homemade dinner? So, are you ready to elevate your dinner routine with these crispy delights?

Why Choose Baked Parmesan Pork Chops?

Healthier Choice: These baked pork chops are a fantastic alternative to fried options, reducing excess oil while keeping all the juicy flavor intact.

Flavor-Packed: Infused with Parmesan cheese and fresh herbs, they deliver a mouthwatering taste that will have you hooked at the first bite.

Quick Prep: In just 30 minutes, you can have a complete meal ready, making it perfect for busy weeknights when you need something delicious and nutritious.

Family-Friendly: Everyone will love the crispy exterior and tender meat, making these pork chops a hit at the dinner table. If you’re looking for more crowd-pleasers, check out my Garlic Parmesan Chicken for another tasty option!

Versatile Pairings: Serve with steamed veggies or a fresh salad for a wholesome dinner that balances flavors and nutrition seamlessly. You won’t regret spending less time on takeout and more time enjoying homemade delights!

Baked Parmesan Pork Chops Ingredients

• Get ready to indulge in a delightful dinner!

For the Pork Chops

  • Pork Chops – Tender and juicy, choose bone-in for extra flavor or boneless for convenience.

For the Coating

  • Parmesan Cheese – Offers a rich, crispy texture; Romano can be used for a similar taste.
  • Herbs (e.g., oregano, thyme) – Elevate the flavor; use fresh herbs for a bolder punch.
  • Garlic – Delivers aromatic goodness; garlic powder works in a pinch.
  • Olive Oil – Essential for achieving that perfect crispy crust; substitute with avocado oil for a twist.

Remember, these Baked Parmesan Pork Chops are not just tasty but also a healthier alternative to frying!

Step‑by‑Step Instructions for Crispy Baked Parmesan Pork Chops

Step 1: Preheat the Oven
Begin by preheating your oven to 400°F (200°C). This is crucial for achieving that golden-brown crisp exterior on your Baked Parmesan Pork Chops. Adjust the oven rack to the middle position to ensure even baking. While the oven warms, you can prepare your baking sheet and other ingredients for a seamless cooking experience.

Step 2: Prepare the Baking Sheet
Line a baking sheet with parchment paper to prevent sticking and make cleanup a breeze. The parchment will also help the heat circulate around your pork chops, allowing for that perfect, crispy texture. Take a moment to gather your ingredients, including the cheese mixture and pork chops, as this will streamline the coating process.

Step 3: Mix the Coating
In a mixing bowl, combine the Parmesan cheese, your chosen herbs, minced garlic, salt, and pepper. Stir the mixture until everything is evenly distributed. This flavorful blend will create a delicious crust for your Baked Parmesan Pork Chops. Take a moment to inhale the tempting aroma of the herbs and cheese—a sign that you’re on the right track!

Step 4: Coat the Pork Chops
Brush each pork chop generously with olive oil to ensure the Parmesan mixture adheres well and creates that enticing crispy coating. Then, take the coated pork chops and press them firmly into the cheese mixture, ensuring they are fully covered. This step is essential for delivering that mouthwatering crunch that makes these chops so irresistible!

Step 5: Arrange on the Baking Sheet
Carefully place the coated pork chops on the prepared baking sheet, ensuring they are spaced a little apart for optimal heat circulation. This layout promotes even cooking and crisping. As you arrange them, take a moment to appreciate how beautifully coated they look, promising a delightful meal ahead!

Step 6: Bake to Perfection
Slide the baking sheet into your preheated oven and bake the pork chops for 25-30 minutes. Keep an eye on them as they cook; you’re looking for the crust to turn a lovely golden brown. Use a meat thermometer to check that the internal temperature reaches 145°F (63°C), ensuring both safety and juicy flavor in your Baked Parmesan Pork Chops.

Step 7: Rest Before Serving
Once done, remove the baking sheet from the oven and let the pork chops rest for a few minutes. This resting period allows the juices to redistribute, resulting in tender meat. As the aroma fills your kitchen, prepare to slice into the juicy, crispy perfection of these Baked Parmesan Pork Chops, ready to impress your family at the dinner table!

Storage Tips for Baked Parmesan Pork Chops

  • Fridge: Store leftover Baked Parmesan Pork Chops in an airtight container for up to 3 days. This helps preserve their juicy texture and prevent spoilage.
  • Freezer: For longer storage, freeze the pork chops in a single layer, then transfer to an airtight freezer bag. They can last up to 3 months without losing their flavor.
  • Reheating: To reheat, place the pork chops on a baking sheet and warm them in a preheated oven at 350°F (175°C) for about 10-15 minutes to regain crispiness.
  • Room Temperature: Avoid leaving out any leftovers at room temperature for more than 2 hours to maintain freshness and prevent bacterial growth.

Variations & Substitutions for Baked Parmesan Pork Chops

Feel free to get creative with these Crispy Baked Parmesan Pork Chops—let your taste buds lead the way!

  • Dairy-Free: Substitute Parmesan with nutritional yeast for a cheesy flavor without the dairy. It’s a great way to keep those rich, umami notes alive in your dish.

  • Spicy Kick: Add smoked paprika or cayenne pepper to your cheese mixture for a zesty warmth that will tantalize your palate. This little twist ramps up the flavor and adds a fun variation to your chops!

  • Herb Swap: Try different herbs like rosemary or basil instead of oregano and thyme for a delightful twist. Fresh herbs can really elevate the dish, giving a unique aroma and taste with every bite.

  • Texture Twist: For an extra crunch, mix panko breadcrumbs with your cheese coating. This will give your pork chops an even crispier texture, perfect for those who love that satisfying crunch when biting in!

  • Veggie Boost: Serve alongside roasted Brussels sprouts or sweet potatoes for a colorful and healthy side. This pairing not only complements the pork but also adds nutritional value to your meal, making dinner feel more complete and balanced.

  • Flavorful Marinade: Consider marinating the pork chops in a mix of soy sauce, garlic, and ginger for an Asian-inspired twist. Marinate for at least 30 minutes to let those flavors develop, and then coat as usual for a delicious fusion.

  • Citrus Zing: Add lemon zest to the cheese mixture for a fresh, zesty flavor that brightens up the dish. It’s a refreshing addition that perfectly balances the richness of the Parmesan.

  • Nutty Flavor: Replace part of the Parmesan with ground almonds or walnuts for a unique and nutty twist. This adds a depth of flavor and a delightful crunch as you savor your crispy chops!

For even more inspiration, consider pairing your Baked Parmesan Pork Chops with other family favorites like Garlic Parmesan Chicken or enjoy a comforting meal with Homemade Parmesan Crusted Chicken. Happy cooking!

What to Serve with Crispy Baked Parmesan Pork Chops

Complete your delicious dinner experience with delightful sides that enhance every bite.

  • Garlic Mashed Potatoes: Creamy and buttery, these mashed potatoes provide a dreamy contrast to the crispy texture of the pork chops. Each spoonful makes your meal feel indulgent.

  • Roasted Seasonal Vegetables: A medley of roasted carrots, bell peppers, and zucchini offers a burst of color and nutrients that pair beautifully with the flavorful pork. Their natural sweetness complements the savory chops.

  • Caesar Salad: Crispy romaine, tangy dressing, and crunchy croutons create a classic combination. The freshness of the salad balances the richness of the Parmesan coating, making your meal feel even more alive.

  • Steamed Green Beans: Simple yet elegant, the crunch of fresh green beans brings a lovely snap to your plate. Their bright color and light flavor make them a great companion for the hearty pork.

  • Honey-Glazed Carrots: Sweet, tender carrots drizzled with honey add a delightful contrast to the savory pork chops. Their natural sweetness will delight your palate and can elevate your family dinner to a new level.

  • Crisp White Wine: A chilled glass of Sauvignon Blanc or Pinot Grigio helps to cleanse the palate and enhances the dish’s flavors without overshadowing them. Pairing wine with your meal can create an inviting atmosphere that brings everyone together.

By incorporating these sides, you’ll transform your Crispy Baked Parmesan Pork Chops into a memorable feast, filled with harmony and flavor. Enjoy the warm moments shared over this delightful dinner!

Make Ahead Options

These Crispy Baked Parmesan Pork Chops are perfect for busy home cooks looking to save time during the week! You can prepare the cheese coating up to 24 hours in advance by mixing the Parmesan, herbs, garlic, salt, and pepper, then store it in an airtight container in the refrigerator. Additionally, you can brush the pork chops with olive oil ahead of time and coat them in the cheese mixture—just make sure to refrigerate them until you’re ready to bake. When it’s dinner time, simply transfer the polished chops to the baking sheet and bake for 25-30 minutes, ensuring you achieve that deliciously crispy exterior and juicy interior. With these prep-ahead steps, you’ll enjoy restaurant-quality pork chops with minimal effort!

Expert Tips for Baked Parmesan Pork Chops

  • Room Temperature Chops: Allow pork chops to sit out for about 30 minutes before baking. This promotes even cooking, ensuring a juicy result.

  • Meat Thermometer Use: Invest in a meat thermometer to accurately check for doneness at 145°F (63°C). This prevents overcooking and drying out your Baked Parmesan Pork Chops.

  • Crispy Finish: For an ultra-crispy exterior, consider broiling the chops for the last 2-3 minutes of baking. Just keep a close eye to avoid burning!

  • Coating Technique: Press the pork chops firmly into the cheese mixture for better adhesion, ensuring maximum cheese crust coverage and flavor.

  • Leftover Hacks: If you have leftovers, store them in an airtight container and reheat in the oven. This helps maintain their crispy texture, making your next meal just as delightful!

Baked Parmesan Pork Chops Recipe FAQs

What’s the best way to choose the right pork chops?
Absolutely! When selecting pork chops, I recommend looking for cuts that are at least 1 to 1.5 inches thick. This allows for a juicy texture while baking. Bone-in chops tend to be more flavorful, but boneless chops are easier to handle. Check for a pinkish hue and avoid any chops with dark spots, as those may indicate spoilage.

How should I store leftover Baked Parmesan Pork Chops?
To keep your Baked Parmesan Pork Chops fresh, store them in an airtight container in the refrigerator for up to 3 days. This helps retain their flavor and texture. When you’re ready to enjoy them again, I often recommend reheating them in the oven at 350°F (175°C) for 10-15 minutes; this keeps them crispy and delightful!

Can I freeze Baked Parmesan Pork Chops?
Very! You can freeze these delicious pork chops for up to 3 months. First, ensure they have cooled to room temperature. Then, arrange them in a single layer on a parchment-lined baking sheet and freeze until solid. Transfer the frozen chops to an airtight freezer bag, removing as much air as possible before sealing. When you’re ready to eat, let them thaw overnight in the fridge before reheating.

What should I do if my pork chops turn out dry?
If your Baked Parmesan Pork Chops end up dry, the most common culprit is overcooking. Ensure you’re checking the internal temperature with a meat thermometer; it should reach 145°F (63°C). If your chops are overcooked, consider serving them with a sauce or gravy to add moisture back in. For next time, remember to let the chops rest after baking—this helps keep them juicy!

Are there any dietary considerations for these Baked Parmesan Pork Chops?
Absolutely! If you or someone you’re cooking for has a dairy allergy, you can substitute the Parmesan cheese with a dairy-free alternative. Additionally, if you have pets, make sure not to feed them any leftover pork chops, especially if they are seasoned, as some ingredients can be harmful to them. Always double-check the labels on your ingredient substitutions to ensure they are safe for your dietary needs!

Baked Parmesan Pork Chops

Tender Baked Parmesan Pork Chops for a Healthy Family Feast

Enjoy these Baked Parmesan Pork Chops, a healthy alternative to frying, combining savory Parmesan with juicy pork chops for a family-friendly dinner.
Prep Time 10 minutes
Cook Time 30 minutes
Resting Time 5 minutes
Total Time 45 minutes
Servings: 4 chops
Course: Dinner
Cuisine: American
Calories: 300

Ingredients
  

For the Pork Chops
  • 4 pieces Pork Chops Bone-in or boneless
For the Coating
  • 1 cup Parmesan Cheese Grated, Romano can be used
  • 2 teaspoons Herbs e.g., oregano, thyme
  • 2 cloves Garlic Minced, or use garlic powder
  • 2 tablespoons Olive Oil Can substitute with avocado oil

Equipment

  • Oven
  • Baking Sheet
  • Mixing Bowl
  • meat thermometer

Method
 

Cooking Instructions
  1. Preheat your oven to 400°F (200°C) and adjust the rack to the middle position.
  2. Line a baking sheet with parchment paper.
  3. In a mixing bowl, combine Parmesan cheese, herbs, minced garlic, salt, and pepper.
  4. Brush each pork chop with olive oil and press into the cheese mixture.
  5. Arrange the coated pork chops on the prepared baking sheet.
  6. Bake in the preheated oven for 25-30 minutes, checking for a golden brown crust and an internal temperature of 145°F (63°C).
  7. Remove from the oven and let rest for 5 minutes before serving.

Nutrition

Serving: 1chopCalories: 300kcalCarbohydrates: 2gProtein: 30gFat: 20gSaturated Fat: 8gPolyunsaturated Fat: 1gMonounsaturated Fat: 10gCholesterol: 90mgSodium: 500mgPotassium: 400mgVitamin A: 100IUCalcium: 300mgIron: 2mg

Notes

For better results, allow pork chops to sit out for about 30 minutes before baking for even cooking.

Tried this recipe?

Let us know how it was!

Chicken Alfredo Monkey Bread: A Cozy Comfort Food Delight

As I pulled the warm, cheesy Chicken Alfredo Monkey Bread from the oven, the delightful aroma filled my kitchen, instantly transporting me to a cozy family gathering. This playful twist on comfort food combines the creamy deliciousness of classic chicken Alfredo with the irresistible pull-apart charm of monkey bread. What I love most about this recipe is not just how easy it is to whip up, but also how it effortlessly transforms mundane weeknight dinners into something special. Whether you’re hosting friends for game night or enjoying a cozy family meal, this Chicken Alfredo Monkey Bread is sure to impress. Curious about how to create this delectable dish that everyone will want to dive into? Let’s get started!

Why is Chicken Alfredo Monkey Bread irresistible?

Comforting, Creamy Goodness: This recipe brings together the rich, creamy flavors of chicken Alfredo, making it a warm embrace in each bite.
Effortlessly Fun: The pull-apart style turns dinner into a playful experience, perfect for everyone to share.
Quick to Prepare: With just a few ingredients and simple steps, you can have this comforting dish ready in no time!
Perfect for Any Occasion: Whether it’s a cozy family night or a gathering with friends, it’s sure to be the star of the table. If you’re looking for more easy crowd-pleasers, check out my Chilli Chicken Takeout or Sizzling Chicken Pepper for delicious alternatives.
Satisfying and Filling: This dish promises not just great flavor but also a hearty meal that will keep everyone coming back for seconds!

Chicken Alfredo Monkey Bread Ingredients

Here’s what you need to create this delightful dish!

For the Chicken Mixture

  • Cooked Chicken, Shredded – Use rotisserie chicken for a quick, time-saving option.
  • Alfredo Sauce – Store-bought or homemade can be used based on your preference for creaminess.
  • Garlic Powder – Adds depth to the flavor; fresh minced garlic works great as a substitute.
  • Italian Seasoning – A blend of herbs that enhances the overall taste; you can swap it for dried oregano if needed.
  • Salt and Pepper – Essential for balancing flavors; adjust to your taste.

For the Biscuit Dough

  • Refrigerated Biscuit Dough – Provides the perfect pull-apart texture; Pillsbury Grands are a solid choice for consistency.

For the Cheese Layer

  • Shredded Mozzarella Cheese – Melts beautifully for a gooey center; consider low-fat options for a healthier twist.
  • Grated Parmesan Cheese – Adds a flavorful crust on top; you can substitute with Pecorino Romano for a sharper kick.

For Garnish

  • Fresh Parsley, Chopped – Optional, but it gives a lovely touch of freshness to the dish.

Now that you have your ingredients, it’s time to create this charming Chicken Alfredo Monkey Bread!

Step‑by‑Step Instructions for Chicken Alfredo Monkey Bread

Step 1: Preheat Oven
Begin by preheating your oven to 375°F (190°C). This ensures that your Chicken Alfredo Monkey Bread bakes evenly, achieving that perfect golden color and delightful texture. Make sure to let your oven reach the desired temperature before you start assembling the dish for maximum efficiency.

Step 2: Prepare Chicken Mixture
In a large mixing bowl, combine your shredded cooked chicken with the creamy Alfredo sauce, garlic powder, Italian seasoning, salt, and pepper. Stir the mixture thoroughly until the chicken is well-coated with the sauce, ensuring each piece is saturated with flavor. This step sets the delicious foundation for your pull-apart bread.

Step 3: Cut Biscuit Dough
Open your refrigerated biscuit dough and cut each biscuit into quarters. This will allow the dough to infuse more of that savory chicken Alfredo flavor as it bakes. Aim for uniform pieces for even cooking, and feel free to use a sharp knife or kitchen scissors for ease—just be careful as you handle the pieces.

Step 4: Combine Ingredients
Incorporate the quartered biscuit pieces into the chicken mixture, tossing gently until well coated. Use your hands or a spatula to ensure all pieces are enveloped in that delicious Alfredo blend. This step is crucial to achieving the perfect flavor throughout your Chicken Alfredo Monkey Bread.

Step 5: Add Cheese
Now it’s time to add the gooey goodness! Fold in the shredded mozzarella cheese and half of the grated Parmesan cheese into the chicken and biscuit mixture. This blend will create a beautiful melty center that enhances the overall taste of your Monkey Bread, making each pull an enjoyable experience.

Step 6: Assemble in Pan
Grease a bundt pan generously with cooking spray or butter to prevent sticking. Layer the chicken and biscuit mixture evenly in the pan, making sure to sprinkle the remaining Parmesan cheese on top. This will create a delightful crust as it bakes, adding that extra touch to your Chicken Alfredo Monkey Bread.

Step 7: Bake
Place the bundt pan in your preheated oven and bake for 25-30 minutes. Keep an eye on the bread as it cooks; look for a golden brown top and a toothpick inserted into the center should come out clean. This indicates that your Chicken Alfredo Monkey Bread is perfectly baked and ready to mesmerize your family!

Step 8: Cool and Serve
Once baked, remove the bundt pan from the oven and let it cool for about 5 minutes. Invert the pan onto a serving platter carefully, allowing the warm, cheesy Chicken Alfredo Monkey Bread to tumble out. Garnish with freshly chopped parsley for a pop of color and serve warm, inviting everyone to dig in!

What to Serve with Chicken Alfredo Monkey Bread

Create a delightful dining experience by pairing this dish with satisfying sides and beverages.

  • Garlic Bread: The buttery, crispy texture of garlic bread complements the creamy richness of the monkey bread, enhancing the overall indulgence.

  • Caesar Salad: A fresh Caesar salad balances the hearty flavors with crisp romaine, creamy dressing, and crunchy croutons, providing a refreshing contrast.

  • Steamed Broccoli: With its vibrant color and lightly crisp texture, steamed broccoli adds a nutritious touch, making your meal more wholesome and enjoyable.

  • Roasted Vegetables: The caramelized sweetness of roasted vegetables—like carrots and zucchini—adds depth of flavor, enhancing the comfort food experience.

  • Red Wine: A glass of medium-bodied red, such as Pinot Noir, pairs beautifully with the dish, offering a fruity contrast to the savory flavors.

  • Lemonade: The bright, tangy notes of homemade lemonade can cleanse the palate between bites, refreshing your taste buds and balancing the richness of the meal.

Transform your dining table into a comforting feast that friends and family will love!

Chicken Alfredo Monkey Bread Variations

Feel free to get creative with this Chicken Alfredo Monkey Bread and make it your own!

  • Vegetarian Twist: Substitute the chicken with sautéed mushrooms, spinach, or zucchini for a delightful meatless option. This version is just as creamy and satisfying.

  • Pesto Bath: Swap the Alfredo sauce for pesto to infuse a vibrant, herby flavor. It transforms your dish into a fragrant, color-rich experience that’s simply irresistible.

  • Cheese Medley: Incorporate different cheeses like cheddar, gouda, or pepper jack for a flavor explosion. Each cheese will bring its unique taste and texture, elevating your Monkey Bread experience.

  • Spicy Kick: Add a pinch of red pepper flakes to the chicken mixture for a slight heat that balances the creaminess. It’s a wonderful twist if you enjoy a little spice!

  • Garlic Lovers: Use fresh minced garlic instead of garlic powder for a more robust flavor. It will fill your kitchen with a mouthwatering aroma and deepen the dish’s complexity.

  • Savory Herbs: Experiment by adding fresh herbs like thyme or rosemary into the chicken mixture for added earthy tones. This can elevate the flavor profile to new, gourmet heights.

  • Buffalo Style: Mix some buffalo sauce into the chicken mixture for a zesty, bold flavor. Pair it with a side of ranch or blue cheese for a delightful contrast.

And if you’re eager for more comforting recipes, be sure to explore my Garlic Chicken Gnocchi or enjoy the lightness of a delicious Blt Chicken Salad. There’s no wrong way to enjoy a cozy night in!

Expert Tips for Chicken Alfredo Monkey Bread

  • Coat Well: Ensure all biscuit pieces are thoroughly coated in the chicken mixture for maximum flavor absorption. This prevents bland bites.

  • Watch the Time: Don’t overbake your Chicken Alfredo Monkey Bread; golden brown is ideal. Use a toothpick to check doneness at the 25-minute mark.

  • Grease the Pan: A well-greased bundt pan is crucial; it ensures easy release and a beautiful presentation, making your dish shine at the table.

  • Customize Flavors: Feel free to swap out the cheeses or sauces based on your preference—this recipe is flexible! Experimenting can lead to exciting variations.

  • Serve Warm: Serve your Chicken Alfredo Monkey Bread right out of the oven for the best texture and flavor. Pair it with a light salad for a balanced meal.

Storage Tips for Chicken Alfredo Monkey Bread

Fridge: Store leftovers in an airtight container in the refrigerator for up to 3 days to maintain freshness and flavor.

Freezer: For longer storage, you can freeze the Chicken Alfredo Monkey Bread in a tightly wrapped portion or in a freezer-safe container for up to 2 months.

Reheating: To enjoy leftovers, reheat in the oven at 350°F (175°C) for about 15 minutes, or until warmed through, preserving that gooey texture.

Serving Tip: Enjoy it warm, right after reheating, for the best experience; a splash of fresh Alfredo sauce can revitalize the flavor too!

Make Ahead Options

These Chicken Alfredo Monkey Bread options are perfect for busy home cooks who want to save precious time! You can prepare the chicken mixture and coat the biscuit pieces up to 24 hours in advance—simply store them covered in the refrigerator to maintain freshness. Additionally, if you’re short on time, you can even bake the entire dish ahead of time and refrigerate it for up to 3 days; just reheat it in the oven before serving to keep it warm and cheesy! When you’re ready to enjoy this delightful Chicken Alfredo Monkey Bread, simply follow the final baking instructions to achieve that glorious golden crust, making mealtime both efficient and scrumptious!

Chicken Alfredo Monkey Bread Recipe FAQs

How do I choose the best cooked chicken for my Chicken Alfredo Monkey Bread?
Absolutely! I recommend using shredded rotisserie chicken for convenience and flavor. Look for meat that is moist and tender, avoiding any that may appear dry or has dark spots. If you’re feeling adventurous, using leftover grilled or roasted chicken from a previous meal can add a unique twist to the dish.

What’s the best way to store leftover Chicken Alfredo Monkey Bread?
For best results, store your leftovers in an airtight container in the refrigerator for up to 3 days. If you want to keep it even longer, you can freeze the Monkey Bread in a tightly wrapped portion or in a freezer-safe container for up to 2 months. Just make sure to label it with the date for easy tracking!

Can I freeze Chicken Alfredo Monkey Bread, and how should I do it?
Yes, indeed! To freeze, first let the Chicken Alfredo Monkey Bread cool completely. Then, slice it into individual portions for easier reheating. Wrap each piece tightly in plastic wrap, followed by aluminum foil for extra protection against freezer burn. Place the wrapped portions in a freezer-safe bag or container. When you’re ready to eat, thaw in the refrigerator overnight and reheat in the oven at 350°F (175°C) for about 15 minutes to restore that gooey, melty goodness.

What should I do if my Chicken Alfredo Monkey Bread is too dry?
If your Monkey Bread turns out dry, you can add a splash of warm Alfredo sauce over the top before serving. This will help rejuvenate the flavors and add moisture back into the dish. Additionally, ensuring the biscuit pieces are well-coated in the chicken mixture before baking can prevent dryness in the future.

Are there any dietary considerations for pets or allergies?
Yes! If you have pets, be cautious about sharing any Chicken Alfredo Monkey Bread with them, as ingredients like garlic and onion can be harmful to dogs and cats. Regarding allergies, always check the biscuit dough and cheese labels for allergens like gluten or dairy. For a gluten-free version, you might consider using gluten-free biscuit dough or a similar alternative.

Chicken Alfredo Monkey Bread

Chicken Alfredo Monkey Bread: A Cozy Comfort Food Delight

This Chicken Alfredo Monkey Bread combines creamy goodness and pull-apart charm, perfect for family nights or gatherings.
Prep Time 15 minutes
Cook Time 30 minutes
Cooling Time 5 minutes
Total Time 50 minutes
Servings: 8 slices
Course: Dinner
Cuisine: Comfort Food
Calories: 320

Ingredients
  

For the Chicken Mixture
  • 2 cups Cooked Chicken, Shredded Use rotisserie chicken for a quick option
  • 1 cup Alfredo Sauce Store-bought or homemade
  • 1 teaspoon Garlic Powder Fresh minced garlic works as a substitute
  • 1 teaspoon Italian Seasoning Can substitute with dried oregano
  • to taste Salt Essential for balancing flavors
  • to taste Pepper Essential for balancing flavors
For the Biscuit Dough
  • 1 pack Refrigerated Biscuit Dough Pillsbury Grands recommended
For the Cheese Layer
  • 2 cups Shredded Mozzarella Cheese Melts beautifully
  • 1/2 cup Grated Parmesan Cheese Can substitute with Pecorino Romano
For Garnish
  • 1 tablespoon Fresh Parsley, Chopped Optional garnish

Equipment

  • Bundt pan
  • Mixing Bowl
  • Oven

Method
 

Preparation
  1. Preheat your oven to 375°F (190°C).
  2. In a large mixing bowl, combine shredded cooked chicken, Alfredo sauce, garlic powder, Italian seasoning, salt, and pepper.
  3. Cut each biscuit into quarters.
  4. Incorporate quartered biscuit pieces into the chicken mixture, tossing gently.
  5. Fold in shredded mozzarella cheese and half of the grated Parmesan cheese.
  6. Grease a bundt pan and layer the chicken and biscuit mixture, sprinkling remaining Parmesan cheese on top.
  7. Bake for 25-30 minutes, until golden brown.
  8. Let cool for 5 minutes, then invert onto a serving platter and garnish with parsley.

Nutrition

Serving: 1sliceCalories: 320kcalCarbohydrates: 30gProtein: 20gFat: 16gSaturated Fat: 8gCholesterol: 50mgSodium: 600mgPotassium: 300mgFiber: 1gSugar: 2gVitamin A: 500IUVitamin C: 2mgCalcium: 250mgIron: 1.5mg

Notes

Ensure all biscuit pieces are coated well for maximum flavor absorption. Serve warm for the best texture.

Tried this recipe?

Let us know how it was!

Creamy Vegetable Casserole for Cozy Winter Gatherings

As I stirred a simmering pot of comforting goodness, the kitchen filled with the rich aroma of mushrooms and roasted vegetables, instantly transporting me to my favorite winter memories. My go-to for chilly nights is this Creamy Winter Vegetable Casserole, a delicious twist on classic comfort food. Packed with hearty carrots, parsnips, and a glorious creamy sauce, it brings warmth to the dinner table and is incredibly versatile—perfect for accommodating gluten-free or dairy-free diets. Not only is this casserole quick to prepare, but it’s also an excellent way to sneak more veggies into your family’s meals, making it a nutrient-rich option everyone will love. Are you ready to transform ordinary winter vegetables into something extraordinary? Let’s dive into this cozy recipe that will warm both your heart and your home!

Why Choose This Creamy Vegetable Casserole?

Comforting Warmth: This casserole is a hug in a dish, bringing together seasonal vegetables and rich flavors for a cozy dinner experience.

Incredibly Versatile: Whether gluten-free, dairy-free, or vegetarian, this recipe can be easily tailored to suit everyone’s preferences.

Nutrient-Packed: Bursting with healthy vegetables like broccoli and parsnips, it’s a delicious way to boost your family’s veggie intake!

Simple Preparation: Quick to mix and bake, this dish fits perfectly into your busy schedule, especially on chilly nights.

Crowd-Pleaser: Perfect for gatherings, it impressively transforms humble ingredients into a creamy, comforting feast that will have everyone going back for seconds!

If you’re looking for more delightful casserole recipes, explore Tater Tot Casserole or Cheesy Low Carb Chicken Casserole for easy, crowd-pleasing options.

Creamy Vegetable Casserole Ingredients

• Here’s everything you need for a satisfying Creamy Vegetable Casserole that will warm your spirit!

For the Vegetable Base

  • Mixed Winter Vegetables – A mix of carrots, parsnips, cauliflower, and Brussels sprouts adds structure and nutrients to your casserole.
  • Low-fat Cream of Mushroom Soup – This serves as a creamy base; you can substitute with cream of celery soup for a milder flavor.
  • Milk – Provides a silky creaminess; use unsweetened plant-based milk to make it dairy-free.

For the Topping

  • Shredded Cheese (Cheddar or Gruyère) – Adds delightful flavor and melty goodness; replace with non-dairy cheese for a vegan option.
  • Breadcrumbs – This adds a crispy texture on top; both regular and gluten-free breadcrumbs work well.
  • Melted Butter – Essential for browning the topping; you can opt for vegetable oil to keep it dairy-free.

For Seasoning

  • Dried Thyme and Garlic Powder – These enhance the flavor; feel free to swap in fresh herbs for a vibrant touch.
  • Salt and Black Pepper – A must for balanced seasoning; adjust according to taste!

Step‑by‑Step Instructions for Creamy Vegetable Casserole

Step 1: Prepare Oven and Dish
Begin by preheating your oven to 375°F (190°C) and greasing a medium-sized baking dish with cooking spray or a little oil. This ensures your Creamy Vegetable Casserole won’t stick as it bakes. While the oven heats up, gather your other ingredients for seamless preparation.

Step 2: Prep Vegetables
In this step, steam or blanch your fresh mixed winter vegetables such as carrots, parsnips, and Brussels sprouts for about 3-4 minutes until they are just tender. Drain them thoroughly to remove any excess moisture that can make the casserole watery. If using frozen vegetables, ensure they are completely thawed and patted dry before moving on.

Step 3: Combine Filling
In a large mixing bowl, combine your prepared vegetables with low-fat cream of mushroom soup, milk, shredded cheese, dried thyme, garlic powder, salt, and black pepper. Stir thoroughly until all the vegetable pieces are evenly coated with the creamy mixture. This will create a rich base for your Creamy Vegetable Casserole that’s bursting with flavor.

Step 4: Fill Baking Dish
Evenly spread the vegetable and soup mixture into the greased baking dish, smoothing out the top with a spatula. Make sure to fill it evenly to ensure that every bite of the casserole has the right balance of veggies and creaminess. Be sure to pack it in slightly to hold everything together as it bakes.

Step 5: Add Topping
For the topping, mix breadcrumbs with melted butter in a small bowl, ensuring that the crumbs are fully coated. Sprinkle this buttery mixture generously over the top of the vegetable filling. This will create the perfect golden and crunchy topping on your Creamy Vegetable Casserole that contrasts beautifully with the softness of the vegetables.

Step 6: Bake
Place the baking dish in the preheated oven and bake uncovered for 25-30 minutes. Keep an eye on it; you want to see the topping turn golden brown and the filling bubbling around the edges. This is the moment that transforms your casserole into a delightful winter comfort dish.

Step 7: Rest Before Serving
Once baked, remove the casserole from the oven and allow it to sit for about 5 minutes before serving. This brief resting time allows the filling to settle, making it easier to serve portions without falling apart. Enjoy this warm, creamy dish that brings everyone together at the dinner table!

Expert Tips for Creamy Vegetable Casserole

  • Uniform Cuts: Dice your vegetables into similar sizes to ensure even cooking throughout the creamy vegetable casserole. This helps every bite be perfectly tender.

  • Drain Excess Moisture: Pat dry your steamed or thawed vegetables before mixing them in; this prevents a watery casserole. Moisture control is key!

  • Make Ahead: Prepare the casserole a day in advance; it holds well in the fridge for up to four days. Just reheat when ready to serve!

  • Freezing Instructions: Want to keep it longer? Wrap the unbaked casserole tightly and freeze for up to three months. Just thaw before baking.

  • Experiment with Variations: Don’t hesitate to change up the vegetables based on what’s in season or your personal preferences—it makes every creamy vegetable casserole unique!

Make Ahead Options

These Creamy Winter Vegetable Casserole make-ahead options are perfect for busy weeknights! You can prepare the entire casserole up to 24 hours in advance by following the initial steps and assembling it in the baking dish but refraining from baking. Simply cover it tightly with plastic wrap and refrigerate to maintain freshness. When you’re ready to serve, remove it from the fridge and bake it straight from cold, adding an extra 5-10 minutes to the baking time to ensure it heats thoroughly. Additionally, you can also freeze the unbaked casserole for up to three months; just make sure to wrap it tightly to lock in the flavor. With these make-ahead tips, you’ll experience all the cozy goodness with minimal effort!

Creamy Vegetable Casserole Variations

Feel free to explore these delightful twists to make our Creamy Vegetable Casserole uniquely yours!

  • Gluten-Free: Use gluten-free breadcrumbs instead of regular to maintain that crunchy topping without gluten.
  • Dairy-Free: Swap milk for unsweetened almond or oat milk and use your favorite non-dairy cheese for a creamy texture.
  • Add Protein: Stir in a cup of cooked quinoa or chickpeas for a hearty protein boost that pairs perfectly with the veggies.
  • Seasonal Vegetables: Substitute other winter favorites like sweet potatoes or kale, changing flavor profiles with each seasonal rotation.
  • Spicy Kick: Add diced jalapeños or crushed red pepper flakes to the filling for a warm, flavorful twist that can elevate your casserole experience.
  • Herb Infusion: Fresh herbs like rosemary or thyme can bring an aromatic depth; simply replace dried versions for a beautiful freshness.
  • Creamy Mushroom Swap: For a creamier texture, consider using a mix of cream cheese and soup to make it even richer and more decadent.
  • Nutty Crunch: Toasted chopped pecans or walnuts added to the breadcrumb topping offer an additional layer of flavor and a satisfying crunch.

Feel encouraged to make this recipe your own and discover new flavor combinations! You might also enjoy exploring options like French Toast Casserole for a sweet twist or Apple Crisp Casserole if you’re in the mood for dessert!

What to Serve with Cozy Creamy Winter Vegetable Casserole

Transition from a delicious casserole to a full meal by pairing it with these delightful side dishes and drinks that round out the cozy experience.

  • Garlic Bread: This warm, crusty side adds a delightful crunch and a pungent aroma, perfect for dipping into the creamy layers of the casserole.

  • Simple Green Salad: Fresh, crisp greens tossed in a light vinaigrette provide a refreshing balance to the richness of the casserole, uplifting the entire meal.

  • Roasted Chicken: A juicy roasted chicken complements the comforting flavors of the casserole, creating a satisfying and protein-packed feast that warms the heart.

  • Crispy Brussels Sprouts: Sautéed or roasted, Brussels sprouts offer a satisfying crunch that contrasts beautifully with the creamy texture, adding a plant-forward flourish.

  • Mashed Potatoes: Creamy mashed potatoes add a classic element to your table, soaking up the flavorful sauce from the casserole, making every bite heavenly.

  • Sparkling Apple Cider: A bubbly drink with a hint of sweetness enhances your meal, making each bite a celebration of cozy flavors and warmth.

  • Chocolate Cake: For dessert, a rich, fudgy chocolate cake rounds out the meal, providing the perfect sweet finish alongside the savory casserole flavors.

  • Steamed Broccoli: Bright green and crunchy, steamed broccoli not only adds color to your plate but also enhances the nutrient profile alongside the creamy casserole.

How to Store and Freeze Creamy Vegetable Casserole

Fridge: Store leftover creamy vegetable casserole in an airtight container for up to 4 days. Reheat in the oven or microwave until warmed through.

Freezer: For long-term storage, wrap the unbaked casserole tightly in plastic wrap and aluminum foil. It will keep for up to 3 months. Thaw before baking for best results.

Reheating: If reheating chilled casserole, bake in a preheated oven at 350°F (175°C) for about 20-25 minutes or until bubbly, ensuring it’s heated all the way through.

Preparation Tip: For ease, prep the casserole ahead and follow storage guidelines to enjoy homemade comfort food—especially during those busy winter months!

Creamy Vegetable Casserole Recipe FAQs

What vegetables should I choose for the casserole?
Absolutely! For the best results, opt for sturdy winter vegetables such as carrots, parsnips, cauliflower, and Brussels sprouts. These not only add structure and nutrients but also complement the creamy sauce beautifully. If you prefer, you can also experiment with seasonal choices or whatever you have on hand!

How should I store leftover creamy vegetable casserole?
To keep your leftover casserole fresh, simply place it in an airtight container and store it in the fridge for up to 4 days. When you’re ready to enjoy it, you can reheat your portions in the oven or microwave. Just ensure it’s heated through before serving!

Can I freeze my creamy vegetable casserole?
Yes, you can freeze it! Wrap the unbaked casserole tightly in plastic wrap and foil. It will keep well for up to 3 months. When you’re ready to bake, simply thaw it in the refrigerator overnight and then bake as directed. This is a great way to have a homemade comfort meal ready to go!

What should I do if my casserole is too watery?
If you find your creamy vegetable casserole is watery, next time be sure to thoroughly pat down your vegetables after blanching or thawing. It’s crucial to eliminate excess moisture before mixing everything together. If the casserole is already assembled, you can try baking it a bit longer to allow some of the liquid to evaporate.

Is this casserole suitable for those with dietary restrictions?
Very much so! This creamy vegetable casserole can easily be tailored to meet various dietary needs. Use gluten-free breadcrumbs and non-dairy milk and cheese to create a gluten-free or dairy-free version. It’s a dish that everyone can enjoy, making it a versatile choice for family gatherings!

Creamy Vegetable Casserole

Creamy Vegetable Casserole for Cozy Winter Gatherings

A comforting and versatile Creamy Vegetable Casserole packed with hearty winter vegetables, perfect for cozy gatherings.
Prep Time 15 minutes
Cook Time 30 minutes
Resting Time 5 minutes
Total Time 50 minutes
Servings: 6 servings
Course: Casserole
Cuisine: American
Calories: 250

Ingredients
  

For the Vegetable Base
  • 4 cups Mixed Winter Vegetables (carrots, parsnips, cauliflower, Brussels sprouts) Steamed or blanched
  • 1 can Low-fat Cream of Mushroom Soup Can substitute with cream of celery soup
  • 1/2 cup Milk Use unsweetened plant-based milk for dairy-free
For the Topping
  • 1 cup Shredded Cheese (Cheddar or Gruyère) Use non-dairy cheese for vegan option
  • 1/2 cup Breadcrumbs Regular or gluten-free
  • 4 tablespoons Melted Butter Opt for vegetable oil to keep it dairy-free
For Seasoning
  • 1 teaspoon Dried Thyme
  • 1 teaspoon Garlic Powder
  • 1 teaspoon Salt Adjust according to taste
  • 1/2 teaspoon Black Pepper Adjust according to taste

Equipment

  • baking dish
  • Mixing Bowl
  • Steamer or Pot
  • spatula

Method
 

Step-by-Step Instructions
  1. Preheat your oven to 375°F (190°C) and grease a medium-sized baking dish.
  2. Steam or blanch your mixed winter vegetables for about 3-4 minutes until tender. Drain thoroughly.
  3. Combine the prepared vegetables with cream of mushroom soup, milk, shredded cheese, thyme, garlic powder, salt, and pepper in a large mixing bowl. Stir until evenly coated.
  4. Spread the mixture evenly into the greased baking dish.
  5. Mix breadcrumbs with melted butter and sprinkle over the top of the vegetable filling.
  6. Bake for 25-30 minutes until the topping is golden brown and filling is bubbling.
  7. Let the casserole sit for about 5 minutes before serving.

Nutrition

Serving: 1servingCalories: 250kcalCarbohydrates: 30gProtein: 10gFat: 10gSaturated Fat: 5gPolyunsaturated Fat: 1gMonounsaturated Fat: 3gCholesterol: 15mgSodium: 500mgPotassium: 400mgFiber: 5gSugar: 2gVitamin A: 3500IUVitamin C: 35mgCalcium: 200mgIron: 2mg

Notes

Make this casserole ahead of time and refrigerate or freeze it for later use. Experiment with seasonal vegetables for unique flavors.

Tried this recipe?

Let us know how it was!

Stay Connected

Get recipes via email: