Get my cookbooks

Creamy Southern Spaghetti Bake: A Cozy Comfort Food Delight

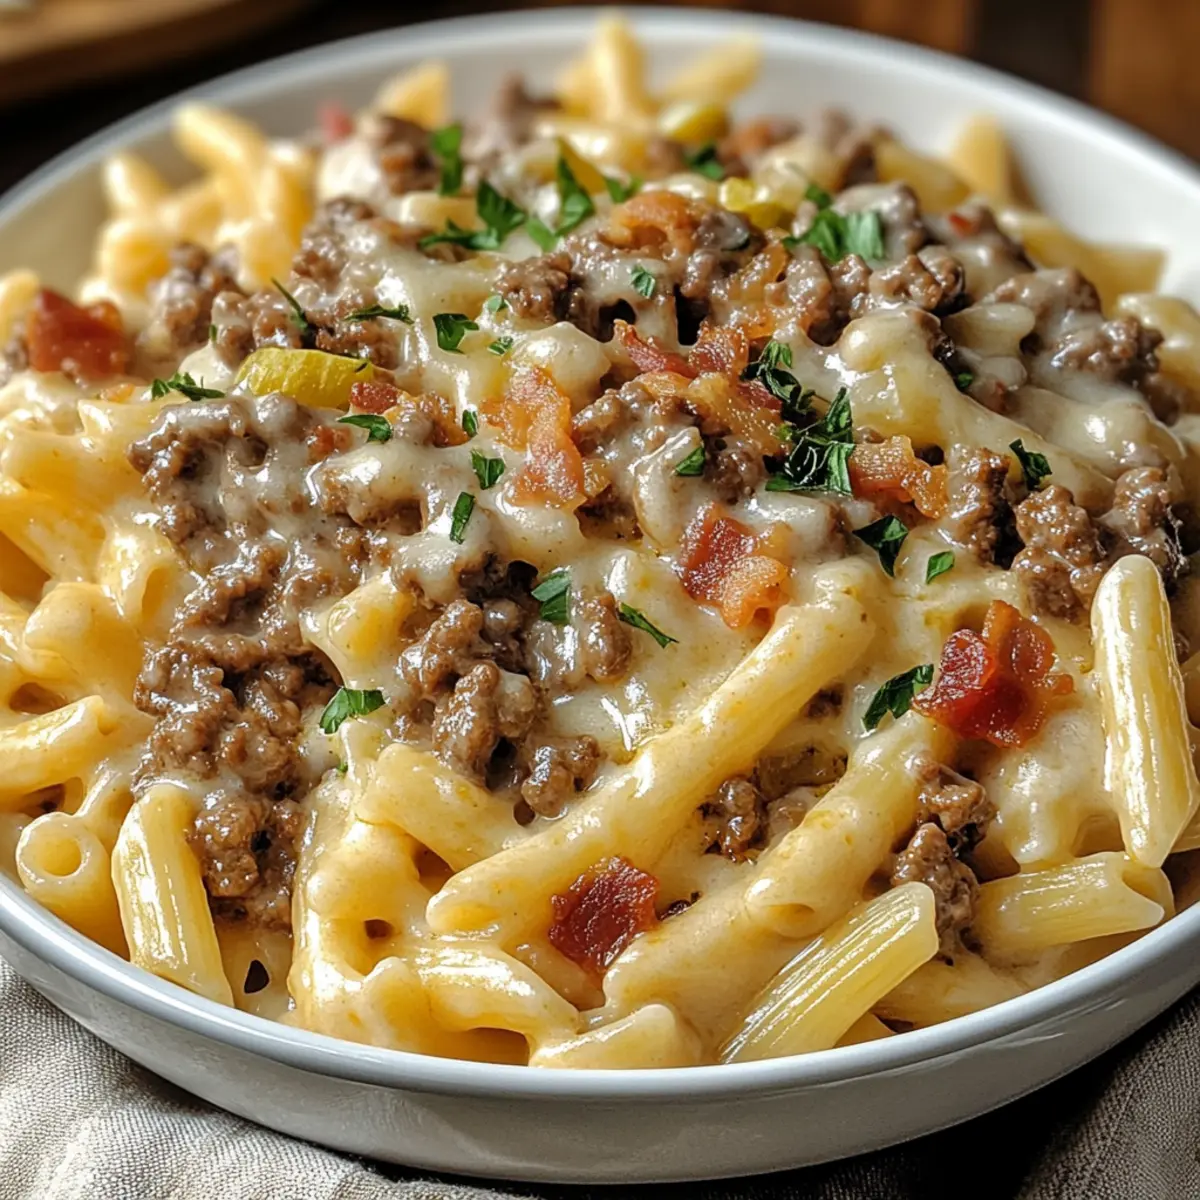
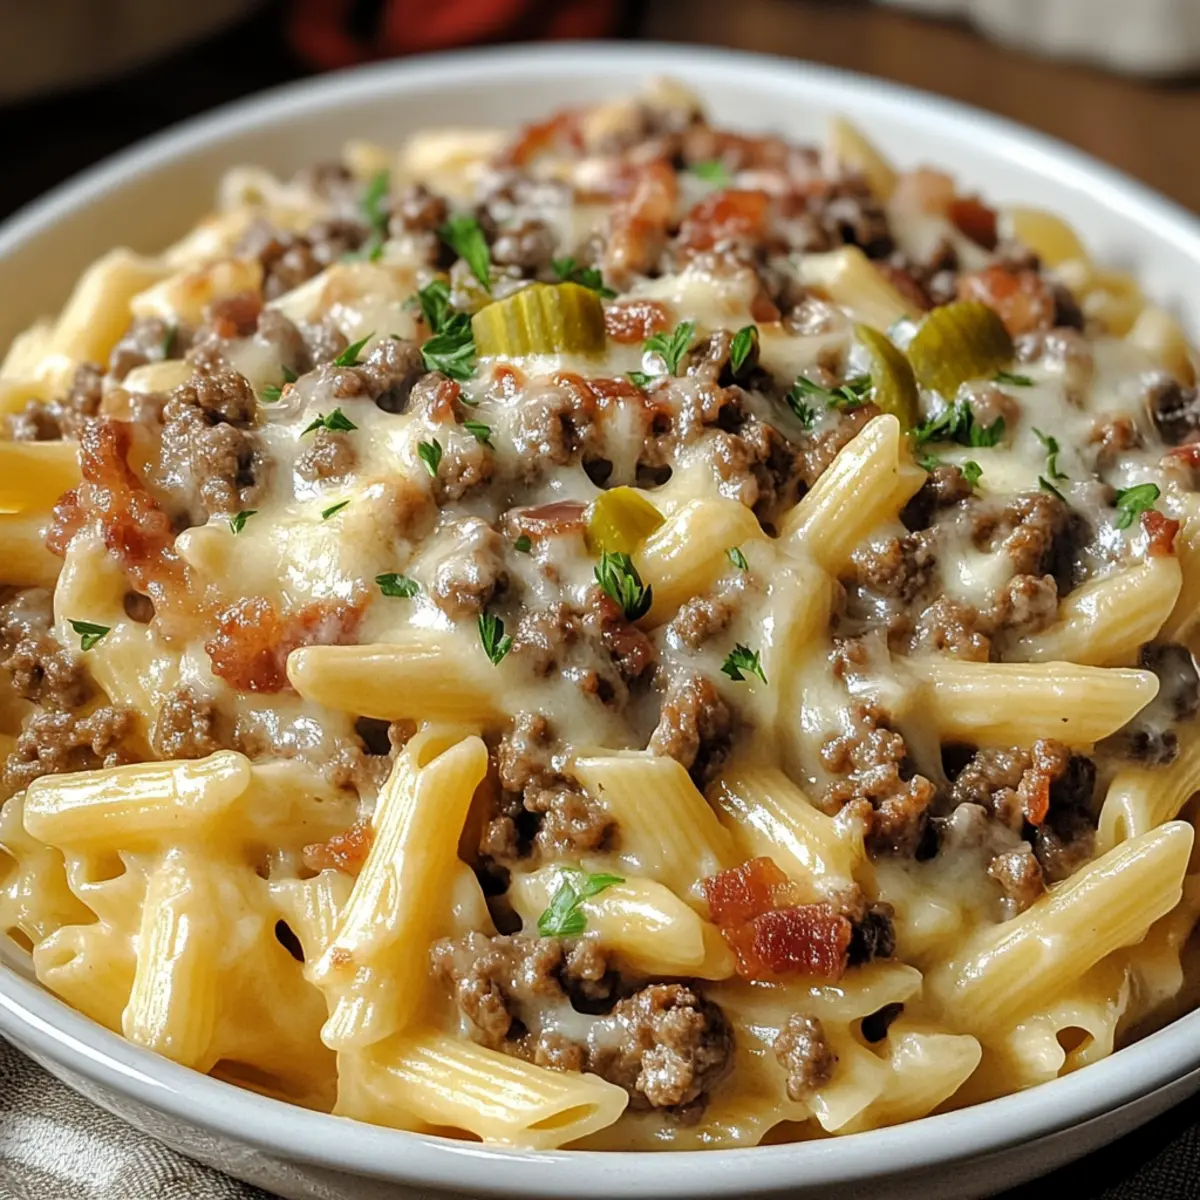
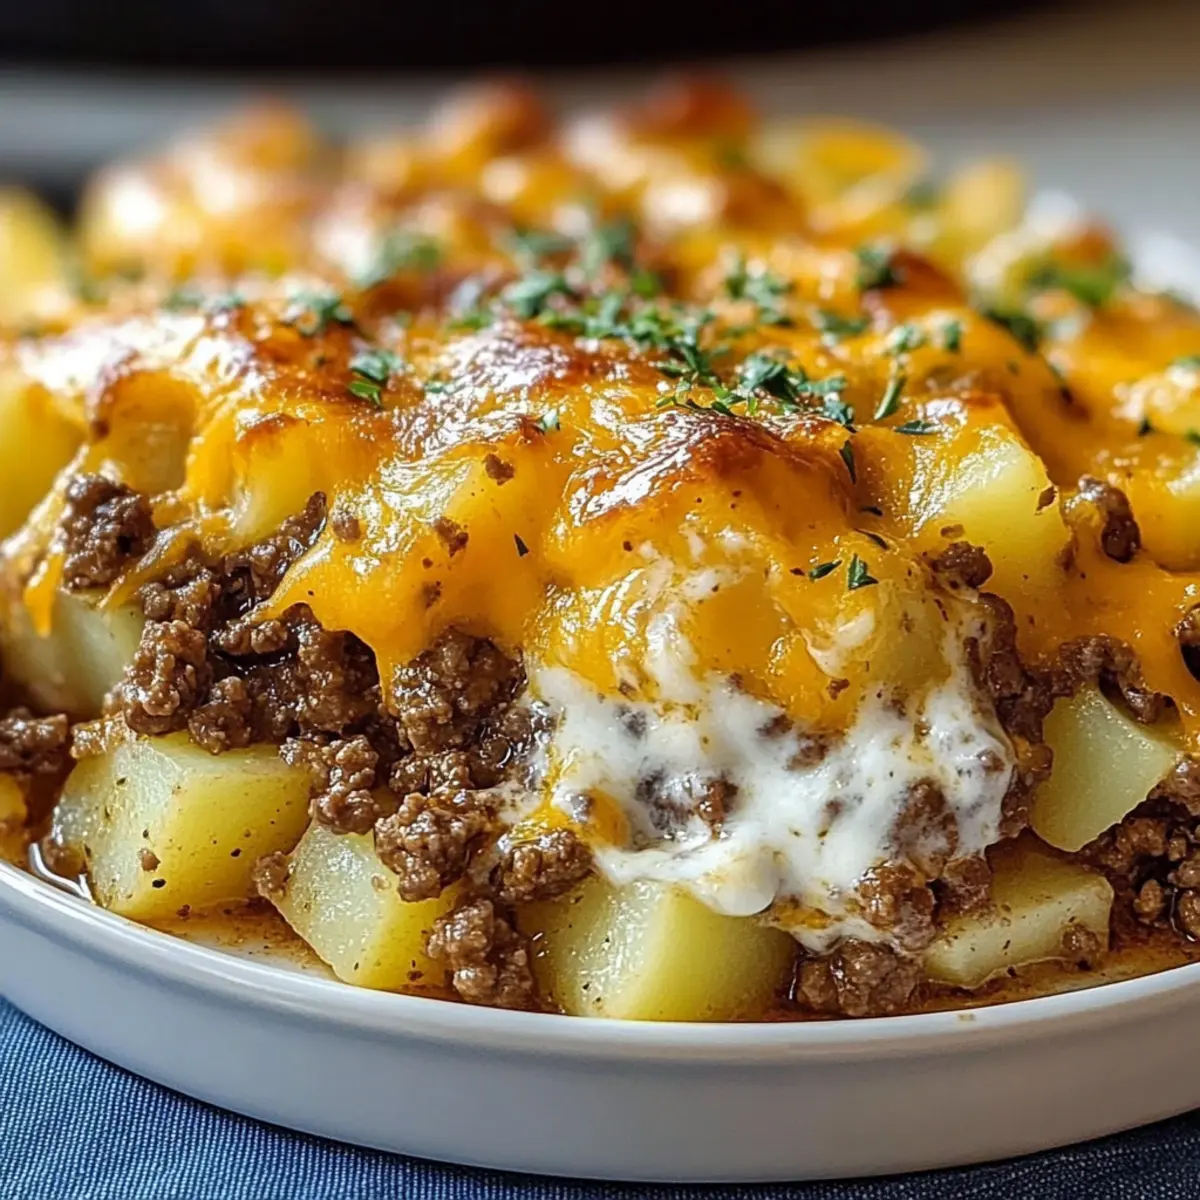
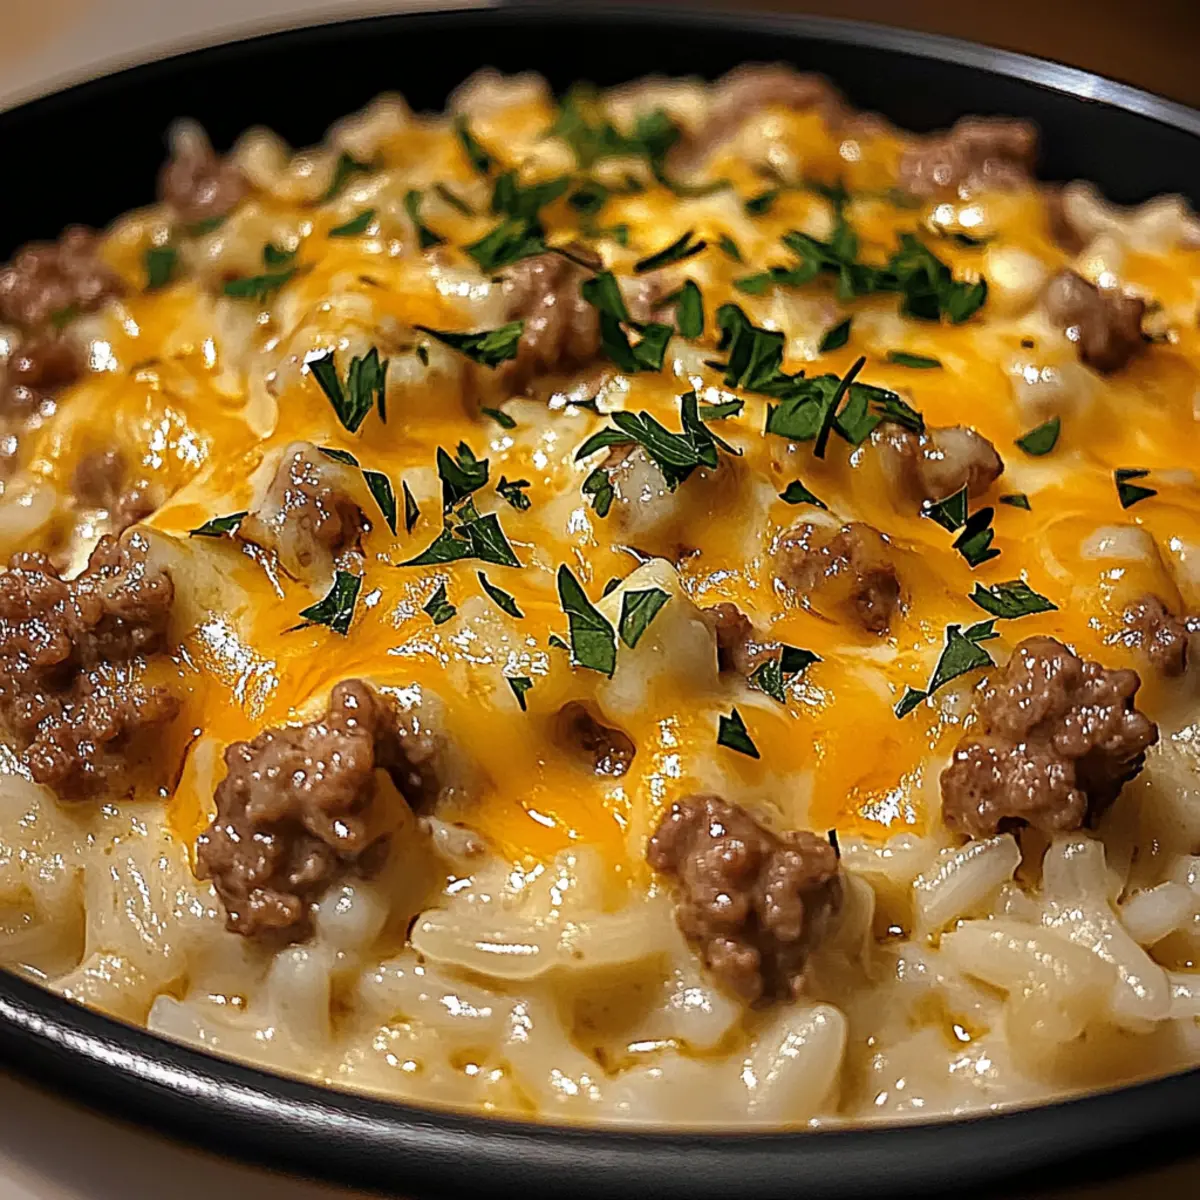
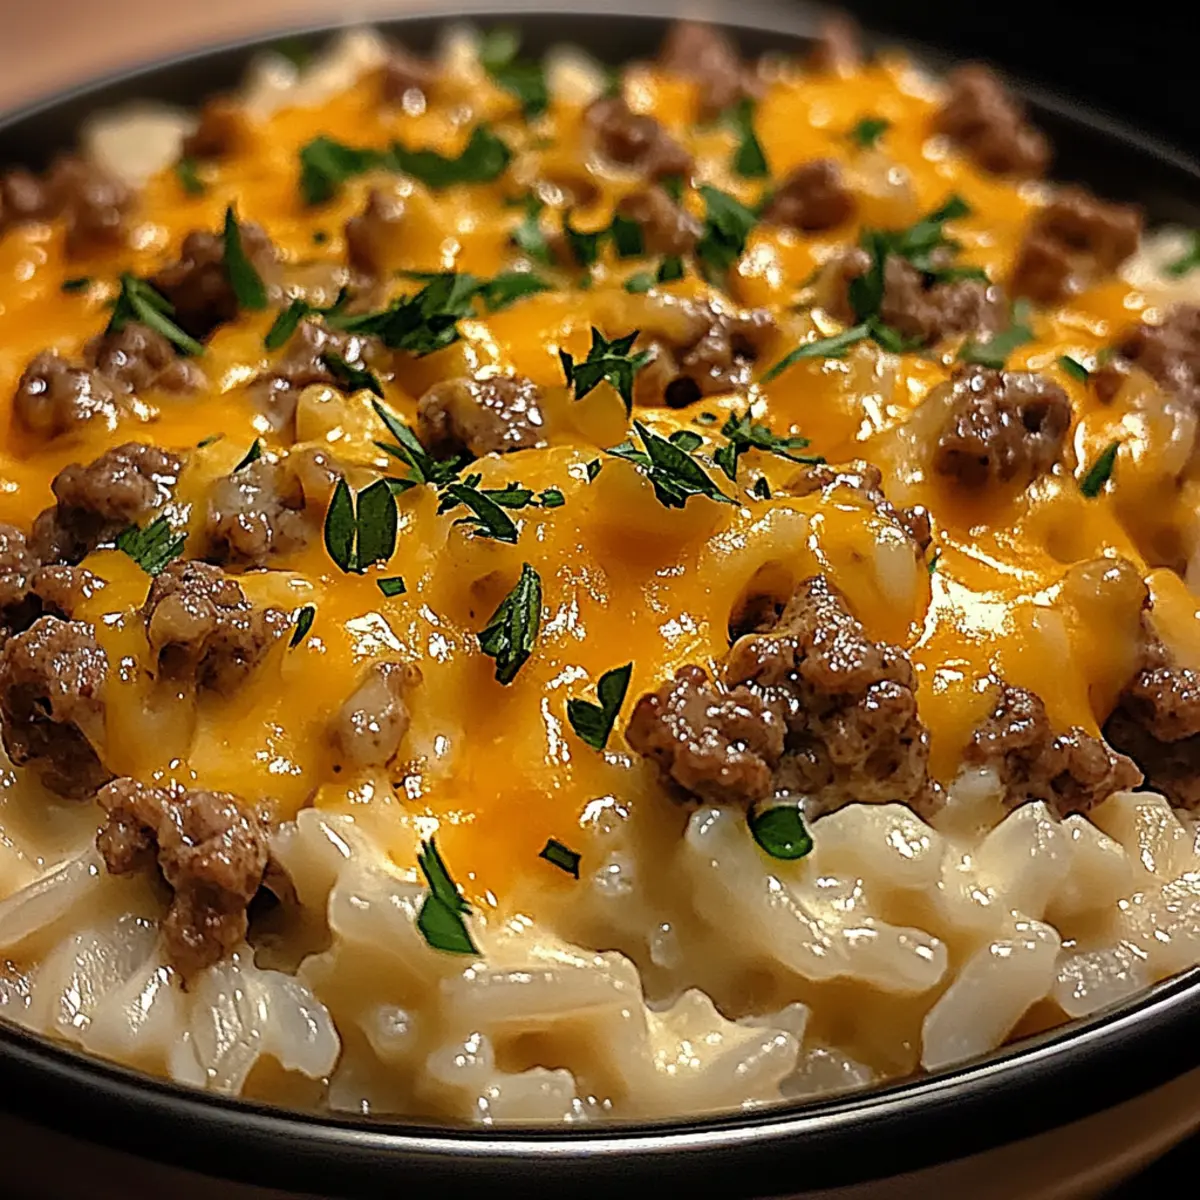
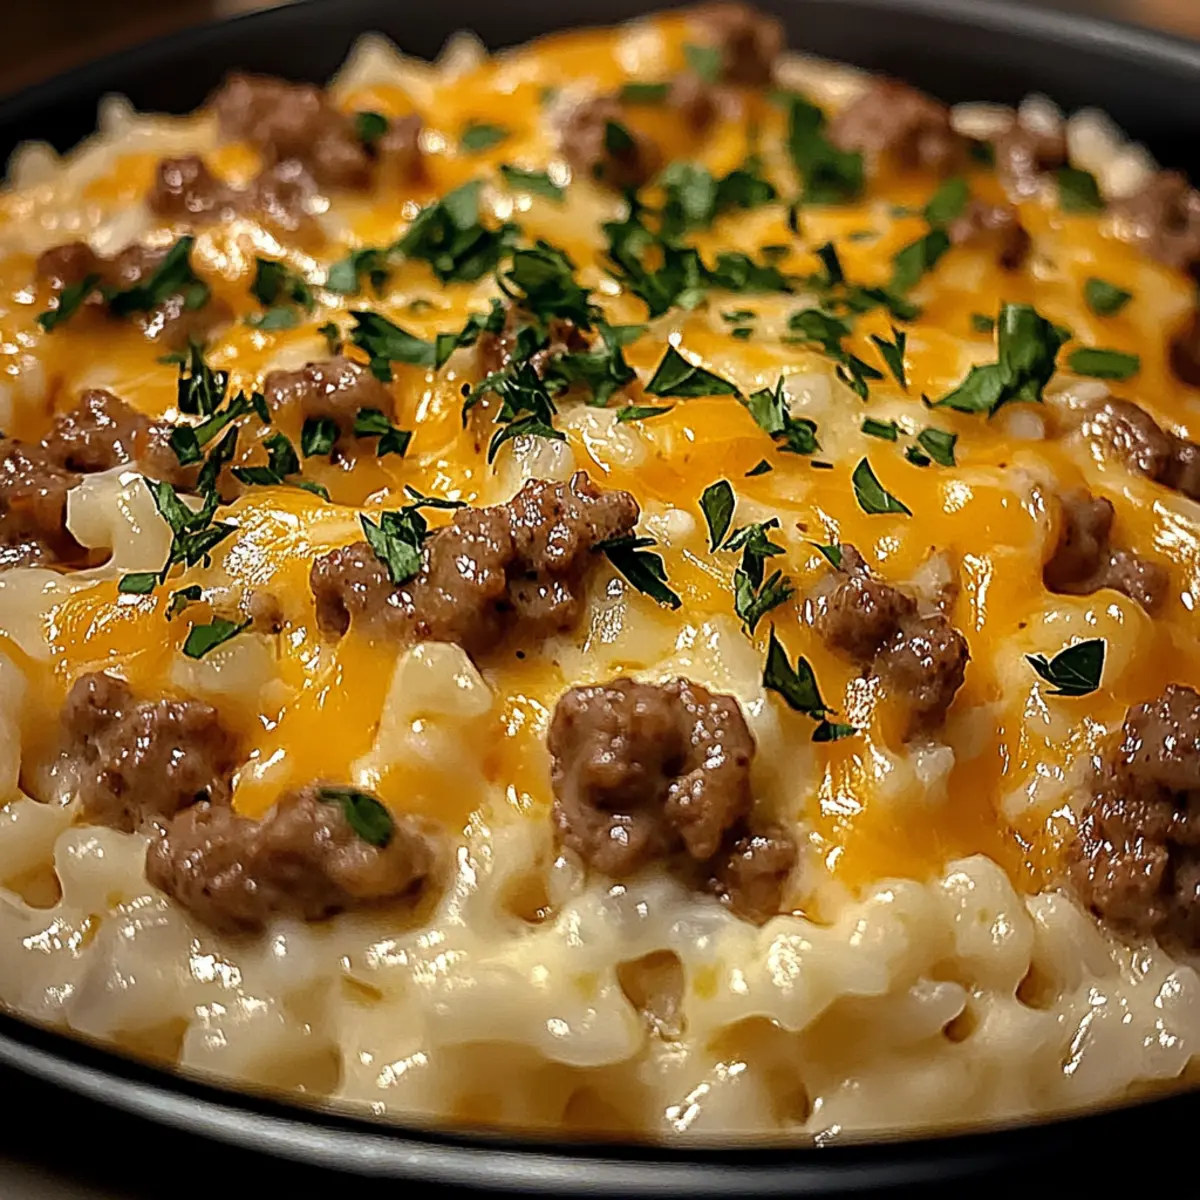
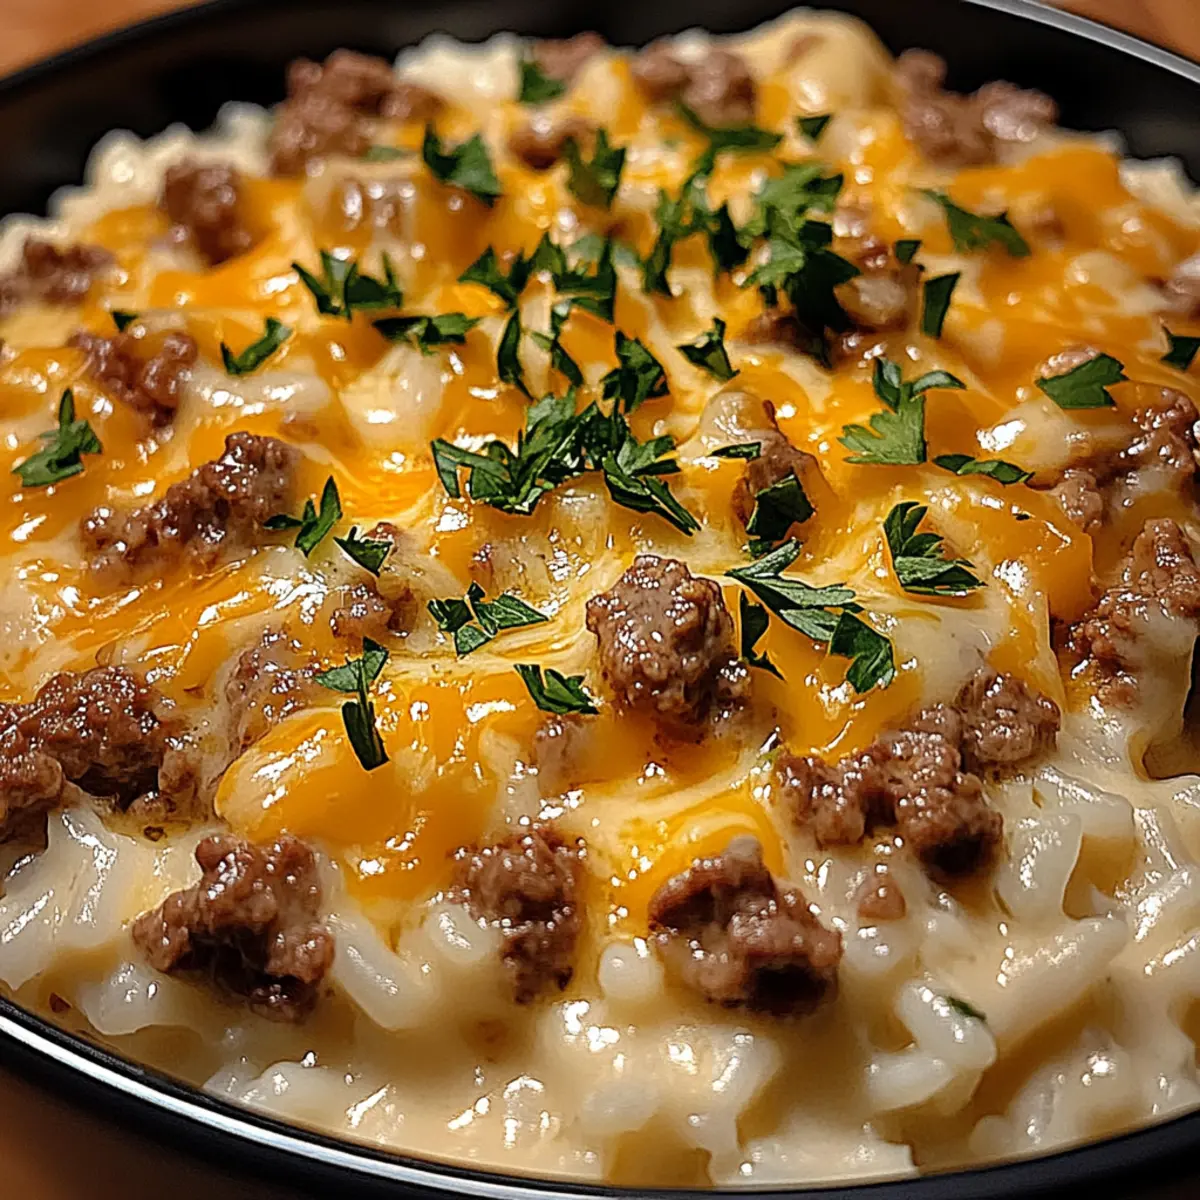
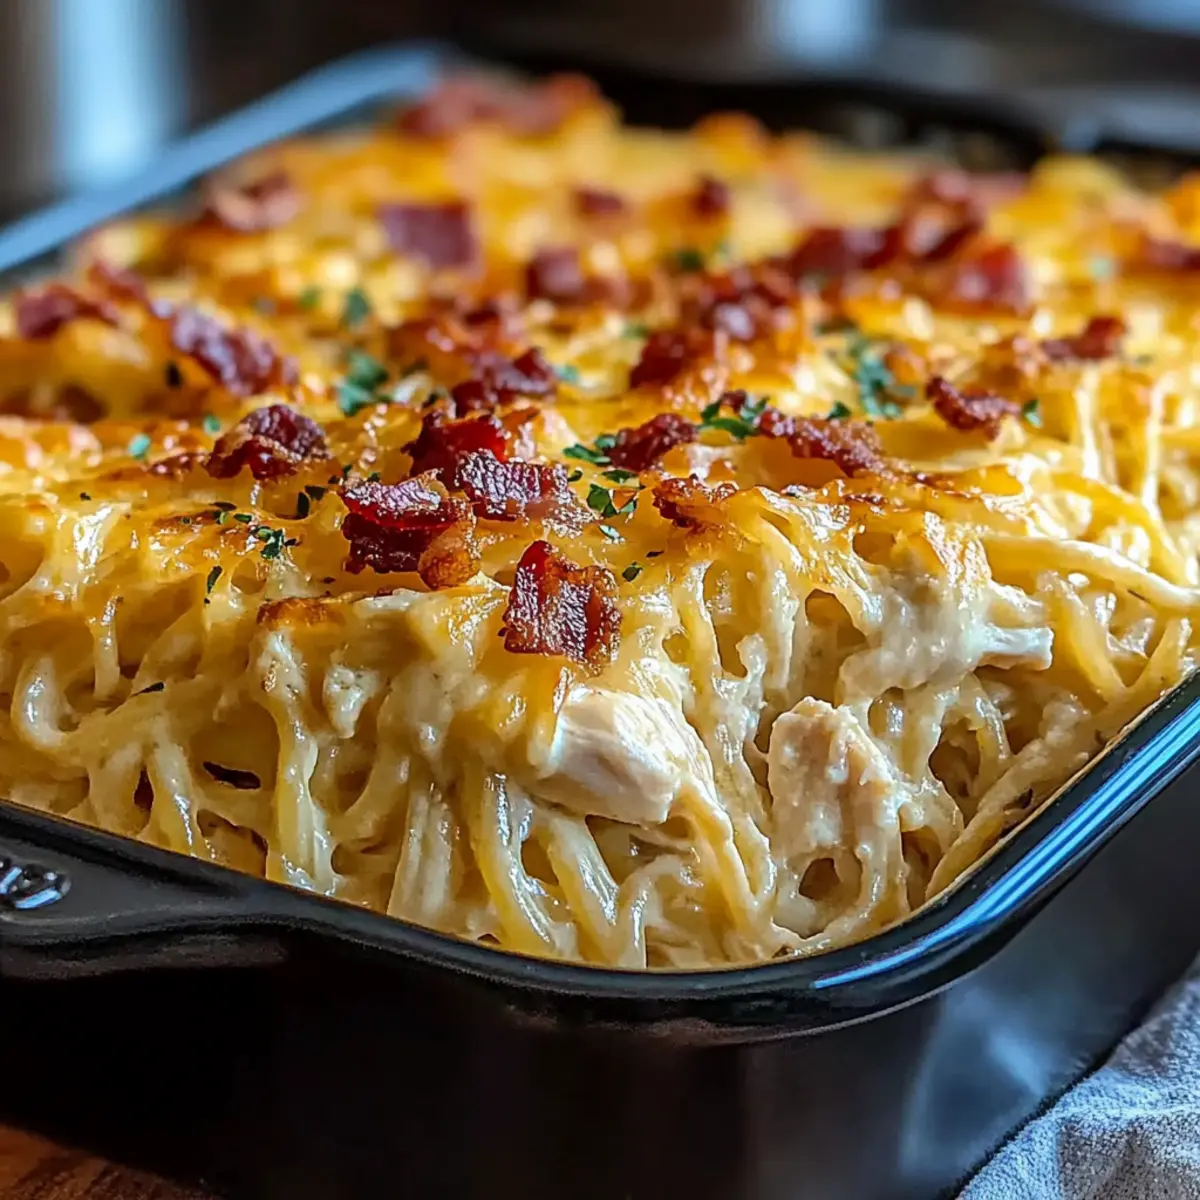
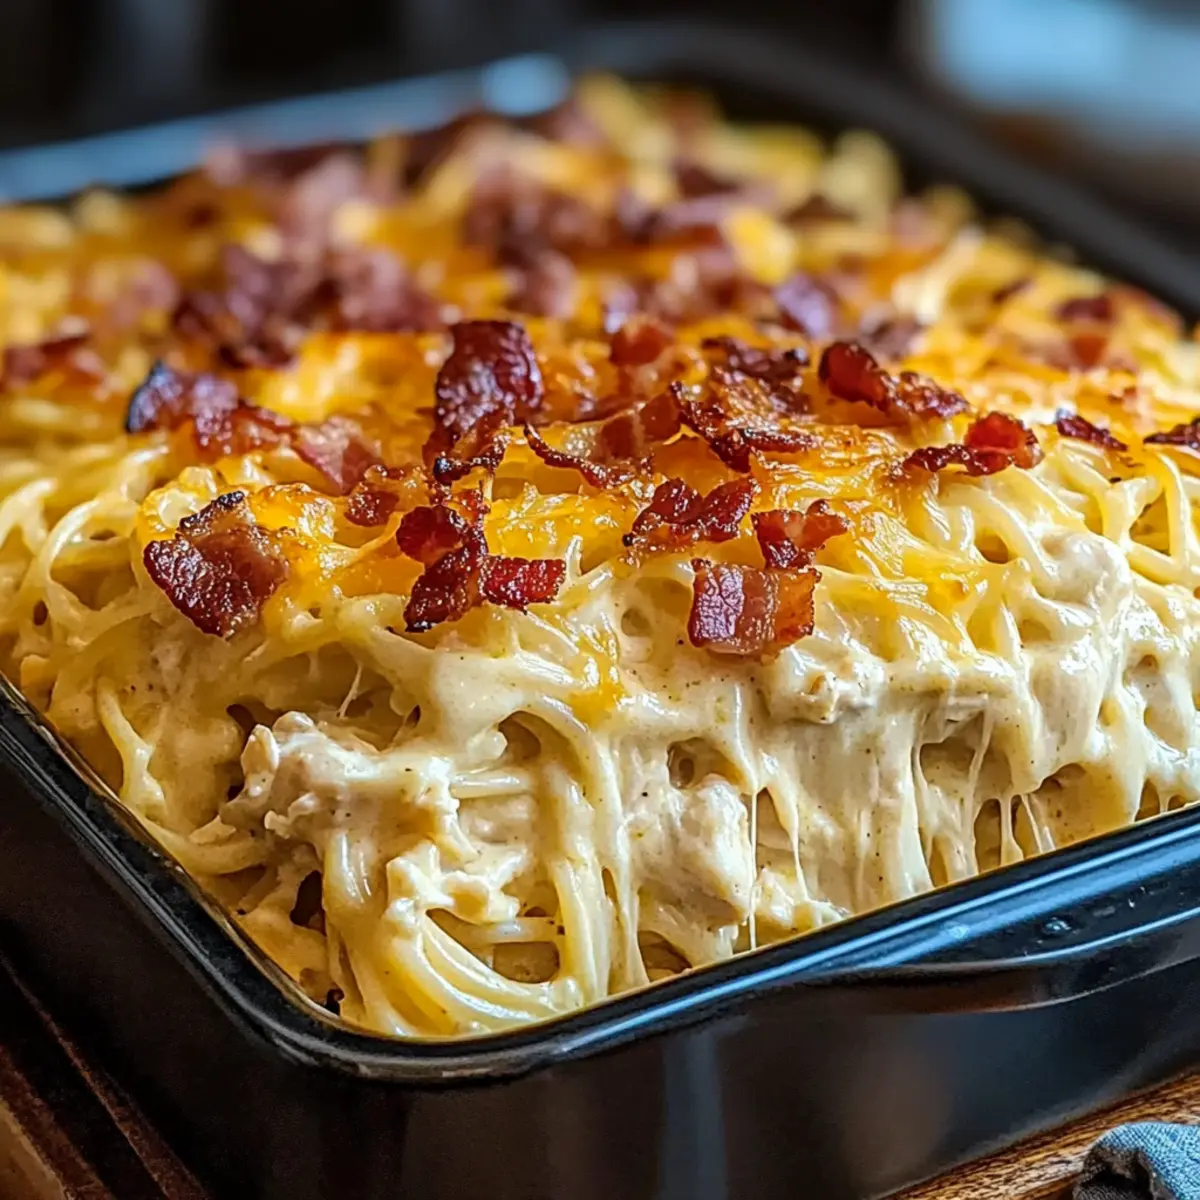
As the savory aroma of baked pasta fills the kitchen, I can’t help but smile—this is the unmistakable vibe of a warm gathering around the dinner table. My Creamy Southern Spaghetti Bake embodies all the comfort of Southern cooking, draping tender noodles in a velvety cream cheese sauce that melds with shredded chicken and a sprinkle of crispy bacon on top. What makes this casserole truly special? It’s not just easy to prepare; it’s also kid-friendly, making it an instant hit for family meals or potluck gatherings. Whether you’re navigating a busy weeknight or planning a cozy Sunday dinner, this dish brings everyone together in the best way possible. Are you ready to dive into a plateful of happiness?

Why Is This Spaghetti Bake Irresistible?

Comforting, Heartwarming Taste: This Creamy Southern Spaghetti Bake delivers a delightful blend of flavors that transport you straight to the cozy kitchens of the South.

Kid-Friendly Appeal: Packed with creamy goodness and delicious toppings, it caters to even the pickiest eaters, making dinner time a breeze.

Easy to Prepare: With simple ingredients and straightforward steps, you’ll have this comforting casserole ready in no time.

Perfect for Gatherings: Whether for a family dinner or a potluck, this dish impresses guests and satisfies appetites, much like our flavorful Mexican Soup or Protein Egg Bake.

Leftover Friendly: It stores well in the fridge for easy reheating, ensuring you can enjoy this scrumptious meal (again!) throughout the week.

Unique Textures: The creamy filling and crispy bacon topping create a satisfying bite that’s simply addictive!

Creamy Southern Spaghetti Bake Ingredients

• Get ready to create this delicious dish with these wholesome ingredients!

For the Pasta Base

  • Spaghetti – The sturdy base of this comforting bake; cook it al dente for the best texture!

For the Filling

  • Cooked Shredded Chicken – Provides heartiness; rotisserie chicken is a convenient and tasty option!
  • Cream Cheese – Adds rich creaminess; ensure it’s softened for smooth blending.
  • Cream of Chicken Soup – Acts as a savory binder; consider a homemade version for extra flair!
  • Sour Cream – Enhances the tangy flavor; Greek yogurt makes a great substitute too.
  • Ranch Seasoning Mix – Infuses that signature Southern taste; feel free to swap for alternative herbs.
  • Garlic Powder – Boosts aromatic depth; fresh minced garlic could elevate the flavor even more.
  • Black Pepper – A dash for subtle heat, balancing the richness of your bake.

For the Toppings

  • Cheddar Cheese – The main melty cheese, opt for sharp cheddar for an extra flavor punch!
  • Parmesan Cheese – Adds a nutty richness; grated or shredded will work perfectly.
  • Bacon – Offers a delightful crunch on top; turkey bacon can be a lighter alternative.
  • Chopped Parsley (optional) – A finishing touch for freshness and a pop of color in presentation.

Dive into these ingredients and get ready to whip up a Creamy Southern Spaghetti Bake that the whole family will love!

Step‑by‑Step Instructions for Creamy Southern Spaghetti Bake

Step 1: Preheat the Oven
Begin by preheating your oven to 350°F (175°C). While the oven warms up, grab a 9×13-inch baking dish and grease it lightly with cooking spray or butter. This will help ensure your Creamy Southern Spaghetti Bake doesn’t stick, making for easy serving later.

Step 2: Cook the Spaghetti
Bring a large pot of salted water to a rolling boil. Add the spaghetti and cook according to package instructions until just al dente, usually about 8-10 minutes. Drain the pasta and set it aside in a large mixing bowl, ensuring the noodles don’t stick together while you prepare the filling.

Step 3: Prepare the Creamy Mixture
In a separate large mixing bowl, add the softened cream cheese, cream of chicken soup, sour cream, ranch seasoning, garlic powder, and black pepper. Using an electric mixer or whisk, beat the mixture until it’s smooth and creamy, about 2-3 minutes. This flavorful base is essential for your Creamy Southern Spaghetti Bake!

Step 4: Mix in Chicken and Cheese
Carefully fold in the shredded chicken, 1½ cups of cheddar cheese, and Parmesan cheese until everything is thoroughly combined. Then, add the drained spaghetti to the mixture, stirring gently until all the pasta is coated with the creamy sauce and the ingredients are well distributed.

Step 5: Assemble the Bake
Pour the creamy spaghetti mixture into the prepared baking dish, spreading it evenly with a spatula. Make sure the filling reaches all corners of the dish. Top it off with the remaining cheddar cheese and crumbled bacon, giving it that delicious crispy layer that will bake to perfection.

Step 6: Bake Covered
Cover the baking dish tightly with aluminum foil and place it in the preheated oven. Bake for 25 minutes to allow the flavors to meld and the dish to heat through. The aroma will start to fill your kitchen, letting you know your Creamy Southern Spaghetti Bake is well on its way!

Step 7: Bake Uncovered
After 25 minutes, remove the foil and bake for an additional 10-15 minutes. Keep an eye on it until the top is golden brown and bubbly—this is when your casserole transforms into a mouthwatering masterpiece.

Step 8: Let it Rest
Once baked, take the dish out of the oven and let it sit for 5-10 minutes. This resting period allows the layers to settle and makes slicing easier. Garnish with freshly chopped parsley if desired, adding a touch of color and freshness to your beautiful Creamy Southern Spaghetti Bake.

Step 9: Serve and Enjoy
Now it’s time to serve up this delightful casserole! Scoop portions onto plates and watch as family and friends gather around, excited to dive into your Creamy Southern Spaghetti Bake, brimming with creamy, cheesy goodness and crispy bacon on top.

Storage Tips for Creamy Southern Spaghetti Bake

Fridge: Store leftovers in an airtight container for up to 3 days to maintain freshness and flavor.

Freezer: For longer storage, freeze individual portions wrapped tightly in plastic wrap, followed by aluminum foil, for up to 2 months.

Reheating: Thaw overnight in the fridge before reheating. Warm in the oven at 350°F (175°C) covered with foil for about 20 minutes, or microwave until heated through, ensuring the Creamy Southern Spaghetti Bake is warmed evenly.

Make-Ahead: You can assemble the entire dish a day in advance and refrigerate it before baking. This will enhance the flavors and save time on busy evenings!

Creamy Southern Spaghetti Bake Variations

Feel free to make this dish your own with these delightful twists and substitutions!

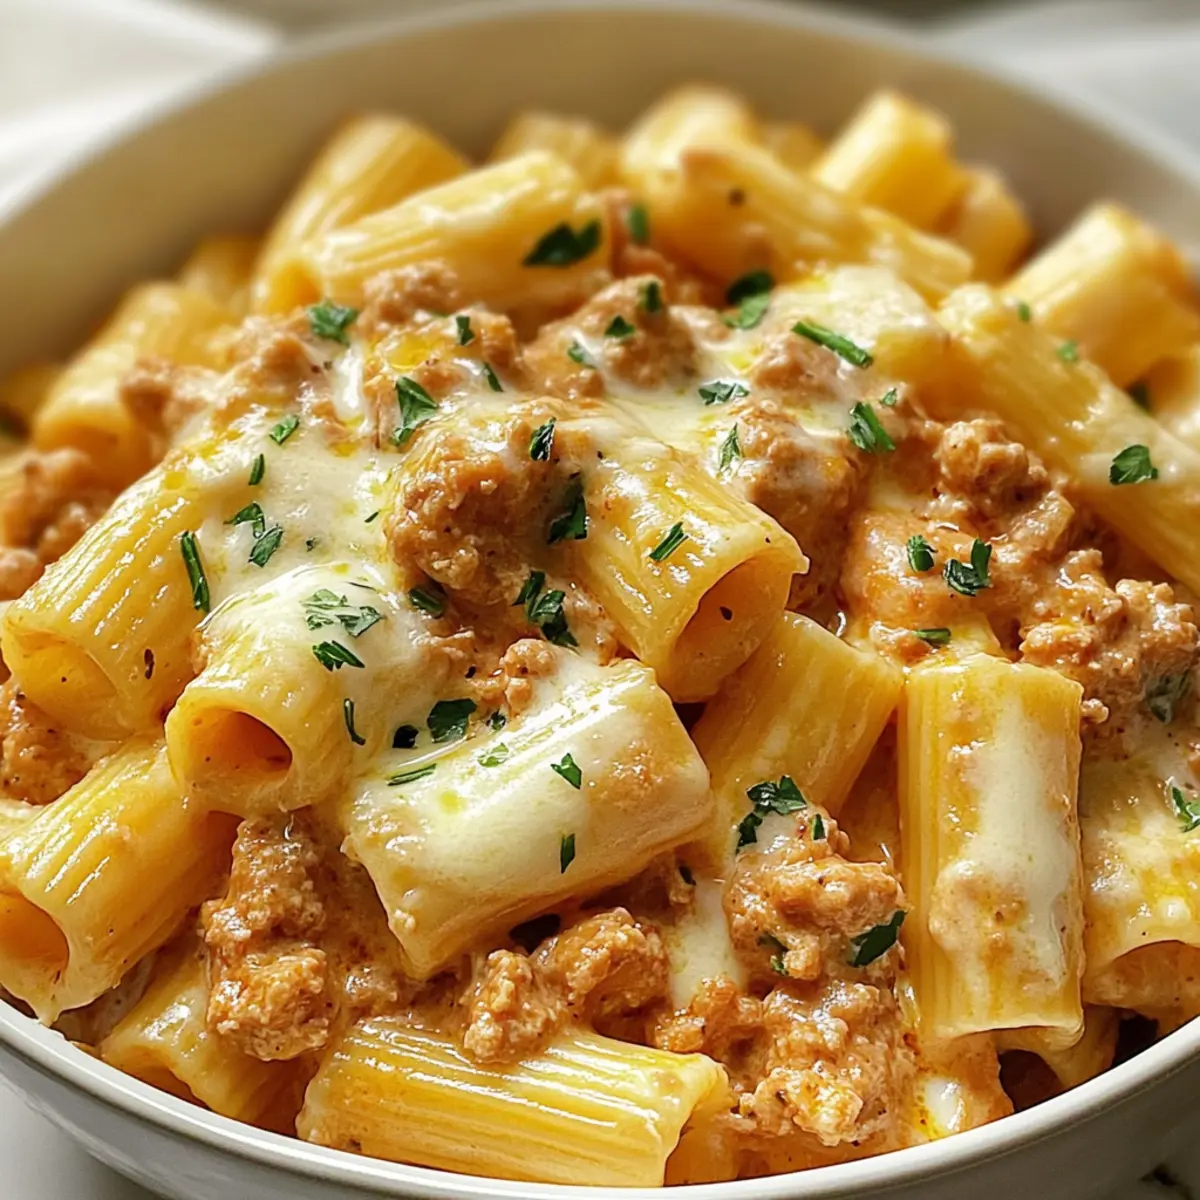
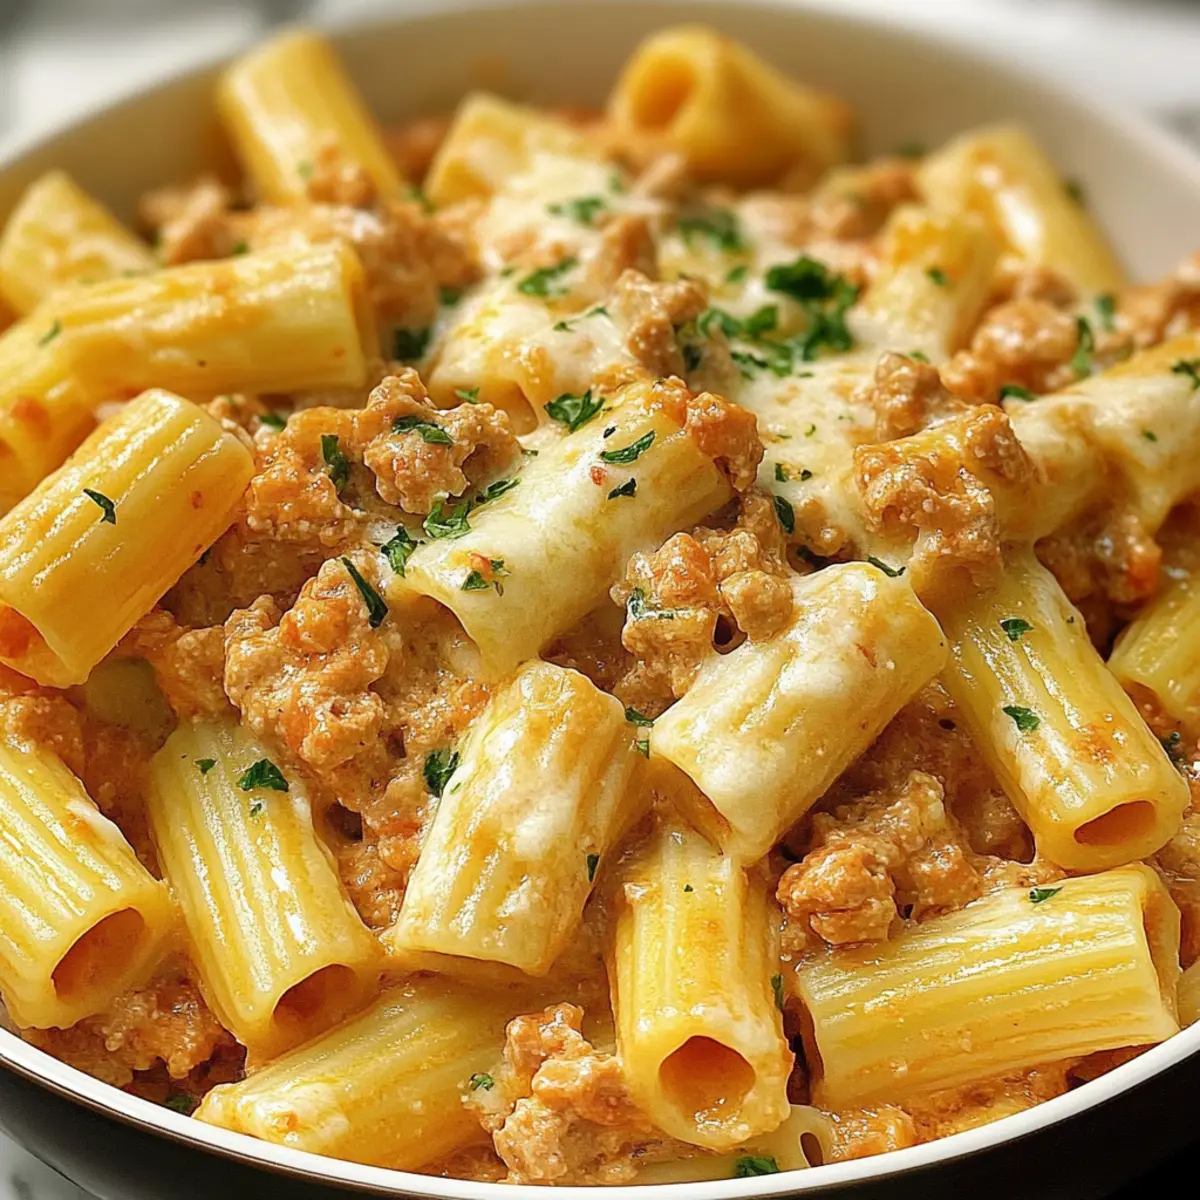
  • Pasta Swap: Substitute spaghetti with other pasta shapes like penne or rotini for a different texture and bite.

  • Vegetarian Delight: Replace chicken and bacon with sautéed seasonal vegetables, like zucchini and bell peppers, plus vegetable broth in place of cream of chicken soup. This brings a fresh, colorful twist!

  • Cheese Medley: Experiment with different cheese combinations, such as incorporating mozzarella or gouda, for a unique flavor profile that will surprise your taste buds.

  • Spice It Up: Add red pepper flakes or diced jalapeños to the creamy mixture for a spicy kick, bringing an exciting heat that will have everyone reaching for more.

  • Gluten-Free Option: Use gluten-free pasta to make this beloved bake accessible for those following a gluten-free diet, without losing its comforting charm.

  • Healthier Choice: Swap out regular cream cheese for a reduced-fat option or Greek yogurt, maintaining that creamy texture while cutting down on calories.

  • Add Crunch: For an extra texture boost, mix in chopped nuts like pecans or walnuts into the filling, providing a surprising crunch that pairs beautifully with the creamy sauce.

With these variations, you can delight your family with a new twist on the classic every time you whip up this Creamy Southern Spaghetti Bake. And if you’re in the mood for other comforting favorites, try our delicious Cheesy Spinach Bake or classic Southern Fried Chicken for a delicious family meal option!

What to Serve with Creamy Southern Spaghetti Bake

The perfect meal isn’t complete without delicious sides to enhance the experience.

  • Garlic Bread: Warm, crusty garlic bread is perfect for scooping up the creamy goodness, adding a wonderful texture contrast to each bite.
  • Fresh Garden Salad: Crisp greens tossed with a tangy vinaigrette offer a refreshing balance to the richness of the bake and cleanse the palate beautifully.
  • Steamed Broccoli: A side of bright, vibrant broccoli brings earthy flavors and a pop of color, complementing the casserole’s indulgence while providing a nutritious touch.
  • Roasted Brussels Sprouts: These caramelized bites add earthy notes that resonate well with the savory flavors of the spaghetti bake. Their slight crispiness elevates the texture experience.
  • Coleslaw: A tangy, crunchy coleslaw can be a delightful addition, adding crunch and brightness to the meal. Its bite-sized pieces create a perfect pairing with the rich bake.
  • Iced Tea or Lemonade: A cool glass of sweet iced tea or refreshing lemonade provides a delightful thirst-quencher that complements the comforting nature of this Southern dish.
  • Chocolate Chip Cookies: End the meal with classic chocolate chip cookies; their warm, gooey goodness is like a hug in dessert form, perfectly capping off family dinner time.

Expert Tips for Creamy Southern Spaghetti Bake

  • Prep Ahead: Assemble the Creamy Southern Spaghetti Bake a day in advance and refrigerate until ready to bake. This enhances flavor and saves time!

  • Watch the Spaghetti: Avoid overcooking the noodles; they should be just al dente as they’ll continue cooking while baking, preventing a mushy texture.

  • Customize Flavors: Feel free to mix in sautéed vegetables like bell peppers or provide a spicy kick with red pepper flakes or jalapeños for a personal touch.

  • Perfect Toppings: Ensure the bacon is evenly crumbled on top for the crispiest finish. Using turkey bacon can lighten up the dish without losing flavor.

  • Storage Tips: Store leftovers in an airtight container for up to 3 days, making it an easy meal option for busy nights or quick lunches!

Make Ahead Options

These Creamy Southern Spaghetti Bake options are perfect for busy home cooks looking to save time! You can prepare the entire casserole up to 24 hours in advance by assembling it in the baking dish, covering it tightly with foil, and refrigerating. This allows the flavors to meld beautifully. Ensure you seal it well to prevent drying out. When you’re ready to bake, simply remove it from the refrigerator and follow the original instructions, allowing for an additional 10 minutes of baking time since it’s starting cold. You’ll have a comforting dish ready to enjoy without the stress of last-minute cooking!

Creamy Southern Spaghetti Bake Recipe FAQs

What kind of spaghetti should I use for the Creamy Southern Spaghetti Bake?
For this recipe, I recommend using regular spaghetti cooked to al dente. This ensures the noodles maintain a nice texture during baking. You can also experiment with other pasta shapes like penne or rotini if you want a different twist!

How should I store leftovers of the Creamy Southern Spaghetti Bake?
Store any leftovers in an airtight container in the fridge for up to 3 days. When reheating, I suggest using the oven to maintain the dish’s flavor and texture. Heat it at 350°F (175°C) covered with foil for about 20 minutes, or until heated through.

Can I freeze the Creamy Southern Spaghetti Bake?
Absolutely! To freeze, wrap individual portions tightly in plastic wrap, followed by aluminum foil to prevent freezer burn. It will keep well for up to 2 months. When you’re ready to enjoy it again, simply thaw it overnight in the fridge and reheat in the oven or microwave.

What if my cream cheese is too cold to mix easily?
If your cream cheese is still cold, it can be tricky to blend smoothly. To soften it quickly, cut it into cubes and let it sit at room temperature for about 20-30 minutes. You can also microwave it in 10-second intervals until it’s soft but not melted, which helps it mix better into the creamy filling.

Can I adjust the recipe for dietary restrictions?
Certainly! For a lighter option, you can use turkey bacon instead of regular bacon. If you’re making this dish vegetarian, simply swap out the chicken and bacon for sautéed seasonal vegetables. Just be sure to use vegetable broth in place of the cream of chicken soup for the right flavor!

How long can I make the Creamy Southern Spaghetti Bake in advance?
You can assemble the dish up to a day ahead of time! Cover it tightly with plastic wrap or foil and refrigerate it until you’re ready to bake. This not only saves time but also allows the flavors to meld beautifully.

Creamy Southern Spaghetti Bake

Creamy Southern Spaghetti Bake: A Cozy Comfort Food Delight

Creamy Southern Spaghetti Bake is a delightful and kid-friendly casserole that brings warmth and comfort to any gathering.
Prep Time 20 minutes
Cook Time 40 minutes
Resting Time 10 minutes
Total Time 1 hour 10 minutes
Servings: 8 slices
Course: Casserole
Cuisine: Southern
Calories: 450

Ingredients
  

For the Pasta Base
  • 1 package Spaghetti Cook al dente
For the Filling
  • 2 cups Cooked Shredded Chicken Rotisserie chicken is a great option
  • 8 oz Cream Cheese Softened for easy blending
  • 1 can Cream of Chicken Soup Homemade version can be used
  • 1 cup Sour Cream Greek yogurt is a good substitute
  • 1 pack Ranch Seasoning Mix Can substitute for other herbs
  • 1 teaspoon Garlic Powder Fresh minced garlic can enhance flavor
  • 1 teaspoon Black Pepper To taste
For the Toppings
  • 2 cups Cheddar Cheese Sharp cheddar for flavor
  • 1/2 cup Parmesan Cheese Grated or shredded
  • 6 slices Bacon Can use turkey bacon
  • 1/4 cup Chopped Parsley Optional for garnish

Equipment

  • 9x13 inch baking dish
  • Large pot
  • Mixing Bowl
  • electric mixer or whisk
  • spatula

Method
 

Preparation Steps
  1. Preheat your oven to 350°F (175°C). Grease a 9×13-inch baking dish.
  2. Bring a large pot of salted water to a boil. Cook spaghetti until al dente, about 8-10 minutes. Drain and set aside.
  3. In a large mixing bowl, combine softened cream cheese, cream of chicken soup, sour cream, ranch seasoning, garlic powder, and black pepper. Beat until smooth.
  4. Fold in the shredded chicken, 1½ cups of cheddar cheese, and Parmesan cheese. Add drained spaghetti and stir until coated.
  5. Pour the mixture into the greased baking dish. Top with remaining cheddar cheese and crumbled bacon.
  6. Cover with aluminum foil and bake for 25 minutes. Remove foil and bake for an additional 10-15 minutes until golden brown.
  7. Let it rest for 5-10 minutes before serving. Garnish with parsley if desired.

Nutrition

Serving: 1sliceCalories: 450kcalCarbohydrates: 45gProtein: 25gFat: 22gSaturated Fat: 10gPolyunsaturated Fat: 2gMonounsaturated Fat: 12gTrans Fat: 1gCholesterol: 70mgSodium: 800mgPotassium: 350mgFiber: 2gSugar: 3gVitamin A: 800IUVitamin C: 2mgCalcium: 300mgIron: 2mg

Notes

Casserole stores well and can be made ahead for convenience. Customize with additional vegetables or spices as desired.

Tried this recipe?

Let us know how it was!

Crispy Cantonese Chow Mein in Under 15 Minutes!

There’s something magical about the sound of sizzling noodles hitting a hot wok, especially when you’re whipping up a batch of Cantonese Chow Mein. In just under 15 minutes, you can create a delicious, crispy dish that rivals your favorite takeout spots, all while using pantry staples you probably have on hand. This quick and hearty meal is not only a feast for the senses but also a wonderful way to impress friends or family without the stress of a lengthy cooking process. Plus, it’s easily adaptable for vegetarians, allowing everyone to enjoy that crunchy goodness. Ready to transform your dinner routine? Let’s dive into this flavorful recipe that promises both comfort and convenience!

Why is this chow mein so special?

Quick Preparation: In less than 15 minutes, you can serve up a restaurant-quality dish from the comfort of your home.

Crispy Texture: Enjoy the delightful crunch of perfectly pan-fried noodles that hold their shape and flavor.

Savory Depth: A harmonious blend of dark soy, oyster sauce, and sesame oil brings out rich, umami flavors, keeping every bite exciting.

Pantry-Friendly: This dish uses ingredients found in most pantries, making it a go-to meal for those busy evenings.

Customizable: Easily adapt the recipe with your favorite veggies or proteins, transforming it to suit any dietary needs.

Crowd-Pleasing: Whether for family dinners or a casual gathering, this chow mein is guaranteed to impress and satisfy everyone at the table.

Cantonese Chow Mein Ingredients

For the Noodles
Chow Mein Egg Noodles – Thin fresh noodles provide the basis for the dish’s texture; Hong Kong-style noodles work best.

For the Vegetables
Yellow Onion – Adds sweetness and depth; substitute with shallots for a milder flavor.
Green Onions – Use both the white and green parts for enhanced flavor and color; chives are a suitable alternative.
Bean Sprouts – Provide crunch and freshness; consider using shredded carrots or bell peppers if you prefer.

For Cooking
Corn Oil – Ideal for cooking due to its neutral flavor; can be swapped with vegetable or canola oil.
Sesame Oil – A little goes a long way, adding a nutty finish; use sparingly for flavor enhancement.

For the Sauce
Dark Soy Sauce – Delivers robust color and flavor; opt for regular soy sauce for a lighter touch.
Regular Soy Sauce – Balances flavors without overwhelming saltiness; tamari is a great gluten-free replacement.
Oyster Sauce – Adds depth and umami; switch to mushroom sauce for a vegetarian option.
Fish Sauce – Gives a savory, complex element; omit for a vegetarian version.
Granulated Sugar – Balances the savory notes; any sweetener can be used as a replacement.
Water – Adjusts sauce consistency when mixed.

Enjoy creating this quick and flavorful Cantonese Chow Mein that brings a taste of takeout to your home dining experience!

Step‑by‑Step Instructions for Crispy Cantonese Chow Mein

Step 1: Prepare Noodles
Begin by boiling water in a large pot. Once it reaches a rolling boil, add the chow mein egg noodles and soak for 30 seconds until softened. Carefully drain the noodles in a colander and allow them to steam for a minute to remove excess moisture, ensuring they’re ready for that perfect crisp later on.

Step 2: Make Sauce
In a mixing bowl, combine the dark soy sauce, regular soy sauce, oyster sauce, fish sauce, granulated sugar, and water. Whisk the ingredients together until the sugar fully dissolves. This sauce will add a savory depth to your crispy Cantonese chow mein, so set it aside while you prepare the other ingredients.

Step 3: Cook Aromatics
Heat a tablespoon of corn oil in a large wok over medium-high heat until shimmering. Add the chopped yellow onion and the white parts of the green onions, sautéing for about 1 minute until they become fragrant and slightly translucent. Once cooked, transfer the aromatics to a plate, leaving the flavorful oil in the wok for the next step.

Step 4: Pan-Fry Noodles
Return the wok to high heat and add enough corn oil to coat the bottom. Spread the soaked chow mein noodles evenly in the hot oil, letting them sit without stirring for about 2 minutes. This helps the bottom crisp up beautifully. After 2 minutes, carefully flip the noodles, adding a bit more oil if needed, and crisp the other side for an additional 2 minutes.

Step 5: Combine
Reduce the heat to medium, then add the sautéed onions, green onions, and bean sprouts to the crispy noodles in the wok. Pour the prepared sauce over the mixture and gently toss everything together for about 1-2 minutes, ensuring the noodles are heated through and evenly coated with the delicious flavors of the Cantonese chow mein sauce.

Step 6: Serve
Once combined and hot, remove the wok from heat. Drizzle a small amount of sesame oil over the chow mein and toss to integrate the nutty flavor. Plate your crispy Cantonese chow mein immediately, allowing the enticing aromas to captivate you and your guests as you serve this flavorful meal hard to resist!

Storage Tips for Cantonese Chow Mein

Fridge: Store leftover Cantonese chow mein in an airtight container for up to 3 days. This keeps the flavors intact while preventing the noodles from drying out.

Freezer: If you want to keep it longer, freeze in a freezer-safe container for up to 1 month. Thaw in the refrigerator overnight before reheating.

Reheating: Reheat in a hot wok or with a bit of water in the microwave to revive the noodles’ texture. Stir well to ensure even heating.

Airtight Storage: For the best results, always use an airtight container to maintain freshness and prevent odors from mingling with other foods.

Helpful Tricks for Cantonese Chow Mein

  • Hot Oil is Key: Ensure your oil is very hot before adding the noodles to achieve that signature crispiness that makes Cantonese chow mein irresistible.

  • Avoid Overcrowding: Do not overcrowd the wok while pan-frying. Work in batches if necessary to ensure even cooking and crispy noodles.

  • Proper Sauce Mixing: Mix the sauce thoroughly until the sugar is completely dissolved before pouring it over the noodles to maximize flavor distribution in your chow mein.

  • Tweak to Taste: Adjust seasoning after combining. A little extra soy sauce or salt can enhance the overall flavor of your Cantonese chow mein, making it just right for your palate.

  • Fresh Additions: Feel free to add fresh vegetables or protein to the stir-fry—this not only boosts nutrition but makes each dish uniquely yours!

What to Serve with Quick and Crispy Cantonese Chow Mein

Elevate your meal experience by pairing this satisfyingly crispy chow mein with delightful side dishes and drinks that complement its bold flavors.

  • Spring Rolls:
    Crispy, vegetable-stuffed spring rolls add a crunchy contrast and are perfect for dipping in sweet and sour sauce.

  • Steamed Dumplings:
    Soft, savory dumplings filled with pork or vegetables create a comforting combination, enhancing the overall dining experience with their unique flavors.

  • Hot and Sour Soup:
    This flavorful soup offers a delightful burst of spice and tang that perfectly balances the sweet and savory notes of the chow mein.

  • Sesame Broccoli:
    Tossed in a light sesame dressing, this vibrant and slightly crunchy side dish adds a fresh, nutritious element, enhancing both texture and healthiness.

  • Teriyaki Tofu Skewers:
    Marinated tofu skewers grilled to perfection will provide a satisfying protein addition, ensuring that every plate is bursting with color and flavor.

  • Green Tea:
    A warm cup of green tea refreshes the palate, marrying well with the meal’s bold flavors while promoting relaxation after a hearty dish.

  • Lemon Sorbet:
    For dessert, a light lemon sorbet cleanses the palate, leaving a refreshing finish to your meal that rounds out the delightful dining experience.

Cantonese Chow Mein Variations & Substitutions

Get ready to put your own spin on this classic dish; the possibilities are endless!

  • Colorful Veggie Medley: Swap bean sprouts for a mix of bell peppers and zucchini to infuse a burst of color and flavor.

  • Protein-Packed Options: Add your choice of protein by incorporating diced tofu or chicken for a heartier meal. It’s a lovely way to elevate the dish!

  • Whole Wheat Noodles: For a healthier twist, choose whole wheat chow mein noodles, giving a nutty taste while maintaining a satisfying chewiness.

  • Gluten-Free Goodness: Opt for gluten-free noodles and tamari to make this chow mein accessible for those with dietary restrictions. It’s just as tasty with these alternatives!

  • Spice It Up: Kick the flavor up a notch by adding sliced jalapeños or crushed red pepper flakes for a vibrant heat that dances on your palate.

  • Asian Greens Addition: Consider tossing in some bok choy or spinach for added nutrition and a fresh, tender bite that complements the dish beautifully.

  • Crushed Peanuts: For a crunchy texture, sprinkle crushed peanuts on top before serving. They bring a satisfying crunch and an extra layer of flavor.

  • Sesame Flavors Galore: Try adding sesame seeds along with the sesame oil. This amplifies the delightful nuttiness and adds an attractive touch to your dish.

Feel free to explore any of these variations, and don’t hesitate to share your creations. And if you’re looking for more deliciousness, check out our Vegetarian Options, or dive into our quick tips for crafting a perfect stir-fry and Cooking Methods that ensure splendid results every time!

Make Ahead Options

These Cantonese Chow Mein are perfect for meal prep enthusiasts! You can prepare the sauce (mixing dark soy sauce, oyster sauce, fish sauce, sugar, and water) up to 3 days in advance, storing it in an airtight container in the refrigerator to maintain its vibrant flavors. Additionally, chop the onions and bean sprouts, sealing them in a separate container to keep them fresh until you’re ready to cook. When you’re set to serve, simply heat the wok, crisp up your noodles, and toss everything together with the sauce to create a delicious meal in minutes. This prep-ahead approach saves time and ensures that every bite is just as satisfying as when freshly made!

Cantonese Chow Mein Recipe FAQs

What type of noodles should I use for the best texture?
Absolutely! For an authentic Cantonese chow mein, I highly recommend using Hong Kong-style chow mein egg noodles. These thin, fresh noodles deliver the ideal texture and crispiness. If you can’t find them, you may use regular chow mein noodles or lo mein, but make sure they are not too thick.

How should I store leftover Cantonese chow mein?
To keep your delicious chow mein fresh, store it in an airtight container in the refrigerator for up to 3 days. This will lock in flavors while preventing the noodles from drying out. For reheating, simply toss it back into a hot wok or microwave with a splash of water to help revive the texture.

Can I freeze leftover chow mein?
Yes, you can absolutely freeze your Cantonese chow mein! Allow it to cool completely, then place it in a freezer-safe container. It will stay fresh for up to 1 month. When you’re ready to enjoy it again, simply thaw it overnight in the refrigerator and reheat in a non-stick skillet or microwave, adding a little water to ensure it warms evenly.

What if I have leftover sauce?
You can store leftover sauce separately in the fridge for up to a week. To use it later, just give it a good stir before adding it back into your stir-fries. This versatile sauce works well with a variety of dishes and is a fantastic way to elevate your meals!

Is there a vegetarian version of Cantonese chow mein?
Very much so! To make the dish vegetarian, simply omit the fish sauce and substitute oyster sauce with mushroom sauce. This way, you can still enjoy those rich, umami flavors without compromising your dietary choices. Additionally, feel free to load up on extra veggies or add tofu for protein.

How do I troubleshoot soggy noodles?
If your noodles turn out soggy, don’t fret! To prevent this, make sure to drain them well after boiling and let them steam for a minute to remove excess moisture. When frying, ensure your oil is hot enough before adding the noodles. If they’re overcooked, they can soak up moisture from the sauce—so it’s key to mix and serve them right away!

Cantonese Chow Mein

Crispy Cantonese Chow Mein in Under 15 Minutes!

Enjoy this quick and delicious Cantonese Chow Mein that's ready in under 15 minutes, perfect for busy evenings.
Prep Time 5 minutes
Cook Time 10 minutes
Total Time 15 minutes
Servings: 2 servings
Course: Dinner
Cuisine: Cantonese
Calories: 350

Ingredients
  

For the Noodles
  • 200 grams Chow Mein Egg Noodles Hong Kong-style noodles work best.
For the Vegetables
  • 1 medium Yellow Onion Substitute with shallots for a milder flavor.
  • 2 stalks Green Onions Use both white and green parts; chives are a suitable alternative.
  • 100 grams Bean Sprouts Can substitute with shredded carrots or bell peppers.
For Cooking
  • 3 tablespoons Corn Oil Can be swapped with vegetable or canola oil.
  • 1 teaspoon Sesame Oil Use sparingly for flavor enhancement.
For the Sauce
  • 2 tablespoons Dark Soy Sauce Opt for regular soy sauce for a lighter touch.
  • 1 tablespoon Regular Soy Sauce Tamari is a great gluten-free replacement.
  • 1 tablespoon Oyster Sauce Switch to mushroom sauce for a vegetarian option.
  • 1 teaspoon Fish Sauce Omit for a vegetarian version.
  • 1 teaspoon Granulated Sugar Any sweetener can be used as a replacement.
  • 3 tablespoons Water Adjust to sauce consistency.

Equipment

  • wok
  • Large pot
  • Mixing Bowl
  • Colander

Method
 

Step-by-Step Instructions for Crispy Cantonese Chow Mein
  1. Prepare Noodles: Boil water in a large pot, add the chow mein egg noodles, soak for 30 seconds, drain, and let steam for 1 minute.
  2. Make Sauce: Combine dark soy sauce, regular soy sauce, oyster sauce, fish sauce, granulated sugar, and water in a mixing bowl. Whisk until sugar dissolves.
  3. Cook Aromatics: Heat corn oil in a wok, sauté onions and green onions for about 1 minute until fragrant and translucent.
  4. Pan-Fry Noodles: Add more corn oil and spread soaked noodles in the hot oil, cooking without stirring for 2 minutes, then flip and cook another 2 minutes.
  5. Combine: Reduce heat to medium, add aromatics and bean sprouts to noodles, pour sauce over, and toss for 1-2 minutes until heated through.
  6. Serve: Remove from heat, drizzle with sesame oil, toss to combine, and plate immediately.

Nutrition

Serving: 1servingCalories: 350kcalCarbohydrates: 50gProtein: 12gFat: 14gSaturated Fat: 2gPolyunsaturated Fat: 6gMonounsaturated Fat: 4gCholesterol: 10mgSodium: 900mgPotassium: 300mgFiber: 2gSugar: 2gVitamin A: 10IUVitamin C: 15mgCalcium: 4mgIron: 10mg

Notes

For the best results, always let the oil heat properly before adding the noodles to achieve the desired crispiness.

Tried this recipe?

Let us know how it was!

Beef and Cheese Ravioli Casserole: Your New Comfort Food Hero

As I pulled out the casserole from the oven, the cheesy aroma wafted through the kitchen, instantly transforming it into my favorite gathering spot. This Decadent Beef and Cheese Ravioli Casserole is more than just a meal; it’s a warm hug after a long day—a quick weeknight dish that delivers all the comfort food vibes we crave. With layers of tender ground beef, gooey mozzarella, and luscious stuffed ravioli, it’s wonderfully customizable, allowing you to adjust ingredients based on dietary preferences. Whether you’re feeding a family or just treating yourself, this dish is as satisfying as it is simple to prepare. Ready to discover how to whip up this million-dollar delight in your own kitchen? Let’s dive in!

Why Is This Casserole a Must-Try?

Comforting Appeal: This Decadent Beef and Cheese Ravioli Casserole is the ultimate crowd-pleaser, perfect for families and gatherings.
Easy to Customize: With simple swaps like ground turkey or veggies, it’s adaptable to various dietary needs.
Hearty Flavor: Each bite bursts with savory beef, melted cheese, and tender ravioli, satisfying even the pickiest eaters.
Time-Saving Delight: Prepare it in under an hour, making it an ideal quick weeknight meal.
Meal Prep Friendly: Make it ahead of time and enjoy it throughout the week or freeze for later—who doesn’t love a comforting dinner ready to go?
Pair it with a fresh side salad or crusty garlic bread for a complete, delicious experience!

Beef and Cheese Ravioli Casserole Ingredients

For the Meat Sauce
Ground Beef – Main protein source that provides richness and depth; substitute with ground turkey or plant-based meat for lighter or vegetarian options.
Onion – Enhances flavor by forming the base of your meat sauce; can be replaced with shallots for a milder taste.
Garlic – Adds aromatic flavor, ensuring a savory dish; use garlic powder if fresh isn’t available.
Marinara Sauce – Forms the flavor foundation of the casserole; store-bought is convenient, but homemade options can add a depth of flavor.

For the Casserole
Cheese-Filled Ravioli – The key carbohydrate component that enriches both texture and flavor; use gluten-free ravioli if necessary.
Mozzarella Cheese – Delivers meltiness and a gooey top layer; substitute with cheddar or Gouda for a different taste experience.
Parmesan Cheese – Adds a salty depth to the dish; can replace with Pecorino Romano for a change in flavor.
Salt and Pepper – Essential for seasoning; adjust according to your taste preferences.

Feel free to mix and match these ingredients to create your perfect Beef and Cheese Ravioli Casserole!

Step‑by‑Step Instructions for Beef and Cheese Ravioli Casserole

Step 1: Preheat the Oven
Begin by preheating your oven to 375°F (190°C). This essential step ensures that your Beef and Cheese Ravioli Casserole bakes evenly and develops a beautiful golden crust. While the oven heats, gather your ingredients so that everything is within reach when you’re ready to assemble.

Step 2: Cook the Beef
In a large skillet over medium heat, add ground beef and cook until it’s browned, about 5-7 minutes. Break up any clumps with a spatula to ensure even cooking. Once browned, you’ll want to add diced onion and minced garlic. Sauté for another 3-4 minutes, until the onion is softened and translucent, releasing a delightful aroma.

Step 3: Add the Marinara Sauce
Once the beef mixture is aromatic and well-cooked, pour in your marinara sauce. Stir to combine thoroughly and let the mixture simmer for about 5 minutes. This allows the flavors to meld beautifully, creating the savory base essential for your Beef and Cheese Ravioli Casserole.

Step 4: Prepare the Ravioli
While the meat sauce simmers, bring a pot of salted water to a boil. Cook the cheese-filled ravioli according to package instructions, typically for 4-5 minutes, until they are tender but still firm. Drain the ravioli and set them aside; they’ll soak up the delicious flavors of the casserole.

Step 5: Layer the Casserole
In a greased casserole dish, start layering by spreading a portion of the beef and marinara mixture at the bottom. Then, add a layer of cooked ravioli, followed by a generous sprinkle of mozzarella and Parmesan cheese. Continue to layer these components until all ingredients have been used, finishing with a layer of cheese on top.

Step 6: Season and Bake
Before baking, season the top layer with a sprinkle of salt and pepper. Cover the casserole dish with aluminum foil to prevent excessive browning. Place it in the preheated oven and bake for 20 minutes. This allows the flavors to meld and the cheese to start melting.

Step 7: Uncover and Finish Baking
After 20 minutes, carefully remove the foil and return the casserole to the oven. Bake for an additional 10 minutes until the top is bubbly and golden brown. Keep an eye on it, as the visual cue of melted cheese and crisp edges will indicate that your Beef and Cheese Ravioli Casserole is ready to enjoy.

Step 8: Cool and Garnish
Once baked to perfection, allow the casserole to cool for about 5-10 minutes. This step helps the layers stabilize, making it easier to serve. For an added touch of freshness and flavor, garnish with chopped fresh basil before serving, enhancing the comforting appeal of your Beef and Cheese Ravioli Casserole.

Make Ahead Options

These Decadent Beef and Cheese Ravioli Casserole options are perfect for those busy weeknights! You can assemble the entire casserole up to 24 hours in advance and simply store it in the refrigerator, tightly covered. This allows the flavors to meld beautifully, making it even tastier when baked. If you need to prep it further in advance, consider freezing the casserole for up to 3 months; just ensure it cools completely before wrapping it tightly in plastic wrap and aluminum foil. To maintain quality, avoid overcooking the ravioli initially, as they’ll continue to soften while baking. When you’re ready to serve, simply bake from chilled for about 30-40 minutes, or if frozen, allow it to thaw overnight in the fridge before baking. Enjoy the convenience of a comforting meal ready to go!

Expert Tips for Beef and Cheese Ravioli Casserole

  • Avoid Overcooked Ravioli: Ensure to cook the ravioli just until tender. Overcooking can lead to mushy pasta after baking in the casserole.
  • Layer Wisely: Start with a layer of meat sauce at the bottom to prevent the noodles from sticking. This ensures an easy serving experience.
  • Bring to Room Temp: If you prepared the casserole in advance, let it sit at room temperature for 30 minutes before baking for even cooking.
  • Customize Spices: Feel free to add oregano, basil, or red pepper flakes to the meat sauce for a personalized kick! Don’t hesitate to explore your flavor preferences.
  • Cheese Variations: Experiment with different cheese combinations to discover new flavors in your Beef and Cheese Ravioli Casserole; a blend of mozzarella and cheddar can work wonders!
  • Check for Doneness: Keep an eye on your casserole during the final few minutes. You want it bubbly and golden, but not burnt. Enjoy the delicious aromas filling your kitchen!

What to Serve with Decadent Beef and Cheese Ravioli Casserole

Prepare to elevate your dining experience with these delightful accompaniments that enhance the heartwarming flavors of your casserole.

  • Garlic Bread: This classic side offers a crunchy contrast to the creamy casserole, perfect for sopping up any delicious sauce left behind. Imagine the aroma of freshly baked bread mingling with the casserole’s cheesy scent—absolutely irresistible!

  • Caesar Salad: Crisp romaine with tangy Caesar dressing provides a refreshing counterbalance to the rich casserole. The crunch of croutons and tang of Parmesan cheese will invigorate each bite of pasta.

  • Roasted Vegetables: A medley of roasted seasonal veggies adds vibrant colors and earthy flavors, turning your meal into a balanced feast. Think of tender bell peppers and zucchini drizzled with olive oil—pure culinary harmony!

  • Steamed Broccoli: Lightly steamed broccoli not only enhances your plate’s presentation but also adds a nutritious and vibrant touch. Its mild flavor won’t compete, making it the ideal partner for the bold casserole.

  • Red Wine: A robust red wine, like a Chianti or Cabernet Sauvignon, complements the savory beef and cheese beautifully, heightening the flavors of your meal. Picture a warm glass as you gather around the table—what could be more inviting?

  • Tiramisu: Finish with a decadent dessert like tiramisu, which offers a light, coffee-flavored finish after a hearty meal. The layers of cream and cocoa beautifully close out your comforting dinner experience.

Beef and Cheese Ravioli Casserole: Variations Galore!

Feel free to express your culinary creativity and customize this delightful casserole to suit your taste and dietary needs.

  • Ground Turkey: Swap ground beef for ground turkey to lighten the dish while maintaining richness.

  • Vegetarian Option: Use plant-based meat alternatives or mushrooms for a hearty, vegetarian twist that’s still satisfying.

  • Assorted Cheeses: Mix in different cheeses like pepper jack for a spicy kick or gouda for a smoky flavor explosion. The melting cheese is pure bliss!

  • Veggie Boost: Add vibrant veggies such as bell peppers, zucchini, or spinach to load up the casserole with nutrition and color.

  • Herb Infusion: Sprinkle fresh or dried herbs like basil or oregano into the beef mixture for layers of aromatic flavors that brighten each bite.

  • Gluten-Free Twist: Opt for gluten-free ravioli to cater to gluten-sensitive family members without sacrificing on flavor.

  • Creamy Addition: For a creamier casserole, mix in a dollop of ricotta cheese between the layers for added richness and texture.

  • Heat Up: For those who enjoy a bit of spice, add red pepper flakes or diced jalapeños to the meat sauce for that extra zing.

Each of these variations can enhance the flavors and textures of your Beef and Cheese Ravioli Casserole, making it a delightful and adaptable recipe. As always, feel free to pair this comforting dish with a fresh side salad or some crusty garlic bread for a complete and satisfying meal!

How to Store and Freeze Beef and Cheese Ravioli Casserole

Fridge: Store leftovers in an airtight container for up to 3 days. To keep the flavors intact, ensure it’s properly covered to avoid drying out.

Freezer: This casserole freezes beautifully! Cool completely, then portion into airtight containers and freeze for up to 3 months. Label with the date for easy tracking.

Reheating: Thaw overnight in the fridge for best results. Reheat in a preheated oven at 350°F (175°C) for about 25-30 minutes, or until heated through and bubbly.

Make-Ahead Tip: Assemble the Beef and Cheese Ravioli Casserole up to 24 hours in advance and refrigerate before baking. A perfect solution for busy nights!

Beef and Cheese Ravioli Casserole Recipe FAQs

What is the best way to choose fresh ravioli?
When selecting fresh ravioli, look for packages that have plump and intact pasta. Check the expiration date and avoid any that seem squished or have dark spots, as these may indicate spoilage. If possible, choose ravioli from reputable brands or local shops known for quality. Fresh ravioli should have a nice, firm texture that feels slightly springy when pressed.

How do I store leftovers of the Beef and Cheese Ravioli Casserole?
Absolutely! Store leftovers in an airtight container in the fridge for up to 3 days. To prevent the casserole from drying out, cover it tightly. When reheating, you can add a splash of marinara sauce to help retain moisture.

Can I freeze the Beef and Cheese Ravioli Casserole?
Yes, this casserole freezes wonderfully! Allow it to cool completely before portioning it into airtight containers. Freeze it for up to 3 months. When you’re ready to enjoy, thaw it overnight in the fridge and reheat in a preheated oven at 350°F (175°C) for 25-30 minutes until heated through and bubbly.

What should I do if my casserole is too watery?
If you find that your casserole is too watery, there are a couple of tricks to manage it. First, ensure you cook the beef enough to reduce excess moisture. If you’ve already baked it, allow it to sit uncovered for a few minutes after taking it out of the oven, which can help evaporate some of the liquid. You can also mix in a spoonful of more cheese to absorb some moisture and enhance the flavor!

Are there any dietary considerations I should be aware of when making this casserole?
Definitely! For those with gluten intolerance, opt for gluten-free ravioli to enjoy this comforting dish without worry. Additionally, if there are dairy allergies, you could substitute non-dairy cheese options. This casserole is also easily adaptable for those who follow a lower-fat diet by replacing ground beef with ground turkey or plant-based alternatives. Always check all ingredient labels to ensure they meet your dietary needs.

Beef and Cheese Ravioli Casserole

Beef and Cheese Ravioli Casserole: Your New Comfort Food Hero

This Beef and Cheese Ravioli Casserole is a warm hug after a long day, delivering all the comfort food vibes we crave.
Prep Time 15 minutes
Cook Time 35 minutes
Cooling Time 10 minutes
Total Time 1 hour
Servings: 6 servings
Course: Casserole
Cuisine: Italian
Calories: 450

Ingredients
  

Meat Sauce
  • 1 lb Ground Beef Can substitute with ground turkey or plant-based meat.
  • 1 medium Onion Can replace with shallots for a milder taste.
  • 2 cloves Garlic Use garlic powder if fresh isn’t available.
  • 24 oz Marinara Sauce Store-bought or homemade.
Casserole
  • 2 cups Cheese-Filled Ravioli Use gluten-free ravioli if necessary.
  • 2 cups Mozzarella Cheese Can substitute with cheddar or Gouda.
  • 1 cup Parmesan Cheese Can replace with Pecorino Romano.
  • to taste Salt
  • to taste Pepper

Equipment

  • Large skillet
  • casserole dish
  • Pot
  • spatula

Method
 

Steps
  1. Preheat your oven to 375°F (190°C). Gather your ingredients.
    Beef and Cheese Ravioli Casserole
  2. In a large skillet over medium heat, cook ground beef until browned, about 5-7 minutes. Add diced onion and minced garlic, and sauté for another 3-4 minutes.
    Beef and Cheese Ravioli Casserole
  3. Pour in the marinara sauce and stir. Let simmer for about 5 minutes.
    Beef and Cheese Ravioli Casserole
  4. Cook cheese-filled ravioli according to package instructions, typically for 4-5 minutes. Drain and set aside.
    Beef and Cheese Ravioli Casserole
  5. In a greased casserole dish, layer beef mixture, ravioli, mozzarella, and parmesan. Repeat layers.
    Beef and Cheese Ravioli Casserole
  6. Season top layer with salt and pepper. Cover with foil and bake for 20 minutes.
    Beef and Cheese Ravioli Casserole
  7. Remove foil and bake for an additional 10 minutes until bubbly and golden brown.
    Beef and Cheese Ravioli Casserole
  8. Allow to cool for 5-10 minutes before serving. Garnish with chopped fresh basil.
    Beef and Cheese Ravioli Casserole

Nutrition

Serving: 1servingCalories: 450kcalCarbohydrates: 30gProtein: 25gFat: 20gSaturated Fat: 10gPolyunsaturated Fat: 1gMonounsaturated Fat: 2gCholesterol: 80mgSodium: 900mgPotassium: 600mgFiber: 3gSugar: 5gVitamin A: 200IUVitamin C: 2mgCalcium: 350mgIron: 3mg

Notes

Customize with different meats and cheeses to suit your taste preferences. Perfect for meal prep!

Tried this recipe?

Let us know how it was!

Loaded Cheeseburger Alfredo Pasta: Your New Favorite Comfort Meal

As I stirred the creamy delight in the skillet, a wave of nostalgia hit me—the kind that transports you back to endless summer nights, indulgent burgers, and carefree laughter. This Loaded Cheeseburger Alfredo Pasta takes all those cherished flavors and folds them into a single, heartwarming dish that’s ready in just 30 minutes. Whether you’re seeking a quick dinner option or an indulgent comfort food fix, this cheesy pasta dish marries the beloved cheeseburger experience with velvety, rich sauce and tender pasta. With rich ground beef and crispy bacon making an appearance, it’s a meal the whole family will crave again and again. Are you ready to whip up some nostalgia in the kitchen?

Why is Loaded Cheeseburger Alfredo Pasta a Must-Try?

Indulgent Comfort Food: This dish marries your favorite cheeseburger flavors with creamy, cheesy pasta, making it an irresistible indulgence.
Quick and Easy: Whip this up in just 30 minutes—perfect for busy weeknights or when fatigue hits, and you need an effortless meal.
Crowd-Pleasing Flavor: The combination of rich ground beef, melted cheese, and crispy bacon is sure to impress everyone at the table.
Versatility: Customize it for your taste—add veggies for a nutritious boost or switch up the cheese for a unique twist. It’s like having a delicious cheeseburger in pasta form!
Mouthwatering Experience: Each bite bursts with flavor, creating a creamy texture that feels luxurious yet comforting, just like a diner favorite. Pair it with a side salad or some garlic bread for a complete dinner experience. Whether paired with Cajun Steak Alfredo or Cajun Sausage Pasta, it’s a meal that will become a staple in your kitchen!

Loaded Cheeseburger Alfredo Pasta Ingredients

For the Pasta
Pasta (penne, rotini, or elbow macaroni) – Acts as the dish’s base, ensuring it holds the creamy sauce well.

For the Meat
Ground Beef – Provides protein and a meaty flavor base; use half lean and half fatty for extra juiciness.
Salt – Enhances flavor; adjust to taste based on dietary requirements.
Black Pepper – Adds a mild heat; freshly ground is preferred for more flavor.
Garlic Powder – Contributes savory depth; fresh minced garlic can be substituted but may alter texture.
Onion Powder – Adds sweetness and aroma; fresh worked onions can also be used.

For the Sauce
Heavy Cream – Provides richness and creaminess; can be substituted with half-and-half for a lighter version.
Beef Broth – Adds depth and richness; vegetable broth can be used for a lighter flavor.
Shredded Cheddar Cheese – The primary cheese giving that iconic cheeseburger flavor; other options include mozzarella or gouda.
Grated Parmesan Cheese – Adds sharpness and enhances creaminess; queso fresco could be an alternative.
Worcestershire Sauce – Adds umami and depth; soy sauce can be used in its absence.
Dijon Mustard – Provides tang and brightness; yellow mustard works as a substitute.
Smoked Paprika – Offers a warm, smoky flavor; paprika can replace it, though without the smokiness.
Red Pepper Flakes (optional) – Adds heat; omit for a milder dish or add diced jalapeños for more spice.
Butter – Enhances rich flavor and helps in sauce creation; use olive oil for a different flair.

For Garnish
Chopped Pickles – Provides crunch and acidity, echoing cheeseburger toppings.
Crispy Bacon Bits – Adds texture and smoky flavor; cook bacon until crispy for best results.
Fresh Parsley – Adds color and freshness; replace with fresh chives for a different herbaceous note.

With this Loaded Cheeseburger Alfredo Pasta ingredients list, you’re just moments away from creating a comforting meal that will make your taste buds sing!

Step‑by‑Step Instructions for Loaded Cheeseburger Alfredo Pasta

Step 1: Cook the Pasta
Begin by boiling a large pot of water over high heat. Add a generous pinch of salt before tossing in your pasta of choice—penne, rotini, or elbow macaroni. Cook according to package instructions until al dente, typically about 8-10 minutes. Once done, drain the pasta in a colander and set aside, allowing the steam to escape while you prepare the loaded cheeseburger alfredo sauce.

Step 2: Brown the Ground Beef
In a large skillet over medium heat, add the ground beef. Season generously with salt, black pepper, garlic powder, and onion powder. Use a spatula to break the beef into smaller pieces while it cooks, about 5-7 minutes, until it’s browned and cooked through. Be sure to drain any excess fat before moving to the next step for a lighter sauce.

Step 3: Create the Sauce Base
With the cooked ground beef still in the skillet, lower the heat to medium-low. Add the butter, heavy cream, and beef broth, stirring well to combine. Incorporate Worcestershire sauce, Dijon mustard, smoked paprika, and optional red pepper flakes, creating a rich and flavorful base. Simmer for about 2-3 minutes, allowing the ingredients to meld and the sauce to start thickening slightly.

Step 4: Add the Cheeses
Gradually mix in the shredded cheddar and grated Parmesan cheese, stirring continuously to ensure they melt evenly. This step is crucial for achieving a smooth, creamy texture in your loaded cheeseburger alfredo. Cook on low heat for another 2-3 minutes until the cheeses are fully melted and incorporated, transforming your sauce into a delicious, cheesy delight.

Step 5: Combine Pasta and Sauce
Gently fold the cooked pasta into the cheesy sauce, making sure each piece is well-coated. Allow the mixture to simmer for an additional 2-3 minutes over low heat, so the pasta absorbs some of the flavors while heating through. The result will be a luxurious loaded cheeseburger alfredo pasta that teases your taste buds.

Step 6: Garnish and Serve
Once fully combined, remove the skillet from heat and transfer the loaded cheeseburger alfredo pasta to a serving bowl or individual plates. Top generously with chopped pickles, crispy bacon bits, and a sprinkle of fresh parsley for an added pop of color. Serve hot and dig into this comforting, indulgent meal that’s sure to become a family favorite!

Storage Tips for Loaded Cheeseburger Alfredo Pasta

Fridge: Store leftovers in an airtight container in the refrigerator for up to 3 days. Reheating slowly over low heat will help maintain the creamy texture.

Freezer: For longer storage, freeze the loaded cheeseburger alfredo pasta in a freezer-safe container for up to 2 months. Thaw in the fridge overnight before reheating.

Reheating: When ready to enjoy again, reheat on the stovetop over low heat, adding a splash of milk or cream to restore the saucy consistency.

Wrapping: If portioning for meal prep, consider individual servings wrapped tightly for easy access during busy weeknights!

Expert Tips for Loaded Cheeseburger Alfredo Pasta

  • Perfectly Browned Beef: Ensure the ground beef is well-browned for optimal flavor; avoid overcrowding the pan to achieve a nice sear.
  • Cheese Addition: Gradually add cheese off the heat to prevent clumping, resulting in a smooth, creamy Loaded Cheeseburger Alfredo Pasta.
  • Pasta Cooking Time: Cook the pasta just until al dente; it will continue to cook when mixed into the sauce, preventing mushiness.
  • Sauce Consistency: If the sauce thickens too much after cooking, add a splash of beef broth or cream to maintain a creamy texture.
  • Garnish Ideas: Experiment with different garnishes like sliced jalapeños or your favorite burger toppings for a personalized touch on your dish.
  • Storage Tips: For leftovers, store in an airtight container and heat slowly with a splash of milk or cream to restore creaminess.

Loaded Cheeseburger Alfredo Pasta Variations

Feel free to play with flavors and textures in your Loaded Cheeseburger Alfredo Pasta to make it uniquely yours!

  • Vegetarian: Replace ground beef with plant-based meat alternatives or sautéed mushrooms for a satisfying meatless version. This swap keeps the dish hearty while catering to vegetarian preferences.

  • Spicy: Add an extra kick by increasing the red pepper flakes or incorporating diced jalapeños. If you love heat, this variation will surely excite your taste buds!

  • Different Cheese: Substitute cheddar with mozzarella or gouda for a unique flavor twist. Each cheese offers a different creamy richness that can keep things interesting.

  • Add Veggies: Toss in sautéed bell peppers, spinach, or even zucchini for added nutrition and color. Not only will you enhance the meal’s visual appeal, but you’ll also bring in some healthy goodness!

  • Creamy Mushroom: Mix in sautéed mushrooms for an earthy flavor boost alongside the creamy sauce. It’s a delightful option that elevates the dish without overpowering it.

  • BBQ Twist: Drizzle some BBQ sauce into the sauce mixture for a tangy and sweet depth. It’s a fun way to combine the classic cheeseburger taste with a smoky BBQ element!

  • Gluten-Free: Use gluten-free pasta options to accommodate dietary restrictions without sacrificing taste or texture. You can enjoy this dish even if you’re avoiding gluten!

  • Cheeseburger Toppings: Top with diced tomatoes, shredded lettuce, or even avocado for a fresh burger-inspired finish that adds a crunchy texture profile, bringing a taste of authenticity to your pasta!

Whichever variation you choose, you can’t go wrong with this comforting dish that feels like a warm hug on a plate. For more comforting ideas, consider trying the delightful Cheeseburger Soup or a creamy twist with Marry Me Shrimp Pasta.

Make Ahead Options

These Loaded Cheeseburger Alfredo Pasta are a fantastic choice for meal prep, allowing you to enjoy a comforting dish on busy nights without the hassle of last-minute cooking! You can prepare the sauce up to 3 days in advance—just cook and combine all sauce ingredients, cool, and refrigerate in an airtight container. The pasta can also be cooked ahead and kept in the fridge for up to 24 hours. When you’re ready to serve, simply reheat the sauce gently on the stove, adding a splash of cream or broth for creaminess, and toss in the cooked pasta until warmed through. This way, you’ll have a delicious meal ready to enjoy with minimal effort!

What to Serve with Loaded Cheeseburger Alfredo Pasta

Elevate your cozy dinner experience with delightful sides and drinks that perfectly complement this creamy comfort dish.

  • Garlic Bread: The buttery, toasted slices bring a crunchy exterior and soft, warm center, perfect for soaking up that rich Alfredo sauce.
  • Caesar Salad: Crisp romaine and tangy dressing add freshness to balance the creaminess, while the crunchy croutons add delightful texture.
  • Steamed Broccoli: This vibrant vegetable brings a pop of color and nutrition, offering a gentle crunch alongside the indulgent pasta.
  • Sweet Potato Fries: Sweet, crispy, and slightly salty, these offer a comforting complement that echoes the flavors of a classic cheeseburger!
  • Coleslaw: Creamy, tangy slaw provides a refreshing contrast that cuts through the richness of the Alfredo, making each bite a pleasure.

For drinks, consider a chilled lemonade or an ice-cold beer to wash it all down, making your meal feel like a casual weekend gathering at a beloved diner. Enjoy!

Loaded Cheeseburger Alfredo Pasta Recipe FAQs

What type of ground beef should I use for Loaded Cheeseburger Alfredo Pasta?
Absolutely! For the best flavor and juiciness, I recommend using a mixture of half lean and half fatty ground beef. This combination provides the perfect balance, ensuring your dish is rich and satisfying while still being easy to cook.

How should I store leftovers of Loaded Cheeseburger Alfredo Pasta?
For optimal freshness, store your leftovers in an airtight container in the refrigerator for up to 3 days. It’s best to reheat slowly over low heat to maintain the creamy texture. Simply add a splash of milk or cream as you warm it up to restore that luscious sauce.

Can I freeze Loaded Cheeseburger Alfredo Pasta?
Absolutely! You can freeze the Loaded Cheeseburger Alfredo Pasta in a freezer-safe container for up to 2 months. Make sure to let it cool completely before sealing. When you’re ready to enjoy it again, thaw it in the fridge overnight and then reheat it on the stovetop, adding a little milk or cream to bring back that creamy goodness!

What if my sauce is too thick when making Loaded Cheeseburger Alfredo Pasta?
If you find your sauce has become too thick while cooking, don’t worry! Simply add a splash of beef broth or cream to loosen it up, stirring gently until you achieve your desired consistency. This should help you get that smooth, velvety sauce that perfectly coats the pasta.

Are there any dietary considerations for Loaded Cheeseburger Alfredo Pasta?
Yes, certainly! If you have dietary restrictions, consider using plant-based alternatives for ground beef, such as mushrooms or a meat substitute. Additionally, those with dairy allergies can opt for lactose-free cream and cheese alternatives. Always check labels to ensure you’re accommodating any specific dietary needs or allergies!

Loaded Cheeseburger Alfredo Pasta

Loaded Cheeseburger Alfredo Pasta

Loaded Cheeseburger Alfredo Pasta combines creamy sauce with hearty flavors reminiscent of burgers, making it a perfect comfort meal.
Prep Time 10 minutes
Cook Time 20 minutes
Total Time 30 minutes
Servings: 4 servings
Course: Pasta
Cuisine: American
Calories: 680

Ingredients
  

For the Pasta
  • 12 oz Pasta (penne, rotini, or elbow macaroni) Acts as the dish's base, ensuring it holds the creamy sauce well.
For the Meat
  • 1 lb Ground Beef Use half lean and half fatty for extra juiciness.
  • 1 tsp Salt Enhances flavor; adjust to taste.
  • 1 tsp Black Pepper Preferably freshly ground.
  • 1 tsp Garlic Powder Savory depth; substitute fresh minced garlic if preferred.
  • 1 tsp Onion Powder Adds sweetness and aroma.
For the Sauce
  • 1 cup Heavy Cream Can be substituted with half-and-half.
  • 1 cup Beef Broth Vegetable broth can be used for a lighter flavor.
  • 1 cup Shredded Cheddar Cheese Primary cheese for cheeseburger flavor.
  • 1/2 cup Grated Parmesan Cheese Adds sharpness and enhances creaminess.
  • 1 tbsp Worcestershire Sauce Adds umami and depth.
  • 1 tbsp Dijon Mustard Provides tang; yellow mustard can substitute.
  • 1 tsp Smoked Paprika Offers a warm, smoky flavor.
  • 1/4 tsp Red Pepper Flakes (optional) Adds heat; omit for a milder dish.
  • 2 tbsp Butter Enhances flavor.
For Garnish
  • 1/2 cup Chopped Pickles Provides crunch and acidity.
  • 1 cup Crispy Bacon Bits Cook bacon until crispy.
  • 2 tbsp Fresh Parsley Adds color and freshness.

Equipment

  • Large pot
  • Large skillet
  • Colander
  • spatula

Method
 

Step-by-Step Instructions
  1. Begin by boiling a large pot of water over high heat. Add a pinch of salt and then add the pasta. Cook until al dente, about 8-10 minutes. Drain and set aside.
  2. In a large skillet over medium heat, add the ground beef. Season with salt, black pepper, garlic powder, and onion powder. Break the beef into smaller pieces while cooking, about 5-7 minutes.
  3. Lower the heat and add butter, heavy cream, and beef broth to the skillet. Stir and incorporate Worcestershire sauce, Dijon mustard, smoked paprika, and red pepper flakes. Simmer for 2-3 minutes.
  4. Gradually mix in shredded cheddar and grated Parmesan cheese, stirring continuously until they melt evenly, about 2-3 minutes.
  5. Gently fold the cooked pasta into the sauce, allowing it to simmer for an additional 2-3 minutes to absorb the flavors.
  6. Remove from heat and serve topped with chopped pickles, crispy bacon bits, and fresh parsley.

Nutrition

Serving: 1servingCalories: 680kcalCarbohydrates: 56gProtein: 36gFat: 40gSaturated Fat: 20gPolyunsaturated Fat: 2gMonounsaturated Fat: 10gTrans Fat: 1gCholesterol: 120mgSodium: 1200mgPotassium: 800mgFiber: 2gSugar: 8gVitamin A: 600IUVitamin C: 2mgCalcium: 400mgIron: 3mg

Notes

For optimal flavor, ensure ground beef is well-browned and avoid overcrowding the pan. Adjust cheese addition off the heat for best results.

Tried this recipe?

Let us know how it was!

Savory Ground Beef and Potatoes Casserole for Family Bliss

Just the other night, as I stirred a bubbling pot of rich beef and tender potatoes, I was transported back to family dinners filled with laughter and comfort. This Hearty Ground Beef and Potatoes Casserole takes me right back to those cozy moments, reminiscent of Sundays gathered around the table. Not only is this dish a true comfort food staple, but it also offers the convenience of a one-pan meal, making it perfect for busy weeknights. Plus, with simple swaps like ground turkey or plant-based crumbles, it caters to various dietary preferences too! Are you ready to create a masterpiece that warms the heart (and belly)? Let’s dive into this recipe!

Why is this casserole a family favorite?

Comforting, hearty meal: This Ground Beef and Potatoes Casserole is a warm embrace on chilly nights, bringing everyone together around the table.

Easy to customize: With options for ground turkey, chicken, or even plant-based crumbles, you can cater to any dietary preference.

One-pan wonder: A quick setup makes it perfect for busy weeknights; just assemble, bake, and enjoy!

Delicious leftovers: Great for make-ahead meals—store in the fridge for up to three days, then simply reheat and dive back into that savory goodness.

You might also enjoy serving it alongside a crisp green salad or roasted vegetables like broccoli for a balanced dinner. Why not try pairing it with the delightful Comfort Garlic Potatoes for an extra layer of flavor?

Ground Beef and Potatoes Casserole Ingredients

For the Casserole

  • Ground Beef – Provides protein and flavor; substitute with ground turkey, chicken, or plant-based crumbles for lighter options.
  • Russet or Yukon Gold Potatoes – Adds structure and creaminess; red potatoes can also be used for holding their shape well.
  • Yellow Onion – Enhances aroma and adds savory depth to the dish.
  • Garlic – Provides robust flavor; use fresh minced garlic for the best taste.
  • Shredded Cheddar Cheese – Offers a rich, melty topping; try Monterey Jack or Colby as alternatives.
  • Sour Cream – Adds creaminess and tang; cream cheese or heavy cream can serve as a good substitute.
  • Beef Broth – Adds moisture and enhances flavor; opt for vegetable broth if you’d like a vegetarian version.
  • Olive Oil – Used for sautéing; any neutral oil can also work.
  • Salt & Black Pepper – Essential for seasoning; adjust to taste based on preference.
  • Dried Thyme & Paprika – Adds depth of flavor; feel free to swap in your favorite herbs or spices.

For Topping

  • Additional Shredded Cheese – A must for that golden, bubbly finish; use whatever cheese you have on hand to top this Ground Beef and Potatoes Casserole!

Step‑by‑Step Instructions for Ground Beef and Potatoes Casserole

Step 1: Prepare Oven
Begin by preheating your oven to 375°F (190°C). This ensures your Ground Beef and Potatoes Casserole bakes evenly and develops a beautiful golden crust. While the oven heats up, gather your ingredients and get ready for the delicious journey ahead.

Step 2: Prepare Vegetables
Peel and dice about 4–5 medium Russet or Yukon Gold potatoes into uniform chunks for optimal cooking. Next, chop 1 medium yellow onion finely and mince 2 cloves of garlic. These fresh vegetables will layer in flavor throughout the casserole, creating a harmoniously rich profile.

Step 3: Sauté Aromatics
In a large skillet, heat 1 tablespoon of olive oil over medium heat. Once hot, add the chopped onion and garlic, sautéing them for about 3–4 minutes until they become soft and fragrant. You want the onions to become translucent but not browned, releasing their delightful aroma into the air.

Step 4: Brown the Beef
Add 1 pound of ground beef to the skillet, breaking it up with a wooden spoon. Season with salt, black pepper, a teaspoon of dried thyme, and a teaspoon of paprika. Cook for approximately 5–7 minutes, stirring frequently, until the beef is browned and fully cooked. Drain excess fat if needed to keep your casserole light and healthy.

Step 5: Simmer with Broth
Stir in 1 cup of beef broth into the skillet, scraping up any browned bits from the bottom. Allow the mixture to simmer for about 2–3 minutes, allowing flavors to meld beautifully. Once done, remove the skillet from heat and let it cool slightly. The savory aroma will have your family excited for dinner!

Step 6: Combine with Potatoes
In a large bowl, combine the diced potatoes with the beef mixture, 1 cup of sour cream, and half of the shredded cheddar cheese (about 1 cup). Gently fold everything together, ensuring the potatoes are well-coated. This rich mixture will become the heart of your Ground Beef and Potatoes Casserole.

Step 7: Layer in Baking Dish
Spread the combined mixture evenly into a greased 9×13 inch baking dish. Top it off with the remaining shredded cheddar cheese for that gooey, delicious topping. Make sure to cover the entire surface with cheese to get that irresistible melt.

Step 8: Bake Covered
Cover the baking dish tightly with aluminum foil and place it in the preheated oven. Bake for 30 minutes. This initial covered baking helps the flavors combine while ensuring the potatoes cook through to tender perfection.

Step 9: Finish Baking Uncovered
After 30 minutes, carefully remove the foil from the casserole. Continue baking for an additional 10-15 minutes until the cheese has melted and formed a bubbly, golden crust on top. Keep an eye on it to avoid burning the edges while achieving that lovely finish.

Step 10: Rest and Serve
Once baked, remove the Ground Beef and Potatoes Casserole from the oven and let it rest for 10 minutes before serving. This resting time allows the layers to settle. Your family will enjoy diving into this comforting meal, and you’ll savor the satisfying looks on their faces!

How to Store and Freeze Ground Beef and Potatoes Casserole

Fridge: Cool completely before refrigerating in an airtight container for up to 3 days. Make sure to cover it well to maintain flavor and moisture.

Freezer: Wrap tightly in plastic wrap or aluminum foil for freezing. It can last in the freezer for up to 3 months. Label it with the date for easy reference.

Reheating: When ready to enjoy leftovers, defrost overnight in the fridge. Reheat gently in the oven at 350°F (175°C) for about 20 minutes, adding a splash of broth to keep it creamy.

Meal Prep: Consider preparing a double batch to freeze one for later. This way, you’ll always have a hearty meal on hand when cravings for Ground Beef and Potatoes Casserole strike!

Make Ahead Options

These Ground Beef and Potatoes Casserole is perfect for meal prep, allowing you to enjoy stress-free weeknight dinners! You can prepare the entire casserole up to 24 hours in advance, simply assemble it and cover tightly with foil before refrigerating. To maintain optimal quality, be sure to store it in an airtight container if not baking right away. When you’re ready to enjoy, remove it from the fridge and bake it for 30 minutes covered, then uncover and bake for an additional 10-15 minutes until the cheese is bubbly and golden. This makes the casserole just as delicious as if it was freshly made, saving you valuable time without sacrificing taste!

Ground Beef and Potatoes Casserole Variations

Feel free to explore these delicious alternatives to make this comforting dish uniquely yours!

  • Ground Turkey: Swap in ground turkey for a lighter take, retaining the same savory flavors.

  • Plant-Based Crumbles: Use plant-based crumbles to create a vegetarian-friendly version that’s equally satisfying and hearty.

  • Different Potatoes: Red potatoes can be used instead of Russet or Yukon Gold for a firmer texture that holds its shape beautifully.

  • Vegetable Boost: Incorporate peas, carrots, or bell peppers to add a nutritious twist, making every bite colorful and wholesome.

  • Spice it Up: For those who crave heat, toss in cayenne pepper or chopped chili peppers to give your casserole a spicy kick; it’s sure to impress!

  • Cheese Variants: Mix it up by using Monterey Jack or Colby cheese instead of cheddar. Each brings a unique flavor that enhances the dish.

  • Creamy Alternatives: Replace sour cream with cream cheese or Greek yogurt for a creamy richness that feels indulgent yet fresh.

  • Flavorful Broth: Swap beef broth with vegetable broth for a rich, herbaceous flavor, ideal for a vegetarian twist without skimping on taste.

With these variations, you can transform the classic Ground Beef and Potatoes Casserole into a personalized family favorite every time. Whether you’re in the mood for a hearty Mongolian Ground Beef dish or a quick and savory meal like Sticky Beef Noodles, the possibilities are boundless!

What to Serve with Hearty Ground Beef and Potato Casserole

As you savor this comforting masterpiece, think of what delightful companions can elevate your meal to new heights.

  • Crisp Green Salad: A light salad of mixed greens with a tangy vinaigrette balances the richness of the casserole, offering a refreshing crunch.

  • Garlic Breadsticks: Soft, buttery breadsticks infused with garlic create the perfect vehicle for scooping up savory bites of casserole—great for sharing!

  • Roasted Brussels Sprouts: These caramelized gems add a delightful crunch and earthy flavor, perfectly complementing the cheesy, savory layers of your casserole.

  • Steamed Broccoli with Lemon: Brighten your plate with vibrant, tender broccoli, seasoned with a splash of lemon juice. Its freshness cuts through the dish’s richness beautifully.

  • Herb-Infused Quinoa: This fluffy, protein-packed side boasts a nutty flavor that pairs nicely with the robust casserole, adding a satisfying grain element.

  • Spicy Pickled Jalapeños: For those who enjoy a kick, serve these tangy slices alongside for an extra flavor burst that contrasts the creamy casserole beautifully.

  • Sweet Cornbread Muffins: Enjoy a slice of sweet cornbread, which pairs perfectly with the savory notes of the casserole, adding a warm, comforting touch to your meal.

  • Chilled White Wine: A crisp Chardonnay or Sauvignon Blanc offers the ideal refreshment, cleansing your palate between bites of the hearty dish.

  • Homemade Apple Crisp: End on a sweet note with warm apple crisp, its cinnamon-spiced goodness creating a comforting finish to a satisfying meal.

Tips for the Best Ground Beef and Potatoes Casserole

Even Dicing: Ensure that potato pieces are uniformly diced to guarantee they cook evenly and achieve that perfect tenderness.

Avoid Sogginess: Don’t overcook the ground beef; it should be just browned. Overcooking can lead to a soggier casserole texture.

Freezing Wisely: If you’re storing leftovers, wrap the casserole tightly to prevent freezer burn. Defrost overnight in the fridge before reheating for best results.

Flavor Boost: Feel free to incorporate additional spices or herbs like rosemary or oregano for a flavor twist in your Ground Beef and Potatoes Casserole.

Mix-in Veggies: For added nutrition and color, consider folding in veggies like peas or diced bell peppers into the mixture before layering.

Perfectly Bubbly: Keep an eye on the casserole in the last 10 minutes to achieve that golden, bubbly cheese topping without burning it!

Ground Beef and Potatoes Casserole Recipe FAQs

What type of potatoes should I use for the casserole?
Absolutely! Russet or Yukon Gold potatoes work best for this casserole due to their creaminess. However, if you prefer, you can use red potatoes, which hold their shape well during cooking and add a lovely color contrast.

How can I store leftovers?
For sure! Once your Ground Beef and Potatoes Casserole has cooled completely, transfer it to an airtight container. It will stay fresh in the refrigerator for up to 3 days. Make sure to cover it tightly to keep moisture in and flavors intact.

Can I freeze the casserole, and how do I do it?
Yes, you can! To freeze, first cool the casserole completely. Then, wrap it tightly in plastic wrap or aluminum foil, ensuring it’s sealed to prevent freezer burn. It can be stored in the freezer for up to 3 months. When you’re ready to enjoy it, defrost it overnight in the refrigerator before reheating.

What if I have dietary restrictions, can this casserole be adapted?
Indeed, this dish is quite versatile! If you have dietary restrictions, feel free to substitute ground beef with ground turkey, chicken, or even plant-based crumbles for a lighter option. You can also replace the sour cream with dairy-free alternatives or use gluten-free broth to suit your needs.

How do I prevent my casserole from being soggy?
Very good question! To avoid sogginess, make sure you don’t overcook your ground beef before adding it to the casserole. Cook it just until browned, about 5-7 minutes. Additionally, try to ensure the diced potatoes are of consistent size for even cooking, which helps maintain the casserole’s structure.

How do I know when my casserole is fully cooked?
Great inquiry! You can tell your Ground Beef and Potatoes Casserole is fully cooked when the cheese on top is melted and bubbly, which usually takes about 10-15 minutes after removing the foil. The casserole should be heated through, and you might even see some golden spots on the cheese topping. Let it cool for 10 minutes before serving for the best texture.

Ground Beef and Potatoes Casserole

Savory Ground Beef and Potatoes Casserole for Family Bliss

This Ground Beef and Potatoes Casserole is a comforting, one-pan meal perfect for busy weeknights.
Prep Time 20 minutes
Cook Time 45 minutes
Resting Time 10 minutes
Total Time 1 hour 15 minutes
Servings: 6 servings
Course: Casserole
Cuisine: American
Calories: 450

Ingredients
  

For the Casserole
  • 1 pound Ground Beef substitute with ground turkey, chicken, or plant-based crumbles
  • 4-5 medium Russet or Yukon Gold Potatoes peeled and diced
  • 1 medium Yellow Onion chopped finely
  • 2 cloves Garlic minced
  • 1 cup Shredded Cheddar Cheese try Monterey Jack or Colby as alternatives
  • 1 cup Sour Cream can be substituted with cream cheese or heavy cream
  • 1 cup Beef Broth vegetable broth can be used for a vegetarian version
  • 1 tablespoon Olive Oil for sautéing
  • to taste Salt & Black Pepper
  • 1 teaspoon Dried Thyme can swap in favorite herbs or spices
  • 1 teaspoon Paprika can swap in favorite herbs or spices
For Topping
  • 1 cup Additional Shredded Cheese use any cheese for topping

Equipment

  • Large skillet
  • 9x13 inch baking dish
  • Cutting board
  • Knife
  • Measuring cups
  • Measuring spoons
  • Aluminum foil

Method
 

Step‑by‑Step Instructions
  1. Preheat your oven to 375°F (190°C). Gather your ingredients.
    Ground Beef and Potatoes Casserole
  2. Peel and dice the potatoes. Chop the onion finely and mince the garlic.
    Ground Beef and Potatoes Casserole
  3. Heat olive oil in a skillet. Sauté onion and garlic until soft and fragrant.
    Ground Beef and Potatoes Casserole
  4. Add ground beef, season, and brown for 5-7 minutes.
    Ground Beef and Potatoes Casserole
  5. Stir in beef broth and simmer for 2-3 minutes.
    Ground Beef and Potatoes Casserole
  6. In a bowl, combine potatoes with beef mixture, sour cream, and half the cheddar cheese.
    Ground Beef and Potatoes Casserole
  7. Spread mixture in a greased baking dish and top with remaining cheese.
    Ground Beef and Potatoes Casserole
  8. Cover with foil and bake for 30 minutes.
    Ground Beef and Potatoes Casserole
  9. Remove foil and bake for an additional 10-15 minutes.
    Ground Beef and Potatoes Casserole
  10. Allow to rest for 10 minutes before serving.
    Ground Beef and Potatoes Casserole

Nutrition

Serving: 1servingCalories: 450kcalCarbohydrates: 45gProtein: 30gFat: 20gSaturated Fat: 10gPolyunsaturated Fat: 1gMonounsaturated Fat: 5gCholesterol: 80mgSodium: 600mgPotassium: 800mgFiber: 4gSugar: 2gVitamin A: 500IUVitamin C: 30mgCalcium: 250mgIron: 3mg

Notes

Ensure even dicing of potatoes for even cooking. Don’t overcook the ground beef to avoid sogginess.

Tried this recipe?

Let us know how it was!

Decadent Lobster Bucatini for Your Elegant Dinner Night

A delightful aroma wafts through the kitchen as I prepare my favorite dinner: Lobster Bucatini. The combination of tender lobster meat, perfectly al dente bucatini, and a rich garlic-butter sauce creates a gourmet experience that feels indulgent yet achievable. This luxurious pasta dish not only elevates any occasion but also serves as a warm embrace on a cozy weeknight. Trust me, the unique hollow shape of the bucatini is perfect for holding onto that luscious sauce, making each bite a heavenly experience. Whether you’re planning a romantic dinner or simply want to treat yourself, this recipe is a fabulous way to enjoy the freshness of seafood at home. Ready to create something unforgettable? Let’s dive into the delicious details!

Why is Lobster Bucatini a Must-Try?

Indulgence: This Lobster Bucatini is a luxurious treat that transforms any meal into a special occasion. Easy to Make: With simple steps, you’ll impress without stress, making it perfect for both novice and experienced chefs. Rich and Flavorful: The garlic-butter sauce envelopes the pasta and lobster, creating an unforgettable flavor experience. Perfectly Textured: The unique hollow shape of bucatini holds onto every drop of that decadent sauce, ensuring each bite is a delight! For more tips on perfecting your pasta game, check out my guide on Cooking with Pasta to elevate your culinary skills even further.

Lobster Bucatini Ingredients

Get ready for a seafood masterpiece!

For the Pasta
Bucatini – This thick pasta with a hollow center captures every bit of that delicious sauce.

For the Sauce
Cooked Lobster Meat – Adds a touch of sweetness and luxurious texture; ensure it’s patted dry if frozen to avoid excess moisture.
Unsalted Butter – Creates a rich, creamy base for the sauce; substitute with olive oil for a dairy-free option.
Olive Oil – Enhances flavor while helping to emulsify the sauce; feel free to use more butter if you prefer!
Garlic – Fresh garlic is a must for an aromatic punch; it elevates the dish beautifully.
Red Pepper Flakes – Add these for a spicy kick; omit if you prefer a milder taste.
Dry White Wine (e.g., Sauvignon Blanc) – Brings acidity and depth to the sauce; a perfect complement to the seafood.
Reserved Pasta Water – Use this to adjust the sauce’s consistency, ensuring it remains silky and smooth.
Salt and Pepper – Essential for seasoning and bringing all flavors together.
Fresh Parsley – Adds vibrant color and an aromatic touch; it’s a delightful finishing touch!
Parmesan Cheese – This cheese offers umami richness; Pecorino Romano makes a great alternative.

Ready to create your Lobster Bucatini masterpiece? Each ingredient plays a vital role in making this luxurious dish unforgettable!

Step‑by‑Step Instructions for Lobster Bucatini

Step 1: Cook the Bucatini
Bring a large pot of salted water to a rolling boil over high heat. Add the bucatini and cook according to the package instructions until it reaches al dente, usually about 8–10 minutes. Once done, reserve ½ cup of the pasta water before draining the bucatini in a colander, letting it sit while you prepare the sauce.

Step 2: Melt the Butter and Oil
In a large skillet set over medium heat, add 2 tablespoons of unsalted butter and 1 tablespoon of olive oil. Allow the butter to melt completely until it begins to froth, indicating it’s ready for the next ingredients. Keep an eye on it to prevent burning, which would alter the flavor of your luxurious Lobster Bucatini.

Step 3: Sauté Garlic and Red Pepper Flakes
Add 4 minced garlic cloves and a pinch of red pepper flakes (if using) to the skillet. Sauté for about 1 minute, stirring constantly, until the garlic turns fragrant and golden. This fragrant base will enhance the richness of your sauce, so ensure it doesn’t brown too much, which can lead to bitterness.

Step 4: Add White Wine
Pour in ½ cup of dry white wine into the skillet and allow it to simmer for 2-3 minutes. Stir occasionally, letting it reduce slightly and concentrate the flavors, which will marry beautifully with the buttery garlic. You’ll know it’s ready when the liquid has reduced by about half, leaving a lovely aroma.

Step 5: Incorporate Lobster Meat
Add your cooked lobster meat to the skillet, stirring gently to warm it through. This should take just about 1-2 minutes; any longer may result in tough lobster. The tender chunks of lobster will soak up the delicious garlic-butter sauce, creating a beautiful balance of flavors in your Lobster Bucatini.

Step 6: Toss in Bucatini and Pasta Water
Carefully transfer the drained bucatini to the skillet, using tongs to toss it well with the lobster and sauce. Gradually add the reserved pasta water, a few tablespoons at a time, stirring until the sauce reaches a silky consistency that lightly coats the pasta. This step is key for achieving the perfect texture.

Step 7: Season to Taste
Taste the dish and season generously with salt and pepper to bring everything together. Adjust the flavors to your liking, ensuring that the richness and sweetness of the lobster shines through. This careful seasoning is what elevates your Lobster Bucatini to that sought-after restaurant-quality level.

Step 8: Finish with Fresh Herbs
Off the heat, add a handful of freshly chopped parsley to the skillet and toss gently to combine. This brightens the rich flavors and adds a pop of color to your Lobster Bucatini. It’s a simple yet impactful finishing touch that reflects your love for homemade cooking.

Step 9: Plate and Garnish
Serve the Lobster Bucatini immediately in warm bowls, ensuring generous amounts of sauce and lobster in each serving. Finish with a generous sprinkle of shaved Parmesan cheese on top, allowing it to melt slightly into the dish. The combination of melted cheese, lobster, and pasta is a delightful sight that promises satisfaction in every bite.

Make Ahead Options

These Lobster Bucatini are perfect for busy weeknights! You can prep the sauce (without the lobster) up to 24 hours in advance; simply store it in an airtight container in the refrigerator. When you’re ready to serve, gently reheat the sauce in a skillet and add the lobster meat, warming it through for just a couple of minutes to prevent overcooking. The bucatini itself can also be cooked ahead of time, refrigerated, and reheated in the sauce with a splash of reserved pasta water. This way, you’ll enjoy a restaurant-quality Lobster Bucatini with minimal effort, making your meal prep a breeze!

How to Store and Freeze Lobster Bucatini

Fridge: Store leftovers in an airtight container for up to 2 days, allowing the flavors to meld while keeping the lobster tender.

Freezer: Lobster Bucatini can be frozen for up to 2 months. Ensure it’s cooled, then pack in a freezer-safe container, leaving some space for expansion.

Reheating: When ready to enjoy, thaw in the refrigerator overnight, then reheat gently in a skillet with a splash of water or broth to avoid toughening the lobster.

Serving Tips: For the best flavor, consume leftovers as soon as possible, maintaining the luxurious taste of your Lobster Bucatini.

Lobster Bucatini Variations & Substitutions

Feel free to explore the many ways you can make this Lobster Bucatini truly your own!

  • Dairy-Free: Substitute unsalted butter with olive oil for a lighter sauce without compromising on flavor.
    Cooking with olive oil not only makes this dish accessible for those avoiding dairy but also adds a subtle, fruity note that enhances the garlic.

  • Extra Veggies: Toss in sautéed spinach or asparagus tips for added nutrition and color.
    These vibrant veggies not only brighten the dish but also offer a delightful crunch that complements the tender lobster beautifully.

  • Gluten-Free: Use gluten-free pasta options like brown rice or chickpea-based bucatini.
    This allows those with gluten sensitivities to indulge without missing out on the flavors of this luxurious meal.

  • Spicy Kick: Add chopped fresh chili or switch to a spicy wine for a fiery twist.
    Adjusting the heat level can cater to personal preferences and bring an exciting new layer of flavor to your Lobster Bucatini!

  • Flavor Boost: Experiment with aromatics such as shallots or leeks in place of garlic for a unique taste.
    These subtle changes can significantly transform the flavor profile, offering a fresh take on this classic dish.

  • Seafood Medley: Mix in shrimp or scallops with the lobster for a delightful seafood combination.
    This variation elevates the dish further, introducing diverse textures and tastes that will have everyone begging for more.

  • Umami Explosion: Substitute Parmesan with Pecorino Romano or Grana Padano for richer, saltier notes.
    These alternatives will enhance the overall savoriness of your Lobster Bucatini, making every bite unforgettable.

  • Herb Forward: Top with fresh basil or dill alongside parsley for a fragrant finish.
    Layering in aromatic herbs allows for a refreshing taste that balances the richness of the sauce beautifully.

For a deeper dive into perfecting your pasta, don’t forget to check out my guide on Cooking with Pasta. Enjoy experimenting and creating a version of Lobster Bucatini that’s perfect for your palate!

Expert Tips for Lobster Bucatini

Quality Ingredients: Start with high-quality lobster meat and fresh vegetables. Better ingredients will make your Lobster Bucatini shine.

Don’t Overcook: Ensure the lobster is just warmed through to maintain tenderness; overcooking will make it tough and chewy.

Pasta Water Magic: Reserve enough pasta water. It’s essential for achieving that silky sauce everyone loves in Lobster Bucatini.

Mind the Heat: When sautéing the garlic, keep the heat moderate. Too high can cause it to burn, resulting in bitterness.

Taste as You Go: Season your dish progressively. Adjust salt and pepper after each step to build flavors, ensuring a delicious final result.

What to Serve with Lobster Bucatini

Indulging in a bowl of Lobster Bucatini is an experience in itself, but pairing it with the right sides can take your meal to the next level.

  • Garlic Bread: This crispy delight complements the rich garlic-butter sauce wonderfully, making every bite even more flavorful. It’s the perfect vessel to soak up sauce remnants too!

  • Arugula Salad: A fresh, peppery salad tossed with lemon vinaigrette adds a bright contrast to the dish, balancing the richness of the pasta while keeping the meal light.

  • Grilled Asparagus: Tender, smoky asparagus drizzled with a touch of olive oil brings a satisfying crunch that harmonizes beautifully with the tender lobster.

  • Creamy Risotto: A creamy risotto infused with citrus notes can enhance the dining experience, providing a luxurious texture that pairs perfectly with the lobster’s sweetness.

  • Chardonnay: A glass of chilled Chardonnay perfectly accents the dish’s flavors, offering a crisp, fruity profile that cuts through the richness for an elegant sip.

  • Lemon Sorbet: End your meal on a refreshing note! This light dessert cleanses the palate and leaves a radiant impression, echoing the brightness of the dish’s flavors.

Lobster Bucatini Recipe FAQs

What should I look for when selecting lobster meat?
Absolutely! When choosing lobster meat, opt for fresh or frozen lobster that is bright red and smells like the ocean. If buying frozen, make sure it’s well-sealed without ice crystals, which could indicate freezer burn. Fresh lobster should feel firm to the touch and not have any off-putting odors.

How do I store leftover Lobster Bucatini?
Store your leftovers in an airtight container in the refrigerator for up to 2 days. This helps maintain the flavors and textures, ensuring your Lobster Bucatini stays delicious. Just make sure it’s cooled to room temperature before securing the lid!

Can I freeze Lobster Bucatini?
Yes, you can freeze Lobster Bucatini for up to 2 months! Let the dish cool completely and pack it in a freezer-safe container, leaving some space at the top for expansion. For best results, label it with the date to keep track of freshness. When ready to enjoy, simply thaw it in the refrigerator overnight.

What should I do if my sauce feels too thick?
If your garlic-butter sauce turns out too thick, don’t worry! Gradually add small amounts of the reserved pasta water to loosen it up. Start with one tablespoon at a time, stirring until you achieve that silky consistency. The pasta water is starchy, helping the sauce cling beautifully to the bucatini without being watery.

Is this dish safe for people with seafood allergies?
It’s essential to exercise caution! Lobster Bucatini contains shellfish, so if anyone at your table has a shellfish allergy, it’s best to avoid this dish altogether. For a seafood-free alternative, consider substituting the lobster with sautéed mushrooms or roasted vegetables for a delightful twist.

Can I make Lobster Bucatini in advance?
While it’s best freshly made, you can prep some elements ahead. Cook the bucatini beforehand and store it in the fridge with a drizzle of olive oil to prevent sticking. You can also prepare the sauce and simply warm it up when ready to combine with the pasta and lobster. Just remember, adding lobster too early may lead to tough meat, so incorporate it last!

Lobster Bucatini

Decadent Lobster Bucatini for Your Elegant Dinner Night

Indulge in the luxurious flavors of Lobster Bucatini, a seafood masterpiece perfect for any occasion.
Prep Time 15 minutes
Cook Time 25 minutes
Total Time 40 minutes
Servings: 4 servings
Course: Pasta
Cuisine: Italian
Calories: 600

Ingredients
  

For the Pasta
  • 8 oz Bucatini
For the Sauce
  • 1 cup Cooked Lobster Meat Patted dry if frozen
  • 2 tbsp Unsalted Butter
  • 1 tbsp Olive Oil Substitute with more butter if desired
  • 4 cloves Garlic Minced
  • 1 pinch Red Pepper Flakes Optional
  • 1/2 cup Dry White Wine e.g., Sauvignon Blanc
  • 1/2 cup Reserved Pasta Water To adjust sauce consistency
  • 1/4 cup Fresh Parsley Chopped
  • 1/2 cup Parmesan Cheese Shaved, optional

Equipment

  • Large pot
  • Colander
  • Large skillet
  • Tongs

Method
 

Step-by-Step Instructions
  1. Bring a large pot of salted water to a rolling boil. Cook the bucatini according to package instructions until al dente, about 8–10 minutes. Reserve 1/2 cup pasta water before draining.
  2. In a large skillet over medium heat, melt the butter and olive oil until frothy.
  3. Add minced garlic and red pepper flakes to the skillet. Sauté for about 1 minute until fragrant and golden.
  4. Pour in the white wine and simmer for 2-3 minutes until reduced by half.
  5. Stir in the cooked lobster meat and warm gently for 1-2 minutes.
  6. Add the drained bucatini to the skillet and toss with the lobster and sauce. Gradually mix in reserved pasta water for desired consistency.
  7. Season with salt and pepper, adjusting flavors as needed.
  8. Off heat, toss in chopped parsley and combine.
  9. Serve immediately in warm bowls with a sprinkle of Parmesan cheese.

Nutrition

Serving: 1servingCalories: 600kcalCarbohydrates: 75gProtein: 25gFat: 20gSaturated Fat: 10gPolyunsaturated Fat: 2gMonounsaturated Fat: 6gCholesterol: 75mgSodium: 800mgPotassium: 600mgFiber: 3gSugar: 2gVitamin A: 500IUVitamin C: 2mgCalcium: 200mgIron: 3mg

Notes

For a dairy-free option, substitute butter with olive oil. Store leftovers in an airtight container for up to 2 days.

Tried this recipe?

Let us know how it was!

Savor the Swiss Mushroom Melt Sandwich: A Comforting Treat

The aroma of sweet onions caramelizing on the stove can transport anyone back to simpler times, where comfort food reigned supreme. Today, I’m excited to share my Swiss Mushroom Melt Sandwich, a delightful vegetarian gem that marries earthy mushrooms and gooey Swiss cheese with crispy sourdough bread. It’s both quick enough for a weeknight meal and impressive enough to wow your guests. By embracing this recipe, you’ll not only save yourself from another round of fast food but also treat your taste buds to an extraordinary lunch that feels like a gourmet experience at home. Curious to see how this comforting concoction comes together? Let’s dive in!

Why is this sandwich a must-try?

Comforting Delight: The Swiss Mushroom Melt Sandwich offers a cozy, hearty meal that will warm your heart and satisfy your cravings.

Quick Prep: With straightforward steps and minimal ingredients, this recipe is ideal for a weeknight dinner.

Customizable Options: Feel free to swap in your favorite ingredients—like adding grilled halloumi cheese or trying a different type of bread.

Heavenly Layers: Experience the irresistible juxtaposition of savory mushrooms, sweet caramelized onions, and creamy Swiss cheese in every bite.

Perfect Pairing: Serve it with a side of creamy tomato soup or a fresh salad for a wholesome lunch or dinner.

Elevate your sandwich game and try this delicious option for an unforgettable meal, perfect to enjoy solo or to impress guests close to your heart.

Swiss Mushroom Melt Sandwich Ingredients

For the Caramelized Onions

  • Yellow Onions – Adds sweetness and depth; can use white or red onions as a substitute.
  • Olive Oil – For sautéing and enhancing flavor; butter or vegetable oil can also be used.
  • Butter – Enhances richness; consider using a non-dairy butter for vegan options.
  • Brown Sugar – Balances acidity and enhances caramelization; honey or maple syrup can work as alternatives.
  • Balsamic Vinegar – Adds acidity and depth; can be omitted, but reduces complexity of flavor.

For the Mushroom Filling

  • Cremini Mushrooms – Provide an earthy flavor and meaty texture; can substitute with button mushrooms or portobellos.
  • Garlic – Adds aromatic flavor; fresh garlic is recommended for the best results.
  • Dry White Wine – Enhances flavor; optional but beneficial; substitute with vegetable broth for an alcohol-free version.
  • Fresh Thyme – Adds a lovely herbal note; dried thyme can also be used in lesser amounts.

For the Sandwich Assembly

  • Sourdough Bread – Offers a delightful crunch; any favorite bread like whole grain or gluten-free can also be used.
  • Swiss Cheese – Melts beautifully and adds that perfect flavor; Gruyère or vegan cheese can work for a dairy-free option.
  • Dijon Mustard – Optional for a tangy kick; yellow mustard or no mustard can also be employed based on preference.

Elevate your meal with this irresistible recipe, and savor every bite of the Swiss Mushroom Melt Sandwich!

Step‑by‑Step Instructions for Swiss Mushroom Melt Sandwich

Step 1: Caramelize the Onions
Start by thinly slicing the yellow onions. In a large skillet, heat 1 tablespoon of olive oil and 1 tablespoon of butter over medium-low heat, stirring occasionally. Add the onions and sauté them for 30–45 minutes until they become deep golden brown and caramelized. Be patient during this process, as low heat helps enhance their sweetness.

Step 2: Add Sweetness and Depth
Once the onions are caramelized, sprinkle in 1 teaspoon of brown sugar and drizzle 1 tablespoon of balsamic vinegar. Stir well, allowing the mixture to dissolve. Cook for an additional 2–3 minutes until the onions are well coated and the flavors meld together, then remove the onions from the skillet and set them aside.

Step 3: Sauté the Mushrooms
In the same skillet, add another tablespoon of olive oil and raise the heat to medium. Once hot, add the sliced cremini mushrooms, making sure not to overcrowd the pan. Sauté them for 8–10 minutes until they are nicely browned and release their earthy aroma, stirring occasionally for even cooking.

Step 4: Incorporate Aromatics
Once the mushrooms are browned, add 2 minced garlic cloves and 1 teaspoon of fresh thyme leaves to the skillet. Cook this mixture for about 1–2 minutes, stirring continuously until the garlic is fragrant but not burnt. The Swiss Mushroom Melt Sandwich will gain another layer of flavor with these aromatic additions.

Step 5: Deglaze with Wine
Pour in ¼ cup of dry white wine to deglaze the skillet, scraping any delicious bits stuck to the bottom. Let it simmer for 3–4 minutes, until the wine has reduced significantly and most of the liquid has evaporated, intensifying the mushrooms’ savory flavor. Remove the skillet from the heat.

Step 6: Prepare the Bread
While the vegetables cool slightly, spread butter generously on one side of each slice of sourdough bread. On the unbuttered side of two slices, spread a thin layer of Dijon mustard for tanginess. This step sets the foundation for assembling a comforting Swiss Mushroom Melt Sandwich.

Step 7: Assemble the Sandwiches
Start layering your sandwiches by placing a slice of Swiss cheese on the mustard-side of each bread slice. Then, generously pile on the sautéed mushrooms and caramelized onions. Add another layer of Swiss cheese on top before closing the sandwiches with the remaining slices of bread, buttered side facing out.

Step 8: Grill to Perfection
Heat a skillet over medium heat and carefully place your assembled sandwiches in the pan. Cook for 3–5 minutes on each side, using a lid to cover the skillet. This helps the cheese melt beautifully while achieving a glorious golden-brown crust on the bread.

Step 9: Slice and Serve
Once the sandwiches are perfectly toasted and the cheese is gooey, remove them from the skillet. Allow them to cool for a minute before cutting each sandwich in half for easy serving. Enjoy your Swiss Mushroom Melt Sandwich immediately, relishing the comforting combination of flavors!

What to Serve with Swiss Mushroom Melt Sandwich

Enhance your dining experience by pairing this comforting sandwich with delightful sides and beverages that elevate its savory goodness.

  • Crispy Potato Chips: The crunchiness of chips beautifully contrasts the melty sandwich, making each bite an exciting texture adventure.
  • Fresh Green Salad: A light, vibrant salad adds a refreshing touch, balancing the richness of the sandwich with crisp greens and a zesty vinaigrette.
  • Creamy Tomato Soup: This classic pairing offers a comforting, silky texture and a tangy flavor that complements the savory notes of the sandwich wonderfully.
  • Roasted Vegetables: Seasoned and roasted veggies bring a smoky depth that enriches the meal with a nutritious and savory element.
  • Pickles or Pickled Veggies: The tangy crunch of pickles cuts through the richness, providing a palate-cleansing bite alongside each mouthful.
  • White Wine: A chilled glass of dry white wine enhances the flavors of the mushrooms and cheese, making for an elegant pairing.
  • Iced Tea: Offering a refreshing sip with a hint of sweetness, iced tea complements the sandwich without overwhelming its rich flavors.
  • Apple Slices: Sweet, crisp apple slices can provide a delightful contrast, making for an unexpected yet pleasant side that brightens the meal.

These pairings promise to transform a simple lunch into a delightful feast, perfect for family gatherings or a cozy solo lunch date.

Storage Tips for Swiss Mushroom Melt Sandwich

  • Room Temperature: Enjoy your Swiss Mushroom Melt Sandwich fresh for the best texture and taste. If left out, it should be consumed within 2 hours to ensure food safety.

  • Fridge: If there are leftovers, store your assembled sandwiches in an airtight container in the refrigerator for up to 3 days. To maintain crispness, consider wrapping the sandwiches in parchment paper before placing them in the container.

  • Freezer: For longer storage, freeze the sandwich components separately (caramelized onions and sautéed mushrooms in airtight containers) for up to 2 months. Assemble and grill the sandwich when ready to enjoy.

  • Reheating: Reheat in a skillet over low heat to avoid sogginess, covering with a lid to help melt the cheese evenly. Heat until warmed through, about 5-7 minutes.

Make Ahead Options

These Swiss Mushroom Melt Sandwiches are a fantastic choice for meal prep, making busy weeknights much easier! You can prepare the caramelized onions and sautéed mushrooms up to 3 days in advance. Simply store each component in separate airtight containers in the refrigerator to maintain their rich flavors and prevent sogginess. When you’re ready to enjoy your sandwich, just quickly assemble the ingredients and grill them in a skillet for 3-5 minutes on each side until the bread is golden and the cheese has melted to gooey perfection. This way, you can savor restaurant-quality results without much effort, turning a busy evening into a delightful dining experience with these comforting Swiss Mushroom Melt Sandwiches!

Expert Tips for the Best Swiss Mushroom Melt Sandwich

  • Caramelization Control: Keep the heat low for perfect caramelization of onions. A slower process brings out their natural sweetness and prevents burning.

  • Don’t Crowd the Mushrooms: Overcrowding your pan can lead to steaming instead of browning. Cook in batches if necessary to achieve that desirable golden color.

  • Melt with a Lid: Always cover your sandwiches with a lid while cooking. This traps heat and moisture, ensuring gooey cheese and crispy bread.

  • Butter Evenly: For a golden crust, ensure both sides of the bread are evenly buttered. This will create that delightful crispy exterior everyone loves.

  • Experiment with Variations: Feel free to explore different ingredients to elevate your Swiss Mushroom Melt Sandwich. Adding a touch of red pepper flakes can add a flavorful kick!

  • Healthy Swaps: To make this dish a bit lighter, consider using less butter or non-dairy options for a delicious vegan-friendly treat.

Swiss Mushroom Melt Sandwich Variations

Feel free to get creative and tailor the sandwich to your taste with these delightful variations!

  • Spicy Kick: Add a sprinkle of red pepper flakes or sriracha to the sautéed mushrooms for a zesty twist. Your taste buds will thank you!

  • Cheesy Delight: Swap Swiss cheese for a mix of aged cheddar and Gruyère for a rich and bold flavor profile that melts perfectly.

  • Herb-Infused: Incorporate chopped fresh basil or rosemary along with the thyme for added depth and fragrance in every bite.

  • Soy Sauce Boost: Drizzle a teaspoon of soy sauce over the mushrooms while cooking for an umami kick that elevates this classic sandwich.

  • Mixed Mushrooms: Combine different mushrooms such as shiitake or oyster for a unique flavor and texture experience. Throw in a few baby bellas for extra earthiness!

  • Breakfast Style: Top the sandwich with a fried egg for a delightful brunch option. The runny yolk adds a luscious creaminess that takes it to another level.

  • Creamy Version: Spread a layer of cream cheese or herbed goat cheese on the bread before assembling for an indulgent, creamy addition to the melt.

  • Green Goodness: Add fresh spinach or arugula to the sandwich filling for a pop of color and a boost of nutrients. It’s a simple way to sneak in some greens!

Try experimenting with these ideas, and if you’re looking for more inspiration, check out our Avocado Melt Sandwich or the Honey Banana Sandwich for even more delightful combinations. Happy cooking!

Swiss Mushroom Melt Sandwich Recipe FAQs

What type of onions should I use for the caramelized onions?
Absolutely! Yellow onions are ideal for caramelization as they offer natural sweetness and depth. However, feel free to substitute with white or red onions if that’s what you have on hand—they’ll also work just fine!

How should I store leftovers of the Swiss Mushroom Melt Sandwich?
If you have leftovers, store your assembled Swiss Mushroom Melt Sandwich in an airtight container in the refrigerator for up to 3 days. For optimal freshness and texture, wrap the sandwiches in parchment paper before placing them in the container to help retain their crispness.

Can I freeze the components of this sandwich?
Yes, you can definitely freeze the components! Store the caramelized onions and sautéed mushrooms in airtight containers, and they will keep in the freezer for up to 2 months. When you’re ready to enjoy, just thaw the components overnight in the refrigerator, assemble your sandwich, and grill it up for a delicious treat.

What if my onions aren’t caramelizing properly?
Don’t fret! If your onions aren’t turning that lovely golden brown, it’s likely they need more time or the heat is too high. Keep the heat low and stir the onions every few minutes to prevent burning. For perfect caramelization, patience is key—aim for about 30-45 minutes. If they’re starting to dry out, add a teaspoon of water to help with the process.

Is this recipe suitable for someone with dairy allergies?
Very! The Swiss Mushroom Melt Sandwich can be adapted to be dairy-free by simply swapping out Swiss cheese for a delicious vegan cheese alternative. You can also use non-dairy butter in place of regular butter. Make sure to check labels on other ingredients to ensure they’re dairy-free, and feel free to customize to meet dietary needs.

How can I make this sandwich even more flavorful?
For a little extra punch, consider adding a sprinkle of red pepper flakes for heat or mixing in other herbs like oregano or parsley. You can even experiment with different cheeses like Gruyère or feta to change the flavor profile. The more, the merrier!

Swiss Mushroom Melt Sandwich

Savor the Swiss Mushroom Melt Sandwich: A Comforting Treat

Experience the delicious Swiss Mushroom Melt Sandwich, a comforting blend of earthy mushrooms, gooey Swiss cheese, and crispy sourdough bread.
Prep Time 10 minutes
Cook Time 35 minutes
Total Time 45 minutes
Servings: 2 sandwiches
Course: Lunch
Cuisine: Vegetarian
Calories: 450

Ingredients
  

For the Caramelized Onions
  • 2 medium Yellow Onions Can substitute with white or red onions.
  • 1 tablespoon Olive Oil Can use butter or vegetable oil.
  • 1 tablespoon Butter Consider non-dairy butter for vegan options.
  • 1 teaspoon Brown Sugar Honey or maple syrup can work as alternatives.
  • 1 tablespoon Balsamic Vinegar Can be omitted.
For the Mushroom Filling
  • 8 ounces Cremini Mushrooms Can substitute with button mushrooms or portobellos.
  • 2 cloves Garlic Fresh garlic is recommended.
  • 1/4 cup Dry White Wine Optional; substitute with vegetable broth.
  • 1 teaspoon Fresh Thyme Dried thyme can also be used.
For the Sandwich Assembly
  • 4 slices Sourdough Bread Can also use whole grain or gluten-free bread.
  • 4 ounces Swiss Cheese Gruyère or vegan cheese can work.
  • 1 tablespoon Dijon Mustard Optional.

Equipment

  • Skillet
  • spatula

Method
 

Step-by-Step Instructions
  1. Start by thinly slicing the yellow onions. In a large skillet, heat 1 tablespoon of olive oil and 1 tablespoon of butter over medium-low heat. Add the onions and sauté for 30–45 minutes until deep golden brown.
  2. Once the onions are caramelized, sprinkle in 1 teaspoon of brown sugar and drizzle 1 tablespoon of balsamic vinegar. Stir well and cook for an additional 2–3 minutes, then set aside.
  3. In the same skillet, add another tablespoon of olive oil and raise the heat to medium. Sauté the sliced cremini mushrooms for 8–10 minutes until nicely browned.
  4. Add 2 minced garlic cloves and 1 teaspoon of fresh thyme to the skillet. Cook for 1–2 minutes until fragrant.
  5. Pour in 1/4 cup of dry white wine to deglaze the skillet. Let it simmer for 3–4 minutes until most of the liquid has evaporated.
  6. Spread butter on one side of each slice of bread and a thin layer of Dijon mustard on the unbuttered sides of two slices.
  7. Layer a slice of Swiss cheese on the mustard-side of each bread slice, followed by sautéed mushrooms and caramelized onions. Top with another layer of Swiss cheese.
  8. Heat a skillet over medium heat and place the assembled sandwiches in the pan. Cook for 3–5 minutes on each side using a lid to help the cheese melt.
  9. Remove from skillet and allow to cool slightly before slicing in half. Enjoy immediately.

Nutrition

Serving: 1sandwichCalories: 450kcalCarbohydrates: 40gProtein: 15gFat: 25gSaturated Fat: 12gPolyunsaturated Fat: 1gMonounsaturated Fat: 11gCholesterol: 40mgSodium: 800mgPotassium: 400mgFiber: 3gSugar: 6gVitamin A: 500IUVitamin C: 3mgCalcium: 300mgIron: 2mg

Notes

For optimal results, keep the heat low while caramelizing onions and cover sandwiches while grilling to maintain moisture and melt the cheese.

Tried this recipe?

Let us know how it was!

Cozy Garlic Butter Beef Bowl: A Family Favorite Delight

As I stood in my kitchen, the aroma of sizzling garlic wafted through the air, igniting happy memories of family dinners filled with laughter. Today, I’m excited to share my Cozy Garlic Butter Beef Bowl – a delightful one-pan meal that will soon be your go-to for busy weeknights or inviting friends over. This creamy creation combines juicy ground beef with tender rice, enveloped in a rich cheddar and Parmesan sauce that is simply irresistible. Not only does it come together in about 40 minutes, but it’s also effortlessly adaptable, making it perfect for both picky eaters and adventurous palates alike. Whether you’re looking to whip up a heartwarming dinner or prep ahead for a busy week, this dish has you covered. Ready to bring a touch of comfort to your table? Let’s dive into this creamy goodness together!

Why Is This Beef Bowl So Irresistible?

Quick and Easy: This Cozy Garlic Butter Beef Bowl is a lifesaver for busy nights, taking just 40 minutes from start to finish! One-Pan Wonder: Minimal cleanup means more time to enjoy your meal and less time scrubbing pots and pans. Creamy Delight: The rich cheddar and Parmesan sauce adds a luscious touch that the whole family will crave. Versatile Ingredients: Feel free to substitute ingredients based on your preferences, whether you choose turkey instead of beef or add colorful veggies like spinach or peppers. Crowd-Pleasing Flavor: It’s the perfect dish for family gatherings or casual get-togethers with friends, appealing to adults and kids alike. Don’t forget to pair it with a crisp salad or some delicious Garlic Butter Baked Chicken for a complete feast!

Cozy Garlic Butter Beef Bowl Ingredients

For the Rice Base
1 cup uncooked long-grain white rice – This provides the essential heartiness to the dish. Substitute with brown rice for a nutritious twist.
3 cups beef broth (low sodium) – Adds moisture and depth to the rice. Use vegetable broth for a vegetarian option.

For the Beef Mixture
1 lb ground beef – The star of the show, bringing protein and flavor. Ground turkey or chicken can make it lighter.
1 small diced onion – Adds sweetness and depth. Shallots or leeks can work nicely if preferred.
4 minced garlic cloves – Infuses the dish with its lovely aroma and robust flavor. Garlic powder can be used in a pinch (1 tsp).
1 tsp Italian seasoning – Delivers herby goodness that’s essential in this cozy dish. Consider substituting with oregano or basil as needed.

For the Creamy Sauce
1/2 cup milk – Helps create a creamy texture in the cheese sauce. Almond milk is a great dairy-free alternative.
1 cup shredded cheddar – Provides that luscious cheesiness we all love. Monterey Jack or Gouda also make delightful substitutes.
1/2 cup grated Parmesan – Adds savory notes and depth; you can increase cheddar if you like it extra cheesy.
3 tbsp butter – Essential for sautéing and enriching the sauce. Olive oil offers a lighter option if desired.

For Seasoning & Garnish
Salt and pepper as needed – Essential for enhancing the natural flavors of your ingredients.
Fresh parsley (optional, 2 tablespoons chopped) – Adds a touch of freshness and color. Chives or green onions are also fantastic alternatives.

Dive into this delicious Cozy Garlic Butter Beef Bowl, packed with flavors that warm the heart and bring the family together!

Step‑by‑Step Instructions for Cozy Garlic Butter Beef Bowl

Step 1: Sauté the Aromatics
In a large skillet over medium heat, melt 1 tablespoon of butter. Add the diced onion and sauté for about 3-4 minutes, or until it becomes translucent and fragrant. This will enhance the base flavors of your Cozy Garlic Butter Beef Bowl as the onion releases its natural sweetness.

Step 2: Brown the Beef
Next, incorporate the 1 pound of ground beef into the skillet, breaking it apart with a spatula. Cook for approximately 5 minutes until the beef is browned and no longer pink. Be sure to drain any excess fat if necessary, as you want a balanced mixture of rich meat and creamy sauce.

Step 3: Add Garlic
Stir in the 4 minced garlic cloves and let them cook for an additional minute. You’ll know it’s ready when the aroma of garlic fills the kitchen, heightening the delicious essence of your Cozy Garlic Butter Beef Bowl. This step is crucial for bringing depth to your dish.

Step 4: Combine Rice and Seasonings
Mix in 1 cup of uncooked long-grain rice along with 3 cups of beef broth, 1 teaspoon of Italian seasoning, and season with salt and pepper to taste. Stir well until the rice is evenly distributed throughout the mixture. This enhances the flavor while creating a cozy base that will meld beautifully with the creamy sauce.

Step 5: Simmer to Perfect Doneness
Raise the heat to bring the mixture to a boil, then lower it to a simmer. Cover the skillet and cook for 18-20 minutes, or until the rice has absorbed the broth. You’ll know it’s cooked when the rice is fluffy and tender, soaking up all the flavorful broth—a key step for the Cozy Garlic Butter Beef Bowl’s heartiness.

Step 6: Prepare the Creamy Cheese Sauce
While the rice simmers, take a small saucepan and melt 2 tablespoons of butter over low heat. Add 1/2 cup of milk, 1 cup of shredded cheddar, and 1/2 cup of grated Parmesan. Whisk together until the mixture is smooth and creamy. This cheese sauce will enrich the beef and rice, bringing your Cozy Garlic Butter Beef Bowl to a delightful crescendo.

Step 7: Combine and Blend
Once the rice is done, carefully fold the creamy cheese sauce into the beef and rice mixture. Using a spatula, mix thoroughly until everything is well blended and coated in that rich, cheesy goodness. This step ensures that every bite of the Cozy Garlic Butter Beef Bowl is bursting with flavor.

Step 8: Cook and Garnish
Cook the combined mixture uncovered for a few more minutes on low heat, stirring occasionally. This will allow it to thicken slightly and meld flavors together. Once finished, garnish with 2 tablespoons of chopped fresh parsley for a pop of color and flavor, enhancing your cozy creation before serving it warm.

How to Store and Freeze Cozy Garlic Butter Beef Bowl

Fridge: Keep leftovers in an airtight container for up to 3 days. To maintain the creamy texture, reheat gently, adding a splash of milk or broth.

Freezer: Freeze the Cozy Garlic Butter Beef Bowl in single portions for up to 3 months. Ensure it’s in a well-sealed, freezer-safe container to prevent freezer burn.

Thawing: For best results, thaw in the refrigerator overnight before reheating. This helps the dish retain its rich flavor and creamy consistency.

Reheating: Reheat on the stovetop over low heat, stirring occasionally, or in the microwave. Add a touch of milk to revive the creamy sauce.

Cozy Garlic Butter Beef Bowl Variations

Feel free to make this dish your own by adding unique twists and substitutions that match your taste preferences!

  • Ground Turkey: Swap out the ground beef for ground turkey for a leaner option that still packs a punch of flavor. It’s a great way to lighten the dish while maintaining its creamy essence.

  • Brown Rice: For a healthier twist, use brown rice instead of white rice. Just remember to adjust the liquid and cooking time as brown rice takes longer to cook but offers a delightful nutty flavor.

  • Vegetable Boost: Add a medley of chopped vegetables like mushrooms, spinach, or bell peppers to enrich the dish with nutrients. These additions not only enhance the flavor but also provide a beautiful pop of color.

  • Spicy Kick: If heat is what you’re after, drizzle in some hot sauce or sprinkle red pepper flakes before serving. This lively addition can take your Cozy Garlic Butter Beef Bowl to a new level of excitement!

  • Dairy-Free: Swap the milk and cheeses for almond milk and dairy-free cheese alternatives for a completely plant-based version. You’ll still enjoy that creamy consistency without the dairy!

  • Cheese Varieties: Change up the cheesy flavor by using different types of cheese such as Monterey Jack or Gouda. Each variety can bring a unique twist, making every bowl a new experience.

  • Herb Forward: Instead of Italian seasoning, use fresh herbs like basil or oregano for a bright, fresh flavor. These herbs can elevate the dish further, offering a refreshing and aromatic quality.

  • Nutty Texture: For some extra crunch, sprinkle toasted pine nuts or slivered almonds on top before serving. This adds a delightful contrast to the creamy texture of the beef and sauce, plus a tasty flavor kick!

Feel free to explore these ideas or combine them to design your Cozy Garlic Butter Beef Bowl that suits your family’s taste buds! And if you’re looking for a side to complement your meal, a crisp salad or some mouthwatering Garlic Butter Baked Chicken would pair beautifully.

What to Serve with Cozy Garlic Butter Beef Bowl

Nothing completes a cozy dinner quite like thoughtfully chosen sides that enhance the delightful flavors of this creamy creation.

  • Garlic Bread: The buttery, garlicky heaven of warm, crispy garlic bread is perfect for sopping up every last bit of the delicious cheese sauce, making it a match made in heaven.

  • Crisp Green Salad: A light, refreshing salad with mixed greens, cherry tomatoes, and a tangy vinaigrette offers a delightful contrast to the rich and creamy beef bowl, balancing the meal beautifully.

  • Roasted Vegetables: Roasted seasonal veggies like carrots, zucchini, and bell peppers not only add vibrant color but also their natural sweetness complements the savory flavors of the dish.

  • Creamy Coleslaw: The crunchiness and tanginess of coleslaw create a pleasant texture and flavor contrast with the creamy garlic butter beef, ensuring that each bite feels just right.

  • Fizzy Lemonade: Refreshing, sparkling lemonade brings a burst of brightness to your plate, and its citrusy zing cuts through the richness of the beef and rice bowl, leaving you wanting more.

  • Chocolate Mousse: For dessert, indulge in a velvety chocolate mousse that is light yet satisfying, making it an ideal sweet ending to a comforting meal.

Expert Tips for Cozy Garlic Butter Beef Bowl

  • Perfect Rice Cooking: Use long-grain rice for fluffiness. If switching to brown rice, adjust the liquid and cooking time accordingly to avoid undercooking.

  • Mind the Garlic: Sauté the garlic just until fragrant. Overcooking it can lead to bitterness, which will affect the overall flavor of your Cozy Garlic Butter Beef Bowl.

  • Meat Alternatives: If opting for turkey or plant-based meat, ensure to season adequately, as they may need extra flavor to reach the depth that ground beef provides.

  • Add Extra Veggies: Thinking of being health-conscious? Incorporate vegetables like chopped spinach, bell peppers, or peas during the rice cooking process for added nutrition and color.

  • Reheat with Care: When storing leftovers, reheating with a splash of milk or broth helps restore creaminess and prevents the dish from drying out. Store properly for up to three days.

Make Ahead Options

These Cozy Garlic Butter Beef Bowls are ideal for meal prep enthusiasts! You can prepare the beef and rice mixture up to 24 hours in advance. Simply follow the instructions up to the point of combining the cheese sauce, then let the skillet cool before transferring it to an airtight container. Refrigerate until you’re ready to serve. When it’s time to enjoy your meal, reheat the mixture over low heat, stirring in the cheese sauce until it is warmed through and creamy once again. This way, you can minimize your cooking time while ensuring a delicious and comforting dinner for your busy weeknight!

Cozy Garlic Butter Beef Bowl Recipe FAQs

What type of rice is best for this Cozy Garlic Butter Beef Bowl?
For this dish, I recommend using uncooked long-grain white rice as it cooks evenly and contributes to a fluffy texture. If you’d like to make it a bit healthier, you can use brown rice; just remember to adjust the liquid and the cooking time slightly, as brown rice takes longer to cook.

How should I store leftover Cozy Garlic Butter Beef Bowl?
Store leftovers in an airtight container in the refrigerator for up to 3 days. To maintain that lovely creamy texture, I suggest reheating gently on the stove with a splash of milk or broth to bring back the richness of the sauce.

Can I freeze the Cozy Garlic Butter Beef Bowl?
Absolutely! You can freeze this dish in single servings for up to 3 months. Just make sure it’s in a well-sealed freezer-safe container to avoid freezer burn. When you’re ready to eat, thaw it overnight in the refrigerator for the best results, then reheat gently.

What should I do if the rice isn’t cooked through?
If you find that the rice isn’t fully cooked after the suggested 18-20 minutes, add a little more broth or water, stir, cover, and cook for an additional 5-10 minutes on low heat. This will give the rice more time to absorb the liquid and become tender.

Are there any dietary considerations for this Cozy Garlic Butter Beef Bowl?
If you’re serving this dish to guests with dietary restrictions, consider using ground turkey or plant-based meat for an alternative protein. Additionally, you can substitute the milk with almond milk for a dairy-free option. For anyone allergic to garlic or onion, you could use asafoetida powder as a milder flavor alternative, while keeping in mind to adjust the overall seasoning.

How can I add more veggies to my Cozy Garlic Butter Beef Bowl?
Incorporating vegetables is a great way to add nutrition! When cooking the rice with the broth, you can include chopped spinach, diced bell peppers, or even peas to enhance color and flavor. Just be mindful of the liquid you add; you may need to adjust slightly to ensure everything cooks perfectly.

Cozy Garlic Butter Beef Bowl

Cozy Garlic Butter Beef Bowl: A Family Favorite Delight

Enjoy a Cozy Garlic Butter Beef Bowl that's perfect for family dinners and quick weeknight meals. A creamy blend of beef, rice, and rich cheese sauce makes this dish irresistible.
Prep Time 10 minutes
Cook Time 30 minutes
Total Time 40 minutes
Servings: 4 bowls
Course: Dinner
Cuisine: American
Calories: 570

Ingredients
  

For the Rice Base
  • 1 cup uncooked long-grain white rice Substitute with brown rice for a nutritious twist.
  • 3 cups beef broth (low sodium) Use vegetable broth for a vegetarian option.
For the Beef Mixture
  • 1 lb ground beef Ground turkey or chicken can make it lighter.
  • 1 small diced onion Shallots or leeks can work nicely if preferred.
  • 4 cloves minced garlic Garlic powder can be used in a pinch (1 tsp).
  • 1 tsp Italian seasoning Consider substituting with oregano or basil as needed.
For the Creamy Sauce
  • 1/2 cup milk Almond milk is a great dairy-free alternative.
  • 1 cup shredded cheddar Monterey Jack or Gouda also make delightful substitutes.
  • 1/2 cup grated Parmesan You can increase cheddar if you like it extra cheesy.
  • 3 tbsp butter Olive oil offers a lighter option if desired.
For Seasoning & Garnish
  • salt and pepper Essential for enhancing the natural flavors of your ingredients.
  • 2 tbsp chopped fresh parsley Chives or green onions are also fantastic alternatives.

Equipment

  • Large skillet
  • Small saucepan
  • spatula
  • whisk

Method
 

Step-by-Step Instructions
  1. In a large skillet over medium heat, melt 1 tablespoon of butter. Add the diced onion and sauté for about 3-4 minutes, or until it becomes translucent and fragrant.
  2. Next, incorporate the 1 pound of ground beef into the skillet, breaking it apart with a spatula. Cook for approximately 5 minutes until the beef is browned and no longer pink.
  3. Stir in the 4 minced garlic cloves and let them cook for an additional minute.
  4. Mix in 1 cup of uncooked long-grain rice along with 3 cups of beef broth, 1 teaspoon of Italian seasoning, and season with salt and pepper to taste. Stir well.
  5. Raise the heat to bring the mixture to a boil, then lower it to a simmer. Cover the skillet and cook for 18-20 minutes.
  6. While the rice simmers, take a small saucepan and melt 2 tablespoons of butter over low heat. Add 1/2 cup of milk, 1 cup of shredded cheddar, and 1/2 cup of grated Parmesan. Whisk together.
  7. Once the rice is done, carefully fold the creamy cheese sauce into the beef and rice mixture.
  8. Cook the combined mixture uncovered for a few more minutes on low heat, stirring occasionally. Garnish with chopped fresh parsley before serving.

Nutrition

Serving: 1bowlCalories: 570kcalCarbohydrates: 45gProtein: 32gFat: 28gSaturated Fat: 15gPolyunsaturated Fat: 1gMonounsaturated Fat: 8gTrans Fat: 1gCholesterol: 90mgSodium: 850mgPotassium: 700mgFiber: 2gSugar: 2gVitamin A: 10IUVitamin C: 3mgCalcium: 20mgIron: 15mg

Notes

For the best results, reheat leftovers gently with a splash of milk or broth to maintain creaminess.

Tried this recipe?

Let us know how it was!

Creamy Rigatoni with Boursin Cheese: Your New Comfort Food Fix

As I stood in my kitchen, the comforting aroma of sautéing garlic and onions filled the air, instantly transporting me to a cozy Italian trattoria. This Creamy Rigatoni with Boursin Cheese is my go-to dish whenever I crave something rich and satisfying, yet quick to prepare. Within just 30 minutes, I can whip up this luscious, one-pot wonder that not only delights the taste buds but also washes away the hassle of extensive cleanup. Whether you’re enjoying a quiet evening or inviting friends over for a casual dinner, this creamy delight fits right in. Plus, it’s incredibly versatile, allowing for simple swaps to cater to your dietary needs. What’s not to love about a dish that brings comfort and joy to the table? Ready to dive in and make a bowl of pure happiness?

Why is Creamy Rigatoni a Must-Try?

Quick and Easy: This dish comes together in just 30 minutes, perfect for busy weeknights or last-minute gatherings.

One-Pot Wonder: Minimal cleanup means more time to enjoy your meal and less stress in the kitchen.

Rich, Creamy Flavor: The Boursin cheese creates a luxurious sauce, bringing comforting, indulgent flavors to every bite.

Versatile Options: Feel free to swap in your favorite proteins or add seasonal vegetables for a personal touch.

Crowd-Pleasing: Ideal for family dinners or casual get-togethers, this creamy rigatoni will have everyone asking for seconds! If you love cozy, satisfying meals, check out this Mexican Soup Dish for another delightful option.

Creamy Rigatoni with Boursin Cheese Ingredients

For the Pasta
Rigatoni Pasta – This hearty pasta shape holds the creamy sauce beautifully; feel free to swap with penne or ziti if needed.

For the Sauce
Boursin Cheese – Delivers a rich, creamy flavor that makes the sauce irresistible; can be replaced with a mix of cream cheese, garlic, and herbs if desired.
Marinara Sauce – Provides moisture and a tangy kick; using a store-bought variety saves time without sacrificing taste.
Ground Meat (Beef/Sausage) – Adds savory depth; for a lighter option, substitute with plant-based protein for a veggie twist.
Onion & Garlic – Infuse the dish with aromatic flavors; sauté until they are golden and fragrant.
Italian Seasoning – Enhances the overall taste with herbal notes; you can make your own blend using oregano, basil, and thyme.

Optional Add-ins
Vegetables (Spinach, Mushrooms, Bell Peppers) – Boost nutrition and flavor by sneaking in some brightly colored veggies for added texture.

With these ingredients, you’re set to create a comforting bowl of creamy rigatoni that brings smiles to the table!

Step‑by‑Step Instructions for Creamy Rigatoni with Boursin Cheese

Step 1: Cook Pasta
Begin by bringing a large pot of salted water to a boil over high heat. Once boiling, add the rigatoni pasta and cook according to package instructions until al dente, about 10-12 minutes. Once cooked, drain the pasta and set it aside, allowing the residual heat to keep it warm while you move to the next steps.

Step 2: Sauté Aromatics
In the same pot, heat 2 tablespoons of olive oil over medium heat. Add the chopped onion and minced garlic, sautéing for about 3-4 minutes until the onion becomes translucent and the garlic fragrant, stirring often to avoid burning. This aromatic base will enhance the creamy rigatoni with Boursin cheese.

Step 3: Brown Meat
Next, add 1 pound of ground meat to the pot, breaking it apart with a wooden spoon. Cook for about 5-7 minutes, or until the meat is browned and fully cooked. Ensure it’s no longer pink and starts to develop a nice color, which will add depth to the creamy sauce.

Step 4: Combine Ingredients
Reduce the heat to low and stir in 1 cup of marinara sauce along with the Boursin cheese. Mix well until the cheese melts completely into the sauce, creating a creamy texture. This should take about 2-3 minutes, and the rich aroma will signal it’s ready for the next step.

Step 5: Mix Pasta
Gently fold in the cooked rigatoni to the pot with the sauce. Toss the pasta thoroughly for about 2 minutes until each piece is well-coated with the creamy Boursin mixture. The heat from the pasta will help meld all the flavors together beautifully.

Step 6: Serve
Once everything is combined, remove the pot from the heat. For an appealing finish, garnish with freshly chopped herbs or additional cheese if desired. Serve the creamy rigatoni with Boursin cheese warm, allowing its rich flavors to shine through in every comforting bite.

Make Ahead Options

These Creamy Rigatoni with Boursin Cheese are perfect for meal prep enthusiasts! You can cook the rigatoni pasta and sauté the aromatics (onion and garlic) up to 24 hours in advance. Store these components in airtight containers in the refrigerator. Just before serving, reheat the pasta and aromatics gently in a pot, then add your browned ground meat and marinara sauce along with the Boursin cheese to create that luscious sauce. For optimal flavor and quality, be sure to mix everything together right before serving to ensure the pasta stays nicely coated and creamy. Enjoy a hassle-free, delicious dinner during those busy nights!

Variations & Substitutions for Creamy Rigatoni with Boursin Cheese

Customize this creamy pasta dish to suit your tastes and dietary needs for a delightful meal that feels just right!

  • Vegetarian: Swap out meat for plant-based protein like lentils or mushrooms for a hearty, veggie-packed dish. You’ll still enjoy that satisfying creamy texture while indulging in fresh, vibrant flavors.

  • Gluten-Free: Replace rigatoni with your favorite gluten-free pasta for a similar texture that meets your dietary requirements. Enjoy the same comforting dish without worrying about gluten!

  • Cheese Alternatives: Experiment with ricotta or goat cheese for a unique twist. Each cheese will impart its own flavorful notes while still letting the creamy vibe shine through.

  • Heat Level: Add red pepper flakes or sautéed jalapeños for a spicy kick. Spicy elements can elevate your creamy rigatoni and leave a lasting impression on your taste buds.

  • Veggie Boost: Stir in seasonal vegetables like spinach, bell peppers, or zucchini for a nutritious boost. Incorporating veggies not only adds color but enhances the overall flavor profile.

  • Herb Infusion: Substitute Italian seasoning with fresh herbs like basil or parsley for a vibrant taste. Fresh herbs can brighten the dish and keep it feeling new and exciting every time you make it!

  • Flavor Enhancers: For added umami, sprinkle in nutritional yeast or a dash of Worcestershire sauce. These simple additions can truly elevate the complexity of your creamy sauce.

If you’re looking for more delightful comfort recipes, try this Chicken Grilled Cheese or a cozy Mexican Soup Dish to keep the warmth going all week long!

What to Serve with Creamy Rigatoni with Boursin Cheese

Cozying up for dinner? Explore these delightful pairings to complement your creamy pasta masterpiece.

  • Garlic Bread: The warm, buttery flavor of garlic bread is the perfect vessel to scoop up every luscious bite, making your meal even more satisfying.

  • Caesar Salad: Crisp romaine lettuce tossed in a tangy Caesar dressing offers a refreshing contrast, balancing out the richness of the rigatoni beautifully.

  • Roasted Vegetables: A medley of seasonal veggies, such as zucchini and bell peppers, adds a caramelized touch and vibrant colors to your table for added nutrition.

  • Bruschetta: This fresh tomato and basil appetizer brings a zesty brightness that perfectly offsets the creaminess, stimulating your taste buds for what’s to come.

  • White Wine: A chilled glass of Chardonnay enhances the creamy richness while providing a elegant touch to your meal; its acidity complements the flavors harmoniously.

  • Dessert Option: End your meal with a light lemon sorbet. Its tartness cleanses the palate and leaves you with a refreshing finish—perfect after the creamy indulgence!

Expert Tips for Creamy Rigatoni

  • Ingredient Swaps: When substituting Boursin, ensure the cream cheese mixture captures the same herb and garlic flavors for a delicious match.

  • Pasta Perfection: Avoid overcooking the rigatoni; al dente ensures a great bite and prevents it from turning mushy in the creamy sauce.

  • Heat Control: When combining ingredients, keep the heat low once the cheese is added to prevent separation and maintain a luxurious texture.

  • Add Flavor: For an extra kick, consider stirring in red pepper flakes or sautéed mushrooms for a heartier finish in your creamy rigatoni with Boursin cheese.

  • Make Ahead: This dish can be prepped in advance—just undercook the pasta and reheat gently to preserve that creamy texture on serving day.

How to Store and Freeze Creamy Rigatoni with Boursin Cheese

Fridge: Store leftover creamy rigatoni in an airtight container for up to 3 days. Make sure it cools down before sealing to prevent condensation.

Freezer: For longer storage, freeze portions in freezer-safe containers for up to 2 months. Allow to cool completely, and label with the date for easy tracking.

Reheating: To reheat, thaw in the fridge overnight if frozen. Gently warm on the stovetop over low heat, adding a splash of milk or broth to restore creaminess.

Airtight Tips: When storing, make sure the container is airtight to prevent freezer burn and maintain the delightful flavors of your creamy rigatoni with Boursin cheese.

Creamy Rigatoni with Boursin Cheese Recipe FAQs

What is the best way to select ripe tomatoes for the marinara sauce?
Absolutely! When selecting tomatoes, look for ones that are firm yet slightly yielding when pressed. They should have a bright red color without dark spots or blemishes. For the best flavor, choose tomatoes that are in season; these will be naturally sweet and juicy, enhancing your marinara sauce dramatically.

How should I store leftover creamy rigatoni with Boursin cheese?
To keep your creamy rigatoni delicious, store the leftovers in an airtight container in the refrigerator for up to 3 days. Make sure you allow the dish to cool down before sealing, as this prevents condensation from gathering, which can make the pasta soggy.

Can I freeze the creamy rigatoni with Boursin cheese?
Yes! To freeze your creamy rigatoni, let it cool completely first. Then portion the pasta into freezer-safe containers, labeling each with the date. You can store it in the freezer for up to 2 months. Make sure you leave a little space at the top of the container for the pasta to expand.

What should I do if the sauce is too thick after reheating?
Very! If you find that the sauce has thickened too much during storage or reheating, simply add a splash of milk or broth while gently stirring over low heat. This will help regain that creamy consistency without breaking down the flavor profile you’ve created.

Is this recipe suitable for people with dairy allergies?
While the primary ingredients in this creamy rigatoni with Boursin cheese contain dairy, you can absolutely make dietary swaps! For a dairy-free version, try using a plant-based cream cheese alternative along with almond or oat milk to create a creamy texture. Also, opt for a marinara sauce that is free of any dairy ingredients.

How do I know when my pasta is cooked al dente?
To check for al dente, start testing your pasta 2 minutes before the end of the package cooking time. It should be firm but not hard when bitten into, with a slightly chewy texture. Taste a piece to ensure that it meets your desired doneness; this is key to preventing the pasta from becoming mushy in the creamy sauce!

Creamy Rigatoni with Boursin Cheese

Creamy Rigatoni with Boursin Cheese: Your New Comfort Food Fix

This Creamy Rigatoni with Boursin Cheese is a rich and satisfying dish that's quick to prepare, making it your new go-to comfort food.
Prep Time 10 minutes
Cook Time 20 minutes
Total Time 30 minutes
Servings: 4 servings
Course: Pasta
Cuisine: Italian
Calories: 550

Ingredients
  

For the Pasta
  • 1 pound Rigatoni Pasta Feel free to swap with penne or ziti if needed.
For the Sauce
  • 8 ounces Boursin Cheese Can be replaced with a mix of cream cheese, garlic, and herbs.
  • 1 cup Marinara Sauce Store-bought variety saves time.
  • 1 pound Ground Meat (Beef/Sausage) For a lighter option, substitute with plant-based protein.
  • 1 small Onion Chopped.
  • 3 cloves Garlic Minced.
  • 1 teaspoon Italian Seasoning Can make your own using oregano, basil, and thyme.
Optional Add-ins
  • Vegetables (Spinach, Mushrooms, Bell Peppers) Optional for added nutrition and flavor.

Equipment

  • Large pot

Method
 

Step-by-Step Instructions
  1. Begin by bringing a large pot of salted water to a boil. Add the rigatoni and cook according to package instructions until al dente, about 10-12 minutes. Drain the pasta and set aside.
  2. In the same pot, heat 2 tablespoons of olive oil over medium heat. Add the chopped onion and minced garlic, sauté for 3-4 minutes until translucent and fragrant.
  3. Next, add 1 pound of ground meat to the pot, breaking it apart. Cook for 5-7 minutes until browned and fully cooked.
  4. Reduce heat to low and stir in 1 cup of marinara sauce and Boursin cheese. Mix well until cheese melts completely, about 2-3 minutes.
  5. Gently fold in the cooked rigatoni. Toss for about 2 minutes until coated with the creamy sauce.
  6. Remove from heat and garnish with chopped herbs or additional cheese if desired. Serve warm.

Nutrition

Serving: 1servingCalories: 550kcalCarbohydrates: 60gProtein: 25gFat: 25gSaturated Fat: 10gPolyunsaturated Fat: 1gMonounsaturated Fat: 3gCholesterol: 80mgSodium: 800mgPotassium: 600mgFiber: 3gSugar: 5gVitamin A: 500IUVitamin C: 8mgCalcium: 150mgIron: 3mg

Notes

For an extra kick, stir in red pepper flakes or sautéed mushrooms. Can be prepped in advance—just undercook the pasta and reheat gently.

Tried this recipe?

Let us know how it was!

Savory Chicken Bell Pepper Ranch Burritos in 30 Minutes!

“Have you ever found yourself staring blankly into the fridge, wishing for a quick yet satisfying dinner solution?” I know the feeling all too well, and that’s where these Chicken Bell Pepper Ranch Burritos come to the rescue! With tender strips of chicken and a rainbow of bell peppers tucked inside soft flour tortillas, they’re crafted for those hectic weeknights when you crave a hearty meal without the fuss. Not only do these burritos pack a flavorful punch in just 30 minutes, but they also serve as a canvas for countless variations to satisfy any palate. Whether you’re sticking to a favorite recipe or exploring new twists, this dish adapts beautifully to your tastes and dietary preferences. So, are you ready to roll into a scrumptious dinner? Let’s dive into making these delightful burritos!

Why Are Chicken Bell Pepper Ranch Burritos Great?

Quick prep time: These delicious burritos come together in just 30 minutes, perfect for busy weeknights.
Flavor explosion: The savory chicken and zesty ranch dressing create an irresistible taste sensation that your family will love.
Customizable: Easily adapt the ingredients to suit your tastes—swap chicken for shrimp or beef, or even try a spicy buffalo dressing!
Nutrient-packed: Filling options like brown rice and black beans add extra nutrition without sacrificing flavor. You can enjoy a satisfying meal that aligns with your dietary needs.
Family favorite: Ideal for both kids and adults, these burritos are sure to become a go-to dish. Try pairing them with Sizzling Chicken Pepper for another explosive flavor combo!

Chicken Bell Pepper Ranch Burritos Ingredients

Here’s everything you need to whip up these delectable burritos in no time!

For the Filling

  • Chicken Strips – A great protein source that brings flavor and texture; ground turkey or beef can also work beautifully.
  • Bell Peppers – Provide freshness and crunch; feel free to mix colors for a vibrant touch!
  • Ranch Dressing – Offers creaminess and tang; consider a light version or homemade ranch for a health-conscious swap.
  • Cooked Rice – Optional for added texture; quinoa makes a great substitute, or skip altogether for a lower-carb meal.

For the Wrap

  • Flour Tortillas – Perfect for holding all the tasty filling; whole wheat tortillas are an excellent alternative for health buffs.
  • Shredded Cheese – Adds a luscious, rich flavor; try cheddar or Monterey Jack, or omit for a dairy-free delight!

With these Chicken Bell Pepper Ranch Burritos ingredients, you’re well on your way to creating a family-approved meal that’s quick, adaptable, and oh-so-delicious!

Step‑by‑Step Instructions for Chicken Bell Pepper Ranch Burritos

Step 1: Cook Chicken
In a large skillet over medium heat, add a splash of oil and cook seasoned chicken strips for about 5–7 minutes, stirring occasionally. Cook until the chicken is browned and reaches an internal temperature of 165°F (75°C), ensuring it’s no longer pink in the middle. Set the cooked chicken aside in a bowl.

Step 2: Sauté Peppers
In the same skillet, add sliced bell peppers, cooking for 3–4 minutes until they are softened and vibrant. Stir frequently to avoid burning, and enjoy the colorful aroma filling your kitchen! This step brings out the peppers’ natural sweetness, which will complement the Chicken Bell Pepper Ranch Burritos beautifully.

Step 3: Mix Filling
Remove the skillet from heat and carefully stir in the creamy ranch dressing, shredded cheese, and optional cooked rice. Combine everything thoroughly until the cheese is slightly melted and all ingredients are well coated. This flavorful mixture will be the heart of your Chicken Bell Pepper Ranch Burritos.

Step 4: Assemble Burritos
Take a flour tortilla and spoon a generous amount of the filling onto the center. Fold the sides over the filling, then roll tightly from the bottom up to create your burrito. Repeat this process until all the filling is used, ensuring each Chicken Bell Pepper Ranch Burrito is packed just right for optimal flavor.

Step 5: Heat Burritos
Wipe the skillet clean and return it over medium-low heat. Place the burritos seam-side down in the skillet and cook for about 2–3 minutes on each side until they are golden brown and crispy. This crispy finish adds a wonderful texture to the Chicken Bell Pepper Ranch Burritos, enhancing the overall experience.

Storage Tips for Chicken Bell Pepper Ranch Burritos

Fridge: Wrapped burritos can be stored in the fridge for up to 3 days. Make sure to keep them airtight to maintain freshness and prevent drying out.

Freezer: For longer storage, place wrapped burritos in the freezer for up to 2 months. Use freezer-safe bags or containers to avoid freezer burn.

Reheating: When ready to enjoy, reheat frozen burritos in the microwave for 1–2 minutes or on a skillet over medium heat for a crispy exterior, ensuring they are heated through.

Serving Suggestions: Enhance your Chicken Bell Pepper Ranch Burritos with fresh salsa or guacamole when serving to elevate the flavor experience!

Expert Tips for Chicken Bell Pepper Ranch Burritos

  • Cool Before Rolling: Let the filling cool slightly before rolling your burritos. This helps prevent sogginess that can occur with hot fillings.

  • Don’t Overpack Tortillas: Avoid overstuffing your tortillas! A well-packed burrito rolls up easier and won’t burst at the seams while cooking.

  • Perfectly Heat Leftovers: To reheat leftover Chicken Bell Pepper Ranch Burritos, either microwave them for a quick fix or lightly toast them in a skillet for the best crispiness.

  • Customize Ingredients: Feel free to swap in your favorite proteins or veggies! Consider adding black beans for a fiber boost or grilled shrimp for a seafood twist.

  • Select the Right Tortillas: Opt for flour tortillas for a classic taste, but whole wheat is a nutritious alternative that holds up just as well!

  • Maintain Texture: Sauté bell peppers until they’re just softened for that delightful crunch in your Chicken Bell Pepper Ranch Burritos. Overcooked peppers may lose their vibrant flavor.

Chicken Bell Pepper Ranch Burritos Variations

Feel free to get creative with these delicious burritos – there are so many fun ways to tailor them to your taste!

  • Beefy Swap: Substitute ground beef for chicken for a classic twist; the savory flavor will satisfy meat lovers.

  • Shrimp Delight: Swap in grilled shrimp instead of chicken for a seafood-inspired delight that’ll tantalize your taste buds.

  • Black Beans Boost: Add black beans for a hearty boost of protein and fiber, making your burritos even more satisfying.

  • Spicy Buffalo Style: Mix buffalo sauce with the ranch dressing for a tangy, spicy flavor; it’ll add a zing that’ll wake up your taste buds!

  • Whole Wheat Wrap: Opt for whole wheat tortillas instead of flour for a healthier option packed with additional nutrients.

  • Veggie Power: Load up on extra veggies like zucchini or corn for a vibrant crunch that enhances both flavor and texture.

  • Creamy Avocado Twist: Incorporate mashed avocado into the filling for an extra creamy layer that complements the ranch beautifully, elevating this hearty dish.

  • Tex-Mex Flair: Sprinkle in some taco seasoning to spice up the chicken; it’ll infuse every bite with zesty notes that pair perfectly with fresh sides like salsa or guacamole.

As you can see, the possibilities are as varied as they are delicious! You can even explore different flavor combinations by pairing your burritos with Blt Chicken Salad for a refreshing side or try them alongside a bowl of Tuscan Chicken Soup for a heartwarming meal. Get ready to enjoy a new favorite!

What to Serve with Chicken Bell Pepper Ranch Burritos?

Elevate your meal with complementary sides that bring out the best in these savory burritos.

  • Fresh Guacamole: A creamy and zesty addition that perfectly balances the savory flavors of the burritos while providing a refreshing touch.

  • Salsa Verde: The bright acidity of this tangy salsa adds a delightful contrast, enhancing each bite with a burst of flavor and freshness.

  • Crispy Tortilla Chips: These add a satisfying crunch to your meal, perfect for scooping up extra ranch or salsa while providing a delightful texture variation.

  • Mexican Street Corn Salad: This sweet and spicy side dish, packed with fresh ingredients, creates a vibrant celebration of flavors that complements the burritos beautifully.

  • Black Bean Salad: Offering a protein-packed option, this dish brings contrasting textures and flavors, enhancing the heartiness of your dinner while keeping it light.

  • Chilled Cucumber Salad: A cool, refreshing side, this salad provides a crisp counterpoint to the warm, hearty burritos, making each bite feel even more satisfying.

  • Margaritas: For an adult beverage pairing, these tangy cocktails beautifully complement the flavors of the burritos, making every bite a fiesta.

  • Chocolate Tres Leches Cake: End the meal with a delightful twist. This rich, moist dessert completes the dining experience with a sweet finale that everyone will love.

Make Ahead Options

These Chicken Bell Pepper Ranch Burritos are perfect for meal prep enthusiasts! You can prepare the filling—chicken strips, sautéed bell peppers, ranch dressing, and cheese—up to 24 hours in advance. Simply store it in an airtight container in the refrigerator to maintain freshness. When you’re ready to serve, warm the filling on the stovetop and assemble the burritos in just a few minutes. If you’d like to take it a step further, you can roll the burritos and wrap them individually in foil; they keep well in the fridge for up to 3 days. Just heat them in a skillet until golden brown for delightful, restaurant-quality results with minimal effort!

Chicken Bell Pepper Ranch Burritos Recipe FAQs

What is the best type of bell peppers to use for Chicken Bell Pepper Ranch Burritos?
Absolutely! You can use any color of bell peppers—red, yellow, orange, or green. Each variety offers a slightly different sweetness level, so feel free to mix them for a colorful presentation that will make your burritos even more appetizing.

How should I store leftover Chicken Bell Pepper Ranch Burritos?
To keep your burritos fresh, wrap them tightly in foil or place them in an airtight container and store them in the fridge for up to 3 days. If you want to store them for longer, they can go in the freezer for up to 2 months. Make sure to seal them well to prevent freezer burn!

Can I freeze Chicken Bell Pepper Ranch Burritos? If so, how?
Yes, you can freeze them! Just wrap each burrito in plastic wrap or foil, then place them in a freezer-safe bag or container. This will help preserve their taste and texture. When you’re ready to eat, thaw them overnight in the fridge and reheat in the microwave for about 1-2 minutes or on a skillet over medium heat until heated through.

What should I do if my burritos are soggy?
If your burritos end up soggy, it’s likely due to moisture from the filling or not letting them cool before wrapping. For future burritos, make sure to let the filling cool before assembling, and consider using less ranch dressing or opting for a thicker version. You can also toast them slightly longer in the skillet for that delightful crispiness!

Can I use gluten-free tortillas for Chicken Bell Pepper Ranch Burritos?
Very much so! If you’re avoiding gluten, just swap your regular flour tortillas with gluten-free ones. There are many brands available that hold up well for burritos, offering the same comfort without compromise. Enjoy your meal worry-free!

Is this recipe suitable for kids and picky eaters?
Absolutely! The flavors in Chicken Bell Pepper Ranch Burritos are mild and approachable. You can adjust the seasoning and filling to suit individual tastes, making it a great family-friendly option. Kids love the fun of rolling their own burritos, too, which makes dinner interactive and enjoyable!

Chicken Bell Pepper Ranch Burritos

Savory Chicken Bell Pepper Ranch Burritos in 30 Minutes!

Delicious Chicken Bell Pepper Ranch Burritos made in just 30 minutes, perfect for a quick dinner solution.
Prep Time 15 minutes
Cook Time 15 minutes
Total Time 30 minutes
Servings: 4 burritos
Course: Dinner
Cuisine: American
Calories: 400

Ingredients
  

Filling
  • 1 lb Chicken Strips can substitute ground turkey or beef
  • 2 Bell Peppers mixed colors for a vibrant touch
  • 1/2 cup Ranch Dressing light version or homemade can be used
  • 1 cup Cooked Rice optional; quinoa makes a great substitute
Wrap
  • 4 Flour Tortillas whole wheat is a nutritious alternative
  • 1 cup Shredded Cheese cheddar or Monterey Jack recommended

Equipment

  • Skillet

Method
 

Cooking Steps
  1. In a large skillet over medium heat, add a splash of oil and cook seasoned chicken strips for about 5–7 minutes until browned and cooked through.
  2. In the same skillet, add sliced bell peppers and cook for 3–4 minutes until softened.
  3. Remove from heat and stir in ranch dressing, shredded cheese, and optional cooked rice until well combined.
  4. Spoon filling onto the center of a tortilla, fold sides, and roll tightly to create burritos.
  5. Wipe the skillet clean, heat over medium-low, and cook burritos seam-side down for 2–3 minutes on each side until golden brown.

Nutrition

Serving: 1burritoCalories: 400kcalCarbohydrates: 50gProtein: 25gFat: 15gSaturated Fat: 7gPolyunsaturated Fat: 1gMonounsaturated Fat: 6gCholesterol: 70mgSodium: 900mgPotassium: 600mgFiber: 3gSugar: 2gVitamin A: 20IUVitamin C: 80mgCalcium: 15mgIron: 10mg

Notes

Let the filling cool slightly before rolling the burritos to avoid sogginess. Don't overpack tortillas for easier rolling.

Tried this recipe?

Let us know how it was!

Stay Connected

Get recipes via email: