Get my cookbooks

Irresistible Biscoff Cake with Creamy Cookie Butter Frosting

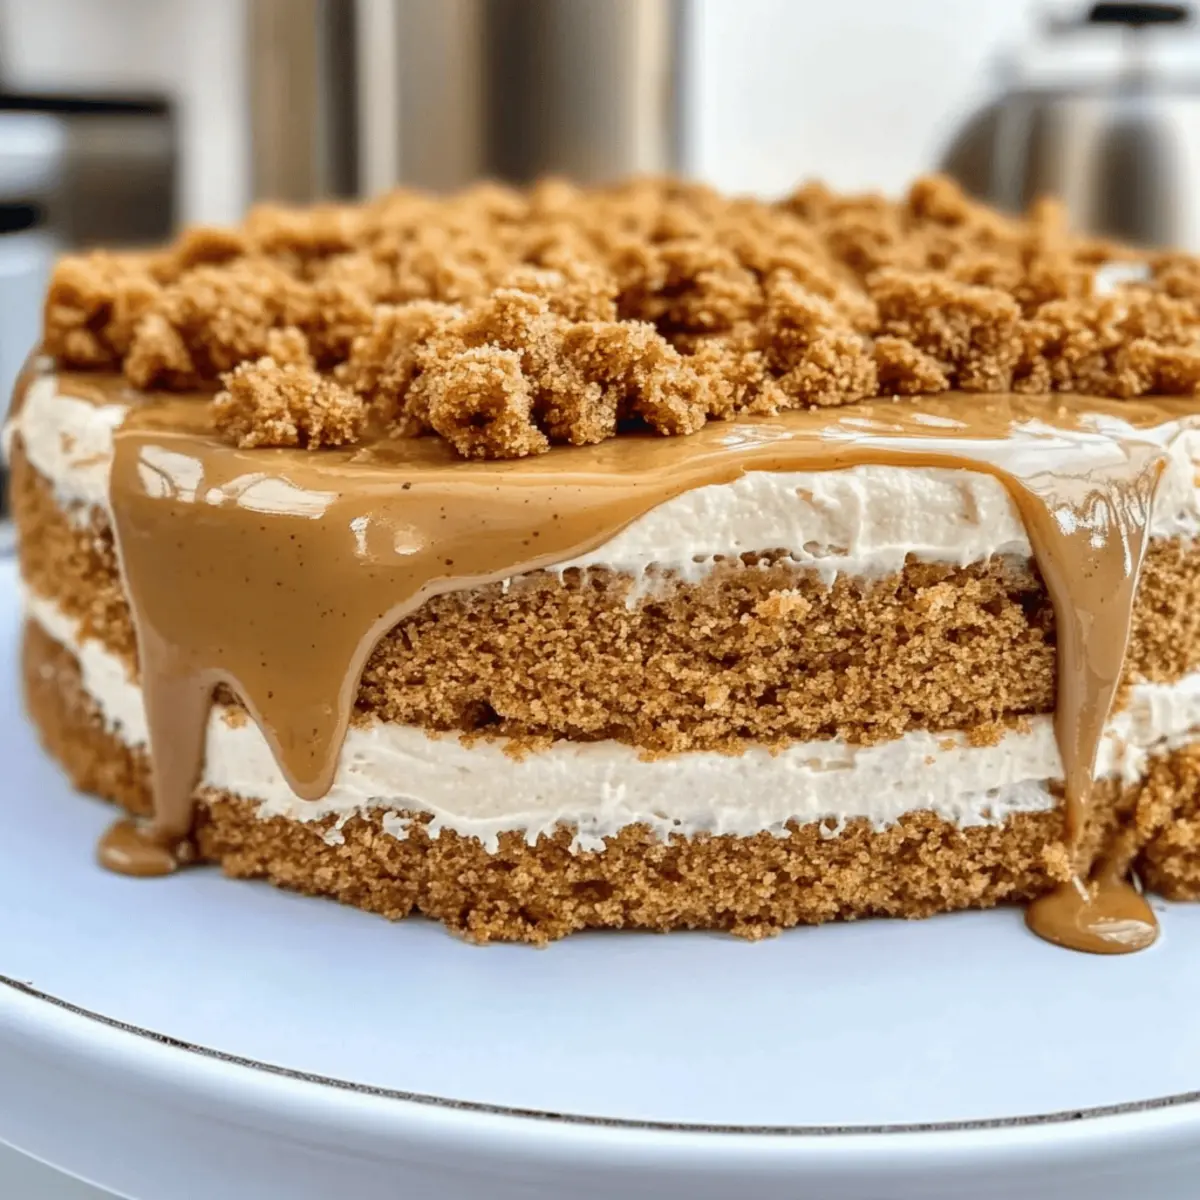
As I reached for my cozy, perfectly worn Biscoff cookie jar, memories of delightful afternoons flooded back. There’s something so special about transforming those iconic cookies into a stunning Biscoff Cake, an adventure that indulges the senses. The layers of this cake are infused with dark brown sugar and warm cinnamon, creating a moist texture that pairs beautifully with a smooth cookie butter frosting. Not only is it a feast for the eyes, but it’s also a quick and impressive dessert for gathering your loved ones. Perfect for celebrations or a treat just because, this cake offers a sweet escape from mundane snacks. Are you ready to dive into this delicious journey and bask in the irresistible aroma of cookie butter?

Why is Biscoff Cake a Must-Try?

Irresistible Flavors: The rich combination of Biscoff cookies, dark brown sugar, and cinnamon creates a deeply satisfying taste that will captivate dessert lovers.

Easy to Make: With straightforward steps, even novice bakers can craft this stunning cake effortlessly—perfect for those who want to impress without the hassle.

Versatile option: Whether served at parties, birthdays, or cozy family gatherings, this cake is a crowd-pleaser that pairs splendidly with coffee or tea.

Decadent Frosting: The creamy cookie butter frosting is a luxurious touch that elevates this cake to a true indulgence, reminiscent of a plush dessert.

Make Ahead: You can freeze the cake layers or store the finished cake in the fridge for days, making it a convenient option for busy schedules.

Dive into this delightful recipe and discover the magic of Biscoff cake, just like with my Strawberry Cheesecake or irresistible Nutella Pancakes Blend!

Biscoff Cake Ingredients

• Delight in creating the delectable Biscoff cake with these essential ingredients.

For the Cake

  • All-Purpose Flour – Base structure for the cake; substitute with gluten-free flour for a gluten-free version.
  • Granulated Sugar – Adds sweetness and complements texture; adjust the amount for desired sweetness.
  • Dark or Light Brown Sugar – Provides moisture and depth of flavor; light brown sugar is a good alternative if dark is unavailable.
  • Baking Powder – This leavening agent ensures a light texture; avoid substituting with baking soda.
  • Ground Cinnamon – Infuses aromatic warmth, essential for that Biscoff flavor; nutmeg can be a delightful alternative.
  • Fine Salt – Enhances flavors and balances sweetness; sea salt can be used for a similar effect.
  • Unsalted Butter – Contributes moisture and richness; for a dairy-free option, substitute with vegan butter.
  • Egg Whites (or Whole Eggs) – Essential for structure and moisture; swap with aquafaba or flaxseed meal mixed with water for a vegan version.
  • Buttermilk – Adds moisture and tang; mix dairy-free milk with lemon juice or vinegar as an alternative.
  • Vegetable or Canola Oil – Keeps the cake moist; coconut oil can serve as a suitable substitute.
  • Vanilla Extract – Enhances overall flavor; consider using vanilla bean paste for extra richness.

For the Frosting

  • Heavy Whipping Cream – Adds creaminess to the buttercream; coconut cream is a great dairy-free option.
  • Cookie Butter – The star ingredient that gives the frosting its signature flavor; no substitutes recommended for the full effect.

For Decoration

  • Biscoff Cookies – Perfect for decoration and added texture; similar spiced cookies can be used if needed.

Step‑by‑Step Instructions for Biscoff Cake

Step 1: Preheat and Prepare
Begin by preheating your oven to 350°F (175°C). While it warms up, prepare three 8-inch cake pans by lining them with parchment paper and spraying them generously with non-stick spray. This will ensure your Biscoff cake layers release easily after baking.

Step 2: Combine Dry Ingredients
In a large mixing bowl, whisk together the all-purpose flour, granulated sugar, both types of brown sugar, baking powder, ground cinnamon, and fine salt. This mixture forms the flavorful base of your cake. Set this bowl aside, as it’s essential to have these dry ingredients well blended before moving on.

Step 3: Cream Butter and Mix in Egg Whites
In another bowl, cream the unsalted butter until it’s light and fluffy using a hand mixer or stand mixer. Once creamed, gradually add the dry ingredient mixture in batches until it resembles coarse crumbs. Incorporate the egg whites and mix until fully combined, ensuring a rich and moist batter.

Step 4: Add Liquid Ingredients
Next, add the buttermilk, vegetable or canola oil, and vanilla extract to the batter. Mix everything together until the batter is smooth and free of lumps. This mixture will create the tender texture that makes the Biscoff cake delightful and indulgent.

Step 5: Bake the Cake Layers
Divide the batter evenly among the prepared cake pans. Transfer them to the preheated oven and bake for 33-35 minutes. Check for doneness by inserting a toothpick into the center; it should come out clean with a few moist crumbs. Remove the pans from the oven once baked.

Step 6: Cool the Cake Layers
Let the cake layers cool in the pans for about 15 minutes. After cooling, gently remove them from the pans and place them on a wire rack. For easier handling while assembling, you can also freeze the layers for a brief period until firm.

Step 7: Prepare the Frosting
To make the frosting, beat the unsalted butter in a mixing bowl until completely smooth. Gradually add the powdered sugar and heavy whipping cream, mixing until you achieve a creamy consistency. Set aside a small portion for decorating your Biscoff cake later.

Step 8: Mix in Cookie Butter
Take the reserved frosting and mix in the cookie butter until thoroughly combined. This will create a rich, flavorful frosting that complements the moist layers of your Biscoff cake perfectly, allowing the iconic cookie taste to shine through.

Step 9: Assemble the Layers
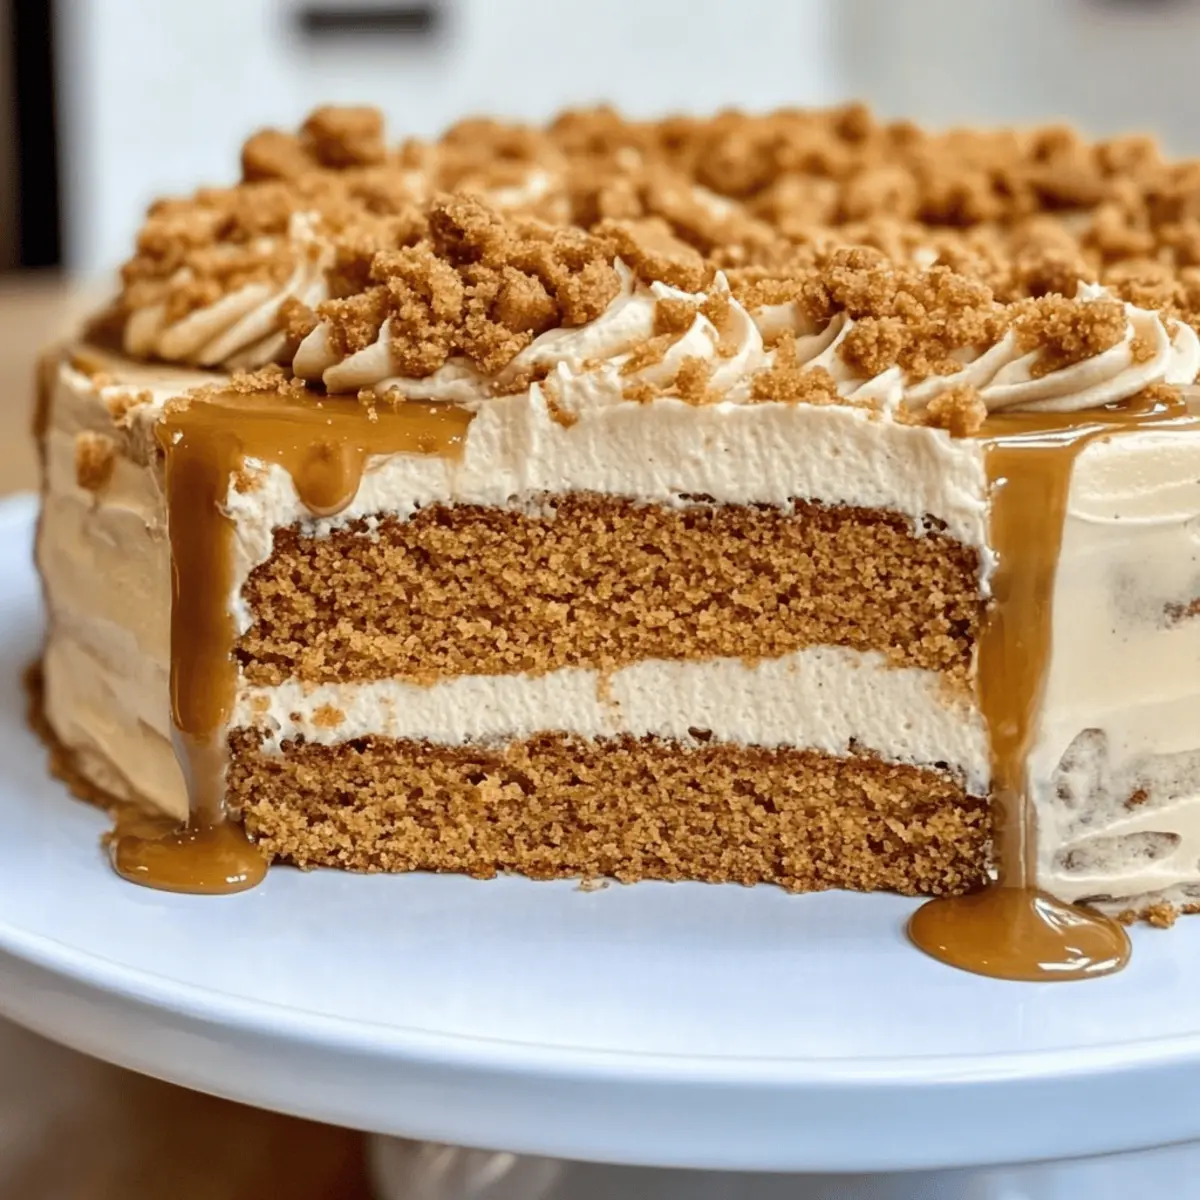
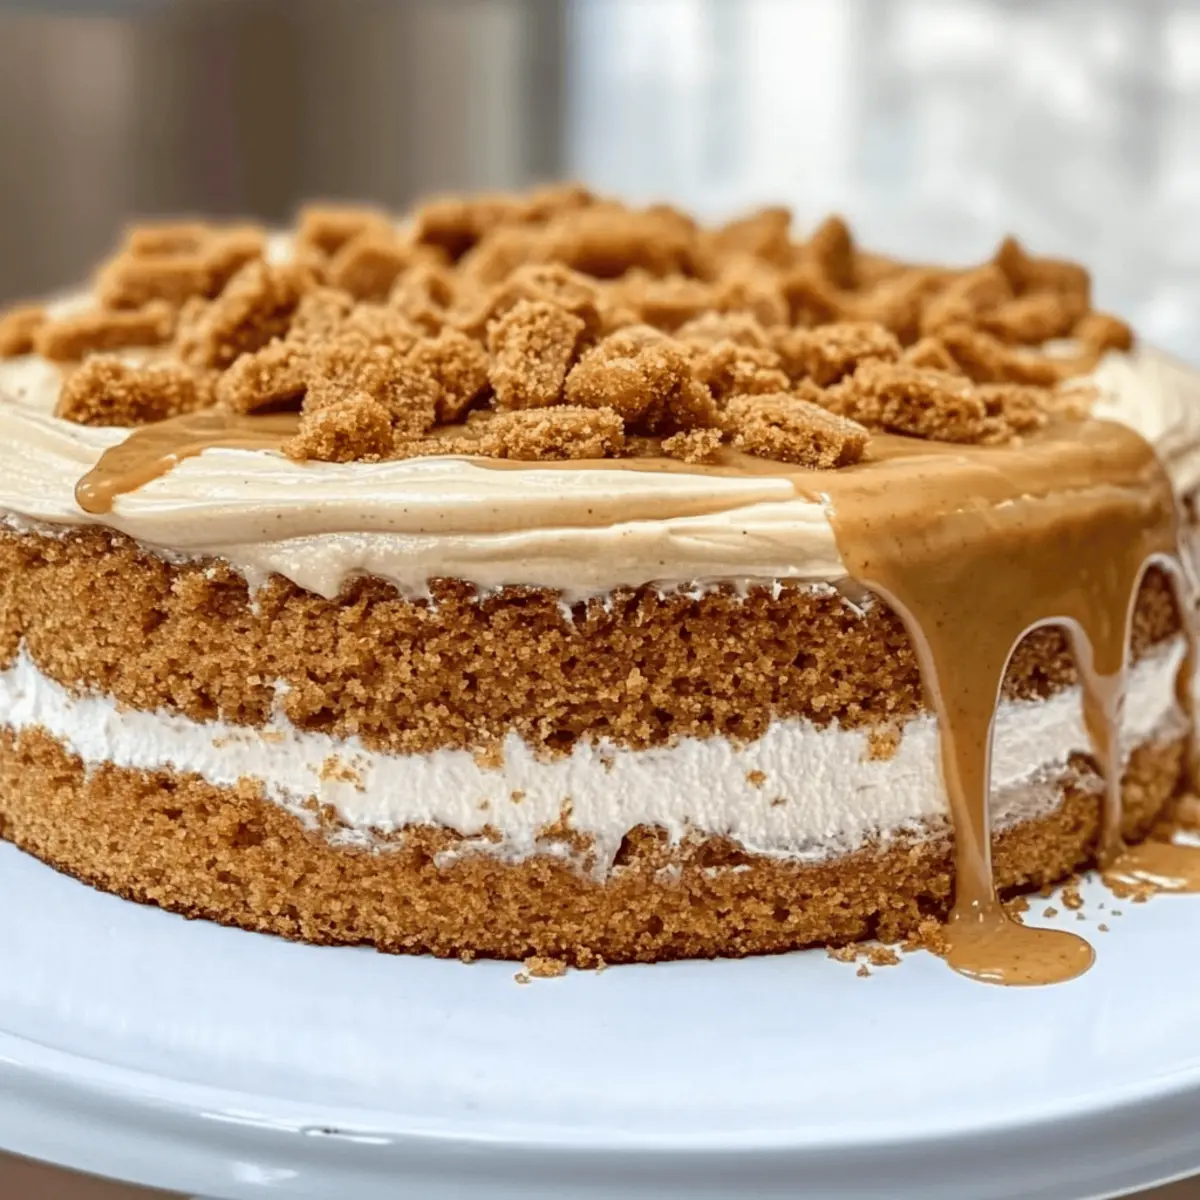
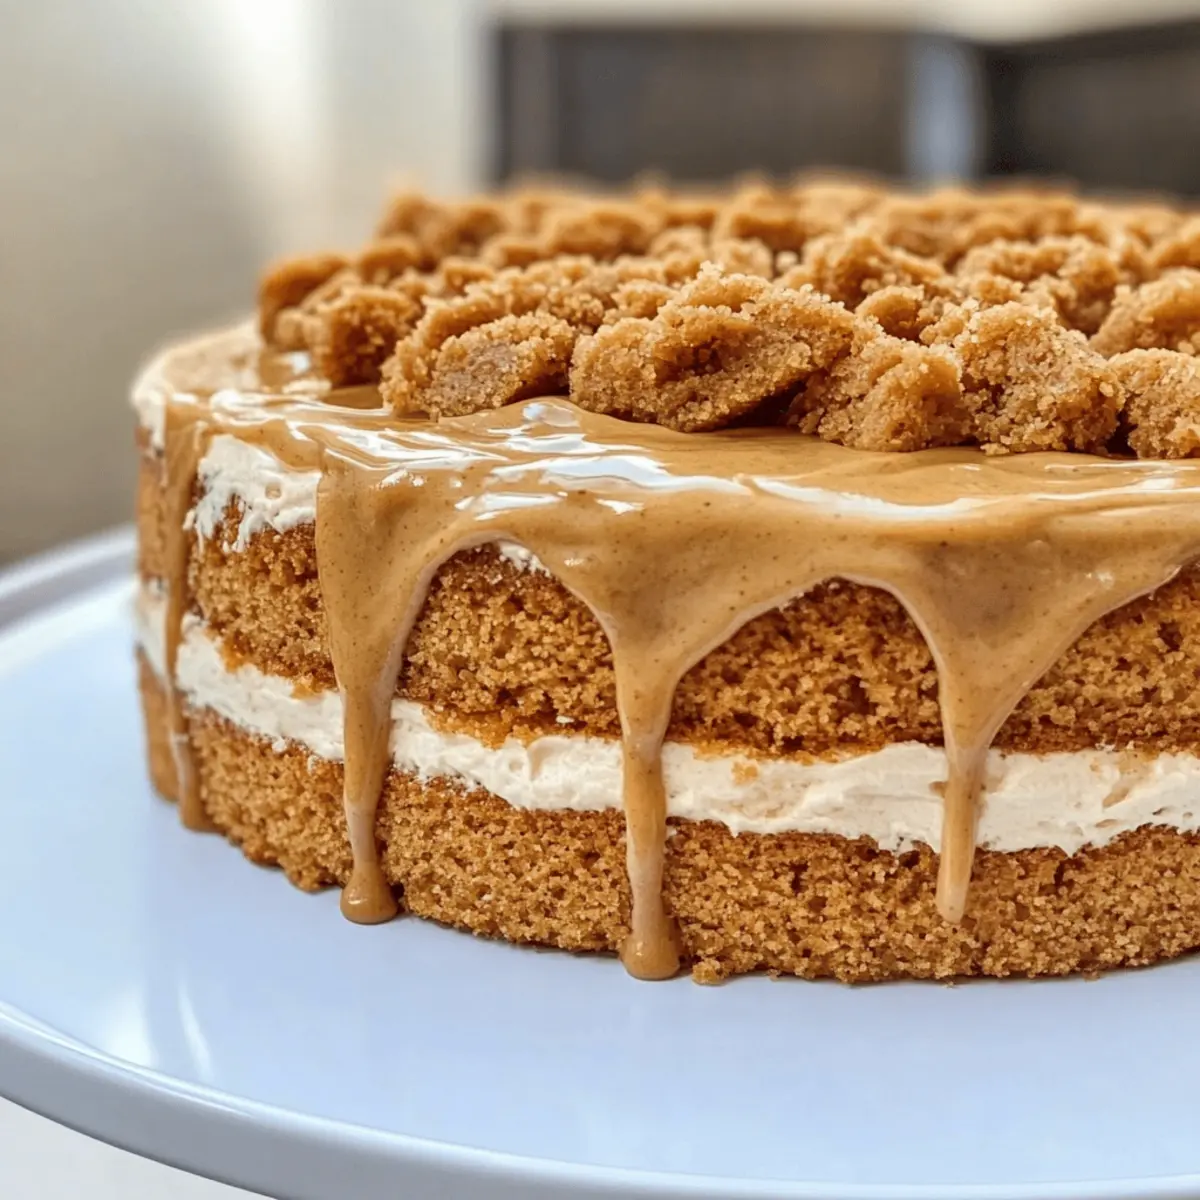
Now it’s time to assemble your cake! Start by placing one layer on a serving plate. Spread a generous layer of frosting on top, followed by a drizzle of warm cookie butter. Repeat this process with the remaining layers, alternating between vanilla and cookie butter frosting for a beautiful presentation.

Step 10: Finish with Decoration
Once assembled, apply a crumb coat to the outer layer of the cake and chill it for about 30 minutes to set. After chilling, apply a final layer of frosting for that perfect finish. Top off the cake with crushed Biscoff cookies for an eye-catching decoration that hints at the deliciousness inside your Biscoff cake.

How to Store and Freeze Biscoff Cake

Room Temperature: Store the Biscoff cake at room temperature for up to 2 days, covered with a cake dome or plastic wrap to keep it fresh and moist.

Fridge: For extended freshness, keep the frosted cake in the fridge for up to 1 week. Cover it well to prevent it from absorbing other flavors.

Freezer: To freeze cake layers, wrap them tightly in plastic wrap and aluminum foil. They can last in the freezer for up to 1 month, preserving the delightful taste of the Biscoff cake.

Reheating: If desired, thaw the frozen layers in the fridge overnight before assembling. To serve, bring the cake to room temperature for a perfect slice!

Expert Tips for Biscoff Cake

  • Room Temperature Ingredients: Always start with room temperature eggs and butter to ensure a smooth batter and even texture in your Biscoff cake.

  • Precise Measurements: Use a kitchen scale when weighing your dry ingredients for consistent results, especially if you want to avoid the common mistake of dry or dense cake layers.

  • Chill Layers: Cooling the cake layers before frosting not only makes them easier to handle, but also helps prevent sliding and tipping, ensuring a beautifully layered Biscoff cake.

  • Warm Cookie Butter: For effortless drizzling between layers, warm your cookie butter lightly in the microwave. This will create a silky smooth flow.

  • Leveling Layers: Before stacking, make sure to level the tops of your cake layers using a serrated knife; this helps achieve a polished, professional-looking finish.

  • Support for Tiered Cakes: If you’re making a tiered Biscoff cake, remember to use dowels or supports between layers to prevent sagging or collapsing during display.

Make Ahead Options

These decadent Biscoff Cake layers are perfect for meal prep enthusiasts! You can bake the cake layers up to 24 hours in advance and refrigerate them (wrapped tightly in plastic wrap) to retain their moisture. Additionally, the cookie butter frosting can be made up to 3 days ahead; simply store it in an airtight container in the refrigerator. When you’re ready to serve, allow the frosting to come to room temperature before spreading it on the chilled cake layers. This not only saves time but ensures that every delightful bite of your Biscoff Cake is just as delicious as when freshly baked, making it a stress-free treat for busy weeknights or special occasions!

Biscoff Cake Variations & Substitutions

Feel free to explore your creativity and customize this delightful Biscoff cake to suit your taste and dietary preferences!

  • Gluten-Free: Replace all-purpose flour with a gluten-free blend for a cake that everyone can enjoy.

  • Vegan Sensation: Use unsweetened almond milk mixed with lemon juice instead of buttermilk, and substitute aquafaba for eggs.

  • Nutty Delight: Add chopped walnuts or pecans into the batter for a delightful crunch that complements the cake’s moistness.

  • Chocolate Twist: Fold in chocolate chips for a delicious chocolatey surprise in every bite, enhancing the flavor profile.

  • Seasonal Spice: Swap ground cinnamon with pumpkin spice for a warm, autumn-inspired variation that’s perfect for fall gatherings.

  • Extra Creamy: Stir in additional heavy cream while making the frosting for an even more luscious and rich topping, perfect for a decadent finish.

  • Fruity Surprise: Add a layer of raspberry or strawberry jam between the cake layers to introduce a tart contrast that beautifully balances the sweetness.

  • Different Extracts: Try almond or maple extract in place of vanilla to create a unique flavor dimension that surprises the palate.

Engage with flavors and textures just like you would in my favorite Strawberry Cheesecake or a comforting batch of Nutella Pancakes Blend! Customize your Biscoff cake today and make it your own!

What to Serve with Biscoff Cake

The perfect Biscoff cake deserves a beautiful spread to complement its unique flavors and delightful texture.

  • Rich Coffee: A warm, bold cup enhances the cake’s sweetness and harmonizes the spiced notes, creating a classic pairing.
  • Vanilla Ice Cream: Creamy, cold ice cream provides a refreshing contrast and balances the cake’s richness, making every bite heavenly.
  • Caramel Drizzle: Adding a warm caramel sauce amplifies the dessert experience, as its buttery sweetness beautifully elevates the cake’s flavors.
  • Fresh Berries: Juicy raspberries or strawberries introduce a tart brightness that cuts through the sweetness, adding freshness and color to your plate.
  • Espresso Martinis: This delightful cocktail offers a spark of caffeine and a sophisticated twist, making it the perfect drink for gatherings.
  • Chocolate Ganache: A smooth layer of chocolate ganache adds decadence, creating an indulgent experience for chocolate lovers to savor alongside the cake.
  • Whipped Cream: Light and airy, simply dolloping it on top brings an elegant touch and balances the dense frosting beautifully.
  • Nuts and Caramel Clusters: A sprinkle of toasted nuts or caramel clusters provides crunch and texture, enhancing the overall taste sensation.
  • Fruit Sorbet: A refreshing fruit sorbet serves as a light, palate-cleansing sidekick, balancing richness with fruity zing.

Biscoff Cake Recipe FAQs

How do I select ripe ingredients for the Biscoff Cake?
Absolutely! Selecting ripe and fresh ingredients is crucial for the best flavor. For the unsalted butter, make sure it’s at room temperature for easy creaming. If you’re using eggs, opt for fresh ones as they help in achieving a great texture. As for the Biscoff cookies, look for packages without any visible damage or dark spots to ensure they’re fresh and full of flavor.

How should I store my Biscoff Cake?
Very good question! For optimal freshness, you can store your Biscoff cake at room temperature for about 2 days, covered with a cake dome or plastic wrap. If you want to keep it longer, the frosted cake can last up to a week in the fridge if well covered to keep out unwanted smells.

Can I freeze leftover Biscoff Cake?
Yes, indeed! To freeze your Biscoff cake layers, wrap them tightly in plastic wrap, followed by aluminum foil to prevent freezer burn. They can last in the freezer for up to 1 month. When you’re ready to use them, simply thaw in the refrigerator overnight, and allow the layers to come to room temperature before frosting.

What should I do if my cake layers are too dense or heavy?
If you encounter dense cake layers, it often means the batter was overmixed, or there wasn’t enough leavening agent. The key is to cream the butter and sugars until light and fluffy before adding the dry ingredients, and mix them just until combined. If you suspect too little baking powder was added, try again with fresh ingredients, as old baking powder can lose effectiveness.

Are there any dietary considerations for making Biscoff Cake?
Absolutely! If you’re making Biscoff cake for someone with dietary restrictions, you can make it vegan by substituting the eggs for aquafaba (3 tablespoons per egg) or flaxseed meal mixed with water (1 tablespoon of flaxseed meal with 3 tablespoons of water per egg). For a gluten-free version, simply use a gluten-free all-purpose flour blend, and substitute the buttermilk with a dairy-free alternative mixed with vinegar or lemon juice.

How can I make Biscoff Cake suitable for pets?
Though Biscoff cookies are delicious for us, they contain sugar and spices which may not be suitable for pets. If you want to share a pup-friendly treat, consider baking a small batch of dog-friendly cake using plain ingredients like whole wheat flour, unsweetened applesauce, and pumpkin puree instead. Always ensure the goodies you share are safe and healthy for your furry companions!

Biscoff Cake

Irresistible Biscoff Cake with Creamy Cookie Butter Frosting

An irresistible Biscoff Cake that combines iconic cookies with rich flavors and a creamy frosting, perfect for celebrations.
Prep Time 30 minutes
Cook Time 35 minutes
Cooling Time 15 minutes
Total Time 1 hour 20 minutes
Servings: 8 slices
Course: Dessert
Cuisine: American
Calories: 300

Ingredients
  

For the Cake
  • 2 cups All-Purpose Flour or gluten-free flour for a gluten-free version
  • 1 cup Granulated Sugar adjust for desired sweetness
  • 1 cup Dark or Light Brown Sugar light brown sugar can be used if dark is unavailable
  • 1 tbsp Baking Powder do not substitute with baking soda
  • 1 tbsp Ground Cinnamon nutmeg can be a delightful alternative
  • 1 tsp Fine Salt sea salt can be used
  • 1 cup Unsalted Butter or vegan butter for a dairy-free option
  • 4 large Egg Whites or whole eggs; can swap with aquafaba or flaxseed meal mixed with water for a vegan version
  • 1 cup Buttermilk mix dairy-free milk with lemon juice or vinegar as an alternative
  • 1/2 cup Vegetable or Canola Oil coconut oil can be used as a substitute
  • 1 tsp Vanilla Extract consider using vanilla bean paste for extra richness
For the Frosting
  • 1 cup Heavy Whipping Cream or coconut cream as a dairy-free option
  • 1 cup Cookie Butter
For Decoration
  • 10 pieces Biscoff Cookies for decoration; similar spiced cookies can be used

Equipment

  • Mixing Bowl
  • hand mixer or stand mixer
  • 8-inch cake pans
  • Parchment Paper
  • non-stick spray
  • Wire rack

Method
 

Step-by-Step Instructions for Biscoff Cake
  1. Preheat your oven to 350°F (175°C) and prepare three 8-inch cake pans with parchment paper and non-stick spray.
  2. In a large mixing bowl, whisk together the all-purpose flour, granulated sugar, both types of brown sugar, baking powder, ground cinnamon, and fine salt.
  3. Cream the unsalted butter until light and fluffy. Gradually add the dry ingredients until it resembles coarse crumbs. Incorporate the egg whites until fully combined.
  4. Add buttermilk, vegetable oil, and vanilla extract to the batter, mixing until smooth.
  5. Divide the batter among the prepared pans and bake for 33-35 minutes. Check for doneness with a toothpick.
  6. Cool the cake layers in the pans for about 15 minutes before transferring to a wire rack.
  7. Beat the unsalted butter until smooth. Gradually add powdered sugar and cream until creamy.
  8. Mix cookie butter into the reserved frosting until combined.
  9. Assemble the cake by layering frosting and cookie butter between layers.
  10. Apply a crumb coat, chill for 30 minutes, and then finish with a layer of frosting and crushed Biscoff cookies on top.

Nutrition

Serving: 1sliceCalories: 300kcalCarbohydrates: 40gProtein: 4gFat: 15gSaturated Fat: 9gPolyunsaturated Fat: 1gMonounsaturated Fat: 5gCholesterol: 45mgSodium: 200mgPotassium: 150mgFiber: 1gSugar: 20gVitamin A: 500IUVitamin C: 1mgCalcium: 50mgIron: 1mg

Notes

Ensure all ingredients are at room temperature for best results. Chill layers for easier handling when frosting.

Tried this recipe?

Let us know how it was!

Hearty Spicy Chorizo Pumpkin Soup to Warm Your Soul

As the crisp air of autumn settles in, there’s something magical about curling up with a warm bowl of soup. Enter my creamy spicy chorizo pumpkin soup, a delightful blend of rich pumpkin puree and smoky chipotle peppers that will infuse your kitchen with its irresistible aroma. This dish not only warms you from the inside out but is also a filling comfort food you can whip up in under 30 minutes! Whether you’re winding down after a long day or hosting friends for a cozy gathering, this soup fits the bill perfectly. Plus, with options for vegetarian chorizo, it can cater to everyone at your table. Ready to discover your new favorite fall recipe? Let’s dive in!

Why is This Soup So Irresistible?

Comforting Warmth: The creamy texture and spicy kick make this soup the ultimate comfort food. Quick to Prepare: Whip it up in just 30 minutes, perfect for busy weeknights! Flavor Explosion: The combination of smoky chipotle and creamy pumpkin creates a taste sensation that will leave you craving more. Customizable Delight: Easily switch out chorizo for tofu chorizo or add extra veggies for a personal touch. Additionally, it pairs wonderfully with crusty bread or a fresh salad, making it a complete meal that everyone will love! If you’re interested in more heartwarming dishes, check out this savory Sausage Tortellini Soup!

Spicy Chorizo Pumpkin Soup Ingredients

For the Soup

  • Chorizo – Adds rich, spicy flavor; can substitute with beef or tofu chorizo for a vegetarian version.
  • Onion – Enhances the flavor base through caramelization; use yellow or white onion for best results.
  • Garlic – Provides depth and aroma; freshly minced is preferred for maximum flavor.
  • Cumin – Gives warm, earthy notes; adjust according to taste preference.
  • Salt – Enhances all flavors; adjust based on the broth’s saltiness.
  • Black Pepper – Adds subtle heat; can replace with white pepper for a milder taste.
  • Broth (Chicken or Beef) – Forms the soup base; vegetable broth makes it vegetarian.
  • Chipotle Peppers – Introduces smoky heat; use according to desired spice level, substitute with jalapeños for milder flavor.
  • Pumpkin Puree – Gives thickness and sweetness to the soup; opt for fresh homemade puree for a richer taste or use canned for convenience.
  • Cream – Adds richness and smoothness; coconut cream or half-and-half can be used as dairy-free alternatives.

For Garnish

  • Chopped Green Onions – Adds freshness and color to each bowl; sprinkle generously for that extra zing.
  • Roasted Pumpkin Seeds – Provide a delightful crunch; can be pre-purchased or easily roasted at home for a crispy topping.

Remind yourself that this spicy chorizo pumpkin soup is perfect for cozy evenings, whether you’re enjoying a quiet night in or gathering with loved ones!

Step‑by‑Step Instructions for Spicy Chorizo Pumpkin Soup

Step 1: Cook the Chorizo
In a heavy-bottomed pot, over medium heat, add your chorizo, breaking it apart with a wooden spoon. Cook for about 5 minutes, stirring frequently, until the chorizo is browned and has released its flavorful oils. Once done, drain any excess fat to keep your spicy chorizo pumpkin soup from becoming greasy.

Step 2: Sauté the Aromatics
Add the chopped onion to the pot, stirring until it becomes soft and fragrant, which should take around 3-4 minutes. Then, add minced garlic and diced chipotle peppers, cooking for another 1-2 minutes until everything is aromatic and well-combined. This will enhance the depth of flavor in your spicy chorizo pumpkin soup.

Step 3: Combine the Ingredients
Pour in your chosen broth (chicken or vegetable) and add the pumpkin puree along with the cumin, salt, and black pepper. Stir well to combine all the ingredients and allow it to simmer on low heat for about 10 minutes. This simmering time is essential for melding the flavors of the spicy chorizo pumpkin soup together beautifully.

Step 4: Finish with Cream
After simmering, turn off the heat and stir in the cream, giving the soup a rich, smooth consistency. If you prefer a vegan option, you can substitute the cream with coconut milk. Taste and adjust the seasoning if necessary, ensuring your spicy chorizo pumpkin soup is perfectly balanced in flavor.

Step 5: Serve Warm
Ladle the warm, creamy soup into bowls and garnish with chopped green onions and roasted pumpkin seeds for added texture and flavor. The vibrant colors and inviting aroma of your spicy chorizo pumpkin soup will make it hard to resist enjoying every last drop!

What to Serve with Spicy Chorizo Pumpkin Soup

Imagine a warm, inviting dinner table where rich flavors and comforting textures come together beautifully.

  • Crusty Bread: A perfect companion, this bread is ideal for dipping and creates a delightful crunchy contrast to the creamy soup.
  • Fresh Green Salad: A bright, crisp salad with a zesty vinaigrette will balance the soup’s richness and refresh your palate.
  • Garlic Breadsticks: Soft and buttery, these breadsticks add a savory touch, making every bite of your soup even more enjoyable.
  • Roasted Vegetables: Seasonal veggies like Brussels sprouts or carrots provide a hearty side that complements the soup’s flavors wonderfully.
  • Cornbread Muffins: Sweet and crumbly, cornbread brings a delightful sweetness that pairs harmoniously with the spicy undertones in the soup.
  • Crispy Tortilla Chips: These adds a crunchy element for a fun textural contrast, and dipping them into the warm soup is pure joy!
  • Cider or Wine: Pair your meal with a robust cider or a crisp white wine to enhance the rich flavors of your spicy chorizo pumpkin soup; both options add a touch of festivity.
  • Pumpkin Spice Dessert: Top off the meal with a slice of pumpkin pie or spiced cake, bringing the ultimate fall flavors to your dining experience.

Spicy Chorizo Pumpkin Soup Variations

Customize your soup experience with these delightful twists that will keep every spoonful exciting and delicious!

  • Vegan Option: Replace chorizo with tofu chorizo, and use coconut milk instead of cream for a fully plant-based dish.
  • Extra Vegetables: Stir in diced carrots or corn for added sweetness and nutrition; these veggies complement the soup beautifully.
  • Gluten-Free: Ensure your broth is gluten-free to cater to dietary restrictions without sacrificing flavor.
  • Smoky Flavor Boost: Add a touch of smoked paprika for an extra layer of warmth and smokiness that pairs perfectly with chorizo.
  • Heat Levels: For those who love an extra kick, toss in more chipotle peppers or a few dashes of hot sauce to set your taste buds ablaze.
  • Herb Infusion: Sprinkle in fresh herbs like cilantro or parsley before serving to brighten up the flavors and add a pop of color.
  • Creamy Texture: Blend a portion of the soup using an immersion blender to create a smoother consistency while maintaining chunks of chorizo.
  • Spicy Topping: Top your bowls with sliced jalapeños or a dollop of spicy salsa for an added burst of flavor and heat.

This spicy chorizo pumpkin soup is not just a recipe; it’s a canvas for your culinary creativity. If you’re interested in similar comforting recipes, consider trying out the heartwarming Mexican Soup or the rich Soup Joumou Haitian. Enjoy your soup adventures!

Expert Tips for Spicy Chorizo Pumpkin Soup

Chorizo Choice: Use high-quality chorizo for the best flavor; the richness makes all the difference in your spicy chorizo pumpkin soup.

Onion Perfection: Sauté onions until golden for maximum sweetness; don’t rush this step to avoid a raw taste in your soup.

Control the Heat: Start with fewer chipotle peppers if you’re unsure about spice; you can always add more to your spicy chorizo pumpkin soup!

Pumpkin Options: Opt for 100% pumpkin puree, not pie filling, to control sweetness and enhance the soup’s natural flavors.

Blend for Smoothness: For an ultra-creamy texture, consider using an immersion blender, especially if you enjoy a velvety finish.

Make Ahead Options

Preparing your spicy chorizo pumpkin soup in advance is a true gift for busy weeknights! You can cook the chorizo and sauté the aromatics up to 24 hours ahead, just store them in an airtight container in the refrigerator. The soup itself can be fully prepared and will keep well for 3 days in the fridge; just remember to stir in the cream right before serving to maintain its rich texture. When you’re ready to enjoy your meal, simply reheat the soup on the stovetop, stirring occasionally, until warmed through. This means you can enjoy a comforting and flavorful dish that’s just as delicious as when it was first made, all with minimal effort!

How to Store and Freeze Spicy Chorizo Pumpkin Soup

Fridge: Keep your spicy chorizo pumpkin soup in an airtight container for up to 3 days. Reheat on the stove over low heat, stirring occasionally to maintain its creamy texture.

Freezer: For longer storage, freeze the cooled soup in freezer-safe containers for up to 3 months. Thaw in the fridge overnight before reheating and enjoy the comforting flavors again.

Reheating: When reheating, consider adding a splash of broth or cream to restore its rich consistency. Heat gently on the stove rather than in the microwave for the best results.

Storing Leftovers: If possible, store the soup without garnishes to keep the toppings fresh until you’re ready to serve. This will ensure your spicy chorizo pumpkin soup maintains its delightful crunch!

Spicy Chorizo Pumpkin Soup Recipe FAQs

What type of chorizo is best for this soup?
Absolutely! Using high-quality chorizo greatly enhances the flavor of your spicy chorizo pumpkin soup. Look for fresh, spicy chorizo that has a vibrant color and fills the air with a rich aroma when cooked. If you’re looking for a vegetarian option, tofu chorizo is a flavorful alternative that still brings that satisfying spice without meat.

How should I store leftovers?
You can easily store your spicy chorizo pumpkin soup in an airtight container in the fridge for up to 3 days. To reheat, just pop it onto the stove over low heat, stirring occasionally to prevent sticking and keep its creamy texture. This way, you can enjoy this comforting dish multiple times throughout the week!

Can I freeze this soup?
Very! If you’re looking to keep your spicy chorizo pumpkin soup for longer, freezing is a great option. Allow the soup to cool completely, then transfer it to freezer-safe containers—leave some space at the top for expansion. It can be stored for up to 3 months. When you’re ready to enjoy it again, thaw in the fridge overnight before gently reheating on the stove.

What if my soup is too thick or too spicy?
No worries! If you find your spicy chorizo pumpkin soup is thicker than you’d like, you can easily thin it out by adding a splash of broth or cream while reheating. This works wonders for restoring that creamy consistency. For those who find the spice level too intense, simply add a dollop of sour cream or yogurt when serving, which can help tone down the heat.

Is this soup suitable for people with dietary restrictions?
Absolutely! The spicy chorizo pumpkin soup can be easily adapted for various dietary needs. To make it gluten-free, ensure you use gluten-free broth. For a vegan version, just replace the chorizo with tofu chorizo and substitute the cream with coconut milk. It’s a versatile recipe that caters to all kinds of preferences, making it perfect for gatherings where everyone can enjoy!

How can I tell if my pumpkin puree is fresh?
When using canned pumpkin for your spicy chorizo pumpkin soup, it’s important to ensure you’re using pure pumpkin and not pumpkin pie filling, which contains added sugars and spices. Look for products that list 100% pumpkin puree on the label. If using fresh pumpkin, it should be vibrant orange and have a smooth texture without dark spots or blemishes showing on the skin.

Spicy chorizo pumpkin soup

Hearty Spicy Chorizo Pumpkin Soup to Warm Your Soul

Enjoy a comforting bowl of spicy chorizo pumpkin soup, perfect for cozy dinners and gatherings.
Prep Time 10 minutes
Cook Time 20 minutes
Total Time 30 minutes
Servings: 4 bowls
Course: Dinner
Cuisine: Autumn, Comfort Food
Calories: 320

Ingredients
  

For the Soup
  • 1 lb Chorizo Adds rich, spicy flavor; can substitute with beef or tofu chorizo for a vegetarian version.
  • 1 medium Onion Use yellow or white onion for best results.
  • 3 cloves Garlic Freshly minced is preferred for maximum flavor.
  • 1 tsp Cumin Adjust according to taste preference.
  • 1 tsp Salt Adjust based on the broth's saltiness.
  • 1 tsp Black Pepper Can replace with white pepper for a milder taste.
  • 4 cups Broth (Chicken or Beef) Vegetable broth makes it vegetarian.
  • 2 pcs Chipotle Peppers Use according to desired spice level, substitute with jalapeños for milder flavor.
  • 1 cup Pumpkin Puree Opt for fresh homemade puree or use canned for convenience.
  • 1/2 cup Cream Coconut cream or half-and-half can be used as dairy-free alternatives.
For Garnish
  • 1/4 cup Chopped Green Onions Adds freshness and color to each bowl.
  • 1/4 cup Roasted Pumpkin Seeds Provide a delightful crunch.

Equipment

  • heavy-bottomed pot

Method
 

Step-by-Step Instructions
  1. In a heavy-bottomed pot, over medium heat, add your chorizo, breaking it apart with a wooden spoon. Cook for about 5 minutes, stirring frequently, until the chorizo is browned and has released its flavorful oils.
  2. Add the chopped onion to the pot, stirring until it becomes soft and fragrant, which should take around 3-4 minutes. Then, add minced garlic and diced chipotle peppers, cooking for another 1-2 minutes.
  3. Pour in your chosen broth and add the pumpkin puree along with the cumin, salt, and black pepper. Stir well and allow it to simmer on low heat for about 10 minutes.
  4. After simmering, turn off the heat and stir in the cream. Taste and adjust seasoning as necessary.
  5. Ladle the warm soup into bowls and garnish with chopped green onions and roasted pumpkin seeds.

Nutrition

Serving: 1bowlCalories: 320kcalCarbohydrates: 35gProtein: 15gFat: 15gSaturated Fat: 7gPolyunsaturated Fat: 1gMonounsaturated Fat: 9gCholesterol: 50mgSodium: 800mgPotassium: 600mgFiber: 5gSugar: 6gVitamin A: 8000IUVitamin C: 12mgCalcium: 50mgIron: 2mg

Notes

This spicy chorizo pumpkin soup is perfect for cozy evenings, whether you’re enjoying a quiet night in or gathering with loved ones!

Tried this recipe?

Let us know how it was!

Butterbeer Cookies: Magical Treats for Your Sweet Tooth

As the aroma of cinnamon and butterscotch wafted through my kitchen, memories of enchanted nights spent in cozy gatherings danced in my mind. Today, I’m excited to share my recipe for Butterbeer Cookies, a whimsical treat that brings the magic of the Harry Potter universe right to your home. These soft, chewy cookies topped with rich butterscotch frosting are not only quick to whip up but are also perfect for festive occasions or a delightful afternoon snack. The golden, gooey layers evoke the sweet, creamy notes of butterbeer, making them irresistibly enchanting for anyone who loves homemade treats. So, are you ready to cast a spell on your taste buds with these delightful cookies?

Why are Butterbeer Cookies so irresistible?

Magical flavors: Experience the enchanting combination of butterscotch and vanilla that transports you straight to Diagon Alley.
Easy to make: With just a few simple steps, even beginner bakers can create these delicious cookies without any fuss.
Perfect for sharing: Whether it’s a holiday gathering or a themed party, these cookies are sure to be a hit with family and friends.
Versatile options: Try experimenting with flavored extracts or nuts for a personalized twist that suits your palate. Looking for breakfast ideas? Don’t forget to check out our delightful Blueberry Breakfast Cookies for a fun morning treat!
Joyful decorations: The sprinkles add a festive flair, making them not just delicious but also visually appealing for any event.

Butterbeer Cookies Ingredients

• Get ready to bake some magic with these Butterbeer Cookies!

For the Cookie Dough

  • Butter – 1/2 cup, softened; it creates a rich, moist cookie base. You can substitute margarine for a dairy-free treat.
  • Granulated Sugar – 1/3 cup; this adds sweetness and contributes to the cookie’s tender crumb.
  • Brown Sugar – 3/4 cup; enhances sweetness while helping achieve that chewy texture we crave.
  • Egg – 1, brought to room temperature; it binds all the delicious ingredients together, ensuring a soft cookie.
  • Vanilla Extract – 2 teaspoons; infuses the dough with a warm depth that complements the butterscotch beautifully.
  • All-Purpose Flour – 1.5 cups; the essential building block for structure in these delightful cookies.
  • Salt – 1/4 teaspoon; balances the sweetness and enhances the cookie flavor.
  • Baking Powder – 1 teaspoon; it helps the cookies rise, resulting in a soft inside.

For the Butterscotch Frosting

  • Powdered Sugar – 2 cups; this gives the frosting its sweetness and smooth texture.
  • Butterscotch Syrup – 1/4 cup; infuses our frosting with that rich, buttery goodness. If needed, caramel syrup is a tasty substitute!
  • Heavy Cream – 1-2 tablespoons; ensures a creamy consistency for the frosting. If you prefer a lighter mix, milk can work instead.

For the Finishing Touch

  • Harry Potter-inspired Sprinkles – Optional; these fun decorations add a whimsical flair to your cookies. Use any sprinkles you have on hand for an extra festive touch.

With these simple ingredients, you’re all set to conjure up some magical Butterbeer Cookies!

Step‑by‑Step Instructions for Butterbeer Cookies

Step 1: Preheat the Oven
Begin your magical baking adventure by preheating your oven to 350°F (175°C). While the oven warms, line a baking sheet with parchment paper to ensure easy removal and cleanup later. This step sets the perfect stage for our Butterbeer Cookies to bake evenly and achieve that delightful golden edge we all crave.

Step 2: Prepare the Dough
In a large mixing bowl, cream together the softened butter, granulated sugar, and brown sugar until the mixture is light and fluffy, about 2-3 minutes. Next, add in one room temperature egg and two teaspoons of vanilla extract, mixing until well combined. The blend should be smooth and creamy, giving you the sweet foundation for your Butterbeer Cookies.

Step 3: Combine Dry Ingredients
In a separate bowl, whisk together the all-purpose flour, baking powder, and salt until they are fully mixed. Gradually add this dry mixture into the wet dough, stirring gently until no flour streaks remain. The dough will become thick and slightly sticky, forming the perfect base for your enchanting Butterbeer Cookies.

Step 4: Form the Cookies
Using a cookie scoop, portion out 7-8 cookie dough balls and place them on the prepared baking sheet, spacing them out for room to spread. Gently roll each ball in your hands and flatten them to about 3/4 inch thick. This shaping helps ensure even baking, giving your Butterbeer Cookies that lovely cookie shape we love to munch on!

Step 5: Bake
Slide the baking sheet into the preheated oven and bake the cookies for 12-13 minutes. Keep an eye on them—the edges should turn golden while the centers may appear slightly underbaked. Once done, remove the sheet from the oven and allow the cookies to cool on the sheet for about 10 minutes before transferring them to a wire rack for complete cooling.

Step 6: Make the Frosting
While the cookies cool, prepare the butterscotch frosting by creaming softened butter in a mixing bowl. Gradually add in 2 cups of powdered sugar, followed by more vanilla extract and 1-2 tablespoons of heavy cream. Mix until fluffy and well-combined, then beat in 1/4 cup of butterscotch syrup for that magical butterscotch flavor, transforming the frosting into a dreamy topping.

Step 7: Decorate
Once your Butterbeer Cookies are completely cool, it’s time for the fun part—decorating! Using a piping bag or a simple knife, generously spread or pipe the butterscotch frosting onto each cookie. For a festive touch, sprinkle your Harry Potter-inspired sprinkles on top, adding an extra layer of whimsy and delight to your cookies before sharing.

How to Store and Freeze Butterbeer Cookies

Room Temperature: Store cookies in an airtight container at room temperature for up to 3 days to maintain their softness and prevent them from drying out.

Fridge: If you prefer, you can keep the cookies in the fridge for up to a week, but be aware that this may affect their texture, making them slightly firmer.

Freezer: For longer storage, freeze unbaked cookie dough balls by placing them on a baking sheet until firm, then transfer to a freezer-safe bag for up to 2 months. Thaw them in the fridge before baking.

Reheating: To regain their soft texture, microwave cookies for about 10-15 seconds or warm them in the oven at 350°F for a few minutes before serving. Enjoy those delightful Butterbeer Cookies!

Make Ahead Options

These Butterbeer Cookies are perfect for busy home cooks looking to save time without sacrificing flavor! You can prepare the cookie dough up to 24 hours in advance by mixing all the ingredients and refrigerating the dough. This allows the flavors to meld beautifully, enhancing the overall taste. For even longer storage, you can freeze the unbaked cookie dough balls for up to 2 months—just thaw them in the refrigerator before baking. When you’re ready to enjoy these magical treats, simply bake from chilled or frozen (adding an extra minute or two to the baking time), and they’ll be just as delicious as if freshly made!

Expert Tips for Butterbeer Cookies

  • Mind the Bake Time: Avoid overbaking; the cookies should be slightly underbaked in the center for that perfect chewy texture.
  • Chill for Best Results: If your dough seems too soft, chill it in the fridge for about 30 minutes before baking. This helps maintain their shape!
  • Room Temperature Egg: Ensure your egg is at room temperature to prevent cold ingredients from ruining the dough’s texture.
  • Frosting Consistency: Adjust the heavy cream for your frosting to achieve your desired thickness; adding a little more can make piping easier.
  • Sprinkle Fun: Let the cookies cool completely before adding sprinkles to avoid melting them into the frosting—this keeps them vibrant and festive!
  • Storage Tips: Store leftover cookies in an airtight container to keep them fresh and chewy; they can also be frozen for longer enjoyment.

What to Serve with Butterbeer Cookies

Indulging in these whimsical treats opens the door to a world of delightful pairings that can elevate your magical baking experience.

  • Warm Apple Cider: Perfectly spiced, this cozy drink complements the sweet butterscotch flavor of the cookies while enhancing the festive atmosphere.
  • Vanilla Ice Cream: A scoop of creamy vanilla adds a rich, cool contrast to the warm, soft cookies—an irresistible combination!
  • Caramel Sauce: Drizzling caramel sauce over your cookies enhances their sweetness, creating an enticing treat that feels indulgent and special.
  • Fresh Fruit Platter: Bright, juicy strawberries or tart apples provide a refreshing burst that cuts through the sweetness, balancing every bite.
  • Chocolate Milk: The creamy richness of chocolate milk pairs beautifully with the cookies, making for a nostalgic and comforting treat.
  • Ginger Snap Cookies: For a delightful texture contrast, these spicy cookies offer a crunch that enhances the softness of the Butterbeer Cookies.
  • Butterscotch Pudding: Dive deeper into the butterscotch theme with a smooth pudding that can be enjoyed alongside the cookies for a double dose of delight!
  • Festive Eggnog: Creamy and spiced, eggnog creates a warm, holiday atmosphere that perfectly complements these enchanting treats as a seasonal beverage.

Butterbeer Cookies: Fun Variations Await!

Indulge your creativity and personalize these delightful Butterbeer Cookies for a unique touch that sparks joy in every bite!

  • Dairy-Free: Swap butter for margarine and heavy cream for a plant-based milk for a delicious dairy-free version.

  • Nutty Twist: Add 1/2 cup of chopped pecans or walnuts to the dough for added crunch and a touch of earthiness.

  • Flavor Fusion: Substitute vanilla extract with butterscotch or rum extract to create your own magical flavor profile that excites the senses.

  • Spiced Pumpkin: Mix in 1/2 cup of pumpkin puree and a dash of cinnamon for a seasonal twist that celebrates fall flavors.

  • Mini Cookies: Use a teaspoon to scoop out smaller dough portions; adjust baking time for bite-sized cookies, perfect for sharing at gatherings.

  • Chocolate Drizzle: Top the frosted cookies with a drizzle of melted chocolate to elevate the sweetness and add a rich contrast to the butterscotch.

  • Fruity Addition: Fold in 1/2 cup of dried cranberries or chopped dried apples for a chewy texture that complements the magical sweetness.

  • Experiment with Frosting: Try topping with cream cheese frosting instead of butterscotch for a tangy twist that pairs beautifully with the cookies’ sweetness.

Each variation invites a little culinary creativity while keeping the spirit of the original Butterbeer Cookies intact. And if you’re looking for more delightful cookie recipes, don’t miss our scrumptious Blueberry Breakfast Cookies or try them alongside your magical creations!

Butterbeer Cookies Recipe FAQs

How do I select ripe ingredients?
Absolutely! For the best flavor and texture, make sure your butter is softened at room temperature, ensuring it effortlessly cremes with sugars. Choose fresh eggs, ideally room temperature, as they blend better into the mixture. When selecting sugar, granulated and brown should be free of lumps, while your all-purpose flour should feel light and fluffy, ensuring a smooth dough.

How should I store leftover cookies?
Very good question! To keep your Butterbeer Cookies fresh, store them in an airtight container at room temperature for up to 3 days. If you prefer a firmer texture, they can be kept in the fridge for up to a week. Just remember, refrigeration may alter their softness slightly, so if you’re after that bakery-fresh feel, room temp storage is key!

Can I freeze Butterbeer Cookies or dough?
Certainly! If you want to make a batch ahead, freeze unbaked cookie dough balls by placing them in a single layer on a baking sheet for a few hours until firm. Once solid, transfer them to a freezer-safe bag or airtight container, storing them for up to 2 months. When you’re ready to bake, thaw them in the fridge overnight and then bake as directed, adding a minute or two extra to the baking time.

What should I do if my cookies spread too much?
If your Butterbeer Cookies spread excessively while baking, it could be due to warm dough or too much butter. To prevent this, chill your dough in the fridge for about 30 minutes before scooping and baking. If you find they still spread too thinly, try adding a bit more flour—1-2 tablespoons at a time—until you achieve a better consistency that holds its shape.

Are there any dietary considerations for pets or allergies?
When baking, always consider allergies! For those with nut allergies, make sure to skip any additions like chopped nuts. Butterbeer Cookies are not suitable for pets, especially due to the high sugar and frosting content. If you need a dairy-free option, swap the butter for margarine and use a plant-based heavy cream alternative in your frosting. Enjoying these treats is best left to humans only!

Can I customize the sprinkles for different occasions?
Absolutely! Get creative with your decorations! While Harry Potter-inspired sprinkles add a whimsical touch, feel free to use seasonal sprinkles for holidays, themed events, or even color-coordinated ones to match a party theme. The more the merrier with sprinkles, making your Butterbeer Cookies enchanting for every occasion they grace!

Butterbeer Cookies

Butterbeer Cookies: Magical Treats for Your Sweet Tooth

Indulge in these Butterbeer Cookies, a magical treat bringing sweet, creamy butterscotch flavors right to your home.
Prep Time 20 minutes
Cook Time 13 minutes
Cooling Time 10 minutes
Total Time 43 minutes
Servings: 12 cookies
Course: Dessert
Cuisine: American
Calories: 150

Ingredients
  

For the Cookie Dough
  • 1/2 cup Butter softened; can substitute margarine
  • 1/3 cup Granulated Sugar
  • 3/4 cup Brown Sugar
  • 1 large Egg brought to room temperature
  • 2 teaspoons Vanilla Extract
  • 1.5 cups All-Purpose Flour
  • 1/4 teaspoon Salt
  • 1 teaspoon Baking Powder
For the Butterscotch Frosting
  • 2 cups Powdered Sugar
  • 1/4 cup Butterscotch Syrup or caramel syrup
  • 1-2 tablespoons Heavy Cream or milk if preferred
For the Finishing Touch
  • Harry Potter-inspired Sprinkles optional

Equipment

  • Mixing Bowl
  • Baking Sheet
  • Piping Bag
  • Cookie Scoop

Method
 

Step-by-Step Instructions for Butterbeer Cookies
  1. Preheat your oven to 350°F (175°C) and line a baking sheet with parchment paper.
  2. In a large mixing bowl, cream together the softened butter, granulated sugar, and brown sugar until light and fluffy, about 2-3 minutes. Add the egg and vanilla extract, mixing until smooth.
  3. In a separate bowl, whisk together the flour, baking powder, and salt. Gradually add this mixture to the wet ingredients, stirring gently until thick and slightly sticky.
  4. Using a cookie scoop, portion out 7-8 dough balls on the baking sheet, flattening them to about 3/4 inch thick.
  5. Bake for 12-13 minutes until edges are golden; cool on the sheet for 10 minutes before transferring to a wire rack.
  6. For frosting, cream softened butter, then gradually add powdered sugar, vanilla extract, and cream until fluffy. Beat in butterscotch syrup for flavor.
  7. Once cookies are cool, decorate with butterscotch frosting and sprinkle with Harry Potter-inspired sprinkles if desired.

Nutrition

Serving: 1cookieCalories: 150kcalCarbohydrates: 22gProtein: 1gFat: 7gSaturated Fat: 4gCholesterol: 20mgSodium: 50mgPotassium: 50mgSugar: 10gVitamin A: 200IUCalcium: 10mgIron: 0.5mg

Notes

Store cookies in an airtight container at room temperature for up to 3 days or in the fridge for up to a week. They can also be frozen for longer storage.

Tried this recipe?

Let us know how it was!

Creamy Pumpkin Soup to Cozy Up Your Chilly Evenings

As the first hints of chill creep into the air, I find myself craving the warm embrace of a bowl of creamy pumpkin soup. There’s something undeniably comforting about this dish, with its smooth texture and naturally sweet flavor that seems to wrap you in a cozy blanket. Made easy with just a few simple ingredients, my Creamy Pumpkin Soup is not only a crowd-pleaser but also a delightful vegetarian option for those busy weeknights. It pairs perfectly with crusty bread, making it ideal for dipping and savoring every last drop. So, what’s your favorite way to top off a cozy soup evening?

Why is Creamy Pumpkin Soup So Special?

Comforting, creamy goodness: Every spoonful of this soup envelops you in warmth, making it the ultimate comfort food for chilly evenings.
Simple ingredients: With just a handful of pantry staples, you can create a deliciously satisfying meal that everyone will love.
Versatile flavors: Easily customize this recipe by swapping pumpkin for butternut squash, or adding spices like cinnamon for a seasonal twist.
Meal prep friendly: This soup keeps well in the fridge and freezes beautifully, making it a great make-ahead option for busy weeknights. You can enjoy it alongside other comforting dishes like Sausage Tortellini Soup or Parmesan Italian Soup when you’re looking for something heartwarming.

Creamy Pumpkin Soup Ingredients

For the Soup Base

  • Pumpkin (or Butternut Squash) – The main ingredient providing sweetness and body; sugar pumpkins are optimal for flavor.
  • Onion – Adds aromatic depth; sauté until translucent for enhanced sweetness.
  • Garlic – Contributes a robust flavor base; use whole cloves for blending smoothly.
  • Chicken or Vegetable Broth – Infuses richness into the soup; opt for low-sodium versions to keep it healthy.
  • Water – Adjusts consistency; add more or less to achieve your desired thickness.

For Creaminess

  • Cream (or Half and Half, Milk) – Gives a luscious texture; incorporate at the end and avoid boiling to preserve creaminess.

While gathering these ingredients, remember—nothing beats the warmth of a homemade creamy pumpkin soup on a chilly evening!

Step‑by‑Step Instructions for Creamy Pumpkin Soup

Step 1: Preheat the Oven
Begin by preheating your oven to 400°F (200°C). While it heats, take your pumpkin or butternut squash and cut it into 2-inch chunks, removing the skin and seeds. Arrange these chunks on a baking sheet lined with parchment paper, making sure they’re in a single layer for even roasting. This will enhance the natural sweetness of your creamy pumpkin soup.

Step 2: Roast the Pumpkin
Place the baking sheet in the preheated oven and roast the pumpkin chunks for about 25-30 minutes, or until they are tender and slightly caramelized. Keep an eye on them, as you’re looking for a golden color on the edges, which brings out a deeper flavor. Once done, remove them from the oven and set aside to cool slightly while you prepare the soup base.

Step 3: Sauté Onions and Garlic
In a large pot, add a splash of olive oil over medium heat. Add the diced onion and sauté for about 5-7 minutes, stirring occasionally until they become translucent and fragrant. Then, add the whole garlic cloves and cook for an additional 1-2 minutes. This step builds a flavorful foundation for your creamy pumpkin soup.

Step 4: Combine Ingredients in the Pot
Once the onions and garlic are ready, add the roasted pumpkin chunks to the pot. Pour in the chicken or vegetable broth along with just enough water to cover the mixture. Bring the pot to a gentle boil over medium-high heat. Keeping it uncovered, let it boil for about 10 minutes, ensuring the pumpkin is tender and all flavors are mingling beautifully.

Step 5: Blend the Soup Smooth
Remove the pot from heat and let it cool for a minute. Using either an immersion stick blender or a countertop blender, carefully blend the mixture until it reaches a silky smooth consistency. If using a countertop blender, blend in small batches while leaving the lid slightly vented to avoid any steam buildup. Your creamy pumpkin soup should now have a luscious texture!

Step 6: Add Cream and Season
Return the blended soup to the pot over low heat, and stir in the cream, half and half, or milk carefully. Make sure not to let the soup boil after adding the cream; instead, gently heat it until warm. Season with salt and freshly cracked black pepper to taste, balancing the natural sweetness of the pumpkin with savory flavors.

Step 7: Serve and Garnish
Once your creamy pumpkin soup is heated through, ladle it into bowls and garnish with a drizzle of cream, a sprinkle of black pepper, or fresh parsley for a pop of color. Serve alongside warm, crusty bread for an inviting meal. Take a moment to savor the delightful aroma before enjoying this comforting dish!

Expert Tips for Creamy Pumpkin Soup

  • Roast for Depth: Roasting pumpkin chunks until caramelized enhances their natural sweetness, providing a richer flavor profile that boiling cannot achieve.
  • Sweet Onion Magic: Sauté onions until they are translucent to avoid harsh flavors, creating a sweeter, more pleasant base for your soup.
  • Vent Blender Lid: When blending the soup, vent the blender lid slightly to prevent hot soup from exploding, ensuring a smooth and safe blending process.
  • Taste and Adjust: Always taste your creamy pumpkin soup before serving. Adjust seasoning generously to balance sweetness and enhance overall flavor.
  • Thickening Tip: If your soup is too thin, simmer it uncovered for a few minutes to evaporate excess liquid and achieve the perfect creamy consistency.

How to Store and Freeze Creamy Pumpkin Soup

Fridge: Store your creamy pumpkin soup in an airtight container for up to 5 days. Cool the soup completely before sealing to maintain freshness.

Freezer: For long-term storage, freeze the soup without cream in an airtight container for up to 3 months. This way, you preserve its flavor and texture.

Reheating: When ready to enjoy, thaw the soup overnight in the fridge. Reheat gently on the stove over low heat, adding cream just before serving for a luscious finish.

Portioning: Consider freezing in individual servings for quick meals on busy nights, perfect for those moments when comfort food calls!

Creamy Pumpkin Soup Variations

Feel free to make this creamy pumpkin soup truly your own with these delightful twists!

  • Butternut Squash: Substitute pumpkin with butternut squash for a sweeter, slightly nuttier flavor profile that still brings that cozy comfort.
  • Coconut Cream: Swap regular cream for coconut cream for a dairy-free, tropical twist that adds a rich, exotic flavor.
  • Spicy Kick: Stir in a pinch of cayenne pepper or red pepper flakes for a warm, spicy kick that contrasts beautifully with the sweetness of the pumpkin.
  • Herb Infusion: Add fresh herbs like thyme or rosemary while simmering for a fragrant burst of flavor. They evoke the comfort of an herb garden in full bloom.
  • Roasted Garlic: Instead of raw garlic, roast a whole head until caramelized and sweet. Blend it in for an added depth that enhances the overall flavor.
  • Garnish Variations: Top with crispy bacon bits or roasted pumpkin seeds for a crunchy texture that perfectly complements the smooth soup. Consider this a celebration for the senses!
  • Nutmeg or Cinnamon: A dash of nutmeg or cinnamon gives a warm, seasonal flair that transports your taste buds right into autumn’s embrace.
  • Vegan Option: Use vegetable broth and coconut milk instead of cream for a creamy, plant-based deliciousness that everyone will enjoy without sacrificing flavor.

Every variation adds a unique touch to your creamy pumpkin soup experience; don’t hesitate to explore these options and make this dish your own! If you’re looking for other comforting soups, you might enjoy a piping hot Sausage Tortellini Soup or a flavorful bowl of Mexican Soup Flavorful. Happy cooking!

What to Serve with Creamy Pumpkin Soup

As the aroma of creamy pumpkin soup fills your kitchen, you’ll want to complement its cozy warmth with delightful side dishes that elevate the dining experience.

  • Crusty Sourdough Bread:
    Its chewy crust and soft interior are perfect for dipping into the thick soup, enhancing every spoonful with texture.

  • Mixed Green Salad:
    A fresh salad with apple slices adds a crisp contrast, brightening your meal and balancing the creamy richness of the soup.

  • Roasted Vegetables:
    Sweet roasted carrots or Brussels sprouts provide a comforting side that pairs wonderfully with the pumpkin’s natural sweetness.

  • Garlic Breadsticks:
    These are perfect for dunking! The buttery garlic flavor complements the savory elements of your creamy pumpkin soup.

  • Cheesy Grilled Cheese Sandwich:
    Fontina or sharp cheddar melted between bread creates an indulgent pairing, ideal for soothed souls on chilly evenings.

  • Pumpkin Spice Latte:
    This seasonal drink harmonizes beautifully with your soup, enhancing the pumpkin flavor and adding a hint of warmth with spices.

  • Crispy Apple Chips:
    Light and crunchy, apple chips add a delightful sweetness that perfectly contrasts the creamy soup, making every bite a celebration.

  • Chai-Infused Hot Chocolate:
    The warm flavors of chai combined with rich chocolate provide a delightful finish to a cozy meal, rounding off the experience beautifully.

Make Ahead Options

These Creamy Pumpkin Soup preparations are perfect for busy weeknights! You can roast the pumpkin and prepare the soup base up to 3 days in advance. Simply roast the pumpkin chunks and sauté the onions and garlic, then blend all ingredients, except for the cream, and let cool before transferring to an airtight container. Refrigerate for up to 5 days. When you’re ready to enjoy your soup, gently reheat it in a pot, stir in the cream, and season to taste. This preparation ensures that your pumpkin soup maintains its creamy texture and rich flavors while saving you precious time for other meal prep. Just as delicious and comforting, you’ll love having this homemade soup ready to go!

Creamy Pumpkin Soup Recipe FAQs

What type of pumpkin should I use for creamy pumpkin soup?
Absolutely! For the best flavor, I recommend using sugar pumpkins or butternut squash. They provide the optimal sweetness and creamy texture. Avoid large carving pumpkins as they can be watery and lack flavor. If you can’t find sugar pumpkins, Hokkaido or Kabocha squash are great substitutes!

How do I store leftover creamy pumpkin soup?
You can store your creamy pumpkin soup in an airtight container in the refrigerator for up to 5 days. Make sure to let it cool completely before sealing it to keep its fresh taste intact. This makes it a perfect meal prep dish for those busy weeknights!

Can I freeze creamy pumpkin soup?
Very much! To freeze creamy pumpkin soup, do so without adding cream. Place it in airtight containers or freezer bags, leaving some headspace for expansion, and freeze for up to 3 months. When you’re ready to enjoy it, thaw overnight in the refrigerator and reheat gently, adding cream just before serving to maintain that luscious texture.

What should I do if my pumpkin soup is too thick?
If you find your creamy pumpkin soup is thicker than you’d like, don’t worry! Simply add a bit of warm vegetable or chicken broth, or even water, a little at a time, until you reach your desired consistency. Stir well and taste, adjusting any seasonings as needed for balance.

Are there any dietary considerations for creamy pumpkin soup?
Definitely! This creamy pumpkin soup is naturally vegetarian and can be made dairy-free by substituting the cream with coconut milk or a non-dairy milk alternative. Always check your ingredients if you have food allergies, especially with store-bought broth or cream substitutes, to ensure they align with your dietary needs.

How can I enhance the flavors of my creamy pumpkin soup?
For a delightful twist, consider adding spices like nutmeg or cinnamon during cooking for a warm autumnal flavor. Feel free to experiment by mixing in other vegetables or even a splash of apple cider during blending for a unique sweetness. Don’t forget to taste and adjust your seasonings to elevate the flavors!

Creamy Pumpkin Soup

Creamy Pumpkin Soup to Cozy Up Your Chilly Evenings

Enjoy the warm, comforting flavors of creamy pumpkin soup, perfect for chilly evenings.
Prep Time 10 minutes
Cook Time 45 minutes
Total Time 55 minutes
Servings: 4 bowls
Course: Dinner
Cuisine: American
Calories: 250

Ingredients
  

For the Soup Base
  • 1 medium Pumpkin (or Butternut Squash) Sugar pumpkins are optimal for flavor.
  • 1 medium Onion Sauté until translucent for enhanced sweetness.
  • 2 cloves Garlic Use whole cloves for blending smoothly.
  • 4 cups Chicken or Vegetable Broth Opt for low-sodium versions to keep it healthy.
  • 1 cup Water Adjust to achieve desired thickness.
For Creaminess
  • 1 cup Cream (or Half and Half, Milk) Incorporate at the end and avoid boiling.

Equipment

  • Oven
  • Large pot
  • blender

Method
 

Step‑by‑Step Instructions for Creamy Pumpkin Soup
  1. Preheat your oven to 400°F (200°C). Cut the pumpkin or butternut squash into 2-inch chunks, removing the skin and seeds.
  2. Arrange the pumpkin chunks on a baking sheet lined with parchment paper and roast for 25-30 minutes until tender and caramelized.
  3. In a large pot, heat a splash of olive oil over medium heat. Add diced onion and sauté for 5-7 minutes until translucent, then add garlic cloves and cook for another 1-2 minutes.
  4. Add the roasted pumpkin to the pot, pour in the broth and enough water to cover. Bring to a gentle boil for about 10 minutes.
  5. Remove from heat, let cool for a minute, then blend until smooth, using an immersion blender or countertop blender.
  6. Return blended soup to pot over low heat, stir in cream, and heat gently without boiling. Season with salt and pepper.
  7. Ladle into bowls, garnish with cream, black pepper, or fresh parsley, and serve with warm crusty bread.

Nutrition

Serving: 1bowlCalories: 250kcalCarbohydrates: 30gProtein: 5gFat: 12gSaturated Fat: 7gPolyunsaturated Fat: 1gMonounsaturated Fat: 5gCholesterol: 30mgSodium: 400mgPotassium: 600mgFiber: 5gSugar: 10gVitamin A: 120IUVitamin C: 20mgCalcium: 8mgIron: 10mg

Notes

Roasting enhances sweetness and flavor; taste and adjust seasoning before serving.

Tried this recipe?

Let us know how it was!

Decadent Black Velvet Cupcakes for a Spooktacular Treat

As I reached for that velvety black cocoa powder, a wave of excitement washed over me—today was the day I would create the ultimate dessert for Halloween: Moist Black Velvet Cupcakes. These deliciously dark treats bring a touch of intrigue to any gathering with their eye-catching color and irresistible flavor. What I love most about this recipe is not just how simple it is to whip up a batch, but also how the rich chocolate taste melds perfectly with the creamy black cocoa buttercream, creating an experience that feels indulgent yet comforting. These cupcakes are a guaranteed crowd-pleaser, turning even the most mundane moments into special ones. Are you ready to explore baking magic and unleash your inner pastry chef? Let’s dive in!

Why Are Black Velvet Cupcakes Special?

Unique Appearance: The deep, dark color of these cupcakes makes them a stunning centerpiece for any Halloween table or festive gathering.

Irresistible Flavor: The blend of black cocoa and buttercream results in a luxurious chocolate experience that’s rich yet not overly sweet.

Easy to Make: This straightforward recipe ensures even beginner bakers can impress their friends and family without stress.

Versatile Treat: Perfect for birthday parties, holiday celebrations, or just because—these cupcakes fit every occasion! Pair them with a glass of cold milk or a latte for a delightful snack.

Crowd-Pleasing Delight: Whether you’re a seasoned chef or a home cook, your guests will love the indulgence packed into every bite, making them the star of any dessert spread.

Transform your baking game and bring a touch of magic to your table with these mesmerizing Black Velvet Cupcakes.

Black Velvet Cupcakes Ingredients

• Here’s everything you need to create these magical treats!

For the Cupcakes

  • All Purpose Flour – Provides the structure; spoon and level to ensure accuracy.
  • Black Cocoa Powder – Adds a rich chocolate flavor and dark color; opt for super black for the best result, but regular cocoa can work in a pinch.
  • Baking Powder – Acts as a leavening agent; make sure it’s fresh for proper rise.
  • Baking Soda – Works with the acid in sour cream; essential for fluffiness.
  • Salt – Enhances flavors; balances the sweetness of the cupcakes.
  • Espresso Powder (optional) – Intensifies the chocolate taste; can skip if not on hand.
  • Unsalted Butter – Brings moisture and richness; must be softened for easy mixing.
  • Granulated Sugar – Sweetens and adds texture; feel free to reduce for a less sweet cupcake.
  • Eggs – Adds moisture and binding; ensure they are room temperature for better mixing.
  • Vanilla Extract – Boosts overall flavor; always a good addition to chocolate recipes.
  • Sour Cream – Contributes moisture and a slight tang; Greek yogurt is a great substitute.
  • Whole Milk – Necessary for liquid; should also be at room temperature for proper blending.

For the Buttercream Frosting

  • Unsalted Butter – The base for a creamy buttercream; should be softened before whipping.
  • Pinch of Salt – Balances the sweetness of the frosting.
  • Black Cocoa Powder – Provides flavor and depth; crucial for that signature black color.
  • Powdered Sugar – Sweetener that helps achieve the right texture for frosting.
  • Heavy Cream – Adds fluffiness to the buttercream; integral for that light, airy consistency.
  • Sprinkles (optional) – Perfect for adding a festive touch to your cupcakes!

Baking these Black Velvet Cupcakes is not just a recipe; it’s a delightful experience that will transform your kitchen into a pastry wonderland!

Step‑by‑Step Instructions for Black Velvet Cupcakes

Step 1: Preheat the Oven
Preheat your oven to 350°F (175°C) and line a cupcake pan with paper liners. Ensuring that the oven reaches the right temperature is crucial for baking these Black Velvet Cupcakes evenly. As the oven warms, gather your ingredients and prepare your mixing bowls for the next steps.

Step 2: Combine Dry Ingredients
In a medium-sized bowl, whisk together all-purpose flour, black cocoa powder, baking powder, baking soda, salt, and espresso powder if using. This mix is essential for the structural integrity of the cupcakes. Ensure there are no lumps in the dry ingredients, as this will create a smoother batter for your delicious Black Velvet Cupcakes.

Step 3: Cream Butter and Sugar
In a large mixing bowl, cream together the softened unsalted butter and granulated sugar using an electric mixer on medium speed until the mixture is light and fluffy, about 2-3 minutes. This process incorporates air, vital for a tender cupcake. You’ll know it’s ready when the mixture appears pale and has increased in volume.

Step 4: Incorporate Eggs and Vanilla
Add the eggs, yolk, and vanilla extract to the butter-sugar mixture, mixing on medium-high speed until fully combined and light in color, approximately 1 minute. This step not only adds moisture but also enhances the flavor of your Black Velvet Cupcakes, making them irresistible.

Step 5: Blend in Dairy Ingredients
On low speed, blend in the whole milk and sour cream, mixing just until combined. This addition brings richness and moisture, essential for achieving the desired soft texture. Make sure not to over-mix, as this could affect the fluffiness of your cupcakes.

Step 6: Combine Wet and Dry Mixtures
Gradually add the dry ingredients to the wet mixture, mixing on low speed. Scrape down the sides of the bowl as needed to ensure everything is well incorporated. The batter should be smooth and slightly thick—this is key for the perfect consistency of your Black Velvet Cupcakes.

Step 7: Bake the Cupcakes
Fill the prepared cupcake liners about 3/4 full with the batter. Bake in the preheated oven for 17-19 minutes, or until a toothpick inserted into the center comes out clean. Keep an eye on them as they bake; you’ll know they’re ready when they spring back gently when touched.

Step 8: Cool the Cupcakes
Remove the cupcakes from the oven and allow them to cool in the pan for about 10 minutes. Then, transfer them to a wire rack to cool completely. This cooling process is essential, as it prevents the frosting from melting when applied to your stunning Black Velvet Cupcakes.

Step 9: Prepare the Buttercream Frosting
For the frosting, beat the softened unsalted butter in a large bowl until light and pale, about 5-10 minutes. This is crucial for achieving a fluffy buttercream. Be patient, as this step is key to the creamy texture you’ll want atop your cupcakes.

Step 10: Mix in Cocoa and Sugar
Gradually sift in the black cocoa powder and powdered sugar, mixing until everything is combined. This blend will create the perfect rich frosting for your Black Velvet Cupcakes. Only mix until the ingredients are incorporated; overmixing may change the texture of the frosting.

Step 11: Whip the Frosting
Add the heavy cream to your buttercream mixture and beat for 1-2 minutes until the frosting is light and fluffy. This step ensures your buttercream is airy and spreads beautifully on the cupcakes. Taste your frosting for sweetness, and adjust if needed.

Step 12: Frost and Decorate
Once your cupcakes are completely cool, pipe the black cocoa buttercream generously onto each cupcake. You can use a piping bag for a professional finish, and if desired, sprinkle festive decorations on top. Your Black Velvet Cupcakes are now ready to wow your guests!

Make Ahead Options

These Moist Black Velvet Cupcakes are perfect for busy home cooks who want to simplify their baking! You can prepare the cupcake batter up to 24 hours in advance by covering it tightly and refrigerating it, which helps to meld the flavors beautifully. Additionally, bake the cupcakes ahead and store them in an airtight container at room temperature for up to 3 days. Just remember, allowing the cupcakes to cool completely before storing prevents them from becoming soggy. When you’re ready to serve, whip up the black cocoa buttercream frosting (which can also be made a day ahead and kept in the fridge) and pipe it onto the cooled cupcakes. You’ll have delicious, ready-to-enjoy treats that are just as scrumptious as when freshly baked!

What to Serve with Black Velvet Cupcakes

These enchanting treats deserve a delightful complement to elevate your dessert experience and wow your guests.

  • Cold Milk: A classic pairing that balances the rich chocolate flavors, making each bite even more indulgent.
  • Hot Coffee: The warmth of coffee brings out the deep cocoa notes, creating a cozy vibe that’s perfect for a baking celebration.
  • Vanilla Ice Cream: A scoop of creamy vanilla adds a contrasting coolness and enhances the chocolate flavor for a heavenly dessert experience.
  • Fresh Berries: Juicy raspberries or strawberries add a tartness that cuts through the sweetness, brightening each mouthful with color and flavor.
  • Chocolate Ganache: Drizzling warm ganache over frosting adds an extra layer of indulgence, taking these cupcakes to the next level of decadence.
  • Seasonal Fruit Salad: A refreshing mix of seasonal fruits offers a vibrant contrast and lightens the dessert table, pleasing guests with its variety.
  • Sparkling Water: Serve with sparkling water to cleanse the palate between bites, enhancing the overall tasting experience with a delightful fizz.
  • Chai Tea: The spiced notes of chai match beautifully with these cupcakes, providing a warm and inviting atmosphere for any gathering.
  • Whipped Cream: Light and airy whipped cream on top adds a fluffy texture that contrasts delightfully with the rich buttercream frosting.
  • Dark Chocolate Shavings: Garnishing with shavings deepens the chocolate experience, providing a sophisticated touch to your cupcake presentation.

Expert Tips for Black Velvet Cupcakes

  • Measure Flour Accurately: Spoon and level the flour instead of scooping to prevent excess flour, which can lead to dense cupcakes.

  • Room Temperature Ingredients: Ensure eggs, milk, and sour cream are at room temperature for a smooth batter and even baking.

  • Take Your Time with Butter: Cream the unsalted butter thoroughly for 5-10 minutes; this extra time is crucial for a light and fluffy black cocoa buttercream.

  • Use Fresh Baking Powder: Check your baking powder for freshness before use to ensure the perfect rise for your moist Black Velvet Cupcakes.

  • Cool Completely: Allow cupcakes to cool fully before frosting; otherwise, the buttercream may melt and lose its fluffy texture.

Storage Tips for Black Velvet Cupcakes

Fridge: Store leftover Black Velvet Cupcakes in an airtight container in the refrigerator for up to 3 days to maintain their moisture and flavor.

Freezer: You can freeze the cupcakes for up to 3 months. Wrap each cupcake tightly in plastic wrap and then place them in a freezer-safe bag—just thaw them in the fridge overnight before serving.

Room Temperature: If you plan to enjoy the cupcakes within a day or two, they can be stored at room temperature in a sealed container, away from direct sunlight.

Reheating: For a warm treat, microwave the cupcakes for about 10-15 seconds. This will make the moist chocolate flavor come alive again!

Black Velvet Cupcake Variations

Feel free to get creative and make these delightful cupcakes your own with these fun suggestions!

  • Greek Yogurt: Substitute sour cream with Greek yogurt for a tangy twist that keeps the cupcakes moist and delicious.

  • Gluten-Free Flour: Use a 1:1 gluten-free flour blend for a gluten-free version, perfect for those with dietary restrictions. Bon appétit!

  • Espresso Powder Boost: For coffee lovers, increase the espresso powder to deepen the chocolate flavor and add a glorious kick.

  • Add Sprinkles: Mix colorful or themed sprinkles into the batter for a festive surprise that elevates your Halloween treats.

  • Spicy Heat: Incorporate a pinch of cayenne or cinnamon into the batter for a comforting warmth that balances the sweet richness.

  • Vanilla Bean Flavor: Replace vanilla extract with scraped vanilla bean for an extra layer of flavor that captivates the senses.

  • Alternate Frosting: Try a cream cheese frosting instead of buttercream for a tangy twist that pairs perfectly with the rich cupcakes.

  • Mini Cupcakes: Scale down the recipe and make mini black velvet cupcakes; they’re great for parties and easy to enjoy in just a few bites!

For even more inspiration, check out my delicious Chocolate Fudge Cupcakes or add a surprising pop with Chocolate Dipped Strawberries!

Black Velvet Cupcakes Recipe FAQs

How do I know if my black cocoa powder is fresh?
Absolutely! Check the expiration date on the packaging. Fresh black cocoa powder should smell rich and chocolatey. If it has lost its aroma or shows any signs of clumping, it might be time to replace it for optimal flavor in your Black Velvet Cupcakes.

What’s the best way to store leftover Black Velvet Cupcakes?
To maintain their moist texture, store your Black Velvet Cupcakes in an airtight container in the fridge for up to 3 days. If you’re not going to eat them right away, wrap each one tightly in plastic wrap and place them in a freezer-safe bag; they can last up to 3 months in the freezer! Just remember to thaw them overnight in the fridge before enjoying!

Can I make these cupcakes gluten-free?
Very! You can substitute the all-purpose flour with a gluten-free flour blend. I recommend using a 1:1 gluten-free flour that includes xanthan gum for the best texture. Just be aware that the results may vary slightly, but they’ll still be delicious.

What should I do if my cupcakes turn out too dense?
If your Black Velvet Cupcakes come out dense, it may be due to excess flour. Always spoon and level the flour into your measuring cup instead of scooping it directly. Also, ensure that your baking powder is fresh and check that you didn’t overmix the batter. For future batches, remember to use room temperature ingredients for a lighter texture!

Can I adjust the sweetness in this recipe?
Absolutely! If you prefer less sweetness, you can reduce the granulated sugar in the cupcake batter or the powdered sugar in the buttercream. Just keep in mind that sweetness balances out the rich chocolate flavor, so adjust to your taste while keeping the overall structure of the batter in mind.

Is there anything I need to keep in mind for dietary restrictions?
It’s essential to consider allergies! These Black Velvet Cupcakes contain common allergens like eggs and dairy. For vegan versions, try substituting eggs with flax eggs (1 tablespoon of flaxseed meal mixed with 2.5 tablespoons of water for each egg) and use plant-based butter and milk alternatives in the recipe. Always check labels to ensure those alternative products fit your specific dietary needs.

Black Velvet Cupcakes

Decadent Black Velvet Cupcakes for a Spooktacular Treat

Indulge in these irresistible Black Velvet Cupcakes, perfect for Halloween festivities, with rich chocolate flavor and creamy buttercream.
Prep Time 20 minutes
Cook Time 19 minutes
Cooling Time 10 minutes
Total Time 49 minutes
Servings: 12 cupcakes
Course: Dessert
Cuisine: American
Calories: 250

Ingredients
  

For the Cupcakes
  • 1 cup All Purpose Flour Spoon and level for accuracy
  • 1/2 cup Black Cocoa Powder Opt for super black for best result
  • 1 tsp Baking Powder Ensure it's fresh for proper rise
  • 1/2 tsp Baking Soda Essential for fluffiness
  • 1/4 tsp Salt Enhances flavors
  • 1 tsp Espresso Powder Optional, intensifies chocolate taste
  • 1/2 cup Unsalted Butter Softened for easier mixing
  • 1 cup Granulated Sugar Feel free to reduce for less sweetness
  • 2 large Eggs Room temperature for better mixing
  • 1 tsp Vanilla Extract Boosts overall flavor
  • 1/2 cup Sour Cream Greek yogurt can be substituted
  • 1/2 cup Whole Milk At room temperature for proper blending
For the Buttercream Frosting
  • 1/2 cup Unsalted Butter Softened before whipping
  • 1 pinch Salt Balances sweetness
  • 1/2 cup Black Cocoa Powder Crucial for the signature black color
  • 3 cups Powdered Sugar Sweetener for frosting texture
  • 2 tbsp Heavy Cream Integral for fluffy consistency
  • 1 cup Sprinkles Optional for decoration

Equipment

  • Cupcake pan
  • Mixing bowls
  • Electric mixer
  • Piping Bag

Method
 

Step‑by‑Step Instructions for Black Velvet Cupcakes
  1. Preheat your oven to 350°F (175°C) and line a cupcake pan with paper liners.
  2. In a medium-sized bowl, whisk together the dry ingredients.
  3. Cream together the softened butter and sugar in a large mixing bowl until light and fluffy.
  4. Add the eggs and vanilla extract to the butter-sugar mixture and mix until combined.
  5. Blend in the milk and sour cream on low speed until combined.
  6. Gradually add the dry ingredients to the wet mixture, mixing until just combined.
  7. Fill the cupcake liners about 3/4 full with batter and bake for 17-19 minutes.
  8. Remove from oven and cool in the pan for 10 minutes before transferring to a wire rack.
  9. Beat softened butter until light and pale for the frosting.
  10. Gradually sift in the cocoa powder and powdered sugar, mixing until combined.
  11. Add heavy cream and beat until the frosting is light and fluffy.
  12. Once cool, pipe the buttercream onto each cupcake and decorate as desired.

Nutrition

Serving: 1cupcakeCalories: 250kcalCarbohydrates: 35gProtein: 3gFat: 12gSaturated Fat: 6gCholesterol: 30mgSodium: 200mgPotassium: 100mgFiber: 1gSugar: 20gVitamin A: 200IUCalcium: 30mgIron: 1mg

Notes

Store leftovers in an airtight container in the fridge for up to 3 days or freeze for up to 3 months.

Tried this recipe?

Let us know how it was!

Savor the Comfort of Chicken Enchilada Rice Casserole

As I stirred the bubbling casserole, a wave of nostalgia washed over me—this is nothing short of a warm embrace after a long day. My Cheesy Chicken Enchilada Rice Casserole brings all the beloved flavors of traditional enchiladas into one blissful dish, and what’s even better? It’s crafted in a single pot and ready in just 50 minutes! Perfect for those rushed weeknights, this comforting meal blends tender chicken, zesty enchilada sauce, and melted cheese seamlessly with savory rice. With each bite, you can customize it to include your favorite veggies, transforming a simple recipe into a nourishing feast. Curious how to create this ode to comfort food? Let’s dive in!

Why Is Chicken Enchilada Rice Casserole a Must-Try?

Comforting simplicity: This dish neatly combines all your favorite enchilada flavors into one easy-to-make casserole.

One-pot wonder: Forget multiple dishes; everything bakes together seamlessly, saving you time on cleanup.

Flavor explosion: The rich enchilada sauce marries beautifully with tender chicken and cheesy goodness, ensuring every bite is a delight.

Adaptable for all: Whether you’re adding veggies like bell peppers or using leftover rotisserie chicken, this recipe invites your personal touch.

Perfect for busy nights: Ready in just 50 minutes, it’s your go-to solution for satisfying family dinners when time is tight.

Elevate your meal rotation with this delightful dish or check out the Corn Chicken Rice for a fresh take on comfort food!

Chicken Enchilada Rice Casserole Ingredients

For the Casserole
Long Grain Rice – This is the base of the casserole; rinse thoroughly to remove excess starch for non-sticky rice.
Cooked Chicken – Adds protein and savory flavor; you can use shredded rotisserie chicken for a quick option.
Red Enchilada Sauce – Infuses the dish with depth and spice, mimicking traditional enchilada flavor.
Refried Beans – Provides creaminess and boosts protein content, enhancing the overall texture.
White Cheddar Cheese – Adds a rich, creamy texture; feel free to substitute with your preferred cheese if desired.
Corn Kernels – Contributes sweetness and texture; you can opt for fresh, frozen, or canned (drained).
Monterey Jack Cheese – Melts beautifully to enhance the cheesy experience of the casserole.
Salt – Essential for seasoning; freshly ground offers the best flavor.
Black Pepper – Provides a subtle heat to the overall flavor profile.
Fresh Cilantro (or Parsley) – Perfect for garnish, adding a vibrant pop of color and freshness to the dish.

Add your own flair to this Chicken Enchilada Rice Casserole by mixing in your favorite veggies or proteins for a delightful twist!

Step‑by‑Step Instructions for Chicken Enchilada Rice Casserole

Step 1: Cook the Rice
Bring 4 cups of water to a rolling boil in a medium saucepan. Add 2 cups of rinsed long grain rice, stir briefly, cover, and reduce to a simmer. Allow the rice to cook for approximately 18 minutes, or until tender and the water is absorbed. Once done, remove from heat and let it sit covered for 5 more minutes before fluffing the rice with a fork.

Step 2: Prepare the Oven
While the rice is cooking, preheat your oven to 350°F (175°C). This temperature is ideal for baking your Chicken Enchilada Rice Casserole to perfection, ensuring that the cheese melts beautifully and the flavors meld together harmoniously. Get a 9×13-inch casserole dish ready for the next steps.

Step 3: Mix Ingredients
In a large mixing bowl, combine 3 cups of shredded cooked chicken, 2 cups of red enchilada sauce, one can of refried beans, and 1 cup of corn kernels. Stir in half of each cheese variety—1 cup of white cheddar cheese and 1 cup of Monterey Jack cheese—until everything is well blended. Gently fold in the cooked rice, ensuring it’s fully incorporated into the flavorful mixture.

Step 4: Assemble Casserole
Transfer the chicken and rice mixture into your prepared casserole dish, spreading it evenly with a spatula. Make sure it’s well packed but not pressed down. Top with the remaining cheese, distributing it evenly to create a delicious, gooey crust over the casserole.

Step 5: Bake
Place the casserole in the preheated oven and bake for 20-30 minutes. You’ll know it’s ready when the cheese is fully melted, bubbly, and lightly golden on top. This will create a beautiful, inviting appearance for your Chicken Enchilada Rice Casserole.

Step 6: Garnish and Serve
Once baked, remove the casserole from the oven and let it rest for about 5 minutes. Sprinkle chopped fresh cilantro or parsley on top for a burst of color and freshness. Your hearty Chicken Enchilada Rice Casserole is now ready to be served, bringing warmth and comfort to your table.

Expert Tips for Chicken Enchilada Rice Casserole

  • Rinse the Rice: This crucial step removes excess starch, preventing the rice from becoming sticky in your Chicken Enchilada Rice Casserole.

  • Add Vegetables: Feel free to incorporate extra veggies like bell peppers or zucchini for a nutritional boost and extra flavor in your casserole.

  • Use Rotisserie Chicken: For convenience, shredded rotisserie chicken is a perfect time-saver, helping you whip up this delectable meal even faster.

  • Check Cheese Quality: For the best melt, choose high-quality cheeses; fresh cheese melts more creamily than pre-shredded varieties.

  • Don’t Overbake: Keep an eye on your casserole towards the end of baking. Remove it from the oven as soon as the cheese is melted and bubbly to avoid drying it out.

  • Store Leftovers Properly: Allow leftovers to cool completely before storing in an airtight container. This keeps your Chicken Enchilada Rice Casserole fresh for up to 3-4 days in the fridge.

Make Ahead Options

These Chicken Enchilada Rice Casserole components are ideal for meal prep, making your busy weeknights a bit easier! You can prepare the entire casserole up to 24 hours in advance and store it in the refrigerator, well-covered. Simply assemble the dish as instructed, but don’t bake it yet—this ensures the flavors meld beautifully. For the best quality, cover tightly with plastic wrap to prevent drying out. When you’re ready to serve, pop it in the oven straight from the fridge, adding an extra 10-15 minutes to the bake time, or until the cheese is bubbly and melted. By prepping ahead, you’ll have a comforting dinner ready with minimal effort!

Chicken Enchilada Rice Casserole Variations

Feel free to get creative and make this delightful casserole your own with these exciting twists!

  • Dairy-Free: Swap the cheese for cashew cheese or a dairy-free blend to cater to dietary needs without losing creaminess.

  • Vegetarian: Replace chicken with black beans or lentils for a delicious plant-based option that’s still hearty and satisfying.

  • Extra Vegetables: Add diced bell peppers, corn, or sautéed zucchini for a pop of color and nutrition that complements the dish beautifully.
    Tossing in more veggies not only enhances flavor but also boosts the casserole’s nutritional profile!

  • Spicy Kick: Stir in diced jalapeños or a splash of hot sauce for an extra layer of heat that enchilada lovers will appreciate.

  • Cheddar & Pepper Jack Mix: Combine white cheddar with pepper jack cheese for a melty, flavorful blend that adds a delightful spice.

  • Quinoa Swap: Replace rice with cooked quinoa for a gluten-free version that provides a boost of protein and a nutty flavor.

  • Rotisserie Chicken: Use shredded rotisserie chicken for a quick, easy shortcut without sacrificing flavor.

For more delicious ideas, consider trying other one-pot wonders like my One Pan Rice or a comforting Low Carb Chicken. Experimentation is the key to making this dish uniquely yours!

How to Store and Freeze Chicken Enchilada Rice Casserole

  • Fridge: Store leftovers in an airtight container for up to 3-4 days. Ensure the casserole is completely cooled before covering to prevent moisture buildup.
  • Freezer: For longer storage, freeze portions in airtight containers or freezer bags for up to 3 months. Label and date each container for easy tracking.
  • Reheating: Thaw in the fridge overnight before reheating. Warm in the oven at 350°F (175°C) for 20-25 minutes until heated through, ensuring the cheese regains its melty texture.
  • Serving Suggestion: Garnish with fresh cilantro or parsley when serving after reheating to enhance freshness and flavor.

What to Serve with Cheesy Chicken Enchilada Rice Casserole

Nothing elevates your weeknight dinner like the rich, comforting flavors cascading from this casserole, perfectly paired with delightful side dishes for a complete meal.

  • Simple Garden Salad: A light, crisp salad provides a refreshing contrast to the rich casserole while adding a nutritious crunch. Toss in a zesty vinaigrette to brighten the meal.

  • Homemade Guacamole: Creamy guacamole enhances the flavors with its smooth texture and cooling effect. Spread it on the side for dipping chips or topping your casserole for an extra layer of deliciousness.

  • Chips and Salsa: The crispy chips and zesty salsa add an appealing crunch and vibrant flavor, making it an ideal appetizer to enjoy before diving into the warm casserole.

  • Mexican Street Corn: This sweet and smoky side creates a delightful fusion of flavors with your Chicken Enchilada Rice Casserole. Its creamy topping complements the casserole while adding a festive flair to the meal.

  • Pineapple Mango Salsa: Bright and fruity, this salsa offers a refreshing contrast to the hearty casserole, enhancing the overall flavor profile and adding a pop of color to your plate.

  • Frozen Margaritas: Chill out with a vibrant margarita that pairs perfectly with the zestiness of enchilada flavors. The refreshing taste balances the warmth of the casserole beautifully.

  • Cilantro Lime Rice: For an extra touch of flavor, serve this fragrant rice on the side. It absorbs the casserole’s flavors, creating a delightful harmony on your plate.

Chicken Enchilada Rice Casserole Recipe FAQs

What type of rice is best for Chicken Enchilada Rice Casserole?
Absolutely! Long grain rice is ideal as it provides a fluffy texture. Be sure to rinse it thoroughly to remove excess starch, which helps prevent the rice from becoming sticky during the cooking process.

How should I store my Chicken Enchilada Rice Casserole leftovers?
For sure! Once cooled, store leftovers in an airtight container in the fridge for up to 3-4 days. Make sure to let the casserole cool completely before sealing it to avoid moisture buildup, which can make it soggy.

Can I freeze Chicken Enchilada Rice Casserole?
Yes, definitely! To freeze, portion the casserole into airtight containers or freezer bags, ensuring they’re well sealed. It can be frozen for up to 3 months. When you’re ready to enjoy it again, thaw it overnight in the fridge and reheat in the oven at 350°F (175°C) for 20-25 minutes, or until it’s heated through.

What should I do if my casserole turns out dry?
Very understandable! If your casserole is on the dry side, it may be due to overbaking. Keep an eye on it during the last few minutes of baking, and remove it from the oven once the cheese is nicely melted and bubbly. If you have leftovers, adding a splash of chicken broth while reheating can help restore moisture.

Is there a way to make this recipe gluten-free?
Absolutely! To adapt the Chicken Enchilada Rice Casserole for gluten-free diets, make sure to use gluten-free enchilada sauce and double-check all the other ingredients for gluten content. You can also substitute the corn tortillas with gluten-free options if you wish to add them for extra flavor and texture.

Can my pet share some of this casserole?
While the rice and chicken might be safe for pets, it’s best to avoid giving them the casserole due to ingredients like cheese and seasoning. Stick to plain cooked chicken and rice for a treat that’s safe for your furry friends!

Chicken Enchilada Rice Casserole

Savor the Comfort of Chicken Enchilada Rice Casserole

Experience the beloved flavors of traditional enchiladas in a hearty Chicken Enchilada Rice Casserole that is easy to make and ready in just 50 minutes.
Prep Time 20 minutes
Cook Time 30 minutes
Resting Time 5 minutes
Total Time 50 minutes
Servings: 6 servings
Course: Casserole
Cuisine: Mexican
Calories: 450

Ingredients
  

For the Casserole
  • 2 cups Long Grain Rice Rinse thoroughly to remove excess starch
  • 3 cups Cooked Chicken Shredded rotisserie chicken works best
  • 2 cups Red Enchilada Sauce Adds depth and spice
  • 1 can Refried Beans
  • 1 cup White Cheddar Cheese Substitute with your preferred cheese if desired
  • 1 cup Corn Kernels Fresh, frozen, or canned (drained)
  • 1 cup Monterey Jack Cheese
  • 1 teaspoon Salt Freshly ground is best
  • 1 teaspoon Black Pepper
  • 1/2 cup Fresh Cilantro (or Parsley) For garnish

Equipment

  • medium saucepan
  • 9x13 inch casserole dish
  • large mixing bowl

Method
 

Step-by-Step Instructions
  1. Bring 4 cups of water to a rolling boil in a medium saucepan. Add 2 cups of rinsed long grain rice, stir briefly, cover, and reduce to a simmer. Cook for approximately 18 minutes, or until tender and water is absorbed. Remove from heat and let it sit covered for 5 more minutes before fluffing with a fork.
  2. While the rice is cooking, preheat your oven to 350°F (175°C) and prepare a 9x13-inch casserole dish.
  3. In a large mixing bowl, combine 3 cups of shredded cooked chicken, 2 cups of red enchilada sauce, one can of refried beans, and 1 cup of corn kernels. Stir in half of each cheese variety—1 cup of white cheddar and 1 cup of Monterey Jack—until well blended. Gently fold in the cooked rice.
  4. Transfer the mixture into the prepared casserole dish, spreading evenly. Top with the remaining cheese to create a gooey crust.
  5. Bake in the preheated oven for 20-30 minutes, until the cheese is fully melted, bubbly, and lightly golden.
  6. Remove from oven and let it rest for about 5 minutes. Garnish with chopped fresh cilantro or parsley before serving.

Nutrition

Serving: 1servingCalories: 450kcalCarbohydrates: 45gProtein: 30gFat: 20gSaturated Fat: 10gPolyunsaturated Fat: 2gMonounsaturated Fat: 6gCholesterol: 70mgSodium: 800mgPotassium: 600mgFiber: 5gSugar: 3gVitamin A: 500IUVitamin C: 10mgCalcium: 300mgIron: 2mg

Notes

Feel free to add your favorite veggies or proteins to customize this dish.

Tried this recipe?

Let us know how it was!

Fudgy Halloween Mummy Cookies for Spooky Sweet Fun

As I rummaged through my pantry last week, a delightful idea struck me: Halloween Mummy Cookies! These charming fudgy treats aren’t just show-stoppers; they’re a fun, interactive baking experience that brings families together during the spookiest season of the year. With their rich chocolate flavor and whimsical mummy decorations, these cookies are sure to capture the hearts of both kids and adults alike. Plus, they’re incredibly quick to prepare and easy to decorate, making them the ultimate dessert for Halloween parties or cozy gatherings. Ready to roll up your sleeves and create these delightful little mummies? Let’s dive into the recipe!

What makes Halloween Mummy Cookies special?

Fudgy Chocolate Goodness: These cookies offer a rich, fudgy chocolate flavor that will delight any sweet tooth.
Easy to Decorate: With simple buttercream piping and candy eyes, the decorating process is fun for all ages.
Perfect for Gatherings: Make these cookies your centerpiece at Halloween parties, bringing smiles to guests of all ages.
Time-Saving Treats: Ready in under an hour, they fit perfectly into any busy October schedule.
Versatile Options: Experiment with different toppings or add a twist with caramel chips for an exciting variation. If you’re looking for another quick treat, try my Blueberry Breakfast Cookies for a delicious morning boost!

Halloween Mummy Cookie Ingredients

For the Cookie Base

  • Butter – Adds moisture and richness to the cookies; substitute with margarine for a dairy-free option.
  • Granulated Sugar – Provides sweetness and helps with cookie structure; can be partially replaced with coconut sugar for a lower GI option.
  • Dark Brown Sugar – Adds depth of flavor and moisture; substitute with light brown sugar if necessary.
  • Egg – Binds the ingredients and contributes to moisture; flax egg can be used as a vegan substitute.
  • Egg Yolk – Enhances richness and texture; you can omit if only using a whole egg.
  • Vanilla Extract – Adds aromatic flavor; use pure vanilla for the best taste.

For the Fudgy Dough

  • All-Purpose Flour – Provides structure to the cookies; substitute with a 1:1 gluten-free flour blend for gluten-free options.
  • Cocoa Powder – Provides that rich chocolate flavor; Dutch-processed cocoa can be used for a deeper taste.
  • Baking Powder & Baking Soda – Ensure they are fresh for the optimal rise of your cookies.
  • Salt – Balances sweetness; use kosher salt for better control over saltiness.

For the Vanilla Buttercream

  • Powdered Sugar – Delivers sweetness and a smooth texture to the buttercream.
  • Milk – Adds moisture; feel free to use any milk type or substitute with non-dairy milk.

With these Halloween Mummy Cookies ingredients, you’re all set to create an enchanting treat that will surely bring festive cheer to your gatherings!

Step‑by‑Step Instructions for Halloween Mummy Cookies

Step 1: Prepare Butter
Start by melting your butter in a microwave-safe bowl until fully liquefied, then let it cool to room temperature for about 20 minutes in the fridge. This cooling process is essential to ensure the melted butter doesn’t cook the eggs when mixed. It sets a smooth base for your Halloween Mummy Cookies.

Step 2: Mix Wet Ingredients
In a large mixing bowl, whisk together the granulated sugar, dark brown sugar, egg, egg yolk, and vanilla extract along with the cooled butter until well combined. Aim for a smooth consistency, where sugar is thoroughly dissolved, and the mixture appears slightly fluffy. This step creates the moisture necessary for those fudgy centers in your cookies.

Step 3: Combine Dry Ingredients
In a separate bowl, whisk together the all-purpose flour, cocoa powder, baking powder, baking soda, and salt. This method ensures an even distribution of the leavening agents and cocoa throughout your dough. Gradually add this dry mixture to the wet ingredients, mixing until just combined to maintain the rich, fudgy texture of your Halloween Mummy Cookies.

Step 4: Chill Dough
Cover the mixing bowl with plastic wrap or a damp towel and refrigerate the cookie dough for 30 minutes. Chilling is an essential step as it helps enhance the texture of the cookies and prevents them from spreading too much while baking. Meanwhile, you can prepare your baking sheets and other baking essentials.

Step 5: Preheat Oven
While the dough is cooling, preheat your oven to 350°F (175°C). Line your baking sheets with parchment paper to prevent sticking and ensure even baking. This preparation not only saves time later but sets the stage for that perfect batch of Halloween Mummy Cookies.

Step 6: Form Cookies
Once the dough is chilled, scoop generous portions (about 2 oz or ¼ cup each) and roll them into balls. Place the dough balls on the prepared baking sheets, flattening each slightly. Ensure there is enough space between each cookie (about 2 inches apart) as they will expand while baking. Aim to fit six per tray for even baking.

Step 7: Bake
Bake the cookies in the preheated oven for 9-10 minutes, watching for the edges to firm up while the centers remain soft. The cookies will look slightly puffed and may still appear a bit underbaked, which is okay as they will continue to cook on the tray. After baking, allow them to cool on the baking sheet for about 3 minutes before transferring them to a wire rack.

Step 8: Make Buttercream
To make the vanilla buttercream, beat together the powdered sugar, softened butter, vanilla extract, and enough milk until the mixture reaches a smooth and spreadable consistency. It should be creamy, but not too runny, and hold its shape well for decorating. This sweet topping will help your Halloween Mummy Cookies come to life!

Step 9: Decorate Cookies
Once the cookies are completely cooled, pipe the buttercream onto the cookies in a fun, draped pattern resembling mummy wrappings. Add candy eyes on top for that adorable, spooky touch, and feel free to get creative! These decorations are a delightful way to engage everyone in the Halloween spirit while making your cookies stand out.

Halloween Mummy Cookies Variations & Substitutions

Get ready to put your own spin on these delightful Halloween Mummy Cookies! With a little creativity, you can make them truly unique and cater to your family’s tastes.

  • Dairy-Free: Substitute butter with coconut oil or margarine, and use almond or oat milk in your buttercream for a delicious non-dairy twist.

  • Gluten-Free: Replace all-purpose flour with a 1:1 gluten-free flour blend to make these cookies accessible for gluten-sensitive friends.

  • Nutty Flavor: Add finely chopped walnuts or pecans to the dough for a delightful crunch that complements the fudgy texture beautifully.

  • Spicy Kick: Incorporate a teaspoon of cayenne or chili powder into the batter for a surprising heat that contrasts perfectly with the sweetness.

  • Pumpkin Spice Twist: For a seasonal boost, add a tablespoon of pumpkin spice to the cookie dough—it’s perfect for that cozy fall flavor.

  • Chocolate Chip Delight: Fold in semi-sweet or dark chocolate chips for a double chocolate experience that will leave chocolate lovers in bliss.

  • Coconut Flakes: Mix in unsweetened shredded coconut to the dough for fun texture and a hint of tropical flavor—perfect for those seeking something different.

  • Decorative Icing: Use vibrant colored icing to create creative designs or seasonal themes beyond Halloween, allowing you to customize each cookie for any occasion!

Explore these fun variations to keep your baking exciting! And if you’re in the mood for something quick and delicious in the morning, don’t forget to try my Blueberry Breakfast Cookies for a delightful start to your day.

Expert Tips for Halloween Mummy Cookies

  • Cool the Butter: Always let the melted butter cool before mixing. This prevents cooking the eggs and helps achieve a fudgy texture in your cookies.

  • Chill the Dough: Don’t skip refrigerating the dough for 30 minutes. This crucial step enhances the cookies’ texture and keeps them from spreading too much while baking.

  • Piping Precision: Use a piping bag with a small tip for decorating. This allows for better control when creating mummy band patterns with the buttercream, making your Halloween Mummy Cookies truly stand out.

  • Watch Baking Time: Be mindful of the baking time; cookies should be slightly underbaked to keep that chewy center. They will firm up while cooling, ensuring the perfect fudgy bite.

  • Storage Solutions: Keep any leftover cookie dough in an airtight container in the fridge for up to a day, or freeze it for up to 30 days for a stress-free baking experience later on.

What to Serve with Halloween Mummy Cookies

These fudgy, spooky treats create an enchanting experience that calls for some delightful companions for a complete Halloween celebration!

  • Pumpkin Spice Latte: The warm, spiced flavors in this classic drink beautifully complement the rich chocolate of the cookies, creating a comforting pairing. Picture sipping this cozy beverage alongside your freshly baked mummies—pure bliss!

  • Caramel Apples: Enjoying these crunchy, sweet treats will add a lovely contrast to the gooeyness of the cookies while keeping the Halloween spirit alive. Drizzled with melted chocolate and sprinkled with nuts, they make for an inviting display.

  • Chocolate Milkshake: A creamy chocolate milkshake is a nostalgic favorite that pairs perfectly with these cookies. The combination of textures will leave everyone wanting more, combining blissfully rich notes of chocolate.

  • Gummy Worms and Candy Corn: These festive candies add a playful touch that echoes the Halloween theme. Scatter them around your cookie platter for a fun surprise that kids will adore.

  • Spiced Hot Cider: This warm, spiced beverage serves as a perfect counterpart to the fudgy cookies. The hints of cinnamon and cloves enhance the chocolatey richness in every bite.

  • Vanilla Ice Cream: A scoop of creamy vanilla ice cream next to these cookies creates a delightful contrast of temperatures. The melting ice cream adds a dreamy texture, making each bite an unforgettable experience.

  • Cinnamon Sugar Doughnuts: For a festive twist, serve some mini doughnuts dusted with cinnamon sugar. They echo the comforting autumn flavors while providing a playful textural variety on your dessert table.

  • Halloween-themed Fruit Platter: Sliced apples, oranges, and berries arranged creatively can add a refreshing touch to your spread. A little sweetness from fruit helps lighten the rich indulgence of the cookies.

Enjoy celebrating this spooktacular season with these delightful pairings!

Make Ahead Options

These Halloween Mummy Cookies are perfect for busy home cooks looking to save time during the festive season! You can prepare the cookie dough up to 24 hours in advance; simply mix and chill it, then wrap it tightly in plastic wrap before refrigerating. Alternatively, if you’re planning even further ahead, the dough can be frozen for up to 30 days—just thaw overnight in the fridge before baking. When you’re ready to enjoy your cookies, scoop, form, and bake them as directed. This way, you’ll have fresh, fudgy Halloween Mummy Cookies that are just as delicious, ready to impress your family and friends without any last-minute stress!

How to Store and Freeze Halloween Mummy Cookies

Room Temperature: Store cookies in an airtight container at room temperature for up to 3 days to maintain freshness and softness.

Fridge: If you live in a warmer climate, keep the cookies in the fridge for up to a week, but let them come to room temperature before enjoying for the best taste.

Freezer: For longer storage, place cookies in an airtight container separated by parchment paper and freeze for up to 2 months. Thaw at room temperature before serving.

Reheating: To restore the fudgy texture, gently reheat chilled or frozen cookies in the microwave for about 10-15 seconds—just enough to warm them slightly. Enjoy your Halloween Mummy Cookies!

Halloween Mummy Cookies Recipe FAQs

How do I choose the right cocoa powder for my Halloween Mummy Cookies?
When selecting cocoa powder, I recommend using Dutch-processed cocoa for a deeper, more intense chocolate flavor. However, if you have natural cocoa powder on hand, it works perfectly as well. Just keep in mind that using Dutch-processed may affect the rise of your cookies due to the difference in acidity.

How can I store leftover Halloween Mummy Cookies?
These delicious cookies can be stored in an airtight container at room temperature for up to 3 days. If you live in a warmer climate, you may want to keep them in the fridge for up to a week. Just remember to allow them to come to room temperature for the best flavor before enjoying!

Can I freeze Halloween Mummy Cookies?
Absolutely! For freezing, place your fully cooled cookies in an airtight container, layering them with parchment paper to prevent sticking. You can freeze them for up to 2 months. When you’re ready to enjoy, simply thaw them at room temperature for a few hours, or use a microwave for a quick reheat (around 10-15 seconds) to restore that fudgy texture.

What can I do if my cookie dough is too sticky?
If your dough is sticky, it could be due to the butter not being cooled enough or too much moisture in the mixture. I suggest chilling it longer (up to 60 minutes) which should help firm it up. If it’s still sticky after chilling, try adding a tablespoon of flour at a time until you reach a workable consistency.

Are there any allergy considerations I should be aware of when making these cookies?
Definitely! If anyone has allergies, you can easily adapt this recipe. For a dairy-free version, replace the butter with margarine or coconut oil. To make it egg-free, use a flax egg (1 tablespoon of ground flaxseed mixed with 3 tablespoons of water, let sit for 5 minutes). Also, consider using a gluten-free flour blend for those with gluten sensitivities. Always check ingredient labels if you’re unsure!

Halloween Mummy Cookies

Fudgy Halloween Mummy Cookies for Spooky Sweet Fun

Delight in these Halloween Mummy Cookies, a fun and interactive treat perfect for parties and gatherings.
Prep Time 20 minutes
Cook Time 10 minutes
Chilling Time 30 minutes
Total Time 1 hour
Servings: 12 cookies
Course: Dessert
Cuisine: American
Calories: 150

Ingredients
  

For the Cookie Base
  • 1 cup Butter Melted and cooled
  • 3/4 cup Granulated Sugar
  • 1/2 cup Dark Brown Sugar Can substitute with light brown sugar
  • 1 large Egg Use flax egg for vegan
  • 1 large Egg Yolk Optional if using whole egg
  • 2 teaspoons Vanilla Extract Use pure for best flavor
For the Fudgy Dough
  • 1 3/4 cups All-Purpose Flour Substitute with gluten-free flour blend if needed
  • 3/4 cup Cocoa Powder Dutch-processed for richer flavor
  • 1 teaspoon Baking Powder Ensure freshness
  • 1 teaspoon Baking Soda Ensure freshness
  • 1/2 teaspoon Salt Use kosher salt
For the Vanilla Buttercream
  • 2 cups Powdered Sugar
  • 1/2 cup Milk Any type or non-dairy

Equipment

  • Mixing Bowl
  • microwave-safe bowl
  • Baking Sheets
  • Parchment Paper
  • Piping Bag

Method
 

Step-by-Step Instructions
  1. Step 1: Prepare Butter - Melt butter and cool.
  2. Step 2: Mix Wet Ingredients - Combine sugars, egg, yolk, vanilla, and cooled butter.
  3. Step 3: Combine Dry Ingredients - Mix flour, cocoa, baking powder, baking soda, and salt.
  4. Step 4: Chill Dough - Refrigerate cookie dough for 30 minutes.
  5. Step 5: Preheat Oven - Preheat to 350°F (175°C) and prepare baking sheets.
  6. Step 6: Form Cookies - Roll dough into balls and place on sheets.
  7. Step 7: Bake - Bake for 9-10 minutes, cool on baking sheet.
  8. Step 8: Make Buttercream - Beat together all buttercream ingredients.
  9. Step 9: Decorate Cookies - Pipe buttercream and add candy eyes.

Nutrition

Serving: 1cookieCalories: 150kcalCarbohydrates: 20gProtein: 1gFat: 7gSaturated Fat: 4gCholesterol: 25mgSodium: 100mgPotassium: 50mgFiber: 1gSugar: 10gCalcium: 1mgIron: 2mg

Notes

Cool melted butter before mixing. Chill dough for best texture. Use piping bag for precise decorating. Watch baking time for chewy centers. Store leftover dough in the fridge or freeze.

Tried this recipe?

Let us know how it was!

Indulge in Creamy Pumpkin Cheesecake Bars – Keto Delight!

As the golden leaves flutter gently to the ground, I find myself yearning for the warmth of autumn flavors—cue my Keto Salted Caramel Pumpkin Cheesecake Bars! What makes these bars so special is their luscious, creamy filling layered atop a buttery pecan crust, creating a delightful contrast that dances on the palate. Not only are they keto-friendly and low-carb, but they’re also gluten-free, making them the perfect seasonal treat for get-togethers or an afternoon indulgence. With a rich drizzle of salted caramel completing this delicious masterpiece, they transform any dessert table into a celebration of fall. So, are you ready to bring a slice of autumn to your kitchen?

Why Are These Pumpkin Cheesecake Bars Irresistible?

Creamy, Silky Texture: Each bite melts in your mouth, thanks to the blend of cream cheese and pumpkin puree, delivering an unforgettable experience.

Low-Carb Delight: Enjoy the flavors of fall without the guilt, as these bars are perfectly keto-friendly and low in carbs.

Buttery Pecan Crust: The crust offers a satisfying crunch that complements the creamy filling beautifully, making it an absolute crowd-pleaser.

Effortlessly Homemade: With simple ingredients and easy steps, you can whip these up faster than you can say “pumpkin spice!”

Perfect for Gatherings: These bars are a festive addition to any dessert table, alongside other treats like Strawberry Cheesecake Dump or Carrot Cake Cheesecake.

Elevate your dessert game this season and enjoy the cozy flavors these bars bring!

Pumpkin Cheesecake Bars Ingredients

Get ready to embrace the warm flavors of fall!

For the Crust

  • Pecan Flour or Finely Ground Pecans – Provides structural integrity; swap with almond flour for a nut-free version.
  • Melted Butter – Binds the crust together; use coconut oil if you’re looking for a dairy-free alternative.
  • Powdered Erythritol – Sweetens both crust and filling; consider monk fruit sweetener for a great substitute.
  • Pinch of Salt – Enhances the overall flavor of the crust.

For the Cheesecake Filling

  • Cream Cheese – Delivers a silky, creamy texture; ensure it’s full-fat for the best results.
  • Pumpkin Puree – Infuses the filling with moisture and autumn flavor; fresh or canned works perfectly.
  • Sour Cream – Adds creaminess; Greek yogurt can be a great substitute if needed.
  • Egg – Acts as a binder; use a flax egg for a vegan alternative.
  • Vanilla Extract – Enhances the flavors beautifully.
  • Pumpkin Pie Spice – The aromatic spice mix that captures the essence of fall; can be exchanged with a blend of nutmeg, cinnamon, and ginger.
  • Cinnamon – Adds extra warmth and depth to the filling.

For the Salted Caramel

  • Butter – Creates a rich base for the caramel; coconut oil is a good replacement for a non-dairy option.
  • Allulose or Erythritol – Sweetens the caramel while allowing it to caramelize; both are effective for a keto-friendly dessert.
  • Heavy Cream – Adds richness and smoothness; substitute with coconut cream for a dairy-free option.
  • Sea Salt – Balances the sweetness and enriches the caramel’s flavor, completing the masterpiece.

These Pumpkin Cheesecake Bars are the perfect way to savor the season—delicious and entirely guilt-free!

Step‑by‑Step Instructions for Keto Salted Caramel Pumpkin Cheesecake Bars

Step 1: Preheat the Oven
Begin by preheating your oven to 325°F (160°C) and lining an 8×8” baking pan with parchment paper. This ensures easy removal later on. Gather your equipment including measuring cups, mixing bowls, and a whisk to help streamline the process as you whip up these delightful Pumpkin Cheesecake Bars.

Step 2: Prepare the Crust
In a mixing bowl, combine pecan flour, melted butter, powdered erythritol, and a pinch of salt. Stir the mixture until well blended, achieving a consistent texture. Press this mixture evenly into the prepared pan to form your crust. Bake for 10 minutes until it’s lightly golden, then remove from the oven and set aside to cool while you prepare the filling.

Step 3: Make the Cheesecake Filling
In another mixing bowl, beat together the cream cheese and erythritol until smooth and creamy. Next, add in the pumpkin puree, sour cream, egg, vanilla extract, pumpkin pie spice, and cinnamon. Blend everything until you achieve a silky filling that’s wonderfully fragrant, perfect for your Pumpkin Cheesecake Bars.

Step 4: Bake the Cheesecake Bars
Pour the creamy filling over the cooled pecan crust in an even layer. Use a spatula to smooth the top, ensuring an even surface. Bake in the preheated oven for 25–30 minutes. The bars should be set around the edges but slightly jiggly in the center when you gently shake the pan. Once done, remove from the oven and let them cool.

Step 5: Chill the Bars
After your Pumpkin Cheesecake Bars have cooled to room temperature, place them in the refrigerator and chill for at least 3 hours. This step is crucial for achieving the perfect texture and flavor. For best results, consider chilling them overnight, allowing all the flavors to meld beautifully.

Step 6: Prepare the Salted Caramel
While the bars are chilling, melt butter and your chosen sweetener in a saucepan over low heat. Stir continuously until the sweetener is dissolved, then add heavy cream, vanilla extract, and sea salt. Simmer the mixture gently until it thickens to a luscious caramel consistency. Remove from heat and allow it to cool slightly.

Step 7: Drizzle and Serve
Once the Pumpkin Cheesecake Bars have chilled completely, remove them from the refrigerator. Drizzle the warm salted caramel over the top for that final touch of decadence. After the caramel has set slightly, slice the bars into squares, serve them chilled, and prepare for rave reviews from family and friends!

Make Ahead Options

These Keto Salted Caramel Pumpkin Cheesecake Bars are a fantastic choice for meal prep! You can prepare the pecan crust and cheesecake filling up to 24 hours in advance, making your busy weeknights a breeze. Simply follow steps 1 through 3, then cover the pan tightly with plastic wrap and refrigerate. For optimal quality, chill the bars for at least 3 hours (or ideally overnight) before serving; this melds the flavors beautifully. Just before serving, prepare the salted caramel sauce, drizzle it over the chilled bars, and enjoy dessert that’s just as delicious as if you had made it fresh!

What to Serve with Keto Salted Caramel Pumpkin Cheesecake Bars

Elevate your autumn dining experience with delightful pairings that balance flavors and textures perfectly.

  • Whipped Coconut Cream: Light and fluffy, this dairy-free option adds a refreshing contrast to the rich cheesecake bars. Great for those craving that creamy feel without the carbs!

  • Caramel Macchiato: The warm, espresso notes of this drink complement the sweet, caramel drizzle like a cozy hug on a chilly day. Perfect for sipping while enjoying dessert!

  • Savory Cheese Platter: Offer a selection of sharp cheeses, like aged cheddar and gouda, to enhance the sweetness of the bars. The combination of flavors makes for an intriguing bite!

  • Roasted Maple Brussels Sprouts: The earthy sweetness of these veggies pairs surprisingly well, providing a harmonious balance to the dessert’s rich flavors. A delightful way to incorporate greens!

  • Spiced Apple Cider: Warm, spiced cider mirrors the pumpkin flavors, wrapping you in cozy aromas as you enjoy your dessert. A classic fall drink!

  • Chocolate Avocado Mousse: This creamy, low-carb dessert offers a unique twist, with avocado providing a rich and smooth texture while keeping it guilt-free! The chocolate tones will satisfy any sweet tooth.

  • Chai Tea: The warm spices in chai amplify the comfort of your pumpkin cheesecake bars, creating an experience that’s both soothing and delightful.

  • Pecan Pie Bites: Mini pecan treats highlight the nutty elements in the cheesecake crust, ensuring a theme of rich flavor runs through your dessert table.

Let these pairings make your Keto Salted Caramel Pumpkin Cheesecake Bars the star of any seasonal gathering!

Pumpkin Cheesecake Bars Variations

Feel free to get creative with these Pumpkin Cheesecake Bars to suit your taste buds and dietary needs! Let your imagination guide you as you savor the fall flavors.

  • Nut-Free: Substitute pecan flour with almond flour for a nut-free crust, perfect for those with allergies. Your bars will still have that delightful flavor, minus the nuts.

  • Dairy-Free: Swap melted butter and cream cheese with coconut oil and dairy-free cream cheese. Get ready for a deliciously creamy texture without the dairy!

  • Sweetness Level: If you prefer a sweeter dessert, add an extra tablespoon of powdered erythritol or monk fruit to enhance the sweetness just right for you.

  • Extra Spice: Elevate the flavor by adding a pinch of ground cloves or allspice with your pumpkin pie spice. It’ll give your bars a warm, aromatic twist.

  • Chocolate Lovers: Fold in sugar-free chocolate chips into the cheesecake filling for a delightful rich addition. Imagine the blissful combination of pumpkin and chocolate in every bite!

  • Layered Delight: For a unique texture, create a swirled effect by mixing half pumpkin filling with a layer of chocolate or vanilla cheesecake. Every bite will be a surprise!

  • Spiced Caramel: Infuse your salted caramel sauce with a dash of cinnamon or nutmeg for an extra layer of flavor, capturing the essence of fall even more.

  • Fruit Fusion: Add a layer of finely chopped apples or pears on top before drizzling with caramel to bring a fresh element that complements the cheesecake perfectly.

As you explore these fun variations, consider pairing these delightful bars with a rich cup of spiced chai tea for a comforting autumn experience. Enjoy!

Expert Tips for Pumpkin Cheesecake Bars

  • Room Temperature Ingredients: Bring cream cheese and egg to room temperature for a smoother filling, avoiding lumps in your cheesecake batter.

  • Chill for Perfection: Chill the bars overnight for the best texture and flavor—this allows all the elements to meld beautifully in these pumpkin cheesecake bars.

  • Full-Fat Cream Cheese: Always use full-fat brick-style cream cheese; low-fat versions can result in a weepy filling that doesn’t hold its shape as well.

  • Cool Caramel Carefully: Allow the salted caramel to cool slightly before drizzling it on top to prevent it from melting the cheesecake when serving.

  • Even Baking: Check for doneness by ensuring the edges are set while the center remains slightly jiggly—it’s perfectly fine if it continues to firm up as it cools.

How to Store and Freeze Pumpkin Cheesecake Bars

Fridge: Store the pumpkin cheesecake bars in an airtight container in the fridge for up to 5 days. This will help maintain their creamy texture and flavor.

Freezer: For longer storage, slice the bars and wrap them individually in plastic wrap, then store in an airtight container in the freezer for up to a month. Thaw in the fridge overnight before serving.

Reheating: If you prefer to enjoy them warm, gently reheat individual slices in the microwave for 10–15 seconds; just be careful not to overheat, as it may affect the texture.

Make-Ahead: These bars can be made a day in advance, especially ideal for planning ahead for gatherings!

Keto Salted Caramel Pumpkin Cheesecake Bars Recipe FAQs

How do I select ripe pumpkin puree?
Absolutely! When choosing pumpkin puree, opt for brands that contain 100% pumpkin with no added sugars or preservatives. If you’re using fresh pumpkins, look for ones that are firm and heavy for their size, with a smooth, unblemished skin. The best pumpkins for puree are the smaller varieties, such as sugar pumpkins, which are known for their sweetness and rich flavor.

How should I store leftover pumpkin cheesecake bars?
Very! Place the pumpkin cheesecake bars in an airtight container and store them in the refrigerator for up to 5 days. This helps maintain their creamy texture and delightful flavors. Make sure they are fully cooled before sealing them, as this prevents moisture buildup from condensation.

Can I freeze pumpkin cheesecake bars?
Absolutely! To freeze the bars, slice them into individual portions and wrap each slice in plastic wrap. Place wrapped slices in an airtight container or freezer bag and store them in the freezer for up to 1 month. To defrost, simply move the slices to the refrigerator overnight. They’ll be just as delicious as the day you made them!

What should I do if my cheesecake filling is too runny?
If you find your cheesecake filling is too runny, don’t worry! This can happen when the cream cheese wasn’t blended thoroughly or was too warm. To fix this, ensure you blend the cream cheese until creamy smooth and be sure all ingredients are at room temperature before mixing. If it’s already baked, chill it in the refrigerator for a couple of hours—this usually helps set it up nicely.

Are these pumpkin cheesecake bars safe for people with nut allergies?
Great question! The original recipe uses pecan flour, which contains nuts. If you or someone you’re serving has a nut allergy, you can easily substitute the pecan flour with a gluten-free almond flour or a seed-based flour blend, like sunflower seed flour, for a nut-free version. Always double-check other ingredients to avoid cross-contamination.

How long do I need to cool the bars before serving?
Chilling is key! After baking, allow the pumpkin cheesecake bars to cool to room temperature, then refrigerate them for at least 3 hours—though overnight is ideal for the best texture and flavor integration. This will give them time to set perfectly before you slice into that creamy goodness!

Pumpkin Cheesecake Bars

Indulge in Creamy Pumpkin Cheesecake Bars – Keto Delight!

Delight in these Pumpkin Cheesecake Bars, a creamy, keto-friendly dessert perfect for any autumn gathering.
Prep Time 15 minutes
Cook Time 40 minutes
Chilling Time 3 hours
Total Time 3 hours 55 minutes
Servings: 9 slices
Course: Dessert
Cuisine: American
Calories: 250

Ingredients
  

For the Crust
  • 1 cup Pecan Flour or finely ground pecans
  • 1/4 cup Melted Butter or coconut oil for dairy-free
  • 1/4 cup Powdered Erythritol or monk fruit sweetener
  • 1 pinch Salt
For the Cheesecake Filling
  • 8 oz Cream Cheese full-fat
  • 1 cup Pumpkin Puree fresh or canned
  • 1/2 cup Sour Cream or Greek yogurt
  • 1 large Egg or flax egg for vegan
  • 1 tsp Vanilla Extract
  • 1 tbsp Pumpkin Pie Spice or a mix of nutmeg, cinnamon, and ginger
  • 1 tsp Cinnamon
For the Salted Caramel
  • 1/2 cup Butter or coconut oil for non-dairy
  • 1/2 cup Allulose or erythritol
  • 1/4 cup Heavy Cream or coconut cream
  • 1/2 tsp Sea Salt

Equipment

  • 8x8 inch baking pan
  • Mixing bowls
  • whisk
  • spatula

Method
 

Preparation
  1. Preheat your oven to 325°F (160°C) and line an 8x8” baking pan with parchment paper.
  2. In a mixing bowl, combine pecan flour, melted butter, powdered erythritol, and a pinch of salt. Stir until well blended and press evenly into the pan.
  3. Bake for 10 minutes until lightly golden, then remove and set aside to cool.
  4. In another bowl, beat cream cheese and erythritol until smooth, then add pumpkin puree, sour cream, egg, vanilla extract, pumpkin pie spice, and cinnamon. Blend until silky.
  5. Pour the filling over the cooled crust. Smooth the top and bake for 25-30 minutes until set.
  6. Let cool to room temperature, then chill in the refrigerator for at least 3 hours.
  7. For the caramel, melt butter and sweetener in a saucepan over low heat. Stir in heavy cream, vanilla, and sea salt, simmer until thickened.
  8. Drizzle the salted caramel over chilled bars, slice, and serve.

Nutrition

Serving: 1sliceCalories: 250kcalCarbohydrates: 10gProtein: 5gFat: 23gSaturated Fat: 12gPolyunsaturated Fat: 2gMonounsaturated Fat: 8gCholesterol: 80mgSodium: 150mgPotassium: 150mgFiber: 3gSugar: 1gVitamin A: 4000IUVitamin C: 2mgCalcium: 50mgIron: 1mg

Notes

Store in an airtight container in the fridge for up to 5 days or freeze for longer storage.

Tried this recipe?

Let us know how it was!

Deliciously Chewy Pumpkin Spice Cookies for Fall Bliss

As I stood in my kitchen, the aroma of spiced pumpkin filled the air, transporting me to crisp autumn days and cozy gatherings. Today, I’m eager to share my recipe for Eggless Chewy Pumpkin Spice Cookies, a delightful twist on the classic snickerdoodle that’s perfect for welcoming the fall season. These cookies boast a wonderfully chewy texture and are made without eggs, making them a fantastic option for anyone with dietary restrictions. Plus, they take just minutes to prepare and elevate your dessert game effortlessly, making them a must-have for your cookie repertoire. So, are you ready to indulge in a warm, pumpkin-flavored hug that’s sure to enchant your taste buds? Let’s dive into the recipe!

Why Should You Make These Cookies?

Easy and Quick: These cookies can be whipped up in no time, making them a perfect choice for spontaneous baking adventures.

Perfect for Fall: With their warm spiced aroma, these cookies truly embody the essence of fall, creating a cozy atmosphere in your home.

Eggless Delight: Designed with everyone in mind, they are egg-free yet still deliver a mouthwatering taste and chewy texture.

Versatile Treat: Feel free to experiment by adding chocolate chips or nuts for an exciting twist!

Crowd-Pleaser: Serve these alongside a cup of tea or with warm milk, and watch as friends and family come back for seconds! You might also enjoy these Blueberry Breakfast Cookies as a delightful morning treat.

Pumpkin Spice Cookies Ingredients

For the Cookie Dough

  • All-purpose flour – Provides structure; accurate measurement is key for the perfect chewy texture.
  • Salt – Enhances the sweetness, creating a balanced flavor profile.
  • Baking powder & Baking soda – These leavening agents ensure a light and fluffy cookie; essential for the rise.
  • Ground cinnamon – Infuses warmth and a rich flavor reminiscent of fall.
  • Pumpkin pie spice – A classic blend that delivers the signature pumpkin flavor; can substitute with cinnamon, ginger, and nutmeg if needed.
  • Unsalted butter – Adds richness; remember to melt and cool for optimal results.
  • Brown sugar – Contributes moisture and a delicious caramel-like flavor; crucial for that soft, chewy bite.
  • Granulated sugar – Offers sweetness while helping to create a delightful crisp exterior.
  • Vanilla extract – Elevates the overall flavor profile, adding depth to the cookies.
  • Pumpkin puree – Ensures genuine pumpkin flavor and moistness; be sure to use canned pumpkin, not pie filling.

For Coating

  • Granulated sugar – Use this for dipping the cookie dough balls for an extra sweetness.
  • Ground cinnamon – This adds an aromatic touch when coating the cookies before baking.
  • Pumpkin pie spice – A sprinkle on the coating adds that extra hint of fall flavors!

Whether you’re craving warm, spiced delights or just want to bake something seasonal, these Pumpkin Spice Cookies will surely charm anyone who takes a bite!

Step‑by‑Step Instructions for Pumpkin Spice Cookies

Step 1: Mix Dry Ingredients
In a large bowl, whisk together 2 cups of all-purpose flour, ½ teaspoon of salt, 1 teaspoon of baking powder, and ½ teaspoon of baking soda. Add in 2 teaspoons of ground cinnamon and 1 teaspoon of pumpkin pie spice for that cozy flavor. Ensure everything is well combined for an even dough texture, then set this mixture aside to be incorporated later.

Step 2: Combine Wet Ingredients
In another bowl, whisk ½ cup of melted and cooled unsalted butter with ¾ cup of brown sugar and ¼ cup of granulated sugar until the mixture is smooth and free of lumps. Next, stir in 1 teaspoon of vanilla extract and ¾ cup of pumpkin puree. Mixing these ingredients well creates a rich base full of that delightful pumpkin spice flavor.

Step 3: Combine Mixtures
Pour the wet mixture into the bowl with the dry ingredients, gently folding them together until just combined. Be careful not to overmix, as this can lead to denser cookies. Once combined, cover the bowl with plastic wrap or a clean kitchen towel and chill the dough in the refrigerator for at least 1 hour, or up to 3 days, allowing the flavors to meld beautifully.

Step 4: Prep for Baking
Preheat your oven to 350°F (177°C) while the dough chills. Line two baking sheets with parchment paper to prevent sticking and ensure easy cleanup. In a small bowl, combine ½ cup of granulated sugar, 2 teaspoons of ground cinnamon, and 1 teaspoon of pumpkin pie spice for the cookie coating, creating a fragrant blend to add extra flavor before baking.

Step 5: Shape Cookies
Once chilled, use a tablespoon to scoop the dough and roll it into balls, each about the size of a tablespoon. Coat the dough balls in the prepared sugar mixture, ensuring they are fully covered. Place them on the lined baking sheets, spacing them about 2 inches apart to allow for spreading during baking, while giving them a nice sugar crust.

Step 6: Bake
Bake the cookies in the preheated oven for 11-13 minutes, or until the edges are set but the centers appear slightly under-baked. This will guarantee a soft, chewy texture in your Pumpkin Spice Cookies. Allow them to cool on the baking sheets for 5 minutes before transferring them to wire racks to cool completely. This step is essential for achieving that perfect, tender bite.

How to Store and Freeze Pumpkin Spice Cookies

Room Temperature: Store your leftover cookies in an airtight container at room temperature for up to 5 days, keeping them soft and delicious.

Fridge: If you want to keep them fresh longer, pop the cookies in a fridge-safe container for up to 1 week. Just bring them back to room temperature before enjoying.

Freezer: For longer storage, freeze the cookies in a single layer on a baking sheet, then transfer them to an airtight container or freezer bag for up to 3 months—perfect for holiday treats.

Reheating: To enjoy warm cookies later, thaw them in the fridge overnight and then reheat in the microwave for about 10-15 seconds, bringing back that chewy goodness in your Pumpkin Spice Cookies!

What to Serve with Eggless Chewy Pumpkin Spice Cookies

As the aroma of baked pumpkin spice cookies wafts through your home, it’s time to think about what delightful companions can elevate your dessert experience.

  • Creamy Hot Cocoa: Rich and velvety, a warm mug of cocoa enhances the cozy flavors of pumpkin and spice in each cookie bite.

  • Chai Tea: Fragrant with spices, chai tea complements the warm notes of pumpkin, providing a soothing beverage to sip between cookies.

  • Vanilla Ice Cream: A scoop of creamy vanilla ice cream contrasts beautifully with the chewy texture of the cookies, creating a deliciously indulgent treat.

  • Apple Cider: Served warm or chilled, apple cider’s sweetness and hint of cinnamon echoes the flavors of autumn, perfect alongside your cookies.

  • Maple Glaze: Drizzling a maple glaze over your cookies adds a touch of sweetness and enhances their delectable fall flavor.

  • Whipped Cream: Light and airy, whipped cream can be a delightful topping for cookies when served with coffee or tea, making each bite feel special.

  • Nutty Trail Mix: A crunchy trail mix adds a satisfying contrast in texture, offering a snacking option that balances the softness of your pumpkin spice cookies.

  • Cheese Board: Pair them with nutty cheeses or a creamy Brie for a sophisticated twist that brings out the spices in the cookies.

  • Pumpkin Spice Latte: Embrace the season with a delicious latte; the warm spices will sing in harmony with your cookies’ rich flavors—perfect for cozy gatherings.

Tips for the Best Pumpkin Spice Cookies

  • Measure Carefully: Always use a proper measuring cup for flour and pumpkin puree. Too much flour can lead to dense cookies, while too little can affect the chewy texture you desire.

  • Chill the Dough: Allow the cookie dough to chill for at least an hour. This helps the cookies hold their shape while baking, resulting in that luscious chewiness.

  • Coating Count: Don’t be shy with the sugar coating! Rolling the cookie dough balls generously in the cinnamon-sugar mixture not only adds flavor but enhances the visual appeal of your pumpkin spice cookies.

  • Timing Is Key: Keep an eye on the baking time. Bake until the edges are set but the centers are soft; this ensures the classic chewy texture and prevents overbaking.

  • Experiment with Add-ins: If you’re feeling adventurous, try adding chocolate chips or nuts. These additions can elevate your pumpkin spice cookies to a whole new flavor profile, making them even more delightful.

Make Ahead Options

These Eggless Chewy Pumpkin Spice Cookies are perfect for meal prep enthusiasts! You can prepare the cookie dough up to 3 days in advance, allowing the flavors to deepen beautifully while chilling in the refrigerator. Simply follow the recipe until the chilling step, covering the bowl with plastic wrap or a clean kitchen towel. To maintain the dough’s quality, ensure it is tightly sealed to avoid any drying out. When you’re ready to bake, scoop and roll the chilled dough into balls, coat them in the sugar mixture, and pop them in the oven. In just 11-13 minutes, you’ll have delicious, freshly baked cookies that are just as scrumptious as if they were made the same day!

Pumpkin Spice Cookies Variations

Feel free to let your creativity shine and make these cookies truly your own with delightful twists and adaptations!

  • Whole Wheat Flour: Substitute some all-purpose flour for whole wheat flour for added nutrition and a nutty flavor. This choice offers a heartier texture that many enjoy.

  • Nutty Flavor: Add chopped walnuts or pecans to the dough for a delicious crunch that complements the spicy pumpkin flavor beautifully. Just remember to adjust the cookie size a bit to balance the added texture.

  • Chocolate Delight: Stir in semi-sweet or dark chocolate chips to the dough for a sweet surprise. The combination of rich chocolate and spiced pumpkin is utterly irresistible!

  • Frosted Indulgence: Drizzle your cooled cookies with maple cream cheese frosting for a decadent finish that enhances the warm spices. This delightful topping elevates each bite into dessert perfection.

  • Spiced Pumpkin Chips: Use pumpkin-flavored chips instead of the traditional chocolate for that extra burst of pumpkin goodness in every bite. It’s a cozy way to enjoy another layer of pumpkin flavor!

  • Dairy-Free Option: Substitute melted coconut oil or a dairy-free butter alternative for the unsalted butter, making these cookies suitable for those who are dairy-sensitive without sacrificing that chewy texture.

  • Add Some Heat: For a kick of spice, add a pinch of cayenne pepper to the dough. The contrasting heat with the sweetness makes for an exciting flavor experience! You might also enjoy these comforting Joumou Haitian Pumpkin Soup for an equally cozy meal.

  • Seasonal Twist: If you’re feeling particularly festive, add a dash of nutmeg or allspice to your cookie coating for that quintessential holiday vibe. It’s a delightful surprise that will have everyone asking for your secret!

Let your kitchen be your playground, and don’t hesitate to mix and match these variations for the ultimate Pumpkin Spice Cookies experience!

Pumpkin Spice Cookies Recipe FAQs

What type of pumpkin puree should I use for the cookies?
Absolutely! It’s best to use canned pumpkin puree, as it provides the right moisture and flavor. Avoid pumpkin pie filling, which contains added sugars and spices that could alter your cookie outcome.

How should I store my leftover pumpkin spice cookies?
Store your leftover cookies in an airtight container at room temperature for up to 5 days; this keeps them soft and delicious. Alternatively, you can refrigerate them for up to 1 week. Just remember to bring them to room temperature before enjoying for the best texture!

Can I freeze pumpkin spice cookies? How do I do it?
Yes, you can freeze these delightful cookies! First, place them in a single layer on a baking sheet to flash freeze for about 1 hour. Once they are solid, transfer the cookies into an airtight container or a freezer bag, separating layers with parchment paper. They will last for up to 3 months in the freezer. When you’re ready for a treat, just thaw them in the refrigerator overnight and reheat in the microwave for a few seconds!

What if my dough is too sticky?
If you find your dough is sticky, don’t worry! Add a little more flour—start with one tablespoon at a time until you achieve a manageable consistency. Ensure you mix gently so as not to overwork the dough, which can make cookies tougher.

Are these cookies suitable for people with allergies?
These pumpkin spice cookies are eggless and can cater to various dietary restrictions. However, pay attention to individual ingredient allergies, such as gluten in the all-purpose flour. For a gluten-free option, a gluten-free flour blend can be used. Always check labels and consider the preferences of those you’re serving.

What’s the best way to ensure my cookies are chewy?
To ensure a wonderfully chewy texture, measure your flour accurately and chill the dough for at least one hour. Baking just until the edges are set and the centers look slightly under-baked also plays a crucial role—this makes all the difference in achieving that soft, tender bite.

Pumpkin Spice Cookies

Deliciously Chewy Pumpkin Spice Cookies for Fall Bliss

Enjoy the delightful taste of Pumpkin Spice Cookies, a must-have fall treat perfect for any gathering.
Prep Time 15 minutes
Cook Time 13 minutes
Chilling Time 1 hour
Total Time 1 hour 28 minutes
Servings: 24 cookies
Course: Dessert
Cuisine: American
Calories: 150

Ingredients
  

For the Cookie Dough
  • 2 cups all-purpose flour Provides structure; accurate measurement is key.
  • 0.5 teaspoon salt Enhances sweetness for balanced flavor.
  • 1 teaspoon baking powder Essential for rise.
  • 0.5 teaspoon baking soda Essential for rise.
  • 2 teaspoons ground cinnamon Infuses warmth and rich flavor.
  • 1 teaspoon pumpkin pie spice Delivers classic pumpkin flavor.
  • 0.5 cups unsalted butter Melt and cool for optimal results.
  • 0.75 cups brown sugar Contributes moisture and flavor.
  • 0.25 cups granulated sugar Adds sweetness.
  • 1 teaspoon vanilla extract Enhances overall flavor.
  • 0.75 cups pumpkin puree Use canned pumpkin, not pie filling.
For Coating
  • 0.5 cups granulated sugar For dipping the cookie dough balls.
  • 2 teaspoons ground cinnamon Adds aromatic touch before baking.
  • 1 teaspoon pumpkin pie spice Adds extra hint of fall flavors.

Equipment

  • Large bowl
  • whisk
  • Baking Sheets
  • Parchment Paper
  • Microwave

Method
 

Step‑by‑Step Instructions
  1. Mix Dry Ingredients: In a large bowl, whisk together flour, salt, baking powder, baking soda, cinnamon, and pumpkin pie spice. Set aside.
  2. Combine Wet Ingredients: Whisk melted butter, brown sugar, granulated sugar, vanilla extract, and pumpkin puree until smooth.
  3. Combine Mixtures: Pour the wet mixture into dry ingredients, folding gently until just combined. Chill the dough for at least 1 hour.
  4. Prep for Baking: Preheat oven to 350°F. Line baking sheets with parchment paper. Mix granulated sugar, cinnamon, and pumpkin pie spice for coating.
  5. Shape Cookies: Scoop dough and roll into balls. Coat in sugar mixture. Space them on the baking sheets.
  6. Bake: Bake for 11-13 minutes until edges are set. Cool on baking sheets for 5 minutes before transferring to wire racks.

Nutrition

Serving: 1cookieCalories: 150kcalCarbohydrates: 20gProtein: 1gFat: 7gSaturated Fat: 4gPolyunsaturated Fat: 0.5gMonounsaturated Fat: 2gCholesterol: 20mgSodium: 80mgPotassium: 50mgFiber: 0.5gSugar: 10gVitamin A: 500IUCalcium: 20mgIron: 0.5mg

Notes

Chilling the dough is essential for achieving chewiness. Experiment with chocolate chips or nuts for added flavor.

Tried this recipe?

Let us know how it was!

Baked Apple Fritters That Will Brighten Your Autumn Days

As the days grow shorter and the cool autumn breeze dances through the trees, there’s nothing quite like the warmth of Baked Apple Fritters to lift your spirits. These delightful treats bring together tender apple chunks and a hint of warming spices, making each bite a cozy embrace. Unlike their fried counterparts, these baked beauties offer a healthier alternative without skimping on that satisfying crunch. Perfect for family get-togethers or a sweet ending to a chilly evening, these fritters capture the essence of fall in every mouthful. So, are you ready to create a seasonal delight that will leave everyone asking for seconds?

Why Are These Fritters a Must-Make?

Cozy, Flavorful Experience: These Baked Apple Fritters are not just desserts; they are a burst of autumn flavors in every bite.

Healthier Twist: By opting for baked instead of fried, you’re treating yourself without the guilt, making them ideal for a comforting family dessert.

Easy to Make: Even beginner bakers will appreciate the straightforward steps, making it a fun kitchen project that everyone can join in on.

Versatile Delights: Swap apples for pears or berries to keep your taste buds excited, or try out a gluten-free flour blend for a little variation.

Crowd-Pleasing: Serve them warm with a scoop of vanilla ice cream, and watch them disappear! Whether for a chilly evening or a cozy gathering, these fritters are sure to impress. For more delicious baked treats, check out our Garlic Butter Baked Chicken or indulging in a warm Apple Crisp Cinnamon to round out your autumn recipes.

Baked Apple Fritters Ingredients

For the Fritters

  • All-purpose flour – Provides structure; substitute with whole wheat flour for a denser texture.
  • White whole wheat flour – Adds a mild flavor and more fiber; can replace with all-purpose flour for texture adjustment.
  • Brown sugar – Supplies sweetness and moisture; coconut sugar can create a lower glycemic option.
  • Baking powder – Helps fritters rise, making them light and fluffy.
  • Cinnamon – Delivers that warm autumn spice everyone loves.
  • Nutmeg – Adds a nutty, aromatic flavor; allspice can be an alternative for enhanced complexity.
  • Allspice – Deepens the overall spice profile.
  • Salt – Balances the sweetness and enhances the flavors.
  • Butter (cold) – Adds richness; cold butter helps to achieve a flaky texture.
  • Milk – Hydrates dry ingredients; use plant-based milk for a dairy-free version.
  • Egg – Binds the ingredients together; a flax egg works as a vegan substitute.
  • Vanilla extract – Adds a delightful aromatic sweetness.
  • Chopped apple – Provides moisture and texture; Honeycrisp or Granny Smith apples offer the best flavor.

For the Glaze

  • Confectioner’s sugar – Sweetness and creates a smooth, glossy glaze.
  • Milk – Helps adjust the glaze consistency to your liking.
  • Vanilla extract – Enhances the flavor of the glaze, making it irresistible.

These Baked Apple Fritters are easy to whip up and can be enjoyed fresh from the oven or warmed later, making them a perfect addition to any autumn gathering!

Step‑by‑Step Instructions for Baked Apple Fritters

Step 1: Preheat and Prepare
Begin by preheating your oven to 400°F (200°C). While the oven warms, line a baking sheet with a silicone mat or parchment paper to prevent sticking. This step ensures that your Baked Apple Fritters will rise beautifully and not stick during baking, making cleanup a breeze.

Step 2: Mix Dry Ingredients
In a large mixing bowl, whisk together the all-purpose flour, white whole wheat flour, brown sugar, baking powder, cinnamon, nutmeg, allspice, and salt until well combined. This mixture promotes an even distribution of flavors and leavening agents, creating a delightful base for your fritters.

Step 3: Incorporate Cold Butter
Next, cut in the cold butter using a pastry cutter or your fingers until the mixture resembles coarse crumbs. This is a crucial step for achieving a flaky texture in your Baked Apple Fritters, as cold butter helps to create delightful layers while baking.

Step 4: Combine Wet Ingredients
In a separate bowl, whisk together the milk, egg, and vanilla extract. Once fully combined, pour the wet ingredients into the dry ingredients. Stir gently until just combined; be careful not to overmix, as this could lead to dense fritters that lack the desired fluffiness.

Step 5: Fold in Apples
Gently fold in the chopped apples into the batter, ensuring they are evenly distributed throughout. The moisture from the apples enhances the flavor and texture of your Baked Apple Fritters, adding a delightful burst of sweetness in every bite.

Step 6: Scoop onto Baking Sheet
Using a 1/4 cup measuring cup, scoop the fritter mixture onto the prepared baking sheet, spacing them about 2 inches apart. This allows for proper expansion while baking, resulting in perfectly shaped fritters that have a lovely, golden exterior.

Step 7: Bake Until Golden
Place the baking sheet in the preheated oven and bake for 11-13 minutes, or until the fritters are golden on the bottom and set in the center. You’ll know they’re done when a toothpick inserted comes out clean, revealing fluffy interiors ready to be glazed.

Step 8: Prepare Glaze
After baking, turn your oven to broil. In a bowl, whisk together the confectioner’s sugar, milk, and a splash of vanilla extract to create a smooth glaze. Adjust the consistency to your liking until it’s pourable but still thick enough to coat the fritters.

Step 9: Glaze and Broil
Brush a thin layer of the glaze over the warm fritters, then return them under the broiler for 2-4 minutes. Keep a close eye on them to prevent burning; this step adds an appetizing golden finish to your Baked Apple Fritters.

Step 10: Final Glaze and Serve
Once broiled, brush remaining glaze over the fritters and allow it to harden slightly before serving. This final touch not only enhances the flavor but adds a beautiful, glossy appearance, making your fritters irresistible and ready to enjoy!

Expert Tips for Baked Apple Fritters

  • Butter Matters: Ensure your butter is cold to achieve the perfect texture; this helps your fritters remain light and flaky.
  • Mixing Technique: Avoid overmixing your batter to prevent dense fritters; mix until just combined for a fluffy result.
  • Broil Carefully: Keep a vigilant eye on your fritters while broiling to prevent burning; a few minutes can make a big difference!
  • Apple Prep: For softer apple pieces, consider grating the apples instead of chopping; this will give you a more integrated flavor in each bite.
  • Experiment Freely: Don’t hesitate to try different fruits or spices; variations can keep your Baked Apple Fritters exciting all season long!

Baked Apple Fritters Variations

Feel free to follow your taste buds and customize these delightful fritters to make them truly yours!

  • Fruit Swap: Substitute chopped apples with pears or mixed berries for a deliciously different flavor. A medley of fruits could offer unexpected sweetness!

  • Gluten-Free Delight: Use a gluten-free flour blend to cater to those with dietary restrictions. This way, everyone can enjoy these tasty treats without worry.

  • Spice It Up: Experiment with warm spices like cardamom or ginger for a unique flavor twist. A sprinkle of each can transport your taste buds into autumn bliss!

  • Nutty Crunch: Add chopped walnuts or pecans for an added layer of texture and flavor. The crunch and richness will elevate every bite, making your fritters even more irresistible.

  • Sugar Alternatives: Swap brown sugar for coconut sugar to lower the glycemic index without sacrificing sweetness. A small change can make a big difference in health!

  • Cinnamon Glaze Twist: Enhance the glaze by adding a pinch of ground cinnamon to it. This simple addition will tie the flavors together beautifully.

  • Dairy-Free Option: Substitute milk with almond or oat milk for a dairy-free version that still maintains that deliciously sweet flavor. It’s inclusive and just as delightful!

  • Maple Glaze: For a unique twist, swap out the vanilla glaze with a maple syrup glaze. The natural sweetness will give your fritters a cozy fall feel, pairing perfectly with a warm drink.

These variations can not only spark creativity in the kitchen but also ensure that each batch of your Baked Apple Fritters offers something unique. Enjoy experimenting! And if you’re in the mood for more delectable treats, don’t miss our comforting Baked Salmon Honey or the irresistible charm of Baked Ham and Cheese Croissants. Happy cooking!

What to Serve with Baked Apple Fritters

Escape into a culinary world by pairing these delightful fritters with comforting sides and drinks that echo the warmth of autumn.

  • Vanilla Ice Cream: A scoop of creamy vanilla ice cream perfectly complements the spiced sweetness of the fritters, creating a blissful contrast.

  • Caramel Sauce: Drizzling warm caramel sauce over the fritters elevates their flavor, adding a rich, gooey sweetness that’s utterly indulgent.

  • Chai Tea: The aromatic spices in chai tea resonate with the flavors of the fritters, making it a cozy and heartwarming beverage pairing.

  • Cranberry Sauce: A tangy cranberry sauce cuts through the sweetness, providing a refreshingly tart element to balance the rich fritters.

  • Apple Cider: A warm mug of spiced apple cider enhances the seasonal experience, with its fragrant aroma and sweet notes echoing the fritters’ flavors.

  • Honey Yogurt Dip: A drizzle of honey over a creamy yogurt dip brings a fresh, tangy balance that complements the fritters while adding a wholesome touch.

Savor each bite with these harmonious pairings that turn your meal into a beautiful autumn experience!

Make Ahead Options

These Baked Apple Fritters are perfect for meal prep enthusiasts! You can prepare the batter up to 24 hours in advance, simply mix all the dry ingredients and store them in an airtight container. When you’re ready to bake, whisk together the wet ingredients, fold in the dry mix and chopped apples, and proceed as usual. Additionally, you can bake the fritters in advance and refrigerate them for up to 4 days; just reheat them in the oven briefly before serving to maintain their delightful texture. This make-ahead approach means you can enjoy delicious, freshly baked fritters in a fraction of the time, ideal for busy weeknights or unexpected guests!

How to Store and Freeze Baked Apple Fritters

Room Temperature: Store completely cooled fritters in an airtight container at room temperature for up to 2 days for the best taste and texture.

Fridge: For extended freshness, place fritters in an airtight container in the refrigerator. They will keep well for up to 4 days, but may lose some crispness.

Freezer: If you want to save them for later, freeze the fritters individually on a baking sheet before transferring to a freezer bag. They can be stored for up to 3 months.

Reheating: To enjoy your Baked Apple Fritters again, simply reheat in the oven at 350°F (175°C) for about 10-15 minutes, or until warmed through. This helps restore their delightful texture!

Baked Apple Fritters Recipe FAQs

How do I know if my apples are ripe for this recipe?
Choose apples that are firm with no soft spots or bruising. Honeycrisp and Granny Smith apples are great options due to their sweetness and tartness, respectively. Look for fresh apples that are vibrant in color, as dark spots or blemishes can indicate overripeness and may affect the flavor of your fritters!

What’s the best way to store Baked Apple Fritters?
After letting your fritters cool completely, place them in an airtight container. They will remain fresh at room temperature for 2 days or in the fridge for up to 4 days. A quick tip: to enhance their texture, reheat them in the oven at 350°F (175°C) for about 10 minutes before serving.

Can I freeze Baked Apple Fritters?
Absolutely! To freeze your fritters, lay them flat on a baking sheet and freeze until solid. Once frozen, transfer them to a freezer-safe bag, removing as much air as possible. They can be stored for up to 3 months. When you’re ready to enjoy them, thaw and reheat in the oven for a fresh-from-the-oven taste.

What if my fritters come out dense?
If your fritters are dense, it might be due to overmixing the batter. Mix just until combined to keep them light and fluffy. Additionally, ensure your baking powder is fresh; expired ingredients can affect rise and texture. Remember, the more gentle you are with the batter, the better your fritters will turn out!

Are there any dietary considerations for Baked Apple Fritters?
These fritters can be made dairy-free by substituting plant-based milk and butter. For a vegan version, replace the egg with a flax egg (mix 1 tablespoon of ground flaxseed with 3 tablespoons of water and let it sit until it thickens). Just be mindful of any allergies to include only ingredients that are suitable for everyone at your gathering!

What variations can I try with the fritter recipe?
Feel free to experiment! Switch out the chopped apples for pears or your favorite berries for a twist on flavor. You can also play with spices—try adding ginger or cardamom to create unique flavor profiles that will keep these Baked Apple Fritters exciting every time!

Baked Apple Fritters

Baked Apple Fritters That Will Brighten Your Autumn Days

Enjoy the delightful warmth of Baked Apple Fritters, a healthier autumn treat bursting with apple and spice flavors.
Prep Time 20 minutes
Cook Time 13 minutes
Total Time 33 minutes
Servings: 12 fritters
Course: Dessert
Cuisine: American
Calories: 150

Ingredients
  

For the Fritters
  • 2 cups all-purpose flour or whole wheat flour for a denser texture
  • 1 cup white whole wheat flour can replace with all-purpose flour
  • 1 cup brown sugar or coconut sugar for lower glycemic option
  • 2 tbsp baking powder helps fritters rise
  • 2 tsp cinnamon provides warmth
  • 1 tsp nutmeg adds aromatic flavor
  • 1 tsp allspice deepens spice profile
  • 1 tsp salt balances sweetness
  • 1/2 cup butter cold, for flaky texture
  • 1 cup milk use plant-based for dairy-free
  • 1 large egg or flax egg for vegan
  • 1 tsp vanilla extract adds aromatic sweetness
  • 2 cups chopped apple Honeycrisp or Granny Smith recommended
For the Glaze
  • 1 cup confectioner’s sugar for sweetness
  • 2 tbsp milk to adjust consistency
  • 1 tsp vanilla extract enhances glaze flavor

Equipment

  • Oven
  • Mixing bowls
  • Baking Sheet
  • Measuring cups
  • whisk
  • pastry cutter

Method
 

Step‑by‑Step Instructions
  1. Preheat your oven to 400°F (200°C) and line a baking sheet with parchment paper.
  2. In a large bowl, whisk together the all-purpose flour, white whole wheat flour, brown sugar, baking powder, cinnamon, nutmeg, allspice, and salt.
  3. Cut in the cold butter until the mixture resembles coarse crumbs.
  4. In another bowl, whisk together the milk, egg, and vanilla extract, then combine with the dry ingredients and stir gently.
  5. Fold in the chopped apples until evenly distributed.
  6. Scoop the mixture onto the prepared sheet, spacing them 2 inches apart.
  7. Bake for 11-13 minutes until golden on the bottom and set in the center.
  8. Whisk together the glaze ingredients until smooth, adjusting for consistency.
  9. Brush the glaze over warm fritters and broil for 2-4 minutes until golden.
  10. Brush with remaining glaze and allow to harden slightly before serving.

Nutrition

Serving: 1fritterCalories: 150kcalCarbohydrates: 22gProtein: 2gFat: 7gSaturated Fat: 4gPolyunsaturated Fat: 0.5gMonounsaturated Fat: 2gCholesterol: 20mgSodium: 150mgPotassium: 150mgFiber: 1gSugar: 6gVitamin A: 300IUVitamin C: 1mgCalcium: 15mgIron: 0.8mg

Notes

These fritters can be enjoyed fresh or reheated for a delightful treat any time.

Tried this recipe?

Let us know how it was!

Stay Connected

Get recipes via email: