Get my cookbooks

Irresistibly Moist Chocolate Pumpkin Bread for Fall Mornings

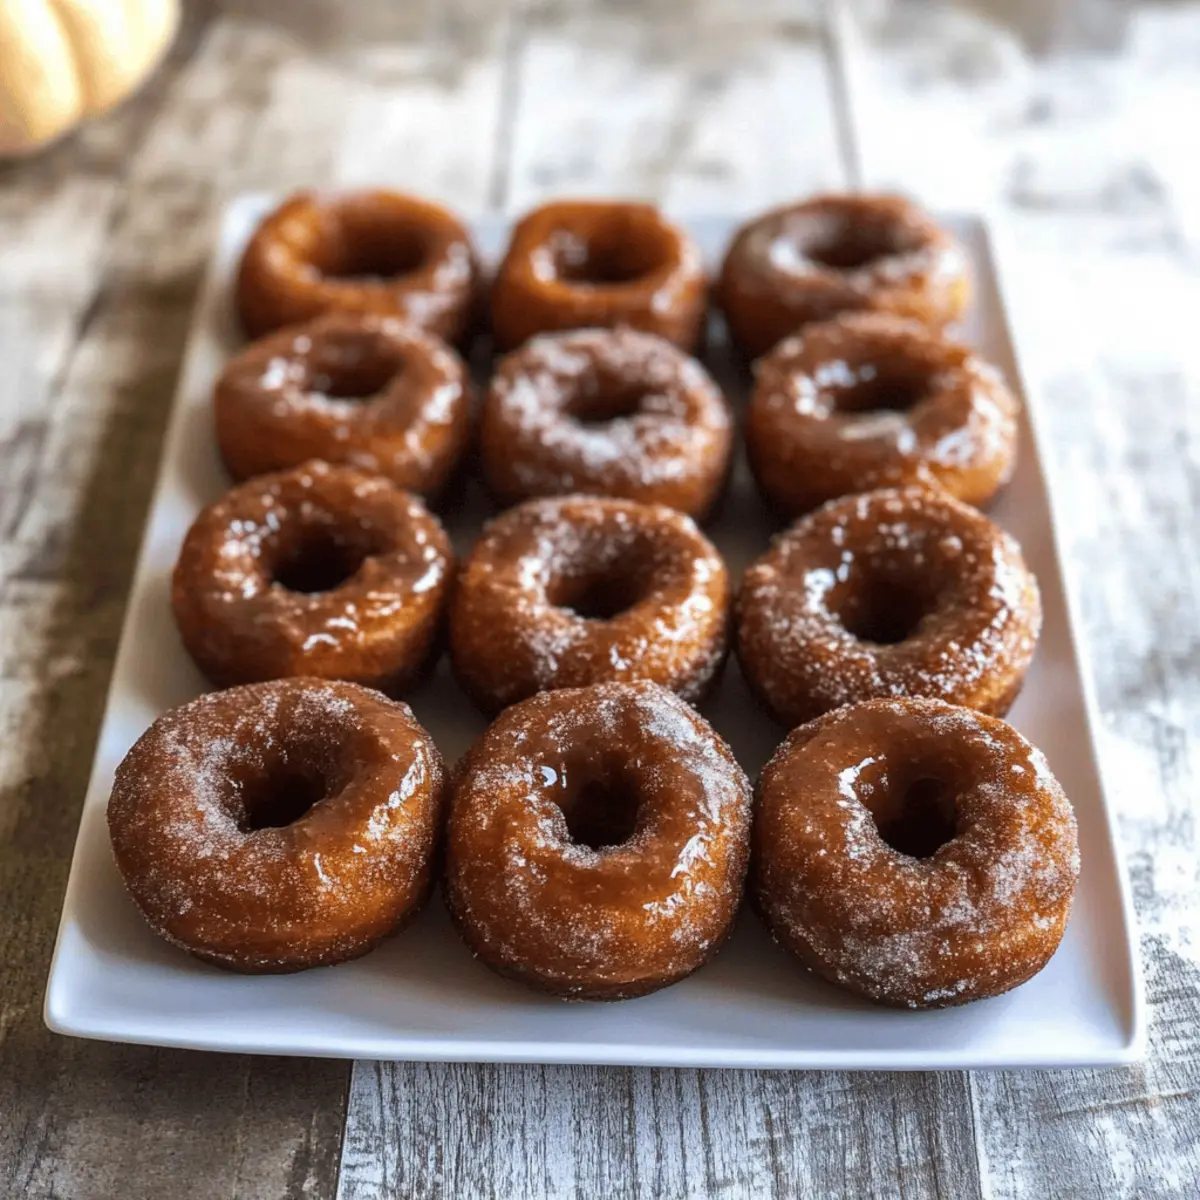
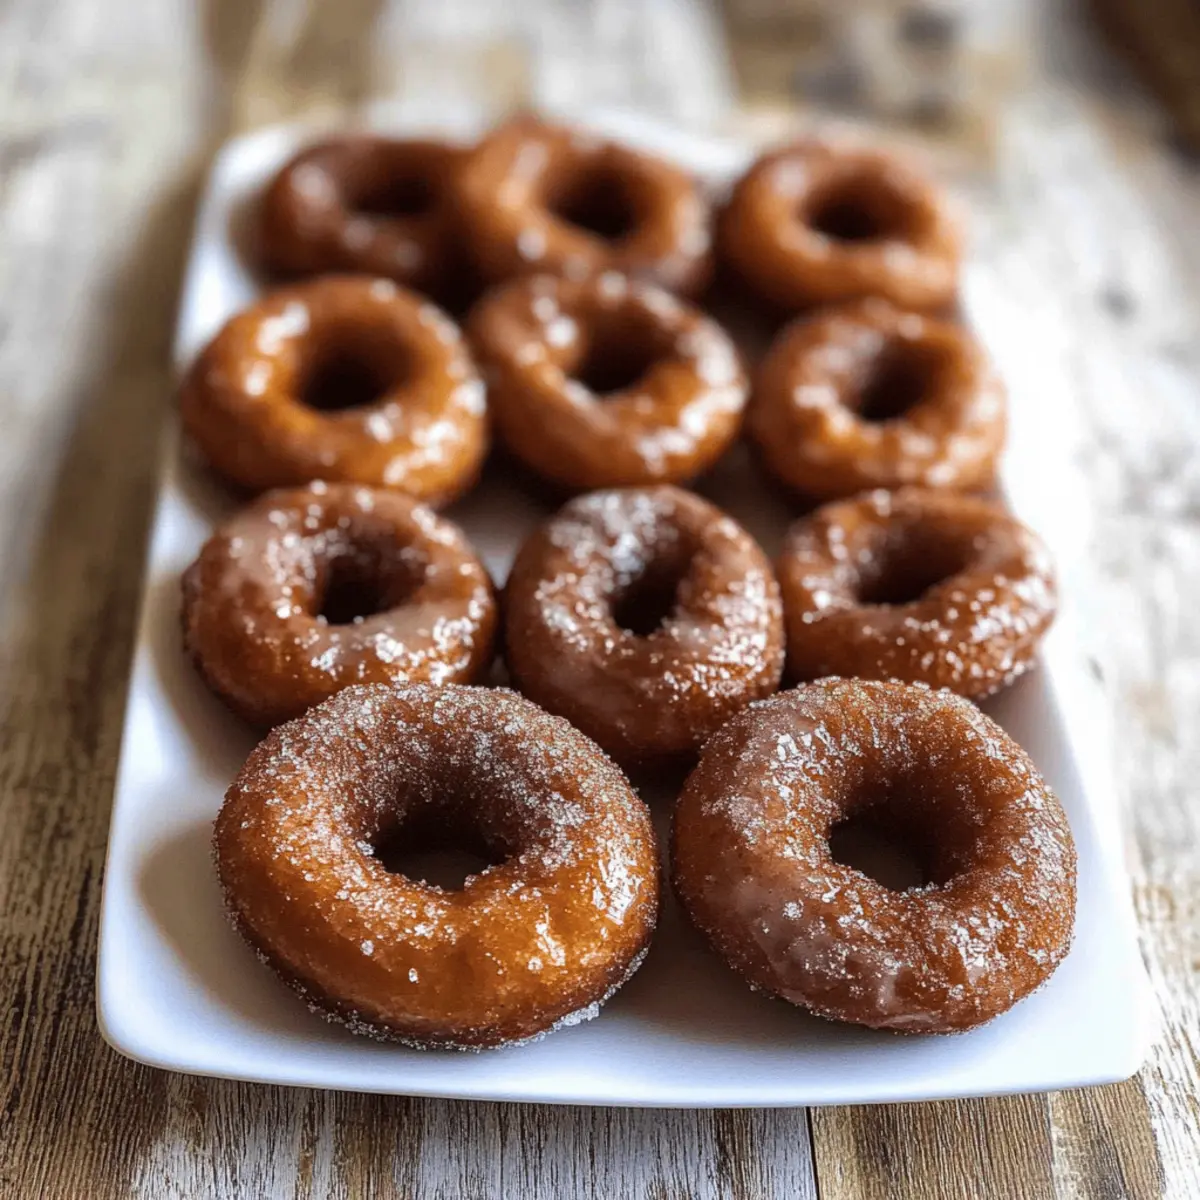
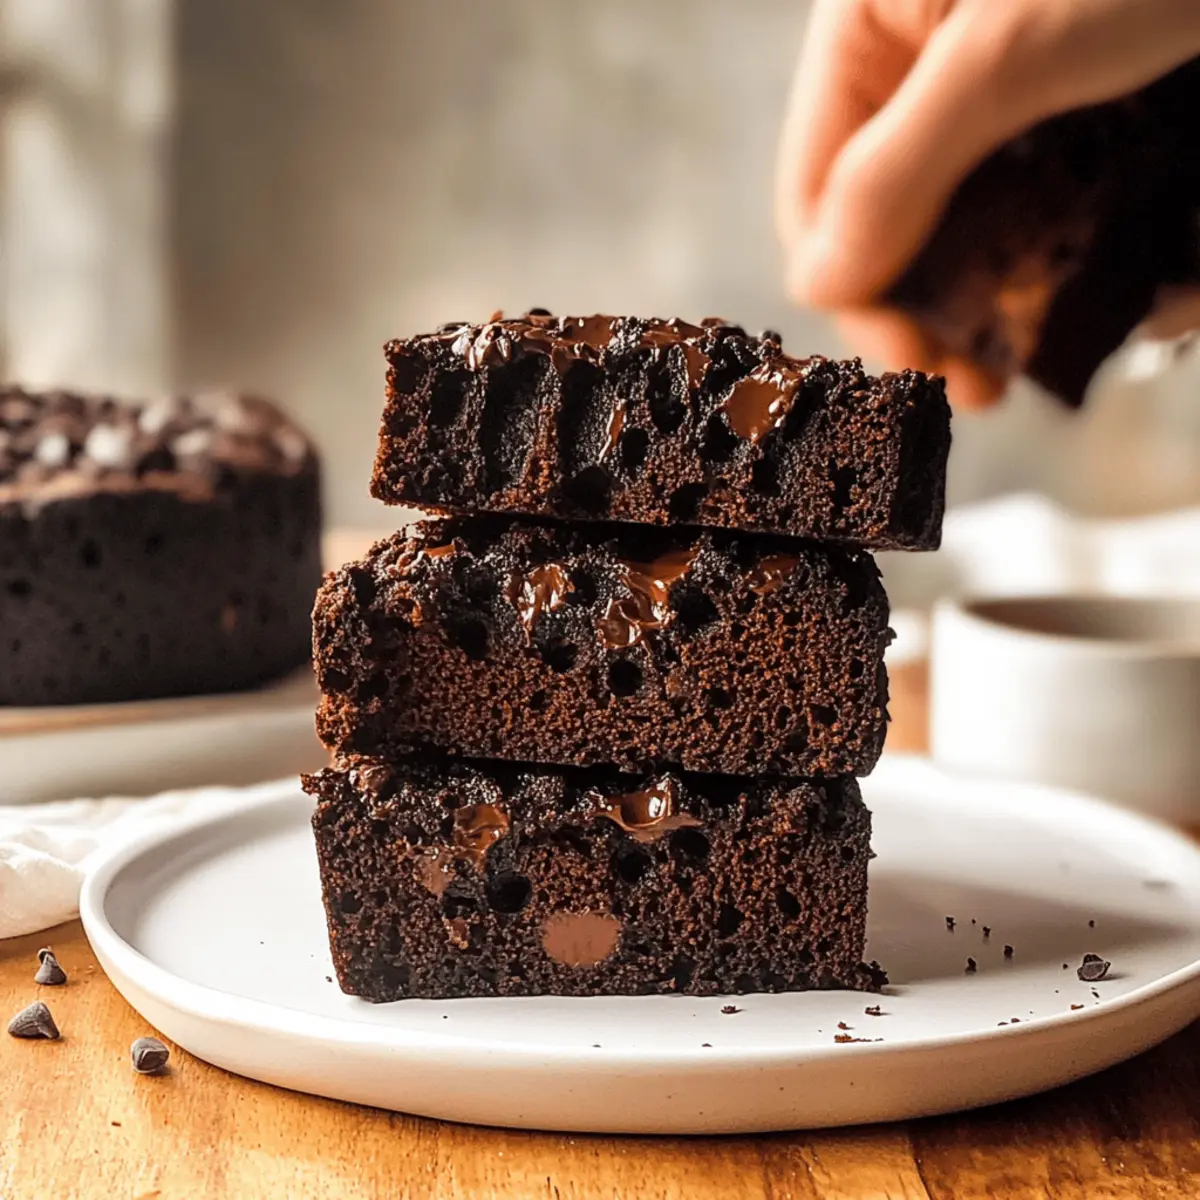
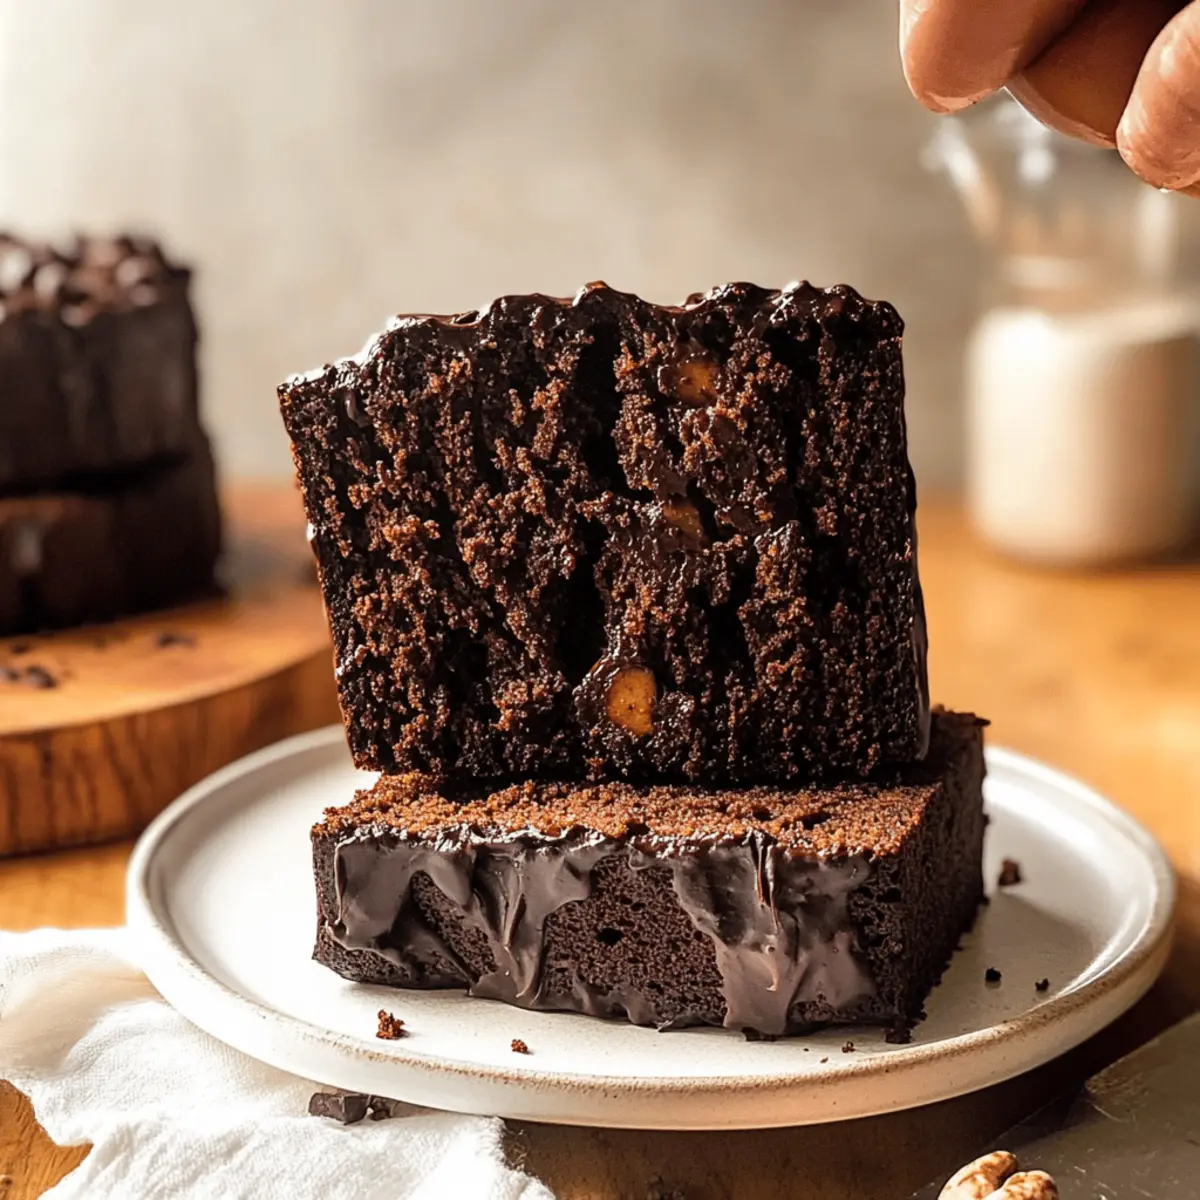
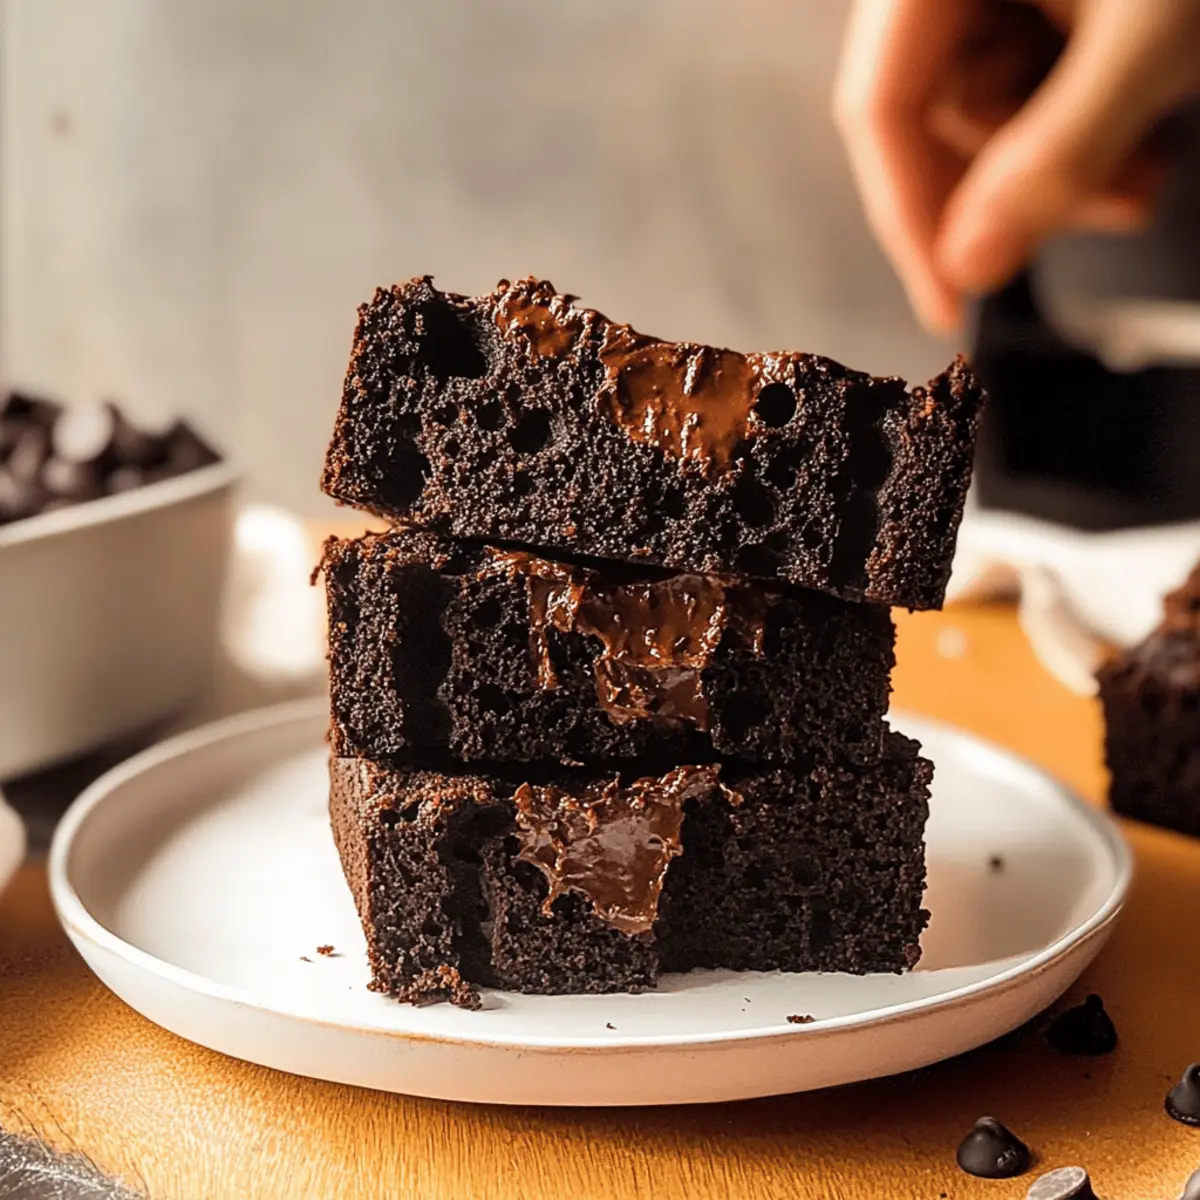
As I savored the last morsel of rich, chocolatey goodness, I realized I had stumbled upon a slice of autumn heaven: Moist Chocolate Pumpkin Bread. Combining the allure of chocolate with the comforting hints of pumpkin, this recipe transforms leftover pumpkin puree into a moist, delightful treat that feels like a warm hug on a chilly day. What I love most is its versatility—it doubles as a quick breakfast and a cozy dessert, making it a must-have in my fall baking repertoire. Plus, this bread is not only simple to whip up, but it also brings together flavors that even the pickiest eaters will adore. Curious to see how it all comes together? Let’s dive into this delicious journey!

Why Is Chocolate Pumpkin Bread So Special?

Indulgent Flavor: Each bite bursts with rich chocolate and subtle pumpkin, making it an irresistible choice for any chocolate lover.
Easy Preparation: This recipe requires minimal baking skills, allowing you to whip it up effortlessly as a post-dinner treat or a cozy breakfast.
Perfect for Autumn: Celebrating the flavors of fall, this bread captures the essence of pumpkin season, making it ideal for gatherings and family celebrations.
Customizable Options: Feel free to experiment with nuts or swap the flour for a gluten-free alternative, giving everyone a chance to enjoy a slice.
Quick and Convenient: Prepares in under an hour! This makes it a great last-minute snack when friends drop by, reminiscent of my favorite Chocolate Granola Cups for unexpected gatherings.

Chocolate Pumpkin Bread Ingredients

For the Batter

  • Pumpkin Puree – Adds moisture and doubles the delight of this chocolate pumpkin bread; you can use canned or homemade.
  • Flour – Provides structure; all-purpose flour works perfectly, but self-rising and cake flour are great substitutes too.
  • Baking Soda – A leavening agent that helps create that fluffy texture you desire.
  • Melted Butter – Unsalted is best; it brings the bread’s moisture—melt it easily in the microwave or stovetop.
  • Greek Yogurt – Adds creaminess—make sure it’s at room temperature for the best results!
  • Dutch Process Cocoa Powder – Rich chocolate flavor; you can also use natural cocoa powder if needed.
  • Granulated Sugar – A sweet touch; caster sugar can be a good alternative if you have it on hand.
  • Brown Sugar – Contributes to the richness and moisture of the bread.
  • Egg – Acts as a binder; ensure it’s a large egg and at room temperature for better mixing.
  • Vanilla Extract – Elevates the overall flavor, making every slice even more divine!
  • Kosher Salt – Balances the sweetness and enhances the flavors of the other ingredients.
  • Chocolate Chips – Provides extra chocolatey goodness and texture; go for dark, milk, or semisweet varieties!

Optional Add-Ins

  • Nuts (Walnuts, Pecans) – Add crunch and flavor; they work beautifully with the moistness of the bread.
  • Dried Fruits (Raisins, Cranberries) – Enhance texture and sweetness; a fantastic combination with the chocolate!

With these simple yet rich ingredients, your Chocolate Pumpkin Bread will surely become a beloved fall staple!

Step‑by‑Step Instructions for Chocolate Pumpkin Bread

Step 1: Preheat and Prepare
Preheat your oven to 350°F (180°C) and get your loaf pan ready by lining it with parchment paper. This step ensures an easy release after baking. While the oven heats, gather your ingredients, making sure to use room temperature items for the best batter consistency.

Step 2: Mix the Wet Ingredients
In a large mixing bowl, whisk together the pumpkin puree, Greek yogurt, melted butter, kosher salt, egg, granulated sugar, brown sugar, and vanilla extract. Sift in the Dutch process cocoa powder to enhance the chocolatey flavor. Mix until everything is well combined, and you see a smooth, rich chocolate mixture with no visible lumps.

Step 3: Combine the Dry Ingredients
Add the all-purpose flour and baking soda to the wet mixture. Using a spatula, gently mix until you see the flour nearly incorporated. Be careful not to over-mix the batter; you want it to be moist and fluffy. It’s crucial for that perfect texture in your Chocolate Pumpkin Bread!

Step 4: Fold in the Chocolate Chips
Now, fold in the chocolate chips gently. The goal is to have them evenly distributed throughout the batter without breaking them apart. Look for an even mixture with no flour lumps remaining, ensuring that every slice will be beautifully dotted with chocolate morsels.

Step 5: Pour and Top
Pour the luscious batter into the prepared loaf pan, spreading it evenly. To enhance the chocolaty goodness, sprinkle a few extra chocolate chips on top. This will create a delightful visual appeal and an extra treat for those lucky enough to snag the end pieces.

Step 6: Bake to Perfection
Place the loaf pan in the preheated oven and bake for 50 to 60 minutes. Keep an eye on it; the bread is ready when a toothpick inserted into the center comes out clean. You should see a lovely dome shape with a slightly cracked top—this visual cue indicates your Chocolate Pumpkin Bread is just right!

Step 7: Cool Before Slicing
Once baked, remove the pan from the oven and let it cool for about 20 minutes. This cooling period helps the bread firm up, making slicing easier. Resist the temptation to cut into it too soon; allowing it to cool will result in a more enjoyable texture and flavor in each bite!

What to Serve with Moist Chocolate Pumpkin Bread

Indulging in a slice of this rich, decadent delight is only the beginning of your autumn feast. Let’s explore the perfect pairings that elevate this cozy treat into a full meal experience.

  • Creamy Mashed Potatoes: The buttery texture of creamy mashed potatoes brings a heartiness that balances the sweetness of the bread perfectly.

  • Maple-Glazed Carrots: These sweet and tender carrots add a burst of color and flavor that harmonize beautifully with the chocolaty notes.

  • Cinnamon-Spiced Apples: Warm, spiced apples not only complement the pumpkin’s flavor but also add a delightful contrast in texture and sweetness.

  • Nutty Harvest Salad: A fresh salad with crunchy nuts, mixed greens, and a tangy vinaigrette provides a refreshing counterpoint to the rich chocolate pumpkin bread.

  • Dark Roast Coffee: The bold flavor of dark roast coffee cuts through the sweetness of the bread, enhancing the chocolate experience with every sip.

  • Homemade Whipped Cream: Light and airy, a dollop of whipped cream transforms each slice into a blissful dessert moment.

  • Chai Tea: The warm spices of chai tea provide a cozy, aromatic pairing that complements the autumn vibes of the bread.

  • Vanilla Ice Cream: A scoop of vanilla ice cream adds creaminess that melts beautifully over warm pumpkin bread, creating a deliciously decadent dessert.

  • Chocolate Stout: For a spirited touch, a glass of chocolate stout beer offers rich flavors that enhance the bread’s chocolate profile.

How to Store and Freeze Chocolate Pumpkin Bread

  • Room Temperature: Store the chocolate pumpkin bread in an airtight container at room temperature for up to 3 days to maintain its freshness and moist texture.

  • Fridge: If you prefer a longer shelf life, you can refrigerate the bread in an airtight container for up to a week. However, note that this may slightly alter its moisture.

  • Freezer: For longer storage, wrap the bread tightly in plastic wrap and store it in a freezer-safe bag for up to 3 months. Thaw overnight in the fridge when ready to enjoy again.

  • Reheating: To warm, slice the bread and microwave for 10-15 seconds or heat in a toaster oven until warm. This will help revive its delightful moistness, making it feel freshly baked!

Expert Tips for Moist Chocolate Pumpkin Bread

  • Room Temperature Ingredients: Always use room temperature eggs and yogurt to ensure a smoother batter and a more uniform rise in your chocolate pumpkin bread.

  • Flour Measurement: Spoon flour into your measuring cup instead of scooping. This prevents compaction and helps maintain the bread’s moisture.

  • Avoid Overmixing: Mix the batter just until combined. Overmixing can lead to a dense loaf instead of the light, fluffy texture we love in chocolate pumpkin bread.

  • Cooling Time: Allow the bread to cool for at least 20 minutes before slicing. This helps set the texture, resulting in cleaner, well-formed slices.

  • Customize with Add-ins: Feel free to incorporate nuts or dried fruits for added texture and flavor. This elevates your chocolate pumpkin bread while making it even more enjoyable!

Make Ahead Options

These Moist Chocolate Pumpkin Bread are perfect for meal prep enthusiasts! You can mix the wet ingredients and dry ingredients separately up to 24 hours in advance, storing them in airtight containers in the refrigerator. This not only saves time the next day but also allows the flavors to meld beautifully. If you prefer, bake the bread ahead of time and allow it to cool completely; then, wrap it tightly and refrigerate for up to 3 days. When ready to serve, simply slice and enjoy as is, or warm individual slices in the microwave for a few seconds. Rest assured, your Chocolate Pumpkin Bread will be just as delicious and moist, making it an ideal treat for busy weeknights or unexpected guests!

Chocolate Pumpkin Bread Variations

Get ready to make this recipe your own with these fun twists and substitutions!

  • Pumpkin Spice: Swap pumpkin puree with pumpkin pie filling for an extra spiced flavor that brings a cozy autumn vibe.

  • Dairy-Free: Replace Greek yogurt with a dairy-free yogurt alternative for a delicious twist that everyone can enjoy, regardless of dietary preferences. It still adds that creamy texture we love!

  • Nutty Goodness: Toss in some chopped walnuts or pecans for a wonderful crunch that complements the soft, gooey bread—feel free to go nuts with your creativity!

  • Fruit Fusion: Add dried fruits like raisins or cranberries to introduce an unexpected sweetness that bursts in every bite—a truly delightful addition alongside chocolate!

  • Gluten-Free: For those avoiding gluten, simply use a gluten-free flour blend to make this Chocolate Pumpkin Bread accessible for all. The flavor and moisture remain beautifully intact.

  • Double Chocolate: Load up on even more chocolate goodness! Incorporate chocolate chips or chunks into the batter and top with a drizzle of melted chocolate glaze after baking for a tantalizing treat.

  • Spicy Heat: If you crave a bit of heat, sprinkle in some cayenne pepper or chili powder for an exciting twist that elevates the chocolatey richness—a bold and adventurous way to spice things up!

While you experiment with these variations, don’t forget about delightful serving options like enjoying a warm slice alongside a scoop of ice cream or a dollop of whipped cream—take it from my experience with Chocolate Fudge Cupcakes for the ultimate indulgence!

Chocolate Pumpkin Bread Recipe FAQs

What type of pumpkin puree should I use?
Absolutely! You can use either canned pumpkin puree or homemade pumpkin puree. If you choose to make your own, ensure you strain it well to avoid excess water, which can affect the moisture level in your bread. Canned pumpkin is quite convenient and consistent, making it a popular choice!

How should I store Chocolate Pumpkin Bread?
To maintain its mouthwatering moistness, store your Chocolate Pumpkin Bread in an airtight container at room temperature for up to 3 days. If you want it to last longer, pop it in the fridge for up to a week, though this might change the texture a bit.

Can I freeze Chocolate Pumpkin Bread?
Yes, you can! Wrap the cooled bread tightly in plastic wrap and then place it inside a freezer-safe bag. This way, it can be stored in the freezer for up to 3 months. When you’re ready to enjoy it, simply transfer it to the fridge overnight to thaw, and microwave slices for about 10-15 seconds to regain that delightful warmth.

What if my batter is too thick?
Very! It’s normal for Chocolate Pumpkin Bread batter to be thicker than a cake batter. However, if yours feels too thick, you can add a tablespoon of milk or water to loosen it up slightly. Just mix gently until you reach the desired consistency without overmixing, which will maintain the bread’s light texture!

Is there a way to make this gluten-free?
Definitely! To make a gluten-free version of your Chocolate Pumpkin Bread, simply replace all-purpose flour with a gluten-free flour blend. Make sure to check that the brand you use contains a binding agent, as this will help it rise and hold together nicely like the original recipe.

Can I add nuts or dried fruits to the recipe?
The more the merrier! I often include nuts like walnuts or pecans for added crunch and flavor. Dried fruits like raisins or cranberries work beautifully too, introducing a delightful sweetness that pairs nicely with the chocolate and pumpkin flavors. Just fold them in gently when mixing the batter!

Chocolate Pumpkin Bread

Irresistibly Moist Chocolate Pumpkin Bread for Fall Mornings

Chocolate Pumpkin Bread is a delightful treat that combines rich chocolate with comforting pumpkin flavors, perfect for fall.
Prep Time 15 minutes
Cook Time 1 hour
Cooling Time 20 minutes
Total Time 1 hour 35 minutes
Servings: 10 slices
Course: Dessert
Cuisine: American
Calories: 250

Ingredients
  

For the Batter
  • 1 cup Pumpkin Puree canned or homemade
  • 1 cup Flour all-purpose
  • 1 teaspoon Baking Soda
  • 1/2 cup Melted Butter unsalted
  • 1/2 cup Greek Yogurt room temperature
  • 1/2 cup Dutch Process Cocoa Powder
  • 1 cup Granulated Sugar or caster sugar
  • 1/2 cup Brown Sugar
  • 1 large Egg room temperature
  • 1 teaspoon Vanilla Extract
  • 1/2 teaspoon Kosher Salt
  • 1 cup Chocolate Chips dark, milk, or semisweet
Optional Add-Ins
  • Nuts (Walnuts, Pecans) for added crunch
  • Dried Fruits (Raisins, Cranberries) for extra sweetness

Equipment

  • Loaf Pan
  • Mixing Bowl
  • whisk
  • spatula
  • Oven

Method
 

Step-by-Step Instructions
  1. Preheat your oven to 350°F (180°C) and line your loaf pan with parchment paper.
  2. In a large mixing bowl, whisk together the pumpkin puree, Greek yogurt, melted butter, kosher salt, egg, granulated sugar, brown sugar, and vanilla extract. Sift in the cocoa powder and mix until smooth.
  3. Add the all-purpose flour and baking soda to the wet mixture and gently mix until nearly combined.
  4. Fold in the chocolate chips gently until evenly distributed.
  5. Pour the batter into the prepared loaf pan and sprinkle a few extra chocolate chips on top.
  6. Bake for 50 to 60 minutes, checking for doneness with a toothpick.
  7. Let the bread cool for about 20 minutes before slicing.

Nutrition

Serving: 1slicesCalories: 250kcalCarbohydrates: 35gProtein: 4gFat: 11gSaturated Fat: 6gPolyunsaturated Fat: 1gMonounsaturated Fat: 3gCholesterol: 30mgSodium: 200mgPotassium: 200mgFiber: 2gSugar: 20gVitamin A: 2500IUVitamin C: 1mgCalcium: 30mgIron: 1mg

Notes

Use room temperature ingredients for a smoother batter. Avoid overmixing to maintain a light texture.

Tried this recipe?

Let us know how it was!

Pumpkin Sour Cream Donuts: Fall’s Cozy Flavor Bomb

As the leaves begin to change, I find myself reaching for the comforting flavors of fall, and nothing captures that essence quite like Pumpkin Sour Cream Donuts. These delightful treats, with their warm spices and soft, fluffy texture, are perfect for creating cherished memories around the kitchen table. What makes them truly special is their irresistible combination of deep-fried goodness and the tangy richness of sour cream. Whether you’re looking to impress guests at a cozy gathering or simply indulge in a homemade treat, these donuts are a quick and satisfying option that will have everyone coming back for seconds. So, are you ready to dive into the warm, spiced world of autumn donuts? Let’s get frying!

Why are Pumpkin Sour Cream Donuts irresistible?

Warm, Cozy Flavors: These donuts bring the essence of fall right to your kitchen, with warm spices that will wrap you in a comforting embrace.

Sour Cream Magic: The inclusion of sour cream adds a delightful tanginess, ensuring each bite is rich and moist.

Quick and Easy: You don’t need to be a baking expert—this simple recipe allows anyone to whip up a batch of these delicious treats in no time.

Crowd-Pleasing Treat: Whether for a gathering or a cozy night in, these donuts are sure to impress family and friends! Pair them with warm drinks like pumpkin spice latte or hot apple cider for that perfect autumn vibe.

Freezing Friendly: Make a big batch and freeze them! Just warm them up for a quick snack that tastes freshly made.

Get ready to enjoy the season with these delightful Pumpkin Sour Cream Donuts—they won’t disappoint!

Pumpkin Sour Cream Donut Ingredients

For the Batter

  • All Purpose Flour – Provides structure; can replace with a gluten-free blend for a different texture.
  • Baking Powder – A leavening agent that helps achieve light and fluffy donuts.
  • Baking Soda – Enhances browning and adds tenderness to the batter.
  • Salt – Balances the sweetness for a well-rounded flavor experience.
  • Ground Cinnamon – Adds warmth and depth, bringing the cozy essence of autumn.
  • Ground Ginger – Offers a zesty kick that complements the pumpkin flavor beautifully.
  • Ground Nutmeg – Enhances the autumnal flavor profile, making each bite special.
  • Ground Cloves – Provides a rich, aromatic quality that pairs impeccably with pumpkin.
  • Brown Sugar – Adds moisture and a deeper sweetness that contrasts beautifully with spices.
  • Unsalted Butter – Contributes richness and depth of flavor; make sure it’s softened for easy mixing.
  • Egg and Egg Yolks – Essential for binding the ingredients and enriching the batter.
  • Vanilla Extract – Adds aromatic sweetness that rounds out the flavors.
  • Sour Cream – Vital for moisture and a delightful tanginess; don’t skip this for the best texture.
  • Canned Pumpkin – The star of the dish; use pure pumpkin puree for the most authentic flavor.

For Frying

  • Flavorless Oil (e.g., canola or avocado) – Necessary for frying; opt for neutral oils to avoid overpowering flavors.

For Coating

  • Granulated Sugar – Perfect for coating the donuts and adding sweetness.
  • Cinnamon & Nutmeg (for spiced sugar) – Enhances the flavor of the sugar coating, making it irresistible.

For the Glaze

  • Powdered Sugar – Forms the base of the glaze for a sweet finish.
  • Maple Syrup – Adds a deliciously rich flavor that pairs perfectly with pumpkin.
  • Heavy Cream/Milk – Adjust the texture of the glaze for a silky finish; add gradually until smooth.

With these ingredients, you’re all set to create your own batch of delightful Pumpkin Sour Cream Donuts that will fill your home with the warm aromas of autumn!

Step‑by‑Step Instructions for Pumpkin Sour Cream Donuts

Step 1: Prepare Toppings
Begin by creating your spiced sugar coating. In a small bowl, mix granulated sugar with ground cinnamon and nutmeg, then set aside. For the maple glaze, whisk together powdered sugar and maple syrup, adding a splash of heavy cream or milk until the mixture is smooth and glossy. This will provide delightful toppings for your Pumpkin Sour Cream Donuts.

Step 2: Make Donut Batter
In a large mixing bowl, combine all-purpose flour, baking powder, baking soda, salt, and your warming spices: cinnamon, ginger, nutmeg, and cloves. In another bowl, cream together the brown sugar and softened butter until light and fluffy. Add the eggs, vanilla extract, sour cream, and canned pumpkin, mixing well before gradually folding the dry ingredients into the wet mixture. Chill the blended batter for at least three hours, allowing the flavors to deepen.

Step 3: Shape and Fry
Once your batter is chilled, dust your work surface with flour and roll out the donut dough to about ¾ inch thick. Use a donut cutter to cut out your donuts, and collect the scraps to reroll as needed. In a deep fryer or heavy pot, heat oil to around 365°F – 375°F. Carefully fry the donuts for about 1-2 minutes per side, flipping them until they achieve a golden brown exterior, then use a slotted spoon to remove and drain on paper towels.

Step 4: Cool and Coat
After frying, let the donuts cool for a few moments on the paper towels. Then, coat half of each warm donut in the prepared spiced sugar, ensuring even coverage. For the remaining donuts, dip them into the luscious maple glaze, allowing the excess to drip off. These warm Pumpkin Sour Cream Donuts are now ready to delight your taste buds with their cozy fall flavors!

What to Serve With Pumpkin Sour Cream Donuts

The aromas of cinnamon and pumpkin fill the air, inviting you to create a cozy meal around these delightful treats.

  • Coffee: A classic pairing! The rich, bold flavors of freshly brewed coffee elevate the sweet, spicy notes of the donuts.
  • Cider: Hot apple cider complements the pumpkin flavor beautifully, making this duo perfect for a crisp autumn afternoon.
  • Vanilla Ice Cream: Add a scoop on the side for a delightful contrast of warm and cold, enhancing the sensory experience.
  • Spiced Whipped Cream: A dollop of cinnamon or nutmeg-infused whipped cream brings a touch of elegance to each bite.
  • Maple Pecan Crunch: Sprinkle some maple-flavored pecans on top for extra texture and a nutty sweetness that balances the flavors beautifully.
  • Fruit Salad: A fresh mix of apples, pears, and cranberries cuts through the richness, offering a refreshing and vibrant touch.
  • Chocolate Drizzle: For the chocolate lovers, a drizzle of melted chocolate on top adds an indulgent twist to these fall treats.

Gather your favorites and enjoy the heartwarming season with these delightful pairings!

Make Ahead Options

These Pumpkin Sour Cream Donuts are perfect for busy home cooks looking to save time! You can prepare the donut batter up to 24 hours in advance; simply cover the mixing bowl tightly with plastic wrap and refrigerate. This chilling time not only deepens the flavors but also makes the dough easier to handle. Additionally, you can shape the donuts and freeze them un-fried for up to 3 days—just place them in a single layer on a baking sheet until solid, then transfer to a zip-top bag. When you’re ready to enjoy, fry the frozen donuts straight from the freezer, adding a minute or so to the cooking time; they’ll come out just as delicious as freshly made!

Pumpkin Sour Cream Donuts Variations

Feel free to customize these donuts to match your taste and dietary preferences!

  • Sweet Potato Swap: Substitute pumpkin puree with sweet potato puree for a subtly different flavor that’s equally delightful.

  • Baked Alternative: For a healthier twist, bake your donuts instead! Just follow the same instructions but use a donut pan instead of frying.

  • Chocolate Glaze: Dip your warm donuts in melted dark chocolate for a rich, decadent coating that will satisfy any chocolate lover.

  • Maple Pecan Crunch: Sprinkle chopped pecans onto the maple glaze for added texture and a nutty flavor that complements the sweetness beautifully.

  • Spiced Rum Flavor: Add a splash of spiced rum to the batter for an adult twist that elevates the cozy autumn flavors perfectly.

  • Vegan Version: Use flax eggs instead of regular eggs, non-dairy yogurt instead of sour cream, and a plant-based butter substitute for a delicious vegan treat.

  • Heat It Up: If you’re feeling adventurous, add a pinch of cayenne pepper to the spiced sugar for a surprising kick that will tantalize your taste buds.

  • Cinnamon Sugar Coating: For a classic twist, coat your donuts in a mixture of granulated sugar and cinnamon instead of the maple glaze for a crunchy, sweet exterior.

These suggestions not only allow you to enjoy Pumpkin Sour Cream Donuts your way but also inspire great pairings! For a cozy afternoon, serve these wonderful donuts with a warm cup of cider or alongside a bowl of steaming Joumou Haitian Pumpkin soup for an ultimate autumn feast. Enjoy experimenting!

Storage Tips for Pumpkin Sour Cream Donuts

  • Room Temperature: Store the donuts in an airtight container at room temperature for up to 2 days to maintain their delightful texture and flavor.

  • Fridge: If you prefer a longer shelf life, you can refrigerate them for up to 5 days; however, they may lose some of their freshness. Reheat briefly in the microwave before enjoying.

  • Freezer: For longer storage, freeze the donuts in an airtight container for up to 2 months. Make sure they are completely cooled before wrapping to prevent freezer burn.

  • Reheating: To enjoy a warm treat, reheat frozen donuts in the oven at 350°F for about 10 minutes or in the microwave for 15-20 seconds, bringing back that fresh out-of-the-fryer taste in your Pumpkin Sour Cream Donuts.

Tips for the Best Pumpkin Sour Cream Donuts

  • Chill the Batter: Allowing the batter to chill for at least 3 hours helps firm it up, making it easier to handle and fry.

  • Oil Temperature Matters: Use a thermometer to maintain oil between 365°F – 375°F for perfectly fried donuts; too cool and they’ll absorb oil, too hot and they’ll burn.

  • Testing Donuts: Before frying the entire batch, fry a small test donut to ensure the cooking time is perfect and the flavor is just right.

  • Proper Coating Techniques: For a delightful crunch, coat the donuts in spiced sugar while they are still warm, allowing it to stick perfectly.

  • Freezing for Freshness: These Pumpkin Sour Cream Donuts can be frozen after frying; glaze them once thawed to maintain freshness and texture.

Indulge in your homemade wonders!

Pumpkin Sour Cream Donuts Recipe FAQs

How do I select the right pumpkin for this recipe?
Absolutely! For the best flavor, choose a can of pure pumpkin puree rather than pumpkin pie filling—it’s essential for achieving that rich, authentic taste in your Pumpkin Sour Cream Donuts. Look for an option labeled 100% pumpkin with a smooth consistency; avoid any with added sugars or spices, as you’ll be adding those in yourself!

What’s the best way to store Pumpkin Sour Cream Donuts?
You can store your freshly made donuts in an airtight container at room temperature for up to 2 days. If you’re looking to keep them longer, consider refrigerating them for up to 5 days—though I recommend warming them briefly in the microwave for that just-fried taste. For even longer storage, freeze your donuts in an airtight container for up to 2 months!

Can I freeze Pumpkin Sour Cream Donuts?
Very! To freeze these delicious treats, let your donuts cool completely after frying, then place them in a single layer on a baking sheet to freeze for about an hour. Once frozen, transfer them to an airtight container or a zip-top bag. Be sure to label with the date! They can be enjoyed up to 2 months later—just glaze them after thawing for maximum freshness.

What should I do if my donuts come out too oily?
If your donuts feel oily, it may be due to the oil temperature being too low during frying. Make sure your oil is heated to a consistent 365°F – 375°F before adding the donuts. Frying in small batches allows the oil to maintain its temperature. If they still come out oily, consider placing them on paper towels right after frying to absorb any excess oil.

Are there any dietary considerations I should be aware of with these donuts?
Definitely! Since this recipe includes both dairy and eggs, those with allergies or dietary restrictions should be cautious. For a dairy-free version, you can substitute sour cream with a non-dairy equivalent like coconut yogurt. Additionally, if you have gluten sensitivities, feel free to replace the all-purpose flour with a gluten-free blend, making it suitable for a broader range of diets.

How can I ensure my donuts have the perfect texture?
To achieve a fluffy texture in your Pumpkin Sour Cream Donuts, make sure to chill the batter for at least 3 hours before frying. Chilling allows the flavors to meld and firms up the dough for easier handling. Also, when frying, avoid overcrowding the pot—this ensures consistent cooking temperature and prevents them from becoming soggy. A quick test of a small donut will help you perfect your technique!

Pumpkin Sour Cream Donuts

Pumpkin Sour Cream Donuts: Fall's Cozy Flavor Bomb

Delight in Pumpkin Sour Cream Donuts, the perfect fall treat combining warm spices and soft texture.
Prep Time 30 minutes
Cook Time 20 minutes
Chilling Time 3 hours
Total Time 3 hours 50 minutes
Servings: 12 donuts
Course: Dessert
Cuisine: American
Calories: 250

Ingredients
  

For the Batter
  • 2 cups All Purpose Flour Can replace with a gluten-free blend
  • 1 tbsp Baking Powder
  • 1 tsp Baking Soda
  • 1/2 tsp Salt
  • 1 tbsp Ground Cinnamon
  • 1 tsp Ground Ginger
  • 1/2 tsp Ground Nutmeg
  • 1/4 tsp Ground Cloves
  • 1 cup Brown Sugar Softened
  • 1/2 cup Unsalted Butter Softened
  • 2 large Eggs Plus 2 yolks
  • 1 tbsp Vanilla Extract
  • 1 cup Sour Cream Vital for moisture
  • 1 cup Canned Pumpkin Use pure pumpkin puree
For Frying
  • 4 cups Flavorless Oil e.g., canola or avocado
For Coating
  • 1/2 cup Granulated Sugar For coating
  • 1 tsp Cinnamon & Nutmeg For spiced sugar
For the Glaze
  • 1 cup Powdered Sugar Base of the glaze
  • 2 tbsp Maple Syrup
  • 2 tbsp Heavy Cream/Milk Adjust for texture

Equipment

  • Deep fryer
  • Mixing Bowl
  • Donut cutter

Method
 

Step‑by‑Step Instructions for Pumpkin Sour Cream Donuts
  1. Prepare the spiced sugar coating by mixing granulated sugar with cinnamon and nutmeg. For the glaze, whisk together powdered sugar and maple syrup, adding milk until smooth.
  2. In a large bowl, combine flour, baking powder, baking soda, salt, and spices. In another bowl, cream brown sugar and butter, then add eggs, vanilla, sour cream, and pumpkin. Mix well.
  3. Chill the blended batter for at least three hours. Roll out the donut dough to ¾ inch thick, cut out donuts, and collect scraps for rerolling.
  4. Heat oil to 365°F - 375°F. Fry donuts for 1-2 minutes per side until golden brown. Drain on paper towels.
  5. Cool briefly, then coat half in spiced sugar and dip the rest in maple glaze.

Nutrition

Serving: 1donutCalories: 250kcalCarbohydrates: 35gProtein: 2gFat: 12gSaturated Fat: 6gPolyunsaturated Fat: 2gMonounsaturated Fat: 3gCholesterol: 40mgSodium: 150mgPotassium: 120mgFiber: 1gSugar: 12gVitamin A: 500IUCalcium: 20mgIron: 1mg

Notes

Chill the batter for at least 3 hours for ease in handling and frying. Maintain oil temperature for perfect frying results.

Tried this recipe?

Let us know how it was!

Delicious Pecan Pie Crescent Rolls for Holiday Indulgence

The aroma of freshly baked pastries fills the air as I peel back the layers of buttery crescent rolls, revealing the charming surprise inside: a gooey pecan filling that oozes warmth and nostalgia. These Pecan Pie Crescent Rolls take the beloved flavors of classic pecan pie and wrap them in a flaky embrace, making them not only an easy dessert but also a showstopper for any holiday gathering. Whether you’re planning a festive brunch or just need a sweet snack to satisfy your cravings, these delightful treats deliver the perfect blend of crunchy pecans and sweet goodness, all in a portable format. Who could resist? So, let’s dive into this simple recipe and explore how to create a delectable dessert that will impress your family and friends!

Why are Pecan Pie Crescent Rolls a Must-Try?

Unforgettable Flavor: The combination of rich pecans and sweet filling delivers the ultimate indulgence that will have your taste buds dancing.

Effortless Preparation: This straightforward recipe requires minimal steps, making it perfect for both novice bakers and experienced chefs.

Perfect for Any Occasion: Whether it’s a holiday brunch or an afternoon treat, these rolls are the ideal sweet addition to your table, much like our Shepherds Pie Soup or Key Lime Pie.

Crowd-Pleasing Treat: Everyone loves the classic taste of pecan pie, and these portable rolls are sure to impress family and friends alike.

Versatile Options: You can easily tweak the recipe with your favorite nuts or add a drizzle of caramel for an extra touch of decadence!

Pecan Pie Crescent Rolls Ingredients

For the Dough
Pillsbury Crescent Rolls – This flaky dough is the foundation for your delightful rolls; feel free to swap it out for any similar brand if needed.

For the Filling
Chopped Pecans – The star ingredient that gives a satisfying crunch; you can substitute with walnuts or almonds for a different twist.
Granulated Sugar – Adds just the right amount of sweetness; brown sugar can be used for a richer flavor profile.
Light Corn Syrup – Creates that gooey texture reminiscent of classic pecan pie filling; honey works in a pinch, but expect a slight flavor shift.
Unsalted Butter – Enhances the richness of the filling; margarine can serve as a dairy-free alternative.
Vanilla Extract – Provides an aromatic touch; opt for imitation vanilla if you prefer a more budget-friendly option.
Large Egg – Binds everything together beautifully; try a flax egg or applesauce if you need a vegan option.

For the Glaze
Reserved Sugar Mixture – Don’t forget the last-minute brush of sweetness for that beautiful shine!

Step‑by‑Step Instructions for Pecan Pie Crescent Rolls

Step 1: Prep the Oven
Begin by preheating your oven to 350°F (175°C). While the oven warms up, take a rimmed baking sheet and line it with parchment paper to prevent sticking. This ensures your Pecan Pie Crescent Rolls come out perfectly golden and intact, ready for the next steps.

Step 2: Mix Filling
In a mixing bowl, combine granulated sugar, light corn syrup, melted unsalted butter, vanilla extract, and the large egg. Be sure to reserve 2 tablespoons of this mixture for later glazing. Stir until well incorporated, then add in the chopped pecans, ensuring they are evenly coated with the sweet filling.

Step 3: Prepare Dough
Open the canister of Pillsbury Crescent Rolls and carefully unroll the dough onto your prepared baking sheet. Separate the dough into individual triangles, placing each piece about an inch apart to allow room for expansion as the Pecan Pie Crescent Rolls bake. They should look ready for delicious filling!

Step 4: Assemble Rolls
Take 2 to 3 tablespoons of the pecan filling and scoop it onto the wide end of each triangle of crescent dough. Carefully roll each triangle towards the narrow tip, making sure the filling is encased within the dough. The Pecan Pie Crescent Rolls should be neatly formed, with the pointed end tucked under to secure the filling.

Step 5: Initial Bake
Slide the baking sheet into your preheated oven and bake the rolls for about 8 minutes. Keep an eye on them; you want them to begin setting but not browning just yet. The aroma of buttery dough and pecans should start filling your kitchen by now!

Step 6: Glaze and Final Bake
After the initial bake, carefully remove the baking sheet and brush the tops of the rolls with the reserved sugar mixture for a sweet glaze. Return them to the oven and bake for an additional 5 minutes or until they turn a golden brown color, signaling they are ready to be enjoyed.

Step 7: Serve
Once out of the oven, allow the Pecan Pie Crescent Rolls to cool slightly. For an extra touch, consider sprinkling more chopped pecans on top before serving. Enjoy them warm, perhaps alongside a scoop of vanilla ice cream or a warm drink at your next festive gathering!

What to Serve with Pecan Pie Crescent Rolls

These delightful crescent rolls are more than just dessert; they can be the centerpiece of your holiday feast, attracting everyone’s attention with their gooey sweetness and crunchy pecan goodness.

  • Vanilla Ice Cream: A scoop of creamy vanilla ice cream adds a cool contrast to the warm rolls, enhancing the indulgence of each bite.

  • Fresh Whipped Cream: Light and airy, this topping complements the rich pecan filling perfectly while providing a touch of elegance.

  • Coffee: A steaming cup of coffee enhances the sweetness while balancing the flavors, making for a delightful morning or afternoon treat.

  • Spiced Tea: The warm spices in a good spiced tea offer a cozy pairing that beautifully contrasts with the sweetness of the rolls.

  • Mixed Berry Salad: A fresh berry salad introduces a tangy burst of flavor, lightening the overall richness of the pecan rolls and adding vibrant color to your table.

  • Maple Syrup Drizzle: A drizzle of pure maple syrup boosts the sweetness of the rolls while adding a deeper level of flavor that resonates with each bite.

  • Chopped Nuts Topping: Sprinkle additional chopped pecans or walnuts on top for an extra crunch enhancement that mirrors the filling inside.

Enjoying these Pecan Pie Crescent Rolls with these pairings will surely elevate your dining experience, making it unforgettable for you and your loved ones!

How to Store and Freeze Pecan Pie Crescent Rolls

Room Temperature: Allow leftover Pecan Pie Crescent Rolls to cool completely before storing in an airtight container at room temperature for up to 2 days to maintain their flaky texture.

Fridge: If you want to keep them longer, you can refrigerate the rolls in an airtight container for up to a week. Just remember they may lose some of their freshness.

Freezer: For longer storage, tightly wrap the rolls in plastic wrap and place them in a freezer-safe bag. They can be frozen for up to 2 months.

Reheating: When you’re ready to enjoy them again, reheat the frozen Pecan Pie Crescent Rolls in a 350°F oven for about 10–15 minutes until warmed through.

Pecan Pie Crescent Rolls: Customizing Your Treats

Feel free to explore delicious alternatives and personal twists for these delectable crescent rolls, perfect for every palate!

  • Nut Swap: Substitute pecans with walnuts or almonds for a delightful variation in flavor and texture.
  • Sweetener Change: Exchange granulated sugar for brown sugar to infuse a deeper richness into your filling.
  • Dairy-Free Delight: Replace unsalted butter with margarine to create a dairy-free version without sacrificing taste.
  • Flavor Boost: Incorporate a dash of cinnamon or nutmeg into the filling for an aromatic spice touch. This adds warmth and depth, wrapping your taste buds in cozy delight.
  • Caramel Drizzle: Drizzle warm caramel sauce over the rolls just before serving for an extra layer of sweetness that’s irresistibly indulgent.
  • Vegan Variation: Use a flax egg or applesauce in place of the large egg for a vegan-friendly option, ensuring you still achieve that perfect binding.
  • Ice Cream Pairing: Serve your rolls warm with a scoop of vanilla ice cream, making them even more irresistible during gatherings, akin to our scrumptious Foster Cinnamon Rolls.
  • Spice Things Up: For a touch of heat, sprinkle a tiny pinch of cayenne or chili powder in the filling. This subtle kick will surprise your guests and elevate the flavor profile beautifully!

Make Ahead Options

These Pecan Pie Crescent Rolls are fantastic for meal prep! You can prepare the filling and assemble the rolls up to 24 hours in advance, storing them tightly wrapped in the refrigerator. To prevent the dough from getting soggy, keep the filling in a separate container until you’re ready to bake. When it’s time to enjoy, simply take them out of the fridge, brush with the reserved sugar mixture, and bake in a preheated oven for about 12 minutes instead of the initial 8. This easy make-ahead method ensures you have delicious, homemade treats ready for your holiday gatherings with minimal last-minute effort!

Expert Tips for Pecan Pie Crescent Rolls

  • Measure Accurately: Ensure to measure your corn syrup and sugar precisely to prevent an overly wet filling that can ooze out during baking.

  • Use Parchment Paper: Lining your baking sheet with parchment paper is essential to avoid sticking. This will help your rolls maintain their beautiful shape.

  • Room Temperature Dough: If using refrigerated crescent rolls, allow them to come to room temperature for 15 minutes before baking for better roll-ability and even baking.

  • Watch Baking Time: Keep a close eye on the rolls as they bake. You want them golden brown, so check a minute or two before the recommended time to prevent over-baking.

  • Try New Nut Varieties: Feel free to switch out pecans for walnuts or almonds for a delightful variation in flavor and texture in your Pecan Pie Crescent Rolls!

Pecan Pie Crescent Rolls Recipe FAQs

How do I select ripe pecans for my filling?
Absolutely! When choosing pecans, look for pieces that are firm and have a rich, brown color. Avoid any that have dark spots or a rancid smell, as these can indicate spoilage. Fresh pecans should offer a delightful crunch, enhancing your Pecan Pie Crescent Rolls!

What is the best way to store leftover Pecan Pie Crescent Rolls?
Very! To keep the rolls fresh, place them in an airtight container at room temperature for up to 2 days. If you want them to last a little longer, storing them in the fridge works too, but be aware they may lose some of their delightful crunch over time.

Can I freeze Pecan Pie Crescent Rolls, and how?
Of course! To freeze your Pecan Pie Crescent Rolls, wrap them tightly in plastic wrap to prevent freezer burn, then place them in a freezer-safe bag. They can be frozen for up to 2 months. When you’re ready to indulge, simply reheat in a 350°F oven for about 10-15 minutes until warmed through.

What should I do if the filling oozes out during baking?
Don’t worry; this can happen! If your filling seems too runny, make sure you’re measuring the corn syrup and sugar accurately. It’s important to reserve the specified amount for glazing to avoid excess goo during baking. Allowing the rolls to set for a few minutes before baking can also help achieve the right consistency.

Are Pecan Pie Crescent Rolls safe for those with nut allergies?
While they are absolutely delicious, they are not safe for individuals with nut allergies due to the pecans used in the filling. If you’re looking for alternatives, you might consider making a nut-free version by substituting the pecans with seeds like sunflower or pumpkin seeds for a similar crunch without the allergens.

What if I have leftover ingredients?
I often find myself with extra filling! You can save the remaining pecan filling in an airtight container in the fridge for up to one week. It works wonderfully as a topping for pancakes or waffles, or you could even mix it into oats for a sweet breakfast treat. The more the merrier!

Pecan Pie Crescent Rolls

Delicious Pecan Pie Crescent Rolls for Holiday Indulgence

Enjoy the delightful Pecan Pie Crescent Rolls, a sweet treat that wraps the classic flavors of pecan pie in flaky pastry.
Prep Time 15 minutes
Cook Time 13 minutes
Total Time 28 minutes
Servings: 8 rolls
Course: Dessert
Cuisine: American
Calories: 150

Ingredients
  

For the Dough
  • 1 roll Pillsbury Crescent Rolls Flaky dough, can substitute with another brand.
For the Filling
  • 1 cup Chopped Pecans Can substitute with walnuts or almonds.
  • 1/2 cup Granulated Sugar Brown sugar can be used for richer flavor.
  • 1/2 cup Light Corn Syrup Honey can be used as a substitute.
  • 1/4 cup Unsalted Butter Melted, margarine can be a dairy-free alternative.
  • 1 teaspoon Vanilla Extract Imitation vanilla can be used.
  • 1 large Egg Can use a flax egg or applesauce for vegan option.
For the Glaze
  • 2 tablespoons Reserved Sugar Mixture Used for glazing the rolls.

Equipment

  • Mixing Bowl
  • Baking Sheet
  • Parchment Paper

Method
 

Step-by-Step Instructions
  1. Preheat the oven to 350°F (175°C) and line a baking sheet with parchment paper.
  2. In a mixing bowl, combine granulated sugar, corn syrup, melted butter, vanilla extract, and egg. Reserve 2 tablespoons for glazing. Stir and add chopped pecans.
  3. Unroll the Pillsbury Crescent Rolls onto the baking sheet and separate into triangles.
  4. Scoop 2 to 3 tablespoons of filling onto the wide end of each triangle and roll towards the tip.
  5. Bake for about 8 minutes until beginning to set, then brush with reserved sugar mixture and bake for an additional 5 minutes until golden brown.
  6. Allow to cool slightly before serving, optionally sprinkle more chopped pecans on top.

Nutrition

Serving: 1rollCalories: 150kcalCarbohydrates: 20gProtein: 2gFat: 8gSaturated Fat: 4gPolyunsaturated Fat: 2gMonounsaturated Fat: 2gCholesterol: 20mgSodium: 150mgPotassium: 50mgFiber: 1gSugar: 10gVitamin A: 5IUCalcium: 2mgIron: 6mg

Notes

Measure ingredients accurately and use parchment paper to prevent sticking. Allow dough to come to room temperature for better roll-ability.

Tried this recipe?

Let us know how it was!

Delicious Maple Cream Cookies for Cozy Autumn Moments

As the leaves begin to paint the world in shades of amber and crimson, there’s nothing quite like the comfort of homemade treats to embrace the season. These Melt-in-the-Mouth Vegan Maple Cream Cookies capture the essence of autumn with their buttery texture and warm spices like cinnamon and nutmeg. What sets them apart is not just their delightful flavor, but how incredibly easy they are to whip up, making them perfect for both seasoned bakers and those new to the kitchen. Picture a cozy evening with these scrumptious sandwich cookies filled with creamy maple buttercream, paired effortlessly with a cup of herbal tea. Ready to dive into the world of vegan desserts? Let’s get baking together!

Why are these cookies a must-try?

Delightfully Simple: The step-by-step process makes creating these cookies approachable, even for beginners.

Autumnal Bliss: Each bite offers a warm hug of cinnamon and nutmeg that perfectly captures the essence of fall.

Irresistibly Creamy Filling: The maple buttercream adds a lush, sweet contrast to the tender cookie, elevating every mouthful.

Versatile Treat: Ideal for cozy gatherings or just a quiet night in, these cookies can adapt to any occasion.

Crowd-Pleasing Flavor: Their delightful combination of flavors and textures ensures they’ll be a hit with everyone at the table.

Prepare to savor a season of warmth and sweetness with these cookies, just like you would with a comforting bowl of Sausage Tortellini Soup.

Maple Cream Cookie Ingredients

For the Cookies

  • Dairy-Free Block Butter – Ensures a buttery flavor while keeping the cookies vegan; opt for Flora Plant Butter for the best results.
  • Caster Sugar – Sweetens your vegan cookies with a light texture; you can substitute with granulated sugar if needed.
  • All-Purpose Flour – Provides the essential structure for these delightful cookies; swap in a gluten-free flour blend for a gluten-free version.
  • Maple Syrup (1 tbsp for cookies, 2 tbsp for filling) – Infuses a lovely maple sweetness that defines the flavor; agave syrup can work as a substitute if desired.
  • Ground Cinnamon – Adds warmth and enhances the overall flavor; feel free to replace it with pumpkin pie spice for a seasonal twist.
  • Ground Nutmeg – Brings depth to the spiciness; use sparingly as it’s potent; additional cinnamon can work in a pinch.

For the Buttercream Filling

  • Icing Sugar – Sweetens the filling and achieves that smooth buttery texture essential for a delicious maple buttercream.
  • Vanilla Extract – Enhances the flavor of the filling; it’s optional, but highly recommended for added depth.
  • Dairy-Free Milk – Adjusts the frosting’s consistency to perfect smoothness; any plant-based milk will do.

Once you have your Maple Cream Cookies assembled, they’re bound to bring joy and cozy vibes to your kitchen. Enjoy the taste of homemade goodness that only comes from recipes crafted with love!

Step‑by‑Step Instructions for Melt-in-the-Mouth Vegan Maple Cream Cookies

Step 1: Prepare the Dough
Start by creaming together 1 cup of cold cubed dairy-free block butter and 1 cup of caster sugar in a large mixing bowl using an electric mixer. Beat until the mixture is light and fluffy, which should take around 3-4 minutes. Gradually sift in 2 cups of all-purpose flour, along with 1 tablespoon of maple syrup, 1 teaspoon of ground cinnamon, and ½ teaspoon of ground nutmeg, mixing until a thick dough forms. Wrap the dough tightly in plastic wrap and refrigerate for 40 minutes to 1 hour to allow it to firm up.

Step 2: Preheat Oven
While the dough chills, preheat your oven to 170°C (fan). Prepare a baking tray by lining it with greaseproof paper. This will prevent the cookies from sticking and aid in easy lifting once baked. Set aside the prepared tray and wait for the dough to chill thoroughly, ensuring better shaping of the maple cream cookies.

Step 3: Shape Cookies
Once the dough is chilled, sprinkle a little flour on your work surface and roll out the dough to about ½ cm thickness. Using a maple leaf cookie cutter or any shape you prefer, cut out cookies and carefully transfer each one to the prepared baking tray. Make sure to leave a bit of space between each cookie, as they will spread slightly while baking.

Step 4: Bake
Slide the baking tray into the preheated oven and bake the cookies for 10-12 minutes, or until the edges are lightly golden brown. Keep an eye on them; they should be firm to the touch yet soft in the center. Once baked to perfection, remove them from the oven and let them cool on the tray for about 5 minutes before transferring to a wire rack to cool completely.

Step 5: Make Buttercream Filling
In a stand mixer, whip ½ cup of softened dairy-free block butter until it is fluffy, which should take about 3 minutes. Gradually add in 2 tablespoons of maple syrup, 2 cups of icing sugar, and 1 teaspoon of vanilla extract. Mix until the filling is light and creamy. If needed, add a splash of dairy-free milk to achieve a smooth, pipeable texture that complements your maple cream cookies wonderfully.

Step 6: Assemble Cookies
To assemble the melt-in-the-mouth cookies, pipe or spread a generous amount of the creamy maple buttercream filling onto the flat side of half the cooled cookies. Top each with another cookie to create delightful sandwich cookies. Press gently to allow the filling to spread slightly to the edges, sandwiching the flavors together beautifully. These vegan maple cream cookies are now ready to enjoy or share!

Expert Tips for Maple Cream Cookies

  • Chill the Dough: Ensure your dough is well-chilled before rolling; this helps maintain the cookie shape and prevents spreading while baking.

  • Mind the Baking Time: Keep an eye on your cookies as they bake; overbaking can lead to dryness. Aim for slightly underbaked, as they firm up upon cooling.

  • Layer It Up: For a more pronounced maple flavor, increase the maple syrup in the filling slightly, but adjust icing sugar for consistency.

  • Flour It Right: Lightly flour your work surface and cookie cutter to prevent sticking, ensuring clean cuts and a neat finish for your maple cream cookies.

  • Make it Festive: Experiment with different shapes using seasonal cookie cutters, perfect for holiday gatherings or themed dessert tables!

How to Store and Freeze Maple Cream Cookies

  • Room Temperature: Store cookies in an airtight container at room temperature for up to 3 days for the best taste and texture. They’ll remain soft and delicious!

  • Fridge: If you prefer a longer shelf life, these vegan maple cream cookies can be kept in the refrigerator for up to a week, but they may lose their chewy texture.

  • Freezer: To freeze, place the cookies in a single layer on a baking sheet to prevent sticking, then wrap them tightly in plastic wrap and store in a freezer bag for up to a month.

  • Reheating: If you want to enjoy them warm, gently reheat the cookies by popping them in a microwave for 10-15 seconds. Enjoy the magic of maple cream goodness!

Make Ahead Options

These Melt-in-the-Mouth Vegan Maple Cream Cookies are perfect for busy home cooks looking to save time! You can prepare the dough up to 3 days in advance and store it tightly wrapped in plastic wrap in the refrigerator. For longer storage, freeze the dough for up to 1 month; just remember to thaw it overnight in the fridge before baking. The buttercream filling can also be made ahead—simply refrigerate it in an airtight container for up to 3 days, and give it a quick whip to restore its fluffiness before assembling. When you’re ready to enjoy these delicious cookies, bake them fresh, fill them with the creamy maple buttercream, and savor the comforting flavors of autumn in no time!

What to Serve with Melt-in-the-Mouth Vegan Maple Cream Cookies

As you indulge in the sweetness of these cookies, consider elevating your experience with perfectly paired delights.

  • Chai Tea: The warm spices of chai beautifully complement the cookies’ flavors and provide a comforting beverage choice.
  • Almond Milk: This creamy, nutty drink enhances the cookies’ buttery richness, perfect for a cozy afternoon snack.
  • Fresh Berries: The tartness of raspberries or strawberries offers a refreshing contrast to the sweet maple filling.
  • Roasted Pumpkin Soup: Velvety and spiced, this savory pairing adds depth to your autumn-themed snack or dessert.
  • Spiced Apple Cider: Hot or cold, it echoes the season’s essence, wrapping you in a warm embrace alongside a cookie.
  • Coconut Whipped Cream: Light and airy, a dollop adds a smooth finish that enhances the luscious maple flavor of the cookies.
  • Vegan Ice Cream: Sandwich a scoop between two cookies for an indulgent treat that is guaranteed to satisfy your sweet tooth!
  • Chocolate Covered Pretzels: Their salty crunch introduces a playful texture that balances the sweet creaminess of the cookies.
  • Maple Pecan Pie: If you’re serving dessert, this classic pie mirrors the cookie’s maple flavor, celebrating autumnal rich traditions.

Maple Cream Cookies Variations & Substitutions

Embrace your creativity and make these scrumptious cookies your own with some easy twists and swaps!

  • Gluten-Free: Swap all-purpose flour for a gluten-free flour blend to cater to gluten-sensitive friends without sacrificing flavor.

  • Different Sweeteners: Replace maple syrup with agave syrup or honey (if not strictly vegan) for a distinct twist in sweetness and flavor.

  • Spice Things Up: Add ground ginger or cardamom for a spicy kick that complements the warm autumn flavors beautifully.

  • Nutty Texture: Incorporate finely chopped walnuts or pecans into the cookie dough for an added crunch that pairs perfectly with the creamy filling.

  • Milk Alternatives: Use coconut milk for the buttercream filling to impart a subtle coconut flavor that dances beautifully with maple.

  • Chocolate Lovers: Drizzle melted dark chocolate over the assembled cookies for an indulgent touch that elevates this delightful treat.

  • Colorful Toppings: Sprinkles or crushed freeze-dried fruits can enhance the visual appeal, making them even more tempting for festive occasions.

  • Seasonal Variants: In lieu of maple syrup, try substituting with pumpkin puree and spice for a cozy, seasonal flavor reminiscent of pumpkin pie.

These creative adaptations allow you to tailor the recipe to your taste or dietary needs! Dive into our world of delicious baking and perhaps pair these cookies with a warm cup of Sausage Tortellini Soup for a heartwarming treat!

Vegan Maple Cream Cookies Recipe FAQs

What should I look for when selecting maple syrup?
Absolutely! When selecting maple syrup, aim for pure maple syrup rather than imitation variants. Look for dark amber syrup for a robust flavor, which is perfect for these cookies. Check for a smooth texture and avoid containers with any sediment at the bottom.

How should I store leftover cookies?
To keep your cookies fresh, store them in an airtight container at room temperature for up to 3 days. If you want to extend their shelf life, you can refrigerate them for up to a week, but be aware that they may lose some of their soft, chewy texture.

Can I freeze the cookies, and how do I do it?
Certainly! To freeze your vegan maple cream cookies, place them in a single layer on a baking sheet and freeze them until solid. Once set, carefully wrap each cookie in plastic wrap or place them in a freezer-safe bag, removing as much air as possible. They can be stored in the freezer for up to a month. When you’re ready to enjoy them, simply thaw them in the refrigerator overnight or at room temperature for a couple of hours.

Why did my cookies turn out too hard or crumbly?
If your cookies are hard or crumbly, it may be due to overbaking or not using enough fat. Keep an eye on them while they bake; they should be barely golden when you take them out. Additionally, ensure that your dairy-free butter is properly measured, as using too little fat can lead to dryness.

Are these cookies safe for people with nut allergies?
Yes! These vegan maple cream cookies can be made nut-free, as long as you select a plant-based milk and butter that are free from nuts. Be sure to check the labels carefully, especially if serving to someone with severe allergies, and consider alternative milk options like oat or soy milk.

Can I make the cookie dough ahead of time?
Absolutely! You can prepare the dough and wrap it tightly in plastic wrap. It can be refrigerated for up to 3 days or even frozen for up to a month. When you’re ready to bake, just thaw it in the fridge overnight and follow the baking instructions as usual. Enjoy the ease of whipping up these charming cookies at your convenience!

Maple Cream Cookies

Delicious Maple Cream Cookies for Cozy Autumn Moments

These Maple Cream Cookies are a delightful vegan treat perfect for autumn, featuring creamy maple buttercream and warm spices.
Prep Time 40 minutes
Cook Time 12 minutes
Chilling Time 1 hour
Total Time 1 hour 52 minutes
Servings: 12 cookies
Course: Dessert
Cuisine: Vegan
Calories: 150

Ingredients
  

For the Cookies
  • 1 cup Dairy-Free Block Butter Opt for Flora Plant Butter for best results.
  • 1 cup Caster Sugar Can substitute with granulated sugar.
  • 2 cups All-Purpose Flour Substitute with gluten-free flour for a gluten-free version.
  • 1 tbsp Maple Syrup Adds maple sweetness for cookies.
  • 1 tsp Ground Cinnamon Can replace with pumpkin pie spice.
  • 0.5 tsp Ground Nutmeg Use sparingly as it's potent.
For the Buttercream Filling
  • 2 cups Icing Sugar Essential for a smooth maple buttercream.
  • 1 tsp Vanilla Extract Optional but recommended.
  • 0.5 cup Dairy-Free Milk Any plant-based milk will do.

Equipment

  • Electric mixer
  • Baking Tray
  • Cookie cutter
  • Stand mixer

Method
 

Step-by-Step Instructions for Melt-in-the-Mouth Vegan Maple Cream Cookies
  1. Cream together 1 cup of cold cubed dairy-free block butter and 1 cup of caster sugar until light and fluffy, about 3-4 minutes. Gradually mix in 2 cups of all-purpose flour, 1 tablespoon of maple syrup, 1 teaspoon ground cinnamon, and ½ teaspoon ground nutmeg until a thick dough forms. Wrap tightly and refrigerate for 40 minutes to 1 hour.
  2. Preheat oven to 170°C (fan). Line a baking tray with greaseproof paper.
  3. Once dough is chilled, roll out to ½ cm thickness and cut with a cookie cutter. Transfer to baking tray leaving space between each.
  4. Bake for 10-12 minutes, until edges are lightly golden. Let cool on the tray for 5 minutes, then transfer to a wire rack.
  5. In a stand mixer, whip ½ cup of softened dairy-free block butter until fluffy. Gradually add 2 tablespoons of maple syrup, 2 cups of icing sugar, and 1 teaspoon of vanilla extract, mixing until light and creamy. Adjust with dairy-free milk as needed.
  6. Assemble cookies by spreading or piping the maple buttercream onto the flat side of half of the cookies, and top with the others. Press gently to allow filling to spread.

Nutrition

Serving: 1cookieCalories: 150kcalCarbohydrates: 22gProtein: 1gFat: 7gSaturated Fat: 2.5gPolyunsaturated Fat: 0.5gMonounsaturated Fat: 2gSodium: 50mgPotassium: 30mgSugar: 10gCalcium: 1mgIron: 2mg

Notes

Enjoy the taste of homemade goodness! Store cookies in an airtight container at room temperature for up to 3 days.

Tried this recipe?

Let us know how it was!

Pumpkin Praline Bread Pudding: A Cozy Fall Delight

As the aroma of baked pumpkin wafts through the house, my mind travels back to those cozy gatherings where rich desserts take center stage. This is where my Pumpkin Praline Bread Pudding shines, offering a luxurious alternative to the traditional pumpkin pie. Easy to whip up and perfect for preparing ahead of time, this crowd-pleasing treat combines creamy custard with chunks of day-old bread, creating an irresistible dish that’s both comforting and sophisticated. And with a delightful praline sauce drizzled on top, you’ll find it hard to resist diving in for seconds. How do you plan to make this decadent dessert your own?

Why You’ll Love This Recipe

Comforting Layers: The Pumpkin Praline Bread Pudding brings together fluffy bread and creamy custard, creating a delightfully rich dish.

Unique Twist: This dessert is an exciting alternative to the traditional pumpkin pie, perfect for those looking to impress guests this holiday season.

Make-Ahead Magic: You can easily prepare it ahead of time, allowing for a stress-free gathering and quality time with loved ones.

Flavorful Flexibility: With suggestions for ingredient substitutions, including variations like gluten-free options, you can tailor it to suit any dietary needs or preferences.

Decadent Topping: Don’t forget the praline sauce! That caramel-like drizzle enhances each bite, making this dessert an absolute showstopper at any table.

Explore more delicious ideas like this by checking out our recipes for Joumou Haitian Pumpkin or other comforting fall treats.

Pumpkin Praline Bread Pudding Ingredients

For the Pudding

  • Day-Old Bread (1 pound) – Provides structure and absorbs the custard; French, Italian, or Challah bread work best.
  • Heavy Cream (1 cup) – Adds richness and creaminess; can substitute with full-fat coconut cream for a dairy-free version.
  • Half and Half (1 cup) – Contributes to a creamy texture; use milk mixed with light cream if necessary.
  • Pumpkin Puree (1 – 15-ounce can) – Provides moisture and flavor; ensure it’s pure pumpkin with no added sugar or spices.
  • Granulated Sugar (1½ cups) – Sweetens the pudding; consider using brown sugar for a deeper flavor.
  • Melted Butter (3 tbsp) – Adds flavor and moisture; coconut oil can be a great dairy-free alternative.
  • Eggs (4) – Binds the mixture together; vegans can replace with flax or chia eggs.
  • Vanilla Extract (2 tsp) – Enhances flavor; opt for pure vanilla for the best taste.
  • Pumpkin Pie Spice (1 tbsp) – A seasoning that complements the pumpkin; homemade substitutes work well if needed.

For the Praline Sauce

  • Unsalted Butter (1 cup) – Provides richness in the sauce; margarine or vegan butter can work as a substitute.
  • Brown Sugar (1 cup) – Sweetens the sauce and gives a caramel-like flavor; granulated sugar can be used instead.
  • Chopped Toasted Pecans (½ cup) – Adds crunch and a nutty flavor; omit for a nut-free version or substitute walnuts.
  • Cinnamon (2 tsp) – Essential in both pudding and sauce; no alternative needed.
  • Nutmeg (1/8 tsp), Ground Ginger (¼ tsp), Ground Cloves (¼ tsp), Ground Allspice (½ tsp) – Provide depth of flavor; feel free to adjust with additional spices as desired.

This Pumpkin Praline Bread Pudding is sure to become a cherished recipe in your home, perfect for gatherings or cozy nights in!

Step‑by‑Step Instructions for Pumpkin Praline Bread Pudding

Step 1: Preheat and Prepare
Preheat your oven to 350°F (175°C). While the oven is heating, generously grease a 9×13 baking dish with cooking spray. This will ensure that your Pumpkin Praline Bread Pudding releases easily once it’s baked. Preparing the dish first gives you a smooth workflow as you move on to the next steps.

Step 2: Tear the Bread
Take your day-old bread and tear it into small, bite-sized pieces, ensuring an even distribution for optimal absorption. Once torn, spread the bread evenly across the greased baking dish. You can use a mix of different breads, like French or Italian, to enhance the texture and flavor of your pudding.

Step 3: Whisk the Custard Mixture
In a large mixing bowl, combine the heavy cream, half and half, pumpkin puree, granulated sugar, melted butter, eggs, vanilla extract, and pumpkin pie spice. Whisk everything together until the mixture is smooth and creamy, roughly 2-3 minutes. This custard will transform the bread into a rich and flavorful Pumpkin Praline Bread Pudding as it bakes.

Step 4: Pour the Custard Over Bread
Carefully pour the prepared custard mixture evenly over the layer of torn bread in the baking dish. Use a spatula to gently push down any bread pieces that float on top to ensure they are all submerged in the custard. This step is crucial for allowing the bread to soak up the flavors as it bakes.

Step 5: Bake Until Golden
Place the baking dish in your preheated oven and bake for approximately 1 hour. You’ll know it’s done when the custard is set and the top is beautifully golden brown. Keep an eye on it during the last few minutes to achieve that perfect golden coloration without overcooking.

Step 6: Make the Praline Sauce
While the Pumpkin Praline Bread Pudding bakes, prepare the praline sauce. In a saucepan over medium heat, combine the unsalted butter, heavy cream, and brown sugar. Bring the mixture to a boil, stirring continuously, then reduce the heat and add the chopped toasted pecans. Allow it to simmer for about 5 minutes until it thickens slightly.

Step 7: Serve Warm with Praline Sauce
Once the bread pudding has finished baking, remove it from the oven and let it cool for a few minutes. Serve warm by drizzling the rich praline sauce over each portion of the Pumpkin Praline Bread Pudding. This extra step adds a decadent finish that will delight everyone at your table.

What to Serve with Pumpkin Praline Bread Pudding

Transform your pumpkin indulgence into a delightful meal with the perfect accompaniments.

  • Whipped Cream: A classic topping that adds a light, airy contrast to the rich pudding, making each bite a moment of bliss.

  • Vanilla Ice Cream: This creamy scoop harmonizes beautifully with the warm bread pudding, creating a comforting contrast of temperatures.

  • Caramel Sauce: Drizzling on homemade or store-bought caramel enhances the sweetness, bringing an extra layer of decadence to the dessert.

  • Candied Pecans: These crunchy, sweet bites echo the flavors of the praline sauce while adding an exciting crunch to each forkful.

  • Spiced Apple Cider: Serve alongside to bring a warm, cozy drink that complements the pumpkin flavors, perfect for fall gatherings.

  • Coffee or Espresso: A rich beverage that cuts through the sweetness while enhancing the warm, aromatic spices in the pudding.

  • Pumpkin Spice Cake: Keep the pumpkin theme alive with a slice of cake, offering a different texture to contrast the pudding.

  • Cheesecake Bites: Mini cheesecakes provide a creamy option that balances the richness of the bread pudding, making for an indulgent spread.

Storage Tips for Pumpkin Praline Bread Pudding

Fridge: Store leftovers tightly covered in the refrigerator for up to 4 days to maintain freshness and flavor.

Freezer: If you need to store it longer, you can freeze the Pumpkin Praline Bread Pudding for up to 3 months. Wrap it tightly in plastic wrap and foil for best results.

Reheating: To reheat, thaw overnight in the fridge if frozen, and warm it in the oven at 350°F (175°C) until heated through, about 25-30 minutes.

Making Ahead: This dessert is perfect for making in advance! Prepare and bake it a day before your gathering, then simply reheat and serve.

Pumpkin Praline Bread Pudding Variations

Feel free to customize your pumpkin praline bread pudding to delight your taste buds and cater to your dietary needs!

  • Gluten-Free: Use gluten-free bread in place of regular bread to accommodate gluten sensitivities without sacrificing flavor.
  • Dairy-Free: Substitute heavy cream with full-fat coconut cream and use almond milk instead of half-and-half for a creamy texture without dairy.
  • Sweetener Swap: For a less sweet pudding, reduce the granulated sugar or swap it for natural sweeteners like maple syrup or coconut sugar.
  • Add-Ins: Toss in chocolate chips, dried cranberries, or fresh apple chunks for added flavor and texture surprises in every bite.
  • Different Breads: Experiment with croissants, brioche, or even pumpkin bread for varying textures and flavors that enrich the pudding experience.
  • Spice it Up: For an extra kick, consider adding a pinch of cayenne pepper or extra ginger to the custard mixture for warmth that complements the pumpkin.
  • Nut-Free Option: Omit the pecans from the praline sauce, and use sunflower seeds or pepitas for a nut-free crunch if desired.

Each variation brings its unique twist to this beloved dessert. Try experimenting with these options, and perhaps you’ll find your signature take on this comforting classic. If you need more autumnal inspiration, don’t forget to check out our delightful recipe for Joumou Haitian Pumpkin or dive into other flavorful offerings this season!

Expert Tips for Pumpkin Praline Bread Pudding

  • Stale Bread: Use slightly stale bread to help it absorb the custard better, resulting in a creamier texture in your Pumpkin Praline Bread Pudding.

  • Custard Soaking: Allow the bread to soak in the custard mixture for at least 30 minutes before baking for deeper flavor integration and a richer dessert.

  • Test for Doneness: Check the pudding toward the end of baking; it should be set in the center and golden brown on top. Avoid overbaking to prevent a dry texture.

  • Praline Sauce Warming: If you make the praline sauce ahead of time, remember to warm it gently before serving to ensure it’s pourable and enhances the dessert’s warmth.

  • Experiment with Toppings: Don’t hesitate to experiment! Top with fresh whipped cream or a scoop of vanilla ice cream to elevate the indulgence of your Pumpkin Praline Bread Pudding.

Make Ahead Options

These Pumpkin Praline Bread Puddings are perfect for busy home cooks looking to save time! You can prepare the entire pudding up to 24 hours in advance by assembling it, covering it tightly, and refrigerating it overnight. To maintain its quality, make sure to cover it well to prevent drying out. When you’re ready to bake, simply preheat your oven and go straight to baking the pudding without needing to bring it to room temperature first. The praline sauce can also be made ahead and stored in the refrigerator for up to 3 days; just warm it gently before serving for that irresistible drizzle. Enjoy a delectable dessert with minimal effort!

Pumpkin Praline Bread Pudding Recipe FAQs

How ripe should my bread be for this recipe?
Absolutely! For the best results, use day-old bread that is slightly stale. This helps the bread absorb the custard mixture better. Avoid fresh bread as it can become mushy. If you don’t have day-old bread on hand, you can lightly toast fresh bread cubes in the oven for a few minutes to dry them out a bit.

How should I store leftover Pumpkin Praline Bread Pudding?
To keep your dessert fresh, store it tightly covered in the refrigerator for up to 4 days. This will retain its lovely flavors and textures. Make sure it cools down to room temperature before sealing it in an airtight container for the best results.

Can I freeze Pumpkin Praline Bread Pudding?
Yes, you can freeze this delightful dessert! Wrap it tightly in plastic wrap and foil to protect it from freezer burn. It can be stored in the freezer for up to 3 months. When you’re ready to enjoy it, thaw it overnight in the refrigerator, and then reheat it in the oven at 350°F (175°C) for about 25-30 minutes, until warmed through.

What if my pudding comes out too dry?
If you find your Pumpkin Praline Bread Pudding is dry, it may need more custard mixture during the soaking process. Make sure to let the bread soak in the custard for at least 30 minutes before baking, and gently press down on the bread pieces to fully immerse them in the mixture. Also, check the baking time; pulling it out once set and golden will help prevent dryness.

Are there any dietary considerations for this recipe?
Very much! This recipe can be tailored for various dietary needs. For a dairy-free version, substitute heavy cream with full-fat coconut cream and use coconut oil in place of butter. For those avoiding eggs, you can replace each egg with 1 tablespoon of flaxseed meal mixed with 2.5 tablespoons of water. It’s versatile enough to cater to many preferences, ensuring everyone can enjoy this scrumptious treat.

Pumpkin Praline Bread Pudding

Pumpkin Praline Bread Pudding: A Cozy Fall Delight

Indulge in this Pumpkin Praline Bread Pudding, a luxurious alternative to pumpkin pie, perfect for gatherings.
Prep Time 30 minutes
Cook Time 1 hour
Soaking Time 30 minutes
Total Time 2 hours
Servings: 12 slices
Course: Dessert
Cuisine: American
Calories: 350

Ingredients
  

For the Pudding
  • 1 pound Day-Old Bread French, Italian, or Challah works best.
  • 1 cup Heavy Cream Can substitute with full-fat coconut cream.
  • 1 cup Half and Half Can use milk mixed with light cream.
  • 1 15-ounce can Pumpkin Puree Ensure it's pure pumpkin with no added sugar.
  • 1.5 cups Granulated Sugar Consider using brown sugar for deeper flavor.
  • 3 tbsp Melted Butter Coconut oil can be a dairy-free alternative.
  • 4 Eggs Vegans can replace with flax or chia eggs.
  • 2 tsp Vanilla Extract Opt for pure vanilla for best taste.
  • 1 tbsp Pumpkin Pie Spice Homemade substitutes work well if needed.
For the Praline Sauce
  • 1 cup Unsalted Butter Margarine or vegan butter can work as a substitute.
  • 1 cup Brown Sugar Granulated sugar can be used instead.
  • 0.5 cup Chopped Toasted Pecans Omit for nut-free version or substitute walnuts.
  • 2 tsp Cinnamon Essential in both pudding and sauce.
  • 1/8 tsp Nutmeg Feel free to adjust with additional spices.
  • 1/4 tsp Ground Ginger Feel free to adjust with additional spices.
  • 1/4 tsp Ground Cloves Feel free to adjust with additional spices.
  • 1/2 tsp Ground Allspice Feel free to adjust with additional spices.

Equipment

  • 9x13 baking dish
  • Mixing Bowl
  • whisk
  • Saucepan

Method
 

Step-by-Step Instructions for Pumpkin Praline Bread Pudding
  1. Preheat your oven to 350°F (175°C) and generously grease a 9x13 baking dish.
  2. Tear the day-old bread into small, bite-sized pieces and spread it evenly across the greased baking dish.
  3. In a large mixing bowl, whisk together the heavy cream, half and half, pumpkin puree, granulated sugar, melted butter, eggs, vanilla extract, and pumpkin pie spice until smooth.
  4. Pour the custard mixture evenly over the layer of torn bread, ensuring all pieces are submerged.
  5. Bake in the preheated oven for approximately 1 hour until the custard is set and golden brown on top.
  6. In a saucepan, combine unsalted butter, heavy cream, and brown sugar over medium heat. Bring to a boil, then reduce heat and add chopped pecans, simmering for about 5 minutes until thickened.
  7. Serve warm by drizzling the praline sauce over each portion of the Pumpkin Praline Bread Pudding.

Nutrition

Serving: 1sliceCalories: 350kcalCarbohydrates: 40gProtein: 5gFat: 20gSaturated Fat: 12gPolyunsaturated Fat: 2gMonounsaturated Fat: 6gCholesterol: 180mgSodium: 250mgPotassium: 250mgFiber: 2gSugar: 20gVitamin A: 3500IUVitamin C: 2mgCalcium: 100mgIron: 1mg

Notes

Allow the bread to soak in the custard mixture for at least 30 minutes before baking for deeper flavor integration. Experiment with toppings like whipped cream or vanilla ice cream to elevate the dish.

Tried this recipe?

Let us know how it was!

Decadent Easy Brownie Truffles That Melt in Your Mouth

“Can you believe how easy it is to turn a simple box of brownie mix into something utterly delightful?” That’s how I felt the first time I whipped up these Easy Brownie Truffles. They meld together fudgy brownie goodness with a creamy cream cheese filling, all enveloped in a glossy chocolate shell. Not only are these treats a breeze to make—perfect for those last-minute dessert cravings—but they also bring a touch of elegance to any holiday gathering. Whether you’re surprising your loved ones with homemade gifts or simply indulging yourself after a long day, these truffles are sure to impress. And let’s not forget, they’re customizable too! Thinking of trying a Gingerbread Truffle or perhaps an Oreo Cookie variation? What flavor combination will inspire you today?

Why Are These Truffles so Irresistible?

Delightfully Easy: The simplicity of using a box of brownie mix means anyone can whip these up, even novice bakers.
Crowd-Pleasing Treats: Their rich chocolate flavor and smooth cream cheese center tantalize the taste buds—perfect for gatherings!
Customizable Fun: With endless variations like Gingerbread Truffles or Baileys Truffles, you can tailor them to fit any occasion.
Elegant Presentation: Charming and beautiful, they make perfect homemade gifts that impress loved ones, especially during the holidays!
Quick Indulgence: Ready in about an hour, they save time without sacrificing taste—ideal for last-minute dessert cravings.
Whether you’re in the mood for a cozy night in or looking for a delightful gift, these Easy Brownie Truffles are bound to become your go-to dessert!

Easy Brownie Truffles Ingredients

• Perfect for making your own homemade delights!

For the Truffles

  • Box of Brownie Mix (18 ounces) – The base that brings rich chocolate flavor to your Easy Brownie Truffles.
  • Full-fat Brick-style Cream Cheese (8 ounces) – Ensures the truffles have a creamy, smooth texture; avoid whipped for best results.
  • Chocolate Melting Wafers (3 cups) – Coats the truffles in a luscious chocolate shell; chocolate chips can be used in a pinch.

For Decoration

  • Sprinkles – Adds a fun pop of color and texture; feel free to experiment with different types for festive occasions.

Step‑by‑Step Instructions for Easy Brownie Truffles

Step 1: Prepare the Brownies
Preheat your oven to the temperature specified on the brownie mix box, typically around 350°F (175°C). Grease a 9×13-inch baking pan and pour in the brownie mix batter. Bake for about 20-25 minutes until a toothpick inserted in the center comes out with a few moist crumbs. Allow the brownies to cool completely in the pan on a wire rack for about 30 minutes.

Step 2: Mix the Brownies and Cream Cheese
Once cooled, scoop the brownies into a large mixing bowl, discarding the firmer edges for a smooth texture. Using an electric mixer, add 8 ounces of room temperature cream cheese to the brownie mix. Beat at medium speed until the mixture is thoroughly combined and creamy—this may take about 2-3 minutes. The mixture should be smooth with no lumps, creating a luscious filling for your Easy Brownie Truffles.

Step 3: Shape the Truffles
With clean hands or a small cookie scoop, shape the brownie mixture into 1-tablespoon-sized balls and place them on a parchment-lined baking sheet. Ensure the truffles are compact and uniform in size for even coating. Once shaped, cover the baking sheet with plastic wrap and freeze the truffles for about 30 minutes until they are solid enough to dip in chocolate.

Step 4: Melt the Chocolate Coating
While the truffles are chilling, prepare the chocolate coating. Place 3 cups of chocolate melting wafers in a microwave-safe bowl. Heat in 30-second intervals, stirring after each interval until completely melted and smooth—this should take about 1-2 minutes. If using chocolate chips, follow the same method, ensuring your chocolate is silky for a beautiful finish on your Easy Brownie Truffles.

Step 5: Dip the Truffles
Remove the truffles from the freezer and work quickly to dip them. Use a fork to lower each truffle into the melted chocolate, ensuring an even coating. Allow any excess chocolate to drip off before returning the truffles to the parchment-lined baking sheet. Repeat this process for all truffles, coating them in a rich chocolate layer that transforms them into mouthwatering confections.

Step 6: Decorate and Chill
While the chocolate is still wet, sprinkle your favorite toppings, like colorful sprinkles, over each truffle for a festive touch. Once decorated, refrigerate the truffles for about 15-20 minutes, or until the chocolate coating has completely set. This final chill ensures the truffles retain their shape and have a delightful crunch when you take a bite of your delicious Easy Brownie Truffles.

Easy Brownie Truffles Variations

Do you want to shake things up? These delightful truffles can take on a whole new personality with just a few tweaks!

  • Gluten-Free: Swap the regular brownie mix for a gluten-free variant to enjoy these truffles without worry. Perfect for those who love chocolate but need a dietary twist!

  • Vegan Twist: Use a plant-based brownie mix and substitute cream cheese with vegan cream cheese for a dessert that everyone can enjoy. You’ll still experience that rich, fudgy goodness!

  • Espresso Infusion: Add 1-2 tablespoons of espresso powder to the brownie mixture for a mocha flavor that dances on your palate. It’s the perfect pick-me-up treat during a cozy afternoon.

  • Gingerbread Cheer: For a seasonal twist, mix ground ginger and cinnamon into the brownie batter and finish with white chocolate melting wafers. A delightful taste of the holidays in every bite!

  • Nutty Delight: Fold in finely chopped nuts, like walnuts or hazelnuts, into your brownie mixture before shaping into truffles. This adds a delightful crunch and depth to your Easy Brownie Truffles.

  • Baileys Indulgence: Swap out some of the cream cheese for Baileys Irish Cream for an adult treat that’s rich and creamy with a hint of liqueur magic. These are perfect for after-dinner snacking!

  • Citrus Zest: Add a teaspoon of lemon zest to your brownie and cream cheese mixture for a refreshing flavor explosion—embracing a zing that complements the chocolate beautifully!

  • Better Than Takeout: Feeling adventurous? Experiment with the flavors of your favorite desserts! Try incorporating elements from Better Than Takeout dishes for creative fusion ideas that excite your taste buds.

With these variations, you’ll find endless possibilities to create your perfect batch of Easy Brownie Truffles. What will you try first?

What to Serve with Easy Brownie Truffles

Indulging in these delightful truffles opens up a world of pairing possibilities that elevate your dessert experience.

  • Rich Coffee: A robust cup of coffee balances the sweetness, enhancing the chocolate flavor while providing a comforting warmth.
  • Vanilla Ice Cream: Creamy vanilla ice cream offers a delightful contrast, creating a luscious duo that melts together beautifully.
  • Fresh Berries: Ripe strawberries or raspberries bring a burst of freshness and acidity, perfectly complementing the richness of the truffles.
  • Champagne: Bubbly champagne adds an elegant touch, making these truffles feel extra special for celebrations or romantic evenings.
  • Chocolate Dipped Fruit: For a chocolate lover’s delight, pair the truffles with chocolate-dipped strawberries or bananas for an indulgent snack.
  • Nutty Biscotti: Crunchy biscotti with a hint of almond or hazelnut is perfect for dipping alongside these truffles, adding a satisfying crunch.
  • Whipped Cream: Light and fluffy whipped cream softens the richness, providing a light and airy counterpart that enhances each bite.
  • Dessert Wine: A glass of dessert wine like Port or Moscato melds beautifully with the chocolate, bringing out deeper flavors in each sweet treat.
  • Mini Cupcake Liners: Presenting truffles in colorful mini cupcake liners not only looks stunning but adds a fun touch to your dessert table.
  • DIY Dessert Boards: Create a dessert board with truffles, assorted nuts, fruits, and cheeses for a delightful assortment that’s perfect for sharing.

How to Store and Freeze Easy Brownie Truffles

Room Temperature: Keep the truffles at room temperature for up to 2 hours; after that, they should be refrigerated to maintain freshness.

Fridge: Store in an airtight container in the refrigerator for up to one week, ensuring the truffles remain fresh and delicious for your indulgent moments.

Freezer: For longer storage, freeze truffles in a single layer for up to two months; once solid, transfer them to an airtight container or freezer bag.

Reheating: Thaw frozen Easy Brownie Truffles in the fridge overnight before serving; avoid microwaving as it may alter their texture.

Make Ahead Options

These Easy Brownie Truffles are perfect for busy home cooks looking to save time without sacrificing flavor! You can prepare the brownie base and cream cheese mixture, rolling them into balls, up to 24 hours in advance and store them in the refrigerator. Simply freeze the truffles as instructed for about 30 minutes, then place them in a sealed container to maintain their shape and quality. When you’re ready to dip and decorate, just follow the melting and coating instructions, and you’ll have your delightful treats ready to impress in no time. The truffles will be just as delicious, offering a sweet solution to quick dessert cravings!

Expert Tips for Easy Brownie Truffles

Use Room Temperature Ingredients: Make sure the cream cheese is at room temperature for easy blending; cold cream cheese can result in lumpy truffles.

Chill for Firmness: If the brownie mixture feels too soft to shape into balls, pop it in the fridge for an additional 30 minutes—this helps keep your Easy Brownie Truffles from getting too sticky.

Mind the Chocolate: Take care when melting chocolate by stirring every 20 seconds to prevent scorching; smooth melted chocolate creates a beautiful coating for your truffles.

Keep Consistency: Avoid adding liquid flavorings directly; if you want to enhance flavor, adjust the cream cheese quantity accordingly to maintain the right texture.

Decorate Quickly: Add sprinkles and toppings before the chocolate hardens; this ensures they adhere well and make your truffles look festive and inviting.

Easy Brownie Truffles Recipe FAQs

How do I choose the right brownie mix?
Absolutely! When selecting your brownie mix, look for one that emphasizes rich chocolate flavor. You can also opt for gluten-free versions if needed. Just be mindful of the baking instructions as different brands may vary slightly.

What’s the best way to store my truffles?
I recommend storing your truffles in an airtight container in the refrigerator for up to one week. This keeps them fresh and ready to enjoy at a moment’s notice. If you prefer them at room temperature, just remember they’ll stay good for about 2 hours before needing to be refrigerated again.

Can I freeze Easy Brownie Truffles?
Certainly! To freeze your truffles, place them in a single layer on a baking sheet and freeze until solid, about 1-2 hours. Then, transfer them to an airtight container or a freezer bag for up to two months. When you’re ready to enjoy, simply thaw them in the fridge overnight. No need to rush with the microwave!

What should I do if the truffle mixture is too soft to shape?
Very good question! If your mixture feels sticky and is challenging to roll, pop it in the fridge for another 30 minutes. This cooling period firms up the mixture, making it easier to form consistent 1-tablespoon-sized balls.

Are there any dietary considerations for these truffles?
Yes! Keep in mind that the cream cheese can be a dietary concern for some, as it contains dairy. If you need a dairy-free option, try using a plant-based cream cheese substitute. Just ensure you stick to the same measurements for consistency!

Easy Brownie Truffles

Decadent Easy Brownie Truffles That Melt in Your Mouth

These Easy Brownie Truffles blend fudgy brownie goodness with creamy filling, perfect for any occasion.
Prep Time 30 minutes
Cook Time 25 minutes
Chilling Time 30 minutes
Total Time 1 hour 25 minutes
Servings: 12 truffles
Course: Dessert
Cuisine: American
Calories: 150

Ingredients
  

For the Truffles
  • 18 ounces Box of Brownie Mix The base that brings rich chocolate flavor to your Easy Brownie Truffles.
  • 8 ounces Full-fat Brick-style Cream Cheese Ensures a creamy, smooth texture; avoid whipped for best results.
  • 3 cups Chocolate Melting Wafers Coats the truffles in a luscious chocolate shell; chocolate chips can be used in a pinch.
For Decoration
  • Sprinkles Adds a fun pop of color and texture; feel free to experiment with different types for festive occasions.

Equipment

  • Oven
  • Electric mixer
  • Mixing Bowl
  • Baking Pan
  • Parchment Paper
  • Microwave
  • Cookie Scoop

Method
 

Step-by-Step Instructions for Easy Brownie Truffles
  1. Preheat your oven to the temperature specified on the brownie mix box, typically around 350°F (175°C). Grease a 9x13-inch baking pan and pour in the brownie mix batter. Bake for about 20-25 minutes until a toothpick inserted in the center comes out with a few moist crumbs. Allow the brownies to cool completely in the pan on a wire rack for about 30 minutes.
  2. Once cooled, scoop the brownies into a large mixing bowl, discarding the firmer edges for a smooth texture. Using an electric mixer, add 8 ounces of room temperature cream cheese to the brownie mix. Beat at medium speed until the mixture is thoroughly combined and creamy—this may take about 2-3 minutes. The mixture should be smooth with no lumps.
  3. With clean hands or a small cookie scoop, shape the brownie mixture into 1-tablespoon-sized balls and place them on a parchment-lined baking sheet. Ensure the truffles are compact and uniform in size for even coating. Once shaped, cover the baking sheet with plastic wrap and freeze the truffles for about 30 minutes until they are solid enough to dip in chocolate.
  4. While the truffles are chilling, prepare the chocolate coating. Place 3 cups of chocolate melting wafers in a microwave-safe bowl. Heat in 30-second intervals, stirring after each interval until completely melted and smooth—this should take about 1-2 minutes.
  5. Remove the truffles from the freezer and work quickly to dip them. Use a fork to lower each truffle into the melted chocolate, ensuring an even coating. Allow any excess chocolate to drip off before returning the truffles to the parchment-lined baking sheet.
  6. While the chocolate is still wet, sprinkle your favorite toppings, like colorful sprinkles, over each truffle for a festive touch. Once decorated, refrigerate the truffles for about 15-20 minutes, or until the chocolate coating has completely set.

Nutrition

Serving: 1truffleCalories: 150kcalCarbohydrates: 20gProtein: 2gFat: 7gSaturated Fat: 4gPolyunsaturated Fat: 0.5gMonounsaturated Fat: 1.5gCholesterol: 15mgSodium: 50mgPotassium: 100mgFiber: 1gSugar: 10gVitamin A: 2IUCalcium: 2mgIron: 4mg

Notes

Use room temperature cream cheese for easy blending and ensure to decorate quickly before the chocolate hardens for best results.

Tried this recipe?

Let us know how it was!

Hearty Italian Sausage Ditalini Soup for Cozy Nights

As I stirred the pot on a brisk evening, the warm aroma of Italian herbs enveloped my kitchen, instantly transporting me to a cozy trattoria in the heart of Italy. That’s the magic of this Creamy Parmesan Italian Sausage Ditalini Soup—a rich and comforting dish that marries savory Italian sausage with tender ditalini pasta, all wrapped in a silky cream broth. Not only is it a delightful way to warm your soul on chilly nights, but it also offers a quick and satisfying meal solution for busy weeknights. The best part? You can easily customize it for lighter cravings or even create a vegetarian twist that doesn’t skimp on flavor! Curious about the little secrets that make this soup a family favorite? Let’s dive into the recipe!

What makes this soup a must-try?

Hearty Comfort: This Italian Sausage Ditalini Soup delivers a warm embrace in every bowl, perfect for chilly nights. Flavorful Depth: With the richness of Italian sausage and a creamy broth, each spoonful brims with inviting Italian flavors. Quick Preparation: Whipping this meal together takes mere minutes, making it great for weeknight dinners. Versatile Customization: Want something lighter? Simply swap in ground turkey or create a vegetarian version that still satisfies. Crowd-Pleasing Appeal: This soup guarantees a hit at any gathering, comforting family and friends alike. You’ll be serving up smiles in no time! Don’t forget to check out our Sausage Tortellini Soup as another delicious option for your cooking repertoire.

Italian Sausage Ditalini Soup Ingredients

Get ready for a delicious journey!

For the Soup Base
Italian sausage – Adds hearty depth and flavor; substitute with ground turkey or chicken for a lighter option.
Yellow onion – Builds aromatic depth; essential for base flavor.
Carrots – Adds sweetness and texture; parsnips work as a great substitution.
Celery – Provides a fresh, slightly peppery taste; fennel is an interesting alternative.
Garlic – Enhances overall flavor complexity; fresh garlic is preferred.
Italian seasoning – Offers a blend of herbs for traditional Italian flavor; individual herbs like oregano can work too.
Red pepper flakes – Adds warmth and heat; omit or reduce for less spice.
Chicken broth – Forms the soup’s savory body; vegetable broth can be used for a vegetarian option.

For the Pasta and Cream
Ditalini pasta – Provides a satisfying bite that absorbs broth; small shells are a good substitute.
Heavy cream – Creates a rich and velvety texture; half-and-half or a mix of milk can lighten it up.
Parmesan cheese – Delivers a savory finish and umami flavor; freshly grated is best.

For Nutritional Boost
Fresh spinach – Adds color and nutrients; kale or Swiss chard can be great substitutions as well.
Salt and black pepper – Essential for seasoning; adjust based on broth and sausage saltiness.

For Garnishing
Garnishes – Extra Parmesan and parsley enhance flavor and presentation.

Elevate your dinner table with this comforting Italian Sausage Ditalini Soup!

Step‑by‑Step Instructions for Creamy Parmesan Italian Sausage Ditalini Soup

Step 1: Brown the sausage
In a large pot, heat over medium heat. Add the Italian sausage, breaking it apart with a wooden spoon as it cooks. Stir occasionally and cook for about 5-7 minutes until it’s browned and no longer pink. If there’s excess grease, drain it carefully, keeping the flavorful bits at the bottom for extra depth in your Italian Sausage Ditalini Soup.

Step 2: Sauté vegetables
Add diced yellow onion, carrots, and celery to the pot. Cook for 5-7 minutes until they soften and become fragrant, stirring occasionally. Then, mix in the minced garlic, Italian seasoning, and red pepper flakes, allowing everything to sauté for an additional minute. This step fills your kitchen with delightful aromas and builds the foundation of your cozy soup.

Step 3: Add broth
Pour in 6 cups of chicken broth, using a wooden spoon to scrape up any browned bits stuck on the bottom of the pot. Stir everything together and bring the mixture to a gentle simmer over medium-high heat. Let it simmer for about 10 minutes, allowing the flavors in your Italian Sausage Ditalini Soup to meld beautifully.

Step 4: Cook pasta
Once the broth is bubbling, add the ditalini pasta and cook according to package instructions, usually about 8-10 minutes. Stir occasionally to prevent sticking. As the pasta cooks, it will absorb the delicious flavors of the broth, enhancing the overall texture and cozy feel of your soup.

Step 5: Make it creamy
Reduce the heat to low and gently stir in 1 cup of heavy cream and 1 cup of grated Parmesan cheese. Keep stirring until the cheese melts completely and the soup becomes creamy and velvety. Then, fold in a few handfuls of fresh spinach, stirring until just wilted. This step transforms your soup into a rich and comforting bowl of Italian Sausage Ditalini Soup.

Step 6: Season and serve
Taste your delicious creation and season with salt and black pepper to suit your preference, adjusting to the flavors of the sausage and broth. Ladle the soup into warm bowls and garnish generously with extra Parmesan cheese and fresh parsley. Serve hot, ideally alongside crusty bread for a hearty finish to your meal.

Expert Tips for Italian Sausage Ditalini Soup

  • Perfect Pasta: Avoid overcooking the ditalini pasta; it should be al dente. Remember, it’ll continue to absorb broth as it sits.

  • Bold Flavor: Opt for fresh, high-quality Italian sausage for the best taste. It significantly enhances the overall flavor of your soup.

  • Creamy Consistency: To maintain the soup’s textural integrity, add extra broth when reheating leftovers, as pasta absorbs liquid over time.

  • Make Ahead: For a convenient option, prepare the soup base without pasta and cream. Freeze it and add freshly cooked pasta and cream when ready to enjoy.

  • Spice It Up: If you enjoy heat, don’t hesitate to adjust the red pepper flakes to your liking or try using spicy Italian sausage in your Italian Sausage Ditalini Soup.

Make Ahead Options

These Creamy Parmesan Italian Sausage Ditalini Soup preparations are perfect for meal prep enthusiasts! You can cook the soup base (but exclude the ditalini pasta and heavy cream) up to 3 days in advance; simply refrigerate it in an airtight container. When you’re ready to enjoy, reheat the soup base, add fresh ditalini pasta, and stir in the heavy cream just before serving to maintain that creamy texture. This approach not only saves you valuable time during busy weeknights but also ensures your soup is just as delicious as if it were made fresh. By following these steps, you’ll have a comforting bowl of Italian Sausage Ditalini Soup ready to warm your soul with minimal effort!

What to Serve with Creamy Parmesan Italian Sausage Ditalini Soup

Imagine cozying up with a steaming bowl of soup, ready to create a delightful meal experience that warms both heart and home.

  • Crusty Bread: Perfect for soaking up the creamy broth, crusty bread adds a satisfying crunch that contrasts beautifully with the soup’s velvety texture. Serve it warm with a dab of butter for that extra touch of love.

  • Garlic Toast: The delightful aroma of toasted garlic complements the rich flavors of the soup, giving each bite a comforting crunch. It’s a must-have for dipping into the savory broth.

  • Caesar Salad: A fresh Caesar salad, with its crisp romaine, creamy dressing, and crunchy croutons, brings a refreshing contrast that balances the hearty soup perfectly. The zing from the dressing enhances the garlicky notes of the soup, elevating your dining experience.

  • Parmesan Crisps: These little gems provide that crunchy texture and parmesan punch that harmonizes with the Parmesan in your soup. They offer a fun, cheesy bite that’s utterly addictive.

  • Savory Herb Couscous: Light and fluffy, couscous carries the essence of Italian herbs, making it an ideal side. The subtle flavors work in tandem with the boldness of the soup, while adding a lovely texture to the plate.

  • Simple Roasted Vegetables: Brightly colored seasonal vegetables roasted to caramelized perfection not only add nutrition but also a wonderful earthiness. Their sweet notes balance the richness of the soup and add warmth to your meal.

  • Red Wine: A glass of smooth red wine pairs beautifully with Italian flavors, enhancing every mouthful. Its tannins complement the savory sausage, making each sip delightful alongside your creamy bowl.

  • Chocolate Fondue: For dessert, a simple chocolate fondue with fresh fruits provides a sweet finish after your cozy soup. The indulgent richness feels celebratory and is perfect for sharing or simply treating yourself.

  • Lemon Sorbet: For a lighter finish, lemon sorbet both refreshes the palate and cleanses the flavors from the hearty meal. It’s an uplifting choice that leaves you feeling satisfied without the heaviness.

How to Store and Freeze Italian Sausage Ditalini Soup

  • Fridge: Store in an airtight container for up to 3-4 days. Be sure to allow it to cool before sealing to prevent condensation.
  • Freezer: Freeze in a freezer-safe container for up to 3 months. Leave space for expansion, as the soup may thicken when frozen.
  • Reheating: When ready to enjoy, thaw overnight in the fridge. Reheat on the stovetop over medium heat, adding a splash of broth to restore creaminess.
  • Leftover Tips: Add extra broth while reheating to maintain the soup’s texture, as the ditalini pasta absorbs liquid over time.

Italian Sausage Ditalini Soup Variations

Feel free to get creative and make this soup your own with these delightful twists!

  • Lighter Option: Replace Italian sausage with ground turkey or chicken for a healthier alternative that still packs flavor. You won’t lose any of the comforting essence—just enjoy a guilt-free bowl!

  • Vegetarian Delight: Swap the sausage for white beans or cooked lentils, and use vegetable broth instead of chicken broth. This helps maintain a hearty texture and protein while keeping it entirely plant-based.

  • Extra Veggies: Throw in a handful of diced zucchini or bell peppers for added color and nutrients. A vibrant mix of vegetables not only enhances the flavor but also increases the dish’s nutritional value.

  • Creamy Alternative: Use half-and-half instead of heavy cream for a lighter, yet still rich, texture. You’ll enjoy the same creamy mouthfeel with less guilt!

  • Spice it Up: For an extra kick, try using spicy Italian sausage or increase the quantity of red pepper flakes. This adds a fiery depth that will warm you right up.

  • Pasta Twist: Can’t find ditalini? Small shells or elbow macaroni work beautifully, adding a fun twist to the soup while still delivering that satisfying bite.

  • Flavor Boost: Incorporate a touch of lemon juice or zest right before serving to brighten the flavors. It adds a refreshing contrast to the richness of the soup.

  • Herbal Infusion: Mix in fresh basil or parsley as a finishing touch to introduce a burst of fresh flavor that complements the heartiness of the soup.

With these variations, you can keep this dish exciting and tailored to your family’s tastes! For another comforting soup option, check out our Italian Penicillin Soup, or explore the creamy goodness of our Mexican Soup. Enjoy your cooking adventure!

Italian Sausage Ditalini Soup Recipe FAQs

What type of Italian sausage is best for this soup?
Absolutely! Fresh Italian sausage made from pork is ideal for this recipe as it adds authentic flavor. You can also choose spicy Italian sausage for a kick or ground turkey or chicken for a lighter version without compromising the taste.

How should I store leftovers of my Italian Sausage Ditalini Soup?
To keep your soup fresh, store it in an airtight container in the fridge for up to 3-4 days. Ensure the soup cools completely before sealing to avoid condensation. When ready to reheat, simply warm it on the stovetop, adding a splash of broth to regain its creamy consistency.

Can I freeze Italian Sausage Ditalini Soup?
Absolutely! You can freeze the soup in a freezer-safe container for up to 3 months. Just remember to leave some space at the top of the container for expansion, as it may thicken when frozen. To reheat, thaw in the fridge overnight, and then warm it gently on the stovetop. Don’t forget to add a bit of broth if it appears too thick after freezing!

What should I do if my soup turns out too thick after refrigerating?
No worries at all! If your soup thickens once refrigerated due to the pasta absorbing liquid, simply add a bit of chicken or vegetable broth while reheating. Stir well until it reaches your desired consistency. It’s a common occurrence with creamy soups, and adjusting it is easy!

Can this soup be made vegetarian?
Very much so! To create a vegetarian version of this Italian Sausage Ditalini Soup, substitute the Italian sausage with sautéed mushrooms or add white beans for added protein and flavor. Use vegetable broth instead of chicken broth and include spinach or any other greens you enjoy for a delightful twist!

How can I tell if my vegetables are fresh enough?
When selecting vegetables like carrots and celery, look for vibrant color and firm texture. Avoid any that are limp or have dark spots all over, as this indicates they’re past their prime. Fresh veggies provide the best flavor and texture for your soup!

Italian Sausage Ditalini Soup

Hearty Italian Sausage Ditalini Soup for Cozy Nights

This Italian Sausage Ditalini Soup is a rich and comforting dish, perfect for warming up chilly nights.
Prep Time 15 minutes
Cook Time 30 minutes
Total Time 45 minutes
Servings: 6 bowls
Course: Dinner
Cuisine: Italian
Calories: 420

Ingredients
  

For the Soup Base
  • 1 lb Italian sausage Substitute with ground turkey or chicken for a lighter option.
  • 1 medium yellow onion Essential for base flavor.
  • 2 medium carrots Parsnips work as a great substitution.
  • 2 stalks celery Fennel is an interesting alternative.
  • 4 cloves garlic Fresh garlic is preferred.
  • 2 tsps Italian seasoning Individual herbs like oregano can work too.
  • 1/2 tsp red pepper flakes Omit or reduce for less spice.
  • 6 cups chicken broth Vegetable broth can be used for a vegetarian option.
For the Pasta and Cream
  • 1 cup ditalini pasta Small shells are a good substitute.
  • 1 cup heavy cream Half-and-half or a mix of milk can lighten it up.
  • 1 cup Parmesan cheese Freshly grated is best.
For Nutritional Boost
  • 4 cups fresh spinach Kale or Swiss chard can be great substitutions as well.
  • to taste salt Adjust based on broth and sausage saltiness.
  • to taste black pepper Adjust based on broth and sausage saltiness.
For Garnishing
  • as needed garnishes Extra Parmesan and parsley enhance flavor and presentation.

Equipment

  • Large pot

Method
 

Step-by-Step Instructions
  1. In a large pot, heat over medium heat. Add the Italian sausage, breaking it apart with a wooden spoon as it cooks. Stir occasionally and cook for about 5-7 minutes until it’s browned and no longer pink.
  2. Add diced yellow onion, carrots, and celery to the pot. Cook for 5-7 minutes until they soften and become fragrant, stirring occasionally. Then, mix in the minced garlic, Italian seasoning, and red pepper flakes.
  3. Pour in 6 cups of chicken broth and stir everything together, scraping up any browned bits. Bring the mixture to a gentle simmer over medium-high heat and let it simmer for about 10 minutes.
  4. Once the broth is bubbling, add the ditalini pasta and cook according to package instructions, about 8-10 minutes.
  5. Reduce the heat to low and gently stir in 1 cup of heavy cream and 1 cup of grated Parmesan cheese. Keep stirring until the cheese melts completely and the soup becomes creamy.
  6. Taste and season with salt and black pepper. Ladle into warm bowls and garnish generously with extra Parmesan cheese and fresh parsley.

Nutrition

Serving: 1bowlCalories: 420kcalCarbohydrates: 30gProtein: 24gFat: 24gSaturated Fat: 13gPolyunsaturated Fat: 1gMonounsaturated Fat: 10gCholesterol: 70mgSodium: 800mgPotassium: 680mgFiber: 3gSugar: 4gVitamin A: 2200IUVitamin C: 10mgCalcium: 350mgIron: 2mg

Notes

Serve hot, ideally alongside crusty bread for a hearty finish to your meal.

Tried this recipe?

Let us know how it was!

Bisquick Pumpkin Donut Holes: Your Easy Fall Comfort Treat

As the leaves start to paint the world in warm hues, there’s nothing quite like the comforting scent of freshly baked goods wafting through the house. Enter my Easy Bisquick Pumpkin Donut Holes—your soon-to-be favorite quick recipe that delivers all the cozy vibes of fall in just a few simple steps. These delightful bites are not only super easy to whip up but they also make for a delicious breakfast or an after-school snack the whole family will adore. Fluffy, tender, and rolled in sweet cinnamon sugar, these treats are a fabulous way to savor the season without spending hours in the kitchen. Ready to fill your home with the aroma of pumpkin goodness? Let’s dive into this delightful recipe!

Why Are These Donut Holes Irresistible?

Ease of Preparation: The simplicity of Bisquick makes whipping up these pumpkin treats a breeze, perfect for both novice cooks and busy chefs alike.

Warm, Spicy Flavor: Featuring rich pumpkin and aromatic spices like cinnamon and pumpkin pie spice, every bite captures the essence of fall.

Versatile Twist: Whether you go for donut holes or mini muffins, this recipe adapts effortlessly to suit your craving. Looking for more pumpkin goodness? Check out my Joumou Haitian Pumpkin for a savory option!

Quick Bake Time: These delightful bites bake in just 10-12 minutes, making them an ideal choice for those last-minute brunches or after-school treats.

Crowd-Pleasing Treat: With their fluffy texture and sweet cinnamon-sugar coating, these donut holes are guaranteed to be a hit with family and friends, leaving everyone wanting more!

Bisquick Pumpkin Donut Holes Ingredients

For the Batter
Bisquick – This convenient mix serves as the backbone for your donut holes.
Sugar – Use granulated or swap for brown sugar for a richer sweetness.
Cinnamon – A warm spice that enhances the overall flavor; feel free to use pumpkin pie spice for a festive touch.
Pumpkin Pie Spice – A blend that complements the pumpkin; if in short supply, mix equal parts cinnamon, nutmeg, and allspice.
Pumpkin Puree – Adds moisture and depth; both canned and homemade versions work wonderfully.
Milk – Use any milk option; almond or oat milk can make this recipe dairy-free.
Egg – Acts as a binder; replace with applesauce or a flax egg for an eggless variant.
Vegetable Oil – Keeps your donuts moist; coconut oil or unsweetened applesauce can be great substitutes.
Butter – Essential for coating the baked donuts in delicious flavor; margarine can also work here.

For the Coating
Cinnamon Sugar Mixture – The perfect finale, this blend adds irresistible sweetness to the donut holes. Add some nutmeg for a delightful twist!

These Bisquick Pumpkin Donut Holes will charm your taste buds with their simplicity and rich fall flavor, making them a must-try for any home chef!

Step‑by‑Step Instructions for Easy Bisquick Pumpkin Donut Holes

Step 1: Preheat and Prepare
Begin by preheating your oven to 400°F (200°C). While the oven heats up, generously grease a mini muffin or donut pan with cooking spray or butter to ensure your Easy Bisquick Pumpkin Donut Holes release smoothly after baking.

Step 2: Mix Dry Ingredients
In a large mixing bowl, whisk together 2 cups of Bisquick, 3/4 cup of sugar, 1 teaspoon of cinnamon, and 2 teaspoons of pumpkin pie spice. Ensure the dry ingredients are well combined and free of lumps, creating a warm, aromatic base for your pumpkin donut holes.

Step 3: Combine Wet Ingredients
In another bowl, stir together 1 cup of pumpkin puree, 1/2 cup of milk, 1 large egg, and 1/4 cup of vegetable oil. Mix until smooth and creamy. Once blended, pour this wet mixture into the dry ingredients and gently stir until just combined, avoiding overmixing for light and fluffy donut holes.

Step 4: Portion and Bake
Using a spoon or a small cookie scoop, fill each cavity of your prepared mini muffin or donut pan with the batter, aiming for about two-thirds full. Place the pan in the preheated oven and bake for 10-12 minutes, or until the tops are golden and a toothpick inserted in the center comes out clean.

Step 5: Coat the Donuts
While the donuts are baking, melt 1/4 cup of butter in a small dish. In another bowl, combine 1/2 cup of sugar with 2 teaspoons of cinnamon to create the cinnamon-sugar mixture. Once the donut holes are baked, remove them from the oven and let them cool for a minute before rolling each warm donut in melted butter, then in the cinnamon-sugar blend.

Step 6: Serve
The Easy Bisquick Pumpkin Donut Holes are now ready to savor! Serve them warm for the best experience, perhaps alongside a cozy cup of coffee or apple cider for a delightful fall treat. Enjoy the tender, fluffy texture and sweet, cinnamon-kissed flavor with your family and friends.

How to Store and Freeze Bisquick Pumpkin Donut Holes

Room Temperature: Store any leftover Bisquick pumpkin donut holes in an airtight container for up to 2 days. Enjoy them fresh for the best taste!

Fridge: If you want to keep them longer, you can refrigerate the donut holes for up to 5 days. Just make sure to use a sealed container to prevent them from drying out.

Freezer: Freeze the donut holes without the cinnamon sugar coating for up to 1 month. To enjoy them later, thaw at room temperature and coat with cinnamon sugar before serving for the freshest flavor.

Reheating: To rewarm, pop them in a 350°F oven for about 5-7 minutes or in the microwave for 10-15 seconds. Enjoy the warmth and deliciousness of your Bisquick pumpkin donut holes!

Expert Tips for Bisquick Pumpkin Donut Holes

  • Room Temperature Ingredients: Ensure all ingredients are at room temperature. This helps them mix more easily and contributes to a fluffier texture in your Bisquick pumpkin donut holes.

  • Don’t Overmix: Be careful not to overmix the batter once you combine the wet and dry ingredients. Overmixing can result in dense donut holes instead of the light, airy treats you’re aiming for.

  • Rest for Crispiness: For a slightly crispier exterior, let the baked donut holes sit for a couple of minutes before rolling them in butter and cinnamon sugar. This little wait can make a big difference!

  • Creative Coatings: Get creative with your sugar coating! Add some nutmeg to your cinnamon-sugar mix for an extra layer of fall flavor that beautifully complements your pumpkin donut holes.

  • Storage Wisdom: Store any leftovers in an airtight container at room temperature. If you plan to freeze them, skip the cinnamon sugar coating and add it after thawing for the best taste experience.

Variations & Substitutions for Bisquick Pumpkin Donut Holes

Customize your delicious pumpkin donut holes and create even more delightful flavors to savor!

  • Brown Sugar: Substitute granulated sugar with brown sugar for a deeper, caramel-like sweetness that enhances the pumpkin flavor.

  • Dairy-Free: Use any plant-based milk, such as almond or oat milk, to easily make these donut holes dairy-free, without sacrificing flavor.

  • Egg-Free: Replace the egg with 1/4 cup of unsweetened applesauce or a flax egg to create a fluffy texture in an eggless version.

  • Cinnamon Swirl: Add a generous sprinkle of cinnamon directly into the batter for added warmth and spice, intensifying the fall vibes.

  • Nutty Delight: Fold in 1/2 cup of chopped walnuts or pecans for a crunchy texture that complements the tender donut holes beautifully.

  • Zesty Twist: Incorporate zest from one orange or lemon into the batter for a bright and refreshing twist on your traditional flavor.

  • Chocolate Chip Surprise: Mix in 1/2 cup of chocolate chips to introduce a sweet surprise in every bite; the combination of pumpkin and chocolate is divine!

  • Spicy Kick: For those who enjoy heat, add a pinch of cayenne pepper to the cinnamon sugar mixture for a surprising kick of spice.

Feeling inspired? These variations can make your Joumou Haitian Pumpkin journey even more enjoyable as you discover the wonderful world of pumpkin!

Make Ahead Options

These Easy Bisquick Pumpkin Donut Holes are perfect for meal prep, allowing you to enjoy a taste of fall even on your busiest days! You can prepare the batter and refrigerate it up to 24 hours in advance, which helps maintain its fluffy texture. Just combine all your dry ingredients in one bowl and your wet ingredients in another; mix them together just before baking for the best results. If you prefer, you can bake the donut holes and store them in an airtight container at room temperature for up to 2 days. To finish, simply roll in cinnamon sugar once warmed. This simple prep allows you to savor delicious, homemade treats at a moment’s notice!

What to Serve with Easy Bisquick Pumpkin Donut Holes

Imagine sinking into the flavors of fall with the perfect accompaniments to your delightful donut holes, enhancing each cozy bite.

  • Hot Apple Cider: A warm mug of spiced apple cider beautifully complements the pumpkin flavor, bringing a delightful warmth to your seasonal treat.

  • Whipped Cream: A dollop of lightly sweetened whipped cream adds a velvety texture that balances the cinnamon-sugar coating, making each bite even more indulgent.

  • Maple Syrup Drizzle: Pouring a little maple syrup over your donut holes introduces a rich sweetness that pairs famously with pumpkin, creating an irresistible flavor contrast.

  • Herbal Tea: A cup of chai or a fragrant herbal tea provides a soothing backdrop that enhances the spices in the donuts, making for a comforting snack or breakfast.

  • Chopped Nuts: Toss some toasted pecans or walnuts over the donut holes for a delightful crunch, adding texture and a nutty flavor that complements their fluffiness.

  • Scoop of Vanilla Ice Cream: Indulge your senses further by serving these pumpkin donut holes warm with a scoop of creamy vanilla ice cream for a luxurious dessert experience.

  • Cream Cheese Frosting: For a richer touch, a light spread of cream cheese frosting introduces a tangy sweetness that pairs beautifully with the warm spices.

  • Pumpkin Spice Latte: Nothing beats the fall vibes like a warm pumpkin spice latte – it’s the ultimate cozy beverage to sip alongside your fluffy donut holes.

Easy Bisquick Pumpkin Donut Holes Recipe FAQs

How do I select ripe pumpkins for pumpkin puree?
Absolutely! When selecting pumpkins, look for ones that are firm with a smooth skin and a rich, deep color. Avoid any with dark spots or soft areas. For an easy option, canned pumpkin puree works just as well, but if you’re feeling adventurous, pick a sugar pumpkin for a naturally sweet and flavorful homemade version.

What is the best way to store leftover Bisquick pumpkin donut holes?
To keep your donut holes fresh, store them in an airtight container at room temperature for up to 2 days. If they’re getting a little stale, you can also refrigerate them for up to 5 days. Just ensure they’re sealed tightly to maintain moisture and flavor.

Can I freeze the donut holes for later enjoyment?
Yes! I often save some for a busy day. To freeze your Easy Bisquick Pumpkin Donut Holes, let them cool completely, then place them in a single layer on a baking sheet and freeze for about an hour. Once frozen, transfer them to a freezer-safe bag and store for up to 1 month. Thaw at room temperature and coat with cinnamon sugar just before serving to make them extra tempting!

What can I do if my donut holes turn out dense?
Very! If your donut holes come out dense, it could be from overmixing the batter or using cold ingredients. Ensure all your ingredients are at room temperature before mixing, and fold just until combined for a light and fluffy texture. It’s all about that gentle touch when mixing!

Are these donut holes suitable for pets or individuals with allergies?
These Easy Bisquick Pumpkin Donut Holes are delicious, but they contain common allergens like eggs and milk. If you’re considering giving them to pets or those with allergies, it’s important to consult with a vet or doctor. You can easily modify the recipe: use a flax egg and dairy-free milk to make them more allergy-friendly. Just keep in mind, treats for pets should always avoid sugar and spices!

Bisquick Pumpkin Donut Holes

Bisquick Pumpkin Donut Holes: Your Easy Fall Comfort Treat

Delight in Bisquick Pumpkin Donut Holes, your easy fall treat perfect for breakfast or snacks.
Prep Time 10 minutes
Cook Time 12 minutes
Cooling Time 1 minute
Total Time 23 minutes
Servings: 4 donut holes
Course: Breakfast
Cuisine: American
Calories: 120

Ingredients
  

For the Batter
  • 2 cups Bisquick convenient mix
  • 3/4 cup sugar granulated or brown
  • 1 teaspoon cinnamon or pumpkin pie spice
  • 2 teaspoons pumpkin pie spice
  • 1 cup pumpkin puree canned or homemade
  • 1/2 cup milk any type, dairy-free options available
  • 1 large egg can be replaced with applesauce
  • 1/4 cup vegetable oil or coconut oil
  • 1/4 cup butter for coating
For the Coating
  • 1/2 cup cinnamon sugar mixture combine sugar and cinnamon

Equipment

  • mini muffin or donut pan
  • Mixing bowls
  • whisk
  • Spoon or cookie scoop

Method
 

Step-by-Step Instructions
  1. Preheat your oven to 400°F (200°C) and grease a mini muffin or donut pan.
  2. In a large bowl, whisk together Bisquick, sugar, cinnamon, and pumpkin pie spice.
  3. In another bowl, mix pumpkin puree, milk, egg, and vegetable oil until smooth, then combine with dry ingredients.
  4. Fill each cavity of the pan with the batter about two-thirds full and bake for 10-12 minutes.
  5. Melt butter for coating and mix sugar with cinnamon in another bowl. Cool baked donut holes slightly, then roll in melted butter and cinnamon-sugar mix.
  6. Serve warm, ideally with coffee or apple cider.

Nutrition

Serving: 1donut holeCalories: 120kcalCarbohydrates: 17gProtein: 1gFat: 6gSaturated Fat: 3gMonounsaturated Fat: 2gCholesterol: 18mgSodium: 100mgPotassium: 80mgSugar: 9gVitamin A: 1400IUCalcium: 50mgIron: 0.5mg

Notes

Ensure ingredients are at room temperature for better mixing and fluffiness. Store leftovers in an airtight container.

Tried this recipe?

Let us know how it was!

Crockpot Chicken and Gravy for Effortless Weeknight Meals

There’s something magical about stepping into a cozy kitchen, the aroma of slow-cooked comfort beckoning you at the end of a long day. Today, let’s pull together a dish that captures that warmth perfectly: Easy Crockpot Chicken and Gravy. This recipe not only saves you precious time but delivers a satisfying meal that’s a hit with everyone at the table. With just a few ingredients and minimal effort, you can create tender chicken enveloped in a luscious gravy that begs to be served over fluffy rice. Whether you’re a busy parent or simply looking to escape the fast food trap, this dish promises to be a comforting staple in your home. Are you ready to discover a new favorite dinner?

Why choose Crockpot Chicken and Gravy?

Effortless Preparation: With just a few minutes of prep, you can set your slow cooker and forget about it, making this dish perfect for busy weeknights.

Irresistible Aroma: Imagine walking into your home after a long day to the delightful scent of slow-cooked comfort.

Crowd-Pleasing Flavor: The creamy gravy turns ordinary chicken into a dish everyone will savor, making it a staple for family dinners.

Versatile Pairing: Serve it over fluffy rice, or try it with mashed potatoes or even noodles for a delightful twist.

Easy Cleanup: With minimal dishes involved, you’ll spend more time enjoying your meal and less time cleaning up!

This Crockpot Chicken and Gravy is truly a game-changer for effortless meals and is sure to become a beloved recipe in your kitchen! If you’re looking for more comfort food ideas, check out my Parmesan Crusted Chicken or Oven Chicken Rice for delicious alternatives.

Crockpot Chicken and Gravy Ingredients

For the Chicken
Chicken Breasts – Use boneless, skinless to make preparation a breeze.
Salt – Enhances flavor; season to personal preference.
Pepper – Adds a mild kick; adjust for your taste.

For the Gravy
Condensed Soup – Cream of chicken is perfect for a rich base; consider homemade for healthier options.
Gravy Mix – Thickens the sauce; substitute with broth and cornstarch for a natural alternative.
Water (optional) – Adjusts gravy consistency; omit for a thicker sauce.

This easy-to-follow ingredient list is all you need to make comforting Crockpot Chicken and Gravy that the whole family will love!

Step‑by‑Step Instructions for Crockpot Chicken and Gravy

Step 1: Prepare the Chicken
Begin by placing the boneless, skinless chicken breasts at the bottom of your slow cooker. Ensure they are evenly spaced, allowing for even cooking. Season each piece generously with salt and pepper to enhance their natural flavors. This step lays the foundation for your luscious Crockpot Chicken and Gravy.

Step 2: Whisk the Gravy Mixture
In a separate bowl, take your condensed cream of chicken soup and add the gravy mix. If you’re adjusting the consistency, pour in some water. Use a whisk to mix these ingredients thoroughly until smooth, ensuring there are no lumps. This mixture will create a rich and savory gravy that envelops your chicken beautifully.

Step 3: Combine Chicken and Gravy
Pour the creamy gravy mixture over the seasoned chicken in the slow cooker, making sure to cover the chicken completely. This will infuse the meat with all the delightful flavors throughout cooking. It’s time to give this comfort food a warm hug!

Step 4: Cook Low and Slow
Cover your slow cooker and set it to LOW for about 4 to 6 hours. This low cooking temperature allows the chicken to become incredibly tender, so don’t rush it! You’ll know it’s ready when the chicken shreds easily with a fork and the gravy is bubbling with deliciousness.

Step 5: Shred the Chicken
Once the cooking time is up, carefully remove the chicken breasts from the slow cooker. Using two forks or a large spoon, shred the chicken into bite-sized pieces. This step reveals the melt-in-your-mouth tender texture you’ve achieved with your Crockpot Chicken and Gravy.

Step 6: Serve and Enjoy
Return the shredded chicken to the slow cooker, mixing it well with the gravy to fully coat the pieces. Serve hot over fluffy steamed rice, which perfectly complements the rich flavor of the chicken and gravy. Get ready to enjoy a comforting meal that everyone will love!

How to Store and Freeze Crockpot Chicken and Gravy

  • Fridge: Store leftovers in an airtight container for up to 3 days. Make sure it’s completely cooled before sealing to retain freshness.
  • Freezer: Freeze in a freezer-safe container for up to 3 months. Label the container with the date for easy tracking.
  • Reheating: Thaw overnight in the fridge and reheat in a saucepan over low heat, adding a splash of water if needed for consistency.
  • Using Leftovers: Enjoy the Crockpot Chicken and Gravy over rice, in wraps, or even in a pot pie for a delicious second meal!

Make Ahead Options

These Easy Crockpot Chicken and Gravy are ideal for meal prep lovers! You can season the chicken breasts and place them in the slow cooker with the gravy mixture up to 24 hours in advance. Just cover and refrigerate until you’re ready to cook. If you want to save even more time, you can fully prepare the dish and keep it in the refrigerator for up to 3 days. To ensure your chicken stays moist and the gravy remains rich, avoid overcooking; it’s best to shred the chicken right before serving and reheat gently. With these make ahead options, a comforting dinner is just a few hours away!

What to Serve with Easy Crockpot Chicken and Gravy?

There’s nothing quite like a cozy family dinner that sparks joy in every bite, and pairing your main dish with delightful sides creates a heartwarming meal.

  • Fluffy Rice: The classic companion that soaks up all that rich gravy, offering a deliciously comforting texture.
  • Creamy Mashed Potatoes: Their smooth, buttery finish complements the savory chicken and gravy splendidly, creating a dish you can’t resist.
  • Steamed Green Beans: These tender, bright vegetables add a refreshing crunch and vibrant color to your plate, balancing the richness.
  • Garlic Bread: Soft and crusty, its buttery aroma invites everyone to the table while adding a satisfying bite to your meal.
  • Coleslaw: The crisp, tangy slaw contrasts beautifully with the creamy gravy, providing a refreshing crunch that brightens every forkful.
  • Herb Salad: A mixture of greens topped with a light vinaigrette infuses freshness and lightness, cutting through the heartiness of the chicken.
  • Apple Crisp: For dessert, this warm, sweet treat pairs wonderfully with a scoop of vanilla ice cream, rounding out a comforting evening meal.

Each of these pairings will enhance the comforting experience of your Easy Crockpot Chicken and Gravy. Enjoy a cozy feast that warms the heart and satisfies your hunger!

Expert Tips for Crockpot Chicken and Gravy

  • Check Temperature: Always ensure the chicken reaches an internal temperature of 165°F (75°C) to ensure it’s safe to eat.
  • Don’t Overcook: Keep an eye on cooking time; overcooking can lead to dry chicken. Check around the 4-hour mark.
  • Add Flavor: For extra depth, consider adding sautéed onions or minced garlic to the gravy mixture before pouring it over the chicken.
  • Perfect Gravy Consistency: Adjust the water to achieve your desired gravy thickness; omit for a richer sauce.
  • Storage Wisdom: Store leftovers in an airtight container in the fridge for up to 3 days, or freeze for up to 3 months to enjoy later.

Incorporating these expert tips will elevate your Crockpot Chicken and Gravy experience, ensuring a comforting meal every time!

Crockpot Chicken and Gravy Variations

Feel free to let your culinary creativity shine as you adapt this comforting recipe to suit your tastes!

  • Thighs Upgrade: Swap chicken breasts for thighs for richer, more flavorful meat that stays wonderfully moist.
  • Veggie Boost: Stir in diced carrots or frozen peas in the last hour of cooking for a colorful, nutritious twist.
  • Garlic Lovers: Add minced garlic or sautéed onions to the gravy mixture for an aromatic, savory depth. Your kitchen will smell heavenly!
  • Herb Infusion: Mix in fresh herbs like thyme or rosemary for an earthy lift that will complement the chicken beautifully.
  • Spicy Kick: Incorporate a teaspoon of cayenne pepper or crushed red pepper for a zesty heat that sparks excitement in every bite.
  • Creamy Alternative: Use a combination of sour cream and cream of mushroom soup for a rich and tangy gravy variation that’s equally comforting.
  • Whole Grain Goodness: Serve your dish over wholesome wild rice or farro for a nutritious twist that adds texture and flavor.
  • Complete Meal: Turn leftovers into a pot pie by adding your favorite vegetables and a flaky crust for a scrumptious second meal.

If you’re looking for more comforting recipes, don’t miss out on my Korean Fried Chicken or Chicken Avocado Melt for a delightful change of pace. Enjoy experimenting!

Crockpot Chicken and Gravy Recipe FAQs

How do I select the best chicken for this recipe?
Absolutely! For the best flavor and texture, use boneless, skinless chicken breasts. They ensure easy shredding and even cooking, making this dish a breeze. If you prefer a richer taste, chicken thighs can be swapped in as well.

How should I store leftovers from Crockpot Chicken and Gravy?
Store leftovers in an airtight container in the refrigerator for up to 3 days. Make sure to let the chicken cool completely before sealing it to keep it fresh. If you want to keep it longer, consider freezing it for up to 3 months.

Can I freeze Crockpot Chicken and Gravy?
Certainly! To freeze, transfer the cooled chicken and gravy into a freezer-safe container. Be sure to label it with the date. For best results, consume it within 3 months. When you’re ready to enjoy it again, thaw in the refrigerator overnight and reheat gently on the stove.

What if my chicken turns out dry?
Very! If your chicken comes out dry, it may have been overcooked. To prevent this, monitor the cooking time—check around the 4-hour mark for doneness. If you find that the chicken is dry after cooking, shred it finely and mix it back into the gravy; this will help keep it moist when served.

Are there any dietary considerations for this recipe?
For those with allergies, always check the labels of your condensed soup and gravy mix for potential allergens, such as gluten or dairy. If you’re serving it to pets, it’s best to keep this meal off their plate due to the high seasoning and gravy content. Always opt for fresh, natural ingredients for a healthier alternative!

How do I ensure the gravy has the right consistency?
To achieve the perfect gravy consistency, start with a little water, then adjust as needed. If it’s too thick, add a splash of water; if it’s too thin, let it cook uncovered for a while to thicken. You can also whisk in a cornstarch slurry (1 tablespoon cornstarch mixed with 1 tablespoon cold water) while cooking to get a velvety texture!

Crockpot Chicken and Gravy

Crockpot Chicken and Gravy for Effortless Weeknight Meals

Experience the comforting taste of Crockpot Chicken and Gravy, perfect for busy weeknights with minimal effort.
Prep Time 10 minutes
Cook Time 5 hours
Total Time 5 hours 10 minutes
Servings: 4 servings
Course: Dinner
Cuisine: American
Calories: 450

Ingredients
  

For the Chicken
  • 2 lbs boneless, skinless chicken breasts
  • to taste salt Enhances flavor
  • to taste pepper Adds a mild kick
For the Gravy
  • 1 can condensed cream of chicken soup Rich base for gravy
  • 1 packet gravy mix Thickens the sauce
  • 1 cup water Optional, for adjusting consistency

Equipment

  • Slow Cooker

Method
 

Step‑by‑Step Instructions
  1. Prepare the Chicken by placing the boneless, skinless chicken breasts at the bottom of your slow cooker. Season generously with salt and pepper.
  2. Whisk the Gravy Mixture by mixing the condensed cream of chicken soup and gravy mix in a bowl, adding water if necessary until smooth.
  3. Combine Chicken and Gravy by pouring the gravy mixture over the chicken in the slow cooker, ensuring it's completely covered.
  4. Cook Low and Slow by covering the slow cooker and setting it to LOW for about 4 to 6 hours until the chicken shreds easily.
  5. Shred the Chicken using two forks to break it into bite-sized pieces and return to the slow cooker.
  6. Serve and Enjoy hot over fluffy steamed rice.

Nutrition

Serving: 1servingCalories: 450kcalCarbohydrates: 12gProtein: 38gFat: 22gSaturated Fat: 7gPolyunsaturated Fat: 1gMonounsaturated Fat: 5gCholesterol: 80mgSodium: 1200mgPotassium: 700mgFiber: 1gSugar: 2gVitamin A: 200IUVitamin C: 2mgCalcium: 20mgIron: 3mg

Notes

Check chicken reaches an internal temperature of 165°F. Store leftovers in airtight containers for future meals.

Tried this recipe?

Let us know how it was!

Irresistible Chicken Tetrazzini Recipe for Cozy Nights

As I pulled the bubbling casserole from the oven, the mouthwatering aroma enveloped my kitchen, teasing my taste buds. This Creamy Chicken Tetrazzini Recipe has become a beloved staple in my home, transforming regular weeknight dinners into a cozy gathering of flavors. Combining tender chicken, earthy mushrooms, and gooey mozzarella, it’s not just a meal—it’s a comforting embrace on a plate. Perfect for those busy evenings or when hosting friends, this dish is a true crowd-pleaser that you can easily prep ahead of time. Plus, it wraps up beautifully in leftovers, making lunch the next day just as delicious. Are you ready to dive into this creamy delight? Let’s get cooking!

Why is this Chicken Tetrazzini Recipe a Must-Try?

Comfort in Every Bite: This creamy Chicken Tetrazzini is a warm hug on a plate, combining tender chicken and rich, gooey cheese in a delightful casserole.

Make-Ahead Magic: Prep it ahead of time and store it in the fridge or freezer for an easy dinner solution when life gets busy.

Versatile Appeal: Cater to your crowd by customizing with different pasta shapes or adding colorful veggies like spinach for a nutrition boost.

Perfectly Creamy Sauce: The velvety half & half sauce elevates this dish, making it a comforting table centerpiece.

Leftover Joy: It tastes even better the next day, wrapping up a delicious lunch that keeps on giving! Whether you’re looking to impress or simplify your weeknight meals, this Chicken Tetrazzini is a winning choice.

Chicken Tetrazzini Ingredients

For the Pasta
Linguine or Spaghetti – A sturdy base that holds the creamy sauce beautifully.

For the Filling
Rotisserie Chicken – Adds richness and saves cooking time; can substitute with freshly cooked chicken breast for a lighter option.
Button Mushrooms – Thickly sliced to enhance the texture and earthiness.
Medium Onion – Essential for a flavorful foundation; sauté until golden.
Garlic Cloves – Minced to impart aromatic flavor and depth to the dish.

For the Sauce
Unsalted Butter – Provides richness and flavor for a luscious sauce.
All-Purpose Flour – Thickens your sauce to the perfect velvety consistency.
Low-Sodium Chicken Broth – Keeps sodium levels in check while adding moisture and flavor.
Lemon Juice – Brightens the dish and balances the creaminess.
Half & Half – Creates an irresistible creamy sauce; substitute equal parts milk and heavy cream if needed.
Sea Salt – Adjust to taste for optimal seasoning; remember to salt pasta water well.
Black Pepper – Freshly ground for added warmth and subtle heat.

For the Topping
Shredded Mozzarella Cheese – Melts into a bubbly, gooey layer that binds the casserole perfectly.
Parsley – Freshly chopped for garnish, adding a pop of color and freshness.

Step‑by‑Step Instructions for Chicken Tetrazzini Recipe

Step 1: Preheat and Prepare
Start by preheating your oven to 350°F (175°C). While the oven warms up, generously butter a 9×13 casserole dish, ensuring a non-stick surface for your Chicken Tetrazzini. This simple step lays the groundwork for a beautifully baked, bubbly casserole that you and your loved ones will savor.

Step 2: Cook the Pasta
In a large pot, bring well-salted water to a boil and add your choice of linguine or spaghetti. Cook until the pasta is barely al dente, usually about 2 minutes less than the package instructions. Once done, drain the pasta, reserving half a cup of the starchy water for later, and set it aside while you focus on the flavorful filling.

Step 3: Sauté the Vegetables
In a large skillet, heat a drizzle of olive oil over medium-high heat. Add the sliced button mushrooms and cook until softened and slightly golden, about 5 minutes. Next, incorporate diced onions and continue cooking until they turn translucent and golden, approximately 3-4 minutes. Finally, stir in minced garlic and cook until fragrant, about 30 seconds, before transferring everything to a bowl with shredded chicken.

Step 4: Make the Sauce
In the same skillet, melt 4 tablespoons of unsalted butter over medium heat. Once it’s bubbling, whisk in an equal amount of all-purpose flour until it becomes lightly golden, about 2 minutes. Gradually pour in low-sodium chicken broth and lemon juice while whisking continuously until smooth and slightly thickened. Let it simmer for about 3-4 minutes, enhancing the flavors before stirring in the half & half.

Step 5: Combine Ingredients
Return the cooked pasta, chicken mixture, and freshly chopped parsley to the skille. Pour the creamy sauce over the top and gently stir everything together until well combined, ensuring every piece of pasta is coated in luscious goodness. With your Chicken Tetrazzini ready, spread the mixture evenly in the prepared casserole dish, creating an inviting layer of flavors.

Step 6: Bake to Perfection
Cover your assembled Chicken Tetrazzini with aluminum foil and place it in the preheated oven. Bake for 20 minutes to allow all the flavors to meld together. After that, carefully remove the foil and sprinkle a generous layer of shredded mozzarella cheese on top. Ounce it bakes for another 15 minutes, broil for the last minute to achieve that beautiful golden crust.

Make Ahead Options

These Chicken Tetrazzini are perfect for busy home cooks looking to save time! You can prepare the entire casserole up to 24 hours in advance by assembling it fully and covering it tightly with foil before refrigerating. Just make sure to chill the dish promptly to maintain freshness. If you want to prep even further ahead, you can freeze the unbaked Chicken Tetrazzini for up to 3 months. When you’re ready to bake, thaw it overnight in the refrigerator and follow the original baking instructions. This way, you’ll enjoy a comforting, creamy meal that’s just as delicious as when it’s freshly made, with minimal effort when it’s time to serve!

Expert Tips for Chicken Tetrazzini Recipe

  • Pasta Perfection: Salt your pasta water generously; it should taste like the ocean to enhance the flavor of the Chicken Tetrazzini.

  • Mushroom Magic: Slice button mushrooms thickly for a meaty texture and robust flavor without becoming soggy during cooking.

  • Prep Ahead: Assembling the dish in advance is a fantastic make-ahead option. Store it in the fridge or freezer before baking for a quick-meal solution.

  • Creamy Consistency: Ensure your sauce doesn’t boil too hard after adding the half & half, as it can split. Gently simmer for a velvety finish.

  • Bubbling Top: Broil the Chicken Tetrazzini for a minute or two at the end for a golden, bubbly cheese layer that everyone will love.

Chicken Tetrazzini Recipe Variations

Explore delightful twists and turns for your Chicken Tetrazzini that will cater to your cravings and bring fresh excitement to your table!

  • Pasta Swap: Use penne or fettuccine instead of linguine for a delightful texture twist to the dish. Each shape holds the sauce differently, adding a new feel to every creamy bite.

  • Vegetable Boost: Add sautéed spinach or bell peppers to enhance nutrition and flavor. Not only do they add color, but they’ll also create a vibrant and refreshing contrast to the rich sauce.

  • Dairy-Free: Substitute half & half with a blend of unsweetened almond milk and coconut cream for a lighter, dairy-free sauce without compromising creaminess. This twist maintains the comfort while accommodating dietary needs.

  • Add Heat: Kick it up a notch by incorporating some crushed red pepper flakes or diced jalapeños into the sauce to bring a spicy punch. A hint of heat can transform this comforting casserole into an exciting experience!

  • Seafood Variation: Swap out the chicken for cooked shrimp or crab for a delightful seafood version. The natural sweetness of seafood perfectly balances with the creamy sauce, offering a luxurious take.

  • Cheese Lovers: Incorporate more cheese like parmesan or gouda, either mixed into the pasta or sprinkled on top before baking for an added layer of richness. It turns up the flavor and makes the dish even more irresistible.

  • Herb Infusion: Experiment with fresh herbs like thyme or basil in place of parsley. These aromatic herbs can elevate the flavor profile, giving your tetrazzini a garden-fresh touch.

  • Nutty Crunch: Top with toasted breadcrumbs or crushed nuts before baking for a delightful crunch. This texture contrast enhances the overall experience while still keeping the comforting creaminess intact.

With these variations, you can keep your Chicken Tetrazzini exciting and tailored to every palate. Consider pairing it with a side of garlic bread or a fresh green salad to balance the meal beautifully. If you’re looking to explore broader flavor profiles, check out our Chilli Chicken Takeout or ignite your taste buds with our Cowboy Butter Chicken. Happy cooking!

How to Store and Freeze Chicken Tetrazzini

Fridge: Store any leftover Chicken Tetrazzini in an airtight container for up to 5 days. Reheat in the oven or microwave, adding a splash of broth for moisture.

Freezer: For long-term storage, freeze the casserole tightly covered with foil or in a freezer-safe container for up to 6 months. Thaw overnight in the refrigerator before baking.

Reheating: To reheat from the fridge, cover with foil and bake at 350°F until warmed through. If reheating from frozen, bake uncovered at 350°F for about 50-60 minutes until bubbly.

Make-Ahead Tip: This Chicken Tetrazzini can be assembled ahead of time and stored in the fridge or freezer before baking, making it a perfect advance meal solution.

What to Serve with Creamy Chicken Tetrazzini Casserole

Bring your dinner table to life with these delightful accompaniments that perfectly complement the creamy goodness of your Chicken Tetrazzini.

  • Garlic Bread: The crispy, buttery bread offers a crunchy contrast to the creamy pasta, perfect for soaking up any leftover sauce.

  • Fresh Green Salad: A crisp salad filled with mixed greens, cherry tomatoes, and a zesty vinaigrette adds brightness, balancing the dish’s richness.

  • Steamed Broccoli: Tender, vibrant broccoli adds a nutritious crunch, making each bite of your casserole feel lighter and fresh. It’s a winning combo!

  • Roasted Asparagus: The earthy, smoky flavors of asparagus enhance the savory notes of the tetrazzini while providing a beautiful plate presentation.

  • Chardonnay: A glass of chilled Chardonnay pairs wonderfully, its fruity notes and acidity cutting through the creaminess of the dish, elevating your meal experience.

  • Apple Pie: For dessert, nothing beats a slice of warm apple pie topped with vanilla ice cream. The sweetness and spice wrap up the meal on a comforting note.

Each of these pairings highlights different textures and flavors while ensuring a well-rounded dining experience. Enjoy!

Chicken Tetrazzini Recipe FAQs

What type of pasta should I use for Chicken Tetrazzini?
I recommend using linguine or spaghetti as the pasta base. It’s important to choose a high-quality, bronze-cut pasta to prevent it from becoming mushy and to hold the creamy sauce beautifully!

How do I store leftover Chicken Tetrazzini?
Store your leftover Chicken Tetrazzini in an airtight container in the fridge for up to 5 days. When reheating, I suggest adding a splash of chicken broth to keep it moist. You can heat it in the oven or microwave, whichever you prefer!

Can I freeze Chicken Tetrazzini?
Absolutely! You can freeze Chicken Tetrazzini by covering it tightly with foil or placing it in a freezer-safe container. It will keep well for up to 6 months. Just remember to thaw it overnight in the refrigerator before baking to ensure even cooking.

What should I do if my sauce is too thick?
If your sauce becomes too thick, you can easily adjust the consistency. Simply add a bit of reserved pasta water or additional chicken broth, a little at a time, while stirring until you achieve your desired creaminess. This is something I often do to ensure the sauce remains velvety!

Is there a way to make Chicken Tetrazzini healthier or accommodate dietary needs?
Definitely! You can lighten up the dish by using less cheese or substituting half & half with a blend of milk and heavy cream. For dietary restrictions, feel free to replace the chicken with sautéed vegetables for a vegetarian option, or use gluten-free pasta to cater to gluten sensitivities.

Can I make Chicken Tetrazzini in advance?
Yes, one of the best features of this Chicken Tetrazzini Recipe is its make-ahead magic! You can assemble the entire dish and store it in the fridge for up to a day before baking, or freeze it before baking to have a comforting meal readily available on a busy night.

Chicken Tetrazzini Recipe

Irresistible Chicken Tetrazzini Recipe for Cozy Nights

This Chicken Tetrazzini Recipe is a comforting casserole that brings together tender chicken, mushrooms, and gooey cheese in a creamy sauce.
Prep Time 20 minutes
Cook Time 35 minutes
Total Time 55 minutes
Servings: 6 servings
Course: Casserole
Cuisine: American
Calories: 540

Ingredients
  

For the Pasta
  • 12 ounces Linguine or Spaghetti
For the Filling
  • 3 cups Rotisserie Chicken Shredded
  • 8 ounces Button Mushrooms Thickly sliced
  • 1 medium Onion Diced
  • 3 cloves Garlic Minced
For the Sauce
  • 4 tablespoons Unsalted Butter
  • 4 tablespoons All-Purpose Flour
  • 2 cups Low-Sodium Chicken Broth
  • 1 tablespoon Lemon Juice
  • 1 cup Half & Half Can substitute with equal parts milk and heavy cream
  • to taste Sea Salt
  • to taste Black Pepper Freshly ground
For the Topping
  • 2 cups Shredded Mozzarella Cheese
  • 2 tablespoons Parsley Freshly chopped

Equipment

  • Oven
  • casserole dish
  • Large pot
  • Large skillet
  • whisk

Method
 

Preparation
  1. Preheat your oven to 350°F (175°C). Butter a 9x13 casserole dish.
  2. In a large pot, boil well-salted water and cook the linguine or spaghetti until barely al dente.
  3. In a large skillet, heat olive oil, sauté mushrooms until softened, add onions until translucent, then garlic.
  4. In the same skillet, melt butter and whisk in flour, then add broth and lemon juice, letting it simmer.
  5. Combine pasta, chicken mixture, and parsley, then stir in the sauce and spread into the casserole dish.
  6. Cover with foil, bake for 20 minutes, then uncover and add mozzarella, baking for another 15 minutes until golden.

Nutrition

Serving: 1servingCalories: 540kcalCarbohydrates: 50gProtein: 35gFat: 25gSaturated Fat: 15gCholesterol: 100mgSodium: 600mgPotassium: 700mgFiber: 3gSugar: 4gVitamin A: 15IUVitamin C: 5mgCalcium: 250mgIron: 3mg

Notes

Leftovers can be stored in an airtight container for up to 5 days and are great reheated. This dish can also be assembled ahead of time and frozen for later use.

Tried this recipe?

Let us know how it was!

Stay Connected

Get recipes via email: