Get my cookbooks

Garlic Naan Bread: Easy and Fluffy Homemade Delight

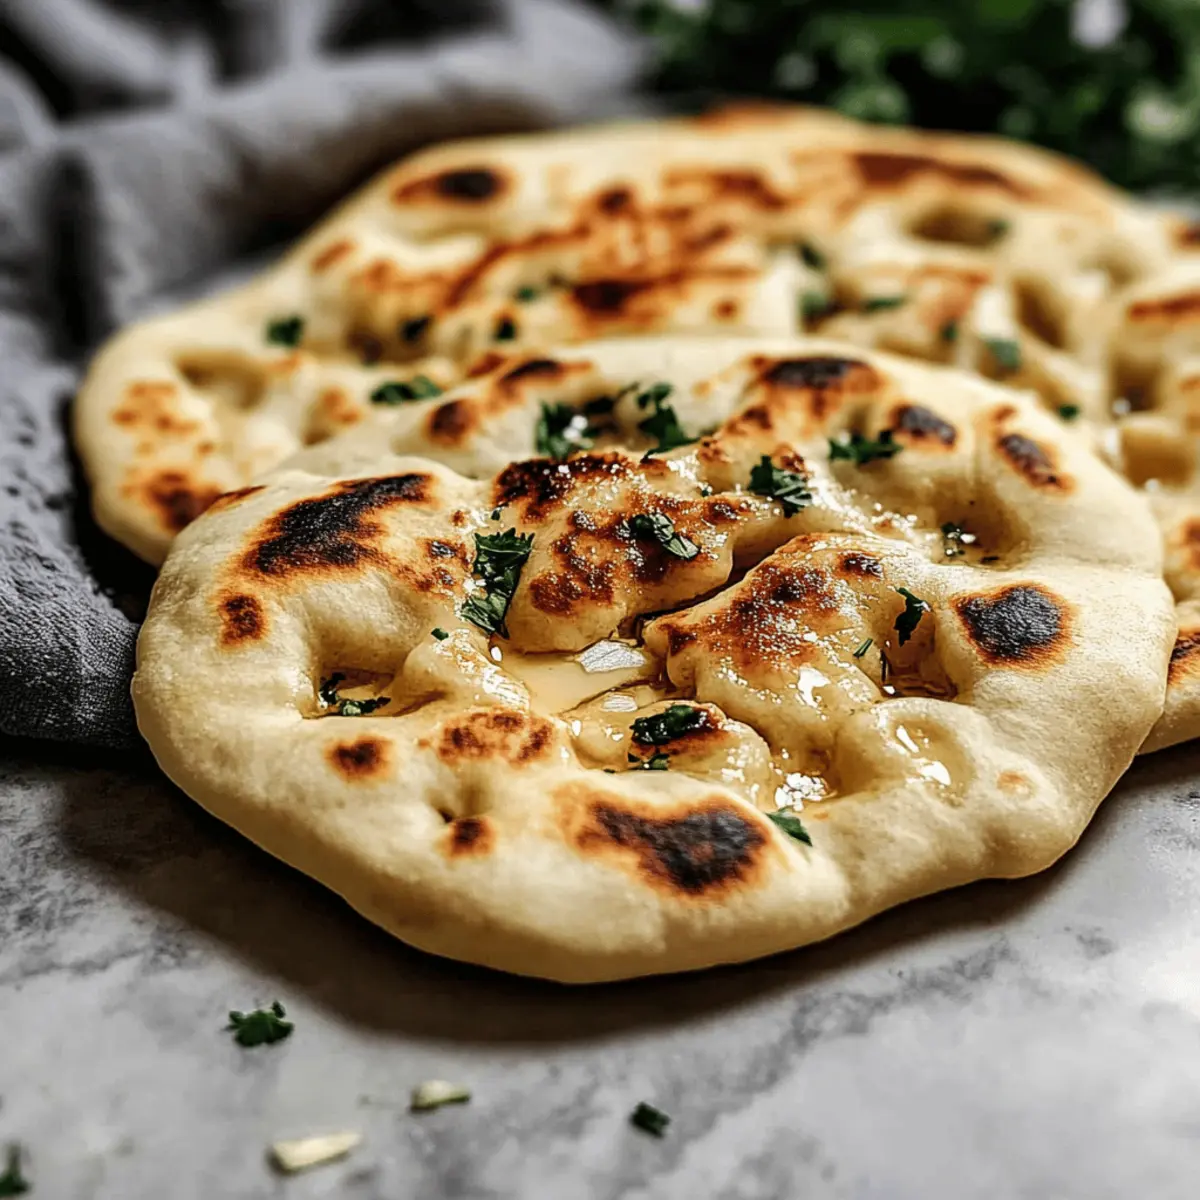
As I stood over the stove, the comforting aroma of baking bread filled my kitchen, whisking me away to bustling Indian markets where the warm, pillowy Garlic Naan Bread is prepared fresh in tandoors. This homemade version captures that magic, allowing you to enjoy soft, fluffy naan right from your kitchen in just 90 minutes! Beyond being a delightful accompaniment to your favorite curries or soups, this easy recipe is adaptable for vegan and gluten-free lifestyles, ensuring everyone can indulge in this hearty treat. So, why settle for store-bought when the joy of making your own awaits? Are you ready to roll up your sleeves and dive into this naan-making adventure?

Why make Garlic Naan Bread at home?

Homemade Joy: There’s nothing quite like the satisfaction of crafting your own Garlic Naan Bread, filling your kitchen with irresistible aromas.

Versatile Recipe: Customize it easily for various diets—swap yogurt for coconut yogurt to make it vegan, or substitute all-purpose flour with a gluten-free blend.

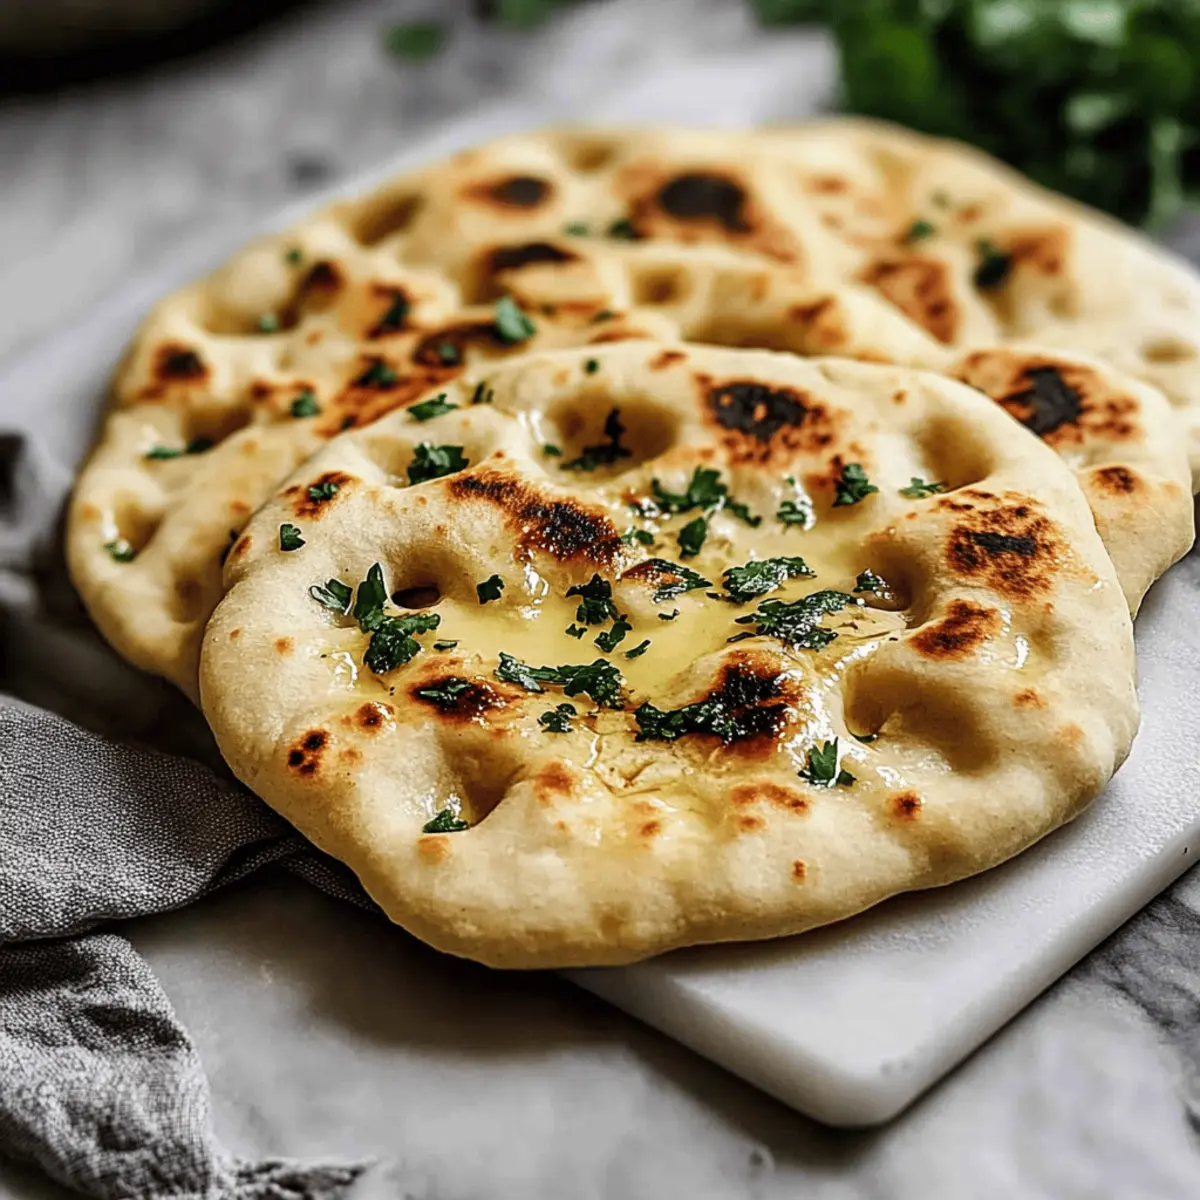
Fast & Easy: In just 90 minutes, you can create fluffy naan that’s perfect for dipping or enjoying alongside all your favorite curries, just like those from a restaurant or an intriguing market.

Impress Friends: Serve this tantalizing bread at dinner parties to impress your guests; everyone will love the warm, garlicky goodness.

For more delicious ideas like pairing this naan with Garlic Parmesan Chicken or tasty Honey Garlic Salmon, this recipe is bound to become a new family favorite!

Garlic Naan Bread Ingredients

• Perfect for making fluffy, flavorful naan.

For the Dough:

  • All-purpose flour – Provides structure; for gluten-free, use gluten-free flour plus xanthan gum.
  • Active dry yeast or instant yeast – Essential for leavening; instant yeast doesn’t need activation.
  • Sugar – Feeds the yeast and enhances browning; can be omitted for a yeast-free option.
  • Warm water (110°F) – Activates the yeast; lukewarm milk offers a richer flavor.
  • Salt – Enhances flavor and strengthens the dough structure.
  • Plain yogurt – Adds moisture; substitute with coconut milk for a vegan option.
  • Oil or ghee – Binds ingredients; use vegetable oil for a vegan alternative.

For the Flavored Coating:

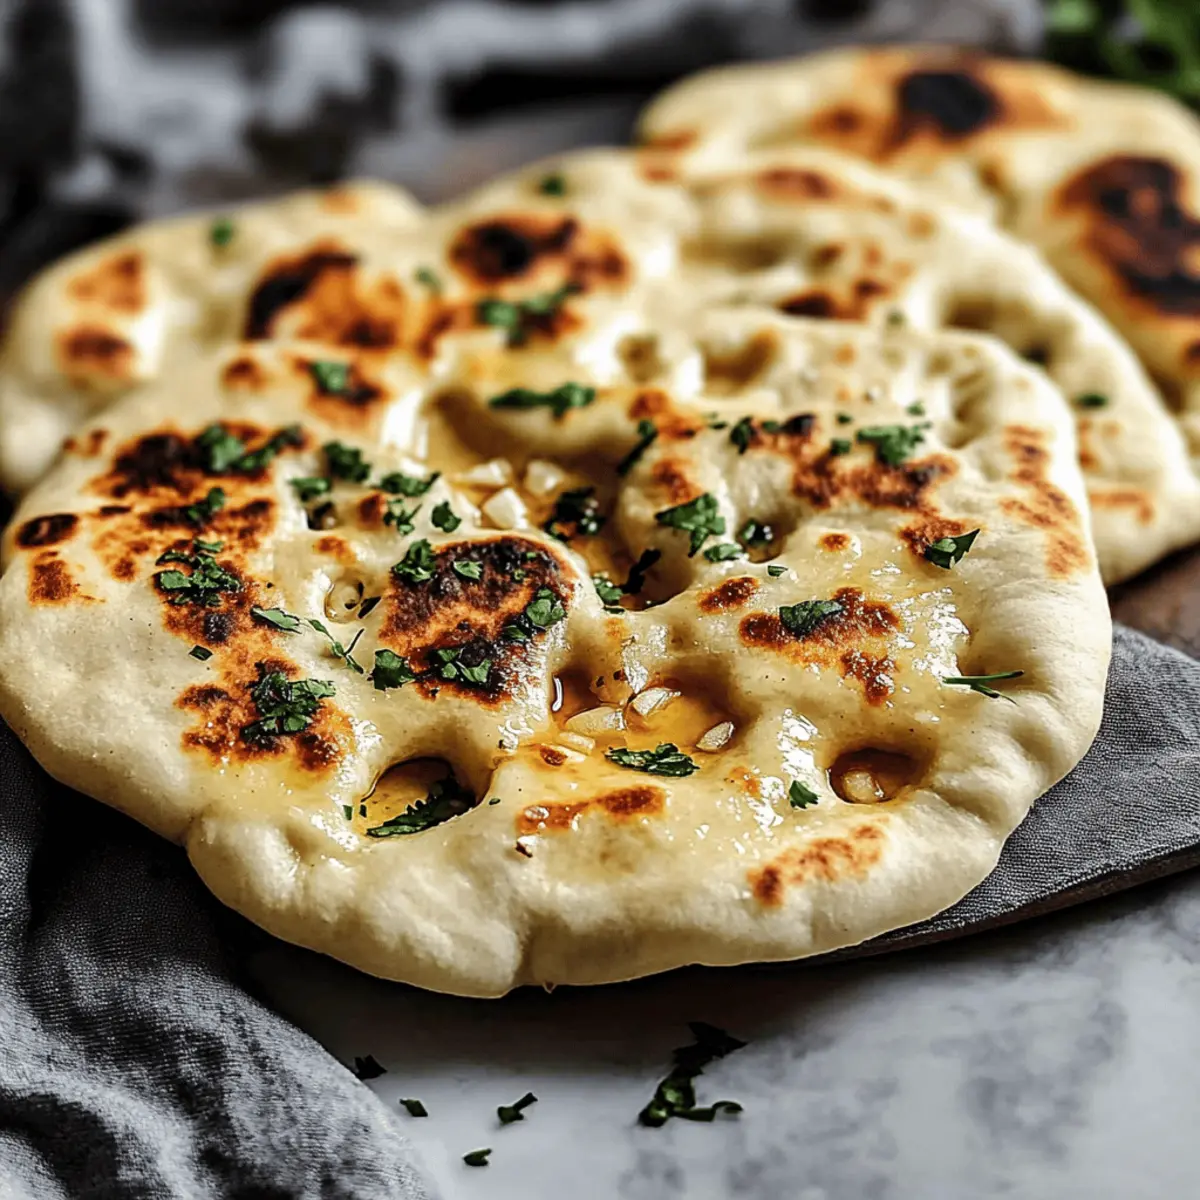
  • Minced garlic – Infuses the naan with aromatic flavor; fresh cloves are recommended.
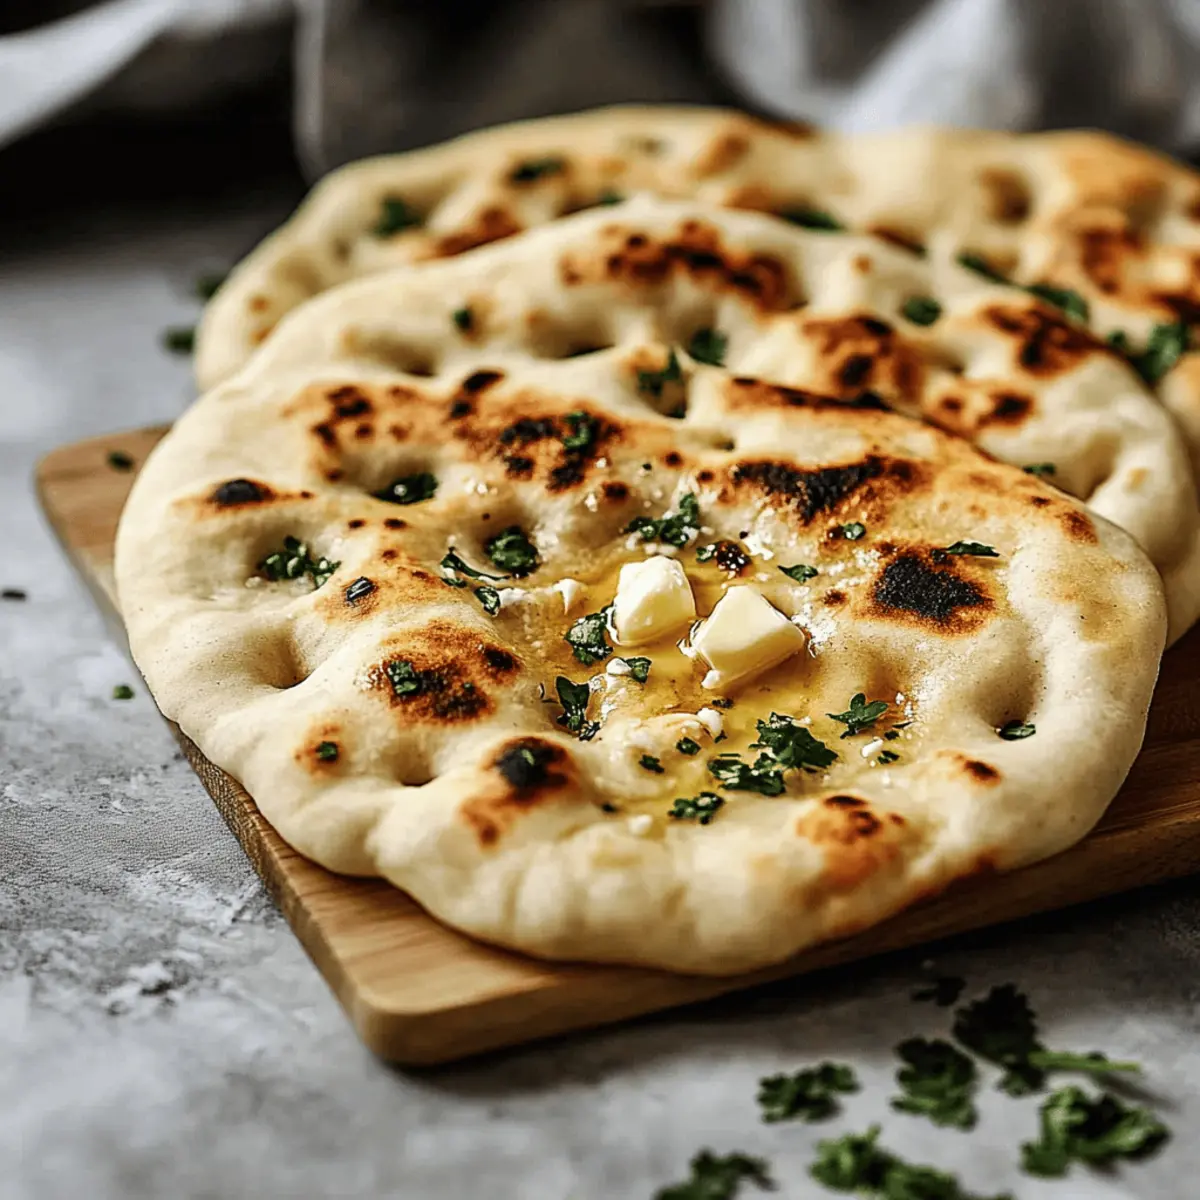
  • Melted butter – For brushing over cooked naan for added richness; use vegan butter for a vegan option.
  • Chopped cilantro or parsley – Optional garnish for added freshness.

With these ingredients in hand, you’re just a few steps away from enjoying warm, fluffy garlic naan bread from your own kitchen!

Step‑by‑Step Instructions for Garlic Naan Bread

Step 1: Activate Yeast
In a small bowl, combine 2 teaspoons of active dry yeast, 1 teaspoon of sugar, and ¾ cup of warm water (110°F). Stir gently and let it sit for about 10 minutes until bubbly and frothy. This bubbling magic indicates that your yeast is ready, setting the stage for soft and fluffy Garlic Naan Bread.

Step 2: Prepare Dough
In a large mixing bowl, whisk together 3 cups of all-purpose flour and 1 teaspoon of salt. Make a well in the center and pour in the activated yeast mixture along with ¼ cup of plain yogurt and 2 tablespoons of oil or ghee. Mix until a sticky dough forms, then turn it out onto a floured surface and knead for about 10 minutes, until smooth and elastic.

Step 3: First Rise
Place the kneaded dough in a lightly greased bowl, cover it with a damp cloth, and allow it to rise in a warm place for about 1 hour or until it doubles in size. You’ll know it’s ready when it feels puffy to the touch. This first rise is essential for achieving the fluffy texture that makes Garlic Naan Bread so delightful.

Step 4: Shape Naans
After the dough has risen, punch it down to release any air bubbles, and divide it into 8 equal portions. On a lightly floured surface, roll each portion into an oval shape about 8 inches long. Try to keep them uniform in size to ensure even cooking. These ovals will soon transform into your soft Garlic Naan.

Step 5: Cook Naans
Heat a cast-iron skillet or non-stick pan over medium-high heat until hot. Lightly oil the surface if needed. Place a rolled naan in the skillet and cook for about 1 minute until bubbles form on the top. Flip it gently and cook for another minute, until golden brown with charred spots. Repeat this for each naan, adjusting heat as necessary to avoid burning.

Step 6: Finishing Touch
In a small bowl, mix together 2 tablespoons of melted butter and 2 cloves of minced garlic. Once cooked, brush each naan with the buttery garlic mixture while they’re still warm, allowing the flavor to seep in. Finish by sprinkling with a pinch of salt and optional chopped cilantro or parsley for a fresh garnish. Your Garlic Naan Bread is now ready to savor!

Tips for the Best Garlic Naan Bread

  • Temperature Check: Ensure your water is at 110°F for yeast activation; too hot can kill the yeast, while too cold won’t activate it.

  • Kneading Matters: Knead your dough for at least 10 minutes to develop gluten. This step is crucial for achieving the fluffy texture of your Garlic Naan Bread.

  • Dough Rising: Cover the dough with a damp cloth during rising to retain moisture and warmth, allowing it to rise properly and become airy.

  • Cooking Heat: Use medium-high heat for cooking. If naan browns too quickly, reduce the heat to ensure it cooks through without burning.

  • Brush While Warm: For maximum flavor, brush the naan with melted butter and garlic immediately after removing it from the skillet; this keeps it moist and delicious.

Make Ahead Options

Garlic Naan Bread is perfect for meal prep enthusiasts looking to save time during busy weeknights! You can prepare the dough up to 24 hours in advance; simply complete the first rise, then store the dough in a lightly greased bowl covered with plastic wrap in the refrigerator. This method not only allows the flavors to develop further but ensures that you’ll enjoy fresh naan with minimal effort. When you’re ready to serve, take the dough out, let it rest at room temperature for about 30 minutes, then shape and cook as usual. By prepping ahead, you’ll have delicious, homemade Garlic Naan Bread ready to accompany your favorite dishes with ease and joy!

What to Serve with Fluffy Garlic Naan Bread?

Elevate your dining experience by discovering the perfect accompaniments that bring out the delightful flavors of Garlic Naan Bread.

  • Creamy Tikka Masala: This rich, tomato-based curry is the ultimate pairing, each bite beautifully complemented by the fluffy naan for scooping.

  • Spicy Aloo Gobi: Featuring roasted potatoes and cauliflower, this vegetarian dish offers a hearty contrast to the soft naan and a burst of warming spices.

  • Cucumber Raita: Cooling and refreshing, this yogurt dip counterbalances the naan’s garlic flavor, making every bite a delightful harmony of tastes.

  • Chickpea Curry: Packed with protein and aromatic spices, this dish’s texture and flavor meld perfectly with the naan, creating a satisfying and wholesome meal.

  • Mint Chutney: Serve this zesty dip alongside for a fresh, vibrant touch that enhances the naan’s flavor while adding a delightful crunch.

  • Golden Lentil Soup: A warm, comforting bowl of lentil soup works beautifully with garlic naan. Its creamy texture and earthy flavor pair well for a nourishing meal.

  • Mango Lassi: This sweet, frothy drink brings a delightful tropical twist to your meal, balancing out the savory notes of garlic blissfully.

  • Chocolate Gulab Jamun: For a sweet ending, these syrup-soaked dumplings add a luscious, decadent note to complete your culinary journey.

With these pairings, your experience with Garlic Naan Bread will be a delicious adventure that tantalizes the senses!

How to Store and Freeze Garlic Naan Bread

Fridge: Store cooked Garlic Naan Bread in an airtight container in the fridge for up to 4 days. This will help retain its softness and flavor.

Freezer: For longer storage, freeze the naans individually wrapped in plastic wrap or foil, then placed in a freezer bag. They can be frozen for up to 2 months without losing their delightful texture.

Reheating: When ready to enjoy, reheat by placing the naan in a skillet over medium heat for about 1-2 minutes on each side until warm, or microwave for 20-30 seconds wrapped in a damp paper towel to maintain moisture.

Room Temperature: If you plan to eat Garlic Naan Bread within a few hours, keep it wrapped in a clean kitchen towel at room temperature for up to 2 hours. This will help keep it warm and soft.

Garlic Naan Bread Variations

Get creative with your Garlic Naan Bread, and elevate your homemade experience with these delightful twists!

  • Vegan Option: Substitute plain yogurt with coconut yogurt and butter with olive oil for a fully plant-based treat. The coconut adds a subtle sweetness that complements the garlic perfectly.

  • Gluten-Free Delight: Use gluten-free all-purpose flour and add xanthan gum to maintain the structure and fluffiness of the naan. This way, everyone can enjoy this golden recipe, free from gluten concerns.

  • Spicy Kick: Mix in spices like cayenne pepper or chili flakes into the dough for an extra burst of flavor. A touch of heat can make each bite even more irresistible.

  • Cheesy Twist: Incorporate shredded cheese, like mozzarella or cheddar, into the dough for a gooey, cheesy naan experience. Imagine pulling apart warm bread with melted cheese stretching—it’s heavenly!

  • Herbed Variation: Add fresh herbs like chopped cilantro, dill, or parsley directly into the dough. Each bite becomes fragrant, bringing a garden-fresh taste to this traditional bread.

  • Garlic-Butter Brushing: For an even richer experience, use a combination of melted butter and garlic oil for brushing instead of just melted butter. The additional garlic oil will intensify that beloved garlic flavor.

  • Stuffed Naan: Roll in fillings like spiced potato or paneer before shaping it into an oval. Stuffed naan becomes a hearty meal on its own, perfect for impressing family and friends!

  • Sweet Naan: For a dessert twist, sprinkle a little cinnamon sugar inside the dough. This sweet iteration pairs beautifully with a scoop of vanilla ice cream.

With these variations, your Garlic Naan Bread will be a versatile staple in your kitchen, whether served alongside classic curries, like Garlic Parmesan Chicken, or as sweet treats!

Garlic Naan Bread Recipe FAQs

How do I select the right ingredients for Garlic Naan Bread?
Absolutely! When choosing all-purpose flour, look for brands with a high protein content to ensure a good structure. For the freshest flavor, use minced garlic from fresh cloves rather than pre-minced varieties. If you’re going for a gluten-free version, opt for a certified gluten-free flour mix along with xanthan gum to achieve the desired texture.

What is the best method for storing leftover Garlic Naan Bread?
To keep your naan soft and flavorful, store it in an airtight container in the fridge for up to 4 days. If you want to save it for later, individually wrap each naan in plastic wrap and place them in a freezer bag for freezing. They can last up to 2 months in the freezer without losing their delightful texture.

How do I properly freeze and reheat Garlic Naan Bread?
Certainly! To freeze, wrap each naan tightly in plastic wrap or aluminum foil, then add all the wrapped naan to a freezer bag. When ready to eat, reheat them in a skillet over medium heat for 1-2 minutes on each side until warm and fluffy. Alternatively, microwave them wrapped in a damp paper towel for about 20-30 seconds; this keeps them moist and delicious!

What should I do if my Garlic Naan Bread isn’t rising properly?
Very! If your naan dough isn’t rising, it usually means the yeast isn’t activated. Make sure your water is at 110°F (not hotter, as it can kill the yeast). If you didn’t activate your yeast correctly, you can try dissolving it in warm water with a pinch of sugar again and let it sit until it’s frothy before adding it back to your dough mixture.

Are there any dietary considerations for Garlic Naan Bread?
Absolutely! For a vegan-friendly version, swap plain yogurt with coconut yogurt and use vegetable oil instead of ghee or butter. If someone has gluten intolerance, ensure you use a gluten-free flour plus xanthan gum to assist with structure. Always check for allergies related to specific ingredients like garlic or dairy when serving to guests.

Can I add different flavors or spices to my Garlic Naan Bread?
The more the merrier! Feel free to enhance your Garlic Naan by incorporating spices into the dough, such as garlic powder, cumin, or dried herbs like oregano or thyme. This adds a unique twist and personal flair to your homemade naan and can be tailored to suit your taste preferences!

Garlic Naan Bread

Garlic Naan Bread: Easy and Fluffy Homemade Delight

Enjoy soft, fluffy Garlic Naan Bread right from your kitchen with this easy recipe that adapts to vegan and gluten-free lifestyles.
Prep Time 30 minutes
Cook Time 20 minutes
Rising Time 1 hour
Total Time 1 hour 50 minutes
Servings: 8 naans
Course: Dinner
Cuisine: Indian
Calories: 180

Ingredients
  

For the Dough
  • 3 cups All-purpose flour or gluten-free flour plus xanthan gum
  • 2 teaspoons Active dry yeast or instant yeast
  • 1 teaspoon Sugar can be omitted for yeast-free option
  • ¾ cup Warm water 110°F
  • 1 teaspoon Salt
  • ¼ cup Plain yogurt or coconut milk for vegan
  • 2 tablespoons Oil or ghee use vegetable oil for vegan
For the Flavored Coating
  • 2 cloves Minced garlic fresh cloves recommended
  • 2 tablespoons Melted butter or vegan butter
  • Chopped cilantro or parsley optional garnish

Equipment

  • Mixing Bowl
  • cast-iron skillet
  • Floured Surface

Method
 

Step-by-Step Instructions
  1. In a small bowl, combine 2 teaspoons of active dry yeast, 1 teaspoon of sugar, and ¾ cup of warm water (110°F). Stir gently and let it sit for about 10 minutes until bubbly and frothy.
  2. In a large mixing bowl, whisk together 3 cups of all-purpose flour and 1 teaspoon of salt. Make a well in the center and pour in the activated yeast mixture along with ¼ cup of plain yogurt and 2 tablespoons of oil or ghee. Mix until a sticky dough forms, then turn it out onto a floured surface and knead for about 10 minutes.
  3. Place the kneaded dough in a lightly greased bowl, cover it with a damp cloth, and allow it to rise in a warm place for about 1 hour or until it doubles in size.
  4. After the dough has risen, punch it down to release any air bubbles, and divide it into 8 equal portions. On a lightly floured surface, roll each portion into an oval shape about 8 inches long.
  5. Heat a cast-iron skillet or non-stick pan over medium-high heat until hot. Place a rolled naan in the skillet and cook for about 1 minute until bubbles form on the top. Flip it gently and cook for another minute.
  6. In a small bowl, mix together 2 tablespoons of melted butter and 2 cloves of minced garlic. Brush each naan with the buttery garlic mixture while they're still warm.

Nutrition

Serving: 1naanCalories: 180kcalCarbohydrates: 34gProtein: 4gFat: 4gSaturated Fat: 2gMonounsaturated Fat: 2gCholesterol: 10mgSodium: 200mgPotassium: 50mgFiber: 1gSugar: 1gVitamin A: 100IUCalcium: 10mgIron: 1mg

Notes

For the best results, ensure your water is at 110°F, knead the dough well, and brush with garlic butter while warm.

Tried this recipe?

Let us know how it was!

Savory Korean Ssamjang Pasta: Quick, Creamy, and Irresistible

As I stirred the pasta in the pot, a fragrant aroma wafted through my kitchen, instantly transporting me to the bustling streets of Seoul. This Creamy Korean Ssamjang Pasta takes just 25 minutes to prepare, transforming a simple weeknight dinner into a hearty, restaurant-worthy feast. Featuring succulent pork belly and a rich, umami-packed sauce that beautifully marries spicy ssamjang with creamy elements, this dish is both quick and irresistible. Plus, it’s incredibly adaptable! You can switch out the pork for chicken or even tofu for a satisfying vegetarian option, ensuring it’s a crowd-pleaser for everyone at the table. Are you curious about how this fusion dish will tantalize your taste buds? Let’s dive into the recipe!

Why Is This Korean Ssamjang Pasta Unique?

Flavorful Fusion: The combination of creamy pasta and spicy ssamjang creates a harmonious blend that’s both comforting and exciting.
Quick Prep: In just 25 minutes, you can whip up a dish that looks and tastes like a gourmet meal.
Versatile Ingredients: Feel free to swap pork belly for chicken or tofu – perfect for flexitarian diets!
Umami Richness: Ssamjang packs a punch of umami that elevates traditional pasta to new heights.
Crowd-Pleaser: This dish is sure to impress family and friends, serving as a delightful alternative to fast food or standard weeknight meals.
If you’re intrigued by more bold flavors, check out Korean Fried Chicken for another delicious twist!

Korean Ssamjang Pasta Ingredients

Unleash your culinary creativity with this savory recipe!

For the Pasta

  • Pasta – Use any preferred type like spaghetti or fettuccine for a delightful base.
  • Salt – Essential for enhancing the pasta’s flavor; adjust according to your taste.

For the Sauce

  • Ssamjang (쌈장) – The star of the show, providing spicy umami depth; you can substitute with gochujang for a different kick.
  • Pork Belly – Adds richness and an irresistible crunch; chicken or tofu work as lighter alternatives.
  • Parmesan Cheese – Offers creaminess and a savory finish; feel free to swap with nutritional yeast for a vegan twist.
  • Egg – Creates a luscious creaminess when mixed in; omit or replace with silken tofu for a vegan option.

For Toppings

  • Green Onions – Adds a fresh crunch on top; chives or shallots are excellent substitutes for varying flavors.

With these ingredients, you’re on your way to creating a flavorful Korean Ssamjang Pasta that will bring joy to your dinner table!

Step‑by‑Step Instructions for Korean Ssamjang Pasta

Step 1: Cook the Pasta
Bring a large pot of salted water to a rolling boil and add your choice of pasta, such as spaghetti or fettuccine. Cook according to the package instructions until al dente, approximately 8–10 minutes. Stir occasionally, ensuring the pasta doesn’t stick. Once cooked, reserve 1 cup of pasta water, then drain the remaining water and set the pasta aside.

Step 2: Prepare the Pork Belly
In a large skillet over medium-high heat, add diced pork belly and cook until crispy and golden brown, about 5–7 minutes. Stir occasionally to ensure even cooking and to render the fat. Once browned, remove the pork belly from the pan and place it on a paper towel-lined plate to drain any excess grease, leaving the flavorful drippings in the pan.

Step 3: Create the Sauce
Return the skillet to medium heat and add the reserved cup of pasta water along with the ssamjang paste. Whisk together until the sauce is smooth and creamy, simmering for about 2–3 minutes. The goal is to bring out the rich umami of the ssamjang, creating a delightful fusion that will envelop the pasta beautifully.

Step 4: Combine Ingredients
Add the drained pasta and crispy pork belly into the skillet with the creamy ssamjang sauce. Toss everything together gently using tongs or a spatula, ensuring each strand of pasta is coated well with the savory sauce. Continue tossing for about 2 minutes, allowing the pasta to absorb the delicious flavors while heating through.

Step 5: Finish and Serve
Remove the skillet from heat and stir in the grated parmesan cheese and a beaten egg. Mix quickly until creamy and cohesive, allowing the residual heat to cook the egg slightly without scrambling it. Serve immediately, topped with freshly chopped green onions for a burst of flavor and a beautiful presentation on your Korean Ssamjang Pasta.

Variations & Substitutions for Korean Ssamjang Pasta

Feel free to explore these delightful twists that will personalize your dish and make it even more exciting!

  • Gochujang Swap: Use gochujang instead of ssamjang for a milder, sweeter flavor. This swap keeps the essence of Korean cuisine intact but with a softer spice.

  • Chicken or Tofu Instead: Swap pork belly for grilled chicken breast or firm tofu for a lighter and plant-based option. Each brings its unique texture and taste, maintaining that delightful umami we love.

  • Add Spinach: Toss in fresh spinach or kale towards the end of cooking for a pop of color and nutrients. The greens wilt beautifully, adding freshness to your creamy pasta.

  • Baby Bell Peppers: Slice and sauté baby bell peppers for a sweet crunch. Their vibrant colors will make the dish visually stunning as well.

  • Sesame Oil Drizzle: Finish with a drizzle of toasted sesame oil. This small addition adds a nutty richness that elevates the overall flavor profile.

  • Vegan Parmesan: Substitute traditional parmesan with nutritional yeast for a vegan-friendly creamy finish. It retains that cheesy flavor without any dairy.

  • Spicy Crushed Peppers: Add crushed red pepper flakes for an extra heat kick. This is perfect if you want to turn the spice level up a notch!

  • Mushroom Magic: Sauté shiitake or button mushrooms to add a savory depth to the dish. Their earthy flavor pairs beautifully with the ssamjang sauce.

For more exciting Korean flavors, why not try out these Korean Fried Chicken or Korean BBQ Meatballs? Embrace the journey of flavor and satisfaction in your cooking!

What to Serve with Creamy Korean Ssamjang Pasta

Creating the perfect dining experience is all about complementing flavors and textures that entice your senses.

  • Crispy Tempura Vegetables: The light, crunchy texture of tempura vegetables adds a delightful contrast to the creamy pasta. Pair them with a dipping sauce for an extra flavor kick!

  • Korean Pickled Radishes: Their sharp, tangy flavor cuts through the richness of the ssamjang pasta, refreshing your palate with each bite. A perfect side for balancing flavors.

  • Steamed Broccoli: The green, slightly bitter notes of steamed broccoli provide a nutritious touch, enhancing the dish’s visual appeal while adding much-needed color.

  • Seaweed Salad: Light and briny, this salad offers a unique texture and flavor, marrying beautifully with the umami notes of the pasta. The seaweed’s chewy consistency adds intrigue to your meal.

  • Sweet Korean Corn Cheese: This warm, cheesy side has a delightful sweetness that complements the spicy pasta perfectly, creating harmony between flavors that delight every taste bud.

  • Cold Beer or Soju: A crisp lager or a shot of soju adds a lively fizz or kick, enhancing the overall experience of your meal while cooling down the spice level.

  • Korean Chocolate Cake: Wrap up the dinner with something sweet. The rich and moist chocolate cake cannily contrasts the rich flavors of the pasta, ensuring a memorable end to your meal.

How to Store and Freeze Korean Ssamjang Pasta

Fridge: Store leftovers in an airtight container for up to 3 days. This keeps your creamy Korean Ssamjang Pasta fresh and flavorful for a quick meal later on.

Freezer: If you plan to freeze, portion out and freeze the pasta in airtight containers. It can last up to 3 months. Thaw overnight in the fridge before reheating.

Reheating: Gently reheat on the stove with a splash of water or additional pasta water to bring back creaminess and flavor. Stir occasionally to avoid drying out.

Room Temperature: It’s best to refrain from leaving cooked pasta out at room temperature for more than 2 hours to maintain safety and quality.

Make Ahead Options

These Creamy Korean Ssamjang Pasta are perfect for busy weeknights! You can prep the pasta and the pork belly up to 24 hours in advance. Cook the pasta as directed, but stop cooking just before it’s al dente; drain and toss it in a little olive oil to prevent sticking, then refrigerate. For the pork belly, cook it until crispy, then allow it to cool before storing it in an airtight container. When you’re ready to serve, simply reheat both components in a pan, add in the ssamjang sauce (made fresh), and finish with parmesan and egg. This way, you’ll enjoy a delicious meal with minimal effort and just as delightful flavors!

Tips for the Best Korean Ssamjang Pasta

  • Don’t Overcook: Ensure the pasta is cooked al dente; it will continue to cook slightly when mixed with the sauce.
  • Pasta Water is Gold: Always reserve that cup of pasta water; its starchiness helps emulsify the sauce beautifully.
  • Sauté Properly: Cook the pork belly until it’s golden brown and crispy for a contrasting texture in your creamy sauce.
  • Savvy Seasoning: Taste and adjust the salt as ssamjang already has a salty profile; you may need less than usual.
  • Egg Trick: Add your beaten egg quickly after removing from heat. This prevents scrambling and keeps the sauce creamy.

Korean Ssamjang Pasta Recipe FAQs

What type of pasta works best for Korean Ssamjang Pasta?
Absolutely! You can use any type of pasta you prefer, such as spaghetti or fettuccine. Just be sure to cook it al dente, so it maintains a nice bite and doesn’t become mushy when combined with the sauce.

How long can I store leftovers of Korean Ssamjang Pasta?
Leftovers can be stored in an airtight container in the fridge for up to 3 days. This allows you to enjoy the savory flavors without any fuss during busy weeknights. Just reheat gently to keep it creamy!

Can I freeze Korean Ssamjang Pasta?
Yes, you can! Portion out the pasta in airtight containers and freeze for up to 3 months. When you’re ready to enjoy it, simply thaw in the fridge overnight. Reheat gently on the stove, adding a splash of water or some reserved pasta water to restore creaminess.

What’s a good substitution for ssamjang if I can’t find it?
Very! If you can’t find ssamjang, gochujang is an excellent alternative—it’s a bit milder and offers a sweet-spicy flavor. You can also use doubanjiang for a different flavor twist, but adjust the amount based on your spice preference.

Are there any dietary considerations with Korean Ssamjang Pasta?
Definitely! If you’re cooking for someone with dietary restrictions, you can substitute pork belly with grilled chicken or tofu for a lighter option. For a vegan version, omit the egg and use nutritional yeast instead of parmesan cheese. Just double-check the labels on your ssamjang, as some brands may contain allergens.

How do I prevent the pasta from drying out during reheating?
To avoid drying out, gently reheat your Korean Ssamjang Pasta on the stove with a splash of water or some reserved pasta water. Stir occasionally while warming it up to ensure the sauce stays creamy and delicious. Enjoy!

Korean Ssamjang Pasta

Savory Korean Ssamjang Pasta: Quick, Creamy, and Irresistible

Experience a harmonious blend of creamy pasta and spicy ssamjang in this quick Korean Ssamjang Pasta recipe.
Prep Time 10 minutes
Cook Time 15 minutes
Total Time 25 minutes
Servings: 4 servings
Course: Pasta
Cuisine: Korean
Calories: 450

Ingredients
  

For the Pasta
  • 12 ounces pasta (spaghetti or fettuccine)
  • 1 tablespoon salt adjust according to taste
For the Sauce
  • 3 tablespoons ssamjang or substitute with gochujang
  • 6 ounces pork belly or substitute with chicken or tofu
  • 1/2 cup parmesan cheese or substitute with nutritional yeast
  • 1 large egg or replace with silken tofu
For Toppings
  • 2 stalks green onions or substitute with chives or shallots

Equipment

  • Large pot
  • Large skillet
  • whisk

Method
 

Step-by-Step Instructions
  1. Bring a large pot of salted water to a boil and cook the pasta according to package instructions until al dente, about 8–10 minutes. Reserve 1 cup of pasta water, then drain the remaining water and set the pasta aside.
  2. In a large skillet over medium-high heat, cook diced pork belly until crispy and golden brown, about 5–7 minutes. Remove from pan, leaving drippings.
  3. Return the skillet to medium heat, add reserved pasta water and ssamjang, whisk until smooth and creamy. Simmer for 2–3 minutes.
  4. Add drained pasta and crispy pork belly into the skillet, toss gently to coat with sauce for about 2 minutes.
  5. Remove from heat, stir in parmesan cheese and beaten egg until creamy. Serve topped with green onions.

Nutrition

Serving: 1servingCalories: 450kcalCarbohydrates: 50gProtein: 20gFat: 20gSaturated Fat: 8gPolyunsaturated Fat: 1gMonounsaturated Fat: 10gCholesterol: 100mgSodium: 800mgPotassium: 300mgFiber: 3gSugar: 2gVitamin A: 300IUVitamin C: 2mgCalcium: 150mgIron: 2mg

Notes

For best results, cook pasta al dente and reserve pasta water for sauce. Store leftovers in an airtight container for up to 3 days.

Tried this recipe?

Let us know how it was!

Chewy Banana Oatmeal Bars – Your New Favorite Healthy Snack

As I rummaged through my pantry in search of a quick snack, I stumbled upon a trio of overripe bananas and a bag of rolled oats. It was the perfect opportunity to whip up some delightful Banana Oatmeal Bars! These bars are not just a treat; they’re a wholesome and easy snack option that transforms simple ingredients into moist, chewy bites of goodness. With no refined sugar and the option to keep them gluten-free, these bars are a guilt-free indulgence perfect for busy mornings or a quick energy boost during the day. Plus, the beauty of this recipe lies in its versatility—you can switch up the nut butter or throw in some dried fruits for that extra yum factor. Are you ready to turn those bananas into something remarkable? Let’s dive into this easy, no-bake recipe!

Why are Banana Oatmeal Bars so great?

Simplicity: This recipe requires minimal ingredients, making it easy even for novice cooks to whip up a wholesome snack.

Health-Conscious: Packed with natural sweetness from bananas and healthy fats from nut butter, these bars align perfectly with your healthy eating goals.

Versatile: Feel free to customize with your favorite nut butter or mix in exciting add-ins like nuts or dried fruits for a unique twist every time.

Time-Saving: Whip up a batch in under 30 minutes, giving you delicious snacks ready to go for the week.

Crowd-Pleaser: With their chewy texture and delightful flavor, these bars are sure to impress everyone from kids to adults!

Want to add even more excitement? Check out variations like Honey Banana Grilled or mix in some dried fruits to create your perfect snack!

Banana Oatmeal Bars Ingredients

For the Bar Mix

  • Mashed Bananas – About 3 ripe bananas add natural sweetness and moisture; use overripe ones for the best flavor.
  • Nut Butter – Choose peanut butter for richness; almond or cashew butter work well for nut-free options.
  • Rolled Oats – These provide texture and structure; opt for gluten-free oats if desired.
  • Cinnamon – A hint of spice that enhances flavor; feel free to leave it out if you’re not a fan.
  • Vanilla Extract – A splash elevates the overall taste; it’s optional but highly recommended!
  • Maple Syrup – Acts as a natural sweetener; honey or agave syrup can be substituted for a different twist.
  • Chocolate Chips – For indulgence; swap for dried fruit or nuts for a healthier variation if preferred.
  • Salt – Just a pinch balances the sweetness and enhances flavor.

Optional Add-Ins

  • Chopped Nuts – Walnuts or pecans add crunch; mix in for extra texture.
  • Dried Fruits – Incorporate cranberries or raisins for a sweet burst in every bite.

These Banana Oatmeal Bars are not just simple to make but also a wholesome treat that can fit delightfully into your healthy eating routine!

Step‑by‑Step Instructions for Banana Oatmeal Bars

Step 1: Preheat and Prepare
Begin by preheating your oven to 350°F (175°C). While the oven warms up, line a 9×9-inch baking pan with parchment paper, ensuring there’s excess hanging over the edges for easy removal later. This step sets the stage for your Banana Oatmeal Bars to bake evenly and prevents sticking.

Step 2: Mix the Ingredients
In a large mixing bowl, mash approximately 3 ripe bananas until smooth, then add your choice of nut butter, rolled oats, cinnamon, vanilla extract, maple syrup, chocolate chips, and a pinch of salt. Mix thoroughly with a spatula or a wooden spoon for about 2-3 minutes until everything is well-cohesive and the mixture resembles a thick batter.

Step 3: Spread the Mixture
Pour the banana mixture into the prepared baking pan, using a spatula to spread it evenly. Press the mixture down firmly to create a compact layer; this helps the bars hold their shape once baked. For extra indulgence, you can sprinkle additional chocolate chips on top before baking.

Step 4: Bake to Perfection
Place the baking pan in your preheated oven and bake for 18-20 minutes. Keep an eye on the edges; they should turn a lovely golden brown as the mixture sets. The center should feel firm to the touch while still being slightly soft for that perfect chewy texture in your Banana Oatmeal Bars.

Step 5: Cool and Slice
Once baked, remove your pan from the oven and let it cool completely in the pan on a wire rack. This could take about 30 minutes. Once cooled, lift the bars out using the parchment paper and cut them into 16 squares. Enjoy your freshly made, wholesome Banana Oatmeal Bars!

Expert Tips for Banana Oatmeal Bars

  • Perfect Bananas: Use overripe bananas for optimal sweetness and moisture. If bananas aren’t ripened enough, speed up the process by placing them in a paper bag with an apple.

  • Nut Butter Consistency: If using nut butter that separates, be sure to stir it thoroughly before measuring. This ensures a smooth mix and avoids dry spots in your Banana Oatmeal Bars.

  • Press Well: When spreading the mixture in the pan, press it down firmly to create a compact layer. This helps maintain the bar’s shape after baking and ensures even cooking.

  • Check Oven Time: Every oven is different, so start checking your bars at around 18 minutes. They should be golden brown on the edges and slightly soft in the center for that chewy texture.

  • Storage Solutions: For optimal freshness, store your Banana Oatmeal Bars in an airtight container in the fridge. They also freeze well for up to three months—perfect for quick snacks later on!

What to Serve with Banana Oatmeal Bars

These delightful bars are perfect for creating a satisfying meal or snack that tantalizes the taste buds.

  • Fresh Fruit Salad: A mixture of seasonal fruits adds brightness and refreshing flavors to balance the rich oats and banana. Pair with a drizzle of honey for extra sweetness!

  • Greek Yogurt: Creamy yogurt brings protein and tanginess, making for a fulfilling snack. Top with a sprinkle of granola for added crunch and texture.

  • Nut Butter: Spread a layer of your favorite nut butter on each bar for an irresistible taste and an extra dose of healthy fats. It enhances the banana flavor beautifully!

  • Smoothie Bowl: Blend a fruit smoothie with spinach, banana, and almond milk. Serve it alongside the bars for a nutrient-packed meal that’s vibrant and filling.

  • Dark Chocolate Drizzle: Add elegance and decadence by drizzling melted dark chocolate over the bars. It elevates the sweetness and makes for a perfect treat!

  • Coffee or Tea: Sip on a warm beverage while enjoying your bars. A rich cup of coffee or herbal tea complements the wholesome flavors and rounds out the experience.

  • Cottage Cheese: This high-protein addition pairs wonderfully with the bars, making them even more satisfying. Add a sprinkle of cinnamon for a warm touch.

  • Trail Mix: A handful of trail mix provides a crunchy contrast that enhances every bite of the soft and chewy bars. Choose a mix with nuts and seeds for extra nutrition.

Banana Oatmeal Bars Variations

Feel free to explore these tasty ideas, customizing your banana oatmeal bars to suit your cravings and needs.

  • Nut-Free: Swap peanut butter for sun butter or tahini to keep your bars nut-free while still creamy and rich.
  • Gluten-Free: Ensure you use certified gluten-free oats for a delightful treat that everyone can enjoy.
  • Cinnamon Lovers: Add an extra teaspoon of cinnamon for a spicier bar or include a pinch of nutmeg for a cozy twist.
  • Enhanced Sweetness: Upgrade the flavor by drizzling a little honey or agave syrup on top after baking—it adds a lovely glaze!
  • Add Some Crunch: Fold in chopped almonds or walnuts for a delightful texture contrast alongside the chewy oats.
  • Dairy-Free: Use dairy-free chocolate chips or omit them altogether, and opt for coconut flakes for a tropical twist.
  • Fruit Explosion: Incorporate diced apples or mashed berries into the mix for an added burst of natural sweetness.
  • Savory Option: For something different, reduce the sweetness and include shredded carrots or zucchini for a savory, moist bar.

These variations invite you to experiment; why not try a mix of different add-ins and discover your perfect balance? Inspired by these flavors? You might also enjoy our Turtle Bars Decadent for another delicious treat!

Make Ahead Options

These Banana Oatmeal Bars are perfect for busy meal prep enthusiasts! You can mix the ingredients and prepare the bars up to 24 hours in advance by storing the unbaked mixture in the refrigerator, ensuring it remains fresh and flavorful. To maintain quality, tightly cover the bowl with plastic wrap. When you’re ready to enjoy your homemade bars, simply pour the mixture into the prepared baking pan and bake according to the original instructions. Alternatively, you can bake them ahead of time and refrigerate or freeze the bars for up to 3 days or 3 months, respectively. Just reheat them slightly before serving for deliciously chewy bars that taste fresh-baked!

How to Store and Freeze Banana Oatmeal Bars

Fridge: Keep your Banana Oatmeal Bars in an airtight container in the refrigerator for up to 1 week to maintain freshness and chewiness.

Freezer: For long-term storage, wrap individual bars or the whole batch tightly in plastic wrap and then place them in a freezer-safe bag. They can be frozen for up to 3 months.

Reheating: To enjoy your bars warm, pop them in the microwave for about 15-20 seconds. This will bring back their chewy texture and enhance the delightful flavors.

Thawing: Simply transfer frozen bars to the fridge overnight to thaw, or leave them at room temperature for a few hours before enjoying them as a quick snack!

Banana Oatmeal Bars Recipe FAQs

What type of bananas should I use for Banana Oatmeal Bars?
The best bananas for this recipe are overripe ones, as they provide maximum sweetness and moisture. If your bananas aren’t quite ripe enough, you can speed up the ripening process by placing them in a paper bag with an apple for about 1-2 days.

How should I store Banana Oatmeal Bars?
These bars can be stored in an airtight container in the refrigerator for up to 1 week. For optimal freshness, it’s best to keep them refrigerated. If you want to keep them longer, you can freeze them!

Can I freeze Banana Oatmeal Bars? How?
Absolutely! To freeze your Banana Oatmeal Bars, wrap each individual bar tightly in plastic wrap. Then, place them in a freezer-safe bag or container. They can be frozen for up to 3 months. When you’re ready to enjoy, simply thaw them in the fridge overnight or let them sit at room temperature for a couple of hours.

What do I do if my bars are too dry or crumbly?
If your bars turn out dry, it’s likely that the bananas weren’t mashed thoroughly enough, or the baking time was too long. Next time, ensure your bananas are well mashed and keep an eye on the bars while baking. If they’re baked too long, they can dry out. Aim for a golden edge but a slightly soft center for that chewy texture.

Are there any dietary considerations I should be aware of?
Yes! If you’re making these bars for people with allergies, be mindful if you’re using nut butters, as some individuals have nut allergies. For gluten-free options, make sure to use certified gluten-free oats to accommodate those dietary needs. Always double-check ingredient labels if you’re uncertain!

Can I make substitutions in the recipe?
Very! You can substitute the nut butter with allergies in mind, using sunflower seed butter if needed. Additionally, feel free to swap out chocolate chips with dried fruits or nuts for a healthier version. This recipe is wonderfully versatile, so don’t hesitate to experiment with your favorite ingredients!

Banana Oatmeal Bars

Chewy Banana Oatmeal Bars – Your New Favorite Healthy Snack

These Banana Oatmeal Bars are a healthy, no-bake snack made with wholesome ingredients, perfect for busy mornings.
Prep Time 10 minutes
Cook Time 20 minutes
Cooling Time 30 minutes
Total Time 1 hour
Servings: 16 squares
Course: Breakfast
Cuisine: Healthy
Calories: 150

Ingredients
  

For the Bar Mix
  • 3 bananas Mashed Bananas Use overripe ones for the best flavor.
  • 1 cup Nut Butter Choose peanut, almond, or cashew butter.
  • 2 cups Rolled Oats Opt for gluten-free oats if desired.
  • 1 teaspoon Cinnamon Optional, can leave out if not a fan.
  • 1 teaspoon Vanilla Extract Highly recommended!
  • 1/4 cup Maple Syrup Substitute with honey or agave syrup if preferred.
  • 1/2 cup Chocolate Chips Optional, can swap for dried fruit or nuts.
  • 1/4 teaspoon Salt Balances sweetness.
Optional Add-Ins
  • 1/2 cup Chopped Nuts Walnuts or pecans add crunch.
  • 1/2 cup Dried Fruits Cranberries or raisins for added sweetness.

Equipment

  • Oven
  • Mixing Bowl
  • Baking Pan
  • spatula

Method
 

Step-by-Step Instructions
  1. Preheat your oven to 350°F (175°C) and line a 9x9-inch baking pan with parchment paper.
  2. In a large mixing bowl, mash approximately 3 ripe bananas until smooth. Add nut butter, rolled oats, cinnamon, vanilla extract, maple syrup, chocolate chips, and salt. Mix thoroughly.
  3. Pour the banana mixture into the prepared baking pan and press down firmly to create a compact layer.
  4. Bake for 18-20 minutes until edges are golden brown, then cool completely in the pan.
  5. Once cooled, lift the bars out using the parchment paper and cut into 16 squares.

Nutrition

Serving: 1squareCalories: 150kcalCarbohydrates: 25gProtein: 3gFat: 5gSaturated Fat: 1gPolyunsaturated Fat: 1gMonounsaturated Fat: 3gSodium: 50mgPotassium: 200mgFiber: 3gSugar: 7gVitamin C: 10mgCalcium: 2mgIron: 4mg

Notes

Use overripe bananas for optimal sweetness. Store in an airtight container in the fridge for up to 1 week or freeze for 3 months.

Tried this recipe?

Let us know how it was!

Blueberry Cheesecake Bites: Guilt-Free Deliciousness Awaits

“Can we transform cheesecake into a snack?” a friend mused as we browsed through dessert recipes. Inspired by that playful idea, I set out to create a guilt-free version that wouldn’t compromise on flavor. Enter my Blueberry Cheesecake Protein Bites—a no-bake, protein-packed treat that satisfies those cheesecake cravings while keeping your health goals in check! These delightful bites are the perfect blend of creamy cheesecake goodness and nutritious ingredients, making them an ideal option for a quick snack or a post-workout refuel. What’s even better? They’re fully customizable, allowing you to mix and match ingredients to suit your taste. Whether you’re craving a late-night treat or a midday boost, these bites are your ticket to enjoying a healthy, satisfying snack. Ready to discover how to make these little delights? Let’s dive into the recipe!

Why Choose Blueberry Cheesecake Bites?

Guilt-Free Indulgence: You don’t have to sacrifice flavor for health with these protein bites. Enjoy the creamy taste of cheesecake without the added calories!

No-Bake Convenience: Perfect for busy lifestyles, these bites require no baking—simply mix, roll, and refrigerate!

Customizable Goodness: Personalize your flavors by swapping blueberries for your favorite fruits or adding decadent touches like dark chocolate chips.

Nutritious Snacking: Packed with protein and fiber, these bites serve as delightful pre-or post-workout fuel that keeps you satisfied.

Flavor Explosion: Each bite bursts with the freshness of blueberries and creamy texture, making them as enjoyable as dessert while being oh-so-healthy.

For other delicious treats, check out these scrumptious Banana Blueberry Breakfast cookies or indulgent Strawberry Cheesecake Dump cake recipes!

Blueberry Cheesecake Bites Ingredients

For the Bites

  • Rolled Oats – Provides structure and fiber; you can substitute with quick oats for a different texture.
  • Almond Flour – Adds healthy fats and a nutty flavor; swap for oat flour to make it nut-free.
  • Vanilla Protein Powder – Boosts the protein content; opt for vegan protein powder for a plant-based option.
  • Cream Cheese (softened) – Contributes creaminess and richness; consider lower-fat substitutes for a lighter option.
  • Greek Yogurt – Adds moisture and additional protein; use dairy-free yogurt for a vegan-friendly alternative.
  • Honey or Maple Syrup – Sweetens the bites; agave nectar works as a delightful substitute for varied sweetness.
  • Blueberries – Offers antioxidants and bursts of flavor; swap with raspberries or dried fruits for a twist.
  • Vanilla Extract – Enhances the overall flavor; while optional, it adds a lovely depth.
  • Salt – Balances the sweetness, and is essential for flavor enhancement.

For Optional Mix-Ins

  • Mini Dark Chocolate Chips – Adds a touch of indulgence, elevating the flavor profile with a chocolate twist.
  • Chia Seeds or Ground Flax – Boosts fiber and nutrients, enhancing the health benefits of these Blueberry Cheesecake Bites.

Creating these bites is not only fun but also gives you a chance to express your creativity in the kitchen!

Step‑by‑Step Instructions for Blueberry Cheesecake Bites

Step 1: Mix the Dry Ingredients
In a large mixing bowl, combine 1 cup of rolled oats, ½ cup of almond flour, and 1 scoop of vanilla protein powder. Use a whisk to blend these dry ingredients evenly for about 1-2 minutes until no clumps remain. This mix forms the foundation of your Blueberry Cheesecake Bites, providing a delightful texture.

Step 2: Prepare the Creamy Mixture
In a separate bowl, beat together 4 ounces of softened cream cheese, ½ cup of Greek yogurt, 2 tablespoons of honey or maple syrup, and 1 teaspoon of vanilla extract. Use a hand mixer or a spatula for about 3-4 minutes until the mixture is smooth and creamy. The goal is to achieve a rich, velvety texture that complements your bites perfectly.

Step 3: Fold in the Blueberries
Carefully add 1 cup of fresh blueberries to the creamy mixture. Gently fold them in using a spatula, taking care not to crush the berries. You want to see those beautiful bursts of blue throughout your mixture, which will provide both flavor and visual appeal in your Blueberry Cheesecake Bites.

Step 4: Combine Wet and Dry Mixtures
Gradually incorporate the dry ingredients into the wet mixture, stirring gently until a dough-like consistency forms. This step should take about 1-2 minutes; look for a mixture that holds together without being too sticky. Ensure everything is well combined while maintaining the integrity of the blueberries.

Step 5: Form the Bites
Take a tablespoon-sized portion of the mixture and roll it into a ball using your hands. Place the rolled bites on a parchment-lined baking sheet, ensuring they are spaced about 1 inch apart. This should yield around 12-15 Blueberry Cheesecake Bites, each perfect for a quick snack or treat.

Step 6: Chill to Firm Up
Refrigerate the baking sheet with the rolled bites for at least 30 minutes. This chilling period allows the flavors to meld and helps the bites firm up, ensuring they hold their shape. Afterward, they should be slightly firm to the touch and ready to enjoy at a moment’s notice.

Make Ahead Options

These Blueberry Cheesecake Protein Bites are a game-changer for meal prep enthusiasts! You can prepare the mixture up to 24 hours in advance—simply follow the initial mixing steps and store the dough in an airtight container in the refrigerator. Just be sure to shape the bites right before serving to maintain that delightful texture and quality. If you prefer, you can also roll the bites and refrigerate them for up to 3 days. When ready to enjoy, serve directly from the fridge, or let them sit for a few minutes to soften slightly. This way, you’ll have delicious, guilt-free snacks ready for busy weeknights or post-workout treats with just a little planning!

Expert Tips for Blueberry Cheesecake Bites

  • Room Temperature Ingredients: Ensure your cream cheese and yogurt are at room temperature for smooth, creamy mixing—this helps avoid lumps.

  • Gentle Folding: Be cautious when folding in the blueberries; gentle movements prevent them from getting crushed, preserving their burst of flavor in the bites.

  • Perfect Storage: Refrigerated bites stay fresh for up to a week. For longer storage, freeze them individually to maintain their delicious texture and convenience.

  • Flavor Variety: Feel free to customize your Blueberry Cheesecake Bites by substituting blueberries with other fruits like strawberries or adding ingredients like chia seeds for extra nutrition.

  • Mix-In Options: Experiment by incorporating mini dark chocolate chips or cocoa powder for a delightful chocolate twist—indulge your cravings while keeping it healthy!

Blueberry Cheesecake Bites Variations & Substitutions

Feel free to explore these variations and substitutions to make these protein bites uniquely yours!

  • Fruit Swaps: Replace blueberries with raspberries, strawberries, or chopped dried fruits for different flavors and textures. Each fruit brings its own vibe, adding a fresh twist you’ll love!

  • Crazy for Chocolate: Add mini dark chocolate chips or a swirl of cocoa powder to the mixture for a rich, satisfying chocolatey treat. The combination of chocolate and blueberry creates a delightful flavor fusion.

  • Fiber Boost: Incorporate chia seeds or ground flaxseed into the mix for added fiber and nutrients, enhancing both texture and health benefits. This adds a slight crunch that complements the creamy bites beautifully.

  • Nut-Free Friendly: Swap almond flour for oat flour to keep these bites nut-free while still maintaining delicious flavor and texture. Perfect for those with nut allergies!

  • Dairy-Free Delight: Use dairy-free yogurt and cream cheese substitutes to create a vegan version without losing that creamy cheesecake essence. Your friends won’t even know the difference!

  • Sweetener Variations: Instead of honey or maple syrup, try agave nectar for a lighter sweetness or even stevia for a sugar-free option. Each alternative introduces its own unique flavor profile.

  • Zesty Kick: Add a touch of lemon zest to the mixture for a refreshing zing that perfectly complements the sweet blueberries. This extra brightness can elevate the flavor experience!

  • Crunchy Texture: Toss in some crushed nuts or granola for a delightful crunch that contrasts the creamy filling. It adds exciting texture and enhances the bite-sized experience.

For more scrumptious snack recipes, don’t miss my delightful Blueberry French Toast or the enticing Strawberry Cheesecake options!

How to Store and Freeze Blueberry Cheesecake Bites

Fridge: Store your Blueberry Cheesecake Bites in an airtight container in the refrigerator for up to one week. This keeps them fresh and ready to enjoy whenever cravings hit.

Freezer: For longer storage, freeze the bites individually on a baking tray. Once firm, transfer them to a zip-top freezer bag for easy access to single servings without thawing the entire batch.

Thawing: To enjoy, simply take out the desired number of bites and let them thaw at room temperature for about 10–15 minutes. They’re just as tasty after freezing!

Refrigeration Tip: To avoid sticking, layer parchment paper between each layer of bites if stacking them in a container—this allows for easy retrieval of your delicious snacks!

What to Serve with Blueberry Cheesecake Protein Bites

Imagine a delightful afternoon snack or a post-workout treat that dances on the palate while being nutritious and satisfying.

  • Fresh Fruit Salad: A colorful medley of seasonal fruits complements the creamy texture of the bites and adds refreshing zest.

  • Greek Yogurt Parfait: Layer your favorite yogurt with granola and berries for a wholesome, filling dessert that echoes the cheesecake flavors.

  • Nutty Granola Bars: Crunchy and sweet, these bars provide a satisfying contrast to the soft, chewy bites and enhance your snack experience.

  • Smoothie Bowl: A vibrant berry smoothie topped with nuts and seeds pairs beautifully, creating a wholesome meal that’s both nourishing and delicious.

  • Chilled Green Tea: The light, earthy flavors of green tea refresh the palate and enhance the fruity notes of the Blueberry Cheesecake Protein Bites.

  • Coconut Macaroons: Chewy, sweet, and tropical, these cookies make an indulgent pairing that keeps your treat balanced yet satisfying.

Treat each pairing as a way to elevate your snacking experience, blending flavors, and textures that resonate with your love for homemade delights!

Blueberry Cheesecake Bites Recipe FAQs

How do I choose the right blueberries?
Absolutely! When selecting blueberries, look for plump, firm berries with a vibrant blue color. Avoid any with green or red spots, as those may not be ripe. Fresh blueberries should have a slight bloom on their surface, indicating freshness. For the best flavor, opt for those that smell sweet and aromatic.

What are the best storage methods for Blueberry Cheesecake Bites?
Very important! Store your Blueberry Cheesecake Bites in an airtight container in the refrigerator for up to one week. This helps keep them fresh and delicious. For longer storage, freeze the bites by placing them individually on a baking tray until firm, then transfer them to a zip-top freezer bag.

Can I freeze Blueberry Cheesecake Bites, and how do I do it?
Absolutely, freezing is a great option! To freeze, first roll the bites into balls and place them on a baking sheet lined with parchment paper. Freeze them for about 1 to 2 hours until solid, then transfer the frozen bites into a zip-top freezer bag. They can be stored this way for up to 3 months. When you’re ready to enjoy, simply thaw the desired number of bites at room temperature for about 10-15 minutes.

What can I do if my mixture is too dry?
Very common! If you find that your mixture is too dry and not holding together, you can add a little more Greek yogurt or cream cheese—about 1 tablespoon at a time—until you reach the desired consistency. Mixing in a splash of milk or water can also help bind the ingredients together for that perfect chewy texture.

Are Blueberry Cheesecake Bites suitable for people with allergies?
Absolutely! These bites can be tweaked to accommodate various dietary restrictions. For nut allergies, replace almond flour with oat flour. Use dairy-free yogurt and cream cheese substitutes for those with lactose intolerance or dairy allergies. Make sure to check all labels for potential allergens like gluten in oats, and customize any ingredients to ensure safety!

How long can these bites stay in the fridge after making?
For optimal freshness, enjoy your Blueberry Cheesecake Bites within 1 week when stored properly in the fridge. After that, the flavors may slightly diminish, but they will still be safe to eat! Just be sure to check for any visual cues like discoloration or changes in texture.

Blueberry Cheesecake Bites

Blueberry Cheesecake Bites: Guilt-Free Deliciousness Awaits

Discover Blueberry Cheesecake Bites, a guilt-free, protein-packed snack that satisfies cravings while keeping health goals in check.
Prep Time 30 minutes
Chilling Time 30 minutes
Total Time 1 hour
Servings: 12 bites
Course: Dessert
Cuisine: Healthy
Calories: 90

Ingredients
  

For the Bites
  • 1 cup Rolled Oats Can substitute with quick oats
  • ½ cup Almond Flour Can substitute with oat flour
  • 1 scoop Vanilla Protein Powder Opt for vegan protein for plant-based option
  • 4 ounces Cream Cheese (softened) Consider lower-fat substitutes
  • ½ cup Greek Yogurt Use dairy-free yogurt for vegan option
  • 2 tablespoons Honey or Maple Syrup Agave nectar also works
  • 1 cup Blueberries Can substitute with raspberries or dried fruits
  • 1 teaspoon Vanilla Extract Optional
  • 1 pinch Salt Essential for flavor enhancement
For Optional Mix-Ins
  • ¼ cup Mini Dark Chocolate Chips Optional
  • 2 tablespoons Chia Seeds or Ground Flax Boosts fiber and nutrients

Equipment

  • Mixing Bowl
  • Hand mixer
  • spatula
  • Baking Sheet
  • Parchment Paper

Method
 

Step‑by‑Step Instructions
  1. In a large mixing bowl, combine 1 cup of rolled oats, ½ cup of almond flour, and 1 scoop of vanilla protein powder. Whisk for 1-2 minutes until no clumps remain.
  2. In a separate bowl, beat together 4 ounces of softened cream cheese, ½ cup of Greek yogurt, 2 tablespoons of honey or maple syrup, and 1 teaspoon of vanilla extract until smooth and creamy.
  3. Carefully add 1 cup of fresh blueberries to the creamy mixture and gently fold them in.
  4. Gradually incorporate the dry ingredients into the wet mixture, stirring gently until a dough-like consistency forms.
  5. Take a tablespoon-sized portion of the mixture and roll it into a ball. Place on a parchment-lined baking sheet, spaced about 1 inch apart.
  6. Refrigerate for at least 30 minutes to firm up.

Nutrition

Serving: 1biteCalories: 90kcalCarbohydrates: 12gProtein: 4gFat: 3gSaturated Fat: 1gPolyunsaturated Fat: 0.5gMonounsaturated Fat: 1.5gCholesterol: 10mgSodium: 55mgPotassium: 75mgFiber: 2gSugar: 4gVitamin A: 200IUVitamin C: 2mgCalcium: 40mgIron: 0.5mg

Notes

For best results, ensure ingredients are at room temperature. Store in an airtight container for up to a week or freeze for longer storage with parchment paper between layers.

Tried this recipe?

Let us know how it was!

Crockpot Apple Crisp: Cozy, Easy Delight for Fall Nights

As I lifted the lid of my mixing bowl, a wave of earthy sweetness wrapped around the kitchen, a promise that something delightful was on the way. This Easy Salted Honey Pie is my go-to dessert for impressing family and friends with minimal effort, bringing the perfect balance of sweetness and a hint of sea salt that elevates any occasion. Whipping up in just 10 minutes, this recipe is not only quick but also adaptable for gluten-free diets, ensuring everyone at your table can indulge in its creamy, rich goodness. Whether you’re hosting a gathering or treating yourself after a long day, this pie is bound to become a favorite in your home. Are you ready to discover a new classic that will have everyone asking for seconds?

Why Will You Adore This Pie?

Unmatched Simplicity: This Easy Salted Honey Pie comes together in just 10 minutes, making it an ideal treat for busy weeknights or spontaneous gatherings.

Rich, Decadent Flavor: The blend of high-quality honey and heavy cream creates a luxuriously creamy filling, balanced perfectly with a sprinkle of flaky sea salt.

Gluten-Free Friendly: With adaptable crust options, this pie ensures everyone can partake in the indulgence, whether you’re using a standard crust or a gluten-free alternative.

Endless Versatility: Feel free to experiment with flavors—try a chocolate cookie crust or a hint of cinnamon for a unique twist!

Crowd-Pleasing Appeal: This dessert is sure to impress family and friends, making it a sure hit for any occasion. Think of it as the perfect companion to your gatherings, just like a Crispy Feta Fried Eggs brunch or a comforting Crispy Chilli Beef dinner!

Easy Make-Ahead Option: Prepare the filling ahead of time for a stress-free dessert experience, allowing you more time to enjoy the company.

Salted Honey Pie Ingredients

For the Crust
Pie Crust – You can use a store-bought or homemade crust; feel free to choose a gluten-free alternative to accommodate dietary needs.

For the Filling
Honey – Opt for high-quality honey for the best flavor; substitute with maple syrup if desired, but be aware it will change the pie’s taste.
Heavy Cream – Adds richness; you may use whole milk or coconut cream for a lighter version.
Unsalted Butter – Enhances the filling’s flavor and texture; coconut oil is a great dairy-free alternative.
Eggs – These provide essential structure to the filling, ensuring a creamy consistency.
Flaky Sea Salt – Sprinkling this just before serving elevates the flavors and adds a delightful contrast to the sweetness.

Note: This Salted Honey Pie is a delightful treat that’s quick to prepare and perfect for satisfying any sweet craving!

Step‑by‑Step Instructions for Salted Honey Pie

Step 1: Preheat the Oven
Begin by preheating your oven to 350°F (175°C). This crucial step ensures that your Easy Salted Honey Pie bakes evenly, resulting in a perfect texture. While the oven warms, you can focus on preparing your pie crust, making this a smooth and efficient process.

Step 2: Prepare the Crust
Take your pie crust and roll it out on a lightly floured surface if homemade, or simply unroll the store-bought crust. Carefully transfer the crust into a 9-inch pie plate, crimping the edges for a beautiful finish. This foundation is essential for holding your luscious filling when baking.

Step 3: Mix the Filling
In a medium mixing bowl, whisk together the eggs, honey, heavy cream, and melted butter until the mixture is smooth and fully combined. The luscious filling should be homogeneous, showcasing a rich, creamy consistency. Keep an eye out for any lumps to ensure your Salted Honey Pie results in a velvety texture.

Step 4: Fill the Crust
Pour the creamy filling into your prepared pie crust. Be cautious not to overfill; leave about half an inch from the top to prevent spills during baking. As the filling settles, you’ll notice its glossy surface, promising a delightful treat once baked to perfection.

Step 5: Bake the Pie
Carefully place your filled pie in the preheated oven and bake for 35-40 minutes. The edges should puff slightly, while the center retains a gentle jiggle, indicating it’s perfectly set. Keep an eye on it as the baking progresses; this visual cue is key for optimal doneness.

Step 6: Cool
After baking, remove your pie from the oven and allow it to cool to room temperature on a wire rack. This cooling process helps the pie maintain its structure. Once cooled, transfer it to the refrigerator and chill for at least 2 hours, allowing the flavors in your Salted Honey Pie to meld beautifully.

Step 7: Serve
Just before serving, sprinkle a generous pinch of flaky sea salt over the top of your chilled pie. This enhances the sweetness and adds a delightful crunch. Slice and present your Salted Honey Pie with pride, ready for everyone to indulge in this sweet, creamy sensation!

Crockpot Apple Crisp Variations

Feel free to play with this recipe and make it truly your own, adding unique touches that excite your taste buds!

  • Gluten-Free: Use certified gluten-free oats and a gluten-free flour blend for the crisp topping, ensuring everyone can enjoy this treat.
  • Nutty Crunch: Add chopped walnuts or pecans to the crumb topping for added texture and a delicious nutty flavor. They not only enhance the crunch but also bring a delightful richness to each bite.
  • Cinnamon Twist: Sprinkle in an extra teaspoon of cinnamon or a touch of nutmeg for a comforting spice that accentuates the natural sweetness of the apples.
  • Maple Sweetness: Substitute some of the sugar with pure maple syrup for a warm, earthy sweetness that complements the apples beautifully. This twist adds a lovely depth of flavor that will leave your guests raving!
  • Mixed Fruits: Combine apples with pears or berries for a fruity medley. This adds layers of flavor and makes for a visually stunning dessert, delighting everyone at your table.
  • Caramel Drizzle: Drizzle some caramel sauce over the top just before serving for an extra indulgent flair. The rich, gooey sweetness balances perfectly with the soft apples and crispy topping.
  • Vegan Delight: Swap butter for coconut oil and use a plant-based milk alternative to create a vegan-friendly version that everyone can enjoy.
  • Serve it Up: Pair with a scoop of vanilla ice cream or whipped cream to enhance the cozy experience, just like a scoop alongside your favorite Crispy Chilli Chicken.

Enjoy the journey of making this comforting dessert your own!

Make Ahead Options

These Easy Salted Honey Pies are perfect for meal prep enthusiasts! You can prepare the filling up to 24 hours in advance by mixing together the eggs, honey, heavy cream, and melted butter, storing it in an airtight container in the refrigerator. Additionally, the pie crust can be prepared ahead of time and refrigerated for up to 3 days. To maintain quality, make sure to wrap the crust tightly to prevent it from drying out. When you’re ready to bake, simply pour the chilled filling into the prepared crust, bake as directed, and enjoy a delightful dessert that saves you time and stress during busy gatherings!

What to Serve with Easy Salted Honey Pie?

Indulge in the sweetness of this delightful pie alongside some perfect pairings that enhance its flavors and textures.

  • Whipped Cream: A light, airy dollop adds creaminess that echoes the pie’s filling while balancing its sweetness beautifully.

  • Vanilla Ice Cream: The cold, creamy texture of vanilla ice cream contrasts the warm pie perfectly, creating a comforting dessert experience.

  • Fresh Berries: Juicy raspberries or strawberries bring a refreshing burst of acidity, complementing the rich honey and cream.

  • Caramel Sauce: Drizzling warm caramel over each slice takes the indulgence up a notch, adding a sweet and buttery flavor that charms your taste buds.

  • Espresso or Coffee: A robust cup of coffee complements the sweetness, making every bite of the pie even more satisfying.

  • Nutty Granola: A sprinkle of nutty granola on top adds crunch and texture, enhancing each creamy slice with a delightful bite.

  • Sparkling Cider: For a festive touch, serve this pie with sparkling cider, refreshing the palate and elevating the dining experience.

  • Chocolate Sauce: For chocolate lovers, a drizzle of rich chocolate sauce on top creates a luxurious pairing that harmonizes beautifully with the pie’s flavors.

  • Coconut Whipped Cream: For a dairy-free alternative, enjoy this pie with luscious coconut whipped cream, adding a tropical twist that enhances the dessert.

  • Chai Latte: The spiced warmth of a chai latte pairs brilliantly, bringing out the pie’s richness while adding comforting, aromatic notes.

Storage Tips for Salted Honey Pie

Fridge: Store your Salted Honey Pie in an airtight container in the refrigerator for up to 3-4 days, keeping it fresh and delicious for your sweet tooth cravings.

Freezer: For longer storage, freeze the pie wrapped tightly in plastic wrap and aluminum foil for up to 3 months. Label it for easy identification later!

Reheating: To enjoy leftovers, thaw overnight in the fridge and reheat slices gently in the microwave, or serve chilled to savor the flavors.

Expert Tips for Salted Honey Pie

  • Smooth Filling: Ensure the mixture is completely smooth before pouring into the crust to avoid any lumps in your pie.

  • Mind the Fill: Avoid overfilling the pie crust; a gentle jiggle in the center indicates perfection without risking spills.

  • Chill Time: Let the pie cool at room temperature before refrigerating. Proper chilling helps the flavors develop and the filling set beautifully.

  • Quality Ingredients: Use high-quality honey for a richer flavor. Experimenting with different types of honey can give your pie a unique taste.

  • Gluten-Free Options: If you’re opting for a gluten-free crust, ensure to check all your ingredients, including any additives in the filling.

Salted Honey Pie Recipe FAQs

How do I choose the best honey for my pie?
Absolutely! Opt for high-quality honey, as it significantly enhances the flavor of your Salted Honey Pie. Look for raw or local honey for a richer taste. If you’re experimenting, remember that maple syrup can be used as a substitute, but it will alter the flavor profile slightly.

How should I store leftover Salted Honey Pie?
To store your Salted Honey Pie, make sure to keep it in an airtight container in the refrigerator for up to 3-4 days. This way, you can savor its delightful taste, keeping it fresh and creamy. If you need to store it longer, consider wrapping it tightly and freezing it for up to 3 months to maintain its yumminess.

Can I freeze the Salted Honey Pie?
Of course! Freezing is a great option. To do so, wrap your chilled pie tightly in plastic wrap followed by aluminum foil to avoid freezer burn. When you’re ready to enjoy, thaw it overnight in the fridge and either enjoy it chilled or gently warm slices in the microwave.

What if my filling has lumps?
If you find your filling has lumps, don’t fret! Simply pour the mixture through a fine-mesh strainer to achieve a smooth consistency. This step ensures your pie has the rich, creamy filling you desire, free from any unwanted textures.

Is this recipe suitable for people with dietary restrictions?
Very! This Salted Honey Pie is easily adaptable for gluten-free diets by choosing a gluten-free crust. Always check your ingredients, including butter and cream, for any potential allergens. You can even substitute with dairy-free alternatives like coconut cream and vegan butter for a completely dairy-free treat!

How long does the pie need to chill before serving?
For the best results, allow your Salted Honey Pie to chill in the refrigerator for at least 2 hours after baking. This chilling time not only helps the filling set perfectly but also allows the flavors to meld beautifully, resulting in a dessert that’s even more delicious.

Crockpot Apple Crisp

Crockpot Apple Crisp: Cozy, Easy Delight for Fall Nights

Crockpot Apple Crisp is a warm, comforting dessert perfect for fall, combining sweet apples with a crunchy topping, highlighting its simplicity and deliciousness.
Prep Time 10 minutes
Cook Time 40 minutes
Cooling Time 2 hours
Total Time 2 hours 50 minutes
Servings: 8 slices
Course: Dessert
Cuisine: American
Calories: 250

Ingredients
  

For the Crisp
  • 6 cups sliced apples Granny Smith or Honeycrisp apples work well.
  • 1 cup brown sugar
  • 1 cup rolled oats
  • 1/2 cup all-purpose flour Use gluten-free flour if desired.
  • 1/2 cup unsalted butter Melted.
  • 1 teaspoon cinnamon
  • 1/2 teaspoon nutmeg

Equipment

  • Crockpot

Method
 

Preparation Steps
  1. Peel and slice the apples, placing them in the crockpot.
  2. Mix together brown sugar, oats, flour, melted butter, cinnamon, and nutmeg in a bowl.
  3. Spread the mixture evenly over the apples in the crockpot.
  4. Cover and cook on low for 4-6 hours or high for 2-3 hours, until apples are tender.
  5. Let cool for at least 2 hours before serving to allow juices to settle.

Nutrition

Serving: 1sliceCalories: 250kcalCarbohydrates: 38gProtein: 2gFat: 10gSaturated Fat: 6gCholesterol: 30mgSodium: 115mgPotassium: 135mgFiber: 2gSugar: 19gVitamin A: 250IUVitamin C: 4mgCalcium: 20mgIron: 0.5mg

Notes

Serve warm with vanilla ice cream or whipped cream for added indulgence.

Tried this recipe?

Let us know how it was!

Moist Apple Cider Bundt Cake for a Cozy Autumn Treat

As I stood in my kitchen, the scent of simmering apple cider wafted in the air, instantly transporting me to crisp autumn days spent picking apples. There’s something undeniably magical about seasonal flavors, and this Cozy Moist Apple Cider Bundt Cake captures all those warm, nostalgic vibes in a delightful dessert. It’s not just simple baking; it’s a heartwarming experience, where each slice delivers a tender crumb reminiscent of your favorite fall treats. With quick prep and an impressive presentation, this spiced bundt cake is perfect for cozy gatherings or a sweet family night at home. Are you ready to embrace the flavors of fall and treat your loved ones to something unforgettable?

Why Is This Cake a Must-Bake?

Cozy Comfort: This Moist Apple Cider Bundt Cake is the ultimate embodiment of fall, evoking the warmth of home-baked treats with every bite. Quick to Prepare: With just a few simple steps, you can whip up a stunning dessert that’s perfect for any autumn gathering. Flavor Explosion: Infused with a blend of spices and sweet apples, the taste is both comforting and festive. Impressive Presentation: The golden, dusted exterior makes it a showstopper on any dessert table. Versatile Adaptations: Feel free to experiment by adding nuts or drizzling caramel on top; each variation brings its own charm! Try serving it warm alongside a scoop of vanilla ice cream to truly elevate your experience. For more cozy recipes, check out our Strawberry Cheesecake Dump and Apple Crisp Cinnamon.

Moist Apple Cider Bundt Cake Ingredients

For the Cake
All-Purpose Flour – Essential for structure; opt for unbleached for a more natural flavor.
Baking Powder – Acts as a leavening agent; double-check the expiration date for best results.
Baking Soda – Provides additional lift; crucial for that perfect fluffy texture.
Ground Cinnamon – Adds warmth; using Ceylon cinnamon will lend a sweeter touch.
Ground Ginger – Infuses warmth; if you prefer, swap in nutmeg for a deeper flavor.
Ground Cloves – Complements the spice blend; you can reduce slightly if you prefer less intensity.
Salt – Balances the sweetness; just a pinch can elevate the flavors beautifully.
Unsalted Butter – Adds richness and moisture; make sure it’s softened for easier mixing.
Brown Sugar – Contributes a molasses-like sweetness; light or dark varieties both work well.
Granulated Sugar – Enhances overall sweetness; a blend of sugars adds depth to the flavor.
Large Eggs – Acts as a binding agent; bring them to room temperature for better incorporation.
Unsweetened Applesauce – Adds moistness and flavor; if using store-bought, drain excess liquid.
Apple Cider – A key flavor contributor; homemade cider is preferred for a fresh taste.
Vanilla Extract – Amplifies the flavor profile; pure extract is the best choice.

For the Topping
Cinnamon-Sugar – A delicious sweet, spiced finish; mix ¼ cup granulated sugar with 2 tsp cinnamon for the perfect sprinkle.

Indulge in the cozy flavors of this Moist Apple Cider Bundt Cake that’s sure to become a seasonal favorite!

Step‑by‑Step Instructions for Moist Apple Cider Bundt Cake

Step 1: Preheat the Oven and Prepare the Pan
Begin by preheating your oven to 350°F (175°C). While it warms up, grab a bundt pan and generously grease it with butter or non-stick spray. Make sure to cover all the nooks and crannies to prevent sticking, ensuring a beautiful release after baking your Moist Apple Cider Bundt Cake.

Step 2: Mix the Dry Ingredients
In a mixing bowl, combine the all-purpose flour, baking powder, baking soda, ground cinnamon, ground ginger, ground cloves, and salt. Whisk these dry ingredients together until they’re well blended — you want an even distribution of spices for optimum flavor. Set the bowl aside while you focus on the wet ingredients.

Step 3: Cream the Sugars and Butter
In a separate large mixing bowl, use an electric mixer to cream together the softened unsalted butter, brown sugar, and granulated sugar on medium speed. Beat until the mixture becomes fluffy and light in color, about 3-4 minutes. This step is essential for achieving that tender texture in your bundt cake.

Step 4: Incorporate the Eggs and Flavorings
Add the large eggs one at a time to the creamed sugary mixture, ensuring each is fully incorporated before the next addition. Once all the eggs are added, stir in the unsweetened applesauce and vanilla extract until completely blended. This will enhance the flavor and moisture of your Moist Apple Cider Bundt Cake.

Step 5: Combine Wet and Dry Mixes
Gradually add the previously mixed dry ingredients to the wet mixture, alternating with the apple cider. Start with the dry mix and blend until just combined, being careful not to over-mix, as this could make the cake dense. The batter should be smooth and slightly thick; you’re aiming for a delicious balance of flavors.

Step 6: Pour and Smooth the Batter
Pour the batter into your prepared bundt pan, smoothing the top with a spatula for an even surface. Gently tap the pan on the counter to eliminate any air bubbles, which can help the cake rise evenly during baking. The enticing aromas will start to fill your kitchen at this step!

Step 7: Bake the Cake
Place the bundt pan in the preheated oven and bake for 50 minutes, or until a toothpick inserted into the center comes out clean. Keep an eye on the cake; it should have a beautiful golden color around the edges and gently spring back when touched. Your patience will soon be rewarded with a delightful treat!

Step 8: Cool and Finish
After baking, remove the bundt pan from the oven and let it cool for 10 minutes on a wire rack. This brief resting period allows the cake to firm up slightly. Afterward, carefully invert the pan onto the rack to release the cake. Brush the warm bundt with melted butter and generously coat it with the cinnamon-sugar mixture for a sweet finishing touch.

What to Serve with Cozy Moist Apple Cider Bundt Cake

Indulge in the heartwarming flavors of fall by creating a beautifully balanced meal around your delightful cake.

  • Vanilla Ice Cream: A classic pairing that adds a creamy sweetness, perfectly complementing the spiced flavors of the bundt cake.
  • Cinnamon-Spiced Coffee: The rich, aromatic notes of cinnamon in your coffee enhance the cake’s spices, creating a cozy drink for chilly evenings.
  • Apple Cider Sangria: This fruity and refreshing drink adds a festive touch, making each slice of cake more delightful.
  • Roasted Root Vegetables: Earthy and sweet, these veggies echo the apple flavors while providing a warm contrast to the cake’s textures.
  • Whipped Cream: Light and airy, a dollop of freshly whipped cream adds a delightful creaminess that elevates every bite of cake.
  • Cheese Platter: Include sharp cheddar for a complementary savory contrast to the sweetness of the bundt cake, balancing the flavors beautifully.
  • Chai Tea: The spicy notes of chai tea offer a warm embrace, making each sip a comforting companion to your cake.

Make your gathering unforgettable with these delicious pairings that will bring everyone together around your Moist Apple Cider Bundt Cake!

Moist Apple Cider Bundt Cake Variations

Feel free to personalize this recipe and embrace your creativity in the kitchen!

  • Dairy-Free: Substitute the unsalted butter with coconut oil and use almond milk instead of regular milk for a rich, dairy-free version.
  • Pecan Power: Toss in a handful of chopped pecans to the batter for delightful nutty crunch in every slice.
  • Pumpkin Spice: Replace applesauce with pumpkin puree to create a cozy pumpkin version perfect for fall festivities.
  • Caramel Drizzle: Drizzle warm caramel sauce over the cooled cake for a luscious and indulgent touch.
  • Spice it Up: Add a pinch of cayenne for a subtle heat that pairs wonderfully with the sweetness of the cake.
  • Gluten-Free: Replace regular flour with a gluten-free flour blend to enjoy a gluten-free version that doesn’t skimp on taste.
  • Bourbon Infusion: Stir in a tablespoon of bourbon to the batter for an unexpected flavor twist that adds warmth to the cake.
  • Fruit Fusion: Toss in some dried cranberries or raisins for added sweetness and chewy texture throughout the bundt cake.

These variations not only transform your cake but also allow you to explore exciting flavor profiles. If you’re on a baking spree, don’t forget to indulge in our Easter Poke Cake or the delightful Honeybun Carrot Cake that are sure to impress your family!

Make Ahead Options

These Moist Apple Cider Bundt Cakes are perfect for meal prep, allowing you to enjoy the sweet flavors of fall without the last-minute hassle! To prepare ahead, you can bake the cake up to 24 hours in advance; simply let it cool completely, then wrap it tightly in plastic wrap or foil to maintain moisture. Alternatively, you can mix the dry ingredients (flour, baking powder, baking soda, spices, and salt) up to 3 days ahead, storing them in an airtight container. When you’re ready to enjoy your cake, follow the final steps of mixing the wet ingredients and baking. This way, you’ll have a delightful dessert with minimal effort, just as delicious and moist as when freshly made!

Expert Tips for Moist Apple Cider Bundt Cake

  • Quality Ingredients: Use fresh, high-quality apple cider and applesauce for the best flavor; homemade is even better for seasonal authenticity.
  • Mixing Technique: Avoid over-mixing the batter; this will help keep your cake tender and fluffy rather than dense.
  • Adjust Applesauce: If using store-bought applesauce, strain any excess moisture to ensure the ideal cake texture.
  • Taste Boost: For a spicier kick, consider incorporating a dash of nutmeg or cayenne pepper into the dry mix for an added layer of flavor.
  • Cooling Time: Don’t skip the cooling time before inverting the cake; it helps maintain the shape and texture of your Moist Apple Cider Bundt Cake.

How to Store and Freeze Moist Apple Cider Bundt Cake

Room Temperature: Store your cake covered at room temperature for up to 3 days to keep it fresh and flavorful.

Fridge: If you plan to enjoy it longer, refrigerate the bundt cake, tightly wrapped, for up to a week. This helps retain its moisture while enhancing the spices.

Freezer: For longer storage, wrap individual slices or the whole cake in plastic wrap, then foil. Freeze for up to 3 months. Thaw overnight in the fridge before serving.

Reheating: To enjoy the cake warm, microwave a slice for 15-20 seconds, or place in a preheated oven at 350°F (175°C) for a few minutes. This is especially delightful when paired with a scoop of ice cream!

Moist Apple Cider Bundt Cake Recipe FAQs

How do I select the best apple cider for my cake?
Absolutely! When choosing apple cider for your Moist Apple Cider Bundt Cake, look for fresh, unfiltered varieties that have a rich, robust flavor. If you can, opt for homemade cider for the best taste experience. Avoid apple juice, as it lacks the depth and warmth necessary for this cozy dessert.

How long can I store the bundt cake, and what’s the best method?
You can store your cake covered at room temperature for up to 3 days, ensuring it stays fresh and moist. For longer storage, wrap the bundt cake tightly in plastic wrap and refrigerate it for up to a week. This helps preserve the flavors and spices, making each slice just as delightful as the first!

Can I freeze the Moist Apple Cider Bundt Cake?
Absolutely! For freezing, wrap individual slices or the entire cake in plastic wrap, then cover it with foil to prevent freezer burn. You can store it for up to 3 months. When you’re ready to enjoy it, simply thaw it overnight in the fridge. For an added touch of warmth, reheat the slices for 15-20 seconds in the microwave or pop them in a preheated oven at 350°F (175°C) for a few minutes.

What should I do if my cake is too dense?
If your bundt cake turns out denser than expected, there could be a few reasons. Ensure that you are not over-mixing the batter, as this can lead to a tough cake. Also, double-check that your leavening agents (baking powder and baking soda) are fresh. If using store-bought applesauce, draining excess moisture is key too!

Does this recipe cater to any dietary considerations?
While this Moist Apple Cider Bundt Cake contains common allergens like eggs and gluten, you can adapt it for dietary needs. For a dairy-free version, substitute the butter with coconut oil or vegan butter, and use flax eggs as an egg replacement. Feel free to explore ingredient alternatives that suit you best; the more the merrier!

Can I add nuts or other toppings to the cake?
Very much so! For added texture and flavor, consider folding in chopped walnuts or pecans into the batter before baking. You might also drizzle melted caramel sauce on top after baking for a decadent finish. Let your creativity shine!

Moist Apple Cider Bundt Cake

Moist Apple Cider Bundt Cake for a Cozy Autumn Treat

This Moist Apple Cider Bundt Cake blends warm spices and sweet apples for a cozy autumn treat that’s sure to impress.
Prep Time 15 minutes
Cook Time 50 minutes
Cooling Time 10 minutes
Total Time 1 hour 15 minutes
Servings: 12 slices
Course: Dessert
Cuisine: American
Calories: 350

Ingredients
  

For the Cake
  • 3 cups All-Purpose Flour Opt for unbleached for a more natural flavor.
  • 2 teaspoons Baking Powder Double-check the expiration date for best results.
  • 1 teaspoon Baking Soda Provides additional lift.
  • 2 teaspoons Ground Cinnamon Using Ceylon cinnamon will lend a sweeter touch.
  • 1 teaspoon Ground Ginger If you prefer, swap in nutmeg for a deeper flavor.
  • 1 teaspoon Ground Cloves You can reduce slightly if you prefer less intensity.
  • 1 teaspoon Salt Just a pinch can elevate the flavors beautifully.
  • 1 cup Unsalted Butter Make sure it’s softened for easier mixing.
  • 1 cup Brown Sugar Light or dark varieties both work well.
  • 1 cup Granulated Sugar A blend of sugars adds depth to the flavor.
  • 3 Large Eggs Large Eggs Bring them to room temperature for better incorporation.
  • 1 cup Unsweetened Applesauce If using store-bought, drain excess liquid.
  • 1 cup Apple Cider Homemade cider is preferred for a fresh taste.
  • 2 teaspoons Vanilla Extract Pure extract is the best choice.
For the Topping
  • ¼ cup Cinnamon-Sugar Mix with 2 tsp cinnamon for the perfect sprinkle.

Equipment

  • Bundt pan
  • Mixing bowls
  • Electric mixer

Method
 

Step-by-Step Instructions
  1. Preheat your oven to 350°F (175°C). Grease a bundt pan with butter or non-stick spray.
  2. In a mixing bowl, combine the flour, baking powder, baking soda, cinnamon, ginger, cloves, and salt. Whisk until well blended.
  3. In a separate bowl, cream together the butter, brown sugar, and granulated sugar until fluffy and light in color.
  4. Add eggs one at a time, blending in each before adding the next. Stir in applesauce and vanilla until blended.
  5. Gradually add dry ingredients to the wet mixture, alternating with the apple cider.
  6. Pour the batter into the prepared bundt pan and smooth the top. Tap the pan to eliminate air bubbles.
  7. Bake for 50 minutes or until a toothpick inserted comes out clean. Keep an eye on the golden color.
  8. Cool in the pan for 10 minutes, then invert onto a wire rack. Brush with melted butter and coat with cinnamon-sugar.

Nutrition

Serving: 1sliceCalories: 350kcalCarbohydrates: 48gProtein: 4gFat: 15gSaturated Fat: 9gPolyunsaturated Fat: 1gMonounsaturated Fat: 4gCholesterol: 55mgSodium: 200mgPotassium: 220mgFiber: 1gSugar: 28gVitamin A: 400IUVitamin C: 1mgCalcium: 20mgIron: 1mg

Notes

Store covered at room temperature for up to 3 days, or refrigerate for up to a week. Wrap and freeze for longer storage.

Tried this recipe?

Let us know how it was!

Pumpkin Spice Coffee Cake That’ll Warm Your Fall Mornings

As the leaves turn golden and the air grows crisp, there’s something magical about bringing a touch of fall into your kitchen. My Pumpkin Spice Coffee Cake with Maple Glaze is a delightful way to celebrate the season, blending the comforting essence of pumpkin puree with a warm hug of spices. This recipe isn’t just about creating a moist, fluffy cake; it’s a simple, quick bake that will fill your home with an irresistible aroma, luring your family and friends to the kitchen. Plus, it’s perfect for cozy morning gatherings or an afternoon pick-me-up with coffee. Are you ready to experience the taste of autumn? Let’s dive in!

Why is Pumpkin Spice Coffee Cake a Must-Try?

Irresistible Aroma: Your kitchen will be filled with the cozy scent of warm spices and sweet pumpkin as this cake bakes.

Simple Ingredients: With just a handful of pantry staples, creating this treat is a breeze! You can even use a substitute like yogurt for sour cream.

Perfectly Moist: The pumpkin puree and sour cream work together to ensure every slice is moist and fluffy.

Versatile Delight: Whether you’re pairing it with your morning coffee or serving guests at a gathering, this cake is an instant crowd-pleaser.

Time-Saving Recipe: In under an hour, you can have a delicious and seasonal dessert ready to impress. For more delightful fall flavors, check out my Joumou Haitian Pumpkin Soup or try whipping up some Nutella Pancakes Blend for brunch!

Pumpkin Spice Coffee Cake Ingredients

For the Cake

  • Pumpkin Puree – Provides moisture and flavor; substitute with homemade pumpkin puree if desired.
  • Sour Cream – Adds tanginess for a moist texture; yogurt can work as a great substitute.
  • Granulated Sugar – Sweetens the cake while enhancing texture; brown sugar can deepen the flavor profile.
  • Light Brown Sugar – Creates a caramel-like sweetness in the cake; dark brown sugar offers an extra molasses kick.
  • All-Purpose Flour – Forms the cake’s structure; feel free to use a gluten-free flour blend if needed.
  • Baking Powder – Ensures the cake rises for a light, fluffy texture; check for freshness for best results.
  • Baking Soda – Works with sour cream for leavening; avoid substitutions in this recipe.
  • Fine Sea Salt – Balances sweetness and enhances flavors; kosher salt is a closer alternative.
  • Ground Cinnamon – Infuses a warm, classic fall flavor; adjust to match your personal taste preference.
  • Ground Ginger – Adds a zesty warmth to complement the pumpkin; feel free to tweak the amount based on your liking.
  • Ground Nutmeg – Enhances the autumnal vibe of the cake; fresh nutmeg offers a more aromatic profile.
  • Vegetable Oil – Keeps the cake tender and moist; melted butter can give it a richer taste.
  • Eggs – Bind ingredients together for structure; flax eggs are a useful vegan substitute.

For the Streusel Topping

  • Brown Sugar – Provides sweetness and depth; you can use granulated sugar as a standby.
  • All-Purpose Flour – Forms the body of the streusel; ensure it’s mixed well for crumbly goodness.
  • Pecans – Add a delightful crunch; walnuts or almonds are excellent alternatives for a nutty flavor.
  • Cinnamon – Enhances the streusel flavor profile; adjust the quantity for your spice comfort level.
  • Melted Butter – Binds the streusel ingredients; coconut oil is a great vegan-friendly option.

For the Maple Glaze

  • Powdered Sugar – Sweetens the glaze for a perfect finish; sift for a smoother texture.
  • Maple Syrup – Adds a rich flavor that pairs beautifully with pumpkin; feel free to substitute with agave syrup for a vegan version.

Dive into baking this delectable Pumpkin Spice Coffee Cake, and let the comforting flavors of fall embrace your kitchen!

Step‑by‑Step Instructions for Pumpkin Spice Coffee Cake

Step 1: Preheat and Prepare the Pan
Begin by preheating your oven to 350°F (175°C) to ensure a perfectly baked Pumpkin Spice Coffee Cake. While the oven warms up, grab an 8-inch square metal baking pan and spray it generously with non-stick spray. This will prevent the cake from sticking, allowing for an easy release once it’s baked.

Step 2: Make the Streusel Topping
In a small mixing bowl, combine the brown sugar, all-purpose flour, chopped pecans, and cinnamon. Pour in the melted butter and mix with a fork until the mixture becomes crumbly. You’ll want to achieve a texture similar to coarse sand; this delightful streusel topping will add a delicious crunch to your cake.

Step 3: Mix the Dry Ingredients
In a large mixing bowl, whisk together the all-purpose flour, baking powder, baking soda, fine sea salt, ground cinnamon, ground ginger, and ground nutmeg. This combination of dry ingredients is essential for your Pumpkin Spice Coffee Cake, as it provides flavor and structure. Ensure everything is evenly mixed before moving on to the next step.

Step 4: Combine the Wet Ingredients
In a separate bowl, blend together the pumpkin puree, vegetable oil, sour cream, and beaten eggs. Stir these ingredients until they are well combined and smooth. This rich mixture will infuse your cake with moisture and flavor, setting the stage for a light and fluffy Pumpkin Spice Coffee Cake.

Step 5: Blend Dry and Wet Mixtures
Create a well in the center of the dry ingredient mixture and pour in the wet blend. Using a spatula, gently stir the ingredients together until just combined—the batter should be slightly lumpy, which ensures moisture and prevents overmixing. Be careful not to overwork the batter, as this could affect the cake’s texture.

Step 6: Layer and Bake
Pour half of the batter into your prepared baking pan, spreading it evenly. Then, sprinkle half of the streusel topping over this layer. Carefully add the remaining batter on top, and finish with the rest of the streusel topping. Bake in the preheated oven for approximately 35 minutes, or until a toothpick inserted into the center comes out clean.

Step 7: Cool and Glaze
Once baked, remove the Pumpkin Spice Coffee Cake from the oven and let it cool in the pan for about 15 minutes. While it cools, prepare your glaze by whisking together powdered sugar and maple syrup until smooth. Drizzle this sweet glaze over the warm cake before slicing it into squares, ready to be enjoyed by family and friends.

Make Ahead Options

These Pumpkin Spice Coffee Cakes are ideal for meal prep enthusiasts! You can mix the dry ingredients and create your streusel topping up to 24 hours in advance, storing them in airtight containers to maintain freshness. Additionally, the cake batter can be prepared the night before and kept in the refrigerator until you’re ready to bake. When you’re ready to enjoy your cake, simply pour the batter into the pan, sprinkle with streusel, and bake as directed; it’ll be just as delicious! By prepping ahead, you’ll save precious time in the morning while still delighting in the comforting flavors of this autumn treat.

How to Store and Freeze Pumpkin Spice Coffee Cake

Room Temperature: Store the cake covered at room temperature for up to 4 days to maintain its delicious moistness and flavor.

Fridge: If you live in a warmer climate, you may refrigerate the coffee cake for up to 1 week. Just make sure it’s wrapped well to prevent drying out.

Freezer: This Pumpkin Spice Coffee Cake freezes beautifully! Wrap it tightly in plastic wrap and aluminum foil; it can be stored in the freezer for up to 3 months.

Reheating: To enjoy leftovers, thaw the cake in the fridge overnight and reheat slices in the microwave for about 15 seconds for a warm, delightful treat.

Expert Tips for Pumpkin Spice Coffee Cake

  • Use Fresh Ingredients: Ensure that your baking powder and baking soda are fresh for the best rise and texture in your Pumpkin Spice Coffee Cake.

  • Check for Doneness: Insert a toothpick into the center of the cake; it should come out clean. If it’s sticky, give it more time in the oven.

  • Don’t Overmix: When combining wet and dry ingredients, stir gently until just combined to avoid a dense cake. Slight lumps are okay!

  • Perfect Pan Choice: Opt for a light-colored metal pan for even baking; avoid dark pans as they can cause the edges to cook faster.

  • Customization Options: Feel free to add nuts, chocolate chips, or other spices to the batter for a personal twist on this delicious coffee cake.

What to Serve with Pumpkin Spice Coffee Cake

Imagine lounging on a crisp fall afternoon, savoring slices of moist cake alongside cozy, complementary flavors and drinks.

  • Warm Spiced Cider: Offers a comforting, fruity balance to the rich spices in the cake, enhancing the autumn experience.
  • Whipped Cream: Light and airy, it adds a delightful creaminess that perfectly contrasts the cake’s denser texture while providing a sweet finish.
  • Fresh Fruit Salad: A vibrant mix of seasonal fruits brings a refreshing zest, balancing the warming spices and adding a splash of color to your table.
  • Hot Coffee: The classic pairing elevates flavors; a bold brew with hints of chocolate or caramel complements the pumpkin’s sweetness.
  • Maple Glazed Pecans: Crunchy and sweet, these create a satisfying texture contrast, while amplifying the maple flavor found in the cake’s glaze.
  • Pumpkin Ice Cream: A creamy, decadent dessert that embraces the fall theme, providing a rich and cool counterpart to the warm coffee cake.
  • Chai Tea: Its spicy, herbal warmth syncs beautifully with the cake’s own spiced flavors; a cozy drink to enhance your afternoons.
  • Chocolate Drizzle: A simple addition that adds richness and a touch of indulgence, perfect for those who crave a chocolate contrast.

Pumpkin Spice Coffee Cake Variations

Feel free to get creative and make this delightful cake your own with these fun twists!

  • Nut-Free: Replace pecans in the streusel with oats for a crunchy, nut-free topping. This option remains satisfying and delicious!
  • Apple & Cranberry: Fold in diced apples or dried cranberries to the batter for bursts of tartness that complement the pumpkin beautifully.
  • Chocolate Chip Delight: Stir in semi-sweet chocolate chips to the batter for an irresistible sweet surprise that elevates the cake to a whole new level.
  • Spice it Up: Increase the amount of ground cinnamon and ginger, or even add a dash of allspice for an extra kick of warmth in every bite.
  • Dairy-Free: Substitute sour cream with coconut yogurt and use a dairy-free butter alternative in the streusel for a deliciously inclusive treat!
  • Maple Pecan Variation: Replace the regular streusel nuts with maple-soaked pecans for that extra layer of flavor that’s perfect for fall!
  • Pumpkin Spice Swirl: Create a pumpkin spice cream cheese swirl by blending cream cheese with a bit of sugar and pumpkin spice mix, then swirl it through the batter before baking.

For those who love seasonal flavors, consider pairing this cake with a warm beverage while diving into other fall favorites like the cozy Strawberry Cheesecake or the delicious Easter Poke Cake. Your taste buds will thank you!

Pumpkin Spice Coffee Cake Recipe FAQs

What type of pumpkin puree should I use?
Absolutely! You can use store-bought pumpkin puree or make your own by roasting fresh pumpkins. If you go for the fresh option, simply cut the pumpkin in half, remove the seeds, roast the halves at 400°F (200°C) until tender, then scoop out the flesh and blend until smooth. It’s a fantastic way to celebrate fall flavors!

How should I store the Pumpkin Spice Coffee Cake?
I recommend storing your pumpkin spice coffee cake covered at room temperature for up to 4 days, keeping it moist and ready to enjoy. If you live in a warm climate, wrapping it tightly and refrigerating it will allow it to last up to a week without losing its delicious texture.

Can I freeze Pumpkin Spice Coffee Cake?
Yes, you can freeze the cake very successfully! Just wrap it tightly in plastic wrap, followed by aluminum foil to protect it from freezer burn, and it will last for up to 3 months. When you’re ready to enjoy a slice, thaw it in the fridge overnight, then warm it in the microwave for about 15 seconds for that freshly-baked feel.

What if my cake is too dense after baking?
Very good question! A dense pumpkin spice coffee cake can happen for a couple of reasons. Overmixing the batter is a common culprit, as this can lead to a tougher texture. Make sure to mix just until the ingredients are combined. Additionally, ensuring your baking powder and baking soda are fresh will help the cake rise beautifully!

Are there any dairy-free substitutions for the ingredients?
Absolutely! For a dairy-free version of this recipe, you can substitute sour cream with unsweetened almond or coconut yogurt. You can also use non-dairy milk combined with a tablespoon of vinegar for the pumpkin puree mixture instead of eggs for added moisture.

Is this recipe safe for pets, like dogs?
While the ingredients in pumpkin spice coffee cake are generally safe for dogs (especially the pumpkin), you should always avoid sharing baked goods that contain sugar or other spices, like nutmeg, which can be harmful to pets. Stick to plain, cooked pumpkin for treats that are safe for your furry friends!

Pumpkin Spice Coffee Cake

Pumpkin Spice Coffee Cake That'll Warm Your Fall Mornings

Enjoy a cozy slice of Pumpkin Spice Coffee Cake filled with warm spices and pumpkin, perfect for fall mornings.
Prep Time 15 minutes
Cook Time 35 minutes
Cooling Time 15 minutes
Total Time 1 hour 5 minutes
Servings: 9 slices
Course: Dessert
Cuisine: American
Calories: 280

Ingredients
  

For the Cake
  • 1 cup Pumpkin Puree Substitute with homemade pumpkin puree if desired.
  • 1 cup Sour Cream Yogurt can work as a great substitute.
  • 1 cup Granulated Sugar Brown sugar can deepen the flavor profile.
  • 1/2 cup Light Brown Sugar Dark brown sugar offers an extra molasses kick.
  • 2 cups All-Purpose Flour Feel free to use a gluten-free flour blend if needed.
  • 2 teaspoons Baking Powder Check for freshness for best results.
  • 1 teaspoon Baking Soda Avoid substitutions in this recipe.
  • 1/2 teaspoon Fine Sea Salt Kosher salt is a closer alternative.
  • 2 teaspoons Ground Cinnamon Adjust to match your personal taste preference.
  • 1 teaspoon Ground Ginger Feel free to tweak the amount based on your liking.
  • 1/2 teaspoon Ground Nutmeg Fresh nutmeg offers a more aromatic profile.
  • 1/2 cup Vegetable Oil Melted butter can give it a richer taste.
  • 2 Eggs Flax eggs are a useful vegan substitute.
For the Streusel Topping
  • 1/2 cup Brown Sugar Granulated sugar can be used as a standby.
  • 1/2 cup All-Purpose Flour Ensure it’s mixed well for crumbly goodness.
  • 1/2 cup Pecans Walnuts or almonds are excellent alternatives.
  • 1 teaspoon Cinnamon Adjust the quantity for your spice comfort level.
  • 1/4 cup Melted Butter Coconut oil is a great vegan-friendly option.
For the Maple Glaze
  • 1 cup Powdered Sugar Sift for a smoother texture.
  • 1/4 cup Maple Syrup Feel free to substitute with agave syrup for a vegan version.

Equipment

  • 8-inch square metal baking pan
  • Mixing bowls
  • whisk
  • spatula
  • Fork

Method
 

Step-by-Step Instructions for Pumpkin Spice Coffee Cake
  1. Preheat your oven to 350°F (175°C) and prepare an 8-inch square metal baking pan with non-stick spray.
  2. In a small mixing bowl, combine the brown sugar, all-purpose flour, chopped pecans, and cinnamon. Mix in melted butter until crumbly.
  3. In a large mixing bowl, whisk together the all-purpose flour, baking powder, baking soda, fine sea salt, ground cinnamon, ground ginger, and ground nutmeg until well combined.
  4. In a separate bowl, blend together the pumpkin puree, vegetable oil, sour cream, and beaten eggs until smooth.
  5. Gently fold the wet ingredient mixture into the dry ingredients until just combined; do not overmix.
  6. Pour half of the batter into the prepared baking pan and sprinkle with half of the streusel topping. Add the remaining batter and top with the remaining streusel.
  7. Bake for approximately 35 minutes or until a toothpick inserted comes out clean. Let it cool for 15 minutes in the pan.
  8. Whisk together powdered sugar and maple syrup to create glaze. Drizzle over the warm cake and slice into squares.

Nutrition

Serving: 1sliceCalories: 280kcalCarbohydrates: 40gProtein: 3gFat: 12gSaturated Fat: 2gPolyunsaturated Fat: 0.5gMonounsaturated Fat: 1gCholesterol: 35mgSodium: 180mgPotassium: 120mgFiber: 1gSugar: 18gVitamin A: 1000IUVitamin C: 1mgCalcium: 20mgIron: 1mg

Notes

Store the cake covered at room temperature for up to 4 days, or refrigerate for up to 1 week. Freeze for up to 3 months wrapped in plastic wrap and aluminum foil.

Tried this recipe?

Let us know how it was!

Delicious Mini Baked Chicken Tacos Ready in 30 Minutes

As I rummaged through the fridge one evening, the sight of leftover chicken sparked an idea I couldn’t resist. Suddenly, my kitchen transformed into a taco haven with the creation of these irresistible Mini Baked Chicken Tacos! Ready in just 30 minutes, this quick and easy recipe is perfect for anyone looking to ditch the fast food routine. The flavorful combination of a creamy, spicy chicken filling and melted cheese makes it a family-friendly favorite, leaving everyone asking for seconds. Plus, the best part? You can customize these tacos with your favorite toppings for that extra flair! What toppings will you choose to make your taco night unforgettable?

Why are Mini Baked Chicken Tacos Amazing?

Deliciously Quick: In just 30 minutes, you can whip up these mouthwatering tacos, making them a perfect weeknight dinner solution.

Crunchy Goodness: Experience a delightful crispy shell that contrasts beautifully with the warm, cheesy filling—every bite is a savory delight!

Customizable Appeal: Tailor each taco to your taste with toppings like salsa, sour cream, or fresh cilantro, ensuring everyone’s plate is filled with their favorites.

Family-Friendly: These Mini Baked Chicken Tacos are a crowd-pleaser that even picky eaters will love, adding fun to any meal.

Simple Ingredients: With easy-to-find components like cooked chicken and corn tortillas, you can start your taco night without a hitch!

For more delicious chicken ideas, check out my Butter Baked Chicken or try the spicy goodness of Chilli Chicken Takeout for another flavor-packed meal.

Mini Baked Chicken Tacos Ingredients

For the Tacos

  • Cooked Chicken (1 ½ lbs) – Use shredded rotisserie chicken for convenience and a burst of flavor.
  • Corn Tortillas (10 small) – Provides a crispy base; flour tortillas can be used, but they may require a quicker bake time.
  • Shredded Cheese (3 cups) – Adds creaminess and a savory kick; feel free to substitute with your favorite cheese like cheddar or Monterey Jack.
  • Olive Oil (1 tablespoon) – Helps crisp taco shells; just a light coating will do to prevent sogginess.

For Optional Toppings

  • Sour Cream – Adds a cooling element to balance the spicy chicken filling.
  • Salsa – A great way to enhance flavor and add zest to your Mini Baked Chicken Tacos.
  • Fresh Cilantro – Offers a fresh finish; explores this herb’s vibrant taste to elevate your dish!
  • Lime Wedges – Squeeze over tacos for a zesty zing; it perfectly complements the savory elements in your tacos.

These Mini Baked Chicken Tacos are not just delicious but also family-friendly and customizable, making them a perfect meal option for any taco night!

Step‑by‑Step Instructions for Mini Baked Chicken Tacos

Step 1: Preheat Oven
Begin by preheating your oven to 425°F (220°C). As it heats, line a large sheet pan with parchment paper to ensure an easy cleanup later. This will help your Mini Baked Chicken Tacos crisp up beautifully without sticking, so your cooking experience remains delightful.

Step 2: Prepare Taco Shells
Take your corn tortillas and gently brush both sides with a light coating of olive oil, ensuring they are well-coated but not soggy. Arrange the tortillas in a baking dish, overlapping slightly if needed to fit. This will create a sturdy shell that holds all the delicious ingredients together.

Step 3: Fill Tortillas
Now it’s time to fill those tortillas! Place the shredded cooked chicken evenly on one side of each tortilla, then sprinkle generously with shredded cheese. This cheesy goodness not only elevates the flavor but also helps keep the tacos intact during baking. Carefully fold each tortilla over to create a taco shape.

Step 4: Bake
Slide the baking dish into your preheated oven and let the Mini Baked Chicken Tacos bake for about 8-12 minutes. You’ll know they’re ready when the tortillas turn a lovely golden brown and the cheese bubbles and begins to crisp. This is the moment you start to smell that mouthwatering taco aroma wafting through your kitchen!

Step 5: Cool and Serve
Once they are perfectly baked, remove the tacos from the oven and allow them to cool for a minute. Use a spatula to gently fold each taco in half. Now is the time to add your favorite toppings like sour cream, salsa, and fresh cilantro. Serve these delightful Mini Baked Chicken Tacos warm for a joyous mealtime experience!

Make Ahead Options

These Mini Baked Chicken Tacos are perfect for meal prep enthusiasts! To save time on busy weeknights, you can assemble the taco filling (shredded chicken and cheese) up to 3 days in advance. Store the mixture in an airtight container in the refrigerator to keep it fresh. Additionally, you can prepare the taco shells by lightly brushing them with olive oil and storing them in a covered container for up to 24 hours; this will help prevent them from becoming soggy. When you’re ready to serve, simply fill the tortillas with the prepared mixture, bake as directed, and enjoy delicious, restaurant-quality tacos with minimal effort!

Storage Tips for Mini Baked Chicken Tacos

Fridge: Store any leftover Mini Baked Chicken Tacos in an airtight container for up to 3 days. This keeps them fresh while preserving the chicken’s flavor.

Freezer: For longer storage, freeze the baked tacos individually in a zip-top bag or airtight container for up to 2 months. Defrost in the fridge overnight before reheating.

Reheating: To restore crispiness, reheat the tacos in the oven at 350°F (175°C) for 8-10 minutes. Avoid using the microwave, as it can make them soggy.

Room Temperature: If you’re serving at a gathering, allow the tacos to remain at room temperature for no more than 2 hours to ensure food safety.

What to Serve with Mini Baked Chicken Tacos?

Enhance your taco night with delightful pairs that bring vibrant flavors and freshness to your table.

  • Creamy Guacamole: This smooth avocado dip adds a rich contrast to the crunch of the tacos, making every bite irresistible.

  • Fresh Green Salad: Crisp lettuce, juicy tomatoes, and a tangy dressing provide a refreshing balance to the savory tacos, elevating your meal.

  • Spicy Corn Salsa: The sweetness of corn with a hint of spice will tantalize your taste buds and complement the creamy filling perfectly.

  • Cilantro Lime Rice: Fluffy rice infused with cilantro and lime adds subtle acidity and texture, soaking up the delicious taco flavors. A great side for any taco night!

  • Chips and Salsa: Crunchy tortilla chips paired with zesty salsa serve as the perfect appetizer, setting the fun tone for your meal.

  • Margaritas: Cool, citrusy margaritas can be the ultimate drink to accompany the lively flavors of your Mini Baked Chicken Tacos, making your gathering festive.

  • Baked Sweet Potatoes: Soft, tender sweet potatoes provide a sweet counterbalance to the spicy chicken, offering a wholesome and hearty side.

  • Fruit Salad: A colorful mix of seasonal fruits can cleanse the palate and add a refreshing sweet touch to your meal.

  • Chocolate Flan: Treat your taste buds with this velvety dessert, adding a rich final note to a delicious evening filled with tacos!

  • Iced Tea: A refreshing glass of home-brewed iced tea is the perfect way to wash down your flavorful tacos while offering a soothing herbal contrast.

Mini Baked Chicken Tacos Variations & Substitutions

Feel free to make these Mini Baked Chicken Tacos your own delightfully flavorful creation!

  • Veggie-Packed: Add diced bell peppers, black beans, or corn to the chicken mixture for a colorful, nutritious twist. This not only enhances flavor but also boosts the overall healthiness of the dish.

  • Spicy Kick: For those who love heat, mix in extra cayenne pepper or diced jalapeños in the filling. Just remember, a little spice can go a long way, so adjust to your taste!

  • Dairy-Free: Substitute the cheese with a dairy-free alternative, such as cashew cheese or nutritional yeast, for a creamy yet dairy-free experience. Everyone deserves to savor a taco night!

  • Air Fryer Adaptation: If you’re looking to save on baking time and energy, cook the tacos in an air fryer at 400°F for 8-10 minutes. They’ll come out crispy and delicious, offering a perfectly toasted shell.

  • Flavor Boost: Try mixing in taco seasoning or a splash of lime juice in the chicken mixture for an extra flavor dimension. It’s a simple shift that can elevate the taste profile, just like in my Tuscan Chicken Soup.

  • Gourmet Touch: Swap regular corn tortillas for mini flour tortillas or even soft taco shells like a flour-jalapeño blend for an added touch of elegance and softness. This can truly take your taco night to the next level!

  • Hearty Protein: Switch out the chicken for cooked ground turkey or beef if you’re in the mood for a different twist but stay assured, the essence remains incredibly comforting.

  • Crispy Toppings: Elevate your presentation by topping with crispy fried onions or tortilla strips. They add a delightful crunch and visual appeal, making your Mini Baked Chicken Tacos a feast for both the eyes and the palate.

Feel free to experiment and make these tacos a family night favorite by serving them alongside a fresh guacamole or a zesty side salad to complement your meal!

Expert Tips for Mini Baked Chicken Tacos

  • Layer Cheese: Place cheese on top of the chicken filling to help seal the tacos during baking, preventing them from opening up.
  • Keep Warm: If hosting a gathering, cover the tacos with a lid or foil and set them in a 250°F oven to keep them warm until serving.
  • Avoid Sogginess: Be mindful not to over-oil the tortillas; a light brush is all you need to achieve a crisp without sogginess.
  • Timing & Handling: Fold the tacos immediately after taking them out of the oven. This helps preserve their structure, as they become delicate as they cool.
  • Enhance Flavor: Experiment with spices or herbs in the chicken mixture for varied flavors. A touch of cumin or chili powder can elevate your Mini Baked Chicken Tacos!

Mini Baked Chicken Tacos Recipe FAQs

What type of chicken is best for these tacos?
Absolutely! I recommend using shredded rotisserie chicken for maximum convenience and flavor. It’s tender, juicy, and saves you the time of cooking chicken from scratch. If you prefer, you can also use leftover grilled or baked chicken, just ensure it’s chopped or shredded finely for easy filling.

How should I store leftover Mini Baked Chicken Tacos?
Leftovers can be stored in an airtight container in the fridge for up to 3 days. This helps maintain their flavor and freshness. To reheat, I suggest placing them in the oven at 350°F (175°C) for about 8-10 minutes to get that crispness back, as microwaving can make them soggy.

Can I freeze Mini Baked Chicken Tacos?
Absolutely! You can freeze the baked tacos individually. First, let them cool completely, then wrap each taco in plastic wrap or aluminum foil and place them in a zip-top bag or airtight container. They’ll keep well for up to 2 months. When you’re ready to enjoy them, simply defrost in the fridge overnight and reheat in the oven.

What should I do if my tortillas tear while preparing?
Don’t worry! If you find your tortillas tearing, you can microwave them for about 10-15 seconds before filling. This softens them, making them more pliable and easier to fold without breaking. Alternatively, consider using smaller tortillas or flour tortillas, as they tend to be more forgiving!

Are there any dietary considerations for Mini Baked Chicken Tacos?
Yes! If serving these tacos to guests with dietary restrictions, be sure to ask about allergies. Gluten-free eaters can substitute corn tortillas, but always check the label to ensure they’re certified gluten-free. For dairy allergies, try using dairy-free cheese—most taste great melted, and your tacos will still be delightful.

How can I customize Mini Baked Chicken Tacos for different tastes?
The more the merrier! You can mix in various ingredients like diced bell peppers, black beans, or jalapeños into the chicken mixture for added flavor and nutrition. Feel free to use different spices, like cumin or smoked paprika, or diverse toppings such as avocado slices or pickled onions to really make them your own!

Mini Baked Chicken Tacos

Delicious Mini Baked Chicken Tacos Ready in 30 Minutes

These Mini Baked Chicken Tacos are a quick and easy meal perfect for family taco night, combining a creamy chicken filling with melted cheese.
Prep Time 10 minutes
Cook Time 12 minutes
Total Time 30 minutes
Servings: 4 tacos
Course: Dinner
Cuisine: Mexican
Calories: 350

Ingredients
  

For the Tacos
  • 1.5 lbs Cooked Chicken Use shredded rotisserie chicken for convenience.
  • 10 small Corn Tortillas Provides a crispy base.
  • 3 cups Shredded Cheese Feel free to substitute with your favorite cheese.
  • 1 tablespoon Olive Oil Lightly coat to prevent sogginess.
For Optional Toppings
  • Sour Cream Adds a cooling element.
  • Salsa A great way to enhance flavor.
  • Fresh Cilantro Offers a fresh finish.
  • Lime Wedges Squeeze over tacos for a zesty zing.

Equipment

  • Oven
  • baking dish
  • Parchment Paper
  • spatula

Method
 

Step‑by‑Step Instructions for Mini Baked Chicken Tacos
  1. Preheat your oven to 425°F (220°C).
  2. Brush both sides of the corn tortillas with olive oil and arrange them in a baking dish.
  3. Fill each tortilla with shredded chicken and sprinkle with cheese, then fold to shape a taco.
  4. Bake in the preheated oven for 8-12 minutes until golden brown and cheese bubbles.
  5. Allow tacos to cool for a minute, then add optional toppings before serving.

Nutrition

Serving: 2tacosCalories: 350kcalCarbohydrates: 30gProtein: 25gFat: 15gSaturated Fat: 7gPolyunsaturated Fat: 2gMonounsaturated Fat: 6gCholesterol: 75mgSodium: 600mgPotassium: 500mgFiber: 2gSugar: 1gVitamin A: 10IUVitamin C: 5mgCalcium: 20mgIron: 10mg

Notes

Customize with your favorite toppings for an unforgettable taco night experience.

Tried this recipe?

Let us know how it was!

Mouthwatering Coffee Cake Cookies You Can’t Resist

As the comforting chill of autumn settles in, I find myself reaching for warm, spiced treats that evoke cozy gatherings and cherished memories. Enter my Chewy Coffee Cake Cookies with Cinnamon Crumb Topping—a delightful fusion that marries the classic flavors of coffee cake with the irresistible texture of a cookie. Not only do these cookies offer quick prep and a satisfying crunch from their crumb topping, but they also come with a gluten-free option for those looking to indulge without worries. Whether it’s an afternoon pick-me-up with your favorite brew or a sweet addition to your fall festivities, these cookies are sure to become a favorite in your baking rotation. Ready to bring the warmth of coffee cake into your kitchen? Let’s dive into this delightful recipe!

Why are Coffee Cake Cookies a Must-Try?

Comforting warmth: The blend of spices creates an inviting aroma that fills your home, perfect for chilly days.
Chewy texture: Each cookie boasts a soft, chewy interior that feels indulgent with every bite.
Easy to make: You’ll love how straightforward and quick the preparation is, making them a go-to recipe.
Crowd-pleaser: These treats are ideal for gatherings, sure to impress family and friends at any occasion.
Versatile options: With a gluten-free alternative available, everyone can join in on the fun! Pair these delights with your favorite beverage or enjoy them as a sweet snack any time of day. If you’re in the mood for even more sweet treats, check out my Blueberry Breakfast Cookies or venture into the world of cakes with my delightful Strawberry Cheesecake Dump.

Coffee Cake Cookie Ingredients

• Dive into the world of delectable flavors with these Coffee Cake Cookies!

For the Cookie Dough

  • Butter – Adds richness and moisture; use cold for the best texture.
  • Brown Sugar – Provides sweetness with a hint of molasses; coconut sugar is a great substitute.
  • Granulated Sugar – Sweetness and structure; no direct substitutes recommended.
  • Egg – Binds ingredients together and adds moisture; substitute with flaxseed eggs for vegan options.
  • Egg Yolk – Creates a tender texture; can be omitted if using a full egg replacement.
  • Vanilla Extract – Flavor booster; swap for almond extract for a unique twist.
  • Baking Powder – Essential for leavening; make sure it’s fresh for the best results.
  • Baking Soda – Works alongside acidic ingredients to aid leavening.
  • Salt – Enhances overall flavor; measure accurately to avoid overly salty cookies.
  • Cinnamon – The key spice that adds to the coffee cake essence; adjust to your taste!
  • Cornstarch – Softens texture and prevents spreading; can be omitted for a denser cookie.
  • All-Purpose Flour – The main structural component; replace with 1:1 gluten-free flour for a gluten-free option.

For the Crumb Topping

  • Flour – Provides structure; use gluten-free flour if necessary.
  • Brown Sugar – Adds sweetness and moisture retention to the crumb topping.
  • Cinnamon – Enhances flavor; adjust according to your preference.
  • Salt – Just a pinch to elevate sweetness and flavor depth.
  • Butter – Softened for easy mixing; applesauce can be used for a lower-fat alternative.

For the Glaze

  • Powdered Sugar – Sweetness for drizzling; use a sugar alternative for a lower-calorie version.
  • Cinnamon – Adds flavor to the glaze, optional but recommended.
  • Milk – Achieves the right consistency for the glaze; can be swapped for non-dairy milk for a vegan option.

Step‑by‑Step Instructions for Coffee Cake Cookies

Step 1: Preheat the Oven
Begin by preheating your oven to 375°F (190°C). While it warms up, line two baking sheets with parchment paper, ensuring they are ready for the delicious Coffee Cake Cookies. This setup makes it easy to transfer your cookies once they’re shaped and filled with that delightful crumb topping.

Step 2: Cream the Butters and Sugars
In a stand mixer, combine cold butter, brown sugar, and granulated sugar. Beat on medium-high speed for about 3-4 minutes until the mixture turns light and fluffy. This step is crucial as it incorporates air into the sugars, creating a tender and chewy texture in your Coffee Cake Cookies. Scrape down the sides of the bowl as needed to make sure everything mixes evenly.

Step 3: Add Eggs and Vanilla
Next, add in one egg, one egg yolk, and the vanilla extract to your creamed mixture. Mix on low speed until just incorporated, ensuring not to overmix. This beautiful blend of ingredients adds moisture and enhances the flavors, creating the perfect base for your cookies. The dough should look smooth and creamy.

Step 4: Incorporate Dry Ingredients
Gradually add the baking powder, baking soda, salt, cornstarch, and flour to the mixing bowl. Combine on low speed until just incorporated, with no dry flour visible. Be careful not to overwork the dough, as this will lead to tougher cookies. You want your Coffee Cake Cookies to maintain that tender, chewy consistency.

Step 5: Shape the Dough Balls
Scoop the cookie dough into tablespoon-sized balls and place about six on each prepared baking sheet. Gently make an indentation in each ball using your thumb. This step creates a perfect spot for the crumb topping, which not only enhances flavor but also adds a lovely visual element to your baked Coffee Cake Cookies.

Step 6: Prepare the Crumb Topping
In a separate bowl, mix together the flour, brown sugar, salt, cinnamon, and softened butter until crumbly. This mixture should resemble coarse crumbs. Fill the indentations on each cookie dough ball generously with this crumb topping. This added layer will provide that classic coffee cake texture you crave.

Step 7: Bake the Cookies
Now, place the baking sheets in the preheated oven and bake for 9-12 minutes. Keep an eye on the cookies, looking for a golden edge and a soft center. The corners should be slightly firm while the middle remains chewy for that ultimate Coffee Cake Cookies experience. Use a spatula to adjust the cookies if needed while they are still warm.

Step 8: Cool and Prepare the Glaze
Once baked, transfer the cookies to a wire rack to cool completely. This is an important step as it allows the cookies to set nicely and enhances their chewy texture. While they cool, you can prepare your glaze to top the cooled Coffee Cake Cookies.

Step 9: Drizzle the Glaze
In a mixing bowl, combine powdered sugar, cinnamon, and milk to create a smooth glaze. Drizzle it over the cooled cookies using a spoon or a piping bag for a more delicate touch. This sweet finish adds a beautiful glaze and enhances the overall flavor of your delightful Coffee Cake Cookies.

How to Store and Freeze Coffee Cake Cookies

Room Temperature: Keep cookies in an airtight container at room temperature for up to 2-3 days to maintain their chewy texture and flavor.

Fridge: To extend freshness, store cookies in the refrigerator for up to a week. Ensure they are in an airtight container to prevent drying out.

Freezer: Freeze baked Coffee Cake Cookies in an airtight container or freezer bag for up to 2-3 months. Thaw at room temperature before enjoying.

Cookie Dough: Refrigerate cookie dough for up to a week before baking, or freeze it for up to 3 months. Just scoop and bake when you’re ready!

Coffee Cake Cookies: Fun Twists to Try

Feel free to tailor these delightful cookies to suit your taste buds and dietary needs!

  • Gluten-Free: Substitute all-purpose flour with a 1:1 gluten-free flour blend for a delightful gluten-free version.
  • Nutty Delight: Mix in chopped nuts like pecans or walnuts for an added crunch and rich flavor that’s almost irresistible.
  • Spicy Kick: For a unique twist, try adding nutmeg along with or instead of cinnamon to create a warm and cozy flavor profile.
  • Chocolate Indulgence: Add mini chocolate chips to the dough to create a heavenly chocolate version that pairs beautifully with the coffee flavors.
  • Vegan Option: Replace eggs with flaxseed eggs and use plant-based butter for a delicious vegan adaptation.
  • Cream Cheese Swirl: For added richness, swirl in some cream cheese into the dough before baking for a tangy contrast.
  • Fruity Upgrade: Add dried fruits like raisins or cranberries for a burst of sweetness and texture that complements the cookies perfectly.
  • Extra Crunch: Top with toasted coconut flakes for a tropical twist that adds both flavor and texture.

These variations can make your cookie experience even more enjoyable and unique! If you’re looking for more scrumptious ideas, don’t forget to try my delectable Strawberry Cheesecake Dump or consider whipping up some classic Nutella Pancakes Blend for a special breakfast treat.

Expert Tips for Coffee Cake Cookies

  • Butter Consistency: Ensure your butter is cold—not too soft— to avoid flat cookies. Perfectly creamed butter will help achieve a chewy texture.

  • Measure Accurately: Proper measurements are key; spoon flour into the measuring cup and level it off. This helps avoid dense or dry Coffee Cake Cookies.

  • Don’t Overmix: Mix the dough until just combined. Overmixing can lead to tougher cookies, so be gentle and keep that chewy texture!

  • Indentation Care: When making the indentations in the dough, don’t go too deep or the cookies may lose shape while baking. A gentle press is sufficient.

  • Cooling Time: Allow cookies to cool completely before glazing. This ensures the glaze sets nicely and doesn’t slide off, enhancing their appealing look.

Make Ahead Options

These Coffee Cake Cookies are perfect for busy home cooks looking to save time! You can prepare the cookie dough up to 3 days in advance; simply refrigerate the dough in an airtight container to maintain its freshness. Alternatively, you can scoop the individual dough balls, place them on a baking sheet, and freeze them in a single layer. Once frozen, transfer them to a zip-top bag for up to 2 months. When you’re ready to bake, there’s no need to thaw—just add a couple of extra minutes to the baking time! By prepping ahead, you’ll have delicious Coffee Cake Cookies ready to enjoy with minimal effort on busy days.

What to Serve with Chewy Coffee Cake Cookies with Cinnamon Crumb Topping?

Indulging in homemade coffee cake cookies creates a cozy moment, especially when paired with delightful accompaniments that elevate the experience.

  • Rich Dark Roast Coffee: A bold cup enhances the cozy spices and sweetness, creating a perfect pairing for your cookies. The warmth of the coffee complements their chewy texture beautifully, making every bite even more satisfying.

  • Steamed Milk with Cinnamon: This warm drink is like a hug in a cup, adding creaminess that puts the spotlight on the cookies’ crumb topping. Drizzling a bit of cinnamon on top ties all the flavors together deliciously.

  • Maple Glazed Scones: For a brunch spread, these scones bring another layer of sweetness and texture, creating a delightful balance with your coffee cake cookies. Their buttery flavor harmonizes well with the cinnamon notes.

  • Apple Cider: Especially in fall, a glass of warm apple cider offers a refreshing complement to the spiced cookies. The fruitiness cuts through the sweetness, providing a bright contrast to each chewy bite.

  • Vanilla Ice Cream: Adding a scoop of vanilla ice cream brings a cool, creamy element that pairs wonderfully with warm cookies. The melting ice cream drizzles into the cookie’s crevices, enhancing each luscious mouthful.

  • Caramel Sauce: Drizzling warm caramel over your cookies introduces a rich and buttery flavor. This adds a luscious finish, transforming your coffee cake cookies into an indulgent dessert.

  • Spiced Tea: A cup of chai or spiced herbal tea echoes the warm cinnamon and creates a comforting moment perfect for cozy afternoons with loved ones.

  • Chocolate Chip Muffins: If you’re looking to create a diverse spread, these muffins add a touch of sweetness and different textures that attract dessert lovers. The chocolate complements the flavors of the cookies exceptionally well.

  • Pumpkin Spice Latte: For an autumn-inspired treat, this drink seamlessly ties into the warm spices of the cookies, making every sip and bite a reassuring embrace of fall flavors.

Coffee Cake Cookies Recipe FAQs

How do I choose the best ingredients for my Coffee Cake Cookies?
Absolutely! When selecting your ingredients, look for cold, unsalted butter to ensure your cookies maintain that chewy texture. For the sugars, brown sugar should be firm to the touch, offering that rich molasses flavor. Make sure your baking powder is fresh—check the expiration date on the bottom for optimal results. If you’re going gluten-free, the 1:1 gluten-free flour is a great substitute that performs beautifully in this recipe.

How should I store my Coffee Cake Cookies?
Very simply! Store your baked cookies in an airtight container at room temperature for 2-3 days. If you want to keep them longer, place them in the refrigerator for up to a week to maintain freshness. Just ensure they are sealed tightly to avoid drying out.

Can I freeze my Coffee Cake Cookies?
Certainly! To freeze your baked cookies, place them in an airtight container or freezer-safe bag. They can last for up to 2-3 months in the freezer. When you’re ready to enjoy, simply thaw them at room temperature for about 15-30 minutes. If you want to prepare the dough ahead of time, scoop it into balls and freeze them in a single layer before transferring to a container. They can be baked straight from the freezer—just add a minute or two to the baking time!

What can I do if my Coffee Cake Cookies spread too much while baking?
I recommend checking a few things! Ensure your butter wasn’t too soft when you creamed it with the sugars, as this can lead to flatter cookies. Furthermore, if you find your cookies are too thin, you might need to add a bit more flour to your dough next time. If you see them spreading, remove the cookie sheet from the oven, and use a spatula to gently reshape the cookies while they’re warm.

Any dietary considerations for my Coffee Cake Cookies?
Yes! If anyone at your gathering has dietary restrictions, this recipe is quite versatile. For vegan options, use flaxseed eggs and non-dairy milk in the glaze. If you’re baking for someone with gluten sensitivities, just replace the all-purpose flour with a 1:1 gluten-free flour. It’s really simple to adapt and ensures everyone can indulge in the delightful flavors of these Coffee Cake Cookies!

Coffee Cake Cookies

Mouthwatering Coffee Cake Cookies You Can’t Resist

These Coffee Cake Cookies combine the comforting flavors of coffee cake in a chewy cookie form, perfect for autumn gatherings.
Prep Time 20 minutes
Cook Time 12 minutes
Cooling Time 30 minutes
Total Time 1 hour 2 minutes
Servings: 24 cookies
Course: Dessert
Cuisine: American
Calories: 150

Ingredients
  

For the Cookie Dough
  • 1 cup Butter Use cold for the best texture.
  • 1 cup Brown Sugar Coconut sugar is a great substitute.
  • 1 cup Granulated Sugar No direct substitutes recommended.
  • 1 large Egg Substitute with flaxseed eggs for vegan options.
  • 1 large Egg Yolk Can be omitted if using a full egg replacement.
  • 2 teaspoons Vanilla Extract Swap for almond extract for a unique twist.
  • 1 teaspoon Baking Powder Make sure it's fresh for the best results.
  • 1 teaspoon Baking Soda
  • 1/2 teaspoon Salt Measure accurately to avoid overly salty cookies.
  • 2 teaspoons Cinnamon Adjust to your taste!
  • 1 cup Cornstarch Can be omitted for a denser cookie.
  • 2 cups All-Purpose Flour Replace with 1:1 gluten-free flour for a gluten-free option.
For the Crumb Topping
  • 1 cup Flour Use gluten-free flour if necessary.
  • 1/2 cup Brown Sugar
  • 1 teaspoon Cinnamon Adjust according to your preference.
  • 1/4 teaspoon Salt Just a pinch to elevate sweetness and flavor depth.
  • 1/4 cup Butter Softened for easy mixing.
For the Glaze
  • 1 cup Powdered Sugar Use a sugar alternative for a lower-calorie version.
  • 1 teaspoon Cinnamon Optional but recommended.
  • 2 tablespoons Milk Can be swapped for non-dairy milk for a vegan option.

Equipment

  • Stand mixer
  • Baking Sheets
  • Parchment Paper
  • Mixing bowls
  • Wire rack

Method
 

Step-by-Step Instructions for Coffee Cake Cookies
  1. Preheat your oven to 375°F (190°C) and line two baking sheets with parchment paper.
  2. In a stand mixer, cream together cold butter, brown sugar, and granulated sugar for 3-4 minutes until light and fluffy.
  3. Add the egg, egg yolk, and vanilla extract to the creamed mixture, mixing on low speed until just incorporated.
  4. Gradually add baking powder, baking soda, salt, cornstarch, and flour, mixing on low speed until no dry flour remains.
  5. Scoop the cookie dough into tablespoon-sized balls, placing them on the prepared baking sheets and creating indentations.
  6. Mix flour, brown sugar, salt, cinnamon, and softened butter in a bowl until crumbly, then fill indentations with the mixture.
  7. Bake for 9-12 minutes until edges are golden and centers are soft.
  8. Cool cookies on a wire rack before preparing the glaze.
  9. Combine powdered sugar, cinnamon, and milk to create glaze, then drizzle over cooled cookies.

Nutrition

Serving: 1cookieCalories: 150kcalCarbohydrates: 24gProtein: 1gFat: 6gSaturated Fat: 4gMonounsaturated Fat: 2gCholesterol: 20mgSodium: 90mgPotassium: 50mgSugar: 8gVitamin A: 200IUCalcium: 20mgIron: 0.5mg

Notes

Cookies can be stored at room temperature for up to 2-3 days, and in the fridge for up to a week. Freeze baked cookies for 2-3 months or cookie dough for 3 months.

Tried this recipe?

Let us know how it was!

One Pot Garlic Pasta: Simple, Flavorful, and Comforting

While rummaging through my pantry one rainy afternoon, I stumbled upon a few humble ingredients that sparked a wave of inspiration. Those boring oats, a jar of nut butter, and some chocolate chips were about to come together for something magical: 4-Ingredient Crispy Chocolate Oat Cookies! These cookies bring a delightful crunch paired with a sweet, comforting chew, making them an irresistible snack for any time of day. Best of all, this recipe is perfect for busy home chefs, requiring minimal prep while still being adaptable to suit gluten-free, vegan, or low-sugar needs. With just a handful of ingredients, you’ll whip up a batch that’s perfect for satisfying any sweet tooth and keeping those fast-food cravings at bay. Are you ready to elevate your snack game? Let’s get baking!

Why are these cookies a game changer?

Simplicity at Its Best: With just four ingredients, you can whip up these delicious cookies in no time!
Versatile Options: Easily adapt the recipe to meet gluten-free, vegan, or low-sugar diets, ensuring everyone can enjoy them.
Decadent Texture: The perfect blend of crispy edges and chewy centers makes these cookies an irresistible treat.
Quick to Make: Bake a batch in under 15 minutes, perfect for last-minute snack cravings.
Crowd-Pleasing Delight: Serve them at gatherings or enjoy them solo—these cookies will please both friends and family alike. Enjoy alongside a warm cup of coffee or pair with some Comfort Garlic Potatoes for a well-rounded treat!

4-Ingredient Crispy Chocolate Oat Cookie Ingredients

For the Cookie Base

  • Rolled Oats – Provides structure and a hearty texture; opt for gluten-free oats to keep it celiac-friendly.
  • Nut Butter (e.g., almond or peanut) – Adds creaminess and binds the cookies; substitute with sunflower seed butter for a nut-free twist.
  • Honey or Maple Syrup – Sweetens the cookies naturally; use maple syrup to make the recipe vegan-compliant.
  • Chocolate Chips – Introduces a rich chocolate flavor; consider dairy-free chocolate chips for a vegan version.

For Extra Flavor

  • Cinnamon (optional) – A warm spice that adds depth to the flavor; perfect for a cozy twist.
  • Dried Fruits or Nuts (optional) – Enhances texture and flavor; add walnuts or cranberries for a delightful crunch.

These ingredients work together to create not just cookies, but a family-loved recipe that can easily satisfy your sweet cravings in a wholesome, guilt-free way. Enjoy this simple treat with your favorite beverage, just like you would with comforting one pot garlic pasta!

Step‑by‑Step Instructions for 4-Ingredient Crispy Chocolate Oat Cookies

Step 1: Preheat the Oven
Begin by preheating your oven to 350°F (175°C) and lining a baking sheet with parchment paper. This step ensures your cookies bake evenly and don’t stick to the pan. You’ll want to see that inviting heat radiating from your oven before poppin’ those doughy delights in.

Step 2: Combine Oats and Nut Butter
In a large mixing bowl, combine the rolled oats with your choice of nut butter—almond or peanut works wonders. Use a sturdy spoon or spatula to mix them until fully combined, creating a pasty texture that holds together well. This is the heart of your 4-Ingredient Crispy Chocolate Oat Cookies, so ensure the mixture is cohesive and smooth.

Step 3: Sweeten the Mixture
Next, add in your honey or maple syrup, depending on your preference. Thoroughly stir the sweetener into the dough mixture for about 1-2 minutes until fully integrated. This addition should make your dough slightly more pliable and introduce a delightful sweetness that elevates the flavor of your cookies.

Step 4: Fold in Chocolate Chips
Now it’s time to fold in your chocolate chips! Gently mix them into the dough until they’re evenly distributed throughout the mixture. Take a moment to enjoy this stage, as the combination of oats and chocolate brings a comforting aroma that will have your mouth watering for those tasty cookies.

Step 5: Scoop and Shape
Using a tablespoon or cookie scoop, drop spoonfuls of dough onto the prepared baking sheet, spacing them about 2 inches apart. Flatten each scoop slightly with the back of the spoon, as this helps them to bake evenly. Seeing the cookies take shape is always an exciting part of making the 4-Ingredient Crispy Chocolate Oat Cookies!

Step 6: Bake to Perfection
Place the baking sheet in the preheated oven and bake for 10-12 minutes, or until the edges are golden brown. Keep an eye on them, as you want to catch them just as they start to crisp while retaining a chewy center. The kitchen will fill with a mouthwatering aroma during this baking time—pure bliss!

Step 7: Cool and Serve
Once baked, remove the cookies from the oven and let them cool on the baking sheet for about 5 minutes. This cooling period allows them to firm up and makes transferring them to a wire rack easier. Once cooled, they’re ready to be shared or savored with your favorite drink!

What to Serve with 4-Ingredient Crispy Chocolate Oat Cookies

Looking to create a delightful spread that brings comfort and joy? Here are some lovely pairings that elevate your snack experience.

  • Creamy Milk: This classic pairing adds a rich, soothing element that balances the cookies’ crunch and sweetness perfectly.

  • Fresh Fruit Salad: A medley of vibrant fruits provides refreshing notes that cut through the richness, making every bite a little brighter. The coolness of chilled berries complements those warm cookie edges beautifully.

  • Hot Coffee or Tea: The warm, robust flavors of coffee or the comforting essence of tea harmonize with the chocolatey goodness, making your snack time feel truly indulgent.

  • Nut Butter Dip: A spoonful of creamy almond or peanut butter as a dip introduces additional nutty flavor and delightful creaminess, enhancing each bite.

  • Dark Chocolate Drizzle: Elevate those cookies’ chocolate flavor by drizzling melted dark chocolate on top, adding a luxurious touch that pleases both eye and palate.

  • Ice Cream: Serve them alongside a scoop of vanilla or chocolate ice cream for a mouthwatering twist. The melty creaminess pairs exquisitely with the cookies’ texture, creating a perfect dessert experience.

  • Chai Latte: With its warm spices and creamy texture, a chai latte brings a comforting, aromatic element that transforms your snack into a cozy affair, perfect for rainy afternoons.

These pairings will not only enhance the flavor of your 4-Ingredient Crispy Chocolate Oat Cookies but also create a delightful meal experience that beckons everyone to indulge!

Expert Tips for 4-Ingredient Crispy Chocolate Oat Cookies

  • Avoid Overmixing: Mixing too vigorously can result in tough cookies, so stir until just combined for the best texture.
  • Chill Dough if Necessary: If the dough spreads too much, pop it in the fridge for 30 minutes before baking to help maintain shape.
  • Uniform Scoops: Use a cookie scoop for evenly sized cookies, ensuring they bake at the same rate and achieve that perfect crunch.
  • Flavor Boost: Consider adding a dash of cinnamon or a handful of dried fruit for an extra layer of flavor and delicious texture.
  • Storage Tips: Keep cookies fresh by storing them in an airtight container at room temperature for up to a week; they can also be frozen for future cravings.

Storage Tips for 4-Ingredient Crispy Chocolate Oat Cookies

Room Temperature: Keep cookies in an airtight container at room temperature for up to 7 days to maintain crispiness and flavor.

Freezer: These cookies can be frozen for up to 3 months. Place them in a single layer on a baking sheet to freeze, then transfer to a zip-top bag for long-term storage.

Reheating: When you’re ready to enjoy, thaw at room temperature or warm in the oven at 350°F (175°C) for 5-7 minutes to restore their lovely texture.

Make-Ahead: Prep a batch and enjoy the convenience of having these delicious snacks ready when cravings hit, especially alongside those comforting one pot garlic pasta dishes!

Make Ahead Options

These 4-Ingredient Crispy Chocolate Oat Cookies are a fantastic choice for meal prep, allowing you to enjoy homemade treats even on your busiest days! You can prepare the cookie dough up to 24 hours in advance; simply mix all the ingredients and refrigerate it in an airtight container. When you’re ready to bake, scoop the dough onto a baking sheet and pop it in the oven, with no need to soften beforehand—this will help keep them just as delicious! For longer storage, you can also freeze the formed cookie dough balls for up to 3 months; just add a couple of extra minutes to the baking time when you bake directly from frozen. Enjoy a sweet, homemade snack with minimal effort!

Variations & Substitutions for 4-Ingredient Crispy Chocolate Oat Cookies

Feel free to get creative with these cookies; let your imagination (and taste buds) guide you!

  • Gluten-Free: Substitute rolled oats with certified gluten-free oats to make these cookies safe for celiac friends.

  • Nut-Free: Swap nut butter for sunflower seed butter, ensuring everyone can enjoy these delicious treats without the worry of allergies. This change still keeps that lovely creamy texture!

  • Vegan: Use maple syrup in place of honey and opt for dairy-free chocolate chips to make these cookies entirely plant-based. A delightful choice for anyone looking to reduce animal products!

  • Low-Sugar: Try using a sugar substitute or use less honey/maple syrup for a lower sugar option. This allows you to indulge while still keeping an eye on sugar intake—balance is key!

  • Chocolate Variations: Experiment with dark chocolate chips for a richer flavor or go for white chocolate if you prefer a sweeter treat. You can even mix and match different types!

  • Texture Twists: Add in some chopped nuts or a sprinkle of granola to create an exciting crunch factor; these additions can enhance both texture and flavor. A bit of crunch makes every bite delightful!

  • Flavor Infusion: Get adventurous by incorporating a dash of cinnamon or even nutmeg to the dough for additional warmth, enhancing the overall flavor experience.

  • Fruit Add-Ins: Fold in dried fruits like cranberries or raisins for a pop of sweetness and added chewiness; this twist elevates the cookie to a deliciously chewy treat!

Feeling inspired? Don’t hesitate to adapt these cookies to suit your taste, and why not enjoy them with a side of Cajun Sausage Pasta for a full meal experience?

4-Ingredient Crispy Chocolate Oat Cookies Recipe FAQs

What type of oats should I use?
For optimal results, use rolled oats as they give the cookies a hearty texture. If you’re looking for a gluten-free option, be sure to choose certified gluten-free oats to ensure there’s no cross-contamination.

How long can I store the cookies?
You can store these cookies in an airtight container at room temperature for up to 7 days. To keep them fresh longer, make sure the container is completely sealed, as exposure to air can cause them to lose their delightful crunch.

Can I freeze these cookies?
Absolutely! To freeze, place the cookies in a single layer on a baking sheet and freeze until solid. Then, transfer them to a zip-top bag or airtight container for storage. They can last in the freezer for up to 3 months. When ready to enjoy, thaw them at room temperature or warm them in the oven at 350°F (175°C) for about 5–7 minutes to refresh their texture.

What if my dough is too sticky?
If your dough feels too sticky and hard to scoop, try chilling it in the refrigerator for about 30 minutes. This helps firm the dough, making it easier to handle and ensuring that your cookies keep their shape while baking.

Are these cookies suitable for dietary restrictions?
Yes! This recipe is quite flexible. You can easily make it gluten-free by using certified gluten-free oats, vegan by substituting honey with maple syrup, and nut-free by using sunflower seed butter instead of nut butter. Always check labels if allergies or sensitivities are a concern.

How can I add extra flavor to the cookies?
For a delightful twist, consider adding spices like cinnamon or nutmeg, or mix in dried fruits or nuts for added texture and flavor. Dried cranberries or chopped walnuts make excellent additions, giving your cookies a unique character. Enjoy experimenting!

One Pot Garlic Pasta

One Pot Garlic Pasta: Simple, Flavorful, and Comforting

One Pot Garlic Pasta that's simple, flavorful, and satisfying, perfect for busy home chefs seeking comfort food.
Prep Time 15 minutes
Cook Time 10 minutes
Total Time 25 minutes
Servings: 4 servings
Course: Pasta
Cuisine: Italian
Calories: 150

Ingredients
  

For the Cookie Base
  • 2 cups Rolled Oats Opt for gluten-free oats to keep it celiac-friendly.
  • 1 cup Nut Butter Almond or peanut; substitute with sunflower seed butter for nut-free.
  • 1/2 cup Honey or Maple Syrup Use maple syrup for vegan compliance.
  • 1 cup Chocolate Chips Consider dairy-free chocolate chips for a vegan option.
For Extra Flavor
  • 1 tsp Cinnamon Optional; adds depth to the flavor.
  • 1 cup Dried Fruits or Nuts Enhances texture and flavor.

Equipment

  • large mixing bowl
  • Baking Sheet
  • Oven

Method
 

Step-by-Step Instructions
  1. Preheat your oven to 350°F (175°C) and line a baking sheet with parchment paper.
  2. In a large mixing bowl, combine the rolled oats with your choice of nut butter until fully combined.
  3. Add your honey or maple syrup to the mixture and stir for about 1-2 minutes.
  4. Fold in your chocolate chips evenly throughout the dough.
  5. Drop spoonfuls of dough onto the prepared baking sheet, flattening each slightly.
  6. Bake for 10-12 minutes, or until the edges are golden brown.
  7. Let the cookies cool on the baking sheet for about 5 minutes before transferring to a wire rack.

Nutrition

Serving: 1cookieCalories: 150kcalCarbohydrates: 20gProtein: 3gFat: 7gSaturated Fat: 1gPolyunsaturated Fat: 0.5gMonounsaturated Fat: 5gSodium: 75mgPotassium: 150mgFiber: 2gSugar: 8gCalcium: 2mgIron: 4mg

Notes

Store cookies in an airtight container at room temperature for up to 7 days. They can also be frozen for up to 3 months.

Tried this recipe?

Let us know how it was!

Stay Connected

Get recipes via email: