Cream Cheese Stuffed French Toast for a Cozy Brunch Indulgence

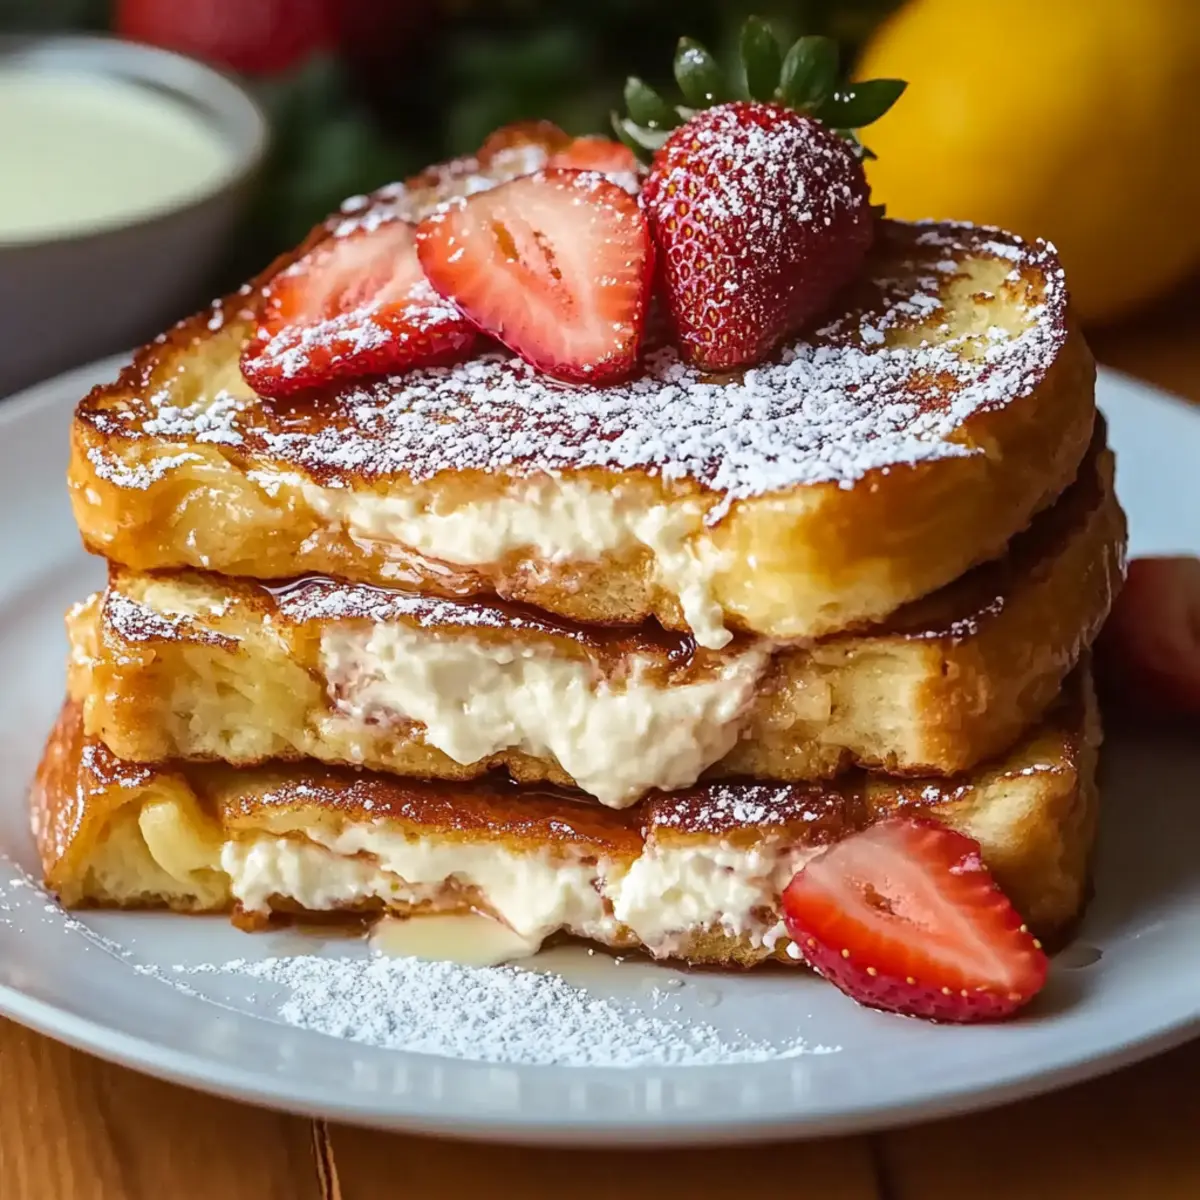
“Did you see what they’re making for brunch?” overheard at the local café last weekend perfectly set my heart racing. The star of the show? Cream Cheese Stuffed French Toast, a dish that promises to elevate any breakfast table from mundane to magnificent. Imagine indulging in thick slices of egg-soaked Texas toast, filled with a luxuriously smooth cream cheese filling that oozes happiness with each bite. This recipe is not just quick to prepare but also incredibly adaptable—you can dress it up with fruit, or keep it simple with syrup. Plus, whether you’re a vegetarian or entertaining dietary preferences, this delightful treat can easily be altered to fit your needs. So what are you waiting for? Let’s explore how to create this comforting brunch classic that will make your loved ones swoon!

Why is this French toast unforgettable?

Decadent Delight: Indulging in Cream Cheese Stuffed French Toast is like a warm hug for your taste buds, with its rich, creamy filling and perfectly golden crust.

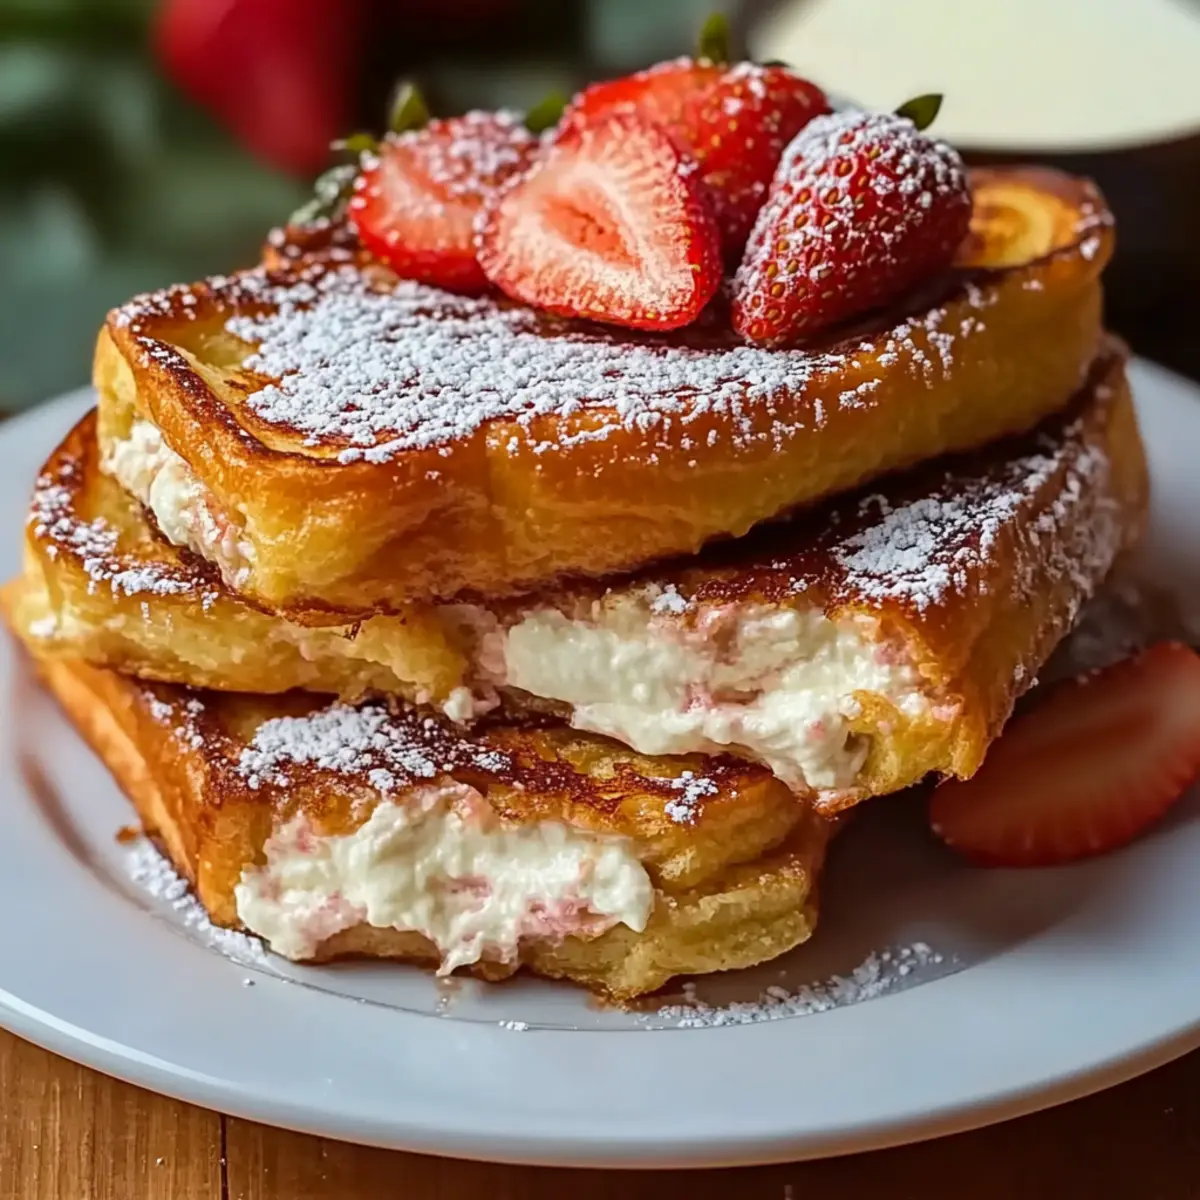
Versatile Options: Customize your creation by selecting your favorite bread, whether it’s Texas toast, brioche, or even sourdough! Consider adding a pop of flavor with fresh strawberries or banana slices.

Quick & Easy: With just a few simple steps, you can whip up this brunch classic in no time—perfect for busy weekends or surprise guests.

Crowd-Pleasing: This dish is bound to impress both family and friends, making any brunch gathering extraordinary. It’s that standout recipe you’ll keep coming back to, similar to my popular Sweet Escape Toast.

Healthy Adaptations: Easily adapt to dietary preferences with dairy-free options or savory twists using herb cream cheese, ensuring everyone can join in the feast! Get ready to elevate your brunch game!

Cream Cheese Stuffed French Toast Ingredients

• Here’s everything you need!

For the Filling

  • Cream Cheese – Use softened cream cheese for easy mixing and a rich, creamy filling.
  • Powdered Sugar – Adjust the sweetness of your filling according to your taste; use less for a lighter touch or alternative sweeteners if preferred.
  • Vanilla Extract – This adds a warm, inviting flavor to the cream cheese mixture.

For the French Toast

  • Texas Toast – Thick slices are crucial for a satisfying stuffed effect; consider using brioche or challah for a richer option.
  • Eggs – These are vital for binding the ingredients and creating that fluffy texture.
  • Milk – Whole milk lends creaminess to your egg mixture; plant-based milk works perfectly for a dairy-free version.
  • Ground Cinnamon & Granulated Sugar – Together, they create a warm, sweet note in the egg mixture.
  • Butter – Essential for achieving a beautifully crispy exterior when cooking.

Optional Toppings

  • Fresh Strawberries – Add a burst of freshness to your dish.
  • Maple Syrup – A classic companion for the perfect drizzle.
  • Whipped Cream – Extra indulgence to brighten your brunch experience.
  • Banana Slices – Elevate your toast with this delicious addition.
  • Chopped Nuts – Enhance flavor and texture with a crunch.

Dive into this Cream Cheese Stuffed French Toast recipe, and watch it transform any meal into a celebration!

Step‑by‑Step Instructions for Cream Cheese Stuffed French Toast

Step 1: Prep Filling
In a mixing bowl, combine 8 ounces of softened cream cheese, 1 cup of powdered sugar, and 1 teaspoon of vanilla extract. Using a hand mixer or a sturdy spatula, blend until the mixture is smooth and creamy with no lumps. This delightful filling will be the heart of your Cream Cheese Stuffed French Toast. Set aside to allow the flavors to meld while you prepare the egg mixture.

Step 2: Prepare Egg Mixture
In a large bowl, whisk together 4 large eggs, 1 cup of milk, 1 teaspoon of ground cinnamon, and 1 tablespoon of granulated sugar until fully combined. Make sure to break up any egg whites for an even texture. This luscious mixture will soak into the Texas toast, creating a rich base for your Cream Cheese Stuffed French Toast. Set the bowl aside while you assemble the toast.

Step 3: Assemble Toast
Take two slices of Texas toast, and generously spread the cream cheese mixture on one slice, covering it evenly. Place the second slice on top to create a sandwich. Press it down slightly to ensure the filling adheres. Repeat with the remaining slices until all the toast is assembled, leaving you with a stack of delightful sandwiches ready to be cooked.

Step 4: Cook
In a large skillet, melt 2 tablespoons of butter over medium heat until bubbly and golden. Carefully dip each sandwich into the egg mixture, coating both sides. Once coated, place the sandwich into the skillet and cook for about 2-3 minutes until golden brown. Flip carefully and cook the other side for another 2-3 minutes, achieving a beautifully crisp exterior.

Step 5: Serve
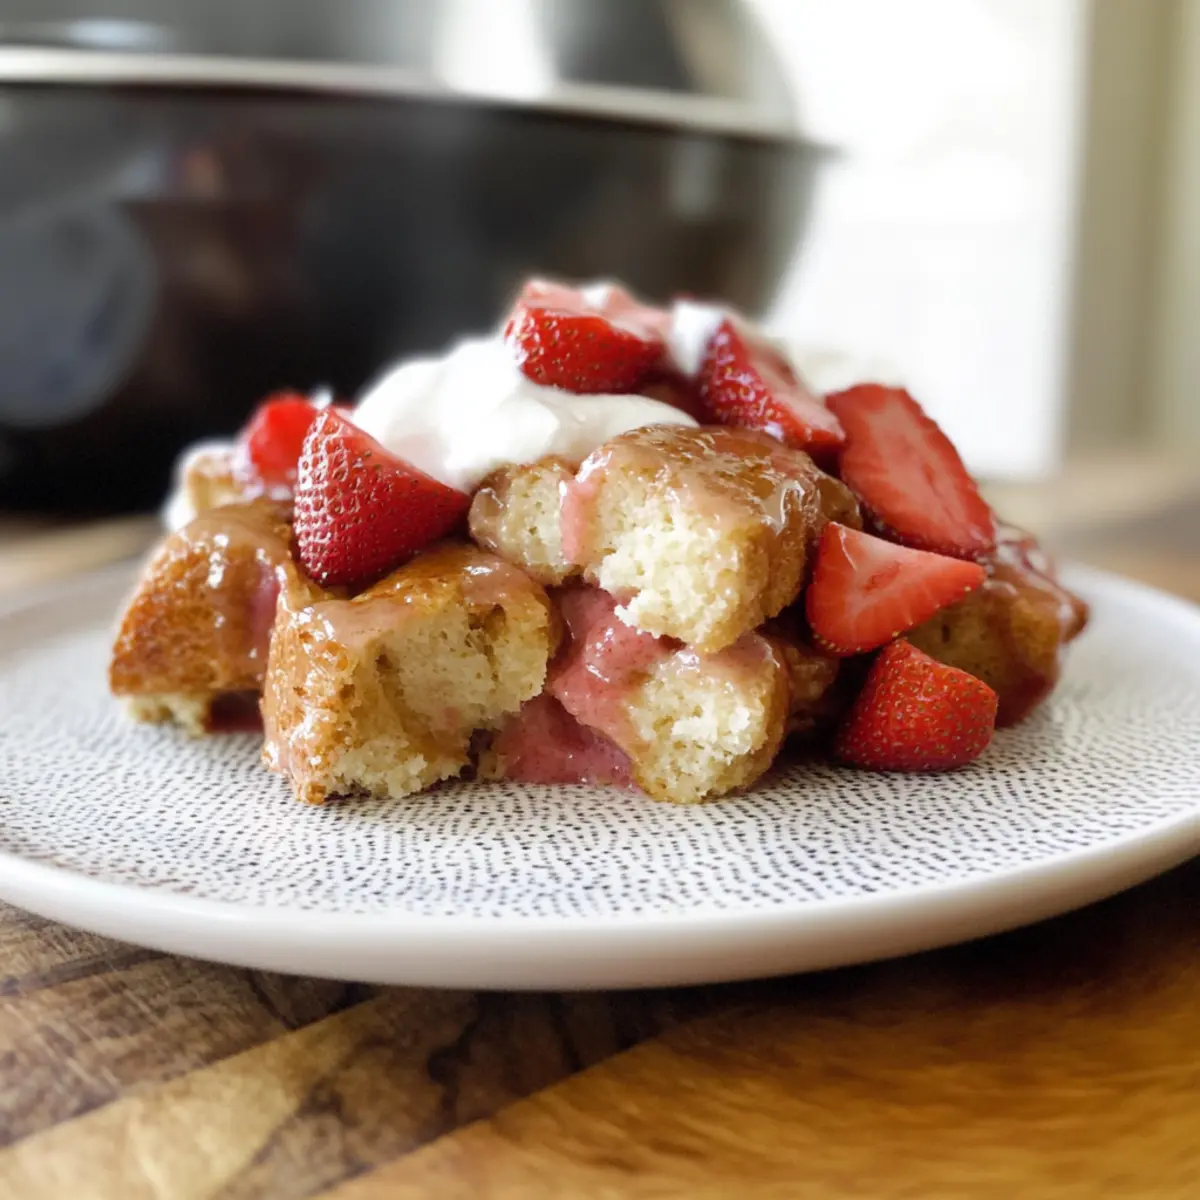
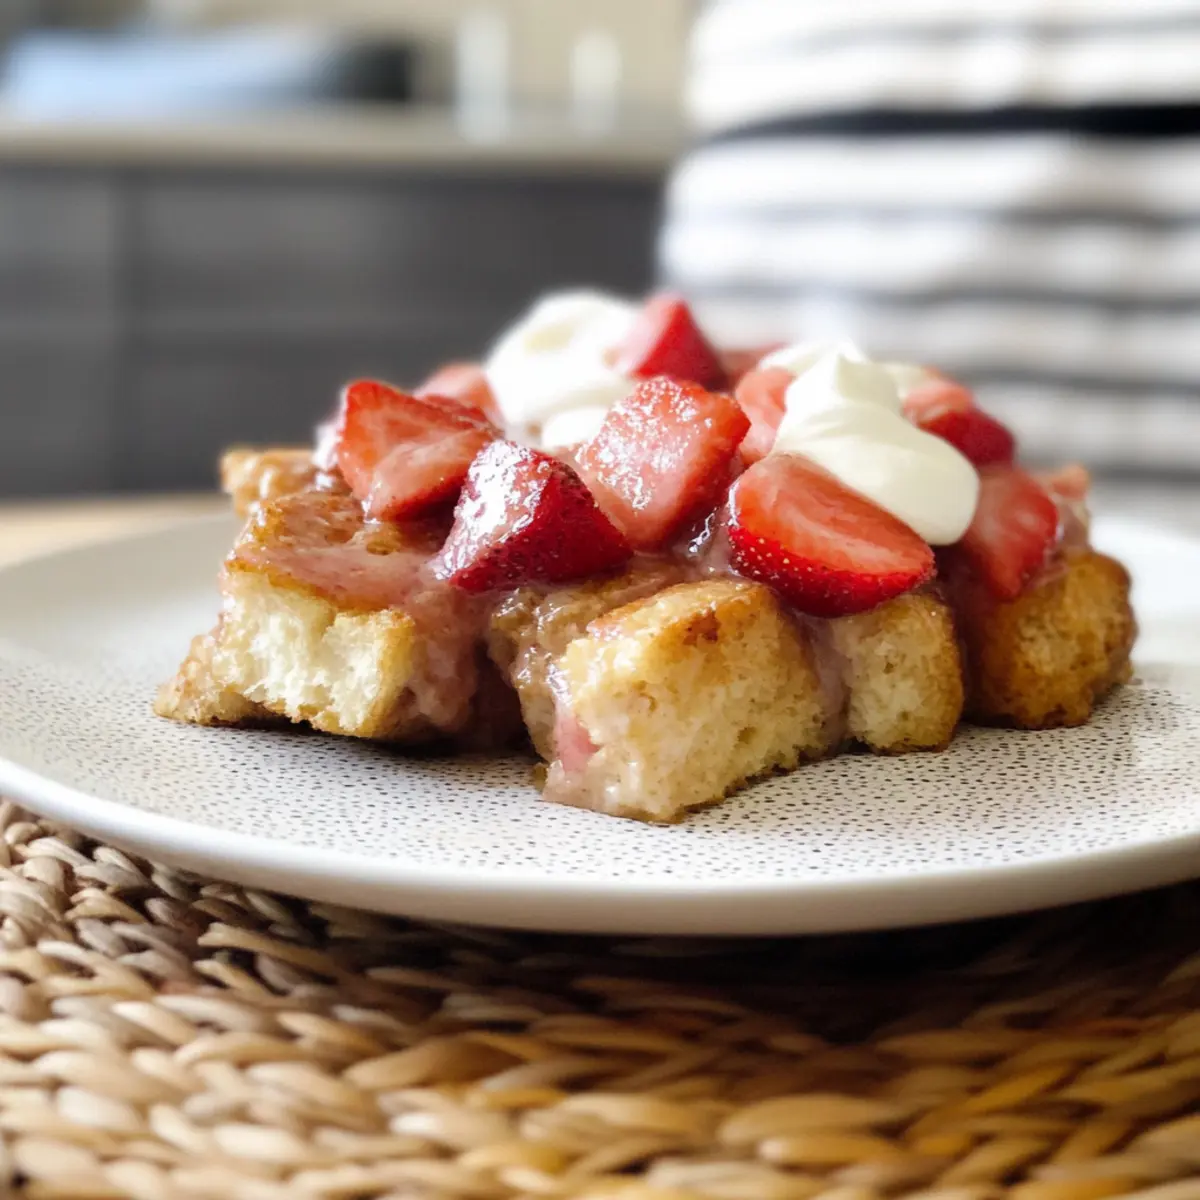
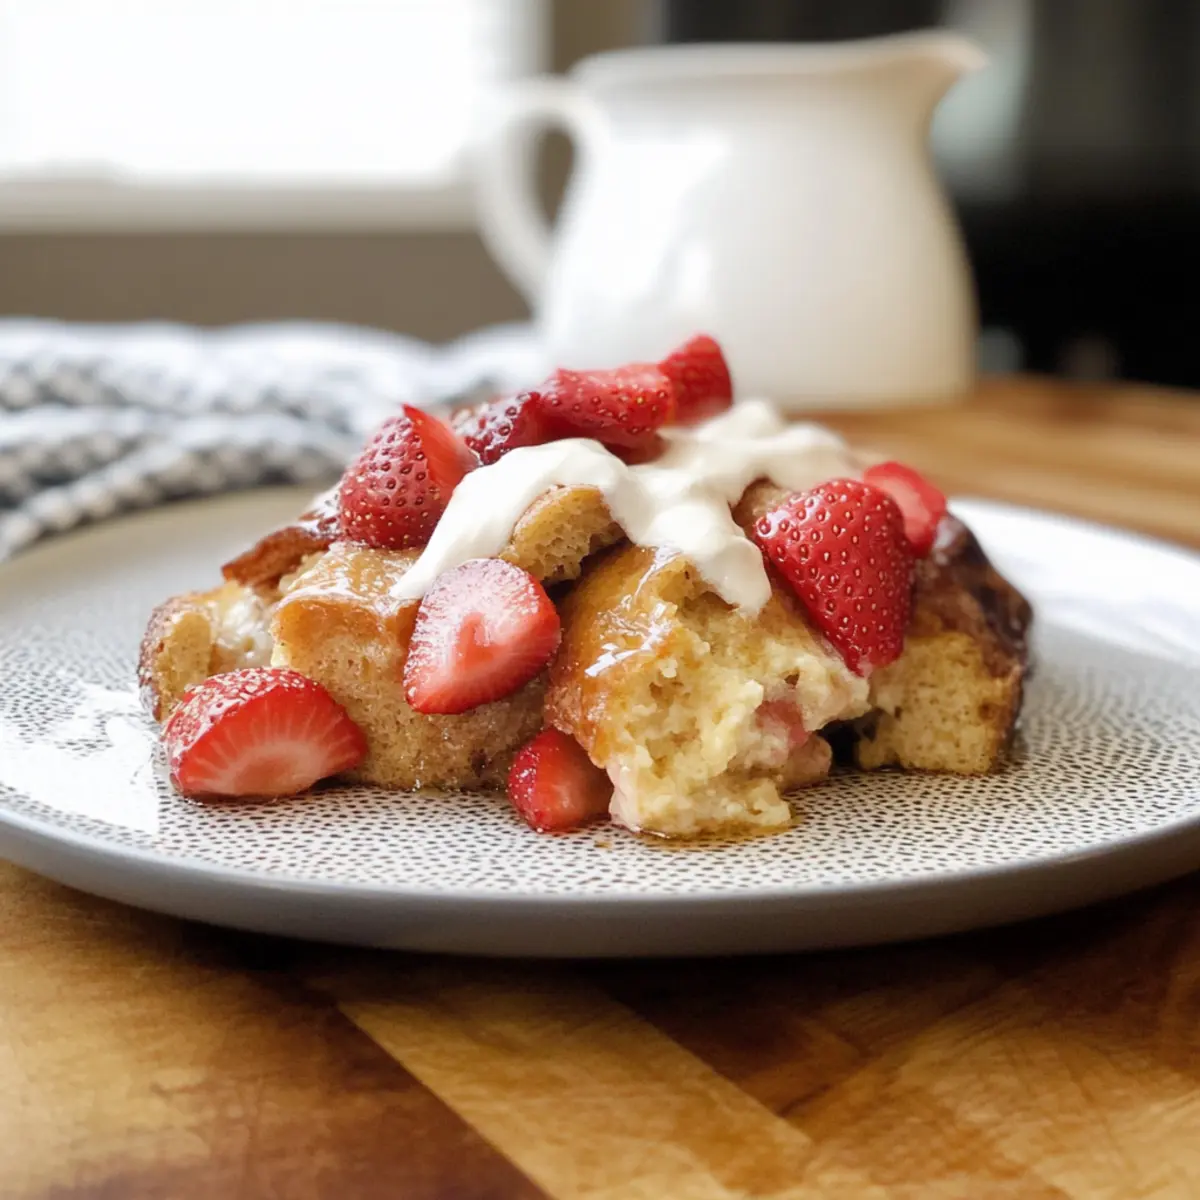
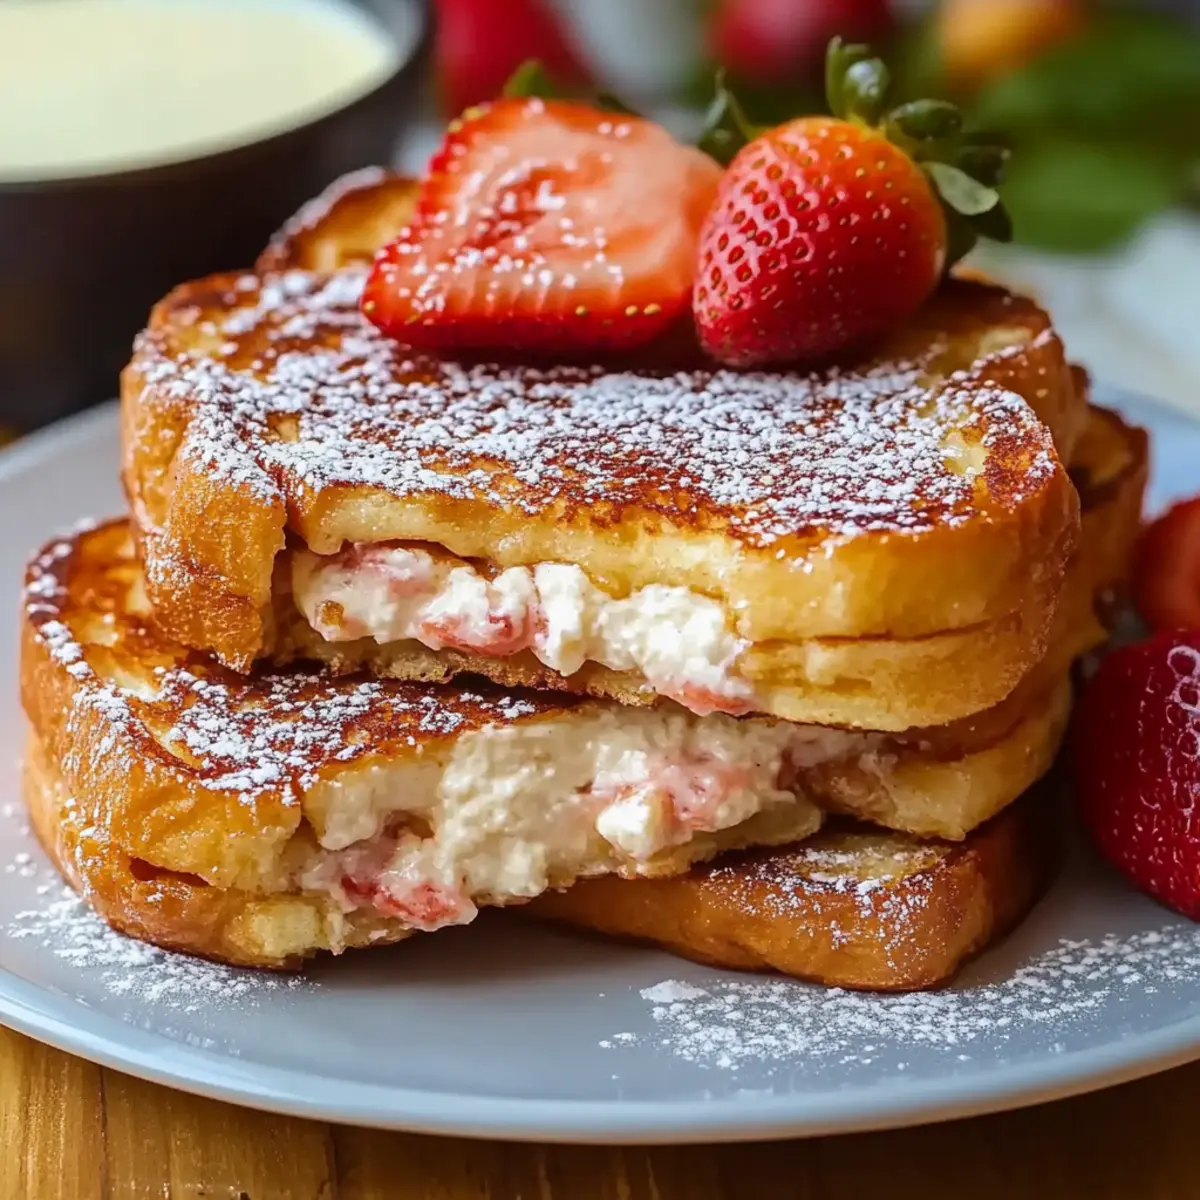
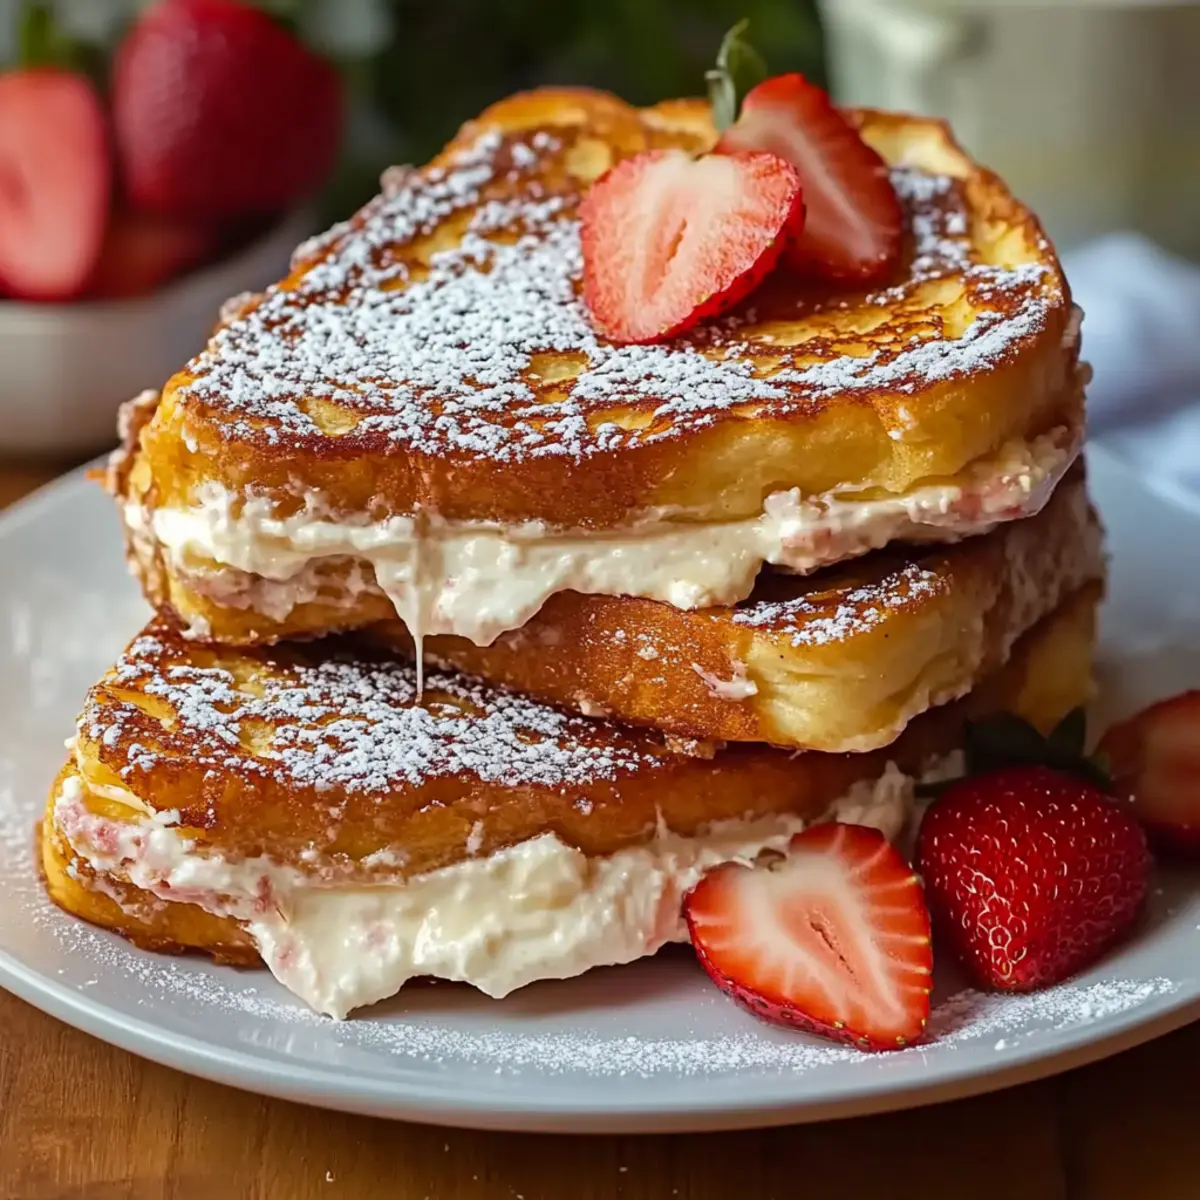
Once cooked to perfection, remove the Cream Cheese Stuffed French Toast from the skillet and serve warm. Slice each sandwich in half to reveal the creamy filling. Consider topping with fresh strawberries, maple syrup, or a dollop of whipped cream for an extra indulgent touch. Enjoy this satisfying brunch treat with friends or family!

What to Serve with Cream Cheese Stuffed French Toast

Elevate your brunch experience with these delightful pairings that harmonize wonderfully with creamy, rich flavors.

  • Fresh Berries: Their sweet-tart flavor brings a burst of freshness, cutting through the richness of the French toast. A sprinkle of powdered sugar enhances the presentation, making everything feel more festive.

  • Breakfast Sausages: Opt for savory breakfast sausages to complement the sweetness, creating a perfect balance. The crispy, juicy bites contrast beautifully with the creamy filling.

  • Maple Syrup: This classic topping adds a sweet, sticky allure that enhances the flavors. Drizzle generously over your French toast for that decadently sweet touch.

  • Whipped Cream: Light and fluffy, it offers an indulgent finish to your plate. Serve alongside to remind everyone that brunch is a treat, not a meal to rush through.

  • Caramelized Bananas: Sautéed with a hint of brown sugar, caramelized bananas bring a warm sweetness that beautifully pairs with cream cheese. The textures add an appealing elegance.

  • Eggs Benedict: For a more substantial meal, serve with poached eggs on English muffins topped with hollandaise sauce—perfect for a brunch that aims to impress.

  • Flavored Coffee: Brewed with cinnamon or vanilla, these warm beverages perfectly complement the flavor profile of your meal. Select a rich roast to provide balance.

  • Spinach Salad: A crisp salad with fresh greens and a light vinaigrette can provide contrast. The freshness cuts through the creaminess, making each bite feel lighter and more satisfying.

  • Fruit Smoothie: A refreshing side option to serve chilled, it adds a fruity twist that excites the palate and rounds out your brunch spread beautifully.

Cream Cheese Stuffed French Toast Variations

Feel free to get creative and customize your Cream Cheese Stuffed French Toast with these delicious options!

  • Dairy-Free: Swap cream cheese for plant-based cream cheese and use almond or oat milk for a luscious vegan delight.

  • Savory Twist: Opt for herb-flavored cream cheese, eliminate the sugar, and add sautéed spinach and tomatoes for a tasteful brunch twist.

  • Fruity Surprise: Add fresh berries or banana slices to the cream cheese filling for an explosion of flavor and color—perfect for fruit lovers!

Indulging in a sweet cream cheese filling is always a treat, but incorporating fresh fruit can elevate the experience to new heights.

  • Flavor Boost: Mix in cinnamon or nutmeg to the cream cheese filling for warm, aromatic notes that will have your kitchen smelling divine.

  • Different Bread: Experiment with brioche or challah for a richer texture, or try whole grain bread for a nutty and hearty base.

For those who love a satisfying bite, the choice of bread can dramatically influence the overall dish—it’s worth exploring!

  • Chocolate Lovers: Add mini chocolate chips or a swirl of chocolate spread inside the filling for a decadent, dessert-like experience.

  • Maple Glaze: Drizzle a maple syrup-glaze over the top once plated for a sweet finish that captures the essence of breakfast bliss.

If you love a good drizzle, adding an extra layer of flavor with maple syrup can be the perfect final touch.

  • Nutty Addition: Fold in chopped nuts such as pecans or walnuts to the cream cheese filling for crunch and depth.

Consider serving your creation with a side of homemade French Onion Soup for a cozy meal combo, or why not pair it with some warm, fresh Blueberry French Toast for a delightful brunch spread? Get ready for a delicious adventure!

Make Ahead Options

These Cream Cheese Stuffed French Toast are perfect for busy mornings and meal prep enthusiasts! You can prepare the cream cheese filling and the egg mixture up to 24 hours in advance. Simply combine 8 ounces of softened cream cheese, 1 cup of powdered sugar, and 1 teaspoon of vanilla extract for the filling, and whisk together 4 large eggs, 1 cup of milk, 1 teaspoon of ground cinnamon, and 1 tablespoon of granulated sugar for the egg mixture. Store them in separate airtight containers in the refrigerator to maintain freshness. When you’re ready to serve, assemble and cook the stuffed toast right from the fridge, and enjoy a delicious brunch with minimal effort and just as delightful results!

How to Store and Freeze Cream Cheese Stuffed French Toast

Fridge: Store leftover Cream Cheese Stuffed French Toast in an airtight container for up to 2 days, ensuring the layers remain intact and fluffy.

Freezer: For longer storage, wrap each sandwich tightly in plastic wrap and place them in a freezer-safe bag; they can be frozen for up to 2 months.

Reheating: To reheat, thaw in the fridge overnight, then bake at 350°F for 10 minutes, or until warmed through and crisp. Alternatively, reheat in a skillet over low heat for a few minutes on each side.

Preparation Tips: If you plan to freeze, consider making the sandwiches without dipping them in the egg mixture first, adding the egg coating just before cooking for the freshest taste.

Tips for the Best Cream Cheese Stuffed French Toast

  • Soften Cream Cheese: Ensure your cream cheese is at room temperature for a smooth, lump-free filling. This makes mixing effortless and results in a creamy texture.

  • Bread Choice Matters: Select thick slices of bread like Texas toast for the best stuffed effect. Brioche or challah can add richness, while sourdough provides a lovely chew.

  • Cooking Temperature: Keep the skillet at medium heat to avoid burning the outside before the inside is cooked through. A consistent temperature ensures a perfect golden crust.

  • Customize Your Egg Mixture: Feel free to experiment with egg mixture spices! A dash of nutmeg or a pinch of cardamom can elevate the flavor of your Cream Cheese Stuffed French Toast.

  • Perfectly Balanced Toppings: While toppings are optional, they can enhance your dish. Consider contrasting textures and flavors, like crunchy nuts paired with sweet maple syrup.

Cream Cheese Stuffed French Toast Recipe FAQs

What type of cream cheese should I use for the filling?
Absolutely, using softened cream cheese is key for a smooth filling. If you want a dairy-free option, many brands offer delicious dairy-free cream cheeses that work just as well—just make sure they’re softened for easier mixing!

How should I store leftovers?
I recommend placing any leftover Cream Cheese Stuffed French Toast in an airtight container in the refrigerator. It will keep well for about 2 days. Just be sure to layer in some parchment paper between layers, if you have more than one layer, to keep them from sticking together.

Can I freeze Cream Cheese Stuffed French Toast?
Yes! For freezing, wrap each sandwich tightly in plastic wrap and then in aluminum foil or place them in a freezer-safe bag. They can be frozen for up to 2 months. When you’re ready to enjoy, let them thaw overnight in the fridge, then reheat in the oven at 350°F for about 10 minutes or until warmed through.

What if my cream cheese mixture is too thick?
If you find your cream cheese mixture is a bit too thick, don’t worry! Simply add a little bit of milk—about a tablespoon at a time—until you reach your desired consistency. This will make it easier to spread and help it blend well with the sugar and vanilla.

Are there any dietary considerations for this recipe?
Very! This recipe is versatile; you can easily switch to gluten-free bread or use a dairy-free cream cheese for a vegan version. Just be mindful of any allergies your guests may have and adjust the fillings and toppings accordingly!

How long should I cook the toast for the best results?
Cook each sandwich for about 2-3 minutes per side on medium heat. This allows the outside to get perfectly golden and crispy while ensuring the inside is warm and the cream cheese filling is nice and gooey. Flip carefully to maintain the structure of your sandwich!

Cream Cheese Stuffed French Toast

Cream Cheese Stuffed French Toast for a Cozy Brunch Indulgence

Cream Cheese Stuffed French Toast is a delightful brunch dish that transforms breakfast into a memorable feast.
Prep Time 15 minutes
Cook Time 10 minutes
Total Time 25 minutes
Servings: 4 servings
Course: Breakfast
Cuisine: American
Calories: 350

Ingredients
  

Filling
  • 8 ounces Cream Cheese softened
  • 1 cup Powdered Sugar
  • 1 teaspoon Vanilla Extract
French Toast
  • 8 slices Texas Toast or brioche/challah
  • 4 large Eggs
  • 1 cup Milk whole or plant-based
  • 1 teaspoon Ground Cinnamon
  • 1 tablespoon Granulated Sugar
  • 2 tablespoons Butter for cooking
Optional Toppings
  • 1 cup Fresh Strawberries
  • 1 cup Maple Syrup
  • 1 cup Whipped Cream
  • 1 cup Banana Slices
  • 1 cup Chopped Nuts

Equipment

  • Mixing Bowl
  • Hand mixer
  • Skillet

Method
 

Preparation
  1. In a mixing bowl, combine cream cheese, powdered sugar, and vanilla extract. Blend until smooth.
  2. In a large bowl, whisk together eggs, milk, ground cinnamon, and granulated sugar until combined.
  3. Spread cream cheese mixture on one slice of Texas toast, cover with another slice to make a sandwich.
  4. Melt butter in a skillet over medium heat. Dip each sandwich into the egg mixture, then place in skillet.
  5. Cook for 2-3 minutes on each side until golden brown. Serve warm with desired toppings.

Nutrition

Serving: 1servingCalories: 350kcalCarbohydrates: 45gProtein: 9gFat: 15gSaturated Fat: 9gPolyunsaturated Fat: 1gMonounsaturated Fat: 5gCholesterol: 180mgSodium: 350mgPotassium: 215mgFiber: 2gSugar: 20gVitamin A: 10IUVitamin C: 5mgCalcium: 10mgIron: 8mg

Notes

For best results, ensure cream cheese is softened and maintain a medium temperature while cooking to avoid burning.

Tried this recipe?

Let us know how it was!

Delicious Ham Cheese Croissants Made Easy in Your Air Fryer

There’s something utterly satisfying about hearing that telltale sizzle of pastries cooking in an air fryer. The moment you pull out a batch of these Air Fryer Ham Cheese Croissants, the golden, flaky layers whisper promises of indulgence. This recipe is a game-changer, perfect for anyone who craves a quick yet gourmet snack or an elegant brunch dish. You’ll find that whipping up these delightful treats takes just minutes, making them an ideal choice for busy days. Plus, the best part? They’re entirely customizable! Swap the savory ham for turkey or add a dollop of pesto for an Italian twist that your taste buds will adore. Curious to see how easily you can create this scrumptious snack at home? Let’s dive into the details!

Why Are These Croissants a Must-Try?

Simplicity is the name of the game: With just a few ingredients and a straightforward process, you can create something extraordinary. Gourmet Flavor comes from the perfect pairing of savory ham and gooey cheese, making them irresistibly delicious. Quick Preparation means you can whip these up in no time, fitting seamlessly into your busy lifestyle. Versatility shines through, as you can customize fillings or experiment with different cheeses, just like in my Banana Grilled Cheese or Chicken Grilled Cheese recipes. Crowd-Pleasing Appeal guarantees that these croissants will be a hit at any gathering, elevating all your brunch occasions!

Ham Cheese Croissants Ingredients

For the Croissant Base

  • Pre-made Croissant Dough – Use a tube of dough for convenience; ensure it’s at room temperature before unrolling for easier handling.

For the Filling

  • Sliced Ham – Offers a delectable savory flavor; feel free to substitute with turkey or chicken for a lighter option.
  • Shredded Cheese – Choose your favorite like Cheddar or Mozzarella; experimenting with pepper jack can add a spicy twist.

For the Egg Wash

  • Egg – Essential for achieving a golden shine on your croissants; it adds to the appealing aesthetics during cooking.

Enjoy creating your Ham Cheese Croissants in the comfort of your kitchen!

Step‑by‑Step Instructions for Irresistible Air Fryer Ham Cheese Croissants

Step 1: Prepare the Dough
Begin by unrolling the pre-made croissant dough on a clean, flat surface. Gently separate the triangles, ensuring they remain intact. Let the dough sit at room temperature for about 10 minutes, making it easier to roll. As you do this, preheat your air fryer to 350°F (175°C) to ensure it’s ready for those delicious Ham Cheese Croissants.

Step 2: Add the Filling
Layer slices of ham evenly on each triangle of dough, making sure to cover the base without overfilling. Sprinkle a generous amount of shredded cheese, like cheddar or mozzarella, over the ham. This combination is the heart of your croissants, delivering savory goodness in every bite. Take a moment to imagine the delicious ooze of melted cheese that awaits!

Step 3: Roll Them Up
Starting at the wider end of each triangle, carefully roll the dough towards the tip, tucking in the edges to secure the filling. You want to create a nice, tight roll that helps keep everything contained while cooking. As you finish rolling each piece, place it seam-side down on a plate, ready for that golden transformation.

Step 4: Brush with Egg Wash
In a small bowl, whisk an egg to create an egg wash, which will give your Ham Cheese Croissants a beautiful shine. Using a pastry brush, gently apply the egg wash over the tops of each croissant. This step is crucial for getting that golden, appetizing look when they come out of the air fryer, enhancing their overall allure.

Step 5: Air Fry Them
Carefully place the croissants in a single layer in your preheated air fryer, ensuring there’s some space between them for even cooking. Cook at 350°F (175°C) for 8-10 minutes, checking for a crispy, golden-brown exterior. The aroma will be irresistible, and you’ll know they’re close to perfect when they turn beautifully flaky!

Step 6: Check for Doneness
Around the 8-minute mark, begin checking your croissants for doneness. Look for a golden, crispy texture on the outside, and listen for that satisfying crunch. If they need a little more time, continue cooking for an additional minute or two. Once ready, remove them from the air fryer and allow them to cool slightly before serving these delicious Ham Cheese Croissants.

Expert Tips for Ham Cheese Croissants

  • Dough Temperature: Ensure your pre-made croissant dough is at room temperature for easier rolling and better flaky layers. Cold dough can be tricky to handle.

  • Avoid Overfilling: While it’s tempting to load up on ham and cheese, overfilling can lead to messy croissants that won’t hold together. Stick to a moderate amount for best results.

  • Egg Wash Importance: Don’t skip the egg wash! It’s crucial for achieving that golden, shiny finish that makes your Ham Cheese Croissants visually appealing and mouthwatering.

  • Watch Cooking Time: Monitor the croissants closely after the 8-minute mark. Air fryer models may vary, and you want to avoid burning while ensuring they’re beautifully crispy.

  • Experiment with Fillings: Get creative! Try different meats or cheeses, such as pesto with turkey or even a blend of cheeses for a unique twist on your Ham Cheese Croissants.

Ham Cheese Croissants Variations

Feel free to explore your creativity and give these delightful croissants a personal touch with these tasty ideas!

  • Turkey Swap: Use sliced turkey instead of ham for a lighter option. It adds a different savory flavor that’s just as delightful.

  • Cheese Variety: Swap cheddar for pepper jack to introduce a spicy kick. Experimenting with cheese can elevate these croissants to new heights!

  • Veggie Boost: Add fresh spinach or sautéed mushrooms to the filling for a nutritious twist. Imagine a burst of flavor with every bite—a satisfying way to sneak in veggies!

  • Herb Infusion: Sprinkle some fresh herbs like basil or oregano into the filling. This will not only enhance the taste but also bring a fresh aroma that fills your kitchen.

  • Garlic Butter: Brush the croissants with a garlic butter mixture before air frying for an indulgent flavor. This simple addition amplifies the deliciousness and creates a rich, savory treat!

  • Pesto Perfect: Spread a thin layer of pesto on the dough before adding ham and cheese. This Italian twist will have your taste buds dancing with joy!

  • Sweet Treat Option: Swap out cheese and ham for chocolate and banana for a dessert twist. This delightful version will be an icebreaker at any brunch gathering!

  • Spicy Kick: Add sliced jalapeños or a few drops of hot sauce to the filling for a spicy surprise in every bite. Who doesn’t love a little extra heat?

If you’re looking for more recipe inspiration, check out my delicious Strawberry Cheesecake Dump Cake or the indulgent Carrot Cake Cheesecake that everyone will love!

Make Ahead Options

These Air Fryer Ham Cheese Croissants are a wonderful option for meal prep enthusiasts! You can assemble the croissants up to 24 hours in advance by rolling them up and placing them on a baking sheet. Cover tightly with plastic wrap and refrigerate to maintain their freshness. When you’re ready to enjoy them, simply brush with the egg wash and cook directly from the fridge; there’s no need to thaw. This method will ensure they taste just as delicious as freshly made. If you want, you can pre-cut the ham and cheese up to 3 days ahead for even easier assembly. These make-ahead tips save you time, making busy weeknights a breeze!

What to Serve with Irresistible Air Fryer Ham Cheese Croissants

Let your taste buds dance as you create a delightful meal that perfectly complements the irresistible flaky layers of savory ham and gooey cheese.

  • Fresh Fruit Salad: The sweetness of ripe berries and melons contrasts beautifully with the rich flavors of the croissants, making each bite refreshing.
  • Light Green Salad: A crisp salad tossed with lemon vinaigrette adds a zesty crunch to balance the buttery richness of the croissants.
  • Garlic Butter Pasta: This creamy pasta dish complements the croissants, enhancing the comfort food vibe that’s perfect for brunch or a cozy dinner.
  • Roasted Vegetables: Seasonal veggies drizzled with olive oil and roasted to perfection provide a warm, earthy side that pairs nicely with the lightness of the croissants.
  • Chilled Sparkling Water: Crisp and refreshing, a glass of sparkling water with a slice of lemon cleanses the palate, enhancing the enjoyment of each bite.
  • Chocolate Chip Cookies: Treat yourself to a sweet ending! Soft, gooey cookies bring nostalgia and joy, rounding out your meal with a childlike delight.

Embrace the comforting combination of flavors and textures, making your meal unforgettable!

Storage Tips for Ham Cheese Croissants

  • Room Temperature: If you plan to enjoy your Ham Cheese Croissants within a few hours of making them, they can be kept at room temperature. Just ensure they are covered to maintain freshness.

  • Fridge: Store leftovers in an airtight container in the refrigerator for up to 3 days. This helps preserve the flavor and texture, making it easier to enjoy them later.

  • Freezer: For longer storage, freeze the croissants in a single layer on a baking sheet until firm, then transfer to an airtight container or freezer bag. They will maintain quality for up to 2 months.

  • Reheating: To restore that glorious crispiness, reheat the croissants in the air fryer at 350°F (175°C) for about 5 minutes. This brings them back to their flavorful best!

Ham Cheese Croissants Recipe FAQs

How do I select the best pre-made croissant dough?
Absolutely! Look for fresh pre-made croissant dough that is sold in the refrigerated section. It should be soft without any dark spots or tears. If possible, check the expiration date to ensure freshness.

How should I store leftover ham cheese croissants?
For optimal freshness, store leftovers in an airtight container in the refrigerator. They’ll stay good for up to 3 days. Just remember to let them cool completely before sealing to avoid unwanted moisture buildup.

Can I freeze the ham cheese croissants?
Very! To freeze, place the baked croissants on a baking sheet in a single layer and freeze until firm, about 1-2 hours. Once frozen, transfer them to an airtight container or freezer bag. They’ll keep well for up to 2 months. When you’re ready to enjoy, reheat in the air fryer at 350°F (175°C) for about 5 minutes.

What if my croissants are not browning properly?
Not to worry! If your croissants aren’t browning, it could be due to the egg wash not fully covering the surface. Make sure you brush the tops generously before air frying. Additionally, every air fryer is slightly different, so you may need to adjust the cooking time slightly and keep an eye on them after the 8-minute mark.

Are these croissants suitable for kids or those with allergies?
Definitely! These ham cheese croissants can easily be made allergy-friendly by substituting with safe ingredients. Opt for gluten-free dough if you have gluten sensitivities, and for dairy issues, use dairy-free cheese and ham alternatives. Always check labels to ensure all ingredients align with any dietary restrictions.

Can I use different fillings besides ham and cheese?
Absolutely! Feel free to get creative. You can use turkey, chicken, or even veggies like spinach and sundried tomatoes for a delicious twist. The options are limitless! Just remember to adjust cooking times if you’re adding moist ingredients.

Ham Cheese Croissants

Delicious Ham Cheese Croissants Made Easy in Your Air Fryer

Delight in these quick and customizable Ham Cheese Croissants, perfect for brunch or a gourmet snack!
Prep Time 10 minutes
Cook Time 10 minutes
Total Time 20 minutes
Servings: 8 croissants
Course: Breakfast
Calories: 200

Ingredients
  

For the Croissant Base
  • 1 tube Pre-made Croissant Dough Ensure it's at room temperature before unrolling.
For the Filling
  • 8 slices Sliced Ham Can be substituted with turkey or chicken.
  • 1 cup Shredded Cheese Cheddar or Mozzarella recommended; pepper jack for spice.
For the Egg Wash
  • 1 large Egg Essential for a golden shine on croissants.

Equipment

  • Air Fryer

Method
 

Step-by-Step Instructions
  1. Begin by unrolling the pre-made croissant dough on a clean surface. Separate the triangles and let sit for 10 minutes at room temperature.
  2. Layer slices of ham evenly on each triangle, then sprinkle with shredded cheese.
  3. Starting at the wider end of each triangle, roll towards the tip and tuck in edges to secure filling.
  4. Whisk an egg to create an egg wash, then brush it over the tops of each croissant.
  5. Place croissants in a single layer in the preheated air fryer and cook at 350°F for 8-10 minutes until golden brown.
  6. Check for doneness around the 8-minute mark; they should be crispy and golden.

Nutrition

Serving: 1croissantCalories: 200kcalCarbohydrates: 15gProtein: 7gFat: 12gSaturated Fat: 5gPolyunsaturated Fat: 0.5gMonounsaturated Fat: 5gCholesterol: 60mgSodium: 400mgPotassium: 150mgFiber: 1gSugar: 1gVitamin A: 300IUCalcium: 150mgIron: 1.5mg

Notes

Ensure dough is room temperature for easier handling. Don't skip the egg wash for a shiny finish.

Tried this recipe?

Let us know how it was!

Quick Ricotta Egg Bites for a Savory, Protein-Packed Breakfast

Caught in the morning rush, I often find myself wishing for a magical breakfast that strikes the perfect balance between quick, nutritious, and utterly delicious. Enter my Quick Ricotta Egg Bites—a delightful solution that not only satisfies cravings but also packs a powerful protein punch! With this recipe, you’ll whip up a gluten-free, low-carb breakfast that transforms hectic mornings into something special. Whether you opt to savor them fresh from the oven or stash a batch for easy meal prep, these little delights are a versatile addition to your kitchen. Customize them with your favorite herbs or veggies for an extra twist. Ready to elevate your brunch game? Let’s dive into the recipe!

Why Choose Quick Ricotta Egg Bites?

Simplicity: This recipe is incredibly easy to prepare, making it perfect for busy mornings without compromising quality.

Protein-Packed: Filled with eggs and ricotta cheese, these bites offer a significant protein boost to kick-start your day.

Versatile: Customize with your favorite add-ins like herbs or veggies, adapting the flavors to suit your taste preferences or whatever you have on hand.

Meal Prep-Friendly: Make a big batch, store them in the fridge, and enjoy them throughout the week—ideal for those hectic mornings!

Gluten-Free & Low-Carb: These bites are perfect for those on a gluten-free or low-carb diet, offering a nutritious and filling option without the guilt.

With these delightful flavors, you can easily transition from a quick breakfast to serving alongside a fresh fruit salad or crispy hash browns for a balanced meal.

Quick Ricotta Egg Bites Ingredients

For the Egg Mixture

  • Eggs – Use large eggs for the best texture and protein content.
  • Ricotta Cheese – Adds creaminess; opt for part-skim for a lighter version or fresh ricotta for richer flavor.
  • Salt – Enhances all the delicious flavors; adjust according to your taste.
  • Pepper – Use freshly ground for the best flavor; it adds a mild heat to the bites.

For Customization

  • Optional Herbs/Seasonings – Add fresh or dried herbs like chives or spinach to elevate the flavor profile and personalize your Quick Ricotta Egg Bites.

By gathering these ingredients, you’re setting yourself up for a delightful breakfast experience that’s not only tasty but also incredibly versatile!

Step‑by‑Step Instructions for Quick Ricotta Egg Bites

Step 1: Preheat the Oven
First, preheat your oven to 325°F (160°C). This temperature is crucial for achieving that perfect, custard-like texture in your Quick Ricotta Egg Bites. While the oven warms up, take a moment to gather your ingredients and prep your workspace for a smooth cooking process.

Step 2: Prepare the Egg Mixture
In a medium mixing bowl, combine the large eggs, ricotta cheese, salt, and freshly ground pepper. Using a whisk or electric mixer, blend the ingredients together until the mixture is beautifully smooth and well-combined. Aim for a light and airy consistency, which will ensure your bites are fluffy when baked.

Step 3: Set Up Your Molds
Take your silicone molds and place them in a baking pan. Silicone molds are ideal for this recipe, as they allow for easy removal of the baked Quick Ricotta Egg Bites later. Ensuring the molds are securely in the pan will also prevent spills while transferring them to the oven.

Step 4: Fill the Molds
Carefully pour the egg mixture into the prepared silicone molds, filling each one about three-quarters full. This allows room for expansion as they bake, preventing overflow. Make sure to distribute the mixture evenly across all molds for uniform cooking.

Step 5: Create a Water Bath
To promote even cooking, create a water bath by pouring hot water into the baking pan until it reaches halfway up the sides of the silicone molds. This method helps to maintain moisture and prevents the Quick Ricotta Egg Bites from drying out while baking.

Step 6: Bake the Egg Bites
Place the baking pan with the filled molds into the preheated oven. Bake for 25 to 35 minutes, or until the bites are fully set and no longer jiggle in the middle when gently shaken. You’ll know they’re done when a toothpick inserted comes out clean and they’re slightly golden on top.

Step 7: Cool & Store
Once baked, remove the pan from the oven and allow the Quick Ricotta Egg Bites to cool for a few minutes before carefully taking them out of the molds. After they are fully cooled, store any leftovers in an airtight container in the fridge for up to 4 days, or freeze them for longer enjoyment.

Storage Tips for Quick Ricotta Egg Bites

Fridge: Store your Quick Ricotta Egg Bites in an airtight container for up to 4 days to maintain freshness and flavor.

Freezer: Freeze the bites for up to 2 months, layering them between parchment paper to prevent sticking and make for easy snacking later.

Reheating: To enjoy leftovers, microwave refrigerated bites for 30 seconds or frozen ones for 1-2 minutes. Alternatively, warm them in the oven at 350°F for 5-7 minutes for that fresh out-of-the-oven taste.

Quick Ricotta Egg Bites Customization Ideas

Feel free to get creative and tailor these egg bites to your taste buds with these delightful variations!

  • Veggie-Packed: Add chopped spinach, diced bell peppers, or sautéed mushrooms for a burst of flavor and nutrients. Mixing in veggies not only enhances taste but also offers a wholesome bite.

  • Cheese Lovers: Swap ricotta for cream cheese or cottage cheese for a unique twist. The creaminess will still shine through, providing a lovely variation in flavor and texture.

  • Savory Bacon: Sprinkle in crispy bacon bits for that smoky, savory kick. Pairing bacon with eggs is timeless, bringing indulgence to your Quick Ricotta Egg Bites.

  • Herb Garden: Infuse freshness by adding chopped fresh herbs like basil, dill, or parsley into your mixture. The aromatic qualities of herbs brighten up each bite, making them simply irresistible.

  • Zesty Heat: For those who like a little spice, mix in jalapeños or a dash of hot sauce. Adding heat elevates the overall experience, giving your breakfast a fun twist.

  • Mediterranean Flair: Introduce sun-dried tomatoes and olives for a Mediterranean vibe. This combination brings together delightful tanginess and richness that’s hard to resist.

  • Flavorful Fusions: Try mixing in taco seasoning or Italian herbs to add a distinct flair. These spices can transform your Quick Ricotta Egg Bites into a global breakfast experience.

  • Sweet & Savory: If you’re adventurous, a pinch of cinnamon or nutmeg can add a subtle sweetness. Pairing this with herbs or veggies can create an exciting balance that tantalizes the taste buds.

These variations will ensure you never get bored of your Quick Ricotta Egg Bites! Don’t forget to check out Garlic Salmon Bites for a savory companion or to try pairing them with a delicious Cheesy Protein Egg on the side!

What to Serve with Quick Ricotta Egg Bites

Start your morning with a well-rounded meal that beautifully complements the fluffy essence of these delightful bites.

  • Crispy Hash Browns: The golden, crispy texture contrasts perfectly with the softness of the egg bites, making every bite a delicious combination.
  • Fresh Fruit Salad: A refreshing mix of seasonal fruits adds a burst of color and natural sweetness, balancing the savory flavors of the egg bites beautifully.
  • Sautéed Spinach: This lightly wilted vegetable side provides a lovely earthiness, enhancing the nutrients while harmonizing with the creamy ricotta.
  • Herbed Toast: A simple slice of toasted bread topped with fresh herbs or a smear of cream cheese creates delightful crunch and enhances your breakfast experience.
  • Savory Yogurt Dip: Pair these egg bites with a chilled yogurt sauce infused with herbs and lemon. The tanginess gives a nice lift to the creamy bites.
  • Spicy Sriracha Sauce: Add a drizzle for a kick of heat that elevates each bite, perfectly satisfying both savory and spicy cravings.
  • Chilled Green Tea: A refreshing drink that cleanses the palate, making your breakfast feel revitalizing. Its subtle flavors won’t overpower the egg bites.
  • Mini Quinoa Salad: A light salad packed with protein and flavor can be a fantastic side, offering a nutrient boost alongside your tasty eggs.
  • Chocolate Chip Muffins: For something sweet, these muffins can provide a delightful contrast, making your breakfast feel indulgent yet wholesome.

Expert Tips for Quick Ricotta Egg Bites

  • Perfect Temperature: Monitor the internal temperature; aim for 160°F to ensure your Quick Ricotta Egg Bites are fully cooked without becoming rubbery.

  • Water Bath Method: Always use a water bath for even baking; it prevents the bites from drying out, ensuring a soft, custard-like texture.

  • Blending Matters: Blend your egg and ricotta mixture thoroughly for a smooth consistency. Any lumps will impact the texture of your tasty bites.

  • Avoid Overfilling: Fill molds only three-quarters full to allow room for expansion while baking, which helps to prevent messy spills.

  • Mix & Match Ingredients: Don’t hesitate to customize with various herbs or veggies. This flexibility keeps your breakfasts exciting and tailored to your preferences!

Make Ahead Options

These Quick Ricotta Egg Bites are a brilliant option for meal prep! You can prepare the egg mixture up to 24 hours in advance by blending the eggs, ricotta, salt, and pepper, then storing it in an airtight container in the refrigerator. Additionally, you can pour the mixture into the molds and keep them in the fridge for up to 3 days before baking. When you’re ready to enjoy them, simply bake directly from the fridge to ensure they maintain their creamy, custard-like texture. This way, you’ll pop these delightful bites into the oven and have a nutritious breakfast ready in no time, making those busy mornings a breeze!

Quick Ricotta Egg Bites Recipe FAQs

How do I choose the best eggs for my Quick Ricotta Egg Bites?
Absolutely! For the best texture and protein content, I recommend using large eggs. Look for eggs that have a clean shell and are stored in a cool environment at the store. Fresh eggs typically yield a fluffier and richer bite!

How should I store the Quick Ricotta Egg Bites after cooking?
Once your bites have cooled, store them in an airtight container in the refrigerator for up to 4 days. This will keep them fresh and ready for quick breakfasts! If you want to enjoy them later, consider freezing.

Can I freeze the Quick Ricotta Egg Bites? How?
Very much! To freeze, place a piece of parchment paper between each bite to prevent them from sticking together. Then, store them in a freezer-safe bag or container. They can be frozen for up to 2 months. When you’re ready to enjoy them, let them thaw in the fridge overnight, or microwave frozen ones for 1-2 minutes until heated through.

What should I do if my egg bites are rubbery?
If you find your egg bites are rubbery, you may have overcooked them. Always check for doneness at 160°F and remove them from the oven once they no longer jiggle in the center. Ensure to use a water bath and blend your mixture well to achieve that creamy texture.

Are Quick Ricotta Egg Bites suitable for those with dietary restrictions?
Absolutely! These egg bites are naturally gluten-free and low-carb, making them a great choice for various diets. However, if you have a dairy allergy, you can try using dairy-free ricotta alternatives available in stores. Just make sure to double-check the labels for any allergens!

Can I add more ingredients to my Quick Ricotta Egg Bites?
Yes! Feel free to customize with your favorite veggies or herbs. For instance, mix in chopped spinach, diced bell peppers, or fresh chives to elevate the flavor profile. Just remember not to exceed the filling capacity of your molds to ensure even baking!

Quick Ricotta Egg Bites

Quick Ricotta Egg Bites for a Savory, Protein-Packed Breakfast

Quick Ricotta Egg Bites are a delicious, protein-packed breakfast solution that are gluten-free and low-carb.
Prep Time 10 minutes
Cook Time 30 minutes
Cooling Time 5 minutes
Total Time 45 minutes
Servings: 4 bites
Course: Breakfast
Cuisine: American
Calories: 90

Ingredients
  

For the Egg Mixture
  • 4 large Eggs Use large eggs for the best texture and protein content.
  • 1 cup Ricotta Cheese Adds creaminess; opt for part-skim for a lighter version.
  • 1 teaspoon Salt Enhances all the delicious flavors; adjust according to your taste.
  • 0.5 teaspoon Pepper Use freshly ground for the best flavor.
For Customization
  • Optional Herbs/Seasonings Add fresh or dried herbs like chives or spinach.

Equipment

  • Oven
  • Mixing Bowl
  • Silicone molds
  • Baking Pan
  • whisk

Method
 

Step-by-Step Instructions
  1. Preheat your oven to 325°F (160°C).
  2. In a medium mixing bowl, combine the large eggs, ricotta cheese, salt, and freshly ground pepper. Blend until smooth.
  3. Take your silicone molds and place them in a baking pan.
  4. Carefully pour the egg mixture into the prepared silicone molds, filling each one about three-quarters full.
  5. Create a water bath by pouring hot water into the baking pan until it reaches halfway up the sides of the silicone molds.
  6. Place the baking pan with the filled molds into the preheated oven. Bake for 25 to 35 minutes.
  7. Once baked, let the Quick Ricotta Egg Bites cool for a few minutes before removing from molds.

Nutrition

Serving: 1biteCalories: 90kcalCarbohydrates: 2gProtein: 6gFat: 7gSaturated Fat: 4gPolyunsaturated Fat: 0.5gMonounsaturated Fat: 1gCholesterol: 180mgSodium: 150mgPotassium: 90mgSugar: 1gVitamin A: 500IUCalcium: 100mgIron: 1mg

Notes

Store in an airtight container for up to 4 days in the fridge or freeze for up to 2 months.

Tried this recipe?

Let us know how it was!

Decadent Breakfast Poutine with Hollandaise Sauce Delight

As the sun peeks through the kitchen window, the smell of sizzling bacon and crispy hash browns fills the air, instantly igniting a hunger that only comfort food can settle. While fast food might be the usual on busy mornings, this Breakfast Poutine with Hollandaise Sauce transforms your plate into a mouthwatering experience that feels both indulgent and homemade. With just a bit of prep, you can whip up this customizable breakfast delight that caters to your cravings—whether you’re a meat lover or a veggie enthusiast. Plus, it’s an absolute crowd-pleaser, perfect for lazy weekends or a quick weekday treat. Curious about how to create this culinary masterpiece? Let’s dive into the delicious details!

Why is this Breakfast Poutine special?

Indulgent melt-in-your-mouth goodness: Each layer of this breakfast poutine harmonizes crispy hash browns, savory bacon, and creamy hollandaise for a unique twist.
Totally customizable: Tailor it to your taste with options like turkey bacon, sautéed spinach, or even spicy jalapeños for that extra kick!
Quick prep time: In under 30 minutes, you’ll have an impressive dish ready, making it the perfect recipe for busy mornings or leisurely brunches.
A feast for the eyes and palate: The stunning presentation of this dish will wow your family and guests, making every meal feel like a special occasion.
Versatile and fulfilling: Enjoy it on its own or pair with a fresh fruit salad or avocado toast, turning your breakfast into a balanced feast that lasts! Bring home the joy of comfort food and spice up your mornings with this delightful creation!

Breakfast Poutine Ingredients

For the Hash Brown Base

  • Frozen Hash Browns – A crispy foundation that can also be made homemade for an extra burst of flavor.
  • Olive Oil – Essential for frying to enhance flavor; any cooking oil can work in a pinch.
  • Salt – Rounds out the flavor; adjust according to your taste preferences.
  • Black Pepper – Adds a mild kick; use more or less based on your heat preference.

For the Eggs and Meats

  • Large Eggs – A great protein source; feel free to poach or scramble for your liking.
  • Bacon – Adds savory depth; alternative options include turkey bacon or tempeh for a vegetarian version.

For the Cheese

  • Cheddar Cheese (shredded) – Provides sharp, creamy goodness; consider Monterey Jack or Gouda as delicious substitutes.
  • Mozzarella Cheese (shredded) – Melts beautifully over the hash browns; other melting cheeses can also be used.

For the Gravy

  • Gravy – A classic poutine topping; feel free to use store-bought or homemade for a personal touch.

For the Hollandaise Sauce

  • Unsalted Butter – Key for richness; you can use salted butter if you adjust other salt in the dish.
  • Egg Yolks – Create a creamy base for the hollandaise; non-dairy substitutes can be used for a different take.
  • Dijon Mustard – Adds tang; experiment with your favorite mustard for variations.
  • White Wine Vinegar – Introduces a touch of acidity; lemon juice can serve as an excellent substitute.
  • Lemon Juice – Brightens the sauce; always choose fresh for the best flavor.
  • Cayenne Pepper – Adds optional heat; feel free to omit for a milder flavor.
  • Garlic Powder – Enhances the savory depth; fresh garlic is a fantastic substitution if you prefer.

Embrace the art of making the perfect Breakfast Poutine with Hollandaise Sauce that speaks to your comfort and creativity in the kitchen!

Step‑by‑Step Instructions for Breakfast Poutine with Hollandaise Sauce

Step 1: Preheat and Bake Hash Browns
Preheat your oven to 400°F (200°C). Spread the frozen hash browns evenly on a parchment-lined baking sheet. Drizzle with olive oil and sprinkle salt and black pepper over them. Bake for 20 minutes, flipping halfway through for an even golden crisp. The hash browns should look perfectly browned and crunchy by the end of the baking period.

Step 2: Cook the Bacon
While the hash browns bake, heat a skillet over medium heat and add a splash of olive oil. Once warm, add chopped bacon to the skillet and cook for 6-8 minutes, stirring occasionally, until it’s crispy and browned. Once done, crumble the bacon and set it aside, leaving the flavorful bacon fat in the skillet for the eggs.

Step 3: Prepare the Eggs
In the same skillet with bacon fat, melt a tablespoon of butter over medium heat. Crack large eggs directly into the skillet and cook them to your preference: sunny-side up for 3-4 minutes, or until the whites are set, and yolks remain runny. Season with salt and black pepper, and keep them warm while you make the hollandaise sauce.

Step 4: Make the Hollandaise Sauce
Set up a double boiler by placing a heatproof bowl over a pot of simmering water. Add the egg yolks, Dijon mustard, and white wine vinegar to the bowl, whisking continuously for about 2 minutes until slightly thickened. Gradually pour in melted butter, whisking until the sauce is creamy and smooth. Stir in fresh lemon juice, cayenne pepper, and garlic powder for the perfect flavor balance.

Step 5: Assemble the Poutine
Once the hash browns are crispy and the eggs are ready, it’s time to assemble your Breakfast Poutine! In individual serving bowls, layer the crispy hash browns at the bottom. Top with cooked eggs, and generously sprinkle shredded cheddar and mozzarella cheese over the top. Pour warm gravy over the entire dish to enhance the flavors.

Step 6: Add the Finishing Touches
Finally, drizzle your luscious hollandaise sauce over the cheese and gravy layers for that creamy indulgence. Sprinkle the crumbled bacon atop everything for a savory crunch. Serve immediately while everything is hot and melty, creating a breakfast experience that’s sure to impress with this delightful Breakfast Poutine with Hollandaise Sauce.

Make Ahead Options

These Breakfast Poutine with Hollandaise Sauce components are perfect for meal prep enthusiasts! You can prepare the crispy hash browns up to 24 hours in advance; just bake them as directed and store them in an airtight container. For the hollandaise sauce, make it fresh, but you can also whisk the egg yolks and mustards a day before and refrigerate them. When you’re ready to serve, simply reheat the hash browns in the oven to crisp them up again, warm up the gravy, and finish with freshly cooked eggs and hollandaise. This way, you’ll enjoy all the indulgent flavors just as delicious without the morning rush!

Expert Tips for Breakfast Poutine

  • Crispy Hash Browns: Ensure they are spread in a single layer on the baking sheet to achieve optimal crispness, avoiding sogginess.
  • Whisk Continuously: When preparing hollandaise sauce, whisk steadily as you add melted butter to avoid separation and achieve a velvety texture.
  • Perfect Eggs: For poached eggs, add a splash of vinegar to the simmering water to help the whites firm up quickly, keeping a lovely shape.
  • Layering Technique: Assemble the Breakfast Poutine with hot components so the cheese melts beautifully over the hash browns for a creamy experience.
  • Flavor Enhancements: Feel free to experiment with unique cheese combinations or fresh herbs to elevate the flavor profile of your breakfast poutine.
  • Separate Storage: If you have leftovers, store components separately in airtight containers to maintain texture and freshness for the next day’s breakfast indulgence.

What to Serve with Breakfast Poutine with Hollandaise Sauce

Elevate your breakfast experience by pairing this indulgent dish with complementary sides that balance flavors and textures.

  • Fresh Fruit Salad: A medley of seasonal fruits enhances the meal’s freshness while offering a light, refreshing contrast to the richness of the poutine.
  • Crispy Breakfast Potatoes: Just as crispy and flavorful, these golden potatoes add an extra crunch while being the perfect canvas for dipping into hollandaise.
  • Avocado Toast: Creamy, ripe avocado on toasted bread aligns beautifully with the savory elements of the poutine, adding a satisfying creaminess.
  • Sautéed Greens: Lightly seasoned spinach or kale provides an earthy note, balancing the richness of the hollandaise and adding nutritional value.
  • Light Spinach Salad: Tossed with a zesty vinaigrette, the salad offers a refreshing bite that cuts through the decadence of your breakfast poutine.
  • Mimosas: This bubbly brunch classic adds a celebratory touch to your meal, with citrus brightness complementing the savory flavors beautifully.
  • Maple Syrup: A small drizzle over your finished poutine can introduce an unexpected sweet note, enhancing the whole breakfast experience.
  • Double Espresso: Kickstart your morning with a bold cup of coffee; its rich flavor cuts through the creaminess, making each bite feel even more satisfying.

Breakfast Poutine with Hollandaise Sauce Variations

Feel free to explore and personalize this delicious breakfast creation, letting your taste buds guide your culinary adventure!

  • Vegetarian Option: Substitute bacon with sautéed spinach or roasted vegetables for a delightful veggie twist. You’ll enjoy the fresh flavors mingling with the creamy sauce.
  • Spicy Kick: Add jalapeños or a dash of hot sauce to spice things up! This fiery addition elevates the dish, making every bite an adventure.
  • Mushroom Gravy: Replace traditional gravy with rich mushroom gravy, offering an earthy flavor profile that complements the dish beautifully. Just imagine the savory goodness!
  • Cheese Lovers: Switch up the cheese by using blue cheese or pepper jack for a bolder flavor. Different cheeses can truly enhance the depth and complexity of your poutine.
  • Savory Herbs: Incorporate fresh herbs like chives, parsley, or thyme to brighten the dish with fragrant freshness. A sprinkle can transform simple into sensational!
  • Add Avocado: Top your poutine with creamy avocado slices for extra richness. The creamy texture brings a lovely balance to the crispy and savory components.
  • Cheese and Egg Variations: Experiment with various egg preparations—poached, scrambled, or even an omelet can change the vibe. Pair them with your favorite blend of cheeses for a tailor-made experience.

For more delicious breakfast ideas, don’t forget to check out these delightful recipes: Banana Blueberry Breakfast or the savory Croissant Breakfast Sandwich. Happy cooking!

How to Store and Freeze Breakfast Poutine

Fridge: Store leftover components separately in airtight containers for up to 2 days to maintain texture and freshness.

Freezer: Both hash browns and gravy can be frozen for up to 3 months; ensure they’re well packaged. Thaw in the fridge overnight before reheating.

Reheating: For best results, reheat hash browns in the oven at 375°F (190°C) for 10-15 minutes until crisp, and warm the gravy on the stovetop. Enjoy your delicious Breakfast Poutine with Hollandaise Sauce!

Assembly Tip: Combine the ingredients right before serving to ensure everything stays fresh and flavorful.

Breakfast Poutine with Hollandaise Sauce Recipe FAQs

How do I choose the best ripeness for my ingredients?
Absolutely! For hash browns, frozen options are perfectly fine, but if you prefer homemade, choose starchy potatoes that are firm and blemish-free. When selecting eggs, look for those with a clean, uncracked shell, and a use-by date that’s far in the future for optimal freshness. For vegetables like spinach or other toppings, vibrant green leaves without wilting or browning are ideal.

What’s the best way to store leftovers from this dish?
After enjoying your Breakfast Poutine with Hollandaise Sauce, you can store leftovers for future indulgence! Keep each component—hash browns, eggs, gravy, and hollandaise—separate in airtight containers in the fridge for up to 2 days. This method preserves the texture and flavors, ensuring that every bite remains delightful when you reheat!

Can I freeze any components of the Breakfast Poutine?
Very! You can easily freeze both hash browns and gravy for up to 3 months. To do this, place them in airtight freezer bags, squeezing out as much air as possible for best results. For reheating, simply thaw the hash browns in the fridge overnight, then bake at 375°F (190°C) for about 10-15 minutes until they’re crispy again. Warm the gravy gently on the stovetop and then enjoy!

What if my hollandaise sauce doesn’t come together?
No worries! If your hollandaise sauce separates, try whisking in a tablespoon of warm water or another egg yolk while whisking vigorously. To prevent this, make sure to whisk continuously while adding melted butter slowly. If you find the sauce too thick, a splash of lemon juice or warm water can help you reach your desired consistency.

Are there any dietary considerations for this recipe?
Absolutely! This Breakfast Poutine is highly customizable. To make it vegetarian, simply substitute the bacon with sautéed vegetables or tempeh. If you’re lactose intolerant or avoiding dairy altogether, consider using non-dairy butter and cheese substitutes that melt well. Just remember to always check ingredient labels for any allergens that may be a concern for you or your guests.

Breakfast Poutine with Hollandaise Sauce

Decadent Breakfast Poutine with Hollandaise Sauce Delight

Indulge in this Breakfast Poutine with Hollandaise Sauce, a customizable and comforting dish perfect for any morning.
Prep Time 10 minutes
Cook Time 20 minutes
Total Time 30 minutes
Servings: 4 servings
Course: Breakfast
Cuisine: Canadian
Calories: 600

Ingredients
  

For the Hash Brown Base
  • 1 bag Frozen Hash Browns Can be made homemade for extra flavor
  • 2 tablespoons Olive Oil Any cooking oil can work
  • 1 teaspoon Salt Adjust to taste
  • 1 teaspoon Black Pepper Adjust to taste
For the Eggs and Meats
  • 4 large Eggs Poach or scramble as desired
  • 6 slices Bacon Turkey bacon or tempeh as alternatives
For the Cheese
  • 1 cup Cheddar Cheese (shredded) Monterey Jack or Gouda are substitutes
  • 1 cup Mozzarella Cheese (shredded) Other melting cheeses can be used
For the Gravy
  • 1 cup Gravy Store-bought or homemade
For the Hollandaise Sauce
  • 1/2 cup Unsalted Butter Salted butter can be used if adjusting other salt
  • 3 large Egg Yolks Non-dairy substitutes can be used
  • 1 tablespoon Dijon Mustard Experiment with different mustards
  • 1 tablespoon White Wine Vinegar Lemon juice can substitute
  • 1 tablespoon Lemon Juice Fresh preferred for best flavor
  • 1/4 teaspoon Cayenne Pepper Optional, omit for a milder flavor
  • 1/2 teaspoon Garlic Powder Fresh garlic is a fantastic substitution

Equipment

  • Oven
  • Skillet
  • double boiler
  • Baking Sheet

Method
 

Step-by-Step Instructions
  1. Preheat your oven to 400°F (200°C). Spread the frozen hash browns evenly on a parchment-lined baking sheet. Drizzle with olive oil and sprinkle salt and black pepper. Bake for 20 minutes, flipping halfway.
  2. Heat a skillet over medium heat and add a splash of olive oil. Once warm, add chopped bacon and cook for 6-8 minutes until crispy. Crumble bacon and set aside.
  3. In the same skillet with bacon fat, melt a tablespoon of butter. Crack eggs into the skillet and cook to preference. Season with salt and black pepper.
  4. Set up a double boiler and add egg yolks, Dijon mustard, and white wine vinegar, whisking continuously for 2 minutes. Gradually add melted butter, whisking until creamy. Stir in lemon juice, cayenne pepper, and garlic powder.
  5. Layer crispy hash browns in bowls, top with cooked eggs, and sprinkle with shredded cheddar and mozzarella cheese. Pour warm gravy over the dish.
  6. Drizzle hollandaise sauce over the dish, and sprinkle crumbled bacon. Serve immediately.

Nutrition

Serving: 1servingCalories: 600kcalCarbohydrates: 40gProtein: 25gFat: 38gSaturated Fat: 15gPolyunsaturated Fat: 3gMonounsaturated Fat: 10gCholesterol: 210mgSodium: 900mgPotassium: 700mgFiber: 3gSugar: 2gVitamin A: 1000IUVitamin C: 5mgCalcium: 300mgIron: 2mg

Notes

Store leftover components separately to maintain texture and freshness. Hash browns and gravy can be frozen for up to 3 months.

Tried this recipe?

Let us know how it was!

Delicious Breakfast Egg Rolls: A Fun Twist on Morning Favorites

The aroma of sizzling breakfast sausage and melted cheddar wafting through the kitchen is the kind of morning magic that makes you smile. That’s the feeling I want to recreate with these irresistible Breakfast Egg Rolls. Perfectly crispy on the outside and stuffed with a savory filling of eggs, sausage, and veggies, they offer a delightful twist on a classic breakfast. Not only are these egg rolls customizable to fit your taste, but they also pack well for meal prep, making them a fantastic go-to for busy mornings or brunch gatherings. Plus, they freeze beautifully, so you can whip them out for a quick treat anytime. Ready to transform your mornings with these tasty bites? Let’s dive into the recipe!

Why are Breakfast Egg Rolls a Must-Try?

Crispy, Crunchy Delight: These breakfast egg rolls bring a fun twist to traditional breakfast fare with their golden, crispy exterior that invites everyone to take a bite. Savory Filling: Each roll is generously filled with a mouthwatering blend of breakfast sausage, eggs, and veggies, ensuring every bite is bursting with flavor. Customizable Options: Feel free to tailor the ingredients—swap in your favorite proteins or veggies for a personalized touch. Easy Meal Prep: Perfect for busy lifestyles, these egg rolls can be made ahead and frozen, making weekday breakfasts a breeze! Pair with salsa or avocado for a refreshing dip, and enjoy a breakfast that’s unlike any other, leaving you and your guests raving about it.

Breakfast Egg Roll Ingredients

• Get ready to bring joy to your mornings with these delightful Breakfast Egg Rolls in no time!

For the Filling

  • Unsalted Butter – Adds richness and flavor; substitute with olive oil for a lighter option.
  • Breakfast Sausage – Provides protein and savory flavor; swap with bacon, ham, or veggie crumbles for variation.
  • Sweet Onion – Adds sweetness and texture; use yellow onion or shallots as a substitute.
  • Green Bell Pepper – Contributes crunch and color; red or yellow bell peppers can be used for a sweeter taste.
  • Sea Salt – Enhances all flavors; substitute with kosher salt or reduce for lower sodium.
  • Black Pepper – Adds subtle heat; white pepper is a milder option.
  • Shredded Hash Browns – Provides a crispy texture; fresh or frozen hash browns work well, but thaw if frozen.
  • Large Eggs – Bind the filling and provide protein; egg whites can be used for a lighter option.
  • Sharp Cheddar Cheese – Adds creaminess and a strong cheese flavor; substitute with Monterey Jack or pepper jack for a spicier kick.

For Assembly and Frying

  • Egg Roll Wrappers – Encases the filling; can use homemade wrappers or store-bought, ensuring they’re kept covered to prevent drying.
  • Canola or Vegetable Oil – For frying, creating a crispy texture; olive oil can also be used, though it has a lower smoke point.

Step‑by‑Step Instructions for Breakfast Egg Rolls

Step 1: Cook the Sausage
In a skillet, melt 1 tablespoon of unsalted butter over medium heat. Add the breakfast sausage, diced sweet onion, and chopped green bell pepper, seasoning with ¼ teaspoon of sea salt and ⅛ teaspoon of black pepper. Cook this mixture for about 5 minutes until the sausage is browned and the vegetables are tender, stirring occasionally for even cooking.

Step 2: Prepare Hash Browns
Using the same skillet, add another tablespoon of butter and heat over medium heat. Once melted, add the shredded hash browns without stirring and cook undisturbed for 4-5 minutes, allowing them to crisp up. After they turn golden brown, stir and continue cooking for a couple more minutes until they are entirely cooked through and crispy.

Step 3: Combine Filling
Crack the large eggs into a bowl and beat them well. Pour the beaten eggs into the skillet with the sausage and hash browns, stirring until just set. Once the eggs begin to firm up, mix in the cheesy goodness of sharp cheddar cheese along with the remaining salt and black pepper, ensuring everything is evenly combined for a flavorful Breakfast Egg Rolls filling.

Step 4: Assemble Egg Rolls
On a clean surface, lay out an egg roll wrapper with one corner pointed toward you. Spoon about ¼ cup of the filling mixture onto the wrapper. Roll the wrapper tightly away from you, folding in the sides as you go to encase the filling securely. Use a little water to seal the edges, ensuring no filling escapes during frying.

Step 5: Fry Egg Rolls
In a Dutch oven, heat 1 inch of canola or vegetable oil to 350°F, ensuring it’s hot enough for frying. Carefully place the assembled egg rolls in batches into the hot oil, frying for about 2-3 minutes on each side until they are golden brown and crispy. Once fried, transfer them to a paper towel-lined plate to drain excess oil before serving warm.

How to Store and Freeze Breakfast Egg Rolls

Fridge: Store cooked breakfast egg rolls in an airtight container for up to 3 days. This keeps them fresh and ready for quick heating.

Freezer: For long-term storage, freeze unfilled or filled (before frying) breakfast egg rolls in a single layer on a baking sheet. Transfer to an airtight container after freezing for up to 3 months.

Reheating: To reheat fried breakfast egg rolls, place them in a preheated oven at 350°F for 8-10 minutes until crispy again. Avoid microwaving, as it can make them soggy.

Prep-Ahead Tip: Make a batch of breakfast egg rolls on the weekend, freeze them, and have a delicious, homemade breakfast ready to go on busy mornings!

Expert Tips for Breakfast Egg Rolls

  • Perfect Oil Temp: Ensure the oil reaches 350°F before frying to achieve that wonderful golden crispiness every time.

  • Avoid Overcrowding: Fry egg rolls in batches to maintain the oil temperature; overcrowding can lead to soggy results.

  • Seal Tight: Always seal the edges of the wrappers tightly with water to prevent any filling from bursting out during frying.

  • Versatile Fillings: Get creative! Customize your Breakfast Egg Rolls with your favorite veggies, cheeses, or even proteins for a tailored breakfast experience.

  • Reheat Like a Pro: To keep them crispy, reheat fried egg rolls in the oven at 350°F for 8-10 minutes.

  • Freezing Tips: Prepared breakfast egg rolls can be frozen before frying for up to 3 months. Just thaw and fry when you’re ready to enjoy!

Breakfast Egg Rolls: Creative Twists

Inviting your culinary creativity into the kitchen can lead to delightful surprises that brighten your mornings!

  • Turkey Swap: Replace breakfast sausage with ground turkey for a leaner option that packs a punch. You’ll still get that savory flavor while keeping it light.
  • Vegetarian Delight: Use plant-based meat alternatives like quinoa or lentils for a satisfying vegetarian version. It’s a perfect way to enjoy a filling breakfast without meat!
  • Spicy Kick: Add diced jalapeños, crushed red pepper flakes, or sriracha to the filling for an extra layer of heat. This way, every bite tantalizes your taste buds!
  • Cheese Variations: Experiment with different cheeses, like pepper jack for a spicy touch or feta for a Mediterranean flair. Each cheese brings its unique flavor profile, making it a fun adventure!
  • Crunchy Greens: Toss in some fresh spinach or kale to amp up the nutrition. These leafy greens add color and valuable nutrients, transforming your egg rolls into a powerhouse breakfast!
  • Hash Brown Twist: Instead of traditional hash browns, try tater tots for added texture and an unexpected surprise inside. Crispy and creamy, it’s a delightful combination!
  • Sweet Option: For a sweeter breakfast twist, fill your egg rolls with scrambled eggs, chocolate chips, and a sprinkle of cinnamon. Serve with maple syrup for dipping – breakfast heaven!
  • Serve with Style: Pair your egg rolls with a refreshing salsa, light ranch, or avocado slices, reminiscent of other favorites like my Banana Blueberry Breakfast or Foster Cinnamon Rolls. This adds zest to each bite, enhancing your breakfast experience!

Feel inspired to mix it up and create variation-filled breakfast egg rolls that every family member will adore!

Make Ahead Options

These Breakfast Egg Rolls are a fantastic option for meal prep enthusiasts! You can prepare and assemble the egg rolls up to 24 hours in advance by tightly wrapping them in plastic wrap and refrigerating. Additionally, you can freeze them before frying for up to 3 months, which keeps them just as delicious when reheated. To maintain quality, ensure the egg rolls are sealed properly to prevent freezer burn. When you’re ready to enjoy, simply fry them straight from the freezer for 3-4 minutes on each side or bake at 425°F for 12-15 minutes until crispy. This way, you’ll have a hearty and satisfying breakfast ready with minimal effort!

What to Serve with Crispy Breakfast Egg Rolls with Sausage and Cheese?

For a delightful breakfast spread, it’s all about balancing flavors and textures to complement the crispy goodness of your egg rolls.

  • Fresh Avocado Slices: Creamy, rich avocado adds a decadent touch and pairs perfectly with the crunchy egg rolls.
  • Tangy Salsa: A vibrant, zesty salsa provides an exciting contrast, enhancing each bite with freshness and brightness.
  • Homemade Ranch Dressing: Creamy ranch dressing brings a cool and tangy element, making it a tasty dip for those egg rolls.
  • Savory Hash Brown Casserole: A hearty hash brown casserole amplifies the breakfast experience, featuring crispy potatoes that harmonize beautifully with the egg rolls.
  • Fruit Salad: A refreshing fruit salad, bursting with seasonal fruits, offers a sweet finish that balances the savory egg rolls.
  • Mimosas: Toast your brunch with a light and bubbly mimosa. The citrus notes brighten up the meal and add a festive flair.
  • Roasted Veggies: A medley of roasted vegetables provides a warm, earthy accompaniment that complements the egg rolls’ rich filling.
  • Smoky Bacon Strips: Crispy, smoky bacon enhances the breakfast theme, infusing delicious flavors that everyone loves.
  • Spicy Kimchi: For those looking for a kick, serving kimchi alongside adds a nice spicy crunch to your plate, enhancing the overall taste.
  • Smoothies: A bright and creamy smoothie packed with greens or berries offers a nutritious sip that rounds out the breakfast beautifully.

Breakfast Egg Rolls Recipe FAQs

What should I look for when selecting ingredients for my Breakfast Egg Rolls?
Absolutely! For the best results, choose fresh ingredients. Look for breakfast sausage that’s firm and not overly fatty, with a nice aroma. Opt for eggs that are free of cracks, and choose hash browns that are golden and crispy. When picking bell peppers, avoid any with dark spots or wrinkles for optimal crunch, and select sweet onions that feel firm and heavy for their size.

How should I store leftover Breakfast Egg Rolls?
Very! Store cooked breakfast egg rolls in an airtight container in the refrigerator for up to 3 days. Make sure they’re completely cool before sealing to prevent sogginess. If you have unfilled egg rolls, you can freeze them before frying. Place them in a single layer on a baking sheet, freeze until solid, then transfer them to an airtight bag and store for up to 3 months.

Can I freeze cooked Breakfast Egg Rolls?
Absolutely! After frying, let the egg rolls cool completely. Then, place them in an airtight container or freezer bag. When ready to enjoy, reheat in a preheated oven at 350°F for about 8-10 minutes or until crispy again. This way, you maintain that delightful crunch!

What can I do if the filling leaks out while frying?
Very! To prevent leaking, make sure to seal the edges of your egg rolls tightly with water. Also, don’t overfill them; using about ¼ cup of filling is ideal. If you notice any leaks, don’t worry too much! You can simply scoop out the filling and enjoy it as a dip alongside your crispy egg rolls.

Are there any dietary considerations for my Breakfast Egg Rolls?
Absolutely! If you’re preparing these for someone with dietary restrictions, there are plenty of options available. Use plant-based sausage crumbles for a meat-free version or substitute dairy with vegan cheese for lactose-intolerant friends. Feel free to include veggies like spinach or mushrooms for added nutrition, or adjust the salt and seasonings to cater to lower sodium diets.

How do I ensure my egg rolls are crispy?
Totally! Start by frying the egg rolls in preheated oil at 350°F to get that perfect golden crust. Avoid overcrowding the pan, as this lowers the oil temperature and could lead to sogginess. If you prefer a healthier option, consider baking them at 425°F for 12-15 minutes. Just be sure to flip halfway through for an even crispiness.

Breakfast Egg Rolls

Delicious Breakfast Egg Rolls: A Fun Twist on Morning Favorites

These Breakfast Egg Rolls are a crispy, savory delight packed with sausage, eggs, and veggies, perfect for busy mornings.
Prep Time 15 minutes
Cook Time 30 minutes
Total Time 45 minutes
Servings: 6 egg rolls
Course: Breakfast
Cuisine: American
Calories: 250

Ingredients
  

For the Filling
  • 1 tablespoon Unsalted Butter Add richness and flavor; substitute with olive oil for a lighter option.
  • 8 ounces Breakfast Sausage Provides protein and savory flavor; swap with bacon, ham, or veggie crumbles for variation.
  • 1 medium Sweet Onion Adds sweetness and texture; use yellow onion or shallots as a substitute.
  • 1 medium Green Bell Pepper Contributes crunch and color; red or yellow bell peppers can be used for a sweeter taste.
  • ¼ teaspoon Sea Salt Enhances all flavors; substitute with kosher salt or reduce for lower sodium.
  • teaspoon Black Pepper Adds subtle heat; white pepper is a milder option.
  • 2 cups Shredded Hash Browns Provides a crispy texture; fresh or frozen hash browns work well, but thaw if frozen.
  • 4 large Eggs Bind the filling and provide protein; egg whites can be used for a lighter option.
  • 1 cup Sharp Cheddar Cheese Adds creaminess and strong flavor; substitute with Monterey Jack or pepper jack for a spicier kick.
For Assembly and Frying
  • 12 pieces Egg Roll Wrappers Encases the filling; can use homemade wrappers or store-bought.
  • 1 cup Canola or Vegetable Oil For frying, creating a crispy texture; olive oil can also be used.

Equipment

  • Skillet
  • Dutch oven
  • spatula
  • Mixing Bowl
  • paper towel

Method
 

Step-by-Step Instructions for Breakfast Egg Rolls
  1. In a skillet, melt 1 tablespoon of unsalted butter over medium heat. Add the breakfast sausage, diced sweet onion, and chopped green bell pepper, seasoning with ¼ teaspoon of sea salt and ⅛ teaspoon of black pepper. Cook this mixture for about 5 minutes until the sausage is browned and vegetables are tender, stirring occasionally.
  2. Using the same skillet, add another tablespoon of butter and heat over medium heat. Once melted, add the shredded hash browns without stirring and cook undisturbed for 4-5 minutes until golden brown. Stir and continue cooking for a couple more minutes until entirely cooked through.
  3. Crack the large eggs into a bowl and beat them well. Pour the beaten eggs into the skillet with the sausage and hash browns, stirring until just set. Mix in the sharp cheddar cheese along with the remaining salt and black pepper.
  4. On a clean surface, lay out an egg roll wrapper with one corner pointed toward you. Spoon about ¼ cup of the filling onto the wrapper. Roll the wrapper tightly, folding in the sides, and seal with a little water.
  5. In a Dutch oven, heat 1 inch of oil to 350°F. Carefully place the assembled egg rolls in batches into the hot oil, frying for 2-3 minutes on each side until golden brown and crispy. Transfer to a paper towel-lined plate to drain excess oil.

Nutrition

Serving: 1egg rollCalories: 250kcalCarbohydrates: 20gProtein: 12gFat: 15gSaturated Fat: 5gPolyunsaturated Fat: 1gMonounsaturated Fat: 8gCholesterol: 100mgSodium: 400mgPotassium: 300mgFiber: 2gSugar: 1gVitamin A: 200IUVitamin C: 10mgCalcium: 150mgIron: 1.5mg

Notes

Expert Tips: Ensure oil temperature reaches 350°F before frying, avoid overcrowding, and seal wrappers tightly. Egg rolls can be customized with veggies and proteins and frozen for later use.

Tried this recipe?

Let us know how it was!

Crispy Breakfast Taquitos: Your Perfect Make-Ahead Morning Bite

The aroma of crispy tortillas filled with savory goodness can instantly transport me back to lazy Sunday brunches with friends, where laughter mingles with the scent of delicious food. Today, I’m excited to share my recipe for Crispy Breakfast Taquitos, the ultimate make-ahead breakfast that brings joy to busy mornings. These delightful rolls are ridiculously easy to prepare and can be customized to fit anyone’s taste, making them a crowd-pleaser in any home. Whether you prefer sausage, sautéed veggies, or gooey cheese, each bite of these golden taquitos offers a satisfying crunch that makes breakfast feel special. Are you ready to elevate your breakfast game? Let’s dive into this recipe that ticks all the right boxes for flavor and convenience!

Why Are Breakfast Taquitos a Game-Changer?

Ease of Preparation: Whipping up these crispy taquitos is a breeze, making them perfect for any skill level, from beginner cooks to seasoned chefs.

Customizable Delight: With endless filling options—like savory sausage or vibrant veggies—everyone can enjoy their favorite flavors.

Make-Ahead Convenience: Prepare them in advance and enjoy a delicious breakfast on those rushed mornings.

Crowd-Pleasing Appeal: These tasty bites are sure to impress family and friends at brunch gatherings, especially when paired with fresh salsa or creamy guacamole.

Nutritional Versatility: There’s room for creativity! You can make them vegetarian, gluten-free, or even lighter by adding more greens. Don’t miss out on these delicious Banana Blueberry Breakfast cookies for a sweet morning treat alongside!

Breakfast Taquitos Ingredients

Discover the essential ingredients for making delightful Breakfast Taquitos!

For the Filling

  • Tortillas – Choose corn for a gluten-free option or flour for a softer bite.
  • Eggs – Packed with protein, scrambled eggs offer a fluffy texture; for a vegan twist, opt for tofu.
  • Cheese – Adds rich creaminess; shredded cheddar or pepper jack pair beautifully, but feta gives a lovely tang.
  • Sausage – Provides the main savory flavor; breakfast sausage or chorizo is recommended, or swap with plant-based sausage for vegetarian delight.

For Dipping Sauces

  • Salsa – Fresh salsa enhances the taquitos’ flavors; try a pico de gallo for an extra zing.
  • Guacamole – Creamy and rich, it complements the crispy texture beautifully.
  • Sour Cream – A classic cooling touch to balance the savory filling.

Step‑by‑Step Instructions for Crispy Breakfast Taquitos

Step 1: Preheat the Oven
Begin by preheating your oven to 400°F (200°C). While the oven is warming up, prepare a baking sheet by lining it with parchment paper. This step ensures your Crispy Breakfast Taquitos will have a perfect golden crunch while baking, preventing sticking and making cleanup a breeze.

Step 2: Cook the Sausage
In a skillet over medium heat, add your choice of breakfast sausage and cook for 5–7 minutes. Stir occasionally, breaking it apart as it browns and cooks through completely. The sausage should be nicely browned; once done, set it aside in a bowl, allowing those flavors to meld while you prepare the eggs.

Step 3: Scramble the Eggs
Using the same skillet to absorb the savory sausage flavor, crack several eggs into the pan. Cook over medium heat for 3–5 minutes, gently stirring until they are fluffy and just set. The eggs should look soft and slightly glossy when done. This step adds richness to your filling for the Breakfast Taquitos.

Step 4: Combine Filling Ingredients
Once scrambled, transfer the cooked eggs into the bowl with the sautéed sausage. Add shredded cheese, allowing it to melt from the residual heat. Stir everything together until well combined, creating a savory filling that will be nestled in each taquito, bursting with flavor.

Step 5: Fill the Tortillas
Lay out your chosen tortillas on a clean surface or a cutting board. Spoon an adequate amount of the filling mixture into a tortilla, making sure not to overfill. Carefully roll each tortilla tightly, placing them seam-side down on the prepared baking sheet. This ensures the fillings stay secure while they bake.

Step 6: Bake for Crispy Perfection
Place the filled taquitos in the preheated oven and bake for 15–20 minutes. Keep an eye on them; they should become crispy and golden brown. If you desire an extra crunch, switch to broil mode for an additional 2–3 minutes at the end, watching closely to avoid burning.

Step 7: Serve with Dipping Sauces
Once baked to perfection, remove the Crispy Breakfast Taquitos from the oven. Let them cool for a couple of minutes before serving. Pair with your favorite dipping sauces like fresh salsa, creamy guacamole, or sour cream for a delightful breakfast treat that everyone will love.

How to Store and Freeze Breakfast Taquitos

Fridge: Store cooked Breakfast Taquitos in an airtight container for up to 3 days. Reheat in the oven at 350°F (175°C) for about 10-12 minutes until warmed through.

Freezer: For longer storage, wrap each breakfast taquito in plastic wrap and place them in a freezer-safe bag. They can stay frozen for up to 2 months.

Reheating: When ready to enjoy, reheat from frozen in the oven at 400°F (200°C) for 20-25 minutes, or until heated through and crispy.

Make-Ahead: Prepare and fill the taquitos 24 hours in advance, refrigerating them tightly wrapped. This way, you can have a quick breakfast ready to bake!

What to Serve with Crispy Breakfast Taquitos

Brighten your breakfast table with delightful pairings that enhance the crispy texture and savory filling of these tasty taquitos.

  • Fresh Fruit Salad:
    A colorful mix of seasonal fruits brings a refreshing contrast, balancing the savory flavors of the taquitos.

  • Breakfast Potatoes:
    Crispy, seasoned breakfast potatoes offer a hearty side that’s comforting and filling, perfect alongside your taquitos.

  • Zesty Pico de Gallo:
    This fresh tomato salsa adds a tangy kick, lifting the flavors of the breakfast taquitos and providing a vibrant crunch.

  • Creamy Guacamole:
    The rich texture of guacamole pairs beautifully with the crispy taquitos, creating a perfect dip for each satisfying bite.

  • Sour Cream:
    A dollop of sour cream adds cool creaminess, balancing the savory filling while enhancing each delicious crunch.

  • Savory Eggs on the Side:
    Scrambled eggs add extra protein to the meal, making it even more filling while complementing the flavors of the taquitos.

  • Coffee or Tea:
    A warm cup of coffee or herbal tea can enhance the breakfast experience, wrapping you in comfort as you savor your meal.

Each of these accompaniments brings its unique flavor and texture, turning a simple breakfast into a delightful feast for the senses!

Breakfast Taquitos: Customization Galore!

Feel free to put your personal twist on these delicious taquitos, making each bite uniquely yours!

  • Vegetarian Option: Swap sausage for sautéed spinach, bell peppers, or black beans for a hearty plant-based filling.
    Elevate the dish with colorful veggies, creating a satisfying experience that’s both nutritious and tasty.

  • Gluten-Free: Opt for corn tortillas instead of flour to make this dish gluten-free.
    Enjoy that crispy outer layer without compromising on flavor or texture!

  • Cheese Variations: Experiment with different cheeses such as queso blanco or mozzarella to find your perfect match.
    Each cheese brings its unique flavor profile, enhancing the overall taste of your breakfast.

  • Spicy Kick: Add fresh diced jalapeños or a sprinkle of crushed red pepper to the filling for a zesty twist.
    Spice it up to awaken your senses and create a delightful contrast with the savory ingredients.

  • Bacon Lovers: Substitute sausage with crispy crumbled bacon for an indulgent flavor burst.
    This option adds a smoky richness that pairs beautifully with the fluffy eggs.

  • Herby Freshness: Mix in fresh herbs like cilantro or green onions into the filling for an aromatic lift.
    The burst of freshness complements the rich flavors, making each taquito even more delightful.

  • Crunch Factor: Toss in some cooked chorizo for a spicy, textured twist that adds depth.
    With every bite, you’ll experience varied textures that elevate your breakfast.

If you’re on the hunt for more tasty breakfasts, don’t forget about the delightful Croissant Breakfast Sandwich to bring even more flavor to your mornings! And for a sweet touch, try the Sweet Escape Charm to round out your breakfast spread.

Make Ahead Options

These Crispy Breakfast Taquitos are perfect for meal prep enthusiasts! You can prepare and fill the taquitos up to 24 hours in advance, wrapping them tightly in plastic wrap and refrigerating to keep them fresh. If you want to prepare them further ahead, consider assembling and freezing the taquitos individually wrapped for up to 2 months. When you’re ready to enjoy them, simply bake directly from the refrigerator or freezer, ensuring they are heated through and crispy by adding an extra 5 minutes to the baking time. This way, you’ll have a delicious, satisfying breakfast ready to go, saving you precious time on those busy mornings!

Expert Tips for Making Breakfast Taquitos

  • Room Temperature Tortillas: Using tortillas at room temperature helps prevent tearing when rolling. Warm them slightly for easier handling.

  • Preheat Your Oven: Ensure the oven is fully preheated for maximum crispiness; an unheated oven can lead to soggy taquitos.

  • Don’t Overfill: Be cautious with the filling quantities; overstuffing can cause the tortillas to break during baking. Aim for a balanced amount.

  • Crispy Finishing Touch: For extra crunch, broil the taquitos for the last couple of minutes but keep a close eye to prevent burning.

  • Storing Leftovers: Store leftover Breakfast Taquitos in an airtight container for up to 3 days. Reheat in the oven for best results, ensuring they remain crispy.

Crispy Breakfast Taquitos Recipe FAQs

What type of tortillas should I use for Breakfast Taquitos?
For a crispy and delightful texture, I recommend using corn tortillas as they are naturally gluten-free. However, flour tortillas can also be used for a softer bite. Just make sure they are at room temperature to avoid tearing while rolling.

How should I store leftover Breakfast Taquitos?
Absolutely! Store your cooked Breakfast Taquitos in an airtight container in the fridge for up to 3 days. When reheating, pop them in the oven at 350°F (175°C) for around 10-12 minutes to restore that lovely crunch.

Can I freeze Breakfast Taquitos?
Yes, you can freeze them! Wrap each taquito tightly in plastic wrap, then store them in a freezer-safe bag. They will keep well frozen for up to 2 months. When ready to serve, reheat from frozen at 400°F (200°C) for 20-25 minutes, or until they’re heated through and crispy.

What can I do if my Breakfast Taquitos are soggy?
To avoid soggy taquitos, make sure your oven is fully preheated before baking. Additionally, make sure not to overfill the tortillas as this can lead to breakage and moisture seeping in. If they do end up soggy, try broiling them for a few minutes at the end to add crispness back.

Are these Breakfast Taquitos suitable for specific diets or allergies?
Yes! These Breakfast Taquitos are highly customizable. For a vegetarian option, swap the sausage for sautéed vegetables or plant-based sausage. To make them gluten-free, simply use corn tortillas. Always check ingredient labels for allergens and feel free to adjust fillings based on dietary needs.

Breakfast Taquitos

Crispy Breakfast Taquitos: Your Perfect Make-Ahead Morning Bite

These Crispy Breakfast Taquitos are the ultimate make-ahead breakfast, customizable for everyone's taste and perfect for busy mornings.
Prep Time 15 minutes
Cook Time 20 minutes
Total Time 35 minutes
Servings: 4 taquitos
Course: Breakfast
Cuisine: Mexican
Calories: 250

Ingredients
  

For the Filling
  • 8 oz Tortillas Corn or flour
  • 4 large Eggs Scrambled; use tofu for vegan
  • 1 cup Cheese Shredded cheddar or pepper jack
  • 1 cup Sausage Cooked breakfast sausage or chorizo
For Dipping Sauces
  • 1 cup Salsa Fresh salsa or pico de gallo
  • 1 cup Guacamole Creamy and rich
  • 1/2 cup Sour Cream For cooling balance

Equipment

  • Skillet
  • Baking Sheet
  • Parchment Paper

Method
 

Step-by-Step Instructions
  1. Preheat your oven to 400°F (200°C) and line a baking sheet with parchment paper.
  2. Cook breakfast sausage in a skillet over medium heat for 5–7 minutes, then set aside.
  3. Scramble eggs in the same skillet for 3–5 minutes until fluffy.
  4. Combine the cooked eggs and sausage with shredded cheese in a bowl.
  5. Fill tortillas with the mixture, roll tightly, and place seam-side down on the baking sheet.
  6. Bake for 15–20 minutes until crispy and golden; optionally broil for 2-3 minutes.
  7. Remove and serve with salsa, guacamole, or sour cream for dipping.

Nutrition

Serving: 1taquitoCalories: 250kcalCarbohydrates: 30gProtein: 12gFat: 10gSaturated Fat: 4gPolyunsaturated Fat: 1gMonounsaturated Fat: 4gCholesterol: 120mgSodium: 500mgPotassium: 200mgFiber: 2gSugar: 1gVitamin A: 500IUVitamin C: 5mgCalcium: 200mgIron: 2mg

Notes

Use room temperature tortillas for easier rolling. Store leftovers in an airtight container for up to 3 days.

Tried this recipe?

Let us know how it was!

Cottage Cheese Flatbread: Easy, Healthy, and Deliciously Versatile

As I rummaged through my fridge, I stumbled upon a tub of cottage cheese that was just waiting to be transformed into something magical. Enter the Cottage Cheese Flatbread, a delightful solution for anyone craving a quick, nutritious bite without the usual hassle. With just two ingredients and a prep time of around 35 minutes, this flatbread is a game-changer for anyone navigating the low-carb or gluten-free landscape. Not only is it high in protein, making it a perfect post-workout snack, but its versatility means you can customize it as a wrap, sandwich, or even a healthy pizza base. What fun flavor twists will you try with this easy recipe?

Why is Cottage Cheese Flatbread a Must-Try?

Quick and Easy: The two-ingredient recipe means no lengthy preparation time, making it perfect for busy days.

High Protein Punch: Each flatbread packs approximately 39g of protein, ideal for supporting your active lifestyle or post-workout recovery.

Gluten-Free Goodness: Those following gluten-free diets can enjoy this satisfying flatbread without compromising flavor or health.

Versatile Base: Use it as a canvas for creating wraps, sandwiches, or even dress it up as a mini pizza—endless options await!

Flavor Creativity: Add your favorite herbs or cheese to personalize your flatbread; imagine the savory delights you can craft!

Nutritious Snack: With roughly 302 calories per serving, it’s a healthy choice that fills you up without the guilt. Discover other delicious options like the Banana Grilled Cheese for further culinary inspiration!

Cottage Cheese Flatbread Ingredients

For the Flatbread
Cottage Cheese – Provides moisture and a whopping protein boost; choose low-sodium for a healthier option.
Whole Eggs – Acts as a binder; replace with four egg whites for a lighter version.

For Flavoring
Garlic Powder – Adds a savory element; use according to your taste preference.
Italian Seasoning – Enhances the overall flavor; explore different herbs for exciting twists!
Oregano – Optional topping before baking for an aromatic finish.

With these simple ingredients, you’re just moments away from enjoying a delicious Cottage Cheese Flatbread!

Step‑by‑Step Instructions for Cottage Cheese Flatbread

Step 1: Preheat the Oven
Begin by preheating your oven to 350°F (176°C). This ensures a consistent baking temperature for your Cottage Cheese Flatbread. While the oven heats up, gather your ingredients and equipment, including a food processor or blender and a quarter baking sheet lined with parchment paper.

Step 2: Blend the Base
In a food processor or blender, combine 1 cup of cottage cheese and 2 large eggs. Blend these ingredients until they form a smooth mixture, which typically takes about 30 seconds. If you prefer a chunkier texture, you can mix them by hand. This creamy base is essential for your flatbread’s delightful consistency.

Step 3: Add Flavorings
Sprinkle in garlic powder and Italian seasoning to the blended mixture. Blend briefly for about 10-15 seconds to incorporate these flavors into your Cottage Cheese Flatbread batter. The aroma should become more inviting, signaling that it’s time to move to the next step.

Step 4: Prepare the Baking Sheet
Take your quarter baking sheet and line it with quality parchment paper. Lightly coat the parchment with cooking spray to prevent sticking. This step is crucial for a successful release of your flatbread after baking, ensuring that it maintains its beautiful shape.

Step 5: Spread the Mixture
Pour the cottage cheese mixture onto the prepared baking sheet. Using a spatula, spread it evenly to your desired thickness—thinner for wraps or thicker for heartier flatbread. Aim for a uniform layer to ensure even baking throughout your Cottage Cheese Flatbread.

Step 6: Optional Seasoning
If desired, sprinkle oregano or any additional seasonings on top of the mixture for extra flavor. This optional step adds a delightful finish to your flatbread, enhancing its taste and aroma as it bakes in the oven.

Step 7: Bake the Flatbread
Place the baking sheet into your preheated oven and bake for about 30-35 minutes. Keep an eye out for the edges to begin browning and the surface to feel firm to the touch. If you’ve made a thicker version, you might need to extend the baking time up to 50 minutes for perfect doneness.

Step 8: Cool and Serve
Once baked, remove the Cottage Cheese Flatbread from the oven and allow it to cool slightly. This helps in firming up the texture even more. After cooling for about 10 minutes, gently peel the flatbread off the parchment paper and slice it into servings.

What to Serve with Cottage Cheese Flatbread

Elevate your meal experience by creating delightful pairings that complement the unique flavors and textures of your flatbread.

  • Fresh Salad: A vibrant mixed greens salad brightens the meal and adds a refreshing crunch, balancing the soft flatbread beautifully.
  • Savory Dips: Pair your flatbread with tzatziki or hummus for a flavor-packed dip; the creamy textures blend wonderfully.
  • Roasted Vegetables: Roasted zucchini and bell peppers offer a sweet, caramelized touch that harmonizes with the savory notes of the flatbread.
  • Grilled Chicken: Juicy, seasoned grilled chicken slices atop the flatbread transform it into a delicious sandwich, perfect for a filling lunch.
  • Avocado Spread: A smooth avocado spread adds creaminess and healthy fats, enhancing the dish’s nutritional profile and flavor.
  • Sliced Tomatoes: Fresh tomatoes sprinkled with herbs create a burst of freshness, bringing out the slight tanginess of the cottage cheese.
  • Italian Sausage: Savory cooked Italian sausage crumbles offer a flavorful punch, making each bite satisfying and hearty.
  • Sparkling Water: A refreshing glass of sparkling water with lemon helps cleanse your palate and adds a light touch to your meal.

Expert Tips for Cottage Cheese Flatbread

  • Use Quality Parchment: A good parchment paper ensures your flatbread won’t stick. Don’t skip oiling the paper if you’re unsure!

  • Monitor Baking Time: Thicker flatbreads may need extra baking time. Start checking for doneness at the 30-minute mark to avoid overcooking.

  • Crispy Finish: For a nice crispy texture, you can leave the flatbread in the oven for a bit longer; this is especially great if you’re using it for pizza.

  • Experiment with Flavors: Enhance your cottage cheese flatbread by adding herbs, grated cheese, or even sun-dried tomatoes into the mix for delightful variations.

  • Choosing Eggs: Whole eggs work best for binding; however, you can use four egg whites as an alternative for a lighter option without sacrificing too much flavor.

Cottage Cheese Flatbread Variations

Feel free to let your creativity shine by customizing this delicious flatbread with these tempting options.

  • Ricotta Swap: Replace cottage cheese with ricotta for a creamier texture and a milder taste.

  • Veggie Boost: Mix in chopped spinach or kale before baking for a nutrient-packed twist that adds color and flavor.

  • Spicy Kick: Add a pinch of cayenne pepper or red pepper flakes for a delightful heat that will tickle your taste buds.

  • Herb Infusion: Experiment with different herbs like basil or rosemary to create an aromatic flatbread that complements various dishes beautifully.

  • Cheesy Goodness: Stir in some grated mozzarella or cheddar cheese for extra richness that’ll make every bite irresistible.

  • Sweet Treat: Transform this flatbread into a dessert by mixing in vanilla extract and sweetener, then top with fresh fruit post-baking.

  • Savory Sun-Dried Tomatoes: Incorporate chopped sun-dried tomatoes for an earthy flavor that’s perfect for Mediterranean-inspired dishes.

Spoil yourself with delectable variations here, and perhaps pair your flatbread with a warm bowl of Strawberry Cheesecake Dump for a delightful dessert experience!

How to Store and Freeze Cottage Cheese Flatbread

Fridge: Store any leftover Cottage Cheese Flatbread in an airtight container or a sealed bag for up to 7 days to maintain its freshness.

Freezer: For longer storage, wrap the flatbread in plastic wrap and then in aluminum foil before freezing. It can last up to 3 months.

Reheating: To enjoy, simply reheat in the oven at 350°F (176°C) for about 10 minutes or microwave for 30-60 seconds until warm.

Make Ahead Options

These Cottage Cheese Flatbreads are perfect for meal prep, saving you valuable time during busy weeknights! You can mix the cottage cheese and egg base up to 24 hours in advance—just refrigerate the mixture in an airtight container to keep it fresh. Additionally, you can bake the flatbreads in advance and store them in the fridge for up to 3 days or freeze them for longer storage. To keep the flatbread from becoming soggy, ensure it’s completely cooled before wrapping or sealing it. When ready to serve, simply reheat in the oven or microwave until warmed through and enjoy your delicious Cottage Cheese Flatbread just as fresh as the day you made it!

Cottage Cheese Flatbread Recipe FAQs

How do I choose the right cottage cheese for this recipe?
Absolutely! For the best results, opt for a low-sodium cottage cheese to keep the flatbread healthy. You can choose between full-fat, reduced-fat, or fat-free varieties depending on your dietary preferences. Just ensure that the cottage cheese is fresh and free from excessive liquid—look for a creamy consistency without too many dark spots or curds.

How should I store leftover Cottage Cheese Flatbread?
You can easily store leftover flatbread in an airtight container or sealed bag in the fridge for up to 7 days. Just let it cool completely before storing to prevent moisture build-up. If you find yourself with some leftovers, I often make a batch at the beginning of the week to enjoy throughout, making my meal prep super simple!

Can I freeze Cottage Cheese Flatbread?
Very! To freeze, wrap the flatbread tightly in plastic wrap and then cover it with aluminum foil. This method protects it from freezer burn. You can store it in the freezer for up to 3 months. When you’re ready to enjoy it, simply thaw it overnight in the fridge before reheating.

What should I do if my flatbread turns out too thick?
If your flatbread is thicker than you’d like, don’t fret! It may just require a little extra baking time. If you notice it still feels soft or undercooked in the center after 30 minutes, pop it back in the oven and check every 5-10 minutes until it’s firm but not overcooked. Always keep an eye on the edges for that perfect golden-brown color!

Is this recipe safe for people with dietary restrictions?
The Cottage Cheese Flatbread is gluten-free, making it a suitable option for those with gluten intolerance. However, if you’re allergic to dairy, it’s best to avoid the cottage cheese or substitute it with a dairy-free alternative, like almond or cashew cream. Always check ingredient labels for hidden allergens, especially if you’re cooking for others!

Can I customize the flavors further to accommodate my taste?
Absolutely! This recipe is super versatile. You can add and experiment with flavors by incorporating grated parmesan, sun-dried tomatoes, or fresh herbs into the blend. If you’re in the mood for something sweet, try adding a bit of cinnamon and a sweetener for dessert versions. The more, the merrier when it comes to flavor!

Cottage Cheese Flatbread

Cottage Cheese Flatbread: Easy, Healthy, and Deliciously Versatile

Cottage Cheese Flatbread is a quick, nutritious, and versatile recipe that's low-carb and gluten-free.
Prep Time 10 minutes
Cook Time 35 minutes
Cooling Time 10 minutes
Total Time 55 minutes
Servings: 4 slices
Course: Breakfast
Cuisine: American
Calories: 302

Ingredients
  

For the Flatbread
  • 1 cup Cottage Cheese Choose low-sodium for a healthier option.
  • 2 large Whole Eggs Replace with four egg whites for a lighter version.
For Flavoring
  • Garlic Powder Adds a savory element; use according to taste.
  • Italian Seasoning Enhances overall flavor; explore different herbs.
  • Oregano Optional topping before baking.

Equipment

  • Food Processor or Blender
  • Baking Sheet
  • Parchment Paper

Method
 

Step-by-Step Instructions
  1. Preheat your oven to 350°F (176°C). Gather your ingredients and equipment.
  2. Combine cottage cheese and eggs in a food processor or blender and blend until smooth.
  3. Sprinkle in garlic powder and Italian seasoning, blend briefly to incorporate.
  4. Line a quarter baking sheet with parchment paper and lightly coat with cooking spray.
  5. Pour the mixture onto the prepared baking sheet and spread evenly.
  6. Optionally sprinkle oregano or additional seasonings on top.
  7. Bake in the preheated oven for 30-35 minutes, watch for browning edges.
  8. Once baked, cool for 10 minutes, then peel off the parchment paper and slice.

Nutrition

Serving: 1sliceCalories: 302kcalCarbohydrates: 4gProtein: 39gFat: 13gSaturated Fat: 3gCholesterol: 186mgSodium: 350mgPotassium: 200mgFiber: 1gSugar: 2gVitamin A: 500IUCalcium: 300mgIron: 1mg

Notes

Store leftovers in an airtight container for up to 7 days or freeze for up to 3 months. Reheat at 350°F for 10 minutes or microwave for 30-60 seconds.

Tried this recipe?

Let us know how it was!

Easy Eggs Benedict Casserole for the Ultimate Brunch Feast

As I stirred together the creamy custard and shared a laugh with friends in the kitchen, the comforting aroma of my Easy Eggs Benedict Casserole danced through the air. This delightful dish transforms a classic brunch favorite into an effortless make-ahead feast, perfect for gatherings that call for a touch of indulgence. The layers of crispy English muffins and savory Canadian bacon not only deliver incredible flavor but also promise flexibility—feel free to customize with your favorite proteins or veggies. Not only is it simple to whip up, but it also allows you to savor each moment with your guests instead of being stuck in the kitchen. What delicious twists will you try with this versatile casserole?

Why is Eggs Benedict Casserole so special?

Comforting, Flavorful Layers: This casserole combines the best of Eggs Benedict with the ease of a baked dish, leaving your taste buds satisfied.

Make-Ahead Magic: Prep it the night before and simply pop it in the oven the next day, giving you more time to enjoy your brunch company.

Customizable Delight: Whether you opt for classic Canadian bacon or switch it up with smoked salmon, the options are endless!

Cheesy Goodness: Melted cheddar cheese brings a rich flavor that complements the savory elements perfectly, making it a crowd favorite.

Family-Friendly: Not only is it a dish everyone will love, but it’s also a great way to sneak in some extra veggies! If you’re looking for more hearty casseroles, check out my Tater Tot Casserole or Apple Crisp Casserole for an equally delightful experience.

Eggs Benedict Casserole Ingredients

• Get ready to create this delightful dish!

For the Custard

  • 12 large eggs – Provides a rich base for custard; fresh eggs yield a firmer texture.
  • 3 cups whole milk – Adds creaminess; can substitute with low-fat milk for a lighter version.
  • 1 teaspoon salt – Enhances the overall flavor of the dish.
  • ½ teaspoon black pepper – For seasoning; adjust to taste.
  • ¼ teaspoon cayenne pepper – Optional for a mild kick.
  • 1 teaspoon Dijon mustard – Adds tanginess to the custard.

For the Base

  • 8 pieces English muffins (quartered) – Forms the base layer; can substitute with brioche or sourdough.
  • 8 ounces Canadian bacon or ham – Provides a hearty filling; can swap for turkey bacon for a lighter option.

For the Topping

  • 2 cups shredded cheddar cheese – Melts beautifully over the top; other cheese varieties can be used for different flavors.
  • 1 cup hollandaise sauce – Store-bought or homemade for a classic finishing touch.
  • Chopped chives or parsley – For garnish, adds freshness and color.

This Eggs Benedict Casserole is not only a meal to behold but a piece of your brunch tradition waiting to be savored!

Step‑by‑Step Instructions for Eggs Benedict Casserole

Step 1: Preheat the Oven
Begin by preheating your oven to 350°F (175°C). This ensures a ready environment for baking your Eggs Benedict Casserole to perfection. While the oven warms up, gather your baking dish and grease it lightly with cooking spray or butter to prevent sticking later on.

Step 2: Prepare the Egg Mixture
In a large mixing bowl, crack the 12 large eggs and whisk them together until frothy. Add 3 cups of whole milk, 1 teaspoon of salt, ½ teaspoon of black pepper, ¼ teaspoon of cayenne pepper, and 1 teaspoon of Dijon mustard, whisking until everything is well combined. This custard mixture will be the heart of your casserole.

Step 3: Layer the Ingredients
Take your greased baking dish and arrange the 8 quartered English muffins at the bottom, creating an even layer. Next, sprinkle the 8 ounces of Canadian bacon or ham over the muffins, distributing it evenly. Pour the prepared egg mixture over these layers, ensuring it seeps in thoroughly, then top the casserole with 2 cups of shredded cheddar cheese, allowing it to melt beautifully during baking.

Step 4: Bake the Casserole
Cover the baking dish with aluminum foil and place it in the preheated oven. Bake for 30 minutes covered, allowing the casserole to set and begin solidifying. After 30 minutes, carefully remove the foil and bake for an additional 15-20 minutes until the top is golden brown and the custard has fully set, creating a delightful color contrast.

Step 5: Serve with Hollandaise Sauce
Once your Eggs Benedict Casserole is ready, take it out from the oven and let it cool slightly for about 5-10 minutes. This cooling period allows flavors to settle and makes it easier to slice. Just before serving, drizzle the top with warm hollandaise sauce and garnish with chopped chives or parsley for a fresh finish, elevating both taste and presentation.

Eggs Benedict Casserole Variations

Feel free to let your creativity shine as you customize this delicious casserole to fit your taste and dietary needs!

  • Protein Swap: Use smoked salmon for a seafood twist, creating a rich and flavorful alternative to ham. The salty, savory notes combined with creamy custard make for an indulgent treat.

  • Veggie Boost: Incorporate fresh spinach or sun-dried tomatoes for added nutrition and a pop of color. These vibrant additions not only enhance the flavor but also elevate the visual appeal of your dish.

  • Cheese Alternatives: Try goat cheese or feta for a different flavor profile, bringing a tangy richness that can surprise and delight your brunch guests.

  • Gluten-Free Option: Substitute with gluten-free bread or cornbread, making it easier for those with dietary restrictions to enjoy this classic dish without sacrificing taste.

  • Add Heat: Mix in jalapeños or hot sauce for a spicy version that will awaken your senses and add a bold kick to each bite. Spice lovers will appreciate the extra zing!

  • Herb Infusion: Add thyme or dill for aromatics, allowing the fresh herbs to brighten the dish and complement the creamy custard beautifully.

  • Nutty Crunch: Top with toasted walnuts or pecans for added texture, introducing delightful crunchiness that contrasts with the softness of the casserole.

If you enjoyed this dish and want more easy casserole ideas, try my French Toast Casserole or Cheesy Low Carb Chicken Casserole. Cooking can be an adventure, and I hope these variations inspire your next brunch gathering!

Make Ahead Options

These Easy Eggs Benedict Casserole are perfect for those busy mornings when you want to enjoy brunch without the hassle! You can assemble the casserole up to 24 hours in advance, simply layering the ingredients as directed (but hold off on adding the hollandaise sauce until you’re ready to serve). Cover tightly with plastic wrap and refrigerate to maintain freshness and prevent drying out. When ready to bake, remove from the fridge and allow it to sit at room temperature for about 20 minutes before popping it in the oven. This allows for even cooking and deliciously fluffy results—easily impressing your family or guests with minimal effort!

Expert Tips for Eggs Benedict Casserole

Whisk Well: Ensure eggs are whisked until frothy to achieve a smooth custard base for your Eggs Benedict Casserole. A good mix prevents any lumps.

Toast Your Muffins: Lightly toast English muffins before layering them to reduce sogginess and enhance their texture in the final bake.

Baking Time Variability: Oven temperatures may vary; always check for a golden top and run a toothpick through the center to confirm that it’s fully set.

Quality Ingredients Count: Use high-quality Canadian bacon and cheese for the best flavor. Fresh ingredients truly make a difference in this dish.

Handle Hollandaise Carefully: If making homemade hollandaise sauce, be cautious about temperatures to avoid it separating. Keep it warm but not too hot as you serve!

Storage Tips for Eggs Benedict Casserole

Fridge: Store leftovers in an airtight container for up to 3-4 days. Reheat in the oven at 350°F (175°C) until warmed through.

Freezer: You can freeze the casserole for up to 2 months. Cover tightly in plastic wrap and aluminum foil to prevent freezer burn. Thaw overnight in the fridge before reheating.

Make-Ahead: For easy prep, assemble and refrigerate the casserole the night before baking. Increase baking time by 10-15 minutes if starting from cold for your Eggs Benedict Casserole.

Reheating: To reheat individual slices, pop them in the microwave for 1-2 minutes or warm in the oven until heated through, to maintain the best texture.

What to Serve with Easy Eggs Benedict Casserole

Serve a delightful array of sides to complement this hearty brunch staple, adding freshness and flavor to your table.

  • Crispy Hash Browns: These golden-brown bites provide a satisfying crunch that beautifully contrasts the creamy casserole. They are an absolute breakfast favorite!

  • Fresh Fruit Medley: A colorful assortment of seasonal fruits adds a refreshing burst of sweetness, balancing the savory richness of the casserole. Think juicy berries, vibrant melons, and zesty citrus!

  • Light Garden Salad: Tossed greens with a light vinaigrette introduce a crisp, refreshing element that lightens up the meal, ensuring a well-rounded brunch experience.

  • Savory Scones: Flaky, buttery scones serve as a perfect side, with a soft texture that pairs well with the rich flavors of the casserole and hollandaise.

  • Mimosas: This classic brunch cocktail, made with fresh orange juice and bubbly champagne, complements the creamy eggs beautifully, brightening your gathering with a festive touch.

  • Bloody Marys: Packed with flavor and garnished with your favorite veggies, this savory drink adds a kick, enhancing the brunch vibe while perfectly matching the Eggs Benedict Casserole.

  • Roasted Asparagus: Tender, lightly seasoned asparagus spears bring a touch of elegance and earthiness to the table, creating a delightful balance alongside the casserole’s flavors.

  • Cheesy Grits: Silky, cheesy grits offer a warm, comforting sidekick, adding creaminess that pairs so well with the casserole’s textures.

  • Mini Quiches: These bite-sized delights can be customized with various fillings, offering an additional layer of flavors that delight guests and elevate your brunch spread.

Eggs Benedict Casserole Recipe FAQs

How do I select ripe ingredients for my Eggs Benedict Casserole?
Absolutely! For the best flavors, choose fresh ingredients. Look for eggs that are clean and have a firm, uncracked shell. When selecting English muffins, they should be slightly springy when pressed with no dark spots. Aim for Canadian bacon that looks moist and has a rich color—avoid any with excessive dryness or sticky residue.

What is the best way to store leftovers from my Eggs Benedict Casserole?
You can store leftovers in an airtight container in the fridge for 3-4 days. Make sure the casserole has cooled down completely before sealing it. When you’re ready to enjoy it again, reheat it in the oven at 350°F (175°C) for about 15-20 minutes or until warmed through.

Can I freeze my Eggs Benedict Casserole? If so, how?
Absolutely! Freezing is a great option. Wrap the cooled casserole tightly in plastic wrap and then in aluminum foil to prevent freezer burn. It can stay good for up to 2 months in the freezer. When you’re ready to enjoy it, simply thaw it overnight in the fridge and then bake it at 350°F (175°C) for about 30-40 minutes to heat all the way through.

What should I do if my casserole is soggy?
Very! If you find your Eggs Benedict Casserole soggy, ensure you lightly toast the English muffins before layering them in the dish. This helps absorb excess moisture. Always check that the custard is set and baked until golden on top. If it’s still too wet, bake it a little longer uncovered to help it firm up.

Are there any dietary considerations for the Eggs Benedict Casserole?
Yes! If you have guests with dietary restrictions, you can customize the casserole. Use turkey bacon for a lower-fat protein option. For a gluten-free version, opt for gluten-free bread. Be cautious with the hollandaise sauce if there are egg allergies; you can skip it or serve it on the side, and diet-friendly alternatives are available if needed. Always inform guests of the key ingredients used!

Eggs Benedict Casserole

Easy Eggs Benedict Casserole for the Ultimate Brunch Feast

This Easy Eggs Benedict Casserole is a delightful twist on a classic, perfect for brunch gatherings with friends and family.
Prep Time 20 minutes
Cook Time 50 minutes
Cooling Time 10 minutes
Total Time 1 hour 20 minutes
Servings: 8 slices
Course: Breakfast
Cuisine: American
Calories: 350

Ingredients
  

For the Custard
  • 12 large eggs fresh eggs yield a firmer texture
  • 3 cups whole milk can substitute with low-fat milk for a lighter version
  • 1 teaspoon salt enhances overall flavor
  • 1/2 teaspoon black pepper for seasoning; adjust to taste
  • 1/4 teaspoon cayenne pepper optional for a mild kick
  • 1 teaspoon Dijon mustard adds tanginess
For the Base
  • 8 pieces English muffins quartered; can substitute with brioche or sourdough
  • 8 ounces Canadian bacon or ham can swap for turkey bacon for a lighter option
For the Topping
  • 2 cups shredded cheddar cheese melts beautifully
  • 1 cup hollandaise sauce store-bought or homemade
  • Chopped chives or parsley for garnish

Equipment

  • baking dish
  • Mixing Bowl
  • whisk

Method
 

Step-by-Step Instructions
  1. Preheat the oven to 350°F (175°C) and grease a baking dish.
  2. In a large mixing bowl, whisk the eggs until frothy and then add the milk, salt, black pepper, cayenne pepper, and Dijon mustard, mixing well.
  3. Layer the quartered English muffins at the bottom, followed by the Canadian bacon, then pour the egg mixture over the top and add the cheddar cheese.
  4. Cover with aluminum foil and bake for 30 minutes. Remove foil and bake for another 15-20 minutes until golden brown.
  5. Let the casserole cool for 5-10 minutes, then drizzle with hollandaise sauce and garnish with chives or parsley before serving.

Nutrition

Serving: 1sliceCalories: 350kcalCarbohydrates: 22gProtein: 20gFat: 20gSaturated Fat: 10gPolyunsaturated Fat: 2gMonounsaturated Fat: 6gCholesterol: 300mgSodium: 800mgPotassium: 400mgFiber: 1gSugar: 2gVitamin A: 700IUCalcium: 300mgIron: 2mg

Notes

Ensure all ingredients are fresh and of high quality for the best flavor. Customize with different proteins or veggies as preferred.

Tried this recipe?

Let us know how it was!

Cottage Cheese Flatbread Pizza: Your Healthy Pizza Upgrade

Flipping through my favorite cookbooks, I stumbled upon a clever twist that’s quickly become my go-to for pizza night: Cottage Cheese Flatbread Pizza! This delicious low-carb alternative lets you savor all the yumminess of traditional pizza while keeping your health goals in check. With its golden, crispy crust and customizable toppings, it’s perfect for anyone wanting a quick and satisfying meal without the guilt. Plus, it’s gluten-free and packed with protein, making it an ideal choice for busy weeknights or leisurely weekends spent entertaining friends. I can’t help but wonder—what toppings will you choose to dress your irresistible flatbread?

Why is This Flatbread Pizza a Must Try?

Health-Conscious Delight: This Cottage Cheese Flatbread Pizza is a low-carb dream come true, combining nutrition with taste without sacrificing flavors.

Quick & Easy: Ready in under an hour, this recipe is perfect for those busy weeknights when you crave something comforting but nutritious.

Customizable Toppings: Go wild with toppings! Whether you prefer the classic pepperoni or fresh veggies, this flatbread can adapt to any preference or dietary restriction.

Gluten-Free Goodness: With a base that’s naturally gluten-free, it opens up a world of eating delicious pizza without the gluten worries. Consider pairing it with a refreshing salad for a complete meal!

Protein-Packed: Thanks to the cottage cheese, this pizza gives you a satisfying protein boost, keeping you full and energized. A healthy alternative to traditional pizzas has never tasted this good!

Cottage Cheese Flatbread Pizza Ingredients

For the Flatbread Base

  • Cottage Cheese – Provides creaminess and moisture to the pizza base; substitute with any unsweetened yogurt for a lighter option.
  • Eggs – Acts as a binder to create structure in the flatbread; for a vegan option, use flax eggs (1 tbsp ground flaxseed + 2.5 tbsp water per egg).
  • Garlic Powder – Adds a savory depth of flavor; fresh minced garlic can be used for a more intense taste.
  • Salt – Enhances overall flavor; adjust to taste, especially if using salty toppings.
  • Black Pepper – Adds a touch of spiciness; can be omitted for a milder taste.
  • Italian Herb Mix – Infuses the flatbread with classic Italian flavors; substitute with individual dried herbs like oregano, basil, and thyme.

For the Toppings

  • Pizza Sauce – Acts as the pizza base sauce; homemade or store-bought options can be used.
  • Grated Cheese – Provides creaminess and a golden, melty topping; replace with dairy-free cheese for a vegan version.
  • Pepperoni – Adds a savory, spicy protein topping; alternatives include vegetables for a healthier twist.

This delicious Cottage Cheese Flatbread Pizza is not just rich in flavor but also ticks the boxes for your health-conscious choices!

Step‑by‑Step Instructions for Cottage Cheese Flatbread Pizza

Step 1: Prepare the Pizza Base
In a blender, combine cottage cheese, eggs, garlic powder, salt, black pepper, and Italian herbs. Blend the mixture until it achieves a smooth consistency, about 1-2 minutes. This will be the base of your Cottage Cheese Flatbread Pizza, so ensure all ingredients are well incorporated.

Step 2: Bake Flatbread
Preheat your oven to 350°F (180°C) and line a baking sheet with parchment paper. Pour the blended mixture onto the prepared sheet, spreading it into a thin circle about ¼ inch thick. Bake for 30 minutes, or until the flatbread turns golden brown and slightly crispy around the edges.

Step 3: Add Toppings and Final Bake
Once the flatbread is baked, raise the oven temperature to 400°F (200°C). Carefully take the flatbread out and spread a generous layer of pizza sauce over the surface. Sprinkle grated cheese on top, followed by your choice of pepperoni slices or other toppings. Return it to the oven for an additional 8-10 minutes until the cheese melts and becomes bubbly.

Step 4: Cool and Serve
Once baked, remove the Cottage Cheese Flatbread Pizza from the oven and let it cool for a few minutes. This cooling time allows the cheese to set slightly, making it easier to slice. Cut into wedges or squares, and serve hot with your favorite salad or dipping sauces for a delightful meal!

What to Serve with Cottage Cheese Flatbread Pizza?

Indulging in a comforting low-carb feast calls for delightful accompaniments that elevate your meal.

  • Fresh Garden Salad: A vibrant mix of greens and seasonal veggies adds crunch and nutrition, perfectly balancing the richness of your pizza.

  • Roasted Vegetables: Caramelized veggies like zucchini, bell peppers, and red onions provide a flavorful, earthy contrast that complements the savory flatbread.

  • Garlic Breadsticks: For that classic pizza night feel, serve warm, buttery garlic breadsticks to soak up any leftover pizza sauce.

  • Homemade Tzatziki: This refreshing yogurt dip adds a cool, creamy element that pairs beautifully with the pizza’s warm crust and toppings.

  • Crispy Veggie Chips: Bake or air-fry your favorite veggies for a crunchy, low-carb snack that offers both flavor and texture alongside your pizza.

  • Sparkling Water with Lemon: A zesty, bubbly drink cleanses the palate between each bite, keeping your meal feeling light and refreshing.

Dressing your Cottage Cheese Flatbread Pizza with these sides makes for a wholesome and satisfying dining experience that everyone will love!

Storage Tips for Cottage Cheese Flatbread Pizza

Refrigerator Storage: Store any leftover Cottage Cheese Flatbread Pizza in an airtight container for up to 3 days to maintain freshness and flavor.

Freezer: Wrap individual slices tightly in plastic wrap or aluminum foil before freezing. This method helps preserve the texture for up to 2 months.

Reheating: For the best results, reheat slices in an oven at 350°F (175°C) for about 10 minutes to restore crispiness. Alternatively, use a microwave for convenience, but be aware that this may make the crust softer.

Thawing: To thaw frozen slices, simply leave them in the refrigerator overnight before reheating or place them in the microwave for a quick defrost.

Cottage Cheese Flatbread Pizza Variations

Feel free to let your creativity shine with these fun twists that will elevate your Cottage Cheese Flatbread Pizza experience!

  • Vegetable Delight: Swap out pepperoni for an assortment of fresh vegetables like bell peppers, mushrooms, and spinach for a colorful, nutritious twist. Mixing veggies brings amazing flavors and texture too!

  • Spicy Kick: Add a sprinkle of red pepper flakes or sliced jalapeños on top before baking for that extra heat. Spicy flavors bring excitement that enhances each bite!

  • Herb-Infused: Experiment with fresh herbs like oregano, basil, or arugula added after baking for a beautiful aroma and freshness. This adds a lovely burst of flavor and a vibrant finish.

  • Cheese Lover’s Dream: Consider using a blend of cheeses like mozzarella and parmesan for an extra gooey, cheesy experience. Mixing cheeses creates a delightful richness you’d surely love!

  • Low-Carb Under 10 Toppings: Make it a super simple dish by adding only 2 or 3 toppings—a classic choice that never disappoints! It keeps your pizza light and allows the flatbread flavor to shine.

  • Sweet Option: For a unique dessert twist, spread a thin layer of fruit preserves instead of sauce and top with ricotta cheese. This unexpected approach can turn your flatbread into a delicious sweet treat!

  • Saucy Goodness: Instead of standard pizza sauce, use pesto or barbecue sauce for a fresh, flavorful change. This fusion will surprise your taste buds with new profiles!

  • Dairy-Free Delight: Use dairy-free cheese alternatives if you want to keep it vegan or lactose-free. This option ensures everyone can enjoy a slice without compromise.

Try these delicious variations to discover your favorite flavor combination! And if you love unique toppings as much as I do, let me suggest pairing this with a refreshing salad or some delightful dips from our other recipes like Strawberry Cheesecake Dump or Carrot Cake Cheesecake. Happy cooking!

Make Ahead Options

These delicious Cottage Cheese Flatbread Pizzas are perfect for busy home cooks looking to save time during hectic weeknights! You can prepare the flatbread base up to 24 hours in advance—just blend the ingredients and bake it as instructed, then allow it to cool completely. Once cooled, wrap the flatbread tightly in plastic wrap and refrigerate to maintain its texture. When it’s time to enjoy your pizza, simply spread the sauce, add toppings, and bake at 400°F (200°C) for 8-10 minutes until the cheese is bubbly and delicious. This method ensures that your flatbread remains just as tasty and satisfying, while allowing you to enjoy a homemade meal with minimal effort!

Expert Tips for Cottage Cheese Flatbread Pizza

  • Smooth Consistency: Ensure your blended mixture reaches a fully smooth texture for the best flatbread results. Lumps can affect the overall feel.

  • Baking Time Watch: Keep a close eye on your flatbread while it bakes. Ovens can vary, so test for golden-brown edges without burning.

  • Thickness Matters: Aim for a ¼ inch thickness with your flatbread. Too thick, and it may become soft rather than crispy when baked.

  • Topping Prep: Pre-cook toppings like mushrooms or bell peppers to prevent excess moisture from affecting your flatbread pizza.

  • Cheese Choice: Choose your cheese wisely. Grated options melt beautifully, but for extra flavor, consider adding a mix of cheeses on top.

  • Cooling Time: Allow the Cottage Cheese Flatbread Pizza to cool for a few minutes before slicing. This helps the cheese set and makes serving easier.

Cottage Cheese Flatbread Pizza Recipe FAQs

What type of cottage cheese should I use for the flatbread?
Absolutely! For the best creamy texture in your Cottage Cheese Flatbread Pizza, opt for full-fat or 2% cottage cheese. If you’re looking for a lighter option, any plain, unsweetened yogurt can work as a great substitute.

How long can I store leftover flatbread pizza in the refrigerator?
You can store your leftover Cottage Cheese Flatbread Pizza in an airtight container in the refrigerator for up to 3 days. To keep it fresh and tasty, make sure it’s well-covered, as this helps prevent it from drying out.

Can I freeze leftover flatbread pizza?
Yes, you can! Just wrap individual slices of your Cottage Cheese Flatbread Pizza tightly in plastic wrap or aluminum foil. They’ll stay fresh in the freezer for up to 2 months. For best results, reheat from frozen in a preheated oven rather than using the microwave.

What should I do if my flatbread doesn’t crisp up well?
If your flatbread comes out soft, it could be due to it being too thick; aim for about ¼ inch thickness. Ensure your oven is preheated properly, and consider baking it a bit longer. Another tip is to check that your blend is smooth, as lumps can affect texture.

Are there any dietary considerations I should be aware of with this recipe?
Great question! This recipe is gluten-free and can be tailored for various dietary needs. For a vegan alternative, replace the eggs with flax eggs (1 tbsp ground flaxseed + 2.5 tbsp water per egg) and use dairy-free cheese options. Always double-check the toppings to ensure they’re allergy-friendly for your guests!

What’s the best way to reheat my flatbread pizza?
To reheat your Cottage Cheese Flatbread Pizza, preheat your oven to 350°F (175°C) and heat for about 10 minutes. This way, you’ll restore that crispy crust! If you’re short on time, a microwave can be used, but know this might make the crust softer.

Feel free to ask more questions, and happy cooking!

Cottage Cheese Flatbread Pizza

Cottage Cheese Flatbread Pizza: Your Healthy Pizza Upgrade

Cottage Cheese Flatbread Pizza is a delicious low-carb alternative, perfect for health-conscious pizza lovers.
Prep Time 15 minutes
Cook Time 40 minutes
Cooling Time 5 minutes
Total Time 1 hour
Servings: 4 slices
Course: Dinner
Cuisine: Italian
Calories: 250

Ingredients
  

For the Flatbread Base
  • 1 cup Cottage Cheese Substitute with unsweetened yogurt for a lighter option.
  • 2 large Eggs For vegan option, use flax eggs (1 tbsp ground flaxseed + 2.5 tbsp water per egg).
  • 1 teaspoon Garlic Powder Fresh minced garlic can be used for a more intense taste.
  • 1/2 teaspoon Salt Adjust to taste, especially if using salty toppings.
  • 1/4 teaspoon Black Pepper Can be omitted for a milder taste.
  • 1 teaspoon Italian Herb Mix Substitute with individual dried herbs like oregano, basil, and thyme.
For the Toppings
  • 1 cup Pizza Sauce Homemade or store-bought options can be used.
  • 1 cup Grated Cheese Replace with dairy-free cheese for a vegan version.
  • 1/2 cup Pepperoni Alternatives include vegetables for a healthier twist.

Equipment

  • blender
  • Baking Sheet
  • Parchment Paper

Method
 

Step-by-Step Instructions
  1. In a blender, combine cottage cheese, eggs, garlic powder, salt, black pepper, and Italian herbs. Blend until smooth, about 1-2 minutes.
  2. Preheat your oven to 350°F (180°C) and line a baking sheet with parchment paper. Pour the blended mixture onto the sheet, spreading into a thin circle about ¼ inch thick. Bake for 30 minutes until golden brown.
  3. Raise the oven temperature to 400°F (200°C). Spread pizza sauce over the baked flatbread, sprinkle with grated cheese, and add pepperoni. Return to the oven for 8-10 minutes until cheese melts.
  4. Remove from the oven, let cool for a few minutes. Cut into wedges or squares, and serve hot.

Nutrition

Serving: 1sliceCalories: 250kcalCarbohydrates: 20gProtein: 15gFat: 10gSaturated Fat: 5gPolyunsaturated Fat: 1gMonounsaturated Fat: 3gCholesterol: 70mgSodium: 400mgPotassium: 300mgFiber: 2gSugar: 2gVitamin A: 500IUVitamin C: 2mgCalcium: 200mgIron: 1mg

Notes

Ensure a smooth mixture for best results. Keep an eye on baking time to prevent burning. Pre-cook wet toppings to avoid sogginess.

Tried this recipe?

Let us know how it was!

Strawberry French Toast Casserole for Effortless Brunch Joy

As the sun peeks through my kitchen window, the sweet, fruity scent of a Slow Cooker Strawberry French Toast Casserole begins to fill the air. There’s something incredibly satisfying about this make-ahead breakfast delight. Perfectly suited for busy mornings or cherished brunch gatherings, it combines the beloved flavors of classic French toast with the vibrant touch of fresh strawberries. The beauty of this dish lies in its simplicity and versatility: you can easily customize it with your favorite fruits or bread types. Plus, it’s a guaranteed crowd-pleaser that will have your family and friends asking for seconds! Are you ready to elevate your breakfast game and make tantalizing memories around the table?

Why is this dish a breakfast game-changer?

Flavorful Fusion: The combination of juicy strawberries and creamy custard brings mouthwatering flavor to every bite, making breakfast a true delight.
Make-Ahead Magic: Prepare it the night before, letting busy mornings become a breeze with this easy slow cooker method.
Customizable Creativity: Feel free to swap in your favorite fruits or breads, tailoring the recipe to fit your taste. If you love berry flavors, check out my Strawberry Cheesecake for another fruity treat!
Family Friendly: Kids and adults alike will love how this casserole transforms traditional French toast into a fun and shareable dish.
Effortless Entertaining: Perfect for brunches or holiday gatherings, this dish ensures everyone is satisfied and happy at the table. Your guests will be reminiscing about this tasty casserole long after the last bite!

Strawberry French Toast Casserole Ingredients

For the Casserole

  • Day-old bread or French bread, cubed – Provides essential structure and texture; stale bread absorbs the egg mixture without becoming soggy.
  • Strawberry preserves – Adds natural sweetness and richness; can be swapped for other fruit preserves to match your favorites.
  • Fresh strawberries, diced – Delivers vibrant flavor to the dish; feel free to replace with blueberries, raspberries, or peaches for a twist.
  • Milk – Acts as a moistening agent for a custardy texture; whole milk offers a richer flavor, but any preferred milk will work.
  • Eggs – Vital for binding the ingredients together and providing a fluffy structure.
  • Vanilla extract – Elevates the overall flavor; always opt for high-quality pure vanilla for best results.
  • Brown sugar – Contributes a delightful hint of caramelization and sweetness to the dish.

Optional Toppings

  • Maple syrup – A classic choice; drizzled on top, it adds a sweet, warm touch.
  • Powdered sugar – Lightly dust over the casserole for a decorative, sweet finish.
  • Whipped cream – Lends a creamy, indulgent flavor; perfect for serving with the casserole.
  • Additional fresh fruit – Consider adding more strawberries or a medley of your favorite fruits for an extra burst of freshness.

This Strawberry French Toast Casserole is not just a breakfast dish; it’s an experience that will fill your mornings with warmth and joy.

Step‑by‑Step Instructions for Strawberry French Toast Casserole

Step 1: Prepare the Slow Cooker
Start by spraying the slow cooker insert with nonstick cooking spray or lining it with parchment for seamless cleanup. This step is crucial to prevent the delicious Strawberry French Toast Casserole from sticking as it cooks, ensuring your masterpiece comes out perfectly without fuss.

Step 2: Layer the Ingredients
Next, take your cubed day-old bread and diced fresh strawberries, and begin layering them in the slow cooker. Alternate layers of bread and strawberries until all ingredients are used, creating a beautiful mosaic of flavors that will complement the custard-like mixture you’ll prepare next.

Step 3: Whisk the Custard Mixture
In a large bowl, whisk together the strawberry preserves, milk, eggs, vanilla extract, and brown sugar until fully blended. This custard will bathe the bread layers, so make sure it’s smooth without lumps. The lovely aroma of vanilla will fill your kitchen, hinting at the sweet treat ahead.

Step 4: Combine the Layers
Pour the custard mixture evenly over the layered bread and strawberries in the slow cooker. Use a spatula to gently press down the bread to ensure every piece is well-coated in the sweet custard. This will enhance the flavor throughout as it cooks.

Step 5: Let it Soak Overnight
Cover the slow cooker and refrigerate the assembled casserole overnight. Allowing it to soak is crucial for the perfect texture, as the stale bread absorbs the custard mixture, resulting in a fluffy and flavorful Strawberry French Toast Casserole the next morning.

Step 6: Cook the Casserole
In the morning, place the slow cooker insert into the base and set it to cook on low for 4 hours or high for 2 hours. Keep an eye on it; the casserole should puff slightly and turn golden brown on the edges, indicating it’s ready to serve and enjoy.

Step 7: Serve and Enjoy
Once done, uncover and let the Strawberry French Toast Casserole rest for a few minutes before serving. Slice into portions, and consider adding your favorite toppings like maple syrup, whipped cream, or more fresh fruit. The warm, inviting aroma will draw everyone to the table for a delightful breakfast!

What to Serve with Strawberry French Toast Casserole

Experience the delightful symphony of flavors that will elevate your breakfast gathering!

  • Crispy Bacon: The salty crunch of bacon creates a contrast that beautifully complements the sweet, fluffy casserole.

  • Fresh Fruit Salad: A medley of seasonal fruits adds a refreshing, vibrant contrast and balances the richness of the casserole.

  • Yogurt Parfait: Layered with granola and fruits, a yogurt parfait provides a creamy texture and a satisfying crunch, making it a wholesome side.

  • Maple Syrup: Drizzling warm maple syrup on top enhances the sweet flavors and adds a delightful stickiness with each bite.

  • Whipped Cream: A dollop of fluffy whipped cream gives a luxurious touch to the dish, inviting everyone to indulge in sweet bliss.

  • Mint Tea: This herbal drink is refreshing and pairs well with the sweetness of the strawberries, providing a soothing beverage to sip on.

Elevate your brunch experience by combining these suggestions for a meal that’s not just delicious but also visually stunning and satisfying for all your guests!

How to Store and Freeze Strawberry French Toast Casserole

Fridge: Store any leftover casserole in an airtight container for up to 3 days. Reheat in the microwave or oven until warmed through.

Freezer: For longer storage, freeze the cooled casserole in portions wrapped tightly in plastic wrap and then foil for up to 2 months. Thaw in the fridge overnight before reheating.

Reheating: To enjoy, bake the thawed casserole at 350°F for about 15-20 minutes, or until heated all the way through, maintaining the light, fluffy texture.

Make-Ahead Tip: Prepare the casserole the night before and refrigerate it until you’re ready to cook, ensuring effortless breakfast enjoyment!

Strawberry French Toast Casserole Variations

Now that you have a sumptuous dish ready to impress, let’s explore how to add your personal flair!

  • Dairy-Free: Swap whole milk for almond or oat milk for a creamy, dairy-free alternative. This keeps the casserole light and delicious!

  • Whole Grain: Use whole grain or sourdough bread instead of white bread for a heartier texture and added nutrition. You’ll love the subtle tang it brings!

  • Berry Medley: Replace strawberries with a mix of blueberries and raspberries for a vibrant color palette and a medley of flavors. This delightful twist will make your casserole even more visually appealing.

  • Extra Vanilla: Add a splash of almond extract along with the vanilla for an extra layer of flavor. It’s a simple adjustment that adds warmth to each bite!

  • Nutty Crunch: Toss in some chopped pecans or walnuts between the bread and strawberries for a delightful crunch. It adds a satisfying contrast to the soft, custardy layers.

  • Spiced Up: Sprinkle in some cinnamon or nutmeg into the custard mixture to elevate that warm, cozy flavor profile. A touch of spice works wonders, especially in colder months!

  • Peachy Keen: Swap fresh strawberries for ripe peaches during summer for a luscious, juicy alternative. The sweet, fragrant peaches make for a refreshing change!

  • Overnight Option: If you like the idea of a baked version, prepare as directed and bake it at 350°F for about 40-50 minutes. A baked Strawberry French Toast Casserole offers a different texture that’s equally delicious.

These variations not only enhance the dish but also cater to diverse preferences, perfect for your next brunch gathering. And if you’re in the mood for something fruity yet creamy, consider making a Strawberry Cheesecake for dessert!

Expert Tips for Strawberry French Toast Casserole

  • Choose the Right Bread: Using stale bread like challah or brioche is key to prevent sogginess, allowing the casserole to maintain its delightful texture.

  • Refrigerate Overnight: Don’t skip this step! Allowing the casserole to soak overnight ensures rich flavor and the ideal custardy consistency.

  • Monitor Cooking Time: Avoid overcooking; keep an eye on the casserole and look for a slight puff and golden edges to maintain that wonderfully soft center.

  • Upgrade the Fruits: While strawberries shine in this recipe, feel free to swap in other berries or fruits like raspberries or peaches to customize your Strawberry French Toast Casserole.

  • Easy Cleanup: Line your slow cooker insert with parchment paper or spray with nonstick cooking spray to make cleanup a breeze after enjoying your delicious breakfast.

Make Ahead Options

These Slow Cooker Strawberry French Toast Casserole is a perfect meal prep solution for busy mornings! You can assemble the entire casserole up to 24 hours in advance by layering the cubed bread and diced strawberries, then pouring the custard over them before covering and refrigerating overnight. This soaking step allows the bread to absorb all the flavors, ensuring your dish is just as delicious the next day. If you prefer, you can also prepare individual servings or store leftovers in the fridge for up to 3 days. When you’re ready to enjoy, simply cook on low for 4 hours or high for 2 hours, and savor a warm, delightful breakfast without the morning rush!

Strawberry French Toast Casserole Recipe FAQs

What kind of bread should I use for this Strawberry French Toast Casserole?
For the best results, use day-old bread like challah or brioche. These types absorb the custard mixture beautifully without becoming soggy. If you’re in the mood for something different, Texas toast or even a sturdy sandwich bread can work well, too!

How can I store leftovers from the casserole?
Store any leftover Strawberry French Toast Casserole in an airtight container in the fridge for up to 3 days. When you’re ready to enjoy, just reheat it in the microwave or bake in the oven until warmed through. It’ll be just as delightful the second time around!

Can I freeze the Strawberry French Toast Casserole?
Absolutely! To freeze, let the casserole cool completely, then wrap it tightly in plastic wrap followed by aluminum foil. It can be stored in the freezer for up to 2 months. When you’re ready to enjoy it, thaw it in the fridge overnight and then bake at 350°F for about 15-20 minutes until heated through.

How do I know if the casserole is cooked properly?
The key indicators are a slight puff in the casserole and golden brown edges. If it looks puffy and slightly firm to the touch, you’re on the right track! Avoid overcooking, as you want to maintain that soft, custardy center for the best experience.

Can I substitute fresh strawberries with other fruits?
Very! This recipe is wonderfully versatile. If you prefer, you can swap strawberries for blueberries, raspberries, or even peaches. Each fruit will lend its unique flavor, creating new and exciting versions of your Strawberry French Toast Casserole!

Is this dish suitable for kids or anyone with gluten allergies?
Definitely! Kids will love the fun and shareable nature of this casserole, making it perfect for family gatherings. For those with gluten allergies, simply substitute the bread with a gluten-free variety, and you’ll have a delicious alternative that everyone can enjoy!

Strawberry French Toast Casserole

Strawberry French Toast Casserole for Effortless Brunch Joy

This Strawberry French Toast Casserole combines classic French toast flavors with fresh strawberries, making it perfect for busy mornings and brunch gatherings.
Prep Time 15 minutes
Cook Time 4 hours
Soaking Time 8 hours
Total Time 12 hours 15 minutes
Servings: 8 slices
Course: Breakfast
Cuisine: American
Calories: 350

Ingredients
  

For the Casserole
  • 8 slices Day-old bread or French bread, cubed Provides essential structure and texture
  • 1 cup Strawberry preserves Can be swapped for other fruit preserves
  • 2 cups Fresh strawberries, diced Feel free to replace with other fruits
  • 2 cups Milk Whole milk offers a richer flavor
  • 6 Eggs Vital for binding the ingredients
  • 2 teaspoons Vanilla extract Opt for high-quality pure vanilla
  • 1/2 cup Brown sugar Adds sweetness and caramelization
Optional Toppings
  • 1/2 cup Maple syrup Classic choice for drizzling
  • 1 cup Powdered sugar For decorative finish
  • 1 cup Whipped cream For serving
  • Additional fresh fruit Consider adding more strawberries

Equipment

  • Slow Cooker

Method
 

Step-by-Step Instructions
  1. Prepare the Slow Cooker: Spray the slow cooker insert with nonstick cooking spray or line it with parchment.
  2. Layer the Ingredients: Layer cubed bread and diced strawberries in the slow cooker.
  3. Whisk the Custard Mixture: In a bowl, whisk together the strawberry preserves, milk, eggs, vanilla extract, and brown sugar.
  4. Combine the Layers: Pour the custard mixture over the layered bread and strawberries.
  5. Let it Soak Overnight: Cover and refrigerate the assembled casserole overnight.
  6. Cook the Casserole: Cook on low for 4 hours or high for 2 hours.
  7. Serve and Enjoy: Let the casserole rest before serving, adding any desired toppings.

Nutrition

Serving: 1sliceCalories: 350kcalCarbohydrates: 50gProtein: 9gFat: 12gSaturated Fat: 5gCholesterol: 150mgSodium: 400mgPotassium: 300mgFiber: 2gSugar: 20gVitamin A: 10IUVitamin C: 15mgCalcium: 15mgIron: 10mg

Notes

Using stale bread is key to prevent sogginess. Do not skip refrigerating overnight for best results.

Tried this recipe?

Let us know how it was!