Get my cookbooks

Savory Chicken Alfredo Sloppy Joes for Cozy Family Nights

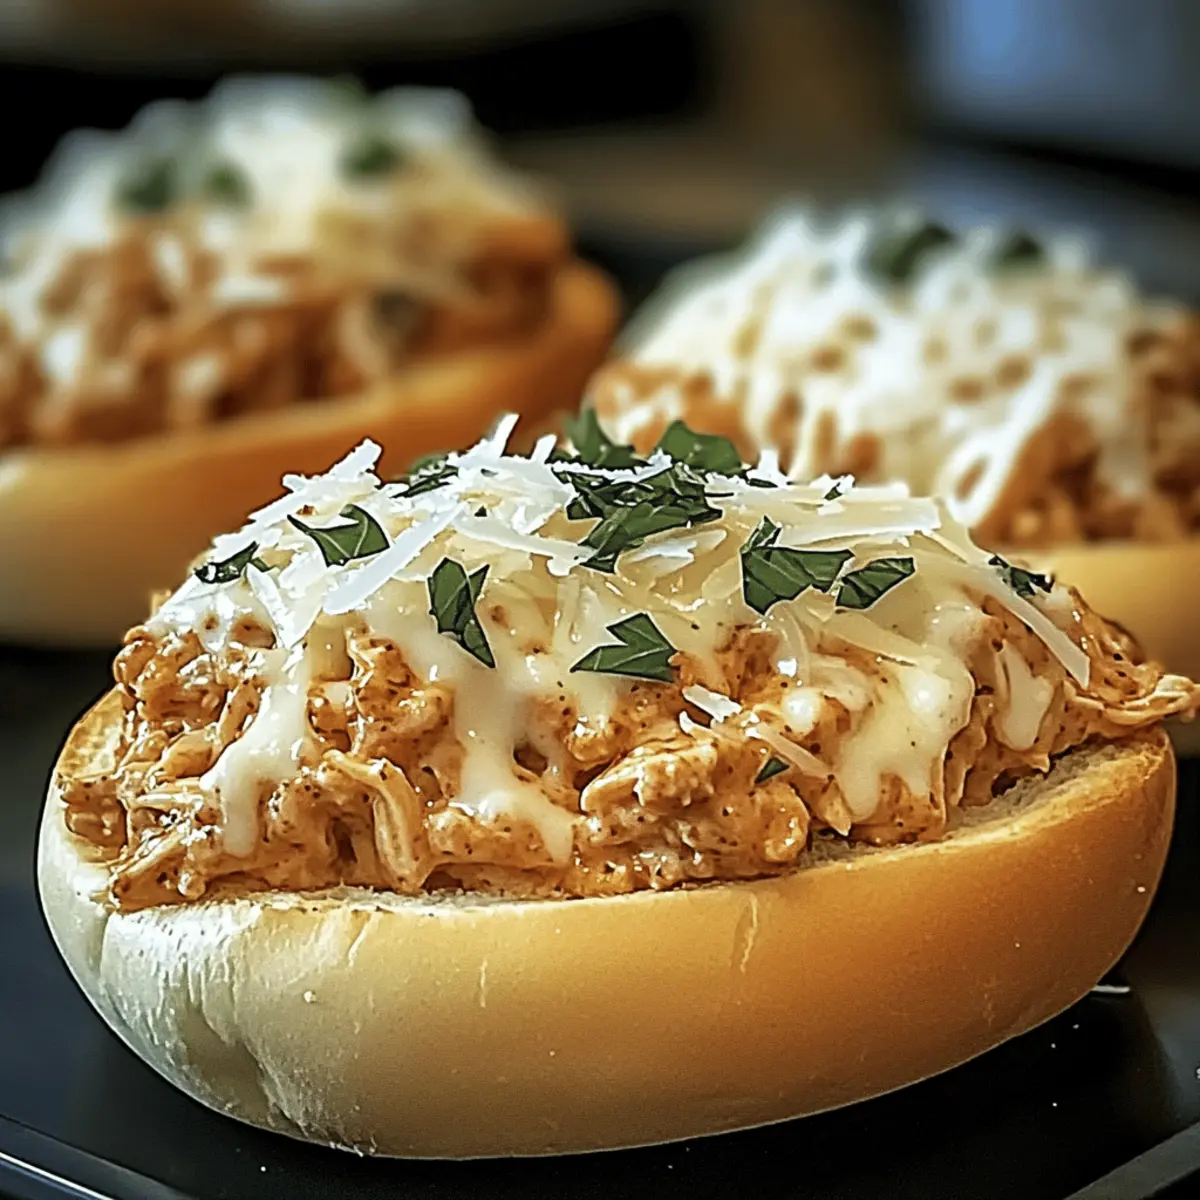
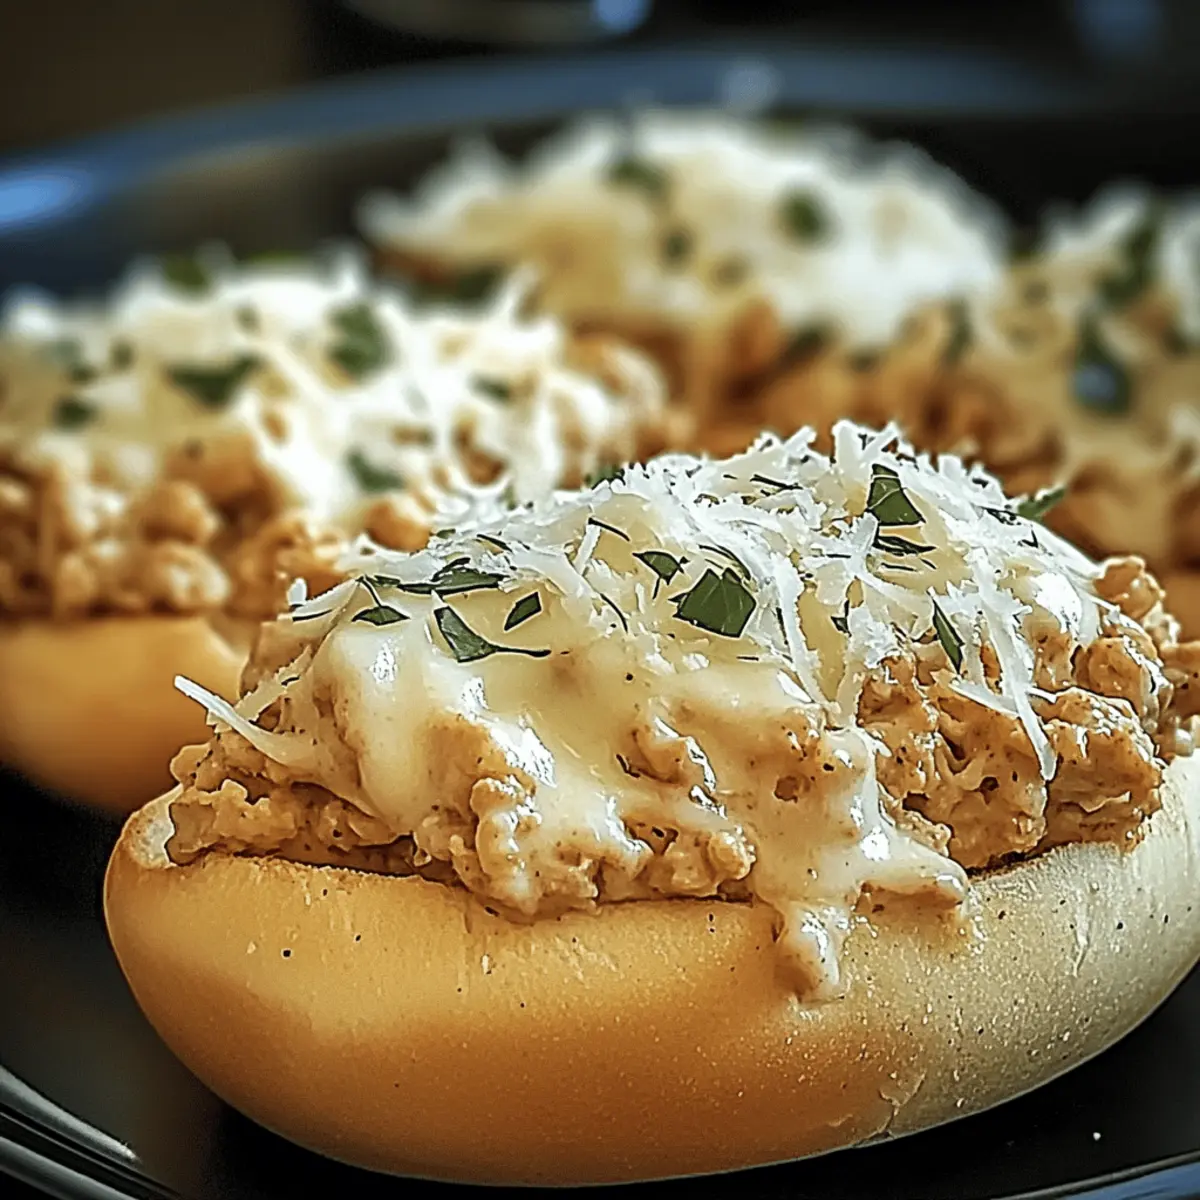
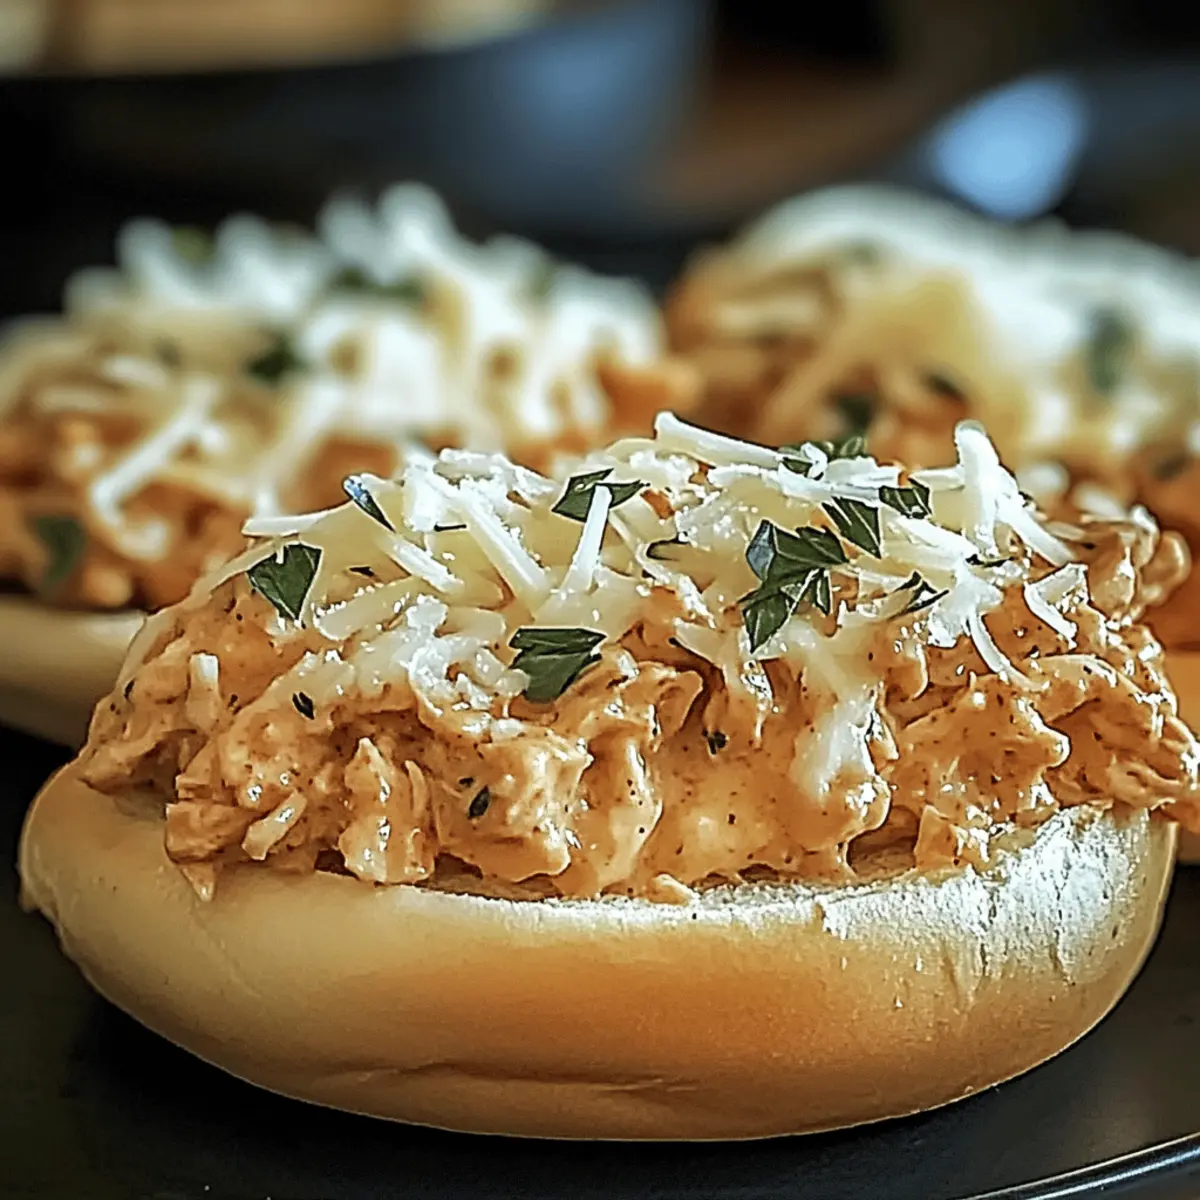
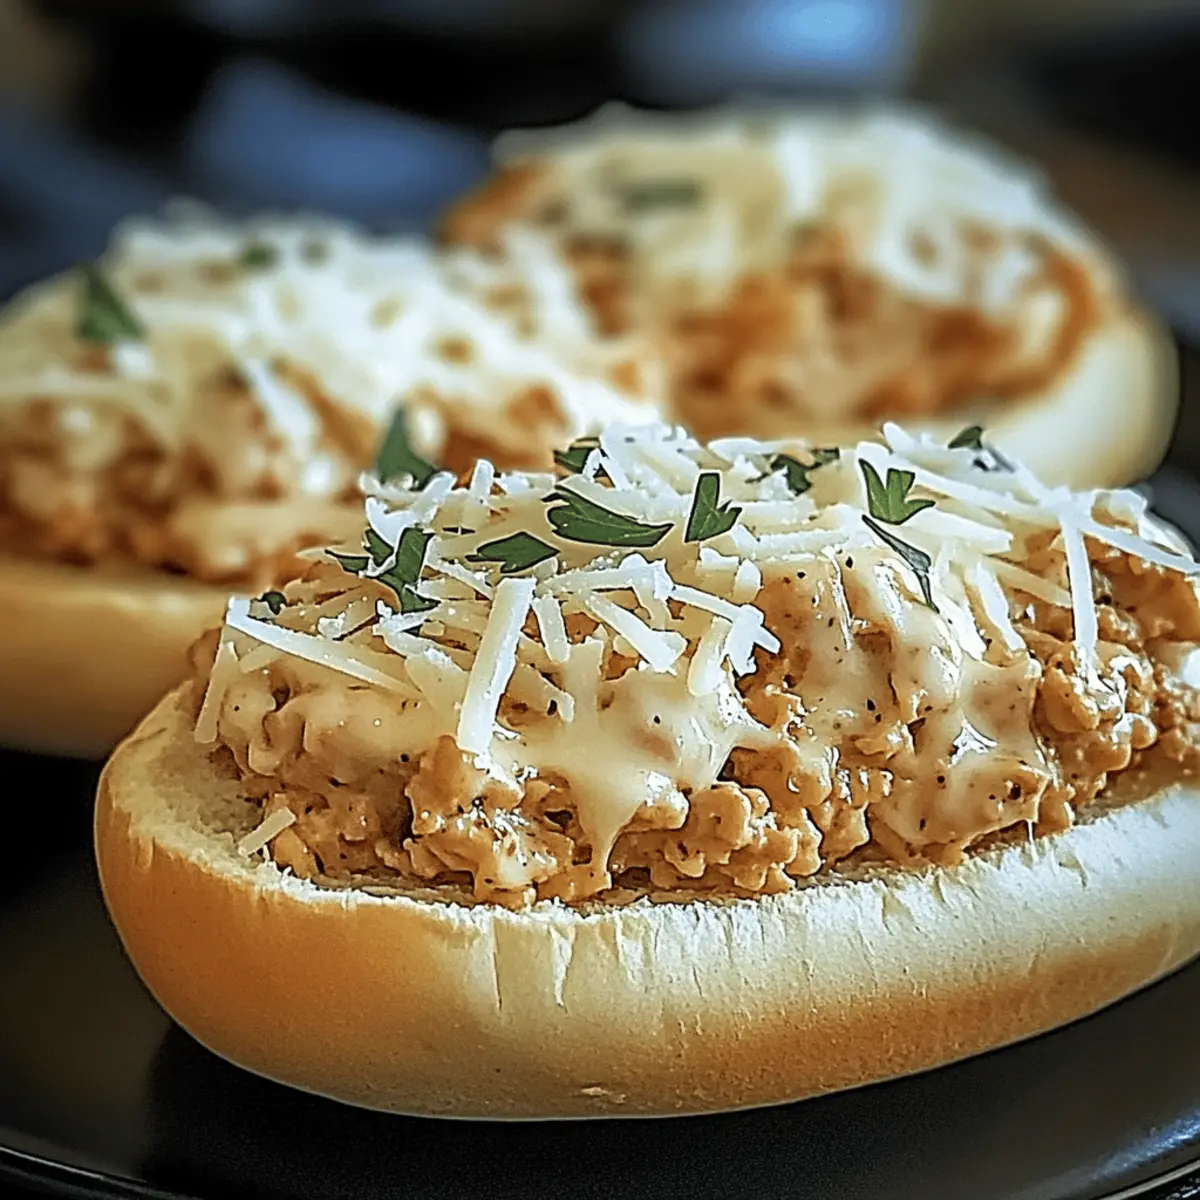
The savory aroma of sautéed onions and garlic fills the air, transporting me back to cozy family dinners where everyone gathered around the table. This is where my Creamy Chicken Alfredo Sloppy Joes come in—an inventive twist on two beloved classics that we all crave. In just a short time, you can whip up these delectable sandwiches, featuring tender ground chicken enveloped in a rich Alfredo sauce and nestled in soft, toasted buns. This recipe isn’t just a quick meal for busy weeknights; it’s also a comforting delight that even the pickiest of eaters will adore. Imagine the smiles as you serve these Sloppy Joes at your next casual gathering! Are you ready to see how easy it is to create this scrumptious fusion?

Why will you love Chicken Alfredo Sloppy Joes?

Comforting Fusion: This recipe combines the rich creaminess of Chicken Alfredo with the beloved Sloppy Joe, creating a dish that feels both familiar and exciting.

Quick and Easy: With straightforward steps, you’ll have this savory meal ready in no time, perfect for busy families!

Crowd-Pleasing: Even picky eaters will rejoice at this creamy, cheesy delight that brings everyone to the table.

Versatile Options: Feel free to customize with veggies or cheeses to make it your own, or serve alongside crispy fries or a fresh salad like a Blt Chicken Salad.

One-Pan Wonder: Minimal cleanup means more time enjoying with family!

Chicken Alfredo Sloppy Joes Ingredients

For the Chicken Mixture

  • Ground Chicken – A lean choice that keeps these Sloppy Joes light but satisfying.
  • Olive Oil – Essential for sautéing your aromatics—feel free to substitute with vegetable oil for a similar flavor.
  • Onion – Adds a touch of sweetness and depth; shallots could be used for a milder effect.
  • Garlic – Fresh minced garlic brings the flavor to life, though garlic powder works in a pinch.

For the Alfredo Sauce

  • Heavy Cream – This is the heart of your sauce, providing that luscious, creamy texture; half-and-half is a lighter alternative.
  • Grated Parmesan Cheese – The star ingredient for an irresistible, cheesy flavor; consider Pecorino Romano if you want to change things up.
  • Italian Seasoning – Adds a symphony of herbs to your dish; try using individual herbs like oregano or basil if needed.
  • Salt and Pepper – Key for enhancing flavors—season generously to suit your taste.

For Assembly

  • Hamburger Buns – Your go-to vessel for this delicious filling; whole wheat or gluten-free varieties work beautifully too!
  • Fresh Parsley (Garnish) – A sprinkle adds a pop of color and freshness; basil or cilantro make great alternatives if needed.

These Chicken Alfredo Sloppy Joes are bound to be a new favorite for family dinners!

Step‑by‑Step Instructions for Chicken Alfredo Sloppy Joes

Step 1: Prepare Chicken Mixture
In a large skillet, heat 1 tablespoon of olive oil over medium heat. Once the oil shimmers, add 1 finely chopped onion and sauté for about 3-4 minutes until it becomes translucent. Stir in 2 minced garlic cloves and cook for another 1-2 minutes until fragrant, taking care not to burn the garlic. This aromatic base sets the tone for your Chicken Alfredo Sloppy Joes.

Step 2: Cook the Chicken
Add 1 pound of ground chicken to the skillet, breaking it apart with a wooden spoon. Cook for approximately 5-7 minutes, stirring occasionally, until the chicken is no longer pink and fully cooked. You’ll know it’s ready when it’s golden-brown and has a crumbly texture. This step is crucial for ensuring that your Chicken Alfredo Sloppy Joes are flavorful and moist.

Step 3: Make Alfredo Sauce
Lower the heat to medium-low, then pour in 1 cup of heavy cream, stirring to combine. Gradually sprinkle in 1 cup of grated Parmesan cheese, stirring continuously until the cheese melts and the sauce thickens, which takes about 2-3 minutes. Season with Italian seasoning, salt, and pepper to taste. If the sauce is too thick, you can add a splash of chicken broth or water for your desired consistency.

Step 4: Assemble Sloppy Joes
Toast your hamburger buns in another skillet or toaster until golden brown. Once ready, generously spoon the creamy chicken Alfredo mixture onto the bottom half of each bun, allowing the rich flavors to soak in slightly. Top with the other half of the bun, creating the perfect vessel for your Chicken Alfredo Sloppy Joes. For an added touch, feel free to sprinkle extra Parmesan cheese on top.

Make Ahead Options

These Chicken Alfredo Sloppy Joes are a fantastic meal prep option that can save you time on busy weeknights! You can prepare the creamy chicken Alfredo mixture up to 3 days in advance. Simply cook the filling as directed, then let it cool and store it in an airtight container in the refrigerator. To prevent any sogginess, keep the hamburger buns separate until you’re ready to serve. On the day of serving, just reheat the mixture in a skillet over medium heat until warmed through, and toast the buns until golden. This way, you’ll enjoy the same delicious taste as fresh-made Sloppy Joes with minimal effort!

Expert Tips for Chicken Alfredo Sloppy Joes

  • Sautéing Secrets: Ensure the onion is sautéed until translucent to develop a rich flavor base; avoid browning it to prevent bitterness.

  • Stir Constantly: When making the Alfredo sauce, stir continually to keep it smooth and prevent sticking or burning to the pan.

  • Add Veggies: For extra nutrition, consider incorporating sautéed bell peppers or spinach into the mixture—this is a great way to balance your Chicken Alfredo Sloppy Joes!

  • Spice It Up: If you enjoy some heat, mix in red pepper flakes to the Alfredo sauce for a delightful kick that elevates the dish.

  • Monitor Thickness: If the sauce becomes too thick, add a splash of chicken broth or water to achieve your preferred creamy consistency.

How to Store and Freeze Chicken Alfredo Sloppy Joes

Fridge: Store leftover Chicken Alfredo mixture in an airtight container for up to 3 days. Keep hamburger buns separate to maintain their texture.

Freezer: For longer storage, freeze the chicken mixture in a freezer-safe container for up to 3 months. Thaw overnight in the fridge when ready to use.

Reheating: Reheat the chicken mixture on the stovetop over medium heat, adding a splash of cream or broth for extra moisture. Toast fresh buns just before serving for the best texture.

Room Temperature: Serve these delightful Sloppy Joes warm for optimal flavor. If they sit out, don’t leave them for more than 2 hours to ensure freshness and safety.

Chicken Alfredo Sloppy Joes Variations

Feel free to personalize your Chicken Alfredo Sloppy Joes with these delightful variations that will suit any palate!

  • Dairy-Free: Substitute heavy cream with coconut cream or cashew cream for a luscious, dairy-free sauce.
  • Vegetable Boost: Add chopped spinach or bell peppers to the chicken mixture for a nutritious twist.
  • Cheesy Delight: Swap the Parmesan for mozzarella for a stretchy, melty goodness that everyone will love.
  • Lower-Calorie Option: Use a light cream or Greek yogurt in place of heavy cream to cut calories while keeping it creamy.
  • Spicy Kick: Mix in jalapeños or red pepper flakes with the chicken to amp up the heat level.
  • Herb Infusion: Fresh basil or oregano can be stirred into the sauce for a more aromatic flavor profile that brightens each bite.
  • Whole Wheat Goodness: Serve on whole wheat or gluten-free buns to add more fiber and cater to dietary needs.
  • Creative Sides: Consider pairing these Sloppy Joes with a fresh garden salad or crispy fries for a complete meal, or try a warm bowl of Tuscan Chicken Soup to round out your dinner.

What to Serve with Chicken Alfredo Sloppy Joes

Cozy up around the dinner table with delightful sides that enhance the creamy, comforting nature of your meal.

  • Crispy Fries: The crunch of golden fries pairs perfectly with the creamy texture of Sloppy Joes, adding contrast and satisfaction.

  • Garden Salad: A fresh, refreshing garden salad provides a light balance to the richness of the Chicken Alfredo Sloppy Joes, making every bite feel wholesome and delicious.

  • Sautéed Vegetables: A mix of colorful sautéed bell peppers and zucchini bring vibrant flavors and essential nutrients, perfectly complementing your dish.

  • Garlic Bread: The crispy, buttery goodness of garlic bread will have everyone reaching for more while soaking up any extra Alfredo sauce.

  • Creamy Coleslaw: The cool, creamy crunch of coleslaw contrasts beautifully with the warm, savory Sloppy Joes, making it an ideal sidekick.

  • Icy Lemonade: A glass of refreshing lemonade not only cleanses the palate but also adds a zesty touch to the meal, elevating your dining experience.

  • Chocolate Chip Cookies: End the meal on a sweet note with warm cookies—everyone loves a nostalgic dessert after comfort food like Chicken Alfredo Sloppy Joes!

Chicken Alfredo Sloppy Joes Recipe FAQs

How do I select the best ground chicken for this recipe?
Absolutely! Look for ground chicken that is bright pink with no dark spots. Freshness is key! If using frozen, make sure it is properly thawed and free of any freezer burn, which can affect the taste.

What’s the best way to store leftover Chicken Alfredo Sloppy Joes?
For sure! Store the Chicken Alfredo mixture in an airtight container in the fridge for up to 3 days. Keep the hamburger buns in a separate bag to avoid sogginess, and when you’re ready to enjoy, just reheat and assemble.

Can I freeze the Chicken Alfredo mixture? If so, how?
Very! To freeze, simply place the cooled Chicken Alfredo mixture in a freezer-safe container. It can last up to 3 months. When ready to eat, thaw it overnight in the fridge and reheat on the stovetop, adding a splash of cream or broth to restore its creamy texture.

What should I do if the Alfredo sauce is too thick?
No worries! If the sauce thickens too much, just add a small amount of chicken broth or water while continuously stirring over low heat. This will help return the sauce to your desired creamy consistency without losing flavor.

Can these Sloppy Joes be safe for kids with dairy allergies?
Absolutely! For a dairy-free version, substitute the heavy cream with coconut cream or a dairy-free heavy cream alternative, and use a non-dairy cheese substitute for the Parmesan. Just be sure to check all labels to ensure they meet your dietary needs.

How should I serve Chicken Alfredo Sloppy Joes for a party?
The more the merrier! You can prepare a big batch and set up a fun assembly station with toasted buns, slaw, and extra toppings like jalapeños or spinach. This not only adds variety but engages guests in customizing their own sandwiches!

Chicken Alfredo Sloppy Joes

Savory Chicken Alfredo Sloppy Joes for Cozy Family Nights

Enjoy these Chicken Alfredo Sloppy Joes, a comforting fusion perfect for cozy family dinners.
Prep Time 10 minutes
Cook Time 20 minutes
Total Time 30 minutes
Servings: 4 sandwiches
Course: Dinner
Cuisine: American
Calories: 500

Ingredients
  

For the Chicken Mixture
  • 1 pound Ground Chicken A lean choice that keeps the dish light.
  • 1 tablespoon Olive Oil Essential for sautéing.
  • 1 medium Onion Adds sweetness and depth.
  • 2 cloves Garlic Fresh minced garlic is ideal.
For the Alfredo Sauce
  • 1 cup Heavy Cream Provides a luscious texture.
  • 1 cup Grated Parmesan Cheese Adds cheesy flavor.
  • 1 teaspoon Italian Seasoning Enhances flavor.
  • to taste Salt Season generously.
  • to taste Pepper Season generously.
For Assembly
  • 4 buns Hamburger Buns Whole wheat or gluten-free options are great.
  • for garnish Fresh Parsley Adds color and freshness.

Equipment

  • Skillet
  • Toaster
  • Wooden spoon

Method
 

Step-by-Step Instructions
  1. In a large skillet, heat 1 tablespoon of olive oil over medium heat. Once shimmery, add 1 finely chopped onion and sauté for 3-4 minutes until translucent.
  2. Stir in 2 minced garlic cloves and cook for another 1-2 minutes until fragrant.
  3. Add 1 pound of ground chicken, breaking it apart. Cook for 5-7 minutes until no longer pink.
  4. Lower heat to medium-low, pour in 1 cup of heavy cream, and stir. Gradually mix in 1 cup of grated Parmesan cheese until melted and thickened.
  5. Season with Italian seasoning, salt, and pepper. Adjust thickness with chicken broth or water if necessary.
  6. Toast hamburger buns until golden brown. Spoon the creamy chicken Alfredo mixture onto the bottom half of each bun.

Nutrition

Serving: 1sandwichCalories: 500kcalCarbohydrates: 45gProtein: 30gFat: 25gSaturated Fat: 12gPolyunsaturated Fat: 3gMonounsaturated Fat: 8gCholesterol: 90mgSodium: 800mgPotassium: 600mgFiber: 2gSugar: 3gVitamin A: 500IUVitamin C: 2mgCalcium: 350mgIron: 2mg

Notes

Feel free to customize with veggies or cheeses, and serve alongside fries or a salad.

Tried this recipe?

Let us know how it was!

Creamy Chicken Spinach Penne: Wholesome Comfort in 30 Minutes

As I whisk the creamy sauce into the sizzling pan, a wave of nostalgia washes over me, transporting me straight to my favorite Italian bistro. This Creamy Chicken Pasta with Spinach is my secret weapon for weeknight dinners, effortlessly marrying tender chicken and vibrant spinach in a velvety embrace. What I love most is how this dish captures the heart of American-Italian cuisine while being ready in just 30 minutes—perfect for those evenings when time is short but you crave something special. Plus, it’s a guaranteed crowd-pleaser that will leave everyone asking for seconds. Are you ready to whip up a dinner that feels like a warm hug? Let’s delve into this delightful recipe together!

Why is This Pasta Recipe So Special?

Velvety Creaminess: The luscious sauce envelops every piece of pasta, ensuring each bite is a delightful explosion of flavor.

Quick and Easy: Ready in just 30 minutes, this recipe fits perfectly into your busy lifestyle without sacrificing taste.

Nutrient Boost: Packed with fresh spinach, you’ll enjoy a healthy dose of vitamins with every serving—making it a guilt-free indulgence!

Crowd-Pleasing: Perfect for family dinners or entertaining friends, this dish always earns rave reviews and requests for the recipe.

Versatile Ingredients: Feel free to swap in shrimp or your favorite veggies, making this dinner adaptable to everyone’s preferences! Enjoy it alongside a refreshing BLT Chicken Salad for a complete meal that satisfies cravings without the fast food guilt!

Chicken Spinach Penne Ingredients

• Get ready to create something special!

For the Pasta
Uncooked Pasta – As the main source of texture, you can substitute with gluten-free pasta if needed.

For the Sauce
Olive Oil – Adds richness; can replace with canola oil if desired.
Boneless Skinless Chicken Breast – The heartiness of this dish; swap for turkey or tofu for a vegetarian twist.
Butter – Enhances flavor; opt for margarine for dairy-free alternatives.
Shallots – Provide a mild touch; yellow onion is a good substitute if you don’t have shallots.
Garlic – The aromatic hero of the dish; garlic powder can be a quick substitute (1/8 tsp per clove).
Red Pepper Flakes – For a hint of heat; omit for a milder flavor or use fresh chili for a different kick.
Tomato Paste – Adds a rich, sweet depth that complements the cream; swap with tomato sauce in a hurry.
Vodka – Boosts flavor; feel free to omit if you want a non-alcoholic version or use broth as an alternative.
Heavy Cream – Creates the luxurious creaminess; half-and-half can lighten it up, but the texture may change.
Baby Spinach – Offers freshness and color; kale or Swiss chard make great substitutions.
Fresh Basil – Provides that aromatic touch; if you’re in a pinch, dried basil works (but use less—1 tsp).
Grated Parmesan Cheese – For rich flavor; nutritional yeast is a solid substitute for a vegan option.
Salt and Pepper – Essential for seasoning; adjust to taste for the perfect finish.

Enjoy making your Chicken Spinach Penne—it’s creamy, comforting, and sure to impress!

Step‑by‑Step Instructions for Creamy Chicken Spinach Penne

Step 1: Cook the Pasta
Begin by bringing a large pot of salted water to a rapid boil. Add your uncooked penne pasta and cook according to the package instructions until al dente, usually around 8-10 minutes. Before draining, reserve about ¼ cup of the starchy pasta water to help thicken your sauce later. Drain the pasta and set it aside in the pot.

Step 2: Cook the Chicken
In a large skillet, heat 2 tablespoons of olive oil over medium-high heat. Season your boneless skinless chicken breast with salt and pepper, then add it to the skillet. Cook for about 5-7 minutes on each side, or until the chicken is golden brown and registers an internal temperature of 165°F. Remove the chicken from the pan and let it rest for a few minutes before slicing.

Step 3: Sauté Aromatics
In the same skillet, reduce the heat to medium and add 2 tablespoons of butter. Once melted, toss in 1 diced shallot and 2 minced garlic cloves, cooking for about 3-5 minutes until they become translucent and fragrant. Scrape the bottom of the pan to incorporate any browned bits, enhancing the flavor for your creamy chicken spinach penne.

Step 4: Build the Sauce
Next, stir in a pinch of red pepper flakes and 2 tablespoons of tomato paste, cooking for an additional 3-5 minutes until the mixture darkens slightly. Then, carefully pour in ½ cup of vodka, scraping the bottom of the pan to release any remaining bits, and allow it to simmer for about 2 minutes, letting the alcohol cook off and concentrate the flavors.

Step 5: Creamify the Sauce
Lower the heat to medium-low and pour in 1 cup of heavy cream, stirring to incorporate. Add in ½ cup of grated Parmesan cheese, mixing until the cheese melts and the sauce becomes silky and creamy. This rich sauce will envelop the chicken and vegetables beautifully, creating that velvety texture your creamy chicken spinach penne is known for.

Step 6: Combine Ingredients
Now, return the cooked penne pasta to the skillet along with 3 cups of baby spinach and a handful of fresh basil leaves. Pour in the reserved pasta water, tossing everything together until the spinach wilts slightly and all the ingredients are well coated in the sauce. The vibrant colors and creamy texture will make this a dish to remember!

Step 7: Serve and Garnish
Once combined, serve your creamy chicken spinach penne immediately, garnished with additional grated Parmesan and fresh basil leaves for a touch of brightness. This comforting dish is best enjoyed fresh, ensuring that the creaminess and flavors are at their peak, ready to warm hearts and fill bellies!

Expert Tips for Chicken Spinach Penne

  • Reserve Pasta Water: Make sure to save about ¼ cup of starchy pasta water before draining; it helps thicken the creamy sauce beautifully.

  • Avoid Overcooking Spinach: Add the spinach at the end and toss just until it wilts; this keeps it vibrant and nutrient-rich.

  • Cream Incorporation: Stir in the heavy cream thoroughly before adding the pasta; this will ensure a smooth and velvety sauce without lumps.

  • Right Chicken Temperature: Always check that the internal temperature of the chicken reaches 165°F to ensure it’s perfectly cooked and safe to eat.

  • Flavor Depth: If using vodka, let it simmer for at least 2 minutes to cook off the alcohol; this enhances the flavor without an overpowering bite.

  • Adapt for Preferences: Feel free to swap in shrimp or your choice of veggies, allowing you to create your ideal version of Chicken Spinach Penne!

Chicken Spinach Penne Variations

Feel free to explore these delicious twists on the classic Chicken Spinach Penne, each promising to ignite your culinary creativity!

  • Seafood Delight: Swap in shrimp or scallops for a seafood twist. Sauté them just until pink and tender for a delightful variation!

  • Vegetarian Option: Omit the chicken altogether and add your favorite veggies like mushrooms, bell peppers, or zucchinis. A hearty mushroom medley adds a satisfying earthiness!

  • Whole Wheat Pasta: Use whole grain or alternative flour pasta for added fiber and nutrition. This small switch makes your dish wholesome without losing flavor!

  • Creamy Dream: Replace heavy cream with a combination of Greek yogurt and a splash of milk. It lightens the dish while keeping that silky texture!

  • Herbaceous Boost: Toss in fresh herbs like thyme or oregano for added aroma. These herbs can elevate the flavor profile and add a garden-fresh touch.

  • Spicy Kick: Add more red pepper flakes or a sliced jalapeño to crank up the heat! This adds a zesty zing that pairs beautifully with creamy sauces.

  • Cheesy Goodness: In addition to Parmesan, mix in some feta or goat cheese for an extra layer of creamy, tangy goodness. These cheeses will enchant your taste buds!

  • Saucy Sophistication: Swap vodka for a splash of white wine or lemon juice for a tangy zing. A bright citrus note can elevate the entire dish to new heights.

Let your imagination soar and customize your dish even more! If you’re looking for a refreshing accompaniment, how about pairing it with a flavorful Tuscan Chicken Soup? Enjoy exploring these variations, and happy cooking!

What to Serve with Creamy Chicken Pasta with Spinach

Looking to create a delightful dining experience to complement your creamy chicken pasta and make your meal truly unforgettable?

  • Garlic Bread: The buttery, toasted goodness of garlic bread is perfect for soaking up the creamy sauce, creating a satisfying pairing that your taste buds will love.

  • Caesar Salad: Crisp romaine, tangy dressing, and crunchy croutons provide a refreshing contrast to the rich pasta, adding a delightful crunch to your meal. A classic that never fails!

  • Steamed Broccoli: Bright green broccoli not only adds vibrant color to your plate but also a nutritious crunch that balances the velvety texture of your creamy dish. It’s a wholesome touch that feels good!

  • Roasted Cherry Tomatoes: Sweet, caramelized tomatoes bring a burst of flavor and acidity, providing a beautiful juxtaposition to the creamy sauce. Simple yet elegant, they elevate your plate to new heights.

  • Wine Pairing: A chilled glass of Sauvignon Blanc or Chardonnay perfectly complements the richness of the creamy chicken and balances the dish with its crisp acidity. So refreshing!

  • Lemon Sorbet: For dessert, a light and zesty lemon sorbet cleanses the palate, leaving a refreshing finish after the indulgent pasta, ensuring a bright end to your meal.

Indulge in these recommendations and watch how they transform your table into a delicious feast, leaving everyone talking about dinner long after the plates are cleared!

Make Ahead Options

These Creamy Chicken Pasta with Spinach preparations are perfect for busy weeknights! You can cook the pasta and sauté the chicken up to 24 hours in advance. Simply store them separately in airtight containers in the refrigerator to keep them fresh. The sauce can also be prepped ahead—mix the cream, tomato paste, and seasonings to refrigerate, and just before serving, heat it gently in a pan, adding the cooked pasta, spinach, and chicken. This way, you’ll still enjoy a rich and flavorful dish without all the cooking time during dinner. When ready to serve, simply combine everything in the skillet and enjoy your restaurant-quality meal with minimal effort!

How to Store and Freeze Chicken Spinach Penne

Fridge: Store leftovers in an airtight container for up to 3 days. To maintain creaminess, add a splash of heavy cream when reheating.

Freezer: For longer storage, freeze the pasta in a container or freezer bag for up to 2 months. Avoid freezing if possible as cream sauces can separate.

Reheating: When ready to enjoy, thaw overnight in the fridge and reheat gently on the stovetop. Add a bit of reserved pasta water if needed to restore creaminess.

Serving Tip: Enhance the fresh flavors by tossing in a handful of baby spinach just before serving, ensuring it remains vibrant and nutrient-rich.

Creamy Chicken Pasta with Spinach Recipe FAQs

Which type of pasta is best for this recipe?
You can use any pasta you love, but I recommend penne for its ability to hold onto the creamy sauce beautifully. If you’re following a gluten-free diet, opt for gluten-free pasta, which works just as wonderfully!

How should I store leftovers?
Store your creamy chicken pasta in an airtight container in the refrigerator for up to 3 days. To keep the dish creamy during reheating, add a splash of heavy cream or a bit of reserved pasta water before warming it up on the stovetop. This helps to restore that luscious texture.

Can I freeze the creamy chicken pasta?
Freezing creamy dishes isn’t usually ideal because the cream can separate, but if you’d like to give it a try, you can freeze the pasta in a container or freezer bag for up to 2 months. Just make sure it’s cooled first. When ready to eat, thaw overnight in the fridge and reheat gently on the stovetop, adding a bit of water or cream to restore creaminess.

What if I can’t find shallots?
No problem at all! You can easily substitute shallots with yellow onion or even green onions. The flavor will be slightly different but still delicious! Just use about a quarter cup of diced yellow onion, and you’re good to go.

How can I make this dish vegetarian?
To transform this dish into a vegetarian meal, simply omit the chicken and swap in more veggies like mushrooms, bell peppers, or zucchini. You can also add chickpeas for protein! Ensure you’re using vegetable broth instead of chicken broth and enjoy a comforting, plant-based version of creamy chicken pasta.

Why is my creamy sauce not thickening?
Don’t worry; this happens to the best of us! If your sauce isn’t thickening, try adding a bit more of the reserved starchy pasta water. The starch from the pasta helps bind the sauce; just gradually add a little at a time while stirring until you achieve that desired velvety consistency.

Chicken Spinach Penne

Creamy Chicken Spinach Penne: Wholesome Comfort in 30 Minutes

A delightful Chicken Spinach Penne recipe that combines tender chicken and vibrant spinach in a creamy sauce, ready in just 30 minutes.
Prep Time 10 minutes
Cook Time 20 minutes
Total Time 30 minutes
Servings: 4 servings
Course: Pasta
Cuisine: Italian
Calories: 590

Ingredients
  

For the Pasta
  • 1 pound uncooked penne pasta gluten-free pasta can be used as a substitute
For the Sauce
  • 2 tablespoons olive oil can replace with canola oil
  • 1 pound boneless skinless chicken breast swap for turkey or tofu for vegetarian option
  • 2 tablespoons butter opt for margarine for dairy-free
  • 1 cup shallots yellow onion is a good substitute
  • 2 cloves garlic garlic powder can be substituted (1/8 tsp per clove)
  • 1/4 teaspoon red pepper flakes omit for milder flavor
  • 2 tablespoons tomato paste swap with tomato sauce in a hurry
  • 1/2 cup vodka omit for non-alcoholic version or use broth
  • 1 cup heavy cream half-and-half can be used
  • 3 cups baby spinach kale or Swiss chard make great substitutions
  • 1 cup fresh basil dried basil works in a pinch (use less)
  • 1/2 cup grated Parmesan cheese nutritional yeast is a solid substitute
  • to taste salt adjust according to preference
  • to taste pepper adjust according to preference

Equipment

  • Large pot
  • Large skillet

Method
 

Step-by-Step Instructions
  1. Cook the Pasta: Bring a large pot of salted water to a boil. Add the penne pasta and cook according to package instructions until al dente, about 8-10 minutes. Reserve ¼ cup of pasta water before draining, then set the pasta aside.
  2. Cook the Chicken: Heat olive oil in a skillet over medium-high heat. Season the chicken with salt and pepper, add to the skillet, and cook until golden brown and cooked through, about 5-7 minutes per side. Remove from skillet and let rest before slicing.
  3. Sauté Aromatics: In the same skillet, reduce heat to medium and melt the butter. Add diced shallot and minced garlic, cooking until translucent and fragrant, about 3-5 minutes.
  4. Build the Sauce: Stir in red pepper flakes and tomato paste, cooking for an additional 3-5 minutes. Add vodka and let simmer for about 2 minutes.
  5. Creamify the Sauce: Lower heat to medium-low and stir in the heavy cream and Parmesan cheese until well combined and creamy.
  6. Combine Ingredients: Return the cooked pasta to the skillet along with baby spinach and basil. Mix in the reserved pasta water until everything is well coated and the spinach wilts slightly.
  7. Serve and Garnish: Serve immediately garnished with additional Parmesan and fresh basil.

Nutrition

Serving: 1servingCalories: 590kcalCarbohydrates: 65gProtein: 30gFat: 25gSaturated Fat: 12gPolyunsaturated Fat: 1gMonounsaturated Fat: 8gCholesterol: 120mgSodium: 800mgPotassium: 600mgFiber: 4gSugar: 5gVitamin A: 1500IUVitamin C: 10mgCalcium: 250mgIron: 2.5mg

Notes

Ensure to reserve pasta water for an extra creamy sauce. Adjust seasonings to personal taste and modify ingredients based on available preferences.

Tried this recipe?

Let us know how it was!

Ground Beef Taco Soup: A Cozy Family Favorite Tonight

As I settled into my cozy kitchen one chilly evening, the aroma of spices and simmering beef filled the air, igniting a warmth that only a homemade meal can provide. This Easy Beef Taco Soup is a delightful fusion of savory ground beef, vibrant tomatoes, and hearty beans, ready in under 10 minutes—perfect for those busy weeknights when time is tight but comfort is still a must. Versatile and family-friendly, this recipe not only satisfies hungry bellies but also allows everyone to customize their bowls with toppings like creamy avocado or zesty jalapeños. Whether you’re stuck in a dinner rut or just want to experience a flavor-packed dish that brightens any table, this Ground Beef Taco Soup is sure to become a go-to favorite. What unique toppings do you think would make your perfect bowl?

What makes this taco soup special?

Quick and Easy: This Ground Beef Taco Soup comes together in under 10 minutes, making it perfect for busy evenings.

Customizable Toppings: From creamy avocado to spicy jalapeños, you can tailor each bowl to suit your family’s tastes.

Hearty & Nourishing: Packed with protein-rich beef and fiber-filled beans, it’s a comforting meal that nourishes both body and soul.

Versatile Variations: You can easily switch up the protein or even make it vegetarian, keeping it fresh and exciting every time you make it.

Crowd-Pleaser: Serve it at family gatherings or casual get-togethers—the delightful flavors are sure to impress everyone at the table. If you’re a fan of quick and tasty meals, you might also enjoy Mexican Taco Soup for another hearty option!

Ground Beef Taco Soup Ingredients

• Dive into the deliciousness with these essential ingredients!

For the Soup

  • Ground Beef – The heart of your dish, providing a hearty protein boost.
  • Onion – Adds depth and sweetness; yellow or white works well, while green onions can be milder.
  • Cumin – Infuses warm flavors; if you’re in a pinch, substitute with taco seasoning.
  • Garlic Powder – A flavor enhancer that brings savory notes; feel free to use fresh garlic cloves instead.
  • Onion Powder – Boosts onion flavor; skip if you’re using fresh onion generously.
  • Chili Powder – Adds a mild kick; adjust according to your spice preference, or swap with paprika for less heat.
  • Cayenne Pepper – Amp up the spice factor if desired; omit for a milder taste.
  • Diced Tomatoes (2 cans) – The soup base that brings acidity and sweetness; fresh tomatoes give an even brighter flavor.
  • Corn (1 can, drained) – Offers sweetness and texture; frozen corn is a great alternative if preferred.
  • Black Beans (1 can, drained) – Boosts protein and fiber; pinto beans can be a tasty substitute.

For the Toppings

  • Shredded Cheese – Melts beautifully and adds creaminess to each bowl.
  • Avocado – Provides a rich, buttery texture that complements the soup nicely.
  • Cilantro – Fresh herbs add brightness and a punch of flavor; use according to your taste.
  • Crushed Tortilla Chips – A crunchy topping that adds delightful texture and a nod to classic tacos.

Embrace the flexibility of this Ground Beef Taco Soup by mixing and matching these ingredients as you please!

Step‑by‑Step Instructions for Ground Beef Taco Soup

Step 1: Brown the Beef and Onion
In a large stock pot over medium heat, brown 1 pound of ground beef along with 1 diced onion. Stir frequently for about 5-7 minutes, until the beef is no longer pink and the onion becomes translucent and fragrant. This step lays the flavorful foundation for your Ground Beef Taco Soup.

Step 2: Mix in the Spices
Once the beef is browned, drain any excess fat if necessary. Stir in 1 teaspoon each of cumin, garlic powder, onion powder, and chili powder, along with a pinch of cayenne pepper if you like extra heat. Cook the spices for 1-2 minutes until they are fragrant, allowing the flavors to meld beautifully into the meat.

Step 3: Add the Tomatoes and Beans
Next, incorporate 2 cans of diced tomatoes, 1 can of drained corn, and 1 can of drained black beans into the pot. Stir well to combine all the ingredients, letting the vibrant colors of the tomatoes and beans come together. This step enriches the soup with texture and depth while ensuring it’s nutritious.

Step 4: Pour in Water and Simmer
Pour in 3 cups of water, stirring everything together, and raise the heat to bring the mixture to a boil. Once boiling, reduce the heat to low and cover. Let the soup simmer for 20 minutes, allowing the flavors to blend together beautifully and the soup to thicken slightly.

Step 5: Serve and Garnish
After simmering, taste your delicious Ground Beef Taco Soup and adjust seasoning if needed. Serve the steaming soup in bowls, offering a variety of toppings like shredded cheese, diced avocado, fresh cilantro, and crushed tortilla chips to personalize each bowl to your family’s taste.

Make Ahead Options

These Easy Beef Taco Soup preparations are ideal for busy weeknights, saving you time without compromising on flavor! You can brown the ground beef and onion, then store them in an airtight container in the refrigerator for up to 3 days. Additionally, you can measure out your spices and keep them ready to go, ensuring quick assembly later. When it’s time to enjoy your soup, simply heat the beef mixture, add the prepared ingredients (diced tomatoes, corn, and beans), pour in water, and simmer for about 20 minutes. This way, your Ground Beef Taco Soup will be just as delicious, while you enjoy the benefits of a streamlined cooking process!

How to Store and Freeze Ground Beef Taco Soup

Fridge: Keep your soup in an airtight container for up to 3 days, ensuring it stays fresh and flavorful. Simply reheat in the microwave or on the stove when ready to enjoy again.

Freezer: For longer storage, freeze the cooled soup in ziplock bags or freezer-safe containers. It will maintain quality for up to 3 months; just remember to label them!

Reheating: Thaw frozen soup in the fridge overnight before reheating. Warm on the stove or microwave, adding a splash of water or broth if it’s too thick.

What to Serve with Easy Beef Taco Soup

Pair this delicious soup with satisfying sides to elevate your cozy meal experience!

  • Crunchy Tortilla Chips:
    Perfect for scooping up that hearty soup, tortilla chips add a satisfying crunch and a classic Tex-Mex touch. Dip them into the soup for an irresistible combination!

  • Fresh Green Salad:
    A crisp green salad with lemon vinaigrette adds brightness and freshness, balancing the rich flavors of the taco soup beautifully. Toss in your favorite veggies for a personal touch.

  • Creamy Guacamole:
    The buttery texture of guacamole enhances the warmth of the soup, creating a delightful contrast that your taste buds will adore. It’s a creamy topping that complements every spoonful!

  • Cheesy Quesadillas:
    Savory quesadillas filled with gooey cheese offer a melty, satisfying side that pairs perfectly with the bold flavors of the soup. They can be easily customized with veggies or protein!

  • Sweet Cornbread:
    The subtle sweetness of cornbread lends a lovely softness and comfort, making each bite a delightful experience alongside your soup. It’s a warm hug for your taste buds!

  • Zesty Limeade:
    Refreshing limeade provides a tangy counterpoint to the rich flavors of the soup, quenching your thirst while adding a burst of citrusy brightness to your meal.

Bring your taco soup experience to life with these delightful pairing ideas that will leave everyone at the table smiling!

Expert Tips for Ground Beef Taco Soup

  • Spice Control: Adjust the level of chili powder and cayenne pepper according to your family’s taste to create the perfect heat balance.

  • Thickening Trick: For a heartier texture, stir in refried beans towards the end of cooking or allow the soup to simmer longer to reduce excess liquid.

  • Slow Cooker Ease: Consider browning the ground beef beforehand, then add all ingredients with only 2 cups of water—a fantastic option for slow cooking this Ground Beef Taco Soup on low for 4-6 hours.

  • Bean Substitutions: Feel free to swap black beans for pinto beans or add extra vegetables like bell peppers or zucchini for a nutritional boost.

  • Storage Know-How: This soup stores well in an airtight container for up to 3 days in the fridge or freezes beautifully—just remember to cool completely before storing!

Ground Beef Taco Soup Variations

Feel free to get creative with your Ground Beef Taco Soup and make it your own delicious masterpiece!

  • Vegetarian: Omit the ground beef and amp up the beans or add tofu for a hearty, meat-free option. It’s just as fulfilling!

  • Different Meats: Switch things up by using ground turkey or pork. Each brings a unique flavor profile that can surprise your taste buds.

  • Spicy Twist: Add fresh jalapeños or hot sauce to increase the heat level. Perfect for those who love a fiery kick!

  • Herbal Infusion: Try adding fresh herbs like parsley or oregano for a burst of freshness. A little sprinkle goes a long way in elevating flavor!

  • Creamy Upgrade: Stir in a dollop of sour cream or Greek yogurt just before serving for a creamy finish that complements the spices perfectly.

  • Vegetable Boost: Toss in diced zucchini or bell peppers for added nutrition and texture. These colorful veggies will brighten your soup.

  • Cheesy Delight: Blend in shredded cheese while it simmers for a rich, cheesy soup experience. Who doesn’t love cheesy goodness?

  • Crisp Addition: Top your soup with crispy tortilla strips instead of crushed chips for a delightful crunch that contrasts beautifully with the soup’s warmth.

If you’re looking for more comforting options, don’t forget to check out the fantastic flavors of Mexican Soup Flavorful or indulge in some delicious Sticky Beef Noodles. Enjoy cooking!

Ground Beef Taco Soup Recipe FAQs

What type of ground beef should I use?
Absolutely! I recommend using lean ground beef (at least 80% lean) to keep it healthier without sacrificing flavor. If you’re looking for lighter options, ground turkey or shredded chicken work beautifully.

How should I store leftover Ground Beef Taco Soup?
Very simple! Let your soup cool completely, then transfer it to an airtight container. It can be kept in the refrigerator for up to 3 days. When you’re ready to enjoy it again, just reheat it on the stovetop or microwave.

Can I freeze Ground Beef Taco Soup?
Yes, you can! To freeze, cool the soup entirely and then pour it into ziplock bags or freezer-safe containers. Make sure to remove as much air as possible to prevent freezer burn. It will stay fresh for up to 3 months. When you’re ready to eat, thaw it in the refrigerator overnight and reheat.

What can I do if my soup is too spicy?
If your Ground Beef Taco Soup ends up too spicy, don’t worry! You can add a dollop of sour cream or thick yogurt at serving to help tone down the heat. Alternatively, stir in a few more canned tomatoes or a splash of water to dilute the spice.

Is this soup suitable for gluten-free diets?
Absolutely! The base ingredients for this Ground Beef Taco Soup are naturally gluten-free. Just ensure that any additional toppings like tortillas or chips are gluten-free, and you’re good to go.

What toppings work best with this soup?
The more the merrier! Popular toppings include shredded cheese, diced avocado, fresh cilantro, sour cream, and crushed tortilla chips. However, feel free to get creative—anything from jalapeños to lime wedges adds a delicious twist!

Ground Beef Taco Soup

Ground Beef Taco Soup: A Cozy Family Favorite Tonight

Enjoy a warm bowl of Ground Beef Taco Soup, perfect for chilly evenings and busy weeknights.
Prep Time 10 minutes
Cook Time 20 minutes
Total Time 30 minutes
Servings: 4 bowls
Course: Dinner
Cuisine: Mexican
Calories: 300

Ingredients
  

For the Soup
  • 1 pound Ground Beef The heart of your dish, providing a hearty protein boost.
  • 1 medium Onion Adds depth and sweetness; yellow or white works well.
  • 1 teaspoon Cumin Infuses warm flavors.
  • 1 teaspoon Garlic Powder A flavor enhancer that brings savory notes.
  • 1 teaspoon Onion Powder Boosts onion flavor; skip if using fresh onion.
  • 1 teaspoon Chili Powder Adds a mild kick; adjust according to spice preference.
  • 1/4 teaspoon Cayenne Pepper Amp up the spice factor if desired.
  • 2 cans Diced Tomatoes Brings acidity and sweetness.
  • 1 can Corn Offers sweetness and texture; drained.
  • 1 can Black Beans Boosts protein and fiber; drained.
For the Toppings
  • 1 cup Shredded Cheese Melts beautifully and adds creaminess.
  • 1 medium Avocado Provides a rich, buttery texture.
  • Cilantro Fresh herbs add brightness.
  • 1 cup Crushed Tortilla Chips Adds delightful texture.

Equipment

  • large stock pot

Method
 

Step-by-Step Instructions for Ground Beef Taco Soup
  1. Brown the beef and onion in a large stock pot over medium heat for about 5-7 minutes until the beef is no longer pink and the onion becomes translucent and fragrant.
  2. Mix in the spices: stir in cumin, garlic powder, onion powder, chili powder, and cayenne pepper. Cook for 1-2 minutes until fragrant.
  3. Add the tomatoes, corn, and black beans into the pot. Stir well to combine.
  4. Pour in 3 cups of water, bring to a boil, then reduce heat and let simmer for 20 minutes.
  5. Serve and garnish with your choice of toppings.

Nutrition

Serving: 1bowlCalories: 300kcalCarbohydrates: 35gProtein: 25gFat: 10gSaturated Fat: 4gPolyunsaturated Fat: 1gMonounsaturated Fat: 4gCholesterol: 50mgSodium: 800mgPotassium: 600mgFiber: 8gSugar: 5gVitamin A: 500IUVitamin C: 7mgCalcium: 150mgIron: 3mg

Notes

Customize with different toppings or proteins as desired. Stores well in the fridge for up to 3 days or freezes for up to 3 months.

Tried this recipe?

Let us know how it was!

Delicious Salmon Bowls Recipe for a Quick Healthy Dinner

As I stood in the kitchen, I couldn’t help but think how a simple Honey Glazed Salmon Bowl could become my go-to weeknight dinner. Imagine succulent, crispy salmon drizzled in a luscious honey lime glaze, paired with cool avocado and crunchy cucumbers—each bite feels like a celebration of flavor. This Salmon Bowls Recipe not only satisfies cravings but is also gluten-free, dairy-free, and ready in just 30 minutes. Perfect for busy weeknights, it’s a delightful twist on healthy eating that even my kids can’t resist! Whether you’re looking to impress dinner guests or simply want to whip up something wholesome for the family, this dish is a great choice. What would you add to your bowl to make it your own?

Why choose the Honey Glazed Salmon Bowl?

Flavorful Delight: Each bite offers a perfectly balanced mix of sweet honey and savory salmon topped with fresh ingredients.
Quick Prep: This recipe shines as a 30-minute marvel, making it ideal for busy nights without sacrificing flavor.
Healthy Ingredients: Packed with nutrient-dense foods, this bowl is gluten-free and dairy-free, ensuring everyone can enjoy.
Customization Galore: Feel free to experiment with proteins and veggies—substitute chicken or tofu, or toss in extra crunch with bell peppers!
Kid-Approved: With its appealing flavors, this dish is not just for the adults; it’s sure to please even the pickiest eaters. Plus, if you’re in the mood for more delicious salmon options, consider trying our honey garlic salmon or herb crusted salmon.

Salmon Bowls Recipe Ingredients

For the Salmon
Salmon Filets – The main protein source; skinless salmon is recommended for quick cooking.
Avocado Oil – A healthy fat for cooking; substitute with olive or sesame oil if desired.
Honey – Adds sweetness to glaze the salmon; maple syrup works as a vegan substitute.
Soy Sauce (or Tamari) – Enhances umami flavors; tamari is a gluten-free alternative.
Sriracha – Introduces heat; adjustable according to your spice tolerance.

For the Rice Base
Cooked Brown Rice – A hearty base for the bowl; quinoa or cauliflower rice can be used for lower-carb options.

For the Salad
Avocado – Provides creaminess and healthy fats; can be replaced with hummus if desired.
Diced Cucumber – Freshness and crunch; feel free to substitute with bell peppers or snap peas.
Olive Oil – In the cucumber salad dressing; any light vegetable oil works well as a substitute.
Chopped Cilantro – Adds a fresh, herbaceous touch; parsley can replace it or omit if preferred.
Fresh Lime Juice – Brightens flavors in the salad dressing and sauce; lemon juice can be an alternative.

For the Sauce
Light Mayo – Provides creaminess; Greek yogurt or a vegan mayo substitute can be used instead.
Paprika – Adds depth to the sauce; smoked paprika is great for enhanced flavor.
Cumin – Brings warmth and complexity; optional but adds recommended flavor layering.
Additional Honey and Lime Juice – To adjust the sweetness and balance of the sauce.

Feel free to explore this Salmon Bowls Recipe as a delicious and satisfying choice for your next family dinner!

Step‑by‑Step Instructions for Honey Glazed Salmon Bowl

Step 1: Preheat the Oven
Begin by preheating your oven to 425°F (220°C). This will ensure that your Honey Glazed Salmon Bowl cooks evenly. While waiting for the oven to reach temperature, prepare your baking sheet by lining it with parchment paper for easy cleanup.

Step 2: Marinate the Salmon
In a mixing bowl, combine cubed salmon with avocado oil, honey, soy sauce (or tamari), and sriracha. Toss everything together until the salmon is well-coated in this mouthwatering marinade. Let it sit for about 5 minutes to soak in the flavors while the oven preheats.

Step 3: Roast the Salmon
Spread the marinated salmon onto the prepared baking sheet in a single layer. Place it in the oven and roast for 10 minutes. For that perfect crispy exterior, switch the oven to broil for an additional 2-3 minutes, watching closely until the salmon is golden and slightly caramelized.

Step 4: Whisk the Sauce
While your salmon roasts, whisk together all the sauce ingredients in a bowl. This includes light mayo, fresh lime juice, honey, paprika, and cumin. Blend thoroughly until smooth and creamy, then set aside for a burst of flavor to drizzle over your Honey Glazed Salmon Bowl.

Step 5: Prepare the Cucumber Salad
In another bowl, combine diced avocado, cucumber, olive oil, chopped cilantro, fresh lime juice, and a drizzle of honey. Toss the ingredients gently to mix, creating a refreshing salad that will add a crunchy element to your bowl.

Step 6: Assemble the Bowls
Once the salmon is out of the oven, it’s time to create your Honey Glazed Salmon Bowl. Start with a generous base of cooked brown rice, then layer the crispy salmon on top. Add the cucumber salad and finish it off with a drizzle of your creamy sauce for that delightful flavor.

Step 7: Serve and Enjoy
Serve your beautifully arranged Honey Glazed Salmon Bowls immediately, offering extra lime wedges and sriracha on the side for those who like an added kick. Gather around the table and savor every bite of this quick and healthy dinner!

What to Serve with Honey Glazed Salmon Bowl

Elevate your dining experience by complementing the vibrant flavors of this delicious salmon bowls recipe with a variety of delightful sides.

  • Creamy Mashed Potatoes: The velvety texture of mashed potatoes enhances the bowl’s crunch, making each bite a comforting delight.

  • Roasted Asparagus: With a slight smokiness and tender bite, asparagus adds a touch of elegance and vibrant color to your meal.

  • Quinoa Salad: Nutty quinoa tossed with herbs and lemon brightens up the dinner table, pairing perfectly with the savory notes of the salmon.

  • Steamed Broccoli: This nutritious option offers a satisfying crunch and balances the sweetness of the honey glaze with its earthy flavor.

  • Citrus Water: Refreshing beverages like lemon or cucumber-infused water cleanse the palate and complement the dish’s lightness.

  • Mango Salsa: A fruity salsa adds an extra layer of freshness and sweetness, heightening the bowl’s flavor profile with every spoonful.

  • Simple Green Salad: Crisp greens tossed with a light vinaigrette lighten the meal, creating a wholesome finish to your dinner experience.

  • Chilled White Wine: Consider a glass of Sauvignon Blanc to complement the dish’s sweetness while also enhancing the overall dining atmosphere.

How to Store and Freeze Honey Glazed Salmon Bowl

Fridge: Store leftovers in an airtight container for up to 3-4 days. Keeping components separate maintains the integrity of the salmon and veggies.

Freezer: For longer storage, freeze the cooked salmon in an airtight container for up to 2 months. Let it thaw in the fridge overnight before reheating.

Reheating: To enjoy your Honey Glazed Salmon Bowl, reheat in the oven at 350°F for about 10-15 minutes, or use a microwave for 2-3 minutes, ensuring the salmon remains moist.

Assembly Tip: If you plan to store leftovers, keep the rice, salmon, and salad ingredients separate until ready to enjoy to maintain freshness.

Expert Tips for Honey Glazed Salmon Bowls

  • Uniform Cuts: Ensure that salmon is cut into uniform cubes for even cooking throughout; this prevents some pieces from overcooking while others remain underdone.
  • Watch the Broil: Monitor the salmon closely while broiling, as it can burn quickly. Aim for a golden, crispy texture without charring.
  • Heat Adjustments: If you enjoy a milder flavor, start with less sriracha in the marinade and add more gradually to your Salmon Bowls Recipe until it meets your heat preference.
  • Fresh Ingredients: Use fresh lime juice and herbs whenever possible for maximum flavor impact, elevating the dish beyond standard recipes.
  • Leftovers Strategy: Store components separately in airtight containers to keep the salmon crispy and vegetables fresh, enjoying leftovers for up to 3-4 days.

Make Ahead Options

These Honey Glazed Salmon Bowls are perfect for meal prep enthusiasts! You can marinate the salmon up to 24 hours in advance, allowing deeper flavors to develop. Simply mix together the avocado oil, honey, soy sauce (or tamari), and sriracha, and toss it with the salmon cubes, then refrigerate. Additionally, the cucumber salad can be prepared a day ahead; just keep it stored in an airtight container to maintain its crunch. When ready to serve, roast the marinated salmon as per the recipe, and assemble your bowls with freshly cooked brown rice and the prepared salad. This way, you’ll have a flavorful dinner ready with minimal effort, just like restaurant-quality results!

Salmon Bowls Recipe Variations

Feel free to let your creativity shine as you customize this delightful dish with your own unique spins!

  • Dairy-Free: Substitute light mayo with dairy-free mayonnaise or Greek yogurt for a creamy, non-dairy sauce.
  • Vegan-Friendly: Use tofu instead of salmon and maple syrup rather than honey to keep it entirely plant-based while still delicious.
  • Extra Crunch: Add sliced radishes or shredded carrots to the cucumber salad for an exciting crunch and refreshing flavor.
  • Grain-Free: Swap brown rice for cauliflower rice to create a low-carb and grain-free base that pairs wonderfully with the salmon.
  • Spicy Kick: For those who love heat, increase the sriracha in the marinade or sprinkle some chili flakes over the finished dish for an added zing.
  • Asian Twist: Incorporate sesame oil in the salad dressing and add edamame or shredded nori for an authentic Asian-inspired take.
  • Zesty Infusion: Try using lemon juice instead of lime for a bright, tangy alternative that adds a refreshing twist to the sauce.
  • Flavor Intensity: Mix smoked paprika and cumin to elevate the sauce with a smoky depth that will tantalize your taste buds!

As you explore these variations, think about how each ingredient can elevate your meal. If you’ve got other salmon cravings, you might also love our Honey Garlic Salmon or the savory flavors of Chicken Katsu Bowls. Enjoy creating your perfect bowl!

Honey Glazed Salmon Bowl Recipe FAQs

How do I select ripe ingredients for the Honey Glazed Salmon Bowl?
Absolutely! When choosing your salmon, look for vibrant color and firm texture without any dark spots. For avocado, gently squeeze it—if it yields slightly, it’s ripe and ready. Cucumbers should be firm and glossy; avoid those with soft spots or dull skin.

What’s the best way to store leftovers?
Very! Store your leftover Honey Glazed Salmon Bowl in an airtight container in the refrigerator for 3-4 days. To maintain freshness, keep the components separate: store the salmon, rice, and salad ingredients in separate containers before combining them when you’re ready to eat.

Can this dish be frozen?
Sure! To freeze the cooked salmon, let it cool completely, then place it in an airtight container or a resealable freezer bag—remove as much air as possible. It can be safely frozen for up to 2 months. When you’re ready to enjoy it, let it thaw in the fridge overnight before reheating.

What if my salmon comes out overcooked?
Don’t worry, it happens! If your salmon turns dry, try drizzling some of the prepared sauce over the top when serving—it adds moisture! For future reference, watch the broiling time closely; just a minute or two can make a big difference in that crispy exterior.

Is this recipe safe for people with allergies?
It’s a great question! The Honey Glazed Salmon Bowl is naturally gluten-free, especially if you use tamari instead of soy sauce. However, be cautious of any soy allergies. For those with egg allergies, feel free to substitute the light mayo with Greek yogurt or a vegan mayo alternative for the sauce. Always check ingredient labels for potential allergens.

Can I customize the vegetables in the salad?
Absolutely! Feel free to mix in other veggies like shredded carrots, bell peppers, or snap peas for extra crunch and nutrition. The flexibility of this Salmon Bowls Recipe makes it easy to cater to personal preferences and seasonal produce!

Salmon Bowls Recipe

Delicious Salmon Bowls Recipe for a Quick Healthy Dinner

This Salmon Bowls Recipe combines crispy salmon with fresh ingredients for a quick and healthy dinner in just 30 minutes.
Prep Time 10 minutes
Cook Time 20 minutes
Marinating Time 5 minutes
Total Time 30 minutes
Servings: 4 bowls
Course: Dinner
Cuisine: American
Calories: 450

Ingredients
  

For the Salmon
  • 4 filets Skinless Salmon Main protein source
  • 2 tablespoons Avocado Oil Healthy cooking fat
  • 3 tablespoons Honey For glazing
  • 2 tablespoons Soy Sauce (or Tamari) Enhances umami flavor
  • 1 teaspoon Sriracha Adjust according to spice tolerance
For the Rice Base
  • 2 cups Cooked Brown Rice Hearty base for the bowl
For the Salad
  • 1 medium Avocado Provides creaminess
  • 1 cup Diced Cucumber For freshness
  • 1 tablespoon Olive Oil For dressing
  • 1/4 cup Chopped Cilantro Adds herbaceous touch
  • 2 tablespoons Fresh Lime Juice For dressing and sauce
For the Sauce
  • 1/2 cup Light Mayo Provides creaminess
  • 1 teaspoon Paprika Adds depth to sauce
  • 1/2 teaspoon Cumin Optional for flavor layering
  • 1 tablespoon Additional Honey To balance sauce
  • 1 tablespoon Additional Lime Juice To adjust sweetness

Equipment

  • Oven
  • Baking Sheet
  • Mixing Bowl
  • whisk

Method
 

Preparation
  1. Preheat the oven to 425°F (220°C) and prepare a baking sheet lined with parchment paper.
  2. In a mixing bowl, combine cubed salmon with avocado oil, honey, soy sauce (or tamari), and sriracha. Marinate for about 5 minutes.
  3. Spread the marinated salmon onto the prepared baking sheet and roast for 10 minutes. Switch to broil for an additional 2-3 minutes until golden.
  4. Whisk together light mayo, fresh lime juice, honey, paprika, and cumin until smooth and set aside.
  5. In another bowl, combine diced avocado, cucumber, olive oil, chopped cilantro, fresh lime juice, and honey, and toss gently to create a salad.
  6. Assemble the bowls starting with brown rice, topped with salmon, cucumber salad, and a drizzle of the creamy sauce.
  7. Serve immediately with extra lime wedges and sriracha on the side.

Nutrition

Serving: 1bowlCalories: 450kcalCarbohydrates: 40gProtein: 30gFat: 20gSaturated Fat: 3gPolyunsaturated Fat: 2gMonounsaturated Fat: 15gCholesterol: 60mgSodium: 700mgPotassium: 800mgFiber: 5gSugar: 8gVitamin A: 500IUVitamin C: 15mgCalcium: 50mgIron: 2mg

Notes

Use fresh ingredients for maximum flavor impact. Store leftovers in airtight containers to keep salmon crispy and vegetables fresh.

Tried this recipe?

Let us know how it was!

Cheesy Beef Enchiladas Tortellini – Dinner Made Easy

As I stirred the bubbling pot of Cheesy Beef Enchilada Tortellini, the irresistible aroma wrapped around me like a warm hug, whispering promises of comfort and flavor. This delightful one-pan fusion dish pairs the heartiness of cheesy tortellini with the zesty kick of enchiladas, making it a brilliant choice for any weeknight dinner. Not only is it quick to make, but it also transforms family meals into moments of joy and togetherness. It’s a perfect solution for those who yearn for homemade goodness while keeping things simple and stress-free. Are you ready to bring this magical blend of cuisines to your table? Let’s dive in!

Why Is This Recipe a Must-Try?

Simplicity: This one-pan wonder is so easy to whip up that even novice cooks can shine.

Flavor Explosion: The zesty enchilada sauce melds beautifully with the creamy cheese tortellini, creating an unforgettable taste sensation.

Variations Galore: Feel free to experiment with ground turkey or a variety of tortellini flavors for a personalized twist.

Family-Friendly: Picky eaters will love this dish, making it the perfect solution for anyone looking for a crowd-pleaser during busy weeknights.

Quick Cook Time: With minimal prep and cooking time, you can have a delicious meal on the table in about 30 minutes, leaving you more time for family connection.

Feeling inspired? Check out Sausage Tortellini Soup or Sticky Beef Noodles for more fabulous weeknight dinner ideas!

Beef Enchilada Tortellini Ingredients

For the Tortellini Dish
Cheese Tortellini – The main carbohydrate base; fresh or frozen works beautifully.
Ground Beef – Adds protein and depth; substitute with ground turkey for a lighter twist.
Onion – Enhances sweetness and depth of flavor; finely chop for even cooking.
Garlic – Elevates aroma and taste; always opt for fresh for the best flavor.
Chili Powder – Infuses spicy warmth; adjust to your heat preference for Beef Enchiladas Tortellini.
Ground Cumin – Provides essential earthiness; don’t skip this for authenticity!
Paprika – Adds smokiness and color; smoked paprika can deepen the flavor.
Salt and Black Pepper – Key for flavor enhancement; taste and adjust as desired.
Enchilada Sauce – Gives vibrant flavor; choose between red or green, with spicy options available.
Mozzarella Cheese – Melts beautifully for creaminess; shredded ensures easy melting.
Cheddar Cheese – Intensifies the cheesy flavors; mix with mozzarella or use alone.
Sour Cream – Adds a touch of creaminess and tang; optional for a lighter dish.
Fresh Cilantro – Provides freshness and color; a wonderful optional garnish.

Step‑by‑Step Instructions for Cheesy Beef Enchiladas Tortellini

Step 1: Cook the Tortellini
Begin by cooking the cheese tortellini according to the package directions in a large pot of boiling salted water; usually, this takes around 3-5 minutes until they float to the top. Once cooked, drain the tortellini and set them aside, letting their warmth remind you of the delicious Cheesy Beef Enchiladas Tortellini that’s about to come together.

Step 2: Brown the Ground Beef
In a large, non-stick skillet, heat a drizzle of oil over medium heat, then add the ground beef. Cook it for about 5-7 minutes, breaking it apart with a spatula until fully browned and no longer pink. Drain any excess fat, allowing the rich, savory aroma of the beef to fill your kitchen, setting the stage for the flavorful dish ahead.

Step 3: Sauté the Onion and Garlic
Next, add the finely chopped onion and minced garlic to the skillet with the browned beef. Sauté for about 2-3 minutes, stirring occasionally, until the onion is softened and translucent. The delightful scent of the onions and garlic mingling with the beef begins to create a comforting depth for your Cheesy Beef Enchiladas Tortellini.

Step 4: Toast the Spices
Sprinkle in the chili powder, ground cumin, paprika, salt, and black pepper, stirring to combine. Toast the spices for about 1 minute, letting them release their aromatic oils and intensify their flavors. This step enhances the zesty profile of the enchilada sauce that will soon coexist with your tortellini.

Step 5: Simmer with Enchilada Sauce
Pour in your choice of enchilada sauce, and stir well to coat the beef mixture. Allow it to simmer gently for about 5 minutes, letting all the flavors meld together. You’ll notice the sauce bubbling slightly, turning into a vibrant, beautiful base that will envelop the tortellini in your fusion dish.

Step 6: Combine Tortellini and Sauce
Carefully add the cooked tortellini to the skillet, gently tossing them in the spicy beef and sauce mixture. Cook for an additional 2 minutes over low heat, ensuring that every piece of tortellini is beautifully coated and heated through, showcasing the colors and flavors of your Cheesy Beef Enchiladas Tortellini.

Step 7: Melt the Cheeses
Now, sprinkle the shredded mozzarella and cheddar cheeses generously over the top of the tortellini. Cover the skillet with a lid and let it cook on low for 2-3 minutes, just enough time for the cheese to melt beautifully. Peek under the lid to see the irresistible, creamy texture beginning to form, promising cheesy goodness in every bite.

Step 8: Serve with a Touch of Cream
Once the cheese has melted, remove the skillet from heat. Stir in a dollop of sour cream for added creaminess, allowing it to swirl beautifully throughout the dish. Garnish with fresh cilantro for that finishing touch, and prepare to serve this warm bowl of Cheesy Beef Enchiladas Tortellini to your eagerly awaiting family.

Expert Tips for Cheesy Beef Enchilada Tortellini

  • Use Non-Stick Skillets: Non-stick pans prevent ingredients from sticking and make cleanup a breeze, ensuring your Cheesy Beef Enchiladas Tortellini looks beautiful.

  • Adjust Spice Levels: Tailor the heat of your enchilada sauce to your family’s tastes. Start with less chili powder and increase gradually to avoid overwhelming picky eaters.

  • Don’t Skip Toasting Spices: Toasting spices enhances their flavors dramatically. Spend that extra minute to let your chili powder and cumin release their aromatic oils.

  • Garnish for Freshness: Always finish your dish with fresh cilantro! It not only adds a pop of color but also brightens the overall flavor profile of your cheesy delight.

  • Reheat with Care: If you have leftovers, add a splash of milk when reheating. This maintains the creamy consistency of the sauce in your Beef Enchiladas Tortellini.

  • Experiment with Ingredients: Feel free to swap out the protein or use different tortellini flavors, making it a versatile dish that fits your family’s preferences.

How to Store and Freeze Beef Enchiladas Tortellini

Fridge: Store leftovers in an airtight container for up to 3 days. Be sure to let the dish cool completely before sealing to prevent condensation.

Freezer: For longer storage, freeze in a freezer-safe container for up to 2 months. To avoid freezer burn, wrap tightly or use heavy-duty foil.

Reheating: When ready to enjoy, thaw in the fridge overnight and reheat in a skillet over low heat or in the microwave. Add a splash of milk to restore creaminess to your Beef Enchiladas Tortellini.

Room Temperature: Avoid leaving the dish out at room temperature for more than 2 hours to ensure freshness and safety.

Beef Enchiladas Tortellini Variations

Feel free to get creative and transform this dish into your family’s favorite version, enhancing flavors and textures!

  • Lean Protein: Substitute ground turkey for a lighter option while still keeping that rich flavor intact.

  • Different Tortellini: Use different tortellini flavors, like mushroom or spinach, for a fun twist that adds extra depth and nutrition. Imagine the burst of umami from mushroom tortellini paired with the spicy sauce!

  • Veggie Boost: Add in black beans or corn for a fiber-packed punch. This not only elevates the nutritional value but also gives the dish a colorful, hearty feel.

  • Extra Creaminess: Stir in cream cheese or ricotta before adding the cheeses for a deliciously creamy texture that blankets the dish in comfort.

  • Spicy Kick: Swap the enchilada sauce for a spicy chipotle version to ramp up the heat level. Perfect for those who crave a fiery culinary adventure at dinner!

  • Crunchy Topping: Top with crushed tortilla chips after cooking for an added crunch that contrasts beautifully with the creamy tortellini.

  • Herb Infusion: Mix in some fresh oregano or cilantro for a pop of fresh flavor that brightens every bite. It’s like adding a little garden zest to your plate.

  • Baked Finish: After combining everything in the skillet, transfer to a baking dish, top with extra cheese, and bake until bubbly for a delightful baked variant!

Feeling inspired? Don’t forget to pair this dish with a fresh salad or some delicious Chili Beef Experience or Korean Ground Beef for a complete meal full of flavors!

What to Serve with Cheesy Beef Enchilada Tortellini

Creating a delightful meal involves more than just the main dish; it’s about complementing flavors and textures that invite everyone to the table.

  • Zesty Mexican Corn Salad: This vibrant salad adds a refreshing crunch and a touch of sweetness that pairs beautifully with the spiciness of the enchiladas. The corn’s brightness will balance the richness of the tortellini splendidly.

  • Creamy Avocado Dip: A side of creamy avocado dip adds a smooth, rich texture that soothes the tongue after each flavorful bite. Perfect for scooping with tortilla chips or fresh veggies!

  • Warm Garlic Bread: A comforting addition, warm garlic bread gives a satisfying crunch and can be used to soak up that delicious enchilada sauce leftover on your plate.

  • Crispy Tortilla Chips: The crunchy texture offers a fun contrast to the creamy tortellini. Serve them with salsa or guacamole for a lively twist that will keep everyone coming back for more.

  • Herbed Rice: Fluffy rice sprinkled with fresh herbs absorbs the enchilada sauce perfectly, creating a wonderful harmony of flavors across your plate. This is a great way to make the meal feel abundant.

  • Classic Margaritas: For a refreshing drink, serve classic margaritas with a salted rim. The zesty lime pairs exceptionally with the spicy and cheesy flavors of your dish, bringing a festive vibe to dinner.

  • Chocolate Flan: To end the meal on a sweet note, a slice of creamy chocolate flan provides a smooth texture that’s balanced with a rich chocolate flavor. It’s a perfect indulgent dessert following a hearty dish like Cheesy Beef Enchilada Tortellini.

Make Ahead Options

These Cheesy Beef Enchilada Tortellini are a perfect solution for busy weeknights, allowing you to save time while still enjoying a homemade meal! You can brown the ground beef and cook the tortellini up to 24 hours in advance. Simply store each component separately in airtight containers in the refrigerator. When you’re ready to serve, combine the beef, sauce, and tortellini in a skillet, and heat over medium until warmed through—about 5-7 minutes. Add the cheeses, cover, and allow them to melt for that irresistible, creamy texture. This way, you’ll have a delicious family meal with minimal effort, ready to savor in no time!

Cheesy Beef Enchilada Tortellini Recipe FAQs

How do I know when my tortellini is the right texture?
Cook the cheese tortellini according to the package directions, usually about 3-5 minutes until they float to the top of the boiling water. They should be tender but not mushy for the best texture in your Cheesy Beef Enchilada Tortellini.

What’s the best way to store leftovers?
Absolutely! Store any leftovers in an airtight container in the fridge for up to 3 days. Make sure to let the dish cool completely before sealing it to prevent moisture buildup, which can spoil the taste.

Can I freeze Cheesy Beef Enchilada Tortellini?
Yes, you can! To freeze, place the dish in a freezer-safe container, ensuring it’s tightly sealed to prevent freezer burn. It can be frozen for up to 2 months. When you’re ready to enjoy it again, thaw it overnight in the fridge and reheat while adding a splash of milk for creaminess.

What should I do if the dish seems too dry after reheating?
If your Cheesy Beef Enchilada Tortellini seems a bit dry when reheating, simply add a splash of milk or a dollop of sour cream during the process. Stir it well to incorporate and restore the creamy texture that makes this dish so delightful.

Can I use different types of tortellini or proteins?
Very much! You can easily swap the cheese tortellini for others like mushroom or spinach flavors. Similarly, ground turkey or chicken can be great substitutions for a lighter meal. Feel free to experiment and find your family’s favorite variation!

Are there any dietary considerations I should keep in mind?
Definitely! If dining with children or individuals with food allergies, check the enchilada sauce for spices that might trigger sensitivities. Additionally, you can use dairy-free cheese and sour cream alternatives to cater to lactose intolerance without sacrificing flavor in your Cheesy Beef Enchilada Tortellini.

Beef Enchiladas Tortellini

Cheesy Beef Enchiladas Tortellini - Dinner Made Easy

Delight in this Cheesy Beef Enchiladas Tortellini, a one-pan fusion meal bursting with flavor, perfect for quick weeknight dinners.
Prep Time 10 minutes
Cook Time 20 minutes
Total Time 30 minutes
Servings: 4 servings
Course: Dinner
Cuisine: Italian, Mexican
Calories: 400

Ingredients
  

For the Tortellini Dish
  • 1 package Cheese Tortellini fresh or frozen
  • 1 pound Ground Beef substitute with ground turkey for a lighter twist
  • 1 medium Onion finely chopped
  • 2 cloves Garlic minced
  • 1 tablespoon Chili Powder adjust according to heat preference
  • 1 teaspoon Ground Cumin
  • 1 teaspoon Paprika smoked paprika can deepen the flavor
  • 1 teaspoon Salt
  • 1 teaspoon Black Pepper
  • 1 cup Enchilada Sauce red or green
  • 1 cup Mozzarella Cheese shredded
  • 1 cup Cheddar Cheese shredded
  • 1/2 cup Sour Cream optional for a lighter dish
  • 1/4 cup Fresh Cilantro for garnish

Equipment

  • Large pot
  • Non-stick skillet

Method
 

Step-by-Step Instructions
  1. Cook the cheese tortellini according to package directions in a large pot of boiling salted water for 3-5 minutes until they float. Drain and set aside.
  2. In a large non-stick skillet, heat a drizzle of oil over medium heat, then add the ground beef. Cook for 5-7 minutes until fully browned. Drain excess fat.
  3. Add finely chopped onion and minced garlic to the skillet and sauté for 2-3 minutes until onion is softened and translucent.
  4. Sprinkle in chili powder, ground cumin, paprika, salt, and black pepper, stirring well. Toast the spices for 1 minute.
  5. Pour in enchilada sauce and stir to coat the beef mixture. Allow to simmer for 5 minutes.
  6. Carefully add the cooked tortellini and toss in the beef and sauce mixture. Cook for an additional 2 minutes over low heat.
  7. Sprinkle shredded mozzarella and cheddar cheeses over the tortellini. Cover and cook on low for 2-3 minutes until cheese melts.
  8. Remove from heat, stir in sour cream and garnish with fresh cilantro. Serve warm.

Nutrition

Serving: 1servingCalories: 400kcalCarbohydrates: 30gProtein: 25gFat: 20gSaturated Fat: 10gPolyunsaturated Fat: 2gMonounsaturated Fat: 5gCholesterol: 70mgSodium: 800mgPotassium: 600mgFiber: 3gSugar: 2gVitamin A: 500IUVitamin C: 5mgCalcium: 250mgIron: 3mg

Notes

Non-stick skillets are recommended. Adjust spice levels to taste. Always finish with fresh cilantro for a bright flavor.

Tried this recipe?

Let us know how it was!

Creamy Bowtie Pasta with Ground Beef for Cozy Family Nights

As I stood in my kitchen, the warm scent of sautéing onions filling the air, I couldn’t help but feel a surge of excitement for a dish that never fails to bring the family together: Creamy Beef and Bowtie Pasta. This comfort food classic combines tender bowtie pasta and savory ground beef enveloped in a rich, velvety cheese sauce, creating a meal that’s both comforting and indulgent. Not only is it absolutely delicious, but it’s also a quick weeknight dinner solution—ideal for those busy evenings when we crave something satisfying yet simple. Imagine gathering around the table, everyone enjoying a hearty dish that’s sure to please even the fussiest eaters. Are you ready to whip up this creamy delight that’s bound to become a favorite in your home?

Why Is This Pasta Recipe a Must-Try?

Creamy goodness awaits you in this delightful dish that seamlessly combines flavors. Quick preparation makes it perfect for those hectic weeknights when cooking feels daunting. Comforting familiarity brings your family together at the dinner table, while cheesy decadence satisfies even the pickiest eaters. For an added twist, try using ground turkey or chicken to lighten things up, or throw in some veggies like spinach for a nutritious boost. You’ll find that no matter how busy life gets, this Creamy Beef and Bowtie Pasta delivers warmth and happiness in every bite!

Bowtie Pasta with Ground Beef Ingredients

• Let’s gather the essentials to create this creamy, comforting dish!

For the Pasta

  • 12 oz uncooked bowtie pasta – Serves as the delightful base; rotini or penne can be swapped for variety.

For the Beef Mixture

  • 1 lb ground beef – Provides hearty protein; increase to 1.5 pounds for a meatier experience.
  • 1/2 onion, diced – Adds sweetness and depth; yellow or white onions are excellent choices.
  • 4 garlic cloves, minced – Enhances flavor with a savory punch; fresh garlic is a must for the best taste.
  • 2 tsp ground paprika – Gives a warm, smoky undertone; smoked paprika can elevate the flavor even more.
  • 1 tsp Italian seasoning – Blends herbs to create aromatic flavor; replace with your favorite individual herbs if desired.
  • 2 tsp Worcestershire sauce – Adds umami complexity; soy sauce can be an easy substitute.

For the Creamy Sauce

  • 4 oz softened cream cheese – Gives richness and creaminess; use Neufchâtel for a lower-fat option.
  • 1 cup beef broth – Enriches the sauce with flavor; vegetable broth works fine for a lighter version.
  • 1 cup heavy cream – Contributes to that signature creamy texture; half-and-half is a lighter alternative.
  • 1 cup shredded cheddar cheese – Melts beautifully into the sauce for flavor; feel free to substitute a sharp cheese you love.
  • 1/2 cup grated Parmesan cheese – Adds a nutty, savory note; Pecorino Romano is another delicious option.
  • Salt and black pepper to taste – Season to bring out all the flavors to your liking.

Enjoy the process of making this flavorful Bowtie Pasta with Ground Beef and gather your family for a cozy dinner that’s sure to be a hit!

Step‑by‑Step Instructions for Creamy Beef and Bowtie Pasta

Step 1: Cook the Pasta
Begin by bringing a large pot of salted water to a rolling boil. Add 12 oz of uncooked bowtie pasta and cook according to package instructions, typically 10–12 minutes, until al dente. Stir occasionally to prevent sticking. Once cooked, reserve 1 cup of pasta water, drain the remaining water, and set the pasta aside in a large bowl.

Step 2: Brown the Beef
In a large skillet over medium heat, add 1 lb of ground beef. Cook for about 6-8 minutes, stirring frequently, until the beef is browned and crumbled. Once browned, drain any excess fat from the skillet. The ground beef should be well-cooked and slightly crispy, imparting a savory flavor essential for your Creamy Beef and Bowtie Pasta.

Step 3: Sauté Onions and Garlic
To the skillet with the ground beef, add 1/2 diced onion and sauté for 2 minutes until the onion becomes translucent. Then, add in 4 minced garlic cloves, cooking for an additional minute until fragrant. The mixture should now be aromatic and the onions tender, serving as a flavorful base for your dish.

Step 4: Season the Mixture
Stir in 2 tsp of ground paprika, 1 tsp of Italian seasoning, and 2 tsp of Worcestershire sauce. Continue to cook for another minute to allow the spices to bloom and enhance the flavor profile. The mixture should be well combined and aromatic, setting the stage for the creamy coating of the bowtie pasta.

Step 5: Incorporate the Cream Cheese
Lower the heat and add 4 oz of softened cream cheese to the skillet. Stir continuously until the cream cheese is fully blended into the beef mixture. This will give your Creamy Beef and Bowtie Pasta a rich, velvety texture as the cream cheese melts and combines with the spices and meat.

Step 6: Create the Sauce
Pour in 1 cup of beef broth and 1 cup of heavy cream, stirring to combine. Gradually add 1 cup of shredded cheddar cheese and 1/2 cup of grated Parmesan cheese, stirring constantly until the cheeses are melted and the sauce is smooth. The sauce should be creamy and luxurious at this point, enveloping the beef beautifully.

Step 7: Combine the Pasta and Sauce
Add the reserved bowtie pasta to the sauce mixture in the skillet. Gently fold the pasta into the creamy sauce, simmering for approximately 2-3 minutes. If the sauce is too thick, gradually stir in reserved pasta water until you reach the desired consistency. The creamy cheese sauce should coat every piece of pasta perfectly, making it irresistible.

Step 8: Serve and Enjoy
Remove the skillet from heat and serve the Creamy Beef and Bowtie Pasta warm. If desired, top with additional shredded cheese or a sprinkle of parsley for an extra touch. This comforting dish is ready to be enjoyed by family and friends, promising a cozy meal filled with rich flavors.

Bowtie Pasta with Ground Beef Variations

Feel free to get creative and personalize your dish with these delightful variations!

  • Lean Turkey: Substitute ground beef with ground turkey or chicken for a lighter yet equally satisfying meal. The flavor remains delicious, while the lower fat content is perfect for health-conscious family members.

  • Veggie-Packed: Add in chopped spinach, bell peppers, or mushrooms for a nutritious boost. These veggies complement the creamy sauce beautifully and bring vibrant colors to your bowl.

  • Pasta Shape Swap: Choose different pasta shapes like fusilli or elbow macaroni for a fun twist. Each type adds its unique texture, making every bite delightful and exciting.

  • Spice It Up: For a spicy kick, toss in a pinch of red pepper flakes or a dash of hot sauce. This little addition can elevate the dish, making it a favorite for those who enjoy a bit of heat.

  • Cheese Lovers: Blend in a variety of cheeses, such as mozzarella or gouda, for an even cheesier experience. The more cheese, the more richness you’ll enjoy!

  • Rich Flavor Boost: Enhance the sauce with a splash of white wine or a spoonful of mustard for complexity. These flavors add depth that will impress your family and friends.

  • Iron-Rich Nutrition: Consider using lentils or chickpeas as a protein-packed vegetarian option. These legumes work well with the creamy sauce while providing a hearty texture.

  • Creamy Alternative: Swap heavy cream for a combination of Greek yogurt and milk to lighten up the dish while still keeping it creamy. It’s a fantastic way to reduce calories but maintain the lusciousness of the sauce.

For more comforting pasta inspiration, check out my Korean Ground Beef and Sticky Beef Noodles recipes! Enjoy crafting your perfect bowl of Creamy Beef and Bowtie Pasta!

Expert Tips for Creamy Beef and Bowtie Pasta

  • Softened Cream Cheese: Make sure your cream cheese is at room temperature for easy blending with the beef and creating a smooth, creamy texture.

  • Reserve Pasta Water: Don’t forget to save a cup of pasta water before draining—it’s essential for adjusting the sauce consistency and making it extra creamy.

  • Simmer for Flavor: Allow the beef and cheese mixture to simmer a bit longer before adding the pasta, enhancing the flavors and ensuring a rich taste that your family will love.

  • Avoid Overcooking: Be careful not to overcook the bowtie pasta; you want it al dente to hold up nicely in the creamy sauce for the best texture.

  • Experiment with Cheese: Feel free to try different cheese combinations for your bowtie pasta with ground beef; adding a mix of cheeses can bring out new and exciting flavors!

Make Ahead Options

These Creamy Beef and Bowtie Pasta are perfect for busy home cooks looking to save time during hectic weeknights! You can prepare the beef and cheese sauce up to 3 days in advance; simply store it in an airtight container in the refrigerator to maintain its rich flavor and creamy texture. Cook the pasta on the day you plan to serve, as fresh pasta retains better texture. When you’re ready to enjoy, gently reheat the sauce on the stovetop over low heat, adding a splash of milk or broth to adjust the consistency if needed. Then, simply combine with freshly cooked pasta, and you’ll have a comforting dish that’s just as delicious as if made fresh!

How to Store and Freeze Creamy Beef and Bowtie Pasta

Fridge: Store leftover Creamy Beef and Bowtie Pasta in an airtight container for up to 3-4 days. Allow it to cool before sealing to maintain texture.

Freezer: For longer storage, freeze the pasta in a freezer-safe container for up to 3 months. Make sure to leave some space for expansion, as the sauce may thicken.

Reheating: When ready to enjoy, thaw in the refrigerator overnight, then reheat on the stovetop or microwave. Add a splash of milk or beef broth to restore creaminess while reheating.

Tip: If freezing, consider portioning the pasta into single servings for quick dinners on busy nights—you’ll be grateful for this comforting meal!

What to Serve with Creamy Beef and Bowtie Pasta

Elevate your family dinner night with flavorful sides and delightful drinks that perfectly accompany this creamy pasta dish.

  • Garlic Bread: Melted butter and garlic bread create a crispy contrast that complements the creaminess of the pasta. It’s perfect for sopping up any leftover sauce.

  • Fresh Green Salad: A crisp salad with vinaigrette adds a light, refreshing note, balancing the richness of the creamy beef and bowtie pasta. Consider including cherry tomatoes and cucumbers for color and crunch.

  • Roasted Vegetables: Tender roasted broccoli or asparagus bring a lovely earthy flavor, adding texture and nutrients that enhance the meal’s overall healthfulness.

  • Macaroni and Cheese: For an indulgent twist, serve a small side of classic mac and cheese. The cheesy comfort complements the flavors already present and will delight cheese lovers.

  • Sparkling Lemonade: This bubbly drink offers a refreshing citrus zing that cleanses the palate, making it a perfect pairing with the creamy dish.

  • Cheesecake: Finish off this warm and hearty meal with a slice of creamy cheesecake. Its smooth texture echoes the pasta’s richness and provides a satisfying sweet end to the dinner.

Creamy Beef and Bowtie Pasta Recipe FAQs

What type of pasta should I use for this recipe?
Absolutely! Bowtie pasta is the star here, but you can easily swap it out for rotini or penne if that’s what you have on hand. Just ensure that you adjust the cooking time according to the pasta shape you choose.

Can I use different types of meat in this recipe?
Very! For a lighter alternative, ground turkey or chicken can be a great substitution for the ground beef. This not only reduces the fat content but still provides that hearty, comforting texture. If going for turkey, I recommend using a little olive oil to help with moisture, as turkey can be drier.

How should I store leftovers?
You can store leftover Creamy Beef and Bowtie Pasta in an airtight container in the refrigerator for 3-4 days. Just let it cool completely before sealing it to keep that creamy texture intact while stored.

Can I freeze Creamy Beef and Bowtie Pasta?
Definitely! To freeze, place portions of the pasta in freezer-safe containers, leaving some space for expansion (about an inch). It’s best to freeze it without adding the cream cheese if you plan to freeze leftovers; it helps maintain the sauce’s quality. The pasta will stay good for up to 3 months. When ready to enjoy, thaw overnight in the fridge and then reheat with a splash of milk or broth to bring back the creaminess!

What should I do if my sauce is too thick?
If your sauce ends up too thick while cooking, don’t worry! Gradually stir in a little of the reserved pasta water while cooking to achieve your desired consistency. The starch in the water helps create a creamier sauce that clings nicely to the pasta.

Are there any dietary considerations I should be aware of?
Certainly! If you’re preparing this dish for someone with allergies, note that it contains dairy and beef. For a dairy-free version, you can explore non-dairy cream cheese and cheeses. Just ensure to check all labels if dietary restrictions apply, especially for any pre-prepared ingredients like sauces or broths.

Bowtie Pasta with Ground Beef

Creamy Bowtie Pasta with Ground Beef for Cozy Family Nights

This creamy bowtie pasta with ground beef is a comforting dish that brings the family together for cozy nights.
Prep Time 15 minutes
Cook Time 30 minutes
Total Time 45 minutes
Servings: 4 servings
Course: Pasta
Cuisine: Italian
Calories: 650

Ingredients
  

For the Pasta
  • 12 oz uncooked bowtie pasta or substitute with rotini or penne
For the Beef Mixture
  • 1 lb ground beef increase to 1.5 pounds for a meatier experience
  • 1/2 onion diced onion yellow or white onions are excellent choices
  • 4 cloves minced garlic fresh garlic is a must for the best taste
  • 2 tsp ground paprika smoked paprika can elevate the flavor
  • 1 tsp Italian seasoning replace with your favorite individual herbs if desired
  • 2 tsp Worcestershire sauce soy sauce can be an easy substitute
For the Creamy Sauce
  • 4 oz softened cream cheese or use Neufchâtel for a lower-fat option
  • 1 cup beef broth vegetable broth works fine for a lighter version
  • 1 cup heavy cream or half-and-half as a lighter alternative
  • 1 cup shredded cheddar cheese feel free to substitute a sharp cheese you love
  • 1/2 cup grated Parmesan cheese Pecorino Romano is another delicious option
  • Salt and black pepper to taste

Equipment

  • Large pot
  • Large skillet
  • Measuring cups
  • Measuring spoons
  • Wooden spoon

Method
 

Step-by-Step Instructions
  1. Begin by bringing a large pot of salted water to a rolling boil. Add 12 oz of uncooked bowtie pasta and cook according to package instructions, typically 10–12 minutes, until al dente. Stir occasionally to prevent sticking. Once cooked, reserve 1 cup of pasta water, drain the remaining water, and set the pasta aside in a large bowl.
  2. In a large skillet over medium heat, add 1 lb of ground beef. Cook for about 6-8 minutes, stirring frequently, until the beef is browned and crumbled. Once browned, drain any excess fat from the skillet.
  3. To the skillet with the ground beef, add 1/2 diced onion and sauté for 2 minutes until translucent. Then, add in 4 minced garlic cloves, cooking for an additional minute until fragrant.
  4. Stir in 2 tsp of ground paprika, 1 tsp of Italian seasoning, and 2 tsp of Worcestershire sauce. Continue to cook for another minute to allow the spices to bloom.
  5. Lower the heat and add 4 oz of softened cream cheese to the skillet. Stir continuously until fully blended into the beef mixture.
  6. Pour in 1 cup of beef broth and 1 cup of heavy cream, stirring to combine. Gradually add 1 cup of shredded cheddar cheese and 1/2 cup of grated Parmesan cheese, stirring constantly until melted and smooth.
  7. Add the reserved bowtie pasta to the sauce mixture in the skillet. Gently fold the pasta into the creamy sauce, simmering for approximately 2-3 minutes. If the sauce is too thick, stir in reserved pasta water until desired consistency.
  8. Remove from heat and serve warm. Optionally, top with additional shredded cheese or a sprinkle of parsley.

Nutrition

Serving: 1servingCalories: 650kcalCarbohydrates: 45gProtein: 34gFat: 36gSaturated Fat: 20gPolyunsaturated Fat: 1gMonounsaturated Fat: 5gTrans Fat: 1gCholesterol: 135mgSodium: 750mgPotassium: 600mgFiber: 3gSugar: 3gVitamin A: 800IUVitamin C: 2mgCalcium: 400mgIron: 3mg

Notes

Make sure your cream cheese is at room temperature for easy blending. Reserve pasta water for sauce consistency.

Tried this recipe?

Let us know how it was!

Creamy Garlic Herb Potato Soup for Cozy Comfort Nights

As the wind howls outside and leaves swirl in a dance of autumnal colors, I often find myself craving the comforting embrace of a warm bowl of soup. This Hearty Cheddar Garlic Herb Potato Soup is my go-to remedy for those chilly evenings—it envelops you in creamy goodness while being surprisingly easy to whip up on the stovetop or in a slow cooker. What I love most about this recipe is its versatility: whether you’re in the mood to enjoy a cozy night at home or need a crowd-pleasing dish for a gathering, this soup fits the bill perfectly. Plus, with a dairy-free option, it welcomes everyone to the table. Ready to dive into this deliciously satisfying bowl of warmth?

Why is Garlic Herb Potato Soup a Must-Try?

Comforting Flavor: Each spoonful delivers a rich, creamy taste infused with garlic and aromatic herbs that warms the soul, perfect for any chilly evening.

Versatile Preparation: Easily custom-made in a slow cooker or on the stovetop, this soup adapts seamlessly to your schedule and cravings.

Dairy-Free Option: With simple substitutions, such as coconut cream and nutritional yeast, everyone can savor this dish, catering to differing dietary needs.

Crowd-Pleasing Delight: It’s sure to impress your guests, making it a fantastic choice for gatherings. Pair it with a side of Cheesy Garlic Chicken for a complete meal that’s sure to impress!

Garlic Herb Potato Soup Ingredients

For the Soup Base

  • Russet Potatoes – Provides that creamy base; substitute with Yukon potatoes for a sweeter flavor.
  • Extra Virgin Olive Oil – Adds healthy fat and enhances flavor; feel free to use avocado oil for a lighter twist.
  • Unsalted Butter – Enriches the soup; switch to vegan butter for a dairy-free alternative.
  • Red Onion – Offers sweetness and depth; yellow onion works wonderfully if you’re in a pinch.
  • Garlic Cloves – Infuses aromatic flavor; adjust the number based on your garlic love!
  • On Everything All-Purpose Blend – A spice mix that elevates the flavor; can be made with common spices you have on hand.
  • Smoked Paprika – Adds a warm, smoky touch; it’s essential for depth in this Garlic Herb Potato Soup.

For the Broth

  • White Cooking Wine – Introduces acidity; feel free to substitute with additional vegetable stock if preferred.
  • Organic Vegetable Stock – Serves as the soup’s flavorful base; ensure it’s gluten-free for those with dietary restrictions.

For the Creaminess

  • Organic Heavy Cream – Contributes to the soup’s rich, creamy texture; substitute with full-fat coconut cream for a vegan version.
  • Sharp Cheddar Cheese – Provides robustness and flavor; nutritional yeast is a perfect vegan alternative while adding a cheesy essence.

For the Extras

  • Kale (optional) – Adds vibrant color and nutrition; skip it if you’re not a fan, but it’s a nutritious bonus!

This simple yet gratifying Garlic Herb Potato Soup guarantees warmth on those chilly nights, inviting you to savor every comforting bite.

Step‑by‑Step Instructions for Creamy Garlic Herb Potato Soup

Step 1: Sauté Aromatics
In a medium Dutch oven, heat 1 tablespoon of extra virgin olive oil and 1 tablespoon of unsalted butter over medium-high heat. Once the butter has melted and the mixture is shimmering, add the chopped red onion and minced garlic. Sauté for 1-2 minutes until the onion is translucent and fragrant, transforming the pot into an appetizing foundation for your Garlic Herb Potato Soup.

Step 2: Add Spices
Stir in 1 teaspoon of smoked paprika and 2 teaspoons of On Everything All-Purpose Blend into the sautéed onions and garlic. Allow the spices to bloom for about 30 seconds, which will release their aromas and deepen the flavors. The intoxicating scent will enhance the base of your Creamy Garlic Herb Potato Soup, preparing your taste buds for what’s to come.

Step 3: Combine Potatoes and Broth
Next, add 4-5 cubed medium russet potatoes to the pot along with 4 cups of organic vegetable stock. Increase the heat to high and bring the mixture to a rapid boil for 1-2 minutes. Once boiling, reduce the heat to low and let the pot simmer uncovered for 15-20 minutes. Check the potatoes for tenderness; they should be easily pierced with a fork, ensuring a creamy texture in your soup.

Step 4: Thicken the Soup (Optional)
If you prefer a thicker Garlic Herb Potato Soup, prepare a thickening agent by mixing a tablespoon of flour with a couple of tablespoons of water until smooth. Gradually stir this mixture into the simmering soup and let it cook for an additional 5 minutes, allowing the flavors to meld together while achieving your desired consistency.

Step 5: Incorporate Cream and Cheese
Stir in 1 cup of organic heavy cream, 2 tablespoons of white cooking wine, and 1-2 cups of freshly grated sharp cheddar cheese into the soup. Mix until the cheese has melted seamlessly into the creamy concoction. Adding these ingredients will elevate your Garlic Herb Potato Soup to new levels of richness and deliciousness, making every spoonful a delight.

Step 6: Add Kale (Optional)
For an extra dose of nutrition and color, gently fold in 1 cup of chopped kale if you’re using it. Cook for about 2-3 minutes, just until the kale is wilted and vibrant, enhancing not only the texture but also the visual appeal of your creamy creation. This added element brings a lovely freshness to your Garlic Herb Potato Soup.

Step 7: Serve and Garnish
Remove the pot from heat and let it sit for a minute. Ladle the steaming soup into bowls and garnish with fresh parsley or green onions for a burst of color and flavor. Pair your Creamy Garlic Herb Potato Soup with a slice of crusty bread or a grilled cheese sandwich to round out this comforting meal.

Helpful Tricks for Garlic Herb Potato Soup

  • Fresh Cheese Matters: Use freshly grated sharp cheddar for a smooth melting experience. Pre-shredded cheeses can lead to clumping and less creaminess in your Garlic Herb Potato Soup.

  • Proper Sautéing: Make sure to sauté the onion and garlic until they’re translucent; this step brings out their flavors and forms a robust base for your soup.

  • Thickening Tip: If you desire a thicker texture, mix flour with water to create a smooth paste before adding it to the simmering soup. This prevents lumps when thickening your Garlic Herb Potato Soup.

  • Slow Cooker Savvy: For a hassle-free option, sauté the aromatics first, then transfer everything (except cream and cheese) into the slow cooker and cook on low for 6-8 hours.

  • Leftover Love: Store any leftover soup in an airtight container for 2-3 days in the refrigerator or freeze for up to 4-6 months. Just thaw before reheating for comfort food anytime!

How to Store and Freeze Garlic Herb Potato Soup

Fridge: Store your Garlic Herb Potato Soup in an airtight container for up to 3 days. Let the soup cool completely before sealing to maintain freshness.

Freezer: For long-term storage, freeze the soup in freezer-safe containers for up to 4-6 months. Be sure to leave some space for expansion as it freezes.

Thawing: When ready to enjoy, thaw the soup in the refrigerator overnight. For a quick meal, you can also reheat from frozen on the stovetop or in the microwave, stirring occasionally.

Reheating: Gently reheat on the stove over low heat, adding a splash of vegetable stock or water if the soup is too thick. Enjoy the comforting flavors once again!

Variations & Substitutions for Garlic Herb Potato Soup

Invite your culinary creativity to shine by customizing this comforting soup to suit your tastes!

  • Vegan Option: Substitute heavy cream with full-fat coconut cream and use nutritional yeast instead of cheddar cheese for a delicious plant-based version.

  • Spicy Kick: If you love heat, add red pepper flakes or a splash of your favorite hot sauce during cooking for a zesty surprise.

  • Sweet Potato Twist: Swap out russet potatoes for sweet potatoes or butternut squash; they’ll give a subtle sweetness that beautifully complements the garlic and herbs.

  • Extra Veggies: Add in chopped carrots or celery for an added crunch and nutritional boost, making your soup even heartier and more vibrant.

  • Creamy Texture Variation: For a silkier texture, blend half of the soup until smooth before mixing it back with the remaining chunks. This creates a comforting balance between creamy and chunky.

  • Cheesy Goodness: Try adding a different cheese, like gouda or pepper jack, to give your Garlic Herb Potato Soup a unique flavor profile—perfect for cheese lovers!

  • Crispy Topping: For added texture, top your soup with crispy bacon or homemade croutons. This will provide a satisfying crunch and elevate each spoonful effortlessly.

  • Herb Infusion: Experiment with fresh herbs like thyme or rosemary in place of the all-purpose blend, bringing a fragrant twist that enhances the garlic flavor beautifully.

Feel free to pair this cozy soup with some delicious sides like Hamburger Potato Soup or Comfort Garlic Potatoes for a complete meal experience that warms the heart and soul!

Make Ahead Options

These Creamy Garlic Herb Potato Soup preparations are perfect for meal prep enthusiasts! You can chop the onions, mince the garlic, and cube the potatoes up to 24 hours in advance. Simply store them separately in airtight containers in the refrigerator to maintain freshness. Additionally, you can prepare the soup base (steps 1-3) and refrigerate it for up to 3 days. When you’re ready to enjoy your soup, gently reheat it on the stove, then stir in the cream, wine, and cheese (steps 5-7). This way, you’ll enjoy a rich, comforting meal while saving precious time on busy weeknights!

What to Serve with Hearty Cheddar Garlic Herb Potato Soup

Cozying up with a warm bowl of soup is just the beginning—let’s complete your meal with enticing sides and sips that elevate every bite.

  • Crusty Sour Dough Bread: Perfect for dipping, this bread adds a delightful crunch that complements the creamy texture of the soup. Slather it with butter for an extra treat.

  • Grilled Cheese Sandwich: A classic pairing! The melty, gooey cheese perfectly balances the rich flavors of the soup. It’s a nostalgia-filled match made in comfort food heaven.

  • Roasted Garlic and Herb Flatbread: Enhance the garlicky goodness of the soup with this flavorful flatbread. The herbs harmonize beautifully, creating a cohesive dining experience.

  • Simple Side Salad: A fresh mixed greens salad with a light vinaigrette adds a refreshing crunch, cutting through the soup’s creaminess. Toss in some cherry tomatoes and cucumbers for a burst of color.

  • Crispy Brussels Sprouts: Roasted until caramelized, these little gems offer a smoky flavor and delightful texture, providing contrast to your creamy Garlic Herb Potato Soup.

  • Apple Cider: The sweet and tart notes of apple cider create a delightful beverage choice to sip alongside your meal. Its refreshing taste pairs beautifully with the richness of the soup.

  • Chocolate Chip Cookies: End your meal on a sweet note! These soft, gooey cookies provide a warm, comforting finish and are sure to please everyone at the table.

  • Iced Tea with Lemon: A refreshing beverage option that offers a cooling contrast to the warm soup, making each bite even more enjoyable as the flavors mingle.

Creamy Garlic Herb Potato Soup Recipe FAQs

How do I choose the best potatoes for the soup?
Absolutely! For this Garlic Herb Potato Soup, medium organic russet potatoes are ideal because they create that creamy texture when cooked down. However, if you’re looking for a sweeter flavor, you can always substitute them with Yukon potatoes. Just choose ones that feel firm with no dark spots or blemishes!

What’s the best way to store the leftovers?
Very easy! Store any leftover Garlic Herb Potato Soup in an airtight container in the refrigerator for up to 3 days. To keep it at its best, allow the soup to cool completely before sealing it up. For an even longer storage option, you can freeze it for up to 4-6 months!

Can I freeze Garlic Herb Potato Soup?
Absolutely! To freeze, ladle the cooled soup into freezer-safe containers, leaving about an inch of space at the top for expansion. Seal tightly and label with the date. When you’re ready to enjoy it, simply thaw it in the refrigerator overnight. You can also reheat directly from frozen on the stove over low heat—just stir occasionally!

What if my soup turns out too thick?
No worries! If you find your Garlic Herb Potato Soup has become too thick after reheating, just stir in a splash of vegetable stock or water to achieve your desired consistency. This way, every bite remains creamy and satisfying!

Is there a vegan option for this soup?
Yes, indeed! To make a vegan version of the Garlic Herb Potato Soup, simply substitute the heavy cream with full-fat coconut cream and replace sharp cheddar cheese with nutritional yeast or dairy-free cheese. This keeps the rich flavors intact while catering to plant-based eaters.

Can I add extra vegetables to the soup?
The more, the merrier! Feel free to incorporate additional veggies like carrots, celery, or even spinach for added nutrition and flavor. You can also swap out the kale if you’re not a fan or if you want to keep it lighter. Just remember to adjust the broth levels accordingly!

Garlic Herb Potato Soup

Creamy Garlic Herb Potato Soup for Cozy Comfort Nights

This comforting Garlic Herb Potato Soup envelops you in creamy goodness while being surprisingly easy to prepare, perfect for chilly evenings.
Prep Time 15 minutes
Cook Time 40 minutes
Thickening Time 5 minutes
Total Time 1 hour
Servings: 4 bowls
Course: Soup
Cuisine: American
Calories: 400

Ingredients
  

For the Soup Base
  • 4-5 medium Russet Potatoes Substitute with Yukon potatoes for a sweeter flavor.
  • 1 tablespoon Extra Virgin Olive Oil Feel free to use avocado oil for a lighter twist.
  • 1 tablespoon Unsalted Butter Switch to vegan butter for a dairy-free alternative.
  • 1 medium Red Onion Yellow onion works well if in a pinch.
  • 4 cloves Garlic Adjust based on your garlic love!
  • 2 teaspoons On Everything All-Purpose Blend Can be made with common spices.
  • 1 teaspoon Smoked Paprika Essential for depth in this soup.
For the Broth
  • 1 cup White Cooking Wine Substitute with additional vegetable stock if preferred.
  • 4 cups Organic Vegetable Stock Ensure it’s gluten-free for dietary restrictions.
For the Creaminess
  • 1 cup Organic Heavy Cream Substitute with full-fat coconut cream for vegan.
  • 2 cups Sharp Cheddar Cheese Nutritional yeast is a vegan alternative.
For the Extras
  • 1 cup Kale Optional; skip if you’re not a fan.

Equipment

  • Dutch oven
  • Stirring spoon
  • Measuring cups
  • Measuring spoons
  • Knife
  • Cutting board

Method
 

Step-by-Step Instructions
  1. In a medium Dutch oven, heat olive oil and butter over medium-high heat. Add chopped red onion and minced garlic. Sauté for 1-2 minutes until translucent.
  2. Stir in smoked paprika and On Everything blend. Allow spices to bloom for about 30 seconds.
  3. Add cubed potatoes and vegetable stock. Bring to a boil for 1-2 minutes, then reduce heat and simmer uncovered for 15-20 minutes until potatoes are tender.
  4. For a thicker soup, mix a tablespoon of flour with water. Stir into soup and cook for an additional 5 minutes.
  5. Stir in heavy cream, cooking wine, and grated cheddar cheese until melted.
  6. If using, fold in chopped kale and cook for 2-3 minutes until wilted.
  7. Remove from heat, let sit, serve in bowls, and garnish with parsley or green onions.

Nutrition

Serving: 1bowlCalories: 400kcalCarbohydrates: 30gProtein: 8gFat: 28gSaturated Fat: 15gPolyunsaturated Fat: 2gMonounsaturated Fat: 10gCholesterol: 60mgSodium: 800mgPotassium: 750mgFiber: 4gSugar: 2gVitamin A: 1000IUVitamin C: 20mgCalcium: 200mgIron: 2mg

Notes

Use freshly grated cheese for best melting. Proper sautéing enhances flavors. For a slow cooker option, sauté aromatics first then transfer everything but cream and cheese.

Tried this recipe?

Let us know how it was!

Creamy Pumpkin Chili: A Heartwarming Fall Comfort Dish

The aroma of autumn feels alive in my kitchen when I whip up a comforting bowl of Creamy Pumpkin Chicken Chili. This delightful dish marries the rich flavors of pumpkin with tender chicken and zesty peppers, offering a warm embrace on chilly evenings. What I adore about this recipe is its incredible versatility; it can be made in under 30 minutes, whether you prefer the stovetop method or the speedy Instant Pot. Plus, it’s a mindful choice for those following Paleo or Whole30 diets, ensuring everyone at the table is satisfied. It’s not just a meal, but a cozy invitation to savor the season together. Curious about how to bring this warm delight to your own table? Let’s dive into the recipe!

Why is this chili a must-try?

Comforting warmth: With its rich, creamy texture, this chili wraps you in the coziness of fall with every spoonful.

Quick and Easy: Whip it up in under 30 minutes, effortlessly adjusting for busy weeknights or unexpected guests.

Versatile options: Easily customize this dish for different diets; whether you’re a fan of One Pan Chili or looking for gluten-free comfort food, this recipe welcomes adaptations.

Healthy indulgence: Packed with nutrient-rich pumpkin and lean protein, it’s both satisfying and good for you!

Crowd pleaser: Serve it at your next gathering and watch as friends and family fall in love with its hearty flavors — truly a shared delight!

Creamy Pumpkin Chicken Chili Ingredients

Get ready to gather all the goodness for your Creamy Pumpkin Chili!

For the Base

  • Avocado Oil or Olive Oil – Cooking fat for sautéing; feel free to substitute with any neutral oil you have on hand.
  • Chicken Breast (1.5 lbs) or Cooked Shredded Chicken (3 cups) – The hearty main protein; rotisserie chicken is a great time saver.
  • Chopped Onion (1 medium) – Adds flavor and sweetness; yellow or white onions work wonderfully as substitutes.
  • Jalapeño Peppers (2, chopped, seeds removed) – Bring the spice; swap in green bell peppers if you prefer less heat.
  • Poblano Peppers (2, chopped) – Elevate the chili flavor; add more jalapeños for extra kick if desired.
  • Diced Tomatoes (1 can, 15 oz or 4 medium chopped) – Provides body and moisture; fresh tomatoes are a lovely alternative.
  • Pumpkin Puree (1 can, 15 oz) – The star of the show for that creamy texture; best not to substitute here.
  • Diced Green Chili Peppers (2 small cans) – Add some zing; adjust the quantity to control the heat level.
  • Chicken or Vegetable Broth (1 cup) – The base of your chili; opt for low-sodium varieties for a healthier dish.

For the Spice Mix

  • Chili Powder (2 tbsp) – Delivers depth and warmth; use cayenne if you want to turn up the heat.
  • Cumin (2 tsp) – Adds earthy undertones that pair beautifully with pumpkin; no substitute needed here.
  • Cayenne Pepper (1/2 tsp) – Adjust according to your spice tolerance; it brings that extra warmth.
  • Sea Salt (1 tsp) – Enhances all the flavors; you can replace with kosher salt if preferred.

For the Creaminess

  • Full Fat Coconut Milk (1 cup) or Cream Cheese (8 oz) – Offers that luscious, creamy finish; coconut milk is perfect for a dairy-free option.

There you have it! Everything you need to create a warm, inviting bowl of Creamy Pumpkin Chicken Chili that will make your kitchen a comforting haven this fall.

Step‑by‑Step Instructions for Creamy Pumpkin Chicken Chili

Step 1: Heat the Oil
In a large pot, heat 2 tablespoons of avocado or olive oil over medium heat. Allow the oil to shimmer for about 1-2 minutes, signaling it’s hot enough. This will be the base for your Creamy Pumpkin Chicken Chili, providing flavor and a great starting point for the sauté.

Step 2: Sauté the Onions
Add one chopped medium onion to the pot and sauté for 3-4 minutes until it becomes translucent and fragrant. Stir it occasionally to prevent sticking, and watch as the onions soften and turn golden, laying a delicious flavor foundation for your chili.

Step 3: Cook the Chicken
Now, stir in 1.5 lbs of raw chicken breast (or 3 cups of cooked shredded chicken if using). If raw, cook for 6-8 minutes until the chicken is browned and cooked through, stirring occasionally. For rotisserie chicken, simply heat it through in the pot for about 4-5 minutes, ensuring it’s well mixed with the onions.

Step 4: Add Peppers and Spices
Mix in 2 chopped jalapeño peppers and 2 chopped poblano peppers along with 2 tablespoons of chili powder, 2 teaspoons of cumin, ½ teaspoon of cayenne pepper, and 1 teaspoon of sea salt. Cook for about 3 minutes; the spices will bloom, and the peppers will soften, filling your kitchen with wonderful aromas.

Step 5: Stir in the Liquid Ingredients
Next, add one can of diced tomatoes (15 oz), one can of pumpkin purée (15 oz), two small cans of diced green chili peppers, and 1 cup of chicken or vegetable broth to the pot. Stir everything together, creating a vibrant mixture that glistens and combines all the flavors for your Creamy Pumpkin Chicken Chili.

Step 6: Add the Creaminess
Reduce the heat to low and mix in 1 cup of full-fat coconut milk or 8 oz of cream cheese if you prefer a creamier texture. Let it simmer for about 25 minutes, stirring occasionally. The sauce will thicken slightly, and the flavors will meld beautifully, resulting in a comforting chili.

Step 7: Serve and Garnish
After simmering, taste for seasoning and adjust as needed. Serve the Creamy Pumpkin Chicken Chili hot in bowls, garnished with your favorite toppings like cilantro, avocado, or shredded cheese. The inviting aroma and rich colors will draw everyone to the table for a cozy fall meal!

Creamy Pumpkin Chili Variations

Feel free to let your creativity shine as you customize this delicious dish to suit your tastes!

  • Dairy-Free: Swap cream cheese with full-fat coconut milk or cashew cream for a rich, nutty flavor without dairy.
  • Vegetarian: Replace chicken with cooked beans or lentils for a protein boost while keeping it plant-based and hearty.
  • Spicy Kick: Add extra jalapeños or a dash of hot sauce to elevate the heat level, making your chili warm and vibrant.
  • Flavorful Veggie Boost: Toss in additional veggies like bell peppers, corn, or zucchini to enhance texture and nutrition; it makes every serving a treat!
  • Smoky Depth: Incorporate paprika or chipotle powder for a unique smoky flavor that adds an exciting twist to your chili.
  • Pumpkin-Free Alternative: If you’re out of pumpkin purée, blended butternut squash or sweet potato can create a similar creaminess and sweetness.
  • Hearty Grains: Serve over cooked quinoa or brown rice for extra filling power; it turns your chili into a comforting grain bowl.
  • Savory Toppings: Garnish with crushed tortilla chips or crumbled bacon for added crunch and flavor; it’s a delightful way to elevate each bite.

Let your taste buds lead the way, and don’t hesitate to explore new flavors as you prepare this comforting and versatile creamy pumpkin chili, just like I do when I make my Sweet Chili Chicken. Enjoy experimenting!

Make Ahead Options

These Creamy Pumpkin Chicken Chili preparations are perfect for busy home cooks looking to save time during the week! You can chop the vegetables and store them in an airtight container in the refrigerator up to 3 days in advance. Additionally, consider cooking the chicken ahead of time, shredding it, and refrigerating it until you’re ready to use it. If you want to prepare the chili itself, make it and cool it completely before transferring it to a container to refrigerate for up to 4 days. When you’re ready to serve, simply reheat the chili on the stovetop or in the microwave, adding a splash of broth if needed to maintain its creamy richness. Enjoy your flavorful, quick meal without the stress of last-minute preparation!

How to Store and Freeze Creamy Pumpkin Chili

Fridge: Store your creamy pumpkin chili in an airtight container for up to 7 days. This keeps it fresh and ready for quick reheating!

Freezer: If you’d like to keep it longer, portion the chili into freezer-friendly containers or bags and freeze for up to 3 months. Make sure to leave some space for expansion.

Thawing: When ready to enjoy, thaw overnight in the fridge. Reheat gently on the stove or in the microwave, adding a splash of broth or water to restore creaminess if needed.

Reheating: Reheat on medium heat, stirring occasionally until thoroughly warmed, making sure to retain that delightful creamy texture.

Expert Tips for Creamy Pumpkin Chili

  • Thicker Chili: For a thicker consistency, add more pumpkin purée or reduce the amount of broth used. This enhances the creamy texture.

  • Seasoning Balance: Always taste your chili before serving and adjust seasonings as needed. Layering flavors at each step is crucial for that perfect creamy pumpkin chili.

  • Optimal Cooking Method: If you’re using raw chicken, ensure it’s fully cooked through before adding other ingredients. This prevents undercooking and ensures safety.

  • Adjust Spice Levels: If you want a milder chili, remove the jalapeño seeds or skip the cayenne pepper. This way, everyone can enjoy the dish without overwhelming heat.

  • Use Fresh Ingredients: Whenever possible, opt for fresh vegetables. They enhance flavor and nutrients, making your creamy pumpkin chili even more delightful.

  • Storage Tips: This chili freezes wonderfully! Store it in portioned containers, and it will be ready for a quick meal anytime, retaining its deliciousness.

What to Serve with Creamy Pumpkin Chicken Chili

A delightful bowl of chili is only the beginning of a cozy fall meal you can share with loved ones.

  • Crunchy Cornbread: The sweetness of cornbread contrasts beautifully with the spicy and creamy notes of the chili, making every bite a comforting experience.
  • Fresh Avocado Salad: A simple avocado salad dressed with lime juice adds a fresh, zesty element to your meal, balancing the warmth of the chili.
  • Garlic Bread Toasts: Crispy, buttery toasts infused with garlic provide the perfect vessel for scooping up the creamy pumpkin chicken chili — a match made in heaven!
  • Roasted Root Vegetables: Add a side of roasted carrots, sweet potatoes, and parsnips for a contrasting hearty texture and additional fall flavors.
  • Savory Rice Pilaf: A light and aromatic rice pilaf complements the chili perfectly, absorbing its rich flavors while adding a nice texture.
  • Crisp Apple Cider: Serve alongside a chilled glass of apple cider; the sweetness of apples harmonizes wonderfully with the chili’s spices.
  • Pumpkin Pie: End your meal on a sweet note with a slice of classic pumpkin pie — it’s the ultimate seasonal dessert to keep the pumpkin theme going!

Creamy Pumpkin Chicken Chili Recipe FAQs

How do I choose the right pumpkin for this chili?
Absolutely! When it comes to selecting pumpkin, look for those that are firm and symmetrical. Avoid any that have dark spots or softness, as these can indicate overripeness. Canned pumpkin purée is also a fantastic option, as it ensures consistent flavor and texture. Just check that it’s 100% pure pumpkin with no additives.

How should I store leftovers of Creamy Pumpkin Chicken Chili?
Very simple! Store your creamy pumpkin chicken chili in airtight containers in the refrigerator for up to 7 days. If you know you’ll have leftovers, portion them out so you can grab just what you need. This makes for easy, on-the-go meals without compromising on flavor!

Can I freeze Creamy Pumpkin Chicken Chili?
Yes, you can! To freeze, let the chili cool completely. Then, transfer it into freezer-friendly containers or resealable bags, leaving some space for expansion. It can be frozen for up to 3 months. For the best results, label each container with the date. When you’re ready to enjoy, thaw it overnight in the fridge and reheat on the stove, adding a splash of broth to restore creaminess.

What if my chili turns out too thick?
If you find your chili is thicker than you’d like, don’t worry! Simply stir in some additional chicken or vegetable broth a little at a time until you reach your desired consistency. Remember, adjusting the flavors as needed is part of the cooking process. You could also mix in a bit more pumpkin purée for a richer texture!

Is this chili suitable for those with dietary restrictions?
Absolutely! This creamy pumpkin chicken chili is gluten-free and can easily be made dairy-free by using coconut milk instead of cream cheese. For Whole30 or Paleo diets, ensure to stick with compliant options for broth and spices. Should you have any nut allergies, coconut milk can be replaced with another non-dairy option like almond milk, but it may slightly change the flavor.

How do I know if my chicken is cooked properly?
To ensure your chicken is safely cooked, it’s important for the internal temperature to reach 165°F (75°C). If you’re using raw chicken breast, cut into one piece to check that the meat is no longer pink and the juices run clear. A meat thermometer is a handy tool to achieve perfect results every time!

Creamy Pumpkin Chili

Creamy Pumpkin Chili: A Heartwarming Fall Comfort Dish

Creamy Pumpkin Chili is a delicious and comforting fall dish, perfect for chilly evenings and versatile for various diets.
Prep Time 10 minutes
Cook Time 25 minutes
Total Time 35 minutes
Servings: 6 cups
Course: Dinner
Cuisine: American
Calories: 350

Ingredients
  

For the Base
  • 2 tbsp Avocado Oil or Olive Oil cooking fat for sautéing
  • 1.5 lbs Chicken Breast or Cooked Shredded Chicken hearty main protein
  • 1 medium Chopped Onion adds flavor and sweetness
  • 2 Jalapeño Peppers, chopped bring spice; seeds removed
  • 2 Poblano Peppers, chopped elevate chili flavor
  • 1 can (15 oz) Diced Tomatoes provides body and moisture
  • 1 can (15 oz) Pumpkin Puree star of the show for creamy texture
  • 2 small cans Diced Green Chili Peppers adds zing
  • 1 cup Chicken or Vegetable Broth base of chili
For the Spice Mix
  • 2 tbsp Chili Powder delivers depth and warmth
  • 2 tsp Cumin adds earthy undertones
  • 1/2 tsp Cayenne Pepper adjust for spice tolerance
  • 1 tsp Sea Salt enhances all flavors
For the Creaminess
  • 1 cup Full Fat Coconut Milk or Cream Cheese offers creamy finish

Equipment

  • Large pot

Method
 

Step‑by‑Step Instructions for Creamy Pumpkin Chicken Chili
  1. Heat 2 tablespoons of avocado or olive oil in a large pot over medium heat for 1-2 minutes.
  2. Add one chopped medium onion and sauté for 3-4 minutes until translucent.
  3. Stir in 1.5 lbs of raw chicken breast, cooking for 6-8 minutes until browned, or heat 3 cups of cooked chicken for 4-5 minutes.
  4. Mix in 2 chopped jalapeños, 2 chopped poblanos, 2 tablespoons chili powder, 2 teaspoons cumin, 1/2 teaspoon cayenne, and 1 teaspoon sea salt for about 3 minutes.
  5. Add 1 can of diced tomatoes, 1 can of pumpkin puree, 2 small cans of diced green chilies, and 1 cup of broth, stirring well.
  6. Reduce heat to low, mix in 1 cup of coconut milk or 8 oz of cream cheese, and let simmer for about 25 minutes, stirring occasionally.
  7. Taste for seasoning, serve hot in bowls garnished with cilantro, avocado, or shredded cheese.

Nutrition

Serving: 1cupCalories: 350kcalCarbohydrates: 25gProtein: 30gFat: 18gSaturated Fat: 12gPolyunsaturated Fat: 2gMonounsaturated Fat: 4gCholesterol: 98mgSodium: 600mgPotassium: 800mgFiber: 7gSugar: 5gVitamin A: 5000IUVitamin C: 30mgCalcium: 80mgIron: 3mg

Notes

This chili freezes wonderfully; store in portioned containers for quick meals. Adjust seasoning before serving for optimal flavor balance.

Tried this recipe?

Let us know how it was!

Crispy Pesto Grilled Cheese for Ultimate Comfort Food Bliss

Walking into my kitchen, I can smell the fragrant aroma of freshly made basil pesto, instantly transporting me to sunny Mediterranean markets. One of my favorite ways to showcase this vibrant sauce is in a crispy Sourdough Pesto Grilled Cheese, which combines the perfect crunch of golden-brown bread with gooey, melty mozzarella. It’s such a simple and satisfying dish for a quick lunch or a cozy dinner, especially when paired with a warm bowl of tomato soup. Not only is this delightful sandwich vegetarian-friendly, but it’s also easily customizable—add crispy bacon or sun-dried tomatoes for an extra flair. Are you ready to elevate your grilled cheese game? Let’s dive into this deliciously comforting recipe!

Why is this Pesto Grilled Cheese a Must-Try?

Comforting, classic twist: This grilled cheese takes a beloved favorite and elevates it with vibrant basil pesto and creamy mozzarella for delicious, gooey goodness.
Quick and easy: Perfect for a busy lunch or dinner, this recipe comes together in no time, making home-cooked meals achievable even on the busiest days!
Customizable flavors: Whether you add bacon for a savory crunch or sun-dried tomatoes for tanginess, you can easily adapt this dish to your taste.
Ideal pairing: Enjoy this sandwich with a warm bowl of tomato soup or a fresh arugula salad with lemon dressing for a complete meal. Try this comforting pairing and elevate your next lunch!
Satisfying textures: Each bite reveals a crispy, golden crust contrasting with luxurious melted cheese, delivering the perfect textures that will leave you craving more.

Pesto Grilled Cheese Ingredients

For the Bread:
Sourdough Bread – Provides a sturdy base with a crispy exterior and soft interior; opt for a sandwich loaf style for the best results.

For the Cheese:
Mozzarella Cheese – Melts beautifully for a gooey texture; ensure it’s patted dry to prevent sogginess.

For the Flavor:
Basil Pesto – Adds a fresh, herbal flavor; use sparingly to avoid excess moisture in your Pesto Grilled Cheese.
Sun-Dried Tomatoes – Provide impactful flavor and slight acidity to balance richness; can be omitted or substituted with roasted red peppers.

For the Crunch:
Bacon – Adds savory crunch and depth; omit for a delightful vegetarian option.

For Cooking:
Butter – Ensures a perfectly golden and crispy crust; use generously on the outside of the sandwich for that irresistible crunch.

Step‑by‑Step Instructions for Pesto Grilled Cheese

Step 1: Preheat the Pan
Start by preheating a sauté pan over medium-low heat for about 2-3 minutes. This gentle heat is crucial to ensuring that your Pesto Grilled Cheese cooks evenly without burning. Use a non-stick or cast-iron skillet for optimal results, creating the perfect base for that crispy crust.

Step 2: Prepare the Bread
While the pan heats up, lay two slices of sturdy sourdough bread on a clean surface. Generously spread butter on one side of each slice, making sure to cover it fully for a golden finish. This buttered side will be placed down on the skillet, creating a delightful crunch as it cooks.

Step 3: Assemble the Cheese Layers
Once the pan is warm, place the buttered sides of the sourdough bread down in the skillet. Layer 3-4 slices of mozzarella cheese on each slice of bread, ensuring even coverage, followed by a tablespoon of basil pesto and a sprinkling of sun-dried tomatoes. Add another layer of mozzarella to seal the flavors in, making it a truly mouthwatering Pesto Grilled Cheese.

Step 4: Create the Sandwiches
Top each sandwich with the second slice of buttered sourdough bread, buttered side facing up. This will form a deliciously crispy exterior while locking in the melty cheese and flavorful pesto. Gently press down the sandwiches with a spatula to encourage a good melt as well.

Step 5: Melt the Cheese
Maintain the pan over low heat to allow the cheese inside your Pesto Grilled Cheese to melt thoroughly. Cook for about 4-5 minutes, carefully watching for the bottom slice to turn a beautiful golden brown. This low and slow method ensures the perfect balance of crunch and gooeyness in every bite.

Step 6: Flip and Cook the Other Side
Once the first side is golden and crispy, use a spatula to carefully flip the sandwiches over. Cook the second side for another 4-5 minutes, keeping the heat low to achieve that delightful contrast of textures. Watch for the mozzarella to ooze just slightly at the edges as it melts perfectly.

Step 7: Serve and Enjoy
When both sides are beautifully golden brown and the cheese is melted, remove the sandwiches from the pan. Let them cool for a minute before slicing in half. Serve your delicious Pesto Grilled Cheese warm, preferably with a side of tomato soup or a zesty arugula salad, elevating this comforting classic into a gourmet experience.

Make Ahead Options

These Sourdough Pesto Grilled Cheese sandwiches are perfect for meal prep and can save you valuable time on busy weeknights! You can assemble the uncooked sandwiches and refrigerate them for up to 24 hours; just keep the butter separate until you’re ready to cook to maintain that delightful crispiness. If you prefer having cooked sandwiches on hand, feel free to prepare them ahead and store them wrapped in foil for up to 2 days in the fridge—reheat in a skillet over low heat to ensure they regain their golden crunch. When you’re ready to serve, simply finish cooking them until heated through, and enjoy a delicious and comforting meal without the hassle!

Pesto Grilled Cheese Variations & Substitutions

Feel free to explore these delightful twists on the classic flavors, allowing your Pesto Grilled Cheese to shine in new ways!

  • Vegetarian Option: Swap bacon for cooked mushrooms or sautéed spinach for a hearty, meat-free alternative. This ensures you maintain hearty flavors without sacrificing taste.

  • Cheese Variety: Add a different cheese like sharp cheddar or creamy fontina for a unique flavor profile. Mixing cheeses can enhance the gooey texture and richness even further.

  • Sun-Dried Tomatoes: Replace them with fresh tomatoes or roasted red peppers for a lighter option. Adjust moisture levels as necessary to keep the bread crisp.

  • Herb Infusion: Mix fresh herbs like thyme or parsley into the pesto for an aromatic flavor boost. These subtle additions can brighten up each bite!

  • Crunch Factor: For added texture, include crispy onions or a sprinkle of toasted pine nuts between the layers. This delightful crunch will elevate the sandwich experience.

  • Spice It Up: Add a thin layer of spicy mustard or crushed red pepper flakes for those who enjoy a little heat. These elements can amplify the excitement in every mouthful.

  • Sweet and Savory: Incorporate a thin layer of fig jam along with the cheese and pesto for a gourmet touch of sweetness that perfectly balances the savory elements.

  • Make It a Meal: Pile on additional veggies like zucchini or bell peppers to turn this Pesto Grilled Cheese into a satisfying, veggie-packed meal.

The beauty of this Pesto Grilled Cheese lies in its adaptability! You might find that a touch of bacon pairs perfectly with a refreshing arugula salad. For a twist on classic comfort food, consider serving it alongside a bowl of Strawberry Cheesecake Dump for a sweet treat after your meal. Mix and match these suggestions as you enjoy this cozy recipe!

What to Serve with Crispy Sourdough Pesto Grilled Cheese?

Imagine a cozy meal where each bite offers a delightful balance of crunchy and creamy textures, transporting you to culinary bliss.

  • Classic Tomato Soup: The warm, comforting flavors of tomato soup create a heavenly match with the crunchy, cheesy goodness of the grilled cheese.
  • Arugula Salad: A light arugula salad dressed in zesty lemon offers a refreshing contrast to the richness of the sandwich, enhancing its flavors.
  • Sweet Potato Fries: Crispy, sweet potato fries provide a delightful crunch and earthy sweetness, rounding out your meal with a nutritious twist.
  • Roasted Vegetable Medley: A colorful blend of roasted vegetables adds a caramelized depth, complementing the savory basil pesto and cheese.
  • Pickles or Sweet Relish: Tangy pickles bring brightness and crunch, cutting through the richness of the sandwich for a balanced bite.
  • Fruit Salad: A light, refreshing fruit salad, bursting with seasonal fruits, offers a sweet contrast that brightens the entire meal experience.
  • Sparkling Lemonade: This bubbly, citrusy drink adds a refreshing zing, perfect for washing down the rich flavors of your sandwich.
  • Iced Tea: A lightly sweetened iced tea makes for a cool, refreshing beverage, perfectly cleansing the palate between each satisfying bite.
  • Chocolate Chip Cookies: Conclude your meal on a sweet note with warm cookies, pairing beautifully with the gourmet feel of your grilled cheese.

Storage Tips for Pesto Grilled Cheese

Fridge: Store cooked Pesto Grilled Cheese wrapped in foil in the refrigerator for up to 2 days, ensuring it retains its flavors and moisture.

Freezer: For longer storage, freeze assembled but uncooked sandwiches wrapped tightly in plastic wrap for up to 1 month. Thaw in the fridge before cooking.

Reheating: Reheat in a skillet over medium-low heat for about 3-4 minutes on each side for optimal crispness, bringing back that lovely crunch.

Make-Ahead: Assemble sandwiches in advance and refrigerate for up to 24 hours, keeping the butter separate until you are ready to cook them.

Expert Tips for Pesto Grilled Cheese

Choose Fresh Sourdough: Use fresh sourdough from a bakery for the best texture—avoid overly airy or sour loaves for a satisfying crunch.

Moisture Control: Pat mozzarella dry with paper towels before adding it to your sandwich. This prevents sogginess, keeping your Pesto Grilled Cheese perfectly gooey but not wet.

Low Heat is Key: Maintain a low cooking temperature to ensure even melting of the cheese without burning the bread. Patience pays off with this delicious sandwich!

Don’t Overload: Avoid overstuffing your sandwich with ingredients, as this can lead to spillage during cooking. A balanced filling ensures the best results.

Experiment with Variations: Feel free to play around with ingredients like adding bacon or mushrooms to customize your Pesto Grilled Cheese with flavors you love.

Perfect Pairings: This sandwich pairs beautifully with a warm bowl of tomato soup or a crisp arugula salad, enhancing the overall comfort food experience.

Sourdough Pesto Grilled Cheese Recipe FAQs

How do I choose the best sourdough bread?
Absolutely! When selecting sourdough bread for your Pesto Grilled Cheese, opt for a loaf with a sturdy texture, which holds up to the filling beautifully. Look for a fresh loaf from a local bakery with a golden-brown crust and a soft, chewy interior. Avoid overly airy loaves with large holes, as they can weaken the structure of your sandwich.

What’s the best way to store my cooked Pesto Grilled Cheese?
Very simply! Once you’ve enjoyed your delicious sandwich, wrap any leftovers tightly in foil and store them in the refrigerator for up to 2 days. If you want to maintain the crispy texture during reheating, I recommend using a skillet over medium-low heat to bring back its crunch, cooking each side for about 3-4 minutes.

Can I freeze my Pesto Grilled Cheese sandwiches?
Absolutely, you can! To freeze, assemble the uncooked sandwiches, but don’t forget to wrap them tightly in plastic wrap. They’ll stay fresh in the freezer for up to 1 month. When you’re ready to enjoy, simply thaw them in the fridge overnight before cooking. This way, you can have a homemade grilled cheese ready whenever a craving hits!

What should I do if my cheese isn’t melting properly?
No worries! If your cheese isn’t melting as it should, make sure you’re cooking over low heat, as high temperatures can burn the bread before the cheese has a chance to melt. If you find your sandwich is getting too crispy, simply reduce the heat further. Patting your mozzarella dry before assembly reduces moisture and promotes a better melt as well.

Are there any dietary considerations for this recipe?
Definitely! This Pesto Grilled Cheese can easily be made vegetarian by omitting the bacon. If you have nut allergies, look for a nut-free basil pesto alternative or make your own using seeds instead of nuts. Always check packaging for allergens, especially with cheese and pre-made pesto, as they can sometimes contain hidden ingredients.

Can I prep the sandwiches ahead of time?
Yes, you can! For quick lunches or dinners, assemble the unbuttered sandwiches up to 24 hours in advance. Just make sure to store them in the refrigerator and keep the butter separate until you’re ready to cook them. This will keep that crispy crust intact while still allowing for speedy meal preparation!

Pesto Grilled Cheese

Crispy Pesto Grilled Cheese for Ultimate Comfort Food Bliss

A delicious Pesto Grilled Cheese sandwich that combines gooey mozzarella and crispy sourdough for a comforting meal.
Prep Time 5 minutes
Cook Time 10 minutes
Total Time 15 minutes
Servings: 2 sandwiches
Course: Lunch
Cuisine: Mediterranean
Calories: 450

Ingredients
  

For the Bread
  • 4 slices Sourdough Bread Sturdy base with a crispy exterior.
For the Cheese
  • 6 slices Mozzarella Cheese Pat dry to prevent sogginess.
For the Flavor
  • 2 tablespoons Basil Pesto Use sparingly to avoid excess moisture.
  • 1/4 cup Sun-Dried Tomatoes Can be omitted or substituted.
For the Crunch
  • 4 slices Bacon Omit for a vegetarian option.
For Cooking
  • 2 tablespoons Butter Generously spread on the outside.

Equipment

  • sauté pan
  • spatula

Method
 

Step-by-Step Instructions
  1. Preheat a sauté pan over medium-low heat for about 2-3 minutes.
  2. Lay two slices of sourdough bread on a clean surface and spread butter on one side of each slice.
  3. Place the buttered sides of the bread in the skillet and layer mozzarella cheese, basil pesto, and sun-dried tomatoes.
  4. Top each sandwich with the second slice of buttered sourdough bread, buttered side facing up.
  5. Cook for about 4-5 minutes until the bottom is golden brown.
  6. Flip the sandwiches over and cook the second side for another 4-5 minutes.
  7. Remove from the pan, cool for a minute, and slice in half before serving.

Nutrition

Serving: 1sandwichCalories: 450kcalCarbohydrates: 40gProtein: 20gFat: 25gSaturated Fat: 15gPolyunsaturated Fat: 2gMonounsaturated Fat: 5gCholesterol: 70mgSodium: 900mgPotassium: 300mgFiber: 3gSugar: 2gVitamin A: 15IUVitamin C: 6mgCalcium: 25mgIron: 10mg

Notes

Pairs beautifully with tomato soup or arugula salad for a complete meal.

Tried this recipe?

Let us know how it was!

Satisfy Your Cravings with Chicken Bacon Ranch Quesadilla

As I flipped through my cookbook one evening, my eyes landed on a recipe that promised to solve my weeknight dinner dilemma: the Chicken Bacon Ranch Quesadilla. In just 20 minutes, this delightful dish combines crispy bacon, tender chicken, and gooey cheese all wrapped in a perfectly toasted tortilla. It’s a quick meal that doesn’t skimp on flavor, making it the ultimate comfort food for both busy families and casual gatherings. What I love most about this quesadilla is its versatility—feel free to get creative with your favorite add-ins or variations. Why settle for takeout when you can whip up a satisfying dish that feels like a treat? Curious how to make this mouthwatering recipe? Let’s dive in!

Why Is This Quesadilla So Irresistible?

Quick, Time-Saving Meal: Ready in just 20 minutes, this Chicken Bacon Ranch Quesadilla is the perfect solution for your busy evenings, giving you more time to relax after a long day.
Flavor Explosion: With crispy bacon and tender chicken combined with gooey cheese and ranch dressing, each bite is a celebration of savory goodness.
Family-Friendly Delight: Both kids and adults will rave about this comforting dish, making it a hit at family dinners or gatherings.
Endless Variations: Want some heat? Add jalapeños! Prefer creamy? Toss in some avocado—the possibilities are endless!
Homemade Goodness: Skip the drive-thru; this quesadilla gives you that delicious takeout-like experience without compromising your health.

Chicken Bacon Ranch Quesadilla Ingredients

For the Quesadilla

  • Flour Tortillas – The base of this quesadilla; substitute with corn tortillas for a gluten-free option.
  • Cooked Chicken (shredded) – Provides protein and heartiness; leftover roasted or rotisserie chicken works wonders.
  • Bacon (cooked and crumbled) – Adds crunch and smoky flavor; turkey bacon is a great lighter variation.
  • Mexican Cheese Blend (shredded) – Delivers a perfect melty texture; feel free to use Monterey Jack or Cheddar for a different flavor profile.
  • Ranch Dressing – Contributes creaminess and tang; swap out for chipotle sauce if you want to add a spicy kick.
  • Diced Tomatoes – Brings freshness and moisture; diced avocado can be used for a creamier texture instead.
  • Red Onion (finely chopped) – Offers crunch and sharpness; green onions can be a milder substitute.
  • Fresh Cilantro (chopped) – Adds an herbal note; skip it if cilantro isn’t your favorite.
  • Butter – Perfect for cooking the quesadilla until golden; olive oil serves as a healthier alternative.

For the Topping

  • Salsa – A delightful dip that pairs beautifully with the quesadilla; try mango salsa for a fruity twist!
  • Sour Cream – Adds a creamy element that balances the savory flavors; Greek yogurt is a healthy substitute.
  • Guacamole – Creaminess that enhances the dish; fresh or store-bought, it’s always a crowd-pleaser.

With just these essential Chicken Bacon Ranch Quesadilla ingredients, you’ll be ready to create a meal that satisfies. Let’s get started!

Step‑by‑Step Instructions for Chicken Bacon Ranch Quesadilla

Step 1: Prepare the Chicken Mixture
In a large mixing bowl, combine the shredded cooked chicken with ranch dressing, ensuring each piece is well-coated. This will take about 2 minutes. The creamy dressing will add flavor and moisture to your Chicken Bacon Ranch Quesadilla. Next, fold in the crumbled bacon, diced tomatoes, finely chopped red onion, and fresh cilantro, mixing until evenly distributed.

Step 2: Heat the Skillet
Place a nonstick skillet over medium heat and add 1 tablespoon of butter, allowing it to melt completely. Swirl the pan to coat the surface evenly, which will help achieve a golden color on the quesadilla. This step typically takes about 1 minute. Watch for the butter to foam slightly before continuing.

Step 3: Assemble the Quesadilla
Lay one flour tortilla in the skillet, making sure it covers the pan uniformly. Sprinkle half of the Mexican cheese blend on one side of the tortilla. Then, spoon a generous portion of the chicken mixture evenly over the cheese, and top it with a little more cheese. This layering will enhance the gooey texture in your Chicken Bacon Ranch Quesadilla.

Step 4: Cook the Quesadilla
Fold the tortilla in half, pressing it gently with a spatula. Cook for 2-3 minutes until the bottom is golden brown and the cheese begins to melt. Carefully flip the quesadilla over and cook for another 2-3 minutes until the second side achieves a similar golden-brown hue and the cheese is fully melted.

Step 5: Rest and Slice
Once cooked, remove the quesadilla from the skillet and let it rest on a cutting board for about 1 minute. This will allow the cheese to set slightly, making it easier to slice. Using a sharp knife or pizza cutter, cut the quesadilla into wedges for serving.

Step 6: Serve It Up
Arrange the wedges on a plate and serve your Chicken Bacon Ranch Quesadilla hot, alongside your favorite dips like salsa, sour cream, or guacamole. The crispy exterior and chewy interior filled with delicious flavors are sure to impress everyone at the table!

What to Serve with Chicken Bacon Ranch Quesadilla

Pairing this delightful quesadilla with complementary sides will elevate your meal experience, creating a feast for the senses.

  • Fresh Garden Salad: Adds a crisp, refreshing element, perfect for cutting through the richness of the quesadilla. Tossed with a light vinaigrette, it brightens every bite.
  • Spicy Salsa: A zesty counterpart that enhances the flavors; choose a store-bought version or whip up a quick homemade blend for extra freshness. The heat from the salsa pairs beautifully with the creamy ranch.
  • Guacamole: This creamy avocado dip brings a silky texture that perfectly contrasts the crispy quesadilla. Plus, you can never go wrong with the classic duo of guac and quesadillas.
  • Creamy Cilantro Lime Rice: The zesty rice complements the quesadilla while providing a hearty side. The addition of lime gives it a refreshing zing that balances the savory elements.
  • Spanish-Style Corn: Sweet corn sautéed with spices adds a chewy bite and natural sweetness that pairs nicely with the savory flavors of the Chicken Bacon Ranch Quesadilla. Plus, it’s easy to prepare!
  • Black Bean Soup: A warm bowl of black bean soup will enhance your quesadilla meal, providing a hearty and comforting combination. The beans add protein and a deliciously earthiness that’s hard to resist.
  • Sweet Iced Tea: This refreshing drink cuts through the richness of the meal, creating a perfect balance. Serve it over ice with a slice of lemon for an inviting touch.
  • Churros: For dessert, these crispy, cinnamon-sugar treats are a delightful end to the meal. They add a sweet, crunchy finish that feels indulgent after your savory quesadilla bliss.

Make Ahead Options

These Chicken Bacon Ranch Quesadillas are perfect for meal prep, making busy weeknights a breeze! You can prepare the chicken mixture (shredded chicken, ranch dressing, crumbled bacon, diced tomatoes, red onion, and cilantro) up to 24 hours in advance; just store it in an airtight container in the refrigerator to maintain its fresh flavors. If you want to go a step further, you can fully assemble the quesadillas, wrap them tightly, and refrigerate them for up to 3 days. When you’re ready to enjoy, simply heat a skillet with butter and cook them straight from the fridge for 2-3 minutes per side until golden and gooey. This way, you’ll have a quick and delicious meal without any fuss!

Expert Tips for Chicken Bacon Ranch Quesadilla

  • Perfectly Golden Tortilla: Ensure your skillet is hot enough but not smoking; you want that crispy golden exterior without burning.
  • Avoid Overstuffing: Less is more! Overstuffing can lead to spills and uneven cooking; keep the filling modest for better results.
  • Rest Before Slicing: Allow the quesadilla to rest for a minute before cutting to let the cheese set; this keeps it all together for your Chicken Bacon Ranch Quesadilla.
  • Layer Your Cheese: Add cheese on both sides of the tortilla and in the filling. This helps with binding and ensures every bite is gooey.
  • Customize the Filling: Feel free to experiment with ingredients like chopped jalapeños or spices to bring your Chicken Bacon Ranch Quesadilla to the next level.

Chicken Bacon Ranch Quesadilla Variations

Feel free to let your culinary creativity shine with these delightful variations that will elevate your Chicken Bacon Ranch Quesadilla experience!

  • Spicy Kick: Add sliced jalapeños for a fiery touch. The spiciness will perfectly complement the rich creaminess of the ranch dressing.

  • Creamy Avocado: Toss in diced avocado alongside your chicken mixture for an extra layer of creaminess. Each bite will be a heavenly blend of flavors!

  • Cheese Swap: Try using pepper jack cheese instead of the Mexican blend for an extra kick. The cheese will melt beautifully while providing a hint of spice.

  • Turkey Bacon: Substitute regular bacon with turkey bacon for a lighter option. You’ll still get that satisfying crunch with less fat!

  • Gluten-Free Flour Tortillas: Swap out flour tortillas for corn tortillas to make this dish gluten-free. You’ll enjoy a delightful crunch that adds texture.

  • Tangy Chipotle Sauce: Replace ranch dressing with chipotle sauce for a smoky twist. It’s an exciting way to introduce heat and flavor!

  • Vegetarian Delight: Omit the bacon and chicken entirely, and fill with your choice of sautéed veggies and extra cheese for a delicious vegetarian version.

  • Southwestern Style: Incorporate black beans and corn into the chicken mixture for a hearty, southwestern flair. Each bite becomes a fiesta of flavors! Pair this with a refreshing Blt Chicken Salad on the side for a colorful meal.

With these simple adjustments, you can explore and enjoy a variety of mouthwatering twists on the classic Chicken Bacon Ranch Quesadilla, perfect for your next meal!

Storage Tips for Chicken Bacon Ranch Quesadilla

Fridge: Store leftovers in an airtight container for up to 3 days; this keeps your Chicken Bacon Ranch Quesadilla fresh and tasty.

Freezer: If you want to keep them longer, freeze the cooked quesadillas individually wrapped in plastic wrap for up to 2 months; just remember to label them!

Reheating: Reheat in a skillet over medium heat for a few minutes on each side until heated through and crispy again; avoid the microwave to maintain the golden texture.

Enjoy Freshness: For the best flavor and texture, consume the quesadillas soon after preparation; they’re irresistibly delicious right off the skillet!

Chicken Bacon Ranch Quesadilla Recipe FAQs

What type of tortillas should I use for the Chicken Bacon Ranch Quesadilla?
Absolutely! Flour tortillas are the traditional choice for this quesadilla, offering a soft and chewy texture. However, if you’re looking for a gluten-free option, corn tortillas work beautifully too. Just make sure they’re warmed slightly to ensure they don’t crack when folding.

How long can I store leftovers of the Chicken Bacon Ranch Quesadilla?
You can store leftovers in an airtight container in the refrigerator for up to 3 days. Be sure to let them cool down before sealing. This way, they maintain their flavors and moisture without becoming soggy!

Can I freeze Chicken Bacon Ranch Quesadilla?
Yes, the quesadillas freeze well! To freeze, wrap each cooked quesadilla tightly in plastic wrap or aluminum foil, and then place them in a freezer bag. They can last up to 2 months in the freezer. When you’re ready to enjoy them, just reheat them on a skillet until warm and crispy.

What should I do if my quesadilla spills out during cooking?
Very! If you find the filling spilling out, it may be due to overstuffing. To prevent this, try using a little less filling next time. Additionally, ensure your skillet isn’t too hot; a medium heat will cook the tortilla while allowing the filling to warm through without burning the outside.

Are there any dietary considerations I should keep in mind?
Definitely! If you’re cooking for those with dietary restrictions, you might use turkey bacon instead of regular bacon for a lighter option, or replace ranch dressing with a dairy-free alternative. For those allergic to gluten, opt for corn tortillas. Always check labels if you’re serving someone with allergies to ensure all ingredients suit their needs.

How do I make sure my Chicken Bacon Ranch Quesadilla is crispy?
To achieve that perfect crispiness, make sure your skillet is at the right temperature—not too hot to burn or too low to soften. Use butter for a wonderful flavor and golden color. After cooking, allow the quesadilla to rest for a minute; this helps the cheese set and keeps everything intact for that delightful crunch when you take a bite.

Chicken Bacon Ranch Quesadilla

Satisfy Your Cravings with Chicken Bacon Ranch Quesadilla

Delicious Chicken Bacon Ranch Quesadilla promises comfort and flavor in just 20 minutes, perfect for busy families.
Prep Time 5 minutes
Cook Time 15 minutes
Resting Time 1 minute
Total Time 21 minutes
Servings: 4 quesadillas
Course: Lunch
Cuisine: American
Calories: 450

Ingredients
  

For the Quesadilla
  • 4 pieces Flour Tortillas Substitute with corn tortillas for gluten-free option
  • 2 cups Cooked Chicken (shredded) Leftover roasted or rotisserie chicken works well
  • 6 slices Bacon (cooked and crumbled) Turkey bacon is a lighter variation
  • 2 cups Mexican Cheese Blend (shredded) Monterey Jack or Cheddar can be used
  • 1/2 cup Ranch Dressing Can swap for chipotle sauce for spiciness
  • 1 cup Diced Tomatoes Diced avocado can be a substitute
  • 1/4 cup Red Onion (finely chopped) Green onions can be used as a milder substitute
  • 1/4 cup Fresh Cilantro (chopped) Skip if not a fan
  • 1 tablespoon Butter Olive oil can be a healthier alternative
For the Topping
  • 1 cup Salsa Mango salsa can be a fruity twist
  • 1/2 cup Sour Cream Greek yogurt is a healthy substitute
  • 1 cup Guacamole Fresh or store-bought is great

Equipment

  • Nonstick skillet

Method
 

Directions
  1. In a large mixing bowl, combine the shredded cooked chicken with ranch dressing, ensuring each piece is well-coated. Add crumbled bacon, diced tomatoes, finely chopped red onion, and fresh cilantro.
  2. Place a nonstick skillet over medium heat and add 1 tablespoon of butter, allowing it to melt completely.
  3. Lay one flour tortilla in the skillet. Sprinkle half of the Mexican cheese blend on one side of the tortilla. Spoon a generous portion of the chicken mixture evenly over the cheese, and top with more cheese.
  4. Fold the tortilla in half, pressing gently with a spatula. Cook for 2-3 minutes until golden brown. Flip and cook another 2-3 minutes.
  5. Remove the quesadilla from the skillet and let it rest on a cutting board for 1 minute. Cut into wedges.
  6. Serve hot, alongside salsa, sour cream, or guacamole.

Nutrition

Serving: 1quesadillaCalories: 450kcalCarbohydrates: 40gProtein: 24gFat: 24gSaturated Fat: 10gPolyunsaturated Fat: 3gMonounsaturated Fat: 5gCholesterol: 75mgSodium: 900mgPotassium: 300mgFiber: 2gSugar: 3gVitamin A: 500IUVitamin C: 5mgCalcium: 300mgIron: 2mg

Notes

Customize your fillings with ingredients like jalapeños or spices for added flavor.

Tried this recipe?

Let us know how it was!

Stay Connected

Get recipes via email: