Get my cookbooks

Vampire Bite Red Velvet Brownies Recipe for a Spooky Treat

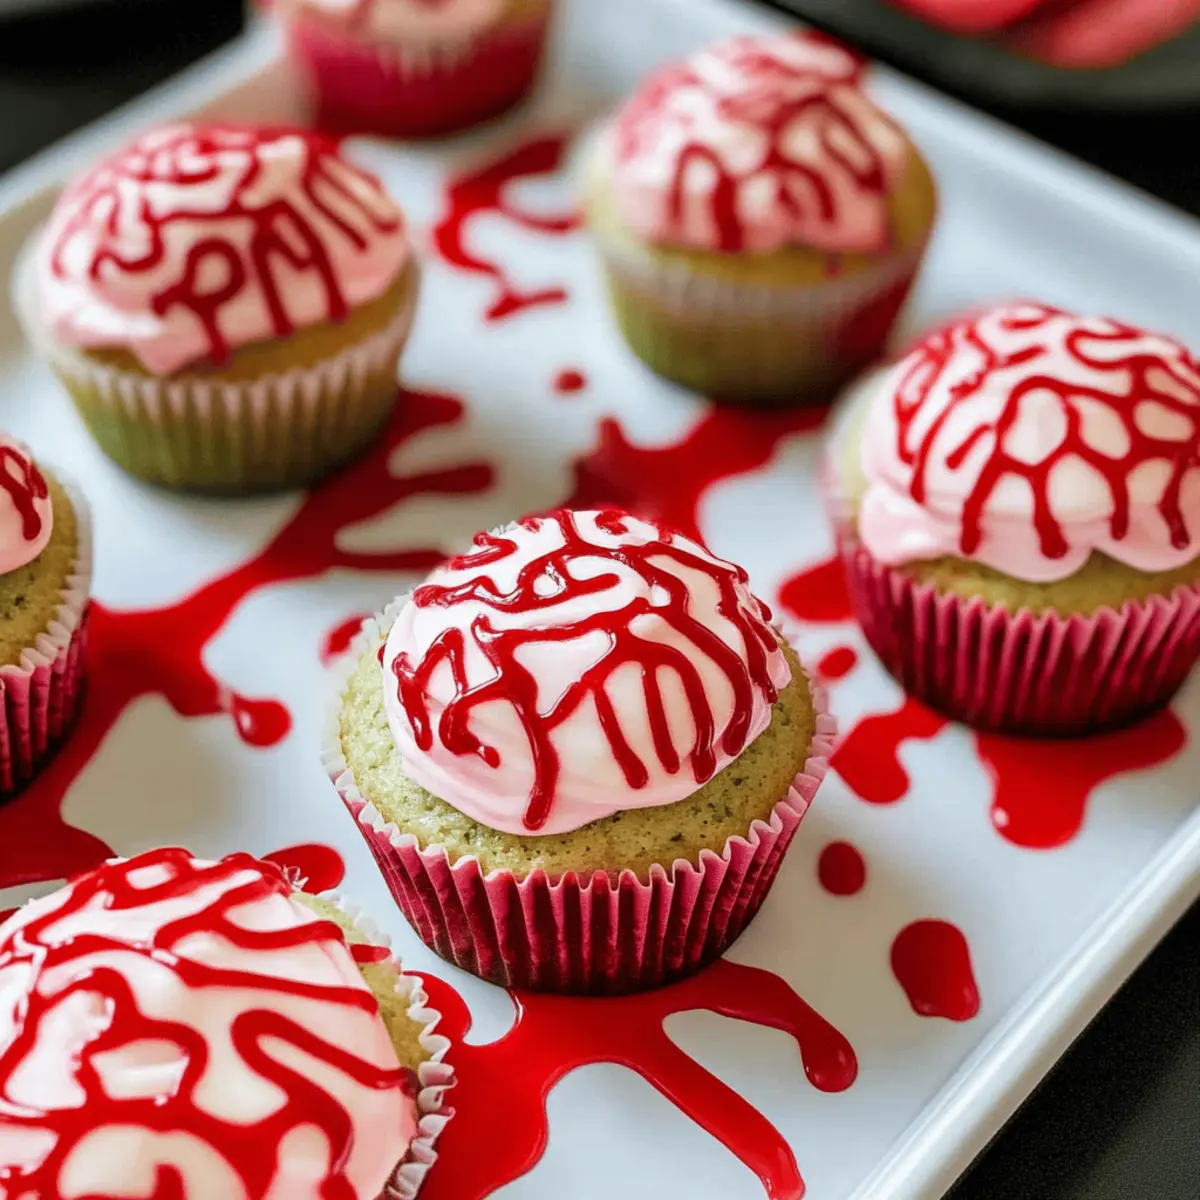
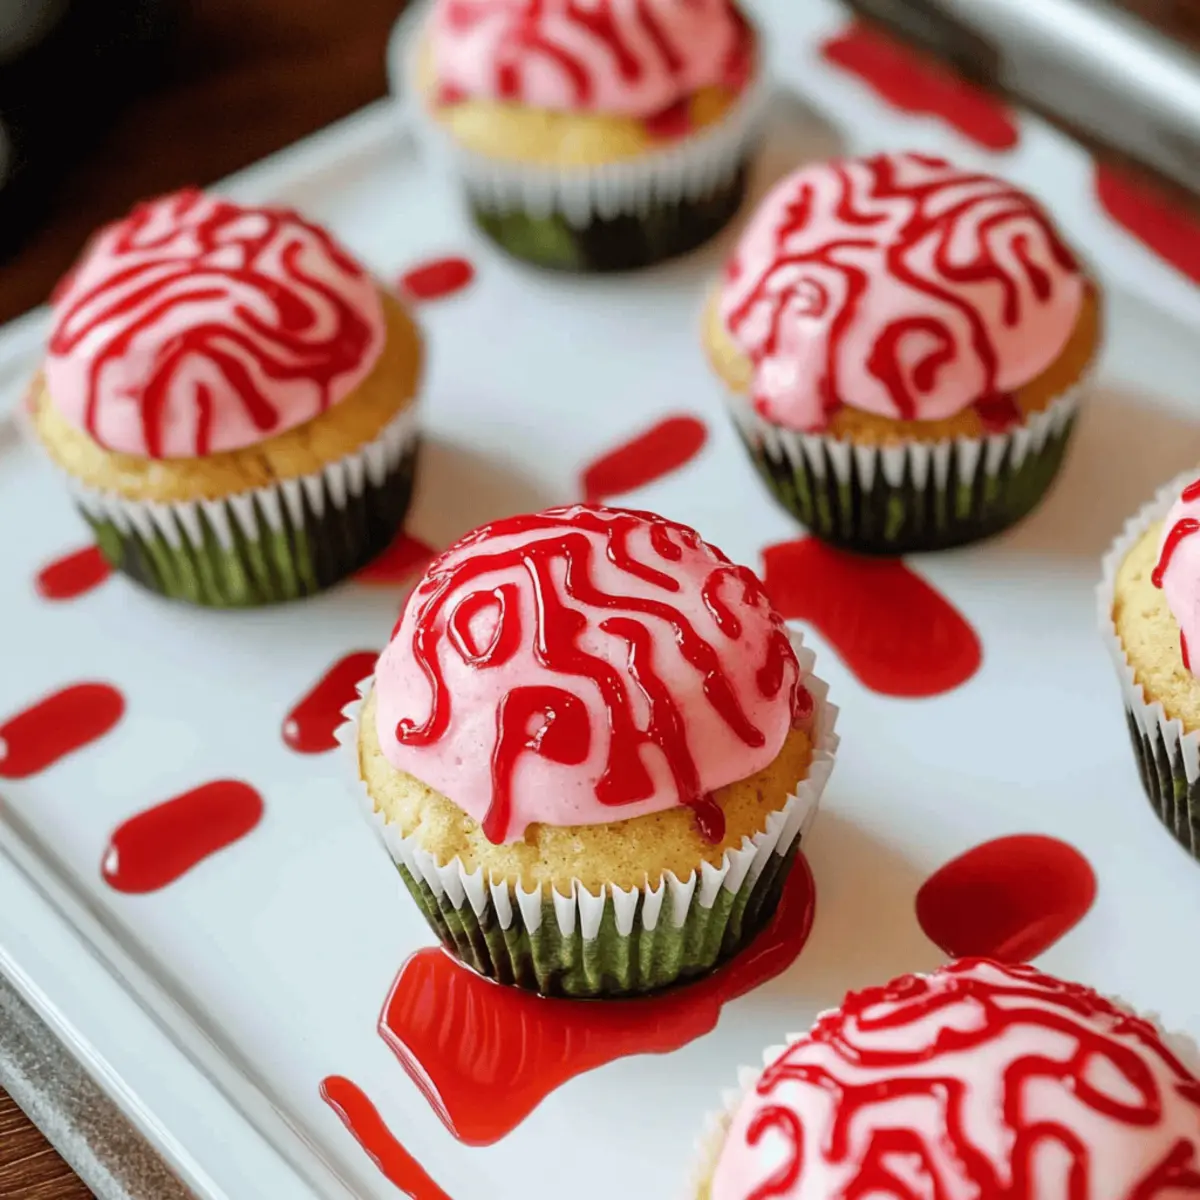
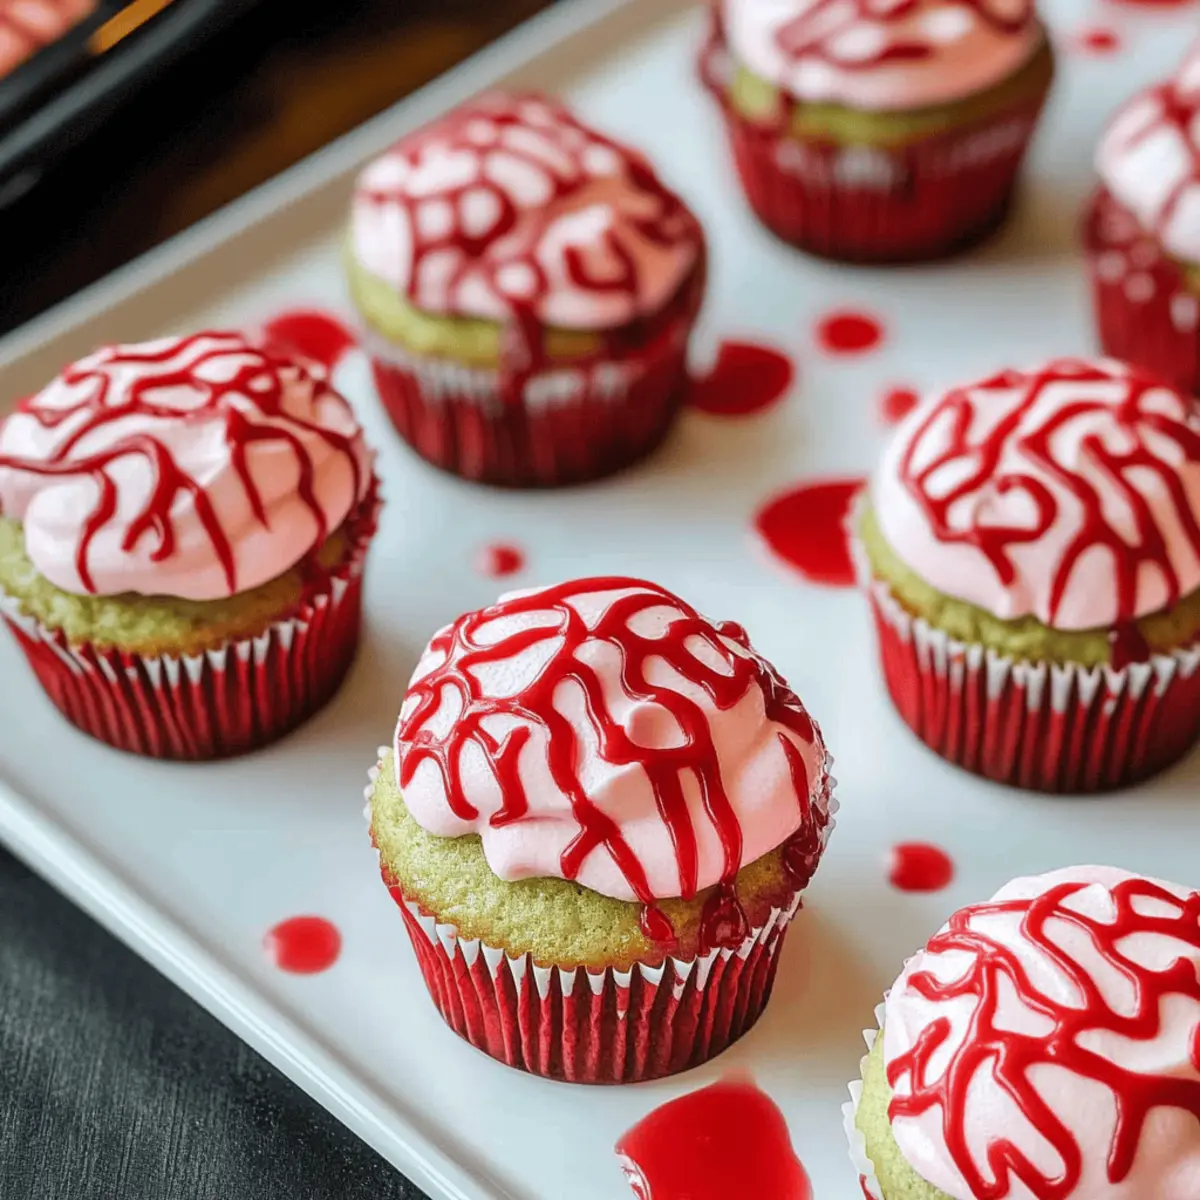
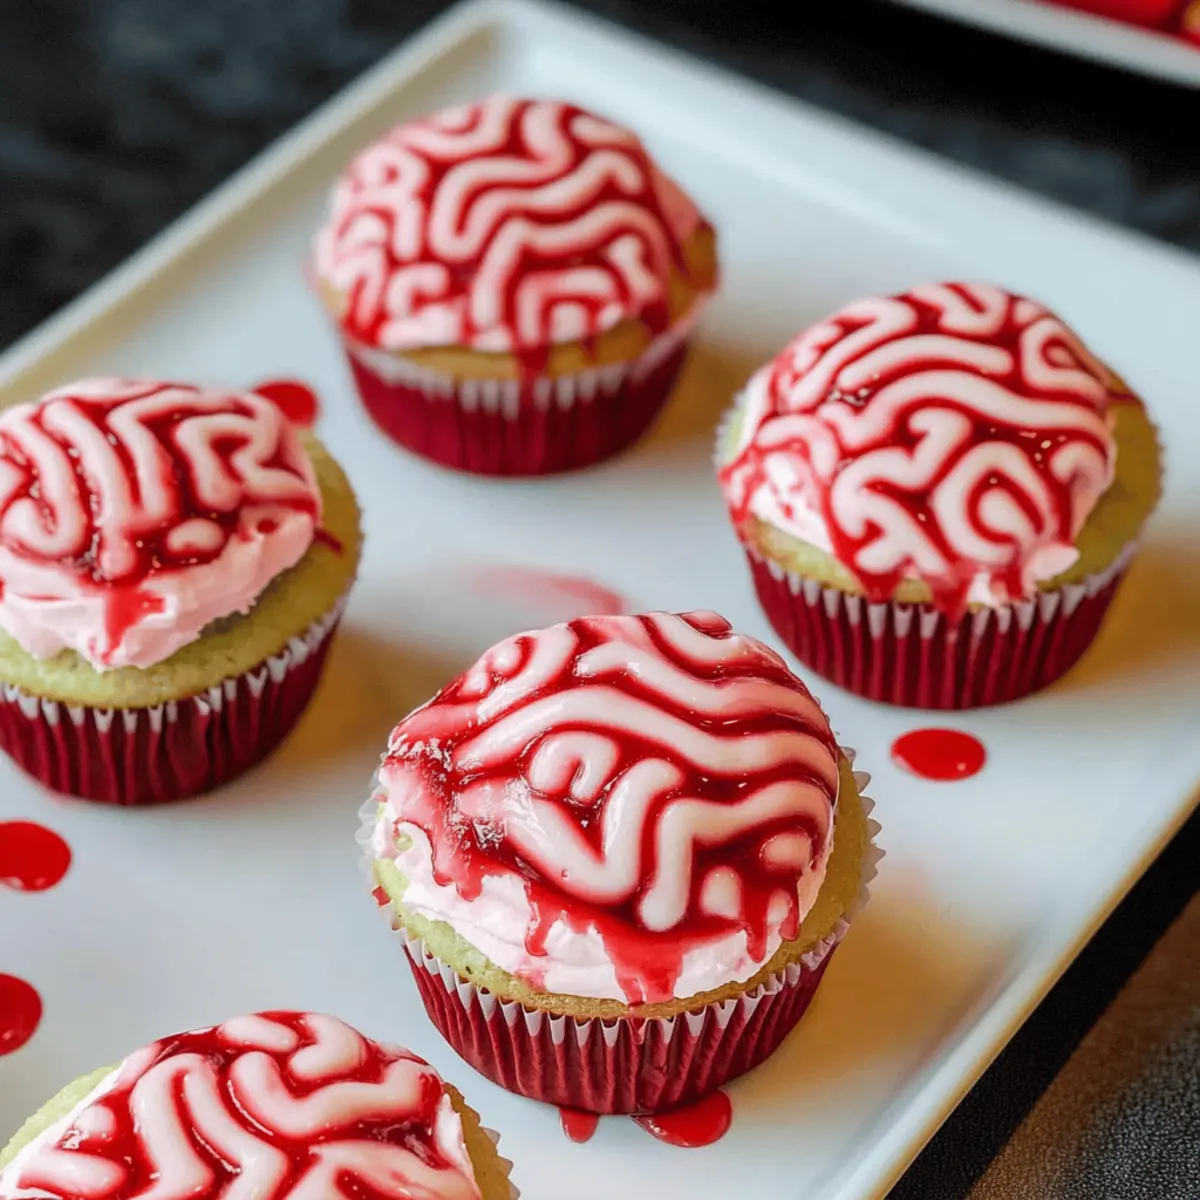
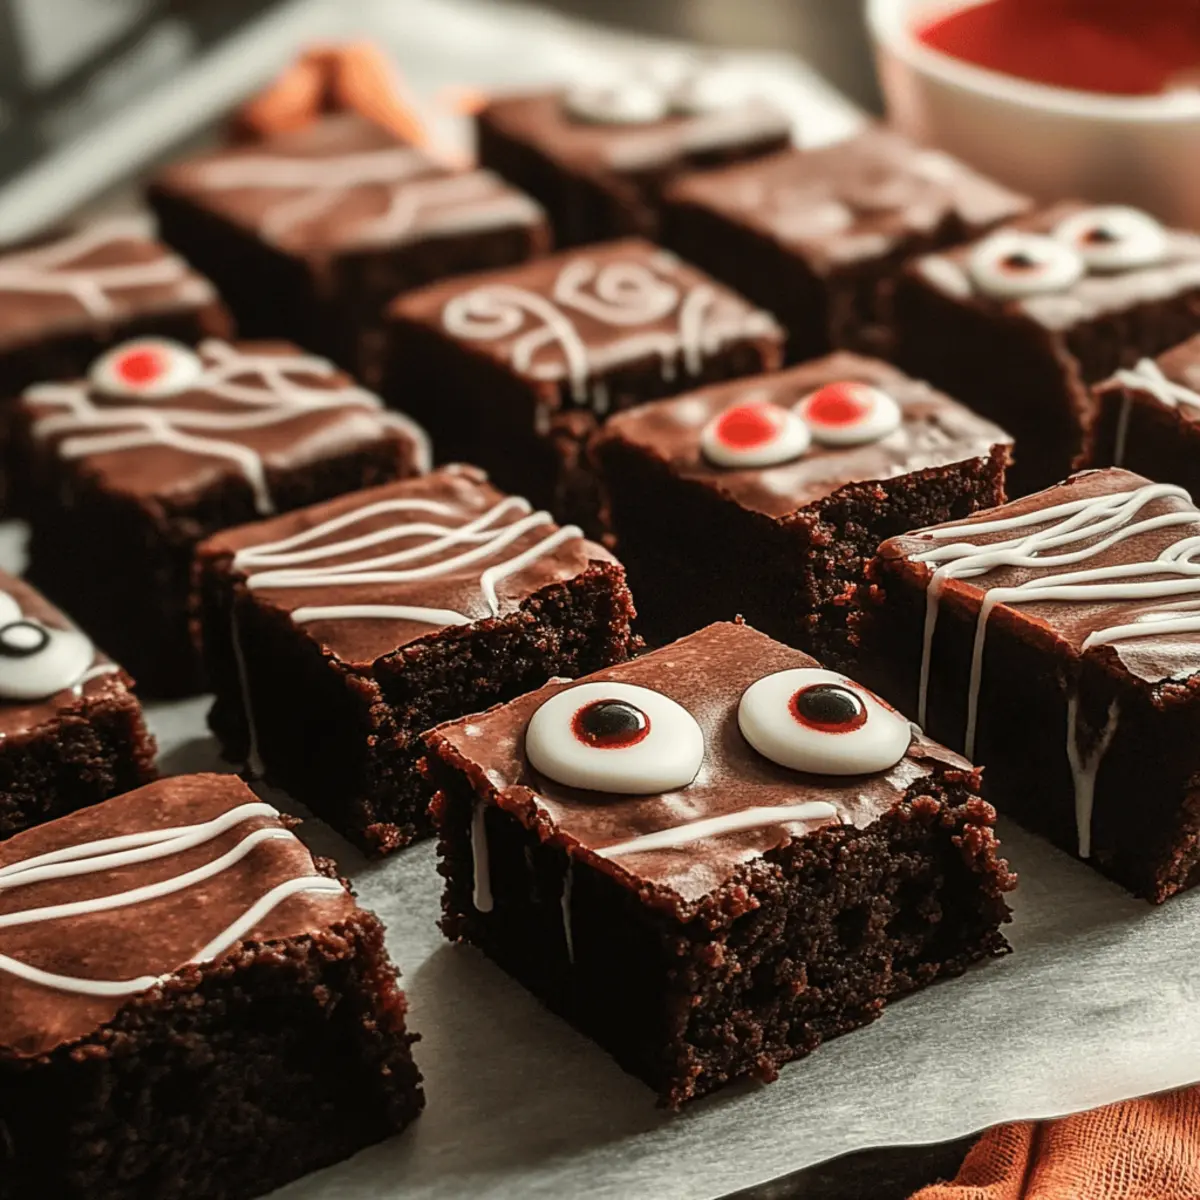
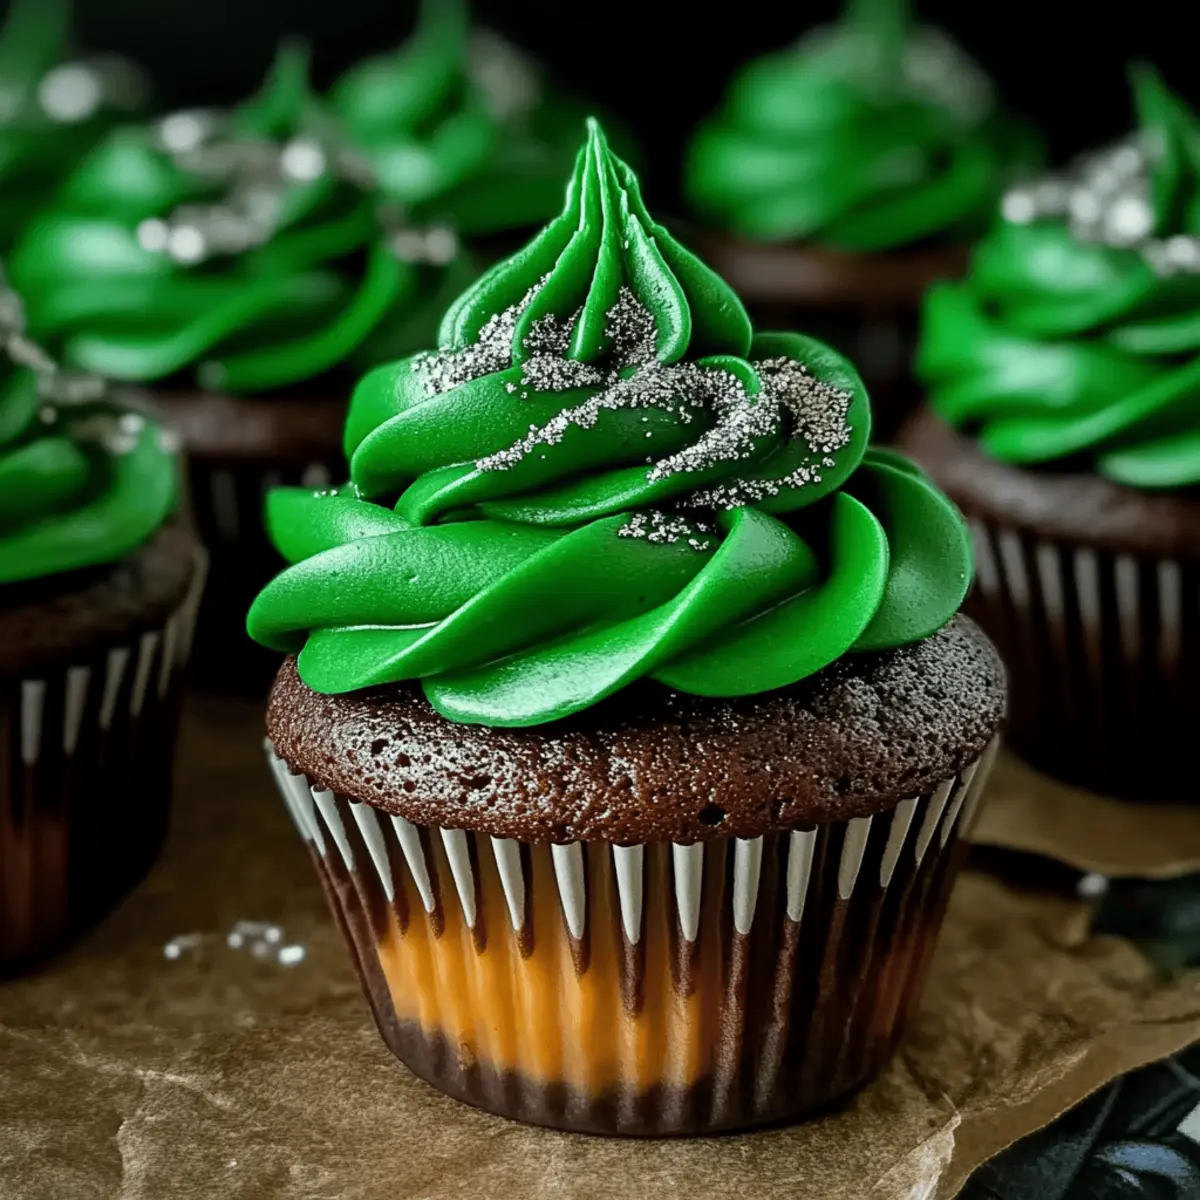
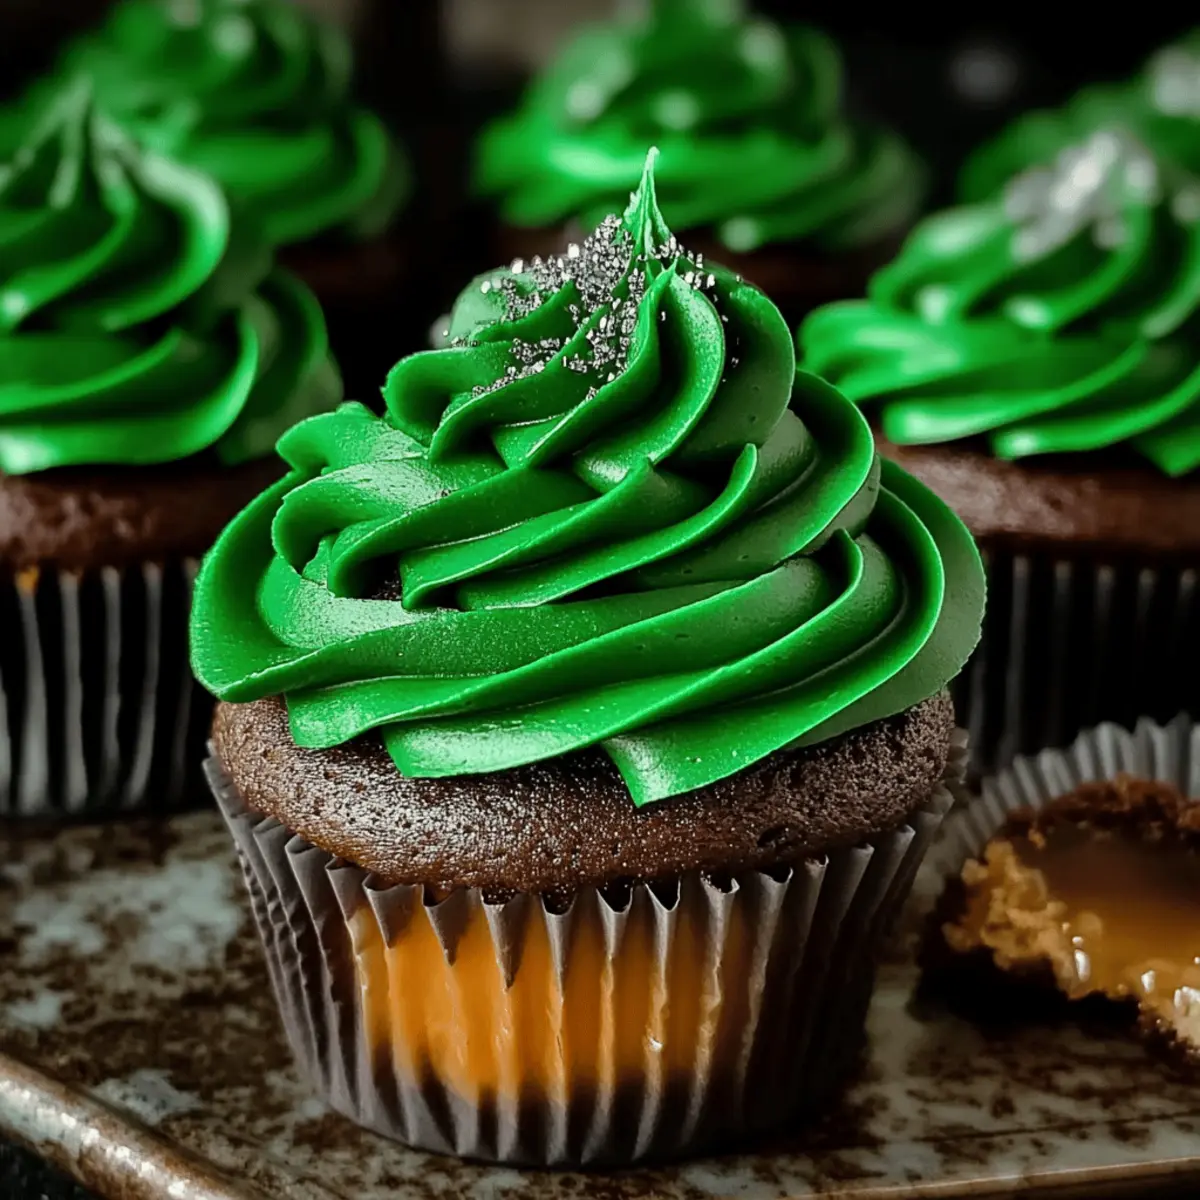
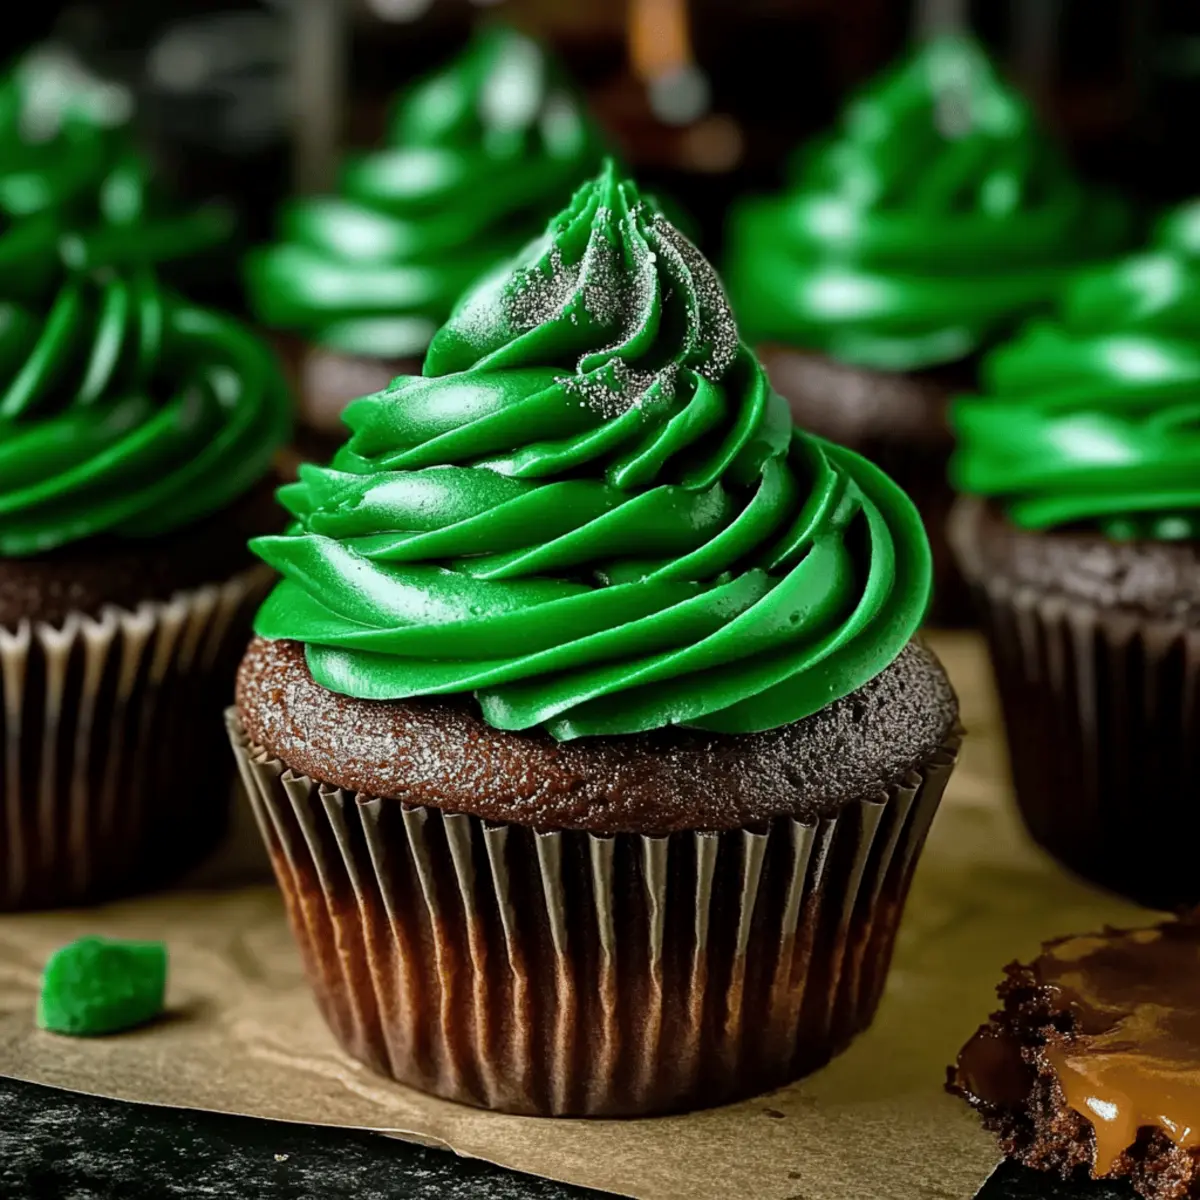
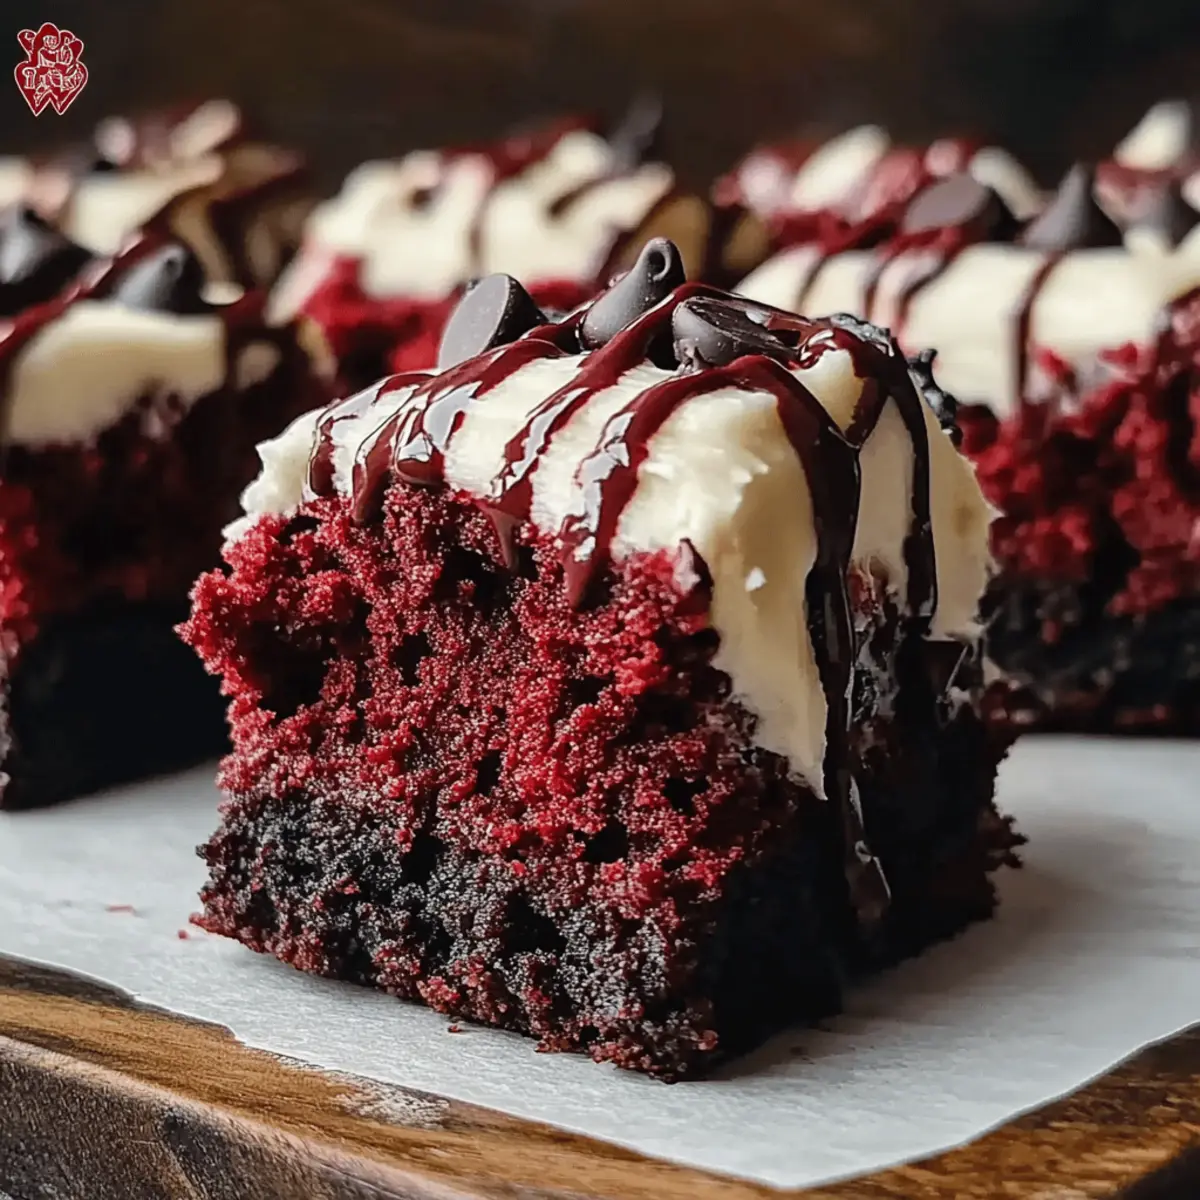
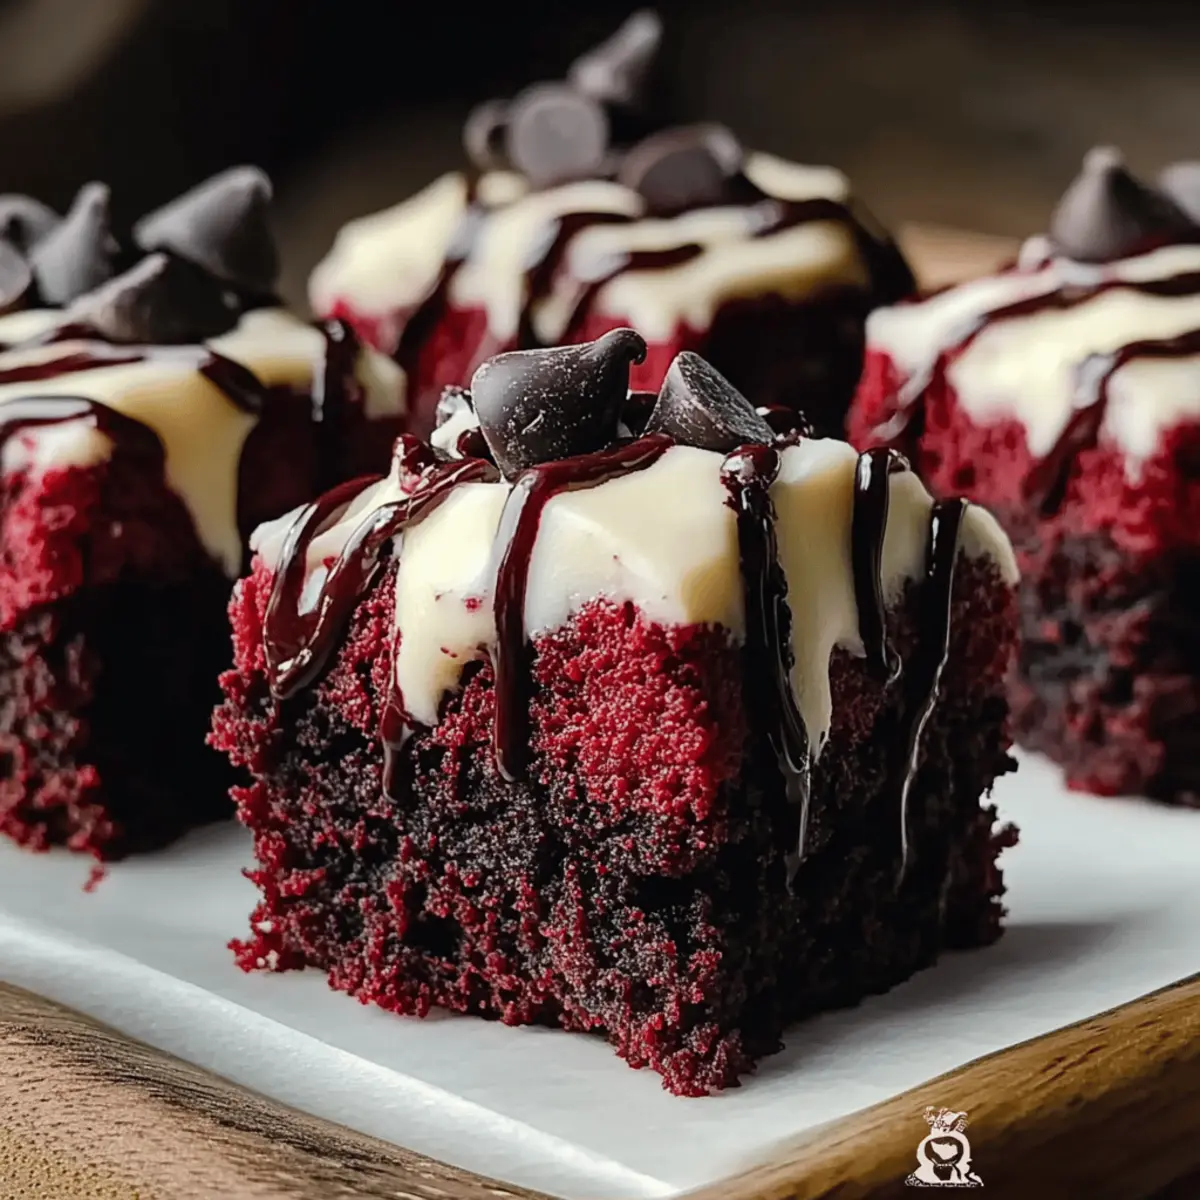
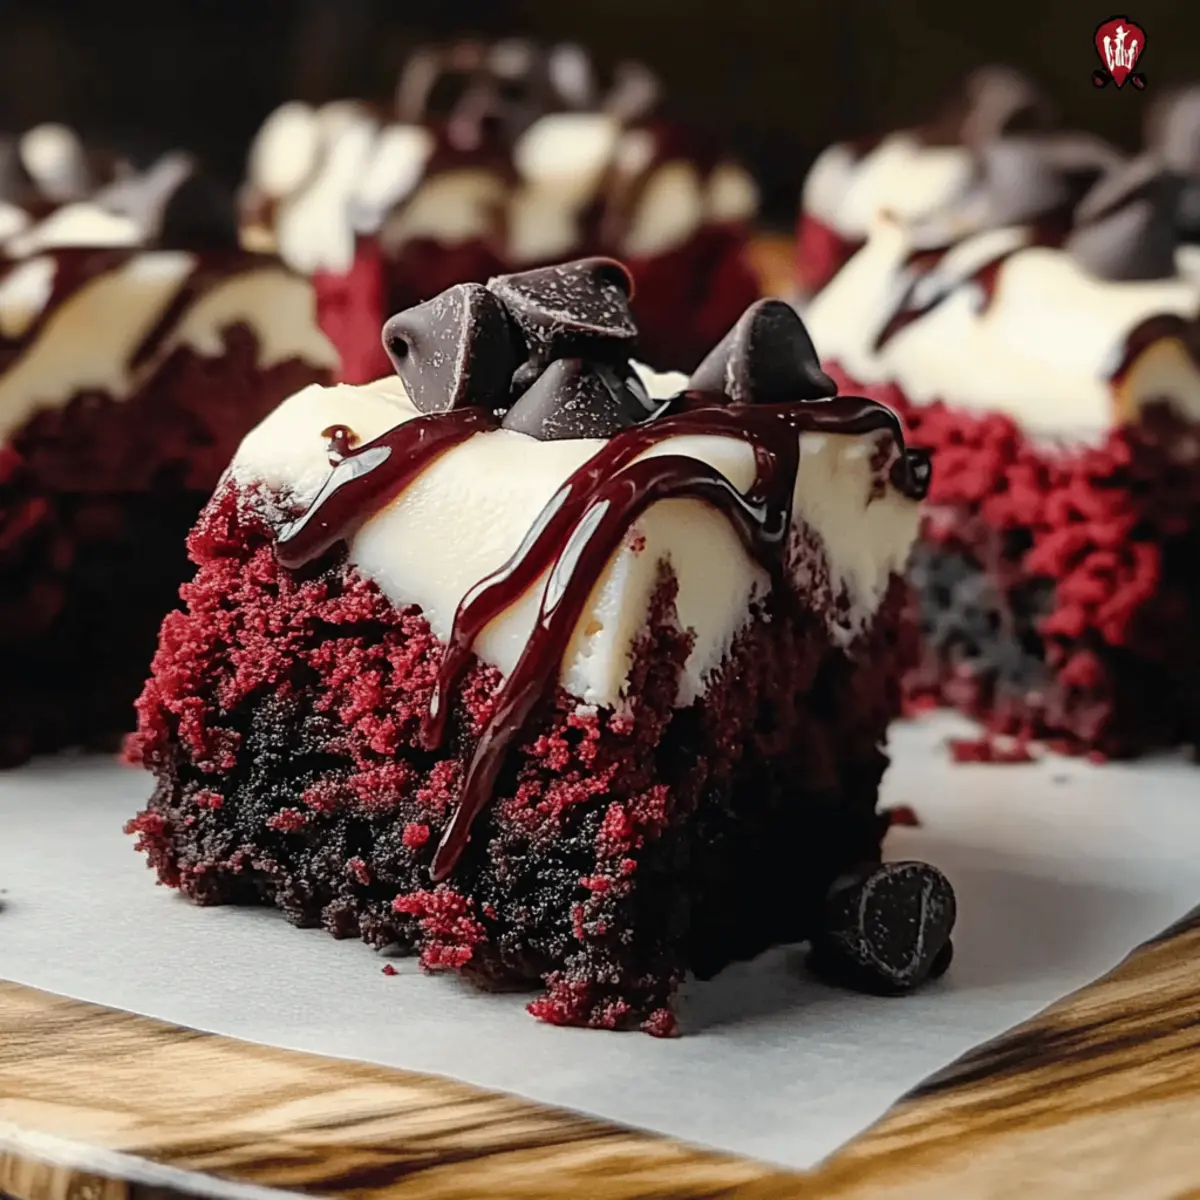
The first bite is a delightful shock to the senses—rich cocoa meets a velvety texture in a vivid red embrace. These Vampire Bite Red Velvet Brownies are not just another dessert; they bring joy and a playful twist to your Halloween celebrations. With a creamy cream cheese frosting and a glossy dark chocolate drizzle, they deliver a visually stunning treat that’s sure to impress your guests. Plus, they’re surprisingly low-effort to whip up, making them a perfect option for busy home chefs who still want to serve something special. This Vampire Bite Red Velvet Brownies Recipe will not only satisfy those sweet cravings but also make your gatherings memorable. Curious about how to bring these ghoulish delights to life in your kitchen? Keep scrolling for all the delicious details!

Why Are These Brownies So Irresistible?

Irresistible Flavor: The deep cocoa notes and creamy frosting create a decadent experience that no one can resist.

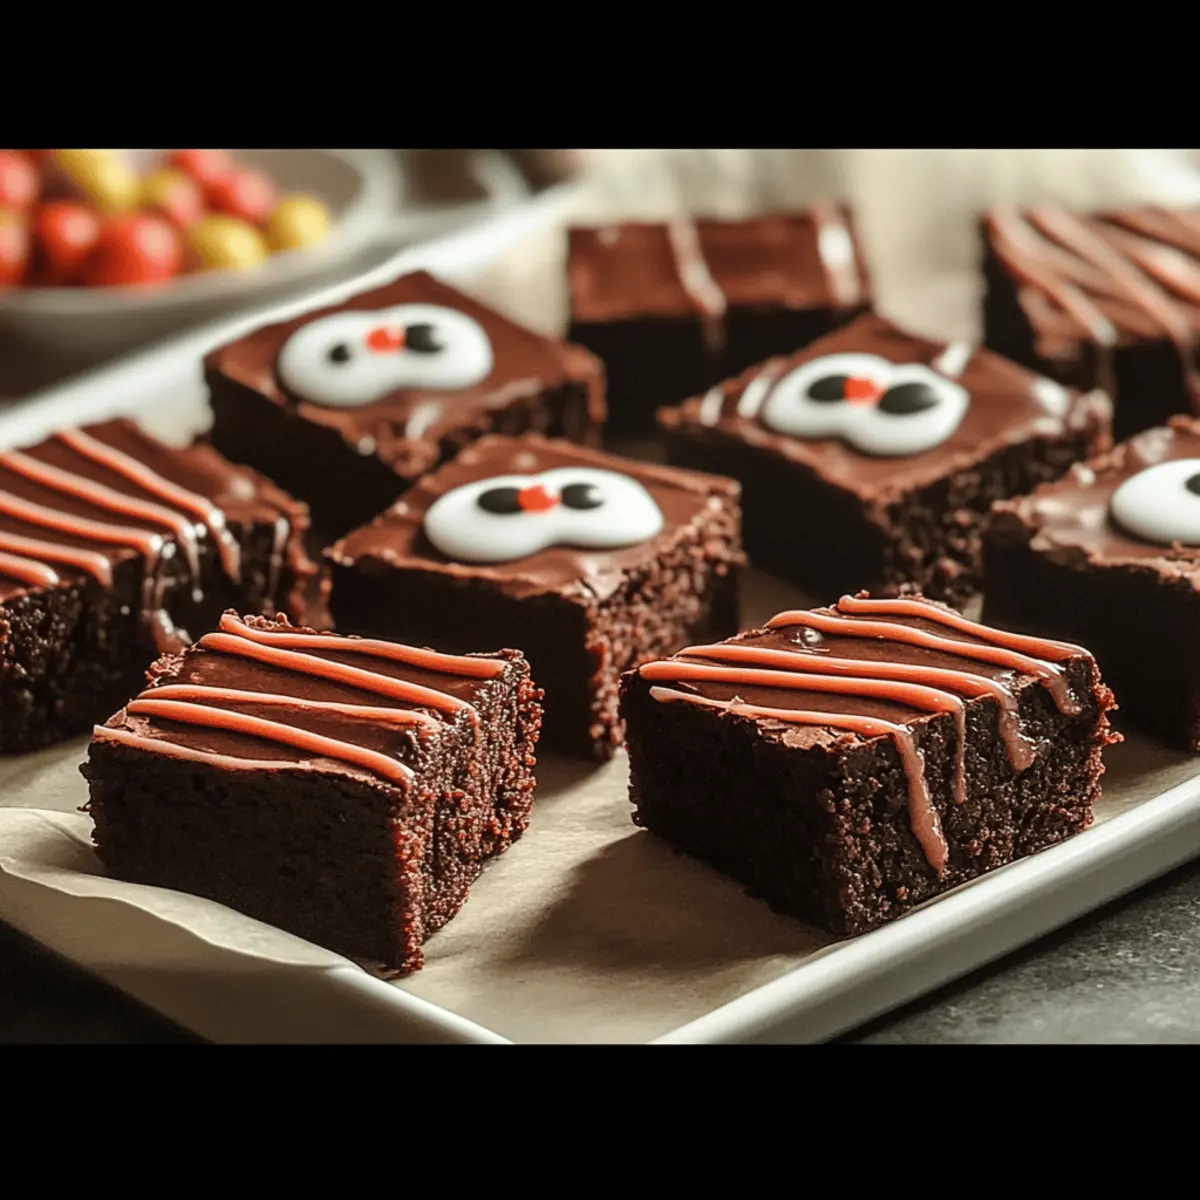
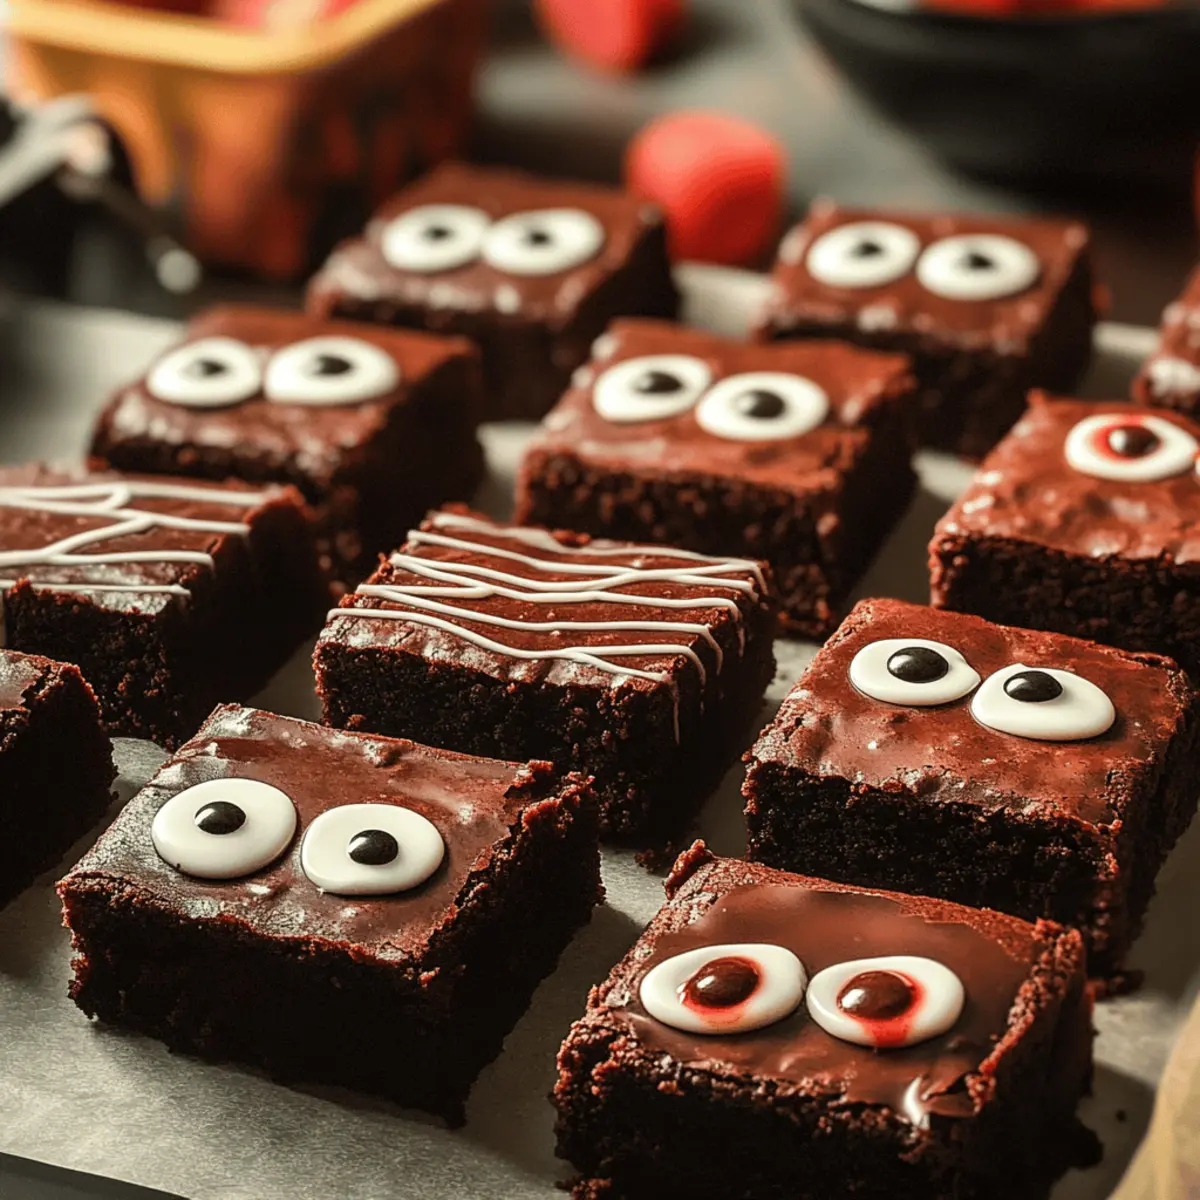
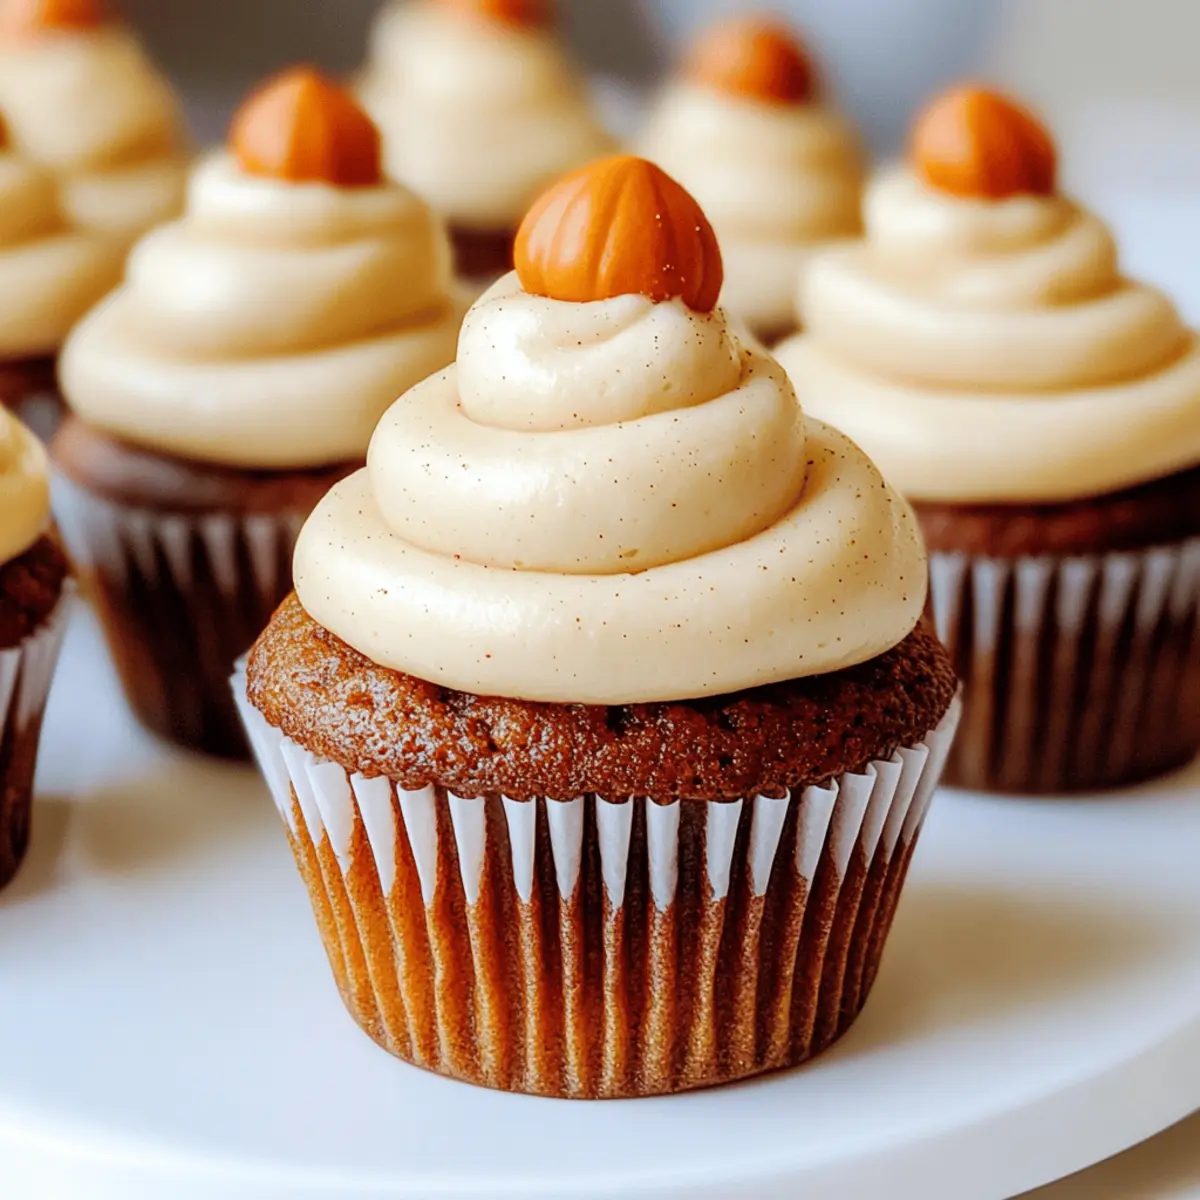
Eye-Catching Color: These stunning red brownies are perfect for Halloween, making them a showstopper at your parties or gatherings.

Easy to Make: You’ll love how simple the steps are, even if you’re short on time. It’s a quick yet impressive dessert!

Versatile Options: Add nuts for crunch or consider a vegan twist to cater to various dietary preferences.

Mouthwatering Texture: Fudgy and moist, these brownies melt in your mouth, providing a rich and satisfying bite every time.

Perfect Pairing: Serve them warm with a scoop of vanilla ice cream or fresh berries for an extra special treat! Don’t forget to check out our Cajun Steak Alfredo for another great dish that will impress your guests!

Vampire Bite Red Velvet Brownies Ingredients

For the Brownies

  • Unsalted Butter – Adds richness and moisture; substitute with coconut oil for a dairy-free version.
  • Granulated Sugar – Provides sweetness and helps with structure; brown sugar can deepen the flavor.
  • Large Eggs – Contributes to the structure and moisture; can replace with applesauce for a vegan option.
  • Vanilla Extract – Enhances flavor profile; no substitutions necessary.
  • Red Food Coloring – Provides the signature red hue; gel coloring is preferred for better results.
  • All-Purpose Flour – Provides structure; use a gluten-free blend for a gluten-free option.
  • Unsweetened Cocoa Powder – Adds depth of chocolate flavor; high-quality Dutch-processed cocoa is best.
  • Baking Powder – A leavening agent for lightness; ensure it’s fresh for proper rise.
  • Salt – Balances sweetness; no substitutions needed.
  • Dark Chocolate Chips – Adds chocolatey bursts; semi-sweet or milk chocolate can substitute.

For the Cream Cheese Frosting

  • Cream Cheese – Provides richness and tang; vegan cream cheese for a dairy-free option.
  • Unsalted Butter – Adds creaminess; plant-based butter can also be used for a dairy-free version.
  • Powdered Sugar – Sweetens the frosting; adjust quantity to taste.
  • Vanilla Extract – For flavor; no substitutions necessary.
  • Milk – Adjusts frosting consistency; any milk (almond, oat) works well.

For the Dark Chocolate Drizzle

  • Dark Chocolate Chips – Used for drizzling; provides rich flavor; semi-sweet chocolate can substitute.
  • Heavy Cream – Helps melt the chocolate smoothly; coconut cream is a dairy-free option.

Dive into this Vampire Bite Red Velvet Brownies Recipe, and let the magic unfold in your kitchen!

Step‑by‑Step Instructions for Vampire Bite Red Velvet Brownies Recipe

Step 1: Preheat and Prepare
Begin by preheating your oven to 350°F (175°C). While the oven warms up, grab a 9×13 inch baking pan and grease it well with butter or line it with parchment paper for easy removal of your brownies later. This step ensures a non-stick surface, allowing your Vampire Bite Red Velvet Brownies to shine!

Step 2: Whisk the Dry Ingredients
In a mixing bowl, whisk together 2 cups of all-purpose flour, ½ cup of unsweetened cocoa powder, 1 teaspoon of baking powder, and ½ teaspoon of salt. This mixture forms the base of your brownies, bringing structure and balancing the sweetness. Set this bowl aside; you’ll soon combine it with the wet ingredients for a deliciously rich batter.

Step 3: Mix the Wet Ingredients
In a large bowl, melt 1 cup of unsalted butter and mix it with 2 cups of granulated sugar until well combined. Gradually add in 4 large eggs, incorporating them one by one for a smooth batter. Then, stir in 1 tablespoon of vanilla extract and 1 tablespoon of red food coloring, letting the vibrant hue shine through as you create a luscious, velvety mixture.

Step 4: Combine Wet and Dry Ingredients
Next, gradually add the dry ingredient mixture to the wet ingredients. Gently stir the batter until just combined, ensuring not to overmix. The goal is to create a thick, luscious batter that embodies the characteristic rich texture of these Vampire Bite Red Velvet Brownies. Finally, fold in 1 cup of dark chocolate chips for delightful surprises in each bite!

Step 5: Spread the Batter
Pour the rich brownie batter into your prepared baking pan, using a spatula to spread it evenly and smooth out the top. This ensures that your brownies bake evenly and rise beautifully. With the vibrant red batters now nestled in the pan, you’re just a baking step away from tempting treats!

Step 6: Bake to Perfection
Place the pan in the preheated oven and bake for 25-30 minutes. To check for doneness, insert a toothpick into the center; it should come out with a few moist crumbs, indicating that these Vampire Bite Red Velvet Brownies are perfectly fudgy. Start checking at the 25-minute mark to avoid overbaking.

Step 7: Cool Before Slicing
Once baked, remove the pan from the oven and allow the brownies to cool in the pan on a wire rack for about 30 minutes. This step is essential for achieving a fudgy texture and preventing them from falling apart when sliced. Patience will reward you with perfectly shaped squares!

Step 8: Frost and Serve
After cooling, prepare the cream cheese frosting by mixing together 8 oz of cream cheese, ½ cup of unsalted butter, 4 cups of powdered sugar, and 1 teaspoon of vanilla extract until creamy and smooth. Spread a generous layer over your cooled brownies for that signature tangy sweetness, making them irresistible. Enjoy your Vampire Bite Red Velvet Brownies with friends and family!

Make Ahead Options

These Vampire Bite Red Velvet Brownies are perfect for busy home cooks looking to save time without compromising flavor. You can prepare the brownie batter up to 24 hours in advance; simply mix the dry and wet ingredients separately and refrigerate them. Ensure you cover the bowls tightly to maintain freshness. Additionally, you can whip up the cream cheese frosting up to 3 days ahead and store it in the fridge in an airtight container. Just before serving, spread the frosting on the cooled brownies and drizzle with melted dark chocolate for an enticing finish. This way, you’ll have delicious brownies ready to impress your guests with minimal effort!

How to Store and Freeze Vampire Bite Red Velvet Brownies

Fridge: Store leftover brownie squares in an airtight container in the refrigerator for up to one week. This will keep them fresh and delicious!

Freezer: For longer storage, freeze the brownies in a single layer, wrapped tightly in plastic wrap, and then place in a freezer-safe bag for up to 3 months.

Thawing: To enjoy, thaw the Vampire Bite Red Velvet Brownies in the fridge overnight or at room temperature for about 1 hour before serving.

Reheating: If you prefer them warm, reheat individual pieces in the microwave for about 10-15 seconds, adding a scoop of ice cream for an indulgent treat!

Expert Tips for Vampire Bite Red Velvet Brownies

  • Use Room Temperature Eggs: Ensure your eggs are at room temperature for better incorporation into the batter, leading to a more uniform texture in your Vampire Bite Red Velvet Brownies.
  • Avoid Overmixing: Don’t overmix the batter once you combine wet and dry ingredients. This helps maintain the fudgy, melt-in-your-mouth quality of the brownies.
  • Check Doneness Early: Start testing for doneness at the 25-minute mark. The toothpick should come out with a few moist crumbs for perfectly gooey brownies.
  • Create a Frosting Swirl: For a beautiful cream cheese swirl, drop dollops of frosting on top of the batter before baking and lightly swirl with a knife for a stunning design.
  • Customize with Add-ins: Add chopped nuts or extra chocolate chips to the batter for texture variations and deeper flavor in your Vampire Bite Red Velvet Brownies.
  • Cool Before Serving: Let the brownies cool fully before slicing to ensure they hold their shape and texture, creating that perfect bite!

What to Serve with Vampire Bite Red Velvet Brownies

Elevate your dessert game with these luscious brownies by pairing them with delightful companions that enhance their rich, velvety texture.

  • Vanilla Ice Cream: The cool, creamy contrast of vanilla ice cream perfectly complements the warm, fudgy brownies. This combination is a classic that never goes out of style.

  • Fresh Berries: Serve with plump strawberries or raspberries for a refreshing brightness that balances the sweetness and adds a pop of color to the plate.

  • Chocolate Drizzle: For true chocoholics, an extra drizzle of dark chocolate sauce can intensify the richness, creating a dessert experience that’s decadently indulgent.

  • Caramel Sauce: A warm drizzle of caramel sauce adds a sweet, buttery touch, creating a delightful contrast to the tangy cream cheese frosting.

  • Whipped Cream: Light, airy whipped cream provides a luscious topping that enhances the brownies’ richness without overwhelming their flavor profile.

  • Mint Tea: Pair your brownies with a warm cup of mint tea for a refreshing finish that cleanses the palate between bites, perfect for guests after a hearty meal.

  • Coffee: A smooth cup of freshly brewed coffee or espresso can elevate the chocolate notes in the brownies, creating a cozy atmosphere for your dessert gathering.

  • Cheesecake Bites: For those who want a little variety, serve mini cheesecake bites alongside your brownies. The creamy texture complements the fudgy goodness beautifully.

Each of these delightful options brings a unique twist to your Vampire Bite Red Velvet Brownies, ensuring an unforgettable dessert experience!

Vampire Bite Red Velvet Brownies Variations

Feel free to get creative with these brownies and make them your own with some delightful adjustments!

  • Nutty Surprise: Add 1 cup of chopped walnuts or pecans. This extra crunch will elevate the flavor and texture immensely!

  • Extra Chocolatey: Toss in an extra half cup of chocolate chips to the batter for a more intense chocolate experience. Everyone loves that gooey goodness!

  • Vegan Twist: Substitute eggs with 1/2 cup of unsweetened applesauce and use vegan cream cheese in the frosting. Enjoy the same rich texture without the animal products!

  • Gluten-Free Delight: Swap all-purpose flour for a gluten-free blend. Your brownies will still rise beautifully and taste amazing, perfect for gluten-sensitive friends.

  • Beet Hue: Replace artificial food coloring with beet juice for a natural red tint. It’s a healthier choice that gives the same vibrant color!

  • Spiced Up: Add a teaspoon of cinnamon or nutmeg to the dry ingredients for a warm, cozy flavor that will surprise your taste buds. Perfect for fall!

  • Creamy Layer: Before baking, drop dollops of the cream cheese frosting into the batter and swirl it with a knife for a pretty visual and flavor explosion.

  • Minty Fresh: Mix in a teaspoon of peppermint extract into the batter for a refreshing twist that complements the chocolate beautifully, especially around the holidays!

And don’t forget to check out our other delicious recipes like Cabbage Fat Burning or indulge in Sausage Tortellini Bite for a varied culinary experience!

Vampire Bite Red Velvet Brownies Recipe FAQs

What type of red food coloring should I use?
I recommend using gel food coloring for the best results with your Vampire Bite Red Velvet Brownies. Gel coloring provides a more vibrant red hue without adding extra liquid to the batter. Alternatively, if you prefer a natural option, beet juice can be used, but the color will be less intense.

How should I store leftover brownies?
Absolutely! Store your leftover Vampire Bite Red Velvet Brownies in an airtight container in the refrigerator for up to one week. This keeps them fresh and delicious. When you’re ready to enjoy them again, let them sit at room temperature for about 30 minutes to bring back their delightful texture.

Can I freeze these brownies?
Very! To freeze your Vampire Bite Red Velvet Brownies, first, let them cool completely. Wrap each brownie individually in plastic wrap, then place them in a freezer-safe bag. They can be frozen for up to 3 months. When you’re ready to enjoy them, simply thaw in the fridge overnight or at room temperature for about an hour.

What should I do if my brownies come out dry?
Not to worry! If your Vampire Bite Red Velvet Brownies turn out dry, it could mean they were overbaked. To prevent this in the future, start checking for doneness a couple of minutes before the recommended baking time. The toothpick should come out with a few moist crumbs rather than clean. If they do dry out, you can still enjoy them with a scoop of ice cream or a drizzle of cream cheese frosting on top!

Are these brownies safe for gluten-free diets?
Yes! You can easily adapt the Vampire Bite Red Velvet Brownies for gluten-free diets by using a gluten-free flour blend instead of all-purpose flour. Make sure to check the other ingredients, especially the baking powder, to ensure they are gluten-free as well. Enjoy this treat without worry!

Vampire Bite Red Velvet Brownies Recipe

Vampire Bite Red Velvet Brownies Recipe for a Spooky Treat

Indulge in these rich and velvety Vampire Bite Red Velvet Brownies, perfect for Halloween celebrations.
Prep Time 20 minutes
Cook Time 30 minutes
Cooling Time 30 minutes
Total Time 1 hour 20 minutes
Servings: 12 slices
Course: Dessert
Cuisine: American
Calories: 250

Ingredients
  

For the Brownies
  • 1 cup unsalted butter can substitute with coconut oil for a dairy-free version
  • 2 cups granulated sugar brown sugar can deepen the flavor
  • 4 large eggs can replace with applesauce for a vegan option
  • 1 tablespoon vanilla extract
  • 1 tablespoon red food coloring gel coloring preferred
  • 2 cups all-purpose flour gluten-free blend can be used
  • ½ cup unsweetened cocoa powder high-quality Dutch-processed cocoa is best
  • 1 teaspoon baking powder ensure it's fresh for proper rise
  • ½ teaspoon salt
  • 1 cup dark chocolate chips semi-sweet or milk chocolate can substitute
For the Cream Cheese Frosting
  • 8 oz cream cheese can use vegan cream cheese for a dairy-free option
  • ½ cup unsalted butter plant-based butter can be used
  • 4 cups powdered sugar adjust quantity to taste
  • 1 teaspoon vanilla extract
  • 1 tablespoon milk any milk (almond, oat) works well
For the Dark Chocolate Drizzle
  • 1 cup dark chocolate chips semi-sweet chocolate can substitute
  • ½ cup heavy cream coconut cream is a dairy-free option

Equipment

  • 9x13-inch baking pan
  • Mixing bowls
  • spatula

Method
 

Step-by-Step Instructions
  1. Preheat your oven to 350°F (175°C) and grease a 9x13 inch baking pan.
  2. In a mixing bowl, whisk together flour, cocoa powder, baking powder, and salt.
  3. Melt butter and mix it with sugar, then add eggs one by one, vanilla, and red food coloring.
  4. Gradually add dry ingredients to wet ingredients, stirring until just combined, then fold in chocolate chips.
  5. Spread the batter into the prepared pan evenly.
  6. Bake for 25-30 minutes, checking for doneness at 25 minutes.
  7. Allow brownies to cool in the pan for about 30 minutes before slicing.
  8. Prepare the frosting with cream cheese, butter, powdered sugar, and vanilla, then spread over cooled brownies.

Nutrition

Serving: 1sliceCalories: 250kcalCarbohydrates: 30gProtein: 3gFat: 12gSaturated Fat: 7gPolyunsaturated Fat: 1gMonounsaturated Fat: 2gCholesterol: 40mgSodium: 150mgPotassium: 100mgFiber: 1gSugar: 20gVitamin A: 300IUCalcium: 30mgIron: 1mg

Notes

Use room temperature eggs for better incorporation. Avoid overmixing the batter and check doneness early.

Tried this recipe?

Let us know how it was!

Delicious Halloween Zombie Cupcakes That Are Frighteningly Fun

As I stood in the kitchen, surrounded by a rainbow of sprinkles and baking supplies, a thought struck me: Halloween is the perfect excuse to indulge your creativity! Enter these Spooky Zombie Halloween Cupcakes, a fun twist that promises to enchant your friends and delight your taste buds. With a luscious strawberry cake base and a creamy buttercream frosting that’s oh-so-easy to whip up, these cupcakes are not just delicious; they also double as a gruesome decoration that’ll steal the show at any gathering. The best part? They’re truly customizable, allowing you to experiment with different flavors for a unique spin. Whether you’re a seasoned home-baker or just beginning your culinary journey, these cupcakes offer both simplicity and fun for everyone. Ready to get your spooky bake on and impress your guests this Halloween? Let’s dive into the delicious details!

Why Are These Cupcakes So Appealing?

Deliciously Spooky: These Halloween Zombie Cupcakes aren’t just festive; they bring a playful flair to your holiday gatherings. Easy to Customize: With options for chocolate or pumpkin cake mixes, every home baker can make these treats their own. Visually Striking: The brain-like frosting design creates an eye-catching centerpiece that will have your guests talking. Kid-Friendly Fun: Perfect for Halloween parties, they are a hit among both kids and adults alike. Quick and Simple: With minimal steps, you can whip up a batch in no time—perfect for last-minute celebrations. For an extra treat, consider pairing these cupcakes with our delightful Chocolate Fudge Cupcakes for that ideal shareable spread!

Halloween Zombie Cupcake Ingredients

These ingredients will help you create the perfect spooky treats!

For the Cupcakes

  • Strawberry cake mix – This serves as the base and provides the delightful flavor; feel free to substitute it with chocolate or red velvet for a different spin.
  • Unsalted butter – Adds richness to the cupcakes; for a lighter version, swap it for vegetable oil instead.
  • Eggs – Essential for binding; you can use flax eggs for a vegan alternative.
  • Water – Helps achieve the right batter consistency; you may replace it with milk for a richer flavor.

For the Buttercream Frosting

  • Unsalted butter – Cream this with your other frosting ingredients for a smooth texture; make sure it’s softened for easy mixing.
  • Powdered sugar – This sweetens the frosting; ensure it’s sifted for a lump-free finish.
  • Strawberry jam – Adds fruity sweetness and enhances the flavor; if you prefer, raspberry jam is a lovely substitute.
  • Vanilla extract – A flavorful addition that rounds out the sweetness; consider almond extract for a unique touch.
  • Kosher salt – Balanced flavor is key, and this helps tone down the sweetness effectively.

For Decoration

  • Strawberry syrup – A fun drizzle to give that ‘bloody’ effect; chocolate syrup can be used for a different spooky look.
  • Edible decorations – Consider gummy worms or candy eyeballs to heighten the Halloween vibe and make your cupcakes even more festive!

Get ready to bake – these Halloween Zombie Cupcakes are going to be a hit at your next gathering!

Step‑by‑Step Instructions for Halloween Zombie Cupcakes

Step 1: Prepare Cupcake Batter
Begin by preheating your oven to 350°F (175°C) and lining a cupcake pan with liners. In a large mixing bowl, combine the strawberry cake mix with the required eggs, water, and softened unsalted butter. Mix thoroughly until smooth and well-blended, ensuring no lumps remain. You’ll want a luscious batter that’s vivid and fragrant, ready to rise into delightful cupcakes.

Step 2: Bake
Pour the prepared batter evenly into the lined cupcake pan, filling each cup about two-thirds full to allow for rising. Place the pan in the preheated oven and bake for approximately 15–18 minutes. Keep an eye on them, and check for doneness by inserting a toothpick in the center—if it comes out clean, your Halloween Zombie Cupcakes are ready to cool!

Step 3: Cool
Once baked, carefully remove the cupcake pan from the oven and allow it to sit for 5 minutes. Then, transfer the cupcakes to a wire rack to cool completely. It’s essential that they are fully cooled before frosting to ensure the buttercream maintains its creamy texture and doesn’t melt into a puddle of sweetness.

Step 4: Make Buttercream Frosting
While the cupcakes are cooling, prepare your decadent strawberry buttercream frosting. In a large mixing bowl, beat together softened unsalted butter, sifted powdered sugar, strawberry jam, a splash of vanilla extract, and a pinch of kosher salt. Whip the mixture until it becomes light, fluffy, and perfectly spreadable, showcasing a delightful pink hue that echoes the spookiness of your Halloween Zombie Cupcakes.

Step 5: Frost Cupcakes
Transfer the prepared buttercream frosting into a piping bag fitted with a star tip for a fun decoration. Once the cupcakes have cooled, pipe the frosting in a brain-like pattern atop each one, swirling and curving to create a gruesome yet delightful appearance. Aim for a generous amount, as this will enhance both the look and flavor of your Halloween Zombie Cupcakes.

Step 6: Decorate
To add the finishing spooky touch, drizzle strawberry syrup over the frosted cupcakes, mimicking a bloody effect that’s perfect for Halloween. For an extra fright, consider adding festive edible decorations like gummy worms or candy eyeballs around the edges or on top. These little accents will elevate your Halloween Zombie Cupcakes into a true frightful treat that’s ready for any Halloween gathering!

Make Ahead Options

These Halloween Zombie Cupcakes are perfect for busy home cooks looking to save time during the spooky season! You can bake the cupcakes up to 3 days in advance and store them in an airtight container at room temperature to maintain their moisture. For the best results, frost them just before serving; this will prevent the buttercream from losing its fluffy texture. You can also prepare the buttercream frosting and refrigerate it in an airtight container for up to 24 hours. When you’re ready to serve, simply rewhip the frosting for a few seconds to restore its lightness before decorating your spooky treats. Enjoy the convenience of meal prep while still delighting your guests with these delicious Halloween Zombie Cupcakes!

What to Serve with Halloween Zombie Cupcakes?

Elevate your spooky celebration with delightful pairings that complement the eerie charm of these enchanting treats.

  • Spooky Punch: A fruity punch with vibrant colors mirrors the festive spirit, providing a refreshing counterbalance to your sweet cupcakes.
  • Ghostly Meringues: Light and airy, these delicate treats add a satisfying crunch and charm, perfect alongside the moist cake.
  • Chocolate-Covered Strawberries: Juicy berries dipped in rich chocolate offer a decadent bite, enhancing the fruity notes of the cupcakes harmoniously.
  • Pumpkin Spice Cookies: Embrace the season with these spiced delights that amplify the festive fall flavors and add an aromatic touch to your spread.
  • Candy Corn Mix: A colorful candy mix adds a playful kick, creating a delightful contrast in texture and sweetness.
  • Hot Apple Cider: A warm, spiced drink pairs beautifully with the cupcakes, bringing comforting seasonal flavors to your Halloween gathering.
  • Vanilla Ice Cream: Creamy and smooth, a scoop mellow out the sweetness of the cupcakes while introducing a delightful chill to your dessert table.
  • Gummy Worms: These playful toppings or side snacks enhance the theme and are always a hit with kids and adults alike.

With these pairings, you’ll create an unforgettable feast that captivates the taste buds and adds a playful atmosphere to your Halloween festivities!

How to Store and Freeze Halloween Zombie Cupcakes

Fridge: Store your frosted Halloween Zombie Cupcakes in an airtight container in the fridge for up to 3 days to maintain freshness and flavor.

Freezer: If you want to prepare these spooky treats ahead of time, freeze unfrosted cupcakes in a single layer in an airtight container for up to 2 months. Thaw completely before frosting.

Reheating: For a delightful experience, if serving chilled, allow the cupcakes to come to room temperature before enjoying. The rich flavors will shine through!

Frosting: Frost just before serving to keep the buttercream looking perfect and preserving its creamy texture that complements the delicious strawberry cake.

Expert Tips for Halloween Zombie Cupcakes

  • Perfect Cooling: Allow your cupcakes to cool completely before frosting to prevent the buttercream from melting and losing its shape.

  • Consistent Texture: Ensure you sift your powdered sugar for a smooth frosting texture; lumpy frosting can ruin the look of your Halloween Zombie Cupcakes.

  • Piping Precision: Use a piping bag for decorating. If you don’t have one, a Ziploc bag with a corner snipped off works just as well for achieving beautiful swirls.

  • Flavor Variations: Don’t hesitate to experiment! Use chocolate or pumpkin cake mixes for unique flavors that can surprise and delight at your Halloween party.

  • Spooky Decorations: Enhance the creepiness with fun edible decorations like gummy worms or candy eyeballs, perfect for making your cupcakes even more festive!

Halloween Zombie Cupcake Variations

Unlock your creativity in the kitchen with these fun ideas that bring flavor and flair to your spooky desserts!

  • Chocolate Delight: Swap strawberry cake mix for chocolate; rich and decadent, it’s perfect for chocolate lovers.

  • Pumpkin Twist: Use pumpkin cake mix for a festive fall flavor that embodies the spirit of Halloween. With its warm spices, this variation gives a cozy twist.

  • Cream Cheese Frosting: Trade the strawberry buttercream for cream cheese frosting for a tangy, deliciously sweet surprise on top. It brings a nice balance to the sweetness of the cake.

  • Raspberry Jam: Replace strawberry jam with raspberry jam for a tart contrast that enhances the overall berry flavor. This small change can elevate the taste profile significantly.

  • Candy Toppers: Add gummy worms or candy eyeballs on top to amplify the spookiness! It’s a small touch, but it can make your cupcakes a real conversation starter.

  • Almond Extract: Substitute vanilla extract with almond extract in your frosting for a nutty twist that surprises the palate. This variant adds a lovely depth to the flavor.

  • Gluten-Free: Use gluten-free cake mix to turn these spooky delights into a friendly option for those with gluten sensitivities. Everyone can enjoy a taste of Halloween!

For even more inspiration, you might want to try serving your Halloween Zombie Cupcakes alongside our Chocolate Fudge Cupcakes for an enticing dessert table that’s sure to wow your guests!

Halloween Zombie Cupcakes Recipe FAQs

How do I select the best strawberry cake mix?
When choosing a strawberry cake mix, look for one that doesn’t contain any artificial colors or flavors if possible. A good mix should have a vibrant pink hue and a pleasant aroma. It’s also a great idea to check the expiration date to ensure optimal freshness. If you’re open to it, feel free to experiment with chocolate or red velvet cake mixes for a spooky twist!

What’s the best way to store leftover cupcakes?
To maintain the delicious flavor and texture of your Halloween Zombie Cupcakes, store them in an airtight container in the refrigerator for up to 3 days. If you notice the frosting becoming less vibrant, a light sprinkle of powdered sugar can bring back some freshness right before serving. Just remember to keep them chilled, as this will help preserve the creamy buttercream texture and flavor.

Can I freeze these cupcakes for later?
Absolutely! To freeze your Halloween Zombie Cupcakes, I recommend freezing them unfrosted. Place them in a single layer in an airtight container or airtight freezer bag, ensuring they are not touching one another. They can be frozen for up to 2 months. When you’re ready to enjoy them, just thaw them completely at room temperature before frosting and serving.

What if my frosting gets too runny?
If your buttercream frosting turns out too runny, it’s likely due to too much liquid (usually from the jam or other ingredients). To fix this, simply add sifted powdered sugar incrementally, beating well until you reach your desired consistency. If the frosting is too thick, you can add a tiny splash of milk or a bit more jam to loosen it. Don’t forget, achieving that perfect fluffy texture is key to decorating your Halloween Zombie Cupcakes!

Are these cupcakes suitable for kids with allergies?
When making these Halloween Zombie Cupcakes, it’s important to consider potential allergies. The recipe contains common allergens like eggs, dairy (butter), and gluten (cake mix). For a kid-friendly and allergy-conscious version, consider using egg replacers, almond milk instead of water, and gluten-free cake mixes. Always check the labels for any hidden allergens, and let your guests know what ingredients you used to keep everyone safe!

Can my pets eat any part of these cupcakes?
I wouldn’t recommend sharing these cupcakes with pets. Especially the frosting, which contains sugar and potentially other harmful ingredients for animals. Strawberry jam might not be ideal for them either. It’s safest to stick with specially formulated pet treats for your furry friends, so they don’t miss out on the fun while keeping their tummies happy!

Halloween Zombie Cupcakes

Delicious Halloween Zombie Cupcakes That Are Frighteningly Fun

Enjoy delicious Halloween Zombie Cupcakes that are easy to customize and frightfully fun for your Halloween gatherings!
Prep Time 10 minutes
Cook Time 18 minutes
Cooling Time 5 minutes
Total Time 33 minutes
Servings: 12 cupcakes
Course: Dessert
Cuisine: American
Calories: 250

Ingredients
  

Cupcake Ingredients
  • 1 box strawberry cake mix Can substitute with chocolate or red velvet.
  • 1/2 cup unsalted butter Softened; can substitute with vegetable oil.
  • 3 large eggs Can use flax eggs for a vegan alternative.
  • 1 cup water Can replace with milk.
Buttercream Frosting Ingredients
  • 1/2 cup unsalted butter Softened.
  • 4 cups powdered sugar Sifted for a lump-free finish.
  • 1/4 cup strawberry jam Can substitute with raspberry jam.
  • 1 teaspoon vanilla extract Can use almond extract for flavor variation.
  • 1/4 teaspoon kosher salt Balances sweetness.
Decoration Ingredients
  • 1/4 cup strawberry syrup For the 'bloody' effect.
  • edible decorations Gummy worms or candy eyeballs for Halloween flair.

Equipment

  • Cupcake pan
  • Mixing Bowl
  • Piping Bag

Method
 

Cupcake Preparation
  1. Preheat your oven to 350°F (175°C) and line a cupcake pan with liners.
  2. In a large mixing bowl, combine the strawberry cake mix, eggs, water, and softened butter. Mix until smooth.
  3. Pour the batter into the cupcake pan, filling each cup about two-thirds full.
  4. Bake for approximately 15-18 minutes, checking for doneness with a toothpick.
  5. Allow the cupcakes to cool in the pan for 5 minutes before transferring to a wire rack.
Frosting Preparation
  1. In a mixing bowl, beat together softened butter, powdered sugar, strawberry jam, vanilla extract, and kosher salt until fluffy.
  2. Ensure the frosting has a light, pink hue.
Decorating Cupcakes
  1. Once cooled, pipe the frosting in a brain-like pattern on each cupcake.
  2. Drizzle strawberry syrup over the frosted cupcakes.
  3. Add edible decorations like gummy worms or candy eyeballs for a spooky effect.

Nutrition

Serving: 1cupcakeCalories: 250kcalCarbohydrates: 32gProtein: 2gFat: 13gSaturated Fat: 8gPolyunsaturated Fat: 0.5gMonounsaturated Fat: 4gCholesterol: 40mgSodium: 150mgPotassium: 50mgFiber: 1gSugar: 18gVitamin A: 400IUCalcium: 20mgIron: 0.5mg

Notes

Allow cupcakes to cool completely before frosting to avoid melting the buttercream.

Tried this recipe?

Let us know how it was!

Cozy Gingerbread Coffee Recipe for a Festive Winter Sip

As the first snowflakes gently fall outside my window, I find myself craving the comfort of a warm, inviting drink. Enter my Gingerbread Coffee Recipe—a cozy masterpiece combining the festive warmth of gingerbread spices with the bold richness of your favorite brew. This delightful concoction is not only simple to whip up, but it also offers a customizable twist, allowing you to adjust sweetness or toss in a splash of vanilla for a personal flair. Whether you’re looking for a holiday treat to impress guests or a quick pick-me-up on a chilly day, this recipe has you covered. Curious about how to create your own festive mug of joy? Let’s dive in and explore the sweet, heartwarming flavors that will transport you right to a winter wonderland.

Why is Gingerbread Coffee a Must-Try?

Comforting goodness: This Gingerbread Coffee Recipe is a delightful fusion that warms both heart and soul during chilly winter days.

Customizable joy: With options to adjust sweetness and flavor, you can easily tailor it to your personal taste, making it uniquely yours.

Festive aroma: The enchanting spices of gingerbread fill your kitchen with a cozy scent, perfectly capturing the essence of the holiday season.

Crowd pleaser: Serve it at your next gathering, and watch friends and family light up with delight as they sip on this winter wonder.

Quick preparation: Ready in just a few minutes, it’s a time-saving treat that makes enjoying homemade, festive beverages effortless.

Pair it perfectly with holiday treats like biscotti or shortbread cookies for a complete cozy experience!

Gingerbread Coffee Recipe Ingredients

For the Coffee Base
Coffee – A robust medium or dark roast gives this Gingerbread Coffee Recipe its essential depth and flavor.

For the Gingerbread Syrup
Brown Sugar – This sweetener adds rich sweetness and a hint of molasses.
Water – Use equal parts with the brown sugar for a simple syrup.
Ginger Powder – For that signature spicy kick, this ingredient is a must!
Cinnamon – A dash enhances the holiday vibes.

For the Creamy Texture
Milk – Use dairy or non-dairy options; frothed almond milk lends a lovely healthful twist.
Whipped Cream – Optional for topping but adds an indulgent finish to your drink.

For Garnishing
Cinnamon – A sprinkle on top adds flavor and a festive touch.
Gingerbread Cookie – Serve on the side for an extra festive flourish, creating a whimsical pairing!

Step‑by‑Step Instructions for Gingerbread Coffee Recipe

Step 1: Brew Your Coffee
Start by brewing your favorite coffee using any method you prefer, such as a French press, drip, or espresso machine. Aim for a strong medium or dark roast, which takes about 5 minutes. Once brewed, pour your coffee into a large mug, leaving space for the delicious gingerbread components that will follow. The rich aroma will fill your kitchen with a cozy warmth.

Step 2: Make the Gingerbread Syrup
In a small saucepan, combine equal parts of brown sugar and water—about ½ cup each—along with 1 teaspoon of ginger powder and ½ teaspoon of cinnamon for that signature gingerbread flavor. Heat the mixture over medium heat, stirring until the sugar dissolves. This should take around 3–5 minutes. Once the syrup is heated and fragrant, set it aside to cool slightly.

Step 3: Froth the Milk
While the gingerbread syrup cools, pour your milk of choice (dairy or non-dairy) into a saucepan, heating it gently over medium heat. Avoid boiling to keep the milk from curdling. After about 3 minutes, use a whisk or a milk frother to froth the milk until it reaches a creamy, foamy texture. This step elevates your cozy gingerbread coffee, making it even more delightful.

Step 4: Combine Ingredients
In your mug filled with brewed coffee, add 2 tablespoons of the gingerbread syrup. Stir gently to combine, allowing the warm spices to infuse into the coffee. The syrup will blend beautifully with the coffee, creating a fragrant and inviting mixture that embodies the holiday spirit.

Step 5: Add Frothed Milk
Next, gently pour the frothed milk over the coffee and gingerbread syrup mixture, creating a layered effect. The frothy milk should float on top, adding an inviting creaminess to your Gingerbread Coffee Recipe. Take a moment to admire the beautiful colors and textures as your drink comes together.

Step 6: Garnish and Serve
Finish off your gingerbread coffee with a generous dollop of whipped cream, if desired. Sprinkle a pinch of cinnamon on top for a festive touch. Optionally, serve alongside a gingerbread cookie for a delightful pairing that completes this cozy holiday drink. Your holiday spirit is now fully captured in this fragrant and delicious mug!

What to Serve with Cozy Gingerbread Coffee?

Embrace the festive spirit with delightful pairings that enhance every sip of your warm, comforting drink.

  • Gingerbread Cookies: The classic pairing! Their soft, spiced sweetness complements the ginger notes in the coffee perfectly, creating a blissful holiday experience.

  • Biscotti: Crunchy and delightful, biscotti add a satisfying texture contrast. Dip them into your gingerbread coffee for a cozy, indulgent treat.

  • Shortbread Cookies: Rich and buttery, these cookies harmonize remarkably with the spiciness of gingerbread coffee, making for a refined pairing.

  • Churros: Dusty with sugar and cinnamon, churros echo the flavors in your drink while offering a crispy treat that’s hard to resist.

  • Rich Chocolate Cake: A decadent, moist chocolate cake introduces a luxurious sweetness that pairs beautifully with the warm spices of the coffee.

  • Spiced Apple Cider: This warm, aromatic drink echoes the holiday season, balancing the flavors of your coffee while offering a festive alternative.

  • Vanilla Ice Cream: A scoop of creamy vanilla ice cream served alongside offers a cool and contrasting texture that will elevate your cozy gingerbread coffee moment.

  • Mulled Wine: If you’re feeling adventurous, this warm, spiced wine creates a festive atmosphere, making it a perfect companion to your mug of gingerbread coffee.

  • Peppermint Bark: With its refreshing mint and rich chocolate, peppermint bark adds a delightful twist of flavor and a sweet finish to your holiday gathering.

Gingerbread Coffee Recipe Variations

Feel free to make this delightful gingerbread coffee your own with these fun twists and substitutions that will make your taste buds sing!

  • Dairy-Free: Substitute regular milk with oat or coconut milk for a rich, creamy texture that suits dairy-free diets.
    Oat milk is particularly luscious and can add a slight sweetness, making your gingerbread coffee even more indulgent!

  • Sugar-Free: Use a sugar alternative like stevia or erythritol to cater to your low-sugar needs without losing flavor.
    This twist ensures you can savor your gingerbread coffee guilt-free, enjoying the comforting taste without the added calories.

  • Spiced Up: Add a pinch of nutmeg or a dash of allspice to the gingerbread syrup for an extra layer of flavor that boasts warmth and complexity.
    This small adjustment can elevate your cozy drink to new heights, making it perfect for those seeking bold, spiced flavors.

  • Minty Twist: Infuse a few drops of peppermint extract to create a festive gingerbread-mint coffee explosion.
    The refreshing touch of mint can create a delightful contrast, turning your cozy cup into a holiday treat that warms you from within.

  • Mocha Delight: Stir in a tablespoon of cocoa powder or chocolate syrup to turn your gingerbread coffee into a chocolatey holiday dream.
    The enchanting combination of chocolate and gingerbread sends your palate into a delightful adventure, perfect for chocolate lovers.

  • Frozen Treat: Blend all ingredients with ice for a refreshing iced gingerbread coffee on warmer winter days.
    Adding a frosty twist can offer a fun departure from the traditional hot drink, perfect for when you’re feeling a bit adventurous!

  • Flavored Cream: Top with flavored whipped cream, like vanilla or cinnamon, to enhance creaminess with additional sweet notes.
    This simple upgrade can truly transform your presentation and add a luxurious touch to your festive beverage.

  • Savory Surprise: Chantilly cream with a sprinkle of sea salt can balance the sweetness of the coffee, adding depth to your drink.
    This combination brings a delightful contrast and sophistication to your cozy drink, perfect for impressing guests!

Pair your cozy gingerbread coffee with treats like biscotti or shortbread cookies for a complete festive experience that warms your heart and soul!

Make Ahead Options

These Gingerbread Coffee Recipe elements are perfect for meal prep enthusiasts! You can prepare the gingerbread syrup up to 3 days in advance by combining ½ cup brown sugar, ½ cup water, 1 teaspoon ginger powder, and ½ teaspoon cinnamon in a small saucepan. Store the cooled syrup in an airtight container in the refrigerator, maintaining its festive flavor. When you’re ready to serve, simply brew your coffee and add 2 tablespoons of the prepped syrup. Froth your milk fresh for the best creamy texture, ensuring your cozy gingerbread coffee remains just as delicious and heartwarming as the day it was made!

Storage Tips for Gingerbread Coffee

Room Temperature: Enjoy your freshly brewed gingerbread coffee immediately for the best flavor and aroma. It’s a drink meant to be savored warm!

Fridge: If you have leftover gingerbread coffee, store it in an airtight container in the fridge for up to 2 days. Reheat gently on the stove or in the microwave before enjoying.

Freezer: While it’s best to drink freshly made gingerbread coffee, you can freeze leftover gingerbread syrup in ice cube trays for later use. Store cubes in a freezer bag for up to 3 months.

Reheating: When ready to use frozen gingerbread syrup, simply thaw in the fridge overnight or place in warm water until it softens. Add to a fresh brew for a quick festive treat!

Expert Tips for Gingerbread Coffee

  • Coffee Quality Matters: Use high-quality, freshly ground medium or dark roast coffee for a richer flavor profile in your Gingerbread Coffee Recipe.

  • Perfecting the Syrup: Avoid boiling the gingerbread syrup; this can lead to a grainy texture. Heat gently and stir until the sugar dissolves.

  • Milk Temperature: Ensure your milk is warmed, but not boiling, to prevent curdling when frothing. Keep it between 150°F and 160°F for best results.

  • Taste as You Go: Adjust the sweetness of your gingerbread syrup by starting with less brown sugar. You can always add more to suit your personal taste!

  • Seasonal Variations: Feel free to mix in a splash of vanilla extract or a sprinkle of nutmeg to personalize your gingerbread coffee and elevate its flavor.

Cozy Gingerbread Coffee Recipe FAQs

How do I choose the right coffee for my Gingerbread Coffee?
Absolutely! For the best flavor, I recommend using a medium or dark roast coffee. Look for beans with chocolatey undertones, which will complement the spice of the gingerbread beautifully. Freshly ground coffee beans create a bolder and more aromatic drink, so consider grinding them just before brewing.

How should I store leftover gingerbread syrup?
Very simply! After preparing gingerbread syrup, allow it to cool before transferring it to an airtight container. Store it in the refrigerator, where it will stay fresh for up to one week. Just give it a good shake before using it again in your cozy drinks!

Can I freeze leftover gingerbread syrup?
Absolutely! Freezing is a great option for preserving your delicious gingerbread syrup. Pour the cooled syrup into ice cube trays and freeze until solid. Transfer the cubes to a freezer bag and store them for up to 3 months. When you’re ready to use, simply thaw the desired amount and add it to your coffee.

What if my gingerbread syrup turns out grainy?
If your syrup has a grainy texture, don’t worry! It may have boiled instead of gently heated. To fix this, return the syrup to a saucepan over low heat and stir continuously until the sugar fully dissolves. Always remember to heat it gently to avoid the same issue in the future!

Is this recipe suitable for those with dietary restrictions?
Very much so! To make this Gingerbread Coffee recipe suitable for various dietary needs, you can easily substitute dairy milk with unsweetened almond milk or any other non-dairy options you prefer. Also, opt for gluten-free gingerbread syrups or flavors if needed, ensuring everyone can enjoy this cozy, festive drink!

Gingerbread Coffee Recipe

Cozy Gingerbread Coffee Recipe for a Festive Winter Sip

Get into the holiday spirit with this delightful Gingerbread Coffee Recipe that combines warm spices with rich coffee for a festive drink experience.
Prep Time 5 minutes
Cook Time 5 minutes
Total Time 10 minutes
Servings: 2 cups
Course: Drinks
Cuisine: American
Calories: 250

Ingredients
  

For the Coffee Base
  • 2 cups Coffee Robust medium or dark roast
For the Gingerbread Syrup
  • 1/2 cup Brown Sugar Adds rich sweetness and a hint of molasses
  • 1/2 cup Water Equal parts with brown sugar
  • 1 teaspoon Ginger Powder For signature spicy kick
  • 1/2 teaspoon Cinnamon Enhances holiday vibes
For the Creamy Texture
  • 1 cup Milk Dairy or non-dairy option
  • 1 cup Whipped Cream Optional for topping
For Garnishing
  • 1 teaspoon Cinnamon Sprinkle on top for flavor
  • 2 pieces Gingerbread Cookie Serve on the side

Equipment

  • Saucepan
  • Coffee maker
  • Whisk or milk frother
  • Mug

Method
 

Step-by-Step Instructions for Gingerbread Coffee Recipe
  1. Start by brewing your favorite coffee using any method you prefer, such as a French press, drip, or espresso machine. Aim for a strong medium or dark roast, which takes about 5 minutes.
  2. In a small saucepan, combine equal parts of brown sugar and water—about ½ cup each—along with 1 teaspoon of ginger powder and ½ teaspoon of cinnamon. Heat until the sugar dissolves.
  3. While the syrup cools, heat your milk of choice in a saucepan, avoiding boiling. After about 3 minutes, froth the milk until creamy.
  4. In your mug filled with brewed coffee, add 2 tablespoons of gingerbread syrup and stir gently.
  5. Gently pour the frothed milk over the coffee and gingerbread syrup, creating a layered effect.
  6. Finish off your coffee with a dollop of whipped cream and a sprinkle of cinnamon. Optionally, serve alongside a gingerbread cookie.

Nutrition

Serving: 1cupCalories: 250kcalCarbohydrates: 35gProtein: 4gFat: 12gSaturated Fat: 7gMonounsaturated Fat: 4gCholesterol: 30mgSodium: 150mgPotassium: 300mgFiber: 1gSugar: 15gVitamin A: 500IUCalcium: 150mgIron: 1mg

Notes

Enjoy your gingerbread coffee immediately for the best flavor and aroma. Store leftovers in an airtight container in the fridge for up to 2 days.

Tried this recipe?

Let us know how it was!

Melt-in-Your-Mouth Mozzarella Cheese Skulls for Halloween

As I prepped for this year’s Halloween bash, I stumbled upon a fun idea that transformed my kitchen into a festive workshop: Mozzarella Cheese Skulls! These adorable, spooky treats are not only a hit with guests but also simple to whip up, making them perfect for any home chef looking to impress. With minimal ingredients and a quick baking time, these mozzarella skulls can elevate your charcuterie board or even serve as a fun party appetizer. Plus, they’re vegetarian-friendly, so everyone can enjoy them without a second thought. Ready to add a little fright to your feast? Let’s dive into how to create these delightful spooky snacks!

Why Are Mozzarella Cheese Skulls Incredible?

Unforgettable Presentation: These mozzarella cheese skulls are sure to steal the show at your Halloween party! Their unique shape makes them a striking addition to any plate, elevating your charcuterie display in seconds.
Quick to Prepare: With only a few ingredients and a baking time of just 8-10 minutes, these skulls are a breeze to create, even for busy home chefs.
Vegetarian-Friendly: Perfect for guests with dietary restrictions, everyone can indulge in these spooky snacks without worry.
Versatile Serving Options: Whether served alone or paired with vibrant dips like pesto or balsamic glaze, these cheese skulls can easily suit various palates. If you’re looking for more delightful party ideas, consider making a Strawberry Cheesecake Dump or our Banana Grilled Cheese for a unique twist!
Crowd-Pleaser: Impress your friends with this playful take on a classic treat — it’s guaranteed to make your celebration a memorable one!

Mozzarella Cheese Skulls Ingredients

For the Cheese Skulls
Mini Mozzarella Balls – These small, cherry-sized mozzarella are perfect for shaping; feel free to use regular mozzarella if needed.
Silicone Skull Molds – Use heat-safe molds to shape the mozzarella into fun skulls; ensure they can withstand the oven temperature.

Optional Dipping Sauces
Balsamic Glaze – Drizzle this sweet-and-tangy glaze for added flavor and a beautiful presentation.
Pesto – A bright, fresh dip that pairs wonderfully with the creamy mozzarella skeletons.

Create these Mozzarella Cheese Skulls yet, and let them be the spooky star of your Halloween celebration!

Step‑by‑Step Instructions for Mozzarella Cheese Skulls

Step 1: Preheat the Oven
Start by preheating your oven to 350°F (175°C). This ensures that as soon as your mozzarella cheese skulls are ready, they will bake evenly and adequately soften. Preheating is crucial, so while you prepare your ingredients, let that oven work its magic!

Step 2: Prepare the Mozzarella
Take your mini mozzarella balls and use a paper towel to blot away excess moisture. This step is vital to achieving a solid shape when baked. Squeeze the balls gently to remove any liquid without breaking them, ensuring your mozzarella cheese skulls will maintain their spooky form.

Step 3: Fill the Molds
Carefully place one dried mini mozzarella ball into each cavity of your silicone skull molds. Ensure they fit snugly without any gaps, as this will help maintain their shape during the baking process. Your molds should be heat-safe to withstand the oven temperature, ready for the transformation ahead!

Step 4: Bake the Mozzarella
Slide your filled molds into the preheated oven and bake for 8-10 minutes. Keep an eye on them; you want the mozzarella to soften but not melt completely. Once slightly soft, they will be ready to mold into the perfect skull shape that will delight your guests.

Step 5: Shape the Cheese Skulls
After baking, carefully remove the molds from the oven using oven mitts. While the mozzarella is still warm, use the back of a spoon to press down gently on each mozzarella ball, shaping them into the skull form. Be light-handed to retain the integrity of the delicious cheese.

Step 6: Cool and Unmold
Transfer the molds to the refrigerator and chill for about 10 minutes. This cooling step helps the mozzarella cheese skulls firm up and hold their cute, spooky shapes. Once cool, gently unmold each skull by turning the mold upside down and tapping it to release the cheese.

Step 7: Serve Your Mozzarella Cheese Skulls
Now that your mozzarella cheese skulls are perfectly shaped, it’s time to showcase them! Arrange them on a festive platter and consider serving them with balsamic glaze or pesto for dipping. These spooky treats are sure to be a hit at your Halloween gathering.

Expert Tips for Mozzarella Cheese Skulls

Drying is Key: Ensure your mozzarella balls are adequately dried before baking; excess moisture can make them lose shape and gooeyness.

Gentle Pressure: Use a light hand when pressing the mozzarella into the molds; pressing too hard may cause them to lose their cute skull shape.

Quality Molds: Opt for high-quality, heat-safe silicone molds; flimsy or low-quality molds may melt, affecting your spooky presentation.

Experiment with Flavors: Don’t hesitate to infuse your mozzarella with herbs or spices before molding for an extra flavor twist to your cheese skulls.

Serving Style: Present your mozzarella cheese skulls on a vibrant platter adorned with festive decor to enhance visual appeal and engage your guests.

What to Serve with Spooky Mozzarella Cheese Skulls?

Create a breathtaking Halloween spread that your guests will rave about long after the festivities!

  • Black Bean Salad: This zesty side dish brings a delightful crunch and earthy flavor that beautifully contrasts the creamy mozzarella, enhancing every bite.
  • Pumpkin Spice Hummus: A seasonal twist, this smooth, sweet dip adds a warm palate surprise when enjoyed alongside the cheese skulls, making it a perfect pair!
  • Garlic Butter Breadsticks: The soft, buttery texture of these breadsticks complements the cheese and serves as a perfect vessel for any leftover dips. Each bite is a comforting delight!
  • Mixed Greens Salad: Fresh greens tossed in a light vinaigrette offer a bright contrast to the richness of the mozzarella, balancing your Halloween feast beautifully.
  • Spooky Sangria: A festive punch with dark fruits and a hint of spice, this drink adds a whimsical touch to your appetizer spread while keeping your guests refreshed.
  • Chocolate Pumpkin Pudding Cups: End your meal on a sweet note with rich chocolate and smooth pumpkin. These adorable cups are both decadent and playful, channeling the Halloween spirit!
  • Caramel Apple Slices: Crisp apple slices dipped in sweet caramel provide a fun, fruity addition to your spread. They are sure to evoke nostalgic Halloween memories!
  • Deviled Eyeball Eggs: Elevate your appetizer table with these fun treats that surprise with flavor and look perfect next to your spooky mozzarella skulls.
  • Roasted Vegetable Platter: A colorful assortment of roasted seasonal vegetables will add vibrant textures and a savory depth alongside the cheese, creating a well-rounded meal.

Storage Tips for Mozzarella Cheese Skulls

Fridge: Keep your mozzarella cheese skulls in an airtight container in the refrigerator for up to 2 days. This helps retain their creamy texture and delightful shape.

Freezer: For longer storage, place the molded mozzarella in a single layer on a baking sheet and freeze until solid. Transfer to a freezer-safe bag and store for up to 2 months.

Reheating: When ready to enjoy, thaw the mozzarella in the fridge overnight before using. Reheat gently in the oven or microwave on low power to avoid melting completely.

Serving Fresh: While these mozzarella cheese skulls can be stored, they are best fresh to maintain that melt-in-your-mouth quality that delights everyone at your Halloween gathering.

Mozzarella Cheese Skulls Variations

Feel free to unleash your creativity and customize these delightful treats for a truly unique experience!

  • Herb-Infused: Add some dried Italian herbs like oregano or basil to the mozzarella before baking for a burst of flavor.
  • Spooky Spices: Mix in a pinch of smoked paprika or garlic powder to give your skulls a delicious smoky twist.
  • Veggie Surprise: Incorporate finely chopped spinach or sun-dried tomatoes into the mozzarella for a colorful, nutritious pop.
  • Colorful Molds: Use themed molds that resonate with other holidays, like pumpkins for fall or bats for Halloween, for different occasions. They’re perfect for family gatherings year-round!
  • Cheesy Blend: Try mixing mozzarella with sharp cheddar for an extra flavorful bite that cheese lovers will adore.
  • Dippity-Do: Serve these skulls with an array of dips, from creamy avocado to homemade salsa, to elevate your snack game even further!
  • Crunch Factor: For extra texture, sprinkle some crushed crackers or seasoned breadcrumbs on top before baking for a delightful crunch.
  • Spicy Kick: If you’re feeling adventurous, add a dash of red pepper flakes to the mozzarella for a fiery surprise that’ll awaken your taste buds!

As you get creative, don’t forget to pair these fun snacks with a vibrant dish like our Strawberry Cheesecake to create a colorful and festive table!

Make Ahead Options

These Mozzarella Cheese Skulls are perfect for meal prep, allowing you to enjoy a stress-free party planning experience! You can prepare the mozzarella balls up to 24 hours in advance; simply follow the initial steps of drying and filling the molds but skip the baking. After placing the filled molds in the refrigerator, they’ll keep fresh and ready for baking just before serving. When it’s time to impress your guests, preheat your oven and bake for 8-10 minutes until they soften, then shape and cool as directed. This way, you save time and ensure your spooky treats are just as delicious, making your Halloween gathering a breeze!

Mozzarella Cheese Skulls Recipe FAQs

What kind of mozzarella should I use?
Absolutely! Mini mozzarella balls are perfect for this recipe, but you can use regular mozzarella balls if you prefer. Just make sure to cut them into smaller, manageable chunks for easy molding.

How should I store the mozzarella cheese skulls after making them?
I recommend storing your mozzarella cheese skulls in an airtight container in the refrigerator. They will stay fresh for up to 2 days, retaining their delicious taste and spooky shape.

Can I freeze mozzarella cheese skulls?
Yes, you can! For freezing, place the molded mozzarella cheese skulls in a single layer on a baking sheet and freeze them until solid. Then, transfer the skulls to a freezer-safe bag, and they can be stored for up to 2 months. When you’re ready to enjoy them, thaw them in the fridge overnight and reheat them gently.

How can I avoid the cheese from melting too much in the oven?
Very! To prevent your mozzarella from melting completely, keep an eye on them as they bake. Aim for 8-10 minutes at 350°F (175°C); you want them slightly softened but still maintaining their shape. Also, ensure they are well-dried before placing them in the oven.

Are mozzarella cheese skulls suitable for vegetarians?
Absolutely! These mozzarella cheese skulls are vegetarian-friendly, making them a perfect party appetizer for everyone to enjoy. Just make sure to check any sauces or dipping options you plan to serve alongside them for dietary restrictions.

Mozzarella Cheese Skulls

Melt-in-Your-Mouth Mozzarella Cheese Skulls for Halloween

These Mozzarella Cheese Skulls are adorable, vegetarian-friendly treats perfect for impressing guests at your Halloween bash.
Prep Time 10 minutes
Cook Time 10 minutes
Cooling Time 10 minutes
Total Time 30 minutes
Servings: 12 skulls
Course: Appetizers
Cuisine: Italian
Calories: 80

Ingredients
  

For the Cheese Skulls
  • 12 oz Mini Mozzarella Balls Feel free to use regular mozzarella if needed.
  • Silicone Skull Molds Ensure they are heat-safe.
Optional Dipping Sauces
  • Balsamic Glaze For drizzling.
  • Pesto Pairs wonderfully with the mozzarella.

Equipment

  • Oven
  • Silicone Skull Molds
  • Baking Sheet

Method
 

Step-by-Step Instructions for Mozzarella Cheese Skulls
  1. Preheat your oven to 350°F (175°C) to ensure even baking.
  2. Blot excess moisture from the mini mozzarella balls with a paper towel for better shape.
  3. Place one dried mozzarella ball into each cavity of your silicone skull molds.
  4. Bake in the preheated oven for 8-10 minutes until mozzarella is softened but not melted.
  5. Gently press down on each mozzarella ball with the back of a spoon to shape them into skulls.
  6. Chill the molds in the refrigerator for about 10 minutes to firm up the shapes.
  7. Unmold the cheese skulls and serve on a festive platter with optional dipping sauces.

Nutrition

Serving: 1skullCalories: 80kcalCarbohydrates: 1gProtein: 6gFat: 6gSaturated Fat: 4gMonounsaturated Fat: 2gCholesterol: 20mgSodium: 200mgPotassium: 50mgSugar: 1gVitamin A: 100IUCalcium: 200mg

Notes

Store in an airtight container in the fridge for up to 2 days or freeze for up to 2 months. Thaw before reheating gently.

Tried this recipe?

Let us know how it was!

Iced Pumpkin Cream Chai Tea Latte – Your Cozy Fall Delight

As autumn breezes in and leaves turn to shades of amber, I find myself craving cozy flavors that embrace the season. The joy of crafting my own Iced Pumpkin Cream Chai Tea Latte at home has become a delightful ritual, bringing warmth and happiness into my day. This vegan, dairy-free treat blends creamy oat milk with the spiced richness of chai, topped with a luscious homemade pumpkin sweet cream that feels like a hug in a glass. Not only is this cozy fall beverage quick to whip up, but it’s also a fantastic way to save some cash while enjoying a café-quality drink without leaving your kitchen. So, are you ready to make this delightful, pumpkin-infused escape, or do you need more convincing of its fall charm?

Why make this iced pumpkin latte?

Autumn-Inspired Flavor: Each sip of this iced pumpkin cream chai latte transports you to a cozy fall day, thanks to its perfect blend of spiced chai and pumpkin goodness.
Easy to Make: Whip up this delightful drink in just a few simple steps, making it an inviting addition to your home routine.
Vegan and Dairy-Free: Enjoy guilt-free pleasure with a recipe that caters to vegan and dairy-free diets, ensuring everyone can indulge.
Budget-Friendly: Save money by creating your favorite café drink at home, allowing you to savor the cozy flavors without breaking the bank.
Endless Versatility: Mix it up by switching to butternut squash or adding a splash of espresso for a fun twist! Enjoy your iced latte alongside some delicious pumpkin muffins for a true fall experience.

Iced Pumpkin Cream Chai Tea Latte Ingredients

For the Pumpkin Sweet Cream
Full-Fat Coconut Milk or Heavy Cream – Provides the creamy base for the pumpkin sweet cream; substitute with almond milk for a lighter option.
Maple Syrup or Vanilla Syrup – Adds sweetness to the pumpkin cream; adjust to taste for desired sweetness level.
Pumpkin Puree – Gives the latte its delicious pumpkin flavor; ensure it’s pure pumpkin without additives for the best taste.
Pumpkin Pie Spice – Offers a warm spice flavor profile; substitute with cinnamon or nutmeg if unavailable.
Vanilla Extract (optional) – Enhances the overall flavor; skip if desired, especially for a simpler taste.

For the Drink
Oat Milk – Acts as the primary milk for the drink, making it vegan; feel free to use any non-dairy milk like almond or soy.
Chai Tea Concentrate – Forms the beverage’s base flavor; use a vegan brand to ensure it’s dairy-free and honey-free.
Ice – Chills the drink and creates that refreshing iced experience.

Step‑by‑Step Instructions for Iced Pumpkin Cream Chai Tea Latte

Step 1: Prepare Pumpkin Sweet Cream
In a jar, combine 5 tablespoons of full-fat coconut milk, 1 tablespoon of maple syrup, 1 tablespoon of pumpkin puree, ⅛ teaspoon of pumpkin pie spice, and optional ½ teaspoon of vanilla extract. Mix well until fully combined, then chill the mixture in your refrigerator for about 10 minutes. This step is crucial for enhancing the flavors and achieving a rich, creamy texture for your iced pumpkin cream chai tea latte.

Step 2: Froth the Mixture
After the pumpkin sweet cream has chilled, it’s time to froth! Use a milk frother or a whisk to blend the mixture until it’s smooth and creamy. If you find the pumpkin cream too thick, feel free to add 1-2 tablespoons of oat milk to achieve your desired consistency. This frothing process ensures that your cream will beautifully top the chai latte, giving it a delightful texture.

Step 3: Assemble the Latte
Now, grab a tall glass and fill it with ice cubes to create that refreshing base for your iced pumpkin cream chai tea latte. Next, pour in ½ cup of chai tea concentrate over the ice, then follow it with ½ to ¾ cup of your oat milk. Stir gently to combine the chai and oat milk, allowing the flavors to meld together and create a deliciously spiced drink.

Step 4: Top with Pumpkin Sweet Cream
Finally, it’s time to add the star of the show! Spoon or pour the chilled pumpkin sweet cream over the top of your chai mixture, letting it float beautifully on the surface. For an extra touch of autumnal flavor, you can sprinkle a bit more pumpkin pie spice on top. This finishing touch makes your iced pumpkin cream chai tea latte visually appealing and enhances the cozy vibes of fall. Serve immediately!

Make Ahead Options

These Iced Pumpkin Cream Chai Tea Lattes are perfect for busy home cooks looking to save time during the hectic week! You can prepare the pumpkin sweet cream up to 3 days in advance; simply mix together the ingredients and store in an airtight container in the refrigerator. To preserve its creamy texture, give it a good stir or froth before using. The chai tea concentrate can also be made ahead and refrigerated for up to 5 days. When you’re ready to enjoy your latte, fill a glass with ice, pour in the chai and oat milk, and finally, top with the chilled pumpkin sweet cream. This way, you’ll have a delicious café-quality drink waiting for you with minimal effort!

How to Store and Freeze Iced Pumpkin Cream Chai Tea Latte

Fridge: Store any leftover iced pumpkin cream chai tea latte in an airtight container for up to 3 days. Give it a good stir before serving as the ingredients may separate.

Pumpkin Sweet Cream Storage: Keep homemade pumpkin sweet cream in an airtight container in the fridge for up to one week. This allows you to make your lattes quickly throughout the week!

Freezer: While it’s best to enjoy your latte fresh, you can freeze the pumpkin sweet cream in ice cube trays for up to 2 months. When ready to use, thaw in the fridge overnight before mixing it into your iced pumpkin cream chai tea latte.

Reheating: If you’d like a cozy warm version instead, heat the chai concentrate and oat milk together, then top with the pumpkin sweet cream. Enjoy your comforting drink warm!

Iced Pumpkin Cream Chai Tea Latte Variations

Feel free to get creative with your iced pumpkin cream chai tea latte! Each variation washes over your senses with delightful flavors and textures.

  • Aromatic Spice: Add a dash of ground ginger for an extra kick of warmth. It complements the pumpkin and spices beautifully.
  • Nutty Delight: Use almond or cashew milk instead of oat milk for an additional nutty richness that enhances the pumpkin cream.
  • Caffeine Boost: Incorporate a shot of espresso for an energizing twist that turns this drink into a bold morning pick-me-up.
  • Chocolate Lover’s Dream: Blend in a tablespoon of cocoa powder into your pumpkin sweet cream for a delightful mocha-like flavor!
  • Decaf Option: Opt for decaffeinated chai tea if you prefer to enjoy this cozy drink without the jolt of caffeine.
  • Gingerbread Touch: Swap out pumpkin pie spice for gingerbread spice during the holiday season for a festive flair with each sip.
  • Frozen Version: Freeze your iced latte into popsicles for a fun, refreshing treat—perfect for warm fall days!
  • Heavenly Whipped Cream: Top your latte with a dollop of coconut whipped cream on colder days for an indulgent finish.

Pair your iced pumpkin cream chai tea latte with sweet treats like Cajun Steak Alfredo or savor it alongside a warm slice of Potato Bacon Soup. These yummy combinations make enjoying the season’s flavors even better!

Expert Tips for Iced Pumpkin Cream Chai Tea Latte

  • Quality Chai Concentrate: Choose a well-reviewed vegan chai tea concentrate for the best flavor. A poor-quality concentrate can lead to a lackluster latte.
  • Chill Ingredients: For an extra refreshing drink, chill your oat milk beforehand. Cold ingredients enhance the creamy texture of your iced pumpkin cream chai tea latte.
  • Store Pumpkin Cream Wisely: If you make the pumpkin sweet cream in advance, store it in an airtight container. Keep it in the fridge and consume within a week for optimal freshness.
  • Frothing Tip: If you don’t have a frother, use a jar with a lid to shake the pumpkin cream until it froths—just make sure to hold it tightly!
  • Taste Test: Always taste and adjust sweetness before serving. Maple syrup and chai concentrates can vary widely in sweetness; personalizing it is key to your perfect iced latte.

What to Serve with Iced Pumpkin Cream Chai Tea Latte

As the rich aroma of fall fills your kitchen, let’s explore the perfect pairings to elevate your delightful iced latte experience.

  • Pumpkin Muffins: Soft and spiced, they provide a sweet balance to the chai’s richness. Pairing a warm muffin with your cold drink creates a comforting contrast that’s utterly satisfying.

  • Spiced Oatmeal Cookies: Chewy and full of warming spices, these cookies bring a bit of nostalgia to your fall feast. The subtle sweetness enhances the pumpkin flavors beautifully.

  • Savory Scones: A touch of herbs or cheese in a flaky scone adds a delightful savory contrast, elevating your drink to a brunch-worthy pairing that pleases the palate.

  • Maple-Glazed Doughnuts: For a touch of indulgence, these sweet treats bring out the pumpkin spice and make for a playful afternoon pick-me-up to enjoy with your latte.

  • Harvest Salad: A fresh salad with apples, walnuts, and cranberries complements the chai’s creaminess while offering a crisp, refreshing bite that lightens up your meal.

  • Chai Spiced Biscotti: Crunchy and perfect for dipping, these cookies harmonize with your iced pumpkin cream chai tea latte, adding an extra layer of spiced delight.

  • Almond Milk Hot Chocolate: To enhance the cozy vibe, a warm cup of almond hot chocolate makes for a great non-caffeinated companion that both kids and adults will adore.

  • Cinnamon Roll: Soft and gooey, the sweet richness of a cinnamon roll is a delightful contrast to the pumpkin spice, creating a comforting breakfast or afternoon treat.

  • Apple Cider: Chilled or warmed, this iconic fall drink perfectly complements the latte’s flavors, evoking the seasonal charm that autumn brings.

These pairings will create a heartwarming fall experience, perfect for savoring each cozy sip of your iced pumpkin cream chai tea latte.

Iced Pumpkin Cream Chai Tea Latte Recipe FAQs

What type of pumpkin puree should I use for the latte?
Absolutely! When choosing pumpkin puree, look for pure pumpkin without additives, ideally canned for convenience or homemade if you’re up for it. This ensures the best flavor and texture in your iced pumpkin cream chai latte.

How long can I store the iced pumpkin cream chai tea latte in the fridge?
You can store any leftovers in an airtight container in the fridge for up to 3 days. Be sure to give it a good stir before serving, as the ingredients may separate during storage.

Can I freeze the pumpkin sweet cream?
Very! To freeze the pumpkin sweet cream, pour it into ice cube trays and freeze for up to 2 months. Thaw the cubes in the fridge overnight before using them in your next latte, making it super convenient for quick enjoyment!

What should I do if my pumpkin sweet cream is too thick?
If your pumpkin sweet cream turns out too thick, don’t worry! Simply add 1-2 tablespoons of oat milk and froth it again until you achieve your desired consistency. This will give you that perfect creamy layer to top your drink.

Is this iced pumpkin cream chai latte suitable for those with allergies?
Yes! This recipe is vegan and dairy-free, making it suitable for many dietary needs. However, if you have nut allergies, be cautious with non-dairy alternatives like almond milk; opting for oat or soy milk is a great alternative.

How can I customize the sweetness of my iced pumpkin cream chai tea latte?
Absolutely! It’s important to tailor sweetness to your personal preference. Maple syrup or vanilla syrup can be adjusted by taste. Start with a tablespoon and gradually add more until you reach your perfect level of sweetness. Enjoy experimenting!

Iced Pumpkin Cream Chai Tea Latte

Iced Pumpkin Cream Chai Tea Latte – Your Cozy Fall Delight

Enjoy a delightful Iced Pumpkin Cream Chai Tea Latte, a vegan and dairy-free treat that captures the cozy flavors of fall.
Prep Time 15 minutes
Chilling Time 10 minutes
Total Time 25 minutes
Servings: 2 cups
Course: Drinks
Cuisine: Vegan
Calories: 250

Ingredients
  

For the Pumpkin Sweet Cream
  • 5 tablespoons full-fat coconut milk or Heavy Cream
  • 1 tablespoon maple syrup or Vanilla Syrup
  • 1 tablespoon pumpkin puree
  • teaspoon pumpkin pie spice or substitute with cinnamon or nutmeg
  • ½ teaspoon vanilla extract optional
For the Drink
  • 1/2 cup chai tea concentrate ensure it's vegan and honey-free
  • 1/2 to 3/4 cup oat milk or any non-dairy milk
  • Ice cubes for chilling the drink

Equipment

  • Milk frother
  • Jar with lid

Method
 

Step-by-Step Instructions
  1. Prepare Pumpkin Sweet Cream: In a jar, combine coconut milk, maple syrup, pumpkin puree, pumpkin pie spice, and vanilla extract. Mix well until combined and chill for about 10 minutes.
  2. Froth the Mixture: Froth the chilled pumpkin sweet cream until smooth. Add oat milk if too thick.
  3. Assemble the Latte: Fill a tall glass with ice. Pour in chai tea concentrate, then add oat milk. Stir to combine.
  4. Top with Pumpkin Sweet Cream: Spoon the pumpkin sweet cream over the chai mixture and sprinkle with pumpkin pie spice. Serve immediately.

Nutrition

Serving: 1cupCalories: 250kcalCarbohydrates: 30gProtein: 4gFat: 12gSaturated Fat: 10gPolyunsaturated Fat: 1gMonounsaturated Fat: 1gSodium: 150mgPotassium: 350mgFiber: 2gSugar: 12gVitamin A: 2000IUVitamin C: 2mgCalcium: 200mgIron: 1mg

Notes

Chill your ingredients for a refreshing drink. Store leftover pumpkin sweet cream in an airtight container in the fridge for up to a week.

Tried this recipe?

Let us know how it was!

Cheesy Pumpkin Ricotta Pasta Bake for a Cozy Night In

As I stirred the vibrant orange pumpkin puree into the creamy ricotta mixture, the warmth of my kitchen enveloped me like a cozy blanket on a chilly evening. This Cheesy Pumpkin Ricotta Pasta Bake is not just another weeknight dinner; it’s a heartwarming embrace on a plate. With its deliciously cheesy goodness and subtle sweetness, this vegetarian-friendly recipe makes preparing a comforting meal a breeze. Plus, it’s surprisingly light at just around 450 calories per serving, showing that comfort food doesn’t have to weigh you down! So, are you ready to dive into a dish that perfectly captures the essence of fall?

Why Choose This Pasta Bake?

Deliciously Cheesy: The melty mozzarella and rich ricotta create a delightful creamy texture that keeps you coming back for seconds!

Seasonal Comfort: Bursting with the earthy sweetness of pumpkin, this dish captures the cozy essence of fall, making it perfect for chilly nights.

Vegetarian-Friendly: Packed with nutritious spinach, this Cheesy Pumpkin Ricotta Pasta Bake is a colorful, healthy option for everyone at the table.

Ease of Preparation: Simple steps make it an ideal dish for both novice cooks and seasoned chefs looking to whip up a heartwarming meal after a long day.

Make-Ahead Magic: Prepare it ahead of time and pop it in the oven for a hassle-free yet impressive dinner. Pair it with a crisp side salad for a complete meal! Don’t forget to check out our other comforting options like Cheesy Spinach Bake for more delicious ideas!

Cheesy Pumpkin Ricotta Pasta Bake Ingredients

For the Pasta
Pasta (penne or rigatoni) – This provides the hearty base; you can substitute with fusilli or shell pasta, just adjust the cooking time accordingly.

For the Sauce
Pumpkin puree – Adds natural sweetness and festive color to the dish, enriching the creamy sauce.
Ricotta cheese – Offers a luscious creaminess without being overly heavy, making it perfect for balance.
Mozzarella cheese – Ensures a gooey, melty finish when baked, elevating the cheesy goodness of this pasta bake.
Parmesan cheese – Delivers a sharp, rich flavor that rounds out the dish beautifully.
Spinach (fresh) – Infuses vitamins and a pop of green color, wilting wonderfully into the sauce.
Onion (finely chopped) – Enhances sweetness and aroma; sauté until translucent for the best flavor.
Garlic (minced) – Adds a savory depth that complements the pumpkin’s sweetness perfectly.
Nutmeg – A pinch of this spice elevates the pumpkin’s flavor, adding a hint of warmth to the dish.
Salt – Essential for bringing all flavors together and ensuring they pop.
Black pepper – Introduces a gentle kick that balances the richness of the cheese.
Vegetable or chicken broth – Helps achieve the desired sauce consistency; adjust to make it creamier.
Olive oil – Prevents sticking while sautéing and adds a hint of flavor.

For Garnish
Fresh basil – Adds a bright, aromatic finish for that perfect garnish touch.

Make this Cheesy Pumpkin Ricotta Pasta Bake for a cozy dinner that becomes a beloved family favorite!

Step‑by‑Step Instructions for Cheesy Pumpkin Ricotta Pasta Bake

Step 1: Preheat the Oven
Begin by preheating your oven to 375°F (190°C). This warm-up is essential to achieve that perfectly golden and bubbly top on the Cheesy Pumpkin Ricotta Pasta Bake as it bakes. While the oven heats, you can gather the other ingredients and prepare for the next steps.

Step 2: Cook the Pasta
In a pot of boiling salted water, cook your pasta—penne or rigatoni—according to the package instructions until al dente, which typically takes around 8-10 minutes. Once cooked, drain the pasta and set it aside, allowing it to cool slightly while you prepare the sauce for your bake.

Step 3: Sauté the Aromatics
In a large skillet, heat 1 tablespoon of olive oil over medium heat. Add the finely chopped onion and sauté for about 5 minutes until it becomes translucent and aromatic. This step is crucial for building the foundation of flavor in your Cheesy Pumpkin Ricotta Pasta Bake.

Step 4: Add Garlic
Next, stir in 2 cloves of minced garlic to the skillet with the onions. Cook for an additional minute, stirring constantly, until fragrant. Be careful not to let the garlic brown, as this can create a bitter taste. The combination of onion and garlic will invigorate the sauce with warmth.

Step 5: Mix the Sauce Ingredients
Add 1 cup of pumpkin puree, 1 cup of ricotta cheese, a pinch of nutmeg, salt, and black pepper to the skillet. Stir everything together until it is smooth and creamy, turning the mixture into a luscious sauce rich with flavor that will envelop your pasta beautifully.

Step 6: Adjust the Sauce Consistency
Gradually pour in 1 cup of vegetable or chicken broth to the pot, mixing until you achieve your desired sauce consistency. If you prefer a creamier finish, don’t hesitate to add a bit more broth. The Cheesy Pumpkin Ricotta Pasta Bake will benefit from this silky texture.

Step 7: Incorporate the Spinach
Add 2 cups of fresh spinach to the sauce in the skillet, tossing until it wilts, which should take about 2-3 minutes. This will not only enhance the nutrition of the dish but also bring a lovely pop of color to your Cheesy Pumpkin Ricotta Pasta Bake.

Step 8: Combine Pasta and Sauce
Carefully fold the drained pasta into the pumpkin-ricotta sauce in the skillet, ensuring each piece is well-coated. This step is vital for achieving a harmonious blend of flavors throughout the dish, so take your time and mix gently to avoid breaking the pasta.

Step 9: Prepare for Baking
Transfer the pasta-sauce mixture into a greased baking dish, smoothing the top with a spatula. This will create an even surface for the cheesy topping and allow for even cooking. Ensure all the pasta is submerged within the creamy sauce for best results.

Step 10: Add the Cheese Toppings
Sprinkle a generous layer of mozzarella and Parmesan cheese over the top of the pasta bake. This will create a deliciously gooey, melty crust once baked, enhancing the comfort food nature of your Cheesy Pumpkin Ricotta Pasta Bake.

Step 11: Bake the Dish
Place the baking dish in the preheated oven and bake for 20-25 minutes. Watch closely as the top turns golden brown and bubbly. This succulent visual cue indicates that your Cheesy Pumpkin Ricotta Pasta Bake is ready to come out.

Step 12: Let It Rest
Once baked, allow the dish to rest for 5-10 minutes before serving. This resting time helps the flavors meld together and makes it easier to serve. Enjoy the comforting aroma as you slice into your Cheesy Pumpkin Ricotta Pasta Bake, ready to warm hearts and bellies alike.

What to Serve with Cheesy Pumpkin Ricotta Pasta Bake

Looking to create a well-rounded meal that’ll satisfy everyone at the table?

  • Garlic Bread: The crunchy exterior and soft insides perfectly balance the creamy pasta bake and add that irresistible garlic aroma.

  • Simple Green Salad: A refreshing mix of greens dressed lightly can cleanse the palate and offset the dish’s richness beautifully. Include cherry tomatoes for a burst of color!

  • Roasted Brussels Sprouts: Their crispy edges and slight bitterness harmonize with the sweet pumpkin sauce while introducing a delightful texture contrast.

  • Cranberry Sauce: A spoonful of tangy-sweet cranberry sauce can elevate the autumn flavors, adding a pop of acidity to the meal.

  • Apple Cider: Serve chilled or warm; its fruity sweetness will echo the cozy feel of fall and complement the dish perfectly.

  • Pumpkin Spice Muffins: For dessert, these muffins can provide a sweet finale, mirroring the comforting pumpkin notes of the pasta bake while offering a light finish.

  • Parmesan Crisps: These crunchy, cheesy little bites complement the creamy pasta and add an extra savory layer to the meal.

Each side brings a unique flavor and texture to your cozy dinner, making the Cheesy Pumpkin Ricotta Pasta Bake the star of the show!

Expert Tips for Cheesy Pumpkin Ricotta Pasta Bake

Timing is Key: Always cook the pasta until al dente before baking; it should have a slight bite to avoid mushiness after it’s baked.

Reserve Pasta Water: Keep a small cup of pasta cooking water for adjusting sauce consistency if it thickens too much during baking.

Avoid Garlic Burn: Be cautious not to let the garlic brown during sautéing, as burnt garlic can give your sauce an unpleasant bitterness.

Extra Crispiness: For a crunchy topping, consider adding toasted panko breadcrumbs on top of the cheese during the last 5 minutes of baking.

Cheese Variations: Feel free to mix different types of cheese if you’re looking for a flavor twist in your Cheesy Pumpkin Ricotta Pasta Bake; sharp cheddar or gouda works wonderfully!

How to Store and Freeze Cheesy Pumpkin Ricotta Pasta Bake

Fridge: Store leftovers in an airtight container in the refrigerator for up to 3-4 days. This ensures your Cheesy Pumpkin Ricotta Pasta Bake remains fresh and ready to enjoy!

Freezer: For longer storage, freeze the pasta bake for up to 3 months. Wrap it tightly in plastic wrap and aluminum foil to prevent freezer burn.

Reheating: To reheat, defrost the frozen pasta bake overnight in the fridge, then warm it in the oven at 350°F (175°C) for about 20-30 minutes until heated through.

Make-Ahead Option: Assemble the Cheesy Pumpkin Ricotta Pasta Bake a day in advance and refrigerate unbaked. Just pop it in the oven when you’re ready to enjoy a cozy dinner!

Make Ahead Options

This Cheesy Pumpkin Ricotta Pasta Bake is a fantastic choice for meal prep! You can assemble the dish up to 24 hours in advance and keep it covered in the refrigerator. Simply follow the steps up to the baking point, then cover tightly with foil or plastic wrap to maintain freshness. For best results, add the cheese topping just before baking. Alternatively, you can prepare the sauce and cook the pasta up to 3 days ahead, storing both separately in the fridge. When you’re ready to enjoy, combine them, add the cheese, and bake according to the instructions. With these make-ahead options, you’ll savor quality, homemade goodness even on your busiest weeknights!

Cheesy Pumpkin Ricotta Pasta Bake Variations

Feel free to make this dish your own and delight your taste buds with these creative twists!

  • Dairy-Free: Swap out the ricotta for a plant-based cheese alternative and enjoy a creamy texture without dairy.
    A vegan cheese made from nuts will complement the pumpkin beautifully, while preserving that comforting creaminess.

  • Texture Twist: Toss in roasted vegetables like bell peppers or zucchini for added flavor and a satisfying bite.
    This not only amps up the nutrition but also adds attractive bursts of color to your pasta bake!

  • Spicy Kick: Add a pinch of red pepper flakes or a splash of hot sauce to the sauce mixture for a zesty finish.
    The hint of heat will elevate this comforting dish, making it a spicy treat for those who love a kick!

  • Cheese Blend: Experiment with different cheeses—mix feta, goat cheese, or gruyere for a flavor explosion.
    Each cheese will add unique notes, transforming the dish into something extraordinary that’s sure to impress.

  • Nutty Flavor: Incorporate a handful of toasted pumpkin seeds or pine nuts on top for a delightful crunch.
    Not only does this add texture contrast, but it also introduces earthy notes that pair splendidly with pumpkin.

  • Herb Infusion: Blend in fresh herbs like sage or thyme while sautéing the onions for an aromatic lift.
    These herbs sing of fall and will seamlessly enhance the overall flavor profile of your Cheesy Pumpkin Ricotta Pasta Bake.

  • Creamy Dream: Add a splash of heavy cream or a dollop of sour cream into the sauce for ultra creaminess.
    This luscious addition will take your pasta bake over the top, making each bite even more indulgent.

  • Casserole Style: Layer the mix in a casserole dish alternating with layers of crispy potatoes for a hearty twist.
    This will create a layered potato-y pumpkin experience reminiscent of your favorite casseroles, perfect for a filling meal!

These variations are delightful ways to customize your Cheesy Pumpkin Ricotta Pasta Bake! Pair it with a crisp salad or crusty bread for a complete meal. If you’re looking for more cozy inspo, check out our delicious Cheesy Garlic Chicken or Cheesy Spinach Bake. Enjoy embracing your culinary creativity!

Cheesy Pumpkin Ricotta Pasta Bake Recipe FAQs

How do I select the best pumpkin puree for this recipe?
When choosing pumpkin puree, look for 100% pure, canned pumpkin with no additives or fillers. Check the label for quality, as some brands might include spices or sugar. If you prefer a fresher option, use homemade pumpkin puree made from roasted sugar pumpkins for a richer flavor.

What is the best way to store leftovers?
Refrigerate any leftovers in an airtight container for up to 3-4 days. Ensure the pasta bake is cooled completely before sealing the container to maintain its creamy texture. You can also layer parchment paper between servings to prevent sticking.

Can I freeze the Cheesy Pumpkin Ricotta Pasta Bake?
Absolutely! For optimal freshness, wrap your baked pasta dish tightly in plastic wrap and then in aluminum foil. This protects against freezer burn and will keep it delicious for up to 3 months. To reheat, thaw it in the refrigerator overnight, then warm it in the oven at 350°F (175°C) for 20-30 minutes until thoroughly heated.

What if my sauce is too thick?
If you find that your sauce has thickened during baking, you can add a splash of reserved pasta water or extra broth to loosen it. Just stir it in gently, incorporating it slowly until you reach your desired consistency. That little tip can save your dish from being too dense!

Is this recipe suitable for vegetarian diets?
Yes, this Cheesy Pumpkin Ricotta Pasta Bake is completely vegetarian-friendly! It incorporates wholesome ingredients like pumpkin, ricotta, and spinach, making it a nutritious option perfect for a family meal. If you’re catering to those with dairy allergies, consider substituting the cheese with vegan alternatives for a delightful, inclusive dinner option.

How do I know when my pasta bake is done?
You’ll know your Cheesy Pumpkin Ricotta Pasta Bake is ready when the top is golden brown and bubbly. This usually takes about 20-25 minutes baking time at 375°F (190°C). Let it rest for 5-10 minutes before serving, which allows the cheese to set slightly for easier slicing.

Cheesy Pumpkin Ricotta Pasta Bake

Cheesy Pumpkin Ricotta Pasta Bake for a Cozy Night In

Enjoy a comforting Cheesy Pumpkin Ricotta Pasta Bake, perfect for chilly nights with its delicious cheesy goodness and seasonal flavors.
Prep Time 15 minutes
Cook Time 25 minutes
Resting Time 10 minutes
Total Time 50 minutes
Servings: 6 servings
Course: Casserole
Cuisine: Italian
Calories: 450

Ingredients
  

For the Pasta
  • 12 oz Pasta (penne or rigatoni) Substitute with fusilli or shell pasta.
For the Sauce
  • 1 cup Pumpkin puree Adds natural sweetness and festive color.
  • 1 cup Ricotta cheese Offers creaminess without being heavy.
  • 1 cup Mozzarella cheese Provides a gooey, melty finish.
  • 1/2 cup Parmesan cheese Delivers a sharp, rich flavor.
  • 2 cups Spinach (fresh) Infuses vitamins and color.
  • 1 medium Onion (finely chopped) Enhances sweetness and aroma.
  • 2 cloves Garlic (minced) Adds savory depth.
  • 1/4 tsp Nutmeg Enhances pumpkin flavor.
  • 1 tsp Salt
  • 1/2 tsp Black pepper
  • 1 cup Vegetable or chicken broth Adjust for sauce consistency.
  • 1 tbsp Olive oil Prevents sticking while sautéing.
For Garnish
  • 1/4 cup Fresh basil For garnish.

Equipment

  • Pot
  • Skillet
  • baking dish

Method
 

Step-by-Step Instructions
  1. Preheat the oven to 375°F (190°C).
  2. Cook pasta in boiling salted water according to package instructions until al dente, about 8-10 minutes, then drain.
  3. In a large skillet, heat 1 tablespoon of olive oil over medium heat. Sauté finely chopped onion for 5 minutes until translucent.
  4. Add 2 cloves of minced garlic and cook for 1 minute until fragrant.
  5. Mix in 1 cup of pumpkin puree, 1 cup of ricotta cheese, a pinch of nutmeg, salt, and black pepper until smooth.
  6. Gradually pour in 1 cup of broth while mixing to achieve desired sauce consistency.
  7. Mix in 2 cups of fresh spinach until wilted, about 2-3 minutes.
  8. Fold cooked pasta into the pumpkin-ricotta sauce until well-coated.
  9. Transfer the mixture to a greased baking dish and smooth the top.
  10. Sprinkle mozzarella and Parmesan cheese over the top.
  11. Bake for 20-25 minutes until golden brown and bubbly.
  12. Allow the dish to rest for 5-10 minutes before serving.

Nutrition

Serving: 1servingCalories: 450kcalCarbohydrates: 55gProtein: 20gFat: 18gSaturated Fat: 10gPolyunsaturated Fat: 1gMonounsaturated Fat: 2gCholesterol: 35mgSodium: 600mgPotassium: 500mgFiber: 4gSugar: 4gVitamin A: 3000IUVitamin C: 15mgCalcium: 250mgIron: 3mg

Notes

Consider adding toasted panko breadcrumbs on top of the cheese for extra crispiness.

Tried this recipe?

Let us know how it was!

Delightful Halloween Deviled Eggs Recipe That Wow Guests

As I peeked into my kitchen, the playful spirit of Halloween whispered in the air, enticing me to create something fun and delicious. This led me to whip up a batch of Halloween Deviled Eggs that are sure to thrill all your ghoulish guests! With a creamy filling that dances on your palate and spooky visuals that add just the right touch of fright, these deviled eggs make for a perfect appetizer. Not only are they quick to prepare, but they also offer an enchanting twist to the classic recipe that everyone knows and loves. Imagine serving these eerie delights at your next Halloween gathering—will your friends dare to take a bite? Get ready to impress with this spooky treat that’s both playful and satisfying!

Why Are These Deviled Eggs Spooky?

Uniquely Themed: These Halloween deviled eggs transform a classic appetizer into a festive delight, perfect for any spooky gathering.
Vibrant Colors: The dyed egg whites create an eye-catching, eerie presentation that’s sure to impress your guests.
Quick and Easy: Requiring minimal effort and ingredients, you can whip these up in no time—ideal when you’re short on party prep.
Crowd-Pleaser: With their creamy filling and playful visuals, these deviled eggs are sure to be a hit, much like my favorite Cheesy Hamburger Potato Soup recipe!
Versatile Flavors: Personalize the yolk filling to suit your taste, adding ingredients like relish or even swapping mayo for Greek yogurt for a lighter twist.
Fun Factor: Both kids and adults will love the playful spirit of these spooky treats, making them a must-have for your Halloween feast!

Halloween Deviled Eggs Ingredients

• Get ready to create spooky delights!

For the Egg Base

  • Hard-Boiled Eggs – Ensure they are cooked perfectly for easy peeling and a sturdy base.
  • White Vinegar – Helps set the color during rinsing, ensuring a vibrant result.

For the Dye

  • Food Coloring – Choose spooky colors like black, purple, neon green, or orange to create the eerie effect.
  • Water – Used for soaking the cracked eggs in food coloring to create unique patterns.

For the Filling

  • Mayonnaise – Provides a creamy texture, making the yolk filling rich and delicious.
  • Mustard (Dijon or Yellow) – Adds tanginess and depth to the filling flavor.
  • Apple Cider Vinegar – Enhances flavor and balances richness in the yolk mixture.
  • Salt & Pepper – Essential seasonings to elevate the taste of your creamy filling.

For Garnishing (Optional)

  • Paprika – Adds a pop of color and a smoky flavor to your spooky eggs.
  • Chia Seeds – For a little crunch and a fun, spooky look.
  • Parsley – Adds freshness and a festive touch to your presentation.

Dive into this Halloween Deviled Eggs Recipe and wow your guests with these delicious, festive bites!

Step‑by‑Step Instructions for Halloween Deviled Eggs Recipe

Step 1: Crack Eggs
Start by carefully cracking the shells of the hard-boiled eggs. You can do this by gently rolling them on the countertop or tapping them with a spoon. Make sure not to break them fully, as you want the cracks to create beautiful patterns once they are dyed. This step is essential for achieving the spooky look of your Halloween deviled eggs.

Step 2: Prepare Dye
In a medium-sized container, mix together enough water and your chosen food coloring to fully submerge the cracked eggs. The colors should be bold and vibrant for the best effect, so don’t be shy with the dye! Stir until the color is evenly distributed, and set the container aside, ready for the soaking process.

Step 3: Soak Eggs
Carefully place the cracked eggs into the colored water and ensure they are fully submerged. Cover the container and refrigerate for at least 3 hours, or even overnight for deeper color saturation. After soaking, the egg whites will take on a ghostly appearance, making these Halloween deviled eggs the perfect spooky treat for your guests!

Step 4: Rinse and Set Color
Once the eggs have soaked, remove them from the colored water and rinse gently under cold water with a splash of white vinegar. This step helps set the color in the egg whites, preventing it from fading. You’ll notice the vibrant hues bringing your deviled eggs to life with an eerie charm.

Step 5: Peel Eggs
Now it’s time to peel the eggs. Gently tap the eggs on a hard surface to crack the shells, and then carefully peel them away. Working under running water can help remove stubborn bits of shell. The unique colors from the dye will provide a captivating look, essential for your Halloween deviled eggs recipe.

Step 6: Prepare Yolk Filling
Slice each peeled egg in half lengthwise and place the yolks into a mixing bowl. Mash the yolks with a fork until they are crumbled finely. Then, add mayonnaise, mustard, apple cider vinegar, salt, and pepper to the bowl, mixing until the filling is creamy and well combined. This filling will bring delight along with a spooky flair!

Step 7: Color Yolks (optional)
If you want to add an extra spooky touch, mix in a few drops of food coloring to the yolk mixture. Stir well until the color is uniformly blended, giving it a bright, adventurous appearance. This optional step adds to the fun, making your Halloween deviled eggs even more thematic and enticing for your guests.

Step 8: Fill Egg Whites
Using a spoon or piping bag, fill the hollowed-out egg whites with the creamy yolk mixture. Getting creative with the presentation adds to the excitement; you can create swirls or peaks to make them look even spookier! Make sure each egg is generously filled to showcase the delicious filling of your Halloween deviled eggs.

Step 9: Garnish
To finish your Halloween deviled eggs, sprinkle each with a dash of paprika or a few chia seeds for a textured, spooky effect. Fresh parsley can also be added to brighten up the presentation. These garnishes will not only enhance the look but also infuse additional flavor, making your appetizer truly captivating.

Step 10: Serve
Once all your eggs are filled and garnished, place them on a platter. Keep them chilled until it’s time to serve, pairing them with other Halloween treats for an impressive spread. The delightful Halloween deviled eggs will surely be a hit with all your ghoulish guests at your festive gathering!

How to Store and Freeze Halloween Deviled Eggs

Fridge: Keep the Halloween deviled eggs covered tightly in an airtight container and store in the refrigerator for up to 3 days for optimal freshness and visual appeal.

Freezer: Freezing is not recommended for filled deviled eggs, as the texture and creaminess may suffer upon thawing. Enjoy them fresh for the best experience!

Serving Suggestions: Serve chilled for the most delicious taste. If not serving immediately, keep the eggs in a cool area to maintain their delightful appearance.

Reheating: If desired, you can enjoy them cold; reheating is not necessary, as the flavor is best when served chilled.

Halloween Deviled Eggs Recipe Variations

Feel free to get creative and customize these delightful deviled eggs! The fun doesn’t have to stop with just one recipe.

  • Vampire Theme: Use red food coloring for a blood-curdling twist, creating a stunning presentation that’s perfect for a vampire-themed party. Guests will be intrigued by the striking look!

  • Spicy Kick: Add a dash of hot sauce or smoked paprika to the yolk mixture for a delightful heat that elevates your spooky treat. This will surprise those who dare take a bite!

  • Greek Yogurt Twist: Swap out mayonnaise for Greek yogurt for a tangy, healthier version that doesn’t sacrifice creaminess. It’s a light option that still thrills the palate.

  • Cheesy Flavor: Mix in shredded cheese, like sharp cheddar or feta, into the yolk filling for a savory dimension. Who could resist the creamy, cheesy goodness that brings comfort amidst the spookiness?

  • Olive Eyes: Top each egg with a black olive slice to resemble creepy eyeballs staring back at your guests. They add a fun and eerie touch, sparking conversations!

  • Herbal Freshness: Instead of just salt and pepper, add finely chopped dill or chives for a refreshing herbal note that balances the richness beautifully. This adds a burst of flavor to every bite!

  • Seasonal Color Blend: Use a combination of green, orange, and purple for an eye-catching tie-dye effect on your egg whites. It’s visually stunning and perfect for those who love creativity!

Getting creative with these variations enhances your Halloween spread, ensuring that everyone will be delighted, much like serving my Broccoli Cheddar Soup alongside familiar treats!

Tips for the Best Halloween Deviled Eggs

  • Perfectly Cooked Eggs: Ensure your hard-boiled eggs are cooked properly for easy peeling. Overcooked eggs can develop a greenish hue and rubbery texture, so aim for about 9-12 minutes of boiling.

  • Spooky Colors: Use food coloring that gives the best contrast on the egg whites. Neon green and black are popular choices that enhance the spooky nature of your Halloween deviled eggs.

  • Creative Cracking: Experiment with different degrees of shell cracking for unique patterns. Subtle cracks can create more delicate spiderweb effects, while heavier cracking results in larger, bolder designs.

  • Keep It Chill: Make sure to store the filled deviled eggs in the fridge until serving. This not only maintains their freshness but also highlights the spooky visual appeal of your Halloween deviled eggs.

  • Garnish Wisely: Choose garnishes that contribute to the theme. Paprika gives a nice smoky flavor, while chia seeds add an eerie texture that fits the Halloween spirit perfectly.

  • Gather Your Guests: Encourage your friends to join in the fun! Making the Halloween deviled eggs together can be a delightful way to kick off your party preparations!

What to Serve with Spooky Halloween Deviled Eggs?

Add some festive flair to your Halloween gathering with these delightful pairings that will enchant both the eyes and the taste buds.

  • Crispy Veggie Platter: A colorful assortment of fresh carrots, cucumbers, and bell peppers provides a crunchy, healthy contrast to the creamy deviled eggs, perfect for dipping in your favorite ranch dressing.
  • Ghostly Cheese Plate: A selection of spooky-shaped cheeses paired with crackers and nuts adds a savory touch. The variety of textures will enhance your appetizer spread and satisfy any cheese lover.
  • Pumpkin Soup: This warm and velvety soup adds a comforting element to your spread, while the earthy flavors beautifully complement the tangy deviled eggs. Perfect for warming up on a chilly Halloween night!
  • Haunted Cocktail Punch: Create a batch of fruity cocktail punch with floating fruit and spooky garnishes for a whimsical drink option. Its sweetness balances the richness of the deviled eggs, making it a festive companion.
  • Scary Spider Cupcakes: These fun, themed desserts will delight your guests and add an element of playfulness to your table. Their sugar rush is just what everyone can enjoy after feasting on your Halloween deviled eggs.
  • Witch’s Brew Salad: A vibrant green salad adorned with bewitching toppings like sliced almonds and dried cranberries offers freshness that perfectly counteracts the richer flavors of the deviled eggs. Include a zesty dressing for a fun twist!

Make Ahead Options

These Halloween Deviled Eggs are perfect for meal prep, allowing you to enjoy your festive gathering without the last-minute rush! You can prepare the dyed egg whites up to 24 hours in advance; simply crack and soak the eggs in the colored water, then refrigerate to maintain their spooky effect. Additionally, you can make the yolk filling up to 3 days ahead—store it in an airtight container in the fridge to keep it creamy and flavorful. On the day of your event, simply fill the egg whites with the yolk mixture and garnish as desired. This way, you’ll have delightful Halloween Deviled Eggs ready to impress your guests without the hassle!

Halloween Deviled Eggs Recipe FAQs

What color food dye works best for these Halloween deviled eggs?
I recommend vibrant colors like neon green, purple, or black to give your deviled eggs a spooky appearance. These colors provide excellent contrast against the egg whites and create an eye-catching, eerie presentation that will thrill your guests!

How long can I store Halloween deviled eggs in the refrigerator?
You can store these Halloween deviled eggs in an airtight container in the refrigerator for up to 3 days. Make sure they’re covered tightly to maintain their freshness and visual appeal, as they tend to lose their vibrant colors over time.

Can I freeze these Halloween deviled eggs?
Freezing is not recommended for filled deviled eggs, as the texture can turn grainy and unappetizing once thawed. To enjoy the best flavors and creamy textures, it’s best to eat them fresh!

What should I do if I have trouble peeling the hard-boiled eggs?
If you find peeling difficult, try a few tips! Peeling the eggs under running water often helps remove stubborn shell bits. Additionally, using eggs that are slightly older (about a week old) can aid in easier peeling since fresh eggs can be more challenging to separate from the shell.

Are these Halloween deviled eggs suitable for children?
Absolutely! These spooky treats are fun for both kids and adults. Just ensure that you monitor any dietary restrictions or allergies, such as sensitivities to mayonnaise or mustard, and you can always swap out ingredients to suit your guests’ needs!

What can I do if my egg whites don’t pick up enough color?
To enhance the dyeing effect, make sure to crack the egg shells thoroughly without breaking them apart. The more cracks, the more chance for the dye to seep in. Soak the eggs longer if necessary, ideally overnight, for deeper color saturation!

Halloween Deviled Eggs Recipe

Delightful Halloween Deviled Eggs Recipe That Wow Guests

This Halloween Deviled Eggs Recipe offers a fun and spooky twist on a classic appetizer, perfect for your ghoulish gatherings.
Prep Time 30 minutes
Cook Time 12 minutes
Soaking Time 3 hours
Total Time 3 hours 42 minutes
Servings: 12 eggs
Course: Appetizers
Cuisine: American
Calories: 80

Ingredients
  

For the Egg Base
  • 6 large Hard-Boiled Eggs Cooked perfectly for easy peeling
  • 1 tablespoon White Vinegar Helps set color during rinsing
For the Dye
  • 4 drops Food Coloring Choose spooky colors like black, purple, green, or orange
  • 2 cups Water Used for soaking the cracked eggs
For the Filling
  • 1/3 cup Mayonnaise Provides creamy texture
  • 1 tablespoon Mustard (Dijon or Yellow) Adds tanginess
  • 1 teaspoon Apple Cider Vinegar Enhances flavor
  • to taste Salt & Pepper Essential seasoning
For Garnishing (Optional)
  • 1 teaspoon Paprika Adds color and smoky flavor
  • 1 tablespoon Chia Seeds For crunch and spooky look
  • 1 tablespoon Parsley Adds freshness to presentation

Equipment

  • Mixing Bowl
  • Container for dyeing
  • Spoon or piping bag

Method
 

Step‑by‑Step Instructions
  1. Carefully crack the shells of the hard-boiled eggs.
  2. In a medium-sized container, mix together water and food coloring.
  3. Place cracked eggs into the colored water and ensure they are fully submerged. Refrigerate for at least 3 hours.
  4. Remove eggs and rinse gently under cold water with a splash of white vinegar.
  5. Peel the eggs gently under running water.
  6. Slice each peeled egg in half and place yolks into a mixing bowl. Mash yolks and mix in mayonnaise, mustard, apple cider vinegar, salt, and pepper.
  7. Optionally, mix in a few drops of food coloring to the yolk mixture.
  8. Fill the hollowed-out egg whites with the creamy yolk mixture.
  9. Garnish with paprika, chia seeds, or parsley.
  10. Keep the eggs chilled until serving.

Nutrition

Serving: 1eggCalories: 80kcalCarbohydrates: 1gProtein: 5gFat: 7gSaturated Fat: 1gMonounsaturated Fat: 5gCholesterol: 186mgSodium: 60mgPotassium: 60mgVitamin A: 270IUCalcium: 30mgIron: 0.4mg

Notes

Ensure your eggs are perfectly cooked for easy peeling. Garnishes should enhance the spooky theme.

Tried this recipe?

Let us know how it was!

Fudgy Spooky Chocolate Halloween Brownies for a Fun Feast

As the leaves fall and the air turns crisp, the anticipation of Halloween begins to weave its magic. Nothing says “spooky season” quite like indulgent treats, and these Spooky Chocolate Halloween Brownies are the perfect way to celebrate! Rich, fudgy squares crafted from Whitakers Dark Chocolate promise a delightfully gooey center that will enchant both kids and adults alike. Not only are these brownies a cinch to whip up with simple ingredients, but they also offer endless decoration possibilities—imagine candy eyes and raspberry coulis creating a playful fright for your Halloween party! Whether you’re hosting a gathering or simply want to enjoy a festive bite at home, these brownies will quickly become your go-to treat. Are you ready to cast a spell in your kitchen? Let’s get baking!

Why are these brownies a must-try?

Unforgettable flavor: The intense richness of Whitakers Dark Chocolate combined with simple pantry staples makes these brownies a chocolate lover’s dream. Versatile decorations: Whether you stick with classic sprinkles or go spooky with candy eyes and raspberry coulis, these brownies become a fun canvas for your creativity. Easy to make: With straightforward steps, you’ll have a batch ready in no time! Perfect for gatherings: They’re sure to be a hit at Halloween parties or family events, leaving everyone wanting more. For an additional chocolate indulgence, check out my Chocolate Fudge Cupcakes recipe for another winning treat!

Spooky Chocolate Halloween Brownies Ingredients

• Get ready to bake!

For the Brownie Batter

  • Whitakers Dark Chocolate – A rich foundation for indulgence; any high-quality dark chocolate can be substituted.
  • Unsalted Butter – Adds moisture and richness; omit for vegan butter if desired.
  • Caster Sugar – Provides the perfect sweetness and texture; granulated sugar works but may alter the texture slightly.
  • Large Eggs – Essential for structure and moisture; substitute with 1/4 cup unsweetened applesauce or flax egg for vegan brownies.
  • Plain Flour – Creates the necessary structure; use a gluten-free blend for gluten-free brownies.
  • Cocoa Powder – Ideally boosts the chocolate flavor; Dutch-processed cocoa offers a deeper taste.
  • Vanilla Extract – Infuses the batter with sweet aroma; don’t skip this for best flavor!
  • Salt – Enhances the chocolate flavor; just a pinch will balance the sweetness.

For the Decorations

  • Candy Eyes – A quirky element to create the spooky look; optional for those who prefer a classic style.
  • White Icing Pens – Perfect for drawing spooky cobwebs or mummies; melted white chocolate serves as a substitute.
  • Red Raspberry Coulis – Adds a wonderfully bloody effect; use store-bought or easily make your own.
  • Halloween Sprinkles – Gives your brownies a festive touch; any seasonal sprinkles can work just as well.

Let’s embrace the fun of Halloween by transforming these ingredients into delicious Spooky Chocolate Halloween Brownies!

Step‑by‑Step Instructions for Spooky Chocolate Halloween Brownies

Step 1: Preheat and Prepare
Begin by preheating your oven to 180°C (160°C fan) / 350°F. While that’s warming up, take a 20cm square baking tin and line it with parchment paper, ensuring the paper hangs over the edges for easy removal later. This step is crucial for ensuring your fudgy brownies release effortlessly once baked.

Step 2: Melt the Chocolate and Butter
Next, melt 200g of Whitakers Dark Chocolate together with 150g of unsalted butter. You can do this by placing them in a heatproof bowl set over a saucepan with gently simmering water or using the microwave in short bursts, stirring until smooth. Once melted, allow the mixture to cool slightly while you move on to the next step.

Step 3: Whisk Eggs and Sugar
In a large mixing bowl, combine 250g of caster sugar with 3 large eggs and 1 teaspoon of vanilla extract. Use a whisk to mix vigorously until the mixture becomes fluffy and light in color, about 2-3 minutes. This aeration will help create that delightful texture in your Spooky Chocolate Halloween Brownies.

Step 4: Combine Chocolate Mixture
Gently stir the cooled chocolate and butter mixture into the egg and sugar blend. Use a spatula to fold it in carefully, ensuring you maintain the lightness of the mixture. The dark chocolate adds a deep richness, setting the stage for your brownies’ intense flavor.

Step 5: Add Dry Ingredients
Sift together 100g of plain flour, 40g of cocoa powder, and a pinch of salt. Gradually fold these dry ingredients into the wet mixture until just combined. Be careful not to overmix; you want to retain that moist and fudgy texture that will make your brownies irresistible.

Step 6: Bake the Brownies
Pour the brownie batter into the prepared baking tin, smoothing the top with a spatula. Place the tin in the preheated oven and bake for 20-25 minutes. Keep an eye on them; the edges should look set, while the center will remain slightly gooey for that perfect fudgy texture.

Step 7: Cool and Prepare for Decoration
Once baked, remove the brownies from the oven and let them cool completely in the tin. This cooling step is essential for achieving clean edges when you cut them. The rich aroma will fill your kitchen, making it hard to wait!

Step 8: Cut and Decorate
After cooling, carefully lift the brownies from the tin using the parchment paper. Cut them into squares, and now comes the fun part—decorating! Use white icing pens, candy eyes, and a drizzle of raspberry coulis to create your spooky designs, bringing your Spooky Chocolate Halloween Brownies to life for the festive occasion.

Storage Tips for Spooky Chocolate Halloween Brownies

Room Temperature: Store brownies in an airtight container at room temperature for up to 4 days. This keeps them fudgy and fresh while retaining their delicious texture.

Fridge: If you prefer a firmer brownie, you can refrigerate them for up to a week. Just be sure to let them come to room temperature before serving for the best flavor.

Freezer: For longer storage, freeze brownies individually wrapped in plastic wrap and sealed in an airtight container for up to a month. Thaw at room temperature before decorating for your Halloween fun!

Reheating: To enjoy warm brownies, gently heat them in the microwave for 10-15 seconds. This will bring back their ooey-gooey goodness for a delightful treat!

Spooky Chocolate Halloween Brownies Variations

Feel free to let your imagination soar while customizing these delightful brownies with these fun variations!

  • Milk Chocolate: Swap dark chocolate for milk chocolate for a sweeter, creamier flavor that kids particularly love.

  • Nutty Crunch: Toss in some chopped walnuts or pecans for added texture; the crunch pairs beautifully with the fudgy center!

  • Chocolate Chips: Mix in a handful of chocolate chips or even caramel bits to create pockets of gooey sweetness. It’s like a treasure hunt in every bite!

  • Vegan Option: For a fully plant-based treat, use vegan butter and substitute the eggs with 1/4 cup unsweetened applesauce.

  • Gluten-Free: Replace the plain flour with a gluten-free flour blend for brownies that everyone can enjoy without compromising flavor.

  • Spicy Twist: Add a pinch of cayenne pepper or cinnamon to the batter for a surprising, warm kick that perfectly complements the chocolate.

  • Fruit Infusion: Fold in some mashed bananas or applesauce for a moist texture and a hint of fruity goodness, lifting each bite to new heights.

For more decadent options, why not try whipping up some Chocolate Chip Pancakes for breakfast or snacking on Chocolate Granola Cups for a delightful treat? The possibilities are endless!

Make Ahead Options

These Spooky Chocolate Halloween Brownies are ideal for meal prep, allowing you to get a head start on your Halloween festivities! You can prepare the brownie batter up to 24 hours in advance by mixing all the ingredients and storing it in an airtight container in the refrigerator. Alternatively, bake the brownies ahead, cool them completely, and store them in an airtight container at room temperature for up to 4 days. To maintain their fudgy texture, avoid decorating them until just before serving; this prevents your spooky decorations from becoming soggy. When you’re ready to impress your guests, simply cut the brownies into squares and have fun decorating with icing pens, candy eyes, and raspberry coulis. Enjoy the satisfaction of serving these delightful treats with minimal effort!

What to Serve with Spooky Chocolate Halloween Brownies?

Imagine a gathering filled with laughter, fun, and delicious treats that create a memorable Halloween atmosphere to savor.

  • Vanilla Ice Cream: The creamy sweetness of vanilla ice cream beautifully balances the rich chocolate flavor, making every bite heavenly. Serve a warm brownie with a scoop melting on top—the ultimate indulgence!
  • Chocolate Sauce: Drizzling warm chocolate sauce enhances flavor and adds decadent richness. It brings an extra touch of chocolaty goodness that chocolate lovers won’t be able to resist.
  • Spiced Pumpkin Cookies: A fall favorite, these cookies add a seasonal touch with warm spices that perfectly complement the chocolate. Their chewy texture contrasts nicely with your fudgy brownies.
  • Fresh Berries: Consider a vibrant mix of raspberries and strawberries to provide a refreshing and tart contrast—a delicious burst of flavor that cuts through the sweetness.
  • Milk: A classic pairing that transports you back to childhood. Whether it’s cold, flavored, or warm, milk is a nostalgic drink that enhances your spooky dessert and brings comfort.
  • Homemade Hot Chocolate: For a cozy feel, serve your brownies with a cup of rich hot chocolate. Add whipped cream and marshmallows for a warming treat that celebrates the spirit of Halloween!

Let the spooky decorations on your brownies inspire creativity in your serving style, creating a feast that’s both eye-catching and delightfully delicious!

Expert Tips for Spooky Chocolate Halloween Brownies

  • Room Temperature Ingredients: Bring eggs and butter to room temperature for smoother blending and better texture in your brownies.
  • Measure Accurately: Use a kitchen scale to measure ingredients precisely; this avoids dense or uneven brownies.
  • Don’t Overmix: Fold in the flour and cocoa gently; overmixing can lead to tough brownies instead of the desired fudgy texture.
  • Check Baking Time: Keep an eye on the oven; bake until a skewer shows a few moist crumbs for the perfect gooey center.
  • Cool Before Cutting: Allow brownies to cool completely in the tin for cleaner, more attractive edges when sliced.
  • Store Decorations Separately: If not serving immediately, keep your fun decorations separate until serving to prevent sogginess and maintain spookiness!

Spooky Chocolate Halloween Brownies Recipe FAQs

What type of chocolate should I use for the brownies?
Absolutely! I recommend using Whitakers Dark Chocolate for a rich flavor, but any high-quality dark chocolate will work wonderfully. If you prefer a sweeter brownie, milk chocolate can be used instead!

How should I store the brownies once baked?
You can store your Spooky Chocolate Halloween Brownies in an airtight container at room temperature for up to 4 days. They’ll remain wonderfully fudgy and delicious. For longer storage, consider refrigerating for up to a week or freezing them.

Can I freeze the brownies? If so, how?
Certainly! To freeze your brownies, wrap each square individually in plastic wrap and place them in an airtight container. They can be frozen for up to a month. When you’re ready to enjoy them, simply thaw at room temperature for a few hours before decorating and diving in!

What if my brownies turn out too dense?
If your brownies end up too dense, it could be due to overmixing after adding the flour or not measuring your ingredients accurately. To achieve that perfect fudgy texture, mix just until combined and be sure to measure with precision. You can also try reducing the baking time slightly next time!

Are there any dietary considerations for these brownies?
Absolutely! If you’re looking for a dairy-free option, you can replace the unsalted butter with vegan butter. Also, for a vegan dessert, substitute the eggs with 1/4 cup unsweetened applesauce or a flax egg (1 tablespoon flaxseed meal mixed with 2.5 tablespoons of water, let sit for a few minutes). Just be mindful of any allergies when adding decorations, especially with products like candy eyes and sprinkles.

Spooky Chocolate Halloween Brownies

Fudgy Spooky Chocolate Halloween Brownies for a Fun Feast

These Spooky Chocolate Halloween Brownies offer a rich, fudgy delight perfect for Halloween celebrations!
Prep Time 15 minutes
Cook Time 25 minutes
Cooling Time 30 minutes
Total Time 1 hour 10 minutes
Servings: 16 squares
Course: Dessert
Cuisine: American
Calories: 200

Ingredients
  

Brownie Batter
  • 200 grams Whitakers Dark Chocolate Any high-quality dark chocolate can be substituted.
  • 150 grams Unsalted Butter Omit for vegan butter if desired.
  • 250 grams Caster Sugar Granulated sugar works but may alter the texture slightly.
  • 3 large Eggs Substitute with 1/4 cup unsweetened applesauce or flax egg for vegan brownies.
  • 100 grams Plain Flour Use a gluten-free blend for gluten-free brownies.
  • 40 grams Cocoa Powder Dutch-processed cocoa offers a deeper taste.
  • 1 teaspoon Vanilla Extract Essential for optimal flavor.
  • 1 pinch Salt Enhances chocolate flavor.
Decorations
  • Optional Candy Eyes For a spooky look.
  • To taste White Icing Pens Can use melted white chocolate instead.
  • To taste Red Raspberry Coulis Use store-bought or homemade.
  • To taste Halloween Sprinkles Any seasonal sprinkles work.

Equipment

  • Oven
  • Mixing Bowl
  • spatula
  • Heatproof bowl
  • Baking Tin
  • Parchment Paper
  • whisk

Method
 

Step-by-Step Instructions
  1. Preheat your oven to 180°C (160°C fan) / 350°F and line a 20cm square baking tin with parchment paper.
  2. Melt 200g of Whitakers Dark Chocolate with 150g of unsalted butter in a heatproof bowl over simmering water or in the microwave.
  3. In a large bowl, whisk together 250g of caster sugar, 3 large eggs, and 1 teaspoon of vanilla extract until fluffy and light in color.
  4. Gently stir in the cooled chocolate and butter mixture into the egg and sugar blend, folding it in carefully.
  5. Sift together 100g of plain flour, 40g of cocoa powder, and a pinch of salt. Gradually fold into the wet mixture until just combined.
  6. Pour the batter into the prepared baking tin and bake for 20-25 minutes, until the edges are set and the center remains slightly gooey.
  7. Remove from the oven and allow to cool completely in the tin.
  8. Lift out the brownies, cut into squares, and decorate with white icing pens, candy eyes, and a drizzle of raspberry coulis.

Nutrition

Serving: 1squareCalories: 200kcalCarbohydrates: 25gProtein: 2gFat: 10gSaturated Fat: 6gMonounsaturated Fat: 3gCholesterol: 50mgSodium: 50mgPotassium: 150mgFiber: 1gSugar: 15gCalcium: 1mgIron: 5mg

Notes

For best results, bring eggs and butter to room temperature before starting. Measure ingredients accurately to avoid uneven texture.

Tried this recipe?

Let us know how it was!

Slytherin’s Secret Butterbeer Cupcakes: Magical Bites to Savor

In a swirl of dust and mystery, I found a recipe that whisked me straight to Diagon Alley—a place where magic and flavor intertwine. Slytherin’s Secret Butterbeer Cupcakes are not just ordinary treats; they’re extravagant delights that invite you into a world of whimsy and nostalgia. With a lush, moist crumb and a gooey caramel center, these cupcakes embody the enchanting essence of butterbeer, making them a captivating choice for any gathering. Plus, they’re surprisingly easy to whip up, leaving you more time to enjoy the company of fellow wizards and Muggles alike. Whether you’re hosting a Harry Potter movie marathon or simply craving a magical escape from everyday life, these cupcakes promise to elevate your culinary adventures. Are you ready to embark on this flavorful journey?

Why are Butterbeer Cupcakes so irresistible?

Indulgent, Slytherin’s Secret Butterbeer Cupcakes are the perfect treat for any occasion, effortlessly blending whimsical charm with rich flavors. Unique, the gooey caramel center surprises your taste buds, while the dark chocolate-green ganache makes these cupcakes visually stunning. Versatile, they can easily be adapted to suit gluten-free or vegan diets, ensuring everyone can indulge. Time-saving, the straightforward recipe allows even novice bakers to create something magical. Crowd-pleasing, these enchanting bites will steal the show at parties, just like the captivating world of Harry Potter itself! Looking for more amazing desserts? Check out these delightful Chocolate Fudge Cupcakes that are sure to impress!

Slytherin’s Secret Butterbeer Cupcakes Ingredients

Dive into the magical world of baking with these enchanting treats!

For the Batter

  • All-purpose flour – Provides structure to the cupcakes; can substitute with gluten-free flour blends for a safe option.
  • Baking powder – Acts as the leavening agent for that perfect rise.
  • Salt – Enhances the overall flavor, bringing all the ingredients together.
  • Unsalted butter – Creates a rich, moist texture; use vegan butter for a dairy-free alternative.
  • Granulated sugar – Adds sweetness and helps the cupcakes rise beautifully.
  • Eggs – Provide moisture and binding; for a vegan option, consider flax eggs.
  • Vanilla extract – Adds depth and warmth to the flavor profile.
  • Buttermilk – Contributes to the moisture and richness; can substitute with plant-based milk and vinegar for dairy-free.
  • Cream soda – Imparts the signature butterbeer flavor; regular soda can be a handy alternative.

For the Gooey Center

  • Caramel sauce – Offers a delicious, gooey filling; either store-bought or homemade works wonders.

For the Ganache Topping

  • Dark chocolate chips – Essential for that enticing ganache topping; choose dairy-free chocolate for a vegan version.
  • Heavy cream – Used to create the ganache; coconut cream is a fabulous non-dairy substitute.
  • Green gel food coloring – Gives the ganache its desired emerald hue for a magical presentation.

For the Decoration (Optional)

  • Edible silver dust/sprinkles – Adds a touch of sparkle to make your cupcakes shine at any gathering.

These Slytherin’s Secret Butterbeer Cupcakes are more than just desserts; they’re a delicious experience waiting to delight your taste buds and transport you into the beloved world of Harry Potter!

Step‑by‑Step Instructions for Slytherin’s Secret Butterbeer Cupcakes

Step 1: Preheat and Prepare
Begin by preheating your oven to 350°F (175°C). While the oven warms up, line a cupcake tin with festive paper liners. This not only makes for easy cleanup but also adds to the whimsical charm of your Slytherin’s Secret Butterbeer Cupcakes. Make sure everything is within reach before you dive into baking!

Step 2: Mix Dry Ingredients
In a medium bowl, whisk together 2 cups of all-purpose flour, 2 teaspoons of baking powder, and ½ teaspoon of salt. This combination will create a fluffy foundation for your cupcakes. Ensure there are no lumps in the flour mixture, which will help achieve the perfect texture. Set this bowl aside as you prepare the wet ingredients.

Step 3: Cream Butter and Sugar
In a large mixing bowl, beat ½ cup of softened unsalted butter and 1 cup of granulated sugar until the mixture is light and fluffy, about 3-4 minutes. This step is crucial for optimal cupcake lift! Once fully combined, add in 2 large eggs and 1 teaspoon of vanilla extract, mixing until well incorporated.

Step 4: Combine Wet and Dry Ingredients
Gradually add the flour mixture to the butter mixture, alternating with 1 cup of buttermilk to keep the batter moist. Mix until just combined; overmixing can lead to dense cupcakes. Finally, gently fold in 1 cup of cream soda to infuse that magical butterbeer flavor into your Slytherin’s Secret Butterbeer Cupcakes.

Step 5: Fill and Bake
Spoon the batter into the prepared cupcake liners, filling each about two-thirds full. Bake in the preheated oven for 18-20 minutes, or until a toothpick inserted in the center comes out clean. Keep an eye on them as they bake; they should be lightly golden on top. Once ready, allow the cupcakes to cool in the tin for 5 minutes before transferring them to a wire rack.

Step 6: Prepare for Filling
Once the cupcakes have fully cooled, carefully use a small paring knife to hollow out a portion in the center of each cupcake. This creates space for the delicious caramel filling that will surprise your taste buds. Take your time to ensure you don’t cut too deep, preserving the cupcake’s structure as much as possible.

Step 7: Fill with Caramel
Spoon a generous amount of caramel sauce into the hollowed centers of each cupcake. The gooey filling should overflow slightly, providing a delightful surprise when bitten into. If you prefer, use a squeeze bottle for more precision. Your Slytherin’s Secret Butterbeer Cupcakes are now ready for the rich ganache!

Step 8: Make the Ganache Topping
In a small saucepan over medium heat, warm ½ cup of heavy cream until it begins to simmer. Remove it from the heat, then stir in 1 cup of dark chocolate chips until completely melted and smooth. For that enchanting emerald hue, add in a few drops of green gel food coloring, mixing thoroughly until you achieve your desired color.

Step 9: Frost the Cupcakes
Once the ganache has cooled slightly, use a spatula or piping bag to frost each cupcake generously with the glossy ganache. Allow it to cascade over the sides for a magical presentation. If you wish, feel free to sprinkle some edible silver dust or decorative sprinkles on top for added sparkle.

Step 10: Chill and Set
Finally, place the decorated Slytherin’s Secret Butterbeer Cupcakes in the refrigerator for about 15-20 minutes, allowing the ganache to set. This will make the cupcakes easier to handle and serve, while the flavors meld beautifully. Your enchanting treats are now ready for any gathering or cozy night in!

Make Ahead Options

These Slytherin’s Secret Butterbeer Cupcakes are perfect for busy home cooks looking to save time! You can prepare the cupcake batter up to 24 hours in advance; simply mix and store it in an airtight container in the refrigerator. Additionally, the baked cupcakes can be stored without the caramel filling at room temperature or in the fridge for up to 3 days. To maintain their delightful texture, always fill the cupcakes with caramel sauce and frost with ganache just before serving. When ready to impress your guests, simply fill the cupcakes and frost them for a fresh, magical treat that tastes just as enchanting!

Slytherin’s Secret Butterbeer Cupcakes Variations

Feel free to let your imagination run wild and customize these delightful cupcakes to suit your taste!

  • Gluten-Free: Substitute all-purpose flour with a gluten-free flour blend for a deliciously safe option.
  • Dairy-Free: Use vegan butter and plant-based milk for a dairy-free twist that’s just as rich and tasty.
  • Vegan: Replace eggs with flax eggs and opt for coconut oil instead of butter for a completely vegan cupcake.
  • Chocolate Twist: Change up the ganache by using milk chocolate chips or swirl in some peanut butter for a decadent flavor combination.
  • Enhanced Flavor: Add a teaspoon of butterscotch extract to the batter for an even more pronounced butterbeer flavor.
  • Caramel Variations: Infuse the caramel filling with a splash of bourbon for adults or a pinch of sea salt for an extra depth of flavor.
  • Mini Cupcakes: Bake in a mini cupcake tin for bite-sized versions that are perfect for sharing at themed parties or gatherings.
  • Spicy Kick: Add a dash of cinnamon or nutmeg to the batter for a warm spice that complements the sweetness beautifully.

For even more delightful treats, don’t forget to check out these irresistible Chocolate Fudge Cupcakes that can add another delicious element to your gathering! Remember, the magic lies in your creativity—enjoy baking!

What to Serve with Slytherin’s Secret Butterbeer Cupcakes

Imagine a table set with delightful treats and drinks that echo the enchanting world of Harry Potter, complementing your magical cupcakes!

  • Butterbeer: This iconic drink pairs perfectly with the butterbeer flavor in your cupcakes, creating a cohesive and whimsical experience.
  • Pumpkin Pasties: These savory pastries add a hearty touch to your dessert spread, balancing the sweetness of the cupcakes with a comforting flavor.
  • Chocolate Frogs: Add a playful element to your festivities with these sweet treats; their rich chocolatey taste is the perfect counterpart to the buttery cupcakes.
  • Spiced Apple Cider: This warm beverage gives a cozy vibe to any gathering, harmonizing beautifully with the rich flavors of your cupcakes.
  • Wand-shaped Cookies: These fun, themed cookies can serve as delightful accompaniments, offering a crunchy texture that contrasts nicely with the cupcake’s softness.
  • Gryffindor Gelato: For a refreshing twist, serve gelato in vibrant red flavors, offering a contrast that is both visually stunning and delicious!
  • Magical Mocktails: Create themed drinks using fruity mixes that resonate with the whimsical aspect of the Hogwarts universe, enhancing the magic of your gathering.

Pair these enchanting ideas with your Slytherin’s Secret Butterbeer Cupcakes, and watch as your guests are transported into a world of wonder!

How to Store and Freeze Slytherin’s Secret Butterbeer Cupcakes

Room Temperature: Keep the cupcakes in an airtight container at room temperature for up to 2 days to maintain their freshness and texture.

Fridge: These cupcakes can be stored in the fridge for up to 5 days. Just ensure they’re properly covered to avoid drying out.

Freezer: Unfilled cupcakes can be frozen for up to 1 month. Wrap them tightly in plastic wrap and then place them in a freezer-safe bag. Thaw and fill with caramel before serving for the best taste experience.

Reheating: If you enjoy them warm, reheat individual cupcakes in the microwave for about 10-15 seconds. This will make the caramel center ooze just like when they’re fresh out of the oven!

Expert Tips for Slytherin’s Secret Butterbeer Cupcakes

  • Mix Gently: Avoid overmixing the batter as this can lead to dense cupcakes. Stir just until combined for the best texture.
  • Check for Doneness: Use a toothpick to test if the cupcakes are fully baked; if it comes out clean, they’re ready. Adjust baking time as needed.
  • Chill Ganache: Let the ganache sit for a few minutes before frosting to achieve the perfect thickness and spreadability.
  • Precision Filling: Use a squeeze bottle or piping bag for filling your cupcakes with caramel for a neater presentation and less mess.
  • Decorative Touches: For an eye-catching finish, try decorating your cupcakes with edible sprinkles or silver dust for that magical Slytherin flair.

Experience the magic of Slytherin’s Secret Butterbeer Cupcakes by following these tips for a delightful treat that everyone will love!

Slytherin’s Secret Butterbeer Cupcakes Recipe FAQs

How do I select ripe ingredients for my cupcakes?
Absolutely! Ensure your butter is softened but not melted, as this creates a fluffy texture when creamed with sugar. For best results, your eggs should be at room temperature, which can be achieved by letting them sit out for about 30 minutes. Additionally, use fresh cream soda—check the expiration date on the bottle for peak flavor!

What are the best storage methods for Slytherin’s Secret Butterbeer Cupcakes?
To enjoy your cupcakes at their best, store them in an airtight container at room temperature for up to 2 days. If you need to keep them longer, pop them in the fridge for up to 5 days. Just be sure they’re covered to keep them moist!

Can I freeze Slytherin’s Secret Butterbeer Cupcakes?
Yes! Unfilled cupcakes can be frozen for up to 1 month. Once cooled, wrap each cupcake tightly in plastic wrap and then place in a freezer-safe bag. When you’re ready to indulge, simply thaw them at room temperature and fill with your gooey caramel sauce before serving to retain that fresh-baked experience!

What should I do if my cupcakes turn out dense?
Very common! If your cupcakes come out dense, it’s likely due to overmixing the batter. Remember, it’s all about that gentle touch! Mix until the ingredients are just combined, and avoid adding too much flour. Additionally, make sure your baking powder is fresh—old leavening agents won’t provide the lift you need.

Are Slytherin’s Secret Butterbeer Cupcakes safe for those with allergies?
These cupcakes can be adjusted to accommodate various dietary needs! For those allergic to eggs, use flax eggs (1 tablespoon of flaxseed meal mixed with 2.5 tablespoons of water per egg). For dairy-free options, swap out the butter for vegan butter or coconut oil and use coconut cream instead of heavy cream. Always check the ingredient labels on your products to ensure they’re allergen-free.

How should I serve Slytherin’s Secret Butterbeer Cupcakes for a party?
Very simple! Arrange them on a decorative platter or cupcake stand to create an eye-catching display. Pair them with themed drinks like pumpkin juice or, of course, butterbeer, to enhance that magical atmosphere. If you want to make an impression, sprinkle a little edible silver dust on top of each cupcake just before serving for that extra touch of enchantment!

Slytherin’s Secret Butterbeer Cupcakes

Slytherin’s Secret Butterbeer Cupcakes: Magical Bites to Savor

Slytherin’s Secret Butterbeer Cupcakes are magical treats that combine whimsical charm with rich flavors, featuring a gooey caramel center and dark chocolate-green ganache.
Prep Time 30 minutes
Cook Time 20 minutes
Chilling Time 20 minutes
Total Time 1 hour 10 minutes
Servings: 12 cupcakes
Course: Dessert
Cuisine: Magical
Calories: 250

Ingredients
  

For the Batter
  • 2 cups all-purpose flour Can substitute with gluten-free flour blends
  • 2 teaspoons baking powder Acts as leavening agent
  • 0.5 teaspoon salt Enhances flavor
  • 0.5 cups unsalted butter Use vegan butter for dairy-free option
  • 1 cup granulated sugar Adds sweetness
  • 2 large eggs Consider flax eggs for vegan option
  • 1 teaspoon vanilla extract Adds depth of flavor
  • 1 cup buttermilk Can substitute with plant-based milk and vinegar
  • 1 cup cream soda Imparts butterbeer flavor
For the Gooey Center
  • 1 cup caramel sauce Store-bought or homemade
For the Ganache Topping
  • 1 cup dark chocolate chips Dairy-free chocolate for vegan version
  • 0.5 cups heavy cream Coconut cream as non-dairy substitute
  • a few drops green gel food coloring For emerald hue
For the Decoration (Optional)
  • to taste edible silver dust/sprinkles For added sparkle

Equipment

  • Cupcake Tin
  • Mixing bowls
  • whisk
  • spatula
  • Saucepan
  • Piping Bag

Method
 

Preparation
  1. Preheat your oven to 350°F (175°C) and line a cupcake tin with paper liners.
  2. In a bowl, whisk together flour, baking powder, and salt, and set aside.
  3. Beat butter and sugar until light and fluffy, then add eggs and vanilla extract, mixing well.
  4. Gradually add the dry ingredients to the wet ingredients, alternating with buttermilk.
  5. Fold in cream soda gently.
  6. Fill cupcake liners about two-thirds full and bake for 18-20 minutes.
  7. After cooling, hollow out a portion of each cupcake and fill with caramel sauce.
  8. Make the ganache by heating cream, adding chocolate chips, and mixing until smooth, adding food coloring.
  9. Frost the cooled cupcakes with ganache and chill for 15-20 minutes to set.

Nutrition

Serving: 1cupcakeCalories: 250kcalCarbohydrates: 35gProtein: 3gFat: 12gSaturated Fat: 7gPolyunsaturated Fat: 1gMonounsaturated Fat: 3gCholesterol: 55mgSodium: 180mgPotassium: 120mgFiber: 1gSugar: 20gVitamin A: 300IUCalcium: 60mgIron: 1mg

Notes

To maintain freshness, store cupcakes in an airtight container for up to 2 days at room temperature or 5 days in the fridge. Unfilled cupcakes can be frozen for up to 1 month.

Tried this recipe?

Let us know how it was!

Irresistibly Moist Pumpkin Cupcakes with Creamy Frosting

As the scent of nutmeg and cinnamon fills my kitchen, I can’t help but smile—it’s time for Pumpkin Cupcakes with Brown Sugar Cream Cheese Frosting! These delightful treats are not just another dessert; they embody the very spirit of fall with their cozy flavors and soft, fluffy texture. What makes this recipe truly special is its ease, perfect for both seasoned bakers and those looking to impress at gatherings with minimal fuss. You can whip up a batch of these moist cupcakes that are guaranteed to become the star of any dessert table, bringing joy to your family and friends. Plus, with tips on making your own pumpkin puree and spice blend, you’ll enjoy a homemade twist that elevates the experience. Are you ready to let your taste buds embark on a sweet fall adventure?

Why are these cupcakes unbeatable?

Simplicity at Its Best: The recipe is straightforward and requires only a few basic baking skills, making it accessible for everyone.

Warm, Cozy Flavors: Infused with pumpkin and spices, these cupcakes capture the essence of fall in every bite.

Perfectly Frosted: The rich brown sugar cream cheese frosting adds a luscious finish that pairs beautifully with the cupcakes.

Homemade Goodness: With tips for making pumpkin puree and pumpkin spice, you’ll elevate your baking game.

Crowd-Pleasing Appeal: These cupcakes are guaranteed to be a hit at parties or family gatherings, leaving everyone wanting more.

Versatile Twist: You can easily customize the recipe by substituting half the pumpkin with banana or applesauce for a fun change!

Pumpkin Cupcake Ingredients

• Let’s gather everything you’ll need for these delightful pumpkin cupcakes!

For the Cupcakes

  • All-Purpose Flour – Provides a fluffy structure; consider using gluten-free flour for a gluten-free option.
  • Baking Powder – A leavening agent that ensures your cupcakes rise perfectly; make sure it’s fresh!
  • Baking Soda – Works with acidic ingredients for additional rise; omit if you’re using self-raising flour.
  • Salt – Enhances the flavors beautifully; don’t skip it, as it balances the sweetness.
  • Pumpkin Spice – Adds that cozy fall flavor profile; feel free to use homemade or store-bought.
  • Dark Brown Sugar – Infuses moisture and a rich sweetness; light brown sugar can substitute for a milder flavor.
  • Pumpkin Purée – Provides moisture and a lovely taste; try making your own for a fresh twist!
  • Vegetable Oil – Keeps the cupcakes moist and tender; melted butter can be a delicious substitute.
  • Eggs – Essential for structure and moisture; ensure they are at room temperature for the best mixing.
  • Vanilla Extract – Adds depth and flavor to both the cupcakes and frosting.

For the Frosting

  • Butter – The base for a rich frosting; make sure it’s at room temperature for easy mixing.
  • Full-Fat Cream Cheese – Adds creaminess and tang; drain excess moisture if you’re using imported varieties.
  • Powdered Sugar – Sweetens and thickens the frosting; sifting helps keep it smooth and free of lumps.

With these quality ingredients at hand, you’re well on your way to creating unforgettable pumpkin cupcakes that will charm your family and friends!

Step‑by‑Step Instructions for Deliciously Moist Pumpkin Cupcakes with Brown Sugar Cream Cheese Frosting

Step 1: Prepare Oven and Pan
Preheat your oven to 160ºC/320ºF and line a 12-cup cupcake tin with festive liners. This will ensure your pumpkin cupcakes bake evenly and are easy to remove once done. Get ready to fill your kitchen with delightful aromas as you prepare for these cozy cupcakes!

Step 2: Mix Dry Ingredients
In a large mixing bowl, whisk together all-purpose flour, baking powder, baking soda, pumpkin spice, and salt. This step is crucial as it combines the leavening agents with the spices that give your pumpkin cupcakes their wonderful flavor. Ensure the mixture is well blended to avoid any clumping.

Step 3: Combine Wet Ingredients
In a separate bowl, whisk together the pumpkin purée, vegetable oil, eggs, and vanilla extract until smooth. Make sure your ingredients are at room temperature to blend easily and create a uniform batter. This step brings together the moisture and flavor needed for deliciously moist cupcakes.

Step 4: Combine Mixtures
Pour the wet mixture into the dry ingredients, stirring gently until no dry flour remains. Be careful not to over-mix, as this can affect the tenderness of your pumpkin cupcakes. The batter should be slightly thick but smooth, ready to be transformed into delightful treats.

Step 5: Fill Cupcake Liners
Using a cookie scoop, fill each cupcake liner about two-thirds full with the batter. Bake in your preheated oven for 23-24 minutes, or until a toothpick inserted into the center comes out clean. Keep an eye on the cupcakes as they bake, looking for a lovely golden color on top.

Step 6: Cool Cupcakes
Once baked, remove the cupcakes from the oven and cool them in the tin for about 5 minutes before transferring them to a wire rack. This cooling period is essential to prevent the cupcakes from becoming soggy. Let them cool completely to ensure the frosting doesn’t melt when applied.

Step 7: Make Frosting
In a large bowl, cream together the room-temperature butter and brown sugar for about 5 minutes until fluffy. Gradually add in the full-fat cream cheese and vanilla extract, then mix until it’s smooth and creamy. Finally, sift in the powdered sugar and beat until fully combined, creating a luscious frosting.

Step 8: Frost Cupcakes
Once your pumpkin cupcakes have cooled down completely, pipe the brown sugar cream cheese frosting on top of each cupcake. Be creative with your design, and feel free to garnish with a sprinkle of pumpkin spice or adorable fondant pumpkins for a festive touch. Enjoy the sweet autumn flavor!

Expert Tips for Pumpkin Cupcakes

  • Fresh Ingredients: Always check that your baking powder and baking soda are fresh to ensure your pumpkin cupcakes rise beautifully.

  • Gentle Mixing: Avoid over-mixing the batter; this will keep your cupcakes tender and fluffy.

  • Cooling Time: Let the cupcakes cool completely before frosting. Otherwise, the cream cheese frosting may melt and lose its shape.

  • Homemade Pumpkin Purée: If using homemade pumpkin purée, ensure it’s well-drained for the right consistency.

  • Room Temperature Eggs: Using room temperature eggs helps your batter mix more smoothly, resulting in moist pumpkin cupcakes.

  • Frosting Consistency: For a lighter frosting, adjust the powdered sugar or add a bit more cream cheese to achieve your desired texture.

Make Ahead Options

These delightful Pumpkin Cupcakes with Brown Sugar Cream Cheese Frosting are perfect for meal prep enthusiasts looking to save time without sacrificing flavor! You can make the cupcakes up to 24 hours in advance and store them in an airtight container at room temperature. The cream cheese frosting can be prepared ahead as well—just keep it refrigerated for up to 3 days. When you’re ready to serve, frost the cooled cupcakes and let them sit at room temperature for about 30 minutes to bring out that rich flavor and creamy texture. This way, your cupcakes stay just as delicious and ready to impress without the last-minute rush!

Pumpkin Cupcakes: Variations & Substitutions

Feel free to let your creativity shine and customize these delightful cupcakes however you like!

  • Gluten-Free: Use a 1:1 gluten-free flour blend to cater to gluten sensitivities without sacrificing flavor.

  • Egg-Free: Substitute each egg with 1/4 cup of unsweetened applesauce or a flax egg for a vegan-friendly alternative.

  • Flavor Boost: Add a teaspoon of freshly grated ginger or an extra pinch of nutmeg to enhance the cozy spice notes.

  • Healthier Frosting: Swap half of the powdered sugar in the frosting for unsweetened cocoa powder to create a delicious dark chocolate version!

  • Nutty Twist: Fold in a half cup of finely chopped walnuts or pecans into the batter for added crunch and flavor.

  • Mini Versions: Make mini cupcakes by adjusting the baking time to around 15-18 minutes, perfect for small bites.

  • Cream Cheese Alternative: For a lighter frosting, replace cream cheese with Greek yogurt for a tangy twist that’s just as creamy.

  • Add Heat: Want a little kick? Incorporate a pinch of cayenne pepper to the batter for an unexpected yet delightful warm flavor.

With these fun variations, you can turn your pumpkin cupcakes into a unique treat every time! Plus, if you’re feeling adventurous, consider pairing them with a warm beverage or even using homemade pumpkin puree to enhance the flavors further. Enjoy your baking journey!

How to Store and Freeze Pumpkin Cupcakes

Room Temperature: Store unfrosted pumpkin cupcakes at room temperature for up to 2 days in an airtight container to maintain their moisture and freshness.

Fridge: Frosted pumpkin cupcakes can be refrigerated for up to a week. Ensure they’re covered to prevent drying out, and allow them to sit at room temperature for about 30 minutes before serving.

Freezer: For longer storage, freeze unfrosted pumpkin cupcakes for up to 3 months. Wrap each cupcake tightly in plastic wrap and place them in a freezer-safe bag.

Reheating: To enjoy a warm cupcake, simply let it thaw at room temperature, then heat in the microwave for 10-15 seconds for that fresh-out-of-the-oven feeling!

What to Serve with Deliciously Moist Pumpkin Cupcakes with Brown Sugar Cream Cheese Frosting

Imagine the warm, inviting scent of pumpkin spice and sweet cream wafting through your home as you prepare a delightful spread to accompany these luscious cupcakes.

  • Chai Tea: The aromatic blend of spices in chai beautifully complements the flavors of pumpkin, making it a cozy pairing for any fall gathering.
  • Coffee: A rich cup of coffee balances the sweetness of the cupcakes, enhancing their flavors with each sip and bite.
  • Creamy Vanilla Ice Cream: The cold, creamy texture of vanilla ice cream contrasts nicely with the soft warmth of the cupcakes and adds a refreshing element.
  • Salted Caramel Sauce: Drizzling warm salted caramel on top or alongside your cupcakes introduces a delightful sweet-and-salty dynamic that’s simply irresistible.
  • Whipped Cream: Light and airy whipped cream softens the richness of the frosting, providing a balanced taste experience that feels indulgent yet light.
  • Cranberry Sauce: A tangy cranberry sauce adds a burst of freshness and tartness, perfectly cutting through the sweetness of the cupcakes for a delightful contrast.
  • Spiced Apple Cider: Serve warm or chilled, spiced apple cider enhances the autumnal essence of your dessert and feels like a cozy hug in a mug.
  • Mini Pumpkin Pies: For an extra festive touch, pair these cupcakes with mini pumpkin pies, providing a delightful mix of textures and flavors for your guests to enjoy.

Pumpkin Cupcakes with Brown Sugar Cream Cheese Frosting Recipe FAQs

What type of pumpkin should I use for the puree?
Absolutely! For the best flavor, I recommend using sugar pumpkins, also known as pie pumpkins. They’re sweeter and have a denser flesh compared to regular pumpkins. If you’re in a pinch, canned pumpkin puree works just fine, but make sure it’s 100% pumpkin with no added spices.

How long can I store frosted pumpkin cupcakes in the fridge?
Frosted pumpkin cupcakes can be stored in the refrigerator for up to a week. Be sure to keep them in an airtight container to prevent them from drying out. Before serving, let them sit at room temperature for about 30 minutes so that the frosting regains its creamy texture.

Can I freeze pumpkin cupcakes?
Very! To freeze unfrosted pumpkin cupcakes, wrap each one tightly in plastic wrap and place them in a freezer-safe bag. They can be stored in the freezer for up to 3 months. When you’re ready to enjoy them, thaw at room temperature for a few hours, then frost just before serving for the best results.

What should I do if my cupcakes don’t rise properly?
If your pumpkin cupcakes don’t rise well, check that your baking powder and baking soda are fresh and active. If they have been sitting in your pantry for a while, they might not perform effectively. Remember to mix the dry and wet ingredients gently, as over-mixing can also lead to denser cupcakes.

Are these pumpkin cupcakes suitable for those with nut allergies?
Absolutely! This recipe is nut-free, making it a great choice for those with nut allergies. If you’re concerned about potential cross-contamination, be sure to check your ingredients, especially the baking powder and any toppings you might use.

Can I substitute any ingredients for a healthier option?
Yes! For a lighter version, you can use whole wheat flour instead of all-purpose flour and consider reducing the amount of brown sugar in the batter. You can also swap in Greek yogurt for part of the oil to add moisture with fewer calories. Have fun experimenting!

Pumpkin Cupcakes

Irresistibly Moist Pumpkin Cupcakes with Creamy Frosting

Delight in these Pumpkin Cupcakes that are perfectly moist and topped with creamy frosting, embodying the spirit of fall.
Prep Time 20 minutes
Cook Time 24 minutes
Cooling Time 5 minutes
Total Time 49 minutes
Servings: 12 cupcakes
Course: Dessert
Cuisine: American
Calories: 200

Ingredients
  

For the Cupcakes
  • 1 cup All-Purpose Flour Consider using gluten-free flour for a gluten-free option.
  • 1 teaspoon Baking Powder Make sure it’s fresh!
  • 1 teaspoon Baking Soda Omit if you’re using self-raising flour.
  • 1/2 teaspoon Salt Don't skip it, as it balances the sweetness.
  • 1 teaspoon Pumpkin Spice Feel free to use homemade or store-bought.
  • 1 cup Dark Brown Sugar Light brown sugar can substitute for a milder flavor.
  • 1 cup Pumpkin Purée Try making your own for a fresh twist!
  • 1/2 cup Vegetable Oil Melted butter can be a delicious substitute.
  • 2 large Eggs Ensure they are at room temperature for the best mixing.
  • 1 teaspoon Vanilla Extract
For the Frosting
  • 1/2 cup Butter Make sure it's at room temperature for easy mixing.
  • 8 oz Full-Fat Cream Cheese Drain excess moisture if you’re using imported varieties.
  • 2 cups Powdered Sugar Sifting helps keep it smooth and free of lumps.

Equipment

  • Oven
  • 12-cup cupcake tin
  • Mixing bowls
  • whisk
  • Cookie Scoop
  • Electric mixer

Method
 

Step‑by‑Step Instructions
  1. Preheat your oven to 160ºC/320ºF and line a 12-cup cupcake tin with festive liners.
  2. In a large mixing bowl, whisk together all-purpose flour, baking powder, baking soda, pumpkin spice, and salt.
  3. In a separate bowl, whisk together the pumpkin purée, vegetable oil, eggs, and vanilla extract until smooth.
  4. Pour the wet mixture into the dry ingredients, stirring gently until no dry flour remains.
  5. Using a cookie scoop, fill each cupcake liner about two-thirds full with the batter.
  6. Bake in your preheated oven for 23-24 minutes, or until a toothpick inserted into the center comes out clean.
  7. Once baked, remove the cupcakes from the oven and cool them in the tin for about 5 minutes before transferring them to a wire rack.
  8. In a large bowl, cream together the room-temperature butter and brown sugar for about 5 minutes until fluffy.
  9. Gradually add in the full-fat cream cheese and vanilla extract, then mix until it’s smooth and creamy.
  10. Finally, sift in the powdered sugar and beat until fully combined, creating a luscious frosting.
  11. Once your pumpkin cupcakes have cooled down completely, pipe the brown sugar cream cheese frosting on top of each cupcake.

Nutrition

Serving: 1cupcakeCalories: 200kcalCarbohydrates: 28gProtein: 2gFat: 10gSaturated Fat: 5gPolyunsaturated Fat: 1gMonounsaturated Fat: 3gCholesterol: 30mgSodium: 200mgPotassium: 150mgFiber: 1gSugar: 15gVitamin A: 800IUCalcium: 20mgIron: 1mg

Notes

These cupcakes are guaranteed to be a hit at parties or family gatherings, leaving everyone wanting more.

Tried this recipe?

Let us know how it was!

Stay Connected

Get recipes via email: