Get my cookbooks

Must-Try Spiderweb Brownies: Fudgy Halloween Delight

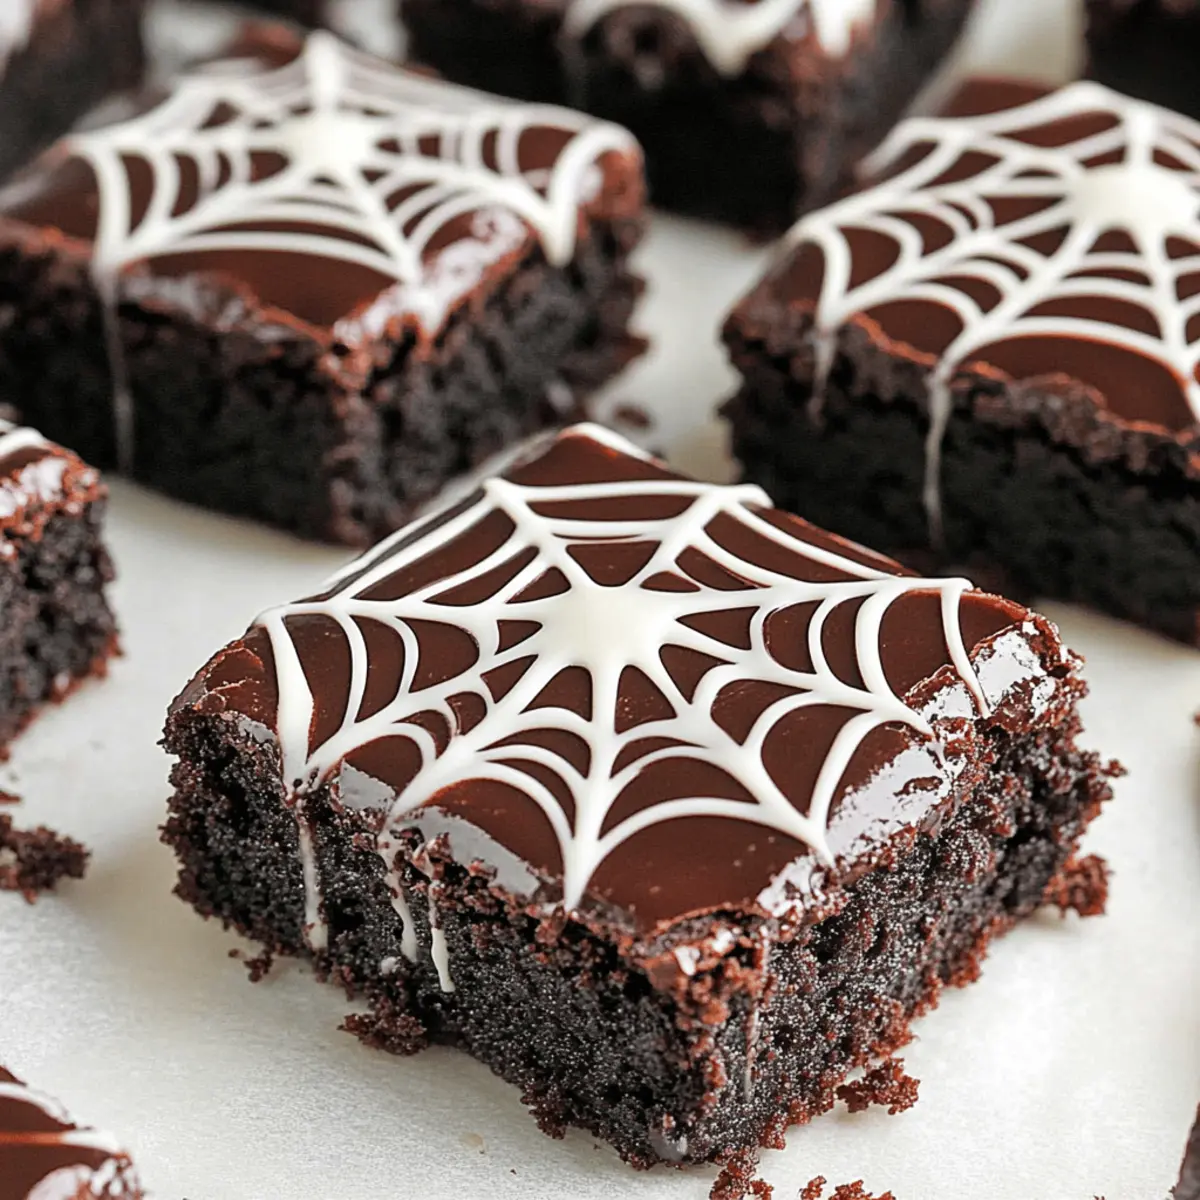
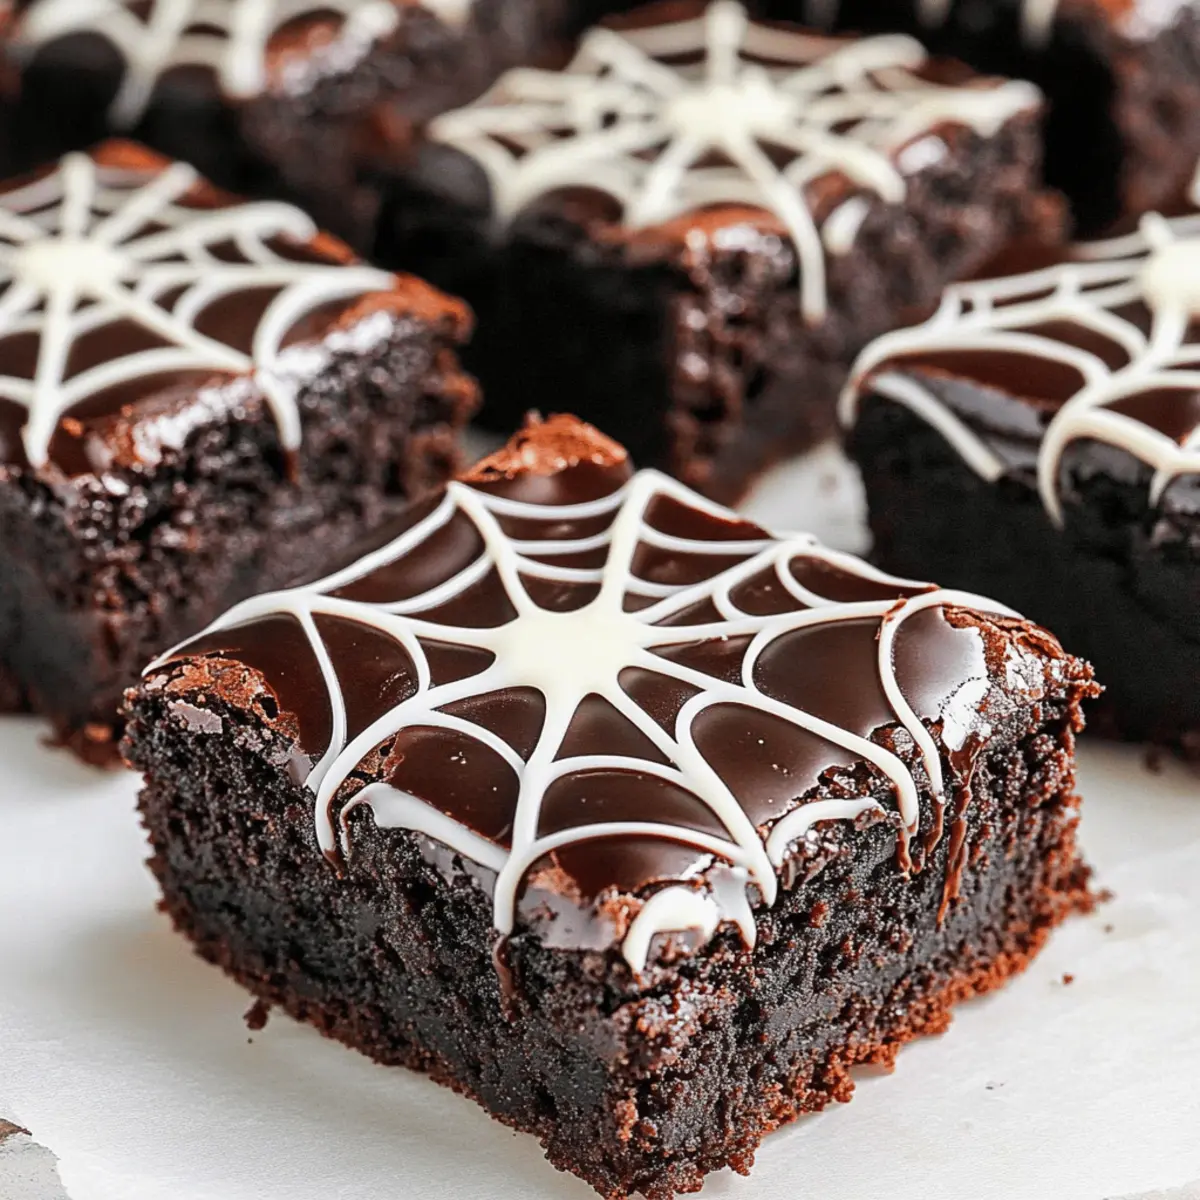
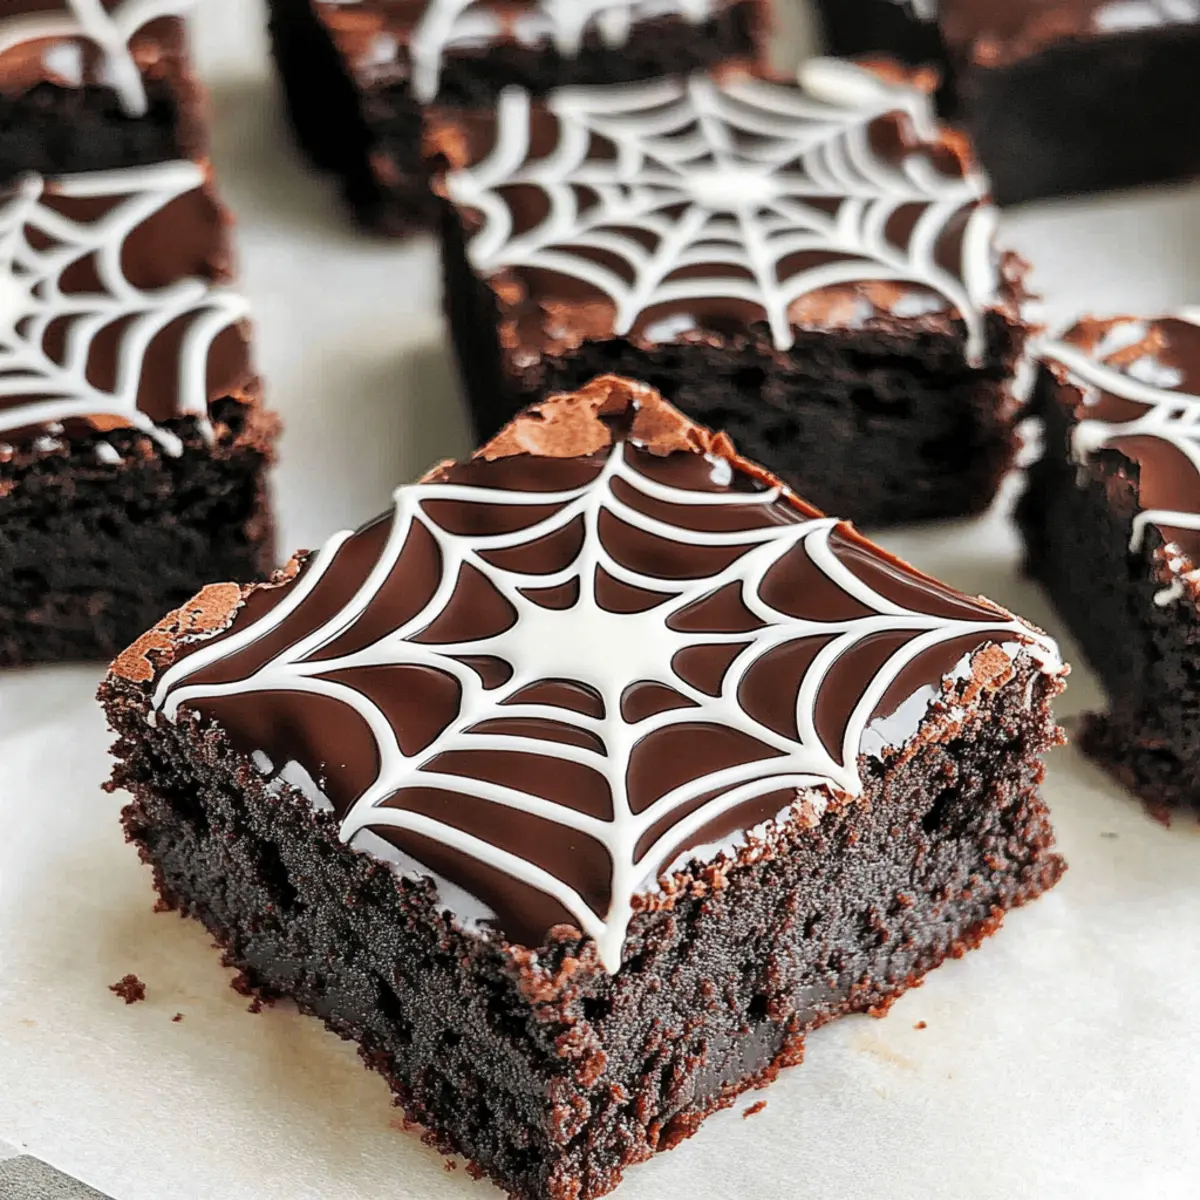
As I recently stirred a pot of melted chocolate, the sweet aroma wafted through my kitchen, transporting me to a world of cozy Halloween memories, and it hit me—the perfect treat for this season! Enter my Spiderweb Brownies, a fudgy delight that combines ultimate chocolate satisfaction with a whimsical holiday twist. With their glossy ganache topped by delicate white chocolate webs, these brownies are not just visually stunning; they’re also a breeze to whip up. Whether you’re throwing a Halloween party or simply craving a comforting dessert at the end of the day, these fudgy brownies fit the bill perfectly. Plus, they can easily be adapted to be gluten-free or dairy-free, ensuring everyone can enjoy this festive treat. Are you ready to impress your friends and family with these spooky yet scrumptious Spiderweb Brownies? Let’s dive into the recipe!

Why Are Spiderweb Brownies So Special?

Decadent and Fudgy: These Spiderweb Brownies are baked to perfection, offering a rich, gooey texture that envelops your taste buds in chocolate bliss.

Easy to Make: With simple ingredients and straightforward steps, you’ll have these delightful treats ready in no time—perfect for beginner bakers and seasoned pros alike!

Versatile for All Diets: Whether you need gluten-free or dairy-free options, this recipe adapts easily, ensuring everyone can indulge.

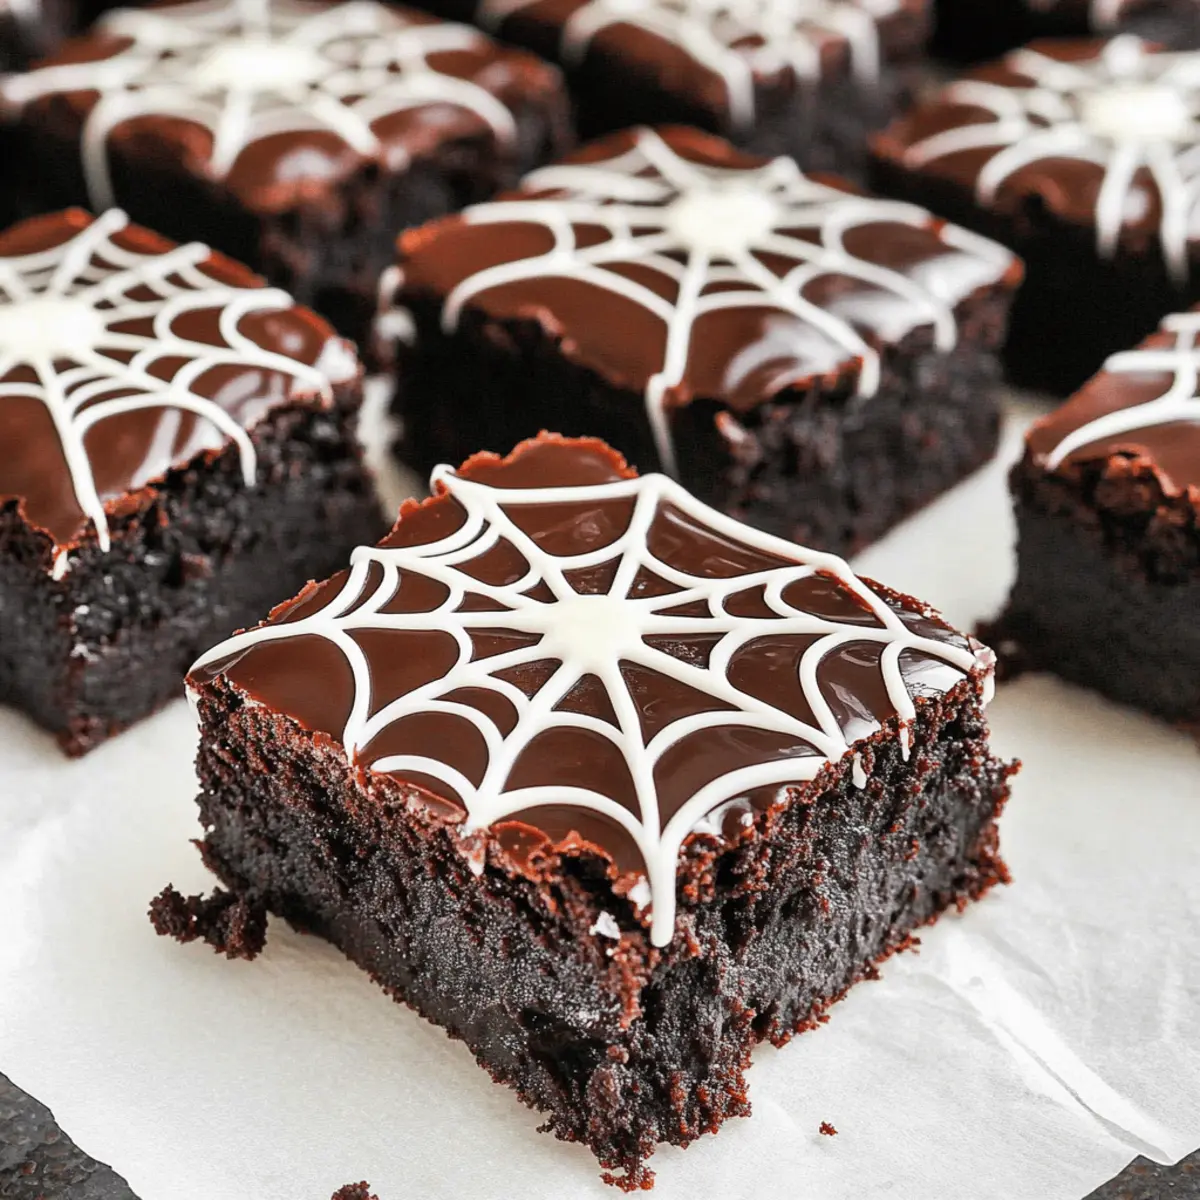
Festive Presentation: The beautiful white chocolate webs make these brownies a stunning centerpiece for your Halloween spread or any festive occasion.

Crowd-Pleasing Delight: They’re sure to impress at parties or as a cozy treat for family movie nights. Nothing beats sharing a delicious homemade dessert with loved ones!

Elevate your dessert game for spooky season or anytime by following this easy Spiderweb Brownies recipe.

Spiderweb Brownies Ingredients

For the Brownies
All-purpose or Gluten-free flour – This provides structure to the brownies; substitute with gluten-free blends like buckwheat or measure-for-measure blends.
Dutch-process cocoa powder – Adds a deep chocolate flavor and color; if needed, you can use regular cocoa powder instead.
Salt – Enhances the flavor; it’s essential to achieving a balanced taste.
Refined coconut oil or butter – Adds moisture and richness; opt for coconut oil for a dairy-free version.
Granulated sugar or coconut sugar – Sweetens the brownies and acts as a binder; coconut sugar offers a healthier alternative.
Vanilla extract – Infuses warmth and depth of flavor into the brownies.
Large eggs (3) – Provides moisture and structure; for a vegan option, consider using egg replacers.
Semi-sweet chocolate chips or chopped chocolate – Great for the ganache and enhances the chocolate flavor; use dairy-free chocolate for allergen-friendly brownies.

For the Ganache
Heavy cream or full-fat canned coconut milk – This is used for making the ganache; choose coconut milk for a dairy-free variant.

For the Spiderweb Topping
White chocolate chips or chopped white chocolate – Create the elegant spiderweb design on top; look for dairy-free brands if needed.

Step‑by‑Step Instructions for Spiderweb Brownies

Step 1: Preheat the Oven
Begin by preheating your oven to 350°F (175°C). While the oven heats up, line an 8″x8″ baking pan with parchment paper, allowing some overhang for easy removal later. This preparation ensures your Spiderweb Brownies bake evenly and can be easily lifted out once they’re cool.

Step 2: Mix Dry Ingredients
In a medium bowl, combine the all-purpose or gluten-free flour, Dutch-process cocoa powder, and salt. Whisk these dry ingredients together thoroughly to ensure an even mixture. Set this bowl aside, allowing the flavors to meld while you work on the wet mixture for your fudgy brownie batter.

Step 3: Prepare the Wet Ingredients
In a separate large bowl, mix together the melted coconut oil or butter with the granulated sugar and vanilla extract. Stir until the mixture is fully combined, with a shiny appearance indicating that the sugar is beginning to dissolve. This will create a rich base for your Spiderweb Brownies.

Step 4: Incorporate the Eggs
Add the three large eggs to your wet mixture, incorporating them one at a time. Mix gently after each addition, just until blended, to maintain the rich fudginess that these brownies are known for. You want to see a smooth mixture without any visible egg streaks.

Step 5: Combine Dry and Wet Mixtures
Gently fold the dry ingredients into the wet mixture using a spatula or wooden spoon. Mix just until you no longer see any flour streaks; be careful not to overmix, as that could lead to dense, cakey brownies. The batter should be thick and glossy.

Step 6: Bake the Brownies
Pour the batter into your prepared baking pan, spreading it evenly. Place the pan in the preheated oven and bake for 15–20 minutes. The brownies should look slightly underbaked and firm along the edges, with a toothpick inserted in the center coming out with moist crumbs for that fudgy texture.

Step 7: Cool the Brownies
Once baked, remove the pan from the oven and allow the brownies to cool in the pan for about 1 hour at room temperature. This step is essential for achieving the perfect texture. After cooling, transfer the brownies to the refrigerator for an additional hour to chill and firm up before cutting them into squares.

Step 8: Make the Ganache
While the brownies cool, prepare the chocolate ganache. Heat the cream (or coconut milk for a dairy-free option) until it begins to steam. Pour this hot liquid over the semi-sweet chocolate chips in a bowl and let it sit for a couple of minutes. Stir until the mixture is completely smooth and glossy, creating a rich topping for your brownies.

Step 9: Decorate the Brownies
Finally, once the brownies have cooled completely, it’s time to decorate them. Melt the white chocolate and use a piping bag or a small ziplock bag with a corner snipped off to pipe spirals over the cooled brownies, creating an elegant spiderweb design. This delightful touch transforms your Spiderweb Brownies into a spooky Halloween treat!

What to Serve with Spiderweb Brownies

These whimsical treats are not just delicious on their own; they can become the highlight of a complete spooky feast or gathering.

  • Pumpkin Spice Latte: The warm spices of this classic beverage perfectly complement the rich chocolate flavor, making for a delightful fall pairing.

  • Vanilla Ice Cream: A scoop of creamy vanilla ice cream on the side provides a cool and creamy contrast to the fudgy brownies, elevating each chocolate bite.

  • Caramel Sauce: Drizzling warm caramel sauce over your brownies adds a luscious sweetness that enhances the decadent chocolate intensity.

  • Fresh Berries: A handful of tart raspberries or strawberries offers a vibrant burst of freshness, balancing the rich flavors and adding a pop of color to your dessert table.

  • Spiced Apple Cider: Serve this warm drink alongside your Spiderweb Brownies for a cozy touch. Its sweetness and spice will harmonize beautifully with the chocolate richness.

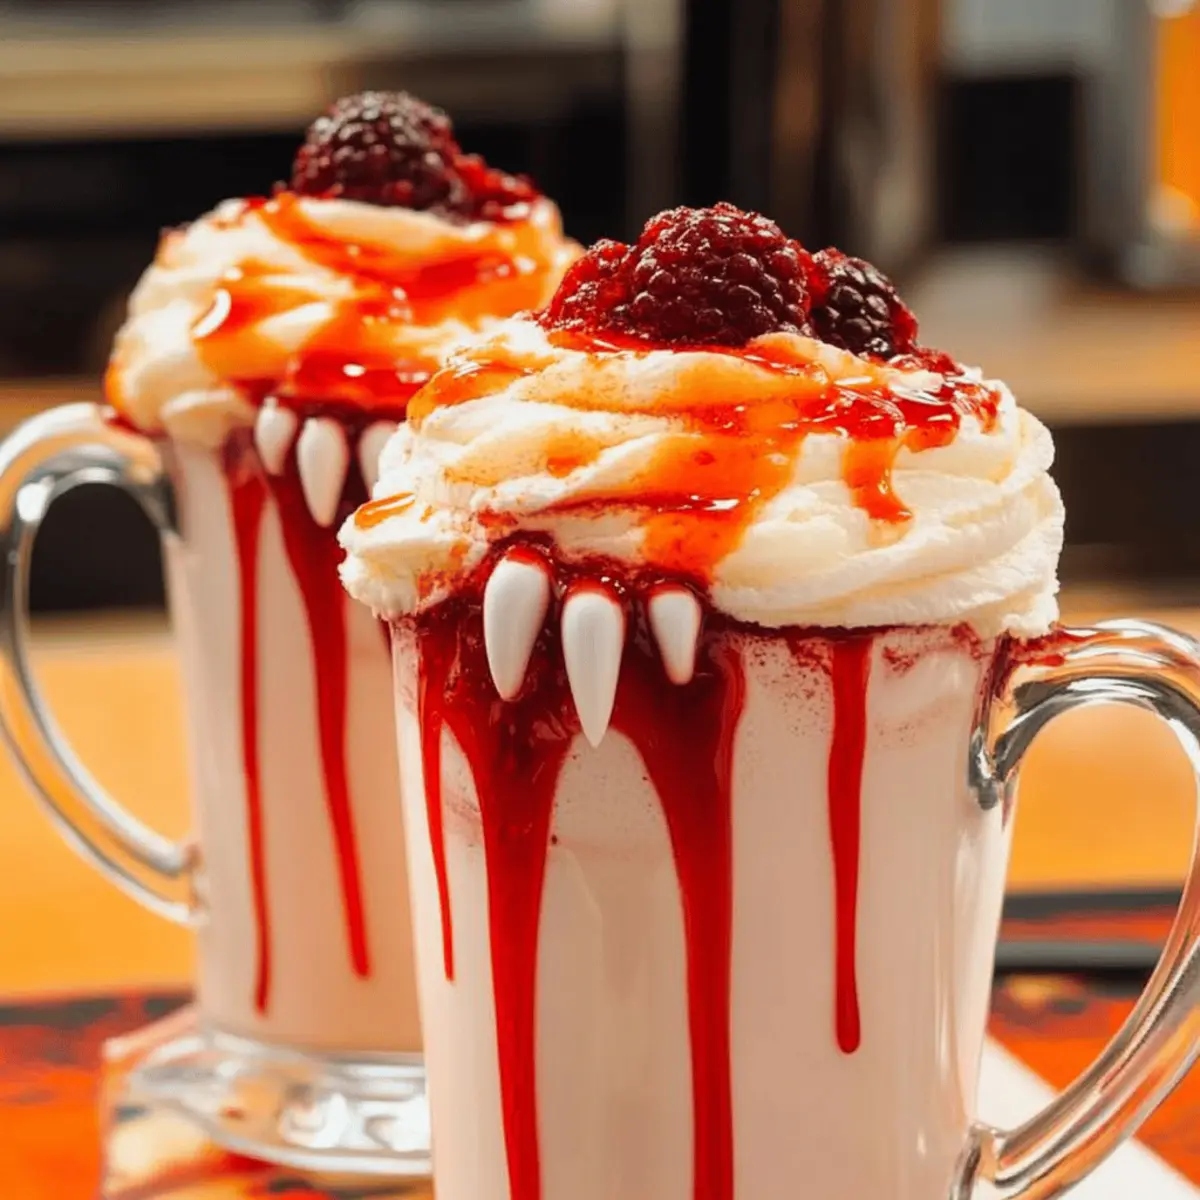
  • Chocolate Milkshake: Pairing these brownies with a thick chocolate shake creates a delightful duo of flavors, perfect for chocolate lovers and adding an extra layer of indulgence.

  • Whipped Cream Topping: Light and airy whipped cream offers a delightful contrast in texture while adding a touch of sweetness without overpowering the brownie’s deep chocolate flavor.

  • Halloween-Themed Cookies: A platter of spooky sugar cookies or ghost-shaped meringues visually enhances your dessert spread and embraces the festive spirit alongside the brownies.

Make Ahead Options

These Spiderweb Brownies are a fantastic choice for meal prep, saving you time on busy days! You can prepare the brownie batter up to 24 hours in advance by mixing all the wet and dry ingredients, then refrigerating it tightly covered. The ganache can also be made up to 3 days ahead; store it in an airtight container in the fridge and simply reheat it gently before spreading over your brownies. Just remember, when you’re ready to bake, allow the batter to come to room temperature for consistent baking results. By prepping ahead, you ensure your Spiderweb Brownies are just as fudgy and delicious, allowing you to enjoy this Halloween treat with minimal effort on the day of serving!

How to Store and Freeze Spiderweb Brownies

  • Room Temperature: Allow brownies to cool completely, then store in an airtight container at room temperature for up to 3 days. Enjoy their gooey texture by serving them fresh!
  • Fridge: To prolong freshness, keep brownies in an airtight container in the refrigerator for up to 5 days. This will help maintain their fudgy consistency and prevent spoilage.
  • Freezer: For longer storage, wrap brownies tightly in plastic wrap or aluminum foil, then place them in a freezer bag. They can be frozen for up to 3 months without losing their delightful flavor.
  • Reheating: To enjoy brownies warm, microwave them for about 10-15 seconds. This will make the chocolate melt slightly, enhancing your Spiderweb Brownies experience!

Spiderweb Brownies Variations

Feel free to mix things up and create your perfect version of these delightful brownies!

  • Gluten-Free: Substitute all-purpose flour with 1 cup of light buckwheat or teff flour for a gluten-free treat perfect for gatherings.

  • Dairy-Free: Use refined coconut oil and dairy-free chocolate chips to easily make these brownies free from dairy without compromising flavor.

  • Vegan Adaptation: Replace eggs with 1/4 cup unsweetened applesauce or a commercial egg replacer to enjoy these treats without any animal products.

  • Nutty Twist: Add 1/2 cup chopped walnuts or pecans into the batter for a delightful crunch that complements the fudgy texture perfectly.

  • Minty Chocolate: Stir in 1/2 teaspoon of peppermint extract into the wet ingredients for a refreshing twist that pairs wonderfully with chocolate.

  • Spicy Heat: For a subtle kick, add 1/4 teaspoon cayenne pepper to the batter. It creates an inviting warmth that will surprise and delight your guests.

  • Flavor Fusion: Swirl 1/2 cup caramel sauce into the brownie batter before baking for a decadent combination of rich chocolate and sweet caramel goodness.

  • Extra Chocolate: Use a combination of semi-sweet and dark chocolate chips to deepen the chocolate flavor, making every bite an indulgent experience.

Feel free to explore these variations, and remember, cooking is all about creativity and personal touch! If you’re looking to add another layer of excitement to your dessert repertoire, you may also enjoy a spooky-inspired treat like Halloween Cake Pops for that festive vibe. Happy baking!

Expert Tips for Spiderweb Brownies

  • Avoid Overmixing: Mixing too much can lead to dense, cakey brownies—just blend until no flour streaks remain for that fudgy texture.
  • Baking Time Matters: Don’t bake the brownies for too long; they should be slightly underbaked in the center to maintain gooeyness.
  • Cooling is Key: Allow the brownies to cool completely before cutting. This gives you clean edges and makes for prettier squares.
  • Creating the Web: Use a toothpick to pipe the spiderweb design carefully; clean it between designs for sharp, clear lines.
  • Chill for Texture: Refrigerating the brownies for an hour enhances their fudginess, making them even more delicious as a Halloween treat.

Spiderweb Brownies Recipe FAQs

What type of flour can I use for Spiderweb Brownies?
Absolutely! You can use all-purpose flour for the traditional version, or opt for gluten-free blends like teff, buckwheat, or a measure-for-measure gluten-free flour to cater to dietary needs. Just make sure the gluten-free flour includes ingredients that mimic the binding properties of wheat flour for the best texture.

How should I store my Spiderweb Brownies?
To keep these fudgy brownies fresh, store them in an airtight container at room temperature for up to 3 days. If you want to extend their shelf life, refrigerate them for up to 5 days. Just remember that chilling them can enhance that classic fudginess!

Can I freeze Spiderweb Brownies?
Very! To freeze your brownies, first allow them to cool completely. Then wrap them tightly in plastic wrap or aluminum foil and place them in a freezer bag. These brownies can be stored in the freezer for up to 3 months. When you’re ready to enjoy them, just let them thaw in the refrigerator or at room temperature.

What should I do if my brownies are too cakey?
If your Spiderweb Brownies turned out cakey, it might be due to overmixing the batter or baking them for too long. For a fudgy texture, mix just until no flour streaks are visible and aim for an underbaked center. Bake for the recommended time, checking often. A toothpick should come out with moist crumbs for that gooey experience!

Can I make these Spiderweb Brownies dairy-free?
You bet! To make them dairy-free, simply use coconut oil instead of butter, and ensure your chocolate chips and ganache are dairy-free. Opt for full-fat coconut milk for the ganache to keep it rich and creamy. It’s a delicious adaptation that everyone can enjoy!

What’s the best way to achieve the perfect spiderweb design?
For the best spiderweb effect, melt the white chocolate and use a piping bag or a small ziplock bag with a tiny corner snipped off. Pipe spirals on top of the cooled brownies, then use a toothpick to gently pull lines outwards for a delicate web effect. A little patience goes a long way for that spooky presentation!

Spiderweb Brownies

Must-Try Spiderweb Brownies: Fudgy Halloween Delight

Indulge in Spiderweb Brownies, a fudgy dessert that brings a festive twist perfect for Halloween.
Prep Time 30 minutes
Cook Time 20 minutes
Cooling Time 2 hours
Total Time 2 hours 50 minutes
Servings: 16 slices
Course: Dessert
Cuisine: American
Calories: 200

Ingredients
  

For the Brownies
  • 1 cup all-purpose or gluten-free flour substitute with gluten-free blends if needed
  • 1/2 cup Dutch-process cocoa powder or regular cocoa powder
  • 1/2 teaspoon salt to enhance flavor
  • 1/2 cup refined coconut oil or butter use coconut oil for dairy-free
  • 1 cup granulated sugar or coconut sugar coconut sugar is a healthier alternative
  • 1 teaspoon vanilla extract
  • 3 large eggs or egg replacers for vegan option
  • 1 cup semi-sweet chocolate chips or chopped chocolate use dairy-free chocolate for allergen-friendly
For the Ganache
  • 1 cup heavy cream or full-fat canned coconut milk choose coconut milk for dairy-free
For the Spiderweb Topping
  • 1/2 cup white chocolate chips or chopped white chocolate look for dairy-free brands if necessary

Equipment

  • 8"x8" baking pan
  • Mixing bowls
  • spatula
  • whisk
  • Piping Bag

Method
 

Step-by-Step Instructions
  1. Preheat your oven to 350°F (175°C) and line an 8"x8" baking pan with parchment paper.
  2. In a medium bowl, combine flour, cocoa powder, and salt. Whisk to mix thoroughly.
  3. In a large bowl, mix melted coconut oil or butter with sugar and vanilla until shiny.
  4. Add the eggs one at a time, mixing gently after each addition until smooth.
  5. Fold dry ingredients into the wet mixture until no flour streaks remain. The batter should be thick and glossy.
  6. Pour the batter into the prepared pan and bake for 15–20 minutes until slightly underbaked.
  7. Allow the brownies to cool for 1 hour at room temperature, then refrigerate for an additional hour.
  8. Heat cream (or coconut milk) until steaming, then pour over chocolate chips and stir until smooth to create ganache.
  9. Melt white chocolate and pipe spirals over cooled brownies to create the spiderweb design.

Nutrition

Serving: 1sliceCalories: 200kcalCarbohydrates: 30gProtein: 2gFat: 9gSaturated Fat: 5gPolyunsaturated Fat: 1gMonounsaturated Fat: 2gCholesterol: 30mgSodium: 100mgPotassium: 150mgFiber: 2gSugar: 20gVitamin A: 200IUCalcium: 20mgIron: 1mg

Notes

These brownies are great for Halloween parties and can be adapted for various dietary needs. Refrigerating enhances fudginess.

Tried this recipe?

Let us know how it was!

Savory Roasted Butternut Squash Pasta Salad for Fall Bliss

As the leaves begin to paint the world with warm hues of orange and gold, I can’t help but crave comforting dishes that celebrate the essence of fall. Enter the Easy Roasted Butternut Squash Pasta Salad—a perfect harmony of sweet, caramelized squash and tender pasta that captures the heart of the season. This delightful vegetarian side dish not only boasts a vibrant blend of flavors but also makes mealtime a breeze with its quick prep and satisfying textures. Tossed with fresh herbs and a light vinaigrette, it effortlessly blends indulgence with a healthy twist. Whether you’re serving it at a festive gathering or enjoying a cozy dinner, this salad is sure to become a fall favorite. Curious how you can mix and match ingredients to make it uniquely yours? Let’s dive in!

How can you customize this salad?

Versatility at Its Finest: This Roasted Butternut Squash Pasta Salad is a canvas for your creativity, allowing for a multitude of delicious variations!

Seasonal Swap: Feel free to replace Brussels sprouts with roasted sweet potatoes for a sweeter flavor profile.

Nut-Free Option: Simply substitute pecans with walnuts or sunflower seeds for a delightful crunch without the nuts.

Whole Grain Alternative: For a heartier twist, try using farro or quinoa instead of pasta, elevating its nutritional value.

Crowd-Pleasing Appeal: Perfect for family dinners or festive gatherings, grab a bowl and see how this dish shines next to grilled chicken or turkey. Don’t forget to check out the Cajun Sausage Pasta for another flavor bomb!

Roasted Butternut Squash Pasta Salad Ingredients

For the Roasted Veggies

  • Brussels Sprouts – Adds a savory, crunchy component; trim and slice in half for even roasting.
  • Butternut Squash – Provides natural sweetness and creaminess; look for squash with a long neck for the best flesh-to-seed ratio.
  • Olive Oil – Essential for roasting; facilitates browning and enhances flavor.
  • Salt and Pepper – Key seasonings to elevate all the flavors.

For the Vinaigrette

  • Unsweetened Apple Cider – Forms the base for the vinaigrette, offering a sweet-tart flavor.
  • Apple Cider Vinegar – Adds acidity to balance the sweetness of the cider.
  • Minced Onion – Contributes depth and flavor to the vinaigrette.
  • Dijon Mustard – Gives a zesty kick and helps emulsify the vinaigrette.
  • Maple Syrup – A natural sweetener that complements the roasted squash’s flavor.

For the Salad Base

  • Dried Cranberries – Introduces a chewy texture and a sweet contrast.
  • Toasted Chopped Pecans – Adds nutty crunch; can be substituted with walnuts or sunflower seeds for a different flavor.

This Roasted Butternut Squash Pasta Salad is not only versatile but brimming with seasonal goodness, making it a delightful addition to your fall table!

Step‑by‑Step Instructions for Easy Roasted Butternut Squash Pasta Salad

Step 1: Preheat the Oven
Begin by preheating your oven to 425°F (220°C). This temperature is perfect for roasting and will help achieve caramelization in the vegetables. While the oven heats, gather your vegetables and prepare them for roasting to ensure everything is ready for the oven.

Step 2: Prepare the Vegetables
Next, peel and cube the butternut squash into uniform 3/4-inch pieces. Trim the Brussels sprouts, slicing them in half to allow for even roasting. Arrange the prepared vegetables on a rimmed sheet pan, ensuring they are spread out to prevent steaming and promote crispiness.

Step 3: Season the Vegetables
Drizzle the vegetables with olive oil, and add a generous sprinkle of salt and pepper. Toss everything together until well-coated, ensuring each piece is evenly seasoned. This step is essential for enhancing the flavors in your Roasted Butternut Squash Pasta Salad when they roast.

Step 4: Roast the Vegetables
Place the sheet pan in the preheated oven and roast the vegetables for 20 minutes. After the first 10 minutes, give them a good toss and rotate the pan to ensure even cooking. You’ll know they’re done when they are tender and have beautiful caramelized edges.

Step 5: Make the Vinaigrette
In a small saucepan, combine the unsweetened apple cider, apple cider vinegar, and minced onion. Bring the mixture to a boil, then reduce the heat and let it simmer until the liquid has reduced by half—this should take about 10 minutes. This reduction concentrates the flavors for your salad dressing.

Step 6: Combine Vinaigrette Ingredients
Once the vinegar mixture has reduced, take it off the heat and whisk in the Dijon mustard, maple syrup, olive oil, and a pinch of salt and pepper. Shake or whisk the ingredients well until they are fully combined. This tangy vinaigrette will beautifully complement your roasted vegetables.

Step 7: Assemble the Salad
In a large bowl, combine the roasted butternut squash and Brussels sprouts with dried cranberries and chopped pecans. Drizzle the homemade vinaigrette over the top. Gently toss everything together, ensuring the vegetables and nuts are well-coated in the dressing without breaking them apart.

Step 8: Taste and Adjust
Finally, take a moment to taste your Easy Roasted Butternut Squash Pasta Salad. Adjust the seasoning by adding more vinaigrette, salt, or pepper as needed. This step allows you to fine-tune the flavors, ensuring every bite is just right before serving.

Make Ahead Options

These Easy Roasted Butternut Squash Pasta Salad ingredients lend themselves wonderfully to meal prep, making your weeknight dinners effortless! You can roast the butternut squash and Brussels sprouts up to 2 days in advance; simply refrigerate them in an airtight container to maintain their texture. For optimal freshness, prepare the vinaigrette up to 24 hours ahead and store it separately. When you’re ready to serve, combine the roasted vegetables with dried cranberries and pecans, then drizzle with the vinaigrette just before tossing. This way, you’ll have a vibrant and delicious salad that’s just as flavorful with minimal effort!

What to Serve with Easy Roasted Butternut Squash Pasta Salad

As you create this vibrant salad, consider delicious additions that enhance your meal.

  • Grilled Chicken Breast: Juicy and lightly seasoned, it adds protein and complements the salad’s earthy flavors beautifully.
  • Sautéed Greens: A mix of spinach or kale brings a burst of color and nutrients, making the meal even heartier.
  • Crusty Bread: Serve with a warm baguette or sourdough for that delightful crunch, perfect for scooping up each flavorful bite.
  • Maple-Glazed Carrots: Sweet alongside savory, these tender, caramelized carrots elevate the autumnal experience on your plate.
  • Herb-Crusted Pork Tenderloin: Offering a savory, herbaceous contrast, this dish pairs wonderfully, creating a satisfying and festive fare.
  • Apple Cider Sangria: A refreshing drink that echoes the salad’s sweet notes, making it a perfect companion for any gathering.
  • Pumpkin Pie: For a sweet finish, nothing says fall like a creamy, spiced slice of pumpkin pie to savor with your meal.

These companions will highlight the homey, comforting essence of your Roasted Butternut Squash Pasta Salad!

Expert Tips for Roasted Butternut Squash Pasta Salad

  • Uniform Cuts: Ensure your butternut squash and Brussels sprouts are cut into 3/4-inch pieces for even roasting and a perfect texture in your salad.
  • Avoid Overcrowding: Use a large sheet pan or multiple pans to prevent the vegetables from steaming. A proper roast is essential for the signature caramelized flavors.
  • Cool Before Mixing: Let the roasted vegetables cool before adding them to the salad to maintain the freshness and crispness of the ingredients.
  • Vinaigrette Balance: Taste your vinaigrette before serving. Adjust the sweetness or acidity by adding a touch more maple syrup or vinegar to suit your taste.
  • Make Ahead Tip: Roast your vegetables up to two days in advance and combine with vinaigrette just before serving to keep the salad vibrant and fresh.

Roasted Butternut Squash Pasta Salad Variations

Get ready to explore delightful twists that elevate your salad experience into something uniquely delicious!

  • Sweet Potato Swap: Replace Brussels sprouts with roasted sweet potatoes for a sweet and hearty flavor.

  • Nut-Free Crunch: Go for walnuts or sunflower seeds instead of pecans for a delightful nut-free option. This swap ensures the same satisfying crunch without the allergens.

  • Whole Grain Upgrade: Use farro or quinoa instead of pasta for a wholesome twist; these grains add extra fiber and protein, making each bite even more fulfilling.

  • Creamy Boost: Add a dollop of Greek yogurt or dairy-free yogurt to your vinaigrette for a creamy dressing that enhances flavor while keeping it light.

  • Fresh Herb Explosion: Toss in some chopped fresh herbs like parsley or sage for an aromatic twist that highlights the flavors of fall.

  • Spicy Kick: Craving some heat? Add a pinch of red pepper flakes or a drizzle of sriracha to your vinaigrette for a spicy finish that will surprise your taste buds.

  • Fruity Twist: Incorporate diced apples or pears to complement the roasted squash beautifully, adding a crisp and juicy contrast!

This Roasted Butternut Squash Pasta Salad offers infinite possibilities for variation that can fit any palate, making it a versatile side dish perfect for gatherings. Pair it with flavorsome dishes like Garlic Parmesan Roasted for an unforgettable meal combo!

How to Store and Freeze Roasted Butternut Squash Pasta Salad

Fridge: Keep your salad in an airtight container for up to 4 days; flavors improve after sitting in the fridge for a few hours.

Freezer: While this salad is best enjoyed fresh, you can freeze the roasted vegetables alone for up to 3 months in a sealed freezer bag; thaw before adding to the salad.

Reheating: To enjoy the roasted veggies warm, reheat them in the oven at 350°F until heated through, then toss into the salad just before serving, ensuring a delightful, fresh taste in your Roasted Butternut Squash Pasta Salad.

Easy Roasted Butternut Squash Pasta Salad Recipe FAQs

What is the best way to select butternut squash?
When choosing butternut squash, look for ones with a long neck and a smooth, even skin. This indicates a better flesh-to-seed ratio, which means more deliciously creamy squash for your salad. Avoid any squash with dark spots or blemishes as these can indicate decay.

How should I store leftover Roasted Butternut Squash Pasta Salad?
Store your salad in an airtight container in the refrigerator for up to 4 days. The flavors tend to deepen and improve after sitting in the fridge for a few hours, making it a perfect make-ahead option for busy days!

Can I freeze the salad?
While it’s best enjoyed fresh, you can freeze just the roasted vegetables for up to 3 months. To do this, cool the roasted veggies completely, then place them in a sealed freezer bag and remove as much air as possible. When ready to use, simply thaw overnight in the refrigerator before adding them to the salad.

What should I do if my Brussels sprouts aren’t crispy?
If your Brussels sprouts turn out soggy, it could be due to overcrowding on the baking sheet. Ensure that the vegetables are spread out in a single layer to allow for proper roasting. Also, be sure to pat them dry before seasoning to remove excess moisture, which enhances crispiness!

Is this salad suitable for those with nut allergies?
Absolutely! You can easily make this Roasted Butternut Squash Pasta Salad nut-free by replacing the pecans with sunflower seeds or omitting them altogether. This way, everyone can enjoy the hearty flavors without worry!

How can I make this salad ahead of time?
To prep in advance, roast the vegetables up to 2 days before serving. Store them in the fridge, and combine them with the vinaigrette just before serving to keep the salad vibrant and fresh. This not only saves time but allows the flavors to meld beautifully!

Roasted Butternut Squash Pasta Salad

Savory Roasted Butternut Squash Pasta Salad for Fall Bliss

This Roasted Butternut Squash Pasta Salad is a delightful vegetarian dish that captures the essence of fall with caramelized squash and tender pasta.
Prep Time 15 minutes
Cook Time 30 minutes
Cooling Time 10 minutes
Total Time 55 minutes
Servings: 4 servings
Course: Salad
Cuisine: American
Calories: 250

Ingredients
  

For the Roasted Veggies
  • 1 pound Brussels Sprouts trimmed and sliced in half
  • 1 medium Butternut Squash peeled and cubed
  • 2 tablespoons Olive Oil
  • 1 teaspoon Salt
  • 1/2 teaspoon Pepper
For the Vinaigrette
  • 1/2 cup Unsweetened Apple Cider
  • 2 tablespoons Apple Cider Vinegar
  • 1 small Minced Onion
  • 1 tablespoon Dijon Mustard
  • 1 tablespoon Maple Syrup
For the Salad Base
  • 1 cup Dried Cranberries
  • 1/2 cup Toasted Chopped Pecans can substitute with walnuts or sunflower seeds

Equipment

  • Oven
  • Sheet Pan
  • Saucepan
  • Large bowl

Method
 

Step‑by‑Step Instructions for Easy Roasted Butternut Squash Pasta Salad
  1. Preheat your oven to 425°F (220°C).
  2. Peel and cube the butternut squash into uniform 3/4-inch pieces and trim the Brussels sprouts.
  3. Drizzle the vegetables with olive oil, salt, and pepper, then toss to coat evenly.
  4. Roast the vegetables for 20 minutes, tossing halfway through.
  5. In a saucepan, combine apple cider, vinegar, and onion; simmer until reduced by half.
  6. Whisk in mustard, maple syrup, olive oil, and seasonings into the reduced mixture.
  7. Combine roasted vegetables, cranberries, and pecans in a large bowl, then drizzle with vinaigrette and toss gently.
  8. Taste and adjust the seasoning as necessary.

Nutrition

Serving: 1servingCalories: 250kcalCarbohydrates: 35gProtein: 4gFat: 12gSaturated Fat: 1gPolyunsaturated Fat: 2gMonounsaturated Fat: 8gSodium: 180mgPotassium: 350mgFiber: 6gSugar: 10gVitamin A: 10000IUVitamin C: 30mgCalcium: 40mgIron: 1mg

Notes

Roast vegetables up to two days in advance and combine with vinaigrette just before serving for maximum freshness.

Tried this recipe?

Let us know how it was!

Magical Harry Potter Butterbeer Cookies for Enchanted Moments

As the oven warms and the scent of butterscotch fills the air, I can’t help but feel a wave of nostalgia wash over me. These Harry Potter Butterbeer Cookies are not just a delicious treat; they’re my ticket to a whimsical world filled with magic and adventure. Soft and chewy, these cookies combine the rich flavors of butterscotch and vanilla, making them a delightful escape from the ordinary. They’re perfect for a cozy afternoon or a gathering with fellow Potterheads, promising to be the highlight of your cookie jar. Best of all, this simple recipe offers a fun twist on traditional baking that is sure to impress friends and family alike. Are you ready to bring a slice of the wizarding world into your kitchen? Let’s dive into the enchanting process of making these magical delights!

Why are Harry Potter Butterbeer Cookies magical?

Irresistible Flavor: These cookies are infused with rich butterscotch and vanilla, creating a taste that transports you straight to Hogsmeade.

Chewy Perfection: With their soft, chewy texture, you’ll experience the ultimate comfort in every bite, reminiscent of fresh-baked treats from your favorite bakery.

Versatile Magic: Feel free to mix in chocolate chips or nuts, making these cookies adaptable to suit everyone’s taste.

Quick to Make: The straightforward baking process means you can whip up a batch in no time, by following these simple steps.

Perfect for All Occasions: Whether you’re hosting a Harry Potter-themed party or just enjoying a cozy night in with a warm drink, these cookies are sure to impress!

Pair them with a cup of hot chocolate for an extra cozy vibe, and if you’re looking to try something else whimsical, check out our Blueberry Breakfast Cookies for a delightful morning treat!

Harry Potter Butterbeer Cookies Ingredients

• Get ready for a magical baking experience!

For the Cookies

  • All-Purpose Flour – Provides structure; can substitute with a gluten-free flour blend for a gluten-free option.
  • Baking Soda – This leavening agent helps cookies rise perfectly.
  • Salt – Enhances the flavor balance in your sweet treats.
  • Unsalted Butter – Adds richness and moisture; margarine can be used as a dairy alternative.
  • Light Brown Sugar – Offers sweetness and moisture; dark brown sugar can provide a deeper flavor.
  • Granulated Sugar – Balances out the sweetness of the cookies.
  • Eggs – Binds the ingredients together and improves texture; can be replaced with flax eggs for a vegan option.
  • Vanilla Extract – Adds depth of flavor; opt for pure vanilla for the best taste.
  • Butter Flavoring – Enhances the buttery taste in the cookies; optional if using butter.
  • Butterscotch Chips – These provide sweetness and a delightful texture; swap for chocolate chips if preferred.

For the Frosting

  • Unsalted Butter – Use softened butter for a creamy frosting consistency.
  • Butterscotch Sauce – Adds a sweet, rich flavor to the frosting.
  • Powdered Sugar – Sweetens and thickens the frosting; make sure to sift for a smooth texture.

For the Caramel Drizzle

  • Cream Soda – The base for a delicious and thick drizzle.
  • Brown Sugar – Adds a caramel flavor depth; adjust sweetness to taste.
  • Butter – Used to enrich the caramel drizzle.
  • Salt – A pinch helps to balance the sweetness.

Embrace the joy of baking with these Harry Potter Butterbeer Cookies, and let the enchantment unfold in your kitchen!

Step‑by‑Step Instructions for Harry Potter Butterbeer Cookies

Step 1: Prepare Your Workspace
Begin by preheating your oven to 350°F (175°C). While it warms up, line two baking sheets with parchment paper to ensure your Harry Potter Butterbeer Cookies come off easily after baking. This simple step sets the stage for the enchanting baking experience that lies ahead.

Step 2: Mix Dry Ingredients
In a medium bowl, whisk together 2 ½ cups of all-purpose flour, 1 teaspoon of baking soda, and ½ teaspoon of salt. This dry mixture is crucial for giving your cookies structure and flavor. Set it aside for later, allowing the ingredients to blend and ensuring an even rise during baking.

Step 3: Cream the Butter and Sugars
In a large mixing bowl, cream together 1 cup of softened unsalted butter, ¾ cup of light brown sugar, and ½ cup of granulated sugar. Use an electric mixer on medium speed for about 2-3 minutes until the mixture is light and fluffy. This step creates a rich base full of flavor for your Harry Potter Butterbeer Cookies.

Step 4: Add Eggs and Flavorings
Add 2 large eggs, 1 teaspoon of vanilla extract, and 1 teaspoon of butter flavoring to the butter mixture. Mix on low speed until well combined, about 1 minute. The eggs will help bind the ingredients and give your cookies a delightful, chewy texture while the extracts infuse magical flavors throughout.

Step 5: Combine Wet and Dry Ingredients
Gradually add the dry mixture to the creamed batter, mixing on low speed until just combined. Do not overmix; you want to keep your cookies tender. Once combined, gently fold in 1 cup of butterscotch chips, which will bring the irresistibly sweet essence of butterscotch to every delightful bite.

Step 6: Scoop the Dough
Using a tablespoon or a cookie scoop, portion out the dough and place them 2 inches apart on your prepared baking sheets. You should have around 24 cookies. Bake the cookies in the preheated oven for 10-12 minutes, or until the edges are golden brown while the centers remain soft.

Step 7: Cool the Cookies
Once baked, remove the cookies from the oven and let them cool on the baking sheets for about 5 minutes. Then, transfer them to a wire rack to cool completely. This cooling process ensures your Harry Potter Butterbeer Cookies set perfectly and are ready for frosting without melting.

Step 8: Prepare the Frosting
In a mixing bowl, beat together ½ cup of softened unsalted butter, ½ cup of butterscotch sauce, and 2 cups of powdered sugar until the mixture is light and fluffy, about 3-5 minutes. This delicious frosting adds a creamy layer to your magical cookies, making them even more irresistible.

Step 9: Create the Caramel Drizzle
In a small saucepan, combine ½ cup of cream soda with 1 cup of brown sugar. Simmer this mixture over medium heat for 8-10 minutes until it thickens. Stir in 2 tablespoons of butter and a pinch of salt. This decadent drizzle will add a sweet, buttery finish to your already enchanting Harry Potter Butterbeer Cookies.

Step 10: Frost and Drizzle
Once the cookies are completely cool, generously frost them with the butterscotch frosting. Finally, drizzle the cooled caramel sauce over each cookie for an extra touch of magic. Your enchanting Harry Potter Butterbeer Cookies are now ready to be enjoyed, bringing a touch of the wizarding world into your kitchen!

Make Ahead Options

These Harry Potter Butterbeer Cookies are perfect for busy home cooks looking to save time without sacrificing flavor! You can prepare the cookie dough and refrigerate it for up to 2 days before baking. Simply mix all the ingredients and shape the dough into balls, then wrap them tightly in plastic wrap to prevent drying out. When you’re ready to bake, just place them on a baking sheet and cook straight from the fridge—no need to thaw! This approach keeps the cookies just as delicious and fresh, ready to enchant your family with minimal effort on your part. Enjoy more magical moments with less stress!

Storage Tips for Harry Potter Butterbeer Cookies

  • Room Temperature: Store cookies in an airtight container at room temperature for up to 1 week to keep them soft and chewy. Enjoy the magic every day!

  • Fridge: If you want to keep them fresher for longer, you can refrigerate the cookies in a sealed container for up to 2 weeks. Just allow them to come to room temperature before serving.

  • Freezer: For longer storage, freeze the baked cookies in a single layer. Once frozen, transfer them to a freezer-safe bag or container for up to 3 months. Thaw in the fridge or at room temperature before enjoying.

  • Cookie Dough: If you prefer to bake fresh cookies later, the dough can be prepared and refrigerated for up to 2 days. Just scoop and bake when you’re ready to sprinkle some magic into your day!

Harry Potter Butterbeer Cookies Variations

Feel free to indulge your creativity and transform these delightful cookies with these whimsical twists!

  • Chocolate Chip Swap: Replace butterscotch chips with chocolate chips for a rich, decadent flavor that every chocolate lover will adore.

  • Nutty Addition: Stir in chopped walnuts or pecans for a delightful crunch. They bring a satisfying texture contrast to the cookies’ chewiness.

  • Minty Twist: Substitute vanilla extract with peppermint extract for a refreshing holiday vibe. The unexpected flavor adds a magical spin to your favorite treat.

  • Oatmeal Boost: Incorporate rolled oats into the dough for a heartier cookie. This adds both texture and boosts nutrition, making your cookies feel even more fulfilling.

  • Spiced Delight: Add a pinch of cinnamon or nutmeg to the batter for warmth and depth. These spices can create a comforting aroma reminiscent of holiday baking.

  • Caramel Swirl: Instead of a drizzle, swirl homemade caramel sauce into the cookie dough before baking. The caramel will melt into gooey pockets of sweetness that will surprise and delight!

  • Fun Mini Versions: For mini cookies, scoop out smaller tablespoon-sized portions and adjust the baking time to around 8-10 minutes. Perfect for bite-sized snacking!

Pair these magical treats with a warm cup of butterbeer or, if you’re in the mood to explore, check out our tempting Blueberry Breakfast Cookies for another enchanting experience!

What to Serve with Harry Potter Butterbeer Cookies?

Indulging in these whimsical cookies opens the door to delightful pairings that elevate your magical experience.

  • Hot Chocolate: The rich, warm flavors complement the butterscotch perfectly, creating a cozy experience that’s pure comfort. Pairing your cookies with a decadent hot chocolate makes for a perfect evening treat after a day of magic!

  • Vanilla Ice Cream: A scoop of creamy vanilla ice cream pairs beautifully with the chewy texture of the cookies, offering a delightful contrast. The cold, creamy ice cream, drizzled with warm butterscotch sauce, takes your experience to the next level.

  • Coffee: A cup of freshly brewed coffee balances the sweetness of the cookies, adding a rich, robust flavor that brightens the experience. It’s a wonderful way to start your day or to enjoy an afternoon pick-me-up alongside your enchanted treats.

  • Caramel Sauce: Drizzling extra caramel sauce over your cookies creates a heavenly sweetness that amplifies their delightful flavor. This dreamy addition brings out the magic in each bite!

  • Milk: A classic pairing, a tall glass of cold milk offers a nostalgic complement to the sweetness of your cookies, ideal for both kids and adults alike. It helps to wash down the buttery flavors, providing a refreshing contrast.

  • Whipped Cream: Topping your cookies with a dollop of freshly whipped cream adds a creamy texture that enhances their indulgence. The lightness of the cream beautifully balances the cookies’ richness, making them truly unforgettable.

  • Fruit Compote: Serve alongside a warm fruit compote for a sweet-tart contrast. The bright fruity flavors cut through the richness of the cookies, inviting every bite to be a little more magical.

  • Sparkling Cider: For a festive touch, pair your cookies with a glass of sparkling cider. The effervescence contrasts perfectly with the softness of the cookies, making any occasion feel special!

Expert Tips for Harry Potter Butterbeer Cookies

  • Soften Your Butter: Ensure your butter is at room temperature; this makes it easier to cream with sugars and ensures a fluffy texture in your cookies.

  • Weigh Your Flour: For best results, use a kitchen scale to measure flour. Too much flour can result in dry cookies; a balance is key to soft, chewy Harry Potter Butterbeer Cookies.

  • Cool Before Frosting: Allow cookies to cool completely before adding frosting; warm cookies can cause the frosting to melt and lose its shape.

  • Spacing Matters: When placing dough on the baking sheets, leave enough space between portions, as the cookies will spread while baking.

  • Experiment with Flavor: Don’t be afraid to substitute butterscotch chips with chocolate chips or add nuts; this variation keeps things fun and fits everyone’s taste preferences!

Harry Potter Butterbeer Cookies Recipe FAQs

What type of butterscotch chips are best for this recipe?
Opt for high-quality butterscotch chips as they add a rich, indulgent flavor to your cookies. I often use Ghirardelli or Nestlé brands, but feel free to experiment with artisanal options to find your favorite!

How should I store my Harry Potter Butterbeer Cookies?
Store cookies in an airtight container at room temperature for up to 1 week to keep them soft and chewy. For longer freshness, refrigerate in a sealed container for up to 2 weeks. Just make sure to let them sit at room temperature before enjoying!

Can I freeze the Harry Potter Butterbeer Cookies?
Absolutely! To freeze, place the baked cookies in a single layer on a baking sheet until solid. Then, transfer them to a freezer-safe bag or container for up to 3 months. When you’re ready to treat yourself, thaw in the fridge overnight or at room temperature, and they’ll taste just as delightful!

What if my cookies turn out too puffy?
If your cookies puff up too much, it might be due to over-measuring the flour or too much baking soda. Be sure to spoon and level the flour when measuring, and keep an eye on the baking soda measurements to ensure a perfect texture!

Can I make any substitutions for dietary reasons?
Absolutely! For a dairy-free option, use margarine or coconut oil instead of butter, and replace butterscotch chips with dairy-free chocolate chips. To make it vegan, simply substitute the eggs with flax eggs (1 tablespoon of ground flaxseed mixed with 2.5 tablespoons of water per egg) and ensure all your other ingredients are free from animal products. Enjoy the magic, everyone can partake!

What should I do if the dough is too sticky?
If the cookie dough feels excessively sticky, it usually means humidity levels are high, or the butter was too soft. Add a touch more flour, one tablespoon at a time, until you achieve a more workable texture. Don’t worry; a little adjustment goes a long way in baking!

Harry Potter Butterbeer Cookies

Magical Harry Potter Butterbeer Cookies for Enchanted Moments

These Harry Potter Butterbeer Cookies combine rich butterscotch and vanilla for a magical treat, perfect for Potterheads and cozy gatherings.
Prep Time 15 minutes
Cook Time 12 minutes
Cooling Time 5 minutes
Total Time 32 minutes
Servings: 24 cookies
Course: Dessert
Cuisine: British
Calories: 200

Ingredients
  

For the Cookies
  • 2.5 cups All-Purpose Flour Can substitute with gluten-free flour blend.
  • 1 teaspoon Baking Soda
  • 0.5 teaspoon Salt
  • 1 cup Unsalted Butter Softened; margarine can be used.
  • 0.75 cup Light Brown Sugar Dark brown sugar can provide a deeper flavor.
  • 0.5 cup Granulated Sugar
  • 2 large Eggs Can be replaced with flax eggs for a vegan option.
  • 1 teaspoon Vanilla Extract Opt for pure vanilla for best taste.
  • 1 teaspoon Butter Flavoring Optional if using butter.
  • 1 cup Butterscotch Chips Can substitute for chocolate chips.
For the Frosting
  • 0.5 cup Unsalted Butter Softened.
  • 0.5 cup Butterscotch Sauce
  • 2 cups Powdered Sugar Make sure to sift for a smooth texture.
For the Caramel Drizzle
  • 0.5 cup Cream Soda
  • 1 cup Brown Sugar Adjust sweetness to taste.
  • 2 tablespoons Butter
  • 1 pinch Salt Helps to balance sweetness.

Equipment

  • Oven
  • Mixing bowls
  • Electric mixer
  • Baking Sheets
  • Parchment Paper
  • Cookie Scoop
  • Saucepan

Method
 

Step‑by‑Step Instructions
  1. Preheat your oven to 350°F (175°C) and line two baking sheets with parchment paper.
  2. In a medium bowl, whisk together 2 ½ cups of all-purpose flour, 1 teaspoon of baking soda, and ½ teaspoon of salt. Set aside.
  3. In a large mixing bowl, cream together 1 cup of softened unsalted butter, ¾ cup of light brown sugar, and ½ cup of granulated sugar for 2-3 minutes until light and fluffy.
  4. Add 2 large eggs, 1 teaspoon of vanilla extract, and 1 teaspoon of butter flavoring to the butter mixture. Mix on low speed until well combined.
  5. Gradually add the dry mixture to the creamed batter, mixing on low speed until just combined. Fold in 1 cup of butterscotch chips.
  6. Scoop the dough using a tablespoon or cookie scoop, placing them 2 inches apart on the baking sheets. Bake for 10-12 minutes until edges are golden brown.
  7. Cool cookies on the baking sheets for about 5 minutes, then transfer to a wire rack to cool completely.
  8. Beat together ½ cup of softened unsalted butter, ½ cup of butterscotch sauce, and 2 cups of powdered sugar until light and fluffy.
  9. In a saucepan, combine ½ cup of cream soda with 1 cup of brown sugar and simmer over medium heat for 8-10 minutes until thick. Stir in 2 tablespoons of butter and a pinch of salt.
  10. Once cooled, frost cookies with butterscotch frosting and drizzle with caramel sauce.

Nutrition

Serving: 1cookieCalories: 200kcalCarbohydrates: 30gProtein: 2gFat: 9gSaturated Fat: 5gPolyunsaturated Fat: 0.5gMonounsaturated Fat: 3gCholesterol: 30mgSodium: 150mgPotassium: 80mgFiber: 0.5gSugar: 15gVitamin A: 300IUCalcium: 20mgIron: 0.5mg

Notes

Store cookies in an airtight container at room temperature for up to 1 week. Refrigerate for longer freshness or freeze for up to 3 months.

Tried this recipe?

Let us know how it was!

Savory Smothered Chicken and Rice: A Cozy Family Favorite

As I stirred together a pot of comforting flavors, the aroma of Savory Smothered Chicken and Rice filled my kitchen, wrapping me in a nostalgic embrace. This delightful one-pan meal is my go-to for busy weeknights when I crave something hearty yet simple. Tender chicken thighs enveloped in a creamy gravy sit atop a fluffy bed of rice, making it the ultimate comfort food that even the pickiest eaters in the family will love. Not only does this dish come together in under 30 minutes, but it also allows for endless customization—from adding vibrant veggies to switching up the proteins—so you can make it truly your own. Are you ready to savor that first bite and fall in love with this quick, kid-friendly recipe?

Why is this chicken and rice dish irresistible?

Comfort at its finest: This Savory Smothered Chicken and Rice dish delivers warmth and richness, making it a perfect fit for any family dinner.
Quick preparation: Ready in under 30 minutes, it’s ideal for those busy weeknights.
Customization: Easily swap in your favorite vegetables or proteins, making it adaptable to every taste.
Kid-friendly: Picky eaters will adore the creamy gravy and tender chicken, ensuring everyone clears their plates.
One-pan convenience: Minimal cleanup means you can spend more time enjoying dinner than washing dishes—perfect for pairing with a simple side salad or steamed veggies. Try adding peas or carrots to sneak in some extra nutrition!

Savory Smothered Chicken and Rice Ingredients

For the Chicken
Chicken Thighs – Tender and juicy, best with bone-in and skin-on for maximum flavor.
Olive Oil or Butter – Choose your preferred fat for cooking; any cooking oil will work.

For the Gravy
Onion – Adds a sweet, flavorful base to the gravy; substitute with shallots for variety.
Garlic – Fresh garlic provides the best aroma, but garlic powder is a convenient alternative.
All-Purpose Flour – Thickens the gravy beautifully; use gluten-free flour for a gluten-free option.
Chicken Broth – The heart of the gravy; low sodium is best for controlling saltiness. Substitute with vegetable broth for a vegetarian version.
Heavy Cream – Makes the gravy rich and creamy; coconut milk can replace it for a dairy-free dish.
Dried Thyme – Adds a lovely herby element; fresh thyme enhances the flavor even more.
Paprika – For a touch of mild heat and a pop of color; smoked paprika offers a unique twist.
Salt and Pepper – Essential for seasoning; adjust to your taste.

For the Rice
Long-Grain White Rice – Fluffy base that complements the dish; brown rice can be used with a slight adjustment in cooking time.

This Savory Smothered Chicken and Rice is the ultimate family favorite, perfect for creating cozy meals that everyone will love! Enjoy cooking!

Step‑by‑Step Instructions for Savory Smothered Chicken and Rice

Step 1: Sear Chicken
Begin by seasoning the chicken thighs generously with salt, pepper, paprika, and thyme. Heat a tablespoon of olive oil or butter in a large skillet over medium-high heat. Place the chicken skin-side down in the hot skillet and sear for 5-6 minutes until golden brown. Flip the chicken and cook for an additional 4-5 minutes. Once browned, remove the chicken from the skillet and set aside.

Step 2: Make Gravy Base
In the same skillet, reduce the heat to medium and add chopped onion. Sauté the onions for about 3-4 minutes until they turn translucent and fragrant. Add minced garlic and cook for another 30 seconds, stirring frequently. Sprinkle in the flour, stirring it well into the mixture, and cook for roughly 1 minute to eliminate the raw flavor and develop a light golden hue.

Step 3: Build Gravy
Gradually whisk in the chicken broth and heavy cream into the flour and onion mixture. Turn the heat up slightly and bring the mixture to a simmer, stirring continuously until the gravy thickens, which should take about 3-5 minutes. Keep an eye on it to avoid burning, and taste to adjust the seasoning with salt and pepper as needed. This creamy base will be the heart of your Savory Smothered Chicken and Rice.

Step 4: Simmer Chicken
Return the seared chicken thighs to the skillet, ensuring they are nestled in the gravy. Cover the skillet with a lid and reduce the heat to low, allowing the chicken to simmer gently for 10-12 minutes. This step is crucial as it allows the flavors to meld together and the chicken to become tender and fully cooked. You’ll know it’s done when the juices run clear, and the chicken is no longer pink inside.

Step 5: Cook Rice
While the chicken simmers, prepare the rice in a separate pot. Bring water or chicken broth to a boil and add a pinch of salt. Stir in the long-grain white rice, then reduce the heat to low, cover, and let it cook for about 15 minutes, or until the rice is tender and all liquid is absorbed. Fluff the rice with a fork before serving, ensuring it has a light and airy texture.

Step 6: Serve
To serve your Savory Smothered Chicken and Rice, ladle a generous portion of fluffy rice into bowls. Top each serving with the succulent chicken thighs and drizzle the creamy gravy over the top. This comforting dish not only pleases the palate but creates a warm, inviting meal perfect for family gatherings or cozy dinners at home.

Make Ahead Options

Savory Smothered Chicken and Rice is an ideal candidate for meal prep, making weeknight dinners a breeze! You can marinate and season the chicken thighs up to 24 hours in advance, allowing flavors to infuse beautifully. The creamy gravy can also be prepared ahead and refrigerated for up to 3 days; simply store it in an airtight container to keep it fresh. When ready to serve, reheat the gravy gently and cook the marinated chicken in the skillet, then whisk in the gravy for a cohesive finish. Serve over freshly cooked rice, and enjoy a delightful, time-saving meal that tastes just as delicious as when made fresh!

Savory Smothered Chicken and Rice Variations

Feel free to get creative with this recipe and adapt it to suit your taste buds and dietary needs!

  • Vegetable Boost: Add peas, carrots, or spinach into the gravy for extra nutrition and vibrant color. These veggies not only enhance the dish but also make it look more appealing on your plate.

  • Lean Protein: Swap in boneless chicken breasts for a lower-fat option. Just be sure to adjust the cooking time, as breasts may take a bit less time than thighs. This will keep things light without compromising on flavor.

  • Quick Prep: Utilize leftover rotisserie chicken to cut down on cooking time. Simply shred the meat and stir it into the gravy. This not only saves time but also infuses a delightful smoky flavor.

  • Spice It Up: Introduce a dash of cayenne pepper or red pepper flakes for a spicy kick. This addition will elevate the dish and give it a whole new personality—sure to please those who love a little heat!

  • Dairy-Free Delight: For a creamy, dairy-free option, replace heavy cream with coconut milk. This swap will still give the gravy that luscious texture while offering a hint of tropical flavor to the dish.

  • Herb Swap: Try using fresh herbs instead of dried thyme, like basil or parsley, for a burst of freshness. Just toss them in right at the end of cooking to keep their vibrant flavors intact.

  • Grain Options: Use brown rice instead of long-grain white rice. The nuttiness of brown rice pairs wonderfully with the savory gravy but may require a little more cooking time for perfect tenderness.

  • Citrus Twist: Adding a splash of lemon or lime juice at the end of cooking can brighten the overall flavor profile. This zingy twist can balance out the richness and lift the dish to new heights.

If you want to explore other delightful chicken and rice recipes, check out these options: Oven Chicken Rice for a different cooking method, or indulge in the comforting goodness of Street Corn Chicken Rice Bowl, which packs a flavor punch!

How to Store and Freeze Savory Smothered Chicken and Rice

Fridge: Store leftovers in an airtight container for up to 3 days. Make sure the chicken and rice are covered in the creamy gravy to prevent drying out.

Freezer: For longer storage, place cooled portions in freezer-safe containers. Savory Smothered Chicken and Rice can be frozen for up to 3 months.

Reheating: When ready to eat, thaw overnight in the fridge, then reheat gently on the stove with a splash of broth or cream to restore the dish’s creamy texture.

Separate Storage: To maintain the best texture, store chicken and rice in separate containers if you know you’ll have leftovers. This helps retain the fluffiness of the rice and the juiciness of the chicken when reheated.

Expert Tips for Savory Smothered Chicken and Rice

  • Perfectly Browned Chicken: Ensure chicken is truly golden brown for enhanced flavor. Avoid overcrowding the skillet, which can lead to steaming instead of browning.

  • Thick Gravy Trick: For a thicker gravy, let it simmer longer to deepen flavors. You can also add more flour, whisking slowly to avoid clumps.

  • Store Smartly: To maintain texture, always store leftover Savory Smothered Chicken and Rice in separate airtight containers. Reheat gently on the stove for best results.

  • Skip Instant Rice: Instant rice can become mushy; opt for long-grain rice for the fluffy base that complements the dish beautifully.

  • Veggie Boost: Don’t hesitate to add vegetables like peas, carrots, or spinach into the gravy for extra nutrition and color—you’ll enhance both flavor and appeal!

What to Serve with Savory Smothered Chicken and Rice

As you dive into this showcase of comforting flavors, think about how to create a symphony of delicious side dishes to elevate your meal experience.

  • Garlic Green Beans:
    Crisp-tender green beans sautéed with garlic provide a fresh crunch that balances the rich, creamy gravy. A sprinkle of lemon juice brightens this simple yet vibrant side.

  • Creamy Mashed Potatoes:
    Don’t shy away from a double-carb delight! The buttery texture of mashed potatoes pairs seamlessly with savory chicken and gravy, creating a plate that feels indulgent yet satisfying.

  • Tangy Cucumber Salad:
    A refreshing cucumber salad with a tangy vinaigrette adds a light crunch. It’s the perfect contrast to the hearty chicken and offers a burst of freshness.

  • Sautéed Spinach:
    Quickly wilted spinach in olive oil and garlic not only provides vibrant color but also a nutritious touch. Its light flavor complements the hearty chicken, rounding out your plate.

  • Herbed Rice Pilaf:
    Elevate your rice game! A fragrant rice pilaf with herbs and nuts adds depth and a delightful crunch. It’s a pleasant twist that’ll keep your taste buds engaged.

  • Roasted Carrots:
    Honey-glazed roasted carrots bring a hint of sweetness, pairing beautifully with the savory dish. Their caramelized edges add both color and a sweet, earthy flavor.

  • Buttered Corn:
    Sweet and tender corn, simply seasoned with butter, creates a comforting side that children adore. Its natural sweetness contrasts wonderfully with the creamy sauce.

  • Chilled White Wine:
    For those looking to sip alongside their meal, a chilled glass of white wine complements the richness of the chicken and gravy, elevating the entire experience.

Each of these options adds a unique twist to your table, enhancing the unforgettable Savory Smothered Chicken and Rice and turning dinner into a true celebration!

Savory Smothered Chicken and Rice Recipe FAQs

How do I choose ripe chicken thighs?
Absolutely! When selecting chicken thighs, look for ones that are plump and have a slight sheen. Avoid any with dark spots or a dull appearance, as these may indicate spoilage. Fresh chicken should have a neutral smell—if it smells off, it’s best to pass.

How should I store leftovers?
Very important! Store your leftover Savory Smothered Chicken and Rice in airtight containers in the refrigerator for up to 3 days. Make sure the chicken and rice are covered with the creamy gravy to keep everything moist and flavorful. If you’re not eating it within that timeframe, consider freezing it to preserve its taste!

Can I freeze this dish?
Absolutely! To freeze Savory Smothered Chicken and Rice, allow it to cool completely first. Then, portion out the dish into freezer-safe containers. It can last for up to 3 months in the freezer. When you’re ready to enjoy it again, thaw it overnight in the fridge and reheat gently on the stove. A splash of chicken broth or cream will help revive the creamy texture.

What if my gravy isn’t thickening?
No worries! If your gravy isn’t thickening as expected, it might need more time simmering over medium heat. You can also gradually whisk in a little more flour mixed with water, ensuring it’s a smooth slurry to avoid clumping. Just remember to give it a few minutes to thicken up. The key is to stir continuously.

Is this recipe suitable for special dietary needs?
The more the merrier! Yes, this recipe for Savory Smothered Chicken and Rice can easily be adapted for dietary needs. For gluten-free options, substitute the all-purpose flour with a gluten-free flour blend or cornstarch. For a dairy-free version, using coconut milk in place of heavy cream works wonderfully. Always check for any allergies when selecting your ingredients!

How can I add vegetables to this dish?
Great question! To incorporate vegetables, you can add them while making the gravy. Consider peas, carrots, or spinach for a nutritional boost. Sauté them alongside the onions to let their flavors meld into the sauce, or toss them in during the simmering stage for a little extra crunch.

Savory Smothered Chicken and Rice

Savory Smothered Chicken and Rice: A Cozy Family Favorite

Savory Smothered Chicken and Rice is a one-pan meal that warms the soul, making it a family favorite for busy weeknights.
Prep Time 10 minutes
Cook Time 20 minutes
Total Time 30 minutes
Servings: 4 servings
Course: Dinner
Cuisine: American
Calories: 550

Ingredients
  

For the Chicken
  • 4 thighs Chicken Thighs Bone-in and skin-on for maximum flavor
  • 1 tablespoon Olive Oil or Butter Any cooking oil will work
For the Gravy
  • 1 medium Onion Chopped
  • 2 cloves Garlic Minced
  • 1 tablespoon All-Purpose Flour Use gluten-free flour for gluten-free option
  • 2 cups Chicken Broth Low sodium preferred
  • 1 cup Heavy Cream Coconut milk can replace for a dairy-free option
  • 1 teaspoon Dried Thyme Fresh thyme enhances flavor
  • 1 teaspoon Paprika Smoked paprika offers a unique twist
  • to taste Salt
  • to taste Pepper
For the Rice
  • 1 cup Long-Grain White Rice Brown rice can be used with adjusted cooking time

Equipment

  • Large skillet
  • Separate Pot for Rice

Method
 

Step-by-Step Instructions
  1. Season the chicken thighs generously with salt, pepper, paprika, and thyme. Heat olive oil or butter in a large skillet over medium-high heat. Sear chicken skin-side down for 5-6 minutes until golden brown. Flip and cook for an additional 4-5 minutes. Remove chicken and set aside.
  2. In the same skillet, reduce heat to medium and add chopped onion. Sauté for 3-4 minutes until translucent. Add minced garlic and cook for 30 seconds. Sprinkle in flour and stir well for roughly 1 minute.
  3. Gradually whisk in chicken broth and heavy cream. Bring to a simmer, stirring continuously until gravy thickens, about 3-5 minutes. Adjust seasoning with salt and pepper as needed.
  4. Return seared chicken to the skillet, ensuring it's nestled in the gravy. Cover and reduce heat to low, simmering for 10-12 minutes.
  5. In a separate pot, bring water or chicken broth to a boil with a pinch of salt. Stir in the rice, cover, and reduce heat to low. Cook for about 15 minutes, or until tender.
  6. Serve by ladling rice into bowls and topping with chicken and creamy gravy.

Nutrition

Serving: 1servingCalories: 550kcalCarbohydrates: 45gProtein: 30gFat: 30gSaturated Fat: 15gPolyunsaturated Fat: 2gMonounsaturated Fat: 11gCholesterol: 120mgSodium: 600mgPotassium: 700mgFiber: 2gSugar: 1gVitamin A: 800IUVitamin C: 5mgCalcium: 50mgIron: 2mg

Notes

For added nutrition, consider adding vegetables like peas or carrots into the gravy.

Tried this recipe?

Let us know how it was!

Ham and Cheese Croissant Breakfast Casserole Delight Awaits

As the morning sun filters through my kitchen window, the irresistible aroma of baked croissants fills the air, instantly lifting my spirit. This isn’t just any breakfast; it’s the Ham and Cheese Croissant Breakfast Casserole Delight, a dish that transforms a few simple ingredients into a cozy, comforting feat of culinary magic. Not only does it come together in a snap, but this casserole is also endlessly customizable, making it a go-to for brunch gatherings or busy weekday mornings. Picture fluffy croissant pieces mingling with savory ham and gooey melted cheese, all wrapped in a rich egg custard. Whether you’re feeding a crowd or just treating yourself, you’ll find it a fun and satisfying dish, with the potential to layer in your favorite veggies or dairy substitutes. So, what flavor combinations will you dream up for your own delightful creation?

Why Is This Casserole a Must-Try?

Convenience is key here! This delightful casserole comes together quickly, allowing you to spend more time lounging with loved ones and less time in the kitchen. Endless Customization options mean you can personalize each serving—swap in sautéed spinach, or try a different cheese like cheddar for a unique twist! Perfect for Gatherings: Whether it’s a weekend brunch or a simple weekday breakfast, this dish appeals to all crowds! Make-Ahead Friendly: Prepping it a day in advance saves time. Plus, leftovers are delicious! Considering alternatives like our Banana Grilled Cheese can also inspire creative meals. Dive into a cozy culinary adventure with this Ham and Cheese Croissant Breakfast Casserole Delight!

Ham and Cheese Croissant Breakfast Casserole Ingredients

For the Casserole

  • Croissants – Provides a rich flavor and soft texture; Substitution: Can use brioche or sourdough for variation.
  • Diced Ham – Adds savory depth; Substitution: Cooked bacon or turkey works well.
  • Shredded Swiss Cheese – Melts beautifully and adds creaminess; Substitution: Cheddar or Monterey Jack can be used for a different taste.
  • Grated Parmesan Cheese – Gives a crispy edge when baked; Optional for garnish or texture enhancement.
  • Large Eggs – Binder for the casserole, providing structure; No substitutions for egg, use alternatives if vegan.
  • Milk – Moistens the casserole and balances flavors; Substitution: Use almond milk or any non-dairy alternative.
  • Dried Thyme & Garlic Powder – Adds aromatic flavor; Substitution: Fresh herbs can be used for a fresher taste.
  • Salt and Pepper – Essential seasoning; Adjust according to personal preference.
  • Chives (for garnish) – Offers a fresh finish; Optional but recommended for color and flavor.

Step‑by‑Step Instructions for Ham and Cheese Croissant Breakfast Casserole Delight

Step 1: Preheat and Prepare
Begin by preheating your oven to 350°F (175°C) to create the perfect baking environment for your Ham and Cheese Croissant Breakfast Casserole. While the oven warms up, grab a 9×13 inch baking dish and generously grease it with butter or cooking spray, ensuring an easy release for your finished casserole.

Step 2: Assemble the Croissants
Cut your croissants into quarters, revealing their fluffy interiors, and spread them evenly across the prepared baking dish. Take a moment to admire the rich layers as you arrange them, creating a cozy bed for the other ingredients. This step sets the foundation for a delightful casserole, adding both texture and flavor.

Step 3: Add Ham and Cheese Layers
Sprinkle the diced ham generously over the croissant pieces, allowing the savory flavors to intermingle. Follow this with an even distribution of shredded Swiss cheese, ensuring every bite will be cheesy and delicious. The combination of ham and cheese elevates this dish, promising a comforting brunch experience.

Step 4: Whisk the Custard Mix
In a medium bowl, crack the large eggs and whisk them together with milk, dried thyme, garlic powder, salt, and pepper until fully combined. This rich custard will envelop the casserole, so make sure it’s smooth and creamy before pouring it over the croissant and filling layers.

Step 5: Soak the Croissants
Pour the egg mixture evenly over the croissant layers, allowing the ingredients to soak up that luscious custard. Using a spatula, gently press down on the layers to help the croissants absorb the liquid beautifully. This soaking will lead to a soft and flavorful casserole when baked.

Step 6: Sprinkle Parmesan
Finish off your assembly by sprinkling grated Parmesan cheese evenly on top of the casserole. This will create a lovely, crispy edge while baking, adding texture and an extra layer of flavor to your Ham and Cheese Croissant Breakfast Casserole Delight.

Step 7: Bake with Love
Cover the baking dish with foil and place it in the preheated oven. Bake for 30 minutes to start cooking the casserole through. After that, remove the foil, allowing the top to brown, and bake for an additional 15-20 minutes until it’s golden brown and the center is set.

Step 8: Cool and Serve
Once baked, take the Ham and Cheese Croissant Breakfast Casserole out of the oven and let it cool for about 5 minutes. This resting time makes it easier to slice into warm squares. For a lovely finishing touch, garnish with fresh chives before serving, enhancing both color and flavor.

Expert Tips for Ham and Cheese Croissant Breakfast Casserole

  • Soak Well: Ensure croissants are adequately soaked with custard; gently pressing helps prevent dryness and ensures every bite is flavorful.

  • Golden Top: Remember to bake uncovered during the last stage to achieve that perfect golden-brown crust on your Ham and Cheese Croissant Breakfast Casserole Delight.

  • Make-Ahead Magic: Prepare the casserole up to a day in advance without baking, then simply pop it in the oven when ready to serve.

  • Storage Savvy: Store any leftovers in an airtight container in the fridge for up to 3-4 days, making it a convenient option for busy mornings.

  • Alternative Ingredients: Don’t hesitate to customize—swap ham for sautéed veggies or use different cheeses to make the dish uniquely yours!

Storage Tips for Ham and Cheese Croissant Breakfast Casserole

Fridge: Store leftovers in an airtight container for up to 3-4 days to maintain freshness and flavor.

Freezer: Wrap individual portions tightly in plastic wrap and foil; freeze for up to 2 months. Thaw overnight in the fridge before reheating.

Reheating: Reheat in the microwave or oven at 350°F (175°C) until heated through, ensuring that the casserole stays moist and delicious.

Make-Ahead Note: Feel free to prepare the Ham and Cheese Croissant Breakfast Casserole in advance; just assemble it without baking and store in the fridge overnight before baking.

Ham and Cheese Croissant Breakfast Casserole Delight Variations

Feel free to give your casserole a personal twist and let your culinary creativity shine!

  • Vegetarian Delight: Swap ham for sautéed mushrooms, bell peppers, or spinach for a fresh, veggie-packed version. The earthy flavors complement the rich croissants beautifully.

  • Cheese Swap: Try using feta or pepper jack cheese instead of Swiss for a unique flavor experience. Imagine a spicy kick or a tangy twist enhancing every bite.

  • Gluten-Free Option: Use gluten-free croissants or bread to cater to dietary needs without sacrificing taste. Make sure to check for brands you love to make it extra special.

  • Spicy Kick: Add spices like smoked paprika or red pepper flakes to the egg mixture for a flavor boost. A little heat can elevate your casserole and tantalize your taste buds.

  • Herb Forward: Incorporate fresh herbs like basil or parsley instead of dried thyme for a fragrant and vibrant addition. The fresh notes will brighten the dish and offer a garden-fresh taste.

  • Savory Alternative: Replace the ham with cooked bacon or turkey for another level of savoriness. The crispy bite adds a delicious crunch to your casserole.

  • Sweet Touch: For a fun twist, sprinkle some maple syrup or serve with a side of fresh fruit like berries for a sweet contrast. It’s a delightful way to balance the savory flavors.

Looking for even more breakfast inspiration? Consider trying a Croissant Breakfast Sandwich or dive into a comforting Cheeseburger Soup that the whole family will adore!

Make Ahead Options

These Ham and Cheese Croissant Breakfast Casserole Delights are perfect for those busy mornings when time is of the essence! You can assemble the entire casserole up to 24 hours in advance, simply covering it tightly with foil and refrigerating it until you’re ready to bake. To ensure the croissants maintain their deliciously soft texture, press down firmly to help them absorb the custard mixture. When you’re ready to enjoy, just preheat your oven and bake straight from the fridge, increasing the initial baking time by about 5-10 minutes to ensure it’s heated through. This make-ahead option allows you to offer a delightful brunch with minimal effort while keeping the casserole just as delicious!

What to Serve with Ham and Cheese Croissant Breakfast Casserole Delight?

As you set the table for a heartwarming breakfast, consider pairing delightful sides that elevate your brunch experience with colors, flavors, and textures.

  • Fresh Fruit Salad: Bursting with vibrant flavors, a colorful fruit salad complements the savory casserole delightfully, offering a refreshing contrast.

  • Crispy Bacon Strips: The salty crunch of crispy bacon adds a delicious richness, perfectly balancing the soft textures of the casserole. A staple on any breakfast table!

  • Sautéed Spinach: A simple sauté of garlic and spinach provides a healthy, vibrant side that enhances the dish’s overall flavor while adding nutritional value.

  • Buttery Toast: Serve with slices of buttery toast or artisan bread for a satisfying crunch as you dig into the warm, creamy casserole.

  • Maple Syrup Drizzle: A light drizzle of maple syrup can add an unexpected sweet touch, harmonizing beautifully with the savory elements of the casserole.

  • Iced Coffee or Mimosas: For drinks, nothing like a refreshing iced coffee or sparkling mimosas to brighten up your morning and keep the energy high.

Pairing these exquisite sides with your Ham and Cheese Croissant Breakfast Casserole Delight will surely create a breakfast feast that everyone will relish!

Ham and Cheese Croissant Breakfast Casserole Recipe FAQs

How do I choose the best croissants for this casserole?
Absolutely! When selecting croissants, look for those that are fresh and flaky. Avoid croissants that have dark spots all over, indicating staleness—they should be golden brown and have a buttery aroma. If you can, choose ones from a local bakery for the best quality!

What is the best way to store leftover casserole?
Very simple! Store leftovers in an airtight container in the fridge for up to 3-4 days. If you like, you can also wrap individual portions tightly in plastic wrap to keep them fresh. To reheat, simply pop it in the microwave or oven until heated through.

Can I freeze Ham and Cheese Croissant Breakfast Casserole?
Of course! To freeze, wrap individual portions tightly in plastic wrap followed by foil to prevent freezer burn. This keeps them fresh for up to 2 months. When you’re ready to enjoy, just thaw overnight in the fridge and reheat in the oven at 350°F (175°C) until warm and inviting.

What if my croissants are too dry?
Great question! If your croissants seem dry, here’s what you can do: Make sure to pour the egg custard evenly over the croissants and press down gently to help them absorb as much liquid as possible. If you find your casserole is still lacking moisture, a splash more milk in the mixture can help add richness.

Are there any dietary considerations I should keep in mind?
Absolutely! For a gluten-free version, feel free to use gluten-free croissants or bread. If opting for dairy-free, almond milk or any non-dairy milk is a perfect substitute. And if you have any egg allergies, look for egg replacers like flaxseed meal or chickpea flour mixed with water to bind the casserole effectively!

Can I customize ingredients for dietary preferences?
Very much so! This casserole is highly customizable. Swap out the ham for sautéed mushrooms, fresh spinach, or bell peppers for a delightful vegetarian option. Experiment with softer cheeses like feta or pepper jack to change the flavor profile and make it your own. The more the merrier when it comes to creativity in your kitchen!

Ham and Cheese Croissant Breakfast Casserole Delight

Ham and Cheese Croissant Breakfast Casserole Delight Awaits

A delightful Ham and Cheese Croissant Breakfast Casserole made with fluffy croissants, savory ham, and gooey melted cheese, perfect for brunch gatherings.
Prep Time 15 minutes
Cook Time 45 minutes
Cooling Time 5 minutes
Total Time 1 hour 5 minutes
Servings: 8 slices
Course: Breakfast
Cuisine: American
Calories: 350

Ingredients
  

For the Casserole
  • 6 croissants Can use brioche or sourdough for variation.
  • 2 cups diced ham Cooked bacon or turkey works well.
  • 2 cups shredded Swiss cheese Cheddar or Monterey Jack can be used for a different taste.
  • 1/2 cup grated Parmesan cheese Optional for garnish or texture enhancement.
  • 6 large eggs No substitutions for egg, use alternatives if vegan.
  • 2 cups milk Use almond milk or any non-dairy alternative.
  • 1 teaspoon dried thyme Fresh herbs can be used for a fresher taste.
  • 1 teaspoon garlic powder
  • to taste salt Adjust according to personal preference.
  • to taste pepper Adjust according to personal preference.
  • 1/4 cup chives Optional but recommended for color and flavor.

Equipment

  • 9x13 inch baking dish
  • Mixing Bowl

Method
 

Step-by-Step Instructions
  1. Preheat your oven to 350°F (175°C) and grease a 9x13 inch baking dish with butter or cooking spray.
  2. Cut the croissants into quarters and spread them evenly across the prepared baking dish.
  3. Sprinkle the diced ham over the croissant pieces followed by shredded Swiss cheese.
  4. In a mixing bowl, whisk together large eggs, milk, dried thyme, garlic powder, salt, and pepper until combined.
  5. Pour the egg mixture evenly over the croissant layers and press down with a spatula to soak.
  6. Sprinkle grated Parmesan cheese on top of the casserole.
  7. Cover the baking dish with foil and bake for 30 minutes. Remove the foil and bake for an additional 15-20 minutes until golden brown.
  8. Let it cool for about 5 minutes before serving and garnish with fresh chives.

Nutrition

Serving: 1sliceCalories: 350kcalCarbohydrates: 20gProtein: 15gFat: 25gSaturated Fat: 10gPolyunsaturated Fat: 1gMonounsaturated Fat: 3gCholesterol: 150mgSodium: 800mgPotassium: 300mgFiber: 1gSugar: 2gVitamin A: 800IUVitamin C: 2mgCalcium: 250mgIron: 2mg

Notes

This casserole can be prepared a day in advance without baking. Store leftovers in an airtight container for up to 3-4 days.

Tried this recipe?

Let us know how it was!

Hawaiian Roll French Toast Recipe: Fluffy Breakfast Bliss

As I stood in my kitchen, the rich scent of cinnamon wafted through the air, instantly transforming my space into a cozy haven. There’s something uniquely satisfying about making a classic dish with a delightful twist, and that’s exactly what the Hawaiian Roll French Toast Recipe offers. By using King’s Hawaiian rolls, you create a breakfast experience that’s not only quick and easy but also perfect for those special occasion gatherings or a simple breakfast-for-dinner night. These fluffy, custardy bites are sure to impress your family and friends, making every bite feel like a sweet hug. Ready to turn your mornings into a taste of paradise? Let’s dive into this delicious recipe!

Why Is This Recipe a Must-Try?

Irresistibly Fluffy: The use of King’s Hawaiian rolls ensures each bite is pillowy soft, making your breakfast experience unforgettable.

Quick & Easy: With straightforward instructions, you can whip this up in no time, perfect for busy mornings or last-minute brunch plans.

Versatile Toppings: Customize your dish with fresh fruits, whipped cream, or even chocolate chips for a delightful twist—just like with my Blueberry French Toast.

Make-Ahead Magic: Prepare it overnight for an effortless morning. Simply reheat later, saving you precious time!

Crowd-Pleasing Appeal: This Hawaiian Roll French Toast is sure to impress guests—whether it’s for a cozy family breakfast or a festive gathering, like the ones inspired by my Creme Brulee French Toast.

Dive into a breakfast experience that feels like a warm embrace; you’ll be coming back for seconds!

Hawaiian Roll French Toast Ingredients

For the French Toast

  • King’s Hawaiian Rolls – Their sweet flavor and soft texture make this recipe a delight; you can substitute with challah or brioche if needed.
  • Large Eggs – Essential for creating a rich custard; ensure they are well-beaten for a light, fluffy result.
  • Milk – Adds the necessary moisture; feel free to swap with dairy-free options for a lighter version.
  • Vanilla Extract – Enhances the overall flavor profile; for a gourmet touch, try using vanilla bean instead.
  • Ground Cinnamon – Offers a warm, inviting spice note; if you’re feeling adventurous, nutmeg can also take its place.
  • Salt – Balances sweetness and elevates the flavors for a perfect harmony in each bite.

Optional Toppings

  • Fresh Fruits – Add brightness and freshness; think berries, bananas, or sliced peaches.
  • Whipped Cream – A decadent addition that complements the fluffy texture beautifully.
  • Chocolate Chips – For chocolate lovers, sprinkle some on top or mix into the custard for an indulgent twist.
  • Syrups – Maple syrup is classic, but consider caramel or chocolate syrup for a changed-up experience.

Embrace your culinary creativity with this Hawaiian Roll French Toast Recipe, and enjoy the fluffy bliss it brings to your breakfast table!

Step‑by‑Step Instructions for Hawaiian Roll French Toast Recipe

Step 1: Prep Rolls
Begin by taking your slab of King’s Hawaiian rolls and slicing it in half horizontally. Carefully separate the top and bottom pairs, ensuring you maintain their structure. This will create delightful pockets for the custard to soak in later, resulting in an ultra-soft and fluffy Hawaiian Roll French Toast.

Step 2: Make Custard
In a large mixing bowl, whisk together 4 large eggs until they become frothy and light. Gradually add in 1 cup of milk, 1 teaspoon of vanilla extract, 1 teaspoon of ground cinnamon, and a pinch of salt. Continue whisking until all ingredients are well blended, creating a rich and aromatic custard that will envelop your rolls in flavor.

Step 3: Soak Rolls
Take each half of the Hawaiian roll and gently dip it into the custard mixture. Let them soak for about 15–20 seconds on each side, ensuring they absorb enough custard without falling apart. Visual cues will include the rolls becoming slightly saturated but still holding their shape, setting the stage for that perfect texture when cooked.

Step 4: Cook
Preheat a non-stick skillet over medium heat and add a tablespoon of butter, allowing it to melt and bubble. Carefully place the soaked rolls in the skillet, cooking them for 2–3 minutes on each side until they are golden brown and slightly crusty. The heavenly aroma will signal that they are nearly ready to enjoy as a delightful Hawaiian Roll French Toast.

Step 5: Serve
Once cooked, gently transfer the golden-brown Hawaiian Roll French Toast to a plate. Serve them immediately while they’re warm and fluffy, and feel free to add luscious toppings such as butter, maple syrup, or fresh fruits. Every bite promises to be a sweet delight, perfect for any breakfast or special occasion.

Hawaiian Roll French Toast Recipe Variations

Feel free to customize your Hawaiian Roll French Toast to make it your own culinary masterpiece!

  • Gluten-Free: Substitute King’s Hawaiian rolls with gluten-free bread to cater to dietary needs. It’s just as fluffy and delicious!

  • Dairy-Free: Opt for almond milk or coconut milk instead of regular milk for a dairy-free delight. This allows everyone to enjoy your fluffy creation, too.

  • Double the Spice: Add a pinch of cardamom along with the cinnamon for an exotic flavor profile. This aromatic twist will tantalize your taste buds!

  • Nutty Base: Incorporate ground nuts like almonds or pecans into the custard mixture for extra texture and richness. It’ll add a lovely crunch to each bite.

  • Fruity Delight: Toss in some chopped fresh fruits like bananas or berries directly into the custard. The fruit will caramelize beautifully as it cooks, offering sweetness and vibrant colors.

  • Chocolate Lovers: Fold in mini chocolate chips into the custard for a melty, sweet surprise. You can turn breakfast into dessert in just one simple swap!

  • Create a Casserole: Assemble the French toast in layers, soaking the roll halves in custard and layering them in a baking dish; allow to sit overnight. This is similar to my scrumptious Creme Brulee French Toast!

  • Fun Topping Bar: Set up a toppings bar with whipped cream, toasted coconut, sprinkles, or even nuts. Let everyone create their perfect sweet experience for your brunch!

Explore these variations and enjoy a delightful twist on your Hawaiian Roll French Toast! For another delicious breakfast option, don’t miss my Apple Crisp Cinnamon Roll Casserole—it’s another family favorite!

Make Ahead Options

These Hawaiian Roll French Toasts are perfect for meal prep enthusiasts! You can prepare the custard (eggs, milk, vanilla, cinnamon, and salt) up to 24 hours in advance, and refrigerate it in an airtight container. Additionally, you can slice the rolls and soak them in the custard mixture up to 3 hours before cooking; just ensure they’re well-coated but not overly soggy, so they maintain their delightful texture. Once ready to serve, simply heat a non-stick skillet over medium heat, add butter, and cook the soaked rolls for 2-3 minutes per side until golden brown. This approach allows you to enjoy a delicious breakfast with minimal effort on busy mornings!

What to Serve with Hawaiian Roll French Toast

Elevate your breakfast experience with delightful pairings that complement the fluffy sweetness of this dish.

  • Crispy Bacon: The salty crunch of bacon contrasts beautifully with the sweetness of the French toast, adding a savory element to your morning meal.

  • Fresh Fruit Salad: A vibrant mix of seasonal fruits brightens up the plate and offers a refreshing balance to the rich custardy bites.

  • Greek Yogurt: Creamy and tangy, a dollop of Greek yogurt adds a sophisticated touch and a protein boost, making every bite feel indulgent yet wholesome.

  • Maple Syrup: A drizzle of pure maple syrup enhances the sweet flavors, creating a delightful harmony with the cinnamon-infused toast.

  • Whipped Cream: Light and fluffy, whipped cream serves as a luxurious topping that elevates the French toast from a breakfast staple to a dessert-like indulgence.

  • Chocolate Chips: Sprinkling some chocolate chips on top melts lightly against the warm toast, infusing each bite with an extra touch of sweetness and decadence.

  • Spiced Chai Latte: Pair your breakfast with a warm spiced chai latte for a comforting beverage that complements the cinnamon notes in the French toast, creating a cozy morning atmosphere.

Choosing from these pairings ensures a breakfast spread that is not only delicious but will also create lasting memories around the table.

Storage Tips for Hawaiian Roll French Toast

Fridge: Store leftovers in an airtight container for up to 2–3 days to maintain freshness.

Freezer: For longer storage, freeze the cooked Hawaiian Roll French Toast for up to 2 months. Wrap each piece in plastic wrap, then place in a freezer-safe bag to prevent freezer burn.

Reheating: Reheat in an air fryer or on a skillet over low heat for about 5 minutes, ensuring they are warmed through and retain their delicious texture.

Make-Ahead Option: If you’re planning to prepare this Hawaiian Roll French Toast for brunch, consider making it as an overnight casserole!

Expert Tips for Hawaiian Roll French Toast

  • Soak Time: Aim for the sweet spot of 15-20 seconds when soaking the rolls to achieve that perfect balance of custardy inside while maintaining structural integrity.

  • Pan Space: Avoid overcrowding your skillet; giving each roll enough room lets them cook evenly, resulting in that sought-after golden brown crust.

  • Flavor Boost: Experiment with your custard! For a twist, incorporate a splash of orange juice or nutmeg for an extra layer of flavor in this Hawaiian Roll French Toast recipe.

  • Resting Time: Allow your cooked French toast to rest for a minute before serving; it helps the flavors settle and ensures a fluffier bite.

  • Enjoy Warm: For the best experience, serve immediately while warm and enjoy the delightful textures!

Hawaiian Roll French Toast Recipe FAQs

What kind of bread can I substitute for King’s Hawaiian rolls?
Absolutely! While King’s Hawaiian rolls are the star of this Hawaiian Roll French Toast Recipe for their unique sweet flavor, you can also use challah, brioche, or Texas toast. Each of these alternatives will bring their special texture and taste—so feel free to experiment!

How long can I store leftover Hawaiian Roll French Toast?
Leftovers can be stored in an airtight container in the refrigerator for up to 2-3 days. When you’re ready to enjoy them again, simply reheat in an air fryer or skillet for about 5 minutes to restore that fluffy goodness!

Can I freeze Hawaiian Roll French Toast?
Yes, you can! For longer storage, freeze the cooked Hawaiian Roll French Toast for up to 2 months. Just wrap each piece in plastic wrap, then place them in a freezer-safe bag to prevent freezer burn. When you’re ready to enjoy, thaw overnight in the fridge and reheat as mentioned for a delightful treat.

What should I do if my French toast turns out soggy?
If you find your French toast too soggy, it might be due to soaking the rolls for too long. Aim for that sweet spot of 15-20 seconds per side in the custard. If they’re already cooked and too soggy, consider giving them a quick sear in a hot skillet to crisp them up a bit.

Are there any dietary options I can consider with this recipe?
Very! You can make this Hawaiian Roll French Toast recipe dairy-free by swapping regular milk for almond, soy, or oat milk. If you have gluten sensitivities, try using gluten-free bread options, which can work beautifully while keeping the flavors intact. Make it work for you!

What toppings do you recommend for Hawaiian Roll French Toast?
For a fun and delightful experience, I often recommend a toppings bar! Fresh fruits like strawberries or bananas add a nice contrast, while whipped cream elevates the indulgence. You can also experiment with chocolate chips or various syrups such as caramel or maple for a sweet finishing touch!

Hawaiian Roll French Toast Recipe

Hawaiian Roll French Toast Recipe: Fluffy Breakfast Bliss

Discover this Hawaiian Roll French Toast Recipe for a quick, easy, and fluffy breakfast experience.
Prep Time 10 minutes
Cook Time 10 minutes
Resting Time 1 minute
Total Time 21 minutes
Servings: 4 slices
Course: Breakfast
Cuisine: Hawaiian
Calories: 320

Ingredients
  

French Toast Base
  • 8 slices King's Hawaiian Rolls Can substitute with challah or brioche.
  • 4 large Eggs Well-beaten.
  • 1 cup Milk Can use dairy-free options.
  • 1 teaspoon Vanilla Extract Vanilla bean can be used for gourmet touch.
  • 1 teaspoon Ground Cinnamon Nutmeg can be used as an alternative.
  • 1 pinch Salt
Optional Toppings
  • 1 cup Fresh Fruits Berries, bananas, or sliced peaches.
  • 1 cup Whipped Cream
  • 1 cup Chocolate Chips
  • 1 cup Syrups Maple, caramel, or chocolate syrup.

Equipment

  • Non-stick skillet
  • Mixing Bowl
  • whisk

Method
 

Preparation Instructions
  1. Slice the King's Hawaiian rolls in half horizontally and separate the top and bottom pairs.
  2. Whisk together eggs, milk, vanilla, cinnamon, and salt in a large mixing bowl until blended.
  3. Dip each half of the roll in the custard mixture for 15-20 seconds per side.
  4. Preheat a skillet over medium heat, melt butter, and cook the soaked rolls for 2-3 minutes on each side until golden brown.
  5. Serve warm, adding toppings like butter, syrups, or fresh fruits.

Nutrition

Serving: 1sliceCalories: 320kcalCarbohydrates: 45gProtein: 8gFat: 12gSaturated Fat: 7gMonounsaturated Fat: 5gCholesterol: 220mgSodium: 300mgPotassium: 200mgFiber: 2gSugar: 15gVitamin A: 500IUVitamin C: 1mgCalcium: 150mgIron: 1mg

Notes

Perfect for that busy morning or a special gathering. Consider making it overnight for convenience.

Tried this recipe?

Let us know how it was!

Delicious Strawberry Cheesecake Cinnabon Rolls Recipe You’ll Love

As I pulled the warm, golden rolls from the oven, the sweet scent of cinnamon mingled with the lush aroma of strawberries, instantly transporting me to a cozy bakery on a sunlit morning. If you’re searching for a delightful way to elevate your breakfast or satisfy a sweet tooth, look no further than this Strawberry Cheesecake Cinnabon Rolls Recipe. These rolls embody an amazing fusion of soft, buttery dough kissed with cinnamon, and a rich, creamy cheesecake filling bursting with fresh strawberries. Not only are they a show-stopping dessert, but they also make for a comforting breakfast treat that’s surprisingly easy to whip up. So, are you ready to roll up your sleeves and create a blissful batch of these indulgent delights? Your kitchen is about to become the heart of the sweetest memories!

Why Are These Rolls So Irresistible?

Decadent Delight: With the creamy combination of cheesecake and fresh strawberries, these Strawberry Cheesecake Cinnabon Rolls will have your taste buds dancing in delight.

Easy to Make: The recipe is simple enough for beginners, ensuring you won’t spend hours in the kitchen.

Customizable Goodness: Feel free to swap out strawberries for other fruits or even experiment with different toppings!

Perfect for Any Occasion: Whether it’s breakfast, dessert, or a brunch gathering, these rolls are always a hit!

A Family Favorite: They fill your home with an irresistible aroma that will bring everyone together, making them an instant crowd pleaser.

For an indulgent balance, serve them alongside a cup of coffee, or consider whipping up a batch of Mexican Taco Soup to complete your meal!

Strawberry Cheesecake Cinnabon Rolls Recipe Ingredients

Here’s everything you need to create these delightful rolls!

For the Dough

  • Active Dry Yeast – Causes the dough to rise; make sure it’s fresh for the best results.
  • Warm Milk – Activates the yeast; ensure it’s not too hot or it may kill the yeast.
  • Sugar – Adds sweetness and helps in the activation of the yeast; brown sugar can be used for a deeper flavor.
  • Butter (Softened) – Provides richness and moisture to the dough.
  • Eggs – Adds structure to the dough and richness.
  • All-Purpose Flour – The main structure ingredient for the rolls; substitute gluten-free flour for a gluten-free option.
  • Cinnamon – Adds warming spice to the filling; increase for a stronger flavor.

For the Filling

  • Cream Cheese (Softened) – Creates a rich filling; ensure it’s fully softened for easy mixing.
  • Sour Cream – Contributes moisture and tang to the cheesecake filling.
  • Fresh Strawberries – Provides fruity freshness; you can substitute with other berries like blueberries or peaches.

For the Icing

  • Powdered Sugar – Sweetens the cream cheese icing; adjust to achieve your desired sweetness.

Now that you have all the ingredients ready, you’re one step closer to enjoying these decadent Strawberry Cheesecake Cinnabon Rolls!

Step‑by‑Step Instructions for Strawberry Cheesecake Cinnabon Rolls Recipe

Step 1: Dough Preparation
Begin by combining 1 cup of warm milk and 2 teaspoons of active dry yeast in a bowl. Allow it to sit for about 5 minutes, until it becomes frothy. In a separate large mixing bowl, add melted butter, sugar, and eggs. Pour the yeast mixture in, then gradually mix in 4 cups of all-purpose flour and a pinch of salt until it forms a smooth dough.

Step 2: First Rise
Once your dough is ready, place it in a lightly greased bowl and cover it with a clean kitchen towel. Set the bowl in a warm, draft-free area for about 1 to 1.5 hours, or until the dough has doubled in size. This first rise is crucial for the fluffiness of your Strawberry Cheesecake Cinnabon Rolls.

Step 3: Filling Preparation
While the dough is rising, prepare your cheesecake filling. In a mixing bowl, combine 8 ounces of softened cream cheese, 1/2 cup of sour cream, 1/2 cup of sugar, and 1 cup of finely chopped fresh strawberries. Use a hand mixer to blend until the mixture is smooth and velvety, ensuring all ingredients are well incorporated for a delicious filling.

Step 4: Assemble Rolls
Once the dough has risen, punch it down gently to release air, then roll it out on a floured surface into a large rectangle, about 1/4 inch thick. Spread the cheesecake filling evenly over the dough, leaving a small border. Sprinkle a mixture of cinnamon and sugar over the filling, then carefully roll the dough tightly into a log shape. Cut into 12 equal rolls.

Step 5: Second Rise
Place the cut rolls into a greased baking pan, making sure they are evenly spaced. Cover the pan with a towel and let the rolls rise for another 30 to 45 minutes, or until they have puffed up noticeably. This step is vital to achieve that soft, pillowy texture in your Strawberry Cheesecake Cinnabon Rolls.

Step 6: Baking
Preheat your oven to 350°F (175°C). Once the rolls have risen, bake them in the preheated oven for about 25 to 30 minutes, or until they turn golden brown on top. Keep an eye on them to prevent overbaking, as you want the rolls to remain soft and gooey inside.

Step 7: Icing Preparation
While the rolls are baking, prepare the icing by whisking together 1 cup of powdered sugar with 2-3 tablespoons of milk in a bowl until you achieve a smooth and pourable consistency. Adjust the thickness to your preference; add more powdered sugar for a thicker icing or more milk for a thinner drizzle.

Step 8: Drizzle and Serve
Once the Strawberry Cheesecake Cinnabon Rolls are baked and slightly cooled, liberally drizzle the icing over the top. Let the icing melt into the warm rolls for an irresistible finish. Serve these delightful treats warm for breakfast or as a decadent dessert treat that’s sure to impress!

Make Ahead Options

These Strawberry Cheesecake Cinnabon Rolls Recipe are perfect for busy home cooks looking to save time without sacrificing flavor! You can prepare the dough and filling up to 24 hours ahead of time. Simply follow the recipe instructions up to the point of the first rise, then store the covered dough in the refrigerator. Meanwhile, mix your filling and keep it chilled. When you’re ready to bake, allow the dough to come to room temperature for about 30 minutes, then proceed with the second rise and baking. This method ensures that these delightful rolls are just as fluffy and delicious, making your mornings smoother and stress-free.

What to Serve with Strawberry Cheesecake Cinnabon Rolls?

Looking for the perfect complements to elevate your Strawberry Cheesecake Cinnabon Rolls into a complete meal experience?

  • Fresh Fruit Salad: A vibrant mix of seasonal fruits adds a refreshing balance to the rich sweetness of the rolls. The bright colors and flavors are sure to please!
  • Coffee or Latte: The bold flavors of coffee or a creamy latte pair wonderfully with the sweetness, enhancing the overall indulgence of your breakfast or dessert.
  • Vanilla Ice Cream: A scoop of cold vanilla ice cream perfectly contrasts the warm, gooey rolls, taking your dessert experience to the next level. Imagine that delightful melt—absolutely divine!
  • Whipped Cream: Light and airy whipped cream is a fantastic way to add an elegant touch. It balances the richness of the cheesecake filling beautifully!
  • Maple Syrup Drizzle: Adding a bit of maple syrup can enhance the cinnamon flavor and introduce a lovely sweetness that complements every bite of the rolls.
  • Cinnamon-Spiced Hot Chocolate: The warmth of hot chocolate infused with cinnamon is a cozy addition that creates a comforting, indulgent combination with your rolls.
  • Caramel Sauce: A drizzle of homemade or store-bought caramel sauce adds a decadent sweetness that heightens the flavor profile wonderfully.
  • Chai Tea: The spiced notes in chai tea harmonize perfectly with the cinnamon in the rolls, creating a deliciously inviting beverage pairing.

How to Store and Freeze Strawberry Cheesecake Cinnabon Rolls

Room Temperature: Keep the rolls in an airtight container for up to 2 days to maintain their softness and freshness.

Fridge: If you need to store them longer, place the rolls in the fridge for up to 5 days, but note they may lose some moisture.

Freezer: Wrap unbaked rolls tightly in plastic wrap and freeze for up to 2 months. Thaw overnight in the fridge before final rise and baking.

Reheating: To enjoy leftover Strawberry Cheesecake Cinnabon Rolls, reheat in a preheated oven at 350°F (175°C) for about 10 minutes for soft, gooey perfection.

Expert Tips for Strawberry Cheesecake Cinnabon Rolls

Fresh Yeast: Always check the expiration date on your active dry yeast. If it’s not fresh, your rolls won’t rise properly.

Temperature Matters: Keep your milk warm—around 110°F. Too hot can kill the yeast, leading to dense rolls.

Don’t Rush the Rises: Both the first and second rises are crucial for achieving that fluffy texture. Skipping them can result in flat rolls.

Smooth Filling: Make sure your cream cheese is fully softened to avoid lumps in the cheesecake filling—smooth mixing is key for a heavenly flavor.

Adjust Icing Consistency: If your icing is too thick, add a little more milk to achieve the perfect drizzle. The sweetness should balance with the rolls beautifully.

Enjoy making your Strawberry Cheesecake Cinnabon Rolls, and with these expert tips, your experience will be a delicious success!

Strawberry Cheesecake Cinnabon Rolls Variations

Get ready to elevate your baking experience with exciting twists on these delicious rolls!

  • Berry Medley: Swap strawberries for raspberries or blueberries to create a delightful berry mix. Each bite will surprise your taste buds with a burst of flavor.

  • Citrus Zing: Add a teaspoon of lemon zest to the filling for a refreshing citrus twist that brightens the entire roll.

  • Spicy Cinnamon: Boost the cinnamon in the filling or add a pinch of nutmeg for a warm, spiced flavor that’s perfect for chilly mornings. Your kitchen will feel cozy with these aromatic notes wafting through.

  • Nutty Crunch: Incorporate crushed nuts, like pecans or walnuts, into the filling for added flavor and crunch, making each bite even more interesting.

  • Chocolate Lovers: Drizzle melted chocolate ganache over the rolls after baking—because who can resist a chocolatey topping on a cinnamon roll?

  • Caramel Bliss: Drizzle warm caramel sauce over the icing for an incredibly indulgent touch that pairs beautifully with the tartness of the strawberries.

  • Gluten-Free Delight: Substitute all-purpose flour with gluten-free flour to make your rolls accessible to everyone without sacrificing taste.

  • Mini Rolls: Cut smaller sections from the rolled dough for bite-sized mini rolls that are perfect for sharing or serving at brunch gatherings.

Feel free to mix and match these variations to create your family’s new favorite! If you’re looking for more delicious inspirations, why not check out our Strawberry Cheesecake Dump or the delightful Foster Cinnamon Rolls recipes? Enjoy your sweet baking adventure!

Strawberry Cheesecake Cinnabon Rolls Recipe FAQs

What type of strawberries should I use for the filling?
Using fresh, ripe strawberries is ideal for achieving the best flavor in your filling. Look for berries that are bright red with no dark spots or soft spots, as they will provide sweet and juicy freshness. If fresh strawberries are not available, frozen strawberries can be used as an alternative, but make sure to thaw and drain any excess liquid to prevent a watery filling.

How should I store leftover Strawberry Cheesecake Cinnabon Rolls?
Store your rolls in an airtight container at room temperature for up to 2 days to keep them soft and delicious. If you want to enjoy them for longer, transfer them to the refrigerator where they will last up to 5 days. To maintain moisture, reheat them in the oven or microwave before serving.

Can I freeze Strawberry Cheesecake Cinnabon Rolls?
Absolutely! You can freeze unbaked rolls after you’ve assembled them. Wrap each roll tightly in plastic wrap and place them in a freezer-safe bag or container. They can be stored in the freezer for up to 2 months. To bake, just thaw overnight in the refrigerator before allowing them to rise a second time and then bake as directed.

What should I do if my dough doesn’t rise?
If your dough doesn’t rise, it may be due to using yeast that wasn’t fresh or milk that was too hot when mixed. You can remedy this by checking the expiration date on your yeast or trying again with warm milk—around 110°F (43°C)—to ensure it is activated properly. If your dough still doesn’t rise, try placing it in a warmer spot (like an oven set to its lowest temperature for a few minutes, then turned off), which can help with the proofing process.

Is this recipe suitable for people with allergies, such as gluten or dairy sensitivities?
Yes, you can make adjustments to accommodate dietary restrictions! For a gluten-free version, substitute the all-purpose flour for a gluten-free flour blend. Additionally, for those who are lactose intolerant or avoiding dairy, you can replace the cream cheese and sour cream with dairy-free alternatives. Just ensure that the products you choose have comparable textures for the best results.

How long do baked rolls stay fresh?
Baked Strawberry Cheesecake Cinnabon Rolls are best enjoyed fresh but can stay fresh for about 2 days when kept in an airtight container at room temperature. If refrigerated, they can last up to 5 days but may lose some of their moist texture. For the best experience, consider reheating them before serving to restore their delightful softness.

Strawberry Cheesecake Cinnabon Rolls Recipe

Delicious Strawberry Cheesecake Cinnabon Rolls Recipe You’ll Love

A delightful Strawberry Cheesecake Cinnabon Rolls recipe combining soft dough, creamy filling, and fresh strawberries, perfect for breakfast or dessert.
Prep Time 30 minutes
Cook Time 30 minutes
Rising Time 1 hour 30 minutes
Total Time 2 hours 30 minutes
Servings: 12 rolls
Course: Dessert
Cuisine: American
Calories: 320

Ingredients
  

For the Dough
  • 2 teaspoons Active Dry Yeast Ensure it's fresh
  • 1 cup Warm Milk Around 110°F
  • 1/2 cup Sugar Can substitute with brown sugar
  • 1/4 cup Butter Softened
  • 2 large Eggs Adds richness
  • 4 cups All-Purpose Flour Can substitute with gluten-free flour
  • 1 teaspoon Cinnamon For flavor
For the Filling
  • 8 ounces Cream Cheese Softened
  • 1/2 cup Sour Cream Contributes moisture
  • 1/2 cup Sugar
  • 1 cup Fresh Strawberries Finely chopped
For the Icing
  • 1 cup Powdered Sugar Adjust to taste
  • 2-3 tablespoons Milk For consistency

Equipment

  • Mixing Bowl
  • Baking Pan
  • Hand mixer
  • Rolling Pin

Method
 

Dough Preparation
  1. Combine warm milk and active dry yeast in a bowl. Let sit for about 5 minutes until frothy.
  2. In another bowl, mix melted butter, sugar, and eggs. Add yeast mixture, gradually mix in all-purpose flour and salt until smooth.
First Rise
  1. Place dough in a greased bowl, cover with towel. Let rise in warm area for 1 to 1.5 hours, until doubled.
Filling Preparation
  1. Mix cream cheese, sour cream, sugar, and strawberries in a bowl until smooth.
Assemble Rolls
  1. Roll out dough into a rectangle. Spread filling, sprinkle with cinnamon and sugar, roll tightly, and cut into 12 equal rolls.
Second Rise
  1. Place rolls in a greased pan, cover with towel, and let rise for 30 to 45 minutes.
Baking
  1. Preheat oven to 350°F (175°C). Bake rolls for 25 to 30 minutes until golden brown.
Icing Preparation
  1. Whisk powdered sugar and milk together until smooth for icing.
Drizzle and Serve
  1. Drizzle icing over warm rolls. Serve immediately.

Nutrition

Serving: 1rollCalories: 320kcalCarbohydrates: 50gProtein: 4gFat: 12gSaturated Fat: 7gMonounsaturated Fat: 3gCholesterol: 30mgSodium: 150mgPotassium: 100mgFiber: 1gSugar: 20gVitamin A: 300IUVitamin C: 5mgCalcium: 50mgIron: 1mg

Notes

Ensure yeast is fresh and milk is warm for best results. Follow rising times carefully for fluffy rolls.

Tried this recipe?

Let us know how it was!

Delicious Pumpkin French Toast Recipe for Cozy Mornings

As the leaves begin to turn and the air becomes crisp, there’s nothing quite like a cozy breakfast to welcome the fall season. This Fluffy Pumpkin French Toast Recipe captures the essence of autumn, infusing thick slices of bread with rich pumpkin puree and a symphony of warm spices like cinnamon and nutmeg. It’s quick to whip up, making it perfect for busy mornings or leisurely family gatherings. Not only does it celebrate the comforting flavors of fall, but this recipe also packs in nutrition, enticing even the pickiest eaters to savor each bite. Are you ready to delight your taste buds with this seasonal favorite?

Why is Pumpkin French Toast a Must-Try?

Cozy Flavor: The delightful combination of pumpkin, cinnamon, and nutmeg will make your taste buds dance with joy during breakfast.

Quick Prep: This recipe comes together in a flash, perfect for those busy mornings when you want something special without the fuss.

Thick Bread: Using thick slices of bread ensures each piece is hearty and holds onto that delicious pumpkin flavor without getting soggy.

Nutritional Boost: Packed with real pumpkin, this dish offers a healthy twist on a breakfast classic, making it a wholesome start to your day.

Crowd-Pleasing Appeal: With its rich flavors and festive charm, this Pumpkin French Toast can easily impress family and friends, perfect for gatherings or cozy brunches.

For more delicious breakfast ideas, check out my recipes for Blueberry French Toast or Creme Brulee French Toast.

Pumpkin French Toast Recipe Ingredients

For the Batter

  • Eggs – Provides structure and richness; substitute with flaxseed meal mixed with water for a vegan option.
  • Milk – Adds moisture and creaminess; use almond or oat milk for a dairy-free alternative.
  • Pumpkin Puree – Imparts pumpkin flavor and moisture; ensure it’s 100% pure pumpkin for the best results.
  • Brown Sugar – Adds sweetness and a hint of caramel flavor; can be substituted with coconut sugar for a less refined option.
  • Vanilla Extract – Enhances the overall flavor; use pure vanilla extract for the best taste.
  • Ground Cinnamon – Offers warmth and spice; feel free to add nutmeg for extra depth.
  • Pumpkin Pie Spice – Provides a blend of traditional pumpkin spices; a mix of cinnamon, nutmeg, and clove can be a great substitution.
  • Kosher Salt – Balances sweetness and enhances flavors; regular salt can be used but decrease the amount slightly.

For the Bread

  • Bread – Thick sliced wheat or white bread for texture; opt for challah or brioche for a richer flavor.
  • Butter – Used for greasing the griddle; coconut oil is a great dairy-free alternative.

For Serving

  • Maple Syrup – Serves as a natural sweetener; honey or agave syrup can work as delicious alternatives.

This Pumpkin French Toast Recipe is sure to warm you up on those chilly fall mornings!

Step‑by‑Step Instructions for Pumpkin French Toast Recipe

Step 1: Preheat the Griddle
Begin by preheating your non-stick griddle to 325°F (160°C). This temperature is perfect for achieving a golden, crispy exterior while keeping the inside fluffy. Make sure to allow the griddle enough time to heat thoroughly; you can test if it’s ready by sprinkling a few drops of water on it—if they sizzle, you’re all set!

Step 2: Whisk the Batter
In a large mixing bowl, combine the eggs, milk, pumpkin puree, brown sugar, vanilla extract, ground cinnamon, pumpkin pie spice, and kosher salt. Whisk these ingredients together until you achieve a smooth, uniform batter. The pumpkin French toast mixture should have a vibrant color and inviting aroma, hinting at the delicious breakfast to come.

Step 3: Prepare the Griddle
Once your griddle is preheated, add a generous pat of butter, allowing it to melt and coat the surface evenly. This step is crucial as it prevents sticking and enhances the overall flavor of the pumpkin French toast. As the butter melts, you’ll notice a delightful sizzle, signaling that your griddle is ready for the bread.

Step 4: Dip the Bread
Take your thick-sliced bread and dip each slice into the pumpkin batter mixture, ensuring they are fully submerged. Allow any excess batter to drip off before placing them onto the griddle. For even cooking, don’t overcrowd the griddle—consider cooking in batches if needed. The bread should soak up the mixture beautifully, with a rich color developing.

Step 5: Cook Until Golden Brown
Cook each slice of pumpkin French toast for about 3-4 minutes on one side or until they develop a lovely golden-brown hue. You’ll know they’re ready to flip when they release easily from the griddle and have a slight puffed appearance. Carefully turn the slices over and allow them to cook for an additional 3-4 minutes on the other side for that perfectly fluffy texture.

Step 6: Serve with Maple Syrup
Once all slices are cooked, serve your fluffy pumpkin French toast immediately. Top each piece with extra butter and drizzle with warm maple syrup for added sweetness. The combination of the rich pumpkin flavor, warm spices, and sticky syrup creates a cozy breakfast that is perfect for sharing with family.

Tips for the Best Pumpkin French Toast

  • Use Thick Bread: Choose thick slices of bread like challah or brioche; they absorb the pumpkin batter without becoming soggy, ensuring the perfect texture.

  • Whisk Well: Make sure to whisk the batter thoroughly to combine all ingredients evenly. This will help in achieving a fluffy pumpkin French toast.

  • Control Griddle Temperature: Maintain the griddle at 325°F for optimal cooking; too hot can burn the outside before the inside cooks through adequately.

  • Avoid Overcrowding: Cook in batches if necessary. Overcrowding the griddle can lower the temperature and prevent the French toast from achieving that golden crisp.

  • Keep Them Warm: If making multiple batches, keep cooked slices warm in a low oven (around 200°F) while finishing the rest; this keeps them fluffy and ready to serve.

  • Serve Fresh: For the best experience, serve your pumpkin French toast immediately with warm maple syrup. It allows the flavors to shine and keeps each bite deliciously cozy.

Pumpkin French Toast Recipe Variations

Feel free to let your creativity shine with these delightful twists that will elevate your Pumpkin French Toast to new heights!

  • Vegan-Friendly: Substitute eggs with flaxseed meal mixed with water and use almond milk for a creamy, plant-based delight. It’s remarkably tasty and just keeps that seasonal flavor.

  • Dairy-Free Delight: Try using oat milk instead of dairy milk and vegan butter for a completely dairy-free breakfast that doesn’t skimp on taste or texture. You may even discover a new favorite way to enjoy pumpkin!

  • Chocolate Chips: For the sweet tooth, add a handful of chocolate chips to your batter for a fun and indulgent twist. The rich swimming chocolate bits pair excellently with the pumpkin.

  • Maple Infusion: Swap brown sugar for maple syrup in the mixture for a smooth, rich sweetness that truly enhances the flavor. This will create a lovely caramelized crust, too!

  • Spice Up the Flavor: Consider adding a pinch of nutmeg or a dash of allspice for extra warmth in your batter. It brings more complexity to the blend and elevates the cozy feel of this dish.

  • Crunchy Topping: After cooking, top with a sprinkle of granola or toasted pecans for a delightful crunch that adds texture and makes each bite even more satisfying.

  • Festive Garnishes: Elevate your serving by topping with whipped cream, a dusting of powdered sugar, and a sprinkle of nutmeg for an inviting presentation. It looks just as good as it tastes!

  • Fruit Toppers: Serve with fresh apple or pear slices sautéed in butter and cinnamon for a wholesome and fruity addition that bridges perfectly with the pumpkin theme.

These variations will transform your Pumpkin French Toast into a vibrant, customizable dish that suits any taste or dietary preference! For a comforting side dish, why not give the savory goodness of Mexican Taco Soup a try? Or, if you’re feeling adventurous, pair it with the unique flavors of Joumou Haitian Pumpkin Soup. Enjoy!

What to Serve with Fluffy Pumpkin French Toast

As you gather around the table for a cozy breakfast, the delightful aroma of pumpkin and spices fills the air, inviting everyone to dig in.

  • Maple Glazed Bacon: The smoky, sweet flavor of maple bacon pairs beautifully with the rich pumpkin, creating a delightful contrast in every bite. It’s the perfect protein boost to start your day!

  • Scrambled Eggs: Fluffy eggs add a creamy texture, bringing balance to the meal, while also providing additional protein. The mild flavor complements the spices in the French toast without overpowering them.

  • Fresh Fruit Medley: A bright mix of berries and slices of orange offers a refreshing pop of color and acidity, cleansing the palate between bites of indulgent French toast. Berries help light up your morning with antioxidants too!

  • Whipped Cream: A dollop of light, airy whipped cream on top takes your Pumpkin French Toast to a whole new level of decadence. This adds sweetness and a creamy element, perfect for a festive breakfast treat.

  • Hot Apple Cider: Sip on warm apple cider infused with cinnamon and cloves for a cozy drink that harmonizes with the fall flavors in your Pumpkin French Toast. It’s an autumnal hug in a cup!

  • Cinnamon Sugar Doughnuts: These delightful mini treats add sweetness and an extra crunch to your breakfast spread. The warm spices echo those in the French toast, creating a cohesive, indulgent experience.

Each of these pairings enhances the magical experience of feasting on Fluffy Pumpkin French Toast, turning your breakfast into a treasured gathering.

How to Store and Freeze Pumpkin French Toast

Room Temperature: Serve your pumpkin French toast fresh for the best taste. However, if you have leftovers, they can be kept at room temperature for up to 2 hours.

Fridge: Store cooled pumpkin French toast in an airtight container in the refrigerator for up to 2 days. Reheat in a toaster or microwave before serving.

Freezer: For longer storage, freeze individual slices by wrapping them tightly in plastic wrap, then placing them in a freezer-safe bag. They can last up to 2 months.

Reheating: To enjoy frozen slices, thaw overnight in the fridge and reheat in a toaster or on the stovetop for that fluffy, comforting texture all over again!

Make Ahead Options

These Pumpkin French Toast Recipes are perfect for meal prep enthusiasts! You can whisk together the batter (eggs, milk, pumpkin puree, and spices) and refrigerate it for up to 24 hours. This allows the flavors to meld beautifully and saves time on busy mornings. Additionally, you can slice and prepare the bread in advance; store them in an airtight container to maintain their freshness. When you’re ready to serve, simply reheat the batter slightly, dip the bread, and cook on a griddle until golden brown. Following these steps ensures you’ll enjoy this seasonal breakfast treat just as delicious as if it were freshly made!

Pumpkin French Toast Recipe FAQs

What type of bread is best for pumpkin French toast?
Absolutely! Thick-sliced bread options like challah, brioche, or even Texas toast are ideal. They absorb the pumpkin batter beautifully without turning soggy, ensuring a heartier texture.

How should I store leftover pumpkin French toast?
You can store cooled pumpkin French toast in an airtight container in the refrigerator for up to 2 days. Reheat slices in a toaster or on the stovetop for the best flavor and texture before serving again.

Can I freeze pumpkin French toast?
Yes! To freeze, wrap individual slices tightly in plastic wrap and place them in a freezer-safe bag. They can last up to 2 months in the freezer. When you’re ready to enjoy them, thaw overnight in the fridge and reheat in a toaster or on the stovetop.

What should I do if my French toast turns out soggy?
If your pumpkin French toast is soggy, it might be due to using regular bread or not allowing enough time for the batter to soak in properly. I recommend using thick bread, and ensure you don’t dip the bread too long in the batter—just enough to coat it. Cook on a preheated griddle to achieve that desired fluffy texture.

Are there any dietary considerations for this recipe?
Absolutely! If you’re looking for a dairy-free alternative, simply use almond milk or oat milk instead of regular milk, and swap butter for coconut oil. For a vegan version, replace the eggs with 1 tablespoon of flaxseed meal mixed with 2.5 tablespoons of water for each egg. Also, check the labels on your maple syrup for any hidden allergens!

Can I add other flavorings or ingredients to the batter?
Very! Feel free to customize the batter by adding a pinch of nutmeg or even chocolate chips for a sweeter version. Just remember to balance out the sweetness to enhance the overall flavor of your pumpkin French toast. Explore and enjoy!

Pumpkin French Toast Recipe

Delicious Pumpkin French Toast Recipe for Cozy Mornings

This Pumpkin French Toast Recipe offers a cozy breakfast experience with rich pumpkin flavors and warm spices.
Prep Time 10 minutes
Cook Time 15 minutes
Total Time 25 minutes
Servings: 4 slices
Course: Breakfast
Cuisine: American
Calories: 300

Ingredients
  

For the Batter
  • 2 large Eggs Substitute with flaxseed meal mixed with water for a vegan option.
  • 1 cup Milk Use almond or oat milk for a dairy-free alternative.
  • 1 cup Pumpkin Puree Ensure it’s 100% pure pumpkin.
  • 2 tablespoons Brown Sugar Can be substituted with coconut sugar.
  • 1 teaspoon Vanilla Extract Use pure vanilla extract.
  • 1 teaspoon Ground Cinnamon Feel free to add nutmeg.
  • 1 teaspoon Pumpkin Pie Spice A mix of cinnamon, nutmeg, and clove can be a substitution.
  • 1/4 teaspoon Kosher Salt Regular salt can be used.
For the Bread
  • 8 slices Bread Thick sliced wheat or white bread; challah or brioche for richer flavor.
  • 2 tablespoons Butter Coconut oil is a great dairy-free alternative.
For Serving
  • 1/4 cup Maple Syrup Honey or agave syrup can work as alternatives.

Equipment

  • non-stick griddle
  • Mixing Bowl

Method
 

Step‑by‑Step Instructions for Pumpkin French Toast Recipe
  1. Preheat your non-stick griddle to 325°F (160°C). Allow the griddle to heat thoroughly.
  2. In a large mixing bowl, combine the eggs, milk, pumpkin puree, brown sugar, vanilla extract, ground cinnamon, pumpkin pie spice, and kosher salt. Whisk until smooth.
  3. Add butter to the preheated griddle, allowing it to melt and coat the surface evenly.
  4. Dip thick slices of bread into the pumpkin batter, ensuring they are fully submerged before placing on the griddle.
  5. Cook each slice for about 3-4 minutes on one side until golden brown, then flip and cook for another 3-4 minutes.
  6. Serve immediately with extra butter and warm maple syrup.

Nutrition

Serving: 1sliceCalories: 300kcalCarbohydrates: 45gProtein: 8gFat: 10gSaturated Fat: 5gPolyunsaturated Fat: 0.5gMonounsaturated Fat: 3gCholesterol: 50mgSodium: 350mgPotassium: 150mgFiber: 2gSugar: 10gVitamin A: 5000IUVitamin C: 2mgCalcium: 150mgIron: 2mg

Notes

For best taste, serve fresh with warm maple syrup. Store leftovers in an airtight container in the fridge for up to 2 days.

Tried this recipe?

Let us know how it was!

Chewy Pumpkin Snickerdoodle Cookies That Feel Like Fall

As the first hints of autumn arrive, the scent of cinnamon and nutmeg fills the air, whisking me back to warm memories of cozy kitchens and laughter. That’s the magic of these Chewy Pumpkin Snickerdoodle Cookies! With their gooey centers surrounded by crispy edges, they are an effortless treat that captures the essence of fall flavors. No need to chill the dough—this simple recipe makes it easy for anyone to whip up a batch in no time, inviting friends and family to indulge in homemade goodness. Plus, they’re a delightful crowd-pleaser, perfect for gatherings or simple afternoons with tea. I can’t wait for you to discover how these pumpkin-infused snickerdoodles can elevate your baking game! Are you ready to fill your kitchen with cozy autumn vibes?

Why Are These Cookies a Must-Bake?

Warm, Cozy Flavors: The blend of pumpkin spice and nutty brown butter makes each bite a comforting delight.
No Chill Needed: Whip up these cookies without the wait! This recipe saves you time while still delivering on texture and flavor.
Chewy Perfection: With crispy edges and gooey centers, they offer a delightful contrast that keeps you coming back for more.
Crowd-Pleasing Treat: Perfect for gatherings, these cookies are sure to impress your friends and family—just like our Blueberry Breakfast Cookies or the rich flavors of Joumou Haitian Pumpkin Soup.
Versatile Sweetness: Feel free to add your favorite mix-ins or spices for a personal touch—think chocolate chips or nuts!
Simple Ingredients: Using common pantry staples means you can bake these cookies anytime the craving strikes.

Chewy Pumpkin Snickerdoodle Cookies Ingredients

  • For the Cookie Dough

  • Unsalted Butter – Adds richness and flavor; make sure it’s browned for a nutty taste.

  • Libby’s Pumpkin Puree – Provides moisture and that delightful pumpkin flavor; use only Libby’s for consistent results.

  • Granulated Sugar – Sweetens the cookies while contributing to their texture.

  • Dark Brown Sugar – Enhances chewiness with its molasses content; light brown sugar works as a substitute if needed.

  • Egg Yolks – Adds richness and keeps the cookies from turning cakey, ensuring gooey centers.

  • Vanilla Extract – Boosts the overall flavor profile of the cookies.

  • All-Purpose Flour – The main structure of the cookies; accurate measuring is key to perfect results.

  • Pumpkin Spice – Introduces that warm, spiced flavor we crave in fall; feel free to use homemade or store-bought.

  • Baking Soda – Helps the cookies puff ever so slightly for the ideal texture.

  • Cream of Tartar – Stabilizes the dough and enhances the cookies’ chewy texture.

  • Kosher Salt – Balances the sweetness and elevates flavor.

  • For the Topping

  • Granulated Sugar & Ground Cinnamon – Create that classic snickerdoodle exterior; mix them together for rolling the cookie dough.

These Chewy Pumpkin Snickerdoodle Cookies are a simple yet irresistible way to embrace the flavors of fall!

Step‑by‑Step Instructions for Chewy Pumpkin Snickerdoodle Cookies

Step 1: Preheat the Oven
Begin by preheating your oven to 350°F (180°C) while you prepare your baking trays. Line two baking sheets with parchment paper, providing a non-stick surface for your cookies. This step is crucial for ensuring an even bake, so don’t skip it!

Step 2: Brown the Butter
In a stainless steel pan, melt the unsalted butter over medium heat, stirring frequently. Cook until the butter turns golden and emits a nutty aroma, approximately 5-7 minutes. Once browned, transfer it to a bowl and let it cool until it reaches 70-75°F. This step adds rich flavor to your Chewy Pumpkin Snickerdoodle Cookies.

Step 3: Prepare the Pumpkin
While the butter cools, drain the excess moisture from the Libby’s pumpkin puree using paper towels. This helps avoid overly wet dough. Gently press the towels into the pumpkin until no more liquid seeps out. A dry pumpkin puree ensures that your cookies maintain their perfect chewy texture.

Step 4: Combine Sugars and Butter
In a large mixing bowl, whisk the cooled brown butter with granulated sugar and dark brown sugar until it takes on a sandy texture. This should take about 1-2 minutes of whisking. The combination of these sugars will create the perfect base for your chewy cookies.

Step 5: Add Wet Ingredients
Next, add in the egg yolks, vanilla extract, and your prepared pumpkin puree. Blend these ingredients together until just combined. The mixture should remain relatively thick but cohesive, ensuring your Chewy Pumpkin Snickerdoodle Cookies have a delightful gooey center.

Step 6: Incorporate Dry Ingredients
Gently fold in the all-purpose flour, pumpkin spice, kosher salt, cream of tartar, and baking soda. Mix until the ingredients are completely incorporated; avoid overmixing. You’ll know it’s ready when no dry flour is visible, and the dough is thick and slightly sticky.

Step 7: Shape the Cookies
Using a cookie scoop, form the dough into balls and generously roll each ball in a mixture of granulated sugar and ground cinnamon. Place them spaced evenly on your prepared baking sheets to allow for spreading during baking. This step creates the classic snickerdoodle exterior that’s both flavorful and visually appealing.

Step 8: Bake the Cookies
Now, pop the trays into your preheated oven and bake for 10-12 minutes. Look for the edges to turn a beautiful golden brown and the centers to puff up. Don’t worry if they look slightly underbaked; they will continue to set as they cool.

Step 9: Cool and Enjoy
Once baked, remove the cookies from the oven and let them cool on the trays for about 5 minutes. Then, transfer them to wire racks to cool completely. This final step is essential as it enhances the chewy texture of your Chewy Pumpkin Snickerdoodle Cookies, making them irresistible!

Make Ahead Options

These Chewy Pumpkin Snickerdoodle Cookies are perfect for meal prep enthusiasts! You can prepare the cookie dough and refrigerate it for up to 24 hours to save time on busy baking days. Simply scoop the dough into balls, roll them in the cinnamon-sugar mixture, and store them lined on a parchment-lined baking tray. When you’re ready to bake, if the dough has been in the fridge overnight, let it sit at room temperature for about 10 minutes before placing it in the preheated oven. This ensures that your cookies bake evenly and retain that irresistible chewy texture, making homemade baking a breeze!

Chewy Pumpkin Snickerdoodle Cookies Variations

Feel free to make these cozy cookies uniquely yours by trying some delightful twists!

  • Light Brown Sugar: Substitute dark brown sugar with light for a milder sweetness in your cookies.
  • Nutty Add-In: Toss in chopped walnuts or pecans for a lovely crunch and nutty flavor that complements pumpkin!
  • Spicy Kick: Amp up the flavor by adding a pinch of cayenne or ground ginger, introducing a warm, spicy element.
  • Choco-Lover’s Dream: Mix in semi-sweet or dark chocolate chips for a deliciously rich contrast to the pumpkin spice. It’s a match made in dessert heaven!
  • Shorter Baking Time: For mini cookies, use a standard scoop and reduce the baking time to 9 minutes. You’ll have bite-sized treats the whole family will love!
  • Gluten-Free Option: Swap all-purpose flour for a gluten-free blend, ensuring the ratios stay consistent for texture and moisture.
  • Cinnamon-Maple Sugar: Replace the rolling sugar with a mix of cinnamon and maple sugar for a uniquely sweet twist that enhances the fall vibe.
  • Pumpkin Spice Blend: Try using varying amounts of nutmeg or cardamom in your pumpkin spice for a unique touch, introducing new flavors into your snickerdoodles.

These variations can bring new life to your baking. Looking for more sweet options? You might enjoy our Blueberry Breakfast Cookies or try the rich flavors of our Joumou Haitian Pumpkin Soup! Happy baking!

Expert Tips for Chewy Pumpkin Snickerdoodle Cookies

  • Measuring Flour Correctly: Don’t scoop directly from the bag; use the spoon-and-level method to avoid excess flour, which can lead to dry cookies.
  • Cool Brown Butter: Allow the butter to cool completely to achieve that delightful chewiness; melted butter can make your cookies oily and flat.
  • Squeeze Out Liquid: Always drain excess moisture from the pumpkin puree. Too much liquid can prevent your cookies from rising properly, resulting in flatness.
  • Baking Sheet Space: Bake one tray at a time in the center of the oven to ensure even baking—this keeps your Chewy Pumpkin Snickerdoodle Cookies light and fluffy.
  • Adjust Baking Time: Keep an eye on your cookies as ovens vary; pulling them out when they’re slightly underbaked ensures a gooey center that complements the chewy edges!

How to Store and Freeze Chewy Pumpkin Snickerdoodle Cookies

Room Temperature: Keep your cookies in an airtight container at room temperature for up to 3 days. This helps maintain their chewy texture while keeping them fresh!

Fridge: If you prefer to enjoy them chilled, store cookies in the fridge for up to 5 days in a sealed container. Bring them to room temperature before serving for the best flavor.

Freezer: For longer storage, freeze cookie dough balls in a single layer on a baking sheet, then transfer to a zip-top bag for up to 2 months. Bake directly from the freezer, adding an extra minute or two to the baking time.

Reheating: To revive any leftovers, pop cookies in the microwave for 10-15 seconds, making them warm and gooey again—just like fresh Chewy Pumpkin Snickerdoodle Cookies!

What to Serve with Chewy Pumpkin Snickerdoodle Cookies

As the aroma of freshly baked cookies fills your kitchen, it’s time to think about the delightful companions that will elevate your autumn treats.

  • Warm Apple Cider: The sweet, spiced warmth of apple cider beautifully complements the cookies, creating an overall cozy experience.
  • Pumpkin Spice Latte: With hints of coffee and spices, this iconic fall beverage pairs perfectly with the chewy pumpkin snickerdoodle cookies.
  • Vanilla Ice Cream: A scoop of creamy vanilla ice cream draped alongside the cookies creates a delightful contrast of temperatures and textures.
  • Chocolate-Dipped Pretzels: Salty and sweet, these crunchy snacks add a satisfying crunch and an unexpected twist to your autumn spread.
  • Spiced Nuts: A mix of roasted nuts seasoned with cinnamon and nutmeg echoes the warm flavors in the cookies while adding a delightful crunch.
  • Cheese Platter: A selection of creamy cheeses balances the sweetness of the cookies, making for a sophisticated pairing for more refined palates.
  • Caramel Sauce: Drizzling caramel sauce over your cookies takes indulgence to the next level, offering a luxurious touch to your homemade treats.
  • Fresh Fruit Salad: Bright, juicy seasonal fruits such as pears and apples refresh the palate and complement the warm flavors of the cookies.
  • Chai Tea: The bold spices in chai tea harmonize nicely with the pumpkin spice flavors, making for a relaxing drink to enhance your cookie experience.

Chewy Pumpkin Snickerdoodle Cookies Recipe FAQs

What’s the best way to select ripe pumpkin for the cookies?
Absolutely! For this recipe, I recommend using Libby’s Pumpkin Puree, as its consistency and flavor are perfect for achieving that gooey center. If you’re using fresh pumpkin, look for varieties such as Sugar Pie or Little Lucy, which are sweeter and have a smooth texture. Avoid pumpkins with dark spots or blemishes, as these can indicate overripeness.

How should I store the Chewy Pumpkin Snickerdoodle Cookies?
For optimal freshness, store your cookies in an airtight container at room temperature for up to 3 days. If you want to enjoy them longer, consider refrigerating them in a sealed container for up to 5 days. Make sure to let them come to room temperature before indulging for the best flavor.

Can I freeze leftover cookie dough?
Certainly! To freeze the dough, scoop it into balls and place them on a baking sheet in a single layer. Freeze the balls for about 1-2 hours, then transfer them to a zip-top bag and store them for up to 2 months. When you’re ready to bake, simply add an extra minute or two to the baking time, and enjoy those freshly baked Chewy Pumpkin Snickerdoodle Cookies!

Why are my cookies not turning out chewy?
Very often, this issue arises from two main factors. First, ensure you’re measuring flour correctly using the spoon-and-level method to avoid excess flour which can dry out the cookies. Second, remember to cool your brown butter properly before mixing it in. If it’s too warm, it can lead to a flat, oily cookie rather than the desired chewy texture.

Are there any allergy considerations I should keep in mind?
Yes! If you’re baking for someone with allergies, check the ingredient labels closely. Common allergens in this recipe include eggs and wheat (in the flour). For egg alternatives, you can use a flax egg made with 1 tablespoon of flaxseed meal mixed with 2.5 tablespoons of water. This helps achieve a similar texture while accommodating those with egg allergies.

How can I tell when the cookies are done baking?
The key is to look for the edges to turn a golden brown color, while the centers should still look slightly puffy and not fully set. This usually takes about 10-12 minutes. Don’t worry if they look a bit underbaked—they’ll continue to firm up while cooling!

Chewy Pumpkin Snickerdoodle Cookies

Chewy Pumpkin Snickerdoodle Cookies That Feel Like Fall

These Chewy Pumpkin Snickerdoodle Cookies are a delightful fall treat with cozy flavors and gooey centers.
Prep Time 30 minutes
Cook Time 12 minutes
Cooling Time 5 minutes
Total Time 47 minutes
Servings: 24 cookies
Course: Dessert
Cuisine: American
Calories: 150

Ingredients
  

For the Cookie Dough
  • 1 cup Unsalted Butter brown for a nutty taste
  • 1 cup Libby’s Pumpkin Puree use for consistency
  • 1 cup Granulated Sugar
  • 1 cup Dark Brown Sugar light brown sugar can be substituted
  • 2 large Egg Yolks
  • 1 teaspoon Vanilla Extract
  • 2 cups All-Purpose Flour accurate measuring is key
  • 1 teaspoon Pumpkin Spice homemade or store-bought
  • 1 teaspoon Baking Soda
  • 1 teaspoon Cream of Tartar
  • 1/2 teaspoon Kosher Salt
For the Topping
  • 1/4 cup Granulated Sugar
  • 1 tablespoon Ground Cinnamon

Equipment

  • Mixing Bowl
  • Baking Sheet
  • Parchment Paper
  • Cookie Scoop
  • whisk
  • pan

Method
 

Step-by-Step Instructions
  1. Preheat your oven to 350°F (180°C) and line two baking sheets with parchment paper.
  2. Melt the unsalted butter in a stainless steel pan over medium heat until golden and nutty, about 5-7 minutes.
  3. Drain excess moisture from the Libby’s pumpkin puree using paper towels.
  4. In a large mixing bowl, whisk the cooled brown butter with granulated sugar and dark brown sugar until sandy.
  5. Add the egg yolks, vanilla extract, and prepared pumpkin puree; mix until just combined.
  6. Gently fold in the all-purpose flour, pumpkin spice, kosher salt, cream of tartar, and baking soda until no dry flour is visible.
  7. Shape the dough into balls and roll each one in a mixture of granulated sugar and ground cinnamon.
  8. Place the cookies spaced evenly on the baking sheets.
  9. Bake for 10-12 minutes until edges are golden brown and centers are puffy. Let them cool on trays for about 5 minutes.
  10. Transfer to wire racks to cool completely.

Nutrition

Serving: 1cookieCalories: 150kcalCarbohydrates: 20gProtein: 1gFat: 7gSaturated Fat: 4gMonounsaturated Fat: 2gCholesterol: 25mgSodium: 40mgPotassium: 60mgSugar: 10gVitamin A: 500IUVitamin C: 1mgCalcium: 10mgIron: 0.5mg

Notes

These cookies can be stored at room temperature in an airtight container for up to 3 days. For longer storage, freeze cookie dough balls for up to 2 months and bake directly from the freezer.

Tried this recipe?

Let us know how it was!

Vampire White Chai Hot Chocolate: A Spooky Sipping Delight

As the chill of autumn creeps in, I find myself daydreaming about cozy evenings filled with the scent of spices and sweet treats. Enter the Vampire White Chai Hot Chocolate—a whimsical concoction that’s not only a delight for your taste buds but also a feast for the eyes! This creamy drink combines the aromatic warmth of chai with the rich taste of white chocolate, all brought to life with a playful swirl of berry syrup. It’s super easy to whip up, making it perfect for a quick Halloween gathering or a quiet night of indulgence. Plus, with dairy-free options available, you can enjoy this comforting treat without any worries. So, are you ready to make your Halloween a little more deliciously spooky?

Why is this Vampire White Chai Hot Chocolate a must-try?

Whimsical Presentation: The festive garnish of vampire teeth adds a fun twist, making it a hit at Halloween parties.

Fruity Delight: The blend of reviews frozen berries with creamy white chocolate offers a unique, delicious contrast that excites your palate.

Quick and Easy: With simple steps and few ingredients, this recipe is perfect for beginners or for those tight on time—ideal for spontaneous gatherings!

Customizable: Make it your own by experimenting with different chai flavors or toppings, just like with my popular Chocolate Fudge Cupcakes which allow for delightful variations.

Dairy-Free Option: Using cashew milk means everyone can indulge without worry, perfect for lactose-intolerant friends or those seeking plant-based alternatives.

So grab your mug, and let’s bring a little magic to your taste buds this Halloween!

Vampire White Chai Hot Chocolate Ingredients

For the Berry Syrup
Frozen Strawberries or Raspberries – Adds natural sweetness and a fruity flavor; substitute any berry, though fresh might take longer to break down.

For the Chai
Full Leaf Tea Co. Organic White Chai – Provides aromatic chai spice with subtle creaminess; ensure a good quality chai for the best flavor.
Cashew Milk – Acts as the base liquid for creaminess and is dairy-free; any milk like almond or oat can work as a substitute.

For the Hot Chocolate
White Chocolate – Adds richness and sweetness; opt for dairy-free white chocolate for a vegan version.

For the Topping
Whipped Cream – Perfect for a creamy finish; coconut whipped cream is a great dairy-free alternative.
Costume Vampire Teeth – Fun garnish for an extra spooky touch; while optional, they greatly enhance the Halloween theme.

Enjoy bringing the magic of this Vampire White Chai Hot Chocolate to life—it’s sure to be a hit!

Step‑by‑Step Instructions for Vampire White Chai Hot Chocolate

Step 1: Prepare the Berry Syrup
In a medium saucepan over low heat, combine your frozen strawberries or raspberries. Cover the saucepan and let the berries thaw for about 5–7 minutes, stirring occasionally until they become soft and juicy, resembling a chunky sauce. This berry syrup will be a deliciously sweet element in your Vampire White Chai Hot Chocolate.

Step 2: Strain the Berry Mixture
Once the berries are softened, use a spoon to gently smash them against the sides of the saucepan for a minute. Then, place a fine mesh sieve over a bowl and pour the smashed berries through it to separate the syrup from any seeds and pulp. Set the berry syrup aside; this visually vibrant component will enhance both the color and flavor of your hot chocolate.

Step 3: Heat the Cashew Milk
In a separate small saucepan, pour in your cashew milk and heat it over low-medium heat. Stir gently and keep an eye on it as it warms, allowing it to simmer without boiling for about 5 minutes. Once it reaches a simmer, you’ll notice a comforting aroma that signals it’s ready for the chai leaves to infuse their flavors.

Step 4: Steep the Chai Leaves
Add the Full Leaf Tea Co. Organic White Chai into the simmering cashew milk. Let the chai steep for 10 minutes, swirling occasionally to help release the spices and create a beautifully aromatic blend. Your kitchen will start to smell like a cozy chai shop, promising a delightful warmth in your Vampire White Chai Hot Chocolate.

Step 5: Combine Milk and White Chocolate
After steeping, carefully strain the tea leaves through a fine mesh sieve to remove them from the cashew milk. Return the strained milk to the saucepan over low heat, and stir in your white chocolate pieces. Continue stirring until the chocolate is fully melted and seamlessly combined into the creamy chai milk, resulting in a rich and decadent drink.

Step 6: Assemble the Vampire White Chai Hot Chocolate
Divide the warm chai-infused hot chocolate between two glasses, creating a comforting, inviting presentation. Generously spoon whipped cream on top, allowing it to create a fluffy layer that complements the creamy drink. Drizzle your homemade berry syrup over the whipped cream for a vibrant splash of color and added sweetness, creating the perfect spooky aesthetic.

Step 7: Add the Finishing Touch
To bring your Vampire White Chai Hot Chocolate to life, garnish with playful costume vampire teeth nestled atop the whipped cream. This whimsical touch makes it a showstopper at any Halloween gathering. Serve immediately while warm, and revel in the deliciously cozy flavors—it’s the perfect drink to scare away the chill on a spooky autumn night!

Helpful Tricks for Vampire White Chai Hot Chocolate

Steep Properly: Ensure the chai leaves steep for the full 10 minutes to extract maximum flavor, avoiding a watered-down taste.

Don’t Boil Milk: Keep the cashew milk at a simmer—not boiling—if you want a velvety smooth Vampire White Chai Hot Chocolate without curdling.

Berries Matter: Choose ripe, sweet berries for the syrup; taste and adjust sweetness with a bit of honey or agave if needed for a more intense flavor.

Whipped Cream Wisdom: For a dairy-free option, coconut whipped cream works beautifully; it adds a delightful tropical flavor that complements the chai.

Vampire Teeth Fun: Don’t skip on the costume vampire teeth for garnishing—this playful addition enhances the presentation and engages the playful spirit of Halloween!

Variations & Substitutions for Vampire White Chai Hot Chocolate

Feel free to customize your Vampire White Chai Hot Chocolate to suit your taste buds and dietary preferences.

  • Chai Twist: Try using a spiced chai or herbal chai for a different flavor profile. Each chai brings a unique spice to your drink—experiment to find your favorite!

  • Berry Options: Substitute frozen strawberries or raspberries with blueberries or blackberries for a different fruity flavor. This swap can add a delightful depth to the syrup!

  • Nut Milk Variety: If you don’t have cashew milk, almond or oat milk works beautifully as a base, giving your hot chocolate a slightly different but equally creamy texture.

  • White Chocolate Alternative: For vegan-friendly options, use dairy-free white chocolate or even a dark chocolate for a richer flavor. The choice will dramatically change the character of your drink!

  • Topping Variations: Top your drink with a sprinkle of cinnamon or nutmeg for an added spice kick. Complimentary flavors like these can elevate your vampire hot chocolate experience.

  • Layered Dessert: Create a visually stunning treat by layering the berry syrup and hot chocolate in clear glasses. It not only looks enticing but also creates an exciting mix of flavors as you sip!

  • Minty Fresh: Add a splash of peppermint extract to your hot chocolate for a refreshing minty twist that offers a fun contrast to the chai spices.

  • Sweetness Adjustment: Depending on your berry choice and chocolate, you may want to adjust the sweetness. A hint of honey, maple syrup, or agave can enhance the flavors without overpowering them.

For more festive ideas, pair your hot chocolate with my delightful Chocolate Chip Pancakes or treat yourself to a slice of Easter Chocolate Lasagna for a perfectly sweet serving!

What to Serve with Vampire White Chai Hot Chocolate

Cozy up to the warmth of this spooky drink that’ll sweeten your Halloween festivities and fill your home with delightful aromas.

  • Halloween Cookies: These festive treats add to the fun atmosphere and are perfect for dunking into your hot chocolate.

  • S’mores Dip: The gooeyness of melted chocolate and marshmallows pairs beautifully with your creamy chai, offering contrasting textures.

  • Pumpkin Spice Muffins: The warm spices in muffins complement the chai, making for an inviting breakfast or snack option.

  • Spiced Apple Cider: Serve this alongside the hot chocolate for a harmonious blend of flavors that embraces the fall season perfectly.

  • Chocolate-Covered Pretzels: The sweet and salty combo enhances the richness of the hot chocolate, balancing your taste profile delightfully.

  • Coconut Macaroons: Their chewy texture and light sweetness make for a perfect contrast with the lush, creamy drink and add a tropical twist.

With each of these suggestions, you’ll create a delightful spread that celebrates the spirit of Halloween and invites warmth into every sip!

How to Store and Freeze Vampire White Chai Hot Chocolate

  • Fridge: Store any leftover Vampire White Chai Hot Chocolate in an airtight container for up to 3 days. Reheat gently on the stove or in the microwave, stirring well to reincorporate the flavors.

  • Berry Syrup Storage: Keep your leftover berry syrup in a sealed container in the fridge for up to a week. It’s perfect for drizzling over pancakes or adding to other drinks!

  • Freezer: To freeze, pour the excess hot chocolate into ice cube trays. They can be used later to create fun slushy drinks, maintaining their delightful flavor for up to 2 months.

  • Reheating Tips: When reheating from frozen, let the cubes thaw in the fridge overnight, then use a blender to revive the creamy consistency before serving.

Make Ahead Options

These Vampire White Chai Hot Chocolates are perfect for busy home cooks looking to save time! You can prepare the berry syrup and keep it in an airtight container in the refrigerator for up to 3 days, allowing you to have a burst of fruity flavor at your fingertips. Additionally, you can steep your chai in the cashew milk a day in advance and refrigerate it; simply reheat it gently before serving to prevent curdling. When you’re ready to indulge, melt the white chocolate into your warm chai mixture and assemble the drink, topping it with whipped cream and the berry syrup for an enchanting presentation. This way, you’ll enjoy a delightful Halloween treat in no time!

Vampire White Chai Hot Chocolate Recipe FAQs

How do I select the best berries for the syrup?
Absolutely! When choosing your frozen strawberries or raspberries, look for those that appear vibrant and plump, without any dark spots all over the package. I recommend using berries that are sweet and ripe for the best flavor. Slightly thawing them before use can also enhance the sweetness.

How should I store any leftover Vampire White Chai Hot Chocolate?
Very simple! Store your leftover Vampire White Chai Hot Chocolate in an airtight container in the fridge for up to 3 days. When you’re ready to enjoy it again, gently reheat it on the stove over low heat or in the microwave, stirring well to reincorporate all of the delightful flavors.

Can I freeze the hot chocolate for later?
Absolutely! To freeze, pour any excess hot chocolate into ice cube trays. They can keep their delightful flavor for up to 2 months. Later, simply let the cubes thaw in the fridge overnight, then blend them for a refreshing slushy treat!

What if my hot chocolate curdles when I heat it?
Don’t worry, it’s a common issue! To avoid curdling, always heat your cashew milk slowly over low-medium heat and never let it boil. If it does curdle, you can try whisking in a bit more cashew milk while gently reheating it to help smooth it out again.

Is this recipe suitable for those with dairy allergies?
Absolutely! This Vampire White Chai Hot Chocolate is designed to be a dairy-free delight using cashew milk and dairy-free white chocolate. If you’re serving it to guests, it’s always good to double-check any additional toppings like whipped cream, though coconut whipped cream is a fantastic dairy-free alternative!

How long can I keep the berry syrup in the fridge?
Great question! You can store your leftover berry syrup in a sealed container in the fridge for up to a week. It’s not only perfect for your hot chocolate but also delightful drizzled over pancakes, waffles, or mixed into other beverages for added sweetness and flavor!

Vampire White Chai Hot Chocolate

Vampire White Chai Hot Chocolate: A Spooky Sipping Delight

Indulge in the deliciously spooky Vampire White Chai Hot Chocolate—rich white chocolate melds with aromatic chai and a swirl of berry syrup.
Prep Time 10 minutes
Cook Time 15 minutes
Total Time 25 minutes
Servings: 2 glasses
Course: Drinks
Cuisine: American
Calories: 350

Ingredients
  

For the Berry Syrup
  • 1 cup Frozen Strawberries or Raspberries Substitute any berry, fresh may take longer to break down.
For the Chai
  • 2 tablespoons Full Leaf Tea Co. Organic White Chai Use a good quality chai for the best flavor.
  • 2 cups Cashew Milk Dairy-free; any milk like almond or oat can work as substitutes.
For the Hot Chocolate
  • 4 ounces White Chocolate Opt for dairy-free white chocolate for a vegan version.
For the Topping
  • 1 cup Whipped Cream Coconut whipped cream is a great dairy-free alternative.
  • 2 pieces Costume Vampire Teeth Optional but enhances the Halloween theme.

Equipment

  • medium saucepan
  • fine mesh sieve
  • Small saucepan

Method
 

Step-by-Step Instructions
  1. Prepare the Berry Syrup: In a medium saucepan over low heat, combine your frozen strawberries or raspberries. Cover and let thaw for about 5-7 minutes, stirring occasionally until soft and juicy.
  2. Strain the Berry Mixture: Gently smash the thawed berries in the saucepan, then strain through a fine mesh sieve to separate syrup from seeds.
  3. Heat the Cashew Milk: Pour cashew milk into a small saucepan, heat over low-medium until it simmers, about 5 minutes.
  4. Steep the Chai Leaves: Add the chai to the simmering cashew milk and steep for 10 minutes, swirling occasionally.
  5. Combine Milk and White Chocolate: Strain tea leaves from the cashew milk and return the milk to low heat, stir in white chocolate until fully melted.
  6. Assemble the Vampire White Chai Hot Chocolate: Divide hot chocolate into two glasses, top with whipped cream, and drizzle with berry syrup.
  7. Add the Finishing Touch: Garnish with costume vampire teeth atop whipped cream for a playful look.

Nutrition

Serving: 1glassCalories: 350kcalCarbohydrates: 45gProtein: 5gFat: 18gSaturated Fat: 10gPolyunsaturated Fat: 0.5gMonounsaturated Fat: 7gCholesterol: 15mgSodium: 150mgPotassium: 300mgFiber: 2gSugar: 30gVitamin A: 500IUVitamin C: 2mgCalcium: 150mgIron: 0.5mg

Notes

For a dairy-free option, coconut whipped cream works beautifully; it adds a delightful tropical flavor that complements the chai.

Tried this recipe?

Let us know how it was!

Stay Connected

Get recipes via email: