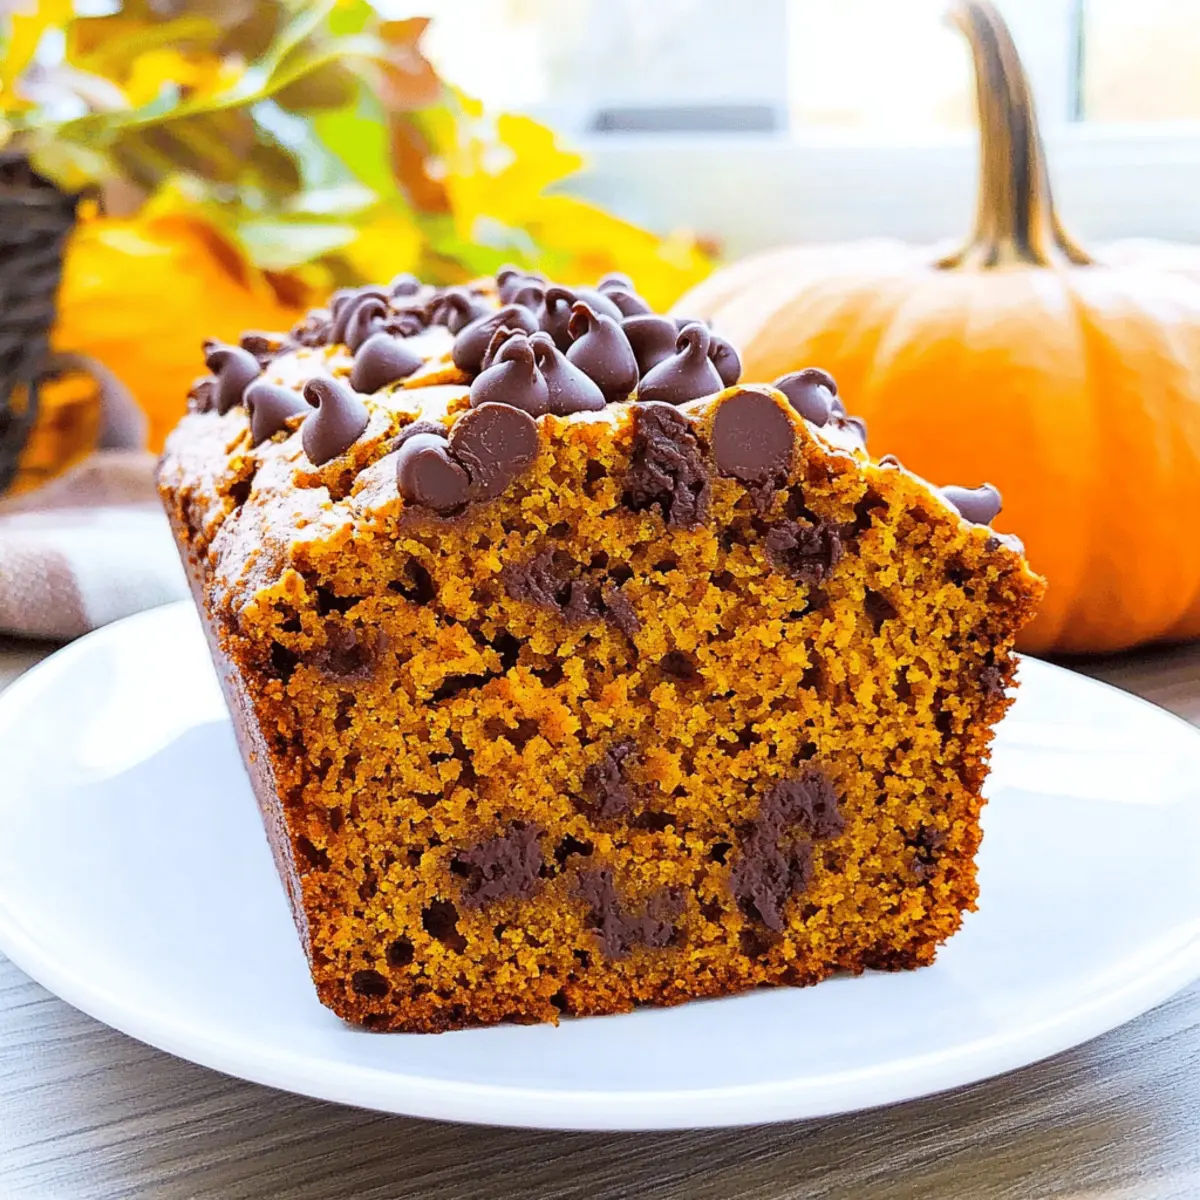
As I lifted the lid on the mixing bowl, a wave of warm spices filled the air, transporting me straight to a cozy autumn kitchen. There’s something incredibly special about homemade Chocolate Chip Pumpkin Bread—it’s not just a delicious treat; it’s the essence of fall captured in each slice. Baked to perfection, this bread is remarkably easy to whip up, making it the ideal companion for busy mornings or festive gatherings. Imagine the delight of serving up moist, tender slices, dotted with melty chocolate chips and infused with cinnamon, cloves, and nutmeg. Whether you’re looking to impress your friends for Thanksgiving or simply want a comforting snack, this recipe offers a delightful escape from the ordinary. Curious how to create this wonderful loaf? Let’s dive in!
Why Is This Pumpkin Bread Special?
Deliciously Unique: This Chocolate Chip Pumpkin Bread combines the warm spices of fall with sweet chocolate, creating a flavor profile that’s both comforting and indulgent.
Quick and Easy: Made with simple ingredients, this recipe requires minimal effort—ideal for both novice bakers and seasoned chefs.
Versatile Options: Want to switch things up? You can easily replace chocolate chips with nuts for a delightful crunch or add mashed banana for a new twist.
Perfect for Sharing: Whether it’s a holiday gathering or a cozy weekend, this bread is a hit among friends and family, making it a must-have in your recipe collection.
Incredible Aroma: The moment you start baking, your kitchen will be filled with the irresistible scent of cinnamon and nutmeg, reminiscent of fall festivities. Enjoy a slice with cream cheese frosting or as an afternoon snack with coffee, you’ll love how it brightens up your day. Check out my Chocolate Fudge Cupcakes for another delightful dessert option!
Chocolate Chip Pumpkin Bread Ingredients
For the Bread
• All-Purpose Flour – Provides structure and texture; swap for whole wheat flour or a gluten-free blend if desired.
• Baking Powder – Acts as a leavening agent to create a light texture.
• Baking Soda – Activates with the acidity from pumpkin, aiding in rising.
• Salt – Enhances overall flavor.
• Ground Cinnamon – Adds warmth and spice; consider using pumpkin pie spice as a convenient substitute.
• Ground Cloves – Imparts a distinct flavor; adjust to your personal taste for a stronger or milder profile.
• Ground Nutmeg – Complements the sweetness and spice; can be omitted or replaced with pumpkin pie spice.
• Cooking Oil – Keeps the bread moist; substitute with melted butter for a richer flavor.
• Large Eggs – Binds ingredients and adds moisture; for a vegan option, use flaxseed eggs.
• Sugar – Sweetens and promotes browning; brown sugar adds a delightful depth of flavor.
• Vanilla Extract – Contributes aromatic sweetness to the loaf.
• Pumpkin Puree – Infuses the bread with its signature flavor and moisture; feel free to use homemade puree if you prefer.
• Chocolate Chips – Adds pockets of sweetness and texture; can be swapped with nuts or dried fruit for variation.
Feel the warmth of fall in every bite with this Chocolate Chip Pumpkin Bread recipe! Enjoy baking!
Step‑by‑Step Instructions for Chocolate Chip Pumpkin Bread
Step 1: Preheat the Oven
Begin by preheating your oven to 350°F (175°C). This ensures that your Chocolate Chip Pumpkin Bread bakes evenly and crisps up nicely on the outside. While the oven warms up, gather your mixing bowls and measuring cups for an organized baking experience.
Step 2: Mix Dry Ingredients
In a large mixing bowl, whisk together 2 cups of all-purpose flour, 1 teaspoon of baking powder, 1 teaspoon of baking soda, 1/2 teaspoon of salt, and your spices: 1 teaspoon of ground cinnamon, 1/4 teaspoon of ground cloves, and 1/4 teaspoon of ground nutmeg. Make sure all the dry ingredients are well combined, as this will help the flavors distribute evenly throughout the Chocolate Chip Pumpkin Bread.
Step 3: Blend Wet Ingredients
In a separate large bowl, combine 1 cup of cooking oil, 2 large eggs, 1 cup of sugar, 1 teaspoon of vanilla extract, and 1 cup of pumpkin puree. Use a whisk to blend the mixture smoothly until it’s creamy and well-integrated. The vibrant orange of the pumpkin should be uniform, ensuring deliciousness in every slice of bread.
Step 4: Combine Mixtures
Gradually fold the dry ingredient mixture into the wet ingredients, stirring gently with a spatula until just combined. Be careful not to overmix; some lumps are perfectly fine. Once blended, gently fold in 1 cup of chocolate chips, ensuring they are evenly distributed throughout the batter for sweet pockets of flavor in your Chocolate Chip Pumpkin Bread.
Step 5: Prepare Bakeware
Prepare an 8″ x 4″ loaf pan by spraying it with cooking oil to prevent sticking. Once coated, pour the batter into the pan, smoothing the top with a spatula for an even surface. For added chocolatey goodness, sprinkle the remaining 1/4 cup of chocolate chips on top, which will create a delightful crust as the bread bakes.
Step 6: Bake the Bread
Carefully place the loaf pan into the preheated oven and bake for 50-60 minutes, or until the top is golden brown and a toothpick inserted in the center comes out clean. This step is crucial for achieving that perfectly moist yet cooked-through Chocolate Chip Pumpkin Bread that everyone loves.
Step 7: Cool the Bread
Once baked, remove the pan from the oven and let it cool in the pan for about 10 minutes. This helps the bread set before transferring it. Afterward, gently run a knife around the edges, and turn the bread out onto a wire rack to cool completely. The warm aroma will fill your kitchen, making it hard to wait to taste this seasonal delight!
How to Store and Freeze Chocolate Chip Pumpkin Bread
Room Temperature: Store the chocolate chip pumpkin bread covered in plastic wrap or in an airtight container for up to 3 days to keep it moist.
Fridge: For extended freshness, refrigerate the bread in an airtight container for up to 1 week. This helps maintain its taste and texture.
Freezer: Wrap individual slices or the whole loaf tightly in plastic wrap, then place it in a freezer bag. Freeze for up to 3 months for optimal flavor.
Reheating: To enjoy, thaw the bread in the fridge overnight, then warm slices in the microwave for 10–15 seconds or in the oven at 350°F (175°C) for 5–10 minutes.
Expert Tips for Chocolate Chip Pumpkin Bread
-
Avoid Overmixing: Stir the batter until just combined to maintain a moist texture. Overmixing can lead to a dense loaf.
-
Perfect Toothpick Test: Insert a toothpick into the center; if it comes out clean or with a few moist crumbs, your Chocolate Chip Pumpkin Bread is perfectly baked.
-
Cool Gradually: Allow the bread to cool in the pan first before transferring it to a wire rack. This helps prevent it from breaking apart.
-
Storage Matters: Keep your bread wrapped in plastic or in an airtight container to maintain freshness. It can stay soft for up to 3 days at room temperature.
-
Try Flavor Variations: For a unique spin, consider swapping chocolate chips for nuts, or adding a mashed banana for extra moisture and flavor in your Chocolate Chip Pumpkin Bread.
Make Ahead Options
These Chocolate Chip Pumpkin Bread loaves are perfect for meal prep enthusiasts! You can mix the dry ingredients up to 3 days in advance, storing them in an airtight container to keep them fresh. The wet ingredients, including the pumpkin puree, can be combined and refrigerated for up to 24 hours, ensuring the flavors meld beautifully. When you’re ready to bake, simply combine the mixtures, fold in the chocolate chips, and pour the batter into your prepared loaf pan. By prepping ahead, you’ll have a delicious, homemade treat ready to bake with minimal effort, making busy weeknights feel special without sacrificing quality!
Chocolate Chip Pumpkin Bread Variations
Feel free to get creative and make this Chocolate Chip Pumpkin Bread your own with these delightful variations!
-
Nutty Crunch: Substitute chocolate chips with chopped walnuts or pecans for a wonderful texture and flavor balance. The nuts add a lovely crunch that complements the softness of the bread.
-
Banana Boost: Fold in 1 cup of mashed ripe banana for a new twist on flavor. This not only adds sweetness but also makes the bread even more moist and luxurious.
-
Pumpkin Pie Spice: Use a store-bought pumpkin pie spice blend instead of measuring out individual spices. This idea simplifies things while delivering a lovely, aromatic essence.
-
Menagerie of Mix-Ins: Combine chocolate chips with dried cranberries or raisins. This gives a delightful sweetness along with chewy fruit textures that brighten up every bite.
-
Double Chocolate Delight: Use both chocolate chips and cocoa powder to deepen the chocolate flavor. This twist turns your bread into a chocolate lover’s dream!
-
A Dash of Heat: Add a pinch of cayenne pepper or some chopped jalapeños for a surprising kick. The heat compliments the sweetness beautifully and will leave your tastebuds buzzing.
-
Nut Butter Swirl: Mix in a few tablespoons of peanut or almond butter for an indulgent treat. When swirled in, it creates luscious pockets of nutty goodness.
-
Cream Cheese Filling: For a decadent treat, incorporate a cream cheese filling in the center by mixing cream cheese with sugar and vanilla. It’s a delicious surprise inside!
Experimenting with these variations can transform the classic Chocolate Chip Pumpkin Bread into something uniquely yours! And if you’re craving more pumpkin goodness, consider trying my Joumou Haitian Pumpkin Soup Recipe or perhaps indulge in some Easter Chocolate Lasagna for dessert!
What to Serve with Best Chocolate Chip Pumpkin Bread
Prepare to elevate your autumn gatherings with delicious pairings that enhance the cozy flavors of this seasonal loaf.
-
Creamy Cinnamon Butter: Add a dollop of this rich spread to your bread for a spiced sweetness that melts beautifully atop warm slices.
-
Maple Glaze: Drizzle this sweet, sticky topping over your pumpkin bread for a delightful contrast that screams autumn indulgence.
-
Hot Apple Cider: The warm spices in cider complement the flavors of the bread, creating a nostalgic, comforting drink pairing for chilly evenings.
-
Whipped Cream Cheese: This tangy creaminess pairs splendidly, cutting through the sweet richness of the bread while enhancing its cozy vibe.
-
Vanilla Ice Cream: Serve alongside a slice for an irresistible treat; the melting ice cream brings a creamy cold contrast that everyone will adore.
-
Chopped Nuts: Sprinkle some toasted walnuts or pecans on top for added crunch; their earthiness perfectly balances the sweetness of the pumpkin and chocolate.
-
Dark Chocolate Ganache: If you’re feeling indulgent, a drizzle of warm ganache will take your pumpkin bread to the next level, elevating its chocolatey goodness.
-
Fresh Fruit Salad: A side of vibrant, seasonal fruits brings freshness and a lighter note, balancing the rich textures of the bread.
-
Herbal Tea: Brew a warm cup of chamomile or chai; their gentle flavors provide a calming backdrop to a slice of this delightful bread.
Embrace the warmth of fall by enjoying these pairings alongside your Chocolate Chip Pumpkin Bread!
Best Chocolate Chip Pumpkin Bread Recipe FAQs
How do I choose the right pumpkin for this recipe?
Absolutely! For the best flavor in your Chocolate Chip Pumpkin Bread, use pure pumpkin puree from small, sugar pumpkins or canned pumpkin puree. Look for a rich, deep orange color without added sugars or spices. Avoid large field pumpkins, as they tend to be watery and bland.
How should I store Chocolate Chip Pumpkin Bread?
To keep your bread fresh, store it wrapped in plastic wrap or in an airtight container at room temperature for up to 3 days. If you want to extend its shelf life, you can refrigerate it for up to a week. Just be sure to wrap it well to prevent it from drying out.
Can I freeze my Chocolate Chip Pumpkin Bread?
Very much so! You can freeze the bread for up to 3 months. To do so, slice the cooled bread and wrap each slice tightly in plastic wrap, then place them in a freezer-safe bag. When you’re ready to enjoy, simply thaw the slices in the refrigerator overnight, and warm them in the microwave or oven to bring back that fresh-baked taste.
What should I do if my chocolate chips sink to the bottom while baking?
Don’t worry! This can happen sometimes. If you find that your chocolate chips are sinking, try tossing them in a bit of flour before folding them into the batter. This will help them stay suspended. Also, remember to mix the batter gently to keep it light and airy.
Is this Chocolate Chip Pumpkin Bread suitable for people with allergies?
Great question! If you have allergies, there are easy substitutions. To make it nut-free, simply use chocolate chips that are also nut-free. For a vegan version, substitute eggs with flaxseed eggs (1 tablespoon of ground flaxseed mixed with 2.5 tablespoons of water per egg) and use a plant-based oil. As for gluten, you can use a gluten-free flour blend instead of all-purpose flour.
How long does the flavor improve after baking?
Fantastic! The flavor of your Chocolate Chip Pumpkin Bread actually improves after a day! If you can resist, let it sit overnight at room temperature, wrapped securely. It allows the spices to meld beautifully, enhancing the overall taste—it’s like giving your bread a little vacation before the grand reveal!
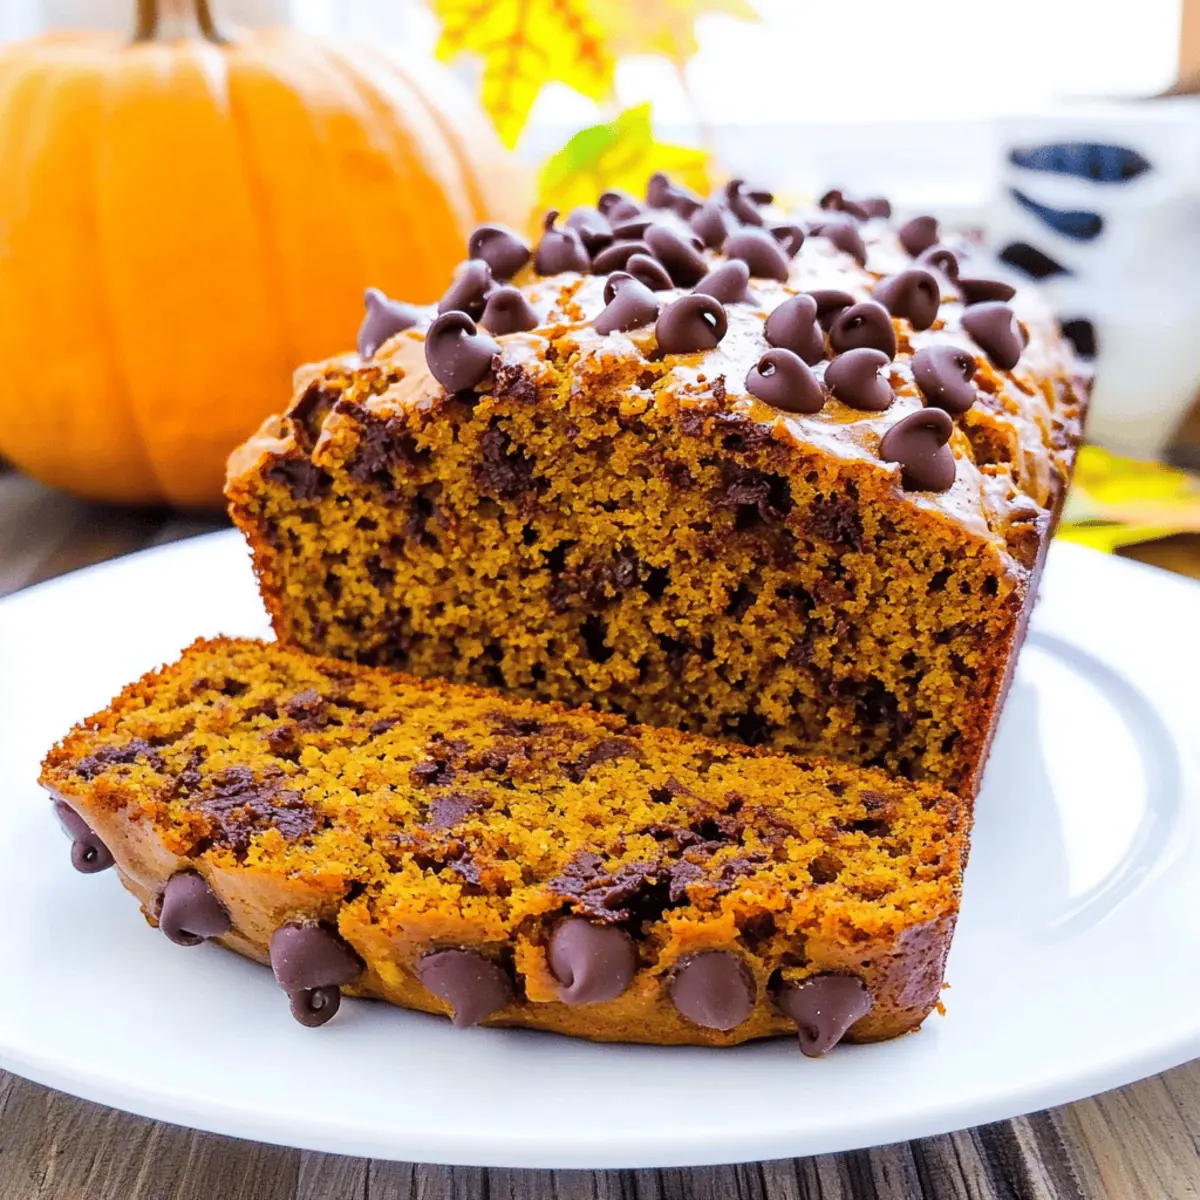
Irresistibly Moist Chocolate Chip Pumpkin Bread Recipe
Ingredients
Equipment
Method
- Preheat your oven to 350°F (175°C). Gather your mixing bowls and measuring cups.
- In a large mixing bowl, whisk together all the dry ingredients.
- Combine the wet ingredients in a separate large bowl and whisk until smooth.
- Gradually fold the dry ingredients into the wet ingredients, then gently fold in the chocolate chips.
- Prepare an 8" x 4" loaf pan by spraying with cooking oil, pour in the batter, and smooth the top.
- Bake for 50-60 minutes or until a toothpick comes out clean.
- Cool in the pan for 10 minutes, then transfer to a wire rack to cool completely.