Get my cookbooks

Easy Eggs Benedict Casserole for the Ultimate Brunch Feast

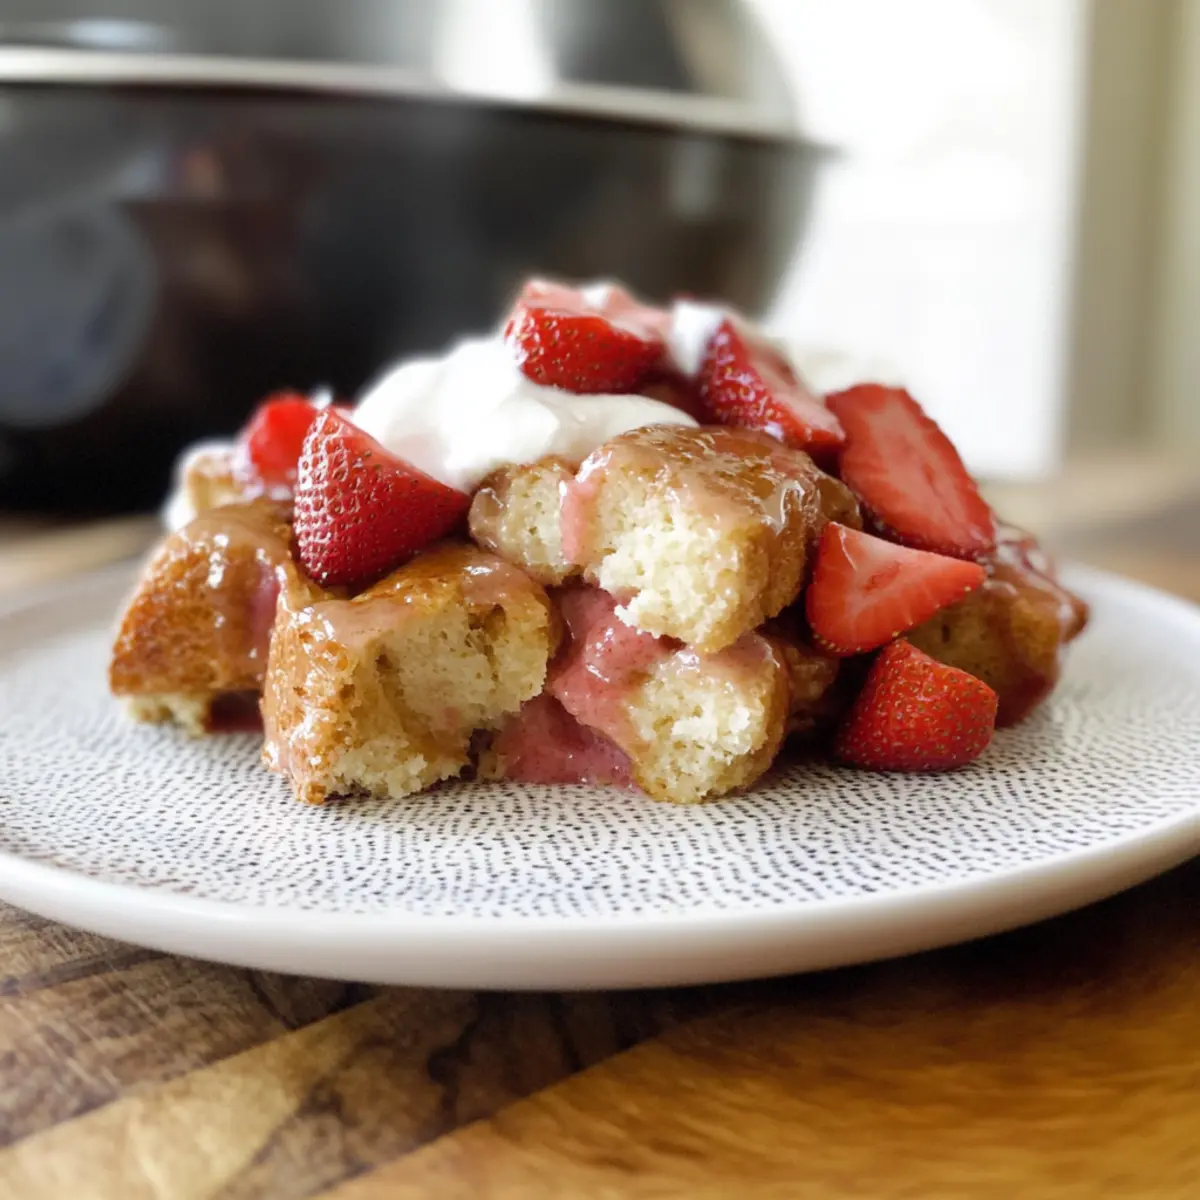
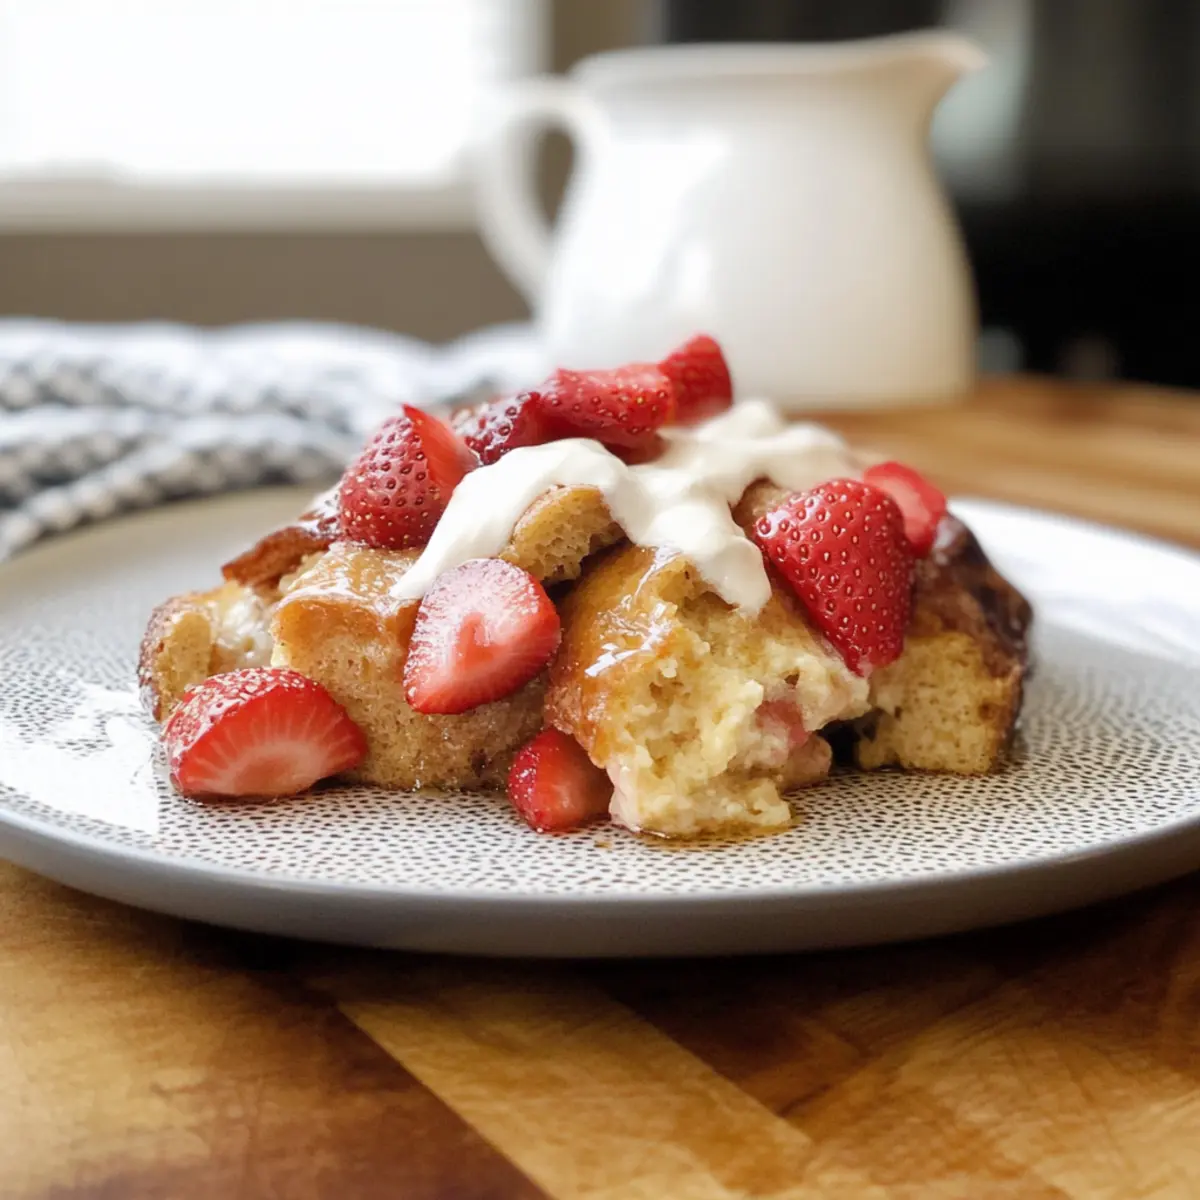
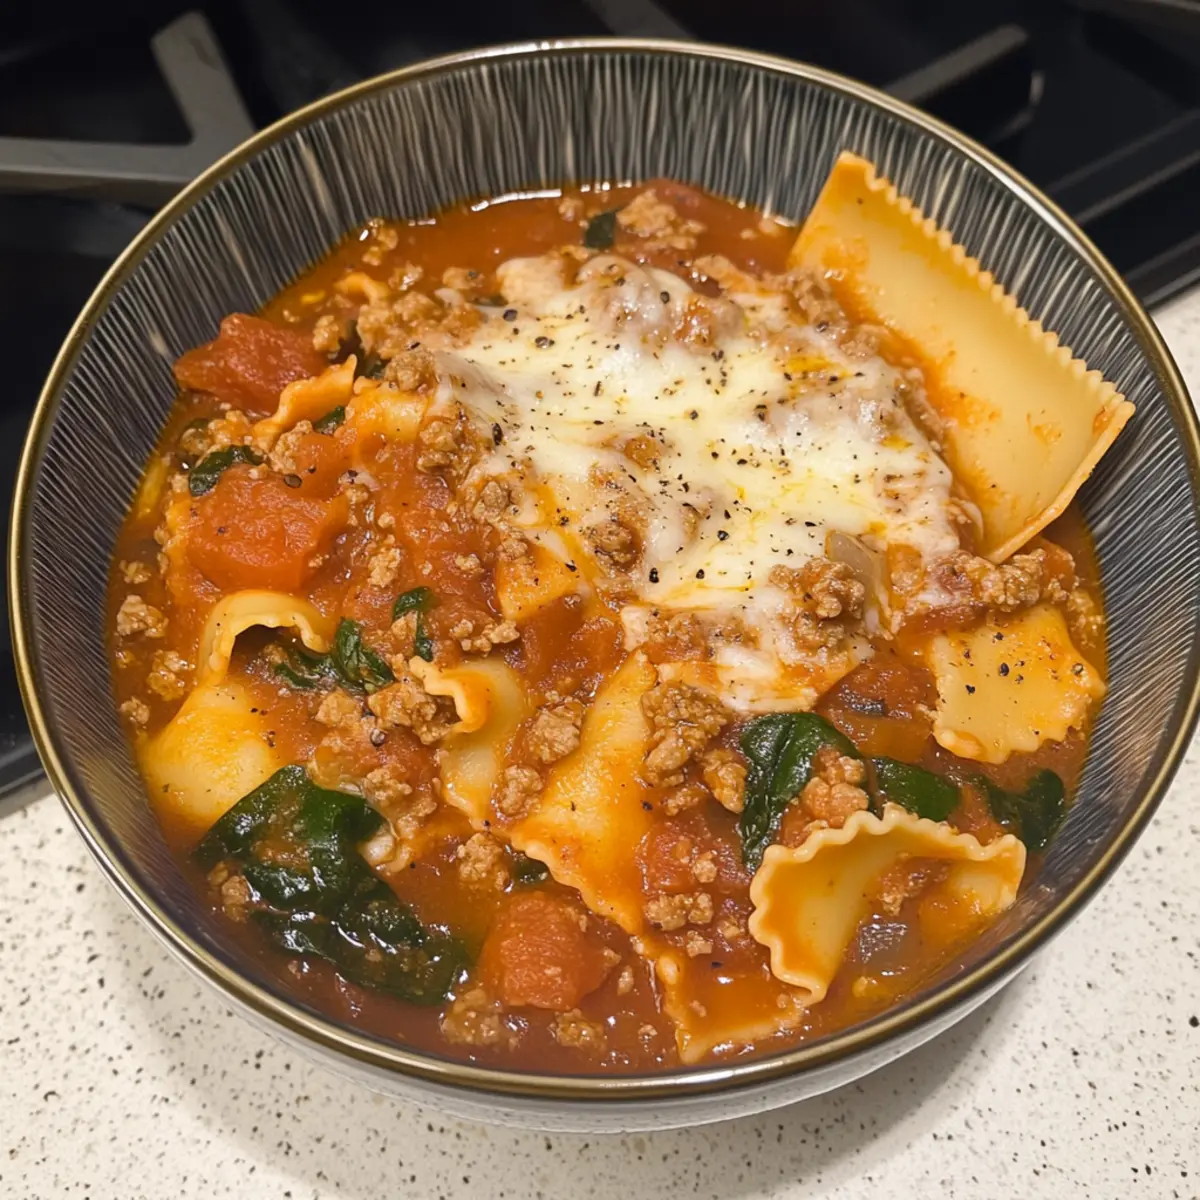
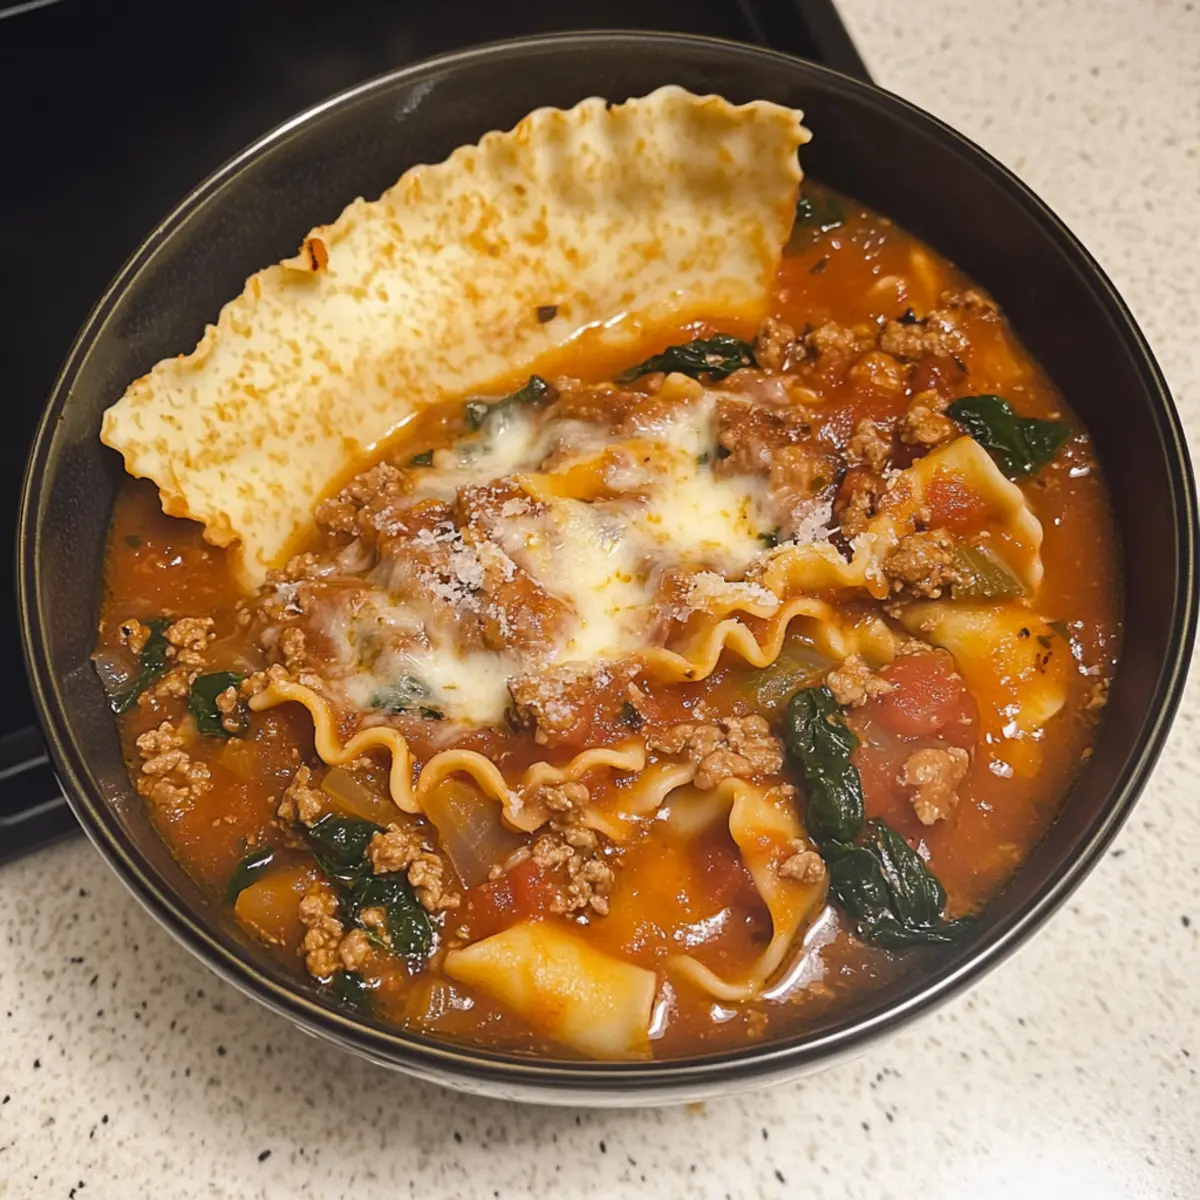
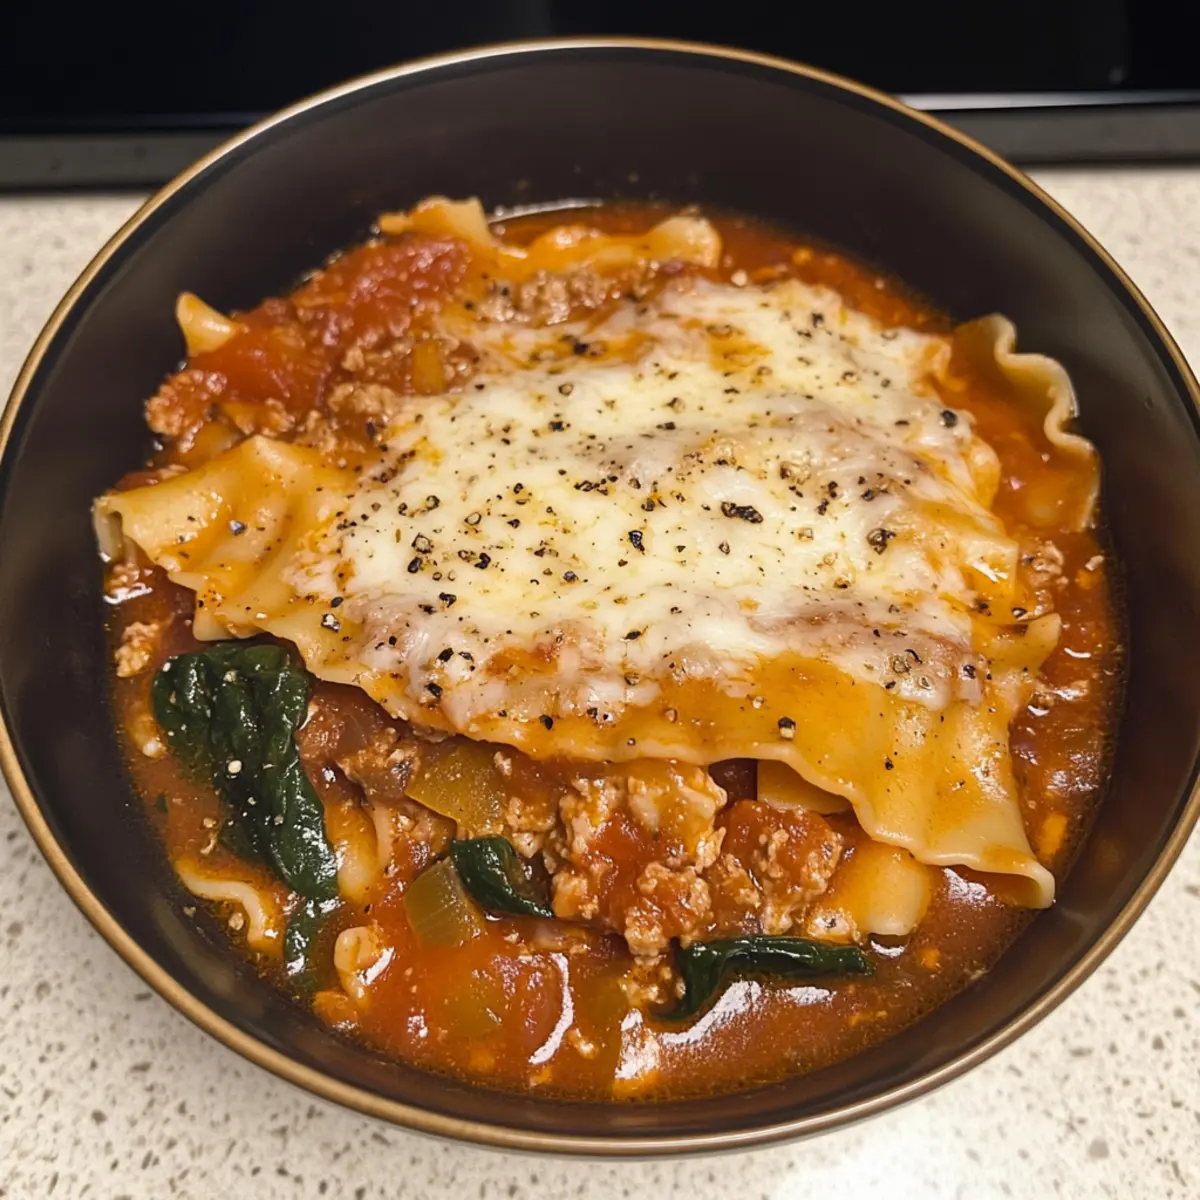
As I stirred together the creamy custard and shared a laugh with friends in the kitchen, the comforting aroma of my Easy Eggs Benedict Casserole danced through the air. This delightful dish transforms a classic brunch favorite into an effortless make-ahead feast, perfect for gatherings that call for a touch of indulgence. The layers of crispy English muffins and savory Canadian bacon not only deliver incredible flavor but also promise flexibility—feel free to customize with your favorite proteins or veggies. Not only is it simple to whip up, but it also allows you to savor each moment with your guests instead of being stuck in the kitchen. What delicious twists will you try with this versatile casserole?

Why is Eggs Benedict Casserole so special?

Comforting, Flavorful Layers: This casserole combines the best of Eggs Benedict with the ease of a baked dish, leaving your taste buds satisfied.

Make-Ahead Magic: Prep it the night before and simply pop it in the oven the next day, giving you more time to enjoy your brunch company.

Customizable Delight: Whether you opt for classic Canadian bacon or switch it up with smoked salmon, the options are endless!

Cheesy Goodness: Melted cheddar cheese brings a rich flavor that complements the savory elements perfectly, making it a crowd favorite.

Family-Friendly: Not only is it a dish everyone will love, but it’s also a great way to sneak in some extra veggies! If you’re looking for more hearty casseroles, check out my Tater Tot Casserole or Apple Crisp Casserole for an equally delightful experience.

Eggs Benedict Casserole Ingredients

• Get ready to create this delightful dish!

For the Custard

  • 12 large eggs – Provides a rich base for custard; fresh eggs yield a firmer texture.
  • 3 cups whole milk – Adds creaminess; can substitute with low-fat milk for a lighter version.
  • 1 teaspoon salt – Enhances the overall flavor of the dish.
  • ½ teaspoon black pepper – For seasoning; adjust to taste.
  • ¼ teaspoon cayenne pepper – Optional for a mild kick.
  • 1 teaspoon Dijon mustard – Adds tanginess to the custard.

For the Base

  • 8 pieces English muffins (quartered) – Forms the base layer; can substitute with brioche or sourdough.
  • 8 ounces Canadian bacon or ham – Provides a hearty filling; can swap for turkey bacon for a lighter option.

For the Topping

  • 2 cups shredded cheddar cheese – Melts beautifully over the top; other cheese varieties can be used for different flavors.
  • 1 cup hollandaise sauce – Store-bought or homemade for a classic finishing touch.
  • Chopped chives or parsley – For garnish, adds freshness and color.

This Eggs Benedict Casserole is not only a meal to behold but a piece of your brunch tradition waiting to be savored!

Step‑by‑Step Instructions for Eggs Benedict Casserole

Step 1: Preheat the Oven
Begin by preheating your oven to 350°F (175°C). This ensures a ready environment for baking your Eggs Benedict Casserole to perfection. While the oven warms up, gather your baking dish and grease it lightly with cooking spray or butter to prevent sticking later on.

Step 2: Prepare the Egg Mixture
In a large mixing bowl, crack the 12 large eggs and whisk them together until frothy. Add 3 cups of whole milk, 1 teaspoon of salt, ½ teaspoon of black pepper, ¼ teaspoon of cayenne pepper, and 1 teaspoon of Dijon mustard, whisking until everything is well combined. This custard mixture will be the heart of your casserole.

Step 3: Layer the Ingredients
Take your greased baking dish and arrange the 8 quartered English muffins at the bottom, creating an even layer. Next, sprinkle the 8 ounces of Canadian bacon or ham over the muffins, distributing it evenly. Pour the prepared egg mixture over these layers, ensuring it seeps in thoroughly, then top the casserole with 2 cups of shredded cheddar cheese, allowing it to melt beautifully during baking.

Step 4: Bake the Casserole
Cover the baking dish with aluminum foil and place it in the preheated oven. Bake for 30 minutes covered, allowing the casserole to set and begin solidifying. After 30 minutes, carefully remove the foil and bake for an additional 15-20 minutes until the top is golden brown and the custard has fully set, creating a delightful color contrast.

Step 5: Serve with Hollandaise Sauce
Once your Eggs Benedict Casserole is ready, take it out from the oven and let it cool slightly for about 5-10 minutes. This cooling period allows flavors to settle and makes it easier to slice. Just before serving, drizzle the top with warm hollandaise sauce and garnish with chopped chives or parsley for a fresh finish, elevating both taste and presentation.

Eggs Benedict Casserole Variations

Feel free to let your creativity shine as you customize this delicious casserole to fit your taste and dietary needs!

  • Protein Swap: Use smoked salmon for a seafood twist, creating a rich and flavorful alternative to ham. The salty, savory notes combined with creamy custard make for an indulgent treat.

  • Veggie Boost: Incorporate fresh spinach or sun-dried tomatoes for added nutrition and a pop of color. These vibrant additions not only enhance the flavor but also elevate the visual appeal of your dish.

  • Cheese Alternatives: Try goat cheese or feta for a different flavor profile, bringing a tangy richness that can surprise and delight your brunch guests.

  • Gluten-Free Option: Substitute with gluten-free bread or cornbread, making it easier for those with dietary restrictions to enjoy this classic dish without sacrificing taste.

  • Add Heat: Mix in jalapeños or hot sauce for a spicy version that will awaken your senses and add a bold kick to each bite. Spice lovers will appreciate the extra zing!

  • Herb Infusion: Add thyme or dill for aromatics, allowing the fresh herbs to brighten the dish and complement the creamy custard beautifully.

  • Nutty Crunch: Top with toasted walnuts or pecans for added texture, introducing delightful crunchiness that contrasts with the softness of the casserole.

If you enjoyed this dish and want more easy casserole ideas, try my French Toast Casserole or Cheesy Low Carb Chicken Casserole. Cooking can be an adventure, and I hope these variations inspire your next brunch gathering!

Make Ahead Options

These Easy Eggs Benedict Casserole are perfect for those busy mornings when you want to enjoy brunch without the hassle! You can assemble the casserole up to 24 hours in advance, simply layering the ingredients as directed (but hold off on adding the hollandaise sauce until you’re ready to serve). Cover tightly with plastic wrap and refrigerate to maintain freshness and prevent drying out. When ready to bake, remove from the fridge and allow it to sit at room temperature for about 20 minutes before popping it in the oven. This allows for even cooking and deliciously fluffy results—easily impressing your family or guests with minimal effort!

Expert Tips for Eggs Benedict Casserole

Whisk Well: Ensure eggs are whisked until frothy to achieve a smooth custard base for your Eggs Benedict Casserole. A good mix prevents any lumps.

Toast Your Muffins: Lightly toast English muffins before layering them to reduce sogginess and enhance their texture in the final bake.

Baking Time Variability: Oven temperatures may vary; always check for a golden top and run a toothpick through the center to confirm that it’s fully set.

Quality Ingredients Count: Use high-quality Canadian bacon and cheese for the best flavor. Fresh ingredients truly make a difference in this dish.

Handle Hollandaise Carefully: If making homemade hollandaise sauce, be cautious about temperatures to avoid it separating. Keep it warm but not too hot as you serve!

Storage Tips for Eggs Benedict Casserole

Fridge: Store leftovers in an airtight container for up to 3-4 days. Reheat in the oven at 350°F (175°C) until warmed through.

Freezer: You can freeze the casserole for up to 2 months. Cover tightly in plastic wrap and aluminum foil to prevent freezer burn. Thaw overnight in the fridge before reheating.

Make-Ahead: For easy prep, assemble and refrigerate the casserole the night before baking. Increase baking time by 10-15 minutes if starting from cold for your Eggs Benedict Casserole.

Reheating: To reheat individual slices, pop them in the microwave for 1-2 minutes or warm in the oven until heated through, to maintain the best texture.

What to Serve with Easy Eggs Benedict Casserole

Serve a delightful array of sides to complement this hearty brunch staple, adding freshness and flavor to your table.

  • Crispy Hash Browns: These golden-brown bites provide a satisfying crunch that beautifully contrasts the creamy casserole. They are an absolute breakfast favorite!

  • Fresh Fruit Medley: A colorful assortment of seasonal fruits adds a refreshing burst of sweetness, balancing the savory richness of the casserole. Think juicy berries, vibrant melons, and zesty citrus!

  • Light Garden Salad: Tossed greens with a light vinaigrette introduce a crisp, refreshing element that lightens up the meal, ensuring a well-rounded brunch experience.

  • Savory Scones: Flaky, buttery scones serve as a perfect side, with a soft texture that pairs well with the rich flavors of the casserole and hollandaise.

  • Mimosas: This classic brunch cocktail, made with fresh orange juice and bubbly champagne, complements the creamy eggs beautifully, brightening your gathering with a festive touch.

  • Bloody Marys: Packed with flavor and garnished with your favorite veggies, this savory drink adds a kick, enhancing the brunch vibe while perfectly matching the Eggs Benedict Casserole.

  • Roasted Asparagus: Tender, lightly seasoned asparagus spears bring a touch of elegance and earthiness to the table, creating a delightful balance alongside the casserole’s flavors.

  • Cheesy Grits: Silky, cheesy grits offer a warm, comforting sidekick, adding creaminess that pairs so well with the casserole’s textures.

  • Mini Quiches: These bite-sized delights can be customized with various fillings, offering an additional layer of flavors that delight guests and elevate your brunch spread.

Eggs Benedict Casserole Recipe FAQs

How do I select ripe ingredients for my Eggs Benedict Casserole?
Absolutely! For the best flavors, choose fresh ingredients. Look for eggs that are clean and have a firm, uncracked shell. When selecting English muffins, they should be slightly springy when pressed with no dark spots. Aim for Canadian bacon that looks moist and has a rich color—avoid any with excessive dryness or sticky residue.

What is the best way to store leftovers from my Eggs Benedict Casserole?
You can store leftovers in an airtight container in the fridge for 3-4 days. Make sure the casserole has cooled down completely before sealing it. When you’re ready to enjoy it again, reheat it in the oven at 350°F (175°C) for about 15-20 minutes or until warmed through.

Can I freeze my Eggs Benedict Casserole? If so, how?
Absolutely! Freezing is a great option. Wrap the cooled casserole tightly in plastic wrap and then in aluminum foil to prevent freezer burn. It can stay good for up to 2 months in the freezer. When you’re ready to enjoy it, simply thaw it overnight in the fridge and then bake it at 350°F (175°C) for about 30-40 minutes to heat all the way through.

What should I do if my casserole is soggy?
Very! If you find your Eggs Benedict Casserole soggy, ensure you lightly toast the English muffins before layering them in the dish. This helps absorb excess moisture. Always check that the custard is set and baked until golden on top. If it’s still too wet, bake it a little longer uncovered to help it firm up.

Are there any dietary considerations for the Eggs Benedict Casserole?
Yes! If you have guests with dietary restrictions, you can customize the casserole. Use turkey bacon for a lower-fat protein option. For a gluten-free version, opt for gluten-free bread. Be cautious with the hollandaise sauce if there are egg allergies; you can skip it or serve it on the side, and diet-friendly alternatives are available if needed. Always inform guests of the key ingredients used!

Eggs Benedict Casserole

Easy Eggs Benedict Casserole for the Ultimate Brunch Feast

This Easy Eggs Benedict Casserole is a delightful twist on a classic, perfect for brunch gatherings with friends and family.
Prep Time 20 minutes
Cook Time 50 minutes
Cooling Time 10 minutes
Total Time 1 hour 20 minutes
Servings: 8 slices
Course: Breakfast
Cuisine: American
Calories: 350

Ingredients
  

For the Custard
  • 12 large eggs fresh eggs yield a firmer texture
  • 3 cups whole milk can substitute with low-fat milk for a lighter version
  • 1 teaspoon salt enhances overall flavor
  • 1/2 teaspoon black pepper for seasoning; adjust to taste
  • 1/4 teaspoon cayenne pepper optional for a mild kick
  • 1 teaspoon Dijon mustard adds tanginess
For the Base
  • 8 pieces English muffins quartered; can substitute with brioche or sourdough
  • 8 ounces Canadian bacon or ham can swap for turkey bacon for a lighter option
For the Topping
  • 2 cups shredded cheddar cheese melts beautifully
  • 1 cup hollandaise sauce store-bought or homemade
  • Chopped chives or parsley for garnish

Equipment

  • baking dish
  • Mixing Bowl
  • whisk

Method
 

Step-by-Step Instructions
  1. Preheat the oven to 350°F (175°C) and grease a baking dish.
  2. In a large mixing bowl, whisk the eggs until frothy and then add the milk, salt, black pepper, cayenne pepper, and Dijon mustard, mixing well.
  3. Layer the quartered English muffins at the bottom, followed by the Canadian bacon, then pour the egg mixture over the top and add the cheddar cheese.
  4. Cover with aluminum foil and bake for 30 minutes. Remove foil and bake for another 15-20 minutes until golden brown.
  5. Let the casserole cool for 5-10 minutes, then drizzle with hollandaise sauce and garnish with chives or parsley before serving.

Nutrition

Serving: 1sliceCalories: 350kcalCarbohydrates: 22gProtein: 20gFat: 20gSaturated Fat: 10gPolyunsaturated Fat: 2gMonounsaturated Fat: 6gCholesterol: 300mgSodium: 800mgPotassium: 400mgFiber: 1gSugar: 2gVitamin A: 700IUCalcium: 300mgIron: 2mg

Notes

Ensure all ingredients are fresh and of high quality for the best flavor. Customize with different proteins or veggies as preferred.

Tried this recipe?

Let us know how it was!

Cottage Cheese Flatbread Pizza: Your Healthy Pizza Upgrade

Flipping through my favorite cookbooks, I stumbled upon a clever twist that’s quickly become my go-to for pizza night: Cottage Cheese Flatbread Pizza! This delicious low-carb alternative lets you savor all the yumminess of traditional pizza while keeping your health goals in check. With its golden, crispy crust and customizable toppings, it’s perfect for anyone wanting a quick and satisfying meal without the guilt. Plus, it’s gluten-free and packed with protein, making it an ideal choice for busy weeknights or leisurely weekends spent entertaining friends. I can’t help but wonder—what toppings will you choose to dress your irresistible flatbread?

Why is This Flatbread Pizza a Must Try?

Health-Conscious Delight: This Cottage Cheese Flatbread Pizza is a low-carb dream come true, combining nutrition with taste without sacrificing flavors.

Quick & Easy: Ready in under an hour, this recipe is perfect for those busy weeknights when you crave something comforting but nutritious.

Customizable Toppings: Go wild with toppings! Whether you prefer the classic pepperoni or fresh veggies, this flatbread can adapt to any preference or dietary restriction.

Gluten-Free Goodness: With a base that’s naturally gluten-free, it opens up a world of eating delicious pizza without the gluten worries. Consider pairing it with a refreshing salad for a complete meal!

Protein-Packed: Thanks to the cottage cheese, this pizza gives you a satisfying protein boost, keeping you full and energized. A healthy alternative to traditional pizzas has never tasted this good!

Cottage Cheese Flatbread Pizza Ingredients

For the Flatbread Base

  • Cottage Cheese – Provides creaminess and moisture to the pizza base; substitute with any unsweetened yogurt for a lighter option.
  • Eggs – Acts as a binder to create structure in the flatbread; for a vegan option, use flax eggs (1 tbsp ground flaxseed + 2.5 tbsp water per egg).
  • Garlic Powder – Adds a savory depth of flavor; fresh minced garlic can be used for a more intense taste.
  • Salt – Enhances overall flavor; adjust to taste, especially if using salty toppings.
  • Black Pepper – Adds a touch of spiciness; can be omitted for a milder taste.
  • Italian Herb Mix – Infuses the flatbread with classic Italian flavors; substitute with individual dried herbs like oregano, basil, and thyme.

For the Toppings

  • Pizza Sauce – Acts as the pizza base sauce; homemade or store-bought options can be used.
  • Grated Cheese – Provides creaminess and a golden, melty topping; replace with dairy-free cheese for a vegan version.
  • Pepperoni – Adds a savory, spicy protein topping; alternatives include vegetables for a healthier twist.

This delicious Cottage Cheese Flatbread Pizza is not just rich in flavor but also ticks the boxes for your health-conscious choices!

Step‑by‑Step Instructions for Cottage Cheese Flatbread Pizza

Step 1: Prepare the Pizza Base
In a blender, combine cottage cheese, eggs, garlic powder, salt, black pepper, and Italian herbs. Blend the mixture until it achieves a smooth consistency, about 1-2 minutes. This will be the base of your Cottage Cheese Flatbread Pizza, so ensure all ingredients are well incorporated.

Step 2: Bake Flatbread
Preheat your oven to 350°F (180°C) and line a baking sheet with parchment paper. Pour the blended mixture onto the prepared sheet, spreading it into a thin circle about ¼ inch thick. Bake for 30 minutes, or until the flatbread turns golden brown and slightly crispy around the edges.

Step 3: Add Toppings and Final Bake
Once the flatbread is baked, raise the oven temperature to 400°F (200°C). Carefully take the flatbread out and spread a generous layer of pizza sauce over the surface. Sprinkle grated cheese on top, followed by your choice of pepperoni slices or other toppings. Return it to the oven for an additional 8-10 minutes until the cheese melts and becomes bubbly.

Step 4: Cool and Serve
Once baked, remove the Cottage Cheese Flatbread Pizza from the oven and let it cool for a few minutes. This cooling time allows the cheese to set slightly, making it easier to slice. Cut into wedges or squares, and serve hot with your favorite salad or dipping sauces for a delightful meal!

What to Serve with Cottage Cheese Flatbread Pizza?

Indulging in a comforting low-carb feast calls for delightful accompaniments that elevate your meal.

  • Fresh Garden Salad: A vibrant mix of greens and seasonal veggies adds crunch and nutrition, perfectly balancing the richness of your pizza.

  • Roasted Vegetables: Caramelized veggies like zucchini, bell peppers, and red onions provide a flavorful, earthy contrast that complements the savory flatbread.

  • Garlic Breadsticks: For that classic pizza night feel, serve warm, buttery garlic breadsticks to soak up any leftover pizza sauce.

  • Homemade Tzatziki: This refreshing yogurt dip adds a cool, creamy element that pairs beautifully with the pizza’s warm crust and toppings.

  • Crispy Veggie Chips: Bake or air-fry your favorite veggies for a crunchy, low-carb snack that offers both flavor and texture alongside your pizza.

  • Sparkling Water with Lemon: A zesty, bubbly drink cleanses the palate between each bite, keeping your meal feeling light and refreshing.

Dressing your Cottage Cheese Flatbread Pizza with these sides makes for a wholesome and satisfying dining experience that everyone will love!

Storage Tips for Cottage Cheese Flatbread Pizza

Refrigerator Storage: Store any leftover Cottage Cheese Flatbread Pizza in an airtight container for up to 3 days to maintain freshness and flavor.

Freezer: Wrap individual slices tightly in plastic wrap or aluminum foil before freezing. This method helps preserve the texture for up to 2 months.

Reheating: For the best results, reheat slices in an oven at 350°F (175°C) for about 10 minutes to restore crispiness. Alternatively, use a microwave for convenience, but be aware that this may make the crust softer.

Thawing: To thaw frozen slices, simply leave them in the refrigerator overnight before reheating or place them in the microwave for a quick defrost.

Cottage Cheese Flatbread Pizza Variations

Feel free to let your creativity shine with these fun twists that will elevate your Cottage Cheese Flatbread Pizza experience!

  • Vegetable Delight: Swap out pepperoni for an assortment of fresh vegetables like bell peppers, mushrooms, and spinach for a colorful, nutritious twist. Mixing veggies brings amazing flavors and texture too!

  • Spicy Kick: Add a sprinkle of red pepper flakes or sliced jalapeños on top before baking for that extra heat. Spicy flavors bring excitement that enhances each bite!

  • Herb-Infused: Experiment with fresh herbs like oregano, basil, or arugula added after baking for a beautiful aroma and freshness. This adds a lovely burst of flavor and a vibrant finish.

  • Cheese Lover’s Dream: Consider using a blend of cheeses like mozzarella and parmesan for an extra gooey, cheesy experience. Mixing cheeses creates a delightful richness you’d surely love!

  • Low-Carb Under 10 Toppings: Make it a super simple dish by adding only 2 or 3 toppings—a classic choice that never disappoints! It keeps your pizza light and allows the flatbread flavor to shine.

  • Sweet Option: For a unique dessert twist, spread a thin layer of fruit preserves instead of sauce and top with ricotta cheese. This unexpected approach can turn your flatbread into a delicious sweet treat!

  • Saucy Goodness: Instead of standard pizza sauce, use pesto or barbecue sauce for a fresh, flavorful change. This fusion will surprise your taste buds with new profiles!

  • Dairy-Free Delight: Use dairy-free cheese alternatives if you want to keep it vegan or lactose-free. This option ensures everyone can enjoy a slice without compromise.

Try these delicious variations to discover your favorite flavor combination! And if you love unique toppings as much as I do, let me suggest pairing this with a refreshing salad or some delightful dips from our other recipes like Strawberry Cheesecake Dump or Carrot Cake Cheesecake. Happy cooking!

Make Ahead Options

These delicious Cottage Cheese Flatbread Pizzas are perfect for busy home cooks looking to save time during hectic weeknights! You can prepare the flatbread base up to 24 hours in advance—just blend the ingredients and bake it as instructed, then allow it to cool completely. Once cooled, wrap the flatbread tightly in plastic wrap and refrigerate to maintain its texture. When it’s time to enjoy your pizza, simply spread the sauce, add toppings, and bake at 400°F (200°C) for 8-10 minutes until the cheese is bubbly and delicious. This method ensures that your flatbread remains just as tasty and satisfying, while allowing you to enjoy a homemade meal with minimal effort!

Expert Tips for Cottage Cheese Flatbread Pizza

  • Smooth Consistency: Ensure your blended mixture reaches a fully smooth texture for the best flatbread results. Lumps can affect the overall feel.

  • Baking Time Watch: Keep a close eye on your flatbread while it bakes. Ovens can vary, so test for golden-brown edges without burning.

  • Thickness Matters: Aim for a ¼ inch thickness with your flatbread. Too thick, and it may become soft rather than crispy when baked.

  • Topping Prep: Pre-cook toppings like mushrooms or bell peppers to prevent excess moisture from affecting your flatbread pizza.

  • Cheese Choice: Choose your cheese wisely. Grated options melt beautifully, but for extra flavor, consider adding a mix of cheeses on top.

  • Cooling Time: Allow the Cottage Cheese Flatbread Pizza to cool for a few minutes before slicing. This helps the cheese set and makes serving easier.

Cottage Cheese Flatbread Pizza Recipe FAQs

What type of cottage cheese should I use for the flatbread?
Absolutely! For the best creamy texture in your Cottage Cheese Flatbread Pizza, opt for full-fat or 2% cottage cheese. If you’re looking for a lighter option, any plain, unsweetened yogurt can work as a great substitute.

How long can I store leftover flatbread pizza in the refrigerator?
You can store your leftover Cottage Cheese Flatbread Pizza in an airtight container in the refrigerator for up to 3 days. To keep it fresh and tasty, make sure it’s well-covered, as this helps prevent it from drying out.

Can I freeze leftover flatbread pizza?
Yes, you can! Just wrap individual slices of your Cottage Cheese Flatbread Pizza tightly in plastic wrap or aluminum foil. They’ll stay fresh in the freezer for up to 2 months. For best results, reheat from frozen in a preheated oven rather than using the microwave.

What should I do if my flatbread doesn’t crisp up well?
If your flatbread comes out soft, it could be due to it being too thick; aim for about ¼ inch thickness. Ensure your oven is preheated properly, and consider baking it a bit longer. Another tip is to check that your blend is smooth, as lumps can affect texture.

Are there any dietary considerations I should be aware of with this recipe?
Great question! This recipe is gluten-free and can be tailored for various dietary needs. For a vegan alternative, replace the eggs with flax eggs (1 tbsp ground flaxseed + 2.5 tbsp water per egg) and use dairy-free cheese options. Always double-check the toppings to ensure they’re allergy-friendly for your guests!

What’s the best way to reheat my flatbread pizza?
To reheat your Cottage Cheese Flatbread Pizza, preheat your oven to 350°F (175°C) and heat for about 10 minutes. This way, you’ll restore that crispy crust! If you’re short on time, a microwave can be used, but know this might make the crust softer.

Feel free to ask more questions, and happy cooking!

Cottage Cheese Flatbread Pizza

Cottage Cheese Flatbread Pizza: Your Healthy Pizza Upgrade

Cottage Cheese Flatbread Pizza is a delicious low-carb alternative, perfect for health-conscious pizza lovers.
Prep Time 15 minutes
Cook Time 40 minutes
Cooling Time 5 minutes
Total Time 1 hour
Servings: 4 slices
Course: Dinner
Cuisine: Italian
Calories: 250

Ingredients
  

For the Flatbread Base
  • 1 cup Cottage Cheese Substitute with unsweetened yogurt for a lighter option.
  • 2 large Eggs For vegan option, use flax eggs (1 tbsp ground flaxseed + 2.5 tbsp water per egg).
  • 1 teaspoon Garlic Powder Fresh minced garlic can be used for a more intense taste.
  • 1/2 teaspoon Salt Adjust to taste, especially if using salty toppings.
  • 1/4 teaspoon Black Pepper Can be omitted for a milder taste.
  • 1 teaspoon Italian Herb Mix Substitute with individual dried herbs like oregano, basil, and thyme.
For the Toppings
  • 1 cup Pizza Sauce Homemade or store-bought options can be used.
  • 1 cup Grated Cheese Replace with dairy-free cheese for a vegan version.
  • 1/2 cup Pepperoni Alternatives include vegetables for a healthier twist.

Equipment

  • blender
  • Baking Sheet
  • Parchment Paper

Method
 

Step-by-Step Instructions
  1. In a blender, combine cottage cheese, eggs, garlic powder, salt, black pepper, and Italian herbs. Blend until smooth, about 1-2 minutes.
  2. Preheat your oven to 350°F (180°C) and line a baking sheet with parchment paper. Pour the blended mixture onto the sheet, spreading into a thin circle about ¼ inch thick. Bake for 30 minutes until golden brown.
  3. Raise the oven temperature to 400°F (200°C). Spread pizza sauce over the baked flatbread, sprinkle with grated cheese, and add pepperoni. Return to the oven for 8-10 minutes until cheese melts.
  4. Remove from the oven, let cool for a few minutes. Cut into wedges or squares, and serve hot.

Nutrition

Serving: 1sliceCalories: 250kcalCarbohydrates: 20gProtein: 15gFat: 10gSaturated Fat: 5gPolyunsaturated Fat: 1gMonounsaturated Fat: 3gCholesterol: 70mgSodium: 400mgPotassium: 300mgFiber: 2gSugar: 2gVitamin A: 500IUVitamin C: 2mgCalcium: 200mgIron: 1mg

Notes

Ensure a smooth mixture for best results. Keep an eye on baking time to prevent burning. Pre-cook wet toppings to avoid sogginess.

Tried this recipe?

Let us know how it was!

Strawberry French Toast Casserole for Effortless Brunch Joy

As the sun peeks through my kitchen window, the sweet, fruity scent of a Slow Cooker Strawberry French Toast Casserole begins to fill the air. There’s something incredibly satisfying about this make-ahead breakfast delight. Perfectly suited for busy mornings or cherished brunch gatherings, it combines the beloved flavors of classic French toast with the vibrant touch of fresh strawberries. The beauty of this dish lies in its simplicity and versatility: you can easily customize it with your favorite fruits or bread types. Plus, it’s a guaranteed crowd-pleaser that will have your family and friends asking for seconds! Are you ready to elevate your breakfast game and make tantalizing memories around the table?

Why is this dish a breakfast game-changer?

Flavorful Fusion: The combination of juicy strawberries and creamy custard brings mouthwatering flavor to every bite, making breakfast a true delight.
Make-Ahead Magic: Prepare it the night before, letting busy mornings become a breeze with this easy slow cooker method.
Customizable Creativity: Feel free to swap in your favorite fruits or breads, tailoring the recipe to fit your taste. If you love berry flavors, check out my Strawberry Cheesecake for another fruity treat!
Family Friendly: Kids and adults alike will love how this casserole transforms traditional French toast into a fun and shareable dish.
Effortless Entertaining: Perfect for brunches or holiday gatherings, this dish ensures everyone is satisfied and happy at the table. Your guests will be reminiscing about this tasty casserole long after the last bite!

Strawberry French Toast Casserole Ingredients

For the Casserole

  • Day-old bread or French bread, cubed – Provides essential structure and texture; stale bread absorbs the egg mixture without becoming soggy.
  • Strawberry preserves – Adds natural sweetness and richness; can be swapped for other fruit preserves to match your favorites.
  • Fresh strawberries, diced – Delivers vibrant flavor to the dish; feel free to replace with blueberries, raspberries, or peaches for a twist.
  • Milk – Acts as a moistening agent for a custardy texture; whole milk offers a richer flavor, but any preferred milk will work.
  • Eggs – Vital for binding the ingredients together and providing a fluffy structure.
  • Vanilla extract – Elevates the overall flavor; always opt for high-quality pure vanilla for best results.
  • Brown sugar – Contributes a delightful hint of caramelization and sweetness to the dish.

Optional Toppings

  • Maple syrup – A classic choice; drizzled on top, it adds a sweet, warm touch.
  • Powdered sugar – Lightly dust over the casserole for a decorative, sweet finish.
  • Whipped cream – Lends a creamy, indulgent flavor; perfect for serving with the casserole.
  • Additional fresh fruit – Consider adding more strawberries or a medley of your favorite fruits for an extra burst of freshness.

This Strawberry French Toast Casserole is not just a breakfast dish; it’s an experience that will fill your mornings with warmth and joy.

Step‑by‑Step Instructions for Strawberry French Toast Casserole

Step 1: Prepare the Slow Cooker
Start by spraying the slow cooker insert with nonstick cooking spray or lining it with parchment for seamless cleanup. This step is crucial to prevent the delicious Strawberry French Toast Casserole from sticking as it cooks, ensuring your masterpiece comes out perfectly without fuss.

Step 2: Layer the Ingredients
Next, take your cubed day-old bread and diced fresh strawberries, and begin layering them in the slow cooker. Alternate layers of bread and strawberries until all ingredients are used, creating a beautiful mosaic of flavors that will complement the custard-like mixture you’ll prepare next.

Step 3: Whisk the Custard Mixture
In a large bowl, whisk together the strawberry preserves, milk, eggs, vanilla extract, and brown sugar until fully blended. This custard will bathe the bread layers, so make sure it’s smooth without lumps. The lovely aroma of vanilla will fill your kitchen, hinting at the sweet treat ahead.

Step 4: Combine the Layers
Pour the custard mixture evenly over the layered bread and strawberries in the slow cooker. Use a spatula to gently press down the bread to ensure every piece is well-coated in the sweet custard. This will enhance the flavor throughout as it cooks.

Step 5: Let it Soak Overnight
Cover the slow cooker and refrigerate the assembled casserole overnight. Allowing it to soak is crucial for the perfect texture, as the stale bread absorbs the custard mixture, resulting in a fluffy and flavorful Strawberry French Toast Casserole the next morning.

Step 6: Cook the Casserole
In the morning, place the slow cooker insert into the base and set it to cook on low for 4 hours or high for 2 hours. Keep an eye on it; the casserole should puff slightly and turn golden brown on the edges, indicating it’s ready to serve and enjoy.

Step 7: Serve and Enjoy
Once done, uncover and let the Strawberry French Toast Casserole rest for a few minutes before serving. Slice into portions, and consider adding your favorite toppings like maple syrup, whipped cream, or more fresh fruit. The warm, inviting aroma will draw everyone to the table for a delightful breakfast!

What to Serve with Strawberry French Toast Casserole

Experience the delightful symphony of flavors that will elevate your breakfast gathering!

  • Crispy Bacon: The salty crunch of bacon creates a contrast that beautifully complements the sweet, fluffy casserole.

  • Fresh Fruit Salad: A medley of seasonal fruits adds a refreshing, vibrant contrast and balances the richness of the casserole.

  • Yogurt Parfait: Layered with granola and fruits, a yogurt parfait provides a creamy texture and a satisfying crunch, making it a wholesome side.

  • Maple Syrup: Drizzling warm maple syrup on top enhances the sweet flavors and adds a delightful stickiness with each bite.

  • Whipped Cream: A dollop of fluffy whipped cream gives a luxurious touch to the dish, inviting everyone to indulge in sweet bliss.

  • Mint Tea: This herbal drink is refreshing and pairs well with the sweetness of the strawberries, providing a soothing beverage to sip on.

Elevate your brunch experience by combining these suggestions for a meal that’s not just delicious but also visually stunning and satisfying for all your guests!

How to Store and Freeze Strawberry French Toast Casserole

Fridge: Store any leftover casserole in an airtight container for up to 3 days. Reheat in the microwave or oven until warmed through.

Freezer: For longer storage, freeze the cooled casserole in portions wrapped tightly in plastic wrap and then foil for up to 2 months. Thaw in the fridge overnight before reheating.

Reheating: To enjoy, bake the thawed casserole at 350°F for about 15-20 minutes, or until heated all the way through, maintaining the light, fluffy texture.

Make-Ahead Tip: Prepare the casserole the night before and refrigerate it until you’re ready to cook, ensuring effortless breakfast enjoyment!

Strawberry French Toast Casserole Variations

Now that you have a sumptuous dish ready to impress, let’s explore how to add your personal flair!

  • Dairy-Free: Swap whole milk for almond or oat milk for a creamy, dairy-free alternative. This keeps the casserole light and delicious!

  • Whole Grain: Use whole grain or sourdough bread instead of white bread for a heartier texture and added nutrition. You’ll love the subtle tang it brings!

  • Berry Medley: Replace strawberries with a mix of blueberries and raspberries for a vibrant color palette and a medley of flavors. This delightful twist will make your casserole even more visually appealing.

  • Extra Vanilla: Add a splash of almond extract along with the vanilla for an extra layer of flavor. It’s a simple adjustment that adds warmth to each bite!

  • Nutty Crunch: Toss in some chopped pecans or walnuts between the bread and strawberries for a delightful crunch. It adds a satisfying contrast to the soft, custardy layers.

  • Spiced Up: Sprinkle in some cinnamon or nutmeg into the custard mixture to elevate that warm, cozy flavor profile. A touch of spice works wonders, especially in colder months!

  • Peachy Keen: Swap fresh strawberries for ripe peaches during summer for a luscious, juicy alternative. The sweet, fragrant peaches make for a refreshing change!

  • Overnight Option: If you like the idea of a baked version, prepare as directed and bake it at 350°F for about 40-50 minutes. A baked Strawberry French Toast Casserole offers a different texture that’s equally delicious.

These variations not only enhance the dish but also cater to diverse preferences, perfect for your next brunch gathering. And if you’re in the mood for something fruity yet creamy, consider making a Strawberry Cheesecake for dessert!

Expert Tips for Strawberry French Toast Casserole

  • Choose the Right Bread: Using stale bread like challah or brioche is key to prevent sogginess, allowing the casserole to maintain its delightful texture.

  • Refrigerate Overnight: Don’t skip this step! Allowing the casserole to soak overnight ensures rich flavor and the ideal custardy consistency.

  • Monitor Cooking Time: Avoid overcooking; keep an eye on the casserole and look for a slight puff and golden edges to maintain that wonderfully soft center.

  • Upgrade the Fruits: While strawberries shine in this recipe, feel free to swap in other berries or fruits like raspberries or peaches to customize your Strawberry French Toast Casserole.

  • Easy Cleanup: Line your slow cooker insert with parchment paper or spray with nonstick cooking spray to make cleanup a breeze after enjoying your delicious breakfast.

Make Ahead Options

These Slow Cooker Strawberry French Toast Casserole is a perfect meal prep solution for busy mornings! You can assemble the entire casserole up to 24 hours in advance by layering the cubed bread and diced strawberries, then pouring the custard over them before covering and refrigerating overnight. This soaking step allows the bread to absorb all the flavors, ensuring your dish is just as delicious the next day. If you prefer, you can also prepare individual servings or store leftovers in the fridge for up to 3 days. When you’re ready to enjoy, simply cook on low for 4 hours or high for 2 hours, and savor a warm, delightful breakfast without the morning rush!

Strawberry French Toast Casserole Recipe FAQs

What kind of bread should I use for this Strawberry French Toast Casserole?
For the best results, use day-old bread like challah or brioche. These types absorb the custard mixture beautifully without becoming soggy. If you’re in the mood for something different, Texas toast or even a sturdy sandwich bread can work well, too!

How can I store leftovers from the casserole?
Store any leftover Strawberry French Toast Casserole in an airtight container in the fridge for up to 3 days. When you’re ready to enjoy, just reheat it in the microwave or bake in the oven until warmed through. It’ll be just as delightful the second time around!

Can I freeze the Strawberry French Toast Casserole?
Absolutely! To freeze, let the casserole cool completely, then wrap it tightly in plastic wrap followed by aluminum foil. It can be stored in the freezer for up to 2 months. When you’re ready to enjoy it, thaw it in the fridge overnight and then bake at 350°F for about 15-20 minutes until heated through.

How do I know if the casserole is cooked properly?
The key indicators are a slight puff in the casserole and golden brown edges. If it looks puffy and slightly firm to the touch, you’re on the right track! Avoid overcooking, as you want to maintain that soft, custardy center for the best experience.

Can I substitute fresh strawberries with other fruits?
Very! This recipe is wonderfully versatile. If you prefer, you can swap strawberries for blueberries, raspberries, or even peaches. Each fruit will lend its unique flavor, creating new and exciting versions of your Strawberry French Toast Casserole!

Is this dish suitable for kids or anyone with gluten allergies?
Definitely! Kids will love the fun and shareable nature of this casserole, making it perfect for family gatherings. For those with gluten allergies, simply substitute the bread with a gluten-free variety, and you’ll have a delicious alternative that everyone can enjoy!

Strawberry French Toast Casserole

Strawberry French Toast Casserole for Effortless Brunch Joy

This Strawberry French Toast Casserole combines classic French toast flavors with fresh strawberries, making it perfect for busy mornings and brunch gatherings.
Prep Time 15 minutes
Cook Time 4 hours
Soaking Time 8 hours
Total Time 12 hours 15 minutes
Servings: 8 slices
Course: Breakfast
Cuisine: American
Calories: 350

Ingredients
  

For the Casserole
  • 8 slices Day-old bread or French bread, cubed Provides essential structure and texture
  • 1 cup Strawberry preserves Can be swapped for other fruit preserves
  • 2 cups Fresh strawberries, diced Feel free to replace with other fruits
  • 2 cups Milk Whole milk offers a richer flavor
  • 6 Eggs Vital for binding the ingredients
  • 2 teaspoons Vanilla extract Opt for high-quality pure vanilla
  • 1/2 cup Brown sugar Adds sweetness and caramelization
Optional Toppings
  • 1/2 cup Maple syrup Classic choice for drizzling
  • 1 cup Powdered sugar For decorative finish
  • 1 cup Whipped cream For serving
  • Additional fresh fruit Consider adding more strawberries

Equipment

  • Slow Cooker

Method
 

Step-by-Step Instructions
  1. Prepare the Slow Cooker: Spray the slow cooker insert with nonstick cooking spray or line it with parchment.
  2. Layer the Ingredients: Layer cubed bread and diced strawberries in the slow cooker.
  3. Whisk the Custard Mixture: In a bowl, whisk together the strawberry preserves, milk, eggs, vanilla extract, and brown sugar.
  4. Combine the Layers: Pour the custard mixture over the layered bread and strawberries.
  5. Let it Soak Overnight: Cover and refrigerate the assembled casserole overnight.
  6. Cook the Casserole: Cook on low for 4 hours or high for 2 hours.
  7. Serve and Enjoy: Let the casserole rest before serving, adding any desired toppings.

Nutrition

Serving: 1sliceCalories: 350kcalCarbohydrates: 50gProtein: 9gFat: 12gSaturated Fat: 5gCholesterol: 150mgSodium: 400mgPotassium: 300mgFiber: 2gSugar: 20gVitamin A: 10IUVitamin C: 15mgCalcium: 15mgIron: 10mg

Notes

Using stale bread is key to prevent sogginess. Do not skip refrigerating overnight for best results.

Tried this recipe?

Let us know how it was!

Crispy Honey Garlic Chicken: Your New Go-To Weeknight Delight

A quick glance at my watch sparked an urgent realization—dinner was just around the corner and takeout wasn’t an option tonight. Thankfully, I had a secret weapon: my Easy 30-Minute Crispy Honey Garlic Chicken, a delightful dish that turns tender chicken thighs into a restaurant-worthy feast right from my kitchen. Not only does this Asian-inspired recipe promise a flavorful sticky glaze with just the right amount of heat, but it also transforms hectic weeknights into culinary triumphs in under half an hour. Perfect for those craving comfort food without the wait, this homemade takeout alternative is bound to become your go-to weeknight staple. Ready to dive into a dish that combines crispy goodness with a touch of sweetness? Let’s get cooking!

Why Choose Honey Garlic Chicken Tonight?

Speedy Preparation: This 30-minute recipe is perfect for busy evenings, giving you more time to unwind with your family.

Irresistible Glaze: The sticky honey garlic sauce provides a mouthwatering sweet and savory blend that will leave everyone wanting seconds.

Versatility: Enjoy it with hibachi-style fried rice or steamed veggies, making it adaptable to your taste preferences.

Crowd-Pleaser: This dish is sure to impress family and friends alike, similar to other favorites like Cheesy Garlic Chicken or Honey Garlic Salmon.

Healthy Alternative: Elevate your weeknight meals with this nutrient-packed recipe, high in protein yet customizable for dietary needs.

Honey Garlic Chicken Ingredients

  • For the Chicken
    Chicken Thighs – Juicy protein base. Substitution: Chicken breast can be used, but thighs give better flavor and tenderness.
    Kosher Salt & Black Pepper – Enhances overall flavor. Adjust to taste.
    Cornstarch – Adds crispiness to chicken when pan-frying. Important for achieving the desired texture; should not be omitted.

  • For the Seasoning
    Garlic Powder – Adds depth and savory flavor without raw garlic texture. Can be swapped with fresh minced garlic if desired.
    Onion Powder – Provides an aromatic essence. Omit for a mild flavor.
    Smoked Paprika – Offers a subtle smokiness. Regular paprika may be used as an alternative.
    Sesame Oil – Enriches with nutty flavor and aroma. Substitute with vegetable oil for a milder taste.

  • For the Sauce
    Honey – Primary sweetener in the sauce. Maple syrup could be a vegan alternative.
    Sweet Chili Sauce – Supplies sweetness and heat to the sauce. Sriracha or additional honey can substitute for heat.
    Soy Sauce – Adds saltiness and umami flavor. Low-sodium soy sauce may be used as a healthier option.
    Fresh Garlic – Enhances the sauce with robust flavor. Minced fresh garlic should be added carefully to avoid burning.

  • For Serving
    Hibachi Rice or Preferred Sides – For serving. Can use any rice or vegetable sides of choice.
    Sesame Seeds & Chopped Scallions – Optional garnish for added texture and flavor.

Step‑by‑Step Instructions for Crispy Honey Garlic Chicken

Step 1: Marinate Chicken
Begin by placing the chicken thighs in a resealable bag. Add kosher salt, black pepper, garlic powder, onion powder, smoked paprika, and sesame oil. Seal the bag and shake it well to ensure the seasoning evenly coats the chicken. Let it marinate in the fridge for a minimum of 1 hour, or up to 1 day, allowing the flavors to permeate and tenderize the meat.

Step 2: Coat Chicken
Once marinated, remove the chicken from the fridge and sprinkle cornstarch over it. Close the bag again and shake vigorously to achieve an even coating of cornstarch on each piece. Let the chicken sit at room temperature for about 20 minutes before cooking. This step is vital for achieving that perfect crispy texture when you fry the chicken.

Step 3: Cook Chicken
Heat 2 tablespoons of oil in a large nonstick skillet over medium-high heat. Carefully place the coated chicken thighs in the hot skillet, allowing space between pieces to prevent steaming. Cook for 3-4 minutes on each side or until they are golden brown and crispy. Once cooked, transfer the chicken to a plate and set aside while you prepare the sauce.

Step 4: Prepare Sauce
In the same skillet, reduce the heat to medium and add honey, sweet chili sauce, soy sauce, and chopped fresh garlic. Stir everything together and let it simmer for about 4-5 minutes, until the sauce thickens and bubbles gently. This sticky honey garlic sauce will infuse the chicken with a deliciously sweet and savory flavor.

Step 5: Combine
Return the browned chicken thighs to the skillet, tossing them in the thickened honey garlic sauce to coat thoroughly. Allow the chicken to cook in the sauce for an additional 1-2 minutes, making sure each piece is glistening and infused with flavor. Prepare to serve this delectable Crispy Honey Garlic Chicken hot, over hibachi fried rice or your favorite sides.

What to Serve with Crispy Honey Garlic Chicken

As you prepare this delightful dish, it’s time to think about how to complement those golden, sticky chicken thighs with sides that will round out your meal beautifully.

  • Hibachi Fried Rice: A perfect match, this savory rice absorbs the flavors of the honey garlic sauce, offering a satisfying base.

  • Steamed Broccoli: Crisp and vibrant, the bright green broccoli adds a refreshing contrast to the rich glaze of the chicken while providing a healthy touch.

  • Asian Slaw: This crunchy side brings a variety of textures with a tangy sauce that balances the sweetness of the chicken, creating a delightful palate experience.

  • Garlic Noodles: Rich and buttery, these noodles take on the wonderful flavors of the chicken, making every bite a satisfying journey through Asian-inspired taste.

  • Cucumber Salad: Crisp, cool cucumber salad with a light vinaigrette adds a refreshing burst and brightens up the dish, providing a classic crunchy contrast.

  • Chilled Sake: For a complete dining experience, enjoy a glass of chilled sake. Its smoothness pairs wonderfully with the sweet-spicy tones of your honey garlic chicken.

  • Mango Sticky Rice: For dessert, indulge in a sweet contrast with this traditional favorite. The creaminess of the coconut and the sweetness of fresh mango create a perfect ending to your meal.

With these options, your Crispy Honey Garlic Chicken will transition from a simple dinner to an extraordinary experience, tantalizing both your spirit and your taste buds!

How to Store and Freeze Honey Garlic Chicken

Fridge: Store leftover Honey Garlic Chicken in an airtight container for up to 3 days. Make sure it’s completely cooled before sealing for best results.

Freezer: For longer storage, freeze portions in airtight containers or freezer bags for up to 2 months. Label with the date for easy tracking.

Reheating: Thaw overnight in the fridge before reheating. Warm in a skillet over medium heat for 5-7 minutes, adding a splash of water if needed to maintain moisture.

Avoid Soggy Chicken: To prevent sogginess, reheat the chicken instead of microwaving it; this helps preserve its crispy texture!

Make Ahead Options

These Crispy Honey Garlic Chicken preparations are perfect for busy home cooks looking to save time! You can marinate the chicken thighs in the flavorful seasoning blend up to 24 hours in advance, ensuring the meat is tender and infused with taste. Additionally, once coated with cornstarch, let the chicken rest for 20 minutes at room temperature before cooking to maintain crispiness. You can also prepare the sticky honey garlic sauce and store it in the refrigerator for up to 3 days. When you’re ready to eat, simply sauté the marinated chicken, add the sauce, and enjoy a delicious meal that feels fresh and homemade, making your weeknight dinners a breeze!

Honey Garlic Chicken Variations & Substitutions

Feel free to make this delicious dish your own with a few simple tweaks, enhancing both flavor and nutrition!

  • Vegetarian Swap: Substitute chicken thighs for tofu or tempeh, marinating just like the chicken for great flavor.

  • Gluten-Free Option: Use gluten-free soy sauce or tamari to make this dish safe for those avoiding gluten.

  • Spice It Up: For a fiery twist, add sliced fresh chilies or a touch of red pepper flakes to the sauce.

  • Different Flavors: Experiment with teriyaki sauce instead of sweet chili sauce for a unique spin on the original flavor.

  • More Crunch: Coat your chicken with panko breadcrumbs instead of cornstarch to achieve an even crunchier texture.

  • Added Greens: Toss in some broccoli or snap peas when simmering the honey garlic sauce to pack in more veggies and nutrition.

  • Sweet Substitution: If you’re out of honey, try agave nectar or brown sugar for a similar sweet profile in the sauce.

  • Side Swap: Serve your Honey Garlic Chicken over jasmine rice, or try it with cauliflower rice for a lower-carb option.

By considering these fun variations or substitutions, you can expand your cooking creativity! Serve it alongside fluffy hibachi-style fried rice or venture into other favorites like Garlic Chicken Gnocchi or Garlic Butter Baked Chicken for a well-rounded meal!

Expert Tips for Crispy Honey Garlic Chicken

Optimal Marinating Time: Allowing the chicken to marinate for at least 1 hour enhances flavor absorption. For the best results, overnight marination is ideal.

Cornstarch Coating: Don’t rush the cornstarch step; this is crucial for creating that irresistible crispy texture. Ensure even coating to avoid soggy spots.

Nonstick Skillet Advantage: Using a nonstick skillet helps prevent chicken from sticking, making both cooking and cleanup a breeze. It’s worth it!

Avoid Overcrowding: Cooking chicken in batches rather than overcrowding the skillet ensures each piece gets that perfect golden crust.

Adjust to Taste: Feel free to modify the sweetness and spice levels in the honey garlic sauce by adjusting the honey and sweet chili sauce amounts to suit your palate.

Garnish for Flair: Top your dish with sesame seeds and chopped scallions just before serving for added flavor and an appealing presentation—making your Honey Garlic Chicken a feast for the eyes too!

Crispy Honey Garlic Chicken Recipe FAQs

How do I choose the best chicken thighs for this recipe?
Absolutely! Look for chicken thighs that are plump and have a deep, pink color. Avoid any that have dark spots or an off smell. Fresh chicken should feel moist but not slimy, ensuring you’re starting with quality protein.

How should I store leftovers of my Honey Garlic Chicken?
For optimal freshness, place any leftover Honey Garlic Chicken in an airtight container, where it can be kept in the fridge for up to 3 days. Make sure the chicken has cooled down completely before sealing the container to avoid moisture buildup.

Can I freeze Crispy Honey Garlic Chicken?
Certainly! To freeze, allow the chicken to cool completely and then portion it into freezer-safe bags or airtight containers. You can freeze it for up to 2 months. Be sure to label the bags with the date for easy tracking.

What should I do if my chicken isn’t crispy?
If your chicken isn’t crispy, it might be due to overcrowding in the skillet during cooking. Make sure to give each piece enough space to brown evenly. If you notice sogginess after storage, reheating in a skillet rather than a microwave can help regain that desired crispiness.

Are there any dietary considerations for this recipe?
Very much so! If you have a soy allergy, consider using coconut aminos as a soy sauce substitute. For a gluten-free option, use gluten-free soy sauce or tamari. Additionally, if you’re looking for a vegan twist, you can substitute chicken with tofu or tempeh, and replace honey with maple syrup to cater to dietary preferences.

How can I tell when my chicken is fully cooked?
To ensure your chicken is fully cooked and safe to eat, the internal temperature should reach 165°F (75°C). Using a meat thermometer is the most accurate method. Additionally, the juices should run clear and not pink when you cut into the chicken. Follow these steps for perfect results every time!

Honey Garlic Chicken

Crispy Honey Garlic Chicken: Your New Go-To Weeknight Delight

This Honey Garlic Chicken recipe provides quick and delicious comfort food with a crispy texture.
Prep Time 30 minutes
Cook Time 15 minutes
Marinating Time 1 hour
Total Time 1 hour 45 minutes
Servings: 4 servings
Course: Dinner
Cuisine: Asian
Calories: 450

Ingredients
  

For the Chicken
  • 2 pounds Chicken Thighs Substitution: Chicken breast can be used, but thighs give better flavor and tenderness.
  • 1 teaspoon Kosher Salt Adjust to taste.
  • 1 teaspoon Black Pepper Adjust to taste.
  • 1/2 cup Cornstarch Important for achieving the desired texture; should not be omitted.
For the Seasoning
  • 1 teaspoon Garlic Powder Can be swapped with fresh minced garlic if desired.
  • 1 teaspoon Onion Powder Omit for a mild flavor.
  • 1 teaspoon Smoked Paprika Regular paprika may be used as an alternative.
  • 2 tablespoons Sesame Oil Substitute with vegetable oil for a milder taste.
For the Sauce
  • 1/2 cup Honey Maple syrup could be a vegan alternative.
  • 1/4 cup Sweet Chili Sauce Sriracha or additional honey can substitute for heat.
  • 1/4 cup Soy Sauce Low-sodium soy sauce may be used as a healthier option.
  • 2 cloves Fresh Garlic Minced fresh garlic should be added carefully to avoid burning.
For Serving
  • 4 cups Hibachi Rice or Preferred Sides Can use any rice or vegetable sides of choice.
  • 2 tablespoons Sesame Seeds Optional garnish for added texture and flavor.
  • 2 tablespoons Chopped Scallions Optional garnish for added texture and flavor.

Equipment

  • Nonstick skillet
  • Resealable Bag

Method
 

Step-by-Step Instructions
  1. Begin by placing the chicken thighs in a resealable bag. Add kosher salt, black pepper, garlic powder, onion powder, smoked paprika, and sesame oil. Seal the bag and shake it well to ensure the seasoning evenly coats the chicken. Let it marinate in the fridge for a minimum of 1 hour, or up to 1 day.
  2. Once marinated, remove the chicken from the fridge and sprinkle cornstarch over it. Close the bag again and shake vigorously to achieve an even coating of cornstarch on each piece. Let the chicken sit at room temperature for about 20 minutes before cooking.
  3. Heat 2 tablespoons of oil in a large nonstick skillet over medium-high heat. Carefully place the coated chicken thighs in the hot skillet, allowing space between pieces to prevent steaming. Cook for 3-4 minutes on each side or until they are golden brown and crispy.
  4. In the same skillet, reduce the heat to medium and add honey, sweet chili sauce, soy sauce, and chopped fresh garlic. Stir everything together and let it simmer for about 4-5 minutes, until the sauce thickens and bubbles gently.
  5. Return the browned chicken thighs to the skillet, tossing them in the thickened honey garlic sauce to coat thoroughly. Allow the chicken to cook in the sauce for an additional 1-2 minutes before serving.

Nutrition

Serving: 1servingCalories: 450kcalCarbohydrates: 30gProtein: 30gFat: 20gSaturated Fat: 4gPolyunsaturated Fat: 1gMonounsaturated Fat: 10gCholesterol: 80mgSodium: 800mgPotassium: 300mgFiber: 1gSugar: 15gVitamin A: 100IUVitamin C: 2mgCalcium: 30mgIron: 2mg

Notes

Allowing the chicken to marinate for at least 1 hour enhances flavor absorption. Use nonstick skillet to make cooking easier.

Tried this recipe?

Let us know how it was!

Greek Chicken Bowls: Your Customizable Healthy Dinner Delight

As I stood in my kitchen, the enticing aroma of Mediterranean spices wafting through the air, I couldn’t help but feel a wave of satisfaction. These Customizable Greek Chicken Bowls have quickly become one of my go-to meals, bringing together tender grilled chicken, crispy roasted chickpeas, and a colorful array of fresh veggies. Not only are they a healthy dinner choice, but their customizable nature means that every bowl can reflect your unique taste and dietary needs. Whether you need a quick meal prep option for the week or want something packed with high protein, these bowls deliver. Who doesn’t love a meal that’s as nourishing as it is delicious? Curious about how to assemble your own flavorful masterpiece? Let’s dive in!

Why Are Greek Chicken Bowls a Must-Try?

Flavorful Fusion: These Greek Chicken Bowls are packed with robust Mediterranean flavors that dance on your palate. Each component complements the others beautifully, providing a vibrant and satisfying meal.

Customizable Goodness: Whether you’re a meat lover or follow a vegetarian lifestyle, these bowls are completely adaptable to your tastes, making them perfect for any dietary preference.

Quick & Easy: Whipping up dinner has never been easier! With minimal prep time, you can create a healthy meal in under 30 minutes, perfect for busy weeknights.

Meal Prep Friendly: Ideal for those who love to prep ahead, simply store the ingredients separately and assemble when you’re ready to eat. This way, you’re prepared for a week of healthy lunches or dinners.

Crowd-Pleaser: Whether it’s a family dinner or a gathering with friends, these bowls are sure to be a hit, just like my Chilli Chicken Takeout.

Dive into this colorful, nutrient-rich dish that highlights the beauty of homemade meals and say goodbye to bland fast food!

Greek Chicken Bowls Ingredients

• Ready to create your own vibrant Greek Chicken Bowls? Here are the ingredients you’ll need!

For the Chicken Marinade

  • Skinless Chicken Breasts – A lean protein source; can substitute with turkey or tofu for a vegetarian option.
  • Red Wine Vinegar – Provides acidity in the marinade; white wine vinegar works as a substitute.
  • Olive Oil – Healthy fats that enhance flavor and moisture; avocado oil is a good alternative.
  • Garlic (minced) – Adds depth of flavor to the marinade; fresh cloves preferred; granulated garlic can be a backup.
  • Dried Oregano – Signature herb in Greek cuisine for flavor; can substitute with Italian seasoning.
  • Lemon Juice and Zest – Brightens the dish with acidity and flavor; fresh lemons are recommended; bottled juice is less potent.
  • Salt and Black Pepper – Essential for seasoning; adjust to taste.

For the Bowl Base

  • Couscous/Quinoa/Brown Rice – Base for the bowls providing carbs and texture; use whatever grain you have on hand; cauliflower rice works for a low-carb option.
  • Fresh Veggies (cucumbers, tomatoes, leafy greens) – Nutrient-rich add-ins; choose seasonal produce for the best flavor.

For the Crunch and Creaminess

  • Chickpeas (roasted) – Add crunch and plant-based protein; canned chickpeas can be used if roasted for a delightful texture.
  • Yogurt (Greek) – Creamy sauce base; mix with garlic and herbs; substitute with dairy-free yogurt for a vegan option.
  • Feta Cheese (optional) – Provides a salty tang; omit for a dairy-free version.

Now you have everything you need to whip up a delicious batch of Greek Chicken Bowls! Enjoy assembling them and creating a meal that perfectly suits your taste!

Step‑by‑Step Instructions for Greek Chicken Bowls

Step 1: Marinate Chicken
In a medium bowl, whisk together red wine vinegar, olive oil, minced garlic, dried oregano, lemon juice, lemon zest, salt, and black pepper. Place your skinless chicken breasts into the marinade, ensuring they’re well coated. Cover the bowl and let the chicken marinate in the refrigerator for at least one hour, or up to overnight, for the best flavor and tenderness.

Step 2: Cook Chicken
Preheat your grill to medium-high heat, about 375°F. Remove the marinated chicken from the fridge and let any excess marinade drip off. Grill each chicken breast for approximately 6–7 minutes on each side, or until they reach an internal temperature of 165°F. Look for a nice char and juices running clear for that perfect grilled finish.

Step 3: Prepare Base
While the chicken is grilling, cook your choice of couscous, quinoa, or brown rice according to package instructions, typically around 15-20 minutes. For an extra layer of flavor, stir in a couple of tablespoons of reserved marinade into the grains while cooking. Once done, fluff with a fork and set aside to cool slightly before assembling your Greek Chicken Bowls.

Step 4: Make Yogurt Sauce
In a mixing bowl, combine Greek yogurt, minced garlic, olive oil, a splash of lemon juice, and feta cheese, if using. Whisk everything together until smooth and creamy. For added freshness, you can grate a small cucumber into the mixture. Set the yogurt sauce aside, allowing the flavors to meld together as you build your bowls.

Step 5: Assemble Bowls
Start with a generous scoop of your cooked grain as the base of each bowl. Next, slice the grilled chicken into strips and layer it atop the grains. Add roasted chickpeas, diced cucumbers, tomatoes, and other fresh vegetables to create a colorful and nutritious medley that will truly make your Greek Chicken Bowls pop.

Step 6: Finish
Drizzle each assembled bowl with the delicious yogurt sauce, allowing it to cascade over the ingredients. For an extra touch of flavor, garnish with fresh herbs like parsley or mint and an additional sprinkle of feta cheese, if desired. Your customizable Greek Chicken Bowls are ready to serve and enjoy!

Make Ahead Options

These Greek Chicken Bowls are perfect for busy weeknights, as many components can be prepared in advance! You can marinate the chicken up to 24 hours ahead of time, letting it absorb all that wonderful flavor before cooking. Additionally, cook your grains (couscous, quinoa, or brown rice) in advance and store them in the fridge for up to 3 days. To maintain quality, keep the cooked ingredients separate until you’re ready to assemble. When it’s time to serve, simply grill the marinated chicken, layer all the components into bowls, and drizzle with your yogurt sauce for a fresh, quick meal that’s just as delicious as when freshly made.

Greek Chicken Bowls: Customization Ideas

Feel free to put your own twist on these Greek Chicken Bowls, transforming them into your unique culinary masterpiece!

  • Vegetarian Delight: Replace chicken with marinated tofu or add extra chickpeas for a satisfying plant-based meal.
  • Grain Swap: Try using farro or wild rice instead of couscous for a nuttier flavor and heartier texture.
  • Zesty Add-Ins: Stir in a tablespoon of capers or olives to boost the Mediterranean flavor profile of your bowls.
  • Crunchy Surprise: Toss in some sunflower seeds or pumpkin seeds for added crunch and nutritional benefits.
  • Roasted Veggie Boost: Add seasonal roasted vegetables like sweet potatoes or beets; their natural sweetness pairs wonderfully with the other flavors.
  • Spicy Kick: For those who like some heat, sprinkle red pepper flakes or drizzle sriracha over the bowls before serving.
  • Fresh Herb Explosion: Incorporate a variety of fresh herbs like dill, parsley, or basil for a burst of freshness; it’s as vibrant as my Tuscan Chicken Soup.
  • Saucy Transition: Swap the yogurt sauce for a tahini dressing for a creamy, nutty flavor that compliments the bowl beautifully.

Customize the Greek Chicken Bowls to suit your family’s taste and dietary needs; the possibilities are endless!

Expert Tips for Greek Chicken Bowls

Marinate Chicken: Give your chicken enough time to soak in the flavors; marinate for at least one hour and up to overnight for maximum tenderness.

Grain Options: Use any base you love, but remember that couscous cooks quicker than quinoa or brown rice. Cook them according to package instructions for the best results.

Roasting Chickpeas: For extra crunch, roast your chickpeas until crisp; toss them in olive oil, salt, and your favorite spices before baking at 400°F for about 20-30 minutes.

Keep it Fresh: To prevent sogginess, store components—chicken, grains, veggies, and sauces—separately until you’re ready to assemble your Greek Chicken Bowls.

Customizable Sauce: Experiment with the yogurt sauce by adding various herbs like dill or mint for a unique twist that complements the Mediterranean flavors beautifully.

How to Store and Freeze Greek Chicken Bowls

Fridge: Store components separately in airtight containers. Grilled chicken and grains can be refrigerated for up to 4 days, ensuring freshness for your Greek Chicken Bowls.

Freezer: For longer storage, freeze marinated chicken and cooked grains in freezer-safe bags. These can last up to 3 months; just remember to thaw in the fridge before reheating.

Reheating: When ready to enjoy, reheat the chicken and grains in the microwave or on the stovetop until warmed through. Add fresh veggies just before serving for optimal taste and texture.

Assembly Advice: To maintain the best quality, keep the yogurt sauce and fresh veggies separate until it’s time to assemble your Greek Chicken Bowls!

What to Serve with Greek Chicken Bowls

Build the perfect meal around your vibrant Greek Chicken Bowls with these delightful pairings.

  • Tzatziki Sauce: A cool, tangy yogurt dip that enhances the Mediterranean flavors and adds a refreshing element.

  • Pita Bread: Soft, warm pita is perfect for scooping up chicken, veggies, and sauce; it brings a comforting nostalgia of Greek dining.

  • Fattoush Salad: The crunchy, herb-laden salad adds a great contrast to the warm chicken and grains, elevating each bite with zesty flavor.

  • Roasted Vegetables: Caramelized seasonal vegetables, such as bell peppers and zucchini, bring warmth and an earthy element to your bowls.

  • Lemon Wedges: A squeeze of fresh lemon adds brightness and elevates all the flavors for a refreshing touch in every bite.

  • Olive Tapenade: A savory spread that integrates the bold flavors of olives and capers, ideal for adding depth to your meal.

  • Herbed Quinoa: Swap in a herbed quinoa as a grain base for an extra dose of nutrition and a nutty flavor that perfectly complements the chicken.

  • White Wine Spritzer: A light, bubbly drink that enhances the Mediterranean influence of your meal, keeping the atmosphere refreshing and lively.

Greek Chicken Bowls Recipe FAQs

What type of chicken is best for Greek Chicken Bowls?
Absolutely! Skinless chicken breasts are my go-to for this recipe because they provide a deliciously lean protein source. If you prefer, you can also use turkey or tofu for a vegetarian option, which will absorb the marinade beautifully!

How do I store Greek Chicken Bowls?
I recommend storing the components separately in airtight containers. This way, grilled chicken and grains stay fresh in the fridge for up to 4 days. Keeping everything separate until you’re ready to eat prevents the veggies from becoming soggy. Just assemble fresh bowls for a delightful lunch or dinner!

Can I freeze Greek Chicken Bowls?
Yes, indeed! For longer storage, you can freeze the marinated chicken and cooked grains in freezer-safe bags. They will keep well in the freezer for up to 3 months. When you’re ready to enjoy, simply thaw in the refrigerator overnight before reheating, ensuring you get that tender, juicy chicken again!

What can I do if my chickpeas aren’t getting crispy?
If your roasted chickpeas aren’t coming out as crispy as you’d like, try draining and rinsing them thoroughly before roasting. Pat them dry, toss with olive oil, and season generously. Bake at 400°F for 20-30 minutes, stirring occasionally until they reach a delightful crunch!

Can I modify the ingredients based on allergies?
Very! This recipe is incredibly customizable to suit various dietary needs. For instance, if you’re avoiding dairy, swap Greek yogurt with a dairy-free option, and simply omit feta cheese. Feel free to mix in seasonal veggies or grains to make it allergen-friendly!

How can I enhance the flavor of the yogurt sauce?
For a tasty twist, add herbs like fresh dill or mint to the yogurt sauce! Simply whisk them in alongside the garlic and lemon juice to elevate the flavor profile, making your Greek Chicken Bowls sing with Mediterranean vibrancy!

Greek Chicken Bowls

Greek Chicken Bowls: Your Customizable Healthy Dinner Delight

Experience the layered flavors in Greek Chicken Bowls, a customizable healthy dinner delight.
Prep Time 10 minutes
Cook Time 20 minutes
Marinating Time 1 hour
Total Time 1 hour 30 minutes
Servings: 4 bowls
Course: Dinner
Cuisine: Mediterranean
Calories: 450

Ingredients
  

For the Chicken Marinade
  • 2 pieces Skinless Chicken Breasts can substitute with turkey or tofu for vegetarian
  • 1/4 cup Red Wine Vinegar white wine vinegar works as substitute
  • 2 tablespoons Olive Oil avocado oil is a good alternative
  • 3 cloves Garlic minced, fresh cloves preferred
  • 2 teaspoons Dried Oregano can substitute with Italian seasoning
  • 2 tablespoons Lemon Juice fresh lemons are recommended
  • 1 teaspoon Lemon Zest
  • to taste Salt
  • to taste Black Pepper
For the Bowl Base
  • 1 cup Couscous/Quinoa/Brown Rice or cauliflower rice for low-carb
  • 2 cups Fresh Veggies like cucumbers, tomatoes, leafy greens
For the Crunch and Creaminess
  • 1 cup Chickpeas roasted; canned chickpeas can be used if roasted
  • 1 cup Yogurt Greek; substitute with dairy-free yogurt for vegan
  • 1/2 cup Feta Cheese optional, omit for a dairy-free version

Equipment

  • Grill
  • Mixing Bowl
  • medium pot
  • Measuring cups
  • Measuring spoons

Method
 

Step-by-Step Instructions
  1. Marinate Chicken: In a medium bowl, whisk together red wine vinegar, olive oil, minced garlic, dried oregano, lemon juice, lemon zest, salt, and black pepper. Place chicken in the marinade and cover. Let it marinate in the fridge for at least 1 hour, up to overnight.
  2. Cook Chicken: Preheat grill to medium-high heat (375°F). Remove chicken from marinade and grill for 6–7 minutes on each side until internal temperature is 165°F.
  3. Prepare Base: Cook couscous, quinoa, or brown rice as per package instructions, typically 15-20 minutes. Stir in reserved marinade for extra flavor.
  4. Make Yogurt Sauce: Mix yogurt, minced garlic, olive oil, lemon juice, and feta. Whisk until smooth. Grate cucumber into the mixture for added freshness.
  5. Assemble Bowls: Start with cooked grain base, add sliced grilled chicken, roasted chickpeas, diced veggies for a nutritious medley.
  6. Finish: Drizzle yogurt sauce over bowls and garnish with fresh herbs and extra feta if desired. Serve and enjoy!

Nutrition

Serving: 1bowlCalories: 450kcalCarbohydrates: 50gProtein: 35gFat: 15gSaturated Fat: 4gPolyunsaturated Fat: 2gMonounsaturated Fat: 8gCholesterol: 70mgSodium: 800mgPotassium: 800mgFiber: 10gSugar: 3gVitamin A: 1000IUVitamin C: 25mgCalcium: 200mgIron: 3mg

Notes

For meal prep, store components separately until ready to assemble to maintain freshness.

Tried this recipe?

Let us know how it was!

Crispy Toasted Ravioli That Will Transform Your Appetizer Game

As the smell of warm, crispy bites wafts through the kitchen, I can’t help but smile. It’s game day, and I’ve just whipped up a batch of Crispy Air Fryer Toasted Ravioli that will wow my friends and family. This fun and easy appetizer puts a delicious twist on a beloved Italian classic, making it a perfect choice for busy weeknights or festive gatherings. The best part? They’re guilt-free, thanks to the air fryer! With a light, crunchy coating and a savory cheesy filling, these toasted ravioli are not only satisfying but also a fantastic way to elevate your at-home snacking game. Ready to dive into the joy of making your own crispy bites? Let’s explore how to bring this delightful dish to life!

Why Try This Crispy Toasted Ravioli?

Guilt-Free Indulgence: With an air fryer, you’ll enjoy crispy toasted ravioli without the excess oil of traditional frying.
Unique Flavor Profile: The blend of Italian seasoning and cheese creates an irresistible savory bite sure to please any palate.
Versatile Options: Feel free to swap the cheese ravioli for spinach or meat-filled varieties, allowing everyone to customize their experience.
Quick Preparation: In under 20 minutes, you can serve up a plate of these tasty morsels, perfect for spontaneous gatherings.
Crowd-Pleasing Appetizer: Whether it’s game day or a cozy dinner, these crispy bites will be a hit with all your guests. Don’t forget to pair them with your favorite dipping sauce for that extra flavor blast!

Toasted Ravioli Ingredients

  • For the Coating
    Frozen Cheese Ravioli – The foundation of this dish; feel free to use any filled variety like spinach or meat for diversity.
    Eggs – Essential for binding the breadcrumbs to the ravioli; you can use either white or brown eggs based on personal preference.
    Panko Breadcrumbs – Create a light, crispy texture; regular breadcrumbs can also work if you’re in a pinch.
    Italian Seasoning – Adds rich flavor; experiment with dried herbs to suit your taste.
    Salt and Black Pepper – Crucial for enhancing flavors; adjust according to your liking.
    Oil or Oil Spray – Ensures a golden crust; choose any cooking oil, but a spray helps with controlling the amount.

  • For Serving
    Grated Parmesan Cheese – An optional topping that boosts flavor; swap with nutritional yeast for a vegan alternative.
    Fresh or Dried Herbs (like Parsley or Basil) – Adds a pop of freshness; can be left out if desired.
    Marinara Sauce or Creamy Vodka Sauce – Perfect for dipping; feel free to choose any favorite sauce to accompany your toasted ravioli.

With these toasted ravioli ingredients, you’re well on your way to creating an irresistible appetizer that’s sure to impress!

Step‑by‑Step Instructions for Crispy Air Fryer Toasted Ravioli

Step 1: Prep the Ingredients
Start by beating two eggs in a shallow bowl until smooth, creating an egg wash to help the breadcrumbs stick to the ravioli. In another bowl, combine panko breadcrumbs with Italian seasoning, salt, and black pepper for extra flavor. This preparation is crucial for achieving the perfect crispy coating for your toasted ravioli.

Step 2: Bread the Ravioli
Take each frozen cheese ravioli and dip it into the beaten egg, ensuring it’s coated evenly. Next, transfer the ravioli to the breadcrumb mixture, pressing gently to help adhere the crumbs. Repeat this process until all ravioli are fully coated, creating a delightful crunch that will transform them into crispy air-fried bites.

Step 3: Prepare the Air Fryer
Lightly grease the air fryer basket with oil or cooking spray to prevent sticking. Arrange the coated ravioli in a single layer, ensuring they aren’t overcrowded for even cooking. This step is essential for achieving that golden brown texture in your crispy air fryer toasted ravioli, as proper air circulation is key to their perfect crispiness.

Step 4: Air Frying
Set the air fryer to 350°F (175°C) and cook the ravioli for about 14 minutes. Halfway through, carefully flip the ravioli and spray with a little more oil for an extra crispy finish. Keep an eye on them; they should turn a beautiful golden brown while developing a delightful crunch, signalling they are ready to come out.

Step 5: Serving
Once the crispy air fryer toasted ravioli are cooked, remove them promptly from the air fryer. Sprinkle with grated Parmesan cheese and fresh herbs for added flavor, if desired. Serve the ravioli hot alongside your favorite dipping sauce, such as marinara or creamy vodka sauce, to enhance the enjoyment of this delicious appetizer.

Step 6: Baking Alternative (Optional)
If you prefer to bake your toasted ravioli, preheat the oven to 400°F (200°C). Arrange the coated ravioli on a parchment-lined baking sheet and bake for about 10 minutes, flipping them halfway through for even crispness. Keep an eye on them; they should achieve a lovely golden finish, making them just as delightful as the air-fried version.

Make Ahead Options

These Crispy Air Fryer Toasted Ravioli are perfect for meal prep enthusiasts! You can bread the ravioli up to 24 hours in advance and refrigerate them, keeping the coating fresh and ready to cook. To maintain quality, ensure they are arranged on a plate in a single layer to prevent sticking. When you’re ready to enjoy them, simply preheat your air fryer and cook for 14 minutes at 350°F (175°C), flipping halfway for even crispiness. With this prep method, you’ll have an impressive appetizer ready in no time, making your busy weeknights a whole lot easier without compromising on taste!

Expert Tips for Crispy Toasted Ravioli

  • Batch Cooking: Work in small batches to prevent overcrowding in the air fryer, which ensures that each toasted ravioli gets the perfect crispy texture.

  • Egg Coating: Ensure the ravioli are fully coated with the egg wash before dipping in breadcrumbs, as this stickiness is key for achieving a golden crust.

  • Adjust Cook Time: If using fresh or precooked ravioli, adjust the cooking time accordingly; they will take less time compared to frozen.

  • Oil Control: Use an oil spray or mist to evenly coat the ravioli without oversaturating them; too much oil can lead to sogginess instead of crispiness.

  • Taste Test: Don’t hesitate to taste the breadcrumb mixture before coating; adjusting salt and seasoning can elevate the flavor of your toasted ravioli significantly.

What to Serve with Crispy Air Fryer Toasted Ravioli

Elevate your appetizer experience by pairing these crunchy delights with complementary flavors and textures that will make your meal unforgettable.

  • Mixed Green Salad: A refreshing garden salad with zesty vinaigrette balances the richness of the toasted ravioli. The crisp greens add freshness with each bite and lighten the overall meal.

  • Garlic Bread: Warm, buttery garlic bread provides a satisfying crunch and a comforting touch. The aromatic flavors intertwine beautifully, inviting everyone to enjoy their favorite Italian experience.

  • Roasted Vegetables: Colorful roasted veggies, like bell peppers and zucchini, add a burst of flavor and nutrients to your spread. Their natural sweetness beautifully contrasts with the savory ravioli filling.

  • Creamy Spinach Dip: This indulgent and creamy dip is perfect for those who love to dip! Serve it warm with your toasted ravioli for an extra layer of rich flavor that guests won’t forget.

  • Pesto Sauce: A dollop of fresh basil pesto brings a herby richness that pairs wonderfully with the crispy ravioli. Its vibrant flavor kicks up the dish even more, allowing a unique twist to a classic Italian favorite.

  • Marinara Sauce: This classic dipping sauce is a must-have with toasted ravioli, ensuring an authentic Italian touch. The tangy tomatoes complement the rich filling, making every bite a savory delight.

  • Wine Pairing: Pair with a chilled Pinot Grigio or a bold Cabernet Sauvignon to enhance the meal’s flavors. The right sip elevates the dining experience, creating a wonderful feast for friends and family.

Transform your crispy air fryer toasted ravioli into a memorable feast with these delightful side dishes that celebrate Italian cuisine!

Toasted Ravioli Variations & Substitutions

Feel free to get creative and make this recipe your own with these fun swaps and variations!

  • Meat-Filled Ravioli: Switch to meat-filled ravioli for a hearty twist that elevates the savory flavors.
  • Spinach or Veggie Ravioli: Use spinach or veggie-filled options for a colorful and nutritious change. Pair perfectly with marinara!
  • Dairy-Free: Substitute eggs with a flaxseed egg and use nutritional yeast instead of Parmesan for a creamy vegan alternative.
  • Heat it Up: Add a sprinkle of cayenne or red pepper flakes to the breadcrumbs for a spicy kick that’ll keep your taste buds dancing.
  • Herb-Infused Breadcrumbs: Mix in fresh herbs like thyme or oregano into the breadcrumb mixture for a delightful flavor boost.
  • Alternative Dipping Sauces: Trade marinara for creamy ranch or zesty pesto to create a unique pairing that suits any palate.
  • Sweet Twist: For a dessert option, fill ravioli with chocolate or fruit and coat with cinnamon sugar after air frying.

If you’re interested in learning more about alternative cooking methods, be sure to check out how to make crispy baked ravioli for yet another delicious option! Don’t forget to try these variations out and find your favorite combination; there’s a world of flavor just waiting for you!

How to Store and Freeze Toasted Ravioli

Fridge: Store leftover toasted ravioli in an airtight container for up to 2 days. To keep them crispy, reheat in the air fryer for 3-5 minutes before serving.

Freezer: For longer storage, freeze uncooked breaded ravioli in a single layer on a baking sheet. Once frozen, transfer to a freezer bag for up to 3 months.

Reheating: To reheat frozen cooked ravioli, air fry at 350°F (175°C) for about 5-7 minutes until heated through and crispy.

Dipping Sauce Storage: If you have leftover dipping sauce, store it separately in the fridge for up to a week for easy access the next time you crave toasted ravioli!

Crispy Air Fryer Toasted Ravioli Recipe FAQs

How do I select the best frozen ravioli?
Absolutely! When choosing frozen ravioli, look for packages that feel firm and are free from ice crystals, which indicate freezer burn. Check the ingredient list; quality brands often use natural ingredients and real cheese for better flavor. If you can’t find cheese ravioli, any filled variety like spinach or meat will work beautifully!

What is the best way to store leftover toasted ravioli?
Very! After enjoying your crispy air fryer toasted ravioli, store any leftovers in an airtight container in the fridge for up to 2 days. To keep their delightful crunch, reheat them in the air fryer at 350°F (175°C) for around 3-5 minutes until they’re hot and crispy again.

Can I freeze toasted ravioli?
Yes, you can! To freeze uncooked breaded ravioli, lay them in a single layer on a baking sheet and place them in the freezer until solid. Once frozen, transfer them to a freezer bag and store for up to 3 months. When you’re ready to eat, there’s no need to thaw; just air fry them directly from the freezer for about 14-16 minutes.

What if my ravioli isn’t crispy enough?
If your toasted ravioli aren’t as crispy as you’d like, there could be a couple of reasons. Firstly, ensure you are not overcrowding the air fryer basket; this can prevent proper air circulation. If they are too greasy, consider reducing the amount of oil spray you use—sometimes less is more for that crunchy texture.

Are toasted ravioli safe for dogs?
While it’s tempting to share your crispy toasted ravioli, it’s best not to give them to dogs. The garlic powder and seasonings can be harmful to pets. If you want to treat your furry friend, consider plain, cooked pasta without any seasonings instead! Always consult your vet for pet-friendly food options.

Toasted Ravioli

Crispy Toasted Ravioli That Will Transform Your Appetizer Game

Toasted Ravioli are guilt-free, crispy bites perfect for game day or gatherings, enhancing your appetizer game.
Prep Time 10 minutes
Cook Time 14 minutes
Total Time 24 minutes
Servings: 4 pieces
Course: Appetizers
Cuisine: Italian
Calories: 250

Ingredients
  

For the Coating
  • 1 package Frozen Cheese Ravioli Any filled variety can be used.
  • 2 large Eggs White or brown eggs based on preference.
  • 1 cup Panko Breadcrumbs Regular breadcrumbs can be a substitute.
  • 1 tablespoon Italian Seasoning Adjust based on taste.
  • 1 teaspoon Salt Adjust according to preference.
  • 1 teaspoon Black Pepper Adjust according to preference.
  • as needed Oil or Oil Spray Use for greasing and achieving a crispy texture.
For Serving
  • 1/2 cup Grated Parmesan Cheese Optional; can substitute with nutritional yeast.
  • as needed Fresh or Dried Herbs (like Parsley or Basil) Optional for garnish.
  • 1 cup Marinara Sauce or Creamy Vodka Sauce Your choice of dipping sauce.

Equipment

  • Air Fryer
  • Shallow bowl
  • Mixing Bowl
  • Parchment Paper

Method
 

Step-by-Step Instructions
  1. Step 1: Prep the Ingredients - Beat two eggs in a shallow bowl. In another bowl, mix panko breadcrumbs with Italian seasoning, salt, and black pepper.
  2. Step 2: Bread the Ravioli - Dip each frozen ravioli into the egg wash, then into the breadcrumb mixture until fully coated.
  3. Step 3: Prepare the Air Fryer - Grease the air fryer basket and arrange the ravioli in a single layer.
  4. Step 4: Air Frying - Set the air fryer to 350°F (175°C) and cook for about 14 minutes, flipping halfway through.
  5. Step 5: Serving - Remove from air fryer, sprinkle with Parmesan and herbs, and serve hot with dipping sauce.
  6. Step 6: Baking Alternative (Optional) - Preheat oven to 400°F (200°C), arrange ravioli on a baking sheet and bake for 10 minutes.

Nutrition

Serving: 4piecesCalories: 250kcalCarbohydrates: 30gProtein: 12gFat: 10gSaturated Fat: 2gPolyunsaturated Fat: 1gMonounsaturated Fat: 4gCholesterol: 70mgSodium: 400mgPotassium: 200mgFiber: 2gSugar: 1gVitamin A: 500IUVitamin C: 2mgCalcium: 150mgIron: 2mg

Notes

These toasted ravioli can be stored in the fridge for up to 2 days, and reheated in the air fryer for best results.

Tried this recipe?

Let us know how it was!

One Pot Lasagna Soup: Cozy Comfort in Every Bite

The aroma of simmering tomatoes and melting cheese wafts through my kitchen, instantly transporting me to a bustling Italian trattoria. This One Pot Lasagna Soup is my go-to comfort dish, embodying the rich flavors of traditional lasagna without the fuss of layers. What makes it even better? It’s a breeze to whip up on a busy weeknight, allowing me to spend more time with family and less time scrubbing dishes. Perfectly creamy and packed with tender pasta, this hearty soup is sure to please everyone at the table. Whether you’re a culinary novice or a seasoned chef, you’ll love how effortlessly this dish comes together. Are you ready to dive into a bowl of warmth and coziness? Let’s get cooking!

Why is One Pot Lasagna Soup so delightful?

Effortless Preparation: This recipe takes just one pot to create a hearty meal, making it perfect for busy nights.
Rich Italian Flavor: Enjoy that authentic lasagna taste—without the complicated layers.
Family-Friendly: Everyone loves comforting soup! It’s a great way to sneak in veggies like spinach.
Customizable Options: Switch proteins or add extra veggies to suit your preferences. For more comforting soups, try my Potato Bacon Soup or the delicious Shepherd’s Pie Soup.
Quick Cleanup: Less mess means more time enjoying meals with loved ones! Each bowl offers creamy, cheesy goodness that warms the soul.

One Pot Lasagna Soup Ingredients

• Dive into the simplicity of this comforting dish!

For the Soup Base

  • Ground Beef – Provides the main protein and flavor. Substitute with ground turkey for a leaner option.
  • Garlic (3 cloves, minced) – Adds aromatic depth. Use garlic powder in a pinch.
  • Onion (1/2 yellow, diced) – Contributes sweetness and texture. Can be omitted for a simpler flavor.
  • Garlic Powder (1/2 tsp) & Onion Powder (1/2 tsp) – Enhance the overall flavor profile.
  • Dried Basil (1/4 tsp) & Dried Oregano (1/2 tsp) – Bring Italian herbs’ essence to the soup. Fresh herbs can be substituted for better flavor.
  • Kosher Salt & Freshly Ground Black Pepper – Essential for seasoning; adjust to taste.
  • Crushed Tomatoes (14 oz can) – Acts as the broth base, providing acidity and sweetness. Tomatoes can be swapped with tomato sauce for a different texture.
  • Chicken Broth (32 oz) – Adds depth to the soup; vegetable broth can be used for a vegetarian version.
  • Water (1 cup) – Dilutes the broth; can be adjusted depending on desired thickness.
  • Tomato Paste (2 tsp) – Intensifies tomato flavor; optional but recommended.

For the Noodles and Greens

  • Lasagna Noodles (6 oz, broken into pieces) – Provide structure; replace with any pasta that complements soups, avoiding overcooking.
  • Frozen Chopped Spinach (1 cup) – Adds nutrients; can substitute with kale or Swiss chard.

For Creaminess

  • Heavy Cream (1/4 cup) – Contributes creaminess; replace with half-and-half for a lighter option.
  • Ricotta Cheese & Mozzarella Cheese (4 oz, sliced) – Introduces the classic lasagna cheese flavors. Optional Parmesan cheese for extra richness.

Embrace the warm, cozy flavors of One Pot Lasagna Soup as you whip up this delightful dish!

Step‑by‑Step Instructions for One Pot Lasagna Soup

Step 1: Brown Ground Beef
In a large pot over medium-high heat, brown 1 pound of ground beef, breaking it apart with a wooden spoon for about 5-7 minutes until uniformly browned. Drain any excess grease to keep the soup rich but not greasy. This step creates the flavorful base for your One Pot Lasagna Soup.

Step 2: Add Aromatics
Reduce the heat to medium-low and incorporate 3 minced garlic cloves and 1/2 diced yellow onion into the pot. Stir in 1/2 teaspoon garlic powder, 1/2 teaspoon onion powder, 1/4 teaspoon dried basil, and 1/2 teaspoon dried oregano. Cook for about 5 minutes, until the onion is softened and fragrant, enhancing the overall depth of flavor.

Step 3: Build the Soup’s Base
Pour in a 14-ounce can of crushed tomatoes, 32 ounces of chicken broth, 1 cup of water, and 2 teaspoons of tomato paste. Bring the mixture to a gentle boil, then add 6 ounces of broken lasagna noodles, stirring everything together. This blend of ingredients will form a hearty soup base full of Italian goodness.

Step 4: Simmer
Cover the pot and reduce the heat to low, allowing the soup to simmer gently for 10 minutes. This short cooking time helps the broken noodles absorb the flavors without becoming mushy. Keep an eye on it, as the aroma of the simmering One Pot Lasagna Soup begins to fill your kitchen!

Step 5: Add Spinach and Cream
After simmering, stir in 1 cup of frozen chopped spinach and 1/4 cup of heavy cream. Increase the heat back to medium and cook uncovered for an additional 5 minutes, stirring occasionally. The cream will enhance the soup’s richness, creating that classic lasagna creaminess in every spoonful.

Step 6: Serve
To serve your One Pot Lasagna Soup, place slices of mozzarella cheese at the bottom of each bowl. Ladle the hot soup over the cheese, allowing it to melt slightly. Top with a dollop of ricotta cheese and a sprinkle of Parmesan if you’d like, offering a delightful finish to your comforting dish.

Expert Tips for One Pot Lasagna Soup

  • Perfect Noodles: Add broken noodles only when the broth is simmering to prevent them from becoming mushy and overcooked in your One Pot Lasagna Soup.

  • Flavorful Browning: Brown the ground beef well to enhance its flavor. Avoid overcrowding the pot to ensure it browns instead of steams.

  • Creamy Finish: Incorporate cream at the end of cooking to prevent curdling, ensuring a luscious, creamy texture for your soup.

  • Save Extra Broth: Keep some extra broth handy when reheating, as the noodles absorb liquid over time, which can thicken your soup.

  • Don’t Rush Simmering: Allow the soup to simmer gently to enrich the flavors fully; a quick boil won’t yield the same depth of taste.

What to Serve with One Pot Lasagna Soup?

When you whip up this comforting bowl of savory goodness, it’s a breeze to create a complete meal that delights the senses.

  • Garlic Bread: The warm, crispy texture is the perfect side, allowing you to soak up every last drop of that creamy soup.
  • Caesar Salad: Crisp greens with a tangy dressing provide a refreshing contrast, balancing the rich flavors while adding a touch of crunch.
  • Roasted Vegetables: Sweet roasted carrots or Brussels sprouts add a lovely caramelized flavor, enhancing the comforting experience with their earthy essence.
  • Italian Red Wine: A glass of Chianti or a light Pinot Noir elevates your meal, pairing beautifully with the rich tomato and cheese notes.
  • Parmesan Crisps: These crunchy, cheesy bites offer delightful texture and a cheesy punch to complement your soup’s creaminess seamlessly.
  • Tiramisu: Cap off the meal with a touch of indulgence! The rich coffee and creamy layers harmonize beautifully after savory One Pot Lasagna Soup.
  • Pesto Flatbread: A warm, herbaceous flatbread drizzled with pesto adds a fragrant, flavorful touch that’s perfect for sopping up the delicious broth.

One Pot Lasagna Soup Variations

Feel free to make this One Pot Lasagna Soup your own by exploring some tasty twists!

  • Italian Sausage: Swap ground beef with Italian sausage for a spicy kick that complements the savory flavors beautifully. The sizzling aroma will fill your kitchen with warmth!

  • Cheese Mix: Experiment with provolone or fontina cheese to give your soup a unique twist. Mixing cheeses creates a delightful creaminess and elevates the cheesy goodness.

  • Veggie Boost: Add diced zucchini or bell peppers for extra veggies. Not only will you boost nutrients, but you’ll also add lovely texture and vibrant color to your soup.

  • Spicy Heat: Toss in red pepper flakes for those who love a little heat. A pinch can elevate the flavor profile and leave you craving more on chilly nights.

  • Dairy-Free: Replace heavy cream with coconut milk, or use unsweetened cashew cream for a lighter, dairy-free version. This option keeps it creamy while providing a delightful subtle sweetness.

  • Pasta Alternatives: Use a different pasta shape like shells or penne to mix things up. Just ensure you adjust the cooking time to achieve that perfect tender bite.

  • Green Swap: Try using fresh kale or Swiss chard instead of spinach. Their rustic flavors add a different dimension to your comforting soup while packing in nutrients!

For more delicious options, check out my Sausage Tortellini Soup for a delightful twist and the flavorful Mexican Soup that brings a kick into your life!

Make Ahead Options

This One Pot Lasagna Soup is an excellent candidate for meal prep, saving you precious time on busy weeknights! You can easily prepare the soup base (without the cream and spinach) up to 24 hours in advance. Simply follow the initial cooking steps, let it cool, and store it in an airtight container in the refrigerator. To maintain quality, avoid adding the heavy cream and spinach until you’re ready to serve. When you’re set to enjoy your delicious soup, just reheat the base on the stove, stir in the frozen spinach and cream, and simmer for a few minutes until heated through. You’ll have a comforting bowl of One Pot Lasagna Soup ready to warm your family’s hearts!

Storage Tips for One Pot Lasagna Soup

Fridge: Store leftovers in an airtight container in the fridge for up to 4 days. The flavors actually deepen and improve after a night’s rest, making the next day’s meal even tastier!

Freezer: If you’re looking for longer storage, freeze the soup (omit the cream) for up to 3 months. To reheat, simply thaw overnight in the fridge and add cream before warming on the stove.

Reheating: When reheating, expect your One Pot Lasagna Soup to thicken due to noodle absorption. Keep extra broth on hand to achieve your desired consistency.

Room Temperature: Avoid leaving the soup out for more than 2 hours at room temperature to ensure food safety.

One Pot Lasagna Soup Recipe FAQs

What type of ground meat is best for this soup?
For a classic flavor, I recommend using ground beef, but you can easily substitute it with ground turkey or Italian sausage for a leaner or spicier option, respectively. Each option brings its unique taste to the soup!

How should I store leftovers of One Pot Lasagna Soup?
Store any leftovers in an airtight container in the fridge for up to 4 days. This soup actually tastes even better the next day as the flavors meld together. Just be sure to give it a good stir and check for consistency before reheating.

Can I freeze One Pot Lasagna Soup?
Absolutely! For freezing, omit the cream from the recipe. Once cooled, transfer the soup to freezer-safe containers, where it can last up to 3 months. When ready to eat, thaw overnight in the fridge, then reheat on the stove and stir in the cream before serving.

What if my lasagna noodles become mushy?
To avoid mushy noodles, add them to the broth only when it’s simmering. Cooking them at a gentle boil ensures they maintain their texture. If you find the soup too thick when reheating, simply add a splash of broth until it’s just right!

Are there any dietary considerations for this soup?
This One Pot Lasagna Soup can easily be adapted for dietary needs! For a vegetarian version, swap the ground beef for a meat alternative or extra beans, and use vegetable broth. Just be mindful of dairy allergies if using cheeses; plant-based cheese can be a great substitute.

What should I serve with One Pot Lasagna Soup?
This hearty soup pairs beautifully with garlic bread or a fresh Caesar salad to balance the rich flavors. The simplicity of these sides makes them perfect for a cozy family dinner!

One Pot Lasagna Soup

One Pot Lasagna Soup: Cozy Comfort in Every Bite

This One Pot Lasagna Soup is a comforting and easy alternative to traditional lasagna, capturing rich Italian flavors in one pot.
Prep Time 15 minutes
Cook Time 30 minutes
Total Time 45 minutes
Servings: 4 bowls
Course: Dinner
Cuisine: Italian
Calories: 400

Ingredients
  

Soup Base
  • 1 pound Ground Beef or ground turkey for a leaner option
  • 3 cloves Garlic, minced or garlic powder in a pinch
  • 1/2 yellow onion Onion, diced can be omitted for a simpler flavor
  • 1/2 tsp Garlic Powder
  • 1/2 tsp Onion Powder
  • 1/4 tsp Dried Basil fresh herbs can be substituted
  • 1/2 tsp Dried Oregano fresh herbs can be substituted
  • Kosher Salt adjust to taste
  • Freshly Ground Black Pepper adjust to taste
  • 14 oz Crushed Tomatoes can substitute with tomato sauce
  • 32 oz Chicken Broth vegetable broth for vegetarian option
  • 1 cup Water adjust for desired thickness
  • 2 tsp Tomato Paste optional but recommended
Noodles and Greens
  • 6 oz Lasagna Noodles, broken replace with any pasta that complements soups
  • 1 cup Frozen Chopped Spinach or kale or Swiss chard
Creaminess
  • 1/4 cup Heavy Cream or half-and-half for a lighter option
  • 4 oz Ricotta Cheese optional Parmesan cheese for extra richness
  • 4 oz Mozzarella Cheese, sliced

Equipment

  • Large pot

Method
 

Cooking Steps
  1. In a large pot over medium-high heat, brown the ground beef for 5-7 minutes until uniformly browned. Drain excess grease.
  2. Reduce heat and add garlic and onion. Stir in garlic powder, onion powder, dried basil, and dried oregano. Cook for 5 minutes until onion is softened.
  3. Pour in crushed tomatoes, chicken broth, water, and tomato paste. Bring to a gentle boil, then add broken lasagna noodles and stir.
  4. Cover the pot and reduce heat to low, allowing to simmer for 10 minutes.
  5. Stir in frozen chopped spinach and heavy cream. Cook uncovered for 5 minutes, stirring occasionally.
  6. To serve, place mozzarella cheese at the bottom of each bowl. Ladle soup over cheese and top with ricotta cheese and Parmesan if desired.

Nutrition

Serving: 1bowlCalories: 400kcalCarbohydrates: 30gProtein: 25gFat: 20gSaturated Fat: 10gPolyunsaturated Fat: 2gMonounsaturated Fat: 8gCholesterol: 80mgSodium: 1000mgPotassium: 800mgFiber: 4gSugar: 6gVitamin A: 450IUVitamin C: 5mgCalcium: 250mgIron: 3mg

Notes

Store leftovers in an airtight container for up to 4 days. Freeze for up to 3 months without cream.

Tried this recipe?

Let us know how it was!

Savory Lasagna Soup Recipe: Comfort Food Delight in a Bowl

As I stirred the bubbling pot on the stove, the rich aroma of Italian herbs wafted through my kitchen, transforming it into a cozy trattoria. This Easy Cheesy Lasagna Soup Recipe is my answer to busy weeknights when comfort food is non-negotiable. With tender pasta nestled in a hearty tomato broth and savory chunks of ground beef, it offers all the indulgence of traditional lasagna while cutting down on prep time. Plus, it’s ready in under an hour, making it perfect for those evenings when you want a wholesome meal without hours spent in the kitchen. Whether you’re cooking for your family or hosting friends, this one-pot dish guarantees a warm, satisfying experience for everyone. Are you ready to dive into a bowl of bliss? Let’s get cooking!

Why will you crave this Lasagna Soup?

Simplicity: This recipe is delightfully straightforward, requiring just a few ingredients and minimal cooking time.

Rich, Hearty Flavors: The combination of savory beef, aromatic herbs, and creamy cheese creates a flavor explosion that warms the soul.

Flexibility: Whether you choose to cook on the stovetop or in an Instant Pot, this Lasagna Soup adapts to your schedule and kitchen tools.

Total Comfort: Imagine a cozy bowl filled with tender pasta and vibrant tomato broth—perfect for weeknight dinners or casual gatherings.

Quick Cleanup: Enjoy your meal without the daunting cleanup; it’s all made in one pot!

Pair it with some delicious crusty breadsticks for an unbeatable combination, or explore other comforting options like Soup Joumou Haitian or Cheeseburger Soup Comforting.

Lasagna Soup Recipe Ingredients

For the Base

  • Olive Oil – Fat for sautéing; substitute with avocado oil, butter, or ghee if preferred.
  • Ground Beef – Provides protein and richness; use 85/15 ground beef or swap for ground turkey/chicken, or skip for vegetarian using lentils.
  • Minced Onion – Adds flavor base; shallots are a great alternative for a milder taste.
  • Minced Garlic – Enhances overall flavor; fresh garlic cloves are always best for maximum taste.

For the Soup

  • Crushed Tomatoes – Forms the soup base with acidity and sweetness; tomato puree or sauce can be used instead.
  • Bay Leaf – Infuses a subtle herbal note; you can omit it if you don’t have any on hand.
  • Dried Basil, Parsley, Oregano – Provide authentic Italian flavor; consider fresh herbs for a brighter taste.
  • Black Pepper – Adds warmth; adjust according to your taste preference.
  • Red Pepper Flakes – Optional spice enhancer; add according to desired heat level or omit entirely.

For the Broth

  • Low Sodium Beef Broth – Liquid base for the soup; feel free to substitute with chicken or vegetable broth.
  • Water – Used to dilute and balance out the broth.

For the Pasta

  • Reginetti Pasta – The key carb element that mimics lasagna shape; broken lasagna noodles or mafaldine work wonderfully as alternatives.

For Garnish

  • Ricotta Cheese – Optional for a touch of creaminess; omit for a dairy-free version or replace with non-dairy cheese.
  • Grated Parmesan Cheese – Adds a savory finish; adjust or skip according to dietary preferences.

This Lasagna Soup Recipe is sure to become a weeknight favorite, blending comfort with simplicity and hearty flavor!

Step‑by‑Step Instructions for Easy Cheesy Lasagna Soup Recipe

Step 1: Sauté the Meat
In a large pot, heat 2 tablespoons of olive oil over medium-high heat for about 3 minutes. Once shimmering, add 1 pound of ground beef and cook for approximately 10 minutes, breaking it into chunks, until well browned and no longer pink. This step builds the savory foundation necessary for your delicious lasagna soup.

Step 2: Add Aromatics
Stir in 1 diced onion and 3 minced garlic cloves into the pot. Sauté for 2 to 3 minutes, stirring occasionally, until the onion is soft and translucent. The fragrant aroma will fill your kitchen, signaling that it’s time to move on to creating the rich soup base.

Step 3: Build the Soup Base
Pour in a 28-ounce can of crushed tomatoes, followed by 4 cups of low sodium beef broth and 1 cup of water. Add in a bay leaf, 1 teaspoon each of dried basil, parsley, and oregano, along with salt, black pepper, and optional red pepper flakes to taste. Stir well and bring the mixture to a rolling boil, enhancing the flavors of your lasagna soup.

Step 4: Cook the Pasta
Once boiling, toss in 8 ounces of reginetti pasta (or your choice of pasta). Cook uncovered for about half of the pasta package’s recommended time, typically around 4 to 5 minutes, stirring occasionally. This allows the pasta to remain slightly undercooked, ensuring it absorbs more broth while finishing in the next step.

Step 5: Final Cook and Serve
Remove the pot from heat and let it sit uncovered for an additional 5 minutes; this helps the pasta to finish cooking to perfection. Afterward, discard the bay leaf and give the soup a final stir. Ladle the comforting Lasagna Soup into bowls, and sprinkle each serving with optional ricotta and grated Parmesan cheese, inviting warmth and satisfaction with every bite.

Lasagna Soup Recipe Variations

Feel free to make this comforting Lasagna Soup your own by mixing in these delicious variations!

  • Sausage Swap: Replace ground beef with Italian sausage for a spicy twist that enhances the flavor profile beautifully.

  • Gluten-Free Option: Use gluten-free pasta to enjoy the same warm comfort without the gluten, perfect for those with dietary restrictions.

  • Vegetable Boost: Add chopped spinach, zucchini, or bell peppers while sautéing for an added nutrition boost that brings vibrant colors to the bowl.

  • Creamy Version: Stir in heavy cream or a splash of half-and-half at the end for a luxuriously creamy finish, making each bite even more indulgent.

  • Herb-Forward: Experiment with fresh herbs like thyme or rosemary instead of typical Italian herbs; their aromas will elevate the overall experience.

  • Mexican Flair: Spice things up by adding diced jalapeños and a sprinkle of taco seasoning for a delightful fusion of flavors.

  • Seafood Surprise: For a unique twist, substitute ground beef with shrimp or crab, creating a coastal-inspired version that’s fresh and flavorful.

  • Broth Base: Switch up the flavor by using chicken or vegetable broth instead of beef broth; this opens the door to new flavor complexities, making it lighter yet satisfying.

No matter how you customize this Lasagna Soup, it promises to deliver hearty comfort in every bite. Pair it with a fresh salad for a complete meal, and don’t forget to explore other comforting soup options like Cheeseburger Soup Comforting or Soup Joumou Haitian!

Expert Tips for Lasagna Soup Recipe

  • Undercook Pasta: Slightly undercook the pasta to absorb broth and prevent mushiness upon resting. This is a common mistake that can ruin the soup’s texture.

  • Creamy Finish: Add ricotta cheese as a topping rather than mixing it into the soup; this prevents curdling and keeps it creamy.

  • Stovetop Advantage: Opt for the stovetop method for the best pasta texture; if using an Instant Pot or crockpot, cook pasta separately to maintain integrity.

  • Herb Freshness: For brighter flavors, use fresh herbs instead of dried ones. Adjust the quantity accordingly—doubling fresh herbs brings a vivacious taste.

  • Meat Substitutions: Feel free to swap ground beef with Italian sausage for an extra flavor boost, or try lentils for a delicious vegetarian option.

What to Serve with Easy Cheesy Lasagna Soup?

As you savor each spoonful of this cozy soup, consider these delightful pairings to create a complete and comforting meal experience.

  • Crusty Breadsticks: The perfect vessel for sopping up the delicious broth, these warm, buttery sticks add a satisfying crunch and indulgent touch.

  • Mixed Green Salad: A light and refreshing contrast, this salad topped with a tangy vinaigrette balances the rich flavors of the soup, providing a crisp bite.

  • Garlic Parmesan Knots: Soft and fluffy, these knots bring a burst of flavor and texture that compliments the savory soup, making every bite memorable.

  • Cheesy Garlic Bread: Smothered in melted cheese and garlic, this irresistibly warm bread elevates the meal, allowing you to enjoy lasagna flavors in a delightful new format.

  • Roasted Vegetables: Seasonal, roasted veggies add depth and earthiness. Carrots, bell peppers, or broccoli are great choices to enhance the nutritional value and flavor profiles.

  • Sweet Corn Muffins: Light and slightly sweet, these muffins offer a delightful contrast to the savory soup, perfect for dipping or enjoying on the side.

  • Red Wine: A glass of smooth, full-bodied red wine brings an elegant touch to your meal, complementing the soup’s herbal notes while enhancing the overall dining experience.

  • Tiramisu: Finish on a sweet note with this classic Italian dessert. Its creamy texture and coffee flavor provide a lovely balance to the meal you’ve created.

With these pairings, you’ll have a complete dining experience that keeps everyone coming back for seconds!

Make Ahead Options

These Easy Cheesy Lasagna Soup preparations are perfect for meal prep enthusiasts looking to save time during busy weeknights! You can sauté the ground beef, onions, and garlic up to 24 hours in advance, refrigerating them in an airtight container. Additionally, you can mix the crushed tomatoes, broth, and spices (up to 3 days ahead), storing them separately. To finish your Lasagna Soup, simply combine the prepped ingredients in a pot, add the pasta, and cook until tender—this step only takes about 10 minutes. Remember to undercook the pasta slightly to absorb more broth when resting. This way, your comforting bowl of soup will be just as delicious as if you made it all at once!

Storage Tips for Lasagna Soup

Fridge: Store your Lasagna Soup in an airtight container for up to 4 days. Make sure it’s cooled to room temperature before sealing to maintain freshness.

Freezer: Freeze the soup in portions using freezer-safe containers for up to 3 months. Allow space for expansion as it freezes!

Reheating: To reheat, warm the soup in a saucepan over medium heat or in the microwave, stirring occasionally, until heated through. Add a splash of broth or water if it appears too thick.

Serving Tip: For the best texture, avoid storing leftover soup with the pasta already mixed in; cook the pasta separately if you plan to store some for later.

Lasagna Soup Recipe FAQs

How do I choose the right pasta for my Lasagna Soup?
For the best texture and absorption of flavors, I recommend using reginetti pasta, which resembles lasagna noodles. However, if you can’t find it, broken lasagna noodles or mafaldine work wonderfully too! Just ensure you cook the pasta slightly less than instructed to avoid mushiness.

How can I store leftovers of my Lasagna Soup?
You can store your Lasagna Soup in an airtight container in the refrigerator for up to 4 days. Make sure it’s cooled to room temperature first. For longer storage, the soup can be frozen in portions for up to 3 months. When reheating, warm gently in a saucepan or microwave, adding a splash of broth or water to reach your desired consistency.

Can I make this soup vegetarian?
Absolutely! To make a delicious vegetarian Lasagna Soup, simply substitute the ground beef with lentils or your favorite plant-based meat alternative. You can also load it up with vegetables like spinach, bell peppers, or zucchini during the sautéing phase for added nutrition and flavor.

How do I avoid my pasta getting mushy when reheating?
To prevent mushiness, it’s best to store the pasta separately from the soup if you plan on having leftovers. If the pasta is already mixed in, try reheating it gently and adding a little water or broth to loosen it up. This way, you keep the pasta’s texture just right!

What if I have a nut allergy—can I modify the soup?
This Lasagna Soup recipe is naturally free of nuts, making it a great option for those with nut allergies. Just ensure that your broth, cheeses, and any added toppings are also free from nut-derived ingredients—always read labels carefully!

What should I do if my soup is too thick?
If your Lasagna Soup turns out thicker than desired, you can easily adjust the consistency! Just add a bit of broth or water, stirring it in gradually until you achieve your preferred thickness. Always taste and adjust seasoning as needed; there’s no such thing as too much flavor!

Lasagna Soup Recipe

Savory Lasagna Soup Recipe: Comfort Food Delight in a Bowl

This Lasagna Soup Recipe offers all the indulgence of traditional lasagna in a hearty, comforting soup.
Prep Time 10 minutes
Cook Time 40 minutes
Resting Time 5 minutes
Total Time 55 minutes
Servings: 6 bowls
Course: Dinner
Cuisine: Italian
Calories: 450

Ingredients
  

For the Base
  • 2 tablespoons Olive Oil or substitute with avocado oil, butter, or ghee
  • 1 pound Ground Beef 85/15 ground beef or substitute
  • 1 medium Minced Onion shallots can be used
  • 3 cloves Minced Garlic fresh garlic is best
For the Soup
  • 28 ounces Crushed Tomatoes or use tomato puree or sauce
  • 1 Bay Leaf optional
  • 1 teaspoon Dried Basil or use fresh herbs
  • 1 teaspoon Dried Parsley or use fresh herbs
  • 1 teaspoon Dried Oregano or use fresh herbs
  • Black Pepper to taste
  • Red Pepper Flakes optional, to taste
For the Broth
  • 4 cups Low Sodium Beef Broth or substitute with chicken or vegetable broth
  • 1 cup Water to balance the broth
For the Pasta
  • 8 ounces Reginetti Pasta or broken lasagna noodles or mafaldine
For Garnish
  • 1 cup Ricotta Cheese optional
  • 1/2 cup Grated Parmesan Cheese adjust according to preferences

Equipment

  • Large pot

Method
 

Step-by-Step Instructions
  1. Heat olive oil in a large pot over medium-high heat for about 3 minutes.
  2. Add ground beef and cook for about 10 minutes until browned.
  3. Stir in onion and garlic; sauté for 2-3 minutes until onion is soft.
  4. Pour in crushed tomatoes, broth, water, bay leaf, herbs, salt, and pepper.
  5. Bring the mixture to a boil.
  6. Add pasta and cook uncovered for about 4-5 minutes.
  7. Remove from heat and let sit for 5 minutes. Discard bay leaf.
  8. Ladle into bowls and top with ricotta and Parmesan cheese.

Nutrition

Serving: 1bowlCalories: 450kcalCarbohydrates: 35gProtein: 25gFat: 20gSaturated Fat: 8gPolyunsaturated Fat: 1gMonounsaturated Fat: 10gCholesterol: 75mgSodium: 800mgPotassium: 800mgFiber: 5gSugar: 6gVitamin A: 800IUVitamin C: 8mgCalcium: 150mgIron: 3mg

Notes

Ensure to slightly undercook the pasta for the best texture. Store leftovers separately if planning to freeze.

Tried this recipe?

Let us know how it was!

Healthy Cheesy Quesadilla You Can Make in 10 Minutes

You know those hectic weeknights when dinner needs to be ready in a flash? That’s when my 10-Minute Healthy Cheesy Quesadilla swoops in like a culinary superhero, transforming chaos into comfort! With its crispy, golden exterior and gooey center, this recipe marries convenience and flavor, allowing you to whip up a wholesome meal without compromising on taste. The best part? It’s highly customizable—you can pile in your favorite veggies or even sneak in some protein, making it a hit for the whole family. Whether you’re looking to eat healthy, enjoy a quick meal, or keep the kids happy, these quesadillas check all the boxes. So, are you ready to turn your busy nights into a celebration of homemade goodness? Let’s get cooking!

Why is this quesadilla a must-try?

Quick & Easy: With just 10 minutes in the kitchen, you can serve up a delicious meal that doesn’t skimp on flavor.

Guilt-Free Indulgence: Using whole wheat tortillas and low-fat cheese, this recipe maintains the cheesy goodness you crave, but in a healthier way.

Customizable Joy: Load it up with your favorite vegetables or try a new protein, making this quesadilla suitable for everyone’s taste buds.

Kid-Approved: Fun, easy to eat, and packed with nutrients, this dish is perfect for fussy eaters.

Leftover Friendly: Made with whatever you have on hand, you can easily swap in ingredients to reduce waste. Whether you enjoy it with Cheesy Garlic Chicken or a side of Cheesy Protein Egg Bake, the versatility is endless!

Healthy Cheesy Quesadilla Ingredients

For the Quesadilla

  • Whole Wheat Tortillas – Provide structure and a hearty base; can substitute with corn tortillas for a gluten-free option.
  • Low-Fat Cheese – Adds creaminess and flavor; use your favorite cheese or dairy-free cheese for a vegan twist.
  • Vegetables (e.g., peppers, onions) – Incorporate nutrients and color; perfect for using up leftover veggies you have on hand.
  • Cooking Spray – Ensures a crispy texture; alternatively, brush with olive oil for a healthier option.

For Serving

  • Greek Yogurt or Sour Cream – Adds creaminess with a tangy flavor contrast; a delicious dip that makes your Healthy Cheesy Quesadilla even more delectable!

Step‑by‑Step Instructions for Healthy Cheesy Quesadilla

Step 1: Preheat the Skillet
Begin by preheating a non-stick skillet over medium heat for about 2 minutes. Once the skillet is warm, lightly spray it with cooking spray or brush with olive oil to ensure a crispy texture for your Healthy Cheesy Quesadilla. You should hear a gentle sizzle when the oil is ready, signaling it’s time to add your tortilla.

Step 2: Assemble the Quesadilla
Place one whole wheat tortilla in the center of the skillet and sprinkle a generous amount of low-fat cheese evenly across the tortilla. Next, layer in your choice of chopped vegetables, such as bell peppers and onions, spreading them out for an even filling. This mix of cheese and colorful veggies ensures a deliciously satisfying center.

Step 3: Add the Second Tortilla
Carefully place another tortilla on top of the filled one. Gently press down to help the layers adhere together, then let it cook for about 3 minutes. Keep an eye on the bottom tortilla—it should begin to turn golden brown, indicating that it’s ready for flipping.

Step 4: Flip the Quesadilla
Using a large spatula, carefully slide it underneath the quesadilla and flip it over. Cook the second side for another 2-3 minutes, or until it becomes golden brown and the cheese is noticeably melted and gooey. You may want to spray the top tortilla as well to enhance crispiness.

Step 5: Cool and Cut the Quesadilla
Once both sides are perfectly golden and the cheese has melted, remove the quesadilla from the skillet and transfer it to a cutting board. Allow it to cool for 30 seconds; this resting time will help the cheese set slightly and make slicing easier.

Step 6: Serve with Your Favorite Dips
After cooling, use a pizza cutter or sharp knife to slice the quesadilla into wedges. Serve immediately with a side of Greek yogurt or sour cream, which adds a delightful tangy dimension to your Healthy Cheesy Quesadilla. Enjoy this quick and nutritious meal that’s perfect for any hectic weeknight!

Healthy Cheesy Quesadilla Variations

Feel free to let your creativity shine and customize this recipe to suit your taste buds!

  • Dairy-Free: Use dairy-free cheese to create a vegan-friendly option without sacrificing that cheesy goodness.

  • Protein Boost: Add cooked chicken, turkey, or black beans for a satisfying protein punch that keeps you full longer.

  • Spicy Twist: Incorporate jalapeños or a sprinkle of chili flakes for a delightful kick that ignites your palate.

  • Veggie Medley: Toss in spinach, mushrooms, or corn to add nutrients and vibrant colors to your quesadilla.

  • Herb Infusion: Fresh herbs like cilantro or parsley can elevate the flavor profile, adding a burst of freshness to each bite. This small addition transforms a simple meal into a lively experience.

  • Whole Grain Goodness: Try using spelt or quinoa tortillas for an even healthier twist, making this dish gluten-free without compromising on taste.

  • Sweet Surprise: For a unique dessert option, add a touch of cinnamon and some peaches or apples in the quesadilla, then serve with a scoop of Greek yogurt.

Each of these variations enhances the original recipe, allowing it to adapt to your pantry and fork preferences. Whether you’re in the mood for something spicy or a bit sweeter, these ideas can make mealtime a fun, flavorful adventure. And don’t forget to pair your creations with sides like Cheesy Hamburger Potato or Cheesy Spinach Artichoke for a full feast experience! Happy cooking!

Storage Tips for Healthy Cheesy Quesadilla

Fridge: Store leftovers in an airtight container for up to 2 days. Ensure the quesadilla is cooled completely before sealing to maintain its texture.

Freezer: For longer storage, wrap individual quesadillas tightly in plastic wrap and place them in a freezer-safe bag. They can be frozen for up to 3 months.

Reheating: To enjoy your Healthy Cheesy Quesadilla again, reheat in a skillet over medium heat for about 3-4 minutes per side, or until warmed through and crisp. Avoid microwaving to keep it crispy!

Serving Suggestions: Pair the reheated quesadilla with fresh dips like salsa or Greek yogurt to enhance its flavor when serving leftovers.

Expert Tips for Healthy Cheesy Quesadilla

  • Extra Crispy Trick: Spray the top tortilla with cooking spray before flipping for an added crunch that enhances the overall texture of your Healthy Cheesy Quesadilla.

  • Don’t Overstuff: Be careful not to overload your quesadilla with filling; too much can lead to mess and uneven cooking. Keep it simple for the best results!

  • Rest Before Cutting: Let the quesadilla sit for 30 seconds after cooking. This helps the cheese set, making it easier to slice without spilling gooey filling everywhere.

  • Control the Heat: Keep your skillet at medium heat. Too high can burn the tortilla before the cheese melts, while too low won’t achieve that desired crispiness.

  • Versatile Veggies: Feel free to experiment with different vegetables based on what you have. This flexibility not only makes for a healthier quesadilla but also reduces food waste!

Make Ahead Options

These Healthy Cheesy Quesadillas are perfect for busy weeknights and meal prep enthusiasts! You can prepare the fillings—like chopped vegetables and shredded low-fat cheese—up to 3 days in advance, storing them in airtight containers in the refrigerator to keep everything fresh. Assemble the quesadillas just before you’re ready to cook; this helps maintain that crispy exterior and gooey center you crave. When it’s time to enjoy your quesadillas, simply preheat the skillet and cook them as directed, creating a delightful meal with minimal effort. This way, you’ll savor restaurant-quality results that are just as delicious as if you’d made them from scratch!

What to Serve with Healthy Cheesy Quesadilla

Transform your quick quesadilla into a delightful meal with these complementary sides and beverages that enhance every flavor.

  • Crispy Green Salad: A refreshing mix of greens, cucumbers, and tomatoes adds a crunchy contrast, balancing the richness of the quesadilla. Toss it in a light vinaigrette for a zesty finish.

  • Zesty Salsa: Fresh tomato salsa brings vibrant flavors, while its acidity cuts through the richness of the cheese. A dollop on the side is perfect for dipping!

  • Guacamole: Creamy avocado dip elevates your quesadilla experience with its smooth texture and subtle flavor. It’s a crowd-pleaser and an ideal partner.

  • Roasted Veggies: Serve a side of roasted bell peppers, zucchini, or squash for a nourishing element rich in fiber. Their caramelized sweetness beautifully complements the savory quesadilla.

  • Greek Yogurt Dip: Enjoy an extra side of Greek yogurt mixed with lime juice and herbs. This tangy dip adds brightness and pairs excellently with every cheesy bite.

  • Cilantro Lime Rice: A flavorful bed of rice infused with lime and cilantro adds a refreshing, zesty touch to your meal. It’s a hearty addition that rounds everything out.

  • Chips and Salsa Verde: Crunchy tortilla chips served with salsa verde make for a fun and flavorful accompaniment. Their crunch and zest create a delightful contrast.

  • Fruit Skewers: Bright, fresh fruit can cleanse your palate. Opt for sweet pineapple, juicy strawberries, or even zesty oranges for a bright endnote to your meal.

  • Light Beer or Sparkling Water: A light, crisp beer or sparkling water with a twist of lime refreshes your palate between bites. Perfect for a casual meal setting.

  • Chocolate Covered Strawberries: For dessert, these sweet bites provide a balanced ending, combining creamy chocolate with the freshness of strawberries. A delightful way to finish your quesadilla night!

Healthy Cheesy Quesadilla Recipe FAQs

How do I select the best vegetables for my quesadilla?
Absolutely! When choosing vegetables, look for fresh, crisp options that are vibrant in color. Bell peppers and onions add great flavor and texture, but you can also incorporate anything from spinach to mushrooms. Ensure vegetables are firm and free of dark spots or wilting—freshness is key for that delicious crunch in your quesadilla!

How should I store leftovers from my Healthy Cheesy Quesadilla?
Very! To keep your leftovers fresh, store them in an airtight container in the fridge for up to 2 days. Make sure they are cooled completely before sealing to avoid sogginess from moisture. When you’re ready to enjoy them again, reheat in a skillet over medium heat for 3-4 minutes per side for the best texture.

Can I freeze my Healthy Cheesy Quesadilla?
Absolutely! If you want to make a batch ahead of time, wrap each cooled quesadilla tightly in plastic wrap and place them in a freezer-safe bag. They can be frozen for up to 3 months. When you’re ready to eat, just reheat them in a skillet until they’re warmed through and crisp—around 3-4 minutes per side.

What if my quesadilla doesn’t get crispy?
No worries! If your quesadilla is turning out soggy, check that your skillet is preheated properly before cooking. I recommend medium heat for even cooking. Also, avoid overstuffing your quesadilla, as this can lead to excess moisture. Lastly, spraying a little cooking spray on both sides helps achieve that golden, crispy exterior.

Are there any dietary considerations I should keep in mind?
Very! If you’re making these for kids or individuals with allergies, consider substitutions such as dairy-free cheese for a vegan option or ensuring that your tortillas meet gluten-free needs. Always check the labels of pre-packaged ingredients to avoid allergens. It’s wonderful how adaptable this Healthy Cheesy Quesadilla recipe is to various dietary needs!

Healthy Cheesy Quesadilla

Healthy Cheesy Quesadilla You Can Make in 10 Minutes

Quick, customizable, and healthy, this Healthy Cheesy Quesadilla is a delicious meal ready in just 10 minutes!
Prep Time 5 minutes
Cook Time 5 minutes
Cooling Time 1 minute
Total Time 11 minutes
Servings: 2 quesadillas
Course: Lunch
Cuisine: Mexican
Calories: 250

Ingredients
  

For the Quesadilla
  • 2 pieces Whole Wheat Tortillas Can substitute with corn tortillas for gluten-free option
  • 1 cup Low-Fat Cheese Use your favorite cheese or dairy-free cheese for a vegan twist
  • 1 cup Vegetables (e.g., peppers, onions) Perfect for using up leftover veggies
  • 1 tsp Cooking Spray Alternatively, brush with olive oil for a healthier option
For Serving
  • 1/2 cup Greek Yogurt or Sour Cream Adds creaminess with a tangy flavor contrast

Equipment

  • Non-stick skillet

Method
 

Step-by-Step Instructions for Healthy Cheesy Quesadilla
  1. Preheat a non-stick skillet over medium heat for about 2 minutes, then lightly spray with cooking spray or brush with olive oil.
  2. Place one whole wheat tortilla in the skillet and sprinkle a generous amount of low-fat cheese evenly across it. Layer with chopped vegetables.
  3. Place another tortilla on top of the filling, gently press down, and cook for about 3 minutes until the bottom tortilla is golden brown.
  4. Carefully flip the quesadilla with a spatula and cook the second side for another 2-3 minutes until golden brown and cheese is melted.
  5. Remove from skillet, let cool for 30 seconds on a cutting board before slicing into wedges.
  6. Serve immediately with Greek yogurt or sour cream.

Nutrition

Serving: 1quesadillaCalories: 250kcalCarbohydrates: 30gProtein: 12gFat: 10gSaturated Fat: 5gPolyunsaturated Fat: 0.5gMonounsaturated Fat: 3gCholesterol: 15mgSodium: 320mgPotassium: 300mgFiber: 5gSugar: 2gVitamin A: 500IUVitamin C: 30mgCalcium: 200mgIron: 1mg

Notes

Extra crispy quesadilla tip: Spray the top tortilla with cooking spray before flipping. Don't overstuff to avoid mess. Let rest for 30 seconds before cutting.

Tried this recipe?

Let us know how it was!

Zesty Spring Roll Salad That Refreshes Every Bite

As I tossed the colorful ingredients together, the fresh scent of vibrant vegetables filled my kitchen, instantly transporting me to a bustling street market. This Spring Roll Salad with Spicy Ginger Dressing is not just a dish; it’s a celebration of freshness and texture, perfect for anyone looking to add a healthy twist to their meals. The best part? It’s incredibly quick and easy to whip up, making it a wonderful option for a light lunch or a stunning side dish at dinner parties. With its bright colors and delightful crunch, this salad will leave your taste buds dancing and your guests asking for seconds. Are you ready to explore a refreshing dish that’s as satisfying as it is nourishing? Let’s dive into this delightful recipe!

Why is this Spring Roll Salad so delightful?

Vibrant Colors: This dish is a feast for the eyes, with a stunning array of fresh vegetables that pop against each other, making it Instagram-worthy!
Quick Preparation: Perfectly easy, this salad can be whipped up in under 30 minutes—ideal for those busy weeknights or last-minute gatherings.
Fresh Ingredients: Using crisp veggies and aromatic herbs means every bite is a burst of freshness, elevating your meals tremendously.
Customizable: Want to switch it up? Add proteins like grilled chicken or tofu, or even mango for a sweet twist—your salad, your rules!
Crowd-Pleaser: Whether it’s a potluck or a family dinner, this zesty salad is sure to impress and satisfy everyone at the table. Want a similar delight? Try the Blt Chicken Salad or the Escape Charm Hawaiian for more delicious options!

Spring Roll Salad Ingredients

For the Salad
Rice Vermicelli Noodles – the perfect base that provides a delightful chewy texture; swap for zucchini noodles for a low-carb option.
Shredded Carrots – adds a crunchy bite and vibrant color; pre-shredded carrots can save time.
Bell Peppers (Red and Yellow) – these sweet and colorful veggies enhance visual appeal; feel free to switch them out for other colorful varieties.
Cucumber – brings refreshing crunch; replace with sliced radishes for an extra zing.
Bean Sprouts – offer a crisp, fresh texture; finely shredded cabbage works well as a substitute.
Fresh Cilantro – pairs wonderfully with the other ingredients for herbaceous flavor; if you’re not a cilantro fan, parsley is a tasty alternative.
Fresh Mint Leaves – adds a cool, refreshing taste; basil can serve as a substitute if needed.
Green Onions – provide a mild onion flavor that enhances overall taste; chives can work instead if you prefer.
Crushed Peanuts (optional) – for added nuttiness and texture; skip them for a nut-free meal and try sunflower seeds instead.

For Spicy Ginger Dressing
Fresh Ginger (grated) – this is the star of the dressing; fresh ginger delivers maximum flavor, but ground ginger can do in a pinch.
Soy Sauce – introduces umami and depth; use tamari for a gluten-free version.
Rice Vinegar – adds a tangy balance with acidity; apple cider vinegar makes a great alternative.
Honey or Agave Syrup – sweetens the dressing to your liking; feel free to adjust the amount.
Sesame Oil – adds a rich, nutty depth; substitute with a neutral oil if preferred.
Chili Sauce – bring the heat; adjust the amount based on how spicy you like it in your Spring Roll Salad!

Step‑by‑Step Instructions for Spring Roll Salad

Step 1: Cook Noodles
Begin by bringing a large pot of water to a boil. Add the rice vermicelli noodles and cook according to the package instructions, usually about 3-5 minutes, until they are tender but still firm to the bite. Once done, drain the noodles and rinse them under cold water to stop the cooking process, ensuring they’re cool and ready for your Spring Roll Salad.

Step 2: Prepare Vegetables
While the noodles are cooling, grab a cutting board and a sharp knife. Slice the shredded carrots, bell peppers, cucumber, and green onions into thin, uniform pieces for even texture and appearance. Arrange the colorful veggies as you cut; their vibrant colors will complement each other beautifully in your refreshing Spring Roll Salad.

Step 3: Combine Greens
In a large mixing bowl, combine the shredded carrots, sliced bell peppers, cucumber, and bean sprouts. Add in the fresh cilantro, mint leaves, and green onions, mixing everything gently to retain the structure of the vegetables. This beautiful medley will create the base for your Spring Roll Salad and set the stage for a delightful blend of textures.

Step 4: Mix Noodles
Once your noodles have cooled and rinsed, add them to the vibrant bowl of vegetables. Gently toss the mixture to ensure the noodles are evenly distributed among the veggies. This step incorporates all the flavors together, forming a delightful core of crunchy and chewy components that make your Spring Roll Salad satisfying.

Step 5: Prepare Dressing
In a separate bowl, whisk together the grated fresh ginger, soy sauce, rice vinegar, honey (or agave syrup), sesame oil, and chili sauce until smooth and well-combined. Taste the dressing to ensure it meets your flavor preference; adjust sweetness or spice levels as needed. This zesty, spicy ginger dressing will elevate your salad to a whole new level!

Step 6: Dress the Salad
Pour the freshly whisked dressing over your noodle and vegetable mixture. Using salad tongs or two large forks, thoroughly toss everything together, ensuring that every bite is coated in that delicious spicy ginger dressing. The vibrant colors of your Spring Roll Salad will shine through as you mix, enticing everyone at your table.

Step 7: Serve
Transfer the beautifully assembled Spring Roll Salad to a large serving platter. If desired, sprinkle crushed peanuts on top for an extra layer of crunch and flavor. For optimal taste, allow the salad to chill in the refrigerator for about 15 minutes before serving to let all the flavors mingle. Enjoy this refreshing dish as a light meal or a delightful side!

Storage Tips for Spring Roll Salad

Fridge: Store leftovers in an airtight container for up to 3 days. This keeps the vegetables crisp while retaining flavor.

Dressing: For optimal freshness, keep the spicy ginger dressing separate in a sealed jar or container until you’re ready to serve. It can last up to 5 days refrigerated.

Reheating: This salad is best served cold, so no reheating is necessary. Toss again before serving, and add extra dressing if needed for moisture.

Make-Ahead: Prepare the vegetables and noodles ahead of time, storing them individually in the fridge for quick assembly when you’re ready to enjoy your Spring Roll Salad.

What to Serve with Spring Roll Salad

A colorful ensemble of flavors awaits you as you create a delightful meal around this fresh salad.

  • Grilled Chicken Skewers: Juicy, marinated chicken skewers provide a savory contrast to the lightness of the salad.
  • Shrimp Tempura: Crispy shrimp tempura pairs wonderfully, adding texture and a touch of indulgence to your meal.
  • Tofu Stir-Fry: Lightly seasoned, sautéed tofu offers a vegetarian protein option that complements the salad’s freshness.
  • Coconut Rice: Soft, fragrant coconut rice brings a sweet tropical flavor that deliciously balances the zesty ginger dressing.
  • Mango Slices: Sweet, ripe mango adds a juicy contrast to the salad’s crunch, enhancing overall fruitiness.

Pair your meal with chilled green tea or a light Riesling for a refreshing beverage that echoes the flavors of the salad.

Make Ahead Options

These Spring Roll Salad bowls are perfect for meal prep enthusiasts! You can slice and prepare all the vegetables—carrots, bell peppers, cucumber, and green onions—up to 3 days in advance. Store them in airtight containers in the refrigerator to maintain their freshness and crunch. You can also cook the rice vermicelli noodles ahead of time; simply keep them in a separate container and rinse them under cold water before assembling the salad. On the day of serving, whisk together the Spicy Ginger Dressing and toss it with the salad ingredients just before enjoying to keep the flavors vibrant and fresh. This makes for a quick, healthy meal with minimal effort on busy weekdays!

Spring Roll Salad Variations & Substitutions

Feel free to adapt this vibrant Spring Roll Salad to suit your taste and dietary needs with these exciting twists!

  • Gluten-Free: Use tamari instead of soy sauce in the dressing for a delicious gluten-free option that doesn’t compromise on flavor.
  • Loaded with Protein: Toss in grilled chicken, shrimp, or tofu to turn this salad into a hearty main dish perfect for your family meals.
  • Fruit Twist: Add in sweet mango slices or avocado cubes for a delightful burst of sweetness that harmonizes perfectly with savory elements.
  • Extra Crunch: Swap out rice vermicelli for shredded Napa cabbage for a satisfying crunch and extra fiber in each bite.
  • Nut-Free Option: Replace crushed peanuts with sunflower seeds or pumpkin seeds to cater to nut allergies without losing that fabulous crunch.
  • Spicy Kick: Increase the amount of chili sauce or add diced jalapeños for those who love a spicier profile—just remember to taste as you go!
  • Herb Variations: If you don’t have cilantro or mint, feel free to use fresh basil for a unique twist that still brings freshness to the dish.
  • Sour Flavor Boost: A splash of lime juice tossed in just before serving can brighten the flavors, making this salad even more refreshing.

Take inspiration from this adaptable salad and explore delightful options like the Bananas Foster Cinnamon Rolls or the Crisp Cinnamon Roll for more fun in your kitchen!

Expert Tips for Spring Roll Salad

  • Choose Fresh Ingredients: Fresh veggies and herbs significantly enhance flavor. Avoid wilted greens, as they spoil the refreshing essence of the Spring Roll Salad.
  • Perfectly Cooked Noodles: Don’t overcook the rice vermicelli; they should be tender but not mushy. Rinse them immediately in cold water to stop cooking and maintain texture.
  • Adjust for Spice: Taste the dressing before adding it to the salad. If you prefer a milder flavor, reduce the chili sauce to suit your taste.
  • Chill for Flavor: Let the salad sit in the refrigerator for about 15 minutes before serving. This allows the ingredients to absorb the spicy ginger dressing.
  • Prep Ahead: To save time, chop vegetables in advance and store them separately. Combine them just before serving for the best crunch.

Spring Roll Salad Recipe FAQs

What kind of vegetables should I use in my Spring Roll Salad?
Absolutely! For the best flavor and texture, choose fresh, vibrant vegetables like bell peppers, cucumbers, and shredded carrots. If you can’t find bean sprouts, finely shredded cabbage is a great substitute. Feel free to mix in your favorites or seasonal veggies for a personalized touch!

How long can I store leftover Spring Roll Salad?
Store your leftovers in an airtight container in the refrigerator for up to 3 days. The crunchiness of the vegetables will diminish over time, so it’s best enjoyed fresh. For optimal flavor, keep the spicy ginger dressing separate until you’re ready to serve.

Can I freeze Spring Roll Salad?
While I don’t recommend freezing the entire salad due to the texture changes, you can freeze the cooked rice vermicelli noodles separately for up to 3 months. Just be sure to cool and portion them before freezing. When you’re ready to enjoy the salad again, thaw the noodles in the refrigerator overnight and mix fresh veggies and dressing.

What if I’m allergic to nuts—can I still enjoy this recipe?
Very! Simply omit the crushed peanuts from your Spring Roll Salad. If you want to add a bit of crunch, consider using sunflower seeds as a nut-free alternative that still delivers texture and flavor. Always check ingredient labels, especially for pre-packaged items like sauces and dressings.

How do I choose ripe vegetables for my Spring Roll Salad?
Look for vegetables that are brightly colored and firm to the touch. Avoid any that have dark spots or are soft, as these may signal spoilage. For cucumbers, go for those with a shiny skin and no wrinkles; it ensures they’re refreshing and crunchy in your salad.

Spring Roll Salad

Zesty Spring Roll Salad That Refreshes Every Bite

A vibrant Spring Roll Salad bursting with freshness and texture, perfect for light lunches or stunning side dishes.
Prep Time 15 minutes
Cook Time 5 minutes
Chilling Time 15 minutes
Total Time 35 minutes
Servings: 4 servings
Course: Salad
Cuisine: Vietnamese
Calories: 200

Ingredients
  

For the Salad
  • 8 oz Rice Vermicelli Noodles or zucchini noodles for low-carb option
  • 1 cup Shredded Carrots pre-shredded can save time
  • 1 cup Bell Peppers (Red and Yellow) or other colorful varieties
  • 1 medium Cucumber or sliced radishes for an extra zing
  • 1 cup Bean Sprouts or finely shredded cabbage as a substitute
  • 1/4 cup Fresh Cilantro or parsley as an alternative
  • 1/4 cup Fresh Mint Leaves or basil if needed
  • 2 stalks Green Onions or chives if you prefer
  • 1/4 cup Crushed Peanuts (optional) or sunflower seeds for nut-free
For Spicy Ginger Dressing
  • 1 tbsp Fresh Ginger (grated) or ground ginger if needed
  • 2 tbsp Soy Sauce or tamari for gluten-free
  • 2 tbsp Rice Vinegar or apple cider vinegar as an alternative
  • 1 tbsp Honey or Agave Syrup adjust to taste
  • 1 tbsp Sesame Oil or neutral oil if preferred
  • 1 tbsp Chili Sauce adjust based on spice preference

Equipment

  • Large pot
  • Cutting board
  • Sharp knife
  • large mixing bowl
  • whisk
  • serving platter

Method
 

Step-by-Step Instructions for Spring Roll Salad
  1. Begin by bringing a large pot of water to a boil. Add the rice vermicelli noodles and cook according to the package instructions, usually about 3-5 minutes, until they are tender but still firm to the bite. Once done, drain the noodles and rinse them under cold water to stop the cooking process, ensuring they’re cool and ready for your Spring Roll Salad.
  2. While the noodles are cooling, grab a cutting board and a sharp knife. Slice the shredded carrots, bell peppers, cucumber, and green onions into thin, uniform pieces for even texture and appearance. Arrange the colorful veggies as you cut; their vibrant colors will complement each other beautifully in your refreshing Spring Roll Salad.
  3. In a large mixing bowl, combine the shredded carrots, sliced bell peppers, cucumber, and bean sprouts. Add in the fresh cilantro, mint leaves, and green onions, mixing everything gently to retain the structure of the vegetables. This beautiful medley will create the base for your Spring Roll Salad and set the stage for a delightful blend of textures.
  4. Once your noodles have cooled and rinsed, add them to the vibrant bowl of vegetables. Gently toss the mixture to ensure the noodles are evenly distributed among the veggies.
  5. In a separate bowl, whisk together the grated fresh ginger, soy sauce, rice vinegar, honey (or agave syrup), sesame oil, and chili sauce until smooth and well-combined. Taste the dressing to ensure it meets your flavor preference; adjust sweetness or spice levels as needed.
  6. Pour the freshly whisked dressing over your noodle and vegetable mixture. Using salad tongs or two large forks, thoroughly toss everything together, ensuring that every bite is coated in that delicious spicy ginger dressing.
  7. Transfer the beautifully assembled Spring Roll Salad to a large serving platter. If desired, sprinkle crushed peanuts on top for an extra layer of crunch and flavor. For optimal taste, allow the salad to chill in the refrigerator for about 15 minutes before serving to let all the flavors mingle.

Nutrition

Serving: 1servingCalories: 200kcalCarbohydrates: 30gProtein: 6gFat: 8gSaturated Fat: 1gPolyunsaturated Fat: 2gMonounsaturated Fat: 4gSodium: 400mgPotassium: 300mgFiber: 3gSugar: 5gVitamin A: 400IUVitamin C: 20mgCalcium: 30mgIron: 1.5mg

Notes

Fresh ingredients enhance flavor. Don't overcook the noodles and let the salad chill before serving for best results.

Tried this recipe?

Let us know how it was!

Stay Connected

Get recipes via email: